
:max_bytes(150000):strip_icc():format(webp)/frenchopen-4d320297828b413f84f9940d5bd258f9.jpg)
Updated 10 Cartoon Canvas Painting Ideas for Total Beginners
10 Cartoon Canvas Painting Ideas for Total Beginners
10 Cartoon Canvas Painting Ideas for Total Beginners
An easy yet powerful editor
Numerous effects to choose from
Detailed tutorials provided by the official channel
Beginning your streak into cartoon canvas painting? Stay tuned to learn about the 10 most amazing ideas to design your best cartoon canvas art in no time!
In this article
01 [10 Cartoon Canvas Painting Ideas](#Part 1)
02 [How To Paint A Cartoon On Canvas](#Part 2)
Part 1 Cartoon Canvas Painting Ideas
Cartoon are an evergreen favourite for almost everyone around. After all, who would mind sparing a laugh on the adorable musings of the cutest cat and mouse duo in Tom and Jerry, or long for a dive into the fantasy of icy adventures with the Frozen fairy tale! While the huge caricature repository has the best of fun to offer, watching them peep at you from the canvas painting on your art wall is no less of a delight.
When starting to create your own cartoon canvas art, end your search of the most striking painting idea with the amazingly stunning choices in the following section:
01Tom and Jerry
These two are undoubtedly the pioneers of the entire cartoon story that has affordably existed till date. The naughty duo promises to lighten up your day with a mere gaze through the art wall in your room, in the same way as their show sets the mood in. Painting them on your room’s wall canvas will certainly add life to the place.
02Super Mario
Who can forget this adorable red plumber, who conveniently takes the credit for giving us the fondest childhood memories? Whether or not a regular console gamer, this adventure hero is an undisputed favorite of everyone around. So why not make him a member of your art collection through a cartoon canvas painting!
03Characters from the Frozen Land
The adorable cartoon characters from the icy landscapes of this winter fairy saga are possibly the best way to begin your exciting journey of cartoon canvas painting. While the magical storyline of the pixie quest has a diversity of the coolest and the most adorable characters to choose from, you are always free to pick your favorite one and start your design spree.
04Kung fu Panda
If you are a parallel admirer of martial arts and caricature heroes, this cartoon character would be an apt choice to satisfy your love for canvas painting. The adorably cute bear eyeing at you from the painting in his best warlike posture would certainly motivate you to work on keeping a check of your fitness levels!
05Sponge Bob
Living up to his name, this spongy creature has created a separate and strong fan base among viewers of all age groups beyond time. Choosing this character for your cartoon canvas art is surely going to spark up your day with the vibrancy of a real rainbow, even in between the sulkiest of moments, as they say, it’s time to brighten up your life with Bob!
06Homer Simpson
If you are convincingly fascinated by the lures of life overseas, this American toon character is all set to give you the perfect feel of the day to day American lifestyle. Try hands at painting a scene from the eventful life of the Simpson family that is ready to add a fun angle to the most boring chores, while giving you a parodical glimpse of the American society and culture.
07Characters from the Avenger Series
Avengers must be your absolute favorite if you have a love for battle and combat games. Bring your adventure feel back to life with creating a canvas painting art of your most admired avenger, or consider including all of them on a king size canvas if you are having a tough time picking the best from the best!
08Angry Birds
These furious creatures have been a global sensation since their entry into the world of gaming. While these star birds take you on a stunning adventure realism with an amazing graphic excellence, a caricature canvas art of these in your painting collection will certainly add the missing spunk to your graphic creativity.
09Members and Trainers of the Pokémon Species
From TV series to gaming adventures, the love for Pokémon has stood the tests of time in every dimension. When it comes to adding these characters to your canvas painting, you have a storehouse of choices from the cute Pikachu and the meticulous Ash to the nasty team Rocket and other amazing members of the Pokémon species.
10Donald Duck
If you are keen on adding a touch of nostalgia to your creative drawing, consider designing a masterpiece of cartoon canvas artwork portraying this bubbly ad quaky creature that has given you the best of childhood entertainment in the form of possibly the most reliable financial advisor and the cutest good luck charm of toon land.
Now that the graphic design technology has reached its par, you can explore your creativity to design these characters for various uses, such as, illustrative, animated, gag, editorial and political cartoons, or caricatures on comic panels and strips.
Part 2 How To Paint A Cartoon On Canvas
Now that you have come cross the exciting ideas of creating cartoon canvas art, this must be a sufficient motivation to experiment with creating a top class caricature canvas painting for yourself. Read through the following section to get an insight into the knowhow of painting a cartoon on canvas in the easiest possible way!
User’s Guide to Create a Cartoon Canvas Painting on Wondershare Filmora Video Editor
Before entering into the actual design task, you will require a download, installation and launch of the Wondershare Filmora application to any of your Windows or Mac supported devices. Visit the following link for a free download of the software program:

Wondershare Filmora - Best Video Editor for Mac/Windows
5,481,435 people have downloaded it.
Build unique custom animations without breaking a sweat.
Focus on creating epic stories and leave the details to Filmora’s auto features.
Start a creative adventure with drag & drop effects and endless possibilities.
Filmora simplifies advanced features to save you time and effort.
Filmora cuts out repetition so you can move on to your next creative breakthrough.
Painting a Young Character
Take the following steps to draw the caricature form of a young or middle aged character in Wondershare Filmora:
Step 1:
Launch Wondershare Filmora on your system and then start new project. Now import the video from your computer in the software interface.

Step 2:
Once you have added the video then simply drag and drop it in the timeline.

Step 3
Once you have added video to the timeline double click on the added video in timeline to open the video editing menu of Wondershare Filmora.

Step 4:
Now, click the “Animation” tab in the editing options at the left side of interface then you can select anyone from the available preset options.

Step 5:
Select any preset from the available list and then drag and drop it in the timeline to apply the preset on the video. After applying you can use the play button to preview the file. This is the way to create beautiful animation with the Wondershare Filmora. Just like this you can quickly create the best Cartoon canvas as well.

Step 5
After doing all necessary editing you just need to click the “Export” button and save it on your computer.

● Ending Thoughts →
● Cartoon canvas art has gained immense popularity in recent times having a reliable economic and creation advantage with the growth of animation design.
● There are a variety of cartoon painting ideas that you can choose to explore your graphic design creativity.
● When looking for the best solutions to work on creating caricature canvas art, Wondershare Filmora is your worthiest choice.
Beginning your streak into cartoon canvas painting? Stay tuned to learn about the 10 most amazing ideas to design your best cartoon canvas art in no time!
In this article
01 [10 Cartoon Canvas Painting Ideas](#Part 1)
02 [How To Paint A Cartoon On Canvas](#Part 2)
Part 1 Cartoon Canvas Painting Ideas
Cartoon are an evergreen favourite for almost everyone around. After all, who would mind sparing a laugh on the adorable musings of the cutest cat and mouse duo in Tom and Jerry, or long for a dive into the fantasy of icy adventures with the Frozen fairy tale! While the huge caricature repository has the best of fun to offer, watching them peep at you from the canvas painting on your art wall is no less of a delight.
When starting to create your own cartoon canvas art, end your search of the most striking painting idea with the amazingly stunning choices in the following section:
01Tom and Jerry
These two are undoubtedly the pioneers of the entire cartoon story that has affordably existed till date. The naughty duo promises to lighten up your day with a mere gaze through the art wall in your room, in the same way as their show sets the mood in. Painting them on your room’s wall canvas will certainly add life to the place.
02Super Mario
Who can forget this adorable red plumber, who conveniently takes the credit for giving us the fondest childhood memories? Whether or not a regular console gamer, this adventure hero is an undisputed favorite of everyone around. So why not make him a member of your art collection through a cartoon canvas painting!
03Characters from the Frozen Land
The adorable cartoon characters from the icy landscapes of this winter fairy saga are possibly the best way to begin your exciting journey of cartoon canvas painting. While the magical storyline of the pixie quest has a diversity of the coolest and the most adorable characters to choose from, you are always free to pick your favorite one and start your design spree.
04Kung fu Panda
If you are a parallel admirer of martial arts and caricature heroes, this cartoon character would be an apt choice to satisfy your love for canvas painting. The adorably cute bear eyeing at you from the painting in his best warlike posture would certainly motivate you to work on keeping a check of your fitness levels!
05Sponge Bob
Living up to his name, this spongy creature has created a separate and strong fan base among viewers of all age groups beyond time. Choosing this character for your cartoon canvas art is surely going to spark up your day with the vibrancy of a real rainbow, even in between the sulkiest of moments, as they say, it’s time to brighten up your life with Bob!
06Homer Simpson
If you are convincingly fascinated by the lures of life overseas, this American toon character is all set to give you the perfect feel of the day to day American lifestyle. Try hands at painting a scene from the eventful life of the Simpson family that is ready to add a fun angle to the most boring chores, while giving you a parodical glimpse of the American society and culture.
07Characters from the Avenger Series
Avengers must be your absolute favorite if you have a love for battle and combat games. Bring your adventure feel back to life with creating a canvas painting art of your most admired avenger, or consider including all of them on a king size canvas if you are having a tough time picking the best from the best!
08Angry Birds
These furious creatures have been a global sensation since their entry into the world of gaming. While these star birds take you on a stunning adventure realism with an amazing graphic excellence, a caricature canvas art of these in your painting collection will certainly add the missing spunk to your graphic creativity.
09Members and Trainers of the Pokémon Species
From TV series to gaming adventures, the love for Pokémon has stood the tests of time in every dimension. When it comes to adding these characters to your canvas painting, you have a storehouse of choices from the cute Pikachu and the meticulous Ash to the nasty team Rocket and other amazing members of the Pokémon species.
10Donald Duck
If you are keen on adding a touch of nostalgia to your creative drawing, consider designing a masterpiece of cartoon canvas artwork portraying this bubbly ad quaky creature that has given you the best of childhood entertainment in the form of possibly the most reliable financial advisor and the cutest good luck charm of toon land.
Now that the graphic design technology has reached its par, you can explore your creativity to design these characters for various uses, such as, illustrative, animated, gag, editorial and political cartoons, or caricatures on comic panels and strips.
Part 2 How To Paint A Cartoon On Canvas
Now that you have come cross the exciting ideas of creating cartoon canvas art, this must be a sufficient motivation to experiment with creating a top class caricature canvas painting for yourself. Read through the following section to get an insight into the knowhow of painting a cartoon on canvas in the easiest possible way!
User’s Guide to Create a Cartoon Canvas Painting on Wondershare Filmora Video Editor
Before entering into the actual design task, you will require a download, installation and launch of the Wondershare Filmora application to any of your Windows or Mac supported devices. Visit the following link for a free download of the software program:
Wondershare Filmora - Best Video Editor for Mac/Windows
5,481,435 people have downloaded it.
Build unique custom animations without breaking a sweat.
Focus on creating epic stories and leave the details to Filmora’s auto features.
Start a creative adventure with drag & drop effects and endless possibilities.
Filmora simplifies advanced features to save you time and effort.
Filmora cuts out repetition so you can move on to your next creative breakthrough.
Painting a Young Character
Take the following steps to draw the caricature form of a young or middle aged character in Wondershare Filmora:
Step 1:
Launch Wondershare Filmora on your system and then start new project. Now import the video from your computer in the software interface.
Step 2:
Once you have added the video then simply drag and drop it in the timeline.
Step 3
Once you have added video to the timeline double click on the added video in timeline to open the video editing menu of Wondershare Filmora.
Step 4:
Now, click the “Animation” tab in the editing options at the left side of interface then you can select anyone from the available preset options.
Step 5:
Select any preset from the available list and then drag and drop it in the timeline to apply the preset on the video. After applying you can use the play button to preview the file. This is the way to create beautiful animation with the Wondershare Filmora. Just like this you can quickly create the best Cartoon canvas as well.
Step 5
After doing all necessary editing you just need to click the “Export” button and save it on your computer.
● Ending Thoughts →
● Cartoon canvas art has gained immense popularity in recent times having a reliable economic and creation advantage with the growth of animation design.
● There are a variety of cartoon painting ideas that you can choose to explore your graphic design creativity.
● When looking for the best solutions to work on creating caricature canvas art, Wondershare Filmora is your worthiest choice.
Top 8 Tools Tell You How to Make Slideshows for Instagram
Top 8 Tools Tell You How to Make Slideshows for Instagram
An easy yet powerful editor
Numerous effects to choose from
Detailed tutorials provided by the official channel
Instagram slideshows land among the latest social media trends of fun and entertainment. Learn how to attract jaw dropping peer attention with creating the same!
In this article
01 [When Should You Use an Instagram Slideshow?](#Part 1)
02 [How to Make an Instagram Slideshow with Music?](#Part 2)
03 [8 Best Instagram Slideshow Apps for Creating Outstanding Slideshow](#Part 3)
Part 1 When Should You Use an Instagram Slideshow?
Revolutions in technology has opened doors to a plenty of new and exciting means of information sharing, entertainment and communication. Playing its part in the game, Instagram slideshow has emerged as an exciting means of quick and impactful content sharing. Diving deeper into the discussion, let us talk about the different areas of working with an Instagram slide show in the following section:
01Explanatory Product Demonstrations and Stepwise Tutorials
Considering the diverse media collaboration entertained by this social media platform, you get the liberty to include 10 media files of videos and images while creating a slideshow on Instagram. This is an affordably sufficient media space to demonstrate your newly launched product in front of the target audience.
The aforesaid characteristic of a slideshow for Instagram can be put to another use of creating detailed, step by step guides and product usage tutorials to create an increased and confident customer reach and brand applicability. A few examples include the presentations of recipes by food blogs and chefs, or a detailed look of the day’s outfit by fashion bloggers.
02Interactive Storytelling or Recreate an Event
Gone are the times when stories and events were restricted to a single image or video with a limited scope of understanding and explanation. You can now work with a combination of multiple images and videos to create more vivid and graphical descriptions of stories, narratives and events.
You can work on creating an engaging slideshow for Instagram to tell an amazing story, voice a narration from the beginning to the end, or share your best moments with your cherished audience, which will surely give them the feel of enjoying the adventure along with you.
03Create a Collection
You can now use a slide show for Instagram to design and present a collection of manifold ideas and products within a single post. You can improvise the collection with displaying a series of related products, showcasing a summary of your different blog posts through the week, or simply present a list of your most reliable inspirations, resources and influencers.
04Exciting Video Teasers
If you have a scheduled video release to entertain your audience, try working with interactive slideshows for Instagram to create some sensational teaser content of the upcoming release to imbibe a natural sense of curiosity within your audience.
You can experiment with releasing a mini photoshoot tour of your filming set, share close up progression details, or include a cliffhanger in the end of your Instagram slideshow to ensure the retrieval of your audience towards watching the release of the actual big content. You can use these short teasers as effective means of creating a campaign buzz, while building a closer connect with your audience.
Part 2 How to Make an Instagram Slideshow with Music?
By now, you must have gathered enough knowledge regarding the credibility of Instagram slideshows in catering to a diversity of commercial, professional and personal content sharing needs. Considering the same, you may conveniently feel motivated to try hands at creating stunning slideshow presentations for Instagram on your own.
Adhering to the concern, let us move ahead with our discussion, while talking about how to make a slideshow for Instagram and supplement the same with adaptable background music to develop amazing content masterpieces and share them with social media peers, while grabbing their obvious attention.
While there are a number of choices in the software market to choose your Instagram slideshow creator tool, the FlexClip tool can be a reliable option. Read though the following section to learn the slideshow creation process in the program with a comprehensive and stepwise tutorial guide:
Step 1: Download the Slideshow Creator Tool
Visit the official website of FlexClip to download and install the slideshow maker software in your preferred device.

Step 2: Start from Scratch
After a successful installation, proceed to launch the tool in your system and wait till the software greets you with its welcome interface. Here, you will have to reach to and tap the ‘Start to Create’ button to begin with the slideshow creation process. You can also select a preset template to work on your slideshow if nothing new clicks in your mind.
Step 3: Select an Aspect Ratio
In the tool’s creator window, navigate to the ‘Options Panel’ at the left and click on ‘More’ to select a suitable aspect ratio. Picking the 9:16 ratio would be a good choice.

Step 4: Upload Your Media
In the same ‘Options Panel’, click on ‘Media’ for dragging and dropping the desired video and image files from your device to the program’s media timeline, followed by applying them to the tool’s storyboard. You can alternatively, choose to directly work with media pages of any preset slideshow template.

Step 5: Customize Your Media
You can now proceed to improvise your media files with amazing texts, filters, stickers, emojis, widgets, etc., by clicking on specific object categories from the ‘Options Panel’.

Step 6: Include Seamless Transitions
Proceed to uplift your creation to the next level with the application of stunning image and video transitions. Navigate to the ‘Options Panel’ and tap ‘Elements’. A variety of transition effects will be displayed to choose from. Select the one you like to add it to your slideshow.

Step 7: Add a Background Music
An in line background audio is the best way to set the mood of your slideshow. Choose to add the same to your creation for making a more engaging impact on the audience. Visit the ‘Options Panel’ again and click on ‘Music’ to open the program’s audio library and select a perfect background music from the huge variety of choices, to include in your slideshow.

Step 8: Preview Your Creation
When you have finished customizing your slideshow, navigate to the top right corner of the editor’s storyboard and hit the ‘Preview’ button to visualize and ensure that your slideshow has everything at the right place. You can continue editing if there is a need to make some changes.
Step 9: Time to Save and Share!
When you are happy with your work, consider saving it either to your device or Google Dropbox, from where you can easily upload the same to your Instagram handle.
Part 3 Best Instagram Slideshow Apps for Creating Outstanding Slideshow
Social media is the talk of the trend in today’s times, which has extended its boundaries to visibly everything around us. Speaking in the light of the fact, slideshow presentations are no exception. Social media platforms today have come up with amazing tools and applications to create and share a stunning slideshow Instagram story with utmost ease and within an affordable time span.
Now that you have developed a comprehensive understanding of the credibility of working with Instagram slideshows and their creation process with the inclusion of complementary background music, let us dive into learning about some of the best and most popular Instagram apps for creating awesome slideshow presentations in the following section:
01Filme Lite
This tool lands among the leading user preferences to work on creating slideshow presentations. The application software is packed with a heap of latest features that form the Instagram trends in current times.
Apart from complementing your slideshow creations with tons of features, this slideshow maker for Instagram grants you the liberty to include your most loved videos and images within your presentation and customize them with a diverse range of effects, along with adjusting their play duration within the slideshow. Additional to image and video customization, you are also allowed to choose the image transition style that perfectly suits your content arrangement within the slides.
Working with the tool, you can be sure of getting an unparalleled slideshow creation experience with a very interactive and user oriented design interface, that is simple enough to be easily understood and worked upon by a newbie to the creative world.
02VivaVideo
If you are working on a detailed presentation and wish to spark up your creation with stunning varieties of jaw dropping special effects, consider creating your PowerPoint slideshows in this application. The tool’s effect library is a storehouse of the most amazing special effects that promise of transforming your slideshow into a visual masterpiece.
You can separately apply these effects to each of the slideshow images or choose to work on a combination of selected effects to include within a single video. Apart from this, you are free to choose an apt background music for your presentation slides from the extensive audio library of the software. The bottom line is; you are assured to a complete fun experience while creating slideshows with this tool.
03Movavi
If you are familiar enough with the fundamental concepts and the trivial anecdotes of working with slideshow presentations and want to take your graphic creativity to the next level, you can try hands at using the Movavi slideshow creator software to design high end PowerPoint presentations of professional quality. The best thing about the tool is, it works online and does not require a software download for usage concerns.
Along with creating online slideshow presentations with ease, the tool permits you to create online videos within minutes and instantly download the same for specific usage. You can further, pop up your presentation slides with wonderful transition and animation effects and also make adjustments in the play duration of each slide. The tool lets you choose and add a perfect background music to your presentation from its conveniently vast audio library.
04Slideshow Lab
If you have just landed into the world of creating slideshow presentations and are looking for easy solutions on how to make a slideshow on Instagram, consider working with this software to polish your design creativity. The simple and user cohesive interface of the tool is best for beginners to understand and get customary with the creation process, that takes the minimum possible time to render an appreciable PowerPoint presentation.
Talking about the slideshow design process, you will need to start with selecting a set of desired images, followed by uploading the same into the tool’s slideshow creator timeline. The next step is to arrange the images in the sequential order of appearance, select an appealing background music and apply smooth image transitions. When you are done with everything, proceed to save the presentation to your device.
05MoShow
While you can choose to create stunning slideshow presentations with almost any class of images, the aforesaid app works best to render Instagram images into a top rated Instagram photo slideshow without compromising with the high resolution image quality of Instagram photos. The application integrates motion pictures and lighting effects to transform the otherwise regular images into lively still captures.
Considering the credibility of the tool in overall user experience, its indeed a thumbs up from graphic creators across the globe, thanks to its smart and interactive interface, in time performance and outstanding creation outputs.
06InVideo Editor
Put an end to your search of effective solutions on how to do a slideshow on Instagram with the InVideo Editor, a smart video and graphic editor that can also be employed to adhere to the requirement of creating amazing slideshow presentations from Instagram media. While the creation process hardly takes a few minutes, you can work with the application to explore your editing creativity to the finest levels. The tool works well with any of your MacOs and Windows compatible devices.
The editor’s effects library is loaded with tons of graphic transitions and filters that are dedicated to enhance the contents of your presentation with utmost ease. You can add creative modifications to the slideshow media, such as, cut, crop and trim videos and images and add the most convincing music, overlays, fonts, etc., and enjoy an additional free access to hundreds of stock videos and slideshow templates.
07LightMV
This one is an online slideshow creator utility that works well with almost any operating system including Windows, iOS, Android and Mac. Essentially a cloud centered editor program, this tool caters to your high quality slideshow creation needs in the most effective way. The design process is quite simple, where you only need to add the images and videos, design your presentation and wait till everything comes to place.
What’s more appealing factor about the tool is that you will never need to download the program in your device or purchase a subscription plan to use the application. All you need to do is land into the tool’s website in your favorite browser and tap on the ‘Slideshow’ option to begin with the creation process. You can select from a heap of preset stunning slideshow templates to create the most enhanced PowerPoint presentation.
08Fliptastic
The Fliptastic slideshow creator app is exclusively developed to adhere to the graphic design concerns of iOS users. This one is a no cost graphic utility with a plethora of versatile features and considerable user backup. The app’s effect library is packed with a unique set of slideshow design templates, transitions, background music choices and filters that work to compliment your presentation with the subtlest look ever.
Paying a bit extra attention to the audio inclusion within the slides, the app offers you a range of free music files to work with, while additionally allowing you to upload and use one from your device or the internet.
09Creating Instagram Slideshows With Filmora
Talking exclusively within the domain of video creation and editing, the credibility of the Wondershare Filmora Video Editor software needs no introduction. Moving ahead with our discussion, let us learn about the process of creating awesome Instagram slideshows with Filmora in the following section:
Step 1: Download and Install the Program
To begin with addressing the concern of how to make a slideshow on Instagram story, navigate to the official Wondershare website and download the Wondershare Filmora Video Editor to your preferred system and proceed to install the same.
Wondershare Filmora - Best Video Editor for Mac/Windows
5,481,435 people have downloaded it.
Build unique custom animations without breaking a sweat.
Focus on creating epic stories and leave the details to Filmora’s auto features.
Start a creative adventure with drag & drop effects and endless possibilities.
Filmora simplifies advanced features to save you time and effort.
Filmora cuts out repetition so you can move on to your next creative breakthrough.
Step 2: Import Your Media
Launch the editor program and wait for the latter’s welcome screen to appear. Here, you need to import the images, videos and other media files to the editor timeline for including them in your slideshow. It is recommended to collect all the image and video files into one single folder before opening a new slideshow design project.
In the editor’s welcome screen, navigate to the ‘Media’ tab at the top left corner and click on the same to open the ‘Import’ menu. From here, you need to choose the ‘Import a Media Folder’ option, followed by navigating to the folder that contains the to be imported media files. When you have reached to the required folder, select it and tap ‘OK’ to import the same into the project timeline. When all the files have been imported, you can see them in the ‘Project Media’ panel.

Step 3: Timeline Positioning of Media Files
Reach to the ‘File’ menu and choose ‘Preferences’ from the latter’s dropdown menu. In the ‘Preferences’ window, hit the ‘Editing’ tab and tap on ‘Photo Preferences’. From the drop down menu that follows, choose the ‘Crop to Fit’ option to adjust the aspect ratio of your imported images in line with the slideshow project. In case your images have the 9:16 vertical aspect ratio, select the ‘Fit’ option to make a proper screen fit.

You can proceed to include the image zoom and camera pan features within your project by clicking on the ‘Pan & Zoom’ option. You can further, modify the preset durations of transitions, effects and photos in the ‘Editing’ tab itself before adding them to the editor timeline. Another way of doing the same is to drag the ends of the media files inward or outward, post the timeline adding process.

When you have finished making the required adjustments, navigate back the ‘Media Panel’ to include the imported media files within the project timeline. You can either click on the files to add them, or choose to ‘Drag and Drop’ the same at a preferred place within the timeline.
When all the images and videos have been added, proceed to arrange them in the desired order of appearance in the slideshow, followed by adjusting their screen time and play durations through any of the methods explained above.
Step 4: Add Transitions to Eliminate Hard Cuts
The smooth play of a slideshow is often distorted by hard cuts, which can be escaped by applying smooth transition effects to the slides. Consider exploring the ‘Transitions’ tab of Filmora to choose from a diversity of easily customizable transition effects and place them at the intersection point of the respective slides in the project timeline.
Instead of applying the same transition to every slide, prefer choosing the one that exclusively suits the content arrangement and flow within particular slides. This would save your slideshow from getting a repetitive look.

Post the timeline adding of a transition, you can double click on the same to reach the ‘Transition Setting Window’, where you are allowed to customize the play duration and select its ‘Transition Mode’. Play durations can alternatively be customised in the project timeline by dragging the slider in a left or right direction.
Step 5: Add Overlays and Filters for an Improvised Colour Scheme
To enhance the thematic appeal of your slideshow, consider desaturating the colours of the included images with the extensive range of visual effects and overlays available in the ‘Effects’ tab of the software’s editing timeline. Opening the tab, you are exposed to a series of ‘Filter and Overlay’ categories, that have further subdivisions of Light Leaks, Sepia Tone and Lomography.
To add a particular effect, place it in the timeline track above the desired clip or image. Observe the changes in the ‘Preview Panel’ and proceed to adjust the effect settings if required, by double clicking on the particular effect.

Step 6: Include Motion Graphic Elements
To supplement your slideshow with elegant motion graphics, navigate to the ‘Elements’ tab in the editor timeline. From here, you can access and choose any suitable motion graphic template from a diversity of available choices, to include within the project timeline. The step is completely optional and you should pay attention to the style of content presentation and the cause of creation of your slideshow when choosing to add these elements to the same.

Step 7: Record Voiceovers and Create Soundtracks
To record a voiceover for your slideshow, navigate to the ‘Media’ tab and tap the ‘Record’ dropdown menu. Click on ‘Record Voiceover’ in the list of options that appears. The ‘Record Audio’ icon pops up and you now need to select a microphone to be used in the recording process. When you are ready, tap the ‘Record’ button to let the recording begin.

You can now see your voice recording appear in the ‘Media’ tab with the previously imported media files, ready to be placed within the audio track of the project timeline. Filmora’s audio library is a storehouse of free access music and audio effects. To add one to your slideshow, navigate and click on the ‘Audio’ tab to select from the extensive Rock, Young & Bright, Electronic, etc., music subcategories till you get the perfect match for your presentation.

Once you have selected all the music tracks, place them one by one on the project timeline and move ahead with adjusting their play durations.
Step 8: Export Your Creation
When you are satisfied with your work, you can export the slideshow directly from Filmora to a number of media sharing platforms. All you need to do is, navigate to and tap the ‘Export’ button in the top right corner of the editor screen and proceed to set the resolution and frame rate, and select the output file format of your created slideshow in the ‘Export Window’ that appears.

When you are ready with everything, click on the ‘Export’ button at the bottom right corner of the screen to share your slideshow across different platforms, including YouTube, Instagram, Vimeo, etc.
The time required by Filmora to render your slideshow on the chosen platform will depend on the output file size. Considering the fact that larger files require a much longer time to be rendered, it would be a smart decision to limit the file size of your slideshow within 500 MB.
● Ending Thoughts →
● Instagram slideshows are exciting means of diving into fun-filled entertainment with your social media peers.
● When looking for solutions on how to create a slideshow on Instagram, there are loads of choices in the software market.
● Talking of best creator alternatives, you can pick the Wondershare Filmora slideshow developer program to make an amazing Insta story slideshow.
Instagram slideshows land among the latest social media trends of fun and entertainment. Learn how to attract jaw dropping peer attention with creating the same!
In this article
01 [When Should You Use an Instagram Slideshow?](#Part 1)
02 [How to Make an Instagram Slideshow with Music?](#Part 2)
03 [8 Best Instagram Slideshow Apps for Creating Outstanding Slideshow](#Part 3)
Part 1 When Should You Use an Instagram Slideshow?
Revolutions in technology has opened doors to a plenty of new and exciting means of information sharing, entertainment and communication. Playing its part in the game, Instagram slideshow has emerged as an exciting means of quick and impactful content sharing. Diving deeper into the discussion, let us talk about the different areas of working with an Instagram slide show in the following section:
01Explanatory Product Demonstrations and Stepwise Tutorials
Considering the diverse media collaboration entertained by this social media platform, you get the liberty to include 10 media files of videos and images while creating a slideshow on Instagram. This is an affordably sufficient media space to demonstrate your newly launched product in front of the target audience.
The aforesaid characteristic of a slideshow for Instagram can be put to another use of creating detailed, step by step guides and product usage tutorials to create an increased and confident customer reach and brand applicability. A few examples include the presentations of recipes by food blogs and chefs, or a detailed look of the day’s outfit by fashion bloggers.
02Interactive Storytelling or Recreate an Event
Gone are the times when stories and events were restricted to a single image or video with a limited scope of understanding and explanation. You can now work with a combination of multiple images and videos to create more vivid and graphical descriptions of stories, narratives and events.
You can work on creating an engaging slideshow for Instagram to tell an amazing story, voice a narration from the beginning to the end, or share your best moments with your cherished audience, which will surely give them the feel of enjoying the adventure along with you.
03Create a Collection
You can now use a slide show for Instagram to design and present a collection of manifold ideas and products within a single post. You can improvise the collection with displaying a series of related products, showcasing a summary of your different blog posts through the week, or simply present a list of your most reliable inspirations, resources and influencers.
04Exciting Video Teasers
If you have a scheduled video release to entertain your audience, try working with interactive slideshows for Instagram to create some sensational teaser content of the upcoming release to imbibe a natural sense of curiosity within your audience.
You can experiment with releasing a mini photoshoot tour of your filming set, share close up progression details, or include a cliffhanger in the end of your Instagram slideshow to ensure the retrieval of your audience towards watching the release of the actual big content. You can use these short teasers as effective means of creating a campaign buzz, while building a closer connect with your audience.
Part 2 How to Make an Instagram Slideshow with Music?
By now, you must have gathered enough knowledge regarding the credibility of Instagram slideshows in catering to a diversity of commercial, professional and personal content sharing needs. Considering the same, you may conveniently feel motivated to try hands at creating stunning slideshow presentations for Instagram on your own.
Adhering to the concern, let us move ahead with our discussion, while talking about how to make a slideshow for Instagram and supplement the same with adaptable background music to develop amazing content masterpieces and share them with social media peers, while grabbing their obvious attention.
While there are a number of choices in the software market to choose your Instagram slideshow creator tool, the FlexClip tool can be a reliable option. Read though the following section to learn the slideshow creation process in the program with a comprehensive and stepwise tutorial guide:
Step 1: Download the Slideshow Creator Tool
Visit the official website of FlexClip to download and install the slideshow maker software in your preferred device.
Step 2: Start from Scratch
After a successful installation, proceed to launch the tool in your system and wait till the software greets you with its welcome interface. Here, you will have to reach to and tap the ‘Start to Create’ button to begin with the slideshow creation process. You can also select a preset template to work on your slideshow if nothing new clicks in your mind.
Step 3: Select an Aspect Ratio
In the tool’s creator window, navigate to the ‘Options Panel’ at the left and click on ‘More’ to select a suitable aspect ratio. Picking the 9:16 ratio would be a good choice.
Step 4: Upload Your Media
In the same ‘Options Panel’, click on ‘Media’ for dragging and dropping the desired video and image files from your device to the program’s media timeline, followed by applying them to the tool’s storyboard. You can alternatively, choose to directly work with media pages of any preset slideshow template.
Step 5: Customize Your Media
You can now proceed to improvise your media files with amazing texts, filters, stickers, emojis, widgets, etc., by clicking on specific object categories from the ‘Options Panel’.
Step 6: Include Seamless Transitions
Proceed to uplift your creation to the next level with the application of stunning image and video transitions. Navigate to the ‘Options Panel’ and tap ‘Elements’. A variety of transition effects will be displayed to choose from. Select the one you like to add it to your slideshow.
Step 7: Add a Background Music
An in line background audio is the best way to set the mood of your slideshow. Choose to add the same to your creation for making a more engaging impact on the audience. Visit the ‘Options Panel’ again and click on ‘Music’ to open the program’s audio library and select a perfect background music from the huge variety of choices, to include in your slideshow.
Step 8: Preview Your Creation
When you have finished customizing your slideshow, navigate to the top right corner of the editor’s storyboard and hit the ‘Preview’ button to visualize and ensure that your slideshow has everything at the right place. You can continue editing if there is a need to make some changes.
Step 9: Time to Save and Share!
When you are happy with your work, consider saving it either to your device or Google Dropbox, from where you can easily upload the same to your Instagram handle.
Part 3 Best Instagram Slideshow Apps for Creating Outstanding Slideshow
Social media is the talk of the trend in today’s times, which has extended its boundaries to visibly everything around us. Speaking in the light of the fact, slideshow presentations are no exception. Social media platforms today have come up with amazing tools and applications to create and share a stunning slideshow Instagram story with utmost ease and within an affordable time span.
Now that you have developed a comprehensive understanding of the credibility of working with Instagram slideshows and their creation process with the inclusion of complementary background music, let us dive into learning about some of the best and most popular Instagram apps for creating awesome slideshow presentations in the following section:
01Filme Lite
This tool lands among the leading user preferences to work on creating slideshow presentations. The application software is packed with a heap of latest features that form the Instagram trends in current times.
Apart from complementing your slideshow creations with tons of features, this slideshow maker for Instagram grants you the liberty to include your most loved videos and images within your presentation and customize them with a diverse range of effects, along with adjusting their play duration within the slideshow. Additional to image and video customization, you are also allowed to choose the image transition style that perfectly suits your content arrangement within the slides.
Working with the tool, you can be sure of getting an unparalleled slideshow creation experience with a very interactive and user oriented design interface, that is simple enough to be easily understood and worked upon by a newbie to the creative world.
02VivaVideo
If you are working on a detailed presentation and wish to spark up your creation with stunning varieties of jaw dropping special effects, consider creating your PowerPoint slideshows in this application. The tool’s effect library is a storehouse of the most amazing special effects that promise of transforming your slideshow into a visual masterpiece.
You can separately apply these effects to each of the slideshow images or choose to work on a combination of selected effects to include within a single video. Apart from this, you are free to choose an apt background music for your presentation slides from the extensive audio library of the software. The bottom line is; you are assured to a complete fun experience while creating slideshows with this tool.
03Movavi
If you are familiar enough with the fundamental concepts and the trivial anecdotes of working with slideshow presentations and want to take your graphic creativity to the next level, you can try hands at using the Movavi slideshow creator software to design high end PowerPoint presentations of professional quality. The best thing about the tool is, it works online and does not require a software download for usage concerns.
Along with creating online slideshow presentations with ease, the tool permits you to create online videos within minutes and instantly download the same for specific usage. You can further, pop up your presentation slides with wonderful transition and animation effects and also make adjustments in the play duration of each slide. The tool lets you choose and add a perfect background music to your presentation from its conveniently vast audio library.
04Slideshow Lab
If you have just landed into the world of creating slideshow presentations and are looking for easy solutions on how to make a slideshow on Instagram, consider working with this software to polish your design creativity. The simple and user cohesive interface of the tool is best for beginners to understand and get customary with the creation process, that takes the minimum possible time to render an appreciable PowerPoint presentation.
Talking about the slideshow design process, you will need to start with selecting a set of desired images, followed by uploading the same into the tool’s slideshow creator timeline. The next step is to arrange the images in the sequential order of appearance, select an appealing background music and apply smooth image transitions. When you are done with everything, proceed to save the presentation to your device.
05MoShow
While you can choose to create stunning slideshow presentations with almost any class of images, the aforesaid app works best to render Instagram images into a top rated Instagram photo slideshow without compromising with the high resolution image quality of Instagram photos. The application integrates motion pictures and lighting effects to transform the otherwise regular images into lively still captures.
Considering the credibility of the tool in overall user experience, its indeed a thumbs up from graphic creators across the globe, thanks to its smart and interactive interface, in time performance and outstanding creation outputs.
06InVideo Editor
Put an end to your search of effective solutions on how to do a slideshow on Instagram with the InVideo Editor, a smart video and graphic editor that can also be employed to adhere to the requirement of creating amazing slideshow presentations from Instagram media. While the creation process hardly takes a few minutes, you can work with the application to explore your editing creativity to the finest levels. The tool works well with any of your MacOs and Windows compatible devices.
The editor’s effects library is loaded with tons of graphic transitions and filters that are dedicated to enhance the contents of your presentation with utmost ease. You can add creative modifications to the slideshow media, such as, cut, crop and trim videos and images and add the most convincing music, overlays, fonts, etc., and enjoy an additional free access to hundreds of stock videos and slideshow templates.
07LightMV
This one is an online slideshow creator utility that works well with almost any operating system including Windows, iOS, Android and Mac. Essentially a cloud centered editor program, this tool caters to your high quality slideshow creation needs in the most effective way. The design process is quite simple, where you only need to add the images and videos, design your presentation and wait till everything comes to place.
What’s more appealing factor about the tool is that you will never need to download the program in your device or purchase a subscription plan to use the application. All you need to do is land into the tool’s website in your favorite browser and tap on the ‘Slideshow’ option to begin with the creation process. You can select from a heap of preset stunning slideshow templates to create the most enhanced PowerPoint presentation.
08Fliptastic
The Fliptastic slideshow creator app is exclusively developed to adhere to the graphic design concerns of iOS users. This one is a no cost graphic utility with a plethora of versatile features and considerable user backup. The app’s effect library is packed with a unique set of slideshow design templates, transitions, background music choices and filters that work to compliment your presentation with the subtlest look ever.
Paying a bit extra attention to the audio inclusion within the slides, the app offers you a range of free music files to work with, while additionally allowing you to upload and use one from your device or the internet.
09Creating Instagram Slideshows With Filmora
Talking exclusively within the domain of video creation and editing, the credibility of the Wondershare Filmora Video Editor software needs no introduction. Moving ahead with our discussion, let us learn about the process of creating awesome Instagram slideshows with Filmora in the following section:
Step 1: Download and Install the Program
To begin with addressing the concern of how to make a slideshow on Instagram story, navigate to the official Wondershare website and download the Wondershare Filmora Video Editor to your preferred system and proceed to install the same.
Wondershare Filmora - Best Video Editor for Mac/Windows
5,481,435 people have downloaded it.
Build unique custom animations without breaking a sweat.
Focus on creating epic stories and leave the details to Filmora’s auto features.
Start a creative adventure with drag & drop effects and endless possibilities.
Filmora simplifies advanced features to save you time and effort.
Filmora cuts out repetition so you can move on to your next creative breakthrough.
Step 2: Import Your Media
Launch the editor program and wait for the latter’s welcome screen to appear. Here, you need to import the images, videos and other media files to the editor timeline for including them in your slideshow. It is recommended to collect all the image and video files into one single folder before opening a new slideshow design project.
In the editor’s welcome screen, navigate to the ‘Media’ tab at the top left corner and click on the same to open the ‘Import’ menu. From here, you need to choose the ‘Import a Media Folder’ option, followed by navigating to the folder that contains the to be imported media files. When you have reached to the required folder, select it and tap ‘OK’ to import the same into the project timeline. When all the files have been imported, you can see them in the ‘Project Media’ panel.
Step 3: Timeline Positioning of Media Files
Reach to the ‘File’ menu and choose ‘Preferences’ from the latter’s dropdown menu. In the ‘Preferences’ window, hit the ‘Editing’ tab and tap on ‘Photo Preferences’. From the drop down menu that follows, choose the ‘Crop to Fit’ option to adjust the aspect ratio of your imported images in line with the slideshow project. In case your images have the 9:16 vertical aspect ratio, select the ‘Fit’ option to make a proper screen fit.
You can proceed to include the image zoom and camera pan features within your project by clicking on the ‘Pan & Zoom’ option. You can further, modify the preset durations of transitions, effects and photos in the ‘Editing’ tab itself before adding them to the editor timeline. Another way of doing the same is to drag the ends of the media files inward or outward, post the timeline adding process.
When you have finished making the required adjustments, navigate back the ‘Media Panel’ to include the imported media files within the project timeline. You can either click on the files to add them, or choose to ‘Drag and Drop’ the same at a preferred place within the timeline.
When all the images and videos have been added, proceed to arrange them in the desired order of appearance in the slideshow, followed by adjusting their screen time and play durations through any of the methods explained above.
Step 4: Add Transitions to Eliminate Hard Cuts
The smooth play of a slideshow is often distorted by hard cuts, which can be escaped by applying smooth transition effects to the slides. Consider exploring the ‘Transitions’ tab of Filmora to choose from a diversity of easily customizable transition effects and place them at the intersection point of the respective slides in the project timeline.
Instead of applying the same transition to every slide, prefer choosing the one that exclusively suits the content arrangement and flow within particular slides. This would save your slideshow from getting a repetitive look.
Post the timeline adding of a transition, you can double click on the same to reach the ‘Transition Setting Window’, where you are allowed to customize the play duration and select its ‘Transition Mode’. Play durations can alternatively be customised in the project timeline by dragging the slider in a left or right direction.
Step 5: Add Overlays and Filters for an Improvised Colour Scheme
To enhance the thematic appeal of your slideshow, consider desaturating the colours of the included images with the extensive range of visual effects and overlays available in the ‘Effects’ tab of the software’s editing timeline. Opening the tab, you are exposed to a series of ‘Filter and Overlay’ categories, that have further subdivisions of Light Leaks, Sepia Tone and Lomography.
To add a particular effect, place it in the timeline track above the desired clip or image. Observe the changes in the ‘Preview Panel’ and proceed to adjust the effect settings if required, by double clicking on the particular effect.
Step 6: Include Motion Graphic Elements
To supplement your slideshow with elegant motion graphics, navigate to the ‘Elements’ tab in the editor timeline. From here, you can access and choose any suitable motion graphic template from a diversity of available choices, to include within the project timeline. The step is completely optional and you should pay attention to the style of content presentation and the cause of creation of your slideshow when choosing to add these elements to the same.
Step 7: Record Voiceovers and Create Soundtracks
To record a voiceover for your slideshow, navigate to the ‘Media’ tab and tap the ‘Record’ dropdown menu. Click on ‘Record Voiceover’ in the list of options that appears. The ‘Record Audio’ icon pops up and you now need to select a microphone to be used in the recording process. When you are ready, tap the ‘Record’ button to let the recording begin.
You can now see your voice recording appear in the ‘Media’ tab with the previously imported media files, ready to be placed within the audio track of the project timeline. Filmora’s audio library is a storehouse of free access music and audio effects. To add one to your slideshow, navigate and click on the ‘Audio’ tab to select from the extensive Rock, Young & Bright, Electronic, etc., music subcategories till you get the perfect match for your presentation.
Once you have selected all the music tracks, place them one by one on the project timeline and move ahead with adjusting their play durations.
Step 8: Export Your Creation
When you are satisfied with your work, you can export the slideshow directly from Filmora to a number of media sharing platforms. All you need to do is, navigate to and tap the ‘Export’ button in the top right corner of the editor screen and proceed to set the resolution and frame rate, and select the output file format of your created slideshow in the ‘Export Window’ that appears.
When you are ready with everything, click on the ‘Export’ button at the bottom right corner of the screen to share your slideshow across different platforms, including YouTube, Instagram, Vimeo, etc.
The time required by Filmora to render your slideshow on the chosen platform will depend on the output file size. Considering the fact that larger files require a much longer time to be rendered, it would be a smart decision to limit the file size of your slideshow within 500 MB.
● Ending Thoughts →
● Instagram slideshows are exciting means of diving into fun-filled entertainment with your social media peers.
● When looking for solutions on how to create a slideshow on Instagram, there are loads of choices in the software market.
● Talking of best creator alternatives, you can pick the Wondershare Filmora slideshow developer program to make an amazing Insta story slideshow.
15 Best Collage Makers to Create Aesthetic Collages
15 Best Collage Makers to Create Aesthetic Collages
An easy yet powerful editor
Numerous effects to choose from
Detailed tutorials provided by the official channel
It is rightly said that a picture is worth a thousand words and what if there are multiple pictures? It becomes a story!! Creating collages have been popular among people for a long and with high-end cameras, mobile phones, and excellent tools the task has become even easier and quicker.

So, if you too are willing to create an aesthetic collage for yourself or loved ones, there is no dearth of collage-making tools. So, to prevent you from the hassles of selecting one such tool, we have shortlisted the popular ones.
In this article
01 [Need for a collage-making tool?](#Part 1)
02 [Top 15 collage makers to create aesthetic collages](#Part 2)
03 [Best software to create video collages and edit videos professionally – Wondershare Filmora](#Part 3)
Part 1 Need for a collage-making tool?
Though aesthetic collage wallpaper making may sound simple, it is an artwork to create an impressive-looking collage. Adjusting the images in the right format, cropping their sizes, setting a background, setting colors, adding text are some of the many factors that go into the making of a visually appealing collage. So now, all these considerations can be taken care of by a good collage-making tool. All you need to do is pick up your choice of images, select a template and let the tool do its work.
In no time, a collage of your choice will be ready.
Part 2 Top 15 collage makers to create aesthetic collages
There is a wide range of online, desktop, and app-based collage-making tools available that can be selected based on your requirements. Check out the most popular ones as below.
01Free Collage Maker Online
This is a free-to-use online tool that can be used for creating impressive aesthetic wallpaper collage quickly. The tool gives you the option to either choose your own layout or use one of the readymade templates. Multiple editing options are supported like adjust9ing exposure, contrast, shadows, white balance, and more. You can even turn, rotate, and distort the images. Using this online tool, you can even add the text and also customize it. A wide range of formats is supported by a tool like RAW, JPEG, PSD, PNG, and others.
022. Canva
This is a widely used online tool that supports multiple functions including image collage creation and image editing. The tool allows adding images in all popular formats for creating a collage using several templates. The position of the photos, font of the text, shades, and other parameters can be adjusted as required. The tool also has a huge collection of images in different categories that can also be used for making aesthetic photo collage. Created collages can be saved in JPEG, PDF, and PNG format.
03Fotor
Creating high-quality trendy photo collages is easy and quick using this online tool that supports all popular image formats. There are several grids and template options available for you to create the desired collage. Stickers and text can be added to the created collage to add some fun elements. Several adjustments can be made like frame width, rounded corners, background color, aspect ratio, adding filters, effects, and more. With multiple features, the interface becomes quite confusing.
04Adobe Creative Cloud Express
Adobe is one of the most widely used tools when it comes to images and videos and creating a picture collage is one of the supported features. Using the online version of this tool, collages can be created quickly and only a free sign-up is needed. In addition to your images, you can even choose from the wide collection of royalty-free pictures. Theme-based templates are available to match your requirements and for customization, all basic editing features are supported. You can even add texts, filters, and effects to your collages.
05Shape Collage
This automatic collage maker lets you create the desired collage in just a few simple steps. The interface is simple and all the basic editing functions for customization are supported. You can change the background, frame, the distance between the images, and several other factors. The tool is available to be used as desktop software, an online program, and also as an app that can be downloaded on a phone.
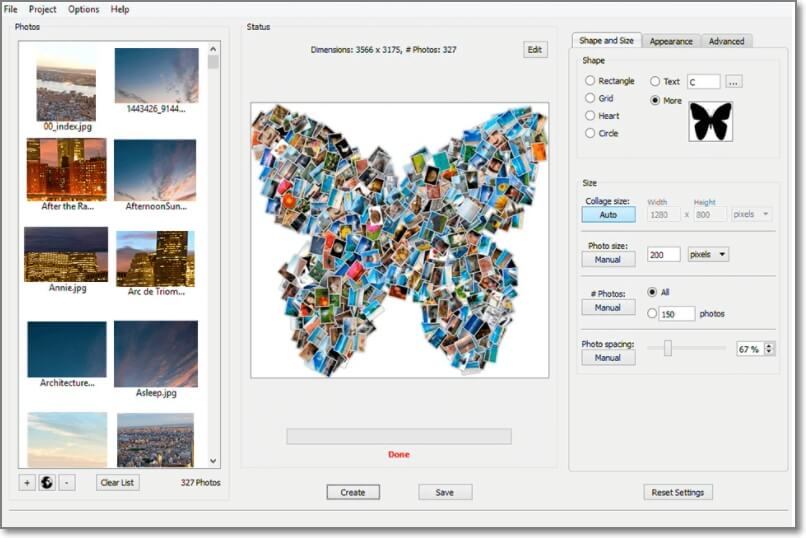
06Kapwing Collage Maker
Using this free online tool, collages can be made using images, videos, GIFs, as well as music files. The tool allows you to choose either a blank canvas or choose from multiple templates available at the site. The drag and drop features are supported and there are multiple editing options as well. The free version has a watermark on the created collages which can be removed after creating a free account. The created collage can be saved to the system or its URL can be obtained.
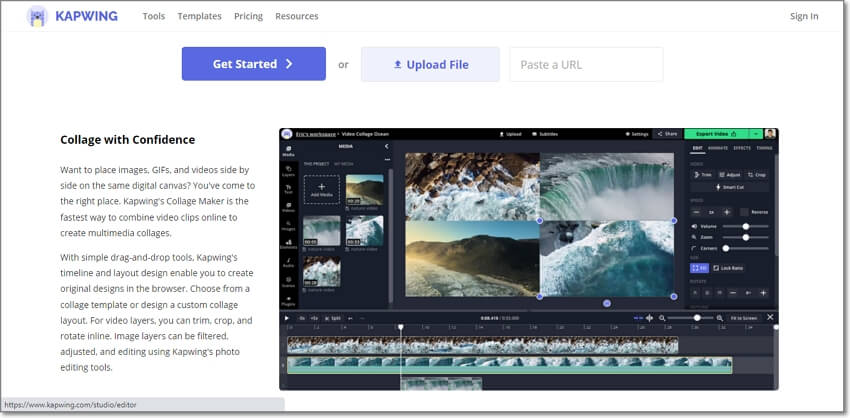
07Photo Joiner
As the name suggests, this is a photo joining tool that works from your browser and allows creating a picture collage. The interface is user-friendly and the work process is smooth where you just need to add the images, choose the layout, add text, and make required settings to create your choice of a template. The tool allows changing the image size, as well as the background. Using the tool, you can also create an FB cover in a simple step.
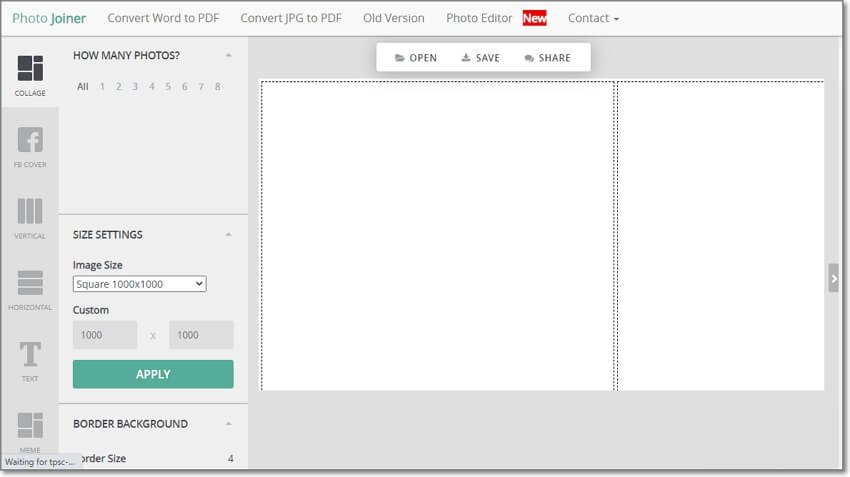
08Ribbet
This is a widely used photo editing tool that performs an array of additional features as well including collage making. The tool is available in a free as well as a premium paid version. The interface is smart and comes packed in with all basic collage-making functions. Decent templates are available to choose from with the option to adjust the size, edit exposure, lighting, and other parameters.
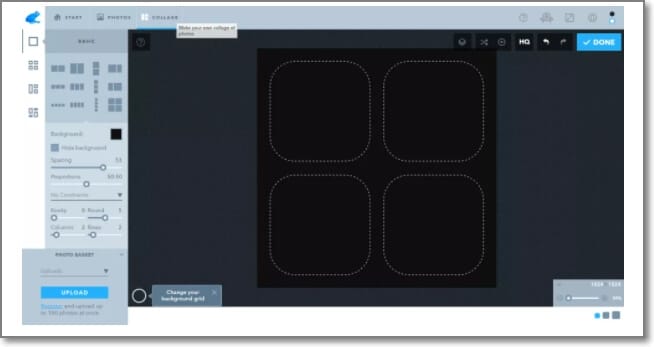
09BeFunky
Creating aesthetic, funky, and all types of different collages is quick and easy using this online tool. A variety of customizable layout options are available at the site to match your requirements. The images can be enhanced by changing the background color, pattern, adding fonts, effects, filters, and more. The free version of the tool supports basic functions while for more advanced options you need to purchase the premium plan. The tool is also available as an app for Android and iOS devices.
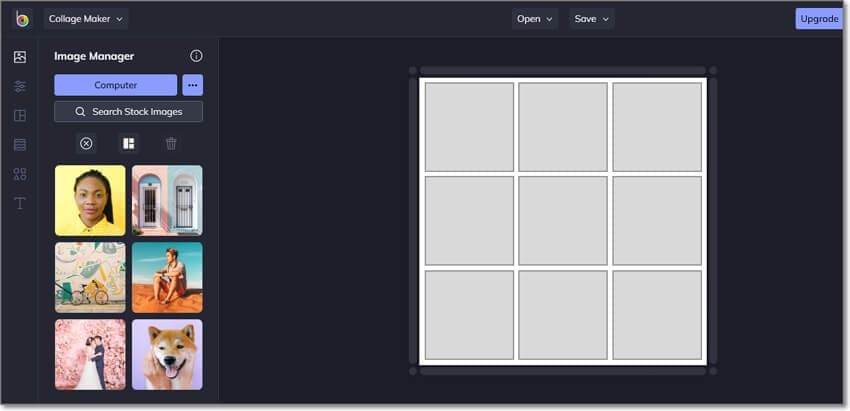
10Kizoa
This is a free online slideshow maker that allows creating a slideshow in different aspect ratios which is suitable for all types of platforms and screen sizes. An array of static and animated templates is available and you can even add multiple effects, text, and other elements to customize the collage as desired. There is also a paid version of the tool with added features and functions.
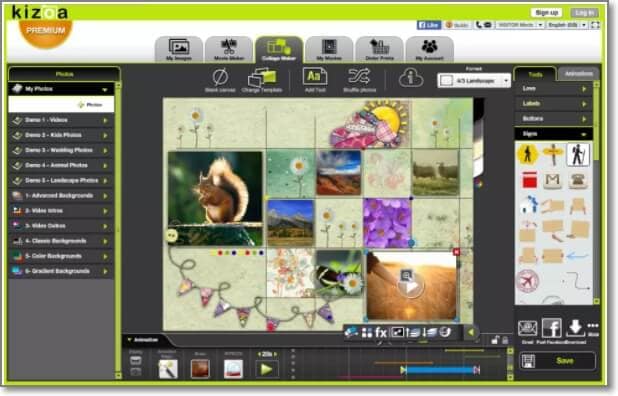
11PicMonkey
This is another popular name when it comes to collage-making tools. The tool allows creating freestyle as well as grid-based collages and in addition to the images, you can even add videos. Hundreds of collage layouts are available that can be further customized as needed. The function of auto-cell resizing adjusts all the images to the grids perfectly. Apart from your media files, you can even choose from the free stock of images and videos available at the site.
12piZap
Just like its interesting name, this online tool allows you to create interesting collages. The interface is intuitive and there are multiple templates to choose from. Further, the templates can be customized using an editing tool, adding filters, texts, effects, and other elements. The Facebook banner template is one of the interesting and useful features. For ad-free experience and additional functions, the pro-paid version can be selected.
13FotoJet
Using this browser-based tool you can create collages, posters, photo cards, YouTube banners, fun images, Facebook covers, and others. The templates in different categories are available to match your themes and create interesting collages. You can even choose to create a classic collage to keep it simple. Upgrading the tool to the paid version offers additional resources and features.

14Picsart Collage Maker
This is another simple to use free online collage-making tool that can create aesthetic and other types of collages. The interface of the tool is clean which makes the working smooth and quick and the images can be added from your system as well as from your social media accounts. Multiple effects, filters, clip-art, and other elements can be added to make the collage look impressive.
15Photovisi
Using this free online collage-making tool, you will have access to templates in different categories like abstract, magic, love, nature, and many categories more. You can even create Facebook covers, E-cards, and YouTube channel banners using the program. An array of built-in effects is available to customize the file and the tool also offers collaboration options. The created collage can be saved locally or can also be shared through an email.
Part 3 Best software to create video collages and edit videos professionally – Wondershare Filmora
Above we have listed the best tools for creating image collages and a few of them also has a feature to add videos. If you are want to create a video collage and looking for a tool that can edit your videos professionally, Wondershare Filmora is the best tool to consider. The animated split screen effect of the software allows you to view your videos on a split-screen thus making it look like a collage.
For all types of video editing requirements, this is an excellent tool available for download on Windows and Mac systems.
For Win 7 or later (64-bit)
For macOS 10.12 or later
● Key Takeaways from This Episode →
● To create aesthetics and other types of collages, a wide range of collage-maker tools are available.
● Choose from desktop tools, online programs, or apps as needed.
● To edit videos and create decent video collages, Wondershare Filmora is an excellent tool.
It is rightly said that a picture is worth a thousand words and what if there are multiple pictures? It becomes a story!! Creating collages have been popular among people for a long and with high-end cameras, mobile phones, and excellent tools the task has become even easier and quicker.
So, if you too are willing to create an aesthetic collage for yourself or loved ones, there is no dearth of collage-making tools. So, to prevent you from the hassles of selecting one such tool, we have shortlisted the popular ones.
In this article
01 [Need for a collage-making tool?](#Part 1)
02 [Top 15 collage makers to create aesthetic collages](#Part 2)
03 [Best software to create video collages and edit videos professionally – Wondershare Filmora](#Part 3)
Part 1 Need for a collage-making tool?
Though aesthetic collage wallpaper making may sound simple, it is an artwork to create an impressive-looking collage. Adjusting the images in the right format, cropping their sizes, setting a background, setting colors, adding text are some of the many factors that go into the making of a visually appealing collage. So now, all these considerations can be taken care of by a good collage-making tool. All you need to do is pick up your choice of images, select a template and let the tool do its work.
In no time, a collage of your choice will be ready.
Part 2 Top 15 collage makers to create aesthetic collages
There is a wide range of online, desktop, and app-based collage-making tools available that can be selected based on your requirements. Check out the most popular ones as below.
01Free Collage Maker Online
This is a free-to-use online tool that can be used for creating impressive aesthetic wallpaper collage quickly. The tool gives you the option to either choose your own layout or use one of the readymade templates. Multiple editing options are supported like adjust9ing exposure, contrast, shadows, white balance, and more. You can even turn, rotate, and distort the images. Using this online tool, you can even add the text and also customize it. A wide range of formats is supported by a tool like RAW, JPEG, PSD, PNG, and others.
022. Canva
This is a widely used online tool that supports multiple functions including image collage creation and image editing. The tool allows adding images in all popular formats for creating a collage using several templates. The position of the photos, font of the text, shades, and other parameters can be adjusted as required. The tool also has a huge collection of images in different categories that can also be used for making aesthetic photo collage. Created collages can be saved in JPEG, PDF, and PNG format.
03Fotor
Creating high-quality trendy photo collages is easy and quick using this online tool that supports all popular image formats. There are several grids and template options available for you to create the desired collage. Stickers and text can be added to the created collage to add some fun elements. Several adjustments can be made like frame width, rounded corners, background color, aspect ratio, adding filters, effects, and more. With multiple features, the interface becomes quite confusing.
04Adobe Creative Cloud Express
Adobe is one of the most widely used tools when it comes to images and videos and creating a picture collage is one of the supported features. Using the online version of this tool, collages can be created quickly and only a free sign-up is needed. In addition to your images, you can even choose from the wide collection of royalty-free pictures. Theme-based templates are available to match your requirements and for customization, all basic editing features are supported. You can even add texts, filters, and effects to your collages.
05Shape Collage
This automatic collage maker lets you create the desired collage in just a few simple steps. The interface is simple and all the basic editing functions for customization are supported. You can change the background, frame, the distance between the images, and several other factors. The tool is available to be used as desktop software, an online program, and also as an app that can be downloaded on a phone.
06Kapwing Collage Maker
Using this free online tool, collages can be made using images, videos, GIFs, as well as music files. The tool allows you to choose either a blank canvas or choose from multiple templates available at the site. The drag and drop features are supported and there are multiple editing options as well. The free version has a watermark on the created collages which can be removed after creating a free account. The created collage can be saved to the system or its URL can be obtained.
07Photo Joiner
As the name suggests, this is a photo joining tool that works from your browser and allows creating a picture collage. The interface is user-friendly and the work process is smooth where you just need to add the images, choose the layout, add text, and make required settings to create your choice of a template. The tool allows changing the image size, as well as the background. Using the tool, you can also create an FB cover in a simple step.
08Ribbet
This is a widely used photo editing tool that performs an array of additional features as well including collage making. The tool is available in a free as well as a premium paid version. The interface is smart and comes packed in with all basic collage-making functions. Decent templates are available to choose from with the option to adjust the size, edit exposure, lighting, and other parameters.
09BeFunky
Creating aesthetic, funky, and all types of different collages is quick and easy using this online tool. A variety of customizable layout options are available at the site to match your requirements. The images can be enhanced by changing the background color, pattern, adding fonts, effects, filters, and more. The free version of the tool supports basic functions while for more advanced options you need to purchase the premium plan. The tool is also available as an app for Android and iOS devices.
10Kizoa
This is a free online slideshow maker that allows creating a slideshow in different aspect ratios which is suitable for all types of platforms and screen sizes. An array of static and animated templates is available and you can even add multiple effects, text, and other elements to customize the collage as desired. There is also a paid version of the tool with added features and functions.
11PicMonkey
This is another popular name when it comes to collage-making tools. The tool allows creating freestyle as well as grid-based collages and in addition to the images, you can even add videos. Hundreds of collage layouts are available that can be further customized as needed. The function of auto-cell resizing adjusts all the images to the grids perfectly. Apart from your media files, you can even choose from the free stock of images and videos available at the site.
12piZap
Just like its interesting name, this online tool allows you to create interesting collages. The interface is intuitive and there are multiple templates to choose from. Further, the templates can be customized using an editing tool, adding filters, texts, effects, and other elements. The Facebook banner template is one of the interesting and useful features. For ad-free experience and additional functions, the pro-paid version can be selected.
13FotoJet
Using this browser-based tool you can create collages, posters, photo cards, YouTube banners, fun images, Facebook covers, and others. The templates in different categories are available to match your themes and create interesting collages. You can even choose to create a classic collage to keep it simple. Upgrading the tool to the paid version offers additional resources and features.
14Picsart Collage Maker
This is another simple to use free online collage-making tool that can create aesthetic and other types of collages. The interface of the tool is clean which makes the working smooth and quick and the images can be added from your system as well as from your social media accounts. Multiple effects, filters, clip-art, and other elements can be added to make the collage look impressive.
15Photovisi
Using this free online collage-making tool, you will have access to templates in different categories like abstract, magic, love, nature, and many categories more. You can even create Facebook covers, E-cards, and YouTube channel banners using the program. An array of built-in effects is available to customize the file and the tool also offers collaboration options. The created collage can be saved locally or can also be shared through an email.
Part 3 Best software to create video collages and edit videos professionally – Wondershare Filmora
Above we have listed the best tools for creating image collages and a few of them also has a feature to add videos. If you are want to create a video collage and looking for a tool that can edit your videos professionally, Wondershare Filmora is the best tool to consider. The animated split screen effect of the software allows you to view your videos on a split-screen thus making it look like a collage.
For all types of video editing requirements, this is an excellent tool available for download on Windows and Mac systems.
For Win 7 or later (64-bit)
For macOS 10.12 or later
● Key Takeaways from This Episode →
● To create aesthetics and other types of collages, a wide range of collage-maker tools are available.
● Choose from desktop tools, online programs, or apps as needed.
● To edit videos and create decent video collages, Wondershare Filmora is an excellent tool.
How to Make an Animated Travel Map Video?
How to Make an Animated Travel Map Video?

Benjamin Arango
Mar 27, 2024• Proven solutions
Animated travel map videos make it easy for the viewers to follow the routes from the source to destination locations right on the single screen. While the static maps would only allow the audience to see the markers from where the journey would start and is expected to end, the animated ones show the real-time movements and therefore look more interactive when viewed.
That said, here you will learn how to create an attractive and engaging animated travel map video using one of the easiest post-production applications, Wondershare Filmora, which is widely appreciated by amateurs and professionals throughout the globe. In another section, you will also learn about an alternative program that might be of some help in case you are more into online designing.
- Method 1: Make Animated Travel Map Videos with Location Video Maker - [Video Tutorial]
- Method 2: Make Interactive Animated Travel Map with Pictramap
- Method 3: Create Animated Travel Map Using Multidev
Method 1 Make Animated Travel Map Videos with Location Video Maker
The entire process of creating an animated travel map video in Wondershare’s Filmora is categorized into two parts, wherein the first part you will collect all the ingredients that are needed to get started, and in the second part you will actually make an animated map using the tools and features present in Filmora.
Watch a video tutorial to see how to make an animated map for a video:
For Win 7 or later (64-bit)
 Secure Download
For macOS 10.14 or later
Secure Download


Part 1: Prepare the Travel Map Materials
Following are the ingredients and the methods to collect them for animated travel map preparation:
Step 1: Get the Map
The first thing that you would need to prepare an animated map is an image of a realistic map. Thanks to Google and Microsoft, these things are now pretty easy to arrange. The process is given below:
- Launch your preferred web browser
- Type google.com in the address bar or the search box and hit Enter
- Scroll to zoom out so you can see the entire world map on one screen

- Type Snipping Tool in the Cortana search box present on the left side of the Taskbar
- Launch Snipping Tool, and use it to capture the screenshot of the map
Note: Snipping Tool is a built-in app in Windows 10 and is available for free. If you are using any other operating system, or have a different program to capture the screenshots, feel free to use it according to your convenience.
- Save the screenshot you captured as a JPG file on your PC
Step 2: Mark Out the Map Path
The next step in the process of preparing an animated travel map is to mark your route on it. To do so, you can use any of your preferred photo editing tools. However, to keep this illustration simple, Microsoft Paint is used here, and the method is given below:
- Right-click the screenshot you just captured
- Go to Open with on the context menu, and then click Paint from the submenu that appears
- Pick your preferred color from the pallet of the Paint interface. It is advisable to use an eye-catchy shade such as Red
- Use the Sphere shape tool to draw a circle over the source and destination locations on the map
- Use the Line tool to draw a line from the source point to the destination. Try giving the line a few turns to make it look realistic
- Go to File > Save As, and save the marked image with a different name
Note: Once this is done, you should have two image files of the map, i.e., one without the marks and one with it
Step 3: Download Some Travel Icons
Another important ingredient in an effective travel map animation is touring icons such as location marker image, a traveling medium symbol like a helicopter, airplane, car/bike (for short distances), etc. A couple of websites that offer royalty-free stock photos at absolutely no cost are listed below:
Note: Although the websites given above allow you to download and use their stock images and icons for free, you may need to give credits to the designers/creators of the symbols while using their objects. Therefore, you are suggested to check the Terms & Conditions and norms of usage of the elements before downloading and adding them to your projects.
Part 2: Make Animated Travel Map Videos with Filmora
After you have gathered all the necessary ingredients that are required to create a travel map animation, it is now time to get to work. The following instructions would guide you through the step-by-step process of preparing a decent and realistic animated travel map in Wondershare Filmora :
For Win 7 or later (64-bit)
Secure Download
For macOS 10.14 or later
Secure Download
Step 1: Import Ingredients to Filmora and Add Them to the Timeline
Launch the video editor on your computer, click anywhere inside the Media window at the upper-left area, and import all the images and icons that you collected earlier to program. Next, drag both the images of the map, i.e., with and without the marks to the Timeline, and ensure that they are of the same duration and are placed on the same track.

Note: Be sure to put the map without the marks first, and then the one with the marks. Also note that the images have the playback duration of 5 seconds in the Timeline by default, and this tenure can be reduced or increased by dragging the side handle of the media to the left or right respectively.
Step 2: Add Transition for Illusion of Route Appearance
Go to Transition from the standard toolbar at the top, locate the Erase Slide transition effect from the available presets, and place it in between the two image files that you earlier added to the Timeline. Next, click and drag either of the side handles of the transition to the end of the media clip. Notice how the other side of the effect is expanded in equal proportion.

Step 3: Preview and Export
Press the Spacebar on the keyboard to preview the video and see if the route appears as if it is being drawn on the map. Once the animation looks acceptable, click EXPORT from the top-center, go to the Local tab on the Export window, select MP4 from the formats list in the left, and click EXPORT from the bottom-right corner to export the current animation to MP4.
Step 4: Customize the Travel Map Media
Either start a new project and import the video of the map you exported in the previous step to the app and then to the Timeline, or remove the existing media from the Timeline in the same project, and add the exported video to it for convenience.

For Win 7 or later (64-bit)
Secure Download
For macOS 10.14 or later
Secure Download
Next, position the Skimmer (Playhead) a couple of frames before the one the route line appears and starts stretching from, and click the Split icon from the editing toolbar above the Timeline itself. Repeat this process for the other side of the media, i.e., position the Skimmer a couple of frames after the route line reaches the destination location, and click the Split icon again. Then remove the separated segments from both the sides by selecting them and pressing Delete on the keyboard, leaving only the portion where the animation is visible.

Optionally, right-click the media that is left behind in the Timeline, and go to Speed and Duration from the context menu. On the Custom Speed box, drag the Speed slider to the left to decrease the playback speed resulting in the increased duration of the media. Alternatively, you can manually enter a value in the Speed box to get precise tenure. Click OK when you are done.

Step 5: Add Animations to Travel Map
Right-click the media in the Timeline, and go to Add Animation from the context menu. Make sure that the Skimmer is on the first frame, and add several keyframes as explained below:
- Click Add to add the first keyframe

- Move a couple of frames further, and click Add one more time. Now, while you are on this second keyframe, use the Scale slider to zoom in to the map so the source location remains within focus.

- Next, move the Playhead further and add another keyframe a couple of frames before the route line hits the edge of the window.
- After this, move the Playhead again and position it where the route line reaches its destination location. Add another keyframe here as well, and move the map in the Preview window so the focus is now on the destination.
- Move the Playhead a few frames further, add another keyframe, and use the Scale slider to zoom a bit more into the map to make the entire animation look realistic. Click OK to save the changes.
Step 6: Add Icons and Titles, and Export the Project
Drag the image of the traveling medium to the Timeline, and place it on the frame the route line starts from. Make sure to place the image on the track above the map, and stretch it to the end so it remains visible throughout the animation. Next, use the method explained above to add keyframes to move the medium along with the route line from the source to the destination. Optionally, add the image of the location marker at the destination point, go to Transition, and add your preferred transition effect, preferably Dissolve, to the marker track in the Timeline so it looks as if it has appeared as the medium arrived the destination.
For Win 7 or later (64-bit)
Secure Download
For macOS 10.14 or later
Secure Download
Get back to the first frame in the Timeline, go to Titles on the standard toolbar, and add a title preset somewhere near the source location. Resize the text, change the format as needed, and add your preferred caption to it such as the start time, name, etc. Reduce the duration of the track so the title appears for a few frames, preferably before the map animation starts. Click OK when done. Repeat this process for the destination point as well.
Once everything is complete, click the Play button in the Preview window to review your work. If the video looks acceptable, click EXPORT from the top-center of the interface, and use the method explained earlier to export the animated travel map in your preferred format.
![]()
Method 2 How to Make Interactive Animated Travel Map with Pictramap
If you don’t want to install a dedicated animation software on your computer due to limited hardware resources or some other reason, there is an online solution called Pictramap to create a travel map animation using a web browser. The web app offers a lucrative interface that could be easily understood and worked with to produce an animated map for free.
The process to create an animated travel map with Pictramap is given below:
Step 1: Create a Project
Launch your favorite web browser, go to https://www.pictramap.com/ , click Create yours now, it’s free, and sign up to Pictramap using your preferred method. When you are on the Dashboard, enter a name in the field available under the My Projects section, and click Create to create a new project (the animated map).

Step 2: Define the Locations and Method of Commute
On the map, right-click the location you want to start your journey from, enter the name of the location or any other significant title, and click Add. Click the location marker, click the Travel Mode icon, and select your preferred mode of traveling. Repeat this process to mark the destination location as well.

Step 3: Preview the Animation
Click the View Animation button from the upper-right corner of the page to see the animated travel map.

Downsides of Using Pictramap to Create Animated Travel Map Video
Although Pictramap allows you to create a travel map animation with ease and extremely quickly, at the time of this writing, it offers no way of downloading the animation to your PC, and therefore it couldn’t be used in your projects.
If you are using Wondershare Filmora, you can use its built-in screen recording feature to record the animation that Pictramap plays, and then save the captured footage as MP4 or any other format on your computer. This video can then be imported to your projects for further uses.
![]()
A cross-platform for making videos anywhere for all creators

Why your video editing isn’t good enough? How about some creative inspo?
- 100 Million+ Users
- 150+ Countries and Regions
- 4 Million+ Social Media Followers
- 5 Million+ Stock Media for Use
* Secure Download

Method 3 How To Make Animated Travel Map Using Multidev
Multi.dev is still a new web-based application to build awesome animated maps, but it’s good! The application helps you create presentations about all your recent and previous trips. And the interface is also hassle-free.
So, follow this step-by-step guide to making animated maps with Multi.dev.
Step 1: Open Multi.dev
Visit Multi.dev from your internet browser.

Once the tool gets open, you will see a demo video. This example clip will have animated maps of different locations. So it is up to you whether to use the same example and edit the places you have been to or are planning to visit. Or, simply create a new animated map from scratch.
Step 2: Choose Your First Location
Take your mouse cursor on the left side of the application and type the first location in the search bar. As soon as you do it, you will see that the “travel arrow” will automatically begin from there. Likewise, type and select the next location through the search bar.
Once you type the location, you will see 8 travel modes, including airplane, bus, and train. You can select the same mode for all sites or a different mode for another place. Totally up to you!

Step 3: Select Map Themes
All your chosen places will be highlighted in the software’s minimalistic map.

Step 4: Download Map on Your Computer
If you’re happy with the animated map, click the “Create Video” button to save the animated map on your computer in a few minutes.


Contrarily, you can also share the animation by choosing the “Share Animation” option.
Conclusion
An animated travel map plays an important role to add a realistic touring effect to your motion picture projects. While you can use a web app like Pictramap to create such an animation online easily and for free, the limitations it comes along with might keep you from choosing this method.
Instead, you may want to get more inclined toward a dedicated post-production software like Wondershare Filmora that gives you full control over the process, and the freedom to choose your preferred format to export the animation to for independent usage.
For Win 7 or later (64-bit)
Secure Download
For macOS 10.14 or later
Secure Download
Benjamin Arango
Benjamin Arango is a writer and a lover of all things video.
Follow @Benjamin Arango
Benjamin Arango
Mar 27, 2024• Proven solutions
Animated travel map videos make it easy for the viewers to follow the routes from the source to destination locations right on the single screen. While the static maps would only allow the audience to see the markers from where the journey would start and is expected to end, the animated ones show the real-time movements and therefore look more interactive when viewed.
That said, here you will learn how to create an attractive and engaging animated travel map video using one of the easiest post-production applications, Wondershare Filmora, which is widely appreciated by amateurs and professionals throughout the globe. In another section, you will also learn about an alternative program that might be of some help in case you are more into online designing.
- Method 1: Make Animated Travel Map Videos with Location Video Maker - [Video Tutorial]
- Method 2: Make Interactive Animated Travel Map with Pictramap
- Method 3: Create Animated Travel Map Using Multidev
Method 1 Make Animated Travel Map Videos with Location Video Maker
The entire process of creating an animated travel map video in Wondershare’s Filmora is categorized into two parts, wherein the first part you will collect all the ingredients that are needed to get started, and in the second part you will actually make an animated map using the tools and features present in Filmora.
Watch a video tutorial to see how to make an animated map for a video:
For Win 7 or later (64-bit)
Secure Download
For macOS 10.14 or later
Secure Download
Part 1: Prepare the Travel Map Materials
Following are the ingredients and the methods to collect them for animated travel map preparation:
Step 1: Get the Map
The first thing that you would need to prepare an animated map is an image of a realistic map. Thanks to Google and Microsoft, these things are now pretty easy to arrange. The process is given below:
- Launch your preferred web browser
- Type google.com in the address bar or the search box and hit Enter
- Scroll to zoom out so you can see the entire world map on one screen
- Type Snipping Tool in the Cortana search box present on the left side of the Taskbar
- Launch Snipping Tool, and use it to capture the screenshot of the map
Note: Snipping Tool is a built-in app in Windows 10 and is available for free. If you are using any other operating system, or have a different program to capture the screenshots, feel free to use it according to your convenience.
- Save the screenshot you captured as a JPG file on your PC
Step 2: Mark Out the Map Path
The next step in the process of preparing an animated travel map is to mark your route on it. To do so, you can use any of your preferred photo editing tools. However, to keep this illustration simple, Microsoft Paint is used here, and the method is given below:
- Right-click the screenshot you just captured
- Go to Open with on the context menu, and then click Paint from the submenu that appears
- Pick your preferred color from the pallet of the Paint interface. It is advisable to use an eye-catchy shade such as Red
- Use the Sphere shape tool to draw a circle over the source and destination locations on the map
- Use the Line tool to draw a line from the source point to the destination. Try giving the line a few turns to make it look realistic
- Go to File > Save As, and save the marked image with a different name
Note: Once this is done, you should have two image files of the map, i.e., one without the marks and one with it
Step 3: Download Some Travel Icons
Another important ingredient in an effective travel map animation is touring icons such as location marker image, a traveling medium symbol like a helicopter, airplane, car/bike (for short distances), etc. A couple of websites that offer royalty-free stock photos at absolutely no cost are listed below:
Note: Although the websites given above allow you to download and use their stock images and icons for free, you may need to give credits to the designers/creators of the symbols while using their objects. Therefore, you are suggested to check the Terms & Conditions and norms of usage of the elements before downloading and adding them to your projects.
Part 2: Make Animated Travel Map Videos with Filmora
After you have gathered all the necessary ingredients that are required to create a travel map animation, it is now time to get to work. The following instructions would guide you through the step-by-step process of preparing a decent and realistic animated travel map in Wondershare Filmora :
For Win 7 or later (64-bit)
Secure Download
For macOS 10.14 or later
Secure Download
Step 1: Import Ingredients to Filmora and Add Them to the Timeline
Launch the video editor on your computer, click anywhere inside the Media window at the upper-left area, and import all the images and icons that you collected earlier to program. Next, drag both the images of the map, i.e., with and without the marks to the Timeline, and ensure that they are of the same duration and are placed on the same track.
Note: Be sure to put the map without the marks first, and then the one with the marks. Also note that the images have the playback duration of 5 seconds in the Timeline by default, and this tenure can be reduced or increased by dragging the side handle of the media to the left or right respectively.
Step 2: Add Transition for Illusion of Route Appearance
Go to Transition from the standard toolbar at the top, locate the Erase Slide transition effect from the available presets, and place it in between the two image files that you earlier added to the Timeline. Next, click and drag either of the side handles of the transition to the end of the media clip. Notice how the other side of the effect is expanded in equal proportion.
Step 3: Preview and Export
Press the Spacebar on the keyboard to preview the video and see if the route appears as if it is being drawn on the map. Once the animation looks acceptable, click EXPORT from the top-center, go to the Local tab on the Export window, select MP4 from the formats list in the left, and click EXPORT from the bottom-right corner to export the current animation to MP4.
Step 4: Customize the Travel Map Media
Either start a new project and import the video of the map you exported in the previous step to the app and then to the Timeline, or remove the existing media from the Timeline in the same project, and add the exported video to it for convenience.
For Win 7 or later (64-bit)
Secure Download
For macOS 10.14 or later
Secure Download
Next, position the Skimmer (Playhead) a couple of frames before the one the route line appears and starts stretching from, and click the Split icon from the editing toolbar above the Timeline itself. Repeat this process for the other side of the media, i.e., position the Skimmer a couple of frames after the route line reaches the destination location, and click the Split icon again. Then remove the separated segments from both the sides by selecting them and pressing Delete on the keyboard, leaving only the portion where the animation is visible.
Optionally, right-click the media that is left behind in the Timeline, and go to Speed and Duration from the context menu. On the Custom Speed box, drag the Speed slider to the left to decrease the playback speed resulting in the increased duration of the media. Alternatively, you can manually enter a value in the Speed box to get precise tenure. Click OK when you are done.
Step 5: Add Animations to Travel Map
Right-click the media in the Timeline, and go to Add Animation from the context menu. Make sure that the Skimmer is on the first frame, and add several keyframes as explained below:
- Click Add to add the first keyframe
- Move a couple of frames further, and click Add one more time. Now, while you are on this second keyframe, use the Scale slider to zoom in to the map so the source location remains within focus.
- Next, move the Playhead further and add another keyframe a couple of frames before the route line hits the edge of the window.
- After this, move the Playhead again and position it where the route line reaches its destination location. Add another keyframe here as well, and move the map in the Preview window so the focus is now on the destination.
- Move the Playhead a few frames further, add another keyframe, and use the Scale slider to zoom a bit more into the map to make the entire animation look realistic. Click OK to save the changes.
Step 6: Add Icons and Titles, and Export the Project
Drag the image of the traveling medium to the Timeline, and place it on the frame the route line starts from. Make sure to place the image on the track above the map, and stretch it to the end so it remains visible throughout the animation. Next, use the method explained above to add keyframes to move the medium along with the route line from the source to the destination. Optionally, add the image of the location marker at the destination point, go to Transition, and add your preferred transition effect, preferably Dissolve, to the marker track in the Timeline so it looks as if it has appeared as the medium arrived the destination.
For Win 7 or later (64-bit)
Secure Download
For macOS 10.14 or later
Secure Download
Get back to the first frame in the Timeline, go to Titles on the standard toolbar, and add a title preset somewhere near the source location. Resize the text, change the format as needed, and add your preferred caption to it such as the start time, name, etc. Reduce the duration of the track so the title appears for a few frames, preferably before the map animation starts. Click OK when done. Repeat this process for the destination point as well.
Once everything is complete, click the Play button in the Preview window to review your work. If the video looks acceptable, click EXPORT from the top-center of the interface, and use the method explained earlier to export the animated travel map in your preferred format.
![]()
Method 2 How to Make Interactive Animated Travel Map with Pictramap
If you don’t want to install a dedicated animation software on your computer due to limited hardware resources or some other reason, there is an online solution called Pictramap to create a travel map animation using a web browser. The web app offers a lucrative interface that could be easily understood and worked with to produce an animated map for free.
The process to create an animated travel map with Pictramap is given below:
Step 1: Create a Project
Launch your favorite web browser, go to https://www.pictramap.com/ , click Create yours now, it’s free, and sign up to Pictramap using your preferred method. When you are on the Dashboard, enter a name in the field available under the My Projects section, and click Create to create a new project (the animated map).
Step 2: Define the Locations and Method of Commute
On the map, right-click the location you want to start your journey from, enter the name of the location or any other significant title, and click Add. Click the location marker, click the Travel Mode icon, and select your preferred mode of traveling. Repeat this process to mark the destination location as well.
Step 3: Preview the Animation
Click the View Animation button from the upper-right corner of the page to see the animated travel map.
Downsides of Using Pictramap to Create Animated Travel Map Video
Although Pictramap allows you to create a travel map animation with ease and extremely quickly, at the time of this writing, it offers no way of downloading the animation to your PC, and therefore it couldn’t be used in your projects.
If you are using Wondershare Filmora, you can use its built-in screen recording feature to record the animation that Pictramap plays, and then save the captured footage as MP4 or any other format on your computer. This video can then be imported to your projects for further uses.
![]()
A cross-platform for making videos anywhere for all creators
Why your video editing isn’t good enough? How about some creative inspo?
- 100 Million+ Users
- 150+ Countries and Regions
- 4 Million+ Social Media Followers
- 5 Million+ Stock Media for Use
* Secure Download
Method 3 How To Make Animated Travel Map Using Multidev
Multi.dev is still a new web-based application to build awesome animated maps, but it’s good! The application helps you create presentations about all your recent and previous trips. And the interface is also hassle-free.
So, follow this step-by-step guide to making animated maps with Multi.dev.
Step 1: Open Multi.dev
Visit Multi.dev from your internet browser.
Once the tool gets open, you will see a demo video. This example clip will have animated maps of different locations. So it is up to you whether to use the same example and edit the places you have been to or are planning to visit. Or, simply create a new animated map from scratch.
Step 2: Choose Your First Location
Take your mouse cursor on the left side of the application and type the first location in the search bar. As soon as you do it, you will see that the “travel arrow” will automatically begin from there. Likewise, type and select the next location through the search bar.
Once you type the location, you will see 8 travel modes, including airplane, bus, and train. You can select the same mode for all sites or a different mode for another place. Totally up to you!
Step 3: Select Map Themes
All your chosen places will be highlighted in the software’s minimalistic map.
Step 4: Download Map on Your Computer
If you’re happy with the animated map, click the “Create Video” button to save the animated map on your computer in a few minutes.
Contrarily, you can also share the animation by choosing the “Share Animation” option.
Conclusion
An animated travel map plays an important role to add a realistic touring effect to your motion picture projects. While you can use a web app like Pictramap to create such an animation online easily and for free, the limitations it comes along with might keep you from choosing this method.
Instead, you may want to get more inclined toward a dedicated post-production software like Wondershare Filmora that gives you full control over the process, and the freedom to choose your preferred format to export the animation to for independent usage.
For Win 7 or later (64-bit)
Secure Download
For macOS 10.14 or later
Secure Download
Benjamin Arango
Benjamin Arango is a writer and a lover of all things video.
Follow @Benjamin Arango
15 Forgotten Cartoon Characters of All Time
15 Forgotten Cartoon Characters of All Time You Used to Love
An easy yet powerful editor
Numerous effects to choose from
Detailed tutorials provided by the official channel
Whether you are from your 70’s, 80’s or 90’s, thanks to video streaming services like Amazon, Netflix, YouTube and various others, you are now getting a golden chance to watch your favourite cartoons at your comfort.
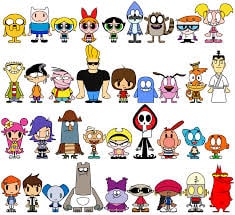
Watching Cartoons were always one of the favourite activities that everything loves to experience without any age restriction. For different centuries cartoon industry has been treated as the perfect medium for the entertainment. With lots of cartoons flooding your TV sets from the last few decades everybody have seen different varieties of characters that have won the hearts of millions.
In this article
01 [Five 70s cartoon characters](#Part 1)
02 [Five 80s cartoon characters](#Part 2)
03 [Five 90s cartoon characters](#Part 3)
Part 1 Six 70s cartoon characters
All the cartoon characters mentioned below were very popular during the 70s &are still having good marks in our hearts today. 70s were known for interesting cartoon series.
01Bagpuss
Premiered: 1974
Actors: Oliver Postgate
YouTube video
Summary
Saggy cloth-cat from this show was featured in around 13 episodes. At that time ‘stop-motion’ technique for animation was utilized by the creators for this television series.
02Fat Albert
Name of the character: Fat Albert
Name of Show: Fat Albert and Cosby Kids
Premiered: 1974
Actors: Weird Harold, Rudy, Mush-mouth, Dumb Donald, Bucky, Bill & of course-Fat Albert.
YouTube video
Summary: Still childhood experiences of Bill-Cosby have had amazing influence on making of this amazing TV series.
03Fred Flintstones
Name of the character: Fred Flintstones
Name of Show: Flintstones
Premiered: 1960-1966
Actors: John Goodman.
YouTube video
YouTube video
Summary
Flintstones returned to TV-screens with characters as well as cultural-references thrown into stone- age narrative that ultimately captivated the audience right before time of ‘The Simpsons’. This show set the premise at the time of stone-age but carefully and delicately crafted plot characteristic of modern day. The Flintstones fascinated audience with casual manner of how the characters faced-life, thus making lasting connection with audience who were craving for celluloid freshness. Fred Flintstone was one of the most amazing 70s cartoon characters.
04The Herbs
Name of the character: The Herbs
**Name of Show:**The Herbs!
Premiered: 1968
Actors:Gordon Rollings .
YouTube video
Summary
Multiple different characters were featured in this 3D animated series with a leading role by same character name. Other important characters were ‘Parsley the Lion’, Sir-Basil, Tarragon-the-Dragon, Lady Rosemary, Sage the Owl, Dill the Dog, Bay Leaf & Signor Solidago.
05Godzooky
Name of the character: Godzooky
**Name of Show:**Godzilla.
Premiered: 1978
Actors: Jeff David as Captain Carl Majors
YouTube video
Summary
Created by Hanna-Barbera-Productions this television series Godzooky.Don-Messick gave his voice for this amazing character. After some popularity of 60s cartoon characters, this was the only one that was extremely famous for his villain attitude.
06Casper
Name of the character: Casper
Name of Show: ‘Casper and the Angels’
Premiered: 1979-1980
Actors: Casper: Julie McWhirter, Nerdley: Hall Smith
YouTube video
Summary
Magic of 70s cartoon cartoons still prevails and Casper is the most amazing example. The ‘Casper’ character was a ghost that was presented in television series as a friendly person. It was like a ghost-child who always tries to befriend the people rather than scaring them off.
Part 2 Five 80s cartoon characters
01Jem
Name of the character: Jem
Name of Show: ‘Jem’
Premiered: 1985
Actors: Britta Phillips as Jerrica Benton
YouTube video
Summary
“Showtime synergy!” beginning with this attractive storylines, this was slightly more adult as compared to the average 80s cartoon characters. This was pretty cool cartoon and sometimes inspires El to easily come-up with her own style of fun alter-ego that Jem could use in order to escape stresses of being world’s savior.
02Penny
Name of the character: Penny
Name of Show: ‘’Inspector Gadget’
Premiered: 1983
Actors: Mona Marshall, Holly Berger
YouTube video
Summary
Penny in this series was the brain behind her uncle’s all crazy escapades. El makes use of her brain in order to provide help for Hopper fling enemies whenever his brawn was not enough to get things done. Both characters tasked with the outsmarting similar power of enemies Dr. Claw in the Inspector Gadget and runs M.A.D. a criminal organization and other ones were Evil Russians beneath mall in the Stranger Things. It was always good to watch this fancy, amazing character from 90s, 80s female cartoon characters.
03Garfield
Name of the character: Garfield
Name of Show: ‘Garfield and Friends’
Premiered: 1988-1995
Actors: Bill Murray as Garfield
YouTube video:
Summary
Followed by Lazy cat Garfield, this show contains excitable dog-Odie, imaginative pig-Orson, & their animal-friends with lots of small-scale adventures around their hometown like playing pranks, throwing birthday-parties, and watching movies together. Garfield was a lazy-cat that only desire to lie around the habits of watching-TV & eating Lasagna, however his friends as well as his owner-Jon always drags him into fun loving adventures of their own.
04Michaelangelo
Name of the character: MichaelLangelo
Name of Show: ‘Teenage Mutant Ninja Turtles’
Premiered: 1987-1996
Actors: Noel Fisher, Greg Cipes, Robbie Rist
YouTube video:
Summary
Michelangelo or nicknamed Mike/Mikey, is the fictional superhero & a leading character from the four main characters of favorite 80’s show Teenage Mutant Ninja Turtles. Michaelangelo, Raphael, Donatello and Leonardo are popular mutant-turtles all have grown-up as youngsters with their mentor Splinter at underground. They fight villains like Foot Clan, Shredder, &intelligent brain inside the jar named Krang. Because of so many fun-villains inside this series were presented, that show was so much popular and beloved by everyone. This TV-series aired for around 10 seasons.
05Firestar
Name of the character: FireStar
Name of Show: Spider-Man & his Amazing Friends
Premiered: 1981
Actors: Kathy Garver, Laura Bailey
YouTube video
Summary
Firestar got the ability to battle wide range of super-villains together with the Spider-Man & Iceman in this animated show Spider-Man & His Amazing Friends. She had never ever appeared in the comic book form earlier Spider-Man & his Amazing-Friends hit but you might see her in modern, live-action Marvel Cinematic-Universe very soon.
Use Wondershare Filmora Video Editor for Cartoon animations, Styles and Editing
cartoon主题视频
For Win 7 or later (64-bit)
For macOS 10.12 or later
Still thinking about your favorite cartoon characters from 80’s or 90’s? Then Filmora can help you to create nostalgic moments again with your hand crafts. You can make video animations, sketch and draw an art of your loved ones from the list of extremely popular cartoon characters. FIlmora is the best choice drawing some amazing cartoons in just few steps.
Even you can Cartoonize any of your video with your favorite animations of cartoons through cartoon effects.
It is the best Smartphone and PC platform based software to make cartoons.
Later on you can share your creations with other platforms over the web.
Even if you want to customize or edit any cartoon, you can do this with its powerful editing features.
Part 3 Five 90s cartoon characters
Most of us are from ‘90s but at the same time, during our children, we didn’t had a lot of options rather than just watch whatever put on the television. At that time cartoons were super-cool with popular music & contains originality. One of the most interesting things was the presence of sense-of-commonality among the people especially children. Cartoons materialized during ‘90s still continue to charm us and cartoon characters were the most among all. Let dig deep-down into our memory lane today & check out the amazing cartoon characters from Golden Period of animation.
01Dexter
Name of the character: Dexter
Name of Show: Dexter’s Laboratory
Premiered: 1995-2003
Actors: Dexter: Christine Cavanaugh, Dee-Dee: Kat Cressida
YouTube video:
Summary
Dexter was the original & the ultimate genius during 90s. Dexter’s intelligence as well as knack for the new inventions made him not only popular but also the smartest one’s among the cartoon characters from 90s cartoon network characters. He was credited with creation of plethora of extraordinary devices & known for someone who keeps on experimenting with various ideas on his mindful head. Dexter shares cute love-hate relationship with an annoying sister of his own Dee-Dee.
02Buster Bunny
Name of the character: Buster Bunny
Name of Show: Tiny Toon Adventures
Premiered: 1995-2003
Actors: Charlie Adler and John Kassir
YouTube video:
Summary
In the list of cartoon network characters 90swe name we have is Buster bunny. Somewhat similar to ‘Looney Tunes’ cartoon-series, the Tiny Toon Adventures’s USP was Buster Bunny and does the same so adventurously. With its young & enthusiastic personality of male rabbit was the commander of all sorts for Tiny Toons. He was capable of dealing with his own-set of issues together with other complicated School curriculum.
03Mojo Jojo
Name of the character: Mojo Jojo!
Name of Show: The Powerpuff Girls
Premiered: 1998-2005
Actors: Cathy Cavadini, Tom Kenny, Tara Strong, EG Daily.
YouTube video:
Summary
The Powerpuff-Girls was one of the most amazing and the most recognizable cartoons characters of all times. Mojo Jojo character also featured in this popular animated-television series with its evil mysteries and actions. This character was at prime time during 90’s and Mojo jojo always threatens Powerpuff Girls with his skills and expertise in gadgets, strategies etc. but somehow powerpuff-girls always managed to beat Mojo-Jojo.
04Courage
Name of the character: Courage
Name of Show: Courage The Cowardly Dog
Premiered: 1996
Actors: Marty Grabstein
YouTube video
Courage character may be easily scared &often found nervous, but he was someone who cares for his owner Muriel & Eustace and would go to any level to protect them. It was the most encouraging and commendable projections of canine on-screen. He was loyal & loving with his emotions to be selfless by risking his life for his owners. Before the arrival of2000 cartoon characters, this was favorite entertainment package for all age group.
05Johnny Bravo
Name of the character: Johnny Bravo
Name of Show: Johnny Bravo
Premiered: 1997–2004
Actors: Jeff Bennett, Brenda Vaccaro& Mae Whitman
YouTube video:
Summary
Who don’t know about ‘Johnny Bravo’? This was one of the most famous and extremely popular character of cartoon network 90s cartoon characters. During 90s this gain so much popularity and showcased with a bang. The animated character Johnny bravo was all famous and was the leading figure. The iconic and comic character Johnny was the central attraction of this television series. He was confident and good-looking as humanly as possible. You often see him wearing sunglasses with black shirt & blue jeans. He was somewhere a positive-individual with no bad-qualities whatsoever that makes him goofy &truly a blue narcissist. No matter how tough were the circumstances, if Johnny cares for or likes a girl, he can go beyond the ordinary level to assure that that particular girl like him at the end.
● Ending Thoughts →
● Different characters from all eras 70’s, 80’s and 90’s were true examples of perfect personality for the children.
● You can cherish all the moments by living again you period as a kid with all those characters
● No matter what the situation or circumstances demands cartoon characters always the best to ensure great level of entertainment without any age restrictions.
Whether you are from your 70’s, 80’s or 90’s, thanks to video streaming services like Amazon, Netflix, YouTube and various others, you are now getting a golden chance to watch your favourite cartoons at your comfort.
Watching Cartoons were always one of the favourite activities that everything loves to experience without any age restriction. For different centuries cartoon industry has been treated as the perfect medium for the entertainment. With lots of cartoons flooding your TV sets from the last few decades everybody have seen different varieties of characters that have won the hearts of millions.
In this article
01 [Five 70s cartoon characters](#Part 1)
02 [Five 80s cartoon characters](#Part 2)
03 [Five 90s cartoon characters](#Part 3)
Part 1 Six 70s cartoon characters
All the cartoon characters mentioned below were very popular during the 70s &are still having good marks in our hearts today. 70s were known for interesting cartoon series.
01Bagpuss
Premiered: 1974
Actors: Oliver Postgate
YouTube video
Summary
Saggy cloth-cat from this show was featured in around 13 episodes. At that time ‘stop-motion’ technique for animation was utilized by the creators for this television series.
02Fat Albert
Name of the character: Fat Albert
Name of Show: Fat Albert and Cosby Kids
Premiered: 1974
Actors: Weird Harold, Rudy, Mush-mouth, Dumb Donald, Bucky, Bill & of course-Fat Albert.
YouTube video
Summary: Still childhood experiences of Bill-Cosby have had amazing influence on making of this amazing TV series.
03Fred Flintstones
Name of the character: Fred Flintstones
Name of Show: Flintstones
Premiered: 1960-1966
Actors: John Goodman.
YouTube video
YouTube video
Summary
Flintstones returned to TV-screens with characters as well as cultural-references thrown into stone- age narrative that ultimately captivated the audience right before time of ‘The Simpsons’. This show set the premise at the time of stone-age but carefully and delicately crafted plot characteristic of modern day. The Flintstones fascinated audience with casual manner of how the characters faced-life, thus making lasting connection with audience who were craving for celluloid freshness. Fred Flintstone was one of the most amazing 70s cartoon characters.
04The Herbs
Name of the character: The Herbs
**Name of Show:**The Herbs!
Premiered: 1968
Actors:Gordon Rollings .
YouTube video
Summary
Multiple different characters were featured in this 3D animated series with a leading role by same character name. Other important characters were ‘Parsley the Lion’, Sir-Basil, Tarragon-the-Dragon, Lady Rosemary, Sage the Owl, Dill the Dog, Bay Leaf & Signor Solidago.
05Godzooky
Name of the character: Godzooky
**Name of Show:**Godzilla.
Premiered: 1978
Actors: Jeff David as Captain Carl Majors
YouTube video
Summary
Created by Hanna-Barbera-Productions this television series Godzooky.Don-Messick gave his voice for this amazing character. After some popularity of 60s cartoon characters, this was the only one that was extremely famous for his villain attitude.
06Casper
Name of the character: Casper
Name of Show: ‘Casper and the Angels’
Premiered: 1979-1980
Actors: Casper: Julie McWhirter, Nerdley: Hall Smith
YouTube video
Summary
Magic of 70s cartoon cartoons still prevails and Casper is the most amazing example. The ‘Casper’ character was a ghost that was presented in television series as a friendly person. It was like a ghost-child who always tries to befriend the people rather than scaring them off.
Part 2 Five 80s cartoon characters
01Jem
Name of the character: Jem
Name of Show: ‘Jem’
Premiered: 1985
Actors: Britta Phillips as Jerrica Benton
YouTube video
Summary
“Showtime synergy!” beginning with this attractive storylines, this was slightly more adult as compared to the average 80s cartoon characters. This was pretty cool cartoon and sometimes inspires El to easily come-up with her own style of fun alter-ego that Jem could use in order to escape stresses of being world’s savior.
02Penny
Name of the character: Penny
Name of Show: ‘’Inspector Gadget’
Premiered: 1983
Actors: Mona Marshall, Holly Berger
YouTube video
Summary
Penny in this series was the brain behind her uncle’s all crazy escapades. El makes use of her brain in order to provide help for Hopper fling enemies whenever his brawn was not enough to get things done. Both characters tasked with the outsmarting similar power of enemies Dr. Claw in the Inspector Gadget and runs M.A.D. a criminal organization and other ones were Evil Russians beneath mall in the Stranger Things. It was always good to watch this fancy, amazing character from 90s, 80s female cartoon characters.
03Garfield
Name of the character: Garfield
Name of Show: ‘Garfield and Friends’
Premiered: 1988-1995
Actors: Bill Murray as Garfield
YouTube video:
Summary
Followed by Lazy cat Garfield, this show contains excitable dog-Odie, imaginative pig-Orson, & their animal-friends with lots of small-scale adventures around their hometown like playing pranks, throwing birthday-parties, and watching movies together. Garfield was a lazy-cat that only desire to lie around the habits of watching-TV & eating Lasagna, however his friends as well as his owner-Jon always drags him into fun loving adventures of their own.
04Michaelangelo
Name of the character: MichaelLangelo
Name of Show: ‘Teenage Mutant Ninja Turtles’
Premiered: 1987-1996
Actors: Noel Fisher, Greg Cipes, Robbie Rist
YouTube video:
Summary
Michelangelo or nicknamed Mike/Mikey, is the fictional superhero & a leading character from the four main characters of favorite 80’s show Teenage Mutant Ninja Turtles. Michaelangelo, Raphael, Donatello and Leonardo are popular mutant-turtles all have grown-up as youngsters with their mentor Splinter at underground. They fight villains like Foot Clan, Shredder, &intelligent brain inside the jar named Krang. Because of so many fun-villains inside this series were presented, that show was so much popular and beloved by everyone. This TV-series aired for around 10 seasons.
05Firestar
Name of the character: FireStar
Name of Show: Spider-Man & his Amazing Friends
Premiered: 1981
Actors: Kathy Garver, Laura Bailey
YouTube video
Summary
Firestar got the ability to battle wide range of super-villains together with the Spider-Man & Iceman in this animated show Spider-Man & His Amazing Friends. She had never ever appeared in the comic book form earlier Spider-Man & his Amazing-Friends hit but you might see her in modern, live-action Marvel Cinematic-Universe very soon.
Use Wondershare Filmora Video Editor for Cartoon animations, Styles and Editing
cartoon主题视频
For Win 7 or later (64-bit)
For macOS 10.12 or later
Still thinking about your favorite cartoon characters from 80’s or 90’s? Then Filmora can help you to create nostalgic moments again with your hand crafts. You can make video animations, sketch and draw an art of your loved ones from the list of extremely popular cartoon characters. FIlmora is the best choice drawing some amazing cartoons in just few steps.
Even you can Cartoonize any of your video with your favorite animations of cartoons through cartoon effects.
It is the best Smartphone and PC platform based software to make cartoons.
Later on you can share your creations with other platforms over the web.
Even if you want to customize or edit any cartoon, you can do this with its powerful editing features.
Part 3 Five 90s cartoon characters
Most of us are from ‘90s but at the same time, during our children, we didn’t had a lot of options rather than just watch whatever put on the television. At that time cartoons were super-cool with popular music & contains originality. One of the most interesting things was the presence of sense-of-commonality among the people especially children. Cartoons materialized during ‘90s still continue to charm us and cartoon characters were the most among all. Let dig deep-down into our memory lane today & check out the amazing cartoon characters from Golden Period of animation.
01Dexter
Name of the character: Dexter
Name of Show: Dexter’s Laboratory
Premiered: 1995-2003
Actors: Dexter: Christine Cavanaugh, Dee-Dee: Kat Cressida
YouTube video:
Summary
Dexter was the original & the ultimate genius during 90s. Dexter’s intelligence as well as knack for the new inventions made him not only popular but also the smartest one’s among the cartoon characters from 90s cartoon network characters. He was credited with creation of plethora of extraordinary devices & known for someone who keeps on experimenting with various ideas on his mindful head. Dexter shares cute love-hate relationship with an annoying sister of his own Dee-Dee.
02Buster Bunny
Name of the character: Buster Bunny
Name of Show: Tiny Toon Adventures
Premiered: 1995-2003
Actors: Charlie Adler and John Kassir
YouTube video:
Summary
In the list of cartoon network characters 90swe name we have is Buster bunny. Somewhat similar to ‘Looney Tunes’ cartoon-series, the Tiny Toon Adventures’s USP was Buster Bunny and does the same so adventurously. With its young & enthusiastic personality of male rabbit was the commander of all sorts for Tiny Toons. He was capable of dealing with his own-set of issues together with other complicated School curriculum.
03Mojo Jojo
Name of the character: Mojo Jojo!
Name of Show: The Powerpuff Girls
Premiered: 1998-2005
Actors: Cathy Cavadini, Tom Kenny, Tara Strong, EG Daily.
YouTube video:
Summary
The Powerpuff-Girls was one of the most amazing and the most recognizable cartoons characters of all times. Mojo Jojo character also featured in this popular animated-television series with its evil mysteries and actions. This character was at prime time during 90’s and Mojo jojo always threatens Powerpuff Girls with his skills and expertise in gadgets, strategies etc. but somehow powerpuff-girls always managed to beat Mojo-Jojo.
04Courage
Name of the character: Courage
Name of Show: Courage The Cowardly Dog
Premiered: 1996
Actors: Marty Grabstein
YouTube video
Courage character may be easily scared &often found nervous, but he was someone who cares for his owner Muriel & Eustace and would go to any level to protect them. It was the most encouraging and commendable projections of canine on-screen. He was loyal & loving with his emotions to be selfless by risking his life for his owners. Before the arrival of2000 cartoon characters, this was favorite entertainment package for all age group.
05Johnny Bravo
Name of the character: Johnny Bravo
Name of Show: Johnny Bravo
Premiered: 1997–2004
Actors: Jeff Bennett, Brenda Vaccaro& Mae Whitman
YouTube video:
Summary
Who don’t know about ‘Johnny Bravo’? This was one of the most famous and extremely popular character of cartoon network 90s cartoon characters. During 90s this gain so much popularity and showcased with a bang. The animated character Johnny bravo was all famous and was the leading figure. The iconic and comic character Johnny was the central attraction of this television series. He was confident and good-looking as humanly as possible. You often see him wearing sunglasses with black shirt & blue jeans. He was somewhere a positive-individual with no bad-qualities whatsoever that makes him goofy &truly a blue narcissist. No matter how tough were the circumstances, if Johnny cares for or likes a girl, he can go beyond the ordinary level to assure that that particular girl like him at the end.
● Ending Thoughts →
● Different characters from all eras 70’s, 80’s and 90’s were true examples of perfect personality for the children.
● You can cherish all the moments by living again you period as a kid with all those characters
● No matter what the situation or circumstances demands cartoon characters always the best to ensure great level of entertainment without any age restrictions.
How to Convert Animated GIF From Video
Versatile Video Editor - Wondershare Filmora
An easy yet powerful editor
Numerous effects to choose from
Detailed tutorials provided by the official channel
The animated GIFs excite the viewers and convey a message. The instant chats include these animated GIFs to add fun to your conversation. Few web designers place animated GIFs on their web pages to attract their target customers wisely. You can convert animated GIFs from video using a reliable application available in the digital space. The animated GIFs impress the viewers and add flavor to the content. Mostly used replacing the emojis because the emojis are static images, whereas the animated GIFs showcase an action that triggers more meaning to the viewers. There are options to extract a specific clipping from videos and use them as animated GIFs. Here, you will be learning about GIFs and the best ways to edit them with sophisticated tools.

In this article
01 [What is GIF?](#Part 1)
02 [Why do People like to use GIFs?](#Part 2)
03 [Convert Animated GIF from Video](#Part 3)
04 [Tip: Easily edit your GIF for free](#Part 4)
Part 1 What is GIF?
The GIF is a Graphical Interchange Format and represents the file format in the bitmap. When compared to other image formats, GIF has unique specifications that are appreciable. The GIF has a lossless compression feature and you can transfer them to any space effortlessly. It includes 256 colors and is widely used for creating buttons and banners on the webpages. It came into practice in the year1987 and occupied the computer space commercially. GIFs are preferred to create small animations and are adopted by social media users. After the advent of PNG, the usage of GIF gradually decreased by website users. Later, the animated GIFs conquered the digital space as they replace most websites’ videos. It serves as one of the best message conveyers and is quite interesting for social media users. Gradually the younger generations were highly attracted to these animated GIFs to express their thoughts in an image format.
Part 2 Why do People like to use GIFs?
People prefer GIFs when compared to videos because animated GIFs convey a strong message quickly than videos. Social media users feel comfortable using GIFs and consider it the best way to express their emotions. Apart from the chat interface, you can find the animated GIFs occupying the website’s landing page, blog posts, and emails. The designers opt for animated GIFs instead of short videos because of their effective results. Many webpage visitors skim the content, and the animated GIFs quickly reveal what you convey. The audience understands the essential data you are emphasizing on the websites swiftly with the help of the animated GIFs.
When you include videos on your websites, the users skip the videos without making any clicks due to lack of time. The animated GIFs overcame this issue, the GIFs started to play as soon as the page loads, and the audience took a quick look at it, receiving the data you are trying to narrate through these animated GIFs. Many web page users prefer animated GIFs because they take less time to load and consume data. Both the viewers and webpage designers use GIFs instead of videos to convey their message in a visual format.
Part 3 Convert Animated GIF from Video
Giphy is the best online program that creates animated GIFs from video. It is an exclusively online program that focuses on an efficient way to create animated GIFs from videos. There are many online tools available to make your GIFs. The Giphy is an impressive application with loads of in-built features to entertain audiences. While creating a GIF, ensure it has a good loading capability to obtain efficient results. You can follow the below steps to convert GIFs from videos using the Giphy app.
Step 1
Visit the official website of Giphy and upload the videos to convert a GIF by tapping the Convert button. You can also upload the video file by pasting the URL from YouTube or Vimeo.

Step 2
Now, use the Giphy tool to trim the video and spot out the section that requires converting it as GIFs.
Trim the videos and locate the section that requires the creation of animated GIFs.

Step 3
Customize the trimmed video section using stickers, filters, and texts. After personalizing the trimmed video, tap Upload to Giphy to store the edited animated GIFs in its library.
You can access the animated GIFs from the storage library in your account.

Follow the above guidelines to create animated GIFs from videos using the Giphy online tool. Surf the steps carefully to ensure successful completion of the animated GIFs creation from video.
Part 4 Tip: Easily edit your GIF for free
Further, you can refine the GIFs using a professional editor like Filmora. The Filmora from Wondershare is an awesome tool that gives you a wow feel while editing the media files. It is an exclusive program that edits the media files effectively to obtain the desired outcomes. You can work as a pro editor without any technical skills. The simple interface of this application triggers you to use the built-in elements professionally. Tap the relevant controls to include the desired effects on the uploaded GIF images. The timeline has a user-friendly interface and there are no complexities even while handling larger image or video files.
The key features of the Filmora application
● Customize the videos based on your needs. You can crop, add text, resize the dimensions precisely.
● You can add special effects to the videos using the in-built filters
● It has a simple interface and assists you in working like a pro.
● The trimmer tool aids in creating animated GIFs from your videos
● Easy to import and export the edited files to desired storage space by a single click action.
Apart from the above functionalities, you can discover enlightening uses of Filmora by installing it on your device. The controls are explicit and you can access them without any hesitation. The simple interface aids the newbie users to master this app in no time due to its comfortable working timeline.
The stepwise procedure to create animated GIFs from the imported videos using the Filmora application.
Step 1 Install the application
Visit the official website of Filmora, download the tool concerning your system OS, and install it by following the instruction wizard. Import the desired video into the timeline by tapping the Import Media Files option.

Step 2 Add texts to the video
Based on your requirements, you can trim the video using the edit tool and insert desired texts by tapping the Title menu.

Step 3 Export the edited file
Finally, click the Export button to save the edited file on any desired storage space. During the export operation, you can perform various changes to your media files. There are options to modify the file format, resolution, and storage path. Tap the respective menus to choose the desired platform that requires the storage operation. Directly post the animated GIFs on your YouTube or Vimeo based on your needs.

The above steps will aid you in creating animated GIFs from videos and using this application efficiently to bring the desired impact on it.
Wondershare Filmora
Get started easily with Filmora’s powerful performance, intuitive interface, and countless effects!
Try It Free Try It Free Try It Free Learn More >

AI Portrait – The best feature of Wondershare Filmora for gameplay editing
The AI Portrait is a new add-on in Wondershare Filmora. It can easily remove video backgrounds without using a green screen or chroma key, allowing you to add borders, glitch effects, pixelated, noise, or segmentation video effects.

Conclusion
Thus, this article had given enough insights into creating an animated GIF from videos. You can either use an online tool or opt for Filmora to edit the videos and convert them to impressive animated GIFs. The Filmora helps you to edit the media files professionally, and its simple interface assists in handling even the complex files efficiently. Connect with this article to explore the video edit process using a reliable program like Filmora. Stay tuned to create animated GIFs that conveys explicit messages to the audience.
The animated GIFs excite the viewers and convey a message. The instant chats include these animated GIFs to add fun to your conversation. Few web designers place animated GIFs on their web pages to attract their target customers wisely. You can convert animated GIFs from video using a reliable application available in the digital space. The animated GIFs impress the viewers and add flavor to the content. Mostly used replacing the emojis because the emojis are static images, whereas the animated GIFs showcase an action that triggers more meaning to the viewers. There are options to extract a specific clipping from videos and use them as animated GIFs. Here, you will be learning about GIFs and the best ways to edit them with sophisticated tools.
In this article
01 [What is GIF?](#Part 1)
02 [Why do People like to use GIFs?](#Part 2)
03 [Convert Animated GIF from Video](#Part 3)
04 [Tip: Easily edit your GIF for free](#Part 4)
Part 1 What is GIF?
The GIF is a Graphical Interchange Format and represents the file format in the bitmap. When compared to other image formats, GIF has unique specifications that are appreciable. The GIF has a lossless compression feature and you can transfer them to any space effortlessly. It includes 256 colors and is widely used for creating buttons and banners on the webpages. It came into practice in the year1987 and occupied the computer space commercially. GIFs are preferred to create small animations and are adopted by social media users. After the advent of PNG, the usage of GIF gradually decreased by website users. Later, the animated GIFs conquered the digital space as they replace most websites’ videos. It serves as one of the best message conveyers and is quite interesting for social media users. Gradually the younger generations were highly attracted to these animated GIFs to express their thoughts in an image format.
Part 2 Why do People like to use GIFs?
People prefer GIFs when compared to videos because animated GIFs convey a strong message quickly than videos. Social media users feel comfortable using GIFs and consider it the best way to express their emotions. Apart from the chat interface, you can find the animated GIFs occupying the website’s landing page, blog posts, and emails. The designers opt for animated GIFs instead of short videos because of their effective results. Many webpage visitors skim the content, and the animated GIFs quickly reveal what you convey. The audience understands the essential data you are emphasizing on the websites swiftly with the help of the animated GIFs.
When you include videos on your websites, the users skip the videos without making any clicks due to lack of time. The animated GIFs overcame this issue, the GIFs started to play as soon as the page loads, and the audience took a quick look at it, receiving the data you are trying to narrate through these animated GIFs. Many web page users prefer animated GIFs because they take less time to load and consume data. Both the viewers and webpage designers use GIFs instead of videos to convey their message in a visual format.
Part 3 Convert Animated GIF from Video
Giphy is the best online program that creates animated GIFs from video. It is an exclusively online program that focuses on an efficient way to create animated GIFs from videos. There are many online tools available to make your GIFs. The Giphy is an impressive application with loads of in-built features to entertain audiences. While creating a GIF, ensure it has a good loading capability to obtain efficient results. You can follow the below steps to convert GIFs from videos using the Giphy app.
Step 1
Visit the official website of Giphy and upload the videos to convert a GIF by tapping the Convert button. You can also upload the video file by pasting the URL from YouTube or Vimeo.
Step 2
Now, use the Giphy tool to trim the video and spot out the section that requires converting it as GIFs.
Trim the videos and locate the section that requires the creation of animated GIFs.
Step 3
Customize the trimmed video section using stickers, filters, and texts. After personalizing the trimmed video, tap Upload to Giphy to store the edited animated GIFs in its library.
You can access the animated GIFs from the storage library in your account.
Follow the above guidelines to create animated GIFs from videos using the Giphy online tool. Surf the steps carefully to ensure successful completion of the animated GIFs creation from video.
Part 4 Tip: Easily edit your GIF for free
Further, you can refine the GIFs using a professional editor like Filmora. The Filmora from Wondershare is an awesome tool that gives you a wow feel while editing the media files. It is an exclusive program that edits the media files effectively to obtain the desired outcomes. You can work as a pro editor without any technical skills. The simple interface of this application triggers you to use the built-in elements professionally. Tap the relevant controls to include the desired effects on the uploaded GIF images. The timeline has a user-friendly interface and there are no complexities even while handling larger image or video files.
The key features of the Filmora application
● Customize the videos based on your needs. You can crop, add text, resize the dimensions precisely.
● You can add special effects to the videos using the in-built filters
● It has a simple interface and assists you in working like a pro.
● The trimmer tool aids in creating animated GIFs from your videos
● Easy to import and export the edited files to desired storage space by a single click action.
Apart from the above functionalities, you can discover enlightening uses of Filmora by installing it on your device. The controls are explicit and you can access them without any hesitation. The simple interface aids the newbie users to master this app in no time due to its comfortable working timeline.
The stepwise procedure to create animated GIFs from the imported videos using the Filmora application.
Step 1 Install the application
Visit the official website of Filmora, download the tool concerning your system OS, and install it by following the instruction wizard. Import the desired video into the timeline by tapping the Import Media Files option.
Step 2 Add texts to the video
Based on your requirements, you can trim the video using the edit tool and insert desired texts by tapping the Title menu.
Step 3 Export the edited file
Finally, click the Export button to save the edited file on any desired storage space. During the export operation, you can perform various changes to your media files. There are options to modify the file format, resolution, and storage path. Tap the respective menus to choose the desired platform that requires the storage operation. Directly post the animated GIFs on your YouTube or Vimeo based on your needs.
The above steps will aid you in creating animated GIFs from videos and using this application efficiently to bring the desired impact on it.
Wondershare Filmora
Get started easily with Filmora’s powerful performance, intuitive interface, and countless effects!
Try It Free Try It Free Try It Free Learn More >
AI Portrait – The best feature of Wondershare Filmora for gameplay editing
The AI Portrait is a new add-on in Wondershare Filmora. It can easily remove video backgrounds without using a green screen or chroma key, allowing you to add borders, glitch effects, pixelated, noise, or segmentation video effects.
Conclusion
Thus, this article had given enough insights into creating an animated GIF from videos. You can either use an online tool or opt for Filmora to edit the videos and convert them to impressive animated GIFs. The Filmora helps you to edit the media files professionally, and its simple interface assists in handling even the complex files efficiently. Connect with this article to explore the video edit process using a reliable program like Filmora. Stay tuned to create animated GIFs that conveys explicit messages to the audience.
10 Awesome Moving Animation PowerPoint Techniques
10 Awesome Moving Animation PowerPoint Techniques
An easy yet powerful editor
Numerous effects to choose from
Detailed tutorials provided by the official channel
PowerPoints can be quite dull without anything to spice it up. So, this question is more than 100% warranted. Fortunately, we were able to pull together a tutorial on creating moving animation PowerPoint presentations.
Complete with some templates that you can start off with (if you’d prefer to make it as simple as possible for yourself.)
In this article
01 [6 Animated Powerpoint Templates with Interactive Features](#Part 1)
02 [How to Create a Moving Animation in Powerpoint](#Part 2)
03 [10 Moving Animation Powerpoint Techniques](#Part 3)
Part 1 6 Animated PowerPoint Templates with Interactive Features
The default people tend to-go-to when it comes to presentations are videos. As they tend to be more engaging on their own. For that, you’ll see people gravitating towards software like Filmora, which can create beautiful, eye-catching presentations that you can easily and quickly share. Not just to an immediate audience, but also on social media and the like.
However, of course, sometimes a personal touch is important in a presentation — important to have a ‘voice’ attached to the image on the screen. But just because this is the case, doesn’t mean that you shouldn’t go all out on your presentation. Hence, why moving animation PowerPoint templates are such a big deal:
01Company Presentation PowerPoint Template
For the first of the Moving Animation PowerPoint templates that we have to introduce, we chose the ‘Company Presentation PowerPoint Template.’ As you can perhaps guess from the name, it’s a very professional template. It comes with a total of 500 sample slides that you can choose from (50 of which are unique), and it’s set up with professional animations that can spice up your presentation without making it look gaudy or over-the-top.

02Move Animated PowerPoint Template
Next is the modern, minimalistic template called “Move Animated.” This one is a lot more versatile, with every single one of the 144 unique slides available suitably animated. The best part of it is definitely the easy way in which it can be used. With the modern, minimalistic style, it’s easy enough to remove the presets and replace them with suitable company or product images to promote your content, idea, or project.

0340 Animated Conceptual Slides for PowerPoint
Again, we have another modern and minimalistic kind of PowerPoint template with ‘40 Animated Conceptual Slides for PowerPoint.’ It comes with 40 modern slides, all of which come fully animated are easy enough to customize with your own branding or content.

04UNIGRAPH - Animated & Creative Template (PPTX)
For a bit more fun, our next template is “UNIGRAPH.” This still definitely fits the description ‘minimalistic’ but the pop of color and effects that it brings to the table gives it a different kind of vibe from all the others. No less professional, but certainly more fun. Of course, most importantly, perhaps, is the fact that each slide is smoothly animated.

05Graph & Charts PowerPoint Presentation
For this next one, we introduce a template set called “Graphs & Charts” for those who may want to present their products, projects, ideas, etc. in the shape of graphs and charts. It’s perfect for professionals, certainly. Especially with its clean look, brightened only by occasional pops of color that can be seen from the graphs and charts that it comes with.

06Laststyle - PowerPoint Template
This next PowerPoint template is most suited for businesses looking to promote their products. The creator of the template has provided five different colored versions of the template, each with 30 unique slides that were carefully sectioned with suitable animations.

Part 2 How to Create a Moving Animation in PowerPoint
Now we come to the point of the article where we speak directly to those who may want to experiment more by personally creating a moving animation PowerPoint. For this example, we’ll be teaching you how to create a path animation PowerPoint with the available tools that the software offers under ‘Animation.’ Stick around if you want to learn more.
01Step 1. Open Project.
First things first, of course. Start a new project. When you’ve started, move on to the Animation tab (which we’ve pointed out in the image below.)

02Step 2. Add Animation.
Then, make sure to select the object or model that you want to animate (in this case, we’ve inserted a 2D model of a businessman), and then click the ‘Add Animation’ button (shown in the image below.)

03Step 3. Choose Animation.
Under ‘Add Animation’ you’ll find several different options for animations that you can choose from. Of course, since our goal is to create a PowerPoint Motion Path Animation, we have selected one of the ‘Motion Path’ options.

04Step 4. Choose Motion Path Animation
In order to make motion animation in PowerPoint, you must select one of the offered ‘Motion Paths’ (i.e., Bounce, Line, Arcs, etc.) and then use the motion path tool that appears to control the direction you wish to make your character move.
In this example, we chose the ‘Lines’ motion path (1) and then used the line tool to create a path for our businessman model. To walk from the right side of the screen towards the left.

05Step 5. Adjust Animation.
With path animation PowerPoint complete, you can adjust as needed with the tools provided. For example, you can have the character start moving as soon as the slide opens, or wait until a minute has passed, you can extend the animation by changing duration, etc.

Part 3 10 Moving Animation PowerPoint Techniques
For this last step, we break down some important PowerPoint 3D Animation need-to-knows. Including the specifics provided by each of the options made available to you and why it’s important to explore every single one to create better and more professional-looking presentations.
01Transitions
When it comes to PowerPoint presentations, most people are no doubt the most familiar with ‘Transitions’ when talking in terms of adding animation into a presentation. This one decides whether you want to shift from one slide to another smoothly, or if you want the previous slide to break into splinters, or rotate into the next slide, and so on and so forth. It’s an ‘in-between’ animation that signals where one ends and the other begins.

02Animations
Now, for the ‘Animations’ tab, we focus on animations that occur in the slide (not in-between like transitions). This can include a wide array of things. Whether it be characters moving (like shown in the tutorial we provided), text boxes appearing and disappearing in short order, images bouncing into view in dramatic fashion, and so on and so forth. There’s lots of potential here.

03Animation - Start
We mentioned this previously in the tutorial, but PowerPoint (which does not offer the more advanced 3D customization options), does still give you the freedom to choose how you want certain animations to work.
In the case of the ‘Animations-Start’ option, the goal is to decide when an animation starts playing. Do you want it to start after a click? Or maybe you want it to start up immediately? Whatever the case may be, this function will let you choose the specifics.

044. Animation - Duration
Next, we decide how long you want the animation to last. For example, if you chose to add a PowerPoint 3D rotation animation into a character, how long do you want it to spin before it settles into place? Perhaps only a second? Perhaps more? Whatever you chose, this is the option that will let you finalize that.

05Animation - Delay
This one is self-explanatory as well. But suffice to say, the ‘Delay’ option is for deciding how much an animation is delayed before starting. For example, if you chose to start it ‘On Click’ you can increase the delay to keep it from playing immediately on click.

06Break Up Presentation into Sections
A lot of PowerPoint templates, you’ll find, are naturally broken into sections. This is because it is easier to consume it in that way. It’s also a good signal to your audience as to what point of the presentation you are on. Are you in the beginning? The middle? Near the end? Etc. In this case, the best option for showing it is transitions that separate the sections from one another.

07Add Animation - Entrance
As promised earlier, we’ll be going through each type of animation is available under the ‘Add Animation’ option. The first is “Entrance” animations. This one is pretty easy to guess. It makes up a variety of animations that serve as its entrance animation. Here are some examples:
● Appear: To have objects appear without any other effect.
● Fade: To have objects fade into view.
● Bounce: To have objects bounce into view.
● Swivel: To have objects swivel into view.

08Add Animation - Emphasis
This next animation style is to give emphasis to an already-present object. For example, at a click, you can have a text box ‘Pulse’ and become the center of attention. You can change ‘Object Color’ to make it stand out. And so on.

099. Add Animation - Exit
Opposite of the ‘Entrance’ animations are the ‘Exit’ animations. You’ll notice that the style of animations is the same here. The only difference is that the animations occur to exit the project out of the presentation. For example, an image exiting to reveal text. Or text flying out to be replaced with more text, etc.

10Add Animation - Motion Path
We’ve already mentioned the PowerPoint Motion Path animation style previously, but just to reiterate some things, this is the most customizable animation feature on PowerPoint. One that allows you to move objects across the slide in whatever way you wish. In our example, we created a motion path animation that took the character from the center of the screen to the left of the screen.

● Key Takeaways from This Episode →
● While videos are the most popular way to share information, there are some presentations that require a heavier guiding hand.
● In these situations, a PowerPoint presentation, carefully animated, can serve in place of an edited video.
● There are templates available that you can take advantage of if you’d prefer to start with something to work from. We introduced some in this article that we think were particularly notable.
● But, of course, more careful personalization is sometimes necessary. In that case, we hope that you find our tutorial and our list of PowerPoint techniques helpful.
PowerPoints can be quite dull without anything to spice it up. So, this question is more than 100% warranted. Fortunately, we were able to pull together a tutorial on creating moving animation PowerPoint presentations.
Complete with some templates that you can start off with (if you’d prefer to make it as simple as possible for yourself.)
In this article
01 [6 Animated Powerpoint Templates with Interactive Features](#Part 1)
02 [How to Create a Moving Animation in Powerpoint](#Part 2)
03 [10 Moving Animation Powerpoint Techniques](#Part 3)
Part 1 6 Animated PowerPoint Templates with Interactive Features
The default people tend to-go-to when it comes to presentations are videos. As they tend to be more engaging on their own. For that, you’ll see people gravitating towards software like Filmora, which can create beautiful, eye-catching presentations that you can easily and quickly share. Not just to an immediate audience, but also on social media and the like.
However, of course, sometimes a personal touch is important in a presentation — important to have a ‘voice’ attached to the image on the screen. But just because this is the case, doesn’t mean that you shouldn’t go all out on your presentation. Hence, why moving animation PowerPoint templates are such a big deal:
01Company Presentation PowerPoint Template
For the first of the Moving Animation PowerPoint templates that we have to introduce, we chose the ‘Company Presentation PowerPoint Template.’ As you can perhaps guess from the name, it’s a very professional template. It comes with a total of 500 sample slides that you can choose from (50 of which are unique), and it’s set up with professional animations that can spice up your presentation without making it look gaudy or over-the-top.
02Move Animated PowerPoint Template
Next is the modern, minimalistic template called “Move Animated.” This one is a lot more versatile, with every single one of the 144 unique slides available suitably animated. The best part of it is definitely the easy way in which it can be used. With the modern, minimalistic style, it’s easy enough to remove the presets and replace them with suitable company or product images to promote your content, idea, or project.
0340 Animated Conceptual Slides for PowerPoint
Again, we have another modern and minimalistic kind of PowerPoint template with ‘40 Animated Conceptual Slides for PowerPoint.’ It comes with 40 modern slides, all of which come fully animated are easy enough to customize with your own branding or content.
04UNIGRAPH - Animated & Creative Template (PPTX)
For a bit more fun, our next template is “UNIGRAPH.” This still definitely fits the description ‘minimalistic’ but the pop of color and effects that it brings to the table gives it a different kind of vibe from all the others. No less professional, but certainly more fun. Of course, most importantly, perhaps, is the fact that each slide is smoothly animated.
05Graph & Charts PowerPoint Presentation
For this next one, we introduce a template set called “Graphs & Charts” for those who may want to present their products, projects, ideas, etc. in the shape of graphs and charts. It’s perfect for professionals, certainly. Especially with its clean look, brightened only by occasional pops of color that can be seen from the graphs and charts that it comes with.
06Laststyle - PowerPoint Template
This next PowerPoint template is most suited for businesses looking to promote their products. The creator of the template has provided five different colored versions of the template, each with 30 unique slides that were carefully sectioned with suitable animations.
Part 2 How to Create a Moving Animation in PowerPoint
Now we come to the point of the article where we speak directly to those who may want to experiment more by personally creating a moving animation PowerPoint. For this example, we’ll be teaching you how to create a path animation PowerPoint with the available tools that the software offers under ‘Animation.’ Stick around if you want to learn more.
01Step 1. Open Project.
First things first, of course. Start a new project. When you’ve started, move on to the Animation tab (which we’ve pointed out in the image below.)
02Step 2. Add Animation.
Then, make sure to select the object or model that you want to animate (in this case, we’ve inserted a 2D model of a businessman), and then click the ‘Add Animation’ button (shown in the image below.)
03Step 3. Choose Animation.
Under ‘Add Animation’ you’ll find several different options for animations that you can choose from. Of course, since our goal is to create a PowerPoint Motion Path Animation, we have selected one of the ‘Motion Path’ options.
04Step 4. Choose Motion Path Animation
In order to make motion animation in PowerPoint, you must select one of the offered ‘Motion Paths’ (i.e., Bounce, Line, Arcs, etc.) and then use the motion path tool that appears to control the direction you wish to make your character move.
In this example, we chose the ‘Lines’ motion path (1) and then used the line tool to create a path for our businessman model. To walk from the right side of the screen towards the left.
05Step 5. Adjust Animation.
With path animation PowerPoint complete, you can adjust as needed with the tools provided. For example, you can have the character start moving as soon as the slide opens, or wait until a minute has passed, you can extend the animation by changing duration, etc.
Part 3 10 Moving Animation PowerPoint Techniques
For this last step, we break down some important PowerPoint 3D Animation need-to-knows. Including the specifics provided by each of the options made available to you and why it’s important to explore every single one to create better and more professional-looking presentations.
01Transitions
When it comes to PowerPoint presentations, most people are no doubt the most familiar with ‘Transitions’ when talking in terms of adding animation into a presentation. This one decides whether you want to shift from one slide to another smoothly, or if you want the previous slide to break into splinters, or rotate into the next slide, and so on and so forth. It’s an ‘in-between’ animation that signals where one ends and the other begins.
02Animations
Now, for the ‘Animations’ tab, we focus on animations that occur in the slide (not in-between like transitions). This can include a wide array of things. Whether it be characters moving (like shown in the tutorial we provided), text boxes appearing and disappearing in short order, images bouncing into view in dramatic fashion, and so on and so forth. There’s lots of potential here.
03Animation - Start
We mentioned this previously in the tutorial, but PowerPoint (which does not offer the more advanced 3D customization options), does still give you the freedom to choose how you want certain animations to work.
In the case of the ‘Animations-Start’ option, the goal is to decide when an animation starts playing. Do you want it to start after a click? Or maybe you want it to start up immediately? Whatever the case may be, this function will let you choose the specifics.
044. Animation - Duration
Next, we decide how long you want the animation to last. For example, if you chose to add a PowerPoint 3D rotation animation into a character, how long do you want it to spin before it settles into place? Perhaps only a second? Perhaps more? Whatever you chose, this is the option that will let you finalize that.
05Animation - Delay
This one is self-explanatory as well. But suffice to say, the ‘Delay’ option is for deciding how much an animation is delayed before starting. For example, if you chose to start it ‘On Click’ you can increase the delay to keep it from playing immediately on click.
06Break Up Presentation into Sections
A lot of PowerPoint templates, you’ll find, are naturally broken into sections. This is because it is easier to consume it in that way. It’s also a good signal to your audience as to what point of the presentation you are on. Are you in the beginning? The middle? Near the end? Etc. In this case, the best option for showing it is transitions that separate the sections from one another.
07Add Animation - Entrance
As promised earlier, we’ll be going through each type of animation is available under the ‘Add Animation’ option. The first is “Entrance” animations. This one is pretty easy to guess. It makes up a variety of animations that serve as its entrance animation. Here are some examples:
● Appear: To have objects appear without any other effect.
● Fade: To have objects fade into view.
● Bounce: To have objects bounce into view.
● Swivel: To have objects swivel into view.
08Add Animation - Emphasis
This next animation style is to give emphasis to an already-present object. For example, at a click, you can have a text box ‘Pulse’ and become the center of attention. You can change ‘Object Color’ to make it stand out. And so on.
099. Add Animation - Exit
Opposite of the ‘Entrance’ animations are the ‘Exit’ animations. You’ll notice that the style of animations is the same here. The only difference is that the animations occur to exit the project out of the presentation. For example, an image exiting to reveal text. Or text flying out to be replaced with more text, etc.
10Add Animation - Motion Path
We’ve already mentioned the PowerPoint Motion Path animation style previously, but just to reiterate some things, this is the most customizable animation feature on PowerPoint. One that allows you to move objects across the slide in whatever way you wish. In our example, we created a motion path animation that took the character from the center of the screen to the left of the screen.
● Key Takeaways from This Episode →
● While videos are the most popular way to share information, there are some presentations that require a heavier guiding hand.
● In these situations, a PowerPoint presentation, carefully animated, can serve in place of an edited video.
● There are templates available that you can take advantage of if you’d prefer to start with something to work from. We introduced some in this article that we think were particularly notable.
● But, of course, more careful personalization is sometimes necessary. In that case, we hope that you find our tutorial and our list of PowerPoint techniques helpful.
Also read:
- Updated How to Find 3D Animation Studio for 2024
- Updated In 2024, How to Make Whiteboard Animation Videos
- New In 2024, Guide on Creating GIF in WhatsApp iPhone
- Updated 2024 Approved Best 10 3D Text Animation Templates
- Updated In 2024, Ways on How to Liven Up Your Animate Website on Scroll
- Updated Easy Cartoon Characters Drawing Tutorials for You Who Are Learning to Draw
- Updated How to Create Benime Whiteboard Animation on Android for 2024
- Updated Whats the Best 10 Photo Animator Templates That Bring Your Images to Life for 2024
- Updated 2024 Approved How To Animate Graphics in Canva
- Updated The Only Guide Youll Ever Need to Learn About GIF Video Downloader for 2024
- In 2024, 10 Cartoon Photo Converters You Couldnt Do Without
- Interesting Fundamentals and Ultimate Guide to Animated Characters Drawings
- New 2024 Approved 10 Cartoon Canvas Painting Ideas for Total Beginners
- 2024 Approved Top Claymation Shows That Make Your Memories Unforgettable
- New 2024 Approved Handy Tip From Adobe Animate Rigging Tutorial for All Learners
- 2024 Approved The 15 Most Efficient Photo to Cartoon Apps for Android
- New 2024 Approved Simple Guide to Create New and Exciting Blackboard Animation
- Updated In 2024, Top 8 Anime Name Generators Online-Get Cool Anime Names
- In 2024, Top 5 Honor Magic 5 Bypass FRP Tools for PC That Actually Work
- New Diverse Template | Online for 2024
- How to Factory Reset Tecno Pova 5 Pro without Losing Data | Dr.fone
- In 2024, iPhone SE (2022) iCloud Activation Lock Bypass
- Top 10 AirPlay Apps in ZTE Blade A73 5G for Streaming | Dr.fone
- Full Guide to Catch 100 IV Pokémon Using a Map On Oppo Reno 8T 5G | Dr.fone
- In 2024, Best 3 Software to Transfer Files to/from Your Oppo Reno 8T via a USB Cable | Dr.fone
- In 2024, Full Guide to Fix iToolab AnyGO Not Working On Tecno Camon 20 | Dr.fone
- Android Safe Mode - How to Turn off Safe Mode on Xiaomi Redmi 12? | Dr.fone
- Possible ways to recover deleted files from Honor X50i
- How To Check if Your Oppo Reno 11 Pro 5G Is Unlocked
- In 2024, Hassle-Free Ways to Remove FRP Lock on ZTE Axon 40 Litewith/without a PC
- Factory Reset on Apple iPhone XR | Dr.fone
- Title: Updated 10 Cartoon Canvas Painting Ideas for Total Beginners
- Author: Elon
- Created at : 2024-05-19 03:04:28
- Updated at : 2024-05-20 03:04:28
- Link: https://animation-videos.techidaily.com/updated-10-cartoon-canvas-painting-ideas-for-total-beginners/
- License: This work is licensed under CC BY-NC-SA 4.0.
