

Updated 15 Best Apps to Turn Photos Into Cartoons and Sketches
The 15 Best Apps to Turn Photos Into Cartoons and Sketches
The 15 Best Apps to Turn Photos into Cartoons and Sketches
An easy yet powerful editor
Numerous effects to choose from
Detailed tutorials provided by the official channel
Our mobile phones give a plethora of capabilities for making them seem creative and one-of-a-kind. One method is to convert ordinary pictures into cartoons or sketches.
And if you want to test an app that can convert any picture into a cartoon, this post is for you.
In this article
01 [The 10 best apps to turn photos into cartoons](#Part 1)
02 [The 5 best apps to turn photos into sketches](#Part 2)
Part 1 The 10 Best Apps to Turn Photos into Cartoons
We all love clicking pictures and exploring what more effects could be added to the click. Converting your images into cartoons is one such effect that most digital art lovers out there would love to unleash their creativity. If you would like to learn more about Filmora video animation , you can watch this tutorial:
For Win 7 or later (64-bit)
For macOS 10.12 or later
Below is the list of top 10 apps that one can use to convert photos to cartoons.
01Cartoon Pictures
Compatibility: Android
Rating: 4.1/5
Key Features: Free of cost with diverse options for cartoon filters.
Verdict:
For people looking to convert photos into cartoons, the Cartoon Pictures app is the one-stop for all. With its compatibility currently offered to both android and iOS, Cartoon Pictures offers a wide range of options. A person can modify their pictures using filters and effects on their image converted to cartoon.
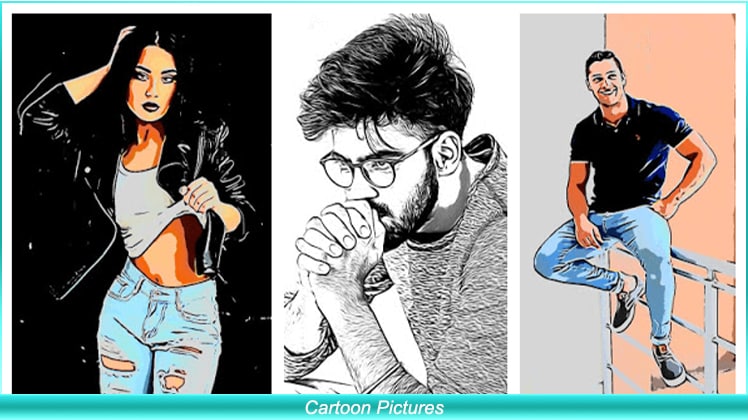
Cartoon pictures are on the top of our list due to the positive review. Overall, the app optimises memory consumption, i.e. 13MB with Cartoon Me’s gallery of filters, drawings, art pieces, editions, cartoons, oil paintings, artistic pictures, effects, and photos.
02Snapchat
Compatibility: Android/iOS
Rating: Android: 4.2/5, iOS: 3.6/5
Key Features: Popular app allowing you to not only use filters but connect with people from all over the world.
Verdict:
Although the app is famous worldwide as a photo-sharing app, Snapchat can be used for much more than that. Snapchat has launched a new effect that allows users to convert their photographs into Disney characters. It changes your look into “a modern-day prince(ess).”
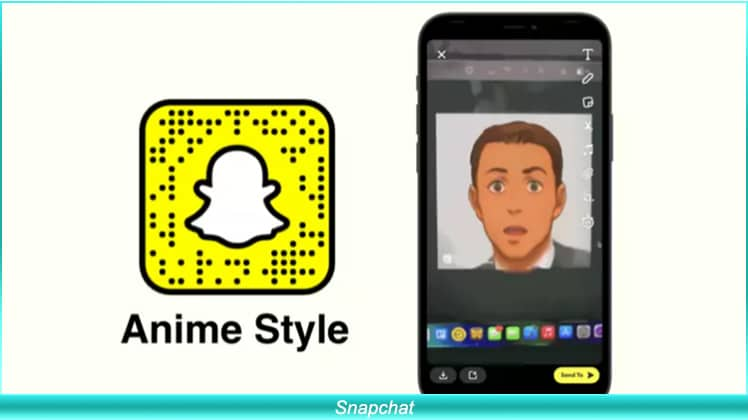
According to the firm, numerous Snapchatters across the world have been using this filter to click a cartoon portrait and has been watched over 1.7 billion times. Snapchat has several other filters that help you convert your real-life photo into a cartoon. Snapchat is free for all, with several positive reviews from across the globe.
03ToonMe
Compatibility: Android/iOS
Rating: Android 4.2/5, iOS: 4.6/5
Key Features: Easy to use UI with several options to cartoonify image
Verdict:
ToonMe is the most simple to use; this app is on our list with an easy UI to use. Compared to all the other photo to cartoon apps, toonme best suits the people who are looking to convert their images readily. You may use your phone or existing photographs to make a cartoon using free built-in editing features.
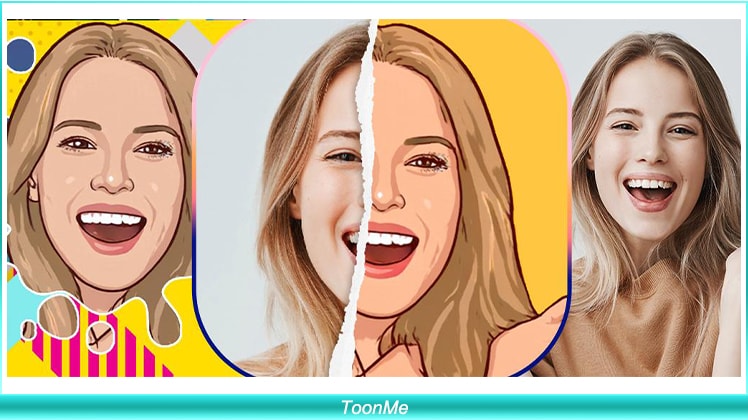
The software is only 16 MB in size and is free to download from both the Google play store and the Apple app store. You may download it right now and start transforming yourself into cartoons.
04Wondershare Filmora
Compatibility: Win/Mac
Rating: Win: 4.5/5, Mac: 4.6/5
Key Features: Several options for video and photo editing in HD+.
Verdict:
Wondershare Filmora Video Editor is a well renowned and well-recognised name for those in the video-editing industry. It is well known for its wide range of tools and implementations that can be made on one image using Filmora. It has a user-friendly interface and an easy-to-use photo to cartoon converter tool.
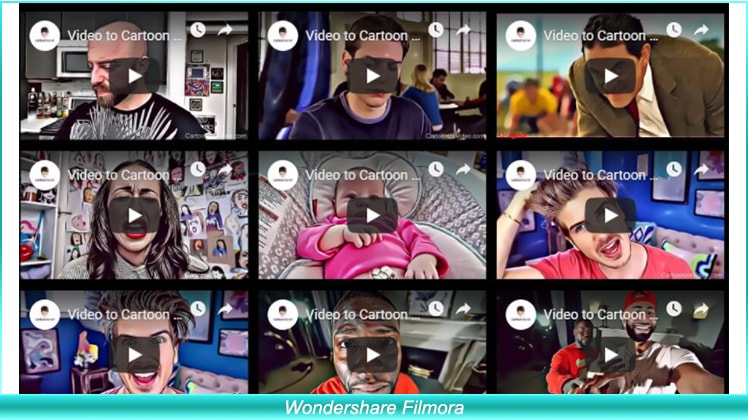
Although there is wide use of Filmora in this section, we would be talking about its ability to convert images into cartoons. The app is available for both Win and Mac, which is entirely justifiable for the feature it offers.

Wondershare Filmora - Best Video Editor for Mac/Windows
5,481,435 people have downloaded it.
Build unique custom animations without breaking a sweat.
Focus on creating epic stories and leave the details to Filmora’s auto features.
Start a creative adventure with drag & drop effects and endless possibilities.
Filmora simplifies advanced features to save you time and effort.
Filmora cuts out repetition so you can move on to your next creative breakthrough.
05Comics and Cartoon Maker
Compatibility: Android
Rating: 4.0/5
Key Features: Readily converts images to animate photos with a comic effect.
Verdict:
Are you a comic fan looking to convert your photos into animated images? Comic Cartoon Maker is the right app for you. With several options to convert your image into a cartoon. Comic Cartoon Maker is available for both Android and iOS and occupies 20MB of space in both.
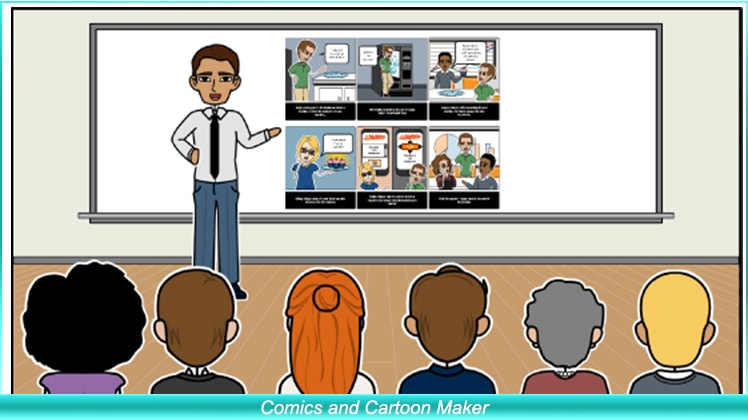
You may choose a photo from your collection or snap a fresh one with the app. After you’ve selected your filter, you may add speaking balloons to create a more believable “comic effect.” This is the simplest approach to “cartoon yourself” that you will discover on the internet.
06Avatoon
Compatibility: Android/iOS
Rating: Android: 4.5/5, iOS: 4.6/5
Key Features: Facial recognition, snapshots, stickers, avatars, and animated profile picture style options.
Verdict:
If you want to transform yourself into animated pictures, this is the programme you use. Anyone can transform themselves into animated characters with a simple click, which may then be made into stickers. These Stickers may be shared among your acquaintances via the WhatsApp app as well as other major social networking sites such as Instagram, Facebook, and many others.
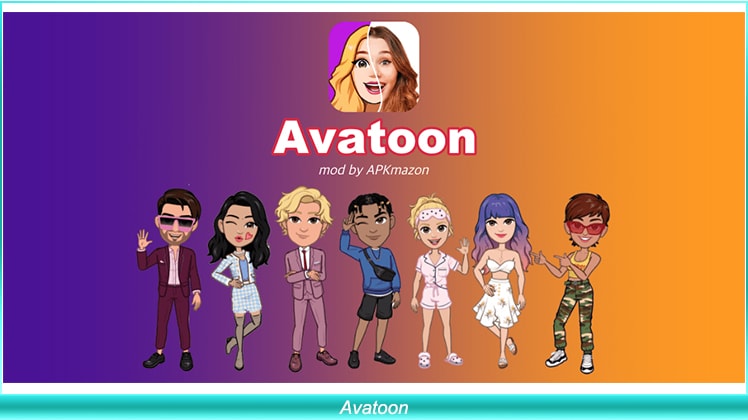
The software is 53 MB in size and is downloadable on both the Play Store and the App Store. The app has been reviewed positively due to the diverse usability of its features.
07Reface
Compatibility: Android/iOS
Rating: Android: 4.2/ 5, iOS: 4.7/5
Key Features: Swap your face with celebrities and animated cartoons.
Verdict:
It’s a famous cartoon picture maker, a face-swapping app available on both the Play Store and App stores. You may change your appearance to that of celebrities featuring animated Disney characters. The software is a lot of fun and very simple to use.
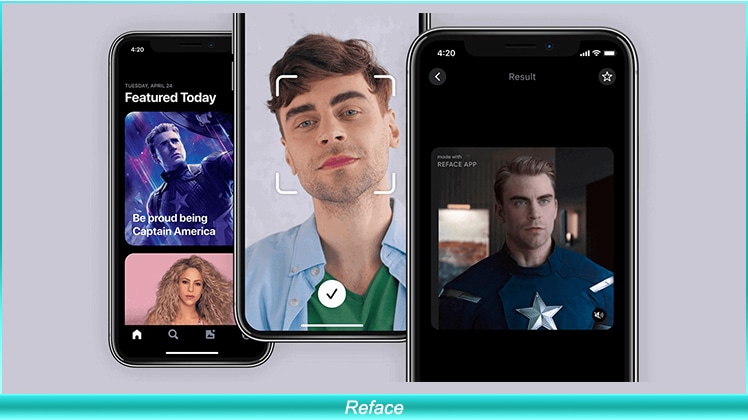
The app is available in both paid and free editions. Although you will be limited to setting and swapping space per day using the free versions, The app consumes a total of 14MB and comes with unique features such as GIF, stickers, meme maker, etc.
08Prisma Photo Editor
Compatibility: Android/iOS
Rating: Android: 4.4/5, iOS: 4.6/5
Key Features: Most optimised AI which converts pictures into cartoons and much more
Verdict:
Prisma picture designer is an older and well-known photo editing tool for both Android and iOS users. It is a picture editing software with the ability to create cartoon pictures in a short amount of time. This programme is a multifunctional photo editor that allows you to edit images and make yourself into a cartoon effortlessly**.**
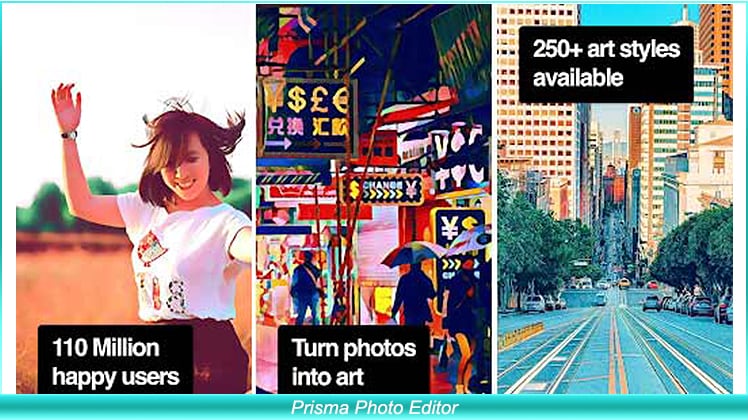
It features a variety of picture filter choices as well as a unique feed. You can simply change a photograph into a magnificent piece of artwork in the style of Munk, Picasso, or any other design you like, which has led to such good reviews by users. Although the app consumes 68MB it is yet most compatible and easy to convert pictures to cartoons.
09Sketch Drawing Photo Editor
Compatibility: Android
Rating: 4.3/5
Key Features: Create animated pics, drawings and sketches with this free animated photo maker
Verdict:
Pencil Photo Sketch is a professional photo programme that can transform your images into stunning hand-drawn pencil drawings or comic cartoon-like illustrations. Choose an image from your album or take a photo with your smartphone to create a pencil sketch or drawing effect.

The app UI is straightforward to use; all you have to do is import a picture or choose a snapshot from your collection and transform it into a magnificent pencil drawing. The software is around 19 MB in size and therefore is downloadable on both the play store and the app store.
10Moments Cartoon Caricature
Compatibility: Android
Rating: 3.2/5
Key Features: Helps you turn your photo into an animated caricature cartoon.
Verdict:
You’ll be able to enter selfie challenges or merely appreciate the great caricature tools that will allow you to convert a regular event into a funny photo. The app’s photo editor has a plethora of tools for transforming photos into cartoons in whatever way you desire.
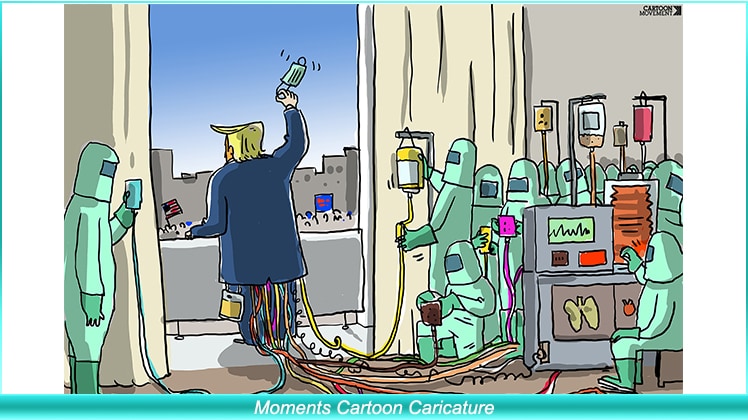
You’ll also have the option of exploring with monochrome caricatures. All of the options available in the Moments Cartoon Caricature software are intended to assist you in creating great social media photographs.
Part 2 The 5 Best Apps to Turn Photos into Sketches
Now that we are done editing the cartoons, next on our list is sketches. Several digital artists look forward to creating a sketch-like effect to their photos. Below is the list of five apps that would help users turn their photos into sketches.
01PicsArt
Compatibility: Android, iOS
Rating: Android: 4.2/5, iOS:4.6/5
Key Features: Several filters, effects and modifications that one can do to their clicks
Verdict: Looking to transform your pictures into an artwork or sketch? Don’t worry PicsArt has got you covered. The app is compatible with Android and iOS and takes around 75MB on your device.
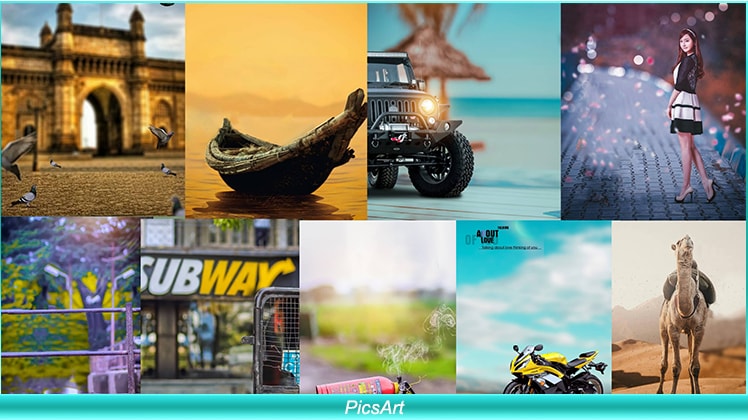
The app can be used to convert images to sketches and much more, making the app multipurpose. The user friendly UI and magnificent quality of filters have given them a reputed stand in their field.
02GoArt
Compatibility: Android,iOS
Rating: Android: 4.3/5, iOS:3.7/5
Key Features: Turns photos into HD paintings that can be printed and framed.
Verdict: GoArt was created to print the images you make as a key focus. This provides some incredible benefits as well as a few possible drawbacks for your photography requirements. The programme transforms the snapshot into an artistic composition by utilising AI technology.
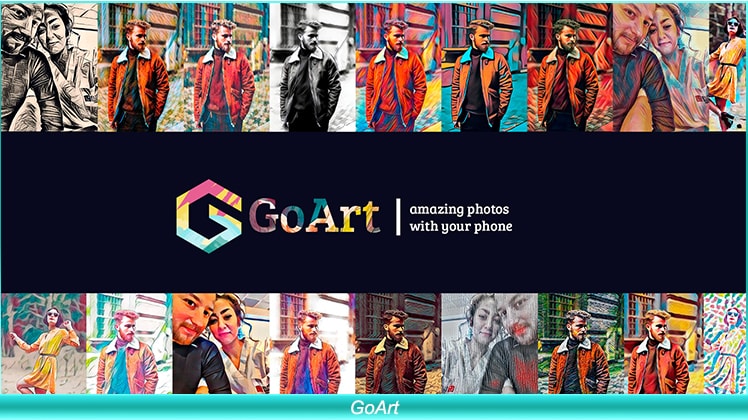
Even though it produces a clear and high-quality image, it might take a couple of minutes to process, as opposed to other fast solutions.
03PhotoLab
Compatibility: Android,iOS
Rating: Android: 4.0/5, iOS:4.3/5
Key Features: Photo filters, sketchbook effect, collages and montage for quick touch-ups.
Verdict: PhotoLab is the software for you if you enjoy playing with hilarious, innovative, and attractive effects. The AI-powered technology is incredibly simple to use and will instantly do modifications such as trimming for you.
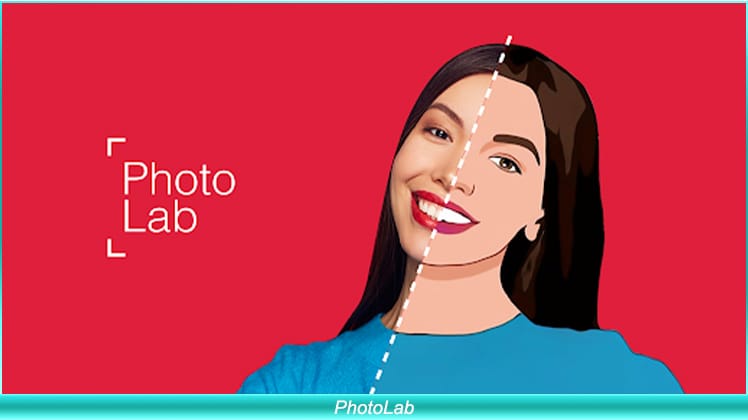
You may quickly publish your picture to social media or share it on a platform developed particularly for publishing digital art from the app.
04Instatoon
Compatibility: iOS
Rating: 4.4/5
Key Features: Helps iOS users convert their images into real-life portraits.
Verdict:
Instatoon has a large fan base since it provides a high-quality product that genuinely does what you ask for! This programme has fewer picture editing options because it focuses solely on producing art from your photographs.
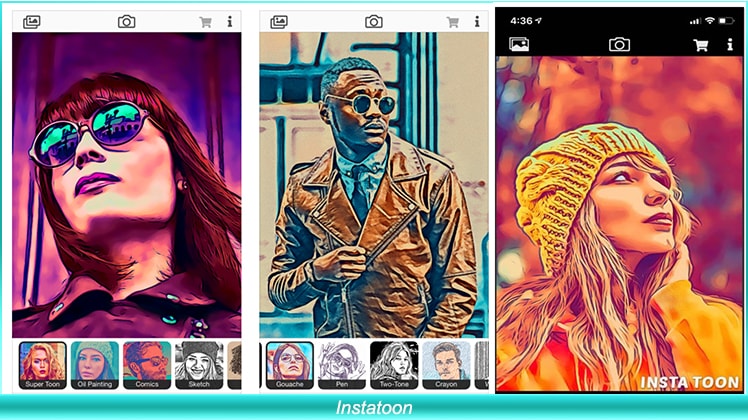
Scroll through the list of possible filters until you discover the ideal match. Numerous filter choices are available, such as black and white sketch designs, oil paintings, and cartoons.
05BeCasso
Compatibility: iOS
Rating: 4.6/5
Key Features: Artificial intelligence, neural networks, and aesthetic picture filters form a potent mix.
Verdict:
BeCasso is packed with excellent creative filters inspired by your favourite painters, such as Vincent Van Gogh and Pablo Picasso.
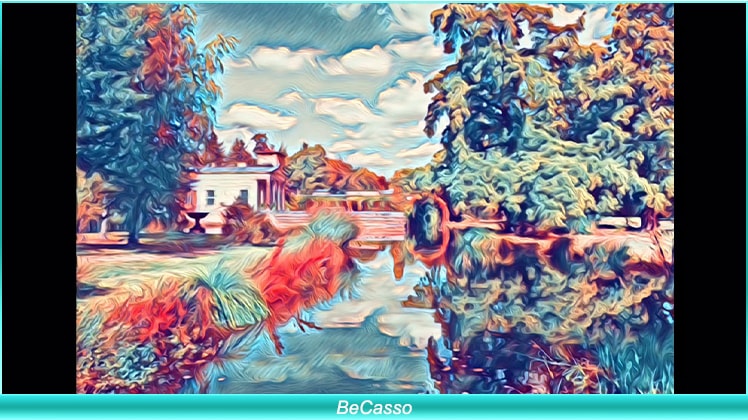
After importing your chosen photo, scroll through a big variety of different artistic styles and choose the filters you want. You would like to edit your images prior sharing them because most of the photo editing capabilities in this programme are only available when you pay for a membership.
Key Takeaways from This Episode
● Using various software, making sketches and cartoons can be tedious and time-consuming for digital enthusiasts. This brings us to a more leisurely resort to propose an effortless and hassle-free way to convert their images into cartoons and sketches.
● So far, we have learned about the various ways we can use animated pic maker and software to animate pictures and form sketch-like effects using apps made for android and iOS.
● With every app having its diversified use and application, users can download the one that suits them the best, reading through the given content to help them save time and plan better.
Our mobile phones give a plethora of capabilities for making them seem creative and one-of-a-kind. One method is to convert ordinary pictures into cartoons or sketches.
And if you want to test an app that can convert any picture into a cartoon, this post is for you.
In this article
01 [The 10 best apps to turn photos into cartoons](#Part 1)
02 [The 5 best apps to turn photos into sketches](#Part 2)
Part 1 The 10 Best Apps to Turn Photos into Cartoons
We all love clicking pictures and exploring what more effects could be added to the click. Converting your images into cartoons is one such effect that most digital art lovers out there would love to unleash their creativity. If you would like to learn more about Filmora video animation , you can watch this tutorial:
For Win 7 or later (64-bit)
For macOS 10.12 or later
Below is the list of top 10 apps that one can use to convert photos to cartoons.
01Cartoon Pictures
Compatibility: Android
Rating: 4.1/5
Key Features: Free of cost with diverse options for cartoon filters.
Verdict:
For people looking to convert photos into cartoons, the Cartoon Pictures app is the one-stop for all. With its compatibility currently offered to both android and iOS, Cartoon Pictures offers a wide range of options. A person can modify their pictures using filters and effects on their image converted to cartoon.
Cartoon pictures are on the top of our list due to the positive review. Overall, the app optimises memory consumption, i.e. 13MB with Cartoon Me’s gallery of filters, drawings, art pieces, editions, cartoons, oil paintings, artistic pictures, effects, and photos.
02Snapchat
Compatibility: Android/iOS
Rating: Android: 4.2/5, iOS: 3.6/5
Key Features: Popular app allowing you to not only use filters but connect with people from all over the world.
Verdict:
Although the app is famous worldwide as a photo-sharing app, Snapchat can be used for much more than that. Snapchat has launched a new effect that allows users to convert their photographs into Disney characters. It changes your look into “a modern-day prince(ess).”
According to the firm, numerous Snapchatters across the world have been using this filter to click a cartoon portrait and has been watched over 1.7 billion times. Snapchat has several other filters that help you convert your real-life photo into a cartoon. Snapchat is free for all, with several positive reviews from across the globe.
03ToonMe
Compatibility: Android/iOS
Rating: Android 4.2/5, iOS: 4.6/5
Key Features: Easy to use UI with several options to cartoonify image
Verdict:
ToonMe is the most simple to use; this app is on our list with an easy UI to use. Compared to all the other photo to cartoon apps, toonme best suits the people who are looking to convert their images readily. You may use your phone or existing photographs to make a cartoon using free built-in editing features.
The software is only 16 MB in size and is free to download from both the Google play store and the Apple app store. You may download it right now and start transforming yourself into cartoons.
04Wondershare Filmora
Compatibility: Win/Mac
Rating: Win: 4.5/5, Mac: 4.6/5
Key Features: Several options for video and photo editing in HD+.
Verdict:
Wondershare Filmora Video Editor is a well renowned and well-recognised name for those in the video-editing industry. It is well known for its wide range of tools and implementations that can be made on one image using Filmora. It has a user-friendly interface and an easy-to-use photo to cartoon converter tool.
Although there is wide use of Filmora in this section, we would be talking about its ability to convert images into cartoons. The app is available for both Win and Mac, which is entirely justifiable for the feature it offers.
Wondershare Filmora - Best Video Editor for Mac/Windows
5,481,435 people have downloaded it.
Build unique custom animations without breaking a sweat.
Focus on creating epic stories and leave the details to Filmora’s auto features.
Start a creative adventure with drag & drop effects and endless possibilities.
Filmora simplifies advanced features to save you time and effort.
Filmora cuts out repetition so you can move on to your next creative breakthrough.
05Comics and Cartoon Maker
Compatibility: Android
Rating: 4.0/5
Key Features: Readily converts images to animate photos with a comic effect.
Verdict:
Are you a comic fan looking to convert your photos into animated images? Comic Cartoon Maker is the right app for you. With several options to convert your image into a cartoon. Comic Cartoon Maker is available for both Android and iOS and occupies 20MB of space in both.
You may choose a photo from your collection or snap a fresh one with the app. After you’ve selected your filter, you may add speaking balloons to create a more believable “comic effect.” This is the simplest approach to “cartoon yourself” that you will discover on the internet.
06Avatoon
Compatibility: Android/iOS
Rating: Android: 4.5/5, iOS: 4.6/5
Key Features: Facial recognition, snapshots, stickers, avatars, and animated profile picture style options.
Verdict:
If you want to transform yourself into animated pictures, this is the programme you use. Anyone can transform themselves into animated characters with a simple click, which may then be made into stickers. These Stickers may be shared among your acquaintances via the WhatsApp app as well as other major social networking sites such as Instagram, Facebook, and many others.
The software is 53 MB in size and is downloadable on both the Play Store and the App Store. The app has been reviewed positively due to the diverse usability of its features.
07Reface
Compatibility: Android/iOS
Rating: Android: 4.2/ 5, iOS: 4.7/5
Key Features: Swap your face with celebrities and animated cartoons.
Verdict:
It’s a famous cartoon picture maker, a face-swapping app available on both the Play Store and App stores. You may change your appearance to that of celebrities featuring animated Disney characters. The software is a lot of fun and very simple to use.
The app is available in both paid and free editions. Although you will be limited to setting and swapping space per day using the free versions, The app consumes a total of 14MB and comes with unique features such as GIF, stickers, meme maker, etc.
08Prisma Photo Editor
Compatibility: Android/iOS
Rating: Android: 4.4/5, iOS: 4.6/5
Key Features: Most optimised AI which converts pictures into cartoons and much more
Verdict:
Prisma picture designer is an older and well-known photo editing tool for both Android and iOS users. It is a picture editing software with the ability to create cartoon pictures in a short amount of time. This programme is a multifunctional photo editor that allows you to edit images and make yourself into a cartoon effortlessly**.**
It features a variety of picture filter choices as well as a unique feed. You can simply change a photograph into a magnificent piece of artwork in the style of Munk, Picasso, or any other design you like, which has led to such good reviews by users. Although the app consumes 68MB it is yet most compatible and easy to convert pictures to cartoons.
09Sketch Drawing Photo Editor
Compatibility: Android
Rating: 4.3/5
Key Features: Create animated pics, drawings and sketches with this free animated photo maker
Verdict:
Pencil Photo Sketch is a professional photo programme that can transform your images into stunning hand-drawn pencil drawings or comic cartoon-like illustrations. Choose an image from your album or take a photo with your smartphone to create a pencil sketch or drawing effect.
The app UI is straightforward to use; all you have to do is import a picture or choose a snapshot from your collection and transform it into a magnificent pencil drawing. The software is around 19 MB in size and therefore is downloadable on both the play store and the app store.
10Moments Cartoon Caricature
Compatibility: Android
Rating: 3.2/5
Key Features: Helps you turn your photo into an animated caricature cartoon.
Verdict:
You’ll be able to enter selfie challenges or merely appreciate the great caricature tools that will allow you to convert a regular event into a funny photo. The app’s photo editor has a plethora of tools for transforming photos into cartoons in whatever way you desire.
You’ll also have the option of exploring with monochrome caricatures. All of the options available in the Moments Cartoon Caricature software are intended to assist you in creating great social media photographs.
Part 2 The 5 Best Apps to Turn Photos into Sketches
Now that we are done editing the cartoons, next on our list is sketches. Several digital artists look forward to creating a sketch-like effect to their photos. Below is the list of five apps that would help users turn their photos into sketches.
01PicsArt
Compatibility: Android, iOS
Rating: Android: 4.2/5, iOS:4.6/5
Key Features: Several filters, effects and modifications that one can do to their clicks
Verdict: Looking to transform your pictures into an artwork or sketch? Don’t worry PicsArt has got you covered. The app is compatible with Android and iOS and takes around 75MB on your device.
The app can be used to convert images to sketches and much more, making the app multipurpose. The user friendly UI and magnificent quality of filters have given them a reputed stand in their field.
02GoArt
Compatibility: Android,iOS
Rating: Android: 4.3/5, iOS:3.7/5
Key Features: Turns photos into HD paintings that can be printed and framed.
Verdict: GoArt was created to print the images you make as a key focus. This provides some incredible benefits as well as a few possible drawbacks for your photography requirements. The programme transforms the snapshot into an artistic composition by utilising AI technology.
Even though it produces a clear and high-quality image, it might take a couple of minutes to process, as opposed to other fast solutions.
03PhotoLab
Compatibility: Android,iOS
Rating: Android: 4.0/5, iOS:4.3/5
Key Features: Photo filters, sketchbook effect, collages and montage for quick touch-ups.
Verdict: PhotoLab is the software for you if you enjoy playing with hilarious, innovative, and attractive effects. The AI-powered technology is incredibly simple to use and will instantly do modifications such as trimming for you.
You may quickly publish your picture to social media or share it on a platform developed particularly for publishing digital art from the app.
04Instatoon
Compatibility: iOS
Rating: 4.4/5
Key Features: Helps iOS users convert their images into real-life portraits.
Verdict:
Instatoon has a large fan base since it provides a high-quality product that genuinely does what you ask for! This programme has fewer picture editing options because it focuses solely on producing art from your photographs.
Scroll through the list of possible filters until you discover the ideal match. Numerous filter choices are available, such as black and white sketch designs, oil paintings, and cartoons.
05BeCasso
Compatibility: iOS
Rating: 4.6/5
Key Features: Artificial intelligence, neural networks, and aesthetic picture filters form a potent mix.
Verdict:
BeCasso is packed with excellent creative filters inspired by your favourite painters, such as Vincent Van Gogh and Pablo Picasso.
After importing your chosen photo, scroll through a big variety of different artistic styles and choose the filters you want. You would like to edit your images prior sharing them because most of the photo editing capabilities in this programme are only available when you pay for a membership.
Key Takeaways from This Episode
● Using various software, making sketches and cartoons can be tedious and time-consuming for digital enthusiasts. This brings us to a more leisurely resort to propose an effortless and hassle-free way to convert their images into cartoons and sketches.
● So far, we have learned about the various ways we can use animated pic maker and software to animate pictures and form sketch-like effects using apps made for android and iOS.
● With every app having its diversified use and application, users can download the one that suits them the best, reading through the given content to help them save time and plan better.
In-Depth Study of Cartoon Painting Starts From Learning to Draw It
In-depth Study of Cartoon Painting Starts from Learning to Draw It
An easy yet powerful editor
Numerous effects to choose from
Detailed tutorials provided by the official channel
Cartoon painting is slowly becoming popular due to its many benefits, especially easy cartoon canvas painting. For instance, it is pretty eye-grabbing, especially if your audience is children.

Thanks to the animation aspect, it has become relatively cheap to do advertisements with cartoons instead of real people.
In this article
01 [What Are Good Cartoons to Draw?](#Part 1)
02 [How Do You Draw a Cartoon Character for Beginners?](#Part 2)
03 [Is There Anything else You Can Do to Draw Cartoons More Quickly?](#Part 3)
Part 1 What Are Good Cartoons to Draw?
As far as good cartoons are concerned, expect about 5 popular types. These cartoons to draw include:
01 Illustrative Cartoons
They are the most suitable cartoons to draw when portraying particular ideas directly and simply.
The cartoons are primarily used in advertisements, teaching aids, and explaining stories. They also have text that explains them further.
It explains why they are common in school books, making them perfect for explaining content or subject.

02 Animated Cartoons
It is important to note that these cartoons are drawn using computers despite looking as if they are hand-drawn. One thing that makes them stand out is that they seem to be in action and movement.
As much as that’s how they seem from the viewer’s perspective, that’s far from the truth. They are just drawn in series, and since the first one will differ from the second one, there is that illusion of movement created.

03 Comic Strips or Panels
In most cases, these are regular features characterized by established or known characters and usually displayed in newspapers.
Just like the animated cartoons, they are showcased in series to tell or illustrate a story. The series of panels have words said by the various characters.
The words are usually in balloons, and a single comic strip may cover a single or double page of a newspaper.

04 Gag Cartoons
As the name gag suggests, these cartoons revolve around jokes. These single-paneled cartoons often make fun of human beings.
Through overstatements, humor resonates from what is drawn. They can either serve as entertainment or point out, if not make fun of, people, especially their mistakes and faults. Besides the cartoon, expect a caption that’s often a single sentence.

05 Editorial or Political Cartoons
These cartoons are also made for the newspapers. Expect them to be a single drawing on an editorial page. It sheds more light on a particular newspaper’s editorial comment.
As much as some have captions, that’s not always the case. Just like the gag cartoons, they ridicule people, but the editorial ones focus on celebrities.

Part 2 How Do You Draw a Cartoon Character for Beginners?
Even cartoon painting experts were once beginners. So, feel encouraged because you stand a chance also to become an expert in the long run. All you need to do is take the first step. Fortunately, we are here to hold your hand as you do so. So. Without further ado, let’s get started.
01 Cartoon Painting of a Young Character
These are the steps you need to follow when doing so:
Step 1Start with the face
The face is significant, especially when it comes to cartoon painting. It has complex as well as simple parts. For example, the face itself is pretty basic since you will need to begin with a circle.
After that, draw a horizontal and vertical line and ensure that they intersect in the middle.

Step 2Draw the eyes by drawing
Draw the eyes by drawing an oval and ensuring that the top side is slightly tilting to the side.
Do the same thing on the other side since the norm is a pair of eyes. The gap between the two should also be sensible.

Step 3Draw eyebrows
On the upper side of the eye, ensure that the lines are slightly thick. The eyebrows also need to be placed above the eyes, slightly above the thick line representing the eyelashes.

Step 4Draw jaw
After that, start shaping the jaw. Keep in mind that it plays a huge role in determining whether the character will look thin or fat. Additionally, how you draw the jaw determines whether the character will be old or young and how old or young the person will look.

Step 5Draw nose
Design the nose and ensure that you don’t put many details. The good thing about the nose is that a tip is enough to serve the purpose. Another common approach when drawing the nose is doing so as if you are viewing it from the side.

Step 6Draw mouth
Next, draw the mouth and consider the age of your character as you do so. If it is a child, despite the gender, stick to simplicity. You should also avoid drawing the lips. Preferably, go for the good, expressive trace since it never disappoints.

Step 7Draw ears
Proceed to the ears and in relation to whether the character is facing the camera or not. If your character is looking at the camera, you should see the front side view. Therefore, it won’t make sense to display the internal cavities in this case.

Step 8Draw haircut
Proceed to the ears and in relation to whether the character is facing the camera or not. If your character is looking at the camera, you should see the front side view. Therefore, it won’t make sense to display the internal cavities in this case.
As scary as it may look, you need not be an expert to make the haircut look perfect. Additionally, there is no constant way of drawing the haircut, and you are at liberty to practice as much creativity as possible.
Nevertheless, please don’t take it lightly since it can be quite descriptive. For instance, the hair is used to tell the personality of a character. Practice makes perfect, and you better keep doing it until you get it right. Ensure that what you draw shows the age and character of the cartoons to draw as perfectly as possible.
So far, our focus has been on a young character. However, that’s not always the case explaining why we will look at a cartoon painting of an old character.

02 Cartoon Paintings of an Old Character
If you want your character to look old, this is the way to go:
Step 1Old character draw a face
The face is no different from that of a young character. Start with the eyes and add their pupils, eyebrows and don’t forget to add wrinkles.
Since the character is old compared to the previous one, ensure that the eyebrows are thick. They should occupy more space of the forehead.

Step 2Old character make the chin
Make the chin longer too.

Step 3Old character draw the nose
Ensure that the nose design looks wider and larger since the character is old. To achieve that, make the nose look close to the eyes

Step 4Old character exaggerates mustache
Skip the mouth bit and instead go for a big, exaggerated mustache. That’s one common characteristic of an old character, especially male.

Step 5Draw hair
When it comes to hair, bald and side hair will play the trick perfectly. The nose is no different from that of a young character.

03 Cartoon Painting of a Female Character
So far, our focus has been on a male character. So, what do you do if you want to create a female one instead? These are some of the steps to follow as you do so.
The procedure is not that different. However, consider that women’s facial structures are more delicate than those of their male counterparts. Some of the things that stand out include long hair, a small nose, a thin chin, thin eyebrows, and large, expressive eyelashes. Large pupils will also do, especially if you are good at drawing.

Key Takeaways from This Episode
● There are five major types of cartoons to draw, animation, editorial, gag, illustrative and comic strips.
● Cartoon painting is not that hard, especially if you have a guide on how to go about it.
● If that turns out to be difficult, you can always go for the Filmora pro.
Cartoon painting is slowly becoming popular due to its many benefits, especially easy cartoon canvas painting. For instance, it is pretty eye-grabbing, especially if your audience is children.
Thanks to the animation aspect, it has become relatively cheap to do advertisements with cartoons instead of real people.
In this article
01 [What Are Good Cartoons to Draw?](#Part 1)
02 [How Do You Draw a Cartoon Character for Beginners?](#Part 2)
03 [Is There Anything else You Can Do to Draw Cartoons More Quickly?](#Part 3)
Part 1 What Are Good Cartoons to Draw?
As far as good cartoons are concerned, expect about 5 popular types. These cartoons to draw include:
01 Illustrative Cartoons
They are the most suitable cartoons to draw when portraying particular ideas directly and simply.
The cartoons are primarily used in advertisements, teaching aids, and explaining stories. They also have text that explains them further.
It explains why they are common in school books, making them perfect for explaining content or subject.
02 Animated Cartoons
It is important to note that these cartoons are drawn using computers despite looking as if they are hand-drawn. One thing that makes them stand out is that they seem to be in action and movement.
As much as that’s how they seem from the viewer’s perspective, that’s far from the truth. They are just drawn in series, and since the first one will differ from the second one, there is that illusion of movement created.
03 Comic Strips or Panels
In most cases, these are regular features characterized by established or known characters and usually displayed in newspapers.
Just like the animated cartoons, they are showcased in series to tell or illustrate a story. The series of panels have words said by the various characters.
The words are usually in balloons, and a single comic strip may cover a single or double page of a newspaper.
04 Gag Cartoons
As the name gag suggests, these cartoons revolve around jokes. These single-paneled cartoons often make fun of human beings.
Through overstatements, humor resonates from what is drawn. They can either serve as entertainment or point out, if not make fun of, people, especially their mistakes and faults. Besides the cartoon, expect a caption that’s often a single sentence.
05 Editorial or Political Cartoons
These cartoons are also made for the newspapers. Expect them to be a single drawing on an editorial page. It sheds more light on a particular newspaper’s editorial comment.
As much as some have captions, that’s not always the case. Just like the gag cartoons, they ridicule people, but the editorial ones focus on celebrities.
Part 2 How Do You Draw a Cartoon Character for Beginners?
Even cartoon painting experts were once beginners. So, feel encouraged because you stand a chance also to become an expert in the long run. All you need to do is take the first step. Fortunately, we are here to hold your hand as you do so. So. Without further ado, let’s get started.
01 Cartoon Painting of a Young Character
These are the steps you need to follow when doing so:
Step 1Start with the face
The face is significant, especially when it comes to cartoon painting. It has complex as well as simple parts. For example, the face itself is pretty basic since you will need to begin with a circle.
After that, draw a horizontal and vertical line and ensure that they intersect in the middle.
Step 2Draw the eyes by drawing
Draw the eyes by drawing an oval and ensuring that the top side is slightly tilting to the side.
Do the same thing on the other side since the norm is a pair of eyes. The gap between the two should also be sensible.
Step 3Draw eyebrows
On the upper side of the eye, ensure that the lines are slightly thick. The eyebrows also need to be placed above the eyes, slightly above the thick line representing the eyelashes.
Step 4Draw jaw
After that, start shaping the jaw. Keep in mind that it plays a huge role in determining whether the character will look thin or fat. Additionally, how you draw the jaw determines whether the character will be old or young and how old or young the person will look.
Step 5Draw nose
Design the nose and ensure that you don’t put many details. The good thing about the nose is that a tip is enough to serve the purpose. Another common approach when drawing the nose is doing so as if you are viewing it from the side.
Step 6Draw mouth
Next, draw the mouth and consider the age of your character as you do so. If it is a child, despite the gender, stick to simplicity. You should also avoid drawing the lips. Preferably, go for the good, expressive trace since it never disappoints.
Step 7Draw ears
Proceed to the ears and in relation to whether the character is facing the camera or not. If your character is looking at the camera, you should see the front side view. Therefore, it won’t make sense to display the internal cavities in this case.
Step 8Draw haircut
Proceed to the ears and in relation to whether the character is facing the camera or not. If your character is looking at the camera, you should see the front side view. Therefore, it won’t make sense to display the internal cavities in this case.
As scary as it may look, you need not be an expert to make the haircut look perfect. Additionally, there is no constant way of drawing the haircut, and you are at liberty to practice as much creativity as possible.
Nevertheless, please don’t take it lightly since it can be quite descriptive. For instance, the hair is used to tell the personality of a character. Practice makes perfect, and you better keep doing it until you get it right. Ensure that what you draw shows the age and character of the cartoons to draw as perfectly as possible.
So far, our focus has been on a young character. However, that’s not always the case explaining why we will look at a cartoon painting of an old character.
02 Cartoon Paintings of an Old Character
If you want your character to look old, this is the way to go:
Step 1Old character draw a face
The face is no different from that of a young character. Start with the eyes and add their pupils, eyebrows and don’t forget to add wrinkles.
Since the character is old compared to the previous one, ensure that the eyebrows are thick. They should occupy more space of the forehead.
Step 2Old character make the chin
Make the chin longer too.
Step 3Old character draw the nose
Ensure that the nose design looks wider and larger since the character is old. To achieve that, make the nose look close to the eyes
Step 4Old character exaggerates mustache
Skip the mouth bit and instead go for a big, exaggerated mustache. That’s one common characteristic of an old character, especially male.
Step 5Draw hair
When it comes to hair, bald and side hair will play the trick perfectly. The nose is no different from that of a young character.
03 Cartoon Painting of a Female Character
So far, our focus has been on a male character. So, what do you do if you want to create a female one instead? These are some of the steps to follow as you do so.
The procedure is not that different. However, consider that women’s facial structures are more delicate than those of their male counterparts. Some of the things that stand out include long hair, a small nose, a thin chin, thin eyebrows, and large, expressive eyelashes. Large pupils will also do, especially if you are good at drawing.
Key Takeaways from This Episode
● There are five major types of cartoons to draw, animation, editorial, gag, illustrative and comic strips.
● Cartoon painting is not that hard, especially if you have a guide on how to go about it.
● If that turns out to be difficult, you can always go for the Filmora pro.
Animate Graphics in Canva
Versatile Video Editor - Wondershare Filmora
An easy yet powerful editor
Numerous effects to choose from
Detailed tutorials provided by the official channel
Canva is a graphic design platform that allows users to create stunning designs for social media posts, presentations, assignments, recipe cards, birthday videos.
With the introduction of Canva’s animation feature, a whole new world of possibilities are open to the public. Also, with pre-designed templates from professional designers, content creation has never been easier than Canva.
Animations themselves have the option of being individually customized element by element. Canva animated graphics makes it easy to unleash your creative potential.
This article will explore how to animate graphics in Canva that can suit every occasion.
In this article
01 [Animate Your Graphic In Canva](#Part 1)
02 [Make A Moving Graphic In Canva](#Part 2)
03 [Pricing for Canva You Should Know](#Part 3)
Part 1 Animate Your Graphic In Canva
People can create animations in Canva in one of two ways. You can select an animation from one of the pre-existing animated templates. This is a time-saving option as it lets you customize ready-made templates to suit your needs
With the pre-set animation templates, you have the option to choose from among
● Invitations
● A4 Documents
● Instagram Post
● Facebook Post
● YouTube Thumbnails
● Presentation
● Flyer/Poster
● Instagram Logo
● Infographic
These options generate the ability to be presented in both portrait and landscape mode. The multitude of options makes it an ideal medium for you to create your animation. The animation options at Canva also come with the opportunity to animate an existing image.

You can choose to animate an existing design. With a few minor edits, you can have a polished and sophisticated post that’s bound to draw viewer attention and earn you kudos.
If this is the case, then you benefit from saving time and the expertise of a professional design team through Canva.
The second option is creating an animation by yourself. Creating your own animation offers you greater flexibility in executing your vision for the design. Without further ado, let’s look at how we can help this happen in the how to make a moving graphic in the Canva section.
Part 2 Make A Moving Graphic In Canva
Making a moving graphic in Canva is easy. Canva offers an “Animation” button that allows users to animate each element in the content. There are four areas that the graphic can touch upon for content. These areas are text, image, audio, and video.
Here’s how you can animate individual elements in Canva.
2.1 How to animate text in Canva?
With text, Canva offers three options. You can choose to create either a title text, a sub-heading text, or regular text for use. Play with different styles and fonts to find one that suits your design. You can also add details like stickers or illustrations to customize the design.
You are now ready to animate once you’re happy with the design. Text animations will help your text jump out from the background. Then choose the “Animate” option in the sidebar after clicking on the selected text.

Allow your font to move around your design with motion. Thanks to “animate,” you can choose between subtle, smooth movement and jagged and sudden motion. You can even mix and match animations for each word.
In Wondershare Filmora, a premier video editing software, the texts are available according to use. For instance, opening and ending credit texts as a template. With options for choosing subtitles, lower 3rds, and call-out templates.
Additionally, users can also save a particular setting as a “preset’. Which makes it easy to reuse the settings in future projects. You can also adjust the duration of the individual text display. It also has an animation option that allows animation of the text according to given presets.
2.2 How do you animate a picture in Canva?
Users have the ability to choose to animate just the image or animate other elements of the picture. They can also make use of options to edit the image using background remover. This allows seamless integration into the presentation.

Users can simply upload their photos. Choose a stock image or upload an image through your photo gallery to use in your design. You can also choose to use “frames,” which are available under the “Elements” tab in Canva.
Make your photo come alive by animating it. Choose from a variety of innovative animation possibilities by selecting the Animation tool. The duration of the animation can be changed using the stopwatch animation icon. It uses a slider to help in setting the duration of each animation. You can also adjust this manually.
2.3 How do you add music to animation in Canva?
Users can find a section dedicated to “Uploads,” allowing creators to use their audio content. The users can use a soundtrack from one of Canva’s audio libraries. This gives users control over their animation’s impact.
One difference between Canva and Wondershare Filmora is that Canva users can only use one audio per presentation. Filmora allows users to overlay multiple soundtracks to their timeline.
Users can also make use of the Audio Effects feature to create audio for “Echo,” “large room,” “small room,” “lobby,” and “phone.” The preview function can help users experience it live before applying the effect.
Filmora Pro’s Auto-Normalization of audio allows intelligent audio analysis and volume adjustment.
2.4 How do you animate video in Canva?
Canva offers presentations that are similar to the explainer-style videos on Youtube. With more modifications, you can convert the presentation to a video format. You can edit individual elements in the presentation to reflect the project details and outcomes.
You can also introduce transition effects to make the presentation a smooth video. Incorporating the three other elements will be a breeze to make a video with animation.

Another noteworthy thing in Canva is that users can upload their videos or use videos provided in the video library. You can also embed videos within a frame from the “Elements” section in Canva. You can trim the video input on the slide for time. It can be presented as a “loop” video.
Filmora offers all the essential video editing tools in addition to AI-powered features called Auto-Highlight and Auro-Reframe. Auto Highlight is a feature that extracts the highlights from a video clip autonomously.
This will save you time while cutting your movie. It also makes it easier to extract the best moments from the video.
Auto Reframe recognizes as well as crops the focal point of your footage, constantly retaining it in the frame. Your film’s primary action or object will never be out of focus within that technique.
Part 3 Pricing for Canva You Should Know
Canva can be used among a multitude of users and companies. The range of access is from a single person use to teams of fifty. It also allows for a custom selection of a number of people.
Canva can be used as free graphic design software. It does display all available options with a few possibilities marked off for Canva Pro users only.
Canva Pro allows up to 5 users per team. A subscription to Canva Pro costs US $119.99 per annum or US $12.99 per month. Pro users have access to unlimited content and newly released tools.
The only difference between Canva Pro and Canva Enterprise is that Canva Pro is for smaller teams. Canva Enterprise allows collaboration between larger teams and franchises.
Canva also offers free Canva Pro subscriptions to non-profit organizations. Students and teachers are offered a special discount for those in educational programs.
Wondershare Filmora
Get started easily with Filmora’s powerful performance, intuitive interface, and countless effects Try It Free Try It Free Learn More >

AI Portrait – The best feature of Wondershare Filmora for gameplay editing
The AI Portrait is a new add-on in Wondershare Filmora. It can easily remove video backgrounds without using a green screen or chroma key, allowing you to add borders, glitch effects, pixelated, noise, or segmentation video effects.

Final Words
We’ve covered how to animate graphics in Canva. You can animate individual elements in Canva or automate it on the whole. Canva’s animate button is an automatic tool that revolutionizes the way traditional animation works.
Wondershare’s Filmora is the video editing tool that is easy to use and offer various animation options.
Canva is a graphic design platform that allows users to create stunning designs for social media posts, presentations, assignments, recipe cards, birthday videos.
With the introduction of Canva’s animation feature, a whole new world of possibilities are open to the public. Also, with pre-designed templates from professional designers, content creation has never been easier than Canva.
Animations themselves have the option of being individually customized element by element. Canva animated graphics makes it easy to unleash your creative potential.
This article will explore how to animate graphics in Canva that can suit every occasion.
In this article
01 [Animate Your Graphic In Canva](#Part 1)
02 [Make A Moving Graphic In Canva](#Part 2)
03 [Pricing for Canva You Should Know](#Part 3)
Part 1 Animate Your Graphic In Canva
People can create animations in Canva in one of two ways. You can select an animation from one of the pre-existing animated templates. This is a time-saving option as it lets you customize ready-made templates to suit your needs
With the pre-set animation templates, you have the option to choose from among
● Invitations
● A4 Documents
● Instagram Post
● Facebook Post
● YouTube Thumbnails
● Presentation
● Flyer/Poster
● Instagram Logo
● Infographic
These options generate the ability to be presented in both portrait and landscape mode. The multitude of options makes it an ideal medium for you to create your animation. The animation options at Canva also come with the opportunity to animate an existing image.
You can choose to animate an existing design. With a few minor edits, you can have a polished and sophisticated post that’s bound to draw viewer attention and earn you kudos.
If this is the case, then you benefit from saving time and the expertise of a professional design team through Canva.
The second option is creating an animation by yourself. Creating your own animation offers you greater flexibility in executing your vision for the design. Without further ado, let’s look at how we can help this happen in the how to make a moving graphic in the Canva section.
Part 2 Make A Moving Graphic In Canva
Making a moving graphic in Canva is easy. Canva offers an “Animation” button that allows users to animate each element in the content. There are four areas that the graphic can touch upon for content. These areas are text, image, audio, and video.
Here’s how you can animate individual elements in Canva.
2.1 How to animate text in Canva?
With text, Canva offers three options. You can choose to create either a title text, a sub-heading text, or regular text for use. Play with different styles and fonts to find one that suits your design. You can also add details like stickers or illustrations to customize the design.
You are now ready to animate once you’re happy with the design. Text animations will help your text jump out from the background. Then choose the “Animate” option in the sidebar after clicking on the selected text.
Allow your font to move around your design with motion. Thanks to “animate,” you can choose between subtle, smooth movement and jagged and sudden motion. You can even mix and match animations for each word.
In Wondershare Filmora, a premier video editing software, the texts are available according to use. For instance, opening and ending credit texts as a template. With options for choosing subtitles, lower 3rds, and call-out templates.
Additionally, users can also save a particular setting as a “preset’. Which makes it easy to reuse the settings in future projects. You can also adjust the duration of the individual text display. It also has an animation option that allows animation of the text according to given presets.
2.2 How do you animate a picture in Canva?
Users have the ability to choose to animate just the image or animate other elements of the picture. They can also make use of options to edit the image using background remover. This allows seamless integration into the presentation.
Users can simply upload their photos. Choose a stock image or upload an image through your photo gallery to use in your design. You can also choose to use “frames,” which are available under the “Elements” tab in Canva.
Make your photo come alive by animating it. Choose from a variety of innovative animation possibilities by selecting the Animation tool. The duration of the animation can be changed using the stopwatch animation icon. It uses a slider to help in setting the duration of each animation. You can also adjust this manually.
2.3 How do you add music to animation in Canva?
Users can find a section dedicated to “Uploads,” allowing creators to use their audio content. The users can use a soundtrack from one of Canva’s audio libraries. This gives users control over their animation’s impact.
One difference between Canva and Wondershare Filmora is that Canva users can only use one audio per presentation. Filmora allows users to overlay multiple soundtracks to their timeline.
Users can also make use of the Audio Effects feature to create audio for “Echo,” “large room,” “small room,” “lobby,” and “phone.” The preview function can help users experience it live before applying the effect.
Filmora Pro’s Auto-Normalization of audio allows intelligent audio analysis and volume adjustment.
2.4 How do you animate video in Canva?
Canva offers presentations that are similar to the explainer-style videos on Youtube. With more modifications, you can convert the presentation to a video format. You can edit individual elements in the presentation to reflect the project details and outcomes.
You can also introduce transition effects to make the presentation a smooth video. Incorporating the three other elements will be a breeze to make a video with animation.
Another noteworthy thing in Canva is that users can upload their videos or use videos provided in the video library. You can also embed videos within a frame from the “Elements” section in Canva. You can trim the video input on the slide for time. It can be presented as a “loop” video.
Filmora offers all the essential video editing tools in addition to AI-powered features called Auto-Highlight and Auro-Reframe. Auto Highlight is a feature that extracts the highlights from a video clip autonomously.
This will save you time while cutting your movie. It also makes it easier to extract the best moments from the video.
Auto Reframe recognizes as well as crops the focal point of your footage, constantly retaining it in the frame. Your film’s primary action or object will never be out of focus within that technique.
Part 3 Pricing for Canva You Should Know
Canva can be used among a multitude of users and companies. The range of access is from a single person use to teams of fifty. It also allows for a custom selection of a number of people.
Canva can be used as free graphic design software. It does display all available options with a few possibilities marked off for Canva Pro users only.
Canva Pro allows up to 5 users per team. A subscription to Canva Pro costs US $119.99 per annum or US $12.99 per month. Pro users have access to unlimited content and newly released tools.
The only difference between Canva Pro and Canva Enterprise is that Canva Pro is for smaller teams. Canva Enterprise allows collaboration between larger teams and franchises.
Canva also offers free Canva Pro subscriptions to non-profit organizations. Students and teachers are offered a special discount for those in educational programs.
Wondershare Filmora
Get started easily with Filmora’s powerful performance, intuitive interface, and countless effects Try It Free Try It Free Learn More >
AI Portrait – The best feature of Wondershare Filmora for gameplay editing
The AI Portrait is a new add-on in Wondershare Filmora. It can easily remove video backgrounds without using a green screen or chroma key, allowing you to add borders, glitch effects, pixelated, noise, or segmentation video effects.
Final Words
We’ve covered how to animate graphics in Canva. You can animate individual elements in Canva or automate it on the whole. Canva’s animate button is an automatic tool that revolutionizes the way traditional animation works.
Wondershare’s Filmora is the video editing tool that is easy to use and offer various animation options.
What’s Music Video GIF & How to Add Music to Your GIF Files
What’s Music Video GIF & How to Add Music to Your GIF Files
An easy yet powerful editor
Numerous effects to choose from
Detailed tutorials provided by the official channel
Want to make your GIFs more catchy and interesting? Try adding music videos to multiply the fun!
In this article
01 [What’s Music Video GIF](#Part 1)
02 [How to Easily Add Music to Your GIF](#Part 2)
03 [How To Make a GIF With Music to Post on Instagram?](#Part 3)
Part 1 What’s Music Video GIF?
GIFs are essentially animated image files that already form an effective and interesting means of communication and media sharing. Your messages get additional spunk and appeal when you add relatable audios to your GIFs. A music video GIF is one that you create by adding sound to the originally mute GIF files. Additionally, creating music enabled GIFs is a fun activity on its own. You get to explore your editing creativity on different levels as you play with the exciting features that come with the latest editing tools available in the software market.
Whether create them casually or use them as a marketing tool, sound effects tend to considerably upgrade the utility of an animated or unmoving snap. If you are a social media freak and want to get your Instagram and Facebook stories be the talk among your friends on the internet, do consider trying these editing tricks to add that extra notch to your otherwise simple and soundless GIFs. After all, your creativity should never go unnoticed and get the attention it deserves!
If this gets you motivated and you have decided to level up your editing skills, do spare your valuable time to see through further sections of this article for quick and easy tools and methods to introduce audio and sound effects to those mute GIFs and never let your social media posts and stories miss a catch!

Part 2 How to Easily Add Music to Your GIF?
Musical GIF videos are quite interesting, no doubt on that, but what is noticeable here is that GIFs do not have inbuilt audio features. You need to add sound additionally to these files to create musical GIF videos. When trying to make your own music GIF video, you can take help of the following tools:
01Kapwing Editor
This one is a free online tool that helps you add audio to your GIFs. This application is free from issues of spam and watermark requirements. It assures you of a quality editing experience without supporting unnecessary and annoying advertisements.
Using this tool, you can create musical GIF videos in two different ways. Take the following steps to create musical GIF videos with this application:
● Using The Kapwing Studio:
Open the Studio and select the GIF and music files you want to merge. Upload the selected files in the tool.
Customize your audio in the Studio timeline to trim the sound file to the specific segment you wish to add to your GIF. You can also introduce volume adjustments and waveform effects to enhance your music video for GIF for an extra catch.
You can further add text and make size adjustments to your GIF using the sidebar controls.
Once you have finalized everything, click ‘Export’ to download the GIF music video in MP4 format. Note that if you download the GIF format, your video will lose the sound effect.
● Copy-Paste Method
You can also merge GIFs and music videos using the direct copy-paste method in the Kapwing Editor. To create one for yourself, here’s what you need to follow:
Step 1: GIF Upload
Select a GIF from your smartphone or PC gallery and upload it to the Kapwing Editor. You can even copy a GIF link from other apps like, YouTube, GIFHY, etc, and paste it in the editor timeline.
Step 2: Audio Upload
Next, you need to upload the audio file you want to get stitched with your GIF. Choose a file either from your system or copy-paste the YouTube URL of the selected video in the Kapwing timeline.
Step 3: Export Your Creation
That it! You are done with your creation. Click ‘Export’ to share your musical GIF video on different social platforms.

02VEED’S GIF Maker
Like the Kapwing Editor, this one is also a free online tool that you can use to add sound to your originally mute GIF files. What’s more interesting is, apart from adding music, you have the flexibility to draw over, add text and images to your GIFs before you proceed with adding sound to your selected GIF.
Follow the steps given below to start creating GIF music videos with this application:
Step 1: Upload GIF File
To begin, upload your selected GIF file to the application’s pop-up window using ‘Drag and Drop’ method. Alternatively, you can click on ‘Choose GIF File’ tab on the app’s welcome window. Select a file from your system’s gallery and click ‘Open’ to upload it.

Step 2: Add Music
To add audio files, select ‘Upload’ or tap the (+) sign at the bottom right to choose the desired music files. Drag them to VEED’s timeline to set them in the order of your preference.

Step 3: Download Your Creation
Your video gets created in MP4 format. Tap ‘Export’ to directly share it with your peers on Twitter, Facebook or other social platforms.
Part 3 How to Make a GIF With Music to Post on Instagram?
Exploring your creative skills is one thing, while attracting attention to your work is the other. You would definitely want your social media communities to notice and compliment your work. Instagram is one among the best media sharing apps you can use to share your creations.
To adhere to the concern of creating audio enabled GIFs compatible for sharing to your Instagram stories and feeds, you can any of the following editing tools:
01Filmora
Wondershare Filmora Video Editor is one of the best and most preferred editing software you can use to add sound to your GIFs and videos. You can play with your editing creativity to make exciting musical GIF videos with this software in just a few minutes.

Using this tool for your editing work promises you the following advantages:
Wondershare Filmora
Get started easily with Filmora’s powerful performance, intuitive interface, and countless effects Try It Free Try It Free Learn More >
● Huge Audio Library
Filmora audio library exposes you with a diverse range of audio and music files and a variety of exciting and relatable sound effects to choose from. You can browse through this storehouse for that perfect music for your GIF absolutely free of cost. The library has an additional Filmstock Effect Store that further increases your audio choice bandwidth.
● Optimal Sync
Filmora allows you to establish the perfect sync between your GIF and audio. Its beat detection feature identifies audio hits to produce markers that you can use to obtain the ideal audio-GIF synchronization in your creations.
● Voiceover Applicable
Filmora gives you the flexibility to record and add you own voiceover using your microphone to make your creations more impactful.
Steps to Create Audio Enabled GIFs Using Filmora
Take the following steps to enhance your GIFs with music and sound effects:
● Select and import your GIF file to the Filmora timeline
● In the software’s audio library, select your desired music and sound effects to add them to the imported GIF file. You can even choose to add your own voiceover to the GIF.
● That’s it! You are now ready to share your work on your Instagram handle and other media sharing platforms. Just click ‘Export’ and your creation gets uploaded on social media in MP4 format. Make sure to adjust the resolution and bit settings for best results.

02Artwork
Like Filmora, Artwork is another application you can use to add sound to GIF files. This one is a browser tool that allows you to create sound enabled videos with static and animated images. Take up the following process to make your own musical GIF with Artwork:
● To begin, signup to Artwork’s free trial feature. Choose your desired sound file in MP3 format and trim it to a play duration of 1 minute. This is essential because Instagram doesn’t allow you to post longer GIFs.
● Add your selected GIF and trimmed MP3 files in Artwork’s pop-up window. Click ‘Save’ and wait till the process to finish.
● Your creation is ready. Download and share it on Instagram.
● Key Takeaways from This Episode →
● Adding music and sound to your GIF is both a fun and exciting activity and also has the potential to enhance the quality and reach of the message you desire to deliver through your GIF. Besides this, it enhances your editing creativity and skill, which is a complement in itself.
● A number of software and online tools available on the internet are ready to help you get through the task. You can rely on these tools to add audio to your GIFs within minutes absolutely free of cost and share them directly on social media.
● Filmora is one among the best GIF editing tools for sharing your creations on Instagram. You can access its huge audio library for selected sound effects, set a perfect sync between your GIF and its audio and even add your own voiceover to boost your creativity using this software.
Want to make your GIFs more catchy and interesting? Try adding music videos to multiply the fun!
In this article
01 [What’s Music Video GIF](#Part 1)
02 [How to Easily Add Music to Your GIF](#Part 2)
03 [How To Make a GIF With Music to Post on Instagram?](#Part 3)
Part 1 What’s Music Video GIF?
GIFs are essentially animated image files that already form an effective and interesting means of communication and media sharing. Your messages get additional spunk and appeal when you add relatable audios to your GIFs. A music video GIF is one that you create by adding sound to the originally mute GIF files. Additionally, creating music enabled GIFs is a fun activity on its own. You get to explore your editing creativity on different levels as you play with the exciting features that come with the latest editing tools available in the software market.
Whether create them casually or use them as a marketing tool, sound effects tend to considerably upgrade the utility of an animated or unmoving snap. If you are a social media freak and want to get your Instagram and Facebook stories be the talk among your friends on the internet, do consider trying these editing tricks to add that extra notch to your otherwise simple and soundless GIFs. After all, your creativity should never go unnoticed and get the attention it deserves!
If this gets you motivated and you have decided to level up your editing skills, do spare your valuable time to see through further sections of this article for quick and easy tools and methods to introduce audio and sound effects to those mute GIFs and never let your social media posts and stories miss a catch!
Part 2 How to Easily Add Music to Your GIF?
Musical GIF videos are quite interesting, no doubt on that, but what is noticeable here is that GIFs do not have inbuilt audio features. You need to add sound additionally to these files to create musical GIF videos. When trying to make your own music GIF video, you can take help of the following tools:
01Kapwing Editor
This one is a free online tool that helps you add audio to your GIFs. This application is free from issues of spam and watermark requirements. It assures you of a quality editing experience without supporting unnecessary and annoying advertisements.
Using this tool, you can create musical GIF videos in two different ways. Take the following steps to create musical GIF videos with this application:
● Using The Kapwing Studio:
Open the Studio and select the GIF and music files you want to merge. Upload the selected files in the tool.
Customize your audio in the Studio timeline to trim the sound file to the specific segment you wish to add to your GIF. You can also introduce volume adjustments and waveform effects to enhance your music video for GIF for an extra catch.
You can further add text and make size adjustments to your GIF using the sidebar controls.
Once you have finalized everything, click ‘Export’ to download the GIF music video in MP4 format. Note that if you download the GIF format, your video will lose the sound effect.
● Copy-Paste Method
You can also merge GIFs and music videos using the direct copy-paste method in the Kapwing Editor. To create one for yourself, here’s what you need to follow:
Step 1: GIF Upload
Select a GIF from your smartphone or PC gallery and upload it to the Kapwing Editor. You can even copy a GIF link from other apps like, YouTube, GIFHY, etc, and paste it in the editor timeline.
Step 2: Audio Upload
Next, you need to upload the audio file you want to get stitched with your GIF. Choose a file either from your system or copy-paste the YouTube URL of the selected video in the Kapwing timeline.
Step 3: Export Your Creation
That it! You are done with your creation. Click ‘Export’ to share your musical GIF video on different social platforms.
02VEED’S GIF Maker
Like the Kapwing Editor, this one is also a free online tool that you can use to add sound to your originally mute GIF files. What’s more interesting is, apart from adding music, you have the flexibility to draw over, add text and images to your GIFs before you proceed with adding sound to your selected GIF.
Follow the steps given below to start creating GIF music videos with this application:
Step 1: Upload GIF File
To begin, upload your selected GIF file to the application’s pop-up window using ‘Drag and Drop’ method. Alternatively, you can click on ‘Choose GIF File’ tab on the app’s welcome window. Select a file from your system’s gallery and click ‘Open’ to upload it.
Step 2: Add Music
To add audio files, select ‘Upload’ or tap the (+) sign at the bottom right to choose the desired music files. Drag them to VEED’s timeline to set them in the order of your preference.
Step 3: Download Your Creation
Your video gets created in MP4 format. Tap ‘Export’ to directly share it with your peers on Twitter, Facebook or other social platforms.
Part 3 How to Make a GIF With Music to Post on Instagram?
Exploring your creative skills is one thing, while attracting attention to your work is the other. You would definitely want your social media communities to notice and compliment your work. Instagram is one among the best media sharing apps you can use to share your creations.
To adhere to the concern of creating audio enabled GIFs compatible for sharing to your Instagram stories and feeds, you can any of the following editing tools:
01Filmora
Wondershare Filmora Video Editor is one of the best and most preferred editing software you can use to add sound to your GIFs and videos. You can play with your editing creativity to make exciting musical GIF videos with this software in just a few minutes.
Using this tool for your editing work promises you the following advantages:
Wondershare Filmora
Get started easily with Filmora’s powerful performance, intuitive interface, and countless effects Try It Free Try It Free Learn More >
● Huge Audio Library
Filmora audio library exposes you with a diverse range of audio and music files and a variety of exciting and relatable sound effects to choose from. You can browse through this storehouse for that perfect music for your GIF absolutely free of cost. The library has an additional Filmstock Effect Store that further increases your audio choice bandwidth.
● Optimal Sync
Filmora allows you to establish the perfect sync between your GIF and audio. Its beat detection feature identifies audio hits to produce markers that you can use to obtain the ideal audio-GIF synchronization in your creations.
● Voiceover Applicable
Filmora gives you the flexibility to record and add you own voiceover using your microphone to make your creations more impactful.
Steps to Create Audio Enabled GIFs Using Filmora
Take the following steps to enhance your GIFs with music and sound effects:
● Select and import your GIF file to the Filmora timeline
● In the software’s audio library, select your desired music and sound effects to add them to the imported GIF file. You can even choose to add your own voiceover to the GIF.
● That’s it! You are now ready to share your work on your Instagram handle and other media sharing platforms. Just click ‘Export’ and your creation gets uploaded on social media in MP4 format. Make sure to adjust the resolution and bit settings for best results.
02Artwork
Like Filmora, Artwork is another application you can use to add sound to GIF files. This one is a browser tool that allows you to create sound enabled videos with static and animated images. Take up the following process to make your own musical GIF with Artwork:
● To begin, signup to Artwork’s free trial feature. Choose your desired sound file in MP3 format and trim it to a play duration of 1 minute. This is essential because Instagram doesn’t allow you to post longer GIFs.
● Add your selected GIF and trimmed MP3 files in Artwork’s pop-up window. Click ‘Save’ and wait till the process to finish.
● Your creation is ready. Download and share it on Instagram.
● Key Takeaways from This Episode →
● Adding music and sound to your GIF is both a fun and exciting activity and also has the potential to enhance the quality and reach of the message you desire to deliver through your GIF. Besides this, it enhances your editing creativity and skill, which is a complement in itself.
● A number of software and online tools available on the internet are ready to help you get through the task. You can rely on these tools to add audio to your GIFs within minutes absolutely free of cost and share them directly on social media.
● Filmora is one among the best GIF editing tools for sharing your creations on Instagram. You can access its huge audio library for selected sound effects, set a perfect sync between your GIF and its audio and even add your own voiceover to boost your creativity using this software.
Top 10 3D Text Animation Templates
Top 10 3D Text Animation Templates
An easy yet powerful editor
Numerous effects to choose from
Detailed tutorials provided by the official channel
“Where is everyone getting their 3D Text Animation templates?”
To answer this request, we’ve compiled a guide that not only teaches you how to create things like 3D Spinning Text (After Effects) but also gives you an idea of where you can find the kind of resources (i.e., 3D Text Animation templates and presets) that you need to get a head start on your projects.
In this article
01 [Top 10 3D Text Animation Templates](#Part 1)
02 [How Do I Make 3D Text in After Effects?](#Part 2)
03 [The Best 10 Amazing 3D Text Animation Templates](#Part 3)
04 [Secrets to Learning More Animation Tactics](#Part 4)
Part 1 What’s 3D Text Animation?
Before anything else, let’s talk about text animation. Specifically, 3D Text Animation. The text that you’re reading now, is 2D Text. It’s static, and it lacks depth. It’s just letters on a screen. Meanwhile, 3D Text is usually built for motion, and thus, it has volume and depth — it’s almost tangible. Here’s what that looks like:

As you can see, even without actually moving, in the text shown in the image above, the potential for motion is there — it looks alive.
Now, you’ll see 3D text like this often in movies or promotions. Usually in the form of extravagant title cards or 3D text logo animation. They’re eye-catching, and because they’re 3D, you can play with them as much as you want to really add drama to your creations.
Part 2 How Do I Make 3D Text in After Effects?
As promised, this next section will teach you how to create 3D Text Animation in Adobe After Effects, which is a VFX and motion graphics software used by many animators to bring life to their text. You’ll notice that the following tutorial is really more about introducing the tools that you can use in order to create 3D Text Animation:
01Step 1. Add Your Text
The first thing that you have to do, of course, is to add your text! To do this, go to the ‘Tools’ panel, select the Type tool, and then select the ‘Composition’ panel. The composition is where you type your text!
With After Effects, you also have the following options:
● Change Text Font
● Adjust Text Size
● Adjust Text Color
● Shift Justification (Left, Middle, right)
And so on! Once you’re done with your text composition, it will be generated by After Effects into a layer that you can adjust as needed in the next steps.

01Step 2. Use Animation Presets
With your text now in a layer that you can add animations to… you’ve practically done a third of the job! Or even more than that if you decide to use the animation presets that are provided by After Effects.
These can be found by selecting ‘Browse Presets…’ on the ‘Animation’ tab (shown in the image below.) All you need to apply them is to drag and drop them onto your text layer.
Note: The first keyframe of this built-in text animation will be applied at the location of the Current Time Indicator (CTI), so make sure that you’ve adjusted that accordingly.

01Step 3. Per-Character Animation
If you’d like to personalize your text animation, After Effects does also give you the option to animate per character (or, per letter, in this case.)
This will give you more control over how you decided to animate your text. Of course, it does mean that it is slightly more complicated as well.
● To animate text per layer, select ‘animate’ on that layer and choose a parameter to start working on animations for.
● You’ll be able to previous (or scrub) through your animations in order to see if they are doing what you need them to do.
● You can also remove applied parameters in order to re-work your animation.

01Step 4. Add Graphic Elements to Text
If you really want to make your 3D Animation Text pop, Adobe After Effects also offers the tools needed to add Graphic Elements to your composition — which can be found at the top-most toolbar!

Part 3 The Best 10 Amazing 3D Text Animation Templates
Now, as promised, we’re also going to be introducing a couple of 3D text animation templates that you can try out for your own projects! Each template will have a link that you can go to in order to see what it looks like, as well as an explanation on how you can use it for your projects in the future!
01Real 3D Light Bulb Kit
The first Text Animation Template on our list is the “Logo Light Bulb” 3D Animation from Envato Elements. This one literally glows people! Making it perfect for a quirky, and yet still very impressive Title Card or Logo. Its design is very realistic, and you can also control how it flickers! For example, turning the bulbs on certain characters first, or turning them all off at once in the end.
023D Text Reveal
This next 3D Animation template is also from Envato Market. And, just like the first, it makes for quite the dramatic Title Card or Logo. With this template, your Text can literally zoom in to view while looking its best and sparkiest in High-Chrome.
033D Metallic Text Animation
Our next pick, the 3D Metallic text animation is another great one for those who are looking for something flashy — something that gives off the impression of being impressive right from the gate. Compared to the previous text animation template, this one has a more rugged kind of appearance. Perfect for those looking to promote something more fun rather than professional.
043D Text Box Animation Pack
The next one is a little less ‘impressive’ — in the sense that it isn’t as in your face as the other 3D animation templates that we’ve introduced thus far. And that’s exactly why the 3D Text Box Animation Pack deserves to be on this list! Its 3D spinning text (after effects) elements are very usable — in that it can work for a variety of individuals and styles. It has a more professional look as well. Making it perfect for corporations.
053D Text & Logo Boxes
This next one, the 3D Text & Logo Boxes pack is particularly perfect for 3D logos. The pack gives you several options for box size as well as text parameters. So, you can design your animated 3D Logo however you want and use it for future projects to give them even more dimension than before.
06The Light Bulb Kit
Our next pick, which is the ‘Light Bulb Kit’ also from Envato, is very similar to the first item on our list — in that it features text lit up by lightbulbs. However, it lends an extra bit of photo-realism to it. Less sparkle and more grain — which may exactly be what you want for your new title card or logo.
073D Text Templates
The 3D Text Templates is a very bright and pop-y template that is perfect for creating eye-catching promotions and advertisements. It’s very simple to use, which, again, maybe exactly what you want. Literally, the template will ask you to choose your own text and change the colors to suit that of your own brand, then you’re done!
083D Text Shapes Logo Reveal
The ‘3D Text Shapes Logo Reveal’ template is a pack of 3D text animations that you can use in order to add a little spin to your logo reveals (quite literally, in some cases!) It has a lot of personality to it, and a certain tech-y or science-y feel that would make it perfect for anyone looking for something more technical.
09Bold Titles
The ‘Bold Titles’ template is very loud and proud. But it has a bit of a retro-vibe to it as well. Making it stand out from some of the more minimalistic modern text animation styles that you see these days.
1010. Wave 3D Logo & Text
Looking for something simple and professional? Then the ‘Wave 3D Logo & Text’ template may just be the one for you. We put it last on this list, but it’s actually quite a strong contender. One that just about anyone (for just about any type of project they’re working on), should be able to get some use out of.
Key Takeaways from This Episode
● 3D Text Animation is the practice of bringing text to life! It gives dimension, depth, and, even, movement into what are usually very static properties!
● You see a lot of 3D Text Animation in big pictures these days. And you can start creating your own with the use of Adobe After Effects — a VFX and Motion Graphics Software that a lot of professionals use for their own text animation.
● Of course, if you don’t have the kind of time to create your own 3D Text Animations from scratch, you can always use templates instead! There are hundreds (if not thousands) of them available out there. It should be simple enough to find one that fits the kind of vibe you’re looking for.
● SECRET TIP! If you’re looking for an all-in-one kind of solution, you might want to consider Filmora Pro. It’s a video editor, first and foremost, but that’s not all it is — you can be using it today to start creating your own 3D Text Animations Try It Free
“Where is everyone getting their 3D Text Animation templates?”
To answer this request, we’ve compiled a guide that not only teaches you how to create things like 3D Spinning Text (After Effects) but also gives you an idea of where you can find the kind of resources (i.e., 3D Text Animation templates and presets) that you need to get a head start on your projects.
In this article
01 [Top 10 3D Text Animation Templates](#Part 1)
02 [How Do I Make 3D Text in After Effects?](#Part 2)
03 [The Best 10 Amazing 3D Text Animation Templates](#Part 3)
04 [Secrets to Learning More Animation Tactics](#Part 4)
Part 1 What’s 3D Text Animation?
Before anything else, let’s talk about text animation. Specifically, 3D Text Animation. The text that you’re reading now, is 2D Text. It’s static, and it lacks depth. It’s just letters on a screen. Meanwhile, 3D Text is usually built for motion, and thus, it has volume and depth — it’s almost tangible. Here’s what that looks like:
As you can see, even without actually moving, in the text shown in the image above, the potential for motion is there — it looks alive.
Now, you’ll see 3D text like this often in movies or promotions. Usually in the form of extravagant title cards or 3D text logo animation. They’re eye-catching, and because they’re 3D, you can play with them as much as you want to really add drama to your creations.
Part 2 How Do I Make 3D Text in After Effects?
As promised, this next section will teach you how to create 3D Text Animation in Adobe After Effects, which is a VFX and motion graphics software used by many animators to bring life to their text. You’ll notice that the following tutorial is really more about introducing the tools that you can use in order to create 3D Text Animation:
01Step 1. Add Your Text
The first thing that you have to do, of course, is to add your text! To do this, go to the ‘Tools’ panel, select the Type tool, and then select the ‘Composition’ panel. The composition is where you type your text!
With After Effects, you also have the following options:
● Change Text Font
● Adjust Text Size
● Adjust Text Color
● Shift Justification (Left, Middle, right)
And so on! Once you’re done with your text composition, it will be generated by After Effects into a layer that you can adjust as needed in the next steps.
01Step 2. Use Animation Presets
With your text now in a layer that you can add animations to… you’ve practically done a third of the job! Or even more than that if you decide to use the animation presets that are provided by After Effects.
These can be found by selecting ‘Browse Presets…’ on the ‘Animation’ tab (shown in the image below.) All you need to apply them is to drag and drop them onto your text layer.
Note: The first keyframe of this built-in text animation will be applied at the location of the Current Time Indicator (CTI), so make sure that you’ve adjusted that accordingly.
01Step 3. Per-Character Animation
If you’d like to personalize your text animation, After Effects does also give you the option to animate per character (or, per letter, in this case.)
This will give you more control over how you decided to animate your text. Of course, it does mean that it is slightly more complicated as well.
● To animate text per layer, select ‘animate’ on that layer and choose a parameter to start working on animations for.
● You’ll be able to previous (or scrub) through your animations in order to see if they are doing what you need them to do.
● You can also remove applied parameters in order to re-work your animation.
01Step 4. Add Graphic Elements to Text
If you really want to make your 3D Animation Text pop, Adobe After Effects also offers the tools needed to add Graphic Elements to your composition — which can be found at the top-most toolbar!
Part 3 The Best 10 Amazing 3D Text Animation Templates
Now, as promised, we’re also going to be introducing a couple of 3D text animation templates that you can try out for your own projects! Each template will have a link that you can go to in order to see what it looks like, as well as an explanation on how you can use it for your projects in the future!
01Real 3D Light Bulb Kit
The first Text Animation Template on our list is the “Logo Light Bulb” 3D Animation from Envato Elements. This one literally glows people! Making it perfect for a quirky, and yet still very impressive Title Card or Logo. Its design is very realistic, and you can also control how it flickers! For example, turning the bulbs on certain characters first, or turning them all off at once in the end.
023D Text Reveal
This next 3D Animation template is also from Envato Market. And, just like the first, it makes for quite the dramatic Title Card or Logo. With this template, your Text can literally zoom in to view while looking its best and sparkiest in High-Chrome.
033D Metallic Text Animation
Our next pick, the 3D Metallic text animation is another great one for those who are looking for something flashy — something that gives off the impression of being impressive right from the gate. Compared to the previous text animation template, this one has a more rugged kind of appearance. Perfect for those looking to promote something more fun rather than professional.
043D Text Box Animation Pack
The next one is a little less ‘impressive’ — in the sense that it isn’t as in your face as the other 3D animation templates that we’ve introduced thus far. And that’s exactly why the 3D Text Box Animation Pack deserves to be on this list! Its 3D spinning text (after effects) elements are very usable — in that it can work for a variety of individuals and styles. It has a more professional look as well. Making it perfect for corporations.
053D Text & Logo Boxes
This next one, the 3D Text & Logo Boxes pack is particularly perfect for 3D logos. The pack gives you several options for box size as well as text parameters. So, you can design your animated 3D Logo however you want and use it for future projects to give them even more dimension than before.
06The Light Bulb Kit
Our next pick, which is the ‘Light Bulb Kit’ also from Envato, is very similar to the first item on our list — in that it features text lit up by lightbulbs. However, it lends an extra bit of photo-realism to it. Less sparkle and more grain — which may exactly be what you want for your new title card or logo.
073D Text Templates
The 3D Text Templates is a very bright and pop-y template that is perfect for creating eye-catching promotions and advertisements. It’s very simple to use, which, again, maybe exactly what you want. Literally, the template will ask you to choose your own text and change the colors to suit that of your own brand, then you’re done!
083D Text Shapes Logo Reveal
The ‘3D Text Shapes Logo Reveal’ template is a pack of 3D text animations that you can use in order to add a little spin to your logo reveals (quite literally, in some cases!) It has a lot of personality to it, and a certain tech-y or science-y feel that would make it perfect for anyone looking for something more technical.
09Bold Titles
The ‘Bold Titles’ template is very loud and proud. But it has a bit of a retro-vibe to it as well. Making it stand out from some of the more minimalistic modern text animation styles that you see these days.
1010. Wave 3D Logo & Text
Looking for something simple and professional? Then the ‘Wave 3D Logo & Text’ template may just be the one for you. We put it last on this list, but it’s actually quite a strong contender. One that just about anyone (for just about any type of project they’re working on), should be able to get some use out of.
Key Takeaways from This Episode
● 3D Text Animation is the practice of bringing text to life! It gives dimension, depth, and, even, movement into what are usually very static properties!
● You see a lot of 3D Text Animation in big pictures these days. And you can start creating your own with the use of Adobe After Effects — a VFX and Motion Graphics Software that a lot of professionals use for their own text animation.
● Of course, if you don’t have the kind of time to create your own 3D Text Animations from scratch, you can always use templates instead! There are hundreds (if not thousands) of them available out there. It should be simple enough to find one that fits the kind of vibe you’re looking for.
● SECRET TIP! If you’re looking for an all-in-one kind of solution, you might want to consider Filmora Pro. It’s a video editor, first and foremost, but that’s not all it is — you can be using it today to start creating your own 3D Text Animations!
How to Create YouTube Intro Animation Like a Pro
How to Create a YouTube Intro Animation like a Pro
An easy yet powerful editor
Numerous effects to choose from
Detailed tutorials provided by the official channel
YouTube video intro animation is the short introductory clips and plays at the beginning of a YouTube video. YouTube intro videos as in almost everywhere, most times probably without giving them a second chance or understanding what their purpose is. There is no difference in YouTube videos, as without a proper setup, even if the content is excellent, your audience is not likely to hang around.
There is some free animation intro for YouTube that you can choose from to create your own YouTube intro. In this article, we will show a comprehensive guide on how to get an intro animation template free download and create your own free YouTube animation intro like a professional. So, let’s move on to explore how is the YouTube intro animation download process works using YouTube Intro Animation Makers through this article.
In this article
01 [What is YouTube Intro Animation?](#Part 1)
02 [How does YouTube Intro Animation Maker works?](#Part 2)
03 [5 of YouTube Intro Animation examples (2022)](#Part 3)
04 [How to Create a YouTube Intro Animation FAST](#Part 4)
Part 1 What is YouTube Intro Animation?
An animation video for YouTube intro is a short animated clip usually 5 to seconds in length and plays before the main YouTube video content. The intro YouTube animation is the primary step to creating your online persona and branding your content on YouTube. You can get YouTube intro animation for free online and include them in your YouTube content. A YouTube intro easily and quickly provides viewers insight into what they should expect from the channel. It is used to familiarize the viewer with the channel’s theme, feel, and look, which gives them context before reaching the main content.
Intro animation YouTube is sometimes called video bumpers, as they catch viewers’ attention and help reinforce your brand. In the general video, intros boost the video quality. You can also get a good video intro from intro animation free download websites for your YouTube content.
Part 2 How do YouTube Intro Animation Maker works?
You can create compelling, engaging, and best intro animation on YouTube by using free animation intro for YouTube or creating a YouTube intro animation by yourself. You don’t need be a pro in video editing or a creator to make animated video intros for your YouTube channel if you have the best intro animation software to create intro videos like a professional. Here are some benefits of YouTube intro animation maker and how it works:
● A YouTube intro animation maker has a built-in editor in your browser
● A YouTube intro animation maker is affordable, fast, and easy to use
● A YouTube intro animation maker can broadcast-quality logo animation and intros
● A YouTube intro animation maker has a wide variety of templates to make your YouTube animation intro
Using a YouTube intro animation maker, you are ready to create unskippable YouTube intros using the most versatile tool to turn your viewers into lifelong channel subscribers.
Part 3 5 of YouTube Intro Animation examples (2022)
To be successful on YouTube, capture and retain your viewers’ attention and increase your conversions. The best method to achieve this is by using an excellent YouTube animated intro to create a lasting impression to make your video worth watching. You can also get Professional YouTube animated intro from intro animation download websites. This action will look at 5 make YouTube intro animation examples and ideas from where you can draw your inspiration in 2022.
01Ted Talk
Ted Talk, free fire intro animation, is a perfect example of a beautiful and captured sequence that helps to tell the audience what the brand is all about and their ideas and worth spreading. The good news about this intro is that you don’t need to be a professional, hire an animator, or invest in any flashy or expensive animation to show your brand on YouTube.
To achieve this intro, all you require is some intro animation in After Effects template free that can work for your brand so that you’ll be able to retain your audience and make them wanting to come back for more.
02Jazza
Jazza is a perfect example of free intro animation templates that you can use all over again to showcase your brand. The main idea for making a gaming intro animation video free download is to bring about an attractive, eye-capturing video intro through it.
This intro communicates a passion for teaching people to paint, animate, and draw. This same template can also create a vlog animation intro for the Jazza language lesson website, as it is a tremendous sequential presentation that represents Jazza mission.
03Salma Jafra
Salma Jafra Video intro tells a short story about the video’s main takeaways and includes an 8 seconds vlog intro animation sequence. Everything, including a brand color, is purple, which helps the audience recognize our videos on YouTube.
In addition to the free animation for YouTube intro, she plugged in her content to the end of the video or outro to generate enough traffic and adhere to SEO guidelines to ensure that the targeted audience finds the videos.
04SciShow
SciShow enables viewers to understand the brand and the kind of free YouTube intro animation video. The main trick of the video is to instantly grab viewers’ attention and convince them that the video is for them.
This intro animation video free download is a perfect example of how you can introduce your theme, tone, and brand name into your YouTube animation intro video download. This type of intro allows viewers to know what to expect quickly, and superb animation and design show off the value of production. Examples of a brand that can benefit from this type of YouTube animation intro download template is sleep studies.
05”Pump Red” Cinema Template

“Pump Red” Cinema Template is perfect for capturing reviewers’ imagination with an eye-catching, captivating, and intelligent video intro. By following the examples in this Minecraft animation intro template, you are more likely to retain your visitors or viewers from the moment they hit the play button on your YouTube video by using a catching soundtrack, on-brand messaging, and exciting visuals.
Part 4 How to Create a YouTube Intro Animation FAST
Whether you are using any streaming channel, YouTube, or selling videos on any e-commerce website, making animation for YouTube intro plays a vital role in promoting your brand. With it, creating an introduction may not seem as complicated as it sounds.
The section explains in detail how to make a YouTube intro animation free with the Wondershare Filmora Video Editor video editor from animated intro download templates or create a custom intro from scratch even if there is no existing footage or image to begin with. The following method will guide you through the process, and then you can keep your video saved for reuse in all creations to maintain consistency and give your brand a unique identity:
Wondershare Filmora
Get started easily with Filmora’s powerful performance, intuitive interface, and countless effects Try It Free Try It Free Learn More >
01Step Launch Intro Animation Software
Launch Wondershare Filmora Video Editor editor, add intro background to Filmora by going to the media tab at the top and selecting any sample colors category from the left pane. All the solid and gradient colors in the media library are available at the right, then over the mouse to the color title you want to use as a background and click on the + icon in the middle to add it to the timeline.
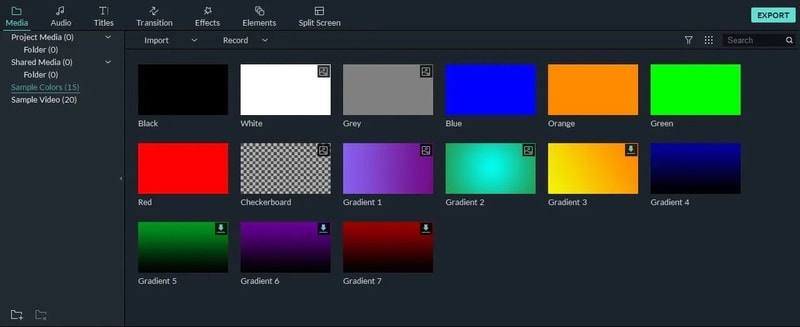
02Step Add Different effects
Add sound effects or audio to YouTube animated intro to make it more recognizable. In Wondershare Filmora Video Editor , visit the built-in audio library by double-clicking the audio thumbnail from the library and listening to the soundtrack. Repeat the process to find the perfect sound effects or background music for your video intro. D-and-drop the audio to the video.

03Step Adding Branding Element
In the animated video intro, add the company name, branding element, and channel name to create brand awareness by clicking on the title tab and hovering the mouse to the text you want to use. Then drag and drop it to track above the video.
Go to the Effects tab and select category from the top left pane. Click and drag your preferred effects from the library effects to the timeline.
04Step Export
Once you finish creating your animated video intro with all the required ingredients, go to Export at the top center area of the interface to export the animated video intro, and once done, share it on social media.
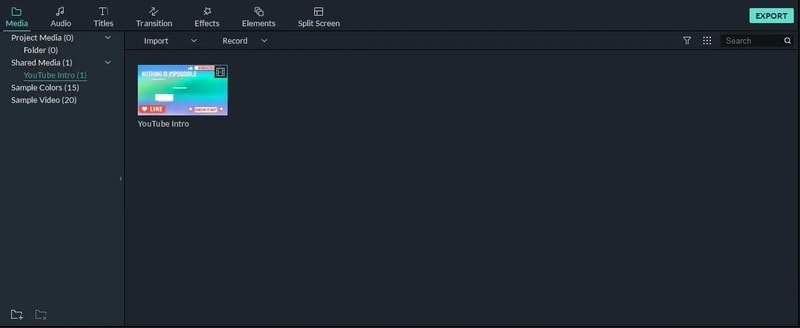
To make YouTube intro animation templates free download with Filmora templates, follow the steps listed below:
Step Select Effects
Log onto the Filmora effects page on filmstock with the same wsid used on Filmora and select the effect you want
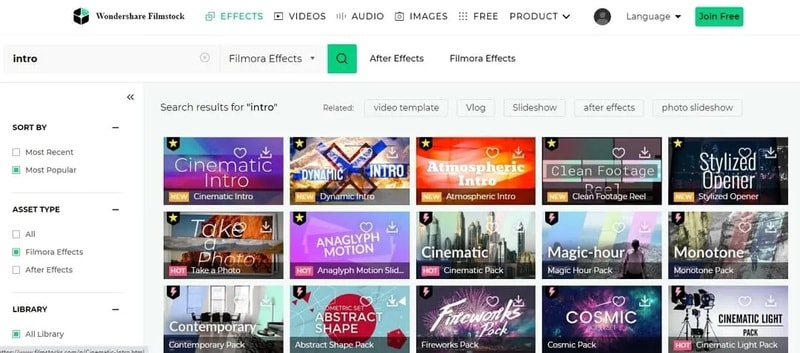
Step Select template
Select the preferred intro templates by clicking on the download now and following the instructions on the screen to attend a download template. After downloading, see in red cycle under the transition, titles, and filter based on the element included in the effect part. Add this downloaded title or transition to the animated intro video.
Step Finalization
Delete your animated video intro from the templates that you selected.
● Key Takeaways from This Episode →
● Introduction about what is YouTube Intro?
● How Intro Animation Maker works with examples.
● The process to develop your own YouTube intro animation for free with Wondershare Filmora Video Editor .
YouTube video intro animation is the short introductory clips and plays at the beginning of a YouTube video. YouTube intro videos as in almost everywhere, most times probably without giving them a second chance or understanding what their purpose is. There is no difference in YouTube videos, as without a proper setup, even if the content is excellent, your audience is not likely to hang around.
There is some free animation intro for YouTube that you can choose from to create your own YouTube intro. In this article, we will show a comprehensive guide on how to get an intro animation template free download and create your own free YouTube animation intro like a professional. So, let’s move on to explore how is the YouTube intro animation download process works using YouTube Intro Animation Makers through this article.
In this article
01 [What is YouTube Intro Animation?](#Part 1)
02 [How does YouTube Intro Animation Maker works?](#Part 2)
03 [5 of YouTube Intro Animation examples (2022)](#Part 3)
04 [How to Create a YouTube Intro Animation FAST](#Part 4)
Part 1 What is YouTube Intro Animation?
An animation video for YouTube intro is a short animated clip usually 5 to seconds in length and plays before the main YouTube video content. The intro YouTube animation is the primary step to creating your online persona and branding your content on YouTube. You can get YouTube intro animation for free online and include them in your YouTube content. A YouTube intro easily and quickly provides viewers insight into what they should expect from the channel. It is used to familiarize the viewer with the channel’s theme, feel, and look, which gives them context before reaching the main content.
Intro animation YouTube is sometimes called video bumpers, as they catch viewers’ attention and help reinforce your brand. In the general video, intros boost the video quality. You can also get a good video intro from intro animation free download websites for your YouTube content.
Part 2 How do YouTube Intro Animation Maker works?
You can create compelling, engaging, and best intro animation on YouTube by using free animation intro for YouTube or creating a YouTube intro animation by yourself. You don’t need be a pro in video editing or a creator to make animated video intros for your YouTube channel if you have the best intro animation software to create intro videos like a professional. Here are some benefits of YouTube intro animation maker and how it works:
● A YouTube intro animation maker has a built-in editor in your browser
● A YouTube intro animation maker is affordable, fast, and easy to use
● A YouTube intro animation maker can broadcast-quality logo animation and intros
● A YouTube intro animation maker has a wide variety of templates to make your YouTube animation intro
Using a YouTube intro animation maker, you are ready to create unskippable YouTube intros using the most versatile tool to turn your viewers into lifelong channel subscribers.
Part 3 5 of YouTube Intro Animation examples (2022)
To be successful on YouTube, capture and retain your viewers’ attention and increase your conversions. The best method to achieve this is by using an excellent YouTube animated intro to create a lasting impression to make your video worth watching. You can also get Professional YouTube animated intro from intro animation download websites. This action will look at 5 make YouTube intro animation examples and ideas from where you can draw your inspiration in 2022.
01Ted Talk
Ted Talk, free fire intro animation, is a perfect example of a beautiful and captured sequence that helps to tell the audience what the brand is all about and their ideas and worth spreading. The good news about this intro is that you don’t need to be a professional, hire an animator, or invest in any flashy or expensive animation to show your brand on YouTube.
To achieve this intro, all you require is some intro animation in After Effects template free that can work for your brand so that you’ll be able to retain your audience and make them wanting to come back for more.
02Jazza
Jazza is a perfect example of free intro animation templates that you can use all over again to showcase your brand. The main idea for making a gaming intro animation video free download is to bring about an attractive, eye-capturing video intro through it.
This intro communicates a passion for teaching people to paint, animate, and draw. This same template can also create a vlog animation intro for the Jazza language lesson website, as it is a tremendous sequential presentation that represents Jazza mission.
03Salma Jafra
Salma Jafra Video intro tells a short story about the video’s main takeaways and includes an 8 seconds vlog intro animation sequence. Everything, including a brand color, is purple, which helps the audience recognize our videos on YouTube.
In addition to the free animation for YouTube intro, she plugged in her content to the end of the video or outro to generate enough traffic and adhere to SEO guidelines to ensure that the targeted audience finds the videos.
04SciShow
SciShow enables viewers to understand the brand and the kind of free YouTube intro animation video. The main trick of the video is to instantly grab viewers’ attention and convince them that the video is for them.
This intro animation video free download is a perfect example of how you can introduce your theme, tone, and brand name into your YouTube animation intro video download. This type of intro allows viewers to know what to expect quickly, and superb animation and design show off the value of production. Examples of a brand that can benefit from this type of YouTube animation intro download template is sleep studies.
05”Pump Red” Cinema Template
“Pump Red” Cinema Template is perfect for capturing reviewers’ imagination with an eye-catching, captivating, and intelligent video intro. By following the examples in this Minecraft animation intro template, you are more likely to retain your visitors or viewers from the moment they hit the play button on your YouTube video by using a catching soundtrack, on-brand messaging, and exciting visuals.
Part 4 How to Create a YouTube Intro Animation FAST
Whether you are using any streaming channel, YouTube, or selling videos on any e-commerce website, making animation for YouTube intro plays a vital role in promoting your brand. With it, creating an introduction may not seem as complicated as it sounds.
The section explains in detail how to make a YouTube intro animation free with the Wondershare Filmora Video Editor video editor from animated intro download templates or create a custom intro from scratch even if there is no existing footage or image to begin with. The following method will guide you through the process, and then you can keep your video saved for reuse in all creations to maintain consistency and give your brand a unique identity:
Wondershare Filmora
Get started easily with Filmora’s powerful performance, intuitive interface, and countless effects Try It Free Try It Free Learn More >
01Step Launch Intro Animation Software
Launch Wondershare Filmora Video Editor editor, add intro background to Filmora by going to the media tab at the top and selecting any sample colors category from the left pane. All the solid and gradient colors in the media library are available at the right, then over the mouse to the color title you want to use as a background and click on the + icon in the middle to add it to the timeline.
02Step Add Different effects
Add sound effects or audio to YouTube animated intro to make it more recognizable. In Wondershare Filmora Video Editor , visit the built-in audio library by double-clicking the audio thumbnail from the library and listening to the soundtrack. Repeat the process to find the perfect sound effects or background music for your video intro. D-and-drop the audio to the video.
03Step Adding Branding Element
In the animated video intro, add the company name, branding element, and channel name to create brand awareness by clicking on the title tab and hovering the mouse to the text you want to use. Then drag and drop it to track above the video.
Go to the Effects tab and select category from the top left pane. Click and drag your preferred effects from the library effects to the timeline.
04Step Export
Once you finish creating your animated video intro with all the required ingredients, go to Export at the top center area of the interface to export the animated video intro, and once done, share it on social media.
To make YouTube intro animation templates free download with Filmora templates, follow the steps listed below:
Step Select Effects
Log onto the Filmora effects page on filmstock with the same wsid used on Filmora and select the effect you want
Step Select template
Select the preferred intro templates by clicking on the download now and following the instructions on the screen to attend a download template. After downloading, see in red cycle under the transition, titles, and filter based on the element included in the effect part. Add this downloaded title or transition to the animated intro video.
Step Finalization
Delete your animated video intro from the templates that you selected.
● Key Takeaways from This Episode →
● Introduction about what is YouTube Intro?
● How Intro Animation Maker works with examples.
● The process to develop your own YouTube intro animation for free with Wondershare Filmora Video Editor .
Also read:
- Updated 2024 Approved 5 Photoshop Alternatives to Animate Your Logo
- New In 2024, The 15 Best Apps to Turn Photos Into Cartoons and Sketches
- New In 2024, Secrets to Make 2D Game Animation
- Updated 2024 Approved You Can Turn a TikTok Into a GIF Now
- New 10 Most Memorable Japanese Cat Cartoons
- New 15 Best Collage Makers to Create Aesthetic Collages for 2024
- Updated In 2024, Is It That Easy to Make My Own Animated Character?
- 2024 Approved How to Create Picsart Cartoon in Simple Ways
- In 2024, 20 Free After Effects Logo Reveal Templates You Will Want to Know
- New In 2024, How To Create Animated Clipart in PowerPoint
- New 2024 Approved Something About Types of Motion Graphics
- New 2024 Approved 6 Types of Animation You May Like
- Updated 2024 Approved Tips on How to Learn Graphics Animation
- New In 2024, Top 3 Ways to Create Gif with Great 3D Gif Maker
- New Methods to Make Photo Motion Effect Online?
- Updated Incredible Ways to Find Suitable Animated Graphic Maker
- How to Create Photo Collage Frame for Free in Minutes?
- 2024 Approved Are You Head Over Heels With 3D Animation Design?
- New 2024 Approved How to Stop Animation From Looping in Unity
- Updated 2024 Approved Learn What Are Differences Between 2D And 3D Animation
- Updated How to Insert a GIF Into Powerpoint for 2024
- New 2024 Approved Best Canva 10 Animated Templates
- New In 2024, Before You Learn 3D Animation Some Things You Should Know
- New 2024 Approved How to Create Photo Collage Frame for Free in Minutes?
- Updated 5 Websites with Animated Logos That Catch Your Eyes for 2024
- Updated 15 Types of Cartoon Drawing Styles Examples
- Updated 2024 Approved OBS Animated Alternatives
- Updated 10 Classical Animated Cartoon Types With Examples for 2024
- How to Create a Whiteboard Video Step by Step 2023 Updated for 2024
- Updated Best 10 Animated Templates in Canva for 2024
- Updated 2024 Approved How to Make Animated Videos for Business Simple Guide
- Updated Useful Tips for Canva Animated Elements for 2024
- Updated 2024 Approved How To Make Pinterest Slideshow in Simple Ways
- Best 12 Illusion Gifs Top Picks for 2024
- New Top 8 Anime Name & Title Generators Online-Get Cool Anime Names for 2024
- Updated Finding The Best Animated Profile Picture Maker
- New 2024 Approved How to Insert a GIF Into Powerpoint
- New Creative Ways to Make iPhone Text GIF for 2024
- Updated What Wikipedia Wont Tell You About Character Rigging
- Updated 18 Best Tools and Services to Create Animated Videos for Your Business for 2024
- How to Transfer Data After Switching From Tecno Pova 5 to Latest Samsung | Dr.fone
- In 2024, Best Pokemons for PVP Matches in Pokemon Go For Tecno Spark Go (2024) | Dr.fone
- 4 Most-Known Ways to Find Someone on Tinder For Oppo Reno 11F 5G by Name | Dr.fone
- Unlock Your iPhone 8 in Minutes with ICCID Code Everything You Need to Know
- In 2024, 4 Effective Methods Fake GPS Location on Apple iPhone 12/iPad | Dr.fone
- Pokémon Go Cooldown Chart On Oppo Reno 11 Pro 5G | Dr.fone
- In 2024, Fixing Foneazy MockGo Not Working On Infinix Note 30 VIP | Dr.fone
- Is your Realme V30 working too slow? Heres how you can hard reset it | Dr.fone
- How to Fix It OnePlus Ace 2 Wont Turn On | Dr.fone
- In 2024, A Comprehensive Guide to iPhone 6s Blacklist Removal Tips and Tools
- Google Play Services Wont Update? 12 Fixes are Here on Infinix Note 30 VIP Racing Edition | Dr.fone
- How to Perform Hard Reset on Honor Play 8T? | Dr.fone
- Hard Resetting an Realme GT Neo 5 SE Device Made Easy | Dr.fone
- In 2024, Preparation to Beat Giovani in Pokemon Go For Realme GT Neo 5 SE | Dr.fone
- How To Change Country on App Store for Apple iPhone SE With 7 Methods
- The Magnificent Art of Pokemon Go Streaming On Honor Magic 5 Pro? | Dr.fone
- In 2024, How to Fix iPad or iPhone XS Max Stuck On Activation Lock?
- How to use iSpoofer on Vivo Y78+? | Dr.fone
- Home Button Not Working on Tecno Pop 7 Pro? Here Are Real Fixes | Dr.fone
- In 2024, Easiest Guide How to Clone Xiaomi Redmi Note 12 4G Phone? | Dr.fone
- 2 Ways to Monitor Vivo X Flip Activity | Dr.fone
- Easy steps to recover deleted messages from A59 5G
- In 2024, How to Change Google Play Location On Realme 11X 5G | Dr.fone
- How Can We Bypass Vivo V30 Pro FRP?
- A Comprehensive Guide to iCloud Unlock From iPhone 14 Pro Max Online
- Remove the Lock Screen Fingerprint Of Your Vivo G2
- In 2024, How to Track Vivo Y56 5G by Phone Number | Dr.fone
- How Can I Catch the Regional Pokémon without Traveling On Honor Play 7T | Dr.fone
- In 2024, Step-by-Step Tutorial How To Bypass Samsung Galaxy M34 5G FRP
- 3 Easy Methods to Unlock iCloud Locked iPhone XR/iPad/iPod
- How to restore wiped messages on Motorola Moto G84 5G
- Guide on How To Remove Apple ID From Apple iPhone SE (2020)
- In 2024, How to Mirror Your Tecno Spark 20 Pro Screen to PC with Chromecast | Dr.fone
- In 2024, How to Fix Pokemon Go Route Not Working On Honor Magic 6 Lite? | Dr.fone
- Unlocking iPhone XS Max Lock Screen 3 Foolproof Methods that Actually Work
- In 2024, How To Fix Apple ID Verification Code Not Working From Apple iPhone 11 Pro
- In 2024, How To Erase an Apple iPhone 12 Pro Max Without Apple ID Password?
- In 2024, Guide to Mirror Your Vivo V30 to Other Android devices | Dr.fone
- 3 Ways to Fake GPS Without Root On OnePlus Ace 2 | Dr.fone
- How to Watch Hulu Outside US On Poco C50 | Dr.fone
- Title: Updated 15 Best Apps to Turn Photos Into Cartoons and Sketches
- Author: Elon
- Created at : 2024-06-23 02:09:31
- Updated at : 2024-06-24 02:09:31
- Link: https://animation-videos.techidaily.com/updated-15-best-apps-to-turn-photos-into-cartoons-and-sketches/
- License: This work is licensed under CC BY-NC-SA 4.0.
