
:max_bytes(150000):strip_icc():format(webp)/GettyImages-990620130-ec2a7076e3f043bfa4f540b72d2034c6.jpg)
Updated 2024 Approved 10 Best Convert Video Between GIF Software High Quality
10 Best Convert Video Between GIF Software [High Quality]
FREE Top 10 Best Convert Video Between GIF and Software [High Quality, 2024]

Shanoon Cox
Mar 27, 2024• Proven solutions


GIF images are gaining popularity among users as they are able to convey a great amount of information. So when you are not able to accommodate heavy videos in your projects but want to deliver more accurate visual information, then GIF are useful solutions.
Converting a video clip to GIF is the easiest way to make GIFs. If you still feel the GIF file is too large, cutting GIF is also a great option.
After 28 hours of research and comparison, we rounded up the top 10 software to convert video between GIFs to help you make GIFs with ease. They are gif video makers that can be used online, on Windows and Mac.
10 Best Software for Converting Video to GIF
1. Wondershare Filmora
Using an interactive platform of Wondershare Filmora, you can easily develop a classic GIF image as an output. All popular video file formats like MKV, WMV, AVI and MP4, etc. are OK. The best part is that Filmora never poses any restriction about file size during conversion hence users can process HD videos to get GIF images.
It’s a very impressive editing tool with a wide set of attractive features that can make your image highly customized. Feel free to choose advanced elements, animations, text, overlays, etc for the development of original GIFs.
Besides, Filmora allows you to extract still images from video with the same resolution. You can then combine and edit the extracted PNG images to make an interesting GIF.

Click Snapshot icon to extract image from video in Filmora
Moreover, if you want to make a GIF online, the Filmora meme maker is your ultimate solution. It helps you make images, GIFs and video memes directly without watermark. You can change text size, color, and position to create a caption when you are editing. You can also put text inside or outside in GIF.
It is totally FREE to use and no signup. Try it now!
Check this video to learn how to convert video to GIF step by step.
Download Mac Version ](https://tools.techidaily.com/wondershare/filmora/download/ )
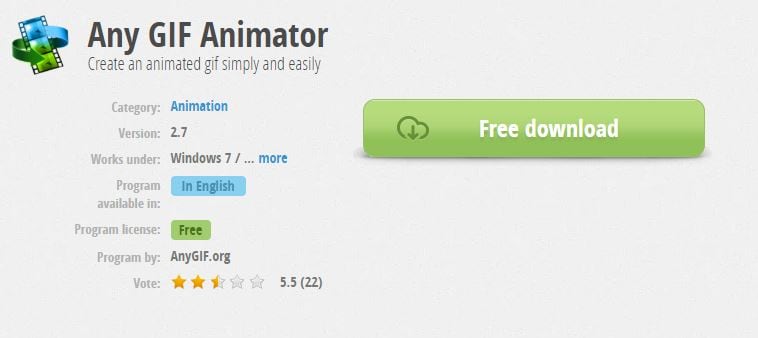
2. Any GIF Animator
The simple and powerful design of Any GIF converter app can immediately turn your favorite videos into interactive GIFs. It supports a wide range of file formats like WEBM, ASF, MPG, FLV, and AVI, etc. The best part is that this tool also allows users to get their media files imported from optical storage devices like DVD etc or even webcam recorded screens can also be processed. It is possible to specify frame rate start and end time markers with ease and for customization, users can access advanced text overlays, loops, and resolution effects.
Features:
- Intuitive easy to use interface lets you access it without even checking any user manual. It is simple and completely hassle-free.
- You may perfect your GIF animation with the help of an animation wizard. It is an easy and quick way of customizing and adding effects to your GIF animation.
- You get a built-in image editor that includes a comprehensive set of tools for editing.
- There are several graphics formats that you may use to convert video to gif on Any GIF Animator. It includes PNG, JPEG, TIFF, BMP, GIF, ICO, PSD, PCX, RLE, PIC, DIB, AVI, PCD, WMF, and several others.
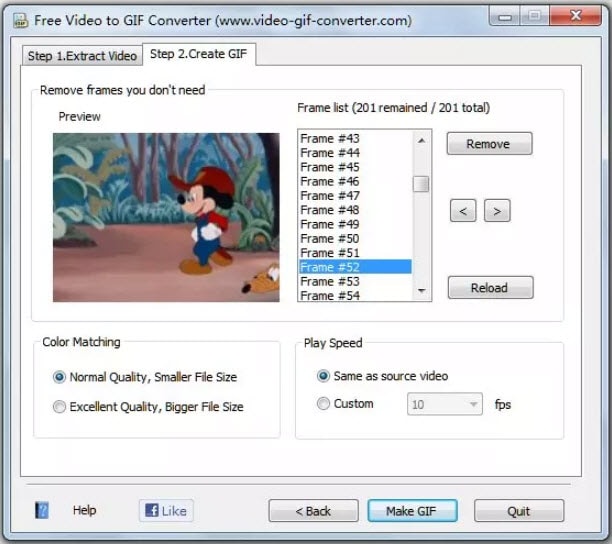
3. Free Video to GIF Converter
This lightweight and user-friendly application can easily fulfill your video to GIF conversion needs with its straightforward conversion process. Users simply need to upload their video file to the software timeline and then update settings for its start time, end time, resolution, frame rate, and size etc. Once all details are specified then simply hit the convert button and within a few seconds, your GIF will be with you. Users can also preview their files at the time of the conversion process so that desired changes can be updated on time.
Features:
- A very simple tool that can be easily used by anyone.
- It allows you to convert long video to gif.
- The interface has just steps, extract, and create a video to gifs.
- The file types supported are AVI, GIF, mp4, MPEG, and WAV.
- You can change the height and width of the individual frame.
- You can select the playback speed.
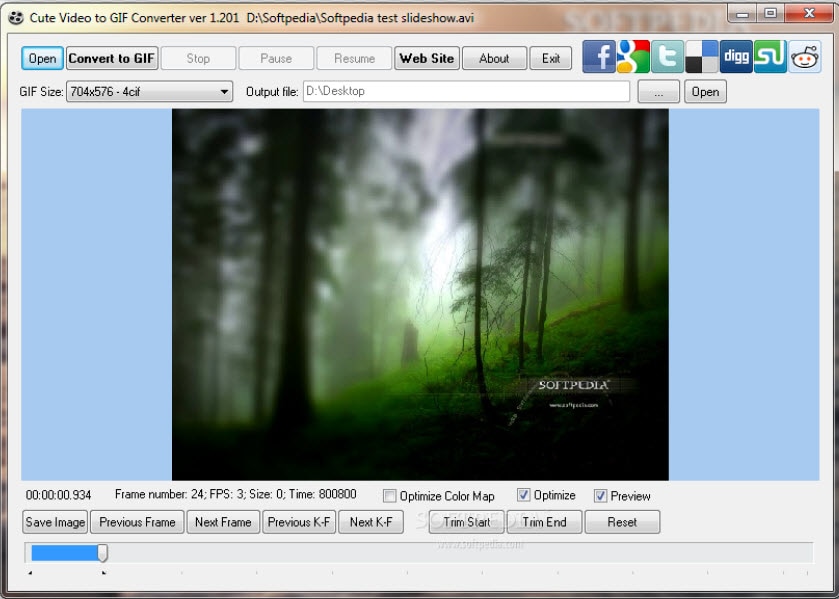
4. Cute Video to GIF Converter
This tool is designed to assist users with fast and efficient GIF conversion processes using various animation effects. It allows users to share collections of GIFS over other networks so that audience can avail the best content with ease update. Users can also extract moments from their favorite TV shows and then develop eye-catching GIFs with small file size and lesser loading times.
Features:
- It has an intuitive GUI consisting of a single-window that shows every segment of the app in one frame with making it fussy.
- Supports several video file types along with several audio file types as well. The video file types include MP4, AVI, MPEG, RMVB, WMV, VOB, SWF, and M2TS and the audio track formats are MP3, AC3, and WMA.
5. KickMyGraphics
Here is a lightweight yet powerful GIF converter program that can record, create or edit GIF images to produce high quality customized results. Users can easily update various animated clips to this platform with popular file formats like PNG, BMP, JPG, regular GIF and animated GIF etc. Its advanced editor allows easy customization with rotate, trim, stretch, loopback, scale and many more options. Users can easily adjust settings for the output file format, size and quality.
Features:
- It is a small, in-built freeware program to convert video to gif.
- You can import several video MPG, AVI, MP4, ASF, and other video types as well. You can import manifold animated Gif, Jpg, Bmp and Png files.
- Direct recording of animated GIF images.
- Allows various editing options like the loop, stretch, pan, reverse, and much more.

6. Movie to GIF
Converting video clips to GIF becomes very simple with Movie to GIF converter tool because its user-friendly interface and fast editing tools make everything possible with ease. It allows users to define color depth, frame rate, speed and size of videos manually and once all settings are done them GIFs can be created within seconds. This tool supports almost all popular media file formats for GIF processing like VOB, MOV, WMV, MP4, AVI etc.
Features:
- Very simple video to GIF converter.
- User-friendly interface.
- Play video clips in GIF files.
- Set more frames per second so the output GIF appears as the original video.
- The breadth and height of the GIF are adjustable.

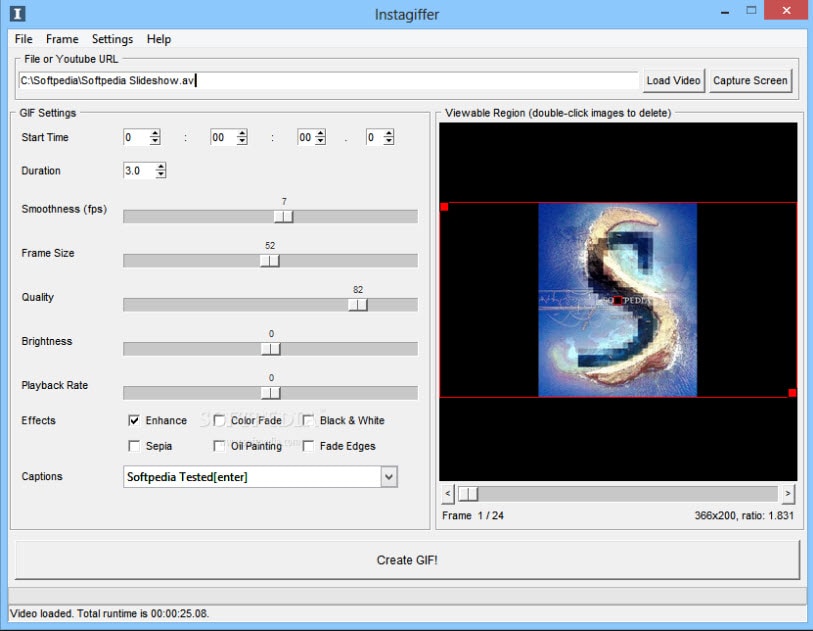
7. Instagriffer
Using Instagriffer, users can collect memorable stills from the screen within seconds and then process them interactively to develop GIFs. No matter whether you want to grab moments from your favorite YouTube video, lovable Vine start or something interesting from Netflix, Instagriffer can assist you to import any of your desired moment for designing GIFs. This instant professional image editor tool possesses a wide range of loops, filters and text abilities. It is available free of cost and you need not worry about viruses, spyware or annoying ads on this platform.
Features:
- You can capture the best GIF-worthy moments instantly from your screen.
- Add text, filters, loops, and more.
- Convert video to gif completely free of charge.
- Easy addition of highly customizable text and custom logos
- With Instagriffer there will be no watermarks to your gif
8. Ezgif
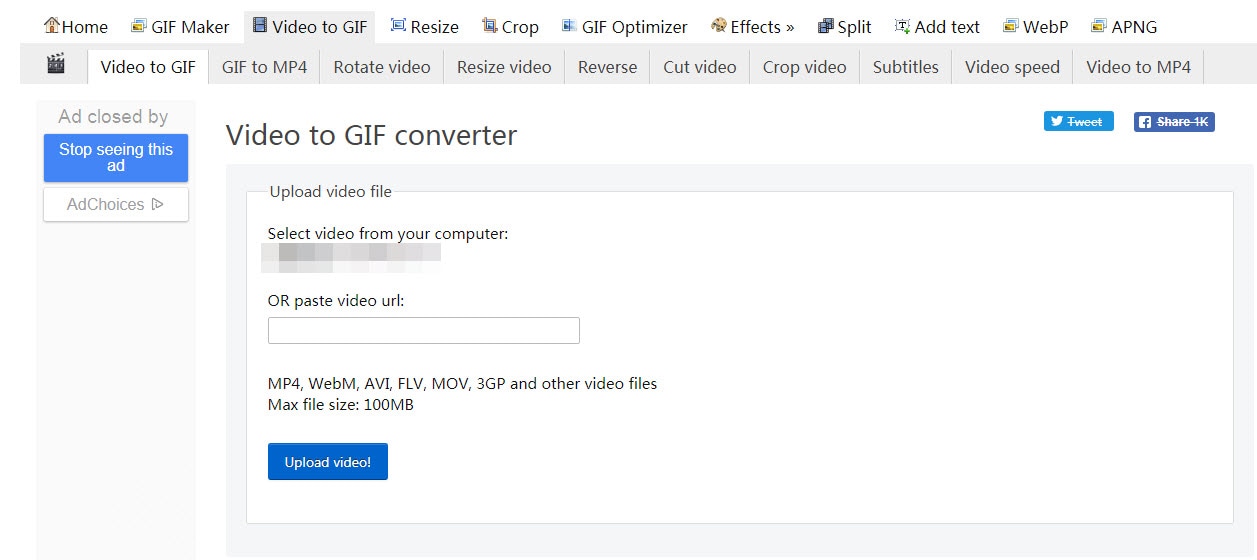
There are two useful options for GIF conversions on Ezgif, the first one is to upload an already existing video file to a software timeline for generating GIF as an output. The second option is to paste the video URL on a specified field in software and then process this video link. It can convert large-sized videos into GIFs within very less time. Never forget to use impressive editing tools of Ezgif to get outstanding and professional-looking GIF outputs.
Features:
- Convert transparent video (with alpha channel) to transparent GIF.
- Use resize the crop tool to crop out only part of the video or change your gif’s dimension.
- Select frame rates as per your requirement.
9. Giphy
Giphy is well known as the biggest GIF supportive platform that is being accessed by millions of users every day. This tool is designed to assists in easy conversions and fast sharing needs for developed GIF images. Users need to copy their desired video URL into a specified field on the software window and then hit the create button. It also follows drag and drop tools for getting videos internally from folders inside the computer. Users can also add sound clips for their GIFs and make it more eye-catching with additional tags and descriptions.
Features:
- Extremely easy and fast gif creation
- Create animated gifs from YouTube videos and images
- Convert video to GIF completely free

10. Zazmar
If you need a tool that can process heavy media files faster to develop light-weighted GIFS then Zamar is the best option for you. It supports more than 1200 media file formats so that users can process any of their desired video or image with ease and their interactive platform makes every editing task much easier with user-friendly editing tools.
Features:
- Fast and easy video to gif conversion.
- Easy drag and drop option for uploading multiple files.
- A high-speed download of the converted files.
Conclusion
Here, I am sure you’ve known which one is the best video to GIF converter software for your needs.
Comparison Table of the Best Video to GIF Converters
Note: You can click the product name to get into the detailed info of each video to GIF converters listed above.
| Program Name | Supported format | System available |
|---|---|---|
| Wondershare Filmora | AVI, DV, DIF, NUT, NSV, FLV, MKV, MP4, M4V, PSP, 3GP, MOV, MPG, MPEG, VOB, DAT, EVO, TS, TP, TRP, M2TS, WMV, ASF, DVR-MS | Win & Mac |
| Any GIF Animator | MP4, MOV, AVI, and more | Win |
| Free Video to GIF Converter | MKV, MP4, MOV, WMV, AVI, FLV, and MOB | Win |
| Cute Video to GIF Converter | AVI, MPG, FLV, MP4, 3GP, VOB, WMV | win |
| KickMyGraphics | AVI, MPG, WMV, MP4, ASF | win |
| Movie to GIF | AVI, MPG, WMV, MP4, MKV, MOV, VOB etc. | win |
| Instagriffer | mkv, flv, avi, mp4 | Win & Mac |
| Ezgif | MP4/AVI/WEBM/FLV/MOV and other video files | Online |
| Giphy | MP4/AVI/WEBM/FLV/MOV and other video files | Online |
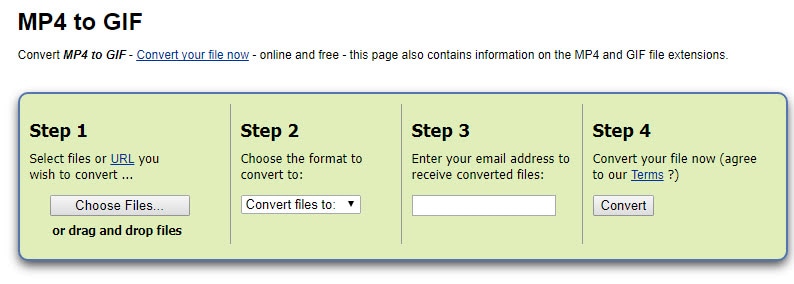
| Zamzar | MP4 | Online |
However, Filmora is one of the best powerful software that can help you create GIFs with straightforward UI interface, and easy-to-use GIF tools. If you want to know the specific steps, please check the video below.
Download Mac Version ](https://tools.techidaily.com/wondershare/filmora/download/ )
Frequently Asked Questions About Converting Video to GIFs
1. How To Crop A GIF To A Circle?
Whether or not you can crop a GIF into a circle, depends on the cropping tools the app you are using offers. Some GIF makers allow you to choose the shape to which you are going to crop a GIF, while others don’t provide this option.
Using Filmora’s mask features is probably one of the easiest ways to crop a GIF to a circle, as you simply have to apply the mask to the footage and specify which parts of the GIF’s frames are going to be removed. What’s more, you can choose the shape of the mask in Filmora which enables you to crop GIFs into a variety of different shapes.
2. How To Turn A Video Into A GIF?
All you need to do in order to turn a video into a GIF is to change the file’s format. Most videos are saved as MP4, AVI, or MOV files, and nearly all video editors and GIF makers allow you to convert a video file into a GIF.
So, you simply have to choose GIF as the format in which you want to export a video file you imported into a video editing software or an online GIF maker and wait for the rendering process to be completed.
Shanoon Cox
Shanoon Cox is a writer and a lover of all things video.
Follow @Shanoon Cox
Shanoon Cox
Mar 27, 2024• Proven solutions
GIF images are gaining popularity among users as they are able to convey a great amount of information. So when you are not able to accommodate heavy videos in your projects but want to deliver more accurate visual information, then GIF are useful solutions.
Converting a video clip to GIF is the easiest way to make GIFs. If you still feel the GIF file is too large, cutting GIF is also a great option.
After 28 hours of research and comparison, we rounded up the top 10 software to convert video between GIFs to help you make GIFs with ease. They are gif video makers that can be used online, on Windows and Mac.
10 Best Software for Converting Video to GIF
1. Wondershare Filmora
Using an interactive platform of Wondershare Filmora, you can easily develop a classic GIF image as an output. All popular video file formats like MKV, WMV, AVI and MP4, etc. are OK. The best part is that Filmora never poses any restriction about file size during conversion hence users can process HD videos to get GIF images.
It’s a very impressive editing tool with a wide set of attractive features that can make your image highly customized. Feel free to choose advanced elements, animations, text, overlays, etc for the development of original GIFs.
Besides, Filmora allows you to extract still images from video with the same resolution. You can then combine and edit the extracted PNG images to make an interesting GIF.
Click Snapshot icon to extract image from video in Filmora
Moreover, if you want to make a GIF online, the Filmora meme maker is your ultimate solution. It helps you make images, GIFs and video memes directly without watermark. You can change text size, color, and position to create a caption when you are editing. You can also put text inside or outside in GIF.
It is totally FREE to use and no signup. Try it now!
Check this video to learn how to convert video to GIF step by step.
Download Mac Version ](https://tools.techidaily.com/wondershare/filmora/download/ )
2. Any GIF Animator
The simple and powerful design of Any GIF converter app can immediately turn your favorite videos into interactive GIFs. It supports a wide range of file formats like WEBM, ASF, MPG, FLV, and AVI, etc. The best part is that this tool also allows users to get their media files imported from optical storage devices like DVD etc or even webcam recorded screens can also be processed. It is possible to specify frame rate start and end time markers with ease and for customization, users can access advanced text overlays, loops, and resolution effects.
Features:
- Intuitive easy to use interface lets you access it without even checking any user manual. It is simple and completely hassle-free.
- You may perfect your GIF animation with the help of an animation wizard. It is an easy and quick way of customizing and adding effects to your GIF animation.
- You get a built-in image editor that includes a comprehensive set of tools for editing.
- There are several graphics formats that you may use to convert video to gif on Any GIF Animator. It includes PNG, JPEG, TIFF, BMP, GIF, ICO, PSD, PCX, RLE, PIC, DIB, AVI, PCD, WMF, and several others.
3. Free Video to GIF Converter
This lightweight and user-friendly application can easily fulfill your video to GIF conversion needs with its straightforward conversion process. Users simply need to upload their video file to the software timeline and then update settings for its start time, end time, resolution, frame rate, and size etc. Once all details are specified then simply hit the convert button and within a few seconds, your GIF will be with you. Users can also preview their files at the time of the conversion process so that desired changes can be updated on time.
Features:
- A very simple tool that can be easily used by anyone.
- It allows you to convert long video to gif.
- The interface has just steps, extract, and create a video to gifs.
- The file types supported are AVI, GIF, mp4, MPEG, and WAV.
- You can change the height and width of the individual frame.
- You can select the playback speed.
4. Cute Video to GIF Converter
This tool is designed to assist users with fast and efficient GIF conversion processes using various animation effects. It allows users to share collections of GIFS over other networks so that audience can avail the best content with ease update. Users can also extract moments from their favorite TV shows and then develop eye-catching GIFs with small file size and lesser loading times.
Features:
- It has an intuitive GUI consisting of a single-window that shows every segment of the app in one frame with making it fussy.
- Supports several video file types along with several audio file types as well. The video file types include MP4, AVI, MPEG, RMVB, WMV, VOB, SWF, and M2TS and the audio track formats are MP3, AC3, and WMA.
5. KickMyGraphics
Here is a lightweight yet powerful GIF converter program that can record, create or edit GIF images to produce high quality customized results. Users can easily update various animated clips to this platform with popular file formats like PNG, BMP, JPG, regular GIF and animated GIF etc. Its advanced editor allows easy customization with rotate, trim, stretch, loopback, scale and many more options. Users can easily adjust settings for the output file format, size and quality.
Features:
- It is a small, in-built freeware program to convert video to gif.
- You can import several video MPG, AVI, MP4, ASF, and other video types as well. You can import manifold animated Gif, Jpg, Bmp and Png files.
- Direct recording of animated GIF images.
- Allows various editing options like the loop, stretch, pan, reverse, and much more.
6. Movie to GIF
Converting video clips to GIF becomes very simple with Movie to GIF converter tool because its user-friendly interface and fast editing tools make everything possible with ease. It allows users to define color depth, frame rate, speed and size of videos manually and once all settings are done them GIFs can be created within seconds. This tool supports almost all popular media file formats for GIF processing like VOB, MOV, WMV, MP4, AVI etc.
Features:
- Very simple video to GIF converter.
- User-friendly interface.
- Play video clips in GIF files.
- Set more frames per second so the output GIF appears as the original video.
- The breadth and height of the GIF are adjustable.
7. Instagriffer
Using Instagriffer, users can collect memorable stills from the screen within seconds and then process them interactively to develop GIFs. No matter whether you want to grab moments from your favorite YouTube video, lovable Vine start or something interesting from Netflix, Instagriffer can assist you to import any of your desired moment for designing GIFs. This instant professional image editor tool possesses a wide range of loops, filters and text abilities. It is available free of cost and you need not worry about viruses, spyware or annoying ads on this platform.
Features:
- You can capture the best GIF-worthy moments instantly from your screen.
- Add text, filters, loops, and more.
- Convert video to gif completely free of charge.
- Easy addition of highly customizable text and custom logos
- With Instagriffer there will be no watermarks to your gif
8. Ezgif
There are two useful options for GIF conversions on Ezgif, the first one is to upload an already existing video file to a software timeline for generating GIF as an output. The second option is to paste the video URL on a specified field in software and then process this video link. It can convert large-sized videos into GIFs within very less time. Never forget to use impressive editing tools of Ezgif to get outstanding and professional-looking GIF outputs.
Features:
- Convert transparent video (with alpha channel) to transparent GIF.
- Use resize the crop tool to crop out only part of the video or change your gif’s dimension.
- Select frame rates as per your requirement.
9. Giphy
Giphy is well known as the biggest GIF supportive platform that is being accessed by millions of users every day. This tool is designed to assists in easy conversions and fast sharing needs for developed GIF images. Users need to copy their desired video URL into a specified field on the software window and then hit the create button. It also follows drag and drop tools for getting videos internally from folders inside the computer. Users can also add sound clips for their GIFs and make it more eye-catching with additional tags and descriptions.
Features:
- Extremely easy and fast gif creation
- Create animated gifs from YouTube videos and images
- Convert video to GIF completely free
10. Zazmar
If you need a tool that can process heavy media files faster to develop light-weighted GIFS then Zamar is the best option for you. It supports more than 1200 media file formats so that users can process any of their desired video or image with ease and their interactive platform makes every editing task much easier with user-friendly editing tools.
Features:
- Fast and easy video to gif conversion.
- Easy drag and drop option for uploading multiple files.
- A high-speed download of the converted files.
Conclusion
Here, I am sure you’ve known which one is the best video to GIF converter software for your needs.
Comparison Table of the Best Video to GIF Converters
Note: You can click the product name to get into the detailed info of each video to GIF converters listed above.
| Program Name | Supported format | System available |
|---|---|---|
| Wondershare Filmora | AVI, DV, DIF, NUT, NSV, FLV, MKV, MP4, M4V, PSP, 3GP, MOV, MPG, MPEG, VOB, DAT, EVO, TS, TP, TRP, M2TS, WMV, ASF, DVR-MS | Win & Mac |
| Any GIF Animator | MP4, MOV, AVI, and more | Win |
| Free Video to GIF Converter | MKV, MP4, MOV, WMV, AVI, FLV, and MOB | Win |
| Cute Video to GIF Converter | AVI, MPG, FLV, MP4, 3GP, VOB, WMV | win |
| KickMyGraphics | AVI, MPG, WMV, MP4, ASF | win |
| Movie to GIF | AVI, MPG, WMV, MP4, MKV, MOV, VOB etc. | win |
| Instagriffer | mkv, flv, avi, mp4 | Win & Mac |
| Ezgif | MP4/AVI/WEBM/FLV/MOV and other video files | Online |
| Giphy | MP4/AVI/WEBM/FLV/MOV and other video files | Online |
| Zamzar | MP4 | Online |
However, Filmora is one of the best powerful software that can help you create GIFs with straightforward UI interface, and easy-to-use GIF tools. If you want to know the specific steps, please check the video below.
Download Mac Version ](https://tools.techidaily.com/wondershare/filmora/download/ )
Frequently Asked Questions About Converting Video to GIFs
1. How To Crop A GIF To A Circle?
Whether or not you can crop a GIF into a circle, depends on the cropping tools the app you are using offers. Some GIF makers allow you to choose the shape to which you are going to crop a GIF, while others don’t provide this option.
Using Filmora’s mask features is probably one of the easiest ways to crop a GIF to a circle, as you simply have to apply the mask to the footage and specify which parts of the GIF’s frames are going to be removed. What’s more, you can choose the shape of the mask in Filmora which enables you to crop GIFs into a variety of different shapes.
2. How To Turn A Video Into A GIF?
All you need to do in order to turn a video into a GIF is to change the file’s format. Most videos are saved as MP4, AVI, or MOV files, and nearly all video editors and GIF makers allow you to convert a video file into a GIF.
So, you simply have to choose GIF as the format in which you want to export a video file you imported into a video editing software or an online GIF maker and wait for the rendering process to be completed.
Shanoon Cox
Shanoon Cox is a writer and a lover of all things video.
Follow @Shanoon Cox
Finding Some Different Ways to Animated Cartoon of Yourself
How to Find Some Different Ways to Animated Cartoon of Yourself
An easy yet powerful editor
Numerous effects to choose from
Detailed tutorials provided by the official channel
Illustrations and transforming pictures into cartoon characters have become famous these days. Are you keen to make one but unable to find the right apps that animate your pictures to do so?
This article will help you find the perfect match for you. You can make an animated cartoon of yourself.
In this article
01 [8 Ways to Get Creative With Your Photos into Cartoon Online Or With Apps](#Part 1)
02 [How to Make Animated Cartoon of Yourself in PowerPoint](#Part 2)
03 [Best 5 Apps to Cartoon Yourself on iPhone, iPad, and Android](#Part 3)
Part 1 8 Ways to Get Creative With Your Photos into Cartoon Online Or With Apps
01ToonCamera
Pros:
● ToonCamera is famous for its tremendous and in-time customer support.
● It has got a variety of high-quality filters for your pictures.
● The best part is that it allows you to apply filters in existing photos or videos and real-time.
Cons:
● ToonCamera comes only with the basic set of tools. You will get multiple filters but not various tools.
● It works only on iOS 8.1 or the later versions.
● The app will charge $1.99.

Hot comments from netizens:
ToonCamera allows you to crop and resize your photos. You can add any filter from its huge filter collection and give your picture an animated effect or Edit.
02Cartoon Camera Free
Pros:
● Cartoon Camera Free is an application that is very easy to use.
● The interface of this app is intuitive.
● You will have high-resolution export as output using a cartoon camera free for editing.
Cons:
● The shortcoming of this app is that it asks you to update frequently.
● The settings in the application are entirely automatic and already set.
● You cannot try your creativity or make changes in the editing according to your choice. It has only two effects.

Hot comments from netizens:
Cartoon Camera Free allows you to apply cartoon and pencil sketch effects to your photos. It is a tremendous animate your pictures app. Not only that, this app will enable you to view the impact in real-time.
03Clip2Comic & Caricature Maker
Pros:
● Clip2Comic & Caricature Maker has 1080p at export.
● This application can transform your pictures into posters, cartoons, and sketch art.
● The best of the app is that it allows you to reset image settings
Cons:
● It works only on iOS platforms.
● The app will leave back their watermark on your pictures. You need to get the paid version to remove the watermark.
● It is an expensive app compared to other editing apps.

Hot Comments from netizens:
People love this editing app. There are eight different comics, sketches, and cartoon characters. The app comes with a caricature and deformation tool and multiple image editing and enhancing tools.
04Cartoon Yourself Video Effects
Pros:
● The editing in this app allows you to keep realistic emotions in your videos and photos.
● The interface is very intuitive.
● The app imitates perfect emotions and has a wide variety for you.
Cons:
● Cartoon Yourself Video Effects may lag sometimes
● The effects may not work at times.
● You may require in-app purchases.

Hot Comments from netizens:
This app gives you access to a brand spectrum of emotions giving the perfect realistic touch to your video. You can share animated videos and gifs with your friends from this app.
05Cartoon Sketch Camera Pro
Pros:
● Cartoon Sketch Camera Pro has a sleek user interface.
● It has got eight cartoon effects and filters for your photos.
● It supports iOS13.
Cons:
● There are no image editors’ options.
● You may face image reporting issues.
● The app will cost you $1.99 to get rid of ads and distances.

Hot Comments from netizens:
Cartoon Sketch Camera Pro Cartoon has effects likePixellate, Sketch, Halftone, Dots, Crosshatch Swirl, and Emboss. You can pally these effects on your photos to get the desired output.
06Photo to Cartoon yourself Edit
Pros:
● You can directly click photos using the app that you want to edit.
● This app allows you to share the cartooned image via email.
● There are a lot of effects and textures available.
Cons:
● You may need in-app purchases to access all effects.
● You will not be able to stretch images to get more photo details.
● You cannot share files from here on social media.

Hot Comments from netizens:
Photo to Cartoon yourself Edit is an app that makes your picture look animated and transforms them into funny and beautiful cartoons in seconds. You can adjust the image in all formats and make the color look more vivid.
07Artist – Video and Photo Editor with Art Filters
Pros:
● Artist allows you to use cartoon filter with just a single click
● This app has multiple filters for every emotion.
● You can create square videos in low quality too.
Cons
● For video edits, the app supports only 30-sec duration.
● You may require in-app purchases to access some features.
● The app may lag at times.

Hot Comments from netizens:
Artist is a straightforward and helpful app. It has multiple features and effects for creating animated pictures. It offers video editing options that look fun. You can turn your selfie into cartoon characters using artisto in just one click.
08Moment Cartoon Caricature Cam
Pros:
● Moment Cartoon Caricature Cam holds an exciting selfie contest for users.
● The app has multiple collections of stickers.
● There are a variety of photo-enhancing tools.
Cons:
● The app is relatively slow at loading
● It includes a lot of ads.
● There are sometimes photo uploading issues.

Hot Comments from netizens:
Using Moment Cartoon Caricature Cam you can edit and enhance your photos. You can create a cartoon version of your selfies and participate in selfie contests.
Part 2 How to Make Animated Cartoon of Yourself in PowerPoint
To turn yourself into an animated character in PowerPoint, it is best to have an image with transparent or white background for best results. You can then use the picture effects, and other tools present in PowerPoint as mentioned to get your output.
● If the target picture has a background, your first step is to isolate it from its background. Remove the background or make it white.
● Now you need to sharpen the picture by 50%. This is available in the picture corrections effect.
● Next, copy the image and paste it back as a picture.
● Repeat these steps four times to make the lines in the image stand out sharply.
● In the end, add the color effect of Black and White at 20%.
● You will get quite a fairly detailed output.
Part 3 Best 5 Apps to Cartoon Yourself on iPhone, iPad, and Android
Five apps to cartoon yourself on iOS and Android platforms.
01Cartoon Yourself
Pros:
● It is a verybasic and simple to use photo to cartoon app for everyone.
● One does not require any editing skills to use this app.
● It contains nice and beautiful cartoons effects
Cons:
● The number of free filters and effects is minimal.
● You may require in-app purchases to access some features.
● It does not allow to click photos or record videos.
Hot Comments from netizens:
Cartoon Yourself is a great app to effortlessly turn your photos into animated versions. You have to add pictures from your gallery and then start editing. You will find a lot of editing tools in this app.
02Paint- art and cartoon filters
Pros:
● It has more than a thousand filters and effects
● Customized cartoon filters are set with various parameters
● It is also an artwork community
Cons:
● Even if you use the paid version, there might be bugs on thedesktop version.
● It needs almost regular updates.
● You may require in-app purchases to access some features.
Hot Comments from netizens:
Paint is an excellent app with thousands of filters and effects to choose from. It allows you to experiment with your creativity and create animated pictures.
03MomentCam cartoons and stickers
Pros:
● Here, you can create your cartoon effects
● It has a very active art community to share photos and win prizes.
● It has an easy user interface
Cons:
● There might be errors in loading if you connect with wifi.
● You may require in-app purchases to access some features
● Ads are very annoying.
Hot comments from netizens:
This app offers you a wide range of filters and emoticons. You can easily edit your photos and convert them into cartoon versions.
04Cart
Pros:
● It is a user-friendly app.
● It has got an intuitive interface
● The effects present here are very interesting
Cons:
● The app contains a lot of ads
● The app may freeze sometimes
● It includes an ad.
Hot comments from netizens:
Camaro offers you a wide range of effects like pencil, sketch, carton, watermarks, etc. You can customize the parameters of each filter.
05Sketch Me! Sketch and Cartoon
Pros:
● You can save the image directly from here
● It has opacity adjustments and distinct edges
● There are multiple video effects, including cartoons
Cons:
● There are issues with image importing
● It costs $1.99 in the app store
● May lag at times
Hot comments from netizens:
Sketch Me! Sketch and Cartoon is a great app that allows you to edit images, manage settings, adjust sharpness, opacity, and create the best-animated version of your photo.
Key Takeaways from This Episode
● Creating cartoon versions of your photos is very simple.
● You need not be a skilled editor for that.
● You can work out your creativity seamlessly by accessing these apps, tools, and software.
● Take help from the aforementioned apps and get the desired results. Happy animating!
Illustrations and transforming pictures into cartoon characters have become famous these days. Are you keen to make one but unable to find the right apps that animate your pictures to do so?
This article will help you find the perfect match for you. You can make an animated cartoon of yourself.
In this article
01 [8 Ways to Get Creative With Your Photos into Cartoon Online Or With Apps](#Part 1)
02 [How to Make Animated Cartoon of Yourself in PowerPoint](#Part 2)
03 [Best 5 Apps to Cartoon Yourself on iPhone, iPad, and Android](#Part 3)
Part 1 8 Ways to Get Creative With Your Photos into Cartoon Online Or With Apps
01ToonCamera
Pros:
● ToonCamera is famous for its tremendous and in-time customer support.
● It has got a variety of high-quality filters for your pictures.
● The best part is that it allows you to apply filters in existing photos or videos and real-time.
Cons:
● ToonCamera comes only with the basic set of tools. You will get multiple filters but not various tools.
● It works only on iOS 8.1 or the later versions.
● The app will charge $1.99.
Hot comments from netizens:
ToonCamera allows you to crop and resize your photos. You can add any filter from its huge filter collection and give your picture an animated effect or Edit.
02Cartoon Camera Free
Pros:
● Cartoon Camera Free is an application that is very easy to use.
● The interface of this app is intuitive.
● You will have high-resolution export as output using a cartoon camera free for editing.
Cons:
● The shortcoming of this app is that it asks you to update frequently.
● The settings in the application are entirely automatic and already set.
● You cannot try your creativity or make changes in the editing according to your choice. It has only two effects.
Hot comments from netizens:
Cartoon Camera Free allows you to apply cartoon and pencil sketch effects to your photos. It is a tremendous animate your pictures app. Not only that, this app will enable you to view the impact in real-time.
03Clip2Comic & Caricature Maker
Pros:
● Clip2Comic & Caricature Maker has 1080p at export.
● This application can transform your pictures into posters, cartoons, and sketch art.
● The best of the app is that it allows you to reset image settings
Cons:
● It works only on iOS platforms.
● The app will leave back their watermark on your pictures. You need to get the paid version to remove the watermark.
● It is an expensive app compared to other editing apps.
Hot Comments from netizens:
People love this editing app. There are eight different comics, sketches, and cartoon characters. The app comes with a caricature and deformation tool and multiple image editing and enhancing tools.
04Cartoon Yourself Video Effects
Pros:
● The editing in this app allows you to keep realistic emotions in your videos and photos.
● The interface is very intuitive.
● The app imitates perfect emotions and has a wide variety for you.
Cons:
● Cartoon Yourself Video Effects may lag sometimes
● The effects may not work at times.
● You may require in-app purchases.
Hot Comments from netizens:
This app gives you access to a brand spectrum of emotions giving the perfect realistic touch to your video. You can share animated videos and gifs with your friends from this app.
05Cartoon Sketch Camera Pro
Pros:
● Cartoon Sketch Camera Pro has a sleek user interface.
● It has got eight cartoon effects and filters for your photos.
● It supports iOS13.
Cons:
● There are no image editors’ options.
● You may face image reporting issues.
● The app will cost you $1.99 to get rid of ads and distances.
Hot Comments from netizens:
Cartoon Sketch Camera Pro Cartoon has effects likePixellate, Sketch, Halftone, Dots, Crosshatch Swirl, and Emboss. You can pally these effects on your photos to get the desired output.
06Photo to Cartoon yourself Edit
Pros:
● You can directly click photos using the app that you want to edit.
● This app allows you to share the cartooned image via email.
● There are a lot of effects and textures available.
Cons:
● You may need in-app purchases to access all effects.
● You will not be able to stretch images to get more photo details.
● You cannot share files from here on social media.
Hot Comments from netizens:
Photo to Cartoon yourself Edit is an app that makes your picture look animated and transforms them into funny and beautiful cartoons in seconds. You can adjust the image in all formats and make the color look more vivid.
07Artist – Video and Photo Editor with Art Filters
Pros:
● Artist allows you to use cartoon filter with just a single click
● This app has multiple filters for every emotion.
● You can create square videos in low quality too.
Cons
● For video edits, the app supports only 30-sec duration.
● You may require in-app purchases to access some features.
● The app may lag at times.
Hot Comments from netizens:
Artist is a straightforward and helpful app. It has multiple features and effects for creating animated pictures. It offers video editing options that look fun. You can turn your selfie into cartoon characters using artisto in just one click.
08Moment Cartoon Caricature Cam
Pros:
● Moment Cartoon Caricature Cam holds an exciting selfie contest for users.
● The app has multiple collections of stickers.
● There are a variety of photo-enhancing tools.
Cons:
● The app is relatively slow at loading
● It includes a lot of ads.
● There are sometimes photo uploading issues.
Hot Comments from netizens:
Using Moment Cartoon Caricature Cam you can edit and enhance your photos. You can create a cartoon version of your selfies and participate in selfie contests.
Part 2 How to Make Animated Cartoon of Yourself in PowerPoint
To turn yourself into an animated character in PowerPoint, it is best to have an image with transparent or white background for best results. You can then use the picture effects, and other tools present in PowerPoint as mentioned to get your output.
● If the target picture has a background, your first step is to isolate it from its background. Remove the background or make it white.
● Now you need to sharpen the picture by 50%. This is available in the picture corrections effect.
● Next, copy the image and paste it back as a picture.
● Repeat these steps four times to make the lines in the image stand out sharply.
● In the end, add the color effect of Black and White at 20%.
● You will get quite a fairly detailed output.
Part 3 Best 5 Apps to Cartoon Yourself on iPhone, iPad, and Android
Five apps to cartoon yourself on iOS and Android platforms.
01Cartoon Yourself
Pros:
● It is a verybasic and simple to use photo to cartoon app for everyone.
● One does not require any editing skills to use this app.
● It contains nice and beautiful cartoons effects
Cons:
● The number of free filters and effects is minimal.
● You may require in-app purchases to access some features.
● It does not allow to click photos or record videos.
Hot Comments from netizens:
Cartoon Yourself is a great app to effortlessly turn your photos into animated versions. You have to add pictures from your gallery and then start editing. You will find a lot of editing tools in this app.
02Paint- art and cartoon filters
Pros:
● It has more than a thousand filters and effects
● Customized cartoon filters are set with various parameters
● It is also an artwork community
Cons:
● Even if you use the paid version, there might be bugs on thedesktop version.
● It needs almost regular updates.
● You may require in-app purchases to access some features.
Hot Comments from netizens:
Paint is an excellent app with thousands of filters and effects to choose from. It allows you to experiment with your creativity and create animated pictures.
03MomentCam cartoons and stickers
Pros:
● Here, you can create your cartoon effects
● It has a very active art community to share photos and win prizes.
● It has an easy user interface
Cons:
● There might be errors in loading if you connect with wifi.
● You may require in-app purchases to access some features
● Ads are very annoying.
Hot comments from netizens:
This app offers you a wide range of filters and emoticons. You can easily edit your photos and convert them into cartoon versions.
04Cart
Pros:
● It is a user-friendly app.
● It has got an intuitive interface
● The effects present here are very interesting
Cons:
● The app contains a lot of ads
● The app may freeze sometimes
● It includes an ad.
Hot comments from netizens:
Camaro offers you a wide range of effects like pencil, sketch, carton, watermarks, etc. You can customize the parameters of each filter.
05Sketch Me! Sketch and Cartoon
Pros:
● You can save the image directly from here
● It has opacity adjustments and distinct edges
● There are multiple video effects, including cartoons
Cons:
● There are issues with image importing
● It costs $1.99 in the app store
● May lag at times
Hot comments from netizens:
Sketch Me! Sketch and Cartoon is a great app that allows you to edit images, manage settings, adjust sharpness, opacity, and create the best-animated version of your photo.
Key Takeaways from This Episode
● Creating cartoon versions of your photos is very simple.
● You need not be a skilled editor for that.
● You can work out your creativity seamlessly by accessing these apps, tools, and software.
● Take help from the aforementioned apps and get the desired results. Happy animating!
How to Animate - Adobe Animate Tutorial for All
How to Animate - Adobe Animate Tutorial for All
An easy yet powerful editor
Numerous effects to choose from
Detailed tutorials provided by the official channel
Now, since the tool has too many elements to understand, it’s always a good strategy to start your journey with a dedicated Adobe Animate CC tutorial.
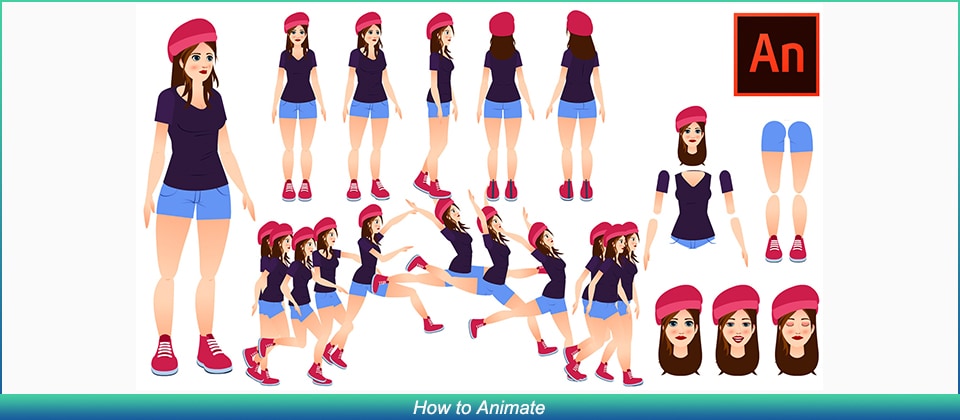
In today’s guide, we are going to introduce a few of these tutorials so that you can easily start creating animations in Adobe Animate CC, even if you have zero prior experience with the software.
In this article
01 [Adobe Animate CC tutorial](#Part 1)
02 [How Do You Animate in Adobe Animation?](#Part 2)
03 [Other Rare Tutorials for Self-learning to Learn How to Animate](#Part 3)
Part 1 Is Adobe Animate Good for Beginners?
When people start their careers as graphic designers, they always struggle to pick the right tool to accompany them during their journey. Since there are too many options to choose from, beginners always end up comparing a tool with other available options. They even weigh the pros and cons of each animation software individually to make the best decision. The same is the case with Adobe Animate. Many beginners want to know if Adobe Animate is the right animation software to get started as a professional graphic designer.
Since the Adobe community continues to grow rapidly, you’ll also be able to find a variety of Adobe Animate tutorials quite easily.
So, as far as beginner-friendliness is concerned, Adobe Animate is a complete winner that anyone can use to create stunning animations, designs, and templates right on their PCs.
Part 2 How Do You Animate in Adobe Animation?
1. Introduction to Adobe Animate
For complete beginners, there’s nothing better than a one-stop tutorial that provides a detailed insight into the basics of Adobe Animate and helps them get familiar with different elements of the software.
Well, this 2 hours 30 minutes long YouTube Adobe Animate tutorial by TipTut is what you need to start your journey with the software. The tutorial involves everything, starting from the simple setup to creating your first animation. You can either download this tutorial on your system or watch it online to understand the basic workflow of Adobe Animate.
Key Features:
● Learn how to set up a project in Adobe Animate.
● Adjusting the elements (such as frame rate) of your first animation.
● Completing your first animation using colors, gestures, and simple movement.
2. Creating HTML Banner Ads
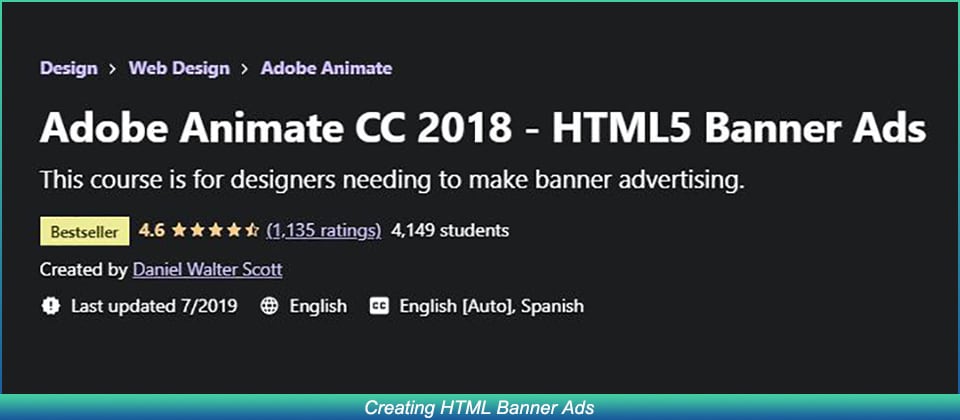
Apart from regular 2D animations, some designers also use Adobe Animate to create dedicated banner ads for their marketing campaigns using HTML 5. This will be a pretty useful Adobe Animate tutorial PDF for anyone who wants to join a marketing firm or plan exclusive marketing campaigns for his own products/services.
Key Features:
● Learn how to build HTML banner ads from scratch.
● Get familiar with the overall process of publishing a banner ad on platforms like Google AdWords.
● Understand how to keep the file size of a banner down to keep it optimized.
3. Animate CC Game Development
As we mentioned earlier, some people also use Adobe Animate to design games. If you want to follow the same career, this Adobe Animate CC tutorial is for you.
All the games developed in Adobe Animate are designed in HTML 5 and are usually web-based. By the end of this tutorial, you would have built a fully-functional game in Adobe Animate.
Key Features:
● Creating the game world.
● Understanding CreateJS Overview in Adobe Animate CC.
● Building in-game assets and configuring their unique features.
4. 2D Animation for Beginners
This is another useful Adobe Animate tutorial for all the beginners out there. Compiled by Walt Wonderwolk, the tutorial is separated into 12 parts in which he has explained different features of Adobe Animate in detail.
Key Features:
● Designing graphic vectors in Adobe Animate.
● Each feature is explained with a respective example.
● Learn how to add sounds to your animations to make them visually appealing.
5. Adobe Animate for Social Media
Being a feature-packed animation software, you can also use Adobe Animate to create content for your social media profiles. To do this, however, you must be familiar with all the necessary features of the tool. This 1.5 hours long tutorial will help you get familiar with features such as the tweening system that’ll help you turn regular social media posts into stunning animations.
Key Features:
● Designing simple assets and designs for social media.
● Exporting GIFs and Animated Videos.
● Customizing stills and motion graphics in Adobe Animate.
Key Takeaways from This Episode
● Adobe Animate boasts different applications, ranging from simple 2D animations to game designing
● Since Adobe Animation is an extensive software, it’ll always be a wise decision to get started with Adobe Animate tutorials.
● After you have compiled designs/animations in Adobe Animate, Wondershare Filmora Pro will help you enhance its overall quality.
Now, since the tool has too many elements to understand, it’s always a good strategy to start your journey with a dedicated Adobe Animate CC tutorial.
In today’s guide, we are going to introduce a few of these tutorials so that you can easily start creating animations in Adobe Animate CC, even if you have zero prior experience with the software.
In this article
01 [Adobe Animate CC tutorial](#Part 1)
02 [How Do You Animate in Adobe Animation?](#Part 2)
03 [Other Rare Tutorials for Self-learning to Learn How to Animate](#Part 3)
Part 1 Is Adobe Animate Good for Beginners?
When people start their careers as graphic designers, they always struggle to pick the right tool to accompany them during their journey. Since there are too many options to choose from, beginners always end up comparing a tool with other available options. They even weigh the pros and cons of each animation software individually to make the best decision. The same is the case with Adobe Animate. Many beginners want to know if Adobe Animate is the right animation software to get started as a professional graphic designer.
Since the Adobe community continues to grow rapidly, you’ll also be able to find a variety of Adobe Animate tutorials quite easily.
So, as far as beginner-friendliness is concerned, Adobe Animate is a complete winner that anyone can use to create stunning animations, designs, and templates right on their PCs.
Part 2 How Do You Animate in Adobe Animation?
1. Introduction to Adobe Animate
For complete beginners, there’s nothing better than a one-stop tutorial that provides a detailed insight into the basics of Adobe Animate and helps them get familiar with different elements of the software.
Well, this 2 hours 30 minutes long YouTube Adobe Animate tutorial by TipTut is what you need to start your journey with the software. The tutorial involves everything, starting from the simple setup to creating your first animation. You can either download this tutorial on your system or watch it online to understand the basic workflow of Adobe Animate.
Key Features:
● Learn how to set up a project in Adobe Animate.
● Adjusting the elements (such as frame rate) of your first animation.
● Completing your first animation using colors, gestures, and simple movement.
2. Creating HTML Banner Ads
Apart from regular 2D animations, some designers also use Adobe Animate to create dedicated banner ads for their marketing campaigns using HTML 5. This will be a pretty useful Adobe Animate tutorial PDF for anyone who wants to join a marketing firm or plan exclusive marketing campaigns for his own products/services.
Key Features:
● Learn how to build HTML banner ads from scratch.
● Get familiar with the overall process of publishing a banner ad on platforms like Google AdWords.
● Understand how to keep the file size of a banner down to keep it optimized.
3. Animate CC Game Development
As we mentioned earlier, some people also use Adobe Animate to design games. If you want to follow the same career, this Adobe Animate CC tutorial is for you.
All the games developed in Adobe Animate are designed in HTML 5 and are usually web-based. By the end of this tutorial, you would have built a fully-functional game in Adobe Animate.
Key Features:
● Creating the game world.
● Understanding CreateJS Overview in Adobe Animate CC.
● Building in-game assets and configuring their unique features.
4. 2D Animation for Beginners
This is another useful Adobe Animate tutorial for all the beginners out there. Compiled by Walt Wonderwolk, the tutorial is separated into 12 parts in which he has explained different features of Adobe Animate in detail.
Key Features:
● Designing graphic vectors in Adobe Animate.
● Each feature is explained with a respective example.
● Learn how to add sounds to your animations to make them visually appealing.
5. Adobe Animate for Social Media
Being a feature-packed animation software, you can also use Adobe Animate to create content for your social media profiles. To do this, however, you must be familiar with all the necessary features of the tool. This 1.5 hours long tutorial will help you get familiar with features such as the tweening system that’ll help you turn regular social media posts into stunning animations.
Key Features:
● Designing simple assets and designs for social media.
● Exporting GIFs and Animated Videos.
● Customizing stills and motion graphics in Adobe Animate.
Key Takeaways from This Episode
● Adobe Animate boasts different applications, ranging from simple 2D animations to game designing
● Since Adobe Animation is an extensive software, it’ll always be a wise decision to get started with Adobe Animate tutorials.
● After you have compiled designs/animations in Adobe Animate, Wondershare Filmora Pro will help you enhance its overall quality.
Animate Your Photo Online with These Awesome Tools
Animate Your Photo Online with These Awesome Tools
An easy yet powerful editor
Numerous effects to choose from
Detailed tutorials provided by the official channel
Animating your family photos online will not only make you nostalgic but will also make you relive that moment. Adding on to this, animating your photos can also make your boring ppt interesting.
This article helps you understand how to animate your pictures online for free and the different features you can use.
In this article
01 [How Can I Turn My Photo into a Cartoon Online?](#Part 1)
02 [Some Other Tools/Plugins to Help You Improve Photo Animate](#Part 2)
Part 1 Part 1: How Can I Turn My Photo into a Cartoon Online?
Animation gives life to your lifeless photos, makes them more interesting, and attracts an audience. You can add more fun to your normal photos by turning your photos into a cartoon. One of the simplest ways is by turning your photo into a cartoon by using online tools. In this section of the article, we will explore more on some online tools which will help you to turn your photos into a cartoon online.
01Befunky
An online cartoonizer that processes your photo online at a very good speed and gives you a cartoon version of the photo in seconds.
A single click on your cartoonizer and you’ll go from photo to cartoon in seconds. Go to the photo editor and click on the artsy section. You will have five classic cartoonizer effects and you will be one click away from your beautiful results.
Pros
Can upload several photos simultaneously.
Very simple interface that supports drag and drop feature.
It is possible to download photos from the stream.
Cons
Many functions are not free.
Too much advertising.
Price $4.95/month
Rating 4.1/5
“Great collage maker and photo editing tools.” - Fayak. A
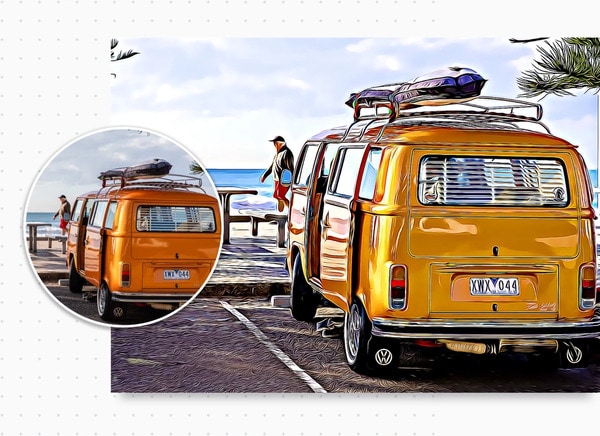
02Painnt- Art & Cartoon Filters
Painnt is one of the best cartoons yourself apps on the market with more than a thousand filters and effects. It is also a creative community which not only helps you animate your photo online but also helps you discover the artwork of your taste or meet like-minded people.
Pros
Regularly updates its software to support more features.
Customize cartoon filter settings with various parameters.
Cons
Bugs might cause trouble to your system even if you have a purchases version.
Price Free/ in-app purchases will not cost more than $9.99
Rating 4.5/ 5
“Great app lots of fun don’t put no money into the custom style.” - SB
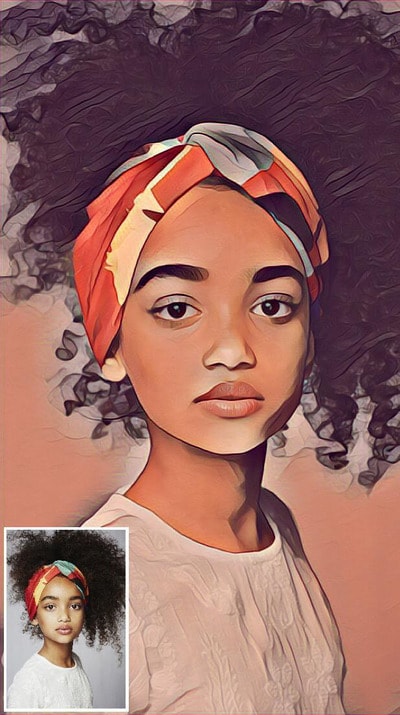
03Prisma Photo Editor
A few years ago, Prisma is one of the most popular applications to animate your photo online. Though its popularity has reduced it still has some cool features.
Pros
Has a good number of filters and you will have a lot of options.
Every image you try will be automatically saved to your camera roll.
Create unique-looking features.
Cons
Create unique-looking features.
Users have no control over how the app reads every image and gives output.
Price Users have no control over how the app reads every image and gives output.
Rating 4.6/5
“I am seriously addicted to this app. I use it to change my 360 pics into mind blowing Virtual Reality 3D photosphere.” -Leighton Scharf
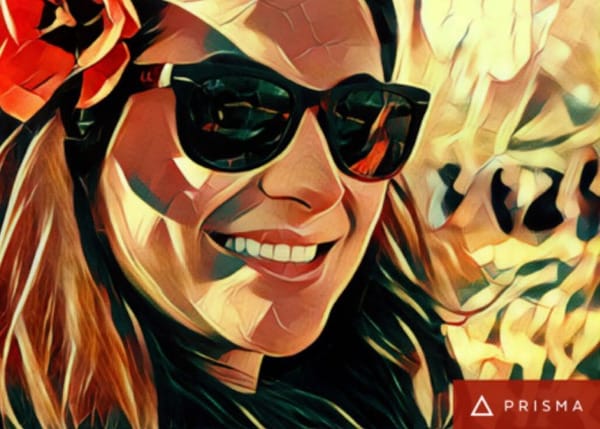
04Cartoon Sketch Camera Pro
Sketch, Cartoon, Halftone, Swirl, Pixellate, Emboss, Crosshatch, or Dots effects can be used to cartoon a photo in this app. but there are only a limited amount of cartoon effects which makes the cartoon sketch camera pro, not one of the best options to animate your photo online free.
Pros
It includes 8 different filters and effects.
You can save a photo to your cartoon library.
Cons
Supported by only Mac products.
Limited filters and effects
Issues wid bugs
Annoying ads
Price Free/In-app purchases.
Rating 3.6/5
“Get ready to watch a lot of application ads”
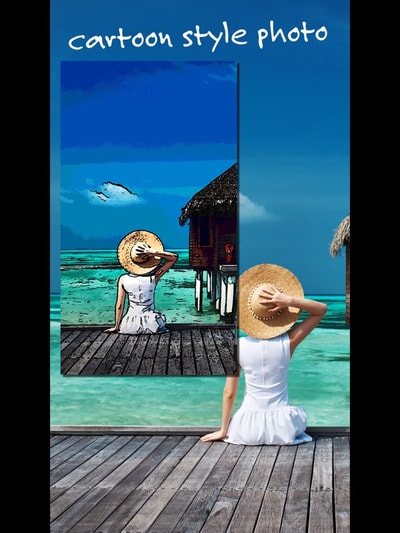
05Cartoon Photo Editor
The cartoon photo editor app helps you create animated pictures online for free. All effects can be previewed in real-time, which helps you to see your results before capturing a picture or recording a video.
Pros
Supports autofocus when shooting a video, picture.
Can also use cartoon effects on previously captured pictures.
Cons
Ads can be bothersome.
Price Free/ In-app purchases.
Rating 4.4 /5
“Not the most well-developed app.” - Nunya
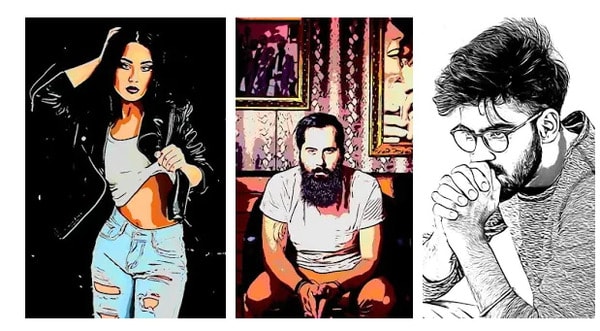
06Photo Lab
Pros
Has an immense number of filters.
Can easily share pictures on social media.
Easy interface
Cons
It’s an internet-based app, so limited features when using offline.
Price Free/ PRO subscription- $4.99/month
Rating 4.6/5
“I love so many aspects of this app.” - creativeme
07Toon Me
Special AI developed algorithm in Toon me app instantly gives you, your cartoon picture. Just take a picture and upload it and get ready to meet your cartoon self. Toon me is one of the easiest ways to animate your photo online.
Pros
Easy to use.
Cool filters which are unique from normal toon apps.
No adds.
Cons
Good filters are only available after paid subscriptions.
Some add ons are and filters are strange.
The App doesn’t let you cartoon any photo. it has to have a face on it.
Price The App doesn’t let you cartoon any photo. it has to have a face on it.
Rating 4.5/5
“Great app. I’m thinking of actually paying for it to try some of the other cool filters,” - Angel

08MomentCam Cartoons and stickers
This app offers a wide range of filters and stickers. besides this, MomentCam is a community that awards prizes to its most creative members. You can accessorize your cartoon with hairbands, sunglasses, pick hairstyles or beards.
Pros
Great cartoon effects.
Easy to use.
Cons
Bugs to be fixed.
May witness errors while connected to a network.
New updates are causing issues.
Price Free/ Subscription $4.99/month
Rating 4.5 / 5
“Disappointed in the new update. Interface is confusing to use.” - Kristie
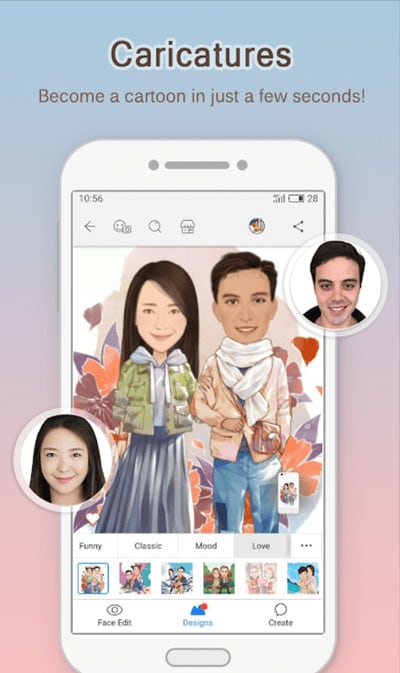
Part 2 Some Other Tools/Plugins to Help You Improve Photo Animate
012D Photography Online
An animation is a vital tool for any digital artist. Leaving your images to normal static pictures can sometimes bore your audience. Your 2d photography can be animated easily online. To animate your photos online you have several online tools like -
Open Toonz It is a powerful tool that is also open-source software.
Piskel Piskel is an online tool for creating animated sprites and pixel art. It’s easy to use and requires no sign-up.
Asperite Is another online tool that can animate your 2d photography online. You can purchase the software for $19.99.
023D Photography Online
3D This- 3Dthis is a unique animation platform that supports 3D animation with the help of amazing in-app tools. It can create 3D models of people’s faces to morph animations. You can convert any picture to a 3D image. Being free software it helps you to learn and explore and create 3D animated pictures online for free.
03Animated Photo Frame Online Editor
Animated photo frames and effects will instantly turn any photo into an awesome greeting card. You can now creatively make your greeting cards for any occasion by using these animations which will convert into gif form.
04Animate Face from Photo Online
This particular type of animation has created a huge trend on social media. Animating faces online you can see how a person in the photograph smiles, moves their head around, etc. People often use it to relive their nostalgic moments of their ancestor’s pictures. My heritage blog is one of the websites which makes still faces move. With the help of My heritage blog, you can animate any of the faces in your photos to see them move, blink, and smile. My heritage easily helps you to animate your family photos online.
Now that we have seen various kinds of animation tools and pros and cons, let us look into one such amazing tool that can animate your photo online easily and very professionally.
Key Takeaways from This Episode
● In this article we have seen how animating a picture can make a static picture into an interesting art piece.
● We have also explored various tools that can make a cartoon and animate your photo online. We have also explored each tool’s pros and cons, their pricing, reviews, and ratings. We have also seen various other tools which help you improve your photo animate. We have also seen. With the advancement of technology, we learned that old pictures of our ancestors can be bought into motion.
● In the later part of the article, we also learned about a specific software called Filmora Pro that has awesome features. In addition to this, Filmora Pro gives a very professional result.
Animating your family photos online will not only make you nostalgic but will also make you relive that moment. Adding on to this, animating your photos can also make your boring ppt interesting.
This article helps you understand how to animate your pictures online for free and the different features you can use.
In this article
01 [How Can I Turn My Photo into a Cartoon Online?](#Part 1)
02 [Some Other Tools/Plugins to Help You Improve Photo Animate](#Part 2)
Part 1 Part 1: How Can I Turn My Photo into a Cartoon Online?
Animation gives life to your lifeless photos, makes them more interesting, and attracts an audience. You can add more fun to your normal photos by turning your photos into a cartoon. One of the simplest ways is by turning your photo into a cartoon by using online tools. In this section of the article, we will explore more on some online tools which will help you to turn your photos into a cartoon online.
01Befunky
An online cartoonizer that processes your photo online at a very good speed and gives you a cartoon version of the photo in seconds.
A single click on your cartoonizer and you’ll go from photo to cartoon in seconds. Go to the photo editor and click on the artsy section. You will have five classic cartoonizer effects and you will be one click away from your beautiful results.
Pros
Can upload several photos simultaneously.
Very simple interface that supports drag and drop feature.
It is possible to download photos from the stream.
Cons
Many functions are not free.
Too much advertising.
Price $4.95/month
Rating 4.1/5
“Great collage maker and photo editing tools.” - Fayak. A
02Painnt- Art & Cartoon Filters
Painnt is one of the best cartoons yourself apps on the market with more than a thousand filters and effects. It is also a creative community which not only helps you animate your photo online but also helps you discover the artwork of your taste or meet like-minded people.
Pros
Regularly updates its software to support more features.
Customize cartoon filter settings with various parameters.
Cons
Bugs might cause trouble to your system even if you have a purchases version.
Price Free/ in-app purchases will not cost more than $9.99
Rating 4.5/ 5
“Great app lots of fun don’t put no money into the custom style.” - SB
03Prisma Photo Editor
A few years ago, Prisma is one of the most popular applications to animate your photo online. Though its popularity has reduced it still has some cool features.
Pros
Has a good number of filters and you will have a lot of options.
Every image you try will be automatically saved to your camera roll.
Create unique-looking features.
Cons
Create unique-looking features.
Users have no control over how the app reads every image and gives output.
Price Users have no control over how the app reads every image and gives output.
Rating 4.6/5
“I am seriously addicted to this app. I use it to change my 360 pics into mind blowing Virtual Reality 3D photosphere.” -Leighton Scharf
04Cartoon Sketch Camera Pro
Sketch, Cartoon, Halftone, Swirl, Pixellate, Emboss, Crosshatch, or Dots effects can be used to cartoon a photo in this app. but there are only a limited amount of cartoon effects which makes the cartoon sketch camera pro, not one of the best options to animate your photo online free.
Pros
It includes 8 different filters and effects.
You can save a photo to your cartoon library.
Cons
Supported by only Mac products.
Limited filters and effects
Issues wid bugs
Annoying ads
Price Free/In-app purchases.
Rating 3.6/5
“Get ready to watch a lot of application ads”
05Cartoon Photo Editor
The cartoon photo editor app helps you create animated pictures online for free. All effects can be previewed in real-time, which helps you to see your results before capturing a picture or recording a video.
Pros
Supports autofocus when shooting a video, picture.
Can also use cartoon effects on previously captured pictures.
Cons
Ads can be bothersome.
Price Free/ In-app purchases.
Rating 4.4 /5
“Not the most well-developed app.” - Nunya
06Photo Lab
Pros
Has an immense number of filters.
Can easily share pictures on social media.
Easy interface
Cons
It’s an internet-based app, so limited features when using offline.
Price Free/ PRO subscription- $4.99/month
Rating 4.6/5
“I love so many aspects of this app.” - creativeme
07Toon Me
Special AI developed algorithm in Toon me app instantly gives you, your cartoon picture. Just take a picture and upload it and get ready to meet your cartoon self. Toon me is one of the easiest ways to animate your photo online.
Pros
Easy to use.
Cool filters which are unique from normal toon apps.
No adds.
Cons
Good filters are only available after paid subscriptions.
Some add ons are and filters are strange.
The App doesn’t let you cartoon any photo. it has to have a face on it.
Price The App doesn’t let you cartoon any photo. it has to have a face on it.
Rating 4.5/5
“Great app. I’m thinking of actually paying for it to try some of the other cool filters,” - Angel
08MomentCam Cartoons and stickers
This app offers a wide range of filters and stickers. besides this, MomentCam is a community that awards prizes to its most creative members. You can accessorize your cartoon with hairbands, sunglasses, pick hairstyles or beards.
Pros
Great cartoon effects.
Easy to use.
Cons
Bugs to be fixed.
May witness errors while connected to a network.
New updates are causing issues.
Price Free/ Subscription $4.99/month
Rating 4.5 / 5
“Disappointed in the new update. Interface is confusing to use.” - Kristie
Part 2 Some Other Tools/Plugins to Help You Improve Photo Animate
012D Photography Online
An animation is a vital tool for any digital artist. Leaving your images to normal static pictures can sometimes bore your audience. Your 2d photography can be animated easily online. To animate your photos online you have several online tools like -
Open Toonz It is a powerful tool that is also open-source software.
Piskel Piskel is an online tool for creating animated sprites and pixel art. It’s easy to use and requires no sign-up.
Asperite Is another online tool that can animate your 2d photography online. You can purchase the software for $19.99.
023D Photography Online
3D This- 3Dthis is a unique animation platform that supports 3D animation with the help of amazing in-app tools. It can create 3D models of people’s faces to morph animations. You can convert any picture to a 3D image. Being free software it helps you to learn and explore and create 3D animated pictures online for free.
03Animated Photo Frame Online Editor
Animated photo frames and effects will instantly turn any photo into an awesome greeting card. You can now creatively make your greeting cards for any occasion by using these animations which will convert into gif form.
04Animate Face from Photo Online
This particular type of animation has created a huge trend on social media. Animating faces online you can see how a person in the photograph smiles, moves their head around, etc. People often use it to relive their nostalgic moments of their ancestor’s pictures. My heritage blog is one of the websites which makes still faces move. With the help of My heritage blog, you can animate any of the faces in your photos to see them move, blink, and smile. My heritage easily helps you to animate your family photos online.
Now that we have seen various kinds of animation tools and pros and cons, let us look into one such amazing tool that can animate your photo online easily and very professionally.
Key Takeaways from This Episode
● In this article we have seen how animating a picture can make a static picture into an interesting art piece.
● We have also explored various tools that can make a cartoon and animate your photo online. We have also explored each tool’s pros and cons, their pricing, reviews, and ratings. We have also seen various other tools which help you improve your photo animate. We have also seen. With the advancement of technology, we learned that old pictures of our ancestors can be bought into motion.
● In the later part of the article, we also learned about a specific software called Filmora Pro that has awesome features. In addition to this, Filmora Pro gives a very professional result.
5 Foolproof Amazing Anime Text to Speech Tips
5 Foolproof Amazing Anime Text to Speech Tips for Makers
An easy yet powerful editor
Numerous effects to choose from
Detailed tutorials provided by the official channel
Our topic for today’s article is on that exact same subject. Or, rather, more specifically, anime text-to-speech.
For those who want more than the usual robotic text-to-speech AI that you see in more professional software. Learn more about all this below, we’ve prepared an entire guide for you!
In this article
01 [What is the Most Realistic Sounding Text to Speech & How to Do It?](#Part 1)
02 [How to Make Your Own Text to Speech Videos for Youtube](#Part 2)
03 [How to Get More Voices for Text to Speech?](#Part 3)
04 [Top 5 Tips on Anime Text to Speech](#Part 4)
Part 1 What is the Most Realistic Sounding Text to Speech & How to Do It?
To start off, we’ve included this little second on need-to-know information regarding text-to-speech. Starting with:
01How did text to speech get popular?
Perhaps unsurprisingly, the text-to-speech function was developed to increase accessibility for those who have trouble reading on screen-text. Either as a result of visual impairment, are blindness. However, with its emergence came popular programs like Audible, which introduced even those without accessibility problems to its convenience for multi-tasking purposes.
02How to get the most realistic sounding text to speech?
There are several ways you can increase the natural sound of your text-to-speech:
● You can choose a tone that suits your taste.
● You can choose a voice gender that you are more comfortable with.
● And you can increase the speed of the text to reduce the awkward, and unnatural pauses that occur after each word.
In the end, though, the best way to get realistic speech is to find a tool that offers high-quality audio options. Which is what we’ll be introducing in the latter sections:
Part 2 How to Make Your Own Text to Speech Videos for YouTube
If you want to create your own anime text-to-speech for your YouTube videos (which is popular with a lot of YouTubers these days), the process is about the same no matter what text-to-speech option you end up choosing in the end. For our examples below, we will be using Natural Readers though, which is a FREE tool, making it a good choice for those who are just looking to try it out.
Step 1: Compose Your Text
The first step is to compose your text! You might prefer to do this on Google Docs or Word, but a lot of text-to-speech tools do offer you a way of composing your text along with them (like the online tool Natural Readers):

Step 2: Choose Voice / Reader
Next, it’s time to choose the reader that you want your text to be read by!
Usually, there are options for different types of accents and languages offered. So, if you want your text to speech to match that of your desired anime characters, you should play around with these options to get the right one.

Step 3: Choose Reading Speed!
Next, it’s time to choose your desired reading speed!
Most readers start off at 1X speed on average, but we personally recommend going for at least 1.25X - 1.5X for an instantly more natural-sounding text-to-speech anime characters.

Step 4: Choose Output Format
And finally, to finish us off, it’s time to choose what output format you want your text-to-speech audio to be! To keep this simple for uploading to YouTube, we recommend sticking with MP3, which most editors accept.

Part 3 How to Get More Voices for Text to Speech?
If you think that the available cartoon characters text-to-speech voices you have are not quite doing it for your project, then you can always explore alternative, third-party options! There are many of these available. Although, you’ll have to check with your text-to-speech reader or maker to make sure that it allows for such a feat:
01Method 1: Windows Text-to-Speech Voices
If you’re looking to change your computer’s text-to-speech voice, then the place to look for this is on ‘Control Panel > Speech’. There, not only can you choose from a variety of different voice options, but you can also change voice speed and voice pitch (how high or low the pitch is), which is a great way of getting a very specific kind of tone for your anime text-to-speech creations.

02Method 2: Third-Party Voices (Screaming Bee)
Next is the third-party resource, Screaming Bee , which offers a good variety of text-to-speech voices that you can try out as well! Using this method will, of course, require downloading and applying these voices for your chosen text-to-speech reader. For example, if you want to use the Windows reader, go to the Control Panel > Speech page for the option to apply it there.

03Method 3: Third-Party Voices (Cepstral Voices)
Another resource that you can check out is Cepstral Voices . Just like Screaming Bee, it offers a range of text-to-speech voices that you can try out to see which one suits your taste most. This includes text-to-speech cartoon characters and text-to-speech anime characters voices!

Part 4 Top 5 Tips on Anime Text to Speech
Now, onto some more anime text-to-speech options that you can try in order to make your text-to-speech script sound exactly like your favorite cartoon or anime characters! For this list, we’ve not only included a description of each reader but also why you might want to try it out:
01Flixier
Flixier is the first anime text-to-speech maker on this list! It is not a free solution. You can try it out for FREE, but if you want to use it for its full capacity, then you’ll need to pay for one of their subscription packages, which start at $10 per month (for access to longer audios, unlimited projects, and more advanced export options.)
● Flixier comes with many different voice options.
● It is an online tool, so no download or installation is required.
● It comes with advanced team functionalities.

02Woord
Woord is our next pick because it works very efficiently at turning text into speech. All you need to do is plug in your text and it will convert it immediately! Much like Flixier, however, it is a freemium tool. So, while you can try it out for free, if you truly want to use it for creating professional projects, you’ll need to unlock one of its subscription packages (which start at $25 per month!)
● Instant text-to-speech maker.
● An online tool, no need for download or installation.
● Lots of natural-sounding voices to choose from.

03Speechelo
Speechelo is a bit different from the two text-to-speech makers on this list. However, that may just mean that it is a more preferable option for some. More specifically, it’s really more of a ‘voice-over-maker’. It does still use AI in order to create human-like voiceovers, with several different options to voice and language. The difference then lies in the fact that it is a one-time payment software that normally costs around $100. In this way, you can avoid long-term ongoing subscription plans. But it is a heavier commitment from the get-go.
● High-quality AI voices for creating realistic voice-overs.
● One-time payment only! No Subscription fees are needed.
● Works in several different languages.

04Cartoon Animator 4
Cartoon Animator 4 is a good option if you’re really looking for that anime or character style for your audio. It works just like your average text-to-speech maker, generally, although it does also offer a couple of more advanced features for those who are looking into animation.
● Free-to-use text-to-speech anime character
● Adjustable volume, pitch, and speed voice parameters.
● A wide variety of voice options to choose from.

05TTS Reader
TTSReader, much like Cartoon Animator 4, is a FREE online tool that you can use in order to create quick and easy text-to-speech audio for your cartoon/anime characters. It doesn’t have as many advanced features as some of the other tools out there, but it can get the job done if all you’re looking for is something easy to use.
● Available to use online for FREE.
● Variety of different voice options.
● Adjustable speed for voice.

Key Takeaways from This Episode
● If you’re looking to increase conversions with better-sounding voiceovers for your video content, then it’s important that you’re aware of all the different options out there!
● Most of these text-to-speech tools work in the same way, but you’ll notice that some of them offer more advanced tools than others.
● In the end, you’ll have to find one that works with your budget and learn how to play around with its settings to make sure that you are getting the most out of your text-to-speech maker.
Our topic for today’s article is on that exact same subject. Or, rather, more specifically, anime text-to-speech.
For those who want more than the usual robotic text-to-speech AI that you see in more professional software. Learn more about all this below, we’ve prepared an entire guide for you!
In this article
01 [What is the Most Realistic Sounding Text to Speech & How to Do It?](#Part 1)
02 [How to Make Your Own Text to Speech Videos for Youtube](#Part 2)
03 [How to Get More Voices for Text to Speech?](#Part 3)
04 [Top 5 Tips on Anime Text to Speech](#Part 4)
Part 1 What is the Most Realistic Sounding Text to Speech & How to Do It?
To start off, we’ve included this little second on need-to-know information regarding text-to-speech. Starting with:
01How did text to speech get popular?
Perhaps unsurprisingly, the text-to-speech function was developed to increase accessibility for those who have trouble reading on screen-text. Either as a result of visual impairment, are blindness. However, with its emergence came popular programs like Audible, which introduced even those without accessibility problems to its convenience for multi-tasking purposes.
02How to get the most realistic sounding text to speech?
There are several ways you can increase the natural sound of your text-to-speech:
● You can choose a tone that suits your taste.
● You can choose a voice gender that you are more comfortable with.
● And you can increase the speed of the text to reduce the awkward, and unnatural pauses that occur after each word.
In the end, though, the best way to get realistic speech is to find a tool that offers high-quality audio options. Which is what we’ll be introducing in the latter sections:
Part 2 How to Make Your Own Text to Speech Videos for YouTube
If you want to create your own anime text-to-speech for your YouTube videos (which is popular with a lot of YouTubers these days), the process is about the same no matter what text-to-speech option you end up choosing in the end. For our examples below, we will be using Natural Readers though, which is a FREE tool, making it a good choice for those who are just looking to try it out.
Step 1: Compose Your Text
The first step is to compose your text! You might prefer to do this on Google Docs or Word, but a lot of text-to-speech tools do offer you a way of composing your text along with them (like the online tool Natural Readers):
Step 2: Choose Voice / Reader
Next, it’s time to choose the reader that you want your text to be read by!
Usually, there are options for different types of accents and languages offered. So, if you want your text to speech to match that of your desired anime characters, you should play around with these options to get the right one.
Step 3: Choose Reading Speed!
Next, it’s time to choose your desired reading speed!
Most readers start off at 1X speed on average, but we personally recommend going for at least 1.25X - 1.5X for an instantly more natural-sounding text-to-speech anime characters.
Step 4: Choose Output Format
And finally, to finish us off, it’s time to choose what output format you want your text-to-speech audio to be! To keep this simple for uploading to YouTube, we recommend sticking with MP3, which most editors accept.
Part 3 How to Get More Voices for Text to Speech?
If you think that the available cartoon characters text-to-speech voices you have are not quite doing it for your project, then you can always explore alternative, third-party options! There are many of these available. Although, you’ll have to check with your text-to-speech reader or maker to make sure that it allows for such a feat:
01Method 1: Windows Text-to-Speech Voices
If you’re looking to change your computer’s text-to-speech voice, then the place to look for this is on ‘Control Panel > Speech’. There, not only can you choose from a variety of different voice options, but you can also change voice speed and voice pitch (how high or low the pitch is), which is a great way of getting a very specific kind of tone for your anime text-to-speech creations.
02Method 2: Third-Party Voices (Screaming Bee)
Next is the third-party resource, Screaming Bee , which offers a good variety of text-to-speech voices that you can try out as well! Using this method will, of course, require downloading and applying these voices for your chosen text-to-speech reader. For example, if you want to use the Windows reader, go to the Control Panel > Speech page for the option to apply it there.
03Method 3: Third-Party Voices (Cepstral Voices)
Another resource that you can check out is Cepstral Voices . Just like Screaming Bee, it offers a range of text-to-speech voices that you can try out to see which one suits your taste most. This includes text-to-speech cartoon characters and text-to-speech anime characters voices!
Part 4 Top 5 Tips on Anime Text to Speech
Now, onto some more anime text-to-speech options that you can try in order to make your text-to-speech script sound exactly like your favorite cartoon or anime characters! For this list, we’ve not only included a description of each reader but also why you might want to try it out:
01Flixier
Flixier is the first anime text-to-speech maker on this list! It is not a free solution. You can try it out for FREE, but if you want to use it for its full capacity, then you’ll need to pay for one of their subscription packages, which start at $10 per month (for access to longer audios, unlimited projects, and more advanced export options.)
● Flixier comes with many different voice options.
● It is an online tool, so no download or installation is required.
● It comes with advanced team functionalities.
02Woord
Woord is our next pick because it works very efficiently at turning text into speech. All you need to do is plug in your text and it will convert it immediately! Much like Flixier, however, it is a freemium tool. So, while you can try it out for free, if you truly want to use it for creating professional projects, you’ll need to unlock one of its subscription packages (which start at $25 per month!)
● Instant text-to-speech maker.
● An online tool, no need for download or installation.
● Lots of natural-sounding voices to choose from.
03Speechelo
Speechelo is a bit different from the two text-to-speech makers on this list. However, that may just mean that it is a more preferable option for some. More specifically, it’s really more of a ‘voice-over-maker’. It does still use AI in order to create human-like voiceovers, with several different options to voice and language. The difference then lies in the fact that it is a one-time payment software that normally costs around $100. In this way, you can avoid long-term ongoing subscription plans. But it is a heavier commitment from the get-go.
● High-quality AI voices for creating realistic voice-overs.
● One-time payment only! No Subscription fees are needed.
● Works in several different languages.
04Cartoon Animator 4
Cartoon Animator 4 is a good option if you’re really looking for that anime or character style for your audio. It works just like your average text-to-speech maker, generally, although it does also offer a couple of more advanced features for those who are looking into animation.
● Free-to-use text-to-speech anime character
● Adjustable volume, pitch, and speed voice parameters.
● A wide variety of voice options to choose from.
05TTS Reader
TTSReader, much like Cartoon Animator 4, is a FREE online tool that you can use in order to create quick and easy text-to-speech audio for your cartoon/anime characters. It doesn’t have as many advanced features as some of the other tools out there, but it can get the job done if all you’re looking for is something easy to use.
● Available to use online for FREE.
● Variety of different voice options.
● Adjustable speed for voice.
Key Takeaways from This Episode
● If you’re looking to increase conversions with better-sounding voiceovers for your video content, then it’s important that you’re aware of all the different options out there!
● Most of these text-to-speech tools work in the same way, but you’ll notice that some of them offer more advanced tools than others.
● In the end, you’ll have to find one that works with your budget and learn how to play around with its settings to make sure that you are getting the most out of your text-to-speech maker.
How to Make 3D Cartoon of Yourself
How to Make a 3D Cartoon of Yourself
An easy yet powerful editor
Numerous effects to choose from
Detailed tutorials provided by the official channel
From among the several trends that emerged on Social Media, making a 3D cartoon of yourself is probably the most popular.
Learning how to make 3D cartoons may just be in the height of demand in the near future.
In this article
01 [What is AI Artist? Plus how to cartoon yourself with it ](#Part 1)
02 [How to Create a 3D Cartoon of Yourself for Meta ](#Part 2)
03 [How to make 3D Cartoon From a Photo ](#Part 3)
04 [Five 3D cartoon Disney-Fied yourself apps ](#Part 4)
05 [More New Useful Tools to Upgrade Your Animation/Cartoon](#Part 5)
Part 1 What is AI Artist? Plus how to cartoon yourself with it
We all remember the Cartoon filter challenge on Facebook, right? Everyone was excited to transform themselves into a cartoon. The options of making personalized cartoon representations of yourself was pretty limited back then. With the Voila AI artist app you can choose at least 3 different cartoon variations of yourself.

The Voila AI artist app can be downloaded from the Apple App store and Android Play Store. You can use the app for free but for faster editing and an ad free experience, you will need to upgrade to the paid version. Other than just creating a cartoon of yourself, you can also create renaissance portraits and caricatures.
● Step 1: Download the Voila AI artist App for your device, and complete the installation process. Allow the app to access your Phone’s Camera rolling permission.
● Step 2: Select the style option you want to use. What we are using here is 3D cartoon (other options: 2D Cartoon, Caricature & and the rest). Touch the arrow and start.
● Step 3: Now, with your camera roll open, click a new one or choose from your gallery. You can also find a celebrities option where you can search for celebrities. This generates a four-grid choice. If you are using the free version, then be prepared to encounter one or two ads. After a few seconds, you can exit out and get back to your images.
● Step 4: You will receive a composite grid of four options; your original image, plus three cartoon representations (Royalty 3D, Baby 3D & Cartoon 3D). Here, you can select the option you like the most and start editing. Locate the up arrow button to immediately share on your preferred social media or simply save a copy in your device.
If the AI artist app has any paid and premium version, upon subscribing you will get ad free & watermark free animated representations.
Part 2 How to Create a 3D Cartoon of Yourself for Meta
Facebook only recently rebranded themselves as Meta. This has now started the rush to create a live virtual interaction space, and big companies like Microsoft and Nvidia are now competing with each other to bridge the gap.
Soon, activities like convening meetings, attending live events or even dating online would take place in virtual environments. So best be prepared for the future by creating a 3D avatar for yourself.
Your virtual avatar would be able to interact with the real world through a virtual platform by using VR headsets and other tech. Sensing your virtual presence would be almost the same as the real world for your peers and colleagues. You can attend a meeting without ever having to travel.
The process behind creating a 3D cartoon of yourself for Meta platforms starts by establishing a facial rig which is like a framework for the cartoon animations to sit on. These days, most apps come with automatic FACS facial rigging which is why certain Instagram filters like the Puppy nose filter was possible.
Presently, creating a complete 3D virtual model of yourself is a bit complicated to do on your own but soon this service will be automated in an app for you.
Part 3 How to make 3D Cartoon From a Photo
Photoshop is no doubt one of the most influential digital assets that allow you to do virtually anything with your photos. Of course, this includes turning your photos into 3D cartoon.
There are advanced techniques and tools you can use to retouch your image to achieve an animated like look for your portraits.
Of course, you can find multiple Photoshop hacks online but the following guide can give you an easy to follow idea of how to go about creating your own 3D cartoon out of an image.

Note; These steps are to be perceived as a simplified overview of your objectives when editing on Photoshop;
● To start out on turning your image into a 3D character, you need to learn how to create layers and then stack them on each other.
● You can then ‘liquify’ these layers to form a mould for your image.
● Apply skin softening techniques to take away the realistic features of the photo before working on turning it into a cartoon.
● Now you can start focus on applying the details to features like eyes, hair, nose and facial lines on your cartoon image.
● You can also change the colour of any individual features on your image. This method is applicable in making caricatures of your photo as well.
Part 4 Five 3D cartoon Disney-Fied yourself apps
Vibrant colours, gorgeous large eyes and shiny hair – pretty much sums up every Disney character you have ever seen. Now, everyone is obsessed with making their own Disney avatar and for good reason. You can use it as filter or upload it on your profile. Here are some of the most in-trend AI powered 3D Disneyfied apps you can use;
01Voila AI Artist

The Voila AI Artist app was released back in March of 2021 and has been the rage among Disneyfied apps. To clarify, the app has nothing to do with the Disney animation company but is perceived by users as the most successful app for disneyfication. Its on-board AI can create 3D and 2D renderings for your image along with hand drawn caricatures. You can download the app on App Store and Google Play.
02ToonMe

The next best app on our Disneyfied list is ToonMe. It also uses AI to turn photos into Disney Characters. The app keeps updating new cartoonish filters which you can use over your images. There are various other features which you can try as well like recreating your photos into classic vectors. The results are of extraordinary quality and can be uploaded on Instagram. You can download the app for free from Play store and App store.
03Snapchat

Snapchat has been around for some time now so you might already have it on your phone. Snapchat offers a vast range of filters and effects that of course includes Disneyfied filters and 3D cartoon images. You can look for them on the Snapchat search bar. New filters keep popping up every day which you can apply over your own images.
04Prisma

Prisma is a notoriously well know pop photo editor – which means it makes your photos ‘pop’. You can use it to edit photos on both Android and iPhone. It also comes with its own range of filters for turning your photos into cartoon images. There are hundreds of variations to choose from so you will definitely be spoilt for choices.
05Clip2Comic Cartoon

This app is only available on the App stores and is well known among iPhone users for turning photos into cartoons and caricatures. It is not exactly a Disneyfied app but it has a plethora of filters and a combination of editing tools to help personalize your 3D photos and comics. You can also directly upload these photos to your Social Media Accounts.
Key Takeaways from This Episode
● With the help of AI and other amazing features, you can use your everyday pictures to make a 3D cartoon of yourself.
● The Metaverse is her and soon we all will be interacting in a virtual space. So best learn how to rig your face with an animation filter.
● Apps like Voila AI artist, you can disneyfy your images quite easily. Explore dozens of such filters and effects with Disneyfied apps.
From among the several trends that emerged on Social Media, making a 3D cartoon of yourself is probably the most popular.
Learning how to make 3D cartoons may just be in the height of demand in the near future.
In this article
01 [What is AI Artist? Plus how to cartoon yourself with it ](#Part 1)
02 [How to Create a 3D Cartoon of Yourself for Meta ](#Part 2)
03 [How to make 3D Cartoon From a Photo ](#Part 3)
04 [Five 3D cartoon Disney-Fied yourself apps ](#Part 4)
05 [More New Useful Tools to Upgrade Your Animation/Cartoon](#Part 5)
Part 1 What is AI Artist? Plus how to cartoon yourself with it
We all remember the Cartoon filter challenge on Facebook, right? Everyone was excited to transform themselves into a cartoon. The options of making personalized cartoon representations of yourself was pretty limited back then. With the Voila AI artist app you can choose at least 3 different cartoon variations of yourself.
The Voila AI artist app can be downloaded from the Apple App store and Android Play Store. You can use the app for free but for faster editing and an ad free experience, you will need to upgrade to the paid version. Other than just creating a cartoon of yourself, you can also create renaissance portraits and caricatures.
● Step 1: Download the Voila AI artist App for your device, and complete the installation process. Allow the app to access your Phone’s Camera rolling permission.
● Step 2: Select the style option you want to use. What we are using here is 3D cartoon (other options: 2D Cartoon, Caricature & and the rest). Touch the arrow and start.
● Step 3: Now, with your camera roll open, click a new one or choose from your gallery. You can also find a celebrities option where you can search for celebrities. This generates a four-grid choice. If you are using the free version, then be prepared to encounter one or two ads. After a few seconds, you can exit out and get back to your images.
● Step 4: You will receive a composite grid of four options; your original image, plus three cartoon representations (Royalty 3D, Baby 3D & Cartoon 3D). Here, you can select the option you like the most and start editing. Locate the up arrow button to immediately share on your preferred social media or simply save a copy in your device.
If the AI artist app has any paid and premium version, upon subscribing you will get ad free & watermark free animated representations.
Part 2 How to Create a 3D Cartoon of Yourself for Meta
Facebook only recently rebranded themselves as Meta. This has now started the rush to create a live virtual interaction space, and big companies like Microsoft and Nvidia are now competing with each other to bridge the gap.
Soon, activities like convening meetings, attending live events or even dating online would take place in virtual environments. So best be prepared for the future by creating a 3D avatar for yourself.
Your virtual avatar would be able to interact with the real world through a virtual platform by using VR headsets and other tech. Sensing your virtual presence would be almost the same as the real world for your peers and colleagues. You can attend a meeting without ever having to travel.
The process behind creating a 3D cartoon of yourself for Meta platforms starts by establishing a facial rig which is like a framework for the cartoon animations to sit on. These days, most apps come with automatic FACS facial rigging which is why certain Instagram filters like the Puppy nose filter was possible.
Presently, creating a complete 3D virtual model of yourself is a bit complicated to do on your own but soon this service will be automated in an app for you.
Part 3 How to make 3D Cartoon From a Photo
Photoshop is no doubt one of the most influential digital assets that allow you to do virtually anything with your photos. Of course, this includes turning your photos into 3D cartoon.
There are advanced techniques and tools you can use to retouch your image to achieve an animated like look for your portraits.
Of course, you can find multiple Photoshop hacks online but the following guide can give you an easy to follow idea of how to go about creating your own 3D cartoon out of an image.
Note; These steps are to be perceived as a simplified overview of your objectives when editing on Photoshop;
● To start out on turning your image into a 3D character, you need to learn how to create layers and then stack them on each other.
● You can then ‘liquify’ these layers to form a mould for your image.
● Apply skin softening techniques to take away the realistic features of the photo before working on turning it into a cartoon.
● Now you can start focus on applying the details to features like eyes, hair, nose and facial lines on your cartoon image.
● You can also change the colour of any individual features on your image. This method is applicable in making caricatures of your photo as well.
Part 4 Five 3D cartoon Disney-Fied yourself apps
Vibrant colours, gorgeous large eyes and shiny hair – pretty much sums up every Disney character you have ever seen. Now, everyone is obsessed with making their own Disney avatar and for good reason. You can use it as filter or upload it on your profile. Here are some of the most in-trend AI powered 3D Disneyfied apps you can use;
01Voila AI Artist
The Voila AI Artist app was released back in March of 2021 and has been the rage among Disneyfied apps. To clarify, the app has nothing to do with the Disney animation company but is perceived by users as the most successful app for disneyfication. Its on-board AI can create 3D and 2D renderings for your image along with hand drawn caricatures. You can download the app on App Store and Google Play.
02ToonMe
The next best app on our Disneyfied list is ToonMe. It also uses AI to turn photos into Disney Characters. The app keeps updating new cartoonish filters which you can use over your images. There are various other features which you can try as well like recreating your photos into classic vectors. The results are of extraordinary quality and can be uploaded on Instagram. You can download the app for free from Play store and App store.
03Snapchat
Snapchat has been around for some time now so you might already have it on your phone. Snapchat offers a vast range of filters and effects that of course includes Disneyfied filters and 3D cartoon images. You can look for them on the Snapchat search bar. New filters keep popping up every day which you can apply over your own images.
04Prisma
Prisma is a notoriously well know pop photo editor – which means it makes your photos ‘pop’. You can use it to edit photos on both Android and iPhone. It also comes with its own range of filters for turning your photos into cartoon images. There are hundreds of variations to choose from so you will definitely be spoilt for choices.
05Clip2Comic Cartoon
This app is only available on the App stores and is well known among iPhone users for turning photos into cartoons and caricatures. It is not exactly a Disneyfied app but it has a plethora of filters and a combination of editing tools to help personalize your 3D photos and comics. You can also directly upload these photos to your Social Media Accounts.
Key Takeaways from This Episode
● With the help of AI and other amazing features, you can use your everyday pictures to make a 3D cartoon of yourself.
● The Metaverse is her and soon we all will be interacting in a virtual space. So best learn how to rig your face with an animation filter.
● Apps like Voila AI artist, you can disneyfy your images quite easily. Explore dozens of such filters and effects with Disneyfied apps.
5 Ways You Never Heard of for Converting MP4 to GIF in Photoshop
5 Techniques You Never heard of for Converting MP4 to GIF in Photoshop
An easy yet powerful editor
Numerous effects to choose from
Detailed tutorials provided by the official channel
When someone mentions a GIF, what comes to your mind? Some people can picture what it means but wouldn’t describe that match. So, before we discuss how to convert mp4 to gif in Photoshop, it would be wise to define it briefly. First of all, GIF stands for Graphics Interchange Format. Its file format is a compressed image, and it is most suitable for animation. We all know that an animated GIF comprises a series of many still images. However, since these images play sequentially, it may appear as if they are in motion. It is that movement illusion that makes the animation effect come about.
When someone mentions a GIF, what comes to your mind? Some people can picture what it means but wouldn’t describe that match. So, before we discuss how to convert mp4 to gif in Photoshop, it would be wise to define it briefly. First of all, GIF stands for Graphics Interchange Format. Its file format is a compressed image, and it is most suitable for animation. We all know that an animated GIF comprises a series of many still images. However, since these images play sequentially, it may appear as if they are in motion. It is that movement illusion that makes the animation effect come about.
In this article
01 [How to Convert Video to GIF in Photoshop - Easy Way](#Part 1)
02 [How to Create Animated GIFs from Video without Photoshop](#Part 2)
Part 1 How to Convert Video to GIF in Photoshop - Easy Way
If you want to convert video to GIF in Photoshop, here is a discussion of the easy way to go about it.
Step 1: Ensure that the Dimensions are Right
When you start to convert mp4 to GIF using Photoshop, it is important to highlight some things that need to be done before anything else. Ensure that you set the resolution and dimensions right. Failure to do saw will see the size of your video determine that of your GIF. Beneath such occurrences, you may find yourself having a GIF that’s too large, and its quality leaves a lot to be desired.
The dimensions you choose will depend on what you are working on at any one particular time. For instance, a 720 x 300 layout is recommended for a banner ad GIF. If there is something that one can’t stress enough is the importance of ensuring that you use pixels. As for the resolution, keep in mind that a low resolution translates to a small file size. In this case, you are at privilege to choose between two units, pixels and inches.
Additionally, set the color mode. Since GIFs are meant for screens, ensure that you select the RGB color mode. Finally, click on Create, which opens a new document, and start following these steps to convert Mp4 to GIF Photoshop.
Step 2: Import the Video you want to convert from MP4 to GIF Photoshop
Remember that we already opened Photoshop by pressing Create. Now, the next thing would be to navigate to File followed by Import before selecting the Video Frames to Layers option.

Step 3: Set Up the Following Settings Accordingly
After choosing the video file, choose Open, and a dialogue box with several options and a preview of the video appears.

The radio buttons give you two options to choose from. The “From Beginning to End” is the ideal choice if you want the whole video to be converted to GIF. However, if you want to focus on a section of the video, select “Selected Range Only.” On the other hand, the checkbox allows you to limit the video to 2 frames. Simply tick it, and Photoshop will automatically ensure that only two frames of the video are left.
Last but not least, check the “Make Frame Animation” checkbox. Once all these settings are set as recommended and depending on preference, Photoshop will export your video as several frames. In the event that the program crashes, all is not lost. You can fix it by reducing the video’s quality and then try importing it.
Step 4: Edit the GIF
Photoshop also gives you several options to help you edit your frames to perfection. In most cases, these settings are ideal for manipulating the quality of your GIF. Interestingly, it is possible to preview how the GIF will look before committing to any change. So expect two panes, right and left. The left one allows you to see the preview, whereas its right counterpart helps you edit.

Alternatively, select one of the preset choices. If you do so, there is no requirement The bottom line is that the tool makes to make any changes. That doesn’t mean you can’t choose a Preset option and then edit it to your preferences. Expect the quality of the GIF to decrease and the size to be relatively small. Right below the Preset, don’t forget to confirm that the selected option is GIF.
Step 5: Save the GIF
Once satisfied by the GIF created, save these frames as animated GIFs. Go to File, then Export, followed by Save for Web (Legacy).

That’s how to convert Mp4 to GIF in simple steps.
Part 2 How to Create Animated GIFs from Video without Photoshop
Alternatively, you can opt to convert Mp4 to GIF using Wondershare Filmora Video Editor . It is yet another tool suitable for creating animated GIFs using videos and photos. It allows the user to customize GIF images using overlays, text, animation, and elements. When it is over, you are at liberty to export it to your computer or any other common portable storage device. The bottommost line is that the tool makes it easy to use whenever necessary. The icing on the cake is the fact that you don’t have to sign up or pay a premium. In case you are wondering, it is also easy to use. All you got to do is to follow these steps.

Wondershare Filmora - Best Video Editor for Mac/Windows
5,481,435 people have downloaded it.
Build unique custom animations without breaking a sweat.
Focus on creating epic stories and leave the details to Filmora’s auto features.
Start a creative adventure with drag & drop effects and endless possibilities.
Filmora simplifies advanced features to save you time and effort.
Filmora cuts out repetition so you can move on to your next creative breakthrough.
Step 1: Import the Videos
Ensure that the videos you import are editable lest that will be a waste of time. Its design makes it compatible with a wide range of formats, including wmv, mkv, mp4, wav, mpeg, avi, jpg, and png. Since it is among the compatible formats, don’t hesitate to use Filmora to convert GIF to mp4 and vice versa instead of Photoshop.
Step 2: Drag the videos to Filmora timeline
Keep in mind that Filmora has a long list of tools you can use to edit your videos. However, you can also use them on a video that’s on its timeline. To drop them there, all you have to do is drag them to the timeline.

Step 3: Edit the File
The list of ways of editing your videos is long. Some of your options are split, crop, combine, slow down, and speed up the GIFs, to mention a few. So, pick the options that fit your situation the best. Ensure that the end product is as good as possible by using these features to the best level.
Step 4: Add Various Text Effects
In most cases, images and videos aren’t enough. You may want to add text to enhance what you want to achieve with the GIF. To do so, you can always introduce text, and trust me, it never disappoints. In addition to text, you can also add sound at this stage. Again, it is something that does GIFs the justice they deserve.

Step 5: Save and Export the GIF
When all is stated and done, you will have to save and export the GIFs so that you can use them accordingly. For instance, you can share them with friends via social media. Ensure that the extension you use is the GIF.
● Key Takeaways from This Episode →
● Based on the above discussion, it is possible to convert mp4 to GIF. As a matter of fact, it is quite easy, and you don’t need to be an expert to get it done.
●Rest assured that the video will become a GIF with a few clicks. Then, you can go ahead and use it as you may wish.
●On one side, you can use Photoshop. It is a tool designed to perform such tasks.
●If you choose it, use the above guide and follow each of the steps. It is quite detailed to the extent that you won’t get stuck along the way.
●On the other hand, you can also use Wondershare Filmora. It is yet another application that converts MP4 to GIF excellently.
When someone mentions a GIF, what comes to your mind? Some people can picture what it means but wouldn’t describe that match. So, before we discuss how to convert mp4 to gif in Photoshop, it would be wise to define it briefly. First of all, GIF stands for Graphics Interchange Format. Its file format is a compressed image, and it is most suitable for animation. We all know that an animated GIF comprises a series of many still images. However, since these images play sequentially, it may appear as if they are in motion. It is that movement illusion that makes the animation effect come about.
When someone mentions a GIF, what comes to your mind? Some people can picture what it means but wouldn’t describe that match. So, before we discuss how to convert mp4 to gif in Photoshop, it would be wise to define it briefly. First of all, GIF stands for Graphics Interchange Format. Its file format is a compressed image, and it is most suitable for animation. We all know that an animated GIF comprises a series of many still images. However, since these images play sequentially, it may appear as if they are in motion. It is that movement illusion that makes the animation effect come about.
In this article
01 [How to Convert Video to GIF in Photoshop - Easy Way](#Part 1)
02 [How to Create Animated GIFs from Video without Photoshop](#Part 2)
Part 1 How to Convert Video to GIF in Photoshop - Easy Way
If you want to convert video to GIF in Photoshop, here is a discussion of the easy way to go about it.
Step 1: Ensure that the Dimensions are Right
When you start to convert mp4 to GIF using Photoshop, it is important to highlight some things that need to be done before anything else. Ensure that you set the resolution and dimensions right. Failure to do saw will see the size of your video determine that of your GIF. Beneath such occurrences, you may find yourself having a GIF that’s too large, and its quality leaves a lot to be desired.
The dimensions you choose will depend on what you are working on at any one particular time. For instance, a 720 x 300 layout is recommended for a banner ad GIF. If there is something that one can’t stress enough is the importance of ensuring that you use pixels. As for the resolution, keep in mind that a low resolution translates to a small file size. In this case, you are at privilege to choose between two units, pixels and inches.
Additionally, set the color mode. Since GIFs are meant for screens, ensure that you select the RGB color mode. Finally, click on Create, which opens a new document, and start following these steps to convert Mp4 to GIF Photoshop.
Step 2: Import the Video you want to convert from MP4 to GIF Photoshop
Remember that we already opened Photoshop by pressing Create. Now, the next thing would be to navigate to File followed by Import before selecting the Video Frames to Layers option.
Step 3: Set Up the Following Settings Accordingly
After choosing the video file, choose Open, and a dialogue box with several options and a preview of the video appears.
The radio buttons give you two options to choose from. The “From Beginning to End” is the ideal choice if you want the whole video to be converted to GIF. However, if you want to focus on a section of the video, select “Selected Range Only.” On the other hand, the checkbox allows you to limit the video to 2 frames. Simply tick it, and Photoshop will automatically ensure that only two frames of the video are left.
Last but not least, check the “Make Frame Animation” checkbox. Once all these settings are set as recommended and depending on preference, Photoshop will export your video as several frames. In the event that the program crashes, all is not lost. You can fix it by reducing the video’s quality and then try importing it.
Step 4: Edit the GIF
Photoshop also gives you several options to help you edit your frames to perfection. In most cases, these settings are ideal for manipulating the quality of your GIF. Interestingly, it is possible to preview how the GIF will look before committing to any change. So expect two panes, right and left. The left one allows you to see the preview, whereas its right counterpart helps you edit.
Alternatively, select one of the preset choices. If you do so, there is no requirement The bottom line is that the tool makes to make any changes. That doesn’t mean you can’t choose a Preset option and then edit it to your preferences. Expect the quality of the GIF to decrease and the size to be relatively small. Right below the Preset, don’t forget to confirm that the selected option is GIF.
Step 5: Save the GIF
Once satisfied by the GIF created, save these frames as animated GIFs. Go to File, then Export, followed by Save for Web (Legacy).
That’s how to convert Mp4 to GIF in simple steps.
Part 2 How to Create Animated GIFs from Video without Photoshop
Alternatively, you can opt to convert Mp4 to GIF using Wondershare Filmora Video Editor . It is yet another tool suitable for creating animated GIFs using videos and photos. It allows the user to customize GIF images using overlays, text, animation, and elements. When it is over, you are at liberty to export it to your computer or any other common portable storage device. The bottommost line is that the tool makes it easy to use whenever necessary. The icing on the cake is the fact that you don’t have to sign up or pay a premium. In case you are wondering, it is also easy to use. All you got to do is to follow these steps.
Wondershare Filmora - Best Video Editor for Mac/Windows
5,481,435 people have downloaded it.
Build unique custom animations without breaking a sweat.
Focus on creating epic stories and leave the details to Filmora’s auto features.
Start a creative adventure with drag & drop effects and endless possibilities.
Filmora simplifies advanced features to save you time and effort.
Filmora cuts out repetition so you can move on to your next creative breakthrough.
Step 1: Import the Videos
Ensure that the videos you import are editable lest that will be a waste of time. Its design makes it compatible with a wide range of formats, including wmv, mkv, mp4, wav, mpeg, avi, jpg, and png. Since it is among the compatible formats, don’t hesitate to use Filmora to convert GIF to mp4 and vice versa instead of Photoshop.
Step 2: Drag the videos to Filmora timeline
Keep in mind that Filmora has a long list of tools you can use to edit your videos. However, you can also use them on a video that’s on its timeline. To drop them there, all you have to do is drag them to the timeline.
Step 3: Edit the File
The list of ways of editing your videos is long. Some of your options are split, crop, combine, slow down, and speed up the GIFs, to mention a few. So, pick the options that fit your situation the best. Ensure that the end product is as good as possible by using these features to the best level.
Step 4: Add Various Text Effects
In most cases, images and videos aren’t enough. You may want to add text to enhance what you want to achieve with the GIF. To do so, you can always introduce text, and trust me, it never disappoints. In addition to text, you can also add sound at this stage. Again, it is something that does GIFs the justice they deserve.
Step 5: Save and Export the GIF
When all is stated and done, you will have to save and export the GIFs so that you can use them accordingly. For instance, you can share them with friends via social media. Ensure that the extension you use is the GIF.
● Key Takeaways from This Episode →
● Based on the above discussion, it is possible to convert mp4 to GIF. As a matter of fact, it is quite easy, and you don’t need to be an expert to get it done.
●Rest assured that the video will become a GIF with a few clicks. Then, you can go ahead and use it as you may wish.
●On one side, you can use Photoshop. It is a tool designed to perform such tasks.
●If you choose it, use the above guide and follow each of the steps. It is quite detailed to the extent that you won’t get stuck along the way.
●On the other hand, you can also use Wondershare Filmora. It is yet another application that converts MP4 to GIF excellently.
Also read:
- In 2024, Whiteboard Animation Services Top 15 Animation Companies to Pick
- Updated In 2024, Adobe Auto Rigger Is AWESOME
- New 2024 Approved Learn Disney Cartoon Drawing to See More Disney Magic Moments
- New 2024 Approved 12 Dubbed Anime Websites to Watch for Free
- New In 2024, Creative Ways to Make iPhone Text GIF
- New Top 7 Animated GIF Text Makers for 2024
- Updated Top 12 2D Animation Studios All Should Check Out
- New 10 Great Apps for Turning Funny Animated Images Into Comics
- Updated In 2024, How to Create Free Photo Collage Frame in Minutes?
- 2024 Approved Learn How to Draw Cartoons Step by Step with This Guide
- Updated 2024 Approved Most Effective Tactics to Set WhatsApp Status
- New Techniques on Making After Effects 2D Animation
- Updated 2024 Approved Simple Guide to Create New and Exciting Blackboard Animation
- Updated 10 Creative Wallpaper Collage Ideas and Photos
- Updated Why These 10 Top Text Motion Templates Are Worth Your Attention for 2024
- New Tutorials to Make Animated Images – Even if Youre Just Starting Out
- New How to Convert Animated GIF From Video for 2024
- 10 Amazing Whiteboard Animation Video Examples You Need to Bookmark for 2024
- New In 2024, How to Make a Photoshop Collage in EASY Steps
- Updated Top 10 Online Animated Logo Makers Everyone Should Know for 2024
- New In 2024, 6 Proven Ways to Dub Anime for Anime Voice Actor
- New Learn How to Create Adobe 3D Animation
- Updated 2024 Approved Tips on How to Learn Graphics Animation
- New 5 Best Adobe Animate Courses & Classes | Beginners Complete Tutorial for 2024
- Updated In 2024, Amazing Ideas About Creating Personalised WhatsApp GIF Sticker
- Updated Top 12 Evil Cartoon Characters of All Time for 2024
- Updated 2024 Approved 10 Scary Anime Girls That Will Make You Creepy
- 2024 Approved Tips That Show Anybody How to Get Awesome Background for Slideshow in PowerPoint
- New How to Create an Animated Sticky Navbar
- How to Make Animated Videos for Business – an Ultimate Guide
- Updated How To Make Pinterest Slideshow in Simple Ways for 2024
- Updated How to Convert Video to GIF Fast & Easy for 2024
- New 2024 Approved How to Make Animated Videos for Business – an Ultimate Guide
- 12 Animated Slideshow PowerPoint Templates and Tools to Make Them
- Updated 5 Photoshop Alternatives to Animate Your Logo for 2024
- 6 Unexpected Ways Gif Animation Maker That Affect Your Marketing for 2024
- Updated In 2024, The 15 Most Efficient Photo to Cartoon Software for Android
- Updated How to Make an Animated Travel Map Video, In 2024
- Updated 2024 Approved 12 Aesthetic GIF Instagram for Marketers
- Updated In 2024, 15 Top Pics Collage Apps
- How to Make Well Done Animated GIF By Yourself?
- 15 Best Sites to Watch Cartoons Online Free And So Can You for 2024
- Updated 2024 Approved Learn What Are Differences Between 2D And 3D Animation
- Updated Great Ways to Make Claymation Videos for 2024
- New Top 12 Video to GIF Converters High Quality to Check Out for 2024
- Updated In 2024, 10 Cartoon Photo Converters
- How to Change GPS Location on Samsung Galaxy S24+ Easily & Safely | Dr.fone
- In 2024, The Updated Method to Bypass Oppo Reno 8T FRP
- 3 Things You Must Know about Fake Snapchat Location On Infinix Hot 40 Pro | Dr.fone
- In 2024, How to Transfer Contacts from Vivo V30 to iPhone XS/11 | Dr.fone
- updated How To Translate Videos in Tamil for a Wider Reach
- Can I recover permanently deleted photos from Magic 5
- Identify missing drivers with Windows Device Manager on Windows 11
- In 2024, 3 Things You Must Know about Fake Snapchat Location On Realme Narzo 60x 5G | Dr.fone
- In 2024, 15 Best Strongest Pokémon To Use in Pokémon GO PvP Leagues For Oppo A58 4G | Dr.fone
- In 2024, How Can I Use a Fake GPS Without Mock Location On Nokia 105 Classic? | Dr.fone
- Unlock Poco M6 Pro 5G Phone Password Without Factory Reset Full Guide Here
- In 2024, A Step-by-Step Guide on Using ADB and Fastboot to Remove FRP Lock on your Xiaomi Redmi K70 Pro
- In 2024, How To Use Special Features - Virtual Location On Itel P40? | Dr.fone
- In 2024, How to Change your Poco X6 Location on Twitter | Dr.fone
- Full Guide on Mirroring Your Vivo X100 to Your PC/Mac | Dr.fone
- How to Factory Reset Itel P55 If I Forgot Security Code or Password? | Dr.fone
- 4 Easy Ways for Your Vivo Y100A Hard Reset | Dr.fone
- In 2024, 4 solution to get rid of pokemon fail to detect location On Vivo Y17s | Dr.fone
- The Ultimate Guide to Infinix Smart 7 HD Pattern Lock Screen Everything You Need to Know
- Updated In 2024, Translate Video From English to Arabic with Ease
- The Complete Guide to Meizu FRP Bypass Everything You Need to Know
- Full Guide to Hard Reset Your Xiaomi Redmi Note 13 5G | Dr.fone
- 6 Proven Ways to Unlock OnePlus 12 Phone When You Forget the Password
- In 2024, How PGSharp Save You from Ban While Spoofing Pokemon Go On Samsung Galaxy S23 Tactical Edition? | Dr.fone
- How to Unlock Realme GT 5 Pro PIN Code/Pattern Lock/Password
- In 2024, Unlock Apple iPhone 11 Pro With Forgotten Passcode Different Methods You Can Try | Dr.fone
- In 2024, How to Unlock Vivo T2x 5G Phone Pattern Lock without Factory Reset
- In 2024, Android Unlock Code Sim Unlock Your Oppo F25 Pro 5G Phone and Remove Locked Screen
- The Easy Way to Remove an Apple ID from Your MacBook For your iPhone 12 Pro
- Simple ways to get lost messages back from 90 Pro
- In 2024, How to use iSpoofer on Honor V Purse? | Dr.fone
- In 2024, Edit and Send Fake Location on Telegram For your Nokia C22 in 3 Ways | Dr.fone
- In 2024, 6 Ways To Transfer Contacts From Nubia Z50 Ultra to iPhone | Dr.fone
- Updated In 2024, How To Auto Translate YouTube Videos Into Different Languages
- The Easiest Methods to Hard Reset Motorola Moto G14 | Dr.fone
- In 2024, What is the best Pokemon for pokemon pvp ranking On Realme Narzo 60 5G? | Dr.fone
- In 2024, Effective Ways To Fix Checkra1n Error 31 From iPhone 13
- Top 15 Augmented Reality Games Like Pokémon GO To Play On Vivo Y78+ (T1) Edition | Dr.fone
- Title: Updated 2024 Approved 10 Best Convert Video Between GIF Software High Quality
- Author: Elon
- Created at : 2024-05-19 03:05:26
- Updated at : 2024-05-20 03:05:26
- Link: https://animation-videos.techidaily.com/updated-2024-approved-10-best-convert-video-between-gif-software-high-quality/
- License: This work is licensed under CC BY-NC-SA 4.0.
