
:max_bytes(150000):strip_icc():format(webp)/0010_21-best-teen-movies-on-netflix-5104880-b0e9832746854cabb4f33cafef96214b.jpg)
Updated 2024 Approved 8 Blender 3D Animation Tutorials
8 Blender 3D Animation Tutorials
8 Blender 3D Animation Tutorials for Beginners
An easy yet powerful editor
Numerous effects to choose from
Detailed tutorials provided by the official channel
Blender animation software is one of the open-source software chosen to create animations. It is easy to create animations, videos or graphics, etc. If you want to be an animation 3D artist, make creative universes, and meet each of the different characters moving around in your heart.
You will learn the step-by-step procedure to create animations and add other edits to the animation. And also a few tips to develop better Blender 3D animation effects.
In this article
01 [Is Blender best for animation?](#Part 1)
02 [How to Create 3D Animated Characters with Blender in 15 Minutes.](#Part 2)
03 [Become a Pro from Beginners in 8 Tutorials](#Part 3)
Part 1 Is Blender best for animation?
The answer to if the Blender is suitable for animation is yes. Blender animation is the best for making animations and bringing any living to animator. This software is mostly for professional works whose limitations will be learning the process, not any technical defects. Let’s talk about why Blender 3D animation software is the best and more helpful.
Character animation is an essential tool for animation, and Blender has developed this tool with no way less to other software.
There are many animation effects other than animating characters. Blender 3D for free has all the necessary tools to do all types of rigs and animations without any difficulty.
Blender is one software that has 2D animation inbuilt in it, like drawing and creating 2D animation.
Blender’s animation tools are making motion graphics possible by advancing the features than it was four years ago.
Nowadays, many people are using Blender to do professional works, including freelancers, small studios, and even game developers.
Part 2 How to Create 3D Animated Characters with Blender in 15 Minutes.
This is a series for people who want to learn how to create 3D blender animation characters from keeping a reference image. Blender’s ringing tools will be more helpful for this process.
01Step 1: Importing
Initially, import a Blender 3D animation character into the Blender to animate. Many free and paid characters are available in Vincent, and Rain v2.0 is present in Blender Cloud; above all, these characters are for free.
Steps to import the character either from Vincent or Rain v2.0
Download the character file from the cloud to any destination folder on the computer. Open the Blender and place the cursor on the origin point on the screen. Later select import present in the File menu and choose the file format. And now, allow the Python script to run for the selected character folder.

02Step 2: Add Keyframes
There will be a diamond-shaped icon below to choose the keyframe you want to add to the timeline, which you may also delete.
Adding a keyframe is simple. Open the timeline window in the animation editor. Press the alphabet ‘G’ on the keyboard, move the bone and place it. Then hit Shift+I and choose the channel LocRot and insert the keyframe. Likewise, you can adjust the keyframe by dragging, making it fast or slow to the requirements.
Moving the keyframe to 20 makes it faster, and moving to 40, slower.
03Step 3: Get Reference Materials
It will be challenging to add movements to the characters, so plenty of videos can get the moves right. There are various reference images and videos available on the Internet. You can either add the selected reference materials to the second screen or add them to the 3D space. Let’s discuss how to add it.
Hit Shift + A to add the reference material. Later select “Image” and then choose the “Background.” Scale the reference image onto the 3D space after it loads.
Afterward, you can leave it to the animation of the reference article, or you can further edit or amplify the movements.
04Step 4: Fine–Tuning and Sound
This step will add smooth movements by combining two keyframes for a more professional look. We have to use the Dope sheet to do complete this process. Let’s see how to add it.
Initially, split the window horizontally. Later switch over the dope sheet below the animation tab, where you can see keyframes of all axis. Now you can drag and edit to slow or amplify the speed.
There is a Graphic editor, which is more advanced to make the movements more accurately and directly to edit the curves.
Sound effects make any video or animation better. You can add and import the sound files. You can also create your sound and insert it into the Blender. Let’s discuss adding sound and making it sync to the character.
Download the audio file, hit shift + A to open Add menu, and choose the “Sound.” Now select the sound that you wish to add.
Drag the sound to keep it to the specific sections alone. Also, you can switch between “No Sync” to “AV Sync” in the playback to give the best synchronization to the characters. The volume and pitch can be adjusted using the sidebar.
05Step 5: Rendering
Before rendering, make sure you keep the FPS is same as that chosen during the keyframes to avoid unnecessary renders. After setting the frame correctly, causing the animation is easy.
Initially, click on “scene” and choose the file extension, file formats, and file colors (BW, RGB, or RGBA). Select the encoding container as “WebM” and video Codec as “WEBM/VP9. After adding the sound, set the audio codec to “Vorbis.” Choose output quality and speed.
After all the rendering, select Render from the top bar and select “Render Animation” in Blender Animation.
Awesome! We have successfully blended a character using Blender 3D animation software. With more practice and knowledge about more tools, one can easily use the Blender 3D mouse.
Part 3 Become a Pro from Beginners in 8 Tutorials.
01Fix 1: Complete Beginners Guide to Blender 2.8
This YouTube tutorial focuses on Blender version 2.8. The tutorial features the redesigned user interface and tools like 3D viewpoint and UV editor, which has new interactive tools. And about different 3D shapes and simple edits like adding colors and “G drag,” etc.
02Fix 2: Blender 2.9 for Absolute Beginners
This YouTube tutorial on Blender 3D animation software version 2.9 has the new advancement about denoiser interactivity in the 3D viewpoint. The YouTuber explains EEVEE, cycles, workbench, movements, rotate, and scale objects.
03Fix 3: Blender Day -1 Absolute Basics - Introduction Series for Beginners
This YouTube tutorial says about the introduction to the Blender 3D for free for beginners. He explains simple movements like rotating and scaling, shapes, and colors to the objects. He also says about the pivot plot and how to create a basic primitive using blender.
04Fix 4: Zoync TV’s Blender Beginners Series
The Blender Beginners video by ZoyncTV is on Blender 2.6. Indeed, even as hotkeys and terms change, the hidden ideas will forever be pertinent. Every video in this 11-section is somewhere between 10 and 20 minutes, split into five separate subjects: displaying, modifiers, materials, surfaces, and animations. It’s a beginner-level course.
05Fix 5: The Blender Survival Guide
The Blender Survival Guide series by Creative COW is outdated but the best video for somebody who has never utilized Blender. Each video in this 13-section series is somewhere in the range of 15 and 45 minutes in length, which means you’ll get 350 intense minutes of preparing. It is a survival reference that shows just the outright necessities.
06Fix 6: KatBit’s Blender Tutorial
The KatsBits site is home to lots of tutorials, video games. Its Blender animation tutorials are fantastic when you want a beginning stage for various 3D models. There are 45 Blender tutorials. Tutorials take you through the most common way of making a 3D level for Quake and tell you the best way to make a basic model.
07Fix 7: Daniel Krafft’s 100 Blender 2.8 Tips
While this is another Blender 2.8 tutorial, Daniel’s tips are overall for any Blender work process. He teaches simple stuff like vertex and edges and some technical parts in the Blender 3D animation software.
08Fix 8: Blender 3D: Noob to Pro
This last tutorial is a “wiki book” called Blender 3D: Noob to Pro that consists of important Blender animation tips and experiences. Start with an outline of 3D ideas and a top-to-bottom introduction to Blender.
Regarding Blender 3D mouse software, we would like to recommend one more tool to you the most. Yes, it is none other than Wondershare Filmora, a perfect alternative to Blender 3D animation software wherein you can get excellent 3D animation effects, 3D texts and animate it. There are some simple steps and various options to work in Filmora for creating 3D animated effects.
● Composition
● Creating our 3D text
● Creating the 3D look
● Basics of 3D animation
● Animating the text in 3D
There are countless YouTube tutorial videos for working with Wondershare Filmora Video Editor ‘s latest version.
Key Takeaways from This Episode
● We learned about Blender 3D animation software.
● How can you create characters using Blender animation?
● 8 Tutorials to move you from a beginner to a Pro.
Blender animation software is one of the open-source software chosen to create animations. It is easy to create animations, videos or graphics, etc. If you want to be an animation 3D artist, make creative universes, and meet each of the different characters moving around in your heart.
You will learn the step-by-step procedure to create animations and add other edits to the animation. And also a few tips to develop better Blender 3D animation effects.
In this article
01 [Is Blender best for animation?](#Part 1)
02 [How to Create 3D Animated Characters with Blender in 15 Minutes.](#Part 2)
03 [Become a Pro from Beginners in 8 Tutorials](#Part 3)
Part 1 Is Blender best for animation?
The answer to if the Blender is suitable for animation is yes. Blender animation is the best for making animations and bringing any living to animator. This software is mostly for professional works whose limitations will be learning the process, not any technical defects. Let’s talk about why Blender 3D animation software is the best and more helpful.
Character animation is an essential tool for animation, and Blender has developed this tool with no way less to other software.
There are many animation effects other than animating characters. Blender 3D for free has all the necessary tools to do all types of rigs and animations without any difficulty.
Blender is one software that has 2D animation inbuilt in it, like drawing and creating 2D animation.
Blender’s animation tools are making motion graphics possible by advancing the features than it was four years ago.
Nowadays, many people are using Blender to do professional works, including freelancers, small studios, and even game developers.
Part 2 How to Create 3D Animated Characters with Blender in 15 Minutes.
This is a series for people who want to learn how to create 3D blender animation characters from keeping a reference image. Blender’s ringing tools will be more helpful for this process.
01Step 1: Importing
Initially, import a Blender 3D animation character into the Blender to animate. Many free and paid characters are available in Vincent, and Rain v2.0 is present in Blender Cloud; above all, these characters are for free.
Steps to import the character either from Vincent or Rain v2.0
Download the character file from the cloud to any destination folder on the computer. Open the Blender and place the cursor on the origin point on the screen. Later select import present in the File menu and choose the file format. And now, allow the Python script to run for the selected character folder.
02Step 2: Add Keyframes
There will be a diamond-shaped icon below to choose the keyframe you want to add to the timeline, which you may also delete.
Adding a keyframe is simple. Open the timeline window in the animation editor. Press the alphabet ‘G’ on the keyboard, move the bone and place it. Then hit Shift+I and choose the channel LocRot and insert the keyframe. Likewise, you can adjust the keyframe by dragging, making it fast or slow to the requirements.
Moving the keyframe to 20 makes it faster, and moving to 40, slower.
03Step 3: Get Reference Materials
It will be challenging to add movements to the characters, so plenty of videos can get the moves right. There are various reference images and videos available on the Internet. You can either add the selected reference materials to the second screen or add them to the 3D space. Let’s discuss how to add it.
Hit Shift + A to add the reference material. Later select “Image” and then choose the “Background.” Scale the reference image onto the 3D space after it loads.
Afterward, you can leave it to the animation of the reference article, or you can further edit or amplify the movements.
04Step 4: Fine–Tuning and Sound
This step will add smooth movements by combining two keyframes for a more professional look. We have to use the Dope sheet to do complete this process. Let’s see how to add it.
Initially, split the window horizontally. Later switch over the dope sheet below the animation tab, where you can see keyframes of all axis. Now you can drag and edit to slow or amplify the speed.
There is a Graphic editor, which is more advanced to make the movements more accurately and directly to edit the curves.
Sound effects make any video or animation better. You can add and import the sound files. You can also create your sound and insert it into the Blender. Let’s discuss adding sound and making it sync to the character.
Download the audio file, hit shift + A to open Add menu, and choose the “Sound.” Now select the sound that you wish to add.
Drag the sound to keep it to the specific sections alone. Also, you can switch between “No Sync” to “AV Sync” in the playback to give the best synchronization to the characters. The volume and pitch can be adjusted using the sidebar.
05Step 5: Rendering
Before rendering, make sure you keep the FPS is same as that chosen during the keyframes to avoid unnecessary renders. After setting the frame correctly, causing the animation is easy.
Initially, click on “scene” and choose the file extension, file formats, and file colors (BW, RGB, or RGBA). Select the encoding container as “WebM” and video Codec as “WEBM/VP9. After adding the sound, set the audio codec to “Vorbis.” Choose output quality and speed.
After all the rendering, select Render from the top bar and select “Render Animation” in Blender Animation.
Awesome! We have successfully blended a character using Blender 3D animation software. With more practice and knowledge about more tools, one can easily use the Blender 3D mouse.
Part 3 Become a Pro from Beginners in 8 Tutorials.
01Fix 1: Complete Beginners Guide to Blender 2.8
This YouTube tutorial focuses on Blender version 2.8. The tutorial features the redesigned user interface and tools like 3D viewpoint and UV editor, which has new interactive tools. And about different 3D shapes and simple edits like adding colors and “G drag,” etc.
02Fix 2: Blender 2.9 for Absolute Beginners
This YouTube tutorial on Blender 3D animation software version 2.9 has the new advancement about denoiser interactivity in the 3D viewpoint. The YouTuber explains EEVEE, cycles, workbench, movements, rotate, and scale objects.
03Fix 3: Blender Day -1 Absolute Basics - Introduction Series for Beginners
This YouTube tutorial says about the introduction to the Blender 3D for free for beginners. He explains simple movements like rotating and scaling, shapes, and colors to the objects. He also says about the pivot plot and how to create a basic primitive using blender.
04Fix 4: Zoync TV’s Blender Beginners Series
The Blender Beginners video by ZoyncTV is on Blender 2.6. Indeed, even as hotkeys and terms change, the hidden ideas will forever be pertinent. Every video in this 11-section is somewhere between 10 and 20 minutes, split into five separate subjects: displaying, modifiers, materials, surfaces, and animations. It’s a beginner-level course.
05Fix 5: The Blender Survival Guide
The Blender Survival Guide series by Creative COW is outdated but the best video for somebody who has never utilized Blender. Each video in this 13-section series is somewhere in the range of 15 and 45 minutes in length, which means you’ll get 350 intense minutes of preparing. It is a survival reference that shows just the outright necessities.
06Fix 6: KatBit’s Blender Tutorial
The KatsBits site is home to lots of tutorials, video games. Its Blender animation tutorials are fantastic when you want a beginning stage for various 3D models. There are 45 Blender tutorials. Tutorials take you through the most common way of making a 3D level for Quake and tell you the best way to make a basic model.
07Fix 7: Daniel Krafft’s 100 Blender 2.8 Tips
While this is another Blender 2.8 tutorial, Daniel’s tips are overall for any Blender work process. He teaches simple stuff like vertex and edges and some technical parts in the Blender 3D animation software.
08Fix 8: Blender 3D: Noob to Pro
This last tutorial is a “wiki book” called Blender 3D: Noob to Pro that consists of important Blender animation tips and experiences. Start with an outline of 3D ideas and a top-to-bottom introduction to Blender.
Regarding Blender 3D mouse software, we would like to recommend one more tool to you the most. Yes, it is none other than Wondershare Filmora, a perfect alternative to Blender 3D animation software wherein you can get excellent 3D animation effects, 3D texts and animate it. There are some simple steps and various options to work in Filmora for creating 3D animated effects.
● Composition
● Creating our 3D text
● Creating the 3D look
● Basics of 3D animation
● Animating the text in 3D
There are countless YouTube tutorial videos for working with Wondershare Filmora Video Editor ‘s latest version.
Key Takeaways from This Episode
● We learned about Blender 3D animation software.
● How can you create characters using Blender animation?
● 8 Tutorials to move you from a beginner to a Pro.
Tips on How to Get Awesome Background for Slideshow in PowerPoint
Tips That Show Anybody How to Get Awesome Background for Slideshow in Powerpoint
An easy yet powerful editor
Numerous effects to choose from
Detailed tutorials provided by the official channel
Amazing slideshow background are an absolute attention grabber in the realm of creative PowerPoint presentations. If you wish to upgrade yours with the same, be here to learn how!
In this article
01 [How to Add Video Background in PowerPoint?](#Part 1)
02 [How to Create Moving Backgrounds in Microsoft PowerPoint?](#Part 2)
03 [Some Tips for You to Get Awesome PowerPoint Backgrounds & Templates](#Part 3)
Part 1 How to Add Video Background in PowerPoint?
When the talk is about engaging means to deliver a precise information, PowerPoint slideshows are an absolute stunner. While these are already a captivating utility to present your thing, the output and audience engagement is at par with the inclusion of attractive design elements in the presentation. As is evident, there are enormous diversities of supplementary elements to complement your presentation, let us centre our discussion to the application of video background for slideshow in PowerPoint.
User’s Guide to Add Video Background in a PowerPoint Slideshow
The following section presents a detailed explanation of the steps to supplement your PowerPoint presentations with classic video backgrounds in just a few quick steps:
Step 1: Launch Your Presentation
Start with opening the desired PowerPoint presentation to which you want to add the video background, in any of your preferred devices.
Step 2: Add a Video to Your Slide
Browse through your presentation slides to locate the one you want to add the video background to. When you have made your choice, navigate to the PowerPoint toolbar at the top and hit the ‘Insert’ tab and choose the ‘Video’ option.
You will now be presented with 2 choices, either uploading a video from your device or insert one from the web by pasting its YouTube URL into the slide. If you are uploading a video from your device, proceed with selecting the desired video and tap ‘Insert’.

Step 3: Move and Resize Your Video
After uploading your video to the slide, you need to make suitable adjustments in its size and alignment to synchronize the same with the contents of the slide. To do this, drag the top left corner of the video to that of the slide to set the top alignment ratio. In the same way, move the bottom right corner of the video to be in sync with that of the slide. You will see the video occupying the entire slide at the end of the adjustment process.

Step 4: Set the Video Background
You will now need to set the video as the background of your slide, so that the latter’s contents are displayed over the video. You can do this by right clicking on the video and choosing the ‘Send to Back’ option from the dropdown that follows. This will cause the contents of your slide to get displayed over the video.

Step 5: Playback Edit and Customization Choices
Before proceeding towards making changes in the video playback and formatting, prefer taking a quick preview of your work till here. Once you are satisfied, navigate to the PowerPoint Toolbar at the top, hit the ‘Video Tools’ tab, followed by clicking on the ‘Playback’ tab.
It is recommended to introduce the following changes in your video for the most affordable slideshow output:
● Loop Your Video
Creating a video loop will facilitate you with an automatic replay of your video without the need to restart it every time with a click. You can loop your video by navigating to the ‘Video Options’ section and choose ‘Loop Until Stopped’ by clicking within the checkbox next to it. The background video will now continue to play until you switch to a different slide.
● Automatically Start Your Video
To avoid clicking on the slide amid your presentation for the video loop to begin, adjust the latter’s settings for an automatic start. Navigate to the ‘Start’ dropdown menu and select ‘Automatically’.
● Trim Your Video
You can work with some basic video editing tools in PowerPoint, like trimming and cropping your background video to a desired length. If you wish to ward off certain portions of your video, reach to and click o the ‘Trim Video’ button. Following this, drag the slider of the video to select the desired portions of the clip and exclude the rest.
You can further work with some more editing effects to create the perfect video backgrounds for your presentation slides in line with your specific preferences.

Step 6: Annotate Your Video Background
When you are done with the video editing process, take a preview of the same to ensure that everything is set in the proper order and at the proper place. Lastly, if you wish to add suitable text annotations to your video, you can do this with the ‘ClassPoint’ tool to write over the video background. All you need to do is select a preferred pen colour and start writing on your slide screen. You can further, save the annotations for a work record.

Part 2 How to Create Moving Backgrounds in Microsoft PowerPoint?
Moving PowerPoint slideshow background is another aspect of graphic creativity at its best, which can be used in a number of ways to grab considerable viewer attention. When choosing to add moving backgrounds to your presentation, the latter can aid in improving the style of content presentation, making your audience curious about how and what happens next.
Having learnt about the utility and creation process of video backgrounds in the PowerPoint presentation tool, let us extend our discussion to the method of creating a moving slide show background in the same in the following section:
User’s Guide to Create Moving Backgrounds for PowerPoint Presentations
Discussed below is an explanatory procedure for designing moving backgrounds with an awesome appearance for slideshow presentations in Microsoft PowerPoint:
Step 1: Open Your Presentation
To begin with, launch the PowerPoint tool in your preferred device and open the presentation on which you will be working to add the moving background. After the presentation gets loaded, navigate through the same and select the desired slide to proceed with the aforesaid task.
Step 2: Choose a Video Location
To add your desired video to the slide, navigate to the PowerPoint ribbon at the top and click on the ‘Insert’ tab. Select ‘Video’ from the list of options that appears, followed by choosing one of the ‘Online Video’ or ‘Video on My PC’ options from the video selection prompt. It is further recommended to select a video in the MP4 format, as the latter gives best results of moving and video backgrounds.
Step 3: Insert Your Video
Choose the second option in the selection prompt to upload a video from your device. You will now be asked to browse through your device and locate the desired video in the ‘Insert Video’ dialog box that appears. Select your video and tap the ‘Insert’ button to add your video.
To upload videos from an online source, choose the ‘Online Video’ option in the selection prompt and proceed to search the video from PowerPoint or paste its embed code to recover the video. The chosen video will begin to download and can be added to the PowerPoint presentation after the download process comes to an end.

Step 4: Playback Editing and Video Customization
Before proceeding further, consider paying your video once by clicking on the ‘Start’ button. You can also add different effects, trim and crop or add a bookmark to your video by navigating to and clicking on the ‘Video Tools’ tab, followed by selecting the ‘Format’ option. To work with the start and playback options for the video, click on ‘Playback’ in the dropdown menu of the ‘Video Tools’ tab.

Part 3 Some Tips for You to Get Awesome PowerPoint Backgrounds & Templates
Now that you have developed a comprehensive understanding of the utility of adding video and moving background for slideshow presentation, let us look through some easy tips and tricks to conveniently access the top rated and the most popular PowerPoint slideshow templates and backgrounds in the following section:
01Cool Slide Backgrounds
Slideshow presentations in PowerPoint are supplemented with a visual spark through amazing and vibrant backgrounds that are a sign of excellent graphic creativity. When working with a PowerPoint presentation of your own, do take the liberty to use some cool slide backgrounds to your creative advantage.
When the talk is about complementing your presentation with a cohesive and upbeat background, you can either select the most suitable one from a heap of pre made slideshow templates available both in the PowerPoint slideshow creator tool as well as across the web. However, if you wish to take the excitement to another level, try hands at creating an awesome and cool backgrounds for PowerPoint slides of your own!
Talking about some really cool tips and tricks to design a slideshow presentation background in PowerPoint, start with including some specific shapes and color overlays to the background capture, experiment with a polygon background, work on enhancing the background image with classic and artistic effects and apply a mix of colors, textures and patterns to give a classy look to your slideshow backgrounds.

02Professional Slideshow Backgrounds
If you are aiming at creating a PowerPoint slideshow presentation with a business centered design approach, you will need to cut down on some extra elements that you would ideally choose to include in a personal purpose based slideshow. Paying attention to the fact that business and corporate centered presentations should be simple, subtle and to the point, it would be an intelligent step to avoid adding too many expressive elements in the background.
Whether you are creating a professional slideshow background of your own or working with a pre designed template, take care to include a complementary play of a light background theme with a maximum of 2 balancing shades.
Avoid too much vibrancy and abstain from applying over the top effects and quick transitions, lest your presentation may look a bit too crowed. If your slides have lot of written content, prefer using a white color background text in a professional font style.
If you have decided on picking a pre made template, you can browse through a diversity of suggestions across the web, while keeping the aforesaid constraints in mind. Consider taking a look at the figure given below to have a more comprehensive understating of the prerequisites of selecting a professional sideshow background template:

03Happy Birthday Slide Backgrounds
Birthday parties are the most appealing synonyms of fun and entertainment. If you are into the profession of organizing events that renders smiling and happy faces, slideshow presentations could be of great help to you in discussing about services, types of social gentries and event targets with your clients.
When looking through different options to select the perfect birthday template, either for a professional event, or just to go down the memory lane of your most cherished moments, take caution to search for a vibrant alternative with colorful images, different background designs and party oriented cool themes, wide aspect ratio with high screen resolution for a mass display and conveniently editable graphics.
If you are creating a happy birthday slide background of your own, there are variety of realms to explore your graphic design creativity, owing to the fact that the subject of creation is highly expressive and multi-dimensional. While you are free to extend your creativity to the next level, do pay attention to the above constraints for a more elusive and outstanding creation output, while maintaining the fun and entertainment quotient intact.

04Wedding Slide Backgrounds
Considering the fact that wedding events are pronounced means of fun, leisure, enjoyment and beautiful memories, anything that aims to be a part of the celebrations, should be equally ecstatic and engaging. Infusing festive occasions with technology, slideshow based wedding invitations and moment captures are the top rated modern trends of celebrating this significant life event.
If you are keen on designing the perfect slideshow presentation for wedding invitations, photo albums and thank you cards, prefer to choose a wedding slide background template with aesthetic layout and flowing element inclusions, like that of floral borders and scented candles. Look though the elements of a subtle thematic setup with soothing color combinations, preferably in complementary pastel shades, like pink and white.
Talking of template customizability, the latter should have placeholders to include names of the bride and groom, the wedding date and venue, and of course the wedding photographs. The beautiful slide background template should have enough design space to include the most elusive play of text colors and fonts to suit specific preferences of creating special memories of a cherished event.

05Slideshow Backgrounds and Templates in Filmora
When looking for the most convenient lead to an extensive variety of beautiful slideshow templates and background, the template library of Wondershare Filmora Video Editor slideshow creator program can be your most affordable destination. The aforesaid software library is known to possess the best and most perfect template choices to suit the creation constraints of almost every slideshow presentation style and objective you can possibly think of.
For Win 7 or later (64-bit)
For macOS 10.12 or later
The elusive templates are further supplemented with a plethora of design flexibilities and customization features that are all set to deliver you the most appreciable creation output. Stressing a bit on the template customization choices of the software, you can work with the tool to uplift your slideshow backgrounds with artistic image effects and overlays, annotate them with beautiful text formations in a variety of colors, fonts and sizes and lots more.
Moving a bit deeper into the creative aspect, you can upgrade the visual style of your presentations with the most perfect and seamless image and video transitions and text animations. The bottom line is, working with the aforesaid slideshow creator program, you are entitled to get jaw dropping applaud from your audience, while making a confident and a content delivery through your slideshow presentation.

● Ending Thoughts →
● Using an expressive and complementing background in your slideshow presentation uplifts its visual credibility in captivating your audience.
● Browsing through the web, you get to access a vast range of amazing slideshow backgrounds and templates to make your presentation, a visual masterpiece.
● When looking for the most distributed storehouse of slideshow backgrounds and templates, the Wondershare Filmora library is your ultimate solution.
Amazing slideshow background are an absolute attention grabber in the realm of creative PowerPoint presentations. If you wish to upgrade yours with the same, be here to learn how!
In this article
01 [How to Add Video Background in PowerPoint?](#Part 1)
02 [How to Create Moving Backgrounds in Microsoft PowerPoint?](#Part 2)
03 [Some Tips for You to Get Awesome PowerPoint Backgrounds & Templates](#Part 3)
Part 1 How to Add Video Background in PowerPoint?
When the talk is about engaging means to deliver a precise information, PowerPoint slideshows are an absolute stunner. While these are already a captivating utility to present your thing, the output and audience engagement is at par with the inclusion of attractive design elements in the presentation. As is evident, there are enormous diversities of supplementary elements to complement your presentation, let us centre our discussion to the application of video background for slideshow in PowerPoint.
User’s Guide to Add Video Background in a PowerPoint Slideshow
The following section presents a detailed explanation of the steps to supplement your PowerPoint presentations with classic video backgrounds in just a few quick steps:
Step 1: Launch Your Presentation
Start with opening the desired PowerPoint presentation to which you want to add the video background, in any of your preferred devices.
Step 2: Add a Video to Your Slide
Browse through your presentation slides to locate the one you want to add the video background to. When you have made your choice, navigate to the PowerPoint toolbar at the top and hit the ‘Insert’ tab and choose the ‘Video’ option.
You will now be presented with 2 choices, either uploading a video from your device or insert one from the web by pasting its YouTube URL into the slide. If you are uploading a video from your device, proceed with selecting the desired video and tap ‘Insert’.
Step 3: Move and Resize Your Video
After uploading your video to the slide, you need to make suitable adjustments in its size and alignment to synchronize the same with the contents of the slide. To do this, drag the top left corner of the video to that of the slide to set the top alignment ratio. In the same way, move the bottom right corner of the video to be in sync with that of the slide. You will see the video occupying the entire slide at the end of the adjustment process.
Step 4: Set the Video Background
You will now need to set the video as the background of your slide, so that the latter’s contents are displayed over the video. You can do this by right clicking on the video and choosing the ‘Send to Back’ option from the dropdown that follows. This will cause the contents of your slide to get displayed over the video.
Step 5: Playback Edit and Customization Choices
Before proceeding towards making changes in the video playback and formatting, prefer taking a quick preview of your work till here. Once you are satisfied, navigate to the PowerPoint Toolbar at the top, hit the ‘Video Tools’ tab, followed by clicking on the ‘Playback’ tab.
It is recommended to introduce the following changes in your video for the most affordable slideshow output:
● Loop Your Video
Creating a video loop will facilitate you with an automatic replay of your video without the need to restart it every time with a click. You can loop your video by navigating to the ‘Video Options’ section and choose ‘Loop Until Stopped’ by clicking within the checkbox next to it. The background video will now continue to play until you switch to a different slide.
● Automatically Start Your Video
To avoid clicking on the slide amid your presentation for the video loop to begin, adjust the latter’s settings for an automatic start. Navigate to the ‘Start’ dropdown menu and select ‘Automatically’.
● Trim Your Video
You can work with some basic video editing tools in PowerPoint, like trimming and cropping your background video to a desired length. If you wish to ward off certain portions of your video, reach to and click o the ‘Trim Video’ button. Following this, drag the slider of the video to select the desired portions of the clip and exclude the rest.
You can further work with some more editing effects to create the perfect video backgrounds for your presentation slides in line with your specific preferences.
Step 6: Annotate Your Video Background
When you are done with the video editing process, take a preview of the same to ensure that everything is set in the proper order and at the proper place. Lastly, if you wish to add suitable text annotations to your video, you can do this with the ‘ClassPoint’ tool to write over the video background. All you need to do is select a preferred pen colour and start writing on your slide screen. You can further, save the annotations for a work record.
Part 2 How to Create Moving Backgrounds in Microsoft PowerPoint?
Moving PowerPoint slideshow background is another aspect of graphic creativity at its best, which can be used in a number of ways to grab considerable viewer attention. When choosing to add moving backgrounds to your presentation, the latter can aid in improving the style of content presentation, making your audience curious about how and what happens next.
Having learnt about the utility and creation process of video backgrounds in the PowerPoint presentation tool, let us extend our discussion to the method of creating a moving slide show background in the same in the following section:
User’s Guide to Create Moving Backgrounds for PowerPoint Presentations
Discussed below is an explanatory procedure for designing moving backgrounds with an awesome appearance for slideshow presentations in Microsoft PowerPoint:
Step 1: Open Your Presentation
To begin with, launch the PowerPoint tool in your preferred device and open the presentation on which you will be working to add the moving background. After the presentation gets loaded, navigate through the same and select the desired slide to proceed with the aforesaid task.
Step 2: Choose a Video Location
To add your desired video to the slide, navigate to the PowerPoint ribbon at the top and click on the ‘Insert’ tab. Select ‘Video’ from the list of options that appears, followed by choosing one of the ‘Online Video’ or ‘Video on My PC’ options from the video selection prompt. It is further recommended to select a video in the MP4 format, as the latter gives best results of moving and video backgrounds.
Step 3: Insert Your Video
Choose the second option in the selection prompt to upload a video from your device. You will now be asked to browse through your device and locate the desired video in the ‘Insert Video’ dialog box that appears. Select your video and tap the ‘Insert’ button to add your video.
To upload videos from an online source, choose the ‘Online Video’ option in the selection prompt and proceed to search the video from PowerPoint or paste its embed code to recover the video. The chosen video will begin to download and can be added to the PowerPoint presentation after the download process comes to an end.
Step 4: Playback Editing and Video Customization
Before proceeding further, consider paying your video once by clicking on the ‘Start’ button. You can also add different effects, trim and crop or add a bookmark to your video by navigating to and clicking on the ‘Video Tools’ tab, followed by selecting the ‘Format’ option. To work with the start and playback options for the video, click on ‘Playback’ in the dropdown menu of the ‘Video Tools’ tab.
Part 3 Some Tips for You to Get Awesome PowerPoint Backgrounds & Templates
Now that you have developed a comprehensive understanding of the utility of adding video and moving background for slideshow presentation, let us look through some easy tips and tricks to conveniently access the top rated and the most popular PowerPoint slideshow templates and backgrounds in the following section:
01Cool Slide Backgrounds
Slideshow presentations in PowerPoint are supplemented with a visual spark through amazing and vibrant backgrounds that are a sign of excellent graphic creativity. When working with a PowerPoint presentation of your own, do take the liberty to use some cool slide backgrounds to your creative advantage.
When the talk is about complementing your presentation with a cohesive and upbeat background, you can either select the most suitable one from a heap of pre made slideshow templates available both in the PowerPoint slideshow creator tool as well as across the web. However, if you wish to take the excitement to another level, try hands at creating an awesome and cool backgrounds for PowerPoint slides of your own!
Talking about some really cool tips and tricks to design a slideshow presentation background in PowerPoint, start with including some specific shapes and color overlays to the background capture, experiment with a polygon background, work on enhancing the background image with classic and artistic effects and apply a mix of colors, textures and patterns to give a classy look to your slideshow backgrounds.
02Professional Slideshow Backgrounds
If you are aiming at creating a PowerPoint slideshow presentation with a business centered design approach, you will need to cut down on some extra elements that you would ideally choose to include in a personal purpose based slideshow. Paying attention to the fact that business and corporate centered presentations should be simple, subtle and to the point, it would be an intelligent step to avoid adding too many expressive elements in the background.
Whether you are creating a professional slideshow background of your own or working with a pre designed template, take care to include a complementary play of a light background theme with a maximum of 2 balancing shades.
Avoid too much vibrancy and abstain from applying over the top effects and quick transitions, lest your presentation may look a bit too crowed. If your slides have lot of written content, prefer using a white color background text in a professional font style.
If you have decided on picking a pre made template, you can browse through a diversity of suggestions across the web, while keeping the aforesaid constraints in mind. Consider taking a look at the figure given below to have a more comprehensive understating of the prerequisites of selecting a professional sideshow background template:
03Happy Birthday Slide Backgrounds
Birthday parties are the most appealing synonyms of fun and entertainment. If you are into the profession of organizing events that renders smiling and happy faces, slideshow presentations could be of great help to you in discussing about services, types of social gentries and event targets with your clients.
When looking through different options to select the perfect birthday template, either for a professional event, or just to go down the memory lane of your most cherished moments, take caution to search for a vibrant alternative with colorful images, different background designs and party oriented cool themes, wide aspect ratio with high screen resolution for a mass display and conveniently editable graphics.
If you are creating a happy birthday slide background of your own, there are variety of realms to explore your graphic design creativity, owing to the fact that the subject of creation is highly expressive and multi-dimensional. While you are free to extend your creativity to the next level, do pay attention to the above constraints for a more elusive and outstanding creation output, while maintaining the fun and entertainment quotient intact.
04Wedding Slide Backgrounds
Considering the fact that wedding events are pronounced means of fun, leisure, enjoyment and beautiful memories, anything that aims to be a part of the celebrations, should be equally ecstatic and engaging. Infusing festive occasions with technology, slideshow based wedding invitations and moment captures are the top rated modern trends of celebrating this significant life event.
If you are keen on designing the perfect slideshow presentation for wedding invitations, photo albums and thank you cards, prefer to choose a wedding slide background template with aesthetic layout and flowing element inclusions, like that of floral borders and scented candles. Look though the elements of a subtle thematic setup with soothing color combinations, preferably in complementary pastel shades, like pink and white.
Talking of template customizability, the latter should have placeholders to include names of the bride and groom, the wedding date and venue, and of course the wedding photographs. The beautiful slide background template should have enough design space to include the most elusive play of text colors and fonts to suit specific preferences of creating special memories of a cherished event.
05Slideshow Backgrounds and Templates in Filmora
When looking for the most convenient lead to an extensive variety of beautiful slideshow templates and background, the template library of Wondershare Filmora Video Editor slideshow creator program can be your most affordable destination. The aforesaid software library is known to possess the best and most perfect template choices to suit the creation constraints of almost every slideshow presentation style and objective you can possibly think of.
For Win 7 or later (64-bit)
For macOS 10.12 or later
The elusive templates are further supplemented with a plethora of design flexibilities and customization features that are all set to deliver you the most appreciable creation output. Stressing a bit on the template customization choices of the software, you can work with the tool to uplift your slideshow backgrounds with artistic image effects and overlays, annotate them with beautiful text formations in a variety of colors, fonts and sizes and lots more.
Moving a bit deeper into the creative aspect, you can upgrade the visual style of your presentations with the most perfect and seamless image and video transitions and text animations. The bottom line is, working with the aforesaid slideshow creator program, you are entitled to get jaw dropping applaud from your audience, while making a confident and a content delivery through your slideshow presentation.
● Ending Thoughts →
● Using an expressive and complementing background in your slideshow presentation uplifts its visual credibility in captivating your audience.
● Browsing through the web, you get to access a vast range of amazing slideshow backgrounds and templates to make your presentation, a visual masterpiece.
● When looking for the most distributed storehouse of slideshow backgrounds and templates, the Wondershare Filmora library is your ultimate solution.
How to Make Photo Motion Effect Online?
Versatile Video Editor - Wondershare Filmora
An easy yet powerful editor
Numerous effects to choose from
Detailed tutorials provided by the official channel
It’s no wonder that the latest technology involving animated images or GIFs has become the prominent attraction center.
These loops are hilarious sometimes and can be used to express what words can’t. What if you wish to create a photo motion effect online with free-to-use animated video software of your choice? Are you also looking for the same?
Well! You can do this yourself now. With the help of this guide article, we will discuss some beneficial motion blur effect online makers that will provide information on how to animate a picture or add a photo motion effect online. So, let’s begin working on those tools and start making our GIFs.
In this article
01 [What is the photo motion effect?](#Part 1)
02 [Websites for photo motion effect online](#Part 2)
03 [Samples for a photo motion effect](#Part 3)
Part 1 What is the photo motion effect?
The photo motion effect online is ideal for creating an animation with your DSLR or still camera. It is just as it feels, the motion through photographs. Usually, with moving photo effects online, the camera is the one moving, along with its subjects. But, we aren’t concerned with the camera usage here as we’re just looking for the effect.
These are a little different than stop-motion, which generally has the fixed subjects are the only things moving bit by bit.
1. Create a Plan
Consider shooting an event or location. Also, ensure there will be lots of movement and motion and movement if it’s an event. Also, consider or brainstorm how you want the camera to move about the space if you’re shooting at a particular location. It could be you only hovering around with the camera, or you could strap it to a bike and take a ride.
2. Click lots of Photos
Keep shooting lots of photos! Most cameras consist of a burst setting, where you can set it to click an image every few seconds. Or, you may tap the shutter button yourself.
3. Import & Edit
Once you finish shooting tons of images, you must get them on your PC to animate them. And, this is where the need for photo motion effect online maker comes in handy. So, let’s discuss them more in further sections without any delay!
Part 2 Websites for photo motion effect online
The following photo motion effect online makers help you transform a static image into a dynamic image in just a few minutes. Some of them even allow you to add or remove things that weren’t in the original shape to your photos. And, they are helpful for both professional designers and beginner photographers or editors.
1. Movepic – Photo Motion

Price: Free, VIP subscription begins from $1.99 per month and consists of a 7-day free trial.
Movepic is a beginner-friendly photo motion effect online maker that you’ll love most probably. Inside the app, you’ll find the standard tools like directional animation, camera motion, and speed controls.
The software also contains a vast gallery of effects that you can use to improve and entirely convert your photo into a dynamic animation. The software recognizes photo elements like the water or sky and contains a variety of animated filters to convert scenery into one from another world.
The only downside is its watermark over your animated picture while you export the project through the accessible version of the app.
2. PixaMotion

Price: Free.
PixaMotion is a free photo motion effect online maker that can do it all pretty much well. Thanks to the sleek modern design, the app is also simple to use. You can animate your photo, add moving elements and audio, and different filters from the app’s gallery to it. The main agenda behind the app is making short loop animations.
PixaMotion contains a few different animation modes. For example, you can select whether you want to animate the entire photo or just some of your photo elements.
You can also select to save it as GIF or video after you’re ok with the completed animated picture. PixaMotion includes a paid subscription, but even the app’s free version allows you to download your photos without a watermark.
3. GIFMaker.me
Price: Free.
If you don’t wish to download any apps or hustle through the registration process, you can use GIFMaker.me as another photo motion effect online maker. This tool helps you to animate still images online as well as transform videos into GIFs.
Compared to different apps available on this list, GIFMaker. I am less sophisticated. The app needs you to upload each image or frame separately to create an animated GIF. The 300 is the maximum number of images you can upload here with ease.
Select the desirable canvas size, animation speed, how many times you want the loop to repeat, and hit the Create GIF Animation tab after you’re all done and ready to upload. Moreover, you can upload an audio URL to add music to your GIF.
Part 3 Samples for a photo motion effect
1. Cinemagraphs

This effect has been around since about 2011, so you’ve probably seen a few already. It has all the photo properties, except there’s always some little piece of it that feels to be moving magically. The only technique for getting this photo motion effect online is to take a little bit of video and work on it.
2. Plotagraph
A Plotagraph, at first glance, is an essence of morphing technique that can seem a bit like a Cinemagraph, the effect mentioned above. The difference is that you start with a photograph in this Plotagraph and not a video. And instead of pulling a video’s piece to use as animated sections, you’re making the animation out of your image.
3. Photoshop Timeline
Many people don’t realize that Photoshop has assisted you in importing and working on a video for five years. This sample is so great because Photoshop is a much more intuitive and deep program for us photographers. You can go with elements like masks, layers, and retouching in it. Or, you can use any moving photo effect online makers mentioned above to recreate an almost similar effect with fewer complexities.
Wondershare Filmora
Get started easily with Filmora’s powerful performance, intuitive interface, and countless effects!
Try It Free Try It Free Try It Free Learn More >

AI Portrait – The best feature of Wondershare Filmora for gameplay editing
The AI Portrait is a new add-on in Wondershare Filmora. It can easily remove video backgrounds without using a green screen or chroma key, allowing you to add borders, glitch effects, pixelated, noise, or segmentation video effects.

Conclusion
At last, we hope your question, “how to find the best photo motion effect online maker,” has the answer now. We gave multiple solutions to this question, and not one. With these motion blur effect online makers, you can quickly get what you long for. Despite these, you can also consider using Filmora that can be valuable on different platforms for animations. So enjoy doing animations and creating funny and helpful GIFs. Thanks for reading this article!
It’s no wonder that the latest technology involving animated images or GIFs has become the prominent attraction center.
These loops are hilarious sometimes and can be used to express what words can’t. What if you wish to create a photo motion effect online with free-to-use animated video software of your choice? Are you also looking for the same?
Well! You can do this yourself now. With the help of this guide article, we will discuss some beneficial motion blur effect online makers that will provide information on how to animate a picture or add a photo motion effect online. So, let’s begin working on those tools and start making our GIFs.
In this article
01 [What is the photo motion effect?](#Part 1)
02 [Websites for photo motion effect online](#Part 2)
03 [Samples for a photo motion effect](#Part 3)
Part 1 What is the photo motion effect?
The photo motion effect online is ideal for creating an animation with your DSLR or still camera. It is just as it feels, the motion through photographs. Usually, with moving photo effects online, the camera is the one moving, along with its subjects. But, we aren’t concerned with the camera usage here as we’re just looking for the effect.
These are a little different than stop-motion, which generally has the fixed subjects are the only things moving bit by bit.
1. Create a Plan
Consider shooting an event or location. Also, ensure there will be lots of movement and motion and movement if it’s an event. Also, consider or brainstorm how you want the camera to move about the space if you’re shooting at a particular location. It could be you only hovering around with the camera, or you could strap it to a bike and take a ride.
2. Click lots of Photos
Keep shooting lots of photos! Most cameras consist of a burst setting, where you can set it to click an image every few seconds. Or, you may tap the shutter button yourself.
3. Import & Edit
Once you finish shooting tons of images, you must get them on your PC to animate them. And, this is where the need for photo motion effect online maker comes in handy. So, let’s discuss them more in further sections without any delay!
Part 2 Websites for photo motion effect online
The following photo motion effect online makers help you transform a static image into a dynamic image in just a few minutes. Some of them even allow you to add or remove things that weren’t in the original shape to your photos. And, they are helpful for both professional designers and beginner photographers or editors.
1. Movepic – Photo Motion
Price: Free, VIP subscription begins from $1.99 per month and consists of a 7-day free trial.
Movepic is a beginner-friendly photo motion effect online maker that you’ll love most probably. Inside the app, you’ll find the standard tools like directional animation, camera motion, and speed controls.
The software also contains a vast gallery of effects that you can use to improve and entirely convert your photo into a dynamic animation. The software recognizes photo elements like the water or sky and contains a variety of animated filters to convert scenery into one from another world.
The only downside is its watermark over your animated picture while you export the project through the accessible version of the app.
2. PixaMotion
Price: Free.
PixaMotion is a free photo motion effect online maker that can do it all pretty much well. Thanks to the sleek modern design, the app is also simple to use. You can animate your photo, add moving elements and audio, and different filters from the app’s gallery to it. The main agenda behind the app is making short loop animations.
PixaMotion contains a few different animation modes. For example, you can select whether you want to animate the entire photo or just some of your photo elements.
You can also select to save it as GIF or video after you’re ok with the completed animated picture. PixaMotion includes a paid subscription, but even the app’s free version allows you to download your photos without a watermark.
3. GIFMaker.me
Price: Free.
If you don’t wish to download any apps or hustle through the registration process, you can use GIFMaker.me as another photo motion effect online maker. This tool helps you to animate still images online as well as transform videos into GIFs.
Compared to different apps available on this list, GIFMaker. I am less sophisticated. The app needs you to upload each image or frame separately to create an animated GIF. The 300 is the maximum number of images you can upload here with ease.
Select the desirable canvas size, animation speed, how many times you want the loop to repeat, and hit the Create GIF Animation tab after you’re all done and ready to upload. Moreover, you can upload an audio URL to add music to your GIF.
Part 3 Samples for a photo motion effect
1. Cinemagraphs
This effect has been around since about 2011, so you’ve probably seen a few already. It has all the photo properties, except there’s always some little piece of it that feels to be moving magically. The only technique for getting this photo motion effect online is to take a little bit of video and work on it.
2. Plotagraph
A Plotagraph, at first glance, is an essence of morphing technique that can seem a bit like a Cinemagraph, the effect mentioned above. The difference is that you start with a photograph in this Plotagraph and not a video. And instead of pulling a video’s piece to use as animated sections, you’re making the animation out of your image.
3. Photoshop Timeline
Many people don’t realize that Photoshop has assisted you in importing and working on a video for five years. This sample is so great because Photoshop is a much more intuitive and deep program for us photographers. You can go with elements like masks, layers, and retouching in it. Or, you can use any moving photo effect online makers mentioned above to recreate an almost similar effect with fewer complexities.
Wondershare Filmora
Get started easily with Filmora’s powerful performance, intuitive interface, and countless effects!
Try It Free Try It Free Try It Free Learn More >
AI Portrait – The best feature of Wondershare Filmora for gameplay editing
The AI Portrait is a new add-on in Wondershare Filmora. It can easily remove video backgrounds without using a green screen or chroma key, allowing you to add borders, glitch effects, pixelated, noise, or segmentation video effects.
Conclusion
At last, we hope your question, “how to find the best photo motion effect online maker,” has the answer now. We gave multiple solutions to this question, and not one. With these motion blur effect online makers, you can quickly get what you long for. Despite these, you can also consider using Filmora that can be valuable on different platforms for animations. So enjoy doing animations and creating funny and helpful GIFs. Thanks for reading this article!
Are You Ready to Animate Game Character From Scratch?
Are You Ready to Animate Game Character from Scratch?
An easy yet powerful editor
Numerous effects to choose from
Detailed tutorials provided by the official channel
As the popularity of animated video games is reaching new heights, demand for game animators are also going up. But, the Information regarding how to animate games is less or not sufficient enough.
In this article
01 [What is 2D & 3D Animation Game?](#Part 1)
02 [How Do You Animate Games?](#Part 2)
03 [How to Draw 2d & 3d Characters for Video Games?](#Part 3)
Part 1 What is 2D & 3D Animation Game?
Gaming animation is a blend of art and technology. It is one of those fields that require several technical skills. These are brilliant programming skills, understanding the basics of computer science, and practical technology know-how, collectively standing as the basic fundamental of Animation. Both 2D and 3D Animation changed the gaming experience forever and created an array of opportunities. But they differ in working and application.
01Working on 2D Animation
Flipbook can be a good example of the mechanism behind 2D Animation. After drawing a character or an object on the first page of a notebook, continue drawing for the next page and so on. Each removing should be a bit ahead or behind. When flipped swiftly, the series of drawings makes the character or object move.
The working of 2D Animation is not so different. But the detailing of the subject or the object cannot be minimal as a flipbook. 2D Animation demands more characters and more details while at the same time requiring smooth, visually appealing, and accurate detailing, which is a lot of pressure for the makers. Thanks to 2D making software, a week’s work can be taken care of in minutes or two.
02Working on 3D Animation
The working mechanism of 3D Animation is more complicated than 2D. It is a layered process that requires several skills. It also involves “rigged” and animated 3D models. In 3D, the initial sketch of the entire subject and object is the first step towards the animation procedure. The second step is to make a 3D model of the intended animated object. It was third, texturing of the 3D animated object. Rigging is the final step; it gives the 3D model the power and ability to move. Once rigging is done, the character is already for posing. Drop it to the scene and start your Animation.
Part 2 How Do You Animate Games?
01Do You Know How Hot Animated Games Are?
A practical example of how Animation has been handed down over the ages would be the case of ‘Anime’. It has persisted as one of the top cultural exports of Japan and has successfully completed more than 20 years of legacy. The name ‘anime’ practically is a shorter version of the word Animation.
You will find that the reasons for animate games to be so popular are in vast numbers. For example, the anime industry is valued at 19 billion USD, to begin with.
A brief overview of reasons why animate games are so popular:
● There is a Game for Everyone
Game animations are evolving which is why it is able to reach out to a majority of people’s interests.
● Unique Styles of Animation
Gaming animations have come a long way and they have a more individual appeal for all age groups.
● Game History
Gamers have something else to look forward to other than just gaming. There is a story behind every game.
● Customization
Players can customize their characters the way they wish to see themselves.
● Action
Gamers can fight in an action sequence or drive a Lamborghini in a high-speed car chase.
02How Do I Create My Own Game Character?
Designing a character starts with imaging a character in its suitable background or subject. If you are a big fan of fantasy games, your imaginations should not have any boundaries. But, in the case of a sports game, you might have to limit your imagination based on realistic features.
How to streamline wild ideas to get a brilliant character out of it?
● Get an idea
Decide whether the character in mind is the main character or what role, in particular, is it going to play in the game.
● Gender
Gender plays a crucial role in character creation. As it pre-decides certain character traits.
● Build personality
Every character has a specific goal. The personality of each character helps them to achieve their goal.
● Back-story
The personality traits of every character are derived from their back-story.
● Strength& Weakness
Each character should have something unique be it in their personality or in their strength.
● Define Relationship
It is important to imagine and define what relationship the characters have.
● Provide aesthetics
Visual Aesthetics is a realm that has no bounds in the art of gaming.
● Create more characters
Including other characters in relation to the protagonist of the game would make the game or the storyline more interesting.
Part 3 How to Draw 2d & 3d Characters for Video Games
01How to Make a 2d & 3d Game Character - Tutorial
First, we conceive an idea in our mind in an abstract form. But, creating a character from an initial sketch all the way to making it into a full-drawn animation is about developing details keeping the speed of work steady.
Detailed animate game tutorials available online:
● Create composition
Make it more defined and structured. A tip to immediately jump-start your imagination would be to see your character in different lights and shades.
● Refine the Character Sketch
Once you have the clay, it’s time to add form.
● Add References
Start looking for references that suit your character.
● Add Details
Now, it’s time to get into the details, like literally. Start breaking your character into blocks and pieces. Maybe not too literally.
02Learn to Animate Games That Are Underrated Now
With more advancement comes more banishment, which means more and types of games are fading out to obscurity. You can now animate games that are underrated and add a bit of your own flavor to them using software.
You can also apply 3D rendering techniques to apply light and shadow effects to your games.
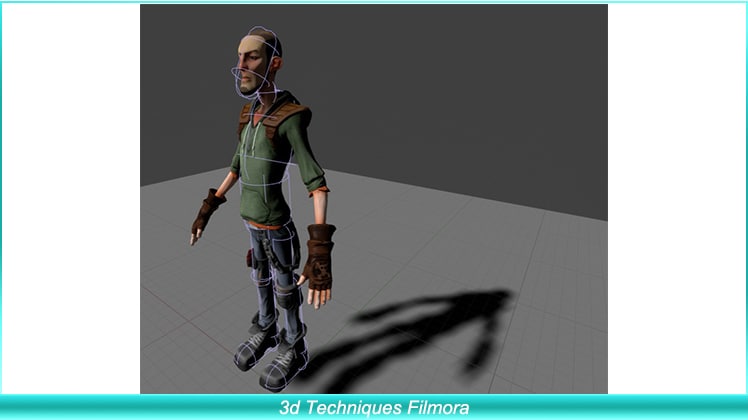
Stop motion is also a popular 2D gaming animation technique that is used in a number of underrated game models like cutout, Claymation, pixilation.
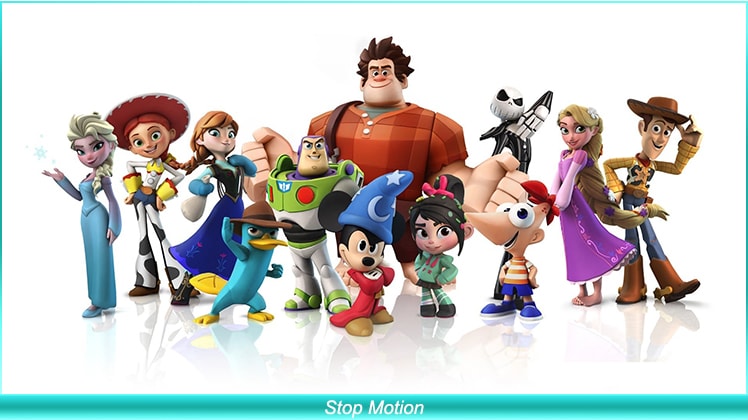
Motion graphics is amazing tool beginners have fun experimenting with. You can create engaging 2D game animations with motion graphic software like Adobe after effects. Make stunning adobe animation tutorials with the same.
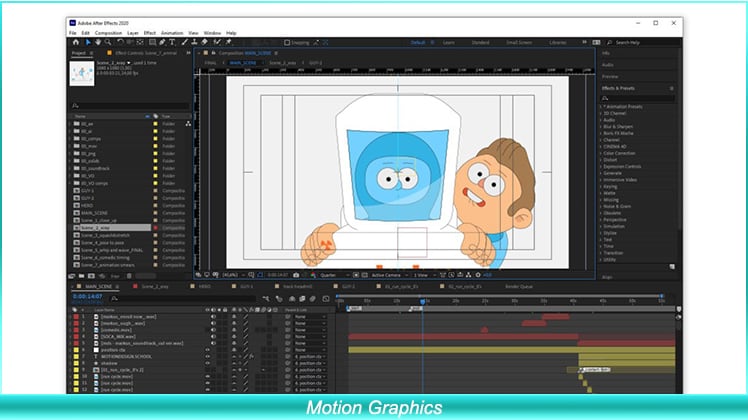
Key Takeaways from This Episode
● Both 2D and 3D Animation offer a separate flavor of the experience. 2D animations run on a definitive FPS and can be compared to a simple flipbook animation, while 3D Animation involves a process called rigging that gives the Animation several movements and abilities.
● Animated games have a global appeal because of their unique style, history, customization, and action features. Animating your own character requires you to pay attention to the details like personality, back story, gender, and aesthetics.
● You can start your animation process with 5 simple steps - concept, composition, sketch, reference, and detailing.
As the popularity of animated video games is reaching new heights, demand for game animators are also going up. But, the Information regarding how to animate games is less or not sufficient enough.
In this article
01 [What is 2D & 3D Animation Game?](#Part 1)
02 [How Do You Animate Games?](#Part 2)
03 [How to Draw 2d & 3d Characters for Video Games?](#Part 3)
Part 1 What is 2D & 3D Animation Game?
Gaming animation is a blend of art and technology. It is one of those fields that require several technical skills. These are brilliant programming skills, understanding the basics of computer science, and practical technology know-how, collectively standing as the basic fundamental of Animation. Both 2D and 3D Animation changed the gaming experience forever and created an array of opportunities. But they differ in working and application.
01Working on 2D Animation
Flipbook can be a good example of the mechanism behind 2D Animation. After drawing a character or an object on the first page of a notebook, continue drawing for the next page and so on. Each removing should be a bit ahead or behind. When flipped swiftly, the series of drawings makes the character or object move.
The working of 2D Animation is not so different. But the detailing of the subject or the object cannot be minimal as a flipbook. 2D Animation demands more characters and more details while at the same time requiring smooth, visually appealing, and accurate detailing, which is a lot of pressure for the makers. Thanks to 2D making software, a week’s work can be taken care of in minutes or two.
02Working on 3D Animation
The working mechanism of 3D Animation is more complicated than 2D. It is a layered process that requires several skills. It also involves “rigged” and animated 3D models. In 3D, the initial sketch of the entire subject and object is the first step towards the animation procedure. The second step is to make a 3D model of the intended animated object. It was third, texturing of the 3D animated object. Rigging is the final step; it gives the 3D model the power and ability to move. Once rigging is done, the character is already for posing. Drop it to the scene and start your Animation.
Part 2 How Do You Animate Games?
01Do You Know How Hot Animated Games Are?
A practical example of how Animation has been handed down over the ages would be the case of ‘Anime’. It has persisted as one of the top cultural exports of Japan and has successfully completed more than 20 years of legacy. The name ‘anime’ practically is a shorter version of the word Animation.
You will find that the reasons for animate games to be so popular are in vast numbers. For example, the anime industry is valued at 19 billion USD, to begin with.
A brief overview of reasons why animate games are so popular:
● There is a Game for Everyone
Game animations are evolving which is why it is able to reach out to a majority of people’s interests.
● Unique Styles of Animation
Gaming animations have come a long way and they have a more individual appeal for all age groups.
● Game History
Gamers have something else to look forward to other than just gaming. There is a story behind every game.
● Customization
Players can customize their characters the way they wish to see themselves.
● Action
Gamers can fight in an action sequence or drive a Lamborghini in a high-speed car chase.
02How Do I Create My Own Game Character?
Designing a character starts with imaging a character in its suitable background or subject. If you are a big fan of fantasy games, your imaginations should not have any boundaries. But, in the case of a sports game, you might have to limit your imagination based on realistic features.
How to streamline wild ideas to get a brilliant character out of it?
● Get an idea
Decide whether the character in mind is the main character or what role, in particular, is it going to play in the game.
● Gender
Gender plays a crucial role in character creation. As it pre-decides certain character traits.
● Build personality
Every character has a specific goal. The personality of each character helps them to achieve their goal.
● Back-story
The personality traits of every character are derived from their back-story.
● Strength& Weakness
Each character should have something unique be it in their personality or in their strength.
● Define Relationship
It is important to imagine and define what relationship the characters have.
● Provide aesthetics
Visual Aesthetics is a realm that has no bounds in the art of gaming.
● Create more characters
Including other characters in relation to the protagonist of the game would make the game or the storyline more interesting.
Part 3 How to Draw 2d & 3d Characters for Video Games
01How to Make a 2d & 3d Game Character - Tutorial
First, we conceive an idea in our mind in an abstract form. But, creating a character from an initial sketch all the way to making it into a full-drawn animation is about developing details keeping the speed of work steady.
Detailed animate game tutorials available online:
● Create composition
Make it more defined and structured. A tip to immediately jump-start your imagination would be to see your character in different lights and shades.
● Refine the Character Sketch
Once you have the clay, it’s time to add form.
● Add References
Start looking for references that suit your character.
● Add Details
Now, it’s time to get into the details, like literally. Start breaking your character into blocks and pieces. Maybe not too literally.
02Learn to Animate Games That Are Underrated Now
With more advancement comes more banishment, which means more and types of games are fading out to obscurity. You can now animate games that are underrated and add a bit of your own flavor to them using software.
You can also apply 3D rendering techniques to apply light and shadow effects to your games.
Stop motion is also a popular 2D gaming animation technique that is used in a number of underrated game models like cutout, Claymation, pixilation.
Motion graphics is amazing tool beginners have fun experimenting with. You can create engaging 2D game animations with motion graphic software like Adobe after effects. Make stunning adobe animation tutorials with the same.
Key Takeaways from This Episode
● Both 2D and 3D Animation offer a separate flavor of the experience. 2D animations run on a definitive FPS and can be compared to a simple flipbook animation, while 3D Animation involves a process called rigging that gives the Animation several movements and abilities.
● Animated games have a global appeal because of their unique style, history, customization, and action features. Animating your own character requires you to pay attention to the details like personality, back story, gender, and aesthetics.
● You can start your animation process with 5 simple steps - concept, composition, sketch, reference, and detailing.
How to Reduce GIF Size and Best GIF Resizers
How to Reduce GIF Size and Best GIF Resizers

Shanoon Cox
Mar 27, 2024• Proven solutions
With the increasing popularity of Smartphones, people these days are experiencing all new things with lots of excitement. And GIFs are always the most interesting content for them. When we talk about limited band width and fast loading time solutions then GIFs are the first options in front of our eyes. These files use to have small size so they can be transferred and downloaded with ease and at faster rate. If you are interested to know about various resizing concepts related to GIFs then the article below can be helpful for you.
How to reduce GIF size?
There are so many things that contribute in managing overall size of GIFs. The list includes the colour count inside, dimensions of images that you have used for development of GIFs and number of frames included inside one GIF folder. In case if it is an animated GIF then size may increase accordingly. Somehow, if you become able to optimize your Gifs then it is much easier to share them over internet.
Photoshop is a great tool to edit your image, including gif images. Here we are going to show you how to make your GIF smaller in Photoshop.
1. Crop away any extra space around the image:
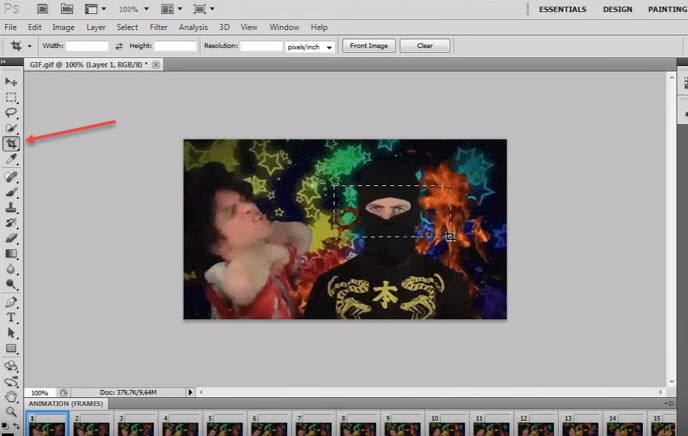
Image source: youtube.com
The very first task for users is to bring your GIF video file onto Photoshop timeline. Sometimes, it is not essential to update whole series of your GIF animation to the library, the GIF can be simply trimmed at timeline panel. One needs to turn on loop option and then be active enough to allocate the right place to trim your video.
2. Reduce dimensions of Output:

Image source: google.com
Those who are working on Photoshop CC 2017 version will be able to develop GIFs by simply executing Explore As option from menu. To do this, they need to move to files and then from drop down menu select Export as. Soon a menu will open where you need to choose your output file format as GIF and adjust weight and height parameter to reduce physical dimensions of your image.
In case if you are using Adobe Photoshop Elements 14 then on its interface, users need to move to File and then hit Save for Web option. It will help to open a Save for Web type dialogue box immediately, on this new window you can apply desired changes to physical dimensions of your content, reduce color information and apply dithering etc.
3. Adjust number of colors in image:
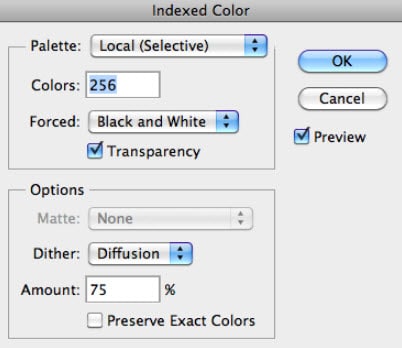
Image source: google.com
One of the most useful tricks for marketers is to optimize size of their GIF images by adjusting total number of colours to it. It can be done using color table tool that assists in easy selection and de-selection. This table use to contain about 256 unique colours and all of them use to contain 8 bit wide information. The best recommendation for good quality and small seize GIFs is to limit colours up to 64 only or keep then less than this. But sometimes your original videos may ask you for increment in color information.
Tips:
During GIF size reduction process, you will have to go through color number selections in the series of 256, 128, 64, 32, 16, 8, 4, 2, 1 etc. Use the smaller side of scale to get best results during optimization process.
- Users can also reduce number of frames in their GIFs.
- Never forget to avoid dithering as it may help to improve appearance of images.
- It is essential work with loss less compression algorithms otherwise huge loss in information will be carried out.
- Interlacing is not good option for your GIFs as it causes significant increase in overall file size.
Best GIF resizers
Those who are searching for some alternatives to Photoshop for creation of GIF images can move towards the list below:
2. FileOptimizer:
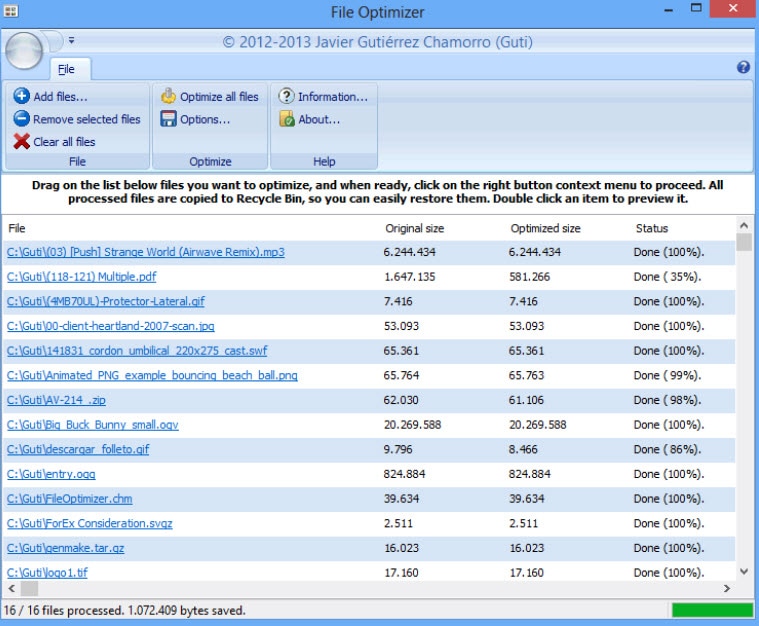
This is an advanced optimization tool for GIF sets as it can shrink output file using its multiple recompressing procedures. It can help to compress audio, video as well as other documents with popular file sizes like JPG, GMP, PNG and TIFF etc.
3. FileMinimizer Pictures:
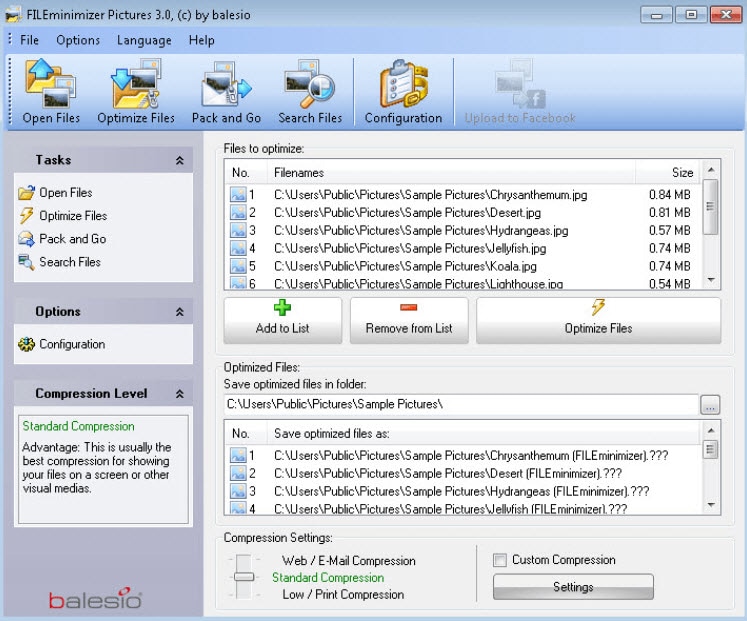
It can compress GIF images up to 98% with its classic optimization techniques. It generally follows 4 compression levels but sometimes may go through several levels to generate smaller GIFs but even without losing quality. It works only on Windows platform.
4. RIOT:
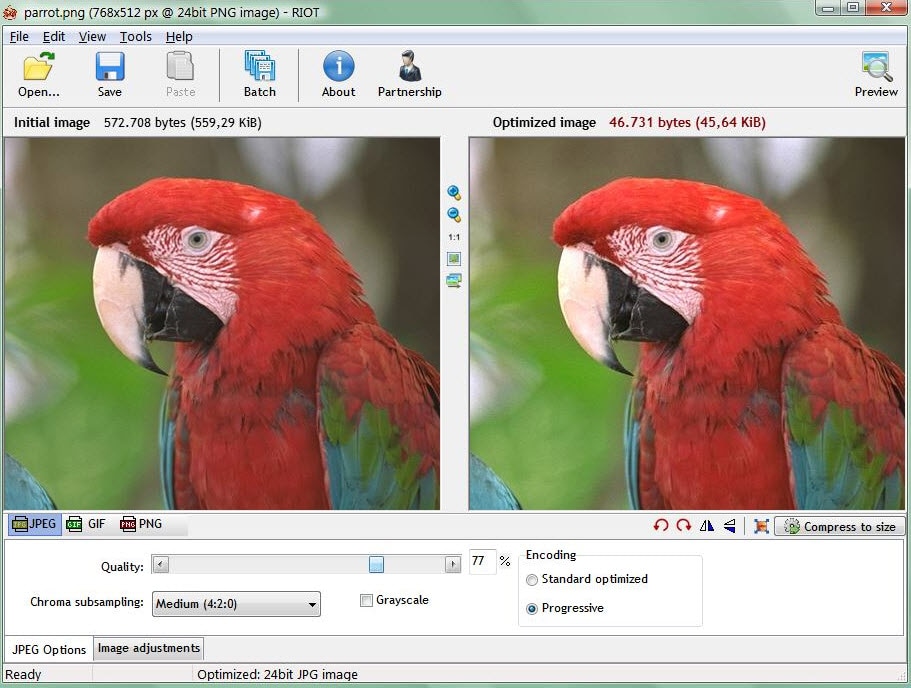
Here RIOT stands for Radical Image Optimization Tool that can adjust so many feature parameters for GIFs along with file size compressions. This optimizer makes use of matadeta settings, color information etc to reduce overall file size.
5. GifftingTool:
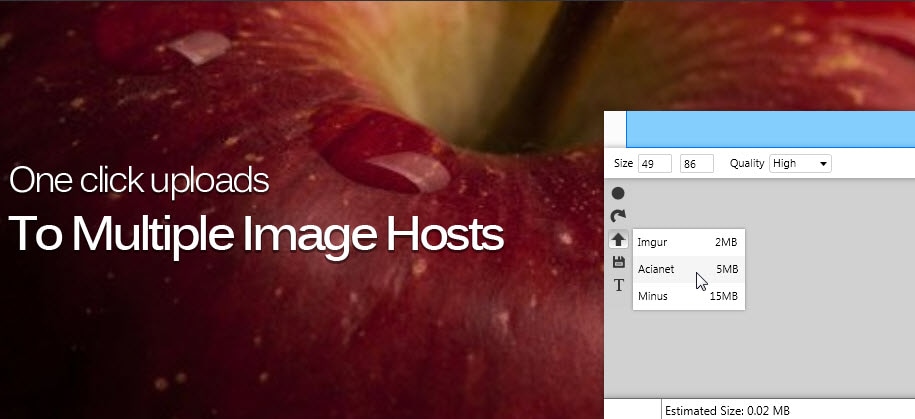
BY simply optimizing repetitive colours and pixels from GIF frames, this tool can easily provides loss less optimization solution. It can be used to adjust image cropping, reversing, merging, looping and filtering needs.
6. GIF Optimizer:
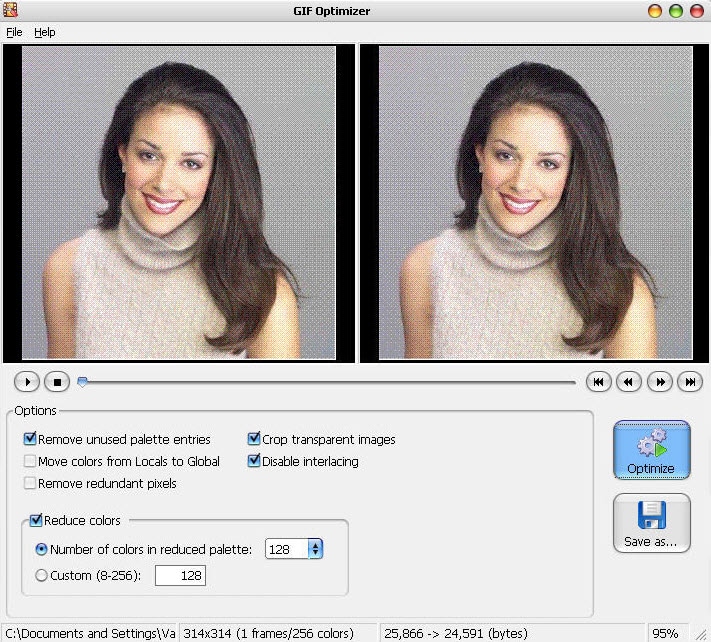
This is specially designed one click type GIF optimizer that can provide compression up to 90%. It also assists to reduce the total load time for GIF with reduction in file size.
7. Ezgif.com – Online:

This online GIF image editor can shrink your image by simply reducing its colour information. Users can easily minimize file size for about 30% using this tool that has features like crop, resize etc.
8. Conpressor.io – Online:
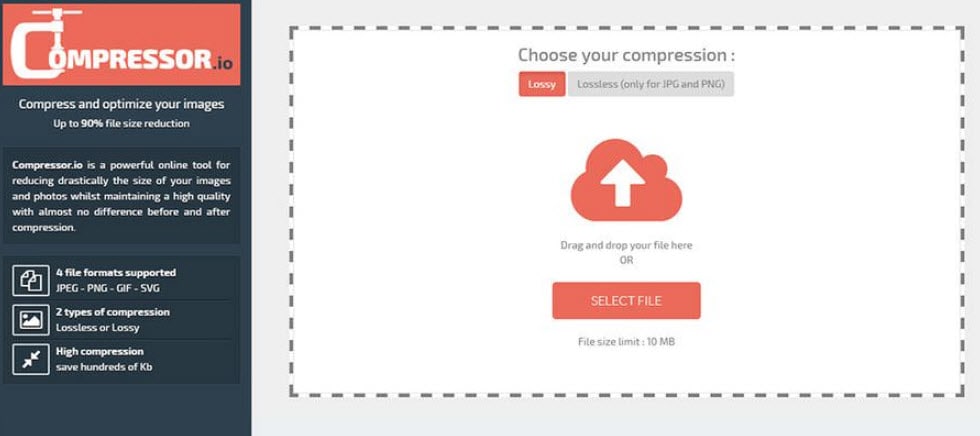
This online web app can assist users to compress their image to smallest size segment even without decaying overall quality. You can easily process SVG, PNG, GIF and JPG file formats over here.
9. Picasion.com – Online:

It helps to reduce overall weight of GIFs so that they can be easily uploaded over internet.
10. GIF Reducer:
Reducer can easily shrink GIF file so that it web loading times can be increased instantly.
11. Resizeimage.net:
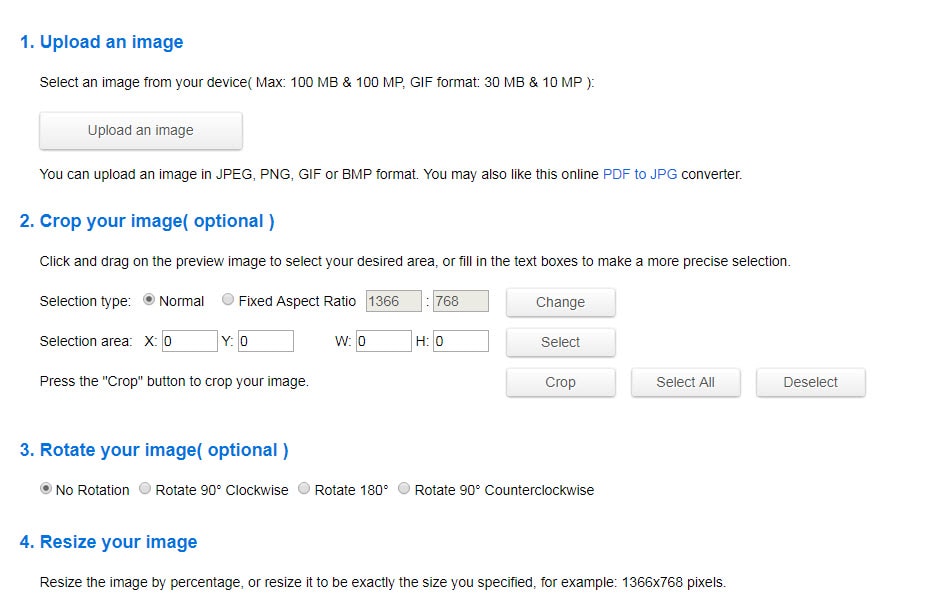
Use this tool to get impressive results for your GIF optimization and it can process almost all file formats to make things easily workable for users.
Conclusion
If you want to make a GIF online, Filmora meme maker is your ultimate solution. It helps you make image, GIF and video memes directly without watermark. It is totally FREE to use and no sign up. You can change text size, color and position to create caption when you are editing. You can also put text inside or outside in GIF. Just with a few clicks, your GIF is done . Try it now!
Shanoon Cox
Shanoon Cox is a writer and a lover of all things video.
Follow @Shanoon Cox
Shanoon Cox
Mar 27, 2024• Proven solutions
With the increasing popularity of Smartphones, people these days are experiencing all new things with lots of excitement. And GIFs are always the most interesting content for them. When we talk about limited band width and fast loading time solutions then GIFs are the first options in front of our eyes. These files use to have small size so they can be transferred and downloaded with ease and at faster rate. If you are interested to know about various resizing concepts related to GIFs then the article below can be helpful for you.
How to reduce GIF size?
There are so many things that contribute in managing overall size of GIFs. The list includes the colour count inside, dimensions of images that you have used for development of GIFs and number of frames included inside one GIF folder. In case if it is an animated GIF then size may increase accordingly. Somehow, if you become able to optimize your Gifs then it is much easier to share them over internet.
Photoshop is a great tool to edit your image, including gif images. Here we are going to show you how to make your GIF smaller in Photoshop.
1. Crop away any extra space around the image:
Image source: youtube.com
The very first task for users is to bring your GIF video file onto Photoshop timeline. Sometimes, it is not essential to update whole series of your GIF animation to the library, the GIF can be simply trimmed at timeline panel. One needs to turn on loop option and then be active enough to allocate the right place to trim your video.
2. Reduce dimensions of Output:
Image source: google.com
Those who are working on Photoshop CC 2017 version will be able to develop GIFs by simply executing Explore As option from menu. To do this, they need to move to files and then from drop down menu select Export as. Soon a menu will open where you need to choose your output file format as GIF and adjust weight and height parameter to reduce physical dimensions of your image.
In case if you are using Adobe Photoshop Elements 14 then on its interface, users need to move to File and then hit Save for Web option. It will help to open a Save for Web type dialogue box immediately, on this new window you can apply desired changes to physical dimensions of your content, reduce color information and apply dithering etc.
3. Adjust number of colors in image:
Image source: google.com
One of the most useful tricks for marketers is to optimize size of their GIF images by adjusting total number of colours to it. It can be done using color table tool that assists in easy selection and de-selection. This table use to contain about 256 unique colours and all of them use to contain 8 bit wide information. The best recommendation for good quality and small seize GIFs is to limit colours up to 64 only or keep then less than this. But sometimes your original videos may ask you for increment in color information.
Tips:
During GIF size reduction process, you will have to go through color number selections in the series of 256, 128, 64, 32, 16, 8, 4, 2, 1 etc. Use the smaller side of scale to get best results during optimization process.
- Users can also reduce number of frames in their GIFs.
- Never forget to avoid dithering as it may help to improve appearance of images.
- It is essential work with loss less compression algorithms otherwise huge loss in information will be carried out.
- Interlacing is not good option for your GIFs as it causes significant increase in overall file size.
Best GIF resizers
Those who are searching for some alternatives to Photoshop for creation of GIF images can move towards the list below:
2. FileOptimizer:
This is an advanced optimization tool for GIF sets as it can shrink output file using its multiple recompressing procedures. It can help to compress audio, video as well as other documents with popular file sizes like JPG, GMP, PNG and TIFF etc.
3. FileMinimizer Pictures:
It can compress GIF images up to 98% with its classic optimization techniques. It generally follows 4 compression levels but sometimes may go through several levels to generate smaller GIFs but even without losing quality. It works only on Windows platform.
4. RIOT:
Here RIOT stands for Radical Image Optimization Tool that can adjust so many feature parameters for GIFs along with file size compressions. This optimizer makes use of matadeta settings, color information etc to reduce overall file size.
5. GifftingTool:
BY simply optimizing repetitive colours and pixels from GIF frames, this tool can easily provides loss less optimization solution. It can be used to adjust image cropping, reversing, merging, looping and filtering needs.
6. GIF Optimizer:
This is specially designed one click type GIF optimizer that can provide compression up to 90%. It also assists to reduce the total load time for GIF with reduction in file size.
7. Ezgif.com – Online:
This online GIF image editor can shrink your image by simply reducing its colour information. Users can easily minimize file size for about 30% using this tool that has features like crop, resize etc.
8. Conpressor.io – Online:
This online web app can assist users to compress their image to smallest size segment even without decaying overall quality. You can easily process SVG, PNG, GIF and JPG file formats over here.
9. Picasion.com – Online:
It helps to reduce overall weight of GIFs so that they can be easily uploaded over internet.
10. GIF Reducer:
Reducer can easily shrink GIF file so that it web loading times can be increased instantly.
11. Resizeimage.net:
Use this tool to get impressive results for your GIF optimization and it can process almost all file formats to make things easily workable for users.
Conclusion
If you want to make a GIF online, Filmora meme maker is your ultimate solution. It helps you make image, GIF and video memes directly without watermark. It is totally FREE to use and no sign up. You can change text size, color and position to create caption when you are editing. You can also put text inside or outside in GIF. Just with a few clicks, your GIF is done . Try it now!
Shanoon Cox
Shanoon Cox is a writer and a lover of all things video.
Follow @Shanoon Cox
How to Draw Cartoons Step by Step with This Guide
Learn How to Draw Cartoons Step by Step with This Guide
An easy yet powerful editor
Numerous effects to choose from
Detailed tutorials provided by the official channel
Cartoon character drawing is usually a vital aspect of any child’s life who loves to watch cartoon series and can sometimes be someone’s favorite thing in the world.

A cartoon character is a series of single drawings that tell a joke or story. Although cartoons are mostly drawn, they can sometimes be animated. Kids like comics which makes them an essential part of every child’s life. Cartoons are not only used for entertainment purposes but also help kids and young children learn more about the world around them. For example, children learn about love, loss, friendship, and other essential life issues about life by watching cartoons.
However, cartoons are not only limited to children but are also for adults. In addition, cartoons created for an adult audience go deeper into real-life problems and explore darker themes. They aim to create content that matches the maturity and age of the audience. Watching cartoons is fun. But what if you could make them? This article will provide you with a guide on producing cool cartoon drawings that will match different audiences, both older and younger.
In this article
01 [How to Draw Cartoon Characters Step by Step](#Part 1)
02 [Cartoon Easy Drawing with Colour Step by Step](#Part 2)
03 [Cartoon Easy Sketch Drawing Step by Step](#Part 3)
Part 1 How to Draw Cartoon Characters Step by Step
Note that in the world we live in, Professionals were once students, and experts were once beginners. This means that everyone has a starting point, and they all have one thing in common: “learning.” Whether you are aspiring to become an English teacher, an astrophysicist, an artist, or a physician’s assistant, you must first learn the ins and outs of the field.
Those aspiring to become animators and cartoonists must first learn the basics of cartoon character drawing and practice some easy, simple cartoon drawing before cranking out the Mickey-Mouses of the entertainment world. However, we will cover the basic principles of easy cartoon drawing for beginners step by step to get your learning process started. Here is how to draw a Micky-Mouse perfectly:

Step 1:
● Use a pencil to begin your drawing.
● First, create a circle for the head and a curved line on the left side.
● Draw a horizontal line at the center.
Step 2: Next, draw an oval shape for the mouth and a “U” shape added to the bottom, and then you can add another parallel “U” shape and connect it with the oval.
Step 3: Draw the eye using two upside-down “U” shapes, and then you add his large ear on the right and a small one at the top of the head.
Step 4: You can draw a bean shape and another smaller one inside for the body.
Step 5: Add oval shapes for his feet to draw his legs and draw his tail on the right side just above the leg.
Step 6: Draw two elongated shapes for his arms, a small oval for the hand and a basic shape of his fingers.
Step 7: Draw the cheese and add a few small circles inside.
Step 8: Also include the facial features by drawing the inside of the nose, eyebrows, eyes, and whiskers.
Step 9:
● Draw his fingers and hair between his ears.
● Trace your pencil lines with a sharpie.
● Erase the pencil afterward.
Step 10: Finally, you can color your drawing and upload it to your website.
Part 1 Cartoon Easy Drawing with Colour Step by Step
Applying color to a drawing is very important to beautify your drawing and make it look stunning and attractive. Here is how to cartoon easy drawing a flower using a colored pencil:
Step 1: Using a color photocopy of a reference photo, crop and rearrange elements of the poppy composition. With light pressure and HB pencil, draw a composition onto a four-ply, 100% cotton museum board frequently found among framing supplies.
Step 2: With very light pressure, apply the first colored pencil layer and add more emphasis where the values will be deeper. While doing this, note that the pencil application will still appear granular, and the texture of the museum board is still visible.

Step 3: Create the veins in the leaves and the fuzzy texture of the stem and pod, and also, as the individual strands of stamens, put down a sheet of translucent drafting paper. Use heavy tracing paper with a very sharp 7H graphite pencil and apply heavy pressure in drawing the lines for stamens, fuzz, and veins on the drafting paper and impress them into the surface of the museum board. Then, with a contrasting layer of darker color, these features dramatically show up on the stem, leaves, center of the flower, pod, and center of the flower. Then add deeper values of rose in the shadowed areas of the flower petals.

Step 4: To make them appear less granular and intensify the colors, start by blending with a clear, alcohol-based blending marker. The solvent, wax, or vegetable oil then dissolves the binder in the colored pencil layer and fluidly releases the pigment. This will also help to “fill in” the dots of the tooth of the paper and make the color appear denser.

Step 5: Continue to intensify the color by using a non-pigmented blending pencil over a previous layer and repeat a layer or two of color, much like a “color sandwich.” Repeat this “ burnishing “ process for subsequent layerings of color, like a double-decker or triple-decker sandwich.
Also, make sure the rich, dark negative space is carried out the same way, layering colors and burnishing, then repeating the colors for deep, rich saturation.
Render the deep, smeary flecks of pollen by heavily applying “freckles” of burgundy, then slightly smudge them with the tip of a blending marker. Lastly, scratch a few of the tiny wisps of fuzz on the pod and stem carefully into the board via a sharp X-acto knife for a striking contrast of light against the deep background.

Part 2 Cartoon Easy Sketch Drawing Step by Step
This is the initial stage of the drawing process. It requires you to create an outline of the concept you want to draw before adding color. However, it is also referred to as a technique in shading. For example, if you’re going to sketch a cherry fruit, there are a few things to note here.
Try not to look at the cherry as a whole but look at its shapes and name them. This way, you are looking at the parts to the whole and not the entire piece.

Step 1: Draw two overlapping circles and draw two curved lines from each of the circles.
Step 2: Make a small rectangle at the top to join the two stems and draw a second set of curved lines.
Step 3: Draw thick lines inside the rectangle for the bumps and darken the lines and use your finger to smudge them a bit for the shaded effect.
Step 4: Draw a curved line from the stem on the right to the circle’s edge to create the bump.
Step 5: Holding your pencil at an angle, make light strokes going across the front of both cherries. Take note of the places where there is no light. This is where the light source is hitting the cherry the most.
Step 6: To darken, a shade over those places again, keep layering the shading technique until you get the effect you see on the cherries.
Step 7: Use the same technique to shade under the cherries, but use your finger to smudge it to smoother the shadow.
●Bonus:
You can add color, effect, or animate to your cartoon character drawing by using Wondershare Filmora Video Editor , the best editor on the internet. Filmora is a free software program with the same creating abilities and imaging editing similar to Adobe Illustrator. It is open software that runs on various programs, such as Windows, Mac, and Linux. Please get to know more about this exclusive tool from Wondershare on their official website.
For Win 7 or later (64-bit)
For macOS 10.12 or later
● Ending Thoughts →
● A step-by-step guide on drawing easy cartoons for painting and how to sketch your drawing correctly.
● Cartoon character drawings in easy and quick steps.
● Easy cartoon drawing for beginners.
● Lastly, to add color to your drawing, use Filmora software.
● So, use the tips and tricks to make your presentation’s best cartoon characters come alive and be a pro with Filmora.
Cartoon character drawing is usually a vital aspect of any child’s life who loves to watch cartoon series and can sometimes be someone’s favorite thing in the world.
A cartoon character is a series of single drawings that tell a joke or story. Although cartoons are mostly drawn, they can sometimes be animated. Kids like comics which makes them an essential part of every child’s life. Cartoons are not only used for entertainment purposes but also help kids and young children learn more about the world around them. For example, children learn about love, loss, friendship, and other essential life issues about life by watching cartoons.
However, cartoons are not only limited to children but are also for adults. In addition, cartoons created for an adult audience go deeper into real-life problems and explore darker themes. They aim to create content that matches the maturity and age of the audience. Watching cartoons is fun. But what if you could make them? This article will provide you with a guide on producing cool cartoon drawings that will match different audiences, both older and younger.
In this article
01 [How to Draw Cartoon Characters Step by Step](#Part 1)
02 [Cartoon Easy Drawing with Colour Step by Step](#Part 2)
03 [Cartoon Easy Sketch Drawing Step by Step](#Part 3)
Part 1 How to Draw Cartoon Characters Step by Step
Note that in the world we live in, Professionals were once students, and experts were once beginners. This means that everyone has a starting point, and they all have one thing in common: “learning.” Whether you are aspiring to become an English teacher, an astrophysicist, an artist, or a physician’s assistant, you must first learn the ins and outs of the field.
Those aspiring to become animators and cartoonists must first learn the basics of cartoon character drawing and practice some easy, simple cartoon drawing before cranking out the Mickey-Mouses of the entertainment world. However, we will cover the basic principles of easy cartoon drawing for beginners step by step to get your learning process started. Here is how to draw a Micky-Mouse perfectly:
Step 1:
● Use a pencil to begin your drawing.
● First, create a circle for the head and a curved line on the left side.
● Draw a horizontal line at the center.
Step 2: Next, draw an oval shape for the mouth and a “U” shape added to the bottom, and then you can add another parallel “U” shape and connect it with the oval.
Step 3: Draw the eye using two upside-down “U” shapes, and then you add his large ear on the right and a small one at the top of the head.
Step 4: You can draw a bean shape and another smaller one inside for the body.
Step 5: Add oval shapes for his feet to draw his legs and draw his tail on the right side just above the leg.
Step 6: Draw two elongated shapes for his arms, a small oval for the hand and a basic shape of his fingers.
Step 7: Draw the cheese and add a few small circles inside.
Step 8: Also include the facial features by drawing the inside of the nose, eyebrows, eyes, and whiskers.
Step 9:
● Draw his fingers and hair between his ears.
● Trace your pencil lines with a sharpie.
● Erase the pencil afterward.
Step 10: Finally, you can color your drawing and upload it to your website.
Part 1 Cartoon Easy Drawing with Colour Step by Step
Applying color to a drawing is very important to beautify your drawing and make it look stunning and attractive. Here is how to cartoon easy drawing a flower using a colored pencil:
Step 1: Using a color photocopy of a reference photo, crop and rearrange elements of the poppy composition. With light pressure and HB pencil, draw a composition onto a four-ply, 100% cotton museum board frequently found among framing supplies.
Step 2: With very light pressure, apply the first colored pencil layer and add more emphasis where the values will be deeper. While doing this, note that the pencil application will still appear granular, and the texture of the museum board is still visible.
Step 3: Create the veins in the leaves and the fuzzy texture of the stem and pod, and also, as the individual strands of stamens, put down a sheet of translucent drafting paper. Use heavy tracing paper with a very sharp 7H graphite pencil and apply heavy pressure in drawing the lines for stamens, fuzz, and veins on the drafting paper and impress them into the surface of the museum board. Then, with a contrasting layer of darker color, these features dramatically show up on the stem, leaves, center of the flower, pod, and center of the flower. Then add deeper values of rose in the shadowed areas of the flower petals.
Step 4: To make them appear less granular and intensify the colors, start by blending with a clear, alcohol-based blending marker. The solvent, wax, or vegetable oil then dissolves the binder in the colored pencil layer and fluidly releases the pigment. This will also help to “fill in” the dots of the tooth of the paper and make the color appear denser.
Step 5: Continue to intensify the color by using a non-pigmented blending pencil over a previous layer and repeat a layer or two of color, much like a “color sandwich.” Repeat this “ burnishing “ process for subsequent layerings of color, like a double-decker or triple-decker sandwich.
Also, make sure the rich, dark negative space is carried out the same way, layering colors and burnishing, then repeating the colors for deep, rich saturation.
Render the deep, smeary flecks of pollen by heavily applying “freckles” of burgundy, then slightly smudge them with the tip of a blending marker. Lastly, scratch a few of the tiny wisps of fuzz on the pod and stem carefully into the board via a sharp X-acto knife for a striking contrast of light against the deep background.
Part 2 Cartoon Easy Sketch Drawing Step by Step
This is the initial stage of the drawing process. It requires you to create an outline of the concept you want to draw before adding color. However, it is also referred to as a technique in shading. For example, if you’re going to sketch a cherry fruit, there are a few things to note here.
Try not to look at the cherry as a whole but look at its shapes and name them. This way, you are looking at the parts to the whole and not the entire piece.
Step 1: Draw two overlapping circles and draw two curved lines from each of the circles.
Step 2: Make a small rectangle at the top to join the two stems and draw a second set of curved lines.
Step 3: Draw thick lines inside the rectangle for the bumps and darken the lines and use your finger to smudge them a bit for the shaded effect.
Step 4: Draw a curved line from the stem on the right to the circle’s edge to create the bump.
Step 5: Holding your pencil at an angle, make light strokes going across the front of both cherries. Take note of the places where there is no light. This is where the light source is hitting the cherry the most.
Step 6: To darken, a shade over those places again, keep layering the shading technique until you get the effect you see on the cherries.
Step 7: Use the same technique to shade under the cherries, but use your finger to smudge it to smoother the shadow.
●Bonus:
You can add color, effect, or animate to your cartoon character drawing by using Wondershare Filmora Video Editor , the best editor on the internet. Filmora is a free software program with the same creating abilities and imaging editing similar to Adobe Illustrator. It is open software that runs on various programs, such as Windows, Mac, and Linux. Please get to know more about this exclusive tool from Wondershare on their official website.
For Win 7 or later (64-bit)
For macOS 10.12 or later
● Ending Thoughts →
● A step-by-step guide on drawing easy cartoons for painting and how to sketch your drawing correctly.
● Cartoon character drawings in easy and quick steps.
● Easy cartoon drawing for beginners.
● Lastly, to add color to your drawing, use Filmora software.
● So, use the tips and tricks to make your presentation’s best cartoon characters come alive and be a pro with Filmora.
Also read:
- New 2024 Approved The Definitive Guide to Whiteboard Animation
- Updated In 2024, The Only Guide Youll Need to Learn About GIF Video Downloader
- You Can Turn a TikTok Into a GIF Now
- New In 2024, How to Become a Motion Graphic Designer
- New 12 Dubbed Anime Websites to Watch for Free for 2024
- Updated 2024 Approved Techniques for Making After Effects 2D Animation
- Samples of Cartoon Character Face
- Updated Popular Tips on Learning Animate Rigging
- New Fuel Your Creativity with 10 Awesome Collection of 2D Animation Examples for 2024
- Updated In 2024, Best Websites to Download Animated GIFs for Free
- 2024 Approved 5 Websites with Animated Logos That Catch Your Eyes
- New How You Can Turn Yourself Into Anime Character Using Anime Filter
- Updated In 2024, Top 7 Animated GIF Text Makers
- New How to Make Your GIF on WhatsApp in Simple Ways
- 2024 Approved Whats Rigging Animation and Why It Matters
- 10 Amazing Whiteboard Animation Video Examples You Need to Bookmark
- Updated Best Websites to Download Animated GIFs for Free-Free GIF Download
- Updated In 2024, The Only Guide Youll Ever Need to Learn About GIF Video Downloader
- How to Make an Animated Travel Map Video for 2024
- Updated In 2024, The Guide to Learning All the Details About Voice Cloning
- In 2024, How to Change Location on TikTok to See More Content On your Samsung Galaxy F34 5G | Dr.fone
- Does Life360 Notify When You Log Out On Xiaomi Redmi Note 13 5G? | Dr.fone
- New 2024 Approved Easy Steps To Create Talking Memoji on iPhone Free
- In 2024, How to use iSpoofer on Tecno Pova 5? | Dr.fone
- Restore Missing App Icon on Nokia G22 Step-by-Step Solutions | Dr.fone
- How to Change/Fake Your Poco F5 5G Location on Viber | Dr.fone
- What is Geo-Blocking and How to Bypass it On Poco F5 Pro 5G? | Dr.fone
- Updated In 2024, Top 10 AI Avatar Video Generators
- How to Share/Fake Location on WhatsApp for Nokia C300 | Dr.fone
- In 2024, Does Airplane Mode Turn off GPS Location On Honor X50i+? | Dr.fone
- In 2024, How to Remove the Activation Lock On your iPad and iPhone 13 without Apple Account
- In 2024, Forgot iPhone 12 Backup Password? Heres What to Do
- All You Need To Know About Mega Greninja For Itel P55 | Dr.fone
- How to Mirror Your Tecno Pova 6 Pro 5G Screen to PC with Chromecast | Dr.fone
- In 2024, The Ultimate Guide to Get the Rare Candy on Pokemon Go Fire Red On Honor Magic 6 Lite | Dr.fone
- The Best Android Unlock Software For Nokia 130 Music Device Top 5 Picks to Remove Android Locks
- In 2024, A Perfect Guide To Remove or Disable Google Smart Lock On Xiaomi Redmi Note 12R
- How to Delete iCloud Account On iPhone 6 Plus without Password?
- Title: Updated 2024 Approved 8 Blender 3D Animation Tutorials
- Author: Elon
- Created at : 2024-04-21 09:30:40
- Updated at : 2024-04-22 09:30:40
- Link: https://animation-videos.techidaily.com/updated-2024-approved-8-blender-3d-animation-tutorials/
- License: This work is licensed under CC BY-NC-SA 4.0.
