

Updated 2024 Approved Adobe Animate Riggings PROPER Tutorial for You
Adobe Animate Rigging’s Tutorial for You
Adobe Animate Rigging’s PROPER Tutorial for You
An easy yet powerful editor
Numerous effects to choose from
Detailed tutorials provided by the official channel
Character rigging involves some easy steps. And the best way for it is Adobe animate rigging. We have laid down the following discussion to help you learn the easiest method of character rigging. And along with it, we will also help you understand both 2D and 3D character designing most effortlessly.
Lastly, and most importantly, it is vital to opt for the simplest yet feature-loaded tool for any animation work. Thus, we will also mention the best tool for animation and video editing. So, without any further wait, let us start our discussion.
In this article
01 [How to Rig a Simple Character | Adobe Animate Tutorial](#Part 1)
02 [Step by Step to Help You Understand 2D/3D Character Design](#Part 2)
Part 1 How to Rig a Simple Character | Adobe Animate Tutorial
Character rigging in Adobe is effortless and straightforward. There are a few steps for rigging in adobe animate, and we will be discussing and explaining the different steps that will help you learn rigging characters for your animation works.
The following are the steps to help you create a rig in Adobe animate.
Step 1: The first step involves selecting the shape for rigging. Otherwise, you can also use bitmap on stage for it.
**Step 2:**Look for the “Asset warp tool” present in the tool panel. This tool will help you in the process of rigging.

Step 3: Create the first joint using the “Asset warp tool” by clicking on the image or the bitmap with the tool. You will see that a triangular mesh-like structure has been formed on your image or bitmap. And the part where you clicked on the image or the bitmap with the “Asset warp tool” forms the first joint.

Step 4: The next step involves making more joints on the image and instilling bones between the joints. For that, go to the “Warp Options” and choose the “Tools” tab. There you will see the option of “Create bones”. Ensure to enable the “Create bones” option; otherwise, you will not create bones between the different joints.

Step 5: Complete the rig formation by joining all the joints correctly with each other with the help of the bones.

The above steps would help you create the rig for the image or bitmap you want to animate. And now, the following steps will help you learn the steps for modifying the rig as well as tweening.
The first process for it is deformation. So, the following are the steps that help you perform the process of deformation in animation.
Step 6: You need to deform the mesh, and you can do so by holding and dragging the joint with the help of the “Asset warp tool”.

**Step 7:**You can also rotate a bone by clicking and dragging the bone you want to rotate when you drag a joint, the size of the joint changes, which is not the case when you drag a bone. Its size remains constant.

Now, we will help you learn to work with the different keyframes. The keyframes enable the image or the bitmap to acquire different poses, vital for animation. The “Edit Multiple Frames” mode helps you work with different keyframes.
You can readily create new keyframes and deform the image through joints or bones. Each keyframe retains its own set, and you can integrate different transforms after setting one pose for the image in the keyframe.

Part 2 Step by Step to Help You Understand 2D/Character Design
Animation is immensely enjoyable and takes the best of our creativity. And as we know, there are two major and most renowned types of it. One is the 2-dimensional animation, which we know as the animation. And the other one is 3-dimensional, better known as animation.
Now, there are different aspects that are essential for anyone aspiring to animate, whether in or 3D, to know. One of the aspects is designing characters for animation. And we have ideally put forth a discussion about the different factors you need to know about character designing in and animation.
01Animate Character Design
There are some steps involved in the designing a character for animation. And those steps are pretty diverse. So, we have enlisted all the required steps and factors to help you learn and understand character designing for animation. The list is as follows.
02Understanding your audience
To create the best character design, it is essential that you understand your target audience. If your target audience includes the kids and the children, your character design will primarily be based on cartoons.
Ensure which genre of animation does your audience prefer? If it is funny or mythological or any other genre, you design your characters accordingly.

03Understand the type of characters or animation you are going to create
There are different types of animation or characters in animation. Different types serve different purposes and genres. So, let us know about the different types of animations, and this will help you understand which one would suit your requirements.
● Pop-style Characters
The characters you see in the comics and superhero animation movies are pop-style characters. They are highly expressive, become the centre of attraction and always are dominant on the screen. They tend to deliver an energy that reaches the audience impeccably.

● Iconic design
These characters are less fancy but highly expressive. They usually have a block face yet connect to an audience of all types. They are generally best for the corporate videos and those with some messages to be delivered.

● Editorial Style Characters
These characters are highly elegant and bold. These are characters that we see in different publications. They consist of great style, realisticity and cleanliness. They are mainly used to express the quality of presence.

● Sketch and experiment
Now that you know about the different character types, it will help you understand which one would match the genre of animation you prefer to work on. So, start sketching your imagination in a draft.
Decide on the different poses your character might have. Track them down in a draft. It helps you become organised and put down your plan and creativity collectively.
Trial and error are one of the best ways to achieve perfection. So, it is crucial to sketch and then take feedback. If they do not appear praiseworthy, continue sketching and then get feedback again.
● Animate and execute
Lastly, it would be best to execute all your drafts and imaginations. Try using the animation tools that suit your skill capacity and genre of animation the best.
04Animate Character Design
There are five simple steps that will help you animate a character design in 3D. The steps are as follows.
● Contrivance the ideas
Try to include such characters that include several layers. It helps in better animation and also makes your creativity sphere widen.

● Designing the character
Your main character has a large to play. So, use all the necessary tools, starting from photoshop to all the other significant factors, to make your character attain all the features necessary for standing out. It also ensures that you can readily apply all the animation techniques and give your creativity shape.

● Modelling the environment
Adding props to the background is an option. You may choose not to include any props as well. You can add the required props and accessories to your main characters. It includes clothes, scars and the like.

● Animation
It is the main step. Use the best tool for animation and instill all the necessary animation processes. Use the different layers in your main character. Set up the primary constraints and animate the background and the props. Ensure proper light settings and set the handheld camera movements as well.

● Playblast settings
Here you choose the appropriate size of your animation video. It is also an important step, which completes your animation of the character in animation.

Now that we know about the different essential aspects of and animation and character design knowing which tool can help us in the most effortless yet best quality video editing. So, as promised before, we will now discuss the best video editing tool, Wondershare Filmora Video Editor !
Here are the best features of Filmora that can ideally help you in video editing.
● Professional quality video editing tools include video stabilization, noise removal, colour tuning, audio mixer, advanced text editor, editing support, scene detection, and an audio equalizer.
● Although it is ideal for professional use, the tool is simple and effortless ot use. You face no difficulties in understating the features of the tool.
● There are over 8effects available that you can use in your videos.
● You can download it for free!
● You can readily opt for its free trial that enables you to be sure of what you are using before buying it!

For Win 7 or later (64-bit)
For macOS 10.12 or later
● Key Takeaways from This Episode →
● A piece of general information about character rigging in animation and how it is beneficial.
● A simple tutorial for character designing in and animation
● The features of the best video editing tool- Filmora.
Character rigging involves some easy steps. And the best way for it is Adobe animate rigging. We have laid down the following discussion to help you learn the easiest method of character rigging. And along with it, we will also help you understand both 2D and 3D character designing most effortlessly.
Lastly, and most importantly, it is vital to opt for the simplest yet feature-loaded tool for any animation work. Thus, we will also mention the best tool for animation and video editing. So, without any further wait, let us start our discussion.
In this article
01 [How to Rig a Simple Character | Adobe Animate Tutorial](#Part 1)
02 [Step by Step to Help You Understand 2D/3D Character Design](#Part 2)
Part 1 How to Rig a Simple Character | Adobe Animate Tutorial
Character rigging in Adobe is effortless and straightforward. There are a few steps for rigging in adobe animate, and we will be discussing and explaining the different steps that will help you learn rigging characters for your animation works.
The following are the steps to help you create a rig in Adobe animate.
Step 1: The first step involves selecting the shape for rigging. Otherwise, you can also use bitmap on stage for it.
**Step 2:**Look for the “Asset warp tool” present in the tool panel. This tool will help you in the process of rigging.
Step 3: Create the first joint using the “Asset warp tool” by clicking on the image or the bitmap with the tool. You will see that a triangular mesh-like structure has been formed on your image or bitmap. And the part where you clicked on the image or the bitmap with the “Asset warp tool” forms the first joint.
Step 4: The next step involves making more joints on the image and instilling bones between the joints. For that, go to the “Warp Options” and choose the “Tools” tab. There you will see the option of “Create bones”. Ensure to enable the “Create bones” option; otherwise, you will not create bones between the different joints.
Step 5: Complete the rig formation by joining all the joints correctly with each other with the help of the bones.
The above steps would help you create the rig for the image or bitmap you want to animate. And now, the following steps will help you learn the steps for modifying the rig as well as tweening.
The first process for it is deformation. So, the following are the steps that help you perform the process of deformation in animation.
Step 6: You need to deform the mesh, and you can do so by holding and dragging the joint with the help of the “Asset warp tool”.
**Step 7:**You can also rotate a bone by clicking and dragging the bone you want to rotate when you drag a joint, the size of the joint changes, which is not the case when you drag a bone. Its size remains constant.
Now, we will help you learn to work with the different keyframes. The keyframes enable the image or the bitmap to acquire different poses, vital for animation. The “Edit Multiple Frames” mode helps you work with different keyframes.
You can readily create new keyframes and deform the image through joints or bones. Each keyframe retains its own set, and you can integrate different transforms after setting one pose for the image in the keyframe.
Part 2 Step by Step to Help You Understand 2D/Character Design
Animation is immensely enjoyable and takes the best of our creativity. And as we know, there are two major and most renowned types of it. One is the 2-dimensional animation, which we know as the animation. And the other one is 3-dimensional, better known as animation.
Now, there are different aspects that are essential for anyone aspiring to animate, whether in or 3D, to know. One of the aspects is designing characters for animation. And we have ideally put forth a discussion about the different factors you need to know about character designing in and animation.
01Animate Character Design
There are some steps involved in the designing a character for animation. And those steps are pretty diverse. So, we have enlisted all the required steps and factors to help you learn and understand character designing for animation. The list is as follows.
02Understanding your audience
To create the best character design, it is essential that you understand your target audience. If your target audience includes the kids and the children, your character design will primarily be based on cartoons.
Ensure which genre of animation does your audience prefer? If it is funny or mythological or any other genre, you design your characters accordingly.
03Understand the type of characters or animation you are going to create
There are different types of animation or characters in animation. Different types serve different purposes and genres. So, let us know about the different types of animations, and this will help you understand which one would suit your requirements.
● Pop-style Characters
The characters you see in the comics and superhero animation movies are pop-style characters. They are highly expressive, become the centre of attraction and always are dominant on the screen. They tend to deliver an energy that reaches the audience impeccably.
● Iconic design
These characters are less fancy but highly expressive. They usually have a block face yet connect to an audience of all types. They are generally best for the corporate videos and those with some messages to be delivered.
● Editorial Style Characters
These characters are highly elegant and bold. These are characters that we see in different publications. They consist of great style, realisticity and cleanliness. They are mainly used to express the quality of presence.
● Sketch and experiment
Now that you know about the different character types, it will help you understand which one would match the genre of animation you prefer to work on. So, start sketching your imagination in a draft.
Decide on the different poses your character might have. Track them down in a draft. It helps you become organised and put down your plan and creativity collectively.
Trial and error are one of the best ways to achieve perfection. So, it is crucial to sketch and then take feedback. If they do not appear praiseworthy, continue sketching and then get feedback again.
● Animate and execute
Lastly, it would be best to execute all your drafts and imaginations. Try using the animation tools that suit your skill capacity and genre of animation the best.
04Animate Character Design
There are five simple steps that will help you animate a character design in 3D. The steps are as follows.
● Contrivance the ideas
Try to include such characters that include several layers. It helps in better animation and also makes your creativity sphere widen.
● Designing the character
Your main character has a large to play. So, use all the necessary tools, starting from photoshop to all the other significant factors, to make your character attain all the features necessary for standing out. It also ensures that you can readily apply all the animation techniques and give your creativity shape.
● Modelling the environment
Adding props to the background is an option. You may choose not to include any props as well. You can add the required props and accessories to your main characters. It includes clothes, scars and the like.
● Animation
It is the main step. Use the best tool for animation and instill all the necessary animation processes. Use the different layers in your main character. Set up the primary constraints and animate the background and the props. Ensure proper light settings and set the handheld camera movements as well.
● Playblast settings
Here you choose the appropriate size of your animation video. It is also an important step, which completes your animation of the character in animation.
Now that we know about the different essential aspects of and animation and character design knowing which tool can help us in the most effortless yet best quality video editing. So, as promised before, we will now discuss the best video editing tool, Wondershare Filmora Video Editor !
Here are the best features of Filmora that can ideally help you in video editing.
● Professional quality video editing tools include video stabilization, noise removal, colour tuning, audio mixer, advanced text editor, editing support, scene detection, and an audio equalizer.
● Although it is ideal for professional use, the tool is simple and effortless ot use. You face no difficulties in understating the features of the tool.
● There are over 8effects available that you can use in your videos.
● You can download it for free!
● You can readily opt for its free trial that enables you to be sure of what you are using before buying it!
For Win 7 or later (64-bit)
For macOS 10.12 or later
● Key Takeaways from This Episode →
● A piece of general information about character rigging in animation and how it is beneficial.
● A simple tutorial for character designing in and animation
● The features of the best video editing tool- Filmora.
How to Make a 3D Cartoon of Yourself
How to Make a 3D Cartoon of Yourself
An easy yet powerful editor
Numerous effects to choose from
Detailed tutorials provided by the official channel
From among the several trends that emerged on Social Media, making a 3D cartoon of yourself is probably the most popular.
Learning how to make 3D cartoons may just be in the height of demand in the near future.
In this article
01 [What is AI Artist? Plus how to cartoon yourself with it ](#Part 1)
02 [How to Create a 3D Cartoon of Yourself for Meta ](#Part 2)
03 [How to make 3D Cartoon From a Photo ](#Part 3)
04 [Five 3D cartoon Disney-Fied yourself apps ](#Part 4)
05 [More New Useful Tools to Upgrade Your Animation/Cartoon](#Part 5)
Part 1 What is AI Artist? Plus how to cartoon yourself with it
We all remember the Cartoon filter challenge on Facebook, right? Everyone was excited to transform themselves into a cartoon. The options of making personalized cartoon representations of yourself was pretty limited back then. With the Voila AI artist app you can choose at least 3 different cartoon variations of yourself.

The Voila AI artist app can be downloaded from the Apple App store and Android Play Store. You can use the app for free but for faster editing and an ad free experience, you will need to upgrade to the paid version. Other than just creating a cartoon of yourself, you can also create renaissance portraits and caricatures.
● Step 1: Download the Voila AI artist App for your device, and complete the installation process. Allow the app to access your Phone’s Camera rolling permission.
● Step 2: Select the style option you want to use. What we are using here is 3D cartoon (other options: 2D Cartoon, Caricature & and the rest). Touch the arrow and start.
● Step 3: Now, with your camera roll open, click a new one or choose from your gallery. You can also find a celebrities option where you can search for celebrities. This generates a four-grid choice. If you are using the free version, then be prepared to encounter one or two ads. After a few seconds, you can exit out and get back to your images.
● Step 4: You will receive a composite grid of four options; your original image, plus three cartoon representations (Royalty 3D, Baby 3D & Cartoon 3D). Here, you can select the option you like the most and start editing. Locate the up arrow button to immediately share on your preferred social media or simply save a copy in your device.
If the AI artist app has any paid and premium version, upon subscribing you will get ad free & watermark free animated representations.
Part 2 How to Create a 3D Cartoon of Yourself for Meta
Facebook only recently rebranded themselves as Meta. This has now started the rush to create a live virtual interaction space, and big companies like Microsoft and Nvidia are now competing with each other to bridge the gap.
Soon, activities like convening meetings, attending live events or even dating online would take place in virtual environments. So best be prepared for the future by creating a 3D avatar for yourself.
Your virtual avatar would be able to interact with the real world through a virtual platform by using VR headsets and other tech. Sensing your virtual presence would be almost the same as the real world for your peers and colleagues. You can attend a meeting without ever having to travel.
The process behind creating a 3D cartoon of yourself for Meta platforms starts by establishing a facial rig which is like a framework for the cartoon animations to sit on. These days, most apps come with automatic FACS facial rigging which is why certain Instagram filters like the Puppy nose filter was possible.
Presently, creating a complete 3D virtual model of yourself is a bit complicated to do on your own but soon this service will be automated in an app for you.
Part 3 How to make 3D Cartoon From a Photo
Photoshop is no doubt one of the most influential digital assets that allow you to do virtually anything with your photos. Of course, this includes turning your photos into 3D cartoon.
There are advanced techniques and tools you can use to retouch your image to achieve an animated like look for your portraits.
Of course, you can find multiple Photoshop hacks online but the following guide can give you an easy to follow idea of how to go about creating your own 3D cartoon out of an image.

Note; These steps are to be perceived as a simplified overview of your objectives when editing on Photoshop;
● To start out on turning your image into a 3D character, you need to learn how to create layers and then stack them on each other.
● You can then ‘liquify’ these layers to form a mould for your image.
● Apply skin softening techniques to take away the realistic features of the photo before working on turning it into a cartoon.
● Now you can start focus on applying the details to features like eyes, hair, nose and facial lines on your cartoon image.
● You can also change the colour of any individual features on your image. This method is applicable in making caricatures of your photo as well.
Part 4 Five 3D cartoon Disney-Fied yourself apps
Vibrant colours, gorgeous large eyes and shiny hair – pretty much sums up every Disney character you have ever seen. Now, everyone is obsessed with making their own Disney avatar and for good reason. You can use it as filter or upload it on your profile. Here are some of the most in-trend AI powered 3D Disneyfied apps you can use;
01Voila AI Artist

The Voila AI Artist app was released back in March of 2021 and has been the rage among Disneyfied apps. To clarify, the app has nothing to do with the Disney animation company but is perceived by users as the most successful app for disneyfication. Its on-board AI can create 3D and 2D renderings for your image along with hand drawn caricatures. You can download the app on App Store and Google Play.
02ToonMe

The next best app on our Disneyfied list is ToonMe. It also uses AI to turn photos into Disney Characters. The app keeps updating new cartoonish filters which you can use over your images. There are various other features which you can try as well like recreating your photos into classic vectors. The results are of extraordinary quality and can be uploaded on Instagram. You can download the app for free from Play store and App store.
03Snapchat

Snapchat has been around for some time now so you might already have it on your phone. Snapchat offers a vast range of filters and effects that of course includes Disneyfied filters and 3D cartoon images. You can look for them on the Snapchat search bar. New filters keep popping up every day which you can apply over your own images.
04Prisma

Prisma is a notoriously well know pop photo editor – which means it makes your photos ‘pop’. You can use it to edit photos on both Android and iPhone. It also comes with its own range of filters for turning your photos into cartoon images. There are hundreds of variations to choose from so you will definitely be spoilt for choices.
05Clip2Comic Cartoon

This app is only available on the App stores and is well known among iPhone users for turning photos into cartoons and caricatures. It is not exactly a Disneyfied app but it has a plethora of filters and a combination of editing tools to help personalize your 3D photos and comics. You can also directly upload these photos to your Social Media Accounts.
Key Takeaways from This Episode
● With the help of AI and other amazing features, you can use your everyday pictures to make a 3D cartoon of yourself.
● The Metaverse is her and soon we all will be interacting in a virtual space. So best learn how to rig your face with an animation filter.
● Apps like Voila AI artist, you can disneyfy your images quite easily. Explore dozens of such filters and effects with Disneyfied apps.
From among the several trends that emerged on Social Media, making a 3D cartoon of yourself is probably the most popular.
Learning how to make 3D cartoons may just be in the height of demand in the near future.
In this article
01 [What is AI Artist? Plus how to cartoon yourself with it ](#Part 1)
02 [How to Create a 3D Cartoon of Yourself for Meta ](#Part 2)
03 [How to make 3D Cartoon From a Photo ](#Part 3)
04 [Five 3D cartoon Disney-Fied yourself apps ](#Part 4)
05 [More New Useful Tools to Upgrade Your Animation/Cartoon](#Part 5)
Part 1 What is AI Artist? Plus how to cartoon yourself with it
We all remember the Cartoon filter challenge on Facebook, right? Everyone was excited to transform themselves into a cartoon. The options of making personalized cartoon representations of yourself was pretty limited back then. With the Voila AI artist app you can choose at least 3 different cartoon variations of yourself.
The Voila AI artist app can be downloaded from the Apple App store and Android Play Store. You can use the app for free but for faster editing and an ad free experience, you will need to upgrade to the paid version. Other than just creating a cartoon of yourself, you can also create renaissance portraits and caricatures.
● Step 1: Download the Voila AI artist App for your device, and complete the installation process. Allow the app to access your Phone’s Camera rolling permission.
● Step 2: Select the style option you want to use. What we are using here is 3D cartoon (other options: 2D Cartoon, Caricature & and the rest). Touch the arrow and start.
● Step 3: Now, with your camera roll open, click a new one or choose from your gallery. You can also find a celebrities option where you can search for celebrities. This generates a four-grid choice. If you are using the free version, then be prepared to encounter one or two ads. After a few seconds, you can exit out and get back to your images.
● Step 4: You will receive a composite grid of four options; your original image, plus three cartoon representations (Royalty 3D, Baby 3D & Cartoon 3D). Here, you can select the option you like the most and start editing. Locate the up arrow button to immediately share on your preferred social media or simply save a copy in your device.
If the AI artist app has any paid and premium version, upon subscribing you will get ad free & watermark free animated representations.
Part 2 How to Create a 3D Cartoon of Yourself for Meta
Facebook only recently rebranded themselves as Meta. This has now started the rush to create a live virtual interaction space, and big companies like Microsoft and Nvidia are now competing with each other to bridge the gap.
Soon, activities like convening meetings, attending live events or even dating online would take place in virtual environments. So best be prepared for the future by creating a 3D avatar for yourself.
Your virtual avatar would be able to interact with the real world through a virtual platform by using VR headsets and other tech. Sensing your virtual presence would be almost the same as the real world for your peers and colleagues. You can attend a meeting without ever having to travel.
The process behind creating a 3D cartoon of yourself for Meta platforms starts by establishing a facial rig which is like a framework for the cartoon animations to sit on. These days, most apps come with automatic FACS facial rigging which is why certain Instagram filters like the Puppy nose filter was possible.
Presently, creating a complete 3D virtual model of yourself is a bit complicated to do on your own but soon this service will be automated in an app for you.
Part 3 How to make 3D Cartoon From a Photo
Photoshop is no doubt one of the most influential digital assets that allow you to do virtually anything with your photos. Of course, this includes turning your photos into 3D cartoon.
There are advanced techniques and tools you can use to retouch your image to achieve an animated like look for your portraits.
Of course, you can find multiple Photoshop hacks online but the following guide can give you an easy to follow idea of how to go about creating your own 3D cartoon out of an image.
Note; These steps are to be perceived as a simplified overview of your objectives when editing on Photoshop;
● To start out on turning your image into a 3D character, you need to learn how to create layers and then stack them on each other.
● You can then ‘liquify’ these layers to form a mould for your image.
● Apply skin softening techniques to take away the realistic features of the photo before working on turning it into a cartoon.
● Now you can start focus on applying the details to features like eyes, hair, nose and facial lines on your cartoon image.
● You can also change the colour of any individual features on your image. This method is applicable in making caricatures of your photo as well.
Part 4 Five 3D cartoon Disney-Fied yourself apps
Vibrant colours, gorgeous large eyes and shiny hair – pretty much sums up every Disney character you have ever seen. Now, everyone is obsessed with making their own Disney avatar and for good reason. You can use it as filter or upload it on your profile. Here are some of the most in-trend AI powered 3D Disneyfied apps you can use;
01Voila AI Artist
The Voila AI Artist app was released back in March of 2021 and has been the rage among Disneyfied apps. To clarify, the app has nothing to do with the Disney animation company but is perceived by users as the most successful app for disneyfication. Its on-board AI can create 3D and 2D renderings for your image along with hand drawn caricatures. You can download the app on App Store and Google Play.
02ToonMe
The next best app on our Disneyfied list is ToonMe. It also uses AI to turn photos into Disney Characters. The app keeps updating new cartoonish filters which you can use over your images. There are various other features which you can try as well like recreating your photos into classic vectors. The results are of extraordinary quality and can be uploaded on Instagram. You can download the app for free from Play store and App store.
03Snapchat
Snapchat has been around for some time now so you might already have it on your phone. Snapchat offers a vast range of filters and effects that of course includes Disneyfied filters and 3D cartoon images. You can look for them on the Snapchat search bar. New filters keep popping up every day which you can apply over your own images.
04Prisma
Prisma is a notoriously well know pop photo editor – which means it makes your photos ‘pop’. You can use it to edit photos on both Android and iPhone. It also comes with its own range of filters for turning your photos into cartoon images. There are hundreds of variations to choose from so you will definitely be spoilt for choices.
05Clip2Comic Cartoon
This app is only available on the App stores and is well known among iPhone users for turning photos into cartoons and caricatures. It is not exactly a Disneyfied app but it has a plethora of filters and a combination of editing tools to help personalize your 3D photos and comics. You can also directly upload these photos to your Social Media Accounts.
Key Takeaways from This Episode
● With the help of AI and other amazing features, you can use your everyday pictures to make a 3D cartoon of yourself.
● The Metaverse is her and soon we all will be interacting in a virtual space. So best learn how to rig your face with an animation filter.
● Apps like Voila AI artist, you can disneyfy your images quite easily. Explore dozens of such filters and effects with Disneyfied apps.
Christmas Is Coming! How to Find & Make Animated Christmas GIFs?
Versatile Video Editor - Wondershare Filmora
An easy yet powerful editor
Numerous effects to choose from
Detailed tutorials provided by the official channel
Since Christmas is just around the corner, you must be looking for all kinds of GIFs and video greetings to wish your loved ones on this special occasion. Ideally, sending an animated Christmas GIF is one of the best ways to expect them during the festive season. If you are running short on time, then you can find a readily available Merry Christmas funny GIF or can come up with a customized Christmas wishes GIF as well. Here, I will let you know how to find and make free Christmas GIFs like a pro.

In this article
01 [5 Best Places to Find Animated Christmas GIFs for Free](#Part 1)
02 [How to Create your Animated Christmas GIFs (with Music): A DIY Guide](#Part 2)
03 [Pro Tip: Customize your GIFs on the Go with Filmora Meme Maker](#Part 3)
Part 1 5 Best Places to Find Animated Christmas GIFs for Free
While there are plenty of websites and apps, I would recommend exploring the following sources to find Merry Christmas animated GIFs for free.
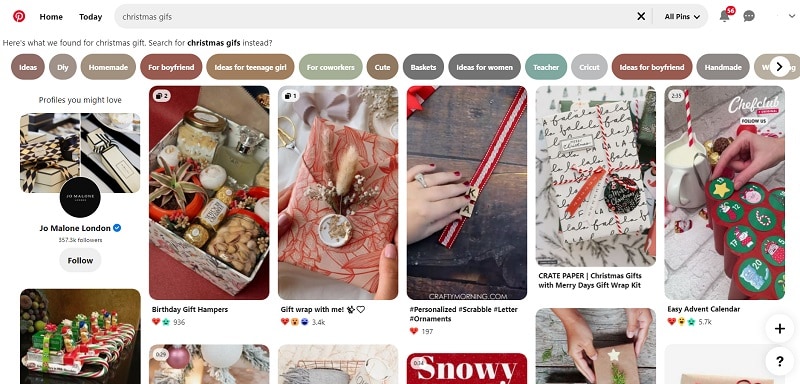
1. Pinterest
Pinterest has to be one of the best sources to get free Christmas GIFs of all kinds. While some GIFs can readily be downloaded from Pinterest, you might be redirected to third-party websites at times. Also, before you use any GIF from Pinterest, make sure you check its copyright policy.
Mostly, you would find aesthetically pleasing Merry Christmas wishes GIFs on Pinterest about DIY activities, food, animations, and so on. The only issue is that the range of GIFs at Pinterest is pretty extensive, and there are no inbuilt categories or filters.
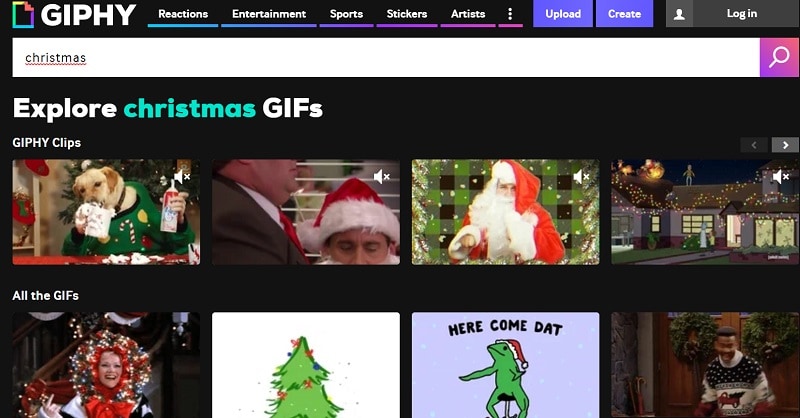
2. Giphy
If you are looking for funny Christmas GIFs, then Giphy would be one of the best places to explore. It has some of the most extensive GIFs collections of all styles, including Christmas wishes GIFs.
You can head to the website of Giphy or use its mobile application to find all sorts of animated Christmas GIFs as per your needs. There are tons of stickers, animated stories, and funny GIFs related to pop cultures that you would also find on Giphy.
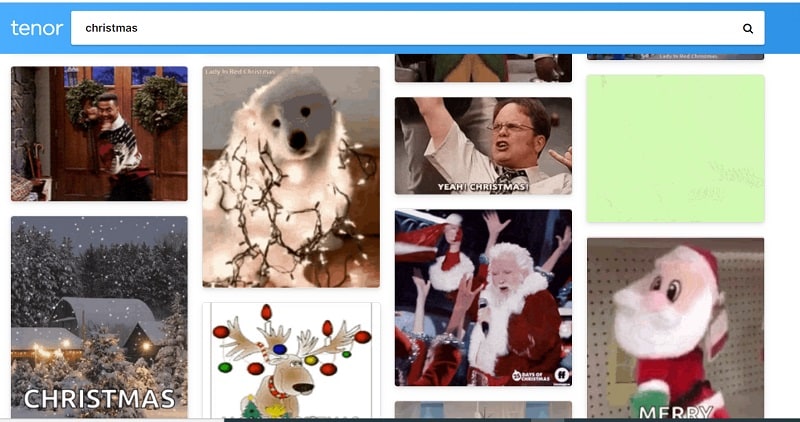
3. Tenor
Tenor is another clean and user-friendly website where you can find different types of funny Merry Christmas GIFs for free. You can look for stickers and GIFs by simply entering keywords of your choice on Tenor.
Once you load an animated Christmas GIF, you can save it offline or generate its shareable link. In this way, you can directly share the Merry Christmas wishes GIF to your loved ones on platforms like WhatsApp, Telegram, Messenger, and so on.
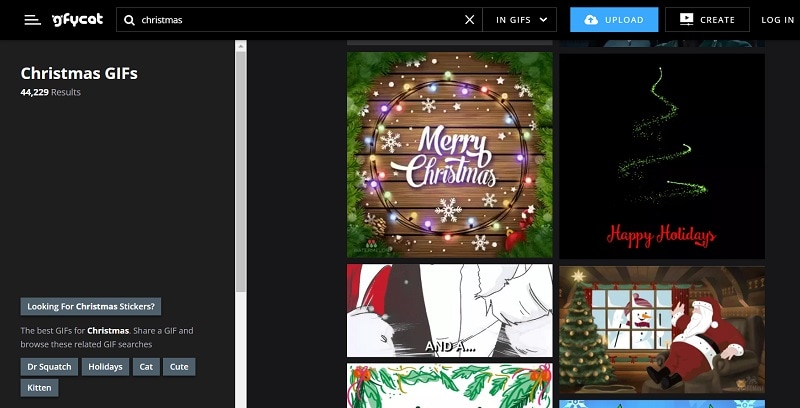
4. GyfCat
Having thousands of anime Christmas GIFs, GyfCat is another popular online source that you should check out. Most of the free Christmas GIFs here are animated or related to pop culture videos.
You can enter multiple keywords and hashtags on the search bar of GyfCat to find specific Christmas wishes GIFs. Most of the results here are ideal for funny Xmas GIFs that are bound to make your friends and family smile.
5. Funimada
From elves to Santa Claus and reindeers to fireworks, you can find funny Christmas GIFs of all kinds in Funimada. Unlike other places, Funimada has a curated list of animated Christmas GIFs that you can explore on its website.
Once you find a perfect anime Christmas GIF at Funimada, you can download it on your device or system and share it with others however you like.
Part 2 How to Create your Animated Christmas GIFs (with Music): A DIY Guide
Most of these readily available animated Christmas GIFs are quite generic and lack a customized appeal. Therefore, if you want to come up with some customized Christmas wishes GIFs, then consider using a dedicated editing tool like Wondershare Filmora.
Since it is a user-friendly video and media editing tool, you won’t encounter issues working on an animated Christmas GIF. You can explore and use the wide range of media assets of Filmora or import anything from your system. Besides that, tons of transitions, filters, captions, and other effects would let you come up with some customized Merry Christmas wishes GIFs via Filmora in the following way.
Step 1 Load the Media Files of your Choice on Filmora
You can start by installing Wondershare Filmora on your system and launch it whenever you want to work on any animated Christmas GIF. Afterward, you can drag and drop your media files to it or go to its Menu > File > Import Media to browse and load your files.
For Win 7 or later (64-bit)
For macOS 10.12 or later

Step2 Create your Animated Christmas GIFs with Filmora
Great! Once you have loaded your media files, you can drag and drop them to the timeline at the bottom to start editing them. If you want to clip out any unwanted parts from a video, then hover the mouse at the end. This will let you use its trimming tool to clip out any part of the file.

There are tons of other editing options that are available on Filmora. For instance, once you select a video, you can go to its properties to apply all sorts of transformations such as rotation, flipping, scaling, repositioning, and so on.

Many people would like to add captions to their animated Christmas GIFs to wish others personally. You can do the same by visiting the “Titles” section of Filmora and exploring different styles of caption effects. You can drag and drop any caption effect and add your text here to customize it.

To further improve the visual appeal of your Christmas wishes GIF, you can explore and apply tons of transitions, filters, overlays, and other effects that are available in Filmora.

If you want to add music to your Merry Christmas wishes GIF, you can add any soundtrack to your project. You can also go to the “Audio” section of Filmora, where you can browse several sound effects and drag and drop your media files. If you want, you can also record voiceovers for your videos using the native feature on Filmora.

Step 3 Export your Christmas Wishes GIFs from Filmora
Lastly, you can get a preview of your funny Merry Christmas GIF on Filmora and can click on the “Export” button to save it. Here, you can select a preferred format (like GIF or MP4) in which you want to keep your media file on your system. If you have included music in your project, consider exporting it as an MP4 file instead of a GIF.

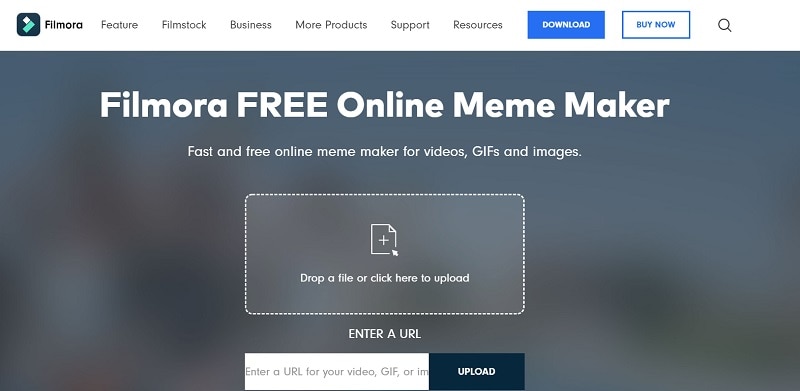
Part 3 Pro Tip: Customize your GIFs on the Go with Filmora Meme Maker
If you already have a Merry Christmas GIF and want to customize it further, you can also check the online Filmora Meme Maker . You can go to its website and upload a video, GIF, or image of your choice. If you have found a funny Christmas GIF online, you can paste its exact URL. Later, you can add texts to your GIFs and export them to your system in a preferred format.
Wondershare Filmora
Get started easily with Filmora’s powerful performance, intuitive interface, and countless effects!
Try It Free Try It Free Try It Free Learn More >

AI Portrait – The best feature of Wondershare Filmora for gameplay editing
The AI Portrait is a new add-on in Wondershare Filmora. It can easily remove video backgrounds without using a green screen or chroma key, allowing you to add borders, glitch effects, pixelated, noise, or segmentation video effects.

Conclusion
So, what are you waiting for? Now when you know where to find animated Christmas GIFs, you can explore the above-listed websites on your own. Apart from using these readily available options, you can also create some customized, funny Merry Christmas GIFs. For that, you can take the assistance of Wondershare Filmora and make the most of its professional features to create, customize, and export your GIFs with music and tons of other effects. Feel free to explore Filmora and wish your loved ones a joyous Christmas in style!
Since Christmas is just around the corner, you must be looking for all kinds of GIFs and video greetings to wish your loved ones on this special occasion. Ideally, sending an animated Christmas GIF is one of the best ways to expect them during the festive season. If you are running short on time, then you can find a readily available Merry Christmas funny GIF or can come up with a customized Christmas wishes GIF as well. Here, I will let you know how to find and make free Christmas GIFs like a pro.
In this article
01 [5 Best Places to Find Animated Christmas GIFs for Free](#Part 1)
02 [How to Create your Animated Christmas GIFs (with Music): A DIY Guide](#Part 2)
03 [Pro Tip: Customize your GIFs on the Go with Filmora Meme Maker](#Part 3)
Part 1 5 Best Places to Find Animated Christmas GIFs for Free
While there are plenty of websites and apps, I would recommend exploring the following sources to find Merry Christmas animated GIFs for free.
1. Pinterest
Pinterest has to be one of the best sources to get free Christmas GIFs of all kinds. While some GIFs can readily be downloaded from Pinterest, you might be redirected to third-party websites at times. Also, before you use any GIF from Pinterest, make sure you check its copyright policy.
Mostly, you would find aesthetically pleasing Merry Christmas wishes GIFs on Pinterest about DIY activities, food, animations, and so on. The only issue is that the range of GIFs at Pinterest is pretty extensive, and there are no inbuilt categories or filters.
2. Giphy
If you are looking for funny Christmas GIFs, then Giphy would be one of the best places to explore. It has some of the most extensive GIFs collections of all styles, including Christmas wishes GIFs.
You can head to the website of Giphy or use its mobile application to find all sorts of animated Christmas GIFs as per your needs. There are tons of stickers, animated stories, and funny GIFs related to pop cultures that you would also find on Giphy.
3. Tenor
Tenor is another clean and user-friendly website where you can find different types of funny Merry Christmas GIFs for free. You can look for stickers and GIFs by simply entering keywords of your choice on Tenor.
Once you load an animated Christmas GIF, you can save it offline or generate its shareable link. In this way, you can directly share the Merry Christmas wishes GIF to your loved ones on platforms like WhatsApp, Telegram, Messenger, and so on.
4. GyfCat
Having thousands of anime Christmas GIFs, GyfCat is another popular online source that you should check out. Most of the free Christmas GIFs here are animated or related to pop culture videos.
You can enter multiple keywords and hashtags on the search bar of GyfCat to find specific Christmas wishes GIFs. Most of the results here are ideal for funny Xmas GIFs that are bound to make your friends and family smile.
5. Funimada
From elves to Santa Claus and reindeers to fireworks, you can find funny Christmas GIFs of all kinds in Funimada. Unlike other places, Funimada has a curated list of animated Christmas GIFs that you can explore on its website.
Once you find a perfect anime Christmas GIF at Funimada, you can download it on your device or system and share it with others however you like.
Part 2 How to Create your Animated Christmas GIFs (with Music): A DIY Guide
Most of these readily available animated Christmas GIFs are quite generic and lack a customized appeal. Therefore, if you want to come up with some customized Christmas wishes GIFs, then consider using a dedicated editing tool like Wondershare Filmora.
Since it is a user-friendly video and media editing tool, you won’t encounter issues working on an animated Christmas GIF. You can explore and use the wide range of media assets of Filmora or import anything from your system. Besides that, tons of transitions, filters, captions, and other effects would let you come up with some customized Merry Christmas wishes GIFs via Filmora in the following way.
Step 1 Load the Media Files of your Choice on Filmora
You can start by installing Wondershare Filmora on your system and launch it whenever you want to work on any animated Christmas GIF. Afterward, you can drag and drop your media files to it or go to its Menu > File > Import Media to browse and load your files.
For Win 7 or later (64-bit)
For macOS 10.12 or later
Step2 Create your Animated Christmas GIFs with Filmora
Great! Once you have loaded your media files, you can drag and drop them to the timeline at the bottom to start editing them. If you want to clip out any unwanted parts from a video, then hover the mouse at the end. This will let you use its trimming tool to clip out any part of the file.
There are tons of other editing options that are available on Filmora. For instance, once you select a video, you can go to its properties to apply all sorts of transformations such as rotation, flipping, scaling, repositioning, and so on.
Many people would like to add captions to their animated Christmas GIFs to wish others personally. You can do the same by visiting the “Titles” section of Filmora and exploring different styles of caption effects. You can drag and drop any caption effect and add your text here to customize it.
To further improve the visual appeal of your Christmas wishes GIF, you can explore and apply tons of transitions, filters, overlays, and other effects that are available in Filmora.
If you want to add music to your Merry Christmas wishes GIF, you can add any soundtrack to your project. You can also go to the “Audio” section of Filmora, where you can browse several sound effects and drag and drop your media files. If you want, you can also record voiceovers for your videos using the native feature on Filmora.
Step 3 Export your Christmas Wishes GIFs from Filmora
Lastly, you can get a preview of your funny Merry Christmas GIF on Filmora and can click on the “Export” button to save it. Here, you can select a preferred format (like GIF or MP4) in which you want to keep your media file on your system. If you have included music in your project, consider exporting it as an MP4 file instead of a GIF.
Part 3 Pro Tip: Customize your GIFs on the Go with Filmora Meme Maker
If you already have a Merry Christmas GIF and want to customize it further, you can also check the online Filmora Meme Maker . You can go to its website and upload a video, GIF, or image of your choice. If you have found a funny Christmas GIF online, you can paste its exact URL. Later, you can add texts to your GIFs and export them to your system in a preferred format.
Wondershare Filmora
Get started easily with Filmora’s powerful performance, intuitive interface, and countless effects!
Try It Free Try It Free Try It Free Learn More >
AI Portrait – The best feature of Wondershare Filmora for gameplay editing
The AI Portrait is a new add-on in Wondershare Filmora. It can easily remove video backgrounds without using a green screen or chroma key, allowing you to add borders, glitch effects, pixelated, noise, or segmentation video effects.
Conclusion
So, what are you waiting for? Now when you know where to find animated Christmas GIFs, you can explore the above-listed websites on your own. Apart from using these readily available options, you can also create some customized, funny Merry Christmas GIFs. For that, you can take the assistance of Wondershare Filmora and make the most of its professional features to create, customize, and export your GIFs with music and tons of other effects. Feel free to explore Filmora and wish your loved ones a joyous Christmas in style!
15 Top Collage Makers to Create Aesthetic Collages
15 Best Collage Makers to Create Aesthetic Collages
An easy yet powerful editor
Numerous effects to choose from
Detailed tutorials provided by the official channel
It is rightly said that a picture is worth a thousand words and what if there are multiple pictures? It becomes a story!! Creating collages have been popular among people for a long and with high-end cameras, mobile phones, and excellent tools the task has become even easier and quicker.
So, if you too are willing to create an aesthetic collage for yourself or loved ones, there is no dearth of collage-making tools. So, to prevent you from the hassles of selecting one such tool, we have shortlisted the popular ones.
In this article
01 [Need for a collage-making tool?](#Part 1)
02 [Top 15 collage makers to create aesthetic collages](#Part 2)
03 [Best software to create video collages and edit videos professionally – Wondershare Filmora](#Part 3)
Part 1 Need for a collage-making tool?
Though aesthetic collage wallpaper making may sound simple, it is an artwork to create an impressive-looking collage. Adjusting the images in the right format, cropping their sizes, setting a background, setting colors, adding text are some of the many factors that go into the making of a visually appealing collage. So now, all these considerations can be taken care of by a good collage-making tool. All you need to do is pick up your choice of images, select a template and let the tool do its work.
In no time, a collage of your choice will be ready.
Part 2 Top 15 collage makers to create aesthetic collages
There is a wide range of online, desktop, and app-based collage-making tools available that can be selected based on your requirements. Check out the most popular ones as below.
01Free Collage Maker Online
This is a free-to-use online tool that can be used for creating impressive aesthetic wallpaper collage quickly. The tool gives you the option to either choose your own layout or use one of the readymade templates. Multiple editing options are supported like adjust9ing exposure, contrast, shadows, white balance, and more. You can even turn, rotate, and distort the images. Using this online tool, you can even add the text and also customize it. A wide range of formats is supported by a tool like RAW, JPEG, PSD, PNG, and others.
022. Canva
This is a widely used online tool that supports multiple functions including image collage creation and image editing. The tool allows adding images in all popular formats for creating a collage using several templates. The position of the photos, font of the text, shades, and other parameters can be adjusted as required. The tool also has a huge collection of images in different categories that can also be used for making aesthetic photo collage. Created collages can be saved in JPEG, PDF, and PNG format.
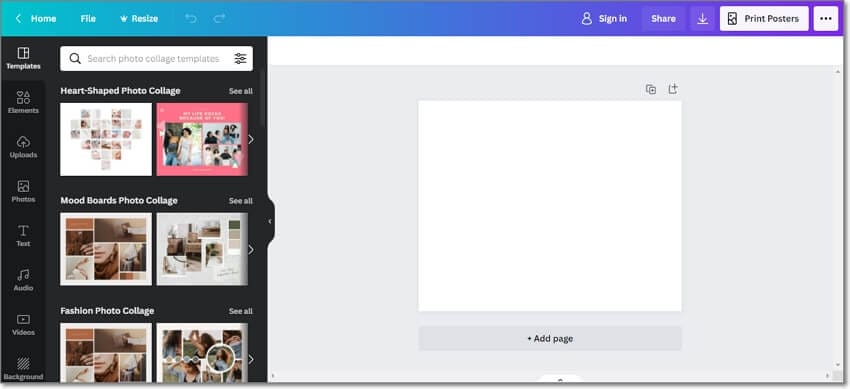
03Fotor
Creating high-quality trendy photo collages is easy and quick using this online tool that supports all popular image formats. There are several grids and template options available for you to create the desired collage. Stickers and text can be added to the created collage to add some fun elements. Several adjustments can be made like frame width, rounded corners, background color, aspect ratio, adding filters, effects, and more. With multiple features, the interface becomes quite confusing.
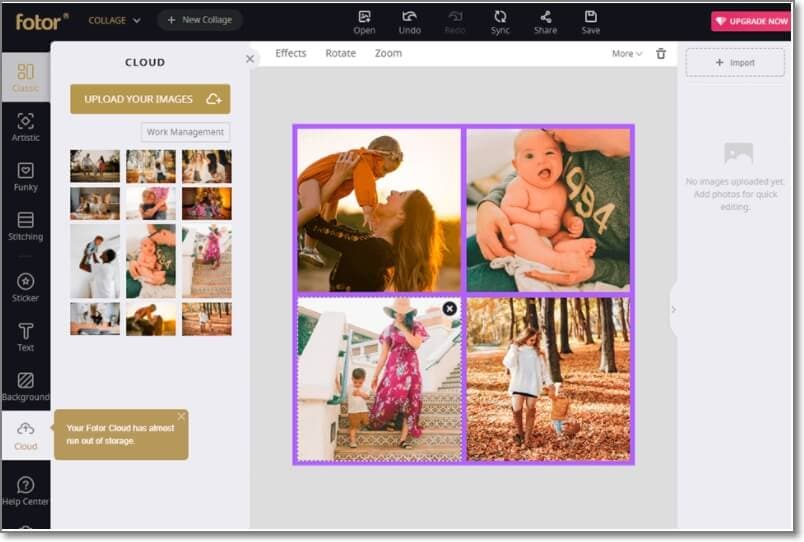
04Adobe Creative Cloud Express
Adobe is one of the most widely used tools when it comes to images and videos and creating a picture collage is one of the supported features. Using the online version of this tool, collages can be created quickly and only a free sign-up is needed. In addition to your images, you can even choose from the wide collection of royalty-free pictures. Theme-based templates are available to match your requirements and for customization, all basic editing features are supported. You can even add texts, filters, and effects to your collages.
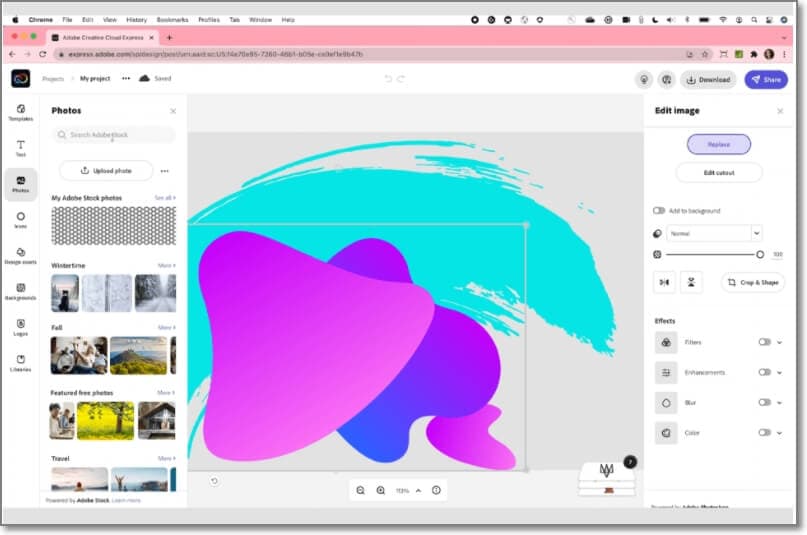
05Shape Collage
This automatic collage maker lets you create the desired collage in just a few simple steps. The interface is simple and all the basic editing functions for customization are supported. You can change the background, frame, the distance between the images, and several other factors. The tool is available to be used as desktop software, an online program, and also as an app that can be downloaded on a phone.
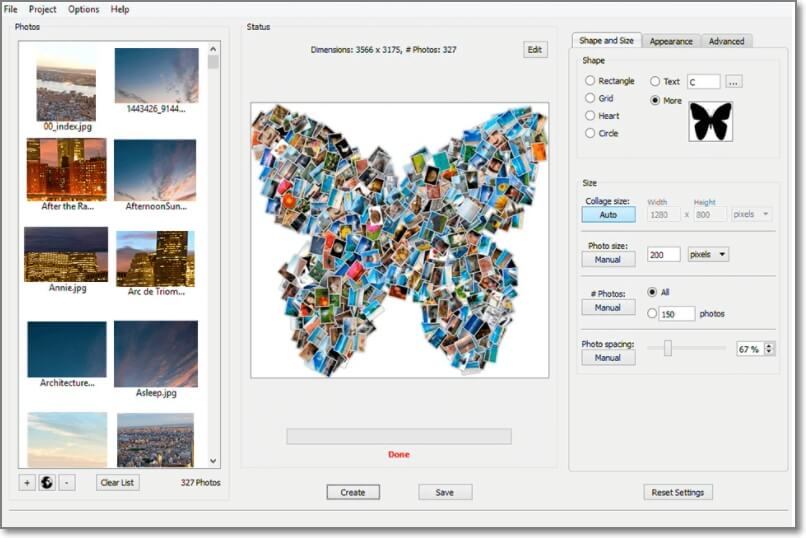
06Kapwing Collage Maker
Using this free online tool, collages can be made using images, videos, GIFs, as well as music files. The tool allows you to choose either a blank canvas or choose from multiple templates available at the site. The drag and drop features are supported and there are multiple editing options as well. The free version has a watermark on the created collages which can be removed after creating a free account. The created collage can be saved to the system or its URL can be obtained.
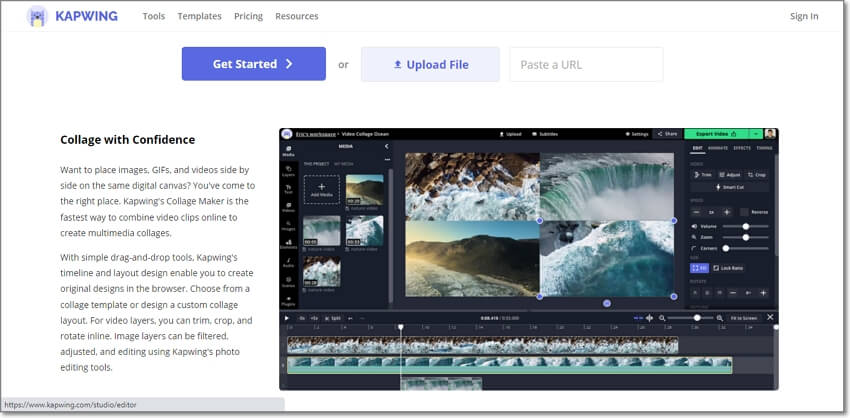
07Photo Joiner
As the name suggests, this is a photo joining tool that works from your browser and allows creating a picture collage. The interface is user-friendly and the work process is smooth where you just need to add the images, choose the layout, add text, and make required settings to create your choice of a template. The tool allows changing the image size, as well as the background. Using the tool, you can also create an FB cover in a simple step.
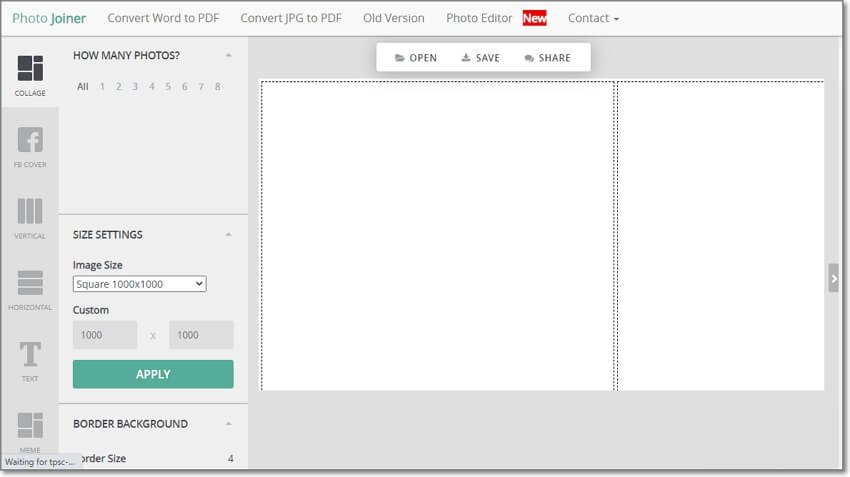
08Ribbet
This is a widely used photo editing tool that performs an array of additional features as well including collage making. The tool is available in a free as well as a premium paid version. The interface is smart and comes packed in with all basic collage-making functions. Decent templates are available to choose from with the option to adjust the size, edit exposure, lighting, and other parameters.
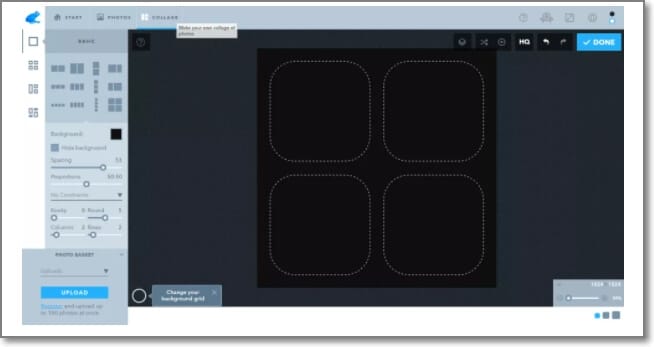
09BeFunky
Creating aesthetic, funky, and all types of different collages is quick and easy using this online tool. A variety of customizable layout options are available at the site to match your requirements. The images can be enhanced by changing the background color, pattern, adding fonts, effects, filters, and more. The free version of the tool supports basic functions while for more advanced options you need to purchase the premium plan. The tool is also available as an app for Android and iOS devices.
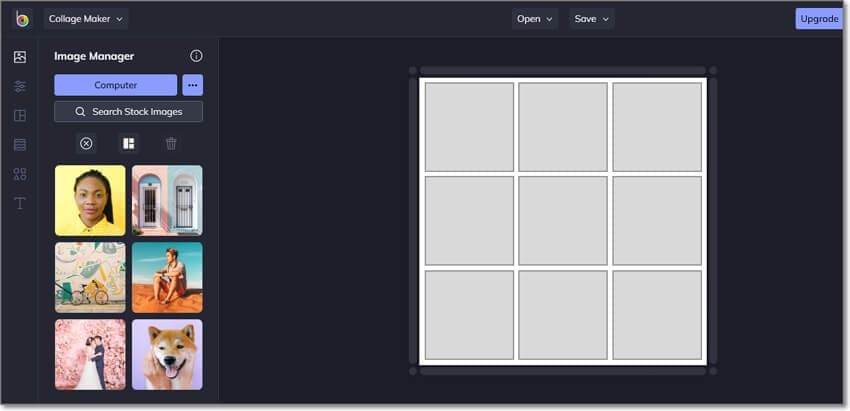
10Kizoa
This is a free online slideshow maker that allows creating a slideshow in different aspect ratios which is suitable for all types of platforms and screen sizes. An array of static and animated templates is available and you can even add multiple effects, text, and other elements to customize the collage as desired. There is also a paid version of the tool with added features and functions.
11PicMonkey
This is another popular name when it comes to collage-making tools. The tool allows creating freestyle as well as grid-based collages and in addition to the images, you can even add videos. Hundreds of collage layouts are available that can be further customized as needed. The function of auto-cell resizing adjusts all the images to the grids perfectly. Apart from your media files, you can even choose from the free stock of images and videos available at the site.
12piZap
Just like its interesting name, this online tool allows you to create interesting collages. The interface is intuitive and there are multiple templates to choose from. Further, the templates can be customized using an editing tool, adding filters, texts, effects, and other elements. The Facebook banner template is one of the interesting and useful features. For ad-free experience and additional functions, the pro-paid version can be selected.
13FotoJet
Using this browser-based tool you can create collages, posters, photo cards, YouTube banners, fun images, Facebook covers, and others. The templates in different categories are available to match your themes and create interesting collages. You can even choose to create a classic collage to keep it simple. Upgrading the tool to the paid version offers additional resources and features.

14Picsart Collage Maker
This is another simple to use free online collage-making tool that can create aesthetic and other types of collages. The interface of the tool is clean which makes the working smooth and quick and the images can be added from your system as well as from your social media accounts. Multiple effects, filters, clip-art, and other elements can be added to make the collage look impressive.
15Photovisi
Using this free online collage-making tool, you will have access to templates in different categories like abstract, magic, love, nature, and many categories more. You can even create Facebook covers, E-cards, and YouTube channel banners using the program. An array of built-in effects is available to customize the file and the tool also offers collaboration options. The created collage can be saved locally or can also be shared through an email.
Part 3 Best software to create video collages and edit videos professionally – Wondershare Filmora
Above we have listed the best tools for creating image collages and a few of them also has a feature to add videos. If you are want to create a video collage and looking for a tool that can edit your videos professionally, Wondershare Filmora is the best tool to consider. The animated split screen effect of the software allows you to view your videos on a split-screen thus making it look like a collage.
For all types of video editing requirements, this is an excellent tool available for download on Windows and Mac systems.
For Win 7 or later (64-bit)
For macOS 10.12 or later
● Key Takeaways from This Episode →
● To create aesthetics and other types of collages, a wide range of collage-maker tools are available.
● Choose from desktop tools, online programs, or apps as needed.
● To edit videos and create decent video collages, Wondershare Filmora is an excellent tool.
It is rightly said that a picture is worth a thousand words and what if there are multiple pictures? It becomes a story!! Creating collages have been popular among people for a long and with high-end cameras, mobile phones, and excellent tools the task has become even easier and quicker.
So, if you too are willing to create an aesthetic collage for yourself or loved ones, there is no dearth of collage-making tools. So, to prevent you from the hassles of selecting one such tool, we have shortlisted the popular ones.
In this article
01 [Need for a collage-making tool?](#Part 1)
02 [Top 15 collage makers to create aesthetic collages](#Part 2)
03 [Best software to create video collages and edit videos professionally – Wondershare Filmora](#Part 3)
Part 1 Need for a collage-making tool?
Though aesthetic collage wallpaper making may sound simple, it is an artwork to create an impressive-looking collage. Adjusting the images in the right format, cropping their sizes, setting a background, setting colors, adding text are some of the many factors that go into the making of a visually appealing collage. So now, all these considerations can be taken care of by a good collage-making tool. All you need to do is pick up your choice of images, select a template and let the tool do its work.
In no time, a collage of your choice will be ready.
Part 2 Top 15 collage makers to create aesthetic collages
There is a wide range of online, desktop, and app-based collage-making tools available that can be selected based on your requirements. Check out the most popular ones as below.
01Free Collage Maker Online
This is a free-to-use online tool that can be used for creating impressive aesthetic wallpaper collage quickly. The tool gives you the option to either choose your own layout or use one of the readymade templates. Multiple editing options are supported like adjust9ing exposure, contrast, shadows, white balance, and more. You can even turn, rotate, and distort the images. Using this online tool, you can even add the text and also customize it. A wide range of formats is supported by a tool like RAW, JPEG, PSD, PNG, and others.
022. Canva
This is a widely used online tool that supports multiple functions including image collage creation and image editing. The tool allows adding images in all popular formats for creating a collage using several templates. The position of the photos, font of the text, shades, and other parameters can be adjusted as required. The tool also has a huge collection of images in different categories that can also be used for making aesthetic photo collage. Created collages can be saved in JPEG, PDF, and PNG format.
03Fotor
Creating high-quality trendy photo collages is easy and quick using this online tool that supports all popular image formats. There are several grids and template options available for you to create the desired collage. Stickers and text can be added to the created collage to add some fun elements. Several adjustments can be made like frame width, rounded corners, background color, aspect ratio, adding filters, effects, and more. With multiple features, the interface becomes quite confusing.
04Adobe Creative Cloud Express
Adobe is one of the most widely used tools when it comes to images and videos and creating a picture collage is one of the supported features. Using the online version of this tool, collages can be created quickly and only a free sign-up is needed. In addition to your images, you can even choose from the wide collection of royalty-free pictures. Theme-based templates are available to match your requirements and for customization, all basic editing features are supported. You can even add texts, filters, and effects to your collages.
05Shape Collage
This automatic collage maker lets you create the desired collage in just a few simple steps. The interface is simple and all the basic editing functions for customization are supported. You can change the background, frame, the distance between the images, and several other factors. The tool is available to be used as desktop software, an online program, and also as an app that can be downloaded on a phone.
06Kapwing Collage Maker
Using this free online tool, collages can be made using images, videos, GIFs, as well as music files. The tool allows you to choose either a blank canvas or choose from multiple templates available at the site. The drag and drop features are supported and there are multiple editing options as well. The free version has a watermark on the created collages which can be removed after creating a free account. The created collage can be saved to the system or its URL can be obtained.
07Photo Joiner
As the name suggests, this is a photo joining tool that works from your browser and allows creating a picture collage. The interface is user-friendly and the work process is smooth where you just need to add the images, choose the layout, add text, and make required settings to create your choice of a template. The tool allows changing the image size, as well as the background. Using the tool, you can also create an FB cover in a simple step.
08Ribbet
This is a widely used photo editing tool that performs an array of additional features as well including collage making. The tool is available in a free as well as a premium paid version. The interface is smart and comes packed in with all basic collage-making functions. Decent templates are available to choose from with the option to adjust the size, edit exposure, lighting, and other parameters.
09BeFunky
Creating aesthetic, funky, and all types of different collages is quick and easy using this online tool. A variety of customizable layout options are available at the site to match your requirements. The images can be enhanced by changing the background color, pattern, adding fonts, effects, filters, and more. The free version of the tool supports basic functions while for more advanced options you need to purchase the premium plan. The tool is also available as an app for Android and iOS devices.
10Kizoa
This is a free online slideshow maker that allows creating a slideshow in different aspect ratios which is suitable for all types of platforms and screen sizes. An array of static and animated templates is available and you can even add multiple effects, text, and other elements to customize the collage as desired. There is also a paid version of the tool with added features and functions.
11PicMonkey
This is another popular name when it comes to collage-making tools. The tool allows creating freestyle as well as grid-based collages and in addition to the images, you can even add videos. Hundreds of collage layouts are available that can be further customized as needed. The function of auto-cell resizing adjusts all the images to the grids perfectly. Apart from your media files, you can even choose from the free stock of images and videos available at the site.
12piZap
Just like its interesting name, this online tool allows you to create interesting collages. The interface is intuitive and there are multiple templates to choose from. Further, the templates can be customized using an editing tool, adding filters, texts, effects, and other elements. The Facebook banner template is one of the interesting and useful features. For ad-free experience and additional functions, the pro-paid version can be selected.
13FotoJet
Using this browser-based tool you can create collages, posters, photo cards, YouTube banners, fun images, Facebook covers, and others. The templates in different categories are available to match your themes and create interesting collages. You can even choose to create a classic collage to keep it simple. Upgrading the tool to the paid version offers additional resources and features.
14Picsart Collage Maker
This is another simple to use free online collage-making tool that can create aesthetic and other types of collages. The interface of the tool is clean which makes the working smooth and quick and the images can be added from your system as well as from your social media accounts. Multiple effects, filters, clip-art, and other elements can be added to make the collage look impressive.
15Photovisi
Using this free online collage-making tool, you will have access to templates in different categories like abstract, magic, love, nature, and many categories more. You can even create Facebook covers, E-cards, and YouTube channel banners using the program. An array of built-in effects is available to customize the file and the tool also offers collaboration options. The created collage can be saved locally or can also be shared through an email.
Part 3 Best software to create video collages and edit videos professionally – Wondershare Filmora
Above we have listed the best tools for creating image collages and a few of them also has a feature to add videos. If you are want to create a video collage and looking for a tool that can edit your videos professionally, Wondershare Filmora is the best tool to consider. The animated split screen effect of the software allows you to view your videos on a split-screen thus making it look like a collage.
For all types of video editing requirements, this is an excellent tool available for download on Windows and Mac systems.
For Win 7 or later (64-bit)
For macOS 10.12 or later
● Key Takeaways from This Episode →
● To create aesthetics and other types of collages, a wide range of collage-maker tools are available.
● Choose from desktop tools, online programs, or apps as needed.
● To edit videos and create decent video collages, Wondershare Filmora is an excellent tool.
Best Tips for Effortless Unity 3D Animation
Top Tips for Effortless Unity 3D Animation
An easy yet powerful editor
Numerous effects to choose from
Detailed tutorials provided by the official channel
Unity 3D animation will be our topic in this article. This will help develop your knowledge of the animation systems in Unity.
Unity 3D character animation is an enlisted brand name of Unity Technologies and game creation. With its peculiar highlights, strong evaluating, and extraordinary abilities for computer games, it has stood out enough to be noticed by the game development community.
In this article
01 [What’s Unity 3D Animation and Why is It Popular?](#Part 1)
02 [How to Create Animations in Unity 3D?](#Part 2)
Part 1 What’s Unity 3D Animation and Why is It Popular?
Animation Unity 3D is the most popular and powerful tool to animate any animation you like.
● Unity provides a more creative iteration platform to realize your vision as fast as possible.
● Unity has broader integration. It works out of the box and creates a real-time workflow custom-made for a project.
● Unity supports a more comprehensive production to make it possible to render shorts, videos, and films to create in days instead of months.
● Unity has an intelligent decision-making feature to discover the errors while doing the process and make corrections soon before it is too late.
● Unity animation 3Dhas a high creation scale like building, reusing and integrating to create more new projects quickly.
● Unity delivers smooth collaboration, allowing the artist to share the project and see their changes immediately, reducing error and miscommunications.
01Do You Think You Know What Unity Animation Is?
Animation unity 3D is a very vast tool with many new things to learn. Everyone can know Unity with proper basics, training, and experiences. There are various tutorials by Unity and many other people sharing their knowledge through the internet.
02Is Unity Good for 3D Animation?
Unity is used chiefly for Unity 3D skeletal animations and complex 3D animations like videos and games. There would be a retouch of Unity when you notice any video games or animation videos. It contains excellent inbuilt coding like C# and JavaScript for scripting. Easy and quick importing for audio, video, and text format as a complete package.
Part 2 How to Create Animations in Unity 3D?
Unity 3D animation highlights incorporate animations, complete control of movements, the occasion of animation playback, refined state machine hierarchies, transitions, mix shapes for facial animations.
01Fix 1: How to Animate Characters in Unity 3D
This YouTube channel explains more about Unity 3D. He starts with an introduction about Unity, tools about Unity 3D character animation like animation controller, looping animation, root motion, and different modes in animation with Unity 3D.
He focuses on Unity 3D character animation fundamentals and lets us understand how and why it works.
02Fix 2: Creating Character Animation in Unity
This video is all about creating procedural character animations in unity by using unity 3D skeletal animation. An archery game is the concept of this youtube video. He focuses on the movement of the bow to the target with rigging techniques.
Unity 3D Character animation mainly focuses on the avatar. Some default avatars, or others, can be imported as files into Unity.
03Fix 3: How to animate in Unity 3D
In this Unity tutorial, you’ll figure out how to animate from top to bottom the whole way. It will cover every one of the basics you want to get everything rolling with activity in Unity 3D.
04Fix 4: Unity 3D Animation for Beginners
This channel teaches Unity animation 3D to beginners, starting with importing a cube into the field and oscillating it. A brief video of 6 minutes but covers most of the tools and ideas about Unity.
05Fix 5: The Animator Controller
This tutorial is from the official Unity themselves explaining about Unity 3D character animation controller. Animation controllers are tools that determine the animations currently being played and blended. Unity channel demonstrates how to make animation controllers and apply different animations to different states.
06Fix 6: Creating simple and easy Animation
This tutorial by Jimmy Vegas on creating simple and easy animation using Unity 3D animation is approximately 7 minutes which explains unity version 2018.3 but mainly applies to almost all the new versions. The tutorial talks about simple animations and controls that will be helpful to learn many tools in unity.
Are you still looking for some other better 3D animation software? If you want to have many controls of 3D animation videos here, we introduce Wondershare Filmora. You simply have to create a white keyframe to start making an animation. Filmora offers six different keyframes to perform smooth and natural animation. And also, tools like autocorrect and auto mixer bring the animation to the next level. Various tutorial videos available on YouTube and Wondershare Filmora Video Editor wesbite have posted different manuals to guide the users.
For Win 7 or later (64-bit)
For macOS 10.12 or later
This video explains how to make an animation video in Fimora with a step-by-step procedure for defining the tools clearly. A 16 minutes video explained every process in many other videos that teach Filmora better and more informative.
Key Takeaways from This Episode
● We learned that Unity animation 3D is a toolset that enhances physics, entertainment, audio, graphic, interaction, and networking and has fast integrated game development speeds. Excellent and easy 3D grounded platform and audio engine. The disadvantage of Unity is it does not provide any source code, and performance issues are hard to find. It fines additional cost for a mobile pro license for practical deployments.
● Although there are many software’s available in the animation market, only a few can be trusted. So, whenever there is confusion regarding which 3D animation software to use, you can blindly choose Filmora. It has a wide range of assistance like preset animation effects, interface access, multiple tracks to add various videos, and totally as a package make Filmora the best alternative to Unity 3D skeletal animation. Just a little practice and experience can make you perfect.
The Top Free 12 GIF Meme Maker at a Glance
The Best Free 12 GIF Meme Maker at a Glance
An easy yet powerful editor
Numerous effects to choose from
Detailed tutorials provided by the official channel
Do you want to make a meme out of a photo? You can do so with the aid of GIF meme maker, which provides an extensive range of templates, including popular ones and meme fonts and a dedicated interface. Let’s look at some of the excellent meme GIF generators for Android, iPhone, online tools, and desktop computers.
In this article
01 [What Is the Meme GIF Maker?](#Part 1)
02 [How Do You Make a GIF Meme on iPhone?](#Part 2)
03 [12 Meme Generators to Create Your Memes](#Part 3)
Part 1 What Is the Meme GIF Maker?
GIF meme maker allows users to make GIFs from the ground up by collecting or submitting videos or photographs. These GIF caption meme-makers enable users to add different creative effects like emojis, photos, text, filters, and backdrops for added customization. They can also export files, and some of them integrate directly with social networking networks to make uploading more convenient.
Each tool here has its own set of features, so read the entire article before determining which GIF meme generator is ideal for your personal or professional needs.
Part 2 How Do You Make a GIF Meme on iPhone?
Make a unique GIF meme on your iPhone following these few steps:
Step 1: Download and install a GIF maker
On your iPhone, install the GIF meme maker. Not only can you use this meme GIF generator to locate animated GIFs, but you can also use it to make your GIF memes from the start. Go to the Apple store, type GIF maker of your choice into the search field. Now select Get or Install from the drop-down menu.

Step 2: Create an account.
Create an account or log in. Fill in the text boxes with your email address, username, and password. Then press the Sign Up button.
Tap Log In, enter your email address with password if you already have an account.

Step 3: Select a photo or video to use for your GIF
Now it’s your turn to get inventive: Simply tap any of the effects tiles at the bottom of the screen to Construct a meme of a stupid selfie or photo with effects, then swipe left/right to navigate between effects. Press and hold the Shutter option to start a movie, or tap once to snap a shot.
p Create. This is locatedht corner.[1]

Step 4: Add text to meme
Put your meme text here. It’s critical to add your content to the meme because that’s what makes it a meme! To access the text tool, tap the Aa icon and type some text for the meme. Tap Done when you’re finished.
Resize and move your text. After you’ve tapped “Done” and are happy with your text, you can tap, hold, and drag it about your GIF. To alter the size, pinch two fingers together.


Step 5: Save and share
When you complete, tap the purple arrow. Tap this button in the bottom right corner once you’re happy with your meme GIF.
Select the Share GIF from the drop-down menu. If you wish to save the GIF to your camera roll, tap Save GIF.


Part 3 Meme Generators to Create Your Memes
Here are 12 meme generators that you can try out
01IMGFlip (Web)

Features:
• It has many meme templates
• You can easily build memes with your photographs.
• You can make changes to your memes
• It includes over 1000 meme templates.
• Allows you to find the meme template you want quickly.
Pros
• Many templates
• Fonts that you can customize.
• Memes on video
Cons
• Adds a watermark to the image
To make a meme with IMGFlip, follow these steps:
Step 1: Begin by making something.
Go to the website and click the “Create” button to get started. From the menu, select “Make a meme.”
Step 2: Pick a design template
To select the proper template for your meme, use the Search box. Alternatively, you can add your image to the app by clicking “Upload new template.”
Step 3: Insert text
Fill in the blanks with the meme text.
Next, click the options toggle to change the text next to each field. Save the image.
02DrMemes (Web)

Features
• You can easily produce memes for free.
• Create memes without a watermark.
• Change fonts easily
• Add emojis and stickers easily to memes.
• You can turn your photos into a GIF meme.
Pros
• User-friendly interface
• Personalization of fonts
• There is no watermark.
Cons
• A smaller number of templates
Follow these simple steps to make a meme using this website:
Step 1: Select a template
Open drmemes.com and select “Choose meme template” or “Upload picture,” depending on how you want to Construct a meme.
Step 2: Type in your text
Add Text from the side boxes. To change the font, use the settings toggle.
03ILoveIMG (Web)

Features
• Provides a variety of templates
• Allows you to alter the size and style of the font
• It generates memes that are free of watermarks.
• You may also choose whether you want the text to be forced into the image.
Pros
• An extensive library of free templates
• There is no watermark.
• Simple to use
• Can compress, resize, crop, and perform other image-editing activities.
Cons
• You can’t change the font.
Follow these steps to make memes using ILoveIMG:
Step 1: Go to the website.
In a browser, go to the website.
Step 2: Pick a design template
“Select meme template” or “Upload image” are the options.
Step 3: Type in your text
Fill in the blanks with your text.
04Meme Generator (Android/iOS)

Features:
● Over 500 high-quality memes and caption examples included.
● You can change size and color.
● There are a variety of fonts to pick from.
● Use the search or filter options to discover the memes you’re looking for quickly.
● There are no watermarks.
Pros
• Many templates
• Crop, rotate and flip images
• Personalize it with a custom image, font style, and sticker.
image
• There is no watermark.
Cons
• Lots of ads
Follow these simple steps to create a meme using the Meme Generator
Step 1: Add Image
Tap “Custom meme Gallery” to add an image from the gallery or select a meme template in the app.
Step 2: Crop Meme
Using the choices at the top of the app, you can crop the meme or rotate/flip the images.
Step 3: Customize font and Save
Change the font style, color, and alignment by tapping on it. You can also decorate it with a sticker.
When done, tap on “Save” to download the meme or hit “Share” to send it to social media apps.
05Meme Creator (Android)

Features
● A large collection of stock pictures and memes
● Add your quotes to the close captions.
● You can add your watermark.
● There are some fantastic stickers available.
● Simple to use
Pros
● No watermark
● Meme categories
● Custom fonts
Cons
● Occasional ads
Here is a simple step guide:
Step 1: Add Image
The program begins with a gallery of meme template categories, including animals, celebrities, cartoons, and more.
To add your original image, tap on one of these templates or hit the “Gallery” icon at the top.
Step 2: Change font size
Fill in the “Top” and “Bottom” text areas with the meme content. Using the options icon next to the text, change the font style.
Step 3: Save and Share
Use the “Save” or “Share” button at the bottom to download or send memes.
06Video & GIF Memes (Android)

Features
● It enables you to make memes from movies, GIFs and photos.
● No watermarks
● Easy to use
● Compatible on device
● Several stickers for users to leverage on
Pros
● There is no watermark.
● Tenor GIF database access
● You can video cut.
Cons
● Too many ads
There are no image memes.
Here are a few steps to follow:
Step 1: Select file
To begin, open the app and select the source file type.
Step 2: Customize text
When asked, trim the video, and add customizable meme text.
Save the video or GIF joke after changing video characteristics such as frame rate, speed, and quality.
07GIF Maker – Meme GIF Creator (iOS)

Features:
● Make as many GIFs as you like from your videos.
● Make an unlimited number of GIFs from your photos.
● Make an infinite number of memes.
● Filters, Stickers, and Fonts of the highest quality.
● Easy to use
Pros
● There is no watermark.
● User-friendly interphase.
● There are some fantastic stickers available.
Cons
● As others, ads.
Follow these simple steps to make use of this amazing tool:
Step 1: Choose the desired video
After running the app, select “Video to GIF” from the menu and select your video.
If necessary, trim it.
Step 2: Add text
To add amusing meme text to your video, tap “Add text.”
Step 3: Download and Share
To download the video or share it directly with social networking apps, click the Share icon.
08Memeto – Meme Maker & Creator (iOS)

Features:
● Create memes with your picture templates, blank memes, and popular templates.
● Customize options available
● Several different meme text styles to choose from.
● 1000+ stickers.
● Choose your photo from your Photo Gallery to be used as background
Pros
● There is no watermark.
● Various types of memes
Cons
● It lacks a search function.
Step 1: Choose a template
Select a meme template in the app, select the meme, and then hit the “Text” option to add and style meme text.
Step 2: Save and Share
Tap the Share button when you finish to save it to your device.
09Meme Generator Suite (Windows)

Features:
● Thousands of memes are available online
● Make memes out of your photos.
● Make posters with the phrase “KEEP CALM” and Jo Baka memes.
● You can move text, resized, and colored.
● There’s also an Offline Collection with over 300 memes that’s always ready to go!
Pros
• Many memes
• Effective search
• Collection in the offline mode
• There is no watermark.
Cons
• Advertisements
Follow these simple are guide:
Step 1: Select template or photo
Start using a pre-loaded meme template from the app or upload your image by selecting “From gallery.”
Step 2: Download and Save
Change the text settings and click the Save icon to download the image.
You can also immediately submit the image to IMGur or social networking apps.
10Meme Generator

Features:
● Get over 500 high-quality memes and caption examples.
● Size and color are changeable.
● There are a variety of fonts to pick from.
● Search or filter options to discover the memes you’re looking for.
● There are no watermarks.
Pros
• Examples of memes
• There is no watermark.
Cons
• Cannot share straight to social networking apps
Step 1: Click on Meme
To begin editing a meme, click on it.
Step 2: Change font
Change the font color and style of the meme text on the meme editing screen.
1111. Deal With It - GIF Maker

Features :
● This online GIF creator is simple to use.
● No third-party software is required to use this GIF maker.
● This website will complete the GIF conversion promptly.
● This GIF generator website is beneficial to new users.
Pros
● The website’s design is simplistic, making this GIF banner maker too simple to manage and utilize.
● It also intensifies the GIF maker, significantly improving the overall effect of the GIF in question.
Cons
● Because the pace of GIF makers is too slow, users sometimes opt to download installable GIF makers.
● GIF makers cannot create animated GIFs, so it is impossible to utilize this tool.
How to Use this Online GIF Maker
Visit the GIF maker’s official homepage.
Step 1: Choose an image
Because it can also be helpful to create GIFs from photos, you may use the Load Image option to upload an image from your computer.
Step 2: Editing
After that, you may add a phrase and glasses to the loaded image.
12LunaPic

Features:
● This online animated GIF creator has a very user-friendly design.
● No other third-party programs are required to use this online animated GIF creator.
● This website can also be valuable to creating GIF banners.
● You may create animated GIFs from several photographs with this website.
Pros
● With the aid of this program, the user can experience the GIF maker mobile feature; hence it is highly recommended.
● Because the tool is so simple, this banner GIF maker gets the job done in style and according to the user’s specifications.
Cons
● Like the GIF icon maker, this application lacks critical features like speed and accuracy necessary for GIF creation.
● Because this program can’t edit GIFs, it doesn’t have any of the GIF edit maker’s features.
How to use LunaPic
Step 1: Upload Image
To get started, go to LunaPic’s official website. To submit photographs from your computer to this online animated GIF maker, click the Upload button.
Step 2: Enhance the image
With this online GIF creator, you can now alter the images.
Step 3: Save the animated GIF
To save the produced GIF, select GIF as the output and click the Save button at the bottom.
Creating your animated GIF from any video or photo is a fascinating and entertaining undertaking. A video scene can be brutal to manage to owe to its vast size, but GIF forms are ideal for profile posts and sharing with friends in the form of simple jokes.
If you want to generate a GIF online, though, Wondershare Filmora Video Editor ‘s online meme maker is the best option. It allows you to create a watermark-free picture, GIF, and video memes. It is entirely free to use and requires no registration. When creating a caption, you can edit the text size, color, and position to make a caption while you are editing. You can also add text inside or outside in GIF. Just with some clicks, your GIF will be complete. Try it now!

Wondershare Filmora - Best Video Editor for Mac/Windows
5,481,435 people have downloaded it.
Build unique custom animations without breaking a sweat.
Focus on creating epic stories and leave the details to Filmora’s auto features.
Start a creative adventure with drag & drop effects and endless possibilities.
Filmora simplifies advanced features to save you time and effort.
Filmora cuts out repetition so you can move on to your next creative breakthrough.
● Key Takeaways from This Episode →
● Now that you know about the 12 best GIF meme generators and how to use them to make a unique and customized GIF with the simple step guide, you can now try your hands on new things.
● However, Wondershare Filmora is your sure best GIF caption meme maker to help you achieve excellent results as a GIF meme creator. So go for it!
Do you want to make a meme out of a photo? You can do so with the aid of GIF meme maker, which provides an extensive range of templates, including popular ones and meme fonts and a dedicated interface. Let’s look at some of the excellent meme GIF generators for Android, iPhone, online tools, and desktop computers.
In this article
01 [What Is the Meme GIF Maker?](#Part 1)
02 [How Do You Make a GIF Meme on iPhone?](#Part 2)
03 [12 Meme Generators to Create Your Memes](#Part 3)
Part 1 What Is the Meme GIF Maker?
GIF meme maker allows users to make GIFs from the ground up by collecting or submitting videos or photographs. These GIF caption meme-makers enable users to add different creative effects like emojis, photos, text, filters, and backdrops for added customization. They can also export files, and some of them integrate directly with social networking networks to make uploading more convenient.
Each tool here has its own set of features, so read the entire article before determining which GIF meme generator is ideal for your personal or professional needs.
Part 2 How Do You Make a GIF Meme on iPhone?
Make a unique GIF meme on your iPhone following these few steps:
Step 1: Download and install a GIF maker
On your iPhone, install the GIF meme maker. Not only can you use this meme GIF generator to locate animated GIFs, but you can also use it to make your GIF memes from the start. Go to the Apple store, type GIF maker of your choice into the search field. Now select Get or Install from the drop-down menu.
Step 2: Create an account.
Create an account or log in. Fill in the text boxes with your email address, username, and password. Then press the Sign Up button.
Tap Log In, enter your email address with password if you already have an account.
Step 3: Select a photo or video to use for your GIF
Now it’s your turn to get inventive: Simply tap any of the effects tiles at the bottom of the screen to Construct a meme of a stupid selfie or photo with effects, then swipe left/right to navigate between effects. Press and hold the Shutter option to start a movie, or tap once to snap a shot.
p Create. This is locatedht corner.[1]
Step 4: Add text to meme
Put your meme text here. It’s critical to add your content to the meme because that’s what makes it a meme! To access the text tool, tap the Aa icon and type some text for the meme. Tap Done when you’re finished.
Resize and move your text. After you’ve tapped “Done” and are happy with your text, you can tap, hold, and drag it about your GIF. To alter the size, pinch two fingers together.
Step 5: Save and share
When you complete, tap the purple arrow. Tap this button in the bottom right corner once you’re happy with your meme GIF.
Select the Share GIF from the drop-down menu. If you wish to save the GIF to your camera roll, tap Save GIF.
Part 3 Meme Generators to Create Your Memes
Here are 12 meme generators that you can try out
01IMGFlip (Web)
Features:
• It has many meme templates
• You can easily build memes with your photographs.
• You can make changes to your memes
• It includes over 1000 meme templates.
• Allows you to find the meme template you want quickly.
Pros
• Many templates
• Fonts that you can customize.
• Memes on video
Cons
• Adds a watermark to the image
To make a meme with IMGFlip, follow these steps:
Step 1: Begin by making something.
Go to the website and click the “Create” button to get started. From the menu, select “Make a meme.”
Step 2: Pick a design template
To select the proper template for your meme, use the Search box. Alternatively, you can add your image to the app by clicking “Upload new template.”
Step 3: Insert text
Fill in the blanks with the meme text.
Next, click the options toggle to change the text next to each field. Save the image.
02DrMemes (Web)
Features
• You can easily produce memes for free.
• Create memes without a watermark.
• Change fonts easily
• Add emojis and stickers easily to memes.
• You can turn your photos into a GIF meme.
Pros
• User-friendly interface
• Personalization of fonts
• There is no watermark.
Cons
• A smaller number of templates
Follow these simple steps to make a meme using this website:
Step 1: Select a template
Open drmemes.com and select “Choose meme template” or “Upload picture,” depending on how you want to Construct a meme.
Step 2: Type in your text
Add Text from the side boxes. To change the font, use the settings toggle.
03ILoveIMG (Web)
Features
• Provides a variety of templates
• Allows you to alter the size and style of the font
• It generates memes that are free of watermarks.
• You may also choose whether you want the text to be forced into the image.
Pros
• An extensive library of free templates
• There is no watermark.
• Simple to use
• Can compress, resize, crop, and perform other image-editing activities.
Cons
• You can’t change the font.
Follow these steps to make memes using ILoveIMG:
Step 1: Go to the website.
In a browser, go to the website.
Step 2: Pick a design template
“Select meme template” or “Upload image” are the options.
Step 3: Type in your text
Fill in the blanks with your text.
04Meme Generator (Android/iOS)
Features:
● Over 500 high-quality memes and caption examples included.
● You can change size and color.
● There are a variety of fonts to pick from.
● Use the search or filter options to discover the memes you’re looking for quickly.
● There are no watermarks.
Pros
• Many templates
• Crop, rotate and flip images
• Personalize it with a custom image, font style, and sticker.
image
• There is no watermark.
Cons
• Lots of ads
Follow these simple steps to create a meme using the Meme Generator
Step 1: Add Image
Tap “Custom meme Gallery” to add an image from the gallery or select a meme template in the app.
Step 2: Crop Meme
Using the choices at the top of the app, you can crop the meme or rotate/flip the images.
Step 3: Customize font and Save
Change the font style, color, and alignment by tapping on it. You can also decorate it with a sticker.
When done, tap on “Save” to download the meme or hit “Share” to send it to social media apps.
05Meme Creator (Android)
Features
● A large collection of stock pictures and memes
● Add your quotes to the close captions.
● You can add your watermark.
● There are some fantastic stickers available.
● Simple to use
Pros
● No watermark
● Meme categories
● Custom fonts
Cons
● Occasional ads
Here is a simple step guide:
Step 1: Add Image
The program begins with a gallery of meme template categories, including animals, celebrities, cartoons, and more.
To add your original image, tap on one of these templates or hit the “Gallery” icon at the top.
Step 2: Change font size
Fill in the “Top” and “Bottom” text areas with the meme content. Using the options icon next to the text, change the font style.
Step 3: Save and Share
Use the “Save” or “Share” button at the bottom to download or send memes.
06Video & GIF Memes (Android)
Features
● It enables you to make memes from movies, GIFs and photos.
● No watermarks
● Easy to use
● Compatible on device
● Several stickers for users to leverage on
Pros
● There is no watermark.
● Tenor GIF database access
● You can video cut.
Cons
● Too many ads
There are no image memes.
Here are a few steps to follow:
Step 1: Select file
To begin, open the app and select the source file type.
Step 2: Customize text
When asked, trim the video, and add customizable meme text.
Save the video or GIF joke after changing video characteristics such as frame rate, speed, and quality.
07GIF Maker – Meme GIF Creator (iOS)
Features:
● Make as many GIFs as you like from your videos.
● Make an unlimited number of GIFs from your photos.
● Make an infinite number of memes.
● Filters, Stickers, and Fonts of the highest quality.
● Easy to use
Pros
● There is no watermark.
● User-friendly interphase.
● There are some fantastic stickers available.
Cons
● As others, ads.
Follow these simple steps to make use of this amazing tool:
Step 1: Choose the desired video
After running the app, select “Video to GIF” from the menu and select your video.
If necessary, trim it.
Step 2: Add text
To add amusing meme text to your video, tap “Add text.”
Step 3: Download and Share
To download the video or share it directly with social networking apps, click the Share icon.
08Memeto – Meme Maker & Creator (iOS)
Features:
● Create memes with your picture templates, blank memes, and popular templates.
● Customize options available
● Several different meme text styles to choose from.
● 1000+ stickers.
● Choose your photo from your Photo Gallery to be used as background
Pros
● There is no watermark.
● Various types of memes
Cons
● It lacks a search function.
Step 1: Choose a template
Select a meme template in the app, select the meme, and then hit the “Text” option to add and style meme text.
Step 2: Save and Share
Tap the Share button when you finish to save it to your device.
09Meme Generator Suite (Windows)
Features:
● Thousands of memes are available online
● Make memes out of your photos.
● Make posters with the phrase “KEEP CALM” and Jo Baka memes.
● You can move text, resized, and colored.
● There’s also an Offline Collection with over 300 memes that’s always ready to go!
Pros
• Many memes
• Effective search
• Collection in the offline mode
• There is no watermark.
Cons
• Advertisements
Follow these simple are guide:
Step 1: Select template or photo
Start using a pre-loaded meme template from the app or upload your image by selecting “From gallery.”
Step 2: Download and Save
Change the text settings and click the Save icon to download the image.
You can also immediately submit the image to IMGur or social networking apps.
10Meme Generator
Features:
● Get over 500 high-quality memes and caption examples.
● Size and color are changeable.
● There are a variety of fonts to pick from.
● Search or filter options to discover the memes you’re looking for.
● There are no watermarks.
Pros
• Examples of memes
• There is no watermark.
Cons
• Cannot share straight to social networking apps
Step 1: Click on Meme
To begin editing a meme, click on it.
Step 2: Change font
Change the font color and style of the meme text on the meme editing screen.
1111. Deal With It - GIF Maker
Features :
● This online GIF creator is simple to use.
● No third-party software is required to use this GIF maker.
● This website will complete the GIF conversion promptly.
● This GIF generator website is beneficial to new users.
Pros
● The website’s design is simplistic, making this GIF banner maker too simple to manage and utilize.
● It also intensifies the GIF maker, significantly improving the overall effect of the GIF in question.
Cons
● Because the pace of GIF makers is too slow, users sometimes opt to download installable GIF makers.
● GIF makers cannot create animated GIFs, so it is impossible to utilize this tool.
How to Use this Online GIF Maker
Visit the GIF maker’s official homepage.
Step 1: Choose an image
Because it can also be helpful to create GIFs from photos, you may use the Load Image option to upload an image from your computer.
Step 2: Editing
After that, you may add a phrase and glasses to the loaded image.
12LunaPic
Features:
● This online animated GIF creator has a very user-friendly design.
● No other third-party programs are required to use this online animated GIF creator.
● This website can also be valuable to creating GIF banners.
● You may create animated GIFs from several photographs with this website.
Pros
● With the aid of this program, the user can experience the GIF maker mobile feature; hence it is highly recommended.
● Because the tool is so simple, this banner GIF maker gets the job done in style and according to the user’s specifications.
Cons
● Like the GIF icon maker, this application lacks critical features like speed and accuracy necessary for GIF creation.
● Because this program can’t edit GIFs, it doesn’t have any of the GIF edit maker’s features.
How to use LunaPic
Step 1: Upload Image
To get started, go to LunaPic’s official website. To submit photographs from your computer to this online animated GIF maker, click the Upload button.
Step 2: Enhance the image
With this online GIF creator, you can now alter the images.
Step 3: Save the animated GIF
To save the produced GIF, select GIF as the output and click the Save button at the bottom.
Creating your animated GIF from any video or photo is a fascinating and entertaining undertaking. A video scene can be brutal to manage to owe to its vast size, but GIF forms are ideal for profile posts and sharing with friends in the form of simple jokes.
If you want to generate a GIF online, though, Wondershare Filmora Video Editor ‘s online meme maker is the best option. It allows you to create a watermark-free picture, GIF, and video memes. It is entirely free to use and requires no registration. When creating a caption, you can edit the text size, color, and position to make a caption while you are editing. You can also add text inside or outside in GIF. Just with some clicks, your GIF will be complete. Try it now!
Wondershare Filmora - Best Video Editor for Mac/Windows
5,481,435 people have downloaded it.
Build unique custom animations without breaking a sweat.
Focus on creating epic stories and leave the details to Filmora’s auto features.
Start a creative adventure with drag & drop effects and endless possibilities.
Filmora simplifies advanced features to save you time and effort.
Filmora cuts out repetition so you can move on to your next creative breakthrough.
● Key Takeaways from This Episode →
● Now that you know about the 12 best GIF meme generators and how to use them to make a unique and customized GIF with the simple step guide, you can now try your hands on new things.
● However, Wondershare Filmora is your sure best GIF caption meme maker to help you achieve excellent results as a GIF meme creator. So go for it!
Also read:
- New 2024 Approved Easy Cartoon Characters Drawing Tutorials for You Who Are Learning to Draw
- Best 12 Video to GIF Converters High Quality to Check Out for 2024
- New Best 15 Female Anime Characters-Who Is Your Favorite, In 2024
- New How to Make Your Characters Interactive in Unity Animation Rigging
- Updated In 2024, Best 10 Photo Animator Templates
- New In 2024, Secret Shortcut to Adobe Animate Character Tutorial
- 2024 Approved How to Make a Photoshop Collage in Simple Steps
- In 2024, Interesting Fundamentals and Ultimate Guide to Animated Characters Drawings
- New 10 of the Best Disney Animated Shows
- New 15 Top Collage Makers to Create Aesthetic Collages for 2024
- New Epic Formula to Animate Photos From These 10 Animate Pictures App
- Updated Types of Cartoon Styles You May Use for The Next Marketing Project
- Top 10 Old Cartoons From Cartoon Network That You Miss
- Updated 2024 Approved Most Popular Tips on Learning Animate Rigging
- New A Roster of 15 Top Disney Channel Cartoons for 2024
- New In 2024, Something About Types of Motion Graphics
- Updated 15 Best Apps to Turn Photos Into Cartoons and Sketches
- Updated In 2024, Most Effective Ways to Set WhatsApp Status
- Updated Best 10 Animoji Apps You Can Use to Edit Animoji for 2024
- New Know All About Animated Business Logos and the Best Tools to Create One
- 2024 Approved 10 Trendy Free Logo Animation Templates
- In 2024, Top Tips for Effortless Unity 3D Animation
- New Best 10 Apps to Enhance Your Instagram Story Slideshow for 2024
- New In 2024, How to Make Architecture Animation
- Adobe Animate Riggings Tutorial for You for 2024
- New In 2024, Create Animated Social Media Posts in Canva
- New Incredible Ways to Find Suitable Animated Graphic Maker
- New In 2024, Best 15 Classics Animated Cartoon Movies
- 2024 Approved How-To Guide Secret Shortcut to Adobe Animate Character Tutorial
- In 2024, Beginner Tutorial on Making Unity 2D Animation
- Updated 10 Top Memorable Japanese Cat Cartoons for 2024
- Updated 2024 Approved Techniques for Creating Animated Logo That Few People Know About
- New 2024 Approved DP Animation Maker Tutorial for Finding The Best Animated Profile Picture Maker
- New 2024 Approved OBS Animated Alternatives
- Updated In 2024, 10 Realistic Cartoon Characters You Would Run Away From if You Met in Real Life
- New Top 10 Online Animated Logo Makers Everyone Should Know
- Updated Popular Tips on Learning Animate Rigging
- Updated How to Make a Photoshop Collage in Simple Steps for 2024
- Updated 2024 Approved How to Animate Image on Scroll and Text on Scroll?
- 2024 Approved Top 10 Apps to Enhance Your Instagram Story Slideshow
- 2024 Approved 8 Blender 3D Animation Tutorials for Beginners
- Updated Learn How to Do Funny Cartoon Drawings
- New 10 2D/3D Animation Tips & Tricks to Bring New Ideas to You
- New 2024 Approved Dead Simple Guide to Create New and Exciting Blackboard Animation
- New In 2024, What Wikipedia Wont Tell You Specifically About Character Rigging
- New Adobe Animate CC Everything You Need to Know for 2024
- 2024 Approved Best 10 3D Text Animation Templates
- How to Remove Activation Lock On the Apple iPhone 13 Without Previous Owner?
- In 2024, What is the best Pokemon for pokemon pvp ranking On Samsung Galaxy F15 5G? | Dr.fone
- 7 Solutions to Fix Error Code 963 on Google Play Of Poco C50 | Dr.fone
- Remove the Lock Screen Fingerprint Of Your Samsung Galaxy M34
- Change Location on Yik Yak For your Poco M6 5G to Enjoy More Fun | Dr.fone
- How To Unlock Apple iPhone 14 Plus Without Swiping Up? 6 Ways
- Guide on How To Erase Apple iPhone 14 Pro Max Devices Entirely | Dr.fone
- In 2024, Top 15 Apps To Hack WiFi Password On Vivo Y27 5G
- Updated What Is AI Background Generator? | Wondershare Virbo Glossary
- Calls on Infinix GT 10 Pro Go Straight to Voicemail? 12 Fixes | Dr.fone
- The Top 5 Android Apps That Use Fingerprint Sensor to Lock Your Apps On Infinix Smart 8 Plus
- How do I reset my Vivo Y200 Phone without technical knowledge? | Dr.fone
- Fake the Location to Get Around the MLB Blackouts on Vivo X Fold 2 | Dr.fone
- How to Stop My Spouse from Spying on My Infinix Note 30i | Dr.fone
- PassFab Apple iPhone 12 mini Backup Unlocker Top 4 Alternatives | Dr.fone
- How to sign a Excel 2000 document online
- How to Factory Reset Vivo Y78 5G in 5 Easy Ways | Dr.fone
- Here are Some of the Best Pokemon Discord Servers to Join On Meizu 21 Pro | Dr.fone
- Top 4 Ways to Trace Lava Agni 2 5G Location | Dr.fone
- Top 4 Ways for Apple iPhone SE (2022) to Mac Mirroring | Dr.fone
- How to Downgrade iPhone 13 without iTunes? | Dr.fone
- Recover Apple iPhone 12 Data From iOS iTunes Backup | Dr.fone
- How To Fix Unresponsive Phone Touchscreen Of Tecno Camon 20 Pro 5G | Dr.fone
- In 2024, How to Hide/Fake Snapchat Location on Your OnePlus Ace 2 | Dr.fone
- Ultimate Guide from Apple iPhone XS Max iCloud Activation Lock Bypass
- How To Fake GPS On Honor Magic 5 For Mobile Legends? | Dr.fone
- Best Anti Tracker Software For Apple iPhone SE (2022) | Dr.fone
- In 2024, Android to Apple How To Transfer Photos From Infinix Hot 30i to iPad Easily | Dr.fone
- How Can Honor Magic 5Mirror Share to PC? | Dr.fone
- Factory Reset iPhone 6 | Dr.fone
- In 2024, How To Enable USB Debugging on a Locked Oppo Reno 11 Pro 5G Phone
- Top 5 Car Locator Apps for Vivo S17 | Dr.fone
- In 2024, How to Mirror Tecno Camon 30 Pro 5G to Mac? | Dr.fone
- In 2024, Guide on How To Change Your Apple ID Email Address On Apple iPhone 11 Pro
- A Step-by-Step Guide on Using ADB and Fastboot to Remove FRP Lock from your Nokia C12
- Vivo V27 Pro ADB Format Tool for PC vs. Other Unlocking Tools Which One is the Best?
- In 2024, How to Track Lava Blaze 2 Pro Location by Number | Dr.fone
- Title: Updated 2024 Approved Adobe Animate Riggings PROPER Tutorial for You
- Author: Elon
- Created at : 2024-06-08 05:08:00
- Updated at : 2024-06-09 05:08:00
- Link: https://animation-videos.techidaily.com/updated-2024-approved-adobe-animate-riggings-proper-tutorial-for-you/
- License: This work is licensed under CC BY-NC-SA 4.0.
