
:max_bytes(150000):strip_icc():format(webp)/free-language-exchange-websites-1357059-d87c92dbdba3429dbf17d51ba313b1ff.png)
Updated 2024 Approved Fuel Your Creativity with 10 Awesome Collection of 2D Animation Examples
Fuel Your Creativity with 10 Awesome Collection of 2D Animation Examples
Fuel your Creativity with 10 Awesome Collection of 2D Animation Examples
An easy yet powerful editor
Numerous effects to choose from
Detailed tutorials provided by the official channel
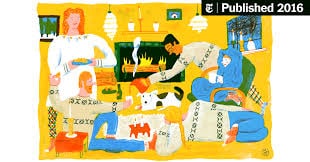
It is pretty evident that organizations are prompt integrating videos into their campaigns on marketing and numerous other touch points.
If you’re not much sure about whether to go with 3D or 2D, always commence with viewing example videos to acquire some inspiration and knowledge or have a talk with 2D cartoon animation video production agencies which could suggest an apt fit.
As it’s always engaging, cost-effective, and fun, animated explainer best 2D animation video will educate and entertain the entire audience at the same time. It is just not only the insight about the services, products, or brand which associate your organization with your customers.
It is the attitude and personality of the brand as well that individual will forward to others after eyeing your video. If you wish to know about what an effectual video peeps like, here’re 10 majestic examples.
01Travel Portland
Why it’s Awesome: This gritty animation beautifully blends real-world objects and hand-drawn style.
Travel Portland - You Can, In Portland from HouseSpecial on Vimeo .
This video made for Travel Portland is quite a decent example of a video which combines distinctive animation disciplines through to singular vision. The video that was clearly created with After Effects, classic animation principles, hand-drawn animation, and showcases stop motion.
02Down the Rabbit Hole
Why It’s Awesome : An alluring case study in experimental design and shape organization.
Down The Rabbit Hole 2016 from Agent Pekka on Vimeo .
Without careful organization and pre-planning, the timeline of the animator could get considerably messy. This video showcases an extravagant example of a multidisciplinary approach and shape layer keyframing to best 2D animation design. In this video, you’ll get keyframing all of the elements.
03Veterans Day
Why it’s Awesome : It is a fascinating model to liquid gritty-style animated video.
SyFy / NBCUniversal - Veterans Day from STATE on Vimeo .
This video made for Syfy and NBC is a superb example of the liquid animation amalgamated with gritty design. Likely this video utilized a 2D rendering simulator technique such as ‘toon shading’ in the Cinema 4D.
04Min Stora Dag
Why it’s Awesome **:**This video wonderfully exhibits stretch and squash assorted with motivated actions.
Min Stora Dag from Brikk on Vimeo .
There’re twelve fundamental principles of animation which you must always follow to make your animations work more interesting. The following video is truly an appreciable instance of a piece that incorporates several of those twelve basic principles to make something remarkably fun.
05Paper
Why it’s Awesome : This video proficiently blends digital and physical elements to craft a splendid 2D design.
Probably you utilized to create most of your work on the computer. Even so, you may find it amusing to experiment with integrating real-world pieces into the next animation project of yours. It may perhaps take a little more pre-production than you are used to, however, the results could be astonishing. This incredible clip from PES is an exquisite blend of expert compositing and paper cutouts.
06CMYK
Why it’s Awesome **:**CMYK presents us that even nominal movement could add up lots of personality to 2D characters.
The objective of any character animator is just to unveil what your character is considering. Animators acquire this in distinct ways, but one vital thing to keep in mind is that you do not have to invest hundreds of hours on a single project so as to produce characters with emotions. This striking animation proves that you could give life to stiff characters with nothing but the most minuscule of movement.
07Tako Faito
Why it’s Awesome **:**This video is literally a fun blend of vectorized 3D elements and Japanese style animation.
Tako Faito! from Giant Ant on Vimeo .
The aim of most animators is to give a hand-drawn look to a project. Regardless, obtaining a good hand-drawn look without the physical drawing of your characters on the computer is quite challenging. This modish video from Giant Ant exhibits how you could simulate hand-drawn video with the ‘easy-to-make’ 3D elements.
08ZOHO
Why It’s Awesome : It reduces troubles significantly, and you face with multi-channel selling.
ZOHO Inventory is online-based inventory management software that aids you to manage offline and online orders and maintain track of the stock levels across multitudinous channels. Zoho Inventory incorporates eBay, Amazon, Etsy, and Shopify, so your sales, contacts, and items orders in these channels are automatically imported. This 2D animation video showcases how you could optimize inventory and purchases levels and obtain critical insights with ZOHO inventory about your businesses at any moment.
09TraQtion
Why it’s Awesome : Working in the cloud, your suppliers and you could ingress the system anywhere, anytime, so you’re in the loop always.
TraQtion is a cloud-based software that helps manufacturers and retailers with the site, product, and supplier compliance management. It aids in tracking the compliance and quality from macro to minutiae, predicting problems, and then taking rectifying measures, wherever you’re. TraQtion produced this animated 2D video to disclose how seamless compliance and quality can be. It’s a sprucely done video overall.
10George Clinical
Why it’s Awesome : George Clinical exhibits its all complete offerings with this 2D video.
In Asia, George Clinical is one of the prime Clinical Research Organizations, imparting top-quality clinical trial research facilities from beginning to finish, reinforced by innovation and science. George Clinical caters an extensive range of clinical trial services to biotech, medical device, and pharmaceutical consumers for all the trial phases, post-marketing trials, registration. This 2D animation video delivers a comprehensive overview of George Clinical and its services.
Verdict
The best upshot of a 2D animated video isn’t to increase the traffic but an endorsement of any brand. Free 2D animation video must cater to the personality and attitude of the brand to a wide range of target audiences. Hence, whenever that onlooker requires something accordant, they will consider your brand and its services.
Irrespective of the matter if you are going to use B2C or B2B marketing, live2D animation video is the platform that connects your audience with you. After the connection is completely built, you will be one step up ahead for sure, holding back on another side to generate sales and escalate ROI. Undeniably, animated videos do the conversion.
The affluent video is one with a catchy hook, a stimulating message and marks your brand to the target audience. Therefore, do not be afraid at all to be distinct from others.
In this respect the name of Wondershare Filmora Video Editor needs mentioning as it is one such video editing software that provides you with countless features and benefits. It becomes easy to create animated videos like a professional when you install Filmora.
Wondershare Filmora
Get started easily with Filmora’s powerful performance, intuitive interface, and countless effects!
Try It Free Try It Free Try It Free Learn More >

Key Takeaways from This Episode
● Work with an organization that can fully understand your requirement on video production easily
● Find a combine multiple videos or reference video elements from the different sources
● Build an invincible creative brief
● With the aforementioned live2D animation instances, it is pretty evident that organizations are prompt integrating videos into their campaigns on marketing and numerous other touch-points.
● If you’re planning to develop these videos, a steady commencement is to develop a briefing of what could be the style and tone for your videos. We recommend you to be unique and different whilst you produce your messaging via the videos.
● Agencies make custom videos typically based on your given brief. At a fixed price with an accomplished video production services plan, their design team skillfully works right from development concept to animation and art design. Having produced 1200+ explainers for the businesses, their creative professional team could help you come up with the upright fit.
It is pretty evident that organizations are prompt integrating videos into their campaigns on marketing and numerous other touch points.
If you’re not much sure about whether to go with 3D or 2D, always commence with viewing example videos to acquire some inspiration and knowledge or have a talk with 2D cartoon animation video production agencies which could suggest an apt fit.
As it’s always engaging, cost-effective, and fun, animated explainer best 2D animation video will educate and entertain the entire audience at the same time. It is just not only the insight about the services, products, or brand which associate your organization with your customers.
It is the attitude and personality of the brand as well that individual will forward to others after eyeing your video. If you wish to know about what an effectual video peeps like, here’re 10 majestic examples.
01Travel Portland
Why it’s Awesome: This gritty animation beautifully blends real-world objects and hand-drawn style.
Travel Portland - You Can, In Portland from HouseSpecial on Vimeo .
This video made for Travel Portland is quite a decent example of a video which combines distinctive animation disciplines through to singular vision. The video that was clearly created with After Effects, classic animation principles, hand-drawn animation, and showcases stop motion.
02Down the Rabbit Hole
Why It’s Awesome : An alluring case study in experimental design and shape organization.
Down The Rabbit Hole 2016 from Agent Pekka on Vimeo .
Without careful organization and pre-planning, the timeline of the animator could get considerably messy. This video showcases an extravagant example of a multidisciplinary approach and shape layer keyframing to best 2D animation design. In this video, you’ll get keyframing all of the elements.
03Veterans Day
Why it’s Awesome : It is a fascinating model to liquid gritty-style animated video.
SyFy / NBCUniversal - Veterans Day from STATE on Vimeo .
This video made for Syfy and NBC is a superb example of the liquid animation amalgamated with gritty design. Likely this video utilized a 2D rendering simulator technique such as ‘toon shading’ in the Cinema 4D.
04Min Stora Dag
Why it’s Awesome **:**This video wonderfully exhibits stretch and squash assorted with motivated actions.
Min Stora Dag from Brikk on Vimeo .
There’re twelve fundamental principles of animation which you must always follow to make your animations work more interesting. The following video is truly an appreciable instance of a piece that incorporates several of those twelve basic principles to make something remarkably fun.
05Paper
Why it’s Awesome : This video proficiently blends digital and physical elements to craft a splendid 2D design.
Probably you utilized to create most of your work on the computer. Even so, you may find it amusing to experiment with integrating real-world pieces into the next animation project of yours. It may perhaps take a little more pre-production than you are used to, however, the results could be astonishing. This incredible clip from PES is an exquisite blend of expert compositing and paper cutouts.
06CMYK
Why it’s Awesome **:**CMYK presents us that even nominal movement could add up lots of personality to 2D characters.
The objective of any character animator is just to unveil what your character is considering. Animators acquire this in distinct ways, but one vital thing to keep in mind is that you do not have to invest hundreds of hours on a single project so as to produce characters with emotions. This striking animation proves that you could give life to stiff characters with nothing but the most minuscule of movement.
07Tako Faito
Why it’s Awesome **:**This video is literally a fun blend of vectorized 3D elements and Japanese style animation.
Tako Faito! from Giant Ant on Vimeo .
The aim of most animators is to give a hand-drawn look to a project. Regardless, obtaining a good hand-drawn look without the physical drawing of your characters on the computer is quite challenging. This modish video from Giant Ant exhibits how you could simulate hand-drawn video with the ‘easy-to-make’ 3D elements.
08ZOHO
Why It’s Awesome : It reduces troubles significantly, and you face with multi-channel selling.
ZOHO Inventory is online-based inventory management software that aids you to manage offline and online orders and maintain track of the stock levels across multitudinous channels. Zoho Inventory incorporates eBay, Amazon, Etsy, and Shopify, so your sales, contacts, and items orders in these channels are automatically imported. This 2D animation video showcases how you could optimize inventory and purchases levels and obtain critical insights with ZOHO inventory about your businesses at any moment.
09TraQtion
Why it’s Awesome : Working in the cloud, your suppliers and you could ingress the system anywhere, anytime, so you’re in the loop always.
TraQtion is a cloud-based software that helps manufacturers and retailers with the site, product, and supplier compliance management. It aids in tracking the compliance and quality from macro to minutiae, predicting problems, and then taking rectifying measures, wherever you’re. TraQtion produced this animated 2D video to disclose how seamless compliance and quality can be. It’s a sprucely done video overall.
10George Clinical
Why it’s Awesome : George Clinical exhibits its all complete offerings with this 2D video.
In Asia, George Clinical is one of the prime Clinical Research Organizations, imparting top-quality clinical trial research facilities from beginning to finish, reinforced by innovation and science. George Clinical caters an extensive range of clinical trial services to biotech, medical device, and pharmaceutical consumers for all the trial phases, post-marketing trials, registration. This 2D animation video delivers a comprehensive overview of George Clinical and its services.
Verdict
The best upshot of a 2D animated video isn’t to increase the traffic but an endorsement of any brand. Free 2D animation video must cater to the personality and attitude of the brand to a wide range of target audiences. Hence, whenever that onlooker requires something accordant, they will consider your brand and its services.
Irrespective of the matter if you are going to use B2C or B2B marketing, live2D animation video is the platform that connects your audience with you. After the connection is completely built, you will be one step up ahead for sure, holding back on another side to generate sales and escalate ROI. Undeniably, animated videos do the conversion.
The affluent video is one with a catchy hook, a stimulating message and marks your brand to the target audience. Therefore, do not be afraid at all to be distinct from others.
In this respect the name of Wondershare Filmora Video Editor needs mentioning as it is one such video editing software that provides you with countless features and benefits. It becomes easy to create animated videos like a professional when you install Filmora.
Wondershare Filmora
Get started easily with Filmora’s powerful performance, intuitive interface, and countless effects!
Try It Free Try It Free Try It Free Learn More >
Key Takeaways from This Episode
● Work with an organization that can fully understand your requirement on video production easily
● Find a combine multiple videos or reference video elements from the different sources
● Build an invincible creative brief
● With the aforementioned live2D animation instances, it is pretty evident that organizations are prompt integrating videos into their campaigns on marketing and numerous other touch-points.
● If you’re planning to develop these videos, a steady commencement is to develop a briefing of what could be the style and tone for your videos. We recommend you to be unique and different whilst you produce your messaging via the videos.
● Agencies make custom videos typically based on your given brief. At a fixed price with an accomplished video production services plan, their design team skillfully works right from development concept to animation and art design. Having produced 1200+ explainers for the businesses, their creative professional team could help you come up with the upright fit.
How to Make GIF Instagram
How to Make GIF Instagram | Quick Tips
An easy yet powerful editor
Numerous effects to choose from
Detailed tutorials provided by the official channel
Creating gif for Instagram to make stories engaging in easy steps. Making Instagram stories by converting gif to video to attract more people.
In this article
01 [10 Best Instagram Gifs for Your Stories](#Part 1)
02 [How to Create a GIF for Instagram](#Part 2)
03 [How to Convert GIF to Video for Instagram](#Part 3)
Part 1 10 Best Instagram Gifs for Your Stories
All of you might know that GIF is also known as Graphics Interchange Format. It was created for the first time in the year 1987. With it you can decrease the size of photos and short animated images. With this kind of technology a gif instagram can also be made with the greatest ease. The GIF instagram story is a fun oriented task that all of you will appreciate in the long run. Here you can even add animated stickers and paste them to your story. With this way you can also make more stickers by changing their size in the long way. Instagram logo gif can also be made easily by following some keywords to get the desired gif over Instagram.
So, to make an Instagram story more happening some of the top gif galleries are:
01Bohemian
As the name suggests, the gif are Bohemian themed. Those who love to add some cute Bohemian things and pictures in gif style; they can type Bohemian on the search bar and choose the best one to make an Instagram story Bohemian themed. Colorful flowers, star, dream catcher, cute girl and days name are available in the said gif style.
02Chicayeye
Various gifs available at this keyword are warm colors themed. They make any Instagram story pleasing with simple yet beautiful color combinations. With matching color combinations of pictures and words, instagram stories can be made more interesting.
03Kindcomments
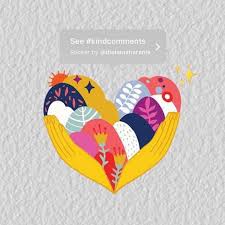
The name itself indicates, there will be a lot of quotes or sayings. Those who are fond of posting some beautiful and engaging quotes on social media accounts, they will definitely love to add gif from Kindcomments.
04Scarletpin

It is seen that food lovers always post their story when they have a lunch or dinner. Making people know what new they are having at a place through Instagram stories seems to be very interesting. So, for those SCARLETPIN has a wide collection of food gifs. It has bright and colorful pictures of food to make the stories more interesting.
05Gladdest
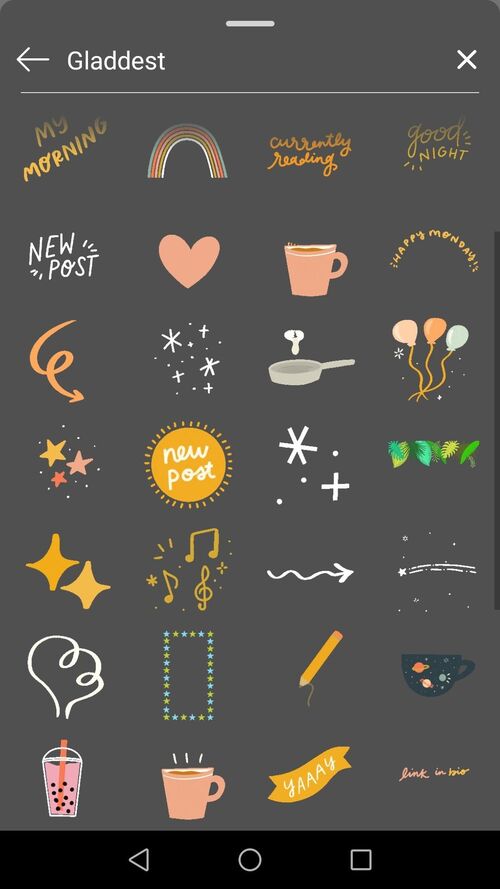
Adorable gif for insta can make any Instagram story look so sweet and engaging. So, when you need a soft tone gif with a lot of sayings, stars, flowers, a piece of cake and music, then type Gladdest at your search result and get some vintage styles gif that make your Instagram story adorable. This will make people to shower love and hearts at your story.
06Hanmade
A lot of gif in instagram that seems to be written with hands can be searched through “handmade”. It has some adorable pink and cute designs. Days and the months are written in some amazing style. An Instagram story can be made attractive by including some heart gif and sayings gif. Those who wish to add some cute stories on Christmas day, they can even get some cute wishes gif in it.
07Hygge
Season’s gif are most common gifs that are included in any Instagram story by the social media users. The most lovable season is the winters where the users have a lot of stuff to include in the story. Looking for winter’s gif for story? Then type Hygge at your search results. ???It will show various gif for a mood of coziness. One can find cozy mugs, stars, snowman, and seasonal stickers to make interesting story over Instagram.
08Vipapier
Some users look for a place where they can get most of the best instagram gifs for their Instagram stories. From sayings to cute pictures of hearts, flowers and stars all can be taken from Vipapier. The best thing is that it has muted color scheme and paint gif that can be applied anywhere in the background of the text. So, search Vipapier over the search results of Instagram and add one that fits in your space.
09LINE & LINES

This is a simple yet very good gif available to make text in the Instgaram look amazing and stylish. One can underline something or write something interesting in break up to give the text a new look. So, various lines can be seen at LINE & LINES to include the same in the Instagram stories.
10Square & Rectangle
Basic shapes are loved by every Instagram user who updates their stories every day. The reason is that they give a new and cool look to any picture. So, if you need basic shape, then ‘square’ or ‘rectangle’ are great way to make your new post look different and impress your followers. They are simple to create and can be added as background theme for the pictures of videos.
Part 2 How to Create a GIF for Instagram
Posting an Instagram GIF is easy using an application for both iPhone and Android. So, let’s see one by one how to make gifs for instagram and post the same on the Instagram stories. To begin with:
01How to Post an Instagram GIF Using App for iPhone
When you are in need to post Gifs to instagram story then you have to take some essential steps. These steps have been taken by GIPHY as well as from GIF stickers that you can add to your content at social media sites like Instagram.
● Install the Giphy app on your iPhone and open it.
● Look for the desired GIF which you want to include in your story on GIPHY.
● Click on the paper-airplane icon located under the GIF.
● Tap the Instagram button. A permission screen will open asking for giving permission for access to open Instagram.
● After giving permission, the selected GIF will open inside Instagram. Select Feed to post the selected GIF to your Instagram feed. This will be a new post over the Instagram.
● In case you need to edit of add filters, you can go with that by moving on to Next.
● Further tap next again to add caption and hash tags if required.
● After creation of GIF post is over, tap Share.
Here you will get more benefits like increasing and decreasing the size of images. Instagram story gif is an issue that is to be done for every kind of need and all the Instagram stories. By good fortune GIPHY has many tons of GIFs that can be selected for this kind of conditions. You just need a special kind of flair when you are making texts for your GIF interface. Even then you have to adopt gif instagram story aesthetic so that your task of doing any promotion on social media sites could become an easy one.
02How to Post an Instagram GIF Using App for Android
Gif can be posted easily using GIPHY Cam for Android. Here you can even open the app of instagram media with the help of an android. The simple steps are:
Save the GIF to the Download folder which you want to share to the Instagram.
Tap to the camera roll after opening GIPHY CAM.
Choose the GIF and move to the next button.
Let the GIF convert and then go to Instagram and share.
Part 3 How to Convert GIF to Video for Instagram
A gif can be converted into video by using various applications. Converting Gif by adding some filter, light effects and sound into video make it more attractive for Instagram stories. One can try Filmora to convert gif to video for instagram in just simple steps.
01**Wondershare Filmora Video Editor ** –A GIF resource

Wondershare Filmora - Best Video Editor for Mac/Windows
5,481,435 people have downloaded it.
Build unique custom animations without breaking a sweat.
Focus on creating epic stories and leave the details to Filmora’s auto features.
Start a creative adventure with drag & drop effects and endless possibilities.
Filmora simplifies advanced features to save you time and effort.
Filmora cuts out repetition so you can move on to your next creative breakthrough.
There are many applications and web tools that offer to convert beautiful gifs to videos and sharing the same over Instagram stories. Filmora V11 is one of the best video editor applications which assist the users to convert gif to video with minimal effort. It is a user-friendly tool that has media editing features. It allows the users to enhance their video with wide variety of sound, light effects, and beautiful gifs and share them to their Instagram stories.
For creating video or converting gifs to video, Filmora V11 can be used. It makes easy for the beginners to convert gift into videos in a few simple steps. Filmora V11 app is required to be installed on the system and media files can be imported there. The best thing is that it supports most of the video formats such as MP4, AVI, H261, FLV, MKV, 3GP, MOV, MPEG, VOB, RMVB, M4V, TS, M2TS, WMV, ASF and many more. To customize gifs and then converting it to video, the Filmora Meme maker can be used. Templates and captions are also found at the application.
02Steps to convert GIF to video for Instagram
● The first step is to download the application Filmora at your computer and open it. Choose the GIF file from the Filmora file.
● Do the necessary editing. This including adding some text, colors and effects to the gif.
● After adding all the effects and editing, tap to create a video from it. Export the same in MP4 format and save it over the mobile. The application will convert the gift into video and is ready for uploading.
● At last in the uploading process, open the Instagram application, select the video from the gallery.
● Captions or description can be added and then uploaded.
● Key Takeaways from This Episode →
● Instagram story gifs are concerned with mainstream creation for graphics interchange format. With these formats you can make the best and interesting story. So, to make gif, maximum use of GIPHY can be made to make your work look to be the best promotional one. Some of the best gifs can be searched by tapping keywords like Bohemian, Hanmade, LINE & LINES and Square & Rectangle
● Posting gif can be understood in just simple steps. If you desire to know how to create gifs for instagram, then you can explore various applications for both iPhone and Android. You may even search well on your GIF and then select the desired gif that can be added well to your instagram story.
● Instagram stories can be made more attractive by converting gif into videos. The same can be done with ease with some user friendly and high tech applications. Filmora can be the best software application for doing the magic over Instagram stories. It can be used to turn gif into videos or videos to gif. So, give your creativity a new height with some good application and impress your followers.
Creating gif for Instagram to make stories engaging in easy steps. Making Instagram stories by converting gif to video to attract more people.
In this article
01 [10 Best Instagram Gifs for Your Stories](#Part 1)
02 [How to Create a GIF for Instagram](#Part 2)
03 [How to Convert GIF to Video for Instagram](#Part 3)
Part 1 10 Best Instagram Gifs for Your Stories
All of you might know that GIF is also known as Graphics Interchange Format. It was created for the first time in the year 1987. With it you can decrease the size of photos and short animated images. With this kind of technology a gif instagram can also be made with the greatest ease. The GIF instagram story is a fun oriented task that all of you will appreciate in the long run. Here you can even add animated stickers and paste them to your story. With this way you can also make more stickers by changing their size in the long way. Instagram logo gif can also be made easily by following some keywords to get the desired gif over Instagram.
So, to make an Instagram story more happening some of the top gif galleries are:
01Bohemian
As the name suggests, the gif are Bohemian themed. Those who love to add some cute Bohemian things and pictures in gif style; they can type Bohemian on the search bar and choose the best one to make an Instagram story Bohemian themed. Colorful flowers, star, dream catcher, cute girl and days name are available in the said gif style.
02Chicayeye
Various gifs available at this keyword are warm colors themed. They make any Instagram story pleasing with simple yet beautiful color combinations. With matching color combinations of pictures and words, instagram stories can be made more interesting.
03Kindcomments
The name itself indicates, there will be a lot of quotes or sayings. Those who are fond of posting some beautiful and engaging quotes on social media accounts, they will definitely love to add gif from Kindcomments.
04Scarletpin
It is seen that food lovers always post their story when they have a lunch or dinner. Making people know what new they are having at a place through Instagram stories seems to be very interesting. So, for those SCARLETPIN has a wide collection of food gifs. It has bright and colorful pictures of food to make the stories more interesting.
05Gladdest
Adorable gif for insta can make any Instagram story look so sweet and engaging. So, when you need a soft tone gif with a lot of sayings, stars, flowers, a piece of cake and music, then type Gladdest at your search result and get some vintage styles gif that make your Instagram story adorable. This will make people to shower love and hearts at your story.
06Hanmade
A lot of gif in instagram that seems to be written with hands can be searched through “handmade”. It has some adorable pink and cute designs. Days and the months are written in some amazing style. An Instagram story can be made attractive by including some heart gif and sayings gif. Those who wish to add some cute stories on Christmas day, they can even get some cute wishes gif in it.
07Hygge
Season’s gif are most common gifs that are included in any Instagram story by the social media users. The most lovable season is the winters where the users have a lot of stuff to include in the story. Looking for winter’s gif for story? Then type Hygge at your search results. ???It will show various gif for a mood of coziness. One can find cozy mugs, stars, snowman, and seasonal stickers to make interesting story over Instagram.
08Vipapier
Some users look for a place where they can get most of the best instagram gifs for their Instagram stories. From sayings to cute pictures of hearts, flowers and stars all can be taken from Vipapier. The best thing is that it has muted color scheme and paint gif that can be applied anywhere in the background of the text. So, search Vipapier over the search results of Instagram and add one that fits in your space.
09LINE & LINES
This is a simple yet very good gif available to make text in the Instgaram look amazing and stylish. One can underline something or write something interesting in break up to give the text a new look. So, various lines can be seen at LINE & LINES to include the same in the Instagram stories.
10Square & Rectangle
Basic shapes are loved by every Instagram user who updates their stories every day. The reason is that they give a new and cool look to any picture. So, if you need basic shape, then ‘square’ or ‘rectangle’ are great way to make your new post look different and impress your followers. They are simple to create and can be added as background theme for the pictures of videos.
Part 2 How to Create a GIF for Instagram
Posting an Instagram GIF is easy using an application for both iPhone and Android. So, let’s see one by one how to make gifs for instagram and post the same on the Instagram stories. To begin with:
01How to Post an Instagram GIF Using App for iPhone
When you are in need to post Gifs to instagram story then you have to take some essential steps. These steps have been taken by GIPHY as well as from GIF stickers that you can add to your content at social media sites like Instagram.
● Install the Giphy app on your iPhone and open it.
● Look for the desired GIF which you want to include in your story on GIPHY.
● Click on the paper-airplane icon located under the GIF.
● Tap the Instagram button. A permission screen will open asking for giving permission for access to open Instagram.
● After giving permission, the selected GIF will open inside Instagram. Select Feed to post the selected GIF to your Instagram feed. This will be a new post over the Instagram.
● In case you need to edit of add filters, you can go with that by moving on to Next.
● Further tap next again to add caption and hash tags if required.
● After creation of GIF post is over, tap Share.
Here you will get more benefits like increasing and decreasing the size of images. Instagram story gif is an issue that is to be done for every kind of need and all the Instagram stories. By good fortune GIPHY has many tons of GIFs that can be selected for this kind of conditions. You just need a special kind of flair when you are making texts for your GIF interface. Even then you have to adopt gif instagram story aesthetic so that your task of doing any promotion on social media sites could become an easy one.
02How to Post an Instagram GIF Using App for Android
Gif can be posted easily using GIPHY Cam for Android. Here you can even open the app of instagram media with the help of an android. The simple steps are:
Save the GIF to the Download folder which you want to share to the Instagram.
Tap to the camera roll after opening GIPHY CAM.
Choose the GIF and move to the next button.
Let the GIF convert and then go to Instagram and share.
Part 3 How to Convert GIF to Video for Instagram
A gif can be converted into video by using various applications. Converting Gif by adding some filter, light effects and sound into video make it more attractive for Instagram stories. One can try Filmora to convert gif to video for instagram in just simple steps.
01**Wondershare Filmora Video Editor ** –A GIF resource
Wondershare Filmora - Best Video Editor for Mac/Windows
5,481,435 people have downloaded it.
Build unique custom animations without breaking a sweat.
Focus on creating epic stories and leave the details to Filmora’s auto features.
Start a creative adventure with drag & drop effects and endless possibilities.
Filmora simplifies advanced features to save you time and effort.
Filmora cuts out repetition so you can move on to your next creative breakthrough.
There are many applications and web tools that offer to convert beautiful gifs to videos and sharing the same over Instagram stories. Filmora V11 is one of the best video editor applications which assist the users to convert gif to video with minimal effort. It is a user-friendly tool that has media editing features. It allows the users to enhance their video with wide variety of sound, light effects, and beautiful gifs and share them to their Instagram stories.
For creating video or converting gifs to video, Filmora V11 can be used. It makes easy for the beginners to convert gift into videos in a few simple steps. Filmora V11 app is required to be installed on the system and media files can be imported there. The best thing is that it supports most of the video formats such as MP4, AVI, H261, FLV, MKV, 3GP, MOV, MPEG, VOB, RMVB, M4V, TS, M2TS, WMV, ASF and many more. To customize gifs and then converting it to video, the Filmora Meme maker can be used. Templates and captions are also found at the application.
02Steps to convert GIF to video for Instagram
● The first step is to download the application Filmora at your computer and open it. Choose the GIF file from the Filmora file.
● Do the necessary editing. This including adding some text, colors and effects to the gif.
● After adding all the effects and editing, tap to create a video from it. Export the same in MP4 format and save it over the mobile. The application will convert the gift into video and is ready for uploading.
● At last in the uploading process, open the Instagram application, select the video from the gallery.
● Captions or description can be added and then uploaded.
● Key Takeaways from This Episode →
● Instagram story gifs are concerned with mainstream creation for graphics interchange format. With these formats you can make the best and interesting story. So, to make gif, maximum use of GIPHY can be made to make your work look to be the best promotional one. Some of the best gifs can be searched by tapping keywords like Bohemian, Hanmade, LINE & LINES and Square & Rectangle
● Posting gif can be understood in just simple steps. If you desire to know how to create gifs for instagram, then you can explore various applications for both iPhone and Android. You may even search well on your GIF and then select the desired gif that can be added well to your instagram story.
● Instagram stories can be made more attractive by converting gif into videos. The same can be done with ease with some user friendly and high tech applications. Filmora can be the best software application for doing the magic over Instagram stories. It can be used to turn gif into videos or videos to gif. So, give your creativity a new height with some good application and impress your followers.
Learn About Lip-Syncing in Animation
Learn all about Lip-Syncing in Animation
An easy yet powerful editor
Numerous effects to choose from
Detailed tutorials provided by the official channel
Lip syncing is one of the important parts of animations that need to be done perfectly. As children we have all enjoyed the special way in which Donald Duck or Mickey Mouse used to talk in cartoons, this is all because of the perfect lip-syncing.

Lip-sync animation tutorial are available that can assist you with the task.
In this article
01 [What is lip-syncing and its importance in animations?](#Part 1)
02 [Key factors to consider while lip-syncing in animations.](#Part 2)
03 [Best software for lip-syncing animations.](#Part 3)
04 [Best all-in-one video editing software for creating impressive animations.](#Part 4)
Part 1 What is Lip-syncing and Its Importance in Animations
In the simplest terms, lip-syncing can be termed as the process and way in which the sound is synchronized to the characters in animation. It is lip-syncing which brings life to the characters and makes them look talking. The process of lip-syncing in animations includes the dialogues and the mouth charts. The dialogues are broken into the phonetic syllables and the frames required for these syllables are then accessed.
Animations are moving and talking images and liveliness come from the dialogues that they speak. So, to make these talks appear real, flawless lip-syncing is very important.
Part 2 Key Factors to Consider While Lip-syncing in Animations
To make the lip-syncing in your animation look perfect several factors need to be taken care of. Some of these important ones are enlisted below.
01 Perfect Match of the Keyframes
The keyframes for the shapes of the words phrase by phrase needs to be perfect to make it look right. The right lip sync will have the correct timings from the mouth open to the mouth close.
02 Adding Body Language
To make the characters in your animations look real and lively, adding gestures and body language will play a huge role. Moreover, lip-syncing along with facial expressions will add to the overall richness of the animations.
03 Watch Yourself or Record Sample Videos
To get the correct lip-syncing for your animations, you can first try and practice by using a mirror or recording some trial videos. In these videos, you can speak and observe the jaw motion.
04 Use Blending
The technique of blending can also be used where the focus is on the most important shape of the mouth rather than each syllable. These shapes can then be blended and used in different ways and combinations.
05 Emphasize Eyes
Eyes need special focus as they can be used for expressing several emotions. Especially during the close-up shots in animations, a person looks at the eyes before the rest of the face.
06 Use the Apt Voice
No matter how perfectly the lip-syncing is done, it will not look good if the voice does not match the characters in your animations. So, make sure to select the voice that matches the looks and the personality of your characters.
Part 3 Best Software for Lip-syncing Animations
Lip sync in animations has become an easier and hassle-free task thanks to the advanced technology and several software and programs available. These 2D and 3D animation-supported tools allow syncing the mouth of the animated character with the dialogues and audio tracks. A few widely used tools for the task are enlisted below.
01 Anime Studio
This is a Windows and Mac-based professional software that supports multiple advanced functions like bone-rigging, automatic image tracing, integrated lip-synching, motion tracking, 3D shape design, character wizard, and many more. Using the vector-based tools of the software, you can add drawings and images for creating customized characters. There is a built-in character wizard that can be used for quick drawing and rigging the characters from the starting. Anime Studio allows recording the sound clip and then these can be synced to the animated characters. Several pre-set props, scenes, videos, stock audio, and characters are also available to choose from.

02 DAZ Studio
This is free-to-use software that can create impressive animations using multiple advanced features. The simple interface and functioning of the software make it apt even for users who have no prior experience in animations. The lip-sync feature of the software can be used to add audio to the created animations. Additional functions include morphing, adjusting different camera angles, plug-ins with advanced capabilities, and more.

03 Crazy Talk
To create impressive animations and add lip-syncing this is one of the popularly used tools. Quick to download, the software allows adding images and pictures to the tool, and then the head, mouth, and eye movement can be added along with lip-synced audio for creating impressive animations. The built-in timeline of the software offers you complete control over the animations, audio, and other parameters. Detailed customization options are supported including the teeth in the mouth of the character. The software is available for Windows and Mac systems.

04 Toon Boom Studio
To help you create rich animations for movies, games, learning, social media sites and any other purpose this is an apt tool to use. The software has a basic version for beginners while an advanced version for professionals. You can import media files in an array of formats like AI, JPEG, TGA, GIF, and others to create animations of your choice. Audio files in WAV, AIFF, and MP3 formats can be added to the created animations and the lip-sync analyzer tool can be used for that perfect syncing. Additional features include zoom-in, zoom-out, skeleton effect, support to the 3D background, multiple formats for exporting files, and more.

05 Crazy Talk Animator
This 2D animation tool can be used for creating rich animations by adding motion and different effects to your images. You can also create landscapes and scenes to further enhance the overall clip. Lip-sync to the animations is supported by the tool and you can even create marks for facial expression and use them to morph. Several tutorials and web resources are available for a better understanding of the tool and its functioning.

Adobe is also a good tool for all types of animation requirements and you can also check the adobe animate lip sync tutorial for your lip-syncing task.
Key Takeaways from This Episode
● Lip-syncing is an important and inevitable part of animations. Lip-syncing brings richness and liveliness to the clips.
● An array of tools and software are available that can help you effortlessly lip-sync animations.
● or all types of video editing needs and for creating animations, Wondershare Filmora works as an excellent all-in-one software.
Lip syncing is one of the important parts of animations that need to be done perfectly. As children we have all enjoyed the special way in which Donald Duck or Mickey Mouse used to talk in cartoons, this is all because of the perfect lip-syncing.
Lip-sync animation tutorial are available that can assist you with the task.
In this article
01 [What is lip-syncing and its importance in animations?](#Part 1)
02 [Key factors to consider while lip-syncing in animations.](#Part 2)
03 [Best software for lip-syncing animations.](#Part 3)
04 [Best all-in-one video editing software for creating impressive animations.](#Part 4)
Part 1 What is Lip-syncing and Its Importance in Animations
In the simplest terms, lip-syncing can be termed as the process and way in which the sound is synchronized to the characters in animation. It is lip-syncing which brings life to the characters and makes them look talking. The process of lip-syncing in animations includes the dialogues and the mouth charts. The dialogues are broken into the phonetic syllables and the frames required for these syllables are then accessed.
Animations are moving and talking images and liveliness come from the dialogues that they speak. So, to make these talks appear real, flawless lip-syncing is very important.
Part 2 Key Factors to Consider While Lip-syncing in Animations
To make the lip-syncing in your animation look perfect several factors need to be taken care of. Some of these important ones are enlisted below.
01 Perfect Match of the Keyframes
The keyframes for the shapes of the words phrase by phrase needs to be perfect to make it look right. The right lip sync will have the correct timings from the mouth open to the mouth close.
02 Adding Body Language
To make the characters in your animations look real and lively, adding gestures and body language will play a huge role. Moreover, lip-syncing along with facial expressions will add to the overall richness of the animations.
03 Watch Yourself or Record Sample Videos
To get the correct lip-syncing for your animations, you can first try and practice by using a mirror or recording some trial videos. In these videos, you can speak and observe the jaw motion.
04 Use Blending
The technique of blending can also be used where the focus is on the most important shape of the mouth rather than each syllable. These shapes can then be blended and used in different ways and combinations.
05 Emphasize Eyes
Eyes need special focus as they can be used for expressing several emotions. Especially during the close-up shots in animations, a person looks at the eyes before the rest of the face.
06 Use the Apt Voice
No matter how perfectly the lip-syncing is done, it will not look good if the voice does not match the characters in your animations. So, make sure to select the voice that matches the looks and the personality of your characters.
Part 3 Best Software for Lip-syncing Animations
Lip sync in animations has become an easier and hassle-free task thanks to the advanced technology and several software and programs available. These 2D and 3D animation-supported tools allow syncing the mouth of the animated character with the dialogues and audio tracks. A few widely used tools for the task are enlisted below.
01 Anime Studio
This is a Windows and Mac-based professional software that supports multiple advanced functions like bone-rigging, automatic image tracing, integrated lip-synching, motion tracking, 3D shape design, character wizard, and many more. Using the vector-based tools of the software, you can add drawings and images for creating customized characters. There is a built-in character wizard that can be used for quick drawing and rigging the characters from the starting. Anime Studio allows recording the sound clip and then these can be synced to the animated characters. Several pre-set props, scenes, videos, stock audio, and characters are also available to choose from.
02 DAZ Studio
This is free-to-use software that can create impressive animations using multiple advanced features. The simple interface and functioning of the software make it apt even for users who have no prior experience in animations. The lip-sync feature of the software can be used to add audio to the created animations. Additional functions include morphing, adjusting different camera angles, plug-ins with advanced capabilities, and more.
03 Crazy Talk
To create impressive animations and add lip-syncing this is one of the popularly used tools. Quick to download, the software allows adding images and pictures to the tool, and then the head, mouth, and eye movement can be added along with lip-synced audio for creating impressive animations. The built-in timeline of the software offers you complete control over the animations, audio, and other parameters. Detailed customization options are supported including the teeth in the mouth of the character. The software is available for Windows and Mac systems.
04 Toon Boom Studio
To help you create rich animations for movies, games, learning, social media sites and any other purpose this is an apt tool to use. The software has a basic version for beginners while an advanced version for professionals. You can import media files in an array of formats like AI, JPEG, TGA, GIF, and others to create animations of your choice. Audio files in WAV, AIFF, and MP3 formats can be added to the created animations and the lip-sync analyzer tool can be used for that perfect syncing. Additional features include zoom-in, zoom-out, skeleton effect, support to the 3D background, multiple formats for exporting files, and more.
05 Crazy Talk Animator
This 2D animation tool can be used for creating rich animations by adding motion and different effects to your images. You can also create landscapes and scenes to further enhance the overall clip. Lip-sync to the animations is supported by the tool and you can even create marks for facial expression and use them to morph. Several tutorials and web resources are available for a better understanding of the tool and its functioning.
Adobe is also a good tool for all types of animation requirements and you can also check the adobe animate lip sync tutorial for your lip-syncing task.
Key Takeaways from This Episode
● Lip-syncing is an important and inevitable part of animations. Lip-syncing brings richness and liveliness to the clips.
● An array of tools and software are available that can help you effortlessly lip-sync animations.
● or all types of video editing needs and for creating animations, Wondershare Filmora works as an excellent all-in-one software.
Best 10 Popular Cartoons You Forgot Existed
Top 10 Popular Cartoons You Forgot Existed
An easy yet powerful editor
Numerous effects to choose from
Detailed tutorials provided by the official channel
There has been an advancement in the cartoon since the last publication made by “Paste” (a 5,800-word short story by Henry James). However, traditional cable networks have created exciting and new worlds and characters. Various streaming platforms like YouTube have allowed different creators to draw cartoon videos and publish them as they want. It has long been said that cartoons are specifically made for kids to enjoy on Saturday morning, but this is no longer the case as adults now enjoy watching cartoons in their free time.
Have you ever thought, “I want to draw myself as a cartoon“ and turn it into animation? Then you must get inspired. Cartoons now range from more complex characters. Many employ wittier humor and more profound stories to engage people of any age, giving them the ability to tell powerful, relatable, and hilarious stories within the realm of animation. As a result of the dramatic change in the cartoon world, we will be writing out top popular cartoons you may have forgotten that ever existed. This list will be on influence, relatability, and influence when they lived.
In this article
01 [Do You Remember the Very Popular Simpsons?](#Part 1)
02 [The 10 Best Cartoon Shows Since the Simpsons](#Part 2)
Part 1 Do You Remember the Very Popular Simpsons?
The Simpsons is an American animated cartoonist Matt Groening created for the Fox Broadcasting Company. The Simpsons began in 1987 as a short cartoon shot on The Tracey Ullman Show and received acclamation throughout its early seasons in the 1990s, which are generally considered a “golden age.”
The popular cartoon series is a satirical depiction of American life epitomized by the Simpson family, consisting of Bart, Homer, Lisa, Marge, and Maggie. In addition, the show is set to run on television, and the human condition and the fictional town of Springfield parody American culture and society.
However, the Simpsons is a combined production by 20th Television and Gracie Films. Also, on March 3, 2021, the series got renewed for seasons 33 and 34, with 22 episodes for each. Thus, increasing the number of episodes from 706 to 750. Furthermore, its thirty-third (33rd) season came on September 26, 2021.
Before now, the Simpsons was the longest-running American animated cartoon series, an American sitcom, and American scripted primetime television series awarded in terms of seasons and number of episodes.
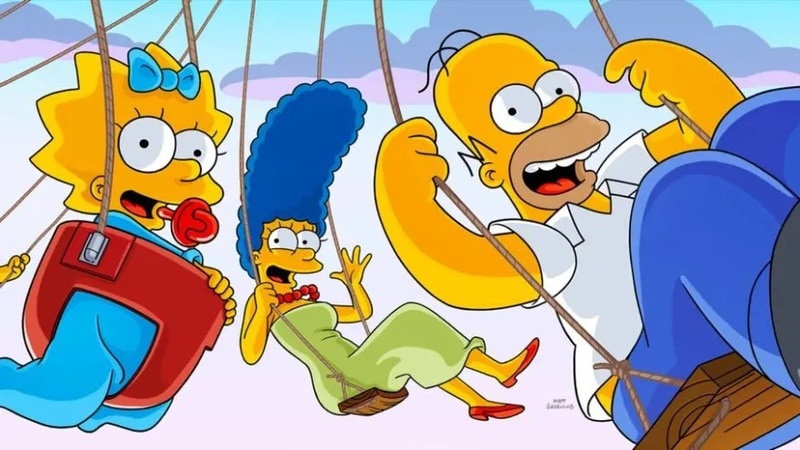
Part 2 The 10 Best Cartoon Shows Since the Simpsons
You can decide to learn to draw your cartoons or draw yourself as a cartoon to create an animation for TV just like the Simpsons. However, if you are looking for the best tool to help you animate your cartoon much more manageable, we recommend using Wondershare Filmora Video Editor .
For Win 7 or later (64-bit)
For macOS 10.12 or later
Wondershare Filmora
Get started easily with Filmora’s powerful performance, intuitive interface, and countless effects!
Try It Free Try It Free Try It Free Learn More >
Filmora platform offers you tons of materials for learning to draw cartoons, and also it has a keyframing feature that allows you to animate your cartoon with ease.
However, here are the ten best cartoon shows that have existed since the Simpsons:
01Futurama
This popular cartoon series, first released on March 28, 1999, is a cartoon series about utopian or dystopian. The central concept of this series is that it dares to imagine a future that’s pretty similar to the present using a bunch of crazy technology and space travel. Aside from being pretty, it is also hilarious.
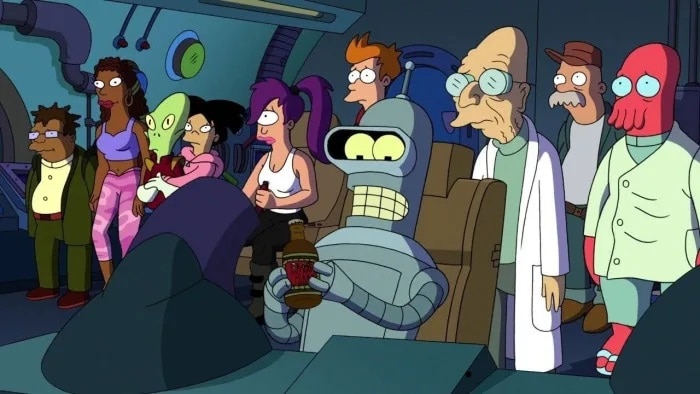
02The Critic
This cartoon series was first created in 1994 by the Simpson’s writers Al Jean and Mike Reiss. This cartoon has ramped up its predecessor’s non sequitur and sight-gag humor featuring Jon Lovitz’s Jay Sherman, an unfortunate portmanteau of Gene Siskel and Roger Ebert.
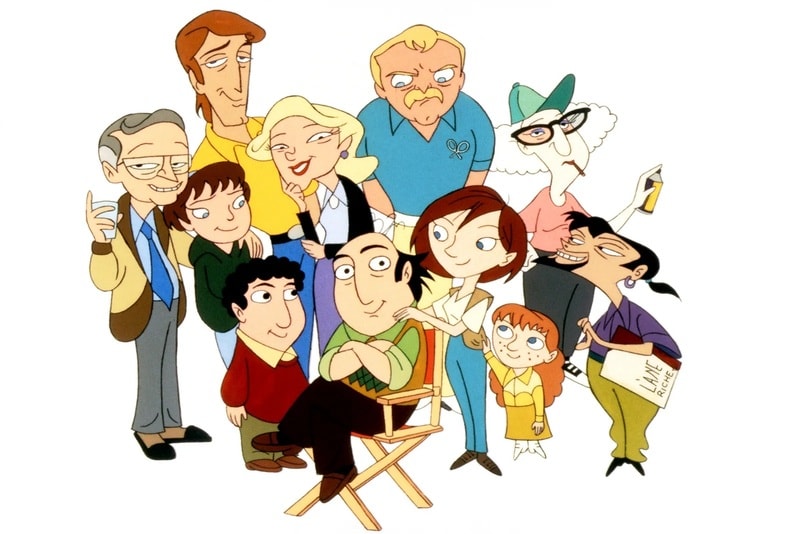
03Bojack Horseman
Bojack Horseman is a dumb cartoon character series first created on August 22, 2014. However, four (4) days later, the series was renewed for a second season, released on July 17, 2015. It is often a searing portrait of addiction, failure, depression, etc., as humans talk to a horse.
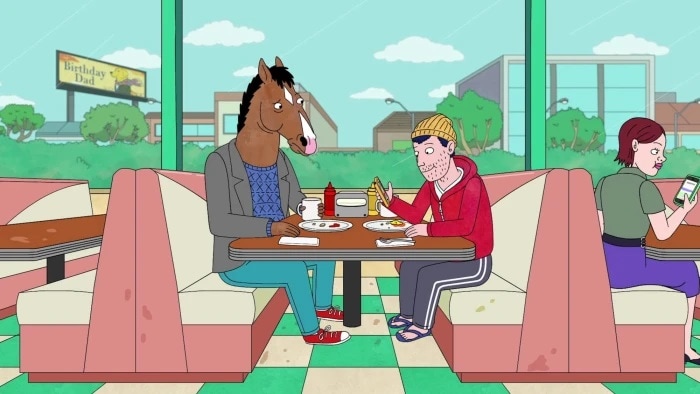
04Family Guy
Family Guy, the snoopy cartoon series, was first created on January 31, 1999, which goes for anything for a laugh style. However, you might not like the Griffin family or the other residents of Quahog, but you have to admit that the show stumbles on a great joke.
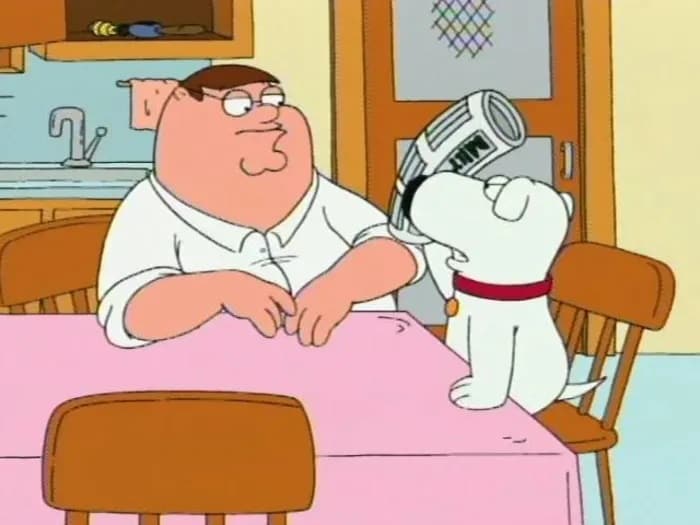
05South Park
South Park debuted with “Cartman Gets an Anal Probe, “ first created on August 13, 1997. Although it started with some cheap animations, it has become one of the iconic animated shows.

06Batman: The Animated Series
The Batman animated cartoon series, created on September 5, 1992, is a favorite for many people, although it is more comedy than an animated drama.
07Gravity Falls
This cartoon animated series was first created on June 15, 2012, and is a mystery story about a few kids with a supernatural bend.
08Teenage Mutant Ninja Turtles
This popular cartoon animated series was first created in 1983 by cartoonists Kevin Eastman and Peter Laird. This cartoon series is the definitive version, brightly colored and fun and fluffy.
09Doug
This cartoon animated series was first created on March 26, 1999, by Jim Jinkins and produced by Jumbo Pictures. It was one of the first animated shows on Nickelodeon before moving to Disney pictures. However, this show is creative and down-to-earth at the same time.

10Hey Arnold
This cartoon animated series came in on October 7, 1996. This show was the second after the first wave of the Nickelodeon show. It was the best of the bunch, and I liked the evolved version of “Doug.”
1
● Ending Thoughts →
● Aside from the list of popular cartoons mentioned in this article, you can also pick the snoopy cartoonswhen talking about comics that once existed.
● Addionally, you can also learn drawing cartoon videos and turn them into animation to publish in TV series.
● Finally, this article also emphasizes Fimora as the best editing tool you can choose from when you want to transform your cartoon drawing for class 6 into an animation.
There has been an advancement in the cartoon since the last publication made by “Paste” (a 5,800-word short story by Henry James). However, traditional cable networks have created exciting and new worlds and characters. Various streaming platforms like YouTube have allowed different creators to draw cartoon videos and publish them as they want. It has long been said that cartoons are specifically made for kids to enjoy on Saturday morning, but this is no longer the case as adults now enjoy watching cartoons in their free time.
Have you ever thought, “I want to draw myself as a cartoon“ and turn it into animation? Then you must get inspired. Cartoons now range from more complex characters. Many employ wittier humor and more profound stories to engage people of any age, giving them the ability to tell powerful, relatable, and hilarious stories within the realm of animation. As a result of the dramatic change in the cartoon world, we will be writing out top popular cartoons you may have forgotten that ever existed. This list will be on influence, relatability, and influence when they lived.
In this article
01 [Do You Remember the Very Popular Simpsons?](#Part 1)
02 [The 10 Best Cartoon Shows Since the Simpsons](#Part 2)
Part 1 Do You Remember the Very Popular Simpsons?
The Simpsons is an American animated cartoonist Matt Groening created for the Fox Broadcasting Company. The Simpsons began in 1987 as a short cartoon shot on The Tracey Ullman Show and received acclamation throughout its early seasons in the 1990s, which are generally considered a “golden age.”
The popular cartoon series is a satirical depiction of American life epitomized by the Simpson family, consisting of Bart, Homer, Lisa, Marge, and Maggie. In addition, the show is set to run on television, and the human condition and the fictional town of Springfield parody American culture and society.
However, the Simpsons is a combined production by 20th Television and Gracie Films. Also, on March 3, 2021, the series got renewed for seasons 33 and 34, with 22 episodes for each. Thus, increasing the number of episodes from 706 to 750. Furthermore, its thirty-third (33rd) season came on September 26, 2021.
Before now, the Simpsons was the longest-running American animated cartoon series, an American sitcom, and American scripted primetime television series awarded in terms of seasons and number of episodes.
Part 2 The 10 Best Cartoon Shows Since the Simpsons
You can decide to learn to draw your cartoons or draw yourself as a cartoon to create an animation for TV just like the Simpsons. However, if you are looking for the best tool to help you animate your cartoon much more manageable, we recommend using Wondershare Filmora Video Editor .
For Win 7 or later (64-bit)
For macOS 10.12 or later
Wondershare Filmora
Get started easily with Filmora’s powerful performance, intuitive interface, and countless effects!
Try It Free Try It Free Try It Free Learn More >
Filmora platform offers you tons of materials for learning to draw cartoons, and also it has a keyframing feature that allows you to animate your cartoon with ease.
However, here are the ten best cartoon shows that have existed since the Simpsons:
01Futurama
This popular cartoon series, first released on March 28, 1999, is a cartoon series about utopian or dystopian. The central concept of this series is that it dares to imagine a future that’s pretty similar to the present using a bunch of crazy technology and space travel. Aside from being pretty, it is also hilarious.
02The Critic
This cartoon series was first created in 1994 by the Simpson’s writers Al Jean and Mike Reiss. This cartoon has ramped up its predecessor’s non sequitur and sight-gag humor featuring Jon Lovitz’s Jay Sherman, an unfortunate portmanteau of Gene Siskel and Roger Ebert.
03Bojack Horseman
Bojack Horseman is a dumb cartoon character series first created on August 22, 2014. However, four (4) days later, the series was renewed for a second season, released on July 17, 2015. It is often a searing portrait of addiction, failure, depression, etc., as humans talk to a horse.
04Family Guy
Family Guy, the snoopy cartoon series, was first created on January 31, 1999, which goes for anything for a laugh style. However, you might not like the Griffin family or the other residents of Quahog, but you have to admit that the show stumbles on a great joke.
05South Park
South Park debuted with “Cartman Gets an Anal Probe, “ first created on August 13, 1997. Although it started with some cheap animations, it has become one of the iconic animated shows.
06Batman: The Animated Series
The Batman animated cartoon series, created on September 5, 1992, is a favorite for many people, although it is more comedy than an animated drama.
07Gravity Falls
This cartoon animated series was first created on June 15, 2012, and is a mystery story about a few kids with a supernatural bend.
08Teenage Mutant Ninja Turtles
This popular cartoon animated series was first created in 1983 by cartoonists Kevin Eastman and Peter Laird. This cartoon series is the definitive version, brightly colored and fun and fluffy.
09Doug
This cartoon animated series was first created on March 26, 1999, by Jim Jinkins and produced by Jumbo Pictures. It was one of the first animated shows on Nickelodeon before moving to Disney pictures. However, this show is creative and down-to-earth at the same time.
10Hey Arnold
This cartoon animated series came in on October 7, 1996. This show was the second after the first wave of the Nickelodeon show. It was the best of the bunch, and I liked the evolved version of “Doug.”
1
● Ending Thoughts →
● Aside from the list of popular cartoons mentioned in this article, you can also pick the snoopy cartoonswhen talking about comics that once existed.
● Addionally, you can also learn drawing cartoon videos and turn them into animation to publish in TV series.
● Finally, this article also emphasizes Fimora as the best editing tool you can choose from when you want to transform your cartoon drawing for class 6 into an animation.
Apps to Animate Still Pictures
Apps to Animate Still Pictures Which Could Make Your Pictures Become Internet Sensation
An easy yet powerful editor
Numerous effects to choose from
Detailed tutorials provided by the official channel
Now, it is a question of what to do with all those still photos lying in your phone. You can be pretty certain that you won’t be retiring from clicking images anytime soon. A tip to help make posting images more interesting would be using apps to animate your photos.
You can also find an app that animates your face specifically, which is great for instagram content and has a greater chance of getting reactions or comments. So without further to do let’s get animating.
In this article
01 [Review of General Methods: Can You Animate Still Pictures?](#Part 1)
02 [10 Best apps to animate still photos on Android & iOS](#Part 2)
03 [Additional Extension: 5 Apps to Animate Old Photos](#Part 3)
Part 1 Review of General Methods: Can You Animate Still Pictures?
It’s pretty obvious that you can! These days you can do whatever you want online so animating still pictures should be a piece of cake if you know-how.
A video is basically an entire collage of moving pictures. So if you can cut out pictures from a video why not turn still pictures into animations.
There are a number of ways you can use to animate still images →
● Videos are multiple pictures that move at a frame rate. Make short copies of a video by cutting out the essential moments and playing them in a loop.
● Add and play video animation elements over a picture. With the right software, this task is as easy as copy-pasting over another image.
● Apply an animated 3D image with a transparent background over another image. Remember, the bigger the element the closer it is. So size is directly translated as distance.
● You can use multiple filters and effects on an image with an animated portrait app. Find out what app you can use further on in this article.
● Turn an image into a GIF. No matter its small size and cartoonish style, GIF animation has a very wide appeal as online content.
Part 2 10 Best apps to animate still photos on Android & iOS
01GIPHY
Giphy is the largest internet catalog for GIF files, clips & stickers. No matter if it is a scene from a movie or an animation you have watched somewhere, using this application you can easily find, save & share or simply create something new.
Price: Free
Pros
● Quickly turns still photos into an animation.
● Easily share your work through all social media channels.
Cons
● Search tags are varied; you may need to search using unlikely words to get desired results.
Applicable System: Android
02GIPHY
One of the best ways to turn your photos & videos into GIFs is using ImgPlay. It has a clearer interface making it easy to use. Imgplay comes with paid- premium and non-paid version making it suitable for personal & professional application.
Price: Pro $4.99.
Pros
● It is not packed with unnecessary features.
Cons
● ImgPlay slaps a watermark on all its non-premium versions.
Applicable System: Android & iOS.
03Loopsie
The best Part is that Loopsie provides spectacular cinematographic effects to your animated stills. Stabilization algorithm efficiently removes shaking effects & blurs.
Price: Free.
Pros
● User friendly UI
● Easy to share on social media platforms.
Cons
● Paid version is a bit pricey.
Applicable System: Only on iOS.
04StoryZ
Looking for ways to create animated visuals form still images? This is where your quest ends. An advanced editing platform that offers overlays, movement & color filters. Banner Ads & watermarks can be removed by paying a small subscription fee.
Price: Free version available. Premium costs INR 789 a year.
Pros
● Double exposure effect combines video overlay & static imagery.
Cons
● Contains Ad & watermark.
Applicable System: Android.
05Animate Me
Animate Me offers you a package of postcards & greeting snapshots that you can animate according to your need. The paid subscription will get you updated sounds & effects every now & then.
Price: Free.
Pros
● Easy to use & beginners friendly.
Cons
● Editing features & tools are limited.
Applicable System: Windows**.**
06Movepic
Create animated stills, GIFs, live-wallpapers all with Movepic. It allows you to animate simply anything by drawing a path. You can also adjust the speed of animation manually.
Price: Free.
Pros
● Animate in a light motion.
● Easy to use.
Cons
● Free version leaves a watermark on images.
Applicable System: Android & iOS.
07Pixaloop
Pixaloop is a fun app packed with significant animation & editing features. 100% free to use software delivers live animated images in a few clicks. User friendly interface edits images using powerful & precise animation tools.
Price- Free.
Pros
● Offers all the necessary features & core tools.
● Provides accuracy & flexibility to the users.
Cons
● The animation process is a bit time consuming.
Applicable System: Android & iOS.
08Zoetropic
Zoetropic has a combination of 3D tools and Camera FX to animate your images. User friendly interface allows you to mask the still areas if you wish to keep it still.
Price: $199 (Pro)
Pros
● Easily customize motion areas.
● Apply overlays & audios.
Cons
● App price is higher than similar available apps.
Applicable System: Android & iOS.
9Motionleap
It is one of the most top reviewed apps on Playstore related to animating still photos. It has several features like programming directional cues, freeze portions of your photo or even apply filters.
Price: Free version. Pro version; $3.50/month, $18/year and $55 lifetime.
Pros
● Its free version does not apply watermark.
● Intuitive Interface.
Cons
● Best features are locked in Pro version.
Applicable System: Android & iOS.
Part 3 Additional Extension: 5 Apps to Animate Old Photos
It can be unanimously agreed upon that people have been storing photos for decades as a means of preserving memories. We don’t get much opportunity to meet familiar faces too often so why not just try and animate still images of relatives. Now we already know how we can start animating images on apps but restoring original images maybe a tad more complicated than that. This time a bit of the animation is dependent on the physical state of the picture so be sure it’s in mint condition.
These photos can be restored or manipulated digitally with the help of smart AI. We have listed down some of the apps to animate old photos and reconstruct faces;
01Photos Revive
You can add colour to old worn out photos and make them look more realistic in terms of tonal colorization using artificial intelligence. The app also asks you recollect any details of the photo that you might remember in terms of the image.
Applicable OS: iOS only.

02Remini
After going through several improvements and upgrades, you can use the app Remini to confidently restore low resolution images that are either pixelated, blurred or damaged into High Definition images. This app has already been used by users to process a hundred million photos.
Applicable OS: Android 1.7.2 or higher, & iOS 9.3 or higher.

03Colorize
Another app that uses AI to add colorization to your old images. It is a popular animate your family photo app which has amazing other tools and filters to try out.
Applicable OS: Android and iOS.

04Deep Nostalgia
Using this app which has been innovated by the geology platform MyHeritage uses ai to add gestures to still images to evoke nostalgia in the users.
Applicable OS: Online.

04Google Photoscan
Google scanner is a futuristic app for restoring photos of the past. The app uses a smart scanning technology that provides several scans of the same photo automatically.
Applicable OS: Android or iOS.

Key Takeaways from This Episode
● Animating photos are a new way of reimagining still images into moving live content. There are many methods and approaches you can choose to animate your images.
● Some of them being video animations, transparent background elements, Filters and effects and of course GIFs.
● There are dozens of apps with built in smart artificial intelligence to help restore old photos or make short animations out of them. Some of them are applicable for desktops while others available both on Android and iOS.
Now, it is a question of what to do with all those still photos lying in your phone. You can be pretty certain that you won’t be retiring from clicking images anytime soon. A tip to help make posting images more interesting would be using apps to animate your photos.
You can also find an app that animates your face specifically, which is great for instagram content and has a greater chance of getting reactions or comments. So without further to do let’s get animating.
In this article
01 [Review of General Methods: Can You Animate Still Pictures?](#Part 1)
02 [10 Best apps to animate still photos on Android & iOS](#Part 2)
03 [Additional Extension: 5 Apps to Animate Old Photos](#Part 3)
Part 1 Review of General Methods: Can You Animate Still Pictures?
It’s pretty obvious that you can! These days you can do whatever you want online so animating still pictures should be a piece of cake if you know-how.
A video is basically an entire collage of moving pictures. So if you can cut out pictures from a video why not turn still pictures into animations.
There are a number of ways you can use to animate still images →
● Videos are multiple pictures that move at a frame rate. Make short copies of a video by cutting out the essential moments and playing them in a loop.
● Add and play video animation elements over a picture. With the right software, this task is as easy as copy-pasting over another image.
● Apply an animated 3D image with a transparent background over another image. Remember, the bigger the element the closer it is. So size is directly translated as distance.
● You can use multiple filters and effects on an image with an animated portrait app. Find out what app you can use further on in this article.
● Turn an image into a GIF. No matter its small size and cartoonish style, GIF animation has a very wide appeal as online content.
Part 2 10 Best apps to animate still photos on Android & iOS
01GIPHY
Giphy is the largest internet catalog for GIF files, clips & stickers. No matter if it is a scene from a movie or an animation you have watched somewhere, using this application you can easily find, save & share or simply create something new.
Price: Free
Pros
● Quickly turns still photos into an animation.
● Easily share your work through all social media channels.
Cons
● Search tags are varied; you may need to search using unlikely words to get desired results.
Applicable System: Android
02GIPHY
One of the best ways to turn your photos & videos into GIFs is using ImgPlay. It has a clearer interface making it easy to use. Imgplay comes with paid- premium and non-paid version making it suitable for personal & professional application.
Price: Pro $4.99.
Pros
● It is not packed with unnecessary features.
Cons
● ImgPlay slaps a watermark on all its non-premium versions.
Applicable System: Android & iOS.
03Loopsie
The best Part is that Loopsie provides spectacular cinematographic effects to your animated stills. Stabilization algorithm efficiently removes shaking effects & blurs.
Price: Free.
Pros
● User friendly UI
● Easy to share on social media platforms.
Cons
● Paid version is a bit pricey.
Applicable System: Only on iOS.
04StoryZ
Looking for ways to create animated visuals form still images? This is where your quest ends. An advanced editing platform that offers overlays, movement & color filters. Banner Ads & watermarks can be removed by paying a small subscription fee.
Price: Free version available. Premium costs INR 789 a year.
Pros
● Double exposure effect combines video overlay & static imagery.
Cons
● Contains Ad & watermark.
Applicable System: Android.
05Animate Me
Animate Me offers you a package of postcards & greeting snapshots that you can animate according to your need. The paid subscription will get you updated sounds & effects every now & then.
Price: Free.
Pros
● Easy to use & beginners friendly.
Cons
● Editing features & tools are limited.
Applicable System: Windows**.**
06Movepic
Create animated stills, GIFs, live-wallpapers all with Movepic. It allows you to animate simply anything by drawing a path. You can also adjust the speed of animation manually.
Price: Free.
Pros
● Animate in a light motion.
● Easy to use.
Cons
● Free version leaves a watermark on images.
Applicable System: Android & iOS.
07Pixaloop
Pixaloop is a fun app packed with significant animation & editing features. 100% free to use software delivers live animated images in a few clicks. User friendly interface edits images using powerful & precise animation tools.
Price- Free.
Pros
● Offers all the necessary features & core tools.
● Provides accuracy & flexibility to the users.
Cons
● The animation process is a bit time consuming.
Applicable System: Android & iOS.
08Zoetropic
Zoetropic has a combination of 3D tools and Camera FX to animate your images. User friendly interface allows you to mask the still areas if you wish to keep it still.
Price: $199 (Pro)
Pros
● Easily customize motion areas.
● Apply overlays & audios.
Cons
● App price is higher than similar available apps.
Applicable System: Android & iOS.
9Motionleap
It is one of the most top reviewed apps on Playstore related to animating still photos. It has several features like programming directional cues, freeze portions of your photo or even apply filters.
Price: Free version. Pro version; $3.50/month, $18/year and $55 lifetime.
Pros
● Its free version does not apply watermark.
● Intuitive Interface.
Cons
● Best features are locked in Pro version.
Applicable System: Android & iOS.
Part 3 Additional Extension: 5 Apps to Animate Old Photos
It can be unanimously agreed upon that people have been storing photos for decades as a means of preserving memories. We don’t get much opportunity to meet familiar faces too often so why not just try and animate still images of relatives. Now we already know how we can start animating images on apps but restoring original images maybe a tad more complicated than that. This time a bit of the animation is dependent on the physical state of the picture so be sure it’s in mint condition.
These photos can be restored or manipulated digitally with the help of smart AI. We have listed down some of the apps to animate old photos and reconstruct faces;
01Photos Revive
You can add colour to old worn out photos and make them look more realistic in terms of tonal colorization using artificial intelligence. The app also asks you recollect any details of the photo that you might remember in terms of the image.
Applicable OS: iOS only.
02Remini
After going through several improvements and upgrades, you can use the app Remini to confidently restore low resolution images that are either pixelated, blurred or damaged into High Definition images. This app has already been used by users to process a hundred million photos.
Applicable OS: Android 1.7.2 or higher, & iOS 9.3 or higher.
03Colorize
Another app that uses AI to add colorization to your old images. It is a popular animate your family photo app which has amazing other tools and filters to try out.
Applicable OS: Android and iOS.
04Deep Nostalgia
Using this app which has been innovated by the geology platform MyHeritage uses ai to add gestures to still images to evoke nostalgia in the users.
Applicable OS: Online.
04Google Photoscan
Google scanner is a futuristic app for restoring photos of the past. The app uses a smart scanning technology that provides several scans of the same photo automatically.
Applicable OS: Android or iOS.
Key Takeaways from This Episode
● Animating photos are a new way of reimagining still images into moving live content. There are many methods and approaches you can choose to animate your images.
● Some of them being video animations, transparent background elements, Filters and effects and of course GIFs.
● There are dozens of apps with built in smart artificial intelligence to help restore old photos or make short animations out of them. Some of them are applicable for desktops while others available both on Android and iOS.
How to Make Photo 3D Cartoon Online
How to Make My Photo 3D Cartoon Online
An easy yet powerful editor
Numerous effects to choose from
Detailed tutorials provided by the official channel
Animated pictures are picking up the pace on the list of the top trends since they are able to convey so much in a fraction of a second which normal pictures or videos are incapable of.
From creating vlogs to making your photos into a 3D cartoon online, everything is possible with the right software or app.
In this article
01 [3 Secrets to Creating an (amazing) Animated Video](#Part 1)
02 [Best 10 3D Photo Maker and Photo Animator Apps](#Part 2)
03 [How to Make Your Own Photo into Cartoon?](#Part 3)
Part 1 3 Secrets to Creating an (amazing) Animated Video
Animation is the perfect tool to boost any campaign. It is a medium of brand communication that has the potential to reach out to a wide variety of audiences. Most recently, photo animations like GIFs, cartooned pictures and motion graphic posters are becoming widely popular.

Marketers and content creators can take full advantage of online apps to develop amazing animated videos that would instantly grasp the viewer’s attention. Here are three secrets you should know about creating an amazing animated video:
Storytelling:
● It is easier to tell a story with moving pictures.
● They add a different level of visual charisma to the storytelling process.
● With the help of a few interesting and easy-to-use apps, you can create stunning cinematic images and establish your own unique style of storytelling.

Persuasive Call to Action:
● A call-to-action is a standard way of telling people what you want them to do such as making a purchase, downloading an e-book or registering for a subscription.
● It helps your audience if you guide them step-by-step with the help of images.
● Try out a combination of both written and animated graphics to boost your content’s persuasion.
● It is easier to convince people when they have the information laid out in front of their eyes.

Simplify the Complex:
● It helps if you imagine your audience like children who need a picture book to learn their lessons.
● It is easier to retain information when they are visually stimulating.
● Designing animated graphics is pretty easy when you understand the purpose behind it.
● Scrutinize your work to check if it is causing any hindrance in keeping up with the information.

Animating images can be a fun and engaging process. It only involves understanding the mindset of your target audience. This process need not be complicated. You can start out by converting your photos into 3D animations using a 3D animated photo maker.
Part 2 Best 10 3D Photo Maker and Photo Animator Apps 800
No. 1 LucidPix

Lucidpix permits you to explore your creative side in fun ways. An app that captures depth-enhanced pictures! Anyone with a smart device (mobile or tablet) can start creating 3D photos using lucidpix.
YouTube Product Demo Video ↓ ↓ ↓
| Name of maker | Size | Rating | Operating System |
|---|---|---|---|
| Lucid Inc. | 39 to 154 MB | 3.6/5 on playstore. | Android and iOS. |
Pros
Free download
User-friendly UI
Easily converts a regular photo into 3D
Cons
Contains Ads
Always offers & insists users to buy app
App is still under development
No. 2 Wigglegram

Wigglegram creates a single 3D image after combining multiple photographs. It turns all the captured photos into one single animated photo to make it look like a 3D image.
YouTube Product Demo Video ↓ ↓ ↓
| Name of maker | Size | Rating | Operating System |
|---|---|---|---|
| n4no | 8.7MB | 3.0/5 on Playstore | Android & iOS |
Pros
Direct social media share option.
Helps create reaction Gifs.
Super easy and fast 3D photo-making experience.
Cons
It doesn’t have good ratings.
App contains Ads.
App size is below 10MB.
No. 3 MotionLeap

Earlier branded as Pixaloop, Motionleap is a great option to animate still images. It also has cool features like animated rains, snow, butterfly & diamond.
YouTube Product Demo Video ↓ ↓ ↓
| Name of maker | Size | Rating | Operating System |
|---|---|---|---|
| Lightricks Ltd | 84 to 197 MB | 4.2/5 Playstore | iOS and Android |
Pros
Easy to use & accurate.
Elements opacity can be controlled.
Neat & clean effects, elements and overlays.
Cons
Better source photos are required.
Animation takes more time in comparison to other apps.
No. 4 Movepic

This super cool app offers effects that let you add glitches, flowing water and even a live sky to your images by just selecting the area you wish to apply the effects and is not that heavy to download.
YouTube Product Demo Video ↓ ↓ ↓
| Name of maker | Size | Rating | Operating System |
|---|---|---|---|
| ryzenrise | 48.16 MB | 4.3/5 on Playstore | Android and iOS (alternative) |
Pros
Is it a secure app to use?
Great for applying photo motion.
Regularly updated for bug fixes.
Cons
Regularly updated for bug fixes.
Lacks certain editing features
No. 5 Adobe Spark

Adobe Spark is a free-to-use photo animation software and has Adobe trust with it. It offers hundreds of fonts and templates for any type of photo though you would bear a watermark for the free version.
YouTube Product Demo Video ↓ ↓ ↓
| Name of maker | Size | Rating | Operating System |
|---|---|---|---|
| Adobe | 2.5 MB | 4.5/5 on Playstore | Android and iOS |
Pros
Hundreds of exclusive templates.
Intuitive interface best suited for beginners.
Easy to view dashboard.
Cons
Limited features in the free version.
Glitches in design.
No. 6 PopPic 6

PopPic 6 is a 3D camera with which you can directly click and apply a 3D filter effect to your flat images in order to make them pop.
YouTube Product Demo Video ↓ ↓ ↓
| Name of maker | Size | Rating | Operating System |
|---|---|---|---|
| PopPic 3D LLC | 36.9 MB | 4.7/5 on Applestore | iOS |
Pros
Ready to click 3D camera.
Dozens of filters.
Stylish and simple app design.
Cons
Limited functionality.
Low performance.
No. 7 ImgPlay

ImgPlay is kind of a cross between the features of Werble and Motionleap. There are hundreds of ready-to-use animations for your photos.
YouTube Product Demo Video ↓ ↓ ↓
| Name of maker | Size | Rating | Operating System |
|---|---|---|---|
| ImgBase Inc | 139 MB | 3.9/5 on Applestore | Android and iOS |
Pros
The convenient app to create easy GIFs.
Click, save and share feature.
Live photo features.
Cons
Limited editing options.
Not for professional graphics.
No. 8 GIPHY

Giphy is like a search engine for GIFs but also has an app version that lets you create amazing GIF animations that are ready for upload.
YouTube Product Demo Video ↓ ↓ ↓
| Name of maker | Size | Rating | Operating System |
|---|---|---|---|
| GIPHY | 100 MB | 4.8/5 on Playstore. | Android and iOS. |
Pros
Great for simple animations.
Create GIFs for promotions.
A vast range of options.
Cons
Limited color options.
Only suitable for GIF animations.
No. 9 Photo Bender

Photo Bender is more specifically designed for Android users. It is an app that enables you to warp your images against an animated effect. There are slight editing features also available in the app like bending and stretching an image.
YouTube Product Demo Video ↓ ↓ ↓
| Name of maker | Size | Rating | Operating System |
|---|---|---|---|
| Smart Photo Editor | 3.5 MB | 3.5/5 on Playstore | Android |
Pros
Export GIF, JPEG and PNG files.
Use simple editing features like coloring, stretching, and brushing.
Completely free to use.
Cons
Limited only to Android.
No. 10 Vimage 3D

An award-winning app for creating awe-inspiring animated images. Programmed to automatically detect what edits your images need. Does involve paying a premium.
YouTube Product Demo Video ↓ ↓ ↓
| Name of maker | Size | Rating | Operating System |
|---|---|---|---|
| Vimage | 21MB | 5.0/5 on Playstore | Android and iOS |
Pros
A large variety of filters, sounds and animated effects.
Max 2560p resolution.
Intuitive app interface.
Cons
Best features are limited to the premium version.
The free version comes with a non-removable watermark.
Part 3 How to Make Your Own Photo into Cartoon?
Prior to the digital age, creating a cartoon would require an entire team of professional animators such as in the house of Disney. A Cartoon animation meant sketching each frame by hand while maintaining continuity.
Now with the help of smart video effects, you can literally turn any image into a cartoon. These cartoonish animations can be both engaging and entertaining with some help from Wondershare Filmora .
Though we have enlisted 10 exceptional apps for ‘cartooning’ your images, Filmora gives you the flexibility which other apps don’t. You can create awesome animated videos online using Filmora while saving a ton of time.
You can use Filmora on both Mac and PC. Turn selfies, stock pictures, and snapshots into inspiring cartoon visuals using dozens of amazing filters and features on Filmora Pro.
Some of the exclusive features of Filmora Pro;
Audio Features →
● Noise Reduction.
● Audio Sync.
● Transition Audio.
● Compressor.
Animation Features →
● Motion Tracking.
● Ease In/Ease Out.
● Pan & Zoom
Movie Editing →
● Add Titles and Texts.
● Cinematic Lighting.
● Masking.
● Distortion and Wrapping.
Colouring Features →
● Colour Wheels
● Colour Correction
● Scopes.
By now you should know that Filmora Pro has a ton of customizable features that you can experiment with but this can be a bit confusing for beginners.
Key Takeaways from This Episode
● You can now turn your images into amazing animated cartoons using a wide range of 3d animated image-makers available online.
● Creating an exceptional animated video is a matter of storytelling, visual engagement and simplifying complex information.
● Use Filmora Pro to get your hands on professional editing software which is jam-packed with a bunch of exclusive features.
Animated pictures are picking up the pace on the list of the top trends since they are able to convey so much in a fraction of a second which normal pictures or videos are incapable of.
From creating vlogs to making your photos into a 3D cartoon online, everything is possible with the right software or app.
In this article
01 [3 Secrets to Creating an (amazing) Animated Video](#Part 1)
02 [Best 10 3D Photo Maker and Photo Animator Apps](#Part 2)
03 [How to Make Your Own Photo into Cartoon?](#Part 3)
Part 1 3 Secrets to Creating an (amazing) Animated Video
Animation is the perfect tool to boost any campaign. It is a medium of brand communication that has the potential to reach out to a wide variety of audiences. Most recently, photo animations like GIFs, cartooned pictures and motion graphic posters are becoming widely popular.
Marketers and content creators can take full advantage of online apps to develop amazing animated videos that would instantly grasp the viewer’s attention. Here are three secrets you should know about creating an amazing animated video:
Storytelling:
● It is easier to tell a story with moving pictures.
● They add a different level of visual charisma to the storytelling process.
● With the help of a few interesting and easy-to-use apps, you can create stunning cinematic images and establish your own unique style of storytelling.
Persuasive Call to Action:
● A call-to-action is a standard way of telling people what you want them to do such as making a purchase, downloading an e-book or registering for a subscription.
● It helps your audience if you guide them step-by-step with the help of images.
● Try out a combination of both written and animated graphics to boost your content’s persuasion.
● It is easier to convince people when they have the information laid out in front of their eyes.
Simplify the Complex:
● It helps if you imagine your audience like children who need a picture book to learn their lessons.
● It is easier to retain information when they are visually stimulating.
● Designing animated graphics is pretty easy when you understand the purpose behind it.
● Scrutinize your work to check if it is causing any hindrance in keeping up with the information.
Animating images can be a fun and engaging process. It only involves understanding the mindset of your target audience. This process need not be complicated. You can start out by converting your photos into 3D animations using a 3D animated photo maker.
Part 2 Best 10 3D Photo Maker and Photo Animator Apps 800
No. 1 LucidPix
Lucidpix permits you to explore your creative side in fun ways. An app that captures depth-enhanced pictures! Anyone with a smart device (mobile or tablet) can start creating 3D photos using lucidpix.
YouTube Product Demo Video ↓ ↓ ↓
| Name of maker | Size | Rating | Operating System |
|---|---|---|---|
| Lucid Inc. | 39 to 154 MB | 3.6/5 on playstore. | Android and iOS. |
Pros
Free download
User-friendly UI
Easily converts a regular photo into 3D
Cons
Contains Ads
Always offers & insists users to buy app
App is still under development
No. 2 Wigglegram
Wigglegram creates a single 3D image after combining multiple photographs. It turns all the captured photos into one single animated photo to make it look like a 3D image.
YouTube Product Demo Video ↓ ↓ ↓
| Name of maker | Size | Rating | Operating System |
|---|---|---|---|
| n4no | 8.7MB | 3.0/5 on Playstore | Android & iOS |
Pros
Direct social media share option.
Helps create reaction Gifs.
Super easy and fast 3D photo-making experience.
Cons
It doesn’t have good ratings.
App contains Ads.
App size is below 10MB.
No. 3 MotionLeap
Earlier branded as Pixaloop, Motionleap is a great option to animate still images. It also has cool features like animated rains, snow, butterfly & diamond.
YouTube Product Demo Video ↓ ↓ ↓
| Name of maker | Size | Rating | Operating System |
|---|---|---|---|
| Lightricks Ltd | 84 to 197 MB | 4.2/5 Playstore | iOS and Android |
Pros
Easy to use & accurate.
Elements opacity can be controlled.
Neat & clean effects, elements and overlays.
Cons
Better source photos are required.
Animation takes more time in comparison to other apps.
No. 4 Movepic
This super cool app offers effects that let you add glitches, flowing water and even a live sky to your images by just selecting the area you wish to apply the effects and is not that heavy to download.
YouTube Product Demo Video ↓ ↓ ↓
| Name of maker | Size | Rating | Operating System |
|---|---|---|---|
| ryzenrise | 48.16 MB | 4.3/5 on Playstore | Android and iOS (alternative) |
Pros
Is it a secure app to use?
Great for applying photo motion.
Regularly updated for bug fixes.
Cons
Regularly updated for bug fixes.
Lacks certain editing features
No. 5 Adobe Spark
Adobe Spark is a free-to-use photo animation software and has Adobe trust with it. It offers hundreds of fonts and templates for any type of photo though you would bear a watermark for the free version.
YouTube Product Demo Video ↓ ↓ ↓
| Name of maker | Size | Rating | Operating System |
|---|---|---|---|
| Adobe | 2.5 MB | 4.5/5 on Playstore | Android and iOS |
Pros
Hundreds of exclusive templates.
Intuitive interface best suited for beginners.
Easy to view dashboard.
Cons
Limited features in the free version.
Glitches in design.
No. 6 PopPic 6
PopPic 6 is a 3D camera with which you can directly click and apply a 3D filter effect to your flat images in order to make them pop.
YouTube Product Demo Video ↓ ↓ ↓
| Name of maker | Size | Rating | Operating System |
|---|---|---|---|
| PopPic 3D LLC | 36.9 MB | 4.7/5 on Applestore | iOS |
Pros
Ready to click 3D camera.
Dozens of filters.
Stylish and simple app design.
Cons
Limited functionality.
Low performance.
No. 7 ImgPlay
ImgPlay is kind of a cross between the features of Werble and Motionleap. There are hundreds of ready-to-use animations for your photos.
YouTube Product Demo Video ↓ ↓ ↓
| Name of maker | Size | Rating | Operating System |
|---|---|---|---|
| ImgBase Inc | 139 MB | 3.9/5 on Applestore | Android and iOS |
Pros
The convenient app to create easy GIFs.
Click, save and share feature.
Live photo features.
Cons
Limited editing options.
Not for professional graphics.
No. 8 GIPHY
Giphy is like a search engine for GIFs but also has an app version that lets you create amazing GIF animations that are ready for upload.
YouTube Product Demo Video ↓ ↓ ↓
| Name of maker | Size | Rating | Operating System |
|---|---|---|---|
| GIPHY | 100 MB | 4.8/5 on Playstore. | Android and iOS. |
Pros
Great for simple animations.
Create GIFs for promotions.
A vast range of options.
Cons
Limited color options.
Only suitable for GIF animations.
No. 9 Photo Bender
Photo Bender is more specifically designed for Android users. It is an app that enables you to warp your images against an animated effect. There are slight editing features also available in the app like bending and stretching an image.
YouTube Product Demo Video ↓ ↓ ↓
| Name of maker | Size | Rating | Operating System |
|---|---|---|---|
| Smart Photo Editor | 3.5 MB | 3.5/5 on Playstore | Android |
Pros
Export GIF, JPEG and PNG files.
Use simple editing features like coloring, stretching, and brushing.
Completely free to use.
Cons
Limited only to Android.
No. 10 Vimage 3D
An award-winning app for creating awe-inspiring animated images. Programmed to automatically detect what edits your images need. Does involve paying a premium.
YouTube Product Demo Video ↓ ↓ ↓
| Name of maker | Size | Rating | Operating System |
|---|---|---|---|
| Vimage | 21MB | 5.0/5 on Playstore | Android and iOS |
Pros
A large variety of filters, sounds and animated effects.
Max 2560p resolution.
Intuitive app interface.
Cons
Best features are limited to the premium version.
The free version comes with a non-removable watermark.
Part 3 How to Make Your Own Photo into Cartoon?
Prior to the digital age, creating a cartoon would require an entire team of professional animators such as in the house of Disney. A Cartoon animation meant sketching each frame by hand while maintaining continuity.
Now with the help of smart video effects, you can literally turn any image into a cartoon. These cartoonish animations can be both engaging and entertaining with some help from Wondershare Filmora .
Though we have enlisted 10 exceptional apps for ‘cartooning’ your images, Filmora gives you the flexibility which other apps don’t. You can create awesome animated videos online using Filmora while saving a ton of time.
You can use Filmora on both Mac and PC. Turn selfies, stock pictures, and snapshots into inspiring cartoon visuals using dozens of amazing filters and features on Filmora Pro.
Some of the exclusive features of Filmora Pro;
Audio Features →
● Noise Reduction.
● Audio Sync.
● Transition Audio.
● Compressor.
Animation Features →
● Motion Tracking.
● Ease In/Ease Out.
● Pan & Zoom
Movie Editing →
● Add Titles and Texts.
● Cinematic Lighting.
● Masking.
● Distortion and Wrapping.
Colouring Features →
● Colour Wheels
● Colour Correction
● Scopes.
By now you should know that Filmora Pro has a ton of customizable features that you can experiment with but this can be a bit confusing for beginners.
Key Takeaways from This Episode
● You can now turn your images into amazing animated cartoons using a wide range of 3d animated image-makers available online.
● Creating an exceptional animated video is a matter of storytelling, visual engagement and simplifying complex information.
● Use Filmora Pro to get your hands on professional editing software which is jam-packed with a bunch of exclusive features.
How to Make an Animated Travel Map Video?
How to Make an Animated Travel Map Video?

Benjamin Arango
Mar 27, 2024• Proven solutions
Animated travel map videos make it easy for the viewers to follow the routes from the source to destination locations right on the single screen. While the static maps would only allow the audience to see the markers from where the journey would start and is expected to end, the animated ones show the real-time movements and therefore look more interactive when viewed.
That said, here you will learn how to create an attractive and engaging animated travel map video using one of the easiest post-production applications, Wondershare Filmora, which is widely appreciated by amateurs and professionals throughout the globe. In another section, you will also learn about an alternative program that might be of some help in case you are more into online designing.
- Method 1: Make Animated Travel Map Videos with Location Video Maker - [Video Tutorial]
- Method 2: Make Interactive Animated Travel Map with Pictramap
- Method 3: Create Animated Travel Map Using Multidev
Method 1 Make Animated Travel Map Videos with Location Video Maker
The entire process of creating an animated travel map video in Wondershare’s Filmora is categorized into two parts, wherein the first part you will collect all the ingredients that are needed to get started, and in the second part you will actually make an animated map using the tools and features present in Filmora.
Watch a video tutorial to see how to make an animated map for a video:
For Win 7 or later (64-bit)
 Secure Download
For macOS 10.14 or later
Secure Download


Part 1: Prepare the Travel Map Materials
Following are the ingredients and the methods to collect them for animated travel map preparation:
Step 1: Get the Map
The first thing that you would need to prepare an animated map is an image of a realistic map. Thanks to Google and Microsoft, these things are now pretty easy to arrange. The process is given below:
- Launch your preferred web browser
- Type google.com in the address bar or the search box and hit Enter
- Scroll to zoom out so you can see the entire world map on one screen

- Type Snipping Tool in the Cortana search box present on the left side of the Taskbar
- Launch Snipping Tool, and use it to capture the screenshot of the map
Note: Snipping Tool is a built-in app in Windows 10 and is available for free. If you are using any other operating system, or have a different program to capture the screenshots, feel free to use it according to your convenience.
- Save the screenshot you captured as a JPG file on your PC
Step 2: Mark Out the Map Path
The next step in the process of preparing an animated travel map is to mark your route on it. To do so, you can use any of your preferred photo editing tools. However, to keep this illustration simple, Microsoft Paint is used here, and the method is given below:
- Right-click the screenshot you just captured
- Go to Open with on the context menu, and then click Paint from the submenu that appears
- Pick your preferred color from the pallet of the Paint interface. It is advisable to use an eye-catchy shade such as Red
- Use the Sphere shape tool to draw a circle over the source and destination locations on the map
- Use the Line tool to draw a line from the source point to the destination. Try giving the line a few turns to make it look realistic
- Go to File > Save As, and save the marked image with a different name
Note: Once this is done, you should have two image files of the map, i.e., one without the marks and one with it
Step 3: Download Some Travel Icons
Another important ingredient in an effective travel map animation is touring icons such as location marker image, a traveling medium symbol like a helicopter, airplane, car/bike (for short distances), etc. A couple of websites that offer royalty-free stock photos at absolutely no cost are listed below:
Note: Although the websites given above allow you to download and use their stock images and icons for free, you may need to give credits to the designers/creators of the symbols while using their objects. Therefore, you are suggested to check the Terms & Conditions and norms of usage of the elements before downloading and adding them to your projects.
Part 2: Make Animated Travel Map Videos with Filmora
After you have gathered all the necessary ingredients that are required to create a travel map animation, it is now time to get to work. The following instructions would guide you through the step-by-step process of preparing a decent and realistic animated travel map in Wondershare Filmora :
For Win 7 or later (64-bit)
Secure Download
For macOS 10.14 or later
Secure Download
Step 1: Import Ingredients to Filmora and Add Them to the Timeline
Launch the video editor on your computer, click anywhere inside the Media window at the upper-left area, and import all the images and icons that you collected earlier to program. Next, drag both the images of the map, i.e., with and without the marks to the Timeline, and ensure that they are of the same duration and are placed on the same track.

Note: Be sure to put the map without the marks first, and then the one with the marks. Also note that the images have the playback duration of 5 seconds in the Timeline by default, and this tenure can be reduced or increased by dragging the side handle of the media to the left or right respectively.
Step 2: Add Transition for Illusion of Route Appearance
Go to Transition from the standard toolbar at the top, locate the Erase Slide transition effect from the available presets, and place it in between the two image files that you earlier added to the Timeline. Next, click and drag either of the side handles of the transition to the end of the media clip. Notice how the other side of the effect is expanded in equal proportion.

Step 3: Preview and Export
Press the Spacebar on the keyboard to preview the video and see if the route appears as if it is being drawn on the map. Once the animation looks acceptable, click EXPORT from the top-center, go to the Local tab on the Export window, select MP4 from the formats list in the left, and click EXPORT from the bottom-right corner to export the current animation to MP4.
Step 4: Customize the Travel Map Media
Either start a new project and import the video of the map you exported in the previous step to the app and then to the Timeline, or remove the existing media from the Timeline in the same project, and add the exported video to it for convenience.

For Win 7 or later (64-bit)
Secure Download
For macOS 10.14 or later
Secure Download
Next, position the Skimmer (Playhead) a couple of frames before the one the route line appears and starts stretching from, and click the Split icon from the editing toolbar above the Timeline itself. Repeat this process for the other side of the media, i.e., position the Skimmer a couple of frames after the route line reaches the destination location, and click the Split icon again. Then remove the separated segments from both the sides by selecting them and pressing Delete on the keyboard, leaving only the portion where the animation is visible.

Optionally, right-click the media that is left behind in the Timeline, and go to Speed and Duration from the context menu. On the Custom Speed box, drag the Speed slider to the left to decrease the playback speed resulting in the increased duration of the media. Alternatively, you can manually enter a value in the Speed box to get precise tenure. Click OK when you are done.

Step 5: Add Animations to Travel Map
Right-click the media in the Timeline, and go to Add Animation from the context menu. Make sure that the Skimmer is on the first frame, and add several keyframes as explained below:
- Click Add to add the first keyframe

- Move a couple of frames further, and click Add one more time. Now, while you are on this second keyframe, use the Scale slider to zoom in to the map so the source location remains within focus.

- Next, move the Playhead further and add another keyframe a couple of frames before the route line hits the edge of the window.
- After this, move the Playhead again and position it where the route line reaches its destination location. Add another keyframe here as well, and move the map in the Preview window so the focus is now on the destination.
- Move the Playhead a few frames further, add another keyframe, and use the Scale slider to zoom a bit more into the map to make the entire animation look realistic. Click OK to save the changes.
Step 6: Add Icons and Titles, and Export the Project
Drag the image of the traveling medium to the Timeline, and place it on the frame the route line starts from. Make sure to place the image on the track above the map, and stretch it to the end so it remains visible throughout the animation. Next, use the method explained above to add keyframes to move the medium along with the route line from the source to the destination. Optionally, add the image of the location marker at the destination point, go to Transition, and add your preferred transition effect, preferably Dissolve, to the marker track in the Timeline so it looks as if it has appeared as the medium arrived the destination.
For Win 7 or later (64-bit)
Secure Download
For macOS 10.14 or later
Secure Download
Get back to the first frame in the Timeline, go to Titles on the standard toolbar, and add a title preset somewhere near the source location. Resize the text, change the format as needed, and add your preferred caption to it such as the start time, name, etc. Reduce the duration of the track so the title appears for a few frames, preferably before the map animation starts. Click OK when done. Repeat this process for the destination point as well.
Once everything is complete, click the Play button in the Preview window to review your work. If the video looks acceptable, click EXPORT from the top-center of the interface, and use the method explained earlier to export the animated travel map in your preferred format.
![]()
Method 2 How to Make Interactive Animated Travel Map with Pictramap
If you don’t want to install a dedicated animation software on your computer due to limited hardware resources or some other reason, there is an online solution called Pictramap to create a travel map animation using a web browser. The web app offers a lucrative interface that could be easily understood and worked with to produce an animated map for free.
The process to create an animated travel map with Pictramap is given below:
Step 1: Create a Project
Launch your favorite web browser, go to https://www.pictramap.com/ , click Create yours now, it’s free, and sign up to Pictramap using your preferred method. When you are on the Dashboard, enter a name in the field available under the My Projects section, and click Create to create a new project (the animated map).

Step 2: Define the Locations and Method of Commute
On the map, right-click the location you want to start your journey from, enter the name of the location or any other significant title, and click Add. Click the location marker, click the Travel Mode icon, and select your preferred mode of traveling. Repeat this process to mark the destination location as well.

Step 3: Preview the Animation
Click the View Animation button from the upper-right corner of the page to see the animated travel map.

Downsides of Using Pictramap to Create Animated Travel Map Video
Although Pictramap allows you to create a travel map animation with ease and extremely quickly, at the time of this writing, it offers no way of downloading the animation to your PC, and therefore it couldn’t be used in your projects.
If you are using Wondershare Filmora, you can use its built-in screen recording feature to record the animation that Pictramap plays, and then save the captured footage as MP4 or any other format on your computer. This video can then be imported to your projects for further uses.
![]()
A cross-platform for making videos anywhere for all creators

Why your video editing isn’t good enough? How about some creative inspo?
- 100 Million+ Users
- 150+ Countries and Regions
- 4 Million+ Social Media Followers
- 5 Million+ Stock Media for Use
* Secure Download

Method 3 How To Make Animated Travel Map Using Multidev
Multi.dev is still a new web-based application to build awesome animated maps, but it’s good! The application helps you create presentations about all your recent and previous trips. And the interface is also hassle-free.
So, follow this step-by-step guide to making animated maps with Multi.dev.
Step 1: Open Multi.dev
Visit Multi.dev from your internet browser.

Once the tool gets open, you will see a demo video. This example clip will have animated maps of different locations. So it is up to you whether to use the same example and edit the places you have been to or are planning to visit. Or, simply create a new animated map from scratch.
Step 2: Choose Your First Location
Take your mouse cursor on the left side of the application and type the first location in the search bar. As soon as you do it, you will see that the “travel arrow” will automatically begin from there. Likewise, type and select the next location through the search bar.
Once you type the location, you will see 8 travel modes, including airplane, bus, and train. You can select the same mode for all sites or a different mode for another place. Totally up to you!

Step 3: Select Map Themes
All your chosen places will be highlighted in the software’s minimalistic map.

Step 4: Download Map on Your Computer
If you’re happy with the animated map, click the “Create Video” button to save the animated map on your computer in a few minutes.


Contrarily, you can also share the animation by choosing the “Share Animation” option.
Conclusion
An animated travel map plays an important role to add a realistic touring effect to your motion picture projects. While you can use a web app like Pictramap to create such an animation online easily and for free, the limitations it comes along with might keep you from choosing this method.
Instead, you may want to get more inclined toward a dedicated post-production software like Wondershare Filmora that gives you full control over the process, and the freedom to choose your preferred format to export the animation to for independent usage.
For Win 7 or later (64-bit)
Secure Download
For macOS 10.14 or later
Secure Download
Benjamin Arango
Benjamin Arango is a writer and a lover of all things video.
Follow @Benjamin Arango
Benjamin Arango
Mar 27, 2024• Proven solutions
Animated travel map videos make it easy for the viewers to follow the routes from the source to destination locations right on the single screen. While the static maps would only allow the audience to see the markers from where the journey would start and is expected to end, the animated ones show the real-time movements and therefore look more interactive when viewed.
That said, here you will learn how to create an attractive and engaging animated travel map video using one of the easiest post-production applications, Wondershare Filmora, which is widely appreciated by amateurs and professionals throughout the globe. In another section, you will also learn about an alternative program that might be of some help in case you are more into online designing.
- Method 1: Make Animated Travel Map Videos with Location Video Maker - [Video Tutorial]
- Method 2: Make Interactive Animated Travel Map with Pictramap
- Method 3: Create Animated Travel Map Using Multidev
Method 1 Make Animated Travel Map Videos with Location Video Maker
The entire process of creating an animated travel map video in Wondershare’s Filmora is categorized into two parts, wherein the first part you will collect all the ingredients that are needed to get started, and in the second part you will actually make an animated map using the tools and features present in Filmora.
Watch a video tutorial to see how to make an animated map for a video:
For Win 7 or later (64-bit)
Secure Download
For macOS 10.14 or later
Secure Download
Part 1: Prepare the Travel Map Materials
Following are the ingredients and the methods to collect them for animated travel map preparation:
Step 1: Get the Map
The first thing that you would need to prepare an animated map is an image of a realistic map. Thanks to Google and Microsoft, these things are now pretty easy to arrange. The process is given below:
- Launch your preferred web browser
- Type google.com in the address bar or the search box and hit Enter
- Scroll to zoom out so you can see the entire world map on one screen
- Type Snipping Tool in the Cortana search box present on the left side of the Taskbar
- Launch Snipping Tool, and use it to capture the screenshot of the map
Note: Snipping Tool is a built-in app in Windows 10 and is available for free. If you are using any other operating system, or have a different program to capture the screenshots, feel free to use it according to your convenience.
- Save the screenshot you captured as a JPG file on your PC
Step 2: Mark Out the Map Path
The next step in the process of preparing an animated travel map is to mark your route on it. To do so, you can use any of your preferred photo editing tools. However, to keep this illustration simple, Microsoft Paint is used here, and the method is given below:
- Right-click the screenshot you just captured
- Go to Open with on the context menu, and then click Paint from the submenu that appears
- Pick your preferred color from the pallet of the Paint interface. It is advisable to use an eye-catchy shade such as Red
- Use the Sphere shape tool to draw a circle over the source and destination locations on the map
- Use the Line tool to draw a line from the source point to the destination. Try giving the line a few turns to make it look realistic
- Go to File > Save As, and save the marked image with a different name
Note: Once this is done, you should have two image files of the map, i.e., one without the marks and one with it
Step 3: Download Some Travel Icons
Another important ingredient in an effective travel map animation is touring icons such as location marker image, a traveling medium symbol like a helicopter, airplane, car/bike (for short distances), etc. A couple of websites that offer royalty-free stock photos at absolutely no cost are listed below:
Note: Although the websites given above allow you to download and use their stock images and icons for free, you may need to give credits to the designers/creators of the symbols while using their objects. Therefore, you are suggested to check the Terms & Conditions and norms of usage of the elements before downloading and adding them to your projects.
Part 2: Make Animated Travel Map Videos with Filmora
After you have gathered all the necessary ingredients that are required to create a travel map animation, it is now time to get to work. The following instructions would guide you through the step-by-step process of preparing a decent and realistic animated travel map in Wondershare Filmora :
For Win 7 or later (64-bit)
Secure Download
For macOS 10.14 or later
Secure Download
Step 1: Import Ingredients to Filmora and Add Them to the Timeline
Launch the video editor on your computer, click anywhere inside the Media window at the upper-left area, and import all the images and icons that you collected earlier to program. Next, drag both the images of the map, i.e., with and without the marks to the Timeline, and ensure that they are of the same duration and are placed on the same track.
Note: Be sure to put the map without the marks first, and then the one with the marks. Also note that the images have the playback duration of 5 seconds in the Timeline by default, and this tenure can be reduced or increased by dragging the side handle of the media to the left or right respectively.
Step 2: Add Transition for Illusion of Route Appearance
Go to Transition from the standard toolbar at the top, locate the Erase Slide transition effect from the available presets, and place it in between the two image files that you earlier added to the Timeline. Next, click and drag either of the side handles of the transition to the end of the media clip. Notice how the other side of the effect is expanded in equal proportion.
Step 3: Preview and Export
Press the Spacebar on the keyboard to preview the video and see if the route appears as if it is being drawn on the map. Once the animation looks acceptable, click EXPORT from the top-center, go to the Local tab on the Export window, select MP4 from the formats list in the left, and click EXPORT from the bottom-right corner to export the current animation to MP4.
Step 4: Customize the Travel Map Media
Either start a new project and import the video of the map you exported in the previous step to the app and then to the Timeline, or remove the existing media from the Timeline in the same project, and add the exported video to it for convenience.
For Win 7 or later (64-bit)
Secure Download
For macOS 10.14 or later
Secure Download
Next, position the Skimmer (Playhead) a couple of frames before the one the route line appears and starts stretching from, and click the Split icon from the editing toolbar above the Timeline itself. Repeat this process for the other side of the media, i.e., position the Skimmer a couple of frames after the route line reaches the destination location, and click the Split icon again. Then remove the separated segments from both the sides by selecting them and pressing Delete on the keyboard, leaving only the portion where the animation is visible.
Optionally, right-click the media that is left behind in the Timeline, and go to Speed and Duration from the context menu. On the Custom Speed box, drag the Speed slider to the left to decrease the playback speed resulting in the increased duration of the media. Alternatively, you can manually enter a value in the Speed box to get precise tenure. Click OK when you are done.
Step 5: Add Animations to Travel Map
Right-click the media in the Timeline, and go to Add Animation from the context menu. Make sure that the Skimmer is on the first frame, and add several keyframes as explained below:
- Click Add to add the first keyframe
- Move a couple of frames further, and click Add one more time. Now, while you are on this second keyframe, use the Scale slider to zoom in to the map so the source location remains within focus.
- Next, move the Playhead further and add another keyframe a couple of frames before the route line hits the edge of the window.
- After this, move the Playhead again and position it where the route line reaches its destination location. Add another keyframe here as well, and move the map in the Preview window so the focus is now on the destination.
- Move the Playhead a few frames further, add another keyframe, and use the Scale slider to zoom a bit more into the map to make the entire animation look realistic. Click OK to save the changes.
Step 6: Add Icons and Titles, and Export the Project
Drag the image of the traveling medium to the Timeline, and place it on the frame the route line starts from. Make sure to place the image on the track above the map, and stretch it to the end so it remains visible throughout the animation. Next, use the method explained above to add keyframes to move the medium along with the route line from the source to the destination. Optionally, add the image of the location marker at the destination point, go to Transition, and add your preferred transition effect, preferably Dissolve, to the marker track in the Timeline so it looks as if it has appeared as the medium arrived the destination.
For Win 7 or later (64-bit)
Secure Download
For macOS 10.14 or later
Secure Download
Get back to the first frame in the Timeline, go to Titles on the standard toolbar, and add a title preset somewhere near the source location. Resize the text, change the format as needed, and add your preferred caption to it such as the start time, name, etc. Reduce the duration of the track so the title appears for a few frames, preferably before the map animation starts. Click OK when done. Repeat this process for the destination point as well.
Once everything is complete, click the Play button in the Preview window to review your work. If the video looks acceptable, click EXPORT from the top-center of the interface, and use the method explained earlier to export the animated travel map in your preferred format.
![]()
Method 2 How to Make Interactive Animated Travel Map with Pictramap
If you don’t want to install a dedicated animation software on your computer due to limited hardware resources or some other reason, there is an online solution called Pictramap to create a travel map animation using a web browser. The web app offers a lucrative interface that could be easily understood and worked with to produce an animated map for free.
The process to create an animated travel map with Pictramap is given below:
Step 1: Create a Project
Launch your favorite web browser, go to https://www.pictramap.com/ , click Create yours now, it’s free, and sign up to Pictramap using your preferred method. When you are on the Dashboard, enter a name in the field available under the My Projects section, and click Create to create a new project (the animated map).
Step 2: Define the Locations and Method of Commute
On the map, right-click the location you want to start your journey from, enter the name of the location or any other significant title, and click Add. Click the location marker, click the Travel Mode icon, and select your preferred mode of traveling. Repeat this process to mark the destination location as well.
Step 3: Preview the Animation
Click the View Animation button from the upper-right corner of the page to see the animated travel map.
Downsides of Using Pictramap to Create Animated Travel Map Video
Although Pictramap allows you to create a travel map animation with ease and extremely quickly, at the time of this writing, it offers no way of downloading the animation to your PC, and therefore it couldn’t be used in your projects.
If you are using Wondershare Filmora, you can use its built-in screen recording feature to record the animation that Pictramap plays, and then save the captured footage as MP4 or any other format on your computer. This video can then be imported to your projects for further uses.
![]()
A cross-platform for making videos anywhere for all creators
Why your video editing isn’t good enough? How about some creative inspo?
- 100 Million+ Users
- 150+ Countries and Regions
- 4 Million+ Social Media Followers
- 5 Million+ Stock Media for Use
* Secure Download
Method 3 How To Make Animated Travel Map Using Multidev
Multi.dev is still a new web-based application to build awesome animated maps, but it’s good! The application helps you create presentations about all your recent and previous trips. And the interface is also hassle-free.
So, follow this step-by-step guide to making animated maps with Multi.dev.
Step 1: Open Multi.dev
Visit Multi.dev from your internet browser.
Once the tool gets open, you will see a demo video. This example clip will have animated maps of different locations. So it is up to you whether to use the same example and edit the places you have been to or are planning to visit. Or, simply create a new animated map from scratch.
Step 2: Choose Your First Location
Take your mouse cursor on the left side of the application and type the first location in the search bar. As soon as you do it, you will see that the “travel arrow” will automatically begin from there. Likewise, type and select the next location through the search bar.
Once you type the location, you will see 8 travel modes, including airplane, bus, and train. You can select the same mode for all sites or a different mode for another place. Totally up to you!
Step 3: Select Map Themes
All your chosen places will be highlighted in the software’s minimalistic map.
Step 4: Download Map on Your Computer
If you’re happy with the animated map, click the “Create Video” button to save the animated map on your computer in a few minutes.
Contrarily, you can also share the animation by choosing the “Share Animation” option.
Conclusion
An animated travel map plays an important role to add a realistic touring effect to your motion picture projects. While you can use a web app like Pictramap to create such an animation online easily and for free, the limitations it comes along with might keep you from choosing this method.
Instead, you may want to get more inclined toward a dedicated post-production software like Wondershare Filmora that gives you full control over the process, and the freedom to choose your preferred format to export the animation to for independent usage.
For Win 7 or later (64-bit)
Secure Download
For macOS 10.14 or later
Secure Download
Benjamin Arango
Benjamin Arango is a writer and a lover of all things video.
Follow @Benjamin Arango
Also read:
- Before You Learn 3D Animation Things You Should Know for 2024
- Updated In 2024, Types of Cartoon Styles You May Use for The Next Marketing Project
- 12 Dubbed Anime Websites to Watch for Free for 2024
- In 2024, How to Make Animated Videos for Business – an Ultimate Guide
- Updated In 2024, Finding Some Different Ways to Animated Cartoon of Yourself
- New How to Liven Up Your Animate Website on Scroll for 2024
- Updated Are You Ready to Animate Game Character From Scratch for 2024
- New 2024 Approved 10 Stunning Stop Motion Movies You Should Not Miss
- How I Animate Discord Profile Pictures (& You Can Too)
- In 2024, Have You Seen the Facebook Cartoon App Everyones Using Recently
- New Best Guide for Beginners on 2D Animation Making for 2024
- 2024 Approved What Wikipedia Cant Tell You About the 10 Batman Cartoons
- 2024 Approved The Best 8 Places for High-Quality Royalty Free Gifs
- Updated In 2024, How to Make Your Own GIF on WhatsApp in Simple Ways
- New The Most Efficient Techniques for You to Make 3D Animation Character for 2024
- New Are You Ready to Animate Game Character From Scratch?
- New How to Animate - Adobe Animate Tutorias
- New 2024 Approved Before You Learn 3D Animation Things You Should Know
- Updated How to Animate Picture Online Without Learning From Scratch for 2024
- Handy Tips From Adobe Animate Rigging Tutorial for All Learners for 2024
- A Step-by-Step Guide on Using ADB and Fastboot to Remove FRP Lock on your Nokia C300
- The Most Useful Tips for Pokemon Go Ultra League On Nokia C02 | Dr.fone
- In 2024, What Pokémon Evolve with A Dawn Stone For Samsung Galaxy A24? | Dr.fone
- In 2024, How To Get the Apple ID Verification Code From iPhone 15 in the Best Ways
- In 2024, How to Screen Mirroring Vivo S17e to PC? | Dr.fone
- In 2024, How to Reset a Locked Xiaomi Redmi K70E Phone
- How to Unlock Apple iPhone 11 Pro Max? | Dr.fone
- Additional Tips About Sinnoh Stone For Vivo S17 | Dr.fone
- How To Transfer Data From iPhone XR To Other iPhone 15 Pro Max devices? | Dr.fone
- Easy Fixes How To Recover Forgotten iCloud Password From your Apple iPhone 11 Pro
- How To Free Up iPhone 13 Space | Dr.fone
- In 2024, How to Get and Use Pokemon Go Promo Codes On Tecno Spark 20 Pro | Dr.fone
- Unlock Apple ID without Phone Number From Apple iPhone SE (2022)
- Hard Resetting an Tecno Pova 6 Pro 5G Device Made Easy | Dr.fone
- In 2024, How to Unlock Nokia C32 Phone with Broken Screen
- Where Is the Best Place to Catch Dratini On Realme C53 | Dr.fone
- How to Fix Vivo Y78+ (T1) Edition Find My Friends No Location Found? | Dr.fone
- How to Fix Error 495 While Download/Updating Android Apps On Oppo Reno 8T 5G | Dr.fone
- Title: Updated 2024 Approved Fuel Your Creativity with 10 Awesome Collection of 2D Animation Examples
- Author: Elon
- Created at : 2024-05-19 03:05:32
- Updated at : 2024-05-20 03:05:32
- Link: https://animation-videos.techidaily.com/updated-2024-approved-fuel-your-creativity-with-10-awesome-collection-of-2d-animation-examples/
- License: This work is licensed under CC BY-NC-SA 4.0.
