
:max_bytes(150000):strip_icc():format(webp)/espnplus-6d79c347f2df42d7a38cdb0ba9a2472b.jpg)
Updated 2024 Approved Great Ways to Make Claymation Videos
Great Ways to Make Claymation Videos
Ways You Can Master to Make Claymation Videos
An easy yet powerful editor
Numerous effects to choose from
Detailed tutorials provided by the official channel
Claymation videos appear to be more appealing as compared to other graphical or pictorial videos we create. However, some people still believe that making such a video is not their forte and that they cannot achieve mastery in the field.
So, if you have the same question and want to learn how to make a claymation video quickly and easily, stay tuned with us. In this article, we are covering all the relevant details to help you create the best claymation video possible and the outcome will be as expected. Let’s get started!
In this article
01 [What is Claymation and How It Works](#Part 1)
02 [History of Claymation Movies](#Part 2)
03 [6 Best Claymation Videos of All Time](#Part 3)
04 [How to Make Claymation Videos](#Part 4)
Part 1 What is Claymation and How It Works
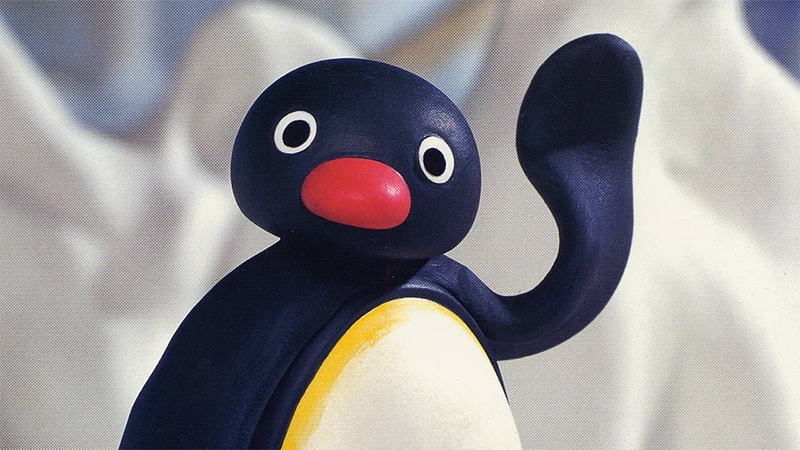
With the name Claymation, you might be thinking that there is a use of clay in creating such videos. Well, you are right. These videos are representations of stop-motion animation, which is created with the help of plasticine clay.
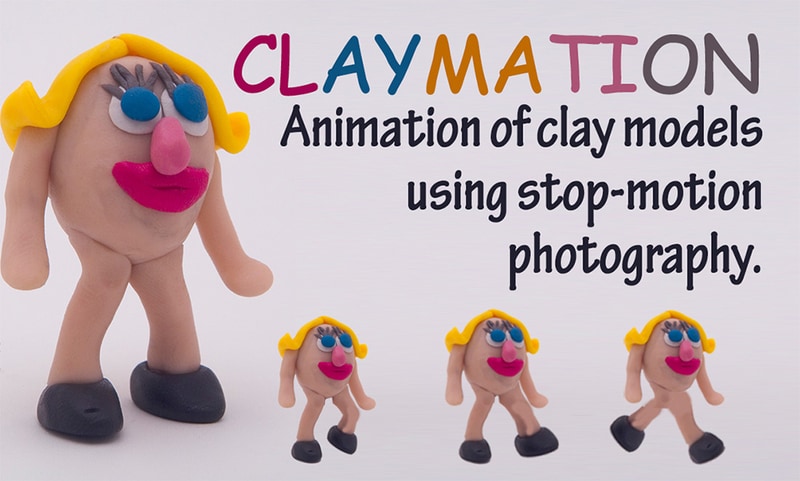
The use of platicsine is not only restricted to the animated characters, but these are also considered for creating the ultimate surroundings. The videos are recorded in such a manner that synchronization must be established with background and character, and viewers will be able to enjoy the same. After creating the videos, they are played in quick succession to get the right appearance of the movement.
Part 2 History of Claymation Movies
01The Beginning of Claymation Movies
Well, you will be surprised to know that the Claymation videos came into existence after the introduction of plasticine. It was founded in 189and since then, clamaytion videos have been able to find their way to silver screens. In earlier times, people used to dip their toes into color and then try to create artwork. But with innovation, the process has been changed and the oldest known extant clay animation film is Long Live the Bull (1926) by Joseph Sunn. The main procedure for creating this film is Claymation.

In the 190as well, there were some productions going on considering the claymation work, and some turned out to be successful, while some had no existence after that. For example, “Animated Putty” (1911), a historic feature by Walter R. Booth, dates back. So, yes, one can consider that this has existed for a very long time.
025 Famous Claymation Examples Over the Years
If we start exploring through some of the best examples of the past, you will be surprised to know that there are some claymation videos that still hit the top of the list of best movies around. These are as follows:
● The Nightmare Before Christmas
● The Life Aquatic with Steve Zissou
● Coraline
● The PJs
And there are some more that excel at utilizing claymation and teaching users how to make a claymation video. Some movies belong to the comedy genre, and some are related to fiction only through having a combination of friendship and others.
03A Look into the Art of Claymation for Film and Video Projects
Claymation has been around for a long time, and it’s becoming more popular. Small projects and big budget features alike are finding new and innovative ways to combine traditional models with other digital filmmaking methodologies like character animation, green screens, etc.
You can see that the team behind Missing Link went to great lengths to create an incredible looking production. They used both practical rigging systems and green screens as props. They used live-action footage and computer animation for more complex water and action sequences. All of them make it more appealing to the audience.
There are a lot of different ways you might want to get into claymation. Hand-drawn stop animation has seen an increase in popularity lately, with people looking for new ways to explore it. Drawing frames by hand is a really satisfying experience, not only because you have the chance to explore your interests and have some fun with them, but also because it pushes you creatively to explore new limits.
So yes, it is right to conclude that there is a great scope for claymation video production and one must be aware of claymation animators to try their hands on it.
Part 3 6 Best Claymation Videos of All Time
People have the curiosity to know the best claymation videos all the time. Well, according to us, the videos you can consider are as follows:
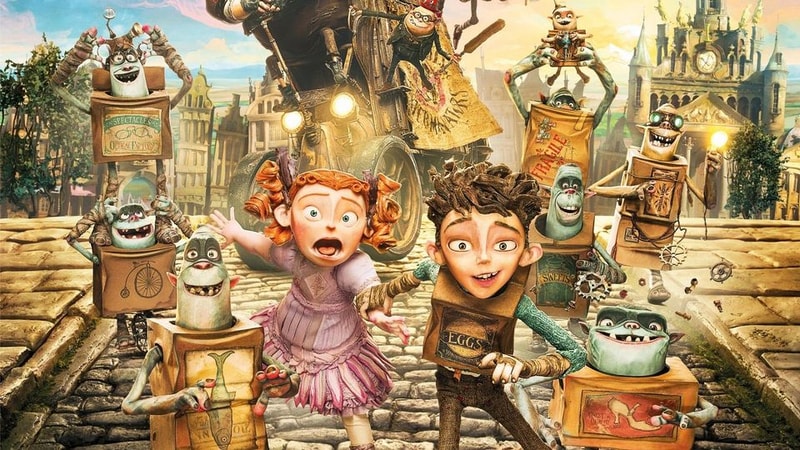
01The Boxtrolls
The Boxtrolls turned out to be one of the best Claymation movies produced to date.The response that was received was not overwhelming, but it came up with a unique setting of clay models and the animation given to this movie was perfect. Also, it received the chance to be premiered during the Venice Film Festival 2014.
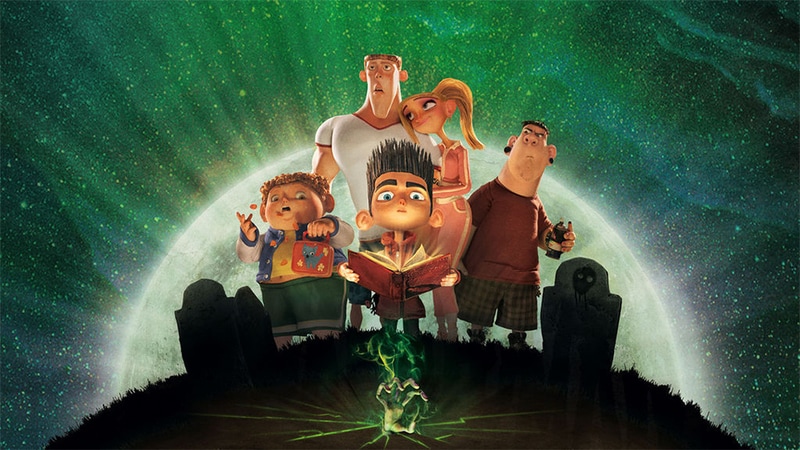
02Paranorman
Paranorman is among those claymation movies which cannot be the result of the dark effort put in by the producers. This movie focuses on children. It has different characters integrated, and the printed faces for each character have been utilized. This movie set good records, and children were very happy after seeing it on screen.
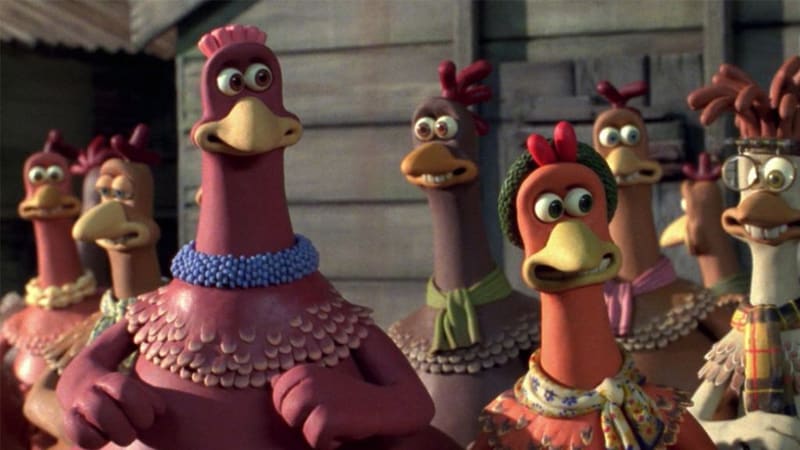
03Chicken run
Chicken Run was not the well-known Claymation video of the time, which was intended to be original cinematic peace. There was collaboration between Dreamworks and others to get this exceptional movie available on screen. The storey was so heart-touching, it’s no wonder it received a good response. Due to the availability of technology at that time, this movie was not able to set good records, but after it, most people are aware of the same.
04Consuming Spirits
Consuming spirits come into consideration in 201and it is a story about three residents of a small rust belt town. They are somewhere, living an interconnected life, and things are not fine with them. Also, they are confused about how to fix things for a better lifestyle.

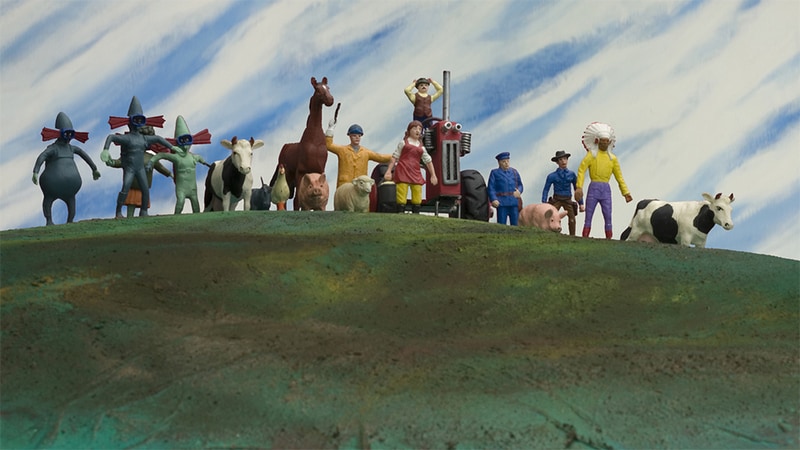
05A town called panic
A town called Panic came into existence in 200and it is an animated movie about a cowboy and an Indian. They are planning to construct a barbecue pit for the birthday but are facing a lot of difficulties in doing so. But somehow they managed to do so. The concept of this movie is quite different as compared to other Claymation movies.
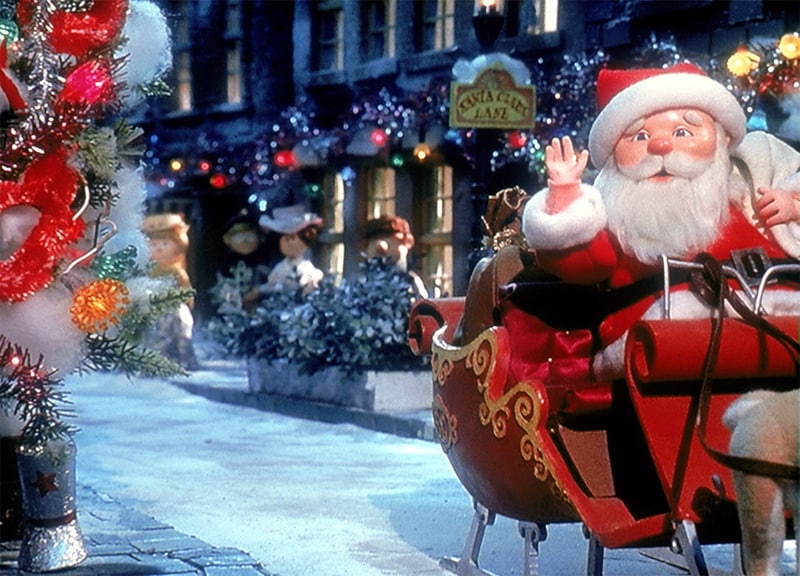
06The Year without a Santa Claus
The Year without a Santa Claus came into existence in 200This movie is focused on the spot where Santa Claus has taken off for the year and others are trying to save Christmas after this announcement. There is a lot more integrated in this movie to watch.
Part 4 How to Make Claymation Videos
If you are looking forward to trying your hands on claymation videos, do it now as this is very simple. For this, you only require a claymation animator like Wondershare Filmora Video Editor for the same. But before choosing it out, be sure to know the steps that will help you make the video easily.
Wondershare Filmora
Get started easily with Filmora’s powerful performance, intuitive interface, and countless effects!
Try It Free Try It Free Try It Free Learn More >

The steps you need to follow are:
Step 1 Make yourself available to the Claymation Animator (you can use Filmora for this task) and sign up for it.
Step 2 Now, to start the project, you need to lockout the photos that are under consideration for creating the project.
Step 3 Arrange all the photos in a sequential order or say whatever you want, and do the editing, considering the speed and other effects.
Step 4 After setting up the effects, review the same for finalization.
Step 5 After finalizing the effects, save the same.
These are the simple steps to follow if you want to create Claymation videos.
Well, as we have discussed Filmora, this is one of the best tools available to help you create claymation videos easily. This tool has an easy-to-use and navigate interface and will assist you in achieving your desired results.
Also, you will be happy to know that an abundance of features have been added to it, making it one of the most considerable tools to have. So, yes, if you are looking for how to create claymation videos, try it now and be ready to get the expected outcome.
● Key Takeaways from This Episode →
● Claymation videos are getting more digitalized.
● Filmora is one of the best claymation animators to use.
● Claymation videos can be edited easily and customised by the user easily.
Claymation videos appear to be more appealing as compared to other graphical or pictorial videos we create. However, some people still believe that making such a video is not their forte and that they cannot achieve mastery in the field.
So, if you have the same question and want to learn how to make a claymation video quickly and easily, stay tuned with us. In this article, we are covering all the relevant details to help you create the best claymation video possible and the outcome will be as expected. Let’s get started!
In this article
01 [What is Claymation and How It Works](#Part 1)
02 [History of Claymation Movies](#Part 2)
03 [6 Best Claymation Videos of All Time](#Part 3)
04 [How to Make Claymation Videos](#Part 4)
Part 1 What is Claymation and How It Works
With the name Claymation, you might be thinking that there is a use of clay in creating such videos. Well, you are right. These videos are representations of stop-motion animation, which is created with the help of plasticine clay.
The use of platicsine is not only restricted to the animated characters, but these are also considered for creating the ultimate surroundings. The videos are recorded in such a manner that synchronization must be established with background and character, and viewers will be able to enjoy the same. After creating the videos, they are played in quick succession to get the right appearance of the movement.
Part 2 History of Claymation Movies
01The Beginning of Claymation Movies
Well, you will be surprised to know that the Claymation videos came into existence after the introduction of plasticine. It was founded in 189and since then, clamaytion videos have been able to find their way to silver screens. In earlier times, people used to dip their toes into color and then try to create artwork. But with innovation, the process has been changed and the oldest known extant clay animation film is Long Live the Bull (1926) by Joseph Sunn. The main procedure for creating this film is Claymation.
In the 190as well, there were some productions going on considering the claymation work, and some turned out to be successful, while some had no existence after that. For example, “Animated Putty” (1911), a historic feature by Walter R. Booth, dates back. So, yes, one can consider that this has existed for a very long time.
025 Famous Claymation Examples Over the Years
If we start exploring through some of the best examples of the past, you will be surprised to know that there are some claymation videos that still hit the top of the list of best movies around. These are as follows:
● The Nightmare Before Christmas
● The Life Aquatic with Steve Zissou
● Coraline
● The PJs
And there are some more that excel at utilizing claymation and teaching users how to make a claymation video. Some movies belong to the comedy genre, and some are related to fiction only through having a combination of friendship and others.
03A Look into the Art of Claymation for Film and Video Projects
Claymation has been around for a long time, and it’s becoming more popular. Small projects and big budget features alike are finding new and innovative ways to combine traditional models with other digital filmmaking methodologies like character animation, green screens, etc.
You can see that the team behind Missing Link went to great lengths to create an incredible looking production. They used both practical rigging systems and green screens as props. They used live-action footage and computer animation for more complex water and action sequences. All of them make it more appealing to the audience.
There are a lot of different ways you might want to get into claymation. Hand-drawn stop animation has seen an increase in popularity lately, with people looking for new ways to explore it. Drawing frames by hand is a really satisfying experience, not only because you have the chance to explore your interests and have some fun with them, but also because it pushes you creatively to explore new limits.
So yes, it is right to conclude that there is a great scope for claymation video production and one must be aware of claymation animators to try their hands on it.
Part 3 6 Best Claymation Videos of All Time
People have the curiosity to know the best claymation videos all the time. Well, according to us, the videos you can consider are as follows:
01The Boxtrolls
The Boxtrolls turned out to be one of the best Claymation movies produced to date.The response that was received was not overwhelming, but it came up with a unique setting of clay models and the animation given to this movie was perfect. Also, it received the chance to be premiered during the Venice Film Festival 2014.
02Paranorman
Paranorman is among those claymation movies which cannot be the result of the dark effort put in by the producers. This movie focuses on children. It has different characters integrated, and the printed faces for each character have been utilized. This movie set good records, and children were very happy after seeing it on screen.
03Chicken run
Chicken Run was not the well-known Claymation video of the time, which was intended to be original cinematic peace. There was collaboration between Dreamworks and others to get this exceptional movie available on screen. The storey was so heart-touching, it’s no wonder it received a good response. Due to the availability of technology at that time, this movie was not able to set good records, but after it, most people are aware of the same.
04Consuming Spirits
Consuming spirits come into consideration in 201and it is a story about three residents of a small rust belt town. They are somewhere, living an interconnected life, and things are not fine with them. Also, they are confused about how to fix things for a better lifestyle.
05A town called panic
A town called Panic came into existence in 200and it is an animated movie about a cowboy and an Indian. They are planning to construct a barbecue pit for the birthday but are facing a lot of difficulties in doing so. But somehow they managed to do so. The concept of this movie is quite different as compared to other Claymation movies.
06The Year without a Santa Claus
The Year without a Santa Claus came into existence in 200This movie is focused on the spot where Santa Claus has taken off for the year and others are trying to save Christmas after this announcement. There is a lot more integrated in this movie to watch.
Part 4 How to Make Claymation Videos
If you are looking forward to trying your hands on claymation videos, do it now as this is very simple. For this, you only require a claymation animator like Wondershare Filmora Video Editor for the same. But before choosing it out, be sure to know the steps that will help you make the video easily.
Wondershare Filmora
Get started easily with Filmora’s powerful performance, intuitive interface, and countless effects!
Try It Free Try It Free Try It Free Learn More >
The steps you need to follow are:
Step 1 Make yourself available to the Claymation Animator (you can use Filmora for this task) and sign up for it.
Step 2 Now, to start the project, you need to lockout the photos that are under consideration for creating the project.
Step 3 Arrange all the photos in a sequential order or say whatever you want, and do the editing, considering the speed and other effects.
Step 4 After setting up the effects, review the same for finalization.
Step 5 After finalizing the effects, save the same.
These are the simple steps to follow if you want to create Claymation videos.
Well, as we have discussed Filmora, this is one of the best tools available to help you create claymation videos easily. This tool has an easy-to-use and navigate interface and will assist you in achieving your desired results.
Also, you will be happy to know that an abundance of features have been added to it, making it one of the most considerable tools to have. So, yes, if you are looking for how to create claymation videos, try it now and be ready to get the expected outcome.
● Key Takeaways from This Episode →
● Claymation videos are getting more digitalized.
● Filmora is one of the best claymation animators to use.
● Claymation videos can be edited easily and customised by the user easily.
Easy Cartoon Characters Drawing Tutorials for You Who Are Learning to Draw
Easy Cartoon Characters Drawing Tutorials for You Who Are Learning to Draw
An easy yet powerful editor
Numerous effects to choose from
Detailed tutorials provided by the official channel
Learning the art of cartoon characters drawing? We can help! Cartoon characters drawing is no rocket science, ABCD: Anybody Can Draw!

We are as excited as you as we bring to you a few of the best drawing tutorials!
In this article
01 [Double Your Results with Learning Cartoon Drawing Styles First](#Part 1)
02 [Best 6 Cartoon Characters Anyone Can Draw (with Free Video Tutorials)](#Part 2)
03 [Easy Cartoon Characters to Draw Step by Step](#Part 3)
Part 1 Double Your Results with Learning Cartoon Drawing Styles First
01 Cartoon Character Sketches
Sketching is one of the most popular art forms. Sketching can be done for real-life people or celebrities or we can also make sketches of imaginary characters and cartoons. Sketching is generally made of pencil and does not involve the usage of colors.

02 Cartoon Characters Drawing with Color
Cartoon characters can be made with color to make them more attractive. This is another popular form of art that cartoonists follow. You can explore several methods of coloring and try making your cartoon colorful.

03 Disney Cartoon Characters Drawing
Disney cartoon character drawing is probably one of the simplest. This is because they have a predefined size and are mostly symmetric. Disney cartoon characters generally use common geometric shapes such as circles, ovals, and squares. Hence making it a beginner-friendly choice!

Part 2 Best 6 Cartoon Characters Anyone Can Draw (with Free Video Tutorials)
01 Roger the alien
Roger the alien is one of the simplest cartoon characters to draw. This children’s classic cartoon character always intrigues children due to its bizarre shape. It fixes the image of an outer space characters in a child’s mind(If they exist).
What makes it easy to draw?
● The oval-shaped head is easy to draw since it is not very detailed.
● The character does not have any hair, hair is one of the more difficult parts to draw.
● The body features aren’t very prominent, hence making the character easy to draw.
Challenges you may encounter
● If you are a first-timer, then you may find it challenging to draw fingers and the toes.
● Getting the weird alien head shape might be a little difficult and may take you a few attempts.
● Making the two eyes exactly similar to each other may be challenging for a few of you.
02 Wakko Warner
What makes it easy to draw?
● The character generally has geometrical shapes and hence you can use shape tracers to draw a few parts.
● The appealing appearance of the character makes it interesting to draw.
● The eyes are not very difficult to recreate.
Challenges you may encounter
● The eyes are not very difficult to recreate.
● The shape of the mouth and the tongue that is sticking out is slightly complex.
● Perfecting the shape of the hair is a little challenging.
03 Cosmo
What makes it easy to draw?
● We recommend you to try this character out mainly because of its uniqueness.
● The eyes are not very complicated to draw.
● The body resembles a stick image and is hence simple to draw.
Challenges you may encounter
● The shape of the crown needs to be perfect, especially because of the tilt the crown has.
● The fingers are challenging to draw.
● The hair has a distinct shape, this shape needs to come out perfectly.
04 Courage the cowardly dog
What makes it easy to draw?
● Firstly, it’s one of the most favorite cartoons, hence it will ensure to keep you interested in the drawing.
● The hands and legs resemble stick figures and are simple to draw.
● The body structure is simple.
Challenges you may encounter
● Drawing a cartoon animal instead of a human being might be intriguing for beginners.
● The large eyes, which is one of the characteristic features needs to be perfect.
● The design of the ears is the trickiest part and could be difficult to draw.
05 Tom And Jerry
When we think of cartoons, the first few names that probably come to our mind are tom and jerry. This duo of a grumpy cat and a mysterious mouse has left an everlasting impact on the world of cartoons. The duo is famous throughout the world and is loved throughout age groups
Why do we recommend you to try your hands on this?
● This is a classic cartoon that almost everyone loves.
● There are several resources on the internet to help you draw the cartoon characters.
● The characters need not be perfect, even a close resemblance to them would be sufficient for the viewers to identify them due to their fame.
Challenges you may encounter
● You need to be careful with the proportion of sizes of tom and jerry.
● The structures of tom and jerry are not very simple to draw.
● Perfecting the grumpy expression on tom’s face and a frightened expression on jerry’s face is challenging.
05 Catdog
Catdog is another very interesting character. Who’d have imagined a cat and a dog morphed in a single body? Well, imagination has no end to it as they say! Catdog is a yellow cat and dog in a single body, it looks cute and at the same time intriguing.
Why do we recommend you try your hands on this?
● The cartoon character is mainly composed of geometrical shapes.
● The character is vividly colorful.
● The bright yellow color is super attractive and hence makes drawing catdog very fun.
Challenges you may encounter
● The character is illusional, you might have difficulty while deciding how to even look at it.
● The cat and dog faces are not very different from each other and have minute differences while drawing you need to be careful about having a distinct difference between the two faces.
Now that we’ve taken our baby steps towards understanding the art of drawing cartoons.
Key Takeaways from This Episode
● That’s a lot of knowledge for today, isn’t it? Today we’ve seen the basics of drawing cartoon characters.
● We also got our hands dirty by exploring a few easy cartoon characters that you could draw.
● Further, we saw the basic steps that you would need to take in order to draw the face of any cartoon character! All in all, we learned everything we needed to know to draw our first cartoon! What are you waiting for? Go try out drawing your first cartoon today!
Learning the art of cartoon characters drawing? We can help! Cartoon characters drawing is no rocket science, ABCD: Anybody Can Draw!
We are as excited as you as we bring to you a few of the best drawing tutorials!
In this article
01 [Double Your Results with Learning Cartoon Drawing Styles First](#Part 1)
02 [Best 6 Cartoon Characters Anyone Can Draw (with Free Video Tutorials)](#Part 2)
03 [Easy Cartoon Characters to Draw Step by Step](#Part 3)
Part 1 Double Your Results with Learning Cartoon Drawing Styles First
01 Cartoon Character Sketches
Sketching is one of the most popular art forms. Sketching can be done for real-life people or celebrities or we can also make sketches of imaginary characters and cartoons. Sketching is generally made of pencil and does not involve the usage of colors.
02 Cartoon Characters Drawing with Color
Cartoon characters can be made with color to make them more attractive. This is another popular form of art that cartoonists follow. You can explore several methods of coloring and try making your cartoon colorful.
03 Disney Cartoon Characters Drawing
Disney cartoon character drawing is probably one of the simplest. This is because they have a predefined size and are mostly symmetric. Disney cartoon characters generally use common geometric shapes such as circles, ovals, and squares. Hence making it a beginner-friendly choice!
Part 2 Best 6 Cartoon Characters Anyone Can Draw (with Free Video Tutorials)
01 Roger the alien
Roger the alien is one of the simplest cartoon characters to draw. This children’s classic cartoon character always intrigues children due to its bizarre shape. It fixes the image of an outer space characters in a child’s mind(If they exist).
What makes it easy to draw?
● The oval-shaped head is easy to draw since it is not very detailed.
● The character does not have any hair, hair is one of the more difficult parts to draw.
● The body features aren’t very prominent, hence making the character easy to draw.
Challenges you may encounter
● If you are a first-timer, then you may find it challenging to draw fingers and the toes.
● Getting the weird alien head shape might be a little difficult and may take you a few attempts.
● Making the two eyes exactly similar to each other may be challenging for a few of you.
02 Wakko Warner
What makes it easy to draw?
● The character generally has geometrical shapes and hence you can use shape tracers to draw a few parts.
● The appealing appearance of the character makes it interesting to draw.
● The eyes are not very difficult to recreate.
Challenges you may encounter
● The eyes are not very difficult to recreate.
● The shape of the mouth and the tongue that is sticking out is slightly complex.
● Perfecting the shape of the hair is a little challenging.
03 Cosmo
What makes it easy to draw?
● We recommend you to try this character out mainly because of its uniqueness.
● The eyes are not very complicated to draw.
● The body resembles a stick image and is hence simple to draw.
Challenges you may encounter
● The shape of the crown needs to be perfect, especially because of the tilt the crown has.
● The fingers are challenging to draw.
● The hair has a distinct shape, this shape needs to come out perfectly.
04 Courage the cowardly dog
What makes it easy to draw?
● Firstly, it’s one of the most favorite cartoons, hence it will ensure to keep you interested in the drawing.
● The hands and legs resemble stick figures and are simple to draw.
● The body structure is simple.
Challenges you may encounter
● Drawing a cartoon animal instead of a human being might be intriguing for beginners.
● The large eyes, which is one of the characteristic features needs to be perfect.
● The design of the ears is the trickiest part and could be difficult to draw.
05 Tom And Jerry
When we think of cartoons, the first few names that probably come to our mind are tom and jerry. This duo of a grumpy cat and a mysterious mouse has left an everlasting impact on the world of cartoons. The duo is famous throughout the world and is loved throughout age groups
Why do we recommend you to try your hands on this?
● This is a classic cartoon that almost everyone loves.
● There are several resources on the internet to help you draw the cartoon characters.
● The characters need not be perfect, even a close resemblance to them would be sufficient for the viewers to identify them due to their fame.
Challenges you may encounter
● You need to be careful with the proportion of sizes of tom and jerry.
● The structures of tom and jerry are not very simple to draw.
● Perfecting the grumpy expression on tom’s face and a frightened expression on jerry’s face is challenging.
05 Catdog
Catdog is another very interesting character. Who’d have imagined a cat and a dog morphed in a single body? Well, imagination has no end to it as they say! Catdog is a yellow cat and dog in a single body, it looks cute and at the same time intriguing.
Why do we recommend you try your hands on this?
● The cartoon character is mainly composed of geometrical shapes.
● The character is vividly colorful.
● The bright yellow color is super attractive and hence makes drawing catdog very fun.
Challenges you may encounter
● The character is illusional, you might have difficulty while deciding how to even look at it.
● The cat and dog faces are not very different from each other and have minute differences while drawing you need to be careful about having a distinct difference between the two faces.
Now that we’ve taken our baby steps towards understanding the art of drawing cartoons.
Key Takeaways from This Episode
● That’s a lot of knowledge for today, isn’t it? Today we’ve seen the basics of drawing cartoon characters.
● We also got our hands dirty by exploring a few easy cartoon characters that you could draw.
● Further, we saw the basic steps that you would need to take in order to draw the face of any cartoon character! All in all, we learned everything we needed to know to draw our first cartoon! What are you waiting for? Go try out drawing your first cartoon today!
Secret Source to Make a Great Stop Motion Puppet
Secret Source to Make a Stop Motion Puppetd
An easy yet powerful editor
Numerous effects to choose from
Detailed tutorials provided by the official channel
The significant difference between a stop-motion puppet and other types is that they have an armature inside. An armature is the puppet’s skeleton, a must to hold its position without sleeping for each captured frame. The stop motion puppet makeover should be precise to prevent it from breaking down or falling quickly. In addition, buying a stop-motion puppet armature might be pretty expensive, so making them by yourself is much more fun and cheaper.

To prevent any mishap during your stop-motion puppet making, your pupils should be as durable and lightweight as possible, and they must be designed based on what you will be doing and what kind of movement will be required of them. In essence, your story’s overall purpose for creating the animation will be the ultimate factor in how your character is built and designed.
In this article
01 [8 Popular Stop Motion Puppet Examples](#Part 1)
02 [How to Make a Stop Motion Puppet](#Part 2)
Part 1 8 Popular Stop Motion Puppet Examples
While wandering all through the web world, you will encounter many famous stop motion puppets. Some of them are very popular stop-motion puppets for sale, and this section of the article is about to explore eight (of them and what they stand for:
01Rudolph the Red-Nosed Reindeer

Rudolph, the Red-Nosed Reindeer, is a pleasant Christmas stop motion animated TV special in 19produced by video craft international limited. These figures starred in the perennially beloved stop motion animation Christmas special.
02Nestor the Long-Eared Christmas Donkey

The Long-Eared Christmas Donkey, Nestor is a Christmas stop motion animated TV special in 19produced by Rankin-Bass productions. The story is back in the Roman Empire days when miniature donkeys were born with very long years and kept getting into trouble. When the owner decides to throw him out of the stable, his mother sacrifices her life to save him from a blizzard.
03Santa Claus is Comin’ to Town

This is a stop-motion animation TV special in 19made by Rankin-bass productions. The story tells all about Santa Claus when he was a baby and growing up with the Kringles. The story is told and sang by a special delivery Kluger voiced by Fred Astaire.
04Negative Space
This one is one of the world’s wide appreciated and Oscar-nominated stop motion puppet animations that reflect the son and father relationship in an interactive way. It is a must to watch animation effects.

05Fantastic Mr. Fox

Fantastic Mr. Fox is a 20puppet animation movie that talks about an urban fox that cannot resist returning to his farm and must help his community survive the farmer’s retaliation.
06Coraline

Coraline is a 20Pope x animation TV series that talks about an adventurous 11-year-old girl that finds another strange world that is an idealized version of her frustrating home.
07The Nightmare before Christmas

The nightmare before Christmas is a puppet animation TV series that talks about Jack Skellington, the king of Halloween Town, and discovers Christmas town but his attempts to bring Christmas to his home result in confusion.
07Corpse bride

Corpse Bride is a puppet animated family TV series in 20talks about a shy groom practicing his wedding vow in the inadvertent presence of a deceased young woman as she rises from the grave, assuming that he has married her.
Part 2 How to Make a Stop Motion Puppet
Do you have a story, and you need some puppets to take the place of your actors, and you want to double in stop motion animation. The fact is there are different ways to create your Stop Motion Puppet, and as per your storyboard requirement, you can go with other methods. Such as, you can either use tools to build your puppet armature, otherwise can make some puppets from clothes and threads to give it a structure, else can use clay to assign a static puppet structure. It’s all your choice, so all in all what you need is:
● A Storyboard
● Puppet armature tools
● Camera setup
● Editing Software (in our case, we are going to use Wondershare Filmora Video Editor )
In this tutorial, we will be teaching you how to make stop-motion puppets in a way that is relatively cost-effective to produce durable means whose construction requires little or no time or extra equipment:

Wondershare Filmora - Best Video Editor for Mac/Windows
5,481,435 people have downloaded it.
Build unique custom animations without breaking a sweat.
Focus on creating epic stories and leave the details to Filmora’s auto features.
Start a creative adventure with drag & drop effects and endless possibilities.
Filmora simplifies advanced features to save you time and effort.
Filmora cuts out repetition so you can move on to your next creative breakthrough.
Materials:
● Ball head screws (M2.5)
● Small screws (M3)
● Ball head screws (2xand brass pipes whose diameter is less than ball head screws
● Brass plate (strips 2mm thick)
Tools:
● M3 thread tap
● M2.5 thread tap
● Screwdriver
● Pliers
● Drill press
● Drills of 2.5 mm, 2 mm, 3 mm
● Power sander
● Loctite
● File
● Bandsaw
Step
● Use the brass to mark the length of the bone
● Cut the tube according to the length
● Sandpaper or file it Square
● On both sides of the tube, use the tap to cause the tread
● Use the screws in the brass tube to screw the ball head

Step 2:
● On each sides of the brass strip, drill 2.5 mm holes
● Then, between holes of the holes you drill, drill 2.5 mm holes
● Between the other 2.5 mm holes, drill 3mm holes

Step 3:
● On the 2.5 mm holes on the sides, use the 3mm drill to create some cup
● With the 3 mm tap, cut the thread in the 2 mm holes in the middle

Step 4:
● Without damaging the holes, file the end of the strip with all the holes as close to the first 3
● From the strip, cut the parts with the first three holes
● Also, as close to the most used flyer to file the other side.
Note: Make sure you are careful while filing as this will get very hot

**Step 5:**Join all the parts together and make sure that the cup on the outer holes of the two plates is two words each other and tighten the bolts to hold the bones

Step 6: Join to strip of bras together and form a torso. Then cut the torso and form the feet

Step 7: When your puppet is the way you want it, lock teeth styles by fixing the ball head screw in place

Animation Editing:
Also, you can make a stop motion video on Filmora by considering the following factors:
● Camera Steadiness is a must for every shot you plan for Stop Motion Video. Shaking a camera is not good. Else, your video won’t be smooth.
● Ensure capture the shot under consistent light and prevent light exposure from changing on the object; otherwise, there will be inconsistency in the video.
● To make it easier, play the film in advance, as the more friends your video, the smoother the video will be.
Here are steps to make a stop motion video on Filmora:
Step 1 Place the camera steady and bring your object in the frame. Lightly move your things and capture the movement frame by frame.

Step 2 Download and start, or if you have already installed, run the Filmora program and choose a suitable frame rate in the project settings. After selecting the resolution, click on the file and go to the project setting.

Step 3 Now import the media file using the import option from the file menu and import the captured images.

Step 4 Adjust the menu’s preference or press the shortcut key Ctrl+Shift+, and a window will appear on your screen. Select the editing panel and change the photo duration between 0.2 to 0.5 seconds.

Step 5 Once done with all the settings and satisfied with the results, click on export and select your desired video format. Your video will be exported and saved in your library so you can share it with friends.

● Key Takeaways from This Episode →
● Get to know about what is stop motion puppets.
● Different examples of how dinosaur stop motion puppet or other puppet animation form works.
● The process to create your stop motion puppet and how Filmora will assist you in it.
The significant difference between a stop-motion puppet and other types is that they have an armature inside. An armature is the puppet’s skeleton, a must to hold its position without sleeping for each captured frame. The stop motion puppet makeover should be precise to prevent it from breaking down or falling quickly. In addition, buying a stop-motion puppet armature might be pretty expensive, so making them by yourself is much more fun and cheaper.
To prevent any mishap during your stop-motion puppet making, your pupils should be as durable and lightweight as possible, and they must be designed based on what you will be doing and what kind of movement will be required of them. In essence, your story’s overall purpose for creating the animation will be the ultimate factor in how your character is built and designed.
In this article
01 [8 Popular Stop Motion Puppet Examples](#Part 1)
02 [How to Make a Stop Motion Puppet](#Part 2)
Part 1 8 Popular Stop Motion Puppet Examples
While wandering all through the web world, you will encounter many famous stop motion puppets. Some of them are very popular stop-motion puppets for sale, and this section of the article is about to explore eight (of them and what they stand for:
01Rudolph the Red-Nosed Reindeer
Rudolph, the Red-Nosed Reindeer, is a pleasant Christmas stop motion animated TV special in 19produced by video craft international limited. These figures starred in the perennially beloved stop motion animation Christmas special.
02Nestor the Long-Eared Christmas Donkey
The Long-Eared Christmas Donkey, Nestor is a Christmas stop motion animated TV special in 19produced by Rankin-Bass productions. The story is back in the Roman Empire days when miniature donkeys were born with very long years and kept getting into trouble. When the owner decides to throw him out of the stable, his mother sacrifices her life to save him from a blizzard.
03Santa Claus is Comin’ to Town
This is a stop-motion animation TV special in 19made by Rankin-bass productions. The story tells all about Santa Claus when he was a baby and growing up with the Kringles. The story is told and sang by a special delivery Kluger voiced by Fred Astaire.
04Negative Space
This one is one of the world’s wide appreciated and Oscar-nominated stop motion puppet animations that reflect the son and father relationship in an interactive way. It is a must to watch animation effects.
05Fantastic Mr. Fox
Fantastic Mr. Fox is a 20puppet animation movie that talks about an urban fox that cannot resist returning to his farm and must help his community survive the farmer’s retaliation.
06Coraline
Coraline is a 20Pope x animation TV series that talks about an adventurous 11-year-old girl that finds another strange world that is an idealized version of her frustrating home.
07The Nightmare before Christmas
The nightmare before Christmas is a puppet animation TV series that talks about Jack Skellington, the king of Halloween Town, and discovers Christmas town but his attempts to bring Christmas to his home result in confusion.
07Corpse bride
Corpse Bride is a puppet animated family TV series in 20talks about a shy groom practicing his wedding vow in the inadvertent presence of a deceased young woman as she rises from the grave, assuming that he has married her.
Part 2 How to Make a Stop Motion Puppet
Do you have a story, and you need some puppets to take the place of your actors, and you want to double in stop motion animation. The fact is there are different ways to create your Stop Motion Puppet, and as per your storyboard requirement, you can go with other methods. Such as, you can either use tools to build your puppet armature, otherwise can make some puppets from clothes and threads to give it a structure, else can use clay to assign a static puppet structure. It’s all your choice, so all in all what you need is:
● A Storyboard
● Puppet armature tools
● Camera setup
● Editing Software (in our case, we are going to use Wondershare Filmora Video Editor )
In this tutorial, we will be teaching you how to make stop-motion puppets in a way that is relatively cost-effective to produce durable means whose construction requires little or no time or extra equipment:
Wondershare Filmora - Best Video Editor for Mac/Windows
5,481,435 people have downloaded it.
Build unique custom animations without breaking a sweat.
Focus on creating epic stories and leave the details to Filmora’s auto features.
Start a creative adventure with drag & drop effects and endless possibilities.
Filmora simplifies advanced features to save you time and effort.
Filmora cuts out repetition so you can move on to your next creative breakthrough.
Materials:
● Ball head screws (M2.5)
● Small screws (M3)
● Ball head screws (2xand brass pipes whose diameter is less than ball head screws
● Brass plate (strips 2mm thick)
Tools:
● M3 thread tap
● M2.5 thread tap
● Screwdriver
● Pliers
● Drill press
● Drills of 2.5 mm, 2 mm, 3 mm
● Power sander
● Loctite
● File
● Bandsaw
Step
● Use the brass to mark the length of the bone
● Cut the tube according to the length
● Sandpaper or file it Square
● On both sides of the tube, use the tap to cause the tread
● Use the screws in the brass tube to screw the ball head
Step 2:
● On each sides of the brass strip, drill 2.5 mm holes
● Then, between holes of the holes you drill, drill 2.5 mm holes
● Between the other 2.5 mm holes, drill 3mm holes
Step 3:
● On the 2.5 mm holes on the sides, use the 3mm drill to create some cup
● With the 3 mm tap, cut the thread in the 2 mm holes in the middle
Step 4:
● Without damaging the holes, file the end of the strip with all the holes as close to the first 3
● From the strip, cut the parts with the first three holes
● Also, as close to the most used flyer to file the other side.
Note: Make sure you are careful while filing as this will get very hot
**Step 5:**Join all the parts together and make sure that the cup on the outer holes of the two plates is two words each other and tighten the bolts to hold the bones
Step 6: Join to strip of bras together and form a torso. Then cut the torso and form the feet
Step 7: When your puppet is the way you want it, lock teeth styles by fixing the ball head screw in place
Animation Editing:
Also, you can make a stop motion video on Filmora by considering the following factors:
● Camera Steadiness is a must for every shot you plan for Stop Motion Video. Shaking a camera is not good. Else, your video won’t be smooth.
● Ensure capture the shot under consistent light and prevent light exposure from changing on the object; otherwise, there will be inconsistency in the video.
● To make it easier, play the film in advance, as the more friends your video, the smoother the video will be.
Here are steps to make a stop motion video on Filmora:
Step 1 Place the camera steady and bring your object in the frame. Lightly move your things and capture the movement frame by frame.
Step 2 Download and start, or if you have already installed, run the Filmora program and choose a suitable frame rate in the project settings. After selecting the resolution, click on the file and go to the project setting.
Step 3 Now import the media file using the import option from the file menu and import the captured images.
Step 4 Adjust the menu’s preference or press the shortcut key Ctrl+Shift+, and a window will appear on your screen. Select the editing panel and change the photo duration between 0.2 to 0.5 seconds.
Step 5 Once done with all the settings and satisfied with the results, click on export and select your desired video format. Your video will be exported and saved in your library so you can share it with friends.
● Key Takeaways from This Episode →
● Get to know about what is stop motion puppets.
● Different examples of how dinosaur stop motion puppet or other puppet animation form works.
● The process to create your stop motion puppet and how Filmora will assist you in it.
Adobe Rigger Is AWESOME
Adobe Auto Rigger is AWESOME
An easy yet powerful editor
Numerous effects to choose from
Detailed tutorials provided by the official channel
The Adobe Auto rigger is definitely something to look into if you want to quickly and easily prep 3D Animated Characters (without having to learn all the difficult ins and outs of Adobe 3D Rigging.) It’s a perfect tool for beginners.
Especially those that aren’t really looking to create big animated projects, just small animated characters or objects that they can use for their websites, video content, video game development, etc.
In this article
01 [What’s Adobe Auto Rigger?](#Part 1)
02 [How Do You Auto Rig a Character in Adobe?](#Part 2)
03 [Other AWESOME Auto Rigger Tools](#Part 3)
Part 1 What’s Adobe Auto Rigger?
Alright, so what is the Adobe Auto Rigger and how does it differ from Adobe Animate Advanced Rigging or Adobe After Effects Rigging? Is there any difference at all??? The simple answer? Yes, there is a definite difference.
It’s all thanks to the third-party tool, Mixamo, which will allow you to upload characters for auto rigging (basically bypassing the kind of work that is usually required for manually rigging and animating in Adobe Animate and After Effects.) We’ll talk more about this in the tutorial below. For now, all you need to know is that it takes care of setting up a character for you with only a few simple steps.
Thus, enabling you to quickly move forward in your projects if you wish. Whether you’re intending to create a quick little animation for your website, or jumping into a video editing software like Wondershare Filmora Video Editor (which is great professional software with everything you need to start creating high-quality content that you can share with your audience.)

Part 2 How Do You Auto Rig a Character in Adobe?
Now onto our promised tutorial. Here, we make use of the Adobe Auto Rigger, Mixamo, in order to demonstrate how you can bypass Adobe Rigging by making use of Mixamo’s auto-rigging functions or their pre-existing character models for creating your projects.
01Upload Your Own Character
To start, you’ll need to visit ‘Maximo.com’ and sign in with your Adobe ID (email and password required.)
You can also sign-up for free if you’d like. That option is available for those who may want to explore the available options first.
Once you’re logged in, go to the ‘Editor’ panel and prepare to upload a custom character for automatic rigging. This is assuming that you have a character design already prepared, of course. If not, then don’t worry. The next should help.

02(Optional) Browse for Downloadable Characters
The best part of Mixamo is that it has a rich library full of pre-rigged characters that you can use should you wish to. These can be found under the ‘Characters’ tab (shown in the image below.)
So, if you don’t have a character model prepared just yet or have no intention of diving too deeply into character design just in general, you don’t have to worry. You can just download one of the pre-rigged characters here and use them for your project.

03Rig a Custom Character
If you’ve decided to go forward with a custom character, after all, upload it to the Adobe Auto Rigger (shown in the image below.)
This is a very straightforward tool that you can use to place the most important markers on your figure (chin, wrists, elbows, knees, and groin). Once you’ve confirmed the placement of all these points, you can continue and come out of it with your Model auto-rigged and work-ready.

04Download Rigged Character and Begin Animation
It may take several minutes for the Adobe Auto Rigger to completely finish auto-rigging your project, so have a bit of patience. You’ll be taken back to the main interface when complete, and you’ll be able to download your now rigged model for use.
Part 3 Other AWESOME Auto Rigger Tools
Now, just in case you’re interested in other methods of automatically rigging outside of what we demonstrated above for rigging in Adobe Animate and After Effects… We’ve included some other add-ons and tools that you can use with other popular Animation software. They’re all a little bit different, so make sure to pay attention to the details provided (and watch the video attached too. As it should show you just what exactly each of these auto-rigging tools is capable of doing for you.)
01InstantRig - Auto Rigger
The first Auto Rigger on this list is ‘Instant Rig.’ This is a rigging tool for the Animation software called 3ds Max. More specifically, it’s a ‘modular rigging’ tool. That makes it very versatile, allowing you to determine the features of the character that you are working with based on their attributes (no matter how many fingers, toes, tails, ears, etc. they need.) The tool is particularly popular with game developers, as it is a quick and easy way of rigging game characters — whether they be humanoid or beastly in form. (A free version of the tool is available, but a full license will require a one-time fee of around $35.)
02Auto-Rig Pro
Next, we have the auto-rigging addon for the free, open-source Animation Software, Blender. This add-on can be used very similarly to the Adobe Animate Puppet Rig tools — and is free to use besides. The add-on has a ‘smart feature’ that is capable of automatically rigging up joints and bones of humanoid forms in an instant and can also be used for rigging up non-humanoid characters — albeit, it would have to be manual.
03Perseus Auto Rig - Maya
Next up, we have Perseus Auto Rig. This one works with Maya (which is a very popular professional software used by a lot of animation studios in the industry) and actually comes in three versions. There’s the Perseus ‘Biped Rigging’ license for humanoid characters, the Perseus ‘Facial Rigging’ license for rigging facial features, and the Perseus ‘Quadruped Rigging’ license for non-humanoid creatures.
04Auto Character Setup
Next is the auto-character set-up tool for MODO. This is a tool designed for rigging up bi-pedal characters — so mostly humanoid forms. But it does offer some flexibility as to the form that bipedal character takes. So, you can adjust it as needed if there’s something incongruous with your design and the auto-rigger itself.
05IKMAX
For our last tool for auto-rigging, we have IKMAX. This works for 3ds Max and Maya (both of which we’ve mentioned before. It’s very easy to use and adjust as needed — with sliders that you can fiddle around with the work through any problem areas if need be.
● Key Takeaways from This Episode →
● If you’re interested in introducing animations into your content but you don’t have the time or the patience to get too involved with Adobe Rigging (which is a complex subject to talk about even for some professional animators), the auto-rigging solutions are definitely something to consider.
● The Adobe Auto Rigger, Mixamo, is an especially exciting tool to try out. Not only is it incredibly easy to use, but it comes with pre-made character designs that you can play around with to start your experimentations into animation early.
● If Adobe is not your software of choice, don’t worry. There are other auto-rigging tools that you can try out if need be. We introduced at least five that you can use with some of the more popular alternative animation software in a list for you to look through.
The Adobe Auto rigger is definitely something to look into if you want to quickly and easily prep 3D Animated Characters (without having to learn all the difficult ins and outs of Adobe 3D Rigging.) It’s a perfect tool for beginners.
Especially those that aren’t really looking to create big animated projects, just small animated characters or objects that they can use for their websites, video content, video game development, etc.
In this article
01 [What’s Adobe Auto Rigger?](#Part 1)
02 [How Do You Auto Rig a Character in Adobe?](#Part 2)
03 [Other AWESOME Auto Rigger Tools](#Part 3)
Part 1 What’s Adobe Auto Rigger?
Alright, so what is the Adobe Auto Rigger and how does it differ from Adobe Animate Advanced Rigging or Adobe After Effects Rigging? Is there any difference at all??? The simple answer? Yes, there is a definite difference.
It’s all thanks to the third-party tool, Mixamo, which will allow you to upload characters for auto rigging (basically bypassing the kind of work that is usually required for manually rigging and animating in Adobe Animate and After Effects.) We’ll talk more about this in the tutorial below. For now, all you need to know is that it takes care of setting up a character for you with only a few simple steps.
Thus, enabling you to quickly move forward in your projects if you wish. Whether you’re intending to create a quick little animation for your website, or jumping into a video editing software like Wondershare Filmora Video Editor (which is great professional software with everything you need to start creating high-quality content that you can share with your audience.)
Part 2 How Do You Auto Rig a Character in Adobe?
Now onto our promised tutorial. Here, we make use of the Adobe Auto Rigger, Mixamo, in order to demonstrate how you can bypass Adobe Rigging by making use of Mixamo’s auto-rigging functions or their pre-existing character models for creating your projects.
01Upload Your Own Character
To start, you’ll need to visit ‘Maximo.com’ and sign in with your Adobe ID (email and password required.)
You can also sign-up for free if you’d like. That option is available for those who may want to explore the available options first.
Once you’re logged in, go to the ‘Editor’ panel and prepare to upload a custom character for automatic rigging. This is assuming that you have a character design already prepared, of course. If not, then don’t worry. The next should help.
02(Optional) Browse for Downloadable Characters
The best part of Mixamo is that it has a rich library full of pre-rigged characters that you can use should you wish to. These can be found under the ‘Characters’ tab (shown in the image below.)
So, if you don’t have a character model prepared just yet or have no intention of diving too deeply into character design just in general, you don’t have to worry. You can just download one of the pre-rigged characters here and use them for your project.
03Rig a Custom Character
If you’ve decided to go forward with a custom character, after all, upload it to the Adobe Auto Rigger (shown in the image below.)
This is a very straightforward tool that you can use to place the most important markers on your figure (chin, wrists, elbows, knees, and groin). Once you’ve confirmed the placement of all these points, you can continue and come out of it with your Model auto-rigged and work-ready.
04Download Rigged Character and Begin Animation
It may take several minutes for the Adobe Auto Rigger to completely finish auto-rigging your project, so have a bit of patience. You’ll be taken back to the main interface when complete, and you’ll be able to download your now rigged model for use.
Part 3 Other AWESOME Auto Rigger Tools
Now, just in case you’re interested in other methods of automatically rigging outside of what we demonstrated above for rigging in Adobe Animate and After Effects… We’ve included some other add-ons and tools that you can use with other popular Animation software. They’re all a little bit different, so make sure to pay attention to the details provided (and watch the video attached too. As it should show you just what exactly each of these auto-rigging tools is capable of doing for you.)
01InstantRig - Auto Rigger
The first Auto Rigger on this list is ‘Instant Rig.’ This is a rigging tool for the Animation software called 3ds Max. More specifically, it’s a ‘modular rigging’ tool. That makes it very versatile, allowing you to determine the features of the character that you are working with based on their attributes (no matter how many fingers, toes, tails, ears, etc. they need.) The tool is particularly popular with game developers, as it is a quick and easy way of rigging game characters — whether they be humanoid or beastly in form. (A free version of the tool is available, but a full license will require a one-time fee of around $35.)
02Auto-Rig Pro
Next, we have the auto-rigging addon for the free, open-source Animation Software, Blender. This add-on can be used very similarly to the Adobe Animate Puppet Rig tools — and is free to use besides. The add-on has a ‘smart feature’ that is capable of automatically rigging up joints and bones of humanoid forms in an instant and can also be used for rigging up non-humanoid characters — albeit, it would have to be manual.
03Perseus Auto Rig - Maya
Next up, we have Perseus Auto Rig. This one works with Maya (which is a very popular professional software used by a lot of animation studios in the industry) and actually comes in three versions. There’s the Perseus ‘Biped Rigging’ license for humanoid characters, the Perseus ‘Facial Rigging’ license for rigging facial features, and the Perseus ‘Quadruped Rigging’ license for non-humanoid creatures.
04Auto Character Setup
Next is the auto-character set-up tool for MODO. This is a tool designed for rigging up bi-pedal characters — so mostly humanoid forms. But it does offer some flexibility as to the form that bipedal character takes. So, you can adjust it as needed if there’s something incongruous with your design and the auto-rigger itself.
05IKMAX
For our last tool for auto-rigging, we have IKMAX. This works for 3ds Max and Maya (both of which we’ve mentioned before. It’s very easy to use and adjust as needed — with sliders that you can fiddle around with the work through any problem areas if need be.
● Key Takeaways from This Episode →
● If you’re interested in introducing animations into your content but you don’t have the time or the patience to get too involved with Adobe Rigging (which is a complex subject to talk about even for some professional animators), the auto-rigging solutions are definitely something to consider.
● The Adobe Auto Rigger, Mixamo, is an especially exciting tool to try out. Not only is it incredibly easy to use, but it comes with pre-made character designs that you can play around with to start your experimentations into animation early.
● If Adobe is not your software of choice, don’t worry. There are other auto-rigging tools that you can try out if need be. We introduced at least five that you can use with some of the more popular alternative animation software in a list for you to look through.
How to Make an Animated Travel Map Video?
How to Make an Animated Travel Map Video?

Benjamin Arango
Mar 27, 2024• Proven solutions
Animated travel map videos make it easy for the viewers to follow the routes from the source to destination locations right on the single screen. While the static maps would only allow the audience to see the markers from where the journey would start and is expected to end, the animated ones show the real-time movements and therefore look more interactive when viewed.
That said, here you will learn how to create an attractive and engaging animated travel map video using one of the easiest post-production applications, Wondershare Filmora, which is widely appreciated by amateurs and professionals throughout the globe. In another section, you will also learn about an alternative program that might be of some help in case you are more into online designing.
- Method 1: Make Animated Travel Map Videos with Location Video Maker - [Video Tutorial]
- Method 2: Make Interactive Animated Travel Map with Pictramap
- Method 3: Create Animated Travel Map Using Multidev
Method 1 Make Animated Travel Map Videos with Location Video Maker
The entire process of creating an animated travel map video in Wondershare’s Filmora is categorized into two parts, wherein the first part you will collect all the ingredients that are needed to get started, and in the second part you will actually make an animated map using the tools and features present in Filmora.
Watch a video tutorial to see how to make an animated map for a video:
For Win 7 or later (64-bit)
 Secure Download
For macOS 10.14 or later
Secure Download


Part 1: Prepare the Travel Map Materials
Following are the ingredients and the methods to collect them for animated travel map preparation:
Step 1: Get the Map
The first thing that you would need to prepare an animated map is an image of a realistic map. Thanks to Google and Microsoft, these things are now pretty easy to arrange. The process is given below:
- Launch your preferred web browser
- Type google.com in the address bar or the search box and hit Enter
- Scroll to zoom out so you can see the entire world map on one screen

- Type Snipping Tool in the Cortana search box present on the left side of the Taskbar
- Launch Snipping Tool, and use it to capture the screenshot of the map
Note: Snipping Tool is a built-in app in Windows 10 and is available for free. If you are using any other operating system, or have a different program to capture the screenshots, feel free to use it according to your convenience.
- Save the screenshot you captured as a JPG file on your PC
Step 2: Mark Out the Map Path
The next step in the process of preparing an animated travel map is to mark your route on it. To do so, you can use any of your preferred photo editing tools. However, to keep this illustration simple, Microsoft Paint is used here, and the method is given below:
- Right-click the screenshot you just captured
- Go to Open with on the context menu, and then click Paint from the submenu that appears
- Pick your preferred color from the pallet of the Paint interface. It is advisable to use an eye-catchy shade such as Red
- Use the Sphere shape tool to draw a circle over the source and destination locations on the map
- Use the Line tool to draw a line from the source point to the destination. Try giving the line a few turns to make it look realistic
- Go to File > Save As, and save the marked image with a different name
Note: Once this is done, you should have two image files of the map, i.e., one without the marks and one with it
Step 3: Download Some Travel Icons
Another important ingredient in an effective travel map animation is touring icons such as location marker image, a traveling medium symbol like a helicopter, airplane, car/bike (for short distances), etc. A couple of websites that offer royalty-free stock photos at absolutely no cost are listed below:
Note: Although the websites given above allow you to download and use their stock images and icons for free, you may need to give credits to the designers/creators of the symbols while using their objects. Therefore, you are suggested to check the Terms & Conditions and norms of usage of the elements before downloading and adding them to your projects.
Part 2: Make Animated Travel Map Videos with Filmora
After you have gathered all the necessary ingredients that are required to create a travel map animation, it is now time to get to work. The following instructions would guide you through the step-by-step process of preparing a decent and realistic animated travel map in Wondershare Filmora :
For Win 7 or later (64-bit)
Secure Download
For macOS 10.14 or later
Secure Download
Step 1: Import Ingredients to Filmora and Add Them to the Timeline
Launch the video editor on your computer, click anywhere inside the Media window at the upper-left area, and import all the images and icons that you collected earlier to program. Next, drag both the images of the map, i.e., with and without the marks to the Timeline, and ensure that they are of the same duration and are placed on the same track.

Note: Be sure to put the map without the marks first, and then the one with the marks. Also note that the images have the playback duration of 5 seconds in the Timeline by default, and this tenure can be reduced or increased by dragging the side handle of the media to the left or right respectively.
Step 2: Add Transition for Illusion of Route Appearance
Go to Transition from the standard toolbar at the top, locate the Erase Slide transition effect from the available presets, and place it in between the two image files that you earlier added to the Timeline. Next, click and drag either of the side handles of the transition to the end of the media clip. Notice how the other side of the effect is expanded in equal proportion.

Step 3: Preview and Export
Press the Spacebar on the keyboard to preview the video and see if the route appears as if it is being drawn on the map. Once the animation looks acceptable, click EXPORT from the top-center, go to the Local tab on the Export window, select MP4 from the formats list in the left, and click EXPORT from the bottom-right corner to export the current animation to MP4.
Step 4: Customize the Travel Map Media
Either start a new project and import the video of the map you exported in the previous step to the app and then to the Timeline, or remove the existing media from the Timeline in the same project, and add the exported video to it for convenience.

For Win 7 or later (64-bit)
Secure Download
For macOS 10.14 or later
Secure Download
Next, position the Skimmer (Playhead) a couple of frames before the one the route line appears and starts stretching from, and click the Split icon from the editing toolbar above the Timeline itself. Repeat this process for the other side of the media, i.e., position the Skimmer a couple of frames after the route line reaches the destination location, and click the Split icon again. Then remove the separated segments from both the sides by selecting them and pressing Delete on the keyboard, leaving only the portion where the animation is visible.

Optionally, right-click the media that is left behind in the Timeline, and go to Speed and Duration from the context menu. On the Custom Speed box, drag the Speed slider to the left to decrease the playback speed resulting in the increased duration of the media. Alternatively, you can manually enter a value in the Speed box to get precise tenure. Click OK when you are done.

Step 5: Add Animations to Travel Map
Right-click the media in the Timeline, and go to Add Animation from the context menu. Make sure that the Skimmer is on the first frame, and add several keyframes as explained below:
- Click Add to add the first keyframe

- Move a couple of frames further, and click Add one more time. Now, while you are on this second keyframe, use the Scale slider to zoom in to the map so the source location remains within focus.

- Next, move the Playhead further and add another keyframe a couple of frames before the route line hits the edge of the window.
- After this, move the Playhead again and position it where the route line reaches its destination location. Add another keyframe here as well, and move the map in the Preview window so the focus is now on the destination.
- Move the Playhead a few frames further, add another keyframe, and use the Scale slider to zoom a bit more into the map to make the entire animation look realistic. Click OK to save the changes.
Step 6: Add Icons and Titles, and Export the Project
Drag the image of the traveling medium to the Timeline, and place it on the frame the route line starts from. Make sure to place the image on the track above the map, and stretch it to the end so it remains visible throughout the animation. Next, use the method explained above to add keyframes to move the medium along with the route line from the source to the destination. Optionally, add the image of the location marker at the destination point, go to Transition, and add your preferred transition effect, preferably Dissolve, to the marker track in the Timeline so it looks as if it has appeared as the medium arrived the destination.
For Win 7 or later (64-bit)
Secure Download
For macOS 10.14 or later
Secure Download
Get back to the first frame in the Timeline, go to Titles on the standard toolbar, and add a title preset somewhere near the source location. Resize the text, change the format as needed, and add your preferred caption to it such as the start time, name, etc. Reduce the duration of the track so the title appears for a few frames, preferably before the map animation starts. Click OK when done. Repeat this process for the destination point as well.
Once everything is complete, click the Play button in the Preview window to review your work. If the video looks acceptable, click EXPORT from the top-center of the interface, and use the method explained earlier to export the animated travel map in your preferred format.
![]()
Method 2 How to Make Interactive Animated Travel Map with Pictramap
If you don’t want to install a dedicated animation software on your computer due to limited hardware resources or some other reason, there is an online solution called Pictramap to create a travel map animation using a web browser. The web app offers a lucrative interface that could be easily understood and worked with to produce an animated map for free.
The process to create an animated travel map with Pictramap is given below:
Step 1: Create a Project
Launch your favorite web browser, go to https://www.pictramap.com/ , click Create yours now, it’s free, and sign up to Pictramap using your preferred method. When you are on the Dashboard, enter a name in the field available under the My Projects section, and click Create to create a new project (the animated map).

Step 2: Define the Locations and Method of Commute
On the map, right-click the location you want to start your journey from, enter the name of the location or any other significant title, and click Add. Click the location marker, click the Travel Mode icon, and select your preferred mode of traveling. Repeat this process to mark the destination location as well.

Step 3: Preview the Animation
Click the View Animation button from the upper-right corner of the page to see the animated travel map.

Downsides of Using Pictramap to Create Animated Travel Map Video
Although Pictramap allows you to create a travel map animation with ease and extremely quickly, at the time of this writing, it offers no way of downloading the animation to your PC, and therefore it couldn’t be used in your projects.
If you are using Wondershare Filmora, you can use its built-in screen recording feature to record the animation that Pictramap plays, and then save the captured footage as MP4 or any other format on your computer. This video can then be imported to your projects for further uses.
![]()
A cross-platform for making videos anywhere for all creators

Why your video editing isn’t good enough? How about some creative inspo?
- 100 Million+ Users
- 150+ Countries and Regions
- 4 Million+ Social Media Followers
- 5 Million+ Stock Media for Use
* Secure Download

Method 3 How To Make Animated Travel Map Using Multidev
Multi.dev is still a new web-based application to build awesome animated maps, but it’s good! The application helps you create presentations about all your recent and previous trips. And the interface is also hassle-free.
So, follow this step-by-step guide to making animated maps with Multi.dev.
Step 1: Open Multi.dev
Visit Multi.dev from your internet browser.

Once the tool gets open, you will see a demo video. This example clip will have animated maps of different locations. So it is up to you whether to use the same example and edit the places you have been to or are planning to visit. Or, simply create a new animated map from scratch.
Step 2: Choose Your First Location
Take your mouse cursor on the left side of the application and type the first location in the search bar. As soon as you do it, you will see that the “travel arrow” will automatically begin from there. Likewise, type and select the next location through the search bar.
Once you type the location, you will see 8 travel modes, including airplane, bus, and train. You can select the same mode for all sites or a different mode for another place. Totally up to you!

Step 3: Select Map Themes
All your chosen places will be highlighted in the software’s minimalistic map.

Step 4: Download Map on Your Computer
If you’re happy with the animated map, click the “Create Video” button to save the animated map on your computer in a few minutes.


Contrarily, you can also share the animation by choosing the “Share Animation” option.
Conclusion
An animated travel map plays an important role to add a realistic touring effect to your motion picture projects. While you can use a web app like Pictramap to create such an animation online easily and for free, the limitations it comes along with might keep you from choosing this method.
Instead, you may want to get more inclined toward a dedicated post-production software like Wondershare Filmora that gives you full control over the process, and the freedom to choose your preferred format to export the animation to for independent usage.
For Win 7 or later (64-bit)
Secure Download
For macOS 10.14 or later
Secure Download
Benjamin Arango
Benjamin Arango is a writer and a lover of all things video.
Follow @Benjamin Arango
Benjamin Arango
Mar 27, 2024• Proven solutions
Animated travel map videos make it easy for the viewers to follow the routes from the source to destination locations right on the single screen. While the static maps would only allow the audience to see the markers from where the journey would start and is expected to end, the animated ones show the real-time movements and therefore look more interactive when viewed.
That said, here you will learn how to create an attractive and engaging animated travel map video using one of the easiest post-production applications, Wondershare Filmora, which is widely appreciated by amateurs and professionals throughout the globe. In another section, you will also learn about an alternative program that might be of some help in case you are more into online designing.
- Method 1: Make Animated Travel Map Videos with Location Video Maker - [Video Tutorial]
- Method 2: Make Interactive Animated Travel Map with Pictramap
- Method 3: Create Animated Travel Map Using Multidev
Method 1 Make Animated Travel Map Videos with Location Video Maker
The entire process of creating an animated travel map video in Wondershare’s Filmora is categorized into two parts, wherein the first part you will collect all the ingredients that are needed to get started, and in the second part you will actually make an animated map using the tools and features present in Filmora.
Watch a video tutorial to see how to make an animated map for a video:
For Win 7 or later (64-bit)
Secure Download
For macOS 10.14 or later
Secure Download
Part 1: Prepare the Travel Map Materials
Following are the ingredients and the methods to collect them for animated travel map preparation:
Step 1: Get the Map
The first thing that you would need to prepare an animated map is an image of a realistic map. Thanks to Google and Microsoft, these things are now pretty easy to arrange. The process is given below:
- Launch your preferred web browser
- Type google.com in the address bar or the search box and hit Enter
- Scroll to zoom out so you can see the entire world map on one screen
- Type Snipping Tool in the Cortana search box present on the left side of the Taskbar
- Launch Snipping Tool, and use it to capture the screenshot of the map
Note: Snipping Tool is a built-in app in Windows 10 and is available for free. If you are using any other operating system, or have a different program to capture the screenshots, feel free to use it according to your convenience.
- Save the screenshot you captured as a JPG file on your PC
Step 2: Mark Out the Map Path
The next step in the process of preparing an animated travel map is to mark your route on it. To do so, you can use any of your preferred photo editing tools. However, to keep this illustration simple, Microsoft Paint is used here, and the method is given below:
- Right-click the screenshot you just captured
- Go to Open with on the context menu, and then click Paint from the submenu that appears
- Pick your preferred color from the pallet of the Paint interface. It is advisable to use an eye-catchy shade such as Red
- Use the Sphere shape tool to draw a circle over the source and destination locations on the map
- Use the Line tool to draw a line from the source point to the destination. Try giving the line a few turns to make it look realistic
- Go to File > Save As, and save the marked image with a different name
Note: Once this is done, you should have two image files of the map, i.e., one without the marks and one with it
Step 3: Download Some Travel Icons
Another important ingredient in an effective travel map animation is touring icons such as location marker image, a traveling medium symbol like a helicopter, airplane, car/bike (for short distances), etc. A couple of websites that offer royalty-free stock photos at absolutely no cost are listed below:
Note: Although the websites given above allow you to download and use their stock images and icons for free, you may need to give credits to the designers/creators of the symbols while using their objects. Therefore, you are suggested to check the Terms & Conditions and norms of usage of the elements before downloading and adding them to your projects.
Part 2: Make Animated Travel Map Videos with Filmora
After you have gathered all the necessary ingredients that are required to create a travel map animation, it is now time to get to work. The following instructions would guide you through the step-by-step process of preparing a decent and realistic animated travel map in Wondershare Filmora :
For Win 7 or later (64-bit)
Secure Download
For macOS 10.14 or later
Secure Download
Step 1: Import Ingredients to Filmora and Add Them to the Timeline
Launch the video editor on your computer, click anywhere inside the Media window at the upper-left area, and import all the images and icons that you collected earlier to program. Next, drag both the images of the map, i.e., with and without the marks to the Timeline, and ensure that they are of the same duration and are placed on the same track.
Note: Be sure to put the map without the marks first, and then the one with the marks. Also note that the images have the playback duration of 5 seconds in the Timeline by default, and this tenure can be reduced or increased by dragging the side handle of the media to the left or right respectively.
Step 2: Add Transition for Illusion of Route Appearance
Go to Transition from the standard toolbar at the top, locate the Erase Slide transition effect from the available presets, and place it in between the two image files that you earlier added to the Timeline. Next, click and drag either of the side handles of the transition to the end of the media clip. Notice how the other side of the effect is expanded in equal proportion.
Step 3: Preview and Export
Press the Spacebar on the keyboard to preview the video and see if the route appears as if it is being drawn on the map. Once the animation looks acceptable, click EXPORT from the top-center, go to the Local tab on the Export window, select MP4 from the formats list in the left, and click EXPORT from the bottom-right corner to export the current animation to MP4.
Step 4: Customize the Travel Map Media
Either start a new project and import the video of the map you exported in the previous step to the app and then to the Timeline, or remove the existing media from the Timeline in the same project, and add the exported video to it for convenience.
For Win 7 or later (64-bit)
Secure Download
For macOS 10.14 or later
Secure Download
Next, position the Skimmer (Playhead) a couple of frames before the one the route line appears and starts stretching from, and click the Split icon from the editing toolbar above the Timeline itself. Repeat this process for the other side of the media, i.e., position the Skimmer a couple of frames after the route line reaches the destination location, and click the Split icon again. Then remove the separated segments from both the sides by selecting them and pressing Delete on the keyboard, leaving only the portion where the animation is visible.
Optionally, right-click the media that is left behind in the Timeline, and go to Speed and Duration from the context menu. On the Custom Speed box, drag the Speed slider to the left to decrease the playback speed resulting in the increased duration of the media. Alternatively, you can manually enter a value in the Speed box to get precise tenure. Click OK when you are done.
Step 5: Add Animations to Travel Map
Right-click the media in the Timeline, and go to Add Animation from the context menu. Make sure that the Skimmer is on the first frame, and add several keyframes as explained below:
- Click Add to add the first keyframe
- Move a couple of frames further, and click Add one more time. Now, while you are on this second keyframe, use the Scale slider to zoom in to the map so the source location remains within focus.
- Next, move the Playhead further and add another keyframe a couple of frames before the route line hits the edge of the window.
- After this, move the Playhead again and position it where the route line reaches its destination location. Add another keyframe here as well, and move the map in the Preview window so the focus is now on the destination.
- Move the Playhead a few frames further, add another keyframe, and use the Scale slider to zoom a bit more into the map to make the entire animation look realistic. Click OK to save the changes.
Step 6: Add Icons and Titles, and Export the Project
Drag the image of the traveling medium to the Timeline, and place it on the frame the route line starts from. Make sure to place the image on the track above the map, and stretch it to the end so it remains visible throughout the animation. Next, use the method explained above to add keyframes to move the medium along with the route line from the source to the destination. Optionally, add the image of the location marker at the destination point, go to Transition, and add your preferred transition effect, preferably Dissolve, to the marker track in the Timeline so it looks as if it has appeared as the medium arrived the destination.
For Win 7 or later (64-bit)
Secure Download
For macOS 10.14 or later
Secure Download
Get back to the first frame in the Timeline, go to Titles on the standard toolbar, and add a title preset somewhere near the source location. Resize the text, change the format as needed, and add your preferred caption to it such as the start time, name, etc. Reduce the duration of the track so the title appears for a few frames, preferably before the map animation starts. Click OK when done. Repeat this process for the destination point as well.
Once everything is complete, click the Play button in the Preview window to review your work. If the video looks acceptable, click EXPORT from the top-center of the interface, and use the method explained earlier to export the animated travel map in your preferred format.
![]()
Method 2 How to Make Interactive Animated Travel Map with Pictramap
If you don’t want to install a dedicated animation software on your computer due to limited hardware resources or some other reason, there is an online solution called Pictramap to create a travel map animation using a web browser. The web app offers a lucrative interface that could be easily understood and worked with to produce an animated map for free.
The process to create an animated travel map with Pictramap is given below:
Step 1: Create a Project
Launch your favorite web browser, go to https://www.pictramap.com/ , click Create yours now, it’s free, and sign up to Pictramap using your preferred method. When you are on the Dashboard, enter a name in the field available under the My Projects section, and click Create to create a new project (the animated map).
Step 2: Define the Locations and Method of Commute
On the map, right-click the location you want to start your journey from, enter the name of the location or any other significant title, and click Add. Click the location marker, click the Travel Mode icon, and select your preferred mode of traveling. Repeat this process to mark the destination location as well.
Step 3: Preview the Animation
Click the View Animation button from the upper-right corner of the page to see the animated travel map.
Downsides of Using Pictramap to Create Animated Travel Map Video
Although Pictramap allows you to create a travel map animation with ease and extremely quickly, at the time of this writing, it offers no way of downloading the animation to your PC, and therefore it couldn’t be used in your projects.
If you are using Wondershare Filmora, you can use its built-in screen recording feature to record the animation that Pictramap plays, and then save the captured footage as MP4 or any other format on your computer. This video can then be imported to your projects for further uses.
![]()
A cross-platform for making videos anywhere for all creators
Why your video editing isn’t good enough? How about some creative inspo?
- 100 Million+ Users
- 150+ Countries and Regions
- 4 Million+ Social Media Followers
- 5 Million+ Stock Media for Use
* Secure Download
Method 3 How To Make Animated Travel Map Using Multidev
Multi.dev is still a new web-based application to build awesome animated maps, but it’s good! The application helps you create presentations about all your recent and previous trips. And the interface is also hassle-free.
So, follow this step-by-step guide to making animated maps with Multi.dev.
Step 1: Open Multi.dev
Visit Multi.dev from your internet browser.
Once the tool gets open, you will see a demo video. This example clip will have animated maps of different locations. So it is up to you whether to use the same example and edit the places you have been to or are planning to visit. Or, simply create a new animated map from scratch.
Step 2: Choose Your First Location
Take your mouse cursor on the left side of the application and type the first location in the search bar. As soon as you do it, you will see that the “travel arrow” will automatically begin from there. Likewise, type and select the next location through the search bar.
Once you type the location, you will see 8 travel modes, including airplane, bus, and train. You can select the same mode for all sites or a different mode for another place. Totally up to you!
Step 3: Select Map Themes
All your chosen places will be highlighted in the software’s minimalistic map.
Step 4: Download Map on Your Computer
If you’re happy with the animated map, click the “Create Video” button to save the animated map on your computer in a few minutes.
Contrarily, you can also share the animation by choosing the “Share Animation” option.
Conclusion
An animated travel map plays an important role to add a realistic touring effect to your motion picture projects. While you can use a web app like Pictramap to create such an animation online easily and for free, the limitations it comes along with might keep you from choosing this method.
Instead, you may want to get more inclined toward a dedicated post-production software like Wondershare Filmora that gives you full control over the process, and the freedom to choose your preferred format to export the animation to for independent usage.
For Win 7 or later (64-bit)
Secure Download
For macOS 10.14 or later
Secure Download
Benjamin Arango
Benjamin Arango is a writer and a lover of all things video.
Follow @Benjamin Arango
Top Practices on Online 3D Avatar Creator
Best Practices on Online 3D Avatar Creator
An easy yet powerful editor
Numerous effects to choose from
Detailed tutorials provided by the official channel
Avatar will match your personality to your social media profiles, YouTube videos, Snapchat, and many others. With 3D Avatar makers online, designing an Avatar is about customizing the color, layout, typography, and other designs and instantly sharing your Avatar to the social media digital platform as easy as choosing a template, customizing, and sharing.
The new software involved in AR and VR technologies uses these realistically customized Avatars. The accurate representation of virtual reality will give a feeling of being in an absolute sense. Users will love to create an avatar representing themselves in the virtual spaces. Making an avatar does not mean you lock your personality; you can change it anytime. This Avatar is created by capturing a webcam, ensuring it is perfect. We will discuss many free 3D Avatar creators online.
In this article
01 [What is a 3D Avatar?](#Part 1)
02 [Best 10 Practices on How to Create an Avatar for Spatial](#Part 2)
03 [How to Create a Gallery in Spatial for Your Art (NFT and Non-NFT)](#Part 3)
04 [How to Build Your Own 3D Avatar Accurately?](#Part 4)
Part 1 What is a 3D Avatar?
In Computer graphics, Avatar is the virtual representation of the user. This can be in the 2D illustration used as a profile picture and 3D representation used in games, VR, and AR technologies. Lately, termed as “Picons,” which means personal icons, but not used now. The use of these avatars was first coined by Neal Stephenson in 1992, which is a stepping stone for the vast Metaverse Universe. A graphic representation by which users wish to represent themselves. It is a caricature of a person, not precisely a photography of that person, is a simple fancy cartoon and bizarre structure; however, the images of natural objects identify the shape and design.
They are widely in online games and websites. They are an integral part of online chat, messaging systems, blogs, and artificial intelligence, especially VR. There are many Online 3D Avatar Creators available, and we shall you get the right match.
01What is Avatar Social Media?
These days’ social media play an integral part in our lives personally and professionally. We can connect with friends and customers easily sitting at the desk. An Avatar can be a profile picture on social media such as Bitmoji. Most users use their photos, sometimes supplemented by digital frames. There are various definitions to represent Avatar-like on social media it is a tiny cartoon picture representing us or our business in social media. Even if it is small, it can significantly impact the people who visit our profile to contact us, so we need to make sure it accurately represents who we are by utilizing an avatar. Keeping a profile picture is very important in social media, which creates a great impression to the followers than visiting a default profile picture set by the applications. There are many free 3D Avatar creators online from which you can create a free 3D avatar and directly share it on your social media.
02Why Do You Need a 3d Avatar?
These 3D avatars show a sense of seriousness and trust. Customers and people who communicate with them directly using avatars feel as if they are physically present in front of them, which makes them joyful, confident, and satisfied. Intelligent technologies like IoT and Machine learning have converted their way of working with 3D avatars having the central part. This is the beginning of the Metaverse universe, where we will have 3D Avatars in malls as salespersons and waiters in restaurants, and many more.
Part 2 Best 10 Practices On How To Create An Avatar For Spatial
Avatars being the most exciting topic for us today, let us get into creating the best Avatar and 3D avatar creator online for free. Besides, we shall see the software and unique features available in it.
01What Are the Best Avatar Creator?
Creating an Avatar can be seen to be complicated, but it is not. You need not even use complex software to create avatars. Let us discuss some Best Avatar Creators in the market to date.
❶ Face Your Manga
Face Your Manga is a 3D Avatar creator Online. We have truly outstanding and most generally utilized Avatar creators getting going our list. Face Your Manga allows you to make a graphical cartoon version of yourself, and it offers a ton of customization features like skin tone, structure, and shape.
There are some default formats, yet you can change them if you feel more innovative. The site is simple to use and free, so you have nothing to lose to create a free 3D Avatar.
![]()
❷ Bitmoji
Bitmoji is the most popular and well-known option on this list, and it’s also the best option for having Animoji on Android! It’s the most popular application in the Play Store, with around 100 million downloads.
With Bitmoji, you can undoubtedly make a ton of stickers and emojis with your face, which means you’ll have the option to effectively and completely put yourself out there. It incorporates a face-like, laughing, crying face, and that’s just the beginning. This is a free 3D avatar creator online that you can get from the Play Store.
![]()
❸ BeFuncky
BeFuncky is a 3D Avatar creator online to edit your photo creatively. This is extraordinary for the people who need to make an Avatar taking motivation from an image without the expectation of making it too cartoony.
You can blow up colors, including a few genuinely fascinating impacts, or essentially change the contrast. Regardless, the site creates a free 3D Avatar loaded with choices!
![]()
❹ PickaFace
A genuinely excellent site we can suggest you use is PickaFace, as it is a 3D avatar creator online. It has a creative drawing style, extraordinary for the people after something more careful than most applications and sites offer.
Considering all the things it offers, including a ton of customization choices, we can say, PickaFace creates a free 3D avatar like no other subscription software.
![]()
❺ Doppelme
We have Doppelme among the best 3D Avatar maker online to finalize the list. The site is similar to other choices we’ve discussed, with numerous customization choices.
The figures and cartoons you create can be changed in any way you choose, whether for your symbol or your friends.
![]()
02Top 8 Practices On How To Create An Avatar For Spatial
To begin creating avatars in spatial, you only need to submit a single photo of yourself. Spatial believes that avatars will have a significant impact on the internet.
●Start by creating a Spatial Account for you using Google, Microsoft, or Slack accounts. The best practice in Spatial is to add good light and color to the Avatar.
●After this, you have to create an avatar with the first step with your webcam, make sure the photo is clear and has perfect light on it.
●Later in your profile, you will have an edit menu to edit your Avatar anytime.
Light is an essential feature in avatar creation. That will create a better light than artificial lightning.
●Spatial will begin to generate a 3D avatar of you once it has a good photo of you.
●You may modify the shirt, skin tone, and color. After you’ve used all of your ingenuity, click “Looks Good,” and you’re done.
●Next, you can customize your Avatar. There is the customization of body, shape for men, woman. Users love to make the Avatar look like themselves. You can make a hand body effect while using VR headsets if you are a hand talker. If joined from the web, you will have different movements with keyboards like dancing.
●Make changes to spatial VR avatar anytime and update. You can change the skin tone, color of the shirt, and your name. The realistic effects create a real presence in VR meetings.
❶ Spatial – Collaborate From Anywhere In Ar.
This is the launch film of Spatial, “A short real-time in Spatial,” a better way to build and work together, a way that brought us to sit next to each other face to face.
●Spatial is a collaborative computing environment that combines all the creativity and visualizes it in the room.
●All of your digital devices are seamlessly tied together into an infinite workspace.
●With a click, you can expand the world’s information with all the power.
●Using AR, infinite canvas pixels become tactile, letting you manipulate them like clay.
●You can sketch a drawing on paper and have them in front of you as a visual.
❷ Spatial Passthrough Prototype
●With this passthrough, you will feel a completely immersive experience.
●To avoid this, Facebook has partnered with spatial and Logitech for the K830 keyboard, which will help users prevent mixed sensations and provide a complete VR experience.
●Facebook says this will provide an infinite office experience.
●There are multiple customizable screens and multiple monitor setups.
●Companies have already collaborated with spatial to bring up infinite offices.
❸ Microsoft Build Keynote collaboration with Spatial
Microsoft and Teams have worked with Spatial.
●A Spatial option on the team’s channel allows you to enter a 2D meeting with avatars.
●To turn something into 3D, scan the QR code and put on the VR or AR Hololens glasses.
●Through Hololens, they can access data with Microsoft productivity apps.
●They can also adjust the position of the robot.
●The eye-tracking is good, which enables the avatars to convey user emoticon.
❹ Qualcomm Snapdragon Summit Keynote
The stage where the digital world is changing, where virtually everyone and everything is connected. We are moving into the world of VR, which is the next noble platform.
●We are all going to wear glasses for effective and interactive communication.
●Spatial tools are already used in companies like Purina to bring the teams together.
●Spatial allows all people on Oculus, Hololens, and even AR-capable smartphones to engage in one virtual environment.
●These are used in games like Pokémon.
●There will be a vast development in technology with these features.
❺ Hololens 2 Launch Keynote
●Hololens is very comfortable and fits like a hat.
●And it signs in as we put on the device.
●After recognizing your Hololens, recognize your hands and then the world.
●You can touch the holo, move it and even resize it.
●Hololens collaborated with Spatial with many more features involved in connecting people, playing games, etc.
❻ Spatial In the Wall Street Journal
●With Virtual reality headsets like Hololens and Oculus Quest with virtual reality platforms like Spatial, you can meet up and collaborate with colleagues and friends.
●You can switch to any world you choose using VR Headsets within a second.
●Before this pandemic, VR used in the market was forecasted at about 829 million in 2018.
●If you wear a holographic headset, you can feel like someone is there with you in the room, and it feels natural.
●Connecting through Spatial is very simple. You need to need to sign in through a Spatial account.
❼ Spatial on TED
This is a video of the Co-founder talking about the improvement of technologies and the transformative nature of Holographic Telepresence.
●The technology improvement from wired telephones to phones and now zoom meetings to VR and AR meetings.
●The troubles in ordinary meetings end through these VR technologies.
●TED has collaborated with Spatial to increase its market.
●TED is an online broadcast that focuses on the target audience with scripted logic.
●The seized extend how to use most of the Spatial features.
❼ AR Insider – A Publication about Spatial Computing
●AR insider profiles as the most significant innovation in VR technologies.
●This is the most crucial feature in Spatial Computing producing the best VR experiences.
●This is like a launchpad to update daily insights of Spatial computing.
●They collect data from top sources.
●It is also seen as a business angle because it has fun games in AR and VR and technical.
Part 3 How To Create A Gallery In Spatial For Your Art (Nft And Non-Nft)
Many artists and creators have been working in Spatial to show their talents on social platforms.
Provide the 3D models the stage they deserve.
You can directly drag/drop your files into Spatial directly.
NFT artists and collectors can import directly from the collections via the Metamask integration.
You can use the gorgeous environment in the library or use your 3D model of yours to set a unique customer environment.
The technologies will be helpful to create an Avatar and Digital Twins to humanize the remote work as companies move to the hybrid work methods.
The future of the world will look like a science fiction movie.
The AR and VR promise to revolutionize the workplace.
The digital twins will be the following way to show ourselves to the digital environment in a decade.
VR headsets are getting cost-efficient, and people are starting to use them. It has to be still improved to be more efficient and lighter.
Part 4 How to Build Your Own 3D Avatar Accurately?
Turning into an Avatar or Disney character is now accessible using AI software like Wondershare Wondershare Filmora Video Editor . Among the various trends in social media, creating an Avatar is getting trendy nowadays. Let us discuss the steps to create a 3D Avatar creator online.
For Win 7 or later (64-bit)
For macOS 10.12 or later
Step 1: To start learning to create a 3D avatar, you need to know how to make layers and stack them on each other.
Step 2: Later, you can “Liquify” the layers to form a mold for your Avatar.
Step 3: Before turning it into a cartoon, apply the skin smoothening effects to create a more realistic image.
Step 4: Now, you can apply details like eyes, nose, hairs, dress, and facial lines to your Avatars.
Step 5: You can change the color of any particular feature.
Compared to all other 3D Avatar creators online free, Wondershare Filmora Video Editor is the most user-friendly and efficient software.
● Key Takeaways from This Episode →
● Learned about multiple applications available for creating 3D Avatars
● Looked into the future world through Spatial
● Discussed the steps involved in making a 3D Avatar maker online using Wondershare Filmora Video Editor
20 Free After Effects Logo Reveal Templates
20 Free After Effects Logo Reveal Templates You Will Want to Know
An easy yet powerful editor
Numerous effects to choose from
Detailed tutorials provided by the official channel
The free After Effects logo reveals templates is a creative and clean animation that is very easy to use and customizable in just a few clicks. This template allows you to change the color, edit the text, add your logo, and click on render and contains two different logo animations for you to choose from. It does not require any plugin, and you can use it for your following modern and professional logo animation.
![]()
By incorporating a logo animation into your video, you can make your brand memorable and choose a suitable template for your brand personality. So, get ready for all the free logo reveal templates in this article.
In this article
01 [20 Best Logo Reveal Templates for After Effects 2022](#Part 1)
02 [Learn How to Use After Effects Logo Reveal Templates](#Part 2)
Part 1 Best Logo Reveal Templates for After Effects 2022
You can use an animated logo reveal if you need to add spice to your marketing campaigns and branded videos. An animated logo reveal is explained as a Great way to capture your audience’s attention as they screw through their newsfeed and stand you out from the competition. This section of the article will give you After Effects logo reveal templates for free that you can choose from this 2022:
![]()
01[Fast Flip Logo Reveal Template](https://dsqqu7oxq6o1v.cloudfront.net/preview-215084-pWlBMUhYg4-high.mp4 target=)
Fast Flip logo reveal template free to download is perfect for those on a budget and uses stock photography which can be replaced with photos of a company or team to review and an elegant logo at the end. All that is required is to customize the color, replace the images, and add your logo.
02Logo Web Search
Logo Web Search is an easy-to-use, stylish and simple animation for a company website. It allows you to change colors quickly and free sound effects, and all you need to do is change the logo text and click on render.
03Search Logo Reveal
Search Logo Reveal After Effect template for free allows you to customize the text and easily drag and drop in your logo. It provides a unique way to review your logo by using an animated search bar with a sample question and bringing up your logo as the answer. It can be a great add on to websites with search options.
04Colors Logo Reveal
Colors Logo Reveal is a super clean and straightforward After Effects logo reveal template that is very easy to use for designers and creators. It contains two different logos animations that you can choose from and requires no plugin. Add your logo, change the color, edit the text, and click on render.
05Logo Reveal
Logo Reveal is perfect for small business companies and startups with an easy-to-use template that comes with detailed instruction on how to customize and render your logo reveal Project.
06Unlock Phone Logo Reveal
Unlock Phone Logo Reveal is one of the dynamic logo reveal After Effects templates for free with a modern design, smooth transition effects, and simple text animation that is super easy to use. All that is required is to edit the text, drag and drop in your media, and click on render. It comprises a cool intro or opener to presentations, slideshows, promotions, and event videos to impress your audience.
07Orbital Free HUD Logo Reveal
Orbital Free HUD Logo Reveal is perfect for any tech company, and it’s done up in futuristic style and includes the complete. AEP project file with background texture and elements.
08Corporate logo reveal
Corporate Logo Reveal template is a stylish and contemporary template that features a simple shape that is elegantly animated and combined with reviewing your logo. It has one logo placeholder, editable text layers, and an easy-to-use color controller. An excellent logo reveals the Premiere Pro template free to download for companies like stockbrokers.
09White Scroll Logo Reveals
White Scroll Logo Reveals perfect for a more classic logo opener and comes with three background versions and three different logo placement options.
10Shape Logo Reveal
Shape Logo Reveal is a stylish logo reveal template with colorful shape layers and lines that beautifully form a clean-looking logo reveal. It is a short intro for a business slideshow, promotions, events, TV shows, videos, commercials, corporate presentations, etc.
11Free Animated Logo Reveals
Free Animated Logo Reveals is packed with three different logos reveal, which a suitable for corporates and an excellent option for one who wants a modern and professional logo show.
12Clean Titles And Logo Reveal
Clean Titles and Logo Reveal offers stylish templates which an eye-catching design and contains two text placeholders and one logo placeholder. It is effortless to use and a short introduction to TV shows, commercials, slideshows, promotions, Facebook and YouTube videos, etc.
13Hi-Tech Logo Reveal 02
Hi-Tech Logo Reveal is a premium animated logo reveal that features a dark blue background joint with light blue HUD elements and a perfect logo reveal template for a company that wants to stand out online.
14Testimonials Logo Reveal
Testimonials logo Reveal is a stylish and clean project that is perfect for displaying the company’s testimonials and reviews. This After Effects logo reveal template for free features six title placeholders, one logo holder, and six photo placeholders, requiring no plugin.
15Elegant Logo Reveal
Elegant logo Reveals perfect for a feminine background. It features chrome logo pens with a silky dark background, enabling you to easily add your text, insert your logo, and change the colors.
16Logo Web Search II
Logo Web Search II is a stylish and straightforward animation mainly for company websites. It is elementary to use.
17Battle Logo Reveal
Blue Action Logo Reveal is for those looking for a minimalist logo opener and features a dynamic animation style, including an editable text layer and a logo placeholder. It also allows you to adjust the colors easily.
18Blue Action Logo Reveal
Blue Action Logo Reveal is majorly for those looking for a minimalist logo opener and features a dynamic animation style including an editable text layer and a logo placeholder. It also allows you to easily adjust the colors.
19Logo Introduction Template
Logo Introduction Template is a free logo reveal from Premiere Pro. It is perfect for the ones looking for a Tudor style logo reveal and allows you to easily customize the colors and insert your logo with a detailed help file.
20Minimal Logo Klick
Minimal Logo Klick comes in a sleek and modern design with playful animation. It encompasses a logo placeholder, an editable text layer, and an intelligent color controller. If you are searching for an unfussy and free logo reveal online, this one is for you.
Part 2 Learn How to Use After Effects Logo Reveal Templates
This section provides you with a basic tutorial on using the logo reveal After Effects template for free. However, this is a professional video editing software, but if video editing is new to you, you can try out Filmora, which is powerful, easy to use for new users. In Filmora, you will use the logo reveal template as a professional even if you are a beginner.
Below is how to use the After Effects logo reveals template:
01Open After Effects and Begin
Open your After Effect software and set up your Project ready. To begin face, create a composition using composition>New. You can also search the web resolution to 3x 2for this Project.
![]()
02Start Creating Logo
Next is to create a solid layer for your logo by using layers>new>solid, and select an appropriate color to match your composition.
![]()
Next is the creator logo by adding the pre-prepared logo artwork. Go to layer>new>text to create a text layer and adjust the text size and color to see.
![]()
03Add Animation to Logo
Manipulate your logo to create an animation and ensure that everything is right where you want it.
![]()
04Add Effects and Keyframe
Add Effect by going to Effect>Simulation>CC Particle World or click on Effects and Presets panel on the right to drag the CC Particle World effect onto your solid layer.
![]()
Set off your animation by adding a keyframe and controlling the animation of the particles effect through the birth rate setting, which is found by expanding the settings in the timeline panel for the solid layer.
![]()
05Import Vector Graphics and Finish
Finally, import your vector graphics into the After Effects by dragging and dropping the file into the Project panel, which brings up an import dialogue.
For Win 7 or later (64-bit)
For macOS 10.12 or later
That’s it! You successfully made use of the logo reveal maker.
● Key Takeaways from This Episode →
● The top 20 logo reveal Premiere Pro templates free to download.
● THow to make logo with After Effects – the logo reveal maker.
● TLastly, the logo reveal, free online tool, Filmora.
● TI hope I’ve gave you a few ideas on the After Effects logo reveal template for your Project and provided a breakdown of other software you can use for free logo reveal, such as Filmora. The article also lists the best logo reveal templates for after-effects that you can choose from this 202You can also use other software for your free logo reveal, but we all need to start somewhere.
Also read:
- New 2024 Approved What Wikipedia Wont Tell You Specifically About Character Rigging
- New 12 Animated Slideshow PowerPoint Templates and Tools to Make Them for 2024
- New In 2024, Ideas of Learning How to Send WhatsApp Animated Gifs
- Updated In 2024, Before You Learn 3D Animation Things You Should Know
- Updated 2024 Approved 10 Top Tools to Make Pic Collage for Windows
- New Secret Source to Make a Stop Motion Puppet
- New 2024 Approved 10 Amazing Wallpaper Collage Ideas and Photos
- New How to Turn Yourself Into a WhatsApp Cartoon
- Updated Top 10 3D Text Animation Templates
- New 10 Best Free GIF Apps for iPhone and iPad for 2024
- Create Animated Video on Canva for 2024
- New You Can Turn a TikTok Into a GIF Now. Heres How
- New How to Analyze an Editorial Cartoon Easily for 2024
- In 2024, 15 Animated Characters We All Had A Crush On
- 10 Great Apps for Turning Funny Animated Images Into Comics for 2024
- Updated Learn How to Make Architecture Animation for 2024
- Updated In 2024, Techniques for Making After Effects 2D Animation
- In 2024, What Is Still Motion Animation and How Does It Work?
- New Tutorial Guide to Animate Pictures in Canva for 2024
- New In 2024, 5 Different Animation Styles A Simple but Comprehensive Guide
- Updated 2024 Approved How to Make a Photoshop Collage in Simple Steps
- Updated 2024 Approved 10 Cartoon Photo Converters You Couldnt Do Without
- New 2024 Approved Know All About Animated Business Logos and the Best Tools to Create One
- 5 Must Try Ways to Add GIF in Text Message on Android
- Updated Adobe Animate CC Everything You Need to Know
- New Beginner Tutorial on Making Unity 2D Animation for 2024
- How-To Guide Make Animation Characters with the Best Animated Character Creators for 2024
- New 2024 Approved 12 Best Stop Motion Studios Worth Recommending
- New 2024 Approved Tutorial on Making Unity 2D Animation
- In 2024, Top 10 Sketch Animation Video Makers
- 2024 Approved Have You Seen the Facebook Cartoon App Everyones Using Recently
- In 2024, Top 12 Video to GIF Converters High Quality to Check Out
- Updated 10 Best Romance Anime Movies You Need to Watch for 2024
- Updated How to Analyze an Editorial Cartoon Easily
- Updated Ways to Create an Adobe Collage for 2024
- Are You Ready to Animate Game Character From Scratch?
- Updated 2024 Approved 18 Best Tools and Services to Create Animated Videos for Business 2023
- In 2024, How to Make Your Characters Interactive in Unity Animation Rigging
- 2024 Approved Best 10 Photo Animator Templates
- New 15 Top Video to GIF App on iPhone and Android
- Updated What Is Still Motion Animation and How Does It Work, In 2024
- 2024 Approved
- How Can We Unlock Our Realme 11 Pro+ Phone Screen?
- A Complete Guide To OEM Unlocking on Itel P55T
- Which is the Best Fake GPS Joystick App On Xiaomi Redmi 12? | Dr.fone
- In 2024, Full Guide to Catch 100 IV Pokémon Using a Map On Lava Blaze Pro 5G | Dr.fone
- Top 10 Fixes for Phone Keep Disconnecting from Wi-Fi On Realme V30T | Dr.fone
- MOV playback issues on Redmi Note 12R
- In 2024, Top 9 Vivo X100 Monitoring Apps for Parental Controls | Dr.fone
- Undelete lost photos from P60.
- How to Fake GPS on Android without Mock Location For your Honor Magic 5 Lite | Dr.fone
- Catch or Beat Sleeping Snorlax on Pokemon Go For Xiaomi Redmi Note 13 5G | Dr.fone
- How to Fix Life360 Shows Wrong Location On Tecno Pop 8? | Dr.fone
- How To Use Allshare Cast To Turn On Screen Mirroring On Honor Play 7T | Dr.fone
- 8 Solutions to Fix Find My Friends Location Not Available On Itel P55+ | Dr.fone
- How To Deal With the Honor Magic 5 Pro Screen Black But Still Works? | Dr.fone
- The Easiest Methods to Hard Reset Tecno Spark Go (2024) | Dr.fone
- In 2024, Does Apple iPhone 13 Pro Have Find My Friends? | Dr.fone
- In 2024, About Nokia G310 FRP Bypass
- Full Guide How To Fix Connection Is Not Private on Vivo T2x 5G | Dr.fone
- Downloading SamFw FRP Tool 3.0 for Infinix Note 30 Pro
- Additional Tips About Sinnoh Stone For OnePlus 11R | Dr.fone
- In 2024, How to Unlock Apple iPhone 15 with a Mask On
- Fix Vivo S17t Android System Webview Crash 2024 Issue | Dr.fone
- Troubleshooting Guide How to Fix an Unresponsive Oppo A58 4G Screen | Dr.fone
- Ultimate Guide on Tecno Spark 10 5G FRP Bypass
- In 2024, Full Tutorial to Bypass Your Vivo Y100i Power 5G Face Lock?
- In 2024, Planning to Use a Pokemon Go Joystick on Nokia 130 Music? | Dr.fone
- Can I use iTools gpx file to catch the rare Pokemon On Xiaomi Civi 3 | Dr.fone
- What To Do When Realme C67 5G Has Black Screen of Death? | Dr.fone
- Title: Updated 2024 Approved Great Ways to Make Claymation Videos
- Author: Elon
- Created at : 2024-05-19 03:05:38
- Updated at : 2024-05-20 03:05:38
- Link: https://animation-videos.techidaily.com/updated-2024-approved-great-ways-to-make-claymation-videos/
- License: This work is licensed under CC BY-NC-SA 4.0.
