
Updated 2024 Approved How to Animate Picture Online Without Learning From Scratch
How to Animate Picture Online Without Learning From Scratch
How to Animate Picture Online Without Learning from Scratch
An easy yet powerful editor
Numerous effects to choose from
Detailed tutorials provided by the official channel
The Internet is flooded with thousands of tools that aim to provide the best-animated video. But trusting all of them every time is not a go-to thing for everyone.

If you also fall into the same category of people who are looking to add animation to designs but are not able to find the best tools, you are on the right page.
In this article
01 [Ready to Add Animation to Your Designs?](#Part 1)
02 [The Secret of Animating Pictures Online](#Part 2)
Part 1 Ready to Add Animation to Your Designs?
Here we are discussing the top three Animated picture maker that is used for creating different videos with differnt types of online picture tools. These are as follows:
1. Powtoon
Powtoon is an interactive yet simple tool available to add animation to designs. It has all the basic functions available for motion graphics that are useful for presentation. It has a variety of characters and animations available, along with simple textual animation. A user can easily prepare the video with full animation.
(This video indicates how to use the Powtoon tool for creating the best-animated videos, along with an example.)
1. Animaker
Animaker is one of the wonderful animation programs to add animation to designs in an interactive yet simple manner. It has all the best features integrated into it, which let a user create the video of their choice. It is safe to use and, being a web-based program, offers all the options.
(This video indicates how to use the Animaker tool for creating the best-animated videos, along with an example.)
3. Moovly
Moovly is also one of the best animation tools available to add animation to the content. On the main page, the “add content” option is available from where a user can simply update the video and add animation to it.
(This video indicates how to use the Moovly tool for creating the best-animated videos, along with an example.)
Note: These tools are among those that even a layman can use. But some users are still not happy with the interface of these animate picture online tools and feel like they are lacking features. For all those out there, we have some other options too.
Part 2 The Secret of Animating Pictures Online
The secret behind animating pictures online is to save time and effort. With the help of online tools, one can get the outcome with the help of inbuilt templates. There will be no need to install any application or plugin when they wish to add any particular animation to the content. Some tools you can consider using to add animation to designs are as follows:
1. Pixtellar
Pixtellar is a great tool that helps in creating animated videos and images too. Along with creating animated videos and images, one can easily create posters, logos, photo collages, and so on.
However, before using it, be sure to do the registration, as without it, using it is impossible. After registering, the steps you need to follow to use it are as follows:
Step 1Create from Scratch
Choose the template of your choice or click on “Create from Scratch”. Here we are choosing the templates.

Step 2Choose social media
It will be redirected to the next page where you will find out templates according to the selected category. (Here we choose social media).

Step 3Click on “Animate”
Choose any of them based on your preferences. You will head to the next page where you can do the editing as per your needs by clicking on “Animate”.

Step 4Save the image
After making the changes and adding the animations, you are all set to save the image. The “Save” button is right at the top of the page!

2. Adobe Spark
Adobe Spark is a tool that has pre-built templates available for adding animations to the designs. From adding animations to editing the image and video, all the options are featured in this. It also gives users an idea of how they can simply create the video and images with the help of animations and other effects.
However, when you are using it, registration is a must. After performing the registration, you are all set to use it. The steps you need to follow to use this tool are as follows:
Step 1Start editing
After completing the registration, you will reach the main page where you can choose the option of your choice and start editing. Here we have chosen the template option.

Step 2Create From This Template
It asks you to be sure and click on “Create From This Template.”

Step 3Do the editing
It takes a few seconds to present the same in front of you. On this page, you are all set to do the editing as per your needs.

Step 4Save the image
After doing all the editing, you are all set to save the image. The “Save” button is right there at the top. Click on it and save the image!

3. Crello or VistaCreate
Crello, which turns out to be VistaCreate, is one of the most famous tools for adding motion to images. It has almost 8,000+ animated designs and motion graphics available, which are helpful in creating eye-catching videos.
When you are using this feature, registration or sign-up is important. On the main page, the signup option is available, helping users do it. After that, the steps are as follows:
Step 1Click on the “Template”
On the home page, you can either create your own or click on the “Template” option available. (We chose the template option here).

Step 2Select the template
Now select the template of your choice. Here we have selected the Happy New Year one.

Step 3Do the editing as required
Now you are all set to do the editing as required. Here all the options are available, which help in adding all the basic to advanced details to the image. You can use it.

Step 4Download the image
After doing the editing, you are all set to download the image. The downloading button is right there at the top.

Key Takeaways from This Episode
● Animated videos are eye-catching, and tools are helpful in making them more enhanced.
● Animation tools are very easy to use and precisely make the video.
● Editing options are available in the tools, which are helpful in adding extra effects to the image.
● The tools are free to use with all the in-built templates and other features.
The Internet is flooded with thousands of tools that aim to provide the best-animated video. But trusting all of them every time is not a go-to thing for everyone.
If you also fall into the same category of people who are looking to add animation to designs but are not able to find the best tools, you are on the right page.
In this article
01 [Ready to Add Animation to Your Designs?](#Part 1)
02 [The Secret of Animating Pictures Online](#Part 2)
Part 1 Ready to Add Animation to Your Designs?
Here we are discussing the top three Animated picture maker that is used for creating different videos with differnt types of online picture tools. These are as follows:
1. Powtoon
Powtoon is an interactive yet simple tool available to add animation to designs. It has all the basic functions available for motion graphics that are useful for presentation. It has a variety of characters and animations available, along with simple textual animation. A user can easily prepare the video with full animation.
(This video indicates how to use the Powtoon tool for creating the best-animated videos, along with an example.)
1. Animaker
Animaker is one of the wonderful animation programs to add animation to designs in an interactive yet simple manner. It has all the best features integrated into it, which let a user create the video of their choice. It is safe to use and, being a web-based program, offers all the options.
(This video indicates how to use the Animaker tool for creating the best-animated videos, along with an example.)
3. Moovly
Moovly is also one of the best animation tools available to add animation to the content. On the main page, the “add content” option is available from where a user can simply update the video and add animation to it.
(This video indicates how to use the Moovly tool for creating the best-animated videos, along with an example.)
Note: These tools are among those that even a layman can use. But some users are still not happy with the interface of these animate picture online tools and feel like they are lacking features. For all those out there, we have some other options too.
Part 2 The Secret of Animating Pictures Online
The secret behind animating pictures online is to save time and effort. With the help of online tools, one can get the outcome with the help of inbuilt templates. There will be no need to install any application or plugin when they wish to add any particular animation to the content. Some tools you can consider using to add animation to designs are as follows:
1. Pixtellar
Pixtellar is a great tool that helps in creating animated videos and images too. Along with creating animated videos and images, one can easily create posters, logos, photo collages, and so on.
However, before using it, be sure to do the registration, as without it, using it is impossible. After registering, the steps you need to follow to use it are as follows:
Step 1Create from Scratch
Choose the template of your choice or click on “Create from Scratch”. Here we are choosing the templates.
Step 2Choose social media
It will be redirected to the next page where you will find out templates according to the selected category. (Here we choose social media).
Step 3Click on “Animate”
Choose any of them based on your preferences. You will head to the next page where you can do the editing as per your needs by clicking on “Animate”.
Step 4Save the image
After making the changes and adding the animations, you are all set to save the image. The “Save” button is right at the top of the page!
2. Adobe Spark
Adobe Spark is a tool that has pre-built templates available for adding animations to the designs. From adding animations to editing the image and video, all the options are featured in this. It also gives users an idea of how they can simply create the video and images with the help of animations and other effects.
However, when you are using it, registration is a must. After performing the registration, you are all set to use it. The steps you need to follow to use this tool are as follows:
Step 1Start editing
After completing the registration, you will reach the main page where you can choose the option of your choice and start editing. Here we have chosen the template option.
Step 2Create From This Template
It asks you to be sure and click on “Create From This Template.”
Step 3Do the editing
It takes a few seconds to present the same in front of you. On this page, you are all set to do the editing as per your needs.
Step 4Save the image
After doing all the editing, you are all set to save the image. The “Save” button is right there at the top. Click on it and save the image!
3. Crello or VistaCreate
Crello, which turns out to be VistaCreate, is one of the most famous tools for adding motion to images. It has almost 8,000+ animated designs and motion graphics available, which are helpful in creating eye-catching videos.
When you are using this feature, registration or sign-up is important. On the main page, the signup option is available, helping users do it. After that, the steps are as follows:
Step 1Click on the “Template”
On the home page, you can either create your own or click on the “Template” option available. (We chose the template option here).
Step 2Select the template
Now select the template of your choice. Here we have selected the Happy New Year one.
Step 3Do the editing as required
Now you are all set to do the editing as required. Here all the options are available, which help in adding all the basic to advanced details to the image. You can use it.
Step 4Download the image
After doing the editing, you are all set to download the image. The downloading button is right there at the top.
Key Takeaways from This Episode
● Animated videos are eye-catching, and tools are helpful in making them more enhanced.
● Animation tools are very easy to use and precisely make the video.
● Editing options are available in the tools, which are helpful in adding extra effects to the image.
● The tools are free to use with all the in-built templates and other features.
How to Combine Multiple GIFs Into One with GIF Combiner
How to Combine Multiple GIFs into One with GIF Combiner

Shanoon Cox
Mar 27, 2024• Proven solutions
Are you looking for a software tool to create animated GIFs? Go online, you will easily find so many with impressive editing abilities. There are so many interesting things that you can do with a collection of GIFs. Many professionals these days are trying new tricks to make classic small duration animated movies with interactive GIF creator tools .
The article below will provide you step by step guidance about how to merge or combine animated GIFs together.
We are going to discuss two methods where one GIF combiner can assist you to play GIFs side by side, whereas the other will tell you about playing another GIF in continuation after first. In the end, we will also let you know the three best GIF combiners you can use.
Keep reading.
If you are not able to use Photoshop due to its complicated interface and Ezgif is not a suitable tool for your device, then the best recommendation for your animated GIF creation needs is Wondershare Filmora .
This tool is designed with a user-friendly interface and it can easily assist you in the development of high-quality gifs. There are so many customization options associated with each design like color correction, speed adjustments, and overlays, etc.
Filmora offers compatibility over Windows as well as Mac devices so you can easily access it anywhere. Further, it can process more than 150 file formats so you need not worry about your selection. Simply download Wondershare Filmora for your desktop and get started with impressive GIF editing.
Download it now to have a try!
See how to make a cool GIF from a video with Wondershare Filmora.
 Download Mac Version ](https://tools.techidaily.com/wondershare/filmora/download/ )
Part 1: How to Combine/Merge Animated GIFs Into One
Method 1: Merge GIFs into one with Photoshop
Adobe Photoshop is one of the top-rated photo editing software tools and nowadays it is popularly being used for GIF combining. Using Photoshop, you can easily play multiple GIF images side by side on the screen. Here are a few simple to follow steps to accomplish this task:
Step 1: Import GIFs to combine
First of all, users need to launch Adobe Photoshop on their device and then import both GIF images to individual tabs. This task can be easily done using Drag and Drop tools. Resize both tabs so that you can view both images at a time on screen.
Step 2: Save GIF with name
Go to the Window menu and ensure that the Timeline option is marked in the drop-down menu.

Now open one empty file with height same as that of already imported GIF files. Save this file with any suitable name, for example Z.

Note: If you need a transparent view of your imported GIF images then go to Layer and select New and finally hit Layer option. You can now hide its bottom layer.
Step 3: Copy frames

Now move to the tab of the first GIF file and then to the timeline toolbar. On the top right corner of your screen, you will find the menu icon. Here you need to select and copy all frames.
Step 4: Paste your copy
It is time to move to GIF Z file, move to its timeline toolbar, and then select the menu icon from the top right corner of your screen. Paste your recently copied selection over here. Never forget to choose Paste Over selection option from Pop up Dialogue Box.
Step 5: Copy and paste
Simply repeat the process explained in Step 3 and 4 for the 2nd GIF image. After execution of these steps, your GIF Z file will be containing all layers of your imported GIF files but as you have pasted them one over another so it is important to separate their elements now.
Step 6: To make separation
To do this separation, go to GIF Z tab and then select layers of second GIF file and simply move them below the first GIF layer files. Users can now have a preview of both GIFs in the timeline window.

Step 7: Change image settings
After finalizing the best preview for your edited files, you can hit the file menu option and then save your project for device or web option. It will immediately open a dialogue box where users can easily specify their image quality and loop count details. Never forget to have one more preview before saving the final results.

Step 8: Save your project
As now you are done with all the editing tasks so it is time to hit the “Save” option and then provide your destination address to the modified file. Your animated GIF file is now ready to get uploaded on the internet.
Check this video to learn more on how to combine gifs with Photoshop
Method 2: Combine GIFs and Play one After Another
Many youngsters love to create impressive stories by just combining a few GIF images one after another in sequence. If you are also one of them then you should follow these steps discussed in the second method.
We are recommending Ezgif.com to complete this task with the easy to follow steps as discussed below:
You may also like: Top 26 Best Free GIF Makers Online >>
Step 1: Upload GIFs files
First of all, you need to upload your desired GIF files to the Ezgif.com platform. For fast selection of multiple files simply follow Ctrl key-based selection.
This tool also allows users to create a mixture of animated GIF files with simple still images even if they are of different file formats. The conversion process will be carried out automatically by this tool.
Step 2: Adjust frame
As soon as these files will get uploaded, you will find all frames on the editor window. Here you can easily adjust frame delays as well as their order. Note that, GIFs are often ordered in alphabetic order so while reorganizing your files, never forget to rename them accurately. Now hit the “Animate It” button and it will immediately prepare a small preview window on the screen.

Step 3: Optimize your GIFs
Ezgif.com provides a wide range of optimization options to users after this preview. You can easily adjust features as per your requirement by setting desired values for text, speed, effects, rotate, resize and crop, etc. If you do not want to make such changes then you can directly hit the save button. This software tool will take a few seconds to process your project and then a new GIF image with all defined frames will be generated. It will be containing all source images with your preferred ordered sequence. You can easily find it at your destination folder and use it further for entertainment.
Part 2: 3 Best GIF Combiners You Can Make GIFs
1. Filmora Meme Maker - Online GIF Combiner
If you want to combine GIFs online, the Filmora meme maker is your ultimate solution.
It helps you make images, GIFs and video memes directly without watermark. It is totally FREE to use and no signup. You can change text size, color and position to create caption when you are editing. You can also put text inside or outside in GIF.
Just with a few clicks, your GIF is done . Try Now!

2. GIPHY
GIPHY is a GIF combiner where you can find various GIF files to combine. All of the GIFs are funny and interesting to use for people who love to combine GIFs. There are some examples in this site, so you can have the inspiration to combine GIFs if you don’t know where to start. You also can find different styles: reaction, sports, artists and more.

3. PIXEL
If you don’t want to use Photoshop to combine GIFs, here we recommend using PIXEL. You can use it to make GIFs easily online. You can add more than one GIF at one time. Besides, this GIF combiner can also change the GIF size to fit your needs. After the editing is made, you need to click create animation to export GIFs. You should know that GIF size is 32×32 for PIXEL, and 64×64 for SUPER PIXEL.
![]()
Frequently Asked Questions About Combing GIFs
1. Can I Combine A Few Gifs?
Yes, you can. Any photo or video editing software that supports GIF file format allows you to combine one or more GIFs. For instance, Adobe Photoshop users can combine several GIF files and play them simultaneously next to each other, but this task can be overwhelming if you are not familiar with this photo editing software.
An online GIF combiner like Ezgif enables you to combine multiple GIFs from your web browser for free, which makes it a great option for anyone who doesn’t have access to a professional photo or video editing software.
2. How To Merge Several Animated GIFs?
Playing two or more GIFs one after another in a single file is easy, as you just have to arrange them in a way you want them to appear in the final version of the GIF on the editor’s timeline and then export your project as a GIF file.
What’s more, you will be able to remove the frames of the GIFs you don’t want to include in the output file or apply different filters and effects. However, the options you are going to have at your disposal depending on the GIF maker or video editing software you are using to merge several animated GIFs into a single file.
Shanoon Cox
Shanoon Cox is a writer and a lover of all things video.
Follow @Shanoon Cox
Shanoon Cox
Mar 27, 2024• Proven solutions
Are you looking for a software tool to create animated GIFs? Go online, you will easily find so many with impressive editing abilities. There are so many interesting things that you can do with a collection of GIFs. Many professionals these days are trying new tricks to make classic small duration animated movies with interactive GIF creator tools .
The article below will provide you step by step guidance about how to merge or combine animated GIFs together.
We are going to discuss two methods where one GIF combiner can assist you to play GIFs side by side, whereas the other will tell you about playing another GIF in continuation after first. In the end, we will also let you know the three best GIF combiners you can use.
Keep reading.
If you are not able to use Photoshop due to its complicated interface and Ezgif is not a suitable tool for your device, then the best recommendation for your animated GIF creation needs is Wondershare Filmora .
This tool is designed with a user-friendly interface and it can easily assist you in the development of high-quality gifs. There are so many customization options associated with each design like color correction, speed adjustments, and overlays, etc.
Filmora offers compatibility over Windows as well as Mac devices so you can easily access it anywhere. Further, it can process more than 150 file formats so you need not worry about your selection. Simply download Wondershare Filmora for your desktop and get started with impressive GIF editing.
Download it now to have a try!
See how to make a cool GIF from a video with Wondershare Filmora.
Download Mac Version ](https://tools.techidaily.com/wondershare/filmora/download/ )
Part 1: How to Combine/Merge Animated GIFs Into One
Method 1: Merge GIFs into one with Photoshop
Adobe Photoshop is one of the top-rated photo editing software tools and nowadays it is popularly being used for GIF combining. Using Photoshop, you can easily play multiple GIF images side by side on the screen. Here are a few simple to follow steps to accomplish this task:
Step 1: Import GIFs to combine
First of all, users need to launch Adobe Photoshop on their device and then import both GIF images to individual tabs. This task can be easily done using Drag and Drop tools. Resize both tabs so that you can view both images at a time on screen.
Step 2: Save GIF with name
Go to the Window menu and ensure that the Timeline option is marked in the drop-down menu.
Now open one empty file with height same as that of already imported GIF files. Save this file with any suitable name, for example Z.
Note: If you need a transparent view of your imported GIF images then go to Layer and select New and finally hit Layer option. You can now hide its bottom layer.
Step 3: Copy frames
Now move to the tab of the first GIF file and then to the timeline toolbar. On the top right corner of your screen, you will find the menu icon. Here you need to select and copy all frames.
Step 4: Paste your copy
It is time to move to GIF Z file, move to its timeline toolbar, and then select the menu icon from the top right corner of your screen. Paste your recently copied selection over here. Never forget to choose Paste Over selection option from Pop up Dialogue Box.
Step 5: Copy and paste
Simply repeat the process explained in Step 3 and 4 for the 2nd GIF image. After execution of these steps, your GIF Z file will be containing all layers of your imported GIF files but as you have pasted them one over another so it is important to separate their elements now.
Step 6: To make separation
To do this separation, go to GIF Z tab and then select layers of second GIF file and simply move them below the first GIF layer files. Users can now have a preview of both GIFs in the timeline window.
Step 7: Change image settings
After finalizing the best preview for your edited files, you can hit the file menu option and then save your project for device or web option. It will immediately open a dialogue box where users can easily specify their image quality and loop count details. Never forget to have one more preview before saving the final results.
Step 8: Save your project
As now you are done with all the editing tasks so it is time to hit the “Save” option and then provide your destination address to the modified file. Your animated GIF file is now ready to get uploaded on the internet.
Check this video to learn more on how to combine gifs with Photoshop
Method 2: Combine GIFs and Play one After Another
Many youngsters love to create impressive stories by just combining a few GIF images one after another in sequence. If you are also one of them then you should follow these steps discussed in the second method.
We are recommending Ezgif.com to complete this task with the easy to follow steps as discussed below:
You may also like: Top 26 Best Free GIF Makers Online >>
Step 1: Upload GIFs files
First of all, you need to upload your desired GIF files to the Ezgif.com platform. For fast selection of multiple files simply follow Ctrl key-based selection.
This tool also allows users to create a mixture of animated GIF files with simple still images even if they are of different file formats. The conversion process will be carried out automatically by this tool.
Step 2: Adjust frame
As soon as these files will get uploaded, you will find all frames on the editor window. Here you can easily adjust frame delays as well as their order. Note that, GIFs are often ordered in alphabetic order so while reorganizing your files, never forget to rename them accurately. Now hit the “Animate It” button and it will immediately prepare a small preview window on the screen.
Step 3: Optimize your GIFs
Ezgif.com provides a wide range of optimization options to users after this preview. You can easily adjust features as per your requirement by setting desired values for text, speed, effects, rotate, resize and crop, etc. If you do not want to make such changes then you can directly hit the save button. This software tool will take a few seconds to process your project and then a new GIF image with all defined frames will be generated. It will be containing all source images with your preferred ordered sequence. You can easily find it at your destination folder and use it further for entertainment.
Part 2: 3 Best GIF Combiners You Can Make GIFs
1. Filmora Meme Maker - Online GIF Combiner
If you want to combine GIFs online, the Filmora meme maker is your ultimate solution.
It helps you make images, GIFs and video memes directly without watermark. It is totally FREE to use and no signup. You can change text size, color and position to create caption when you are editing. You can also put text inside or outside in GIF.
Just with a few clicks, your GIF is done . Try Now!
2. GIPHY
GIPHY is a GIF combiner where you can find various GIF files to combine. All of the GIFs are funny and interesting to use for people who love to combine GIFs. There are some examples in this site, so you can have the inspiration to combine GIFs if you don’t know where to start. You also can find different styles: reaction, sports, artists and more.
3. PIXEL
If you don’t want to use Photoshop to combine GIFs, here we recommend using PIXEL. You can use it to make GIFs easily online. You can add more than one GIF at one time. Besides, this GIF combiner can also change the GIF size to fit your needs. After the editing is made, you need to click create animation to export GIFs. You should know that GIF size is 32×32 for PIXEL, and 64×64 for SUPER PIXEL.
![]()
Frequently Asked Questions About Combing GIFs
1. Can I Combine A Few Gifs?
Yes, you can. Any photo or video editing software that supports GIF file format allows you to combine one or more GIFs. For instance, Adobe Photoshop users can combine several GIF files and play them simultaneously next to each other, but this task can be overwhelming if you are not familiar with this photo editing software.
An online GIF combiner like Ezgif enables you to combine multiple GIFs from your web browser for free, which makes it a great option for anyone who doesn’t have access to a professional photo or video editing software.
2. How To Merge Several Animated GIFs?
Playing two or more GIFs one after another in a single file is easy, as you just have to arrange them in a way you want them to appear in the final version of the GIF on the editor’s timeline and then export your project as a GIF file.
What’s more, you will be able to remove the frames of the GIFs you don’t want to include in the output file or apply different filters and effects. However, the options you are going to have at your disposal depending on the GIF maker or video editing software you are using to merge several animated GIFs into a single file.
Shanoon Cox
Shanoon Cox is a writer and a lover of all things video.
Follow @Shanoon Cox
Adobe Animate Text Effects Skills You Need to Know
Adobe Animate Text Effects Skills That You Need to Know
An easy yet powerful editor
Numerous effects to choose from
Detailed tutorials provided by the official channel
Adobe Animate Text Effects can be created with the use of Adobe Animate. As well as a couple of other models of Adobe.
We’ve outline a thorough explanation on the subject so that you can be prepared as you can be, so continue reading in order to learn more.
In this article
01 [What’s Text Animation?](#Part 1)
02 [What Adobe Program is Best for Text Animation?](#Part 2)
03 [5 Creative Ways to Animate Text in After Effects](#Part 3)
04 [Adobe Alternative to Make Text Animation](#Part 4)
Part 1 What’s Text Animation?
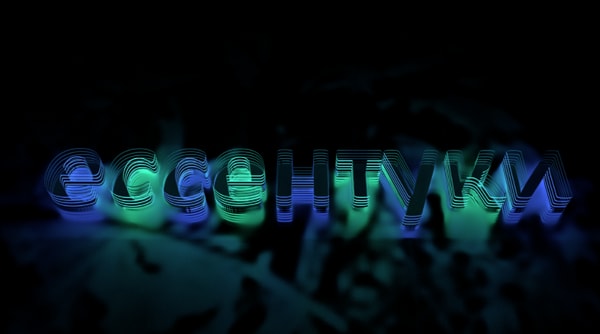
“Text Animation“ refers to moving letters, words, sentences, and even whole paragraphs. The animation, or movement, rather, can be anything. It can move from side to side, jump up and down, create a dizzying circle, recede from view, etc. Usually, said movement is placed on an endless repeat, a pattern that the text is coded to follow decided by the animator who created it!
Part 2 What Adobe Program is Best for Text Animation?
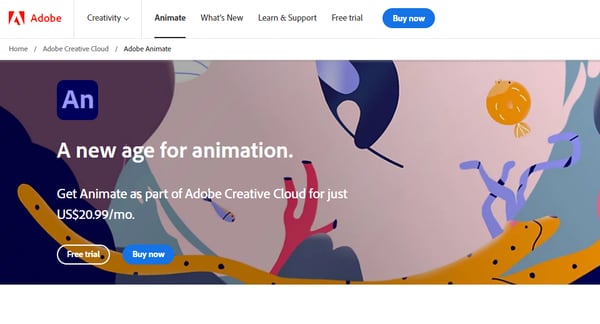
Adobe Animate is Adobe’s very own software developed for animators. Whether they be working on movies, shows, short videos for online posting, games, or text animations. As mentioned at the beginning of this article, this is the software most professionals use in order to bring life to their digital creations. It’s also the one that we’d recommend if you’re looking into advanced adobe animate text animation!
Part 3 5 Creative Ways to Animate Text in After Effects
Now, we should make it very clear, of course. That while Adobe Animate is considered the best for animation (whether it be text or character models), there are other tools that you can use in order to get the same effect. For example, there’s adobe spark animate text, adobe premiere pro animate text, and this next one, also from Adobe, called After Effects, is a VFX and motion graphics software used to create movie titles, intros, transitions, logos, and so much more.
We’ve listed some of the more creative ways you can use After Effects to create what could very well be Adobe Animate text effects below to help you along:
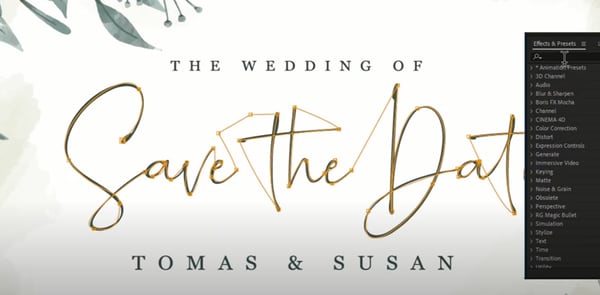
01METHOD 1: After Effects Animation Presets
The first, and easiest, way of animating your text with After Effects is to use presets! After Effects offers multiple animations presets that you can try in order to test out certain settings. (This is also a good way of getting to know the possibilities and limits of text animation and how you can work within those bounds.
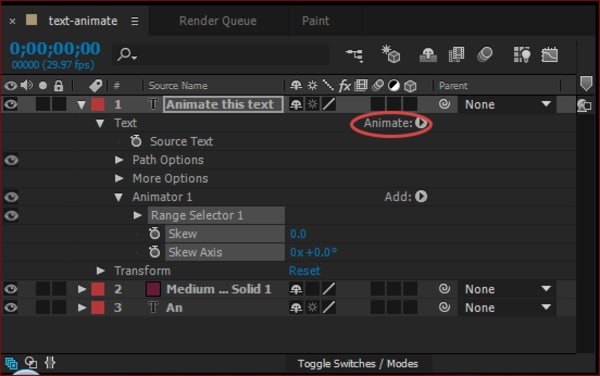
02METHOD 2: After Effects Text Animators
If the presets aren’t working out for you, you can also try out After Effect’s “animators” and “selectors”. To clarify, you add ‘animators’ to your text (it will mark the object(s) to be animated). And then, you use a ‘selector’ in order to specify how you want the properties to be animated. This is a great way of truly getting the exact effect that you want, although it might take some finagling to get it to work completely.
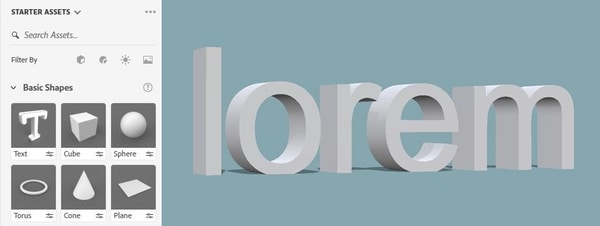
03METHOD 3: Per-Character 3D Text Properties
If you want to step up your game even more, you can always make your texts into 3D characters on their own! This is easier to do in Adobe Dimension, which (from the example image below) you can see has a “Text” preset that you can use in order to start creating 3D Text Properties immediately! The beauty of this method, of course, is that your text can be adjusted like any 3D character. Making the possibilities endless!
04METHOD 4: Path Animation
The next method of animating with After Effects is a little more constrained than the others we’ve introduced thus far. However, it has its uses! As you can see from the image below, you can animate your text to follow a mask (which you set over your text layer). This will make it possible for you to animate along a path.

05METHOD 5: After Effects Selectors
This next method is related to the ‘Animators’ methods we introduced second. It also works a lot like the masks we mentioned in Method 4–which, as mentioned, you can use in order to set up a foundation or limits for your animation.

Adobe Animate Text Effects can be created with the use of Adobe Animate. As well as a couple of other models of Adobe.
We’ve outline a thorough explanation on the subject so that you can be prepared as you can be, so continue reading in order to learn more.
In this article
01 [What’s Text Animation?](#Part 1)
02 [What Adobe Program is Best for Text Animation?](#Part 2)
03 [5 Creative Ways to Animate Text in After Effects](#Part 3)
04 [Adobe Alternative to Make Text Animation](#Part 4)
Part 1 What’s Text Animation?
“Text Animation“ refers to moving letters, words, sentences, and even whole paragraphs. The animation, or movement, rather, can be anything. It can move from side to side, jump up and down, create a dizzying circle, recede from view, etc. Usually, said movement is placed on an endless repeat, a pattern that the text is coded to follow decided by the animator who created it!
Part 2 What Adobe Program is Best for Text Animation?
Adobe Animate is Adobe’s very own software developed for animators. Whether they be working on movies, shows, short videos for online posting, games, or text animations. As mentioned at the beginning of this article, this is the software most professionals use in order to bring life to their digital creations. It’s also the one that we’d recommend if you’re looking into advanced adobe animate text animation!
Part 3 5 Creative Ways to Animate Text in After Effects
Now, we should make it very clear, of course. That while Adobe Animate is considered the best for animation (whether it be text or character models), there are other tools that you can use in order to get the same effect. For example, there’s adobe spark animate text, adobe premiere pro animate text, and this next one, also from Adobe, called After Effects, is a VFX and motion graphics software used to create movie titles, intros, transitions, logos, and so much more.
We’ve listed some of the more creative ways you can use After Effects to create what could very well be Adobe Animate text effects below to help you along:
01METHOD 1: After Effects Animation Presets
The first, and easiest, way of animating your text with After Effects is to use presets! After Effects offers multiple animations presets that you can try in order to test out certain settings. (This is also a good way of getting to know the possibilities and limits of text animation and how you can work within those bounds.
02METHOD 2: After Effects Text Animators
If the presets aren’t working out for you, you can also try out After Effect’s “animators” and “selectors”. To clarify, you add ‘animators’ to your text (it will mark the object(s) to be animated). And then, you use a ‘selector’ in order to specify how you want the properties to be animated. This is a great way of truly getting the exact effect that you want, although it might take some finagling to get it to work completely.
03METHOD 3: Per-Character 3D Text Properties
If you want to step up your game even more, you can always make your texts into 3D characters on their own! This is easier to do in Adobe Dimension, which (from the example image below) you can see has a “Text” preset that you can use in order to start creating 3D Text Properties immediately! The beauty of this method, of course, is that your text can be adjusted like any 3D character. Making the possibilities endless!
04METHOD 4: Path Animation
The next method of animating with After Effects is a little more constrained than the others we’ve introduced thus far. However, it has its uses! As you can see from the image below, you can animate your text to follow a mask (which you set over your text layer). This will make it possible for you to animate along a path.
05METHOD 5: After Effects Selectors
This next method is related to the ‘Animators’ methods we introduced second. It also works a lot like the masks we mentioned in Method 4–which, as mentioned, you can use in order to set up a foundation or limits for your animation.
2D Character Animation: Everything You Should Know About It
2D Character Animation: Everything You Should Know About It
An easy yet powerful editor
Numerous effects to choose from
Detailed tutorials provided by the official channel
2D character animation is one of the significant kinds of animation popularly used for creating animated movies, marketing videos, cartoons, advertisements, educational content, corporate presentations, video games, etc.
With the popularity of video content, more and more businesses tend to use animation for promotion, as they magnify conversion rates by 20%. Some companies hire 2D character animation services; others try to make them online with software help.
In this article
01 [What is 2D Character Animation and What Does 2D Animation Do?](#Part 1)
02 [2D Character Animation Tips and Tricks](#Part 2)
03 [An Ultimate Guide to Create 2D Character Animation Online](#Part 3)
04 [5 Great 2D Character Animation Templates](#Part 4)
Part 1 What is 2D Character Animation and What Does 2D Animation Do?
2D animation is identified by having its characters and objects created in a 2D space. It means that they only have height and width to specify.
However, 2D animation is considered a traditional style, known from the 1800s. Initially, it was designed by merging the frames in which one drawing was followed by another and making them different; every second consists of 24 frames.
We all remember the classic Disney animations. Snow White and the Seven Dwarfs, The Little Mermaid, Bambi, etc. They are some of the highly famous 2D animation styles.
With the advancement of computer technologies, this process also got digitized through various 2D character animation software.
In this guide, we’ll talk about everything relatable to 2D character animation, and let’s proceed with the expert tips and tricks to create inspirational style within animation character 2D.
Part 2 2D Character Animation Tips and Tricks
01Look for a real-time reference
Using a real-world reference for 2D character animation can help you effectively animate faces. For example, when studios collaborate with voice-over artists, they often record their facial movements. It further helps 2D animators to ensure their expressions get captured convincingly.
If it seems impossible, you can consider using your face, so you have something to refer back to. You could also use a mirror and utter the words your character will speak. It will display the correct animated expressions.
02Observe real life
You need to use observation a lot more. One of the primary aspects of 2D character animation is bringing life to animate objections. Therefore, you must carefully consider how emotion can get portrayed and select each movement accordingly.
Take time watching how people in real-life environments talk and interact with each other, how they express emotions, how they move, etc. Please don’t spend much time doing this, as it is valuable to research.
03Simplicity is the key
2D character animation is never complex compared with 3D. Think carefully before creating a scene too complicated. You must not include too much information, which is hard to digest, and you may even find yourself compromising the scene’s realism. Try not to heavy the stage with too many pose changes or other elements, and keep it genuine.
04Draw animation again and again
Drawing animation consumes a lot of time. You can’t complete it within one day, so you better know deep down that one task only can be done after you have revamped it various times. For 2D character animation, you may need to draw objects on paper several times.
You can’t master the skill of animation character 2D quickly. Luckily, all pains will be relieved someday.
05Feedback is important
Feedback is an essential element of artistic development. It’s wise to actively seek out feedback from familiar figures who can help you enhance. Naturally, we may see work we have invested a great deal of time and effort indifferently to someone not so involved in the creative process. Feedback can equate to a valuable learning opportunity that will assist you produce the results hit the spot much more appropriately.
Part 3 An Ultimate Guide to Create 2D Character Animation Online
Let’s now look at making an illustrated 2D character animation move on a screen.
While there are nearly numerous options for 2D character animation tools and software, this tutorial will animate a character in Adobe After Effects.
Steps to create 2D character animation After Effects
01Step 1: Download and Install Duik
You need to install the Duik animation plugin for Adobe After Effects to simplify the whole process. You can animate and rig characters’ entire limbs with Duik using just the placement of their feet and hands.
While this isn’t an essential step, it can be valuable for beginners, as you’ll see in this tutorial. Luckily, Duik is available for free from Rainbox Laboratory.
02Step 2: Design Your Character
You need a moving character before you’re able to start animating. You can create this character in Adobe Illustrator and import it into After Effects.
Try creating a straightforward character with an aim on the character’s limbs.
In the example mentioned below, you can see that the body is a very rudimentary shape—a circle—with long legs that make it simple to consider the animation process.

Check the character’s joints. Making a round joint between the lower and upper parts of the legs, for instance, will help the character move more smoothly.

03Step 3: Make and Import Your Character Artwork
Now, you’ll need to make a few final adjustments before moving your character artwork. Break your character out into layers firstly. Every section of the character that will move independently needs a separate layer.
So, layers include his circular body, face, and the leg’s segments (i.e., lower leg, upper leg, and foot).

To import your character artwork, go to File, click the Import tab, and choose your character file. Ensure that you need to import it as a composition to ensure it includes the layers you just created.
04Step 4: Establish Initial Character Rigging
Now, the 2D character animation is almost over by the initial rigging.
Firstly, lower the opacity of all your layers to above 50% to see the critical joints within the character.
Next, you must ensure that the joints hinge in the ideal direction. It’s simple to do with the anchor point tool. For each character’s layer, place the anchor point at the center of gravity for each layer of the 2D character animation.
The anchor point would probably go between the eyes for the layer of the face (i.e., the nose, eyes, and mouth). For each legs’ section, hold the anchor point where the leg will hinge (e.g., the anchor point would be at the highest point for the leg’s upper portion, where it meets the body).

Then, use the parent tool to join the limbs’ sections. For instance, the parent of the foot would be the lower leg, and the upper portion is the parent of the lower leg.
It makes sure that the leg moves together as one unit with multiple hinge points.
Finally, use the Duik toolbar to create character controllers. Controllers control the rotation and position of critical elements within your character. For the ankles of the 2D character animation, you would select the controller that encompasses both the rotation and position.
05Step 5: Create Your Rig
Use the Duik toolbar to create a rig. Select each layer from the extremities inward from each limb, lasting with your controllers.
You would select the ankle for a leg, followed by the upper portion, the lower leg, and conclusively, the controller at the ankle. Then, select auto-rig within the Rigging area of the Duik toolbar.
The entire leg will move when you move that ankle controller. If your character contains them, repeat the process for the other leg, along with other limbs.
Before proceeding, test the limbs to make sure they hinge and move correctly. You need to adjust the opacity of the character back to 100% once you are satisfied with the movements.

06Step 6: Start Animating Your Character
You can begin animating after completing a rig. First, create keyframes—the ending and beginning points of the character’s movement. The character’s legs are at their most magnified are thus the endpoints for a walk cycle. Make sure that the beginning and ending of keyframes are identical to get an ideal loop.
Start adding in-between frames from there, like when one leg crosses over the other in the middle of a walking stride.
Moreover, you can add ‘easing” to the animation via 2D character animation After Effects’ Easy Ease tab, located under the Animation button, and Keyframe Assistant.
It will smoothen the transition between the keyframes. You will have a primary walking sequence at this instance.

Now, you can make further refinements to add detail and secondary movement, like a bobbing motion of the head. You can also modify elements like the keyframe velocity, further smoothing out the animation.
As you practice, you’ll get a better feel for your animation preferences and develop more advanced realistic 2D animation character design capabilities.
Part 4 5 Great 2D Character Animation Templates
1 – FrameStory Character Animation Toolkit
2 – Explainer Video Character Animation ToolKit
3 – 2D Character Animation After Effects Template
4 – Character Animation ToolKit
5 – Rigged Character Animation Mockup Template
Given above is a list of the best 2D character animation templates worth considering. Yet, if you are tired of using After Effects Templates, why not select Wondershare Filmora Template Mode?
It is a brand-new mode recently launched by Filmora to ramp up your story. It is a simplistic way to use compared with After Effects.
****Wondershare Filmora Video Editor Template Mode**
For Win 7 or later (64-bit)
For macOS 10.12 or later
Filmora Template Mode is a bold breakthrough that helps you create incredible videos in a minute. Forget about dragging n dropping the video clips into a timeline; Filmora template Mode provides you a new way of generating videos automatically by using various stylish video templates.
Steps to create a stunning animated video in 3 levels
01Step 1: Choose a template
Pick up a video template that best suits your needs.

02Step 2: Import Media
Import at least three video clips or images and let AI assist you in ramping the production process without hassle.

03Step 3: Export Project
Export media among multiple social media platforms.

● Key Takeaways from This Episode →
● Understanding 2D character animation tips and tricks
● A step by step guide to creating 2D character animation online
● Five best 2D character animation templates
● The best alternative of using the Template mode directly within the Wondershare Filmora
2D character animation is one of the significant kinds of animation popularly used for creating animated movies, marketing videos, cartoons, advertisements, educational content, corporate presentations, video games, etc.
With the popularity of video content, more and more businesses tend to use animation for promotion, as they magnify conversion rates by 20%. Some companies hire 2D character animation services; others try to make them online with software help.
In this article
01 [What is 2D Character Animation and What Does 2D Animation Do?](#Part 1)
02 [2D Character Animation Tips and Tricks](#Part 2)
03 [An Ultimate Guide to Create 2D Character Animation Online](#Part 3)
04 [5 Great 2D Character Animation Templates](#Part 4)
Part 1 What is 2D Character Animation and What Does 2D Animation Do?
2D animation is identified by having its characters and objects created in a 2D space. It means that they only have height and width to specify.
However, 2D animation is considered a traditional style, known from the 1800s. Initially, it was designed by merging the frames in which one drawing was followed by another and making them different; every second consists of 24 frames.
We all remember the classic Disney animations. Snow White and the Seven Dwarfs, The Little Mermaid, Bambi, etc. They are some of the highly famous 2D animation styles.
With the advancement of computer technologies, this process also got digitized through various 2D character animation software.
In this guide, we’ll talk about everything relatable to 2D character animation, and let’s proceed with the expert tips and tricks to create inspirational style within animation character 2D.
Part 2 2D Character Animation Tips and Tricks
01Look for a real-time reference
Using a real-world reference for 2D character animation can help you effectively animate faces. For example, when studios collaborate with voice-over artists, they often record their facial movements. It further helps 2D animators to ensure their expressions get captured convincingly.
If it seems impossible, you can consider using your face, so you have something to refer back to. You could also use a mirror and utter the words your character will speak. It will display the correct animated expressions.
02Observe real life
You need to use observation a lot more. One of the primary aspects of 2D character animation is bringing life to animate objections. Therefore, you must carefully consider how emotion can get portrayed and select each movement accordingly.
Take time watching how people in real-life environments talk and interact with each other, how they express emotions, how they move, etc. Please don’t spend much time doing this, as it is valuable to research.
03Simplicity is the key
2D character animation is never complex compared with 3D. Think carefully before creating a scene too complicated. You must not include too much information, which is hard to digest, and you may even find yourself compromising the scene’s realism. Try not to heavy the stage with too many pose changes or other elements, and keep it genuine.
04Draw animation again and again
Drawing animation consumes a lot of time. You can’t complete it within one day, so you better know deep down that one task only can be done after you have revamped it various times. For 2D character animation, you may need to draw objects on paper several times.
You can’t master the skill of animation character 2D quickly. Luckily, all pains will be relieved someday.
05Feedback is important
Feedback is an essential element of artistic development. It’s wise to actively seek out feedback from familiar figures who can help you enhance. Naturally, we may see work we have invested a great deal of time and effort indifferently to someone not so involved in the creative process. Feedback can equate to a valuable learning opportunity that will assist you produce the results hit the spot much more appropriately.
Part 3 An Ultimate Guide to Create 2D Character Animation Online
Let’s now look at making an illustrated 2D character animation move on a screen.
While there are nearly numerous options for 2D character animation tools and software, this tutorial will animate a character in Adobe After Effects.
Steps to create 2D character animation After Effects
01Step 1: Download and Install Duik
You need to install the Duik animation plugin for Adobe After Effects to simplify the whole process. You can animate and rig characters’ entire limbs with Duik using just the placement of their feet and hands.
While this isn’t an essential step, it can be valuable for beginners, as you’ll see in this tutorial. Luckily, Duik is available for free from Rainbox Laboratory.
02Step 2: Design Your Character
You need a moving character before you’re able to start animating. You can create this character in Adobe Illustrator and import it into After Effects.
Try creating a straightforward character with an aim on the character’s limbs.
In the example mentioned below, you can see that the body is a very rudimentary shape—a circle—with long legs that make it simple to consider the animation process.
Check the character’s joints. Making a round joint between the lower and upper parts of the legs, for instance, will help the character move more smoothly.
03Step 3: Make and Import Your Character Artwork
Now, you’ll need to make a few final adjustments before moving your character artwork. Break your character out into layers firstly. Every section of the character that will move independently needs a separate layer.
So, layers include his circular body, face, and the leg’s segments (i.e., lower leg, upper leg, and foot).
To import your character artwork, go to File, click the Import tab, and choose your character file. Ensure that you need to import it as a composition to ensure it includes the layers you just created.
04Step 4: Establish Initial Character Rigging
Now, the 2D character animation is almost over by the initial rigging.
Firstly, lower the opacity of all your layers to above 50% to see the critical joints within the character.
Next, you must ensure that the joints hinge in the ideal direction. It’s simple to do with the anchor point tool. For each character’s layer, place the anchor point at the center of gravity for each layer of the 2D character animation.
The anchor point would probably go between the eyes for the layer of the face (i.e., the nose, eyes, and mouth). For each legs’ section, hold the anchor point where the leg will hinge (e.g., the anchor point would be at the highest point for the leg’s upper portion, where it meets the body).
Then, use the parent tool to join the limbs’ sections. For instance, the parent of the foot would be the lower leg, and the upper portion is the parent of the lower leg.
It makes sure that the leg moves together as one unit with multiple hinge points.
Finally, use the Duik toolbar to create character controllers. Controllers control the rotation and position of critical elements within your character. For the ankles of the 2D character animation, you would select the controller that encompasses both the rotation and position.
05Step 5: Create Your Rig
Use the Duik toolbar to create a rig. Select each layer from the extremities inward from each limb, lasting with your controllers.
You would select the ankle for a leg, followed by the upper portion, the lower leg, and conclusively, the controller at the ankle. Then, select auto-rig within the Rigging area of the Duik toolbar.
The entire leg will move when you move that ankle controller. If your character contains them, repeat the process for the other leg, along with other limbs.
Before proceeding, test the limbs to make sure they hinge and move correctly. You need to adjust the opacity of the character back to 100% once you are satisfied with the movements.
06Step 6: Start Animating Your Character
You can begin animating after completing a rig. First, create keyframes—the ending and beginning points of the character’s movement. The character’s legs are at their most magnified are thus the endpoints for a walk cycle. Make sure that the beginning and ending of keyframes are identical to get an ideal loop.
Start adding in-between frames from there, like when one leg crosses over the other in the middle of a walking stride.
Moreover, you can add ‘easing” to the animation via 2D character animation After Effects’ Easy Ease tab, located under the Animation button, and Keyframe Assistant.
It will smoothen the transition between the keyframes. You will have a primary walking sequence at this instance.
Now, you can make further refinements to add detail and secondary movement, like a bobbing motion of the head. You can also modify elements like the keyframe velocity, further smoothing out the animation.
As you practice, you’ll get a better feel for your animation preferences and develop more advanced realistic 2D animation character design capabilities.
Part 4 5 Great 2D Character Animation Templates
1 – FrameStory Character Animation Toolkit
2 – Explainer Video Character Animation ToolKit
3 – 2D Character Animation After Effects Template
4 – Character Animation ToolKit
5 – Rigged Character Animation Mockup Template
Given above is a list of the best 2D character animation templates worth considering. Yet, if you are tired of using After Effects Templates, why not select Wondershare Filmora Template Mode?
It is a brand-new mode recently launched by Filmora to ramp up your story. It is a simplistic way to use compared with After Effects.
****Wondershare Filmora Video Editor Template Mode**
For Win 7 or later (64-bit)
For macOS 10.12 or later
Filmora Template Mode is a bold breakthrough that helps you create incredible videos in a minute. Forget about dragging n dropping the video clips into a timeline; Filmora template Mode provides you a new way of generating videos automatically by using various stylish video templates.
Steps to create a stunning animated video in 3 levels
01Step 1: Choose a template
Pick up a video template that best suits your needs.
02Step 2: Import Media
Import at least three video clips or images and let AI assist you in ramping the production process without hassle.
03Step 3: Export Project
Export media among multiple social media platforms.
● Key Takeaways from This Episode →
● Understanding 2D character animation tips and tricks
● A step by step guide to creating 2D character animation online
● Five best 2D character animation templates
● The best alternative of using the Template mode directly within the Wondershare Filmora
15 Top Pics Collage Apps
15 Best Pics Collage Apps in 2024: Top Picks
An easy yet powerful editor
Numerous effects to choose from
Detailed tutorials provided by the official channel
With a high-end camera in a mobile phone these days there is a huge collection of pictures from various events, trips, and of your near and dear ones. So why not be creative and make some interesting pics collage from these images? Surprise your friends, relatives, and other people on their special occasion by creating pics collage and for this, you would need the help of a good collage app.

With the myriad of options available, selecting a few can be a difficult task and to help you with this, we have shortlisted some of the popular ones in the write-up below.
Part 1 Top 11 Pics Collage apps for Android and iOS
Below we have shortlisted the best apps for the pics collage that will help you create a customized collage using multiple functions and tools.
01Pic Collage
This is one of the most widely used apps available for iOS and Android devices that helps you create interesting collages.
Key features
● Free app with basic features and allows to remove ads and get access to advanced features using the paid version
● Intuitive layout with multiple templates to create photo collage pics.
● Comes with an array of photo editing tools.
● Add images from your phone or also from social media accounts.

02Photo and Shape Collage Maker
This is a free Android-based app with a 3.6 rating.
Key features
● Create frame collage, shape collage, name collage, and others.
● Comes with predefined shapes for creating a collage.
● Allows editing the collage size, background, and other factors.
● Customized shape collage can be created your name, number, or face.
● Add stickers, text, and other elements.

03Diptic
This is a paid app for iOS devices that allows creating photos as well as video collages.
Key features:
● Comes with over 190 layouts to choose from
● Add multiple photos and videos in each layout.
● Option for customizing the layout.
● Use different filters for enhancing the images.
● Add captions, effects, and other interesting elements.
● Allows creating Diptics using photos and videos from the device, Facebook, Dropbox, and other sources.

04PhotoGrid
This is an Android and iOS based app for creating collages.
Key features
● Create collage using photos, and videos.
● Comes with a variety of templates for creating personalized collages.
● The built-in editor lets you customize the images.
● Background stickers, doodles, text, and other effects can be added.
● A free version supports basic features while the paid pro version removes ads and watermarks and offers advanced features.

05Ribbet
This app on Android and iOS is mainly a photo editing tool that also supports creating collages.
Key features
● Create a collage using different customizable templates.
● Edit images and change file parameters to suit requirements.
● Add special effects, frames, and text.
● Editing tools like clones, curves, and burning.

06Moldiv
Use this app on your Android and iOS devices to create collages and professionally edit images.
Key features
● Comes with a variety of free collage templates.
● A wide range of layouts is available that can be customized.
● Works as a pro image editing tool.
● Add stickers, filters, backgrounds, and other elements.
● Allows adding up to 9 photos in a frame.

07PicPlayPost
Just like its name, this is an interesting tool for creating collages on iOS and Android devices and supports other functions as well.
Key features
● Free app with IAP option.
● Allows creating an animated slideshow using images and videos.
● Option to choose aspect ratio depending on the platform you wish to use the collage.
● Add text watermark or a business logo using the app.
● A wide range of media file formats is supported.

08PiZap
This is a multitasking app for Android and iOS devices that support functions like creating a collage, meme, photo editing, and more.
Key features:
● Create photo collages, posters, and greeting cards, in a few simple steps.
● A wide range of templates is available including the ones for Twitter, YouTube, and other sites.
● Add text, memes, shapes, filters, and other elements.
● Free to use app with Pro version offering additional features and removing ads.

0910. Live Collage
Download this app on your Android and iOS devices for creating interesting collages.
Key features:
● A simple and clean interface makes collage-making easy and fast.
● Comes with a variety of templates including special ones for Facebook, and Instagram.
● Allows creating customized canvas size and 3D templates available as well.
● Add filters to enhance your images.

1011. Pic Stitch
The app on Android and iOS devices allows creating customized pic collages for all occasions.
Key features
● User-friendly interface to create a customized collage using images and videos.
● Comes with more than 200 templates.
● Multiple images editing options are supported.
● Share created collages to social media sites.
● Choose a customized aspect ratio and also add music.

1112. PicsArt
PicsArt collage is another widely used Android and iOS-based tool that can be used for multiple tasks including collage-making.
Key features
● Comes with multiple templates including the ones for social media as well as business requirements.
● Add up to 10 images on a grid.
● Comes with a free photo library to select images.
● Being a complete image editing tool it allows personalized images in different ways.

Additional Reading: Edit your videos professionally and create a video collage using Wondershare UniConverter
If you are looking for a video editing tool that can let your edit your videos like a professional Wondershare Filmora Video Editor is just the right choice. This Windows and Mac-based software support variety of basic, as well as advanced features, and this, makes the software for all users. With over 800 stunning effects, you can create a video masterpiece using your creativity. Media files in all key formats are supported and there are options to add texts, overlays, transitions, filters, as well as music files.
The split-screen feature of the software can be further used to play multiple videos in different frames making it look like a video collage.

Wondershare Filmora - Best Video Editor for Mac/Windows
5,481,435 people have downloaded it.
Build unique custom animations without breaking a sweat.
Focus on creating epic stories and leave the details to Filmora’s auto features.
Start a creative adventure with drag & drop effects and endless possibilities.
Filmora simplifies advanced features to save you time and effort.
Filmora cuts out repetition so you can move on to your next creative breakthrough.
● Key Takeaways from This Episode →
● Create stunning pic collages on your phone using apps.
● A wide range of apps for Android and iOS are available.
● Edit your videos professionally and create a video collage using Wondershare Filmora.
With a high-end camera in a mobile phone these days there is a huge collection of pictures from various events, trips, and of your near and dear ones. So why not be creative and make some interesting pics collage from these images? Surprise your friends, relatives, and other people on their special occasion by creating pics collage and for this, you would need the help of a good collage app.
With the myriad of options available, selecting a few can be a difficult task and to help you with this, we have shortlisted some of the popular ones in the write-up below.
Part 1 Top 11 Pics Collage apps for Android and iOS
Below we have shortlisted the best apps for the pics collage that will help you create a customized collage using multiple functions and tools.
01Pic Collage
This is one of the most widely used apps available for iOS and Android devices that helps you create interesting collages.
Key features
● Free app with basic features and allows to remove ads and get access to advanced features using the paid version
● Intuitive layout with multiple templates to create photo collage pics.
● Comes with an array of photo editing tools.
● Add images from your phone or also from social media accounts.
02Photo and Shape Collage Maker
This is a free Android-based app with a 3.6 rating.
Key features
● Create frame collage, shape collage, name collage, and others.
● Comes with predefined shapes for creating a collage.
● Allows editing the collage size, background, and other factors.
● Customized shape collage can be created your name, number, or face.
● Add stickers, text, and other elements.
03Diptic
This is a paid app for iOS devices that allows creating photos as well as video collages.
Key features:
● Comes with over 190 layouts to choose from
● Add multiple photos and videos in each layout.
● Option for customizing the layout.
● Use different filters for enhancing the images.
● Add captions, effects, and other interesting elements.
● Allows creating Diptics using photos and videos from the device, Facebook, Dropbox, and other sources.
04PhotoGrid
This is an Android and iOS based app for creating collages.
Key features
● Create collage using photos, and videos.
● Comes with a variety of templates for creating personalized collages.
● The built-in editor lets you customize the images.
● Background stickers, doodles, text, and other effects can be added.
● A free version supports basic features while the paid pro version removes ads and watermarks and offers advanced features.
05Ribbet
This app on Android and iOS is mainly a photo editing tool that also supports creating collages.
Key features
● Create a collage using different customizable templates.
● Edit images and change file parameters to suit requirements.
● Add special effects, frames, and text.
● Editing tools like clones, curves, and burning.
06Moldiv
Use this app on your Android and iOS devices to create collages and professionally edit images.
Key features
● Comes with a variety of free collage templates.
● A wide range of layouts is available that can be customized.
● Works as a pro image editing tool.
● Add stickers, filters, backgrounds, and other elements.
● Allows adding up to 9 photos in a frame.
07PicPlayPost
Just like its name, this is an interesting tool for creating collages on iOS and Android devices and supports other functions as well.
Key features
● Free app with IAP option.
● Allows creating an animated slideshow using images and videos.
● Option to choose aspect ratio depending on the platform you wish to use the collage.
● Add text watermark or a business logo using the app.
● A wide range of media file formats is supported.
08PiZap
This is a multitasking app for Android and iOS devices that support functions like creating a collage, meme, photo editing, and more.
Key features:
● Create photo collages, posters, and greeting cards, in a few simple steps.
● A wide range of templates is available including the ones for Twitter, YouTube, and other sites.
● Add text, memes, shapes, filters, and other elements.
● Free to use app with Pro version offering additional features and removing ads.
0910. Live Collage
Download this app on your Android and iOS devices for creating interesting collages.
Key features:
● A simple and clean interface makes collage-making easy and fast.
● Comes with a variety of templates including special ones for Facebook, and Instagram.
● Allows creating customized canvas size and 3D templates available as well.
● Add filters to enhance your images.
1011. Pic Stitch
The app on Android and iOS devices allows creating customized pic collages for all occasions.
Key features
● User-friendly interface to create a customized collage using images and videos.
● Comes with more than 200 templates.
● Multiple images editing options are supported.
● Share created collages to social media sites.
● Choose a customized aspect ratio and also add music.
1112. PicsArt
PicsArt collage is another widely used Android and iOS-based tool that can be used for multiple tasks including collage-making.
Key features
● Comes with multiple templates including the ones for social media as well as business requirements.
● Add up to 10 images on a grid.
● Comes with a free photo library to select images.
● Being a complete image editing tool it allows personalized images in different ways.
Additional Reading: Edit your videos professionally and create a video collage using Wondershare UniConverter
If you are looking for a video editing tool that can let your edit your videos like a professional Wondershare Filmora Video Editor is just the right choice. This Windows and Mac-based software support variety of basic, as well as advanced features, and this, makes the software for all users. With over 800 stunning effects, you can create a video masterpiece using your creativity. Media files in all key formats are supported and there are options to add texts, overlays, transitions, filters, as well as music files.
The split-screen feature of the software can be further used to play multiple videos in different frames making it look like a video collage.
Wondershare Filmora - Best Video Editor for Mac/Windows
5,481,435 people have downloaded it.
Build unique custom animations without breaking a sweat.
Focus on creating epic stories and leave the details to Filmora’s auto features.
Start a creative adventure with drag & drop effects and endless possibilities.
Filmora simplifies advanced features to save you time and effort.
Filmora cuts out repetition so you can move on to your next creative breakthrough.
● Key Takeaways from This Episode →
● Create stunning pic collages on your phone using apps.
● A wide range of apps for Android and iOS are available.
● Edit your videos professionally and create a video collage using Wondershare Filmora.
12 Animation Video Maker That Can Triple Your Conversion Rates
12 Animation Video Maker That Can Triple Conversion Rates
An easy yet powerful editor
Numerous effects to choose from
Detailed tutorials provided by the official channel
Gone are the days when creating animation requires expert skills, time, and a lot of money. Thanks to technological advancement several software and tools are available for creating animated videos in a hassle-free manner.

The following parts of the topic will help you to learn in detail about animation videos, their importance, the best software, and animation online website tools.
In this article
01 [What is an Animated Video and Its Importance?](#Part 1)
02 [Top 11 Online Animation Video Maker](#Part 2)
03 [Best Alternative To Online Tools For Creating Professional Animated Videos ](#Part 3)
Part 1 What is an Animated Video and Its Importance?
Animated Video
In simplest terms, animation refers to a method where figures appear as moving images to make them look lively and interesting. Using the drawings, effects, designs, and illustrations, an animated video is created to catch your attention. Animations can be of several types like cartoon animations, 3D animations, motion graphics, CGI, 2D animations, and more.
Benefits of using Animated videos
Animated videos have dominated the entire digital space and there are several reasons for the same. Some of the major ones are enlisted below.
● Add life to your concepts
● Bring in the content to your interesting ideas
● Ability to represent abstract ideas visually
● Video production can be managed in a hassle-free manner
● Animated videos are more visually and psychologically appealing
● Helps in boosting the conversion rates
● Makes you stand out from the competition
● Helps in expanding the reach and getting the attention and engagement
● Improves SEO
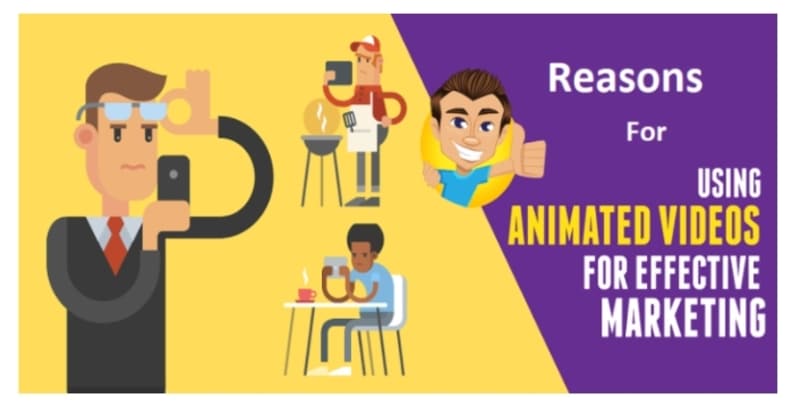
Part 2 Top 11 online animation video maker
If you are in search of a simple yet effective solution to create animations, 3D animation maker online tools work as a great choice. The majority of these programs are free and simple to use and support all basic animation requirements. Below listed are the top 11 online 3D animation makers that can be used for creating impressive animations.
01PowToon
This is a widely used online tool that supports creating videos in multiple formats including animated ones. The tool majorly supports features related to cartoon animation and depending on your requirements you can choose from different licenses and plans. Some of the key features of the tool include presentation mode, animation mode, readymade templates, integration with different tools, and others.

02Moovly
This is one of the top online animation maker 3D tool for creating interesting and eye-catchy animations. The tool is completely cloud-based and thus there is no need for any software download or installation. Different types of animations like doodles, cartoons, and others can be created easily using the program. Huge stock of videos, sound, music, motion graphics, photos, and others are available at the program to create a customized animation as required.
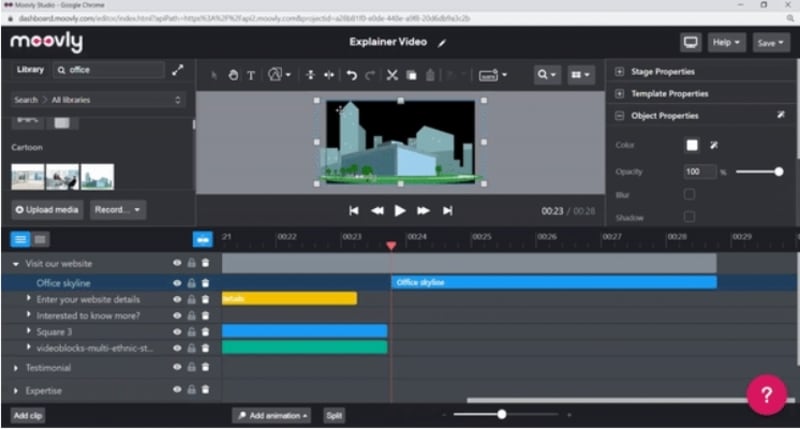
03Explee
This is a simple to use online tool that can help you create animated videos in a few simple steps. The program focuses on using a whiteboard which along with Explee’s Bringlife technology can create impressive animations. More than 6000 images are available at the tool for illustrating your concept and ideas. Some of the animation features supported by the tool include draw, pop, pin, fade, and others.
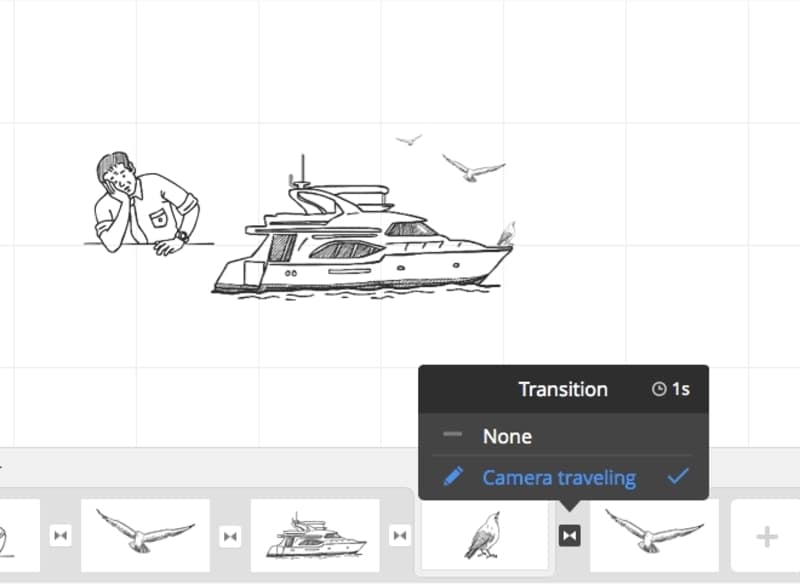
04Wideo
This is a simple yet versatile 3D online animation maker tool for animated video creation. Several pre-designed templates are available using which animated videos can be created quickly and easily. The free version of the tool allows creating animations for up to 30 seconds and for longer animations you would need to upgrade to a paid subscription. The tool also has a stock of free video library and the processed files can be exported as MP4 videos.
05Animaker
Creating cartoons and other animations can be done quickly and easily using this online tool that comes along with several pre-designed templates. The tool is simple to use and requires no specialized skill sets or technical know-how. Some of the interesting features for animation creation include character building, lip-syncing, facial expressions, smart moves, and more. You can customize the templates at the program and create the desired animation using the wide collection of images, videos, GIFs, and music files.
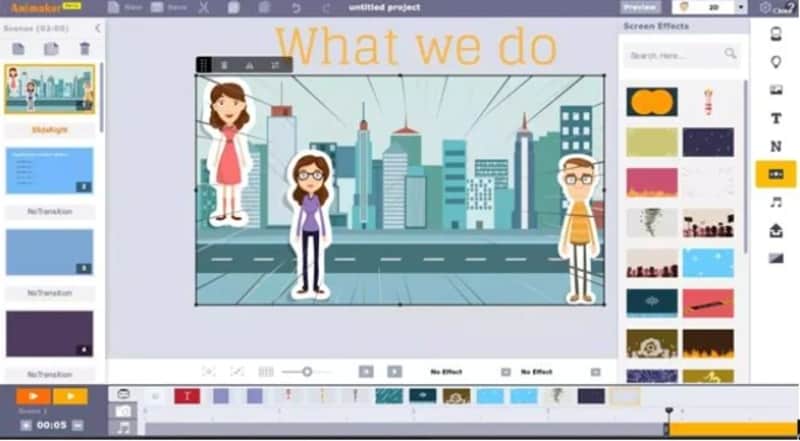
06Vyond
Professional-looking animated videos can be created using this cloud-based tool. You can either create an animation from scratch or use one of the templates at the site and then customize it as needed. The lip-sync feature of the tool allows you to import or an audio file or even add a voice recording. Animations for marketing, training, communications, HR and other purposes can be created using the tool. The tool comes with a 14-days free trial version after which you need to upgrade to a paid plan.
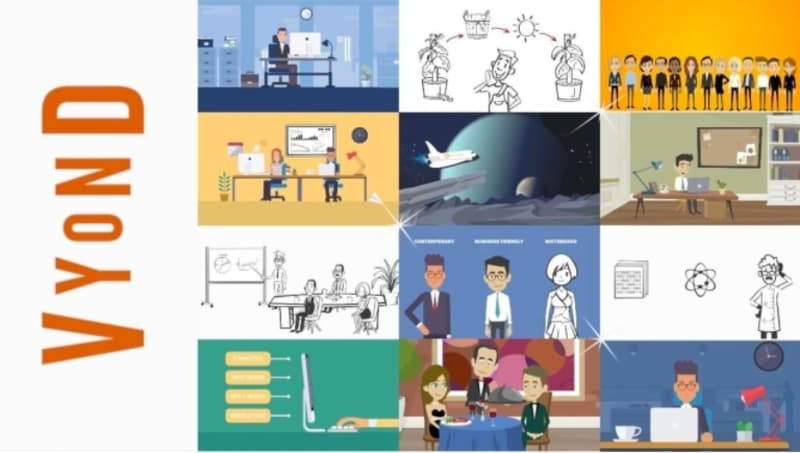
07Renderforest
This online tool comes with more than 500 templates in different categories that can be used along with multiple customization tools of the program to create the desired 2D as well as 3D animation. Simple interface and easy steps make the tool apt even for the ones who do not possess technical know-how. Several toolkits like the 3D video toolkit, whiteboard animation toolkit, and others are available at the site for you to learn the process. Customization options include adding music, adjusting scene order, adjusting VoiceOver, and more. The created video can be directly uploaded to YouTube or can be saved to the local system or project library.
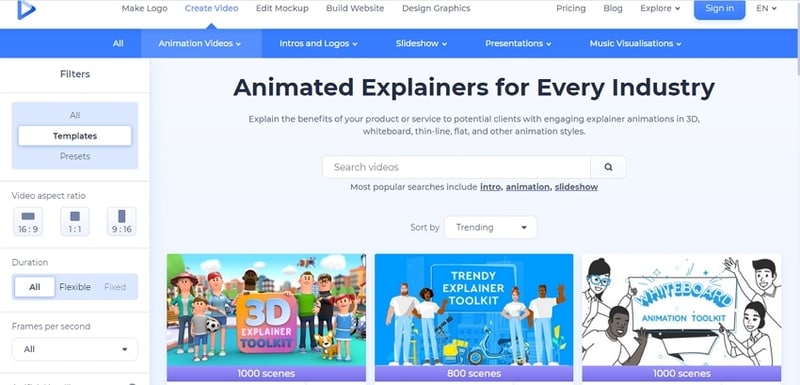
08Animatron
Using this browser-based tool you can easily create animated videos for multiple purposes like presentation, explainer videos, banners, whiteboard animations, and more. You can choose from more than 200 animated templates available at the site and then customize them as required multiple functions. In addition to your videos and other media files, you can also add them from the free library available at Animatron. You can preview the created animation and then export it to your system or directly to popular social media platforms. Tutorials o guide you through the process of animated video creation are also present on the site.
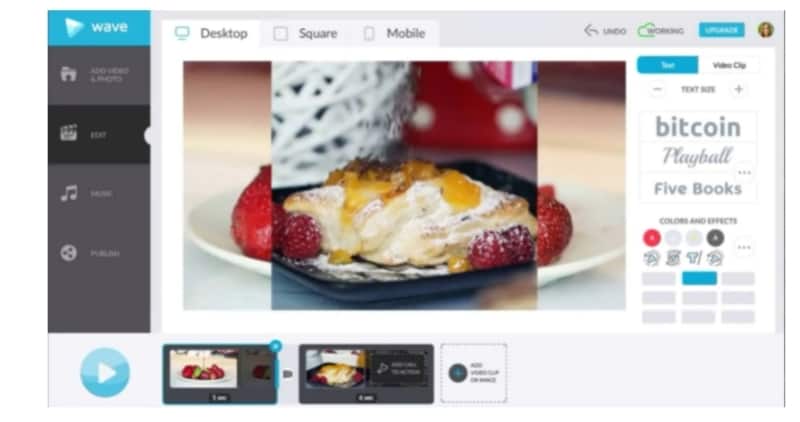
09MotionDen
This is another widely used name when it comes to online video creation tools. This simple yet functional program will let you create animated videos of your choice using multiple templates available at the site. There is a collection of desktop as well as mobile-friendly templates. These template’s video, music, photos, text, and other elements can be customized using the program editor and then the processed video can be quickly downloaded to your local system.
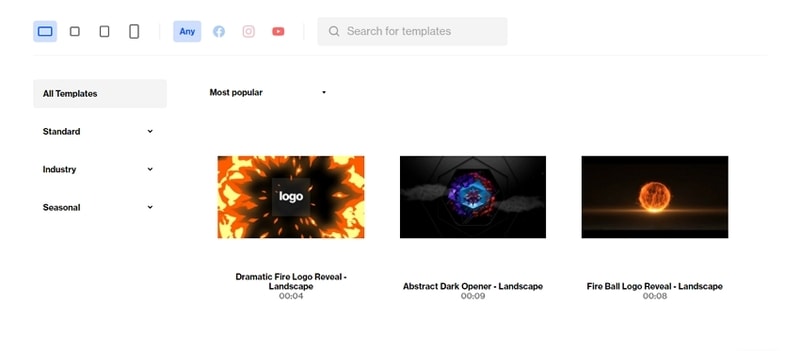
10Toonator
Creating cartoons is simple and quick using this online tool that requires no software download or installation. Using the program, you can create an interesting cartoon as needed as well as edit the graphics. The tool can also work with your tablets that making it easy to edit the files using a pen or fingers. You can even check the designs of cartoons that have been created by other users.
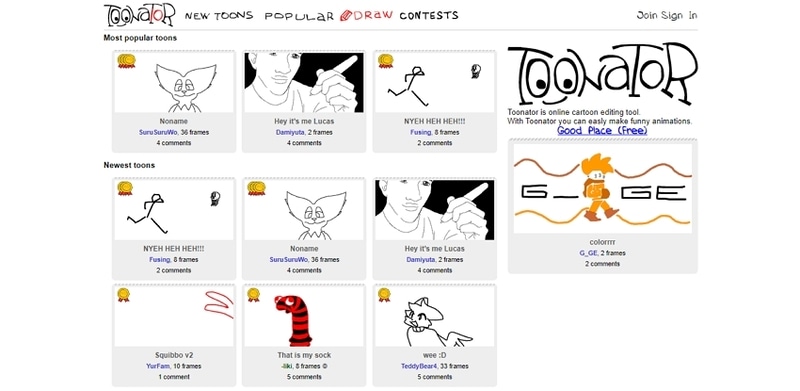
11Biteable
To create animations for your social media sites, marketing, and other requirements, this is a versatile tool to use. You can use the readymade templates available at the site or can also create animation from a scratch. Customize the templates by selecting the scenes, adding images, music, and text as needed. The animated videos can be saved locally or can also be uploaded to popular social media sites.
Part 3 Part Best Alternative to online tools for creating professional animated videos
****Wondershare Filmora Video Editor **
Online tools are simple programs for basic animated video creation. Moreover, these programs are internet-dependent and support limited file size processing. So, if you are looking for an alternative program for creating professional-looking animated videos with support to advanced features, Wondershare Fimora works as an excellent alternative. This Windows and Mac-based tool comes with an array of features that can let you create the desired 2D, 3D, and other animated videos in just a few simple steps.
For Win 7 or later (64-bit)
For macOS 10.12 or later
Key features of the software
● Create professional-looking 2D, 3D, and other animated videos using keyframes.
● Customize the animations using features like motion tracking, pan & zoom, ease-in, ease-out, and more.
● Add customized text & titles, lights & flares, masking, warp, distorting, and more.
● High-quality pre-set available for auto-correction, color wheels, scopes, and more.
● Customize audio using features like automatic audio sync, audio compression, noise reduction, audio transitions, and more.
● Windows and Mac support.
● Key Takeaways from This Episode →
● Animated videos are important to improve the conversion rates, increase the reach of the videos, engage the viewers, and more.
● Several 3D online animation maker is available that can help create decent animated videos.
● With restrictions and limitations of 3D animation websites, professional software like Wondershare Fimora works as the best alternative.
Gone are the days when creating animation requires expert skills, time, and a lot of money. Thanks to technological advancement several software and tools are available for creating animated videos in a hassle-free manner.
The following parts of the topic will help you to learn in detail about animation videos, their importance, the best software, and animation online website tools.
In this article
01 [What is an Animated Video and Its Importance?](#Part 1)
02 [Top 11 Online Animation Video Maker](#Part 2)
03 [Best Alternative To Online Tools For Creating Professional Animated Videos ](#Part 3)
Part 1 What is an Animated Video and Its Importance?
Animated Video
In simplest terms, animation refers to a method where figures appear as moving images to make them look lively and interesting. Using the drawings, effects, designs, and illustrations, an animated video is created to catch your attention. Animations can be of several types like cartoon animations, 3D animations, motion graphics, CGI, 2D animations, and more.
Benefits of using Animated videos
Animated videos have dominated the entire digital space and there are several reasons for the same. Some of the major ones are enlisted below.
● Add life to your concepts
● Bring in the content to your interesting ideas
● Ability to represent abstract ideas visually
● Video production can be managed in a hassle-free manner
● Animated videos are more visually and psychologically appealing
● Helps in boosting the conversion rates
● Makes you stand out from the competition
● Helps in expanding the reach and getting the attention and engagement
● Improves SEO
Part 2 Top 11 online animation video maker
If you are in search of a simple yet effective solution to create animations, 3D animation maker online tools work as a great choice. The majority of these programs are free and simple to use and support all basic animation requirements. Below listed are the top 11 online 3D animation makers that can be used for creating impressive animations.
01PowToon
This is a widely used online tool that supports creating videos in multiple formats including animated ones. The tool majorly supports features related to cartoon animation and depending on your requirements you can choose from different licenses and plans. Some of the key features of the tool include presentation mode, animation mode, readymade templates, integration with different tools, and others.
02Moovly
This is one of the top online animation maker 3D tool for creating interesting and eye-catchy animations. The tool is completely cloud-based and thus there is no need for any software download or installation. Different types of animations like doodles, cartoons, and others can be created easily using the program. Huge stock of videos, sound, music, motion graphics, photos, and others are available at the program to create a customized animation as required.
03Explee
This is a simple to use online tool that can help you create animated videos in a few simple steps. The program focuses on using a whiteboard which along with Explee’s Bringlife technology can create impressive animations. More than 6000 images are available at the tool for illustrating your concept and ideas. Some of the animation features supported by the tool include draw, pop, pin, fade, and others.
04Wideo
This is a simple yet versatile 3D online animation maker tool for animated video creation. Several pre-designed templates are available using which animated videos can be created quickly and easily. The free version of the tool allows creating animations for up to 30 seconds and for longer animations you would need to upgrade to a paid subscription. The tool also has a stock of free video library and the processed files can be exported as MP4 videos.
05Animaker
Creating cartoons and other animations can be done quickly and easily using this online tool that comes along with several pre-designed templates. The tool is simple to use and requires no specialized skill sets or technical know-how. Some of the interesting features for animation creation include character building, lip-syncing, facial expressions, smart moves, and more. You can customize the templates at the program and create the desired animation using the wide collection of images, videos, GIFs, and music files.
06Vyond
Professional-looking animated videos can be created using this cloud-based tool. You can either create an animation from scratch or use one of the templates at the site and then customize it as needed. The lip-sync feature of the tool allows you to import or an audio file or even add a voice recording. Animations for marketing, training, communications, HR and other purposes can be created using the tool. The tool comes with a 14-days free trial version after which you need to upgrade to a paid plan.
07Renderforest
This online tool comes with more than 500 templates in different categories that can be used along with multiple customization tools of the program to create the desired 2D as well as 3D animation. Simple interface and easy steps make the tool apt even for the ones who do not possess technical know-how. Several toolkits like the 3D video toolkit, whiteboard animation toolkit, and others are available at the site for you to learn the process. Customization options include adding music, adjusting scene order, adjusting VoiceOver, and more. The created video can be directly uploaded to YouTube or can be saved to the local system or project library.
08Animatron
Using this browser-based tool you can easily create animated videos for multiple purposes like presentation, explainer videos, banners, whiteboard animations, and more. You can choose from more than 200 animated templates available at the site and then customize them as required multiple functions. In addition to your videos and other media files, you can also add them from the free library available at Animatron. You can preview the created animation and then export it to your system or directly to popular social media platforms. Tutorials o guide you through the process of animated video creation are also present on the site.
09MotionDen
This is another widely used name when it comes to online video creation tools. This simple yet functional program will let you create animated videos of your choice using multiple templates available at the site. There is a collection of desktop as well as mobile-friendly templates. These template’s video, music, photos, text, and other elements can be customized using the program editor and then the processed video can be quickly downloaded to your local system.
10Toonator
Creating cartoons is simple and quick using this online tool that requires no software download or installation. Using the program, you can create an interesting cartoon as needed as well as edit the graphics. The tool can also work with your tablets that making it easy to edit the files using a pen or fingers. You can even check the designs of cartoons that have been created by other users.
11Biteable
To create animations for your social media sites, marketing, and other requirements, this is a versatile tool to use. You can use the readymade templates available at the site or can also create animation from a scratch. Customize the templates by selecting the scenes, adding images, music, and text as needed. The animated videos can be saved locally or can also be uploaded to popular social media sites.
Part 3 Part Best Alternative to online tools for creating professional animated videos
****Wondershare Filmora Video Editor **
Online tools are simple programs for basic animated video creation. Moreover, these programs are internet-dependent and support limited file size processing. So, if you are looking for an alternative program for creating professional-looking animated videos with support to advanced features, Wondershare Fimora works as an excellent alternative. This Windows and Mac-based tool comes with an array of features that can let you create the desired 2D, 3D, and other animated videos in just a few simple steps.
For Win 7 or later (64-bit)
For macOS 10.12 or later
Key features of the software
● Create professional-looking 2D, 3D, and other animated videos using keyframes.
● Customize the animations using features like motion tracking, pan & zoom, ease-in, ease-out, and more.
● Add customized text & titles, lights & flares, masking, warp, distorting, and more.
● High-quality pre-set available for auto-correction, color wheels, scopes, and more.
● Customize audio using features like automatic audio sync, audio compression, noise reduction, audio transitions, and more.
● Windows and Mac support.
● Key Takeaways from This Episode →
● Animated videos are important to improve the conversion rates, increase the reach of the videos, engage the viewers, and more.
● Several 3D online animation maker is available that can help create decent animated videos.
● With restrictions and limitations of 3D animation websites, professional software like Wondershare Fimora works as the best alternative.
The Only Guide to Make 2D Rigging Clear to You
The Only Guide You’ll Ever Need to Learn That Make 2D Rigging Clear to You
An easy yet powerful editor
Numerous effects to choose from
Detailed tutorials provided by the official channel
If you’re looking to get a head start in 2D Rigging or 2D Animation in general, then this guide should get you to where you need to go.
We’ll be introducing 2D Rigging in a comprehensive way — perfect for beginners who aren’t familiar with the subject and want something more solid as their foundation.
In this article
01 [All You Need to Know About 2D Rigging](#Part 1)
02 [What is the Difference and Connection Between 2D and 3D](#Part 2)
03 [What Are the Best 2D Rigging Animation Tools?](#Part 3)
Part 1 All You Need to Know About Rigging
For this first part, we’re going to talk about Rigging in a general way. Think of it as an introduction to the subject. One that should, hopefully, set you off on the right foot. It should also help clarify things that you might need to know as we delve into deeper and more advanced subjects in the next sections of this article.
01What is the Meaning of Rigging in Animation?
Alright, so what does rigging 2D characters actually do? What meaning, or effect, does it have? These questions can be quickly answered with this: Rigging (whether it’s or 3D) is the practice of attaching ‘bones’ to a character model. Bones that, in the future, you can use to create motion.
If you’re an artist, then you’re probably familiar with the concept of creating an initial sketch that you put the final drawing on top of — done with the sole purpose of creating a structure that will allow you to move forward more easily in your art.
That’s exactly what you do when Rigging. You’re building a structure that will allow you to easily create animated characters that you can move at will in the future.
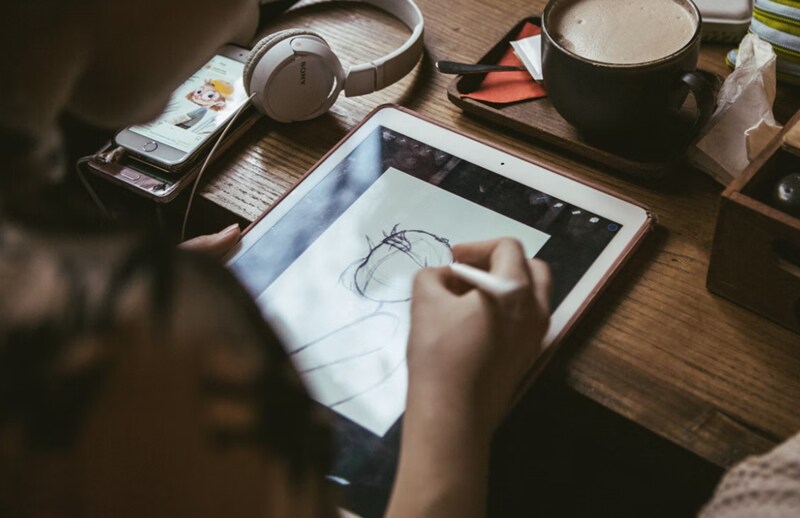
02Why Use Animation?
Alright, so what’s the difference between creating a Face Rig and a Face Rig? Is there any? To answer this, the simple answer is, yes. There is quite the difference.
A lot of animators prefer to practice Animation over Animation because it is more traditional and requires less complicated software (not that it doesn’t come with complications of its own.) Specifically, animation requires quite a lengthy character creation and rigging process.
You should consider the subject more based on what project you’re working on. Things that you might want to keep in mind include your project timeline, project budget, character rig usability in the future, length of the project, and so on.
(There’s also a more in-depth breakdown of this in of this guide.)
03What is Animation Rigging Software?
Now, for the last section of this Rigging overview, let’s talk about Rigging Animation Software. You should be able to guess what it’s meant for, but how you can use it is a little different, especially with the many different varieties of Rigging Animation Software available.
We’ll be introducing some in the third part of this guide — so you can learn more about the differences there. For now, all you need to know is that it usually comes with advanced rigging and character deformer tools that you can use to easily (and efficiently) animate your characters.
Part 2 What is the Difference and Connection Between and 3D
As promised, this next section will be devoted to clarifying the differences and similarities between Animation and Animation. As we mentioned previously, most animators prefer Animation. But, more often than not, they switch between both forms in order to create something suitable for their current project.
01How and Animations Are Created
First, let’s talk about the process involved. In the end, this can be described simply as: it starts off the same, but then becomes significantly more and more dissimilar the further you go along. More specifically, whether you’re working on a or Animation, you usually start with working through your vision for the project.
That means exploring ideas and creating hand-illustrated storyboards (which will serve as the foundation for the project as a whole). Then, the next steps involve media gathering (i.e., character creation, sound clips, voice-overs, sound effects, etc.) So that everything would be ready for the project.
This is when the difference starts. Animation involves hand-drawing characters in different poses and angles (with the standard being frames for a second) and can be completed with basic rigging (i.e., face rig for moving mouths or eyes). It’s normal in Animation as well for characters to remain static for several frames. While, with 3D, it is the exact opposite — the characters must be in constant motion so as to remain realistic (which can be done with extensive rigging.)
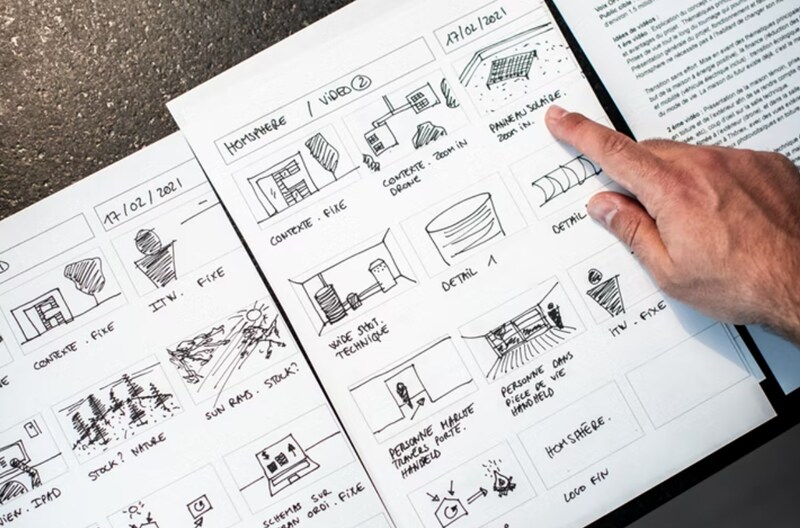
02Time Investments for Creating and Animations
Next, let’s talk about time investments. This can be a bit tricky to differentiate. Animations, as mentioned, are generally easier to create because it requires less rigging (but more drawings for certain scenes and angles makes it take more time). Meanwhile, Animation usually involves a front-heavy timeline — since you’re looking at intensive character creation and rigging. Once all this is set up though? The rest of the process is much faster than Animation.
You’ll also have to consider the work that you have to put in after your animations have been created. For example, the work you’ll need to put into finalizing your project with a video editor like Wondershare Filmora Video Editor (which would work great with animations especially, as it will allow you to actively add into the timeline as you go.)
For Win 7 or later (64-bit)
For macOS 10.12 or later
Part 3 What Are the Best Rigging Animation Tools?
For this final section of the guide, we’re finally moving on to our introduction to Rigging Animation Software. As mentioned, we’ve picked quite the variety to make sure that you have a good idea of how each will work. (A sample video has also been attached to make sure that you know what kind of projects can be created with these Rigging tools. Take the opportunity to explore those, too. If only for further edification.)
01Reallusion – Cartoon Animator 4
The first of the Rigging Animation Software on this list is Reallusion’s Cartoon Animator 4 (previously known as CrazyTalk Animator). This software was originally developed in order to allow everyone (from beginners to professionals) to create advanced animations with very little effort. To that end, it comes with a lot of motion templates and Auto Rig functions (i.e., audio lip-syncing) that the user can use to seriously cut down on the work required.
02Harmony ToonBoom
Harmony ToonBoom is well-known in the Rigging Animation Software industry. It’s the software that is used by many professionals. According to the Toon Boom Harmony website, this software was even used to create popular television shows like Rick and Morty, Bob’s Burgers, The Simpsons, and Futurama. It’s considerably more difficult to use for beginners, but it comes with many advanced functions that allow its users to create truly complex and beautiful Animations.
03Synfig Studio
The best thing about Synfig Studio (right from the onset), is that it is FREE. There are two versions of this tool — one that is ‘stable’ and the other in ‘development.’ The developmental version offers more advanced functions, of course, but for most beginners, the ‘stable’ version would serve just as well.
04Adobe Animate
Adobe Animate is software that belongs in Adobe’s long line of professional-level products. It’s a part of the classic ‘Adobe Suite.’ As a professional software, however, keep in mind that it might be more difficult to get used to at first (there’s a steep, learning curve right off the bat). But, if used correctly, it can be used to create quite impressive and eye-catching interactive animations (i.e., game content or website elements.)
05Animaker
Animaker is quite popular for beginners. It offers templates, so you can start off with an easy project if that’s what you’d like. But it also offers a lot of custom-creation tools that can be used for creating complex and professional Animations — although perhaps not at the level as the ones you might see from other alternatives (this software is most suitable for simple animations.)
06Moho Pro
Moho Pro (previously known as Anime Studio Pro) is a popular Animation program that fans of anime really love. This is one of the best software to use if you’re more interested in traditional animation (which involves a lot of free-hand drawing). Although, despite that fact, it has many advanced rigging functions as well (so you can create a mix of traditional and modern animation if you wish.)
07Pencil 2D
Pencil 2D, much like Synfig Studio, is FREE, cross-platform software. It’s quite old, but it’s matured over the years to include more and more functions (you might already be personally aware of it, in fact. It had its time to shine in the early 2010s.) The important thing to remember though is the fact that this is definitely more of a ‘traditional animation’ software. It does offer some basic rigging, but it’s best used by those who would prefer to practice the art of frame-by-frame animation.
08OpenToonz
OpenToonz is another free Rigging Animation Software (although it should be noted that there is a premium version, called Toonz, that is quite well known.) The best part about it is that it is a combination of software. One that you can use both for traditional animation and Animation. It’s also pretty easy to use, making it a good option for those just starting out.
● Key Takeaways from This Episode →
● 2D Rigging is the practice of creating ‘structure’ or ‘bones’ from which you can move characters or models. In these are usually ‘pins’ placed in bendable areas (i.e., the elbow, for bending the arm.)
● There are many differences between Animation and Animation. What you end up choosing should be decided by your project.
● Remember though, that Animations usually take longer to create even though Animations require more complex riggings.
● If you’re serious about getting into Rigging, make sure to consider the Rigging Animation Software that you choose to use very carefully. Each one has its own pros and cons.
If you’re looking to get a head start in 2D Rigging or 2D Animation in general, then this guide should get you to where you need to go.
We’ll be introducing 2D Rigging in a comprehensive way — perfect for beginners who aren’t familiar with the subject and want something more solid as their foundation.
In this article
01 [All You Need to Know About 2D Rigging](#Part 1)
02 [What is the Difference and Connection Between 2D and 3D](#Part 2)
03 [What Are the Best 2D Rigging Animation Tools?](#Part 3)
Part 1 All You Need to Know About Rigging
For this first part, we’re going to talk about Rigging in a general way. Think of it as an introduction to the subject. One that should, hopefully, set you off on the right foot. It should also help clarify things that you might need to know as we delve into deeper and more advanced subjects in the next sections of this article.
01What is the Meaning of Rigging in Animation?
Alright, so what does rigging 2D characters actually do? What meaning, or effect, does it have? These questions can be quickly answered with this: Rigging (whether it’s or 3D) is the practice of attaching ‘bones’ to a character model. Bones that, in the future, you can use to create motion.
If you’re an artist, then you’re probably familiar with the concept of creating an initial sketch that you put the final drawing on top of — done with the sole purpose of creating a structure that will allow you to move forward more easily in your art.
That’s exactly what you do when Rigging. You’re building a structure that will allow you to easily create animated characters that you can move at will in the future.
02Why Use Animation?
Alright, so what’s the difference between creating a Face Rig and a Face Rig? Is there any? To answer this, the simple answer is, yes. There is quite the difference.
A lot of animators prefer to practice Animation over Animation because it is more traditional and requires less complicated software (not that it doesn’t come with complications of its own.) Specifically, animation requires quite a lengthy character creation and rigging process.
You should consider the subject more based on what project you’re working on. Things that you might want to keep in mind include your project timeline, project budget, character rig usability in the future, length of the project, and so on.
(There’s also a more in-depth breakdown of this in of this guide.)
03What is Animation Rigging Software?
Now, for the last section of this Rigging overview, let’s talk about Rigging Animation Software. You should be able to guess what it’s meant for, but how you can use it is a little different, especially with the many different varieties of Rigging Animation Software available.
We’ll be introducing some in the third part of this guide — so you can learn more about the differences there. For now, all you need to know is that it usually comes with advanced rigging and character deformer tools that you can use to easily (and efficiently) animate your characters.
Part 2 What is the Difference and Connection Between and 3D
As promised, this next section will be devoted to clarifying the differences and similarities between Animation and Animation. As we mentioned previously, most animators prefer Animation. But, more often than not, they switch between both forms in order to create something suitable for their current project.
01How and Animations Are Created
First, let’s talk about the process involved. In the end, this can be described simply as: it starts off the same, but then becomes significantly more and more dissimilar the further you go along. More specifically, whether you’re working on a or Animation, you usually start with working through your vision for the project.
That means exploring ideas and creating hand-illustrated storyboards (which will serve as the foundation for the project as a whole). Then, the next steps involve media gathering (i.e., character creation, sound clips, voice-overs, sound effects, etc.) So that everything would be ready for the project.
This is when the difference starts. Animation involves hand-drawing characters in different poses and angles (with the standard being frames for a second) and can be completed with basic rigging (i.e., face rig for moving mouths or eyes). It’s normal in Animation as well for characters to remain static for several frames. While, with 3D, it is the exact opposite — the characters must be in constant motion so as to remain realistic (which can be done with extensive rigging.)
02Time Investments for Creating and Animations
Next, let’s talk about time investments. This can be a bit tricky to differentiate. Animations, as mentioned, are generally easier to create because it requires less rigging (but more drawings for certain scenes and angles makes it take more time). Meanwhile, Animation usually involves a front-heavy timeline — since you’re looking at intensive character creation and rigging. Once all this is set up though? The rest of the process is much faster than Animation.
You’ll also have to consider the work that you have to put in after your animations have been created. For example, the work you’ll need to put into finalizing your project with a video editor like Wondershare Filmora Video Editor (which would work great with animations especially, as it will allow you to actively add into the timeline as you go.)
For Win 7 or later (64-bit)
For macOS 10.12 or later
Part 3 What Are the Best Rigging Animation Tools?
For this final section of the guide, we’re finally moving on to our introduction to Rigging Animation Software. As mentioned, we’ve picked quite the variety to make sure that you have a good idea of how each will work. (A sample video has also been attached to make sure that you know what kind of projects can be created with these Rigging tools. Take the opportunity to explore those, too. If only for further edification.)
01Reallusion – Cartoon Animator 4
The first of the Rigging Animation Software on this list is Reallusion’s Cartoon Animator 4 (previously known as CrazyTalk Animator). This software was originally developed in order to allow everyone (from beginners to professionals) to create advanced animations with very little effort. To that end, it comes with a lot of motion templates and Auto Rig functions (i.e., audio lip-syncing) that the user can use to seriously cut down on the work required.
02Harmony ToonBoom
Harmony ToonBoom is well-known in the Rigging Animation Software industry. It’s the software that is used by many professionals. According to the Toon Boom Harmony website, this software was even used to create popular television shows like Rick and Morty, Bob’s Burgers, The Simpsons, and Futurama. It’s considerably more difficult to use for beginners, but it comes with many advanced functions that allow its users to create truly complex and beautiful Animations.
03Synfig Studio
The best thing about Synfig Studio (right from the onset), is that it is FREE. There are two versions of this tool — one that is ‘stable’ and the other in ‘development.’ The developmental version offers more advanced functions, of course, but for most beginners, the ‘stable’ version would serve just as well.
04Adobe Animate
Adobe Animate is software that belongs in Adobe’s long line of professional-level products. It’s a part of the classic ‘Adobe Suite.’ As a professional software, however, keep in mind that it might be more difficult to get used to at first (there’s a steep, learning curve right off the bat). But, if used correctly, it can be used to create quite impressive and eye-catching interactive animations (i.e., game content or website elements.)
05Animaker
Animaker is quite popular for beginners. It offers templates, so you can start off with an easy project if that’s what you’d like. But it also offers a lot of custom-creation tools that can be used for creating complex and professional Animations — although perhaps not at the level as the ones you might see from other alternatives (this software is most suitable for simple animations.)
06Moho Pro
Moho Pro (previously known as Anime Studio Pro) is a popular Animation program that fans of anime really love. This is one of the best software to use if you’re more interested in traditional animation (which involves a lot of free-hand drawing). Although, despite that fact, it has many advanced rigging functions as well (so you can create a mix of traditional and modern animation if you wish.)
07Pencil 2D
Pencil 2D, much like Synfig Studio, is FREE, cross-platform software. It’s quite old, but it’s matured over the years to include more and more functions (you might already be personally aware of it, in fact. It had its time to shine in the early 2010s.) The important thing to remember though is the fact that this is definitely more of a ‘traditional animation’ software. It does offer some basic rigging, but it’s best used by those who would prefer to practice the art of frame-by-frame animation.
08OpenToonz
OpenToonz is another free Rigging Animation Software (although it should be noted that there is a premium version, called Toonz, that is quite well known.) The best part about it is that it is a combination of software. One that you can use both for traditional animation and Animation. It’s also pretty easy to use, making it a good option for those just starting out.
● Key Takeaways from This Episode →
● 2D Rigging is the practice of creating ‘structure’ or ‘bones’ from which you can move characters or models. In these are usually ‘pins’ placed in bendable areas (i.e., the elbow, for bending the arm.)
● There are many differences between Animation and Animation. What you end up choosing should be decided by your project.
● Remember though, that Animations usually take longer to create even though Animations require more complex riggings.
● If you’re serious about getting into Rigging, make sure to consider the Rigging Animation Software that you choose to use very carefully. Each one has its own pros and cons.
Also read:
- 2024 Approved 4 Things You Should Know About Pinterest GIF
- New 2024 Approved 10 Photoshop Cartoon Effects For Creatives
- Best 15 Female Anime Characters-Who Is Your Favorite, In 2024
- The Only Guide Youll Need to Learn About GIF Video Downloader for 2024
- Updated How to Create Picsart Cartoon for 2024
- New 2024 Approved Whats Rigging Animation and Why It Matters
- Top 3 Ways to Create Gif Images with Great 3D Gif Maker
- New Animated Collage Maker Tips
- New In 2024, Tips for GIF to Animated PNG You Should Know
- Updated How to Analyze an Editorial Cartoon for 2024
- Updated Whats the Best 10 Photo Animator Templates That Bring Your Images to Life, In 2024
- Updated Best GIF Resizers to Reduce GIF Size for 2024
- New 2024 Approved How to Make Photo 3D Cartoon Online
- Updated How to Send and Add Snapchat GIFs 100 The Easy Way
- Updated 2024 Approved Finding The Best Animated Profile Picture Maker
- New How to Animate Image on Scroll
- Updated Types of Cartoon Styles You May Use for Your Next Marketing Project
- New Best GIF to Video Converters for 2024
- New 2024 Approved How to Send and Add Snapchat GIFs 100 The Easy Way
- New In 2024, Have You Seen the Facebook Cartoon App Everyones Using Lately
- New OBS Animated Alternatives for 2024
- New 2024 Approved Is It That Easy to Make My Own Animated Character?
- Updated 2024 Approved Adobe Animate Text Effects Skills You Need to Know
- New 15 Best Video to GIF App on iPhone and Android
- Updated In 2024, How to Make Your GIF on WhatsApp in Simple Ways
- New Best 10 Animated Templates in Canva for 2024
- New What Is A GIF for 2024
- What Wikipedia Wont Tell You Specifically About Character Rigging
- Updated Top 10 Cartoon Canvas Painting Ideas for Total Beginners for 2024
- Updated Secret Source to Make a Stop Motion Puppet for 2024
- New The Best 8 Places for High-Quality Royalty Free Gifs (Paid and Free)
- Updated 2024 Approved How to Turn Yourself Into a WhatsApp Cartoon
- Updated In 2024, 12 Websites with Triggered Animate on Scroll Examples
- In 2024, Ultimate Guide on Tecno Camon 20 Pro 5G FRP Bypass
- Prevent Cross-Site Tracking on Lava Blaze Curve 5G and Browser | Dr.fone
- In 2024, How to Mirror PC Screen to Vivo X90S Phones? | Dr.fone
- In 2024, A Quick Guide to Infinix Smart 8 HD FRP Bypass Instantly
- Read This Guide to Find a Reliable Alternative to Fake GPS On Nokia G42 5G | Dr.fone
- 3 Ways to Track Poco F5 Pro 5G without Them Knowing | Dr.fone
- Your Complete Guide To Reset Realme GT 5 Pro | Dr.fone
- How to Fix iPhone 6s Plus Passcode not Working?
- In 2024, Remove the Lock Screen Fingerprint Of Your Poco
- Top 12 Prominent Infinix GT 10 Pro Fingerprint Not Working Solutions
- Bricked Your Nokia C12 Pro? Heres A Full Solution | Dr.fone
- In 2024, All You Need To Know About Mega Greninja For Vivo V27 Pro | Dr.fone
- How To Unbrick a Dead Oppo Reno 11 Pro 5G | Dr.fone
- What Does Enter PUK Code Mean And Why Did The Sim Get PUK Blocked On Xiaomi 13 Ultra Device
- 4 Most-Known Ways to Find Someone on Tinder For Nokia 130 Music by Name | Dr.fone
- How to Change Netflix Location to Get More Country Version On Oppo A18 | Dr.fone
- Title: Updated 2024 Approved How to Animate Picture Online Without Learning From Scratch
- Author: Elon
- Created at : 2024-06-08 05:07:57
- Updated at : 2024-06-09 05:07:57
- Link: https://animation-videos.techidaily.com/updated-2024-approved-how-to-animate-picture-online-without-learning-from-scratch/
- License: This work is licensed under CC BY-NC-SA 4.0.
