
:max_bytes(150000):strip_icc():format(webp)/Unlockedphone_mikkelwilliam_Getty_Eplus-bd0f806b392b4069ab6618d3b520f5b7.jpg)
Updated 2024 Approved How to Create Free Photo Collage Frame in Minutes?
How to Create Free Photo Collage Frame in Minutes?
How to Create Photo Collage Frame for Free in Minutes?
An easy yet powerful editor
Numerous effects to choose from
Detailed tutorials provided by the official channel
Decoration of pictures and collages can be done by making beautiful and stylish frames. A family picture or collage can be beautified by adding an attractive frame to it. Know about Best App for Photo Frames Online so you can create photo collages easily in minutes.
In this article
01 [How Do You Make a Collage Picture Frame?](#Part 1)
02 [What is the Best App for Photo Frames?](#Part 2)
Part 1 How Do You Make a Collage Picture Frame?
A beautiful collage without a stylish frame will not be attractive. When a family collage is accompanied by an artistic frame, it adds beauty to it and will be an attraction point for the visitors in the home. Wondering where to get it from? You can do it easily through some most popular apps. Yes, you can get your photo collage framed by yourself.

A wall can be decorated with collage picture frames by following just a few simple steps. Let’s begin with!!!
● Selection of the place where the collage frame is required to be hung: The place should be selected based on certain factors such as being easily approachable, proper lighting, and matching with the theme of the home. The place should be sufficient to add on some more picture frames in the future. The wall picture collage frames shall be created based on the room themes like kid’s room, living room, or bedroom. The position of the frames should be marked with tape so that the exact dimension can be known.
● 2. Select the online application to create frames: There are many applications available online that offer pictures collage frames. Choose one application as per the interest and explore it over the phone or desktop. There are various collage picture frame templates available at the application.
● 3. Uploading the pictures: Select the frame that is best for the picture. The frames shall be selected as per the size of the collage. Several pictures can be selected to make a collage and fix the frame. The frame style can be changed that suits best to the picture or collage. A family picture can be uploaded to create a beautiful and perfect size family photo frame collage.
● 4. Customization: The Photo Collage Frame can be even made better with customization over online applications. Text and style can be included in the frames to give it a better look. Grid frame for picture collage is also available which can be created that fits perfectly to the pictures.
● 5. A collage photo frame is ready to hang on the wall & share: The photo collage with frame can be downloaded from the application. A beautiful picture frame collage wall can be hung in the living room or can be shared online with family and friends to print the same. More frames can be added in the future by choosing the same theme and customization.
Part 2 Part2 what is the Best App for Photo Frames?
Selecting the best App for a photo frame enhances the appearance of any ordinary picture. Some of the top Applications used for frame collage wall are as mentioned:

02 PhotoDirector
This app is popular due to its great AI tools, attractive picture effects, and advanced color control. It has a massive collection of frames that fits perfectly for a single picture as well as a collage. The style options of frames available on the app are classic, modern, and whimsical. Animation and glitch effects add an extra feature to this app.
Pros:
1. Wide range of frames is available.
2. It is easy to use as it can work on Android, iOS, macOS, and Windows devices.
3. Free version is available and photo frames can be shared over social media platforms.
Cons:
1. a Large number of editing options makes it confusing.
2. Fewer features are available.
3. Difficulty in finding plug-in features.

03PicsArt-Our Choice
PicsArt-Our Choice app is having a good combination best photo frames and multi-functional photo editing tools. Clip art, text option, frame editing, and making attractive collages make this app a masterpiece. This app can be used over smartphones and the pictures can be easily shared over social media platforms.
Pros:
1. Availability of tools to make clipart and collages.
2. Option to edit frames and objects.
3. Fully packed with a lot of stickers, frames, and filter options.
Cons:
1. The processing of images is slower.
2. Frequent ads disturb the process of editing and frame creation.
3. The application requires more space on downloading over the phone

04 PicFrame
This application has features to combine multiple pictures in one frame and the created frames can be easily shared over social media platforms. A great artwork can be done by using advanced tools such as filters, attractive frames, and drawing tools. The adjustable photo effects, background patterns and fully customized frames allow creating some attractive pictures and collage frame design.
Pros:
1. Option to save pictures in different resolutions.
2. Great tools for reshaping pictures and wide frame patterns
3. Work also on iPhone and iPad.
Cons:
1. With more new and advanced apps, it has become slightly outdated.
2. It closes very frequently, so sometimes work done on the application is lost.
3. Time to create frames is longer.

05Photo Grid
Photo Grid is an App that offers great photo editing features with more than three hundred layouts to give an attractive look to a picture. The users can transform their various pictures into beautiful collages. Filters, stickers, makeup tools, animated emoticons, and customized background features have made this app a bit popular. Extra pages can be added and the Lightbox feature makes it good for presentation.
Pros:
1. Massive collection of photo frames with customized features
2. Easy to use.
3. Various photo editing option
Cons:
1. It comes with various ads that trouble making frames and collages.
2. Lot of flexibility is not there regarding making videos with pictures.
3. Own frames cannot be created.

06ImgLabs
ImgLabs is one of the best applications to decorate photos and add creativity to them. Easy editing, beautify and stickers can be done over pictures and can be easily shared over Instagram and Facebook. More than twenty images can be added along with beautiful frames through this app. Cool photo filters, drawing tools, collage photo frame design tools, and texture effects make it a great photo frame application.
Pros:
1. The Android and iOS versions of the app are easy to use.
2. Attractive blurring and background effects give an attractive look to the images and picture frames.
3. Well-developed photo editing tools are available.
Cons:
1. The frames available are less as compared to other photo & frame editing applications.
2. Difference in functions is noticed in iOS and Android apps.
3. Installation issues in photo edit and stickers

So, these were some of the applications that offer to make some creative photo edits, collages, and frames. Turning to high definition of pictures and frames, most of the applications are coming up with new and advanced features to give the best picture experience to people. One of the applications which any creative person loves to use is Filmora.
****Wondershare Filmora Video Editor ** that creates attractive and professional quality videos for both business and personal purposes. It transforms the video by adding various stylish effects. One can edit the clips, add watermarks, and can adjust the brightness of the videos in simple steps. A wide range of stickers, animated texts, sound effects, filters, and inserting colorful borders over videos make it a great app.
For Win 7 or later (64-bit)
For macOS 10.12 or later
The videos can be made in different file formats such as mp4, wmv, avi, gif, and mp3 and can be easily shared over social media platforms. This app has great importance for business as it offers various facilities such as Multi-channel marketing, social advertising, and social promotion. It is good for user and brand management also.
So, making any video from pictures or movies through Filmora app will be an amazing idea. With advanced texting, color tuning, and 3D effects, one can be so creative. Even Filmora can be used to create video projects.
● Key Takeaways from This Episode →
● Simple pictures or collages can be taken to next level by adding alluring frames to them. With advanced drawing tools, pictures, and light effects, a stylish collage photo frame design can be created online. It allows bringing so many memories of people in one beautiful frame.
● Photo frame collage wall can be created over many applications. There are Android applications that offer many advanced features required to give a fine touch to the pictures, collages, and frames. They can be used and frames for family pictures can be made easily by following simple steps.
● he selection of the application should be made based on the several options available with the app. For example, an app that has easy to use, is good for all devices, has great editing features, eye-catching eye work and mesmerizing effect shall be preferred.
● So, try some amazing and advanced online Apps to create beautiful picture frames for you and your family now!!!
Decoration of pictures and collages can be done by making beautiful and stylish frames. A family picture or collage can be beautified by adding an attractive frame to it. Know about Best App for Photo Frames Online so you can create photo collages easily in minutes.
In this article
01 [How Do You Make a Collage Picture Frame?](#Part 1)
02 [What is the Best App for Photo Frames?](#Part 2)
Part 1 How Do You Make a Collage Picture Frame?
A beautiful collage without a stylish frame will not be attractive. When a family collage is accompanied by an artistic frame, it adds beauty to it and will be an attraction point for the visitors in the home. Wondering where to get it from? You can do it easily through some most popular apps. Yes, you can get your photo collage framed by yourself.
A wall can be decorated with collage picture frames by following just a few simple steps. Let’s begin with!!!
● Selection of the place where the collage frame is required to be hung: The place should be selected based on certain factors such as being easily approachable, proper lighting, and matching with the theme of the home. The place should be sufficient to add on some more picture frames in the future. The wall picture collage frames shall be created based on the room themes like kid’s room, living room, or bedroom. The position of the frames should be marked with tape so that the exact dimension can be known.
● 2. Select the online application to create frames: There are many applications available online that offer pictures collage frames. Choose one application as per the interest and explore it over the phone or desktop. There are various collage picture frame templates available at the application.
● 3. Uploading the pictures: Select the frame that is best for the picture. The frames shall be selected as per the size of the collage. Several pictures can be selected to make a collage and fix the frame. The frame style can be changed that suits best to the picture or collage. A family picture can be uploaded to create a beautiful and perfect size family photo frame collage.
● 4. Customization: The Photo Collage Frame can be even made better with customization over online applications. Text and style can be included in the frames to give it a better look. Grid frame for picture collage is also available which can be created that fits perfectly to the pictures.
● 5. A collage photo frame is ready to hang on the wall & share: The photo collage with frame can be downloaded from the application. A beautiful picture frame collage wall can be hung in the living room or can be shared online with family and friends to print the same. More frames can be added in the future by choosing the same theme and customization.
Part 2 Part2 what is the Best App for Photo Frames?
Selecting the best App for a photo frame enhances the appearance of any ordinary picture. Some of the top Applications used for frame collage wall are as mentioned:
02 PhotoDirector
This app is popular due to its great AI tools, attractive picture effects, and advanced color control. It has a massive collection of frames that fits perfectly for a single picture as well as a collage. The style options of frames available on the app are classic, modern, and whimsical. Animation and glitch effects add an extra feature to this app.
Pros:
1. Wide range of frames is available.
2. It is easy to use as it can work on Android, iOS, macOS, and Windows devices.
3. Free version is available and photo frames can be shared over social media platforms.
Cons:
1. a Large number of editing options makes it confusing.
2. Fewer features are available.
3. Difficulty in finding plug-in features.
03PicsArt-Our Choice
PicsArt-Our Choice app is having a good combination best photo frames and multi-functional photo editing tools. Clip art, text option, frame editing, and making attractive collages make this app a masterpiece. This app can be used over smartphones and the pictures can be easily shared over social media platforms.
Pros:
1. Availability of tools to make clipart and collages.
2. Option to edit frames and objects.
3. Fully packed with a lot of stickers, frames, and filter options.
Cons:
1. The processing of images is slower.
2. Frequent ads disturb the process of editing and frame creation.
3. The application requires more space on downloading over the phone
04 PicFrame
This application has features to combine multiple pictures in one frame and the created frames can be easily shared over social media platforms. A great artwork can be done by using advanced tools such as filters, attractive frames, and drawing tools. The adjustable photo effects, background patterns and fully customized frames allow creating some attractive pictures and collage frame design.
Pros:
1. Option to save pictures in different resolutions.
2. Great tools for reshaping pictures and wide frame patterns
3. Work also on iPhone and iPad.
Cons:
1. With more new and advanced apps, it has become slightly outdated.
2. It closes very frequently, so sometimes work done on the application is lost.
3. Time to create frames is longer.
05Photo Grid
Photo Grid is an App that offers great photo editing features with more than three hundred layouts to give an attractive look to a picture. The users can transform their various pictures into beautiful collages. Filters, stickers, makeup tools, animated emoticons, and customized background features have made this app a bit popular. Extra pages can be added and the Lightbox feature makes it good for presentation.
Pros:
1. Massive collection of photo frames with customized features
2. Easy to use.
3. Various photo editing option
Cons:
1. It comes with various ads that trouble making frames and collages.
2. Lot of flexibility is not there regarding making videos with pictures.
3. Own frames cannot be created.
06ImgLabs
ImgLabs is one of the best applications to decorate photos and add creativity to them. Easy editing, beautify and stickers can be done over pictures and can be easily shared over Instagram and Facebook. More than twenty images can be added along with beautiful frames through this app. Cool photo filters, drawing tools, collage photo frame design tools, and texture effects make it a great photo frame application.
Pros:
1. The Android and iOS versions of the app are easy to use.
2. Attractive blurring and background effects give an attractive look to the images and picture frames.
3. Well-developed photo editing tools are available.
Cons:
1. The frames available are less as compared to other photo & frame editing applications.
2. Difference in functions is noticed in iOS and Android apps.
3. Installation issues in photo edit and stickers
So, these were some of the applications that offer to make some creative photo edits, collages, and frames. Turning to high definition of pictures and frames, most of the applications are coming up with new and advanced features to give the best picture experience to people. One of the applications which any creative person loves to use is Filmora.
****Wondershare Filmora Video Editor ** that creates attractive and professional quality videos for both business and personal purposes. It transforms the video by adding various stylish effects. One can edit the clips, add watermarks, and can adjust the brightness of the videos in simple steps. A wide range of stickers, animated texts, sound effects, filters, and inserting colorful borders over videos make it a great app.
For Win 7 or later (64-bit)
For macOS 10.12 or later
The videos can be made in different file formats such as mp4, wmv, avi, gif, and mp3 and can be easily shared over social media platforms. This app has great importance for business as it offers various facilities such as Multi-channel marketing, social advertising, and social promotion. It is good for user and brand management also.
So, making any video from pictures or movies through Filmora app will be an amazing idea. With advanced texting, color tuning, and 3D effects, one can be so creative. Even Filmora can be used to create video projects.
● Key Takeaways from This Episode →
● Simple pictures or collages can be taken to next level by adding alluring frames to them. With advanced drawing tools, pictures, and light effects, a stylish collage photo frame design can be created online. It allows bringing so many memories of people in one beautiful frame.
● Photo frame collage wall can be created over many applications. There are Android applications that offer many advanced features required to give a fine touch to the pictures, collages, and frames. They can be used and frames for family pictures can be made easily by following simple steps.
● he selection of the application should be made based on the several options available with the app. For example, an app that has easy to use, is good for all devices, has great editing features, eye-catching eye work and mesmerizing effect shall be preferred.
● So, try some amazing and advanced online Apps to create beautiful picture frames for you and your family now!!!
Learn Disney Cartoon Drawing to See Disney Magic Moments
Learn Disney Cartoon Drawing to See More Disney Magic Moments
An easy yet powerful editor
Numerous effects to choose from
Detailed tutorials provided by the official channel
How to Draw a Disney Caricature

Disney-Inspired Ipad Drawing Class for Beginners
In this article
01 [How to Draw a Disney Caricature](#Part 1)
02 [Disney-Inspired Ipad Drawing Class for Beginners](#Part 2)
Part 1 How to Draw a Disney Caricature
Below is the step-by-step guide to making a Disney cartoon drawing with colors from the comfort of your home:
01How to Draw Mickey

Unarguably, Mickey Mouse is one of the most famous anime characters globally. This character was created in 1928 and is a famous Disney cartoon drawing by animators. Here are straightforward steps to help you draw a Mickey Mouse:
Step 1: Sketch the general but carefully observed features of Mickey Mouse, including the position of ears, body shape (reverse C shape), body proportions including eyes, limbs, and arms, length of arms, button on his pants, and angle on the hands.
Step 2: Take your pencil and paper, and using gentle and weak strokes, make a simple sketch of the head, neck, belly, and limbs.

Step 3: Draw contours of the mouth, ears, and nose.

Step 4: Specify the face features like a smiling opened mouth, tip of the nose, and eyes.

Step 5: Draw the hands carefully, observing the length of both arms and their proportion to the size of the character’s head.

Step 6: Sketch the outline contours of the shoes, the legs, and the pants.

Step 7: Sketch the final outline contour of the body, then erase excess lines where necessary. Add the two buttons on Mickey mouse pants.

Step 8: Draw his nose’s tail, tongue, and ellipse.

Step 9: First, use a 2B or 4B or any soft black color pencil to color the black parts.

Step 10: Depending on your preference, you can color with water, acrylic paints, or pastels.

02How to Draw Captain America
Follow these simple steps to make a Disney cartoon drawing of Captain America:
Step 1: Draw the head and chest
Draw the outlines of his masked face using smooth lines. Draw a curved line across his face to divide his face from his mask. Draw a large letter A and add tiny wings beside it on his forehead. Draw his mouth, eyes, and nose. Use curved lines to indicate his shoulder and chest, then draw a star on his chest.

Step 2: Draw his arm and waist
Draw a curved line on the shoulder to represent the bicep, then draw his gloved arm curled to form a fist. Draw curved lines beneath the chest to represent his muscular weight, then draw the pouches on his belt and use more curved lines to draw his waist.

Step 3: Draw his legs
Here, we shall portray Captain America in action. Use curved lines to show his extended right leg with boots. The left leg should appear more petite.

Step 4: Draw his shield
Against his right arm, carefully draw a flattened circular shape. You can achieve this by drawing concentric circles with a large star in the middle. Draw his arm poking out from behind his shield.

Step 5: Include the final details
Add some vertical lines across his waist and some details on his boots.

Step 6: Colour Captain America
Using colors of the American flag, color your drawing with red, white, and blue colors.

03How to Draw Stitch
Stitch is a bulletproof and fireproof alien from the Lilo and Stitch animations. Here’s how you can draw Stitch:
Step 1: Draw a circle that would form Stitch’s head

Step 2: Using a long curved line, draw an irregular peanut shape beneath the head to represent its body.

Step 3: To form its light underbelly, enclose a small shape parallel to the outline of Stitch’s body using a long curved line. On the chest region, draw a series of small “V” shapes to indicate the presence of fur.

Step 4: Draw Stitch’s arm using curved lines for the upper arm and another pair for the lower arm. Draw his bent hands and fingers using short lines. At the tip of its fingers, draw small pointed triangles to represent its claws.

Step 5: Erase the guidelines from Stitch’s arm

Step 6: Draw Stitch’s outstretched arm using a pair of curved lines and small “C” shaped lines to represent the fingers. Use short lines to connect the fingers. Draw small “V” shapes at the tip of the fingers for the triangular claws.

Step 7: Use a pair of curved lines to sketch each leg, then enclose the toes using C-shaped lines

Step 8: Sketch the ears using long curved lines to indicate the base and folds. Sketch the fur on top of Stitch’s head using a series of curved lines.

Step 9: Draw a big circle for the nose and use curved lines to indicate the nostrils. For the eyes, draw irregular rounded shapes, one within the other. Sketch too long curved lines to show the mouth and small blonde triangles for the teeth. Above the eyes and nose, draw curved lines.

Step 10: Use different shades of blue to colour Stitch.

Part 2 Disney-Inspired Ipad Drawing Class for Beginner
Here is a list of classes for beginners interested in drawing Disney characters.
01Dive into the world of Animation with a Disney-Inspired Ipad Drawing Course

This Disney-inspired lesson focuses on real-life scenarios that are beautiful and adorable. Create your everyday settings by sketching backgrounds and outfitting figures.
It will assist you in developing a straightforward approach to drawing cartoon characters through experimentation and time. Follow along and sketch characters, then make your new character.
02Drawing Faces: A Beginner‘s Guide

Ira Marcks, a graphic novelist, will teach you everything you need to know about drawing faces. Are you completely new when it comes to drawing? No worries; follow along with Ira’s bite-sized lectures, and you’ll be ready to delve into a class project by the end of the course.
Do you prefer to set your speed and work at it? If yes, then extend your learning beyond the classroom, download Ira’s Drawing Faces Book.
03Disney Inspired Drawings: Faces and Expressions

Learners will look at sketching a cartoon image of themselves or people they know while exploring the specific traits of Disney-style characters in this one-time live drawing lesson.
Learners will collaborate with the teacher while working on their art projects. This is a technique class, so the focus will be on the process and working towards a finished goal. Nevertheless, a piece may get completed outside of class.
This program is for students who have a basic understanding of drawing and proportion, are open to artistic growth, and are comfortable appearing on camera and sharing their work in a small group setting. All to help each other, and the classroom environment will support all students.
04Free Art Lessons By The Parks’ Imagineers
This lesson will teach how to create your theme park, design virtual landscapes, and even sketch unique costumes!
You’ll also learn how to draw characters from Frozen 2 like Anna and Elsa and classics like Mickey Mouse, Daisy Duck, Pluto, and others.
Your class experience can be enjoyable when using an easy-to-use tool like Wondershare Filmora.
Wondershare Filmora Video Editor is a robust and easy-to-use video editor for users of all skill levels, from beginner to advanced. Its advanced tools, adjustable keyframing, smoothing effects, and motion blur will considerably assist you in creating a high-quality animation video. Furthermore, the auto color correction and audio mixing will elevate your 2D animation film to new heights. Filmora is the best solution if you want more productivity, control, and customization options for your Disney cartoon drawings and animation.
For Win 7 or later (64-bit)
For macOS 10.12 or later
● Ending Thoughts →
● How to make a Disney cartoon drawing
● A step-by-step guide to drawing your favorite Disney cartoon drawing with colors
● How to use Filmora to create animations
● Different Disney-inspired beginner classes for iPad users.
How to Draw a Disney Caricature
Disney-Inspired Ipad Drawing Class for Beginners
In this article
01 [How to Draw a Disney Caricature](#Part 1)
02 [Disney-Inspired Ipad Drawing Class for Beginners](#Part 2)
Part 1 How to Draw a Disney Caricature
Below is the step-by-step guide to making a Disney cartoon drawing with colors from the comfort of your home:
01How to Draw Mickey
Unarguably, Mickey Mouse is one of the most famous anime characters globally. This character was created in 1928 and is a famous Disney cartoon drawing by animators. Here are straightforward steps to help you draw a Mickey Mouse:
Step 1: Sketch the general but carefully observed features of Mickey Mouse, including the position of ears, body shape (reverse C shape), body proportions including eyes, limbs, and arms, length of arms, button on his pants, and angle on the hands.
Step 2: Take your pencil and paper, and using gentle and weak strokes, make a simple sketch of the head, neck, belly, and limbs.
Step 3: Draw contours of the mouth, ears, and nose.
Step 4: Specify the face features like a smiling opened mouth, tip of the nose, and eyes.
Step 5: Draw the hands carefully, observing the length of both arms and their proportion to the size of the character’s head.
Step 6: Sketch the outline contours of the shoes, the legs, and the pants.
Step 7: Sketch the final outline contour of the body, then erase excess lines where necessary. Add the two buttons on Mickey mouse pants.
Step 8: Draw his nose’s tail, tongue, and ellipse.
Step 9: First, use a 2B or 4B or any soft black color pencil to color the black parts.
Step 10: Depending on your preference, you can color with water, acrylic paints, or pastels.
02How to Draw Captain America
Follow these simple steps to make a Disney cartoon drawing of Captain America:
Step 1: Draw the head and chest
Draw the outlines of his masked face using smooth lines. Draw a curved line across his face to divide his face from his mask. Draw a large letter A and add tiny wings beside it on his forehead. Draw his mouth, eyes, and nose. Use curved lines to indicate his shoulder and chest, then draw a star on his chest.
Step 2: Draw his arm and waist
Draw a curved line on the shoulder to represent the bicep, then draw his gloved arm curled to form a fist. Draw curved lines beneath the chest to represent his muscular weight, then draw the pouches on his belt and use more curved lines to draw his waist.
Step 3: Draw his legs
Here, we shall portray Captain America in action. Use curved lines to show his extended right leg with boots. The left leg should appear more petite.
Step 4: Draw his shield
Against his right arm, carefully draw a flattened circular shape. You can achieve this by drawing concentric circles with a large star in the middle. Draw his arm poking out from behind his shield.
Step 5: Include the final details
Add some vertical lines across his waist and some details on his boots.
Step 6: Colour Captain America
Using colors of the American flag, color your drawing with red, white, and blue colors.
03How to Draw Stitch
Stitch is a bulletproof and fireproof alien from the Lilo and Stitch animations. Here’s how you can draw Stitch:
Step 1: Draw a circle that would form Stitch’s head
Step 2: Using a long curved line, draw an irregular peanut shape beneath the head to represent its body.
Step 3: To form its light underbelly, enclose a small shape parallel to the outline of Stitch’s body using a long curved line. On the chest region, draw a series of small “V” shapes to indicate the presence of fur.
Step 4: Draw Stitch’s arm using curved lines for the upper arm and another pair for the lower arm. Draw his bent hands and fingers using short lines. At the tip of its fingers, draw small pointed triangles to represent its claws.
Step 5: Erase the guidelines from Stitch’s arm
Step 6: Draw Stitch’s outstretched arm using a pair of curved lines and small “C” shaped lines to represent the fingers. Use short lines to connect the fingers. Draw small “V” shapes at the tip of the fingers for the triangular claws.
Step 7: Use a pair of curved lines to sketch each leg, then enclose the toes using C-shaped lines
Step 8: Sketch the ears using long curved lines to indicate the base and folds. Sketch the fur on top of Stitch’s head using a series of curved lines.
Step 9: Draw a big circle for the nose and use curved lines to indicate the nostrils. For the eyes, draw irregular rounded shapes, one within the other. Sketch too long curved lines to show the mouth and small blonde triangles for the teeth. Above the eyes and nose, draw curved lines.
Step 10: Use different shades of blue to colour Stitch.
Part 2 Disney-Inspired Ipad Drawing Class for Beginner
Here is a list of classes for beginners interested in drawing Disney characters.
01Dive into the world of Animation with a Disney-Inspired Ipad Drawing Course
This Disney-inspired lesson focuses on real-life scenarios that are beautiful and adorable. Create your everyday settings by sketching backgrounds and outfitting figures.
It will assist you in developing a straightforward approach to drawing cartoon characters through experimentation and time. Follow along and sketch characters, then make your new character.
02Drawing Faces: A Beginner‘s Guide
Ira Marcks, a graphic novelist, will teach you everything you need to know about drawing faces. Are you completely new when it comes to drawing? No worries; follow along with Ira’s bite-sized lectures, and you’ll be ready to delve into a class project by the end of the course.
Do you prefer to set your speed and work at it? If yes, then extend your learning beyond the classroom, download Ira’s Drawing Faces Book.
03Disney Inspired Drawings: Faces and Expressions
Learners will look at sketching a cartoon image of themselves or people they know while exploring the specific traits of Disney-style characters in this one-time live drawing lesson.
Learners will collaborate with the teacher while working on their art projects. This is a technique class, so the focus will be on the process and working towards a finished goal. Nevertheless, a piece may get completed outside of class.
This program is for students who have a basic understanding of drawing and proportion, are open to artistic growth, and are comfortable appearing on camera and sharing their work in a small group setting. All to help each other, and the classroom environment will support all students.
04Free Art Lessons By The Parks’ Imagineers
This lesson will teach how to create your theme park, design virtual landscapes, and even sketch unique costumes!
You’ll also learn how to draw characters from Frozen 2 like Anna and Elsa and classics like Mickey Mouse, Daisy Duck, Pluto, and others.
Your class experience can be enjoyable when using an easy-to-use tool like Wondershare Filmora.
Wondershare Filmora Video Editor is a robust and easy-to-use video editor for users of all skill levels, from beginner to advanced. Its advanced tools, adjustable keyframing, smoothing effects, and motion blur will considerably assist you in creating a high-quality animation video. Furthermore, the auto color correction and audio mixing will elevate your 2D animation film to new heights. Filmora is the best solution if you want more productivity, control, and customization options for your Disney cartoon drawings and animation.
For Win 7 or later (64-bit)
For macOS 10.12 or later
● Ending Thoughts →
● How to make a Disney cartoon drawing
● A step-by-step guide to drawing your favorite Disney cartoon drawing with colors
● How to use Filmora to create animations
● Different Disney-inspired beginner classes for iPad users.
5 Different Animation Styles: A Simple but Comprehensive Guide
5 Different Animation Styles: A Simple but Comprehensive Guide

Shanoon Cox
Mar 27, 2024• Proven solutions
To whatever generation or kind one could belong to, animation style videos attract people of all ages, and you will be one of them for sure. Rather than ordinary videos, animated ones provoke diverse impacts on the audience utilizing kinesthetic, illustration, and aural. But the reality or fact is, due to overexposure to social media sites and technological advancements, we have forgotten its importance. They are on the verge of existence at present. Are you an art lover who wishes to know more about animation styles? Want to know some of the software tools that can bring out the artist in you? Here is a complete guide that is all you need.
- Part 1: 5 Different Animation Styles
- Part 2: Create Your Animation Videos with Professional Video Editor
5 Different Animation Styles
Ready to enter into the world of animation along with us? We are all set to take you through a ride of different animation styles, their importance, and some of the videos that one should give a try!
1. 2D Animation
Let’s start with 2D as our fist animation style, which is the traditional or oldest form in practice for more than 100 years since 1908. 2D has widely been in usage to create animated short films, cartoon characters, games, marketing videos, and educational materials. In 2D animation, the characters or items, creatures, and backgrounds get crafted in a two-dimensional space. It produces a graphic of movement with the drawings played serially one after another.
Recommended Software: At present, various free animator tools like Creatoon, Blender, and Pencil 2D, whereas, for professionals, Encore, Flash, Toon Boom Harmony, and Adobe Photoshop can be handy!
The above 2D animation style video is a short film “Dark Dark Woods” directed by the students at “The Animation Workshop.” It is all about the young princess, Maria, drenched, and tired of living a royal life being filled with rules, duties, lessons, responsibilities, and customs. One night, she enters into an adventurous event where she finds herself in a mysterious monster-filled dark wood. Watch the film and find did she find out there!
2. 3D Animation
As the next version of 2D, in the animation industry, 3D revolutionized the market since its first appearance in 1972. Like 2D, 3D finds applications in varied platforms like a business, education, and entertainment. Still, the difference is they are unique and created in three-dimensional space using computer graphics and cinematography techniques as well. The pictures or characters look perfected with cutting-edge technology where toy story movie is an outstanding example.
Recommended Software: One can try some of the 3D modeling software packs like Maya, Houdini, Modo, ZBrush, and Lightwave 3D.
Do you know how it feels if you are trapped alone on a deserted island? “It’s a Cinch!” is a fantastic, funny 3D short film that is an adventurous movie made by the ESMA team at CGI. For sure, you will like this funny movie all about atrocities happening with a man and a pelican and enjoy it as much as I did!
3. Motion Graphics
Our next animation style is motion graphics of the animated graphic design, where text appears to be the main enhancing factor. It is a piece of animation or digital footage that illuminates a motion or notation incorporated with audio. It is a new way of communicating to the audience and in driving them deep into the story. You can categorize it under the visual effect technique, which involves the movement of graphic images or elements like logos or text, sound, music, and motion. Motion graphics are best to be found in action and finds a place in multimedia projects, advertising agencies, branding, television title making, and storytelling.
Recommended Software: Tools that are best for motion graphics is Mocha AE, After Effects, Illustrator, and Cinema 4D.
The world is a great place, but we always forget another beautiful hidden green world behind the fantastic buildings we reside in. Yes, “Beautiful World” is a motion graphic video by Blasterjaxx & DBSTF feat. Ryder presents how we humans have developed a great empire by destroying the other beautiful part of the world.
4. Stop Motion
Stop motion is one of the traditional animation styles that is the most popular filmmaking technique that uses hand-crafted or manipulated objects, mostly clay models. Puppets, silhouettes, and cut-outs can also be implemented as stop motion aids to produce animation. It is labor-intensive, a form of art, and has its flavor in animation, although 3D and visual effects have replaced it quite a long time before. But still, filmmakers like Tim Burton use stop motion in their films, making it to withstand the animation industry.
Recommended Software: You can make your stop motion video with software like Dragon frame, Stop Motion Pro Eclipse, and IKITMovie.
Although stop motion has gone before ages, there is still a fantastic introduction. Here is an award-winning short film, “Tokri (the basket),” which is a clumsy accident that leads a juvenile girl onto Mumbai’s streets with the trust of making things correct. Studio Eeksaurus, an Indian bastion animation company, has depicted a father and daughter’s tender emotive tale.
5. Paint-On-Glass Animation
Here is a Paint-on-Glass animation style that is a technique used for making animated films that gives a lot of fun. Artists paint short stories on glasses using oil paints and film them by recording it frame-by-frame. Russian animator Aleksandr Petrov is a famous artist well known for making award-winning paint-on-glass animation. Animators use different objects like brick dust, sand, pastels, and charcoal, to create outstanding drama in their films.
Recommended Software: You can also become a paint-on-glass animator now with tools like Pencil 2D, Blender, Krita, and GIMP.
Suppose you are wondering whether you could find any paint-on-glass animated movie on social media sites. In that case, there are numerous animated films, like “The Old Man and the Sea,” and “My Love,” produced by the experts of pictures of Aleksandr Petrov animation. Surprisingly, this bind-blowing introduction is a result of oil paints on a sheet of glass.
Conclusion
Do you aspire to become an animator and come up painting bright colors to videos? Choose animation styles that you most enjoy, find attractive today, and start working on it. Lastly, do not forget to give Filmora a chance to uplift your creation and give your animation style a life!
Shanoon Cox
Shanoon Cox is a writer and a lover of all things video.
Follow @Shanoon Cox
Shanoon Cox
Mar 27, 2024• Proven solutions
To whatever generation or kind one could belong to, animation style videos attract people of all ages, and you will be one of them for sure. Rather than ordinary videos, animated ones provoke diverse impacts on the audience utilizing kinesthetic, illustration, and aural. But the reality or fact is, due to overexposure to social media sites and technological advancements, we have forgotten its importance. They are on the verge of existence at present. Are you an art lover who wishes to know more about animation styles? Want to know some of the software tools that can bring out the artist in you? Here is a complete guide that is all you need.
- Part 1: 5 Different Animation Styles
- Part 2: Create Your Animation Videos with Professional Video Editor
5 Different Animation Styles
Ready to enter into the world of animation along with us? We are all set to take you through a ride of different animation styles, their importance, and some of the videos that one should give a try!
1. 2D Animation
Let’s start with 2D as our fist animation style, which is the traditional or oldest form in practice for more than 100 years since 1908. 2D has widely been in usage to create animated short films, cartoon characters, games, marketing videos, and educational materials. In 2D animation, the characters or items, creatures, and backgrounds get crafted in a two-dimensional space. It produces a graphic of movement with the drawings played serially one after another.
Recommended Software: At present, various free animator tools like Creatoon, Blender, and Pencil 2D, whereas, for professionals, Encore, Flash, Toon Boom Harmony, and Adobe Photoshop can be handy!
The above 2D animation style video is a short film “Dark Dark Woods” directed by the students at “The Animation Workshop.” It is all about the young princess, Maria, drenched, and tired of living a royal life being filled with rules, duties, lessons, responsibilities, and customs. One night, she enters into an adventurous event where she finds herself in a mysterious monster-filled dark wood. Watch the film and find did she find out there!
2. 3D Animation
As the next version of 2D, in the animation industry, 3D revolutionized the market since its first appearance in 1972. Like 2D, 3D finds applications in varied platforms like a business, education, and entertainment. Still, the difference is they are unique and created in three-dimensional space using computer graphics and cinematography techniques as well. The pictures or characters look perfected with cutting-edge technology where toy story movie is an outstanding example.
Recommended Software: One can try some of the 3D modeling software packs like Maya, Houdini, Modo, ZBrush, and Lightwave 3D.
Do you know how it feels if you are trapped alone on a deserted island? “It’s a Cinch!” is a fantastic, funny 3D short film that is an adventurous movie made by the ESMA team at CGI. For sure, you will like this funny movie all about atrocities happening with a man and a pelican and enjoy it as much as I did!
3. Motion Graphics
Our next animation style is motion graphics of the animated graphic design, where text appears to be the main enhancing factor. It is a piece of animation or digital footage that illuminates a motion or notation incorporated with audio. It is a new way of communicating to the audience and in driving them deep into the story. You can categorize it under the visual effect technique, which involves the movement of graphic images or elements like logos or text, sound, music, and motion. Motion graphics are best to be found in action and finds a place in multimedia projects, advertising agencies, branding, television title making, and storytelling.
Recommended Software: Tools that are best for motion graphics is Mocha AE, After Effects, Illustrator, and Cinema 4D.
The world is a great place, but we always forget another beautiful hidden green world behind the fantastic buildings we reside in. Yes, “Beautiful World” is a motion graphic video by Blasterjaxx & DBSTF feat. Ryder presents how we humans have developed a great empire by destroying the other beautiful part of the world.
4. Stop Motion
Stop motion is one of the traditional animation styles that is the most popular filmmaking technique that uses hand-crafted or manipulated objects, mostly clay models. Puppets, silhouettes, and cut-outs can also be implemented as stop motion aids to produce animation. It is labor-intensive, a form of art, and has its flavor in animation, although 3D and visual effects have replaced it quite a long time before. But still, filmmakers like Tim Burton use stop motion in their films, making it to withstand the animation industry.
Recommended Software: You can make your stop motion video with software like Dragon frame, Stop Motion Pro Eclipse, and IKITMovie.
Although stop motion has gone before ages, there is still a fantastic introduction. Here is an award-winning short film, “Tokri (the basket),” which is a clumsy accident that leads a juvenile girl onto Mumbai’s streets with the trust of making things correct. Studio Eeksaurus, an Indian bastion animation company, has depicted a father and daughter’s tender emotive tale.
5. Paint-On-Glass Animation
Here is a Paint-on-Glass animation style that is a technique used for making animated films that gives a lot of fun. Artists paint short stories on glasses using oil paints and film them by recording it frame-by-frame. Russian animator Aleksandr Petrov is a famous artist well known for making award-winning paint-on-glass animation. Animators use different objects like brick dust, sand, pastels, and charcoal, to create outstanding drama in their films.
Recommended Software: You can also become a paint-on-glass animator now with tools like Pencil 2D, Blender, Krita, and GIMP.
Suppose you are wondering whether you could find any paint-on-glass animated movie on social media sites. In that case, there are numerous animated films, like “The Old Man and the Sea,” and “My Love,” produced by the experts of pictures of Aleksandr Petrov animation. Surprisingly, this bind-blowing introduction is a result of oil paints on a sheet of glass.
Conclusion
Do you aspire to become an animator and come up painting bright colors to videos? Choose animation styles that you most enjoy, find attractive today, and start working on it. Lastly, do not forget to give Filmora a chance to uplift your creation and give your animation style a life!
Shanoon Cox
Shanoon Cox is a writer and a lover of all things video.
Follow @Shanoon Cox
12 Animation Video Maker That Can Triple Conversion Rates
12 Animation Video Maker That Can Triple Conversion Rates
An easy yet powerful editor
Numerous effects to choose from
Detailed tutorials provided by the official channel
Gone are the days when creating animation requires expert skills, time, and a lot of money. Thanks to technological advancement several software and tools are available for creating animated videos in a hassle-free manner.
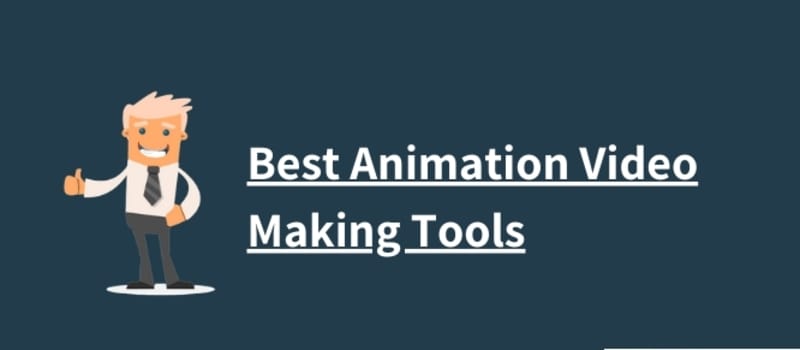
The following parts of the topic will help you to learn in detail about animation videos, their importance, the best software, and animation online website tools.
In this article
01 [What is an Animated Video and Its Importance?](#Part 1)
02 [Top 11 Online Animation Video Maker](#Part 2)
03 [Best Alternative To Online Tools For Creating Professional Animated Videos ](#Part 3)
Part 1 What is an Animated Video and Its Importance?
Animated Video
In simplest terms, animation refers to a method where figures appear as moving images to make them look lively and interesting. Using the drawings, effects, designs, and illustrations, an animated video is created to catch your attention. Animations can be of several types like cartoon animations, 3D animations, motion graphics, CGI, 2D animations, and more.
Benefits of using Animated videos
Animated videos have dominated the entire digital space and there are several reasons for the same. Some of the major ones are enlisted below.
● Add life to your concepts
● Bring in the content to your interesting ideas
● Ability to represent abstract ideas visually
● Video production can be managed in a hassle-free manner
● Animated videos are more visually and psychologically appealing
● Helps in boosting the conversion rates
● Makes you stand out from the competition
● Helps in expanding the reach and getting the attention and engagement
● Improves SEO
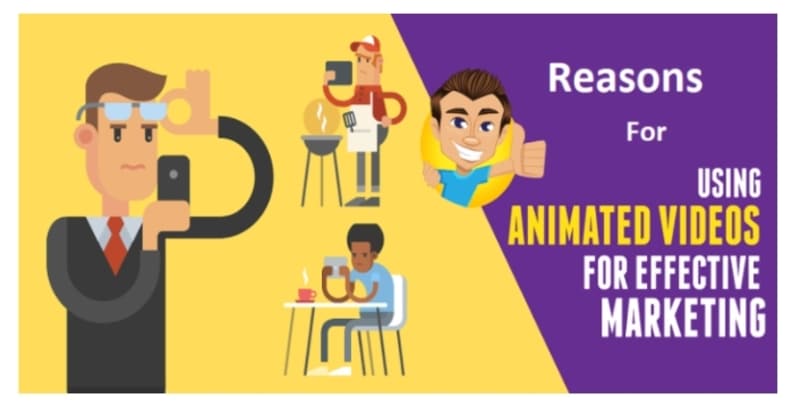
Part 2 Top 11 online animation video maker
If you are in search of a simple yet effective solution to create animations, 3D animation maker online tools work as a great choice. The majority of these programs are free and simple to use and support all basic animation requirements. Below listed are the top 11 online 3D animation makers that can be used for creating impressive animations.
01PowToon
This is a widely used online tool that supports creating videos in multiple formats including animated ones. The tool majorly supports features related to cartoon animation and depending on your requirements you can choose from different licenses and plans. Some of the key features of the tool include presentation mode, animation mode, readymade templates, integration with different tools, and others.

02Moovly
This is one of the top online animation maker 3D tool for creating interesting and eye-catchy animations. The tool is completely cloud-based and thus there is no need for any software download or installation. Different types of animations like doodles, cartoons, and others can be created easily using the program. Huge stock of videos, sound, music, motion graphics, photos, and others are available at the program to create a customized animation as required.
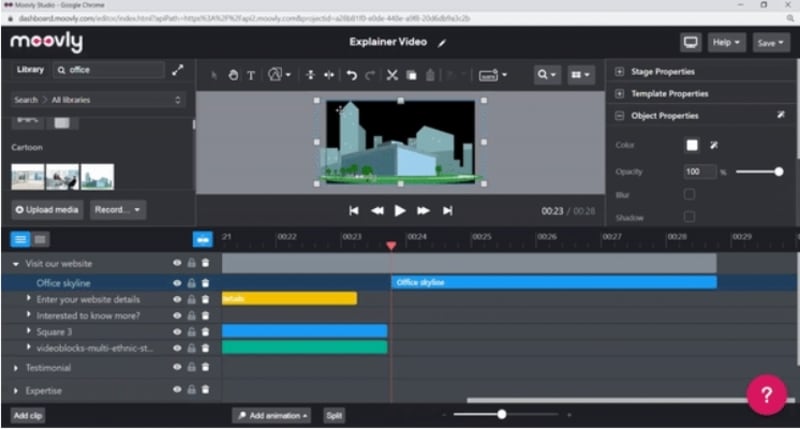
03Explee
This is a simple to use online tool that can help you create animated videos in a few simple steps. The program focuses on using a whiteboard which along with Explee’s Bringlife technology can create impressive animations. More than 6000 images are available at the tool for illustrating your concept and ideas. Some of the animation features supported by the tool include draw, pop, pin, fade, and others.
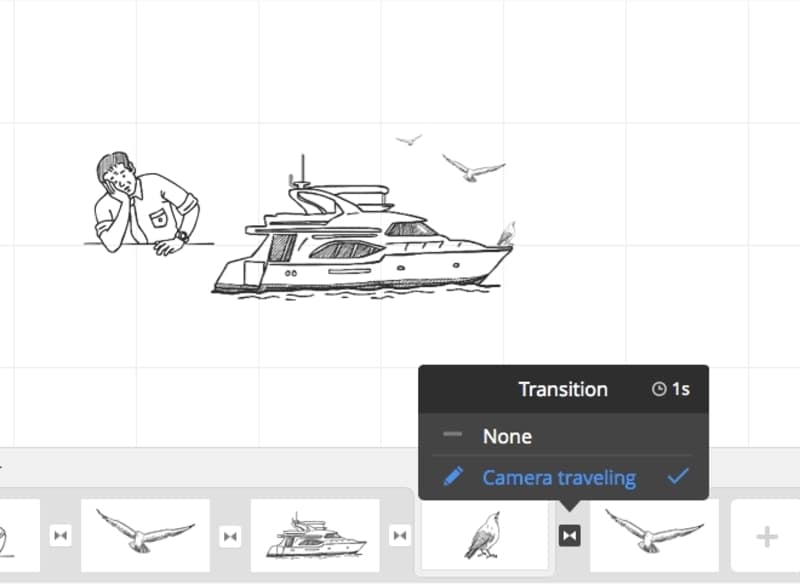
04Wideo
This is a simple yet versatile 3D online animation maker tool for animated video creation. Several pre-designed templates are available using which animated videos can be created quickly and easily. The free version of the tool allows creating animations for up to 30 seconds and for longer animations you would need to upgrade to a paid subscription. The tool also has a stock of free video library and the processed files can be exported as MP4 videos.
05Animaker
Creating cartoons and other animations can be done quickly and easily using this online tool that comes along with several pre-designed templates. The tool is simple to use and requires no specialized skill sets or technical know-how. Some of the interesting features for animation creation include character building, lip-syncing, facial expressions, smart moves, and more. You can customize the templates at the program and create the desired animation using the wide collection of images, videos, GIFs, and music files.
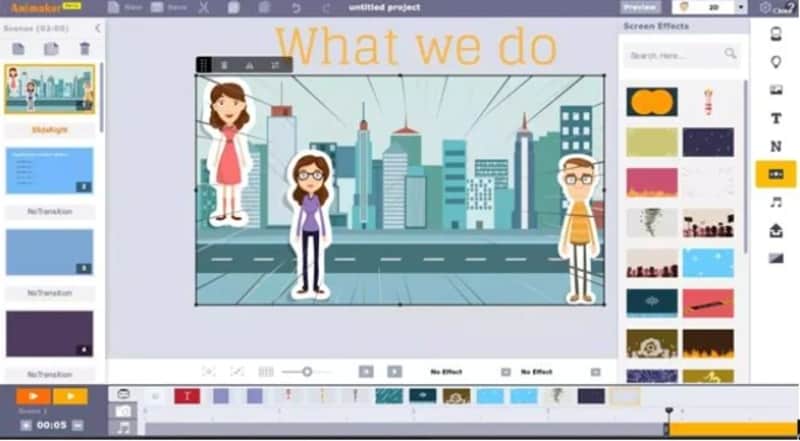
06Vyond
Professional-looking animated videos can be created using this cloud-based tool. You can either create an animation from scratch or use one of the templates at the site and then customize it as needed. The lip-sync feature of the tool allows you to import or an audio file or even add a voice recording. Animations for marketing, training, communications, HR and other purposes can be created using the tool. The tool comes with a 14-days free trial version after which you need to upgrade to a paid plan.
07Renderforest
This online tool comes with more than 500 templates in different categories that can be used along with multiple customization tools of the program to create the desired 2D as well as 3D animation. Simple interface and easy steps make the tool apt even for the ones who do not possess technical know-how. Several toolkits like the 3D video toolkit, whiteboard animation toolkit, and others are available at the site for you to learn the process. Customization options include adding music, adjusting scene order, adjusting VoiceOver, and more. The created video can be directly uploaded to YouTube or can be saved to the local system or project library.
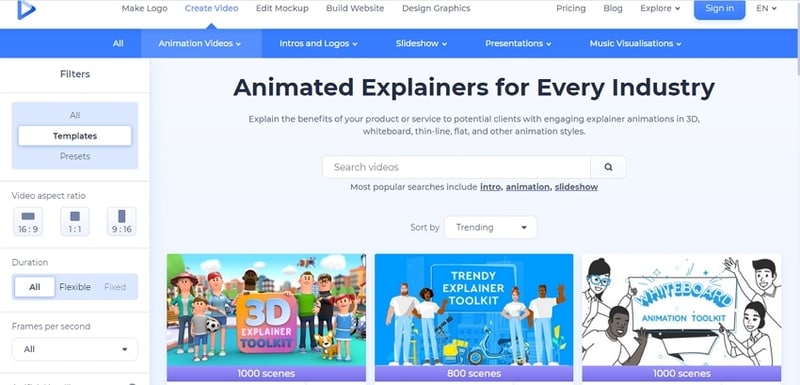
08Animatron
Using this browser-based tool you can easily create animated videos for multiple purposes like presentation, explainer videos, banners, whiteboard animations, and more. You can choose from more than 200 animated templates available at the site and then customize them as required multiple functions. In addition to your videos and other media files, you can also add them from the free library available at Animatron. You can preview the created animation and then export it to your system or directly to popular social media platforms. Tutorials o guide you through the process of animated video creation are also present on the site.
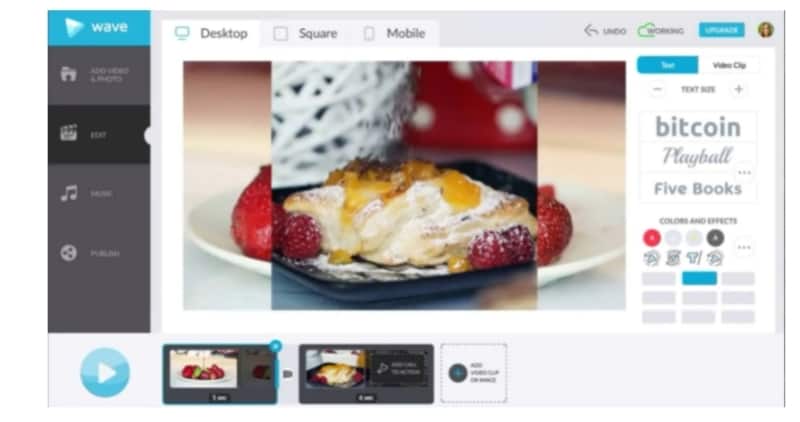
09MotionDen
This is another widely used name when it comes to online video creation tools. This simple yet functional program will let you create animated videos of your choice using multiple templates available at the site. There is a collection of desktop as well as mobile-friendly templates. These template’s video, music, photos, text, and other elements can be customized using the program editor and then the processed video can be quickly downloaded to your local system.
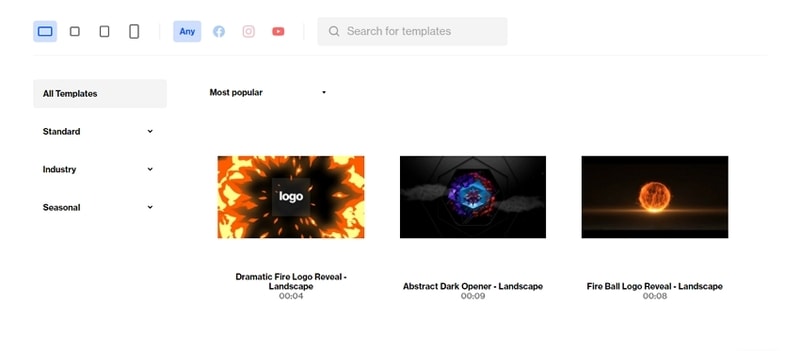
10Toonator
Creating cartoons is simple and quick using this online tool that requires no software download or installation. Using the program, you can create an interesting cartoon as needed as well as edit the graphics. The tool can also work with your tablets that making it easy to edit the files using a pen or fingers. You can even check the designs of cartoons that have been created by other users.
11Biteable
To create animations for your social media sites, marketing, and other requirements, this is a versatile tool to use. You can use the readymade templates available at the site or can also create animation from a scratch. Customize the templates by selecting the scenes, adding images, music, and text as needed. The animated videos can be saved locally or can also be uploaded to popular social media sites.
Part 3 Part Best Alternative to online tools for creating professional animated videos
****Wondershare Filmora Video Editor **
Online tools are simple programs for basic animated video creation. Moreover, these programs are internet-dependent and support limited file size processing. So, if you are looking for an alternative program for creating professional-looking animated videos with support to advanced features, Wondershare Fimora works as an excellent alternative. This Windows and Mac-based tool comes with an array of features that can let you create the desired 2D, 3D, and other animated videos in just a few simple steps.
For Win 7 or later (64-bit)
For macOS 10.12 or later
Key features of the software
● Create professional-looking 2D, 3D, and other animated videos using keyframes.
● Customize the animations using features like motion tracking, pan & zoom, ease-in, ease-out, and more.
● Add customized text & titles, lights & flares, masking, warp, distorting, and more.
● High-quality pre-set available for auto-correction, color wheels, scopes, and more.
● Customize audio using features like automatic audio sync, audio compression, noise reduction, audio transitions, and more.
● Windows and Mac support.
● Key Takeaways from This Episode →
● Animated videos are important to improve the conversion rates, increase the reach of the videos, engage the viewers, and more.
● Several 3D online animation maker is available that can help create decent animated videos.
● With restrictions and limitations of 3D animation websites, professional software like Wondershare Fimora works as the best alternative.
Gone are the days when creating animation requires expert skills, time, and a lot of money. Thanks to technological advancement several software and tools are available for creating animated videos in a hassle-free manner.
The following parts of the topic will help you to learn in detail about animation videos, their importance, the best software, and animation online website tools.
In this article
01 [What is an Animated Video and Its Importance?](#Part 1)
02 [Top 11 Online Animation Video Maker](#Part 2)
03 [Best Alternative To Online Tools For Creating Professional Animated Videos ](#Part 3)
Part 1 What is an Animated Video and Its Importance?
Animated Video
In simplest terms, animation refers to a method where figures appear as moving images to make them look lively and interesting. Using the drawings, effects, designs, and illustrations, an animated video is created to catch your attention. Animations can be of several types like cartoon animations, 3D animations, motion graphics, CGI, 2D animations, and more.
Benefits of using Animated videos
Animated videos have dominated the entire digital space and there are several reasons for the same. Some of the major ones are enlisted below.
● Add life to your concepts
● Bring in the content to your interesting ideas
● Ability to represent abstract ideas visually
● Video production can be managed in a hassle-free manner
● Animated videos are more visually and psychologically appealing
● Helps in boosting the conversion rates
● Makes you stand out from the competition
● Helps in expanding the reach and getting the attention and engagement
● Improves SEO
Part 2 Top 11 online animation video maker
If you are in search of a simple yet effective solution to create animations, 3D animation maker online tools work as a great choice. The majority of these programs are free and simple to use and support all basic animation requirements. Below listed are the top 11 online 3D animation makers that can be used for creating impressive animations.
01PowToon
This is a widely used online tool that supports creating videos in multiple formats including animated ones. The tool majorly supports features related to cartoon animation and depending on your requirements you can choose from different licenses and plans. Some of the key features of the tool include presentation mode, animation mode, readymade templates, integration with different tools, and others.
02Moovly
This is one of the top online animation maker 3D tool for creating interesting and eye-catchy animations. The tool is completely cloud-based and thus there is no need for any software download or installation. Different types of animations like doodles, cartoons, and others can be created easily using the program. Huge stock of videos, sound, music, motion graphics, photos, and others are available at the program to create a customized animation as required.
03Explee
This is a simple to use online tool that can help you create animated videos in a few simple steps. The program focuses on using a whiteboard which along with Explee’s Bringlife technology can create impressive animations. More than 6000 images are available at the tool for illustrating your concept and ideas. Some of the animation features supported by the tool include draw, pop, pin, fade, and others.
04Wideo
This is a simple yet versatile 3D online animation maker tool for animated video creation. Several pre-designed templates are available using which animated videos can be created quickly and easily. The free version of the tool allows creating animations for up to 30 seconds and for longer animations you would need to upgrade to a paid subscription. The tool also has a stock of free video library and the processed files can be exported as MP4 videos.
05Animaker
Creating cartoons and other animations can be done quickly and easily using this online tool that comes along with several pre-designed templates. The tool is simple to use and requires no specialized skill sets or technical know-how. Some of the interesting features for animation creation include character building, lip-syncing, facial expressions, smart moves, and more. You can customize the templates at the program and create the desired animation using the wide collection of images, videos, GIFs, and music files.
06Vyond
Professional-looking animated videos can be created using this cloud-based tool. You can either create an animation from scratch or use one of the templates at the site and then customize it as needed. The lip-sync feature of the tool allows you to import or an audio file or even add a voice recording. Animations for marketing, training, communications, HR and other purposes can be created using the tool. The tool comes with a 14-days free trial version after which you need to upgrade to a paid plan.
07Renderforest
This online tool comes with more than 500 templates in different categories that can be used along with multiple customization tools of the program to create the desired 2D as well as 3D animation. Simple interface and easy steps make the tool apt even for the ones who do not possess technical know-how. Several toolkits like the 3D video toolkit, whiteboard animation toolkit, and others are available at the site for you to learn the process. Customization options include adding music, adjusting scene order, adjusting VoiceOver, and more. The created video can be directly uploaded to YouTube or can be saved to the local system or project library.
08Animatron
Using this browser-based tool you can easily create animated videos for multiple purposes like presentation, explainer videos, banners, whiteboard animations, and more. You can choose from more than 200 animated templates available at the site and then customize them as required multiple functions. In addition to your videos and other media files, you can also add them from the free library available at Animatron. You can preview the created animation and then export it to your system or directly to popular social media platforms. Tutorials o guide you through the process of animated video creation are also present on the site.
09MotionDen
This is another widely used name when it comes to online video creation tools. This simple yet functional program will let you create animated videos of your choice using multiple templates available at the site. There is a collection of desktop as well as mobile-friendly templates. These template’s video, music, photos, text, and other elements can be customized using the program editor and then the processed video can be quickly downloaded to your local system.
10Toonator
Creating cartoons is simple and quick using this online tool that requires no software download or installation. Using the program, you can create an interesting cartoon as needed as well as edit the graphics. The tool can also work with your tablets that making it easy to edit the files using a pen or fingers. You can even check the designs of cartoons that have been created by other users.
11Biteable
To create animations for your social media sites, marketing, and other requirements, this is a versatile tool to use. You can use the readymade templates available at the site or can also create animation from a scratch. Customize the templates by selecting the scenes, adding images, music, and text as needed. The animated videos can be saved locally or can also be uploaded to popular social media sites.
Part 3 Part Best Alternative to online tools for creating professional animated videos
****Wondershare Filmora Video Editor **
Online tools are simple programs for basic animated video creation. Moreover, these programs are internet-dependent and support limited file size processing. So, if you are looking for an alternative program for creating professional-looking animated videos with support to advanced features, Wondershare Fimora works as an excellent alternative. This Windows and Mac-based tool comes with an array of features that can let you create the desired 2D, 3D, and other animated videos in just a few simple steps.
For Win 7 or later (64-bit)
For macOS 10.12 or later
Key features of the software
● Create professional-looking 2D, 3D, and other animated videos using keyframes.
● Customize the animations using features like motion tracking, pan & zoom, ease-in, ease-out, and more.
● Add customized text & titles, lights & flares, masking, warp, distorting, and more.
● High-quality pre-set available for auto-correction, color wheels, scopes, and more.
● Customize audio using features like automatic audio sync, audio compression, noise reduction, audio transitions, and more.
● Windows and Mac support.
● Key Takeaways from This Episode →
● Animated videos are important to improve the conversion rates, increase the reach of the videos, engage the viewers, and more.
● Several 3D online animation maker is available that can help create decent animated videos.
● With restrictions and limitations of 3D animation websites, professional software like Wondershare Fimora works as the best alternative.
What’s Rigging Animation and Why It Matters
What’s Rigging Animation and Why It Matters
An easy yet powerful editor
Numerous effects to choose from
Detailed tutorials provided by the official channel
Today there is a lot pre-made skeletons you can use and reuse as many times as you want, making only a few minor adjustments to the base design. If your creativity is sparking like firecrackers, then a rig can make it look more defined and/or realistic.
Not convinced? Let’s talk more about Rigging Animation.
In this article
01 [What is Rigging Animation](#Part 1)
02 [The Ultimate Collection for Free Maya Rigs [2022]](#Part 2)
Part 1 What is Rigging Animation
01Why Your Animators Need to Know How to Rig
Walk into any professional animation studio toady, you would notice unfamiliar skeleton figures in at least one of the screens.
This is called skeleton animation and is a major technique used in creating animated models that give us that 36vibe of the character in movies. It helps animators in controlling its movement just like a puppet. Hidden call back to the Matrix.
What you see in most movies or games, are characters and models who supported by a network of digital mechanical skeletons all rigged to move in a certain way.
02How Does Rigging Work?
The process of rigging is usually the second step in a long line of other methods applied after creating a model.
There is a series of interdependent bones that need to be constructed which is representation of the skeletal structure which is the basic goal in rigging animation.
With the right digital animation software you can reposition, repurpose and scale these bones in more ways than one.
The next step would involve recording the different movements of these bones on a timeline. This part of the process is called keyframing in animation.
These simple steps are actually more intricate than they actually are. Each movement acts as trigger to another set of movements like how the shoulder bone is connected to the forearm of our body.
This movement of the model becomes even more realistic once its weight scale has been determined. Painting weight can be considered to be the most unnerving challenge in the entire process.
Which is where Inverse Kinematics can help in making things 5easier by just reversing forward kinematic movements.
All of these aspects of rigging makes it possible to help animation mimic real life movements.
03How is Rigging Used?
Rigging is a technique which has only started gaining more prominence in recent times due to how crucial it is to the gaming and animation movie industry.
Not only is it used on characters but all mechanical objects in animations can also be rigged. With the help of a computerized program physicality is added to the bone structure and is recorded through a series of frames. These recording are then played back.
There are other applications to the and modelling process which goes beyond the entertainment industry such as giving virtual medical demonstrations or modeling a product.
This entire process can get much more repetitive and complex when it comes to rigging something as dynamic as the human face.
04Intro to Rigging Software
You might already be aware by now that there are some major animation software on the market that can provide you with just about every tool you need to make jaw dropping rigger animations.
Software like Blender, Cinema 4D, Maya and Houdini employs fantastic Skeletal Animation and digital motion capturing techniques. They open the doors to more realistic animations that can be used to create far more interactive and personalized digital worlds.
Maya and 3Ds Max is used to do real time animation rigging and is considered by most to be the industry standard by most animators.
Blender on the other hand is a free to use software. Though not quite as strong as Maya, it is an open source software which is equipped with everything you need to rig and animate models.
You can import completed animated files onto game engines and all types of other applications. The most common format for importing animated files is .fbx.
Part 2 The Ultimate Collection for Free Maya Rigs [2022]
01How’s Maya Rigs?
To tell the truth, every year you have spent on learning animation would come into great use in making your imagination come to life. Maya is probably the one software which gives you credit for just knowing it.
Maya has several levels of features you need to practice before you can call yourself a Maya master.
The best way to get your hands practiced on animating on Maya is by becoming well versed with all the stats and proportions while working with rigs. You would surely need to get your hands on high quality rig packages that makes the learning experience even more worth it.
With time, you would get better at understanding of the specifics of building a structure you would be showing in the final result. However getting stuck with the wrong type of rig can end up making your animating experience counterintuitive.
Here is a list of Maya Rigs you can start on right away;
02Best Free Maya Rigs of 2022
● Basic Rigs

Understanding the Basic Functionality of inanimate objects is a clear place to start in animation rigging. It helps you get a strong grasp over animation principals like bouncing a ball, before moving on to more challenging rigging packages.
● Ultimate Rigs
As you keep trying out different basic rigging functionalities, you eventually would need an ultimate rigging pack which is a complete set of all basic rigs. It is a great option to download and have this as a backup.
● Flour Sack
The Flour Sack free Rig is old school trainer pack. It simplifies your understanding character emotions by applying posing and adding weight to an object with a whimsical undefined structure.
● Wall E

If you are easily familiar with this character then you should remember how beautifully Wall-E was able express himself. It certainly is a step up on your journey to improving motion capture techniques. Try making your own Dreamworks style animation with Filmora from Wondershare where you can pair your animations with a few amazing film editing tools.
● JuiceBox
Another favored animation teaching prop is the Juice Box. It follows similar principals like the Flour Sack but the straw adds a different dimension to it. This is where an animator can try out more ways to get creative without a simple straw getting in their way.
● The Walking Egg
An egg shaped mechanical quadruped robot who has the ability to contract its legs into its body. Its legs are probably its best feature since it is lockable at then joints. A fun part of this robot is that its screen eyes can turn into guns.
● Cartoon Chameleon
This chameleon has all basic body and facial functions needed by a quadruped. It is a funny whimsical character similar to ‘Pasacal’ from the movie “Tangled” which you can play with. Its tongue is a special feature although you may need to work on its control.
● Judy Hopps
Time to master the art of animating emotions and Judy with her amazing big round eyes can easily be adjusted with the help of floating controllers. The dynamic features of this rig has micro facial controls which you practice with.
● Roboter 2.0.1
Interested in Robots? Try playing with this humanoid figure but be warned that it might not feel as easy to replicate natural human body motion. It might take some practice but you can try taking on the initial steps by practicing on a robot rig. At least you can excuse any minor imperfections.
● Bony and Beefy
The next challenge would be to master this incredibly advanced rig. There are various different body specifications which you will need to be familiar with. This rig gives you a fair advantage by already toggling all visibility controls.
● Key Takeaways from This Episode →
● Rigging is a fantastic way to learn the foundations of animations and how it all ties into the final result. It involves creating skeletal animations of bones that share parental relationship with each other; one bone moves an entire set. You can record these movements and then play them over timeline.
● You can practice rigging with both simple and advanced animations. Complex rigging structures like facial features may require separate project of its own. There are various rigging software like Blender and Maya which provides you with everything you need to carry out a successful rigging process.
● Get started with rigging animation by practicing on free Maya Rigs. Find out which rig suits you best according to your skills level.
Today there is a lot pre-made skeletons you can use and reuse as many times as you want, making only a few minor adjustments to the base design. If your creativity is sparking like firecrackers, then a rig can make it look more defined and/or realistic.
Not convinced? Let’s talk more about Rigging Animation.
In this article
01 [What is Rigging Animation](#Part 1)
02 [The Ultimate Collection for Free Maya Rigs [2022]](#Part 2)
Part 1 What is Rigging Animation
01Why Your Animators Need to Know How to Rig
Walk into any professional animation studio toady, you would notice unfamiliar skeleton figures in at least one of the screens.
This is called skeleton animation and is a major technique used in creating animated models that give us that 36vibe of the character in movies. It helps animators in controlling its movement just like a puppet. Hidden call back to the Matrix.
What you see in most movies or games, are characters and models who supported by a network of digital mechanical skeletons all rigged to move in a certain way.
02How Does Rigging Work?
The process of rigging is usually the second step in a long line of other methods applied after creating a model.
There is a series of interdependent bones that need to be constructed which is representation of the skeletal structure which is the basic goal in rigging animation.
With the right digital animation software you can reposition, repurpose and scale these bones in more ways than one.
The next step would involve recording the different movements of these bones on a timeline. This part of the process is called keyframing in animation.
These simple steps are actually more intricate than they actually are. Each movement acts as trigger to another set of movements like how the shoulder bone is connected to the forearm of our body.
This movement of the model becomes even more realistic once its weight scale has been determined. Painting weight can be considered to be the most unnerving challenge in the entire process.
Which is where Inverse Kinematics can help in making things 5easier by just reversing forward kinematic movements.
All of these aspects of rigging makes it possible to help animation mimic real life movements.
03How is Rigging Used?
Rigging is a technique which has only started gaining more prominence in recent times due to how crucial it is to the gaming and animation movie industry.
Not only is it used on characters but all mechanical objects in animations can also be rigged. With the help of a computerized program physicality is added to the bone structure and is recorded through a series of frames. These recording are then played back.
There are other applications to the and modelling process which goes beyond the entertainment industry such as giving virtual medical demonstrations or modeling a product.
This entire process can get much more repetitive and complex when it comes to rigging something as dynamic as the human face.
04Intro to Rigging Software
You might already be aware by now that there are some major animation software on the market that can provide you with just about every tool you need to make jaw dropping rigger animations.
Software like Blender, Cinema 4D, Maya and Houdini employs fantastic Skeletal Animation and digital motion capturing techniques. They open the doors to more realistic animations that can be used to create far more interactive and personalized digital worlds.
Maya and 3Ds Max is used to do real time animation rigging and is considered by most to be the industry standard by most animators.
Blender on the other hand is a free to use software. Though not quite as strong as Maya, it is an open source software which is equipped with everything you need to rig and animate models.
You can import completed animated files onto game engines and all types of other applications. The most common format for importing animated files is .fbx.
Part 2 The Ultimate Collection for Free Maya Rigs [2022]
01How’s Maya Rigs?
To tell the truth, every year you have spent on learning animation would come into great use in making your imagination come to life. Maya is probably the one software which gives you credit for just knowing it.
Maya has several levels of features you need to practice before you can call yourself a Maya master.
The best way to get your hands practiced on animating on Maya is by becoming well versed with all the stats and proportions while working with rigs. You would surely need to get your hands on high quality rig packages that makes the learning experience even more worth it.
With time, you would get better at understanding of the specifics of building a structure you would be showing in the final result. However getting stuck with the wrong type of rig can end up making your animating experience counterintuitive.
Here is a list of Maya Rigs you can start on right away;
02Best Free Maya Rigs of 2022
● Basic Rigs
Understanding the Basic Functionality of inanimate objects is a clear place to start in animation rigging. It helps you get a strong grasp over animation principals like bouncing a ball, before moving on to more challenging rigging packages.
● Ultimate Rigs
As you keep trying out different basic rigging functionalities, you eventually would need an ultimate rigging pack which is a complete set of all basic rigs. It is a great option to download and have this as a backup.
● Flour Sack
The Flour Sack free Rig is old school trainer pack. It simplifies your understanding character emotions by applying posing and adding weight to an object with a whimsical undefined structure.
● Wall E
If you are easily familiar with this character then you should remember how beautifully Wall-E was able express himself. It certainly is a step up on your journey to improving motion capture techniques. Try making your own Dreamworks style animation with Filmora from Wondershare where you can pair your animations with a few amazing film editing tools.
● JuiceBox
Another favored animation teaching prop is the Juice Box. It follows similar principals like the Flour Sack but the straw adds a different dimension to it. This is where an animator can try out more ways to get creative without a simple straw getting in their way.
● The Walking Egg
An egg shaped mechanical quadruped robot who has the ability to contract its legs into its body. Its legs are probably its best feature since it is lockable at then joints. A fun part of this robot is that its screen eyes can turn into guns.
● Cartoon Chameleon
This chameleon has all basic body and facial functions needed by a quadruped. It is a funny whimsical character similar to ‘Pasacal’ from the movie “Tangled” which you can play with. Its tongue is a special feature although you may need to work on its control.
● Judy Hopps
Time to master the art of animating emotions and Judy with her amazing big round eyes can easily be adjusted with the help of floating controllers. The dynamic features of this rig has micro facial controls which you practice with.
● Roboter 2.0.1
Interested in Robots? Try playing with this humanoid figure but be warned that it might not feel as easy to replicate natural human body motion. It might take some practice but you can try taking on the initial steps by practicing on a robot rig. At least you can excuse any minor imperfections.
● Bony and Beefy
The next challenge would be to master this incredibly advanced rig. There are various different body specifications which you will need to be familiar with. This rig gives you a fair advantage by already toggling all visibility controls.
● Key Takeaways from This Episode →
● Rigging is a fantastic way to learn the foundations of animations and how it all ties into the final result. It involves creating skeletal animations of bones that share parental relationship with each other; one bone moves an entire set. You can record these movements and then play them over timeline.
● You can practice rigging with both simple and advanced animations. Complex rigging structures like facial features may require separate project of its own. There are various rigging software like Blender and Maya which provides you with everything you need to carry out a successful rigging process.
● Get started with rigging animation by practicing on free Maya Rigs. Find out which rig suits you best according to your skills level.
Ideas of Learning How to Send WhatsApp Animated Gifs
Ideas That Will Help You Out in Learning How to Send WhatsApp Animated Gifs
An easy yet powerful editor
Numerous effects to choose from
Detailed tutorials provided by the official channel
While chatting on WhatsApp, expressing your thoughts, suggestions, and situations become easier if assisted with some animations and for this GIFs are available.

So, if you too are keen to try these animated images but clueless about how to use them, we are here to help you. Learn about different ways to send WhatsApp animated GIFs in the following parts.
In this article
01 [How to send WhatsApp GIF using Integrated library](#Part 1)
02 [How to send GIF Stored on your device](#Part 2)
03 [How to create WhatsApp GIF using videos](#Part 3)
04 [Best tool for creating interesting GIFs in a hassle-free manner- Wondershare Filmora](#Part 4)
Part 1 How to send WhatsApp GIF using Integrated library
The WhatsApp feature on your iPhone as well as Android devices comes integrated with a GIF library powered by Tenor that allows you to search for GIFs using desired keywords. The steps to send GIFs through the method for both iPhone, as well as Android, are almost the same.
Step 1. Open WhatsApp and select the contact or the group chat to whom you wish to send the GIF.
On your Android phone, click on the smiley emoji at the input section and then choose GIF at the bottom of the screen. A sample of GIF will appear. On your iPhone, you need to click on the sticker icon to launch GIF options.
Step 2. Enter the desired keyword at the search icon to look out for a more specific GIF.
Step 3. Tap on the selected GIF and then if needed add a caption as well.
Step 4. Finally, click on the Send icon to share the GIF to the chat.
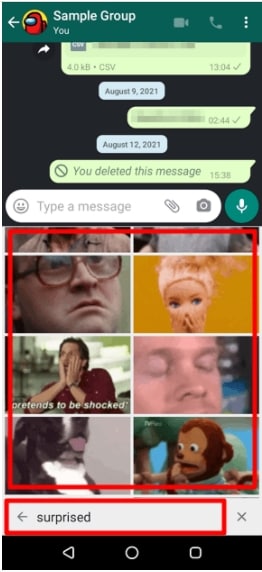
Part 2 How to send GIF Stored on your device
Several third-party apps can let you create GIFs as needed. Moreover, you can also download these animations from online sites to your device.
Once you have done WhatsApp animated GIF download to your device, these GIF files can be sent on WhatsApp by attaching them like any other image or video.
Step 1. Launch WhatsApp and select the desired contact. Click on the attach or gallery icon at the input area to browse and add the saved GIF.
Note: The size of the GIF has to be less than 16MB.
Step 2. Add a caption if needed.
Step 3. Click on the Send icon.
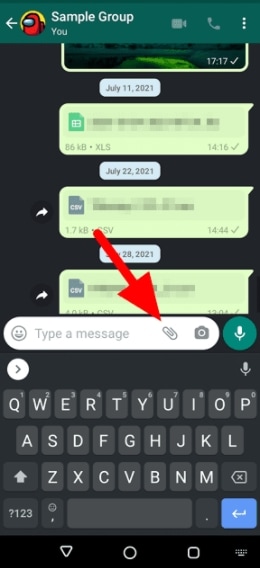
Part 3 How to create WhatsApp GIF using videos
Another way is by creating GIFs using the videos on your device. The videos to be shared as GIF has to be less than 6 seconds and thus the longer videos need to be trimmed.
Steps to create WhatsApp GIF using videos
Step 1. Launch the WhatsApp chat to which you want to send the GIF. Click on the gallery icon to browse and add the video from the device. Alternatively, you can also record a video to be used as GIF.
Step 2. After the video is added, trim it under 6 seconds using the slider at the top. Add the caption or other available elements if needed.
Step 3. Click on the GIF button and then tap on the Send icon.
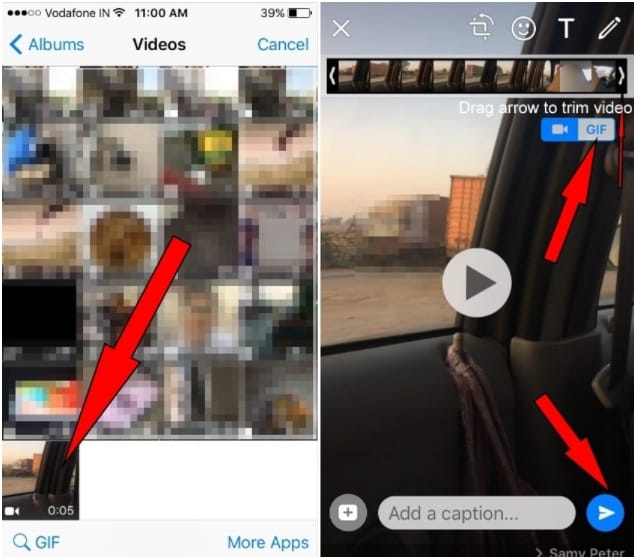
Part 4 Best tool for creating interesting GIFs in a hassle-free manner- Wondershare Filmora
Above we have mentioned in part 2 that there are several third-party apps available that can be used for creating GIFs. Among the myriad of options available, we suggest Wondershare Filmora Video Editor owing to its user-friendly interface and fast processing.
Wondershare Filmora
Get started easily with Filmora’s powerful performance, intuitive interface, and countless effects!
Try It Free Try It Free Try It Free Learn More >

Using the software, you can quickly create animated GIF stickers for WhatsApp using images and videos in all key formats. Several elements to further pep up your animations can be added like text, sound, effects, and more. Additionally, you can even edit the added media files using features like rotate, split, trim, speed-up, speed-down, and more.
Once installed on your Windows or Mac devices, Wondershare Filmora works as a complete video editing tool.
Steps to create Animated WhatsApp GIF using Wondershare Filmora
Step 1. Run the software on your system, browse and import the images and videos from which animations have to be created.
Step 2. Next, drag and move the media files to the timeline of the tool.
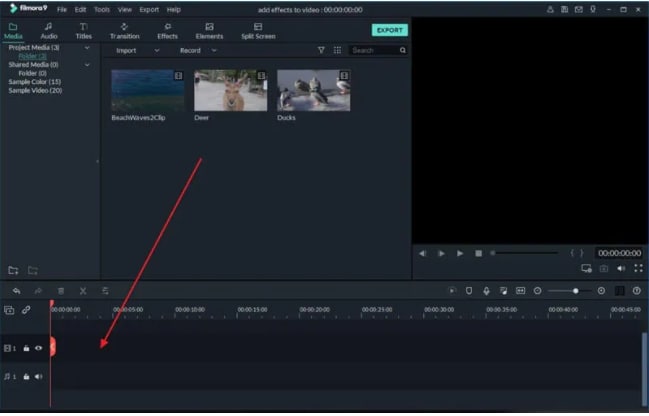
Step 3. Next, add effects, text, and other elements as needed..
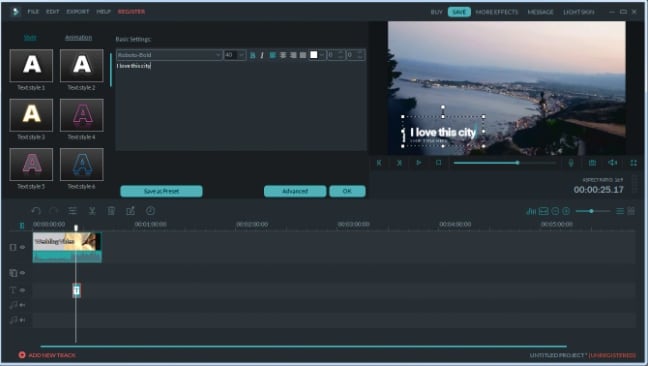
Step 4. At the Local section, save the created media file as GIF. Give the desired name and then select the desktop location. Click on the EXPORT button to start processing.
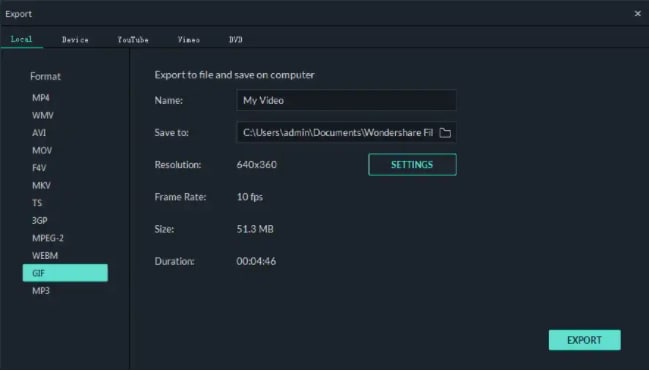
● Key Takeaways from This Episode →
●WhatsApp GIFs on your phone can be sent by either searching them from the integrated library or using the ones saved to your device.
●GIFs can also be created using videos.
●Wondershare Filmora is the best third-party app for effortlessly creating impressing GIFs.
While chatting on WhatsApp, expressing your thoughts, suggestions, and situations become easier if assisted with some animations and for this GIFs are available.
So, if you too are keen to try these animated images but clueless about how to use them, we are here to help you. Learn about different ways to send WhatsApp animated GIFs in the following parts.
In this article
01 [How to send WhatsApp GIF using Integrated library](#Part 1)
02 [How to send GIF Stored on your device](#Part 2)
03 [How to create WhatsApp GIF using videos](#Part 3)
04 [Best tool for creating interesting GIFs in a hassle-free manner- Wondershare Filmora](#Part 4)
Part 1 How to send WhatsApp GIF using Integrated library
The WhatsApp feature on your iPhone as well as Android devices comes integrated with a GIF library powered by Tenor that allows you to search for GIFs using desired keywords. The steps to send GIFs through the method for both iPhone, as well as Android, are almost the same.
Step 1. Open WhatsApp and select the contact or the group chat to whom you wish to send the GIF.
On your Android phone, click on the smiley emoji at the input section and then choose GIF at the bottom of the screen. A sample of GIF will appear. On your iPhone, you need to click on the sticker icon to launch GIF options.
Step 2. Enter the desired keyword at the search icon to look out for a more specific GIF.
Step 3. Tap on the selected GIF and then if needed add a caption as well.
Step 4. Finally, click on the Send icon to share the GIF to the chat.
Part 2 How to send GIF Stored on your device
Several third-party apps can let you create GIFs as needed. Moreover, you can also download these animations from online sites to your device.
Once you have done WhatsApp animated GIF download to your device, these GIF files can be sent on WhatsApp by attaching them like any other image or video.
Step 1. Launch WhatsApp and select the desired contact. Click on the attach or gallery icon at the input area to browse and add the saved GIF.
Note: The size of the GIF has to be less than 16MB.
Step 2. Add a caption if needed.
Step 3. Click on the Send icon.
Part 3 How to create WhatsApp GIF using videos
Another way is by creating GIFs using the videos on your device. The videos to be shared as GIF has to be less than 6 seconds and thus the longer videos need to be trimmed.
Steps to create WhatsApp GIF using videos
Step 1. Launch the WhatsApp chat to which you want to send the GIF. Click on the gallery icon to browse and add the video from the device. Alternatively, you can also record a video to be used as GIF.
Step 2. After the video is added, trim it under 6 seconds using the slider at the top. Add the caption or other available elements if needed.
Step 3. Click on the GIF button and then tap on the Send icon.
Part 4 Best tool for creating interesting GIFs in a hassle-free manner- Wondershare Filmora
Above we have mentioned in part 2 that there are several third-party apps available that can be used for creating GIFs. Among the myriad of options available, we suggest Wondershare Filmora Video Editor owing to its user-friendly interface and fast processing.
Wondershare Filmora
Get started easily with Filmora’s powerful performance, intuitive interface, and countless effects!
Try It Free Try It Free Try It Free Learn More >
Using the software, you can quickly create animated GIF stickers for WhatsApp using images and videos in all key formats. Several elements to further pep up your animations can be added like text, sound, effects, and more. Additionally, you can even edit the added media files using features like rotate, split, trim, speed-up, speed-down, and more.
Once installed on your Windows or Mac devices, Wondershare Filmora works as a complete video editing tool.
Steps to create Animated WhatsApp GIF using Wondershare Filmora
Step 1. Run the software on your system, browse and import the images and videos from which animations have to be created.
Step 2. Next, drag and move the media files to the timeline of the tool.
Step 3. Next, add effects, text, and other elements as needed..
Step 4. At the Local section, save the created media file as GIF. Give the desired name and then select the desktop location. Click on the EXPORT button to start processing.
● Key Takeaways from This Episode →
●WhatsApp GIFs on your phone can be sent by either searching them from the integrated library or using the ones saved to your device.
●GIFs can also be created using videos.
●Wondershare Filmora is the best third-party app for effortlessly creating impressing GIFs.
Tips for GIF to Animated PNG
Versatile Video Editor - Wondershare Filmora
An easy yet powerful editor
Numerous effects to choose from
Detailed tutorials provided by the official channel
The advent of many instant chats had led to the demand for GIFs and animated PNGs. Users access these files to express their emotions amidst the chat environment. There are unique ways to convert GIFs to animated PNGs precisely. In the digital space, there are surplus applications are available to perform this conversion process without compromising with the quality factors.
In this article, a detailed discussion on the GIFs and the animated PNGs are available for better understanding. It is the process of working with images and implementing some actions with the pictures that makes it appear interesting. Most GIFs and animated PNGs are used for fun and it helps to excite your friends amidst serious chats. It serves as the source of conveying thoughts with fun-filled visuals. Before choosing between the GIFs and APNGs, analyze which file format offers you surplus advantages for optimal handling. Here, in the below discussion you will study the features of this file format and the precise methods to switch between these two files efficiently.
In this article
01 [What is GIF & What is animated PNG](#Part 1)
02 [GIF vs animated PNG, which is better?](#Part 2)
03 [Can PNG be animated like GIF?](#Part 3)
04 [How to Convert GIF to animated PNG?](#Part 4)
Part 1 What is GIF & What is animated PNG
The GIFs are animated images and the picture moves in a sequence in a cycle. The movement repeats without stopping. This type of picture is popular on the webpages and the built-in templates are available in the digital space for quick downloads. The single-frame GIFs take more time to download and displays exciting moves that trigger laughter with audiences. GIF takes the abbreviation of Graphics Interchange Format. It came into existence in the year 1980s and is widely used globally. GIFs are animated images in a basic format. It adopts the safe LZW algorithm that tracks the colors optimally.
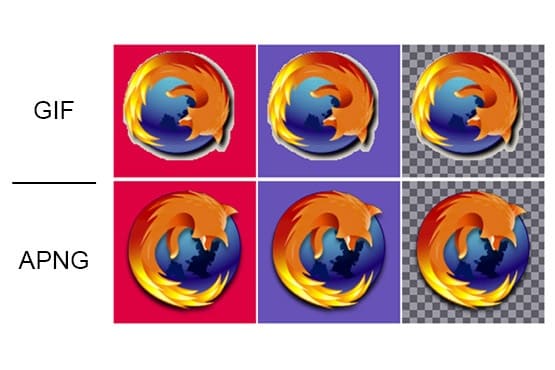
The superior form of the motion picture is animated PNGs. It stands for Portable Network Graphics. This format supports indexed color, grayscale, and true color images. Additionally, the animated PNGs has advantages like alpha channels, cross-platform gamma corrections and two-dimensional interlacing. APNG came into existence in the year 1995 and is compatible with a few web browsers.
Part 2 GIF vs animated PNG, which is better?
When compared to GIFs and APNG, APNG seems to be technically strong with a wide range of supporting features. The quality of the file of APNG is good as it displays 24-bit images and 8- bit transparency. The APNG images can be compressed to the smallest value thereby encouraging the ease of transfer between devices. APNG has access to many color combinations whereas GIFs can use up to 256 colors. The new web browser versions are compatible with APNGs and the older browsers play the GIFs precisely. To view the APNG files in the older browsers you require external plugins or extensions. The higher quality APNGs are mostly used by professionals when compared to GIFs. The portability in moving the animated images is simple with APNGs. The GIF files have a poor compression rate and it is difficult to transfer at the digital space.
Part 3 Can PNG be animated like GIF?
You can animate the PNG files like GIF using reliable tools in the online space. There are unique programs to establish this process. It works on every detail on the PNG files and adds transition effects to the images to implement the movements. If you take closer looks at the digital space, you will acquire sophisticated programs to add transitions to the static pictures. While animating the PNG files, you must include frames, durations, and transition effects to the PNG images to include the animations. Based on the settings, the animated PNG file functions. Every move of the images is assigned by the attributes set by the users with the help of powerful applications in the digital space. You can also find online tools to assist in this operation. The static PNG files get desired moves by animating like GIF files. The APNG has superior quality when compared to GIF files. As discussed above many professionals opt for APNG files than GIFs.

Part 4 How to Convert GIF to animated PNG?
In this section, you will learn how to convert GIF to animated PNG using online tools. Use the recommended online platform to carry out the quality conversions to acquire desired outcomes.
1. EZGIF
It is an exclusive online space that brings quality animations to GIF files acquiring the properties of APNG. By converting the GIFs to APNG, you can enhance various features like easy storage, best compression, quality elements in the file. When you step into this website, you can perform a wide range of conversion processes between animated and static image files. Choose the right tabs on the menu to trigger the desired changes to the uploaded files.
Choose GIF to APNG tab at the top menu to begin this conversion process. The GIF files will receive all the good functionalities of APNG after this conversion process. You can download the animated PNGs to any platform after a successful conversion.
Follow the below steps to proceed with GIF to animated PNGs using the EZGIF online tool.
Step 1
Go to the website and upload the GIF file by tapping the ‘Choose File’ button. The maximum file size is 50MB that ensures a flawless upload process. Here, you can either choose a file from a local drive or paste the URL from an online source into this webpage flawlessly. Then, click the Upload button to trigger this GIF to the APNG conversion process.
Step 2
Format the output and click the convert button to download the animated PNG files.
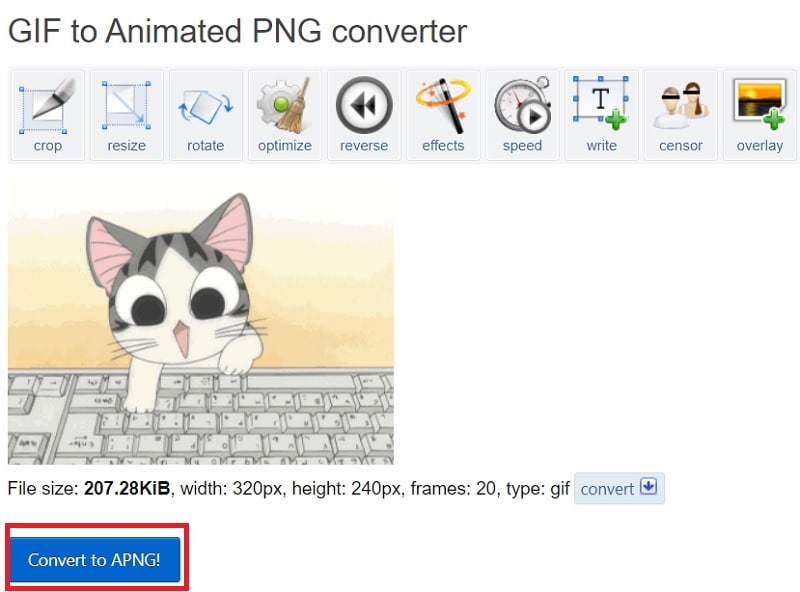
It is a simple and yet effective one that helps to convert the GIFs to animated PNGs in no time. You can also use the edit tools to make changes to the GIF files before the conversion process. The converted files are available for downloads at your local system drive. Access them when required and upload them to the desired platform to make fun with your friends and family members.
2. Free convert
In this section, you will be learning how to use the Free convert webpage to carry out the GIF to the animated PNG conversion process. It is a user-friendly interface where the controls are explicit to make the perfect click appropriately. This website provides a secure platform to carry out the conversion process optimally. The uploaded files are deleted automatically after 2 hours. You can expect a quality conversion process to take place on this website.
The stepwise process to convert GIF to animated PNG using the Freeconvert website.
Step 1
Upload the Gif files by tapping the ‘Choose GIF files’ button. This platform supports GIF file sizes up to 1GB.

Step 2
Hit the Convert to APNG button to trigger the conversion process and download the APNG file to desired storage space precisely.

Surf the above steps to carry out a precise conversion process between GIF and animated PNG. After this format conversion process, you can enjoy all the benefits of APNG overcoming the constraints with the GIF files.
These are the two efficient ways of converting the GIF files to APNG format using online web pages. You can choose any one of the websites to carry out the desired APNG conversion process optimally.
Wondershare Filmora
Get started easily with Filmora’s powerful performance, intuitive interface, and countless effects!
Try It Free Try It Free Try It Free Learn More >
AI Portrait – The best feature of Wondershare Filmora for gameplay editing
The AI Portrait is a new add-on in Wondershare Filmora. It can easily remove video backgrounds without using a green screen or chroma key, allowing you to add borders, glitch effects, pixelated, noise, or segmentation video effects.

Conclusion
Thus, this article had given valuable insights on the conversion of GIF to animated PNG files. The enlightening discussion about the GIFs and APNGs assists you to choose the best one from these two options. You must be clear about the differences between these formats and select the ones that meet your needs appropriately. Connect with the above-discussed web pages to carry out the conversion effortlessly with a few clicks. Stay connected with this article to discover the new horizons of animated clippings that excite you during online communications.
The advent of many instant chats had led to the demand for GIFs and animated PNGs. Users access these files to express their emotions amidst the chat environment. There are unique ways to convert GIFs to animated PNGs precisely. In the digital space, there are surplus applications are available to perform this conversion process without compromising with the quality factors.
In this article, a detailed discussion on the GIFs and the animated PNGs are available for better understanding. It is the process of working with images and implementing some actions with the pictures that makes it appear interesting. Most GIFs and animated PNGs are used for fun and it helps to excite your friends amidst serious chats. It serves as the source of conveying thoughts with fun-filled visuals. Before choosing between the GIFs and APNGs, analyze which file format offers you surplus advantages for optimal handling. Here, in the below discussion you will study the features of this file format and the precise methods to switch between these two files efficiently.
In this article
01 [What is GIF & What is animated PNG](#Part 1)
02 [GIF vs animated PNG, which is better?](#Part 2)
03 [Can PNG be animated like GIF?](#Part 3)
04 [How to Convert GIF to animated PNG?](#Part 4)
Part 1 What is GIF & What is animated PNG
The GIFs are animated images and the picture moves in a sequence in a cycle. The movement repeats without stopping. This type of picture is popular on the webpages and the built-in templates are available in the digital space for quick downloads. The single-frame GIFs take more time to download and displays exciting moves that trigger laughter with audiences. GIF takes the abbreviation of Graphics Interchange Format. It came into existence in the year 1980s and is widely used globally. GIFs are animated images in a basic format. It adopts the safe LZW algorithm that tracks the colors optimally.
The superior form of the motion picture is animated PNGs. It stands for Portable Network Graphics. This format supports indexed color, grayscale, and true color images. Additionally, the animated PNGs has advantages like alpha channels, cross-platform gamma corrections and two-dimensional interlacing. APNG came into existence in the year 1995 and is compatible with a few web browsers.
Part 2 GIF vs animated PNG, which is better?
When compared to GIFs and APNG, APNG seems to be technically strong with a wide range of supporting features. The quality of the file of APNG is good as it displays 24-bit images and 8- bit transparency. The APNG images can be compressed to the smallest value thereby encouraging the ease of transfer between devices. APNG has access to many color combinations whereas GIFs can use up to 256 colors. The new web browser versions are compatible with APNGs and the older browsers play the GIFs precisely. To view the APNG files in the older browsers you require external plugins or extensions. The higher quality APNGs are mostly used by professionals when compared to GIFs. The portability in moving the animated images is simple with APNGs. The GIF files have a poor compression rate and it is difficult to transfer at the digital space.
Part 3 Can PNG be animated like GIF?
You can animate the PNG files like GIF using reliable tools in the online space. There are unique programs to establish this process. It works on every detail on the PNG files and adds transition effects to the images to implement the movements. If you take closer looks at the digital space, you will acquire sophisticated programs to add transitions to the static pictures. While animating the PNG files, you must include frames, durations, and transition effects to the PNG images to include the animations. Based on the settings, the animated PNG file functions. Every move of the images is assigned by the attributes set by the users with the help of powerful applications in the digital space. You can also find online tools to assist in this operation. The static PNG files get desired moves by animating like GIF files. The APNG has superior quality when compared to GIF files. As discussed above many professionals opt for APNG files than GIFs.
Part 4 How to Convert GIF to animated PNG?
In this section, you will learn how to convert GIF to animated PNG using online tools. Use the recommended online platform to carry out the quality conversions to acquire desired outcomes.
1. EZGIF
It is an exclusive online space that brings quality animations to GIF files acquiring the properties of APNG. By converting the GIFs to APNG, you can enhance various features like easy storage, best compression, quality elements in the file. When you step into this website, you can perform a wide range of conversion processes between animated and static image files. Choose the right tabs on the menu to trigger the desired changes to the uploaded files.
Choose GIF to APNG tab at the top menu to begin this conversion process. The GIF files will receive all the good functionalities of APNG after this conversion process. You can download the animated PNGs to any platform after a successful conversion.
Follow the below steps to proceed with GIF to animated PNGs using the EZGIF online tool.
Step 1
Go to the website and upload the GIF file by tapping the ‘Choose File’ button. The maximum file size is 50MB that ensures a flawless upload process. Here, you can either choose a file from a local drive or paste the URL from an online source into this webpage flawlessly. Then, click the Upload button to trigger this GIF to the APNG conversion process.
Step 2
Format the output and click the convert button to download the animated PNG files.
It is a simple and yet effective one that helps to convert the GIFs to animated PNGs in no time. You can also use the edit tools to make changes to the GIF files before the conversion process. The converted files are available for downloads at your local system drive. Access them when required and upload them to the desired platform to make fun with your friends and family members.
2. Free convert
In this section, you will be learning how to use the Free convert webpage to carry out the GIF to the animated PNG conversion process. It is a user-friendly interface where the controls are explicit to make the perfect click appropriately. This website provides a secure platform to carry out the conversion process optimally. The uploaded files are deleted automatically after 2 hours. You can expect a quality conversion process to take place on this website.
The stepwise process to convert GIF to animated PNG using the Freeconvert website.
Step 1
Upload the Gif files by tapping the ‘Choose GIF files’ button. This platform supports GIF file sizes up to 1GB.
Step 2
Hit the Convert to APNG button to trigger the conversion process and download the APNG file to desired storage space precisely.
Surf the above steps to carry out a precise conversion process between GIF and animated PNG. After this format conversion process, you can enjoy all the benefits of APNG overcoming the constraints with the GIF files.
These are the two efficient ways of converting the GIF files to APNG format using online web pages. You can choose any one of the websites to carry out the desired APNG conversion process optimally.
Wondershare Filmora
Get started easily with Filmora’s powerful performance, intuitive interface, and countless effects!
Try It Free Try It Free Try It Free Learn More >
AI Portrait – The best feature of Wondershare Filmora for gameplay editing
The AI Portrait is a new add-on in Wondershare Filmora. It can easily remove video backgrounds without using a green screen or chroma key, allowing you to add borders, glitch effects, pixelated, noise, or segmentation video effects.
Conclusion
Thus, this article had given valuable insights on the conversion of GIF to animated PNG files. The enlightening discussion about the GIFs and APNGs assists you to choose the best one from these two options. You must be clear about the differences between these formats and select the ones that meet your needs appropriately. Connect with the above-discussed web pages to carry out the conversion effortlessly with a few clicks. Stay connected with this article to discover the new horizons of animated clippings that excite you during online communications.
Also read:
- Updated How To Create Animated Clipart in PowerPoint
- Updated How to Create a Whiteboard Video Step by Step for 2024
- Updated In 2024, The Only Guide to Make 2D Rigging Clear to You
- New 2024 Approved 10 Best Convert Video Between GIF Software High Quality
- Updated How to Make Your Own GIF on WhatsApp in Simple Ways
- Updated Tutorials to Make Animated Images – Even if Youre Just Starting Out for 2024
- Updated How to Create Picsart Cartoon in Simple Ways for 2024
- Updated Techniques for Making After Effects 2D Animation for 2024
- New The Most Efficient Techniques for You to Make 3D Animation Character for 2024
- 10 of the Best Disney Animated Shows (Sorted by Popularity Ascending)
- New How to Make GIF Instagram for 2024
- New 15 Forgotten Cartoon Characters of All Time for 2024
- Updated 2024 Approved What Is the Meaning of Motion Graphics
- Updated In 2024, Adobe Animate CC Everything You Need to Know
- Updated 2024 Approved Before You Learn 3D Animation Some Things You Should Know
- New Ways on How to Liven Up Your Animate Website on Scroll for 2024
- Updated In 2024, Incredible Ways to Find Suitable Animated Graphic Maker
- New 6 Unexpected Ways Gif Animation Maker Can Affect Your Marketing for 2024
- 10 Great Apps to Turn Funny Animated Images Into Comics
- Best 15 Anime Fonts-Find Your Favorite One
- New 2024 Approved The Best 8 Places for High-Quality Royalty Free Gifs (Paid and Free)
- In 2024, What Legendaries Are In Pokemon Platinum On Samsung Galaxy M14 5G? | Dr.fone
- In 2024, Change Location on Yik Yak For your Apple iPhone 14 Pro Max to Enjoy More Fun | Dr.fone
- Xiaomi 14 Not Connecting to Wi-Fi? 12 Quick Ways to Fix | Dr.fone
- How to Change OnePlus Ace 2 Location on Skout | Dr.fone
- Super Easy Ways To Deal with Samsung Galaxy A05 Unresponsive Screen | Dr.fone
- In 2024, How to Track a Lost Samsung Galaxy A14 5G for Free? | Dr.fone
- In 2024, 4 Things You Must Know About iPhone 6s Activation Lock
- How to Wipe iPhone 14 Data Permanently? | Stellar
- Pingora
- In 2024, How to Bypass Activation Lock from iPhone 15 Pro Max or iPad?
- How to Screen Mirroring Oppo F25 Pro 5G? | Dr.fone
- Title: Updated 2024 Approved How to Create Free Photo Collage Frame in Minutes?
- Author: Elon
- Created at : 2024-05-19 03:05:46
- Updated at : 2024-05-20 03:05:46
- Link: https://animation-videos.techidaily.com/updated-2024-approved-how-to-create-free-photo-collage-frame-in-minutes/
- License: This work is licensed under CC BY-NC-SA 4.0.
