
:max_bytes(150000):strip_icc():format(webp)/kids-ipad-580f65635f9b58564cc0fc91-5c5cbb6ac9e77c0001d92aa4.jpg)
Updated 2024 Approved How to Make a Photoshop Collage in EASY Steps
How to Make a Photoshop Collage in EASY Steps
How to Make a Photoshop Collage in EASY Steps
An easy yet powerful editor
Numerous effects to choose from
Detailed tutorials provided by the official channel
Photographs are a way of capturing and stopping the time in a small frame. They hold millions of memories that we want to cherish forever in our lives. And sometimes, we want to make a cluster of all the happy memories by making a collage of the photos.

Also, what can be a better gift to someone than presenting them a collection of all the cherishable memories you have with them in photographs? And that can be made possible through various photoshop collage ideas.
In this article
01 [Does Photoshop Have Collage Templates?](#Part 1)
02 [How to Make Your Own Collage with Photoshop Templates](#Part 2)
03 [How to Custom a Photoshop Collage in 9 Simple Steps](#Part 3)
Part 1 Does Photoshop Have Collage Templates?
There is numerous photo collage template in photoshop, and you even access and use some of them for free. Additionally, you can also create your template in Photoshop and use them in making your collage. If you want to make your template in Photoshop, here is how.
Step 1: Make a new layer and fill it up with your choice of colour.
Step 2: Resize and duplicate the layer to create the pattern you want for your collage.
Step 3: Integrate a “Clipping Mask.”
Step 4: For every image, create new clipping masks.
Step 5: Your collage template is ready so, export it to use!
Part 2 How to Make Your Own Collage with Photoshop Templates
Now that we know that you can access numerous incredible photoshop templates for free, you might want to create a collage for yourself in Photoshop. So, this is how you can use the photoshop collage template to make your collage with Photoshop Templates.
First, you need to select the images you want to create a collage with. Then you will have to import them. You can either “select and import” them one at a time or even batch import all of them together. Then, you can readily choose the template you want to use, or you can also create one for yourself.
Then you can resize or edit the images in the way you want and place them in the desired order. After you are done arranging and creating the collage perfectly, save the file in JPEG format and then export it to access it whenever you want!
Part 3 How to Custom a Photoshop Collage in 9 Simple Steps
If you do not know the answer to the question: how to make a collage in photoshop, there is absolutely nothing to worry about. Because the answer to this question is simple and includes not more than nine steps.
So now, we will be discussing the nine simple steps that will help you make a custom photo collage in photoshop. Here is the list of steps that will help you in doing so.
● Step 1: Selecting your favorite photos
The first step to making a collage in photoshop is to select all the photos you would like your collage to have. Now, it will be best for you to choose your photos wisely. We understand that each photograph is equally sweet and cherishable. But, when you select the images for your collage in a thoughtful manner, the collage turns out much better than expected.
You can use different collage ideas for photoshop, such as following a particular storyline, where you collage the photos so that it recreates the memory or the moments in sequence. Another way to select your photos is by sticking to a particular theme, and it can be vintage or on one specific color or the like. It will help your collage turn out in the best and the most thoughtful way.
● Step 2: Opening the photos you have selected, in collage maker photoshop
Now that you have selected which images you would want your collage to have, the next step will require you to open those images in the collage maker Photoshop. For this, you will have to select the option “File”. There, you will find the option “Open”. Then you will open the images you have chosen in Photoshop.
Also, you can simply press the “ctrl” and the “O” keys on your keyboard and it will automatically help you open the images you have selected for the photo collage on photoshop.

Another way to open the pages you have selected for your collage is through the “Drag and Drop” function. It is more effortless to choose the images and open them in Photoshop. After you have opened the photos in Photoshop, it will open in a different tab and look like in the following picture.

● Step 3: Make a new file for your collage on photoshop
The third step requires you to make a new file for your photo collage in photoshop. For this, you need to select or click on the “File” option on Photoshop. Then, click on the “New” option. It will help you make a new file for your collage. You can also select the “ctrl” and “N” together.
As you click on the “New” option, you will be given options to choose from. Choose the one that matches your preference.
When you are working on photoshop to make a collage, the images will need a collage background because it is on this background that the photos will assemble. If you have made a collage before on photoshop, you can use the old collage photoshop template. Otherwise, you need to create a new document for the collage.

● Step 4: Add the selected images one-by-one
Adding the images can be done in many ways. One way to do so is by opening the photo and clicking on it. Another way of doing so is to use the “Marquee Tool” of Photoshop.

Another way of doing so is by pressing the “ctrl” and “A” keys on your keyboard together. You will find the matching ants border around the image when you do this.

Then, go to the “Edit” option and choose “Copy” there. Or, you can also select the “ctrl” and “C” keys on your keywords together. Then go to your new document and select the option of “Paste” from the “Edit” option, or you can also press the “ctrl” and “V” keys together to do so.
The photo will be added in its own layer on the new document.

● Step 5: Arrange the images
Now, arrange the images in the way you want. If you have chosen to tell a story through your collage creator in photoshop, then arrange the photos accordingly. You can do so with the help of the “Move” tool or simply tap V. You can also use the “Free Transform” tool to edit and transform the images in the way you want. You can resize, rotate and edit the photos in many other ways through the “Free Transform” tool.
Step 6: Integrate image space
To create a collage in photoshop in a better and more spaced-out manner, you need to add some spacing between the images you have in your collage. There are two ways to add spacing between the pictures; one way is by creating a thin, white border around each image.
And the second method is by accessing and using the “Layers” feature in Photoshop.

● Step 7: Merge all the Layers
This step is necessary when you have used the “Layer” feature to create the spacing among the images present in your collage. You will be able to do so from the “Layer” option. So, go to the “Layer” option and select the “Merge Invisible” option present there.

● Step 8: cropping the final picture
Before the final step, it is important that you crop the final picture. And to do so, you can opt for the “Crop tool”. You will be able to access it easily, or you can also simply tap C to use the “Crop tool.”

● Step 9: Save the final collage and export
After you have done all the necessary changes and are satisfied with the final collage, then, save the file. To do so, go to the “File” option and select the “Save as” option.

Then choose the file type to be “JPEG”. Type the name you would want the collage to be saved as. This completes the process of saving the file. Then choose the image quality you would want the collage to be exported in.

● Key Takeaways from This Episode →
● In this discussion, we have covered the following topics.
● We discussed whether Photoshop has collage templates.
● Then we proceeded with discussing how we can create a collage in photoshop using the templates in it.
● Lastly, we wrapped up our discussion with the nine-step tutorial about customizing a collage in Photoshop.
Photographs are a way of capturing and stopping the time in a small frame. They hold millions of memories that we want to cherish forever in our lives. And sometimes, we want to make a cluster of all the happy memories by making a collage of the photos.
Also, what can be a better gift to someone than presenting them a collection of all the cherishable memories you have with them in photographs? And that can be made possible through various photoshop collage ideas.
In this article
01 [Does Photoshop Have Collage Templates?](#Part 1)
02 [How to Make Your Own Collage with Photoshop Templates](#Part 2)
03 [How to Custom a Photoshop Collage in 9 Simple Steps](#Part 3)
Part 1 Does Photoshop Have Collage Templates?
There is numerous photo collage template in photoshop, and you even access and use some of them for free. Additionally, you can also create your template in Photoshop and use them in making your collage. If you want to make your template in Photoshop, here is how.
Step 1: Make a new layer and fill it up with your choice of colour.
Step 2: Resize and duplicate the layer to create the pattern you want for your collage.
Step 3: Integrate a “Clipping Mask.”
Step 4: For every image, create new clipping masks.
Step 5: Your collage template is ready so, export it to use!
Part 2 How to Make Your Own Collage with Photoshop Templates
Now that we know that you can access numerous incredible photoshop templates for free, you might want to create a collage for yourself in Photoshop. So, this is how you can use the photoshop collage template to make your collage with Photoshop Templates.
First, you need to select the images you want to create a collage with. Then you will have to import them. You can either “select and import” them one at a time or even batch import all of them together. Then, you can readily choose the template you want to use, or you can also create one for yourself.
Then you can resize or edit the images in the way you want and place them in the desired order. After you are done arranging and creating the collage perfectly, save the file in JPEG format and then export it to access it whenever you want!
Part 3 How to Custom a Photoshop Collage in 9 Simple Steps
If you do not know the answer to the question: how to make a collage in photoshop, there is absolutely nothing to worry about. Because the answer to this question is simple and includes not more than nine steps.
So now, we will be discussing the nine simple steps that will help you make a custom photo collage in photoshop. Here is the list of steps that will help you in doing so.
● Step 1: Selecting your favorite photos
The first step to making a collage in photoshop is to select all the photos you would like your collage to have. Now, it will be best for you to choose your photos wisely. We understand that each photograph is equally sweet and cherishable. But, when you select the images for your collage in a thoughtful manner, the collage turns out much better than expected.
You can use different collage ideas for photoshop, such as following a particular storyline, where you collage the photos so that it recreates the memory or the moments in sequence. Another way to select your photos is by sticking to a particular theme, and it can be vintage or on one specific color or the like. It will help your collage turn out in the best and the most thoughtful way.
● Step 2: Opening the photos you have selected, in collage maker photoshop
Now that you have selected which images you would want your collage to have, the next step will require you to open those images in the collage maker Photoshop. For this, you will have to select the option “File”. There, you will find the option “Open”. Then you will open the images you have chosen in Photoshop.
Also, you can simply press the “ctrl” and the “O” keys on your keyboard and it will automatically help you open the images you have selected for the photo collage on photoshop.
Another way to open the pages you have selected for your collage is through the “Drag and Drop” function. It is more effortless to choose the images and open them in Photoshop. After you have opened the photos in Photoshop, it will open in a different tab and look like in the following picture.
● Step 3: Make a new file for your collage on photoshop
The third step requires you to make a new file for your photo collage in photoshop. For this, you need to select or click on the “File” option on Photoshop. Then, click on the “New” option. It will help you make a new file for your collage. You can also select the “ctrl” and “N” together.
As you click on the “New” option, you will be given options to choose from. Choose the one that matches your preference.
When you are working on photoshop to make a collage, the images will need a collage background because it is on this background that the photos will assemble. If you have made a collage before on photoshop, you can use the old collage photoshop template. Otherwise, you need to create a new document for the collage.
● Step 4: Add the selected images one-by-one
Adding the images can be done in many ways. One way to do so is by opening the photo and clicking on it. Another way of doing so is to use the “Marquee Tool” of Photoshop.
Another way of doing so is by pressing the “ctrl” and “A” keys on your keyboard together. You will find the matching ants border around the image when you do this.
Then, go to the “Edit” option and choose “Copy” there. Or, you can also select the “ctrl” and “C” keys on your keywords together. Then go to your new document and select the option of “Paste” from the “Edit” option, or you can also press the “ctrl” and “V” keys together to do so.
The photo will be added in its own layer on the new document.
● Step 5: Arrange the images
Now, arrange the images in the way you want. If you have chosen to tell a story through your collage creator in photoshop, then arrange the photos accordingly. You can do so with the help of the “Move” tool or simply tap V. You can also use the “Free Transform” tool to edit and transform the images in the way you want. You can resize, rotate and edit the photos in many other ways through the “Free Transform” tool.
Step 6: Integrate image space
To create a collage in photoshop in a better and more spaced-out manner, you need to add some spacing between the images you have in your collage. There are two ways to add spacing between the pictures; one way is by creating a thin, white border around each image.
And the second method is by accessing and using the “Layers” feature in Photoshop.
● Step 7: Merge all the Layers
This step is necessary when you have used the “Layer” feature to create the spacing among the images present in your collage. You will be able to do so from the “Layer” option. So, go to the “Layer” option and select the “Merge Invisible” option present there.
● Step 8: cropping the final picture
Before the final step, it is important that you crop the final picture. And to do so, you can opt for the “Crop tool”. You will be able to access it easily, or you can also simply tap C to use the “Crop tool.”
● Step 9: Save the final collage and export
After you have done all the necessary changes and are satisfied with the final collage, then, save the file. To do so, go to the “File” option and select the “Save as” option.
Then choose the file type to be “JPEG”. Type the name you would want the collage to be saved as. This completes the process of saving the file. Then choose the image quality you would want the collage to be exported in.
● Key Takeaways from This Episode →
● In this discussion, we have covered the following topics.
● We discussed whether Photoshop has collage templates.
● Then we proceeded with discussing how we can create a collage in photoshop using the templates in it.
● Lastly, we wrapped up our discussion with the nine-step tutorial about customizing a collage in Photoshop.
Nurturing Mind, Heart, and Soul on the Top 5 Anime Streaming Sanctuaries
FREE Best Anime Streaming Sites to Download Anime

Benjamin Arango
Mar 27, 2024• Proven solutions


Anime (also known as Japanese-style animation) is a global subgenre of TV content. With billions of viewers around the globe, the Anime industry is one of the mainstream genres getting a lot of attention. It has boomed in popularity with the rise in online streaming services. People are discovering the amazing blend of art, animation, storytelling, and music. You can find the best free anime websites to watch anime online .
But why we’re here is that only a few of these streaming sites allow their users to download anime easily and watch cartoon online in HD . That said there are numerous free and paid providers out of which only a handful works properly and lets the users enjoy their favorite anime. So, let us discover the best anime streaming sites – free and paid as well as those with the feature to download anime and watch anime offline. In this article, you will learn:
- Part 1: Best Anime Streaming Sites to Download Anime[Free]
- Part 2: Best Anime Streaming Sites to Download Anime[Paid]
- Part 3: Record an Anime with Wondershare Filmora
Part 1 Best Anime Streaming Sites to Download Anime[Free]
Free Anime Streaming Sites to Download Anime at A Glance:
01 Animeland
Animeland is a free online English dubbed anime streaming site that doesn’t require you to register to watch or even download anime from the site. It is one of the most famous free anime sites offering 1080p high-definition video streaming. The site has reportedly around 1.10 million monthly viewers with famous anime series English dubbed like Naruto, Bleach, Attack on Titan, etc.

Image Source: Animeland
You can download from the site just by going on the site and searching for your desired dubbed anime movie or series. Play the episode you want to download and then on the playback window, you will see a download button right at the top of the player box, click it, and your episode will start downloading automatically.
02 Kissanime.ru
The Kissanime site is popular for dubbed anime streaming with the latest content. The site offers high-definition video quality arranged category-wise with easy access and searching features. The user interface is quite neat with high-performance servers for buffer-free streaming i.e. RapidVideo, Streamango, etc., and featured thumbnail images.
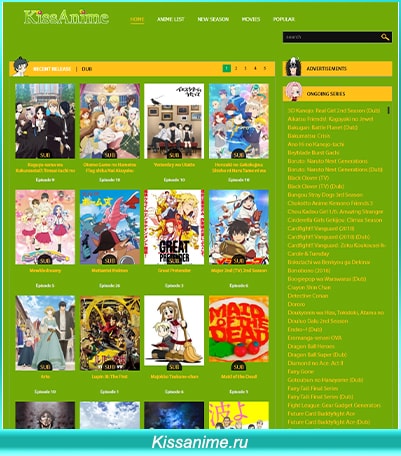
Image Source: Kissanime.ru
The website has made it very easy for users to download their desired anime seasons. To download from kissanime.ru, please search for your desired anime series and play the episode that you want to download. Shortly you’ll be taken to the screenplay page, here just scroll down a bit and you’ll find a clickable link to download the very episode that is being played in the browser window.
03 Chia-Anime
Chia-Anime is another free tier anime streaming site with a mobile-friendly UI sorted category-wise and including old and new dubbed anime series. The categorization makes navigation pretty smooth on the site and you’ll be able to find your desired anime content easily. The Chia anime has a wide range of the latest anime series like the popular “One Piece”, “High school of Death”, etc.

Image Source: Chia-Anime
The site supports ultra-high-definition video streaming with its sleek and colorful design. To download an anime episode from Chia-anime.tv, you can head onto the site and search for the anime series you want to download. Then play the intended episode once you’re on the streaming webpage you’ll see a download link just down below the video player, click on it and your download should start.
04 GoGoAnime.io
GoGoAnime is also a free anime streaming site with seven different streaming servers to choose from that make the streaming quite fast and reliable. The collection of anime movies and shows on the site is pretty satisfactory and also has a dedicated chat room where you can interact with other anime lovers and make friends.
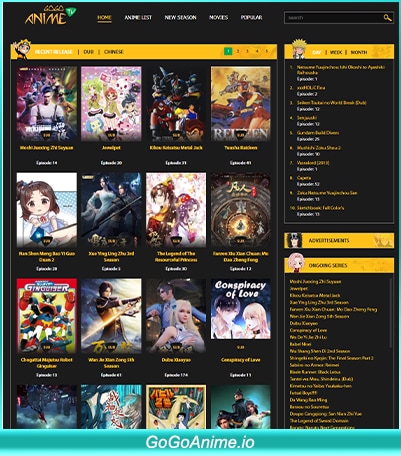
Image Source: GoGoAnime.io
You can download the full episode of your desired anime from GoGoAnime only from the default server named VIDSTREAMING. To download play the episode and on the streaming webpage you’ll see a download icon just above the player window press it and the episode will directly start downloading.
05 9anime
9Anime also offers a free online anime streaming library. With a wide variety of fascinating anime catalogs to choose from. The site has diverse anime genres such as Yaoi, Parody, Dementia, action, etc. The servers are fast and offer HD quality content on the go. On 9anime you won’t need to sign up before enjoying your treasured anime series even for accessing the free anime resources.
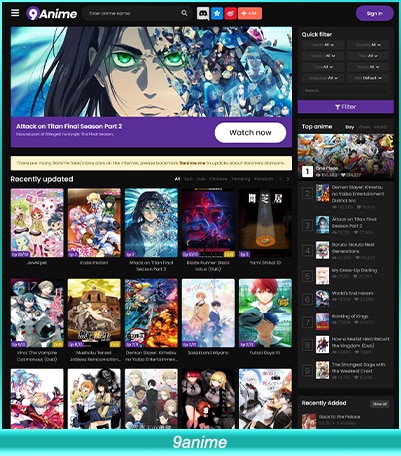
Image Source: 9anime5
You can download any anime episode from the site. To do so you need to play the episode you want to download and then select the Mp4upload server in the server list then a download button will appear down the player window.
Part 2 Best Anime Streaming Sites to Download [Paid]
Paid Anime Streaming Sites to Download Anime at a Glance:
| Site | Pricing | Download | Supported OS |
|---|---|---|---|
| Funimation | $7.99 monthly | FunimationNow app | Android/IOS |
| Crunchyroll | $9.99 monthly | VRV app | Android/IOS |
| Hulu | $5.99 monthly | Hulu app | Windows 10/Android/IOS |
| Netflix | $8.99 monthly | Netflix app | Windows/Mac/Android/IOS |
| Amazon Prime Video | $12.99 monthly | Amazon Prime Video app | Android/IOS |
01 Funimation
In the anime industry, Funimation has its history with big anime series like Dragon Ball Z and other exclusives that you won’t find anywhere else. If you’re searching for titles that no other streaming site may have, you most probably will find the leading seasonal titles on Funimation.
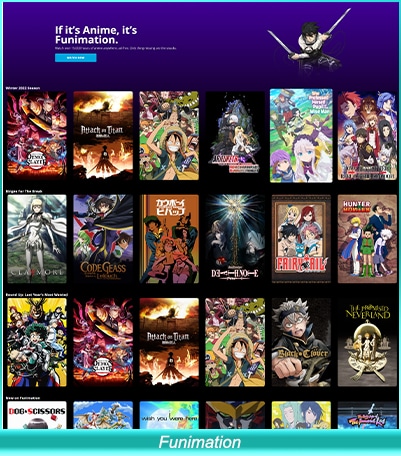
Image Source: Funimation
Please kindly note that the anime download from Funimation is only available for mobile users on both Android and iOS. You need to install the FunimationNow app on your phone, then search for the anime you like, and download the anime episodes to watch anime offline through your library.
02 Crunchyroll
Crunchyroll is one of the top anime streaming sites – legally. You can have a free account to keep track of your watch history. But to enjoy the wonderful selection of shows from subgenres like seinen, shojo, to shonen you’ll have to buy a premium membership. There’s a Crunchyroll app for iOS and Android as well to let its users stream anime on the go.
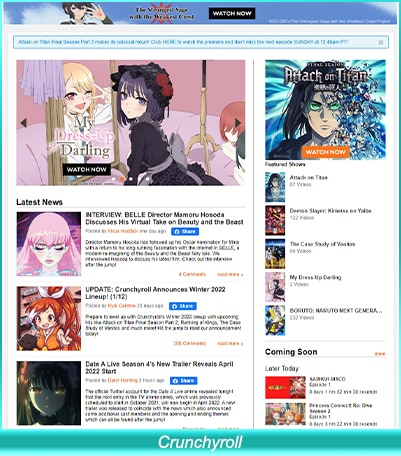
Image Source: Crunchyroll
But you can download anime via the Crunchyroll app. Instead, you’ll have to connect it to your VRV streaming service pack and you can download your anime on the VRV app for offline viewing. Crunchyroll premium clients already have a VRV premium account.
03 Hulu
Hulu is a Walt Disney-owned subscription video-on-demand service. It’s one of the anime streaming sites offering different genres of anime in HD quality. It has an excellent variety of anime shows with its on-demand library growing each day with anime TV shows and series. Even before Netflix was imagining diving into the anime world Hulu had collected a valuable collection of anime titles that’s been growing ever since.

Image Source: Hulu Stream
Hulu also has different subscription plans so if you have the right plan you can enjoy watching anime offline. The anime can be downloaded on mobile devices only and you can find the Downloadable items in the app and if your chosen anime is downloadable you can just click the download button on the details page and there you go.
04 Netflix
The streaming giant Netflix has pushed hard in on Japanese anime. In the past two to three years the company has enormously increased its anime database buying rights to several popular titles on the internet such as Neon Genesis Evangelion, Baki, and Death Note. While also investing and producing some Netflix original anime series and movie titles as well.
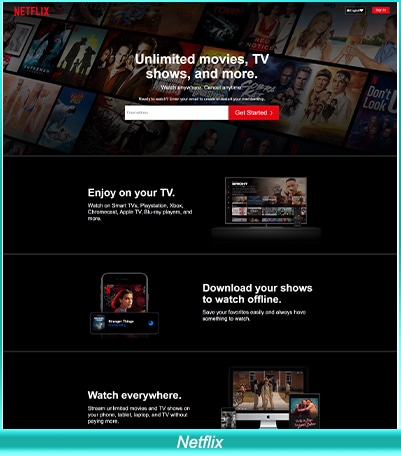
Image Source: Netflix Download
Netflix comes with multiple subscription plans and allows you to download and enjoy anime offline on its mobile Netflix app. To watch anime offline, you have to search for your desired anime series and open it in the app just look around for a download icon on the description page of the specific series, and pressing it will download the title for you.
05 Amazon Prime Video
Amazon Prime Video is an online streaming service offering a large library of original as well as popular anime movies and series. Subscribers to Amazon Prime have the facility to download content even in 4K Ultra video quality. Though the site has a comparatively low reputation in its anime catalog, it has developed a decent mix of classics, brand-new, hidden gem series, and movies.
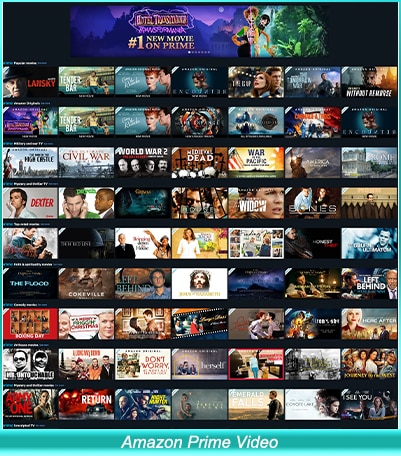
Image Source: Amazon Prime Video
A subscribed user can download anime on the mobile application of the Amazon Prime Video for both Android and IOS. To download anime, you can look out for your favorite content, and in the description of that series or movie you’ll see a download button, press it. Now you’ll be able to watch anime offline anywhere without an active internet connection.
Part 3 Record an Anime with Wondershare Filmora
There are lots of paid and subscription-based anime sites that limited people have access to and you want to share the latest episode with your friends, want to make a video for YouTube, or compose an anime reviews video with markers and voiceover to show off your editing skills but first, you’ll need to record anime. Whichever might be the case persuading you to record anime on your computer, you don’t need to worry as I’ll be taking you through each step needed to record anime. Remember to connect with other video creators in the Wondershare Video Community .
Wondershare Filmora is a proficient tool for video content creators and makes it easy and simple to record anime and create professional-looking videos on Mac and Windows. There are three kinds of screen recording types you can choose from, including full-screen, target window, and custom selection. You can record from the computer audio system or microphone audio, determine the quality you want as output, the frame rate, set hotkeys to start, and stop the recording from the settings window. Now we will dive into recording our anime video to produce a review of the Tower of God anime series.
The steps for you to record anime are (the steps are the same on Windows):
- Download Filmora and install it on your computer system either Mac or Windows as the efficient tool supports both platforms.
- Open Filmora, click on the “New Project” option, go to the Record drop-down menu, and choose the “Record PC Screen” option.
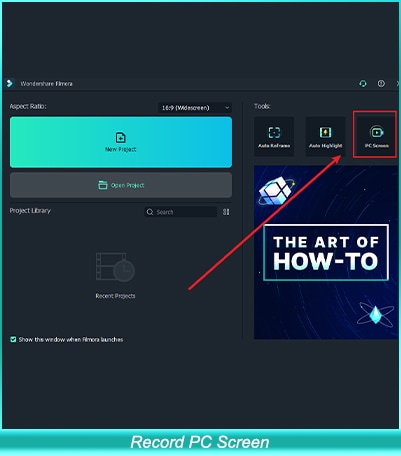
- Now head over to the anime you want to record and play it.
- You will be prompted with Wondershare Filmora Scrn recorder options i.e. in case you want Full-Screen recording, audio, and microphone options. Once you press the record (red) button Filmora will start the recording.
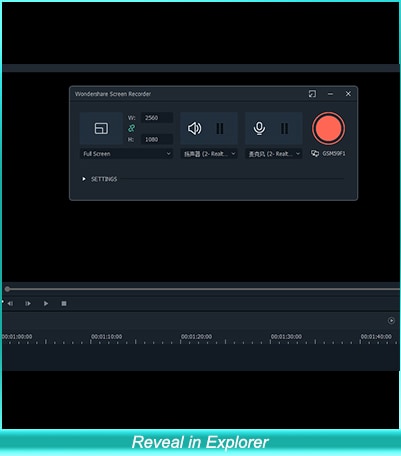
- You can confirm if the software is recording your screen or not by looking at the top menu bar, a red recording button will be displayed during the whole screen recording.
- To pause or stop the anime recording press the red button on the top menu bar.
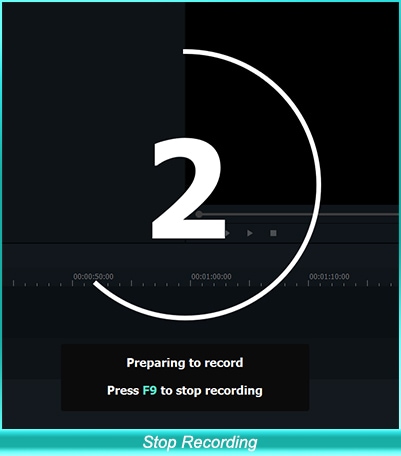
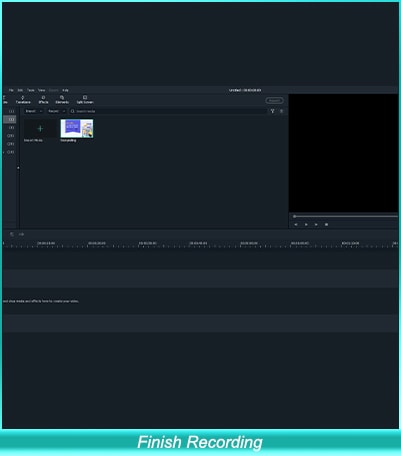
- Press the Stop button to finish recording the anime. You’ll be taken back to the Filmora editor window where you can tweak around with the recorded anime.
- You can locate the recorded file by right-clicking the recorded file in the media library and selecting the “Reveal in Explorer” option.

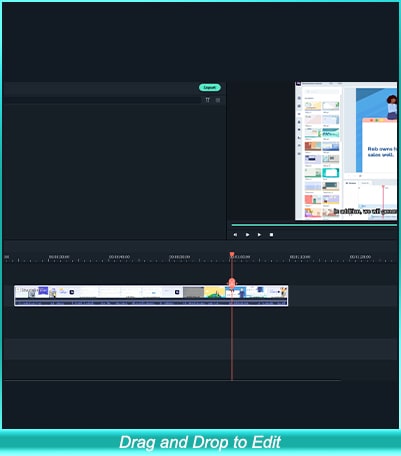
- You can drag and drop the recorded file to the timeline if you want to edit it. Filmora can easily cut, trim, rotate, layer multiple video effects, and much more. That’s up to you how deep you want to dig into the features of this amazing video editing toolkit.
Tips:
You can also set a timer to record the anime i.e. for 20 minutes and then the screen recording will automatically stop and save the file onto the location you’ve specified in the “Save To” location bar.
Seeing all this, aren’t you interested in Filmora? Give it a go.
● Conclusion for Downloading Anime →
With the popularity of the once-niche area of animation continuously blossoming and becoming more mainstream. These free and paid sites are propping up to grab more users’ attention with unique features. Japanese anime has the power to impress anyone with its vivid imagination and colorful storytelling techniques. We’ve covered top free and paid sites that allow you to download anime content and stream on the go without worrying about an active internet connection. Also, to extend your anime interest, you can put life into the world of anime and find some apps to turn photos into cartoons and sketches !
Benjamin Arango
Benjamin Arango is a writer and a lover of all things video.
Follow @Benjamin Arango
Benjamin Arango
Mar 27, 2024• Proven solutions
Anime (also known as Japanese-style animation) is a global subgenre of TV content. With billions of viewers around the globe, the Anime industry is one of the mainstream genres getting a lot of attention. It has boomed in popularity with the rise in online streaming services. People are discovering the amazing blend of art, animation, storytelling, and music. You can find the best free anime websites to watch anime online .
But why we’re here is that only a few of these streaming sites allow their users to download anime easily and watch cartoon online in HD . That said there are numerous free and paid providers out of which only a handful works properly and lets the users enjoy their favorite anime. So, let us discover the best anime streaming sites – free and paid as well as those with the feature to download anime and watch anime offline. In this article, you will learn:
- Part 1: Best Anime Streaming Sites to Download Anime[Free]
- Part 2: Best Anime Streaming Sites to Download Anime[Paid]
- Part 3: Record an Anime with Wondershare Filmora
Part 1 Best Anime Streaming Sites to Download Anime[Free]
Free Anime Streaming Sites to Download Anime at A Glance:
01 Animeland
Animeland is a free online English dubbed anime streaming site that doesn’t require you to register to watch or even download anime from the site. It is one of the most famous free anime sites offering 1080p high-definition video streaming. The site has reportedly around 1.10 million monthly viewers with famous anime series English dubbed like Naruto, Bleach, Attack on Titan, etc.
Image Source: Animeland
You can download from the site just by going on the site and searching for your desired dubbed anime movie or series. Play the episode you want to download and then on the playback window, you will see a download button right at the top of the player box, click it, and your episode will start downloading automatically.
02 Kissanime.ru
The Kissanime site is popular for dubbed anime streaming with the latest content. The site offers high-definition video quality arranged category-wise with easy access and searching features. The user interface is quite neat with high-performance servers for buffer-free streaming i.e. RapidVideo, Streamango, etc., and featured thumbnail images.
Image Source: Kissanime.ru
The website has made it very easy for users to download their desired anime seasons. To download from kissanime.ru, please search for your desired anime series and play the episode that you want to download. Shortly you’ll be taken to the screenplay page, here just scroll down a bit and you’ll find a clickable link to download the very episode that is being played in the browser window.
03 Chia-Anime
Chia-Anime is another free tier anime streaming site with a mobile-friendly UI sorted category-wise and including old and new dubbed anime series. The categorization makes navigation pretty smooth on the site and you’ll be able to find your desired anime content easily. The Chia anime has a wide range of the latest anime series like the popular “One Piece”, “High school of Death”, etc.
Image Source: Chia-Anime
The site supports ultra-high-definition video streaming with its sleek and colorful design. To download an anime episode from Chia-anime.tv, you can head onto the site and search for the anime series you want to download. Then play the intended episode once you’re on the streaming webpage you’ll see a download link just down below the video player, click on it and your download should start.
04 GoGoAnime.io
GoGoAnime is also a free anime streaming site with seven different streaming servers to choose from that make the streaming quite fast and reliable. The collection of anime movies and shows on the site is pretty satisfactory and also has a dedicated chat room where you can interact with other anime lovers and make friends.
Image Source: GoGoAnime.io
You can download the full episode of your desired anime from GoGoAnime only from the default server named VIDSTREAMING. To download play the episode and on the streaming webpage you’ll see a download icon just above the player window press it and the episode will directly start downloading.
05 9anime
9Anime also offers a free online anime streaming library. With a wide variety of fascinating anime catalogs to choose from. The site has diverse anime genres such as Yaoi, Parody, Dementia, action, etc. The servers are fast and offer HD quality content on the go. On 9anime you won’t need to sign up before enjoying your treasured anime series even for accessing the free anime resources.
Image Source: 9anime5
You can download any anime episode from the site. To do so you need to play the episode you want to download and then select the Mp4upload server in the server list then a download button will appear down the player window.
Part 2 Best Anime Streaming Sites to Download [Paid]
Paid Anime Streaming Sites to Download Anime at a Glance:
| Site | Pricing | Download | Supported OS |
|---|---|---|---|
| Funimation | $7.99 monthly | FunimationNow app | Android/IOS |
| Crunchyroll | $9.99 monthly | VRV app | Android/IOS |
| Hulu | $5.99 monthly | Hulu app | Windows 10/Android/IOS |
| Netflix | $8.99 monthly | Netflix app | Windows/Mac/Android/IOS |
| Amazon Prime Video | $12.99 monthly | Amazon Prime Video app | Android/IOS |
01 Funimation
In the anime industry, Funimation has its history with big anime series like Dragon Ball Z and other exclusives that you won’t find anywhere else. If you’re searching for titles that no other streaming site may have, you most probably will find the leading seasonal titles on Funimation.
Image Source: Funimation
Please kindly note that the anime download from Funimation is only available for mobile users on both Android and iOS. You need to install the FunimationNow app on your phone, then search for the anime you like, and download the anime episodes to watch anime offline through your library.
02 Crunchyroll
Crunchyroll is one of the top anime streaming sites – legally. You can have a free account to keep track of your watch history. But to enjoy the wonderful selection of shows from subgenres like seinen, shojo, to shonen you’ll have to buy a premium membership. There’s a Crunchyroll app for iOS and Android as well to let its users stream anime on the go.
Image Source: Crunchyroll
But you can download anime via the Crunchyroll app. Instead, you’ll have to connect it to your VRV streaming service pack and you can download your anime on the VRV app for offline viewing. Crunchyroll premium clients already have a VRV premium account.
03 Hulu
Hulu is a Walt Disney-owned subscription video-on-demand service. It’s one of the anime streaming sites offering different genres of anime in HD quality. It has an excellent variety of anime shows with its on-demand library growing each day with anime TV shows and series. Even before Netflix was imagining diving into the anime world Hulu had collected a valuable collection of anime titles that’s been growing ever since.
Image Source: Hulu Stream
Hulu also has different subscription plans so if you have the right plan you can enjoy watching anime offline. The anime can be downloaded on mobile devices only and you can find the Downloadable items in the app and if your chosen anime is downloadable you can just click the download button on the details page and there you go.
04 Netflix
The streaming giant Netflix has pushed hard in on Japanese anime. In the past two to three years the company has enormously increased its anime database buying rights to several popular titles on the internet such as Neon Genesis Evangelion, Baki, and Death Note. While also investing and producing some Netflix original anime series and movie titles as well.
Image Source: Netflix Download
Netflix comes with multiple subscription plans and allows you to download and enjoy anime offline on its mobile Netflix app. To watch anime offline, you have to search for your desired anime series and open it in the app just look around for a download icon on the description page of the specific series, and pressing it will download the title for you.
05 Amazon Prime Video
Amazon Prime Video is an online streaming service offering a large library of original as well as popular anime movies and series. Subscribers to Amazon Prime have the facility to download content even in 4K Ultra video quality. Though the site has a comparatively low reputation in its anime catalog, it has developed a decent mix of classics, brand-new, hidden gem series, and movies.
Image Source: Amazon Prime Video
A subscribed user can download anime on the mobile application of the Amazon Prime Video for both Android and IOS. To download anime, you can look out for your favorite content, and in the description of that series or movie you’ll see a download button, press it. Now you’ll be able to watch anime offline anywhere without an active internet connection.
Part 3 Record an Anime with Wondershare Filmora
There are lots of paid and subscription-based anime sites that limited people have access to and you want to share the latest episode with your friends, want to make a video for YouTube, or compose an anime reviews video with markers and voiceover to show off your editing skills but first, you’ll need to record anime. Whichever might be the case persuading you to record anime on your computer, you don’t need to worry as I’ll be taking you through each step needed to record anime. Remember to connect with other video creators in the Wondershare Video Community .
Wondershare Filmora is a proficient tool for video content creators and makes it easy and simple to record anime and create professional-looking videos on Mac and Windows. There are three kinds of screen recording types you can choose from, including full-screen, target window, and custom selection. You can record from the computer audio system or microphone audio, determine the quality you want as output, the frame rate, set hotkeys to start, and stop the recording from the settings window. Now we will dive into recording our anime video to produce a review of the Tower of God anime series.
The steps for you to record anime are (the steps are the same on Windows):
- Download Filmora and install it on your computer system either Mac or Windows as the efficient tool supports both platforms.
- Open Filmora, click on the “New Project” option, go to the Record drop-down menu, and choose the “Record PC Screen” option.
- Now head over to the anime you want to record and play it.
- You will be prompted with Wondershare Filmora Scrn recorder options i.e. in case you want Full-Screen recording, audio, and microphone options. Once you press the record (red) button Filmora will start the recording.
- You can confirm if the software is recording your screen or not by looking at the top menu bar, a red recording button will be displayed during the whole screen recording.
- To pause or stop the anime recording press the red button on the top menu bar.
- Press the Stop button to finish recording the anime. You’ll be taken back to the Filmora editor window where you can tweak around with the recorded anime.
- You can locate the recorded file by right-clicking the recorded file in the media library and selecting the “Reveal in Explorer” option.
- You can drag and drop the recorded file to the timeline if you want to edit it. Filmora can easily cut, trim, rotate, layer multiple video effects, and much more. That’s up to you how deep you want to dig into the features of this amazing video editing toolkit.
Tips:
You can also set a timer to record the anime i.e. for 20 minutes and then the screen recording will automatically stop and save the file onto the location you’ve specified in the “Save To” location bar.
Seeing all this, aren’t you interested in Filmora? Give it a go.
● Conclusion for Downloading Anime →
With the popularity of the once-niche area of animation continuously blossoming and becoming more mainstream. These free and paid sites are propping up to grab more users’ attention with unique features. Japanese anime has the power to impress anyone with its vivid imagination and colorful storytelling techniques. We’ve covered top free and paid sites that allow you to download anime content and stream on the go without worrying about an active internet connection. Also, to extend your anime interest, you can put life into the world of anime and find some apps to turn photos into cartoons and sketches !
Benjamin Arango
Benjamin Arango is a writer and a lover of all things video.
Follow @Benjamin Arango
How to Insert a GIF Into Powerpoint
How to Insert a GIF into Powerpoint

Shanoon Cox
Mar 27, 2024• Proven solutions
Microsoft Powerpoint has been on the Internet for quite some time now. People who use this application make a common mistake of using too many slides with huge amounts of text and that is a major turnoff for the audience. Huge text is seen as a disaster. You should be able to convey an interesting story to your attentive audience without explaining every single detail on your slides for your presentation. Using a GIF to explain complicate things or just set it as a background can be much interesting.
You may also like: Top 26 Best Free GIF Makers Online >>
Why we need to insert GIF into the Powerpoint
- It allows us to instantly grab the audience’s short attention span.
- It allows the presentation to answer a lot of preconceived notion from the audience with less words.
- It is a good guide to bring up a pressing issue.
Tips when adding gif to your Powerpoint presentation
- Keep it easy to follow along.
- Make use of humor
- Combine GIF images with your text together.
Part 1: Make GIFs by yourself
There are many animated gif images on the internet, you can also make one by yourself. Wondershare Filmora is a powerful editing tools that allow you to convert video into GIF images, no matter what kind of video formats you got, including MKV, FLV, WMV, MP4, etc. You can also add advanced elements, animations, text, overlays to personlize your GIFs.
However, if you want to make a GIF online, Filmora meme maker is your ultimate solution. It helps you make image, GIF and video memes directly without watermark. It is totally FREE to use and no sign up. You can change text size, color and position to create caption when you are editing. You can also put text inside or outside in GIF. Just with a few clicks, your GIF is done . Try it now!
Download Mac Version ](https://tools.techidaily.com/wondershare/filmora/download/ )
Part 2: How to Insert a GIF into Powerpoint
There are three main methods on using Microsoft Powerpoint to your advantage when you are trying to insert a GIF image into your presentation.
Method 1: Powerpoint Picture Insert Utility
Select the Insert tab located at the top of the Powerpoint application.
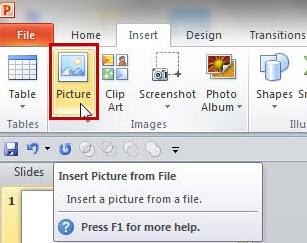
The next step is to select the Picture icon located in the Images ribbon area located also at the top of the computer window. Look for the image that you desire to add to the Powerpoint slide, then make sure to double click on the file to successfully insert your image.
You also have the option to move the GIF image on the page by clicking and dragging the image to the location that you want to place the picture.
Method 2: Copy and Paste
A helpful step is to first locate your desired GIF image, using Control + C to copy it first. Then, paste your image on the Powerpoint slide by pressing Control + V.
You can also highlight the file name, and then use the drag and drop feature to put your image directly into the Powerpoint slide of your choice.
Method 3: Embedding GIF’s from the web
The final method is to embed GIF images on the Internet into a Powerpoint slide. You can achieve this function by using the Insert Ribbon’s Pictures icon.
Select Pictures, then write in the image URL directly in the File input box. Then, select Insert. The Powerpoint application will download the GIF image that you selected into the current Powerpoint slide for your presentation. The GIF image is still available for you to access anytime if you are not connected to the Internet. It is due to being embedded.
Here we recommend the method 1 and 2, the method 3 will take a little time while Powerpoint downloading the GIF picture.
Customize the GIFs in Powerpoint
There are some important ways to customize your GIF images in the Powerpoint application.
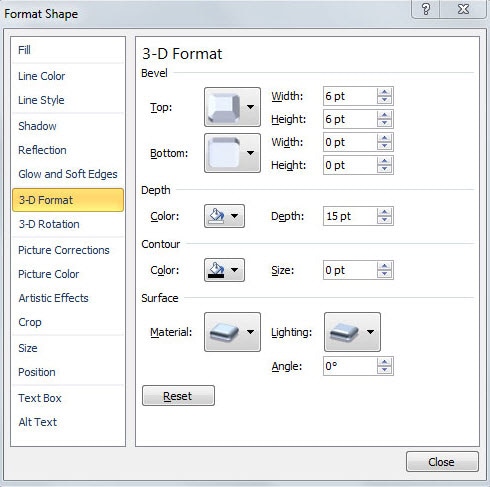
If you desire on changing the physical size of your GIF file or changing the appearance of the image, you can right click on your desired image and select Format Pictures. It will open up a brand new Format Picture window that will have a good variety of image editing menus at your fingertips at the left side of the computer window.
There is a feature where you can change the brightness and contrast on your images by selecting the Picture Corrections icon. Experiment and have fun.
Shanoon Cox
Shanoon Cox is a writer and a lover of all things video.
Follow @Shanoon Cox
Shanoon Cox
Mar 27, 2024• Proven solutions
Microsoft Powerpoint has been on the Internet for quite some time now. People who use this application make a common mistake of using too many slides with huge amounts of text and that is a major turnoff for the audience. Huge text is seen as a disaster. You should be able to convey an interesting story to your attentive audience without explaining every single detail on your slides for your presentation. Using a GIF to explain complicate things or just set it as a background can be much interesting.
You may also like: Top 26 Best Free GIF Makers Online >>
Why we need to insert GIF into the Powerpoint
- It allows us to instantly grab the audience’s short attention span.
- It allows the presentation to answer a lot of preconceived notion from the audience with less words.
- It is a good guide to bring up a pressing issue.
Tips when adding gif to your Powerpoint presentation
- Keep it easy to follow along.
- Make use of humor
- Combine GIF images with your text together.
Part 1: Make GIFs by yourself
There are many animated gif images on the internet, you can also make one by yourself. Wondershare Filmora is a powerful editing tools that allow you to convert video into GIF images, no matter what kind of video formats you got, including MKV, FLV, WMV, MP4, etc. You can also add advanced elements, animations, text, overlays to personlize your GIFs.
However, if you want to make a GIF online, Filmora meme maker is your ultimate solution. It helps you make image, GIF and video memes directly without watermark. It is totally FREE to use and no sign up. You can change text size, color and position to create caption when you are editing. You can also put text inside or outside in GIF. Just with a few clicks, your GIF is done . Try it now!
Download Mac Version ](https://tools.techidaily.com/wondershare/filmora/download/ )
Part 2: How to Insert a GIF into Powerpoint
There are three main methods on using Microsoft Powerpoint to your advantage when you are trying to insert a GIF image into your presentation.
Method 1: Powerpoint Picture Insert Utility
Select the Insert tab located at the top of the Powerpoint application.
The next step is to select the Picture icon located in the Images ribbon area located also at the top of the computer window. Look for the image that you desire to add to the Powerpoint slide, then make sure to double click on the file to successfully insert your image.
You also have the option to move the GIF image on the page by clicking and dragging the image to the location that you want to place the picture.
Method 2: Copy and Paste
A helpful step is to first locate your desired GIF image, using Control + C to copy it first. Then, paste your image on the Powerpoint slide by pressing Control + V.
You can also highlight the file name, and then use the drag and drop feature to put your image directly into the Powerpoint slide of your choice.
Method 3: Embedding GIF’s from the web
The final method is to embed GIF images on the Internet into a Powerpoint slide. You can achieve this function by using the Insert Ribbon’s Pictures icon.
Select Pictures, then write in the image URL directly in the File input box. Then, select Insert. The Powerpoint application will download the GIF image that you selected into the current Powerpoint slide for your presentation. The GIF image is still available for you to access anytime if you are not connected to the Internet. It is due to being embedded.
Here we recommend the method 1 and 2, the method 3 will take a little time while Powerpoint downloading the GIF picture.
Customize the GIFs in Powerpoint
There are some important ways to customize your GIF images in the Powerpoint application.
If you desire on changing the physical size of your GIF file or changing the appearance of the image, you can right click on your desired image and select Format Pictures. It will open up a brand new Format Picture window that will have a good variety of image editing menus at your fingertips at the left side of the computer window.
There is a feature where you can change the brightness and contrast on your images by selecting the Picture Corrections icon. Experiment and have fun.
Shanoon Cox
Shanoon Cox is a writer and a lover of all things video.
Follow @Shanoon Cox
20 Free After Effects Logo Reveal Templates You Will Want to Know
20 Free After Effects Logo Reveal Templates You Will Want to Know
An easy yet powerful editor
Numerous effects to choose from
Detailed tutorials provided by the official channel
The free After Effects logo reveals templates is a creative and clean animation that is very easy to use and customizable in just a few clicks. This template allows you to change the color, edit the text, add your logo, and click on render and contains two different logo animations for you to choose from. It does not require any plugin, and you can use it for your following modern and professional logo animation.
![]()
By incorporating a logo animation into your video, you can make your brand memorable and choose a suitable template for your brand personality. So, get ready for all the free logo reveal templates in this article.
In this article
01 [20 Best Logo Reveal Templates for After Effects 2022](#Part 1)
02 [Learn How to Use After Effects Logo Reveal Templates](#Part 2)
Part 1 Best Logo Reveal Templates for After Effects 2022
You can use an animated logo reveal if you need to add spice to your marketing campaigns and branded videos. An animated logo reveal is explained as a Great way to capture your audience’s attention as they screw through their newsfeed and stand you out from the competition. This section of the article will give you After Effects logo reveal templates for free that you can choose from this 2022:
![]()
01[Fast Flip Logo Reveal Template](https://dsqqu7oxq6o1v.cloudfront.net/preview-215084-pWlBMUhYg4-high.mp4 target=)
Fast Flip logo reveal template free to download is perfect for those on a budget and uses stock photography which can be replaced with photos of a company or team to review and an elegant logo at the end. All that is required is to customize the color, replace the images, and add your logo.
02Logo Web Search
Logo Web Search is an easy-to-use, stylish and simple animation for a company website. It allows you to change colors quickly and free sound effects, and all you need to do is change the logo text and click on render.
03Search Logo Reveal
Search Logo Reveal After Effect template for free allows you to customize the text and easily drag and drop in your logo. It provides a unique way to review your logo by using an animated search bar with a sample question and bringing up your logo as the answer. It can be a great add on to websites with search options.
04Colors Logo Reveal
Colors Logo Reveal is a super clean and straightforward After Effects logo reveal template that is very easy to use for designers and creators. It contains two different logos animations that you can choose from and requires no plugin. Add your logo, change the color, edit the text, and click on render.
05Logo Reveal
Logo Reveal is perfect for small business companies and startups with an easy-to-use template that comes with detailed instruction on how to customize and render your logo reveal Project.
06Unlock Phone Logo Reveal
Unlock Phone Logo Reveal is one of the dynamic logo reveal After Effects templates for free with a modern design, smooth transition effects, and simple text animation that is super easy to use. All that is required is to edit the text, drag and drop in your media, and click on render. It comprises a cool intro or opener to presentations, slideshows, promotions, and event videos to impress your audience.
07Orbital Free HUD Logo Reveal
Orbital Free HUD Logo Reveal is perfect for any tech company, and it’s done up in futuristic style and includes the complete. AEP project file with background texture and elements.
08Corporate logo reveal
Corporate Logo Reveal template is a stylish and contemporary template that features a simple shape that is elegantly animated and combined with reviewing your logo. It has one logo placeholder, editable text layers, and an easy-to-use color controller. An excellent logo reveals the Premiere Pro template free to download for companies like stockbrokers.
09White Scroll Logo Reveals
White Scroll Logo Reveals perfect for a more classic logo opener and comes with three background versions and three different logo placement options.
10Shape Logo Reveal
Shape Logo Reveal is a stylish logo reveal template with colorful shape layers and lines that beautifully form a clean-looking logo reveal. It is a short intro for a business slideshow, promotions, events, TV shows, videos, commercials, corporate presentations, etc.
11Free Animated Logo Reveals
Free Animated Logo Reveals is packed with three different logos reveal, which a suitable for corporates and an excellent option for one who wants a modern and professional logo show.
12Clean Titles And Logo Reveal
Clean Titles and Logo Reveal offers stylish templates which an eye-catching design and contains two text placeholders and one logo placeholder. It is effortless to use and a short introduction to TV shows, commercials, slideshows, promotions, Facebook and YouTube videos, etc.
13Hi-Tech Logo Reveal 02
Hi-Tech Logo Reveal is a premium animated logo reveal that features a dark blue background joint with light blue HUD elements and a perfect logo reveal template for a company that wants to stand out online.
14Testimonials Logo Reveal
Testimonials logo Reveal is a stylish and clean project that is perfect for displaying the company’s testimonials and reviews. This After Effects logo reveal template for free features six title placeholders, one logo holder, and six photo placeholders, requiring no plugin.
15Elegant Logo Reveal
Elegant logo Reveals perfect for a feminine background. It features chrome logo pens with a silky dark background, enabling you to easily add your text, insert your logo, and change the colors.
16Logo Web Search II
Logo Web Search II is a stylish and straightforward animation mainly for company websites. It is elementary to use.
17Battle Logo Reveal
Blue Action Logo Reveal is for those looking for a minimalist logo opener and features a dynamic animation style, including an editable text layer and a logo placeholder. It also allows you to adjust the colors easily.
18Blue Action Logo Reveal
Blue Action Logo Reveal is majorly for those looking for a minimalist logo opener and features a dynamic animation style including an editable text layer and a logo placeholder. It also allows you to easily adjust the colors.
19Logo Introduction Template
Logo Introduction Template is a free logo reveal from Premiere Pro. It is perfect for the ones looking for a Tudor style logo reveal and allows you to easily customize the colors and insert your logo with a detailed help file.
20Minimal Logo Klick
Minimal Logo Klick comes in a sleek and modern design with playful animation. It encompasses a logo placeholder, an editable text layer, and an intelligent color controller. If you are searching for an unfussy and free logo reveal online, this one is for you.
Part 2 Learn How to Use After Effects Logo Reveal Templates
This section provides you with a basic tutorial on using the logo reveal After Effects template for free. However, this is a professional video editing software, but if video editing is new to you, you can try out Filmora, which is powerful, easy to use for new users. In Filmora, you will use the logo reveal template as a professional even if you are a beginner.
Below is how to use the After Effects logo reveals template:
01Open After Effects and Begin
Open your After Effect software and set up your Project ready. To begin face, create a composition using composition>New. You can also search the web resolution to 3x 2for this Project.
![]()
02Start Creating Logo
Next is to create a solid layer for your logo by using layers>new>solid, and select an appropriate color to match your composition.
![]()
Next is the creator logo by adding the pre-prepared logo artwork. Go to layer>new>text to create a text layer and adjust the text size and color to see.
![]()
03Add Animation to Logo
Manipulate your logo to create an animation and ensure that everything is right where you want it.
![]()
04Add Effects and Keyframe
Add Effect by going to Effect>Simulation>CC Particle World or click on Effects and Presets panel on the right to drag the CC Particle World effect onto your solid layer.
![]()
Set off your animation by adding a keyframe and controlling the animation of the particles effect through the birth rate setting, which is found by expanding the settings in the timeline panel for the solid layer.
![]()
05Import Vector Graphics and Finish
Finally, import your vector graphics into the After Effects by dragging and dropping the file into the Project panel, which brings up an import dialogue.
For Win 7 or later (64-bit)
For macOS 10.12 or later
That’s it! You successfully made use of the logo reveal maker.
● Key Takeaways from This Episode →
● The top 20 logo reveal Premiere Pro templates free to download.
● THow to make logo with After Effects – the logo reveal maker.
● TLastly, the logo reveal, free online tool, Filmora.
● TI hope I’ve gave you a few ideas on the After Effects logo reveal template for your Project and provided a breakdown of other software you can use for free logo reveal, such as Filmora. The article also lists the best logo reveal templates for after-effects that you can choose from this 202You can also use other software for your free logo reveal, but we all need to start somewhere.
Ideas That Will Help You Out in Learning How to Send WhatsApp Animated Gifs
Ideas That Will Help You Out in Learning How to Send WhatsApp Animated Gifs
An easy yet powerful editor
Numerous effects to choose from
Detailed tutorials provided by the official channel
While chatting on WhatsApp, expressing your thoughts, suggestions, and situations become easier if assisted with some animations and for this GIFs are available.

So, if you too are keen to try these animated images but clueless about how to use them, we are here to help you. Learn about different ways to send WhatsApp animated GIFs in the following parts.
In this article
01 [How to send WhatsApp GIF using Integrated library](#Part 1)
02 [How to send GIF Stored on your device](#Part 2)
03 [How to create WhatsApp GIF using videos](#Part 3)
04 [Best tool for creating interesting GIFs in a hassle-free manner- Wondershare Filmora](#Part 4)
Part 1 How to send WhatsApp GIF using Integrated library
The WhatsApp feature on your iPhone as well as Android devices comes integrated with a GIF library powered by Tenor that allows you to search for GIFs using desired keywords. The steps to send GIFs through the method for both iPhone, as well as Android, are almost the same.
Step 1. Open WhatsApp and select the contact or the group chat to whom you wish to send the GIF.
On your Android phone, click on the smiley emoji at the input section and then choose GIF at the bottom of the screen. A sample of GIF will appear. On your iPhone, you need to click on the sticker icon to launch GIF options.
Step 2. Enter the desired keyword at the search icon to look out for a more specific GIF.
Step 3. Tap on the selected GIF and then if needed add a caption as well.
Step 4. Finally, click on the Send icon to share the GIF to the chat.
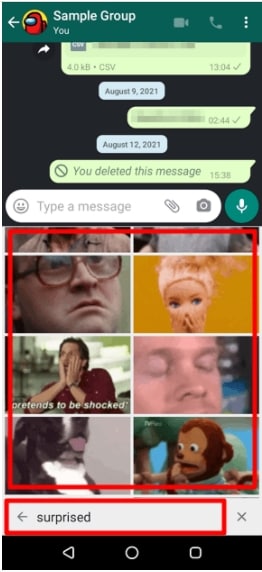
Part 2 How to send GIF Stored on your device
Several third-party apps can let you create GIFs as needed. Moreover, you can also download these animations from online sites to your device.
Once you have done WhatsApp animated GIF download to your device, these GIF files can be sent on WhatsApp by attaching them like any other image or video.
Step 1. Launch WhatsApp and select the desired contact. Click on the attach or gallery icon at the input area to browse and add the saved GIF.
Note: The size of the GIF has to be less than 16MB.
Step 2. Add a caption if needed.
Step 3. Click on the Send icon.
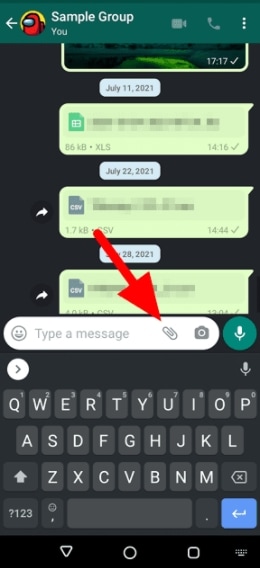
Part 3 How to create WhatsApp GIF using videos
Another way is by creating GIFs using the videos on your device. The videos to be shared as GIF has to be less than 6 seconds and thus the longer videos need to be trimmed.
Steps to create WhatsApp GIF using videos
Step 1. Launch the WhatsApp chat to which you want to send the GIF. Click on the gallery icon to browse and add the video from the device. Alternatively, you can also record a video to be used as GIF.
Step 2. After the video is added, trim it under 6 seconds using the slider at the top. Add the caption or other available elements if needed.
Step 3. Click on the GIF button and then tap on the Send icon.
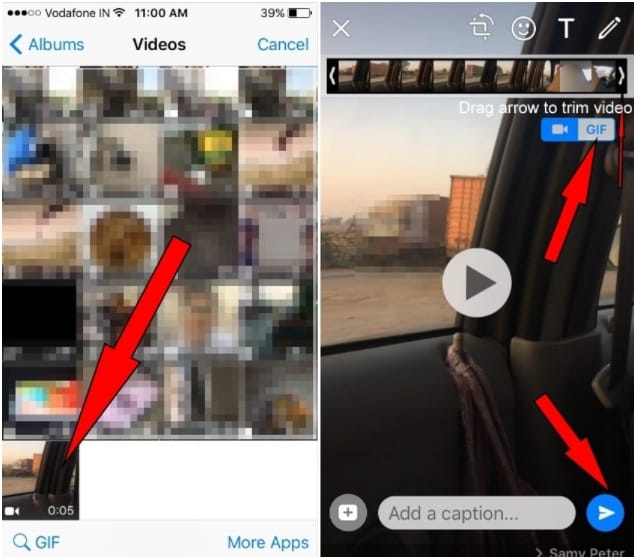
Part 4 Best tool for creating interesting GIFs in a hassle-free manner- Wondershare Filmora
Above we have mentioned in part 2 that there are several third-party apps available that can be used for creating GIFs. Among the myriad of options available, we suggest Wondershare Filmora Video Editor owing to its user-friendly interface and fast processing.
Wondershare Filmora
Get started easily with Filmora’s powerful performance, intuitive interface, and countless effects!
Try It Free Try It Free Try It Free Learn More >

Using the software, you can quickly create animated GIF stickers for WhatsApp using images and videos in all key formats. Several elements to further pep up your animations can be added like text, sound, effects, and more. Additionally, you can even edit the added media files using features like rotate, split, trim, speed-up, speed-down, and more.
Once installed on your Windows or Mac devices, Wondershare Filmora works as a complete video editing tool.
Steps to create Animated WhatsApp GIF using Wondershare Filmora
Step 1. Run the software on your system, browse and import the images and videos from which animations have to be created.
Step 2. Next, drag and move the media files to the timeline of the tool.
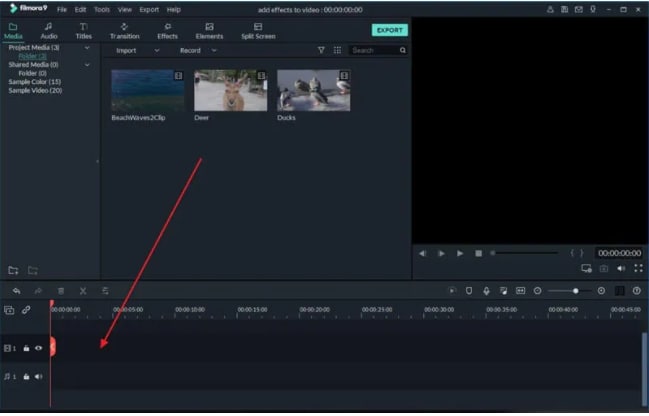
Step 3. Next, add effects, text, and other elements as needed..
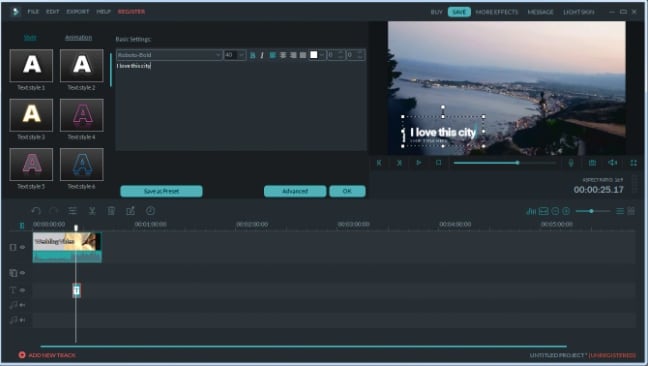
Step 4. At the Local section, save the created media file as GIF. Give the desired name and then select the desktop location. Click on the EXPORT button to start processing.
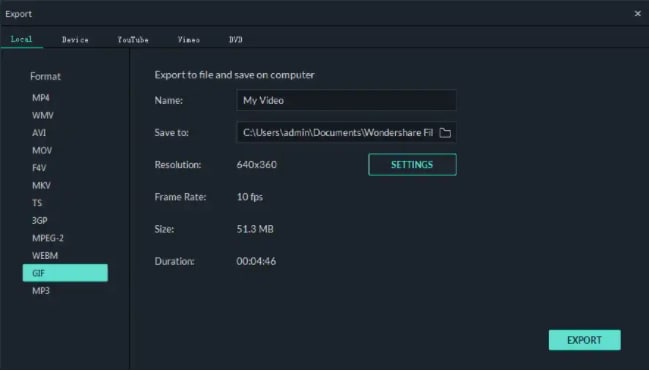
● Key Takeaways from This Episode →
●WhatsApp GIFs on your phone can be sent by either searching them from the integrated library or using the ones saved to your device.
●GIFs can also be created using videos.
●Wondershare Filmora is the best third-party app for effortlessly creating impressing GIFs.
While chatting on WhatsApp, expressing your thoughts, suggestions, and situations become easier if assisted with some animations and for this GIFs are available.
So, if you too are keen to try these animated images but clueless about how to use them, we are here to help you. Learn about different ways to send WhatsApp animated GIFs in the following parts.
In this article
01 [How to send WhatsApp GIF using Integrated library](#Part 1)
02 [How to send GIF Stored on your device](#Part 2)
03 [How to create WhatsApp GIF using videos](#Part 3)
04 [Best tool for creating interesting GIFs in a hassle-free manner- Wondershare Filmora](#Part 4)
Part 1 How to send WhatsApp GIF using Integrated library
The WhatsApp feature on your iPhone as well as Android devices comes integrated with a GIF library powered by Tenor that allows you to search for GIFs using desired keywords. The steps to send GIFs through the method for both iPhone, as well as Android, are almost the same.
Step 1. Open WhatsApp and select the contact or the group chat to whom you wish to send the GIF.
On your Android phone, click on the smiley emoji at the input section and then choose GIF at the bottom of the screen. A sample of GIF will appear. On your iPhone, you need to click on the sticker icon to launch GIF options.
Step 2. Enter the desired keyword at the search icon to look out for a more specific GIF.
Step 3. Tap on the selected GIF and then if needed add a caption as well.
Step 4. Finally, click on the Send icon to share the GIF to the chat.
Part 2 How to send GIF Stored on your device
Several third-party apps can let you create GIFs as needed. Moreover, you can also download these animations from online sites to your device.
Once you have done WhatsApp animated GIF download to your device, these GIF files can be sent on WhatsApp by attaching them like any other image or video.
Step 1. Launch WhatsApp and select the desired contact. Click on the attach or gallery icon at the input area to browse and add the saved GIF.
Note: The size of the GIF has to be less than 16MB.
Step 2. Add a caption if needed.
Step 3. Click on the Send icon.
Part 3 How to create WhatsApp GIF using videos
Another way is by creating GIFs using the videos on your device. The videos to be shared as GIF has to be less than 6 seconds and thus the longer videos need to be trimmed.
Steps to create WhatsApp GIF using videos
Step 1. Launch the WhatsApp chat to which you want to send the GIF. Click on the gallery icon to browse and add the video from the device. Alternatively, you can also record a video to be used as GIF.
Step 2. After the video is added, trim it under 6 seconds using the slider at the top. Add the caption or other available elements if needed.
Step 3. Click on the GIF button and then tap on the Send icon.
Part 4 Best tool for creating interesting GIFs in a hassle-free manner- Wondershare Filmora
Above we have mentioned in part 2 that there are several third-party apps available that can be used for creating GIFs. Among the myriad of options available, we suggest Wondershare Filmora Video Editor owing to its user-friendly interface and fast processing.
Wondershare Filmora
Get started easily with Filmora’s powerful performance, intuitive interface, and countless effects!
Try It Free Try It Free Try It Free Learn More >
Using the software, you can quickly create animated GIF stickers for WhatsApp using images and videos in all key formats. Several elements to further pep up your animations can be added like text, sound, effects, and more. Additionally, you can even edit the added media files using features like rotate, split, trim, speed-up, speed-down, and more.
Once installed on your Windows or Mac devices, Wondershare Filmora works as a complete video editing tool.
Steps to create Animated WhatsApp GIF using Wondershare Filmora
Step 1. Run the software on your system, browse and import the images and videos from which animations have to be created.
Step 2. Next, drag and move the media files to the timeline of the tool.
Step 3. Next, add effects, text, and other elements as needed..
Step 4. At the Local section, save the created media file as GIF. Give the desired name and then select the desktop location. Click on the EXPORT button to start processing.
● Key Takeaways from This Episode →
●WhatsApp GIFs on your phone can be sent by either searching them from the integrated library or using the ones saved to your device.
●GIFs can also be created using videos.
●Wondershare Filmora is the best third-party app for effortlessly creating impressing GIFs.
Animate Photo Online with These Awesome Tools
Animate Your Photo Online with These Awesome Tools
An easy yet powerful editor
Numerous effects to choose from
Detailed tutorials provided by the official channel
Animating your family photos online will not only make you nostalgic but will also make you relive that moment. Adding on to this, animating your photos can also make your boring ppt interesting.
This article helps you understand how to animate your pictures online for free and the different features you can use.
In this article
01 [How Can I Turn My Photo into a Cartoon Online?](#Part 1)
02 [Some Other Tools/Plugins to Help You Improve Photo Animate](#Part 2)
Part 1 Part 1: How Can I Turn My Photo into a Cartoon Online?
Animation gives life to your lifeless photos, makes them more interesting, and attracts an audience. You can add more fun to your normal photos by turning your photos into a cartoon. One of the simplest ways is by turning your photo into a cartoon by using online tools. In this section of the article, we will explore more on some online tools which will help you to turn your photos into a cartoon online.
01Befunky
An online cartoonizer that processes your photo online at a very good speed and gives you a cartoon version of the photo in seconds.
A single click on your cartoonizer and you’ll go from photo to cartoon in seconds. Go to the photo editor and click on the artsy section. You will have five classic cartoonizer effects and you will be one click away from your beautiful results.
Pros
Can upload several photos simultaneously.
Very simple interface that supports drag and drop feature.
It is possible to download photos from the stream.
Cons
Many functions are not free.
Too much advertising.
Price $4.95/month
Rating 4.1/5
“Great collage maker and photo editing tools.” - Fayak. A
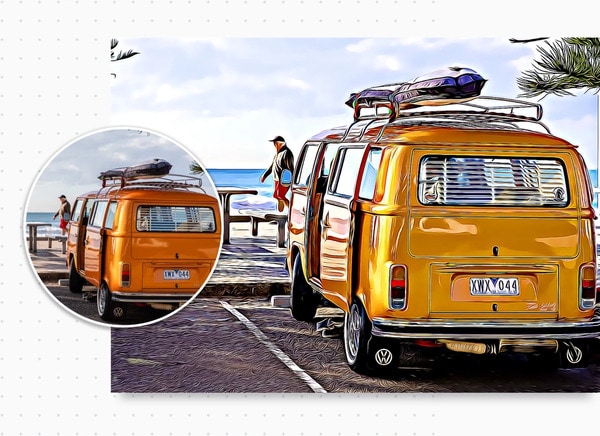
02Painnt- Art & Cartoon Filters
Painnt is one of the best cartoons yourself apps on the market with more than a thousand filters and effects. It is also a creative community which not only helps you animate your photo online but also helps you discover the artwork of your taste or meet like-minded people.
Pros
Regularly updates its software to support more features.
Customize cartoon filter settings with various parameters.
Cons
Bugs might cause trouble to your system even if you have a purchases version.
Price Free/ in-app purchases will not cost more than $9.99
Rating 4.5/ 5
“Great app lots of fun don’t put no money into the custom style.” - SB
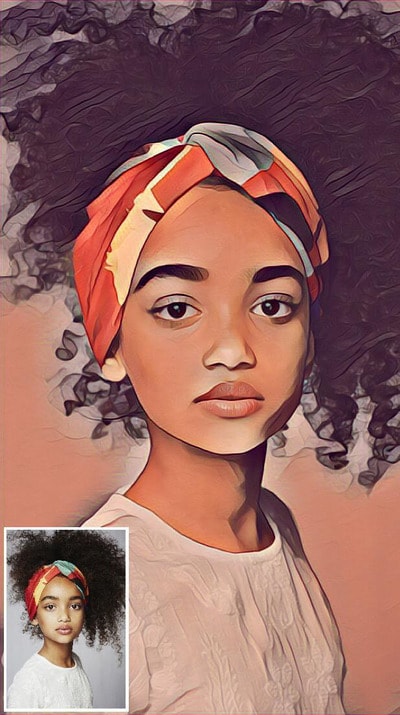
03Prisma Photo Editor
A few years ago, Prisma is one of the most popular applications to animate your photo online. Though its popularity has reduced it still has some cool features.
Pros
Has a good number of filters and you will have a lot of options.
Every image you try will be automatically saved to your camera roll.
Create unique-looking features.
Cons
Create unique-looking features.
Users have no control over how the app reads every image and gives output.
Price Users have no control over how the app reads every image and gives output.
Rating 4.6/5
“I am seriously addicted to this app. I use it to change my 360 pics into mind blowing Virtual Reality 3D photosphere.” -Leighton Scharf

04Cartoon Sketch Camera Pro
Sketch, Cartoon, Halftone, Swirl, Pixellate, Emboss, Crosshatch, or Dots effects can be used to cartoon a photo in this app. but there are only a limited amount of cartoon effects which makes the cartoon sketch camera pro, not one of the best options to animate your photo online free.
Pros
It includes 8 different filters and effects.
You can save a photo to your cartoon library.
Cons
Supported by only Mac products.
Limited filters and effects
Issues wid bugs
Annoying ads
Price Free/In-app purchases.
Rating 3.6/5
“Get ready to watch a lot of application ads”
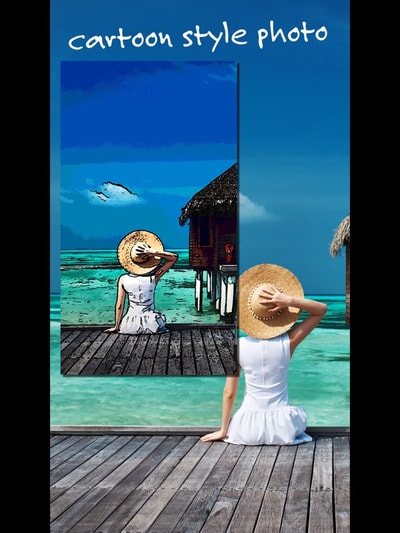
05Cartoon Photo Editor
The cartoon photo editor app helps you create animated pictures online for free. All effects can be previewed in real-time, which helps you to see your results before capturing a picture or recording a video.
Pros
Supports autofocus when shooting a video, picture.
Can also use cartoon effects on previously captured pictures.
Cons
Ads can be bothersome.
Price Free/ In-app purchases.
Rating 4.4 /5
“Not the most well-developed app.” - Nunya

06Photo Lab
Pros
Has an immense number of filters.
Can easily share pictures on social media.
Easy interface
Cons
It’s an internet-based app, so limited features when using offline.
Price Free/ PRO subscription- $4.99/month
Rating 4.6/5
“I love so many aspects of this app.” - creativeme

07Toon Me
Special AI developed algorithm in Toon me app instantly gives you, your cartoon picture. Just take a picture and upload it and get ready to meet your cartoon self. Toon me is one of the easiest ways to animate your photo online.
Pros
Easy to use.
Cool filters which are unique from normal toon apps.
No adds.
Cons
Good filters are only available after paid subscriptions.
Some add ons are and filters are strange.
The App doesn’t let you cartoon any photo. it has to have a face on it.
Price The App doesn’t let you cartoon any photo. it has to have a face on it.
Rating 4.5/5
“Great app. I’m thinking of actually paying for it to try some of the other cool filters,” - Angel
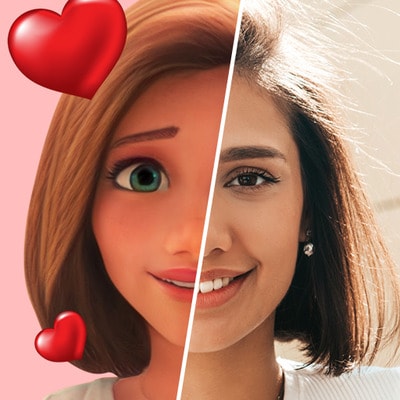
08MomentCam Cartoons and stickers
This app offers a wide range of filters and stickers. besides this, MomentCam is a community that awards prizes to its most creative members. You can accessorize your cartoon with hairbands, sunglasses, pick hairstyles or beards.
Pros
Great cartoon effects.
Easy to use.
Cons
Bugs to be fixed.
May witness errors while connected to a network.
New updates are causing issues.
Price Free/ Subscription $4.99/month
Rating 4.5 / 5
“Disappointed in the new update. Interface is confusing to use.” - Kristie
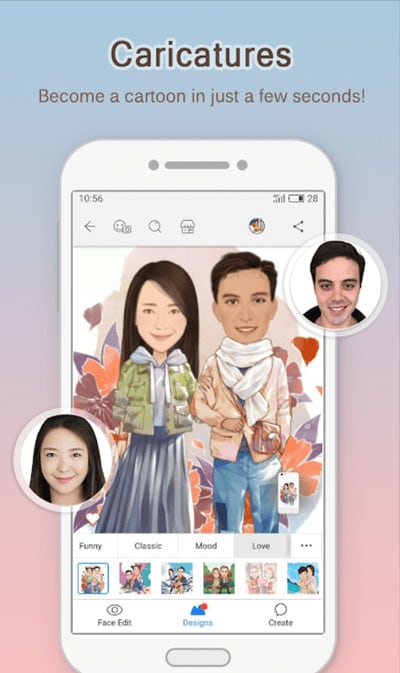
Part 2 Some Other Tools/Plugins to Help You Improve Photo Animate
012D Photography Online
An animation is a vital tool for any digital artist. Leaving your images to normal static pictures can sometimes bore your audience. Your 2d photography can be animated easily online. To animate your photos online you have several online tools like -
Open Toonz It is a powerful tool that is also open-source software.
Piskel Piskel is an online tool for creating animated sprites and pixel art. It’s easy to use and requires no sign-up.
Asperite Is another online tool that can animate your 2d photography online. You can purchase the software for $19.99.
023D Photography Online
3D This- 3Dthis is a unique animation platform that supports 3D animation with the help of amazing in-app tools. It can create 3D models of people’s faces to morph animations. You can convert any picture to a 3D image. Being free software it helps you to learn and explore and create 3D animated pictures online for free.
03Animated Photo Frame Online Editor
Animated photo frames and effects will instantly turn any photo into an awesome greeting card. You can now creatively make your greeting cards for any occasion by using these animations which will convert into gif form.
04Animate Face from Photo Online
This particular type of animation has created a huge trend on social media. Animating faces online you can see how a person in the photograph smiles, moves their head around, etc. People often use it to relive their nostalgic moments of their ancestor’s pictures. My heritage blog is one of the websites which makes still faces move. With the help of My heritage blog, you can animate any of the faces in your photos to see them move, blink, and smile. My heritage easily helps you to animate your family photos online.
Now that we have seen various kinds of animation tools and pros and cons, let us look into one such amazing tool that can animate your photo online easily and very professionally.
Key Takeaways from This Episode
● In this article we have seen how animating a picture can make a static picture into an interesting art piece.
● We have also explored various tools that can make a cartoon and animate your photo online. We have also explored each tool’s pros and cons, their pricing, reviews, and ratings. We have also seen various other tools which help you improve your photo animate. We have also seen. With the advancement of technology, we learned that old pictures of our ancestors can be bought into motion.
● In the later part of the article, we also learned about a specific software called Filmora Pro that has awesome features. In addition to this, Filmora Pro gives a very professional result.
Animating your family photos online will not only make you nostalgic but will also make you relive that moment. Adding on to this, animating your photos can also make your boring ppt interesting.
This article helps you understand how to animate your pictures online for free and the different features you can use.
In this article
01 [How Can I Turn My Photo into a Cartoon Online?](#Part 1)
02 [Some Other Tools/Plugins to Help You Improve Photo Animate](#Part 2)
Part 1 Part 1: How Can I Turn My Photo into a Cartoon Online?
Animation gives life to your lifeless photos, makes them more interesting, and attracts an audience. You can add more fun to your normal photos by turning your photos into a cartoon. One of the simplest ways is by turning your photo into a cartoon by using online tools. In this section of the article, we will explore more on some online tools which will help you to turn your photos into a cartoon online.
01Befunky
An online cartoonizer that processes your photo online at a very good speed and gives you a cartoon version of the photo in seconds.
A single click on your cartoonizer and you’ll go from photo to cartoon in seconds. Go to the photo editor and click on the artsy section. You will have five classic cartoonizer effects and you will be one click away from your beautiful results.
Pros
Can upload several photos simultaneously.
Very simple interface that supports drag and drop feature.
It is possible to download photos from the stream.
Cons
Many functions are not free.
Too much advertising.
Price $4.95/month
Rating 4.1/5
“Great collage maker and photo editing tools.” - Fayak. A
02Painnt- Art & Cartoon Filters
Painnt is one of the best cartoons yourself apps on the market with more than a thousand filters and effects. It is also a creative community which not only helps you animate your photo online but also helps you discover the artwork of your taste or meet like-minded people.
Pros
Regularly updates its software to support more features.
Customize cartoon filter settings with various parameters.
Cons
Bugs might cause trouble to your system even if you have a purchases version.
Price Free/ in-app purchases will not cost more than $9.99
Rating 4.5/ 5
“Great app lots of fun don’t put no money into the custom style.” - SB
03Prisma Photo Editor
A few years ago, Prisma is one of the most popular applications to animate your photo online. Though its popularity has reduced it still has some cool features.
Pros
Has a good number of filters and you will have a lot of options.
Every image you try will be automatically saved to your camera roll.
Create unique-looking features.
Cons
Create unique-looking features.
Users have no control over how the app reads every image and gives output.
Price Users have no control over how the app reads every image and gives output.
Rating 4.6/5
“I am seriously addicted to this app. I use it to change my 360 pics into mind blowing Virtual Reality 3D photosphere.” -Leighton Scharf
04Cartoon Sketch Camera Pro
Sketch, Cartoon, Halftone, Swirl, Pixellate, Emboss, Crosshatch, or Dots effects can be used to cartoon a photo in this app. but there are only a limited amount of cartoon effects which makes the cartoon sketch camera pro, not one of the best options to animate your photo online free.
Pros
It includes 8 different filters and effects.
You can save a photo to your cartoon library.
Cons
Supported by only Mac products.
Limited filters and effects
Issues wid bugs
Annoying ads
Price Free/In-app purchases.
Rating 3.6/5
“Get ready to watch a lot of application ads”
05Cartoon Photo Editor
The cartoon photo editor app helps you create animated pictures online for free. All effects can be previewed in real-time, which helps you to see your results before capturing a picture or recording a video.
Pros
Supports autofocus when shooting a video, picture.
Can also use cartoon effects on previously captured pictures.
Cons
Ads can be bothersome.
Price Free/ In-app purchases.
Rating 4.4 /5
“Not the most well-developed app.” - Nunya
06Photo Lab
Pros
Has an immense number of filters.
Can easily share pictures on social media.
Easy interface
Cons
It’s an internet-based app, so limited features when using offline.
Price Free/ PRO subscription- $4.99/month
Rating 4.6/5
“I love so many aspects of this app.” - creativeme
07Toon Me
Special AI developed algorithm in Toon me app instantly gives you, your cartoon picture. Just take a picture and upload it and get ready to meet your cartoon self. Toon me is one of the easiest ways to animate your photo online.
Pros
Easy to use.
Cool filters which are unique from normal toon apps.
No adds.
Cons
Good filters are only available after paid subscriptions.
Some add ons are and filters are strange.
The App doesn’t let you cartoon any photo. it has to have a face on it.
Price The App doesn’t let you cartoon any photo. it has to have a face on it.
Rating 4.5/5
“Great app. I’m thinking of actually paying for it to try some of the other cool filters,” - Angel
08MomentCam Cartoons and stickers
This app offers a wide range of filters and stickers. besides this, MomentCam is a community that awards prizes to its most creative members. You can accessorize your cartoon with hairbands, sunglasses, pick hairstyles or beards.
Pros
Great cartoon effects.
Easy to use.
Cons
Bugs to be fixed.
May witness errors while connected to a network.
New updates are causing issues.
Price Free/ Subscription $4.99/month
Rating 4.5 / 5
“Disappointed in the new update. Interface is confusing to use.” - Kristie
Part 2 Some Other Tools/Plugins to Help You Improve Photo Animate
012D Photography Online
An animation is a vital tool for any digital artist. Leaving your images to normal static pictures can sometimes bore your audience. Your 2d photography can be animated easily online. To animate your photos online you have several online tools like -
Open Toonz It is a powerful tool that is also open-source software.
Piskel Piskel is an online tool for creating animated sprites and pixel art. It’s easy to use and requires no sign-up.
Asperite Is another online tool that can animate your 2d photography online. You can purchase the software for $19.99.
023D Photography Online
3D This- 3Dthis is a unique animation platform that supports 3D animation with the help of amazing in-app tools. It can create 3D models of people’s faces to morph animations. You can convert any picture to a 3D image. Being free software it helps you to learn and explore and create 3D animated pictures online for free.
03Animated Photo Frame Online Editor
Animated photo frames and effects will instantly turn any photo into an awesome greeting card. You can now creatively make your greeting cards for any occasion by using these animations which will convert into gif form.
04Animate Face from Photo Online
This particular type of animation has created a huge trend on social media. Animating faces online you can see how a person in the photograph smiles, moves their head around, etc. People often use it to relive their nostalgic moments of their ancestor’s pictures. My heritage blog is one of the websites which makes still faces move. With the help of My heritage blog, you can animate any of the faces in your photos to see them move, blink, and smile. My heritage easily helps you to animate your family photos online.
Now that we have seen various kinds of animation tools and pros and cons, let us look into one such amazing tool that can animate your photo online easily and very professionally.
Key Takeaways from This Episode
● In this article we have seen how animating a picture can make a static picture into an interesting art piece.
● We have also explored various tools that can make a cartoon and animate your photo online. We have also explored each tool’s pros and cons, their pricing, reviews, and ratings. We have also seen various other tools which help you improve your photo animate. We have also seen. With the advancement of technology, we learned that old pictures of our ancestors can be bought into motion.
● In the later part of the article, we also learned about a specific software called Filmora Pro that has awesome features. In addition to this, Filmora Pro gives a very professional result.
[Top 10] Best Photo to Animation Converters
[Top 10] Best Photo to Animation Converters That Give You an Advantage
An easy yet powerful editor
Numerous effects to choose from
Detailed tutorials provided by the official channel
We do have a couple of recommendations to give. There’s a wide variety of tools out there that will allow you to make animated pictures. With some actually allowing you to add animation (or motion) to your photographs while others bring a pop-up of life to your pictures with artistic filters and effects.
Have a look at our list of the top ten best photos to animation converter tools below to see if one of them catches your eye.
Alright, let’s get straight to our list of the best photo to animation converter tools available. As mentioned, we’ve picked quite the variety — including both software and online photo animator tools so that you can find one that best suits the kind of projects that you’re working on.
For your convenience, we’ve included the pros and cons of each converter as well as the most common scenarios each application can be used.
01Filmora
Rating and Reviews: [Techradar: 4.5/5]
Wondershare Filmora Video Editor , while, first and foremost, is an advanced video editor, is the first photo animation maker on this list of ours. This software is highly-rated online and it comes with a bunch of presets, filters, and effects, that you can use in order to animate your photographs. Its more advanced video editing functions would no doubt prove to be useful in the future as well, allowing you to increase the complexity of your projects and achieve more and more things.
● With Filmora, you have access to a built-in library of Effects and Elements that you can use in order to make animated pictures.
● The advanced video editing functions can also be used to create more complex motion animations that you are unlikely to see in other alternatives.
URL: https://filmora.wondershare.com/
| PROS | CONS |
|---|---|
| ● Access to built-in effects and elements library.● Advanced editing functions.● A FREE trial is available to try out its many features. | ● As a downloadable software, Filmora will require downloading and installing.● Some of its features and functions are locked in the FREE version as well.● Payment is either subscription-based or one-time for a perpetual license. |
For Win 7 or later (64-bit)
For macOS 10.12 or later
02PicMonkey
Rating and Reviews: [G2: 4.4/5]
When it comes to online photo animator tools, PicMonkey is definitely one of the first that people recommend. It’s premium software, so you’ll have to pay to use all of its functions — with the cheapest plan worth $72 annually or $7.99 monthly. The best part about it is, undoubtedly, the fact that it was developed by Shutterstock, which is highly regarded in the photography industry. So, you can surely rely on stable support.
● Photo Animation maker with lots of built-in animation effects and templates that allow users to easily make animated pictures.
URL: https://www.picmonkey.com/design/photo-animation-maker
| PROS | CONS |
|---|---|
| ● A FREE trial is available to test out its functions.● Developed by a reliable company.● Packed with lots of built-in animated effects and presets. | ● Packed with lots of built-in animated effects and presets.● No software version for use without the internet.● Does not come equipped with advanced custom animation tools. |

03Adobe Creative Cloud Express
Rating and Reviews: [Creative Bloq: 4/5]
The Adobe Creative Cloud Express is both an online photo animator and an application that you can download and install on your phone. As is expected from any Adobe product, it’s quite premium in make and is better suited for more serious photo animations — especially as you’ll need to pay in order to be able to use it to its fullest extent.
● Comes with a veritable library of templates, effects, and filters for advanced photo editing and photo animation.
URL: https://www.adobe.com/express/create/social-media-graphic
| PROS | CONS |
|---|---|
| ● Advanced photo editing tool.● Available both online and as an app.● Reliable and trustworthy adobe product. | ● The FREE trial is limited.● The FREE trial is limited.● Advanced photo editing is not suitable for beginners. |

04ColorCinch
Rating and Reviews: [Crozdesk: 4/5]
ColorCinch, or Cartoonize, as it is also called, is another popular online photo animator that you might have heard about already. This one features quite a few presets that you can use to quickly change the look of your photographs.
● Photo editing functions for breathing new life into existing photographs.
● Presets, templates, filters, and effects are available for easy and efficient photo editing.
URL: https://www.cartoonize.net/
| PROS | CONS |
|---|---|
| ● Beginner-friendly UI.● Comes with lots of filters and effects built-in.● Cartoonizer effect for simple photo animation onlinep. | ● Paid tool Limited FREE trial.● Subscription-based packages.● Limited customer animation functions. |

05Photo Cartoon
Rating and Reviews: N/A
Photo Cartoon is an online photo animator that specifically alters your photos and ‘cartoon-izes’ it (with several effects to choose from as to the specific style that you want). This single-use, while definitely not the most advanced on this list of ours, offers the user an easy way to change the look of their photographs.
● Transform photos into cartoons, paintings, drawings, and caricatures.
URL: https://photocartoon.net/
| PROS | CONS |
|---|---|
| ● Quick and easy to use● Online software, good for all devices● The finished photo animation can be downloaded and shared. | ● Very basic functions.● Limited effects/filters to choose from. ● Not highly rated online. |
06BeFunky
Rating and Reviews: [G2: 4.2/5]
With BeFunky, we go back to somewhat more advanced online photo animator tools. This one works quite simply as well though. Similar to the previous tool we introduced, BeFunky is meant primarily for quickly and easily adding filters and effects to photographs to change its style to look more like a cartoon or animation.
● Create a cartoon version of your images easily and quickly.
URL: https://www.befunky.com/features/photo-to-cartoon/
| PROS | CONS |
|---|---|
| ● Easy-to-use and beginner-friendly● Easy-to-use and beginner-friendly.● Available online and thus compatible with most devices. | ● Limited photo editing scope.● Sign-up is required for long-term use.● No advanced custom animation functions. |

077. ASPOSE
Rating and Reviews: N/A
Although not very well-known, ASPOSE is an easy way of animating pictures online. All you really have to do is upload your file (in the way that is suggested) and you’re good to go. You’ll be given a choice in what kind of animations you want to put on your photograph thereafter. And, when the conversion is complete, it’ll be FREE to download and share.
● Easily make animated pictures online by uploading photographs to be animated.
URL: https://products.aspose.app/imaging/animation-maker
| PROS | CONS |
|---|---|
| ● FREE photo to animation converter● Easy-to-use and efficient.● Motion animations available. | ● Internet is required for use.● Not the most advanced filters/effects/animations are available.● No custom animation function. |

08TheCartoonist.me
Rating and Reviews: N/A
We’re approaching more and more obscure territory the further we go along this list, with many of the tools, including this next one, called ‘The Cartoonist.me’, not having been rated by the usual tech websites. But, that doesn’t mean that the tool itself is any less useful. This one, in particular, is akin to the other cartoon-izers that we introduced earlier — in that it changes the look of photographs into one similar to what is used in animations.
● Picture animator online that allows you to turn your pictures into cartoon versions of their former self.
URL: https://thecartoonist.me/
| PROS | CONS |
|---|---|
| ● FREE photo animation maker.● Basic cartoon effects available.● Upload and Download | ● No advanced photo editing.● No advanced photo editing.● Not highly rated. |

09Snapstouch
Rating and Reviews: N/A
Snapstouch is another obscure, but no less useful, photo editing tool that adds a touch animation to your photographs. This online tool offers sketch, painting, pencil sketch, outline, cartoon, and many other filters that you can apply to your photographs to directly change their look.
● Change the look of your photographs with an easily applied filter.
URL: http://www.snapstouch.com/
| PROS | CONS |
|---|---|
| ● Easy-to-use (upload then download)● FREE to use online tool.● Several effects to choose from. | ● A limited selection of filter effects.● Old and dated UI.● Not highly rated. |

10AnyMaking
Rating and Reviews: N/A
AnyMaking is a basic online photo editor that comes with a variety of photo effects that you can apply to your photographs to change their looks. Much like the previous tools, AnyMaking offers ‘animation’ style filters that can turn your photographs into something that looks like they came from one of your favorite animated films.
● Turn your photographs completely anew with fun photo effects.
| PROS | CONS |
|---|---|
| ● FREE-to-use photo effects tool.● Cartoonizer effect for animating photographs.● Easy-to-use (upload then download) | ● Limited photo effects.● No custom photo animation functions.● Not highly rated. |

● Key Takeaways from This Episode →
● Photo to Animation is quite a broad subject and, fittingly, that means that the tools that allow for it are varied indeed.
● Some photo to animation converters will allow you to completely change the look of your photograph with a single application of a filter. While others are more involved (and thus, more flexible) and require more careful customization.
● We’ve included both types (and all the types between) in our list of photo to animation converters. Hopefully, you’ll find one that can help you make the animated pictures that you want to make.
We do have a couple of recommendations to give. There’s a wide variety of tools out there that will allow you to make animated pictures. With some actually allowing you to add animation (or motion) to your photographs while others bring a pop-up of life to your pictures with artistic filters and effects.
Have a look at our list of the top ten best photos to animation converter tools below to see if one of them catches your eye.
Alright, let’s get straight to our list of the best photo to animation converter tools available. As mentioned, we’ve picked quite the variety — including both software and online photo animator tools so that you can find one that best suits the kind of projects that you’re working on.
For your convenience, we’ve included the pros and cons of each converter as well as the most common scenarios each application can be used.
01Filmora
Rating and Reviews: [Techradar: 4.5/5]
Wondershare Filmora Video Editor , while, first and foremost, is an advanced video editor, is the first photo animation maker on this list of ours. This software is highly-rated online and it comes with a bunch of presets, filters, and effects, that you can use in order to animate your photographs. Its more advanced video editing functions would no doubt prove to be useful in the future as well, allowing you to increase the complexity of your projects and achieve more and more things.
● With Filmora, you have access to a built-in library of Effects and Elements that you can use in order to make animated pictures.
● The advanced video editing functions can also be used to create more complex motion animations that you are unlikely to see in other alternatives.
URL: https://filmora.wondershare.com/
| PROS | CONS |
|---|---|
| ● Access to built-in effects and elements library.● Advanced editing functions.● A FREE trial is available to try out its many features. | ● As a downloadable software, Filmora will require downloading and installing.● Some of its features and functions are locked in the FREE version as well.● Payment is either subscription-based or one-time for a perpetual license. |
For Win 7 or later (64-bit)
For macOS 10.12 or later
02PicMonkey
Rating and Reviews: [G2: 4.4/5]
When it comes to online photo animator tools, PicMonkey is definitely one of the first that people recommend. It’s premium software, so you’ll have to pay to use all of its functions — with the cheapest plan worth $72 annually or $7.99 monthly. The best part about it is, undoubtedly, the fact that it was developed by Shutterstock, which is highly regarded in the photography industry. So, you can surely rely on stable support.
● Photo Animation maker with lots of built-in animation effects and templates that allow users to easily make animated pictures.
URL: https://www.picmonkey.com/design/photo-animation-maker
| PROS | CONS |
|---|---|
| ● A FREE trial is available to test out its functions.● Developed by a reliable company.● Packed with lots of built-in animated effects and presets. | ● Packed with lots of built-in animated effects and presets.● No software version for use without the internet.● Does not come equipped with advanced custom animation tools. |
03Adobe Creative Cloud Express
Rating and Reviews: [Creative Bloq: 4/5]
The Adobe Creative Cloud Express is both an online photo animator and an application that you can download and install on your phone. As is expected from any Adobe product, it’s quite premium in make and is better suited for more serious photo animations — especially as you’ll need to pay in order to be able to use it to its fullest extent.
● Comes with a veritable library of templates, effects, and filters for advanced photo editing and photo animation.
URL: https://www.adobe.com/express/create/social-media-graphic
| PROS | CONS |
|---|---|
| ● Advanced photo editing tool.● Available both online and as an app.● Reliable and trustworthy adobe product. | ● The FREE trial is limited.● The FREE trial is limited.● Advanced photo editing is not suitable for beginners. |
04ColorCinch
Rating and Reviews: [Crozdesk: 4/5]
ColorCinch, or Cartoonize, as it is also called, is another popular online photo animator that you might have heard about already. This one features quite a few presets that you can use to quickly change the look of your photographs.
● Photo editing functions for breathing new life into existing photographs.
● Presets, templates, filters, and effects are available for easy and efficient photo editing.
URL: https://www.cartoonize.net/
| PROS | CONS |
|---|---|
| ● Beginner-friendly UI.● Comes with lots of filters and effects built-in.● Cartoonizer effect for simple photo animation onlinep. | ● Paid tool Limited FREE trial.● Subscription-based packages.● Limited customer animation functions. |
05Photo Cartoon
Rating and Reviews: N/A
Photo Cartoon is an online photo animator that specifically alters your photos and ‘cartoon-izes’ it (with several effects to choose from as to the specific style that you want). This single-use, while definitely not the most advanced on this list of ours, offers the user an easy way to change the look of their photographs.
● Transform photos into cartoons, paintings, drawings, and caricatures.
URL: https://photocartoon.net/
| PROS | CONS |
|---|---|
| ● Quick and easy to use● Online software, good for all devices● The finished photo animation can be downloaded and shared. | ● Very basic functions.● Limited effects/filters to choose from. ● Not highly rated online. |
06BeFunky
Rating and Reviews: [G2: 4.2/5]
With BeFunky, we go back to somewhat more advanced online photo animator tools. This one works quite simply as well though. Similar to the previous tool we introduced, BeFunky is meant primarily for quickly and easily adding filters and effects to photographs to change its style to look more like a cartoon or animation.
● Create a cartoon version of your images easily and quickly.
URL: https://www.befunky.com/features/photo-to-cartoon/
| PROS | CONS |
|---|---|
| ● Easy-to-use and beginner-friendly● Easy-to-use and beginner-friendly.● Available online and thus compatible with most devices. | ● Limited photo editing scope.● Sign-up is required for long-term use.● No advanced custom animation functions. |
077. ASPOSE
Rating and Reviews: N/A
Although not very well-known, ASPOSE is an easy way of animating pictures online. All you really have to do is upload your file (in the way that is suggested) and you’re good to go. You’ll be given a choice in what kind of animations you want to put on your photograph thereafter. And, when the conversion is complete, it’ll be FREE to download and share.
● Easily make animated pictures online by uploading photographs to be animated.
URL: https://products.aspose.app/imaging/animation-maker
| PROS | CONS |
|---|---|
| ● FREE photo to animation converter● Easy-to-use and efficient.● Motion animations available. | ● Internet is required for use.● Not the most advanced filters/effects/animations are available.● No custom animation function. |
08TheCartoonist.me
Rating and Reviews: N/A
We’re approaching more and more obscure territory the further we go along this list, with many of the tools, including this next one, called ‘The Cartoonist.me’, not having been rated by the usual tech websites. But, that doesn’t mean that the tool itself is any less useful. This one, in particular, is akin to the other cartoon-izers that we introduced earlier — in that it changes the look of photographs into one similar to what is used in animations.
● Picture animator online that allows you to turn your pictures into cartoon versions of their former self.
URL: https://thecartoonist.me/
| PROS | CONS |
|---|---|
| ● FREE photo animation maker.● Basic cartoon effects available.● Upload and Download | ● No advanced photo editing.● No advanced photo editing.● Not highly rated. |
09Snapstouch
Rating and Reviews: N/A
Snapstouch is another obscure, but no less useful, photo editing tool that adds a touch animation to your photographs. This online tool offers sketch, painting, pencil sketch, outline, cartoon, and many other filters that you can apply to your photographs to directly change their look.
● Change the look of your photographs with an easily applied filter.
URL: http://www.snapstouch.com/
| PROS | CONS |
|---|---|
| ● Easy-to-use (upload then download)● FREE to use online tool.● Several effects to choose from. | ● A limited selection of filter effects.● Old and dated UI.● Not highly rated. |
10AnyMaking
Rating and Reviews: N/A
AnyMaking is a basic online photo editor that comes with a variety of photo effects that you can apply to your photographs to change their looks. Much like the previous tools, AnyMaking offers ‘animation’ style filters that can turn your photographs into something that looks like they came from one of your favorite animated films.
● Turn your photographs completely anew with fun photo effects.
| PROS | CONS |
|---|---|
| ● FREE-to-use photo effects tool.● Cartoonizer effect for animating photographs.● Easy-to-use (upload then download) | ● Limited photo effects.● No custom photo animation functions.● Not highly rated. |
● Key Takeaways from This Episode →
● Photo to Animation is quite a broad subject and, fittingly, that means that the tools that allow for it are varied indeed.
● Some photo to animation converters will allow you to completely change the look of your photograph with a single application of a filter. While others are more involved (and thus, more flexible) and require more careful customization.
● We’ve included both types (and all the types between) in our list of photo to animation converters. Hopefully, you’ll find one that can help you make the animated pictures that you want to make.
Also read:
- New In 2024, Top 8 Anime Name & Title Generators Online-Get Cool Anime Names
- New How to Analyze an Editorial Cartoon Easily
- How to Cartoonize Photo Photoshop in Easy Steps
- Updated The Only Guide Youll Need to Learn About GIF Video Downloader
- 10 Cartoon Canvas Painting Ideas for Total Beginners
- Updated Top 10 Best Photo to Animation Converters for 2024
- 2024 Approved Cartoon Fundamentals How to Learn Cartoon Characters Sketch Quickly
- New The Coolest Anime Characters Ever| List of Top Favorites for 2024
- Updated 2024 Approved How to Turn Yourself Into WhatsApp Cartoon
- OBS Animated Alternatives for 2024
- Updated In 2024, Simple Shortcut to Convert Videos to Gifs on iPhone
- Is It That Easy to Make My Animated Character
- Best GIF Maker Software for Windows and Mac
- New Tutorial Guide to Animate Pictures in Canva for 2024
- Tutorials to Make Animated Images
- New 2024 Approved Top 3 Ways to Create Gif with Great 3D Gif Maker
- Life360 Learn How Everything Works On Asus ROG Phone 7 Ultimate | Dr.fone
- Quickly Remove Google FRP Lock on Meizu 21
- How to Unlock Apple iPhone 6 Plus without Passcode or Face ID | Dr.fone
- In 2024, iPhone 6s Plus Backup Password Never Set But Still Asking? Heres the Fix | Dr.fone
- How to Track Vivo X90S by Phone Number | Dr.fone
- A Detailed Guide on Faking Your Location in Mozilla Firefox On Tecno Pova 6 Pro 5G | Dr.fone
- In 2024, Find My App Troubleshooting No Location Found vs. Location Not Available & How to Fix Them On Apple iPhone 8 Plus | Dr.fone
- How to Reset Itel P55 5G Without the Home Button | Dr.fone
- How to Recover Apple iPhone 15 Pro Data From iOS iCloud? | Dr.fone
- Best Android Data Recovery - undelete lost call logs from Lava Storm 5G
- In 2024, 5 Ways to Transfer Music from Realme 10T 5G to Other Android Devices Easily | Dr.fone
- Fix App Not Available in Your Country Play Store Problem on Motorola Moto G23 | Dr.fone
- How To Restore a Bricked Google Pixel 8 Back to Operation | Dr.fone
- Title: Updated 2024 Approved How to Make a Photoshop Collage in EASY Steps
- Author: Elon
- Created at : 2024-05-19 03:05:38
- Updated at : 2024-05-20 03:05:38
- Link: https://animation-videos.techidaily.com/updated-2024-approved-how-to-make-a-photoshop-collage-in-easy-steps/
- License: This work is licensed under CC BY-NC-SA 4.0.
