
:max_bytes(150000):strip_icc():format(webp)/Apple-Watch-Ultra-2-23e8ec3e4ee04c6e98c9d654a35f59ec.jpg)
Updated 2024 Approved Learn All About Lip-Syncing in Animation
Learn All About Lip-Syncing in Animation
Learn all about Lip-Syncing in Animation
An easy yet powerful editor
Numerous effects to choose from
Detailed tutorials provided by the official channel
Lip syncing is one of the important parts of animations that need to be done perfectly. As children we have all enjoyed the special way in which Donald Duck or Mickey Mouse used to talk in cartoons, this is all because of the perfect lip-syncing.

Lip-sync animation tutorial are available that can assist you with the task.
In this article
01 [What is lip-syncing and its importance in animations?](#Part 1)
02 [Key factors to consider while lip-syncing in animations.](#Part 2)
03 [Best software for lip-syncing animations.](#Part 3)
04 [Best all-in-one video editing software for creating impressive animations.](#Part 4)
Part 1 What is Lip-syncing and Its Importance in Animations
In the simplest terms, lip-syncing can be termed as the process and way in which the sound is synchronized to the characters in animation. It is lip-syncing which brings life to the characters and makes them look talking. The process of lip-syncing in animations includes the dialogues and the mouth charts. The dialogues are broken into the phonetic syllables and the frames required for these syllables are then accessed.
Animations are moving and talking images and liveliness come from the dialogues that they speak. So, to make these talks appear real, flawless lip-syncing is very important.
Part 2 Key Factors to Consider While Lip-syncing in Animations
To make the lip-syncing in your animation look perfect several factors need to be taken care of. Some of these important ones are enlisted below.
01 Perfect Match of the Keyframes
The keyframes for the shapes of the words phrase by phrase needs to be perfect to make it look right. The right lip sync will have the correct timings from the mouth open to the mouth close.
02 Adding Body Language
To make the characters in your animations look real and lively, adding gestures and body language will play a huge role. Moreover, lip-syncing along with facial expressions will add to the overall richness of the animations.
03 Watch Yourself or Record Sample Videos
To get the correct lip-syncing for your animations, you can first try and practice by using a mirror or recording some trial videos. In these videos, you can speak and observe the jaw motion.
04 Use Blending
The technique of blending can also be used where the focus is on the most important shape of the mouth rather than each syllable. These shapes can then be blended and used in different ways and combinations.
05 Emphasize Eyes
Eyes need special focus as they can be used for expressing several emotions. Especially during the close-up shots in animations, a person looks at the eyes before the rest of the face.
06 Use the Apt Voice
No matter how perfectly the lip-syncing is done, it will not look good if the voice does not match the characters in your animations. So, make sure to select the voice that matches the looks and the personality of your characters.
Part 3 Best Software for Lip-syncing Animations
Lip sync in animations has become an easier and hassle-free task thanks to the advanced technology and several software and programs available. These 2D and 3D animation-supported tools allow syncing the mouth of the animated character with the dialogues and audio tracks. A few widely used tools for the task are enlisted below.
01 Anime Studio
This is a Windows and Mac-based professional software that supports multiple advanced functions like bone-rigging, automatic image tracing, integrated lip-synching, motion tracking, 3D shape design, character wizard, and many more. Using the vector-based tools of the software, you can add drawings and images for creating customized characters. There is a built-in character wizard that can be used for quick drawing and rigging the characters from the starting. Anime Studio allows recording the sound clip and then these can be synced to the animated characters. Several pre-set props, scenes, videos, stock audio, and characters are also available to choose from.

02 DAZ Studio
This is free-to-use software that can create impressive animations using multiple advanced features. The simple interface and functioning of the software make it apt even for users who have no prior experience in animations. The lip-sync feature of the software can be used to add audio to the created animations. Additional functions include morphing, adjusting different camera angles, plug-ins with advanced capabilities, and more.

03 Crazy Talk
To create impressive animations and add lip-syncing this is one of the popularly used tools. Quick to download, the software allows adding images and pictures to the tool, and then the head, mouth, and eye movement can be added along with lip-synced audio for creating impressive animations. The built-in timeline of the software offers you complete control over the animations, audio, and other parameters. Detailed customization options are supported including the teeth in the mouth of the character. The software is available for Windows and Mac systems.

04 Toon Boom Studio
To help you create rich animations for movies, games, learning, social media sites and any other purpose this is an apt tool to use. The software has a basic version for beginners while an advanced version for professionals. You can import media files in an array of formats like AI, JPEG, TGA, GIF, and others to create animations of your choice. Audio files in WAV, AIFF, and MP3 formats can be added to the created animations and the lip-sync analyzer tool can be used for that perfect syncing. Additional features include zoom-in, zoom-out, skeleton effect, support to the 3D background, multiple formats for exporting files, and more.

05 Crazy Talk Animator
This 2D animation tool can be used for creating rich animations by adding motion and different effects to your images. You can also create landscapes and scenes to further enhance the overall clip. Lip-sync to the animations is supported by the tool and you can even create marks for facial expression and use them to morph. Several tutorials and web resources are available for a better understanding of the tool and its functioning.

Adobe is also a good tool for all types of animation requirements and you can also check the adobe animate lip sync tutorial for your lip-syncing task.
Key Takeaways from This Episode
● Lip-syncing is an important and inevitable part of animations. Lip-syncing brings richness and liveliness to the clips.
● An array of tools and software are available that can help you effortlessly lip-sync animations.
● or all types of video editing needs and for creating animations, Wondershare Filmora works as an excellent all-in-one software.
Lip syncing is one of the important parts of animations that need to be done perfectly. As children we have all enjoyed the special way in which Donald Duck or Mickey Mouse used to talk in cartoons, this is all because of the perfect lip-syncing.
Lip-sync animation tutorial are available that can assist you with the task.
In this article
01 [What is lip-syncing and its importance in animations?](#Part 1)
02 [Key factors to consider while lip-syncing in animations.](#Part 2)
03 [Best software for lip-syncing animations.](#Part 3)
04 [Best all-in-one video editing software for creating impressive animations.](#Part 4)
Part 1 What is Lip-syncing and Its Importance in Animations
In the simplest terms, lip-syncing can be termed as the process and way in which the sound is synchronized to the characters in animation. It is lip-syncing which brings life to the characters and makes them look talking. The process of lip-syncing in animations includes the dialogues and the mouth charts. The dialogues are broken into the phonetic syllables and the frames required for these syllables are then accessed.
Animations are moving and talking images and liveliness come from the dialogues that they speak. So, to make these talks appear real, flawless lip-syncing is very important.
Part 2 Key Factors to Consider While Lip-syncing in Animations
To make the lip-syncing in your animation look perfect several factors need to be taken care of. Some of these important ones are enlisted below.
01 Perfect Match of the Keyframes
The keyframes for the shapes of the words phrase by phrase needs to be perfect to make it look right. The right lip sync will have the correct timings from the mouth open to the mouth close.
02 Adding Body Language
To make the characters in your animations look real and lively, adding gestures and body language will play a huge role. Moreover, lip-syncing along with facial expressions will add to the overall richness of the animations.
03 Watch Yourself or Record Sample Videos
To get the correct lip-syncing for your animations, you can first try and practice by using a mirror or recording some trial videos. In these videos, you can speak and observe the jaw motion.
04 Use Blending
The technique of blending can also be used where the focus is on the most important shape of the mouth rather than each syllable. These shapes can then be blended and used in different ways and combinations.
05 Emphasize Eyes
Eyes need special focus as they can be used for expressing several emotions. Especially during the close-up shots in animations, a person looks at the eyes before the rest of the face.
06 Use the Apt Voice
No matter how perfectly the lip-syncing is done, it will not look good if the voice does not match the characters in your animations. So, make sure to select the voice that matches the looks and the personality of your characters.
Part 3 Best Software for Lip-syncing Animations
Lip sync in animations has become an easier and hassle-free task thanks to the advanced technology and several software and programs available. These 2D and 3D animation-supported tools allow syncing the mouth of the animated character with the dialogues and audio tracks. A few widely used tools for the task are enlisted below.
01 Anime Studio
This is a Windows and Mac-based professional software that supports multiple advanced functions like bone-rigging, automatic image tracing, integrated lip-synching, motion tracking, 3D shape design, character wizard, and many more. Using the vector-based tools of the software, you can add drawings and images for creating customized characters. There is a built-in character wizard that can be used for quick drawing and rigging the characters from the starting. Anime Studio allows recording the sound clip and then these can be synced to the animated characters. Several pre-set props, scenes, videos, stock audio, and characters are also available to choose from.
02 DAZ Studio
This is free-to-use software that can create impressive animations using multiple advanced features. The simple interface and functioning of the software make it apt even for users who have no prior experience in animations. The lip-sync feature of the software can be used to add audio to the created animations. Additional functions include morphing, adjusting different camera angles, plug-ins with advanced capabilities, and more.
03 Crazy Talk
To create impressive animations and add lip-syncing this is one of the popularly used tools. Quick to download, the software allows adding images and pictures to the tool, and then the head, mouth, and eye movement can be added along with lip-synced audio for creating impressive animations. The built-in timeline of the software offers you complete control over the animations, audio, and other parameters. Detailed customization options are supported including the teeth in the mouth of the character. The software is available for Windows and Mac systems.
04 Toon Boom Studio
To help you create rich animations for movies, games, learning, social media sites and any other purpose this is an apt tool to use. The software has a basic version for beginners while an advanced version for professionals. You can import media files in an array of formats like AI, JPEG, TGA, GIF, and others to create animations of your choice. Audio files in WAV, AIFF, and MP3 formats can be added to the created animations and the lip-sync analyzer tool can be used for that perfect syncing. Additional features include zoom-in, zoom-out, skeleton effect, support to the 3D background, multiple formats for exporting files, and more.
05 Crazy Talk Animator
This 2D animation tool can be used for creating rich animations by adding motion and different effects to your images. You can also create landscapes and scenes to further enhance the overall clip. Lip-sync to the animations is supported by the tool and you can even create marks for facial expression and use them to morph. Several tutorials and web resources are available for a better understanding of the tool and its functioning.
Adobe is also a good tool for all types of animation requirements and you can also check the adobe animate lip sync tutorial for your lip-syncing task.
Key Takeaways from This Episode
● Lip-syncing is an important and inevitable part of animations. Lip-syncing brings richness and liveliness to the clips.
● An array of tools and software are available that can help you effortlessly lip-sync animations.
● or all types of video editing needs and for creating animations, Wondershare Filmora works as an excellent all-in-one software.
Best 15 Anime Fonts-Find Your Favorite One
Best 15 Anime Fonts-Find Your Favorite One

Shanoon Cox
Mar 27, 2024• Proven solutions
Anime is basically a fancy name for Japanese cartoons and is a trending genre for a long time. The popularity of these anime series has led fans to create characteristic font styles based on the logo or title of these series. A font such as this is commonly regarded as an anime font.
Since the anime font has a very distinct typeface and usually represents a theme, it is now widely used in video making, titles, posters, and also in games. The anime font can depict fun or thrill depending on which one you choose.
In this article, we have listed the best anime fonts of all time.
- Best 15 Anime Fonts You Can Choose
- Bonus Tip-Add Subtitle to an Anime Movie with Wondershare Filmora
Best 15 Anime Fonts You Can Choose
As anime is a trendy genre and you are likely to find a huge variety of anime font online. However, some of these fonts, based on the best-selling anime series, are sought after more than others. Therefore, we have rounded the ultimate anime font list for your ease.
1. Naruto Font
As we all know the popular Japanese Manga series Naruto, this anime font is based on the logo of that series. It is a very simple brush stroke anime font but is designed very artistically. This free anime font is perfect for adding elegant yet animated fonts to various kinds of videos or content.
2. Anime Ace Font
Anime Ace is a free anime font that is part of Blambot’s Dialogue Collection by Nate Piekos. It is a cartoonish font that is perfect for use in comic books. This is designed to be used as the font for the character’s speech bubbles. Using this anime font can give a very comic-esque vibe to your creations, making them very attractive.

3. Death Note Font
The famous thrilling action series Death Note has a very characteristic font used. This has come to be known as the Death Note Font. As its origin is from a thriller series, this anime font is best for complementing horror and scary themes. An anime font like this one has a hair-rising and dramatic appeal to it.

4. Evangelion Font
Another famed television series released back in the 90s, Neon Genesis Evangelion, has been trending, and so is the anime font used in its titles. This bold and tightly packed anime font is very conventional and artistic. It can be used to complement some serious themes with a stylish anime font like this one. This anime font also gives a dramatic outlook and hence can be used for engaging titles.
5. Sailor Moon Font
Sailor Moon is a best-selling Manga series, and its distinctive fonts are also quite loved. There are total 3 fonts used in this series. The unique feature of these fonts is that they are all very stylish with a visually attractive appeal. This particular anime font is thus best suited for brand titles, posters, shopping bags, etc. As a free anime font, you can use it for various purposes, including utilizing it for making beautiful invitation cards.

6. Haikyuu Font
This anime font from the sports-based Manga series resembles Japanese calligraphy. It has a dramatic vibe that is well-suited for short titles for serious shows and content. You can also use this free anime font to give your content a striking introduction. Plus, this anime font is available as Regular as well Shadowed. So, you can choose the style that best fits the theme of your content.

7. Danganronpa font
A captivating anime font is featured in the Japanese video game, Danganronpa. This anime font has gained popularity as it is stylishly distinct with a thriller vibe linked to it. Since it is a free anime font and is easily available, it can help you craft very engaging and stunning content. It will serve to give your content a unique touch as this anime font has a very characteristic style.

8. My Hero Academia Font
My Hero Academia is a highly acclaimed superhero Manga series, and its font has also been used extensively. It presents a very attractive anime font that can be utilized in banners and posters since it has a very clean and simple typeface. This anime font is also well-suited for use in logos.
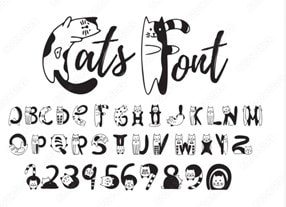
9. Pet Fonts
As the name suggests, this anime font is based on different animals. Cats, dogs, bunnies, and many other animals are used creatively as fonts. Using this cute and creative anime font gives a very crafty and artful effect to the content it is utilized in. So, Pets font is great to create a light-hearted and cartoonish outlook.
10. Otaku Rant Anime Font Family
The Otaku Rant Anime Font Family consists of 3 types i.e., Regular, Italic, and Bold. All these comic fonts are very simple yet elegant. This anime font family can be perfectly used for designing posters and covers, owing to its stylish appeal. Thus, it is a great anime font for making interesting content that wows the viewers.

11. Squealer Anime Font
The Squealer Anime Font is very artistic. It has a gothic calligraphic appeal to it. This unique and riveting anime font can be employed in designing posters to impress the audience. As this free anime font is very stylish, it can also be used commercially in crafting cards or posters.

12. Porky’s Font Comic Font
As the name suggests, this anime font is based on the 1980’s Classic movie ‘Porky.’ It presents a very fancy and artistic style. Therefore, it is widely used for blogs or fashion magazines, giving an attractive outlook. It is a fusion of ancient and conventional typography. This free anime font can help you give a beautiful look to your content.

13. Anime Inept
Anime Inept gives the look of a handwritten font, which makes the text more personalized. Since this anime font gives a distinct look, it makes any text stand out of the ordinary. Given the simplicity of this font, it is an excellent choice for comic texts or titles.

14. Pokemon Anime Font
We all know the world-famous Pokemon that has been a popular game and animated series. Its even catchier anime font has also been extensively used for various purposes. Since the Pokemon anime font has a clear and fun typeface, it is perfect for creating attractive stickers, advertisements, and similar titles.
15. Saiyan Sans Anime Font
Dragon Ball Z or Saiyan Sans is a fan-favorite anime series. This anime font is based on the fancy logo used in the Dragon Ball Z title. It is a very catchy and curvy anime font that adds a stylish appeal to the text. Owing to its fancy style, it is also suitable for use as overlay text on an image.
Bonus Tip-Add Subtitle to an Anime Movie with Wondershare Filmora
Wondershare Filmora is a very intuitive and easy-to-use video editor. It has powerful one-click tools to enable users to craft professional-grade videos effortlessly. In Filmora, you will find a wide array of catchy text templates that can be customized and animated to add further effects.


Here is a guide to add anime font to your videos using Filmora.
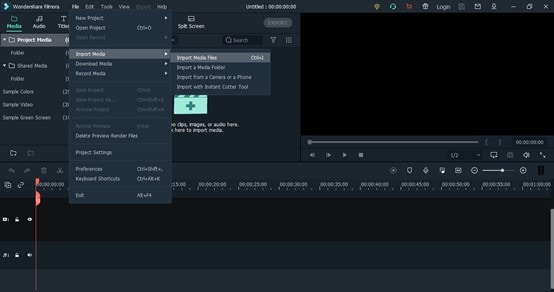
1. Download and install Filmora on your PC. To import your anime video, go to File and select Import Media Files or drag and drop it to Filmora.
2. After importing, drag and drop the video to the timeline.
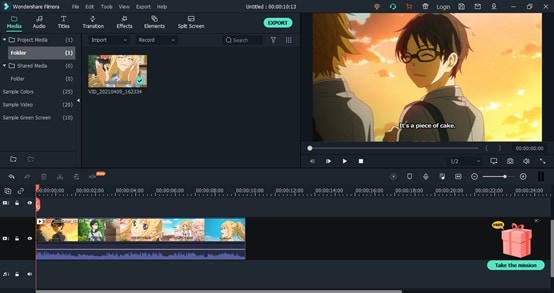
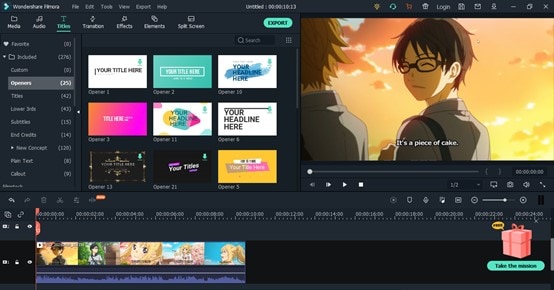
3. In the Titles tab, you can find a variety of text templates from different categories like Openers, Subtitles, Titles, etc. Double-click a title to it to the timeline. Drag and adjust the duration of the text. Double-click on the title in the timeline to customize it.
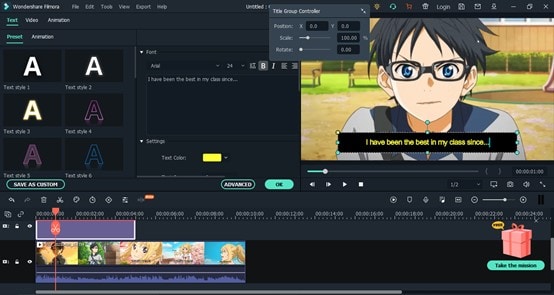
4. Here you can adjust the size, position, font, and other aspects of the text. Use the scale to change the size of the text.
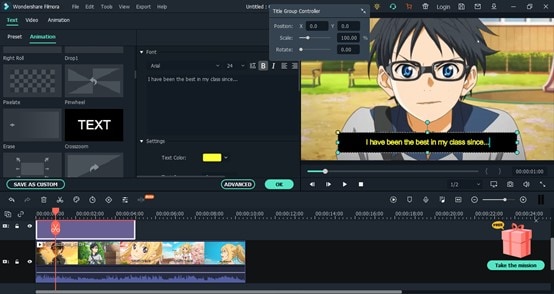
5. In the Animation tab, you can also add a special effect to the text, making it catchy and dynamic. Just double-click the animation to add it.
6. Click on Export. Select the resolution and export it to your device or share it to social media.

Conclusion
Now, you have the best 15 anime font list to help you craft exciting videos. Whether you wish to create a stylish fashion video with an elegant anime font, or a short horror clip with anime font from Death Note, you will find a free anime font for every theme here.
Since fonts play a significant role in any content, they must be chosen with care. So, give our list a read and find out which anime font complements your video the best. Don’t forget to try and add anime font subtitles to your video using the Filmora video editor.
Good luck!
Shanoon Cox
Shanoon Cox is a writer and a lover of all things video.
Follow @Shanoon Cox
Shanoon Cox
Mar 27, 2024• Proven solutions
Anime is basically a fancy name for Japanese cartoons and is a trending genre for a long time. The popularity of these anime series has led fans to create characteristic font styles based on the logo or title of these series. A font such as this is commonly regarded as an anime font.
Since the anime font has a very distinct typeface and usually represents a theme, it is now widely used in video making, titles, posters, and also in games. The anime font can depict fun or thrill depending on which one you choose.
In this article, we have listed the best anime fonts of all time.
- Best 15 Anime Fonts You Can Choose
- Bonus Tip-Add Subtitle to an Anime Movie with Wondershare Filmora
Best 15 Anime Fonts You Can Choose
As anime is a trendy genre and you are likely to find a huge variety of anime font online. However, some of these fonts, based on the best-selling anime series, are sought after more than others. Therefore, we have rounded the ultimate anime font list for your ease.
1. Naruto Font
As we all know the popular Japanese Manga series Naruto, this anime font is based on the logo of that series. It is a very simple brush stroke anime font but is designed very artistically. This free anime font is perfect for adding elegant yet animated fonts to various kinds of videos or content.
2. Anime Ace Font
Anime Ace is a free anime font that is part of Blambot’s Dialogue Collection by Nate Piekos. It is a cartoonish font that is perfect for use in comic books. This is designed to be used as the font for the character’s speech bubbles. Using this anime font can give a very comic-esque vibe to your creations, making them very attractive.
3. Death Note Font
The famous thrilling action series Death Note has a very characteristic font used. This has come to be known as the Death Note Font. As its origin is from a thriller series, this anime font is best for complementing horror and scary themes. An anime font like this one has a hair-rising and dramatic appeal to it.
4. Evangelion Font
Another famed television series released back in the 90s, Neon Genesis Evangelion, has been trending, and so is the anime font used in its titles. This bold and tightly packed anime font is very conventional and artistic. It can be used to complement some serious themes with a stylish anime font like this one. This anime font also gives a dramatic outlook and hence can be used for engaging titles.
5. Sailor Moon Font
Sailor Moon is a best-selling Manga series, and its distinctive fonts are also quite loved. There are total 3 fonts used in this series. The unique feature of these fonts is that they are all very stylish with a visually attractive appeal. This particular anime font is thus best suited for brand titles, posters, shopping bags, etc. As a free anime font, you can use it for various purposes, including utilizing it for making beautiful invitation cards.
6. Haikyuu Font
This anime font from the sports-based Manga series resembles Japanese calligraphy. It has a dramatic vibe that is well-suited for short titles for serious shows and content. You can also use this free anime font to give your content a striking introduction. Plus, this anime font is available as Regular as well Shadowed. So, you can choose the style that best fits the theme of your content.
7. Danganronpa font
A captivating anime font is featured in the Japanese video game, Danganronpa. This anime font has gained popularity as it is stylishly distinct with a thriller vibe linked to it. Since it is a free anime font and is easily available, it can help you craft very engaging and stunning content. It will serve to give your content a unique touch as this anime font has a very characteristic style.
8. My Hero Academia Font
My Hero Academia is a highly acclaimed superhero Manga series, and its font has also been used extensively. It presents a very attractive anime font that can be utilized in banners and posters since it has a very clean and simple typeface. This anime font is also well-suited for use in logos.
9. Pet Fonts
As the name suggests, this anime font is based on different animals. Cats, dogs, bunnies, and many other animals are used creatively as fonts. Using this cute and creative anime font gives a very crafty and artful effect to the content it is utilized in. So, Pets font is great to create a light-hearted and cartoonish outlook.
10. Otaku Rant Anime Font Family
The Otaku Rant Anime Font Family consists of 3 types i.e., Regular, Italic, and Bold. All these comic fonts are very simple yet elegant. This anime font family can be perfectly used for designing posters and covers, owing to its stylish appeal. Thus, it is a great anime font for making interesting content that wows the viewers.
11. Squealer Anime Font
The Squealer Anime Font is very artistic. It has a gothic calligraphic appeal to it. This unique and riveting anime font can be employed in designing posters to impress the audience. As this free anime font is very stylish, it can also be used commercially in crafting cards or posters.
12. Porky’s Font Comic Font
As the name suggests, this anime font is based on the 1980’s Classic movie ‘Porky.’ It presents a very fancy and artistic style. Therefore, it is widely used for blogs or fashion magazines, giving an attractive outlook. It is a fusion of ancient and conventional typography. This free anime font can help you give a beautiful look to your content.
13. Anime Inept
Anime Inept gives the look of a handwritten font, which makes the text more personalized. Since this anime font gives a distinct look, it makes any text stand out of the ordinary. Given the simplicity of this font, it is an excellent choice for comic texts or titles.
14. Pokemon Anime Font
We all know the world-famous Pokemon that has been a popular game and animated series. Its even catchier anime font has also been extensively used for various purposes. Since the Pokemon anime font has a clear and fun typeface, it is perfect for creating attractive stickers, advertisements, and similar titles.
15. Saiyan Sans Anime Font
Dragon Ball Z or Saiyan Sans is a fan-favorite anime series. This anime font is based on the fancy logo used in the Dragon Ball Z title. It is a very catchy and curvy anime font that adds a stylish appeal to the text. Owing to its fancy style, it is also suitable for use as overlay text on an image.
Bonus Tip-Add Subtitle to an Anime Movie with Wondershare Filmora
Wondershare Filmora is a very intuitive and easy-to-use video editor. It has powerful one-click tools to enable users to craft professional-grade videos effortlessly. In Filmora, you will find a wide array of catchy text templates that can be customized and animated to add further effects.
Here is a guide to add anime font to your videos using Filmora.
1. Download and install Filmora on your PC. To import your anime video, go to File and select Import Media Files or drag and drop it to Filmora.
2. After importing, drag and drop the video to the timeline.
3. In the Titles tab, you can find a variety of text templates from different categories like Openers, Subtitles, Titles, etc. Double-click a title to it to the timeline. Drag and adjust the duration of the text. Double-click on the title in the timeline to customize it.
4. Here you can adjust the size, position, font, and other aspects of the text. Use the scale to change the size of the text.
5. In the Animation tab, you can also add a special effect to the text, making it catchy and dynamic. Just double-click the animation to add it.
6. Click on Export. Select the resolution and export it to your device or share it to social media.
Conclusion
Now, you have the best 15 anime font list to help you craft exciting videos. Whether you wish to create a stylish fashion video with an elegant anime font, or a short horror clip with anime font from Death Note, you will find a free anime font for every theme here.
Since fonts play a significant role in any content, they must be chosen with care. So, give our list a read and find out which anime font complements your video the best. Don’t forget to try and add anime font subtitles to your video using the Filmora video editor.
Good luck!
Shanoon Cox
Shanoon Cox is a writer and a lover of all things video.
Follow @Shanoon Cox
5 Free Animated Gif Sources You Must Check
Versatile Video Editor - Wondershare Filmora
An easy yet powerful editor
Numerous effects to choose from
Detailed tutorials provided by the official channel
You might already know how often people share all kinds of images and GIFs on social media and IM apps. For instance, you might want to send some love animated GIFs to others to express your feelings. After all, if a photo is worth a thousand words, then a GIF would value a million instead. That’s why to help you find some of the best anime love GIFs, I have listed the top 5 websites here. Besides that, I will also let you know how to come up with some heart-animated GIFs on your own.

In this article
01 [Tip 5 Places to Explore Love Animated GIFs](#Part 1)
02 [Make your Own Animated Love GIFs with Music](#Part 2)
03 [Make More Funny Love Animated GIFs with Filmora Meme Maker](#Part 3)
Part 1 Tip 5 Places to Explore Love Animated GIFs
If you search on the web, you can find a wide range of heart-animated GIFs on different websites and apps. Out of them, I would recommend exploring the following places to share or download I Love You funny GIFs.
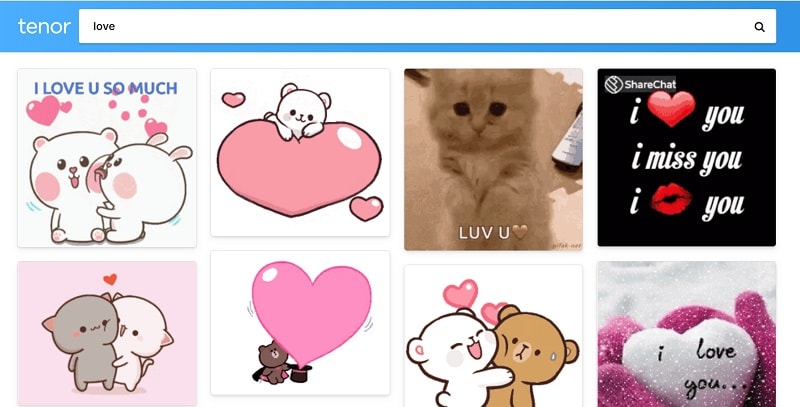
1. Tenor
Tenor features one of the best sources to find heart-animated GIFs of all kinds. You can access its website on any browser of your choice and enter keywords like love, romantic, I love you, and so much more.
Apart from love cartoon GIFs, you can also find stickers and other animated content on Tenor. While there are options to download any I Love You anime GIF from Tenor, you can also generate its unique link and instantly share it with others on IM apps like WhatsApp or Telegram.
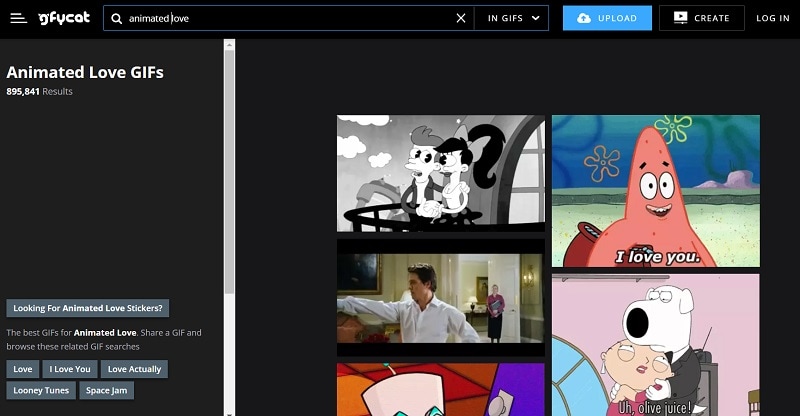
2. GyfCat
Explore some of the best I Love You funny GIFs, and that too for free at GyfCat. This online resource can be accessed on almost any platform and has a sleek interface. You can enter any keyword of your choice on GyfCat to find all sorts of anime love GIFs.
Most of the GIFs available on GyfCat are based on popular shows, series, and anime. You can readily download any animated heart GIF from here and later upload it on a preferred platform.
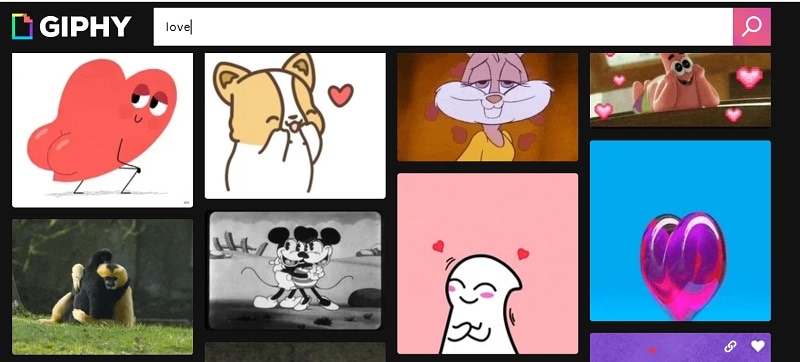
3. Giphy
Giphy is one of the biggest platforms to host GIFs and images of all freely available sorts. Since GIFs have limited inbuilt filters, you can enter keywords or look for anything via hashtags.
One of the best things about Giphy is that you can find tons of love animated GIFs in high quality. You can directly download them to your device or share them with others via their unique links.
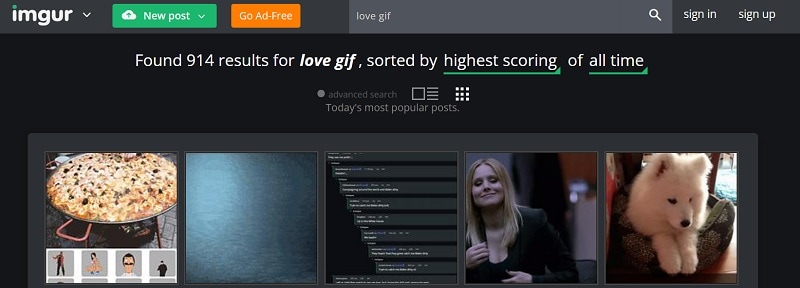
4. Imgur
Imgur is known to host millions of images and GIFs in different categories. While most of these anime love GIFs are freely available on Imgur, some have restricted guidelines for commercial use.
You can also upload any GIF to Imgur and get its unique link to share it with others quickly. They can tap on the link to view your heart animated GIF without downloading anything.
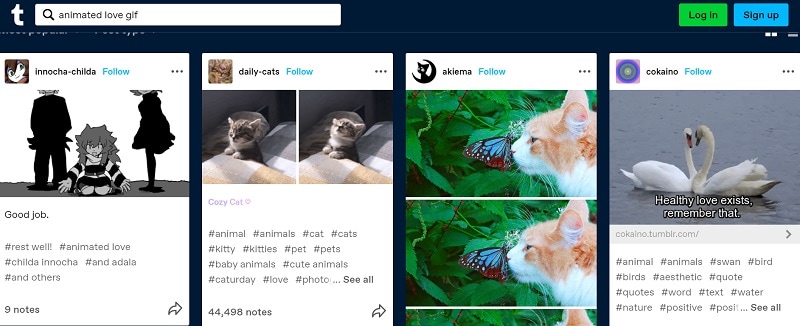
5. Tumblr
Tumblr is a popular microblogging website that hosts millions of blogs in one place. Therefore, you can easily search for interesting blogs that upload the I Love You animated GIF.
Apart from following these blogs, you can also do a global search on Tumblr to find love cartoon GIFs in different categories. You can download them on your device or directly share them with others via Tumblr.
Part 2 Make your Own Animated Love GIFs with Music
Since the above-listed websites for I Love You anime GIFs can be a bit generic, you can consider coming up with some unique media of your own. To do that, I would recommend using Wondershare Filmora, which is a user-friendly and feature-equipped media editing tool.
If you want, you can readily import images, GIFs, videos, music, and other media files on Filmora. Besides that, the application also features a wide range of assets related to sound effects, images, and more that you can readily use. To come up with some interesting, I Love You animated GIFs using Filmora, follow this drill:
Step 1: Load your Media Files from your System
Once Wondershare Filmora is installed, you can launch it on your system and go to its Menu > File > Import to load your photos, videos, and so on. You can also drag and drop them to the interface of Filmora.
For Win 7 or later (64-bit)
For macOS 10.12 or later

Step 2: Use Filmora to Create Amazing Romantic GIFs
After loading these media files, you can drag and drop them to the timeline at the bottom to start editing. To get rid of anything, you can hover the mouse pointer on the sides to get its trimming tool and use it to clip any unwanted part of the clip.

Once you select any media, you can get tons of editing options for it on the side. For instance, you can go to its properties to rotate, flip, reposition, scale, and perform several other edits on your media files.

If you want to add any text or caption effect to your I Love You anime GIF, then you can go to the “Titles” section on Filmora. Here, you can find tons of caption effects that you can add to your projects and customize them further as per your needs.

Besides that, to make your heart-animated GIFs look more interesting, you can add numerous filters, overlays, stickers, and other effects from the available features on Filmora.

One of the best things about Filmora is exploring the inbuilt sound effects and adding background music to your love cartoon GIFs. For instance, you can add soundtracks, effects and even edit the inserted audio in Filmora. There is also an advanced option to record voiceovers using the native feature in Filmora.

Step 3: Save your Love Animated GIFs from Filmora
In the end, you can check a preview of your heart animated GIF on Filmora and can click on the “Export” button at the top. You can now export your media as a GIF file on your system. However, if it has background music, you can consider saving it as an MP4 file instead.

Tip Make More Funny Love Animated GIFs with Filmora Meme Maker
If you want to customize your GIFs, you can also take the assistance of Filmora Meme Maker . Let’s say you have created a love animated GIF or have found it online. Now, you can head to the official website of the Filmora Meme Maker and upload it here. Later, you can add captions to the GIF and customize it using readily available templates. That’s it! You can now download the I Love You funny GIF in a preferred format on your device.
Conclusion
There you go! I’m sure that after reading this post, you can find tons of love animated GIFs. From Tenor to Tumblr and Giphy to GyfCat, there are so many websites from where you can download unlimited anime love GIFs. Though, if you want to come up with some interesting heart-animated GIFs with music, then you can simply try Wondershare Filmora. It is one of the best media editing tools that offer a wide range of assets and other advanced features that would let you create and edit all kinds of GIFs on the go.
Versatile Video Editor - Wondershare Filmora
An easy yet powerful editor
Numerous effects to choose from
Detailed tutorials provided by the official channel
You might already know how often people share all kinds of images and GIFs on social media and IM apps. For instance, you might want to send some love animated GIFs to others to express your feelings. After all, if a photo is worth a thousand words, then a GIF would value a million instead. That’s why to help you find some of the best anime love GIFs, I have listed the top 5 websites here. Besides that, I will also let you know how to come up with some heart-animated GIFs on your own.
In this article
01 [Tip 5 Places to Explore Love Animated GIFs](#Part 1)
02 [Make your Own Animated Love GIFs with Music](#Part 2)
03 [Make More Funny Love Animated GIFs with Filmora Meme Maker](#Part 3)
Part 1 Tip 5 Places to Explore Love Animated GIFs
If you search on the web, you can find a wide range of heart-animated GIFs on different websites and apps. Out of them, I would recommend exploring the following places to share or download I Love You funny GIFs.
1. Tenor
Tenor features one of the best sources to find heart-animated GIFs of all kinds. You can access its website on any browser of your choice and enter keywords like love, romantic, I love you, and so much more.
Apart from love cartoon GIFs, you can also find stickers and other animated content on Tenor. While there are options to download any I Love You anime GIF from Tenor, you can also generate its unique link and instantly share it with others on IM apps like WhatsApp or Telegram.
2. GyfCat
Explore some of the best I Love You funny GIFs, and that too for free at GyfCat. This online resource can be accessed on almost any platform and has a sleek interface. You can enter any keyword of your choice on GyfCat to find all sorts of anime love GIFs.
Most of the GIFs available on GyfCat are based on popular shows, series, and anime. You can readily download any animated heart GIF from here and later upload it on a preferred platform.
3. Giphy
Giphy is one of the biggest platforms to host GIFs and images of all freely available sorts. Since GIFs have limited inbuilt filters, you can enter keywords or look for anything via hashtags.
One of the best things about Giphy is that you can find tons of love animated GIFs in high quality. You can directly download them to your device or share them with others via their unique links.
4. Imgur
Imgur is known to host millions of images and GIFs in different categories. While most of these anime love GIFs are freely available on Imgur, some have restricted guidelines for commercial use.
You can also upload any GIF to Imgur and get its unique link to share it with others quickly. They can tap on the link to view your heart animated GIF without downloading anything.
5. Tumblr
Tumblr is a popular microblogging website that hosts millions of blogs in one place. Therefore, you can easily search for interesting blogs that upload the I Love You animated GIF.
Apart from following these blogs, you can also do a global search on Tumblr to find love cartoon GIFs in different categories. You can download them on your device or directly share them with others via Tumblr.
Part 2 Make your Own Animated Love GIFs with Music
Since the above-listed websites for I Love You anime GIFs can be a bit generic, you can consider coming up with some unique media of your own. To do that, I would recommend using Wondershare Filmora, which is a user-friendly and feature-equipped media editing tool.
If you want, you can readily import images, GIFs, videos, music, and other media files on Filmora. Besides that, the application also features a wide range of assets related to sound effects, images, and more that you can readily use. To come up with some interesting, I Love You animated GIFs using Filmora, follow this drill:
Step 1: Load your Media Files from your System
Once Wondershare Filmora is installed, you can launch it on your system and go to its Menu > File > Import to load your photos, videos, and so on. You can also drag and drop them to the interface of Filmora.
For Win 7 or later (64-bit)
For macOS 10.12 or later
Step 2: Use Filmora to Create Amazing Romantic GIFs
After loading these media files, you can drag and drop them to the timeline at the bottom to start editing. To get rid of anything, you can hover the mouse pointer on the sides to get its trimming tool and use it to clip any unwanted part of the clip.
Once you select any media, you can get tons of editing options for it on the side. For instance, you can go to its properties to rotate, flip, reposition, scale, and perform several other edits on your media files.
If you want to add any text or caption effect to your I Love You anime GIF, then you can go to the “Titles” section on Filmora. Here, you can find tons of caption effects that you can add to your projects and customize them further as per your needs.
Besides that, to make your heart-animated GIFs look more interesting, you can add numerous filters, overlays, stickers, and other effects from the available features on Filmora.
One of the best things about Filmora is exploring the inbuilt sound effects and adding background music to your love cartoon GIFs. For instance, you can add soundtracks, effects and even edit the inserted audio in Filmora. There is also an advanced option to record voiceovers using the native feature in Filmora.
Step 3: Save your Love Animated GIFs from Filmora
In the end, you can check a preview of your heart animated GIF on Filmora and can click on the “Export” button at the top. You can now export your media as a GIF file on your system. However, if it has background music, you can consider saving it as an MP4 file instead.
Tip Make More Funny Love Animated GIFs with Filmora Meme Maker
If you want to customize your GIFs, you can also take the assistance of Filmora Meme Maker . Let’s say you have created a love animated GIF or have found it online. Now, you can head to the official website of the Filmora Meme Maker and upload it here. Later, you can add captions to the GIF and customize it using readily available templates. That’s it! You can now download the I Love You funny GIF in a preferred format on your device.
Conclusion
There you go! I’m sure that after reading this post, you can find tons of love animated GIFs. From Tenor to Tumblr and Giphy to GyfCat, there are so many websites from where you can download unlimited anime love GIFs. Though, if you want to come up with some interesting heart-animated GIFs with music, then you can simply try Wondershare Filmora. It is one of the best media editing tools that offer a wide range of assets and other advanced features that would let you create and edit all kinds of GIFs on the go.
Versatile Video Editor - Wondershare Filmora
An easy yet powerful editor
Numerous effects to choose from
Detailed tutorials provided by the official channel
Before You Learn Facebook Slideshow: 5 Things You Should Know [How-TOS]
Before You Learn Facebook Slideshow Things You Should Know [How-TOS]
An easy yet powerful editor
Numerous effects to choose from
Detailed tutorials provided by the official channel
If you are looking for interesting solutions to create the most amazing slideshow on Facebook, rest assured, you are at the right place to get every help!
In this article
01 [Where Did the Facebook Slideshow Tool Go?](#Part 1)
02 [How to Create a Slideshow on Facebook?](#Part 2)
03 [Top 5 Facebook Slideshow Alternatives](#Part 3)
Part 1 Where Did the Facebook Slideshow Tool Go?
While almost everyone around you must be fascinated about the stunning and appealing slideshows that the Facebook community used to offer its users with, it is evidently sad to realize that the utility has become a story of the past. The creators of the tool have by now, took multiple rounds on removing, retrieving and again removing the utility from the official Facebook website as well as the smartphone application.
It is however relaxing to know that the Facebook developer team has worked efficiently to produce alternatives to the application’s slideshow tool after the latter’s permanent disappearance from the user account pages and app profiles. You can now work with the Facebook Ads Manager or Facebook Creator Studio to sort out the concern of creating slideshow on Facebook.
Part 2 How to Create a Slideshow on Facebook?
Facebook slideshows are incredibly awesome trends of making a concise, expressive and to the point delivery of diverse content varieties. Piping up your information through and extensive assortment of sound, text and motion, these short snippets are no less than a seamless video streaming of the same information.
If you are about to launch a new product for your business enterprise, consider working with the utility to create an elusive Facebook slideshow ad for a quick demonstration of your brand among different social media communities, turning the fun of slideshow creation into a smart and responsive product promotion strategy, without having to bother your wallet for the same.
If you are concerned about the quality of the final output, it is not a cause of worry, since the Facebook slideshow creator tool promises you of an appreciable slideshow result, that takes a quick loading time, is comparable to a high resolution video and works well with all your favourite devices.
Having talked enough on the usage credibility, let us now proceed to adhere to the concern of creating a slideshow on Facebook with a diversity of media files in the following section:
01Facebook Slideshows from Videos
Step 1: Launch the Tool
Start with opening the Facebook app in your device to launch the ‘Facebook Ads Manager’ utility and tap ‘Create’ in the latter’s welcome interface.

Step 2: Select Your Video
Browse through your device’s gallery to choose a desired video for slideshow creation. When you have made your choice, set a 16:9 aspect ratio for the same to avoid square cropping.

Step 3: Upload Your Video
Proceed with uploading your video to the Facebook tool by clicking on the ‘Add Video’ button and watch it getting split into still images frames, from where you can view a seamless slideshow display of the same.

Step 4: Select Multiple Frames
you can now select a series of image frames and arrange them in the correct sequence of appearance by clicking on each one of them to be included within the creator timeline.
Step 5: Add Captions Your Stills
Tap on the small ‘Pencil’ icon within the images to customize them with suitable captions. You can further add style to these image names by making appropriate selections of font, position color of every frame caption. Once you have finished naming all the frames, click on ‘Save’ to apply your changes.
Step 6: Preview Your Creation
When you are satisfied with your work, consider watching a preview of the same to be assured of the perfect placement of everything. To do this, navigate to the ‘Preview Pane’ at the top right corner of the program interface, and tapping the ‘Preview’ button.
02Facebook Slideshows from Images
Step 1: Launch the Tool
To begin with, open the Facebook app in any of your preferred devices and proceed to launch the ‘Facebook Ads Manager’ tool, followed by clicking on the ‘Create Slideshow’ button at the bottom of the tool’s welcome screen.

Step 2: Upload Your Images
As you complete Step 1, a ‘Video Creation Kit’ will appear, where you will need to click within the ‘Create Slideshow’ checkbox, followed by tapping on the ‘Continue’ button at the bottom right corner of the window.

Step 3: Upload Your Images
Clicking on the ‘Continue’ button will take you to the ‘Settings Box’ where you need to tap on the ‘Add Photos’ option. An image selection box will now pop up, allowing you to select and upload a maximum of 10 images from your Facebook account, stock and page galleries or your device collections. Prefer keeping all the photos within the same aspect ratio to escape the extra task of cropping the images.
When you have finished making your selections, navigate to the bottom right corner of the window and hit the ‘Confirm’ button. This will make your selections shows up all together in the ‘Settings Box’, in the sequential order of their appearance in the slideshow. If you want to introduce some changes, delete and re-upload the images.

Step 4: Customize Your Images with Captions
To add suitable captions to the slideshow images, tap the ‘Pencil’ icon within them. You are also allowed to customize the stills with transitions, effects, etc., and make adjustments to the screen time of each image frame.

Part 3 Top 5 Facebook Slideshow Alternatives
Having heard about the disappointment from the exit of the Facebook slideshow creator tool, it becomes naturally important to seek through the affordable alternatives of the same to set straight the issue of how to do a slideshow on Facebook. Working towards the solutions, let us learn about the top 5 most preferred Facebook slideshow alternatives in the following section:
03PowerDirector
One of the most suitable candidates of Facebook slideshow alternatives, PowerDirector easily lands among the highly preferred tools for creating stunning slideshows. Compatible with the MacOs and Windows operating systems, the software lets you create high end, top quality slideshow presentations with a classic and professional outlook.
Talking of the creator program’s most appealing features, this one is an upgraded slideshow creator suite that is capable enough to address your most diverse design requirements, like those of high resolution video effects, Hollywood inspired movies and personal content sharing. The software package is loaded with tons of elusive video effects, themed templates and transition effects to facilitate a compelling creation.
Working with PowerDirector’s exclusive slideshow program, you get the liberty to escape the notch of storyboard and timeline editing and start the creation process in the launch window of the program itself. The extremely user cohesive interface of the software guides you through each creation step via streamlined plug-ins, making the design process quick and super easy even for newbies.

04SmartSHOW 3D
When thinking of how to make a slideshow on facebook, this one is another top rated Facebook slideshow alternatives, that comes with an extensive toolkit to create amazing presentations from video clips and images, while complementing them with a plethora of effects and transitions. Some of the key features of the program include multiple slide layering, animating selected layers and fine tune the transitions with keyframe adjustments.
You can additionally uplift the slides with image masks, shapes, 3D animated texts and other forms of graphic arts. An additively appealing feature of the slideshow creator program is the ability to mix descriptive images with your favorite music to develop stunning masterpieces of entertaining slideshows, which you can conveniently share and enjoy with family and friends on a diversity of social media platforms.
Using the tool, you can work with applying motion graphic effects to still photos without having to be an over the top tech savvy user. The editor library of the tool is loaded with some of the most awesome transition effects, like, wipes, 3D motions, gradients and fade-ins, along with the facility of adding titles, voice comments and captions to the slides of your presentation. The tool is however, exclusively a Windows compatible utility.

05PhotoStage Slideshow Software
Next in the list of alternatives to the Facebook slideshow maker tool is the aforesaid software program, that allows you to create professional quality slideshows with as many videos and images as you can possibly think of and supplement them with a variety of texts, music, voiceovers and effects. You can further work on customizing the slideshow images with making suitable adjustments in color, brightness and saturation parameters.
The software comes with a Quick Create utility, which you can use to instantly create high resolution slideshows and spark them up with zooms, pans and fades, while getting a preview of the same in real-time. You can even proceed to burn your creation into a disk, make an online upload, or simply save it to your device.
Talking of the cost constraints of this amazing slideshow creator tool, you get to work with the software for a commercial use, free of cost for a definite time period and with a restricted number of features. However, you can always consider on buying the paid version of the program to avail an access to the latter’s entire range of features and utilities. The tool works well with all Windows and Mac supported devices.

06Kizoa
Moving ahead in the list you have the Kizoa slideshow maker for Facebook, which is a dependable alternative to the conventional Facebook slideshow creator. Choosing this tool to design your slideshow presentation, you are entitled to the amazing feature of displaying your presentation on almost any screen, including smartphones, television, computers and tablets with getting to choose from 7 types of aspect ratios. The tool is designed to have a Windows and MacOs compatibility.
The application further lets you add the most specific parts of your images within the presentation slides with its smart cropping tool, while keeping an account of the file formats and screen space requirements of the images with utmost convenience. You are also allowed to choose from a storehouse of preset templates to add your desired photos and video clips in the slideshow and entice them with GIFs, effects and texts.
When you are done with the creation process, just attempt to download and save the slideshow in any preferred file format, such as, AVI, GIF, MP4, MOV, MPEG2, etc., or even burn it to a DVD. You are now free to share your slideshow on various online media sharing platforms. Using the free version of Kizoa, you are permitted to create slideshows with a duration of 60 seconds, which can be upgraded to a limitless length with a paid subscription.

07SlideLab
If you are a newbie to the field of creating slideshows, and wondering about how to create a slideshow on Facebook 2021, this one is affordably the most perfect tool you can rely on. Packed with an extensive range of effects, music, transitions and filters, SlideLab is the smartest software choice to create slideshow presentations for family entertainment and personal use.
The tool consists of an in built sharing utility that allows you to design and share slideshows on social media platforms, like YouTube, Facebook and Instagram with a single click. Working on your slideshow within the program, you can escape the cringe of cropping the images, as they are automatically adjusted to the square fit alignment of the app’s working window. You can quickly rearrange the placement of the images in the slideshow as per your preferences.
As far as the sharing credibility of the presentation is concerned, the software grants you the liberty to export your creation in PPTX and PDF file formats, and view them later in Keynote and PowerPoint.
The app shows a convenient workflow with Windows and MacOs devices and limits the image play duration to 3 seconds, along with a permitting a restricted number of transitions and effects in its free version, which you can access by availing a paid subscription of the program.

08Creating Facebook Slideshows With Wondershare Filmora
When browsing through feasible alternatives on how to make a facebook slideshow, the IT market is indeed flooded with a hoard of creation utilities. If you have just begun trying hands at slideshow creation, consider using the Wondershare Filmora Video Editor slideshow maker application for addressing your slideshow design concerns. The extensive, feature rich library of the app lets you create attractive presentation masterpieces with a wide range of special effects, transitions, texts, titles and music tracks.
For Win 7 or later (64-bit)
For macOS 10.12 or later
Working with the Filmora slideshow creator, you can trim, crop or cut the video clips and images of your presentation to give them the best look. The tool comes with a unique Filmora Template Mode to create business oriented Facebook slideshows, is compatible to any windows and Mac supported device and lets you easily make a slideshow on Facebook.
● Ending Thoughts →
● Creating Facebook slideshows can be useful in addressing a variety of personal and professional data sharing needs.
● Browsing through design alternatives, you will land across a pool of software choices to create stunning slideshows for Facebook.
● When deciding on the best Facebook slideshow creator tool, Wondershare Filmora can be your smartest pick.
If you are looking for interesting solutions to create the most amazing slideshow on Facebook, rest assured, you are at the right place to get every help!
In this article
01 [Where Did the Facebook Slideshow Tool Go?](#Part 1)
02 [How to Create a Slideshow on Facebook?](#Part 2)
03 [Top 5 Facebook Slideshow Alternatives](#Part 3)
Part 1 Where Did the Facebook Slideshow Tool Go?
While almost everyone around you must be fascinated about the stunning and appealing slideshows that the Facebook community used to offer its users with, it is evidently sad to realize that the utility has become a story of the past. The creators of the tool have by now, took multiple rounds on removing, retrieving and again removing the utility from the official Facebook website as well as the smartphone application.
It is however relaxing to know that the Facebook developer team has worked efficiently to produce alternatives to the application’s slideshow tool after the latter’s permanent disappearance from the user account pages and app profiles. You can now work with the Facebook Ads Manager or Facebook Creator Studio to sort out the concern of creating slideshow on Facebook.
Part 2 How to Create a Slideshow on Facebook?
Facebook slideshows are incredibly awesome trends of making a concise, expressive and to the point delivery of diverse content varieties. Piping up your information through and extensive assortment of sound, text and motion, these short snippets are no less than a seamless video streaming of the same information.
If you are about to launch a new product for your business enterprise, consider working with the utility to create an elusive Facebook slideshow ad for a quick demonstration of your brand among different social media communities, turning the fun of slideshow creation into a smart and responsive product promotion strategy, without having to bother your wallet for the same.
If you are concerned about the quality of the final output, it is not a cause of worry, since the Facebook slideshow creator tool promises you of an appreciable slideshow result, that takes a quick loading time, is comparable to a high resolution video and works well with all your favourite devices.
Having talked enough on the usage credibility, let us now proceed to adhere to the concern of creating a slideshow on Facebook with a diversity of media files in the following section:
01Facebook Slideshows from Videos
Step 1: Launch the Tool
Start with opening the Facebook app in your device to launch the ‘Facebook Ads Manager’ utility and tap ‘Create’ in the latter’s welcome interface.
Step 2: Select Your Video
Browse through your device’s gallery to choose a desired video for slideshow creation. When you have made your choice, set a 16:9 aspect ratio for the same to avoid square cropping.
Step 3: Upload Your Video
Proceed with uploading your video to the Facebook tool by clicking on the ‘Add Video’ button and watch it getting split into still images frames, from where you can view a seamless slideshow display of the same.
Step 4: Select Multiple Frames
you can now select a series of image frames and arrange them in the correct sequence of appearance by clicking on each one of them to be included within the creator timeline.
Step 5: Add Captions Your Stills
Tap on the small ‘Pencil’ icon within the images to customize them with suitable captions. You can further add style to these image names by making appropriate selections of font, position color of every frame caption. Once you have finished naming all the frames, click on ‘Save’ to apply your changes.
Step 6: Preview Your Creation
When you are satisfied with your work, consider watching a preview of the same to be assured of the perfect placement of everything. To do this, navigate to the ‘Preview Pane’ at the top right corner of the program interface, and tapping the ‘Preview’ button.
02Facebook Slideshows from Images
Step 1: Launch the Tool
To begin with, open the Facebook app in any of your preferred devices and proceed to launch the ‘Facebook Ads Manager’ tool, followed by clicking on the ‘Create Slideshow’ button at the bottom of the tool’s welcome screen.
Step 2: Upload Your Images
As you complete Step 1, a ‘Video Creation Kit’ will appear, where you will need to click within the ‘Create Slideshow’ checkbox, followed by tapping on the ‘Continue’ button at the bottom right corner of the window.
Step 3: Upload Your Images
Clicking on the ‘Continue’ button will take you to the ‘Settings Box’ where you need to tap on the ‘Add Photos’ option. An image selection box will now pop up, allowing you to select and upload a maximum of 10 images from your Facebook account, stock and page galleries or your device collections. Prefer keeping all the photos within the same aspect ratio to escape the extra task of cropping the images.
When you have finished making your selections, navigate to the bottom right corner of the window and hit the ‘Confirm’ button. This will make your selections shows up all together in the ‘Settings Box’, in the sequential order of their appearance in the slideshow. If you want to introduce some changes, delete and re-upload the images.
Step 4: Customize Your Images with Captions
To add suitable captions to the slideshow images, tap the ‘Pencil’ icon within them. You are also allowed to customize the stills with transitions, effects, etc., and make adjustments to the screen time of each image frame.
Part 3 Top 5 Facebook Slideshow Alternatives
Having heard about the disappointment from the exit of the Facebook slideshow creator tool, it becomes naturally important to seek through the affordable alternatives of the same to set straight the issue of how to do a slideshow on Facebook. Working towards the solutions, let us learn about the top 5 most preferred Facebook slideshow alternatives in the following section:
03PowerDirector
One of the most suitable candidates of Facebook slideshow alternatives, PowerDirector easily lands among the highly preferred tools for creating stunning slideshows. Compatible with the MacOs and Windows operating systems, the software lets you create high end, top quality slideshow presentations with a classic and professional outlook.
Talking of the creator program’s most appealing features, this one is an upgraded slideshow creator suite that is capable enough to address your most diverse design requirements, like those of high resolution video effects, Hollywood inspired movies and personal content sharing. The software package is loaded with tons of elusive video effects, themed templates and transition effects to facilitate a compelling creation.
Working with PowerDirector’s exclusive slideshow program, you get the liberty to escape the notch of storyboard and timeline editing and start the creation process in the launch window of the program itself. The extremely user cohesive interface of the software guides you through each creation step via streamlined plug-ins, making the design process quick and super easy even for newbies.
04SmartSHOW 3D
When thinking of how to make a slideshow on facebook, this one is another top rated Facebook slideshow alternatives, that comes with an extensive toolkit to create amazing presentations from video clips and images, while complementing them with a plethora of effects and transitions. Some of the key features of the program include multiple slide layering, animating selected layers and fine tune the transitions with keyframe adjustments.
You can additionally uplift the slides with image masks, shapes, 3D animated texts and other forms of graphic arts. An additively appealing feature of the slideshow creator program is the ability to mix descriptive images with your favorite music to develop stunning masterpieces of entertaining slideshows, which you can conveniently share and enjoy with family and friends on a diversity of social media platforms.
Using the tool, you can work with applying motion graphic effects to still photos without having to be an over the top tech savvy user. The editor library of the tool is loaded with some of the most awesome transition effects, like, wipes, 3D motions, gradients and fade-ins, along with the facility of adding titles, voice comments and captions to the slides of your presentation. The tool is however, exclusively a Windows compatible utility.
05PhotoStage Slideshow Software
Next in the list of alternatives to the Facebook slideshow maker tool is the aforesaid software program, that allows you to create professional quality slideshows with as many videos and images as you can possibly think of and supplement them with a variety of texts, music, voiceovers and effects. You can further work on customizing the slideshow images with making suitable adjustments in color, brightness and saturation parameters.
The software comes with a Quick Create utility, which you can use to instantly create high resolution slideshows and spark them up with zooms, pans and fades, while getting a preview of the same in real-time. You can even proceed to burn your creation into a disk, make an online upload, or simply save it to your device.
Talking of the cost constraints of this amazing slideshow creator tool, you get to work with the software for a commercial use, free of cost for a definite time period and with a restricted number of features. However, you can always consider on buying the paid version of the program to avail an access to the latter’s entire range of features and utilities. The tool works well with all Windows and Mac supported devices.
06Kizoa
Moving ahead in the list you have the Kizoa slideshow maker for Facebook, which is a dependable alternative to the conventional Facebook slideshow creator. Choosing this tool to design your slideshow presentation, you are entitled to the amazing feature of displaying your presentation on almost any screen, including smartphones, television, computers and tablets with getting to choose from 7 types of aspect ratios. The tool is designed to have a Windows and MacOs compatibility.
The application further lets you add the most specific parts of your images within the presentation slides with its smart cropping tool, while keeping an account of the file formats and screen space requirements of the images with utmost convenience. You are also allowed to choose from a storehouse of preset templates to add your desired photos and video clips in the slideshow and entice them with GIFs, effects and texts.
When you are done with the creation process, just attempt to download and save the slideshow in any preferred file format, such as, AVI, GIF, MP4, MOV, MPEG2, etc., or even burn it to a DVD. You are now free to share your slideshow on various online media sharing platforms. Using the free version of Kizoa, you are permitted to create slideshows with a duration of 60 seconds, which can be upgraded to a limitless length with a paid subscription.
07SlideLab
If you are a newbie to the field of creating slideshows, and wondering about how to create a slideshow on Facebook 2021, this one is affordably the most perfect tool you can rely on. Packed with an extensive range of effects, music, transitions and filters, SlideLab is the smartest software choice to create slideshow presentations for family entertainment and personal use.
The tool consists of an in built sharing utility that allows you to design and share slideshows on social media platforms, like YouTube, Facebook and Instagram with a single click. Working on your slideshow within the program, you can escape the cringe of cropping the images, as they are automatically adjusted to the square fit alignment of the app’s working window. You can quickly rearrange the placement of the images in the slideshow as per your preferences.
As far as the sharing credibility of the presentation is concerned, the software grants you the liberty to export your creation in PPTX and PDF file formats, and view them later in Keynote and PowerPoint.
The app shows a convenient workflow with Windows and MacOs devices and limits the image play duration to 3 seconds, along with a permitting a restricted number of transitions and effects in its free version, which you can access by availing a paid subscription of the program.
08Creating Facebook Slideshows With Wondershare Filmora
When browsing through feasible alternatives on how to make a facebook slideshow, the IT market is indeed flooded with a hoard of creation utilities. If you have just begun trying hands at slideshow creation, consider using the Wondershare Filmora Video Editor slideshow maker application for addressing your slideshow design concerns. The extensive, feature rich library of the app lets you create attractive presentation masterpieces with a wide range of special effects, transitions, texts, titles and music tracks.
For Win 7 or later (64-bit)
For macOS 10.12 or later
Working with the Filmora slideshow creator, you can trim, crop or cut the video clips and images of your presentation to give them the best look. The tool comes with a unique Filmora Template Mode to create business oriented Facebook slideshows, is compatible to any windows and Mac supported device and lets you easily make a slideshow on Facebook.
● Ending Thoughts →
● Creating Facebook slideshows can be useful in addressing a variety of personal and professional data sharing needs.
● Browsing through design alternatives, you will land across a pool of software choices to create stunning slideshows for Facebook.
● When deciding on the best Facebook slideshow creator tool, Wondershare Filmora can be your smartest pick.
Epic Formula to Animate Photos From These 10 Animate Pictures App
Epic Formula to Animate Photos from These 10 Animate Pictures App
An easy yet powerful editor
Numerous effects to choose from
Detailed tutorials provided by the official channel
With the availability of modern technology, still photos can be seamlessly transformed into live animated photos. Adding motion and movement along with filter effects to still photos is pretty easy with an animated pictures app.
For Win 7 or later (64-bit)
For macOS 10.12 or later
In this article, we have listed 10 of the best animated picture apps available in 2021. You will find all essential details and features of these 10 apps which will help you choose the best option when choosing an app for animating a picture. Let us take a look at these 10 apps!
In this article
01 [10 Animate Pictures Apps](#Part 1)
02 [The contrast of These 10 Animate Pictures Apps](#Part 2)
Part 1 10 Animate Pictures Apps
01 MotionLeap

MotionLeap
● Price
Free, with premium version available.
● OS
Android and iOS
● Key features
You can freeze parts of an image.
Variety of filters can be applied.
Although MotionLeap is free to use there’s a Pro and subscription version with a greater variety of features in it. The best part about this animated pictures app is that it does not put any watermark over the final image.
The app can animate still photos and convert them into short, loop videos. This is done by the programming of the directional cues into the image which is executed by dragging actions of the thumb across your mobile screen.
Although, on MotionLeap, without the pro version, the photo will be saved in video format.
02 GIPHY

GIPHY
● Price
Free
● OS
Android and iOS
● Key features
Simple, easy to use UI
A variety of built-in animation tools
Sticker maker on iOS (for iPhone X and later models)
We might already be acquainted with GIPHY as the most popular search engine for GIFs. Although, what’s unknown is that GIPHY has a mobile app both for Android and iOS which can be used to create GIFs and animate photos.
The app’s key advantage is its highly intuitive and very easy to use interface that makes it really easy to animate photos with the GIPHY app. Above all, it is completely free to use and along with animating pictures, you can also add captions to your animated photos or even capture short videos.
03 Movepic

Movepic
● Price
Free, with premium version available.
● OS
Android and iOS
● Key features
Easy to use.
A range of built in overlays and filters.
Movepic is another excellent app for animating pictures. As an animated pictures app, it is quite similar to MotionLeap owing to the fact that it animates still photos.
A downside of the Movepic free version is that it puts a watermark on the image and you cannot remove it without upgrading to the premium version or VIP account. The app saves the final images as a movie file and not as a GIF.
04 ImgPlay

ImgPlay
● Price
Free, with premium version available.
● OS
Android and iOS
● Key features
Easy to use.
Lay out still photographs side-by-side and use burst photos or videos.
ImgPlay is another very popular and effective animated pictures app. The app makes use of a range of ready-to-use animated photos for the web.
ImgPlay also comes with a range of advanced and easy-to-understand controls. This app, in spite of all its perks, puts a watermark on the image—which, once again, cannot be removed unless you buy the premium version of the app.
05 StoryZ

StoryZ
● Price
Free, with premium version available.
● OS
Android and iOS
● Key features
Programmed movement paths, overlays and color filters.
Saves images automatically as GIFs.
StoryZ is one of the best apps on this list and anyone who has used the app would agree with that. The app can seamlessly animate still photos.
A great thing about this app is that StoryZ enables users to remove the watermark from the image by simply watching a quick ad before saving the file.
06 VIMAGE 3D

VIMAGE 3D
● Price
Free, with premium version available.
● OS
Android and iOS
● Key features
AI enabled.
A range of filters and special effects.
Add sounds to your animated images and videos.
This one is an award winning app for animating pictures and the app won a Google Play award in 2018. The app is simply exceptional in terms of user experience as well as features.
Like most of these apps, you do need to pay to remove the watermark, get access to the full effects library, and the ability to export your images in up to 2560p resolution.
07 Photo Bender

Photo Bender
● Price
Free
● OS
Android
● Key features
A variety of editing tools and features including brushes.
Enables users to export images as MP4s, GIFs, JPEGs, and PNGs.
Photo Bender is an animated pictures app that is specific to the Android platform. The app is popular for its convenience of use and it enables users to digitally warp images and animate photos.
There are a variety of things that can be done to an image with the help of this app. From colouring an image, to bending it, stretching it, and a lot more, you can do it all. You also get a range of brushes to use on the image.
08 Zoetropic

Zoetropic
● Price
Free, with premium version available.
● OS
Android and iOS
● Key features
The app is really fast and efficient.
Simple UI.
Zoetropic helps you animate images in minutes,even if you are using the app for the first time. The app does not come with a lot of features but its simplicity, effectiveness and ease of use makes it a great option for animated pictures app.
09 Lumyer

Lumyer
● Price
Free, with premium version available.
● OS
Android and iOS
● Key features
Seasonal and occasional animation effects.
Easy to use.
This app is another great platform to edit pictures and animate them. It enables you to add a variety of effects to pictures and easily animate them.
From subtle weather effects to sparkle, seasonal animations and a lot more, the app offers a lot of options.
Part 2: The contrast of These 10 Animate Pictures Apps
| Name of The Animated Picture App | Advantages | Disadvantages |
|---|---|---|
| MotionLeap | No watermark+Variety of filters; | File saved in video format without pro version |
| GIPHY | Free to use+Simple UI | Not suitable for advanced editing |
| Movepic | Built-in overlays and filters | Saves final image as video file without pro version Watermark |
| ImgPlay | Easy to use and understand+Ready to go animated photos for the web | Watermark on image |
| StoryZ | Remove watermark by watching an ad+Variety of animation techniques | Boring interface |
| VIMAGE 3D | Neat UI+Endless features+AI enabled | Need to buy premium version to access majority of features |
| Photo Bender | A range of tasks can be executed | Not a very attractive UI |
| Zoetropic | Simple, effective and easy to use | Limited effects on free version |
| Lumyer | Fast and easy to use+Lot of features | Can be expensive due to several in-app purchases |
| Filmora | Easy to Use+fordable+ons of features+Seamless UI+rofessional video editing tools | Not available on mobile |
Key Takeaways from This Episode
● That brings us to the end of the article. Anyone looking for an animated pictures app to animate their images have found 10 of the best apps available in the market right now.
● With the list of these 10 apps, anyone can find the most suitable platform for their own purposes of animating an image.
● Last but not the least, if it comes to an all inclusive platform for video editing and animating pictures, Filmora Pro is definitely the winner on this list! So check out your options and make the best choice!
With the availability of modern technology, still photos can be seamlessly transformed into live animated photos. Adding motion and movement along with filter effects to still photos is pretty easy with an animated pictures app.
For Win 7 or later (64-bit)
For macOS 10.12 or later
In this article, we have listed 10 of the best animated picture apps available in 2021. You will find all essential details and features of these 10 apps which will help you choose the best option when choosing an app for animating a picture. Let us take a look at these 10 apps!
In this article
01 [10 Animate Pictures Apps](#Part 1)
02 [The contrast of These 10 Animate Pictures Apps](#Part 2)
Part 1 10 Animate Pictures Apps
01 MotionLeap
MotionLeap
● Price
Free, with premium version available.
● OS
Android and iOS
● Key features
You can freeze parts of an image.
Variety of filters can be applied.
Although MotionLeap is free to use there’s a Pro and subscription version with a greater variety of features in it. The best part about this animated pictures app is that it does not put any watermark over the final image.
The app can animate still photos and convert them into short, loop videos. This is done by the programming of the directional cues into the image which is executed by dragging actions of the thumb across your mobile screen.
Although, on MotionLeap, without the pro version, the photo will be saved in video format.
02 GIPHY
GIPHY
● Price
Free
● OS
Android and iOS
● Key features
Simple, easy to use UI
A variety of built-in animation tools
Sticker maker on iOS (for iPhone X and later models)
We might already be acquainted with GIPHY as the most popular search engine for GIFs. Although, what’s unknown is that GIPHY has a mobile app both for Android and iOS which can be used to create GIFs and animate photos.
The app’s key advantage is its highly intuitive and very easy to use interface that makes it really easy to animate photos with the GIPHY app. Above all, it is completely free to use and along with animating pictures, you can also add captions to your animated photos or even capture short videos.
03 Movepic
Movepic
● Price
Free, with premium version available.
● OS
Android and iOS
● Key features
Easy to use.
A range of built in overlays and filters.
Movepic is another excellent app for animating pictures. As an animated pictures app, it is quite similar to MotionLeap owing to the fact that it animates still photos.
A downside of the Movepic free version is that it puts a watermark on the image and you cannot remove it without upgrading to the premium version or VIP account. The app saves the final images as a movie file and not as a GIF.
04 ImgPlay
ImgPlay
● Price
Free, with premium version available.
● OS
Android and iOS
● Key features
Easy to use.
Lay out still photographs side-by-side and use burst photos or videos.
ImgPlay is another very popular and effective animated pictures app. The app makes use of a range of ready-to-use animated photos for the web.
ImgPlay also comes with a range of advanced and easy-to-understand controls. This app, in spite of all its perks, puts a watermark on the image—which, once again, cannot be removed unless you buy the premium version of the app.
05 StoryZ
StoryZ
● Price
Free, with premium version available.
● OS
Android and iOS
● Key features
Programmed movement paths, overlays and color filters.
Saves images automatically as GIFs.
StoryZ is one of the best apps on this list and anyone who has used the app would agree with that. The app can seamlessly animate still photos.
A great thing about this app is that StoryZ enables users to remove the watermark from the image by simply watching a quick ad before saving the file.
06 VIMAGE 3D
VIMAGE 3D
● Price
Free, with premium version available.
● OS
Android and iOS
● Key features
AI enabled.
A range of filters and special effects.
Add sounds to your animated images and videos.
This one is an award winning app for animating pictures and the app won a Google Play award in 2018. The app is simply exceptional in terms of user experience as well as features.
Like most of these apps, you do need to pay to remove the watermark, get access to the full effects library, and the ability to export your images in up to 2560p resolution.
07 Photo Bender
Photo Bender
● Price
Free
● OS
Android
● Key features
A variety of editing tools and features including brushes.
Enables users to export images as MP4s, GIFs, JPEGs, and PNGs.
Photo Bender is an animated pictures app that is specific to the Android platform. The app is popular for its convenience of use and it enables users to digitally warp images and animate photos.
There are a variety of things that can be done to an image with the help of this app. From colouring an image, to bending it, stretching it, and a lot more, you can do it all. You also get a range of brushes to use on the image.
08 Zoetropic
Zoetropic
● Price
Free, with premium version available.
● OS
Android and iOS
● Key features
The app is really fast and efficient.
Simple UI.
Zoetropic helps you animate images in minutes,even if you are using the app for the first time. The app does not come with a lot of features but its simplicity, effectiveness and ease of use makes it a great option for animated pictures app.
09 Lumyer
Lumyer
● Price
Free, with premium version available.
● OS
Android and iOS
● Key features
Seasonal and occasional animation effects.
Easy to use.
This app is another great platform to edit pictures and animate them. It enables you to add a variety of effects to pictures and easily animate them.
From subtle weather effects to sparkle, seasonal animations and a lot more, the app offers a lot of options.
Part 2: The contrast of These 10 Animate Pictures Apps
| Name of The Animated Picture App | Advantages | Disadvantages |
|---|---|---|
| MotionLeap | No watermark+Variety of filters; | File saved in video format without pro version |
| GIPHY | Free to use+Simple UI | Not suitable for advanced editing |
| Movepic | Built-in overlays and filters | Saves final image as video file without pro version Watermark |
| ImgPlay | Easy to use and understand+Ready to go animated photos for the web | Watermark on image |
| StoryZ | Remove watermark by watching an ad+Variety of animation techniques | Boring interface |
| VIMAGE 3D | Neat UI+Endless features+AI enabled | Need to buy premium version to access majority of features |
| Photo Bender | A range of tasks can be executed | Not a very attractive UI |
| Zoetropic | Simple, effective and easy to use | Limited effects on free version |
| Lumyer | Fast and easy to use+Lot of features | Can be expensive due to several in-app purchases |
| Filmora | Easy to Use+fordable+ons of features+Seamless UI+rofessional video editing tools | Not available on mobile |
Key Takeaways from This Episode
● That brings us to the end of the article. Anyone looking for an animated pictures app to animate their images have found 10 of the best apps available in the market right now.
● With the list of these 10 apps, anyone can find the most suitable platform for their own purposes of animating an image.
● Last but not the least, if it comes to an all inclusive platform for video editing and animating pictures, Filmora Pro is definitely the winner on this list! So check out your options and make the best choice!
Cartoon Fundamentals: How to Learn Cartoon Characters Sketch Quickly
Cartoon Fundamentals: How to Learn Cartoon Characters Sketch Quickly
An easy yet powerful editor
Numerous effects to choose from
Detailed tutorials provided by the official channel
Whether your favourite Cartoon character Bugs-bunny comes from space or beyond your imagination, whether nostalgic Tom and Jerry are young, eternal or old, knowing the process to draw cute, funny, adorable cartoon-characters is a kind of special feeling always & looks essential incase you desire to become quality professional artist. Cartoon Characters are more challenging to draw while taking care of their weird postures, body-parts like legs, hands.Cartoons characters are the easiest ones to draw as it involved simplistic shapes and doesn’t needed a hard core practice.
In this article, you will be able to get access to drawing amazing characters with a wide range of characters featuring ordinary people, fictional-characters, creatures, monsters, or your favourite cute little ones in easy way.
In this article
01 [Basics of Cartoon Characters Sketch](#Part 1)
02 [Cartoon Characters Sketch Anyone Can Draw (With Free Video Tutorials)](#Part 2)
Part 1 Basics of Cartoon Characters Sketch
Before going ahead with the process of learning step by step how to draw cartoon characters, you need to understand the methodology behind sketching. It is easy to draw multiple cartoon characters but at the same time, you need to figure out sketching techniques involved in making that happen. If you want to extract few details of your central character, you need to represent cartoon characters sketch with the help of shapes. The main goal here is to recognize drawing & let it be attractive as children are the main audience and cartoon characters like Disney, Chuck Jones, Walter-Lantz and others have truly enchanted this world with eternal character & their magical appearance.
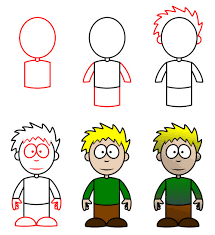
01Concentrating on circle
One of the most basic and interesting shape for any cartoon sketch is circle. All you need is to clearly define basic proportion of your character and that can be happened with desired character’s head. Later on you can trace its charm with face axis.
02Draw Cartoon Eyes
In order to make eyes, one needs to take care of oval shape sketch with slight tilt to side at top position. You have to note that, it is always important to leave good gap between each one of them of approximately similar size as the eye.
03Drawing Cartoon Hair
There is nothing to fear when it comes to draw cartoon hair. You don’t need stylist or a fashion designer in order to make them look perfect. With ideal haircut and matching personality of the desired character, you can do this thing pretty awesome. Hair can represent age, conservatism, rebellion etc. and comes in incredible features.
One of the most accurate & a faster way to do that is by taking references from a fashion magazine, Google Search or cartoon magazine. Once you are done with your findings of ideal styling, you can later on simplify your hair version.
04Sketching for Older Character
Sometimes older characters can be pretty easy to draw as it all begins with their eyes, facial expressions, addition of wrinkles, eyebrows, eye pupils etc. You just need to expand eyebrow a little bit. The older characters have thicker-eyebrows, large forehead space etc.
05Drawing a female character
It’s simple, just focus around delicacy in facial structures, like:-
● Thin eyebrows
● Larger & expressive eyelashes
● Thinner-chin
● Small-nose under fewer-details
● Long hair or depends on your choice
That’s it. Also, you need to give comfort feeling to your character, the more you draw the more realistic it will look.
● Filmora for learning new drawing skills
For Win 7 or later (64-bit)
For macOS 10.12 or later
If you want to showcase your talent to this world without any extravagant apps or software then FIlmora is the best choice that you can consider for drawing some amazing cartoon at your own. This app has its own fun loving designing features and you can add varieties of stickers, images and text to your drawings.
What exactly Filmora can do your drawings:
● For your Pencil sketch of cartoon characters, this app has a lot of text, images and fun loving stickers to showcase more highlighting features of your cartoon character.
● You can share your cartoon with your friends and other community over the web through Twitter, Facebook, and WhatsApp etc.
● This will let you access video editing and image editing features also, to give your cartoon a life.
Part 2 Cartoon Characters Sketch Anyone Can Draw (With Free Video Tutorials)
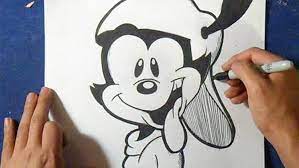
Now, it’s time to move on with thinking about which cartoon characters to put in your papers with emotions, facial expressions and other features. We are now moving towards the process to include more and more emotions to the same.
Let’s begin drawing 8 amazing characters that are not only famous but also living in heart of children.
01Bugs Bunny
Who doesn’t live Bugs Bunny? Well, it is among the list of most iconic characters that you can imagine and it is certainly the most funnies and interesting character to draw. Right from drawing its big feet to attractive teeth just made for cutting carrots, a lot of things are included in Bugs bunny.
Let’s Draw it:-
● Draw a circle & a “noodle” shaped object as per the imagination. The circle will be its head & pear shape will be its body. You need to make bottom pear fatter as compared to upper portion and also upper-part has to overlap head circle only a little.
● Include perspective guidelines at around the head as this thing can correctly position eyes as well as nose of your bunny.
● You need to draw the eyes at Horizontal guideline and nose where guidelines crosses.
● Draw cheeks and include ears, arms. At the time of drawing arms, you have to give natural curve to arms.
● The arm curves together with the legs-curves might look little difficult, therefore you have to make use of your pencil tenderly without pushing it harder.
● Draw inner lines in ear & iris ellipse at inner portion of eyes.
● Add nose & draw mouth, teeth.
● Your Bunny starts taking its shape and here you can add colors as per your choice
Your cartoon Bugs-Bunny is now ready.
02Popeye
One of the most famous cartoon character of Disney Popeye also appeared on the cinema screens and this belongs to the list of famous classic cartoon-characters.
Let’s draw this amazing character:-
● First Sketch few basic shapes like head, chest, belly.
● It’s a comic character so give it a grotesque-look
● Slightly include other body-parts with shapes like ellipses, noodles in the form of contours.
● Draw one centre-line across the head with well-balanced facial features.
● Draw nose, mouth, ears for the face to form.
● Sketch contours of Popeye’s fists, and arms.
● You can begin giving colors to this shape with flat layers of colorings
03Barney Rubble
As a next door friend and neighbor of Flintstone-house, Barney is kind of a quirky character. This contains features like ears & big feet in the form of angles.
Here is an amazing video tutorial for your Barnet Rubble Cartoon Character:-
04Scrooge McDuck
This cartoon character has wealthy features with fun-loving designs to draw in the form of top-hat, a-cane, as well as few small reading glasses. When it comes to drawing this cartoon characters sketch you need to come up with funny and slightly challenging features.
05Drawing a Ninja For Amazing Action
● Step 1
Work on the head first with nice & precise circle in order to illustrate head portion. Inside this, you can add two more tiny circles for eyes. Once you are done with the eyes, you need to add large & thin rectangle that represents headband. At one portion of headband draw tiny circle with small triangles in numbers 2.
● Step 2
Left arm of our ninja can be sketched through a long & thin rectangle. In order to showcase right arm, draw two rectangles and later on both hands has to be represented in terms of circles.
● Step 3
Two Legs are also need to draw in terms of unusual position. So total of 5 rectangles has to be drawn for both legs & feet.
● Step 4
Add accessories like sabre with basic shapes like circle or rectangle for the same.
● Step 5
Now refine it with an outline and work upon head to make sure both eyes will be clear & visible and also keep the head round & tight.
● Step 6
For upper portion, use nice curved lines and illustrate chest & arms. For showing a discipline make use of good contour likes that highlights posture & gesture.
● Step 7
Repeat the process for the lower portion of your Action ninja.
● Step 8
Now throw some colors’ either black, brown & red to finish the masterpiece!
06Morty Smith
Morty is a lot easy and occupies t-shirt & jeans in its overall appearance and it is much smaller & way more natural than you usually think.
07Helga G. Pataki
If you want to add some crazy cartoon characters in your list then Helga is a good choice. While drawing its cartoon, you need to pay close attention to head as this thing can be little strange with her rectangle hairdo.
08Kim Possible
The design of Kim Possible looks easy at first appearance but when you actually begin with the process of draw its shape, you may get confused. You need to add varieties of features in her face with crazy parachute pants right from the 1980s.
09Shaggy Rogers
The companion of Scooby Shaggy also love its treats & also like to run-away from the monsters at first sight. He can solve mysteries and fun to watch.
● Ending Thoughts →
● Well, drawing cartoons is always a fun loving thing to do. You can pick any one cartoon for drawing some favorite designs.
● You can make use of professional apps to give proper background to your poster or sketch making.
● For Fictional creatures, you can illustrate their styling features, fun facts and lot more to make it much more interesting.
Whether your favourite Cartoon character Bugs-bunny comes from space or beyond your imagination, whether nostalgic Tom and Jerry are young, eternal or old, knowing the process to draw cute, funny, adorable cartoon-characters is a kind of special feeling always & looks essential incase you desire to become quality professional artist. Cartoon Characters are more challenging to draw while taking care of their weird postures, body-parts like legs, hands.Cartoons characters are the easiest ones to draw as it involved simplistic shapes and doesn’t needed a hard core practice.
In this article, you will be able to get access to drawing amazing characters with a wide range of characters featuring ordinary people, fictional-characters, creatures, monsters, or your favourite cute little ones in easy way.
In this article
01 [Basics of Cartoon Characters Sketch](#Part 1)
02 [Cartoon Characters Sketch Anyone Can Draw (With Free Video Tutorials)](#Part 2)
Part 1 Basics of Cartoon Characters Sketch
Before going ahead with the process of learning step by step how to draw cartoon characters, you need to understand the methodology behind sketching. It is easy to draw multiple cartoon characters but at the same time, you need to figure out sketching techniques involved in making that happen. If you want to extract few details of your central character, you need to represent cartoon characters sketch with the help of shapes. The main goal here is to recognize drawing & let it be attractive as children are the main audience and cartoon characters like Disney, Chuck Jones, Walter-Lantz and others have truly enchanted this world with eternal character & their magical appearance.
01Concentrating on circle
One of the most basic and interesting shape for any cartoon sketch is circle. All you need is to clearly define basic proportion of your character and that can be happened with desired character’s head. Later on you can trace its charm with face axis.
02Draw Cartoon Eyes
In order to make eyes, one needs to take care of oval shape sketch with slight tilt to side at top position. You have to note that, it is always important to leave good gap between each one of them of approximately similar size as the eye.
03Drawing Cartoon Hair
There is nothing to fear when it comes to draw cartoon hair. You don’t need stylist or a fashion designer in order to make them look perfect. With ideal haircut and matching personality of the desired character, you can do this thing pretty awesome. Hair can represent age, conservatism, rebellion etc. and comes in incredible features.
One of the most accurate & a faster way to do that is by taking references from a fashion magazine, Google Search or cartoon magazine. Once you are done with your findings of ideal styling, you can later on simplify your hair version.
04Sketching for Older Character
Sometimes older characters can be pretty easy to draw as it all begins with their eyes, facial expressions, addition of wrinkles, eyebrows, eye pupils etc. You just need to expand eyebrow a little bit. The older characters have thicker-eyebrows, large forehead space etc.
05Drawing a female character
It’s simple, just focus around delicacy in facial structures, like:-
● Thin eyebrows
● Larger & expressive eyelashes
● Thinner-chin
● Small-nose under fewer-details
● Long hair or depends on your choice
That’s it. Also, you need to give comfort feeling to your character, the more you draw the more realistic it will look.
● Filmora for learning new drawing skills
For Win 7 or later (64-bit)
For macOS 10.12 or later
If you want to showcase your talent to this world without any extravagant apps or software then FIlmora is the best choice that you can consider for drawing some amazing cartoon at your own. This app has its own fun loving designing features and you can add varieties of stickers, images and text to your drawings.
What exactly Filmora can do your drawings:
● For your Pencil sketch of cartoon characters, this app has a lot of text, images and fun loving stickers to showcase more highlighting features of your cartoon character.
● You can share your cartoon with your friends and other community over the web through Twitter, Facebook, and WhatsApp etc.
● This will let you access video editing and image editing features also, to give your cartoon a life.
Part 2 Cartoon Characters Sketch Anyone Can Draw (With Free Video Tutorials)
Now, it’s time to move on with thinking about which cartoon characters to put in your papers with emotions, facial expressions and other features. We are now moving towards the process to include more and more emotions to the same.
Let’s begin drawing 8 amazing characters that are not only famous but also living in heart of children.
01Bugs Bunny
Who doesn’t live Bugs Bunny? Well, it is among the list of most iconic characters that you can imagine and it is certainly the most funnies and interesting character to draw. Right from drawing its big feet to attractive teeth just made for cutting carrots, a lot of things are included in Bugs bunny.
Let’s Draw it:-
● Draw a circle & a “noodle” shaped object as per the imagination. The circle will be its head & pear shape will be its body. You need to make bottom pear fatter as compared to upper portion and also upper-part has to overlap head circle only a little.
● Include perspective guidelines at around the head as this thing can correctly position eyes as well as nose of your bunny.
● You need to draw the eyes at Horizontal guideline and nose where guidelines crosses.
● Draw cheeks and include ears, arms. At the time of drawing arms, you have to give natural curve to arms.
● The arm curves together with the legs-curves might look little difficult, therefore you have to make use of your pencil tenderly without pushing it harder.
● Draw inner lines in ear & iris ellipse at inner portion of eyes.
● Add nose & draw mouth, teeth.
● Your Bunny starts taking its shape and here you can add colors as per your choice
Your cartoon Bugs-Bunny is now ready.
02Popeye
One of the most famous cartoon character of Disney Popeye also appeared on the cinema screens and this belongs to the list of famous classic cartoon-characters.
Let’s draw this amazing character:-
● First Sketch few basic shapes like head, chest, belly.
● It’s a comic character so give it a grotesque-look
● Slightly include other body-parts with shapes like ellipses, noodles in the form of contours.
● Draw one centre-line across the head with well-balanced facial features.
● Draw nose, mouth, ears for the face to form.
● Sketch contours of Popeye’s fists, and arms.
● You can begin giving colors to this shape with flat layers of colorings
03Barney Rubble
As a next door friend and neighbor of Flintstone-house, Barney is kind of a quirky character. This contains features like ears & big feet in the form of angles.
Here is an amazing video tutorial for your Barnet Rubble Cartoon Character:-
04Scrooge McDuck
This cartoon character has wealthy features with fun-loving designs to draw in the form of top-hat, a-cane, as well as few small reading glasses. When it comes to drawing this cartoon characters sketch you need to come up with funny and slightly challenging features.
05Drawing a Ninja For Amazing Action
● Step 1
Work on the head first with nice & precise circle in order to illustrate head portion. Inside this, you can add two more tiny circles for eyes. Once you are done with the eyes, you need to add large & thin rectangle that represents headband. At one portion of headband draw tiny circle with small triangles in numbers 2.
● Step 2
Left arm of our ninja can be sketched through a long & thin rectangle. In order to showcase right arm, draw two rectangles and later on both hands has to be represented in terms of circles.
● Step 3
Two Legs are also need to draw in terms of unusual position. So total of 5 rectangles has to be drawn for both legs & feet.
● Step 4
Add accessories like sabre with basic shapes like circle or rectangle for the same.
● Step 5
Now refine it with an outline and work upon head to make sure both eyes will be clear & visible and also keep the head round & tight.
● Step 6
For upper portion, use nice curved lines and illustrate chest & arms. For showing a discipline make use of good contour likes that highlights posture & gesture.
● Step 7
Repeat the process for the lower portion of your Action ninja.
● Step 8
Now throw some colors’ either black, brown & red to finish the masterpiece!
06Morty Smith
Morty is a lot easy and occupies t-shirt & jeans in its overall appearance and it is much smaller & way more natural than you usually think.
07Helga G. Pataki
If you want to add some crazy cartoon characters in your list then Helga is a good choice. While drawing its cartoon, you need to pay close attention to head as this thing can be little strange with her rectangle hairdo.
08Kim Possible
The design of Kim Possible looks easy at first appearance but when you actually begin with the process of draw its shape, you may get confused. You need to add varieties of features in her face with crazy parachute pants right from the 1980s.
09Shaggy Rogers
The companion of Scooby Shaggy also love its treats & also like to run-away from the monsters at first sight. He can solve mysteries and fun to watch.
● Ending Thoughts →
● Well, drawing cartoons is always a fun loving thing to do. You can pick any one cartoon for drawing some favorite designs.
● You can make use of professional apps to give proper background to your poster or sketch making.
● For Fictional creatures, you can illustrate their styling features, fun facts and lot more to make it much more interesting.
How to Make a Photoshop Collage in Simple Steps
How to Make a Photoshop Collage in EASY Steps
An easy yet powerful editor
Numerous effects to choose from
Detailed tutorials provided by the official channel
Photographs are a way of capturing and stopping the time in a small frame. They hold millions of memories that we want to cherish forever in our lives. And sometimes, we want to make a cluster of all the happy memories by making a collage of the photos.

Also, what can be a better gift to someone than presenting them a collection of all the cherishable memories you have with them in photographs? And that can be made possible through various photoshop collage ideas.
In this article
01 [Does Photoshop Have Collage Templates?](#Part 1)
02 [How to Make Your Own Collage with Photoshop Templates](#Part 2)
03 [How to Custom a Photoshop Collage in 9 Simple Steps](#Part 3)
Part 1 Does Photoshop Have Collage Templates?
There is numerous photo collage template in photoshop, and you even access and use some of them for free. Additionally, you can also create your template in Photoshop and use them in making your collage. If you want to make your template in Photoshop, here is how.
Step 1: Make a new layer and fill it up with your choice of colour.
Step 2: Resize and duplicate the layer to create the pattern you want for your collage.
Step 3: Integrate a “Clipping Mask.”
Step 4: For every image, create new clipping masks.
Step 5: Your collage template is ready so, export it to use!
Part 2 How to Make Your Own Collage with Photoshop Templates
Now that we know that you can access numerous incredible photoshop templates for free, you might want to create a collage for yourself in Photoshop. So, this is how you can use the photoshop collage template to make your collage with Photoshop Templates.
First, you need to select the images you want to create a collage with. Then you will have to import them. You can either “select and import” them one at a time or even batch import all of them together. Then, you can readily choose the template you want to use, or you can also create one for yourself.
Then you can resize or edit the images in the way you want and place them in the desired order. After you are done arranging and creating the collage perfectly, save the file in JPEG format and then export it to access it whenever you want!
Part 3 How to Custom a Photoshop Collage in 9 Simple Steps
If you do not know the answer to the question: how to make a collage in photoshop, there is absolutely nothing to worry about. Because the answer to this question is simple and includes not more than nine steps.
So now, we will be discussing the nine simple steps that will help you make a custom photo collage in photoshop. Here is the list of steps that will help you in doing so.
● Step 1: Selecting your favorite photos
The first step to making a collage in photoshop is to select all the photos you would like your collage to have. Now, it will be best for you to choose your photos wisely. We understand that each photograph is equally sweet and cherishable. But, when you select the images for your collage in a thoughtful manner, the collage turns out much better than expected.
You can use different collage ideas for photoshop, such as following a particular storyline, where you collage the photos so that it recreates the memory or the moments in sequence. Another way to select your photos is by sticking to a particular theme, and it can be vintage or on one specific color or the like. It will help your collage turn out in the best and the most thoughtful way.
● Step 2: Opening the photos you have selected, in collage maker photoshop
Now that you have selected which images you would want your collage to have, the next step will require you to open those images in the collage maker Photoshop. For this, you will have to select the option “File”. There, you will find the option “Open”. Then you will open the images you have chosen in Photoshop.
Also, you can simply press the “ctrl” and the “O” keys on your keyboard and it will automatically help you open the images you have selected for the photo collage on photoshop.

Another way to open the pages you have selected for your collage is through the “Drag and Drop” function. It is more effortless to choose the images and open them in Photoshop. After you have opened the photos in Photoshop, it will open in a different tab and look like in the following picture.

● Step 3: Make a new file for your collage on photoshop
The third step requires you to make a new file for your photo collage in photoshop. For this, you need to select or click on the “File” option on Photoshop. Then, click on the “New” option. It will help you make a new file for your collage. You can also select the “ctrl” and “N” together.
As you click on the “New” option, you will be given options to choose from. Choose the one that matches your preference.
When you are working on photoshop to make a collage, the images will need a collage background because it is on this background that the photos will assemble. If you have made a collage before on photoshop, you can use the old collage photoshop template. Otherwise, you need to create a new document for the collage.

● Step 4: Add the selected images one-by-one
Adding the images can be done in many ways. One way to do so is by opening the photo and clicking on it. Another way of doing so is to use the “Marquee Tool” of Photoshop.

Another way of doing so is by pressing the “ctrl” and “A” keys on your keyboard together. You will find the matching ants border around the image when you do this.

Then, go to the “Edit” option and choose “Copy” there. Or, you can also select the “ctrl” and “C” keys on your keywords together. Then go to your new document and select the option of “Paste” from the “Edit” option, or you can also press the “ctrl” and “V” keys together to do so.
The photo will be added in its own layer on the new document.

● Step 5: Arrange the images
Now, arrange the images in the way you want. If you have chosen to tell a story through your collage creator in photoshop, then arrange the photos accordingly. You can do so with the help of the “Move” tool or simply tap V. You can also use the “Free Transform” tool to edit and transform the images in the way you want. You can resize, rotate and edit the photos in many other ways through the “Free Transform” tool.
Step 6: Integrate image space
To create a collage in photoshop in a better and more spaced-out manner, you need to add some spacing between the images you have in your collage. There are two ways to add spacing between the pictures; one way is by creating a thin, white border around each image.
And the second method is by accessing and using the “Layers” feature in Photoshop.

● Step 7: Merge all the Layers
This step is necessary when you have used the “Layer” feature to create the spacing among the images present in your collage. You will be able to do so from the “Layer” option. So, go to the “Layer” option and select the “Merge Invisible” option present there.

● Step 8: cropping the final picture
Before the final step, it is important that you crop the final picture. And to do so, you can opt for the “Crop tool”. You will be able to access it easily, or you can also simply tap C to use the “Crop tool.”

● Step 9: Save the final collage and export
After you have done all the necessary changes and are satisfied with the final collage, then, save the file. To do so, go to the “File” option and select the “Save as” option.

Then choose the file type to be “JPEG”. Type the name you would want the collage to be saved as. This completes the process of saving the file. Then choose the image quality you would want the collage to be exported in.

● Key Takeaways from This Episode →
● In this discussion, we have covered the following topics.
● We discussed whether Photoshop has collage templates.
● Then we proceeded with discussing how we can create a collage in photoshop using the templates in it.
● Lastly, we wrapped up our discussion with the nine-step tutorial about customizing a collage in Photoshop.
Photographs are a way of capturing and stopping the time in a small frame. They hold millions of memories that we want to cherish forever in our lives. And sometimes, we want to make a cluster of all the happy memories by making a collage of the photos.
Also, what can be a better gift to someone than presenting them a collection of all the cherishable memories you have with them in photographs? And that can be made possible through various photoshop collage ideas.
In this article
01 [Does Photoshop Have Collage Templates?](#Part 1)
02 [How to Make Your Own Collage with Photoshop Templates](#Part 2)
03 [How to Custom a Photoshop Collage in 9 Simple Steps](#Part 3)
Part 1 Does Photoshop Have Collage Templates?
There is numerous photo collage template in photoshop, and you even access and use some of them for free. Additionally, you can also create your template in Photoshop and use them in making your collage. If you want to make your template in Photoshop, here is how.
Step 1: Make a new layer and fill it up with your choice of colour.
Step 2: Resize and duplicate the layer to create the pattern you want for your collage.
Step 3: Integrate a “Clipping Mask.”
Step 4: For every image, create new clipping masks.
Step 5: Your collage template is ready so, export it to use!
Part 2 How to Make Your Own Collage with Photoshop Templates
Now that we know that you can access numerous incredible photoshop templates for free, you might want to create a collage for yourself in Photoshop. So, this is how you can use the photoshop collage template to make your collage with Photoshop Templates.
First, you need to select the images you want to create a collage with. Then you will have to import them. You can either “select and import” them one at a time or even batch import all of them together. Then, you can readily choose the template you want to use, or you can also create one for yourself.
Then you can resize or edit the images in the way you want and place them in the desired order. After you are done arranging and creating the collage perfectly, save the file in JPEG format and then export it to access it whenever you want!
Part 3 How to Custom a Photoshop Collage in 9 Simple Steps
If you do not know the answer to the question: how to make a collage in photoshop, there is absolutely nothing to worry about. Because the answer to this question is simple and includes not more than nine steps.
So now, we will be discussing the nine simple steps that will help you make a custom photo collage in photoshop. Here is the list of steps that will help you in doing so.
● Step 1: Selecting your favorite photos
The first step to making a collage in photoshop is to select all the photos you would like your collage to have. Now, it will be best for you to choose your photos wisely. We understand that each photograph is equally sweet and cherishable. But, when you select the images for your collage in a thoughtful manner, the collage turns out much better than expected.
You can use different collage ideas for photoshop, such as following a particular storyline, where you collage the photos so that it recreates the memory or the moments in sequence. Another way to select your photos is by sticking to a particular theme, and it can be vintage or on one specific color or the like. It will help your collage turn out in the best and the most thoughtful way.
● Step 2: Opening the photos you have selected, in collage maker photoshop
Now that you have selected which images you would want your collage to have, the next step will require you to open those images in the collage maker Photoshop. For this, you will have to select the option “File”. There, you will find the option “Open”. Then you will open the images you have chosen in Photoshop.
Also, you can simply press the “ctrl” and the “O” keys on your keyboard and it will automatically help you open the images you have selected for the photo collage on photoshop.
Another way to open the pages you have selected for your collage is through the “Drag and Drop” function. It is more effortless to choose the images and open them in Photoshop. After you have opened the photos in Photoshop, it will open in a different tab and look like in the following picture.
● Step 3: Make a new file for your collage on photoshop
The third step requires you to make a new file for your photo collage in photoshop. For this, you need to select or click on the “File” option on Photoshop. Then, click on the “New” option. It will help you make a new file for your collage. You can also select the “ctrl” and “N” together.
As you click on the “New” option, you will be given options to choose from. Choose the one that matches your preference.
When you are working on photoshop to make a collage, the images will need a collage background because it is on this background that the photos will assemble. If you have made a collage before on photoshop, you can use the old collage photoshop template. Otherwise, you need to create a new document for the collage.
● Step 4: Add the selected images one-by-one
Adding the images can be done in many ways. One way to do so is by opening the photo and clicking on it. Another way of doing so is to use the “Marquee Tool” of Photoshop.
Another way of doing so is by pressing the “ctrl” and “A” keys on your keyboard together. You will find the matching ants border around the image when you do this.
Then, go to the “Edit” option and choose “Copy” there. Or, you can also select the “ctrl” and “C” keys on your keywords together. Then go to your new document and select the option of “Paste” from the “Edit” option, or you can also press the “ctrl” and “V” keys together to do so.
The photo will be added in its own layer on the new document.
● Step 5: Arrange the images
Now, arrange the images in the way you want. If you have chosen to tell a story through your collage creator in photoshop, then arrange the photos accordingly. You can do so with the help of the “Move” tool or simply tap V. You can also use the “Free Transform” tool to edit and transform the images in the way you want. You can resize, rotate and edit the photos in many other ways through the “Free Transform” tool.
Step 6: Integrate image space
To create a collage in photoshop in a better and more spaced-out manner, you need to add some spacing between the images you have in your collage. There are two ways to add spacing between the pictures; one way is by creating a thin, white border around each image.
And the second method is by accessing and using the “Layers” feature in Photoshop.
● Step 7: Merge all the Layers
This step is necessary when you have used the “Layer” feature to create the spacing among the images present in your collage. You will be able to do so from the “Layer” option. So, go to the “Layer” option and select the “Merge Invisible” option present there.
● Step 8: cropping the final picture
Before the final step, it is important that you crop the final picture. And to do so, you can opt for the “Crop tool”. You will be able to access it easily, or you can also simply tap C to use the “Crop tool.”
● Step 9: Save the final collage and export
After you have done all the necessary changes and are satisfied with the final collage, then, save the file. To do so, go to the “File” option and select the “Save as” option.
Then choose the file type to be “JPEG”. Type the name you would want the collage to be saved as. This completes the process of saving the file. Then choose the image quality you would want the collage to be exported in.
● Key Takeaways from This Episode →
● In this discussion, we have covered the following topics.
● We discussed whether Photoshop has collage templates.
● Then we proceeded with discussing how we can create a collage in photoshop using the templates in it.
● Lastly, we wrapped up our discussion with the nine-step tutorial about customizing a collage in Photoshop.
Also read:
- Updated Ways You Can Master to Make Claymation Videos for 2024
- Updated In 2024, 10 Best Free GIF Apps for iPhone and iPad
- Updated Handy Tip From Adobe Animate Rigging Tutorial for All Learners for 2024
- New In 2024, Animate Your Photo Online with These Awesome Tools
- New In 2024, Learn What Are Differences Between 2D And 3D Animation
- Updated 2024 Approved Beginners Guide for Learning 3D Animation
- New 2024 Approved Ideas That Will Help You Out in Learning How to Send WhatsApp Animated Gifs
- New In 2024, 5 Ways You Never Heard of for Converting MP4 to GIF in Photoshop
- Updated 2024 Approved Learn How to Draw Cartoons Step by Step with This Guide
- New Epic Formula to Animate Photos From These 10 Animate Pictures App
- Updated 10 2D/3D Animation Tips & Tricks for You
- Updated 2024 Approved How to Create Benime Whiteboard Animation in Android
- New In 2024, Apps to Animate Still Pictures Which Could Make Your Pictures Become Internet Sensation
- In 2024, 2D Character Animation Everything You Should Know About It
- 10 Trendy Free Logo Animation Templates
- New 2024 Approved How To Create Pinterest Slideshow in Simple Ways
- New 2024 Approved The 10 Most Adorable Aesthetic Cartoon Characters of All Time
- New Top 20+ Best Free GIF Makers Online to Quickly Edit GIF for 2024
- Updated Best 10 Animoji Apps You Can Use to Edit Animoji for 2024
- 2024 Approved In-Depth Study of Cartoon Painting Starts
- Updated How to Animate Image on Scroll and Text on Scroll?
- New In 2024, How to Convert Animated GIF From Video
- Updated In 2024, FREE Top 21 Best Anime Websites to Watch Anime Online
- New 10 Scary Anime Girls That Will Make You Creepy for 2024
- How to Create Slideshow in LinkedIn
- 2024 Approved Learn About Lip-Syncing in Animation
- 2024 Approved How to Animate Image on Scroll
- Best 8 Tools Tell You How to Make Slideshows for Instagram for 2024
- Updated How to Convert Animated GIF From Video for 2024
- 12 Websites with Triggered Animate on Scroll Examples
- Updated In 2024, Nurturing the Spirit Through the Top 10 Intellectual Anime Websites
- New 6 Unexpected Ways Gif Animation Maker Can Affect Your Marketing
- 2024 Approved 8 Blender 3D Animation Tutorials for Beginners
- New FREE Best Anime Streaming Sites to Download Anime
- Updated How to Insert a GIF Into Powerpoint for 2024
- 2024 Approved How to Become a Motion Graphic Designer
- New Know All About Animated Business Logos and the Best Tools to Create One
- In 2024, A Beginners Guide to Tell You What 3D Animation Is
- New 2024 Approved Most Popular Tips on Learning Animate Rigging
- New In 2024, How to Stop Animation From Looping in Unity
- In 2024, Have You Seen the Facebook Cartoon App Everyones Using Recently
- 2024 Approved 15 Best Apps to Turn Photos Into Cartoons and Sketches
- New 2024 Approved 15 Horror Animes That Will Trigger a Heart Attack
- Updated Top 8 Tools Tell You How to Make Slideshows for Instagram for 2024
- Updated 10 of the Best Disney Animated Shows for 2024
- New 2024 Approved Top 10 Best Photo to Animation Converters
- How to Bypass Google FRP Lock from Tecno Pova 5 Pro Devices
- How to Transfer Photos from Infinix Zero 30 5G to Laptop Without USB | Dr.fone
- In 2024, How to Migrate Android Data From Motorola Moto G24 to New Android Phone? | Dr.fone
- In 2024, Why is iPogo not working On Motorola Defy 2? Fixed | Dr.fone
- How to Cast Poco M6 Pro 4G to Computer for iPhone and Android? | Dr.fone
- In 2024, Unova Stone Pokémon Go Evolution List and How Catch Them For Vivo Y100A | Dr.fone
- Solutions to Spy on Nokia C110 with and without jailbreak | Dr.fone
- In 2024, How to Mirror PC Screen to Tecno Spark 10C Phones? | Dr.fone
- In 2024, How to Change GPS Location on Oppo Find X6 Easily & Safely | Dr.fone
- In 2024, How to Make the Most of Your iPhone 11 Pro Max Lock Screen with Notifications? | Dr.fone
- In 2024, Different Methods To Unlock Your iPhone 8
- How to Unlock Vivo S17 Pro Phone with Broken Screen
- Can I recover permanently deleted photos from Vivo X100
- The Updated Method to Bypass Tecno Camon 30 Pro 5G FRP
- In 2024, How to Intercept Text Messages on Vivo Y200e 5G | Dr.fone
- In 2024, Here Are Some Reliable Ways to Get Pokemon Go Friend Codes For Honor X9b | Dr.fone
- How to Change your Samsung Galaxy A05 Location on Twitter | Dr.fone
- Tecno Pova 6 Pro 5G ADB Format Tool for PC vs. Other Unlocking Tools Which One is the Best?
- In 2024, Pokemon Go Error 12 Failed to Detect Location On Lava Agni 2 5G? | Dr.fone
- Possible solutions to restore deleted videos from Vivo Y200
- 8 Quick Fixes Unfortunately, Snapchat has Stopped on Oppo A56s 5G | Dr.fone
- In 2024, How to Transfer Data from Google Pixel 8 Pro to BlackBerry | Dr.fone
- How to Restore Contacts on iPhone SE (2020) (4 Methods) | Stellar
- How to Unlock iPhone 11 Pro Max, Apples New iPhone | Dr.fone
- HTC U23 Not Connecting to Wi-Fi? 12 Quick Ways to Fix | Dr.fone
- In 2024, How To Change Your Apple ID Password On your iPhone 11 Pro | Dr.fone
- Complete Tutorial for Vivo X100 Pro Hard Reset | Dr.fone
- In 2024, A Complete Guide To OEM Unlocking on Oppo A59 5G
- In 2024, Ultimate Guide from OnePlus 11 5G FRP Bypass
- In 2024, Forgot iPhone Passcode Again? Unlock Apple iPhone SE (2020) Without Passcode Now | Dr.fone
- Title: Updated 2024 Approved Learn All About Lip-Syncing in Animation
- Author: Elon
- Created at : 2024-05-19 03:05:41
- Updated at : 2024-05-20 03:05:41
- Link: https://animation-videos.techidaily.com/updated-2024-approved-learn-all-about-lip-syncing-in-animation/
- License: This work is licensed under CC BY-NC-SA 4.0.
