
:max_bytes(150000):strip_icc():format(webp)/GettyImages-962954554-5c338fc146e0fb0001346aec.jpg)
Updated 2024 Approved The Ultimate Cheatsheet to 15 Adobe Animate Alternatives
The Ultimate Cheatsheet to 15 Adobe Animate Alternatives
The Ultimate Cheatsheet to 15 Adobe Animate Alternatives in 2024
An easy yet powerful editor
Numerous effects to choose from
Detailed tutorials provided by the official channel
Like all other Adobe premium software like Photoshop, illustrator, and premiere pro, Adobe Animate is designed for professionals.
No need to feel discouraged as there are plenty of Adobe Animate free alternatives with which you can polish the animator in you. Let’s check them out.
In this article
01 [Adobe Animate - How It Became a Good Option Without Hesitation?](#Part 1)
02 [Top 10 Adobe Animate Alternatives to Improve Animation Experience](#Part 2)
03 [The Most Comprehensive All-round Comparison Among All Alternatives](#Part 3)
Part 1 Adobe Animate - How It Became a Good Option Without Hesitation?
1. How Much Do You Know About Adobe Animate Key Features?
The Adobe Creative Cloud is constantly updating its range of virtual tools with new features which give users twice more incentive to subscribe. Adobe Animate CC, which is basically the new Adobe Flash, has also received an update recently which installed a bundle of new features to its interface, making it even more irresistible to animators.
What’s new with Adobe Animate?
● Adobe Animate Camera
Adding to Adobe’s line of exclusivity is its all-new Adobe Virtual Camera. Using this feature, Adobe animate users can now control their animation camera movements giving your animation videos a more realistic feel.
● Export any Format
Exporting your animations to your desktop is a convenience every software should provide.
● Audio Syncing
Adobe Animate enables you to synchronize audio to your animations completely easily which is yet another feature that has been recently added.
● Vector Brushes
Though it resembles the same functionality with Adobe Illustrator, Adobe Animate has renewed the tool with the ability to use tilt and pressure effects when drawing with a stylus or pen.
● Web Fonts
Now you can use a vast library of Adobe web fonts with Adobe Animate. These high-quality fonts are available in HTML5 canvas documents.
2. What Lay Behind Adobe Animate Alternative?
When it comes to choosing the best premium animation software, Adobe Animate CC is the obvious choice, but what makes beginners hesitant in using Adobe Animate is the fact that you need to subscribe to Adobe Creative Cloud.
This becomes an obstacle to those who are just starting out and are not that confident in getting their hands on a professional league interface like Animate. It also lacks sufficient facilities for practicing 3D animations.
This is exactly where free Alternatives to Adobe Animate enters the scene. Check out our list and find out which alternative suits your level of animation skills.
Part 2 Top 10 Adobe Animate Alternatives to Improve Animation Experience
No. 1 Krita

The first free-to-use Adobe Alternative on our list is ‘Krita’. It is an open-source animator with an intuitive drag and drop panel which gives users complete flexibility.
Krita llll➤
● UI
It offers over 30 different Dockers which are like toolkits for the program.
● Features
Freehand path tool+Object manipulation+HDR support+Layer Management+Enhanced OpenGL
● Compatibility
Supports various metadata formats like ORA, KRA, PSD, JPEG and PNG files.
● Popularity
Krita has a 4.3 start popularity rating at G2.com.
● Operating System
Compatible with Windows 8 or higher, macOS X 10.12 and Linux Basic.
● Pricing
Free to use.
● Who is Best For?
Krita is an excellent alternative for beginners who are looking to not get overwhelmed by comprehensive features.
● Reviewers say compared to Adobe Animate
Many reviewers have preferred Krita’s simplistic approach to Adobe Animate.
● Verdict
It is an excellent image editor and animator but can be limiting in its professional application.
Strengths
100 preloaded brushes: You can use brush tools in categories like digital, ink, paint, and sketch.
Onion Layer Editing: You can go back and check your previous drawing before moving on to the next.
Counteractive Tools: Efficiently compatible with pressure-sensitive tablets.
Weaknesses
Pixel-based Drawings: Its drawings are pixelated making it harder to achieve precisions around the rough edges.
Added Support: Exporting animation files requires support from a secondary application.
No. 2 Open Toonz

A friendlier platform for cartoon animation lovers and yet another free Adobe Animate Alternative. An open-source platform whose code can be modified by the user to add new features and graphics.
Open Toonz llll➤
● UI
Its interface has separate organized rooms called ‘workspaces’. The tools and windows in each room are different and fulfill a separate function.
● Features
Indexed Colour Palettes+Motion Tracking+Effects and Composting+Effects and Composting+Effects and Composting
● Compatibility
Opentoonz supports a plethora of file formats like AVI, 3GP, BMP, JPG, GIF, MOV, NOL, RGB, SGI, TGA, TIF, and TIFF.
● Popularity
OpenToonz has a standard rating of 4.1 stars on G2.
● Operating System
Compatible with macOS X 10.9, Windows 7 or higher.
● Pricing
Free to use.
● Who is Best For?
Can be used by both professionals and beginners alike.
● Reviewers say compared to Adobe Animate
It is a great platform to familiarize yourself with basic animation.
● Verdict
OpenToonz is an excellent animation tool for beginners but lacks some of the higher-performing functions demanded by professionals.
Strengths
TWAIN Standard Compatible: Images captured on OpenToonx using its digital camera and scanners can be used in animations.
Choose from different animation types: You can choose between standard animation and skeletal animations.
100s of Special Effects: Change the effects of your image however you want using effects like incident light or distortion waves.
Weaknesses
Suitable only for beginners: OpenToonz may still require some work in order to muster the attention of pros.
Lack of automated syncing: You may find it difficult to sync the voices of your characters.
No. 3 Toon Boom

Toon Boom is a more popular alternative to Adobe Animate and is recognized by professional animation studios worldwide. Toon Boom even has its own pro-grade animation software called Harmony which has been used to create various popular TV animated series.
Toon Boom llll➤
● UI
The extremely instinctive interface where you can navigate using various effects like zoom in & out, pan and reset your views.
● Features
Advanced Cut out+Bitmap and Vector Drawing+Bitmap and Vector Drawing+Access to Harmony Server+Access to Harmony Server
● Compatibility
Toon Boom can import dozens of different file formats like BMP, JPEG, PSD, TGA, SGI, TIFF, TVG and PAL.
● Popularity
Toom Boom is rated excellent on G2 with 4.7 stars.
● Operating System
Can run with Windows 7 & 10, macOS High Sierra, Catalina, Mojave.
● Pricing
Basic - $25/month; Advanced - $63/month; Premium - $115/month.
● Who is Best For?
Superb animation software with dozens of features that would attract freelance animators and professionals.
● Reviewers say compared to Adobe Animate
The common opinion amongst reviewers is that Toon Boom offers many more features than Adobe Animate.
● Verdict
Toon Boom is premium software that is excellent for pro-league animators and is one of Adobe Animates biggest competitors.
Strengths
Onion Skinning Feature: You can view your drawings in layers.
Import & Export Different types of files: You can export and import files like paper drawings, digital drawings and 13 other file types.
Peg Animations: You can chart your character’s movements using pegs between two points.
Weaknesses
Lacks Audio Features: You require an external audio application to include audio in your animations.
Do not include pre-made characters: You would need to create your characters from scratch.
No. 4 TVPaint Animation

TVPaint has been a household animation software that has been around for a while. It has considerable features which are great for creating versatile 2D animations.
TVPaint Animation llll➤
● UI
The TVPaint Interface is not too complex and has a wide range of bitmap drawing tools for 2D all 2D animation processes.
● Features
Bitmap Drawing Tools+Bitmap Drawing Tools+Layer Management+Layer Management+Layer Management
● Compatibility
Can import image and video files like WMV, AVI, MOV, MPEG, GIF, JPEG, PNG, and TIFF.
● Popularity
TVPaint has been around for a long while and has a 5-star G2 rating.
● Operating System
Later versions of TVPaint are compatible with Microsoft Windows, macOS X, Android, and Linux.
● Pricing
Standard version 11.0 costs €500; Professional version 11.0 costs €1250.
● Who is Best For?
It is traditionally acclaimed 2D animation software superb for professional animation studios.
● Reviewers say compared to Adobe Animate
Both TV Paint and Animate cc has the ability to perfect frame to frame animation with minor differences in the choice of tools.
● Verdict
TV Paint is a fantastic software amongst animators who wish to perfect their craft.
Strengths
Versatile Drawing Tools: You have access to all essential drawing tools like brushes, color palettes, textures and more.
Strong Painting Engine: Powerful painting tool for sketching and painting backgrounds.
Colour & Texture Generator: This tool provides an enhanced spectrum of colors.
Weaknesses
Learning Curve: TVPaint has its own learning curve as the interface is dissimilar from average animators.
Limited to Bitmap: You can only edit images in Bitmap format.
No. 5 Synfig Studio

Synfig is yet another free-to-use Adobe Animate alternative but is quite powerful in creating fabulous vector animations which are flawless to look at it.
Synfig Studio llll➤
● UI
Synfig is yet another free-to-use Adobe Animate alternative but is quite powerful in creating fabulous vector animations which are flawless to look at it.
● Features
Various different layers+Sound Support+Dozens of Drawing Tools+Dozens of Drawing Tools+Import Facility
● Compatibility
You can render multiple video formats like AVI, MPEG, GIF, and MNG.
● Popularity
Excellent Rating 5 stars for Vector Graphics on G2.
● Operating System
Can run on Windows 7 and above, macOS X 10.8 and Linux.
● Pricing
Free to use.
● Who is Best For?
Synfig is a bit complex but great for animators who are willing to learn.
● Reviewers say compared to Adobe Animate
Much more convenient interface.
● Verdict
Synfig Studios is a great program for animating vector graphics.
Strengths
Vector Tweening: Change the shape of your vectors automatically.
50+ Layers: Choose from multiple gradients, filters, distortions, geometrics and fractals.
Auto Lip-Sync: Your audio will be automatically paired with your characters.
Weaknesses
Continuous Saving: You will need to manually save your files each time.
Learning Curve: The program takes some time to master.
No. 6 Cacani

Here comes CACANi, a new chip off the old block for anime lovers. It has awesome features for drawing vector animations.
Cacani llll➤
● UI
Excellent vector drawing interface which reduces your effort and time by auto-generating drawings.
● Features
Auto-generated Drawings+Personal Drawing Assistant+Max Artist Control+Max Artist Control+Shortcut Customization
● Compatibility
BMP, PNG, JPG, TGA, and TIFF files can all be imported.
● Popularity
Relatively new to the market but is growing in popularity.
● Operating System
Compatible with Windows 7, 8, 10, or higher.
● Pricing
30-day license $20; Yearlong license $180; Lifelong license $499; Team Plans start at $399 for 4 devices; Perpetual Team Plan $799
● Who is Best For?
Animators looking to work with a more powerful set of tools and are willing to pay for it can opt for Cacani.
● Reviewers say compared to Adobe Animate
An advanced tool provides excellent support for smooth and curve drawings.
● Verdict
A premium tool meant for advanced usage and is excellent for instinctive users and animators.
Strengths
Painting Assistance: You can paint one sequence and your color combination will be carried forward to the next sequence.
Drawing Tools: Simplifies all types of vector drawings.
Stroke Correction: You can correct problems in-between frames.
Weaknesses
Cost-effective for individual use: Teams and businesses may find it a bit above budget.
Cost-effective for individual use: Teams and businesses may find it a bit above budget.
No. 7 Wick Editor

Wick Editor is a free-to-use open-source platform that is great for creating standard flash-based animations. It was incepted with the purpose to provide animators with a free platform equipped with easy-to-use toolkits.
Wick Editor llll➤
● UI
Wick’s interface includes a combination of programming and animation systems using tools like Flash and Scratch and HyperCard.
● Features
Interactive Interface+Browser Operated+Browser Operated+Includes Guides and Tutorials
● Compatibility
Requires third-party assistance to convert wick files to GIF, ZIP or HTML.
● Popularity
Moderately rate by first-time users.
● Operating System
Can run online through browsers like Firefox or Chrome.
● Pricing
Free to use.
● Who is Best For?
Suitable marketing animators and freelancers.
● Reviewers say compared to Adobe Animate
Not as comprehensive as Adobe Animate.
● Verdict
Wick Editor is more suited for animating basic promotions but not meant for professional use.
Strengths
User Friendly: Icons, texts, and labels are enlarged for convenience.
Includes Basic Programming: Combines animation elements with a programming interface.
Export to multiple formats: You can use export wick projects in multiple formats.
Weaknesses
Incompatible with Mobile Devices: It is not available for use on mobile devices.
Incompatible with Mobile Devices: It is not available for use on mobile devices.
No. 8 Blender

Animators who are looking to specialize in 3D animations can get their hands on Blender. It is a highly popular open-source 3D animation software.
Blender llll➤
● UI
Animators who are looking to specialize in 3D animations can get their hands on Blender. It is a highly popular open-source 3D animation software.
● Features
3D modelling+Raster Graphics Editing+Fluid and Smoke Simulation+Raster Graphics Editing+Rigging & Skinning
● Compatibility
Blender is compatible with a wide range of file formats namely OBJ, 3DS, FBX, STL, PLY and so on.
● Popularity
Blender has an excellent rating of 4.5 on G2.
● Operating System
Compatible for Windows 10 or higher, macOS 10.13 and Linux.
● Pricing
Free to use.
● Who is Best For?
Blender is used by animators worldwide to create professional animation productions.
● Reviewers say compared to Adobe Animate.
Adobe Animate is comparatively easier to use, but Blender is great for small-scale animation businesses.
● Verdict
An excellent diverse animation tool for small-scale studios, freelancers and hobbyists.
Strengths
Sync Sound: Match your audios with your visuals with auto-sync.
Preset Shortcuts: You can memorize a list of hotkeys for convenient use.
Shape Keys: You can add more detail with the help of shape keys like skeletal rigging.
Weaknesses
Complicated User interface: There are dozens of duplicate buttons which uncoordinated.
Glitches: Open source software is known to be glitchy as they lack premium security.
No. 9 Autodesk Maya

Maya is a well-known 3D graphics editor which is absolutely jam-packed with features and functions like 3D animation, rendering, simulation, composting, modeling and visualization. It can be considered the next level in animation after Adobe Animate.
Krita llll➤
● UI
Maya is a well-known 3D graphics editor which is absolutely jam-packed with features and functions like 3D animation, rendering, simulation, composting, modeling and visualization. It can be considered the next level in animation after Adobe Animate.
● Features
Ready to use graphs+Ready to use graphs+Bifrost Programming Environment+Ocean Simulation Systems+Seamless Import and Export
● Compatibility
Maya can import various file formats, including mayaBinary, mayaLT, mayaAscii, OBJ, audio, EPS, Adobe Illustrator, Image, FBX.
● Popularity
Maya has a standard 4.3 rating on G2.
● Operating System
Compatible with macOS X 10.13, Windows 10 or higher and Linux.
● Pricing
Annual Subscription $1700.
● Who is Best For?
Maya is equipped with a substantial number of features and requires animators to take time learn therefore grooming their animation skills.
● Reviewers say compared to Adobe Animate
Adobe animate has a much more convenient interface when compared to Autodesk Maya but it is more alluring for professional studios.
● Verdict
Autodesk Maya is mighty fine 3D animation software that opens more doors for animators with a keen sense of detail.
Strengths
A complete 3D animation package: Maya hasn’t left any stone unturned in terms of features.
One of the best in the Industry: Simple to create any type of animation.
Python API: Convenient for creating plugins and scripts.
Weaknesses
Lacks Convenient Interface: Maya’s toolkit is a bit more complex than Animate CC.
No. 10 Filmora Pro

Filmora Pro is an excellent Adobe Animate alternative in terms of convenience, versatility and the variation animation features you can explore on its super intuitive interface.
Krita llll➤
● UI
Filmora Pro is basically a video editing software with a unique interface that is simple to understand and master.
● Features
Length Adjustment+Gradient Tool+Evaporate+Linear Wipe+Pinwheel
● Compatibility
You can import a wide range of video files like MP4, MOV, WMV, AVI, F4V, MKV, TS, MPEG-2, GIF, MP3 and WEBM.
● Popularity
Filmora Pro is rated at a whopping 4.6 stars.
● Operating System
Compatible with Windows 7, 8, 10, 11, macOS 10.15, 11, 13, 14.
● Pricing
Per Year subscription $51.99; time Purchase $79.99
● Who is Best For?
Filmora Pro from Wondershare is ideal for users, from vloggers and freelancers to hobbyists and professionals.
● Reviewers say compared to Adobe Animate.
According to most reviewers, Filmora Pro has an easier-to-use interface and an abundance of features compared to Adobe Animate CC. Still, it is essentially a video editing software nonetheless.
● Verdict
Filmora Pro is an all-in-one video editing software that offers tons of editing features for all types of videos.
Strengths
Preset Options: You can experiment with a wide range of presets to edit animations quickly.
Easy Media Upload: Filmora supports a wide range of file formats.
4K video: You can also use Filmora to edit 4K videos.
Weaknesses
Lacks Shortcut Options: It may get a bit difficult to navigate on Filmora.
Cartoonish Transitions: Transition between cuts can require extra care.
Part 1 The Most Comprehensive All-round Comparison Among All Alternatives
| Tools | UI | G2 Rating | OS | Pricing |
|---|---|---|---|---|
| Krita | Versatile | 4.3 | Windows 8 or higher, macOS X 10.12 and Linux | Free |
| Open Toonz | Compartmentalized | 4.1 | MacOS X 10.9, Windows 7 or higher | Free |
| Toon Boom | Instinctive | 4.7 | Windows 7 & 10, macOS High Sierra, Catalina, Mojave | Basic – $25/month; Advanced - $63/month; Premium - $115/month |
| TVPaint Animation | Comprehensive | 5 | Windows, macOS X, Android and Linux. | Standard Version – €500; Pro Version – €1250 |
| Synfig Studio | Versatile | 5 | Windows 7 and above, macOS X 10.8 and Linux | Free |
| Cacani | Effortless | NIL | Windows 7, 8, 10 or higher | 30-day license $20; Yearlong license $180; Lifelong license $499; Team Plans start at $399 for 4 devices; Perpetual Team Plan $799 |
| Wick Editor | Hybrid | NIL | Firefox or Chrome. | Free |
| Blender | Changing | 4.5 | Windows 10 or higher, macOS 10.13 and Linux. | Free |
| Maya | Comprehensive | 4.3 | MacOS X 10.13, Windows 10 or higher and Linux. | Annual Subscription $1700 |
| Filmora Pro | Versatile | 4.6 | Windows 7, 8, 10, 11, macOS 10.15, 11, 13, 14. | Yearly – $51.99; One Time –$79.99 |

Wondershare Filmora - Best Video Editor for Mac/Windows
5,481,435 people have downloaded it.
Build unique custom animations without breaking a sweat.
Focus on creating epic stories and leave the details to Filmora’s auto features.
Start a creative adventure with drag & drop effects and endless possibilities.
Filmora simplifies advanced features to save you time and effort.
Filmora cuts out repetition so you can move on to your next creative breakthrough.
Key Takeaways from This Episode
● There are dozens of free and paid animation software out there, but only a few are ideal Adobe Animate Alternatives.
● Adobe Animate is one of the best 2D and 3D animation software in the market, with versatile tools and many plug-in options.
● You need a monthly or yearly subscription to Adobe Creative Cloud to use Animate CC, which is why we have complied a list of the best Adobe Animate Alternatives.
Like all other Adobe premium software like Photoshop, illustrator, and premiere pro, Adobe Animate is designed for professionals.
No need to feel discouraged as there are plenty of Adobe Animate free alternatives with which you can polish the animator in you. Let’s check them out.
In this article
01 [Adobe Animate - How It Became a Good Option Without Hesitation?](#Part 1)
02 [Top 10 Adobe Animate Alternatives to Improve Animation Experience](#Part 2)
03 [The Most Comprehensive All-round Comparison Among All Alternatives](#Part 3)
Part 1 Adobe Animate - How It Became a Good Option Without Hesitation?
1. How Much Do You Know About Adobe Animate Key Features?
The Adobe Creative Cloud is constantly updating its range of virtual tools with new features which give users twice more incentive to subscribe. Adobe Animate CC, which is basically the new Adobe Flash, has also received an update recently which installed a bundle of new features to its interface, making it even more irresistible to animators.
What’s new with Adobe Animate?
● Adobe Animate Camera
Adding to Adobe’s line of exclusivity is its all-new Adobe Virtual Camera. Using this feature, Adobe animate users can now control their animation camera movements giving your animation videos a more realistic feel.
● Export any Format
Exporting your animations to your desktop is a convenience every software should provide.
● Audio Syncing
Adobe Animate enables you to synchronize audio to your animations completely easily which is yet another feature that has been recently added.
● Vector Brushes
Though it resembles the same functionality with Adobe Illustrator, Adobe Animate has renewed the tool with the ability to use tilt and pressure effects when drawing with a stylus or pen.
● Web Fonts
Now you can use a vast library of Adobe web fonts with Adobe Animate. These high-quality fonts are available in HTML5 canvas documents.
2. What Lay Behind Adobe Animate Alternative?
When it comes to choosing the best premium animation software, Adobe Animate CC is the obvious choice, but what makes beginners hesitant in using Adobe Animate is the fact that you need to subscribe to Adobe Creative Cloud.
This becomes an obstacle to those who are just starting out and are not that confident in getting their hands on a professional league interface like Animate. It also lacks sufficient facilities for practicing 3D animations.
This is exactly where free Alternatives to Adobe Animate enters the scene. Check out our list and find out which alternative suits your level of animation skills.
Part 2 Top 10 Adobe Animate Alternatives to Improve Animation Experience
No. 1 Krita
The first free-to-use Adobe Alternative on our list is ‘Krita’. It is an open-source animator with an intuitive drag and drop panel which gives users complete flexibility.
Krita llll➤
● UI
It offers over 30 different Dockers which are like toolkits for the program.
● Features
Freehand path tool+Object manipulation+HDR support+Layer Management+Enhanced OpenGL
● Compatibility
Supports various metadata formats like ORA, KRA, PSD, JPEG and PNG files.
● Popularity
Krita has a 4.3 start popularity rating at G2.com.
● Operating System
Compatible with Windows 8 or higher, macOS X 10.12 and Linux Basic.
● Pricing
Free to use.
● Who is Best For?
Krita is an excellent alternative for beginners who are looking to not get overwhelmed by comprehensive features.
● Reviewers say compared to Adobe Animate
Many reviewers have preferred Krita’s simplistic approach to Adobe Animate.
● Verdict
It is an excellent image editor and animator but can be limiting in its professional application.
Strengths
100 preloaded brushes: You can use brush tools in categories like digital, ink, paint, and sketch.
Onion Layer Editing: You can go back and check your previous drawing before moving on to the next.
Counteractive Tools: Efficiently compatible with pressure-sensitive tablets.
Weaknesses
Pixel-based Drawings: Its drawings are pixelated making it harder to achieve precisions around the rough edges.
Added Support: Exporting animation files requires support from a secondary application.
No. 2 Open Toonz
A friendlier platform for cartoon animation lovers and yet another free Adobe Animate Alternative. An open-source platform whose code can be modified by the user to add new features and graphics.
Open Toonz llll➤
● UI
Its interface has separate organized rooms called ‘workspaces’. The tools and windows in each room are different and fulfill a separate function.
● Features
Indexed Colour Palettes+Motion Tracking+Effects and Composting+Effects and Composting+Effects and Composting
● Compatibility
Opentoonz supports a plethora of file formats like AVI, 3GP, BMP, JPG, GIF, MOV, NOL, RGB, SGI, TGA, TIF, and TIFF.
● Popularity
OpenToonz has a standard rating of 4.1 stars on G2.
● Operating System
Compatible with macOS X 10.9, Windows 7 or higher.
● Pricing
Free to use.
● Who is Best For?
Can be used by both professionals and beginners alike.
● Reviewers say compared to Adobe Animate
It is a great platform to familiarize yourself with basic animation.
● Verdict
OpenToonz is an excellent animation tool for beginners but lacks some of the higher-performing functions demanded by professionals.
Strengths
TWAIN Standard Compatible: Images captured on OpenToonx using its digital camera and scanners can be used in animations.
Choose from different animation types: You can choose between standard animation and skeletal animations.
100s of Special Effects: Change the effects of your image however you want using effects like incident light or distortion waves.
Weaknesses
Suitable only for beginners: OpenToonz may still require some work in order to muster the attention of pros.
Lack of automated syncing: You may find it difficult to sync the voices of your characters.
No. 3 Toon Boom
Toon Boom is a more popular alternative to Adobe Animate and is recognized by professional animation studios worldwide. Toon Boom even has its own pro-grade animation software called Harmony which has been used to create various popular TV animated series.
Toon Boom llll➤
● UI
The extremely instinctive interface where you can navigate using various effects like zoom in & out, pan and reset your views.
● Features
Advanced Cut out+Bitmap and Vector Drawing+Bitmap and Vector Drawing+Access to Harmony Server+Access to Harmony Server
● Compatibility
Toon Boom can import dozens of different file formats like BMP, JPEG, PSD, TGA, SGI, TIFF, TVG and PAL.
● Popularity
Toom Boom is rated excellent on G2 with 4.7 stars.
● Operating System
Can run with Windows 7 & 10, macOS High Sierra, Catalina, Mojave.
● Pricing
Basic - $25/month; Advanced - $63/month; Premium - $115/month.
● Who is Best For?
Superb animation software with dozens of features that would attract freelance animators and professionals.
● Reviewers say compared to Adobe Animate
The common opinion amongst reviewers is that Toon Boom offers many more features than Adobe Animate.
● Verdict
Toon Boom is premium software that is excellent for pro-league animators and is one of Adobe Animates biggest competitors.
Strengths
Onion Skinning Feature: You can view your drawings in layers.
Import & Export Different types of files: You can export and import files like paper drawings, digital drawings and 13 other file types.
Peg Animations: You can chart your character’s movements using pegs between two points.
Weaknesses
Lacks Audio Features: You require an external audio application to include audio in your animations.
Do not include pre-made characters: You would need to create your characters from scratch.
No. 4 TVPaint Animation
TVPaint has been a household animation software that has been around for a while. It has considerable features which are great for creating versatile 2D animations.
TVPaint Animation llll➤
● UI
The TVPaint Interface is not too complex and has a wide range of bitmap drawing tools for 2D all 2D animation processes.
● Features
Bitmap Drawing Tools+Bitmap Drawing Tools+Layer Management+Layer Management+Layer Management
● Compatibility
Can import image and video files like WMV, AVI, MOV, MPEG, GIF, JPEG, PNG, and TIFF.
● Popularity
TVPaint has been around for a long while and has a 5-star G2 rating.
● Operating System
Later versions of TVPaint are compatible with Microsoft Windows, macOS X, Android, and Linux.
● Pricing
Standard version 11.0 costs €500; Professional version 11.0 costs €1250.
● Who is Best For?
It is traditionally acclaimed 2D animation software superb for professional animation studios.
● Reviewers say compared to Adobe Animate
Both TV Paint and Animate cc has the ability to perfect frame to frame animation with minor differences in the choice of tools.
● Verdict
TV Paint is a fantastic software amongst animators who wish to perfect their craft.
Strengths
Versatile Drawing Tools: You have access to all essential drawing tools like brushes, color palettes, textures and more.
Strong Painting Engine: Powerful painting tool for sketching and painting backgrounds.
Colour & Texture Generator: This tool provides an enhanced spectrum of colors.
Weaknesses
Learning Curve: TVPaint has its own learning curve as the interface is dissimilar from average animators.
Limited to Bitmap: You can only edit images in Bitmap format.
No. 5 Synfig Studio
Synfig is yet another free-to-use Adobe Animate alternative but is quite powerful in creating fabulous vector animations which are flawless to look at it.
Synfig Studio llll➤
● UI
Synfig is yet another free-to-use Adobe Animate alternative but is quite powerful in creating fabulous vector animations which are flawless to look at it.
● Features
Various different layers+Sound Support+Dozens of Drawing Tools+Dozens of Drawing Tools+Import Facility
● Compatibility
You can render multiple video formats like AVI, MPEG, GIF, and MNG.
● Popularity
Excellent Rating 5 stars for Vector Graphics on G2.
● Operating System
Can run on Windows 7 and above, macOS X 10.8 and Linux.
● Pricing
Free to use.
● Who is Best For?
Synfig is a bit complex but great for animators who are willing to learn.
● Reviewers say compared to Adobe Animate
Much more convenient interface.
● Verdict
Synfig Studios is a great program for animating vector graphics.
Strengths
Vector Tweening: Change the shape of your vectors automatically.
50+ Layers: Choose from multiple gradients, filters, distortions, geometrics and fractals.
Auto Lip-Sync: Your audio will be automatically paired with your characters.
Weaknesses
Continuous Saving: You will need to manually save your files each time.
Learning Curve: The program takes some time to master.
No. 6 Cacani
Here comes CACANi, a new chip off the old block for anime lovers. It has awesome features for drawing vector animations.
Cacani llll➤
● UI
Excellent vector drawing interface which reduces your effort and time by auto-generating drawings.
● Features
Auto-generated Drawings+Personal Drawing Assistant+Max Artist Control+Max Artist Control+Shortcut Customization
● Compatibility
BMP, PNG, JPG, TGA, and TIFF files can all be imported.
● Popularity
Relatively new to the market but is growing in popularity.
● Operating System
Compatible with Windows 7, 8, 10, or higher.
● Pricing
30-day license $20; Yearlong license $180; Lifelong license $499; Team Plans start at $399 for 4 devices; Perpetual Team Plan $799
● Who is Best For?
Animators looking to work with a more powerful set of tools and are willing to pay for it can opt for Cacani.
● Reviewers say compared to Adobe Animate
An advanced tool provides excellent support for smooth and curve drawings.
● Verdict
A premium tool meant for advanced usage and is excellent for instinctive users and animators.
Strengths
Painting Assistance: You can paint one sequence and your color combination will be carried forward to the next sequence.
Drawing Tools: Simplifies all types of vector drawings.
Stroke Correction: You can correct problems in-between frames.
Weaknesses
Cost-effective for individual use: Teams and businesses may find it a bit above budget.
Cost-effective for individual use: Teams and businesses may find it a bit above budget.
No. 7 Wick Editor
Wick Editor is a free-to-use open-source platform that is great for creating standard flash-based animations. It was incepted with the purpose to provide animators with a free platform equipped with easy-to-use toolkits.
Wick Editor llll➤
● UI
Wick’s interface includes a combination of programming and animation systems using tools like Flash and Scratch and HyperCard.
● Features
Interactive Interface+Browser Operated+Browser Operated+Includes Guides and Tutorials
● Compatibility
Requires third-party assistance to convert wick files to GIF, ZIP or HTML.
● Popularity
Moderately rate by first-time users.
● Operating System
Can run online through browsers like Firefox or Chrome.
● Pricing
Free to use.
● Who is Best For?
Suitable marketing animators and freelancers.
● Reviewers say compared to Adobe Animate
Not as comprehensive as Adobe Animate.
● Verdict
Wick Editor is more suited for animating basic promotions but not meant for professional use.
Strengths
User Friendly: Icons, texts, and labels are enlarged for convenience.
Includes Basic Programming: Combines animation elements with a programming interface.
Export to multiple formats: You can use export wick projects in multiple formats.
Weaknesses
Incompatible with Mobile Devices: It is not available for use on mobile devices.
Incompatible with Mobile Devices: It is not available for use on mobile devices.
No. 8 Blender
Animators who are looking to specialize in 3D animations can get their hands on Blender. It is a highly popular open-source 3D animation software.
Blender llll➤
● UI
Animators who are looking to specialize in 3D animations can get their hands on Blender. It is a highly popular open-source 3D animation software.
● Features
3D modelling+Raster Graphics Editing+Fluid and Smoke Simulation+Raster Graphics Editing+Rigging & Skinning
● Compatibility
Blender is compatible with a wide range of file formats namely OBJ, 3DS, FBX, STL, PLY and so on.
● Popularity
Blender has an excellent rating of 4.5 on G2.
● Operating System
Compatible for Windows 10 or higher, macOS 10.13 and Linux.
● Pricing
Free to use.
● Who is Best For?
Blender is used by animators worldwide to create professional animation productions.
● Reviewers say compared to Adobe Animate.
Adobe Animate is comparatively easier to use, but Blender is great for small-scale animation businesses.
● Verdict
An excellent diverse animation tool for small-scale studios, freelancers and hobbyists.
Strengths
Sync Sound: Match your audios with your visuals with auto-sync.
Preset Shortcuts: You can memorize a list of hotkeys for convenient use.
Shape Keys: You can add more detail with the help of shape keys like skeletal rigging.
Weaknesses
Complicated User interface: There are dozens of duplicate buttons which uncoordinated.
Glitches: Open source software is known to be glitchy as they lack premium security.
No. 9 Autodesk Maya
Maya is a well-known 3D graphics editor which is absolutely jam-packed with features and functions like 3D animation, rendering, simulation, composting, modeling and visualization. It can be considered the next level in animation after Adobe Animate.
Krita llll➤
● UI
Maya is a well-known 3D graphics editor which is absolutely jam-packed with features and functions like 3D animation, rendering, simulation, composting, modeling and visualization. It can be considered the next level in animation after Adobe Animate.
● Features
Ready to use graphs+Ready to use graphs+Bifrost Programming Environment+Ocean Simulation Systems+Seamless Import and Export
● Compatibility
Maya can import various file formats, including mayaBinary, mayaLT, mayaAscii, OBJ, audio, EPS, Adobe Illustrator, Image, FBX.
● Popularity
Maya has a standard 4.3 rating on G2.
● Operating System
Compatible with macOS X 10.13, Windows 10 or higher and Linux.
● Pricing
Annual Subscription $1700.
● Who is Best For?
Maya is equipped with a substantial number of features and requires animators to take time learn therefore grooming their animation skills.
● Reviewers say compared to Adobe Animate
Adobe animate has a much more convenient interface when compared to Autodesk Maya but it is more alluring for professional studios.
● Verdict
Autodesk Maya is mighty fine 3D animation software that opens more doors for animators with a keen sense of detail.
Strengths
A complete 3D animation package: Maya hasn’t left any stone unturned in terms of features.
One of the best in the Industry: Simple to create any type of animation.
Python API: Convenient for creating plugins and scripts.
Weaknesses
Lacks Convenient Interface: Maya’s toolkit is a bit more complex than Animate CC.
No. 10 Filmora Pro
Filmora Pro is an excellent Adobe Animate alternative in terms of convenience, versatility and the variation animation features you can explore on its super intuitive interface.
Krita llll➤
● UI
Filmora Pro is basically a video editing software with a unique interface that is simple to understand and master.
● Features
Length Adjustment+Gradient Tool+Evaporate+Linear Wipe+Pinwheel
● Compatibility
You can import a wide range of video files like MP4, MOV, WMV, AVI, F4V, MKV, TS, MPEG-2, GIF, MP3 and WEBM.
● Popularity
Filmora Pro is rated at a whopping 4.6 stars.
● Operating System
Compatible with Windows 7, 8, 10, 11, macOS 10.15, 11, 13, 14.
● Pricing
Per Year subscription $51.99; time Purchase $79.99
● Who is Best For?
Filmora Pro from Wondershare is ideal for users, from vloggers and freelancers to hobbyists and professionals.
● Reviewers say compared to Adobe Animate.
According to most reviewers, Filmora Pro has an easier-to-use interface and an abundance of features compared to Adobe Animate CC. Still, it is essentially a video editing software nonetheless.
● Verdict
Filmora Pro is an all-in-one video editing software that offers tons of editing features for all types of videos.
Strengths
Preset Options: You can experiment with a wide range of presets to edit animations quickly.
Easy Media Upload: Filmora supports a wide range of file formats.
4K video: You can also use Filmora to edit 4K videos.
Weaknesses
Lacks Shortcut Options: It may get a bit difficult to navigate on Filmora.
Cartoonish Transitions: Transition between cuts can require extra care.
Part 1 The Most Comprehensive All-round Comparison Among All Alternatives
| Tools | UI | G2 Rating | OS | Pricing |
|---|---|---|---|---|
| Krita | Versatile | 4.3 | Windows 8 or higher, macOS X 10.12 and Linux | Free |
| Open Toonz | Compartmentalized | 4.1 | MacOS X 10.9, Windows 7 or higher | Free |
| Toon Boom | Instinctive | 4.7 | Windows 7 & 10, macOS High Sierra, Catalina, Mojave | Basic – $25/month; Advanced - $63/month; Premium - $115/month |
| TVPaint Animation | Comprehensive | 5 | Windows, macOS X, Android and Linux. | Standard Version – €500; Pro Version – €1250 |
| Synfig Studio | Versatile | 5 | Windows 7 and above, macOS X 10.8 and Linux | Free |
| Cacani | Effortless | NIL | Windows 7, 8, 10 or higher | 30-day license $20; Yearlong license $180; Lifelong license $499; Team Plans start at $399 for 4 devices; Perpetual Team Plan $799 |
| Wick Editor | Hybrid | NIL | Firefox or Chrome. | Free |
| Blender | Changing | 4.5 | Windows 10 or higher, macOS 10.13 and Linux. | Free |
| Maya | Comprehensive | 4.3 | MacOS X 10.13, Windows 10 or higher and Linux. | Annual Subscription $1700 |
| Filmora Pro | Versatile | 4.6 | Windows 7, 8, 10, 11, macOS 10.15, 11, 13, 14. | Yearly – $51.99; One Time –$79.99 |
Wondershare Filmora - Best Video Editor for Mac/Windows
5,481,435 people have downloaded it.
Build unique custom animations without breaking a sweat.
Focus on creating epic stories and leave the details to Filmora’s auto features.
Start a creative adventure with drag & drop effects and endless possibilities.
Filmora simplifies advanced features to save you time and effort.
Filmora cuts out repetition so you can move on to your next creative breakthrough.
Key Takeaways from This Episode
● There are dozens of free and paid animation software out there, but only a few are ideal Adobe Animate Alternatives.
● Adobe Animate is one of the best 2D and 3D animation software in the market, with versatile tools and many plug-in options.
● You need a monthly or yearly subscription to Adobe Creative Cloud to use Animate CC, which is why we have complied a list of the best Adobe Animate Alternatives.
How to Make GIF Stickers for WhatsApp 100% The Easy Way
How to Make GIF Stickers for WhatsApp 100% The Easy Way
An easy yet powerful editor
Numerous effects to choose from
Detailed tutorials provided by the official channel
Wish your dear friends and loved ones on their special days using some interesting WhatsApp stickers. There is an integrated library of these stickers in different categories on your Android as well as iPhone.

Still, if you want a more personalized one, you can create a customized sticker using videos on your phone or using third-party apps and tools. Learn about how to use the integrated stickers and create customized in the following parts of the topic.
In this article
01 [Using stickers from integrated library](#Part 1)
02 [Best tools to create animated GIF sticker – Wondershare Filmora](#Part 2)
03 [Using iPhone and Android videos to make GIF stickers](#Part 3)
Part 1 Using stickers from integrated library
WhatsApp on your Android and iPhone has a decent collection of stickers that can send to your contacts. You simply need to look for the sticker in the desired category and send it and the steps for adding GIFs to WhatsApp are listed below.
Step 1. Open the WhatsApp contact to which you wish to send the sticker. To open the animation library on your Android device, tap on the emoji icon and choose the GIF option. On an iPhone, the library opens by clicking on the sticker icon.
Step 2. Search and select the desired sticker from the available options.
Step 3. To finally share the selected one, click on the sticker and then on the Send button.

Part 2 Best tools to create animated GIF sticker – Wondershare Filmora
If you are in search of a tool that lets you create a professional-looking animated GIF easily Wondershare Filmora Video Editor is the best WhatsApp GIF maker tool. This software once downloaded on your Windows or Mac system, is all set to look after multiple video editing tasks including GIF creation.
Wondershare Filmora
Get started easily with Filmora’s powerful performance, intuitive interface, and countless effects!
Try It Free Try It Free Try It Free Learn More >

Your videos in MP4, MKV, MOV, and several other key formats can be converted to a GIF file using the program and multiple options for editing are available as well like crop, trim, add effects, add texts, and more.
The intuitive interface of the software makes it easy to use even by non-techy people.
Steps on how to make WhatsApp GIF sticker using Wondershare Filmora
**Step 1.**On your Windows or Mac, download, install, and launch the Wondershare software and then import the video files from which GIF has to be created.
Step 2. The added files have to be now dragged and dropped to the timeline.

Step 3. Editing tools for customization can be used.
**Step 4.**For further personalization by adding text, effects, and more the related functions can be used.

Step 5. Next, choose the GIF option as the target file format from the Local tab. Select the file name and the location. Clicking on the EXPORT button will start the processing.

Part 3 Using iPhone and Android videos to make GIF stickers
If you do not wish to use any third-party tools, basic stickers can also be created using the videos on your Android and iPhone. A video cannot be more than 6 seconds in length to be used as a GIF and thus longer videos need to be trimmed.
Steps on how to make a GIF stickers for WhatsApp
Step 1. Launch the WhatsApp contact to which you wish to send the GIF. Add the video from the device gallery by clicking on the camera button. A video using the camera can also be recorded.
Note: Ensure that video length is not more than 6 seconds. If it is more, use the slider at the top to trim the video.
Step 2. Next, you can add the text using the Caption option.
Step 3. Now to convert this video into a GIF click on the GIF button under the video and then tap on the Send button to share this animation with the contact.

● Key Takeaways from This Episode →
●WhatsApp has an integrated library of GIF stickers in a wide range of categories.
●For creating customized stickers, Wondershare Filmora works as the best software as it is simple, quick, and has multiple editing options.
●Using the videos from the gallery, GIF stickers can also be created on your Android and iPhone.
Wish your dear friends and loved ones on their special days using some interesting WhatsApp stickers. There is an integrated library of these stickers in different categories on your Android as well as iPhone.
Still, if you want a more personalized one, you can create a customized sticker using videos on your phone or using third-party apps and tools. Learn about how to use the integrated stickers and create customized in the following parts of the topic.
In this article
01 [Using stickers from integrated library](#Part 1)
02 [Best tools to create animated GIF sticker – Wondershare Filmora](#Part 2)
03 [Using iPhone and Android videos to make GIF stickers](#Part 3)
Part 1 Using stickers from integrated library
WhatsApp on your Android and iPhone has a decent collection of stickers that can send to your contacts. You simply need to look for the sticker in the desired category and send it and the steps for adding GIFs to WhatsApp are listed below.
Step 1. Open the WhatsApp contact to which you wish to send the sticker. To open the animation library on your Android device, tap on the emoji icon and choose the GIF option. On an iPhone, the library opens by clicking on the sticker icon.
Step 2. Search and select the desired sticker from the available options.
Step 3. To finally share the selected one, click on the sticker and then on the Send button.
Part 2 Best tools to create animated GIF sticker – Wondershare Filmora
If you are in search of a tool that lets you create a professional-looking animated GIF easily Wondershare Filmora Video Editor is the best WhatsApp GIF maker tool. This software once downloaded on your Windows or Mac system, is all set to look after multiple video editing tasks including GIF creation.
Wondershare Filmora
Get started easily with Filmora’s powerful performance, intuitive interface, and countless effects!
Try It Free Try It Free Try It Free Learn More >
Your videos in MP4, MKV, MOV, and several other key formats can be converted to a GIF file using the program and multiple options for editing are available as well like crop, trim, add effects, add texts, and more.
The intuitive interface of the software makes it easy to use even by non-techy people.
Steps on how to make WhatsApp GIF sticker using Wondershare Filmora
**Step 1.**On your Windows or Mac, download, install, and launch the Wondershare software and then import the video files from which GIF has to be created.
Step 2. The added files have to be now dragged and dropped to the timeline.
Step 3. Editing tools for customization can be used.
**Step 4.**For further personalization by adding text, effects, and more the related functions can be used.
Step 5. Next, choose the GIF option as the target file format from the Local tab. Select the file name and the location. Clicking on the EXPORT button will start the processing.
Part 3 Using iPhone and Android videos to make GIF stickers
If you do not wish to use any third-party tools, basic stickers can also be created using the videos on your Android and iPhone. A video cannot be more than 6 seconds in length to be used as a GIF and thus longer videos need to be trimmed.
Steps on how to make a GIF stickers for WhatsApp
Step 1. Launch the WhatsApp contact to which you wish to send the GIF. Add the video from the device gallery by clicking on the camera button. A video using the camera can also be recorded.
Note: Ensure that video length is not more than 6 seconds. If it is more, use the slider at the top to trim the video.
Step 2. Next, you can add the text using the Caption option.
Step 3. Now to convert this video into a GIF click on the GIF button under the video and then tap on the Send button to share this animation with the contact.
● Key Takeaways from This Episode →
●WhatsApp has an integrated library of GIF stickers in a wide range of categories.
●For creating customized stickers, Wondershare Filmora works as the best software as it is simple, quick, and has multiple editing options.
●Using the videos from the gallery, GIF stickers can also be created on your Android and iPhone.
How to Cartoonize Photo Photoshop in Simple Steps
How to Cartoonize Photo Photoshop in Easy Steps
An easy yet powerful editor
Numerous effects to choose from
Detailed tutorials provided by the official channel
Cartoons, an already catchy entertainment source, can upgrade other media utilities on integration. Look through the easiest ways of creating cartoonize photo Photoshop stills!
In this article
01 [Types of Cartoon Effects in Photoshop](#Part 1)
02 [Easiest Ways to Cartoonize Photo in Photoshop](#Part 2)
03 [How to Use a Variety of Photoshop Special Effects to Create the Final Caricature Look](#Part 3)
Part 1 Types of Cartoon Effects in Photoshop
It is an absolute fun activity to explore your editing creativity in the realm of cartoonizing the otherwise ordinary still captures. Talking of the most convenient cartoon creator and editor applications, you can safely rely on the Photoshop Image Editor application to choose from a pool of cartoon editing effects for adding that spunky and funny element to your image files.
Presented in the following section, is a discussion of some of the most stunning and visibly amazing cartoon effects in the application’s Editor Library to cartoonize Photoshop images:
01Pop Art Photoshop Action
The effect is a predominantly preferred as a cartoon action Photoshop utility to caricaturize a normal image, along with customizing the same to change the colors and background of the original still capture for creating a brand new appearance with utmost ease. Apart from this, the aforesaid effect allows you to exclusively customize the globally acclaimed graphic masterpieces of Roy Lichtenstein. Working with the effect, you can edit a self-portrait or the favorite image of your pet to give the latter, a funny retro feel.

02Vintage Comic Creator
If the idea of sticking to just the creation of cartoon images is not enough to satisfy you, the Vintage Comic Creator effect allows you to expand your creativity level to work on cartoon based shape and text edits. You can use the effect to enhance an image logo or plain text with a comic book oriented text. A download of this cartoon effect template facilitates you with diversities of customizable layer styles, overlays and patterns.

03GTA Photoshop Action
This is a complete pleasure for the creative fan of Grand Theft Auto, the wicked chasing game series. Additional to creating a stark variety of edited cartoon stills, you are free to reinvent the aforesaid game’s most popular caricature edits, while using the GTA Photoshop Action editing filter. Launched by Indworks, the effect package consisting of 15 vibrant themes and 5 collage templates; promises a quick mimicry of your most cherished video and console games.

04Vector Paint Photoshop Action
The one is an amazing Photoshop effect for creating cartoon edits, which works through a merger of two different ingenious art themes or styles for transforming basic images into cartoonized stills.
The effect grants you the liberty to use varieties of art styles, such as, comic, photo retouching and energetic oil to obtain editing results comparable to that of any original photograph. The template is conveniently simple to use and assures you of quick results. All this, just at a nominal price of $6! Interesting, right?

05Ultra Realistic 3D Space Effect
Considering the fact of you being a space admirer, this one is the perfect image editor for you to add the vibrancy of stunning space elements and backgrounds within your cartoonized edits. The effect lets you play with the diverse range of customizable text and exciting caricature backgrounds. When downloading the template, you get a main setup file, a few editing examples and a web link to the free fonts present in the effect.

06Animated Zombie Grime Art Photoshop Action
Are you in love with the latest zombie grimes? If yes, then this action set is exclusive editor package for you. Working with the aforesaid image template, you can effortlessly add the perfect zombie theme to your cartoon edits, along with simultaneously creating a stunning animation, which you can use to enhance your video or GIF uploads on social media. Not forgetting the best part, you get a free access to this amazing utility.

Part 2 Easiest Ways to Cartoonize Photo in Photoshop
Having known about the amazing varieties of cartoonized editor templates in Photoshop, it is a natural instinct to feel motivated to create your own caricature images from normal capture stills. Addressing the concern of image transformation methods to turn a photo into a cartoon Photoshop, let us dive into some of the most affordable methods of creating cartoonized photos in the aforesaid editing application.
Talking of the most basic Photoshop tools for creating caricature images, you can start your editing spree with using the Graphic Tablet, Brush Tool, Layer Masks and a graphic pen to create amateur cartoonized edits from your still photographs, getting a full control on image tracing.
01Brush Tool
A few usage examples include working with a combination of the graphic tablet pen and the editor brushes to trace your image, using the brush in a masked or a fresh layer to avoid altering the actual image, and much more.
02Graphic Tablet
It is best to use the Photoshop Graphic Tablet for adhering to the concern of tracing cartoonized images. You can alternatively cater to the job with a trackpad, mouse, or even your hand. It is however, difficult to assure steady hand postures for image tracing, lest you are using a stylus pen.
03Pen Tool
Using the Pen Tool for cartoonizing your portrait, allows you to draw outlines along the desired figure within the image, along with its important elements, so that you can easily use these outlined paths to introduce different color blocks.
Similar to the Brush Tool, the Photoshop Pen utility grants you the freedom to vary the degree of detailing in your cartoon edit, from being highly expressive to only remaining around the shore. Working with the Pen Tool can, however be a bit tiring and time taking, with respect to the extent of detailing you wish to add to the caricature edits.
Additional to the aforementioned tools, you can also consider using the default image filters of the Photoshop application to get comparable results. This is an exclusively better option to choose, compared to the Pen Tool, when you are working without a Graphic Tablet. To get over the top realistic caricature renderings, you will need to supplement the use of Photoshop filters with the application’s editing channels and other adjustments.
Part 3 How to Use a Variety of Photoshop Special Effects to Create the Final Caricature Look
Considering the extensive discussion on the credibility of the Photoshop Image Editor application in the realm of creating stunning caricature images in high end resolution, let us proceed to learn about using the diversity of Photoshop’s special effects to get the last stage cartoonized appearance of ordinary still images.
User’s Guide to Create High End Cartoonized Look
The following tutorial is a stepwise explanation of the process to convert photo into cartoon Photoshop in the easiest possible way. Stick to the method for getting affordable results in a quick span.
Step 1: Download and Launch the Program
Visit the official website of Photoshop Image Editor for a free download of the software program in your system, followed by installing and launching the same in your device.
Step 2: Upload Your Image
On a successful launch of the editor program, you will be directed to the ‘Photoshop Editor’ window, where you are required to upload any desired still image from your device for creating a cartoonized edit. To do this, either simply add your image to the editor workspace using the ‘Drag and Drop’ method, or navigate to the ‘File’ tab in the top toolbar and click on ‘Open’ in the dropdown menu.
Step 3: Edge Enhancement
Once your image appears in the editor timeline, proceed to sharpen the edges of the face and body of the portrait. Start with navigating to and clicking on the ‘Filter’ option, followed by tapping on ‘Filter Gallery’ and selecting the ‘Artistic’ folder, where you need to choose the ‘Poster Edges’ option. Observe the effect of these setting on the portrait and make necessary changes.

Step 4: Background Setting
Ensure that the background and foreground of your image are set to white and black colors respectively. If not, proceed to adjust the same as required.

Step 5: Distorting the Edges
You now need to introduce some distortion in the edges of your portrait. Navigate to the ‘Filter’ option again, open the ‘Filter Gallery’ and choose ‘Torn Edges’ from the menu that drops down. Select the desired parameter values in accordance with your creative suitability.


Step 6: Using the Channels Panel
The next step is to select and copy your portrait using the ‘Ctrl + A’ and Ctrl + C commands respectively. Navigate to the ‘Channels’ panel at the right of the Photoshop workspace. At the panel’s bottom right, proceed with creating a new channel. It will be assigned the name ‘Alpha 1’ by Photoshop, which you are most welcome to change.


Step 7: Color Inversion
When you finish creating the channel, use the ‘Ctrl + V’ command to paste your portrait in the same. Proceed with inverting the image colors by navigating to the ‘Image’ option, followed by choosing the ‘Adjustment’ and ‘Invert’ options from the consecutive drop downs. Now, make a selection of the ‘White’ regions of your portrait by pressing the ‘Ctrl’ key and clicking on the ‘Alpha 1 Channel thumbnail.

Step 8: Layer Creation
Navigate to the ‘Layers’ panel at the right of the Photoshop workspace, and click on the ‘New Layer’ icon for creating a fresh layer. Fill the just created layer with black color, either by pressing ‘g’ from your system’s keyboard, or using the ‘Paint Bucket’ tool. Don’t forget to assign a suitable name to the layer.

Repeat the above process to create a separate layer and e fill the same with white color. The layer creation process is essential to separate the white and black colors of the actual image.

Step 10: Layer Dragging
In the ‘Layers’ panel, drag the ‘Black’ layer above the ‘White’ one.

Step 11: Creating Additional Layers
You are now required to create three more layers, with the same process as for the above two, for adding effects to the Skin, Clothes and Teeth/Eyes of the portrait. When you finish creation, assign suitable names to the layers, followed by dragging them below the ‘Black’ one within the ‘Layers’ panel.

Step 12: Color Selection and Application
Choose the respective colors for the clothes, skin and teeth/eyes of the cartoonized edit. To proceed with color application, navigate to the toolbar at the left of the Photoshop workspace and choose the ‘Brush Tool’. Finally, choose a particular layer and apply careful brush strokes to add color to the specific area of the portrait that you wish to edit. Follow the same process to add colors to the remaining layers to get the desired result in all areas of your cartoonized edit.

Step 13: Using the Gradient Tool
Navigate to the ‘Layers’ panel again and create a new ‘Gradient’ layer to further enhance your creation. You now need to select the ‘Gradient Tool’ from the toolbar at the left of the Photoshop workspace. The ‘Gradient Editor’ pops up with the continuously running ‘Gradient Bar’, as soon as you make the selection. Double click on the gradient boxes at both ends to select them, followed by making your color choices. Tap on ‘OK’ when you are satisfied with your work.

Step 14: Filling the Gradients
To proceed with gradient filling, press and hold the mouse button on the image at the bottom left and continue to drag the cursor to its top right corner. Leave the mouse and navigate to the ‘Layers’ panel for dragging and dropping the ‘Gradient’ layer above the ‘White’ layer.

You are now done with the process of creating a caricature edit from a normal still portrait. Your final image output will appear something like the following:

Cartoons, an already catchy entertainment source, can upgrade other media utilities on integration. Look through the easiest ways of creating cartoonize photo Photoshop stills!
In this article
01 [Types of Cartoon Effects in Photoshop](#Part 1)
02 [Easiest Ways to Cartoonize Photo in Photoshop](#Part 2)
03 [How to Use a Variety of Photoshop Special Effects to Create the Final Caricature Look](#Part 3)
Part 1 Types of Cartoon Effects in Photoshop
It is an absolute fun activity to explore your editing creativity in the realm of cartoonizing the otherwise ordinary still captures. Talking of the most convenient cartoon creator and editor applications, you can safely rely on the Photoshop Image Editor application to choose from a pool of cartoon editing effects for adding that spunky and funny element to your image files.
Presented in the following section, is a discussion of some of the most stunning and visibly amazing cartoon effects in the application’s Editor Library to cartoonize Photoshop images:
01Pop Art Photoshop Action
The effect is a predominantly preferred as a cartoon action Photoshop utility to caricaturize a normal image, along with customizing the same to change the colors and background of the original still capture for creating a brand new appearance with utmost ease. Apart from this, the aforesaid effect allows you to exclusively customize the globally acclaimed graphic masterpieces of Roy Lichtenstein. Working with the effect, you can edit a self-portrait or the favorite image of your pet to give the latter, a funny retro feel.
02Vintage Comic Creator
If the idea of sticking to just the creation of cartoon images is not enough to satisfy you, the Vintage Comic Creator effect allows you to expand your creativity level to work on cartoon based shape and text edits. You can use the effect to enhance an image logo or plain text with a comic book oriented text. A download of this cartoon effect template facilitates you with diversities of customizable layer styles, overlays and patterns.
03GTA Photoshop Action
This is a complete pleasure for the creative fan of Grand Theft Auto, the wicked chasing game series. Additional to creating a stark variety of edited cartoon stills, you are free to reinvent the aforesaid game’s most popular caricature edits, while using the GTA Photoshop Action editing filter. Launched by Indworks, the effect package consisting of 15 vibrant themes and 5 collage templates; promises a quick mimicry of your most cherished video and console games.
04Vector Paint Photoshop Action
The one is an amazing Photoshop effect for creating cartoon edits, which works through a merger of two different ingenious art themes or styles for transforming basic images into cartoonized stills.
The effect grants you the liberty to use varieties of art styles, such as, comic, photo retouching and energetic oil to obtain editing results comparable to that of any original photograph. The template is conveniently simple to use and assures you of quick results. All this, just at a nominal price of $6! Interesting, right?
05Ultra Realistic 3D Space Effect
Considering the fact of you being a space admirer, this one is the perfect image editor for you to add the vibrancy of stunning space elements and backgrounds within your cartoonized edits. The effect lets you play with the diverse range of customizable text and exciting caricature backgrounds. When downloading the template, you get a main setup file, a few editing examples and a web link to the free fonts present in the effect.
06Animated Zombie Grime Art Photoshop Action
Are you in love with the latest zombie grimes? If yes, then this action set is exclusive editor package for you. Working with the aforesaid image template, you can effortlessly add the perfect zombie theme to your cartoon edits, along with simultaneously creating a stunning animation, which you can use to enhance your video or GIF uploads on social media. Not forgetting the best part, you get a free access to this amazing utility.
Part 2 Easiest Ways to Cartoonize Photo in Photoshop
Having known about the amazing varieties of cartoonized editor templates in Photoshop, it is a natural instinct to feel motivated to create your own caricature images from normal capture stills. Addressing the concern of image transformation methods to turn a photo into a cartoon Photoshop, let us dive into some of the most affordable methods of creating cartoonized photos in the aforesaid editing application.
Talking of the most basic Photoshop tools for creating caricature images, you can start your editing spree with using the Graphic Tablet, Brush Tool, Layer Masks and a graphic pen to create amateur cartoonized edits from your still photographs, getting a full control on image tracing.
01Brush Tool
A few usage examples include working with a combination of the graphic tablet pen and the editor brushes to trace your image, using the brush in a masked or a fresh layer to avoid altering the actual image, and much more.
02Graphic Tablet
It is best to use the Photoshop Graphic Tablet for adhering to the concern of tracing cartoonized images. You can alternatively cater to the job with a trackpad, mouse, or even your hand. It is however, difficult to assure steady hand postures for image tracing, lest you are using a stylus pen.
03Pen Tool
Using the Pen Tool for cartoonizing your portrait, allows you to draw outlines along the desired figure within the image, along with its important elements, so that you can easily use these outlined paths to introduce different color blocks.
Similar to the Brush Tool, the Photoshop Pen utility grants you the freedom to vary the degree of detailing in your cartoon edit, from being highly expressive to only remaining around the shore. Working with the Pen Tool can, however be a bit tiring and time taking, with respect to the extent of detailing you wish to add to the caricature edits.
Additional to the aforementioned tools, you can also consider using the default image filters of the Photoshop application to get comparable results. This is an exclusively better option to choose, compared to the Pen Tool, when you are working without a Graphic Tablet. To get over the top realistic caricature renderings, you will need to supplement the use of Photoshop filters with the application’s editing channels and other adjustments.
Part 3 How to Use a Variety of Photoshop Special Effects to Create the Final Caricature Look
Considering the extensive discussion on the credibility of the Photoshop Image Editor application in the realm of creating stunning caricature images in high end resolution, let us proceed to learn about using the diversity of Photoshop’s special effects to get the last stage cartoonized appearance of ordinary still images.
User’s Guide to Create High End Cartoonized Look
The following tutorial is a stepwise explanation of the process to convert photo into cartoon Photoshop in the easiest possible way. Stick to the method for getting affordable results in a quick span.
Step 1: Download and Launch the Program
Visit the official website of Photoshop Image Editor for a free download of the software program in your system, followed by installing and launching the same in your device.
Step 2: Upload Your Image
On a successful launch of the editor program, you will be directed to the ‘Photoshop Editor’ window, where you are required to upload any desired still image from your device for creating a cartoonized edit. To do this, either simply add your image to the editor workspace using the ‘Drag and Drop’ method, or navigate to the ‘File’ tab in the top toolbar and click on ‘Open’ in the dropdown menu.
Step 3: Edge Enhancement
Once your image appears in the editor timeline, proceed to sharpen the edges of the face and body of the portrait. Start with navigating to and clicking on the ‘Filter’ option, followed by tapping on ‘Filter Gallery’ and selecting the ‘Artistic’ folder, where you need to choose the ‘Poster Edges’ option. Observe the effect of these setting on the portrait and make necessary changes.
Step 4: Background Setting
Ensure that the background and foreground of your image are set to white and black colors respectively. If not, proceed to adjust the same as required.
Step 5: Distorting the Edges
You now need to introduce some distortion in the edges of your portrait. Navigate to the ‘Filter’ option again, open the ‘Filter Gallery’ and choose ‘Torn Edges’ from the menu that drops down. Select the desired parameter values in accordance with your creative suitability.
Step 6: Using the Channels Panel
The next step is to select and copy your portrait using the ‘Ctrl + A’ and Ctrl + C commands respectively. Navigate to the ‘Channels’ panel at the right of the Photoshop workspace. At the panel’s bottom right, proceed with creating a new channel. It will be assigned the name ‘Alpha 1’ by Photoshop, which you are most welcome to change.
Step 7: Color Inversion
When you finish creating the channel, use the ‘Ctrl + V’ command to paste your portrait in the same. Proceed with inverting the image colors by navigating to the ‘Image’ option, followed by choosing the ‘Adjustment’ and ‘Invert’ options from the consecutive drop downs. Now, make a selection of the ‘White’ regions of your portrait by pressing the ‘Ctrl’ key and clicking on the ‘Alpha 1 Channel thumbnail.
Step 8: Layer Creation
Navigate to the ‘Layers’ panel at the right of the Photoshop workspace, and click on the ‘New Layer’ icon for creating a fresh layer. Fill the just created layer with black color, either by pressing ‘g’ from your system’s keyboard, or using the ‘Paint Bucket’ tool. Don’t forget to assign a suitable name to the layer.
Repeat the above process to create a separate layer and e fill the same with white color. The layer creation process is essential to separate the white and black colors of the actual image.
Step 10: Layer Dragging
In the ‘Layers’ panel, drag the ‘Black’ layer above the ‘White’ one.
Step 11: Creating Additional Layers
You are now required to create three more layers, with the same process as for the above two, for adding effects to the Skin, Clothes and Teeth/Eyes of the portrait. When you finish creation, assign suitable names to the layers, followed by dragging them below the ‘Black’ one within the ‘Layers’ panel.
Step 12: Color Selection and Application
Choose the respective colors for the clothes, skin and teeth/eyes of the cartoonized edit. To proceed with color application, navigate to the toolbar at the left of the Photoshop workspace and choose the ‘Brush Tool’. Finally, choose a particular layer and apply careful brush strokes to add color to the specific area of the portrait that you wish to edit. Follow the same process to add colors to the remaining layers to get the desired result in all areas of your cartoonized edit.
Step 13: Using the Gradient Tool
Navigate to the ‘Layers’ panel again and create a new ‘Gradient’ layer to further enhance your creation. You now need to select the ‘Gradient Tool’ from the toolbar at the left of the Photoshop workspace. The ‘Gradient Editor’ pops up with the continuously running ‘Gradient Bar’, as soon as you make the selection. Double click on the gradient boxes at both ends to select them, followed by making your color choices. Tap on ‘OK’ when you are satisfied with your work.
Step 14: Filling the Gradients
To proceed with gradient filling, press and hold the mouse button on the image at the bottom left and continue to drag the cursor to its top right corner. Leave the mouse and navigate to the ‘Layers’ panel for dragging and dropping the ‘Gradient’ layer above the ‘White’ layer.
You are now done with the process of creating a caricature edit from a normal still portrait. Your final image output will appear something like the following:
10 Amazing Wallpaper Collage Ideas and Photos
10 Creative Wallpaper Collage Ideas and Photos for 2024
An easy yet powerful editor
Numerous effects to choose from
Detailed tutorials provided by the official channel
Photos are not only some captured moments, but memories for lifetime. So, why not relive these happy and special moments by creating a wallpaper of these photos in a collage format. You can choose from the huge collection of your photos and create wallpaper collages. Set a theme for different rooms and then create interesting wall picture collage. In this article we will help you to learn about some creative wallpaper collage ideas and photos for 2024.
In this article
01 [Top 10 wall collage ideas](#Part 1)
02 [How can wondershare filmora help you design your desired wall collage](#Part 2)
Part 1 Top 10 wall collage ideas
There is no dearth of ideas, themes, and designs when it comes to wall photo collages and wallpaper. To make your selection task a little easier, we have shortlisted some of the popular and creative wall collage ideas that can be used in 2024.
01A simple traditional collage
As it is said simplicity is the best, the same goes with the wall collages. A traditional collage having multiple images set in an order never goes out of fashion. Depending on the size of the wall, you can choose the shape and the number of the pictures to be added to the wallpaper.
02Full wall collage
This is one of the easiest ways of creating a collage, where you can get all your favourite pics printed and framed and put up randomly on an entire wall. Besides the captured images, you can also choose some of the stock images available at several online sites like Filmora, Canva, and more.
03Creating a photo grid
Besides putting the photos on a wall directly, you can even place them on some rack to create a collage. Creating a wallpaper on a frame or a grid has multiple benefits like it will keep your walls clean, can be moved at any place of your choice and add to overall looks to the room.
04Creating a collage using polaroid
Instead of getting your images printed and framed, simply take polaroid prints and hang them on a fairy light. This is one of the pocket-friendly collage wall ideas that will also will add warmth and coziness to your room and living space.

05Creating a collage in some shape
Choose a shape of your choice and then set all the desired pictures in that particular shape. This wall collage will look interesting and creative as well. While setting the images in a particular shape ensure that all the pictures are more or less of the same size to make it look symmetrical.
06Adding neon sign to collages
Another interesting way to pep up your wall collage is by adding a neon sign like a heart shape, cloud, or any other amidst your photos on the wall. Neon signs in different shapes, sizes, and colors are available online at pocket friendly prices. As per the theme of your photos, you can add one or more neon signs.
07Wall collage in a letter shape
Create a photo collage in the shape of your name initial or an entire name. You can also create collages for each room in the initials of the name of the person staying in those room. These collages will give a personalised touch to your room.
08Caricature wall collage
To add some fun elements to your wall, use caricature of your photos, instead of the simple pictures. There are several online sites that can help you convert your regular images into caricatures that can be used for creating wallpapers.
09Cartoon wall collage
If you want to decorate a kid’s room wall then nothing can be better than using pictures of their favorite cartoon characters for creating a collage. You can even create an interesting wall of your room if you too like cartoon characters. Stock images of these characters in high quality are available on several online sites.
10World Map wall collage
This is one of the best collage ideas if you love to travel. You can create a world map on your wall and then add your own captured images to the places which you have visited.
Part 2 How can Wondershare Filmora help you design your desired wall collage
Using your own captured images for creating a wall collage is a good idea but to further enhance the wallpaper or use the pictures that would match the desired theme you could select the images from the stock library available at several sites.
One such excellent tool is Wondershare Filmora where you can get a huge collection of images in an array of themes and categories. The royalty free images at Wondershare can be used without any worries.
Additionally, the software also has a collection of music and sound effects that can be used for creating online presentations. Wondershare Filmora Video Editor is complete video editing software that can be used for creating professional looking videos. Some of the key features of the tool include adding filters, overlays, transitions, titles, and much more.
Wondershare Filmora - Best Video Editor for Mac/Windows
5,481,435 people have downloaded it.
Build unique custom animations without breaking a sweat.
Focus on creating epic stories and leave the details to Filmora’s auto features.
Start a creative adventure with drag & drop effects and endless possibilities.
Filmora simplifies advanced features to save you time and effort.
Filmora cuts out repetition so you can move on to your next creative breakthrough.
The software is available for download on Windows and Mac systems.
● Key Takeaways from This Episode →
● Wall collages using captured pictures and stock images is an interesting way to decorate your walls.
● There are several creative ideas for wall collage.
● Wondershare Filmora is an excellent tool to find a huge collection of stock images in an array of categories and for all video editing requirements.
Photos are not only some captured moments, but memories for lifetime. So, why not relive these happy and special moments by creating a wallpaper of these photos in a collage format. You can choose from the huge collection of your photos and create wallpaper collages. Set a theme for different rooms and then create interesting wall picture collage. In this article we will help you to learn about some creative wallpaper collage ideas and photos for 2024.
In this article
01 [Top 10 wall collage ideas](#Part 1)
02 [How can wondershare filmora help you design your desired wall collage](#Part 2)
Part 1 Top 10 wall collage ideas
There is no dearth of ideas, themes, and designs when it comes to wall photo collages and wallpaper. To make your selection task a little easier, we have shortlisted some of the popular and creative wall collage ideas that can be used in 2024.
01A simple traditional collage
As it is said simplicity is the best, the same goes with the wall collages. A traditional collage having multiple images set in an order never goes out of fashion. Depending on the size of the wall, you can choose the shape and the number of the pictures to be added to the wallpaper.
02Full wall collage
This is one of the easiest ways of creating a collage, where you can get all your favourite pics printed and framed and put up randomly on an entire wall. Besides the captured images, you can also choose some of the stock images available at several online sites like Filmora, Canva, and more.
03Creating a photo grid
Besides putting the photos on a wall directly, you can even place them on some rack to create a collage. Creating a wallpaper on a frame or a grid has multiple benefits like it will keep your walls clean, can be moved at any place of your choice and add to overall looks to the room.
04Creating a collage using polaroid
Instead of getting your images printed and framed, simply take polaroid prints and hang them on a fairy light. This is one of the pocket-friendly collage wall ideas that will also will add warmth and coziness to your room and living space.
05Creating a collage in some shape
Choose a shape of your choice and then set all the desired pictures in that particular shape. This wall collage will look interesting and creative as well. While setting the images in a particular shape ensure that all the pictures are more or less of the same size to make it look symmetrical.
06Adding neon sign to collages
Another interesting way to pep up your wall collage is by adding a neon sign like a heart shape, cloud, or any other amidst your photos on the wall. Neon signs in different shapes, sizes, and colors are available online at pocket friendly prices. As per the theme of your photos, you can add one or more neon signs.
07Wall collage in a letter shape
Create a photo collage in the shape of your name initial or an entire name. You can also create collages for each room in the initials of the name of the person staying in those room. These collages will give a personalised touch to your room.
08Caricature wall collage
To add some fun elements to your wall, use caricature of your photos, instead of the simple pictures. There are several online sites that can help you convert your regular images into caricatures that can be used for creating wallpapers.
09Cartoon wall collage
If you want to decorate a kid’s room wall then nothing can be better than using pictures of their favorite cartoon characters for creating a collage. You can even create an interesting wall of your room if you too like cartoon characters. Stock images of these characters in high quality are available on several online sites.
10World Map wall collage
This is one of the best collage ideas if you love to travel. You can create a world map on your wall and then add your own captured images to the places which you have visited.
Part 2 How can Wondershare Filmora help you design your desired wall collage
Using your own captured images for creating a wall collage is a good idea but to further enhance the wallpaper or use the pictures that would match the desired theme you could select the images from the stock library available at several sites.
One such excellent tool is Wondershare Filmora where you can get a huge collection of images in an array of themes and categories. The royalty free images at Wondershare can be used without any worries.
Additionally, the software also has a collection of music and sound effects that can be used for creating online presentations. Wondershare Filmora Video Editor is complete video editing software that can be used for creating professional looking videos. Some of the key features of the tool include adding filters, overlays, transitions, titles, and much more.
Wondershare Filmora - Best Video Editor for Mac/Windows
5,481,435 people have downloaded it.
Build unique custom animations without breaking a sweat.
Focus on creating epic stories and leave the details to Filmora’s auto features.
Start a creative adventure with drag & drop effects and endless possibilities.
Filmora simplifies advanced features to save you time and effort.
Filmora cuts out repetition so you can move on to your next creative breakthrough.
The software is available for download on Windows and Mac systems.
● Key Takeaways from This Episode →
● Wall collages using captured pictures and stock images is an interesting way to decorate your walls.
● There are several creative ideas for wall collage.
● Wondershare Filmora is an excellent tool to find a huge collection of stock images in an array of categories and for all video editing requirements.
10 Cartoon Character Makers to Make Animated Characters
10 Cartoon Character Makers to Create Animated Characters
An easy yet powerful editor
Numerous effects to choose from
Detailed tutorials provided by the official channel
Learning cartoon making is easy through various application or makers online. Draw cartoon characters sketch in easy steps.

With the changing marketing and business trends, people and business owners are adopting different patterns in the pictures to make them visually good and attractive. Videos and pictures with animated characters look so amazing and gain maximum customers views. This ultimately helps the business owners to generate more leads for their business.
Not only business, but the presence of animated characters is also seen in the stories and status of the people over social media accounts. People impress others through making their own cartoon characters and animated pictures or characters. Earlier it has very tough to create cartoon character, but with so many online makers today, one can easily draw and create cartoon characters. There are various platforms that use software to turn a picture into a cartoon character or even animated picture. There are easy and interesting ways to create cartoon characters. If you love to see and are interested in drawing cartoon characters, then you can make it through various platforms. Let’s see some easy way to create own cartoon character.
In this article
01 [5 Easy Ways to Create Your Own Cartoon Character [For Non-illustrators] ](#Part 1)
02 [5 Create Cartoon Characters to Create Animated Characters for PRO](#Part 2)
03 [How to Create a Cartoon Character: A General Guide](#Part 3)
Part 1 5 Easy Ways to Create Your Own Cartoon Character [For Non-illustrators]
01Through Online Avatar Builders
Avatar building is an extraordinary way of presenting yourself. The best thing with avatar builders is that there is no need to download any application. You can easily do it in your device through online websites. They are the easiest and economical way of creating cartoon. You can add fun elements with these Avatar builders. Some of the websites that offer avatar building tools are:
Cartoonize: You can instantly make cartoon or avatar characters through Cartoonize. It can be used for face customization and adding colors. Face features like eyes, nose, hair style and expressions can be perfectly drawn with this tool. You can learn more by going to their official website.
The process is simple. You can upload your picture, go to cartoonize option at the top of the menu, do the necessary edits and features. Save it and your avatar cartoon is ready.
The other avatar building platforms are charatoon and Face your Manga. For Face your Manga, Adobe Flash Player is required. The gallery can be explored with some famous avatar of popular personalities.
02Character builders
The other way to create your own cartoon character is through character builders. The difference of this cartoon making is that one can create a complete cartoon with complete features. Like from head to toe. GraphicMama Character Maker Packs is one that offers kit to make customized cartoons.
03Tools for converting pictures into cartoons
A perfect cartoon can be made when it resemble truly as you are. The best method for doing that is using software to turn a picture into a cartoon. Filters, facial expressions and styles can be added through this way. Adobe Character Animator is a tool that can be used to convert a picture, catch the facial expression and voice.
You can learn to create cartoon character from photo by following the video
The other two ways are related to taking help of others in making the cartoon characters. Some of them are:
04Outsourcing designers or illustrators
When the perfection level is not achieved through own creation, the other option is to get it done through designers or illustrators. There are freelancers and studio who offer such services. They create cartoon as per the requirement of the customers.
05Modification in Stock cartoon characters
Those who are not having any experience of making cartoons, they can use the stocks cartoon characters and can change them with the use of software.
Part 2 5 Create Cartoon Characters to Create Animated Characters for PRO
A professional cartoon maker need some advance tools and features to give a unique and perfect look to his cartoon drawn. So, for them some applications or cartoon character maker is good. Let’s see some of the makers that are specifically designed for professionals:
01Animaker
This has various themes to make your cartoon look great. It brings life to a character. The steps involve in making a cartoon character is as under:
● As required, select the animated template.
● You can add customized features as such as backgrounds, pictures and animated text.
● Music can also be added and can be selected from the library.
● After the character is ready, you can share or download the video.
02Adobe
This is the most widely platform or maker for creating high quality contents, cartoon avatar and games. Sketch and drawing tool are there in the maker that gives real experience to the cartoon. The platform facilitates exploring the file to WebGL, SVG and Adobe AIR.
You can view how it works and the process in the video-
03Reallusion
Text and voice has given a new definition to the cartoon world. If you desire to add some interesting elements in cartoon through text and voices, then Reallusion is a good option for you. It has 3D head creation tool which can be used to make animated cartoons for mails and e-cards.
You can view how it works and the process in the video-
04Renderforest
This cartoon maker has some great collection of professionally designed templates, to make cartoon making process easy and perfect. Templates for kids, education, character adventure, healthcare and iconic animation are some of the collections one can find in this maker.
The process of cartoon creation is easy with following steps:
● Choose the most excellent cartoon templates or start from zero through sketch,
● You can edit the already available stories. Even animated characters can be used.
● Add some customized features like voice or music, style or colors.
● This is how you can create exclusive vibrant cartoons.
Video can be watched at-
05Biteable
Biteable has several templates like leadership skill tips, travel agent explainer and many more. The video clips, music, animated templates of this maker create engaging cartoon characters.
The process to develop a cartoon video through Biteable is as under:
● Open the maker Biteable
● As per your requirement, pick the one cartoon template
● Log in the account
● You can add many effects like backing music, clips and text.
● As made in the website, you can share on social media and emails.
Part 3 How to Create a Cartoon Character: A General Guide
A professional cartoon expert becomes an expert after a continuous practice. It’s not easy to learn making cartoons. Therefore to be an expert one need to learn the basics and other important principles for cartoon making. A general guide for the same is as under:
● Begin with basic steps
Learn the basic shapes like making ovals, circles and other shapes. This will help you to be perfection in making the basic outline of the cartoon. This will improve you skill and you can explore more possibilities with the basic outlines.
● Shape improvement
This is an advance stage of basic step. This step will help you to define the shape of the cartoon character you are going to draw. It gives structure and design to a character.
● Including details
This stage is more about designing a character. Pose, expression, attires, props are selected in this step. The personality of a character is made better. It makes the character more interesting and engaging.
● Shadow of cartoon character
Before giving a final touch to the character, it is necessary to check the shadow of the picture drawn. It will show whether you are on right path or not.
● Final touch
The last step is adding all details in the character. It may be straight teeth, big smile, messy hairs or anything. Lines can be made fine and clean. You can add colors of your choice.
The other platform or cartoon maker that can be checked out is Filmora.
Wondershare Filmora Video Editor is software used for making, editing and adding effects to pictures or videos. It is easy to use application loaded with many advanced tools and features to make picture and video editing simple. Those who are looking for a robust application for capturing some precious moments through picture and videos, then Filmora is a perfect application.
Filmora can be used to draw and insert cartoon characters in any video. Animation, text and music can be added effectively with Filmora. A beginner can easily learn to create cartoon character online.
Wondershare Filmora
Get started easily with Filmora’s powerful performance, intuitive interface, and countless effects!
Try It Free Try It Free Try It Free Learn More >
● Ending Thoughts →
● Cartoon characters making is not an easy task. But now there are cartoon character maker free which has made easy to learn cartoon making. The various tools used are Avatar maker, cartoon making, turning picture into cartoon and through experts support.
● The different professional cartoon character maker online are Animaker, Reallusion, Biteable and Adobe. Through these cartoon makers making cartoon characters are easy with advanced features.
● Filmora is one of the popular picture and video making and editing software which can also be used for making amazing cartoon characters.
Learning cartoon making is easy through various application or makers online. Draw cartoon characters sketch in easy steps.
With the changing marketing and business trends, people and business owners are adopting different patterns in the pictures to make them visually good and attractive. Videos and pictures with animated characters look so amazing and gain maximum customers views. This ultimately helps the business owners to generate more leads for their business.
Not only business, but the presence of animated characters is also seen in the stories and status of the people over social media accounts. People impress others through making their own cartoon characters and animated pictures or characters. Earlier it has very tough to create cartoon character, but with so many online makers today, one can easily draw and create cartoon characters. There are various platforms that use software to turn a picture into a cartoon character or even animated picture. There are easy and interesting ways to create cartoon characters. If you love to see and are interested in drawing cartoon characters, then you can make it through various platforms. Let’s see some easy way to create own cartoon character.
In this article
01 [5 Easy Ways to Create Your Own Cartoon Character [For Non-illustrators] ](#Part 1)
02 [5 Create Cartoon Characters to Create Animated Characters for PRO](#Part 2)
03 [How to Create a Cartoon Character: A General Guide](#Part 3)
Part 1 5 Easy Ways to Create Your Own Cartoon Character [For Non-illustrators]
01Through Online Avatar Builders
Avatar building is an extraordinary way of presenting yourself. The best thing with avatar builders is that there is no need to download any application. You can easily do it in your device through online websites. They are the easiest and economical way of creating cartoon. You can add fun elements with these Avatar builders. Some of the websites that offer avatar building tools are:
Cartoonize: You can instantly make cartoon or avatar characters through Cartoonize. It can be used for face customization and adding colors. Face features like eyes, nose, hair style and expressions can be perfectly drawn with this tool. You can learn more by going to their official website.
The process is simple. You can upload your picture, go to cartoonize option at the top of the menu, do the necessary edits and features. Save it and your avatar cartoon is ready.
The other avatar building platforms are charatoon and Face your Manga. For Face your Manga, Adobe Flash Player is required. The gallery can be explored with some famous avatar of popular personalities.
02Character builders
The other way to create your own cartoon character is through character builders. The difference of this cartoon making is that one can create a complete cartoon with complete features. Like from head to toe. GraphicMama Character Maker Packs is one that offers kit to make customized cartoons.
03Tools for converting pictures into cartoons
A perfect cartoon can be made when it resemble truly as you are. The best method for doing that is using software to turn a picture into a cartoon. Filters, facial expressions and styles can be added through this way. Adobe Character Animator is a tool that can be used to convert a picture, catch the facial expression and voice.
You can learn to create cartoon character from photo by following the video
The other two ways are related to taking help of others in making the cartoon characters. Some of them are:
04Outsourcing designers or illustrators
When the perfection level is not achieved through own creation, the other option is to get it done through designers or illustrators. There are freelancers and studio who offer such services. They create cartoon as per the requirement of the customers.
05Modification in Stock cartoon characters
Those who are not having any experience of making cartoons, they can use the stocks cartoon characters and can change them with the use of software.
Part 2 5 Create Cartoon Characters to Create Animated Characters for PRO
A professional cartoon maker need some advance tools and features to give a unique and perfect look to his cartoon drawn. So, for them some applications or cartoon character maker is good. Let’s see some of the makers that are specifically designed for professionals:
01Animaker
This has various themes to make your cartoon look great. It brings life to a character. The steps involve in making a cartoon character is as under:
● As required, select the animated template.
● You can add customized features as such as backgrounds, pictures and animated text.
● Music can also be added and can be selected from the library.
● After the character is ready, you can share or download the video.
02Adobe
This is the most widely platform or maker for creating high quality contents, cartoon avatar and games. Sketch and drawing tool are there in the maker that gives real experience to the cartoon. The platform facilitates exploring the file to WebGL, SVG and Adobe AIR.
You can view how it works and the process in the video-
03Reallusion
Text and voice has given a new definition to the cartoon world. If you desire to add some interesting elements in cartoon through text and voices, then Reallusion is a good option for you. It has 3D head creation tool which can be used to make animated cartoons for mails and e-cards.
You can view how it works and the process in the video-
04Renderforest
This cartoon maker has some great collection of professionally designed templates, to make cartoon making process easy and perfect. Templates for kids, education, character adventure, healthcare and iconic animation are some of the collections one can find in this maker.
The process of cartoon creation is easy with following steps:
● Choose the most excellent cartoon templates or start from zero through sketch,
● You can edit the already available stories. Even animated characters can be used.
● Add some customized features like voice or music, style or colors.
● This is how you can create exclusive vibrant cartoons.
Video can be watched at-
05Biteable
Biteable has several templates like leadership skill tips, travel agent explainer and many more. The video clips, music, animated templates of this maker create engaging cartoon characters.
The process to develop a cartoon video through Biteable is as under:
● Open the maker Biteable
● As per your requirement, pick the one cartoon template
● Log in the account
● You can add many effects like backing music, clips and text.
● As made in the website, you can share on social media and emails.
Part 3 How to Create a Cartoon Character: A General Guide
A professional cartoon expert becomes an expert after a continuous practice. It’s not easy to learn making cartoons. Therefore to be an expert one need to learn the basics and other important principles for cartoon making. A general guide for the same is as under:
● Begin with basic steps
Learn the basic shapes like making ovals, circles and other shapes. This will help you to be perfection in making the basic outline of the cartoon. This will improve you skill and you can explore more possibilities with the basic outlines.
● Shape improvement
This is an advance stage of basic step. This step will help you to define the shape of the cartoon character you are going to draw. It gives structure and design to a character.
● Including details
This stage is more about designing a character. Pose, expression, attires, props are selected in this step. The personality of a character is made better. It makes the character more interesting and engaging.
● Shadow of cartoon character
Before giving a final touch to the character, it is necessary to check the shadow of the picture drawn. It will show whether you are on right path or not.
● Final touch
The last step is adding all details in the character. It may be straight teeth, big smile, messy hairs or anything. Lines can be made fine and clean. You can add colors of your choice.
The other platform or cartoon maker that can be checked out is Filmora.
Wondershare Filmora Video Editor is software used for making, editing and adding effects to pictures or videos. It is easy to use application loaded with many advanced tools and features to make picture and video editing simple. Those who are looking for a robust application for capturing some precious moments through picture and videos, then Filmora is a perfect application.
Filmora can be used to draw and insert cartoon characters in any video. Animation, text and music can be added effectively with Filmora. A beginner can easily learn to create cartoon character online.
Wondershare Filmora
Get started easily with Filmora’s powerful performance, intuitive interface, and countless effects!
Try It Free Try It Free Try It Free Learn More >
● Ending Thoughts →
● Cartoon characters making is not an easy task. But now there are cartoon character maker free which has made easy to learn cartoon making. The various tools used are Avatar maker, cartoon making, turning picture into cartoon and through experts support.
● The different professional cartoon character maker online are Animaker, Reallusion, Biteable and Adobe. Through these cartoon makers making cartoon characters are easy with advanced features.
● Filmora is one of the popular picture and video making and editing software which can also be used for making amazing cartoon characters.
Ready to Animate Game Character From Scratch?
Are You Ready to Animate Game Character from Scratch?
An easy yet powerful editor
Numerous effects to choose from
Detailed tutorials provided by the official channel
As the popularity of animated video games is reaching new heights, demand for game animators are also going up. But, the Information regarding how to animate games is less or not sufficient enough.
In this article
01 [What is 2D & 3D Animation Game?](#Part 1)
02 [How Do You Animate Games?](#Part 2)
03 [How to Draw 2d & 3d Characters for Video Games?](#Part 3)
Part 1 What is 2D & 3D Animation Game?
Gaming animation is a blend of art and technology. It is one of those fields that require several technical skills. These are brilliant programming skills, understanding the basics of computer science, and practical technology know-how, collectively standing as the basic fundamental of Animation. Both 2D and 3D Animation changed the gaming experience forever and created an array of opportunities. But they differ in working and application.
01Working on 2D Animation
Flipbook can be a good example of the mechanism behind 2D Animation. After drawing a character or an object on the first page of a notebook, continue drawing for the next page and so on. Each removing should be a bit ahead or behind. When flipped swiftly, the series of drawings makes the character or object move.
The working of 2D Animation is not so different. But the detailing of the subject or the object cannot be minimal as a flipbook. 2D Animation demands more characters and more details while at the same time requiring smooth, visually appealing, and accurate detailing, which is a lot of pressure for the makers. Thanks to 2D making software, a week’s work can be taken care of in minutes or two.
02Working on 3D Animation
The working mechanism of 3D Animation is more complicated than 2D. It is a layered process that requires several skills. It also involves “rigged” and animated 3D models. In 3D, the initial sketch of the entire subject and object is the first step towards the animation procedure. The second step is to make a 3D model of the intended animated object. It was third, texturing of the 3D animated object. Rigging is the final step; it gives the 3D model the power and ability to move. Once rigging is done, the character is already for posing. Drop it to the scene and start your Animation.
Part 2 How Do You Animate Games?
01Do You Know How Hot Animated Games Are?
A practical example of how Animation has been handed down over the ages would be the case of ‘Anime’. It has persisted as one of the top cultural exports of Japan and has successfully completed more than 20 years of legacy. The name ‘anime’ practically is a shorter version of the word Animation.
You will find that the reasons for animate games to be so popular are in vast numbers. For example, the anime industry is valued at 19 billion USD, to begin with.
A brief overview of reasons why animate games are so popular:
● There is a Game for Everyone
Game animations are evolving which is why it is able to reach out to a majority of people’s interests.
● Unique Styles of Animation
Gaming animations have come a long way and they have a more individual appeal for all age groups.
● Game History
Gamers have something else to look forward to other than just gaming. There is a story behind every game.
● Customization
Players can customize their characters the way they wish to see themselves.
● Action
Gamers can fight in an action sequence or drive a Lamborghini in a high-speed car chase.
02How Do I Create My Own Game Character?
Designing a character starts with imaging a character in its suitable background or subject. If you are a big fan of fantasy games, your imaginations should not have any boundaries. But, in the case of a sports game, you might have to limit your imagination based on realistic features.
How to streamline wild ideas to get a brilliant character out of it?
● Get an idea
Decide whether the character in mind is the main character or what role, in particular, is it going to play in the game.
● Gender
Gender plays a crucial role in character creation. As it pre-decides certain character traits.
● Build personality
Every character has a specific goal. The personality of each character helps them to achieve their goal.
● Back-story
The personality traits of every character are derived from their back-story.
● Strength& Weakness
Each character should have something unique be it in their personality or in their strength.
● Define Relationship
It is important to imagine and define what relationship the characters have.
● Provide aesthetics
Visual Aesthetics is a realm that has no bounds in the art of gaming.
● Create more characters
Including other characters in relation to the protagonist of the game would make the game or the storyline more interesting.
Part 3 How to Draw 2d & 3d Characters for Video Games
01How to Make a 2d & 3d Game Character - Tutorial
First, we conceive an idea in our mind in an abstract form. But, creating a character from an initial sketch all the way to making it into a full-drawn animation is about developing details keeping the speed of work steady.
Detailed animate game tutorials available online:
● Create composition
Make it more defined and structured. A tip to immediately jump-start your imagination would be to see your character in different lights and shades.
● Refine the Character Sketch
Once you have the clay, it’s time to add form.
● Add References
Start looking for references that suit your character.
● Add Details
Now, it’s time to get into the details, like literally. Start breaking your character into blocks and pieces. Maybe not too literally.
02Learn to Animate Games That Are Underrated Now
With more advancement comes more banishment, which means more and types of games are fading out to obscurity. You can now animate games that are underrated and add a bit of your own flavor to them using software.
You can also apply 3D rendering techniques to apply light and shadow effects to your games.
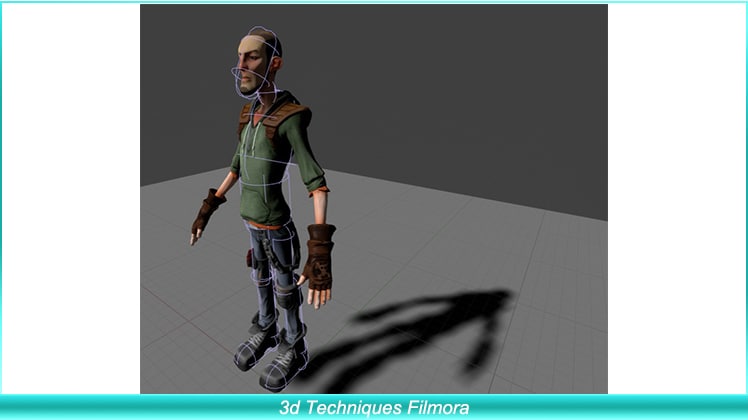
Stop motion is also a popular 2D gaming animation technique that is used in a number of underrated game models like cutout, Claymation, pixilation.
Motion graphics is amazing tool beginners have fun experimenting with. You can create engaging 2D game animations with motion graphic software like Adobe after effects. Make stunning adobe animation tutorials with the same.
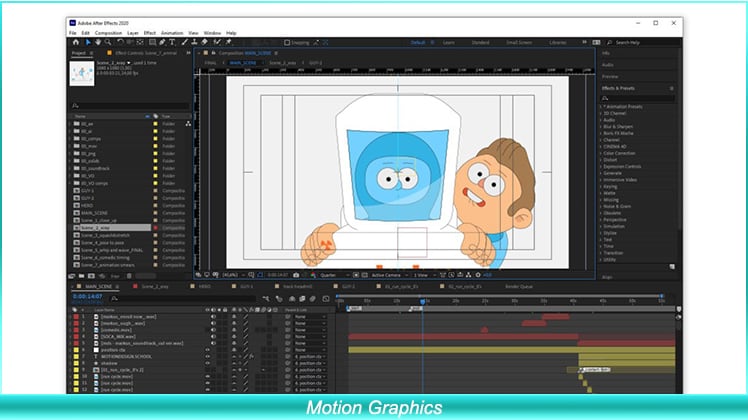
Key Takeaways from This Episode
● Both 2D and 3D Animation offer a separate flavor of the experience. 2D animations run on a definitive FPS and can be compared to a simple flipbook animation, while 3D Animation involves a process called rigging that gives the Animation several movements and abilities.
● Animated games have a global appeal because of their unique style, history, customization, and action features. Animating your own character requires you to pay attention to the details like personality, back story, gender, and aesthetics.
● You can start your animation process with 5 simple steps - concept, composition, sketch, reference, and detailing.
As the popularity of animated video games is reaching new heights, demand for game animators are also going up. But, the Information regarding how to animate games is less or not sufficient enough.
In this article
01 [What is 2D & 3D Animation Game?](#Part 1)
02 [How Do You Animate Games?](#Part 2)
03 [How to Draw 2d & 3d Characters for Video Games?](#Part 3)
Part 1 What is 2D & 3D Animation Game?
Gaming animation is a blend of art and technology. It is one of those fields that require several technical skills. These are brilliant programming skills, understanding the basics of computer science, and practical technology know-how, collectively standing as the basic fundamental of Animation. Both 2D and 3D Animation changed the gaming experience forever and created an array of opportunities. But they differ in working and application.
01Working on 2D Animation
Flipbook can be a good example of the mechanism behind 2D Animation. After drawing a character or an object on the first page of a notebook, continue drawing for the next page and so on. Each removing should be a bit ahead or behind. When flipped swiftly, the series of drawings makes the character or object move.
The working of 2D Animation is not so different. But the detailing of the subject or the object cannot be minimal as a flipbook. 2D Animation demands more characters and more details while at the same time requiring smooth, visually appealing, and accurate detailing, which is a lot of pressure for the makers. Thanks to 2D making software, a week’s work can be taken care of in minutes or two.
02Working on 3D Animation
The working mechanism of 3D Animation is more complicated than 2D. It is a layered process that requires several skills. It also involves “rigged” and animated 3D models. In 3D, the initial sketch of the entire subject and object is the first step towards the animation procedure. The second step is to make a 3D model of the intended animated object. It was third, texturing of the 3D animated object. Rigging is the final step; it gives the 3D model the power and ability to move. Once rigging is done, the character is already for posing. Drop it to the scene and start your Animation.
Part 2 How Do You Animate Games?
01Do You Know How Hot Animated Games Are?
A practical example of how Animation has been handed down over the ages would be the case of ‘Anime’. It has persisted as one of the top cultural exports of Japan and has successfully completed more than 20 years of legacy. The name ‘anime’ practically is a shorter version of the word Animation.
You will find that the reasons for animate games to be so popular are in vast numbers. For example, the anime industry is valued at 19 billion USD, to begin with.
A brief overview of reasons why animate games are so popular:
● There is a Game for Everyone
Game animations are evolving which is why it is able to reach out to a majority of people’s interests.
● Unique Styles of Animation
Gaming animations have come a long way and they have a more individual appeal for all age groups.
● Game History
Gamers have something else to look forward to other than just gaming. There is a story behind every game.
● Customization
Players can customize their characters the way they wish to see themselves.
● Action
Gamers can fight in an action sequence or drive a Lamborghini in a high-speed car chase.
02How Do I Create My Own Game Character?
Designing a character starts with imaging a character in its suitable background or subject. If you are a big fan of fantasy games, your imaginations should not have any boundaries. But, in the case of a sports game, you might have to limit your imagination based on realistic features.
How to streamline wild ideas to get a brilliant character out of it?
● Get an idea
Decide whether the character in mind is the main character or what role, in particular, is it going to play in the game.
● Gender
Gender plays a crucial role in character creation. As it pre-decides certain character traits.
● Build personality
Every character has a specific goal. The personality of each character helps them to achieve their goal.
● Back-story
The personality traits of every character are derived from their back-story.
● Strength& Weakness
Each character should have something unique be it in their personality or in their strength.
● Define Relationship
It is important to imagine and define what relationship the characters have.
● Provide aesthetics
Visual Aesthetics is a realm that has no bounds in the art of gaming.
● Create more characters
Including other characters in relation to the protagonist of the game would make the game or the storyline more interesting.
Part 3 How to Draw 2d & 3d Characters for Video Games
01How to Make a 2d & 3d Game Character - Tutorial
First, we conceive an idea in our mind in an abstract form. But, creating a character from an initial sketch all the way to making it into a full-drawn animation is about developing details keeping the speed of work steady.
Detailed animate game tutorials available online:
● Create composition
Make it more defined and structured. A tip to immediately jump-start your imagination would be to see your character in different lights and shades.
● Refine the Character Sketch
Once you have the clay, it’s time to add form.
● Add References
Start looking for references that suit your character.
● Add Details
Now, it’s time to get into the details, like literally. Start breaking your character into blocks and pieces. Maybe not too literally.
02Learn to Animate Games That Are Underrated Now
With more advancement comes more banishment, which means more and types of games are fading out to obscurity. You can now animate games that are underrated and add a bit of your own flavor to them using software.
You can also apply 3D rendering techniques to apply light and shadow effects to your games.
Stop motion is also a popular 2D gaming animation technique that is used in a number of underrated game models like cutout, Claymation, pixilation.
Motion graphics is amazing tool beginners have fun experimenting with. You can create engaging 2D game animations with motion graphic software like Adobe after effects. Make stunning adobe animation tutorials with the same.
Key Takeaways from This Episode
● Both 2D and 3D Animation offer a separate flavor of the experience. 2D animations run on a definitive FPS and can be compared to a simple flipbook animation, while 3D Animation involves a process called rigging that gives the Animation several movements and abilities.
● Animated games have a global appeal because of their unique style, history, customization, and action features. Animating your own character requires you to pay attention to the details like personality, back story, gender, and aesthetics.
● You can start your animation process with 5 simple steps - concept, composition, sketch, reference, and detailing.
Also read:
- Updated Learn 3D Logo Animation and Templates
- In 2024, How To Turn Yourself Into Anime Character
- How to Create an Adobe Collage, In 2024
- New 2024 Approved Adobe Animate Text Effects Skills That You Need to Know
- In 2024, The 10 Most Adorable Aesthetic Cartoon Characters of All Time
- Adobe Animate Text Effects Skills You Need to Know for 2024
- Updated 2024 Approved OBS Animated Lower Thirds Alternatives
- Updated How to Make a GIF in Photoshop for 2024
- Updated Top 10 Websites to Download Anime Subtitles for Free
- Updated Top 7 Best Animated Lyric Video Software for FREE for 2024
- New Learn About Lip-Syncing in Animation
- 2024 Approved 5 Different Animation Styles A Simple but Comprehensive Guide
- In 2024, 10 Must-Use MP4 to GIF Converters to Get Perfect-Made GIF
- New OBS Animated Lower Thirds Alternatives
- New In 2024, Ways to Stop Animation From Looping in Unity
- New Before You Learn 3D Animation Some Things You Should Know
- 2024 Approved The Best 8 Places for High-Quality Royalty Free Gifs
- Updated How to Create Photo Collage Frame for Free in Minutes for 2024
- New Whats Music Video GIF & How to Add Music to Your GIF Files
- New 2024 Approved How I Animate Discord Profile Pictures
- In 2024, How to Reduce GIF Size and Best GIF Resizers
- 2024 Approved Best 12 Evil Cartoon Characters of All Time
- Ways on How to Get Started in Stop Motion Claymation
- Updated In 2024, 10 Cartoon Character Makers to Make Animated Characters
- Updated In 2024, Top 7 Best Animated Lyric Video Software for FREE
- 10 Top Tools to Make Pic Collage for Windows
- Updated How to Make a 3D Cartoon of Yourself
- Updated 2024 Approved Are You Head Over Heels With 3D Animation Design?
- New How to Animate Image on Scroll and Text on Scroll?
- Updated In 2024, Apps to Animate Still Pictures Which Could Make Your Pictures Become Internet Sensation
- Updated How to Make Your Own GIF on WhatsApp in Simple Ways
- New How to Obtain and Create Animated GIF Icons Like a Pro?
- New How To Turn Yourself Into Anime Character
- Updated In 2024, Beginners Guide for Learning 3D Animation
- Updated Handy Tip From Adobe Animate Rigging Tutorial for All Learners for 2024
- New In 2024, Adobe Animate Riggings Tutorial for You
- Updated 2024 Approved Animate Your Photo Online with These Awesome Tools
- New Complete Guide to Send Gif WhatsApp on Android
- Updated In 2024, Something About Types of Motion Graphics
- Updated Something About Types of Motion Graphics for 2024
- Updated In 2024, A Roster of 15 Best Disney Channel Cartoons
- New 2024 Approved 10 Great Apps for Turning Funny Animated Images Into Comics
- 10 Cartoon Character Makers to Create Animated Characters for 2024
- New Tutorial Guide to Animate Pictures in Canva for 2024
- Updated In 2024, Before You Learn Facebook Slideshow 5 Things You Should Know
- New In 2024, Are You Ready to Animate Game Character From Scratch?
- How Many Attempts To Unlock Apple iPhone SE (2022)
- In 2024, How to Mirror Oppo A1x 5G to Mac? | Dr.fone
- How to Recover Deleted iPhone SE (2020) Camera Roll Photos and Photo Stream Pictures? | Stellar
- In 2024, Full Guide to Unlock Your Samsung Galaxy A15 4G
- How to Cast Honor Magic 6 Screen to PC Using WiFi | Dr.fone
- Why is iPogo not working On Realme Narzo 60 5G? Fixed | Dr.fone
- Looking For A Location Changer On Samsung Galaxy F54 5G? Look No Further | Dr.fone
- 3 Ways for Android Pokemon Go Spoofing On Honor X7b | Dr.fone
- How to Resolve Vivo Y28 5G Screen Not Working | Dr.fone
- In 2024, How to Transfer Data from Realme 11 5G to Other Android Devices? | Dr.fone
- 3 Ways to Unlock iPhone 13 Pro without Passcode or Face ID
- In 2024, Apple ID Locked or Disabled From iPhone 11 Pro? 7 Mehtods You Cant-Miss
- How To Restore Missing Music Files from Honor X8b
- 4 Ways to Unlock Apple iPhone 13 Pro Max to Use USB Accessories Without Passcode
- In 2024, Top 10 Best Spy Watches For your Xiaomi Redmi Note 12T Pro | Dr.fone
- Undelete lost data from Xiaomi Redmi Note 12R
- How to Fix My Apple iPhone 13 mini Location Is Wrong | Dr.fone
- Fix File Not Loaded Completely Error in Excel 2010
- How To Fix Unresponsive Phone Touchscreen Of Vivo X90S | Dr.fone
- In 2024, Solutions to Spy on Lava Blaze 2 with and without jailbreak | Dr.fone
- Downloading SamFw FRP Tool 3.0 for Vivo V29 Pro
- Step-by-Step Tutorial How To Bypass Vivo Y36i FRP
- What is Fake GPS Location Pro and Is It Good On Oppo Reno 11F 5G? | Dr.fone
- 2024 Approved What Is an AI Editor?
- In 2024, How to Remove a Previously Synced Google Account from Your Poco F5 5G
- Unlock Your Xiaomi Redmi A2s Potential The Top 20 Lock Screen Apps You Need to Try
- In 2024, How To Bypass Google Pixel 8 Pro FRP In 3 Different Ways
- In 2024, Recommended Best Applications for Mirroring Your Realme Narzo 60x 5G Screen | Dr.fone
- In 2024, Simple and Effective Ways to Change Your Country on YouTube App Of your OnePlus 11R | Dr.fone
- New What Is an AI Video Maker for 2024
- Title: Updated 2024 Approved The Ultimate Cheatsheet to 15 Adobe Animate Alternatives
- Author: Elon
- Created at : 2024-05-19 03:05:16
- Updated at : 2024-05-20 03:05:16
- Link: https://animation-videos.techidaily.com/updated-2024-approved-the-ultimate-cheatsheet-to-15-adobe-animate-alternatives/
- License: This work is licensed under CC BY-NC-SA 4.0.
