
:max_bytes(150000):strip_icc():format(webp)/GettyImages-642250032-010d3026f565420eac9ac098bced6278.jpg)
Updated 2024 Approved Top 10 Banned Anime Around the World and Why
Uncensored Top 10 + Free Streaming Sites
Top 10 Banned Anime Around the World and Why

Shanoon Cox
Mar 27, 2024• Proven solutions
There is hardly a genre that anime hasn’t conquered. While anime is super entertaining and fun to watch, it can get quite crazy and questionable. Yes, anime is animated but the content is mature. From violence to incest and other controversial issues, anime can be offensive sometimes. Due to this, some countries have banned anime shows for its viewers – especially for younger audiences.
Want to find out what anime shows they are and why they are banned? Well, you are in the right spot. Today, we will talk about the top 10 banned anime shows and why they are banned. So, let’s find out!
![]()
A cross-platform for making videos anywhere for all creators

Why your video editing isn’t good enough? How about some creative inspo?
- 100 Million+ Users
- 150+ Countries and Regions
- 4 Million+ Social Media Followers
- 5 Million+ Stock Media for Use
* Secure Download

Part 1: Top 10 Banned Anime List
Here is a list of the 10 banned animes you should know about and why they are banned:
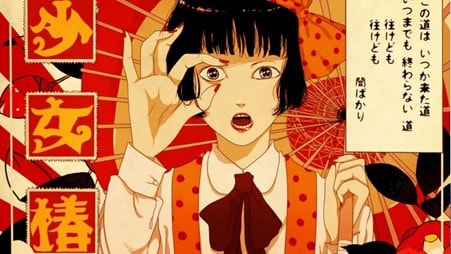
1. Shoujo Tsubaki (Banned Everywhere)
It has a very dark, depressing, and intense storyline and it is considered one of the most controversial anime movies ever. This is a 1992 anime film about a young girl whose mother dies. The girl meets a man who tells her he will help her if she ever needs anything. So, after her mother’s death, she goes to find the man and ends up at a circus where she gets abused and raped. Thus, Shoujo Tsubaki is about child sexual abuse with unbearable gore scenes. The horrific and disturbing visuals of this anime have left many viewers traumatized – so much so that the tapes of this film were also destroyed. Therefore, Shoujo Tsubaki is banned almost everywhere, including Japan itself.
2. Osomatsu-San (Banned in Japan)
Osomatsu-San is banned in Japan due to copyright issues. The series’ first episode had parodies of famous anime shows including Attack on Titan, Naruto, Sailor Moon, Dragon Ball Z, and more. Thus, due to copyright, the show’s first episode was removed from airing. It is still not available on mainstream anime websites. You can find the DVD version of the show, but even those do not have the first episode.

3. Excel Saga (Banned in Japan)
Excel Saga is based on a popular manga of the same name. It is about a secret ideological organization whose purpose is world domination. The entire Excel Saga is available to watch except for its last episode, called “Going Too Far” – very fitting indeed. It is even banned in its home country, Japan. The reason why this episode got banned is that it’s too long, violent, pornographic, and offensive. Fun fact: The Director of the show, Shinichi Watanabe, purposely got the last episode banned to make it daring and unforgettable. The last episode of Excel Saga is only available on DVD.

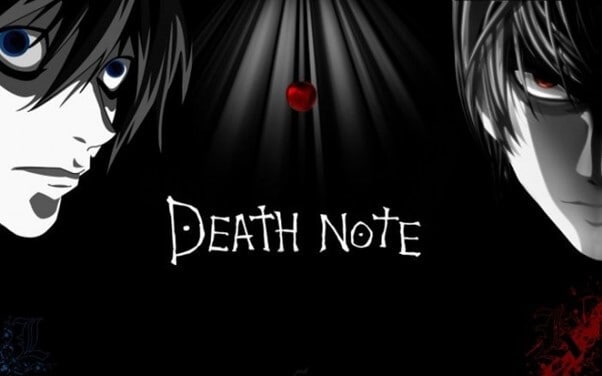
4. Death Note (Banned in China)
Death note is one of the most famous anime shows ever and while it’s gruesome, bloody and horrific, it is easily available on mainstream platforms, including Netflix. However, there is still a country that did not appreciate the dark premise of this show. Death Note is banned in China due to its theme. The show is about death, justice, murder and violence so it is considered as a corrupting influence on kids.
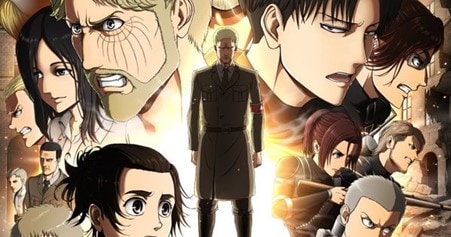
5. Attack on Titan (Banned in China)
Another cult-favorite anime on the lists is Attack on Titan. Due to its bloody, disgusting and disturbing visuals, it has been banned in China. While millions of viewers love this anime, China thinks this show portrays a lot of excessive violence which is very unhealthy for the younger audience. With that being said, if you are 18 and above, do not miss out on Attack on Titan. It is truly one of the best anime out there!
6. High School DxD (Banned in New Zealand)
With very high viewer ratings, it’s a bit of shock to see this show on the list. High School DxD follows the story of Issei Hyodo, a perverted high school kid who is killed on his very first date. But he gets reincarnated by Rias Gremory as a demon. Now, how come a show about angles and demons gets banned? Well, the premise of the show focuses on corrupt high school kids with a perverted mindset. This show is very sexual and shows a lot of nudity in certain scenes. This is why New Zealand has banned High School DxD for its sexual, harem themes based around high school kids.

7. Puni Puny Poemy (Banned in New Zealand)
Puni Puny Poemy sounds super cute and childish but don’t let the name fool you. Puni Puny Poemy is a spin-off inspired by Excel Saga – no wonder is it banned. This anime has a lot of sexual content surrounding very young characters. The nudity, explicit sexual scenes and harem inspired content is what makes this show so questionable. Thus, it is banned in New Zealand for being overly vulgar and sexual for young viewers. The show does not have a high viewership such as popular titles like Death Note or Attack on Titan, so many countries ignored it.
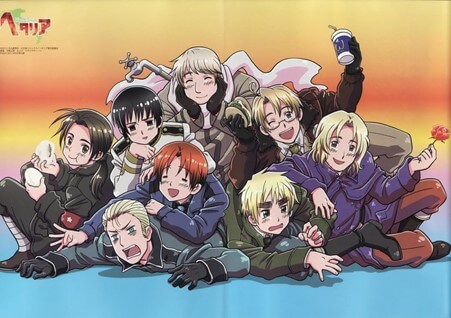
8. Hetalia: Axis Powers (Banned in South Korea)
Every character in this show represents a country and the role they played in World War II. Even though it is a comedy anime, it offended a few countries. South Korea actually banned the show on the grounds of “offensive stereotypes” and was called a “national crime” by the country. Hetalia: Axis Powers continued to air, the character and all the references to South Korea were completely removed due to backlash. The censored version of this anime is still available in some parts of the country.
9. Pokémon (Banned in Saudi Arabia)
Pokemon banned? Pokemon is perhaps THE most famous and innocent anime ever. It’s kid friendly and super clean. So, why is a show about Satoshi and his pocket monster banned? The religious authorities of Saudi Arabia declared that Pokemon promotes gambling and Jewish sentiments. Since then, there have been many conspiracy theories revolving around the show claiming it to be a Zionist conspiracy. Thus, it is banned in Saudi Arabia. Crazy right?
10. Kite (Banned in Norway)
Kite follows the story of a girl who uses bullets to kill people and make them explode. Now, you must be thinking that the violent nature of the show got it banned in Norway. Nope! not the case. Kite is banned in Norway due to a very graphic sexual assault scene on a minor. Norway has very strict laws against child pornography, thus the entire anime got banned. Similarly, the United States also censored and removed certain parts of the movie but it is not banned there.
Part 2: Where to Watch Anime Online for Free
If you live in any of the countries mentioned in the list above and want to watch the anime banned by your country, we have got you covered. Here are top 5 websites where you can watch anime online for free:
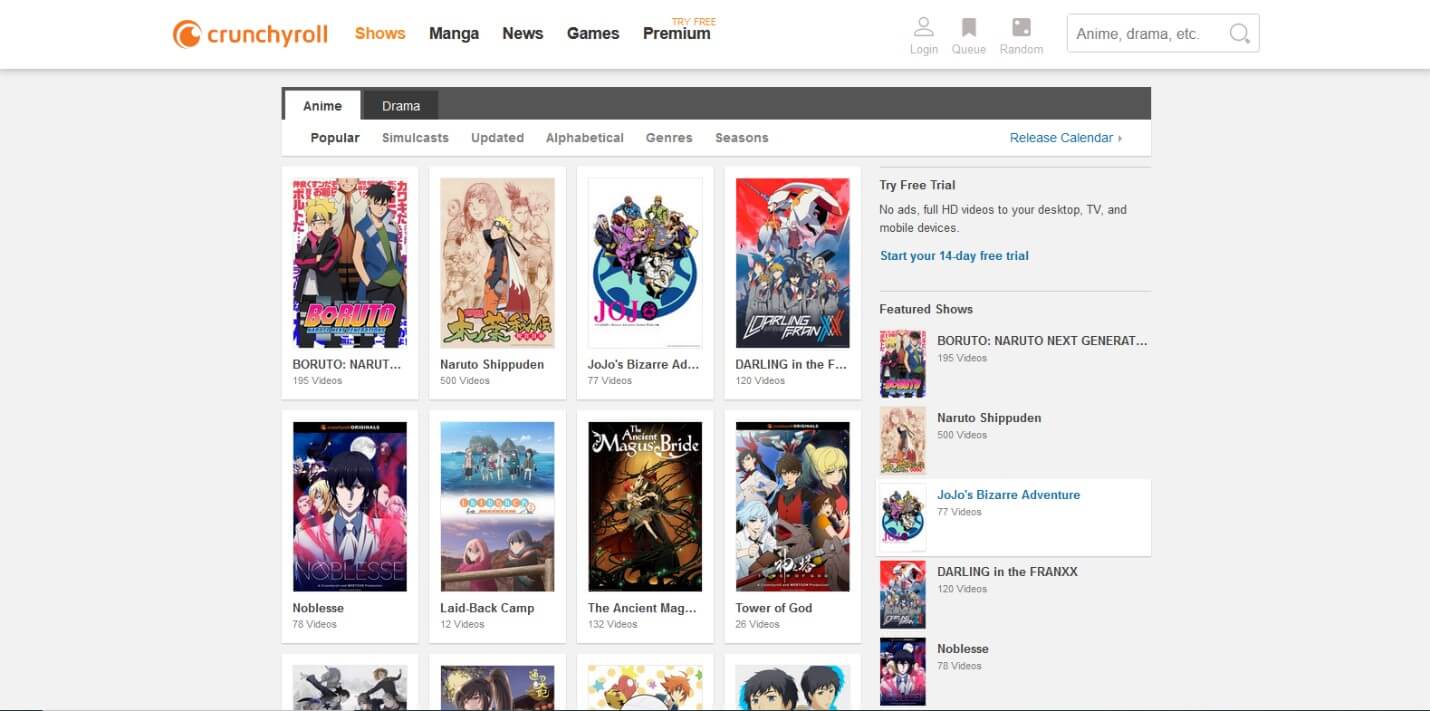
1. Crunchyroll
Crunchyroll has a wide range of anime shows and movies. This streaming service is available in different countries including the USA, UK, Canada, Australia and some Asian countries. From old anime shows to all the latest ones, you will find everything here. It allows you to watch and share anime on social media. It is also available in different languages with subtitles and dubbing. Crunchyroll also offers a premium version for an ad-free experience. The premium version also has a popular manga.
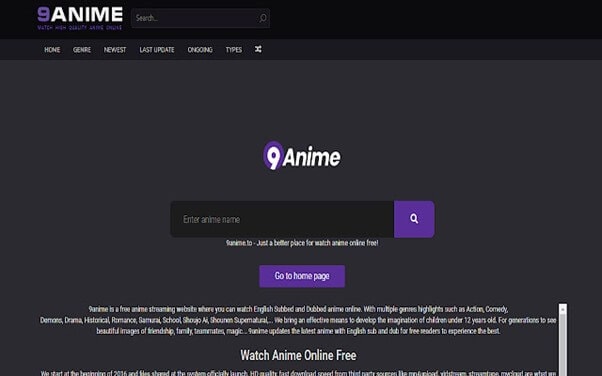
2. 9anime
9anime is a dedicated website for anime. It allows you to watch different types of animated content. From action, drama, and thriller to comedy, you can watch any anime show here. This website gives you access to all the popular anime shows, movies, and OVA (Original Video Animation). It is available across multiple countries including Canada, United States, United Kingdom, Australia, Netherlands, and some Asian countries. If it is not available in your country of origin, you can also access this website on a VPN.
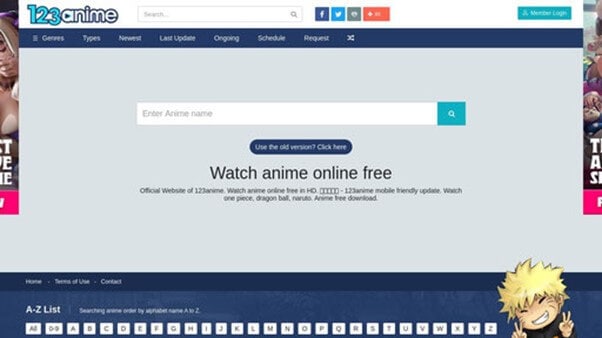
3. 123anime
This is a great alternative to 9anime. This website is a free platform to watch anime online for free in HD quality. It is also mobile-friendly and loads video without buffering. You can watch all the famous anime shows and movies on 123anime such as Pokemon, One Piece, Death Note, Dragon Ball Z, Naruto, and more. It also allows you to download anime for free.
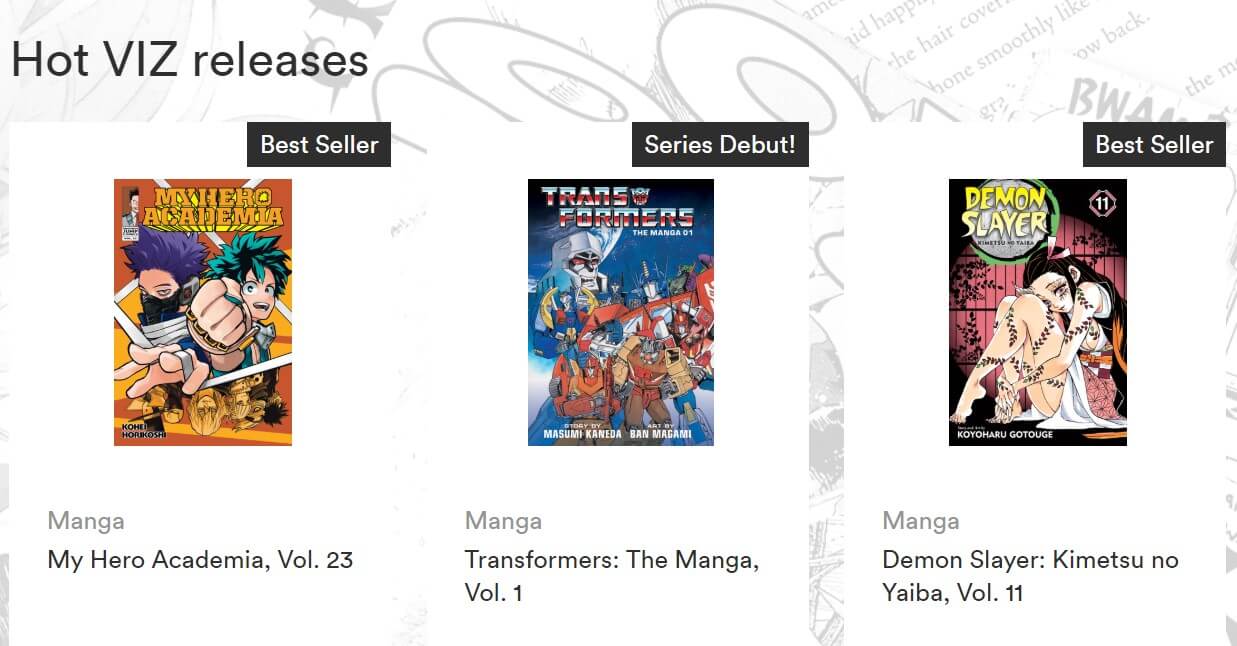
4. VIZ
VIZ is one of the most popular choices for manga and anime. From publishing, to animation and to entertainment licensing, VIZ handles it all. It offers all popular manga as well as all the latest anime series. From classic cult favorites to latest hits, VIZ has the best collection of anime shows and movies. You can save your favorite show on the website and create your own library to binge watch anime shows. All the shows also come with English subtitles.
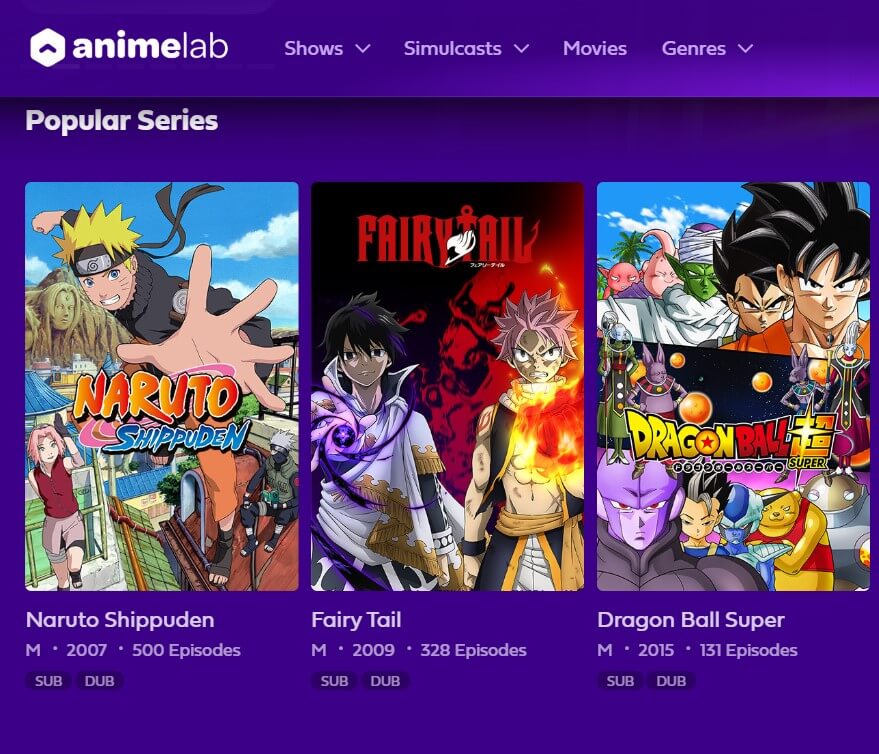
5. Animelab
AnimeLab is a website that offers a huge collection of all the popular anime. Plus, all the videos here are dubbed and subtitled. It also allows you to watch all the latest shows and releases as soon as they are aired. From action, thriller, adventure and horror to drama and comedy, you can watch all types of anime here. It is also compatible with all android and iPhone devices. AnimeLab is available in only two countries currently i.e., New Zealand and Australia. You can use VPN to watch in any other country.
While anime has entertained fans over the years, there are some anime shows that are very disturbing and offensive. They can toy with the psychology of the viewer and are often too inappropriate to handle. Such anime can be violent, sexual or gruesome. This is why some anime are banned in certain countries due to local laws, censorship, and copyright issues. In this article, we listed down top 10 banned anime shows and why they are banned. If you want to watch anime, especially banned anime, do check out the websites mentioned above. You will find all the anime shows you are looking for!
Shanoon Cox
Shanoon Cox is a writer and a lover of all things video.
Follow @Shanoon Cox
Shanoon Cox
Mar 27, 2024• Proven solutions
There is hardly a genre that anime hasn’t conquered. While anime is super entertaining and fun to watch, it can get quite crazy and questionable. Yes, anime is animated but the content is mature. From violence to incest and other controversial issues, anime can be offensive sometimes. Due to this, some countries have banned anime shows for its viewers – especially for younger audiences.
Want to find out what anime shows they are and why they are banned? Well, you are in the right spot. Today, we will talk about the top 10 banned anime shows and why they are banned. So, let’s find out!
![]()
A cross-platform for making videos anywhere for all creators
Why your video editing isn’t good enough? How about some creative inspo?
- 100 Million+ Users
- 150+ Countries and Regions
- 4 Million+ Social Media Followers
- 5 Million+ Stock Media for Use
* Secure Download
Part 1: Top 10 Banned Anime List
Here is a list of the 10 banned animes you should know about and why they are banned:
1. Shoujo Tsubaki (Banned Everywhere)
It has a very dark, depressing, and intense storyline and it is considered one of the most controversial anime movies ever. This is a 1992 anime film about a young girl whose mother dies. The girl meets a man who tells her he will help her if she ever needs anything. So, after her mother’s death, she goes to find the man and ends up at a circus where she gets abused and raped. Thus, Shoujo Tsubaki is about child sexual abuse with unbearable gore scenes. The horrific and disturbing visuals of this anime have left many viewers traumatized – so much so that the tapes of this film were also destroyed. Therefore, Shoujo Tsubaki is banned almost everywhere, including Japan itself.
2. Osomatsu-San (Banned in Japan)
Osomatsu-San is banned in Japan due to copyright issues. The series’ first episode had parodies of famous anime shows including Attack on Titan, Naruto, Sailor Moon, Dragon Ball Z, and more. Thus, due to copyright, the show’s first episode was removed from airing. It is still not available on mainstream anime websites. You can find the DVD version of the show, but even those do not have the first episode.
3. Excel Saga (Banned in Japan)
Excel Saga is based on a popular manga of the same name. It is about a secret ideological organization whose purpose is world domination. The entire Excel Saga is available to watch except for its last episode, called “Going Too Far” – very fitting indeed. It is even banned in its home country, Japan. The reason why this episode got banned is that it’s too long, violent, pornographic, and offensive. Fun fact: The Director of the show, Shinichi Watanabe, purposely got the last episode banned to make it daring and unforgettable. The last episode of Excel Saga is only available on DVD.
4. Death Note (Banned in China)
Death note is one of the most famous anime shows ever and while it’s gruesome, bloody and horrific, it is easily available on mainstream platforms, including Netflix. However, there is still a country that did not appreciate the dark premise of this show. Death Note is banned in China due to its theme. The show is about death, justice, murder and violence so it is considered as a corrupting influence on kids.
5. Attack on Titan (Banned in China)
Another cult-favorite anime on the lists is Attack on Titan. Due to its bloody, disgusting and disturbing visuals, it has been banned in China. While millions of viewers love this anime, China thinks this show portrays a lot of excessive violence which is very unhealthy for the younger audience. With that being said, if you are 18 and above, do not miss out on Attack on Titan. It is truly one of the best anime out there!
6. High School DxD (Banned in New Zealand)
With very high viewer ratings, it’s a bit of shock to see this show on the list. High School DxD follows the story of Issei Hyodo, a perverted high school kid who is killed on his very first date. But he gets reincarnated by Rias Gremory as a demon. Now, how come a show about angles and demons gets banned? Well, the premise of the show focuses on corrupt high school kids with a perverted mindset. This show is very sexual and shows a lot of nudity in certain scenes. This is why New Zealand has banned High School DxD for its sexual, harem themes based around high school kids.
7. Puni Puny Poemy (Banned in New Zealand)
Puni Puny Poemy sounds super cute and childish but don’t let the name fool you. Puni Puny Poemy is a spin-off inspired by Excel Saga – no wonder is it banned. This anime has a lot of sexual content surrounding very young characters. The nudity, explicit sexual scenes and harem inspired content is what makes this show so questionable. Thus, it is banned in New Zealand for being overly vulgar and sexual for young viewers. The show does not have a high viewership such as popular titles like Death Note or Attack on Titan, so many countries ignored it.
8. Hetalia: Axis Powers (Banned in South Korea)
Every character in this show represents a country and the role they played in World War II. Even though it is a comedy anime, it offended a few countries. South Korea actually banned the show on the grounds of “offensive stereotypes” and was called a “national crime” by the country. Hetalia: Axis Powers continued to air, the character and all the references to South Korea were completely removed due to backlash. The censored version of this anime is still available in some parts of the country.
9. Pokémon (Banned in Saudi Arabia)
Pokemon banned? Pokemon is perhaps THE most famous and innocent anime ever. It’s kid friendly and super clean. So, why is a show about Satoshi and his pocket monster banned? The religious authorities of Saudi Arabia declared that Pokemon promotes gambling and Jewish sentiments. Since then, there have been many conspiracy theories revolving around the show claiming it to be a Zionist conspiracy. Thus, it is banned in Saudi Arabia. Crazy right?
10. Kite (Banned in Norway)
Kite follows the story of a girl who uses bullets to kill people and make them explode. Now, you must be thinking that the violent nature of the show got it banned in Norway. Nope! not the case. Kite is banned in Norway due to a very graphic sexual assault scene on a minor. Norway has very strict laws against child pornography, thus the entire anime got banned. Similarly, the United States also censored and removed certain parts of the movie but it is not banned there.
Part 2: Where to Watch Anime Online for Free
If you live in any of the countries mentioned in the list above and want to watch the anime banned by your country, we have got you covered. Here are top 5 websites where you can watch anime online for free:
1. Crunchyroll
Crunchyroll has a wide range of anime shows and movies. This streaming service is available in different countries including the USA, UK, Canada, Australia and some Asian countries. From old anime shows to all the latest ones, you will find everything here. It allows you to watch and share anime on social media. It is also available in different languages with subtitles and dubbing. Crunchyroll also offers a premium version for an ad-free experience. The premium version also has a popular manga.
2. 9anime
9anime is a dedicated website for anime. It allows you to watch different types of animated content. From action, drama, and thriller to comedy, you can watch any anime show here. This website gives you access to all the popular anime shows, movies, and OVA (Original Video Animation). It is available across multiple countries including Canada, United States, United Kingdom, Australia, Netherlands, and some Asian countries. If it is not available in your country of origin, you can also access this website on a VPN.
3. 123anime
This is a great alternative to 9anime. This website is a free platform to watch anime online for free in HD quality. It is also mobile-friendly and loads video without buffering. You can watch all the famous anime shows and movies on 123anime such as Pokemon, One Piece, Death Note, Dragon Ball Z, Naruto, and more. It also allows you to download anime for free.
4. VIZ
VIZ is one of the most popular choices for manga and anime. From publishing, to animation and to entertainment licensing, VIZ handles it all. It offers all popular manga as well as all the latest anime series. From classic cult favorites to latest hits, VIZ has the best collection of anime shows and movies. You can save your favorite show on the website and create your own library to binge watch anime shows. All the shows also come with English subtitles.
5. Animelab
AnimeLab is a website that offers a huge collection of all the popular anime. Plus, all the videos here are dubbed and subtitled. It also allows you to watch all the latest shows and releases as soon as they are aired. From action, thriller, adventure and horror to drama and comedy, you can watch all types of anime here. It is also compatible with all android and iPhone devices. AnimeLab is available in only two countries currently i.e., New Zealand and Australia. You can use VPN to watch in any other country.
While anime has entertained fans over the years, there are some anime shows that are very disturbing and offensive. They can toy with the psychology of the viewer and are often too inappropriate to handle. Such anime can be violent, sexual or gruesome. This is why some anime are banned in certain countries due to local laws, censorship, and copyright issues. In this article, we listed down top 10 banned anime shows and why they are banned. If you want to watch anime, especially banned anime, do check out the websites mentioned above. You will find all the anime shows you are looking for!
Shanoon Cox
Shanoon Cox is a writer and a lover of all things video.
Follow @Shanoon Cox
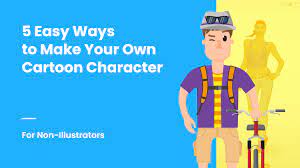
10 Cartoon Character Makers to Create Animated Characters
10 Cartoon Character Makers to Create Animated Characters
An easy yet powerful editor
Numerous effects to choose from
Detailed tutorials provided by the official channel
Learning cartoon making is easy through various application or makers online. Draw cartoon characters sketch in easy steps.

With the changing marketing and business trends, people and business owners are adopting different patterns in the pictures to make them visually good and attractive. Videos and pictures with animated characters look so amazing and gain maximum customers views. This ultimately helps the business owners to generate more leads for their business.
Not only business, but the presence of animated characters is also seen in the stories and status of the people over social media accounts. People impress others through making their own cartoon characters and animated pictures or characters. Earlier it has very tough to create cartoon character, but with so many online makers today, one can easily draw and create cartoon characters. There are various platforms that use software to turn a picture into a cartoon character or even animated picture. There are easy and interesting ways to create cartoon characters. If you love to see and are interested in drawing cartoon characters, then you can make it through various platforms. Let’s see some easy way to create own cartoon character.
In this article
01 [5 Easy Ways to Create Your Own Cartoon Character [For Non-illustrators] ](#Part 1)
02 [5 Create Cartoon Characters to Create Animated Characters for PRO](#Part 2)
03 [How to Create a Cartoon Character: A General Guide](#Part 3)
Part 1 5 Easy Ways to Create Your Own Cartoon Character [For Non-illustrators]
01Through Online Avatar Builders
Avatar building is an extraordinary way of presenting yourself. The best thing with avatar builders is that there is no need to download any application. You can easily do it in your device through online websites. They are the easiest and economical way of creating cartoon. You can add fun elements with these Avatar builders. Some of the websites that offer avatar building tools are:
Cartoonize: You can instantly make cartoon or avatar characters through Cartoonize. It can be used for face customization and adding colors. Face features like eyes, nose, hair style and expressions can be perfectly drawn with this tool. You can learn more by going to their official website.
The process is simple. You can upload your picture, go to cartoonize option at the top of the menu, do the necessary edits and features. Save it and your avatar cartoon is ready.
The other avatar building platforms are charatoon and Face your Manga. For Face your Manga, Adobe Flash Player is required. The gallery can be explored with some famous avatar of popular personalities.
02Character builders
The other way to create your own cartoon character is through character builders. The difference of this cartoon making is that one can create a complete cartoon with complete features. Like from head to toe. GraphicMama Character Maker Packs is one that offers kit to make customized cartoons.
03Tools for converting pictures into cartoons
A perfect cartoon can be made when it resemble truly as you are. The best method for doing that is using software to turn a picture into a cartoon. Filters, facial expressions and styles can be added through this way. Adobe Character Animator is a tool that can be used to convert a picture, catch the facial expression and voice.
You can learn to create cartoon character from photo by following the video
The other two ways are related to taking help of others in making the cartoon characters. Some of them are:
04Outsourcing designers or illustrators
When the perfection level is not achieved through own creation, the other option is to get it done through designers or illustrators. There are freelancers and studio who offer such services. They create cartoon as per the requirement of the customers.
05Modification in Stock cartoon characters
Those who are not having any experience of making cartoons, they can use the stocks cartoon characters and can change them with the use of software.
Part 2 5 Create Cartoon Characters to Create Animated Characters for PRO
A professional cartoon maker need some advance tools and features to give a unique and perfect look to his cartoon drawn. So, for them some applications or cartoon character maker is good. Let’s see some of the makers that are specifically designed for professionals:
01Animaker
This has various themes to make your cartoon look great. It brings life to a character. The steps involve in making a cartoon character is as under:
● As required, select the animated template.
● You can add customized features as such as backgrounds, pictures and animated text.
● Music can also be added and can be selected from the library.
● After the character is ready, you can share or download the video.
02Adobe
This is the most widely platform or maker for creating high quality contents, cartoon avatar and games. Sketch and drawing tool are there in the maker that gives real experience to the cartoon. The platform facilitates exploring the file to WebGL, SVG and Adobe AIR.
You can view how it works and the process in the video-
03Reallusion
Text and voice has given a new definition to the cartoon world. If you desire to add some interesting elements in cartoon through text and voices, then Reallusion is a good option for you. It has 3D head creation tool which can be used to make animated cartoons for mails and e-cards.
You can view how it works and the process in the video-
04Renderforest
This cartoon maker has some great collection of professionally designed templates, to make cartoon making process easy and perfect. Templates for kids, education, character adventure, healthcare and iconic animation are some of the collections one can find in this maker.
The process of cartoon creation is easy with following steps:
● Choose the most excellent cartoon templates or start from zero through sketch,
● You can edit the already available stories. Even animated characters can be used.
● Add some customized features like voice or music, style or colors.
● This is how you can create exclusive vibrant cartoons.
Video can be watched at-
05Biteable
Biteable has several templates like leadership skill tips, travel agent explainer and many more. The video clips, music, animated templates of this maker create engaging cartoon characters.
The process to develop a cartoon video through Biteable is as under:
● Open the maker Biteable
● As per your requirement, pick the one cartoon template
● Log in the account
● You can add many effects like backing music, clips and text.
● As made in the website, you can share on social media and emails.
Part 3 How to Create a Cartoon Character: A General Guide
A professional cartoon expert becomes an expert after a continuous practice. It’s not easy to learn making cartoons. Therefore to be an expert one need to learn the basics and other important principles for cartoon making. A general guide for the same is as under:
● Begin with basic steps
Learn the basic shapes like making ovals, circles and other shapes. This will help you to be perfection in making the basic outline of the cartoon. This will improve you skill and you can explore more possibilities with the basic outlines.
● Shape improvement
This is an advance stage of basic step. This step will help you to define the shape of the cartoon character you are going to draw. It gives structure and design to a character.
● Including details
This stage is more about designing a character. Pose, expression, attires, props are selected in this step. The personality of a character is made better. It makes the character more interesting and engaging.
● Shadow of cartoon character
Before giving a final touch to the character, it is necessary to check the shadow of the picture drawn. It will show whether you are on right path or not.
● Final touch
The last step is adding all details in the character. It may be straight teeth, big smile, messy hairs or anything. Lines can be made fine and clean. You can add colors of your choice.
The other platform or cartoon maker that can be checked out is Filmora.
Wondershare Filmora Video Editor is software used for making, editing and adding effects to pictures or videos. It is easy to use application loaded with many advanced tools and features to make picture and video editing simple. Those who are looking for a robust application for capturing some precious moments through picture and videos, then Filmora is a perfect application.
Filmora can be used to draw and insert cartoon characters in any video. Animation, text and music can be added effectively with Filmora. A beginner can easily learn to create cartoon character online.
Wondershare Filmora
Get started easily with Filmora’s powerful performance, intuitive interface, and countless effects!
Try It Free Try It Free Try It Free Learn More >

● Ending Thoughts →
● Cartoon characters making is not an easy task. But now there are cartoon character maker free which has made easy to learn cartoon making. The various tools used are Avatar maker, cartoon making, turning picture into cartoon and through experts support.
● The different professional cartoon character maker online are Animaker, Reallusion, Biteable and Adobe. Through these cartoon makers making cartoon characters are easy with advanced features.
● Filmora is one of the popular picture and video making and editing software which can also be used for making amazing cartoon characters.
Learning cartoon making is easy through various application or makers online. Draw cartoon characters sketch in easy steps.
With the changing marketing and business trends, people and business owners are adopting different patterns in the pictures to make them visually good and attractive. Videos and pictures with animated characters look so amazing and gain maximum customers views. This ultimately helps the business owners to generate more leads for their business.
Not only business, but the presence of animated characters is also seen in the stories and status of the people over social media accounts. People impress others through making their own cartoon characters and animated pictures or characters. Earlier it has very tough to create cartoon character, but with so many online makers today, one can easily draw and create cartoon characters. There are various platforms that use software to turn a picture into a cartoon character or even animated picture. There are easy and interesting ways to create cartoon characters. If you love to see and are interested in drawing cartoon characters, then you can make it through various platforms. Let’s see some easy way to create own cartoon character.
In this article
01 [5 Easy Ways to Create Your Own Cartoon Character [For Non-illustrators] ](#Part 1)
02 [5 Create Cartoon Characters to Create Animated Characters for PRO](#Part 2)
03 [How to Create a Cartoon Character: A General Guide](#Part 3)
Part 1 5 Easy Ways to Create Your Own Cartoon Character [For Non-illustrators]
01Through Online Avatar Builders
Avatar building is an extraordinary way of presenting yourself. The best thing with avatar builders is that there is no need to download any application. You can easily do it in your device through online websites. They are the easiest and economical way of creating cartoon. You can add fun elements with these Avatar builders. Some of the websites that offer avatar building tools are:
Cartoonize: You can instantly make cartoon or avatar characters through Cartoonize. It can be used for face customization and adding colors. Face features like eyes, nose, hair style and expressions can be perfectly drawn with this tool. You can learn more by going to their official website.
The process is simple. You can upload your picture, go to cartoonize option at the top of the menu, do the necessary edits and features. Save it and your avatar cartoon is ready.
The other avatar building platforms are charatoon and Face your Manga. For Face your Manga, Adobe Flash Player is required. The gallery can be explored with some famous avatar of popular personalities.
02Character builders
The other way to create your own cartoon character is through character builders. The difference of this cartoon making is that one can create a complete cartoon with complete features. Like from head to toe. GraphicMama Character Maker Packs is one that offers kit to make customized cartoons.
03Tools for converting pictures into cartoons
A perfect cartoon can be made when it resemble truly as you are. The best method for doing that is using software to turn a picture into a cartoon. Filters, facial expressions and styles can be added through this way. Adobe Character Animator is a tool that can be used to convert a picture, catch the facial expression and voice.
You can learn to create cartoon character from photo by following the video
The other two ways are related to taking help of others in making the cartoon characters. Some of them are:
04Outsourcing designers or illustrators
When the perfection level is not achieved through own creation, the other option is to get it done through designers or illustrators. There are freelancers and studio who offer such services. They create cartoon as per the requirement of the customers.
05Modification in Stock cartoon characters
Those who are not having any experience of making cartoons, they can use the stocks cartoon characters and can change them with the use of software.
Part 2 5 Create Cartoon Characters to Create Animated Characters for PRO
A professional cartoon maker need some advance tools and features to give a unique and perfect look to his cartoon drawn. So, for them some applications or cartoon character maker is good. Let’s see some of the makers that are specifically designed for professionals:
01Animaker
This has various themes to make your cartoon look great. It brings life to a character. The steps involve in making a cartoon character is as under:
● As required, select the animated template.
● You can add customized features as such as backgrounds, pictures and animated text.
● Music can also be added and can be selected from the library.
● After the character is ready, you can share or download the video.
02Adobe
This is the most widely platform or maker for creating high quality contents, cartoon avatar and games. Sketch and drawing tool are there in the maker that gives real experience to the cartoon. The platform facilitates exploring the file to WebGL, SVG and Adobe AIR.
You can view how it works and the process in the video-
03Reallusion
Text and voice has given a new definition to the cartoon world. If you desire to add some interesting elements in cartoon through text and voices, then Reallusion is a good option for you. It has 3D head creation tool which can be used to make animated cartoons for mails and e-cards.
You can view how it works and the process in the video-
04Renderforest
This cartoon maker has some great collection of professionally designed templates, to make cartoon making process easy and perfect. Templates for kids, education, character adventure, healthcare and iconic animation are some of the collections one can find in this maker.
The process of cartoon creation is easy with following steps:
● Choose the most excellent cartoon templates or start from zero through sketch,
● You can edit the already available stories. Even animated characters can be used.
● Add some customized features like voice or music, style or colors.
● This is how you can create exclusive vibrant cartoons.
Video can be watched at-
05Biteable
Biteable has several templates like leadership skill tips, travel agent explainer and many more. The video clips, music, animated templates of this maker create engaging cartoon characters.
The process to develop a cartoon video through Biteable is as under:
● Open the maker Biteable
● As per your requirement, pick the one cartoon template
● Log in the account
● You can add many effects like backing music, clips and text.
● As made in the website, you can share on social media and emails.
Part 3 How to Create a Cartoon Character: A General Guide
A professional cartoon expert becomes an expert after a continuous practice. It’s not easy to learn making cartoons. Therefore to be an expert one need to learn the basics and other important principles for cartoon making. A general guide for the same is as under:
● Begin with basic steps
Learn the basic shapes like making ovals, circles and other shapes. This will help you to be perfection in making the basic outline of the cartoon. This will improve you skill and you can explore more possibilities with the basic outlines.
● Shape improvement
This is an advance stage of basic step. This step will help you to define the shape of the cartoon character you are going to draw. It gives structure and design to a character.
● Including details
This stage is more about designing a character. Pose, expression, attires, props are selected in this step. The personality of a character is made better. It makes the character more interesting and engaging.
● Shadow of cartoon character
Before giving a final touch to the character, it is necessary to check the shadow of the picture drawn. It will show whether you are on right path or not.
● Final touch
The last step is adding all details in the character. It may be straight teeth, big smile, messy hairs or anything. Lines can be made fine and clean. You can add colors of your choice.
The other platform or cartoon maker that can be checked out is Filmora.
Wondershare Filmora Video Editor is software used for making, editing and adding effects to pictures or videos. It is easy to use application loaded with many advanced tools and features to make picture and video editing simple. Those who are looking for a robust application for capturing some precious moments through picture and videos, then Filmora is a perfect application.
Filmora can be used to draw and insert cartoon characters in any video. Animation, text and music can be added effectively with Filmora. A beginner can easily learn to create cartoon character online.
Wondershare Filmora
Get started easily with Filmora’s powerful performance, intuitive interface, and countless effects!
Try It Free Try It Free Try It Free Learn More >
● Ending Thoughts →
● Cartoon characters making is not an easy task. But now there are cartoon character maker free which has made easy to learn cartoon making. The various tools used are Avatar maker, cartoon making, turning picture into cartoon and through experts support.
● The different professional cartoon character maker online are Animaker, Reallusion, Biteable and Adobe. Through these cartoon makers making cartoon characters are easy with advanced features.
● Filmora is one of the popular picture and video making and editing software which can also be used for making amazing cartoon characters.
How to Create Photo Collage Frame for Free in Minutes?
How to Create Photo Collage Frame for Free in Minutes?
An easy yet powerful editor
Numerous effects to choose from
Detailed tutorials provided by the official channel
Decoration of pictures and collages can be done by making beautiful and stylish frames. A family picture or collage can be beautified by adding an attractive frame to it. Know about Best App for Photo Frames Online so you can create photo collages easily in minutes.
In this article
01 [How Do You Make a Collage Picture Frame?](#Part 1)
02 [What is the Best App for Photo Frames?](#Part 2)
Part 1 How Do You Make a Collage Picture Frame?
A beautiful collage without a stylish frame will not be attractive. When a family collage is accompanied by an artistic frame, it adds beauty to it and will be an attraction point for the visitors in the home. Wondering where to get it from? You can do it easily through some most popular apps. Yes, you can get your photo collage framed by yourself.

A wall can be decorated with collage picture frames by following just a few simple steps. Let’s begin with!!!
● Selection of the place where the collage frame is required to be hung: The place should be selected based on certain factors such as being easily approachable, proper lighting, and matching with the theme of the home. The place should be sufficient to add on some more picture frames in the future. The wall picture collage frames shall be created based on the room themes like kid’s room, living room, or bedroom. The position of the frames should be marked with tape so that the exact dimension can be known.
● 2. Select the online application to create frames: There are many applications available online that offer pictures collage frames. Choose one application as per the interest and explore it over the phone or desktop. There are various collage picture frame templates available at the application.
● 3. Uploading the pictures: Select the frame that is best for the picture. The frames shall be selected as per the size of the collage. Several pictures can be selected to make a collage and fix the frame. The frame style can be changed that suits best to the picture or collage. A family picture can be uploaded to create a beautiful and perfect size family photo frame collage.
● 4. Customization: The Photo Collage Frame can be even made better with customization over online applications. Text and style can be included in the frames to give it a better look. Grid frame for picture collage is also available which can be created that fits perfectly to the pictures.
● 5. A collage photo frame is ready to hang on the wall & share: The photo collage with frame can be downloaded from the application. A beautiful picture frame collage wall can be hung in the living room or can be shared online with family and friends to print the same. More frames can be added in the future by choosing the same theme and customization.
Part 2 Part2 what is the Best App for Photo Frames?
Selecting the best App for a photo frame enhances the appearance of any ordinary picture. Some of the top Applications used for frame collage wall are as mentioned:

02 PhotoDirector
This app is popular due to its great AI tools, attractive picture effects, and advanced color control. It has a massive collection of frames that fits perfectly for a single picture as well as a collage. The style options of frames available on the app are classic, modern, and whimsical. Animation and glitch effects add an extra feature to this app.
Pros:
1. Wide range of frames is available.
2. It is easy to use as it can work on Android, iOS, macOS, and Windows devices.
3. Free version is available and photo frames can be shared over social media platforms.
Cons:
1. a Large number of editing options makes it confusing.
2. Fewer features are available.
3. Difficulty in finding plug-in features.

03PicsArt-Our Choice
PicsArt-Our Choice app is having a good combination best photo frames and multi-functional photo editing tools. Clip art, text option, frame editing, and making attractive collages make this app a masterpiece. This app can be used over smartphones and the pictures can be easily shared over social media platforms.
Pros:
1. Availability of tools to make clipart and collages.
2. Option to edit frames and objects.
3. Fully packed with a lot of stickers, frames, and filter options.
Cons:
1. The processing of images is slower.
2. Frequent ads disturb the process of editing and frame creation.
3. The application requires more space on downloading over the phone

04 PicFrame
This application has features to combine multiple pictures in one frame and the created frames can be easily shared over social media platforms. A great artwork can be done by using advanced tools such as filters, attractive frames, and drawing tools. The adjustable photo effects, background patterns and fully customized frames allow creating some attractive pictures and collage frame design.
Pros:
1. Option to save pictures in different resolutions.
2. Great tools for reshaping pictures and wide frame patterns
3. Work also on iPhone and iPad.
Cons:
1. With more new and advanced apps, it has become slightly outdated.
2. It closes very frequently, so sometimes work done on the application is lost.
3. Time to create frames is longer.

05Photo Grid
Photo Grid is an App that offers great photo editing features with more than three hundred layouts to give an attractive look to a picture. The users can transform their various pictures into beautiful collages. Filters, stickers, makeup tools, animated emoticons, and customized background features have made this app a bit popular. Extra pages can be added and the Lightbox feature makes it good for presentation.
Pros:
1. Massive collection of photo frames with customized features
2. Easy to use.
3. Various photo editing option
Cons:
1. It comes with various ads that trouble making frames and collages.
2. Lot of flexibility is not there regarding making videos with pictures.
3. Own frames cannot be created.

06ImgLabs
ImgLabs is one of the best applications to decorate photos and add creativity to them. Easy editing, beautify and stickers can be done over pictures and can be easily shared over Instagram and Facebook. More than twenty images can be added along with beautiful frames through this app. Cool photo filters, drawing tools, collage photo frame design tools, and texture effects make it a great photo frame application.
Pros:
1. The Android and iOS versions of the app are easy to use.
2. Attractive blurring and background effects give an attractive look to the images and picture frames.
3. Well-developed photo editing tools are available.
Cons:
1. The frames available are less as compared to other photo & frame editing applications.
2. Difference in functions is noticed in iOS and Android apps.
3. Installation issues in photo edit and stickers

So, these were some of the applications that offer to make some creative photo edits, collages, and frames. Turning to high definition of pictures and frames, most of the applications are coming up with new and advanced features to give the best picture experience to people. One of the applications which any creative person loves to use is Filmora.
****Wondershare Filmora Video Editor ** that creates attractive and professional quality videos for both business and personal purposes. It transforms the video by adding various stylish effects. One can edit the clips, add watermarks, and can adjust the brightness of the videos in simple steps. A wide range of stickers, animated texts, sound effects, filters, and inserting colorful borders over videos make it a great app.
For Win 7 or later (64-bit)
For macOS 10.12 or later
The videos can be made in different file formats such as mp4, wmv, avi, gif, and mp3 and can be easily shared over social media platforms. This app has great importance for business as it offers various facilities such as Multi-channel marketing, social advertising, and social promotion. It is good for user and brand management also.
So, making any video from pictures or movies through Filmora app will be an amazing idea. With advanced texting, color tuning, and 3D effects, one can be so creative. Even Filmora can be used to create video projects.
● Key Takeaways from This Episode →
● Simple pictures or collages can be taken to next level by adding alluring frames to them. With advanced drawing tools, pictures, and light effects, a stylish collage photo frame design can be created online. It allows bringing so many memories of people in one beautiful frame.
● Photo frame collage wall can be created over many applications. There are Android applications that offer many advanced features required to give a fine touch to the pictures, collages, and frames. They can be used and frames for family pictures can be made easily by following simple steps.
● he selection of the application should be made based on the several options available with the app. For example, an app that has easy to use, is good for all devices, has great editing features, eye-catching eye work and mesmerizing effect shall be preferred.
● So, try some amazing and advanced online Apps to create beautiful picture frames for you and your family now!!!
Decoration of pictures and collages can be done by making beautiful and stylish frames. A family picture or collage can be beautified by adding an attractive frame to it. Know about Best App for Photo Frames Online so you can create photo collages easily in minutes.
In this article
01 [How Do You Make a Collage Picture Frame?](#Part 1)
02 [What is the Best App for Photo Frames?](#Part 2)
Part 1 How Do You Make a Collage Picture Frame?
A beautiful collage without a stylish frame will not be attractive. When a family collage is accompanied by an artistic frame, it adds beauty to it and will be an attraction point for the visitors in the home. Wondering where to get it from? You can do it easily through some most popular apps. Yes, you can get your photo collage framed by yourself.
A wall can be decorated with collage picture frames by following just a few simple steps. Let’s begin with!!!
● Selection of the place where the collage frame is required to be hung: The place should be selected based on certain factors such as being easily approachable, proper lighting, and matching with the theme of the home. The place should be sufficient to add on some more picture frames in the future. The wall picture collage frames shall be created based on the room themes like kid’s room, living room, or bedroom. The position of the frames should be marked with tape so that the exact dimension can be known.
● 2. Select the online application to create frames: There are many applications available online that offer pictures collage frames. Choose one application as per the interest and explore it over the phone or desktop. There are various collage picture frame templates available at the application.
● 3. Uploading the pictures: Select the frame that is best for the picture. The frames shall be selected as per the size of the collage. Several pictures can be selected to make a collage and fix the frame. The frame style can be changed that suits best to the picture or collage. A family picture can be uploaded to create a beautiful and perfect size family photo frame collage.
● 4. Customization: The Photo Collage Frame can be even made better with customization over online applications. Text and style can be included in the frames to give it a better look. Grid frame for picture collage is also available which can be created that fits perfectly to the pictures.
● 5. A collage photo frame is ready to hang on the wall & share: The photo collage with frame can be downloaded from the application. A beautiful picture frame collage wall can be hung in the living room or can be shared online with family and friends to print the same. More frames can be added in the future by choosing the same theme and customization.
Part 2 Part2 what is the Best App for Photo Frames?
Selecting the best App for a photo frame enhances the appearance of any ordinary picture. Some of the top Applications used for frame collage wall are as mentioned:
02 PhotoDirector
This app is popular due to its great AI tools, attractive picture effects, and advanced color control. It has a massive collection of frames that fits perfectly for a single picture as well as a collage. The style options of frames available on the app are classic, modern, and whimsical. Animation and glitch effects add an extra feature to this app.
Pros:
1. Wide range of frames is available.
2. It is easy to use as it can work on Android, iOS, macOS, and Windows devices.
3. Free version is available and photo frames can be shared over social media platforms.
Cons:
1. a Large number of editing options makes it confusing.
2. Fewer features are available.
3. Difficulty in finding plug-in features.
03PicsArt-Our Choice
PicsArt-Our Choice app is having a good combination best photo frames and multi-functional photo editing tools. Clip art, text option, frame editing, and making attractive collages make this app a masterpiece. This app can be used over smartphones and the pictures can be easily shared over social media platforms.
Pros:
1. Availability of tools to make clipart and collages.
2. Option to edit frames and objects.
3. Fully packed with a lot of stickers, frames, and filter options.
Cons:
1. The processing of images is slower.
2. Frequent ads disturb the process of editing and frame creation.
3. The application requires more space on downloading over the phone
04 PicFrame
This application has features to combine multiple pictures in one frame and the created frames can be easily shared over social media platforms. A great artwork can be done by using advanced tools such as filters, attractive frames, and drawing tools. The adjustable photo effects, background patterns and fully customized frames allow creating some attractive pictures and collage frame design.
Pros:
1. Option to save pictures in different resolutions.
2. Great tools for reshaping pictures and wide frame patterns
3. Work also on iPhone and iPad.
Cons:
1. With more new and advanced apps, it has become slightly outdated.
2. It closes very frequently, so sometimes work done on the application is lost.
3. Time to create frames is longer.
05Photo Grid
Photo Grid is an App that offers great photo editing features with more than three hundred layouts to give an attractive look to a picture. The users can transform their various pictures into beautiful collages. Filters, stickers, makeup tools, animated emoticons, and customized background features have made this app a bit popular. Extra pages can be added and the Lightbox feature makes it good for presentation.
Pros:
1. Massive collection of photo frames with customized features
2. Easy to use.
3. Various photo editing option
Cons:
1. It comes with various ads that trouble making frames and collages.
2. Lot of flexibility is not there regarding making videos with pictures.
3. Own frames cannot be created.
06ImgLabs
ImgLabs is one of the best applications to decorate photos and add creativity to them. Easy editing, beautify and stickers can be done over pictures and can be easily shared over Instagram and Facebook. More than twenty images can be added along with beautiful frames through this app. Cool photo filters, drawing tools, collage photo frame design tools, and texture effects make it a great photo frame application.
Pros:
1. The Android and iOS versions of the app are easy to use.
2. Attractive blurring and background effects give an attractive look to the images and picture frames.
3. Well-developed photo editing tools are available.
Cons:
1. The frames available are less as compared to other photo & frame editing applications.
2. Difference in functions is noticed in iOS and Android apps.
3. Installation issues in photo edit and stickers
So, these were some of the applications that offer to make some creative photo edits, collages, and frames. Turning to high definition of pictures and frames, most of the applications are coming up with new and advanced features to give the best picture experience to people. One of the applications which any creative person loves to use is Filmora.
****Wondershare Filmora Video Editor ** that creates attractive and professional quality videos for both business and personal purposes. It transforms the video by adding various stylish effects. One can edit the clips, add watermarks, and can adjust the brightness of the videos in simple steps. A wide range of stickers, animated texts, sound effects, filters, and inserting colorful borders over videos make it a great app.
For Win 7 or later (64-bit)
For macOS 10.12 or later
The videos can be made in different file formats such as mp4, wmv, avi, gif, and mp3 and can be easily shared over social media platforms. This app has great importance for business as it offers various facilities such as Multi-channel marketing, social advertising, and social promotion. It is good for user and brand management also.
So, making any video from pictures or movies through Filmora app will be an amazing idea. With advanced texting, color tuning, and 3D effects, one can be so creative. Even Filmora can be used to create video projects.
● Key Takeaways from This Episode →
● Simple pictures or collages can be taken to next level by adding alluring frames to them. With advanced drawing tools, pictures, and light effects, a stylish collage photo frame design can be created online. It allows bringing so many memories of people in one beautiful frame.
● Photo frame collage wall can be created over many applications. There are Android applications that offer many advanced features required to give a fine touch to the pictures, collages, and frames. They can be used and frames for family pictures can be made easily by following simple steps.
● he selection of the application should be made based on the several options available with the app. For example, an app that has easy to use, is good for all devices, has great editing features, eye-catching eye work and mesmerizing effect shall be preferred.
● So, try some amazing and advanced online Apps to create beautiful picture frames for you and your family now!!!
Best 10 Video to GIF Converters: Top Picks
Best 10 Video to GIF Converters: Top Picks
An easy yet powerful editor
Numerous effects to choose from
Detailed tutorials provided by the official channel
Having trouble converting your videos to GIF? Browse the top 10 converters to sort this out!
In this article
01 [Why GIFs are Widely Used and Popular?](#Part 1)
02 [Top 10 Ways to Turn Video into GIF](#Part 2)
Part 1 Why GIFs are Widely Used and Popular?
If you take a poll on the watch preference of GIF versus videos, most of votes you get would be in favor of watching GIFs. There are obvious reasons to the fact that anyone would prefer watching a GIF over a video, irrespective of its length. Some major ones that make it quite annoying to watch videos include the following:
● To begin with, you need to turn the video on and off, depending on your choice of watching a video or surfing through stories and feeds, failing which you get to hear additional sounds through your feed from the already running video. You further need to stop the music or go for a volume control in case you are not interested to watch the video.
● Most of the videos you run turn up to be irrelevant or uninteresting through the middle, but you don’t have a choice to make bit adjustments. If however possible, the method is not quite convenient. You may need to visit a different site in case you run a video that is not integrated with webpage of your searched content, wait for the portal’s interface to load or watch an advertisement.
● GIFs, on the other hand, do not require pausing or turning off, and run automatically. You also don’t need to mute any sounds. These ensure to-the-point message delivery and don’t divert your attention from the primary content you visit the webpage for.
Owing to the above, most of us are now much interested to convert videos to GIFs for an exact, impactful and to the point content creation and sharing. See through the next sections of this article to learn about the best video to GIF conversion tools and software.
Part 1 Top 10 Ways to Turn Video into GIF
Considering the credibility of GIFs, you may often require to convert your long videos into short and content specific GIFs. Given below are the 10 best methods to cater to the need of video to GIF conversion:
01Filmora
Wondershare Filmora Video Editor is one among the most popular and easy methods to convert videos to GIFs. It is compatible with almost all common video formats and is loaded with a plethora of exciting effects and editing tools. Take the following steps to create GIFs from videos using this application:
Wondershare Filmora
Get started easily with Filmora’s powerful performance, intuitive interface, and countless effects!
Try It Free Try It Free Try It Free Learn More >

Step 1: Import Your Video
Launch Filmora and import your desired video in the app’s welcome window. To do this, click on ‘New Project’ followed by ‘Import’ option from the drop down menu to add your video to the Filmora.

Step 2: Timeline Dragging
Add your video to the app’s timeline using the ‘Drag and Drop’ method. You can also extract video frames by taking screenshots and merge these images into your GIF from the media library.

Step 3: Explore Your Editing Skills
You can now edit the imported video in the timeline using a range of interesting effects. Crop, trim, split or make speed adjustments to give your video a catchy look.

Step 4: Include Messages
Try adding texts and supplementary elements to deliver impactful messages through your creation.

Step 5: It’s Time to Share!
Click ‘Export’ to save your GIF to your device. You are now ready to post your work in your social communities to get the most deserved attention of your peers!

02YouTube to GIF
This one is a simple and user-friendly video to GIF converter. You can convert videos to GIFs from your PC or other online platforms with this converter. The converter allows you to play with a variety of editing effects to make your creation more interesting. All you need to do is the following:
● In the video URL bar, type ‘gif’ after ‘www.’ and you will be redirected to converter’s working window. Set the GIF time interval or apply specific effects using the tools from the panel in the left of the working window.


● To set the video time frame, highlight it in the video timeline. Set the desired interval using the ‘Start Time’ and ‘End Time’ options.

● To add a new visual effect, select it from the menu. Below the video timeline, a row of parameters will get displayed. Set the effect parameters to make desired changes.
● Click ‘Create GIF’. In the ‘Settings’ menu, you can rename and add tags to your creation and even make it private.

● That’s it! You can download your GIF now. You may get a converter purchase offer for enabling advanced features. While most users prefer sticking to the free version, it is up to you whether to decline or accept the purchase offer.
● The ‘Download’ feature is exclusive to registered users. However, if you don’t prefer creating an account, just open the GIF download link in a separate tab’s ‘Direct Link’ row. Alternatively, you can replace ‘gif’ with ‘conv’ in the video URL bar and choose ‘Convert to GIF’. However, this process may take some extra minutes.

03Giphy GIF Maker
This is an editing tool that you can use to convert video to GIF online. This one is a reliable converter tool with a user-cohesive interface. It is a simple video editor that is available to you for free. All you need to do is mentioned below:
Step 1: Load your Video
Go to the official app website and paste your desired video link in the search bar. Your video gets uploaded to the app’s editor screen. Specify the time frame and check out your GIF’s preview.

Step 2: Let’s Go Editing!
Select ‘Continue to Decorate’ to edit your GIF with texts, effects, frames and filters. You can even go for a straight upload if your video doesn’t require customization.

Step 3: Time to Share!
Select ‘Continue to Upload’ and add required tags. Tap ‘Upload to Giphy’ to make a social media post or add it to the app’s website through a specific share code.
04Wondershare TunesGo
This is an effective video to GIF creator tool, loaded with extensive features. You can use this application to convert videos, live photos and multiple snaps into interesting GIFs. TunesGo gives you the freedom to edit your work in your own style with a variety of effects. Here’s what you need to do:

Step 1: Launch TunesGo
Download, install and launch the app into your PC. You may be asked for a device connection setup, but you can skip that in case GIF creation is your only requirement.

Step 2: Upload your Video
In the app’s welcome screen, navigate to ‘Toolbox’ at the top. From the drop down interface, choose ‘GIF Maker’. In the new window that pops-up next, click on ‘Add’ to upload the desired video to the app from your PC.

Step 3: Let’s Create!
Set the required time frame for your GIF in the app’s timeline and tap the ‘Create GIF’ button to start the conversion process. On completion, your work gets automatically saved in the ‘Pictures’ folder in your PC. You can also customize your target location.

05Vimeo
Vimeo is also a quick, 3-stepvideo to GIF converter. However, you need to have a Vimeo account to take up the conversion process. This is an easy and hassle free GIF creator, that adheres to your creation needs within minutes. Here’s what you need to do:
Step 1: Upload Your Video
Log in to your Vimeo account. In the opening window, select ’Upload’ from the toolbar at the top. ‘Drag and Drop’ or click ‘Choose Files’ to upload the desired video from your device.

Step 2: Create Your GIF
After you are done uploading the video, select ‘Create a GIF’ from the sidebar at the left. You will be directed to the GIF Editor window. Select a loop section from the video and set a time frame of maximum 6 seconds in the video timeline. Now click ‘Create GIF’.


Step 3: Export Your Creation
Your GIF is ready to download and share. You can also embed your GIF by generating embed codes for specific platforms.
06 Adobe Photoshop
This one is one f the most popular editing applications you can use to make GIF out of video. It’s simple and user-friendly interface does not require you to possess a Photoshop mastery for the conversion purpose. Here’s what you need to follow:
Step 1: Search Your Video
Find a video of your choice from a desired platform. In case you want a YouTube video, add ‘ss’ prior to the video’s service name in YouTube’s URL bar.
STEP 2: Edit Your Video
Use any preferable video splitters and editors to crop, trim and add interesting effects to your video and set a maximum time frame of 3 seconds.
Step 3: Create GIF
Open your edited video in Adobe Photoshop and tap ‘File Import-Video frames into layers’.

Step 4: Adjust Settings
Make required setting adjustments and click on ‘File-Save for Web’. Try adjusting image resolution and color range if your file size exceeds 10 MB.

Step 5: Save Your Work
In the ’Files’ tab at the top, select ‘Save’ and choose the ‘.gif’ extension in the ‘File Type’ dialog box to save your creation to your PC.
07Convertio
This converter provides a simple, 3-step process to create GIF from video. Either use it as a browser extension or download it from Google Chrome Webstore. Take the following steps to convert videos to GIF online.
● Upload your desired video to the service timeline. You can either choose files directly or ‘Drag and Drop’ them from your device.
● Select ‘Convert’ to make GIF from your uploaded video.
● Tap ‘Download’ to save your creation.

You can use this service to make different format conversions. However, this converter does not allow you to edit or add effects your GIF.
08MakeAGif
You can use this tool as a GIF video maker online to create, exchange and share GIFs on different platforms. Additionally, you also get the flexibility to use already saved images in your device to add them to your GIF. The app’s basic version allows you to create GIFs without watermarks. To add watermarks, you will need an account on the app. To convert videos to GIFs using this tool, you should take the following steps:
Step 1: Upload Your Video
In the app’s welcome screen, click on ‘Video to GIF’ and upload a desired video in the editor timeline. Add effects and make speed and time frame adjustments. When satisfied, tap ‘Continue to Publishing’.

Step 2: Add Names and Tags
In the publishing window, give a suitable name and add required tags to your edited video to make it easily identifiable. When you are done, click on ‘Create a GIF’ from the bottom right.

Step 3: Ready to Share!
You can now share your created GIF across social media platforms.

09Adobe Premiere
Similar to Adobe Photoshop, Adobe Premiere too is quite a preferred application for creating GIFs from videos. This is a simple, quick and free application that converts your videos to GIFs in a span of few minutes. Here’s what you need to do to go about the process:

Step 1: Edit your Video
Add a video of your choice in the Adobe Premiere timeline and play with your editing creativity to add desired effects and filters to it. Make sure to set requisite time frames to your edit.

Step 2: Prepare an Export
Click into the app’s video timeline, and prepare a file export using the following path:
File> Export> Media

Step 3: Settings Adjustments
In the Media Export window, navigate to the ‘Format’ tab. From the drop down menu, choose ‘Animated GIF’. Here, you can add your gif file, select its target destination and adjust the required settings.

Step 4: Export Your Work
Click ‘Export’ to share your creation on social media or click on ‘Queue’ to send your GIF to a specific media encoder.

1010. Movavi Video Converter
This is one of the latest video converter software you can rely on to make GIF from video files. This software allows you to create top quality animated GIFs and is compatible with a variety of video formats. Using this converter, you can create amazing GIFs in 5 quick steps: here’s what you need to follow:
Step 1: Download and Install the Software
To begin, download the converter software from its official site and adhere to the user instructions to install the same in your system.
Step 2: Upload Your Video
In the software’s opening window, click on ‘Add Media’ followed by ‘Add Video’ and select a desired video from your system to upload on the Movavi video timeline.

Step 3: Trim Your Video
Select ‘Edit’ from the right of your video file. In the editing window, specify the initial cut of the video by displacing the marker to the desired point. Click on ‘Scissors’ to add multiple cut points to your video. You can even drag the cut points around the editor timeline. Choose the unvented sections and click ‘Trash Can’. When the result satisfies you, click ‘Done’.

Step 4: Choose a Conversion Format
Navigate to the ‘Images’ tab and select ‘GIF’ and set an adequate size for the GIF. Here, you can adjust quality, frame size and rate and resize method using the ‘Cogwheel’ tool.

Step 5: Let’s Get Converting!
Tap ‘Convert’ and wait for the conversion to finish. You will be automatically directed to the folder where your converted files get saved.

● Key Takeaways from This Episode →
● GIFs are short, to the point and convenient to access, providing exact and impactful message delivery.
● The software market is flooded with a variety of editing tools to convert your dull videos to catchy GIFs.
● Filmora is a quick and smart editing tool that envisages your GIF creating experience with a range of exciting features.
Having trouble converting your videos to GIF? Browse the top 10 converters to sort this out!
In this article
01 [Why GIFs are Widely Used and Popular?](#Part 1)
02 [Top 10 Ways to Turn Video into GIF](#Part 2)
Part 1 Why GIFs are Widely Used and Popular?
If you take a poll on the watch preference of GIF versus videos, most of votes you get would be in favor of watching GIFs. There are obvious reasons to the fact that anyone would prefer watching a GIF over a video, irrespective of its length. Some major ones that make it quite annoying to watch videos include the following:
● To begin with, you need to turn the video on and off, depending on your choice of watching a video or surfing through stories and feeds, failing which you get to hear additional sounds through your feed from the already running video. You further need to stop the music or go for a volume control in case you are not interested to watch the video.
● Most of the videos you run turn up to be irrelevant or uninteresting through the middle, but you don’t have a choice to make bit adjustments. If however possible, the method is not quite convenient. You may need to visit a different site in case you run a video that is not integrated with webpage of your searched content, wait for the portal’s interface to load or watch an advertisement.
● GIFs, on the other hand, do not require pausing or turning off, and run automatically. You also don’t need to mute any sounds. These ensure to-the-point message delivery and don’t divert your attention from the primary content you visit the webpage for.
Owing to the above, most of us are now much interested to convert videos to GIFs for an exact, impactful and to the point content creation and sharing. See through the next sections of this article to learn about the best video to GIF conversion tools and software.
Part 1 Top 10 Ways to Turn Video into GIF
Considering the credibility of GIFs, you may often require to convert your long videos into short and content specific GIFs. Given below are the 10 best methods to cater to the need of video to GIF conversion:
01Filmora
Wondershare Filmora Video Editor is one among the most popular and easy methods to convert videos to GIFs. It is compatible with almost all common video formats and is loaded with a plethora of exciting effects and editing tools. Take the following steps to create GIFs from videos using this application:
Wondershare Filmora
Get started easily with Filmora’s powerful performance, intuitive interface, and countless effects!
Try It Free Try It Free Try It Free Learn More >
Step 1: Import Your Video
Launch Filmora and import your desired video in the app’s welcome window. To do this, click on ‘New Project’ followed by ‘Import’ option from the drop down menu to add your video to the Filmora.
Step 2: Timeline Dragging
Add your video to the app’s timeline using the ‘Drag and Drop’ method. You can also extract video frames by taking screenshots and merge these images into your GIF from the media library.
Step 3: Explore Your Editing Skills
You can now edit the imported video in the timeline using a range of interesting effects. Crop, trim, split or make speed adjustments to give your video a catchy look.
Step 4: Include Messages
Try adding texts and supplementary elements to deliver impactful messages through your creation.
Step 5: It’s Time to Share!
Click ‘Export’ to save your GIF to your device. You are now ready to post your work in your social communities to get the most deserved attention of your peers!
02YouTube to GIF
This one is a simple and user-friendly video to GIF converter. You can convert videos to GIFs from your PC or other online platforms with this converter. The converter allows you to play with a variety of editing effects to make your creation more interesting. All you need to do is the following:
● In the video URL bar, type ‘gif’ after ‘www.’ and you will be redirected to converter’s working window. Set the GIF time interval or apply specific effects using the tools from the panel in the left of the working window.
● To set the video time frame, highlight it in the video timeline. Set the desired interval using the ‘Start Time’ and ‘End Time’ options.
● To add a new visual effect, select it from the menu. Below the video timeline, a row of parameters will get displayed. Set the effect parameters to make desired changes.
● Click ‘Create GIF’. In the ‘Settings’ menu, you can rename and add tags to your creation and even make it private.
● That’s it! You can download your GIF now. You may get a converter purchase offer for enabling advanced features. While most users prefer sticking to the free version, it is up to you whether to decline or accept the purchase offer.
● The ‘Download’ feature is exclusive to registered users. However, if you don’t prefer creating an account, just open the GIF download link in a separate tab’s ‘Direct Link’ row. Alternatively, you can replace ‘gif’ with ‘conv’ in the video URL bar and choose ‘Convert to GIF’. However, this process may take some extra minutes.
03Giphy GIF Maker
This is an editing tool that you can use to convert video to GIF online. This one is a reliable converter tool with a user-cohesive interface. It is a simple video editor that is available to you for free. All you need to do is mentioned below:
Step 1: Load your Video
Go to the official app website and paste your desired video link in the search bar. Your video gets uploaded to the app’s editor screen. Specify the time frame and check out your GIF’s preview.
Step 2: Let’s Go Editing!
Select ‘Continue to Decorate’ to edit your GIF with texts, effects, frames and filters. You can even go for a straight upload if your video doesn’t require customization.
Step 3: Time to Share!
Select ‘Continue to Upload’ and add required tags. Tap ‘Upload to Giphy’ to make a social media post or add it to the app’s website through a specific share code.
04Wondershare TunesGo
This is an effective video to GIF creator tool, loaded with extensive features. You can use this application to convert videos, live photos and multiple snaps into interesting GIFs. TunesGo gives you the freedom to edit your work in your own style with a variety of effects. Here’s what you need to do:
Step 1: Launch TunesGo
Download, install and launch the app into your PC. You may be asked for a device connection setup, but you can skip that in case GIF creation is your only requirement.
Step 2: Upload your Video
In the app’s welcome screen, navigate to ‘Toolbox’ at the top. From the drop down interface, choose ‘GIF Maker’. In the new window that pops-up next, click on ‘Add’ to upload the desired video to the app from your PC.
Step 3: Let’s Create!
Set the required time frame for your GIF in the app’s timeline and tap the ‘Create GIF’ button to start the conversion process. On completion, your work gets automatically saved in the ‘Pictures’ folder in your PC. You can also customize your target location.
05Vimeo
Vimeo is also a quick, 3-stepvideo to GIF converter. However, you need to have a Vimeo account to take up the conversion process. This is an easy and hassle free GIF creator, that adheres to your creation needs within minutes. Here’s what you need to do:
Step 1: Upload Your Video
Log in to your Vimeo account. In the opening window, select ’Upload’ from the toolbar at the top. ‘Drag and Drop’ or click ‘Choose Files’ to upload the desired video from your device.
Step 2: Create Your GIF
After you are done uploading the video, select ‘Create a GIF’ from the sidebar at the left. You will be directed to the GIF Editor window. Select a loop section from the video and set a time frame of maximum 6 seconds in the video timeline. Now click ‘Create GIF’.
Step 3: Export Your Creation
Your GIF is ready to download and share. You can also embed your GIF by generating embed codes for specific platforms.
06 Adobe Photoshop
This one is one f the most popular editing applications you can use to make GIF out of video. It’s simple and user-friendly interface does not require you to possess a Photoshop mastery for the conversion purpose. Here’s what you need to follow:
Step 1: Search Your Video
Find a video of your choice from a desired platform. In case you want a YouTube video, add ‘ss’ prior to the video’s service name in YouTube’s URL bar.
STEP 2: Edit Your Video
Use any preferable video splitters and editors to crop, trim and add interesting effects to your video and set a maximum time frame of 3 seconds.
Step 3: Create GIF
Open your edited video in Adobe Photoshop and tap ‘File Import-Video frames into layers’.
Step 4: Adjust Settings
Make required setting adjustments and click on ‘File-Save for Web’. Try adjusting image resolution and color range if your file size exceeds 10 MB.
Step 5: Save Your Work
In the ’Files’ tab at the top, select ‘Save’ and choose the ‘.gif’ extension in the ‘File Type’ dialog box to save your creation to your PC.
07Convertio
This converter provides a simple, 3-step process to create GIF from video. Either use it as a browser extension or download it from Google Chrome Webstore. Take the following steps to convert videos to GIF online.
● Upload your desired video to the service timeline. You can either choose files directly or ‘Drag and Drop’ them from your device.
● Select ‘Convert’ to make GIF from your uploaded video.
● Tap ‘Download’ to save your creation.
You can use this service to make different format conversions. However, this converter does not allow you to edit or add effects your GIF.
08MakeAGif
You can use this tool as a GIF video maker online to create, exchange and share GIFs on different platforms. Additionally, you also get the flexibility to use already saved images in your device to add them to your GIF. The app’s basic version allows you to create GIFs without watermarks. To add watermarks, you will need an account on the app. To convert videos to GIFs using this tool, you should take the following steps:
Step 1: Upload Your Video
In the app’s welcome screen, click on ‘Video to GIF’ and upload a desired video in the editor timeline. Add effects and make speed and time frame adjustments. When satisfied, tap ‘Continue to Publishing’.
Step 2: Add Names and Tags
In the publishing window, give a suitable name and add required tags to your edited video to make it easily identifiable. When you are done, click on ‘Create a GIF’ from the bottom right.
Step 3: Ready to Share!
You can now share your created GIF across social media platforms.
09Adobe Premiere
Similar to Adobe Photoshop, Adobe Premiere too is quite a preferred application for creating GIFs from videos. This is a simple, quick and free application that converts your videos to GIFs in a span of few minutes. Here’s what you need to do to go about the process:
Step 1: Edit your Video
Add a video of your choice in the Adobe Premiere timeline and play with your editing creativity to add desired effects and filters to it. Make sure to set requisite time frames to your edit.
Step 2: Prepare an Export
Click into the app’s video timeline, and prepare a file export using the following path:
File> Export> Media
Step 3: Settings Adjustments
In the Media Export window, navigate to the ‘Format’ tab. From the drop down menu, choose ‘Animated GIF’. Here, you can add your gif file, select its target destination and adjust the required settings.
Step 4: Export Your Work
Click ‘Export’ to share your creation on social media or click on ‘Queue’ to send your GIF to a specific media encoder.
1010. Movavi Video Converter
This is one of the latest video converter software you can rely on to make GIF from video files. This software allows you to create top quality animated GIFs and is compatible with a variety of video formats. Using this converter, you can create amazing GIFs in 5 quick steps: here’s what you need to follow:
Step 1: Download and Install the Software
To begin, download the converter software from its official site and adhere to the user instructions to install the same in your system.
Step 2: Upload Your Video
In the software’s opening window, click on ‘Add Media’ followed by ‘Add Video’ and select a desired video from your system to upload on the Movavi video timeline.
Step 3: Trim Your Video
Select ‘Edit’ from the right of your video file. In the editing window, specify the initial cut of the video by displacing the marker to the desired point. Click on ‘Scissors’ to add multiple cut points to your video. You can even drag the cut points around the editor timeline. Choose the unvented sections and click ‘Trash Can’. When the result satisfies you, click ‘Done’.
Step 4: Choose a Conversion Format
Navigate to the ‘Images’ tab and select ‘GIF’ and set an adequate size for the GIF. Here, you can adjust quality, frame size and rate and resize method using the ‘Cogwheel’ tool.
Step 5: Let’s Get Converting!
Tap ‘Convert’ and wait for the conversion to finish. You will be automatically directed to the folder where your converted files get saved.
● Key Takeaways from This Episode →
● GIFs are short, to the point and convenient to access, providing exact and impactful message delivery.
● The software market is flooded with a variety of editing tools to convert your dull videos to catchy GIFs.
● Filmora is a quick and smart editing tool that envisages your GIF creating experience with a range of exciting features.
Dead Simple Guide to Create New and Exciting Blackboard Animation
Dead Simple Guide to Create New and Exciting Blackboard Animation
An easy yet powerful editor
Numerous effects to choose from
Detailed tutorials provided by the official channel
Yes, it is definitely possible In fact, it couldn’t be easier. A lot of the ‘whiteboard animation’ generators also work as blackboard animation generators.
In this guide, we hope to shed some light on the subject so that everyone can have an easier time approaching the matter of creating a blackboard project on their own.
In this article
01 [Is Blackboard Animation Outdated?](#Part 1)
02 [How to Combine Modern Needs with Blackboard Animation?](#Part 2)
03 [How to Create a Blackboard Animation in ONE DAY?](#Part 3)
Part 1 Is Blackboard Animation Outdated?
Blackboard animation some may say is as outdated as the concept of ‘blackboards’ themselves. After all, nowadays, whiteboards are the standard for presenting information in a school setting — with many preferring the ease of using dry-erase markers over the more unwieldy chalk.
However, unlike the inconveniences of using an actual chalkboard, chalkboard animation is not so different from whiteboard animation In fact, it’s just given a different look. One that may be exactly what you’re looking for — especially if you’re looking to get in touch with the older generation (who would no doubt be more familiar with the concept.)

Part 2 How to Combine Modern Needs with Blackboard Animation?
But alright, so how do you make it so that your blackboard animation is just as suited for the modern generation as it is for the older generation?? Well, that’s easy really. You’ll need images Or, rather, you’ll need visuals outside of just the plain text that is usually associated with chalkboard animation.
With the right kind of visuals to go along with your informational text, you can boost the effectiveness of your chalkboard animation video and make it more palatable. Perfectly in line with the modern needs of the era.

Part 3 How to Create a Blackboard Animation in ONE DAY?
Alright, so onto actually talking about how you can go about creating a chalkboard animation video Take note, this is going to be an ‘overview’ kind of tutorial. We’ve also decided to choose a more ‘custom’ method, rather than using one of the premium blackboard animation generators (which usually require you to pay a steep price in order to gain access to a media library.)
01Step 1. Pick Your Software
The first step in creating chalkboard animation is to pick the software that you want to use This can be something more ‘animation-specific’, like After Effects. Or something more ‘video-editing-specific’ like Filmora.
Again, because this is meant to be more of a ‘general’ tutorial, we won’t be showing you exactly how to use whatever editing software you decide to use in order to create your blackboard animation videos. But, as a general kind of advice, it would be best that you pick a video editor like Wondershare Filmora Video Editor that offers a Timeline feature that will allow you to quickly put together a project

02Step 2. Create a Storyboard
Next, to make the actual blackboard animation creation process go smoother, it’s important that you create a storyboard that will outline the video that you want to create
The more detailed this storyboard is, the better Although, of course, you don’t necessarily have to draw every single frame of your chalkboard animation beforehand. Just sketch out the general idea. It will help make sure that you won’t have to rush about making all sorts of corrections in the future

03Step 3. Draw Characters
For this step, we say ‘characters’ and use the word ‘draw.’ But really, this is a very open kind of step where we encourage you to put together all media that you will need to make your project into a reality This is where the storyboard really helps. After all, with that, you have an idea of exactly what kind of characters, settings, music, audio, etc. you’ll need for each scene (if not each frame)
If you’re not the ‘drawing’ type, by the way, there are both FREE and premium media libraries that you can take advantage of to use for your project It might be difficult to find matching art styles at first. But, if you’re really particular about that, then you can always find a freelance digital artist to design with a specific style in mind

04Step 4. Put Together Project
Last of all, of course, is the process of putting everything together. Do you have your software? Great Launch it and create a new project Do you have your storyboard? That’s also great Now you have an idea where each character and setting will go
In the image below, we’re only showing the start of a potential project. We’ve only added one image to the timeline But, as you can see, with the use of Filmora, even this one image can be turned into a video

● Key Takeaways from This Episode →
● Blackboards are naturally associated with learning This makes blackboard animation videos a great method of sharing information with an audience. Whether you’re doing it to promote your services/goods or just genuinely looking to impart knowledge to another
● Some may think that blackboards are outdated — for the mere fact that blackboards themselves are considered outdated when compared to whiteboards — but that doesn’t make them any less effective at getting a message across so long as you include the right kind of visuals
● In our brief ‘overview’ tutorial, we expand on the subject of blackboard animation some more. Be warned, it’s not the kind of project you should go into if you’re not prepared for the work Longer projects, especially, will require quite a bit of elbow grease to get done.
● Still, there’s something satisfying about a well-done chalkboard animation video that will not only be a joy to create but also, hopefully, catch the attention of your audience as well.
Yes, it is definitely possible In fact, it couldn’t be easier. A lot of the ‘whiteboard animation’ generators also work as blackboard animation generators.
In this guide, we hope to shed some light on the subject so that everyone can have an easier time approaching the matter of creating a blackboard project on their own.
In this article
01 [Is Blackboard Animation Outdated?](#Part 1)
02 [How to Combine Modern Needs with Blackboard Animation?](#Part 2)
03 [How to Create a Blackboard Animation in ONE DAY?](#Part 3)
Part 1 Is Blackboard Animation Outdated?
Blackboard animation some may say is as outdated as the concept of ‘blackboards’ themselves. After all, nowadays, whiteboards are the standard for presenting information in a school setting — with many preferring the ease of using dry-erase markers over the more unwieldy chalk.
However, unlike the inconveniences of using an actual chalkboard, chalkboard animation is not so different from whiteboard animation In fact, it’s just given a different look. One that may be exactly what you’re looking for — especially if you’re looking to get in touch with the older generation (who would no doubt be more familiar with the concept.)
Part 2 How to Combine Modern Needs with Blackboard Animation?
But alright, so how do you make it so that your blackboard animation is just as suited for the modern generation as it is for the older generation?? Well, that’s easy really. You’ll need images Or, rather, you’ll need visuals outside of just the plain text that is usually associated with chalkboard animation.
With the right kind of visuals to go along with your informational text, you can boost the effectiveness of your chalkboard animation video and make it more palatable. Perfectly in line with the modern needs of the era.
Part 3 How to Create a Blackboard Animation in ONE DAY?
Alright, so onto actually talking about how you can go about creating a chalkboard animation video Take note, this is going to be an ‘overview’ kind of tutorial. We’ve also decided to choose a more ‘custom’ method, rather than using one of the premium blackboard animation generators (which usually require you to pay a steep price in order to gain access to a media library.)
01Step 1. Pick Your Software
The first step in creating chalkboard animation is to pick the software that you want to use This can be something more ‘animation-specific’, like After Effects. Or something more ‘video-editing-specific’ like Filmora.
Again, because this is meant to be more of a ‘general’ tutorial, we won’t be showing you exactly how to use whatever editing software you decide to use in order to create your blackboard animation videos. But, as a general kind of advice, it would be best that you pick a video editor like Wondershare Filmora Video Editor that offers a Timeline feature that will allow you to quickly put together a project
02Step 2. Create a Storyboard
Next, to make the actual blackboard animation creation process go smoother, it’s important that you create a storyboard that will outline the video that you want to create
The more detailed this storyboard is, the better Although, of course, you don’t necessarily have to draw every single frame of your chalkboard animation beforehand. Just sketch out the general idea. It will help make sure that you won’t have to rush about making all sorts of corrections in the future
03Step 3. Draw Characters
For this step, we say ‘characters’ and use the word ‘draw.’ But really, this is a very open kind of step where we encourage you to put together all media that you will need to make your project into a reality This is where the storyboard really helps. After all, with that, you have an idea of exactly what kind of characters, settings, music, audio, etc. you’ll need for each scene (if not each frame)
If you’re not the ‘drawing’ type, by the way, there are both FREE and premium media libraries that you can take advantage of to use for your project It might be difficult to find matching art styles at first. But, if you’re really particular about that, then you can always find a freelance digital artist to design with a specific style in mind
04Step 4. Put Together Project
Last of all, of course, is the process of putting everything together. Do you have your software? Great Launch it and create a new project Do you have your storyboard? That’s also great Now you have an idea where each character and setting will go
In the image below, we’re only showing the start of a potential project. We’ve only added one image to the timeline But, as you can see, with the use of Filmora, even this one image can be turned into a video
● Key Takeaways from This Episode →
● Blackboards are naturally associated with learning This makes blackboard animation videos a great method of sharing information with an audience. Whether you’re doing it to promote your services/goods or just genuinely looking to impart knowledge to another
● Some may think that blackboards are outdated — for the mere fact that blackboards themselves are considered outdated when compared to whiteboards — but that doesn’t make them any less effective at getting a message across so long as you include the right kind of visuals
● In our brief ‘overview’ tutorial, we expand on the subject of blackboard animation some more. Be warned, it’s not the kind of project you should go into if you’re not prepared for the work Longer projects, especially, will require quite a bit of elbow grease to get done.
● Still, there’s something satisfying about a well-done chalkboard animation video that will not only be a joy to create but also, hopefully, catch the attention of your audience as well.
15 Types of Cartoon Drawing Styles with Examples
15 Types of Cartoon Drawing Styles with Examples
An easy yet powerful editor
Numerous effects to choose from
Detailed tutorials provided by the official channel
The perfect, if not the best, place to begin cartoon drawing style as an artist is drawings or sketches since you don’t need a lot of drawing equipment to start this type of drawing. What you chiefly need is just your pen and paper to begin.
So, let’s move ahead as this content will show you different cartoon drawing styles, and in no time, you’ll master the art.
In this article
01 [15 Types of Cartoon You May Use for Your Next Marketing Project](#Part 1)
02 [How To Draw Myself In Five Different Cartoon Styles](#Part 2)
Part 1 Types of Cartoon You May Use for Your Next Marketing Project
As I’ve mentioned before, there are various types and styles of cartoon drawings. Below are a few cartoon drawing styles you may want to use for your next project.
01Modern Cartoon Style
This style is currently the most common art style displayed on TV channels like Cartoon Network.
Note that this cartoon-style drawing’s main features are the thick outlines, geometric shapes, and bright colors.
One of the significant reasons this drawing style is this way is that using simple shapes without much detail makes the overall animation process much faster and saves resources for the studios. Nonetheless, it is a beautiful and captivating cartoon drawing style!
This drawing style is used by many modern cartoons. Here are a few examples:
● The Powerpuff Girls
● Dexter’s Laboratory
● Codename: Kids Next Door
● Gravity Falls
02Realistic Cartoon Style
This cartoon drawing style is more quirky since, generally, cartoon drawing is more likely to simplify shapes. The realistic cartoon-style drawing adds more details and keeps figures much more in line with reality. This drawing style is typical among artists who vectorize people’s photographs.
You can also, to some extent, include Caricatures in this category. Caricatures are generally very realistic besides the whole enlargement and shrinking of specific body parts!
Few examples of realistic cartoon drawing styles:
● Ugly Americans
● General Caricataures
● Archer
03Modern Anime
This style tends to be more complex, primarily seen in drawings where the characters seem to be in motion, like in comic books. Modern-day drawings of this style have a lot of shadows and highlights in their character and environment, giving them a relatively new level of complexity.
Here are a few examples of modern animes that follow this Japanese cartoon drawing style.
● My Hero Academia
● Sword Art Online
● Attack on Titan
● Fullmetal Alchemist Brotherhood
04Classic Manga
The old Japanese manga characters tend to possess human-like attributes (proportions) in terms of the body. The difference is the big eyes they have the most time.
Generally, this cartoon drawing style focuses more on feminine bodies, possessing angular chins and thin bodies. Some drawing styles tend to make some parts of the body overtly long compared to the rest of the body; for instance, the legs are mostly longer than other parts.
A few examples of classic manga possessing this cartoon style drawing are:
● Oh My Goddess
● Urusei Yatsura
● Sailor Moon
● Hellsing
05Chibi Drawing Style
The Chibi Cartoon Drawing Style mainly focuses on making the characters into a tiny version of themselves as if being compressed or compacted into a small container.
Examples of where this drawing style is used:
● Lucky Star
● Bottle Fairy
● Himouto! Umaru-chan
06The Simpsons Cartoon Drawing Style
This cartoon-style drawing is widely famous. Though this style has undergone some evolution throughout the years, the main features remained constant! That is to say, the yellow bodies and big and white sphere-like eyes remained.
07Classic Disney
This drawing style was a staple for years, though this drawing style has had an evolutionary cartoon drawing style over the years.
08Mid 20th Century Disney
Disney upped their game during the mid 20th century and started working more with live actors, drawing from references, and filming shots before drawing the cartoons.
Some remarkable examples of this cartoon drawing style are
● Alice in Wonderland
● Cinderella
● Beauty and the Beast
09Modern Disney Drawing Style
This cartoon-style drawing is an immediate improvement of the mid-20th 20th drawing style. This cartoon style is brighter, more detailed, and more complex generally.
Although Disney has stopped creating 2D cartoon drawings, there are still some examples of this more refined art style:
● The Princess and the Frog
● Lilo and Stitch
10Old Cartoon Drawing Style
This drawing style is mostly in black and white format, with very high contrast body parts. The features of this style are having short bodies and long limbs. Sometimes, this type of drawing is referred to as Noodle drawing because the character’s body moves as if there are no bones in their body.
Some examples of this cartoon drawing style include:
● Mickey Mouse
● Betty Boop
11South Park
South Park cartoon drawing style is aptly geometric and has little depth. Shadows or highlights in this cartoon-style are rare. The colors are pretty solid and clean.
12Chrono Trigger/ Dragon Ball (Akira Toriyama)
Akira Toriyama’s cartoon drawing style characterizes having big and almost rectangular eyes and a lot of geometric shapes and definitions in the muscles.
13Crayon Shin-Chan
This cartoon-style drawing is effortless. An exciting aspect of this style is that it doesn’t mind pushing the limits of the character.
The lines generally are thin, and the eyes are prominent in black and white colors.
14Betty Boop
Betty Boop’s cartoon drawing style possesses contrasting black and white colors. Fragile lines with the characters contain a very high amount of black shapes.
15Adventure Time
Adventure Time’s art is incredibly geometric, and its characters are nearly boneless, making it a more current example of a cartoon drawing style.
More fluid animation is possible as a result of this. The art is also quite brilliant, with vibrant hues that leap off the screen.
Aside from that, the characters’ eyes are usually tiny (with a few exceptions), and the lines are skinny.
Part 2 How to draw myself in five different cartoon styles
There are loads of cartoon characters to choose from when trying to draw me. To sketch yourself as a cartoon, first, you have to determine what cartoon drawing style to appear in. This will give you hints on how to go about the drawing.
● The traditional drawing method is a pencil and paper.
● Online Avatar builders
● Adobe character animator
● Outsource to designers or illustrators
● Hire a studio or a freelancer
● Wondershare Filmora Video Editor

Wondershare Filmora - Best Video Editor for Mac/Windows
5,481,435 people have downloaded it.
Build unique custom animations without breaking a sweat.
Focus on creating epic stories and leave the details to Filmora’s auto features.
Start a creative adventure with drag & drop effects and endless possibilities.
Filmora simplifies advanced features to save you time and effort.
Filmora cuts out repetition so you can move on to your next creative breakthrough.
The Filmora software is an easy-to-use editing app with many beautiful features that can make your animation or cartoon-style drawing more vibrant.
● Split-screen makes it easier to tell a story or draw with multiple screens.
● Preset templates are superb for turning your drawings into creative videos.
● Motion graphics
● Keyframing
● Screen recorder and other unique features.
● Ending Thoughts →
● We’ve looked at the various cartoon drawing styles.
● How to draw self in cartoon style.
● The Filmora software to upbeat your sketches at the professional level.
● hus, go check out any cartoon-style drawings and see which one you like best. Make sure to study the reference drawing and practice more to perfect the artist in you.
The perfect, if not the best, place to begin cartoon drawing style as an artist is drawings or sketches since you don’t need a lot of drawing equipment to start this type of drawing. What you chiefly need is just your pen and paper to begin.
So, let’s move ahead as this content will show you different cartoon drawing styles, and in no time, you’ll master the art.
In this article
01 [15 Types of Cartoon You May Use for Your Next Marketing Project](#Part 1)
02 [How To Draw Myself In Five Different Cartoon Styles](#Part 2)
Part 1 Types of Cartoon You May Use for Your Next Marketing Project
As I’ve mentioned before, there are various types and styles of cartoon drawings. Below are a few cartoon drawing styles you may want to use for your next project.
01Modern Cartoon Style
This style is currently the most common art style displayed on TV channels like Cartoon Network.
Note that this cartoon-style drawing’s main features are the thick outlines, geometric shapes, and bright colors.
One of the significant reasons this drawing style is this way is that using simple shapes without much detail makes the overall animation process much faster and saves resources for the studios. Nonetheless, it is a beautiful and captivating cartoon drawing style!
This drawing style is used by many modern cartoons. Here are a few examples:
● The Powerpuff Girls
● Dexter’s Laboratory
● Codename: Kids Next Door
● Gravity Falls
02Realistic Cartoon Style
This cartoon drawing style is more quirky since, generally, cartoon drawing is more likely to simplify shapes. The realistic cartoon-style drawing adds more details and keeps figures much more in line with reality. This drawing style is typical among artists who vectorize people’s photographs.
You can also, to some extent, include Caricatures in this category. Caricatures are generally very realistic besides the whole enlargement and shrinking of specific body parts!
Few examples of realistic cartoon drawing styles:
● Ugly Americans
● General Caricataures
● Archer
03Modern Anime
This style tends to be more complex, primarily seen in drawings where the characters seem to be in motion, like in comic books. Modern-day drawings of this style have a lot of shadows and highlights in their character and environment, giving them a relatively new level of complexity.
Here are a few examples of modern animes that follow this Japanese cartoon drawing style.
● My Hero Academia
● Sword Art Online
● Attack on Titan
● Fullmetal Alchemist Brotherhood
04Classic Manga
The old Japanese manga characters tend to possess human-like attributes (proportions) in terms of the body. The difference is the big eyes they have the most time.
Generally, this cartoon drawing style focuses more on feminine bodies, possessing angular chins and thin bodies. Some drawing styles tend to make some parts of the body overtly long compared to the rest of the body; for instance, the legs are mostly longer than other parts.
A few examples of classic manga possessing this cartoon style drawing are:
● Oh My Goddess
● Urusei Yatsura
● Sailor Moon
● Hellsing
05Chibi Drawing Style
The Chibi Cartoon Drawing Style mainly focuses on making the characters into a tiny version of themselves as if being compressed or compacted into a small container.
Examples of where this drawing style is used:
● Lucky Star
● Bottle Fairy
● Himouto! Umaru-chan
06The Simpsons Cartoon Drawing Style
This cartoon-style drawing is widely famous. Though this style has undergone some evolution throughout the years, the main features remained constant! That is to say, the yellow bodies and big and white sphere-like eyes remained.
07Classic Disney
This drawing style was a staple for years, though this drawing style has had an evolutionary cartoon drawing style over the years.
08Mid 20th Century Disney
Disney upped their game during the mid 20th century and started working more with live actors, drawing from references, and filming shots before drawing the cartoons.
Some remarkable examples of this cartoon drawing style are
● Alice in Wonderland
● Cinderella
● Beauty and the Beast
09Modern Disney Drawing Style
This cartoon-style drawing is an immediate improvement of the mid-20th 20th drawing style. This cartoon style is brighter, more detailed, and more complex generally.
Although Disney has stopped creating 2D cartoon drawings, there are still some examples of this more refined art style:
● The Princess and the Frog
● Lilo and Stitch
10Old Cartoon Drawing Style
This drawing style is mostly in black and white format, with very high contrast body parts. The features of this style are having short bodies and long limbs. Sometimes, this type of drawing is referred to as Noodle drawing because the character’s body moves as if there are no bones in their body.
Some examples of this cartoon drawing style include:
● Mickey Mouse
● Betty Boop
11South Park
South Park cartoon drawing style is aptly geometric and has little depth. Shadows or highlights in this cartoon-style are rare. The colors are pretty solid and clean.
12Chrono Trigger/ Dragon Ball (Akira Toriyama)
Akira Toriyama’s cartoon drawing style characterizes having big and almost rectangular eyes and a lot of geometric shapes and definitions in the muscles.
13Crayon Shin-Chan
This cartoon-style drawing is effortless. An exciting aspect of this style is that it doesn’t mind pushing the limits of the character.
The lines generally are thin, and the eyes are prominent in black and white colors.
14Betty Boop
Betty Boop’s cartoon drawing style possesses contrasting black and white colors. Fragile lines with the characters contain a very high amount of black shapes.
15Adventure Time
Adventure Time’s art is incredibly geometric, and its characters are nearly boneless, making it a more current example of a cartoon drawing style.
More fluid animation is possible as a result of this. The art is also quite brilliant, with vibrant hues that leap off the screen.
Aside from that, the characters’ eyes are usually tiny (with a few exceptions), and the lines are skinny.
Part 2 How to draw myself in five different cartoon styles
There are loads of cartoon characters to choose from when trying to draw me. To sketch yourself as a cartoon, first, you have to determine what cartoon drawing style to appear in. This will give you hints on how to go about the drawing.
● The traditional drawing method is a pencil and paper.
● Online Avatar builders
● Adobe character animator
● Outsource to designers or illustrators
● Hire a studio or a freelancer
● Wondershare Filmora Video Editor
Wondershare Filmora - Best Video Editor for Mac/Windows
5,481,435 people have downloaded it.
Build unique custom animations without breaking a sweat.
Focus on creating epic stories and leave the details to Filmora’s auto features.
Start a creative adventure with drag & drop effects and endless possibilities.
Filmora simplifies advanced features to save you time and effort.
Filmora cuts out repetition so you can move on to your next creative breakthrough.
The Filmora software is an easy-to-use editing app with many beautiful features that can make your animation or cartoon-style drawing more vibrant.
● Split-screen makes it easier to tell a story or draw with multiple screens.
● Preset templates are superb for turning your drawings into creative videos.
● Motion graphics
● Keyframing
● Screen recorder and other unique features.
● Ending Thoughts →
● We’ve looked at the various cartoon drawing styles.
● How to draw self in cartoon style.
● The Filmora software to upbeat your sketches at the professional level.
● hus, go check out any cartoon-style drawings and see which one you like best. Make sure to study the reference drawing and practice more to perfect the artist in you.
What Is the Best Collage Photo Grid Maker - Experts Choice
What is the Best Collage Photo Grid Maker - Experts Choice
An easy yet powerful editor
Numerous effects to choose from
Detailed tutorials provided by the official channel
Whether it is an Instagram collage grid, other social media sites, an online platform, a greeting card, or even a wall of your room, collages are everywhere. It is a great way to assemble multiple pictures into a single frame. Depending on your purpose, theme, and other factors, there are several different styles of collages that can be created like photo grid, shaped collage, polaroid collage, and more. One of the most classic and traditional styles is a photo grid collage. Taking the help of a dedicated collage-making app or a tool can help you create an amazing and eye-catchy collage in no time. Keep reading to learn more about collage photo grid and the best tools to create them.

In this article
01 [What is a photo grid?](#Part 1)
02 [Need for using special tools and apps to create a photo grid collage](#Part 2)
03 [Top 5 tools to create photo grid](#Part 3)
04 [Use stock images to enhance your photo grid](#Part 4)
Part 1 What is a photo grid?
When a special grid frame having a specific number of rows and columns is used for arranging photos, the created collage is known as a photo grid collage. These multiple added images will make them look like a single picture in a frame. A photo grid is one of the most classic styles of creating a collage that is also the most widely used one. You can never go wrong with a collage while arranging the pictures in a photo grid.
Part 2 Need for using special tools and apps to create a photo grid collage
Though creating a photo grid may look like a simple process which it is also, there are a lot of elements that go into creating an impressive and attractive collage. Adding the images of the correct size and orientation, adjusting the borders, customizing the frames, adding filters, adding text, are some of the many factors that help in creating a wonderful collage, and for this good collage-making tool or an app is required.
These special photo grid collage maker tools have built-in templates, designs, and support other features that help you create an interesting photo grid of your choice. Moreover, some of these programs also come with high-quality stock images that can be used in the grid to further enhance their overall looks.
Part 3 Top 5 tools to create photo grid
We have selected the top 5 grid collage maker tools that can be used to create a customized photo grid.
01Fotor
This is one of the best tools available for creating a photo grid using one of the several templates available. It is the Classic Collage style of this app that will let you create a customized grid where you can add the desired number of images and then edit the background, borders, and other elements. You can even add text, stickers, effects, and other interesting filters. Fotor is a free online tool that can be used from your browser and you just need to free sign-up using your Google, Facebook, or Apple account.

02FotoJet
This is another free-to-use browser-based tool that can be used for creating a photo grid. The interface of the tool is simple and there are multiple grid options to choose from depending on the number of images to be added. The spacing between the grids as well as the roundness of the margins can also be adjusted as desired. The tool also gives you the option to choose the added image file resolution. Text, clipart, and background to the collage can also be added and there is also a library of images that can be used. The created collage can be saved or can also be shared directly to Twitter, Pinterest, and Tumblr.

03Adobe Spark
This is one of the top collages making tools that can be used to design the desired collage in different styles including photo grid. Unlike other Adobe tools, the collage-making program is simple and quick to use and does not require advanced technical know-how. You simply need to create a free account for Adobe Creative Cloud and the collage-making features can be easily used. There are pre-set designs and templates available to match your theme and requirements. You can further make customization to other collage elements as needed.

04Photo Collage
This free-to-use online tool requires no software download or installation and allows creating a grid quickly and easily. The interface of the tool is user-friendly where you just need to browse and add the images or can simply drag and drop them as well. You can choose from multiple template options available and can also add text, effects, and stickers to the collage. Multiple image editing options are also supported like zoom, flip, transparency, and more.

05Canva
Free and simple to use, this is one of the most widely used collage-making tools that is available as a browser-based program as well as Android and iOS app. Several photo-grid templates in different styles are available at the site that lets you create the desired collage in no time. You can customize the selected templates by adding filters, texts, effects, and more elements available. A paid version of the tool with advanced features is also available.

Part 4 Use stock images to enhance your photo grid
Adding high-quality and interesting images to your photo grid will level up its overall look and make it eye-catchy. If you are running short of such interesting and bright images, no need to worry as several sites have a good collection of images that can be used. One such program that we recommend here to check the stock images is Wondershare Filmora. Though Filmora is an advanced Windows and Mac-based video editing software, there are multiple additional features supported one of them is a collection of images in an array of categories.
Depending on the theme of your photo grid, you can select the desired images and other media from Wondershare Filmora Video Editor . Additionally, the split-screen feature of the software will let you add and play multiple videos in a single frame that makes it look like a video collage.
Wondershare Filmora - Best Video Editor for Mac/Windows
5,481,435 people have downloaded it.
Build unique custom animations without breaking a sweat.
Focus on creating epic stories and leave the details to Filmora’s auto features.
Start a creative adventure with drag & drop effects and endless possibilities.
Filmora simplifies advanced features to save you time and effort.
Filmora cuts out repetition so you can move on to your next creative breakthrough.
● Key Takeaways from This Episode →
● A photo grid is a classic and traditional style of creating a collage.
● There are several online tools, software, and mobile apps available for creating interesting photo grids.
● Wondershare Filmora is a great site to get stock of images in different categories and for all types of video editing requirements.
Whether it is an Instagram collage grid, other social media sites, an online platform, a greeting card, or even a wall of your room, collages are everywhere. It is a great way to assemble multiple pictures into a single frame. Depending on your purpose, theme, and other factors, there are several different styles of collages that can be created like photo grid, shaped collage, polaroid collage, and more. One of the most classic and traditional styles is a photo grid collage. Taking the help of a dedicated collage-making app or a tool can help you create an amazing and eye-catchy collage in no time. Keep reading to learn more about collage photo grid and the best tools to create them.
In this article
01 [What is a photo grid?](#Part 1)
02 [Need for using special tools and apps to create a photo grid collage](#Part 2)
03 [Top 5 tools to create photo grid](#Part 3)
04 [Use stock images to enhance your photo grid](#Part 4)
Part 1 What is a photo grid?
When a special grid frame having a specific number of rows and columns is used for arranging photos, the created collage is known as a photo grid collage. These multiple added images will make them look like a single picture in a frame. A photo grid is one of the most classic styles of creating a collage that is also the most widely used one. You can never go wrong with a collage while arranging the pictures in a photo grid.
Part 2 Need for using special tools and apps to create a photo grid collage
Though creating a photo grid may look like a simple process which it is also, there are a lot of elements that go into creating an impressive and attractive collage. Adding the images of the correct size and orientation, adjusting the borders, customizing the frames, adding filters, adding text, are some of the many factors that help in creating a wonderful collage, and for this good collage-making tool or an app is required.
These special photo grid collage maker tools have built-in templates, designs, and support other features that help you create an interesting photo grid of your choice. Moreover, some of these programs also come with high-quality stock images that can be used in the grid to further enhance their overall looks.
Part 3 Top 5 tools to create photo grid
We have selected the top 5 grid collage maker tools that can be used to create a customized photo grid.
01Fotor
This is one of the best tools available for creating a photo grid using one of the several templates available. It is the Classic Collage style of this app that will let you create a customized grid where you can add the desired number of images and then edit the background, borders, and other elements. You can even add text, stickers, effects, and other interesting filters. Fotor is a free online tool that can be used from your browser and you just need to free sign-up using your Google, Facebook, or Apple account.
02FotoJet
This is another free-to-use browser-based tool that can be used for creating a photo grid. The interface of the tool is simple and there are multiple grid options to choose from depending on the number of images to be added. The spacing between the grids as well as the roundness of the margins can also be adjusted as desired. The tool also gives you the option to choose the added image file resolution. Text, clipart, and background to the collage can also be added and there is also a library of images that can be used. The created collage can be saved or can also be shared directly to Twitter, Pinterest, and Tumblr.
03Adobe Spark
This is one of the top collages making tools that can be used to design the desired collage in different styles including photo grid. Unlike other Adobe tools, the collage-making program is simple and quick to use and does not require advanced technical know-how. You simply need to create a free account for Adobe Creative Cloud and the collage-making features can be easily used. There are pre-set designs and templates available to match your theme and requirements. You can further make customization to other collage elements as needed.
04Photo Collage
This free-to-use online tool requires no software download or installation and allows creating a grid quickly and easily. The interface of the tool is user-friendly where you just need to browse and add the images or can simply drag and drop them as well. You can choose from multiple template options available and can also add text, effects, and stickers to the collage. Multiple image editing options are also supported like zoom, flip, transparency, and more.
05Canva
Free and simple to use, this is one of the most widely used collage-making tools that is available as a browser-based program as well as Android and iOS app. Several photo-grid templates in different styles are available at the site that lets you create the desired collage in no time. You can customize the selected templates by adding filters, texts, effects, and more elements available. A paid version of the tool with advanced features is also available.
Part 4 Use stock images to enhance your photo grid
Adding high-quality and interesting images to your photo grid will level up its overall look and make it eye-catchy. If you are running short of such interesting and bright images, no need to worry as several sites have a good collection of images that can be used. One such program that we recommend here to check the stock images is Wondershare Filmora. Though Filmora is an advanced Windows and Mac-based video editing software, there are multiple additional features supported one of them is a collection of images in an array of categories.
Depending on the theme of your photo grid, you can select the desired images and other media from Wondershare Filmora Video Editor . Additionally, the split-screen feature of the software will let you add and play multiple videos in a single frame that makes it look like a video collage.
Wondershare Filmora - Best Video Editor for Mac/Windows
5,481,435 people have downloaded it.
Build unique custom animations without breaking a sweat.
Focus on creating epic stories and leave the details to Filmora’s auto features.
Start a creative adventure with drag & drop effects and endless possibilities.
Filmora simplifies advanced features to save you time and effort.
Filmora cuts out repetition so you can move on to your next creative breakthrough.
● Key Takeaways from This Episode →
● A photo grid is a classic and traditional style of creating a collage.
● There are several online tools, software, and mobile apps available for creating interesting photo grids.
● Wondershare Filmora is a great site to get stock of images in different categories and for all types of video editing requirements.
Also read:
- Everything You Need to Know About Becoming a Motion Graphic Designer
- New 2024 Approved The Most Efficient Techniques for You to Make 3D Animation Character
- 2024 Approved 10 Options for Your Need on Animation Makers
- Updated 2024 Approved Top 10 Online Animated Logo Makers Everyone Should Know
- New How to Create an Animated Sticky Navbar
- Updated What Is A GIF
- New In 2024, A Beginners Guide to Tell You What 3D Animation Is
- New 10 Amazing Wallpaper Collage Ideas and Photos
- 2024 Approved Stunning Ideas About Creating Personalised WhatsApp GIF Sticker
- New 10 Cartoon Photo Converters
- In 2024, Best 8 Tools Tell You How to Make Slideshows for Instagram
- In 2024, Samples of Cartoon Character Face to Inspire You
- Updated 2024 Approved Animate Graphics in Canva
- Top 3 Ways to Create Gif with Great 3D Gif Maker
- 15 Best Video to GIF App on iPhone and Android
- 2024 Approved The Only Guide Youll Ever Need to Learn That Make 2D Rigging Clear to You
- Updated Ultimate Guide to Animated Characters Drawings for 2024
- New 15 Best Apps to Turn Photos Into Cartoons and Sketches
- New What This Post Can Teach You About Clay Animation for 2024
- Updated Top 20+ Best Free GIF Makers Online to Quickly Edit GIF for 2024
- New Popular Tips on Learning Animate Rigging
- Updated In 2024, Best 10 Animated DP for WhatsApp
- In 2024, Little Known Techniques of Motion Graphics in Premiere Pro
- Have You Seen the Facebook Cartoon App Everyones Using Recently for 2024
- In 2024, 5 Best Adobe Animate Courses & Classes | Beginners Complete Tutorial
- New Ready to Animate Game Character From Scratch for 2024
- New In 2024, 4 Smart Solutions to Create or Find Good Morning/Night GIFs
- 6 Proven Ways to Dub Anime for Anime Voice Actor
- Top 10 Best and Fast Ways to Turn Image Into Gif for 2024
- Want to Make a Meme GIF?
- 2024 Approved Before You Learn 3D Animation Some Things You Should Know
- Updated 2024 Approved Know All About Animated Business Logos and the Best Tools to Create One
- Amazing Ways to Find Suitable Animated Graphic Maker for 2024
- Updated Best 15 Female Anime Characters-Who Is Your Favorite for 2024
- Updated Top 10 Best Photo to Animation Converters
- 2024 Approved 6 Unexpected Ways Gif Animation Maker Can Affect Your Marketing
- In 2024, Why These 10+ Top Text Motion Templates Are Worth Your Attention
- How to Make Slideshow in LinkedIn for 2024
- Updated 5 Techniques You Never Heard of for Converting MP4 to GIF in Photoshop for 2024
- In 2024, Popular Tips on Learning Animate Rigging
- In 2024, Ways on How to Liven Up Your Animate Website on Scroll
- Updated Top Tips for Effortless Unity 3D Animation for 2024
- Updated What Wikipedia Cant Tell You About the 10 Best Batman Cartoons
- How to Become a Motion Graphic Designer
- New 15 Forgotten Cartoon Characters of All Time for 2024
- New In 2024, Learn About Lip-Syncing in Animation
- In 2024, The 10 Most Adorable Aesthetic Cartoon Characters of All Time
- Updated 2024 Approved The Only Guide to Make 2D Rigging Clear to You
- Updated Create Animated Video on Canva for 2024
- Set Your Preferred Job Location on LinkedIn App of your Motorola G24 Power | Dr.fone
- How to Transfer Data After Switching From Xiaomi 13T Pro to Latest Samsung | Dr.fone
- How to Factory Reset Xiaomi Civi 3 without Losing Data | Dr.fone
- How To Unlock The iPhone SE SIM Lock 4 Easy Methods
- Solutions to Spy on Motorola Defy 2 with and without jailbreak | Dr.fone
- How to Remove a Previously Synced Google Account from Your Vivo Y28 5G
- In 2024, Removing Device From Apple ID For your iPhone 15 Plus
- Strategies for Apps That Wont Download From Play Store On Xiaomi Civi 3 Disney 100th Anniversary Edition | Dr.fone
- Updated 2024 Approved Searching for Free Sports Streaming Sites? Look No Further
- New In 2024, The Power of AI Thumbnail Generators
- In 2024, The Updated Method to Bypass Nokia C32 FRP
- In 2024, Does Life360 Notify When You Log Out On Xiaomi 13T Pro? | Dr.fone
- Wondering the Best Alternative to Hola On Vivo S18? Here Is the Answer | Dr.fone
- Fix App Not Available in Your Country Play Store Problem on Oppo K11x | Dr.fone
- In 2024, How To Use Special Features - Virtual Location On Samsung Galaxy Z Fold 5? | Dr.fone
- In 2024, Pokemon Go Error 12 Failed to Detect Location On Oppo Find X7 Ultra? | Dr.fone
- In 2024, How to Unlock Vivo T2 5G Phone Pattern Lock without Factory Reset
- In 2024, What Legendaries Are In Pokemon Platinum On Realme C33 2023? | Dr.fone
- Why Your Honor Magic 5 Lite Screen Might be Unresponsive and How to Fix It | Dr.fone
- In 2024, 4 solution to get rid of pokemon fail to detect location On Tecno Spark 10 4G | Dr.fone
- Hassle-Free Ways to Remove FRP Lock from Tecno Spark 10C Phones with/without a PC
- How to Unlock Your iPhone 7 Passcode 4 Easy Methods (With or Without iTunes) | Dr.fone
- In 2024, How To Bypass iCloud Activation Lock On iPod and iPhone 13 mini The Right Way
- 5 Best Route Generator Apps You Should Try On Honor Play 8T | Dr.fone
- In 2024, 10 Best Fake GPS Location Spoofers for Apple iPhone 7 Plus | Dr.fone
- How to play an MP4 on Xiaomi Redmi Note 12T Pro?
- In 2024, Unlocking the Power of Smart Lock A Beginners Guide for Motorola G24 Power Users
- In 2024, How to use Pokemon Go Joystick on Samsung Galaxy A24? | Dr.fone
- 10 Free Location Spoofers to Fake GPS Location on your Lava Blaze Curve 5G | Dr.fone
- How to Fake Snapchat Location on Poco X6 Pro | Dr.fone
- Easy Guide to Oppo Find N3 Flip FRP Bypass With Best Methods
- In 2024, How To Change Xiaomi Redmi Note 12R Lock Screen Password?
- In 2024, A Quick Guide to Infinix Smart 7 HD FRP Bypass Instantly
- Prank Your Friends! Easy Ways to Fake and Share Google Maps Location On Tecno Pova 5 Pro | Dr.fone
- In 2024, How to Fix Pokemon Go Route Not Working On Poco C65? | Dr.fone
- Unlocking Apple iPhone 6 Plus Passcode without a Computer
- In 2024, How to Unlock Nokia C22 Phone Password Without Factory Reset?
- In 2024, Easy Guide How To Bypass Oppo K11 5G FRP Android 10/11/12/13
- In 2024, How to Unlock Disabled Apple iPhone 8/iPad Without Computer
- Can I Bypass a Forgotten Phone Password Of Xiaomi 13 Ultra?
- In 2024, Will Pokémon Go Ban the Account if You Use PGSharp On Oppo A18 | Dr.fone
- 7 Ways to Lock Apps on iPhone 15 Pro and iPad Securely | Dr.fone
- Title: Updated 2024 Approved Top 10 Banned Anime Around the World and Why
- Author: Elon
- Created at : 2024-05-19 03:05:52
- Updated at : 2024-05-20 03:05:52
- Link: https://animation-videos.techidaily.com/updated-2024-approved-top-10-banned-anime-around-the-world-and-why/
- License: This work is licensed under CC BY-NC-SA 4.0.
