
:max_bytes(150000):strip_icc():format(webp)/the-best-halloween-live-wallpaper-for-2019-4691483-019a40e91504436ca9fc9f1944d89c15.jpg)
Updated 2024 Approved What Is Anime? Anime VS Manga VS Cartoon
What Is Anime? [Anime VS Manga VS Cartoon]
What is Anime? [Anime VS Manga VS Cartoon]

Shanoon Cox
Mar 27, 2024• Proven solutions
You may have heard of Anime. What is Anime? Anime, Manga, and Cartoons all are the exquisite openings of little portals into the other worlds that will entertain, delight, and educate you at the same time. They are the forms of art and words creating a unique medium for sharing the realities of the world, spirituality, and ideas.
The digital world has grown so immensely, and then Amine, Manga, and Cartoon have become popular in the whole world that people often confuse these terms. To understand them better and to decode the myth of anime, manga, and cartoon, we’ll go deeper into each and see what anime is, and show the differences in anime, manga, and cartoon.
- Part 1: What is Anime?
- Part 2: What is Manga?
- Part 3: What is Cartoon?
- Part 4: Differences between Anime, Manga, and Cartoon
Part 1: What is Anime?
Anime is the Japanese form of animation – word for word. This scrupulous style and form of animation originated in Japan characterized by its vivid imagination and bright color usage. The thematic elements of fantasy and fiction combined with science give this style its unique look and feel. This meticulously thought and designed animation is nowadays produced all around the world intending its huge fanbase not just in the Japanese but all over the world.
The story is behind the word anime is interesting – the Japanese animēshiyon is a loanword from English animation, which then made its journey back to English as anime. So, the Japanese borrowed it from English and the English took it back modified. This modified version of animation became the basis of many popular TV shows and movies that excite people to know more about anime.
Note
Subbed Anime and Dubbed Anime
There are two common ways to enjoy the anime world, subbed anime and dubbed anime. A “sub” is an anime-type that is shown in its original Japanese voice with subtitles of another language (mostly English). While the “dub” anime is the one that is released with a new re-scripted voice – voice actors speaking another language recorded as voiceover to make it suitable for a worldwide audience.
Though the topic is often a debatable topic among anime fandom. I’ll just highlight my thoughts on both versions. As anime is mostly Japanese creation and watching them in the western world required either an English subtitle or dubbed over by English-speaking voice actors.
Anime hardcore fans or purists argue the original voice and theme of the anime should not be altered to keep the original imaginative flair and theme of the series. While the dubbed anime released with a re-scripted voice track translated into English or any other language for that matter to allow a larger audience to enjoy the anime series without the hassle of reading through the subtitles.
Part 2: What is Manga?
Manga, on the other hand, is the Japanese version of comic books and graphic novels. It has the same detailed and amplified facial features with a vivid and bright color combination. The Japanese word manga came from man-, meaning aimless, while, -ga, means pictures. So, it means aimless pictures.
Manga is unlike the usual superhero comics such as Marvel Comics or D.C. Comics written by many writers and editorial boards. Manga is more detailed and complete like novels that often are the vision of a single author. Mostly following the lives of seemingly ordinary people to develop an interesting and engaging experience – a cliffhanger.
Part 3: What is Cartoon?
The word cartoon comes from the Italian word cartoon meaning a large sheet of card or paper. The word cartoon generally signifies a visual art as animation or a funny drawing while in a historical perspective it can refer to a preparatory drawing for an oil painting, fresco, or tapestry. A cartoon in literal meaning is a caricature intended as satire or a one-dimensional non-realistic or semi-realistic portrayal.
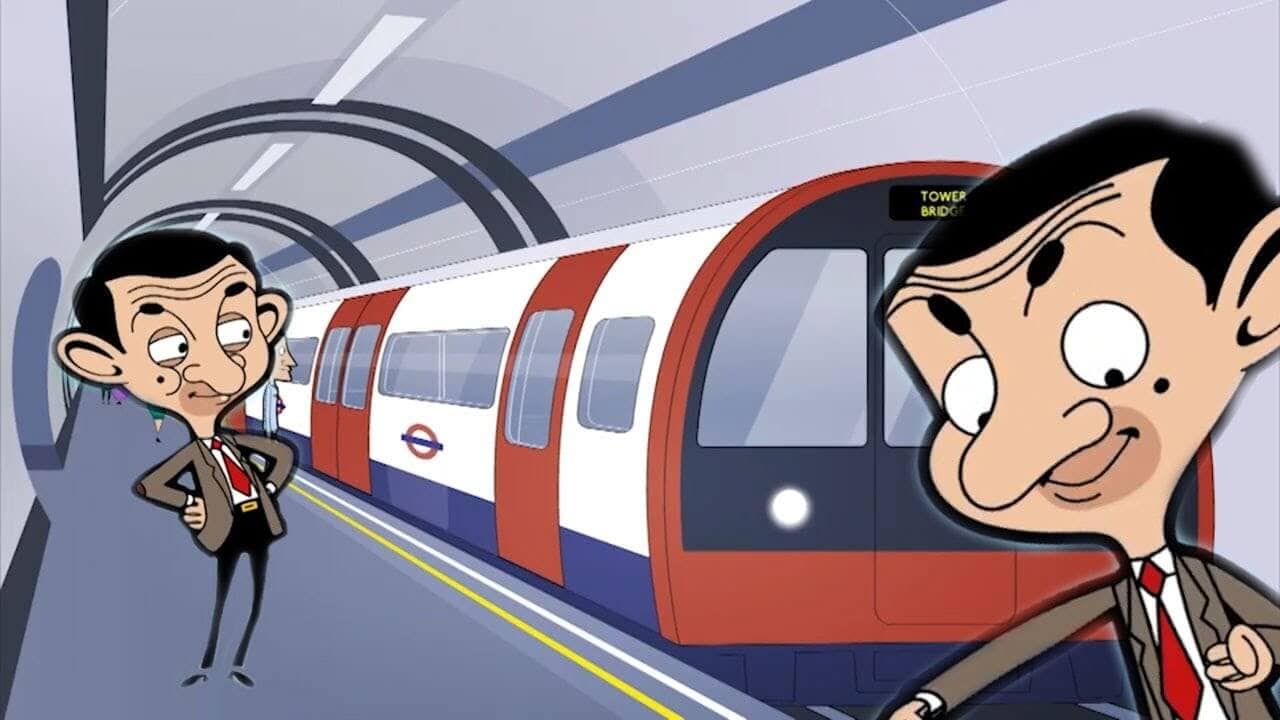
Image resource: Mr. Bean Cartoon World
Did you see Mr Bean Cartoon? A cartoon can be animated, a motion picture of a sequence of illustrations causing it to feel like a moving caricature. In the 19th century, cartoons were humorous illustrations in magazines and newspapers transforming into comic strips and animated films in the early 20th century, as we know them now.
Part 4: Differences between Anime, Manga, and Cartoon
Here we will talk about the differences between anime, manga, and cartoon from the following three aspects:
1. Relation
To effectively understand the difference between anime and manga you need to remember this little trick for anime vs manga,
- Most manga can be never converted to an anime series. But numerous manga serves as a basis for anime. Put in another way – anime is mostly, but not always, is the animated form of manga.
- Anime and manga are character-oriented where characters have goals in life that play a large thematic role in their life and the stories revolve around that.
- However, the cartoon vs manga and anime is another story altogether,
- In the western world comics and novels became animated cartoons with the advent of the digital age. In Japanese and wider Asia, the manga which is the Japanese version of comics and print cartoons turned into animated cartoons – anime.
2. Content
- Anime is a distinctive art form with diverse production techniques, it amalgamates graphic art, cinematography, characterization, and other imaginative techniques. Anime is hand-drawn, which separates it from reality into the fiction realm that provides an ideal path for the fantasy world.
- Manga showcases an illuminative and vivid imagination of the creator in the form of magazines and publications. The content incites the reader to engage deep into the artistic world of the creator.
- A cartoon is also a form of art, including and not limited to humorous illustrations, political and satirical drawings, and animated films. From art to entertainment, and political commentary, cartoons play an essential role in influencing the world.
3. Style
- While the western design cartoon has its specific features and details and the Japanese manga and anime have their rich history and imaginative flair to them. On the whole, they are part of the same family of art and human illustration techniques developed to showcase the tingling visualization of the creator.
Conclusion
The Japanese storytelling is so rich and vibrant filled with dynamic characters and caricatures which serve as the best entertaining setting for both children and adults. All of these art forms have their dedicated audience which reveres one or the other. Creators that depict their vivid imagination into eloquent and exquisite characters conveying some message and thought-provoking idea. So, altogether none is better than the other and there are millions and millions of people reading and watching all these forms of artistic mastery. Just pick the one you love!
You may also like: Best Anime Websites to Watch Anime for Free >>
Shanoon Cox
Shanoon Cox is a writer and a lover of all things video.
Follow @Shanoon Cox
Shanoon Cox
Mar 27, 2024• Proven solutions
You may have heard of Anime. What is Anime? Anime, Manga, and Cartoons all are the exquisite openings of little portals into the other worlds that will entertain, delight, and educate you at the same time. They are the forms of art and words creating a unique medium for sharing the realities of the world, spirituality, and ideas.
The digital world has grown so immensely, and then Amine, Manga, and Cartoon have become popular in the whole world that people often confuse these terms. To understand them better and to decode the myth of anime, manga, and cartoon, we’ll go deeper into each and see what anime is, and show the differences in anime, manga, and cartoon.
- Part 1: What is Anime?
- Part 2: What is Manga?
- Part 3: What is Cartoon?
- Part 4: Differences between Anime, Manga, and Cartoon
Part 1: What is Anime?
Anime is the Japanese form of animation – word for word. This scrupulous style and form of animation originated in Japan characterized by its vivid imagination and bright color usage. The thematic elements of fantasy and fiction combined with science give this style its unique look and feel. This meticulously thought and designed animation is nowadays produced all around the world intending its huge fanbase not just in the Japanese but all over the world.
The story is behind the word anime is interesting – the Japanese animēshiyon is a loanword from English animation, which then made its journey back to English as anime. So, the Japanese borrowed it from English and the English took it back modified. This modified version of animation became the basis of many popular TV shows and movies that excite people to know more about anime.
Note
Subbed Anime and Dubbed Anime
There are two common ways to enjoy the anime world, subbed anime and dubbed anime. A “sub” is an anime-type that is shown in its original Japanese voice with subtitles of another language (mostly English). While the “dub” anime is the one that is released with a new re-scripted voice – voice actors speaking another language recorded as voiceover to make it suitable for a worldwide audience.
Though the topic is often a debatable topic among anime fandom. I’ll just highlight my thoughts on both versions. As anime is mostly Japanese creation and watching them in the western world required either an English subtitle or dubbed over by English-speaking voice actors.
Anime hardcore fans or purists argue the original voice and theme of the anime should not be altered to keep the original imaginative flair and theme of the series. While the dubbed anime released with a re-scripted voice track translated into English or any other language for that matter to allow a larger audience to enjoy the anime series without the hassle of reading through the subtitles.
Part 2: What is Manga?
Manga, on the other hand, is the Japanese version of comic books and graphic novels. It has the same detailed and amplified facial features with a vivid and bright color combination. The Japanese word manga came from man-, meaning aimless, while, -ga, means pictures. So, it means aimless pictures.
Manga is unlike the usual superhero comics such as Marvel Comics or D.C. Comics written by many writers and editorial boards. Manga is more detailed and complete like novels that often are the vision of a single author. Mostly following the lives of seemingly ordinary people to develop an interesting and engaging experience – a cliffhanger.
Part 3: What is Cartoon?
The word cartoon comes from the Italian word cartoon meaning a large sheet of card or paper. The word cartoon generally signifies a visual art as animation or a funny drawing while in a historical perspective it can refer to a preparatory drawing for an oil painting, fresco, or tapestry. A cartoon in literal meaning is a caricature intended as satire or a one-dimensional non-realistic or semi-realistic portrayal.
Image resource: Mr. Bean Cartoon World
Did you see Mr Bean Cartoon? A cartoon can be animated, a motion picture of a sequence of illustrations causing it to feel like a moving caricature. In the 19th century, cartoons were humorous illustrations in magazines and newspapers transforming into comic strips and animated films in the early 20th century, as we know them now.
Part 4: Differences between Anime, Manga, and Cartoon
Here we will talk about the differences between anime, manga, and cartoon from the following three aspects:
1. Relation
To effectively understand the difference between anime and manga you need to remember this little trick for anime vs manga,
- Most manga can be never converted to an anime series. But numerous manga serves as a basis for anime. Put in another way – anime is mostly, but not always, is the animated form of manga.
- Anime and manga are character-oriented where characters have goals in life that play a large thematic role in their life and the stories revolve around that.
- However, the cartoon vs manga and anime is another story altogether,
- In the western world comics and novels became animated cartoons with the advent of the digital age. In Japanese and wider Asia, the manga which is the Japanese version of comics and print cartoons turned into animated cartoons – anime.
2. Content
- Anime is a distinctive art form with diverse production techniques, it amalgamates graphic art, cinematography, characterization, and other imaginative techniques. Anime is hand-drawn, which separates it from reality into the fiction realm that provides an ideal path for the fantasy world.
- Manga showcases an illuminative and vivid imagination of the creator in the form of magazines and publications. The content incites the reader to engage deep into the artistic world of the creator.
- A cartoon is also a form of art, including and not limited to humorous illustrations, political and satirical drawings, and animated films. From art to entertainment, and political commentary, cartoons play an essential role in influencing the world.
3. Style
- While the western design cartoon has its specific features and details and the Japanese manga and anime have their rich history and imaginative flair to them. On the whole, they are part of the same family of art and human illustration techniques developed to showcase the tingling visualization of the creator.
Conclusion
The Japanese storytelling is so rich and vibrant filled with dynamic characters and caricatures which serve as the best entertaining setting for both children and adults. All of these art forms have their dedicated audience which reveres one or the other. Creators that depict their vivid imagination into eloquent and exquisite characters conveying some message and thought-provoking idea. So, altogether none is better than the other and there are millions and millions of people reading and watching all these forms of artistic mastery. Just pick the one you love!
You may also like: Best Anime Websites to Watch Anime for Free >>
Shanoon Cox
Shanoon Cox is a writer and a lover of all things video.
Follow @Shanoon Cox
The Only Guide You’ll Ever Need to Learn About GIF Video Downloader
The Only Guide You’ll Ever Need to Learn About GIF Video Downloader
An easy yet powerful editor
Numerous effects to choose from
Detailed tutorials provided by the official channel
Want to escape the tiff of tedious video download processes? Stay tuned for best solutions
In this article
01 [Benefits of Using Video Downloader Online](#Part 1)
02 [How to Download Videos From Giphy?](#Part 2)
03 [How to Download Giphy Videos for Mobile/Computer?](#Part 3)
04 [Best 5 Tools for Converting Giphy to Mp4](#Part 4)
Part 1 Benefits of Using Video Downloader Online
Today’s information technology centered era has found a web solution for almost any and everything that can be possibly thought of. From informative articles to explanatory videos, you can find useful and need specific content in a diversity of ways. While reading does not sound a convenient cup of tea to most of us, videos are something more preferable.
When looking through descriptive solutions that could affordably serve your purpose, explanatory videos are the handiest choices owing to the ‘see and learn’ flexibility they provide viewers with. However, what attract more concern is, how to save these videos to your device. After all, you would never want to lose a useful video and most of us, of course have data pricing and usage limitations.
Online video downloader tools are certainly the most widely preferred and trusted solutions to the aforesaid concerns, and why not, they claim a range of choice benefits. Some of the obvious benefits of using these tools are listed below:
01Hassle Free Video Streaming
A seamless stream is something all of us would wish to be guaranteed of, before even thinking to watch a video. Whether looking through informative content or just as an entertainment choice, videos with frequent buffering intervals are always disapproving. One of the major reasons you should prefer an online video download is to escape the ‘and…that’s buffering again’ notch.
02Information Sharing
Living within a bunch of social media platforms and utilities, content sharing has become more of a habit than a requisite need. Any and everything ranging from useful to entertaining, unusual to funny; is shared across social media platforms every seconds.
Well, that’s absolutely fine, but what if you wish to share large video files through Instant Messaging tools and mails? Link sharing is not always convenient, owing to device version differences. To be on the safe side, it is quite better to download videos online and share them with your peers without having to worry about length and device compatibility.
03Cut Down on e-Learning Utilities
Imagine a scenario where you are into watching an explicitly useful video and the internet shuts down or you run out of data? This can be both annoying and critical at times. Why take the risk when you have dependable solutions? Just go for a quick video download using any of your preferred online tools and enjoy an uninterrupted streaming
04YouTube is not the End
Online video downloading tools provide you with the flexibility of surfing through a pool of content sites and support a range of video formats. Consequently, there is a visibly unlimited content access and download liberty that these tools assure you of. As a matter of fact, YouTube is definitely not the only video platform you are left with.
05Say ‘NO’ to Installation Procedures
Installing apps is something most of us tend to preferably avoid. While the running out of your device’s storage space is an evident concern, exposure to malware and spam content is an added risk to your smartphone or PC. Besides this, installation procedures may often be wary and time consuming. Taking the help of inbuilt download feature these online tools have is an affordable pick through.
06Convenient Usage
Not everyone around you is familiar with the know-how of technical utilities. Keeping that in mind, these online video download tools are developed to serve users within a range of technical backgrounds. Even if you don’t know anything about downloads, all you need to do is just copy a video link and paste it in the downloader’s URL bar and that’s actually it. You can see the video in your device gallery within a minimal time span.
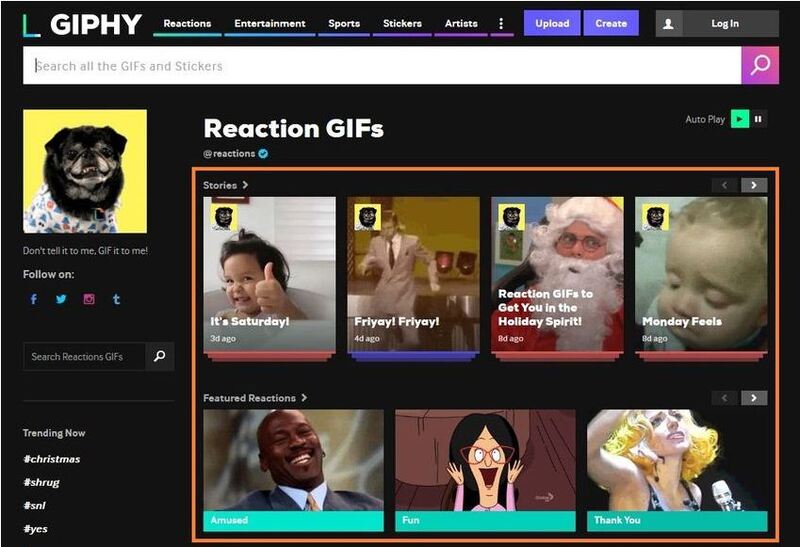
Part 2 How to Download Videos From Giphy?
Giphy is a popular and preferred application you can choose to share video contents with social media communities across various platforms. The site has introduced a GIF Video downloader tool to facilitate quick and easy video downloads among its users. This tool allows you a high quality video download in mp4 format.
The tool is compatible with almost all common web browsers and confines the video download process to a single copy-paste step. You can even download live Giphy videos here, but you are required to wait for the video streaming to finish. To download videos to your heart’s content using this tool, here’s what you need to do:
Step 1: Copy a Video Link
Visit the official website of Giphy and type a matching keyword in the search box to look for a desired video. You can also refer to the site’s suggestion list that appears when you enter a particular keyword. When you have made your choice, just copy the video URL.
Step 2: Time to Paste
Paste the copied link in the Giphy search bar and click on ‘Download’ to receive a download link for your selected video. Click on the provided link to initiate the downloading process.
Part 3 How to Download Giphy Videos for Mobile/Computer?
Most of us have specific device preferences to get that perfect and comfortable video streaming experience. While some of us get glued to smartphones, others may find PCs more convenient. If device compatibility keeps you from watching your favorite videos, see through the following steps to download GIF videos on any of your preferred devices:
01Mobile Downloads
Downloading Giphy videos was never easier You just need to do the following to get your favorite one in your smartphone:
Step 1:
Visit the official Giphy website and search a video of your choice.
Step2:
Once found, copy the video URL and paste the same in the Giphy search bar.
Step 3:
Click ‘Download’ and that’s it
02PC Downloads
If you are among those who would rather prefer a wide screen video stream, you can choose download Giphy videos into your PC. After all, it’s nothing more than a few quick steps All you have to do is explained below:
Step 1: Video Selection
In your suitable browser, visit the official Giphy website. Select a video category from the top and select a video you wish to download.
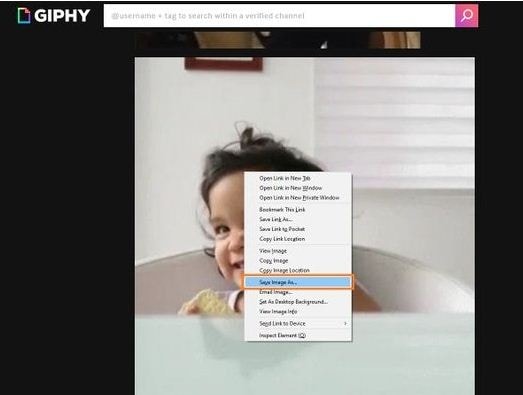
Step 2: Save Your Video
Right click on your previously selected video and choose ‘Save Image As’ fr4om the drop down menu. The ‘Save Image’ box opens up.
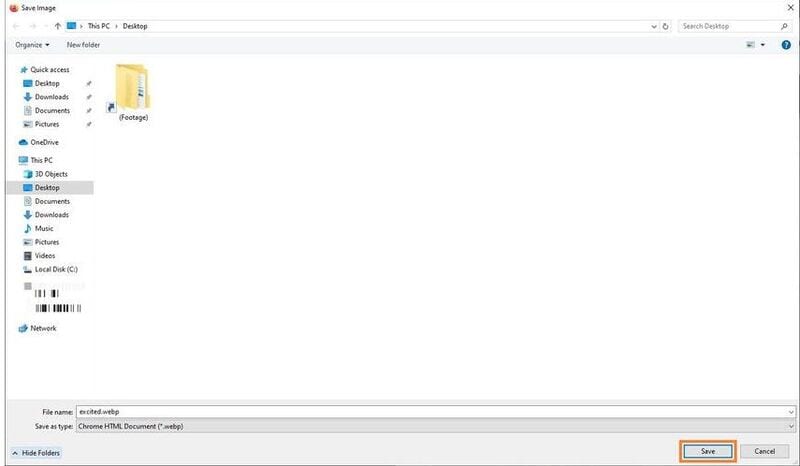
Step 3: Name Your Video
Using the ‘Save Image’ box, navigate to a suitable destination in your PC where you want to save your video. In the ‘File Name’ dialog box, give a name to the video file without changing the file extension. When you are done, click on ‘Save’. This will download and save your video in the selected target folder.
Part 4 Best 5 Tools for Converting Giphy to Mp4
While the short and specific GIFs on the Giphy website are quite interesting and impactful, you may sometimes encounter the need to go for a change of video format (for IM and mail sharing purposes). Having learnt about benefits of online video download, you would certainly want to browse through the best tools for converting Giphy videos to mp4.
Listed below are some of the most quick and convenient tools you can choose to convert Giphy video to mp4:
01**Wondershare Filmora Video Editor **
This is exceptionally excellent video converter software that has the potential to cater to all your conversion needs in a single go. Loaded with exciting features and available to users for free, this tool supports and ensures a hassle free inter conversion of almost all known video file formats. This is a single package solution to all your video editing and conversion requirements.
Wondershare Filmora
Get started easily with Filmora’s powerful performance, intuitive interface, and countless effects!
Try It Free Try It Free Try It Free Learn More >

Key Features:
Some of the most prominent features of this software include the following:
● The most appealing feature about this tool is that you don’t require an internet facility to use it.
● Highly stable and crash protected software, even on heavy loading (around 10 files at a time).
● Has the most convenient interface, suitable for users with varieties of technical aptitude.
● Comes with an inbuilt audio library that allows you to add relatable music to your video, once you are done with the conversion process.
● You can enhance your downloaded video with a range of amazing effects and texts in the tool’s editor window.
02Online-Convert
This is quite a handy tool to convert Giphy videos to mp4. It comes with an inbuilt video editor that gives you the liberty to cut, crop, trim and rotate your videos to exclusively extract the ‘most perfect’ parts and even decorate them with amazing frames. This one is also a free video converter tool.
Key Features
Listed below are some of the most viable features of this conversion tool:
● You can directly export the mp4 files to Cloud utilities.
● This tool supports almost all video formats.
● Has preloaded fundamental video editing features
03Convert GIF to Mp4
This one is a free online Giphy to mp4 converter tool, having a bit tricky interface, but has amazing editing features. You can cut, crop and trim videos, add music and adjust frame rates and even add subtitles to your videos with this tool. It however does not support external media sharing of the converted mp4 files.
Key Features:
Major attractions of this online tool comprise the following:
● This tool is loaded with hundreds of sound and video editing utilities.
● It comes with SubRip Subtitle (SRT) files that you can use to add interesting subtitles and make your videos more impactful.
● You can directly export the downloaded videos to your Google and IOS Dropbox.
04GIF-2-Mp4
This conversion tool has possibly has the most convenient user interface. Like most online tools, this too offers you a free GIF to video conversion service. However, you will have to compromise on the editing flexibility and data limit while using this tool, as it lacks any editing features and converts files within 50 MB. You can only adjust the resolution and quality of the converted mp4 files.
Key Features:
You can still prefer this conversion tool on account of the following features:
● This tool is simple and is developed with a view to assure user cohesiveness.
● You don’t need to go through wary software settings or wait for long durations for the conversion process to finish.
● Using this tool, you can share video files through email.
05CloudConvert
This is another excellent online tool to convert Giphy videos to mp4. It enables a quick file conversion and you are granted the liberty to make adjustments in video quality, file size and resolution. The tool’s handy interface converts GIF video to mp4 files in a matter of several seconds. However, it has a limitation of allowing utmost 25 conversions in 24 hours.
Key Features:
Using this tool for video conversion gives you access to the following features:
● This is a quick and free converter tool.
● You are not forced to watch unnecessary advertisements on the tool’s site.
● You can go for a parallel conversion of multiple files.
● You can make changes in the default video and sound settings.
● Key Takeaways from This Episode →
● Online video downloader tools are an advantageous means of hassle free video streaming.
● User credibility has flooded the online market with a range of video converter tools.
● Filmora is among the most preferred, quick and convenient GIF to mp4 converters available online.
Want to escape the tiff of tedious video download processes? Stay tuned for best solutions
In this article
01 [Benefits of Using Video Downloader Online](#Part 1)
02 [How to Download Videos From Giphy?](#Part 2)
03 [How to Download Giphy Videos for Mobile/Computer?](#Part 3)
04 [Best 5 Tools for Converting Giphy to Mp4](#Part 4)
Part 1 Benefits of Using Video Downloader Online
Today’s information technology centered era has found a web solution for almost any and everything that can be possibly thought of. From informative articles to explanatory videos, you can find useful and need specific content in a diversity of ways. While reading does not sound a convenient cup of tea to most of us, videos are something more preferable.
When looking through descriptive solutions that could affordably serve your purpose, explanatory videos are the handiest choices owing to the ‘see and learn’ flexibility they provide viewers with. However, what attract more concern is, how to save these videos to your device. After all, you would never want to lose a useful video and most of us, of course have data pricing and usage limitations.
Online video downloader tools are certainly the most widely preferred and trusted solutions to the aforesaid concerns, and why not, they claim a range of choice benefits. Some of the obvious benefits of using these tools are listed below:
01Hassle Free Video Streaming
A seamless stream is something all of us would wish to be guaranteed of, before even thinking to watch a video. Whether looking through informative content or just as an entertainment choice, videos with frequent buffering intervals are always disapproving. One of the major reasons you should prefer an online video download is to escape the ‘and…that’s buffering again’ notch.
02Information Sharing
Living within a bunch of social media platforms and utilities, content sharing has become more of a habit than a requisite need. Any and everything ranging from useful to entertaining, unusual to funny; is shared across social media platforms every seconds.
Well, that’s absolutely fine, but what if you wish to share large video files through Instant Messaging tools and mails? Link sharing is not always convenient, owing to device version differences. To be on the safe side, it is quite better to download videos online and share them with your peers without having to worry about length and device compatibility.
03Cut Down on e-Learning Utilities
Imagine a scenario where you are into watching an explicitly useful video and the internet shuts down or you run out of data? This can be both annoying and critical at times. Why take the risk when you have dependable solutions? Just go for a quick video download using any of your preferred online tools and enjoy an uninterrupted streaming
04YouTube is not the End
Online video downloading tools provide you with the flexibility of surfing through a pool of content sites and support a range of video formats. Consequently, there is a visibly unlimited content access and download liberty that these tools assure you of. As a matter of fact, YouTube is definitely not the only video platform you are left with.
05Say ‘NO’ to Installation Procedures
Installing apps is something most of us tend to preferably avoid. While the running out of your device’s storage space is an evident concern, exposure to malware and spam content is an added risk to your smartphone or PC. Besides this, installation procedures may often be wary and time consuming. Taking the help of inbuilt download feature these online tools have is an affordable pick through.
06Convenient Usage
Not everyone around you is familiar with the know-how of technical utilities. Keeping that in mind, these online video download tools are developed to serve users within a range of technical backgrounds. Even if you don’t know anything about downloads, all you need to do is just copy a video link and paste it in the downloader’s URL bar and that’s actually it. You can see the video in your device gallery within a minimal time span.
Part 2 How to Download Videos From Giphy?
Giphy is a popular and preferred application you can choose to share video contents with social media communities across various platforms. The site has introduced a GIF Video downloader tool to facilitate quick and easy video downloads among its users. This tool allows you a high quality video download in mp4 format.
The tool is compatible with almost all common web browsers and confines the video download process to a single copy-paste step. You can even download live Giphy videos here, but you are required to wait for the video streaming to finish. To download videos to your heart’s content using this tool, here’s what you need to do:
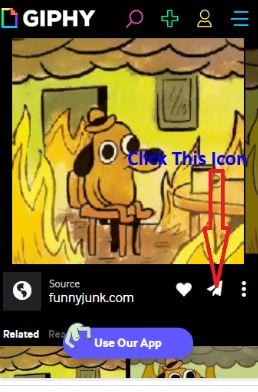
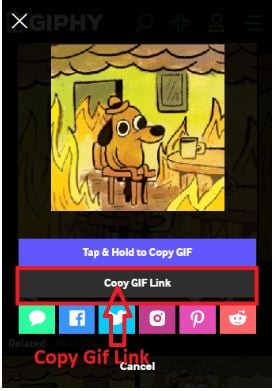
Step 1: Copy a Video Link
Visit the official website of Giphy and type a matching keyword in the search box to look for a desired video. You can also refer to the site’s suggestion list that appears when you enter a particular keyword. When you have made your choice, just copy the video URL.
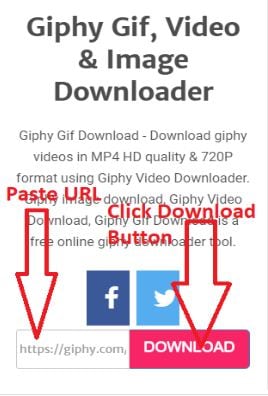
Step 2: Time to Paste
Paste the copied link in the Giphy search bar and click on ‘Download’ to receive a download link for your selected video. Click on the provided link to initiate the downloading process.
Part 3 How to Download Giphy Videos for Mobile/Computer?
Most of us have specific device preferences to get that perfect and comfortable video streaming experience. While some of us get glued to smartphones, others may find PCs more convenient. If device compatibility keeps you from watching your favorite videos, see through the following steps to download GIF videos on any of your preferred devices:
01Mobile Downloads
Downloading Giphy videos was never easier You just need to do the following to get your favorite one in your smartphone:
Step 1:
Visit the official Giphy website and search a video of your choice.
Step2:
Once found, copy the video URL and paste the same in the Giphy search bar.
Step 3:
Click ‘Download’ and that’s it
02PC Downloads
If you are among those who would rather prefer a wide screen video stream, you can choose download Giphy videos into your PC. After all, it’s nothing more than a few quick steps All you have to do is explained below:
Step 1: Video Selection
In your suitable browser, visit the official Giphy website. Select a video category from the top and select a video you wish to download.
Step 2: Save Your Video
Right click on your previously selected video and choose ‘Save Image As’ fr4om the drop down menu. The ‘Save Image’ box opens up.
Step 3: Name Your Video
Using the ‘Save Image’ box, navigate to a suitable destination in your PC where you want to save your video. In the ‘File Name’ dialog box, give a name to the video file without changing the file extension. When you are done, click on ‘Save’. This will download and save your video in the selected target folder.
Part 4 Best 5 Tools for Converting Giphy to Mp4
While the short and specific GIFs on the Giphy website are quite interesting and impactful, you may sometimes encounter the need to go for a change of video format (for IM and mail sharing purposes). Having learnt about benefits of online video download, you would certainly want to browse through the best tools for converting Giphy videos to mp4.
Listed below are some of the most quick and convenient tools you can choose to convert Giphy video to mp4:
01**Wondershare Filmora Video Editor **
This is exceptionally excellent video converter software that has the potential to cater to all your conversion needs in a single go. Loaded with exciting features and available to users for free, this tool supports and ensures a hassle free inter conversion of almost all known video file formats. This is a single package solution to all your video editing and conversion requirements.
Wondershare Filmora
Get started easily with Filmora’s powerful performance, intuitive interface, and countless effects!
Try It Free Try It Free Try It Free Learn More >
Key Features:
Some of the most prominent features of this software include the following:
● The most appealing feature about this tool is that you don’t require an internet facility to use it.
● Highly stable and crash protected software, even on heavy loading (around 10 files at a time).
● Has the most convenient interface, suitable for users with varieties of technical aptitude.
● Comes with an inbuilt audio library that allows you to add relatable music to your video, once you are done with the conversion process.
● You can enhance your downloaded video with a range of amazing effects and texts in the tool’s editor window.
02Online-Convert
This is quite a handy tool to convert Giphy videos to mp4. It comes with an inbuilt video editor that gives you the liberty to cut, crop, trim and rotate your videos to exclusively extract the ‘most perfect’ parts and even decorate them with amazing frames. This one is also a free video converter tool.
Key Features
Listed below are some of the most viable features of this conversion tool:
● You can directly export the mp4 files to Cloud utilities.
● This tool supports almost all video formats.
● Has preloaded fundamental video editing features
03Convert GIF to Mp4
This one is a free online Giphy to mp4 converter tool, having a bit tricky interface, but has amazing editing features. You can cut, crop and trim videos, add music and adjust frame rates and even add subtitles to your videos with this tool. It however does not support external media sharing of the converted mp4 files.
Key Features:
Major attractions of this online tool comprise the following:
● This tool is loaded with hundreds of sound and video editing utilities.
● It comes with SubRip Subtitle (SRT) files that you can use to add interesting subtitles and make your videos more impactful.
● You can directly export the downloaded videos to your Google and IOS Dropbox.
04GIF-2-Mp4
This conversion tool has possibly has the most convenient user interface. Like most online tools, this too offers you a free GIF to video conversion service. However, you will have to compromise on the editing flexibility and data limit while using this tool, as it lacks any editing features and converts files within 50 MB. You can only adjust the resolution and quality of the converted mp4 files.
Key Features:
You can still prefer this conversion tool on account of the following features:
● This tool is simple and is developed with a view to assure user cohesiveness.
● You don’t need to go through wary software settings or wait for long durations for the conversion process to finish.
● Using this tool, you can share video files through email.
05CloudConvert
This is another excellent online tool to convert Giphy videos to mp4. It enables a quick file conversion and you are granted the liberty to make adjustments in video quality, file size and resolution. The tool’s handy interface converts GIF video to mp4 files in a matter of several seconds. However, it has a limitation of allowing utmost 25 conversions in 24 hours.
Key Features:
Using this tool for video conversion gives you access to the following features:
● This is a quick and free converter tool.
● You are not forced to watch unnecessary advertisements on the tool’s site.
● You can go for a parallel conversion of multiple files.
● You can make changes in the default video and sound settings.
● Key Takeaways from This Episode →
● Online video downloader tools are an advantageous means of hassle free video streaming.
● User credibility has flooded the online market with a range of video converter tools.
● Filmora is among the most preferred, quick and convenient GIF to mp4 converters available online.
Want to escape the tiff of tedious video download processes? Stay tuned for best solutions
In this article
01 [Benefits of Using Video Downloader Online](#Part 1)
02 [How to Download Videos From Giphy?](#Part 2)
03 [How to Download Giphy Videos for Mobile/Computer?](#Part 3)
04 [Best 5 Tools for Converting Giphy to Mp4](#Part 4)
Part 1 Benefits of Using Video Downloader Online
Today’s information technology centered era has found a web solution for almost any and everything that can be possibly thought of. From informative articles to explanatory videos, you can find useful and need specific content in a diversity of ways. While reading does not sound a convenient cup of tea to most of us, videos are something more preferable.
When looking through descriptive solutions that could affordably serve your purpose, explanatory videos are the handiest choices owing to the ‘see and learn’ flexibility they provide viewers with. However, what attract more concern is, how to save these videos to your device. After all, you would never want to lose a useful video and most of us, of course have data pricing and usage limitations.
Online video downloader tools are certainly the most widely preferred and trusted solutions to the aforesaid concerns, and why not, they claim a range of choice benefits. Some of the obvious benefits of using these tools are listed below:
01Hassle Free Video Streaming
A seamless stream is something all of us would wish to be guaranteed of, before even thinking to watch a video. Whether looking through informative content or just as an entertainment choice, videos with frequent buffering intervals are always disapproving. One of the major reasons you should prefer an online video download is to escape the ‘and…that’s buffering again’ notch.
02Information Sharing
Living within a bunch of social media platforms and utilities, content sharing has become more of a habit than a requisite need. Any and everything ranging from useful to entertaining, unusual to funny; is shared across social media platforms every seconds.
Well, that’s absolutely fine, but what if you wish to share large video files through Instant Messaging tools and mails? Link sharing is not always convenient, owing to device version differences. To be on the safe side, it is quite better to download videos online and share them with your peers without having to worry about length and device compatibility.
03Cut Down on e-Learning Utilities
Imagine a scenario where you are into watching an explicitly useful video and the internet shuts down or you run out of data? This can be both annoying and critical at times. Why take the risk when you have dependable solutions? Just go for a quick video download using any of your preferred online tools and enjoy an uninterrupted streaming
04YouTube is not the End
Online video downloading tools provide you with the flexibility of surfing through a pool of content sites and support a range of video formats. Consequently, there is a visibly unlimited content access and download liberty that these tools assure you of. As a matter of fact, YouTube is definitely not the only video platform you are left with.
05Say ‘NO’ to Installation Procedures
Installing apps is something most of us tend to preferably avoid. While the running out of your device’s storage space is an evident concern, exposure to malware and spam content is an added risk to your smartphone or PC. Besides this, installation procedures may often be wary and time consuming. Taking the help of inbuilt download feature these online tools have is an affordable pick through.
06Convenient Usage
Not everyone around you is familiar with the know-how of technical utilities. Keeping that in mind, these online video download tools are developed to serve users within a range of technical backgrounds. Even if you don’t know anything about downloads, all you need to do is just copy a video link and paste it in the downloader’s URL bar and that’s actually it. You can see the video in your device gallery within a minimal time span.
Part 2 How to Download Videos From Giphy?
Giphy is a popular and preferred application you can choose to share video contents with social media communities across various platforms. The site has introduced a GIF Video downloader tool to facilitate quick and easy video downloads among its users. This tool allows you a high quality video download in mp4 format.
The tool is compatible with almost all common web browsers and confines the video download process to a single copy-paste step. You can even download live Giphy videos here, but you are required to wait for the video streaming to finish. To download videos to your heart’s content using this tool, here’s what you need to do:
Step 1: Copy a Video Link
Visit the official website of Giphy and type a matching keyword in the search box to look for a desired video. You can also refer to the site’s suggestion list that appears when you enter a particular keyword. When you have made your choice, just copy the video URL.
Step 2: Time to Paste
Paste the copied link in the Giphy search bar and click on ‘Download’ to receive a download link for your selected video. Click on the provided link to initiate the downloading process.
Part 3 How to Download Giphy Videos for Mobile/Computer?
Most of us have specific device preferences to get that perfect and comfortable video streaming experience. While some of us get glued to smartphones, others may find PCs more convenient. If device compatibility keeps you from watching your favorite videos, see through the following steps to download GIF videos on any of your preferred devices:
01Mobile Downloads
Downloading Giphy videos was never easier You just need to do the following to get your favorite one in your smartphone:
Step 1:
Visit the official Giphy website and search a video of your choice.
Step2:
Once found, copy the video URL and paste the same in the Giphy search bar.
Step 3:
Click ‘Download’ and that’s it
02PC Downloads
If you are among those who would rather prefer a wide screen video stream, you can choose download Giphy videos into your PC. After all, it’s nothing more than a few quick steps All you have to do is explained below:
Step 1: Video Selection
In your suitable browser, visit the official Giphy website. Select a video category from the top and select a video you wish to download.
Step 2: Save Your Video
Right click on your previously selected video and choose ‘Save Image As’ fr4om the drop down menu. The ‘Save Image’ box opens up.
Step 3: Name Your Video
Using the ‘Save Image’ box, navigate to a suitable destination in your PC where you want to save your video. In the ‘File Name’ dialog box, give a name to the video file without changing the file extension. When you are done, click on ‘Save’. This will download and save your video in the selected target folder.
Part 4 Best 5 Tools for Converting Giphy to Mp4
While the short and specific GIFs on the Giphy website are quite interesting and impactful, you may sometimes encounter the need to go for a change of video format (for IM and mail sharing purposes). Having learnt about benefits of online video download, you would certainly want to browse through the best tools for converting Giphy videos to mp4.
Listed below are some of the most quick and convenient tools you can choose to convert Giphy video to mp4:
01**Wondershare Filmora Video Editor **
This is exceptionally excellent video converter software that has the potential to cater to all your conversion needs in a single go. Loaded with exciting features and available to users for free, this tool supports and ensures a hassle free inter conversion of almost all known video file formats. This is a single package solution to all your video editing and conversion requirements.
Wondershare Filmora
Get started easily with Filmora’s powerful performance, intuitive interface, and countless effects!
Try It Free Try It Free Try It Free Learn More >
Key Features:
Some of the most prominent features of this software include the following:
● The most appealing feature about this tool is that you don’t require an internet facility to use it.
● Highly stable and crash protected software, even on heavy loading (around 10 files at a time).
● Has the most convenient interface, suitable for users with varieties of technical aptitude.
● Comes with an inbuilt audio library that allows you to add relatable music to your video, once you are done with the conversion process.
● You can enhance your downloaded video with a range of amazing effects and texts in the tool’s editor window.
02Online-Convert
This is quite a handy tool to convert Giphy videos to mp4. It comes with an inbuilt video editor that gives you the liberty to cut, crop, trim and rotate your videos to exclusively extract the ‘most perfect’ parts and even decorate them with amazing frames. This one is also a free video converter tool.
Key Features
Listed below are some of the most viable features of this conversion tool:
● You can directly export the mp4 files to Cloud utilities.
● This tool supports almost all video formats.
● Has preloaded fundamental video editing features
03Convert GIF to Mp4
This one is a free online Giphy to mp4 converter tool, having a bit tricky interface, but has amazing editing features. You can cut, crop and trim videos, add music and adjust frame rates and even add subtitles to your videos with this tool. It however does not support external media sharing of the converted mp4 files.
Key Features:
Major attractions of this online tool comprise the following:
● This tool is loaded with hundreds of sound and video editing utilities.
● It comes with SubRip Subtitle (SRT) files that you can use to add interesting subtitles and make your videos more impactful.
● You can directly export the downloaded videos to your Google and IOS Dropbox.
04GIF-2-Mp4
This conversion tool has possibly has the most convenient user interface. Like most online tools, this too offers you a free GIF to video conversion service. However, you will have to compromise on the editing flexibility and data limit while using this tool, as it lacks any editing features and converts files within 50 MB. You can only adjust the resolution and quality of the converted mp4 files.
Key Features:
You can still prefer this conversion tool on account of the following features:
● This tool is simple and is developed with a view to assure user cohesiveness.
● You don’t need to go through wary software settings or wait for long durations for the conversion process to finish.
● Using this tool, you can share video files through email.
05CloudConvert
This is another excellent online tool to convert Giphy videos to mp4. It enables a quick file conversion and you are granted the liberty to make adjustments in video quality, file size and resolution. The tool’s handy interface converts GIF video to mp4 files in a matter of several seconds. However, it has a limitation of allowing utmost 25 conversions in 24 hours.
Key Features:
Using this tool for video conversion gives you access to the following features:
● This is a quick and free converter tool.
● You are not forced to watch unnecessary advertisements on the tool’s site.
● You can go for a parallel conversion of multiple files.
● You can make changes in the default video and sound settings.
● Key Takeaways from This Episode →
● Online video downloader tools are an advantageous means of hassle free video streaming.
● User credibility has flooded the online market with a range of video converter tools.
● Filmora is among the most preferred, quick and convenient GIF to mp4 converters available online.
26 Cool Anime Girl Names and Their Meanings
26 Cool Anime Girl Names and Their Meanings
Shanoon Cox
Mar 27, 2024• Proven solutions
The dedication in anime goes even beyond the lively visuals and complex plotlines. You will find powerful and spunk anime girl characters leading the show. Not to mention the unique anime girl name that is often linked to the characters’ roles in the plot, values, or personality. These interesting names with deep meanings have been a focus of attention for many anime fans.
From adorable and cool-sounding names to sweet names with spiritual meaning, there are all kinds of anime girl names. Let’s look at some fun cases where a character’s name is just as necessary as any other information to disclose their nature and purpose.
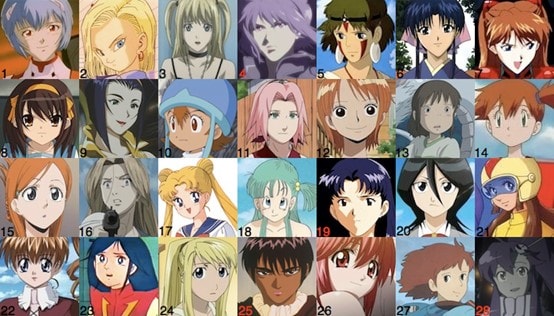
26 Cool Anime Girl Names and Their Meanings
Here we sorted out 26 cool anime girl names for you. They are listed in alphabetical order:
1. Asuka: tomorrow, smell, perfume
Asuka is a Japanese anime girl name which means tomorrow; smell, perfume, collectively its smell of tomorrow. While perfume gets mentioned as the gods’ poetry, the appeal of its magical language remains mysterious and fragile. Perfume, smell together with tomorrow gives all the positive feelings which a character portrays in the series.
2. Bashira: joyful and a predictor of good news
Bashira is a Japanese anime name that means joyful and a predictor of good news. Being an anime girl character, this name adds a translation of her appearance and the purposes of her character in the series. We agree that anime is not for everyone since their deeply planned names always help people get the unclear meanings and hidden purposes of characters.
3. Chika: scatter, flower
Chika is a popular feminine Japanese anime name. It can be written with the kanji characters (chi), meaning thousand, wisdom, intellect, or scatter combined with (ka), meaning “flower.” This name gives us the concept of a strong girl, who can be both; strong girls with delicacy.
4. Dai: great
Its origin is Japan; Dai is a female-given name that is pronounced dah-ee. Dai means “great; to shine,” and it is of Japanese and Welsh origin. Greatness has always been everyone’s preference; anime girl characters have also been portrayed as goddesses many times.
5. Erza Scarlet: the gift of God
According to the name and its meaning, Erza played a very restricted role, and following the rules is all she wanted. Erza means the gift of God; this term is often termed as enhanced wisdom, knowledge, and faith.
6. Fujiko: wisteria
Fujiko means Wisteria which is a name of a flower that perfectly portrays the feminity of a girl and strength.
7. Gizmodo – black clover
Gizmodo is a dark Japanese name that means black clover. The anime girl characters are powerful idols who can deal with all kinds of negativity with their dark sides.
8. Haruko: spring-born
Haruko means the spring-born, which can be pretty colorful. With this vibrant personality, anime girl characters never fail to spread positivity among their fans.
9. Isamu: brave, courageous
Anime characters always show bravery, and being courageous is their constant middle name. Isamu is a Japanese name that is perfectly picked for girl characters whose series revolves around bravery.
10. Junko: pure, genuine child
Junko a Japanese name chosen for an anime girl who is pure and genuine. A child who can serve their fans with purity and kindness.
11. Kamiko: little goddess
Kamiko, the Japanese-oriented name for a girl character, elaborates that a little goddess can be a lot. Their kind little hearts can be an example for their fans.
12. Lina: palm tree
Lina, the palm tree, played support for others like the palm tree, huge and helpful. This Japanese name, with its meaning, is enough strength for viewers.
13. Masami: become beautiful
Masami is a Japanese girl term that represents “to become beautiful.” Anime girl characters always successfully show how they pull them back despite all of the chaos around them.
14. Natsuki: vegetables, Greens, Moon
This female Japanese name has a lot wider meaning than its character, but somehow it was dreamily selected. Natsuki, which means vegetables, green, and moon, every word has its beauty. Their bright explanations can also brighten anyone’s perspective.
15. Ohana: God’s grace gift
The name Ohana is an Armenian origin as an anime girl’s name. Ohana means God’s grace gift. God’s grace is accessible today and tomorrow to those who have damaged hearts but are beautifully pulled back.
16. Puyumi: purity
The name means “purity.” More accurately represents the lotus flower’s nature that grows on mud, but the lotus bud grows high through mud and blooms continuously. Anime girl’s names are wisely chosen according to their characters.
17. Qualia: Angel
Qualia originated from Japan speaks for itself; the angel means anime fans can experience their life turning into a good point.
18. Reiko: Beautiful; lovely child
Reiko, the Japanese name picked for the anime girl character, portrays a lovely-hearted child and a savior of humanity. These characters can tremendously leave a big impact on their fans’ lives.
19. Sakura: Cherry blossom
A flower of several trees is cherry blossom, also known as Sakura and Sakura, an anime girl character in Japanese.
20. Tomiko: Happiness child
It’s a Japanese-oriented anime girl name that means happiness child. Through this anime character, fans can have more than an open doorway to enjoy this greatness;
21. Umeko: Plum
The Umeko means the Plum is again a Japanese name means the Plum, which implies something desirable. These girl anime characters are a true example for fans who can spread positivity.
22. Veronica: victory
Veronica is an old Greek-originated name, which means victory. Anime girls are powerful girls who can make sure of the victory after every conflict regardless of gender.
23. Wakana: Harmony, Music, Complete
The name Wakana is mainly a Japanese female name that means harmony, which gives the concept of completeness. Anime girl characters are the whole pack of providing harmony and peace.
24. Xoey: life
Zoe is a word that comes from the Greek language, which means life. This life can give an ability to learn and to assist others and make the fans’ life stress-free.
25. Yuriko: Lily flower
Yuriko is a Japanese girl name that means Lily, which gives the feeling of Gentleness. Anime girls can be strong yet the most delicate characters.
26. Zuiho: Expertise, Perfect, Serious
This anime girl name can give you inspiration for being an expert and perfect. This Japanese-originated name can be the ideal impression of strictness.
What a Cool Anime Name Can Make a Difference?
An anime name says a lot about the character and its personality. While creating anime names, animators aim to spot a light on the individuality of the character with connections to their past.
Anime names are full of style, strong sense, and unique sounds. These names are always cool; whether for girls or boys, they’re used in adventurous, creative, and romantic anime series. All in all, anime girl names can be a true inspiration for anyone, regardless of gender
So, which anime girl name sounds perfect for your kid?
Shanoon Cox
Shanoon Cox is a writer and a lover of all things video.
Follow @Shanoon Cox
Shanoon Cox
Mar 27, 2024• Proven solutions
The dedication in anime goes even beyond the lively visuals and complex plotlines. You will find powerful and spunk anime girl characters leading the show. Not to mention the unique anime girl name that is often linked to the characters’ roles in the plot, values, or personality. These interesting names with deep meanings have been a focus of attention for many anime fans.
From adorable and cool-sounding names to sweet names with spiritual meaning, there are all kinds of anime girl names. Let’s look at some fun cases where a character’s name is just as necessary as any other information to disclose their nature and purpose.
26 Cool Anime Girl Names and Their Meanings
Here we sorted out 26 cool anime girl names for you. They are listed in alphabetical order:
1. Asuka: tomorrow, smell, perfume
Asuka is a Japanese anime girl name which means tomorrow; smell, perfume, collectively its smell of tomorrow. While perfume gets mentioned as the gods’ poetry, the appeal of its magical language remains mysterious and fragile. Perfume, smell together with tomorrow gives all the positive feelings which a character portrays in the series.
2. Bashira: joyful and a predictor of good news
Bashira is a Japanese anime name that means joyful and a predictor of good news. Being an anime girl character, this name adds a translation of her appearance and the purposes of her character in the series. We agree that anime is not for everyone since their deeply planned names always help people get the unclear meanings and hidden purposes of characters.
3. Chika: scatter, flower
Chika is a popular feminine Japanese anime name. It can be written with the kanji characters (chi), meaning thousand, wisdom, intellect, or scatter combined with (ka), meaning “flower.” This name gives us the concept of a strong girl, who can be both; strong girls with delicacy.
4. Dai: great
Its origin is Japan; Dai is a female-given name that is pronounced dah-ee. Dai means “great; to shine,” and it is of Japanese and Welsh origin. Greatness has always been everyone’s preference; anime girl characters have also been portrayed as goddesses many times.
5. Erza Scarlet: the gift of God
According to the name and its meaning, Erza played a very restricted role, and following the rules is all she wanted. Erza means the gift of God; this term is often termed as enhanced wisdom, knowledge, and faith.
6. Fujiko: wisteria
Fujiko means Wisteria which is a name of a flower that perfectly portrays the feminity of a girl and strength.
7. Gizmodo – black clover
Gizmodo is a dark Japanese name that means black clover. The anime girl characters are powerful idols who can deal with all kinds of negativity with their dark sides.
8. Haruko: spring-born
Haruko means the spring-born, which can be pretty colorful. With this vibrant personality, anime girl characters never fail to spread positivity among their fans.
9. Isamu: brave, courageous
Anime characters always show bravery, and being courageous is their constant middle name. Isamu is a Japanese name that is perfectly picked for girl characters whose series revolves around bravery.
10. Junko: pure, genuine child
Junko a Japanese name chosen for an anime girl who is pure and genuine. A child who can serve their fans with purity and kindness.
11. Kamiko: little goddess
Kamiko, the Japanese-oriented name for a girl character, elaborates that a little goddess can be a lot. Their kind little hearts can be an example for their fans.
12. Lina: palm tree
Lina, the palm tree, played support for others like the palm tree, huge and helpful. This Japanese name, with its meaning, is enough strength for viewers.
13. Masami: become beautiful
Masami is a Japanese girl term that represents “to become beautiful.” Anime girl characters always successfully show how they pull them back despite all of the chaos around them.
14. Natsuki: vegetables, Greens, Moon
This female Japanese name has a lot wider meaning than its character, but somehow it was dreamily selected. Natsuki, which means vegetables, green, and moon, every word has its beauty. Their bright explanations can also brighten anyone’s perspective.
15. Ohana: God’s grace gift
The name Ohana is an Armenian origin as an anime girl’s name. Ohana means God’s grace gift. God’s grace is accessible today and tomorrow to those who have damaged hearts but are beautifully pulled back.
16. Puyumi: purity
The name means “purity.” More accurately represents the lotus flower’s nature that grows on mud, but the lotus bud grows high through mud and blooms continuously. Anime girl’s names are wisely chosen according to their characters.
17. Qualia: Angel
Qualia originated from Japan speaks for itself; the angel means anime fans can experience their life turning into a good point.
18. Reiko: Beautiful; lovely child
Reiko, the Japanese name picked for the anime girl character, portrays a lovely-hearted child and a savior of humanity. These characters can tremendously leave a big impact on their fans’ lives.
19. Sakura: Cherry blossom
A flower of several trees is cherry blossom, also known as Sakura and Sakura, an anime girl character in Japanese.
20. Tomiko: Happiness child
It’s a Japanese-oriented anime girl name that means happiness child. Through this anime character, fans can have more than an open doorway to enjoy this greatness;
21. Umeko: Plum
The Umeko means the Plum is again a Japanese name means the Plum, which implies something desirable. These girl anime characters are a true example for fans who can spread positivity.
22. Veronica: victory
Veronica is an old Greek-originated name, which means victory. Anime girls are powerful girls who can make sure of the victory after every conflict regardless of gender.
23. Wakana: Harmony, Music, Complete
The name Wakana is mainly a Japanese female name that means harmony, which gives the concept of completeness. Anime girl characters are the whole pack of providing harmony and peace.
24. Xoey: life
Zoe is a word that comes from the Greek language, which means life. This life can give an ability to learn and to assist others and make the fans’ life stress-free.
25. Yuriko: Lily flower
Yuriko is a Japanese girl name that means Lily, which gives the feeling of Gentleness. Anime girls can be strong yet the most delicate characters.
26. Zuiho: Expertise, Perfect, Serious
This anime girl name can give you inspiration for being an expert and perfect. This Japanese-originated name can be the ideal impression of strictness.
What a Cool Anime Name Can Make a Difference?
An anime name says a lot about the character and its personality. While creating anime names, animators aim to spot a light on the individuality of the character with connections to their past.
Anime names are full of style, strong sense, and unique sounds. These names are always cool; whether for girls or boys, they’re used in adventurous, creative, and romantic anime series. All in all, anime girl names can be a true inspiration for anyone, regardless of gender
So, which anime girl name sounds perfect for your kid?
Shanoon Cox
Shanoon Cox is a writer and a lover of all things video.
Follow @Shanoon Cox
Before You Learn 3D Animation: Some Things You Should Know
Before You Learn 3D Animation: Some Things You Should Know
An easy yet powerful editor
Numerous effects to choose from
Detailed tutorials provided by the official channel
Before you delve into the profession of creating 3d cartoon filters, you need to understand or decide if creating animated characters is something you would like to do. It’s not going to be smooth as you will get frustrated at some point, you will get confused, and it will be challenging, but in the end, it is rewarding because it is an expression of your mind coming to life. You are the one to breathe life into your characters who represent your imaginations. You will also have to infuse a great deal of your creativity to create beautiful and exciting characters for others to enjoy. Meanwhile, let’s first understand what 3d animations mean.
Becoming a 3d animator is not a feat you can achieve in a short time. It is not days, weeks, months, or even years. Like any other profession, a professional 3d animator must have put in a great deal of work, mixed with a lot of passion and love for what he is doing. To become successful as a 3d animator, you must love what you are doing or be ready to put in the work.
This article will expose what you should learn to create beautiful 3d animation cartoons, including what to expect as a 3d animator.
In this article
01 [What are 3d animation and the process of 3d animation?](#Part 1)
02 [Differences between 2d animation and 3d animation](#Part 2)
03 [A roaster of 8 best 3d animation software.](#Part 3)
04 [Top 3 3d animation making mistakes to avoid](#Part 4)
Part 1 What Is 3D Animation And The Process of 3D Animation?
animation is a term that describes the art of creating 3-dimensional images and placing them in a digital environment. It is a process that uses motion to bring objects, characters, etc., to life.
It is also known as computer-generated imagery, and it is currently the most common animation type for feature films.
Various software and programs are designed specifically for 3d animations and allow the animators to bring the objects to life.
The process of 3d animation happens in three(3) stages;
● Modeling
● Layout and animation
● Rendering
Modeling in 3d animation involves generating the objects or characters either by using a modeling tool or using a real thing. The real object is scanned directly into the computer, where other processes follow. You have total control over your character and how you want them to appear by modeling. You decide the weight, specifications, feel, etc. However, scanning objects save a lot of time. You must add texture before modeling your character or reviewing it before moving to the following layout and animation.
Layout and animation stage: A layout is determined when the generated objects move to this stage. It involves creating a set/scene where the objects can position. Layout first happens before animation does. After adding the objects and characters, they get animated using animation variables. After this, you use motion capture or keyframing to give life to the models in the scenes.
Rendering: Rendering is using software or programs. It is not something to do using just your computer. These tools can generate the scenes into the finished image according to the client’s requirements or set goals.
Creating cartoon background images or any other form of animations is a process that requires a lot of planning and work, which sums up a lot of time. To learn 3d animation, you must be ready to give in ample time as it is a profession that requires some time to handle.
The process listed above also shows the creativity requirement required to succeed in the 3d animation industry. To think that you must create the scenes, which is the layout stage, means you have to be creative in your imagination. If you then decide to model your character from scratch using modeling tools. That also requires another job of thinking and extracting a lot of your creative juices.
Part 2 What is the difference between 2d animation and 3d animation?
Anyone can decide to learn animation with no plan in mind or understanding of what the profession involves. animation is different from 2d animation, and if you want to learn animation, you need to understand the distinction between these two.
animation can have a lot of creative possibilities, whereas 3d animation has a lot of natural abilities. The visual style of both types of animation is explicitly different.
3d animation is a more intensive technical process than the various stages mentioned earlier. It would most likely involve different specialists to handle them to get a more professional output. However, 2d animation consists of drawing the characters frame by frame.
animated cartoons are in The Simpsons, Pinocchio, the Lion king, etc.

animations are like the ones Dreamworks, Pixar, produce. They include the avengers, the bad guys, etc.


Part 3 A Roaster Of 8 Best 3D Animation Software

Several 3D animation software exists in the market, both free and paid. If you are a animation creator or love animation for fun, you can use the free software to make your videos, cartoon photos, 3d cartoon faces, etc.
With many animation software available in the market, you can only fully trust a few.
Here’s a roaster of 8 best 3D animation software you could use to create the cartoon monsters you’ve always been curious about;
● Filmora
● Blender
● Maya
● Wings 3d
● Adobe Animate
● Cinema 4d
● K-3D
● Milcamo
Filmora Video animation tool: This is a highly recommended 3D animation tool with many features and pros. It has a wide range of keyframes, about six of which make your cartoon background images smooth and natural.
| Software | Features | OS | Pro |
|---|---|---|---|
| Wondershare Filmora Video Editor | It has an auto-color correction It has smooth keyframes | Windows, Mac | You can apply light flare effects You can apply an audio mixer |
| Blender | It has textured brushes and masking for 3d painting. It has add-ons and customised tools with high python scripting. | Windows, Linux, Mac computers | It has Virtual reality rendering, Strong camera restoration. It had both manual and automatic tracking. |
| Maya | Free trial of 30 days. Can create complex technical effects | Windows, Max | Good Control and perfect accuracy. Can collect motion capture data. |
| Wings 3d | Auto UV mapping system It has support for light and material effects. | Windows, Linux, and Mac OS | Advanced 3d and 2d modeling tools. It is free to use |
| Adobe animate | Virtual camera functionality gives a realistic view. Adoptive animation effects, zooming, panning etc. | Windows, Mac | Effective audio syncing technology. Customizable font, styling etc. |
| Cinema 4d | Concepts develop without time modeling Large library of preset scenes. | Windows, Mac | Customised with a huge asset range It is a faster tool than Maya Dissect complete scene and is faster than Maya. |
| K-3D | It has property adjustment capabilities with handy strong features. I5 is made up of basic tools for animation, curves, patches. | Mac OS X, Linux, FreeBSD, windows platforms | It is very flexible for either complex or basic workflows. It has a wide selection of plugins. |
| Mixamo | Streamlined user experience It has a faster search function that is accurate | Windows, Mac | It has fast character and animation browsing. Download multiple animations at a go |
For Win 7 or later (64-bit)
For macOS 10.12 or later
Part 4 Top Three (3) 3d Animation Making Mistakes To Avoid

As we initially mentioned, 3d animation requires an intensive technical process. It is a skill that you need to hone over the years by paying attention to detail, being highly creative, and daring to succeed.
Here are 3 mistakes you must avoid during the animation process;
● Forgetting the ‘why’ factor
● Over-animating a scene
● Not giving your viewers time to take it in
Forgetting the why: In a animation cartoon, every move, walking step, and smile is essential. Every character represented in your cartoon background is there for a specific reason.
You would be making a mistake that will affect the result if you lose focus on this reason. Your viewers won’t find your cartoon believable if the moves and acting don’t add up.
Your characters don’t just move because they want to move. Something must have spurred the motion or reaction. It could be for what happened to them, what they heard, or saw another character did in the scene. Do not neglect the why of the act.
While animating, focus on why and keep revisiting until all your characters and objects are knitted closely together.
Over-animating a scene: This is another mistake animators should avoid. If you animate your characters, everything may be a mess if you animate the background and foreground. Simplicity is how to get this thing, keep it simple and focused.
Do not have much going on in each scene but only where you need the attention of your viewers. Animators that do this end up confusing their viewers with no direction.
You can use camera effects such as depth of field to make your audience focus on the point you are trying to make in the particular scene.
Not giving your viewers time to take it in: This is another 3d animation making a mistake you should be careful of. Not giving your viewers time to process the happenings on the scene before the next.
This can be avoided by timing and measuring cuts such that any animation at the start of a new scene is timed to enable the viewers to take it in. You can ask for third-party criticism on your work to find out how your animation is received and see pointers to mistakes such as this. The third party could be your colleague or friend.
Note: You can easily avoid any error or mistake or modify your 3D animation with the help of the Wondershare Filmora video editor. That will provide a solid base for featuring 3D animation.
● Ending Thoughts →
● 3D animation refers to using motion to breathe life into inanimate objects, and they can create animated videos and animation cartoons.
● 3D animation is highly technical, unlike 2d animation
● You can avoid the above 3d mistakes if you remain objective and open, and ready to accept constructive criticism.
● Becoming an animator is a fun thing to do, and it allows you to be free to express your creativity while entertaining other people entirely.
● Before you start learning 3d animation and create cartoon photos, ensure that you have read through all that we have explained here to have good information about what you are going into.
Before you delve into the profession of creating 3d cartoon filters, you need to understand or decide if creating animated characters is something you would like to do. It’s not going to be smooth as you will get frustrated at some point, you will get confused, and it will be challenging, but in the end, it is rewarding because it is an expression of your mind coming to life. You are the one to breathe life into your characters who represent your imaginations. You will also have to infuse a great deal of your creativity to create beautiful and exciting characters for others to enjoy. Meanwhile, let’s first understand what 3d animations mean.
Becoming a 3d animator is not a feat you can achieve in a short time. It is not days, weeks, months, or even years. Like any other profession, a professional 3d animator must have put in a great deal of work, mixed with a lot of passion and love for what he is doing. To become successful as a 3d animator, you must love what you are doing or be ready to put in the work.
This article will expose what you should learn to create beautiful 3d animation cartoons, including what to expect as a 3d animator.
In this article
01 [What are 3d animation and the process of 3d animation?](#Part 1)
02 [Differences between 2d animation and 3d animation](#Part 2)
03 [A roaster of 8 best 3d animation software.](#Part 3)
04 [Top 3 3d animation making mistakes to avoid](#Part 4)
Part 1 What Is 3D Animation And The Process of 3D Animation?
animation is a term that describes the art of creating 3-dimensional images and placing them in a digital environment. It is a process that uses motion to bring objects, characters, etc., to life.
It is also known as computer-generated imagery, and it is currently the most common animation type for feature films.
Various software and programs are designed specifically for 3d animations and allow the animators to bring the objects to life.
The process of 3d animation happens in three(3) stages;
● Modeling
● Layout and animation
● Rendering
Modeling in 3d animation involves generating the objects or characters either by using a modeling tool or using a real thing. The real object is scanned directly into the computer, where other processes follow. You have total control over your character and how you want them to appear by modeling. You decide the weight, specifications, feel, etc. However, scanning objects save a lot of time. You must add texture before modeling your character or reviewing it before moving to the following layout and animation.
Layout and animation stage: A layout is determined when the generated objects move to this stage. It involves creating a set/scene where the objects can position. Layout first happens before animation does. After adding the objects and characters, they get animated using animation variables. After this, you use motion capture or keyframing to give life to the models in the scenes.
Rendering: Rendering is using software or programs. It is not something to do using just your computer. These tools can generate the scenes into the finished image according to the client’s requirements or set goals.
Creating cartoon background images or any other form of animations is a process that requires a lot of planning and work, which sums up a lot of time. To learn 3d animation, you must be ready to give in ample time as it is a profession that requires some time to handle.
The process listed above also shows the creativity requirement required to succeed in the 3d animation industry. To think that you must create the scenes, which is the layout stage, means you have to be creative in your imagination. If you then decide to model your character from scratch using modeling tools. That also requires another job of thinking and extracting a lot of your creative juices.
Part 2 What is the difference between 2d animation and 3d animation?
Anyone can decide to learn animation with no plan in mind or understanding of what the profession involves. animation is different from 2d animation, and if you want to learn animation, you need to understand the distinction between these two.
animation can have a lot of creative possibilities, whereas 3d animation has a lot of natural abilities. The visual style of both types of animation is explicitly different.
3d animation is a more intensive technical process than the various stages mentioned earlier. It would most likely involve different specialists to handle them to get a more professional output. However, 2d animation consists of drawing the characters frame by frame.
animated cartoons are in The Simpsons, Pinocchio, the Lion king, etc.
animations are like the ones Dreamworks, Pixar, produce. They include the avengers, the bad guys, etc.
Part 3 A Roaster Of 8 Best 3D Animation Software
Several 3D animation software exists in the market, both free and paid. If you are a animation creator or love animation for fun, you can use the free software to make your videos, cartoon photos, 3d cartoon faces, etc.
With many animation software available in the market, you can only fully trust a few.
Here’s a roaster of 8 best 3D animation software you could use to create the cartoon monsters you’ve always been curious about;
● Filmora
● Blender
● Maya
● Wings 3d
● Adobe Animate
● Cinema 4d
● K-3D
● Milcamo
Filmora Video animation tool: This is a highly recommended 3D animation tool with many features and pros. It has a wide range of keyframes, about six of which make your cartoon background images smooth and natural.
| Software | Features | OS | Pro |
|---|---|---|---|
| Wondershare Filmora Video Editor | It has an auto-color correction It has smooth keyframes | Windows, Mac | You can apply light flare effects You can apply an audio mixer |
| Blender | It has textured brushes and masking for 3d painting. It has add-ons and customised tools with high python scripting. | Windows, Linux, Mac computers | It has Virtual reality rendering, Strong camera restoration. It had both manual and automatic tracking. |
| Maya | Free trial of 30 days. Can create complex technical effects | Windows, Max | Good Control and perfect accuracy. Can collect motion capture data. |
| Wings 3d | Auto UV mapping system It has support for light and material effects. | Windows, Linux, and Mac OS | Advanced 3d and 2d modeling tools. It is free to use |
| Adobe animate | Virtual camera functionality gives a realistic view. Adoptive animation effects, zooming, panning etc. | Windows, Mac | Effective audio syncing technology. Customizable font, styling etc. |
| Cinema 4d | Concepts develop without time modeling Large library of preset scenes. | Windows, Mac | Customised with a huge asset range It is a faster tool than Maya Dissect complete scene and is faster than Maya. |
| K-3D | It has property adjustment capabilities with handy strong features. I5 is made up of basic tools for animation, curves, patches. | Mac OS X, Linux, FreeBSD, windows platforms | It is very flexible for either complex or basic workflows. It has a wide selection of plugins. |
| Mixamo | Streamlined user experience It has a faster search function that is accurate | Windows, Mac | It has fast character and animation browsing. Download multiple animations at a go |
For Win 7 or later (64-bit)
For macOS 10.12 or later
Part 4 Top Three (3) 3d Animation Making Mistakes To Avoid
As we initially mentioned, 3d animation requires an intensive technical process. It is a skill that you need to hone over the years by paying attention to detail, being highly creative, and daring to succeed.
Here are 3 mistakes you must avoid during the animation process;
● Forgetting the ‘why’ factor
● Over-animating a scene
● Not giving your viewers time to take it in
Forgetting the why: In a animation cartoon, every move, walking step, and smile is essential. Every character represented in your cartoon background is there for a specific reason.
You would be making a mistake that will affect the result if you lose focus on this reason. Your viewers won’t find your cartoon believable if the moves and acting don’t add up.
Your characters don’t just move because they want to move. Something must have spurred the motion or reaction. It could be for what happened to them, what they heard, or saw another character did in the scene. Do not neglect the why of the act.
While animating, focus on why and keep revisiting until all your characters and objects are knitted closely together.
Over-animating a scene: This is another mistake animators should avoid. If you animate your characters, everything may be a mess if you animate the background and foreground. Simplicity is how to get this thing, keep it simple and focused.
Do not have much going on in each scene but only where you need the attention of your viewers. Animators that do this end up confusing their viewers with no direction.
You can use camera effects such as depth of field to make your audience focus on the point you are trying to make in the particular scene.
Not giving your viewers time to take it in: This is another 3d animation making a mistake you should be careful of. Not giving your viewers time to process the happenings on the scene before the next.
This can be avoided by timing and measuring cuts such that any animation at the start of a new scene is timed to enable the viewers to take it in. You can ask for third-party criticism on your work to find out how your animation is received and see pointers to mistakes such as this. The third party could be your colleague or friend.
Note: You can easily avoid any error or mistake or modify your 3D animation with the help of the Wondershare Filmora video editor. That will provide a solid base for featuring 3D animation.
● Ending Thoughts →
● 3D animation refers to using motion to breathe life into inanimate objects, and they can create animated videos and animation cartoons.
● 3D animation is highly technical, unlike 2d animation
● You can avoid the above 3d mistakes if you remain objective and open, and ready to accept constructive criticism.
● Becoming an animator is a fun thing to do, and it allows you to be free to express your creativity while entertaining other people entirely.
● Before you start learning 3d animation and create cartoon photos, ensure that you have read through all that we have explained here to have good information about what you are going into.
How to Make a Photoshop Collage in EASY Steps
How to Make a Photoshop Collage in EASY Steps
An easy yet powerful editor
Numerous effects to choose from
Detailed tutorials provided by the official channel
Photographs are a way of capturing and stopping the time in a small frame. They hold millions of memories that we want to cherish forever in our lives. And sometimes, we want to make a cluster of all the happy memories by making a collage of the photos.

Also, what can be a better gift to someone than presenting them a collection of all the cherishable memories you have with them in photographs? And that can be made possible through various photoshop collage ideas.
In this article
01 [Does Photoshop Have Collage Templates?](#Part 1)
02 [How to Make Your Own Collage with Photoshop Templates](#Part 2)
03 [How to Custom a Photoshop Collage in 9 Simple Steps](#Part 3)
Part 1 Does Photoshop Have Collage Templates?
There is numerous photo collage template in photoshop, and you even access and use some of them for free. Additionally, you can also create your template in Photoshop and use them in making your collage. If you want to make your template in Photoshop, here is how.
Step 1: Make a new layer and fill it up with your choice of colour.
Step 2: Resize and duplicate the layer to create the pattern you want for your collage.
Step 3: Integrate a “Clipping Mask.”
Step 4: For every image, create new clipping masks.
Step 5: Your collage template is ready so, export it to use!
Part 2 How to Make Your Own Collage with Photoshop Templates
Now that we know that you can access numerous incredible photoshop templates for free, you might want to create a collage for yourself in Photoshop. So, this is how you can use the photoshop collage template to make your collage with Photoshop Templates.
First, you need to select the images you want to create a collage with. Then you will have to import them. You can either “select and import” them one at a time or even batch import all of them together. Then, you can readily choose the template you want to use, or you can also create one for yourself.
Then you can resize or edit the images in the way you want and place them in the desired order. After you are done arranging and creating the collage perfectly, save the file in JPEG format and then export it to access it whenever you want!
Part 3 How to Custom a Photoshop Collage in 9 Simple Steps
If you do not know the answer to the question: how to make a collage in photoshop, there is absolutely nothing to worry about. Because the answer to this question is simple and includes not more than nine steps.
So now, we will be discussing the nine simple steps that will help you make a custom photo collage in photoshop. Here is the list of steps that will help you in doing so.
● Step 1: Selecting your favorite photos
The first step to making a collage in photoshop is to select all the photos you would like your collage to have. Now, it will be best for you to choose your photos wisely. We understand that each photograph is equally sweet and cherishable. But, when you select the images for your collage in a thoughtful manner, the collage turns out much better than expected.
You can use different collage ideas for photoshop, such as following a particular storyline, where you collage the photos so that it recreates the memory or the moments in sequence. Another way to select your photos is by sticking to a particular theme, and it can be vintage or on one specific color or the like. It will help your collage turn out in the best and the most thoughtful way.
● Step 2: Opening the photos you have selected, in collage maker photoshop
Now that you have selected which images you would want your collage to have, the next step will require you to open those images in the collage maker Photoshop. For this, you will have to select the option “File”. There, you will find the option “Open”. Then you will open the images you have chosen in Photoshop.
Also, you can simply press the “ctrl” and the “O” keys on your keyboard and it will automatically help you open the images you have selected for the photo collage on photoshop.

Another way to open the pages you have selected for your collage is through the “Drag and Drop” function. It is more effortless to choose the images and open them in Photoshop. After you have opened the photos in Photoshop, it will open in a different tab and look like in the following picture.

● Step 3: Make a new file for your collage on photoshop
The third step requires you to make a new file for your photo collage in photoshop. For this, you need to select or click on the “File” option on Photoshop. Then, click on the “New” option. It will help you make a new file for your collage. You can also select the “ctrl” and “N” together.
As you click on the “New” option, you will be given options to choose from. Choose the one that matches your preference.
When you are working on photoshop to make a collage, the images will need a collage background because it is on this background that the photos will assemble. If you have made a collage before on photoshop, you can use the old collage photoshop template. Otherwise, you need to create a new document for the collage.

● Step 4: Add the selected images one-by-one
Adding the images can be done in many ways. One way to do so is by opening the photo and clicking on it. Another way of doing so is to use the “Marquee Tool” of Photoshop.

Another way of doing so is by pressing the “ctrl” and “A” keys on your keyboard together. You will find the matching ants border around the image when you do this.

Then, go to the “Edit” option and choose “Copy” there. Or, you can also select the “ctrl” and “C” keys on your keywords together. Then go to your new document and select the option of “Paste” from the “Edit” option, or you can also press the “ctrl” and “V” keys together to do so.
The photo will be added in its own layer on the new document.

● Step 5: Arrange the images
Now, arrange the images in the way you want. If you have chosen to tell a story through your collage creator in photoshop, then arrange the photos accordingly. You can do so with the help of the “Move” tool or simply tap V. You can also use the “Free Transform” tool to edit and transform the images in the way you want. You can resize, rotate and edit the photos in many other ways through the “Free Transform” tool.
Step 6: Integrate image space
To create a collage in photoshop in a better and more spaced-out manner, you need to add some spacing between the images you have in your collage. There are two ways to add spacing between the pictures; one way is by creating a thin, white border around each image.
And the second method is by accessing and using the “Layers” feature in Photoshop.

● Step 7: Merge all the Layers
This step is necessary when you have used the “Layer” feature to create the spacing among the images present in your collage. You will be able to do so from the “Layer” option. So, go to the “Layer” option and select the “Merge Invisible” option present there.

● Step 8: cropping the final picture
Before the final step, it is important that you crop the final picture. And to do so, you can opt for the “Crop tool”. You will be able to access it easily, or you can also simply tap C to use the “Crop tool.”

● Step 9: Save the final collage and export
After you have done all the necessary changes and are satisfied with the final collage, then, save the file. To do so, go to the “File” option and select the “Save as” option.

Then choose the file type to be “JPEG”. Type the name you would want the collage to be saved as. This completes the process of saving the file. Then choose the image quality you would want the collage to be exported in.

● Key Takeaways from This Episode →
● In this discussion, we have covered the following topics.
● We discussed whether Photoshop has collage templates.
● Then we proceeded with discussing how we can create a collage in photoshop using the templates in it.
● Lastly, we wrapped up our discussion with the nine-step tutorial about customizing a collage in Photoshop.
Photographs are a way of capturing and stopping the time in a small frame. They hold millions of memories that we want to cherish forever in our lives. And sometimes, we want to make a cluster of all the happy memories by making a collage of the photos.
Also, what can be a better gift to someone than presenting them a collection of all the cherishable memories you have with them in photographs? And that can be made possible through various photoshop collage ideas.
In this article
01 [Does Photoshop Have Collage Templates?](#Part 1)
02 [How to Make Your Own Collage with Photoshop Templates](#Part 2)
03 [How to Custom a Photoshop Collage in 9 Simple Steps](#Part 3)
Part 1 Does Photoshop Have Collage Templates?
There is numerous photo collage template in photoshop, and you even access and use some of them for free. Additionally, you can also create your template in Photoshop and use them in making your collage. If you want to make your template in Photoshop, here is how.
Step 1: Make a new layer and fill it up with your choice of colour.
Step 2: Resize and duplicate the layer to create the pattern you want for your collage.
Step 3: Integrate a “Clipping Mask.”
Step 4: For every image, create new clipping masks.
Step 5: Your collage template is ready so, export it to use!
Part 2 How to Make Your Own Collage with Photoshop Templates
Now that we know that you can access numerous incredible photoshop templates for free, you might want to create a collage for yourself in Photoshop. So, this is how you can use the photoshop collage template to make your collage with Photoshop Templates.
First, you need to select the images you want to create a collage with. Then you will have to import them. You can either “select and import” them one at a time or even batch import all of them together. Then, you can readily choose the template you want to use, or you can also create one for yourself.
Then you can resize or edit the images in the way you want and place them in the desired order. After you are done arranging and creating the collage perfectly, save the file in JPEG format and then export it to access it whenever you want!
Part 3 How to Custom a Photoshop Collage in 9 Simple Steps
If you do not know the answer to the question: how to make a collage in photoshop, there is absolutely nothing to worry about. Because the answer to this question is simple and includes not more than nine steps.
So now, we will be discussing the nine simple steps that will help you make a custom photo collage in photoshop. Here is the list of steps that will help you in doing so.
● Step 1: Selecting your favorite photos
The first step to making a collage in photoshop is to select all the photos you would like your collage to have. Now, it will be best for you to choose your photos wisely. We understand that each photograph is equally sweet and cherishable. But, when you select the images for your collage in a thoughtful manner, the collage turns out much better than expected.
You can use different collage ideas for photoshop, such as following a particular storyline, where you collage the photos so that it recreates the memory or the moments in sequence. Another way to select your photos is by sticking to a particular theme, and it can be vintage or on one specific color or the like. It will help your collage turn out in the best and the most thoughtful way.
● Step 2: Opening the photos you have selected, in collage maker photoshop
Now that you have selected which images you would want your collage to have, the next step will require you to open those images in the collage maker Photoshop. For this, you will have to select the option “File”. There, you will find the option “Open”. Then you will open the images you have chosen in Photoshop.
Also, you can simply press the “ctrl” and the “O” keys on your keyboard and it will automatically help you open the images you have selected for the photo collage on photoshop.
Another way to open the pages you have selected for your collage is through the “Drag and Drop” function. It is more effortless to choose the images and open them in Photoshop. After you have opened the photos in Photoshop, it will open in a different tab and look like in the following picture.
● Step 3: Make a new file for your collage on photoshop
The third step requires you to make a new file for your photo collage in photoshop. For this, you need to select or click on the “File” option on Photoshop. Then, click on the “New” option. It will help you make a new file for your collage. You can also select the “ctrl” and “N” together.
As you click on the “New” option, you will be given options to choose from. Choose the one that matches your preference.
When you are working on photoshop to make a collage, the images will need a collage background because it is on this background that the photos will assemble. If you have made a collage before on photoshop, you can use the old collage photoshop template. Otherwise, you need to create a new document for the collage.
● Step 4: Add the selected images one-by-one
Adding the images can be done in many ways. One way to do so is by opening the photo and clicking on it. Another way of doing so is to use the “Marquee Tool” of Photoshop.
Another way of doing so is by pressing the “ctrl” and “A” keys on your keyboard together. You will find the matching ants border around the image when you do this.
Then, go to the “Edit” option and choose “Copy” there. Or, you can also select the “ctrl” and “C” keys on your keywords together. Then go to your new document and select the option of “Paste” from the “Edit” option, or you can also press the “ctrl” and “V” keys together to do so.
The photo will be added in its own layer on the new document.
● Step 5: Arrange the images
Now, arrange the images in the way you want. If you have chosen to tell a story through your collage creator in photoshop, then arrange the photos accordingly. You can do so with the help of the “Move” tool or simply tap V. You can also use the “Free Transform” tool to edit and transform the images in the way you want. You can resize, rotate and edit the photos in many other ways through the “Free Transform” tool.
Step 6: Integrate image space
To create a collage in photoshop in a better and more spaced-out manner, you need to add some spacing between the images you have in your collage. There are two ways to add spacing between the pictures; one way is by creating a thin, white border around each image.
And the second method is by accessing and using the “Layers” feature in Photoshop.
● Step 7: Merge all the Layers
This step is necessary when you have used the “Layer” feature to create the spacing among the images present in your collage. You will be able to do so from the “Layer” option. So, go to the “Layer” option and select the “Merge Invisible” option present there.
● Step 8: cropping the final picture
Before the final step, it is important that you crop the final picture. And to do so, you can opt for the “Crop tool”. You will be able to access it easily, or you can also simply tap C to use the “Crop tool.”
● Step 9: Save the final collage and export
After you have done all the necessary changes and are satisfied with the final collage, then, save the file. To do so, go to the “File” option and select the “Save as” option.
Then choose the file type to be “JPEG”. Type the name you would want the collage to be saved as. This completes the process of saving the file. Then choose the image quality you would want the collage to be exported in.
● Key Takeaways from This Episode →
● In this discussion, we have covered the following topics.
● We discussed whether Photoshop has collage templates.
● Then we proceeded with discussing how we can create a collage in photoshop using the templates in it.
● Lastly, we wrapped up our discussion with the nine-step tutorial about customizing a collage in Photoshop.
Simple Shortcut to Convert Videos to Gifs on iPhone
Simple Shortcut to Convert Videos to Gifs on iPhone
An easy yet powerful editor
Numerous effects to choose from
Detailed tutorials provided by the official channel
To create iPhone video to GIF there are several third-party apps available. You can even choose the online sites for the task, but the editing and other options will be limited. The GIFs on your iPhone can be created using videos as well as Live photos.

One of the best ways to create a GIF is using the Shortcuts app that comes pre-installed on devices running on iOS 13 and later versions of the OS. The app has shortcuts to accomplish several tasks on your iPhone including GIF creation. Learn about using Shortcuts and other tools for creating a GIF on iPhone.
In this article
01 [How to make GIF from Video on iPhone using Shortcut App](#Part 1)
02 [How to save Live Photos as GIF on iPhone](#Part 2)
03 [How to save Live Photos as GIF on iPhone](#Part 3)
04 [How to save videos as live photos on your iPhone?](#Part 4)
05 [Best tool for creating GIFs and video editing on your Windows and Mac- Wondershare Filmora](#Part 5)
Part 1 How to make GIF from Video on iPhone using Shortcut App
One of the easiest ways to convert video GIF iPhone is by using the Shortcuts app. If you have deleted the app, you can reinstall it from the app store. Once the app is installed, you would next need to allow the untrusted shortcuts and for this go to Settings > Shortcuts> toggle Add Untrusted Shortcuts to add the shortcuts created by the user. The further steps for converting video to GIF iPhone are as follows.
Step 1. On your iPhone, download the Video to GIF shortcut. You can download it using iCloud or RoutineHub. Find the shortcut and click on Get Shortcut will let you check the action of the shortcut.
Move down and click on the red Add Untrusted Shortcut button that will add the shortcut for the library.

Step 2. Go to the My Shortcuts tab and click on the Video to GIF section. If you are using it for the first time, you need to grant permission to use the videos and photos. Click on the OK button and continue.

Step 3. Next, browse and add the video from which you wish to create the GIF. Since GIF animations are short, it is always recommended to use short videos.
Step 4. Video processing will start and during this, the Video to GIF shortcut will be greyed out.

Step 5. Once done, the preview of the GIF will appear on the screen. Finally, you can save the GIF to your Photos app on iPhone or can also share it through email, AirDrop, iMessage, and other third-party services as needed.

Part 2 How to save Live Photos as GIF on iPhone
Live Photo is an interesting feature of the iPhone where an image is captured in an animated form for a couple of seconds. These Live Photos can be easily converted to GIFs using the steps below.
Step 1. On your iPhone Photo app, open the Live Photo that you want to save as GIF.
Step 2. Darg the selected photo upwards and will see multiple effects options along with other image details.
Step 3 To save the selected image as GIF, choose Loop or Bounce animation. Once done, share the image on mail and other services listed or save it to the device.

Part 3 How to save Live Photo as video on iPhone
You can also convert your live photos to videos and then use them for making GIFs and for other uses. The steps for iPhone live photo to video are as follows.
Step 1. On your iPhone, open the Photos app and choose the Live Photo that you want to convert.
Step 2. Next, click on the share button at the bottom of the screen and multiple options will be seen.
Step 3. Scroll down and choose Save as Video option and with this, the live photo will be saved as a Video.
Additionally, you can also convert the LivePhotos to videos using the shortcut app.

Part 4 How to save videos as live photos on your iPhone?
If you need to convert your videos to live photos on iPhone, there are several third-party tools available and one of the widely used is IntoLive. Using this app, videos, as well as GIFs, can be converted into live photos.
Steps on how to turn a video into a live photo iPhone
Step 1. Download, install and launch the IntoLive app from the app store.
Step 2. Next, browse and add the desired video.
Step 3. If needed, the added video can be customized using several supported features.
Step 4. Next, click on the Make option at the top-right corner and then choose the repeats you want for a Live Photo.
Step 5. Finally, click on the Live Photo and your Live Photo will be saved to the device.

Part 5 Best tool for creating GIFs and video editing on your Windows and Mac- Wondershare Filmora
Above we have listed several ways to create GIFs on your iPhone and also to convert videos to LivePhotos and vice-versa. Installing different tools for different tasks is a hassle and also a time-consuming task. So, if you are looking for an all-in-one tool that allows you to create GIFs, and professionally edit your media files, Wondershare Filmora Video Editor is the best tool to consider. Available for quick download on your Windows and Mac system, this feature-packed software has an intuitive and user-friendly interface.
Wondershare Filmora
Get started easily with Filmora’s powerful performance, intuitive interface, and countless effects!
Try It Free Try It Free Try It Free Learn More >
Media files in all key formats are supported by the tool and there are multiple options for editing and video creation like splitting, rotating, cutting, adding effects, sounds, text, and other elements. In a few simple steps, your customized GIF and other professional-looking media files will be ready.
Steps to create GIF using Wondershare Filmora
Step 1. Launch the installed software on your system and add the video or images from the system.
Step 2. The added media files next need to be dragged and dropped to the timeline at the bottom of the interface.
Step 3. After the files are moved, you can customize them using several editing tools like rotate, crop, cut, and more.
Step 4. Next, add text, effects, sound, and other elements as needed.

Step 5. Finally choose to export the file and then from the Local tab, select the GIF option. Choose a file name and location and then finally click on the EXPORT button.

● Key Takeaways from This Episode →
●There are several ways to turn video into GIF iPhone.
●Using shortcuts is one of the most straightforward methods for creating GIFs using videos.
●You can also convert videos to LivePhoto and vice versa on your iPhone using third-party apps.
●Wondershare Filmora is an excellent software to make GIFs and professionally edit media files.
To create iPhone video to GIF there are several third-party apps available. You can even choose the online sites for the task, but the editing and other options will be limited. The GIFs on your iPhone can be created using videos as well as Live photos.
One of the best ways to create a GIF is using the Shortcuts app that comes pre-installed on devices running on iOS 13 and later versions of the OS. The app has shortcuts to accomplish several tasks on your iPhone including GIF creation. Learn about using Shortcuts and other tools for creating a GIF on iPhone.
In this article
01 [How to make GIF from Video on iPhone using Shortcut App](#Part 1)
02 [How to save Live Photos as GIF on iPhone](#Part 2)
03 [How to save Live Photos as GIF on iPhone](#Part 3)
04 [How to save videos as live photos on your iPhone?](#Part 4)
05 [Best tool for creating GIFs and video editing on your Windows and Mac- Wondershare Filmora](#Part 5)
Part 1 How to make GIF from Video on iPhone using Shortcut App
One of the easiest ways to convert video GIF iPhone is by using the Shortcuts app. If you have deleted the app, you can reinstall it from the app store. Once the app is installed, you would next need to allow the untrusted shortcuts and for this go to Settings > Shortcuts> toggle Add Untrusted Shortcuts to add the shortcuts created by the user. The further steps for converting video to GIF iPhone are as follows.
Step 1. On your iPhone, download the Video to GIF shortcut. You can download it using iCloud or RoutineHub. Find the shortcut and click on Get Shortcut will let you check the action of the shortcut.
Move down and click on the red Add Untrusted Shortcut button that will add the shortcut for the library.
Step 2. Go to the My Shortcuts tab and click on the Video to GIF section. If you are using it for the first time, you need to grant permission to use the videos and photos. Click on the OK button and continue.
Step 3. Next, browse and add the video from which you wish to create the GIF. Since GIF animations are short, it is always recommended to use short videos.
Step 4. Video processing will start and during this, the Video to GIF shortcut will be greyed out.
Step 5. Once done, the preview of the GIF will appear on the screen. Finally, you can save the GIF to your Photos app on iPhone or can also share it through email, AirDrop, iMessage, and other third-party services as needed.
Part 2 How to save Live Photos as GIF on iPhone
Live Photo is an interesting feature of the iPhone where an image is captured in an animated form for a couple of seconds. These Live Photos can be easily converted to GIFs using the steps below.
Step 1. On your iPhone Photo app, open the Live Photo that you want to save as GIF.
Step 2. Darg the selected photo upwards and will see multiple effects options along with other image details.
Step 3 To save the selected image as GIF, choose Loop or Bounce animation. Once done, share the image on mail and other services listed or save it to the device.
Part 3 How to save Live Photo as video on iPhone
You can also convert your live photos to videos and then use them for making GIFs and for other uses. The steps for iPhone live photo to video are as follows.
Step 1. On your iPhone, open the Photos app and choose the Live Photo that you want to convert.
Step 2. Next, click on the share button at the bottom of the screen and multiple options will be seen.
Step 3. Scroll down and choose Save as Video option and with this, the live photo will be saved as a Video.
Additionally, you can also convert the LivePhotos to videos using the shortcut app.
Part 4 How to save videos as live photos on your iPhone?
If you need to convert your videos to live photos on iPhone, there are several third-party tools available and one of the widely used is IntoLive. Using this app, videos, as well as GIFs, can be converted into live photos.
Steps on how to turn a video into a live photo iPhone
Step 1. Download, install and launch the IntoLive app from the app store.
Step 2. Next, browse and add the desired video.
Step 3. If needed, the added video can be customized using several supported features.
Step 4. Next, click on the Make option at the top-right corner and then choose the repeats you want for a Live Photo.
Step 5. Finally, click on the Live Photo and your Live Photo will be saved to the device.
Part 5 Best tool for creating GIFs and video editing on your Windows and Mac- Wondershare Filmora
Above we have listed several ways to create GIFs on your iPhone and also to convert videos to LivePhotos and vice-versa. Installing different tools for different tasks is a hassle and also a time-consuming task. So, if you are looking for an all-in-one tool that allows you to create GIFs, and professionally edit your media files, Wondershare Filmora Video Editor is the best tool to consider. Available for quick download on your Windows and Mac system, this feature-packed software has an intuitive and user-friendly interface.
Wondershare Filmora
Get started easily with Filmora’s powerful performance, intuitive interface, and countless effects!
Try It Free Try It Free Try It Free Learn More >
Media files in all key formats are supported by the tool and there are multiple options for editing and video creation like splitting, rotating, cutting, adding effects, sounds, text, and other elements. In a few simple steps, your customized GIF and other professional-looking media files will be ready.
Steps to create GIF using Wondershare Filmora
Step 1. Launch the installed software on your system and add the video or images from the system.
Step 2. The added media files next need to be dragged and dropped to the timeline at the bottom of the interface.
Step 3. After the files are moved, you can customize them using several editing tools like rotate, crop, cut, and more.
Step 4. Next, add text, effects, sound, and other elements as needed.
Step 5. Finally choose to export the file and then from the Local tab, select the GIF option. Choose a file name and location and then finally click on the EXPORT button.
● Key Takeaways from This Episode →
●There are several ways to turn video into GIF iPhone.
●Using shortcuts is one of the most straightforward methods for creating GIFs using videos.
●You can also convert videos to LivePhoto and vice versa on your iPhone using third-party apps.
●Wondershare Filmora is an excellent software to make GIFs and professionally edit media files.
How to Analyze an Editorial Cartoon Easily
How to Analyze an Editorial Cartoon
An easy yet powerful editor
Numerous effects to choose from
Detailed tutorials provided by the official channel
We all remember opening our daily newspaper and seeing a graphical representation of some new scoop or story that gives you a gist of what is happening, usually involving humor or sarcasm. That is what one would call and editorial cartoon and they are quite popular amongst newspapers, internet blogs and most recently, Social Media.
Some would even say that ‘Memes’ are an evolved form of editorial cartoons. They are funny, entertaining and can even portray some type of story. Editorial cartoons, in layman terms are a graphical approach to reflect the creator’s ideas. These are usually drawn on a tight deadline; hence feature simple caricatures and whimsical characters.
Cartoonists and hobbyists around the world can save on time using online tools to bring their ideas to life. Today, with some help from the right technology, anybody can try their hands in drawing amazing characters, combining both visual and verbal languages.
If you are someone who feels they have an amazing idea for a cartoon but lacks the skills to draw one can choose from a plethora of tools like Powtown, Photoshop or AI Artist to create amazing sketches and drawing, in half the time.
In this article
01 [Always Be Timely — Editorial Cartoons in a Snap](#Part 1)
02 [The 8 Best Apps to Turn Photos Into Cartoons and Sketches](#Part 2)
03 [How to Make 3D Cartoon From a Photo](#Part 3)
Part 1 Always Be Timely — Editorial Cartoons in a Snap
When a new idea pops into your head, we are usually overwhelmed or excited by its prospects of it that we forget to analyze its features before proceeding to turn it into a cartoon. Here are some tips to help you look into the details of your cartoon.
● Make a note of all the characters in your cartoon strip, what actions are they involved in and the dialogues that are being uttered.
● From which angle or whose angle the story is being told.
● Divide the cartoon design into four quadrants; Top Right & Left, Bottom Right & Left.
● Pay attention to key elements such as use of furniture, tools, technology or signs.
● Define traits like time of day, time of the year or time in history where the context is set.
● Keep in mind the audience you are reaching out to. You can ensure reliability the subtle use of intellect and humour.
Now that you have a clearer picture of what you are trying to depict it is best not to delay the idea and start cracking your creative eggs.
Beginners can use an easy tool like Powtoon, and its simple drag and drop interface to start making cartoons in just three simple steps. You can save up on a lot of time and get your cartoon ready for uploading to your new blog post.
Step 1: Set a Background for your Cartoon
Open the Powtoon Studio on your system and click on ‘Backgrounds’ located on the panel to your right. It will open up a vast library filled with ready to use backgrounds.
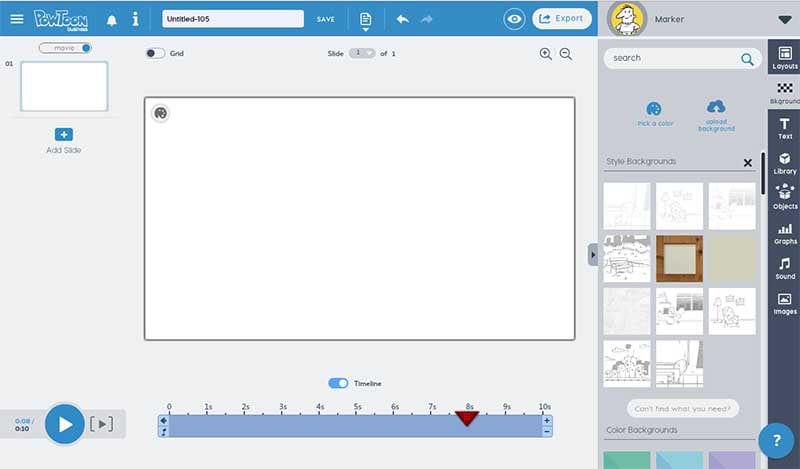
Select any you like to get started. It will intently appear on the board.
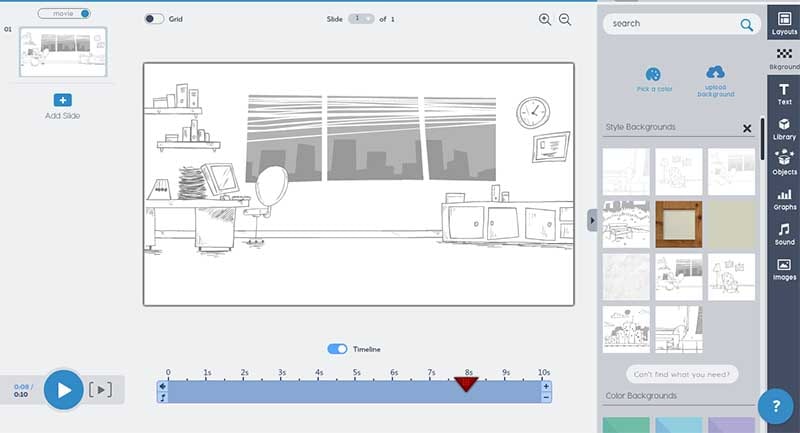
Step 2: Select the Characters for your Cartoon
Well, you have a setting and now it is time to place your characters in it. Click on the ‘Animated Character’ from the panel. Choose any template for your characters.
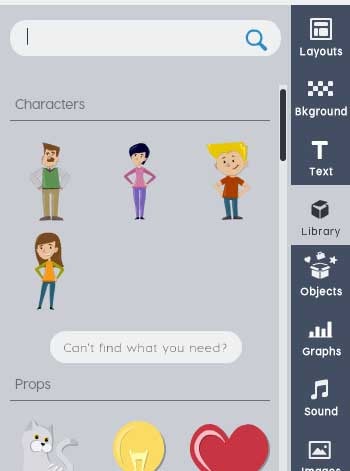
Step 3: Add the Text
There are various ways you can add dialogues, messages or texts to your cartoon. You can click on ‘Text’ and add a Quote Box or Dialogue Box. You can edit your text by simply clicking on the box.
Part 2 The 8 Best Apps to Turn Photos Into Cartoons and Sketches
01Photo Lab Picture Editor
Photolab is a great choice for turning your photos into a painting, sketch or a watercolor image. Along with filters you will get montages, borders and frames to make your art work more realistic. You will find all presets in the effects category. It also features filters like digital rain and jigsaw puzzle. Photolab can also be used as a photo editor as it is capable to perform color adjustment, rotate and crop.
Key Features:
● 800+ effects.
● E-card templates for special occasions.
● You can choose a photo from gallery or click one using the camera app.
02Prisma Photo Editor
Prisma has the magical ability to turn your photo or sketch into a Van Gogh or Picasso style painting. Wondering how? It has filters that are inspired by the eminent artist around the world. Choose a photo from your gallery and choose from exciting filters. Prisma also have cool editing tools that help you adjust the intensity of the filters applied if you want to.
Key Features
● Online App community.
● Similar to Instagram
● artistic filters.
03Paint Lab – Photo Cartoon
Paintlab features an easy to use interface and wide range of filters. With it you can turn any photos into a cartoon or a drawing just in few seconds. Once you are done editing you can share your final work on any social media platform directly from paintlab. It is compatible only with androids.
Key Fetaures
● Fast editing
● Perfect or beginners.
● Includes beautification and imperfection correction tools and effects.
04Cartoon Photo PRO
Using Cartoon Photo Pro alongside your photos you can also turn your videos into cartoon. Effects are artistic and customizable. Only downside it doesn’t come for free. It also has great ratings in Playstore.

Key Features
● User friendly interface
● Animates videos.
05Brushstroke
Brushstroke is ideal for editing and printing high resolution photos. The app comes with a paint directly option. It is not android compatible. The best feature is apart from filters and painting styles you can also pick the color palette and canvas surface.
Key Features
● You can sign your photos before printing
● Wide range of styles and sub-styles.
06Clip2Comic
If you like having fun and playing around we bet you would love an photo editing app that turn your close ones’ photo into caricatures. One tap can give you comic-book style drawing and sketches. This is one of best sketch and animation apps suggested for iPhone users. User friendly interface is an added bonus.
Key Features
● Live preview animation camera option.
● Carton-style photo effects.
07PhotoMania
PhotoMania is fun to use, if you want to try out different effects then you are at the right app. It has 400 presets in total including vintage looks and effects for sketches. PhotoMania has a collection of cool and exciting frames that you can add to your photos to make them more interesting. If you are someone who likes to send e-cards here you will get dozens of options. You can also utilize PhotoMania as a photo editor as it features the best exposure settings. And we know how important masking tool is, it helps you create neat photos, the app also has this amazing feature.
Key Features:
● Advanced photo editing tools and presets, for instance HDR and LOMO.
● It can also make your photo a painting.
● Adds textures and offers holiday templates.
08Toonme
Toonme has similar photo editing features like Clip2Comic. Only it is better. It has AI assistance that helps you create realistic effects. You can choose from the variety of styles and even tweak them to get a personalized style. Toonme is free to download but if you want use pro features you can subscribe to their monthly affordable package. Also, it is compatible with both iOS and Android devices.
Key Features:
● Offers hand-drawn effects.
● Offers numerous layouts that goes well with profile pictures even instagram stories.
● You can share your work with other Toonme Users.
Part 3 How to Make 3D Cartoon From a Photo
Do you know that animators used to hand sketch every frame and every detail that too with continuation? Thanks to our modern day technology we can take a snap of any object or person and turn that into a cartoon within few seconds. With the right amount of help and creativity you can create characters that are entertaining and engaging at the same time. Wondershare Filmora Video Editor can be used to create animated videos. Amazing features and filters save editing time while making the entire process flexible. Though we have already mentioned eight apps for sketching, animating and caricaturing your photos, Filmora is a complete package. Motion tracking, easy zoom in and out, masking, panning and color correction are some of the best features offered by this editing software. It can run on both PC and Mac. User friendly interface suits both professionals as well as beginner.
For Win 7 or later (64-bit)
For macOS 10.12 or later
● Ending Thoughts →
● Creating an animated video that stands as an exception is now simple and hassle-free.
● Never be afraid to experiment and explore amazing ways of story-telling.
● Things discussed so far will help you analyze and understand cartoons and animation.
We all remember opening our daily newspaper and seeing a graphical representation of some new scoop or story that gives you a gist of what is happening, usually involving humor or sarcasm. That is what one would call and editorial cartoon and they are quite popular amongst newspapers, internet blogs and most recently, Social Media.
Some would even say that ‘Memes’ are an evolved form of editorial cartoons. They are funny, entertaining and can even portray some type of story. Editorial cartoons, in layman terms are a graphical approach to reflect the creator’s ideas. These are usually drawn on a tight deadline; hence feature simple caricatures and whimsical characters.
Cartoonists and hobbyists around the world can save on time using online tools to bring their ideas to life. Today, with some help from the right technology, anybody can try their hands in drawing amazing characters, combining both visual and verbal languages.
If you are someone who feels they have an amazing idea for a cartoon but lacks the skills to draw one can choose from a plethora of tools like Powtown, Photoshop or AI Artist to create amazing sketches and drawing, in half the time.
In this article
01 [Always Be Timely — Editorial Cartoons in a Snap](#Part 1)
02 [The 8 Best Apps to Turn Photos Into Cartoons and Sketches](#Part 2)
03 [How to Make 3D Cartoon From a Photo](#Part 3)
Part 1 Always Be Timely — Editorial Cartoons in a Snap
When a new idea pops into your head, we are usually overwhelmed or excited by its prospects of it that we forget to analyze its features before proceeding to turn it into a cartoon. Here are some tips to help you look into the details of your cartoon.
● Make a note of all the characters in your cartoon strip, what actions are they involved in and the dialogues that are being uttered.
● From which angle or whose angle the story is being told.
● Divide the cartoon design into four quadrants; Top Right & Left, Bottom Right & Left.
● Pay attention to key elements such as use of furniture, tools, technology or signs.
● Define traits like time of day, time of the year or time in history where the context is set.
● Keep in mind the audience you are reaching out to. You can ensure reliability the subtle use of intellect and humour.
Now that you have a clearer picture of what you are trying to depict it is best not to delay the idea and start cracking your creative eggs.
Beginners can use an easy tool like Powtoon, and its simple drag and drop interface to start making cartoons in just three simple steps. You can save up on a lot of time and get your cartoon ready for uploading to your new blog post.
Step 1: Set a Background for your Cartoon
Open the Powtoon Studio on your system and click on ‘Backgrounds’ located on the panel to your right. It will open up a vast library filled with ready to use backgrounds.
Select any you like to get started. It will intently appear on the board.
Step 2: Select the Characters for your Cartoon
Well, you have a setting and now it is time to place your characters in it. Click on the ‘Animated Character’ from the panel. Choose any template for your characters.
Step 3: Add the Text
There are various ways you can add dialogues, messages or texts to your cartoon. You can click on ‘Text’ and add a Quote Box or Dialogue Box. You can edit your text by simply clicking on the box.
Part 2 The 8 Best Apps to Turn Photos Into Cartoons and Sketches
01Photo Lab Picture Editor
Photolab is a great choice for turning your photos into a painting, sketch or a watercolor image. Along with filters you will get montages, borders and frames to make your art work more realistic. You will find all presets in the effects category. It also features filters like digital rain and jigsaw puzzle. Photolab can also be used as a photo editor as it is capable to perform color adjustment, rotate and crop.
Key Features:
● 800+ effects.
● E-card templates for special occasions.
● You can choose a photo from gallery or click one using the camera app.
02Prisma Photo Editor
Prisma has the magical ability to turn your photo or sketch into a Van Gogh or Picasso style painting. Wondering how? It has filters that are inspired by the eminent artist around the world. Choose a photo from your gallery and choose from exciting filters. Prisma also have cool editing tools that help you adjust the intensity of the filters applied if you want to.
Key Features
● Online App community.
● Similar to Instagram
● artistic filters.
03Paint Lab – Photo Cartoon
Paintlab features an easy to use interface and wide range of filters. With it you can turn any photos into a cartoon or a drawing just in few seconds. Once you are done editing you can share your final work on any social media platform directly from paintlab. It is compatible only with androids.
Key Fetaures
● Fast editing
● Perfect or beginners.
● Includes beautification and imperfection correction tools and effects.
04Cartoon Photo PRO
Using Cartoon Photo Pro alongside your photos you can also turn your videos into cartoon. Effects are artistic and customizable. Only downside it doesn’t come for free. It also has great ratings in Playstore.
Key Features
● User friendly interface
● Animates videos.
05Brushstroke
Brushstroke is ideal for editing and printing high resolution photos. The app comes with a paint directly option. It is not android compatible. The best feature is apart from filters and painting styles you can also pick the color palette and canvas surface.
Key Features
● You can sign your photos before printing
● Wide range of styles and sub-styles.
06Clip2Comic
If you like having fun and playing around we bet you would love an photo editing app that turn your close ones’ photo into caricatures. One tap can give you comic-book style drawing and sketches. This is one of best sketch and animation apps suggested for iPhone users. User friendly interface is an added bonus.
Key Features
● Live preview animation camera option.
● Carton-style photo effects.
07PhotoMania
PhotoMania is fun to use, if you want to try out different effects then you are at the right app. It has 400 presets in total including vintage looks and effects for sketches. PhotoMania has a collection of cool and exciting frames that you can add to your photos to make them more interesting. If you are someone who likes to send e-cards here you will get dozens of options. You can also utilize PhotoMania as a photo editor as it features the best exposure settings. And we know how important masking tool is, it helps you create neat photos, the app also has this amazing feature.
Key Features:
● Advanced photo editing tools and presets, for instance HDR and LOMO.
● It can also make your photo a painting.
● Adds textures and offers holiday templates.
08Toonme
Toonme has similar photo editing features like Clip2Comic. Only it is better. It has AI assistance that helps you create realistic effects. You can choose from the variety of styles and even tweak them to get a personalized style. Toonme is free to download but if you want use pro features you can subscribe to their monthly affordable package. Also, it is compatible with both iOS and Android devices.
Key Features:
● Offers hand-drawn effects.
● Offers numerous layouts that goes well with profile pictures even instagram stories.
● You can share your work with other Toonme Users.
Part 3 How to Make 3D Cartoon From a Photo
Do you know that animators used to hand sketch every frame and every detail that too with continuation? Thanks to our modern day technology we can take a snap of any object or person and turn that into a cartoon within few seconds. With the right amount of help and creativity you can create characters that are entertaining and engaging at the same time. Wondershare Filmora Video Editor can be used to create animated videos. Amazing features and filters save editing time while making the entire process flexible. Though we have already mentioned eight apps for sketching, animating and caricaturing your photos, Filmora is a complete package. Motion tracking, easy zoom in and out, masking, panning and color correction are some of the best features offered by this editing software. It can run on both PC and Mac. User friendly interface suits both professionals as well as beginner.
For Win 7 or later (64-bit)
For macOS 10.12 or later
● Ending Thoughts →
● Creating an animated video that stands as an exception is now simple and hassle-free.
● Never be afraid to experiment and explore amazing ways of story-telling.
● Things discussed so far will help you analyze and understand cartoons and animation.
Also read:
- Updated In 2024, Animate Graphics in Canva
- In 2024, How-To Guide Secret Shortcut to Adobe Animate Character Tutorial
- New Tutorials to Make Animated Images – Even if Youre Just Starting Out
- New In 2024, 10 Must-Use MP4 to GIF Converters to Get Perfect-Made GIF
- 2024 Approved 12 Aesthetic GIF Instagram for Marketers
- New In 2024, 10 2D/3D Animation Tips & Tricks to Bring New Ideas to You
- Updated In 2024, Before You Learn 3D Animation Some Things You Should Know
- How-To Guide Secret Shortcut to Adobe Animate Character Tutorial
- In 2024, Why These 10 Top Text Motion Templates Are Worth Your Attention
- Updated 2024 Approved Adobe Animate Text Effects Skills That You Need to Know
- New How to Make Animated Videos for Business Simple Guide
- Some Techniques for Creating Animated Logo That Few People Know About for 2024
- New In 2024, 12 Dubbed Anime Websites to Watch for Free
- New 10 Options for Your Need on Animation Makers for 2024
- Updated In 2024, Guide on How to Create GIF in WhatsApp iPhone
- Updated 2024 Approved 10 Realistic Cartoon Characters You Would Run Away From if You Met in Real Life
- Whats Music Video GIF & How to Add Music to Your GIF Files
- Updated 2024 Approved 5 Different Animation Styles A Simple but Complete Guide
- New 6 Types of Animation You May Like for 2024
- New Top 10 Best Batman Anime Movies 2024 Updated
- Updated How to Turn Yourself Into a WhatsApp Cartoon
- New 2024 Approved How to Make a 3D Cartoon of Yourself
- Updated 2024 Approved Tips for GIF to Animated PNG You Should Know
- 2024 Approved 10 Realistic Cartoon Characters You Will Run Away From if You Met in R
- In 2024, 12 Aesthetic GIF Instagram for Marketers and Creatives
- Updated Nurturing Mind, Heart, and Soul on the Top 5 Anime Streaming Sanctuaries
- New Tips for Canva Animated Elements
- Best 15 Horror Animes That Will Trigger a Heart Attack for 2024
- In 2024, Some Must-Know Useful Lego Animation Ideas for You
- 5 Different Animation Styles A Simple but Comprehensive Guide
- New 2024 Approved Tips for Canva Animated Elements
- Updated In 2024, How to Create Slideshow in LinkedIn
- New In 2024, Guide on Creating GIF in WhatsApp iPhone
- New In 2024, Top 8 Anime Name & Title Generators Online-Get Cool Anime Names
- New In 2024, Amazing Techniques of Motion Graphics in Premiere Pro
- In 2024, 4 Ways to Transfer Music from Vivo S17 to iPhone | Dr.fone
- In 2024, How to get the dragon scale and evolution-enabled pokemon On Honor X50? | Dr.fone
- Updated In 2024, What Is an AI Video Maker?
- How to Unlock Realme Phone without Any Data Loss
- How to Rescue Lost Photos from Huawei P60?
- In 2024, Fake the Location to Get Around the MLB Blackouts on Samsung Galaxy F15 5G | Dr.fone
- How to find lost iPhone 14 Pro Backup files on Windows PC? | Stellar
- How To Create an Apple Developer Account On Apple iPhone 13 Pro
- How To Bypass Google FRP on Reno 11 Pro 5G
- How To Unbrick a Dead Xiaomi 14 | Dr.fone
- Simple ways to get recent calls back from Hot 40 Pro
- In 2024, Does find my friends work on Apple iPhone 12 mini | Dr.fone
- In 2024, Does Airplane Mode Turn off GPS Location On Vivo Y27 4G? | Dr.fone
- How to Remove iPhone X SIM Lock?
- Solved Warning Camera Failed on Lenovo ThinkPhone | Dr.fone
- 3 Smart and Simple Ways to Change Home Address on Apple iPhone 14 Plus | Dr.fone
- Fake Android Location without Rooting For Your Nubia Red Magic 8S Pro | Dr.fone
- In 2024, Which Pokémon can Evolve with a Moon Stone For Oppo Find N3? | Dr.fone
- Effective Ways To Fix Checkra1n Error 31 From Apple iPhone 15
- Unlock Your Xiaomi Redmi 12s Potential The Top 20 Lock Screen Apps You Need to Try
- In 2024, How to Successfully Bypass iCloud Activation Lock on Apple iPhone SE
- New 10 Best Animated Explainer Video Examples for 2024
- Top IMEI Unlokers for Your Motorola G24 Power Phone
- Title: Updated 2024 Approved What Is Anime? Anime VS Manga VS Cartoon
- Author: Elon
- Created at : 2024-05-19 03:05:56
- Updated at : 2024-05-20 03:05:56
- Link: https://animation-videos.techidaily.com/updated-2024-approved-what-is-anime-anime-vs-manga-vs-cartoon/
- License: This work is licensed under CC BY-NC-SA 4.0.
