
:max_bytes(150000):strip_icc():format(webp)/superbowl_dmytroAksonov_Getty-5a775189119fa8003752b313.jpg)
Updated 2024 Approved What Is Still Motion Animation?
What Is Still Motion Animation?
What is Still Motion Animation and How Does It Work?
An easy yet powerful editor
Numerous effects to choose from
Detailed tutorials provided by the official channel
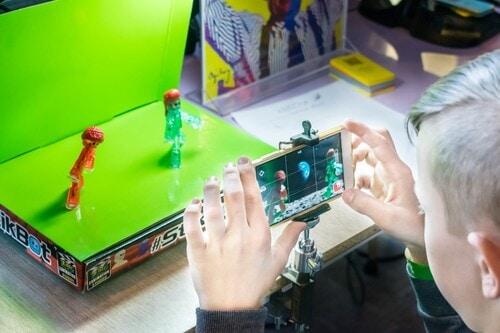
When we talk about motion, it makes us think about moves, but it refers to step motion when speaking about still-motion. So, in simple words, still motion animation refers to the animation that holds picture-to-picture motion animation.
This article covers all the relevant information related to still motion animation, paper motion animation, liquid motion animation. The name may vary, but such motions come under stop motion or still motion techniques to a great extent. That uses picture after picture or stopping camera process from reflecting animation to any inanimate objects or things. Under paper motion animation, images are adjusted in such a manner that results in continual animation reflection.
In this article
01 [Guide to Learn What is Still Motion Animation](#Part 1)
02 [6 Most Satisfying Still Motion Animation Examples](#Part 2)
03 [5 Inspiring Still Motion Animation Websites to Check Out](#Part 3)
04 [How Still Motion Are Animated at Filmora](#Part 4)
Part 1 Guide to Learn What is Still Motion Animation
Still motion animation is also known as walking motion animation and stalk motion animation used to boost a scene in animation. It comes in a frame-to-frame outlook. It can be a booster in horror movies, comedy, and thrillers. It used to express flashbacks, dreams, and summaries of a long scene. Sometimes it could be slower, faster, fade, blur or split frames to discover/show unconscious scenes.
Part 2 6 Most Satisfying Still Motion Animation examples
Before moving ahead with detailing how to process still motion animation, let’s try to understand it with some out-of-the-box examples to make you know what liquid motion animation is with the following criteria?
01Rudolph the Red-Nosed Reindeer

The famous, Rudolph, the Red-Nosed Reindeer, is a 19Christmas movie that shows stop motion animation first. The class one-hour program special mentions many people’s first exposure to the stop motion that Rudolph especially showed, Yukon Cornelius, Sam the snowman, etc. In everlasting memory of Rudolph, people still mention the Island of Misfit Toys and wonder what that seemingly-normal ragdoll is doing there.
02A town called Panic (2009)
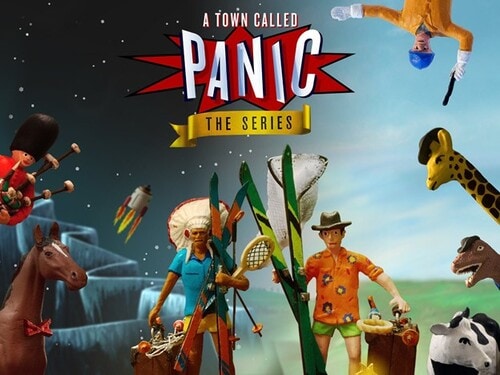
Based on the Belgian puppet on a series of identical names, this demented feature seems to star the playthings you would find packed away with an old model plaything. The plot illustrates how boyish Cowboy and Indian want to offer a birthday gift to their housemate and seemingly surrogate parent, Horse, resulting in mishaps at birthday parties, the frozen north, and also the bottom of the ocean. The persistently surreal feature includes equine music teachers, giant robotic penguins, and livestock used as cannon-fodder. Still, instead of becoming overwhelming annoying, a town called Panic sustains its gleefulness over the long run.
03Chicken Run (1994)
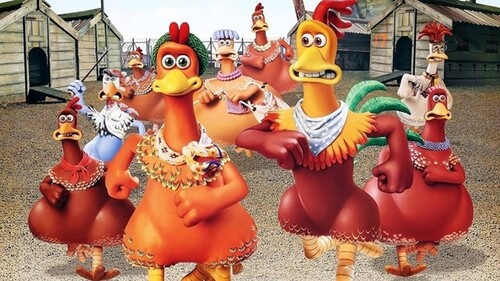
Chicken Run is a still/stop motion animation comedy film produced by Pathe Aardman and Dreamwork animations. It’s a 20stop-motion animated movie. The plot focuses on a group of chickens who see poultry named Rocky as their hope to vacate the farm when their owners prepare to show them chicken meat tarts. He manages to help them in an adventurous, funny way which makes the movie best. Its sequel started developing in 2020.
04Mary and Max (2009)
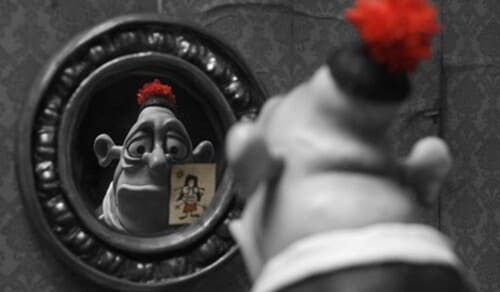
Mary and Max are again a still-motion animation adult comedy-drama film. It is an Australian film written and directed by Adam Elliot, which shows the lives and friendships of two unlikely people. Elliot’s relationship inspires the movie with his friend. He has been writing when his friend had started for over twenty years.
05The Nightmare Before Christmas (1993)

The Nightmare Before Christmas is also known as Tim Burton’s Nightmare before Christmas. It is an American stop-motion animation movie. It shows a musical dark fantasy Halloween film directed by Henry Selick.
It depicts the story of Jack Skellington, the king of “Halloween Town,” who stumbles upon “Christmas town.” He becomes obsessive about celebrating the vacation.
06Fantastic Mr. Fox (2009)
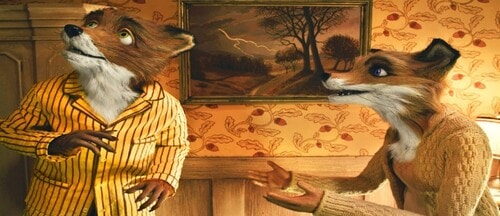
Fantastic Mr. Fox is a comedy film based on stop motion animation directed by Wes Anderson, who co-wrote the screenplay with Noah Baumbach. It is an American 20movie. The project is predicated on the 19children’s novel of the identical name by Roald Dahl. The plot is the titular character Mr. Fox (Clooney), as his spree of thefts leads to his family, and later his community, eventually hunted down by three farmers called Boggis (Robin Hurlstone), Bunce (Hugo Guinness), and Bean (Michael Gambon).
Part 3 5 Inspiring Still Motion Animation Websites to Check out
Here, with your journey of paper motion animation, let’s try to explore some inspiring websites that support still motion animation with the following information:
01Dragonframe Blog
Dragonframe makes a picture capture computer program for halt movement. So, they are kind of specialists on the matter. And they keep a charming web journal around the subject. It supports Still motion animation accurately.
Dragonframe highlights the most recent and most noteworthy halt movement recordings of all sorts in their web journal. They incorporate pictures, video, and a brief compose-up on each one. It’s a fantastic source of motivation and a great way to find out what’s trending within the world of halt movement liveliness.
02Stop MotionAnimation.com
Here’s a thought, if you’re searching for stop movement activity assets, why not see to StopMotionAnimation.com?
StopMotionAnimation.com may be a community location for all things related to the procedure and craftsmanship shape. They have free instructional exercises just like the “The Unique Halt Movement Handbook” in web page shape, recordings that serve as motivation, and a message board that clients can sign up for and take portion in.
They indeed have their claim list of assets to purchase apparatuses and supplies to make your claim’s halt movement liveliness.
03Into film
Into Film isn’t a halt movement liveliness location. It’s a location around filmmaking in common, but one specific asset worth checking out for any wannabe halt movement animator.
That’s the “Introduction to Halt Movement Animation” PDF accessible for gratis download. Unquestionably choose this one up on the off chance that you’re unused to the art.
And at that point, hang around Into Film to memorize more recommendations on object motion animation and the craftsmanship of filmmaking.
04Animation Resources.org
Movement Assets could be a location committed to all sorts of movement procedures. They talk about hypotheses and methods and have a community program through the site.
But they, too, conversation a parcel approximately halt movement and the history of the craftsmanship frame. By searching for “stop motion“ on the location, you’ll get a list of the broad web journal posts on the subject and learn more approximately the roots of halt motion.
05AnimateClay.com

Whereas there are many ways to make halt movement animation, clay is one of the foremost well-known, much obliged in massive portion to Aardman Animation and their motion pictures like Wallace & Gromit.
AnimateClay.com could be an asset, particularly for claymation. They have a vast instructional exercise segment, news, holdings for acquiring supplies, and a podcast devoted to animating with clay.
Part 4How Still Motion Are Animated at Filmora?
Wondershare Filmora Video Editor is by far one of the best video altering computer program with cool highlights that compares to other competing video altering Softwares. Numerous video-altering programs claimed to offer proficiency come about; Filmora is one of some consumer-level devices that convey.

Wondershare Filmora - Best Video Editor for Mac/Windows
5,481,435 people have downloaded it.
Build unique custom animations without breaking a sweat.
Focus on creating epic stories and leave the details to Filmora’s auto features.
Start a creative adventure with drag & drop effects and endless possibilities.
Filmora simplifies advanced features to save you time and effort.
Filmora cuts out repetition so you can move on to your next creative breakthrough.
01Step 1: Start your video project
However, if you’re not an Animoto client, sign up for a free account to induce begun. Log in and press Make to start a modern video. Select Begin from Scratch, choose a topic and a perspective ratio.
02Step 2: Add a photo burst block
Another step is to tap on the little additional sign symbol at the foot of your workspace. This will open up the Include a Square window. Tap Burst on the left-hand side of the window. Animoto recordings are built by blending and coordinating pieces. The Burst square permits you to include a fast arrangement of up to pictures in your video.
You’ll be inquired to select a move. We prescribe the Difficult Cut move for a clean-looking halt movement effect.
03Step 3: Add your photos in the right order
Another, transfer the photographs that you shot for your halt movement and drag and drop them into the Photo Burst square. Make beyond any doubt you include them in consecutive arrange, from to begin with to last.
If you’ve got more than photos—the most significant number a single Photo Burst square accepts—that’s not an issue. Add a modern Photo Burst after the primary and proceed including your pictures.
04Step 4: Adjust your speed
Once your photographs get included, it’s time to set the speed. Tap the stopwatch symbol within the Burst square, and you’ll discover three-speed options—Slower, Quicker, and Auto. Press through to choose the speed that feels best to you.
05Step 5: Now, finalize your video
Once that’s done, you’re able to place the final finishing touches on your video. You can also add Blocks, text, and music from the library.
● Key Takeaways from This Episode →
● What is meant by Stop motion or still motion animation
● Different examples of paper motion animation to explain the techniques
● Steps to apply walking motion animation with Filmora
When we talk about motion, it makes us think about moves, but it refers to step motion when speaking about still-motion. So, in simple words, still motion animation refers to the animation that holds picture-to-picture motion animation.
This article covers all the relevant information related to still motion animation, paper motion animation, liquid motion animation. The name may vary, but such motions come under stop motion or still motion techniques to a great extent. That uses picture after picture or stopping camera process from reflecting animation to any inanimate objects or things. Under paper motion animation, images are adjusted in such a manner that results in continual animation reflection.
In this article
01 [Guide to Learn What is Still Motion Animation](#Part 1)
02 [6 Most Satisfying Still Motion Animation Examples](#Part 2)
03 [5 Inspiring Still Motion Animation Websites to Check Out](#Part 3)
04 [How Still Motion Are Animated at Filmora](#Part 4)
Part 1 Guide to Learn What is Still Motion Animation
Still motion animation is also known as walking motion animation and stalk motion animation used to boost a scene in animation. It comes in a frame-to-frame outlook. It can be a booster in horror movies, comedy, and thrillers. It used to express flashbacks, dreams, and summaries of a long scene. Sometimes it could be slower, faster, fade, blur or split frames to discover/show unconscious scenes.
Part 2 6 Most Satisfying Still Motion Animation examples
Before moving ahead with detailing how to process still motion animation, let’s try to understand it with some out-of-the-box examples to make you know what liquid motion animation is with the following criteria?
01Rudolph the Red-Nosed Reindeer
The famous, Rudolph, the Red-Nosed Reindeer, is a 19Christmas movie that shows stop motion animation first. The class one-hour program special mentions many people’s first exposure to the stop motion that Rudolph especially showed, Yukon Cornelius, Sam the snowman, etc. In everlasting memory of Rudolph, people still mention the Island of Misfit Toys and wonder what that seemingly-normal ragdoll is doing there.
02A town called Panic (2009)
Based on the Belgian puppet on a series of identical names, this demented feature seems to star the playthings you would find packed away with an old model plaything. The plot illustrates how boyish Cowboy and Indian want to offer a birthday gift to their housemate and seemingly surrogate parent, Horse, resulting in mishaps at birthday parties, the frozen north, and also the bottom of the ocean. The persistently surreal feature includes equine music teachers, giant robotic penguins, and livestock used as cannon-fodder. Still, instead of becoming overwhelming annoying, a town called Panic sustains its gleefulness over the long run.
03Chicken Run (1994)
Chicken Run is a still/stop motion animation comedy film produced by Pathe Aardman and Dreamwork animations. It’s a 20stop-motion animated movie. The plot focuses on a group of chickens who see poultry named Rocky as their hope to vacate the farm when their owners prepare to show them chicken meat tarts. He manages to help them in an adventurous, funny way which makes the movie best. Its sequel started developing in 2020.
04Mary and Max (2009)
Mary and Max are again a still-motion animation adult comedy-drama film. It is an Australian film written and directed by Adam Elliot, which shows the lives and friendships of two unlikely people. Elliot’s relationship inspires the movie with his friend. He has been writing when his friend had started for over twenty years.
05The Nightmare Before Christmas (1993)
The Nightmare Before Christmas is also known as Tim Burton’s Nightmare before Christmas. It is an American stop-motion animation movie. It shows a musical dark fantasy Halloween film directed by Henry Selick.
It depicts the story of Jack Skellington, the king of “Halloween Town,” who stumbles upon “Christmas town.” He becomes obsessive about celebrating the vacation.
06Fantastic Mr. Fox (2009)
Fantastic Mr. Fox is a comedy film based on stop motion animation directed by Wes Anderson, who co-wrote the screenplay with Noah Baumbach. It is an American 20movie. The project is predicated on the 19children’s novel of the identical name by Roald Dahl. The plot is the titular character Mr. Fox (Clooney), as his spree of thefts leads to his family, and later his community, eventually hunted down by three farmers called Boggis (Robin Hurlstone), Bunce (Hugo Guinness), and Bean (Michael Gambon).
Part 3 5 Inspiring Still Motion Animation Websites to Check out
Here, with your journey of paper motion animation, let’s try to explore some inspiring websites that support still motion animation with the following information:
01Dragonframe Blog
Dragonframe makes a picture capture computer program for halt movement. So, they are kind of specialists on the matter. And they keep a charming web journal around the subject. It supports Still motion animation accurately.
Dragonframe highlights the most recent and most noteworthy halt movement recordings of all sorts in their web journal. They incorporate pictures, video, and a brief compose-up on each one. It’s a fantastic source of motivation and a great way to find out what’s trending within the world of halt movement liveliness.
02Stop MotionAnimation.com
Here’s a thought, if you’re searching for stop movement activity assets, why not see to StopMotionAnimation.com?
StopMotionAnimation.com may be a community location for all things related to the procedure and craftsmanship shape. They have free instructional exercises just like the “The Unique Halt Movement Handbook” in web page shape, recordings that serve as motivation, and a message board that clients can sign up for and take portion in.
They indeed have their claim list of assets to purchase apparatuses and supplies to make your claim’s halt movement liveliness.
03Into film
Into Film isn’t a halt movement liveliness location. It’s a location around filmmaking in common, but one specific asset worth checking out for any wannabe halt movement animator.
That’s the “Introduction to Halt Movement Animation” PDF accessible for gratis download. Unquestionably choose this one up on the off chance that you’re unused to the art.
And at that point, hang around Into Film to memorize more recommendations on object motion animation and the craftsmanship of filmmaking.
04Animation Resources.org
Movement Assets could be a location committed to all sorts of movement procedures. They talk about hypotheses and methods and have a community program through the site.
But they, too, conversation a parcel approximately halt movement and the history of the craftsmanship frame. By searching for “stop motion“ on the location, you’ll get a list of the broad web journal posts on the subject and learn more approximately the roots of halt motion.
05AnimateClay.com
Whereas there are many ways to make halt movement animation, clay is one of the foremost well-known, much obliged in massive portion to Aardman Animation and their motion pictures like Wallace & Gromit.
AnimateClay.com could be an asset, particularly for claymation. They have a vast instructional exercise segment, news, holdings for acquiring supplies, and a podcast devoted to animating with clay.
Part 4How Still Motion Are Animated at Filmora?
Wondershare Filmora Video Editor is by far one of the best video altering computer program with cool highlights that compares to other competing video altering Softwares. Numerous video-altering programs claimed to offer proficiency come about; Filmora is one of some consumer-level devices that convey.
Wondershare Filmora - Best Video Editor for Mac/Windows
5,481,435 people have downloaded it.
Build unique custom animations without breaking a sweat.
Focus on creating epic stories and leave the details to Filmora’s auto features.
Start a creative adventure with drag & drop effects and endless possibilities.
Filmora simplifies advanced features to save you time and effort.
Filmora cuts out repetition so you can move on to your next creative breakthrough.
01Step 1: Start your video project
However, if you’re not an Animoto client, sign up for a free account to induce begun. Log in and press Make to start a modern video. Select Begin from Scratch, choose a topic and a perspective ratio.
02Step 2: Add a photo burst block
Another step is to tap on the little additional sign symbol at the foot of your workspace. This will open up the Include a Square window. Tap Burst on the left-hand side of the window. Animoto recordings are built by blending and coordinating pieces. The Burst square permits you to include a fast arrangement of up to pictures in your video.
You’ll be inquired to select a move. We prescribe the Difficult Cut move for a clean-looking halt movement effect.
03Step 3: Add your photos in the right order
Another, transfer the photographs that you shot for your halt movement and drag and drop them into the Photo Burst square. Make beyond any doubt you include them in consecutive arrange, from to begin with to last.
If you’ve got more than photos—the most significant number a single Photo Burst square accepts—that’s not an issue. Add a modern Photo Burst after the primary and proceed including your pictures.
04Step 4: Adjust your speed
Once your photographs get included, it’s time to set the speed. Tap the stopwatch symbol within the Burst square, and you’ll discover three-speed options—Slower, Quicker, and Auto. Press through to choose the speed that feels best to you.
05Step 5: Now, finalize your video
Once that’s done, you’re able to place the final finishing touches on your video. You can also add Blocks, text, and music from the library.
● Key Takeaways from This Episode →
● What is meant by Stop motion or still motion animation
● Different examples of paper motion animation to explain the techniques
● Steps to apply walking motion animation with Filmora
Top 8 Anime Name Generators Online-Get Cool Anime Names
Top 8 Anime Name Generators Online-Get Cool Anime Names

Shanoon Cox
Mar 27, 2024• Proven solutions
An anime name generator is a cool and fun tool that is used by anime lovers all over the world. This tool helps to create attractive anime names for you depending on your interests in anime or your character traits.
Anime names are used for a variety of purposes by anime lovers. Most of them want a cool anime-related name for their YouTube channel, game profile, twitch profile, etc. and with a large number of users on these platforms, it is difficult to get a unique name.
Also, a name becomes a symbol that represents quality, appearance, shortcomings, personality, etc.
The anime name generators will generate unique anime-related names for the users to choose from. A cool anime name always will attract more audiences to whatever content they are displaying.
Top 8 Anime Name Generators Online
A cool anime name will always attract the attention of people no matter what platform you are on. But not all people are creative enough to create such a name of their own. That is where an anime name generator comes for help.
Let’s have a look at the top 8 anime name generators available online that can be used to create unique anime names.
1. Fantasy Name Generator
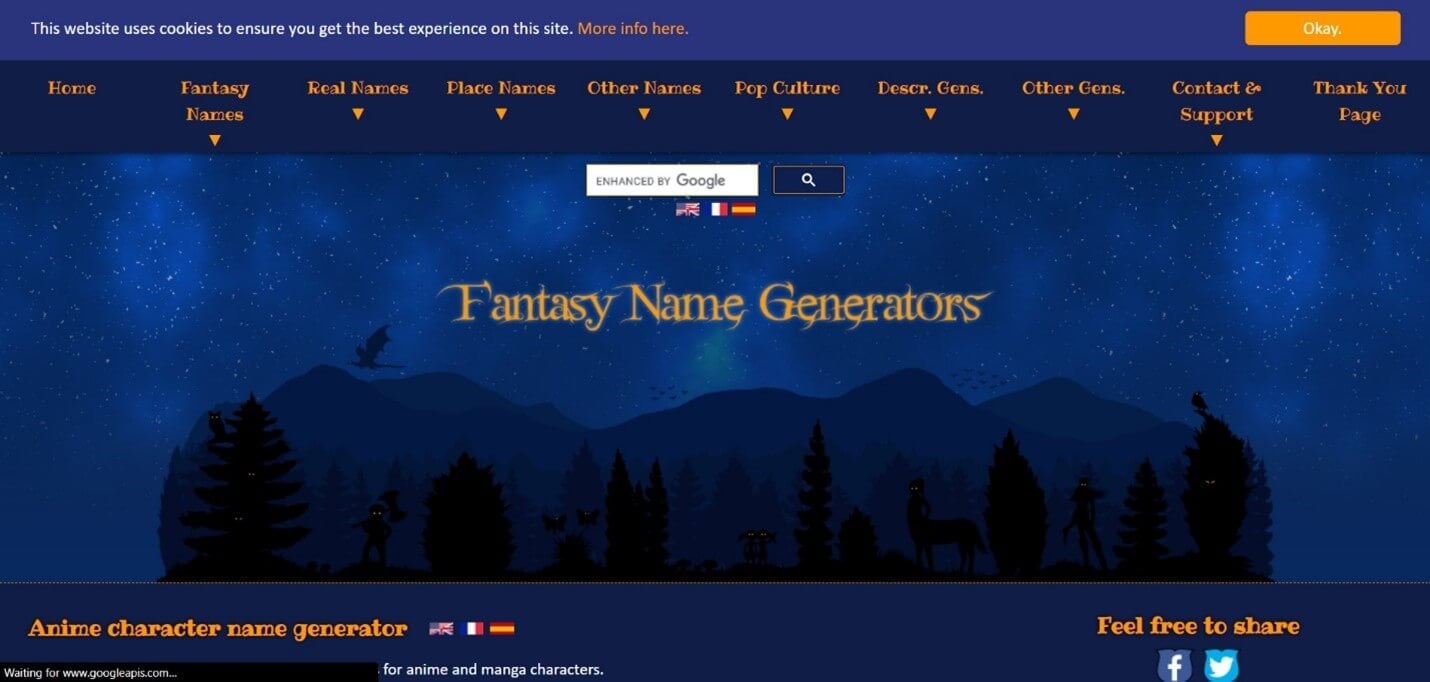
The Fantasy Name Generator is a free application that can provide up to 10 anime and manga character names. The names on this site are divided into 3 categories, namely real names, fake names, and nicknames or unique names. All the names provided are Japanese.
A list of 10 names will be listed on the website when you open it. You can easily choose between male and female character anime names. If you are not satisfied with the displayed list, simply click on the Male names of Females names tab and 10 new random names will be displayed.
2. Cool Generator
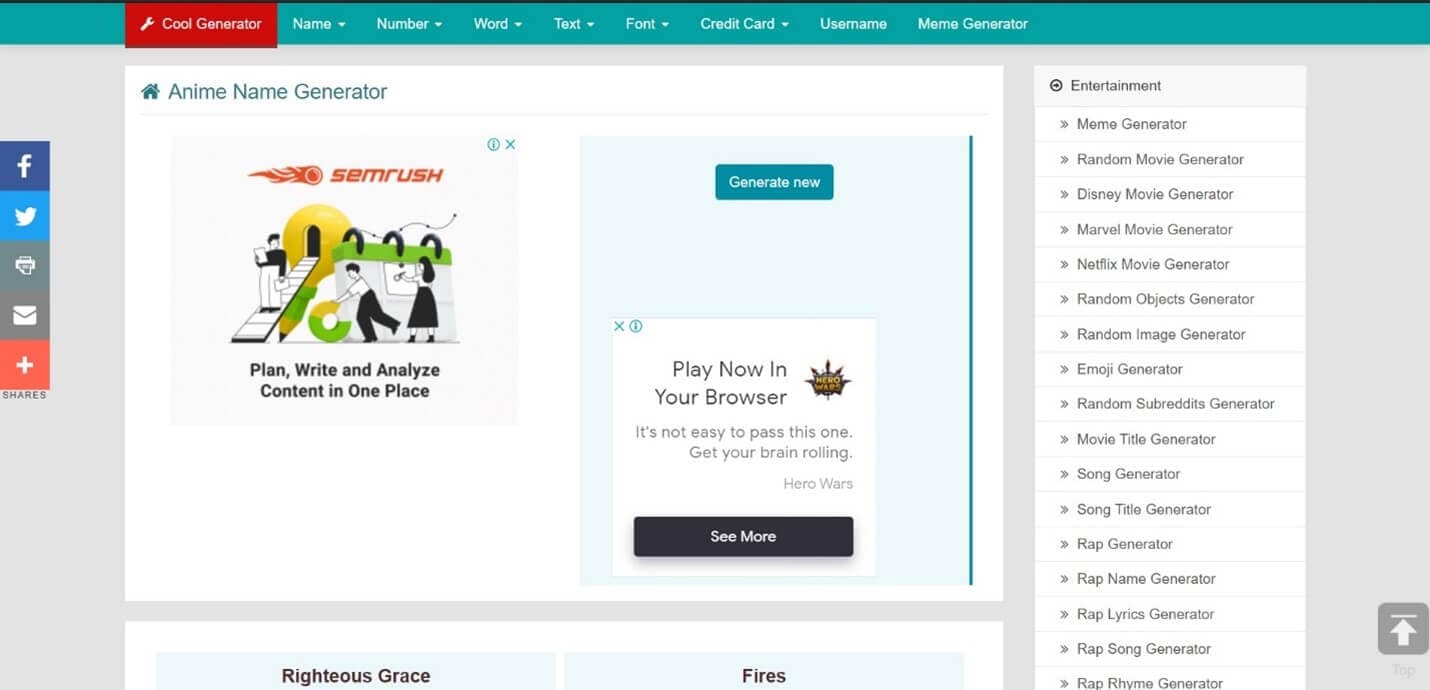
The Cool Generator is another simple anime name generator that can be used to create anime names, clan names, team names, etc. All the anime names generated by this tool are unique and represent different characteristics.
A list of 24 anime names will be displayed when you open the cool generator. You can choose any one of the names from it. If you are not satisfied with the names displayed, you can go for another set of 24 names by tapping on the Generate New tab displayed above.
3. Thestoryshack.com
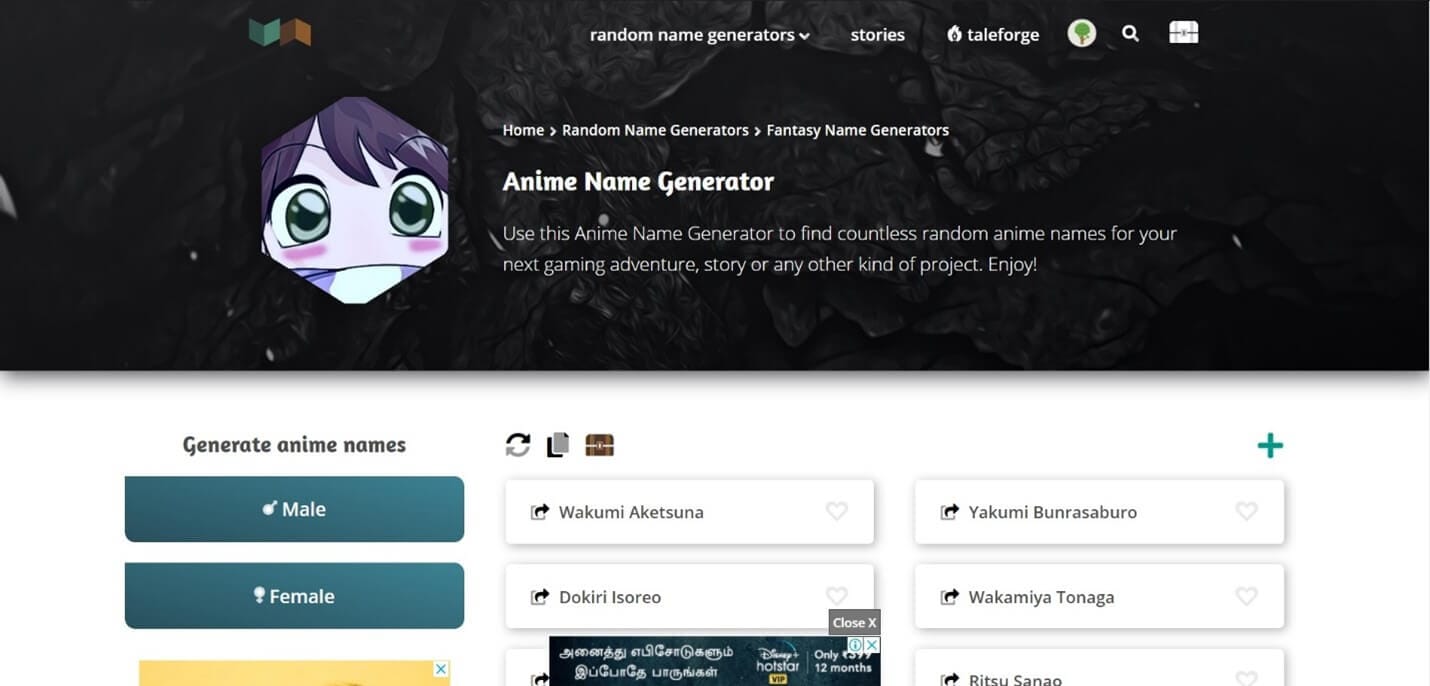
Thestoryshack.com is an awesome anime name generator that can provide you with countless anime names for your story, gaming adventure, or any other project. 6 unique names will be displayed on the page and you can go for more by clicking on the refresh tab.
This anime name-generating tool helps to choose between female and male character names very easily. They have also sorted the names into different categories elf names like elf names, dragon names, demon names, dwarf names, medieval names, Viking names, etc. for the convenience of the users.
4. Masterpiece Generator
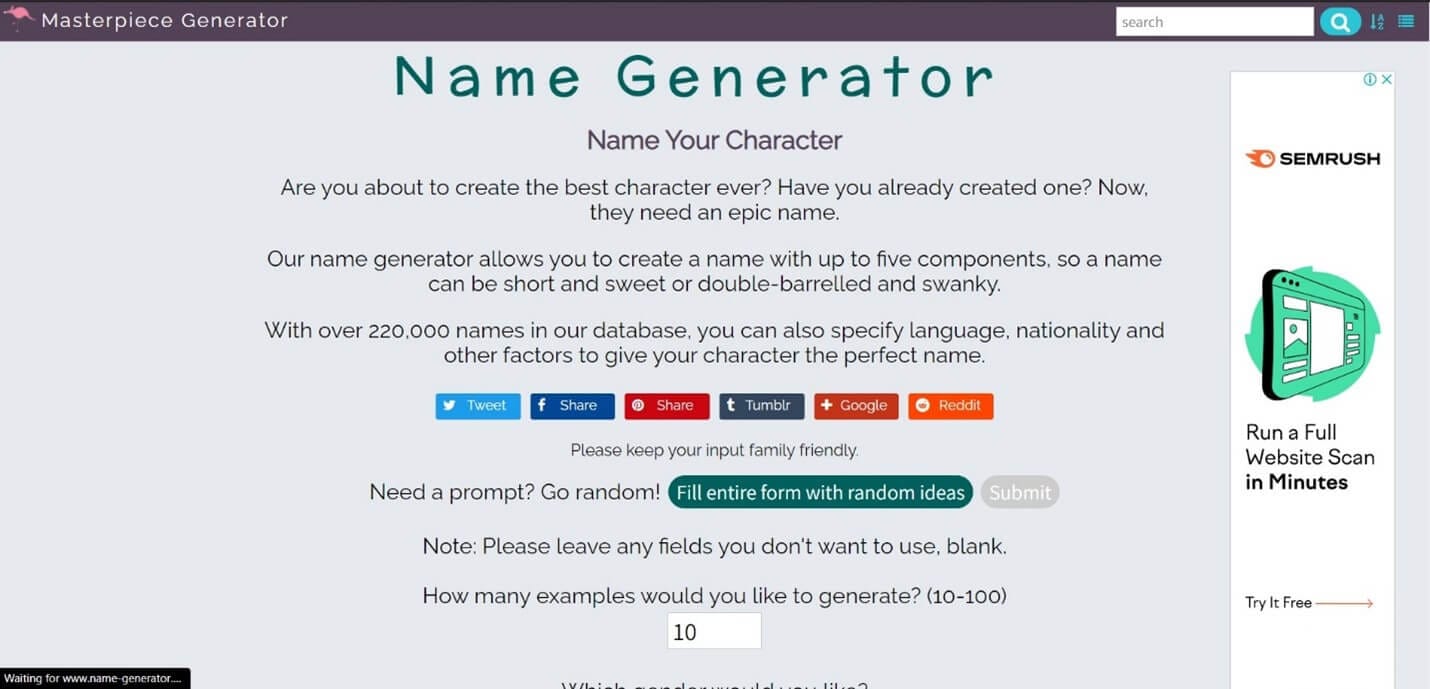
Masterpiece Generator is another free online tool that helps you to create epic anime names. This tool allows you to create names with a maximum of 5 components, and hence you can choose between short and sweet or long and swanky names.
This application takes into account a variety of factors like gender, character title, flavor, character type, birth year, nationality, etc. to create a list of names. Once you have givens your suggestion, a list of names will be displayed on the page after clicking on the Write me some character names tab towards the bottom.
5. Reedsy
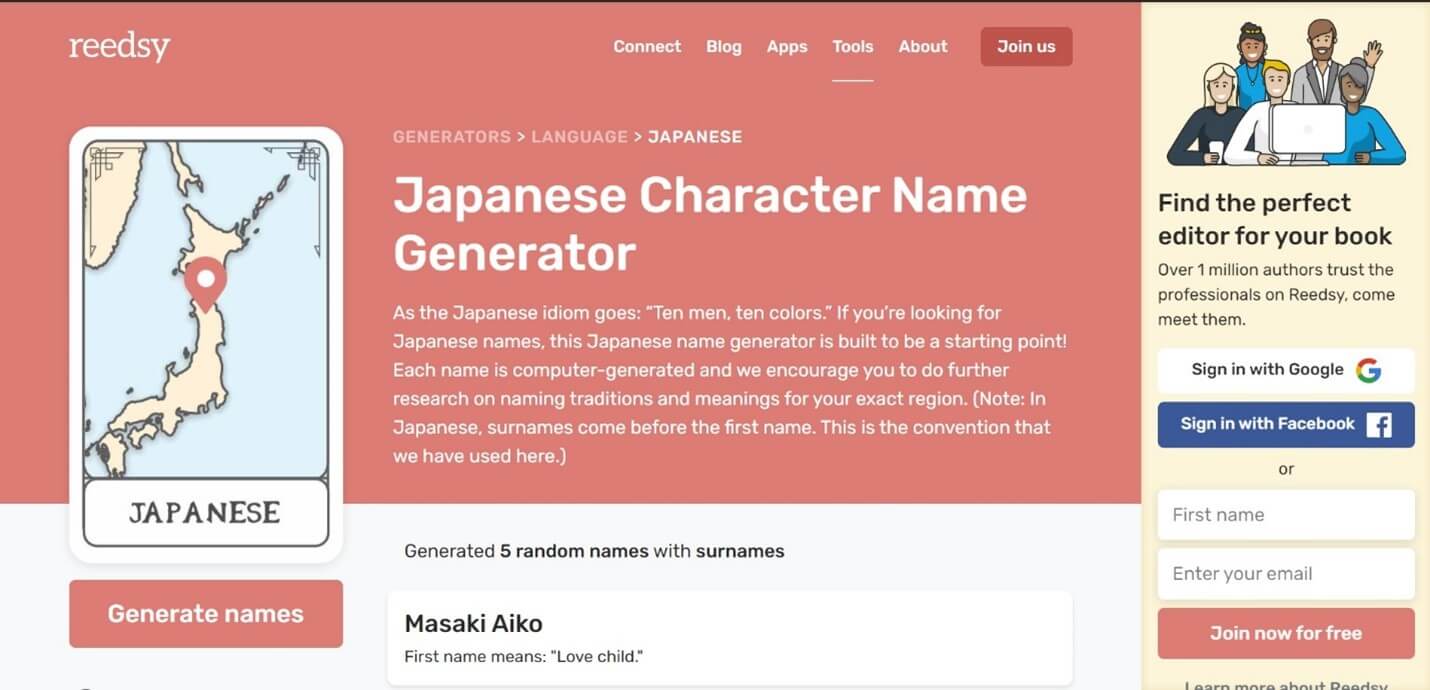
Reedsy is another tool that can generate cool Japanese anime character names for you. All the names are computer-generated and have something to do with their traditions.
A list of five Japanese names will be displayed once you open the page. The meanings of these names will also be mentioned for those who wish to choose names with specific meanings. You can choose the names between random, male, and female options. Clicking on the Generate names tab will always display a new set of names with the meanings.
6. Rumandmonkey.com
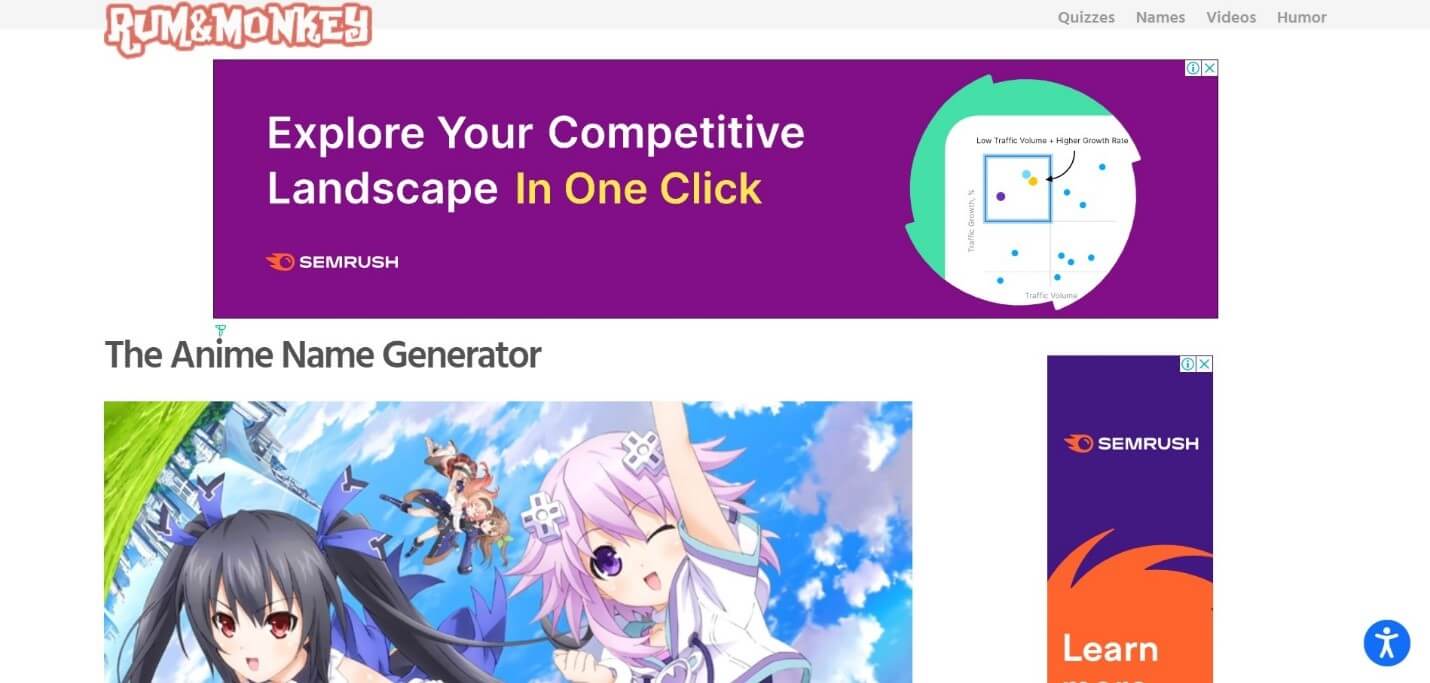
Rumandmonkey.com is a fun anime title generator that you can use to create appealing anime names. A small drawback is the number of ads that keep covering your display when you open the tool.
This anime name generator has classified the character names based on a different generation. You can choose between the greatest generation, baby boomer, generation x, millennials, and generation alpha categories. A variety of other questions will be asked on your likes and dislikes and an anime name will be displayed depending on the answers you have given. This tool only displays 1 name at a time and might require a little patience.
7. Quizony
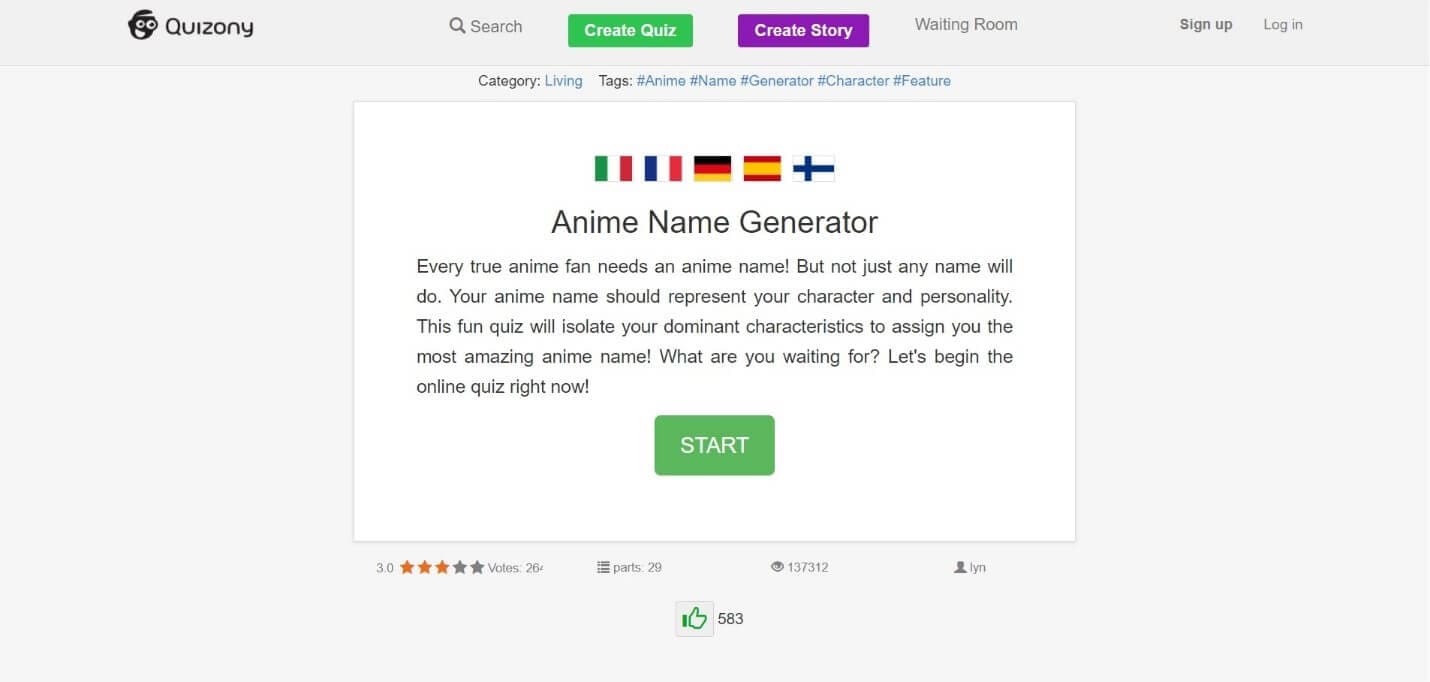
Quizony is a great anime name generator for anime fans out there. The anime names generated by this tool represent the personality and character of the individual.
A series of questions will be asked by this tool to have an idea of likes and dislikes. A small drawback is that about 29 questions must be answered before they provide you with anime names. Once all the questions are answered the tool will choose a unique name for you. This tool has a brilliant way of choosing names but is not a suitable option if you want more than one anime name.
8. Fun Generator
As the name indicates Fun Generator is a very good application for all the fun-seeking anime lovers out there. This tool allows you to choose between a variety of Japanese anime names for your character.
A list of 5 different anime character names will be displayed when you open the site. You can either choose any one of them or go for another set by clicking on the tabs below. They also have options to choose from random, male or female character names.
Conclusion
Anime names are used by many anime lovers all over the world as their user name, profile name, etc. most people tend to keep this name for a lifetime. But not everyone can create an anime name that defines them and which is already not taken.
This problem is solved by anime name generators that are freely available online nowadays. These anime name generators help to create unique anime names that are appealing and tailored to the character traits of the individual.
We have listed the best online anime title generators available above. Choose an attractive anime name for yourself and have fun.
Shanoon Cox
Shanoon Cox is a writer and a lover of all things video.
Follow @Shanoon Cox
Shanoon Cox
Mar 27, 2024• Proven solutions
An anime name generator is a cool and fun tool that is used by anime lovers all over the world. This tool helps to create attractive anime names for you depending on your interests in anime or your character traits.
Anime names are used for a variety of purposes by anime lovers. Most of them want a cool anime-related name for their YouTube channel, game profile, twitch profile, etc. and with a large number of users on these platforms, it is difficult to get a unique name.
Also, a name becomes a symbol that represents quality, appearance, shortcomings, personality, etc.
The anime name generators will generate unique anime-related names for the users to choose from. A cool anime name always will attract more audiences to whatever content they are displaying.
Top 8 Anime Name Generators Online
A cool anime name will always attract the attention of people no matter what platform you are on. But not all people are creative enough to create such a name of their own. That is where an anime name generator comes for help.
Let’s have a look at the top 8 anime name generators available online that can be used to create unique anime names.
1. Fantasy Name Generator
The Fantasy Name Generator is a free application that can provide up to 10 anime and manga character names. The names on this site are divided into 3 categories, namely real names, fake names, and nicknames or unique names. All the names provided are Japanese.
A list of 10 names will be listed on the website when you open it. You can easily choose between male and female character anime names. If you are not satisfied with the displayed list, simply click on the Male names of Females names tab and 10 new random names will be displayed.
2. Cool Generator
The Cool Generator is another simple anime name generator that can be used to create anime names, clan names, team names, etc. All the anime names generated by this tool are unique and represent different characteristics.
A list of 24 anime names will be displayed when you open the cool generator. You can choose any one of the names from it. If you are not satisfied with the names displayed, you can go for another set of 24 names by tapping on the Generate New tab displayed above.
3. Thestoryshack.com
Thestoryshack.com is an awesome anime name generator that can provide you with countless anime names for your story, gaming adventure, or any other project. 6 unique names will be displayed on the page and you can go for more by clicking on the refresh tab.
This anime name-generating tool helps to choose between female and male character names very easily. They have also sorted the names into different categories elf names like elf names, dragon names, demon names, dwarf names, medieval names, Viking names, etc. for the convenience of the users.
4. Masterpiece Generator
Masterpiece Generator is another free online tool that helps you to create epic anime names. This tool allows you to create names with a maximum of 5 components, and hence you can choose between short and sweet or long and swanky names.
This application takes into account a variety of factors like gender, character title, flavor, character type, birth year, nationality, etc. to create a list of names. Once you have givens your suggestion, a list of names will be displayed on the page after clicking on the Write me some character names tab towards the bottom.
5. Reedsy
Reedsy is another tool that can generate cool Japanese anime character names for you. All the names are computer-generated and have something to do with their traditions.
A list of five Japanese names will be displayed once you open the page. The meanings of these names will also be mentioned for those who wish to choose names with specific meanings. You can choose the names between random, male, and female options. Clicking on the Generate names tab will always display a new set of names with the meanings.
6. Rumandmonkey.com
Rumandmonkey.com is a fun anime title generator that you can use to create appealing anime names. A small drawback is the number of ads that keep covering your display when you open the tool.
This anime name generator has classified the character names based on a different generation. You can choose between the greatest generation, baby boomer, generation x, millennials, and generation alpha categories. A variety of other questions will be asked on your likes and dislikes and an anime name will be displayed depending on the answers you have given. This tool only displays 1 name at a time and might require a little patience.
7. Quizony
Quizony is a great anime name generator for anime fans out there. The anime names generated by this tool represent the personality and character of the individual.
A series of questions will be asked by this tool to have an idea of likes and dislikes. A small drawback is that about 29 questions must be answered before they provide you with anime names. Once all the questions are answered the tool will choose a unique name for you. This tool has a brilliant way of choosing names but is not a suitable option if you want more than one anime name.
8. Fun Generator
As the name indicates Fun Generator is a very good application for all the fun-seeking anime lovers out there. This tool allows you to choose between a variety of Japanese anime names for your character.
A list of 5 different anime character names will be displayed when you open the site. You can either choose any one of them or go for another set by clicking on the tabs below. They also have options to choose from random, male or female character names.
Conclusion
Anime names are used by many anime lovers all over the world as their user name, profile name, etc. most people tend to keep this name for a lifetime. But not everyone can create an anime name that defines them and which is already not taken.
This problem is solved by anime name generators that are freely available online nowadays. These anime name generators help to create unique anime names that are appealing and tailored to the character traits of the individual.
We have listed the best online anime title generators available above. Choose an attractive anime name for yourself and have fun.
Shanoon Cox
Shanoon Cox is a writer and a lover of all things video.
Follow @Shanoon Cox
How to Create Picsart Cartoon in Simple Ways
How to Create Picsart Cartoon
An easy yet powerful editor
Numerous effects to choose from
Detailed tutorials provided by the official channel
Cartoonized images are a convenient source of fun and media entertainment in present times. Try hands at creating your own caricature masterpieces with Picsart!
In this article
01 [How To Edit Cartoon Picture in Picsart](#Part 1)
02 [How To Make A Cartoon On Your Phone](#Part 2)
03 [How to Cartoon Yourself on Picsart](#Part 3)
Part 1 How to Edit Cartoon Picture in Picsart
Cartoonized pictures as you must be aware of, are comic transformations of real-time images and are widely used on social media to add a funny angle to the diversity of conversation going on, or even just as a source of plentiful amusement.
If you often feel motivated to experiment with the art and are looking for a perfect solution, see through the following section for a detailed and stepwise guide to create and edit a Picsart cartoon with utmost ease and within a quick time span:
User’s Guide to Edit Cartoon Pictures in Picsart
Step 1: Download the Picsart Application
Visit the official Picsart website to download the desktop version of the app in your Windows or MacOs supported PC.
Step 2: Make a Selection
Launch the app in your system to reach the Picsart welcome screen. Navigate to the bottom and tap the ‘+’ symbol. You are now required to choose a desired image to create the cartoon edit. You can either browse through your system gallery or search a specific one from the Picsart photo library in the ‘Search Bar’ at the top of the app screen.

Step 3: Let’s Get Editing!
When you have made your choice, navigate to the toolbar at the bottom of the app screen and click on the ‘Effects’ tab. Make a side scroll to choose a specific effect category, like that of ‘Artistic’ or ‘Magic’ to open a library of effects in the selected category.
As an example, selecting the ‘Cartoonizer’ option in the ‘Artistic’ effects category can add an immediate caricature feel to your selected real-time image. You can further include manual adjustments to get the perfect cartoon look by pressing and holding the ‘Cartoonizer’ option. There are a whole variety of magical effects, such as, Neo Pop, Soul, Badlands, Animation and Paw in the ‘Magic’ effects category, that are just perfect in giving your edit a fantasizing look with a Picsart cartoon background.
If you are looking for a quicker editing process, prefer adding cartoonized elements, like ‘Picsart Stickers’ to your image instead of going for a complete caricature edit. To do this, open the ‘Picsart Photo Editor’, navigates to the ‘Sticker’ symbol and click on it, followed by searching ‘Cartoon Sticker’. You can alternatively search a specific keyword with the ‘Cartoon’ descriptor, if you are clear on what you want to add.
You can further, resize your selected sticker with a ‘Two Finger Pinch’ or use the ‘Eraser’ tool to ward off any unwanted portions from the same. You are free to take as many repetitions of the process as you wish, till you get the perfect result for saving to your device and sharing on your social media handles.

Step 4: Time to Save and Share!
When you are satisfied with your work, navigate to the right hand corner and tap ‘Apply’ to finalize your changes, followed by clicking on the ‘Next’ button at the top right corner of the app screen to save and export your creation.
Part 2 How to Make a Cartoon on Your Phone
After a detailed analysis of the cartoon editing procedure in your desktops, let us see thro ugh the method of creating cartoonized images on your MacOs and Android smartphones on the following section:
Stepwise Procedure for Creating Cartoonized Images on Phone
Step 1: Download the Application
When going to use the Picsart editor application on your smartphone, you will first require a download of the same in your concerned device. You can do this by visiting the ‘Google PlayStore’ for an Android device or the ‘Apple App Store’ for MacOs smartphones.
Step 2: Choose a Real-time Image
After a successful launch of the ‘Picsart Editor’ application in your smartphone, reach to and click on the ‘+’ icon at the bottom of the app’s working interface. This needs to be followed by selecting any specific real-time image, either from your smartphone gallery or the Picsart photo library using the top ‘Search Bar’ of the interface, for creating a cartoonized edit.

Step 3: Editing Begins!
Once you are done with selecting the image, proceed to add effects to your selection by clicking the ‘Effects’ tab in the bottom toolbar, succeeded by picking a desired effect type through a right scroll. Tap on any category, such as, Magic, Artistic, etc, to open the effect library of the same.
For instance, you can click on the ‘Cartoonizer’ option within Artistic’ effects to supplement your uploaded real-time image with an instant cartoonized effect. You are also granted the liberty to make manual changes to set the caricature image effects as per your preferences, which you can do with a ‘Press and Hold’ of the ‘Cartoonizer’ tab. If you have a diversion towards complementing your cartoonized images with magical effects, choose from Animation, Neo Pop, Paw, Badlands, Paw, and other amazing options in the ‘Magic’ category.

Step 4: Save and Export
When you have completed the editing process and the changes satisfy you, go to the ‘Apply’ tab at the right side of the editor screen to see the changes appear in your edit. You can now navigate to the upper right corner of the app screen and click on ‘Next’ to save your work locally to your device, along with exporting the same across different media platforms.
Part 3 How to Cartoon Yourself on Picsart
Having learnt about the interesting ways to edit cartoon pictures and create cartoons on your smartphone, you might like to try hands on creating a cartoon portrait of yourself in the Picsart editor for a variety of reasons, like that of creating cartoon profile pics of yourself. Let us have a look of the procedure for the same using the Picsart Online Image Editor tool in the following section:
User’s Guide to Create a Cartoon Portrait With Picsart Online Photo Editor
Step 1: Launch the Application
In any of your favorite internet browsers, search for and open ‘Picsart Desktop Editor’. In the app’s working interface, tap ‘Upload’ or ‘New Project’ to choose an image from your device or the free to use Picsart image library respectively, for proceeding with the cartoonized transformations.

Step 2: Edit Your Selection
Tap on the ‘Effects’ tab from the editing toolbar at the top of your image and select a desired effect category to access the diversity of cartoonifying filters. It is recommended to select the ‘Magic’ category for the most splendid cartoon effects, such as, Paw, Badland, Animation, Soul and Neo Pop among many others.

You can even make manual adjustments in the brightness, color, saturation, burn and fade, etc., of the image by clicking on the ‘Adjust’ and ‘Blend’ options at the top of the image workspace.

Step 3: Download and Share Your Work
When you are done editing, navigate to and click on the ‘Share’ option at the upper right corner of the editor screen to download your cartoonized image.

****Wondershare Filmora Video Editor Cartoon Image Creator**
For Win 7 or later (64-bit)
For macOS 10.12 or later
Picsart is certainly a dependable solution to create caricature images, but if you are keen on looking for an alternative application to cater to the need, Introduced to the software market by Wondershare, the Filmora Cartoon Image Creator can be a convenient rescue. The app promises you of a high quality cartoonized edit with a plethora of editing effects to suit your most specific editing preferences.
● Ending Thoughts →
● Creating cartoonized edits from real time images is a fun and entertaining activity along with being the latest media trend.
● The Picsart editor application allows making caricature images from actual stills through desktop, smartphone and online compatible image editing program.
● Talking of suitable Picsart alternatives, you can rely on the Filmora Cartoon Image Creator application for high quality cartoonized image creation.
Cartoonized images are a convenient source of fun and media entertainment in present times. Try hands at creating your own caricature masterpieces with Picsart!
In this article
01 [How To Edit Cartoon Picture in Picsart](#Part 1)
02 [How To Make A Cartoon On Your Phone](#Part 2)
03 [How to Cartoon Yourself on Picsart](#Part 3)
Part 1 How to Edit Cartoon Picture in Picsart
Cartoonized pictures as you must be aware of, are comic transformations of real-time images and are widely used on social media to add a funny angle to the diversity of conversation going on, or even just as a source of plentiful amusement.
If you often feel motivated to experiment with the art and are looking for a perfect solution, see through the following section for a detailed and stepwise guide to create and edit a Picsart cartoon with utmost ease and within a quick time span:
User’s Guide to Edit Cartoon Pictures in Picsart
Step 1: Download the Picsart Application
Visit the official Picsart website to download the desktop version of the app in your Windows or MacOs supported PC.
Step 2: Make a Selection
Launch the app in your system to reach the Picsart welcome screen. Navigate to the bottom and tap the ‘+’ symbol. You are now required to choose a desired image to create the cartoon edit. You can either browse through your system gallery or search a specific one from the Picsart photo library in the ‘Search Bar’ at the top of the app screen.
Step 3: Let’s Get Editing!
When you have made your choice, navigate to the toolbar at the bottom of the app screen and click on the ‘Effects’ tab. Make a side scroll to choose a specific effect category, like that of ‘Artistic’ or ‘Magic’ to open a library of effects in the selected category.
As an example, selecting the ‘Cartoonizer’ option in the ‘Artistic’ effects category can add an immediate caricature feel to your selected real-time image. You can further include manual adjustments to get the perfect cartoon look by pressing and holding the ‘Cartoonizer’ option. There are a whole variety of magical effects, such as, Neo Pop, Soul, Badlands, Animation and Paw in the ‘Magic’ effects category, that are just perfect in giving your edit a fantasizing look with a Picsart cartoon background.
If you are looking for a quicker editing process, prefer adding cartoonized elements, like ‘Picsart Stickers’ to your image instead of going for a complete caricature edit. To do this, open the ‘Picsart Photo Editor’, navigates to the ‘Sticker’ symbol and click on it, followed by searching ‘Cartoon Sticker’. You can alternatively search a specific keyword with the ‘Cartoon’ descriptor, if you are clear on what you want to add.
You can further, resize your selected sticker with a ‘Two Finger Pinch’ or use the ‘Eraser’ tool to ward off any unwanted portions from the same. You are free to take as many repetitions of the process as you wish, till you get the perfect result for saving to your device and sharing on your social media handles.
Step 4: Time to Save and Share!
When you are satisfied with your work, navigate to the right hand corner and tap ‘Apply’ to finalize your changes, followed by clicking on the ‘Next’ button at the top right corner of the app screen to save and export your creation.
Part 2 How to Make a Cartoon on Your Phone
After a detailed analysis of the cartoon editing procedure in your desktops, let us see thro ugh the method of creating cartoonized images on your MacOs and Android smartphones on the following section:
Stepwise Procedure for Creating Cartoonized Images on Phone
Step 1: Download the Application
When going to use the Picsart editor application on your smartphone, you will first require a download of the same in your concerned device. You can do this by visiting the ‘Google PlayStore’ for an Android device or the ‘Apple App Store’ for MacOs smartphones.
Step 2: Choose a Real-time Image
After a successful launch of the ‘Picsart Editor’ application in your smartphone, reach to and click on the ‘+’ icon at the bottom of the app’s working interface. This needs to be followed by selecting any specific real-time image, either from your smartphone gallery or the Picsart photo library using the top ‘Search Bar’ of the interface, for creating a cartoonized edit.
Step 3: Editing Begins!
Once you are done with selecting the image, proceed to add effects to your selection by clicking the ‘Effects’ tab in the bottom toolbar, succeeded by picking a desired effect type through a right scroll. Tap on any category, such as, Magic, Artistic, etc, to open the effect library of the same.
For instance, you can click on the ‘Cartoonizer’ option within Artistic’ effects to supplement your uploaded real-time image with an instant cartoonized effect. You are also granted the liberty to make manual changes to set the caricature image effects as per your preferences, which you can do with a ‘Press and Hold’ of the ‘Cartoonizer’ tab. If you have a diversion towards complementing your cartoonized images with magical effects, choose from Animation, Neo Pop, Paw, Badlands, Paw, and other amazing options in the ‘Magic’ category.
Step 4: Save and Export
When you have completed the editing process and the changes satisfy you, go to the ‘Apply’ tab at the right side of the editor screen to see the changes appear in your edit. You can now navigate to the upper right corner of the app screen and click on ‘Next’ to save your work locally to your device, along with exporting the same across different media platforms.
Part 3 How to Cartoon Yourself on Picsart
Having learnt about the interesting ways to edit cartoon pictures and create cartoons on your smartphone, you might like to try hands on creating a cartoon portrait of yourself in the Picsart editor for a variety of reasons, like that of creating cartoon profile pics of yourself. Let us have a look of the procedure for the same using the Picsart Online Image Editor tool in the following section:
User’s Guide to Create a Cartoon Portrait With Picsart Online Photo Editor
Step 1: Launch the Application
In any of your favorite internet browsers, search for and open ‘Picsart Desktop Editor’. In the app’s working interface, tap ‘Upload’ or ‘New Project’ to choose an image from your device or the free to use Picsart image library respectively, for proceeding with the cartoonized transformations.
Step 2: Edit Your Selection
Tap on the ‘Effects’ tab from the editing toolbar at the top of your image and select a desired effect category to access the diversity of cartoonifying filters. It is recommended to select the ‘Magic’ category for the most splendid cartoon effects, such as, Paw, Badland, Animation, Soul and Neo Pop among many others.
You can even make manual adjustments in the brightness, color, saturation, burn and fade, etc., of the image by clicking on the ‘Adjust’ and ‘Blend’ options at the top of the image workspace.
Step 3: Download and Share Your Work
When you are done editing, navigate to and click on the ‘Share’ option at the upper right corner of the editor screen to download your cartoonized image.
****Wondershare Filmora Video Editor Cartoon Image Creator**
For Win 7 or later (64-bit)
For macOS 10.12 or later
Picsart is certainly a dependable solution to create caricature images, but if you are keen on looking for an alternative application to cater to the need, Introduced to the software market by Wondershare, the Filmora Cartoon Image Creator can be a convenient rescue. The app promises you of a high quality cartoonized edit with a plethora of editing effects to suit your most specific editing preferences.
● Ending Thoughts →
● Creating cartoonized edits from real time images is a fun and entertaining activity along with being the latest media trend.
● The Picsart editor application allows making caricature images from actual stills through desktop, smartphone and online compatible image editing program.
● Talking of suitable Picsart alternatives, you can rely on the Filmora Cartoon Image Creator application for high quality cartoonized image creation.
Best 10 3D Text Animation Templates
Top 10 3D Text Animation Templates
An easy yet powerful editor
Numerous effects to choose from
Detailed tutorials provided by the official channel
“Where is everyone getting their 3D Text Animation templates?”
To answer this request, we’ve compiled a guide that not only teaches you how to create things like 3D Spinning Text (After Effects) but also gives you an idea of where you can find the kind of resources (i.e., 3D Text Animation templates and presets) that you need to get a head start on your projects.
In this article
01 [Top 10 3D Text Animation Templates ](#Part 1)
02 [How Do I Make 3D Text in After Effects?](#Part 2)
03 [The Best 10 Amazing 3D Text Animation Templates](#Part 3)
04 [Secrets to Learning More Animation Tactics](#Part 4)
Part 1 What’s 3D Text Animation?
Before anything else, let’s talk about text animation. Specifically, 3D Text Animation. The text that you’re reading now, is 2D Text. It’s static, and it lacks depth. It’s just letters on a screen. Meanwhile, 3D Text is usually built for motion, and thus, it has volume and depth — it’s almost tangible. Here’s what that looks like:

As you can see, even without actually moving, in the text shown in the image above, the potential for motion is there — it looks alive.
Now, you’ll see 3D text like this often in movies or promotions. Usually in the form of extravagant title cards or 3D text logo animation. They’re eye-catching, and because they’re 3D, you can play with them as much as you want to really add drama to your creations.
Part 2 How Do I Make 3D Text in After Effects?
As promised, this next section will teach you how to create 3D Text Animation in Adobe After Effects, which is a VFX and motion graphics software used by many animators to bring life to their text. You’ll notice that the following tutorial is really more about introducing the tools that you can use in order to create 3D Text Animation:
01Step 1. Add Your Text
The first thing that you have to do, of course, is to add your text! To do this, go to the ‘Tools’ panel, select the Type tool, and then select the ‘Composition’ panel. The composition is where you type your text!
With After Effects, you also have the following options:
● Change Text Font
● Adjust Text Size
● Adjust Text Color
● Shift Justification (Left, Middle, right)
And so on! Once you’re done with your text composition, it will be generated by After Effects into a layer that you can adjust as needed in the next steps.

01Step 2. Use Animation Presets
With your text now in a layer that you can add animations to… you’ve practically done a third of the job! Or even more than that if you decide to use the animation presets that are provided by After Effects.
These can be found by selecting ‘Browse Presets…’ on the ‘Animation’ tab (shown in the image below.) All you need to apply them is to drag and drop them onto your text layer.
Note: The first keyframe of this built-in text animation will be applied at the location of the Current Time Indicator (CTI), so make sure that you’ve adjusted that accordingly.

01Step 3. Per-Character Animation
If you’d like to personalize your text animation, After Effects does also give you the option to animate per character (or, per letter, in this case.)
This will give you more control over how you decided to animate your text. Of course, it does mean that it is slightly more complicated as well.
● To animate text per layer, select ‘animate’ on that layer and choose a parameter to start working on animations for.
● You’ll be able to previous (or scrub) through your animations in order to see if they are doing what you need them to do.
● You can also remove applied parameters in order to re-work your animation.

01Step 4. Add Graphic Elements to Text
If you really want to make your 3D Animation Text pop, Adobe After Effects also offers the tools needed to add Graphic Elements to your composition — which can be found at the top-most toolbar!

Part 3 The Best 10 Amazing 3D Text Animation Templates
Now, as promised, we’re also going to be introducing a couple of 3D text animation templates that you can try out for your own projects! Each template will have a link that you can go to in order to see what it looks like, as well as an explanation on how you can use it for your projects in the future!
01Real 3D Light Bulb Kit
The first Text Animation Template on our list is the “Logo Light Bulb” 3D Animation from Envato Elements. This one literally glows people! Making it perfect for a quirky, and yet still very impressive Title Card or Logo. Its design is very realistic, and you can also control how it flickers! For example, turning the bulbs on certain characters first, or turning them all off at once in the end.
023D Text Reveal
This next 3D Animation template is also from Envato Market. And, just like the first, it makes for quite the dramatic Title Card or Logo. With this template, your Text can literally zoom in to view while looking its best and sparkiest in High-Chrome.
033D Metallic Text Animation
Our next pick, the 3D Metallic text animation is another great one for those who are looking for something flashy — something that gives off the impression of being impressive right from the gate. Compared to the previous text animation template, this one has a more rugged kind of appearance. Perfect for those looking to promote something more fun rather than professional.
043D Text Box Animation Pack
The next one is a little less ‘impressive’ — in the sense that it isn’t as in your face as the other 3D animation templates that we’ve introduced thus far. And that’s exactly why the 3D Text Box Animation Pack deserves to be on this list! Its 3D spinning text (after effects) elements are very usable — in that it can work for a variety of individuals and styles. It has a more professional look as well. Making it perfect for corporations.
053D Text & Logo Boxes
This next one, the 3D Text & Logo Boxes pack is particularly perfect for 3D logos. The pack gives you several options for box size as well as text parameters. So, you can design your animated 3D Logo however you want and use it for future projects to give them even more dimension than before.
06The Light Bulb Kit
Our next pick, which is the ‘Light Bulb Kit’ also from Envato, is very similar to the first item on our list — in that it features text lit up by lightbulbs. However, it lends an extra bit of photo-realism to it. Less sparkle and more grain — which may exactly be what you want for your new title card or logo.
073D Text Templates
The 3D Text Templates is a very bright and pop-y template that is perfect for creating eye-catching promotions and advertisements. It’s very simple to use, which, again, maybe exactly what you want. Literally, the template will ask you to choose your own text and change the colors to suit that of your own brand, then you’re done!
083D Text Shapes Logo Reveal
The ‘3D Text Shapes Logo Reveal’ template is a pack of 3D text animations that you can use in order to add a little spin to your logo reveals (quite literally, in some cases!) It has a lot of personality to it, and a certain tech-y or science-y feel that would make it perfect for anyone looking for something more technical.
09Bold Titles
The ‘Bold Titles’ template is very loud and proud. But it has a bit of a retro-vibe to it as well. Making it stand out from some of the more minimalistic modern text animation styles that you see these days.
1010. Wave 3D Logo & Text
Looking for something simple and professional? Then the ‘Wave 3D Logo & Text’ template may just be the one for you. We put it last on this list, but it’s actually quite a strong contender. One that just about anyone (for just about any type of project they’re working on), should be able to get some use out of.
Key Takeaways from This Episode
● 3D Text Animation is the practice of bringing text to life! It gives dimension, depth, and, even, movement into what are usually very static properties!
● You see a lot of 3D Text Animation in big pictures these days. And you can start creating your own with the use of Adobe After Effects — a VFX and Motion Graphics Software that a lot of professionals use for their own text animation.
● Of course, if you don’t have the kind of time to create your own 3D Text Animations from scratch, you can always use templates instead! There are hundreds (if not thousands) of them available out there. It should be simple enough to find one that fits the kind of vibe you’re looking for.
● SECRET TIP! If you’re looking for an all-in-one kind of solution, you might want to consider Filmora Pro. It’s a video editor, first and foremost, but that’s not all it is — you can be using it today to start creating your own 3D Text Animations!
“Where is everyone getting their 3D Text Animation templates?”
To answer this request, we’ve compiled a guide that not only teaches you how to create things like 3D Spinning Text (After Effects) but also gives you an idea of where you can find the kind of resources (i.e., 3D Text Animation templates and presets) that you need to get a head start on your projects.
In this article
01 [Top 10 3D Text Animation Templates ](#Part 1)
02 [How Do I Make 3D Text in After Effects?](#Part 2)
03 [The Best 10 Amazing 3D Text Animation Templates](#Part 3)
04 [Secrets to Learning More Animation Tactics](#Part 4)
Part 1 What’s 3D Text Animation?
Before anything else, let’s talk about text animation. Specifically, 3D Text Animation. The text that you’re reading now, is 2D Text. It’s static, and it lacks depth. It’s just letters on a screen. Meanwhile, 3D Text is usually built for motion, and thus, it has volume and depth — it’s almost tangible. Here’s what that looks like:
As you can see, even without actually moving, in the text shown in the image above, the potential for motion is there — it looks alive.
Now, you’ll see 3D text like this often in movies or promotions. Usually in the form of extravagant title cards or 3D text logo animation. They’re eye-catching, and because they’re 3D, you can play with them as much as you want to really add drama to your creations.
Part 2 How Do I Make 3D Text in After Effects?
As promised, this next section will teach you how to create 3D Text Animation in Adobe After Effects, which is a VFX and motion graphics software used by many animators to bring life to their text. You’ll notice that the following tutorial is really more about introducing the tools that you can use in order to create 3D Text Animation:
01Step 1. Add Your Text
The first thing that you have to do, of course, is to add your text! To do this, go to the ‘Tools’ panel, select the Type tool, and then select the ‘Composition’ panel. The composition is where you type your text!
With After Effects, you also have the following options:
● Change Text Font
● Adjust Text Size
● Adjust Text Color
● Shift Justification (Left, Middle, right)
And so on! Once you’re done with your text composition, it will be generated by After Effects into a layer that you can adjust as needed in the next steps.
01Step 2. Use Animation Presets
With your text now in a layer that you can add animations to… you’ve practically done a third of the job! Or even more than that if you decide to use the animation presets that are provided by After Effects.
These can be found by selecting ‘Browse Presets…’ on the ‘Animation’ tab (shown in the image below.) All you need to apply them is to drag and drop them onto your text layer.
Note: The first keyframe of this built-in text animation will be applied at the location of the Current Time Indicator (CTI), so make sure that you’ve adjusted that accordingly.
01Step 3. Per-Character Animation
If you’d like to personalize your text animation, After Effects does also give you the option to animate per character (or, per letter, in this case.)
This will give you more control over how you decided to animate your text. Of course, it does mean that it is slightly more complicated as well.
● To animate text per layer, select ‘animate’ on that layer and choose a parameter to start working on animations for.
● You’ll be able to previous (or scrub) through your animations in order to see if they are doing what you need them to do.
● You can also remove applied parameters in order to re-work your animation.
01Step 4. Add Graphic Elements to Text
If you really want to make your 3D Animation Text pop, Adobe After Effects also offers the tools needed to add Graphic Elements to your composition — which can be found at the top-most toolbar!
Part 3 The Best 10 Amazing 3D Text Animation Templates
Now, as promised, we’re also going to be introducing a couple of 3D text animation templates that you can try out for your own projects! Each template will have a link that you can go to in order to see what it looks like, as well as an explanation on how you can use it for your projects in the future!
01Real 3D Light Bulb Kit
The first Text Animation Template on our list is the “Logo Light Bulb” 3D Animation from Envato Elements. This one literally glows people! Making it perfect for a quirky, and yet still very impressive Title Card or Logo. Its design is very realistic, and you can also control how it flickers! For example, turning the bulbs on certain characters first, or turning them all off at once in the end.
023D Text Reveal
This next 3D Animation template is also from Envato Market. And, just like the first, it makes for quite the dramatic Title Card or Logo. With this template, your Text can literally zoom in to view while looking its best and sparkiest in High-Chrome.
033D Metallic Text Animation
Our next pick, the 3D Metallic text animation is another great one for those who are looking for something flashy — something that gives off the impression of being impressive right from the gate. Compared to the previous text animation template, this one has a more rugged kind of appearance. Perfect for those looking to promote something more fun rather than professional.
043D Text Box Animation Pack
The next one is a little less ‘impressive’ — in the sense that it isn’t as in your face as the other 3D animation templates that we’ve introduced thus far. And that’s exactly why the 3D Text Box Animation Pack deserves to be on this list! Its 3D spinning text (after effects) elements are very usable — in that it can work for a variety of individuals and styles. It has a more professional look as well. Making it perfect for corporations.
053D Text & Logo Boxes
This next one, the 3D Text & Logo Boxes pack is particularly perfect for 3D logos. The pack gives you several options for box size as well as text parameters. So, you can design your animated 3D Logo however you want and use it for future projects to give them even more dimension than before.
06The Light Bulb Kit
Our next pick, which is the ‘Light Bulb Kit’ also from Envato, is very similar to the first item on our list — in that it features text lit up by lightbulbs. However, it lends an extra bit of photo-realism to it. Less sparkle and more grain — which may exactly be what you want for your new title card or logo.
073D Text Templates
The 3D Text Templates is a very bright and pop-y template that is perfect for creating eye-catching promotions and advertisements. It’s very simple to use, which, again, maybe exactly what you want. Literally, the template will ask you to choose your own text and change the colors to suit that of your own brand, then you’re done!
083D Text Shapes Logo Reveal
The ‘3D Text Shapes Logo Reveal’ template is a pack of 3D text animations that you can use in order to add a little spin to your logo reveals (quite literally, in some cases!) It has a lot of personality to it, and a certain tech-y or science-y feel that would make it perfect for anyone looking for something more technical.
09Bold Titles
The ‘Bold Titles’ template is very loud and proud. But it has a bit of a retro-vibe to it as well. Making it stand out from some of the more minimalistic modern text animation styles that you see these days.
1010. Wave 3D Logo & Text
Looking for something simple and professional? Then the ‘Wave 3D Logo & Text’ template may just be the one for you. We put it last on this list, but it’s actually quite a strong contender. One that just about anyone (for just about any type of project they’re working on), should be able to get some use out of.
Key Takeaways from This Episode
● 3D Text Animation is the practice of bringing text to life! It gives dimension, depth, and, even, movement into what are usually very static properties!
● You see a lot of 3D Text Animation in big pictures these days. And you can start creating your own with the use of Adobe After Effects — a VFX and Motion Graphics Software that a lot of professionals use for their own text animation.
● Of course, if you don’t have the kind of time to create your own 3D Text Animations from scratch, you can always use templates instead! There are hundreds (if not thousands) of them available out there. It should be simple enough to find one that fits the kind of vibe you’re looking for.
● SECRET TIP! If you’re looking for an all-in-one kind of solution, you might want to consider Filmora Pro. It’s a video editor, first and foremost, but that’s not all it is — you can be using it today to start creating your own 3D Text Animations!
OBS Animated Alternatives
OBS Animated Lower Thirds Alternatives
An easy yet powerful editor
Numerous effects to choose from
Detailed tutorials provided by the official channel
It’s worth noting that people commonly use built-in OBS animated lower thirds for the job, but you can also use other editing tools to create custom animations and import them in your OBS Livestream.
This guide will walk you through everything you need to know about OBS animated lower thirds and their best alternatives you can use in 2022 and beyond.
In this article
01 [What are Lower Thirds in Animation?](#Part 1)
02 [How To Set Up An Animated Lower Third In OBS Studio](#Part 2)
03 [8 AMAZING OBS Animated Lower Thirds Alternatives](#Part 3)
Part 1 What is Lower Thirds in Animation?
To put it in simple words, a lower third is simply a graphic overlay that appears on top of the actual footage. As the name implies, the contents of the lower third usually occur at the lower end of the screen, but streamers can also configure the OBS settings to change their position within the screen. Ideally, lower third animations are utilized to give a context of the overall video.
Let’s say you are life streaming your GTA V gameplay on YouTube. So, to help first-time viewers get the overall context, you can add GTA-related elements in the lower third animation and maximize viewer acquisition. In addition to this, you can also use OBS animated lower-thirds to display exclusive offers and discounts throughout the live stream.
Part 2 How To Set Up An Animated Lower Third In OBS Studio
So, now that you know the major benefits of using animated lower thirds in OBS studio, let’s understand how to set them up to make your live streams more engaging. It’s worth noting that OBS works around the concept of layers that you can manage individually to run your live streams. So, to add an animated lower third in OBS studio, all you have to do is add a dedicated layer and place it right above the video layer.
When it comes to setting up the lower-third, you’ll first need to create the graphics you want to display on top of the live streams. You can use Photoshop to design a custom lower-third animation if you are a professional designer. But, if you have just stepped into the world of live streams and don’t have any prior experience with Photoshop, you can also purchase one of the ready-to-use lower-third packages and import them directly to OBS.
Either way, it would be crucial to ensure that your OBS animated lower-third graphics do not interfere with the actual video. Why? Because this will make the video look more cluttered, and you’ll end up losing potential viewers.
Here’s a YouTube video that’ll walk you through the step-by-step procedure of creating lower-third animations in OBS Studio.
Part 3 8 AMAZING OBS Animated Lower Thirds Alternatives
While OBS is a great tool to add lower-third animations to your live streams, it has its fair share of drawbacks. For instance, OBS has a pretty complicated interface, which means if you are an absolute beginner, you may not easily set up your live streams. Not to mention, OBS is heavy software - so if you don’t have a high-configuration system, you won’t be able to run the tool at all.
So, what’s your next best option? Fortunately, there are several OBS alternatives that you can use to set up OBS animated lower-third graphics and enhance the overall quality of your live streams. To make your job easier, we have cherry-picked 8 of the most reliable OBS alternatives that you can use to add lower-third animations to a Livestream video.
01Wirecast

Like OBS, Wirecast is a popular video streaming platform that many content creators use to live stream on their social media handles. It also offers a layer-based architecture, which means users can add multiple layers separately and manage them through an easy-to-navigate panel.
One of the key reasons Wirecast is an ideal choice to add animated lower-third graphics to your live streams is its built-in collections. The tool already has several ready-to-integrate lower-third animations that one could import into their project without any hassle.
Pros:
● Built-in lower-third graphic templates
● Easy-to-use Interface
● Switch between multiple camera angles with one click
Cons:
● Unlike OBS Studio, Wirecast isn’t available for free
Why Do We Recommend Wirecast?
Wirecast is a fully functional video streaming platform where you can easily manage all your live streams. Wirecast offers far better functionality than OBS Studio despite having a relatively easy-to-use UI.
02vMix

vMix is a feature-rich video production software that offers everything one would need to create stunning videos. However, it also has a dedicated live stream manager to manage your live streams, switch between multiple camera angles, and add overlay animations to keep the viewers engaged. Unlike OBS Studio, vMix doesn’t have a layering system, which means you can overlay multiple channels easily.
As far as OBS animated lower-thirds are concerned, there are different ways you can add these animations to your live streams. You can either import dedicated PSD files, embed HTML codes, or choose one of the ready-to-use lower-third templates to do the job. In either case, vMix will help you add stunning lower-third animations within a few minutes.
Pros:
● Full-scale video production software
● Built-in support for audio mixing
● Add and Manage Multiple Camera Inputs
Cons:
● If you want to relish all the benefits of vMix, you would have to purchase its pro version, which costs $1200. As compared to other available options, vMix is significantly expensive.
Why Do We Recommend vMix?
vMix is ideal for users who want to upgrade from OBS and can spend $1200 on a live stream manager. It’ll provide everything you need to live stream across different social media platforms.
03Restream Studio

Restream Studio is a browser-based live stream tool that offers an easy-to-navigate panel to manage your live streams. Restream is ideal for beginners who don’t want to spend a hefty amount on their live streaming software. With restream, you can upload your brand logos, graphic overlays, and text details and save them in the “Favorites” tab for future use.
This way, whenever you are live streaming, you can directly choose one of these overlays and switch between them easily. The tool also has a dedicated “Hide/Show” button that’ll allow you to change the display status of the lower-third animations.
Pros:
● Cross-platform Compatibility
● Ideal for Beginners and Novice YouTubers
● Save Multiple Graphic Overlays for Future Use
Cons:
● You won’t get any advanced functionality like Wirecast or OBS Studio
Why Do We Recommend Restream Studio?
Restream Studio is the perfect solution for users who don’t want to get overwhelmed with the complex features of OBS Studio. With its browser-friendly UI, you’ll be able to run Restream Studio across different platforms and add OBS animated lower-third graphics to your live streams easily.
04Lightstream

Lightstream is another free live stream manager that offers many features to execute hassle-free live streams across different platforms, including YouTube, Facebook, and Twitch. Even though the tool doesn’t provide advanced features like OBS Studio or Wirecast, it has everything you require to stream live on your social media handles. One of the key features of Lightstream is that you can add multiple scenes/overlays and switch between them with a single click.
Pros:
● Being open-source, Lightstream is available for free
● Lightstream is a cloud-based tool, which means it offers cross-platform compatibility
● Easy to set up, even if you are a beginner
Cons:
● Lacks advanced editing features
Why Do We Recommend Lightstream?
Lightstream is the most reliable live stream manager for users looking for a simple and cross-platform tool to manage live streams and add overlays.
05Adobe Photoshop

Before you act surprised, let us clarify that Adobe Photoshop isn’t an alternative to OBS Studio. However, you can use it to create customized overlays and lower-third graphics to add a personal touch to your live streams. Suppose you are already familiar with Photoshop and have been using it for a few years. In that case, it’ll allow you to design personalized text overlays, graphics, animations, and logos for your live streams.
And, once you have successfully designed the lower-third overlays, you can use any of the live stream managers to add them to your live streams.
Pros:
● Design custom overlays for your social media live streams
● Offers advanced editing options to customize logos and lower-third graphics
Cons:
● Photoshop has a steep learning curve, and if you are not an experienced designer, you won’t be able to design custom overlays
Why Do We Recommend Adobe Photoshop?
Adobe Photoshop is a reliable choice for creators who find the built-in media libraries of a live stream manager limited. With Photoshop, you’ll be able to design custom overlays for your live streams.
06ShareX

ShareX is also an open-source screen recorder and lives stream manager that offers all the OBS features you’ll need to manage your live streams and add multiple lower-third overlays. The only downside of ShareX is that it has a complicated user interface. Even if you have used OBS in the past, you’ll find ShareX’s user interface relatively complex. So, you should only sign up for ShareX if you are comfortable with complex user interfaces.
Pros:
● Upload and save pictures, videos, logos for lower-third overlays
● Record your entire screen or a specific window
● Assign hotkeys to switch between multiple windows during the Livestream
Cons:
● The user interface isn’t as friendly as other available options
Why Do We Recommend ShareX?
ShareX is an ideal OBS animated lower-third alternative for users who need a free-of-cost solution to manage their live streams.
07Canva

Again, Canva doesn’t support live stream management at all. However, like Adobe Photoshop, you can use Canva to create stunning lower-third overlays for your Livestream sessions. The major benefit of using Canva is that it has thousands of pre-made templates that you can import to your design with one click. All these templates are fully customizable - so you’ll be able to design custom lower-third overlays for your live streams.
Pros:
● Comparatively less complicated than Adobe Photoshop
● Canva is affordable
● Being a web-based designing tool, you can access Canva on any device
Cons:
● The premium version of Canva is relatively expensive than its competitors.
Why Do We Recommend Canva?
Canva is a one-stop solution for content creators looking for an additional designing tool to create custom OBS animated lower thirds for their live streams.
Key Takeaways from This Episode
● OBS animated lower-thirds are one of the most effective ways to share the context of a live stream with your viewers
● With OBS Studio, you have the liberty to import custom animated lower-third animations and overlays and add them to the live stream through its layered architecture
● Apart from OBS Studio, there are several other tools (such as Wondershare Filmora Pro) to add animated lower-thirds to live streams.
It’s worth noting that people commonly use built-in OBS animated lower thirds for the job, but you can also use other editing tools to create custom animations and import them in your OBS Livestream.
This guide will walk you through everything you need to know about OBS animated lower thirds and their best alternatives you can use in 2022 and beyond.
In this article
01 [What are Lower Thirds in Animation?](#Part 1)
02 [How To Set Up An Animated Lower Third In OBS Studio](#Part 2)
03 [8 AMAZING OBS Animated Lower Thirds Alternatives](#Part 3)
Part 1 What is Lower Thirds in Animation?
To put it in simple words, a lower third is simply a graphic overlay that appears on top of the actual footage. As the name implies, the contents of the lower third usually occur at the lower end of the screen, but streamers can also configure the OBS settings to change their position within the screen. Ideally, lower third animations are utilized to give a context of the overall video.
Let’s say you are life streaming your GTA V gameplay on YouTube. So, to help first-time viewers get the overall context, you can add GTA-related elements in the lower third animation and maximize viewer acquisition. In addition to this, you can also use OBS animated lower-thirds to display exclusive offers and discounts throughout the live stream.
Part 2 How To Set Up An Animated Lower Third In OBS Studio
So, now that you know the major benefits of using animated lower thirds in OBS studio, let’s understand how to set them up to make your live streams more engaging. It’s worth noting that OBS works around the concept of layers that you can manage individually to run your live streams. So, to add an animated lower third in OBS studio, all you have to do is add a dedicated layer and place it right above the video layer.
When it comes to setting up the lower-third, you’ll first need to create the graphics you want to display on top of the live streams. You can use Photoshop to design a custom lower-third animation if you are a professional designer. But, if you have just stepped into the world of live streams and don’t have any prior experience with Photoshop, you can also purchase one of the ready-to-use lower-third packages and import them directly to OBS.
Either way, it would be crucial to ensure that your OBS animated lower-third graphics do not interfere with the actual video. Why? Because this will make the video look more cluttered, and you’ll end up losing potential viewers.
Here’s a YouTube video that’ll walk you through the step-by-step procedure of creating lower-third animations in OBS Studio.
Part 3 8 AMAZING OBS Animated Lower Thirds Alternatives
While OBS is a great tool to add lower-third animations to your live streams, it has its fair share of drawbacks. For instance, OBS has a pretty complicated interface, which means if you are an absolute beginner, you may not easily set up your live streams. Not to mention, OBS is heavy software - so if you don’t have a high-configuration system, you won’t be able to run the tool at all.
So, what’s your next best option? Fortunately, there are several OBS alternatives that you can use to set up OBS animated lower-third graphics and enhance the overall quality of your live streams. To make your job easier, we have cherry-picked 8 of the most reliable OBS alternatives that you can use to add lower-third animations to a Livestream video.
01Wirecast
Like OBS, Wirecast is a popular video streaming platform that many content creators use to live stream on their social media handles. It also offers a layer-based architecture, which means users can add multiple layers separately and manage them through an easy-to-navigate panel.
One of the key reasons Wirecast is an ideal choice to add animated lower-third graphics to your live streams is its built-in collections. The tool already has several ready-to-integrate lower-third animations that one could import into their project without any hassle.
Pros:
● Built-in lower-third graphic templates
● Easy-to-use Interface
● Switch between multiple camera angles with one click
Cons:
● Unlike OBS Studio, Wirecast isn’t available for free
Why Do We Recommend Wirecast?
Wirecast is a fully functional video streaming platform where you can easily manage all your live streams. Wirecast offers far better functionality than OBS Studio despite having a relatively easy-to-use UI.
02vMix
vMix is a feature-rich video production software that offers everything one would need to create stunning videos. However, it also has a dedicated live stream manager to manage your live streams, switch between multiple camera angles, and add overlay animations to keep the viewers engaged. Unlike OBS Studio, vMix doesn’t have a layering system, which means you can overlay multiple channels easily.
As far as OBS animated lower-thirds are concerned, there are different ways you can add these animations to your live streams. You can either import dedicated PSD files, embed HTML codes, or choose one of the ready-to-use lower-third templates to do the job. In either case, vMix will help you add stunning lower-third animations within a few minutes.
Pros:
● Full-scale video production software
● Built-in support for audio mixing
● Add and Manage Multiple Camera Inputs
Cons:
● If you want to relish all the benefits of vMix, you would have to purchase its pro version, which costs $1200. As compared to other available options, vMix is significantly expensive.
Why Do We Recommend vMix?
vMix is ideal for users who want to upgrade from OBS and can spend $1200 on a live stream manager. It’ll provide everything you need to live stream across different social media platforms.
03Restream Studio
Restream Studio is a browser-based live stream tool that offers an easy-to-navigate panel to manage your live streams. Restream is ideal for beginners who don’t want to spend a hefty amount on their live streaming software. With restream, you can upload your brand logos, graphic overlays, and text details and save them in the “Favorites” tab for future use.
This way, whenever you are live streaming, you can directly choose one of these overlays and switch between them easily. The tool also has a dedicated “Hide/Show” button that’ll allow you to change the display status of the lower-third animations.
Pros:
● Cross-platform Compatibility
● Ideal for Beginners and Novice YouTubers
● Save Multiple Graphic Overlays for Future Use
Cons:
● You won’t get any advanced functionality like Wirecast or OBS Studio
Why Do We Recommend Restream Studio?
Restream Studio is the perfect solution for users who don’t want to get overwhelmed with the complex features of OBS Studio. With its browser-friendly UI, you’ll be able to run Restream Studio across different platforms and add OBS animated lower-third graphics to your live streams easily.
04Lightstream
Lightstream is another free live stream manager that offers many features to execute hassle-free live streams across different platforms, including YouTube, Facebook, and Twitch. Even though the tool doesn’t provide advanced features like OBS Studio or Wirecast, it has everything you require to stream live on your social media handles. One of the key features of Lightstream is that you can add multiple scenes/overlays and switch between them with a single click.
Pros:
● Being open-source, Lightstream is available for free
● Lightstream is a cloud-based tool, which means it offers cross-platform compatibility
● Easy to set up, even if you are a beginner
Cons:
● Lacks advanced editing features
Why Do We Recommend Lightstream?
Lightstream is the most reliable live stream manager for users looking for a simple and cross-platform tool to manage live streams and add overlays.
05Adobe Photoshop
Before you act surprised, let us clarify that Adobe Photoshop isn’t an alternative to OBS Studio. However, you can use it to create customized overlays and lower-third graphics to add a personal touch to your live streams. Suppose you are already familiar with Photoshop and have been using it for a few years. In that case, it’ll allow you to design personalized text overlays, graphics, animations, and logos for your live streams.
And, once you have successfully designed the lower-third overlays, you can use any of the live stream managers to add them to your live streams.
Pros:
● Design custom overlays for your social media live streams
● Offers advanced editing options to customize logos and lower-third graphics
Cons:
● Photoshop has a steep learning curve, and if you are not an experienced designer, you won’t be able to design custom overlays
Why Do We Recommend Adobe Photoshop?
Adobe Photoshop is a reliable choice for creators who find the built-in media libraries of a live stream manager limited. With Photoshop, you’ll be able to design custom overlays for your live streams.
06ShareX
ShareX is also an open-source screen recorder and lives stream manager that offers all the OBS features you’ll need to manage your live streams and add multiple lower-third overlays. The only downside of ShareX is that it has a complicated user interface. Even if you have used OBS in the past, you’ll find ShareX’s user interface relatively complex. So, you should only sign up for ShareX if you are comfortable with complex user interfaces.
Pros:
● Upload and save pictures, videos, logos for lower-third overlays
● Record your entire screen or a specific window
● Assign hotkeys to switch between multiple windows during the Livestream
Cons:
● The user interface isn’t as friendly as other available options
Why Do We Recommend ShareX?
ShareX is an ideal OBS animated lower-third alternative for users who need a free-of-cost solution to manage their live streams.
07Canva
Again, Canva doesn’t support live stream management at all. However, like Adobe Photoshop, you can use Canva to create stunning lower-third overlays for your Livestream sessions. The major benefit of using Canva is that it has thousands of pre-made templates that you can import to your design with one click. All these templates are fully customizable - so you’ll be able to design custom lower-third overlays for your live streams.
Pros:
● Comparatively less complicated than Adobe Photoshop
● Canva is affordable
● Being a web-based designing tool, you can access Canva on any device
Cons:
● The premium version of Canva is relatively expensive than its competitors.
Why Do We Recommend Canva?
Canva is a one-stop solution for content creators looking for an additional designing tool to create custom OBS animated lower thirds for their live streams.
Key Takeaways from This Episode
● OBS animated lower-thirds are one of the most effective ways to share the context of a live stream with your viewers
● With OBS Studio, you have the liberty to import custom animated lower-third animations and overlays and add them to the live stream through its layered architecture
● Apart from OBS Studio, there are several other tools (such as Wondershare Filmora Pro) to add animated lower-thirds to live streams.
You Can Turn a TikTok Into a GIF Now. Here’s How
You Can Turn a TikTok Into a GIF Now. Here’s How
An easy yet powerful editor
Numerous effects to choose from
Detailed tutorials provided by the official channel
Want to add sharing flexibility to TikTok videos? Convert them into GIFs!
In this article
01 [What is GIF TikTok?](#Part 1)
02 [How to Make a GIF From a TikTok Video](#Part 2)
Part 1 What Is TikTok GIF?
In today’s IT enhanced lifestyle, having a profound reach on social media is the new name of popularity. Everyone out there is profusely keen on creating and sharing a plethora of content varieties; memes, videos, animations and what not, across social communities. However, TikTok videos lag behind in this race; often lack the ‘Share’ flexibility.
To match up, there are solutions to convert TikTok video into GIFs. A TikTok GIF is a short, impactful and to the point clip that’s here to share fun and exciting content in the most interesting ways. If you have a bunch of TikTok videos to share with your peers, but missing out on an effective sharing solution, you can conveniently look forward to convert those videos into catchy and interesting GIFs that will definitely hold the attention of your viewers.
Feel motivated? See through the rest of this article to know some quick and easy TikTok to GIF conversion tools and software!
Part 2 How to Make a GIF From a TikTok Video
When looking through solutions to create GIF TikTok videos, you will find a pool of methods and tools available on the internet. All you need to do is select the best one for yourself and get started with converting TikTok Videos into GIFs. Given below are some of the best solutions adhering to the aforesaid concern:
01Filmora
Wondershare Filmora Video Editor is one of the best application software to create a TikTok GIF. This is a simple and smart converter application that caters to your concern in just a few minutes. What’s best is that this app is absolutely free to use and is compatible with your PC, smartphone and a variety of other devices. Here’s how you can use Filmora to convert your TikTok videos into GIFs:

Step 1: Import Your Video
Start with importing a desired TikTok video file to the Filmora timeline. You can also ‘Drag and Drop’ the video file to the editor timeline. Using this application, you have the flexibility to import your clip in almost any video format.

Step 2: Edit Your Clip
Suited to your content preferences, you can edit and enhance your clips with a variety of effects, like, cut, trim, rotate, split, etc., and make appropriate speed adjustments. You can even include text messages to make your GIF more impactful.

Wondershare Filmora
Get started easily with Filmora’s powerful performance, intuitive interface, and countless effects!
Try It Free Try It Free Try It Free Learn More >

Step 3: Let’s Save and Share!
When you are happy, save your work using the .gif file extension. That’s it! You are ready to share your creation with your social media peers.

02TikTok’s Inbuilt GIF Converter
TikTok allows you to directly convert its videos into GIFs. You can use the TikTok application in your smartphone to take up the conversion process. All you need to do is follow the steps given below:
Step 1: Select Your TikTok Video
To get started, open the TikTok application in your smartphone and select the video you want to convert into GIF.
Step 2: Share the Video
Click the ‘Share’ icon at the right of the video screen.

Step 3: Format Selection
Scroll down to the bottom of the screen and choose the ‘Share as GIF’ option. This will automatically convert your TikTok video into GIF in a few seconds.

Step 4: Save and Export
Click on the ‘Save Image’ option to save the GIF in your phone’s gallery. You can also export your creation to different social media platforms.
03Wondershare UniConverter
This one is a handy toolbox loaded with a variety of features that allow you to play with your video creativity. Using this tool, you can quickly create GIF for TikTok and also fix the size and duration of the same. This software supports almost all video formats and comes with an inbuilt editor that you can use to add effects and make your GIFs all the more interesting. This is compatible with your Windows or MacOS PC.
Take the following steps to create GIFs from TikTok videos using this software:

Step 1: Download and Launch the Application
Download the Wondershare UniConverter application to your PC from the software’s official website.
Step 2: Open GIF Maker
In the app’s welcome screen, navigate to the ‘Toolbox’ tab and select ‘GIF Maker’ from the panel that gets displayed.
Step 3: Upload Your TikTok Video
In the next pop-up window, select ‘Video to GIF’ and click on the (+) icon in the centre. You can also click on ‘Add Files’ in the top left and choose a saved TikTok video from your PC to upload.

Step 4: Trim Your Video
Trim the uploaded video to the desired portion from where you wish to create the GIF and set adequate time frames for the same. You can even drag the video thumbnail slider to trim the video.

Step 5: Let’s Get Creating!
Set the final size and frame rate from the ‘Output Size’ and ‘Frame Rate’ tabs respectively. To save your creation, browse and choose the desired system folder by clicking on the ‘Save to:’ tab. Lastly, select ‘Create GIF’ to start the conversion process.

04Kapwing GIF Maker
There may be instances where you cannot save or share TikTok videos. To cut the rush in such cases, you can use Kapwing’s GIF Maker to convert videos from TikTok to GIF online. This one is a free video editing tool that works with almost all internet enabled smartphones and supports almost all common video formats. Here’s what you need to do for making GIFs from TikTok videos using this tool:
Step 1: Copy a Video Link
Search your desired TikTok video and click on the ‘Share’ icon. In the drop down menu, select ‘Copy Link’ to save the video link in your device memory. Once this happens, you will get a confirmation message that says, ‘Copied’.

Step 2: Open GIF Maker
Open the GIF Maker tool in your browser and paste the saved TikTok video link in the editor’s URL bar. This will automatically redirect you to the Kapwing Studio, where you have the liberty to trim, crop or split your video clip to the desired time frame. It is better to set a play span of 3-5 seconds.
You can trim the clip by dragging its ends or introduce cuts at specific points using the split button above the editor timeline. To make volume adjustments, select the video layer and click on ‘Edit Video’ and move the adjuster circle to the left or right to decrease, increase and mute the video volume.


Step 3: Download and Share Your Creation
To save your work, tap ‘Export Video’ at the top and select ‘Export as GIF’ from the drop down menu. Wait for the conversion process to finish and click ‘Download’. This will save the GIF to your device.
You will find a watermark at the corner of your clip. Click ‘Sign In to Remove the Watermark’ to remove it. A workspace for the present and later projects will be created, where you can save you work for a couple of days with Kapwing’s free version. To export your work to social media, click ‘Share’. You can even host your creation on websites. Just copy the video link and select ‘Embed’.

05TT Downloader
This one is another online tool you can use to create GIFs from TikTok videos. This is a quick converter tool that transforms TikTok videos to GIFs in 5 easy steps within minutes. It is a browser tool and does not require a software download. All you need to do is explained in the following steps:

Step 1:
Visit the official site of the tool.
Step 2:
Select ‘TikTok to GIF’ to get redirected to the TikTok to GIF Converter home page.
Step 3:
Copy and paste the desired TikTok video link in the converter’s URL bar. To proceed further, click on ‘Get Video’.

Step 4:
Trim your clip within a time frame of 1-10 seconds.
Step 5:
Click ‘Done’ to initiate the conversion process. Once it finishes, you can download the converted GIF to your device.
06MiniTool MovieMaker
You can prefer this tool to convert TikTok videos in your PC into GIFs. This tool gives you the liberty to trim, cut, reverse and rotate GIFs and even add text and filters to them. Here’s how you can use this tool to transform TikTok videos into interesting GIFs:
Step 1:
Download and install this GIF maker tool in your PC. Launch the same when you are done with the installation process.
Step 2:
In the converter window, import and add your desired TikTok clip into the converter timeline.

Step 3:
You are now free to edit and add text to your video.
Step 4:
Once you finish, tap ‘Export’ and choose your output format as GIF.
Step 5:
Hit ‘Export’ to let the conversion process begin.
● Key Takeaways from This Episode →
● TikTok videos often lack the save and share features, which is an obvious necessity of today’s social outlook.
● Varieties of online tools and software are available for converting TikTok videos to GIFs to increase the sharing flexibility.
● Filmora is a quick and intelligent choice to take up the conversion process within a catch of few clicks.
Want to add sharing flexibility to TikTok videos? Convert them into GIFs!
In this article
01 [What is GIF TikTok?](#Part 1)
02 [How to Make a GIF From a TikTok Video](#Part 2)
Part 1 What Is TikTok GIF?
In today’s IT enhanced lifestyle, having a profound reach on social media is the new name of popularity. Everyone out there is profusely keen on creating and sharing a plethora of content varieties; memes, videos, animations and what not, across social communities. However, TikTok videos lag behind in this race; often lack the ‘Share’ flexibility.
To match up, there are solutions to convert TikTok video into GIFs. A TikTok GIF is a short, impactful and to the point clip that’s here to share fun and exciting content in the most interesting ways. If you have a bunch of TikTok videos to share with your peers, but missing out on an effective sharing solution, you can conveniently look forward to convert those videos into catchy and interesting GIFs that will definitely hold the attention of your viewers.
Feel motivated? See through the rest of this article to know some quick and easy TikTok to GIF conversion tools and software!
Part 2 How to Make a GIF From a TikTok Video
When looking through solutions to create GIF TikTok videos, you will find a pool of methods and tools available on the internet. All you need to do is select the best one for yourself and get started with converting TikTok Videos into GIFs. Given below are some of the best solutions adhering to the aforesaid concern:
01Filmora
Wondershare Filmora Video Editor is one of the best application software to create a TikTok GIF. This is a simple and smart converter application that caters to your concern in just a few minutes. What’s best is that this app is absolutely free to use and is compatible with your PC, smartphone and a variety of other devices. Here’s how you can use Filmora to convert your TikTok videos into GIFs:
Step 1: Import Your Video
Start with importing a desired TikTok video file to the Filmora timeline. You can also ‘Drag and Drop’ the video file to the editor timeline. Using this application, you have the flexibility to import your clip in almost any video format.
Step 2: Edit Your Clip
Suited to your content preferences, you can edit and enhance your clips with a variety of effects, like, cut, trim, rotate, split, etc., and make appropriate speed adjustments. You can even include text messages to make your GIF more impactful.
Wondershare Filmora
Get started easily with Filmora’s powerful performance, intuitive interface, and countless effects!
Try It Free Try It Free Try It Free Learn More >
Step 3: Let’s Save and Share!
When you are happy, save your work using the .gif file extension. That’s it! You are ready to share your creation with your social media peers.
02TikTok’s Inbuilt GIF Converter
TikTok allows you to directly convert its videos into GIFs. You can use the TikTok application in your smartphone to take up the conversion process. All you need to do is follow the steps given below:
Step 1: Select Your TikTok Video
To get started, open the TikTok application in your smartphone and select the video you want to convert into GIF.
Step 2: Share the Video
Click the ‘Share’ icon at the right of the video screen.
Step 3: Format Selection
Scroll down to the bottom of the screen and choose the ‘Share as GIF’ option. This will automatically convert your TikTok video into GIF in a few seconds.
Step 4: Save and Export
Click on the ‘Save Image’ option to save the GIF in your phone’s gallery. You can also export your creation to different social media platforms.
03Wondershare UniConverter
This one is a handy toolbox loaded with a variety of features that allow you to play with your video creativity. Using this tool, you can quickly create GIF for TikTok and also fix the size and duration of the same. This software supports almost all video formats and comes with an inbuilt editor that you can use to add effects and make your GIFs all the more interesting. This is compatible with your Windows or MacOS PC.
Take the following steps to create GIFs from TikTok videos using this software:
Step 1: Download and Launch the Application
Download the Wondershare UniConverter application to your PC from the software’s official website.
Step 2: Open GIF Maker
In the app’s welcome screen, navigate to the ‘Toolbox’ tab and select ‘GIF Maker’ from the panel that gets displayed.
Step 3: Upload Your TikTok Video
In the next pop-up window, select ‘Video to GIF’ and click on the (+) icon in the centre. You can also click on ‘Add Files’ in the top left and choose a saved TikTok video from your PC to upload.
Step 4: Trim Your Video
Trim the uploaded video to the desired portion from where you wish to create the GIF and set adequate time frames for the same. You can even drag the video thumbnail slider to trim the video.
Step 5: Let’s Get Creating!
Set the final size and frame rate from the ‘Output Size’ and ‘Frame Rate’ tabs respectively. To save your creation, browse and choose the desired system folder by clicking on the ‘Save to:’ tab. Lastly, select ‘Create GIF’ to start the conversion process.
04Kapwing GIF Maker
There may be instances where you cannot save or share TikTok videos. To cut the rush in such cases, you can use Kapwing’s GIF Maker to convert videos from TikTok to GIF online. This one is a free video editing tool that works with almost all internet enabled smartphones and supports almost all common video formats. Here’s what you need to do for making GIFs from TikTok videos using this tool:
Step 1: Copy a Video Link
Search your desired TikTok video and click on the ‘Share’ icon. In the drop down menu, select ‘Copy Link’ to save the video link in your device memory. Once this happens, you will get a confirmation message that says, ‘Copied’.
Step 2: Open GIF Maker
Open the GIF Maker tool in your browser and paste the saved TikTok video link in the editor’s URL bar. This will automatically redirect you to the Kapwing Studio, where you have the liberty to trim, crop or split your video clip to the desired time frame. It is better to set a play span of 3-5 seconds.
You can trim the clip by dragging its ends or introduce cuts at specific points using the split button above the editor timeline. To make volume adjustments, select the video layer and click on ‘Edit Video’ and move the adjuster circle to the left or right to decrease, increase and mute the video volume.
Step 3: Download and Share Your Creation
To save your work, tap ‘Export Video’ at the top and select ‘Export as GIF’ from the drop down menu. Wait for the conversion process to finish and click ‘Download’. This will save the GIF to your device.
You will find a watermark at the corner of your clip. Click ‘Sign In to Remove the Watermark’ to remove it. A workspace for the present and later projects will be created, where you can save you work for a couple of days with Kapwing’s free version. To export your work to social media, click ‘Share’. You can even host your creation on websites. Just copy the video link and select ‘Embed’.
05TT Downloader
This one is another online tool you can use to create GIFs from TikTok videos. This is a quick converter tool that transforms TikTok videos to GIFs in 5 easy steps within minutes. It is a browser tool and does not require a software download. All you need to do is explained in the following steps:
Step 1:
Visit the official site of the tool.
Step 2:
Select ‘TikTok to GIF’ to get redirected to the TikTok to GIF Converter home page.
Step 3:
Copy and paste the desired TikTok video link in the converter’s URL bar. To proceed further, click on ‘Get Video’.
Step 4:
Trim your clip within a time frame of 1-10 seconds.
Step 5:
Click ‘Done’ to initiate the conversion process. Once it finishes, you can download the converted GIF to your device.
06MiniTool MovieMaker
You can prefer this tool to convert TikTok videos in your PC into GIFs. This tool gives you the liberty to trim, cut, reverse and rotate GIFs and even add text and filters to them. Here’s how you can use this tool to transform TikTok videos into interesting GIFs:
Step 1:
Download and install this GIF maker tool in your PC. Launch the same when you are done with the installation process.
Step 2:
In the converter window, import and add your desired TikTok clip into the converter timeline.
Step 3:
You are now free to edit and add text to your video.
Step 4:
Once you finish, tap ‘Export’ and choose your output format as GIF.
Step 5:
Hit ‘Export’ to let the conversion process begin.
● Key Takeaways from This Episode →
● TikTok videos often lack the save and share features, which is an obvious necessity of today’s social outlook.
● Varieties of online tools and software are available for converting TikTok videos to GIFs to increase the sharing flexibility.
● Filmora is a quick and intelligent choice to take up the conversion process within a catch of few clicks.
Top 10 Video to GIF Converters: Top Picks
Best 10 Video to GIF Converters: Top Picks
An easy yet powerful editor
Numerous effects to choose from
Detailed tutorials provided by the official channel
Having trouble converting your videos to GIF? Browse the top 10 converters to sort this out!
In this article
01 [Why GIFs are Widely Used and Popular?](#Part 1)
02 [Top 10 Ways to Turn Video into GIF](#Part 2)
Part 1 Why GIFs are Widely Used and Popular?
If you take a poll on the watch preference of GIF versus videos, most of votes you get would be in favor of watching GIFs. There are obvious reasons to the fact that anyone would prefer watching a GIF over a video, irrespective of its length. Some major ones that make it quite annoying to watch videos include the following:
● To begin with, you need to turn the video on and off, depending on your choice of watching a video or surfing through stories and feeds, failing which you get to hear additional sounds through your feed from the already running video. You further need to stop the music or go for a volume control in case you are not interested to watch the video.
● Most of the videos you run turn up to be irrelevant or uninteresting through the middle, but you don’t have a choice to make bit adjustments. If however possible, the method is not quite convenient. You may need to visit a different site in case you run a video that is not integrated with webpage of your searched content, wait for the portal’s interface to load or watch an advertisement.
● GIFs, on the other hand, do not require pausing or turning off, and run automatically. You also don’t need to mute any sounds. These ensure to-the-point message delivery and don’t divert your attention from the primary content you visit the webpage for.
Owing to the above, most of us are now much interested to convert videos to GIFs for an exact, impactful and to the point content creation and sharing. See through the next sections of this article to learn about the best video to GIF conversion tools and software.
Part 1 Top 10 Ways to Turn Video into GIF
Considering the credibility of GIFs, you may often require to convert your long videos into short and content specific GIFs. Given below are the 10 best methods to cater to the need of video to GIF conversion:
01Filmora
Wondershare Filmora Video Editor is one among the most popular and easy methods to convert videos to GIFs. It is compatible with almost all common video formats and is loaded with a plethora of exciting effects and editing tools. Take the following steps to create GIFs from videos using this application:
Wondershare Filmora
Get started easily with Filmora’s powerful performance, intuitive interface, and countless effects!
Try It Free Try It Free Try It Free Learn More >

Step 1: Import Your Video
Launch Filmora and import your desired video in the app’s welcome window. To do this, click on ‘New Project’ followed by ‘Import’ option from the drop down menu to add your video to the Filmora.

Step 2: Timeline Dragging
Add your video to the app’s timeline using the ‘Drag and Drop’ method. You can also extract video frames by taking screenshots and merge these images into your GIF from the media library.

Step 3: Explore Your Editing Skills
You can now edit the imported video in the timeline using a range of interesting effects. Crop, trim, split or make speed adjustments to give your video a catchy look.

Step 4: Include Messages
Try adding texts and supplementary elements to deliver impactful messages through your creation.

Step 5: It’s Time to Share!
Click ‘Export’ to save your GIF to your device. You are now ready to post your work in your social communities to get the most deserved attention of your peers!

02YouTube to GIF
This one is a simple and user-friendly video to GIF converter. You can convert videos to GIFs from your PC or other online platforms with this converter. The converter allows you to play with a variety of editing effects to make your creation more interesting. All you need to do is the following:
● In the video URL bar, type ‘gif’ after ‘www.’ and you will be redirected to converter’s working window. Set the GIF time interval or apply specific effects using the tools from the panel in the left of the working window.


● To set the video time frame, highlight it in the video timeline. Set the desired interval using the ‘Start Time’ and ‘End Time’ options.

● To add a new visual effect, select it from the menu. Below the video timeline, a row of parameters will get displayed. Set the effect parameters to make desired changes.
● Click ‘Create GIF’. In the ‘Settings’ menu, you can rename and add tags to your creation and even make it private.

● That’s it! You can download your GIF now. You may get a converter purchase offer for enabling advanced features. While most users prefer sticking to the free version, it is up to you whether to decline or accept the purchase offer.
● The ‘Download’ feature is exclusive to registered users. However, if you don’t prefer creating an account, just open the GIF download link in a separate tab’s ‘Direct Link’ row. Alternatively, you can replace ‘gif’ with ‘conv’ in the video URL bar and choose ‘Convert to GIF’. However, this process may take some extra minutes.

03Giphy GIF Maker
This is an editing tool that you can use to convert video to GIF online. This one is a reliable converter tool with a user-cohesive interface. It is a simple video editor that is available to you for free. All you need to do is mentioned below:
Step 1: Load your Video
Go to the official app website and paste your desired video link in the search bar. Your video gets uploaded to the app’s editor screen. Specify the time frame and check out your GIF’s preview.

Step 2: Let’s Go Editing!
Select ‘Continue to Decorate’ to edit your GIF with texts, effects, frames and filters. You can even go for a straight upload if your video doesn’t require customization.

Step 3: Time to Share!
Select ‘Continue to Upload’ and add required tags. Tap ‘Upload to Giphy’ to make a social media post or add it to the app’s website through a specific share code.
04Wondershare TunesGo
This is an effective video to GIF creator tool, loaded with extensive features. You can use this application to convert videos, live photos and multiple snaps into interesting GIFs. TunesGo gives you the freedom to edit your work in your own style with a variety of effects. Here’s what you need to do:

Step 1: Launch TunesGo
Download, install and launch the app into your PC. You may be asked for a device connection setup, but you can skip that in case GIF creation is your only requirement.

Step 2: Upload your Video
In the app’s welcome screen, navigate to ‘Toolbox’ at the top. From the drop down interface, choose ‘GIF Maker’. In the new window that pops-up next, click on ‘Add’ to upload the desired video to the app from your PC.

Step 3: Let’s Create!
Set the required time frame for your GIF in the app’s timeline and tap the ‘Create GIF’ button to start the conversion process. On completion, your work gets automatically saved in the ‘Pictures’ folder in your PC. You can also customize your target location.

05Vimeo
Vimeo is also a quick, 3-stepvideo to GIF converter. However, you need to have a Vimeo account to take up the conversion process. This is an easy and hassle free GIF creator, that adheres to your creation needs within minutes. Here’s what you need to do:
Step 1: Upload Your Video
Log in to your Vimeo account. In the opening window, select ’Upload’ from the toolbar at the top. ‘Drag and Drop’ or click ‘Choose Files’ to upload the desired video from your device.

Step 2: Create Your GIF
After you are done uploading the video, select ‘Create a GIF’ from the sidebar at the left. You will be directed to the GIF Editor window. Select a loop section from the video and set a time frame of maximum 6 seconds in the video timeline. Now click ‘Create GIF’.


Step 3: Export Your Creation
Your GIF is ready to download and share. You can also embed your GIF by generating embed codes for specific platforms.
06 Adobe Photoshop
This one is one f the most popular editing applications you can use to make GIF out of video. It’s simple and user-friendly interface does not require you to possess a Photoshop mastery for the conversion purpose. Here’s what you need to follow:
Step 1: Search Your Video
Find a video of your choice from a desired platform. In case you want a YouTube video, add ‘ss’ prior to the video’s service name in YouTube’s URL bar.
STEP 2: Edit Your Video
Use any preferable video splitters and editors to crop, trim and add interesting effects to your video and set a maximum time frame of 3 seconds.
Step 3: Create GIF
Open your edited video in Adobe Photoshop and tap ‘File Import-Video frames into layers’.

Step 4: Adjust Settings
Make required setting adjustments and click on ‘File-Save for Web’. Try adjusting image resolution and color range if your file size exceeds 10 MB.

Step 5: Save Your Work
In the ’Files’ tab at the top, select ‘Save’ and choose the ‘.gif’ extension in the ‘File Type’ dialog box to save your creation to your PC.
07Convertio
This converter provides a simple, 3-step process to create GIF from video. Either use it as a browser extension or download it from Google Chrome Webstore. Take the following steps to convert videos to GIF online.
● Upload your desired video to the service timeline. You can either choose files directly or ‘Drag and Drop’ them from your device.
● Select ‘Convert’ to make GIF from your uploaded video.
● Tap ‘Download’ to save your creation.

You can use this service to make different format conversions. However, this converter does not allow you to edit or add effects your GIF.
08MakeAGif
You can use this tool as a GIF video maker online to create, exchange and share GIFs on different platforms. Additionally, you also get the flexibility to use already saved images in your device to add them to your GIF. The app’s basic version allows you to create GIFs without watermarks. To add watermarks, you will need an account on the app. To convert videos to GIFs using this tool, you should take the following steps:
Step 1: Upload Your Video
In the app’s welcome screen, click on ‘Video to GIF’ and upload a desired video in the editor timeline. Add effects and make speed and time frame adjustments. When satisfied, tap ‘Continue to Publishing’.

Step 2: Add Names and Tags
In the publishing window, give a suitable name and add required tags to your edited video to make it easily identifiable. When you are done, click on ‘Create a GIF’ from the bottom right.

Step 3: Ready to Share!
You can now share your created GIF across social media platforms.

09Adobe Premiere
Similar to Adobe Photoshop, Adobe Premiere too is quite a preferred application for creating GIFs from videos. This is a simple, quick and free application that converts your videos to GIFs in a span of few minutes. Here’s what you need to do to go about the process:

Step 1: Edit your Video
Add a video of your choice in the Adobe Premiere timeline and play with your editing creativity to add desired effects and filters to it. Make sure to set requisite time frames to your edit.

Step 2: Prepare an Export
Click into the app’s video timeline, and prepare a file export using the following path:
File> Export> Media

Step 3: Settings Adjustments
In the Media Export window, navigate to the ‘Format’ tab. From the drop down menu, choose ‘Animated GIF’. Here, you can add your gif file, select its target destination and adjust the required settings.

Step 4: Export Your Work
Click ‘Export’ to share your creation on social media or click on ‘Queue’ to send your GIF to a specific media encoder.

1010. Movavi Video Converter
This is one of the latest video converter software you can rely on to make GIF from video files. This software allows you to create top quality animated GIFs and is compatible with a variety of video formats. Using this converter, you can create amazing GIFs in 5 quick steps: here’s what you need to follow:
Step 1: Download and Install the Software
To begin, download the converter software from its official site and adhere to the user instructions to install the same in your system.
Step 2: Upload Your Video
In the software’s opening window, click on ‘Add Media’ followed by ‘Add Video’ and select a desired video from your system to upload on the Movavi video timeline.

Step 3: Trim Your Video
Select ‘Edit’ from the right of your video file. In the editing window, specify the initial cut of the video by displacing the marker to the desired point. Click on ‘Scissors’ to add multiple cut points to your video. You can even drag the cut points around the editor timeline. Choose the unvented sections and click ‘Trash Can’. When the result satisfies you, click ‘Done’.

Step 4: Choose a Conversion Format
Navigate to the ‘Images’ tab and select ‘GIF’ and set an adequate size for the GIF. Here, you can adjust quality, frame size and rate and resize method using the ‘Cogwheel’ tool.

Step 5: Let’s Get Converting!
Tap ‘Convert’ and wait for the conversion to finish. You will be automatically directed to the folder where your converted files get saved.

● Key Takeaways from This Episode →
● GIFs are short, to the point and convenient to access, providing exact and impactful message delivery.
● The software market is flooded with a variety of editing tools to convert your dull videos to catchy GIFs.
● Filmora is a quick and smart editing tool that envisages your GIF creating experience with a range of exciting features.
Having trouble converting your videos to GIF? Browse the top 10 converters to sort this out!
In this article
01 [Why GIFs are Widely Used and Popular?](#Part 1)
02 [Top 10 Ways to Turn Video into GIF](#Part 2)
Part 1 Why GIFs are Widely Used and Popular?
If you take a poll on the watch preference of GIF versus videos, most of votes you get would be in favor of watching GIFs. There are obvious reasons to the fact that anyone would prefer watching a GIF over a video, irrespective of its length. Some major ones that make it quite annoying to watch videos include the following:
● To begin with, you need to turn the video on and off, depending on your choice of watching a video or surfing through stories and feeds, failing which you get to hear additional sounds through your feed from the already running video. You further need to stop the music or go for a volume control in case you are not interested to watch the video.
● Most of the videos you run turn up to be irrelevant or uninteresting through the middle, but you don’t have a choice to make bit adjustments. If however possible, the method is not quite convenient. You may need to visit a different site in case you run a video that is not integrated with webpage of your searched content, wait for the portal’s interface to load or watch an advertisement.
● GIFs, on the other hand, do not require pausing or turning off, and run automatically. You also don’t need to mute any sounds. These ensure to-the-point message delivery and don’t divert your attention from the primary content you visit the webpage for.
Owing to the above, most of us are now much interested to convert videos to GIFs for an exact, impactful and to the point content creation and sharing. See through the next sections of this article to learn about the best video to GIF conversion tools and software.
Part 1 Top 10 Ways to Turn Video into GIF
Considering the credibility of GIFs, you may often require to convert your long videos into short and content specific GIFs. Given below are the 10 best methods to cater to the need of video to GIF conversion:
01Filmora
Wondershare Filmora Video Editor is one among the most popular and easy methods to convert videos to GIFs. It is compatible with almost all common video formats and is loaded with a plethora of exciting effects and editing tools. Take the following steps to create GIFs from videos using this application:
Wondershare Filmora
Get started easily with Filmora’s powerful performance, intuitive interface, and countless effects!
Try It Free Try It Free Try It Free Learn More >
Step 1: Import Your Video
Launch Filmora and import your desired video in the app’s welcome window. To do this, click on ‘New Project’ followed by ‘Import’ option from the drop down menu to add your video to the Filmora.
Step 2: Timeline Dragging
Add your video to the app’s timeline using the ‘Drag and Drop’ method. You can also extract video frames by taking screenshots and merge these images into your GIF from the media library.
Step 3: Explore Your Editing Skills
You can now edit the imported video in the timeline using a range of interesting effects. Crop, trim, split or make speed adjustments to give your video a catchy look.
Step 4: Include Messages
Try adding texts and supplementary elements to deliver impactful messages through your creation.
Step 5: It’s Time to Share!
Click ‘Export’ to save your GIF to your device. You are now ready to post your work in your social communities to get the most deserved attention of your peers!
02YouTube to GIF
This one is a simple and user-friendly video to GIF converter. You can convert videos to GIFs from your PC or other online platforms with this converter. The converter allows you to play with a variety of editing effects to make your creation more interesting. All you need to do is the following:
● In the video URL bar, type ‘gif’ after ‘www.’ and you will be redirected to converter’s working window. Set the GIF time interval or apply specific effects using the tools from the panel in the left of the working window.
● To set the video time frame, highlight it in the video timeline. Set the desired interval using the ‘Start Time’ and ‘End Time’ options.
● To add a new visual effect, select it from the menu. Below the video timeline, a row of parameters will get displayed. Set the effect parameters to make desired changes.
● Click ‘Create GIF’. In the ‘Settings’ menu, you can rename and add tags to your creation and even make it private.
● That’s it! You can download your GIF now. You may get a converter purchase offer for enabling advanced features. While most users prefer sticking to the free version, it is up to you whether to decline or accept the purchase offer.
● The ‘Download’ feature is exclusive to registered users. However, if you don’t prefer creating an account, just open the GIF download link in a separate tab’s ‘Direct Link’ row. Alternatively, you can replace ‘gif’ with ‘conv’ in the video URL bar and choose ‘Convert to GIF’. However, this process may take some extra minutes.
03Giphy GIF Maker
This is an editing tool that you can use to convert video to GIF online. This one is a reliable converter tool with a user-cohesive interface. It is a simple video editor that is available to you for free. All you need to do is mentioned below:
Step 1: Load your Video
Go to the official app website and paste your desired video link in the search bar. Your video gets uploaded to the app’s editor screen. Specify the time frame and check out your GIF’s preview.
Step 2: Let’s Go Editing!
Select ‘Continue to Decorate’ to edit your GIF with texts, effects, frames and filters. You can even go for a straight upload if your video doesn’t require customization.
Step 3: Time to Share!
Select ‘Continue to Upload’ and add required tags. Tap ‘Upload to Giphy’ to make a social media post or add it to the app’s website through a specific share code.
04Wondershare TunesGo
This is an effective video to GIF creator tool, loaded with extensive features. You can use this application to convert videos, live photos and multiple snaps into interesting GIFs. TunesGo gives you the freedom to edit your work in your own style with a variety of effects. Here’s what you need to do:
Step 1: Launch TunesGo
Download, install and launch the app into your PC. You may be asked for a device connection setup, but you can skip that in case GIF creation is your only requirement.
Step 2: Upload your Video
In the app’s welcome screen, navigate to ‘Toolbox’ at the top. From the drop down interface, choose ‘GIF Maker’. In the new window that pops-up next, click on ‘Add’ to upload the desired video to the app from your PC.
Step 3: Let’s Create!
Set the required time frame for your GIF in the app’s timeline and tap the ‘Create GIF’ button to start the conversion process. On completion, your work gets automatically saved in the ‘Pictures’ folder in your PC. You can also customize your target location.
05Vimeo
Vimeo is also a quick, 3-stepvideo to GIF converter. However, you need to have a Vimeo account to take up the conversion process. This is an easy and hassle free GIF creator, that adheres to your creation needs within minutes. Here’s what you need to do:
Step 1: Upload Your Video
Log in to your Vimeo account. In the opening window, select ’Upload’ from the toolbar at the top. ‘Drag and Drop’ or click ‘Choose Files’ to upload the desired video from your device.
Step 2: Create Your GIF
After you are done uploading the video, select ‘Create a GIF’ from the sidebar at the left. You will be directed to the GIF Editor window. Select a loop section from the video and set a time frame of maximum 6 seconds in the video timeline. Now click ‘Create GIF’.
Step 3: Export Your Creation
Your GIF is ready to download and share. You can also embed your GIF by generating embed codes for specific platforms.
06 Adobe Photoshop
This one is one f the most popular editing applications you can use to make GIF out of video. It’s simple and user-friendly interface does not require you to possess a Photoshop mastery for the conversion purpose. Here’s what you need to follow:
Step 1: Search Your Video
Find a video of your choice from a desired platform. In case you want a YouTube video, add ‘ss’ prior to the video’s service name in YouTube’s URL bar.
STEP 2: Edit Your Video
Use any preferable video splitters and editors to crop, trim and add interesting effects to your video and set a maximum time frame of 3 seconds.
Step 3: Create GIF
Open your edited video in Adobe Photoshop and tap ‘File Import-Video frames into layers’.
Step 4: Adjust Settings
Make required setting adjustments and click on ‘File-Save for Web’. Try adjusting image resolution and color range if your file size exceeds 10 MB.
Step 5: Save Your Work
In the ’Files’ tab at the top, select ‘Save’ and choose the ‘.gif’ extension in the ‘File Type’ dialog box to save your creation to your PC.
07Convertio
This converter provides a simple, 3-step process to create GIF from video. Either use it as a browser extension or download it from Google Chrome Webstore. Take the following steps to convert videos to GIF online.
● Upload your desired video to the service timeline. You can either choose files directly or ‘Drag and Drop’ them from your device.
● Select ‘Convert’ to make GIF from your uploaded video.
● Tap ‘Download’ to save your creation.
You can use this service to make different format conversions. However, this converter does not allow you to edit or add effects your GIF.
08MakeAGif
You can use this tool as a GIF video maker online to create, exchange and share GIFs on different platforms. Additionally, you also get the flexibility to use already saved images in your device to add them to your GIF. The app’s basic version allows you to create GIFs without watermarks. To add watermarks, you will need an account on the app. To convert videos to GIFs using this tool, you should take the following steps:
Step 1: Upload Your Video
In the app’s welcome screen, click on ‘Video to GIF’ and upload a desired video in the editor timeline. Add effects and make speed and time frame adjustments. When satisfied, tap ‘Continue to Publishing’.
Step 2: Add Names and Tags
In the publishing window, give a suitable name and add required tags to your edited video to make it easily identifiable. When you are done, click on ‘Create a GIF’ from the bottom right.
Step 3: Ready to Share!
You can now share your created GIF across social media platforms.
09Adobe Premiere
Similar to Adobe Photoshop, Adobe Premiere too is quite a preferred application for creating GIFs from videos. This is a simple, quick and free application that converts your videos to GIFs in a span of few minutes. Here’s what you need to do to go about the process:
Step 1: Edit your Video
Add a video of your choice in the Adobe Premiere timeline and play with your editing creativity to add desired effects and filters to it. Make sure to set requisite time frames to your edit.
Step 2: Prepare an Export
Click into the app’s video timeline, and prepare a file export using the following path:
File> Export> Media
Step 3: Settings Adjustments
In the Media Export window, navigate to the ‘Format’ tab. From the drop down menu, choose ‘Animated GIF’. Here, you can add your gif file, select its target destination and adjust the required settings.
Step 4: Export Your Work
Click ‘Export’ to share your creation on social media or click on ‘Queue’ to send your GIF to a specific media encoder.
1010. Movavi Video Converter
This is one of the latest video converter software you can rely on to make GIF from video files. This software allows you to create top quality animated GIFs and is compatible with a variety of video formats. Using this converter, you can create amazing GIFs in 5 quick steps: here’s what you need to follow:
Step 1: Download and Install the Software
To begin, download the converter software from its official site and adhere to the user instructions to install the same in your system.
Step 2: Upload Your Video
In the software’s opening window, click on ‘Add Media’ followed by ‘Add Video’ and select a desired video from your system to upload on the Movavi video timeline.
Step 3: Trim Your Video
Select ‘Edit’ from the right of your video file. In the editing window, specify the initial cut of the video by displacing the marker to the desired point. Click on ‘Scissors’ to add multiple cut points to your video. You can even drag the cut points around the editor timeline. Choose the unvented sections and click ‘Trash Can’. When the result satisfies you, click ‘Done’.
Step 4: Choose a Conversion Format
Navigate to the ‘Images’ tab and select ‘GIF’ and set an adequate size for the GIF. Here, you can adjust quality, frame size and rate and resize method using the ‘Cogwheel’ tool.
Step 5: Let’s Get Converting!
Tap ‘Convert’ and wait for the conversion to finish. You will be automatically directed to the folder where your converted files get saved.
● Key Takeaways from This Episode →
● GIFs are short, to the point and convenient to access, providing exact and impactful message delivery.
● The software market is flooded with a variety of editing tools to convert your dull videos to catchy GIFs.
● Filmora is a quick and smart editing tool that envisages your GIF creating experience with a range of exciting features.
Also read:
- 2024 Approved How to Make Your GIF on WhatsApp in Simple Ways
- Updated 2024 Approved Can I Do Animated Logo Design Without Design Skills?
- Updated In 2024, Before You Learn 3D Animation Some Things You Should Know
- In 2024, Tutorials to Make Animated Images – Even if Youre Just Starting Out
- In 2024, What Is A GIF
- Updated In 2024, What Wikipedia Wont Tell You Specifically About Character Rigging
- Updated 2024 Approved No. 1 Maker to Animate Your Logo Online Free
- Updated In 2024, 10 Top Memorable Japanese Cat Cartoons
- In 2024, Most Effective Tactics to Set WhatsApp Status
- Updated How to Create a Whiteboard Animation Video
- Updated Ready to Animate Game Character From Scratch, In 2024
- Updated Tutorial Guide to Animate Pictures in Canva
- 10 Trendy Free Logo Animation Templates for 2024
- Updated 5 Ways You Never Heard of for Converting MP4 to GIF in Photoshop for 2024
- Updated In 2024, How to Animate Image on Scroll
- 2024 Approved How to Make a Video a Live Photo
- Create Animated Video on Canva
- In 2024, The Only Guide Youll Ever Need to Learn That Make 2D Rigging Clear to You
- Ways to Make Sure You Get the Most up to Date Cartoon Character Design Tips for 2024
- 2024 Approved How to Create a Whiteboard Animation Video
- Whats the Best 10 Photo Animator Templates That Bring Your Images to Life for 2024
- In 2024, Top 10 Cartoon Canvas Painting Ideas for Total Beginners
- Top 7 Best Free GIF Apps for Android
- New How to Reduce GIF Size and Best GIF Resizers for 2024
- Updated Top 10 Old Cartoons From Cartoon Network That You Miss
- Updated Methods to Make Photo Motion Effect Online, In 2024
- Learn All About Lip-Syncing in Animation
- New In 2024, Beginner Tutorial on Making Unity 2D Animation
- Updated In 2024, Best GIF Croppers How to Crop an Animated GIF
- Updated Ways to Get the Most up to Date Cartoon Character Design Tips for 2024
- Updated Best 15 Horror Animes That Will Trigger a Heart Attack for 2024
- New 2024 Approved Learn Simple Blender Rigging in Only 2 Minutes
- All About 3D Medical Animation
- Updated In 2024, 12 Aesthetic GIF Instagram for Marketers
- New In 2024, How To Remove The Endless Loop From Animated GIF
- 10 Must Watch Netflix Cartoon Series
- Updated In 2024, Useful Tips for Canva Animated Elements
- How to Make a Video a Live Photo for 2024
- 2024 Approved How to Combine Multiple GIFs Into One with GIF Combiner
- Updated In 2024, The Best Free 12 GIF Meme Maker at a Glance
- The Secret Sauce for Making GIF Instagram Story More Stunning
- New In 2024, Tutorials to Make Animated Images – Even if Youre Just Starting Out
- New Dead Simple Guide to Create New and Exciting Blackboard Animation
- 2024 Approved Best 15 Instant Classics Animated Cartoon Movies
- New 2024 Approved 10 Amazing Wallpaper Collage Ideas and Photos
- Updated Ultimate Guide to Animated Characters Drawings for 2024
- Best 15 2D Animation Software Free That Worth to Try
- Top 10 3D Text Animation Templates for 2024
- New How to Make a 3D Cartoon of Yourself
- 6 Types of Animation You May Like
- How to Share Location in Messenger On Nubia Red Magic 8S Pro? | Dr.fone
- How to Show Wi-Fi Password on Samsung Galaxy S24 Ultra
- How to use Device Manager to reinstall hardware drivers in Windows 11/10/7
- How To Bypass iCloud Activation Lock On iPod and iPhone 15 Pro Max The Right Way
- In 2024, How to Unlock Apple iPhone 11 With an Apple Watch & What to Do if It Doesnt Work | Dr.fone
- Top 11 Free Apps to Check IMEI on Vivo T2 Pro 5G Phones
- In 2024, How to Screen Mirroring Gionee F3 Pro to PC? | Dr.fone
- Repair damaged, unplayable video files of Samsung Galaxy F34 5G
- 8 Ultimate Fixes for Google Play Your Samsung Galaxy A24 Isnt Compatible | Dr.fone
- Top 10 Fingerprint Lock Apps to Lock Your Realme 12 Pro+ 5G Phone
- Gmail Not Working on Xiaomi Redmi A2 7 Common Problems & Fixes | Dr.fone
- In 2024, 3 Effective Ways to Unlock iCloud Account Without Password On iPhone 8
- In 2024, How to Unlock Xiaomi Mix Fold 3 Pattern Lock if Forgotten? 6 Ways
- A Step-by-Step Guide to Finding Your Apple ID From Your Apple iPhone 8
- Looking For A Location Changer On Samsung Galaxy F15 5G? Look No Further | Dr.fone
- How to Unlock Realme 12 Pro+ 5G Phone Pattern Lock without Factory Reset
- In 2024, Unlock iPhone 14 Plus Without Passcode Easily
- How to Fix Unfortunately, Contacts Has Stopped Error on Vivo Y27s | Dr.fone
- In 2024, Your Account Has Been Disabled in the App Store and iTunes On Apple iPhone X?
- How to retrieve erased music from Infinix
- In 2024, How to Track Motorola Moto G14 Location without Installing Software? | Dr.fone
- In 2024, How To Stream Anything From Honor X9b to Apple TV | Dr.fone
- Removing Device From Apple ID For your iPhone XS
- How to Unlock iPhone 14 Pro Without Passcode? | Dr.fone
- In 2024, Top 5 Car Locator Apps for Samsung Galaxy M14 5G | Dr.fone
- How to identify missing or malfunctioning your drivers with Windows Device Manager on Windows 7
- How to Update Apple iPhone 6s without Losing Any Data? | Dr.fone
- The way to recover deleted photos on Oppo Find X7 Ultra without backup.
- The Ultimate Guide to Bypassing iCloud Activation Lock on Apple iPhone 11 Pro
- How to Fix iPad or iPhone 14 Pro Stuck On Activation Lock?
- Simple Solutions to Fix Android SystemUI Has Stopped Error For ZTE Nubia Flip 5G | Dr.fone
- How to Activate Stellar Data Recovery for iPhone 12 Pro | Stellar
- In 2024, 5 Ways To Teach You To Transfer Files from Lava Blaze Pro 5G to Other Android Devices Easily | Dr.fone
- How to Rescue Lost Messages from Motorola Moto G 5G (2023)
- How to Fix Error 495 While Download/Updating Android Apps On Samsung Galaxy M34 | Dr.fone
- What is Fake GPS Location Pro and Is It Good On Vivo S17? | Dr.fone
- 7 Solutions to Fix Chrome Crashes or Wont Open on Nokia C32 | Dr.fone
- How to Unlock Apple ID From your Apple iPhone 14 Pro Max without Security Questions?
- In 2024, How to Track a Lost Samsung Galaxy M14 4G for Free? | Dr.fone
- In 2024, How to Factory Reset iPad or Apple iPhone 13 mini without iCloud Password or Apple ID?
- How To Restore a Bricked Honor Magic Vs 2 Back to Operation | Dr.fone
- How to Reset Tecno Spark Go (2024) without Losing Data | Dr.fone
- Title: Updated 2024 Approved What Is Still Motion Animation?
- Author: Elon
- Created at : 2024-05-19 03:05:49
- Updated at : 2024-05-20 03:05:49
- Link: https://animation-videos.techidaily.com/updated-2024-approved-what-is-still-motion-animation/
- License: This work is licensed under CC BY-NC-SA 4.0.
