

Updated A Beginners Guide for Learning 3D Animation
Beginners Guide for Learning 3D Animation
A Beginners Guide for Learning 3D Animation
An easy yet powerful editor
Numerous effects to choose from
Detailed tutorials provided by the official channel
“I am still finding it difficult to go into animation even after covering some basic concepts of animation, hardware, software, books, and courses. Is there a way I can learn 3D animation and graphic design courses quickly and easily?”
This guide will show you what professional 3D animators go through and share how you can start your animation career. Sit back and enjoy this all-encompassing and educating guide to learn 3D Animation for beginners!
In this article
01 [Should You Study 3D Animation?](#Part 1)
02 [Top 5 Programs for 3D Animation](#Part 2)
03 [The Best 10 Online Courses to Learn 3D Animation for Beginners](#Part 3)
04 [Recommended 3D Animation Learning Books and Resources](#Part 4)
Part 1 Should You Study 3D Animation?
3D animation is a graphic design technique that uses motions to bring props, characters, objects, etc., to life. For a long time, 3D animation has created TV shows, films, and games, but now it is widely used to create materials for businesses that help them advertise their services and products. The most common usage of 3D animation is creating three-dimensional moving objects and placing them in a digital environment. There is software used to generate these objects specifically for 3D animation with 3D animation courses online for free to learn how to use such software. This software helps 3D animators to create the illusion of movement needed to bring these objects to life.
As the popularity of 3D animation begins to grow, its usage also increases. 3D animation can be useful for the following:
● Many businesses use 3D animation for presentation and more examples and graphics.
● 3D animation is used in real estate as many apartment complexes use it to create interior and exterior renders for their properties. 3D animation allows renters or buyers to view the property without visiting it.
● 3D animation can also be valuable in the medical industry to create exciting graphics for presentation.
You can divide the process of 3D animation into three primary phases:
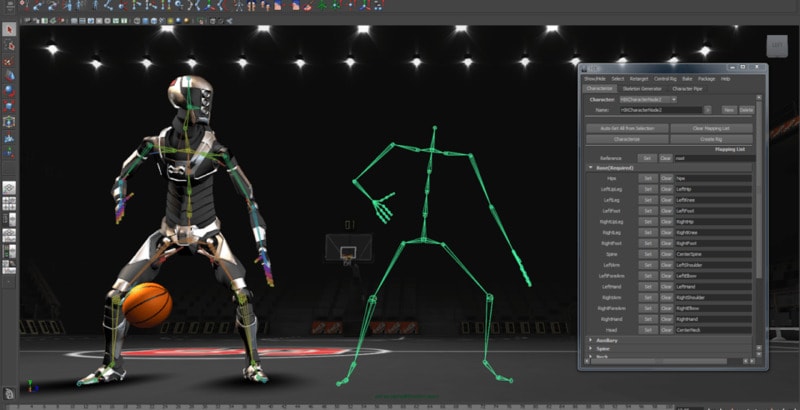
● Modeling: The modeling stage is how characters or objects get created. This stage can include scanning natural objects into a computer or using a modeling tool. Both methods are helpful and outstanding. When you scan real-world objects into your computer, it saves a lot of time; creating a model entirely by yourself using a tool will give you control over the entire look. Irrespective of the methods used, textures must be added to the character or objects before moving to the next stage.
● Animation and layout: At this stage, the created models are animated and positioned into a particular scene, first determining a layout by creating a set and adding objects into it. The characters and things must be animated by assigning animation variables, and then models within the scene can be given life through motion capture and keyframing.
● Rendering: This stage is where the scene generates into the finished image by using a specific software as the process of rendering cannot be handled by a typical computer
For learning 3D animation, practice, to make yourself perfect for getting your 3D animation as smooth and precise as you would like it to take some time. If your set goal is to create 3D characters, you first need to know how to recreate people in a digital form. According to the 3D animation forum, it takes at least eight months to learn how to animate if only you spend about three to four hours every day. It takes firm dedication to learn 3D animation and graphic design courses.
Part 2 Top 5 Programs for 3D Animation
Aside from the three basic phases involved in 3D animation, there are other individual steps that and needed in 3D animation and 3D animation graphic design courses which include:
● Step 1: creating the story and conceptualizing
● Step 2: making the 3D models
● Step 3: rigging, texturing, and animation
● Step 4: setting up the cameras and lightning
● Step 5: rendering
● Step 6: applying special effects and compositing
● Step 7: editing, music, and Foley
● Step 8: the final output
The best part of 3D animation is finding free animation programs without watermarks that are very useful for creating content on Windows and Mac. These best 3D animation courses include:
01Filmora
For Win 7 or later (64-bit)
For macOS 10.12 or later
Wondershare Filmora Video Editor is a straightforward and powerful animation software to create 3D animated text, shapes, elements, or transitions you want for your videos with its 800+ stunning effects. This software comes with a keyframing, green screen, video stabilization, color tuning, split and zoom, amongst others, that help you create precise and smooth animation effects. Filmora program works perfectly on your Windows and Mac computer.
02Blender
Blender is an open-source, powerful 3D animation software for professional users. This animation software does not easily make an image and mission since it focuses on 3D. It takes your animation projects to a whole new level as this program works perfectly on your Mac computer.
03DAZ Studio
DAZ Studio is a potent and completely free tool for 3D animation creation that lets you create short videos whether you are using this for pleasure or business. This 3D animation creator is complicated to use, and 3D effects are at the core focus of this software. This software is highly compatible with Windows 64 bit, and you can build a model, render, and pose animation within the skin texture level.
04Terragen

Terragen is a completely free 3D animation program for Windows tablets and computers. It allows you to create a photo-realistic CG environment and 3D animation that you want. The featured image gallery on this software homepage will give you a profound idea of the outcome when you use the program.
05Anim8or
Anim8or Easy free 3D animation program supports 3D modeler and Truetype fonts to meet your advanced needs. This program is difficult for beginners but allows you to create a unique work according to your needs.
Part 3 The Best 10 Online Courses to Learn 3D Animation for Beginners
There are online 3D animation courses for beginners to learn from and these courses include:
01Introduction to Voxel Art for Character Design by Zach Soares
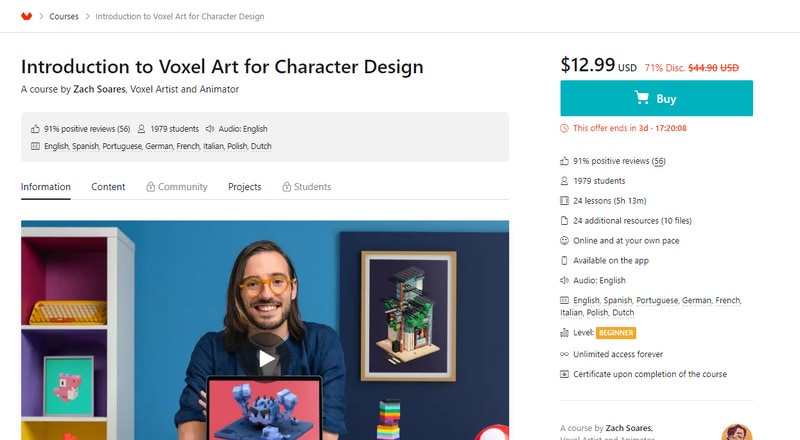
Price: $12.99
Certificate: Available upon completion of the course
02Psychedelic Animation with Photoshop and After Effects by Klarens Malluta
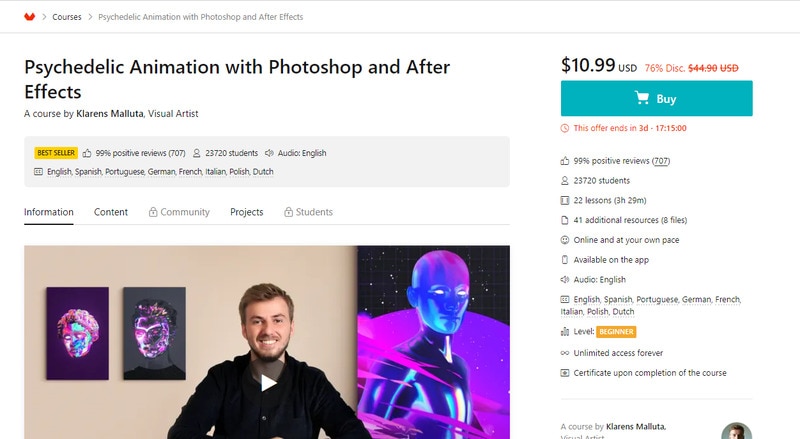
Price: $10.99
Certificate: Available upon completion of the course
032D and 3D Animation with After Effects and Cinema 4D by Andrea Gendusa
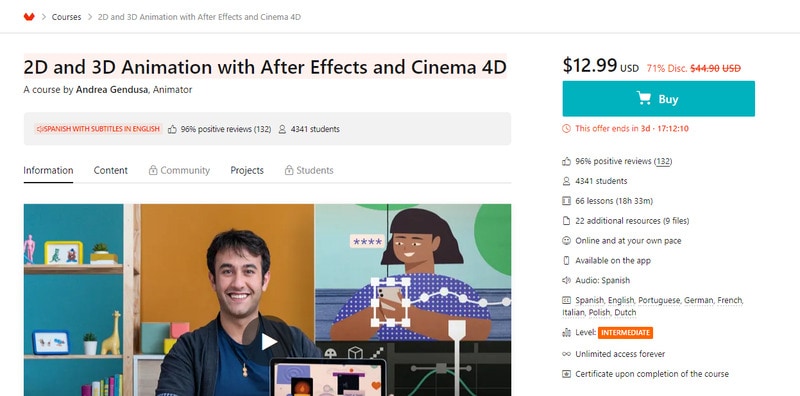
Price: $12.99
Certificate: Available upon completion of the course
04Blender for Beginners by Carlos Sifuentes Haro
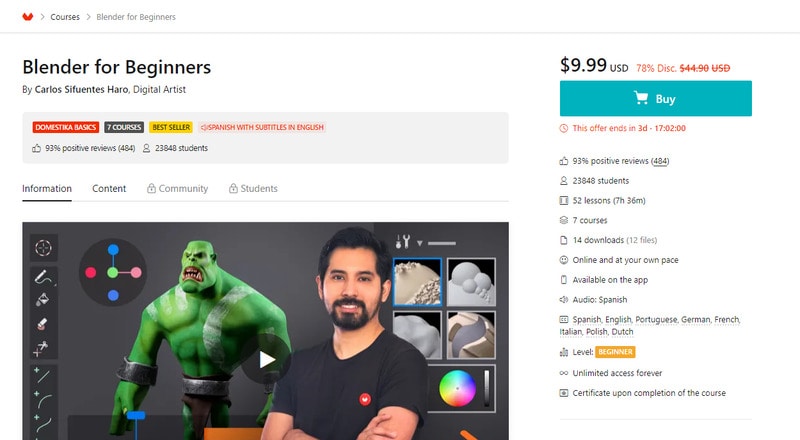
Price: $9.99
Certificate: Available upon completion of the course
05Adobe After Effects for Beginners by Manuel Neto
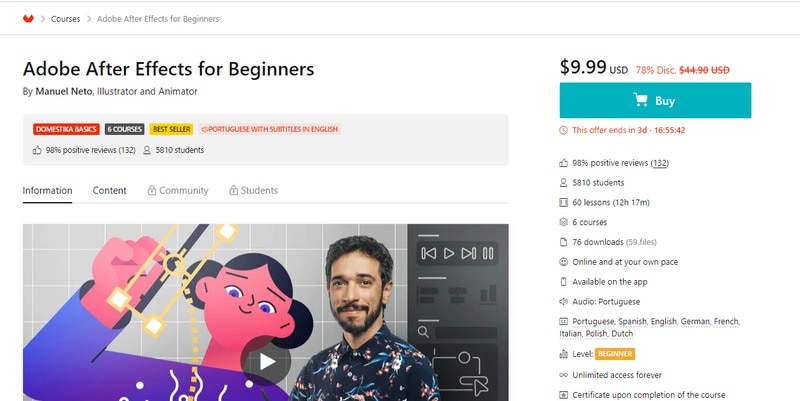
Price: $9.99
Certificate: Available upon completion of the course
06Animation for Typographic Compositions by Holke 79
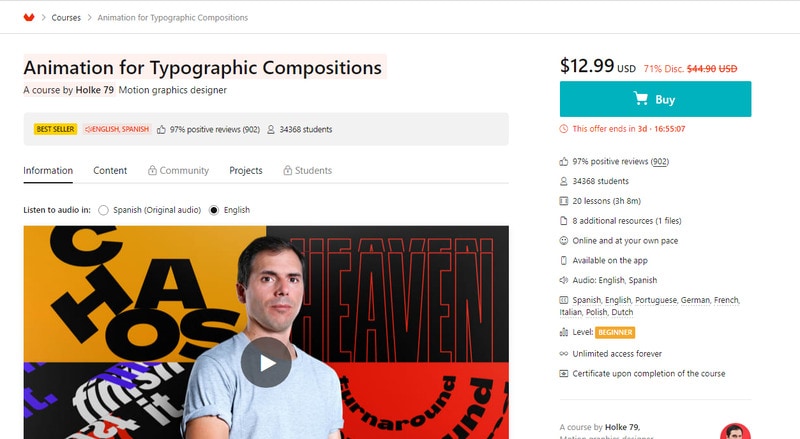
Price: $12.99
Certificate: Available upon completion of the course
07Adobe After Effects for Character Animation By Facundo López
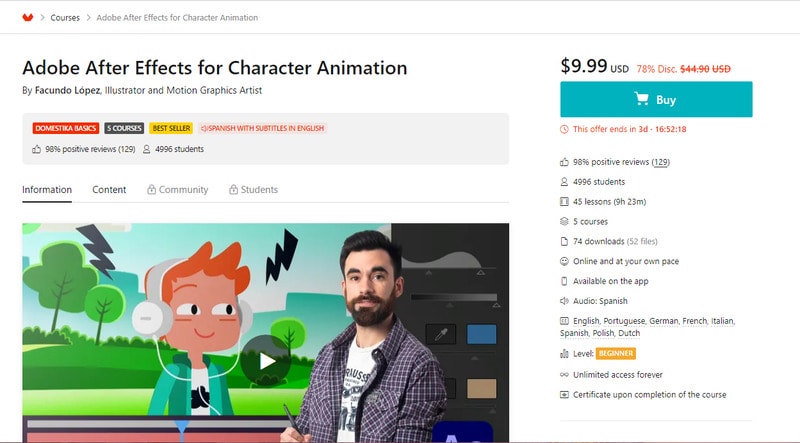
Price: $9.99
Certificate: Available upon completion of the course
08Animation Techniques with 3D Effects in After Effects by Moncho Massé
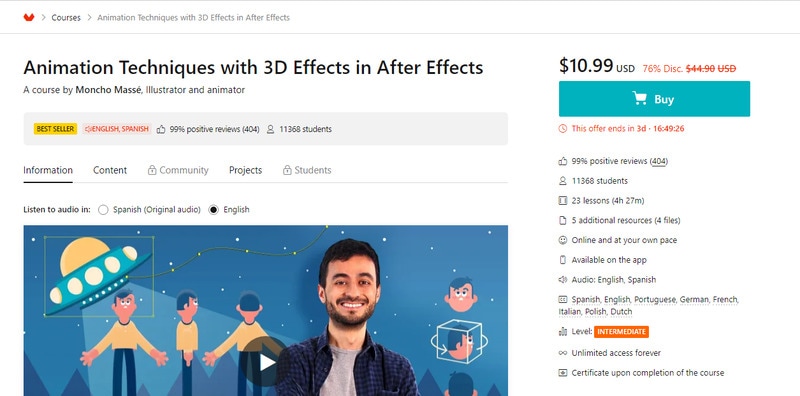
Price: $10.99
Certificate: Available upon completion of the course
093D Typography: Playing with Color and Volume by Thomas Burden
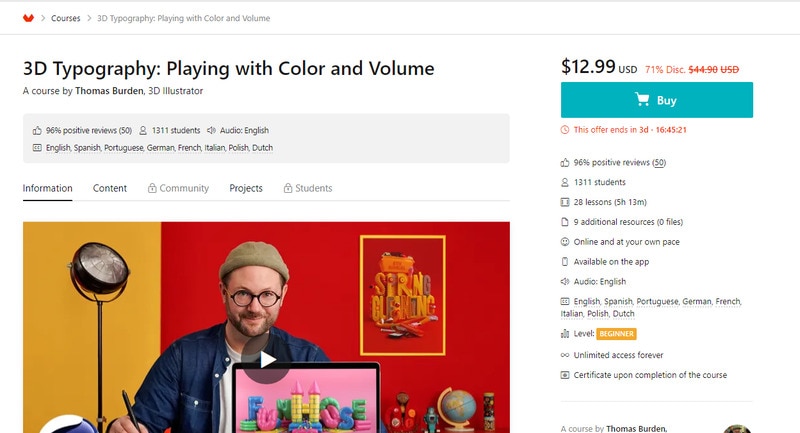
Price: $12.99
Certificate: Available upon completion of the course
103D Animation for Non Animators with Cinema 4D by Zigor Samaniego

Price: $11.99
Certificate: Certificate upon completion of the course
Part 4 Part 4 Recommended 3D Animation Learning Books and Resources
Learn 3D animation with the best 3D animation courses, learning books, and resources. Books and Resources for learning 3D animation include but are not limited to:
● 3D Animation Essentials by Andy Beane
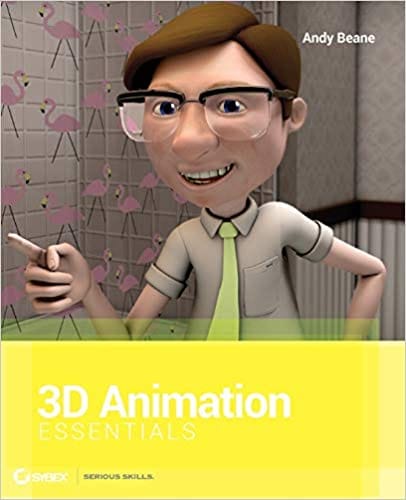
3D Animation Essentials by Andy Beane is a comprehensive book on the fundamentals and principles of 3D animation for films and video games.
● 3D Art Essential by Ami Chopine
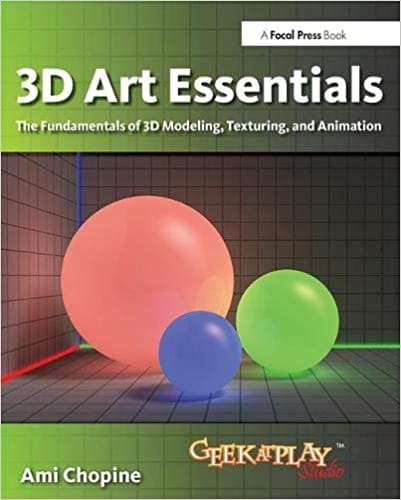
3D Art Essential by Ami Chopine is all about the hows and whys of 3D animation and teachers why certain techniques and styles work for a particular project.
● Key Takeaways from This Episode →
● Understanding 3D Animation
● Top 5 Programs used for learning 3D Animation
● The Best 10 Online 3D Animation Courses for Beginners
● 3D Animation Graphic Design Courses, Learning Books and Resources
“I am still finding it difficult to go into animation even after covering some basic concepts of animation, hardware, software, books, and courses. Is there a way I can learn 3D animation and graphic design courses quickly and easily?”
This guide will show you what professional 3D animators go through and share how you can start your animation career. Sit back and enjoy this all-encompassing and educating guide to learn 3D Animation for beginners!
In this article
01 [Should You Study 3D Animation?](#Part 1)
02 [Top 5 Programs for 3D Animation](#Part 2)
03 [The Best 10 Online Courses to Learn 3D Animation for Beginners](#Part 3)
04 [Recommended 3D Animation Learning Books and Resources](#Part 4)
Part 1 Should You Study 3D Animation?
3D animation is a graphic design technique that uses motions to bring props, characters, objects, etc., to life. For a long time, 3D animation has created TV shows, films, and games, but now it is widely used to create materials for businesses that help them advertise their services and products. The most common usage of 3D animation is creating three-dimensional moving objects and placing them in a digital environment. There is software used to generate these objects specifically for 3D animation with 3D animation courses online for free to learn how to use such software. This software helps 3D animators to create the illusion of movement needed to bring these objects to life.
As the popularity of 3D animation begins to grow, its usage also increases. 3D animation can be useful for the following:
● Many businesses use 3D animation for presentation and more examples and graphics.
● 3D animation is used in real estate as many apartment complexes use it to create interior and exterior renders for their properties. 3D animation allows renters or buyers to view the property without visiting it.
● 3D animation can also be valuable in the medical industry to create exciting graphics for presentation.
You can divide the process of 3D animation into three primary phases:
● Modeling: The modeling stage is how characters or objects get created. This stage can include scanning natural objects into a computer or using a modeling tool. Both methods are helpful and outstanding. When you scan real-world objects into your computer, it saves a lot of time; creating a model entirely by yourself using a tool will give you control over the entire look. Irrespective of the methods used, textures must be added to the character or objects before moving to the next stage.
● Animation and layout: At this stage, the created models are animated and positioned into a particular scene, first determining a layout by creating a set and adding objects into it. The characters and things must be animated by assigning animation variables, and then models within the scene can be given life through motion capture and keyframing.
● Rendering: This stage is where the scene generates into the finished image by using a specific software as the process of rendering cannot be handled by a typical computer
For learning 3D animation, practice, to make yourself perfect for getting your 3D animation as smooth and precise as you would like it to take some time. If your set goal is to create 3D characters, you first need to know how to recreate people in a digital form. According to the 3D animation forum, it takes at least eight months to learn how to animate if only you spend about three to four hours every day. It takes firm dedication to learn 3D animation and graphic design courses.
Part 2 Top 5 Programs for 3D Animation
Aside from the three basic phases involved in 3D animation, there are other individual steps that and needed in 3D animation and 3D animation graphic design courses which include:
● Step 1: creating the story and conceptualizing
● Step 2: making the 3D models
● Step 3: rigging, texturing, and animation
● Step 4: setting up the cameras and lightning
● Step 5: rendering
● Step 6: applying special effects and compositing
● Step 7: editing, music, and Foley
● Step 8: the final output
The best part of 3D animation is finding free animation programs without watermarks that are very useful for creating content on Windows and Mac. These best 3D animation courses include:
01Filmora
For Win 7 or later (64-bit)
For macOS 10.12 or later
Wondershare Filmora Video Editor is a straightforward and powerful animation software to create 3D animated text, shapes, elements, or transitions you want for your videos with its 800+ stunning effects. This software comes with a keyframing, green screen, video stabilization, color tuning, split and zoom, amongst others, that help you create precise and smooth animation effects. Filmora program works perfectly on your Windows and Mac computer.
02Blender
Blender is an open-source, powerful 3D animation software for professional users. This animation software does not easily make an image and mission since it focuses on 3D. It takes your animation projects to a whole new level as this program works perfectly on your Mac computer.
03DAZ Studio
DAZ Studio is a potent and completely free tool for 3D animation creation that lets you create short videos whether you are using this for pleasure or business. This 3D animation creator is complicated to use, and 3D effects are at the core focus of this software. This software is highly compatible with Windows 64 bit, and you can build a model, render, and pose animation within the skin texture level.
04Terragen
Terragen is a completely free 3D animation program for Windows tablets and computers. It allows you to create a photo-realistic CG environment and 3D animation that you want. The featured image gallery on this software homepage will give you a profound idea of the outcome when you use the program.
05Anim8or
Anim8or Easy free 3D animation program supports 3D modeler and Truetype fonts to meet your advanced needs. This program is difficult for beginners but allows you to create a unique work according to your needs.
Part 3 The Best 10 Online Courses to Learn 3D Animation for Beginners
There are online 3D animation courses for beginners to learn from and these courses include:
01Introduction to Voxel Art for Character Design by Zach Soares
Price: $12.99
Certificate: Available upon completion of the course
02Psychedelic Animation with Photoshop and After Effects by Klarens Malluta
Price: $10.99
Certificate: Available upon completion of the course
032D and 3D Animation with After Effects and Cinema 4D by Andrea Gendusa
Price: $12.99
Certificate: Available upon completion of the course
04Blender for Beginners by Carlos Sifuentes Haro
Price: $9.99
Certificate: Available upon completion of the course
05Adobe After Effects for Beginners by Manuel Neto
Price: $9.99
Certificate: Available upon completion of the course
06Animation for Typographic Compositions by Holke 79
Price: $12.99
Certificate: Available upon completion of the course
07Adobe After Effects for Character Animation By Facundo López
Price: $9.99
Certificate: Available upon completion of the course
08Animation Techniques with 3D Effects in After Effects by Moncho Massé
Price: $10.99
Certificate: Available upon completion of the course
093D Typography: Playing with Color and Volume by Thomas Burden
Price: $12.99
Certificate: Available upon completion of the course
103D Animation for Non Animators with Cinema 4D by Zigor Samaniego
Price: $11.99
Certificate: Certificate upon completion of the course
Part 4 Part 4 Recommended 3D Animation Learning Books and Resources
Learn 3D animation with the best 3D animation courses, learning books, and resources. Books and Resources for learning 3D animation include but are not limited to:
● 3D Animation Essentials by Andy Beane
3D Animation Essentials by Andy Beane is a comprehensive book on the fundamentals and principles of 3D animation for films and video games.
● 3D Art Essential by Ami Chopine
3D Art Essential by Ami Chopine is all about the hows and whys of 3D animation and teachers why certain techniques and styles work for a particular project.
● Key Takeaways from This Episode →
● Understanding 3D Animation
● Top 5 Programs used for learning 3D Animation
● The Best 10 Online 3D Animation Courses for Beginners
● 3D Animation Graphic Design Courses, Learning Books and Resources
What Wikipedia Won’t Tell You Specifically About Character Rigging
What Wikipedia Won’t Tell You Specifically About Character Rigging
An easy yet powerful editor
Numerous effects to choose from
Detailed tutorials provided by the official channel
The function of character rigging can easily be compared to that of bones, muscles and joints. They act as skeletons to virtual animations. You can also imagine them as strings used on dolls. These digitalized bones function inter-connectedly in a 3D animation.
In this article
01 [Intro to Character Rigging](#Part 1)
02 [8 Tips for Character Rigging](#Part 2)
03 [10 Best Character Rigging Services to Buy Online](#Part 3)
04 [How to Make 3d Character Rig? Are There Any Plugins or Easy](#Part 4)
Part 1 Intro to Character Rigging
As you already know by now that the process of rigging a character can be quite a tedious task. It involves a lot of creative thinking, precision and a keen eye to notice all the small details.
Once you have a model character to work on, riggers set off to creating a skeleton to match the character. These skele-animations can be used to move the entire model as if tugging on strings (not literally).
The movement of the chain of skeletons or rigs is interdependent. Which means if you pull on any one bone, it moves all the other bones in the same sequence. Similar to how bones move within the human body.
Riggers use programs and tools to create a series of bone like structures that can deformed and animated freely according to the preference of the animators.
Movements like positioning, curving and rotation can be recorded and then played back in the animation.
This requires the rigger to constantly coordinate between modelers, animators till the end of the project. This entire process can take weeks or even months.
Amazingly enough, its 20and there are online tools and tutorials you can use to easily learn complex animations like they make in large scale movies and games.
Part 2 8 Tips for Character Rigging
01The Right Rig for the Job
Rigging is a skill all animators gets good at overtime. The more you practice the more familiar you are with the tools you are using. It will also help you understand that not all rigs are meant for the same set of movements.
You need to be able to discern what rig is it that you need and discard what you don’t. If the rig is being used in a game, then the focus will be more on the experience while for movies its attention.
02Deformers for Facial Rigging
Constructing a realistic facial rig can be quite a task but is indeed satisfying once finished. Human facial features require a great degree of flexibility which is why using a variety of deformers for different parts of the face. They are better suited for creating joints over the face and can be done more quickly.
03IK and FK
Though you can use one without the other, it is best to use both of them in an animation. You can’t work without both arms can you? Applying both Inverse and Forward Kinematics in your rig design can help it make more stylistic.
04Learn Python and Maya API: Learn Python and Maya API
If you wish to take your rigging skills to the next level then learning Maya API and Python are great millstones. This way, you can create high quality and sophisticated rigs with high intense flexibility on Maya. Also, Python allows you to write new scripts for PlugIns.
05Delegate to an Animator
After rigging for several hours it is easy to feel like you are only seeing from one perspective. Get in touch with an animator earlier on in the project can help you get feedback to stay consistent in the rigging process.
06Learn Web Technologies: Learn Web Technologies
To be a good animator or rigging specialist involves a lot of learning. Animation technology is constantly changing therefore it is highly recommended to stay up to date with the latest web technologies. Learning HTML, Java Script and CSS is becoming vital to being a part of the gaming world.
07Use Scalable Tools
Not all the characters or objects you rig are going to be of the same size. Selecting the right rigging software is crucial for you to be able to scale your animations. You won’t need to use everything, just the tools that serve your purpose.
08Use a Clean Interface
If you have ever heard of the phrase ‘clean workplace – cleaner work’ then you should know how an untidy interface can affect your workflow. This won’t necessarily change the results but can surely better your experience.
Part 3 Best Character Rigging Services to Buy Online
Don’t feel confused about where to begin. The first step to get into rigging is to master a software, any software, here are of the best ones you can choose from;
01Maya
Offers the best animation features on the market.

02Blender
Vast variety of tools for sculpting, rigging or VFX.

03Modo
Has a more simplified approach towards modelling and rigging.

043ds Max
Leverages high flexibility and ease of use to riggers.
05Sculptris
Excellentfor beginners who need a gateway software to start art.

06ZBrush
Lets you work on your sculpting skills with digital clay.

07Cheetah 3D
Developed by Macintosh to be an easy to learn modelling software.

08Rhinoceros 3D
Harbours a mathematical approach to modelling and modular design.

09Fusion 360
Offers a wide range of simulation tools.

10Cinema 4D
Recognized by professionals for well-equipped arsenal of digital rendering.

Part 4 How to Make Character Rig? Are There Any Plugins or Easy
How to Make Character Rig? Are There Any Plugins or Easy
When we imagine animation, most of the time we are baffled by the end product? But what really goes on behind the mesmerizing colors and whimsical characters.
The basic is of course building rigs to support the entire movement of the character and confine it to actual physical laws that makes it almost a mimic of reality. The entire process of rigging rather simplifies the path to achieve that goal.
In Cinema, character rigging has multiple layers that goes into creating the entire skeleton animation. Setting up a character rig can take anywhere between a few hours or a few days. It probably takes mainstream movies ten times that time.
Let us break down the process of making a rig so that it is simpler to understand.
The process;
Weight Painting: An integral part of the entire rigging process. Although, weight painting can be rendered automatically by the software that you are using, but that can end up making the animation look less realistic. You can instead fine tune the weight of each bone in the rig. You can also copy similar looking bones and apply them to different mesh and repurpose them to function differently.
Placing Bones: After designing a bone structure of character, you can copy the same and use it for similar characters. This is why in games and animation, you notice characters with similar features and traits.
Inverse Kinematics: Not all bones are meant to move in a forward direction. This is why inverses Kinematics are applied to certain bones like the legs, shoulders or even a dragon’s tail. Setting up the IK of your rig would keep specific bones pointed in the right direction so as to make the animation look more natural.
Applying Constraints: The physical realm is built with restrictions. There are things you can do or can’t do according to the natural order of things so as to make your character movement more naturalistic.
Simulation Skeletons: Now comes the part where the magic happens. After fully completing a skeletal animation you can now simulate the motion over the mesh and record the result of the simulation through a series of frames.
Create an animated movie: You can play back the simulation in an animation software such as Blender and then create your own animated movie with Filmora with its easy drag and drop interface. Movies are a collage of frames, so you need to animate according to the fps you want for your video.
Facial Rigs: Facial expressions are more complex than whole body movements. It requires the attention dedicated to a project of its own. Here is where you can play with deforming shapes together to replicate facial muscle movement.
● Key Takeaways from This Episode →
● Rigging has become science in its own right but that does not mean you can’t be artistic with it.
● What you should remember that creating skeletal animation is all about movement and applying physical restrictions to it.
● Start simple and practice until you master the most complex features of any of the top rigging software services raging in the market.
The function of character rigging can easily be compared to that of bones, muscles and joints. They act as skeletons to virtual animations. You can also imagine them as strings used on dolls. These digitalized bones function inter-connectedly in a 3D animation.
In this article
01 [Intro to Character Rigging](#Part 1)
02 [8 Tips for Character Rigging](#Part 2)
03 [10 Best Character Rigging Services to Buy Online](#Part 3)
04 [How to Make 3d Character Rig? Are There Any Plugins or Easy](#Part 4)
Part 1 Intro to Character Rigging
As you already know by now that the process of rigging a character can be quite a tedious task. It involves a lot of creative thinking, precision and a keen eye to notice all the small details.
Once you have a model character to work on, riggers set off to creating a skeleton to match the character. These skele-animations can be used to move the entire model as if tugging on strings (not literally).
The movement of the chain of skeletons or rigs is interdependent. Which means if you pull on any one bone, it moves all the other bones in the same sequence. Similar to how bones move within the human body.
Riggers use programs and tools to create a series of bone like structures that can deformed and animated freely according to the preference of the animators.
Movements like positioning, curving and rotation can be recorded and then played back in the animation.
This requires the rigger to constantly coordinate between modelers, animators till the end of the project. This entire process can take weeks or even months.
Amazingly enough, its 20and there are online tools and tutorials you can use to easily learn complex animations like they make in large scale movies and games.
Part 2 8 Tips for Character Rigging
01The Right Rig for the Job
Rigging is a skill all animators gets good at overtime. The more you practice the more familiar you are with the tools you are using. It will also help you understand that not all rigs are meant for the same set of movements.
You need to be able to discern what rig is it that you need and discard what you don’t. If the rig is being used in a game, then the focus will be more on the experience while for movies its attention.
02Deformers for Facial Rigging
Constructing a realistic facial rig can be quite a task but is indeed satisfying once finished. Human facial features require a great degree of flexibility which is why using a variety of deformers for different parts of the face. They are better suited for creating joints over the face and can be done more quickly.
03IK and FK
Though you can use one without the other, it is best to use both of them in an animation. You can’t work without both arms can you? Applying both Inverse and Forward Kinematics in your rig design can help it make more stylistic.
04Learn Python and Maya API: Learn Python and Maya API
If you wish to take your rigging skills to the next level then learning Maya API and Python are great millstones. This way, you can create high quality and sophisticated rigs with high intense flexibility on Maya. Also, Python allows you to write new scripts for PlugIns.
05Delegate to an Animator
After rigging for several hours it is easy to feel like you are only seeing from one perspective. Get in touch with an animator earlier on in the project can help you get feedback to stay consistent in the rigging process.
06Learn Web Technologies: Learn Web Technologies
To be a good animator or rigging specialist involves a lot of learning. Animation technology is constantly changing therefore it is highly recommended to stay up to date with the latest web technologies. Learning HTML, Java Script and CSS is becoming vital to being a part of the gaming world.
07Use Scalable Tools
Not all the characters or objects you rig are going to be of the same size. Selecting the right rigging software is crucial for you to be able to scale your animations. You won’t need to use everything, just the tools that serve your purpose.
08Use a Clean Interface
If you have ever heard of the phrase ‘clean workplace – cleaner work’ then you should know how an untidy interface can affect your workflow. This won’t necessarily change the results but can surely better your experience.
Part 3 Best Character Rigging Services to Buy Online
Don’t feel confused about where to begin. The first step to get into rigging is to master a software, any software, here are of the best ones you can choose from;
01Maya
Offers the best animation features on the market.
02Blender
Vast variety of tools for sculpting, rigging or VFX.
03Modo
Has a more simplified approach towards modelling and rigging.
043ds Max
Leverages high flexibility and ease of use to riggers.
05Sculptris
Excellentfor beginners who need a gateway software to start art.
06ZBrush
Lets you work on your sculpting skills with digital clay.
07Cheetah 3D
Developed by Macintosh to be an easy to learn modelling software.
08Rhinoceros 3D
Harbours a mathematical approach to modelling and modular design.
09Fusion 360
Offers a wide range of simulation tools.
10Cinema 4D
Recognized by professionals for well-equipped arsenal of digital rendering.
Part 4 How to Make Character Rig? Are There Any Plugins or Easy
How to Make Character Rig? Are There Any Plugins or Easy
When we imagine animation, most of the time we are baffled by the end product? But what really goes on behind the mesmerizing colors and whimsical characters.
The basic is of course building rigs to support the entire movement of the character and confine it to actual physical laws that makes it almost a mimic of reality. The entire process of rigging rather simplifies the path to achieve that goal.
In Cinema, character rigging has multiple layers that goes into creating the entire skeleton animation. Setting up a character rig can take anywhere between a few hours or a few days. It probably takes mainstream movies ten times that time.
Let us break down the process of making a rig so that it is simpler to understand.
The process;
Weight Painting: An integral part of the entire rigging process. Although, weight painting can be rendered automatically by the software that you are using, but that can end up making the animation look less realistic. You can instead fine tune the weight of each bone in the rig. You can also copy similar looking bones and apply them to different mesh and repurpose them to function differently.
Placing Bones: After designing a bone structure of character, you can copy the same and use it for similar characters. This is why in games and animation, you notice characters with similar features and traits.
Inverse Kinematics: Not all bones are meant to move in a forward direction. This is why inverses Kinematics are applied to certain bones like the legs, shoulders or even a dragon’s tail. Setting up the IK of your rig would keep specific bones pointed in the right direction so as to make the animation look more natural.
Applying Constraints: The physical realm is built with restrictions. There are things you can do or can’t do according to the natural order of things so as to make your character movement more naturalistic.
Simulation Skeletons: Now comes the part where the magic happens. After fully completing a skeletal animation you can now simulate the motion over the mesh and record the result of the simulation through a series of frames.
Create an animated movie: You can play back the simulation in an animation software such as Blender and then create your own animated movie with Filmora with its easy drag and drop interface. Movies are a collage of frames, so you need to animate according to the fps you want for your video.
Facial Rigs: Facial expressions are more complex than whole body movements. It requires the attention dedicated to a project of its own. Here is where you can play with deforming shapes together to replicate facial muscle movement.
● Key Takeaways from This Episode →
● Rigging has become science in its own right but that does not mean you can’t be artistic with it.
● What you should remember that creating skeletal animation is all about movement and applying physical restrictions to it.
● Start simple and practice until you master the most complex features of any of the top rigging software services raging in the market.
Easy Cartoon Characters Drawing Tutorials for You Who Are Learning to Draw
Easy Cartoon Characters Drawing Tutorials for You Who Are Learning to Draw
An easy yet powerful editor
Numerous effects to choose from
Detailed tutorials provided by the official channel
Learning the art of cartoon characters drawing? We can help! Cartoon characters drawing is no rocket science, ABCD: Anybody Can Draw!

We are as excited as you as we bring to you a few of the best drawing tutorials!
In this article
01 [Double Your Results with Learning Cartoon Drawing Styles First](#Part 1)
02 [Best 6 Cartoon Characters Anyone Can Draw (with Free Video Tutorials)](#Part 2)
03 [Easy Cartoon Characters to Draw Step by Step](#Part 3)
Part 1 Double Your Results with Learning Cartoon Drawing Styles First
01 Cartoon Character Sketches
Sketching is one of the most popular art forms. Sketching can be done for real-life people or celebrities or we can also make sketches of imaginary characters and cartoons. Sketching is generally made of pencil and does not involve the usage of colors.

02 Cartoon Characters Drawing with Color
Cartoon characters can be made with color to make them more attractive. This is another popular form of art that cartoonists follow. You can explore several methods of coloring and try making your cartoon colorful.

03 Disney Cartoon Characters Drawing
Disney cartoon character drawing is probably one of the simplest. This is because they have a predefined size and are mostly symmetric. Disney cartoon characters generally use common geometric shapes such as circles, ovals, and squares. Hence making it a beginner-friendly choice!

Part 2 Best 6 Cartoon Characters Anyone Can Draw (with Free Video Tutorials)
01 Roger the alien
Roger the alien is one of the simplest cartoon characters to draw. This children’s classic cartoon character always intrigues children due to its bizarre shape. It fixes the image of an outer space characters in a child’s mind(If they exist).
What makes it easy to draw?
● The oval-shaped head is easy to draw since it is not very detailed.
● The character does not have any hair, hair is one of the more difficult parts to draw.
● The body features aren’t very prominent, hence making the character easy to draw.
Challenges you may encounter
● If you are a first-timer, then you may find it challenging to draw fingers and the toes.
● Getting the weird alien head shape might be a little difficult and may take you a few attempts.
● Making the two eyes exactly similar to each other may be challenging for a few of you.
02 Wakko Warner
What makes it easy to draw?
● The character generally has geometrical shapes and hence you can use shape tracers to draw a few parts.
● The appealing appearance of the character makes it interesting to draw.
● The eyes are not very difficult to recreate.
Challenges you may encounter
● The eyes are not very difficult to recreate.
● The shape of the mouth and the tongue that is sticking out is slightly complex.
● Perfecting the shape of the hair is a little challenging.
03 Cosmo
What makes it easy to draw?
● We recommend you to try this character out mainly because of its uniqueness.
● The eyes are not very complicated to draw.
● The body resembles a stick image and is hence simple to draw.
Challenges you may encounter
● The shape of the crown needs to be perfect, especially because of the tilt the crown has.
● The fingers are challenging to draw.
● The hair has a distinct shape, this shape needs to come out perfectly.
04 Courage the cowardly dog
What makes it easy to draw?
● Firstly, it’s one of the most favorite cartoons, hence it will ensure to keep you interested in the drawing.
● The hands and legs resemble stick figures and are simple to draw.
● The body structure is simple.
Challenges you may encounter
● Drawing a cartoon animal instead of a human being might be intriguing for beginners.
● The large eyes, which is one of the characteristic features needs to be perfect.
● The design of the ears is the trickiest part and could be difficult to draw.
05 Tom And Jerry
When we think of cartoons, the first few names that probably come to our mind are tom and jerry. This duo of a grumpy cat and a mysterious mouse has left an everlasting impact on the world of cartoons. The duo is famous throughout the world and is loved throughout age groups
Why do we recommend you to try your hands on this?
● This is a classic cartoon that almost everyone loves.
● There are several resources on the internet to help you draw the cartoon characters.
● The characters need not be perfect, even a close resemblance to them would be sufficient for the viewers to identify them due to their fame.
Challenges you may encounter
● You need to be careful with the proportion of sizes of tom and jerry.
● The structures of tom and jerry are not very simple to draw.
● Perfecting the grumpy expression on tom’s face and a frightened expression on jerry’s face is challenging.
05 Catdog
Catdog is another very interesting character. Who’d have imagined a cat and a dog morphed in a single body? Well, imagination has no end to it as they say! Catdog is a yellow cat and dog in a single body, it looks cute and at the same time intriguing.
Why do we recommend you try your hands on this?
● The cartoon character is mainly composed of geometrical shapes.
● The character is vividly colorful.
● The bright yellow color is super attractive and hence makes drawing catdog very fun.
Challenges you may encounter
● The character is illusional, you might have difficulty while deciding how to even look at it.
● The cat and dog faces are not very different from each other and have minute differences while drawing you need to be careful about having a distinct difference between the two faces.
Now that we’ve taken our baby steps towards understanding the art of drawing cartoons.
Key Takeaways from This Episode
● That’s a lot of knowledge for today, isn’t it? Today we’ve seen the basics of drawing cartoon characters.
● We also got our hands dirty by exploring a few easy cartoon characters that you could draw.
● Further, we saw the basic steps that you would need to take in order to draw the face of any cartoon character! All in all, we learned everything we needed to know to draw our first cartoon! What are you waiting for? Go try out drawing your first cartoon today!
Learning the art of cartoon characters drawing? We can help! Cartoon characters drawing is no rocket science, ABCD: Anybody Can Draw!
We are as excited as you as we bring to you a few of the best drawing tutorials!
In this article
01 [Double Your Results with Learning Cartoon Drawing Styles First](#Part 1)
02 [Best 6 Cartoon Characters Anyone Can Draw (with Free Video Tutorials)](#Part 2)
03 [Easy Cartoon Characters to Draw Step by Step](#Part 3)
Part 1 Double Your Results with Learning Cartoon Drawing Styles First
01 Cartoon Character Sketches
Sketching is one of the most popular art forms. Sketching can be done for real-life people or celebrities or we can also make sketches of imaginary characters and cartoons. Sketching is generally made of pencil and does not involve the usage of colors.
02 Cartoon Characters Drawing with Color
Cartoon characters can be made with color to make them more attractive. This is another popular form of art that cartoonists follow. You can explore several methods of coloring and try making your cartoon colorful.
03 Disney Cartoon Characters Drawing
Disney cartoon character drawing is probably one of the simplest. This is because they have a predefined size and are mostly symmetric. Disney cartoon characters generally use common geometric shapes such as circles, ovals, and squares. Hence making it a beginner-friendly choice!
Part 2 Best 6 Cartoon Characters Anyone Can Draw (with Free Video Tutorials)
01 Roger the alien
Roger the alien is one of the simplest cartoon characters to draw. This children’s classic cartoon character always intrigues children due to its bizarre shape. It fixes the image of an outer space characters in a child’s mind(If they exist).
What makes it easy to draw?
● The oval-shaped head is easy to draw since it is not very detailed.
● The character does not have any hair, hair is one of the more difficult parts to draw.
● The body features aren’t very prominent, hence making the character easy to draw.
Challenges you may encounter
● If you are a first-timer, then you may find it challenging to draw fingers and the toes.
● Getting the weird alien head shape might be a little difficult and may take you a few attempts.
● Making the two eyes exactly similar to each other may be challenging for a few of you.
02 Wakko Warner
What makes it easy to draw?
● The character generally has geometrical shapes and hence you can use shape tracers to draw a few parts.
● The appealing appearance of the character makes it interesting to draw.
● The eyes are not very difficult to recreate.
Challenges you may encounter
● The eyes are not very difficult to recreate.
● The shape of the mouth and the tongue that is sticking out is slightly complex.
● Perfecting the shape of the hair is a little challenging.
03 Cosmo
What makes it easy to draw?
● We recommend you to try this character out mainly because of its uniqueness.
● The eyes are not very complicated to draw.
● The body resembles a stick image and is hence simple to draw.
Challenges you may encounter
● The shape of the crown needs to be perfect, especially because of the tilt the crown has.
● The fingers are challenging to draw.
● The hair has a distinct shape, this shape needs to come out perfectly.
04 Courage the cowardly dog
What makes it easy to draw?
● Firstly, it’s one of the most favorite cartoons, hence it will ensure to keep you interested in the drawing.
● The hands and legs resemble stick figures and are simple to draw.
● The body structure is simple.
Challenges you may encounter
● Drawing a cartoon animal instead of a human being might be intriguing for beginners.
● The large eyes, which is one of the characteristic features needs to be perfect.
● The design of the ears is the trickiest part and could be difficult to draw.
05 Tom And Jerry
When we think of cartoons, the first few names that probably come to our mind are tom and jerry. This duo of a grumpy cat and a mysterious mouse has left an everlasting impact on the world of cartoons. The duo is famous throughout the world and is loved throughout age groups
Why do we recommend you to try your hands on this?
● This is a classic cartoon that almost everyone loves.
● There are several resources on the internet to help you draw the cartoon characters.
● The characters need not be perfect, even a close resemblance to them would be sufficient for the viewers to identify them due to their fame.
Challenges you may encounter
● You need to be careful with the proportion of sizes of tom and jerry.
● The structures of tom and jerry are not very simple to draw.
● Perfecting the grumpy expression on tom’s face and a frightened expression on jerry’s face is challenging.
05 Catdog
Catdog is another very interesting character. Who’d have imagined a cat and a dog morphed in a single body? Well, imagination has no end to it as they say! Catdog is a yellow cat and dog in a single body, it looks cute and at the same time intriguing.
Why do we recommend you try your hands on this?
● The cartoon character is mainly composed of geometrical shapes.
● The character is vividly colorful.
● The bright yellow color is super attractive and hence makes drawing catdog very fun.
Challenges you may encounter
● The character is illusional, you might have difficulty while deciding how to even look at it.
● The cat and dog faces are not very different from each other and have minute differences while drawing you need to be careful about having a distinct difference between the two faces.
Now that we’ve taken our baby steps towards understanding the art of drawing cartoons.
Key Takeaways from This Episode
● That’s a lot of knowledge for today, isn’t it? Today we’ve seen the basics of drawing cartoon characters.
● We also got our hands dirty by exploring a few easy cartoon characters that you could draw.
● Further, we saw the basic steps that you would need to take in order to draw the face of any cartoon character! All in all, we learned everything we needed to know to draw our first cartoon! What are you waiting for? Go try out drawing your first cartoon today!
Ways to Make Sure You Get the Most up to Date Cartoon Character Design Tips
Ways to Make Sure You Get the Most up to Date Cartoon Character Design Tips
An easy yet powerful editor
Numerous effects to choose from
Detailed tutorials provided by the official channel
Making an overall excellent and unique character design cartoon art style is sometimes hard. The truth is that everyone has a favorite cartoon character, but the question is, how does this character come to life? While you are about to start copying other well-known cartoon or comic characters, you will eventually branch out and come with your own. In addition, there are several ways to come up with ideas for cartoon characters’ concept art to draw. Any of these ways can get you started on populating your world of cartoons.
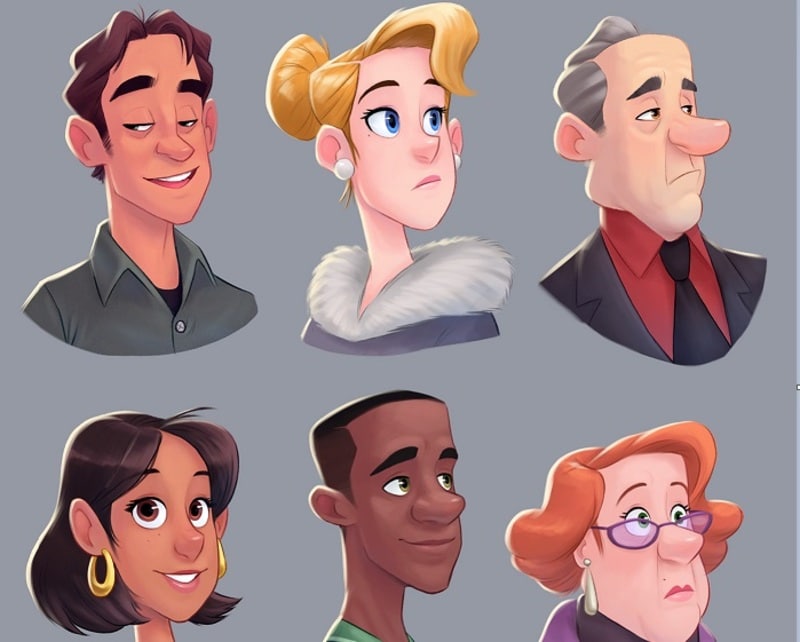
More so, the process of tackling your character design is often full of hurdles. This process requires a lot of creative thinking to create one’s character from the beginning, although many well-known characters from films, advertising, and cartoons look straightforward. But need to exert a vast amount of skill and effort to make them effective.
In this article
01 [10 Tips for Brilliant Cartoon Character Design](#Part 1)
02 [How to Apply Cartoon Character Design to Filmora Video Editing?](#Part 2)
Part 1 Tips for Brilliant Cartoon Character Design
As a cartoon character designer, here are 10 tips you need to put in place to make a brilliant cartoon character design. They are;
● Do not lose the magic
Make sure you try not to polish all the charm from your characters. Many character designers usually begin their project with a sketch and agree that this is often where the essence of the character gets captured. Therefore, when you start working up a design, make sure you do not lose that magic.
The first thing is to decide what you are trying to communicate and then create loose sketches with flow, acting, and movement. As soon as you tighten up the drawing, some of the dynamics will automatically loosen, so it is crucial to have as much life in the early stages as possible. In addition, movement is all but impossible to add later. Thus, you need to ensure that it is in the initial sketch.
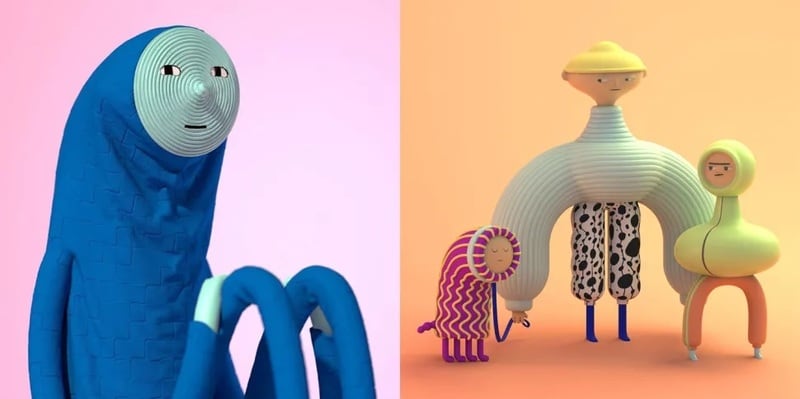
● Avoid reference material
Although inspiration needs to come from somewhere, the aim is to create something original, and you shouldn’t have the reference material right in front of you as you work.
Also, if you take a look at something and when you try and hazily remember it in your mind, that is when you can end up making something new, rather than making a pastiche of something.
● Make research on other characters
For guidance purposes, it can be much help when you try to deconstruct why certain character designs work and why some do not work. Also, there is no shortage of research material to be found, as illustrated characters are appearing everywhere like stickers on fruit, TV commercials, shop signs, cereal boxes, animations on mobile phones, etc. Make sure you study these character designs and think about what makes some successful and the particular thing you like about them.
● Also, take a look elsewhere
It is also a great idea to look beyond some character designs when hunting for inspiration because most times, when you begin a project, you might start with the feeling to evoke. The process usually starts with the designer taking a video of himself as a reference and capturing something of the character’s posture or idea’s movement.
● Try not to lose sight of the original idea
It is elementary to allow your favorite designs to influence you subconsciously. Sometimes when you look back at your initial artworks, it will bring back the feeling you had when you were creating them, and the project you are trying to develop will shift back on track.
● Exaggerate
When you exaggerate the defining features of your character design, it will help it appear larger than real life. Also, exaggerated features help viewers identify the characters’ essential qualities. Exaggeration is key in cartoon caricatures and also helps emphasize certain personality traits. In addition, if your character is strong, try not to give it normal-sized bulging arms, but soup them up so that they are five times as big as they should be. Note that the technique of exaggeration can also apply to characteristics.
● Decide the aim of your character design
When creating a character design, consider your audience as character designs mainly aim at young children, typically designed around bright colors and basic shapes. Also, commissioned character designs are no less creative but are usually more restrictive. Most clients usually have specific needs but want you to do your ‘thing.’ Usually, you need to break down the core features and personality. For example, if the eyes are essential, you will focus the whole design around the face, making this the key element that stands out.
● Make your character distinctive
Whether you are creating a monkey, monster, or robot, you can guarantee that there will be a hundred other similar creations out there. Therefore, your character design is required to be exciting and robust in a visual sense to captivate people’s attention.
● Create clear silhouettes
A silhouette is required to help you understand the character’s gesture which is another good way to differentiate your character and improve its pose. This lets you see how the character ‘reads’ and requires you to make the gesture clearer. It answers the question of; can things be simplified? Do you have a basic understanding of character, emotions, and how the line of action works? In addition, try not to overlap everything and keep the limbs separately.
● Consider line quality
Finally, curved and straight curved lines read by your eyes are at different speeds. The lines drawn are from which your character design is composed can go some way to describing it. Soft, thick, round, and even lines may suggest acute and approachable character, whereas sharp, uneven, scratchy lines may indicate an erratic and uneasy character.
Part 3 How to Apply Cartoon Character Design to Filmora Video Editing?
You can cartoon your character background design in your Video Editing turn a video into a cartoon depending on your device. If you are working on your mobile phone, then you can convert any number of your social media accounts that include film or photos to some degree. The detail or performance level will not be great most of the time.
But if you wish to do it professionally using your PC, then the best video to the cartoon software program for both Windows and Mac is Filmora. Filmora is the best software to convert video to a Cartoon background easily. It will enable you the requisite tools that will act as the right approach to create cartoon characters with appropriate locations and video.
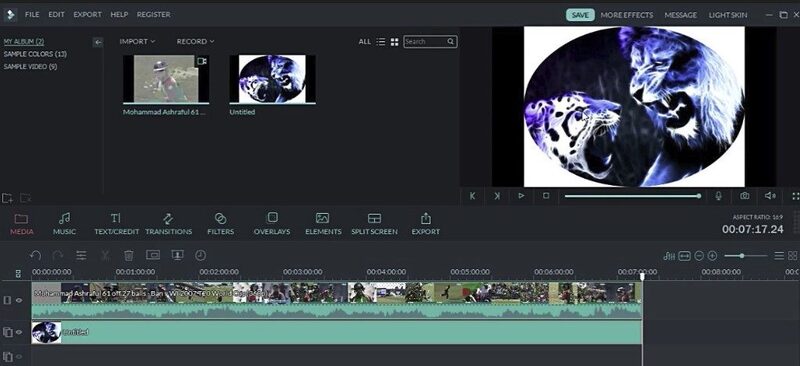
The Wondershare Filmora Video Editor professional video editing software allows you to turn your videos into cartoons easily. The process by which videos get converted into cartoon style on Filmora is straightforward.
Step 1: Import the videos into Filmora
From the official website of Filmora, you will get the link to download, install and launch. Then from the main interface, import your video to it.
Step 2: Add the Cartoon effect under Stylize
You can add different effects or use the Stylize animation effects to your cartoon character.
Step 3: Adjust the cartoon settings and do some basic color corrections to perfect the cartoon result.
Go through different settings to provide the exemplary cartoon character, its background, and full-fledged video edited with Filmora.
For Win 7 or later (64-bit)
For macOS 10.12 or later
● Ending Thoughts →
● This article explained all you require to get the most up-to-date cartoon character design tips. A section of the report gave a list of the information you need to put in place to achieve this. Another area recommended the best video to cartoon editing tools used by cartoon character designers to get the most out of their character design.
● Also, Filmora acts as the right tool to cover up all the necessary editing you might need to create your cartoon character with related background and artistic pieces of equipment.
Making an overall excellent and unique character design cartoon art style is sometimes hard. The truth is that everyone has a favorite cartoon character, but the question is, how does this character come to life? While you are about to start copying other well-known cartoon or comic characters, you will eventually branch out and come with your own. In addition, there are several ways to come up with ideas for cartoon characters’ concept art to draw. Any of these ways can get you started on populating your world of cartoons.
More so, the process of tackling your character design is often full of hurdles. This process requires a lot of creative thinking to create one’s character from the beginning, although many well-known characters from films, advertising, and cartoons look straightforward. But need to exert a vast amount of skill and effort to make them effective.
In this article
01 [10 Tips for Brilliant Cartoon Character Design](#Part 1)
02 [How to Apply Cartoon Character Design to Filmora Video Editing?](#Part 2)
Part 1 Tips for Brilliant Cartoon Character Design
As a cartoon character designer, here are 10 tips you need to put in place to make a brilliant cartoon character design. They are;
● Do not lose the magic
Make sure you try not to polish all the charm from your characters. Many character designers usually begin their project with a sketch and agree that this is often where the essence of the character gets captured. Therefore, when you start working up a design, make sure you do not lose that magic.
The first thing is to decide what you are trying to communicate and then create loose sketches with flow, acting, and movement. As soon as you tighten up the drawing, some of the dynamics will automatically loosen, so it is crucial to have as much life in the early stages as possible. In addition, movement is all but impossible to add later. Thus, you need to ensure that it is in the initial sketch.
● Avoid reference material
Although inspiration needs to come from somewhere, the aim is to create something original, and you shouldn’t have the reference material right in front of you as you work.
Also, if you take a look at something and when you try and hazily remember it in your mind, that is when you can end up making something new, rather than making a pastiche of something.
● Make research on other characters
For guidance purposes, it can be much help when you try to deconstruct why certain character designs work and why some do not work. Also, there is no shortage of research material to be found, as illustrated characters are appearing everywhere like stickers on fruit, TV commercials, shop signs, cereal boxes, animations on mobile phones, etc. Make sure you study these character designs and think about what makes some successful and the particular thing you like about them.
● Also, take a look elsewhere
It is also a great idea to look beyond some character designs when hunting for inspiration because most times, when you begin a project, you might start with the feeling to evoke. The process usually starts with the designer taking a video of himself as a reference and capturing something of the character’s posture or idea’s movement.
● Try not to lose sight of the original idea
It is elementary to allow your favorite designs to influence you subconsciously. Sometimes when you look back at your initial artworks, it will bring back the feeling you had when you were creating them, and the project you are trying to develop will shift back on track.
● Exaggerate
When you exaggerate the defining features of your character design, it will help it appear larger than real life. Also, exaggerated features help viewers identify the characters’ essential qualities. Exaggeration is key in cartoon caricatures and also helps emphasize certain personality traits. In addition, if your character is strong, try not to give it normal-sized bulging arms, but soup them up so that they are five times as big as they should be. Note that the technique of exaggeration can also apply to characteristics.
● Decide the aim of your character design
When creating a character design, consider your audience as character designs mainly aim at young children, typically designed around bright colors and basic shapes. Also, commissioned character designs are no less creative but are usually more restrictive. Most clients usually have specific needs but want you to do your ‘thing.’ Usually, you need to break down the core features and personality. For example, if the eyes are essential, you will focus the whole design around the face, making this the key element that stands out.
● Make your character distinctive
Whether you are creating a monkey, monster, or robot, you can guarantee that there will be a hundred other similar creations out there. Therefore, your character design is required to be exciting and robust in a visual sense to captivate people’s attention.
● Create clear silhouettes
A silhouette is required to help you understand the character’s gesture which is another good way to differentiate your character and improve its pose. This lets you see how the character ‘reads’ and requires you to make the gesture clearer. It answers the question of; can things be simplified? Do you have a basic understanding of character, emotions, and how the line of action works? In addition, try not to overlap everything and keep the limbs separately.
● Consider line quality
Finally, curved and straight curved lines read by your eyes are at different speeds. The lines drawn are from which your character design is composed can go some way to describing it. Soft, thick, round, and even lines may suggest acute and approachable character, whereas sharp, uneven, scratchy lines may indicate an erratic and uneasy character.
Part 3 How to Apply Cartoon Character Design to Filmora Video Editing?
You can cartoon your character background design in your Video Editing turn a video into a cartoon depending on your device. If you are working on your mobile phone, then you can convert any number of your social media accounts that include film or photos to some degree. The detail or performance level will not be great most of the time.
But if you wish to do it professionally using your PC, then the best video to the cartoon software program for both Windows and Mac is Filmora. Filmora is the best software to convert video to a Cartoon background easily. It will enable you the requisite tools that will act as the right approach to create cartoon characters with appropriate locations and video.
The Wondershare Filmora Video Editor professional video editing software allows you to turn your videos into cartoons easily. The process by which videos get converted into cartoon style on Filmora is straightforward.
Step 1: Import the videos into Filmora
From the official website of Filmora, you will get the link to download, install and launch. Then from the main interface, import your video to it.
Step 2: Add the Cartoon effect under Stylize
You can add different effects or use the Stylize animation effects to your cartoon character.
Step 3: Adjust the cartoon settings and do some basic color corrections to perfect the cartoon result.
Go through different settings to provide the exemplary cartoon character, its background, and full-fledged video edited with Filmora.
For Win 7 or later (64-bit)
For macOS 10.12 or later
● Ending Thoughts →
● This article explained all you require to get the most up-to-date cartoon character design tips. A section of the report gave a list of the information you need to put in place to achieve this. Another area recommended the best video to cartoon editing tools used by cartoon character designers to get the most out of their character design.
● Also, Filmora acts as the right tool to cover up all the necessary editing you might need to create your cartoon character with related background and artistic pieces of equipment.
18 Best Tools and Services to Create Animated Videos for Your Business
18 Best Tools and Services to Create Animated Videos for Your Business

Shanoon Cox
Mar 27, 2024• Proven solutions
Video content is dominating the market with a huge arena to explore. Be it a short clip that explains your company/product or a user guide kind of thing, when you are up for business explainer videos, there is nothing better than illustrative animated videos.
These animated videos can be made without much hassle and can bring exceptional results for your business. All that you need to do is, figure out the right animation tool or service for business animation and convey your message aptly to the audience, and then rest will be history.
Make Your Marketing Videos Shine
Recently, video marketing has become an unstoppable trend. Celebrities and businesses earn great fortune through high-quality marketing videos. To join the profitable video marketing era , you can create your own marketing videos now!
- Part 1: Best Tools and Services to Make Animated Videos for Business
- Part 2: The Benefits of Animated Videos for Your Business
- Part 3: FAQ to Create Animated Videos
Part 1: Best Tools and Services to Make Animated Videos for Business
1. Wideo
Among 2D animtion makers , this can let you edit, create, and share animated videos for business intuitively. You get more than 80 ready-to-edit video templates for business or build them from scratch to suit your business demands. These templates are completely customizable for your needs and make Wideo a much liked tool.
Features:
- You can build amazing animated videos effortlessly.
- You just spend 5 minutes to pick the template and customize by drag and drop, and you are sorted to create a professional looking animated business.
- Either download as a MP4 or share on social media sites like Facebook and YouTube, Wideo does it all.
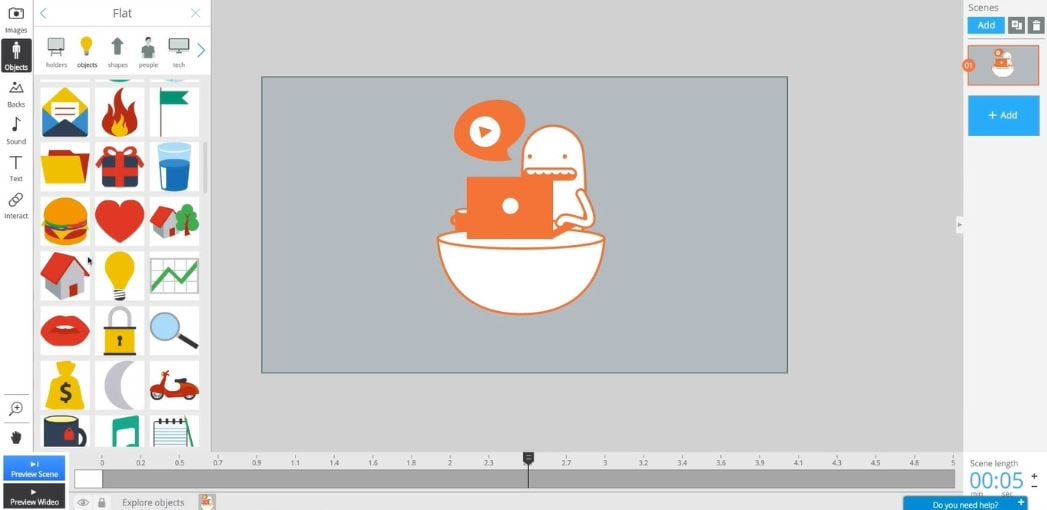
2. Moovly
Being in your budget and still creating fabulous videos which are intuitive and simple for your business is possible with Moovly. Using this tool you can create animated video, banners, Ads, Whiteboard animation, YouTube intro, and engaging explainer video.
Features:
- You don’t need to install it, as it can directly be done on your desktop.
- You need not more than 15 minutes to do a video.
- More than 600000 free samples, videos, animations and sounds are readily available and you are allowed to use your own media too.

3. Powtoon
PowToon can create engaging explainer animated videos for business, which can captivate the audience. Be it marketing, HR, IT, report making or training your videos always standout. These videos are useful for creating personal videos to surprise your loved ones, make attention grabbing learning material, and captivating office presentations.
Features:
- Anyday a PowToon weighs over video as it can engage, explain and market your idea in the work place.
- With inbuilt drag and drop template a high quality PowToon is just made within 20 minutes.
- With a growing community of fellow designers, you can easily get help for a new video from them.

4. Piehole.tv
They have a simple and stress free process to create an animation.
Features:
- They arrange a call for you to get a creative brief and start the process.
- Be it script, voiceover, design, or animation, they can integrate it better.
5. Blender
This open source video animator has is free to use and has 3D creation suite. Rigging, modeling, animation, rendering, simulation, motion tracking and compositing, game creation, as well as video editing is possible with Blender.
Features:
- You can get attractive ultra-realistic rendering with cycle render engine from Blender.
- This is a public project by numbers of scientists, VFX experts, artists animators and the likes.
- The high end modeling tools help in sculpting, modeling, and UV features are remarkable.
- 3D painting using textured brushes and masking allows crisper out comes.

6. Animate CC
Creating vector business animations and publish them instantly is made easy. These animations include – apps, web, and games to name a few. You can reach the target audience through mobile, desktop, and TV.
Features:
- With animation and illustration tools creating web-based interactive content is easy now, be it game environments, player sprites, or interfaces your games and Ads will stand out.
- You can export the animations to multiple platforms like WebGL, HTML5 Canvas, Flash/Adobe AIR and the likes.
- Create interactive web banners and lively expressive characters using tilt and pressure sensitive brushes.

7. Muvizu
Your business explainer videos can be flawlessly designed with interactive 3D animation package like Muvizu. You can drag and drop the customizable animated characters with sets and use the automatic lip-synching feature for a great video.
Features:
- Worldwide it’s a great tool for demonstrators to use as a lesson building element that reaches students with the right message.
- With their easy commercial terms, you can earn money from your animations without any hassle.
- Engaging content that can reach the audience quickly with super-fast controls.
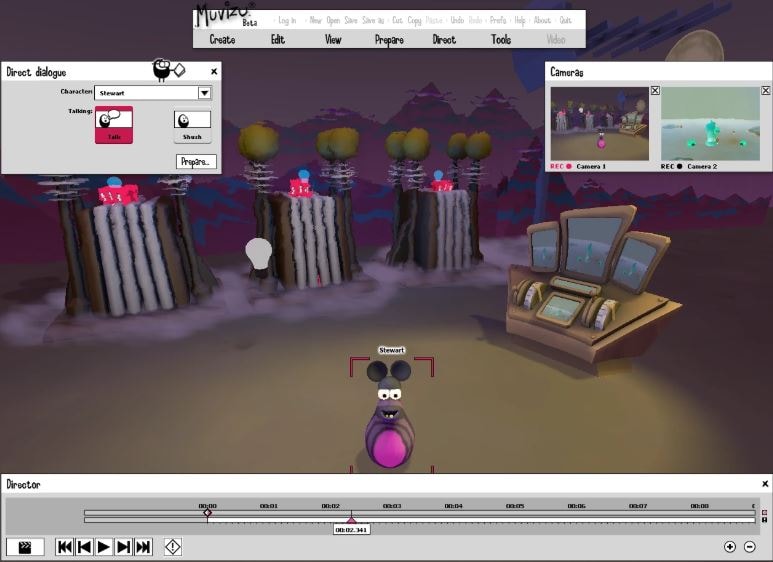
8. CrazyTalk Animator 3
Revered as the easiest 2D animation program it allows animators to create compelling business animations. You can add life to logos, images, and props using the elastic motion effects as well as the inbuilt templates. 2D talking characters are built using bone ridge editors, facial puppet, motion libraries for web, videos, apps, games, and presentations.
Features:
- It comes with a preview camera for reviewing scenes and live camera for using key frames to animate the position of the camera.
- A rich environment to edit animation, actors, special effects and scenes.
- You can navigate scenes using perspective mode in order to experience the movements of the camera in realistic 3D feel.

9. Topexplainers
Topexplainers help the business to make high-quality professional videos for your business including 50% of animation technology and 50% of marketing techniques. With Topexplainers, you can reach your clients and convey your message in just a few seconds. The team makes clear, short, and convincing videos to explain your business in a very simple way. The powers of content and visuals have no match. The Topexplainers video animation services help to make customized videos to garner 5 times more positive engagements and 65% more attention from the users.
Pricing – There are 3 packages in Topexplainers. Firstly, the 30-second package priced at $397. Secondly, the 60-second package at $597, and finally, the 90-second package priced at $797.
10. Side Kick Sales Videos
The value of business animation videos is increasing with each passing day. Side Kick Sales Videos team aims at creating highly-effective, ingenious, result-driven online videos that can help in fighting the rat-race and get the attention of the viewers. From graphics animation to royalty free music and highly converting the script to visual design, Side Kick Sales Videos personalizes video animation services to create an enhancing package and create your brand awareness.
Pricing – Side Kick Sales Videos offer 3 packages for 30 seconds, 60 seconds, and 90 seconds explainer videos respectively. The price for 30 seconds video is $247, 60 seconds is $349, and 90 seconds is $449.
11. Explainify
The team at Explainify understands your brand and your ideas to create the right tone of the message that you wish to convey to your customers. From scripting the 60-90 seconds pitch to showing you the storyboard and helping you understand what the final video will be like with animations, sound, and vocals, Explainify offers great video animation services.

12. Animation ANTS
The business animation explainer videos have the power to strengthen your marketing efforts. Animation ANTS helps to create stunning, short, and crisp videos within an affordable budget to deliver your message to the masses. Your customers receive a concise message with the videos created by the Animation ANTS.
Pricing – The custom videos have different package names like Leaf, Seed, and Rock. Each of the packages is priced at $3900, $4700, and $5400 respectively. Other than the packages, Animation Ants also offer more template style videos at a discounted price.
13. 90 Seconds
Yes, the name says it all. Within 90 seconds you can create a business animation video, just plan, shoot, edit and review your video from your mobile device. The entire process of creating a video is simple, quick, and easy with the 90 seconds video animation services. You get access to the 90 seconds marketplace of over 12,000 video creative professionals in over 160 countries. You can choose from 70 categories that include photographers, videographers, animators and more.
Pricing – The pricing is flexible for 90 Seconds. Firstly, there’s standard fixed pricing, especially effective for one-time projects. Second, comes the pre-pay starting from US$20000 which is good for the on-going massive content requirement with a flexible timeline. Finally, the subscription model starts from US$3500/month for the brands that regularly need video content and loves what 90-Seconds offer.
14. Idea Rocket Animation
If you are looking for a perfect solution for the most complex problem, turn to Idea Rocket Animation. It takes a brief from you to understand your brand and requirements and then designs the business animation video online. The Idea Rocket Animation takes your message and pitches it to a story, creating a visually appealing design, animations, and sounds.
Pricing – The pricing of business animation videos with Idea Rocket Animation is between $5,000 and $35,000 per minute depending on your choice of animation styles, studios, etc. Budget pricing is also available for creating animation videos between $2000 to $5000 where you need to satisfy with budget studios, DIY software, and freelance professionals.
15. Battle Media Lab
The Battle Media Lab bridges the gaps between brands, design, animations, sound, bringing all together beautifully into one video that is appealing to the viewers. This is one of the most trusted video animation services that influence your brand positively by defining the essence of your products and services and how it benefits the community through an eye-catching and impressive video.
16. Epipheo
Creating a business animation video with Epipheo, lets you explain what you do and offer, why do your products, services, and presence matters or how you’re unique and different from the rest of the companies in the similar niche through an appealing video that can draw the attention of the viewers.
Pricing – The different categories of videos that Epipheo offers are – a video case study, internal video, storytelling video, trade show videos, 3D explainer videos and more. You need to ask for a quote as per your requirement.
17. Promoshin
Do you wish to avoid in-house video cost or hefty fees for several one-time projects? Turn to Promoshin that allows you to create unlimited customized video content at a flat fee per month. With Promoshin you get to access a team of 8 creative experts who can create any kind of video for your company with unlimited revisions.
Pricing – You need to fill a form to get the pricing detail.
18. Tell us Talk
You get a special admin interface which can access by one or more users as per your control. Tell us talk helps the small businesses to create a manageable comprehensive web interface that can be used by users to manage the administrative tasks of the company. It makes your task easy and simple to deal with the customers through customer admin interface used by the web administrators with the help of toolbox function. From internal billing to API access and sending SMS and MMS, Tell us Talk creates a personal interactive platform to keep in touch with your customers and win their trust.
Pricing – Tell us Talk basic fees is 46.8 EUR/month per user. For additional users, the charge is 1.8 EUR/month. The extended option costs 57.8 EUR/month with additional users charged at 1.8 EUR/month.

Part 2: The Benefits of Animated Videos for Your Business
1. Exposure for your brand extensively
Animated videos for business is a great medium for brand development as they wonderfully collaborate color schemes, logos, brand images with the right kind of audio visuals for creating a complete packaged deal.
These animated audio visuals make your branding more appealing by creating recurrent themes, which keeps the background or foundation intact, while the characters in the clip move.
Animation also helps you to develop more sophisticated creatives and brand icons that can strengthen your marketing pitch. It doesn’t matter whether you are a seasoned player in online marketing or an amateur, the right animated video can speak volumes to promote your business.
2. High quality yet low budget
With animated videos you save plenty of money and time that gets wasted with traditionally shot videos. The surging costs to track a location, hire a crew, pay the artists, pay for top-notch equipment, arrange the set, etc. can make a hole in your pocket.
But, business animation can drastically reverse the expenses by creating a beautiful amalgamation of voiceover, visual, and audio content to deliver a beautiful story. The right animation artist and the correct tool can help you woo your audience like never before.
If you don’t like something in an animated video, then only that part is chopped and edited to add something more substantial.
3. More engagement
A video content is always appealing to the audience, as apart from plain text it is loaded with interesting audio visuals. Human brain being thirsty for knowledge through sight and experience is keen to consume more of audio visual things.
This in turn helps you create better engagement with your target group. Animated videos being a popular medium of imparting knowledge and message, deliver a clear and crisp message in a short span of tome and encourage audio visual learning.
Part 3: FAQ to Create Animated Videos
1. Which software is used to make animated videos?
In the world of animation, different software programs represent various tools to create animated videos with. You will often need to deal separately with 3D animation than 2D, you might need another for modeling and yet a third for rendering. Maya is a good all-round program that can help. Other tools to create animated videos include Adobe Animate and Moho. Each is a decent all-round program with great features.
2. How do I make an animated video for free?
There are tools to create animated videos that are available online, for free, if you know where to look. One of the tops of the list is Filmora, from Wondershare. Although any exported files will contain their watermark unless you unlock the paid version – you can still animate on it. Their Animation 101 pack has both features and learning tools, which will help you to succeed. Best of all, Filmora has an online learning library packed full of resources, as well as a multitude of plugins to help you broaden your animation horizons. It’s an excellent program for a beginner and a unique program for the more experienced editor, so everyone wins.
3. How to start a career in animation?
There are several steps to becoming a full-time animation artist – but it is possible. You should start by getting the relevant College qualifications in animation, or by entering a digital animation degree program. As you learn, save up your successes for both a CV and a portfolio. If you can put together a good demo reel, then all the better. Accept any work experience you can get, and, with a little luck, you will finish your studies with all the tools to create animated videos that you could ever need.
Final Verdict
Apart from using the above mentioned tools for creating business explainer videos, you could use Wondershare Filmora and edit your video while rendering powerful effects. We are sure that with this tool, there is no room for being disappointed. It can seamlessly create the most engaging videos with the least professional video editing.
Shanoon Cox
Shanoon Cox is a writer and a lover of all things video.
Follow @Shanoon Cox
Shanoon Cox
Mar 27, 2024• Proven solutions
Video content is dominating the market with a huge arena to explore. Be it a short clip that explains your company/product or a user guide kind of thing, when you are up for business explainer videos, there is nothing better than illustrative animated videos.
These animated videos can be made without much hassle and can bring exceptional results for your business. All that you need to do is, figure out the right animation tool or service for business animation and convey your message aptly to the audience, and then rest will be history.
Make Your Marketing Videos Shine
Recently, video marketing has become an unstoppable trend. Celebrities and businesses earn great fortune through high-quality marketing videos. To join the profitable video marketing era , you can create your own marketing videos now!
- Part 1: Best Tools and Services to Make Animated Videos for Business
- Part 2: The Benefits of Animated Videos for Your Business
- Part 3: FAQ to Create Animated Videos
Part 1: Best Tools and Services to Make Animated Videos for Business
1. Wideo
Among 2D animtion makers , this can let you edit, create, and share animated videos for business intuitively. You get more than 80 ready-to-edit video templates for business or build them from scratch to suit your business demands. These templates are completely customizable for your needs and make Wideo a much liked tool.
Features:
- You can build amazing animated videos effortlessly.
- You just spend 5 minutes to pick the template and customize by drag and drop, and you are sorted to create a professional looking animated business.
- Either download as a MP4 or share on social media sites like Facebook and YouTube, Wideo does it all.
2. Moovly
Being in your budget and still creating fabulous videos which are intuitive and simple for your business is possible with Moovly. Using this tool you can create animated video, banners, Ads, Whiteboard animation, YouTube intro, and engaging explainer video.
Features:
- You don’t need to install it, as it can directly be done on your desktop.
- You need not more than 15 minutes to do a video.
- More than 600000 free samples, videos, animations and sounds are readily available and you are allowed to use your own media too.
3. Powtoon
PowToon can create engaging explainer animated videos for business, which can captivate the audience. Be it marketing, HR, IT, report making or training your videos always standout. These videos are useful for creating personal videos to surprise your loved ones, make attention grabbing learning material, and captivating office presentations.
Features:
- Anyday a PowToon weighs over video as it can engage, explain and market your idea in the work place.
- With inbuilt drag and drop template a high quality PowToon is just made within 20 minutes.
- With a growing community of fellow designers, you can easily get help for a new video from them.
4. Piehole.tv
They have a simple and stress free process to create an animation.
Features:
- They arrange a call for you to get a creative brief and start the process.
- Be it script, voiceover, design, or animation, they can integrate it better.
5. Blender
This open source video animator has is free to use and has 3D creation suite. Rigging, modeling, animation, rendering, simulation, motion tracking and compositing, game creation, as well as video editing is possible with Blender.
Features:
- You can get attractive ultra-realistic rendering with cycle render engine from Blender.
- This is a public project by numbers of scientists, VFX experts, artists animators and the likes.
- The high end modeling tools help in sculpting, modeling, and UV features are remarkable.
- 3D painting using textured brushes and masking allows crisper out comes.
6. Animate CC
Creating vector business animations and publish them instantly is made easy. These animations include – apps, web, and games to name a few. You can reach the target audience through mobile, desktop, and TV.
Features:
- With animation and illustration tools creating web-based interactive content is easy now, be it game environments, player sprites, or interfaces your games and Ads will stand out.
- You can export the animations to multiple platforms like WebGL, HTML5 Canvas, Flash/Adobe AIR and the likes.
- Create interactive web banners and lively expressive characters using tilt and pressure sensitive brushes.
7. Muvizu
Your business explainer videos can be flawlessly designed with interactive 3D animation package like Muvizu. You can drag and drop the customizable animated characters with sets and use the automatic lip-synching feature for a great video.
Features:
- Worldwide it’s a great tool for demonstrators to use as a lesson building element that reaches students with the right message.
- With their easy commercial terms, you can earn money from your animations without any hassle.
- Engaging content that can reach the audience quickly with super-fast controls.
8. CrazyTalk Animator 3
Revered as the easiest 2D animation program it allows animators to create compelling business animations. You can add life to logos, images, and props using the elastic motion effects as well as the inbuilt templates. 2D talking characters are built using bone ridge editors, facial puppet, motion libraries for web, videos, apps, games, and presentations.
Features:
- It comes with a preview camera for reviewing scenes and live camera for using key frames to animate the position of the camera.
- A rich environment to edit animation, actors, special effects and scenes.
- You can navigate scenes using perspective mode in order to experience the movements of the camera in realistic 3D feel.
9. Topexplainers
Topexplainers help the business to make high-quality professional videos for your business including 50% of animation technology and 50% of marketing techniques. With Topexplainers, you can reach your clients and convey your message in just a few seconds. The team makes clear, short, and convincing videos to explain your business in a very simple way. The powers of content and visuals have no match. The Topexplainers video animation services help to make customized videos to garner 5 times more positive engagements and 65% more attention from the users.
Pricing – There are 3 packages in Topexplainers. Firstly, the 30-second package priced at $397. Secondly, the 60-second package at $597, and finally, the 90-second package priced at $797.
10. Side Kick Sales Videos
The value of business animation videos is increasing with each passing day. Side Kick Sales Videos team aims at creating highly-effective, ingenious, result-driven online videos that can help in fighting the rat-race and get the attention of the viewers. From graphics animation to royalty free music and highly converting the script to visual design, Side Kick Sales Videos personalizes video animation services to create an enhancing package and create your brand awareness.
Pricing – Side Kick Sales Videos offer 3 packages for 30 seconds, 60 seconds, and 90 seconds explainer videos respectively. The price for 30 seconds video is $247, 60 seconds is $349, and 90 seconds is $449.
11. Explainify
The team at Explainify understands your brand and your ideas to create the right tone of the message that you wish to convey to your customers. From scripting the 60-90 seconds pitch to showing you the storyboard and helping you understand what the final video will be like with animations, sound, and vocals, Explainify offers great video animation services.
12. Animation ANTS
The business animation explainer videos have the power to strengthen your marketing efforts. Animation ANTS helps to create stunning, short, and crisp videos within an affordable budget to deliver your message to the masses. Your customers receive a concise message with the videos created by the Animation ANTS.
Pricing – The custom videos have different package names like Leaf, Seed, and Rock. Each of the packages is priced at $3900, $4700, and $5400 respectively. Other than the packages, Animation Ants also offer more template style videos at a discounted price.
13. 90 Seconds
Yes, the name says it all. Within 90 seconds you can create a business animation video, just plan, shoot, edit and review your video from your mobile device. The entire process of creating a video is simple, quick, and easy with the 90 seconds video animation services. You get access to the 90 seconds marketplace of over 12,000 video creative professionals in over 160 countries. You can choose from 70 categories that include photographers, videographers, animators and more.
Pricing – The pricing is flexible for 90 Seconds. Firstly, there’s standard fixed pricing, especially effective for one-time projects. Second, comes the pre-pay starting from US$20000 which is good for the on-going massive content requirement with a flexible timeline. Finally, the subscription model starts from US$3500/month for the brands that regularly need video content and loves what 90-Seconds offer.
14. Idea Rocket Animation
If you are looking for a perfect solution for the most complex problem, turn to Idea Rocket Animation. It takes a brief from you to understand your brand and requirements and then designs the business animation video online. The Idea Rocket Animation takes your message and pitches it to a story, creating a visually appealing design, animations, and sounds.
Pricing – The pricing of business animation videos with Idea Rocket Animation is between $5,000 and $35,000 per minute depending on your choice of animation styles, studios, etc. Budget pricing is also available for creating animation videos between $2000 to $5000 where you need to satisfy with budget studios, DIY software, and freelance professionals.
15. Battle Media Lab
The Battle Media Lab bridges the gaps between brands, design, animations, sound, bringing all together beautifully into one video that is appealing to the viewers. This is one of the most trusted video animation services that influence your brand positively by defining the essence of your products and services and how it benefits the community through an eye-catching and impressive video.
16. Epipheo
Creating a business animation video with Epipheo, lets you explain what you do and offer, why do your products, services, and presence matters or how you’re unique and different from the rest of the companies in the similar niche through an appealing video that can draw the attention of the viewers.
Pricing – The different categories of videos that Epipheo offers are – a video case study, internal video, storytelling video, trade show videos, 3D explainer videos and more. You need to ask for a quote as per your requirement.
17. Promoshin
Do you wish to avoid in-house video cost or hefty fees for several one-time projects? Turn to Promoshin that allows you to create unlimited customized video content at a flat fee per month. With Promoshin you get to access a team of 8 creative experts who can create any kind of video for your company with unlimited revisions.
Pricing – You need to fill a form to get the pricing detail.
18. Tell us Talk
You get a special admin interface which can access by one or more users as per your control. Tell us talk helps the small businesses to create a manageable comprehensive web interface that can be used by users to manage the administrative tasks of the company. It makes your task easy and simple to deal with the customers through customer admin interface used by the web administrators with the help of toolbox function. From internal billing to API access and sending SMS and MMS, Tell us Talk creates a personal interactive platform to keep in touch with your customers and win their trust.
Pricing – Tell us Talk basic fees is 46.8 EUR/month per user. For additional users, the charge is 1.8 EUR/month. The extended option costs 57.8 EUR/month with additional users charged at 1.8 EUR/month.
Part 2: The Benefits of Animated Videos for Your Business
1. Exposure for your brand extensively
Animated videos for business is a great medium for brand development as they wonderfully collaborate color schemes, logos, brand images with the right kind of audio visuals for creating a complete packaged deal.
These animated audio visuals make your branding more appealing by creating recurrent themes, which keeps the background or foundation intact, while the characters in the clip move.
Animation also helps you to develop more sophisticated creatives and brand icons that can strengthen your marketing pitch. It doesn’t matter whether you are a seasoned player in online marketing or an amateur, the right animated video can speak volumes to promote your business.
2. High quality yet low budget
With animated videos you save plenty of money and time that gets wasted with traditionally shot videos. The surging costs to track a location, hire a crew, pay the artists, pay for top-notch equipment, arrange the set, etc. can make a hole in your pocket.
But, business animation can drastically reverse the expenses by creating a beautiful amalgamation of voiceover, visual, and audio content to deliver a beautiful story. The right animation artist and the correct tool can help you woo your audience like never before.
If you don’t like something in an animated video, then only that part is chopped and edited to add something more substantial.
3. More engagement
A video content is always appealing to the audience, as apart from plain text it is loaded with interesting audio visuals. Human brain being thirsty for knowledge through sight and experience is keen to consume more of audio visual things.
This in turn helps you create better engagement with your target group. Animated videos being a popular medium of imparting knowledge and message, deliver a clear and crisp message in a short span of tome and encourage audio visual learning.
Part 3: FAQ to Create Animated Videos
1. Which software is used to make animated videos?
In the world of animation, different software programs represent various tools to create animated videos with. You will often need to deal separately with 3D animation than 2D, you might need another for modeling and yet a third for rendering. Maya is a good all-round program that can help. Other tools to create animated videos include Adobe Animate and Moho. Each is a decent all-round program with great features.
2. How do I make an animated video for free?
There are tools to create animated videos that are available online, for free, if you know where to look. One of the tops of the list is Filmora, from Wondershare. Although any exported files will contain their watermark unless you unlock the paid version – you can still animate on it. Their Animation 101 pack has both features and learning tools, which will help you to succeed. Best of all, Filmora has an online learning library packed full of resources, as well as a multitude of plugins to help you broaden your animation horizons. It’s an excellent program for a beginner and a unique program for the more experienced editor, so everyone wins.
3. How to start a career in animation?
There are several steps to becoming a full-time animation artist – but it is possible. You should start by getting the relevant College qualifications in animation, or by entering a digital animation degree program. As you learn, save up your successes for both a CV and a portfolio. If you can put together a good demo reel, then all the better. Accept any work experience you can get, and, with a little luck, you will finish your studies with all the tools to create animated videos that you could ever need.
Final Verdict
Apart from using the above mentioned tools for creating business explainer videos, you could use Wondershare Filmora and edit your video while rendering powerful effects. We are sure that with this tool, there is no room for being disappointed. It can seamlessly create the most engaging videos with the least professional video editing.
Shanoon Cox
Shanoon Cox is a writer and a lover of all things video.
Follow @Shanoon Cox
Amazing Techniques of Motion Graphics in Premiere Pro
Little Known Techniques of Motion Graphics in Premiere Pro
An easy yet powerful editor
Numerous effects to choose from
Detailed tutorials provided by the official channel
Video editing has recently gained momentum in content design, and with Motion Graphics Premiere Pro editing templates, it has all the fun in the house.
In this article
01 [5 Editing Motion Graphics Techniques in Adobe Premiere Pro](#Part 1)
02 [10 Free Motion Graphics Templates for Premiere Pro](#Part 2)
03 [How to Use Motion Graphics Templates in Premiere Pro](#Part 3)
Part 1 5 Editing Motion Graphics Techniques in Adobe Premiere Pro
A variety of editing techniques of motion graphics for Premiere Pro are ready to give a classy touch to your videos. Let’s brush up through the best you can have.
01Cropping Clips
Cropping your videos allows you to fit them into your required size frames. To remove any unwanted portions of your edits, crop them in adobe Premiere Pro with your desired aspect ratio to give that ‘just perfect’ look to your edits.
Start from importing and adding your footage to your project panel, followed by creating a fresh composition. Now, choose ‘Crop’ from the Effects panel to add it to your clip, either by double-clicking or dragging and dropping.
02Trimming Clips
If you want to adjust the ‘In and Out’ play back sequence of your edited clips, you can go for trimming them. You can trim your clips in the Source and Program monitors, or even in the Premiere Pro timeline. You can choose from the standard cut, jump cut, B-roll cut etc, to suit your editing needs and styles.
All you need to do is open the clip, mark the In and Out points, adjust their sequence with previous or next edits in your cue and that’s it. You can also use keyboard shortcuts for this purpose. However, you need to preset these shortcuts before you begin editing your clips.
03Adding Text
You can try adding simple and formatted texts to enhance your video outlook. This comes handy when you are aiming to deliver specific messages to your audience. You can add normal write-ups, callout quotations and customize your text in a number of exciting styles. Just go to the Type tool, format your text in the Text Box and you’re done!
04Audio Level Adjustment
Want to add spark to your clips with a synchronized audio visual effect? After you finish trimming and cropping, consider opting for an in-line audio adjustment. This will definitely enhance your video and take your craft to the next level.
All you need to do is select an audio clip, click on ‘Audio Gain’ in the drop down menu, set desired Decibel count in the Audio Gain Box and select ‘OK’.
05Exporting Videos
Once you are done with your video craft, you should certainly look forward to making it available for social exposure. To do this, select appropriate sequence constraints in the Export window, choose the export platform, format and Codec, make fine tuning and bit rate adjustments and finish export either in Premiere Pro or Media Encoder. You may also save these settings for your next exports.
Part 2 Free Motion Graphics Templates for Premiere Pro
Let’s have a look into your best choices of free motion graphic templates for Premiere Pro:
0114 Premiere Pro Lumetri Looks
Want to enhance your video creativity with that amazing Hollywood feel? You can undoubtedly opt for the Premiere Lumetri Looks template that gives you the liberty to provide a Hollywood oriented color scheme to your videos, just like those incredible color patterns one would see in Dr. Strangelove, The Martian and many more famous Hollywood flicks.

0215 Animated Lower Thirds
This template comes handy when you need to add lower thirds to your videos, either to introduce different content varieties or to objectify your video components. You can use this template with ease in your personal as well as commercial videos to give them that explicit professional touch.

03Horror Trailer Titles
If horror videos turn you on, use this template in video creations to customize them with that intense and scary feel! This template helps you add scary title slates that are just enough to add a terrifying quotient to your videos. From personal to professional, this template can add intensity to any video type.
04Instagram Stories Premiere Pro Template
This template is a definite catch for those Instagram lovers who constantly experiment to post engaging stories on the platform. If you want your IG stories to grab the talk, go for this animation template to customize photos and text so that they get the buzz among your followers.

05Dust Overlays
Comprising of studio-like effects, this template allows you to enhance your films with high quality dynamic animation in appealing texture variations. Use this template to create videos with those attractive misty backgrounds with cohesive variations in lighting with adjustable power effects.
06Travel Stories Premiere Pro Template
If you are into travel blogging and trying to add spunk to your stories and videos, this template is there to help you out with its catchy text animations and flowy transitions. Available in an upgraded configuration, this template is everything you need to make your travel blogs hover the trending charts.

07Digital Slideshow
Go for this template to add spark to your graphic presentations. Designed primarily for professional usage, it is equally effective in personal projects also. Developed by Evanto Elements, the company offers unlimited access on subscription.

08Free Quotes Premiere Pro Template
If you want to add animated quotes to your video creations, this template is a must try for you. Providing 6 quoting options and a ‘click to change’ text and color interface with convenient customizability keeps it among the top choices for hastle free motion editing.

09Cinematic Title Style Library
If you are bored with those conventional Premiere Pro titles but don’t want to invest time in creating styles of your own, you can use the modernized title styles from this library to enhance your creations with that intense cinematic feel. You can use them comfortably for personal and commercial purposes.

10Space Background Elements
This set of background templates is designed to provide realistic settings to video creators who work on science fiction and space oriented themes. Loaded with different real-time effects, this template provides the ultimate feel of a space travel in 4K.

Part 2 Alternatives to Premiere Pro: Filmora
If not Premiere Pro, you can go for Filmora as a dependable alternative. It’s an exquisite set of amazing and top-notch tools for creating g and editing videos. Wondershare introduced Filmora as an effective, easy-to-use editing software that’s equally caters to the editing pace of beginners as well as experts. You can use Filmora with Windows and macOS.
Packed with a range of appealing customization choices, Filmora comes to you in four principal versions:
● Wondershare Filmora Video Editor
Suitable for beginners, this is the basic and the simplest version having inbuilt editing templates. It’s desktop compatible software.
For Win 7 or later (64-bit)
For macOS 10.12 or later
● Filmora
Android and iOS compatibility in this version of Filmora brought video editing from PCs and laptops into smartphones.

● FilmoraScrn
This version allows you to record your editing screen if you’re a working on Windows.

Part 4 How to Use Motion Graphics Templates in Premiere Pro
After getting familiar with Premiere Pro editing and templates, let’s get into using these adobe premiere motion graphics templates for an exemplary video creating experience. Take up the following steps to get started.
● Go to Premiere Pro Essential Graphics Panel
In the Premiere Pro startup page, select ‘Window’ from the toolbar and select ‘Essential Graphics’ from the drop down menu.
● Add Motion Graphics Templates to Library
Click the ‘Import’ button present at the bottom in the right side of the Essential Graphics Panel. Go to and choose your downloaded motion graphics template file and select ‘Open’. Your file is added to the Essential Graphics Library.
● Drag-Drop the MOGRT to Timeline
‘Drag’ your motion graphics template from the library and ‘Drop’ it on your Timeline.
● Customize Your Template
Go to the ‘Edit’ option in the Essential Graphics Panel to look for customization choices available for your selected motion graphics adobe template.
● Key Takeaways from This Episode →
● Adobe Premiere Pro is an amazing video creation and editing tool that ensures to give a professional class to your edits. Be it personal creativity or professional expertise, this software is all set to give you a wholesome editing experience you will never forget.
● Loaded with an extensive variety of editing templates, available for free and on subscription, adobe premiere pro is a one stop access to all your editing concerns. Its customizable effects will certainly make your creations stand out in the league.
● Video editing is a high in demand craft of excellence. With advancements in software developments, the creative market offers you a pool of over the top editing software that is ready to give that classy spunk to your videos. So just your own from the pool and go on a spree of creating trend setting videos that never miss out on grabbing the attention of everyone around!
Video editing has recently gained momentum in content design, and with Motion Graphics Premiere Pro editing templates, it has all the fun in the house.
In this article
01 [5 Editing Motion Graphics Techniques in Adobe Premiere Pro](#Part 1)
02 [10 Free Motion Graphics Templates for Premiere Pro](#Part 2)
03 [How to Use Motion Graphics Templates in Premiere Pro](#Part 3)
Part 1 5 Editing Motion Graphics Techniques in Adobe Premiere Pro
A variety of editing techniques of motion graphics for Premiere Pro are ready to give a classy touch to your videos. Let’s brush up through the best you can have.
01Cropping Clips
Cropping your videos allows you to fit them into your required size frames. To remove any unwanted portions of your edits, crop them in adobe Premiere Pro with your desired aspect ratio to give that ‘just perfect’ look to your edits.
Start from importing and adding your footage to your project panel, followed by creating a fresh composition. Now, choose ‘Crop’ from the Effects panel to add it to your clip, either by double-clicking or dragging and dropping.
02Trimming Clips
If you want to adjust the ‘In and Out’ play back sequence of your edited clips, you can go for trimming them. You can trim your clips in the Source and Program monitors, or even in the Premiere Pro timeline. You can choose from the standard cut, jump cut, B-roll cut etc, to suit your editing needs and styles.
All you need to do is open the clip, mark the In and Out points, adjust their sequence with previous or next edits in your cue and that’s it. You can also use keyboard shortcuts for this purpose. However, you need to preset these shortcuts before you begin editing your clips.
03Adding Text
You can try adding simple and formatted texts to enhance your video outlook. This comes handy when you are aiming to deliver specific messages to your audience. You can add normal write-ups, callout quotations and customize your text in a number of exciting styles. Just go to the Type tool, format your text in the Text Box and you’re done!
04Audio Level Adjustment
Want to add spark to your clips with a synchronized audio visual effect? After you finish trimming and cropping, consider opting for an in-line audio adjustment. This will definitely enhance your video and take your craft to the next level.
All you need to do is select an audio clip, click on ‘Audio Gain’ in the drop down menu, set desired Decibel count in the Audio Gain Box and select ‘OK’.
05Exporting Videos
Once you are done with your video craft, you should certainly look forward to making it available for social exposure. To do this, select appropriate sequence constraints in the Export window, choose the export platform, format and Codec, make fine tuning and bit rate adjustments and finish export either in Premiere Pro or Media Encoder. You may also save these settings for your next exports.
Part 2 Free Motion Graphics Templates for Premiere Pro
Let’s have a look into your best choices of free motion graphic templates for Premiere Pro:
0114 Premiere Pro Lumetri Looks
Want to enhance your video creativity with that amazing Hollywood feel? You can undoubtedly opt for the Premiere Lumetri Looks template that gives you the liberty to provide a Hollywood oriented color scheme to your videos, just like those incredible color patterns one would see in Dr. Strangelove, The Martian and many more famous Hollywood flicks.
0215 Animated Lower Thirds
This template comes handy when you need to add lower thirds to your videos, either to introduce different content varieties or to objectify your video components. You can use this template with ease in your personal as well as commercial videos to give them that explicit professional touch.
03Horror Trailer Titles
If horror videos turn you on, use this template in video creations to customize them with that intense and scary feel! This template helps you add scary title slates that are just enough to add a terrifying quotient to your videos. From personal to professional, this template can add intensity to any video type.
04Instagram Stories Premiere Pro Template
This template is a definite catch for those Instagram lovers who constantly experiment to post engaging stories on the platform. If you want your IG stories to grab the talk, go for this animation template to customize photos and text so that they get the buzz among your followers.
05Dust Overlays
Comprising of studio-like effects, this template allows you to enhance your films with high quality dynamic animation in appealing texture variations. Use this template to create videos with those attractive misty backgrounds with cohesive variations in lighting with adjustable power effects.
06Travel Stories Premiere Pro Template
If you are into travel blogging and trying to add spunk to your stories and videos, this template is there to help you out with its catchy text animations and flowy transitions. Available in an upgraded configuration, this template is everything you need to make your travel blogs hover the trending charts.
07Digital Slideshow
Go for this template to add spark to your graphic presentations. Designed primarily for professional usage, it is equally effective in personal projects also. Developed by Evanto Elements, the company offers unlimited access on subscription.
08Free Quotes Premiere Pro Template
If you want to add animated quotes to your video creations, this template is a must try for you. Providing 6 quoting options and a ‘click to change’ text and color interface with convenient customizability keeps it among the top choices for hastle free motion editing.
09Cinematic Title Style Library
If you are bored with those conventional Premiere Pro titles but don’t want to invest time in creating styles of your own, you can use the modernized title styles from this library to enhance your creations with that intense cinematic feel. You can use them comfortably for personal and commercial purposes.
10Space Background Elements
This set of background templates is designed to provide realistic settings to video creators who work on science fiction and space oriented themes. Loaded with different real-time effects, this template provides the ultimate feel of a space travel in 4K.
Part 2 Alternatives to Premiere Pro: Filmora
If not Premiere Pro, you can go for Filmora as a dependable alternative. It’s an exquisite set of amazing and top-notch tools for creating g and editing videos. Wondershare introduced Filmora as an effective, easy-to-use editing software that’s equally caters to the editing pace of beginners as well as experts. You can use Filmora with Windows and macOS.
Packed with a range of appealing customization choices, Filmora comes to you in four principal versions:
● Wondershare Filmora Video Editor
Suitable for beginners, this is the basic and the simplest version having inbuilt editing templates. It’s desktop compatible software.
For Win 7 or later (64-bit)
For macOS 10.12 or later
● Filmora
Android and iOS compatibility in this version of Filmora brought video editing from PCs and laptops into smartphones.
● FilmoraScrn
This version allows you to record your editing screen if you’re a working on Windows.
Part 4 How to Use Motion Graphics Templates in Premiere Pro
After getting familiar with Premiere Pro editing and templates, let’s get into using these adobe premiere motion graphics templates for an exemplary video creating experience. Take up the following steps to get started.
● Go to Premiere Pro Essential Graphics Panel
In the Premiere Pro startup page, select ‘Window’ from the toolbar and select ‘Essential Graphics’ from the drop down menu.
● Add Motion Graphics Templates to Library
Click the ‘Import’ button present at the bottom in the right side of the Essential Graphics Panel. Go to and choose your downloaded motion graphics template file and select ‘Open’. Your file is added to the Essential Graphics Library.
● Drag-Drop the MOGRT to Timeline
‘Drag’ your motion graphics template from the library and ‘Drop’ it on your Timeline.
● Customize Your Template
Go to the ‘Edit’ option in the Essential Graphics Panel to look for customization choices available for your selected motion graphics adobe template.
● Key Takeaways from This Episode →
● Adobe Premiere Pro is an amazing video creation and editing tool that ensures to give a professional class to your edits. Be it personal creativity or professional expertise, this software is all set to give you a wholesome editing experience you will never forget.
● Loaded with an extensive variety of editing templates, available for free and on subscription, adobe premiere pro is a one stop access to all your editing concerns. Its customizable effects will certainly make your creations stand out in the league.
● Video editing is a high in demand craft of excellence. With advancements in software developments, the creative market offers you a pool of over the top editing software that is ready to give that classy spunk to your videos. So just your own from the pool and go on a spree of creating trend setting videos that never miss out on grabbing the attention of everyone around!
How to Create Picsart Cartoon
How to Create Picsart Cartoon
An easy yet powerful editor
Numerous effects to choose from
Detailed tutorials provided by the official channel
Cartoonized images are a convenient source of fun and media entertainment in present times. Try hands at creating your own caricature masterpieces with Picsart!
In this article
01 [How To Edit Cartoon Picture in Picsart](#Part 1)
02 [How To Make A Cartoon On Your Phone](#Part 2)
03 [How to Cartoon Yourself on Picsart](#Part 3)
Part 1 How to Edit Cartoon Picture in Picsart
Cartoonized pictures as you must be aware of, are comic transformations of real-time images and are widely used on social media to add a funny angle to the diversity of conversation going on, or even just as a source of plentiful amusement.
If you often feel motivated to experiment with the art and are looking for a perfect solution, see through the following section for a detailed and stepwise guide to create and edit a Picsart cartoon with utmost ease and within a quick time span:
User’s Guide to Edit Cartoon Pictures in Picsart
Step 1: Download the Picsart Application
Visit the official Picsart website to download the desktop version of the app in your Windows or MacOs supported PC.
Step 2: Make a Selection
Launch the app in your system to reach the Picsart welcome screen. Navigate to the bottom and tap the ‘+’ symbol. You are now required to choose a desired image to create the cartoon edit. You can either browse through your system gallery or search a specific one from the Picsart photo library in the ‘Search Bar’ at the top of the app screen.

Step 3: Let’s Get Editing!
When you have made your choice, navigate to the toolbar at the bottom of the app screen and click on the ‘Effects’ tab. Make a side scroll to choose a specific effect category, like that of ‘Artistic’ or ‘Magic’ to open a library of effects in the selected category.
As an example, selecting the ‘Cartoonizer’ option in the ‘Artistic’ effects category can add an immediate caricature feel to your selected real-time image. You can further include manual adjustments to get the perfect cartoon look by pressing and holding the ‘Cartoonizer’ option. There are a whole variety of magical effects, such as, Neo Pop, Soul, Badlands, Animation and Paw in the ‘Magic’ effects category, that are just perfect in giving your edit a fantasizing look with a Picsart cartoon background.
If you are looking for a quicker editing process, prefer adding cartoonized elements, like ‘Picsart Stickers’ to your image instead of going for a complete caricature edit. To do this, open the ‘Picsart Photo Editor’, navigates to the ‘Sticker’ symbol and click on it, followed by searching ‘Cartoon Sticker’. You can alternatively search a specific keyword with the ‘Cartoon’ descriptor, if you are clear on what you want to add.
You can further, resize your selected sticker with a ‘Two Finger Pinch’ or use the ‘Eraser’ tool to ward off any unwanted portions from the same. You are free to take as many repetitions of the process as you wish, till you get the perfect result for saving to your device and sharing on your social media handles.

Step 4: Time to Save and Share!
When you are satisfied with your work, navigate to the right hand corner and tap ‘Apply’ to finalize your changes, followed by clicking on the ‘Next’ button at the top right corner of the app screen to save and export your creation.
Part 2 How to Make a Cartoon on Your Phone
After a detailed analysis of the cartoon editing procedure in your desktops, let us see thro ugh the method of creating cartoonized images on your MacOs and Android smartphones on the following section:
Stepwise Procedure for Creating Cartoonized Images on Phone
Step 1: Download the Application
When going to use the Picsart editor application on your smartphone, you will first require a download of the same in your concerned device. You can do this by visiting the ‘Google PlayStore’ for an Android device or the ‘Apple App Store’ for MacOs smartphones.
Step 2: Choose a Real-time Image
After a successful launch of the ‘Picsart Editor’ application in your smartphone, reach to and click on the ‘+’ icon at the bottom of the app’s working interface. This needs to be followed by selecting any specific real-time image, either from your smartphone gallery or the Picsart photo library using the top ‘Search Bar’ of the interface, for creating a cartoonized edit.

Step 3: Editing Begins!
Once you are done with selecting the image, proceed to add effects to your selection by clicking the ‘Effects’ tab in the bottom toolbar, succeeded by picking a desired effect type through a right scroll. Tap on any category, such as, Magic, Artistic, etc, to open the effect library of the same.
For instance, you can click on the ‘Cartoonizer’ option within Artistic’ effects to supplement your uploaded real-time image with an instant cartoonized effect. You are also granted the liberty to make manual changes to set the caricature image effects as per your preferences, which you can do with a ‘Press and Hold’ of the ‘Cartoonizer’ tab. If you have a diversion towards complementing your cartoonized images with magical effects, choose from Animation, Neo Pop, Paw, Badlands, Paw, and other amazing options in the ‘Magic’ category.

Step 4: Save and Export
When you have completed the editing process and the changes satisfy you, go to the ‘Apply’ tab at the right side of the editor screen to see the changes appear in your edit. You can now navigate to the upper right corner of the app screen and click on ‘Next’ to save your work locally to your device, along with exporting the same across different media platforms.
Part 3 How to Cartoon Yourself on Picsart
Having learnt about the interesting ways to edit cartoon pictures and create cartoons on your smartphone, you might like to try hands on creating a cartoon portrait of yourself in the Picsart editor for a variety of reasons, like that of creating cartoon profile pics of yourself. Let us have a look of the procedure for the same using the Picsart Online Image Editor tool in the following section:
User’s Guide to Create a Cartoon Portrait With Picsart Online Photo Editor
Step 1: Launch the Application
In any of your favorite internet browsers, search for and open ‘Picsart Desktop Editor’. In the app’s working interface, tap ‘Upload’ or ‘New Project’ to choose an image from your device or the free to use Picsart image library respectively, for proceeding with the cartoonized transformations.

Step 2: Edit Your Selection
Tap on the ‘Effects’ tab from the editing toolbar at the top of your image and select a desired effect category to access the diversity of cartoonifying filters. It is recommended to select the ‘Magic’ category for the most splendid cartoon effects, such as, Paw, Badland, Animation, Soul and Neo Pop among many others.

You can even make manual adjustments in the brightness, color, saturation, burn and fade, etc., of the image by clicking on the ‘Adjust’ and ‘Blend’ options at the top of the image workspace.

Step 3: Download and Share Your Work
When you are done editing, navigate to and click on the ‘Share’ option at the upper right corner of the editor screen to download your cartoonized image.

****Wondershare Filmora Video Editor Cartoon Image Creator**
For Win 7 or later (64-bit)
For macOS 10.12 or later
Picsart is certainly a dependable solution to create caricature images, but if you are keen on looking for an alternative application to cater to the need, Introduced to the software market by Wondershare, the Filmora Cartoon Image Creator can be a convenient rescue. The app promises you of a high quality cartoonized edit with a plethora of editing effects to suit your most specific editing preferences.
● Ending Thoughts →
● Creating cartoonized edits from real time images is a fun and entertaining activity along with being the latest media trend.
● The Picsart editor application allows making caricature images from actual stills through desktop, smartphone and online compatible image editing program.
● Talking of suitable Picsart alternatives, you can rely on the Filmora Cartoon Image Creator application for high quality cartoonized image creation.
Cartoonized images are a convenient source of fun and media entertainment in present times. Try hands at creating your own caricature masterpieces with Picsart!
In this article
01 [How To Edit Cartoon Picture in Picsart](#Part 1)
02 [How To Make A Cartoon On Your Phone](#Part 2)
03 [How to Cartoon Yourself on Picsart](#Part 3)
Part 1 How to Edit Cartoon Picture in Picsart
Cartoonized pictures as you must be aware of, are comic transformations of real-time images and are widely used on social media to add a funny angle to the diversity of conversation going on, or even just as a source of plentiful amusement.
If you often feel motivated to experiment with the art and are looking for a perfect solution, see through the following section for a detailed and stepwise guide to create and edit a Picsart cartoon with utmost ease and within a quick time span:
User’s Guide to Edit Cartoon Pictures in Picsart
Step 1: Download the Picsart Application
Visit the official Picsart website to download the desktop version of the app in your Windows or MacOs supported PC.
Step 2: Make a Selection
Launch the app in your system to reach the Picsart welcome screen. Navigate to the bottom and tap the ‘+’ symbol. You are now required to choose a desired image to create the cartoon edit. You can either browse through your system gallery or search a specific one from the Picsart photo library in the ‘Search Bar’ at the top of the app screen.
Step 3: Let’s Get Editing!
When you have made your choice, navigate to the toolbar at the bottom of the app screen and click on the ‘Effects’ tab. Make a side scroll to choose a specific effect category, like that of ‘Artistic’ or ‘Magic’ to open a library of effects in the selected category.
As an example, selecting the ‘Cartoonizer’ option in the ‘Artistic’ effects category can add an immediate caricature feel to your selected real-time image. You can further include manual adjustments to get the perfect cartoon look by pressing and holding the ‘Cartoonizer’ option. There are a whole variety of magical effects, such as, Neo Pop, Soul, Badlands, Animation and Paw in the ‘Magic’ effects category, that are just perfect in giving your edit a fantasizing look with a Picsart cartoon background.
If you are looking for a quicker editing process, prefer adding cartoonized elements, like ‘Picsart Stickers’ to your image instead of going for a complete caricature edit. To do this, open the ‘Picsart Photo Editor’, navigates to the ‘Sticker’ symbol and click on it, followed by searching ‘Cartoon Sticker’. You can alternatively search a specific keyword with the ‘Cartoon’ descriptor, if you are clear on what you want to add.
You can further, resize your selected sticker with a ‘Two Finger Pinch’ or use the ‘Eraser’ tool to ward off any unwanted portions from the same. You are free to take as many repetitions of the process as you wish, till you get the perfect result for saving to your device and sharing on your social media handles.
Step 4: Time to Save and Share!
When you are satisfied with your work, navigate to the right hand corner and tap ‘Apply’ to finalize your changes, followed by clicking on the ‘Next’ button at the top right corner of the app screen to save and export your creation.
Part 2 How to Make a Cartoon on Your Phone
After a detailed analysis of the cartoon editing procedure in your desktops, let us see thro ugh the method of creating cartoonized images on your MacOs and Android smartphones on the following section:
Stepwise Procedure for Creating Cartoonized Images on Phone
Step 1: Download the Application
When going to use the Picsart editor application on your smartphone, you will first require a download of the same in your concerned device. You can do this by visiting the ‘Google PlayStore’ for an Android device or the ‘Apple App Store’ for MacOs smartphones.
Step 2: Choose a Real-time Image
After a successful launch of the ‘Picsart Editor’ application in your smartphone, reach to and click on the ‘+’ icon at the bottom of the app’s working interface. This needs to be followed by selecting any specific real-time image, either from your smartphone gallery or the Picsart photo library using the top ‘Search Bar’ of the interface, for creating a cartoonized edit.
Step 3: Editing Begins!
Once you are done with selecting the image, proceed to add effects to your selection by clicking the ‘Effects’ tab in the bottom toolbar, succeeded by picking a desired effect type through a right scroll. Tap on any category, such as, Magic, Artistic, etc, to open the effect library of the same.
For instance, you can click on the ‘Cartoonizer’ option within Artistic’ effects to supplement your uploaded real-time image with an instant cartoonized effect. You are also granted the liberty to make manual changes to set the caricature image effects as per your preferences, which you can do with a ‘Press and Hold’ of the ‘Cartoonizer’ tab. If you have a diversion towards complementing your cartoonized images with magical effects, choose from Animation, Neo Pop, Paw, Badlands, Paw, and other amazing options in the ‘Magic’ category.
Step 4: Save and Export
When you have completed the editing process and the changes satisfy you, go to the ‘Apply’ tab at the right side of the editor screen to see the changes appear in your edit. You can now navigate to the upper right corner of the app screen and click on ‘Next’ to save your work locally to your device, along with exporting the same across different media platforms.
Part 3 How to Cartoon Yourself on Picsart
Having learnt about the interesting ways to edit cartoon pictures and create cartoons on your smartphone, you might like to try hands on creating a cartoon portrait of yourself in the Picsart editor for a variety of reasons, like that of creating cartoon profile pics of yourself. Let us have a look of the procedure for the same using the Picsart Online Image Editor tool in the following section:
User’s Guide to Create a Cartoon Portrait With Picsart Online Photo Editor
Step 1: Launch the Application
In any of your favorite internet browsers, search for and open ‘Picsart Desktop Editor’. In the app’s working interface, tap ‘Upload’ or ‘New Project’ to choose an image from your device or the free to use Picsart image library respectively, for proceeding with the cartoonized transformations.
Step 2: Edit Your Selection
Tap on the ‘Effects’ tab from the editing toolbar at the top of your image and select a desired effect category to access the diversity of cartoonifying filters. It is recommended to select the ‘Magic’ category for the most splendid cartoon effects, such as, Paw, Badland, Animation, Soul and Neo Pop among many others.
You can even make manual adjustments in the brightness, color, saturation, burn and fade, etc., of the image by clicking on the ‘Adjust’ and ‘Blend’ options at the top of the image workspace.
Step 3: Download and Share Your Work
When you are done editing, navigate to and click on the ‘Share’ option at the upper right corner of the editor screen to download your cartoonized image.
****Wondershare Filmora Video Editor Cartoon Image Creator**
For Win 7 or later (64-bit)
For macOS 10.12 or later
Picsart is certainly a dependable solution to create caricature images, but if you are keen on looking for an alternative application to cater to the need, Introduced to the software market by Wondershare, the Filmora Cartoon Image Creator can be a convenient rescue. The app promises you of a high quality cartoonized edit with a plethora of editing effects to suit your most specific editing preferences.
● Ending Thoughts →
● Creating cartoonized edits from real time images is a fun and entertaining activity along with being the latest media trend.
● The Picsart editor application allows making caricature images from actual stills through desktop, smartphone and online compatible image editing program.
● Talking of suitable Picsart alternatives, you can rely on the Filmora Cartoon Image Creator application for high quality cartoonized image creation.
Also read:
- Updated Top 10 Classical Animated Cartoon Types With Examples for 2024
- New 2024 Approved Amazing Ways to Find Suitable Animated Graphic Maker
- Updated How to Send and Add Snapchat GIFs 100 The Easy Way for 2024
- In 2024, How to Create Your Avatar Free
- Updated Top 15 Greatest Claymation Movies of All Time for 2024
- Create or Find Good Morning/Night GIFs for 2024
- New 15 Forgotten Cartoon Characters of All Time
- Updated 2024 Approved How to Animate Image on Scroll
- In 2024, Types of Cartoon Styles You May Use for Your Next Marketing Project
- How to Turn Yourself Into WhatsApp Cartoon for 2024
- New In 2024, How to Create a YouTube Intro Animation Like a Pro
- Updated Fuel Your Creativity with 10 Awesome Collection of 2D Animation Examples for 2024
- 2024 Approved Animate Photo Online with These Awesome Tools
- New 2024 Approved Types of Cartoon Styles You May Use for Your Next Marketing Project
- New 2024 Approved How to Make GIF Instagram | Quick Tips
- Updated In 2024, Best 15 Horror Animes That Will Trigger a Heart Attack
- Updated Learn All About 3D Logo Animation and Templates
- New 2024 Approved Ways to Get the Most up to Date Cartoon Character Design Tips
- Simple Guide to Create New and Exciting Blackboard Animation for 2024
- New Can I Still Do Animated Logo Design Without Design Skills, In 2024
- Updated In 2024, Animate Graphics in Canva
- Updated How to Learn Cartoon Characters Sketch Quickly for 2024
- 15 Horror Animes That Will Trigger a Heart Attack
- Updated 2024 Approved Best 15 Instant Classics Animated Cartoon Movies
- 10 Cartoon Photo Converters for 2024
- What Is Still Motion Animation, In 2024
- New In 2024, Top 10 3D Text Animation Templates
- How To Learn Cartoon Sketch Drawing for 2024
- Updated Beginners Guide for Learning 3D Animation
- New In 2024, Why These 10 Top Text Motion Templates Are Worth Your Attention
- How to Create A GIF with Sound, In 2024
- 2024 Approved How to Find 3D Animation Studio Meeting All Your Inspiring Needs
- Updated Popular Female & Male Disney Cartoon Characters To Empower You
- Best 15 Horror Animes That Will Trigger a Heart Attack for 2024
- Updated 10 Must Watch Netflix Cartoon Series
- In 2024, 10 Cartoon Character Makers to Make Animated Characters
- New In 2024, Top 3 Ways to Create Gif with Great 3D Gif Maker
- Updated How to Make a 3D Cartoon of Yourself for 2024
- Updated Adobe Animate CC Everything You Need to Know for 2024
- 2024 Approved Whats Music Video GIF & How to Add Music to Your GIF Files
- 2024 Approved What Is Still Motion Animation and How Does It Work?
- Updated 2024 Approved 5 Foolproof Amazing Anime Text to Speech Tips for Makers
- Updated 2024 Approved How to Combine Multiple GIFs Into One with GIF Combiner
- Updated The 10 Most Adorable Aesthetic Cartoon Characters of All Time
- Updated 2024 Approved How to Learn Cartoon Characters Sketch Quickly
- New Learn How to Draw Cartoons Step by Step with This Guide for 2024
- 2024 Approved Best 10 Apps to Enhance Your Instagram Story Slideshow
- Updated 2024 Approved Top 8 Tools Tell You How to Make Slideshows for Instagram
- Want to Make a Meme GIF, In 2024
- How to Hard Reset Infinix Smart 8 Pro Without Password | Dr.fone
- MOV to Galaxy Z Flip 5 converter-convert .mov files for Galaxy Z Flip 5
- How to Share/Fake Location on WhatsApp for Nubia Red Magic 8S Pro+ | Dr.fone
- Is your Vivo Y27s working too slow? Heres how you can hard reset it | Dr.fone
- 3 Ways for Android Pokemon Go Spoofing On Realme Narzo 60 5G | Dr.fone
- Nokia C32 ADB Format Tool for PC vs. Other Unlocking Tools Which One is the Best?
- How to Unlock Vivo Y78+ Phone Forgot Password
- In 2024, How Can You Transfer Files From Realme 11 Pro+ To iPhone 15/14/13? | Dr.fone
- How to Fix & Retrieve Pictures/Videos From a Water Damaged iPhone 7 Plus That Wont Turn on | Stellar
- In 2024, Full Guide to Bypass Vivo X Fold 2 FRP
- A Step-by-Step Guide on Using ADB and Fastboot to Remove FRP Lock on your Vivo S18 Pro
- In 2024, Easy Guide How To Bypass Xiaomi Redmi Note 13 5G FRP Android 10/11/12/13
- How To Change Your SIM PIN Code on Your Gionee Phone
- 10 Fake GPS Location Apps on Android Of your Samsung Galaxy A25 5G | Dr.fone
- In 2024, How does the stardust trade cost In pokemon go On Apple iPhone X? | Dr.fone
- How To Simulate GPS Movement With Location Spoofer On Oppo Reno 8T 5G? | Dr.fone
- In 2024, Everything You Need to Know about Lock Screen Settings on your Realme GT Neo 5
- New Best Celebrity Voice Generator Tools to Transform Your Voice for 2024
- In 2024, Guide to Mirror Your Google Pixel 8 Pro to Other Android devices | Dr.fone
- In 2024, Downloading SamFw FRP Tool 3.0 for Samsung Galaxy S23 Tactical Edition
- In 2024, Best 3 Software to Transfer Files to/from Your Vivo Y77t via a USB Cable | Dr.fone
- What You Need To Know To Improve Your Vivo S17e Hard Reset | Dr.fone
- In 2024, Three Ways to Sim Unlock Vivo Y28 5G
- In 2024, How to use Pokemon Go Joystick on Apple iPhone 8 Plus? | Dr.fone
- Best 10 Mock Location Apps Worth Trying On Motorola Defy 2 | Dr.fone
- 10 Easy-to-Use FRP Bypass Tools for Unlocking Google Accounts On Honor Magic Vs 2
- Title: Updated A Beginners Guide for Learning 3D Animation
- Author: Elon
- Created at : 2024-06-30 12:28:24
- Updated at : 2024-07-01 12:28:24
- Link: https://animation-videos.techidaily.com/updated-a-beginners-guide-for-learning-3d-animation/
- License: This work is licensed under CC BY-NC-SA 4.0.
