
:max_bytes(150000):strip_icc():format(webp)/GettyImages-545995058-58ed21243df78cadab023f3c.jpg)
Updated Adobe Rigger Is AWESOME for 2024
Adobe Rigger Is AWESOME
Adobe Auto Rigger is AWESOME
An easy yet powerful editor
Numerous effects to choose from
Detailed tutorials provided by the official channel
The Adobe Auto rigger is definitely something to look into if you want to quickly and easily prep 3D Animated Characters (without having to learn all the difficult ins and outs of Adobe 3D Rigging.) It’s a perfect tool for beginners.
Especially those that aren’t really looking to create big animated projects, just small animated characters or objects that they can use for their websites, video content, video game development, etc.
In this article
01 [What’s Adobe Auto Rigger?](#Part 1)
02 [How Do You Auto Rig a Character in Adobe?](#Part 2)
03 [Other AWESOME Auto Rigger Tools](#Part 3)
Part 1 What’s Adobe Auto Rigger?
Alright, so what is the Adobe Auto Rigger and how does it differ from Adobe Animate Advanced Rigging or Adobe After Effects Rigging? Is there any difference at all??? The simple answer? Yes, there is a definite difference.
It’s all thanks to the third-party tool, Mixamo, which will allow you to upload characters for auto rigging (basically bypassing the kind of work that is usually required for manually rigging and animating in Adobe Animate and After Effects.) We’ll talk more about this in the tutorial below. For now, all you need to know is that it takes care of setting up a character for you with only a few simple steps.
Thus, enabling you to quickly move forward in your projects if you wish. Whether you’re intending to create a quick little animation for your website, or jumping into a video editing software like Wondershare Filmora Video Editor (which is great professional software with everything you need to start creating high-quality content that you can share with your audience.)

Part 2 How Do You Auto Rig a Character in Adobe?
Now onto our promised tutorial. Here, we make use of the Adobe Auto Rigger, Mixamo, in order to demonstrate how you can bypass Adobe Rigging by making use of Mixamo’s auto-rigging functions or their pre-existing character models for creating your projects.
01Upload Your Own Character
To start, you’ll need to visit ‘Maximo.com’ and sign in with your Adobe ID (email and password required.)
You can also sign-up for free if you’d like. That option is available for those who may want to explore the available options first.
Once you’re logged in, go to the ‘Editor’ panel and prepare to upload a custom character for automatic rigging. This is assuming that you have a character design already prepared, of course. If not, then don’t worry. The next should help.

02(Optional) Browse for Downloadable Characters
The best part of Mixamo is that it has a rich library full of pre-rigged characters that you can use should you wish to. These can be found under the ‘Characters’ tab (shown in the image below.)
So, if you don’t have a character model prepared just yet or have no intention of diving too deeply into character design just in general, you don’t have to worry. You can just download one of the pre-rigged characters here and use them for your project.

03Rig a Custom Character
If you’ve decided to go forward with a custom character, after all, upload it to the Adobe Auto Rigger (shown in the image below.)
This is a very straightforward tool that you can use to place the most important markers on your figure (chin, wrists, elbows, knees, and groin). Once you’ve confirmed the placement of all these points, you can continue and come out of it with your Model auto-rigged and work-ready.

04Download Rigged Character and Begin Animation
It may take several minutes for the Adobe Auto Rigger to completely finish auto-rigging your project, so have a bit of patience. You’ll be taken back to the main interface when complete, and you’ll be able to download your now rigged model for use.
Part 3 Other AWESOME Auto Rigger Tools
Now, just in case you’re interested in other methods of automatically rigging outside of what we demonstrated above for rigging in Adobe Animate and After Effects… We’ve included some other add-ons and tools that you can use with other popular Animation software. They’re all a little bit different, so make sure to pay attention to the details provided (and watch the video attached too. As it should show you just what exactly each of these auto-rigging tools is capable of doing for you.)
01InstantRig - Auto Rigger
The first Auto Rigger on this list is ‘Instant Rig.’ This is a rigging tool for the Animation software called 3ds Max. More specifically, it’s a ‘modular rigging’ tool. That makes it very versatile, allowing you to determine the features of the character that you are working with based on their attributes (no matter how many fingers, toes, tails, ears, etc. they need.) The tool is particularly popular with game developers, as it is a quick and easy way of rigging game characters — whether they be humanoid or beastly in form. (A free version of the tool is available, but a full license will require a one-time fee of around $35.)
02Auto-Rig Pro
Next, we have the auto-rigging addon for the free, open-source Animation Software, Blender. This add-on can be used very similarly to the Adobe Animate Puppet Rig tools — and is free to use besides. The add-on has a ‘smart feature’ that is capable of automatically rigging up joints and bones of humanoid forms in an instant and can also be used for rigging up non-humanoid characters — albeit, it would have to be manual.
03Perseus Auto Rig - Maya
Next up, we have Perseus Auto Rig. This one works with Maya (which is a very popular professional software used by a lot of animation studios in the industry) and actually comes in three versions. There’s the Perseus ‘Biped Rigging’ license for humanoid characters, the Perseus ‘Facial Rigging’ license for rigging facial features, and the Perseus ‘Quadruped Rigging’ license for non-humanoid creatures.
04Auto Character Setup
Next is the auto-character set-up tool for MODO. This is a tool designed for rigging up bi-pedal characters — so mostly humanoid forms. But it does offer some flexibility as to the form that bipedal character takes. So, you can adjust it as needed if there’s something incongruous with your design and the auto-rigger itself.
05IKMAX
For our last tool for auto-rigging, we have IKMAX. This works for 3ds Max and Maya (both of which we’ve mentioned before. It’s very easy to use and adjust as needed — with sliders that you can fiddle around with the work through any problem areas if need be.
● Key Takeaways from This Episode →
● If you’re interested in introducing animations into your content but you don’t have the time or the patience to get too involved with Adobe Rigging (which is a complex subject to talk about even for some professional animators), the auto-rigging solutions are definitely something to consider.
● The Adobe Auto Rigger, Mixamo, is an especially exciting tool to try out. Not only is it incredibly easy to use, but it comes with pre-made character designs that you can play around with to start your experimentations into animation early.
● If Adobe is not your software of choice, don’t worry. There are other auto-rigging tools that you can try out if need be. We introduced at least five that you can use with some of the more popular alternative animation software in a list for you to look through.
The Adobe Auto rigger is definitely something to look into if you want to quickly and easily prep 3D Animated Characters (without having to learn all the difficult ins and outs of Adobe 3D Rigging.) It’s a perfect tool for beginners.
Especially those that aren’t really looking to create big animated projects, just small animated characters or objects that they can use for their websites, video content, video game development, etc.
In this article
01 [What’s Adobe Auto Rigger?](#Part 1)
02 [How Do You Auto Rig a Character in Adobe?](#Part 2)
03 [Other AWESOME Auto Rigger Tools](#Part 3)
Part 1 What’s Adobe Auto Rigger?
Alright, so what is the Adobe Auto Rigger and how does it differ from Adobe Animate Advanced Rigging or Adobe After Effects Rigging? Is there any difference at all??? The simple answer? Yes, there is a definite difference.
It’s all thanks to the third-party tool, Mixamo, which will allow you to upload characters for auto rigging (basically bypassing the kind of work that is usually required for manually rigging and animating in Adobe Animate and After Effects.) We’ll talk more about this in the tutorial below. For now, all you need to know is that it takes care of setting up a character for you with only a few simple steps.
Thus, enabling you to quickly move forward in your projects if you wish. Whether you’re intending to create a quick little animation for your website, or jumping into a video editing software like Wondershare Filmora Video Editor (which is great professional software with everything you need to start creating high-quality content that you can share with your audience.)
Part 2 How Do You Auto Rig a Character in Adobe?
Now onto our promised tutorial. Here, we make use of the Adobe Auto Rigger, Mixamo, in order to demonstrate how you can bypass Adobe Rigging by making use of Mixamo’s auto-rigging functions or their pre-existing character models for creating your projects.
01Upload Your Own Character
To start, you’ll need to visit ‘Maximo.com’ and sign in with your Adobe ID (email and password required.)
You can also sign-up for free if you’d like. That option is available for those who may want to explore the available options first.
Once you’re logged in, go to the ‘Editor’ panel and prepare to upload a custom character for automatic rigging. This is assuming that you have a character design already prepared, of course. If not, then don’t worry. The next should help.
02(Optional) Browse for Downloadable Characters
The best part of Mixamo is that it has a rich library full of pre-rigged characters that you can use should you wish to. These can be found under the ‘Characters’ tab (shown in the image below.)
So, if you don’t have a character model prepared just yet or have no intention of diving too deeply into character design just in general, you don’t have to worry. You can just download one of the pre-rigged characters here and use them for your project.
03Rig a Custom Character
If you’ve decided to go forward with a custom character, after all, upload it to the Adobe Auto Rigger (shown in the image below.)
This is a very straightforward tool that you can use to place the most important markers on your figure (chin, wrists, elbows, knees, and groin). Once you’ve confirmed the placement of all these points, you can continue and come out of it with your Model auto-rigged and work-ready.
04Download Rigged Character and Begin Animation
It may take several minutes for the Adobe Auto Rigger to completely finish auto-rigging your project, so have a bit of patience. You’ll be taken back to the main interface when complete, and you’ll be able to download your now rigged model for use.
Part 3 Other AWESOME Auto Rigger Tools
Now, just in case you’re interested in other methods of automatically rigging outside of what we demonstrated above for rigging in Adobe Animate and After Effects… We’ve included some other add-ons and tools that you can use with other popular Animation software. They’re all a little bit different, so make sure to pay attention to the details provided (and watch the video attached too. As it should show you just what exactly each of these auto-rigging tools is capable of doing for you.)
01InstantRig - Auto Rigger
The first Auto Rigger on this list is ‘Instant Rig.’ This is a rigging tool for the Animation software called 3ds Max. More specifically, it’s a ‘modular rigging’ tool. That makes it very versatile, allowing you to determine the features of the character that you are working with based on their attributes (no matter how many fingers, toes, tails, ears, etc. they need.) The tool is particularly popular with game developers, as it is a quick and easy way of rigging game characters — whether they be humanoid or beastly in form. (A free version of the tool is available, but a full license will require a one-time fee of around $35.)
02Auto-Rig Pro
Next, we have the auto-rigging addon for the free, open-source Animation Software, Blender. This add-on can be used very similarly to the Adobe Animate Puppet Rig tools — and is free to use besides. The add-on has a ‘smart feature’ that is capable of automatically rigging up joints and bones of humanoid forms in an instant and can also be used for rigging up non-humanoid characters — albeit, it would have to be manual.
03Perseus Auto Rig - Maya
Next up, we have Perseus Auto Rig. This one works with Maya (which is a very popular professional software used by a lot of animation studios in the industry) and actually comes in three versions. There’s the Perseus ‘Biped Rigging’ license for humanoid characters, the Perseus ‘Facial Rigging’ license for rigging facial features, and the Perseus ‘Quadruped Rigging’ license for non-humanoid creatures.
04Auto Character Setup
Next is the auto-character set-up tool for MODO. This is a tool designed for rigging up bi-pedal characters — so mostly humanoid forms. But it does offer some flexibility as to the form that bipedal character takes. So, you can adjust it as needed if there’s something incongruous with your design and the auto-rigger itself.
05IKMAX
For our last tool for auto-rigging, we have IKMAX. This works for 3ds Max and Maya (both of which we’ve mentioned before. It’s very easy to use and adjust as needed — with sliders that you can fiddle around with the work through any problem areas if need be.
● Key Takeaways from This Episode →
● If you’re interested in introducing animations into your content but you don’t have the time or the patience to get too involved with Adobe Rigging (which is a complex subject to talk about even for some professional animators), the auto-rigging solutions are definitely something to consider.
● The Adobe Auto Rigger, Mixamo, is an especially exciting tool to try out. Not only is it incredibly easy to use, but it comes with pre-made character designs that you can play around with to start your experimentations into animation early.
● If Adobe is not your software of choice, don’t worry. There are other auto-rigging tools that you can try out if need be. We introduced at least five that you can use with some of the more popular alternative animation software in a list for you to look through.
Before You Learn Facebook Slideshow: 5 Things You Should Know [How-TOS]
Before You Learn Facebook Slideshow Things You Should Know [How-TOS]
An easy yet powerful editor
Numerous effects to choose from
Detailed tutorials provided by the official channel
If you are looking for interesting solutions to create the most amazing slideshow on Facebook, rest assured, you are at the right place to get every help!
In this article
01 [Where Did the Facebook Slideshow Tool Go?](#Part 1)
02 [How to Create a Slideshow on Facebook?](#Part 2)
03 [Top 5 Facebook Slideshow Alternatives](#Part 3)
Part 1 Where Did the Facebook Slideshow Tool Go?
While almost everyone around you must be fascinated about the stunning and appealing slideshows that the Facebook community used to offer its users with, it is evidently sad to realize that the utility has become a story of the past. The creators of the tool have by now, took multiple rounds on removing, retrieving and again removing the utility from the official Facebook website as well as the smartphone application.
It is however relaxing to know that the Facebook developer team has worked efficiently to produce alternatives to the application’s slideshow tool after the latter’s permanent disappearance from the user account pages and app profiles. You can now work with the Facebook Ads Manager or Facebook Creator Studio to sort out the concern of creating slideshow on Facebook.
Part 2 How to Create a Slideshow on Facebook?
Facebook slideshows are incredibly awesome trends of making a concise, expressive and to the point delivery of diverse content varieties. Piping up your information through and extensive assortment of sound, text and motion, these short snippets are no less than a seamless video streaming of the same information.
If you are about to launch a new product for your business enterprise, consider working with the utility to create an elusive Facebook slideshow ad for a quick demonstration of your brand among different social media communities, turning the fun of slideshow creation into a smart and responsive product promotion strategy, without having to bother your wallet for the same.
If you are concerned about the quality of the final output, it is not a cause of worry, since the Facebook slideshow creator tool promises you of an appreciable slideshow result, that takes a quick loading time, is comparable to a high resolution video and works well with all your favourite devices.
Having talked enough on the usage credibility, let us now proceed to adhere to the concern of creating a slideshow on Facebook with a diversity of media files in the following section:
01Facebook Slideshows from Videos
Step 1: Launch the Tool
Start with opening the Facebook app in your device to launch the ‘Facebook Ads Manager’ utility and tap ‘Create’ in the latter’s welcome interface.

Step 2: Select Your Video
Browse through your device’s gallery to choose a desired video for slideshow creation. When you have made your choice, set a 16:9 aspect ratio for the same to avoid square cropping.

Step 3: Upload Your Video
Proceed with uploading your video to the Facebook tool by clicking on the ‘Add Video’ button and watch it getting split into still images frames, from where you can view a seamless slideshow display of the same.

Step 4: Select Multiple Frames
you can now select a series of image frames and arrange them in the correct sequence of appearance by clicking on each one of them to be included within the creator timeline.
Step 5: Add Captions Your Stills
Tap on the small ‘Pencil’ icon within the images to customize them with suitable captions. You can further add style to these image names by making appropriate selections of font, position color of every frame caption. Once you have finished naming all the frames, click on ‘Save’ to apply your changes.
Step 6: Preview Your Creation
When you are satisfied with your work, consider watching a preview of the same to be assured of the perfect placement of everything. To do this, navigate to the ‘Preview Pane’ at the top right corner of the program interface, and tapping the ‘Preview’ button.
02Facebook Slideshows from Images
Step 1: Launch the Tool
To begin with, open the Facebook app in any of your preferred devices and proceed to launch the ‘Facebook Ads Manager’ tool, followed by clicking on the ‘Create Slideshow’ button at the bottom of the tool’s welcome screen.

Step 2: Upload Your Images
As you complete Step 1, a ‘Video Creation Kit’ will appear, where you will need to click within the ‘Create Slideshow’ checkbox, followed by tapping on the ‘Continue’ button at the bottom right corner of the window.

Step 3: Upload Your Images
Clicking on the ‘Continue’ button will take you to the ‘Settings Box’ where you need to tap on the ‘Add Photos’ option. An image selection box will now pop up, allowing you to select and upload a maximum of 10 images from your Facebook account, stock and page galleries or your device collections. Prefer keeping all the photos within the same aspect ratio to escape the extra task of cropping the images.
When you have finished making your selections, navigate to the bottom right corner of the window and hit the ‘Confirm’ button. This will make your selections shows up all together in the ‘Settings Box’, in the sequential order of their appearance in the slideshow. If you want to introduce some changes, delete and re-upload the images.

Step 4: Customize Your Images with Captions
To add suitable captions to the slideshow images, tap the ‘Pencil’ icon within them. You are also allowed to customize the stills with transitions, effects, etc., and make adjustments to the screen time of each image frame.

Part 3 Top 5 Facebook Slideshow Alternatives
Having heard about the disappointment from the exit of the Facebook slideshow creator tool, it becomes naturally important to seek through the affordable alternatives of the same to set straight the issue of how to do a slideshow on Facebook. Working towards the solutions, let us learn about the top 5 most preferred Facebook slideshow alternatives in the following section:
03PowerDirector
One of the most suitable candidates of Facebook slideshow alternatives, PowerDirector easily lands among the highly preferred tools for creating stunning slideshows. Compatible with the MacOs and Windows operating systems, the software lets you create high end, top quality slideshow presentations with a classic and professional outlook.
Talking of the creator program’s most appealing features, this one is an upgraded slideshow creator suite that is capable enough to address your most diverse design requirements, like those of high resolution video effects, Hollywood inspired movies and personal content sharing. The software package is loaded with tons of elusive video effects, themed templates and transition effects to facilitate a compelling creation.
Working with PowerDirector’s exclusive slideshow program, you get the liberty to escape the notch of storyboard and timeline editing and start the creation process in the launch window of the program itself. The extremely user cohesive interface of the software guides you through each creation step via streamlined plug-ins, making the design process quick and super easy even for newbies.

04SmartSHOW 3D
When thinking of how to make a slideshow on facebook, this one is another top rated Facebook slideshow alternatives, that comes with an extensive toolkit to create amazing presentations from video clips and images, while complementing them with a plethora of effects and transitions. Some of the key features of the program include multiple slide layering, animating selected layers and fine tune the transitions with keyframe adjustments.
You can additionally uplift the slides with image masks, shapes, 3D animated texts and other forms of graphic arts. An additively appealing feature of the slideshow creator program is the ability to mix descriptive images with your favorite music to develop stunning masterpieces of entertaining slideshows, which you can conveniently share and enjoy with family and friends on a diversity of social media platforms.
Using the tool, you can work with applying motion graphic effects to still photos without having to be an over the top tech savvy user. The editor library of the tool is loaded with some of the most awesome transition effects, like, wipes, 3D motions, gradients and fade-ins, along with the facility of adding titles, voice comments and captions to the slides of your presentation. The tool is however, exclusively a Windows compatible utility.

05PhotoStage Slideshow Software
Next in the list of alternatives to the Facebook slideshow maker tool is the aforesaid software program, that allows you to create professional quality slideshows with as many videos and images as you can possibly think of and supplement them with a variety of texts, music, voiceovers and effects. You can further work on customizing the slideshow images with making suitable adjustments in color, brightness and saturation parameters.
The software comes with a Quick Create utility, which you can use to instantly create high resolution slideshows and spark them up with zooms, pans and fades, while getting a preview of the same in real-time. You can even proceed to burn your creation into a disk, make an online upload, or simply save it to your device.
Talking of the cost constraints of this amazing slideshow creator tool, you get to work with the software for a commercial use, free of cost for a definite time period and with a restricted number of features. However, you can always consider on buying the paid version of the program to avail an access to the latter’s entire range of features and utilities. The tool works well with all Windows and Mac supported devices.

06Kizoa
Moving ahead in the list you have the Kizoa slideshow maker for Facebook, which is a dependable alternative to the conventional Facebook slideshow creator. Choosing this tool to design your slideshow presentation, you are entitled to the amazing feature of displaying your presentation on almost any screen, including smartphones, television, computers and tablets with getting to choose from 7 types of aspect ratios. The tool is designed to have a Windows and MacOs compatibility.
The application further lets you add the most specific parts of your images within the presentation slides with its smart cropping tool, while keeping an account of the file formats and screen space requirements of the images with utmost convenience. You are also allowed to choose from a storehouse of preset templates to add your desired photos and video clips in the slideshow and entice them with GIFs, effects and texts.
When you are done with the creation process, just attempt to download and save the slideshow in any preferred file format, such as, AVI, GIF, MP4, MOV, MPEG2, etc., or even burn it to a DVD. You are now free to share your slideshow on various online media sharing platforms. Using the free version of Kizoa, you are permitted to create slideshows with a duration of 60 seconds, which can be upgraded to a limitless length with a paid subscription.

07SlideLab
If you are a newbie to the field of creating slideshows, and wondering about how to create a slideshow on Facebook 2021, this one is affordably the most perfect tool you can rely on. Packed with an extensive range of effects, music, transitions and filters, SlideLab is the smartest software choice to create slideshow presentations for family entertainment and personal use.
The tool consists of an in built sharing utility that allows you to design and share slideshows on social media platforms, like YouTube, Facebook and Instagram with a single click. Working on your slideshow within the program, you can escape the cringe of cropping the images, as they are automatically adjusted to the square fit alignment of the app’s working window. You can quickly rearrange the placement of the images in the slideshow as per your preferences.
As far as the sharing credibility of the presentation is concerned, the software grants you the liberty to export your creation in PPTX and PDF file formats, and view them later in Keynote and PowerPoint.
The app shows a convenient workflow with Windows and MacOs devices and limits the image play duration to 3 seconds, along with a permitting a restricted number of transitions and effects in its free version, which you can access by availing a paid subscription of the program.

08Creating Facebook Slideshows With Wondershare Filmora
When browsing through feasible alternatives on how to make a facebook slideshow, the IT market is indeed flooded with a hoard of creation utilities. If you have just begun trying hands at slideshow creation, consider using the Wondershare Filmora Video Editor slideshow maker application for addressing your slideshow design concerns. The extensive, feature rich library of the app lets you create attractive presentation masterpieces with a wide range of special effects, transitions, texts, titles and music tracks.
For Win 7 or later (64-bit)
For macOS 10.12 or later
Working with the Filmora slideshow creator, you can trim, crop or cut the video clips and images of your presentation to give them the best look. The tool comes with a unique Filmora Template Mode to create business oriented Facebook slideshows, is compatible to any windows and Mac supported device and lets you easily make a slideshow on Facebook.
● Ending Thoughts →
● Creating Facebook slideshows can be useful in addressing a variety of personal and professional data sharing needs.
● Browsing through design alternatives, you will land across a pool of software choices to create stunning slideshows for Facebook.
● When deciding on the best Facebook slideshow creator tool, Wondershare Filmora can be your smartest pick.
If you are looking for interesting solutions to create the most amazing slideshow on Facebook, rest assured, you are at the right place to get every help!
In this article
01 [Where Did the Facebook Slideshow Tool Go?](#Part 1)
02 [How to Create a Slideshow on Facebook?](#Part 2)
03 [Top 5 Facebook Slideshow Alternatives](#Part 3)
Part 1 Where Did the Facebook Slideshow Tool Go?
While almost everyone around you must be fascinated about the stunning and appealing slideshows that the Facebook community used to offer its users with, it is evidently sad to realize that the utility has become a story of the past. The creators of the tool have by now, took multiple rounds on removing, retrieving and again removing the utility from the official Facebook website as well as the smartphone application.
It is however relaxing to know that the Facebook developer team has worked efficiently to produce alternatives to the application’s slideshow tool after the latter’s permanent disappearance from the user account pages and app profiles. You can now work with the Facebook Ads Manager or Facebook Creator Studio to sort out the concern of creating slideshow on Facebook.
Part 2 How to Create a Slideshow on Facebook?
Facebook slideshows are incredibly awesome trends of making a concise, expressive and to the point delivery of diverse content varieties. Piping up your information through and extensive assortment of sound, text and motion, these short snippets are no less than a seamless video streaming of the same information.
If you are about to launch a new product for your business enterprise, consider working with the utility to create an elusive Facebook slideshow ad for a quick demonstration of your brand among different social media communities, turning the fun of slideshow creation into a smart and responsive product promotion strategy, without having to bother your wallet for the same.
If you are concerned about the quality of the final output, it is not a cause of worry, since the Facebook slideshow creator tool promises you of an appreciable slideshow result, that takes a quick loading time, is comparable to a high resolution video and works well with all your favourite devices.
Having talked enough on the usage credibility, let us now proceed to adhere to the concern of creating a slideshow on Facebook with a diversity of media files in the following section:
01Facebook Slideshows from Videos
Step 1: Launch the Tool
Start with opening the Facebook app in your device to launch the ‘Facebook Ads Manager’ utility and tap ‘Create’ in the latter’s welcome interface.
Step 2: Select Your Video
Browse through your device’s gallery to choose a desired video for slideshow creation. When you have made your choice, set a 16:9 aspect ratio for the same to avoid square cropping.
Step 3: Upload Your Video
Proceed with uploading your video to the Facebook tool by clicking on the ‘Add Video’ button and watch it getting split into still images frames, from where you can view a seamless slideshow display of the same.
Step 4: Select Multiple Frames
you can now select a series of image frames and arrange them in the correct sequence of appearance by clicking on each one of them to be included within the creator timeline.
Step 5: Add Captions Your Stills
Tap on the small ‘Pencil’ icon within the images to customize them with suitable captions. You can further add style to these image names by making appropriate selections of font, position color of every frame caption. Once you have finished naming all the frames, click on ‘Save’ to apply your changes.
Step 6: Preview Your Creation
When you are satisfied with your work, consider watching a preview of the same to be assured of the perfect placement of everything. To do this, navigate to the ‘Preview Pane’ at the top right corner of the program interface, and tapping the ‘Preview’ button.
02Facebook Slideshows from Images
Step 1: Launch the Tool
To begin with, open the Facebook app in any of your preferred devices and proceed to launch the ‘Facebook Ads Manager’ tool, followed by clicking on the ‘Create Slideshow’ button at the bottom of the tool’s welcome screen.
Step 2: Upload Your Images
As you complete Step 1, a ‘Video Creation Kit’ will appear, where you will need to click within the ‘Create Slideshow’ checkbox, followed by tapping on the ‘Continue’ button at the bottom right corner of the window.
Step 3: Upload Your Images
Clicking on the ‘Continue’ button will take you to the ‘Settings Box’ where you need to tap on the ‘Add Photos’ option. An image selection box will now pop up, allowing you to select and upload a maximum of 10 images from your Facebook account, stock and page galleries or your device collections. Prefer keeping all the photos within the same aspect ratio to escape the extra task of cropping the images.
When you have finished making your selections, navigate to the bottom right corner of the window and hit the ‘Confirm’ button. This will make your selections shows up all together in the ‘Settings Box’, in the sequential order of their appearance in the slideshow. If you want to introduce some changes, delete and re-upload the images.
Step 4: Customize Your Images with Captions
To add suitable captions to the slideshow images, tap the ‘Pencil’ icon within them. You are also allowed to customize the stills with transitions, effects, etc., and make adjustments to the screen time of each image frame.
Part 3 Top 5 Facebook Slideshow Alternatives
Having heard about the disappointment from the exit of the Facebook slideshow creator tool, it becomes naturally important to seek through the affordable alternatives of the same to set straight the issue of how to do a slideshow on Facebook. Working towards the solutions, let us learn about the top 5 most preferred Facebook slideshow alternatives in the following section:
03PowerDirector
One of the most suitable candidates of Facebook slideshow alternatives, PowerDirector easily lands among the highly preferred tools for creating stunning slideshows. Compatible with the MacOs and Windows operating systems, the software lets you create high end, top quality slideshow presentations with a classic and professional outlook.
Talking of the creator program’s most appealing features, this one is an upgraded slideshow creator suite that is capable enough to address your most diverse design requirements, like those of high resolution video effects, Hollywood inspired movies and personal content sharing. The software package is loaded with tons of elusive video effects, themed templates and transition effects to facilitate a compelling creation.
Working with PowerDirector’s exclusive slideshow program, you get the liberty to escape the notch of storyboard and timeline editing and start the creation process in the launch window of the program itself. The extremely user cohesive interface of the software guides you through each creation step via streamlined plug-ins, making the design process quick and super easy even for newbies.
04SmartSHOW 3D
When thinking of how to make a slideshow on facebook, this one is another top rated Facebook slideshow alternatives, that comes with an extensive toolkit to create amazing presentations from video clips and images, while complementing them with a plethora of effects and transitions. Some of the key features of the program include multiple slide layering, animating selected layers and fine tune the transitions with keyframe adjustments.
You can additionally uplift the slides with image masks, shapes, 3D animated texts and other forms of graphic arts. An additively appealing feature of the slideshow creator program is the ability to mix descriptive images with your favorite music to develop stunning masterpieces of entertaining slideshows, which you can conveniently share and enjoy with family and friends on a diversity of social media platforms.
Using the tool, you can work with applying motion graphic effects to still photos without having to be an over the top tech savvy user. The editor library of the tool is loaded with some of the most awesome transition effects, like, wipes, 3D motions, gradients and fade-ins, along with the facility of adding titles, voice comments and captions to the slides of your presentation. The tool is however, exclusively a Windows compatible utility.
05PhotoStage Slideshow Software
Next in the list of alternatives to the Facebook slideshow maker tool is the aforesaid software program, that allows you to create professional quality slideshows with as many videos and images as you can possibly think of and supplement them with a variety of texts, music, voiceovers and effects. You can further work on customizing the slideshow images with making suitable adjustments in color, brightness and saturation parameters.
The software comes with a Quick Create utility, which you can use to instantly create high resolution slideshows and spark them up with zooms, pans and fades, while getting a preview of the same in real-time. You can even proceed to burn your creation into a disk, make an online upload, or simply save it to your device.
Talking of the cost constraints of this amazing slideshow creator tool, you get to work with the software for a commercial use, free of cost for a definite time period and with a restricted number of features. However, you can always consider on buying the paid version of the program to avail an access to the latter’s entire range of features and utilities. The tool works well with all Windows and Mac supported devices.
06Kizoa
Moving ahead in the list you have the Kizoa slideshow maker for Facebook, which is a dependable alternative to the conventional Facebook slideshow creator. Choosing this tool to design your slideshow presentation, you are entitled to the amazing feature of displaying your presentation on almost any screen, including smartphones, television, computers and tablets with getting to choose from 7 types of aspect ratios. The tool is designed to have a Windows and MacOs compatibility.
The application further lets you add the most specific parts of your images within the presentation slides with its smart cropping tool, while keeping an account of the file formats and screen space requirements of the images with utmost convenience. You are also allowed to choose from a storehouse of preset templates to add your desired photos and video clips in the slideshow and entice them with GIFs, effects and texts.
When you are done with the creation process, just attempt to download and save the slideshow in any preferred file format, such as, AVI, GIF, MP4, MOV, MPEG2, etc., or even burn it to a DVD. You are now free to share your slideshow on various online media sharing platforms. Using the free version of Kizoa, you are permitted to create slideshows with a duration of 60 seconds, which can be upgraded to a limitless length with a paid subscription.
07SlideLab
If you are a newbie to the field of creating slideshows, and wondering about how to create a slideshow on Facebook 2021, this one is affordably the most perfect tool you can rely on. Packed with an extensive range of effects, music, transitions and filters, SlideLab is the smartest software choice to create slideshow presentations for family entertainment and personal use.
The tool consists of an in built sharing utility that allows you to design and share slideshows on social media platforms, like YouTube, Facebook and Instagram with a single click. Working on your slideshow within the program, you can escape the cringe of cropping the images, as they are automatically adjusted to the square fit alignment of the app’s working window. You can quickly rearrange the placement of the images in the slideshow as per your preferences.
As far as the sharing credibility of the presentation is concerned, the software grants you the liberty to export your creation in PPTX and PDF file formats, and view them later in Keynote and PowerPoint.
The app shows a convenient workflow with Windows and MacOs devices and limits the image play duration to 3 seconds, along with a permitting a restricted number of transitions and effects in its free version, which you can access by availing a paid subscription of the program.
08Creating Facebook Slideshows With Wondershare Filmora
When browsing through feasible alternatives on how to make a facebook slideshow, the IT market is indeed flooded with a hoard of creation utilities. If you have just begun trying hands at slideshow creation, consider using the Wondershare Filmora Video Editor slideshow maker application for addressing your slideshow design concerns. The extensive, feature rich library of the app lets you create attractive presentation masterpieces with a wide range of special effects, transitions, texts, titles and music tracks.
For Win 7 or later (64-bit)
For macOS 10.12 or later
Working with the Filmora slideshow creator, you can trim, crop or cut the video clips and images of your presentation to give them the best look. The tool comes with a unique Filmora Template Mode to create business oriented Facebook slideshows, is compatible to any windows and Mac supported device and lets you easily make a slideshow on Facebook.
● Ending Thoughts →
● Creating Facebook slideshows can be useful in addressing a variety of personal and professional data sharing needs.
● Browsing through design alternatives, you will land across a pool of software choices to create stunning slideshows for Facebook.
● When deciding on the best Facebook slideshow creator tool, Wondershare Filmora can be your smartest pick.
10 Cartoon Photo Converters You Couldn’t Do Without
D:\【内容】文章录入资料\20220321 Cartoon\35. 10 Cartoon Photo Converters You Couldn’t Do Without
An easy yet powerful editor
Numerous effects to choose from
Detailed tutorials provided by the official channel
We all love to edit our images. Undoubtedly right now, the innovation in technology or day the editing tools available put us at a point where we can do more than editing the photograph. Well, here we are discussing convert picture to cartoon. Yes, you understand it right. This conversion can be done for various projects. We are not saying you to confine this ultimate option to your photos only. If you are a part of social media and create content, these tools will help you to get the best outcome in return.
Well, keep reading till the last as here we explore photo to cartoon online free, and some paid versions that you can try. Let’s get started!
In this article
01 [5 Online Picture to Cartoon Converters](#Part 1)
02 [5 Picture to Cartoon Converters on Your Phone](#Part 2)
03 [How to convert photo to cartoon with the help of FotoSketcher](#Part 3)
Part 1 Online Picture to Cartoon Converters
In this section, we are discussing the best online photo to cartoon converter that you can use and complete this tedious task within a few minutes. The best tools that you can consider include: -
01Befunky
Befunky, an online picture converter, offers a unique way of transforming your photographs into cartoon-like images. You can choose from a 50+ range of styles and adjust the size of the image before you start. The website lets you choose the style of cartoon you want, such as traditional or modern. You can also choose the size of your cartoon and even change the background color.

02Cartoonize
Cartoonize is an online tool that converts pictures into cartoon-style images. It is a free online service that allows users to convert any image into a cartoon-style image in seconds. It has been widely used by bloggers, teachers, and artists for the quick and easy creation of cartoons. This online tool can be used for many purposes, including Blogging, Teaching, Social Media Marketing, and other portals.

03PhotoCartoon
PhotoCartoon is an online image-to cartoon converter that converts photos into cartoons. This tool is helpful for people who want to create a cartoon from an image without having to draw it by hand. The website also provides users with the ability to add text, color, and other effects to the images they have converted into comics. It can be used for creating memes or advertisements as well as personal projects like comics and illustrations.

04Free Photo to cartoon
This online Free Photo to Cartoon Converter allows users to convert a photo into an animated cartoon. It is an easy-to-use tool that provides high-quality results in a short amount of time. It has been proven to be more effective than using traditional methods. The site also offers users the option of using different filters and uploading images from Facebook or Instagram for conversion. Within no time, a user will be able to get the outcome of their choice.

05Picsart
Picsart is a website that lets users draw pictures and make them into cartoons. It offers an easy interface to create personalized cartoons, which can be shared on social media. It has a free version for drawing and sharing custom images, as well as paid subscriptions for more features like making animated GIFs, drawing with your webcam, or using the site’s editor.

Part 2 5 Picture to Cartoon Converters on Your Phone
Well, above, we have discussed the tools that can be used through the website or, say, on the computer. But when you don’t have a computer, you can do it with the help of your phone as well. Now cartoon photo converter for phones is also available that one can try. These are as follows: -
01**Wondershare Filmora Video Editor **
Filmora is an app for users to create videos, collages, and other types of images. It is a free app that comes with different features. It has been downloaded over 100 million times and has been used by numerous industries for completing the editing part. This acts as the best video to cartoon converter online free. It is available on iOS, Android, Windows 10, and Mac OS X.
For Win 7 or later (64-bit)
For macOS 10.12 or later
In general, it allows users to take pictures or videos from their phones and then convert them into a cartoon. The app also allows users to edit their images before converting them into cartoons as they want. The effects added in this tool are so awesome that any can love trying this out.
02Cartoon Photo Editor
This is a photo editor that allows users to turn photos into cartoon drawings. Users can choose from a range of styles and colors to create their own unique cartoons. The app offers different drawing styles, and accordingly, a user can choose one and do the editing easily. It also features abstract designs that lack realism but are still recognizable as cartoons. Users feel great using this app because of its interface and the features available.
03Art Camera – Cartoon, Pencil Sketch Art Effect Photo
Art Camera is a new photo app that allows taking photos that look like pencil drawings or sketches. It uses a sophisticated algorithm and the latest machine learning technology to transform your photos into cartoon-like images. This app is perfect for those who are looking for an artistic way of capturing memories, portraits, or even creating art from their own imagination. It is widely is available on iOS, Android, and Windows Phone devices.
04Tooncam – Cartoon, Pencil Sketch Pic
Tooncam is a free app that helps you to create cartoon images. You can use it on your phone or tablet. It is one of the best apps for creating cartoons on your phone with images with just one click. With this app, you can also share your cartoons with friends or family members and make them laugh out loud with funny pictures.
The app uses the camera of your device and its powerful photo editing tools to convert any photo into a cartoon image in just a few steps.
05Photo To Cartoon Yourself Edit
The app is a picture to cartoon converter on your phone that lets you transform a photo into a cartoon in just one tap. You can use this app to create an animated movie, comic strip, or comic book. The app works by converting the image into vector graphics and then adding colors and shading, and finally exporting it as an animated GIF. The app is available for iOS platforms.
Part 3 How to convert photo to cartoon
We are sure you might be thinking about how you can use these tools. Well, firstly, understand that every tool we have discussed above have the somewhere same interface, and you need to follow some steps to convert photo to cartoon. To help you more, here we are discussing the steps you need to follow while using FotoSketcher for the same purpose.
FotoSketcher is one of the best tools available free of cost for you. You can simply convert the photos into a cartoon and use them over different portals as per your need. There will be no need for you to engage in any complicated process to complete the editing task. The steps are also very simple to follow for this tool, and these are as follows: -
Step 1: firstly, get the FotoSketcher tool on your device.
Step 2: Wait until the installation of the tool gets completed. It is compatible with Windows and Mac both.
Step 3: Now, open the tool and upload the photo you wish to convert.
Step 4: Here, it asks you to select the type. You can either select cartoon 1 or Cartoon 2. These are the special effects being part of this software.
Step 5: Now, from the list of features, select the type of editing you wish to apply. There are multiple options available to choose from. You can choose any of them as per your preference.
Step 6: Blend the colors as needed for the edited photo. Along with it, there are some other parameters too need to look out for editing, and accordingly, you can set them.
Step 7: After setting up the changes, click on “Draw” to apply the changes. Wait until it applies the effects.
Step 8: The resulted image will appear, and you can download it in the required format from here.
● Ending Thoughts →
● Do convert photo to cartoon online in just simple steps without being part of any complicated process.
● Filmora is the best cartoon image converter online available, helping in converting the images as required.
● The photo to cartoon software is quite simple to use and does not require any particular technical knowledge.
We all love to edit our images. Undoubtedly right now, the innovation in technology or day the editing tools available put us at a point where we can do more than editing the photograph. Well, here we are discussing convert picture to cartoon. Yes, you understand it right. This conversion can be done for various projects. We are not saying you to confine this ultimate option to your photos only. If you are a part of social media and create content, these tools will help you to get the best outcome in return.
Well, keep reading till the last as here we explore photo to cartoon online free, and some paid versions that you can try. Let’s get started!
In this article
01 [5 Online Picture to Cartoon Converters](#Part 1)
02 [5 Picture to Cartoon Converters on Your Phone](#Part 2)
03 [How to convert photo to cartoon with the help of FotoSketcher](#Part 3)
Part 1 Online Picture to Cartoon Converters
In this section, we are discussing the best online photo to cartoon converter that you can use and complete this tedious task within a few minutes. The best tools that you can consider include: -
01Befunky
Befunky, an online picture converter, offers a unique way of transforming your photographs into cartoon-like images. You can choose from a 50+ range of styles and adjust the size of the image before you start. The website lets you choose the style of cartoon you want, such as traditional or modern. You can also choose the size of your cartoon and even change the background color.
02Cartoonize
Cartoonize is an online tool that converts pictures into cartoon-style images. It is a free online service that allows users to convert any image into a cartoon-style image in seconds. It has been widely used by bloggers, teachers, and artists for the quick and easy creation of cartoons. This online tool can be used for many purposes, including Blogging, Teaching, Social Media Marketing, and other portals.
03PhotoCartoon
PhotoCartoon is an online image-to cartoon converter that converts photos into cartoons. This tool is helpful for people who want to create a cartoon from an image without having to draw it by hand. The website also provides users with the ability to add text, color, and other effects to the images they have converted into comics. It can be used for creating memes or advertisements as well as personal projects like comics and illustrations.
04Free Photo to cartoon
This online Free Photo to Cartoon Converter allows users to convert a photo into an animated cartoon. It is an easy-to-use tool that provides high-quality results in a short amount of time. It has been proven to be more effective than using traditional methods. The site also offers users the option of using different filters and uploading images from Facebook or Instagram for conversion. Within no time, a user will be able to get the outcome of their choice.
05Picsart
Picsart is a website that lets users draw pictures and make them into cartoons. It offers an easy interface to create personalized cartoons, which can be shared on social media. It has a free version for drawing and sharing custom images, as well as paid subscriptions for more features like making animated GIFs, drawing with your webcam, or using the site’s editor.
Part 2 5 Picture to Cartoon Converters on Your Phone
Well, above, we have discussed the tools that can be used through the website or, say, on the computer. But when you don’t have a computer, you can do it with the help of your phone as well. Now cartoon photo converter for phones is also available that one can try. These are as follows: -
01**Wondershare Filmora Video Editor **
Filmora is an app for users to create videos, collages, and other types of images. It is a free app that comes with different features. It has been downloaded over 100 million times and has been used by numerous industries for completing the editing part. This acts as the best video to cartoon converter online free. It is available on iOS, Android, Windows 10, and Mac OS X.
For Win 7 or later (64-bit)
For macOS 10.12 or later
In general, it allows users to take pictures or videos from their phones and then convert them into a cartoon. The app also allows users to edit their images before converting them into cartoons as they want. The effects added in this tool are so awesome that any can love trying this out.
02Cartoon Photo Editor
This is a photo editor that allows users to turn photos into cartoon drawings. Users can choose from a range of styles and colors to create their own unique cartoons. The app offers different drawing styles, and accordingly, a user can choose one and do the editing easily. It also features abstract designs that lack realism but are still recognizable as cartoons. Users feel great using this app because of its interface and the features available.
03Art Camera – Cartoon, Pencil Sketch Art Effect Photo
Art Camera is a new photo app that allows taking photos that look like pencil drawings or sketches. It uses a sophisticated algorithm and the latest machine learning technology to transform your photos into cartoon-like images. This app is perfect for those who are looking for an artistic way of capturing memories, portraits, or even creating art from their own imagination. It is widely is available on iOS, Android, and Windows Phone devices.
04Tooncam – Cartoon, Pencil Sketch Pic
Tooncam is a free app that helps you to create cartoon images. You can use it on your phone or tablet. It is one of the best apps for creating cartoons on your phone with images with just one click. With this app, you can also share your cartoons with friends or family members and make them laugh out loud with funny pictures.
The app uses the camera of your device and its powerful photo editing tools to convert any photo into a cartoon image in just a few steps.
05Photo To Cartoon Yourself Edit
The app is a picture to cartoon converter on your phone that lets you transform a photo into a cartoon in just one tap. You can use this app to create an animated movie, comic strip, or comic book. The app works by converting the image into vector graphics and then adding colors and shading, and finally exporting it as an animated GIF. The app is available for iOS platforms.
Part 3 How to convert photo to cartoon
We are sure you might be thinking about how you can use these tools. Well, firstly, understand that every tool we have discussed above have the somewhere same interface, and you need to follow some steps to convert photo to cartoon. To help you more, here we are discussing the steps you need to follow while using FotoSketcher for the same purpose.
FotoSketcher is one of the best tools available free of cost for you. You can simply convert the photos into a cartoon and use them over different portals as per your need. There will be no need for you to engage in any complicated process to complete the editing task. The steps are also very simple to follow for this tool, and these are as follows: -
Step 1: firstly, get the FotoSketcher tool on your device.
Step 2: Wait until the installation of the tool gets completed. It is compatible with Windows and Mac both.
Step 3: Now, open the tool and upload the photo you wish to convert.
Step 4: Here, it asks you to select the type. You can either select cartoon 1 or Cartoon 2. These are the special effects being part of this software.
Step 5: Now, from the list of features, select the type of editing you wish to apply. There are multiple options available to choose from. You can choose any of them as per your preference.
Step 6: Blend the colors as needed for the edited photo. Along with it, there are some other parameters too need to look out for editing, and accordingly, you can set them.
Step 7: After setting up the changes, click on “Draw” to apply the changes. Wait until it applies the effects.
Step 8: The resulted image will appear, and you can download it in the required format from here.
● Ending Thoughts →
● Do convert photo to cartoon online in just simple steps without being part of any complicated process.
● Filmora is the best cartoon image converter online available, helping in converting the images as required.
● The photo to cartoon software is quite simple to use and does not require any particular technical knowledge.
15 Types of Cartoon Drawing Styles with Examples
15 Types of Cartoon Drawing Styles with Examples
An easy yet powerful editor
Numerous effects to choose from
Detailed tutorials provided by the official channel
The perfect, if not the best, place to begin cartoon drawing style as an artist is drawings or sketches since you don’t need a lot of drawing equipment to start this type of drawing. What you chiefly need is just your pen and paper to begin.
So, let’s move ahead as this content will show you different cartoon drawing styles, and in no time, you’ll master the art.
In this article
01 [15 Types of Cartoon You May Use for Your Next Marketing Project](#Part 1)
02 [How To Draw Myself In Five Different Cartoon Styles](#Part 2)
Part 1 Types of Cartoon You May Use for Your Next Marketing Project
As I’ve mentioned before, there are various types and styles of cartoon drawings. Below are a few cartoon drawing styles you may want to use for your next project.
01Modern Cartoon Style
This style is currently the most common art style displayed on TV channels like Cartoon Network.
Note that this cartoon-style drawing’s main features are the thick outlines, geometric shapes, and bright colors.
One of the significant reasons this drawing style is this way is that using simple shapes without much detail makes the overall animation process much faster and saves resources for the studios. Nonetheless, it is a beautiful and captivating cartoon drawing style!
This drawing style is used by many modern cartoons. Here are a few examples:
● The Powerpuff Girls
● Dexter’s Laboratory
● Codename: Kids Next Door
● Gravity Falls
02Realistic Cartoon Style
This cartoon drawing style is more quirky since, generally, cartoon drawing is more likely to simplify shapes. The realistic cartoon-style drawing adds more details and keeps figures much more in line with reality. This drawing style is typical among artists who vectorize people’s photographs.
You can also, to some extent, include Caricatures in this category. Caricatures are generally very realistic besides the whole enlargement and shrinking of specific body parts!
Few examples of realistic cartoon drawing styles:
● Ugly Americans
● General Caricataures
● Archer
03Modern Anime
This style tends to be more complex, primarily seen in drawings where the characters seem to be in motion, like in comic books. Modern-day drawings of this style have a lot of shadows and highlights in their character and environment, giving them a relatively new level of complexity.
Here are a few examples of modern animes that follow this Japanese cartoon drawing style.
● My Hero Academia
● Sword Art Online
● Attack on Titan
● Fullmetal Alchemist Brotherhood
04Classic Manga
The old Japanese manga characters tend to possess human-like attributes (proportions) in terms of the body. The difference is the big eyes they have the most time.
Generally, this cartoon drawing style focuses more on feminine bodies, possessing angular chins and thin bodies. Some drawing styles tend to make some parts of the body overtly long compared to the rest of the body; for instance, the legs are mostly longer than other parts.
A few examples of classic manga possessing this cartoon style drawing are:
● Oh My Goddess
● Urusei Yatsura
● Sailor Moon
● Hellsing
05Chibi Drawing Style
The Chibi Cartoon Drawing Style mainly focuses on making the characters into a tiny version of themselves as if being compressed or compacted into a small container.
Examples of where this drawing style is used:
● Lucky Star
● Bottle Fairy
● Himouto! Umaru-chan
06The Simpsons Cartoon Drawing Style
This cartoon-style drawing is widely famous. Though this style has undergone some evolution throughout the years, the main features remained constant! That is to say, the yellow bodies and big and white sphere-like eyes remained.
07Classic Disney
This drawing style was a staple for years, though this drawing style has had an evolutionary cartoon drawing style over the years.
08Mid 20th Century Disney
Disney upped their game during the mid 20th century and started working more with live actors, drawing from references, and filming shots before drawing the cartoons.
Some remarkable examples of this cartoon drawing style are
● Alice in Wonderland
● Cinderella
● Beauty and the Beast
09Modern Disney Drawing Style
This cartoon-style drawing is an immediate improvement of the mid-20th 20th drawing style. This cartoon style is brighter, more detailed, and more complex generally.
Although Disney has stopped creating 2D cartoon drawings, there are still some examples of this more refined art style:
● The Princess and the Frog
● Lilo and Stitch
10Old Cartoon Drawing Style
This drawing style is mostly in black and white format, with very high contrast body parts. The features of this style are having short bodies and long limbs. Sometimes, this type of drawing is referred to as Noodle drawing because the character’s body moves as if there are no bones in their body.
Some examples of this cartoon drawing style include:
● Mickey Mouse
● Betty Boop
11South Park
South Park cartoon drawing style is aptly geometric and has little depth. Shadows or highlights in this cartoon-style are rare. The colors are pretty solid and clean.
12Chrono Trigger/ Dragon Ball (Akira Toriyama)
Akira Toriyama’s cartoon drawing style characterizes having big and almost rectangular eyes and a lot of geometric shapes and definitions in the muscles.
13Crayon Shin-Chan
This cartoon-style drawing is effortless. An exciting aspect of this style is that it doesn’t mind pushing the limits of the character.
The lines generally are thin, and the eyes are prominent in black and white colors.
14Betty Boop
Betty Boop’s cartoon drawing style possesses contrasting black and white colors. Fragile lines with the characters contain a very high amount of black shapes.
15Adventure Time
Adventure Time’s art is incredibly geometric, and its characters are nearly boneless, making it a more current example of a cartoon drawing style.
More fluid animation is possible as a result of this. The art is also quite brilliant, with vibrant hues that leap off the screen.
Aside from that, the characters’ eyes are usually tiny (with a few exceptions), and the lines are skinny.
Part 2 How to draw myself in five different cartoon styles
There are loads of cartoon characters to choose from when trying to draw me. To sketch yourself as a cartoon, first, you have to determine what cartoon drawing style to appear in. This will give you hints on how to go about the drawing.
● The traditional drawing method is a pencil and paper.
● Online Avatar builders
● Adobe character animator
● Outsource to designers or illustrators
● Hire a studio or a freelancer
● Wondershare Filmora Video Editor

Wondershare Filmora - Best Video Editor for Mac/Windows
5,481,435 people have downloaded it.
Build unique custom animations without breaking a sweat.
Focus on creating epic stories and leave the details to Filmora’s auto features.
Start a creative adventure with drag & drop effects and endless possibilities.
Filmora simplifies advanced features to save you time and effort.
Filmora cuts out repetition so you can move on to your next creative breakthrough.
The Filmora software is an easy-to-use editing app with many beautiful features that can make your animation or cartoon-style drawing more vibrant.
● Split-screen makes it easier to tell a story or draw with multiple screens.
● Preset templates are superb for turning your drawings into creative videos.
● Motion graphics
● Keyframing
● Screen recorder and other unique features.
● Ending Thoughts →
● We’ve looked at the various cartoon drawing styles.
● How to draw self in cartoon style.
● The Filmora software to upbeat your sketches at the professional level.
● hus, go check out any cartoon-style drawings and see which one you like best. Make sure to study the reference drawing and practice more to perfect the artist in you.
The perfect, if not the best, place to begin cartoon drawing style as an artist is drawings or sketches since you don’t need a lot of drawing equipment to start this type of drawing. What you chiefly need is just your pen and paper to begin.
So, let’s move ahead as this content will show you different cartoon drawing styles, and in no time, you’ll master the art.
In this article
01 [15 Types of Cartoon You May Use for Your Next Marketing Project](#Part 1)
02 [How To Draw Myself In Five Different Cartoon Styles](#Part 2)
Part 1 Types of Cartoon You May Use for Your Next Marketing Project
As I’ve mentioned before, there are various types and styles of cartoon drawings. Below are a few cartoon drawing styles you may want to use for your next project.
01Modern Cartoon Style
This style is currently the most common art style displayed on TV channels like Cartoon Network.
Note that this cartoon-style drawing’s main features are the thick outlines, geometric shapes, and bright colors.
One of the significant reasons this drawing style is this way is that using simple shapes without much detail makes the overall animation process much faster and saves resources for the studios. Nonetheless, it is a beautiful and captivating cartoon drawing style!
This drawing style is used by many modern cartoons. Here are a few examples:
● The Powerpuff Girls
● Dexter’s Laboratory
● Codename: Kids Next Door
● Gravity Falls
02Realistic Cartoon Style
This cartoon drawing style is more quirky since, generally, cartoon drawing is more likely to simplify shapes. The realistic cartoon-style drawing adds more details and keeps figures much more in line with reality. This drawing style is typical among artists who vectorize people’s photographs.
You can also, to some extent, include Caricatures in this category. Caricatures are generally very realistic besides the whole enlargement and shrinking of specific body parts!
Few examples of realistic cartoon drawing styles:
● Ugly Americans
● General Caricataures
● Archer
03Modern Anime
This style tends to be more complex, primarily seen in drawings where the characters seem to be in motion, like in comic books. Modern-day drawings of this style have a lot of shadows and highlights in their character and environment, giving them a relatively new level of complexity.
Here are a few examples of modern animes that follow this Japanese cartoon drawing style.
● My Hero Academia
● Sword Art Online
● Attack on Titan
● Fullmetal Alchemist Brotherhood
04Classic Manga
The old Japanese manga characters tend to possess human-like attributes (proportions) in terms of the body. The difference is the big eyes they have the most time.
Generally, this cartoon drawing style focuses more on feminine bodies, possessing angular chins and thin bodies. Some drawing styles tend to make some parts of the body overtly long compared to the rest of the body; for instance, the legs are mostly longer than other parts.
A few examples of classic manga possessing this cartoon style drawing are:
● Oh My Goddess
● Urusei Yatsura
● Sailor Moon
● Hellsing
05Chibi Drawing Style
The Chibi Cartoon Drawing Style mainly focuses on making the characters into a tiny version of themselves as if being compressed or compacted into a small container.
Examples of where this drawing style is used:
● Lucky Star
● Bottle Fairy
● Himouto! Umaru-chan
06The Simpsons Cartoon Drawing Style
This cartoon-style drawing is widely famous. Though this style has undergone some evolution throughout the years, the main features remained constant! That is to say, the yellow bodies and big and white sphere-like eyes remained.
07Classic Disney
This drawing style was a staple for years, though this drawing style has had an evolutionary cartoon drawing style over the years.
08Mid 20th Century Disney
Disney upped their game during the mid 20th century and started working more with live actors, drawing from references, and filming shots before drawing the cartoons.
Some remarkable examples of this cartoon drawing style are
● Alice in Wonderland
● Cinderella
● Beauty and the Beast
09Modern Disney Drawing Style
This cartoon-style drawing is an immediate improvement of the mid-20th 20th drawing style. This cartoon style is brighter, more detailed, and more complex generally.
Although Disney has stopped creating 2D cartoon drawings, there are still some examples of this more refined art style:
● The Princess and the Frog
● Lilo and Stitch
10Old Cartoon Drawing Style
This drawing style is mostly in black and white format, with very high contrast body parts. The features of this style are having short bodies and long limbs. Sometimes, this type of drawing is referred to as Noodle drawing because the character’s body moves as if there are no bones in their body.
Some examples of this cartoon drawing style include:
● Mickey Mouse
● Betty Boop
11South Park
South Park cartoon drawing style is aptly geometric and has little depth. Shadows or highlights in this cartoon-style are rare. The colors are pretty solid and clean.
12Chrono Trigger/ Dragon Ball (Akira Toriyama)
Akira Toriyama’s cartoon drawing style characterizes having big and almost rectangular eyes and a lot of geometric shapes and definitions in the muscles.
13Crayon Shin-Chan
This cartoon-style drawing is effortless. An exciting aspect of this style is that it doesn’t mind pushing the limits of the character.
The lines generally are thin, and the eyes are prominent in black and white colors.
14Betty Boop
Betty Boop’s cartoon drawing style possesses contrasting black and white colors. Fragile lines with the characters contain a very high amount of black shapes.
15Adventure Time
Adventure Time’s art is incredibly geometric, and its characters are nearly boneless, making it a more current example of a cartoon drawing style.
More fluid animation is possible as a result of this. The art is also quite brilliant, with vibrant hues that leap off the screen.
Aside from that, the characters’ eyes are usually tiny (with a few exceptions), and the lines are skinny.
Part 2 How to draw myself in five different cartoon styles
There are loads of cartoon characters to choose from when trying to draw me. To sketch yourself as a cartoon, first, you have to determine what cartoon drawing style to appear in. This will give you hints on how to go about the drawing.
● The traditional drawing method is a pencil and paper.
● Online Avatar builders
● Adobe character animator
● Outsource to designers or illustrators
● Hire a studio or a freelancer
● Wondershare Filmora Video Editor
Wondershare Filmora - Best Video Editor for Mac/Windows
5,481,435 people have downloaded it.
Build unique custom animations without breaking a sweat.
Focus on creating epic stories and leave the details to Filmora’s auto features.
Start a creative adventure with drag & drop effects and endless possibilities.
Filmora simplifies advanced features to save you time and effort.
Filmora cuts out repetition so you can move on to your next creative breakthrough.
The Filmora software is an easy-to-use editing app with many beautiful features that can make your animation or cartoon-style drawing more vibrant.
● Split-screen makes it easier to tell a story or draw with multiple screens.
● Preset templates are superb for turning your drawings into creative videos.
● Motion graphics
● Keyframing
● Screen recorder and other unique features.
● Ending Thoughts →
● We’ve looked at the various cartoon drawing styles.
● How to draw self in cartoon style.
● The Filmora software to upbeat your sketches at the professional level.
● hus, go check out any cartoon-style drawings and see which one you like best. Make sure to study the reference drawing and practice more to perfect the artist in you.
15 Top Collage Makers to Create Aesthetic Collages
15 Best Collage Makers to Create Aesthetic Collages
An easy yet powerful editor
Numerous effects to choose from
Detailed tutorials provided by the official channel
It is rightly said that a picture is worth a thousand words and what if there are multiple pictures? It becomes a story!! Creating collages have been popular among people for a long and with high-end cameras, mobile phones, and excellent tools the task has become even easier and quicker.

So, if you too are willing to create an aesthetic collage for yourself or loved ones, there is no dearth of collage-making tools. So, to prevent you from the hassles of selecting one such tool, we have shortlisted the popular ones.
In this article
01 [Need for a collage-making tool?](#Part 1)
02 [Top 15 collage makers to create aesthetic collages](#Part 2)
03 [Best software to create video collages and edit videos professionally – Wondershare Filmora](#Part 3)
Part 1 Need for a collage-making tool?
Though aesthetic collage wallpaper making may sound simple, it is an artwork to create an impressive-looking collage. Adjusting the images in the right format, cropping their sizes, setting a background, setting colors, adding text are some of the many factors that go into the making of a visually appealing collage. So now, all these considerations can be taken care of by a good collage-making tool. All you need to do is pick up your choice of images, select a template and let the tool do its work.
In no time, a collage of your choice will be ready.
Part 2 Top 15 collage makers to create aesthetic collages
There is a wide range of online, desktop, and app-based collage-making tools available that can be selected based on your requirements. Check out the most popular ones as below.
01Free Collage Maker Online
This is a free-to-use online tool that can be used for creating impressive aesthetic wallpaper collage quickly. The tool gives you the option to either choose your own layout or use one of the readymade templates. Multiple editing options are supported like adjust9ing exposure, contrast, shadows, white balance, and more. You can even turn, rotate, and distort the images. Using this online tool, you can even add the text and also customize it. A wide range of formats is supported by a tool like RAW, JPEG, PSD, PNG, and others.
022. Canva
This is a widely used online tool that supports multiple functions including image collage creation and image editing. The tool allows adding images in all popular formats for creating a collage using several templates. The position of the photos, font of the text, shades, and other parameters can be adjusted as required. The tool also has a huge collection of images in different categories that can also be used for making aesthetic photo collage. Created collages can be saved in JPEG, PDF, and PNG format.
03Fotor
Creating high-quality trendy photo collages is easy and quick using this online tool that supports all popular image formats. There are several grids and template options available for you to create the desired collage. Stickers and text can be added to the created collage to add some fun elements. Several adjustments can be made like frame width, rounded corners, background color, aspect ratio, adding filters, effects, and more. With multiple features, the interface becomes quite confusing.
04Adobe Creative Cloud Express
Adobe is one of the most widely used tools when it comes to images and videos and creating a picture collage is one of the supported features. Using the online version of this tool, collages can be created quickly and only a free sign-up is needed. In addition to your images, you can even choose from the wide collection of royalty-free pictures. Theme-based templates are available to match your requirements and for customization, all basic editing features are supported. You can even add texts, filters, and effects to your collages.
05Shape Collage
This automatic collage maker lets you create the desired collage in just a few simple steps. The interface is simple and all the basic editing functions for customization are supported. You can change the background, frame, the distance between the images, and several other factors. The tool is available to be used as desktop software, an online program, and also as an app that can be downloaded on a phone.
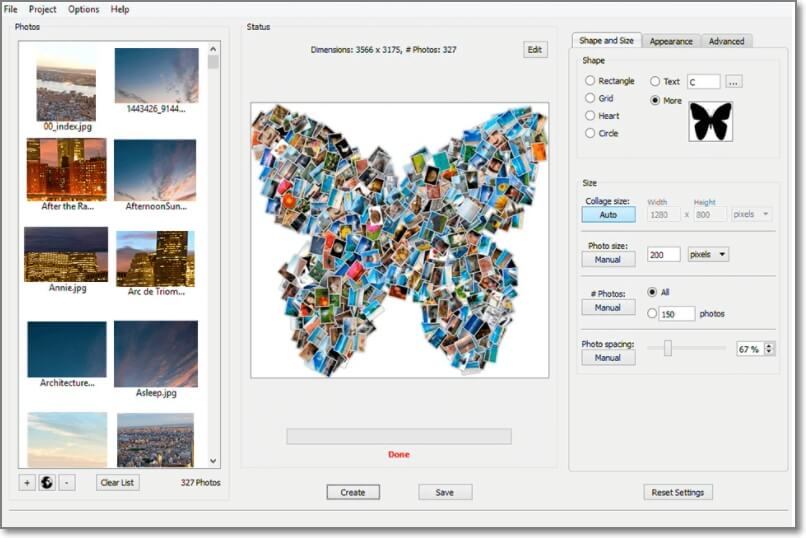
06Kapwing Collage Maker
Using this free online tool, collages can be made using images, videos, GIFs, as well as music files. The tool allows you to choose either a blank canvas or choose from multiple templates available at the site. The drag and drop features are supported and there are multiple editing options as well. The free version has a watermark on the created collages which can be removed after creating a free account. The created collage can be saved to the system or its URL can be obtained.
07Photo Joiner
As the name suggests, this is a photo joining tool that works from your browser and allows creating a picture collage. The interface is user-friendly and the work process is smooth where you just need to add the images, choose the layout, add text, and make required settings to create your choice of a template. The tool allows changing the image size, as well as the background. Using the tool, you can also create an FB cover in a simple step.
08Ribbet
This is a widely used photo editing tool that performs an array of additional features as well including collage making. The tool is available in a free as well as a premium paid version. The interface is smart and comes packed in with all basic collage-making functions. Decent templates are available to choose from with the option to adjust the size, edit exposure, lighting, and other parameters.
09BeFunky
Creating aesthetic, funky, and all types of different collages is quick and easy using this online tool. A variety of customizable layout options are available at the site to match your requirements. The images can be enhanced by changing the background color, pattern, adding fonts, effects, filters, and more. The free version of the tool supports basic functions while for more advanced options you need to purchase the premium plan. The tool is also available as an app for Android and iOS devices.
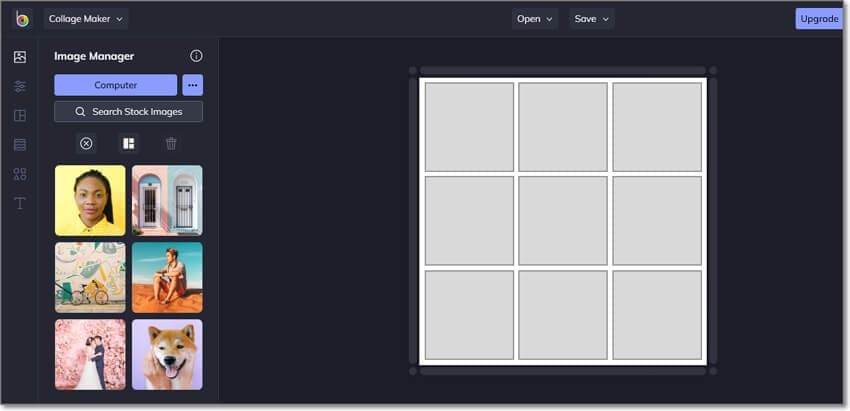
10Kizoa
This is a free online slideshow maker that allows creating a slideshow in different aspect ratios which is suitable for all types of platforms and screen sizes. An array of static and animated templates is available and you can even add multiple effects, text, and other elements to customize the collage as desired. There is also a paid version of the tool with added features and functions.
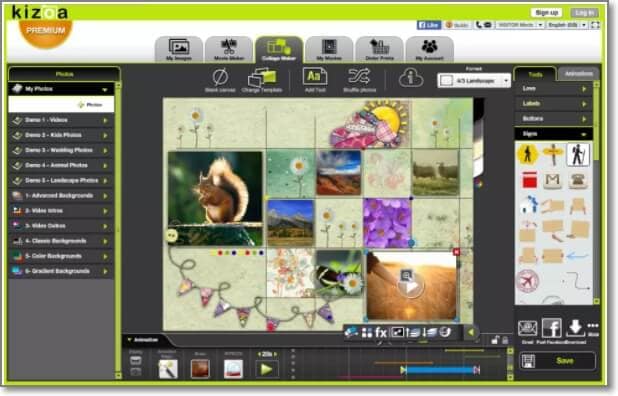
11PicMonkey
This is another popular name when it comes to collage-making tools. The tool allows creating freestyle as well as grid-based collages and in addition to the images, you can even add videos. Hundreds of collage layouts are available that can be further customized as needed. The function of auto-cell resizing adjusts all the images to the grids perfectly. Apart from your media files, you can even choose from the free stock of images and videos available at the site.
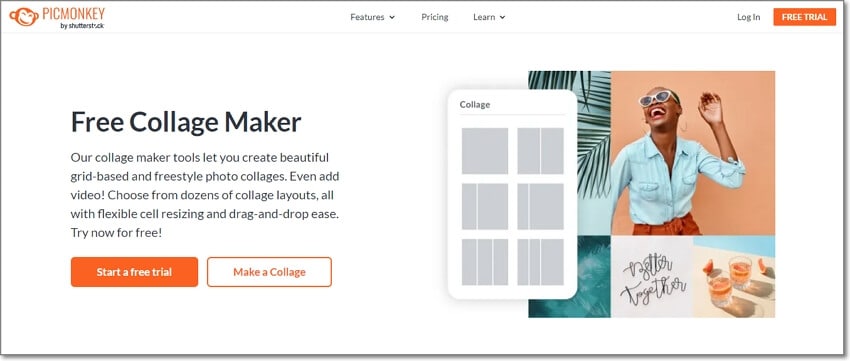
12piZap
Just like its interesting name, this online tool allows you to create interesting collages. The interface is intuitive and there are multiple templates to choose from. Further, the templates can be customized using an editing tool, adding filters, texts, effects, and other elements. The Facebook banner template is one of the interesting and useful features. For ad-free experience and additional functions, the pro-paid version can be selected.
13FotoJet
Using this browser-based tool you can create collages, posters, photo cards, YouTube banners, fun images, Facebook covers, and others. The templates in different categories are available to match your themes and create interesting collages. You can even choose to create a classic collage to keep it simple. Upgrading the tool to the paid version offers additional resources and features.

14Picsart Collage Maker
This is another simple to use free online collage-making tool that can create aesthetic and other types of collages. The interface of the tool is clean which makes the working smooth and quick and the images can be added from your system as well as from your social media accounts. Multiple effects, filters, clip-art, and other elements can be added to make the collage look impressive.
15Photovisi
Using this free online collage-making tool, you will have access to templates in different categories like abstract, magic, love, nature, and many categories more. You can even create Facebook covers, E-cards, and YouTube channel banners using the program. An array of built-in effects is available to customize the file and the tool also offers collaboration options. The created collage can be saved locally or can also be shared through an email.
Part 3 Best software to create video collages and edit videos professionally – Wondershare Filmora
Above we have listed the best tools for creating image collages and a few of them also has a feature to add videos. If you are want to create a video collage and looking for a tool that can edit your videos professionally, Wondershare Filmora is the best tool to consider. The animated split screen effect of the software allows you to view your videos on a split-screen thus making it look like a collage.
For all types of video editing requirements, this is an excellent tool available for download on Windows and Mac systems.
For Win 7 or later (64-bit)
For macOS 10.12 or later
● Key Takeaways from This Episode →
● To create aesthetics and other types of collages, a wide range of collage-maker tools are available.
● Choose from desktop tools, online programs, or apps as needed.
● To edit videos and create decent video collages, Wondershare Filmora is an excellent tool.
It is rightly said that a picture is worth a thousand words and what if there are multiple pictures? It becomes a story!! Creating collages have been popular among people for a long and with high-end cameras, mobile phones, and excellent tools the task has become even easier and quicker.
So, if you too are willing to create an aesthetic collage for yourself or loved ones, there is no dearth of collage-making tools. So, to prevent you from the hassles of selecting one such tool, we have shortlisted the popular ones.
In this article
01 [Need for a collage-making tool?](#Part 1)
02 [Top 15 collage makers to create aesthetic collages](#Part 2)
03 [Best software to create video collages and edit videos professionally – Wondershare Filmora](#Part 3)
Part 1 Need for a collage-making tool?
Though aesthetic collage wallpaper making may sound simple, it is an artwork to create an impressive-looking collage. Adjusting the images in the right format, cropping their sizes, setting a background, setting colors, adding text are some of the many factors that go into the making of a visually appealing collage. So now, all these considerations can be taken care of by a good collage-making tool. All you need to do is pick up your choice of images, select a template and let the tool do its work.
In no time, a collage of your choice will be ready.
Part 2 Top 15 collage makers to create aesthetic collages
There is a wide range of online, desktop, and app-based collage-making tools available that can be selected based on your requirements. Check out the most popular ones as below.
01Free Collage Maker Online
This is a free-to-use online tool that can be used for creating impressive aesthetic wallpaper collage quickly. The tool gives you the option to either choose your own layout or use one of the readymade templates. Multiple editing options are supported like adjust9ing exposure, contrast, shadows, white balance, and more. You can even turn, rotate, and distort the images. Using this online tool, you can even add the text and also customize it. A wide range of formats is supported by a tool like RAW, JPEG, PSD, PNG, and others.
022. Canva
This is a widely used online tool that supports multiple functions including image collage creation and image editing. The tool allows adding images in all popular formats for creating a collage using several templates. The position of the photos, font of the text, shades, and other parameters can be adjusted as required. The tool also has a huge collection of images in different categories that can also be used for making aesthetic photo collage. Created collages can be saved in JPEG, PDF, and PNG format.
03Fotor
Creating high-quality trendy photo collages is easy and quick using this online tool that supports all popular image formats. There are several grids and template options available for you to create the desired collage. Stickers and text can be added to the created collage to add some fun elements. Several adjustments can be made like frame width, rounded corners, background color, aspect ratio, adding filters, effects, and more. With multiple features, the interface becomes quite confusing.
04Adobe Creative Cloud Express
Adobe is one of the most widely used tools when it comes to images and videos and creating a picture collage is one of the supported features. Using the online version of this tool, collages can be created quickly and only a free sign-up is needed. In addition to your images, you can even choose from the wide collection of royalty-free pictures. Theme-based templates are available to match your requirements and for customization, all basic editing features are supported. You can even add texts, filters, and effects to your collages.
05Shape Collage
This automatic collage maker lets you create the desired collage in just a few simple steps. The interface is simple and all the basic editing functions for customization are supported. You can change the background, frame, the distance between the images, and several other factors. The tool is available to be used as desktop software, an online program, and also as an app that can be downloaded on a phone.
06Kapwing Collage Maker
Using this free online tool, collages can be made using images, videos, GIFs, as well as music files. The tool allows you to choose either a blank canvas or choose from multiple templates available at the site. The drag and drop features are supported and there are multiple editing options as well. The free version has a watermark on the created collages which can be removed after creating a free account. The created collage can be saved to the system or its URL can be obtained.
07Photo Joiner
As the name suggests, this is a photo joining tool that works from your browser and allows creating a picture collage. The interface is user-friendly and the work process is smooth where you just need to add the images, choose the layout, add text, and make required settings to create your choice of a template. The tool allows changing the image size, as well as the background. Using the tool, you can also create an FB cover in a simple step.
08Ribbet
This is a widely used photo editing tool that performs an array of additional features as well including collage making. The tool is available in a free as well as a premium paid version. The interface is smart and comes packed in with all basic collage-making functions. Decent templates are available to choose from with the option to adjust the size, edit exposure, lighting, and other parameters.
09BeFunky
Creating aesthetic, funky, and all types of different collages is quick and easy using this online tool. A variety of customizable layout options are available at the site to match your requirements. The images can be enhanced by changing the background color, pattern, adding fonts, effects, filters, and more. The free version of the tool supports basic functions while for more advanced options you need to purchase the premium plan. The tool is also available as an app for Android and iOS devices.
10Kizoa
This is a free online slideshow maker that allows creating a slideshow in different aspect ratios which is suitable for all types of platforms and screen sizes. An array of static and animated templates is available and you can even add multiple effects, text, and other elements to customize the collage as desired. There is also a paid version of the tool with added features and functions.
11PicMonkey
This is another popular name when it comes to collage-making tools. The tool allows creating freestyle as well as grid-based collages and in addition to the images, you can even add videos. Hundreds of collage layouts are available that can be further customized as needed. The function of auto-cell resizing adjusts all the images to the grids perfectly. Apart from your media files, you can even choose from the free stock of images and videos available at the site.
12piZap
Just like its interesting name, this online tool allows you to create interesting collages. The interface is intuitive and there are multiple templates to choose from. Further, the templates can be customized using an editing tool, adding filters, texts, effects, and other elements. The Facebook banner template is one of the interesting and useful features. For ad-free experience and additional functions, the pro-paid version can be selected.
13FotoJet
Using this browser-based tool you can create collages, posters, photo cards, YouTube banners, fun images, Facebook covers, and others. The templates in different categories are available to match your themes and create interesting collages. You can even choose to create a classic collage to keep it simple. Upgrading the tool to the paid version offers additional resources and features.
14Picsart Collage Maker
This is another simple to use free online collage-making tool that can create aesthetic and other types of collages. The interface of the tool is clean which makes the working smooth and quick and the images can be added from your system as well as from your social media accounts. Multiple effects, filters, clip-art, and other elements can be added to make the collage look impressive.
15Photovisi
Using this free online collage-making tool, you will have access to templates in different categories like abstract, magic, love, nature, and many categories more. You can even create Facebook covers, E-cards, and YouTube channel banners using the program. An array of built-in effects is available to customize the file and the tool also offers collaboration options. The created collage can be saved locally or can also be shared through an email.
Part 3 Best software to create video collages and edit videos professionally – Wondershare Filmora
Above we have listed the best tools for creating image collages and a few of them also has a feature to add videos. If you are want to create a video collage and looking for a tool that can edit your videos professionally, Wondershare Filmora is the best tool to consider. The animated split screen effect of the software allows you to view your videos on a split-screen thus making it look like a collage.
For all types of video editing requirements, this is an excellent tool available for download on Windows and Mac systems.
For Win 7 or later (64-bit)
For macOS 10.12 or later
● Key Takeaways from This Episode →
● To create aesthetics and other types of collages, a wide range of collage-maker tools are available.
● Choose from desktop tools, online programs, or apps as needed.
● To edit videos and create decent video collages, Wondershare Filmora is an excellent tool.
Ways on How to Get Started in Stop Motion Claymation
How to Get Started in Stop Motion Claymation
An easy yet powerful editor
Numerous effects to choose from
Detailed tutorials provided by the official channel
Stop Motion Claymation is not a new concept. It has been floating around the media industry since the 1950 and many creators have utilized it to tell their stories to the world. If you haven’t heard about claymations so far, you are not alone. Unfortunately, a wide range of the global population is unfamiliar with the concept of stop motion claymation.

But, if you are someone who wants to get into animation, but don’t have an expensive budget, claymations can be a great tool to share your story with the world and attract a global audience. In this guide, we are going to talk about claymations, some of the most popular claymation websites, and the best ways to get started with stop motion claymation. So, if you also want to explore your creative side and be unique with the approach, continue reading. By the end of this guide, you’ll be running out to buy clay and make some high-quality clay stop-motion animations.
In this article
01 [Ways to Make Stop Motion Videos with Clay Using Your Phone](#Part 1)
02 [How to Edit a Stop Motion Claymation Animation ](#Part 2)
03 [Best 5 Clay for Stop Motion and Ways to Get Started](#Part 3)
Part 1 Ways to Make Stop Motion Videos with Clay Using Your Phone
So, now that you are familiar with the basic concept of clay stop animation, let’s understand how you can get started with claymation animations. Ideally, if you are an absolute beginner, you would want to start by understanding the dynamics of creating clay models first. Whether you are going to create a animation or a simple stop motion clip, the models will play a major role in the story and it would be important that these models look appealing.
When it comes to capturing the motion, you don’t need any expensive cameras. You can easily shoot the entire motion on your phone as well. Today, even the basic smartphones come with recording features and they are enough to capture the movement of your clay models. However, if you want to keep the production quality as high as possible, make sure to invest in a decent tripod. A tripod will ensure that your stop motion claymation doesn’t feel jerky at all.
After you have crafted the clay models and purchased the tripod, the next step would be to write down a script for the animation. Whether you are creating a short video or a 3-hour long movie, a script will ensure that you don’t miss out on any important scenes while recording the animation. There are multiple script writing software you can find online that’ll speed up the entire process. However, as a beginner, you can also pen down your script in a regular MS Word document. Lack of resources should never come between your creativity.
Once the script is final, the next phase would be to record the stop motion animation claymation. This is the stage where you have to be extra careful because you’ll practically be recording the storyline of your animation. Simply fire up the smartphone’s camera and start shooting each frame one-by-one. Keep in mind that shooting a stop motion animation is pretty time-consuming and it can even take up to 5-7 hours to get the job done. So, make sure to grab your cup of coffee and stay patient throughout the process.
Part 2 How to Edit a Stop Motion Claymation Animation
At this point, you would have several hundred photographs and a script in mind to make your stop motion claymation. So, the next part would be to turn these raw images into an animation. To do this, you can use different types of video editing applications. However, we recommend using Wondershare Wondershare Filmora Video Editor for the job.
It’s a full-scale cross-platform video editing tool that’s designed to help creators showcase their creativity by turning RAW images/clips into visually engaging videos. Filmora is targeted towards a wide variety of creators such as YouTubers, social media influencers, production artists, and even animators. For an animator, Filmora is nothing short of an oasis.
The tool comes with a built-in media library where you’ll find hundreds of ready-to-use animation templates. These templates could be integrated into your video with a single click. The best part is all these templates are fully customizable, which means you can modify them to meet the overall theme of your claymation.
Filmora boasts a timeline-based interface that makes the editing process a hassle-free task, especially when you have hundreds of images to edit. You can simply bring all the images to the timeline and merge them together to make a stunning animation within a few minutes. The tool also comes with a dedicated audio editing panel where you can add the voiceover or background tracks to bring life to your stop animation claymation. If you have edited any videos in the past, you may already know that the audio is the backbone for any video, even if you are editing a stop motion animation using clay.
Here’s a quick recap of all the features that make Wondershare Filmora an ideal video editing software for stop motion claymation animation.
● Timeline based user interface for more convenient editing
● Built-in media library to find graphic, animation, and audio templates
● Export videos directly to YouTube and other social media platforms
● Available for both Windows and macOS
So, if you are also ready with your clay models and smartphone’s camera, get started with the shooting process and use Filmora to turn the RAW images to a visually enticing stop motion claymation.
Part 3 Best 5 Clay for Stop Motion and Ways to Get Started
In case you are getting serious about stop motion claymations, you would also want to understand which clays are best for such animations. To be honest, you can find dozens of clays in the market. But, not every clay is worth using in a claymation. Here are 5 of the best clays for stop motion animations you can use in your projects.
01Puppet Putty
Puppet Putty is one of the most popular clay brands that’s specifically marketed towards claymation fanatics. As compared to other available options, the Puppet Putty is comparatively softer, which means you can easily mold it into different shapes using your hands only. While the Puppet Putty works great by itself, you can also combine it with other types of clay to make your clay models more appealing.
02Van Aken
Van Aken is another popular clay brand that’s ideal for claymation animations. It’s one of the inexpensive clays and that’s the reason why many claymation fanatics use it to create clay models for their projects. One of the best features of the Van Aken clay is that it’s available in different colors, which means you can get creative with your models by mixing different color combinations. Some animators also mix Van Aken with Pupper Putty to make the characters look more stunning under the perfect lighting conditions.
03Sargent Art
Sargent Art is a brand that primarily designs clays for sculpting. However, you can also use it to create clay models for your claymations. Sargent Art’s clay has the perfect blend of Wax and Oil, which makes it quite easier for the animator to sculpt different models.
04Sculpey
Sculpey is a clay brand that designs polymer-based clays that are relatively better than the traditional ceramic mud clays. This type of clay is made up of plastic and it’s comparatively more pliable than any regular clay. And, once you have your sculpture ready, you can simply place the cay model in an oven and make it rock solid within a few minutes.
05Plastilina
Finally, Plastilina is also a great option for stop motion claymation models. You can use Plastilina to design parts of the model that need to look as natural as possible. For example, you can use Plastilina to create parts such as teeth, eyes, and tongue so that your animation characters don’t contain any distortions.
● Key Takeaways from This Episode →
● Stop motion claymation animations are a great way to create stunning animations and share your creative stories with the world.
● To get started with claymations, you’ll need the right type of clay, an editing software like Wondershare Filmora Video Editor , and a storyline.
● There are different types of clays you can use to create clay models for your animations. To make your animations look more natural, you can also mix different types of clays together. This will also allow you to create personalized color combinations for your animation projects.
Stop Motion Claymation is not a new concept. It has been floating around the media industry since the 1950 and many creators have utilized it to tell their stories to the world. If you haven’t heard about claymations so far, you are not alone. Unfortunately, a wide range of the global population is unfamiliar with the concept of stop motion claymation.
But, if you are someone who wants to get into animation, but don’t have an expensive budget, claymations can be a great tool to share your story with the world and attract a global audience. In this guide, we are going to talk about claymations, some of the most popular claymation websites, and the best ways to get started with stop motion claymation. So, if you also want to explore your creative side and be unique with the approach, continue reading. By the end of this guide, you’ll be running out to buy clay and make some high-quality clay stop-motion animations.
In this article
01 [Ways to Make Stop Motion Videos with Clay Using Your Phone](#Part 1)
02 [How to Edit a Stop Motion Claymation Animation ](#Part 2)
03 [Best 5 Clay for Stop Motion and Ways to Get Started](#Part 3)
Part 1 Ways to Make Stop Motion Videos with Clay Using Your Phone
So, now that you are familiar with the basic concept of clay stop animation, let’s understand how you can get started with claymation animations. Ideally, if you are an absolute beginner, you would want to start by understanding the dynamics of creating clay models first. Whether you are going to create a animation or a simple stop motion clip, the models will play a major role in the story and it would be important that these models look appealing.
When it comes to capturing the motion, you don’t need any expensive cameras. You can easily shoot the entire motion on your phone as well. Today, even the basic smartphones come with recording features and they are enough to capture the movement of your clay models. However, if you want to keep the production quality as high as possible, make sure to invest in a decent tripod. A tripod will ensure that your stop motion claymation doesn’t feel jerky at all.
After you have crafted the clay models and purchased the tripod, the next step would be to write down a script for the animation. Whether you are creating a short video or a 3-hour long movie, a script will ensure that you don’t miss out on any important scenes while recording the animation. There are multiple script writing software you can find online that’ll speed up the entire process. However, as a beginner, you can also pen down your script in a regular MS Word document. Lack of resources should never come between your creativity.
Once the script is final, the next phase would be to record the stop motion animation claymation. This is the stage where you have to be extra careful because you’ll practically be recording the storyline of your animation. Simply fire up the smartphone’s camera and start shooting each frame one-by-one. Keep in mind that shooting a stop motion animation is pretty time-consuming and it can even take up to 5-7 hours to get the job done. So, make sure to grab your cup of coffee and stay patient throughout the process.
Part 2 How to Edit a Stop Motion Claymation Animation
At this point, you would have several hundred photographs and a script in mind to make your stop motion claymation. So, the next part would be to turn these raw images into an animation. To do this, you can use different types of video editing applications. However, we recommend using Wondershare Wondershare Filmora Video Editor for the job.
It’s a full-scale cross-platform video editing tool that’s designed to help creators showcase their creativity by turning RAW images/clips into visually engaging videos. Filmora is targeted towards a wide variety of creators such as YouTubers, social media influencers, production artists, and even animators. For an animator, Filmora is nothing short of an oasis.
The tool comes with a built-in media library where you’ll find hundreds of ready-to-use animation templates. These templates could be integrated into your video with a single click. The best part is all these templates are fully customizable, which means you can modify them to meet the overall theme of your claymation.
Filmora boasts a timeline-based interface that makes the editing process a hassle-free task, especially when you have hundreds of images to edit. You can simply bring all the images to the timeline and merge them together to make a stunning animation within a few minutes. The tool also comes with a dedicated audio editing panel where you can add the voiceover or background tracks to bring life to your stop animation claymation. If you have edited any videos in the past, you may already know that the audio is the backbone for any video, even if you are editing a stop motion animation using clay.
Here’s a quick recap of all the features that make Wondershare Filmora an ideal video editing software for stop motion claymation animation.
● Timeline based user interface for more convenient editing
● Built-in media library to find graphic, animation, and audio templates
● Export videos directly to YouTube and other social media platforms
● Available for both Windows and macOS
So, if you are also ready with your clay models and smartphone’s camera, get started with the shooting process and use Filmora to turn the RAW images to a visually enticing stop motion claymation.
Part 3 Best 5 Clay for Stop Motion and Ways to Get Started
In case you are getting serious about stop motion claymations, you would also want to understand which clays are best for such animations. To be honest, you can find dozens of clays in the market. But, not every clay is worth using in a claymation. Here are 5 of the best clays for stop motion animations you can use in your projects.
01Puppet Putty
Puppet Putty is one of the most popular clay brands that’s specifically marketed towards claymation fanatics. As compared to other available options, the Puppet Putty is comparatively softer, which means you can easily mold it into different shapes using your hands only. While the Puppet Putty works great by itself, you can also combine it with other types of clay to make your clay models more appealing.
02Van Aken
Van Aken is another popular clay brand that’s ideal for claymation animations. It’s one of the inexpensive clays and that’s the reason why many claymation fanatics use it to create clay models for their projects. One of the best features of the Van Aken clay is that it’s available in different colors, which means you can get creative with your models by mixing different color combinations. Some animators also mix Van Aken with Pupper Putty to make the characters look more stunning under the perfect lighting conditions.
03Sargent Art
Sargent Art is a brand that primarily designs clays for sculpting. However, you can also use it to create clay models for your claymations. Sargent Art’s clay has the perfect blend of Wax and Oil, which makes it quite easier for the animator to sculpt different models.
04Sculpey
Sculpey is a clay brand that designs polymer-based clays that are relatively better than the traditional ceramic mud clays. This type of clay is made up of plastic and it’s comparatively more pliable than any regular clay. And, once you have your sculpture ready, you can simply place the cay model in an oven and make it rock solid within a few minutes.
05Plastilina
Finally, Plastilina is also a great option for stop motion claymation models. You can use Plastilina to design parts of the model that need to look as natural as possible. For example, you can use Plastilina to create parts such as teeth, eyes, and tongue so that your animation characters don’t contain any distortions.
● Key Takeaways from This Episode →
● Stop motion claymation animations are a great way to create stunning animations and share your creative stories with the world.
● To get started with claymations, you’ll need the right type of clay, an editing software like Wondershare Filmora Video Editor , and a storyline.
● There are different types of clays you can use to create clay models for your animations. To make your animations look more natural, you can also mix different types of clays together. This will also allow you to create personalized color combinations for your animation projects.
How to Liven Up Your Animate Website on Scroll
How to Liven Up Your Animate Website on Scroll
An easy yet powerful editor
Numerous effects to choose from
Detailed tutorials provided by the official channel
“I am looking for the information about animate website on a scroll and how to use the parallax scrolling on the website. Can I get some reference websites and a video editor for editing the parallax videos?”

The animate website on scroll is a new and latest feature offered by the developers in the new websites. Here, in this article, we are going to discuss the animate scroll websites.
In this article
01 [The Benefits of Scroll Animation That Few People Know](#Part 1)
02 [Top 5 Scroll-to-Animate Effects in Online Animation](#Part 2)
03 [10 Websites With Inspiring Scrolling Animation](#Part 3)
Part 1 The Benefits of Scroll Animation That Few People Know
01 What is Scroll Animation?
Scroll animation is a feature offered by the website developers on the website where you will see the elements when you move the cursor on the website or when you scroll the webpage of the website.

Previously this concept was not much popular because sometimes website visitors can get confused with this feature but as per a few kinds of research, it is observed that this feature is more user friendly than the common websites. This technique also helps people to make the content more visible at the time of scrolling the website.
02 Why Should You Use On-Scroll Animation Effects?
There are many positive aspects of using the On-Scroll animation effects for your websites. When you use this animation on your website then you will see a wow factor on your website and your visitors will be happy while browsing.
#1: Visitors Never Lost while Navigating
In the on scroll animation effects when the visitors scroll your website then they will never feel lost and they can easily understand that where they started and ended up.
#2: Animate website on Scroll can attract the Visitor Attention to Call to Action
If you use the animate website on a scroll then your website visitors can get direct attention to the call to action buttons available on your webpage. It can easily attract the attention of visitors to any specific place where you want. On scroll, the animation is just like pointing at anyone with a finger. The working of this technique is that when a user starts browsing and scrolling on your website then it starts loading the next steps.
#3: It keeps Visitors Engaged
With the animate website on scroll whenever a visitor scrolls down to the webpages then they will find the interesting content in every scroll. It gives a very good view to the user than the static website content. Users show interest in reading the whole page.
#4: Scrolling Decrease the Page Loading Time
In the scroll animation users slowly scroll the website to find the content which helps you to decrease the loading time of a webpage. Scrolling always loads the elements one by one when they need.
Part 2 Top 5 Scroll-to-Animate Effects in Online Animation
01 Scroll Through Image to Change Text Parallax Effect
In the Scroll through Image effect, you will see the content of the webpage after scrolling through the image on the website and developed by codemyui.

02 Hero Book Cover Slide to Intro – Mobile Friendly
In this animation effect when you move the cursor on the image then the image will turn upside and you will be able to see the content written on the webpage.

03 Marquee Page Border Effect On Scroll using GSAP
Marquee page border effect as the name of this scroll effect tells about it that in this effect you will simply see the moving border when you scroll from all 4 sides. It gives a great look to your videos.

04 Scrollable Agency Portfolio Grid Design
Scrollable Agency Portfolio Grid Design effect is specially designed for the agencies. It gives a very creative look to the web pages. You can simply scroll the web pages from the right to the left side and then finally select the content using the call to action buttons.

05 Change Text Color and Side across Image on Scroll
This scrolling effect allows you to give a text-changing effect on your web pages. When a visitor scroll on your website pages then they will see the changes in the colors of the text which gives a superb view to your viewers.

Part 3 10 Websites with Inspiring Scrolling Animation
01 Jessandruss
Jessandruss is a wedding website developed using scrolling animation. On this website mainly the wedding story of Jess & Russ is presented by the website developers. This is an awesome design of the parallax scrolling where you can see their relationship story.

02 Fire Watch Game
Fire Watch Game website is one of the best examples of the Parallax scrolling website. On this website, developers have used around 6 layers which can be moved and show the sense of depth. On this website, parallax scrolling is not used on the whole site so you can only find it on the top of the homepage. This helps the website to make it user-friendly for the visitors and they can easily read it without any issue of the constant parallax scrolling.

03 Diesel Bad Guide
Diesel Bad guide is a one-page website that was designed for the launch of Diesel’s bad Fragrance. When visitors visit the website then they will see an image with the call to action button with the name “Bad Guide”. When you move the cursor on the call to action button you will hear a sound and after clicking you will be redirected to the product page where you can buy the fragrances. You can view the direction on the website to use it. You can use your mouse to drag the products from up to down and down to upside. This is completely developed using parallax scrolling.

04 ToyFight
ToyFight is the most popular and award-winning website where you can find thousands of cool features. This website is designed with the use of parallax scrolling and 3D technology. When you move the cursor on this website then the toys move a little bit in the background which is the effect of parallax scrolling. All pages of this website are designed using parallax scrolling.

05 New York Times: Snowfall
Snowfall is a webpage designed on the New York Times website shows that how the parallax scrolling is used to show a story related to the snowfall. On this webpage, they used parallax scrolling on the images and videos which show the tunnel creek avalanche. This story is very old and published in 2012 but still, this is the best example of parallax scrolling usage.

06 Dog studio
Dog studio is an awesome website developed using the parallax scrolling effect. In the background, you will see a 3D animated dog that continuously moves when you scroll on the website. It also changes the color of the dog when you hover the mouse on the titles of the website. The do position also changes as you scroll down the website.

07 Delassus Group
Delassus Group’s website is the most popular example of horizontal scrolling. Mostly all websites work in vertical scrolling while using parallax scrolling but in the case of the Delassus group website, you will see the website display its products horizontally in a very attractive way.
08 Louie Sellers
Recapafteruse website is a portfolio website which is designed by Louie Seller and they always use a very clever parallax scrolling effect to keep interesting the webpage for their visitors. Recapafteruse is their business name. On the website when you first start scrolling then the pen will uncap and when you finish scrolling and reach the end of the page then the pen will be closed again. It reflects his business name “RecapAfterUse”. This effect is used on every webpage of the website.

09 The story of The Goonies
Goonies website is another example of parallax scrolling. On this website when you visit the first page you will see the image with the water and mountains and after starting the scrolling you will start seeing the images of kids and after that credits page and finally the gallery page. This is a one-page website and parallax scrolling is used on the whole webpage.

10 Wondershare Filmora
Wondershare Filmora is advanced video editing software that helps you to edit the videos for your parallax scrolling websites. It offers you several advanced video editing options with the easiest-to-use interface. The software is available for windows as well as Mac users to edit the videos. With the help of Wondershare Filmora, you can easily edit the videos with cool features such as motion tracking, color matching, audio ducking, split-screen, using premade templates, controlling the video speed, etc. The Wondershare Filmora offers you basic to advanced level options for editing your videos for parallax scrolling with the easy-to-use interface so you can use it even you are a newbie in video editing without any issue.
Key Takeaways from This Episode
● This is all about the parallax scrolling website and its examples.
● There are many different high-tech blog sites are available that use different types of parallax scrolling animation designs to keep their users engaged.
● These look very attractive and you get the chance to get more viewers for your website.
● If you are looking for making the best animation video to use with your parallax scrolling website then we would like to suggest the Wondershare Filmora software as it can help you to create the best videos for your parallax scrolling website.
“I am looking for the information about animate website on a scroll and how to use the parallax scrolling on the website. Can I get some reference websites and a video editor for editing the parallax videos?”
The animate website on scroll is a new and latest feature offered by the developers in the new websites. Here, in this article, we are going to discuss the animate scroll websites.
In this article
01 [The Benefits of Scroll Animation That Few People Know](#Part 1)
02 [Top 5 Scroll-to-Animate Effects in Online Animation](#Part 2)
03 [10 Websites With Inspiring Scrolling Animation](#Part 3)
Part 1 The Benefits of Scroll Animation That Few People Know
01 What is Scroll Animation?
Scroll animation is a feature offered by the website developers on the website where you will see the elements when you move the cursor on the website or when you scroll the webpage of the website.
Previously this concept was not much popular because sometimes website visitors can get confused with this feature but as per a few kinds of research, it is observed that this feature is more user friendly than the common websites. This technique also helps people to make the content more visible at the time of scrolling the website.
02 Why Should You Use On-Scroll Animation Effects?
There are many positive aspects of using the On-Scroll animation effects for your websites. When you use this animation on your website then you will see a wow factor on your website and your visitors will be happy while browsing.
#1: Visitors Never Lost while Navigating
In the on scroll animation effects when the visitors scroll your website then they will never feel lost and they can easily understand that where they started and ended up.
#2: Animate website on Scroll can attract the Visitor Attention to Call to Action
If you use the animate website on a scroll then your website visitors can get direct attention to the call to action buttons available on your webpage. It can easily attract the attention of visitors to any specific place where you want. On scroll, the animation is just like pointing at anyone with a finger. The working of this technique is that when a user starts browsing and scrolling on your website then it starts loading the next steps.
#3: It keeps Visitors Engaged
With the animate website on scroll whenever a visitor scrolls down to the webpages then they will find the interesting content in every scroll. It gives a very good view to the user than the static website content. Users show interest in reading the whole page.
#4: Scrolling Decrease the Page Loading Time
In the scroll animation users slowly scroll the website to find the content which helps you to decrease the loading time of a webpage. Scrolling always loads the elements one by one when they need.
Part 2 Top 5 Scroll-to-Animate Effects in Online Animation
01 Scroll Through Image to Change Text Parallax Effect
In the Scroll through Image effect, you will see the content of the webpage after scrolling through the image on the website and developed by codemyui.
02 Hero Book Cover Slide to Intro – Mobile Friendly
In this animation effect when you move the cursor on the image then the image will turn upside and you will be able to see the content written on the webpage.
03 Marquee Page Border Effect On Scroll using GSAP
Marquee page border effect as the name of this scroll effect tells about it that in this effect you will simply see the moving border when you scroll from all 4 sides. It gives a great look to your videos.
04 Scrollable Agency Portfolio Grid Design
Scrollable Agency Portfolio Grid Design effect is specially designed for the agencies. It gives a very creative look to the web pages. You can simply scroll the web pages from the right to the left side and then finally select the content using the call to action buttons.
05 Change Text Color and Side across Image on Scroll
This scrolling effect allows you to give a text-changing effect on your web pages. When a visitor scroll on your website pages then they will see the changes in the colors of the text which gives a superb view to your viewers.
Part 3 10 Websites with Inspiring Scrolling Animation
01 Jessandruss
Jessandruss is a wedding website developed using scrolling animation. On this website mainly the wedding story of Jess & Russ is presented by the website developers. This is an awesome design of the parallax scrolling where you can see their relationship story.
02 Fire Watch Game
Fire Watch Game website is one of the best examples of the Parallax scrolling website. On this website, developers have used around 6 layers which can be moved and show the sense of depth. On this website, parallax scrolling is not used on the whole site so you can only find it on the top of the homepage. This helps the website to make it user-friendly for the visitors and they can easily read it without any issue of the constant parallax scrolling.
03 Diesel Bad Guide
Diesel Bad guide is a one-page website that was designed for the launch of Diesel’s bad Fragrance. When visitors visit the website then they will see an image with the call to action button with the name “Bad Guide”. When you move the cursor on the call to action button you will hear a sound and after clicking you will be redirected to the product page where you can buy the fragrances. You can view the direction on the website to use it. You can use your mouse to drag the products from up to down and down to upside. This is completely developed using parallax scrolling.
04 ToyFight
ToyFight is the most popular and award-winning website where you can find thousands of cool features. This website is designed with the use of parallax scrolling and 3D technology. When you move the cursor on this website then the toys move a little bit in the background which is the effect of parallax scrolling. All pages of this website are designed using parallax scrolling.
05 New York Times: Snowfall
Snowfall is a webpage designed on the New York Times website shows that how the parallax scrolling is used to show a story related to the snowfall. On this webpage, they used parallax scrolling on the images and videos which show the tunnel creek avalanche. This story is very old and published in 2012 but still, this is the best example of parallax scrolling usage.
06 Dog studio
Dog studio is an awesome website developed using the parallax scrolling effect. In the background, you will see a 3D animated dog that continuously moves when you scroll on the website. It also changes the color of the dog when you hover the mouse on the titles of the website. The do position also changes as you scroll down the website.
07 Delassus Group
Delassus Group’s website is the most popular example of horizontal scrolling. Mostly all websites work in vertical scrolling while using parallax scrolling but in the case of the Delassus group website, you will see the website display its products horizontally in a very attractive way.
08 Louie Sellers
Recapafteruse website is a portfolio website which is designed by Louie Seller and they always use a very clever parallax scrolling effect to keep interesting the webpage for their visitors. Recapafteruse is their business name. On the website when you first start scrolling then the pen will uncap and when you finish scrolling and reach the end of the page then the pen will be closed again. It reflects his business name “RecapAfterUse”. This effect is used on every webpage of the website.
09 The story of The Goonies
Goonies website is another example of parallax scrolling. On this website when you visit the first page you will see the image with the water and mountains and after starting the scrolling you will start seeing the images of kids and after that credits page and finally the gallery page. This is a one-page website and parallax scrolling is used on the whole webpage.
10 Wondershare Filmora
Wondershare Filmora is advanced video editing software that helps you to edit the videos for your parallax scrolling websites. It offers you several advanced video editing options with the easiest-to-use interface. The software is available for windows as well as Mac users to edit the videos. With the help of Wondershare Filmora, you can easily edit the videos with cool features such as motion tracking, color matching, audio ducking, split-screen, using premade templates, controlling the video speed, etc. The Wondershare Filmora offers you basic to advanced level options for editing your videos for parallax scrolling with the easy-to-use interface so you can use it even you are a newbie in video editing without any issue.
Key Takeaways from This Episode
● This is all about the parallax scrolling website and its examples.
● There are many different high-tech blog sites are available that use different types of parallax scrolling animation designs to keep their users engaged.
● These look very attractive and you get the chance to get more viewers for your website.
● If you are looking for making the best animation video to use with your parallax scrolling website then we would like to suggest the Wondershare Filmora software as it can help you to create the best videos for your parallax scrolling website.
Also read:
- New A Roster of 15 Best Disney Channel Cartoons
- Updated How to Insert a GIF Into Powerpoint for 2024
- New 2024 Approved Animate Photo Online with These Awesome Tools
- Top 10 3D Text Animation Templates
- New You Can Turn a TikTok Into a GIF Now
- Updated 2024 Approved 12+ Stunning Instagram GIF Stickers and How to Make & Find
- Updated How To Make Pinterest Slideshow in Simple Ways for 2024
- New 2024 Approved Best 15 Anime Fonts-Find Your Favorite One
- How to Make My Photo 3D Cartoon Online for 2024
- Updated In 2024, Popular Female & Male Disney Cartoon Characters
- 10 Popular Cartoon Characters That You Wont Want to Miss for 2024
- New 2024 Approved 10 of the Best Disney Animated Shows
- Looking for Love Animated GIFs? Here Are 5 Free Sources For You
- New In 2024, Popular Female & Male Disney Cartoon Characters To Empower You
- Updated 2024 Approved Top 15 2D Animation Software Free That Worth to Try
- In 2024, How I Animate Discord Profile Pictures (& You Can Too)
- In 2024, Learn How to Make Architecture Animation
- New 2024 Approved 5 Ways You Never Heard of for Converting MP4 to GIF in Photoshop
- New 2024 Approved 10 Best Convert Video Between GIF Software High Quality
- In 2024, Learn 3D Logo Animation and Templates
- FREE Best Anime Streaming Sites to Download Anime for 2024
- Updated Learn 3D Logo Animation and Templates
- Updated In 2024, Some Techniques for Creating Animated Logo That Few People Know About
- Updated 2024 Approved How to Animate - Adobe Animate Tutorias
- Updated Secret Source to Make a Great Stop Motion Puppet for 2024
- Top 10 Cartoon Canvas Painting Ideas for Total Beginners for 2024
- Stunning Ideas About Creating Personalised WhatsApp GIF Sticker
- New In 2024, 10 Great Apps for Turning Funny Animated Images Into Comics
- Updated 2024 Approved The Best 8 Places for High-Quality Royalty Free Gifs
- New 2024 Approved Best Guide for Beginners on 2D Animation Making
- Updated In 2024, How to Create an Adobe Collage?
- New The Only Guide Youll Ever Need to Learn That Make 2D Rigging Clear to You for 2024
- Best 10 Photo Animator Templates
- Updated Epic Formula to Animate Photos From These 10 Animate Pictures App
- Updated Adobe Animate Text Effects Skills You Need to Know
- New How To Remove The Endless Loop From Animated GIF
- New In 2024, Top 12 Video to GIF Converters High Quality to Check Out
- New 2024 Approved The Best 8 Places for High-Quality Royalty Free Gifs (Paid and Free)
- New In 2024, How to Analyze an Editorial Cartoon Easily
- Updated In 2024, Adobe Rigger Is AWESOME
- How To Create Pinterest Slideshow in Simple Ways
- In 2024, Handy Tips From Adobe Animate Rigging Tutorial for All Learners
- New In 2024, What Is Anime? Anime VS Manga VS Cartoon
- Updated How to Animate Image on Scroll and Text on Scroll, In 2024
- In 2024, 12 Aesthetic GIF Instagram for Marketers
- Updated In 2024, Can I Still Do Animated Logo Design Without Design Skills?
- New 12 Animated Slideshow PowerPoint Templates and Tools to Make Them
- Updated 2024 Approved 12 Animation Video Maker That Can Triple Conversion Rates
- 2024 Approved The Definitive Guide to Whiteboard Animation
- How to Remove Apple ID from iPhone 14 without Password?
- How to Simulate GPS Movement in AR games On Xiaomi 13T? | Dr.fone
- Undelete lost photos from Motorola Moto G Stylus 5G (2023).
- In 2024, Complete Tutorial to Use GPS Joystick to Fake GPS Location On Apple iPhone 12 mini | Dr.fone
- In 2024, How to Unlock iPhone 6s Passcode without iTunes without Knowing Passcode?
- How To Remove or Bypass Knox Enrollment Service On Vivo Y56 5G
- How to Find iSpoofer Pro Activation Key On Samsung Galaxy A34 5G? | Dr.fone
- Guide How To Unbrick a Bricked Xiaomi Redmi 13C 5G Phone | Dr.fone
- In 2024, Most Asked Questions about Pokemon Go Battle League Rewards On Apple iPhone 6 Plus | Dr.fone
- Easy steps to recover deleted data from Vivo G2
- In 2024, Apple ID is Greyed Out On Apple iPhone 12 Pro Max How to Bypass?
- In 2024, Where Is the Best Place to Catch Dratini On Tecno Spark 10 4G | Dr.fone
- In 2024, How to Change Lock Screen Wallpaper on Samsung Galaxy F15 5G
- In 2024, How to Remove and Reset Face ID on Apple iPhone 12 mini
- In 2024, What Legendaries Are In Pokemon Platinum On Tecno Spark 20C? | Dr.fone
- Reliable User Guide to Fix Nubia Red Magic 9 Pro Running Slow and Freezing | Dr.fone
- Home Button Not Working on Itel P55 5G? Here Are Real Fixes | Dr.fone
- 4 Ways to Unlock Apple iPhone 8 Plus to Use USB Accessories Without Passcode | Dr.fone
- How to Mirror Motorola Moto G14 to Mac? | Dr.fone
- In 2024, Pokemon Go No GPS Signal? Heres Every Possible Solution On Google Pixel 7a | Dr.fone
- Looking For A Location Changer On Samsung Galaxy S23+? Look No Further | Dr.fone
- Turn Off Screen Lock - Honor Play 7T
- Title: Updated Adobe Rigger Is AWESOME for 2024
- Author: Elon
- Created at : 2024-05-19 03:05:18
- Updated at : 2024-05-20 03:05:18
- Link: https://animation-videos.techidaily.com/updated-adobe-rigger-is-awesome-for-2024/
- License: This work is licensed under CC BY-NC-SA 4.0.
