
:max_bytes(150000):strip_icc():format(webp)/MorningShow-aed160f9cfd448cc8034b23bb3073314.jpg)
Updated Animate Graphics in Canva
Animate Graphics in Canva
Versatile Video Editor - Wondershare Filmora
An easy yet powerful editor
Numerous effects to choose from
Detailed tutorials provided by the official channel
Canva is a graphic design platform that allows users to create stunning designs for social media posts, presentations, assignments, recipe cards, birthday videos.
With the introduction of Canva’s animation feature, a whole new world of possibilities are open to the public. Also, with pre-designed templates from professional designers, content creation has never been easier than Canva.
Animations themselves have the option of being individually customized element by element. Canva animated graphics makes it easy to unleash your creative potential.
This article will explore how to animate graphics in Canva that can suit every occasion.
In this article
01 [Animate Your Graphic In Canva](#Part 1)
02 [Make A Moving Graphic In Canva](#Part 2)
03 [Pricing for Canva You Should Know](#Part 3)
Part 1 Animate Your Graphic In Canva
People can create animations in Canva in one of two ways. You can select an animation from one of the pre-existing animated templates. This is a time-saving option as it lets you customize ready-made templates to suit your needs
With the pre-set animation templates, you have the option to choose from among
● Invitations
● A4 Documents
● Instagram Post
● Facebook Post
● YouTube Thumbnails
● Presentation
● Flyer/Poster
● Instagram Logo
● Infographic
These options generate the ability to be presented in both portrait and landscape mode. The multitude of options makes it an ideal medium for you to create your animation. The animation options at Canva also come with the opportunity to animate an existing image.

You can choose to animate an existing design. With a few minor edits, you can have a polished and sophisticated post that’s bound to draw viewer attention and earn you kudos.
If this is the case, then you benefit from saving time and the expertise of a professional design team through Canva.
The second option is creating an animation by yourself. Creating your own animation offers you greater flexibility in executing your vision for the design. Without further ado, let’s look at how we can help this happen in the how to make a moving graphic in the Canva section.
Part 2 Make A Moving Graphic In Canva
Making a moving graphic in Canva is easy. Canva offers an “Animation” button that allows users to animate each element in the content. There are four areas that the graphic can touch upon for content. These areas are text, image, audio, and video.
Here’s how you can animate individual elements in Canva.
2.1 How to animate text in Canva?
With text, Canva offers three options. You can choose to create either a title text, a sub-heading text, or regular text for use. Play with different styles and fonts to find one that suits your design. You can also add details like stickers or illustrations to customize the design.
You are now ready to animate once you’re happy with the design. Text animations will help your text jump out from the background. Then choose the “Animate” option in the sidebar after clicking on the selected text.

Allow your font to move around your design with motion. Thanks to “animate,” you can choose between subtle, smooth movement and jagged and sudden motion. You can even mix and match animations for each word.
In Wondershare Filmora, a premier video editing software, the texts are available according to use. For instance, opening and ending credit texts as a template. With options for choosing subtitles, lower 3rds, and call-out templates.
Additionally, users can also save a particular setting as a “preset’. Which makes it easy to reuse the settings in future projects. You can also adjust the duration of the individual text display. It also has an animation option that allows animation of the text according to given presets.
2.2 How do you animate a picture in Canva?
Users have the ability to choose to animate just the image or animate other elements of the picture. They can also make use of options to edit the image using background remover. This allows seamless integration into the presentation.

Users can simply upload their photos. Choose a stock image or upload an image through your photo gallery to use in your design. You can also choose to use “frames,” which are available under the “Elements” tab in Canva.
Make your photo come alive by animating it. Choose from a variety of innovative animation possibilities by selecting the Animation tool. The duration of the animation can be changed using the stopwatch animation icon. It uses a slider to help in setting the duration of each animation. You can also adjust this manually.
2.3 How do you add music to animation in Canva?
Users can find a section dedicated to “Uploads,” allowing creators to use their audio content. The users can use a soundtrack from one of Canva’s audio libraries. This gives users control over their animation’s impact.
One difference between Canva and Wondershare Filmora is that Canva users can only use one audio per presentation. Filmora allows users to overlay multiple soundtracks to their timeline.
Users can also make use of the Audio Effects feature to create audio for “Echo,” “large room,” “small room,” “lobby,” and “phone.” The preview function can help users experience it live before applying the effect.
Filmora Pro’s Auto-Normalization of audio allows intelligent audio analysis and volume adjustment.
2.4 How do you animate video in Canva?
Canva offers presentations that are similar to the explainer-style videos on Youtube. With more modifications, you can convert the presentation to a video format. You can edit individual elements in the presentation to reflect the project details and outcomes.
You can also introduce transition effects to make the presentation a smooth video. Incorporating the three other elements will be a breeze to make a video with animation.

Another noteworthy thing in Canva is that users can upload their videos or use videos provided in the video library. You can also embed videos within a frame from the “Elements” section in Canva. You can trim the video input on the slide for time. It can be presented as a “loop” video.
Filmora offers all the essential video editing tools in addition to AI-powered features called Auto-Highlight and Auro-Reframe. Auto Highlight is a feature that extracts the highlights from a video clip autonomously.
This will save you time while cutting your movie. It also makes it easier to extract the best moments from the video.
Auto Reframe recognizes as well as crops the focal point of your footage, constantly retaining it in the frame. Your film’s primary action or object will never be out of focus within that technique.
Part 3 Pricing for Canva You Should Know
Canva can be used among a multitude of users and companies. The range of access is from a single person use to teams of fifty. It also allows for a custom selection of a number of people.
Canva can be used as free graphic design software. It does display all available options with a few possibilities marked off for Canva Pro users only.
Canva Pro allows up to 5 users per team. A subscription to Canva Pro costs US $119.99 per annum or US $12.99 per month. Pro users have access to unlimited content and newly released tools.
The only difference between Canva Pro and Canva Enterprise is that Canva Pro is for smaller teams. Canva Enterprise allows collaboration between larger teams and franchises.
Canva also offers free Canva Pro subscriptions to non-profit organizations. Students and teachers are offered a special discount for those in educational programs.
Wondershare Filmora
Get started easily with Filmora’s powerful performance, intuitive interface, and countless effects!
Try It Free Try It Free Try It Free Learn More >

AI Portrait – The best feature of Wondershare Filmora for gameplay editing
The AI Portrait is a new add-on in Wondershare Filmora. It can easily remove video backgrounds without using a green screen or chroma key, allowing you to add borders, glitch effects, pixelated, noise, or segmentation video effects.

Final Words
We’ve covered how to animate graphics in Canva. You can animate individual elements in Canva or automate it on the whole. Canva’s animate button is an automatic tool that revolutionizes the way traditional animation works.
Wondershare’s Filmora is the video editing tool that is easy to use and offer various animation options.
Canva is a graphic design platform that allows users to create stunning designs for social media posts, presentations, assignments, recipe cards, birthday videos.
With the introduction of Canva’s animation feature, a whole new world of possibilities are open to the public. Also, with pre-designed templates from professional designers, content creation has never been easier than Canva.
Animations themselves have the option of being individually customized element by element. Canva animated graphics makes it easy to unleash your creative potential.
This article will explore how to animate graphics in Canva that can suit every occasion.
In this article
01 [Animate Your Graphic In Canva](#Part 1)
02 [Make A Moving Graphic In Canva](#Part 2)
03 [Pricing for Canva You Should Know](#Part 3)
Part 1 Animate Your Graphic In Canva
People can create animations in Canva in one of two ways. You can select an animation from one of the pre-existing animated templates. This is a time-saving option as it lets you customize ready-made templates to suit your needs
With the pre-set animation templates, you have the option to choose from among
● Invitations
● A4 Documents
● Instagram Post
● Facebook Post
● YouTube Thumbnails
● Presentation
● Flyer/Poster
● Instagram Logo
● Infographic
These options generate the ability to be presented in both portrait and landscape mode. The multitude of options makes it an ideal medium for you to create your animation. The animation options at Canva also come with the opportunity to animate an existing image.
You can choose to animate an existing design. With a few minor edits, you can have a polished and sophisticated post that’s bound to draw viewer attention and earn you kudos.
If this is the case, then you benefit from saving time and the expertise of a professional design team through Canva.
The second option is creating an animation by yourself. Creating your own animation offers you greater flexibility in executing your vision for the design. Without further ado, let’s look at how we can help this happen in the how to make a moving graphic in the Canva section.
Part 2 Make A Moving Graphic In Canva
Making a moving graphic in Canva is easy. Canva offers an “Animation” button that allows users to animate each element in the content. There are four areas that the graphic can touch upon for content. These areas are text, image, audio, and video.
Here’s how you can animate individual elements in Canva.
2.1 How to animate text in Canva?
With text, Canva offers three options. You can choose to create either a title text, a sub-heading text, or regular text for use. Play with different styles and fonts to find one that suits your design. You can also add details like stickers or illustrations to customize the design.
You are now ready to animate once you’re happy with the design. Text animations will help your text jump out from the background. Then choose the “Animate” option in the sidebar after clicking on the selected text.
Allow your font to move around your design with motion. Thanks to “animate,” you can choose between subtle, smooth movement and jagged and sudden motion. You can even mix and match animations for each word.
In Wondershare Filmora, a premier video editing software, the texts are available according to use. For instance, opening and ending credit texts as a template. With options for choosing subtitles, lower 3rds, and call-out templates.
Additionally, users can also save a particular setting as a “preset’. Which makes it easy to reuse the settings in future projects. You can also adjust the duration of the individual text display. It also has an animation option that allows animation of the text according to given presets.
2.2 How do you animate a picture in Canva?
Users have the ability to choose to animate just the image or animate other elements of the picture. They can also make use of options to edit the image using background remover. This allows seamless integration into the presentation.
Users can simply upload their photos. Choose a stock image or upload an image through your photo gallery to use in your design. You can also choose to use “frames,” which are available under the “Elements” tab in Canva.
Make your photo come alive by animating it. Choose from a variety of innovative animation possibilities by selecting the Animation tool. The duration of the animation can be changed using the stopwatch animation icon. It uses a slider to help in setting the duration of each animation. You can also adjust this manually.
2.3 How do you add music to animation in Canva?
Users can find a section dedicated to “Uploads,” allowing creators to use their audio content. The users can use a soundtrack from one of Canva’s audio libraries. This gives users control over their animation’s impact.
One difference between Canva and Wondershare Filmora is that Canva users can only use one audio per presentation. Filmora allows users to overlay multiple soundtracks to their timeline.
Users can also make use of the Audio Effects feature to create audio for “Echo,” “large room,” “small room,” “lobby,” and “phone.” The preview function can help users experience it live before applying the effect.
Filmora Pro’s Auto-Normalization of audio allows intelligent audio analysis and volume adjustment.
2.4 How do you animate video in Canva?
Canva offers presentations that are similar to the explainer-style videos on Youtube. With more modifications, you can convert the presentation to a video format. You can edit individual elements in the presentation to reflect the project details and outcomes.
You can also introduce transition effects to make the presentation a smooth video. Incorporating the three other elements will be a breeze to make a video with animation.
Another noteworthy thing in Canva is that users can upload their videos or use videos provided in the video library. You can also embed videos within a frame from the “Elements” section in Canva. You can trim the video input on the slide for time. It can be presented as a “loop” video.
Filmora offers all the essential video editing tools in addition to AI-powered features called Auto-Highlight and Auro-Reframe. Auto Highlight is a feature that extracts the highlights from a video clip autonomously.
This will save you time while cutting your movie. It also makes it easier to extract the best moments from the video.
Auto Reframe recognizes as well as crops the focal point of your footage, constantly retaining it in the frame. Your film’s primary action or object will never be out of focus within that technique.
Part 3 Pricing for Canva You Should Know
Canva can be used among a multitude of users and companies. The range of access is from a single person use to teams of fifty. It also allows for a custom selection of a number of people.
Canva can be used as free graphic design software. It does display all available options with a few possibilities marked off for Canva Pro users only.
Canva Pro allows up to 5 users per team. A subscription to Canva Pro costs US $119.99 per annum or US $12.99 per month. Pro users have access to unlimited content and newly released tools.
The only difference between Canva Pro and Canva Enterprise is that Canva Pro is for smaller teams. Canva Enterprise allows collaboration between larger teams and franchises.
Canva also offers free Canva Pro subscriptions to non-profit organizations. Students and teachers are offered a special discount for those in educational programs.
Wondershare Filmora
Get started easily with Filmora’s powerful performance, intuitive interface, and countless effects!
Try It Free Try It Free Try It Free Learn More >
AI Portrait – The best feature of Wondershare Filmora for gameplay editing
The AI Portrait is a new add-on in Wondershare Filmora. It can easily remove video backgrounds without using a green screen or chroma key, allowing you to add borders, glitch effects, pixelated, noise, or segmentation video effects.
Final Words
We’ve covered how to animate graphics in Canva. You can animate individual elements in Canva or automate it on the whole. Canva’s animate button is an automatic tool that revolutionizes the way traditional animation works.
Wondershare’s Filmora is the video editing tool that is easy to use and offer various animation options.
Tutorials for Animating Picture Online Without Learning From Scratch
How to Animate Picture Online Without Learning from Scratch
An easy yet powerful editor
Numerous effects to choose from
Detailed tutorials provided by the official channel
The Internet is flooded with thousands of tools that aim to provide the best-animated video. But trusting all of them every time is not a go-to thing for everyone.

If you also fall into the same category of people who are looking to add animation to designs but are not able to find the best tools, you are on the right page.
In this article
01 [Ready to Add Animation to Your Designs?](#Part 1)
02 [The Secret of Animating Pictures Online](#Part 2)
Part 1 Ready to Add Animation to Your Designs?
Here we are discussing the top three Animated picture maker that is used for creating different videos with differnt types of online picture tools. These are as follows:
1. Powtoon
Powtoon is an interactive yet simple tool available to add animation to designs. It has all the basic functions available for motion graphics that are useful for presentation. It has a variety of characters and animations available, along with simple textual animation. A user can easily prepare the video with full animation.
(This video indicates how to use the Powtoon tool for creating the best-animated videos, along with an example.)
1. Animaker
Animaker is one of the wonderful animation programs to add animation to designs in an interactive yet simple manner. It has all the best features integrated into it, which let a user create the video of their choice. It is safe to use and, being a web-based program, offers all the options.
(This video indicates how to use the Animaker tool for creating the best-animated videos, along with an example.)
3. Moovly
Moovly is also one of the best animation tools available to add animation to the content. On the main page, the “add content” option is available from where a user can simply update the video and add animation to it.
(This video indicates how to use the Moovly tool for creating the best-animated videos, along with an example.)
Note: These tools are among those that even a layman can use. But some users are still not happy with the interface of these animate picture online tools and feel like they are lacking features. For all those out there, we have some other options too.
Part 2 The Secret of Animating Pictures Online
The secret behind animating pictures online is to save time and effort. With the help of online tools, one can get the outcome with the help of inbuilt templates. There will be no need to install any application or plugin when they wish to add any particular animation to the content. Some tools you can consider using to add animation to designs are as follows:
1. Pixtellar
Pixtellar is a great tool that helps in creating animated videos and images too. Along with creating animated videos and images, one can easily create posters, logos, photo collages, and so on.
However, before using it, be sure to do the registration, as without it, using it is impossible. After registering, the steps you need to follow to use it are as follows:
Step 1Create from Scratch
Choose the template of your choice or click on “Create from Scratch”. Here we are choosing the templates.

Step 2Choose social media
It will be redirected to the next page where you will find out templates according to the selected category. (Here we choose social media).

Step 3Click on “Animate”
Choose any of them based on your preferences. You will head to the next page where you can do the editing as per your needs by clicking on “Animate”.

Step 4Save the image
After making the changes and adding the animations, you are all set to save the image. The “Save” button is right at the top of the page!

2. Adobe Spark
Adobe Spark is a tool that has pre-built templates available for adding animations to the designs. From adding animations to editing the image and video, all the options are featured in this. It also gives users an idea of how they can simply create the video and images with the help of animations and other effects.
However, when you are using it, registration is a must. After performing the registration, you are all set to use it. The steps you need to follow to use this tool are as follows:
Step 1Start editing
After completing the registration, you will reach the main page where you can choose the option of your choice and start editing. Here we have chosen the template option.

Step 2Create From This Template
It asks you to be sure and click on “Create From This Template.”

Step 3Do the editing
It takes a few seconds to present the same in front of you. On this page, you are all set to do the editing as per your needs.

Step 4Save the image
After doing all the editing, you are all set to save the image. The “Save” button is right there at the top. Click on it and save the image!

3. Crello or VistaCreate
Crello, which turns out to be VistaCreate, is one of the most famous tools for adding motion to images. It has almost 8,000+ animated designs and motion graphics available, which are helpful in creating eye-catching videos.
When you are using this feature, registration or sign-up is important. On the main page, the signup option is available, helping users do it. After that, the steps are as follows:
Step 1Click on the “Template”
On the home page, you can either create your own or click on the “Template” option available. (We chose the template option here).

Step 2Select the template
Now select the template of your choice. Here we have selected the Happy New Year one.

Step 3Do the editing as required
Now you are all set to do the editing as required. Here all the options are available, which help in adding all the basic to advanced details to the image. You can use it.

Step 4Download the image
After doing the editing, you are all set to download the image. The downloading button is right there at the top.

Key Takeaways from This Episode
● Animated videos are eye-catching, and tools are helpful in making them more enhanced.
● Animation tools are very easy to use and precisely make the video.
● Editing options are available in the tools, which are helpful in adding extra effects to the image.
● The tools are free to use with all the in-built templates and other features.
The Internet is flooded with thousands of tools that aim to provide the best-animated video. But trusting all of them every time is not a go-to thing for everyone.
If you also fall into the same category of people who are looking to add animation to designs but are not able to find the best tools, you are on the right page.
In this article
01 [Ready to Add Animation to Your Designs?](#Part 1)
02 [The Secret of Animating Pictures Online](#Part 2)
Part 1 Ready to Add Animation to Your Designs?
Here we are discussing the top three Animated picture maker that is used for creating different videos with differnt types of online picture tools. These are as follows:
1. Powtoon
Powtoon is an interactive yet simple tool available to add animation to designs. It has all the basic functions available for motion graphics that are useful for presentation. It has a variety of characters and animations available, along with simple textual animation. A user can easily prepare the video with full animation.
(This video indicates how to use the Powtoon tool for creating the best-animated videos, along with an example.)
1. Animaker
Animaker is one of the wonderful animation programs to add animation to designs in an interactive yet simple manner. It has all the best features integrated into it, which let a user create the video of their choice. It is safe to use and, being a web-based program, offers all the options.
(This video indicates how to use the Animaker tool for creating the best-animated videos, along with an example.)
3. Moovly
Moovly is also one of the best animation tools available to add animation to the content. On the main page, the “add content” option is available from where a user can simply update the video and add animation to it.
(This video indicates how to use the Moovly tool for creating the best-animated videos, along with an example.)
Note: These tools are among those that even a layman can use. But some users are still not happy with the interface of these animate picture online tools and feel like they are lacking features. For all those out there, we have some other options too.
Part 2 The Secret of Animating Pictures Online
The secret behind animating pictures online is to save time and effort. With the help of online tools, one can get the outcome with the help of inbuilt templates. There will be no need to install any application or plugin when they wish to add any particular animation to the content. Some tools you can consider using to add animation to designs are as follows:
1. Pixtellar
Pixtellar is a great tool that helps in creating animated videos and images too. Along with creating animated videos and images, one can easily create posters, logos, photo collages, and so on.
However, before using it, be sure to do the registration, as without it, using it is impossible. After registering, the steps you need to follow to use it are as follows:
Step 1Create from Scratch
Choose the template of your choice or click on “Create from Scratch”. Here we are choosing the templates.
Step 2Choose social media
It will be redirected to the next page where you will find out templates according to the selected category. (Here we choose social media).
Step 3Click on “Animate”
Choose any of them based on your preferences. You will head to the next page where you can do the editing as per your needs by clicking on “Animate”.
Step 4Save the image
After making the changes and adding the animations, you are all set to save the image. The “Save” button is right at the top of the page!
2. Adobe Spark
Adobe Spark is a tool that has pre-built templates available for adding animations to the designs. From adding animations to editing the image and video, all the options are featured in this. It also gives users an idea of how they can simply create the video and images with the help of animations and other effects.
However, when you are using it, registration is a must. After performing the registration, you are all set to use it. The steps you need to follow to use this tool are as follows:
Step 1Start editing
After completing the registration, you will reach the main page where you can choose the option of your choice and start editing. Here we have chosen the template option.
Step 2Create From This Template
It asks you to be sure and click on “Create From This Template.”
Step 3Do the editing
It takes a few seconds to present the same in front of you. On this page, you are all set to do the editing as per your needs.
Step 4Save the image
After doing all the editing, you are all set to save the image. The “Save” button is right there at the top. Click on it and save the image!
3. Crello or VistaCreate
Crello, which turns out to be VistaCreate, is one of the most famous tools for adding motion to images. It has almost 8,000+ animated designs and motion graphics available, which are helpful in creating eye-catching videos.
When you are using this feature, registration or sign-up is important. On the main page, the signup option is available, helping users do it. After that, the steps are as follows:
Step 1Click on the “Template”
On the home page, you can either create your own or click on the “Template” option available. (We chose the template option here).
Step 2Select the template
Now select the template of your choice. Here we have selected the Happy New Year one.
Step 3Do the editing as required
Now you are all set to do the editing as required. Here all the options are available, which help in adding all the basic to advanced details to the image. You can use it.
Step 4Download the image
After doing the editing, you are all set to download the image. The downloading button is right there at the top.
Key Takeaways from This Episode
● Animated videos are eye-catching, and tools are helpful in making them more enhanced.
● Animation tools are very easy to use and precisely make the video.
● Editing options are available in the tools, which are helpful in adding extra effects to the image.
● The tools are free to use with all the in-built templates and other features.
Top 8 Tools Tell You How to Make Slideshows for Instagram
Top 8 Tools Tell You How to Make Slideshows for Instagram
An easy yet powerful editor
Numerous effects to choose from
Detailed tutorials provided by the official channel
Instagram slideshows land among the latest social media trends of fun and entertainment. Learn how to attract jaw dropping peer attention with creating the same!
In this article
01 [When Should You Use an Instagram Slideshow?](#Part 1)
02 [How to Make an Instagram Slideshow with Music?](#Part 2)
03 [8 Best Instagram Slideshow Apps for Creating Outstanding Slideshow](#Part 3)
Part 1 When Should You Use an Instagram Slideshow?
Revolutions in technology has opened doors to a plenty of new and exciting means of information sharing, entertainment and communication. Playing its part in the game, Instagram slideshow has emerged as an exciting means of quick and impactful content sharing. Diving deeper into the discussion, let us talk about the different areas of working with an Instagram slide show in the following section:
01Explanatory Product Demonstrations and Stepwise Tutorials
Considering the diverse media collaboration entertained by this social media platform, you get the liberty to include 10 media files of videos and images while creating a slideshow on Instagram. This is an affordably sufficient media space to demonstrate your newly launched product in front of the target audience.
The aforesaid characteristic of a slideshow for Instagram can be put to another use of creating detailed, step by step guides and product usage tutorials to create an increased and confident customer reach and brand applicability. A few examples include the presentations of recipes by food blogs and chefs, or a detailed look of the day’s outfit by fashion bloggers.
02Interactive Storytelling or Recreate an Event
Gone are the times when stories and events were restricted to a single image or video with a limited scope of understanding and explanation. You can now work with a combination of multiple images and videos to create more vivid and graphical descriptions of stories, narratives and events.
You can work on creating an engaging slideshow for Instagram to tell an amazing story, voice a narration from the beginning to the end, or share your best moments with your cherished audience, which will surely give them the feel of enjoying the adventure along with you.
03Create a Collection
You can now use a slide show for Instagram to design and present a collection of manifold ideas and products within a single post. You can improvise the collection with displaying a series of related products, showcasing a summary of your different blog posts through the week, or simply present a list of your most reliable inspirations, resources and influencers.
04Exciting Video Teasers
If you have a scheduled video release to entertain your audience, try working with interactive slideshows for Instagram to create some sensational teaser content of the upcoming release to imbibe a natural sense of curiosity within your audience.
You can experiment with releasing a mini photoshoot tour of your filming set, share close up progression details, or include a cliffhanger in the end of your Instagram slideshow to ensure the retrieval of your audience towards watching the release of the actual big content. You can use these short teasers as effective means of creating a campaign buzz, while building a closer connect with your audience.
Part 2 How to Make an Instagram Slideshow with Music?
By now, you must have gathered enough knowledge regarding the credibility of Instagram slideshows in catering to a diversity of commercial, professional and personal content sharing needs. Considering the same, you may conveniently feel motivated to try hands at creating stunning slideshow presentations for Instagram on your own.
Adhering to the concern, let us move ahead with our discussion, while talking about how to make a slideshow for Instagram and supplement the same with adaptable background music to develop amazing content masterpieces and share them with social media peers, while grabbing their obvious attention.
While there are a number of choices in the software market to choose your Instagram slideshow creator tool, the FlexClip tool can be a reliable option. Read though the following section to learn the slideshow creation process in the program with a comprehensive and stepwise tutorial guide:
Step 1: Download the Slideshow Creator Tool
Visit the official website of FlexClip to download and install the slideshow maker software in your preferred device.

Step 2: Start from Scratch
After a successful installation, proceed to launch the tool in your system and wait till the software greets you with its welcome interface. Here, you will have to reach to and tap the ‘Start to Create’ button to begin with the slideshow creation process. You can also select a preset template to work on your slideshow if nothing new clicks in your mind.
Step 3: Select an Aspect Ratio
In the tool’s creator window, navigate to the ‘Options Panel’ at the left and click on ‘More’ to select a suitable aspect ratio. Picking the 9:16 ratio would be a good choice.

Step 4: Upload Your Media
In the same ‘Options Panel’, click on ‘Media’ for dragging and dropping the desired video and image files from your device to the program’s media timeline, followed by applying them to the tool’s storyboard. You can alternatively, choose to directly work with media pages of any preset slideshow template.

Step 5: Customize Your Media
You can now proceed to improvise your media files with amazing texts, filters, stickers, emojis, widgets, etc., by clicking on specific object categories from the ‘Options Panel’.

Step 6: Include Seamless Transitions
Proceed to uplift your creation to the next level with the application of stunning image and video transitions. Navigate to the ‘Options Panel’ and tap ‘Elements’. A variety of transition effects will be displayed to choose from. Select the one you like to add it to your slideshow.

Step 7: Add a Background Music
An in line background audio is the best way to set the mood of your slideshow. Choose to add the same to your creation for making a more engaging impact on the audience. Visit the ‘Options Panel’ again and click on ‘Music’ to open the program’s audio library and select a perfect background music from the huge variety of choices, to include in your slideshow.

Step 8: Preview Your Creation
When you have finished customizing your slideshow, navigate to the top right corner of the editor’s storyboard and hit the ‘Preview’ button to visualize and ensure that your slideshow has everything at the right place. You can continue editing if there is a need to make some changes.
Step 9: Time to Save and Share!
When you are happy with your work, consider saving it either to your device or Google Dropbox, from where you can easily upload the same to your Instagram handle.
Part 3 Best Instagram Slideshow Apps for Creating Outstanding Slideshow
Social media is the talk of the trend in today’s times, which has extended its boundaries to visibly everything around us. Speaking in the light of the fact, slideshow presentations are no exception. Social media platforms today have come up with amazing tools and applications to create and share a stunning slideshow Instagram story with utmost ease and within an affordable time span.
Now that you have developed a comprehensive understanding of the credibility of working with Instagram slideshows and their creation process with the inclusion of complementary background music, let us dive into learning about some of the best and most popular Instagram apps for creating awesome slideshow presentations in the following section:
01Filme Lite
This tool lands among the leading user preferences to work on creating slideshow presentations. The application software is packed with a heap of latest features that form the Instagram trends in current times.
Apart from complementing your slideshow creations with tons of features, this slideshow maker for Instagram grants you the liberty to include your most loved videos and images within your presentation and customize them with a diverse range of effects, along with adjusting their play duration within the slideshow. Additional to image and video customization, you are also allowed to choose the image transition style that perfectly suits your content arrangement within the slides.
Working with the tool, you can be sure of getting an unparalleled slideshow creation experience with a very interactive and user oriented design interface, that is simple enough to be easily understood and worked upon by a newbie to the creative world.
02VivaVideo
If you are working on a detailed presentation and wish to spark up your creation with stunning varieties of jaw dropping special effects, consider creating your PowerPoint slideshows in this application. The tool’s effect library is a storehouse of the most amazing special effects that promise of transforming your slideshow into a visual masterpiece.
You can separately apply these effects to each of the slideshow images or choose to work on a combination of selected effects to include within a single video. Apart from this, you are free to choose an apt background music for your presentation slides from the extensive audio library of the software. The bottom line is; you are assured to a complete fun experience while creating slideshows with this tool.
03Movavi
If you are familiar enough with the fundamental concepts and the trivial anecdotes of working with slideshow presentations and want to take your graphic creativity to the next level, you can try hands at using the Movavi slideshow creator software to design high end PowerPoint presentations of professional quality. The best thing about the tool is, it works online and does not require a software download for usage concerns.
Along with creating online slideshow presentations with ease, the tool permits you to create online videos within minutes and instantly download the same for specific usage. You can further, pop up your presentation slides with wonderful transition and animation effects and also make adjustments in the play duration of each slide. The tool lets you choose and add a perfect background music to your presentation from its conveniently vast audio library.
04Slideshow Lab
If you have just landed into the world of creating slideshow presentations and are looking for easy solutions on how to make a slideshow on Instagram, consider working with this software to polish your design creativity. The simple and user cohesive interface of the tool is best for beginners to understand and get customary with the creation process, that takes the minimum possible time to render an appreciable PowerPoint presentation.
Talking about the slideshow design process, you will need to start with selecting a set of desired images, followed by uploading the same into the tool’s slideshow creator timeline. The next step is to arrange the images in the sequential order of appearance, select an appealing background music and apply smooth image transitions. When you are done with everything, proceed to save the presentation to your device.
05MoShow
While you can choose to create stunning slideshow presentations with almost any class of images, the aforesaid app works best to render Instagram images into a top rated Instagram photo slideshow without compromising with the high resolution image quality of Instagram photos. The application integrates motion pictures and lighting effects to transform the otherwise regular images into lively still captures.
Considering the credibility of the tool in overall user experience, its indeed a thumbs up from graphic creators across the globe, thanks to its smart and interactive interface, in time performance and outstanding creation outputs.
06InVideo Editor
Put an end to your search of effective solutions on how to do a slideshow on Instagram with the InVideo Editor, a smart video and graphic editor that can also be employed to adhere to the requirement of creating amazing slideshow presentations from Instagram media. While the creation process hardly takes a few minutes, you can work with the application to explore your editing creativity to the finest levels. The tool works well with any of your MacOs and Windows compatible devices.
The editor’s effects library is loaded with tons of graphic transitions and filters that are dedicated to enhance the contents of your presentation with utmost ease. You can add creative modifications to the slideshow media, such as, cut, crop and trim videos and images and add the most convincing music, overlays, fonts, etc., and enjoy an additional free access to hundreds of stock videos and slideshow templates.
07LightMV
This one is an online slideshow creator utility that works well with almost any operating system including Windows, iOS, Android and Mac. Essentially a cloud centered editor program, this tool caters to your high quality slideshow creation needs in the most effective way. The design process is quite simple, where you only need to add the images and videos, design your presentation and wait till everything comes to place.
What’s more appealing factor about the tool is that you will never need to download the program in your device or purchase a subscription plan to use the application. All you need to do is land into the tool’s website in your favorite browser and tap on the ‘Slideshow’ option to begin with the creation process. You can select from a heap of preset stunning slideshow templates to create the most enhanced PowerPoint presentation.
08Fliptastic
The Fliptastic slideshow creator app is exclusively developed to adhere to the graphic design concerns of iOS users. This one is a no cost graphic utility with a plethora of versatile features and considerable user backup. The app’s effect library is packed with a unique set of slideshow design templates, transitions, background music choices and filters that work to compliment your presentation with the subtlest look ever.
Paying a bit extra attention to the audio inclusion within the slides, the app offers you a range of free music files to work with, while additionally allowing you to upload and use one from your device or the internet.
09Creating Instagram Slideshows With Filmora
Talking exclusively within the domain of video creation and editing, the credibility of the Wondershare Filmora Video Editor software needs no introduction. Moving ahead with our discussion, let us learn about the process of creating awesome Instagram slideshows with Filmora in the following section:
Step 1: Download and Install the Program
To begin with addressing the concern of how to make a slideshow on Instagram story, navigate to the official Wondershare website and download the Wondershare Filmora Video Editor to your preferred system and proceed to install the same.

Wondershare Filmora - Best Video Editor for Mac/Windows
5,481,435 people have downloaded it.
Build unique custom animations without breaking a sweat.
Focus on creating epic stories and leave the details to Filmora’s auto features.
Start a creative adventure with drag & drop effects and endless possibilities.
Filmora simplifies advanced features to save you time and effort.
Filmora cuts out repetition so you can move on to your next creative breakthrough.
Step 2: Import Your Media
Launch the editor program and wait for the latter’s welcome screen to appear. Here, you need to import the images, videos and other media files to the editor timeline for including them in your slideshow. It is recommended to collect all the image and video files into one single folder before opening a new slideshow design project.
In the editor’s welcome screen, navigate to the ‘Media’ tab at the top left corner and click on the same to open the ‘Import’ menu. From here, you need to choose the ‘Import a Media Folder’ option, followed by navigating to the folder that contains the to be imported media files. When you have reached to the required folder, select it and tap ‘OK’ to import the same into the project timeline. When all the files have been imported, you can see them in the ‘Project Media’ panel.

Step 3: Timeline Positioning of Media Files
Reach to the ‘File’ menu and choose ‘Preferences’ from the latter’s dropdown menu. In the ‘Preferences’ window, hit the ‘Editing’ tab and tap on ‘Photo Preferences’. From the drop down menu that follows, choose the ‘Crop to Fit’ option to adjust the aspect ratio of your imported images in line with the slideshow project. In case your images have the 9:16 vertical aspect ratio, select the ‘Fit’ option to make a proper screen fit.

You can proceed to include the image zoom and camera pan features within your project by clicking on the ‘Pan & Zoom’ option. You can further, modify the preset durations of transitions, effects and photos in the ‘Editing’ tab itself before adding them to the editor timeline. Another way of doing the same is to drag the ends of the media files inward or outward, post the timeline adding process.

When you have finished making the required adjustments, navigate back the ‘Media Panel’ to include the imported media files within the project timeline. You can either click on the files to add them, or choose to ‘Drag and Drop’ the same at a preferred place within the timeline.
When all the images and videos have been added, proceed to arrange them in the desired order of appearance in the slideshow, followed by adjusting their screen time and play durations through any of the methods explained above.
Step 4: Add Transitions to Eliminate Hard Cuts
The smooth play of a slideshow is often distorted by hard cuts, which can be escaped by applying smooth transition effects to the slides. Consider exploring the ‘Transitions’ tab of Filmora to choose from a diversity of easily customizable transition effects and place them at the intersection point of the respective slides in the project timeline.
Instead of applying the same transition to every slide, prefer choosing the one that exclusively suits the content arrangement and flow within particular slides. This would save your slideshow from getting a repetitive look.

Post the timeline adding of a transition, you can double click on the same to reach the ‘Transition Setting Window’, where you are allowed to customize the play duration and select its ‘Transition Mode’. Play durations can alternatively be customised in the project timeline by dragging the slider in a left or right direction.
Step 5: Add Overlays and Filters for an Improvised Colour Scheme
To enhance the thematic appeal of your slideshow, consider desaturating the colours of the included images with the extensive range of visual effects and overlays available in the ‘Effects’ tab of the software’s editing timeline. Opening the tab, you are exposed to a series of ‘Filter and Overlay’ categories, that have further subdivisions of Light Leaks, Sepia Tone and Lomography.
To add a particular effect, place it in the timeline track above the desired clip or image. Observe the changes in the ‘Preview Panel’ and proceed to adjust the effect settings if required, by double clicking on the particular effect.

Step 6: Include Motion Graphic Elements
To supplement your slideshow with elegant motion graphics, navigate to the ‘Elements’ tab in the editor timeline. From here, you can access and choose any suitable motion graphic template from a diversity of available choices, to include within the project timeline. The step is completely optional and you should pay attention to the style of content presentation and the cause of creation of your slideshow when choosing to add these elements to the same.

Step 7: Record Voiceovers and Create Soundtracks
To record a voiceover for your slideshow, navigate to the ‘Media’ tab and tap the ‘Record’ dropdown menu. Click on ‘Record Voiceover’ in the list of options that appears. The ‘Record Audio’ icon pops up and you now need to select a microphone to be used in the recording process. When you are ready, tap the ‘Record’ button to let the recording begin.

You can now see your voice recording appear in the ‘Media’ tab with the previously imported media files, ready to be placed within the audio track of the project timeline. Filmora’s audio library is a storehouse of free access music and audio effects. To add one to your slideshow, navigate and click on the ‘Audio’ tab to select from the extensive Rock, Young & Bright, Electronic, etc., music subcategories till you get the perfect match for your presentation.

Once you have selected all the music tracks, place them one by one on the project timeline and move ahead with adjusting their play durations.
Step 8: Export Your Creation
When you are satisfied with your work, you can export the slideshow directly from Filmora to a number of media sharing platforms. All you need to do is, navigate to and tap the ‘Export’ button in the top right corner of the editor screen and proceed to set the resolution and frame rate, and select the output file format of your created slideshow in the ‘Export Window’ that appears.

When you are ready with everything, click on the ‘Export’ button at the bottom right corner of the screen to share your slideshow across different platforms, including YouTube, Instagram, Vimeo, etc.
The time required by Filmora to render your slideshow on the chosen platform will depend on the output file size. Considering the fact that larger files require a much longer time to be rendered, it would be a smart decision to limit the file size of your slideshow within 500 MB.
● Ending Thoughts →
● Instagram slideshows are exciting means of diving into fun-filled entertainment with your social media peers.
● When looking for solutions on how to create a slideshow on Instagram, there are loads of choices in the software market.
● Talking of best creator alternatives, you can pick the Wondershare Filmora slideshow developer program to make an amazing Insta story slideshow.
Instagram slideshows land among the latest social media trends of fun and entertainment. Learn how to attract jaw dropping peer attention with creating the same!
In this article
01 [When Should You Use an Instagram Slideshow?](#Part 1)
02 [How to Make an Instagram Slideshow with Music?](#Part 2)
03 [8 Best Instagram Slideshow Apps for Creating Outstanding Slideshow](#Part 3)
Part 1 When Should You Use an Instagram Slideshow?
Revolutions in technology has opened doors to a plenty of new and exciting means of information sharing, entertainment and communication. Playing its part in the game, Instagram slideshow has emerged as an exciting means of quick and impactful content sharing. Diving deeper into the discussion, let us talk about the different areas of working with an Instagram slide show in the following section:
01Explanatory Product Demonstrations and Stepwise Tutorials
Considering the diverse media collaboration entertained by this social media platform, you get the liberty to include 10 media files of videos and images while creating a slideshow on Instagram. This is an affordably sufficient media space to demonstrate your newly launched product in front of the target audience.
The aforesaid characteristic of a slideshow for Instagram can be put to another use of creating detailed, step by step guides and product usage tutorials to create an increased and confident customer reach and brand applicability. A few examples include the presentations of recipes by food blogs and chefs, or a detailed look of the day’s outfit by fashion bloggers.
02Interactive Storytelling or Recreate an Event
Gone are the times when stories and events were restricted to a single image or video with a limited scope of understanding and explanation. You can now work with a combination of multiple images and videos to create more vivid and graphical descriptions of stories, narratives and events.
You can work on creating an engaging slideshow for Instagram to tell an amazing story, voice a narration from the beginning to the end, or share your best moments with your cherished audience, which will surely give them the feel of enjoying the adventure along with you.
03Create a Collection
You can now use a slide show for Instagram to design and present a collection of manifold ideas and products within a single post. You can improvise the collection with displaying a series of related products, showcasing a summary of your different blog posts through the week, or simply present a list of your most reliable inspirations, resources and influencers.
04Exciting Video Teasers
If you have a scheduled video release to entertain your audience, try working with interactive slideshows for Instagram to create some sensational teaser content of the upcoming release to imbibe a natural sense of curiosity within your audience.
You can experiment with releasing a mini photoshoot tour of your filming set, share close up progression details, or include a cliffhanger in the end of your Instagram slideshow to ensure the retrieval of your audience towards watching the release of the actual big content. You can use these short teasers as effective means of creating a campaign buzz, while building a closer connect with your audience.
Part 2 How to Make an Instagram Slideshow with Music?
By now, you must have gathered enough knowledge regarding the credibility of Instagram slideshows in catering to a diversity of commercial, professional and personal content sharing needs. Considering the same, you may conveniently feel motivated to try hands at creating stunning slideshow presentations for Instagram on your own.
Adhering to the concern, let us move ahead with our discussion, while talking about how to make a slideshow for Instagram and supplement the same with adaptable background music to develop amazing content masterpieces and share them with social media peers, while grabbing their obvious attention.
While there are a number of choices in the software market to choose your Instagram slideshow creator tool, the FlexClip tool can be a reliable option. Read though the following section to learn the slideshow creation process in the program with a comprehensive and stepwise tutorial guide:
Step 1: Download the Slideshow Creator Tool
Visit the official website of FlexClip to download and install the slideshow maker software in your preferred device.
Step 2: Start from Scratch
After a successful installation, proceed to launch the tool in your system and wait till the software greets you with its welcome interface. Here, you will have to reach to and tap the ‘Start to Create’ button to begin with the slideshow creation process. You can also select a preset template to work on your slideshow if nothing new clicks in your mind.
Step 3: Select an Aspect Ratio
In the tool’s creator window, navigate to the ‘Options Panel’ at the left and click on ‘More’ to select a suitable aspect ratio. Picking the 9:16 ratio would be a good choice.
Step 4: Upload Your Media
In the same ‘Options Panel’, click on ‘Media’ for dragging and dropping the desired video and image files from your device to the program’s media timeline, followed by applying them to the tool’s storyboard. You can alternatively, choose to directly work with media pages of any preset slideshow template.
Step 5: Customize Your Media
You can now proceed to improvise your media files with amazing texts, filters, stickers, emojis, widgets, etc., by clicking on specific object categories from the ‘Options Panel’.
Step 6: Include Seamless Transitions
Proceed to uplift your creation to the next level with the application of stunning image and video transitions. Navigate to the ‘Options Panel’ and tap ‘Elements’. A variety of transition effects will be displayed to choose from. Select the one you like to add it to your slideshow.
Step 7: Add a Background Music
An in line background audio is the best way to set the mood of your slideshow. Choose to add the same to your creation for making a more engaging impact on the audience. Visit the ‘Options Panel’ again and click on ‘Music’ to open the program’s audio library and select a perfect background music from the huge variety of choices, to include in your slideshow.
Step 8: Preview Your Creation
When you have finished customizing your slideshow, navigate to the top right corner of the editor’s storyboard and hit the ‘Preview’ button to visualize and ensure that your slideshow has everything at the right place. You can continue editing if there is a need to make some changes.
Step 9: Time to Save and Share!
When you are happy with your work, consider saving it either to your device or Google Dropbox, from where you can easily upload the same to your Instagram handle.
Part 3 Best Instagram Slideshow Apps for Creating Outstanding Slideshow
Social media is the talk of the trend in today’s times, which has extended its boundaries to visibly everything around us. Speaking in the light of the fact, slideshow presentations are no exception. Social media platforms today have come up with amazing tools and applications to create and share a stunning slideshow Instagram story with utmost ease and within an affordable time span.
Now that you have developed a comprehensive understanding of the credibility of working with Instagram slideshows and their creation process with the inclusion of complementary background music, let us dive into learning about some of the best and most popular Instagram apps for creating awesome slideshow presentations in the following section:
01Filme Lite
This tool lands among the leading user preferences to work on creating slideshow presentations. The application software is packed with a heap of latest features that form the Instagram trends in current times.
Apart from complementing your slideshow creations with tons of features, this slideshow maker for Instagram grants you the liberty to include your most loved videos and images within your presentation and customize them with a diverse range of effects, along with adjusting their play duration within the slideshow. Additional to image and video customization, you are also allowed to choose the image transition style that perfectly suits your content arrangement within the slides.
Working with the tool, you can be sure of getting an unparalleled slideshow creation experience with a very interactive and user oriented design interface, that is simple enough to be easily understood and worked upon by a newbie to the creative world.
02VivaVideo
If you are working on a detailed presentation and wish to spark up your creation with stunning varieties of jaw dropping special effects, consider creating your PowerPoint slideshows in this application. The tool’s effect library is a storehouse of the most amazing special effects that promise of transforming your slideshow into a visual masterpiece.
You can separately apply these effects to each of the slideshow images or choose to work on a combination of selected effects to include within a single video. Apart from this, you are free to choose an apt background music for your presentation slides from the extensive audio library of the software. The bottom line is; you are assured to a complete fun experience while creating slideshows with this tool.
03Movavi
If you are familiar enough with the fundamental concepts and the trivial anecdotes of working with slideshow presentations and want to take your graphic creativity to the next level, you can try hands at using the Movavi slideshow creator software to design high end PowerPoint presentations of professional quality. The best thing about the tool is, it works online and does not require a software download for usage concerns.
Along with creating online slideshow presentations with ease, the tool permits you to create online videos within minutes and instantly download the same for specific usage. You can further, pop up your presentation slides with wonderful transition and animation effects and also make adjustments in the play duration of each slide. The tool lets you choose and add a perfect background music to your presentation from its conveniently vast audio library.
04Slideshow Lab
If you have just landed into the world of creating slideshow presentations and are looking for easy solutions on how to make a slideshow on Instagram, consider working with this software to polish your design creativity. The simple and user cohesive interface of the tool is best for beginners to understand and get customary with the creation process, that takes the minimum possible time to render an appreciable PowerPoint presentation.
Talking about the slideshow design process, you will need to start with selecting a set of desired images, followed by uploading the same into the tool’s slideshow creator timeline. The next step is to arrange the images in the sequential order of appearance, select an appealing background music and apply smooth image transitions. When you are done with everything, proceed to save the presentation to your device.
05MoShow
While you can choose to create stunning slideshow presentations with almost any class of images, the aforesaid app works best to render Instagram images into a top rated Instagram photo slideshow without compromising with the high resolution image quality of Instagram photos. The application integrates motion pictures and lighting effects to transform the otherwise regular images into lively still captures.
Considering the credibility of the tool in overall user experience, its indeed a thumbs up from graphic creators across the globe, thanks to its smart and interactive interface, in time performance and outstanding creation outputs.
06InVideo Editor
Put an end to your search of effective solutions on how to do a slideshow on Instagram with the InVideo Editor, a smart video and graphic editor that can also be employed to adhere to the requirement of creating amazing slideshow presentations from Instagram media. While the creation process hardly takes a few minutes, you can work with the application to explore your editing creativity to the finest levels. The tool works well with any of your MacOs and Windows compatible devices.
The editor’s effects library is loaded with tons of graphic transitions and filters that are dedicated to enhance the contents of your presentation with utmost ease. You can add creative modifications to the slideshow media, such as, cut, crop and trim videos and images and add the most convincing music, overlays, fonts, etc., and enjoy an additional free access to hundreds of stock videos and slideshow templates.
07LightMV
This one is an online slideshow creator utility that works well with almost any operating system including Windows, iOS, Android and Mac. Essentially a cloud centered editor program, this tool caters to your high quality slideshow creation needs in the most effective way. The design process is quite simple, where you only need to add the images and videos, design your presentation and wait till everything comes to place.
What’s more appealing factor about the tool is that you will never need to download the program in your device or purchase a subscription plan to use the application. All you need to do is land into the tool’s website in your favorite browser and tap on the ‘Slideshow’ option to begin with the creation process. You can select from a heap of preset stunning slideshow templates to create the most enhanced PowerPoint presentation.
08Fliptastic
The Fliptastic slideshow creator app is exclusively developed to adhere to the graphic design concerns of iOS users. This one is a no cost graphic utility with a plethora of versatile features and considerable user backup. The app’s effect library is packed with a unique set of slideshow design templates, transitions, background music choices and filters that work to compliment your presentation with the subtlest look ever.
Paying a bit extra attention to the audio inclusion within the slides, the app offers you a range of free music files to work with, while additionally allowing you to upload and use one from your device or the internet.
09Creating Instagram Slideshows With Filmora
Talking exclusively within the domain of video creation and editing, the credibility of the Wondershare Filmora Video Editor software needs no introduction. Moving ahead with our discussion, let us learn about the process of creating awesome Instagram slideshows with Filmora in the following section:
Step 1: Download and Install the Program
To begin with addressing the concern of how to make a slideshow on Instagram story, navigate to the official Wondershare website and download the Wondershare Filmora Video Editor to your preferred system and proceed to install the same.
Wondershare Filmora - Best Video Editor for Mac/Windows
5,481,435 people have downloaded it.
Build unique custom animations without breaking a sweat.
Focus on creating epic stories and leave the details to Filmora’s auto features.
Start a creative adventure with drag & drop effects and endless possibilities.
Filmora simplifies advanced features to save you time and effort.
Filmora cuts out repetition so you can move on to your next creative breakthrough.
Step 2: Import Your Media
Launch the editor program and wait for the latter’s welcome screen to appear. Here, you need to import the images, videos and other media files to the editor timeline for including them in your slideshow. It is recommended to collect all the image and video files into one single folder before opening a new slideshow design project.
In the editor’s welcome screen, navigate to the ‘Media’ tab at the top left corner and click on the same to open the ‘Import’ menu. From here, you need to choose the ‘Import a Media Folder’ option, followed by navigating to the folder that contains the to be imported media files. When you have reached to the required folder, select it and tap ‘OK’ to import the same into the project timeline. When all the files have been imported, you can see them in the ‘Project Media’ panel.
Step 3: Timeline Positioning of Media Files
Reach to the ‘File’ menu and choose ‘Preferences’ from the latter’s dropdown menu. In the ‘Preferences’ window, hit the ‘Editing’ tab and tap on ‘Photo Preferences’. From the drop down menu that follows, choose the ‘Crop to Fit’ option to adjust the aspect ratio of your imported images in line with the slideshow project. In case your images have the 9:16 vertical aspect ratio, select the ‘Fit’ option to make a proper screen fit.
You can proceed to include the image zoom and camera pan features within your project by clicking on the ‘Pan & Zoom’ option. You can further, modify the preset durations of transitions, effects and photos in the ‘Editing’ tab itself before adding them to the editor timeline. Another way of doing the same is to drag the ends of the media files inward or outward, post the timeline adding process.
When you have finished making the required adjustments, navigate back the ‘Media Panel’ to include the imported media files within the project timeline. You can either click on the files to add them, or choose to ‘Drag and Drop’ the same at a preferred place within the timeline.
When all the images and videos have been added, proceed to arrange them in the desired order of appearance in the slideshow, followed by adjusting their screen time and play durations through any of the methods explained above.
Step 4: Add Transitions to Eliminate Hard Cuts
The smooth play of a slideshow is often distorted by hard cuts, which can be escaped by applying smooth transition effects to the slides. Consider exploring the ‘Transitions’ tab of Filmora to choose from a diversity of easily customizable transition effects and place them at the intersection point of the respective slides in the project timeline.
Instead of applying the same transition to every slide, prefer choosing the one that exclusively suits the content arrangement and flow within particular slides. This would save your slideshow from getting a repetitive look.
Post the timeline adding of a transition, you can double click on the same to reach the ‘Transition Setting Window’, where you are allowed to customize the play duration and select its ‘Transition Mode’. Play durations can alternatively be customised in the project timeline by dragging the slider in a left or right direction.
Step 5: Add Overlays and Filters for an Improvised Colour Scheme
To enhance the thematic appeal of your slideshow, consider desaturating the colours of the included images with the extensive range of visual effects and overlays available in the ‘Effects’ tab of the software’s editing timeline. Opening the tab, you are exposed to a series of ‘Filter and Overlay’ categories, that have further subdivisions of Light Leaks, Sepia Tone and Lomography.
To add a particular effect, place it in the timeline track above the desired clip or image. Observe the changes in the ‘Preview Panel’ and proceed to adjust the effect settings if required, by double clicking on the particular effect.
Step 6: Include Motion Graphic Elements
To supplement your slideshow with elegant motion graphics, navigate to the ‘Elements’ tab in the editor timeline. From here, you can access and choose any suitable motion graphic template from a diversity of available choices, to include within the project timeline. The step is completely optional and you should pay attention to the style of content presentation and the cause of creation of your slideshow when choosing to add these elements to the same.
Step 7: Record Voiceovers and Create Soundtracks
To record a voiceover for your slideshow, navigate to the ‘Media’ tab and tap the ‘Record’ dropdown menu. Click on ‘Record Voiceover’ in the list of options that appears. The ‘Record Audio’ icon pops up and you now need to select a microphone to be used in the recording process. When you are ready, tap the ‘Record’ button to let the recording begin.
You can now see your voice recording appear in the ‘Media’ tab with the previously imported media files, ready to be placed within the audio track of the project timeline. Filmora’s audio library is a storehouse of free access music and audio effects. To add one to your slideshow, navigate and click on the ‘Audio’ tab to select from the extensive Rock, Young & Bright, Electronic, etc., music subcategories till you get the perfect match for your presentation.
Once you have selected all the music tracks, place them one by one on the project timeline and move ahead with adjusting their play durations.
Step 8: Export Your Creation
When you are satisfied with your work, you can export the slideshow directly from Filmora to a number of media sharing platforms. All you need to do is, navigate to and tap the ‘Export’ button in the top right corner of the editor screen and proceed to set the resolution and frame rate, and select the output file format of your created slideshow in the ‘Export Window’ that appears.
When you are ready with everything, click on the ‘Export’ button at the bottom right corner of the screen to share your slideshow across different platforms, including YouTube, Instagram, Vimeo, etc.
The time required by Filmora to render your slideshow on the chosen platform will depend on the output file size. Considering the fact that larger files require a much longer time to be rendered, it would be a smart decision to limit the file size of your slideshow within 500 MB.
● Ending Thoughts →
● Instagram slideshows are exciting means of diving into fun-filled entertainment with your social media peers.
● When looking for solutions on how to create a slideshow on Instagram, there are loads of choices in the software market.
● Talking of best creator alternatives, you can pick the Wondershare Filmora slideshow developer program to make an amazing Insta story slideshow.
Some Must-Know Useful Lego Animation Ideas for You
Some Must-know Useful Lego Animation ideas for you
An easy yet powerful editor
Numerous effects to choose from
Detailed tutorials provided by the official channel
There are so many things to learn in creating a LEGO movie, including the software and stop motion animation. There are tons of Lego animation software data for beginners and professionals. Many beginners make classic mistakes in brickfilming, and as a result, they don’t get the most out of their effort.
Do you want to create a stop motion LEGO movie and determine the kind of tool you will have to apply to Lego city animation? Worry not, as this Lego animation tutorial will guide you through some more useful LEGO animation ideas for beginners and professionals. And, you will get to know how Lego animation videos and Lego ww2 animation goes hand in hand with the help of different Lego Animation Makers here under Lego animation class. In addition to that, some excellent Lego animation movie examples will give you a better idea of how Lego Animation works in reality.
In this article
01 [Best LEGO Animation Makers in 2022](#Part 1)
02 [Three Sharing of LEGO Animation Examples worth Learning from](#Part 2)
03 [Advanced LEGO Animation Tips for You](#Part 3)
Part 1 LEGO Animation Makers for Windows/Mac
01**Wondershare Filmora Video Editor **
Wondershare Filmora - Best Video Editor for Mac/Windows
5,481,435 people have downloaded it.
Build unique custom animations without breaking a sweat.
Focus on creating epic stories and leave the details to Filmora’s auto features.
Start a creative adventure with drag & drop effects and endless possibilities.
Filmora simplifies advanced features to save you time and effort.
Filmora cuts out repetition so you can move on to your next creative breakthrough.
Filmora Video Editor is the best LEGO stop motion movie maker available for windows and Mac and highly recommended video editing software. This software is suitable for making LEGO among us animation because of its exclusive features:
● LEGO stop-motion movies are done quickly on this software
● It uses the editing tools like cropping, trimming, combing, rotating, and splitting videos.
● It has various effects that you can use to style your video and make a masterpiece.
● It supports Windows (bits), and MacOs 10.(High Sierra), Mac OS 10.(Sierra), OS X 10.(El Capitan), OS X 10.(Yosemite)
● Your LEGO stop-motion movie can be directly online using this software.
02FrameByFrame
FrameByFrame is a free LEGO mouth animation maker available for Mac users. It is an introductory video creation program that uses a webcam to create stop motion. It is elementary to use, and you need to have cameras such as i-sight connected with your Mac device to take shots by pressing the camera button. This software displays what you took by the camera and the frame superimposed to create the stop motion movie. It is light, easy to use, and you can trim the unwanted parts if needed.
03Boinx iStopMotion
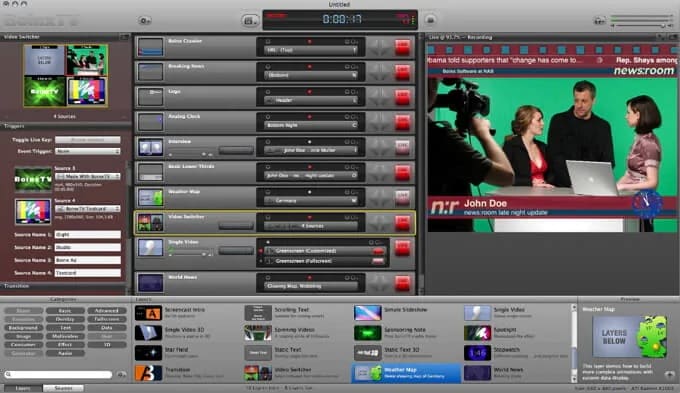
Boinx iStopMotion is a paid LEGO stop-motion movie-maker ideal for higher-level Mac devices. It can create a shot-by-shot sequence using stop motion and time-lapse. With the help of the menu, it is perfect for kids and features onion skinning. It allows you to create a LEGO movie from your imagination and creativity, which features overlay, zooming, blinking to make movement more visible, etc. After creating or using this software, you can export your video and enjoy it on your movie player.
04Stop Motion Pro Eclipse
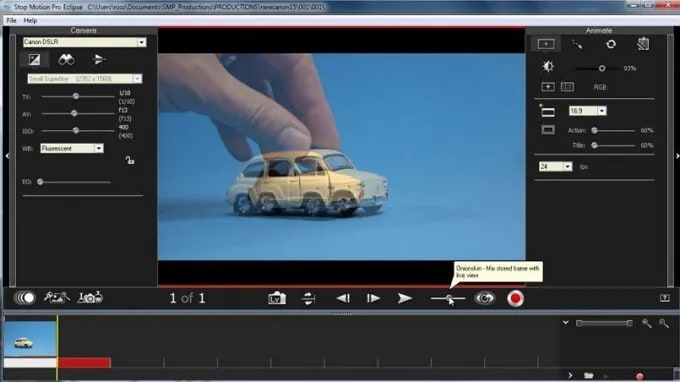
Stop Motion Pro Eclipse is a paid video creation software available for Windows to help you create LEGO stop motion animation movies. It is highly compatible with many popular video webcams and cameras that can capture and paste pictures and turn them into lovely stories with animated characters. It allows you to play up to frames per second, and while you can lay back to stop moving animation, you can also record audio. It also allows you to plan and track the movement of the movie characters and Lego friends animation.
05IKITMovie
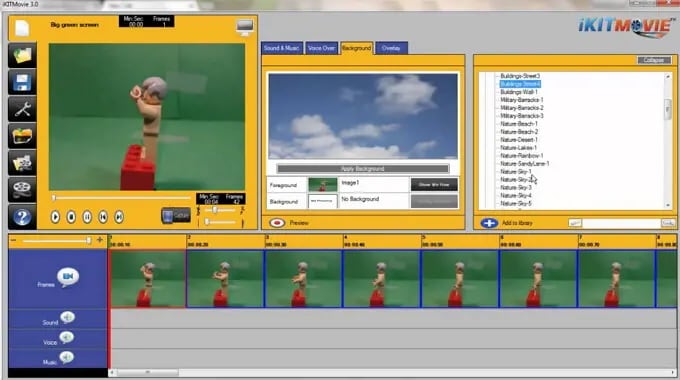
IKITMovie is a paid Lego animations 63movie maker for Windows devices that helps solve the problem of making good LEGO stop motion animation videos. It is easy to use in any age range and has thousands of background audio tracks. It is perfect for creating LEGO animation or clay motion by using the green screen feature to replace the original background of the video with still or moving images.
Part 2 LEGO Animation Makers for Android and iPhone
01Stop Motion Studio
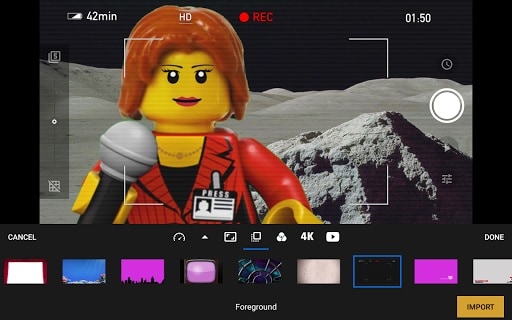
Stop Motion Studio is best for iOS and Android devices equipped with a versatile set of animated stop-motion tools and Grant complete control over all camera settings. It allows you to create LEGO stop-motion animated movies instantly and anywhere using your mobile phone free of charge but requires in-app purchases if you would want to export your project in resolution or import pics into the app.
02Clayframes
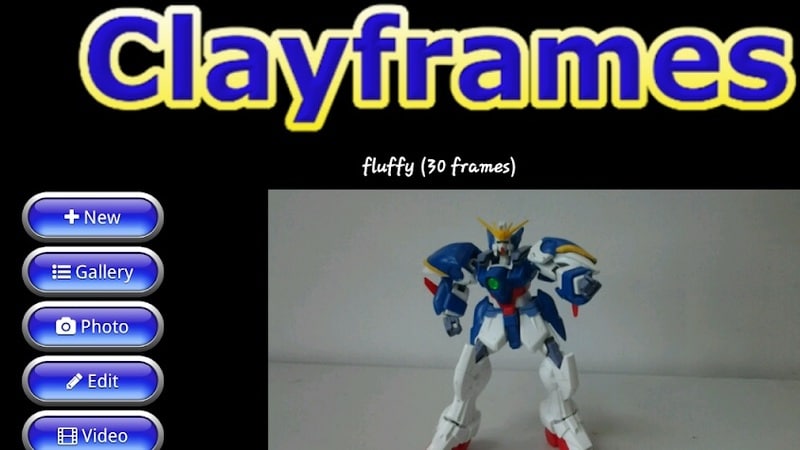
Clayframes is the best LEGO stop motion app 4 Android devices to capture new footage or import images you want to use and arrange them the way you want. The eraser tool in the app allows you to remove objects you don’t want to keep in the shot and Rigs.
03iMotion
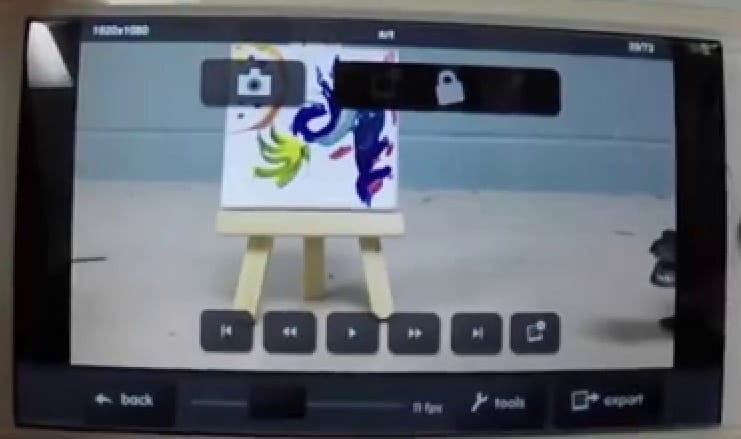
iMotion is available for iPad and iPhone users to create LEGO stop motion videos from an app. It’s has a Wi-Fi remote, photo library import mods, and time-lapse that you can choose the best to meet the demand of your project.
04Life Lapse Stop Motion Maker
Life Lapse Stop Motion Maker offers an all-in-one tool you need to edit and shoot a LEGO stop motion animation available on Android and iPhone devices. While shooting in LEGO stop motion video, you can focus on white balance and exposure lock ghosted image overlay, or time intervals.
05I Can Animate
I Can Animate is a straightforward app to create a LEGO stop motion video within a few steps and is available for Android and iOS devices. Post launching the app, you can click on Design, and a device camera will open to start creating your video.
Part 3 Three Sharing of LEGO Animation Examples worth Learning from
This section of the article will share three LEGO animation examples that are worth learning from:
01Minecraft LEGO Animation
Minecraft LEGO brings one of the most popular lego Minecraft animation video games into the real world with authentic characters and features. Minecraft Lego animation videos are a limitless possibility to build play and display, and the perfect way to expand play is creative fun.
02Ninjago LEGO Animation
Ninjago LEGO is a cartoon Network series inspired by Japanese and Chinese culture and myths in a fictional world. The Lego Ninjago animation theme enjoyed popularity and success in the first and two years before planned discontinuation in 2013.
03Blender LEGO Animation
Blender LEGO is an add-on known as a bricker to convert a mesh into a real photo brick model. Bricker is a fun and stylish plugin for Lego blender animation with specific tools for designing alternative LEGO sets.
Part 4 Advanced LEGO Animation Tips for You
This section provides the top LEGO animation movies ranked in 20and also offer a guide on how to make a Lego star wars animation:
LEGO Animation Movies Ranked in 2022
01Battle of the Brick

This LEGO animation video follows the epic battle between blue and red and a recreation of the Zanzibar map of the halo franchise
02Lego Thriller

This video is from Berlin in Germany and uses LEGO as pixel instead of stop motion characters in the creation of fantastic effects
03Adventure Time Title in LEGO
This is a LEGO recreation of cartoon series that comprises stunning detail and complexity.
04Lego Cl!ck
This LEGO stop motion video shows what happens when ideas click and integrate human and non-human elements.
05Lego Arcade

This is a LEGO stop motion video that recreation classic arcade games.
Part 5 How to Make a LEGO Animation
Once the production stage is complete, it is time to move to the post-production stage in Filmora, where your LEGO animated stop motion video will get to its final form:
For Win 7 or later (64-bit)
For macOS 10.12 or later
01Step Arrange images
The first thing is to place all the images you want to use in the final production of the video into a folder. Then arrange them accordingly in the same ways they should appear in the video.
02Step Launch Software
Launch Filmora and click on create a new project and add the project you made to the Filmora media tab. Also, import all audio files you want to use in your project before doing any actual editing.
03Step Edit Media
Move to the File menu, click on the preferred option, and go to the edit tab to set the maximum duration of a photo in the video you are creating. The value you are inserting into the photo duration box is determined by the number of frames in your video.
Please note that Filmora does not allow you to reduce a video frame rate below 23.97FPS. Therefore if you want your LEGO animation to have frame-per-second, you should send the photo duration value to 00:00:04.
04Step Preview
After that, you can add your media access to the timeline and click on the Play button to preview the results. When satisfied with the results, you can export your LEGO animated video from Filmora.
● Key Takeaways from This Episode →
● Some of the best LEGO Animation makers
● LEGO animation maker for different devices
● Some of the critical tips for creating LEGO animation videos
● If you are a beginner in LEGO animation, this article completely breaks down everything. You learned about LEGO animation and the best LEGO animation software that you can use effectively. Some parts of the report also give ideas on some LEGO animation that you can copy while working on yours.
There are so many things to learn in creating a LEGO movie, including the software and stop motion animation. There are tons of Lego animation software data for beginners and professionals. Many beginners make classic mistakes in brickfilming, and as a result, they don’t get the most out of their effort.
Do you want to create a stop motion LEGO movie and determine the kind of tool you will have to apply to Lego city animation? Worry not, as this Lego animation tutorial will guide you through some more useful LEGO animation ideas for beginners and professionals. And, you will get to know how Lego animation videos and Lego ww2 animation goes hand in hand with the help of different Lego Animation Makers here under Lego animation class. In addition to that, some excellent Lego animation movie examples will give you a better idea of how Lego Animation works in reality.
In this article
01 [Best LEGO Animation Makers in 2022](#Part 1)
02 [Three Sharing of LEGO Animation Examples worth Learning from](#Part 2)
03 [Advanced LEGO Animation Tips for You](#Part 3)
Part 1 LEGO Animation Makers for Windows/Mac
01**Wondershare Filmora Video Editor **
Wondershare Filmora - Best Video Editor for Mac/Windows
5,481,435 people have downloaded it.
Build unique custom animations without breaking a sweat.
Focus on creating epic stories and leave the details to Filmora’s auto features.
Start a creative adventure with drag & drop effects and endless possibilities.
Filmora simplifies advanced features to save you time and effort.
Filmora cuts out repetition so you can move on to your next creative breakthrough.
Filmora Video Editor is the best LEGO stop motion movie maker available for windows and Mac and highly recommended video editing software. This software is suitable for making LEGO among us animation because of its exclusive features:
● LEGO stop-motion movies are done quickly on this software
● It uses the editing tools like cropping, trimming, combing, rotating, and splitting videos.
● It has various effects that you can use to style your video and make a masterpiece.
● It supports Windows (bits), and MacOs 10.(High Sierra), Mac OS 10.(Sierra), OS X 10.(El Capitan), OS X 10.(Yosemite)
● Your LEGO stop-motion movie can be directly online using this software.
02FrameByFrame
FrameByFrame is a free LEGO mouth animation maker available for Mac users. It is an introductory video creation program that uses a webcam to create stop motion. It is elementary to use, and you need to have cameras such as i-sight connected with your Mac device to take shots by pressing the camera button. This software displays what you took by the camera and the frame superimposed to create the stop motion movie. It is light, easy to use, and you can trim the unwanted parts if needed.
03Boinx iStopMotion
Boinx iStopMotion is a paid LEGO stop-motion movie-maker ideal for higher-level Mac devices. It can create a shot-by-shot sequence using stop motion and time-lapse. With the help of the menu, it is perfect for kids and features onion skinning. It allows you to create a LEGO movie from your imagination and creativity, which features overlay, zooming, blinking to make movement more visible, etc. After creating or using this software, you can export your video and enjoy it on your movie player.
04Stop Motion Pro Eclipse
Stop Motion Pro Eclipse is a paid video creation software available for Windows to help you create LEGO stop motion animation movies. It is highly compatible with many popular video webcams and cameras that can capture and paste pictures and turn them into lovely stories with animated characters. It allows you to play up to frames per second, and while you can lay back to stop moving animation, you can also record audio. It also allows you to plan and track the movement of the movie characters and Lego friends animation.
05IKITMovie
IKITMovie is a paid Lego animations 63movie maker for Windows devices that helps solve the problem of making good LEGO stop motion animation videos. It is easy to use in any age range and has thousands of background audio tracks. It is perfect for creating LEGO animation or clay motion by using the green screen feature to replace the original background of the video with still or moving images.
Part 2 LEGO Animation Makers for Android and iPhone
01Stop Motion Studio
Stop Motion Studio is best for iOS and Android devices equipped with a versatile set of animated stop-motion tools and Grant complete control over all camera settings. It allows you to create LEGO stop-motion animated movies instantly and anywhere using your mobile phone free of charge but requires in-app purchases if you would want to export your project in resolution or import pics into the app.
02Clayframes
Clayframes is the best LEGO stop motion app 4 Android devices to capture new footage or import images you want to use and arrange them the way you want. The eraser tool in the app allows you to remove objects you don’t want to keep in the shot and Rigs.
03iMotion
iMotion is available for iPad and iPhone users to create LEGO stop motion videos from an app. It’s has a Wi-Fi remote, photo library import mods, and time-lapse that you can choose the best to meet the demand of your project.
04Life Lapse Stop Motion Maker
Life Lapse Stop Motion Maker offers an all-in-one tool you need to edit and shoot a LEGO stop motion animation available on Android and iPhone devices. While shooting in LEGO stop motion video, you can focus on white balance and exposure lock ghosted image overlay, or time intervals.
05I Can Animate
I Can Animate is a straightforward app to create a LEGO stop motion video within a few steps and is available for Android and iOS devices. Post launching the app, you can click on Design, and a device camera will open to start creating your video.
Part 3 Three Sharing of LEGO Animation Examples worth Learning from
This section of the article will share three LEGO animation examples that are worth learning from:
01Minecraft LEGO Animation
Minecraft LEGO brings one of the most popular lego Minecraft animation video games into the real world with authentic characters and features. Minecraft Lego animation videos are a limitless possibility to build play and display, and the perfect way to expand play is creative fun.
02Ninjago LEGO Animation
Ninjago LEGO is a cartoon Network series inspired by Japanese and Chinese culture and myths in a fictional world. The Lego Ninjago animation theme enjoyed popularity and success in the first and two years before planned discontinuation in 2013.
03Blender LEGO Animation
Blender LEGO is an add-on known as a bricker to convert a mesh into a real photo brick model. Bricker is a fun and stylish plugin for Lego blender animation with specific tools for designing alternative LEGO sets.
Part 4 Advanced LEGO Animation Tips for You
This section provides the top LEGO animation movies ranked in 20and also offer a guide on how to make a Lego star wars animation:
LEGO Animation Movies Ranked in 2022
01Battle of the Brick
This LEGO animation video follows the epic battle between blue and red and a recreation of the Zanzibar map of the halo franchise
02Lego Thriller
This video is from Berlin in Germany and uses LEGO as pixel instead of stop motion characters in the creation of fantastic effects
03Adventure Time Title in LEGO
This is a LEGO recreation of cartoon series that comprises stunning detail and complexity.
04Lego Cl!ck
This LEGO stop motion video shows what happens when ideas click and integrate human and non-human elements.
05Lego Arcade
This is a LEGO stop motion video that recreation classic arcade games.
Part 5 How to Make a LEGO Animation
Once the production stage is complete, it is time to move to the post-production stage in Filmora, where your LEGO animated stop motion video will get to its final form:
For Win 7 or later (64-bit)
For macOS 10.12 or later
01Step Arrange images
The first thing is to place all the images you want to use in the final production of the video into a folder. Then arrange them accordingly in the same ways they should appear in the video.
02Step Launch Software
Launch Filmora and click on create a new project and add the project you made to the Filmora media tab. Also, import all audio files you want to use in your project before doing any actual editing.
03Step Edit Media
Move to the File menu, click on the preferred option, and go to the edit tab to set the maximum duration of a photo in the video you are creating. The value you are inserting into the photo duration box is determined by the number of frames in your video.
Please note that Filmora does not allow you to reduce a video frame rate below 23.97FPS. Therefore if you want your LEGO animation to have frame-per-second, you should send the photo duration value to 00:00:04.
04Step Preview
After that, you can add your media access to the timeline and click on the Play button to preview the results. When satisfied with the results, you can export your LEGO animated video from Filmora.
● Key Takeaways from This Episode →
● Some of the best LEGO Animation makers
● LEGO animation maker for different devices
● Some of the critical tips for creating LEGO animation videos
● If you are a beginner in LEGO animation, this article completely breaks down everything. You learned about LEGO animation and the best LEGO animation software that you can use effectively. Some parts of the report also give ideas on some LEGO animation that you can copy while working on yours.
How to Draw A Skeleton Cartoon – A Step by Step Guide
How to Draw Skeleton Cartoon – A Step by Step Guide
An easy yet powerful editor
Numerous effects to choose from
Detailed tutorials provided by the official channel
We often see skeleton cartoons on t-shirts and phone cases. There is a famous skeleton cartoon show. Most of the shows are pretty popular, and the skeleton cartoon in the shows became quite trendy in the fashion industry. The trend of a skeleton cartoon character is very much relevant nowadays. One might think about how this skeleton cartoon is drawn.
Sometimes it is hand drawn or digitally drawn. Here is a step-by-step guide for you if you wonder how to draw a skeleton cartoon. This guide will effortlessly help you draw the most quirky and trendy skeleton cartoon.
In this article
01 [This Is What 5 Skeletons of Famous Cartoon Characters Would Look Like](#Part 1)
02 [How to Draw Cartoon Skeletons With Step by Step](#Part 2)
Part 1 This Is What 5 Skeletons of Famous Cartoon Characters Would Look Like
From our very childhood, we have come across numerous cartoons shows. But have we ever wondered how the skeleton of these cartoon characters would look? No worries if you have not given a thought to this. This article can give you a small tour of the world where you will be able to see skeletons of a few famous cartoon characters that we have known since our childhood. The skeletons of famous cartoon characters are:
01Charlie
Charlie Brown, known as Charlie, is the main character in the comic strip Peanuts. This is a widely recognized American cartoon. Many people can relate to Charlie. Charlie is shy, nervous, and lacks confidence. These characteristics make him relatable to a chunk of common people. Charlie is referred to as the “Loveable Loser.”Charlie is an overwhelmingly short and stout character physically. Have you ever imagined how Charlie’s skeleton version would look? Here is how the skeleton cartoon of Charlie would look.

02Fred Flintstone
I have known very few people who do not know about Fred Flintstone. Fred Flinstone is the protagonist of the famous American sitcom show Yabba-Dabba-Dinosaurs and the entire franchise. The Flinstone is another show that features Fred with his family. Of course, the show’s main attraction is the Flinstone family and the way this show is set. This show is set in a way that romanticizes a family living in a cave. Coming to talk about skeletons, have you ever thought that what if a skeleton cartoon show version of The Flintstone were made. How would this short, fat man with almost a square look as a skeleton? We can look up here how the skeleton version of Fred Flintstone looks:

03Bubbles
The Bubble is one of the main characters of the popular TV cartoon show Powerpuff girls. The other protagonists are Blossom and Buttercup, her sisters. The Bubble is named Bubble because she is the bubbliest and most fun-loving among the three sisters. Bubble is a sweet little girl with a round face and big round eyes and short limbs. These characteristics in this character make it look cuter. But to think, how would we imagine Bubble in a skeleton version. This is how Bubble would look like a skeleton.

04Dexter
Dexter is the protagonist in the show Dexter’s Laboratory. Dexter is one of the most outstanding kid scientists who have made great inventions in his secret laboratory. It would be more appropriate to call Dexter an anti-heroic protagonist. He works in his secret laboratory for various projects like stopping bullying worldwide. Dexter is a short young boy with curly hair. Dexter is mostly seen wearing a white lab coat and semi-circle goggles, like someone who is always working in a lab. Imagining Dexter as a skeleton can be hilarious. But this is how Dexter would look like a skeleton cartoon.

05Pikachu
Pikachu is one of the characters or one of the Pokémons in the famous animated Japanese series Pokémon. Pikachu is a small yellow furry Pokémon. It seems very sweet to the audience and the general public, but it acquires a dangerous skill to give out an electric shock. This small yellow furry creature has featured in many films with the protagonist of the famous show Pokémon Ash Ketchum. This cartoon character has a presence in the fashion industry. It has been used to fashion dresses, bags, and many more. How would it be if we sat to think of a skeleton version of this furry creature? This may not a pleasant experience for everyone. The perfect way to demonstrate pikachu as a skeleton version would be:

Part 2 How to Draw Cartoon Skeletons With Step by Step
Have you ever tried drawing a skeleton cartoon character? You can use a skeleton cartoon to add a quirky effect to your project. You can draw an animated skeleton on your favorite t-shirt and change the vibe of the t-shirt. There are many methods to draw skeleton cartoon. Here we focus mainly on one way to draw cartoon skeleton. The method might seem difficult at the beginning, but the whole process becomes easier and smooth once you start following the steps. The steps are:
Step 1: To start with the drawing of the skeleton, let’s start with the head or the skull. The head should be round, and the jaw area needs to be at some angle or angular and have smaller lines than the long rounded lines on the upper part of the skull.
Step 2: The mouth of the skull must be open, and then we need to concentrate on other features of the face like the teeth, nose, and cheekbone.

Step 3: After the head is complete, we focus on the neck and the chest area. To draw the neck, divide the neck into small sections to show the division in the neck portion, as shown in the picture.
Step 4: To start with the rib cage, we need to draw the spine. The spine can be drawn as a long thick line and should be a continuity of the neck, so the neck and the spine should be drawn in the same way and same line. It is to be drawn at the body’s center, just below the head. You can refer to the example as shown below.
Step 5: After you have drawn the spine, to draw the rib, draw circles around the spine as if the curved lines demonstrating the rib are revolving around the spine.

Step 6: After the head and the chest region is complete. Focus on the hand. You can rest the arms any way you want. Since you are a beginner, this example shows the easiest ways to rest the hands when you are drawing a cartoon skeleton.
Step 7: The left arm will rest on the hips, and the right arm needs to be shown in a way so that it looks that the skeleton body is leaning on some object.
Step 8: Since the arms have divisions, the bones must be drawn the same way shown in the example with the same divisions on the arms.
Step 9: Keep in mind that both the arms must have equal bone divisions; otherwise, the drawing may look weird.
Step 10: Now you need to draw the hand. The hand is made of small bones. To draw the hand, divide it into small sections consisting of very small bones.

Step 11: After the hands are complete, the upper part of the body is complete. Now we need to focus on the lower part of the body.
Step 12: To start with the lower part of the body, we start with the hip portion.
Step 13: Show the hips with curved lines, and draw a round-like shape inside the curve to show the holes in the hips.
Step 14: After the hip is complete, start with the upper half of the legs. Draw a long bone from the hip to demonstrate the upper part of the leg.

Step 15: Now we need to concentrate on the other half of the leg. You can position the legs any way you want. Here in the example, the left leg will be crossed over the right leg.
Step 16: After the lower half of the legs is complete, the standing posture of the skeleton is set.
Step 17: Now we need to add the feet at the end of the leg. The feet are made of tiny pieces of bones; to draw the feet, divide them into small sections, as shown in the example.
Step 18: Draw the feet in a similar way to how you have drawn the hands.

Step 19: You can color your skeleton drawing or give your shading style after your skeleton drawing is done.
You can make quirky skeleton cartoon animations and compile them to a video, adding music effects. You might think you need different apps for the video and the audio editing part. That might be the case for other apps. Here is Wondershare Filmora Video Editor ; you can edit your video, make slideshows, and edit the background sound score. Just imagine of not changing windows while editing your exciting project can be so comfortable!
For Win 7 or later (64-bit)
For macOS 10.12 or later
● Ending Thoughts →
● It might be astonishing for you to see the skeleton versions of your favorite cartoon characters from your childhood.
● It gives a quirky effect to our minds but, at the same time, leaves us wondering about the skeleton drawing cartoon.
● Now you know the methodof drawing a cartoon skeleton. You can make your version of a skeleton cartoon; you can create your style and interpretation. You can create a skeleton dog cartoon.
● You can use the method to make animations or even paint on your t-shirt or wall paintings to add a little quirkiness.
● The cartoon skeleton gives a cool vibe. You can use your animation as your wallpaper. Keep quirking!
We often see skeleton cartoons on t-shirts and phone cases. There is a famous skeleton cartoon show. Most of the shows are pretty popular, and the skeleton cartoon in the shows became quite trendy in the fashion industry. The trend of a skeleton cartoon character is very much relevant nowadays. One might think about how this skeleton cartoon is drawn.
Sometimes it is hand drawn or digitally drawn. Here is a step-by-step guide for you if you wonder how to draw a skeleton cartoon. This guide will effortlessly help you draw the most quirky and trendy skeleton cartoon.
In this article
01 [This Is What 5 Skeletons of Famous Cartoon Characters Would Look Like](#Part 1)
02 [How to Draw Cartoon Skeletons With Step by Step](#Part 2)
Part 1 This Is What 5 Skeletons of Famous Cartoon Characters Would Look Like
From our very childhood, we have come across numerous cartoons shows. But have we ever wondered how the skeleton of these cartoon characters would look? No worries if you have not given a thought to this. This article can give you a small tour of the world where you will be able to see skeletons of a few famous cartoon characters that we have known since our childhood. The skeletons of famous cartoon characters are:
01Charlie
Charlie Brown, known as Charlie, is the main character in the comic strip Peanuts. This is a widely recognized American cartoon. Many people can relate to Charlie. Charlie is shy, nervous, and lacks confidence. These characteristics make him relatable to a chunk of common people. Charlie is referred to as the “Loveable Loser.”Charlie is an overwhelmingly short and stout character physically. Have you ever imagined how Charlie’s skeleton version would look? Here is how the skeleton cartoon of Charlie would look.
02Fred Flintstone
I have known very few people who do not know about Fred Flintstone. Fred Flinstone is the protagonist of the famous American sitcom show Yabba-Dabba-Dinosaurs and the entire franchise. The Flinstone is another show that features Fred with his family. Of course, the show’s main attraction is the Flinstone family and the way this show is set. This show is set in a way that romanticizes a family living in a cave. Coming to talk about skeletons, have you ever thought that what if a skeleton cartoon show version of The Flintstone were made. How would this short, fat man with almost a square look as a skeleton? We can look up here how the skeleton version of Fred Flintstone looks:
03Bubbles
The Bubble is one of the main characters of the popular TV cartoon show Powerpuff girls. The other protagonists are Blossom and Buttercup, her sisters. The Bubble is named Bubble because she is the bubbliest and most fun-loving among the three sisters. Bubble is a sweet little girl with a round face and big round eyes and short limbs. These characteristics in this character make it look cuter. But to think, how would we imagine Bubble in a skeleton version. This is how Bubble would look like a skeleton.
04Dexter
Dexter is the protagonist in the show Dexter’s Laboratory. Dexter is one of the most outstanding kid scientists who have made great inventions in his secret laboratory. It would be more appropriate to call Dexter an anti-heroic protagonist. He works in his secret laboratory for various projects like stopping bullying worldwide. Dexter is a short young boy with curly hair. Dexter is mostly seen wearing a white lab coat and semi-circle goggles, like someone who is always working in a lab. Imagining Dexter as a skeleton can be hilarious. But this is how Dexter would look like a skeleton cartoon.
05Pikachu
Pikachu is one of the characters or one of the Pokémons in the famous animated Japanese series Pokémon. Pikachu is a small yellow furry Pokémon. It seems very sweet to the audience and the general public, but it acquires a dangerous skill to give out an electric shock. This small yellow furry creature has featured in many films with the protagonist of the famous show Pokémon Ash Ketchum. This cartoon character has a presence in the fashion industry. It has been used to fashion dresses, bags, and many more. How would it be if we sat to think of a skeleton version of this furry creature? This may not a pleasant experience for everyone. The perfect way to demonstrate pikachu as a skeleton version would be:
Part 2 How to Draw Cartoon Skeletons With Step by Step
Have you ever tried drawing a skeleton cartoon character? You can use a skeleton cartoon to add a quirky effect to your project. You can draw an animated skeleton on your favorite t-shirt and change the vibe of the t-shirt. There are many methods to draw skeleton cartoon. Here we focus mainly on one way to draw cartoon skeleton. The method might seem difficult at the beginning, but the whole process becomes easier and smooth once you start following the steps. The steps are:
Step 1: To start with the drawing of the skeleton, let’s start with the head or the skull. The head should be round, and the jaw area needs to be at some angle or angular and have smaller lines than the long rounded lines on the upper part of the skull.
Step 2: The mouth of the skull must be open, and then we need to concentrate on other features of the face like the teeth, nose, and cheekbone.
Step 3: After the head is complete, we focus on the neck and the chest area. To draw the neck, divide the neck into small sections to show the division in the neck portion, as shown in the picture.
Step 4: To start with the rib cage, we need to draw the spine. The spine can be drawn as a long thick line and should be a continuity of the neck, so the neck and the spine should be drawn in the same way and same line. It is to be drawn at the body’s center, just below the head. You can refer to the example as shown below.
Step 5: After you have drawn the spine, to draw the rib, draw circles around the spine as if the curved lines demonstrating the rib are revolving around the spine.
Step 6: After the head and the chest region is complete. Focus on the hand. You can rest the arms any way you want. Since you are a beginner, this example shows the easiest ways to rest the hands when you are drawing a cartoon skeleton.
Step 7: The left arm will rest on the hips, and the right arm needs to be shown in a way so that it looks that the skeleton body is leaning on some object.
Step 8: Since the arms have divisions, the bones must be drawn the same way shown in the example with the same divisions on the arms.
Step 9: Keep in mind that both the arms must have equal bone divisions; otherwise, the drawing may look weird.
Step 10: Now you need to draw the hand. The hand is made of small bones. To draw the hand, divide it into small sections consisting of very small bones.
Step 11: After the hands are complete, the upper part of the body is complete. Now we need to focus on the lower part of the body.
Step 12: To start with the lower part of the body, we start with the hip portion.
Step 13: Show the hips with curved lines, and draw a round-like shape inside the curve to show the holes in the hips.
Step 14: After the hip is complete, start with the upper half of the legs. Draw a long bone from the hip to demonstrate the upper part of the leg.
Step 15: Now we need to concentrate on the other half of the leg. You can position the legs any way you want. Here in the example, the left leg will be crossed over the right leg.
Step 16: After the lower half of the legs is complete, the standing posture of the skeleton is set.
Step 17: Now we need to add the feet at the end of the leg. The feet are made of tiny pieces of bones; to draw the feet, divide them into small sections, as shown in the example.
Step 18: Draw the feet in a similar way to how you have drawn the hands.
Step 19: You can color your skeleton drawing or give your shading style after your skeleton drawing is done.
You can make quirky skeleton cartoon animations and compile them to a video, adding music effects. You might think you need different apps for the video and the audio editing part. That might be the case for other apps. Here is Wondershare Filmora Video Editor ; you can edit your video, make slideshows, and edit the background sound score. Just imagine of not changing windows while editing your exciting project can be so comfortable!
For Win 7 or later (64-bit)
For macOS 10.12 or later
● Ending Thoughts →
● It might be astonishing for you to see the skeleton versions of your favorite cartoon characters from your childhood.
● It gives a quirky effect to our minds but, at the same time, leaves us wondering about the skeleton drawing cartoon.
● Now you know the methodof drawing a cartoon skeleton. You can make your version of a skeleton cartoon; you can create your style and interpretation. You can create a skeleton dog cartoon.
● You can use the method to make animations or even paint on your t-shirt or wall paintings to add a little quirkiness.
● The cartoon skeleton gives a cool vibe. You can use your animation as your wallpaper. Keep quirking!
10 Cartoon Character Makers to Make Animated Characters
10 Cartoon Character Makers to Create Animated Characters
An easy yet powerful editor
Numerous effects to choose from
Detailed tutorials provided by the official channel
Learning cartoon making is easy through various application or makers online. Draw cartoon characters sketch in easy steps.

With the changing marketing and business trends, people and business owners are adopting different patterns in the pictures to make them visually good and attractive. Videos and pictures with animated characters look so amazing and gain maximum customers views. This ultimately helps the business owners to generate more leads for their business.
Not only business, but the presence of animated characters is also seen in the stories and status of the people over social media accounts. People impress others through making their own cartoon characters and animated pictures or characters. Earlier it has very tough to create cartoon character, but with so many online makers today, one can easily draw and create cartoon characters. There are various platforms that use software to turn a picture into a cartoon character or even animated picture. There are easy and interesting ways to create cartoon characters. If you love to see and are interested in drawing cartoon characters, then you can make it through various platforms. Let’s see some easy way to create own cartoon character.
In this article
01 [5 Easy Ways to Create Your Own Cartoon Character [For Non-illustrators] ](#Part 1)
02 [5 Create Cartoon Characters to Create Animated Characters for PRO](#Part 2)
03 [How to Create a Cartoon Character: A General Guide](#Part 3)
Part 1 5 Easy Ways to Create Your Own Cartoon Character [For Non-illustrators]
01Through Online Avatar Builders
Avatar building is an extraordinary way of presenting yourself. The best thing with avatar builders is that there is no need to download any application. You can easily do it in your device through online websites. They are the easiest and economical way of creating cartoon. You can add fun elements with these Avatar builders. Some of the websites that offer avatar building tools are:
Cartoonize: You can instantly make cartoon or avatar characters through Cartoonize. It can be used for face customization and adding colors. Face features like eyes, nose, hair style and expressions can be perfectly drawn with this tool. You can learn more by going to their official website.
The process is simple. You can upload your picture, go to cartoonize option at the top of the menu, do the necessary edits and features. Save it and your avatar cartoon is ready.
The other avatar building platforms are charatoon and Face your Manga. For Face your Manga, Adobe Flash Player is required. The gallery can be explored with some famous avatar of popular personalities.
02Character builders
The other way to create your own cartoon character is through character builders. The difference of this cartoon making is that one can create a complete cartoon with complete features. Like from head to toe. GraphicMama Character Maker Packs is one that offers kit to make customized cartoons.
03Tools for converting pictures into cartoons
A perfect cartoon can be made when it resemble truly as you are. The best method for doing that is using software to turn a picture into a cartoon. Filters, facial expressions and styles can be added through this way. Adobe Character Animator is a tool that can be used to convert a picture, catch the facial expression and voice.
You can learn to create cartoon character from photo by following the video
The other two ways are related to taking help of others in making the cartoon characters. Some of them are:
04Outsourcing designers or illustrators
When the perfection level is not achieved through own creation, the other option is to get it done through designers or illustrators. There are freelancers and studio who offer such services. They create cartoon as per the requirement of the customers.
05Modification in Stock cartoon characters
Those who are not having any experience of making cartoons, they can use the stocks cartoon characters and can change them with the use of software.
Part 2 5 Create Cartoon Characters to Create Animated Characters for PRO
A professional cartoon maker need some advance tools and features to give a unique and perfect look to his cartoon drawn. So, for them some applications or cartoon character maker is good. Let’s see some of the makers that are specifically designed for professionals:
01Animaker
This has various themes to make your cartoon look great. It brings life to a character. The steps involve in making a cartoon character is as under:
● As required, select the animated template.
● You can add customized features as such as backgrounds, pictures and animated text.
● Music can also be added and can be selected from the library.
● After the character is ready, you can share or download the video.
02Adobe
This is the most widely platform or maker for creating high quality contents, cartoon avatar and games. Sketch and drawing tool are there in the maker that gives real experience to the cartoon. The platform facilitates exploring the file to WebGL, SVG and Adobe AIR.
You can view how it works and the process in the video-
03Reallusion
Text and voice has given a new definition to the cartoon world. If you desire to add some interesting elements in cartoon through text and voices, then Reallusion is a good option for you. It has 3D head creation tool which can be used to make animated cartoons for mails and e-cards.
You can view how it works and the process in the video-
04Renderforest
This cartoon maker has some great collection of professionally designed templates, to make cartoon making process easy and perfect. Templates for kids, education, character adventure, healthcare and iconic animation are some of the collections one can find in this maker.
The process of cartoon creation is easy with following steps:
● Choose the most excellent cartoon templates or start from zero through sketch,
● You can edit the already available stories. Even animated characters can be used.
● Add some customized features like voice or music, style or colors.
● This is how you can create exclusive vibrant cartoons.
Video can be watched at-
05Biteable
Biteable has several templates like leadership skill tips, travel agent explainer and many more. The video clips, music, animated templates of this maker create engaging cartoon characters.
The process to develop a cartoon video through Biteable is as under:
● Open the maker Biteable
● As per your requirement, pick the one cartoon template
● Log in the account
● You can add many effects like backing music, clips and text.
● As made in the website, you can share on social media and emails.
Part 3 How to Create a Cartoon Character: A General Guide
A professional cartoon expert becomes an expert after a continuous practice. It’s not easy to learn making cartoons. Therefore to be an expert one need to learn the basics and other important principles for cartoon making. A general guide for the same is as under:
● Begin with basic steps
Learn the basic shapes like making ovals, circles and other shapes. This will help you to be perfection in making the basic outline of the cartoon. This will improve you skill and you can explore more possibilities with the basic outlines.
● Shape improvement
This is an advance stage of basic step. This step will help you to define the shape of the cartoon character you are going to draw. It gives structure and design to a character.
● Including details
This stage is more about designing a character. Pose, expression, attires, props are selected in this step. The personality of a character is made better. It makes the character more interesting and engaging.
● Shadow of cartoon character
Before giving a final touch to the character, it is necessary to check the shadow of the picture drawn. It will show whether you are on right path or not.
● Final touch
The last step is adding all details in the character. It may be straight teeth, big smile, messy hairs or anything. Lines can be made fine and clean. You can add colors of your choice.
The other platform or cartoon maker that can be checked out is Filmora.
Wondershare Filmora Video Editor is software used for making, editing and adding effects to pictures or videos. It is easy to use application loaded with many advanced tools and features to make picture and video editing simple. Those who are looking for a robust application for capturing some precious moments through picture and videos, then Filmora is a perfect application.
Filmora can be used to draw and insert cartoon characters in any video. Animation, text and music can be added effectively with Filmora. A beginner can easily learn to create cartoon character online.
Wondershare Filmora
Get started easily with Filmora’s powerful performance, intuitive interface, and countless effects!
Try It Free Try It Free Try It Free Learn More >
● Ending Thoughts →
● Cartoon characters making is not an easy task. But now there are cartoon character maker free which has made easy to learn cartoon making. The various tools used are Avatar maker, cartoon making, turning picture into cartoon and through experts support.
● The different professional cartoon character maker online are Animaker, Reallusion, Biteable and Adobe. Through these cartoon makers making cartoon characters are easy with advanced features.
● Filmora is one of the popular picture and video making and editing software which can also be used for making amazing cartoon characters.
Learning cartoon making is easy through various application or makers online. Draw cartoon characters sketch in easy steps.
With the changing marketing and business trends, people and business owners are adopting different patterns in the pictures to make them visually good and attractive. Videos and pictures with animated characters look so amazing and gain maximum customers views. This ultimately helps the business owners to generate more leads for their business.
Not only business, but the presence of animated characters is also seen in the stories and status of the people over social media accounts. People impress others through making their own cartoon characters and animated pictures or characters. Earlier it has very tough to create cartoon character, but with so many online makers today, one can easily draw and create cartoon characters. There are various platforms that use software to turn a picture into a cartoon character or even animated picture. There are easy and interesting ways to create cartoon characters. If you love to see and are interested in drawing cartoon characters, then you can make it through various platforms. Let’s see some easy way to create own cartoon character.
In this article
01 [5 Easy Ways to Create Your Own Cartoon Character [For Non-illustrators] ](#Part 1)
02 [5 Create Cartoon Characters to Create Animated Characters for PRO](#Part 2)
03 [How to Create a Cartoon Character: A General Guide](#Part 3)
Part 1 5 Easy Ways to Create Your Own Cartoon Character [For Non-illustrators]
01Through Online Avatar Builders
Avatar building is an extraordinary way of presenting yourself. The best thing with avatar builders is that there is no need to download any application. You can easily do it in your device through online websites. They are the easiest and economical way of creating cartoon. You can add fun elements with these Avatar builders. Some of the websites that offer avatar building tools are:
Cartoonize: You can instantly make cartoon or avatar characters through Cartoonize. It can be used for face customization and adding colors. Face features like eyes, nose, hair style and expressions can be perfectly drawn with this tool. You can learn more by going to their official website.
The process is simple. You can upload your picture, go to cartoonize option at the top of the menu, do the necessary edits and features. Save it and your avatar cartoon is ready.
The other avatar building platforms are charatoon and Face your Manga. For Face your Manga, Adobe Flash Player is required. The gallery can be explored with some famous avatar of popular personalities.
02Character builders
The other way to create your own cartoon character is through character builders. The difference of this cartoon making is that one can create a complete cartoon with complete features. Like from head to toe. GraphicMama Character Maker Packs is one that offers kit to make customized cartoons.
03Tools for converting pictures into cartoons
A perfect cartoon can be made when it resemble truly as you are. The best method for doing that is using software to turn a picture into a cartoon. Filters, facial expressions and styles can be added through this way. Adobe Character Animator is a tool that can be used to convert a picture, catch the facial expression and voice.
You can learn to create cartoon character from photo by following the video
The other two ways are related to taking help of others in making the cartoon characters. Some of them are:
04Outsourcing designers or illustrators
When the perfection level is not achieved through own creation, the other option is to get it done through designers or illustrators. There are freelancers and studio who offer such services. They create cartoon as per the requirement of the customers.
05Modification in Stock cartoon characters
Those who are not having any experience of making cartoons, they can use the stocks cartoon characters and can change them with the use of software.
Part 2 5 Create Cartoon Characters to Create Animated Characters for PRO
A professional cartoon maker need some advance tools and features to give a unique and perfect look to his cartoon drawn. So, for them some applications or cartoon character maker is good. Let’s see some of the makers that are specifically designed for professionals:
01Animaker
This has various themes to make your cartoon look great. It brings life to a character. The steps involve in making a cartoon character is as under:
● As required, select the animated template.
● You can add customized features as such as backgrounds, pictures and animated text.
● Music can also be added and can be selected from the library.
● After the character is ready, you can share or download the video.
02Adobe
This is the most widely platform or maker for creating high quality contents, cartoon avatar and games. Sketch and drawing tool are there in the maker that gives real experience to the cartoon. The platform facilitates exploring the file to WebGL, SVG and Adobe AIR.
You can view how it works and the process in the video-
03Reallusion
Text and voice has given a new definition to the cartoon world. If you desire to add some interesting elements in cartoon through text and voices, then Reallusion is a good option for you. It has 3D head creation tool which can be used to make animated cartoons for mails and e-cards.
You can view how it works and the process in the video-
04Renderforest
This cartoon maker has some great collection of professionally designed templates, to make cartoon making process easy and perfect. Templates for kids, education, character adventure, healthcare and iconic animation are some of the collections one can find in this maker.
The process of cartoon creation is easy with following steps:
● Choose the most excellent cartoon templates or start from zero through sketch,
● You can edit the already available stories. Even animated characters can be used.
● Add some customized features like voice or music, style or colors.
● This is how you can create exclusive vibrant cartoons.
Video can be watched at-
05Biteable
Biteable has several templates like leadership skill tips, travel agent explainer and many more. The video clips, music, animated templates of this maker create engaging cartoon characters.
The process to develop a cartoon video through Biteable is as under:
● Open the maker Biteable
● As per your requirement, pick the one cartoon template
● Log in the account
● You can add many effects like backing music, clips and text.
● As made in the website, you can share on social media and emails.
Part 3 How to Create a Cartoon Character: A General Guide
A professional cartoon expert becomes an expert after a continuous practice. It’s not easy to learn making cartoons. Therefore to be an expert one need to learn the basics and other important principles for cartoon making. A general guide for the same is as under:
● Begin with basic steps
Learn the basic shapes like making ovals, circles and other shapes. This will help you to be perfection in making the basic outline of the cartoon. This will improve you skill and you can explore more possibilities with the basic outlines.
● Shape improvement
This is an advance stage of basic step. This step will help you to define the shape of the cartoon character you are going to draw. It gives structure and design to a character.
● Including details
This stage is more about designing a character. Pose, expression, attires, props are selected in this step. The personality of a character is made better. It makes the character more interesting and engaging.
● Shadow of cartoon character
Before giving a final touch to the character, it is necessary to check the shadow of the picture drawn. It will show whether you are on right path or not.
● Final touch
The last step is adding all details in the character. It may be straight teeth, big smile, messy hairs or anything. Lines can be made fine and clean. You can add colors of your choice.
The other platform or cartoon maker that can be checked out is Filmora.
Wondershare Filmora Video Editor is software used for making, editing and adding effects to pictures or videos. It is easy to use application loaded with many advanced tools and features to make picture and video editing simple. Those who are looking for a robust application for capturing some precious moments through picture and videos, then Filmora is a perfect application.
Filmora can be used to draw and insert cartoon characters in any video. Animation, text and music can be added effectively with Filmora. A beginner can easily learn to create cartoon character online.
Wondershare Filmora
Get started easily with Filmora’s powerful performance, intuitive interface, and countless effects!
Try It Free Try It Free Try It Free Learn More >
● Ending Thoughts →
● Cartoon characters making is not an easy task. But now there are cartoon character maker free which has made easy to learn cartoon making. The various tools used are Avatar maker, cartoon making, turning picture into cartoon and through experts support.
● The different professional cartoon character maker online are Animaker, Reallusion, Biteable and Adobe. Through these cartoon makers making cartoon characters are easy with advanced features.
● Filmora is one of the popular picture and video making and editing software which can also be used for making amazing cartoon characters.
Types of Cartoon Styles You May Use for Your Next Marketing Project
Types of Cartoon Styles You May Use for Your Next Marketing Project
An easy yet powerful editor
Numerous effects to choose from
Detailed tutorials provided by the official channel
The whole concept of animation originated mainly from Japan. The cartoons that are shown on TV have different cartoon art styles. These cartoon art styles have their history of origin. These numerous cartoon styles play a significant role in the whole animation industry. If you find which cartoon illustration styles to use for your next project, this is the perfect place for your answer.
You can use any cartoon art style in your upcoming marketing project and make it a success. This article focuses on different cartoon art styles and how you can develop your anime cartoon style. You can use these methods to draw cartoon styles of yourself.
In this article
01 [10 Types of Cartoon Styles With Examples](#Part 1)
02 [Drawing Myself in 5 Different Cartoon Styles](#Part 2)
03 [How You Can Develop a Cartoon Style for Animation](#Part 3)
Part 1 Types of Cartoon Styles With Examples
There are numerous kinds of cartoon styles. Different animators use different cartoon styles. You can even develop your anime cartoon style. The different types of Animation are:
012D Animation
animations are trendy cartoon styles. This style of animation needs no introduction. This type of anime cartoon style was produced by Walt Disney. The most exciting features of the images were that they had only two dimensions: height and width.
Even though several people suggested that 2D art styles cartoon were invented during the early twentieth century. Back then, it was not much popular; Walt Disney made these cartoon styles famous. Example:

02Traditional Animation
As the name suggests, traditional Animation is an old cartoon art style. These cartoon styles were first seen in the year 1877. Emil Reynaud discovered a new tool for demonstrating objects that are moving. In this type of Animation, all the images are drawn manually on paper with a pencil. This method of making cartoon styles is time-consuming. However, later computer applications and programs were developed, making this task much easier and more efficient. Example:

03Animation
animation cartoon styles came into existence with graphics and visual software development. The first 3D dimensional image was created in the year 1972. However, an attempt to make 3D Animation was made in 1961. Nowadays, 3D Animation is a widely used animation style. It is used in the entertainment industry and medical imaging to adequately explain the body and organisms. Example:

04Flipbook Animation
In flipbook animation, each frame is drawn on each notebook page. After drawing all the frames is complete, turn the pages quickly. When the pages are turned quickly, it seems to be a moving video because of the different frames drawn on each page. Example:

05Clay Animation
This animation method turns out to be very funny after it is completed. This method of Animation is quite tricky. In this animation method, the characters are made out of clay at first, and then the movements are recorded in a camera. These movements are then made smooth and compiled like a video with different scenes using the software. The main audience for this kind of Animation is children. Example:

06Typography Animation
Typography animation is also called kinetic typography. This style of Animation is text animation. This method was originated in the year 1899. Back then, this Animation was not much popular. This style of typography animation gained popularity after 60 years it first originated. Typography animation is considered a good method for e-learning while training employees. Example:

07Stop-Motion Animation
Stop-Motion animation is an age-old animation technique. The attempt to use this type of Animation was made 150 years ago. The specialty of this type of Animation is that the animator takes pictures of different frames by moving the objects in different positions and clicking the picture of each frame. These pictures are compiled to create a continuous video. This method of Animation is straightforward to go. Example:

08Sand Animation
Sand Animation was invented in the year 1969. This type of Animation involves sand and a luminous surface on which the Animation is done. This method is used in cartoon anime styles or different shows. In this type of Animation, the sand is used to create 2D images. This type of Animation is used for storytelling in reality shows. Example:

09Motion Graphics
Motion design was invented in the year 1960. It is one of the most popular cartoon art styles used nowadays. This type of Animation creates promotional videos, game screensavers, commercial advertising videos, etc. It is one of the universal animation techniques used globally for various purposes. Example:

10Mechanical Animation
Mechanical Animation is mainly used in producing technical equipment. The most fantastic thing about this animation method is that you can make changes to a product that has not yet been developed. This kind of Animation is used with 3D Animation to show the working of machines in and out. It is done together with 3D Animation to clearly visualize the machine.

Part 2 Drawing Myself in 5 Different Cartoon Styles
You can draw yourself using these 5 different cartoon styles:
01You can use 3D filters on Snapchat to draw a Pixar-like picture of yourself
The steps are:
Step 1: Install and run the “Snapchat” app on your phone.
Step2: Open the app and turn on the camera.
Step 3: There is a smiling face symbol on the right side of the camera button, tap on that.
Step 4: Click on the explore menu and select the “Cartoon 3D Style” option.
Step 5: Capture your video
Step 6: Then your cartoon character-like video is ready.
02You can also use Instagram to create a Disney-like character of yourself
The steps are:
Step 1: Open your Instagram account.
Step 2: Click on the ‘+’ icon. Select the “Story” option.
Step 3: Different effects appear on the screen.
Step 4: Scroll the effects and find an icon of a magnifying glass.
Step 5: Click on that icon and type cartoon on the search bar.
Step 6: After your search is finished, different cartoon filters will appear on your screen.
Step 7: Tap on any one of the effects. The effect opens.
Step 8: Tap on the bookmark icon to save the cartoon effect.
Step 9: Now you can go back to the effects options to use the cartoon effect.
Your Disney-like cartoon picture is ready!
03You can use Google meet
Step 1: When you open the Google meet app, there are filters to use while on a call.
Step 2: Choose one of the filters that have a cartoon effect.
Step 3: When you join any meeting, you will appear like a cartoon character from TV.
04You can use B612
Step 1: Install and open the app on your phone.
Step 2: After you open the app, a circle button appears at the bottom of your screen in the middle.
Step 3: Tap on the circle.
Step 4: Numerous filters will appear.
Step 5: Choose one cartoon-like filter from the options of effect in the menu.
Step 6: After selecting one effect, make a video of yourself using an effect.
Step 7: Your cartoon video is ready on your screen.
05You can use Wondershare Filmora Video Editor
For Win 7 or later (64-bit)
For macOS 10.12 or later
Step 1: Capture a video of yourself using your phone’s camera.
Step 2: Install and open the Filmora app on your phone.
Step 3: After you open the app, you will be given the option to choose a video.
Step 4: Choose the video of yourself.
Step 5: After choosing your video, there is an option “click edit” tap on that.
Step 6: A menu appears; select the “effects” option from the menu.
Step 7: Different effects will appear on your screen.
Step 8: Select the cartoon effect you want to use in your video.
Step 9: After you have selected the effect, it will take some time to process.
Step 10: Your cartoon-like video is ready.
How You Can Develop a Cartoon Style for Animation
Anyone can develop new cartoon styles by following these simple procedures or habits. The procedures are:
● You can take references from real-life objects.
Most of the Animation we see here has been taken from real-life references, be it a cat, car, house, etc. So, to develop the cartoon styles, you can take references from real-life objects. You can also search for a particular characteristic in things you won’t use as your reference. If you want to draw a cat, you can use a living cat as your reference.
● You can copy and try to make Animation like your favorite animator.
If you use this method, this will help you improve your skill. No animation is 100% real, no matter what kind of Animation it is or who is creating it. However, you cannot keep on making animations like your favorite animator because you will not be able to find your anime art styles and skills.
● You can create an animated character of your own.
After taking your reference from real-life objects and knowing about the animation styles and the basic principles of Animation, you can create your animated character. If you create your character, keeping all the skills and techniques in mind, you can develop outstanding animation styles.
● To develop your cartoon style, you need to practice drawing regularly.
To get s grasp this whole process of Animation, you need to draw and practice different cartoon art styles. You can draw anything you like, or you don’t like on paper or on a drawing tablet. You can also color sketchbooks to improve your skills in Animation.
You can use Filmora to make cartoon videos and, at the same time, make cartoon videos of normally captured videos. These cartoon videos can be compiled into one video. You can use this video to edit different types of videos. Filmora has a user-friendly interface that can help you create your cartoon video effortlessly.
● Ending Thoughts →
● I hope you have understood the different types of anime cartoon styles by now.
● These methods can help you make the best for your next marketing project.
● These methods are easy, efficient, and efficient. All the aforementioned methods were discovered in the late nineteenth and early twentieth century.
● With the advancement of technology, the process has become more accessible. However, you can use any cartoon-style art.
The whole concept of animation originated mainly from Japan. The cartoons that are shown on TV have different cartoon art styles. These cartoon art styles have their history of origin. These numerous cartoon styles play a significant role in the whole animation industry. If you find which cartoon illustration styles to use for your next project, this is the perfect place for your answer.
You can use any cartoon art style in your upcoming marketing project and make it a success. This article focuses on different cartoon art styles and how you can develop your anime cartoon style. You can use these methods to draw cartoon styles of yourself.
In this article
01 [10 Types of Cartoon Styles With Examples](#Part 1)
02 [Drawing Myself in 5 Different Cartoon Styles](#Part 2)
03 [How You Can Develop a Cartoon Style for Animation](#Part 3)
Part 1 Types of Cartoon Styles With Examples
There are numerous kinds of cartoon styles. Different animators use different cartoon styles. You can even develop your anime cartoon style. The different types of Animation are:
012D Animation
animations are trendy cartoon styles. This style of animation needs no introduction. This type of anime cartoon style was produced by Walt Disney. The most exciting features of the images were that they had only two dimensions: height and width.
Even though several people suggested that 2D art styles cartoon were invented during the early twentieth century. Back then, it was not much popular; Walt Disney made these cartoon styles famous. Example:
02Traditional Animation
As the name suggests, traditional Animation is an old cartoon art style. These cartoon styles were first seen in the year 1877. Emil Reynaud discovered a new tool for demonstrating objects that are moving. In this type of Animation, all the images are drawn manually on paper with a pencil. This method of making cartoon styles is time-consuming. However, later computer applications and programs were developed, making this task much easier and more efficient. Example:
03Animation
animation cartoon styles came into existence with graphics and visual software development. The first 3D dimensional image was created in the year 1972. However, an attempt to make 3D Animation was made in 1961. Nowadays, 3D Animation is a widely used animation style. It is used in the entertainment industry and medical imaging to adequately explain the body and organisms. Example:
04Flipbook Animation
In flipbook animation, each frame is drawn on each notebook page. After drawing all the frames is complete, turn the pages quickly. When the pages are turned quickly, it seems to be a moving video because of the different frames drawn on each page. Example:
05Clay Animation
This animation method turns out to be very funny after it is completed. This method of Animation is quite tricky. In this animation method, the characters are made out of clay at first, and then the movements are recorded in a camera. These movements are then made smooth and compiled like a video with different scenes using the software. The main audience for this kind of Animation is children. Example:
06Typography Animation
Typography animation is also called kinetic typography. This style of Animation is text animation. This method was originated in the year 1899. Back then, this Animation was not much popular. This style of typography animation gained popularity after 60 years it first originated. Typography animation is considered a good method for e-learning while training employees. Example:
07Stop-Motion Animation
Stop-Motion animation is an age-old animation technique. The attempt to use this type of Animation was made 150 years ago. The specialty of this type of Animation is that the animator takes pictures of different frames by moving the objects in different positions and clicking the picture of each frame. These pictures are compiled to create a continuous video. This method of Animation is straightforward to go. Example:
08Sand Animation
Sand Animation was invented in the year 1969. This type of Animation involves sand and a luminous surface on which the Animation is done. This method is used in cartoon anime styles or different shows. In this type of Animation, the sand is used to create 2D images. This type of Animation is used for storytelling in reality shows. Example:
09Motion Graphics
Motion design was invented in the year 1960. It is one of the most popular cartoon art styles used nowadays. This type of Animation creates promotional videos, game screensavers, commercial advertising videos, etc. It is one of the universal animation techniques used globally for various purposes. Example:
10Mechanical Animation
Mechanical Animation is mainly used in producing technical equipment. The most fantastic thing about this animation method is that you can make changes to a product that has not yet been developed. This kind of Animation is used with 3D Animation to show the working of machines in and out. It is done together with 3D Animation to clearly visualize the machine.
Part 2 Drawing Myself in 5 Different Cartoon Styles
You can draw yourself using these 5 different cartoon styles:
01You can use 3D filters on Snapchat to draw a Pixar-like picture of yourself
The steps are:
Step 1: Install and run the “Snapchat” app on your phone.
Step2: Open the app and turn on the camera.
Step 3: There is a smiling face symbol on the right side of the camera button, tap on that.
Step 4: Click on the explore menu and select the “Cartoon 3D Style” option.
Step 5: Capture your video
Step 6: Then your cartoon character-like video is ready.
02You can also use Instagram to create a Disney-like character of yourself
The steps are:
Step 1: Open your Instagram account.
Step 2: Click on the ‘+’ icon. Select the “Story” option.
Step 3: Different effects appear on the screen.
Step 4: Scroll the effects and find an icon of a magnifying glass.
Step 5: Click on that icon and type cartoon on the search bar.
Step 6: After your search is finished, different cartoon filters will appear on your screen.
Step 7: Tap on any one of the effects. The effect opens.
Step 8: Tap on the bookmark icon to save the cartoon effect.
Step 9: Now you can go back to the effects options to use the cartoon effect.
Your Disney-like cartoon picture is ready!
03You can use Google meet
Step 1: When you open the Google meet app, there are filters to use while on a call.
Step 2: Choose one of the filters that have a cartoon effect.
Step 3: When you join any meeting, you will appear like a cartoon character from TV.
04You can use B612
Step 1: Install and open the app on your phone.
Step 2: After you open the app, a circle button appears at the bottom of your screen in the middle.
Step 3: Tap on the circle.
Step 4: Numerous filters will appear.
Step 5: Choose one cartoon-like filter from the options of effect in the menu.
Step 6: After selecting one effect, make a video of yourself using an effect.
Step 7: Your cartoon video is ready on your screen.
05You can use Wondershare Filmora Video Editor
For Win 7 or later (64-bit)
For macOS 10.12 or later
Step 1: Capture a video of yourself using your phone’s camera.
Step 2: Install and open the Filmora app on your phone.
Step 3: After you open the app, you will be given the option to choose a video.
Step 4: Choose the video of yourself.
Step 5: After choosing your video, there is an option “click edit” tap on that.
Step 6: A menu appears; select the “effects” option from the menu.
Step 7: Different effects will appear on your screen.
Step 8: Select the cartoon effect you want to use in your video.
Step 9: After you have selected the effect, it will take some time to process.
Step 10: Your cartoon-like video is ready.
How You Can Develop a Cartoon Style for Animation
Anyone can develop new cartoon styles by following these simple procedures or habits. The procedures are:
● You can take references from real-life objects.
Most of the Animation we see here has been taken from real-life references, be it a cat, car, house, etc. So, to develop the cartoon styles, you can take references from real-life objects. You can also search for a particular characteristic in things you won’t use as your reference. If you want to draw a cat, you can use a living cat as your reference.
● You can copy and try to make Animation like your favorite animator.
If you use this method, this will help you improve your skill. No animation is 100% real, no matter what kind of Animation it is or who is creating it. However, you cannot keep on making animations like your favorite animator because you will not be able to find your anime art styles and skills.
● You can create an animated character of your own.
After taking your reference from real-life objects and knowing about the animation styles and the basic principles of Animation, you can create your animated character. If you create your character, keeping all the skills and techniques in mind, you can develop outstanding animation styles.
● To develop your cartoon style, you need to practice drawing regularly.
To get s grasp this whole process of Animation, you need to draw and practice different cartoon art styles. You can draw anything you like, or you don’t like on paper or on a drawing tablet. You can also color sketchbooks to improve your skills in Animation.
You can use Filmora to make cartoon videos and, at the same time, make cartoon videos of normally captured videos. These cartoon videos can be compiled into one video. You can use this video to edit different types of videos. Filmora has a user-friendly interface that can help you create your cartoon video effortlessly.
● Ending Thoughts →
● I hope you have understood the different types of anime cartoon styles by now.
● These methods can help you make the best for your next marketing project.
● These methods are easy, efficient, and efficient. All the aforementioned methods were discovered in the late nineteenth and early twentieth century.
● With the advancement of technology, the process has become more accessible. However, you can use any cartoon-style art.
Also read:
- New How to Convert Animated GIF From Video
- 10 Awesome Moving Animation PowerPoint Techniques for 2024
- 10 Classical Animated Cartoon Types With Examples for 2024
- 2024 Approved 5 Different Animation Styles A Simple but Complete Guide
- Christmas Is Coming! How to Find & Make Animated Christmas GIFs, In 2024
- Updated How to Cartoonize Photo Photoshop in Simple Steps for 2024
- Updated 2024 Approved Types of Cartoon Styles You May Use for The Next Marketing Project
- New 2024 Approved Top 10 Animated DP for WhatsApp
- Updated 2024 Approved Learn What Are Differences Between 2D And 3D Animation
- Updated Great Guide for Beginners on 2D Animation Making
- The Top Free 12 GIF Meme Maker at a Glance
- Updated In 2024, The Most Efficient Techniques to Make 3D Animation Character
- Updated 5 Must Try Ways to Add and Send GIF in Text Message on Android for 2024
- Want to Make a Meme GIF, In 2024
- Updated How to Make Your Characters Interactive in Unity Animation Rigging for 2024
- Looking for Love Animated GIFs? Here Are 5 Free Sources For You
- 5 Free Animated Gif Sources You Must Check
- New How to Make a Photoshop Collage in Simple Steps
- New 2024 Approved Tips on How to Learn Graphics Animation
- Updated Adobe Animate Riggings Tutorial for You
- Top 3 Ways to Create Gif Images with Great 3D Gif Maker
- 2024 Approved 10 Must-Use MP4 to GIF Converters to Get Perfect-Made GIF
- Read This Guide to Find a Reliable Alternative to Fake GPS On Tecno Pop 8 | Dr.fone
- In 2024, Did Your Apple iPhone 15 Passcode Change Itself? Unlock It Now | Dr.fone
- In 2024, Is GSM Flasher ADB Legit? Full Review To Bypass Your Nokia C12FRP Lock
- How to Transfer Photos from Infinix GT 10 Pro to Laptop Without USB | Dr.fone
- Full Solutions to Fix Error Code 920 In Google Play on Lenovo ThinkPhone | Dr.fone
- 3 Ways to Erase iPhone 15 Plus When Its Locked Within Seconds | Dr.fone
- In 2024, Unlocking Made Easy The Best 10 Apps for Unlocking Your Oppo Reno 11 5G Device
- Best Ways on How to Unlock/Bypass/Swipe/Remove Motorola Edge 40 Pro Fingerprint Lock
- Full Guide on Mirroring Your Vivo Y100A to Your PC/Mac | Dr.fone
- 3 Solutions to Find Your Honor X50 Current Location of a Mobile Number | Dr.fone
- Catch or Beat Sleeping Snorlax on Pokemon Go For Oppo A59 5G | Dr.fone
- How to Unlock Vivo X100 Phone without Any Data Loss
- How to Show Wi-Fi Password on Vivo V29e
- Why Is My Asus ROG Phone 8 Offline? Troubleshooting Guide | Dr.fone
- In 2024, The Best Methods to Unlock the iPhone Locked to Owner for Apple iPhone 15
- How to Put iPhone XS or iPad on Recovery mode? (Step by Step Tutorial) | Stellar
- Title: Updated Animate Graphics in Canva
- Author: Elon
- Created at : 2024-05-19 03:04:36
- Updated at : 2024-05-20 03:04:36
- Link: https://animation-videos.techidaily.com/updated-animate-graphics-in-canva/
- License: This work is licensed under CC BY-NC-SA 4.0.
