

Updated Best 10 Apps to Enhance Your Instagram Story Slideshow
Best 10 Apps to Enhance Your Instagram Story Slideshow
Best 10 Apps to Enhance Your Instagram Story Slideshow
An easy yet powerful editor
Numerous effects to choose from
Detailed tutorials provided by the official channel
Instagram reels and stories have turned into convenient ways of exploring your video creation skills with fun. Read further to know about the top 10 apps to create amazing Insta story slideshows!
In this article
01 [What’s Instagram Story Slideshow](#Part 1)
02 [How to Use Instagram Slideshow?](#Part 2)
03 [Top 10 Apps for Making Instagram Story Slideshow (iOS & Android)](#Part 3)
04 [Tips for Enhancing Your Insta Story Slideshow](#Part 4)
Part 1 What’s Instagram Story Slideshow
With the growing influence of social media on the global life and work culture in today’s times, each and every event on such platforms becomes the new trend of the current IT impacted society. Speaking in the light of the newest developments, Instagram story slideshows have become the latest talk of the diverse range of social media communities across the web.
Since its entry into the communication galore, the Instagram application has emerged as an absolute favourite of social media freaks, thanks to its already captivating features. Moving ahead with its customary user appealing efforts, the latter has recently introduced the slideshow feature to upgrade and improvise its content stories and reels.
Working with the same, you can now integrate your otherwise simple and elementary Instagram stories into awesome slideshows. This visibly means that your conventional stories and reels on the app are now going to get that missing spark with a plethora of customizable motion graphic features. An Instagram story slideshow can work to earn you a huge number of followers, thus uplifting your social creativity quotient and entertainment appeal.
These creative 15 second snippets are appreciably the most amazing trends to increase your audience backup as a market organization, business enterprise, an influencer or as a rising star, all because of an excellent content presentation strategy and catchy outlook. Try hands at using this high end graphic presentation utility to attract the most awaited jaw dropping appreciation of your social media posts.
Part 2 How to Use Instagram Slideshow
Now that you are aware about the excitement and social buzz that your Instagram story slideshows can create with an immediate effect, the aforesaid reason is sufficient enough to motivate you towards diving deeper into the interesting ways of working with the feature to your maximum advantage. Adhering to the concern, let us proceed with learning about the most appealing trends to use an Instagram slideshow in the following section:
● Stepwise Tutorials and Visual Guides
The utility of Instagram slideshows to merge multiple images and videos together has blocked the interruption of additional feeds amid the content presentation, thus giving you the liberty to post a set of related videos and stills in one go, which can be of great help when you encounter a need to share tutorial videos, recipe follow ups and alike content that essentially requires a sequential presentation.
The Instagram stories slideshow can be useful to DIY creators who wish to demonstrate or guide their followers to create stunning examples of self-designed masterpieces. Posting step wise guides with clear cut instructions to work upon or use something, like that of a new product, can also be catered with an Instagram slideshow story.
● Product Advertising and Sale
If you are looking for impressive and cost effective solutions to launch your products among potential customers, consider taking the help of Instagram slideshows. The feature is known to deliver excellent results in the brand promotion of some particular products, such as jewelry and apparel design.
Jewelers, furniture retailers and textile designers can work with the slideshow to upload a series of images and videos for a clear and vivid demonstration of the product. Considering the fact that such commodities may greatly differ in their visual and actual appearance, the products can be shown through a variety of angles to facilitate viewers with the most comprehensive and an almost exact presentation of the different aspects that a product claims to have.
Part 3 Top 10 Apps for Making Instagram Story Slideshow (iOS & Android)
By now, you must have had a comprehensive understanding of the significance of Instagram story slideshows in uplifting different aspects of your content delivery, along with effectively addressing your diverse and large scale information sharing needs. Moving ahead with our discussion, let us browse through some of the best software solutions to create the most appealing Instagram story slideshows in the following section:
01SlideLab
Starting with the list the first application to look forward on creating over the top Instagram story slideshows with utmost ease. The software package is loaded with an extensive range of editing effects and filters, audio-visual transitions and supplementary design elements, that promise you of a high resolution, professional quality slideshow output.
Working with the software, you get the flexibility to conveniently customize the sequence in which the images would appear in the slideshow, with allowing a maximum screen display time of 3 seconds to each image. The created slideshows can be easily shared on various media handles and platforms, including Instagram, Facebook and YouTube.
While you can undertake a free trial of the tool, a paid subscription of the same costing $ 4.99 is required for accessing the complete range of features associated with the program. The software is however, exclusively compatible with iOS supported devices.
02VivaVideo
This one is an excellent video editor and graphic designer tool, which you can use to create and share amazing slideshows to complement your Instagram stories and feeds. Working with the aforesaid software program, you don’t need to worry about the concerns of device compatibility, as the program works well with your favorite MacOs and Windows supported systems and devices.
Talking of the specific features that the software promises to offer, you can use its built in camera to capture high resolution videos and supplement them with over 60 high end customization utilities, like sound effects and transitions, along with dubbing the video. The basic version of the tool is available for free usage and allows you to choose between the Pro and Quick modes, respectively for a high flexibility and an escalated automated response.
The free version is however, known to leave watermarks on the created videos, is stuffed with frequently appearing ads and permits a 5-minute presentation time. You can escape these hustles anytime by subscribing to the paid version of VivaVideo for $ 2.99.

03InShot
The InShot image and video editor program is another potential candidate to be employed as an Instagram story slideshow creator. The software’s effect library is packed with a heap of conveniently usable design elements and features to create the most beautiful Instagram slideshows. The app can be put to use for efficiently designing Instagram stories to address personal and professional concerns.
Some over the top features of the tool include, the flexibility to crop, trim, cut and merge video files, and uplift them with a range of effects, filters, transitions and backgrounds. The exclusive audio flexibility of the software allows you to add upbeat sound and music, while enabling a choice of fading music in and out.
The software additionally permits to adjust the speed control of your videos, making them run in a slow or fast motion as per the content requirement. There are also a variety of graphic elements, like, texts, emojis, stickers, etc., which you can add to your images and videos to make them more pronounced.

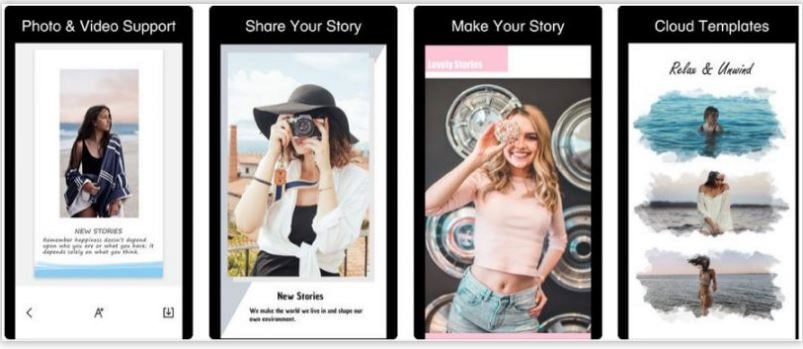
04StoryArt
Enjoying the highest user ratings on a number of leading software review platforms, the StoryArt software package lands among the most popular and preferred applications to work with creating slideshows for Instagram stories. The most appealing features of the software program include, an extensive range of more than 200 premade slideshow templates which can be directly edited to create amazing Instagram feeds and stories.
Other attractive features of the slideshow creator tool include, a plethora of design effects with varying diversities of fonts, colors, filters and around 20 elusive background themes, that are updated weekly with new additions. The program comes with a clean and responsive interface, is free to use and conforms with Windows and MacOs devices.
05Unfold
Unfold is quite a reliable software tool for creating elegant Instagram story slideshows from a storehouse of preset design templates, while adding a series of inline video and image editing effects to the same. The tool’s slideshow creator package comes with a mix of free and premium features, and does not require the account creation formality to begin working.
Major attractions of the program consist of 25 free and more than 60 premium slideshow design templates, 5 different font styles and upgraded text customizations, high resolution slideshow output and a direct share facility. You can prefer to download the software application from the various iOS and Android app stores, and work with the same on your preferred laptops, desktops and smartphones, without worrying about device compatibility.

06Canva
Canva is conveniently counted among the best Instagram slideshow maker tools and has the possibly the vastest inventory of over 60, 000 beautiful premade slideshow templates to create the mot captivating Instagram stories. Working with the tool, you are granted the liberty to select from a hoard of around 1 million stock images to set the most perfect background for the slideshow being created.
Additional features of the software comprise of high end image customization effects, fonts, transitions, texts and filters, with a never ending variety of frames, textures, icons, badges and stickers. If this is not enough, you get to access a diverse library of high end design elements, like, photo vignette, design grids, image enhancer and photo blur, to compliment your Instagram slideshow stories with the most cherished visual effects.
Talking of the platform cohesiveness, you can work with the tool through its desktop download as well as a free installation from any of the Android or Apple app stores.

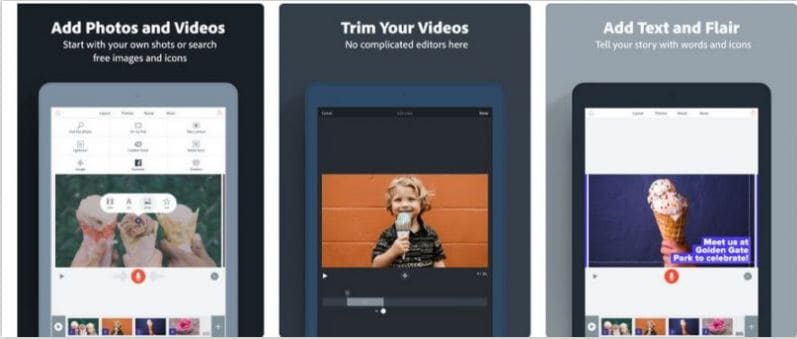
07Adobe Spark
This one is a family of graphic design software and tools that conveniently boasts of its extensive credibility towards facilitating the creation of high resolution and engaging image and video slideshows to uplift the conventional feeds and stories of Instagram. Post the creation process, you can add a diversity of audio-visual effects, like, animations, sounds, fonts, text layouts, cutouts and design elements to further enhance your graphic artwork.
The application greets you with the most pleasing and easy to use workspace, which would never require you to be a graphic design expert to start working on the slideshows. If you are into creating video centered Instagram story slideshows, you can choose to work with animated videos and prefer to select the media from your device gallery as well as the software’s huge in-house video collection. The tool’s template library is a further amusement, with a countless number of story and message centered themes.
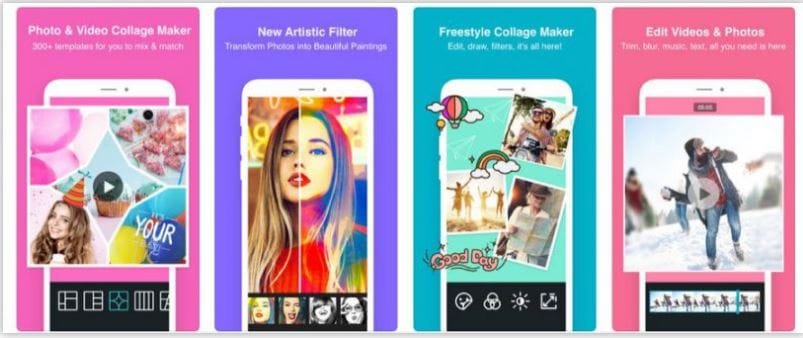
08PhotoGrid
If you are explicitly keen on creating video and photo collages for a jaw dropping Instagram story, consider working with the aforesaid application without a second thought. What’s more exciting is that the software comes with a huge set of over 300 pre made design templates to exclusively craft beautiful slideshows for Instagram stories on any iOS and Android device.
Talking of the app’s set of editing features, apart from being packed with multiple text fonts, over 60 image filters and 90 slideshow backgrounds, the most striking characteristic of the tool is, it permits you to clip an object from an image and remove the latter’s background. Other utilities of the software comprise of a real-time selfie camera, that clicks and automatically beautifies the captured image, beauty enhancing features that can apply and remove makeup from profile shots and selfies.
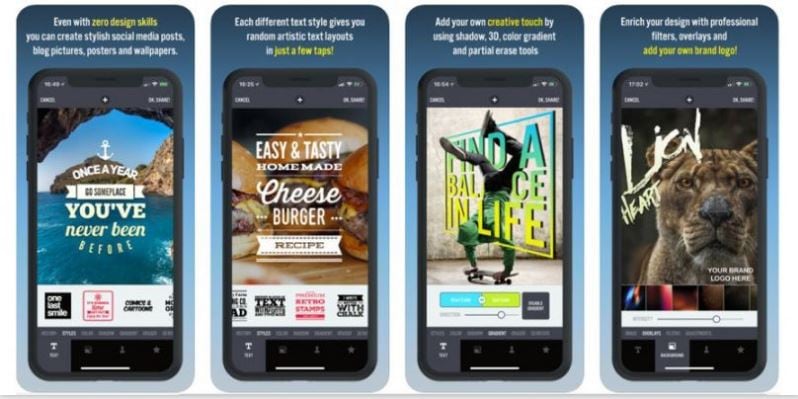
09Typorama
The next entry in the list is the Typorama software tool, which you can use to create text based slideshows for your Instagram stories. The software’s fonts library is full of elusive typographic designs to choose the best one that suits your content style and arrangement within the slideshow. When opting to work with this feature of the software, you will only need to select a suitable background and begin typing. That’s it!
Extending the text styling credibility of the tool a bit more, you can select from over 50 different typographic layouts and more than 100 typeface and font choices, a huge collection of story based quotes and a diversity of shadows, distortion effects and gradients to improvise your text. The program additionally consists of over 1000 stock templates, image filters, overlays and correction tools to enhance your slideshow background.
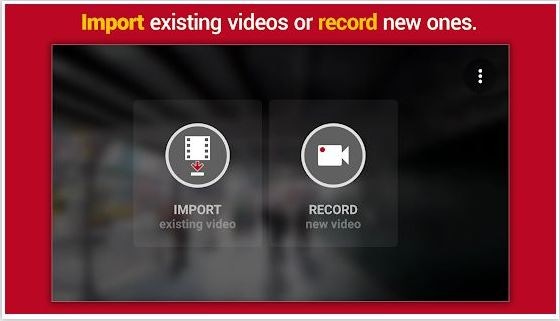
10Microsoft Hyperlapse
This one is an advanced slideshow creator program that allows you to design Instagram stories slideshow in time lapse. You can work with the tool to modify the slideshow speed up to 32 times ahead of the normal and create time lapse stories for a maximum of 20 minutes directly on your smartphone.
The app specializes in creating high end video slideshows for Instagram stories and feeds, while showing a great compatibility with high resolution videos. The working interface is super easy to understand and use, without requiring any over the top technical expertise. Feel free to use the app on any iOS or Android supported smartphone.
Part 4 Tips for Enhancing Your Insta Story Slideshow
By far, you have come a long way reading through the credibility, usage and tools to create Instagram story slideshow free of cost as well as though paid subscriptions. In the following section of this article, let us keep our focus on learning about some of the most amazing tips and tricks to upgrade your Insta story slideshow to the next level:
● A Compact Photo Album
Do you land among those social media freaks how want to share just every moment of your day with your peers, or are you confused on selecting the best photos and videos of a cherished event, vacation or bringing home a new utility and end up posting a heap of media on your social media handles?
If your answer is a guilty ‘Yes’, you can try on giving up the habit now by creating an Instagram story photo slideshow to share mini album of your most loved images from the event or vacation. You can use the feature to create a collection of amazing videos as well and share it too with your friends on social media without the guilt of becoming a feed-hog.
Want a practical experience of using Instagram slideshows? See through the following tutorial to understand the exact creation process:
Step 1: Choose the First Image
Begin with selecting the first image for your slideshow, just as you would ideally do for a normal, single image Instagram feed and long press the same.
Step 2: Confirming the Selection
Navigate to the bottom right corner of your selected image to locate a button similar to a photo slideshow. Tap the button to see a ‘1’ inscribed in a blue circle appear on your chosen image.
Step 3: Make Further Selections
You can now proceed to select other images or videos for the slideshow, in a similar fashion as the first one. You are allowed to include a maximum of 10 media files within the slideshow.
Step 4: Customize Your Creation
Tap the ‘Next’ button when you have finished making the required selections. The editor interface will now open to let you customize the selected images with a series of effects and filters, both one at a time, as well as the entire set altogether. You can also work with modifying the order of appearance of the photos and videos if required.
Step 5: The Final Touches
Once you are done with the editing process, continue to follow the remaining steps, as you would do to create a normal Instagram post. You can include captions, locations and tag your peers on the platform.
Step 6: Time to Share!
Your Instagram slideshow is ready to be posted. Upload it either to your feed or story to receive a hoard of likes and comments!
● Animated Text Overlays
If your Instagram story slideshows are missing out on the visual spunk, try complimenting their images and videos with animated transitions and text overlays. Short and quick animations are the best ways to enhance a slideshow story with an eye catching effect. Applying a variety of text overlays would help to keep the audience curious about the next visual delight.
● Prefer a Vertical Aspect Ratio
While the landscape mode tends to ward off certain portions of the visual media from a slideshow being played across multiple sized screens, using the portrait mode with a vertical aspect ratio suits best to almost every screen size. Taking care of this fact will ensure that your audience does not get distracted with the semi visible contents of the slideshow story.
● Choose Your Editing Effects Wisely
Regardless of the slideshow creation tool you prefer, there are a diversity of effects, templates, design elements and filters to uplift your craft with the perfect look. However, you should be cautious enough while making your choice so that the balance of colors, fonts and themes is affordably maintained, lest you would end up with a messy and loud Instagram story slideshow, that would not gather much appeal.
● Creating Instagram Story Slideshows with Wondershare Filmora
Wondershare Filmora Video Editor is the undisputed leader in creating awesome slideshows for Instagram stories, packed with a diverse number of graphic design tools. Beginning to discuss about the reserve of features that the software promises to offer, the app’s template library is a trunk of the most expressive and elegant slideshow backgrounds, themes and images.
For Win 7 or later (64-bit)
For macOS 10.12 or later
Moving further, the app has recently added the 1:1 aspect ratio to its image and video resolution alternatives to exclusively adhere to the slideshow design concern, allowing the perfect display of your craft across a variety of screen dimensions. Filmora, an advanced version of the basic Filmora editor program is known to most effectively cater to the concern of creating Instagram story slideshows.
Working with this slideshow creator program, you can explore your editing skills to your heart’s content and supplement the images and videos of your slideshow with the most expanded range of audio-visual effects, seamless animated transitions, text overlays, thematic backgrounds and creative image filters. The app comes to you absolutely free of cost and welcomes you with a pleasing and clean interface, and is compatible with all of your Mac, iOS and Windows supported devices and Android smartphones.
● Ending Thoughts →
● Instagram story slideshows are the newest trends of professional and commercial information sharing and personalized fun and entertainment.
● When looking through alternatives to create Instagram slideshow online or through an application software, there is a heap of creator tools.
● Pick the Wondershare Filmora slideshow creator program to design the most sparked up slideshows for your Instagram stories.
Instagram reels and stories have turned into convenient ways of exploring your video creation skills with fun. Read further to know about the top 10 apps to create amazing Insta story slideshows!
In this article
01 [What’s Instagram Story Slideshow](#Part 1)
02 [How to Use Instagram Slideshow?](#Part 2)
03 [Top 10 Apps for Making Instagram Story Slideshow (iOS & Android)](#Part 3)
04 [Tips for Enhancing Your Insta Story Slideshow](#Part 4)
Part 1 What’s Instagram Story Slideshow
With the growing influence of social media on the global life and work culture in today’s times, each and every event on such platforms becomes the new trend of the current IT impacted society. Speaking in the light of the newest developments, Instagram story slideshows have become the latest talk of the diverse range of social media communities across the web.
Since its entry into the communication galore, the Instagram application has emerged as an absolute favourite of social media freaks, thanks to its already captivating features. Moving ahead with its customary user appealing efforts, the latter has recently introduced the slideshow feature to upgrade and improvise its content stories and reels.
Working with the same, you can now integrate your otherwise simple and elementary Instagram stories into awesome slideshows. This visibly means that your conventional stories and reels on the app are now going to get that missing spark with a plethora of customizable motion graphic features. An Instagram story slideshow can work to earn you a huge number of followers, thus uplifting your social creativity quotient and entertainment appeal.
These creative 15 second snippets are appreciably the most amazing trends to increase your audience backup as a market organization, business enterprise, an influencer or as a rising star, all because of an excellent content presentation strategy and catchy outlook. Try hands at using this high end graphic presentation utility to attract the most awaited jaw dropping appreciation of your social media posts.
Part 2 How to Use Instagram Slideshow
Now that you are aware about the excitement and social buzz that your Instagram story slideshows can create with an immediate effect, the aforesaid reason is sufficient enough to motivate you towards diving deeper into the interesting ways of working with the feature to your maximum advantage. Adhering to the concern, let us proceed with learning about the most appealing trends to use an Instagram slideshow in the following section:
● Stepwise Tutorials and Visual Guides
The utility of Instagram slideshows to merge multiple images and videos together has blocked the interruption of additional feeds amid the content presentation, thus giving you the liberty to post a set of related videos and stills in one go, which can be of great help when you encounter a need to share tutorial videos, recipe follow ups and alike content that essentially requires a sequential presentation.
The Instagram stories slideshow can be useful to DIY creators who wish to demonstrate or guide their followers to create stunning examples of self-designed masterpieces. Posting step wise guides with clear cut instructions to work upon or use something, like that of a new product, can also be catered with an Instagram slideshow story.
● Product Advertising and Sale
If you are looking for impressive and cost effective solutions to launch your products among potential customers, consider taking the help of Instagram slideshows. The feature is known to deliver excellent results in the brand promotion of some particular products, such as jewelry and apparel design.
Jewelers, furniture retailers and textile designers can work with the slideshow to upload a series of images and videos for a clear and vivid demonstration of the product. Considering the fact that such commodities may greatly differ in their visual and actual appearance, the products can be shown through a variety of angles to facilitate viewers with the most comprehensive and an almost exact presentation of the different aspects that a product claims to have.
Part 3 Top 10 Apps for Making Instagram Story Slideshow (iOS & Android)
By now, you must have had a comprehensive understanding of the significance of Instagram story slideshows in uplifting different aspects of your content delivery, along with effectively addressing your diverse and large scale information sharing needs. Moving ahead with our discussion, let us browse through some of the best software solutions to create the most appealing Instagram story slideshows in the following section:
01SlideLab
Starting with the list the first application to look forward on creating over the top Instagram story slideshows with utmost ease. The software package is loaded with an extensive range of editing effects and filters, audio-visual transitions and supplementary design elements, that promise you of a high resolution, professional quality slideshow output.
Working with the software, you get the flexibility to conveniently customize the sequence in which the images would appear in the slideshow, with allowing a maximum screen display time of 3 seconds to each image. The created slideshows can be easily shared on various media handles and platforms, including Instagram, Facebook and YouTube.
While you can undertake a free trial of the tool, a paid subscription of the same costing $ 4.99 is required for accessing the complete range of features associated with the program. The software is however, exclusively compatible with iOS supported devices.
02VivaVideo
This one is an excellent video editor and graphic designer tool, which you can use to create and share amazing slideshows to complement your Instagram stories and feeds. Working with the aforesaid software program, you don’t need to worry about the concerns of device compatibility, as the program works well with your favorite MacOs and Windows supported systems and devices.
Talking of the specific features that the software promises to offer, you can use its built in camera to capture high resolution videos and supplement them with over 60 high end customization utilities, like sound effects and transitions, along with dubbing the video. The basic version of the tool is available for free usage and allows you to choose between the Pro and Quick modes, respectively for a high flexibility and an escalated automated response.
The free version is however, known to leave watermarks on the created videos, is stuffed with frequently appearing ads and permits a 5-minute presentation time. You can escape these hustles anytime by subscribing to the paid version of VivaVideo for $ 2.99.
03InShot
The InShot image and video editor program is another potential candidate to be employed as an Instagram story slideshow creator. The software’s effect library is packed with a heap of conveniently usable design elements and features to create the most beautiful Instagram slideshows. The app can be put to use for efficiently designing Instagram stories to address personal and professional concerns.
Some over the top features of the tool include, the flexibility to crop, trim, cut and merge video files, and uplift them with a range of effects, filters, transitions and backgrounds. The exclusive audio flexibility of the software allows you to add upbeat sound and music, while enabling a choice of fading music in and out.
The software additionally permits to adjust the speed control of your videos, making them run in a slow or fast motion as per the content requirement. There are also a variety of graphic elements, like, texts, emojis, stickers, etc., which you can add to your images and videos to make them more pronounced.
04StoryArt
Enjoying the highest user ratings on a number of leading software review platforms, the StoryArt software package lands among the most popular and preferred applications to work with creating slideshows for Instagram stories. The most appealing features of the software program include, an extensive range of more than 200 premade slideshow templates which can be directly edited to create amazing Instagram feeds and stories.
Other attractive features of the slideshow creator tool include, a plethora of design effects with varying diversities of fonts, colors, filters and around 20 elusive background themes, that are updated weekly with new additions. The program comes with a clean and responsive interface, is free to use and conforms with Windows and MacOs devices.
05Unfold
Unfold is quite a reliable software tool for creating elegant Instagram story slideshows from a storehouse of preset design templates, while adding a series of inline video and image editing effects to the same. The tool’s slideshow creator package comes with a mix of free and premium features, and does not require the account creation formality to begin working.
Major attractions of the program consist of 25 free and more than 60 premium slideshow design templates, 5 different font styles and upgraded text customizations, high resolution slideshow output and a direct share facility. You can prefer to download the software application from the various iOS and Android app stores, and work with the same on your preferred laptops, desktops and smartphones, without worrying about device compatibility.
06Canva
Canva is conveniently counted among the best Instagram slideshow maker tools and has the possibly the vastest inventory of over 60, 000 beautiful premade slideshow templates to create the mot captivating Instagram stories. Working with the tool, you are granted the liberty to select from a hoard of around 1 million stock images to set the most perfect background for the slideshow being created.
Additional features of the software comprise of high end image customization effects, fonts, transitions, texts and filters, with a never ending variety of frames, textures, icons, badges and stickers. If this is not enough, you get to access a diverse library of high end design elements, like, photo vignette, design grids, image enhancer and photo blur, to compliment your Instagram slideshow stories with the most cherished visual effects.
Talking of the platform cohesiveness, you can work with the tool through its desktop download as well as a free installation from any of the Android or Apple app stores.
07Adobe Spark
This one is a family of graphic design software and tools that conveniently boasts of its extensive credibility towards facilitating the creation of high resolution and engaging image and video slideshows to uplift the conventional feeds and stories of Instagram. Post the creation process, you can add a diversity of audio-visual effects, like, animations, sounds, fonts, text layouts, cutouts and design elements to further enhance your graphic artwork.
The application greets you with the most pleasing and easy to use workspace, which would never require you to be a graphic design expert to start working on the slideshows. If you are into creating video centered Instagram story slideshows, you can choose to work with animated videos and prefer to select the media from your device gallery as well as the software’s huge in-house video collection. The tool’s template library is a further amusement, with a countless number of story and message centered themes.
08PhotoGrid
If you are explicitly keen on creating video and photo collages for a jaw dropping Instagram story, consider working with the aforesaid application without a second thought. What’s more exciting is that the software comes with a huge set of over 300 pre made design templates to exclusively craft beautiful slideshows for Instagram stories on any iOS and Android device.
Talking of the app’s set of editing features, apart from being packed with multiple text fonts, over 60 image filters and 90 slideshow backgrounds, the most striking characteristic of the tool is, it permits you to clip an object from an image and remove the latter’s background. Other utilities of the software comprise of a real-time selfie camera, that clicks and automatically beautifies the captured image, beauty enhancing features that can apply and remove makeup from profile shots and selfies.
09Typorama
The next entry in the list is the Typorama software tool, which you can use to create text based slideshows for your Instagram stories. The software’s fonts library is full of elusive typographic designs to choose the best one that suits your content style and arrangement within the slideshow. When opting to work with this feature of the software, you will only need to select a suitable background and begin typing. That’s it!
Extending the text styling credibility of the tool a bit more, you can select from over 50 different typographic layouts and more than 100 typeface and font choices, a huge collection of story based quotes and a diversity of shadows, distortion effects and gradients to improvise your text. The program additionally consists of over 1000 stock templates, image filters, overlays and correction tools to enhance your slideshow background.
10Microsoft Hyperlapse
This one is an advanced slideshow creator program that allows you to design Instagram stories slideshow in time lapse. You can work with the tool to modify the slideshow speed up to 32 times ahead of the normal and create time lapse stories for a maximum of 20 minutes directly on your smartphone.
The app specializes in creating high end video slideshows for Instagram stories and feeds, while showing a great compatibility with high resolution videos. The working interface is super easy to understand and use, without requiring any over the top technical expertise. Feel free to use the app on any iOS or Android supported smartphone.
Part 4 Tips for Enhancing Your Insta Story Slideshow
By far, you have come a long way reading through the credibility, usage and tools to create Instagram story slideshow free of cost as well as though paid subscriptions. In the following section of this article, let us keep our focus on learning about some of the most amazing tips and tricks to upgrade your Insta story slideshow to the next level:
● A Compact Photo Album
Do you land among those social media freaks how want to share just every moment of your day with your peers, or are you confused on selecting the best photos and videos of a cherished event, vacation or bringing home a new utility and end up posting a heap of media on your social media handles?
If your answer is a guilty ‘Yes’, you can try on giving up the habit now by creating an Instagram story photo slideshow to share mini album of your most loved images from the event or vacation. You can use the feature to create a collection of amazing videos as well and share it too with your friends on social media without the guilt of becoming a feed-hog.
Want a practical experience of using Instagram slideshows? See through the following tutorial to understand the exact creation process:
Step 1: Choose the First Image
Begin with selecting the first image for your slideshow, just as you would ideally do for a normal, single image Instagram feed and long press the same.
Step 2: Confirming the Selection
Navigate to the bottom right corner of your selected image to locate a button similar to a photo slideshow. Tap the button to see a ‘1’ inscribed in a blue circle appear on your chosen image.
Step 3: Make Further Selections
You can now proceed to select other images or videos for the slideshow, in a similar fashion as the first one. You are allowed to include a maximum of 10 media files within the slideshow.
Step 4: Customize Your Creation
Tap the ‘Next’ button when you have finished making the required selections. The editor interface will now open to let you customize the selected images with a series of effects and filters, both one at a time, as well as the entire set altogether. You can also work with modifying the order of appearance of the photos and videos if required.
Step 5: The Final Touches
Once you are done with the editing process, continue to follow the remaining steps, as you would do to create a normal Instagram post. You can include captions, locations and tag your peers on the platform.
Step 6: Time to Share!
Your Instagram slideshow is ready to be posted. Upload it either to your feed or story to receive a hoard of likes and comments!
● Animated Text Overlays
If your Instagram story slideshows are missing out on the visual spunk, try complimenting their images and videos with animated transitions and text overlays. Short and quick animations are the best ways to enhance a slideshow story with an eye catching effect. Applying a variety of text overlays would help to keep the audience curious about the next visual delight.
● Prefer a Vertical Aspect Ratio
While the landscape mode tends to ward off certain portions of the visual media from a slideshow being played across multiple sized screens, using the portrait mode with a vertical aspect ratio suits best to almost every screen size. Taking care of this fact will ensure that your audience does not get distracted with the semi visible contents of the slideshow story.
● Choose Your Editing Effects Wisely
Regardless of the slideshow creation tool you prefer, there are a diversity of effects, templates, design elements and filters to uplift your craft with the perfect look. However, you should be cautious enough while making your choice so that the balance of colors, fonts and themes is affordably maintained, lest you would end up with a messy and loud Instagram story slideshow, that would not gather much appeal.
● Creating Instagram Story Slideshows with Wondershare Filmora
Wondershare Filmora Video Editor is the undisputed leader in creating awesome slideshows for Instagram stories, packed with a diverse number of graphic design tools. Beginning to discuss about the reserve of features that the software promises to offer, the app’s template library is a trunk of the most expressive and elegant slideshow backgrounds, themes and images.
For Win 7 or later (64-bit)
For macOS 10.12 or later
Moving further, the app has recently added the 1:1 aspect ratio to its image and video resolution alternatives to exclusively adhere to the slideshow design concern, allowing the perfect display of your craft across a variety of screen dimensions. Filmora, an advanced version of the basic Filmora editor program is known to most effectively cater to the concern of creating Instagram story slideshows.
Working with this slideshow creator program, you can explore your editing skills to your heart’s content and supplement the images and videos of your slideshow with the most expanded range of audio-visual effects, seamless animated transitions, text overlays, thematic backgrounds and creative image filters. The app comes to you absolutely free of cost and welcomes you with a pleasing and clean interface, and is compatible with all of your Mac, iOS and Windows supported devices and Android smartphones.
● Ending Thoughts →
● Instagram story slideshows are the newest trends of professional and commercial information sharing and personalized fun and entertainment.
● When looking through alternatives to create Instagram slideshow online or through an application software, there is a heap of creator tools.
● Pick the Wondershare Filmora slideshow creator program to design the most sparked up slideshows for your Instagram stories.
Best Claymation Shows That Make Your Memories Unforgettable
Best Claymation Shows That Make Your Memories Unforgettable
An easy yet powerful editor
Numerous effects to choose from
Detailed tutorials provided by the official channel
There are plenty of things that the 90s have given us. And when we revisit them now, it gives us an inimitable feeling of nostalgia which we would like to store forever with us. And one of the things that can bring back tons of cherished memories from the 90s is the claymation tv shows.
The claymation shows were called the clay animation shows. The reason for such a name was because the characters in the shows were made from malleable or deformable materials, especially out of clay. They have been one of the most revolutionary and entertaining components of that time.
These shows were one of the forms among the numerous forms of stop-motion animations. We will cover what these shows were about, their cast, and where you can watch them today. And in the following discussion, we will be discussing the ten best 90s claymation shows to bring back wonderful nostalgic memories.

Here is the list of the top claymation tv shows and all the information, including the sites and apps you can watch even today!
01Plasmo
Plasmo was an Australian science fiction TV series about a two and a half-year-old space orphan. The show first premiered in 199starring Abbe Holmes, Phillip Houghton and Pia Morley. You can watch this show on YouTube.

02Plonsters
The Plonsters was a show that premiered in 19which showed the characters Plif, Plops and Plummy, babble and morph, and their wonderful adventures. The show starred Ralph Thiekötter, and you can watch this show on Netflix and Tubi.
04Rex the Runt
Rex the Runt was a comedy show that premiered in 199The show was about the adventures of intrepid Rex and his plasticine companions. It starred about nine celebrities. Steve Box, Elisabeth Hadley, Andrew Jeffers, and Kevin Wrench were among them. You can watch this show even today on Amazon Prime.

05Mio Mao
Mia Mao first premiered in 197starring Derek Griffiths as cast. The show was about two plasticine kittens, Mia and Mao, exploring and finding different objects and animals who hide in their garden. You can watch this show on Amazon Prime.
06Celebrity Death
The Celebrity Deathmatch featured numerous celebrities who were shown as clay-animated characters. Their characters would have quite an intense fight in a boxing ring, and the match would be pretty different from the ordinary boxing matches.
Most of the boxing matches ended with the death of the celebrities, which was the reason for the show to get its name “Celebrity Deathmatch”. It was one of the most favourite and popular 9claymation shows on MTV, an absolute treat and entertainment to watch.
The show premiered on January 2199and it continued to air till the year 2007., with its final episode on March 3200Its cast included a series of celebrities, including Maurice Schlafer, Lean Maxwell, Mills Lane, David Wills, Steve Austin, Masasa Moyo and several other celebrities.
You can readily watch this show today on Amazon Instant Video, iTunes, Paramount+ or Amazon Prime Video.
07The Gumby Show
The Gumby Show was yet another popular tv show of the 9that premiered first on March 1195It featured a green-titular character, a humanoid that was a creation and the model of Art Clokey.
This character has been the reason behind two tv series, another feature-length movie and several other media. The ones to star in this tv show are Dal McKennon and Dick Beals. The show is about Gumby experiencing different adventures through various times and environments in history. The show also features his constant companion, a titular, red coloured talking pony named Pokey.
You can watch the show on Netflix and Amazon Prime.
08Pat & Mat
Pat & Mat was an entertaining and fun-to-watch television show of the 90s. The show first premiered in 19and starred David Nykl and Peter Alton, who played the role of Pat and Mat, respectively.
The show was about two neighbours, Pat and Mat, who faced self-created problems. And then, they solved these problems through any possible and impossible remedy.
You can watch this show now on Zee5 and Mx Player for free.
09Pingu
Pingu was a television show about a clumsy yet sweet penguin who lived with his family in the polar ice cap of Antarctica. Pingu, along with his seal friend Robby and sister, Punga, go on different adventures.
This show first premiered on May 2198with Carlo Bonomi, David Sant and Marcello Magni starring in it. You can watch the episodes of this unforgettable and entertaining tv show on ITV Hub and Amazon Prime.
10The Red and the Blue
The Red and the Blue was an Italian television series for children that first premiered in 197The show was about two antagonist clay shape-shifting characters who detected against an undifferentiated background, white.
The cast of this tv show included Carlo Bonomi, and you can see this show today on YouTube.
11The PJs
The PJs was a popular and loved tv show that premiered on 10th January 199About twenty celebrities were starring in this show, and naming a few among them were Eddie Murphy, Ja’Net DuBois, Loretta Devine, Shawn Michael Howard, Snoop Dog and many more.
The show was about Thurgood Stubbs, the superintendent of Lawrence Hilton-Jacobs housing project and lived with his wife, Muriel. This comedy show satirically featured the difficulties one faces in a big-city housing project, which the protagonist Thurgood Stubbs and his friends faced.
You can watch this show on Peacock Tv.
● Bonus:
Now, without video editing, these fantastic shows of the 9could not have been created. But To your surprise, you too can create such incredible videos effortlessly. And that can be possible through an efficient and effective video editing tool.
You can find innumerable video editing tools available in this present world, but you must choose the best. So, let us introduce you to the best video editing tool, with which you can showcase all your editing skills and creativity-Wondershare Filmora Video Editor !
We call this tool the best video editing tool because its numerous features make it the most proficient video editing tool. Let us now look into its numerous effective features below.
● Professional editing tools
Filmora is the video editing tool that incorporates all the professional editing features to make your videos of the best and the professional quality. The elements envelop every aspect of the finest quality video editing works, which brings out the best of skills and creativity in you.
● Easy to use
Although Filmora has every professional editing tool, you will face no difficulty figuring out how the tools work. Even if you are a beginner, you can effortlessly use this editing tool to not only initiate your video editing journey but also enrich your skills.
● Free trial
You need not buy the proceed features on your first try. You can readily avail of the free trial of Filmora and its paid features. And as you try and find the features pleasing, you can proceed to purchase the aid features.
● Personalize and edit your videos
You can avail of the various features such as rotating, cropping, trimming and splitting the videos to edit. Also, there are other features where you can change the speed of the videos. Therefore, the features you get in these tools are of the most proficient quality.
● Over 8effects
The Filmora editing tool offers you more than 8editing effects that will never make you feel lacking any features and effects you need. And this helps you in making the best videos most effortlessly.
● Get the tool on any devices
Filmora believes that editing skills should be made discoverable anywhere and everywhere. Thus, you can download or use this tool on any device that you use. So, you need not have any specific device to avail of this incredible video editing tool, and you can make and edit videos on any device you want.
● Key Takeaways from This Episode →
● These are the best ten claymation tv shows and series that you can watch even today to bring back all the memories and revisit your early days of the 90s. So, to wrap up our discussion, we would conclude by retracing the aspects and factors that we covered in our discussion. We had enveloped the following topics effectively.
● We discussed the claymation picture through a little interdiction.
● Then, we discussed the ten best claymation TV shows popular in the 90s. We discussed their stories, their casts, their premieres and also the sites and apps where you can watch them even today.
● Lastly, we introduced you to the best editing tool, Filmora, that will help you edit any video of your choice and explore your video editing skills with the finest professional features and infinite effects.
There are plenty of things that the 90s have given us. And when we revisit them now, it gives us an inimitable feeling of nostalgia which we would like to store forever with us. And one of the things that can bring back tons of cherished memories from the 90s is the claymation tv shows.
The claymation shows were called the clay animation shows. The reason for such a name was because the characters in the shows were made from malleable or deformable materials, especially out of clay. They have been one of the most revolutionary and entertaining components of that time.
These shows were one of the forms among the numerous forms of stop-motion animations. We will cover what these shows were about, their cast, and where you can watch them today. And in the following discussion, we will be discussing the ten best 90s claymation shows to bring back wonderful nostalgic memories.
Here is the list of the top claymation tv shows and all the information, including the sites and apps you can watch even today!
01Plasmo
Plasmo was an Australian science fiction TV series about a two and a half-year-old space orphan. The show first premiered in 199starring Abbe Holmes, Phillip Houghton and Pia Morley. You can watch this show on YouTube.
02Plonsters
The Plonsters was a show that premiered in 19which showed the characters Plif, Plops and Plummy, babble and morph, and their wonderful adventures. The show starred Ralph Thiekötter, and you can watch this show on Netflix and Tubi.
04Rex the Runt
Rex the Runt was a comedy show that premiered in 199The show was about the adventures of intrepid Rex and his plasticine companions. It starred about nine celebrities. Steve Box, Elisabeth Hadley, Andrew Jeffers, and Kevin Wrench were among them. You can watch this show even today on Amazon Prime.
05Mio Mao
Mia Mao first premiered in 197starring Derek Griffiths as cast. The show was about two plasticine kittens, Mia and Mao, exploring and finding different objects and animals who hide in their garden. You can watch this show on Amazon Prime.
06Celebrity Death
The Celebrity Deathmatch featured numerous celebrities who were shown as clay-animated characters. Their characters would have quite an intense fight in a boxing ring, and the match would be pretty different from the ordinary boxing matches.
Most of the boxing matches ended with the death of the celebrities, which was the reason for the show to get its name “Celebrity Deathmatch”. It was one of the most favourite and popular 9claymation shows on MTV, an absolute treat and entertainment to watch.
The show premiered on January 2199and it continued to air till the year 2007., with its final episode on March 3200Its cast included a series of celebrities, including Maurice Schlafer, Lean Maxwell, Mills Lane, David Wills, Steve Austin, Masasa Moyo and several other celebrities.
You can readily watch this show today on Amazon Instant Video, iTunes, Paramount+ or Amazon Prime Video.
07The Gumby Show
The Gumby Show was yet another popular tv show of the 9that premiered first on March 1195It featured a green-titular character, a humanoid that was a creation and the model of Art Clokey.
This character has been the reason behind two tv series, another feature-length movie and several other media. The ones to star in this tv show are Dal McKennon and Dick Beals. The show is about Gumby experiencing different adventures through various times and environments in history. The show also features his constant companion, a titular, red coloured talking pony named Pokey.
You can watch the show on Netflix and Amazon Prime.
08Pat & Mat
Pat & Mat was an entertaining and fun-to-watch television show of the 90s. The show first premiered in 19and starred David Nykl and Peter Alton, who played the role of Pat and Mat, respectively.
The show was about two neighbours, Pat and Mat, who faced self-created problems. And then, they solved these problems through any possible and impossible remedy.
You can watch this show now on Zee5 and Mx Player for free.
09Pingu
Pingu was a television show about a clumsy yet sweet penguin who lived with his family in the polar ice cap of Antarctica. Pingu, along with his seal friend Robby and sister, Punga, go on different adventures.
This show first premiered on May 2198with Carlo Bonomi, David Sant and Marcello Magni starring in it. You can watch the episodes of this unforgettable and entertaining tv show on ITV Hub and Amazon Prime.
10The Red and the Blue
The Red and the Blue was an Italian television series for children that first premiered in 197The show was about two antagonist clay shape-shifting characters who detected against an undifferentiated background, white.
The cast of this tv show included Carlo Bonomi, and you can see this show today on YouTube.
11The PJs
The PJs was a popular and loved tv show that premiered on 10th January 199About twenty celebrities were starring in this show, and naming a few among them were Eddie Murphy, Ja’Net DuBois, Loretta Devine, Shawn Michael Howard, Snoop Dog and many more.
The show was about Thurgood Stubbs, the superintendent of Lawrence Hilton-Jacobs housing project and lived with his wife, Muriel. This comedy show satirically featured the difficulties one faces in a big-city housing project, which the protagonist Thurgood Stubbs and his friends faced.
You can watch this show on Peacock Tv.
● Bonus:
Now, without video editing, these fantastic shows of the 9could not have been created. But To your surprise, you too can create such incredible videos effortlessly. And that can be possible through an efficient and effective video editing tool.
You can find innumerable video editing tools available in this present world, but you must choose the best. So, let us introduce you to the best video editing tool, with which you can showcase all your editing skills and creativity-Wondershare Filmora Video Editor !
We call this tool the best video editing tool because its numerous features make it the most proficient video editing tool. Let us now look into its numerous effective features below.
● Professional editing tools
Filmora is the video editing tool that incorporates all the professional editing features to make your videos of the best and the professional quality. The elements envelop every aspect of the finest quality video editing works, which brings out the best of skills and creativity in you.
● Easy to use
Although Filmora has every professional editing tool, you will face no difficulty figuring out how the tools work. Even if you are a beginner, you can effortlessly use this editing tool to not only initiate your video editing journey but also enrich your skills.
● Free trial
You need not buy the proceed features on your first try. You can readily avail of the free trial of Filmora and its paid features. And as you try and find the features pleasing, you can proceed to purchase the aid features.
● Personalize and edit your videos
You can avail of the various features such as rotating, cropping, trimming and splitting the videos to edit. Also, there are other features where you can change the speed of the videos. Therefore, the features you get in these tools are of the most proficient quality.
● Over 8effects
The Filmora editing tool offers you more than 8editing effects that will never make you feel lacking any features and effects you need. And this helps you in making the best videos most effortlessly.
● Get the tool on any devices
Filmora believes that editing skills should be made discoverable anywhere and everywhere. Thus, you can download or use this tool on any device that you use. So, you need not have any specific device to avail of this incredible video editing tool, and you can make and edit videos on any device you want.
● Key Takeaways from This Episode →
● These are the best ten claymation tv shows and series that you can watch even today to bring back all the memories and revisit your early days of the 90s. So, to wrap up our discussion, we would conclude by retracing the aspects and factors that we covered in our discussion. We had enveloped the following topics effectively.
● We discussed the claymation picture through a little interdiction.
● Then, we discussed the ten best claymation TV shows popular in the 90s. We discussed their stories, their casts, their premieres and also the sites and apps where you can watch them even today.
● Lastly, we introduced you to the best editing tool, Filmora, that will help you edit any video of your choice and explore your video editing skills with the finest professional features and infinite effects.
10 Best Tools to Make Pic Collage for Windows
10 Best Tools to Make Pic Collage for Windows
An easy yet powerful editor
Numerous effects to choose from
Detailed tutorials provided by the official channel
Collages are a great way to assemble all your favorite pictures in one place. You can share these collages with your friends, relatives, and dear ones or can also use them for posting on social media sites and other online platforms. Though creating a collage may sound simple, a lot of considerations need to be taken for creating an interesting and eye-catchy collage, and for this, a help of a professional tool can be taken. In the following parts of the topic, you can learn about the best tools for photo collage Windows 10 and other OS.

In the following parts of the topic, you can learn about the best tools for photo collage Windows 10 and other OS.
In this article
01 [Top 10 Pic Collage for Windows Tools](#Part 1)
02 [The Best Tool to Get Stock Images for Creating Collages](#Part 2)
Part 1 Top 10 Pic Collage for Windows Tools
Checkout the best collage for Windows below.
01PhotoPad Photo Editing Software
This is a complete photo editing tool supporting an array of features including the creation of a photo collage. This software from NCH software can let you add the desired images manually and also support using the auto grid to add an unlimited number of pictures. The tool also lets you choose the collage orientation size and set the background as needed.
Pros:
● Create collage Windows manually or automatically.
● Allows adding a background color, image, or from the available background options.
● Spacing and corners between the images can be selected.
● The size of the tool is small.
Cons:
● Stickers and filters to individual images cannot be added.
● Cannot choose a custom collage size.

02PhotoScapeX
Available for download on Windows 10 and higher versions this is another widely used photo editing tool that can also let you create collages manually as well as automatically. Multiple frames are available that can be selected as desired and there are additional features like adding filters, and also edit them in multiple ways.
Pros:
● Allows creating collage manually and automatically.
● Multiple editing tools for customization like filters, crop, zoom, doodle, and more.
● Picture alignment can be done in 3 modes- vertical, horizontal, and tile.
● Option to change and customize image size, spacing, margin, and others.
Cons:
● Limited photos can be added.
● The size of the tool is large in comparison to other tools.

03Phototastic Collage
This is free to use Windows-based tool that can create impressive collages in no time. Multiple designs, frames, and other options are available to create a customized collage as needed.
Pros:
● Multiple customization options are available for creating the desired collage.
● User-friendly and simple interface.
● An array of templates is available.
Cons:
● The free version has limited features.
● Limitation to the number of images that can be added.
● Ads in the app.

04PicCollage
Unleash your creativity by creating an interesting collage using this excellent collage-making app. There are multiple templates and customization options supports.
Pros
● Create collage manually or automatically
● The earlier created collage can be edited.
● Allows creating a collage in 3 options- grid, template, freestyle.
Cons
● Watermark on the created collage.
● The image size cannot be customized.

05Collage Maker-Photo Grid and Montage
Using this free Windows tool, you can create an interesting photo collage or a free-styled montage as needed. A wide range of layouts and templates are available that can be further customized to get the desired collage.
Pros:
● Free Windows software.
● Come with multiple filters, layout, and editing tools.
● The user interface is easy.
● Preview option available.
Cons:
● Performance glitches due to bugs.
● Custom collage size cannot be set.
● Watermark on the collage.

06Fotor
If you are looking for a simple and basic collage-making tool, Fotor is the right choice. Collage in the grid, freestyle, and photo-stitch style can be created and basic customization features are supported.
Pros:
● Simple to use tool that is apt for beginners.
● Border can be changed from a solid color to a background.
Cons:
● Customization options are limited.
● Border and the image size cannot be changed.

07El Collagero
Just like its name, this is an interesting Windows-based tool for creating a collage of your choice. A wide range of options for customization is available that can let you edit the images, choose a template and then also edit the file.
Pros:
● A wide range of templates and designs for collages is available.
● Allows adding text, symbols, and other elements.
● Created collage can be shared on social media sites.
Cons:
● In comparison to other professional tools, the functions are limited.

08Atlantas Photo Collage Studio
This Windows-based tool will let you create collages of all types and for all occasions. You can choose from over 100 templates that best match your collage theme and image content.
Pros:
● More than 100 templates for collage designs are available.
● The size of the layout can be changed.
● Multiple editing and customization options are supported like zoom, opacity selection, and more.
Cons:
● Limitation of adding 45 images.
● For the advanced functions, need to subscribe to the paid version.

09PhotoJoiner
Using this Windows tool, pick up your favorite images and turn them into a beautiful collage with customized design and style.
Pros:
● A simple and basic tool for creating a collage.
● Created collage can be saved or shared to the social media site.
● Change the order of the images, margins, and other aspects.
Cons
● Collage templates are limited.
● Advanced features are missing.

1010. Blend Photo
To create a collage of images with a blending effect, this is the right tool to use. Available for download on the Windows system this tool lets you create collages telling interesting stories.
Pros:
● Simple and easy collage-making tool.
● Add blending effect to your collages.
● Over 50 custom shapes for image cropping are available along with the option for free-hand cropping.
● Multiple filters can be added.
Cons:
● Limited Editing and customization options.

Part 2 The Best Tool to Get Stock Images for Creating Collages
Several times, the captured and stored images may not fit in the collage theme you wish to create and, in such situations, you can use the stock images available online at several sites. One of the best tools where you can check out the images in different categories is Wondershare Filmora. This versatile software from Wondershare Filmora Video Editor is an advanced video editing tool that also has a huge collection of stock media including images.
Additionally, the split-screen feature of the software can be used for creating a video collage. Available for Windows and Mac systems, Wondershare Filmora will look after all your advanced video editing and customized requirements.

Wondershare Filmora - Best Video Editor for Mac/Windows
5,481,435 people have downloaded it.
Build unique custom animations without breaking a sweat.
Focus on creating epic stories and leave the details to Filmora’s auto features.
Start a creative adventure with drag & drop effects and endless possibilities.
Filmora simplifies advanced features to save you time and effort.
Filmora cuts out repetition so you can move on to your next creative breakthrough.
● Key Takeaways from This Episode →
● Collage-making tools help in creating an interesting and eye-catchy collage in a hassle-free manner.
●Several Windows-based tools are available for quick download.
●Wondershare Filmora is a great software to find a collection of stock images in different categories.
Collages are a great way to assemble all your favorite pictures in one place. You can share these collages with your friends, relatives, and dear ones or can also use them for posting on social media sites and other online platforms. Though creating a collage may sound simple, a lot of considerations need to be taken for creating an interesting and eye-catchy collage, and for this, a help of a professional tool can be taken. In the following parts of the topic, you can learn about the best tools for photo collage Windows 10 and other OS.
In the following parts of the topic, you can learn about the best tools for photo collage Windows 10 and other OS.
In this article
01 [Top 10 Pic Collage for Windows Tools](#Part 1)
02 [The Best Tool to Get Stock Images for Creating Collages](#Part 2)
Part 1 Top 10 Pic Collage for Windows Tools
Checkout the best collage for Windows below.
01PhotoPad Photo Editing Software
This is a complete photo editing tool supporting an array of features including the creation of a photo collage. This software from NCH software can let you add the desired images manually and also support using the auto grid to add an unlimited number of pictures. The tool also lets you choose the collage orientation size and set the background as needed.
Pros:
● Create collage Windows manually or automatically.
● Allows adding a background color, image, or from the available background options.
● Spacing and corners between the images can be selected.
● The size of the tool is small.
Cons:
● Stickers and filters to individual images cannot be added.
● Cannot choose a custom collage size.
02PhotoScapeX
Available for download on Windows 10 and higher versions this is another widely used photo editing tool that can also let you create collages manually as well as automatically. Multiple frames are available that can be selected as desired and there are additional features like adding filters, and also edit them in multiple ways.
Pros:
● Allows creating collage manually and automatically.
● Multiple editing tools for customization like filters, crop, zoom, doodle, and more.
● Picture alignment can be done in 3 modes- vertical, horizontal, and tile.
● Option to change and customize image size, spacing, margin, and others.
Cons:
● Limited photos can be added.
● The size of the tool is large in comparison to other tools.
03Phototastic Collage
This is free to use Windows-based tool that can create impressive collages in no time. Multiple designs, frames, and other options are available to create a customized collage as needed.
Pros:
● Multiple customization options are available for creating the desired collage.
● User-friendly and simple interface.
● An array of templates is available.
Cons:
● The free version has limited features.
● Limitation to the number of images that can be added.
● Ads in the app.
04PicCollage
Unleash your creativity by creating an interesting collage using this excellent collage-making app. There are multiple templates and customization options supports.
Pros
● Create collage manually or automatically
● The earlier created collage can be edited.
● Allows creating a collage in 3 options- grid, template, freestyle.
Cons
● Watermark on the created collage.
● The image size cannot be customized.
05Collage Maker-Photo Grid and Montage
Using this free Windows tool, you can create an interesting photo collage or a free-styled montage as needed. A wide range of layouts and templates are available that can be further customized to get the desired collage.
Pros:
● Free Windows software.
● Come with multiple filters, layout, and editing tools.
● The user interface is easy.
● Preview option available.
Cons:
● Performance glitches due to bugs.
● Custom collage size cannot be set.
● Watermark on the collage.
06Fotor
If you are looking for a simple and basic collage-making tool, Fotor is the right choice. Collage in the grid, freestyle, and photo-stitch style can be created and basic customization features are supported.
Pros:
● Simple to use tool that is apt for beginners.
● Border can be changed from a solid color to a background.
Cons:
● Customization options are limited.
● Border and the image size cannot be changed.
07El Collagero
Just like its name, this is an interesting Windows-based tool for creating a collage of your choice. A wide range of options for customization is available that can let you edit the images, choose a template and then also edit the file.
Pros:
● A wide range of templates and designs for collages is available.
● Allows adding text, symbols, and other elements.
● Created collage can be shared on social media sites.
Cons:
● In comparison to other professional tools, the functions are limited.
08Atlantas Photo Collage Studio
This Windows-based tool will let you create collages of all types and for all occasions. You can choose from over 100 templates that best match your collage theme and image content.
Pros:
● More than 100 templates for collage designs are available.
● The size of the layout can be changed.
● Multiple editing and customization options are supported like zoom, opacity selection, and more.
Cons:
● Limitation of adding 45 images.
● For the advanced functions, need to subscribe to the paid version.
09PhotoJoiner
Using this Windows tool, pick up your favorite images and turn them into a beautiful collage with customized design and style.
Pros:
● A simple and basic tool for creating a collage.
● Created collage can be saved or shared to the social media site.
● Change the order of the images, margins, and other aspects.
Cons
● Collage templates are limited.
● Advanced features are missing.
1010. Blend Photo
To create a collage of images with a blending effect, this is the right tool to use. Available for download on the Windows system this tool lets you create collages telling interesting stories.
Pros:
● Simple and easy collage-making tool.
● Add blending effect to your collages.
● Over 50 custom shapes for image cropping are available along with the option for free-hand cropping.
● Multiple filters can be added.
Cons:
● Limited Editing and customization options.
Part 2 The Best Tool to Get Stock Images for Creating Collages
Several times, the captured and stored images may not fit in the collage theme you wish to create and, in such situations, you can use the stock images available online at several sites. One of the best tools where you can check out the images in different categories is Wondershare Filmora. This versatile software from Wondershare Filmora Video Editor is an advanced video editing tool that also has a huge collection of stock media including images.
Additionally, the split-screen feature of the software can be used for creating a video collage. Available for Windows and Mac systems, Wondershare Filmora will look after all your advanced video editing and customized requirements.
Wondershare Filmora - Best Video Editor for Mac/Windows
5,481,435 people have downloaded it.
Build unique custom animations without breaking a sweat.
Focus on creating epic stories and leave the details to Filmora’s auto features.
Start a creative adventure with drag & drop effects and endless possibilities.
Filmora simplifies advanced features to save you time and effort.
Filmora cuts out repetition so you can move on to your next creative breakthrough.
● Key Takeaways from This Episode →
● Collage-making tools help in creating an interesting and eye-catchy collage in a hassle-free manner.
●Several Windows-based tools are available for quick download.
●Wondershare Filmora is a great software to find a collection of stock images in different categories.
Top 15 2D Animation Software Free That Worth to Try
Top 15 2D Animation Software Free That Worth to Try
An easy yet powerful editor
Numerous effects to choose from
Detailed tutorials provided by the official channel
When you are trying to create a funny cartoon, explainer videos, or other short informative content to post online, 2D animation software is a breeze to use.
With access to the best 2D animation software, you can create compelling and intricate stories that will help you sync with the audience.
01Wondershare Filmora
Price: Free, $99.99 (Perpetual); $59.99 (1-Year)
Pros
Numerous preset options
Both for beginners and professionals
Quick video trim/edits
Cons
Straightforward user interface
Lacks various shortcuts
May need high system requirements
What are users saying?
“I am solving the problem of getting an easy-to-use, all-in-one video editor. In addition, the editor gives you the ability to command over your audio files, whereas other editors just give you the basic audio editing capabilities. Lastly, the fully editable text effects and the vast numbers too.”
Key Features
Unlimited Video Tracks.
Audio Noise Reduction.
Automatic Audio Sync.
Motion Graphics animation support.
Auto color correction.
Available for Mac and Windows.
For Win 7 or later (64-bit)
For macOS 10.12 or later
02Opentoonz
Price: Free
Pros
Accessible plugin to automatically create animation effects
Unique Xsheets & Timelines features
Audio/Soundtrack Implementer
Cons
Somewhat Limited drawing capabilities
Intricate setup
A bit outdated UI design
What are users saying?
“Not a very self-explanatory 2D animation software. I had to look up some help, but it worked out in the end (youtube tutorials).”
Key Features
GTS scanning tool
Easy to modify picture styles
Add light and distortion effects
Works with black and white and colored scans
03Pencil 2D
Price: Free
Pros
Easy to use
Open sources
Supports multiple languages
Cons
It doesn’t support shape tools
Only for beginners
It doesn’t support 3D animation
What are users saying?
“The main thing against Pencil2d is the lack of complicated tools. Some tools are not there to bring better color effects, curves, drawing tools, etc. But honestly, this is not a big problem, the intention to be the most robust in the world but to be a tool that provides you a great introduction to animation with vector drawing.”
Key Features
Simplistic design to let you make animation easily
Raster and vector workflow switching
Cross-platform compatibility to free download
04Maefloresta/TupiTube
Price: Free
Pros
Great for beginners
Effective tools management
Friendly price plan
Cons
Differences in color correction
Certain confusing tools
Unable to erase unwanted frames
What are users saying?
“Honestly, I love the app, but I wish there were an eraser, but other than that, it is great for everything from experimental clips to my YT videos that will be coming out in a few months.”
Key Features
A free downloadable app that assists on tablets and smartphones
Simple software with tutorials
Interactive user interface that beginners can use with ease
05Synfig
Price: Free
Pros
Offers 50+ layers
Easy to use layout
Lots of technical tools and functions
Cons
Difficult layout
Hard learning curve
Only a few tutorials available
What are users saying?
“It is cumbersome. You will look for tutorials to understand it, even if you have the best 2D animation software Background. - Though, it’s not famous so you may not wander for information about it as easily. - You do need high PC requirements to operate it, it is heavy. - You have to Constantly save because there are a few operations that make it crash.”
Key Features
Compatible with multiple content layers
The bone system assists for the cutout animations creation from bitmap images
Consistent with sound support to allow for the addition and syncing of narration and music to the video
06CelAction 2D
Price: $1300 Studio Edition (Single License Use)
Pros
Fast to use
Low system requirements
Add-ons available
Cons
Less dynamic
Less in demand
Time-Consuming to learn
What are users saying?
**”**I found the software pretty responsive and may not be good for beginners. Being a beginner, I need easy-to-use free download 2D animation software with low learning, and it didn’t fit my needs entirely.”
Key Features
Quick and straightforward to use professionally
Features ergonomic controls
Simply manages complicated projects with different layers
Compatible with all modern Windows machines - 32 and 64-bit Also runs with Macs through Boot Camp
The multiplane camera helps you have more excellent controls
07Moho (Anime Studio) Pro
Price: $399 (Full Pack)
Pros
Regular updates available
Advanced features
Also good for beginners
Cons
Doesn’t automatically sync
Some functions are highly advanced
Lacks flexibility
What are users saying?
“I am freelance, and Moho12 has allowed me to give more character to animated characters that I can use for some clients. The compatibility that I get with Adobe Illustrator and the speed of the render makes it one of my central tools when it comes to working with character animations.”
Key Features
Improved freehand drawing tools
Beizer manages to make it simpler for you to design your videos
Brilliant warp feature assists in creating custom meshes to twist and bend your animations
Realistic motion blur
Best 2D Animation software for different layers at the same time
08FlipBook
Price: $19.99 (FlipBook Lite); $49.99 (FlipBook Studio); $149.99 (FlipBook Pro); $199.99 (FlipBook Pro HD)
Pros
Simple to draw
Easy to import from a scanner
Quick uploads
Cons
No free version
Challenging to make subtle changes
May not be user-friendly features
What are users saying?
“FlipBook does not contain a steep learning curve, and even first-time animators will be able to produce creative projects.”
Key Features
Modifications will be active while you draw the animation, so FlipBook is pretty quick
Easy to use the shift key to make speed painting
Ten animation layers for adding extra touches
Simple to use a scanner to import images

09Reallusion CrazyTalk Animator
Price: $199 (Pipeline); $99 (Pro)
Pros
Large library of appealing templates
Both for beginners and professionals
Easy to control characters
Cons
No drawing tools
A bit high learning curve
Hard to sync voice
What are users saying?
“This is a 2D animation maker online that makes sense. CTA makes sense in everything it does. One will find the tools exactly where they are supposed to be, and things work exactly the way one expects them to work.”
Key Features
Assists real-time facial expression with precise modification
Black magic to transform the image into a moving cartoon
You can make 2D visual effects for professionals
10Stop Motion Studio
Price: $59.99
Pros
Inbuilt sound editor
Easy to schedule
Not free
Cons
Certain hoops
No bone ringing tools or template designs
Only for 2D stop motion, 2D animation online
What are users saying?
“So I am in high school, Considering an animation class. Currently, we use this to make a claymation. I have noticed a few complexities with it. The camera does not aim well, which is a big hassle. It also Consists of a glitch where sometimes, if you hit the undo frame, it will delete all your other projects. When that happened to me, I was not happy. Now, this last part may just be nitpicking, but when I saw the official company’s animation, I saw their fingers in it, and the animation was not smooth.”
Key Features
Onionskin helps you to view previous frames via a transparent overlay
Audio recording and Chroma key and audio recording to better narrate and add voice effects
Simple
one-click upload to Facebook and YouTube
DSLR camera assistance for creating perfect 1080p recordings
11Harmony
Price: $25.50/month (Harmony Essentials); $64.50/month (Harmony Advanced); $117.50/month (Harmony Premium)
Pros
Lots of animation and drawing tools
Offers various color controls
Flexible 2D animation
Cons
Complicated to learn
High system requirements
Not free
What are users saying?
“I have created really powerful 2D animations with Harmony; it offers almost every tool to be precise and creative in the artworks and the advanced tools for paperless animations, which they helped me a lot.”
Key Features
Smooth lines
Stabilizer
It offers 3, 4, and 5-point guides for curved perspectives.
It helps create cut-out animation.
Easy integration with software available in the production pipeline.
It offers 2D or 3D integration.
12Krita
Price: Free
Pros
Completely free
Easy to use
High compatibility
Cons
No dedicated support
Use only on desktop
Outdated UI
What are users saying?
“Krita helps me with my advertising videos as well as logos and other image editing use cases. I mainly use it to make thumbnails for my youtube channel and featured images for the articles on my website. I also use it to make some quick logos for my youtube channel and website.“
Key Features
This online 2D animation maker software allows you to add a stabilizer to the brush to smooth it.
Personalized brush with nine different brush engines.
Create comic panels with built-in vector drawing tools.
Create seamless patterns and textures by making image reference on the x and y-axis.
Import brush packs and texture from other artists.
You can flatten, combine, or order layers to organize your artwork.

13Animaker
Price: $10/mo (Basic); $19/mo (Starter); $49/mo (Pro); Custom Pricing (Enterprise)
Pros
Helpful app
Able to make beautiful videos
Tons of features
Cons
May not work on specific systems
Chunky UI
Time-Consuming
What are users saying?
“Firstly, it displays that you are limited to the materials that you can use. If you want it, you can go for its paid version, which I think is ideal for a company but still hard. Secondly, I am trying to execute a project for my science class, and so far, I’ve had three days to work on it.”
Key Features
Create animated videos in 6 unique video styles like 2D, handcraft, infographics, whiteboard, 2.5 D, and typography.
Beginners can create videos and use them as both animation and animated presentations.
Best free download 2D animation software has 200 sound effects to choose from.
It offers 100 background music tracks.
It helps you to record direct voice recordings.
Animaker allows the team to collaborate.
Export video in full HD quality.
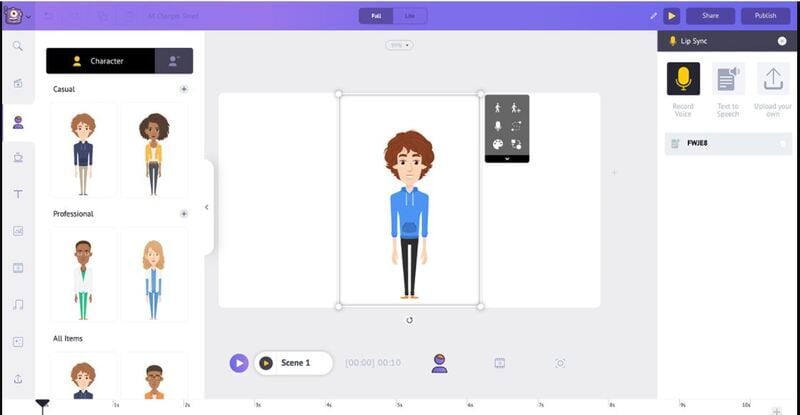
14SketchBook
Price: Free
Pros
Many options of pencils, brushes etc.
Various color options
Ideal for quick inspirations
Cons
It may be hard to enlarge projects
Lack of usability in some features
Some functions are confusing
What are users saying?
“Sketchbook has helped us in mobility. Since it is also available for tablets like iPad, it can be used to create quick artworks and concept arts and be used as a notebook to take notes. The different features also come in real handy, and the artwork created can be used to display professionally with a good amount of details.”
Key Features
It helps you draw basic shapes like circles, triangles, rectangles, etc.
Adjust the rules as per your desire.
Fill color into your artwork.
Also, import or export the layer as PSD.
15Animate CC
Price: $20.99/mo
Pros
Helpful user interface
Various essential modules
Extremely smooth
Cons
High battery utilization
Steep learning curve
Lack some tools for handling sound
What are users saying?
“We use Animate to make educational videos, but we also use some of the drawing tools to create vector-based illustrations, and we can export them out from Animate to use them in printed products.“
Key Features
Create new poses for vector images or figures.
It helps you to arrange your layers in a parent-child hierarchy.
● Automatically matches mouth poses to voice inflections.
● Easy to export 360 VR animations.
● Create ads directly with Animate.
● Export images with the correct resolution by bypassing the image optimization and using image settings.
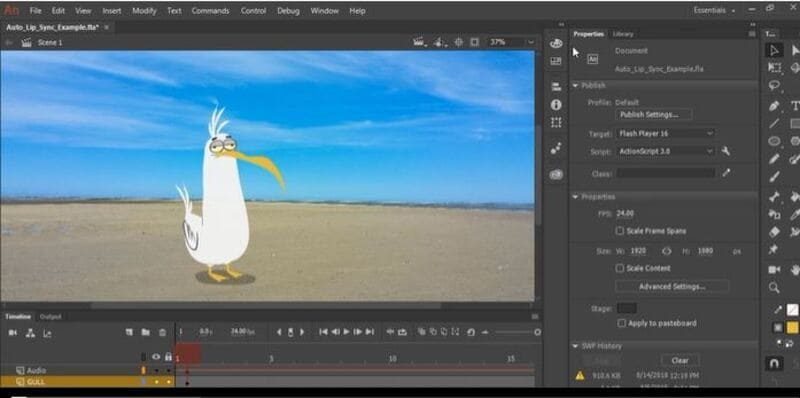
● Key Takeaways from This Episode →
● Using 2D animation software is simpler when you have the right software. You already have a storyboard and a script in mind, but now you can realize your vision in unique and intricate ways.
● So, if you want to make 3D animation, various 3D animation software options are also for you. If any of the products above will serve you well, you could use Filmora, which comes first in the series of 2D animation software.
When you are trying to create a funny cartoon, explainer videos, or other short informative content to post online, 2D animation software is a breeze to use.
With access to the best 2D animation software, you can create compelling and intricate stories that will help you sync with the audience.
01Wondershare Filmora
Price: Free, $99.99 (Perpetual); $59.99 (1-Year)
Pros
Numerous preset options
Both for beginners and professionals
Quick video trim/edits
Cons
Straightforward user interface
Lacks various shortcuts
May need high system requirements
What are users saying?
“I am solving the problem of getting an easy-to-use, all-in-one video editor. In addition, the editor gives you the ability to command over your audio files, whereas other editors just give you the basic audio editing capabilities. Lastly, the fully editable text effects and the vast numbers too.”
Key Features
Unlimited Video Tracks.
Audio Noise Reduction.
Automatic Audio Sync.
Motion Graphics animation support.
Auto color correction.
Available for Mac and Windows.
For Win 7 or later (64-bit)
For macOS 10.12 or later
02Opentoonz
Price: Free
Pros
Accessible plugin to automatically create animation effects
Unique Xsheets & Timelines features
Audio/Soundtrack Implementer
Cons
Somewhat Limited drawing capabilities
Intricate setup
A bit outdated UI design
What are users saying?
“Not a very self-explanatory 2D animation software. I had to look up some help, but it worked out in the end (youtube tutorials).”
Key Features
GTS scanning tool
Easy to modify picture styles
Add light and distortion effects
Works with black and white and colored scans
03Pencil 2D
Price: Free
Pros
Easy to use
Open sources
Supports multiple languages
Cons
It doesn’t support shape tools
Only for beginners
It doesn’t support 3D animation
What are users saying?
“The main thing against Pencil2d is the lack of complicated tools. Some tools are not there to bring better color effects, curves, drawing tools, etc. But honestly, this is not a big problem, the intention to be the most robust in the world but to be a tool that provides you a great introduction to animation with vector drawing.”
Key Features
Simplistic design to let you make animation easily
Raster and vector workflow switching
Cross-platform compatibility to free download
04Maefloresta/TupiTube
Price: Free
Pros
Great for beginners
Effective tools management
Friendly price plan
Cons
Differences in color correction
Certain confusing tools
Unable to erase unwanted frames
What are users saying?
“Honestly, I love the app, but I wish there were an eraser, but other than that, it is great for everything from experimental clips to my YT videos that will be coming out in a few months.”
Key Features
A free downloadable app that assists on tablets and smartphones
Simple software with tutorials
Interactive user interface that beginners can use with ease
05Synfig
Price: Free
Pros
Offers 50+ layers
Easy to use layout
Lots of technical tools and functions
Cons
Difficult layout
Hard learning curve
Only a few tutorials available
What are users saying?
“It is cumbersome. You will look for tutorials to understand it, even if you have the best 2D animation software Background. - Though, it’s not famous so you may not wander for information about it as easily. - You do need high PC requirements to operate it, it is heavy. - You have to Constantly save because there are a few operations that make it crash.”
Key Features
Compatible with multiple content layers
The bone system assists for the cutout animations creation from bitmap images
Consistent with sound support to allow for the addition and syncing of narration and music to the video
06CelAction 2D
Price: $1300 Studio Edition (Single License Use)
Pros
Fast to use
Low system requirements
Add-ons available
Cons
Less dynamic
Less in demand
Time-Consuming to learn
What are users saying?
**”**I found the software pretty responsive and may not be good for beginners. Being a beginner, I need easy-to-use free download 2D animation software with low learning, and it didn’t fit my needs entirely.”
Key Features
Quick and straightforward to use professionally
Features ergonomic controls
Simply manages complicated projects with different layers
Compatible with all modern Windows machines - 32 and 64-bit Also runs with Macs through Boot Camp
The multiplane camera helps you have more excellent controls
07Moho (Anime Studio) Pro
Price: $399 (Full Pack)
Pros
Regular updates available
Advanced features
Also good for beginners
Cons
Doesn’t automatically sync
Some functions are highly advanced
Lacks flexibility
What are users saying?
“I am freelance, and Moho12 has allowed me to give more character to animated characters that I can use for some clients. The compatibility that I get with Adobe Illustrator and the speed of the render makes it one of my central tools when it comes to working with character animations.”
Key Features
Improved freehand drawing tools
Beizer manages to make it simpler for you to design your videos
Brilliant warp feature assists in creating custom meshes to twist and bend your animations
Realistic motion blur
Best 2D Animation software for different layers at the same time
08FlipBook
Price: $19.99 (FlipBook Lite); $49.99 (FlipBook Studio); $149.99 (FlipBook Pro); $199.99 (FlipBook Pro HD)
Pros
Simple to draw
Easy to import from a scanner
Quick uploads
Cons
No free version
Challenging to make subtle changes
May not be user-friendly features
What are users saying?
“FlipBook does not contain a steep learning curve, and even first-time animators will be able to produce creative projects.”
Key Features
Modifications will be active while you draw the animation, so FlipBook is pretty quick
Easy to use the shift key to make speed painting
Ten animation layers for adding extra touches
Simple to use a scanner to import images
09Reallusion CrazyTalk Animator
Price: $199 (Pipeline); $99 (Pro)
Pros
Large library of appealing templates
Both for beginners and professionals
Easy to control characters
Cons
No drawing tools
A bit high learning curve
Hard to sync voice
What are users saying?
“This is a 2D animation maker online that makes sense. CTA makes sense in everything it does. One will find the tools exactly where they are supposed to be, and things work exactly the way one expects them to work.”
Key Features
Assists real-time facial expression with precise modification
Black magic to transform the image into a moving cartoon
You can make 2D visual effects for professionals
10Stop Motion Studio
Price: $59.99
Pros
Inbuilt sound editor
Easy to schedule
Not free
Cons
Certain hoops
No bone ringing tools or template designs
Only for 2D stop motion, 2D animation online
What are users saying?
“So I am in high school, Considering an animation class. Currently, we use this to make a claymation. I have noticed a few complexities with it. The camera does not aim well, which is a big hassle. It also Consists of a glitch where sometimes, if you hit the undo frame, it will delete all your other projects. When that happened to me, I was not happy. Now, this last part may just be nitpicking, but when I saw the official company’s animation, I saw their fingers in it, and the animation was not smooth.”
Key Features
Onionskin helps you to view previous frames via a transparent overlay
Audio recording and Chroma key and audio recording to better narrate and add voice effects
Simple
one-click upload to Facebook and YouTube
DSLR camera assistance for creating perfect 1080p recordings
11Harmony
Price: $25.50/month (Harmony Essentials); $64.50/month (Harmony Advanced); $117.50/month (Harmony Premium)
Pros
Lots of animation and drawing tools
Offers various color controls
Flexible 2D animation
Cons
Complicated to learn
High system requirements
Not free
What are users saying?
“I have created really powerful 2D animations with Harmony; it offers almost every tool to be precise and creative in the artworks and the advanced tools for paperless animations, which they helped me a lot.”
Key Features
Smooth lines
Stabilizer
It offers 3, 4, and 5-point guides for curved perspectives.
It helps create cut-out animation.
Easy integration with software available in the production pipeline.
It offers 2D or 3D integration.
12Krita
Price: Free
Pros
Completely free
Easy to use
High compatibility
Cons
No dedicated support
Use only on desktop
Outdated UI
What are users saying?
“Krita helps me with my advertising videos as well as logos and other image editing use cases. I mainly use it to make thumbnails for my youtube channel and featured images for the articles on my website. I also use it to make some quick logos for my youtube channel and website.“
Key Features
This online 2D animation maker software allows you to add a stabilizer to the brush to smooth it.
Personalized brush with nine different brush engines.
Create comic panels with built-in vector drawing tools.
Create seamless patterns and textures by making image reference on the x and y-axis.
Import brush packs and texture from other artists.
You can flatten, combine, or order layers to organize your artwork.
13Animaker
Price: $10/mo (Basic); $19/mo (Starter); $49/mo (Pro); Custom Pricing (Enterprise)
Pros
Helpful app
Able to make beautiful videos
Tons of features
Cons
May not work on specific systems
Chunky UI
Time-Consuming
What are users saying?
“Firstly, it displays that you are limited to the materials that you can use. If you want it, you can go for its paid version, which I think is ideal for a company but still hard. Secondly, I am trying to execute a project for my science class, and so far, I’ve had three days to work on it.”
Key Features
Create animated videos in 6 unique video styles like 2D, handcraft, infographics, whiteboard, 2.5 D, and typography.
Beginners can create videos and use them as both animation and animated presentations.
Best free download 2D animation software has 200 sound effects to choose from.
It offers 100 background music tracks.
It helps you to record direct voice recordings.
Animaker allows the team to collaborate.
Export video in full HD quality.
14SketchBook
Price: Free
Pros
Many options of pencils, brushes etc.
Various color options
Ideal for quick inspirations
Cons
It may be hard to enlarge projects
Lack of usability in some features
Some functions are confusing
What are users saying?
“Sketchbook has helped us in mobility. Since it is also available for tablets like iPad, it can be used to create quick artworks and concept arts and be used as a notebook to take notes. The different features also come in real handy, and the artwork created can be used to display professionally with a good amount of details.”
Key Features
It helps you draw basic shapes like circles, triangles, rectangles, etc.
Adjust the rules as per your desire.
Fill color into your artwork.
Also, import or export the layer as PSD.
15Animate CC
Price: $20.99/mo
Pros
Helpful user interface
Various essential modules
Extremely smooth
Cons
High battery utilization
Steep learning curve
Lack some tools for handling sound
What are users saying?
“We use Animate to make educational videos, but we also use some of the drawing tools to create vector-based illustrations, and we can export them out from Animate to use them in printed products.“
Key Features
Create new poses for vector images or figures.
It helps you to arrange your layers in a parent-child hierarchy.
● Automatically matches mouth poses to voice inflections.
● Easy to export 360 VR animations.
● Create ads directly with Animate.
● Export images with the correct resolution by bypassing the image optimization and using image settings.
● Key Takeaways from This Episode →
● Using 2D animation software is simpler when you have the right software. You already have a storyboard and a script in mind, but now you can realize your vision in unique and intricate ways.
● So, if you want to make 3D animation, various 3D animation software options are also for you. If any of the products above will serve you well, you could use Filmora, which comes first in the series of 2D animation software.
Want to Make a Meme GIF? Here’s How to Do
Want to Make a Meme GIF? Here’s How to Do
An easy yet powerful editor
Numerous effects to choose from
Detailed tutorials provided by the official channel
You might know that mememe gif, are very much popular in the market of graphics developing on the internet. This kind of meme culture has got well developed in our life style so that you might have not imagined before. Even this topic was not too much exclusive on the web. Thus we have begun to employ memes in our daily life style. This was the one that started as a humorous topic and now during these days it became to be much talked in the form of freedom of speech.
Take for example the cat in grumpy form, a sandwich eating kid or a successful kid all these are the best tips for making a gif meme. Even today they are being used at a very wide scale. Finally you can see that memes of gifs have become a very valuable part of our lives. When you make use of such kind of technology then you will get benefit in the tasks related to media and the internet.
In this article
01 [Can Gifs Be Memes?](#Part 1)
02 [8 Must-Visit GIF Websites to Get Stunning Memes](#Part 2)
03 [How to Make a Meme GIF](#Part 3)
04 [Tips for Inspiring Meme Gifs Ideas](#Part 4)
Part 1 Can Gifs Be Memes?

01What’s Memes?
You will see that memes is a good element of any kind of system or culture. This kind of system could be passed from one person to the other one. This task can be also done well by non genetic methods. You can say when you make meme gif, then you have to use any kind of video, photo, image and piece of any paper showing some written text. This text can be used well by persons who use internet in a very extensive way. Memes generally has a humorous nature so most internet users will have a fine experience while using it.
02What Does Meme and GIF Stand For?
When we talk of meme then you will see that it stands for Multimedia & Electronic Music Experiments. This is a way with which you can develop many customizable electronic instruments in the long way. You will see that Meme was first of all developed by Richard Dawkins in the year 1976. He did it with replicating as well as transmission of meme. When we talk about gif then we will see that stands for Graphics Interchange Format. It was first of all made in the year 1987. With this kind of system you can decrease the size of animated pictures and images.
Part 2 Must-Visit GIF Websites to Get Stunning Memes
01GIPHY
Key Features-
When you make a gif meme then you will see that this website was first of all created by Jack Cooke and Alex Chung. They did it in the form of a GIF and even a sticker keyboard that was having unique characteristics**.** Here you have to simply plug inside a keyboard and click on the button of the search bar. In this way you can create many samples of gif and upload them from the sites of social media like Facebook and Instagram.
02 Tenor
Key Features-
The interface of Tenor is very much good looking and straight forward. With it you can type the keyword concerned with the homepage to your GIF to search it with the help of hit bar. With Tenor you can also make genius ideas related to making a meme gif. When you visit the site of Tenor then you will see that it does not have any scarcity of content when you want to upload graphics interface format with it on your website.
03 GIFER
Key Features-
When you ignore the meme gif site of GIFER then you will see that your list will be incomplete without it. This is one of the best resources for getting and making gif memes on the pin point. When you want to type anything or want to get some information about any subject then click on any of the emotion icons. You may also click on the search bar.
04 Gfycat
Key Features-
The site of Gfycat is the best when you want to so like the activities of making memes. This is the best way to make a gif meme so that you will get good results in the task of making graphic interface samples. Like all the websites of GIF this site will also enable you to seek search content. Just type specific keywords or you might simply click on the left side panel.
05Imgflip
Key Features-
When you want to make a meme gif then just land on the site of Imgflip. This could be a great option. When we compare it with other kind of GIF sites then we will see that they have a simple layout. You can click on the search icon that is at the top and get information about any of your target keywords.
06Reaction GIFs
Key Features-
Here when you land on the site of Reaction GIFs. You can type your favorite keyword like make a meme gif on the right side of this search engine and hit on the search icon. You can also easily upload any kind of content even yet this procedure might take a bit more time. This kind of website is visible in a streamlined way. Here you can even make the entries related to FAQs.
07Imgur
Key Features-
When you talk of Imgur then you will see that you can make and create static images with this kind of site. This is a genuine site with which you can make a meme gif. You can make any kind of theme related to internet graphics when you choose this site.
Part 3 How to Make a Meme GIF
01How to Make a Meme GIF on Ios &Want to make an Android Gift?
When you want to make a Meme GIF on Los then you can make use of Meme maker. Here you can get started well. Just take one such page and upload a GIF on it. You may even click on the text that is seen on the top left to make addition of the needed captions. Here you can add your needed images or audio options. When you want to make an android gif then just make the following steps:-
● Just open the gallery of your desired app and press the images that depict your needed photos.
● Tape the icon that shows the 3 vertical dots.
● Choose the create option and select the GIF option.
● You can create the GIF image and review it in a better way.
02How to Make a Meme GIF on Window? Here’s How to & Mac?
When you make a meme gif on Window then you have to see and take some steps:-
● Just land on the IMGFlip website.
● You have to click on the icon of GIF icon.
● Just import an image and video to make it converted to GIF.
● You may add a text to the GIF.
● You may also customize the speed and count the times that you have played it.
● Finally you may save it in animated form.
Part 4 Tips for Inspiring Meme Gifs Ideas
When you want to add and follow tips for inspiring more ideas for making meme gif then you can see that such ideas are even being used at TV shows and movies. You can even make attractive images with them. You can easily loop these images to create the best animated clips. After you make a meme gif then you will see that even you can use a pop reference in the long way. When you do the combination of meme and gif then you can also make humorous clips that are called as meme gif. Even you can make use of the content that is concerned with Wondershare Filmora Video Editor VII so that your graphics will appear well in the long way.
Wondershare Filmora - Best Video Editor for Mac/Windows
5,481,435 people have downloaded it.
Build unique custom animations without breaking a sweat.
Focus on creating epic stories and leave the details to Filmora’s auto features.
Start a creative adventure with drag & drop effects and endless possibilities.
Filmora simplifies advanced features to save you time and effort.
Filmora cuts out repetition so you can move on to your next creative breakthrough.
Brief summary
● When you make meme gif then you will see that with this technology you can create a fine system on the internet frame as far as meme is concerned with Filmora VII. On the other hand gif stands for graphic interface formats.
● You can visit more websites for gif and meme creation on the internet and here you will get many unique websites for gif creation. You can also take help from graphics experts who will give you the best output concerned with gif and making a meme in the long way.
● You can get more tips on the web when you want to make gif samples on the platform of android and Mac. Here you will have to take and follow certain steps and with it you will reach your goal to make the best graphical interface even on all kinds of smart phones etc. Here you will also get support to make a meme gif. Taking care about what you need for meme gif
● Key Takeaways from This Episode →
● When we talk about the final conclusion of this article then we will see that meme gif will be a nice way to develop advanced methods of media and graphics interchange format. Here you will see that this could be a free method with which you can make a perfect meme.
● You can also use GIPHY on the technology platform of iPad, iPhone and Android. You can also make the task of downloading of GIPHY on your phone that might be of any model. You can make memes gif for your app store in your phone. You can do this task easily on your search bar. Most of these apps are available in black color.
You might know that mememe gif, are very much popular in the market of graphics developing on the internet. This kind of meme culture has got well developed in our life style so that you might have not imagined before. Even this topic was not too much exclusive on the web. Thus we have begun to employ memes in our daily life style. This was the one that started as a humorous topic and now during these days it became to be much talked in the form of freedom of speech.
Take for example the cat in grumpy form, a sandwich eating kid or a successful kid all these are the best tips for making a gif meme. Even today they are being used at a very wide scale. Finally you can see that memes of gifs have become a very valuable part of our lives. When you make use of such kind of technology then you will get benefit in the tasks related to media and the internet.
In this article
01 [Can Gifs Be Memes?](#Part 1)
02 [8 Must-Visit GIF Websites to Get Stunning Memes](#Part 2)
03 [How to Make a Meme GIF](#Part 3)
04 [Tips for Inspiring Meme Gifs Ideas](#Part 4)
Part 1 Can Gifs Be Memes?
01What’s Memes?
You will see that memes is a good element of any kind of system or culture. This kind of system could be passed from one person to the other one. This task can be also done well by non genetic methods. You can say when you make meme gif, then you have to use any kind of video, photo, image and piece of any paper showing some written text. This text can be used well by persons who use internet in a very extensive way. Memes generally has a humorous nature so most internet users will have a fine experience while using it.
02What Does Meme and GIF Stand For?
When we talk of meme then you will see that it stands for Multimedia & Electronic Music Experiments. This is a way with which you can develop many customizable electronic instruments in the long way. You will see that Meme was first of all developed by Richard Dawkins in the year 1976. He did it with replicating as well as transmission of meme. When we talk about gif then we will see that stands for Graphics Interchange Format. It was first of all made in the year 1987. With this kind of system you can decrease the size of animated pictures and images.
Part 2 Must-Visit GIF Websites to Get Stunning Memes
01GIPHY
Key Features-
When you make a gif meme then you will see that this website was first of all created by Jack Cooke and Alex Chung. They did it in the form of a GIF and even a sticker keyboard that was having unique characteristics**.** Here you have to simply plug inside a keyboard and click on the button of the search bar. In this way you can create many samples of gif and upload them from the sites of social media like Facebook and Instagram.
02 Tenor
Key Features-
The interface of Tenor is very much good looking and straight forward. With it you can type the keyword concerned with the homepage to your GIF to search it with the help of hit bar. With Tenor you can also make genius ideas related to making a meme gif. When you visit the site of Tenor then you will see that it does not have any scarcity of content when you want to upload graphics interface format with it on your website.
03 GIFER
Key Features-
When you ignore the meme gif site of GIFER then you will see that your list will be incomplete without it. This is one of the best resources for getting and making gif memes on the pin point. When you want to type anything or want to get some information about any subject then click on any of the emotion icons. You may also click on the search bar.
04 Gfycat
Key Features-
The site of Gfycat is the best when you want to so like the activities of making memes. This is the best way to make a gif meme so that you will get good results in the task of making graphic interface samples. Like all the websites of GIF this site will also enable you to seek search content. Just type specific keywords or you might simply click on the left side panel.
05Imgflip
Key Features-
When you want to make a meme gif then just land on the site of Imgflip. This could be a great option. When we compare it with other kind of GIF sites then we will see that they have a simple layout. You can click on the search icon that is at the top and get information about any of your target keywords.
06Reaction GIFs
Key Features-
Here when you land on the site of Reaction GIFs. You can type your favorite keyword like make a meme gif on the right side of this search engine and hit on the search icon. You can also easily upload any kind of content even yet this procedure might take a bit more time. This kind of website is visible in a streamlined way. Here you can even make the entries related to FAQs.
07Imgur
Key Features-
When you talk of Imgur then you will see that you can make and create static images with this kind of site. This is a genuine site with which you can make a meme gif. You can make any kind of theme related to internet graphics when you choose this site.
Part 3 How to Make a Meme GIF
01How to Make a Meme GIF on Ios &Want to make an Android Gift?
When you want to make a Meme GIF on Los then you can make use of Meme maker. Here you can get started well. Just take one such page and upload a GIF on it. You may even click on the text that is seen on the top left to make addition of the needed captions. Here you can add your needed images or audio options. When you want to make an android gif then just make the following steps:-
● Just open the gallery of your desired app and press the images that depict your needed photos.
● Tape the icon that shows the 3 vertical dots.
● Choose the create option and select the GIF option.
● You can create the GIF image and review it in a better way.
02How to Make a Meme GIF on Window? Here’s How to & Mac?
When you make a meme gif on Window then you have to see and take some steps:-
● Just land on the IMGFlip website.
● You have to click on the icon of GIF icon.
● Just import an image and video to make it converted to GIF.
● You may add a text to the GIF.
● You may also customize the speed and count the times that you have played it.
● Finally you may save it in animated form.
Part 4 Tips for Inspiring Meme Gifs Ideas
When you want to add and follow tips for inspiring more ideas for making meme gif then you can see that such ideas are even being used at TV shows and movies. You can even make attractive images with them. You can easily loop these images to create the best animated clips. After you make a meme gif then you will see that even you can use a pop reference in the long way. When you do the combination of meme and gif then you can also make humorous clips that are called as meme gif. Even you can make use of the content that is concerned with Wondershare Filmora Video Editor VII so that your graphics will appear well in the long way.
Wondershare Filmora - Best Video Editor for Mac/Windows
5,481,435 people have downloaded it.
Build unique custom animations without breaking a sweat.
Focus on creating epic stories and leave the details to Filmora’s auto features.
Start a creative adventure with drag & drop effects and endless possibilities.
Filmora simplifies advanced features to save you time and effort.
Filmora cuts out repetition so you can move on to your next creative breakthrough.
Brief summary
● When you make meme gif then you will see that with this technology you can create a fine system on the internet frame as far as meme is concerned with Filmora VII. On the other hand gif stands for graphic interface formats.
● You can visit more websites for gif and meme creation on the internet and here you will get many unique websites for gif creation. You can also take help from graphics experts who will give you the best output concerned with gif and making a meme in the long way.
● You can get more tips on the web when you want to make gif samples on the platform of android and Mac. Here you will have to take and follow certain steps and with it you will reach your goal to make the best graphical interface even on all kinds of smart phones etc. Here you will also get support to make a meme gif. Taking care about what you need for meme gif
● Key Takeaways from This Episode →
● When we talk about the final conclusion of this article then we will see that meme gif will be a nice way to develop advanced methods of media and graphics interchange format. Here you will see that this could be a free method with which you can make a perfect meme.
● You can also use GIPHY on the technology platform of iPad, iPhone and Android. You can also make the task of downloading of GIPHY on your phone that might be of any model. You can make memes gif for your app store in your phone. You can do this task easily on your search bar. Most of these apps are available in black color.
Techniques on Making After Effects 2D Animation
Adobe After Effects is probably the most versatile software you can add to your arsenal of skills on your journey to learn After Effects 2D animation. Both beginners and professionals can brush up their animation skills on After Effects with some help from tutorials and videos. When it comes to experimenting with visual effects, motion graphics, and 3D composting, Adobe After Effects is recommended as an industry-standard software. So it should come as no surprise that there is a surplus of After Effects tutorials and information on the internet. To help simplify things, here’s a compiled list of Adobe After Effects courses along with a few tips to get started.
In this article
01 [Practical Online 2D Animation Courses](#Part 1)
02 [How to Create 2D Motion Graphics with After Effects](#Part 2)
03 [5 Best Animation After Effects that you must know](#Part 3)
04 [5 Character Animation Tools for After Effects](#Part 4)
Part 1 Practical Online 2D Animation Courses
Learning After Effects need not be complicated. You can use this tool to help you create amazing designs from your sheer imagination. Here is a list of the best courses which are self-paced so you don’t need to worry about fitting them into your schedule. Some of these courses are primarily for beginners who are seeking to orient themselves to the basics. While other courses have recent insights into the latest techniques curated by the industry experts. The courses in this list are diverse and are from different platforms like Domestika, Coursera, Adobe, and YouTube.
1. Getting Started - Adobe
The official Adobe learning site has its own course for introducing After Effects. After all, the software is a product of Adobe itself. This tutorial is purely for complete beginners and is designed to briefly introduce the interface and basic functioning of Adobe After Effects. It takes you through the manual control and menu options which you will need to familiarize yourself with.
2. The Basics – YouTube
This free-to-watch After Effects tutorial is presented by a very passionate photographer and YouTuber Peter Meckinnon. He walks you through the various elements the Adobe interface puts at your disposal. These elements are quite artistically introduced by Peter as he animates a basic title project on Adobe.
3. How to Animate a line - YouTube
When you are introduced to a vast world of possibilities, it can be a bit overwhelming. Which is why starting from the very basics is always a good idea. This next YouTube tutorial shows you step by step how to animate a line on Adobe After Effects from one point to another.
4. Introduction and Advanced After Effects – Domestika
Domestika is an online learning platform that is great for freelancers and independent artists who can purchase self-paced lessons on topics like graphic design and animation. The Introduction and Advanced After Effects tutorials by Carlos Zensuke Albarran are a comprehensive bundle of lessons that quench your thirst for 2D effects animation a bit further.
5. Typography Animation – Domestika
The mark of a professional is his specialization. As you gain more experience in practicing Adobe After Effects, you can begin trying out more bold and stylistic animations with simple typographic techniques. It would not only make you more confident as a motion graphics designer but also equip you with fluid skills as a freelancer. Typographic motion graphics is a cash cow for many After Effect animators.
6. Vectorial Animation – Domestika
Cartoonist animated videos and motion designs are quite interesting to animate. Vectorial 2D animation is quite popular among YouTube tutorials and explainer videos. They make for excellent corporate animations. You can find an amazing Domestika tutorial on Vectorial that walks you through in simple steps on Frame by Frame style animations.
7. Getting Started with Motion Graphics - Coursera
Coursera is another amazing online learning platform for gaining access to Beginner to Advanced courses on Adobe After Effects. This one tutorial introduces you to Beginner level motion graphics where you can learn from short self-paced videos.
8. Getting Started with Motion Graphics - SkillShare
SkillShare is another amazing online learning platform for gaining access to Beginner to Advanced courses on Adobe After Effects. This one tutorial introduces you to Beginner level motion graphics where you can learn from short self-paced videos. It is guided by a leading professional in motion graphics and visual effects who covers all the bases alongside hands-projects.
9. Make Simple Logo Intro in After Effects – YouTube
Creating Intros for your videos is probably the most cost-effective marketing gizmos employed today. This free tutorial on YouTube from Tech Infusion is a simple-to-follow video that sheds some light on how to create eye-catching intros that instantly catches your audience’s attention.
10. Work with Composition - Adobe
Working with After Effects is all about creating gorgeous compositions that pop. This Adobe tutorial equips you with the basics of creating animation on Adobe After Effects with multiple layers and keyframes.
Part 2 How to Create 2D Motion Graphics with After Effects
The astonishing world of intriguing after-effects is vast. Whether you do it as a profession or simply as a hobby, learning how to add after-effects to your 2d motion graphics is always an amazing idea. Worried how you’d understand the tools to add after-effects to your animation? Well, we’ve got you covered! Today we’ll be looking at how you can add after-effects to your 2d animation.

●To make a new 2D graphics in after effects, you need to make a new composition. To do so, head to the composition menu in the menu bar. Upon clicking on the composition menu, a new drop-down menu would open up. From the drop-down menu, click on “new composition”.

●A new setting box would pop up, in this settings box you can alter the settings of the composition. If you do not wish to change any setting, simply click on “ok” and proceed ahead.

●Next, you need to find the tool panel in the main menu bar. Upon clicking on it, a new drop-down menu will appear, click on “star tool”. We’re simply taking the star shape, for instance, alternatively, you can select and another shape too…

●Once you’ve selected the shape you want, draw by clicking your mouse and dragging

●Click on the shape and the layers will appear on the left of your screen. From the popped up screen, click on “properties”. Here you can find multiple animation options and you can even edit frame by frame. Add frames at regular intervals and move according to your wish

Part 3 5 Best Animation After Effects that you must know
1. Stacking animation – YouTube
Stacking animation is an excellent and simple trick that can make any animation look cool and complex. The stacking animation is nothing but the use of the stacking template multiple times. To do so, you just need to duplicate a few of the base layers. Next, you need to offset the duplicated frames by a few frames and finally add some effects. The Adding of stacking animation will result in a slight extension of your animation layers. You can further customize your frames by adding effects or color to enhance the animation.

2. Light sweeps
An advantage of using the after effects software is that it offers several drag and drop features which you can simply drag and drop to your animation to enhance its looks. A light sweep animation is one such animation that can add great value to your animation. You can add this effect by following the steps given below
●Head to “effects” from your main interface
●Here you need to find “generate”
●Now from the list of drag and drop animations, drag and drop “light sweeps” onto your workspace
You can then change and customize almost any aspect of the animation simply by clicking on it and changing the settings

3. Quick shape animation
This is a very cool trick that you can use on your 2d objects! This includes the creation of your own layer(you can use any 2d shape). Further, you need to duplicate your shape and the stagger the animation. This gives the entire animation an interesting and engaging effect. The trick is very resourceful while dealing with 2d objects.

4. Animate your background
When your entire animation looks slightly basic and you wish to give your animation a zest, this trick is highly useful! If you’re working with colored backgrounds, this animation trick can help make it more attractive. This animation is simply just adding motion to your background making it look like it’s moving in or out.

5. Graphics reflection
Although this method is slightly complicated, it could enhance the animation by leaps and bounds. To do so, you need to write a fancy text of your choice, then you need to duplicate this text, and further, you need to flip it vertically. To make it look more realistic, you can add the blur effect. This will make it look like the duplicated text is a reflection of the original text

Part 4 5 Character Animation Tools for After Effects
1. Rubber hose 2
Rubber hose is one of the primitive tools for adding animations. This is mainly because it was found in the early 2000s and back then, animations had wobbly legs and an absurd body structure. This tool has several cool inbuilt functions that make the animation so much simpler. The robust tool. makes animation pretty simple and hassle-free. Rubber hose 2 is an advanced version of rubber hose, it has several advanced features. The plug-in is however not free, you’d need to purchase it at $45 in order to gain a lifetime access.
2. Duik
Duik is one of the most advanced and comprehensive character animation tools in the market. It was initially launched in 2008, but since then there’s been a vast improvement in the tool’s features and today it’s one of the picks to perform animation using rigging and other animation techniques. Duik has several tools that make the animation so convenient. The tool has features such as auto rig, which helps save time while animating. Other tools include effects such as bones, rigging, various filters, and effects.
3. Joystick ‘n sliders
Joystick’n sliders is another highly utilitarian tool for animators. Along with key animation features such as rigging and boning, the tool has other cool and highly useful features to make your animation interesting! The user interface of this tool is a big plus, the simplicity of the user interface makes the tool perfect for beginners and advanced level animators. The tool is simple to use and has a plethora of cool features which could help you make your animation highly engaging.
4. Puppet tool 3
Puppet tool 3 is an after effects plugin that could help you create character animations. The plug-in is different from the in-built puppet tool in after effects. The puppet tool inbuilt into after effects are the Rigging tool for animation, however using the inbuilt tool is slightly sophisticated. Puppet tool 3 is not an individual tool but works in coordination with the inbuilt the puppet tool. Since using the inbuilt tool was complex, puppet tool 3 made it simple. Apart from rigging, the plugin also allows you to work with a few additional features. You can buy the plug-in for only $39.95!
5. Adobe animate character
Adobe character animation is the in-house plugin of Adobe to animate characters. However, the tool is probably still in development. Adobe has been working on releasing this tool for a while now, and in the latest version of after effects, Adobe added the beta version of the character animator. Character animator is probably the most efficient and advanced animation tool. It uses facial recognition for animations and allows you to perform almost all basic animations. The software is perfect when you’re trying to create a complex animated character.
Key Takeaways from This Episode
● Today we’ve dwelled a lot into animation and the tools available for animation.
● We’ve seen how animation could be enhanced using the inbuilt tools available in Adobe after effects.
● We’ve also gone a step further and seen the external plugin tools that you can use to make character animations and highly advanced 2d effects ok animations.
● We’ve also taken an overview on how to create a simple basic 2d motion animation, all in all, we’ve gone from understanding the beginner level animation to understanding advanced animation
02 [How to Create 2D Motion Graphics with After Effects](#Part 2)
03 [5 Best Animation After Effects that you must know](#Part 3)
04 [5 Character Animation Tools for After Effects](#Part 4)
Part 1 Practical Online 2D Animation Courses
Learning After Effects need not be complicated. You can use this tool to help you create amazing designs from your sheer imagination. Here is a list of the best courses which are self-paced so you don’t need to worry about fitting them into your schedule. Some of these courses are primarily for beginners who are seeking to orient themselves to the basics. While other courses have recent insights into the latest techniques curated by the industry experts. The courses in this list are diverse and are from different platforms like Domestika, Coursera, Adobe, and YouTube.
1. Getting Started - Adobe
The official Adobe learning site has its own course for introducing After Effects. After all, the software is a product of Adobe itself. This tutorial is purely for complete beginners and is designed to briefly introduce the interface and basic functioning of Adobe After Effects. It takes you through the manual control and menu options which you will need to familiarize yourself with.
2. The Basics – YouTube
This free-to-watch After Effects tutorial is presented by a very passionate photographer and YouTuber Peter Meckinnon. He walks you through the various elements the Adobe interface puts at your disposal. These elements are quite artistically introduced by Peter as he animates a basic title project on Adobe.
3. How to Animate a line - YouTube
When you are introduced to a vast world of possibilities, it can be a bit overwhelming. Which is why starting from the very basics is always a good idea. This next YouTube tutorial shows you step by step how to animate a line on Adobe After Effects from one point to another.
4. Introduction and Advanced After Effects – Domestika
Domestika is an online learning platform that is great for freelancers and independent artists who can purchase self-paced lessons on topics like graphic design and animation. The Introduction and Advanced After Effects tutorials by Carlos Zensuke Albarran are a comprehensive bundle of lessons that quench your thirst for 2D effects animation a bit further.
5. Typography Animation – Domestika
The mark of a professional is his specialization. As you gain more experience in practicing Adobe After Effects, you can begin trying out more bold and stylistic animations with simple typographic techniques. It would not only make you more confident as a motion graphics designer but also equip you with fluid skills as a freelancer. Typographic motion graphics is a cash cow for many After Effect animators.
6. Vectorial Animation – Domestika
Cartoonist animated videos and motion designs are quite interesting to animate. Vectorial 2D animation is quite popular among YouTube tutorials and explainer videos. They make for excellent corporate animations. You can find an amazing Domestika tutorial on Vectorial that walks you through in simple steps on Frame by Frame style animations.
7. Getting Started with Motion Graphics - Coursera
Coursera is another amazing online learning platform for gaining access to Beginner to Advanced courses on Adobe After Effects. This one tutorial introduces you to Beginner level motion graphics where you can learn from short self-paced videos.
8. Getting Started with Motion Graphics - SkillShare
SkillShare is another amazing online learning platform for gaining access to Beginner to Advanced courses on Adobe After Effects. This one tutorial introduces you to Beginner level motion graphics where you can learn from short self-paced videos. It is guided by a leading professional in motion graphics and visual effects who covers all the bases alongside hands-projects.
9. Make Simple Logo Intro in After Effects – YouTube
Creating Intros for your videos is probably the most cost-effective marketing gizmos employed today. This free tutorial on YouTube from Tech Infusion is a simple-to-follow video that sheds some light on how to create eye-catching intros that instantly catches your audience’s attention.
10. Work with Composition - Adobe
Working with After Effects is all about creating gorgeous compositions that pop. This Adobe tutorial equips you with the basics of creating animation on Adobe After Effects with multiple layers and keyframes.
Part 2 How to Create 2D Motion Graphics with After Effects
The astonishing world of intriguing after-effects is vast. Whether you do it as a profession or simply as a hobby, learning how to add after-effects to your 2d motion graphics is always an amazing idea. Worried how you’d understand the tools to add after-effects to your animation? Well, we’ve got you covered! Today we’ll be looking at how you can add after-effects to your 2d animation.
●To make a new 2D graphics in after effects, you need to make a new composition. To do so, head to the composition menu in the menu bar. Upon clicking on the composition menu, a new drop-down menu would open up. From the drop-down menu, click on “new composition”.
●A new setting box would pop up, in this settings box you can alter the settings of the composition. If you do not wish to change any setting, simply click on “ok” and proceed ahead.
●Next, you need to find the tool panel in the main menu bar. Upon clicking on it, a new drop-down menu will appear, click on “star tool”. We’re simply taking the star shape, for instance, alternatively, you can select and another shape too…
●Once you’ve selected the shape you want, draw by clicking your mouse and dragging
●Click on the shape and the layers will appear on the left of your screen. From the popped up screen, click on “properties”. Here you can find multiple animation options and you can even edit frame by frame. Add frames at regular intervals and move according to your wish
Part 3 5 Best Animation After Effects that you must know
1. Stacking animation – YouTube
Stacking animation is an excellent and simple trick that can make any animation look cool and complex. The stacking animation is nothing but the use of the stacking template multiple times. To do so, you just need to duplicate a few of the base layers. Next, you need to offset the duplicated frames by a few frames and finally add some effects. The Adding of stacking animation will result in a slight extension of your animation layers. You can further customize your frames by adding effects or color to enhance the animation.
2. Light sweeps
An advantage of using the after effects software is that it offers several drag and drop features which you can simply drag and drop to your animation to enhance its looks. A light sweep animation is one such animation that can add great value to your animation. You can add this effect by following the steps given below
●Head to “effects” from your main interface
●Here you need to find “generate”
●Now from the list of drag and drop animations, drag and drop “light sweeps” onto your workspace
You can then change and customize almost any aspect of the animation simply by clicking on it and changing the settings
3. Quick shape animation
This is a very cool trick that you can use on your 2d objects! This includes the creation of your own layer(you can use any 2d shape). Further, you need to duplicate your shape and the stagger the animation. This gives the entire animation an interesting and engaging effect. The trick is very resourceful while dealing with 2d objects.
4. Animate your background
When your entire animation looks slightly basic and you wish to give your animation a zest, this trick is highly useful! If you’re working with colored backgrounds, this animation trick can help make it more attractive. This animation is simply just adding motion to your background making it look like it’s moving in or out.
5. Graphics reflection
Although this method is slightly complicated, it could enhance the animation by leaps and bounds. To do so, you need to write a fancy text of your choice, then you need to duplicate this text, and further, you need to flip it vertically. To make it look more realistic, you can add the blur effect. This will make it look like the duplicated text is a reflection of the original text
Part 4 5 Character Animation Tools for After Effects
1. Rubber hose 2
Rubber hose is one of the primitive tools for adding animations. This is mainly because it was found in the early 2000s and back then, animations had wobbly legs and an absurd body structure. This tool has several cool inbuilt functions that make the animation so much simpler. The robust tool. makes animation pretty simple and hassle-free. Rubber hose 2 is an advanced version of rubber hose, it has several advanced features. The plug-in is however not free, you’d need to purchase it at $45 in order to gain a lifetime access.
2. Duik
Duik is one of the most advanced and comprehensive character animation tools in the market. It was initially launched in 2008, but since then there’s been a vast improvement in the tool’s features and today it’s one of the picks to perform animation using rigging and other animation techniques. Duik has several tools that make the animation so convenient. The tool has features such as auto rig, which helps save time while animating. Other tools include effects such as bones, rigging, various filters, and effects.
3. Joystick ‘n sliders
Joystick’n sliders is another highly utilitarian tool for animators. Along with key animation features such as rigging and boning, the tool has other cool and highly useful features to make your animation interesting! The user interface of this tool is a big plus, the simplicity of the user interface makes the tool perfect for beginners and advanced level animators. The tool is simple to use and has a plethora of cool features which could help you make your animation highly engaging.
4. Puppet tool 3
Puppet tool 3 is an after effects plugin that could help you create character animations. The plug-in is different from the in-built puppet tool in after effects. The puppet tool inbuilt into after effects are the Rigging tool for animation, however using the inbuilt tool is slightly sophisticated. Puppet tool 3 is not an individual tool but works in coordination with the inbuilt the puppet tool. Since using the inbuilt tool was complex, puppet tool 3 made it simple. Apart from rigging, the plugin also allows you to work with a few additional features. You can buy the plug-in for only $39.95!
5. Adobe animate character
Adobe character animation is the in-house plugin of Adobe to animate characters. However, the tool is probably still in development. Adobe has been working on releasing this tool for a while now, and in the latest version of after effects, Adobe added the beta version of the character animator. Character animator is probably the most efficient and advanced animation tool. It uses facial recognition for animations and allows you to perform almost all basic animations. The software is perfect when you’re trying to create a complex animated character.
Key Takeaways from This Episode
● Today we’ve dwelled a lot into animation and the tools available for animation.
● We’ve seen how animation could be enhanced using the inbuilt tools available in Adobe after effects.
● We’ve also gone a step further and seen the external plugin tools that you can use to make character animations and highly advanced 2d effects ok animations.
● We’ve also taken an overview on how to create a simple basic 2d motion animation, all in all, we’ve gone from understanding the beginner level animation to understanding advanced animation
5 Foolproof Amazing Anime Text to Speech Tips
5 Foolproof Amazing Anime Text to Speech Tips for Makers
An easy yet powerful editor
Numerous effects to choose from
Detailed tutorials provided by the official channel
Our topic for today’s article is on that exact same subject. Or, rather, more specifically, anime text-to-speech.
For those who want more than the usual robotic text-to-speech AI that you see in more professional software. Learn more about all this below, we’ve prepared an entire guide for you!
In this article
01 [What is the Most Realistic Sounding Text to Speech & How to Do It?](#Part 1)
02 [How to Make Your Own Text to Speech Videos for Youtube](#Part 2)
03 [How to Get More Voices for Text to Speech?](#Part 3)
04 [Top 5 Tips on Anime Text to Speech](#Part 4)
Part 1 What is the Most Realistic Sounding Text to Speech & How to Do It?
To start off, we’ve included this little second on need-to-know information regarding text-to-speech. Starting with:
01How did text to speech get popular?
Perhaps unsurprisingly, the text-to-speech function was developed to increase accessibility for those who have trouble reading on screen-text. Either as a result of visual impairment, are blindness. However, with its emergence came popular programs like Audible, which introduced even those without accessibility problems to its convenience for multi-tasking purposes.
02How to get the most realistic sounding text to speech?
There are several ways you can increase the natural sound of your text-to-speech:
● You can choose a tone that suits your taste.
● You can choose a voice gender that you are more comfortable with.
● And you can increase the speed of the text to reduce the awkward, and unnatural pauses that occur after each word.
In the end, though, the best way to get realistic speech is to find a tool that offers high-quality audio options. Which is what we’ll be introducing in the latter sections:
Part 2 How to Make Your Own Text to Speech Videos for YouTube
If you want to create your own anime text-to-speech for your YouTube videos (which is popular with a lot of YouTubers these days), the process is about the same no matter what text-to-speech option you end up choosing in the end. For our examples below, we will be using Natural Readers though, which is a FREE tool, making it a good choice for those who are just looking to try it out.
Step 1: Compose Your Text
The first step is to compose your text! You might prefer to do this on Google Docs or Word, but a lot of text-to-speech tools do offer you a way of composing your text along with them (like the online tool Natural Readers):

Step 2: Choose Voice / Reader
Next, it’s time to choose the reader that you want your text to be read by!
Usually, there are options for different types of accents and languages offered. So, if you want your text to speech to match that of your desired anime characters, you should play around with these options to get the right one.

Step 3: Choose Reading Speed!
Next, it’s time to choose your desired reading speed!
Most readers start off at 1X speed on average, but we personally recommend going for at least 1.25X - 1.5X for an instantly more natural-sounding text-to-speech anime characters.

Step 4: Choose Output Format
And finally, to finish us off, it’s time to choose what output format you want your text-to-speech audio to be! To keep this simple for uploading to YouTube, we recommend sticking with MP3, which most editors accept.

Part 3 How to Get More Voices for Text to Speech?
If you think that the available cartoon characters text-to-speech voices you have are not quite doing it for your project, then you can always explore alternative, third-party options! There are many of these available. Although, you’ll have to check with your text-to-speech reader or maker to make sure that it allows for such a feat:
01Method 1: Windows Text-to-Speech Voices
If you’re looking to change your computer’s text-to-speech voice, then the place to look for this is on ‘Control Panel > Speech’. There, not only can you choose from a variety of different voice options, but you can also change voice speed and voice pitch (how high or low the pitch is), which is a great way of getting a very specific kind of tone for your anime text-to-speech creations.

02Method 2: Third-Party Voices (Screaming Bee)
Next is the third-party resource, Screaming Bee , which offers a good variety of text-to-speech voices that you can try out as well! Using this method will, of course, require downloading and applying these voices for your chosen text-to-speech reader. For example, if you want to use the Windows reader, go to the Control Panel > Speech page for the option to apply it there.

03Method 3: Third-Party Voices (Cepstral Voices)
Another resource that you can check out is Cepstral Voices . Just like Screaming Bee, it offers a range of text-to-speech voices that you can try out to see which one suits your taste most. This includes text-to-speech cartoon characters and text-to-speech anime characters voices!

Part 4 Top 5 Tips on Anime Text to Speech
Now, onto some more anime text-to-speech options that you can try in order to make your text-to-speech script sound exactly like your favorite cartoon or anime characters! For this list, we’ve not only included a description of each reader but also why you might want to try it out:
01Flixier
Flixier is the first anime text-to-speech maker on this list! It is not a free solution. You can try it out for FREE, but if you want to use it for its full capacity, then you’ll need to pay for one of their subscription packages, which start at $10 per month (for access to longer audios, unlimited projects, and more advanced export options.)
● Flixier comes with many different voice options.
● It is an online tool, so no download or installation is required.
● It comes with advanced team functionalities.

02Woord
Woord is our next pick because it works very efficiently at turning text into speech. All you need to do is plug in your text and it will convert it immediately! Much like Flixier, however, it is a freemium tool. So, while you can try it out for free, if you truly want to use it for creating professional projects, you’ll need to unlock one of its subscription packages (which start at $25 per month!)
● Instant text-to-speech maker.
● An online tool, no need for download or installation.
● Lots of natural-sounding voices to choose from.

03Speechelo
Speechelo is a bit different from the two text-to-speech makers on this list. However, that may just mean that it is a more preferable option for some. More specifically, it’s really more of a ‘voice-over-maker’. It does still use AI in order to create human-like voiceovers, with several different options to voice and language. The difference then lies in the fact that it is a one-time payment software that normally costs around $100. In this way, you can avoid long-term ongoing subscription plans. But it is a heavier commitment from the get-go.
● High-quality AI voices for creating realistic voice-overs.
● One-time payment only! No Subscription fees are needed.
● Works in several different languages.

04Cartoon Animator 4
Cartoon Animator 4 is a good option if you’re really looking for that anime or character style for your audio. It works just like your average text-to-speech maker, generally, although it does also offer a couple of more advanced features for those who are looking into animation.
● Free-to-use text-to-speech anime character
● Adjustable volume, pitch, and speed voice parameters.
● A wide variety of voice options to choose from.

05TTS Reader
TTSReader, much like Cartoon Animator 4, is a FREE online tool that you can use in order to create quick and easy text-to-speech audio for your cartoon/anime characters. It doesn’t have as many advanced features as some of the other tools out there, but it can get the job done if all you’re looking for is something easy to use.
● Available to use online for FREE.
● Variety of different voice options.
● Adjustable speed for voice.

Key Takeaways from This Episode
● If you’re looking to increase conversions with better-sounding voiceovers for your video content, then it’s important that you’re aware of all the different options out there!
● Most of these text-to-speech tools work in the same way, but you’ll notice that some of them offer more advanced tools than others.
● In the end, you’ll have to find one that works with your budget and learn how to play around with its settings to make sure that you are getting the most out of your text-to-speech maker.
Our topic for today’s article is on that exact same subject. Or, rather, more specifically, anime text-to-speech.
For those who want more than the usual robotic text-to-speech AI that you see in more professional software. Learn more about all this below, we’ve prepared an entire guide for you!
In this article
01 [What is the Most Realistic Sounding Text to Speech & How to Do It?](#Part 1)
02 [How to Make Your Own Text to Speech Videos for Youtube](#Part 2)
03 [How to Get More Voices for Text to Speech?](#Part 3)
04 [Top 5 Tips on Anime Text to Speech](#Part 4)
Part 1 What is the Most Realistic Sounding Text to Speech & How to Do It?
To start off, we’ve included this little second on need-to-know information regarding text-to-speech. Starting with:
01How did text to speech get popular?
Perhaps unsurprisingly, the text-to-speech function was developed to increase accessibility for those who have trouble reading on screen-text. Either as a result of visual impairment, are blindness. However, with its emergence came popular programs like Audible, which introduced even those without accessibility problems to its convenience for multi-tasking purposes.
02How to get the most realistic sounding text to speech?
There are several ways you can increase the natural sound of your text-to-speech:
● You can choose a tone that suits your taste.
● You can choose a voice gender that you are more comfortable with.
● And you can increase the speed of the text to reduce the awkward, and unnatural pauses that occur after each word.
In the end, though, the best way to get realistic speech is to find a tool that offers high-quality audio options. Which is what we’ll be introducing in the latter sections:
Part 2 How to Make Your Own Text to Speech Videos for YouTube
If you want to create your own anime text-to-speech for your YouTube videos (which is popular with a lot of YouTubers these days), the process is about the same no matter what text-to-speech option you end up choosing in the end. For our examples below, we will be using Natural Readers though, which is a FREE tool, making it a good choice for those who are just looking to try it out.
Step 1: Compose Your Text
The first step is to compose your text! You might prefer to do this on Google Docs or Word, but a lot of text-to-speech tools do offer you a way of composing your text along with them (like the online tool Natural Readers):
Step 2: Choose Voice / Reader
Next, it’s time to choose the reader that you want your text to be read by!
Usually, there are options for different types of accents and languages offered. So, if you want your text to speech to match that of your desired anime characters, you should play around with these options to get the right one.
Step 3: Choose Reading Speed!
Next, it’s time to choose your desired reading speed!
Most readers start off at 1X speed on average, but we personally recommend going for at least 1.25X - 1.5X for an instantly more natural-sounding text-to-speech anime characters.
Step 4: Choose Output Format
And finally, to finish us off, it’s time to choose what output format you want your text-to-speech audio to be! To keep this simple for uploading to YouTube, we recommend sticking with MP3, which most editors accept.
Part 3 How to Get More Voices for Text to Speech?
If you think that the available cartoon characters text-to-speech voices you have are not quite doing it for your project, then you can always explore alternative, third-party options! There are many of these available. Although, you’ll have to check with your text-to-speech reader or maker to make sure that it allows for such a feat:
01Method 1: Windows Text-to-Speech Voices
If you’re looking to change your computer’s text-to-speech voice, then the place to look for this is on ‘Control Panel > Speech’. There, not only can you choose from a variety of different voice options, but you can also change voice speed and voice pitch (how high or low the pitch is), which is a great way of getting a very specific kind of tone for your anime text-to-speech creations.
02Method 2: Third-Party Voices (Screaming Bee)
Next is the third-party resource, Screaming Bee , which offers a good variety of text-to-speech voices that you can try out as well! Using this method will, of course, require downloading and applying these voices for your chosen text-to-speech reader. For example, if you want to use the Windows reader, go to the Control Panel > Speech page for the option to apply it there.
03Method 3: Third-Party Voices (Cepstral Voices)
Another resource that you can check out is Cepstral Voices . Just like Screaming Bee, it offers a range of text-to-speech voices that you can try out to see which one suits your taste most. This includes text-to-speech cartoon characters and text-to-speech anime characters voices!
Part 4 Top 5 Tips on Anime Text to Speech
Now, onto some more anime text-to-speech options that you can try in order to make your text-to-speech script sound exactly like your favorite cartoon or anime characters! For this list, we’ve not only included a description of each reader but also why you might want to try it out:
01Flixier
Flixier is the first anime text-to-speech maker on this list! It is not a free solution. You can try it out for FREE, but if you want to use it for its full capacity, then you’ll need to pay for one of their subscription packages, which start at $10 per month (for access to longer audios, unlimited projects, and more advanced export options.)
● Flixier comes with many different voice options.
● It is an online tool, so no download or installation is required.
● It comes with advanced team functionalities.
02Woord
Woord is our next pick because it works very efficiently at turning text into speech. All you need to do is plug in your text and it will convert it immediately! Much like Flixier, however, it is a freemium tool. So, while you can try it out for free, if you truly want to use it for creating professional projects, you’ll need to unlock one of its subscription packages (which start at $25 per month!)
● Instant text-to-speech maker.
● An online tool, no need for download or installation.
● Lots of natural-sounding voices to choose from.
03Speechelo
Speechelo is a bit different from the two text-to-speech makers on this list. However, that may just mean that it is a more preferable option for some. More specifically, it’s really more of a ‘voice-over-maker’. It does still use AI in order to create human-like voiceovers, with several different options to voice and language. The difference then lies in the fact that it is a one-time payment software that normally costs around $100. In this way, you can avoid long-term ongoing subscription plans. But it is a heavier commitment from the get-go.
● High-quality AI voices for creating realistic voice-overs.
● One-time payment only! No Subscription fees are needed.
● Works in several different languages.
04Cartoon Animator 4
Cartoon Animator 4 is a good option if you’re really looking for that anime or character style for your audio. It works just like your average text-to-speech maker, generally, although it does also offer a couple of more advanced features for those who are looking into animation.
● Free-to-use text-to-speech anime character
● Adjustable volume, pitch, and speed voice parameters.
● A wide variety of voice options to choose from.
05TTS Reader
TTSReader, much like Cartoon Animator 4, is a FREE online tool that you can use in order to create quick and easy text-to-speech audio for your cartoon/anime characters. It doesn’t have as many advanced features as some of the other tools out there, but it can get the job done if all you’re looking for is something easy to use.
● Available to use online for FREE.
● Variety of different voice options.
● Adjustable speed for voice.
Key Takeaways from This Episode
● If you’re looking to increase conversions with better-sounding voiceovers for your video content, then it’s important that you’re aware of all the different options out there!
● Most of these text-to-speech tools work in the same way, but you’ll notice that some of them offer more advanced tools than others.
● In the end, you’ll have to find one that works with your budget and learn how to play around with its settings to make sure that you are getting the most out of your text-to-speech maker.
Also read:
- Updated In 2024, Obtain and Create Animated GIF Icons
- Updated 2024 Approved How to Cartoonize Photo Photoshop in Simple Steps
- 2024 Approved Easy Cartoon Characters Drawing Tutorials for You Who Are Learning to Draw
- Learn 3D Logo Animation and Templates
- New 6 Proven Ways to Dub Anime for Anime Voice Actor
- New Best GIF Maker Software for Windows and Mac
- In 2024, 20 Free After Effects Logo Reveal Templates
- Updated 18 Best Tools and Services to Create Animated Videos for Your Business for 2024
- Updated 2024 Approved How To Create Animated Clipart in PowerPoint
- 2024 Approved How to Draw Cartoons Step by Step with This Guide
- 10 of the Best Disney Animated Shows (Sorted by Popularity Ascending) for 2024
- Updated How To Remove The Endless Loop From Animated GIF
- New Best 10 3D Text Animation Templates for 2024
- Is It That Easy to Make My Animated Character
- New Ways to Make Sure You Get the Most up to Date Cartoon Character Design Tips for 2024
- Updated 2024 Approved Top 10 Cartoon Canvas Painting Ideas for Total Beginners
- Updated Creative Ways to Create iPhone Text GIF
- Updated In 2024, Learn All About Lip-Syncing in Animation
- New In 2024, Tutorial on Making Unity 2D Animation
- Updated What Wikipedia Cant Tell You About the 10 Batman Cartoons
- How to Make Creative Animation Videos for 2024
- In 2024, 10 Best Romance Anime Movies You Need to Watch
- New 2024 Approved How to Cartoonize Photo Photoshop in Simple Steps
- In 2024, Whiteboard Animation Services Top 15 Animation Companies to Pick
- New How to Create a Whiteboard Animation Video for 2024
- Updated In 2024, Top 8 Tools Tell You How to Make Slideshows for Instagram
- 12 Animation Video Maker That Can Triple Conversion Rates for 2024
- New Best 15 Female Anime Characters-Who Is Your Favorite for 2024
- 2024 Approved Learn Pencil2D Animation Tutorial Overview
- New How to Make a GIF in Photoshop
- Updated All About Types of Motion Graphics
- Updated 2024 Approved Top 10 Sketch Animation Video Makers
- 2024 Approved Learn All About Lip-Syncing in Animation
- Updated How to Make GIF Instagram | Quick Tips
- Updated Techniques for Making After Effects 2D Animation
- Updated 2024 Approved Learn What Are Differences Between 2D And 3D Animation
- New In 2024, Secrets to Make 2D Game Animation
- In 2024, Here are Some of the Best Pokemon Discord Servers to Join On Tecno Spark 10 Pro | Dr.fone
- How to Change Spotify Location After Moving to Another Country On Realme C67 4G | Dr.fone
- Protecting Your Privacy How To Remove Apple ID From Apple iPhone 13 Pro
- Android Screen Stuck General Honor X8b Partly Screen Unresponsive | Dr.fone
- Top 4 Ways to Trace Huawei P60 Location | Dr.fone
- In 2024, Top 5 Car Locator Apps for Samsung Galaxy F34 5G | Dr.fone
- 9 Solutions to Fix OnePlus 11R System Crash Issue | Dr.fone
- Best Android Data Recovery - Retrieve Lost Photos from Honor .
- New iPhone 14 Pro Restore from iCloud Stuck on Time Remaining Estimating | Stellar
- What are Location Permissions Life360 On Vivo V29e? | Dr.fone
- How to Bypass Google FRP Lock from Meizu Devices
- Bypass iCloud Activation Lock with IMEI Code From iPhone 15
- Dose Life360 Notify Me When Someone Checks My Location On Motorola Moto G84 5G? | Dr.fone
- Fixes for Apps Keep Crashing on Realme V30 | Dr.fone
- Apply These Techniques to Improve How to Detect Fake GPS Location On Samsung Galaxy S23+ | Dr.fone
- Unlocking Made Easy The Best 10 Apps for Unlocking Your Realme Note 50 Device
- Fix App Not Available in Your Country Play Store Problem on Huawei Nova Y71 | Dr.fone
- In 2024, Is pgsharp legal when you are playing pokemon On Xiaomi Redmi 13C? | Dr.fone
- Turning Off Two Factor Authentication From Apple iPhone 12? 5 Tips You Must Know
- In 2024, How to Unlock iCloud lock on your iPhone 11 Pro Max and iPad?
- How to Share/Fake Location on WhatsApp for Apple iPhone XR | Dr.fone
- In 2024, How To Remove Flashlight From Apple iPhone 15 Plus Lock Screen | Dr.fone
- Possible solutions to restore deleted contacts from Vivo S17 Pro.
- How to Remove Apple iPhone 15 Plus SIM Lock?
- How To Fake GPS On Vivo T2x 5G For Mobile Legends? | Dr.fone
- How To Transfer Data From Apple iPhone 6 To Other iPhone devices? | Dr.fone
- iSpoofer is not working On Apple iPhone 12 Pro? Fixed | Dr.fone
- In 2024, Everything You Need to Know about Lock Screen Settings on your Vivo Y02T
- Solutions to restore deleted files from Realme C67 5G
- New Guide How To Check iCloud Activation Lock Status On Your iPhone 14 Pro
- How to Change Netflix Location to Get More Country Version On Tecno Pova 6 Pro 5G | Dr.fone
- In 2024, Various Methods to Transfer Pictures from Apple iPhone 12 mini to PC | Dr.fone
- AddROM Bypass An Android Tool to Unlock FRP Lock Screen For your Motorola
- How To Unbrick a Dead Nokia C300 | Dr.fone
- In 2024, Latest way to get Shiny Meltan Box in Pokémon Go Mystery Box On Honor 90 Lite | Dr.fone
- PassFab iPhone 12 Pro Max Backup Unlocker Top 4 Alternatives | Dr.fone
- In 2024, How PGSharp Save You from Ban While Spoofing Pokemon Go On Google Pixel 7a? | Dr.fone
- Title: Updated Best 10 Apps to Enhance Your Instagram Story Slideshow
- Author: Elon
- Created at : 2024-06-08 05:08:00
- Updated at : 2024-06-09 05:08:00
- Link: https://animation-videos.techidaily.com/updated-best-10-apps-to-enhance-your-instagram-story-slideshow/
- License: This work is licensed under CC BY-NC-SA 4.0.
