
:max_bytes(150000):strip_icc():format(webp)/ps5controller-0d702b25f7fa47b482999811cfc7af39.jpg)
Updated Best Guide for Beginners on 2D Animation Making
Great Guide for Beginners on 2D Animation Making
Best Guide for Beginners on 2D Animation Making
An easy yet powerful editor
Numerous effects to choose from
Detailed tutorials provided by the official channel
Often called traditional animation, 2D animation making mostly syncs with vector graphics via computer software. The aim is to create animated images useful in websites, advertisements, films, or computer games.
Furthermore, the 2D animation-making process includes creating storyboards, characters, and backgrounds in 2D space. Objects in 2D animation move up, down, right, and left, but not towards or away from the camera, such as in the 3D animation.
In this article
01 [Is 2D Animation Easy & How Do You Learn It?](#Part 1)
02 [The 5 Principles of Animation](#Part 2)
03 [3 Reasons to Create Animated Videos](#Part 3)
04 [5 Essential Tips for Your 2D Animation Making](#Part 4)
Part 1 Is 2D Animation Easy & How Do You Learn It?
In 2020, the video became the #1 form of media for content strategy, overtaking infographics and blogs. Undoubtedly, the power of video marketing and animated videos offer a creative, unique, and sometimes more effective way to explain a concept or tell a story.
We asked Yakkety Yak Video Producer and animator extraordinaire Sean Froelich to give us his top 2D animation tips for beginners or tell us how they can be made accessible. So, with his comments, here we’ve described all the content you need for this section and how you can learn the 2D animation making the easy way!
First, let’s look at the difference between different kinds of animation and answer the question: “What is 2D animation?”
You’re probably much more familiar with this animation style than you think. This work involves drawing 2D objects and characters within a flat space. Everything you draw only has a height and width but no depth (which would make it 3D).
So how do you get flat characters and objects to move? Here, the artist would move from the page or screen to specialist 2D animation software to sequence the individual images.
Classic Disney movies are good examples of creating 2D animation for the big screen, but it’s not only in cinema that you can find this sort of project. You might hear people asking, “is 2D animation dead?” but it’s still widely used for commercials, corporate marketing, advertising, video games, and more.
The best way to learn 2D animation making is through courses and tutorials and taking inspiration from real-time scenarios.
If you have already started learning but aren’t getting the progress you want, they are an excellent guide to get you back on the right track.
Fact Check:
A good animation includes various elements: Acting, Image Composition, Physics, film-making, body language, character design, world-building, and much more.
Even professionals use step-by-step workflows, so they don’t have to think about everything.
If even they can’t do it, why should you, as a beginner, overwhelm yourself? The best you can do is to tackle one challenge after the other.
● Deliberately practice single aspects of animation.
● Get feedback from mentors and other artists.
● Increase the difficulty step by step.
Part 2 The 5 Principles of Animation
Animators follow a list of strict principles to create the most inspiring projects. And, these five basic principles stand above the rest as the most significant ones. Your animation will look wooden and fall flat if you ignore these fundamental principles of making 2D animation video memorable.
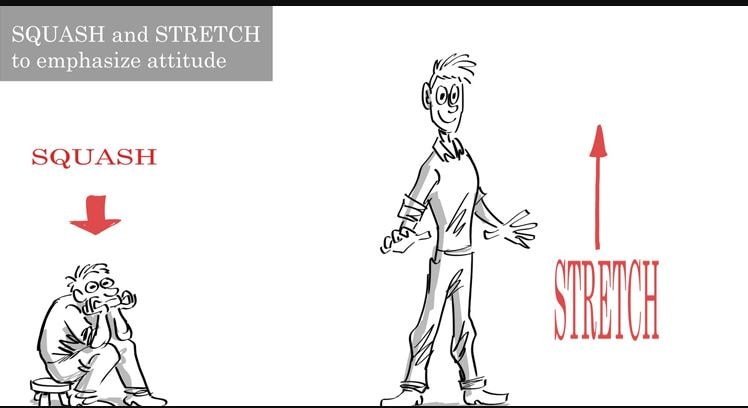
01Squash and stretch
Squash and stretch give weight and authenticity to an object. For example, imagine a rubber ball bouncing on the ground. It squashes as it hits the ground and comes back up after it stretches. On the other hand, a metal ball would barely stretch or squash.
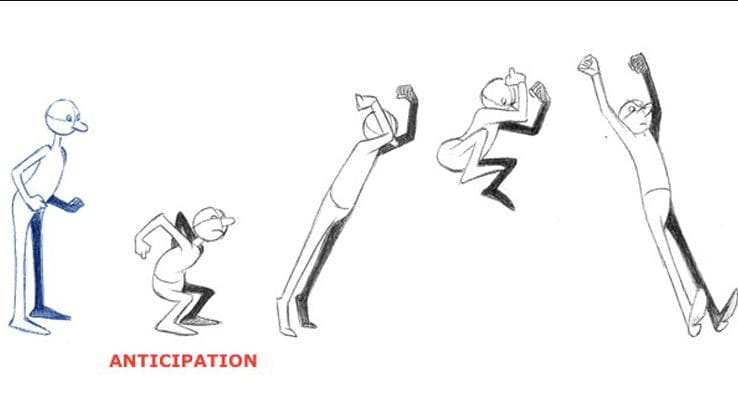
02Anticipation
Anticipation is one of the essential 2D animation-making principles to give animations a sense of grounding. For example, you must position your body to help you move before heading up from the chair. It would be unrealistic to get up without using your arms to help push your body up. This is why anticipation is crucial to consider.
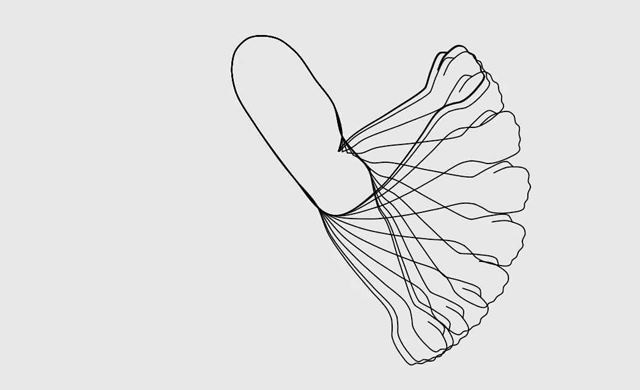
03Ease in ease out
Imagine the swinging pendulum of a clock. It slows down on each side before increasing the speed. This swinging from side to side would be the quickest in the middle and naturally slow down on each side. This is the essential aspect of easing in and out. It further moves to feel more natural.
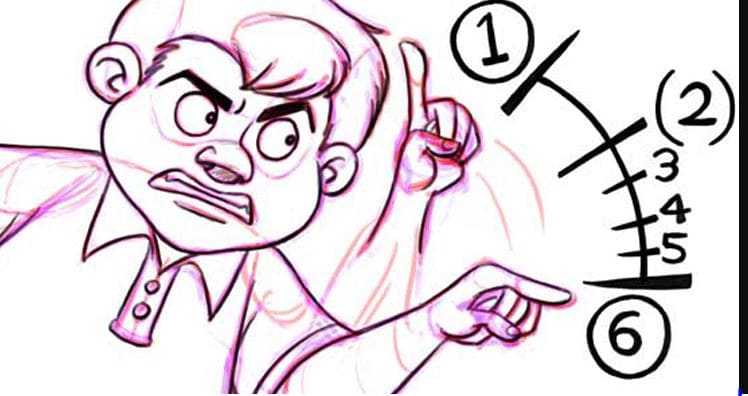
04Timing
The quantity of drawings for a given action will vary based on the movements. Fast movements get less drawing while complex and slow movements need more. Timing will give believability to your characters’ movements and objects.
05Solid Drawing
Without any practice of solid drawing, an animator cannot use it effectively animate. On the other hand, with the concept of solid drawing, the animator understands the object’s dimensions in 3D space. Therefore, depth, volume, and weight can convey to the necessary movement.
Part 2 3 Reasons to Create Animated Videos
We can describe a list of 5 reasons to use animation for business.
01It is fun
Your animation doesn’t need to be accurate or realistic. The main objective of using it in business or even cartoons is to instill entertainment and fun. It’s an ideal way to catch customers’ attention instead of strictly for marketing.
02Lasting impression
The animated videos for business leave a lasting impression on the current and new customers. Yet, you must be clear about using animation to convey your business creatively. A story too dragged from the business purpose may not be ideal for making a lasting impression.
So, convey the values you inject into a particular product so that the potential customers get attracted by the information they get from it.
03Boosts conversion rate
Due to the beautiful aspect of business animation videos, the customer is likely to finish the action expected by the brand. Therefore, more than half the visited customers will likely stay on the website with animated content instead of getting high bounce-off rates.
So, you should explain the merits of your product or service to the user in the business’s animated videos. Please add CTA at the end of the video.
Part 4 5 Essential Tips for Your 2D Animation Making
The decision to excel in 2D animation making could be a tricky task even if you are aware of its significance, as mentioned above, of animation. However, knowing the importance won’t get you on the right path without any implementation efforts.
You must implement the right strategies and know the essential factors before making animated videos for business. So, let’s discuss those points!
01Budget
The budget is the best factor because you can’t do anything without having money. So, you need to invest a fair amount or invest in decent 2D animation software for beginners. Yet, animation for business doesn’t demand a budget like creating a Pixar movie in millions. For instance, Wondershare Filmora will cost you around $156 per year, less than spending millions in outsourcing video animation work. Yet, it also depends on the style and job of business values you want to incorporate in the animation. You have to outsource if it is expert-level work!
02Brand Positioning
Consider your brand positioning! While 2D animation making, viewers tend to remember more about the brand values. They must know your identity as a brand and the whole industry.
It will allow for incorporating some brand positioning before deciding to make animation videos for business. You can check the brand’s overview from the customer’s point of view. Then, you can instill the presentation according to your business type, whether B2B or B2C, afterward.
03Target Audience
The 2D animation making also holds about the target audience, but it doesn’t mean making videos only for them necessarily. The first question is why you are creating such a video. There could be various reasons, such as attaining new customers, educating the current customers, or raising the awareness of a latest brand or a product.
04Market
You must be aware of the ideas to market your videos before even beginning the 2D animation making. The market can be Instagram, YouTube, or any other social media handle to get a high presence of a potential audience. Moreover, the video should not be too pushy.
05Do Your Research in Advance
Research is a natural starter of all the video production processes, regardless of the objective of a video. You are required to know everything there is to know about a service or a product your animated video is about to execute and plan the video’s production from beginning to end.
You should decide if the 2D animated video is a good option for the product you’re promoting since a live-action video.
Powerful Video Editor Allows You Make Wonderful Animated Videos
Animation maker Wondershare Filmora Video Editor is ideal for you looking to make stunning animated videos. It is also the best alternative to Adobe Premiere Pro or Adobe After Effects.
Key Features of Filmora
● It includes every primary and advanced editing option, including unlimited tracks, automatic stabilization, preset transitions, advanced editing, and an inbuilt screen recorder.
● Customized animations can help insert video clips and make them fascinating with a unique signature style.
● The Filmora comes with a pack of audio editing options, including an audio compressor, automatic audio sync, audio transitions, noise reduction, etc.
● Each video can be color corrected and set to high-quality video presets with control settings, auto-correction, color wheels, and scopes.
● You have a great option to use different effects such as lights & flares, texts & tiles, masking, warp & distort, etc.
For Win 7 or later (64-bit)
For macOS 10.12 or later
● Key Takeaways from This Episode →
● A guide to 2D animation making
● Five principles of 2D animation making
● Three reasons to create 2D animated videos
● Five top tips for 2D animation making
Often called traditional animation, 2D animation making mostly syncs with vector graphics via computer software. The aim is to create animated images useful in websites, advertisements, films, or computer games.
Furthermore, the 2D animation-making process includes creating storyboards, characters, and backgrounds in 2D space. Objects in 2D animation move up, down, right, and left, but not towards or away from the camera, such as in the 3D animation.
In this article
01 [Is 2D Animation Easy & How Do You Learn It?](#Part 1)
02 [The 5 Principles of Animation](#Part 2)
03 [3 Reasons to Create Animated Videos](#Part 3)
04 [5 Essential Tips for Your 2D Animation Making](#Part 4)
Part 1 Is 2D Animation Easy & How Do You Learn It?
In 2020, the video became the #1 form of media for content strategy, overtaking infographics and blogs. Undoubtedly, the power of video marketing and animated videos offer a creative, unique, and sometimes more effective way to explain a concept or tell a story.
We asked Yakkety Yak Video Producer and animator extraordinaire Sean Froelich to give us his top 2D animation tips for beginners or tell us how they can be made accessible. So, with his comments, here we’ve described all the content you need for this section and how you can learn the 2D animation making the easy way!
First, let’s look at the difference between different kinds of animation and answer the question: “What is 2D animation?”
You’re probably much more familiar with this animation style than you think. This work involves drawing 2D objects and characters within a flat space. Everything you draw only has a height and width but no depth (which would make it 3D).
So how do you get flat characters and objects to move? Here, the artist would move from the page or screen to specialist 2D animation software to sequence the individual images.
Classic Disney movies are good examples of creating 2D animation for the big screen, but it’s not only in cinema that you can find this sort of project. You might hear people asking, “is 2D animation dead?” but it’s still widely used for commercials, corporate marketing, advertising, video games, and more.
The best way to learn 2D animation making is through courses and tutorials and taking inspiration from real-time scenarios.
If you have already started learning but aren’t getting the progress you want, they are an excellent guide to get you back on the right track.
Fact Check:
A good animation includes various elements: Acting, Image Composition, Physics, film-making, body language, character design, world-building, and much more.
Even professionals use step-by-step workflows, so they don’t have to think about everything.
If even they can’t do it, why should you, as a beginner, overwhelm yourself? The best you can do is to tackle one challenge after the other.
● Deliberately practice single aspects of animation.
● Get feedback from mentors and other artists.
● Increase the difficulty step by step.
Part 2 The 5 Principles of Animation
Animators follow a list of strict principles to create the most inspiring projects. And, these five basic principles stand above the rest as the most significant ones. Your animation will look wooden and fall flat if you ignore these fundamental principles of making 2D animation video memorable.
01Squash and stretch
Squash and stretch give weight and authenticity to an object. For example, imagine a rubber ball bouncing on the ground. It squashes as it hits the ground and comes back up after it stretches. On the other hand, a metal ball would barely stretch or squash.
02Anticipation
Anticipation is one of the essential 2D animation-making principles to give animations a sense of grounding. For example, you must position your body to help you move before heading up from the chair. It would be unrealistic to get up without using your arms to help push your body up. This is why anticipation is crucial to consider.
03Ease in ease out
Imagine the swinging pendulum of a clock. It slows down on each side before increasing the speed. This swinging from side to side would be the quickest in the middle and naturally slow down on each side. This is the essential aspect of easing in and out. It further moves to feel more natural.
04Timing
The quantity of drawings for a given action will vary based on the movements. Fast movements get less drawing while complex and slow movements need more. Timing will give believability to your characters’ movements and objects.
05Solid Drawing
Without any practice of solid drawing, an animator cannot use it effectively animate. On the other hand, with the concept of solid drawing, the animator understands the object’s dimensions in 3D space. Therefore, depth, volume, and weight can convey to the necessary movement.
Part 2 3 Reasons to Create Animated Videos
We can describe a list of 5 reasons to use animation for business.
01It is fun
Your animation doesn’t need to be accurate or realistic. The main objective of using it in business or even cartoons is to instill entertainment and fun. It’s an ideal way to catch customers’ attention instead of strictly for marketing.
02Lasting impression
The animated videos for business leave a lasting impression on the current and new customers. Yet, you must be clear about using animation to convey your business creatively. A story too dragged from the business purpose may not be ideal for making a lasting impression.
So, convey the values you inject into a particular product so that the potential customers get attracted by the information they get from it.
03Boosts conversion rate
Due to the beautiful aspect of business animation videos, the customer is likely to finish the action expected by the brand. Therefore, more than half the visited customers will likely stay on the website with animated content instead of getting high bounce-off rates.
So, you should explain the merits of your product or service to the user in the business’s animated videos. Please add CTA at the end of the video.
Part 4 5 Essential Tips for Your 2D Animation Making
The decision to excel in 2D animation making could be a tricky task even if you are aware of its significance, as mentioned above, of animation. However, knowing the importance won’t get you on the right path without any implementation efforts.
You must implement the right strategies and know the essential factors before making animated videos for business. So, let’s discuss those points!
01Budget
The budget is the best factor because you can’t do anything without having money. So, you need to invest a fair amount or invest in decent 2D animation software for beginners. Yet, animation for business doesn’t demand a budget like creating a Pixar movie in millions. For instance, Wondershare Filmora will cost you around $156 per year, less than spending millions in outsourcing video animation work. Yet, it also depends on the style and job of business values you want to incorporate in the animation. You have to outsource if it is expert-level work!
02Brand Positioning
Consider your brand positioning! While 2D animation making, viewers tend to remember more about the brand values. They must know your identity as a brand and the whole industry.
It will allow for incorporating some brand positioning before deciding to make animation videos for business. You can check the brand’s overview from the customer’s point of view. Then, you can instill the presentation according to your business type, whether B2B or B2C, afterward.
03Target Audience
The 2D animation making also holds about the target audience, but it doesn’t mean making videos only for them necessarily. The first question is why you are creating such a video. There could be various reasons, such as attaining new customers, educating the current customers, or raising the awareness of a latest brand or a product.
04Market
You must be aware of the ideas to market your videos before even beginning the 2D animation making. The market can be Instagram, YouTube, or any other social media handle to get a high presence of a potential audience. Moreover, the video should not be too pushy.
05Do Your Research in Advance
Research is a natural starter of all the video production processes, regardless of the objective of a video. You are required to know everything there is to know about a service or a product your animated video is about to execute and plan the video’s production from beginning to end.
You should decide if the 2D animated video is a good option for the product you’re promoting since a live-action video.
Powerful Video Editor Allows You Make Wonderful Animated Videos
Animation maker Wondershare Filmora Video Editor is ideal for you looking to make stunning animated videos. It is also the best alternative to Adobe Premiere Pro or Adobe After Effects.
Key Features of Filmora
● It includes every primary and advanced editing option, including unlimited tracks, automatic stabilization, preset transitions, advanced editing, and an inbuilt screen recorder.
● Customized animations can help insert video clips and make them fascinating with a unique signature style.
● The Filmora comes with a pack of audio editing options, including an audio compressor, automatic audio sync, audio transitions, noise reduction, etc.
● Each video can be color corrected and set to high-quality video presets with control settings, auto-correction, color wheels, and scopes.
● You have a great option to use different effects such as lights & flares, texts & tiles, masking, warp & distort, etc.
For Win 7 or later (64-bit)
For macOS 10.12 or later
● Key Takeaways from This Episode →
● A guide to 2D animation making
● Five principles of 2D animation making
● Three reasons to create 2D animated videos
● Five top tips for 2D animation making
10 Awesome Moving Animation PowerPoint Techniques
10 Awesome Moving Animation PowerPoint Techniques
An easy yet powerful editor
Numerous effects to choose from
Detailed tutorials provided by the official channel
PowerPoints can be quite dull without anything to spice it up. So, this question is more than 100% warranted. Fortunately, we were able to pull together a tutorial on creating moving animation PowerPoint presentations.
Complete with some templates that you can start off with (if you’d prefer to make it as simple as possible for yourself.)
In this article
01 [6 Animated Powerpoint Templates with Interactive Features](#Part 1)
02 [How to Create a Moving Animation in Powerpoint](#Part 2)
03 [10 Moving Animation Powerpoint Techniques](#Part 3)
Part 1 6 Animated PowerPoint Templates with Interactive Features
The default people tend to-go-to when it comes to presentations are videos. As they tend to be more engaging on their own. For that, you’ll see people gravitating towards software like Filmora, which can create beautiful, eye-catching presentations that you can easily and quickly share. Not just to an immediate audience, but also on social media and the like.
However, of course, sometimes a personal touch is important in a presentation — important to have a ‘voice’ attached to the image on the screen. But just because this is the case, doesn’t mean that you shouldn’t go all out on your presentation. Hence, why moving animation PowerPoint templates are such a big deal:
01Company Presentation PowerPoint Template
For the first of the Moving Animation PowerPoint templates that we have to introduce, we chose the ‘Company Presentation PowerPoint Template.’ As you can perhaps guess from the name, it’s a very professional template. It comes with a total of 500 sample slides that you can choose from (50 of which are unique), and it’s set up with professional animations that can spice up your presentation without making it look gaudy or over-the-top.

02Move Animated PowerPoint Template
Next is the modern, minimalistic template called “Move Animated.” This one is a lot more versatile, with every single one of the 144 unique slides available suitably animated. The best part of it is definitely the easy way in which it can be used. With the modern, minimalistic style, it’s easy enough to remove the presets and replace them with suitable company or product images to promote your content, idea, or project.

0340 Animated Conceptual Slides for PowerPoint
Again, we have another modern and minimalistic kind of PowerPoint template with ‘40 Animated Conceptual Slides for PowerPoint.’ It comes with 40 modern slides, all of which come fully animated are easy enough to customize with your own branding or content.

04UNIGRAPH - Animated & Creative Template (PPTX)
For a bit more fun, our next template is “UNIGRAPH.” This still definitely fits the description ‘minimalistic’ but the pop of color and effects that it brings to the table gives it a different kind of vibe from all the others. No less professional, but certainly more fun. Of course, most importantly, perhaps, is the fact that each slide is smoothly animated.

05Graph & Charts PowerPoint Presentation
For this next one, we introduce a template set called “Graphs & Charts” for those who may want to present their products, projects, ideas, etc. in the shape of graphs and charts. It’s perfect for professionals, certainly. Especially with its clean look, brightened only by occasional pops of color that can be seen from the graphs and charts that it comes with.

06Laststyle - PowerPoint Template
This next PowerPoint template is most suited for businesses looking to promote their products. The creator of the template has provided five different colored versions of the template, each with 30 unique slides that were carefully sectioned with suitable animations.

Part 2 How to Create a Moving Animation in PowerPoint
Now we come to the point of the article where we speak directly to those who may want to experiment more by personally creating a moving animation PowerPoint. For this example, we’ll be teaching you how to create a path animation PowerPoint with the available tools that the software offers under ‘Animation.’ Stick around if you want to learn more.
01Step 1. Open Project.
First things first, of course. Start a new project. When you’ve started, move on to the Animation tab (which we’ve pointed out in the image below.)

02Step 2. Add Animation.
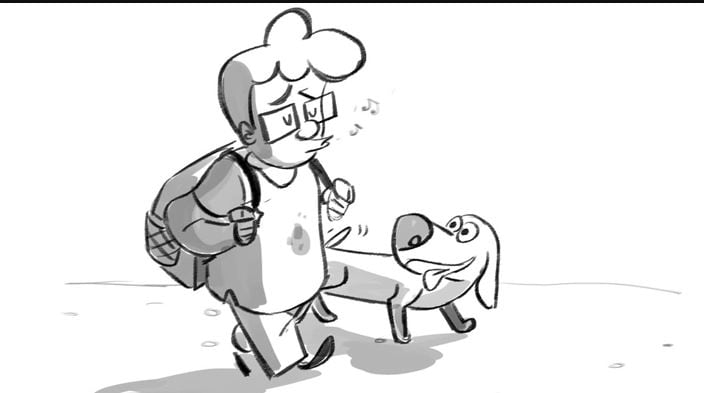
Then, make sure to select the object or model that you want to animate (in this case, we’ve inserted a 2D model of a businessman), and then click the ‘Add Animation’ button (shown in the image below.)

03Step 3. Choose Animation.
Under ‘Add Animation’ you’ll find several different options for animations that you can choose from. Of course, since our goal is to create a PowerPoint Motion Path Animation, we have selected one of the ‘Motion Path’ options.

04Step 4. Choose Motion Path Animation
In order to make motion animation in PowerPoint, you must select one of the offered ‘Motion Paths’ (i.e., Bounce, Line, Arcs, etc.) and then use the motion path tool that appears to control the direction you wish to make your character move.
In this example, we chose the ‘Lines’ motion path (1) and then used the line tool to create a path for our businessman model. To walk from the right side of the screen towards the left.

05Step 5. Adjust Animation.
With path animation PowerPoint complete, you can adjust as needed with the tools provided. For example, you can have the character start moving as soon as the slide opens, or wait until a minute has passed, you can extend the animation by changing duration, etc.

Part 3 10 Moving Animation PowerPoint Techniques
For this last step, we break down some important PowerPoint 3D Animation need-to-knows. Including the specifics provided by each of the options made available to you and why it’s important to explore every single one to create better and more professional-looking presentations.
01Transitions
When it comes to PowerPoint presentations, most people are no doubt the most familiar with ‘Transitions’ when talking in terms of adding animation into a presentation. This one decides whether you want to shift from one slide to another smoothly, or if you want the previous slide to break into splinters, or rotate into the next slide, and so on and so forth. It’s an ‘in-between’ animation that signals where one ends and the other begins.

02Animations
Now, for the ‘Animations’ tab, we focus on animations that occur in the slide (not in-between like transitions). This can include a wide array of things. Whether it be characters moving (like shown in the tutorial we provided), text boxes appearing and disappearing in short order, images bouncing into view in dramatic fashion, and so on and so forth. There’s lots of potential here.

03Animation - Start
We mentioned this previously in the tutorial, but PowerPoint (which does not offer the more advanced 3D customization options), does still give you the freedom to choose how you want certain animations to work.
In the case of the ‘Animations-Start’ option, the goal is to decide when an animation starts playing. Do you want it to start after a click? Or maybe you want it to start up immediately? Whatever the case may be, this function will let you choose the specifics.

044. Animation - Duration
Next, we decide how long you want the animation to last. For example, if you chose to add a PowerPoint 3D rotation animation into a character, how long do you want it to spin before it settles into place? Perhaps only a second? Perhaps more? Whatever you chose, this is the option that will let you finalize that.

05Animation - Delay
This one is self-explanatory as well. But suffice to say, the ‘Delay’ option is for deciding how much an animation is delayed before starting. For example, if you chose to start it ‘On Click’ you can increase the delay to keep it from playing immediately on click.

06Break Up Presentation into Sections
A lot of PowerPoint templates, you’ll find, are naturally broken into sections. This is because it is easier to consume it in that way. It’s also a good signal to your audience as to what point of the presentation you are on. Are you in the beginning? The middle? Near the end? Etc. In this case, the best option for showing it is transitions that separate the sections from one another.

07Add Animation - Entrance
As promised earlier, we’ll be going through each type of animation is available under the ‘Add Animation’ option. The first is “Entrance” animations. This one is pretty easy to guess. It makes up a variety of animations that serve as its entrance animation. Here are some examples:
● Appear: To have objects appear without any other effect.
● Fade: To have objects fade into view.
● Bounce: To have objects bounce into view.
● Swivel: To have objects swivel into view.

08Add Animation - Emphasis
This next animation style is to give emphasis to an already-present object. For example, at a click, you can have a text box ‘Pulse’ and become the center of attention. You can change ‘Object Color’ to make it stand out. And so on.

099. Add Animation - Exit
Opposite of the ‘Entrance’ animations are the ‘Exit’ animations. You’ll notice that the style of animations is the same here. The only difference is that the animations occur to exit the project out of the presentation. For example, an image exiting to reveal text. Or text flying out to be replaced with more text, etc.

10Add Animation - Motion Path
We’ve already mentioned the PowerPoint Motion Path animation style previously, but just to reiterate some things, this is the most customizable animation feature on PowerPoint. One that allows you to move objects across the slide in whatever way you wish. In our example, we created a motion path animation that took the character from the center of the screen to the left of the screen.

● Key Takeaways from This Episode →
● While videos are the most popular way to share information, there are some presentations that require a heavier guiding hand.
● In these situations, a PowerPoint presentation, carefully animated, can serve in place of an edited video.
● There are templates available that you can take advantage of if you’d prefer to start with something to work from. We introduced some in this article that we think were particularly notable.
● But, of course, more careful personalization is sometimes necessary. In that case, we hope that you find our tutorial and our list of PowerPoint techniques helpful.
PowerPoints can be quite dull without anything to spice it up. So, this question is more than 100% warranted. Fortunately, we were able to pull together a tutorial on creating moving animation PowerPoint presentations.
Complete with some templates that you can start off with (if you’d prefer to make it as simple as possible for yourself.)
In this article
01 [6 Animated Powerpoint Templates with Interactive Features](#Part 1)
02 [How to Create a Moving Animation in Powerpoint](#Part 2)
03 [10 Moving Animation Powerpoint Techniques](#Part 3)
Part 1 6 Animated PowerPoint Templates with Interactive Features
The default people tend to-go-to when it comes to presentations are videos. As they tend to be more engaging on their own. For that, you’ll see people gravitating towards software like Filmora, which can create beautiful, eye-catching presentations that you can easily and quickly share. Not just to an immediate audience, but also on social media and the like.
However, of course, sometimes a personal touch is important in a presentation — important to have a ‘voice’ attached to the image on the screen. But just because this is the case, doesn’t mean that you shouldn’t go all out on your presentation. Hence, why moving animation PowerPoint templates are such a big deal:
01Company Presentation PowerPoint Template
For the first of the Moving Animation PowerPoint templates that we have to introduce, we chose the ‘Company Presentation PowerPoint Template.’ As you can perhaps guess from the name, it’s a very professional template. It comes with a total of 500 sample slides that you can choose from (50 of which are unique), and it’s set up with professional animations that can spice up your presentation without making it look gaudy or over-the-top.
02Move Animated PowerPoint Template
Next is the modern, minimalistic template called “Move Animated.” This one is a lot more versatile, with every single one of the 144 unique slides available suitably animated. The best part of it is definitely the easy way in which it can be used. With the modern, minimalistic style, it’s easy enough to remove the presets and replace them with suitable company or product images to promote your content, idea, or project.
0340 Animated Conceptual Slides for PowerPoint
Again, we have another modern and minimalistic kind of PowerPoint template with ‘40 Animated Conceptual Slides for PowerPoint.’ It comes with 40 modern slides, all of which come fully animated are easy enough to customize with your own branding or content.
04UNIGRAPH - Animated & Creative Template (PPTX)
For a bit more fun, our next template is “UNIGRAPH.” This still definitely fits the description ‘minimalistic’ but the pop of color and effects that it brings to the table gives it a different kind of vibe from all the others. No less professional, but certainly more fun. Of course, most importantly, perhaps, is the fact that each slide is smoothly animated.
05Graph & Charts PowerPoint Presentation
For this next one, we introduce a template set called “Graphs & Charts” for those who may want to present their products, projects, ideas, etc. in the shape of graphs and charts. It’s perfect for professionals, certainly. Especially with its clean look, brightened only by occasional pops of color that can be seen from the graphs and charts that it comes with.
06Laststyle - PowerPoint Template
This next PowerPoint template is most suited for businesses looking to promote their products. The creator of the template has provided five different colored versions of the template, each with 30 unique slides that were carefully sectioned with suitable animations.
Part 2 How to Create a Moving Animation in PowerPoint
Now we come to the point of the article where we speak directly to those who may want to experiment more by personally creating a moving animation PowerPoint. For this example, we’ll be teaching you how to create a path animation PowerPoint with the available tools that the software offers under ‘Animation.’ Stick around if you want to learn more.
01Step 1. Open Project.
First things first, of course. Start a new project. When you’ve started, move on to the Animation tab (which we’ve pointed out in the image below.)
02Step 2. Add Animation.
Then, make sure to select the object or model that you want to animate (in this case, we’ve inserted a 2D model of a businessman), and then click the ‘Add Animation’ button (shown in the image below.)
03Step 3. Choose Animation.
Under ‘Add Animation’ you’ll find several different options for animations that you can choose from. Of course, since our goal is to create a PowerPoint Motion Path Animation, we have selected one of the ‘Motion Path’ options.
04Step 4. Choose Motion Path Animation
In order to make motion animation in PowerPoint, you must select one of the offered ‘Motion Paths’ (i.e., Bounce, Line, Arcs, etc.) and then use the motion path tool that appears to control the direction you wish to make your character move.
In this example, we chose the ‘Lines’ motion path (1) and then used the line tool to create a path for our businessman model. To walk from the right side of the screen towards the left.
05Step 5. Adjust Animation.
With path animation PowerPoint complete, you can adjust as needed with the tools provided. For example, you can have the character start moving as soon as the slide opens, or wait until a minute has passed, you can extend the animation by changing duration, etc.
Part 3 10 Moving Animation PowerPoint Techniques
For this last step, we break down some important PowerPoint 3D Animation need-to-knows. Including the specifics provided by each of the options made available to you and why it’s important to explore every single one to create better and more professional-looking presentations.
01Transitions
When it comes to PowerPoint presentations, most people are no doubt the most familiar with ‘Transitions’ when talking in terms of adding animation into a presentation. This one decides whether you want to shift from one slide to another smoothly, or if you want the previous slide to break into splinters, or rotate into the next slide, and so on and so forth. It’s an ‘in-between’ animation that signals where one ends and the other begins.
02Animations
Now, for the ‘Animations’ tab, we focus on animations that occur in the slide (not in-between like transitions). This can include a wide array of things. Whether it be characters moving (like shown in the tutorial we provided), text boxes appearing and disappearing in short order, images bouncing into view in dramatic fashion, and so on and so forth. There’s lots of potential here.
03Animation - Start
We mentioned this previously in the tutorial, but PowerPoint (which does not offer the more advanced 3D customization options), does still give you the freedom to choose how you want certain animations to work.
In the case of the ‘Animations-Start’ option, the goal is to decide when an animation starts playing. Do you want it to start after a click? Or maybe you want it to start up immediately? Whatever the case may be, this function will let you choose the specifics.
044. Animation - Duration
Next, we decide how long you want the animation to last. For example, if you chose to add a PowerPoint 3D rotation animation into a character, how long do you want it to spin before it settles into place? Perhaps only a second? Perhaps more? Whatever you chose, this is the option that will let you finalize that.
05Animation - Delay
This one is self-explanatory as well. But suffice to say, the ‘Delay’ option is for deciding how much an animation is delayed before starting. For example, if you chose to start it ‘On Click’ you can increase the delay to keep it from playing immediately on click.
06Break Up Presentation into Sections
A lot of PowerPoint templates, you’ll find, are naturally broken into sections. This is because it is easier to consume it in that way. It’s also a good signal to your audience as to what point of the presentation you are on. Are you in the beginning? The middle? Near the end? Etc. In this case, the best option for showing it is transitions that separate the sections from one another.
07Add Animation - Entrance
As promised earlier, we’ll be going through each type of animation is available under the ‘Add Animation’ option. The first is “Entrance” animations. This one is pretty easy to guess. It makes up a variety of animations that serve as its entrance animation. Here are some examples:
● Appear: To have objects appear without any other effect.
● Fade: To have objects fade into view.
● Bounce: To have objects bounce into view.
● Swivel: To have objects swivel into view.
08Add Animation - Emphasis
This next animation style is to give emphasis to an already-present object. For example, at a click, you can have a text box ‘Pulse’ and become the center of attention. You can change ‘Object Color’ to make it stand out. And so on.
099. Add Animation - Exit
Opposite of the ‘Entrance’ animations are the ‘Exit’ animations. You’ll notice that the style of animations is the same here. The only difference is that the animations occur to exit the project out of the presentation. For example, an image exiting to reveal text. Or text flying out to be replaced with more text, etc.
10Add Animation - Motion Path
We’ve already mentioned the PowerPoint Motion Path animation style previously, but just to reiterate some things, this is the most customizable animation feature on PowerPoint. One that allows you to move objects across the slide in whatever way you wish. In our example, we created a motion path animation that took the character from the center of the screen to the left of the screen.
● Key Takeaways from This Episode →
● While videos are the most popular way to share information, there are some presentations that require a heavier guiding hand.
● In these situations, a PowerPoint presentation, carefully animated, can serve in place of an edited video.
● There are templates available that you can take advantage of if you’d prefer to start with something to work from. We introduced some in this article that we think were particularly notable.
● But, of course, more careful personalization is sometimes necessary. In that case, we hope that you find our tutorial and our list of PowerPoint techniques helpful.
How To Learn Cartoon Sketch Drawing
How To Learn Cartoon Sketch Drawing— Pencil Sketch for Beginners
An easy yet powerful editor
Numerous effects to choose from
Detailed tutorials provided by the official channel
If you are learning how to draw, particularly cartoon sketches drawing, you must start at a beginner’s level. No skill is difficult if you just put your mind to it. You can learn the basics of the beginning, what you must do, and a learning curve, but if you have passion for it or love what you are doing, you will give it time to practice.
It all boils down to practicing it. Knowing how to draw beautiful sketch cartoons drawing is not a complex thing to do if you start at the beginner’s level.
So, for all who are reading this article, we will show sketch drawings of cartoons, i.e., how to draw step by step in an understandable manner.
In this article
01 [Collection of 8 Hottest Cartoon Drawings](#Part 1)
02 [How to Draw Cartoon Step by Step Easy Pencil Drawing](#Part 2)
Part 1 Collection of 8 Hottest Cartoon Drawings
Here’s a collection of 8 hottest cartoon love drawing pencil sketches for you.
01Motlu Patlu
This is a sketch of the Motu Patlu cartoon drawing. The artist used some simple forms such as a pear shape while developing the body in making this sketch. The pear shape helps in developing the bodies of cartoon characters.

02Basketball Sketch Drawing
The cartoon basketball drawing is one of our top picks wherein the artist took his time to get every detail in the scene. The image alone tells the story.

03Tom and Jerry Sketch drawing
If you were a lover of the famous cartoon Tom and Jerry, you should know this. Here’s a sketch cartoon drawing of Tom and Jerry.

04Cat Sketch
Isn’t this beautiful sketch cartoon drawing of a cat just it? The way the artist details it and gets the perfect fit made it part of our collection.

05Cute Cartoon love sketch
We couldn’t have finished this list without adding this beautiful sketch cartoon drawing.

06Homer
This cartoon sketch drawing of Homer in the Simpsons is just it. Looking at the body build, you can easily trace the outline of the pear-shaped form.

07Cute Cartoon Drawing
This drawing cartoon sketch caught our attention, and we are sure you would love it. With the round head and pear-shaped belly, you will agree that you can start your learning journey with the steps listed in this article.

08Cartoon love drawing
This sketch cartoon drawing portrays the love between a girl and a boy. It is one attractive sketch that shows details of expressions on the faces.

Part 2 How to Draw Cartoon Step by Step Easy Pencil Drawing
An essential factor you must bear in mind is that you must not let go of your creativity when learning how to draw.
You have to be free with yourself and try to create cartoon sketch drawings of characters that you love.
The more it’s about something you love, the better you get at it.
Here’s a step-by-step process of an easy pencil drawing or sketch cartoon drawing.
● Step 1: Draw a circle
Draw a circle and a “noodle” shape, as shown in the illustration. The head is a circle, and the body is a pear form.
The lower half of the pear is fatter than the top. Take note of how the upper half slightly overlaps the head circle.

● Step 2: Draw a pair of eyes.
As shown in the image, add the perspective guidelines around the head. These recommendations will assist you in correctly positioning your rabbit’s eyes and nose.
Above the horizontal guideline, draw the eyes. Where the parameters cross is where the nose is put.

● Step 3: Draw the cheek and Wings
Make the cheekbones. As shown in the illustration, add the ears and arms. It’s OK if the ear shapes differ somewhat from those displayed.
Notice how the arm contour curve organically emerges from behind the shoulders when you sketch the arms. Make it this way if you can.

● Step 4: Draw the legs
Draw the legs and tail of the animal. The arm and leg curves may appear to be challenging. As a result, be gentle with your pencil. Don’t yank on the pencil too hard!
Your cartoon rabbit’s shape is now plainly evident.

● Step 5: Draw the mouth
Let’s focus on the face for a moment. Draw an iris ellipse and an inner line in the ear inside the eyes. Include the nose. Draw the mouth and the teeth.

● Step 6: Outline the contours
Because rabbits eat carrots, this one eats them in excess. Outline the carrot’s outlines. On the legs, draw the brows and the fingers.
As you may have observed, I messed up the teeth in the previous image. Therefore I deleted the thick black pencil lines that were superfluous.
Erase and Shade (Step 8)

● Step 7: Outline the Character
Now, outline the contours of the entire character with a softer pencil. You can pick up B4 or B6 (if you don’t have either, try HB). Please leave a little bright dot on the nose while darkening it.

● Step 8: Erase and Shade
Remove everything that isn’t required. See? That is how your bunny should seem.
I also advocate using a pencil-type eraser in addition to regular or kneaded erasers. Shade the entire rabbit’s body if you’re using a graphite pencil. The inside of the ear, the belly, the paws, and the tail can all be white or brighter.

●Bonus Software for Beautiful Sketch Cartoon Drawing:
Wondershare Filmora Video Editor is a superb video editing software developed by Wondershare. It is a simple entry-level version with preset video templates and effects. With the numerous powerful features in Filmora, we can add amazing effects to our cartoon sketches to make them look better.
For Win 7 or later (64-bit)
For macOS 10.12 or later
Here’s how to use Filmora for cartoon sketch drawing enhancements.
Chroma key (Green screen): This feature can change the background of your sketched cartoon drawing photo by adding special effects to make it look nice.
Color Match: Color match is a feature in Filmora used to apply color correction settings in a video. You can use this feature to enhance your sketches.
Mask and blend: Filmora mask and blend feature has resourceful modes and is easy to use. You can use them for your pencil sketched cartoon drawing.
● Ending Thoughts →
● Making beautiful sketch cartoon drawings is not rocket science. It is a result of consistent practice.
● In this article, we have given you key points and strategies you can use to start practicing cartoon sketch drawing. However, do begin from our idea, i.e., a circle for the head and a pear for developing the body.
● Thus, your journey to learning how to draw cartoons step by step quickly with a pencil is already a walkover.
If you are learning how to draw, particularly cartoon sketches drawing, you must start at a beginner’s level. No skill is difficult if you just put your mind to it. You can learn the basics of the beginning, what you must do, and a learning curve, but if you have passion for it or love what you are doing, you will give it time to practice.
It all boils down to practicing it. Knowing how to draw beautiful sketch cartoons drawing is not a complex thing to do if you start at the beginner’s level.
So, for all who are reading this article, we will show sketch drawings of cartoons, i.e., how to draw step by step in an understandable manner.
In this article
01 [Collection of 8 Hottest Cartoon Drawings](#Part 1)
02 [How to Draw Cartoon Step by Step Easy Pencil Drawing](#Part 2)
Part 1 Collection of 8 Hottest Cartoon Drawings
Here’s a collection of 8 hottest cartoon love drawing pencil sketches for you.
01Motlu Patlu
This is a sketch of the Motu Patlu cartoon drawing. The artist used some simple forms such as a pear shape while developing the body in making this sketch. The pear shape helps in developing the bodies of cartoon characters.
02Basketball Sketch Drawing
The cartoon basketball drawing is one of our top picks wherein the artist took his time to get every detail in the scene. The image alone tells the story.
03Tom and Jerry Sketch drawing
If you were a lover of the famous cartoon Tom and Jerry, you should know this. Here’s a sketch cartoon drawing of Tom and Jerry.
04Cat Sketch
Isn’t this beautiful sketch cartoon drawing of a cat just it? The way the artist details it and gets the perfect fit made it part of our collection.
05Cute Cartoon love sketch
We couldn’t have finished this list without adding this beautiful sketch cartoon drawing.
06Homer
This cartoon sketch drawing of Homer in the Simpsons is just it. Looking at the body build, you can easily trace the outline of the pear-shaped form.
07Cute Cartoon Drawing
This drawing cartoon sketch caught our attention, and we are sure you would love it. With the round head and pear-shaped belly, you will agree that you can start your learning journey with the steps listed in this article.
08Cartoon love drawing
This sketch cartoon drawing portrays the love between a girl and a boy. It is one attractive sketch that shows details of expressions on the faces.
Part 2 How to Draw Cartoon Step by Step Easy Pencil Drawing
An essential factor you must bear in mind is that you must not let go of your creativity when learning how to draw.
You have to be free with yourself and try to create cartoon sketch drawings of characters that you love.
The more it’s about something you love, the better you get at it.
Here’s a step-by-step process of an easy pencil drawing or sketch cartoon drawing.
● Step 1: Draw a circle
Draw a circle and a “noodle” shape, as shown in the illustration. The head is a circle, and the body is a pear form.
The lower half of the pear is fatter than the top. Take note of how the upper half slightly overlaps the head circle.
● Step 2: Draw a pair of eyes.
As shown in the image, add the perspective guidelines around the head. These recommendations will assist you in correctly positioning your rabbit’s eyes and nose.
Above the horizontal guideline, draw the eyes. Where the parameters cross is where the nose is put.
● Step 3: Draw the cheek and Wings
Make the cheekbones. As shown in the illustration, add the ears and arms. It’s OK if the ear shapes differ somewhat from those displayed.
Notice how the arm contour curve organically emerges from behind the shoulders when you sketch the arms. Make it this way if you can.
● Step 4: Draw the legs
Draw the legs and tail of the animal. The arm and leg curves may appear to be challenging. As a result, be gentle with your pencil. Don’t yank on the pencil too hard!
Your cartoon rabbit’s shape is now plainly evident.
● Step 5: Draw the mouth
Let’s focus on the face for a moment. Draw an iris ellipse and an inner line in the ear inside the eyes. Include the nose. Draw the mouth and the teeth.
● Step 6: Outline the contours
Because rabbits eat carrots, this one eats them in excess. Outline the carrot’s outlines. On the legs, draw the brows and the fingers.
As you may have observed, I messed up the teeth in the previous image. Therefore I deleted the thick black pencil lines that were superfluous.
Erase and Shade (Step 8)
● Step 7: Outline the Character
Now, outline the contours of the entire character with a softer pencil. You can pick up B4 or B6 (if you don’t have either, try HB). Please leave a little bright dot on the nose while darkening it.
● Step 8: Erase and Shade
Remove everything that isn’t required. See? That is how your bunny should seem.
I also advocate using a pencil-type eraser in addition to regular or kneaded erasers. Shade the entire rabbit’s body if you’re using a graphite pencil. The inside of the ear, the belly, the paws, and the tail can all be white or brighter.
●Bonus Software for Beautiful Sketch Cartoon Drawing:
Wondershare Filmora Video Editor is a superb video editing software developed by Wondershare. It is a simple entry-level version with preset video templates and effects. With the numerous powerful features in Filmora, we can add amazing effects to our cartoon sketches to make them look better.
For Win 7 or later (64-bit)
For macOS 10.12 or later
Here’s how to use Filmora for cartoon sketch drawing enhancements.
Chroma key (Green screen): This feature can change the background of your sketched cartoon drawing photo by adding special effects to make it look nice.
Color Match: Color match is a feature in Filmora used to apply color correction settings in a video. You can use this feature to enhance your sketches.
Mask and blend: Filmora mask and blend feature has resourceful modes and is easy to use. You can use them for your pencil sketched cartoon drawing.
● Ending Thoughts →
● Making beautiful sketch cartoon drawings is not rocket science. It is a result of consistent practice.
● In this article, we have given you key points and strategies you can use to start practicing cartoon sketch drawing. However, do begin from our idea, i.e., a circle for the head and a pear for developing the body.
● Thus, your journey to learning how to draw cartoons step by step quickly with a pencil is already a walkover.
What Wikipedia Won’t Tell You Specifically About Character Rigging
What Wikipedia Won’t Tell You Specifically About Character Rigging
An easy yet powerful editor
Numerous effects to choose from
Detailed tutorials provided by the official channel
The function of character rigging can easily be compared to that of bones, muscles and joints. They act as skeletons to virtual animations. You can also imagine them as strings used on dolls. These digitalized bones function inter-connectedly in a 3D animation.
In this article
01 [Intro to Character Rigging](#Part 1)
02 [8 Tips for Character Rigging](#Part 2)
03 [10 Best Character Rigging Services to Buy Online](#Part 3)
04 [How to Make 3d Character Rig? Are There Any Plugins or Easy](#Part 4)
Part 1 Intro to Character Rigging
As you already know by now that the process of rigging a character can be quite a tedious task. It involves a lot of creative thinking, precision and a keen eye to notice all the small details.
Once you have a model character to work on, riggers set off to creating a skeleton to match the character. These skele-animations can be used to move the entire model as if tugging on strings (not literally).
The movement of the chain of skeletons or rigs is interdependent. Which means if you pull on any one bone, it moves all the other bones in the same sequence. Similar to how bones move within the human body.
Riggers use programs and tools to create a series of bone like structures that can deformed and animated freely according to the preference of the animators.
Movements like positioning, curving and rotation can be recorded and then played back in the animation.
This requires the rigger to constantly coordinate between modelers, animators till the end of the project. This entire process can take weeks or even months.
Amazingly enough, its 20and there are online tools and tutorials you can use to easily learn complex animations like they make in large scale movies and games.
Part 2 8 Tips for Character Rigging
01The Right Rig for the Job
Rigging is a skill all animators gets good at overtime. The more you practice the more familiar you are with the tools you are using. It will also help you understand that not all rigs are meant for the same set of movements.
You need to be able to discern what rig is it that you need and discard what you don’t. If the rig is being used in a game, then the focus will be more on the experience while for movies its attention.
02Deformers for Facial Rigging
Constructing a realistic facial rig can be quite a task but is indeed satisfying once finished. Human facial features require a great degree of flexibility which is why using a variety of deformers for different parts of the face. They are better suited for creating joints over the face and can be done more quickly.
03IK and FK
Though you can use one without the other, it is best to use both of them in an animation. You can’t work without both arms can you? Applying both Inverse and Forward Kinematics in your rig design can help it make more stylistic.
04Learn Python and Maya API: Learn Python and Maya API
If you wish to take your rigging skills to the next level then learning Maya API and Python are great millstones. This way, you can create high quality and sophisticated rigs with high intense flexibility on Maya. Also, Python allows you to write new scripts for PlugIns.
05Delegate to an Animator
After rigging for several hours it is easy to feel like you are only seeing from one perspective. Get in touch with an animator earlier on in the project can help you get feedback to stay consistent in the rigging process.
06Learn Web Technologies: Learn Web Technologies
To be a good animator or rigging specialist involves a lot of learning. Animation technology is constantly changing therefore it is highly recommended to stay up to date with the latest web technologies. Learning HTML, Java Script and CSS is becoming vital to being a part of the gaming world.
07Use Scalable Tools
Not all the characters or objects you rig are going to be of the same size. Selecting the right rigging software is crucial for you to be able to scale your animations. You won’t need to use everything, just the tools that serve your purpose.
08Use a Clean Interface
If you have ever heard of the phrase ‘clean workplace – cleaner work’ then you should know how an untidy interface can affect your workflow. This won’t necessarily change the results but can surely better your experience.
Part 3 Best Character Rigging Services to Buy Online
Don’t feel confused about where to begin. The first step to get into rigging is to master a software, any software, here are of the best ones you can choose from;
01Maya
Offers the best animation features on the market.

02Blender
Vast variety of tools for sculpting, rigging or VFX.

03Modo
Has a more simplified approach towards modelling and rigging.

043ds Max
Leverages high flexibility and ease of use to riggers.
05Sculptris
Excellentfor beginners who need a gateway software to start art.

06ZBrush
Lets you work on your sculpting skills with digital clay.

07Cheetah 3D
Developed by Macintosh to be an easy to learn modelling software.

08Rhinoceros 3D
Harbours a mathematical approach to modelling and modular design.

09Fusion 360
Offers a wide range of simulation tools.

10Cinema 4D
Recognized by professionals for well-equipped arsenal of digital rendering.

Part 4 How to Make Character Rig? Are There Any Plugins or Easy
How to Make Character Rig? Are There Any Plugins or Easy
When we imagine animation, most of the time we are baffled by the end product? But what really goes on behind the mesmerizing colors and whimsical characters.
The basic is of course building rigs to support the entire movement of the character and confine it to actual physical laws that makes it almost a mimic of reality. The entire process of rigging rather simplifies the path to achieve that goal.
In Cinema, character rigging has multiple layers that goes into creating the entire skeleton animation. Setting up a character rig can take anywhere between a few hours or a few days. It probably takes mainstream movies ten times that time.
Let us break down the process of making a rig so that it is simpler to understand.
The process;
Weight Painting: An integral part of the entire rigging process. Although, weight painting can be rendered automatically by the software that you are using, but that can end up making the animation look less realistic. You can instead fine tune the weight of each bone in the rig. You can also copy similar looking bones and apply them to different mesh and repurpose them to function differently.
Placing Bones: After designing a bone structure of character, you can copy the same and use it for similar characters. This is why in games and animation, you notice characters with similar features and traits.
Inverse Kinematics: Not all bones are meant to move in a forward direction. This is why inverses Kinematics are applied to certain bones like the legs, shoulders or even a dragon’s tail. Setting up the IK of your rig would keep specific bones pointed in the right direction so as to make the animation look more natural.
Applying Constraints: The physical realm is built with restrictions. There are things you can do or can’t do according to the natural order of things so as to make your character movement more naturalistic.
Simulation Skeletons: Now comes the part where the magic happens. After fully completing a skeletal animation you can now simulate the motion over the mesh and record the result of the simulation through a series of frames.
Create an animated movie: You can play back the simulation in an animation software such as Blender and then create your own animated movie with Filmora with its easy drag and drop interface. Movies are a collage of frames, so you need to animate according to the fps you want for your video.
Facial Rigs: Facial expressions are more complex than whole body movements. It requires the attention dedicated to a project of its own. Here is where you can play with deforming shapes together to replicate facial muscle movement.
● Key Takeaways from This Episode →
● Rigging has become science in its own right but that does not mean you can’t be artistic with it.
● What you should remember that creating skeletal animation is all about movement and applying physical restrictions to it.
● Start simple and practice until you master the most complex features of any of the top rigging software services raging in the market.
The function of character rigging can easily be compared to that of bones, muscles and joints. They act as skeletons to virtual animations. You can also imagine them as strings used on dolls. These digitalized bones function inter-connectedly in a 3D animation.
In this article
01 [Intro to Character Rigging](#Part 1)
02 [8 Tips for Character Rigging](#Part 2)
03 [10 Best Character Rigging Services to Buy Online](#Part 3)
04 [How to Make 3d Character Rig? Are There Any Plugins or Easy](#Part 4)
Part 1 Intro to Character Rigging
As you already know by now that the process of rigging a character can be quite a tedious task. It involves a lot of creative thinking, precision and a keen eye to notice all the small details.
Once you have a model character to work on, riggers set off to creating a skeleton to match the character. These skele-animations can be used to move the entire model as if tugging on strings (not literally).
The movement of the chain of skeletons or rigs is interdependent. Which means if you pull on any one bone, it moves all the other bones in the same sequence. Similar to how bones move within the human body.
Riggers use programs and tools to create a series of bone like structures that can deformed and animated freely according to the preference of the animators.
Movements like positioning, curving and rotation can be recorded and then played back in the animation.
This requires the rigger to constantly coordinate between modelers, animators till the end of the project. This entire process can take weeks or even months.
Amazingly enough, its 20and there are online tools and tutorials you can use to easily learn complex animations like they make in large scale movies and games.
Part 2 8 Tips for Character Rigging
01The Right Rig for the Job
Rigging is a skill all animators gets good at overtime. The more you practice the more familiar you are with the tools you are using. It will also help you understand that not all rigs are meant for the same set of movements.
You need to be able to discern what rig is it that you need and discard what you don’t. If the rig is being used in a game, then the focus will be more on the experience while for movies its attention.
02Deformers for Facial Rigging
Constructing a realistic facial rig can be quite a task but is indeed satisfying once finished. Human facial features require a great degree of flexibility which is why using a variety of deformers for different parts of the face. They are better suited for creating joints over the face and can be done more quickly.
03IK and FK
Though you can use one without the other, it is best to use both of them in an animation. You can’t work without both arms can you? Applying both Inverse and Forward Kinematics in your rig design can help it make more stylistic.
04Learn Python and Maya API: Learn Python and Maya API
If you wish to take your rigging skills to the next level then learning Maya API and Python are great millstones. This way, you can create high quality and sophisticated rigs with high intense flexibility on Maya. Also, Python allows you to write new scripts for PlugIns.
05Delegate to an Animator
After rigging for several hours it is easy to feel like you are only seeing from one perspective. Get in touch with an animator earlier on in the project can help you get feedback to stay consistent in the rigging process.
06Learn Web Technologies: Learn Web Technologies
To be a good animator or rigging specialist involves a lot of learning. Animation technology is constantly changing therefore it is highly recommended to stay up to date with the latest web technologies. Learning HTML, Java Script and CSS is becoming vital to being a part of the gaming world.
07Use Scalable Tools
Not all the characters or objects you rig are going to be of the same size. Selecting the right rigging software is crucial for you to be able to scale your animations. You won’t need to use everything, just the tools that serve your purpose.
08Use a Clean Interface
If you have ever heard of the phrase ‘clean workplace – cleaner work’ then you should know how an untidy interface can affect your workflow. This won’t necessarily change the results but can surely better your experience.
Part 3 Best Character Rigging Services to Buy Online
Don’t feel confused about where to begin. The first step to get into rigging is to master a software, any software, here are of the best ones you can choose from;
01Maya
Offers the best animation features on the market.
02Blender
Vast variety of tools for sculpting, rigging or VFX.
03Modo
Has a more simplified approach towards modelling and rigging.
043ds Max
Leverages high flexibility and ease of use to riggers.
05Sculptris
Excellentfor beginners who need a gateway software to start art.
06ZBrush
Lets you work on your sculpting skills with digital clay.
07Cheetah 3D
Developed by Macintosh to be an easy to learn modelling software.
08Rhinoceros 3D
Harbours a mathematical approach to modelling and modular design.
09Fusion 360
Offers a wide range of simulation tools.
10Cinema 4D
Recognized by professionals for well-equipped arsenal of digital rendering.
Part 4 How to Make Character Rig? Are There Any Plugins or Easy
How to Make Character Rig? Are There Any Plugins or Easy
When we imagine animation, most of the time we are baffled by the end product? But what really goes on behind the mesmerizing colors and whimsical characters.
The basic is of course building rigs to support the entire movement of the character and confine it to actual physical laws that makes it almost a mimic of reality. The entire process of rigging rather simplifies the path to achieve that goal.
In Cinema, character rigging has multiple layers that goes into creating the entire skeleton animation. Setting up a character rig can take anywhere between a few hours or a few days. It probably takes mainstream movies ten times that time.
Let us break down the process of making a rig so that it is simpler to understand.
The process;
Weight Painting: An integral part of the entire rigging process. Although, weight painting can be rendered automatically by the software that you are using, but that can end up making the animation look less realistic. You can instead fine tune the weight of each bone in the rig. You can also copy similar looking bones and apply them to different mesh and repurpose them to function differently.
Placing Bones: After designing a bone structure of character, you can copy the same and use it for similar characters. This is why in games and animation, you notice characters with similar features and traits.
Inverse Kinematics: Not all bones are meant to move in a forward direction. This is why inverses Kinematics are applied to certain bones like the legs, shoulders or even a dragon’s tail. Setting up the IK of your rig would keep specific bones pointed in the right direction so as to make the animation look more natural.
Applying Constraints: The physical realm is built with restrictions. There are things you can do or can’t do according to the natural order of things so as to make your character movement more naturalistic.
Simulation Skeletons: Now comes the part where the magic happens. After fully completing a skeletal animation you can now simulate the motion over the mesh and record the result of the simulation through a series of frames.
Create an animated movie: You can play back the simulation in an animation software such as Blender and then create your own animated movie with Filmora with its easy drag and drop interface. Movies are a collage of frames, so you need to animate according to the fps you want for your video.
Facial Rigs: Facial expressions are more complex than whole body movements. It requires the attention dedicated to a project of its own. Here is where you can play with deforming shapes together to replicate facial muscle movement.
● Key Takeaways from This Episode →
● Rigging has become science in its own right but that does not mean you can’t be artistic with it.
● What you should remember that creating skeletal animation is all about movement and applying physical restrictions to it.
● Start simple and practice until you master the most complex features of any of the top rigging software services raging in the market.
What Is the Best Collage Photo Grid Maker - Experts Choice
What is the Best Collage Photo Grid Maker - Experts Choice
An easy yet powerful editor
Numerous effects to choose from
Detailed tutorials provided by the official channel
Whether it is an Instagram collage grid, other social media sites, an online platform, a greeting card, or even a wall of your room, collages are everywhere. It is a great way to assemble multiple pictures into a single frame. Depending on your purpose, theme, and other factors, there are several different styles of collages that can be created like photo grid, shaped collage, polaroid collage, and more. One of the most classic and traditional styles is a photo grid collage. Taking the help of a dedicated collage-making app or a tool can help you create an amazing and eye-catchy collage in no time. Keep reading to learn more about collage photo grid and the best tools to create them.

In this article
01 [What is a photo grid?](#Part 1)
02 [Need for using special tools and apps to create a photo grid collage](#Part 2)
03 [Top 5 tools to create photo grid](#Part 3)
04 [Use stock images to enhance your photo grid](#Part 4)
Part 1 What is a photo grid?
When a special grid frame having a specific number of rows and columns is used for arranging photos, the created collage is known as a photo grid collage. These multiple added images will make them look like a single picture in a frame. A photo grid is one of the most classic styles of creating a collage that is also the most widely used one. You can never go wrong with a collage while arranging the pictures in a photo grid.
Part 2 Need for using special tools and apps to create a photo grid collage
Though creating a photo grid may look like a simple process which it is also, there are a lot of elements that go into creating an impressive and attractive collage. Adding the images of the correct size and orientation, adjusting the borders, customizing the frames, adding filters, adding text, are some of the many factors that help in creating a wonderful collage, and for this good collage-making tool or an app is required.
These special photo grid collage maker tools have built-in templates, designs, and support other features that help you create an interesting photo grid of your choice. Moreover, some of these programs also come with high-quality stock images that can be used in the grid to further enhance their overall looks.
Part 3 Top 5 tools to create photo grid
We have selected the top 5 grid collage maker tools that can be used to create a customized photo grid.
01Fotor
This is one of the best tools available for creating a photo grid using one of the several templates available. It is the Classic Collage style of this app that will let you create a customized grid where you can add the desired number of images and then edit the background, borders, and other elements. You can even add text, stickers, effects, and other interesting filters. Fotor is a free online tool that can be used from your browser and you just need to free sign-up using your Google, Facebook, or Apple account.

02FotoJet
This is another free-to-use browser-based tool that can be used for creating a photo grid. The interface of the tool is simple and there are multiple grid options to choose from depending on the number of images to be added. The spacing between the grids as well as the roundness of the margins can also be adjusted as desired. The tool also gives you the option to choose the added image file resolution. Text, clipart, and background to the collage can also be added and there is also a library of images that can be used. The created collage can be saved or can also be shared directly to Twitter, Pinterest, and Tumblr.

03Adobe Spark
This is one of the top collages making tools that can be used to design the desired collage in different styles including photo grid. Unlike other Adobe tools, the collage-making program is simple and quick to use and does not require advanced technical know-how. You simply need to create a free account for Adobe Creative Cloud and the collage-making features can be easily used. There are pre-set designs and templates available to match your theme and requirements. You can further make customization to other collage elements as needed.

04Photo Collage
This free-to-use online tool requires no software download or installation and allows creating a grid quickly and easily. The interface of the tool is user-friendly where you just need to browse and add the images or can simply drag and drop them as well. You can choose from multiple template options available and can also add text, effects, and stickers to the collage. Multiple image editing options are also supported like zoom, flip, transparency, and more.

05Canva
Free and simple to use, this is one of the most widely used collage-making tools that is available as a browser-based program as well as Android and iOS app. Several photo-grid templates in different styles are available at the site that lets you create the desired collage in no time. You can customize the selected templates by adding filters, texts, effects, and more elements available. A paid version of the tool with advanced features is also available.

Part 4 Use stock images to enhance your photo grid
Adding high-quality and interesting images to your photo grid will level up its overall look and make it eye-catchy. If you are running short of such interesting and bright images, no need to worry as several sites have a good collection of images that can be used. One such program that we recommend here to check the stock images is Wondershare Filmora. Though Filmora is an advanced Windows and Mac-based video editing software, there are multiple additional features supported one of them is a collection of images in an array of categories.
Depending on the theme of your photo grid, you can select the desired images and other media from Wondershare Filmora Video Editor . Additionally, the split-screen feature of the software will let you add and play multiple videos in a single frame that makes it look like a video collage.

Wondershare Filmora - Best Video Editor for Mac/Windows
5,481,435 people have downloaded it.
Build unique custom animations without breaking a sweat.
Focus on creating epic stories and leave the details to Filmora’s auto features.
Start a creative adventure with drag & drop effects and endless possibilities.
Filmora simplifies advanced features to save you time and effort.
Filmora cuts out repetition so you can move on to your next creative breakthrough.
● Key Takeaways from This Episode →
● A photo grid is a classic and traditional style of creating a collage.
● There are several online tools, software, and mobile apps available for creating interesting photo grids.
● Wondershare Filmora is a great site to get stock of images in different categories and for all types of video editing requirements.
Whether it is an Instagram collage grid, other social media sites, an online platform, a greeting card, or even a wall of your room, collages are everywhere. It is a great way to assemble multiple pictures into a single frame. Depending on your purpose, theme, and other factors, there are several different styles of collages that can be created like photo grid, shaped collage, polaroid collage, and more. One of the most classic and traditional styles is a photo grid collage. Taking the help of a dedicated collage-making app or a tool can help you create an amazing and eye-catchy collage in no time. Keep reading to learn more about collage photo grid and the best tools to create them.
In this article
01 [What is a photo grid?](#Part 1)
02 [Need for using special tools and apps to create a photo grid collage](#Part 2)
03 [Top 5 tools to create photo grid](#Part 3)
04 [Use stock images to enhance your photo grid](#Part 4)
Part 1 What is a photo grid?
When a special grid frame having a specific number of rows and columns is used for arranging photos, the created collage is known as a photo grid collage. These multiple added images will make them look like a single picture in a frame. A photo grid is one of the most classic styles of creating a collage that is also the most widely used one. You can never go wrong with a collage while arranging the pictures in a photo grid.
Part 2 Need for using special tools and apps to create a photo grid collage
Though creating a photo grid may look like a simple process which it is also, there are a lot of elements that go into creating an impressive and attractive collage. Adding the images of the correct size and orientation, adjusting the borders, customizing the frames, adding filters, adding text, are some of the many factors that help in creating a wonderful collage, and for this good collage-making tool or an app is required.
These special photo grid collage maker tools have built-in templates, designs, and support other features that help you create an interesting photo grid of your choice. Moreover, some of these programs also come with high-quality stock images that can be used in the grid to further enhance their overall looks.
Part 3 Top 5 tools to create photo grid
We have selected the top 5 grid collage maker tools that can be used to create a customized photo grid.
01Fotor
This is one of the best tools available for creating a photo grid using one of the several templates available. It is the Classic Collage style of this app that will let you create a customized grid where you can add the desired number of images and then edit the background, borders, and other elements. You can even add text, stickers, effects, and other interesting filters. Fotor is a free online tool that can be used from your browser and you just need to free sign-up using your Google, Facebook, or Apple account.
02FotoJet
This is another free-to-use browser-based tool that can be used for creating a photo grid. The interface of the tool is simple and there are multiple grid options to choose from depending on the number of images to be added. The spacing between the grids as well as the roundness of the margins can also be adjusted as desired. The tool also gives you the option to choose the added image file resolution. Text, clipart, and background to the collage can also be added and there is also a library of images that can be used. The created collage can be saved or can also be shared directly to Twitter, Pinterest, and Tumblr.
03Adobe Spark
This is one of the top collages making tools that can be used to design the desired collage in different styles including photo grid. Unlike other Adobe tools, the collage-making program is simple and quick to use and does not require advanced technical know-how. You simply need to create a free account for Adobe Creative Cloud and the collage-making features can be easily used. There are pre-set designs and templates available to match your theme and requirements. You can further make customization to other collage elements as needed.
04Photo Collage
This free-to-use online tool requires no software download or installation and allows creating a grid quickly and easily. The interface of the tool is user-friendly where you just need to browse and add the images or can simply drag and drop them as well. You can choose from multiple template options available and can also add text, effects, and stickers to the collage. Multiple image editing options are also supported like zoom, flip, transparency, and more.
05Canva
Free and simple to use, this is one of the most widely used collage-making tools that is available as a browser-based program as well as Android and iOS app. Several photo-grid templates in different styles are available at the site that lets you create the desired collage in no time. You can customize the selected templates by adding filters, texts, effects, and more elements available. A paid version of the tool with advanced features is also available.
Part 4 Use stock images to enhance your photo grid
Adding high-quality and interesting images to your photo grid will level up its overall look and make it eye-catchy. If you are running short of such interesting and bright images, no need to worry as several sites have a good collection of images that can be used. One such program that we recommend here to check the stock images is Wondershare Filmora. Though Filmora is an advanced Windows and Mac-based video editing software, there are multiple additional features supported one of them is a collection of images in an array of categories.
Depending on the theme of your photo grid, you can select the desired images and other media from Wondershare Filmora Video Editor . Additionally, the split-screen feature of the software will let you add and play multiple videos in a single frame that makes it look like a video collage.
Wondershare Filmora - Best Video Editor for Mac/Windows
5,481,435 people have downloaded it.
Build unique custom animations without breaking a sweat.
Focus on creating epic stories and leave the details to Filmora’s auto features.
Start a creative adventure with drag & drop effects and endless possibilities.
Filmora simplifies advanced features to save you time and effort.
Filmora cuts out repetition so you can move on to your next creative breakthrough.
● Key Takeaways from This Episode →
● A photo grid is a classic and traditional style of creating a collage.
● There are several online tools, software, and mobile apps available for creating interesting photo grids.
● Wondershare Filmora is a great site to get stock of images in different categories and for all types of video editing requirements.
How to Send and Add Snapchat GIFs 100% in Easy Way
How to Send and Add Snapchat GIFs 100% The Easy Way
An easy yet powerful editor
Numerous effects to choose from
Detailed tutorials provided by the official channel
GIFs make texting so much more fun. You can express many emotions and include entertaining animations to give your messages a human touch. Users may share and receive GIFs on most social networking networks, and Snapchat is no exception. We’ll show you how to send GIFs on Snapchat, whether you’re an Android or iOS user, in this article.
This covers instructions on how to get GIFs in Snapchat and how to transmit GIFs in chat rooms and on Snapchat Stories updates. Let’s get started.
In this article
01 [How to Send GIFs on Snapchat](#Part 1)
02 [How to Get GIFs on Snapchat Snaps and Messages?](#Part 2)
Part 1 How to Send GIFs on Snapchat
Here is a simple step guide on how to send Snapchat GIF:
Step 1: Take a photo
Start your Snapchat app as usual and snap a photo or video.

Step 2: Tap the Sticker icon
From the row on the right side of the screen, tap the Sticker icon.
To add a GIF to your photo or video, scroll down and select one. You can also use the search option to locate more particular GIFs by entering a term or phrase.

Step 3: Drag GIF
Drag the GIF you added to the screen’s desired location.
Pinch your screen to change the GIF’s size as needed.
Step 4: Save and Share
You can then share your Snap with other social networking platforms by sending it to your Stories, friends/contacts, or just saving it to your gallery.

Part 2 How to Get GIFs on Snapchat Snaps and Messages?
Getting a GIF on Snapchat can be tasking, but here is a simple guide to achieving that.
Step 1: Make use of a Gboard.
Enter the chat of the friend or person to whom you want to send the GIF and maximize or open the keyboard using the text bar.

Step 2: Select the GIF you want.
Choose a GIF from the collection or catalog that you’d want to utilize and submit it.

You can use the same snap to apply many stickers. Drag and drop it on the trashcan icon to get rid of it.
Here’s how to get Gboard on your Android device if it didn’t come with it:
• Download the Gboard from the Play Store or whichever playstore you want.
• Go to Settings> System> Languages and Input> Virtual Keyboard and select it.
• Double-check that Gboard is selected as your primary keyboard.
After that, grant any permissions it requires so that you can use it right away in Snapchat.
Now that it’s as simple as it gets, let’s send comparable GIFs utilizing iOS devices.
For iPhone/iPad:
For iPhone users, you must first download and install the giphy app on your phone. Once you have successfully set the giphy app as your default keyboard, you can send Snapchat GIFs chat by following the steps below:
Step 1: Press the Globe icon
Continuously press and hold the globe icon to the left of the space bar to reveal the available keyboard, then choose a specific or favorite GIF from the giphy list.

Step 2: Find GIF
Find the GIF you wish to send and tap it to copy it.

Step 3: Paste GIF
Return to the conversation, paste the GIF into the text box, and press the send button.

For those who don’t know how to use the Giphy app on their iPhones or iPads, read the following instructions:
• Go to the Settings menu and pick the General icon.
•To see your keyboard options, go to the keyboard setting and tap it.
• To see the accessible keyboard, tap on the part labelled keyboard.
• Select Add a New Keyboard.
• The Giphy keyboard will undoubtedly be among the third-party keyboards.
• Once you’ve included or added the keyboard, it’ll appear in the “active keyboard” section.
• Select the Allow Full Access option.
Have you heard of Filmora before? I’m afraid not, Wondershare Filmora Video Editor is a video editing program that allows you to edit videos in various ways.
It’s exciting and amusing to make your animated GIF from any video or photo. Due to their large size, video scenes might be challenging to manage, but GIFs are perfect for profile posts and sharing with friends as simple jokes.
However, if you wish to create a GIF online, Filmora’s online meme maker is the ideal choice. You may use it to make a watermark-free photo, GIF, and video memes. It is free to use, and there is no need to register. You can change the text size, color, and position when you’re altering a caption. You can also add text to the inside or outside in a GIF.
Wondershare Filmora
Get started easily with Filmora’s powerful performance, intuitive interface, and countless effects!
Try It Free Try It Free Try It Free Learn More >

GIFs may be created from a collection of static photographs or even moving movies, and the process is effortless enough for anyone to do. We recommend Wondershare Filmora for you to complete this task quickly and easily. The rationale for this suggestion is the software tool’s user-friendly and engaging interface. You can soon mix a lot of stills into GIFs or convert small videos into GIFs with Filmora. What’s more, the Filmora platform enables easy modification of GIFs, with users able to add overlays, components, and text to their GIFs.
● Key Takeaways from This Episode →
● You must have gotten one or two tips on how to send and add Snapchat GIFs, all that is for you is to grab your phone, be it an Android or iOS, and make your chat, conversations, photos, and videos more interesting by making use of GIFs on Snapchat.
● iPhone users must ensure that the Giphy app is installed to achieve this.It is also important to note that you can create your exciting GIFs using Wondershare Filmora, and this can help you easily create an awesome GIF in no time. Get to it!!
GIFs make texting so much more fun. You can express many emotions and include entertaining animations to give your messages a human touch. Users may share and receive GIFs on most social networking networks, and Snapchat is no exception. We’ll show you how to send GIFs on Snapchat, whether you’re an Android or iOS user, in this article.
This covers instructions on how to get GIFs in Snapchat and how to transmit GIFs in chat rooms and on Snapchat Stories updates. Let’s get started.
In this article
01 [How to Send GIFs on Snapchat](#Part 1)
02 [How to Get GIFs on Snapchat Snaps and Messages?](#Part 2)
Part 1 How to Send GIFs on Snapchat
Here is a simple step guide on how to send Snapchat GIF:
Step 1: Take a photo
Start your Snapchat app as usual and snap a photo or video.
Step 2: Tap the Sticker icon
From the row on the right side of the screen, tap the Sticker icon.
To add a GIF to your photo or video, scroll down and select one. You can also use the search option to locate more particular GIFs by entering a term or phrase.
Step 3: Drag GIF
Drag the GIF you added to the screen’s desired location.
Pinch your screen to change the GIF’s size as needed.
Step 4: Save and Share
You can then share your Snap with other social networking platforms by sending it to your Stories, friends/contacts, or just saving it to your gallery.
Part 2 How to Get GIFs on Snapchat Snaps and Messages?
Getting a GIF on Snapchat can be tasking, but here is a simple guide to achieving that.
Step 1: Make use of a Gboard.
Enter the chat of the friend or person to whom you want to send the GIF and maximize or open the keyboard using the text bar.
Step 2: Select the GIF you want.
Choose a GIF from the collection or catalog that you’d want to utilize and submit it.
You can use the same snap to apply many stickers. Drag and drop it on the trashcan icon to get rid of it.
Here’s how to get Gboard on your Android device if it didn’t come with it:
• Download the Gboard from the Play Store or whichever playstore you want.
• Go to Settings> System> Languages and Input> Virtual Keyboard and select it.
• Double-check that Gboard is selected as your primary keyboard.
After that, grant any permissions it requires so that you can use it right away in Snapchat.
Now that it’s as simple as it gets, let’s send comparable GIFs utilizing iOS devices.
For iPhone/iPad:
For iPhone users, you must first download and install the giphy app on your phone. Once you have successfully set the giphy app as your default keyboard, you can send Snapchat GIFs chat by following the steps below:
Step 1: Press the Globe icon
Continuously press and hold the globe icon to the left of the space bar to reveal the available keyboard, then choose a specific or favorite GIF from the giphy list.
Step 2: Find GIF
Find the GIF you wish to send and tap it to copy it.
Step 3: Paste GIF
Return to the conversation, paste the GIF into the text box, and press the send button.
For those who don’t know how to use the Giphy app on their iPhones or iPads, read the following instructions:
• Go to the Settings menu and pick the General icon.
•To see your keyboard options, go to the keyboard setting and tap it.
• To see the accessible keyboard, tap on the part labelled keyboard.
• Select Add a New Keyboard.
• The Giphy keyboard will undoubtedly be among the third-party keyboards.
• Once you’ve included or added the keyboard, it’ll appear in the “active keyboard” section.
• Select the Allow Full Access option.
Have you heard of Filmora before? I’m afraid not, Wondershare Filmora Video Editor is a video editing program that allows you to edit videos in various ways.
It’s exciting and amusing to make your animated GIF from any video or photo. Due to their large size, video scenes might be challenging to manage, but GIFs are perfect for profile posts and sharing with friends as simple jokes.
However, if you wish to create a GIF online, Filmora’s online meme maker is the ideal choice. You may use it to make a watermark-free photo, GIF, and video memes. It is free to use, and there is no need to register. You can change the text size, color, and position when you’re altering a caption. You can also add text to the inside or outside in a GIF.
Wondershare Filmora
Get started easily with Filmora’s powerful performance, intuitive interface, and countless effects!
Try It Free Try It Free Try It Free Learn More >
GIFs may be created from a collection of static photographs or even moving movies, and the process is effortless enough for anyone to do. We recommend Wondershare Filmora for you to complete this task quickly and easily. The rationale for this suggestion is the software tool’s user-friendly and engaging interface. You can soon mix a lot of stills into GIFs or convert small videos into GIFs with Filmora. What’s more, the Filmora platform enables easy modification of GIFs, with users able to add overlays, components, and text to their GIFs.
● Key Takeaways from This Episode →
● You must have gotten one or two tips on how to send and add Snapchat GIFs, all that is for you is to grab your phone, be it an Android or iOS, and make your chat, conversations, photos, and videos more interesting by making use of GIFs on Snapchat.
● iPhone users must ensure that the Giphy app is installed to achieve this.It is also important to note that you can create your exciting GIFs using Wondershare Filmora, and this can help you easily create an awesome GIF in no time. Get to it!!
Best 10 Animated Templates in Canva
Versatile Video Editor - Wondershare Filmora
An easy yet powerful editor
Numerous effects to choose from
Detailed tutorials provided by the official channel
Canva is one of the premier graphic design platforms available to users. They can create Instagram posts, make YouTube thumbnails, infographics, invitations, business cards, and more.
The platform is beginner-friendly and extremely customizable, ideal for everyday use. More brands and companies use data visualized through graphic design, creating greater understanding and impact on users.
With Canva animated templates, you can show more with less work. This has wide-ranging effects from diversifying education to elaborating business reports and lucrative marketing opportunities.
In the article below, take a look at ten of the best Canva animated templates.
In this article
01 [Can You Animate in Canva?](#Part 1)
02 [Where Can I Find Animated Elements In Canva?](#Part 2)
03 [How Do I Get More Animations in Canva? ](#Part 3)
Part 1 Can You Animate in Canva?
Animation is an evergreen storytelling style as it’s versatile enough to be used in various types of content. Animations can last from a few seconds to a few minutes. According to HubSpot, A video-based email increases click rates by 300%.
1. Customization
Canva can be used to create customized animation. This can be done by creating an image and animating each element. Users can choose to create a textured background and edit images uploaded to Canva.
Users can also overlay audio to enhance the quality of the animation. The text can be refined to suit the style of the animation.
2. Automation
Canva has also launched a comprehensive suite of features under the “Animation” button. This automates the process and allows static images to be converted to animations. The animations range from simple motion to complex creations.
3. Movement
With the animation button, users can choose the type of animation they would like to use. The choices range from subtle animations like ‘Fade’, ‘Drift’ to bursts of motion like ‘Tumble’ and ‘Block’ and everything in-between.
4. Overview
Canva helps create high-quality animations at affordable prices. Creating an animation has never been easier with ready-made design templates by experienced designers.
Let’s look at how to animate the various elements of an image and the various animated templates in Canva.
Part 2 Where Can I Find Animated Elements In Canva?
With Canva’s many layouts and features to choose from, it might be difficult to figure out where to start. So, let’s start with the basics.
You have four basic facets to consider when choosing to animate. They are text, audio, image, and video. Every animation is crafted from varied combinations of these four basic steps.
One other consideration is the style of presentation you’d like to choose. Is it in portrait mode or landscape mode?
Do you want a previously crafted presentation ready to go? If so, Canva offers two options.
Step1 Select the “Create a Design” option on Canva
This allows users to create content in any format ranging from Instagram videos and reels, YouTube thumbnails and Facebook covers, logos, and more.
Step2 You can edit images and add the necessary text to your content. Bolster your content with video clips and audio to create the primary image you want
Edit the content to your preferences.
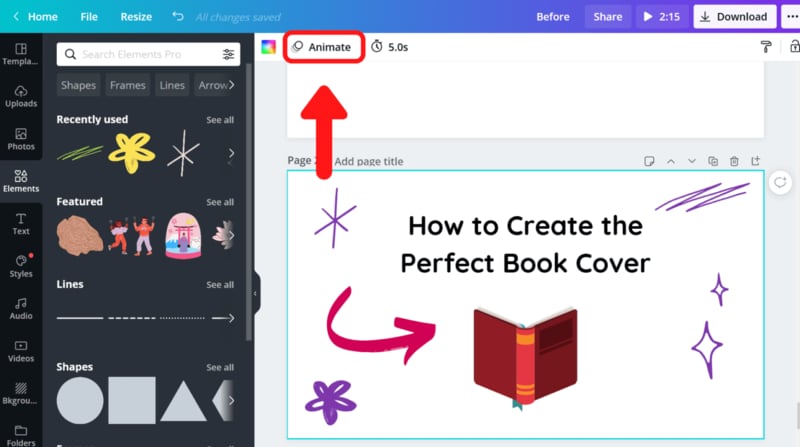
Step3 You are now ready to animate the construct
Select the animate button and look for “Page Animations” to animate the entire presentation. You can choose to animate any element on the page. You can also add borders or other design elements and animate them.
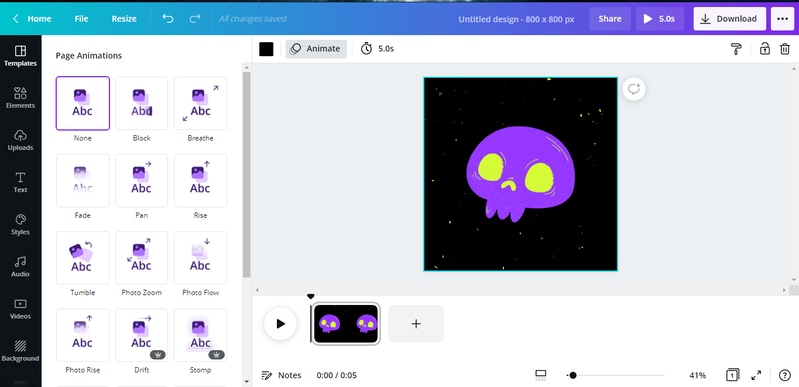
Step4 Here, you can choose from any myriad options for animation styles
You can also adjust the length of each animation with the stopwatch icon next to the animate button.
You can change the length of your video if you have one. You can also modify the audio clip to suit each animation.

Step5 Once you’ve animated the features according to your preference, you can now save the file in pdf, jpg, png or gif, or mp4 formats
Please note that all these options are for Canva Pro. Canva with the free subscription may allow limited format downloads. This is why you should consider tools like Wondershare Filmore for video animation.
Wondershare Filmora Pro for Video Animation
With Wondershare Filmora Pro, animation has never been easier. With its innovative keyframe technology, it makes animations easy to use. Animations can be easily created and, with the help of Filmora’s automation tool, fine-tuned for a professional finish.
Filmora provides a pioneering opportunity to create a visual masterpiece with a beginner’s experience with a simple functional drag and drop. With motion tracking, the ability to create split-screen, green screen, and blending capabilities, the Filmora Pro experience is unparalleled.
Part 3 How Do I Get More Animations in Canva?
Canva has filters allowing users to sort presentations by style, like “Animated,” “Minimalist,” “Corporate” and more. Canva has a series of ready-made animated templates available for use. Let’s explore a few of them.
It also allows sorting by themes like “Pink” or “Business” or “Background” depending on your needs. Users can also choose to sort out presentations according to the presentation’s color scheme.
Pink and Violet Simple Hot Neon Gradients Creative Presentation
With a gradient background that’s a popular website trend, this presentation boasts twenty-six slides with a signature animation you can tweak to suit your needs.
Blue Timeline Cycle Presentation
This presentation is useful for compact information with a clean and modern outlook. With ten power-packed slides, this animated template allows researchers and businesses to use data visualization to convey ideas.
Blue and White Illustrated Medical Healthcare in the 21st Century Education Presentation
With fourteen slides, this animation perfectly creates a visual treat for viewers. You can also convey vital information in bite-sized morsels. You can illustrate your point with lively animation designs while captivating your audience.
Neon Cyber Monday Sale Animated Video Facebook Ad Post
A fresh offering from Canva is this neon Facebook Ad Post with a captivating starry background and neon text elements.
You can customize this video to edit the text, the color palette, the duration of the video, and more.
Yellow Happy Wildlife Conservation Day Animated Video
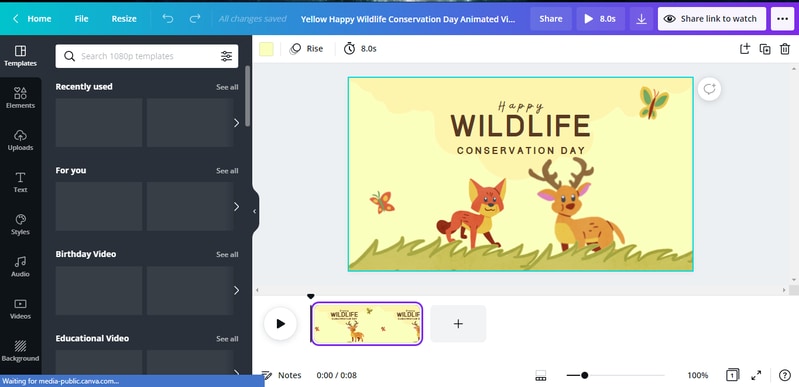
For a child-friendly video with animation, head on over to this presentation. This animation allows children to marvel at the motion and pay rapt attention when listening to essential issues with soothing attention-grabbing colors.
Green and Orange Business Hip Tech Weekly Team Updates Presentation
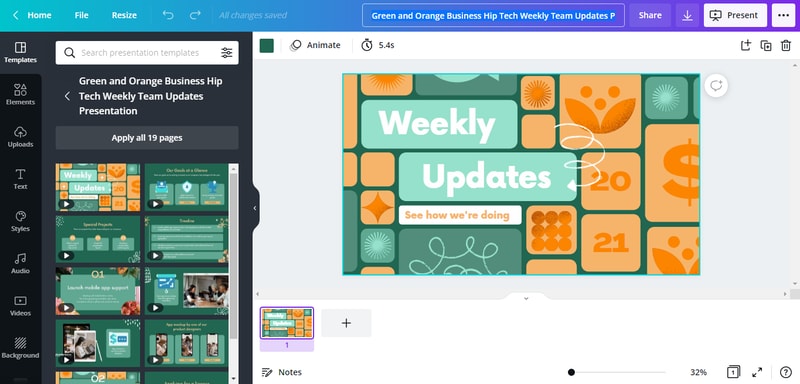
As the perfect complement of colors, this presentation is suited for everything from a YouTube thumbnail to a business meeting. With nineteen slides, the variations of animations found are endless.
Brown Cute Start Healthy Lifestyle Explainer Video Animation
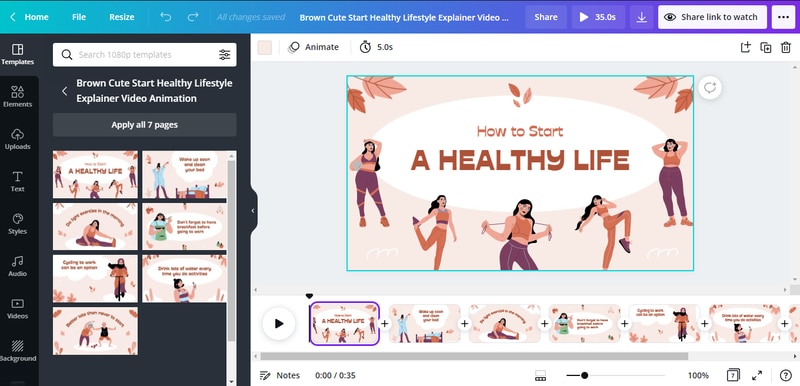
These cute animations make it straightforward to craft an explainer video around fitness. You can also use this for an Instagram post or story reel.
With seven slides, you can craft a compelling explainer video that keeps your viewers glued to the screen.
Sweet Fruit Candy Animated Group Project Presentation
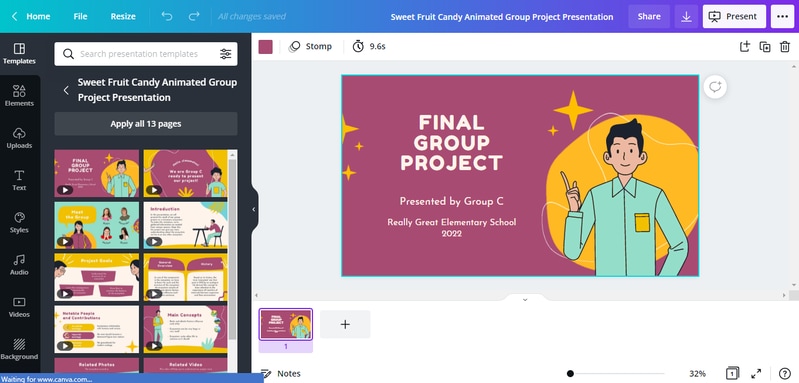
This presentation is perfect for group presentations. It’s an ideal template to break down large amounts of information in a versatile and easily created presentation.
With over thirteen slides, it’s a perfect slide set to breathe new life into your homework.
Pink and Cream Minimalist Food Animated Presentation

For a simple personalized food-related presentation, this slide set has you covered. With gorgeous visuals and space to write recipes, the history.
This presentation, with fourteen slides, remains a favorite among culinary enthusiasts.
Marketing Agency Animated Facebook Cover
Motion is identified as a compelling website design trend for 2022. Colorful, animated art in vibrant color themes can win more visitors to your page and attention in a saturated market.
Use this theme to illustrate a gorgeous campaign ad for your social media feed.
Wondershare Filmora
Get started easily with Filmora’s powerful performance, intuitive interface, and countless effects!
Try It Free Try It Free Try It Free Learn More >
AI Portrait – The best feature of Wondershare Filmora for gameplay editing
The AI Portrait is a new add-on in Wondershare Filmora. It can easily remove video backgrounds without using a green screen or chroma key, allowing you to add borders, glitch effects, pixelated, noise, or segmentation video effects.

Final Words
Canva is a great tool for animated videos and you can use animated Canva templates to create a unique animation in images. It is a great tool and can be used easily to create any length of animated video. But if you are looking for an advanced and easy-to-use video animation tool, then give a try to Wondershare Filmora.
Canva is one of the premier graphic design platforms available to users. They can create Instagram posts, make YouTube thumbnails, infographics, invitations, business cards, and more.
The platform is beginner-friendly and extremely customizable, ideal for everyday use. More brands and companies use data visualized through graphic design, creating greater understanding and impact on users.
With Canva animated templates, you can show more with less work. This has wide-ranging effects from diversifying education to elaborating business reports and lucrative marketing opportunities.
In the article below, take a look at ten of the best Canva animated templates.
In this article
01 [Can You Animate in Canva?](#Part 1)
02 [Where Can I Find Animated Elements In Canva?](#Part 2)
03 [How Do I Get More Animations in Canva? ](#Part 3)
Part 1 Can You Animate in Canva?
Animation is an evergreen storytelling style as it’s versatile enough to be used in various types of content. Animations can last from a few seconds to a few minutes. According to HubSpot, A video-based email increases click rates by 300%.
1. Customization
Canva can be used to create customized animation. This can be done by creating an image and animating each element. Users can choose to create a textured background and edit images uploaded to Canva.
Users can also overlay audio to enhance the quality of the animation. The text can be refined to suit the style of the animation.
2. Automation
Canva has also launched a comprehensive suite of features under the “Animation” button. This automates the process and allows static images to be converted to animations. The animations range from simple motion to complex creations.
3. Movement
With the animation button, users can choose the type of animation they would like to use. The choices range from subtle animations like ‘Fade’, ‘Drift’ to bursts of motion like ‘Tumble’ and ‘Block’ and everything in-between.
4. Overview
Canva helps create high-quality animations at affordable prices. Creating an animation has never been easier with ready-made design templates by experienced designers.
Let’s look at how to animate the various elements of an image and the various animated templates in Canva.
Part 2 Where Can I Find Animated Elements In Canva?
With Canva’s many layouts and features to choose from, it might be difficult to figure out where to start. So, let’s start with the basics.
You have four basic facets to consider when choosing to animate. They are text, audio, image, and video. Every animation is crafted from varied combinations of these four basic steps.
One other consideration is the style of presentation you’d like to choose. Is it in portrait mode or landscape mode?
Do you want a previously crafted presentation ready to go? If so, Canva offers two options.
Step1 Select the “Create a Design” option on Canva
This allows users to create content in any format ranging from Instagram videos and reels, YouTube thumbnails and Facebook covers, logos, and more.
Step2 You can edit images and add the necessary text to your content. Bolster your content with video clips and audio to create the primary image you want
Edit the content to your preferences.
Step3 You are now ready to animate the construct
Select the animate button and look for “Page Animations” to animate the entire presentation. You can choose to animate any element on the page. You can also add borders or other design elements and animate them.
Step4 Here, you can choose from any myriad options for animation styles
You can also adjust the length of each animation with the stopwatch icon next to the animate button.
You can change the length of your video if you have one. You can also modify the audio clip to suit each animation.
Step5 Once you’ve animated the features according to your preference, you can now save the file in pdf, jpg, png or gif, or mp4 formats
Please note that all these options are for Canva Pro. Canva with the free subscription may allow limited format downloads. This is why you should consider tools like Wondershare Filmore for video animation.
Wondershare Filmora Pro for Video Animation
With Wondershare Filmora Pro, animation has never been easier. With its innovative keyframe technology, it makes animations easy to use. Animations can be easily created and, with the help of Filmora’s automation tool, fine-tuned for a professional finish.
Filmora provides a pioneering opportunity to create a visual masterpiece with a beginner’s experience with a simple functional drag and drop. With motion tracking, the ability to create split-screen, green screen, and blending capabilities, the Filmora Pro experience is unparalleled.
Part 3 How Do I Get More Animations in Canva?
Canva has filters allowing users to sort presentations by style, like “Animated,” “Minimalist,” “Corporate” and more. Canva has a series of ready-made animated templates available for use. Let’s explore a few of them.
It also allows sorting by themes like “Pink” or “Business” or “Background” depending on your needs. Users can also choose to sort out presentations according to the presentation’s color scheme.
Pink and Violet Simple Hot Neon Gradients Creative Presentation
With a gradient background that’s a popular website trend, this presentation boasts twenty-six slides with a signature animation you can tweak to suit your needs.
Blue Timeline Cycle Presentation
This presentation is useful for compact information with a clean and modern outlook. With ten power-packed slides, this animated template allows researchers and businesses to use data visualization to convey ideas.
Blue and White Illustrated Medical Healthcare in the 21st Century Education Presentation
With fourteen slides, this animation perfectly creates a visual treat for viewers. You can also convey vital information in bite-sized morsels. You can illustrate your point with lively animation designs while captivating your audience.
Neon Cyber Monday Sale Animated Video Facebook Ad Post
A fresh offering from Canva is this neon Facebook Ad Post with a captivating starry background and neon text elements.
You can customize this video to edit the text, the color palette, the duration of the video, and more.
Yellow Happy Wildlife Conservation Day Animated Video
For a child-friendly video with animation, head on over to this presentation. This animation allows children to marvel at the motion and pay rapt attention when listening to essential issues with soothing attention-grabbing colors.
Green and Orange Business Hip Tech Weekly Team Updates Presentation
As the perfect complement of colors, this presentation is suited for everything from a YouTube thumbnail to a business meeting. With nineteen slides, the variations of animations found are endless.
Brown Cute Start Healthy Lifestyle Explainer Video Animation
These cute animations make it straightforward to craft an explainer video around fitness. You can also use this for an Instagram post or story reel.
With seven slides, you can craft a compelling explainer video that keeps your viewers glued to the screen.
Sweet Fruit Candy Animated Group Project Presentation
This presentation is perfect for group presentations. It’s an ideal template to break down large amounts of information in a versatile and easily created presentation.
With over thirteen slides, it’s a perfect slide set to breathe new life into your homework.
Pink and Cream Minimalist Food Animated Presentation
For a simple personalized food-related presentation, this slide set has you covered. With gorgeous visuals and space to write recipes, the history.
This presentation, with fourteen slides, remains a favorite among culinary enthusiasts.
Marketing Agency Animated Facebook Cover
Motion is identified as a compelling website design trend for 2022. Colorful, animated art in vibrant color themes can win more visitors to your page and attention in a saturated market.
Use this theme to illustrate a gorgeous campaign ad for your social media feed.
Wondershare Filmora
Get started easily with Filmora’s powerful performance, intuitive interface, and countless effects!
Try It Free Try It Free Try It Free Learn More >
AI Portrait – The best feature of Wondershare Filmora for gameplay editing
The AI Portrait is a new add-on in Wondershare Filmora. It can easily remove video backgrounds without using a green screen or chroma key, allowing you to add borders, glitch effects, pixelated, noise, or segmentation video effects.
Final Words
Canva is a great tool for animated videos and you can use animated Canva templates to create a unique animation in images. It is a great tool and can be used easily to create any length of animated video. But if you are looking for an advanced and easy-to-use video animation tool, then give a try to Wondershare Filmora.
Also read:
- New The Coolest Anime Characters Ever| List of Top Favorites
- Updated Best 10 Animated Templates in Canva for 2024
- Updated In 2024, How to Make GIF Stickers for WhatsApp 100 The Simple Way
- Updated In 2024, Is It That Easy to Make My Animated Character
- Updated Popular Tips on Learning Animate Rigging
- New 15 Best Sites to Watch Cartoons Online Free And So Can You
- Updated Fuel Creativity with 10 Awesome Collection of 2D Animation Examples for 2024
- New Guide on Creating GIF in WhatsApp iPhone for 2024
- How to Stop Animation From Looping in Unity for 2024
- 2024 Approved 10 Trendy & Stylish Free Logo Animation Templates
- New FREE Best Anime Streaming Sites to Download Anime
- 20 Free After Effects Logo Reveal Templates You Will Want to Know
- Methods to Make Photo Motion Effect Online?
- New In 2024, Learn What Are Differences Between 2D And 3D Animation
- New 2024 Approved Ideas That Will Help You Out in Learning How to Send WhatsApp Animated Gifs
- How to Create a YouTube Intro Animation Like a Pro
- New Useful Tips for Canva Animated Elements
- Updated The Best Free 12 GIF Meme Maker at a Glance
- What Wikipedia Cant Tell You About the 10 Batman Cartoons for 2024
- Updated How to Make GIF Instagram | Quick Tips for 2024
- In 2024, Best 10 Animated Templates in Canva
- 2024 Approved 10 Most Memorable Japanese Cat Cartoons
- Best Canva 10 Animated Templates
- 2024 Approved Useful Tips for Canva Animated Elements
- Updated 2024 Approved You Can Turn a TikTok Into a GIF Now. Heres How
- Updated Make Well Done Animated GIF for 2024
- 6 Unexpected Ways Gif Animation Maker That Affect Your Marketing
- Updated 2024 Approved The Ultimate Cheatsheet to 15 Adobe Animate Alternatives
- Updated In 2024, Want to Make a Meme GIF?
- Updated In 2024, The Most Efficient Techniques for You to Make 3D Animation Character
- New Best 12 Evil Cartoon Characters of All Time for 2024
- 2024 Approved How to Create Benime Whiteboard Animation in Android
- New Ways on How to Get Started in Stop Motion Claymation
- Best 10 Animated Photo Collage Apps for 2024
- Updated In 2024, What Wikipedia Cant Tell You About the 10 Batman Cartoons
- In 2024, Top 11 Free Apps to Check IMEI on Samsung Galaxy A05s Phones
- How To Transfer Data From iPhone 15 Plus To Other iPhone devices? | Dr.fone
- Why Does My Vivo X Fold 2 Keep Turning Off By Itself? 6 Fixes Are Here | Dr.fone
- List of Pokémon Go Joysticks On Honor Magic 6 | Dr.fone
- A Detailed Guide on Faking Your Location in Mozilla Firefox On Nubia Red Magic 9 Pro+ | Dr.fone
- How to Reset a Oppo Reno 10 5G Phone That Is Locked | Dr.fone
- Complete Tutorial to Use GPS Joystick to Fake GPS Location On Vivo V30 Pro | Dr.fone
- Life360 Learn How Everything Works On Oppo A56s 5G | Dr.fone
- 9 Best Phone Monitoring Apps for Apple iPhone SE (2020) | Dr.fone
- How to Change your Samsung Galaxy A15 5G Location on Twitter | Dr.fone
- Repair Office 2003 Files (Word, Excel and PowerPoint)on Windows | Stellar
- Full Guide to Bypass Samsung Galaxy S23 FE FRP
- In 2024, Additional Tips About Sinnoh Stone For Vivo Y27 5G | Dr.fone
- How to Change Spotify Location After Moving to Another Country On Vivo Y36 | Dr.fone
- How to restore wiped music on Realme Narzo N53
- In 2024, How to Unlock iCloud lock from your iPhone 12 and iPad?
- Title: Updated Best Guide for Beginners on 2D Animation Making
- Author: Elon
- Created at : 2024-05-19 03:04:42
- Updated at : 2024-05-20 03:04:42
- Link: https://animation-videos.techidaily.com/updated-best-guide-for-beginners-on-2d-animation-making/
- License: This work is licensed under CC BY-NC-SA 4.0.
