
:max_bytes(150000):strip_icc():format(webp)/macOS-Sonoma-Banner-fe4ffda2caaf4040b81ae0b66f2d6dc0.jpg)
Updated Can I Do Animated Logo Design Without Design Skills, In 2024
Can I Do Animated Logo Design Without Design Skills?
Can I Still Do Animated Logo Design Without Design Skills?
An easy yet powerful editor
Numerous effects to choose from
Detailed tutorials provided by the official channel
In the fast-moving world, you cannot afford to keep your brand design still as it doesn’t influence the audience toward your business. It is pretty essential to create an impressive and animated logo for the brand.
This article will discuss how you can create an animated logo design even if you do not have design skills.
In this article
01 [This is What a Conventional Professional Animation Designer Should Be](#Part 1)
02 [Your Number 1 Tip to Do Animated Logo Design Without Design Skills](#Part 2)
03 [This is the Smartest Tip Ever About Filmora](#Part 3)
Part 1 This is What a Conventional Professional Animation Designer Should Be
01How to Make an Animated Logo for an Animation Designer?
There are various online logo maker tools available to create an animated logo design for your brand easily. There are several online logo makers available from which you can easily create an effective animated logo for your business. We will discuss Canva online logo maker for a better understanding of making the online animated logo design for the brand. All you have to do is to follow the simple steps listed below.
Method to make the Animated Logo Design for your Business
Step 1: Initiate with Canva
Initially, you need to launch Canva and choose “Animated Logos” for the library of effectively and professionally designed templates through which you can create inspiration and further customize it accordingly.
Step 2: Choose the appropriate design as per nature of business
Now, you have to select any one of the designed templates that seem closest to the look you are looking to give to your brand. All the templates available are professionally designed and fully customizable. You can even initiate the process with the blank design template from scratch. It would help if you made sure that you were looking to create a simple or complex design for the logo.
![]()
Step 3: Customization of the animated logo
Now is the time to customize your logo. You can use a lot of creativity and skills. Think about your business and how the logo should and take help of the font styles, design colors, font size, video background, and text to bring out the best in your animated logo design. Look for what effect you want for the logo design. Apart from this, it is better to animate the text and elements separately or set the complete design into motion. After successfully editing the design of the logo, you need to proceed to the next step listed below.
![]()
Step 4: Download the file in required format
When you are satisfied with the logo animation design, you need to save it. Also, you can download it into high-resolution either in MP4 videos or GIF files as per your choice. With MP4 file, you will need to include the audio files; however, if you choose GIF files, it will provide you with brief and compressed clips with no audio.
![]()
Step 5: Include the file to your various visual branding media
Lastly, you need to recall and recognize the brand by employing an innovative animated logo in different visual media like social media accounts, websites, and various advertising and promo videos. After making a creative animated logo design, you can use it on your website or different social accounts to attract your business audience.
02How Much Does a Professional Animated Logo Cost?
The cost for the professional animated logo is not fixed, as it depends on the work you have done while making a logo for your brand. In general words, it can be said that the price for animated logo design is anywhere from $0 to $1000. However, if you have a small firm or startup looking to get a quality design, it will cost you between $300-$1300. Suppose you have a large-scale business and are looking to replace the traditional logo design with a customized animated logo. In that case, you will be required to hire a professional logo designer who will look after the design and make it creative.
Part 2 Your Number 1 Tip to Do Animated Logo Design Without Design Skills
011. 5 Tools You Need to Make an Animated Logo
When looking to create an animated logo design free for your social media account or website, you need to understand that you will require some tools to create it impressive and professional. The 5 tools or the websites used for making the animated logo design are listed below:
● Canva
● Filmora
● Designhill
● Squarespace
● Hatchful
025 Tips to Animate a Logo
● Make sure to use images that include transparent background
You need to make sure that when you upload any images or illustrations, it must include a transparent background so that you will be able to make a seamless animation logo without having pesky color and look attractive to the audience.
![]()
● Select the suitable template for the business
You will discover several template options available while using the animated logo designer; however, you need to make sure that chosen template must align with the business nature. For example, if you sell organic products, you need to choose the environment design template.
![]()
● Make use of masks appropriately
A mask is defined as the container for the photos. The logo design maker service provides interesting masks in different shapes to make a stunning and appealing animated logo after effects. You are required to use masks with photos, solid color, and shaded background.
● Keep it simple and short
Always try to make logo design short and straightforward! If you are using too many effects and colors in the logo design, it turns complex for the audience.
![]()
● Create an impact on the audience
To impact the audience, you need to make sure that the animation doesn’t last longer than 3-4 seconds. The templates collections of the different logo design makers are perfectly timed; therefore, there is no need to worry about making long animation.
Part 3 This is the Smartest Tip Ever About Filmora
01What’s Filmora?
![]()
Wondershare Filmora is video editing software available on Wondershare that facilitates you to explore creativity and make the cinematic magic regarding the professionally designed videos. This tool comprises a wide range of visual effects, video editing features, and motion graphics, making it the most preferred and ideal tool for video editing purposes. If you are looking to use the tool, all you have to do is download the Filmora software on your Windows or Mac system. After downloading the software, please install the program, run it and start using it.
Wondershare Filmora
Power Up Your Story with Filmora. Professional video editing is made easy.
Requirement
Windows- Win 8 or later (64 bit OS) and MAC- macOS X 10.13 or later.
The state-of-art feature of the tool makes it one of the most preferred tools for video editing, especially for the filmmaker and video editors.
02Is It Possible to Add a Video to the Animated Logo?
Yes, you will include video to the animated logo by selecting the “Video” tab. Along with such, add it to a text or make use of them as the background. You also need to understand that such videos are accessible to Filmora Pro members.
03Is the Music Available on the Asset Library Royalty-free?
No, if you are using royalty- free assets you are required to pay for getting the access…
04How to Make an Animated Video in a Snap?
If you are looking to create an animated video in a snap, you need to follow the below steps:
Step 1: Choose the incredible tool for making animated videos: You need to download the tool and register your account.
Step 2: Select a well-made animation template: Select the template from the library of the tool and launch your trip of creation.
Step 3: Drag and drop: Drag and drop the content to the canvas and customize every aspect of the video with complete flexibility.
Step 4: Download and share: Download your creation to the device and also remember to share it on your social media account for better reach.
Key Takeaways from This Episode
● Filmora makes the video editing experience more engaging and hassle-free. It can be easily downloaded on your Window or Mac System by visiting the Wondershare official website. It includes several editing options which help you to create an engaging animated video.
● You can make animated logo designs even if you don’t have design skills by choosing the online logo design maker over the Internet. The template will be initially provided to you; all you have to do is select the correct template following the nature of your business.
● You can easily add multimedia files like audio and video to your animated logo design by selecting the “Video” tab. Along with, such add it to a text or make use of them as the background. Therefore, it can be concluded that you can easily create an animated logo design without design skills and give your brand professional and valued recognition.
● If you have any recommendations or doubts regarding the discussion, please let us know by commenting on the box below.
A Roster of 15 Top Disney Channel Cartoons
A Roster of 15 Best Disney Channel Cartoons
An easy yet powerful editor
Numerous effects to choose from
Detailed tutorials provided by the official channel
Disney channel is among the most liked channel by children. Undoubtedly, in childhood, every one of us, at some point has seen the best cartoon on it. The Disney channel cartoons always hit the top of the list because of the content and graphics used. Well, we cannot forget that still some people are fond of it and wish to try out some of the best cartoons.
Well, if you are also a big fan of the best Disney cartoons, stay tuned with us in this read till the last. Here we are exploring the list of all the best cartoons on this channel and sharing something new too. Let’s get started!
In this article
01 [All Best 10 Disney Channel Cartoons](#Part 1)
02 [All 5 Upcoming Disney Movies in 2022](#Part 2)
03 [How to View Disney Channel Cartoons](#Part 3)
Part 1 All Best 10 Disney Channel Cartoons
In this section, firstly, we discuss the best cartoons on Disney plus that viewer must try out. These are as follows:
01Gravity Falls
Gravity Falls is a Disney Channel show. It has a large fan base, and the show has been consistently popular for its high-quality storytelling. It has also been praised by critics for its artistic style and visual appeal. The show is about the adventures of a boy named Dipper Pines who lives in an old house with his family and also his brother, Mabel.
Premiered: June 15 2012
Stars (IMDb): 8.9/10
02Kim Possible
“Kim Possible is an American animated television series created by Craig McCracken for Disney Channel. The series follows the adventures of teenage girl Kim Possible and her friends Ron Stoppable and Goofy as they try to stop evil villains.
Premiered: 7 June 2002
Stars (IMDb): 7.2/10
03Phineas and Ferb
Phineas and Ferb is a popular cartoon that Disney has produced. It is known for its humorous storyline and characters. Phineas and Ferb are two best friends who are always trying to get into trouble with their inventions. They invent many different things which they use for their own purposes but never really think about the consequences of what they do. They also have some sort of relationship with Perry the Platypus.
Premiered: August 17 2007
Stars (IMDb): 8.1/10
04The Owl House
The Owl house is one of the greatest animated cartoons that has ever been made. It has a simple storyline, it is well-made, and it has a strong message. The main character of the cartoon is an owl. He has a set of skills that he can use to help humans out. The story revolves around the concept of the warrior.
Premiered: January 10, 2020
Stars (IMDb): 8.2/10
05Darkwing Duck
Darkwing Duck is a Disney Channel animated series created by Don Hertzfeldt. The show follows the adventures of Darkwing Duck and his friends as they work to save the world from evil and disaster.
Premiered: September 6 1991
Stars (IMDb): 7.6/10
06Star vs The Forces of Evil
We are all familiar with the classic Disney Channel cartoon “The Forces of Evil”. It is a story about a group of mischievous children who want to defeat evil forces. They want to take over the world and rule it. But then they learn that there are two sides to every story and that sometimes good can win out over evil.
Premiered: January 18 2015
Stars (IMDb): 8.1/10
07The New Adventures of Winnie the Pooh
Winnie the Pooh is a very popular cartoon series with a huge fan base. The story of this cartoon is about a young bear who lives in the forest, who meets two other bears and a tree, who is his best friend. He has some adventures with them. This cartoon was first shown in 1959. It was later adapted into an animated movie in 1966, which became very popular among children and adults alike.
Premiered: January 17 1988
Stars (IMDb): 7.7/10
08The Ghost and Molly McGee
The Ghost and Molly McGee want to get back home. It’s up to them to find their way through the maze of mirrors and see if they can make it back home. The two ghosts have been separated for ages, but now they are reunited in this big adventure!
Premiered: October 1 2021
Stars (IMDb): 7.3/10
09Recess
Disney channel cartoon’s “Recess” is a pre-school cartoon series produced by Disney Channel. This is a story of a few friends who met on the ground during recess time and had fun together. They get into so many things that turn out to be the game changer for them.
Premiered: September 13 1997
Stars (IMDb): 6.6/10
10Curious George
Curious George is a cute African monkey who can’t seem to stay out of mischief. “The Man in the Yellow Hat,” George’s pal, tries his hardest to look after him and is always there to save the day. Learning, forgiveness, and playful curiosity are among the show’s themes.
Premiered: 4 September 2006
Stars (IMDb): 6.5/10
Part 2 All 5 Upcoming Disney Movies in 2022
After exploring the list of best cartoons on Disney Plus, how can we forget to check out the upcoming movies on Disney in 2022? Yes, there is plenty of option available for 2022 as well. Few of them are: -
01Polar Bear (film)
A polar bear is an upcoming movie on Disney. This movie highlights the polar bear’s era and helps people to know more about them. This will be going to release on April 22, 2022.
02Fire Island
Fire Island is an upcoming American romantic comedy film directed by Andrew Ahn and written by and starring Joel Kim Booster. Releasing on Hulu on June 3, 2022. The story revolves around two friends embracing a long weeks’ vacation. They also find out some new friends during the same adventure.
03Good Luck to You, Leo Grande
Good Luck to You, Leo Grande is a romantic movie that revolves around a window. She hires a sex worker to fulfil her fantasies. This movie will hit the cinemas on January 22 2022.
04Not Okay
Not okay is a movie about friends who are planning a trip but then get into some uninvited troubles and are not in the state to come out of them. This movie will be in cinemas on August 5, 2022.
05Black Panther: Wakanda Forever
Black Panther: Wakanda Forever is a superhero film. This movie will amaze all the viewers with its plot and graphics used. This movie will be in cinemas on November 11, 2022.
Part 3 How to View Disney Channel Cartoons
We are pretty sure if you are a big fan of Disney Channel Cartoons, you might be getting curious to try out the Disney cartoon face too. But sometimes it happens that the graphics available online doesn’t meet our needs, due to which we are not able to try that out.
If the same is happening to you, then try Filmora. Yes, you read it right. This is one of the best editing tools available helpful in extracting the cartoon face, and you can use them easily. This tool will help you to edit the videos too, and after it, the same can be used with the best graphics easily.
This wonderful tool will cater to your obsession with Disney cartoons and help you to get the best outcomes available. You will be able to express more and achieve more. Exploring more about the features of Wondershare Filmora Video Editor that can help you includes: -
● Video editing is at its best.
● Editing features for every kind of video.
● Innovative interface.
● Colour correction can be done easily.
● Multiple effects for video.
For Win 7 or later (64-bit)
For macOS 10.12 or later
All these features are helpful for users to View Disney Channel Cartoons easily, and in case they are in video creation and wish to use them can go ahead with it. For sure, their editing along with video needs will be catered to, and there will be no problem in resolving things.
● Ending Thoughts →
● Disney channel has the best cartoon content, and no other channel can beat it. that’s why we created this amazing list for you.
● Filmora is one of the best tools available helpful for users to create the best videos with Disney cartoon characters too.
● Upcoming Disney channel cartoons are best to watch in 2022, and viewers must not miss them.
Tutorial Guide to Animate Pictures in Canva
Versatile Video Editor - Wondershare Filmora
An easy yet powerful editor
Numerous effects to choose from
Detailed tutorials provided by the official channel
With the rapid rise of social media worldwide, animated posts (like GIFs) are becoming famous. They have become a replacement to other modes like JPEG and .Png
Famous designing tools like Canva introduced an animation feature in the light of its popularity. The feature allows you to step up your social media game and creates animated visuals in a blink! It is also efficient for both professional and amateur users.
Besides social media content, Canva is also useful to design birthday cards, event invites, inspirational quotes, and more! Let’s learn about how to animate pictures in Canva in detail.
In this article
01 What Canva Pictures Can Be Used For?
02 How to Animate Pictures in Canva?
03 Tips: Animate Pictures In Video
Part 1: What Canva Pictures Can Be Used For?
Be it for marketing campaigns or projects, Canva is the best tool for all designing work. It is a foolproof platform where you do not need prior designing experience. Canva is useful for

Social media/Instagram Posts: You can build your Instagram presence by creating posts through Canva. It has multiple templates and features to make alluring Instagram posts. It also has drag-and-drop free images to add customized designs to the template.
Facebook Covers: You can make Facebook covers on Canva by choosing a layout and adding other elements. You can include colors, fonts, and pictures on the cover. Canva has templates for all themes, moods, and styles!
Event Invites: Canva has hundreds of free layouts and libraries to create event invites. You can choose the appropriate template and incorporate party-oriented photos, icons, stickers, illustrations, and graphics. It also has a personalizing option to add personal pictures and artwork in the editor.
Inspirational Quotes: Canva allows you to curate inspirational quotes and dispense motivation in people. It has templates to modify the elements like font size, text size, borders, images, and more!
Collages: It helps create a collage where you can combine multiple pictures in one frame. Canva offers various grids with a capacity of 12 pictures and different sizes.
Part 2: How to Animate Pictures in Canva?
Canva helps you add instant animation in presentations, social media posts, and more. To know how to animate images in Canva, follow the below steps:

Step 1: Add Static Elements
Start by creating an image through static elements. To make the design attractive, you can add sample texts, illustrations, doodles, and other entities.
Try to stimulate your creativity and come up with a layout beforehand. If possible, sketch on paper and replicate the same.
Step 2: Animate Your Design
Take a final glance at the layout. Make sure it’s perfect. Once all the elements are placed as per your design, it’s time to animate them. For that:
- Click on the white background page
- Go to the “Toolbar” section
- Select the “Animate” button
Step 3: Select Page Animation Style
Canva offers six animation styles, where five are for free users, and one is for pro users. To access the five animation styles, follow these steps.
- Press the “Animate” Button
- Select “Page Animations”
- There you will find options like Block, Pan, Fade, Rise, and Tumble
- Select the style as per your design
Step 4: Preview and Download
After selecting a page animation style, it will preview the effect. If you find it good, move on to downloading the GIF. Here’s how to do so
- Go to the “Toolbar” option (present on your upper right hand)
- Choose GIF as the file type
- Check the page number and verify if it’s correct
- Press the “Done” button
Step 5: Final GIF
After clicking on the “Done” button, your GIF will be downloaded. You will be able to see a display for five seconds. If you want to edit the image after this, click on the time button (near the “Animate” button).
So, that was all about how to animate a photo in Canva.
Drawbacks of Canva
Despite efficient features and easy interface, there are certain areas where Canva lacks. This includes
- It does not have any local file storage.
- As too many people use Canva, your template may look the same as others.
- Some of its best features are not free to access.
- The mobile app version lacks certain elements and features.
Out of all these drawbacks, repetitions of templates are a big issue. That’s because everyone wants their posts to look unique and irreplaceable. However, common Canva templates may prevent that from happening.
Fortunately, there are ways to combat such issues. Let’s learn about them in the next section.
Tips: Animate Pictures In Video
You can also animate pictures in the video to make them more lively. For that, you can use Wondershare Filmora Pro Video Editor. It’s also efficient if you don’t know how to animate a picture in Canva:
Wondershare Filmora Video Editor
Filmora by Wondershare is a video editing software that helps you build custom animations easily. It has auto features to make epic stories and posts.
Wondershare Filmora
Get started easily with Filmora’s powerful performance, intuitive interface, and countless effects!
Try It Free Try It Free Try It Free Learn More about Filmora>

Its drag and drop effect makes designing simple and quick. Due to its outstanding attributes, options, and styles, Filmora has 77+ million happy users!
It’s a power-packed integration of functionality, performance, and more! In fact, it resolves the repeated template issue of Canva. The software has top-notch functions and innovative filters that add authenticity to the designs.
Till now, you learned about how to animate a picture on Canva. Now, let’s comprehend the right way to use Filmora for animating and adding images in the video.
Before using, make sure to update the software to its latest version. Follow separate methods for both Windows and Mac.
For Win
Step 1: Adding Image to Video Track
With Filmora, adding images to video is a matter of seconds! Start by:
- Identify the position where you want to add the image and place the Playhead there.
- Right-click on the picture from the media library. Click on the “Insert” option. Your image will be added. Select the “Append” option, if you want to add an image at the video end.

Note: How to Remove Black Bars around the Image?
- Go to “Settings” from the File section.
- Click on the “Editing” tab and select “Photo Placement.”
- Choose from the “Crop to Fit” or “Pan To Zoom” option. The black bars will be removed.
To add the image in between the video clip, split them. Now, add the image between the split parts.
Step 2: Add Images as Overlays
To add images as overlays, drag the image to a video track above the main track. The main track consists of your video.
Track 1 (or the track with a video clip) is the base of your video. If you add anything else, it will be displayed above this track as video track 2, 3, and so on. Overall, you can add 100 video tracks.
Step 3: Edit Your Image
If you know how to animate an image in Canva, editing images on Filmora is even easier. You can try the following methods:
Animate Your Images
- To add animation presets to the image, click on the image twice.
- Go to the “Animation Tab” and look for an animation preset.
- Drag the presets to the image for its effect

Make Image Color Adjustments
- Double-click on the image
- Go to the “Color” tab and then the “Color” section
- Customize the temperature, saturation, brightness, etc., as per your need.
- Press Ok.
Change Image Duration
You can increase the image duration to more than the default timing of 5 seconds. For that:
- Click on the image and select the “Duration” option.
- Go to the “Duration Setting” panel.
- Add the new duration timing.

Adjust Position, Rotate/Flip, and Opacity
- You can resize the image position through the circles and squares at the image edges.
- To flip or rotate the image, double-click on the picture. From the “Image Panel,” go to “Transform” and then click on “Rotate.” You can choose either “Horizontal Flip” or “Vertical Flip” to flip the images.
- Double-click on the image and click on the “Composting” option to add opacity. You can choose the blending mode or adjust the “Opacity” accordingly.

For Mac
Filmora for Mac comes with a drag and drop feature to add transitions, animated titles, and effects. You can start a new project from scratch by clicking on “New Project”. The entire process is the same as that for Windows users.
To apply animation in the images, use the motion effects option. For that,
- Click on the Image
- Go to Motion Tab
- Select a motion effect
- Double-click to apply the effect

Conclusion
So that’s how to animate photos in Canva. Hopefully, our steps will help you revamp your posts like a pro! If not Canva, you can use its alternative Filmora. It’s equally prominent, user-friendly, and feature-rich.
Versatile Video Editor - Wondershare Filmora
An easy yet powerful editor
Numerous effects to choose from
Detailed tutorials provided by the official channel
With the rapid rise of social media worldwide, animated posts (like GIFs) are becoming famous. They have become a replacement to other modes like JPEG and .Png
Famous designing tools like Canva introduced an animation feature in the light of its popularity. The feature allows you to step up your social media game and creates animated visuals in a blink! It is also efficient for both professional and amateur users.
Besides social media content, Canva is also useful to design birthday cards, event invites, inspirational quotes, and more! Let’s learn about how to animate pictures in Canva in detail.
In this article
01 What Canva Pictures Can Be Used For?
02 How to Animate Pictures in Canva?
03 Tips: Animate Pictures In Video
Part 1: What Canva Pictures Can Be Used For?
Be it for marketing campaigns or projects, Canva is the best tool for all designing work. It is a foolproof platform where you do not need prior designing experience. Canva is useful for
Social media/Instagram Posts: You can build your Instagram presence by creating posts through Canva. It has multiple templates and features to make alluring Instagram posts. It also has drag-and-drop free images to add customized designs to the template.
Facebook Covers: You can make Facebook covers on Canva by choosing a layout and adding other elements. You can include colors, fonts, and pictures on the cover. Canva has templates for all themes, moods, and styles!
Event Invites: Canva has hundreds of free layouts and libraries to create event invites. You can choose the appropriate template and incorporate party-oriented photos, icons, stickers, illustrations, and graphics. It also has a personalizing option to add personal pictures and artwork in the editor.
Inspirational Quotes: Canva allows you to curate inspirational quotes and dispense motivation in people. It has templates to modify the elements like font size, text size, borders, images, and more!
Collages: It helps create a collage where you can combine multiple pictures in one frame. Canva offers various grids with a capacity of 12 pictures and different sizes.
Part 2: How to Animate Pictures in Canva?
Canva helps you add instant animation in presentations, social media posts, and more. To know how to animate images in Canva, follow the below steps:
Step 1: Add Static Elements
Start by creating an image through static elements. To make the design attractive, you can add sample texts, illustrations, doodles, and other entities.
Try to stimulate your creativity and come up with a layout beforehand. If possible, sketch on paper and replicate the same.
Step 2: Animate Your Design
Take a final glance at the layout. Make sure it’s perfect. Once all the elements are placed as per your design, it’s time to animate them. For that:
- Click on the white background page
- Go to the “Toolbar” section
- Select the “Animate” button
Step 3: Select Page Animation Style
Canva offers six animation styles, where five are for free users, and one is for pro users. To access the five animation styles, follow these steps.
- Press the “Animate” Button
- Select “Page Animations”
- There you will find options like Block, Pan, Fade, Rise, and Tumble
- Select the style as per your design
Step 4: Preview and Download
After selecting a page animation style, it will preview the effect. If you find it good, move on to downloading the GIF. Here’s how to do so
- Go to the “Toolbar” option (present on your upper right hand)
- Choose GIF as the file type
- Check the page number and verify if it’s correct
- Press the “Done” button
Step 5: Final GIF
After clicking on the “Done” button, your GIF will be downloaded. You will be able to see a display for five seconds. If you want to edit the image after this, click on the time button (near the “Animate” button).
So, that was all about how to animate a photo in Canva.
Drawbacks of Canva
Despite efficient features and easy interface, there are certain areas where Canva lacks. This includes
- It does not have any local file storage.
- As too many people use Canva, your template may look the same as others.
- Some of its best features are not free to access.
- The mobile app version lacks certain elements and features.
Out of all these drawbacks, repetitions of templates are a big issue. That’s because everyone wants their posts to look unique and irreplaceable. However, common Canva templates may prevent that from happening.
Fortunately, there are ways to combat such issues. Let’s learn about them in the next section.
Tips: Animate Pictures In Video
You can also animate pictures in the video to make them more lively. For that, you can use Wondershare Filmora Pro Video Editor. It’s also efficient if you don’t know how to animate a picture in Canva:
Wondershare Filmora Video Editor
Filmora by Wondershare is a video editing software that helps you build custom animations easily. It has auto features to make epic stories and posts.
Wondershare Filmora
Get started easily with Filmora’s powerful performance, intuitive interface, and countless effects!
Try It Free Try It Free Try It Free Learn More about Filmora>
Its drag and drop effect makes designing simple and quick. Due to its outstanding attributes, options, and styles, Filmora has 77+ million happy users!
It’s a power-packed integration of functionality, performance, and more! In fact, it resolves the repeated template issue of Canva. The software has top-notch functions and innovative filters that add authenticity to the designs.
Till now, you learned about how to animate a picture on Canva. Now, let’s comprehend the right way to use Filmora for animating and adding images in the video.
Before using, make sure to update the software to its latest version. Follow separate methods for both Windows and Mac.
For Win
Step 1: Adding Image to Video Track
With Filmora, adding images to video is a matter of seconds! Start by:
- Identify the position where you want to add the image and place the Playhead there.
- Right-click on the picture from the media library. Click on the “Insert” option. Your image will be added. Select the “Append” option, if you want to add an image at the video end.
Note: How to Remove Black Bars around the Image?
- Go to “Settings” from the File section.
- Click on the “Editing” tab and select “Photo Placement.”
- Choose from the “Crop to Fit” or “Pan To Zoom” option. The black bars will be removed.
To add the image in between the video clip, split them. Now, add the image between the split parts.
Step 2: Add Images as Overlays
To add images as overlays, drag the image to a video track above the main track. The main track consists of your video.
Track 1 (or the track with a video clip) is the base of your video. If you add anything else, it will be displayed above this track as video track 2, 3, and so on. Overall, you can add 100 video tracks.
Step 3: Edit Your Image
If you know how to animate an image in Canva, editing images on Filmora is even easier. You can try the following methods:
Animate Your Images
- To add animation presets to the image, click on the image twice.
- Go to the “Animation Tab” and look for an animation preset.
- Drag the presets to the image for its effect
Make Image Color Adjustments
- Double-click on the image
- Go to the “Color” tab and then the “Color” section
- Customize the temperature, saturation, brightness, etc., as per your need.
- Press Ok.
Change Image Duration
You can increase the image duration to more than the default timing of 5 seconds. For that:
- Click on the image and select the “Duration” option.
- Go to the “Duration Setting” panel.
- Add the new duration timing.
Adjust Position, Rotate/Flip, and Opacity
- You can resize the image position through the circles and squares at the image edges.
- To flip or rotate the image, double-click on the picture. From the “Image Panel,” go to “Transform” and then click on “Rotate.” You can choose either “Horizontal Flip” or “Vertical Flip” to flip the images.
- Double-click on the image and click on the “Composting” option to add opacity. You can choose the blending mode or adjust the “Opacity” accordingly.
For Mac
Filmora for Mac comes with a drag and drop feature to add transitions, animated titles, and effects. You can start a new project from scratch by clicking on “New Project”. The entire process is the same as that for Windows users.
To apply animation in the images, use the motion effects option. For that,
- Click on the Image
- Go to Motion Tab
- Select a motion effect
- Double-click to apply the effect
Conclusion
So that’s how to animate photos in Canva. Hopefully, our steps will help you revamp your posts like a pro! If not Canva, you can use its alternative Filmora. It’s equally prominent, user-friendly, and feature-rich.
Versatile Video Editor - Wondershare Filmora
An easy yet powerful editor
Numerous effects to choose from
Detailed tutorials provided by the official channel
Best 10 Animoji Apps You Can Use to Edit Animoji
Best 10 Animoji Apps You Can Use to Edit Animoji

Shanoon Cox
Mar 27, 2024• Proven solutions
Animojis are animated emojis first developed by Apple for iOS users. Animojis are 3D avatars that can mimic and duplicate your facial expressions through the face ID camera system. They can make any conversation entertaining, convey your feelings more clearly and can be used across different social media networks. iPhones and some high-end Android phones have built-in animoji apps but this feature is not available on every device. Don’t worry if you do not have an expensive phone because there are many animoji apps for both Android and iOS.
Today, we will talk about the 10 best animoji apps to edit animoji on android and IOS. So, let’s begin!
Best 10 And Emoji Apps to Edit Animoji
Most of the smartphones today come with the facial recognition feature (also known as face ID). This means that any phone that features face ID can also be used to create and edit animoji. Thus, even if your phone does not come with a featured animoji app, you can download any one of the 10 best animoji apps down below!
Note: Some of these apps are available for Android only, while others are compatible with both Android and IOS.
- 1. Anymoji (Android)
- 2. Bitmoji (Android and iPhone)
- 3. Disney Emoji Blitz (Android and iPhone)
- 4. SuperMoji (Android and iOS)
- 5. Zepeto (Android and iOS)
- 6. Emoji Face Recorder (Android and iOS)
- 7. Mirror (Android and iPhone)
- 8. Mojipop (Android and iPhone)
- 9. Emoji Maker (Android)
- 10. Big Emoji (Android)
1.Anymoji (Android)
Anymoji is a 3D emoji, avatar, and cartoon creation and editing app. It offers an extensive library of face emoji avatars that can duplicate your facial expressions and mimic your voice. This animoji maker for Android allows you to create cool stories and posts for social media. The best part about this app is that it is free to download. Moreover, it does not require any registration or sign up. With over one million downloads on Google Play Store, anymoji has become the go-to app for 3D Avatar creation!
2.Bitmoji (Android and iPhone)
The bitmoji app is designed by Bitstrips that is acquired by Snapchat. It is one of the most popular emoji utility apps and web extensions. It allows you to create personalized emojis with a custom Avatar of yourself. You can use bitmoji to create and edit your own animated cartoons combined with a library of emotions, expressions, and stickers – all featuring YOU! The bitmoji app allows you to copy and paste your bitmojis virtually anywhere, including social media apps like Facebook, Instagram, or Snapchat.
3.Disney Emoji Blitz (Android and iPhone)
Disney emoji black is an app that features hundreds of Disney Star Wars and Pixar emojis. It is not just an animoji maker but it also serves as a gaming app. You can virtually play with all your Disney characters here. From frozen Elsa to Aladdin’s genie, you can play with over 400 different Disney and Pixar characters. So, collect and chat with your favorite Disney characters through this fun emoji app!
4.SuperMoji (Android and iOS)
Supermoji is yet another popular and emoji app that allows you to create and edit funny emoticons and animojis. It supports both sound and videos and is compatible with both Android and IOS. Supermoji offers high quality animated emojis that you can control and animate with your gestures and facial expressions. 8 uses many popular animojis, including cat, alien, poop, chicken, and dog. One of the best things about this app is that it is also compatible with older devices, so even if you do not have the latest iOS or Android phone, you can still create animoji using this app.
5.Zepeto (Android and iOS)
Zepeto is created by SNOW corporation for both iOS and Android. It is a custom Avatar creation app that allows you to personalize your avatar with millions of options. From hairstyle to clothing and makeup, you can create a full custom version of yourself through this app. Zepeto reads and copies your facial expressions and creates a custom sticker for you. This app will save your animated stickers that can later be used during conversations on social media platforms. Moreover, you can also add special effects on the stickers and edit animoji whenever you want.
6.Emoji Face Recorder (Android and iOS)
Emoji face recorder is another popular and emoji app that allows you to create live avatars and selfies on your smartphone. This app includes different 3D stickers like zebra, Santa Claus, deer, octopus, panda, leopard, squirrel, etc. So, record your face and your expressions to different 3D models without any hassle now. You can share your stickers and gifs on social media apps and amuse your friends all day!
7.Mirror (Android and iPhone)
Mirror is a fun emoji maker that allows you to create funny animoji on your iPhone and iOS device. This app has more than 1500+ stickers that you can customize. Along with this, you can also use this app to create full 3D avatars of yourself with the real-time face swap option. You can share and send your personal emojis to friends and family on Messenger, WhatsApp, and Snapchat.

8.Mojipop (Android and iPhone)
Mojipop is an app that you can use to take a selfie and create your own avatars and stickers. This app has an advanced facial recognition feature, so it is very easy to create and edit animojis with Mojipop. You can share them on social media and use them in day-to-day conversations to make them more fun. It also allows you to create a personalized GIF sticker on this device.
9.Emoji Maker (Android)
Emoji maker app can create free personal and animated phone emojis. It has many popular characters like a pig, fox, cat, panda, and other animated emojis. Moreover, you can also create your avatar by customizing your face, hair, body, and more. You can choose from a wide range of moods, expressions, and animated text as well. Emoji Maker app also allows you to send and receive animated emojis on your phone. This is a very simple 3D animated Avatar and sticker making app that anyone can easily use and express themselves!
10.Big Emoji (Android)
big emoji is a 3D Avatar creator app for Android that can create your 3D avatars and animojis. This app has over 5000+ emojis and emoticons. It allows you to edit and customize emojis by changing the background, color, and other features. It is easy to use, and it is compatible with older devices as well. Like other emoji apps, Big Emoji also allows you to send and share custom emojis on social media apps like Messenger, Facebook, WhatsApp, and Snapchat.
Bonus Tip-Add Animoji to Your Video with Wondershare Filmora
Filmora from Wondershare is one of the most popular video editing tools that comes with various cool features. It is user-friendly with an intuitive interface that makes the app suitable for beginners as well.
Filmora is the number one tool for all types of video editing , whether you create YouTube vlogs, Professional Videos, or TikToks. So, no matter what the purpose, Wondershare Filmora is the best tool to test your creativity.
How to Add Animoji in Video with Wondershare Filmora?
One of the best features of Wondershare Filmora is motion tracking. You can use this feature to add and edit emojis and animojis in any video. Motion tracking allows you to track the movement of something in a video to add images, text, stickers, or emojis.
Follow these steps to add animoji/emoji in your videos using the motion tracking feature in Wondershare Filmora:
Step 1: Download and Install Filmora
First of all, download and install Wondershare Filmora on your Mac or PC from the official website.
Step 2: Launch the Wondershare Filmora
Once you install the app, launch it on the desktop, and open the app.
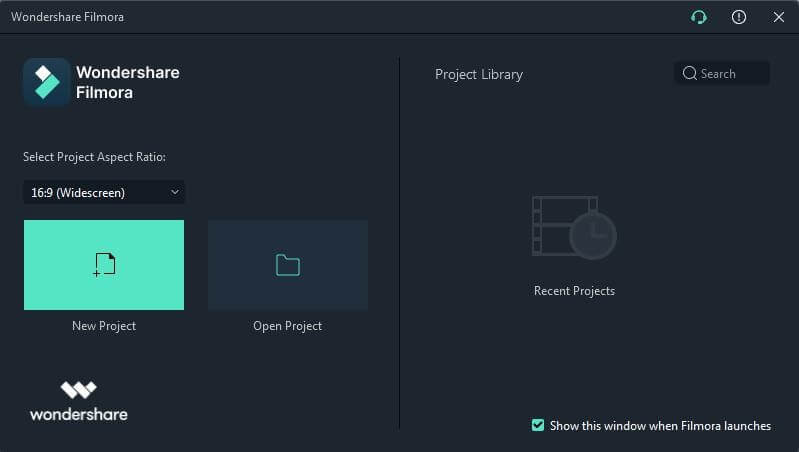
Step 3: Import Video
Now, click on the “Import Media Files Here” option on the welcome screen and import the video and emoji/animoji to the media library. Once the files are uploaded, they will appear on the left side of the screen in Media Tab.

Step 4: Add Emoji or Animoji to Video
Drag the video from the Media Tab and drop it onto a video track on the timeline. Now, to apply motion tracking, place the play-head at the beginning of the clip. The video tracking will start wherever the play-head.
Now, click on the icon in the timeline bar to enable the motion tracking tool. Once the tracking box appears, move it to select the object that you want to track. Now you can place the emoji or Animoji that you want to add. Go to the Media Tab and select the Animoji. Place it wherever you want to.
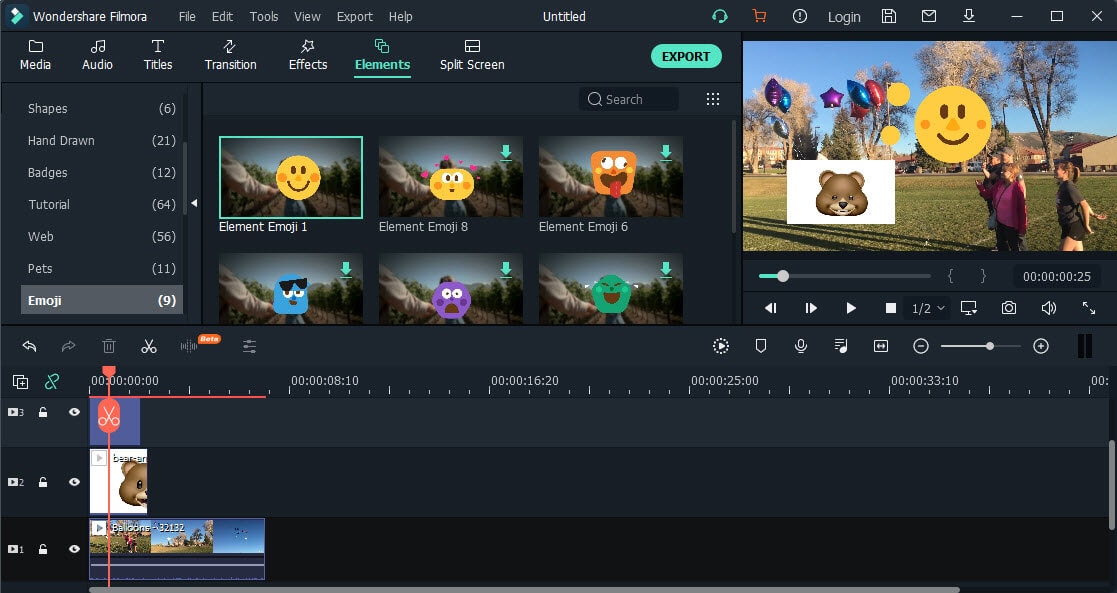
Step 5: Export Video
Click on the Export button and export your video to your computer or directly to a YouTube or Vimeo channel.
Conclusion
Modern communication is all about emojis and expressions. Nowadays, emojis and animojis have become an essential part of all our digital interactions and communications. From popular social media apps to smartphone keywords, emojis are present everywhere! If you don’t know how to create and edit animoji, use one of the 10 best animoji apps mentioned above!
Shanoon Cox
Shanoon Cox is a writer and a lover of all things video.
Follow @Shanoon Cox
Shanoon Cox
Mar 27, 2024• Proven solutions
Animojis are animated emojis first developed by Apple for iOS users. Animojis are 3D avatars that can mimic and duplicate your facial expressions through the face ID camera system. They can make any conversation entertaining, convey your feelings more clearly and can be used across different social media networks. iPhones and some high-end Android phones have built-in animoji apps but this feature is not available on every device. Don’t worry if you do not have an expensive phone because there are many animoji apps for both Android and iOS.
Today, we will talk about the 10 best animoji apps to edit animoji on android and IOS. So, let’s begin!
Best 10 And Emoji Apps to Edit Animoji
Most of the smartphones today come with the facial recognition feature (also known as face ID). This means that any phone that features face ID can also be used to create and edit animoji. Thus, even if your phone does not come with a featured animoji app, you can download any one of the 10 best animoji apps down below!
Note: Some of these apps are available for Android only, while others are compatible with both Android and IOS.
- 1. Anymoji (Android)
- 2. Bitmoji (Android and iPhone)
- 3. Disney Emoji Blitz (Android and iPhone)
- 4. SuperMoji (Android and iOS)
- 5. Zepeto (Android and iOS)
- 6. Emoji Face Recorder (Android and iOS)
- 7. Mirror (Android and iPhone)
- 8. Mojipop (Android and iPhone)
- 9. Emoji Maker (Android)
- 10. Big Emoji (Android)
1.Anymoji (Android)
Anymoji is a 3D emoji, avatar, and cartoon creation and editing app. It offers an extensive library of face emoji avatars that can duplicate your facial expressions and mimic your voice. This animoji maker for Android allows you to create cool stories and posts for social media. The best part about this app is that it is free to download. Moreover, it does not require any registration or sign up. With over one million downloads on Google Play Store, anymoji has become the go-to app for 3D Avatar creation!
2.Bitmoji (Android and iPhone)
The bitmoji app is designed by Bitstrips that is acquired by Snapchat. It is one of the most popular emoji utility apps and web extensions. It allows you to create personalized emojis with a custom Avatar of yourself. You can use bitmoji to create and edit your own animated cartoons combined with a library of emotions, expressions, and stickers – all featuring YOU! The bitmoji app allows you to copy and paste your bitmojis virtually anywhere, including social media apps like Facebook, Instagram, or Snapchat.
3.Disney Emoji Blitz (Android and iPhone)
Disney emoji black is an app that features hundreds of Disney Star Wars and Pixar emojis. It is not just an animoji maker but it also serves as a gaming app. You can virtually play with all your Disney characters here. From frozen Elsa to Aladdin’s genie, you can play with over 400 different Disney and Pixar characters. So, collect and chat with your favorite Disney characters through this fun emoji app!
4.SuperMoji (Android and iOS)
Supermoji is yet another popular and emoji app that allows you to create and edit funny emoticons and animojis. It supports both sound and videos and is compatible with both Android and IOS. Supermoji offers high quality animated emojis that you can control and animate with your gestures and facial expressions. 8 uses many popular animojis, including cat, alien, poop, chicken, and dog. One of the best things about this app is that it is also compatible with older devices, so even if you do not have the latest iOS or Android phone, you can still create animoji using this app.
5.Zepeto (Android and iOS)
Zepeto is created by SNOW corporation for both iOS and Android. It is a custom Avatar creation app that allows you to personalize your avatar with millions of options. From hairstyle to clothing and makeup, you can create a full custom version of yourself through this app. Zepeto reads and copies your facial expressions and creates a custom sticker for you. This app will save your animated stickers that can later be used during conversations on social media platforms. Moreover, you can also add special effects on the stickers and edit animoji whenever you want.
6.Emoji Face Recorder (Android and iOS)
Emoji face recorder is another popular and emoji app that allows you to create live avatars and selfies on your smartphone. This app includes different 3D stickers like zebra, Santa Claus, deer, octopus, panda, leopard, squirrel, etc. So, record your face and your expressions to different 3D models without any hassle now. You can share your stickers and gifs on social media apps and amuse your friends all day!
7.Mirror (Android and iPhone)
Mirror is a fun emoji maker that allows you to create funny animoji on your iPhone and iOS device. This app has more than 1500+ stickers that you can customize. Along with this, you can also use this app to create full 3D avatars of yourself with the real-time face swap option. You can share and send your personal emojis to friends and family on Messenger, WhatsApp, and Snapchat.
8.Mojipop (Android and iPhone)
Mojipop is an app that you can use to take a selfie and create your own avatars and stickers. This app has an advanced facial recognition feature, so it is very easy to create and edit animojis with Mojipop. You can share them on social media and use them in day-to-day conversations to make them more fun. It also allows you to create a personalized GIF sticker on this device.
9.Emoji Maker (Android)
Emoji maker app can create free personal and animated phone emojis. It has many popular characters like a pig, fox, cat, panda, and other animated emojis. Moreover, you can also create your avatar by customizing your face, hair, body, and more. You can choose from a wide range of moods, expressions, and animated text as well. Emoji Maker app also allows you to send and receive animated emojis on your phone. This is a very simple 3D animated Avatar and sticker making app that anyone can easily use and express themselves!
10.Big Emoji (Android)
big emoji is a 3D Avatar creator app for Android that can create your 3D avatars and animojis. This app has over 5000+ emojis and emoticons. It allows you to edit and customize emojis by changing the background, color, and other features. It is easy to use, and it is compatible with older devices as well. Like other emoji apps, Big Emoji also allows you to send and share custom emojis on social media apps like Messenger, Facebook, WhatsApp, and Snapchat.
Bonus Tip-Add Animoji to Your Video with Wondershare Filmora
Filmora from Wondershare is one of the most popular video editing tools that comes with various cool features. It is user-friendly with an intuitive interface that makes the app suitable for beginners as well.
Filmora is the number one tool for all types of video editing , whether you create YouTube vlogs, Professional Videos, or TikToks. So, no matter what the purpose, Wondershare Filmora is the best tool to test your creativity.
How to Add Animoji in Video with Wondershare Filmora?
One of the best features of Wondershare Filmora is motion tracking. You can use this feature to add and edit emojis and animojis in any video. Motion tracking allows you to track the movement of something in a video to add images, text, stickers, or emojis.
Follow these steps to add animoji/emoji in your videos using the motion tracking feature in Wondershare Filmora:
Step 1: Download and Install Filmora
First of all, download and install Wondershare Filmora on your Mac or PC from the official website.
Step 2: Launch the Wondershare Filmora
Once you install the app, launch it on the desktop, and open the app.
Step 3: Import Video
Now, click on the “Import Media Files Here” option on the welcome screen and import the video and emoji/animoji to the media library. Once the files are uploaded, they will appear on the left side of the screen in Media Tab.
Step 4: Add Emoji or Animoji to Video
Drag the video from the Media Tab and drop it onto a video track on the timeline. Now, to apply motion tracking, place the play-head at the beginning of the clip. The video tracking will start wherever the play-head.
Now, click on the icon in the timeline bar to enable the motion tracking tool. Once the tracking box appears, move it to select the object that you want to track. Now you can place the emoji or Animoji that you want to add. Go to the Media Tab and select the Animoji. Place it wherever you want to.
Step 5: Export Video
Click on the Export button and export your video to your computer or directly to a YouTube or Vimeo channel.
Conclusion
Modern communication is all about emojis and expressions. Nowadays, emojis and animojis have become an essential part of all our digital interactions and communications. From popular social media apps to smartphone keywords, emojis are present everywhere! If you don’t know how to create and edit animoji, use one of the 10 best animoji apps mentioned above!
Shanoon Cox
Shanoon Cox is a writer and a lover of all things video.
Follow @Shanoon Cox
How to Make GIF Stickers for WhatsApp 100% The Simple Way
How to Make GIF Stickers for WhatsApp 100% The Easy Way
An easy yet powerful editor
Numerous effects to choose from
Detailed tutorials provided by the official channel
Wish your dear friends and loved ones on their special days using some interesting WhatsApp stickers. There is an integrated library of these stickers in different categories on your Android as well as iPhone.

Still, if you want a more personalized one, you can create a customized sticker using videos on your phone or using third-party apps and tools. Learn about how to use the integrated stickers and create customized in the following parts of the topic.
In this article
01 [Using stickers from integrated library](#Part 1)
02 [Best tools to create animated GIF sticker – Wondershare Filmora](#Part 2)
03 [Using iPhone and Android videos to make GIF stickers](#Part 3)
Part 1 Using stickers from integrated library
WhatsApp on your Android and iPhone has a decent collection of stickers that can send to your contacts. You simply need to look for the sticker in the desired category and send it and the steps for adding GIFs to WhatsApp are listed below.
Step 1. Open the WhatsApp contact to which you wish to send the sticker. To open the animation library on your Android device, tap on the emoji icon and choose the GIF option. On an iPhone, the library opens by clicking on the sticker icon.
Step 2. Search and select the desired sticker from the available options.
Step 3. To finally share the selected one, click on the sticker and then on the Send button.

Part 2 Best tools to create animated GIF sticker – Wondershare Filmora
If you are in search of a tool that lets you create a professional-looking animated GIF easily Wondershare Filmora Video Editor is the best WhatsApp GIF maker tool. This software once downloaded on your Windows or Mac system, is all set to look after multiple video editing tasks including GIF creation.
Wondershare Filmora
Get started easily with Filmora’s powerful performance, intuitive interface, and countless effects!
Try It Free Try It Free Try It Free Learn More >
Your videos in MP4, MKV, MOV, and several other key formats can be converted to a GIF file using the program and multiple options for editing are available as well like crop, trim, add effects, add texts, and more.
The intuitive interface of the software makes it easy to use even by non-techy people.
Steps on how to make WhatsApp GIF sticker using Wondershare Filmora
**Step 1.**On your Windows or Mac, download, install, and launch the Wondershare software and then import the video files from which GIF has to be created.
Step 2. The added files have to be now dragged and dropped to the timeline.

Step 3. Editing tools for customization can be used.
**Step 4.**For further personalization by adding text, effects, and more the related functions can be used.

Step 5. Next, choose the GIF option as the target file format from the Local tab. Select the file name and the location. Clicking on the EXPORT button will start the processing.

Part 3 Using iPhone and Android videos to make GIF stickers
If you do not wish to use any third-party tools, basic stickers can also be created using the videos on your Android and iPhone. A video cannot be more than 6 seconds in length to be used as a GIF and thus longer videos need to be trimmed.
Steps on how to make a GIF stickers for WhatsApp
Step 1. Launch the WhatsApp contact to which you wish to send the GIF. Add the video from the device gallery by clicking on the camera button. A video using the camera can also be recorded.
Note: Ensure that video length is not more than 6 seconds. If it is more, use the slider at the top to trim the video.
Step 2. Next, you can add the text using the Caption option.
Step 3. Now to convert this video into a GIF click on the GIF button under the video and then tap on the Send button to share this animation with the contact.

● Key Takeaways from This Episode →
●WhatsApp has an integrated library of GIF stickers in a wide range of categories.
●For creating customized stickers, Wondershare Filmora works as the best software as it is simple, quick, and has multiple editing options.
●Using the videos from the gallery, GIF stickers can also be created on your Android and iPhone.
Wish your dear friends and loved ones on their special days using some interesting WhatsApp stickers. There is an integrated library of these stickers in different categories on your Android as well as iPhone.
Still, if you want a more personalized one, you can create a customized sticker using videos on your phone or using third-party apps and tools. Learn about how to use the integrated stickers and create customized in the following parts of the topic.
In this article
01 [Using stickers from integrated library](#Part 1)
02 [Best tools to create animated GIF sticker – Wondershare Filmora](#Part 2)
03 [Using iPhone and Android videos to make GIF stickers](#Part 3)
Part 1 Using stickers from integrated library
WhatsApp on your Android and iPhone has a decent collection of stickers that can send to your contacts. You simply need to look for the sticker in the desired category and send it and the steps for adding GIFs to WhatsApp are listed below.
Step 1. Open the WhatsApp contact to which you wish to send the sticker. To open the animation library on your Android device, tap on the emoji icon and choose the GIF option. On an iPhone, the library opens by clicking on the sticker icon.
Step 2. Search and select the desired sticker from the available options.
Step 3. To finally share the selected one, click on the sticker and then on the Send button.
Part 2 Best tools to create animated GIF sticker – Wondershare Filmora
If you are in search of a tool that lets you create a professional-looking animated GIF easily Wondershare Filmora Video Editor is the best WhatsApp GIF maker tool. This software once downloaded on your Windows or Mac system, is all set to look after multiple video editing tasks including GIF creation.
Wondershare Filmora
Get started easily with Filmora’s powerful performance, intuitive interface, and countless effects!
Try It Free Try It Free Try It Free Learn More >
Your videos in MP4, MKV, MOV, and several other key formats can be converted to a GIF file using the program and multiple options for editing are available as well like crop, trim, add effects, add texts, and more.
The intuitive interface of the software makes it easy to use even by non-techy people.
Steps on how to make WhatsApp GIF sticker using Wondershare Filmora
**Step 1.**On your Windows or Mac, download, install, and launch the Wondershare software and then import the video files from which GIF has to be created.
Step 2. The added files have to be now dragged and dropped to the timeline.
Step 3. Editing tools for customization can be used.
**Step 4.**For further personalization by adding text, effects, and more the related functions can be used.
Step 5. Next, choose the GIF option as the target file format from the Local tab. Select the file name and the location. Clicking on the EXPORT button will start the processing.
Part 3 Using iPhone and Android videos to make GIF stickers
If you do not wish to use any third-party tools, basic stickers can also be created using the videos on your Android and iPhone. A video cannot be more than 6 seconds in length to be used as a GIF and thus longer videos need to be trimmed.
Steps on how to make a GIF stickers for WhatsApp
Step 1. Launch the WhatsApp contact to which you wish to send the GIF. Add the video from the device gallery by clicking on the camera button. A video using the camera can also be recorded.
Note: Ensure that video length is not more than 6 seconds. If it is more, use the slider at the top to trim the video.
Step 2. Next, you can add the text using the Caption option.
Step 3. Now to convert this video into a GIF click on the GIF button under the video and then tap on the Send button to share this animation with the contact.
● Key Takeaways from This Episode →
●WhatsApp has an integrated library of GIF stickers in a wide range of categories.
●For creating customized stickers, Wondershare Filmora works as the best software as it is simple, quick, and has multiple editing options.
●Using the videos from the gallery, GIF stickers can also be created on your Android and iPhone.
Ways You Can Master to Find 10 Best Free Animated Text Generator
Ways You Can Master to Find 10 Best Free Animated Text Generator
An easy yet powerful editor
Numerous effects to choose from
Detailed tutorials provided by the official channel
We’ve compiled a list of some of the best text animation software and tools out there!
One for general, animated text generators, and the other for online text gif maker tools. Pick whichever suits your project and start working on a more professional look today.
In this article
01 [10 Best Animated Text Generators for 2021](#Part 1)
02 [8 Best Online Text GIF Generators to Make Animated Word GIFs](#Part 2)
03 [How to Use an Animated Text Generator to Make Stunning Videos?](#Part 3)
Part 1 10 Best Animated Text Generators for 2021
For our first list, as promised, we’ve compiled a list of some of the best-animated text generators for 2021. This is a general list of text animation software that you have to either download or install to use! If you want the online text animation maker list, that would be the one after this!
01Aurora: 3D Text Logo Maker
PRICE: FREE!
RATING: 4.5/5
The first animated text generator on our list is Aurora 3D. Aurora offers several different products, but the one that we’re focusing on today is their 3D Text & Logo maker, which you can use to create some pretty advanced text animations with no sweat (as well as logos, of course, as the name implies)! The software is available for both Mac and Windows OS computers and desktops.
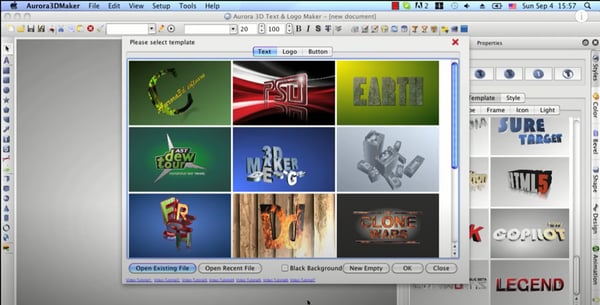
02Animaker
PRICE: Basic Plan = $10 per month!
RATING: 4.9/5
If you’re looking for a more modern text animation maker, then Animaker might just be the one that you want! With this, you can create your 3D text animations from scratch, or choose from the dozens of templates and presets that they have for text, animated characters, icons, and other properties. This is more of a video editor than a strict text tool, but we thought it was important to give you a good variety. It’s also not FREE, but you can try it for free for a time so that you can check if it’s the one for you.

03OpenToonz
PRICE: Free
RATING: 4/5
OpenToonz is a free text animation software that you can use for both basic and advanced 2D animation. It comes in several different languages (including Spanish and Japanese) and is very useful for creating simple text animation from scratch — no complicated tools. Just create and go! (It is also available in both Mac and Windows!)
04Reallusion
PRICE: Free
RATING: 4/5
Reallusion is another open-source text gif maker that you can use if you’re looking for something quick-and-easy. It supports a ton of different fonts, as well as ways to control the width, height, dimension, and style of every single object inside of their 3D properties gallery — giving you a lot of options for customization without any added cost!
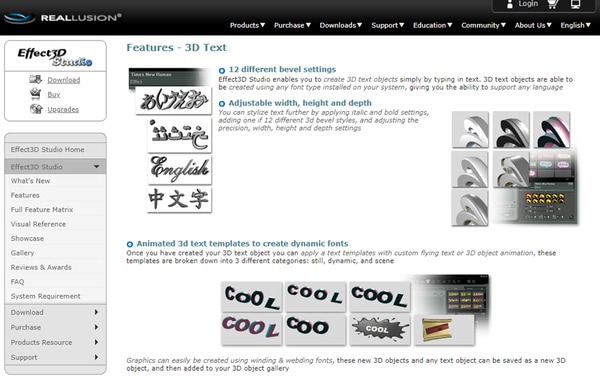
05Express Animate
PRICE: $60 (full license)
RATING: 4/5
Express Animate, just like Open Toonz, it is more of an animation tool than one strictly created for text animation. However, it does work for that purpose as well. So, if you’re willing to pay for the full license (which will cost $60), it could be a fairly good tool for you. Especially if you’re interested in trying out more complex animations in the future.
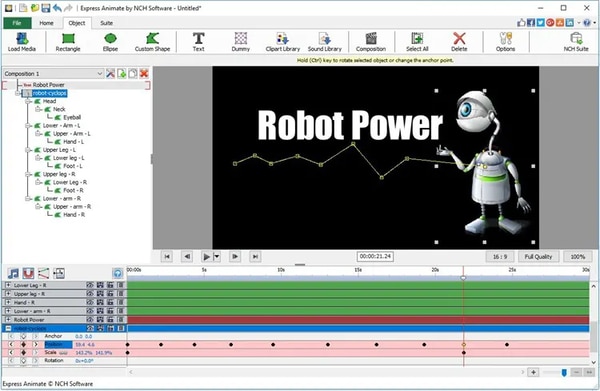
06Motion
PRICE: $47
RATING: 3.9/5
Motion is a Mac-only software. It is, just like some of the other options on this list, a great option for those looking for a tool that can help them with general animations (not just text animation — although it provides tools for that as well). The best part of Motion is undoubtedly its graphic library, where you have access to a ton of different presets and templates that you can use to simplify your text-animation-making.
07Xara 3D Maker
PRICE: $39.99
RATING: 3.9/5
Xara is another one of our paid options. It also comes complete with a range of different templates and presets that you can use in order to simplify your animation-generating. And, if you end up disliking the product after you try it, they do offer a 30-day money-back guarantee that you can take advantage of to make sure that you get the most out of your purchase.
08Easy Banner
PRICE: FREE
RATING: 3.5/5
Easy Banner is a free animated text-banner-making software. It’s only available in Windows, and its uses are limited to created banners. However, if that’s what you’re looking for? Then there’s no reason not to try it out! Especially since it’s free, and it comes with some pretty advanced customization options for getting the exact look that you want on your text banners.
09Falco GIF Animator
PRICE: FREE
RATING: 3.5/5
Falco Gif Animator is from the same creators of the previous item on this list (Softpedia!) The two offer similar tools, but for different purposes. Whilst the previous tool was for the creation of animated-text banners, this one is a GIF maker for icons, cursors, logos, etc. It’s also FREE! So, if the project you’re working on is applicable to its available features? Then you should definitely try it!

10TISFAT
PRICE: Free
RATING: 3/5
TISFAT is the last of the tools that we have for you. It’s an open-source stick animation tool that you can use to create text animations in whatever style or format that you desire. Making it more customizable than some of the other Softpedia options we just introduced, but still, one to consider based on your own circumstances.
Part 2 8 Best Online Text GIF Generators to Make Animated Word GIFs
And so, we move on to our next list! Here’s where we introduce online solutions for animated text generation needs! So, all the tools on this list will not require any downloading, but they will require that you have internet while working!
01MotionDen
| PROS | CONS |
|---|---|
| ● FREE version available● Large resources library● Easy-to-use video templates | ● Must upgrade to the premium version to export high-quality projects without a watermark.● The FREE version has a 5-video limit (you cannot work on any more projects than that).● Difficult to use for creating text animation from scratch. |
RATING: 4.8/5
MotionDen is a good entry point for text animation online solutions! It comes with tons of different templates that you can choose from to start working on your project immediately. MotionDen also offers a free version that you can test out for a limited number of times (one that gives you access to all their tools and their large resource library). So, you can decide to upgrade to their premium version whenever you want to (which will cost you around $29 per month!)
02Wave.Video
| PROS | CONS |
|---|---|
| ● FREE version is available for trying out its tools.● Vast library of animation properties for you to play around with.● Vast library of animation properties for you to play around with. | ● FREE version limits the length of your projects to 15 seconds.● You can also only create five video projects with the free version.● You can also only create five video projects with the free version. |
RATING: 4.5/5
Wave.Video, just like MotionDen, is a freemium software. You can try it out for free and start using their online video editing tools immediately to create short promos, logos, text gifs, etc. If you want access to some of its more advanced tools, however, you’ll need to pay the premium price ($24-48), which, to you, may or may not be worth the vast library of polished animation properties.
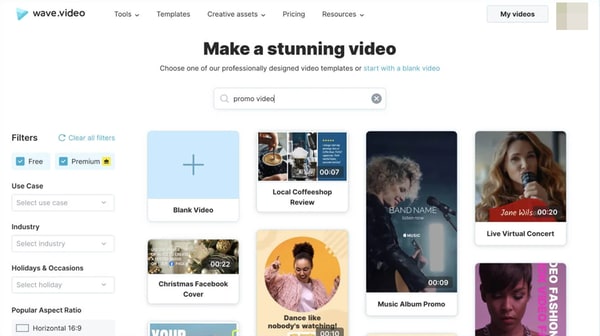
03MakerMoon
| PROS | CONS |
|---|---|
| ● Easy-to-use, and comes with templates and presets!● Advanced video editing tools that you can use to personalize your projects.● FREE plan is available. | ● The FREE version is limited in use.● You also cannot download high-quality projects without a watermark with the free version.● Basic animations only. |
RATING: 4.3/5
If you want to keep things simple, then MakerMoon might be your preferred choice for text animation. It is, like the previous picks, an online video maker, but one with the focus on creating text-centric projects, which you can personalize in a number of ways to create logos, banners, short videos, gifs, etc.
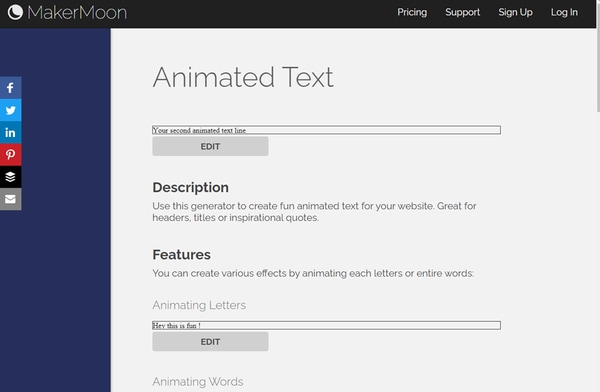
04Textanim
| PROS | CONS |
|---|---|
| ● FREE online GIF maker● A variety of different font style options● Animated Effects options | ● Output is GIF only.● Limited animations options.● Limited resource library. |
RATING: 4/5
Textanim is a very bubbly and glittery kind of gif-maker, made for a more specific kind of project. But, if it works, it works! Plus, it’s also the first completely FREE online gif maker on this list. So, you can test it out without having to make any commitments and use it literally anytime you feel like it. Unfortunately, though, it should be said that the animations here are mainly for effects (i.e., glowing, sparkling, etc.). The text won’t actually move. So, if that’s not what you’re looking for? Then it might not be for you.
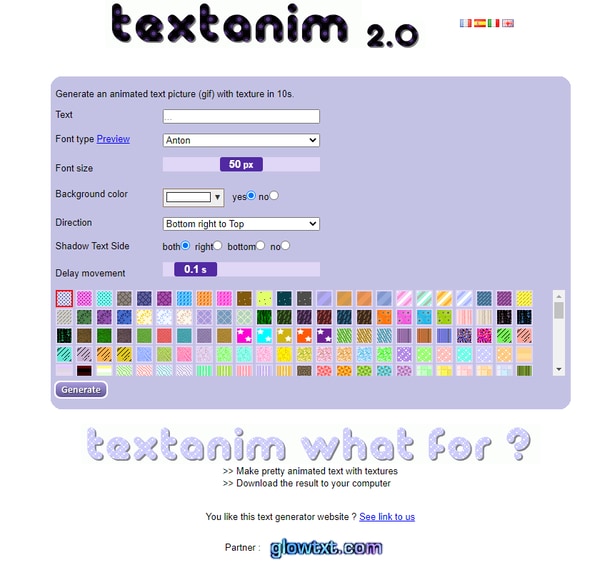
05SnackThis
| PROS | CONS |
|---|---|
| ● FREE version for testing its tools and resources is available.● Lots of modern templates are available.● Editing tools for polishing projects. | ● If you’re using the FREE version, you will not be able to actually download your project.● You will also need to register to use it.● The customization options are limited. |
RATING: 4/5
SnackThis, unlike Textanim, is the type to cater to a wider array of users. Its templates are all very modern and professional-looking. So, if what you’re looking for is to create text banners, logos, icons, etc. for your business? Then this definitely is an option that you may want to consider. It’s pretty easy to use too! All you have to do is select the template that you want to use, and then edit it to match what you need.
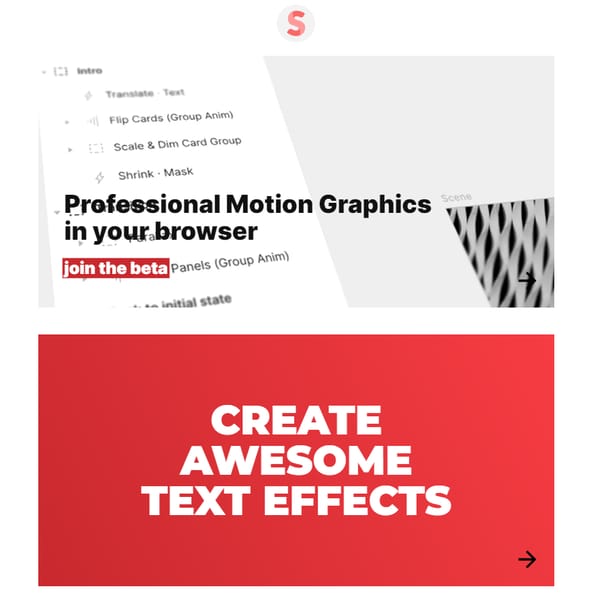
06Animatron Studio
| PROS | CONS |
|---|---|
| ● More customizable functions.● Advanced video editing options.● Pre-made templates are available for easier animating. | ● FREE Version is limited.● Might be difficult for inexperienced animators.● Output formats are MP4 and GIF only. |
RATING: 3.9/5
Animatron Studio is the tool to use if what you’re looking for is customization. This tool is really better described as animation software, rather than a simple text generator. That means that you have more options than what you might see from other online text animation tools, but it also means that you’ll need to put in more effort to come up with a polished-looking end-product.

07Cool Text
| PROS | CONS |
|---|---|
| ● Easy and quick to use.● Various font customization options.● FREE to use. | ● Limited customizability.● Old-fashioned fonts. |
RATING: 3.5/5
As a departure from the previous pick, we have Cool Text, which is its complete opposite! This is an older software and is definitely best described strictly as an animated text generator. With Cool Text, you can make logos or icons very easily. The options are, of course, more limited because of that, but it may very well be all you need based on the kind of project you’re working on.
08Loading.io
| PROS | CONS |
|---|---|
| ● Lots of fonts customization options.● Three different output formats (svg., png., and gif).● Also pre-set animations to choose from. | ● The FREE version is limited.● It isn’t as advanced as some of the other tools on this list. |
RATING: 3.5/5
For our last online text animator, we have Loading.io. This one is a very simple, and very straightforward kind of tool. It’s also a freemium one, so you’ll have to pay in order to unlock some of its features, but it’s a solid contender for its customization tools, which gives a lot more options to choose from.
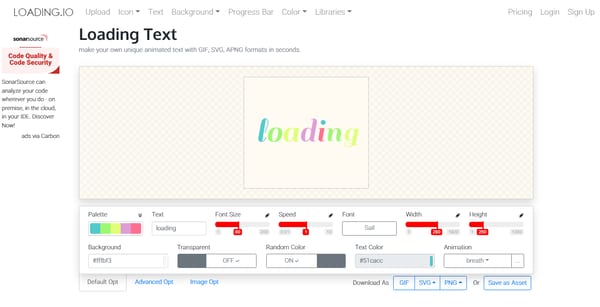
Part 3 How to Use an Animated Text Generator to Make Stunning Videos?
Now, if you need help making use of your finished animated text, icons, etc. Then you’ll probably need a video editor like Wondershare Filmora !
For Win 7 or later (64-bit)
For macOS 10.14 or later
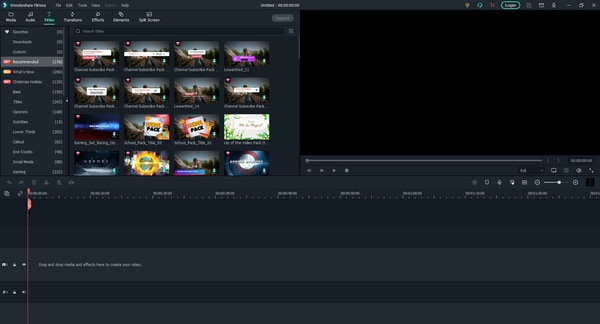
As you can see from the image shown above, Wondershare Filmora is a very sleek video editing software. It’s used by all sorts of professionals as well, as it comes with all kinds of resources and tools that you can use in order to create stunning videos (including, believe it or not, templates for animated text! So, if you want, you can even skip the animated text maker altogether and just get straight to using Filmora.)
Key Takeaways from This Episode
● There are various text animation generators in the market! Some of which you can download straight to your desktop or computer!
● There are also online GIF makers that you can use straight from your browser, leaving out all the hassle of having to download or install anything and helping you get straight to work!
● If you want to polish up your project some more, then consider using an advanced video editor like Filmora Pro to make sure that your work is sparkly clean!
We’ve compiled a list of some of the best text animation software and tools out there!
One for general, animated text generators, and the other for online text gif maker tools. Pick whichever suits your project and start working on a more professional look today.
In this article
01 [10 Best Animated Text Generators for 2021](#Part 1)
02 [8 Best Online Text GIF Generators to Make Animated Word GIFs](#Part 2)
03 [How to Use an Animated Text Generator to Make Stunning Videos?](#Part 3)
Part 1 10 Best Animated Text Generators for 2021
For our first list, as promised, we’ve compiled a list of some of the best-animated text generators for 2021. This is a general list of text animation software that you have to either download or install to use! If you want the online text animation maker list, that would be the one after this!
01Aurora: 3D Text Logo Maker
PRICE: FREE!
RATING: 4.5/5
The first animated text generator on our list is Aurora 3D. Aurora offers several different products, but the one that we’re focusing on today is their 3D Text & Logo maker, which you can use to create some pretty advanced text animations with no sweat (as well as logos, of course, as the name implies)! The software is available for both Mac and Windows OS computers and desktops.
02Animaker
PRICE: Basic Plan = $10 per month!
RATING: 4.9/5
If you’re looking for a more modern text animation maker, then Animaker might just be the one that you want! With this, you can create your 3D text animations from scratch, or choose from the dozens of templates and presets that they have for text, animated characters, icons, and other properties. This is more of a video editor than a strict text tool, but we thought it was important to give you a good variety. It’s also not FREE, but you can try it for free for a time so that you can check if it’s the one for you.
03OpenToonz
PRICE: Free
RATING: 4/5
OpenToonz is a free text animation software that you can use for both basic and advanced 2D animation. It comes in several different languages (including Spanish and Japanese) and is very useful for creating simple text animation from scratch — no complicated tools. Just create and go! (It is also available in both Mac and Windows!)
04Reallusion
PRICE: Free
RATING: 4/5
Reallusion is another open-source text gif maker that you can use if you’re looking for something quick-and-easy. It supports a ton of different fonts, as well as ways to control the width, height, dimension, and style of every single object inside of their 3D properties gallery — giving you a lot of options for customization without any added cost!
05Express Animate
PRICE: $60 (full license)
RATING: 4/5
Express Animate, just like Open Toonz, it is more of an animation tool than one strictly created for text animation. However, it does work for that purpose as well. So, if you’re willing to pay for the full license (which will cost $60), it could be a fairly good tool for you. Especially if you’re interested in trying out more complex animations in the future.
06Motion
PRICE: $47
RATING: 3.9/5
Motion is a Mac-only software. It is, just like some of the other options on this list, a great option for those looking for a tool that can help them with general animations (not just text animation — although it provides tools for that as well). The best part of Motion is undoubtedly its graphic library, where you have access to a ton of different presets and templates that you can use to simplify your text-animation-making.
07Xara 3D Maker
PRICE: $39.99
RATING: 3.9/5
Xara is another one of our paid options. It also comes complete with a range of different templates and presets that you can use in order to simplify your animation-generating. And, if you end up disliking the product after you try it, they do offer a 30-day money-back guarantee that you can take advantage of to make sure that you get the most out of your purchase.
08Easy Banner
PRICE: FREE
RATING: 3.5/5
Easy Banner is a free animated text-banner-making software. It’s only available in Windows, and its uses are limited to created banners. However, if that’s what you’re looking for? Then there’s no reason not to try it out! Especially since it’s free, and it comes with some pretty advanced customization options for getting the exact look that you want on your text banners.
09Falco GIF Animator
PRICE: FREE
RATING: 3.5/5
Falco Gif Animator is from the same creators of the previous item on this list (Softpedia!) The two offer similar tools, but for different purposes. Whilst the previous tool was for the creation of animated-text banners, this one is a GIF maker for icons, cursors, logos, etc. It’s also FREE! So, if the project you’re working on is applicable to its available features? Then you should definitely try it!
10TISFAT
PRICE: Free
RATING: 3/5
TISFAT is the last of the tools that we have for you. It’s an open-source stick animation tool that you can use to create text animations in whatever style or format that you desire. Making it more customizable than some of the other Softpedia options we just introduced, but still, one to consider based on your own circumstances.
Part 2 8 Best Online Text GIF Generators to Make Animated Word GIFs
And so, we move on to our next list! Here’s where we introduce online solutions for animated text generation needs! So, all the tools on this list will not require any downloading, but they will require that you have internet while working!
01MotionDen
| PROS | CONS |
|---|---|
| ● FREE version available● Large resources library● Easy-to-use video templates | ● Must upgrade to the premium version to export high-quality projects without a watermark.● The FREE version has a 5-video limit (you cannot work on any more projects than that).● Difficult to use for creating text animation from scratch. |
RATING: 4.8/5
MotionDen is a good entry point for text animation online solutions! It comes with tons of different templates that you can choose from to start working on your project immediately. MotionDen also offers a free version that you can test out for a limited number of times (one that gives you access to all their tools and their large resource library). So, you can decide to upgrade to their premium version whenever you want to (which will cost you around $29 per month!)
02Wave.Video
| PROS | CONS |
|---|---|
| ● FREE version is available for trying out its tools.● Vast library of animation properties for you to play around with.● Vast library of animation properties for you to play around with. | ● FREE version limits the length of your projects to 15 seconds.● You can also only create five video projects with the free version.● You can also only create five video projects with the free version. |
RATING: 4.5/5
Wave.Video, just like MotionDen, is a freemium software. You can try it out for free and start using their online video editing tools immediately to create short promos, logos, text gifs, etc. If you want access to some of its more advanced tools, however, you’ll need to pay the premium price ($24-48), which, to you, may or may not be worth the vast library of polished animation properties.
03MakerMoon
| PROS | CONS |
|---|---|
| ● Easy-to-use, and comes with templates and presets!● Advanced video editing tools that you can use to personalize your projects.● FREE plan is available. | ● The FREE version is limited in use.● You also cannot download high-quality projects without a watermark with the free version.● Basic animations only. |
RATING: 4.3/5
If you want to keep things simple, then MakerMoon might be your preferred choice for text animation. It is, like the previous picks, an online video maker, but one with the focus on creating text-centric projects, which you can personalize in a number of ways to create logos, banners, short videos, gifs, etc.
04Textanim
| PROS | CONS |
|---|---|
| ● FREE online GIF maker● A variety of different font style options● Animated Effects options | ● Output is GIF only.● Limited animations options.● Limited resource library. |
RATING: 4/5
Textanim is a very bubbly and glittery kind of gif-maker, made for a more specific kind of project. But, if it works, it works! Plus, it’s also the first completely FREE online gif maker on this list. So, you can test it out without having to make any commitments and use it literally anytime you feel like it. Unfortunately, though, it should be said that the animations here are mainly for effects (i.e., glowing, sparkling, etc.). The text won’t actually move. So, if that’s not what you’re looking for? Then it might not be for you.
05SnackThis
| PROS | CONS |
|---|---|
| ● FREE version for testing its tools and resources is available.● Lots of modern templates are available.● Editing tools for polishing projects. | ● If you’re using the FREE version, you will not be able to actually download your project.● You will also need to register to use it.● The customization options are limited. |
RATING: 4/5
SnackThis, unlike Textanim, is the type to cater to a wider array of users. Its templates are all very modern and professional-looking. So, if what you’re looking for is to create text banners, logos, icons, etc. for your business? Then this definitely is an option that you may want to consider. It’s pretty easy to use too! All you have to do is select the template that you want to use, and then edit it to match what you need.
06Animatron Studio
| PROS | CONS |
|---|---|
| ● More customizable functions.● Advanced video editing options.● Pre-made templates are available for easier animating. | ● FREE Version is limited.● Might be difficult for inexperienced animators.● Output formats are MP4 and GIF only. |
RATING: 3.9/5
Animatron Studio is the tool to use if what you’re looking for is customization. This tool is really better described as animation software, rather than a simple text generator. That means that you have more options than what you might see from other online text animation tools, but it also means that you’ll need to put in more effort to come up with a polished-looking end-product.
07Cool Text
| PROS | CONS |
|---|---|
| ● Easy and quick to use.● Various font customization options.● FREE to use. | ● Limited customizability.● Old-fashioned fonts. |
RATING: 3.5/5
As a departure from the previous pick, we have Cool Text, which is its complete opposite! This is an older software and is definitely best described strictly as an animated text generator. With Cool Text, you can make logos or icons very easily. The options are, of course, more limited because of that, but it may very well be all you need based on the kind of project you’re working on.
08Loading.io
| PROS | CONS |
|---|---|
| ● Lots of fonts customization options.● Three different output formats (svg., png., and gif).● Also pre-set animations to choose from. | ● The FREE version is limited.● It isn’t as advanced as some of the other tools on this list. |
RATING: 3.5/5
For our last online text animator, we have Loading.io. This one is a very simple, and very straightforward kind of tool. It’s also a freemium one, so you’ll have to pay in order to unlock some of its features, but it’s a solid contender for its customization tools, which gives a lot more options to choose from.
Part 3 How to Use an Animated Text Generator to Make Stunning Videos?
Now, if you need help making use of your finished animated text, icons, etc. Then you’ll probably need a video editor like Wondershare Filmora !
For Win 7 or later (64-bit)
For macOS 10.14 or later
As you can see from the image shown above, Wondershare Filmora is a very sleek video editing software. It’s used by all sorts of professionals as well, as it comes with all kinds of resources and tools that you can use in order to create stunning videos (including, believe it or not, templates for animated text! So, if you want, you can even skip the animated text maker altogether and just get straight to using Filmora.)
Key Takeaways from This Episode
● There are various text animation generators in the market! Some of which you can download straight to your desktop or computer!
● There are also online GIF makers that you can use straight from your browser, leaving out all the hassle of having to download or install anything and helping you get straight to work!
● If you want to polish up your project some more, then consider using an advanced video editor like Filmora Pro to make sure that your work is sparkly clean!
How to Cartoonize Photo Photoshop in Simple Steps
How to Cartoonize Photo Photoshop in Easy Steps
An easy yet powerful editor
Numerous effects to choose from
Detailed tutorials provided by the official channel
Cartoons, an already catchy entertainment source, can upgrade other media utilities on integration. Look through the easiest ways of creating cartoonize photo Photoshop stills!
In this article
01 [Types of Cartoon Effects in Photoshop](#Part 1)
02 [Easiest Ways to Cartoonize Photo in Photoshop](#Part 2)
03 [How to Use a Variety of Photoshop Special Effects to Create the Final Caricature Look](#Part 3)
Part 1 Types of Cartoon Effects in Photoshop
It is an absolute fun activity to explore your editing creativity in the realm of cartoonizing the otherwise ordinary still captures. Talking of the most convenient cartoon creator and editor applications, you can safely rely on the Photoshop Image Editor application to choose from a pool of cartoon editing effects for adding that spunky and funny element to your image files.
Presented in the following section, is a discussion of some of the most stunning and visibly amazing cartoon effects in the application’s Editor Library to cartoonize Photoshop images:
01Pop Art Photoshop Action
The effect is a predominantly preferred as a cartoon action Photoshop utility to caricaturize a normal image, along with customizing the same to change the colors and background of the original still capture for creating a brand new appearance with utmost ease. Apart from this, the aforesaid effect allows you to exclusively customize the globally acclaimed graphic masterpieces of Roy Lichtenstein. Working with the effect, you can edit a self-portrait or the favorite image of your pet to give the latter, a funny retro feel.

02Vintage Comic Creator
If the idea of sticking to just the creation of cartoon images is not enough to satisfy you, the Vintage Comic Creator effect allows you to expand your creativity level to work on cartoon based shape and text edits. You can use the effect to enhance an image logo or plain text with a comic book oriented text. A download of this cartoon effect template facilitates you with diversities of customizable layer styles, overlays and patterns.

03GTA Photoshop Action
This is a complete pleasure for the creative fan of Grand Theft Auto, the wicked chasing game series. Additional to creating a stark variety of edited cartoon stills, you are free to reinvent the aforesaid game’s most popular caricature edits, while using the GTA Photoshop Action editing filter. Launched by Indworks, the effect package consisting of 15 vibrant themes and 5 collage templates; promises a quick mimicry of your most cherished video and console games.

04Vector Paint Photoshop Action
The one is an amazing Photoshop effect for creating cartoon edits, which works through a merger of two different ingenious art themes or styles for transforming basic images into cartoonized stills.
The effect grants you the liberty to use varieties of art styles, such as, comic, photo retouching and energetic oil to obtain editing results comparable to that of any original photograph. The template is conveniently simple to use and assures you of quick results. All this, just at a nominal price of $6! Interesting, right?

05Ultra Realistic 3D Space Effect
Considering the fact of you being a space admirer, this one is the perfect image editor for you to add the vibrancy of stunning space elements and backgrounds within your cartoonized edits. The effect lets you play with the diverse range of customizable text and exciting caricature backgrounds. When downloading the template, you get a main setup file, a few editing examples and a web link to the free fonts present in the effect.

06Animated Zombie Grime Art Photoshop Action
Are you in love with the latest zombie grimes? If yes, then this action set is exclusive editor package for you. Working with the aforesaid image template, you can effortlessly add the perfect zombie theme to your cartoon edits, along with simultaneously creating a stunning animation, which you can use to enhance your video or GIF uploads on social media. Not forgetting the best part, you get a free access to this amazing utility.

Part 2 Easiest Ways to Cartoonize Photo in Photoshop
Having known about the amazing varieties of cartoonized editor templates in Photoshop, it is a natural instinct to feel motivated to create your own caricature images from normal capture stills. Addressing the concern of image transformation methods to turn a photo into a cartoon Photoshop, let us dive into some of the most affordable methods of creating cartoonized photos in the aforesaid editing application.
Talking of the most basic Photoshop tools for creating caricature images, you can start your editing spree with using the Graphic Tablet, Brush Tool, Layer Masks and a graphic pen to create amateur cartoonized edits from your still photographs, getting a full control on image tracing.
01Brush Tool
A few usage examples include working with a combination of the graphic tablet pen and the editor brushes to trace your image, using the brush in a masked or a fresh layer to avoid altering the actual image, and much more.
02Graphic Tablet
It is best to use the Photoshop Graphic Tablet for adhering to the concern of tracing cartoonized images. You can alternatively cater to the job with a trackpad, mouse, or even your hand. It is however, difficult to assure steady hand postures for image tracing, lest you are using a stylus pen.
03Pen Tool
Using the Pen Tool for cartoonizing your portrait, allows you to draw outlines along the desired figure within the image, along with its important elements, so that you can easily use these outlined paths to introduce different color blocks.
Similar to the Brush Tool, the Photoshop Pen utility grants you the freedom to vary the degree of detailing in your cartoon edit, from being highly expressive to only remaining around the shore. Working with the Pen Tool can, however be a bit tiring and time taking, with respect to the extent of detailing you wish to add to the caricature edits.
Additional to the aforementioned tools, you can also consider using the default image filters of the Photoshop application to get comparable results. This is an exclusively better option to choose, compared to the Pen Tool, when you are working without a Graphic Tablet. To get over the top realistic caricature renderings, you will need to supplement the use of Photoshop filters with the application’s editing channels and other adjustments.
Part 3 How to Use a Variety of Photoshop Special Effects to Create the Final Caricature Look
Considering the extensive discussion on the credibility of the Photoshop Image Editor application in the realm of creating stunning caricature images in high end resolution, let us proceed to learn about using the diversity of Photoshop’s special effects to get the last stage cartoonized appearance of ordinary still images.
User’s Guide to Create High End Cartoonized Look
The following tutorial is a stepwise explanation of the process to convert photo into cartoon Photoshop in the easiest possible way. Stick to the method for getting affordable results in a quick span.
Step 1: Download and Launch the Program
Visit the official website of Photoshop Image Editor for a free download of the software program in your system, followed by installing and launching the same in your device.
Step 2: Upload Your Image
On a successful launch of the editor program, you will be directed to the ‘Photoshop Editor’ window, where you are required to upload any desired still image from your device for creating a cartoonized edit. To do this, either simply add your image to the editor workspace using the ‘Drag and Drop’ method, or navigate to the ‘File’ tab in the top toolbar and click on ‘Open’ in the dropdown menu.
Step 3: Edge Enhancement
Once your image appears in the editor timeline, proceed to sharpen the edges of the face and body of the portrait. Start with navigating to and clicking on the ‘Filter’ option, followed by tapping on ‘Filter Gallery’ and selecting the ‘Artistic’ folder, where you need to choose the ‘Poster Edges’ option. Observe the effect of these setting on the portrait and make necessary changes.

Step 4: Background Setting
Ensure that the background and foreground of your image are set to white and black colors respectively. If not, proceed to adjust the same as required.

Step 5: Distorting the Edges
You now need to introduce some distortion in the edges of your portrait. Navigate to the ‘Filter’ option again, open the ‘Filter Gallery’ and choose ‘Torn Edges’ from the menu that drops down. Select the desired parameter values in accordance with your creative suitability.


Step 6: Using the Channels Panel
The next step is to select and copy your portrait using the ‘Ctrl + A’ and Ctrl + C commands respectively. Navigate to the ‘Channels’ panel at the right of the Photoshop workspace. At the panel’s bottom right, proceed with creating a new channel. It will be assigned the name ‘Alpha 1’ by Photoshop, which you are most welcome to change.


Step 7: Color Inversion
When you finish creating the channel, use the ‘Ctrl + V’ command to paste your portrait in the same. Proceed with inverting the image colors by navigating to the ‘Image’ option, followed by choosing the ‘Adjustment’ and ‘Invert’ options from the consecutive drop downs. Now, make a selection of the ‘White’ regions of your portrait by pressing the ‘Ctrl’ key and clicking on the ‘Alpha 1 Channel thumbnail.

Step 8: Layer Creation
Navigate to the ‘Layers’ panel at the right of the Photoshop workspace, and click on the ‘New Layer’ icon for creating a fresh layer. Fill the just created layer with black color, either by pressing ‘g’ from your system’s keyboard, or using the ‘Paint Bucket’ tool. Don’t forget to assign a suitable name to the layer.

Repeat the above process to create a separate layer and e fill the same with white color. The layer creation process is essential to separate the white and black colors of the actual image.

Step 10: Layer Dragging
In the ‘Layers’ panel, drag the ‘Black’ layer above the ‘White’ one.

Step 11: Creating Additional Layers
You are now required to create three more layers, with the same process as for the above two, for adding effects to the Skin, Clothes and Teeth/Eyes of the portrait. When you finish creation, assign suitable names to the layers, followed by dragging them below the ‘Black’ one within the ‘Layers’ panel.

Step 12: Color Selection and Application
Choose the respective colors for the clothes, skin and teeth/eyes of the cartoonized edit. To proceed with color application, navigate to the toolbar at the left of the Photoshop workspace and choose the ‘Brush Tool’. Finally, choose a particular layer and apply careful brush strokes to add color to the specific area of the portrait that you wish to edit. Follow the same process to add colors to the remaining layers to get the desired result in all areas of your cartoonized edit.

Step 13: Using the Gradient Tool
Navigate to the ‘Layers’ panel again and create a new ‘Gradient’ layer to further enhance your creation. You now need to select the ‘Gradient Tool’ from the toolbar at the left of the Photoshop workspace. The ‘Gradient Editor’ pops up with the continuously running ‘Gradient Bar’, as soon as you make the selection. Double click on the gradient boxes at both ends to select them, followed by making your color choices. Tap on ‘OK’ when you are satisfied with your work.

Step 14: Filling the Gradients
To proceed with gradient filling, press and hold the mouse button on the image at the bottom left and continue to drag the cursor to its top right corner. Leave the mouse and navigate to the ‘Layers’ panel for dragging and dropping the ‘Gradient’ layer above the ‘White’ layer.

You are now done with the process of creating a caricature edit from a normal still portrait. Your final image output will appear something like the following:

Cartoons, an already catchy entertainment source, can upgrade other media utilities on integration. Look through the easiest ways of creating cartoonize photo Photoshop stills!
In this article
01 [Types of Cartoon Effects in Photoshop](#Part 1)
02 [Easiest Ways to Cartoonize Photo in Photoshop](#Part 2)
03 [How to Use a Variety of Photoshop Special Effects to Create the Final Caricature Look](#Part 3)
Part 1 Types of Cartoon Effects in Photoshop
It is an absolute fun activity to explore your editing creativity in the realm of cartoonizing the otherwise ordinary still captures. Talking of the most convenient cartoon creator and editor applications, you can safely rely on the Photoshop Image Editor application to choose from a pool of cartoon editing effects for adding that spunky and funny element to your image files.
Presented in the following section, is a discussion of some of the most stunning and visibly amazing cartoon effects in the application’s Editor Library to cartoonize Photoshop images:
01Pop Art Photoshop Action
The effect is a predominantly preferred as a cartoon action Photoshop utility to caricaturize a normal image, along with customizing the same to change the colors and background of the original still capture for creating a brand new appearance with utmost ease. Apart from this, the aforesaid effect allows you to exclusively customize the globally acclaimed graphic masterpieces of Roy Lichtenstein. Working with the effect, you can edit a self-portrait or the favorite image of your pet to give the latter, a funny retro feel.
02Vintage Comic Creator
If the idea of sticking to just the creation of cartoon images is not enough to satisfy you, the Vintage Comic Creator effect allows you to expand your creativity level to work on cartoon based shape and text edits. You can use the effect to enhance an image logo or plain text with a comic book oriented text. A download of this cartoon effect template facilitates you with diversities of customizable layer styles, overlays and patterns.
03GTA Photoshop Action
This is a complete pleasure for the creative fan of Grand Theft Auto, the wicked chasing game series. Additional to creating a stark variety of edited cartoon stills, you are free to reinvent the aforesaid game’s most popular caricature edits, while using the GTA Photoshop Action editing filter. Launched by Indworks, the effect package consisting of 15 vibrant themes and 5 collage templates; promises a quick mimicry of your most cherished video and console games.
04Vector Paint Photoshop Action
The one is an amazing Photoshop effect for creating cartoon edits, which works through a merger of two different ingenious art themes or styles for transforming basic images into cartoonized stills.
The effect grants you the liberty to use varieties of art styles, such as, comic, photo retouching and energetic oil to obtain editing results comparable to that of any original photograph. The template is conveniently simple to use and assures you of quick results. All this, just at a nominal price of $6! Interesting, right?
05Ultra Realistic 3D Space Effect
Considering the fact of you being a space admirer, this one is the perfect image editor for you to add the vibrancy of stunning space elements and backgrounds within your cartoonized edits. The effect lets you play with the diverse range of customizable text and exciting caricature backgrounds. When downloading the template, you get a main setup file, a few editing examples and a web link to the free fonts present in the effect.
06Animated Zombie Grime Art Photoshop Action
Are you in love with the latest zombie grimes? If yes, then this action set is exclusive editor package for you. Working with the aforesaid image template, you can effortlessly add the perfect zombie theme to your cartoon edits, along with simultaneously creating a stunning animation, which you can use to enhance your video or GIF uploads on social media. Not forgetting the best part, you get a free access to this amazing utility.
Part 2 Easiest Ways to Cartoonize Photo in Photoshop
Having known about the amazing varieties of cartoonized editor templates in Photoshop, it is a natural instinct to feel motivated to create your own caricature images from normal capture stills. Addressing the concern of image transformation methods to turn a photo into a cartoon Photoshop, let us dive into some of the most affordable methods of creating cartoonized photos in the aforesaid editing application.
Talking of the most basic Photoshop tools for creating caricature images, you can start your editing spree with using the Graphic Tablet, Brush Tool, Layer Masks and a graphic pen to create amateur cartoonized edits from your still photographs, getting a full control on image tracing.
01Brush Tool
A few usage examples include working with a combination of the graphic tablet pen and the editor brushes to trace your image, using the brush in a masked or a fresh layer to avoid altering the actual image, and much more.
02Graphic Tablet
It is best to use the Photoshop Graphic Tablet for adhering to the concern of tracing cartoonized images. You can alternatively cater to the job with a trackpad, mouse, or even your hand. It is however, difficult to assure steady hand postures for image tracing, lest you are using a stylus pen.
03Pen Tool
Using the Pen Tool for cartoonizing your portrait, allows you to draw outlines along the desired figure within the image, along with its important elements, so that you can easily use these outlined paths to introduce different color blocks.
Similar to the Brush Tool, the Photoshop Pen utility grants you the freedom to vary the degree of detailing in your cartoon edit, from being highly expressive to only remaining around the shore. Working with the Pen Tool can, however be a bit tiring and time taking, with respect to the extent of detailing you wish to add to the caricature edits.
Additional to the aforementioned tools, you can also consider using the default image filters of the Photoshop application to get comparable results. This is an exclusively better option to choose, compared to the Pen Tool, when you are working without a Graphic Tablet. To get over the top realistic caricature renderings, you will need to supplement the use of Photoshop filters with the application’s editing channels and other adjustments.
Part 3 How to Use a Variety of Photoshop Special Effects to Create the Final Caricature Look
Considering the extensive discussion on the credibility of the Photoshop Image Editor application in the realm of creating stunning caricature images in high end resolution, let us proceed to learn about using the diversity of Photoshop’s special effects to get the last stage cartoonized appearance of ordinary still images.
User’s Guide to Create High End Cartoonized Look
The following tutorial is a stepwise explanation of the process to convert photo into cartoon Photoshop in the easiest possible way. Stick to the method for getting affordable results in a quick span.
Step 1: Download and Launch the Program
Visit the official website of Photoshop Image Editor for a free download of the software program in your system, followed by installing and launching the same in your device.
Step 2: Upload Your Image
On a successful launch of the editor program, you will be directed to the ‘Photoshop Editor’ window, where you are required to upload any desired still image from your device for creating a cartoonized edit. To do this, either simply add your image to the editor workspace using the ‘Drag and Drop’ method, or navigate to the ‘File’ tab in the top toolbar and click on ‘Open’ in the dropdown menu.
Step 3: Edge Enhancement
Once your image appears in the editor timeline, proceed to sharpen the edges of the face and body of the portrait. Start with navigating to and clicking on the ‘Filter’ option, followed by tapping on ‘Filter Gallery’ and selecting the ‘Artistic’ folder, where you need to choose the ‘Poster Edges’ option. Observe the effect of these setting on the portrait and make necessary changes.
Step 4: Background Setting
Ensure that the background and foreground of your image are set to white and black colors respectively. If not, proceed to adjust the same as required.
Step 5: Distorting the Edges
You now need to introduce some distortion in the edges of your portrait. Navigate to the ‘Filter’ option again, open the ‘Filter Gallery’ and choose ‘Torn Edges’ from the menu that drops down. Select the desired parameter values in accordance with your creative suitability.
Step 6: Using the Channels Panel
The next step is to select and copy your portrait using the ‘Ctrl + A’ and Ctrl + C commands respectively. Navigate to the ‘Channels’ panel at the right of the Photoshop workspace. At the panel’s bottom right, proceed with creating a new channel. It will be assigned the name ‘Alpha 1’ by Photoshop, which you are most welcome to change.
Step 7: Color Inversion
When you finish creating the channel, use the ‘Ctrl + V’ command to paste your portrait in the same. Proceed with inverting the image colors by navigating to the ‘Image’ option, followed by choosing the ‘Adjustment’ and ‘Invert’ options from the consecutive drop downs. Now, make a selection of the ‘White’ regions of your portrait by pressing the ‘Ctrl’ key and clicking on the ‘Alpha 1 Channel thumbnail.
Step 8: Layer Creation
Navigate to the ‘Layers’ panel at the right of the Photoshop workspace, and click on the ‘New Layer’ icon for creating a fresh layer. Fill the just created layer with black color, either by pressing ‘g’ from your system’s keyboard, or using the ‘Paint Bucket’ tool. Don’t forget to assign a suitable name to the layer.
Repeat the above process to create a separate layer and e fill the same with white color. The layer creation process is essential to separate the white and black colors of the actual image.
Step 10: Layer Dragging
In the ‘Layers’ panel, drag the ‘Black’ layer above the ‘White’ one.
Step 11: Creating Additional Layers
You are now required to create three more layers, with the same process as for the above two, for adding effects to the Skin, Clothes and Teeth/Eyes of the portrait. When you finish creation, assign suitable names to the layers, followed by dragging them below the ‘Black’ one within the ‘Layers’ panel.
Step 12: Color Selection and Application
Choose the respective colors for the clothes, skin and teeth/eyes of the cartoonized edit. To proceed with color application, navigate to the toolbar at the left of the Photoshop workspace and choose the ‘Brush Tool’. Finally, choose a particular layer and apply careful brush strokes to add color to the specific area of the portrait that you wish to edit. Follow the same process to add colors to the remaining layers to get the desired result in all areas of your cartoonized edit.
Step 13: Using the Gradient Tool
Navigate to the ‘Layers’ panel again and create a new ‘Gradient’ layer to further enhance your creation. You now need to select the ‘Gradient Tool’ from the toolbar at the left of the Photoshop workspace. The ‘Gradient Editor’ pops up with the continuously running ‘Gradient Bar’, as soon as you make the selection. Double click on the gradient boxes at both ends to select them, followed by making your color choices. Tap on ‘OK’ when you are satisfied with your work.
Step 14: Filling the Gradients
To proceed with gradient filling, press and hold the mouse button on the image at the bottom left and continue to drag the cursor to its top right corner. Leave the mouse and navigate to the ‘Layers’ panel for dragging and dropping the ‘Gradient’ layer above the ‘White’ layer.
You are now done with the process of creating a caricature edit from a normal still portrait. Your final image output will appear something like the following:
Also read:
- New In 2024, Top 15 Male Anime Characters By Voting
- Updated 2024 Approved 15 Forgotten Cartoon Characters of All Time You Used to Love
- New 2024 Approved Top 8 Tools Tell You How to Make Slideshows for Instagram
- New 2024 Approved Make Creative Animation Videos
- New What Is Still Motion Animation and How Does It Work, In 2024
- New 2024 Approved Top 10 Popular Cartoons You Forgot Existed
- Updated 15 Top Pics Collage Apps
- Updated Techniques on How to Make After Effects 2D Animation
- New Tutorials to Make Animated Images – Even if Youre Just Starting Out for 2024
- New 2024 Approved Finding The Best Animated Profile Picture Maker
- New 2024 Approved Best Claymation Shows That Make Your Memories Unforgettable
- Updated 2024 Approved All About Types of Motion Graphics
- New Top 7 Best Free GIF Apps for Android for 2024
- New 15 Animated Characters We All Had A Crush On
- New 20 Best Anime Movies You Cannot Miss 2024 List
- Updated 15 Best Video to GIF App on iPhone and Android
- Updated 2024 Approved You Can Turn a TikTok Into a GIF Now. Heres How
- New In 2024, Tips for Animated Collage Maker
- 2024 Approved The Only Guide to Make 2D Rigging Clear to You
- Updated In 2024, How To Create Pinterest Slideshow in Simple Ways
- New In 2024, Top 10 Animated Photo Collage Apps You Should Know
- 2024 Approved Best GIF Maker Software for Windows and Mac
- 2024 Approved Some Must-Know Useful Lego Animation Ideas
- Guide on How to Create GIF in WhatsApp iPhone
- Updated 2024 Approved 10 Best Tools to Make Pic Collage for Windows
- Updated 2024 Approved How to Cartoonize Photo Photoshop in Simple Steps
- How to Create an Adobe Collage for 2024
- Updated 2024 Approved Ways to Create Animated Clipart in PowerPoint
- New 10 Must Watch Netflix Cartoon Series for 2024
- Interesting Fundamentals and Ultimate Guide to Animated Characters Drawings
- In 2024, How to Make My Photo 3D Cartoon Online
- Updated The Definitive Guide to Whiteboard Animation
- New 2024 Approved Best 10 Apps to Enhance Your Instagram Story Slideshow
- Tips for GIF to Animated PNG You Should Know
- Types of Cartoon Styles You May Use for The Next Marketing Project for 2024
- Updated In 2024, 5 Photoshop Alternatives to Animate Logo
- In 2024, Best GIF Resizers to Reduce GIF Size
- In 2024, Want to Make a Meme GIF?
- In 2024, Finding The Best Animated Profile Picture Maker
- In 2024, Some Must-Know Useful Lego Animation Ideas for You
- 2024 Approved Learn Pencil2D Animation Tutorial Overview
- New In 2024, All About 3D Medical Animation And Its Uses
- 2024 Approved 2D Character Animation Everything You Should Know About It
- New 15 Forgotten Cartoon Characters of All Time
- 2024 Approved The Top Free 12 GIF Meme Maker at a Glance
- In 2024, 12+ Stunning Instagram GIF Stickers
- 2024 Approved 10 2D/3D Animation Tips & Tricks for You
- 10 Fake GPS Location Apps on Android Of your Realme V30T | Dr.fone
- Turning Off Two Factor Authentication From Apple iPhone 14 Plus? 5 Tips You Must Know
- 4 Methods to Turn off Life 360 On Tecno Spark 20C without Anyone Knowing | Dr.fone
- Dose Life360 Notify Me When Someone Checks My Location On Vivo Y55s 5G (2023)? | Dr.fone
- In 2024, Pokémon Go Cooldown Chart On Tecno Camon 20 Premier 5G | Dr.fone
- Top 5 Tracking Apps to Track Samsung Galaxy A23 5G without Them Knowing | Dr.fone
- In 2024, How To Remove Passcode From Apple iPhone 15 Pro? Complete Guide | Dr.fone
- Full Guide to Fix iToolab AnyGO Not Working On Nokia C12 | Dr.fone
- How Can I Catch the Regional Pokémon without Traveling On Motorola Razr 40 | Dr.fone
- In 2024, How I Transferred Messages from Infinix GT 10 Pro to iPhone 12/XS (Max) in Seconds | Dr.fone
- In 2024, The Ultimate Guide to Get the Rare Candy on Pokemon Go Fire Red On Vivo Y27 5G | Dr.fone
- In 2024, 3 Ways to Unlock Your iPhone 14 Pro Max for Free
- Fixes for Apps Keep Crashing on Vivo V27e | Dr.fone
- Detailed guide of ispoofer for pogo installation On Apple iPhone 15 Plus | Dr.fone
- Hassle-Free Ways to Remove FRP Lock on Oppo Find N3 Flipwith/without a PC
- 3 Ways to Change Location on Facebook Marketplace for Apple iPhone 12 Pro Max | Dr.fone
- Updated How To Use CapCut Translate to Transform Video Content for 2024
- Full Solutions to Fix Error Code 920 In Google Play on Vivo S18 Pro | Dr.fone
- In 2024, How to Change/Fake Your Nokia C12 Plus Location on Viber | Dr.fone
- Two Ways to Track My Boyfriends Realme 11 Pro+ without Him Knowing | Dr.fone
- In 2024, How to Share/Fake Location on WhatsApp for Apple iPhone 6 | Dr.fone
- In 2024, 4 Most-Known Ways to Find Someone on Tinder For Samsung Galaxy Z Fold 5 by Name | Dr.fone
- In 2024, How to Migrate Android Data From Samsung Galaxy Z Flip 5 to New Android Phone? | Dr.fone
- 2 Ways to Transfer Text Messages from OnePlus Ace 2 Pro to iPhone 15/14/13/12/11/X/8/ | Dr.fone
- In 2024, Complete Tutorial to Use GPS Joystick to Fake GPS Location On Samsung Galaxy A34 5G | Dr.fone
- The Ultimate Guide to Get the Rare Candy on Pokemon Go Fire Red On Samsung Galaxy Z Fold 5 | Dr.fone
- Easily Unlock Your Infinix Note 30 VIP Racing Edition Device SIM
- In 2024, 3 Things You Must Know about Fake Snapchat Location On Samsung Galaxy S23 | Dr.fone
- A Quick Guide to Sony Xperia 5 V FRP Bypass Instantly
- How to Fix Android App Not Installed Error on Infinix GT 10 Pro Quickly? | Dr.fone
- In 2024, Top 5 Car Locator Apps for Meizu 21 Pro | Dr.fone
- In 2024, Why Your WhatsApp Live Location is Not Updating and How to Fix on your Apple iPhone 12 Pro | Dr.fone
- The Ultimate Guide to Bypassing iCloud Activation Lock on Apple iPhone 12 mini
- In 2024, Top 6 Mickey Mouse Voice Generators
- Three Solutions to Hard Reset Xiaomi Redmi 12? | Dr.fone
- A Step-by-Step Guide on Using ADB and Fastboot to Remove FRP Lock on your Itel P55 5G
- How To Recover Data From Lost or Stolen iPhone 15 In Easy Steps | Stellar
- Title: Updated Can I Do Animated Logo Design Without Design Skills, In 2024
- Author: Elon
- Created at : 2024-05-19 03:05:22
- Updated at : 2024-05-20 03:05:22
- Link: https://animation-videos.techidaily.com/updated-can-i-do-animated-logo-design-without-design-skills-in-2024/
- License: This work is licensed under CC BY-NC-SA 4.0.
