

Updated Create or Find Good Morning/Night GIFs for 2024
Create or Find Good Morning/Night GIFs
Versatile Video Editor - Wondershare Filmora
An easy yet powerful editor
Numerous effects to choose from
Detailed tutorials provided by the official channel
Do you want to wish your friends and family some heartful greetings every morning or night? Like you, many other people also look for good morning and night GIF images to meet their requirements. Since there can be limited sources for animated GIFs, you might find getting some new and unique images hard. That’s why I will let you know how to come up with some good night/morning animated GIFs in this post and share some reliable resources to download them.

In this article
01 [Create Good Morning/Night GIF Images with Adobe Photoshop](#Part 1)
02 [Create Stunning Good Morning or Night GIFs with Filmora](#Part 2)
03 [Create Animated Good Morning/Night GIFs with Canva](#Part 3)
04 [Find Readily Available Good Morning/Night GIFs](#Part 4)
Part 1 Create Good Morning/Night GIF Images with Adobe Photoshop
If you are familiar with Adobe Photoshop or are willing to learn it, you can also use its assistance to create good morning/night GIF images. Even though the application is mostly used to edit images, it can also help you develop all kinds of funny good morning/night GIFs.
To do that, you need to work on different layers in Photoshop and then merge them as a single frame to provide a more animated appeal. Here are some basic steps that you can follow to come up with anime good night or morning GIFs.
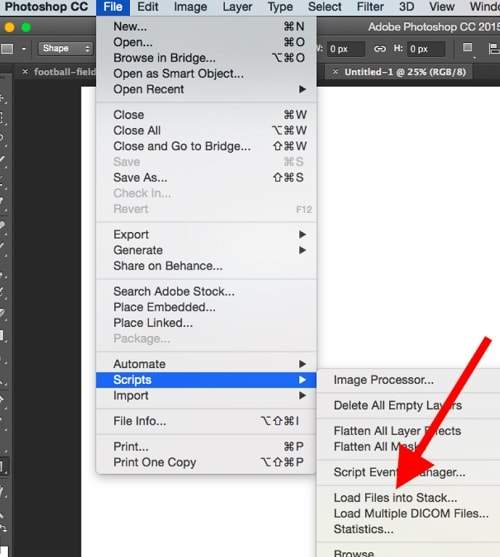
Step 1 Launch Photoshop and Load Media Assets
You can start by launching Adobe Photoshop on your system and visiting its File > Scripts section to load your media files.
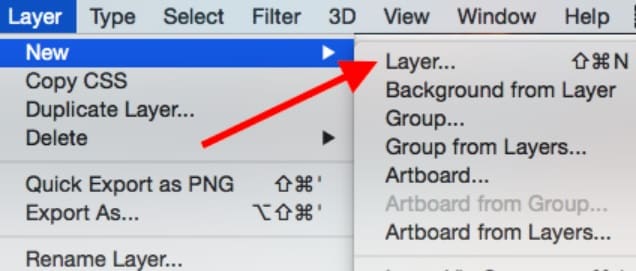
Step 2 Start working on Animated GIFs in Photoshop
Now, to come up with a funny good morning/night GIF, you can go to its Menu > Layer and choose to create a new layer.
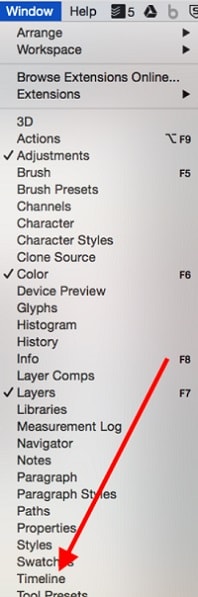
Since it is recommended to have a timeline for your media, you can go to its Window > Timeline to get a timeline view at the bottom.
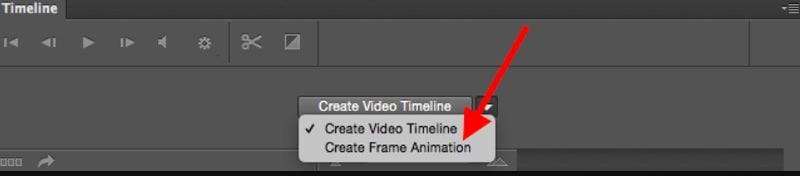
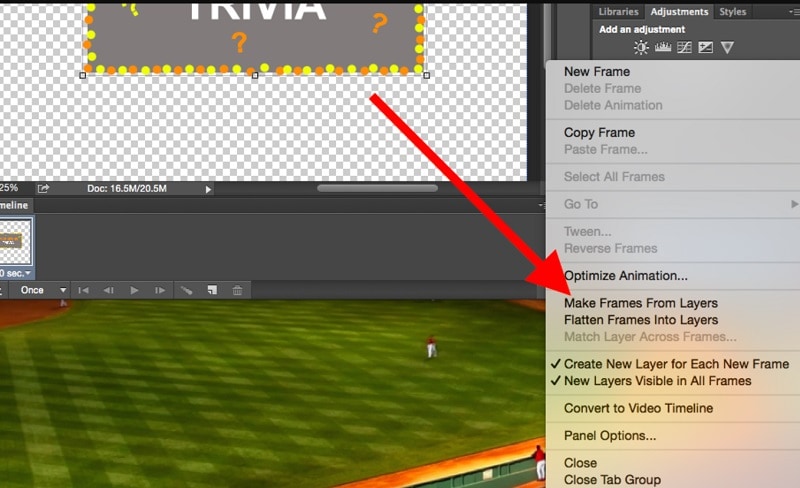
Afterward, you can go to the timeline at the bottom panel and choose work on frame animations to create any good morning/night animation.
You can now duplicate your files or adjust them on the timeline to develop an animated GIF. Afterward, you can go to its properties to create a new layer for your frames and then merge them.
Step 3 Make Final Adjustments to your Animated GIFs
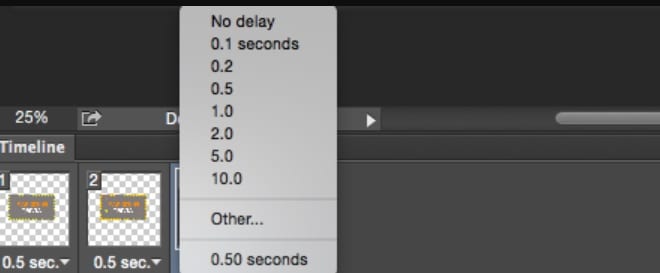
As you would have different good morning/night GIF funny animations, you can right-click on the timeline and set up their respective durations.
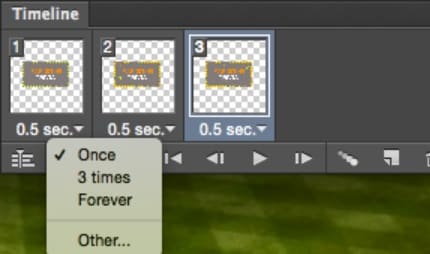
Besides that, you can also right-click any frame and select how many times it would be repeated.
Step 4 Export the Media file as a GIF from Photoshop
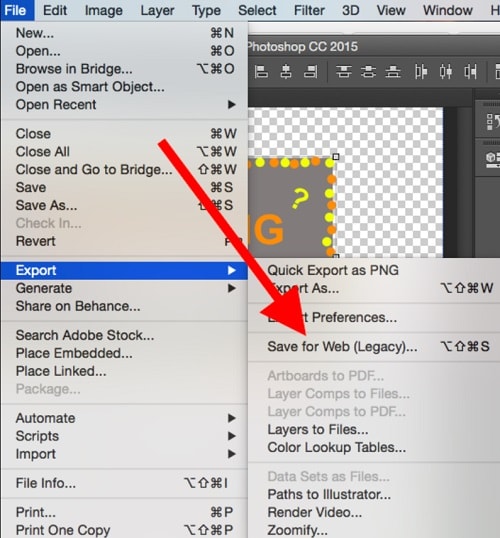
After making all the edits, you can go to its File > Export feature and save your good night/morning GIF images in a compatible format (to be published on the web).
Part 2 Create Stunning Good Morning or Night GIFs with Filmora
Since Photoshop can be quite complicated to learn, you can consider using Wondershare Filmora to create videos and GIFs of all sorts. It is a multitrack timeline editing application that offers a wide range of editing options that are super easy to use. Apart from that, you will also get access to a wide range of media assets and effects that you can readily use to create good morning/night animated GIFs.
Wondershare Filmora
Get started easily with Filmora’s powerful performance, intuitive interface, and countless effects!
Try It Free Try It Free Try It Free Learn More >

Step 1 Launch Filmora and Load your Files to Create GIFs
You can start by launching Wondershare Filmora on your system and just drag and drop your media files to its interface. Besides that, you can also go to its File > Import menu to browse and load your media files (like morning or night images).

Step 2 Come up with Engaging GIFs using Filmora
Afterward, you can drop these media assets to the timeline at the bottom in a preferred format and start editing them. For instance, you can hover the cursor at the side to use the trimmer tool to clip any unwanted part from the video clip.

You can also select any media file and go to its properties to perform all kinds of actions on the selected media file like scaling, repositioning, flipping, rotating, and so on.

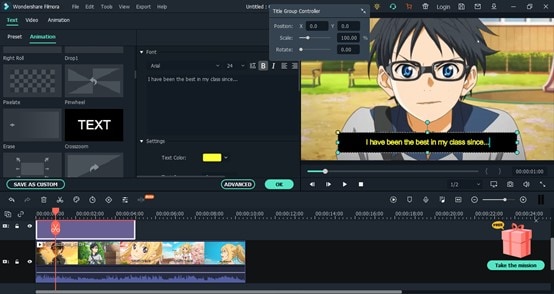
Many people would like to write quotes and messages on their good night/morning GIF images. In this case, you can go to the “Titles” section of Filmora to add different caption effects to your videos.

Besides that, you can also explore a wide range of transitions, stickers, overlays, filters, and numerous other visual effects that you can readily add to your animated good morning/night GIFs.

Step 3 Save your good morning or night GIFs on Filmora
After working on your anime good night/morning GIF, you can click on the “Export” button from the top and choose to save the media file in a GIF format on your system.

Part 3 Create Animated Good Morning/Night GIFs with Canva
Canva is one of the most user-friendly online solutions that you can use to come up with graphics of different styles. From social media posts to posters and video clips to logos, Canva can help you develop all types of customized designs. A while back, it has added a dedicated option to create and edit animations that would let you come up with some stunning good morning/night GIF images.
Step 1 Select a Project Type or Template of Canva
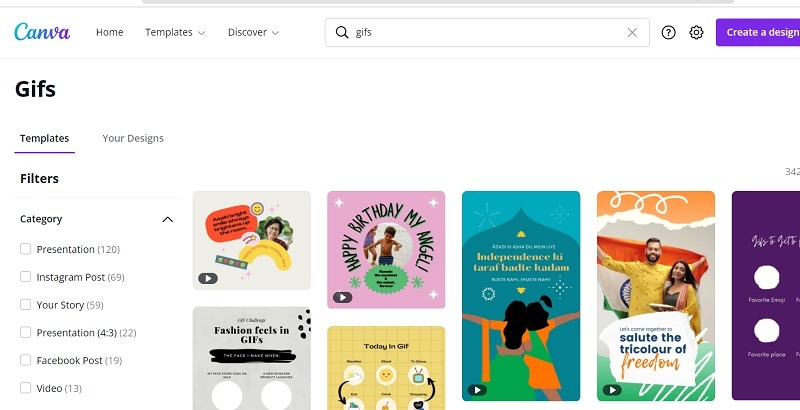
At first, you can go to the official website of Canva and choose to work on a template of your choice. Here, you can look for GIFs readily available on Canva or work on an empty canvas.
Step 2 Customize your Good Morning/Night GIF on Canva
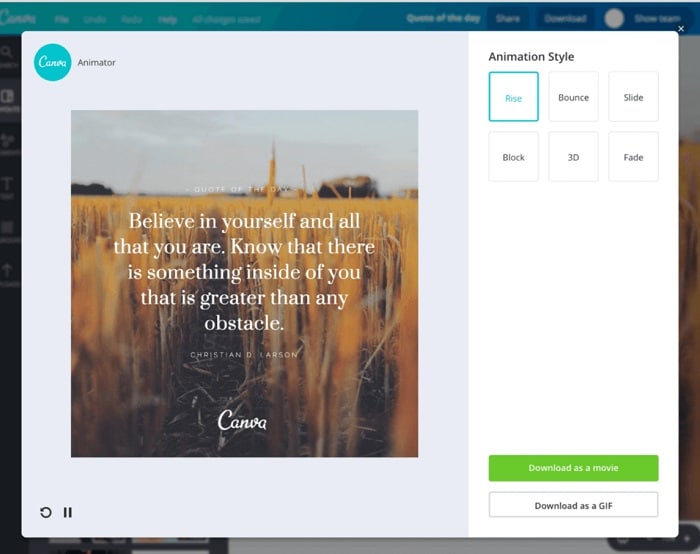
From the sidebar, you can drag and drop various elements, captions, borders, and other objects to develop an animated good morning/night GIF. Several other features in Canva would let you customize and edit your GIFs easily.
Step 3 Export your Designs as GIFs from Canva
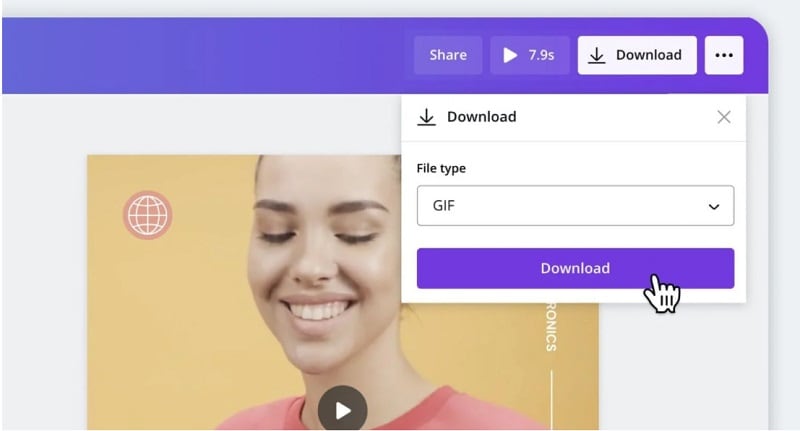
That’s it! After working on all the features of your good night/morning funny GIFs, you can click on the “Export” button from the top and save your GIF on your system’s local storage from Canva.
Part 4 Find Readily Available Good Morning/Night GIFs
If you are running short on time and can’t come up with any good morning/night animated GIF, then you can pick them from the following resources:
1. Tenor
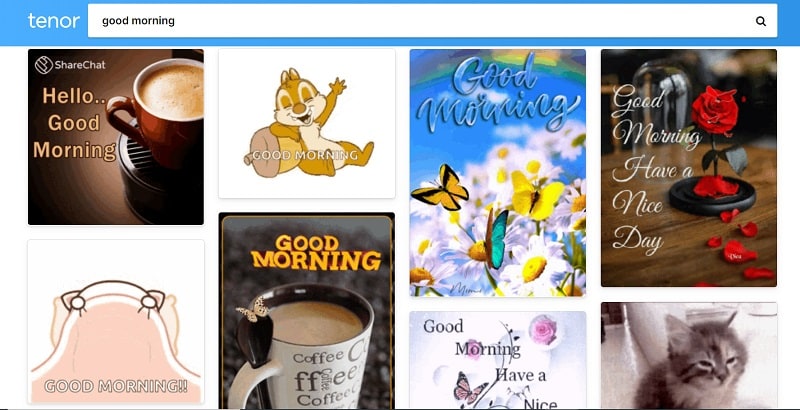
Tenor is certainly one of the most prominent websites to find GIFs and stickers of all kinds. Therefore, you can head to its official website and look for good morning/night animations by entering relevant keywords on the search bar. Later, you can download the GIF or directly share its link with others.
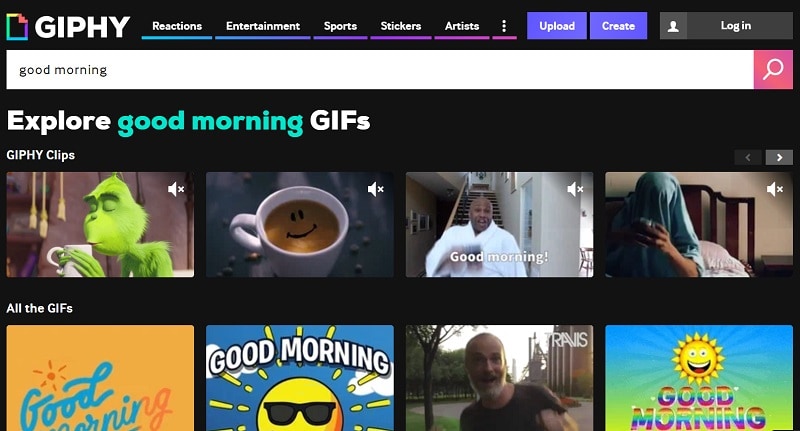
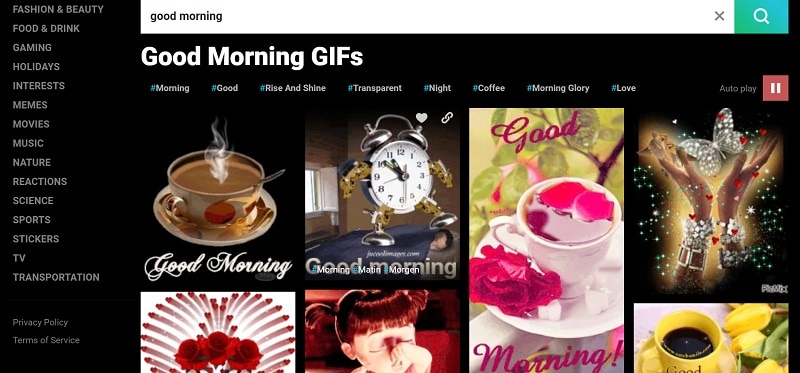
2. Giphy
Like Tenor, Giphy is another popular source where you can find hundreds of good night/morning funny GIFs. The website is quite easy to navigate and will let you see all kinds of GIFs by entering appropriate keywords. Later, you can directly copy the URL of the GIF and share it with others on platforms like WhatsApp and Instagram.
3. Gifer
Lastly, you can also explore Gifer to find an extensive collection of inspiring or funny good night/morning GIFs. The website has already listed GIFs in different categories that you can explore to save time or can enter keywords on the search bar to find appropriate content.
Wondershare Filmora
Get started easily with Filmora’s powerful performance, intuitive interface, and countless effects!
Try It Free Try It Free Try It Free Learn More >
AI Portrait – The best feature of Wondershare Filmora for gameplay editing
The AI Portrait is a new add-on in Wondershare Filmora. It can easily remove video backgrounds without using a green screen or chroma key, allowing you to add borders, glitch effects, pixelated, noise, or segmentation video effects.

Conclusion
After reading this guide, I’m sure that you can easily pick or create all kinds of good night/morning GIFs. While Photoshop can make animated good morning/night GIFs, it is certainly not that user-friendly. That’s why I would recommend using a reliable and friendly application like Wondershare Filmora to meet your requirements. The media-editing tool has an extensive range of assets and offers tons of high-end features to come up with all sorts of inspiring, romantic, or funny good morning/night GIFs.
Do you want to wish your friends and family some heartful greetings every morning or night? Like you, many other people also look for good morning and night GIF images to meet their requirements. Since there can be limited sources for animated GIFs, you might find getting some new and unique images hard. That’s why I will let you know how to come up with some good night/morning animated GIFs in this post and share some reliable resources to download them.
In this article
01 [Create Good Morning/Night GIF Images with Adobe Photoshop](#Part 1)
02 [Create Stunning Good Morning or Night GIFs with Filmora](#Part 2)
03 [Create Animated Good Morning/Night GIFs with Canva](#Part 3)
04 [Find Readily Available Good Morning/Night GIFs](#Part 4)
Part 1 Create Good Morning/Night GIF Images with Adobe Photoshop
If you are familiar with Adobe Photoshop or are willing to learn it, you can also use its assistance to create good morning/night GIF images. Even though the application is mostly used to edit images, it can also help you develop all kinds of funny good morning/night GIFs.
To do that, you need to work on different layers in Photoshop and then merge them as a single frame to provide a more animated appeal. Here are some basic steps that you can follow to come up with anime good night or morning GIFs.
Step 1 Launch Photoshop and Load Media Assets
You can start by launching Adobe Photoshop on your system and visiting its File > Scripts section to load your media files.
Step 2 Start working on Animated GIFs in Photoshop
Now, to come up with a funny good morning/night GIF, you can go to its Menu > Layer and choose to create a new layer.
Since it is recommended to have a timeline for your media, you can go to its Window > Timeline to get a timeline view at the bottom.
Afterward, you can go to the timeline at the bottom panel and choose work on frame animations to create any good morning/night animation.
You can now duplicate your files or adjust them on the timeline to develop an animated GIF. Afterward, you can go to its properties to create a new layer for your frames and then merge them.
Step 3 Make Final Adjustments to your Animated GIFs
As you would have different good morning/night GIF funny animations, you can right-click on the timeline and set up their respective durations.
Besides that, you can also right-click any frame and select how many times it would be repeated.
Step 4 Export the Media file as a GIF from Photoshop
After making all the edits, you can go to its File > Export feature and save your good night/morning GIF images in a compatible format (to be published on the web).
Part 2 Create Stunning Good Morning or Night GIFs with Filmora
Since Photoshop can be quite complicated to learn, you can consider using Wondershare Filmora to create videos and GIFs of all sorts. It is a multitrack timeline editing application that offers a wide range of editing options that are super easy to use. Apart from that, you will also get access to a wide range of media assets and effects that you can readily use to create good morning/night animated GIFs.
Wondershare Filmora
Get started easily with Filmora’s powerful performance, intuitive interface, and countless effects!
Try It Free Try It Free Try It Free Learn More >
Step 1 Launch Filmora and Load your Files to Create GIFs
You can start by launching Wondershare Filmora on your system and just drag and drop your media files to its interface. Besides that, you can also go to its File > Import menu to browse and load your media files (like morning or night images).
Step 2 Come up with Engaging GIFs using Filmora
Afterward, you can drop these media assets to the timeline at the bottom in a preferred format and start editing them. For instance, you can hover the cursor at the side to use the trimmer tool to clip any unwanted part from the video clip.
You can also select any media file and go to its properties to perform all kinds of actions on the selected media file like scaling, repositioning, flipping, rotating, and so on.
Many people would like to write quotes and messages on their good night/morning GIF images. In this case, you can go to the “Titles” section of Filmora to add different caption effects to your videos.
Besides that, you can also explore a wide range of transitions, stickers, overlays, filters, and numerous other visual effects that you can readily add to your animated good morning/night GIFs.
Step 3 Save your good morning or night GIFs on Filmora
After working on your anime good night/morning GIF, you can click on the “Export” button from the top and choose to save the media file in a GIF format on your system.
Part 3 Create Animated Good Morning/Night GIFs with Canva
Canva is one of the most user-friendly online solutions that you can use to come up with graphics of different styles. From social media posts to posters and video clips to logos, Canva can help you develop all types of customized designs. A while back, it has added a dedicated option to create and edit animations that would let you come up with some stunning good morning/night GIF images.
Step 1 Select a Project Type or Template of Canva
At first, you can go to the official website of Canva and choose to work on a template of your choice. Here, you can look for GIFs readily available on Canva or work on an empty canvas.
Step 2 Customize your Good Morning/Night GIF on Canva
From the sidebar, you can drag and drop various elements, captions, borders, and other objects to develop an animated good morning/night GIF. Several other features in Canva would let you customize and edit your GIFs easily.
Step 3 Export your Designs as GIFs from Canva
That’s it! After working on all the features of your good night/morning funny GIFs, you can click on the “Export” button from the top and save your GIF on your system’s local storage from Canva.
Part 4 Find Readily Available Good Morning/Night GIFs
If you are running short on time and can’t come up with any good morning/night animated GIF, then you can pick them from the following resources:
1. Tenor
Tenor is certainly one of the most prominent websites to find GIFs and stickers of all kinds. Therefore, you can head to its official website and look for good morning/night animations by entering relevant keywords on the search bar. Later, you can download the GIF or directly share its link with others.
2. Giphy
Like Tenor, Giphy is another popular source where you can find hundreds of good night/morning funny GIFs. The website is quite easy to navigate and will let you see all kinds of GIFs by entering appropriate keywords. Later, you can directly copy the URL of the GIF and share it with others on platforms like WhatsApp and Instagram.
3. Gifer
Lastly, you can also explore Gifer to find an extensive collection of inspiring or funny good night/morning GIFs. The website has already listed GIFs in different categories that you can explore to save time or can enter keywords on the search bar to find appropriate content.
Wondershare Filmora
Get started easily with Filmora’s powerful performance, intuitive interface, and countless effects!
Try It Free Try It Free Try It Free Learn More >
AI Portrait – The best feature of Wondershare Filmora for gameplay editing
The AI Portrait is a new add-on in Wondershare Filmora. It can easily remove video backgrounds without using a green screen or chroma key, allowing you to add borders, glitch effects, pixelated, noise, or segmentation video effects.
Conclusion
After reading this guide, I’m sure that you can easily pick or create all kinds of good night/morning GIFs. While Photoshop can make animated good morning/night GIFs, it is certainly not that user-friendly. That’s why I would recommend using a reliable and friendly application like Wondershare Filmora to meet your requirements. The media-editing tool has an extensive range of assets and offers tons of high-end features to come up with all sorts of inspiring, romantic, or funny good morning/night GIFs.
Secret Shortcut to Adobe Animate Character Tutorial
How-to Guide: Secret Shortcut to Adobe Animate Character Tutorial
An easy yet powerful editor
Numerous effects to choose from
Detailed tutorials provided by the official channel
Whether you are a beginner or an experienced graphics designer, you can use Adobe Character Animator to animate 2D characters easily. But, if you are an absolute beginner, it might take a few weeks to get familiar with the software’s features/workflow.

Irrespective of your experience with the tool, this Adobe animate character tutorial will help you get started and edit visually appealing animated shorts.
In this article
01 [How Do I Animate a Character in Adobe Animation?](#Part 1)
02 [Is Adobe Character Animator Easy to Use?](#Part 2)
03 [How to Rig a Simple Character | Adobe Animate Tutorial](#Part 3)
04 [One-Stop Solution to Edit High-Quality Videos in Every Situation](#Part 4)
Part 1 How Do I Animate a Character in Adobe Animation?
1. Start With a Script
If you want to create an animation that engages the customers, you must always start your journey with a script. Like a short movie, even an animated sketch requires a script. It’ll set the tone for the entire animation and help you start sailing in the right direction.

If you have a full production team, the writers will take care of scriptwriting and you’ll just have to suggest a few changes in between. But, if you are working on your own, you’ll have to handle the script writing all-by-yourself. In any case, however, make sure to start by crafting a beautiful script with an amazing storyline.
2. Record the Voiceover
The next step in our Adobe Animate character tutorial is recording the voiceover for the video. Unless you are planning to create a GIF animation, you would need a dedicated voiceover for your animated video to make it more appealing.

Now, before you even begin with animating the character, recording the audio will help you clear out one task from the list. To record the voiceover, you can try different types of audio recording software and equipment.
3. Start Creating the Character
At this point in our Adobe animate character tutorial, we are ready to design the actual character itself. To do this, launch Adobe Character Animator on your system. On its home screen, you’ll see a tab containing different types of characters (along with their dedicated Photoshop and Illustrator versions). Click on any of these characters and it’ll automatically open in the editing panel of Adobe character animator.

Now, you can start with animating the character. In the top-left corner, you’ll see two different options, i.e., “
If you double-tap the “Scene” tab the character will open up in a real-time environment where it’ll react to your movement and speech. Make sure that the webcam stays turned on throughout the process. Then, simply press the “Record” button and start recording the entire scene for your animation.
Part 2 Is Adobe Character Animator Easy to Use?
That’s how you can animate a character in Adobe character animator and create visually stunning animations. However, many beginners want to know if it’s easy to use Adobe character animator. The answer is Yes! With Character Animator, Adobe has developed a relatively easy-to-use interface that anyone can use easily.
Part 3 How to Rig a Simple Character | Adobe Animate Tutorial
Now, if you aspire to become a skilled graphic designer, here are a few tutorials that’ll help you get started with Adobe Character Animator and explore all its features.
1. Getting Started With Adobe Character Animator
This 15 minutes Adobe animate character tutorial by Okay Samurai is the best thing you’ll find on the Internet, especially if you are a complete beginner and want to learn different elements of the software.
2. Creating Illustrator Puppet
Adobe Character Animator lets users create both Illustrator and Photoshop puppets. If you want to become an expert in the former, this hour-long YouTube video is the best tutorial for you.
3. Getting Started With Advanced Rigging
This is another useful Adobe Animate character tutorial that’s exclusively designed to help editors understand the basics of creating a character such as “Surr”. For people who don’t know, it’s a free character in the Illustrator puppet library that you can directly import into your project.
4. Animation Workflow in Adobe Character Animator
If you are looking for an all-in-one tutorial to understand the entire workflow of working with the software, this tutorial by Okay Samurai is the best place to get started.
5. Adding an Illustrator Puppet on Live Footage
In this tutorial, you’ll understand how you can create an Illustrator puppet and add it to real-life footage, even when there’s camera movement.
6. Using the Walk Behavior in Adobe Character Animator
This tutorial will be the perfect knowledge hub. In this tutorial, you’ll learn about the basics of using the walk behavior in Adobe Character Animator and how to apply it to different characters to make it walk across the scene.
7. Creating and Implementing Replays
Replays are one of the most powerful (and one of the latest) features of Adobe Character Animator. With Replays, you can record a gesture/movement and apply a trigger to use it anytime you want throughout the animation. This tutorial will help you understand how to implement the replays in the software and use them to craft the perfect storyline.
8. Cartoon Workflow in Character Animator
Thanks to this amazing 1 hour 40 minutes long Adobe animate character tutorial, you’ll be able to get familiar with the complete workflow of pairing the software with other tools and compiling a cartoon animation at the end using Adobe After Effects.
9. Running an Animated Livestream
If you are a YouTuber or have your own Instagram brand, this will be a pretty exciting way to engage with your audience. Simply use the livestream feature, create a stunning 2D character, and interact with your audience in a more interactive manner.
10. Working With Adobe Fresco and Character Animator
This is also a useful Adobe character animate tutorial by David Werner that’ll help you understand how to use both Adobe Fresco and Character Animator together. After this tutorial, you’ll be able to import your Fresco drawings into Character Animator and customize them to create visually engaging animations.
Key Takeaways from This Episode
● Adobe Character Animator is among the most powerful animation tools you can use in 2021 to create stunning animations
● You should always start designing an animation in Character Animator by writing dedicated scripts.
● You can also pair Adobe Character Animator with other Adobe editing tools such as Illustrator, Photoshop, and Adobe Fresco
Whether you are a beginner or an experienced graphics designer, you can use Adobe Character Animator to animate 2D characters easily. But, if you are an absolute beginner, it might take a few weeks to get familiar with the software’s features/workflow.
Irrespective of your experience with the tool, this Adobe animate character tutorial will help you get started and edit visually appealing animated shorts.
In this article
01 [How Do I Animate a Character in Adobe Animation?](#Part 1)
02 [Is Adobe Character Animator Easy to Use?](#Part 2)
03 [How to Rig a Simple Character | Adobe Animate Tutorial](#Part 3)
04 [One-Stop Solution to Edit High-Quality Videos in Every Situation](#Part 4)
Part 1 How Do I Animate a Character in Adobe Animation?
1. Start With a Script
If you want to create an animation that engages the customers, you must always start your journey with a script. Like a short movie, even an animated sketch requires a script. It’ll set the tone for the entire animation and help you start sailing in the right direction.
If you have a full production team, the writers will take care of scriptwriting and you’ll just have to suggest a few changes in between. But, if you are working on your own, you’ll have to handle the script writing all-by-yourself. In any case, however, make sure to start by crafting a beautiful script with an amazing storyline.
2. Record the Voiceover
The next step in our Adobe Animate character tutorial is recording the voiceover for the video. Unless you are planning to create a GIF animation, you would need a dedicated voiceover for your animated video to make it more appealing.
Now, before you even begin with animating the character, recording the audio will help you clear out one task from the list. To record the voiceover, you can try different types of audio recording software and equipment.
3. Start Creating the Character
At this point in our Adobe animate character tutorial, we are ready to design the actual character itself. To do this, launch Adobe Character Animator on your system. On its home screen, you’ll see a tab containing different types of characters (along with their dedicated Photoshop and Illustrator versions). Click on any of these characters and it’ll automatically open in the editing panel of Adobe character animator.
Now, you can start with animating the character. In the top-left corner, you’ll see two different options, i.e., “
If you double-tap the “Scene” tab the character will open up in a real-time environment where it’ll react to your movement and speech. Make sure that the webcam stays turned on throughout the process. Then, simply press the “Record” button and start recording the entire scene for your animation.
Part 2 Is Adobe Character Animator Easy to Use?
That’s how you can animate a character in Adobe character animator and create visually stunning animations. However, many beginners want to know if it’s easy to use Adobe character animator. The answer is Yes! With Character Animator, Adobe has developed a relatively easy-to-use interface that anyone can use easily.
Part 3 How to Rig a Simple Character | Adobe Animate Tutorial
Now, if you aspire to become a skilled graphic designer, here are a few tutorials that’ll help you get started with Adobe Character Animator and explore all its features.
1. Getting Started With Adobe Character Animator
This 15 minutes Adobe animate character tutorial by Okay Samurai is the best thing you’ll find on the Internet, especially if you are a complete beginner and want to learn different elements of the software.
2. Creating Illustrator Puppet
Adobe Character Animator lets users create both Illustrator and Photoshop puppets. If you want to become an expert in the former, this hour-long YouTube video is the best tutorial for you.
3. Getting Started With Advanced Rigging
This is another useful Adobe Animate character tutorial that’s exclusively designed to help editors understand the basics of creating a character such as “Surr”. For people who don’t know, it’s a free character in the Illustrator puppet library that you can directly import into your project.
4. Animation Workflow in Adobe Character Animator
If you are looking for an all-in-one tutorial to understand the entire workflow of working with the software, this tutorial by Okay Samurai is the best place to get started.
5. Adding an Illustrator Puppet on Live Footage
In this tutorial, you’ll understand how you can create an Illustrator puppet and add it to real-life footage, even when there’s camera movement.
6. Using the Walk Behavior in Adobe Character Animator
This tutorial will be the perfect knowledge hub. In this tutorial, you’ll learn about the basics of using the walk behavior in Adobe Character Animator and how to apply it to different characters to make it walk across the scene.
7. Creating and Implementing Replays
Replays are one of the most powerful (and one of the latest) features of Adobe Character Animator. With Replays, you can record a gesture/movement and apply a trigger to use it anytime you want throughout the animation. This tutorial will help you understand how to implement the replays in the software and use them to craft the perfect storyline.
8. Cartoon Workflow in Character Animator
Thanks to this amazing 1 hour 40 minutes long Adobe animate character tutorial, you’ll be able to get familiar with the complete workflow of pairing the software with other tools and compiling a cartoon animation at the end using Adobe After Effects.
9. Running an Animated Livestream
If you are a YouTuber or have your own Instagram brand, this will be a pretty exciting way to engage with your audience. Simply use the livestream feature, create a stunning 2D character, and interact with your audience in a more interactive manner.
10. Working With Adobe Fresco and Character Animator
This is also a useful Adobe character animate tutorial by David Werner that’ll help you understand how to use both Adobe Fresco and Character Animator together. After this tutorial, you’ll be able to import your Fresco drawings into Character Animator and customize them to create visually engaging animations.
Key Takeaways from This Episode
● Adobe Character Animator is among the most powerful animation tools you can use in 2021 to create stunning animations
● You should always start designing an animation in Character Animator by writing dedicated scripts.
● You can also pair Adobe Character Animator with other Adobe editing tools such as Illustrator, Photoshop, and Adobe Fresco
Best 15 Anime Fonts-Find Your Favorite One
Best 15 Anime Fonts-Find Your Favorite One

Shanoon Cox
Mar 27, 2024• Proven solutions
Anime is basically a fancy name for Japanese cartoons and is a trending genre for a long time. The popularity of these anime series has led fans to create characteristic font styles based on the logo or title of these series. A font such as this is commonly regarded as an anime font.
Since the anime font has a very distinct typeface and usually represents a theme, it is now widely used in video making, titles, posters, and also in games. The anime font can depict fun or thrill depending on which one you choose.
In this article, we have listed the best anime fonts of all time.
- Best 15 Anime Fonts You Can Choose
- Bonus Tip-Add Subtitle to an Anime Movie with Wondershare Filmora
Best 15 Anime Fonts You Can Choose
As anime is a trendy genre and you are likely to find a huge variety of anime font online. However, some of these fonts, based on the best-selling anime series, are sought after more than others. Therefore, we have rounded the ultimate anime font list for your ease.
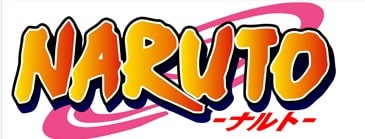
1. Naruto Font
As we all know the popular Japanese Manga series Naruto, this anime font is based on the logo of that series. It is a very simple brush stroke anime font but is designed very artistically. This free anime font is perfect for adding elegant yet animated fonts to various kinds of videos or content.
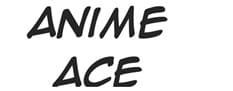
2. Anime Ace Font
Anime Ace is a free anime font that is part of Blambot’s Dialogue Collection by Nate Piekos. It is a cartoonish font that is perfect for use in comic books. This is designed to be used as the font for the character’s speech bubbles. Using this anime font can give a very comic-esque vibe to your creations, making them very attractive.
3. Death Note Font
The famous thrilling action series Death Note has a very characteristic font used. This has come to be known as the Death Note Font. As its origin is from a thriller series, this anime font is best for complementing horror and scary themes. An anime font like this one has a hair-rising and dramatic appeal to it.
4. Evangelion Font
Another famed television series released back in the 90s, Neon Genesis Evangelion, has been trending, and so is the anime font used in its titles. This bold and tightly packed anime font is very conventional and artistic. It can be used to complement some serious themes with a stylish anime font like this one. This anime font also gives a dramatic outlook and hence can be used for engaging titles.
5. Sailor Moon Font
Sailor Moon is a best-selling Manga series, and its distinctive fonts are also quite loved. There are total 3 fonts used in this series. The unique feature of these fonts is that they are all very stylish with a visually attractive appeal. This particular anime font is thus best suited for brand titles, posters, shopping bags, etc. As a free anime font, you can use it for various purposes, including utilizing it for making beautiful invitation cards.
6. Haikyuu Font
This anime font from the sports-based Manga series resembles Japanese calligraphy. It has a dramatic vibe that is well-suited for short titles for serious shows and content. You can also use this free anime font to give your content a striking introduction. Plus, this anime font is available as Regular as well Shadowed. So, you can choose the style that best fits the theme of your content.

7. Danganronpa font
A captivating anime font is featured in the Japanese video game, Danganronpa. This anime font has gained popularity as it is stylishly distinct with a thriller vibe linked to it. Since it is a free anime font and is easily available, it can help you craft very engaging and stunning content. It will serve to give your content a unique touch as this anime font has a very characteristic style.

8. My Hero Academia Font
My Hero Academia is a highly acclaimed superhero Manga series, and its font has also been used extensively. It presents a very attractive anime font that can be utilized in banners and posters since it has a very clean and simple typeface. This anime font is also well-suited for use in logos.
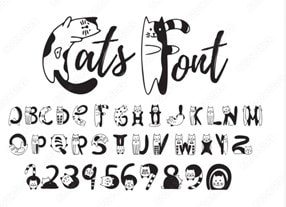
9. Pet Fonts
As the name suggests, this anime font is based on different animals. Cats, dogs, bunnies, and many other animals are used creatively as fonts. Using this cute and creative anime font gives a very crafty and artful effect to the content it is utilized in. So, Pets font is great to create a light-hearted and cartoonish outlook.
10. Otaku Rant Anime Font Family
The Otaku Rant Anime Font Family consists of 3 types i.e., Regular, Italic, and Bold. All these comic fonts are very simple yet elegant. This anime font family can be perfectly used for designing posters and covers, owing to its stylish appeal. Thus, it is a great anime font for making interesting content that wows the viewers.

11. Squealer Anime Font
The Squealer Anime Font is very artistic. It has a gothic calligraphic appeal to it. This unique and riveting anime font can be employed in designing posters to impress the audience. As this free anime font is very stylish, it can also be used commercially in crafting cards or posters.

12. Porky’s Font Comic Font
As the name suggests, this anime font is based on the 1980’s Classic movie ‘Porky.’ It presents a very fancy and artistic style. Therefore, it is widely used for blogs or fashion magazines, giving an attractive outlook. It is a fusion of ancient and conventional typography. This free anime font can help you give a beautiful look to your content.

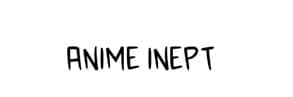
13. Anime Inept
Anime Inept gives the look of a handwritten font, which makes the text more personalized. Since this anime font gives a distinct look, it makes any text stand out of the ordinary. Given the simplicity of this font, it is an excellent choice for comic texts or titles.
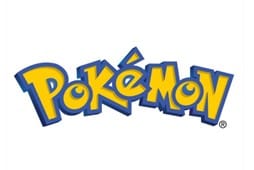
14. Pokemon Anime Font
We all know the world-famous Pokemon that has been a popular game and animated series. Its even catchier anime font has also been extensively used for various purposes. Since the Pokemon anime font has a clear and fun typeface, it is perfect for creating attractive stickers, advertisements, and similar titles.
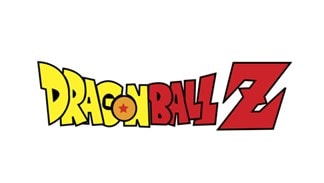
15. Saiyan Sans Anime Font
Dragon Ball Z or Saiyan Sans is a fan-favorite anime series. This anime font is based on the fancy logo used in the Dragon Ball Z title. It is a very catchy and curvy anime font that adds a stylish appeal to the text. Owing to its fancy style, it is also suitable for use as overlay text on an image.
Bonus Tip-Add Subtitle to an Anime Movie with Wondershare Filmora
Wondershare Filmora is a very intuitive and easy-to-use video editor. It has powerful one-click tools to enable users to craft professional-grade videos effortlessly. In Filmora, you will find a wide array of catchy text templates that can be customized and animated to add further effects.


Here is a guide to add anime font to your videos using Filmora.
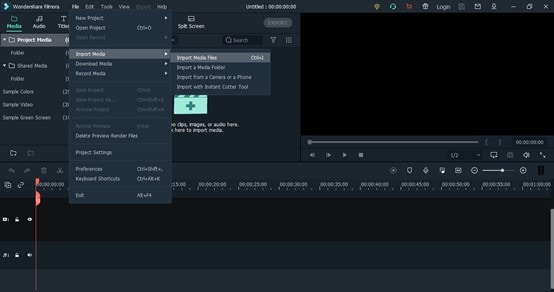
1. Download and install Filmora on your PC. To import your anime video, go to File and select Import Media Files or drag and drop it to Filmora.
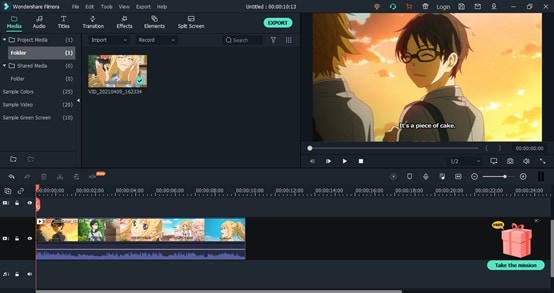
2. After importing, drag and drop the video to the timeline.
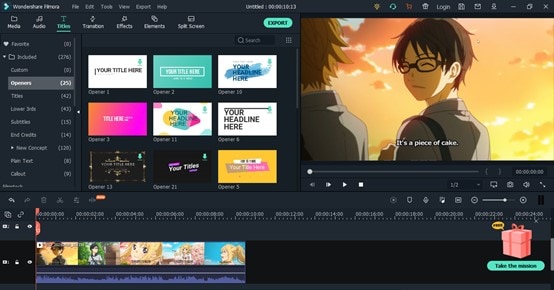
3. In the Titles tab, you can find a variety of text templates from different categories like Openers, Subtitles, Titles, etc. Double-click a title to it to the timeline. Drag and adjust the duration of the text. Double-click on the title in the timeline to customize it.
4. Here you can adjust the size, position, font, and other aspects of the text. Use the scale to change the size of the text.
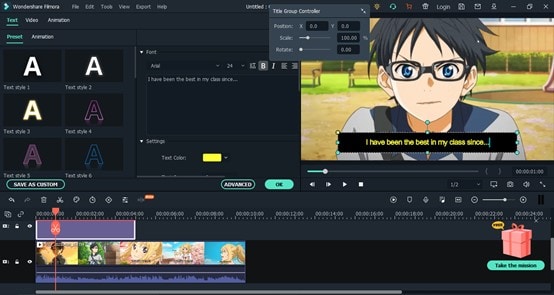
5. In the Animation tab, you can also add a special effect to the text, making it catchy and dynamic. Just double-click the animation to add it.
6. Click on Export. Select the resolution and export it to your device or share it to social media.

Conclusion
Now, you have the best 15 anime font list to help you craft exciting videos. Whether you wish to create a stylish fashion video with an elegant anime font, or a short horror clip with anime font from Death Note, you will find a free anime font for every theme here.
Since fonts play a significant role in any content, they must be chosen with care. So, give our list a read and find out which anime font complements your video the best. Don’t forget to try and add anime font subtitles to your video using the Filmora video editor.
Good luck!
Shanoon Cox
Shanoon Cox is a writer and a lover of all things video.
Follow @Shanoon Cox
Shanoon Cox
Mar 27, 2024• Proven solutions
Anime is basically a fancy name for Japanese cartoons and is a trending genre for a long time. The popularity of these anime series has led fans to create characteristic font styles based on the logo or title of these series. A font such as this is commonly regarded as an anime font.
Since the anime font has a very distinct typeface and usually represents a theme, it is now widely used in video making, titles, posters, and also in games. The anime font can depict fun or thrill depending on which one you choose.
In this article, we have listed the best anime fonts of all time.
- Best 15 Anime Fonts You Can Choose
- Bonus Tip-Add Subtitle to an Anime Movie with Wondershare Filmora
Best 15 Anime Fonts You Can Choose
As anime is a trendy genre and you are likely to find a huge variety of anime font online. However, some of these fonts, based on the best-selling anime series, are sought after more than others. Therefore, we have rounded the ultimate anime font list for your ease.
1. Naruto Font
As we all know the popular Japanese Manga series Naruto, this anime font is based on the logo of that series. It is a very simple brush stroke anime font but is designed very artistically. This free anime font is perfect for adding elegant yet animated fonts to various kinds of videos or content.
2. Anime Ace Font
Anime Ace is a free anime font that is part of Blambot’s Dialogue Collection by Nate Piekos. It is a cartoonish font that is perfect for use in comic books. This is designed to be used as the font for the character’s speech bubbles. Using this anime font can give a very comic-esque vibe to your creations, making them very attractive.
3. Death Note Font
The famous thrilling action series Death Note has a very characteristic font used. This has come to be known as the Death Note Font. As its origin is from a thriller series, this anime font is best for complementing horror and scary themes. An anime font like this one has a hair-rising and dramatic appeal to it.
4. Evangelion Font
Another famed television series released back in the 90s, Neon Genesis Evangelion, has been trending, and so is the anime font used in its titles. This bold and tightly packed anime font is very conventional and artistic. It can be used to complement some serious themes with a stylish anime font like this one. This anime font also gives a dramatic outlook and hence can be used for engaging titles.
5. Sailor Moon Font
Sailor Moon is a best-selling Manga series, and its distinctive fonts are also quite loved. There are total 3 fonts used in this series. The unique feature of these fonts is that they are all very stylish with a visually attractive appeal. This particular anime font is thus best suited for brand titles, posters, shopping bags, etc. As a free anime font, you can use it for various purposes, including utilizing it for making beautiful invitation cards.
6. Haikyuu Font
This anime font from the sports-based Manga series resembles Japanese calligraphy. It has a dramatic vibe that is well-suited for short titles for serious shows and content. You can also use this free anime font to give your content a striking introduction. Plus, this anime font is available as Regular as well Shadowed. So, you can choose the style that best fits the theme of your content.
7. Danganronpa font
A captivating anime font is featured in the Japanese video game, Danganronpa. This anime font has gained popularity as it is stylishly distinct with a thriller vibe linked to it. Since it is a free anime font and is easily available, it can help you craft very engaging and stunning content. It will serve to give your content a unique touch as this anime font has a very characteristic style.
8. My Hero Academia Font
My Hero Academia is a highly acclaimed superhero Manga series, and its font has also been used extensively. It presents a very attractive anime font that can be utilized in banners and posters since it has a very clean and simple typeface. This anime font is also well-suited for use in logos.
9. Pet Fonts
As the name suggests, this anime font is based on different animals. Cats, dogs, bunnies, and many other animals are used creatively as fonts. Using this cute and creative anime font gives a very crafty and artful effect to the content it is utilized in. So, Pets font is great to create a light-hearted and cartoonish outlook.
10. Otaku Rant Anime Font Family
The Otaku Rant Anime Font Family consists of 3 types i.e., Regular, Italic, and Bold. All these comic fonts are very simple yet elegant. This anime font family can be perfectly used for designing posters and covers, owing to its stylish appeal. Thus, it is a great anime font for making interesting content that wows the viewers.
11. Squealer Anime Font
The Squealer Anime Font is very artistic. It has a gothic calligraphic appeal to it. This unique and riveting anime font can be employed in designing posters to impress the audience. As this free anime font is very stylish, it can also be used commercially in crafting cards or posters.
12. Porky’s Font Comic Font
As the name suggests, this anime font is based on the 1980’s Classic movie ‘Porky.’ It presents a very fancy and artistic style. Therefore, it is widely used for blogs or fashion magazines, giving an attractive outlook. It is a fusion of ancient and conventional typography. This free anime font can help you give a beautiful look to your content.
13. Anime Inept
Anime Inept gives the look of a handwritten font, which makes the text more personalized. Since this anime font gives a distinct look, it makes any text stand out of the ordinary. Given the simplicity of this font, it is an excellent choice for comic texts or titles.
14. Pokemon Anime Font
We all know the world-famous Pokemon that has been a popular game and animated series. Its even catchier anime font has also been extensively used for various purposes. Since the Pokemon anime font has a clear and fun typeface, it is perfect for creating attractive stickers, advertisements, and similar titles.
15. Saiyan Sans Anime Font
Dragon Ball Z or Saiyan Sans is a fan-favorite anime series. This anime font is based on the fancy logo used in the Dragon Ball Z title. It is a very catchy and curvy anime font that adds a stylish appeal to the text. Owing to its fancy style, it is also suitable for use as overlay text on an image.
Bonus Tip-Add Subtitle to an Anime Movie with Wondershare Filmora
Wondershare Filmora is a very intuitive and easy-to-use video editor. It has powerful one-click tools to enable users to craft professional-grade videos effortlessly. In Filmora, you will find a wide array of catchy text templates that can be customized and animated to add further effects.
Here is a guide to add anime font to your videos using Filmora.
1. Download and install Filmora on your PC. To import your anime video, go to File and select Import Media Files or drag and drop it to Filmora.
2. After importing, drag and drop the video to the timeline.
3. In the Titles tab, you can find a variety of text templates from different categories like Openers, Subtitles, Titles, etc. Double-click a title to it to the timeline. Drag and adjust the duration of the text. Double-click on the title in the timeline to customize it.
4. Here you can adjust the size, position, font, and other aspects of the text. Use the scale to change the size of the text.
5. In the Animation tab, you can also add a special effect to the text, making it catchy and dynamic. Just double-click the animation to add it.
6. Click on Export. Select the resolution and export it to your device or share it to social media.
Conclusion
Now, you have the best 15 anime font list to help you craft exciting videos. Whether you wish to create a stylish fashion video with an elegant anime font, or a short horror clip with anime font from Death Note, you will find a free anime font for every theme here.
Since fonts play a significant role in any content, they must be chosen with care. So, give our list a read and find out which anime font complements your video the best. Don’t forget to try and add anime font subtitles to your video using the Filmora video editor.
Good luck!
Shanoon Cox
Shanoon Cox is a writer and a lover of all things video.
Follow @Shanoon Cox
Techniques on How to Make After Effects 2D Animation
Adobe After Effects is probably the most versatile software you can add to your arsenal of skills on your journey to learn After Effects 2D animation. Both beginners and professionals can brush up their animation skills on After Effects with some help from tutorials and videos. When it comes to experimenting with visual effects, motion graphics, and 3D composting, Adobe After Effects is recommended as an industry-standard software. So it should come as no surprise that there is a surplus of After Effects tutorials and information on the internet. To help simplify things, here’s a compiled list of Adobe After Effects courses along with a few tips to get started.
In this article
01 [Practical Online 2D Animation Courses](#Part 1)
02 [How to Create 2D Motion Graphics with After Effects](#Part 2)
03 [5 Best Animation After Effects that you must know](#Part 3)
04 [5 Character Animation Tools for After Effects](#Part 4)
Part 1 Practical Online 2D Animation Courses
Learning After Effects need not be complicated. You can use this tool to help you create amazing designs from your sheer imagination. Here is a list of the best courses which are self-paced so you don’t need to worry about fitting them into your schedule. Some of these courses are primarily for beginners who are seeking to orient themselves to the basics. While other courses have recent insights into the latest techniques curated by the industry experts. The courses in this list are diverse and are from different platforms like Domestika, Coursera, Adobe, and YouTube.
1. Getting Started - Adobe
The official Adobe learning site has its own course for introducing After Effects. After all, the software is a product of Adobe itself. This tutorial is purely for complete beginners and is designed to briefly introduce the interface and basic functioning of Adobe After Effects. It takes you through the manual control and menu options which you will need to familiarize yourself with.
2. The Basics – YouTube
This free-to-watch After Effects tutorial is presented by a very passionate photographer and YouTuber Peter Meckinnon. He walks you through the various elements the Adobe interface puts at your disposal. These elements are quite artistically introduced by Peter as he animates a basic title project on Adobe.
3. How to Animate a line - YouTube
When you are introduced to a vast world of possibilities, it can be a bit overwhelming. Which is why starting from the very basics is always a good idea. This next YouTube tutorial shows you step by step how to animate a line on Adobe After Effects from one point to another.
4. Introduction and Advanced After Effects – Domestika
Domestika is an online learning platform that is great for freelancers and independent artists who can purchase self-paced lessons on topics like graphic design and animation. The Introduction and Advanced After Effects tutorials by Carlos Zensuke Albarran are a comprehensive bundle of lessons that quench your thirst for 2D effects animation a bit further.
5. Typography Animation – Domestika
The mark of a professional is his specialization. As you gain more experience in practicing Adobe After Effects, you can begin trying out more bold and stylistic animations with simple typographic techniques. It would not only make you more confident as a motion graphics designer but also equip you with fluid skills as a freelancer. Typographic motion graphics is a cash cow for many After Effect animators.
6. Vectorial Animation – Domestika
Cartoonist animated videos and motion designs are quite interesting to animate. Vectorial 2D animation is quite popular among YouTube tutorials and explainer videos. They make for excellent corporate animations. You can find an amazing Domestika tutorial on Vectorial that walks you through in simple steps on Frame by Frame style animations.
7. Getting Started with Motion Graphics - Coursera
Coursera is another amazing online learning platform for gaining access to Beginner to Advanced courses on Adobe After Effects. This one tutorial introduces you to Beginner level motion graphics where you can learn from short self-paced videos.
8. Getting Started with Motion Graphics - SkillShare
SkillShare is another amazing online learning platform for gaining access to Beginner to Advanced courses on Adobe After Effects. This one tutorial introduces you to Beginner level motion graphics where you can learn from short self-paced videos. It is guided by a leading professional in motion graphics and visual effects who covers all the bases alongside hands-projects.
9. Make Simple Logo Intro in After Effects – YouTube
Creating Intros for your videos is probably the most cost-effective marketing gizmos employed today. This free tutorial on YouTube from Tech Infusion is a simple-to-follow video that sheds some light on how to create eye-catching intros that instantly catches your audience’s attention.
10. Work with Composition - Adobe
Working with After Effects is all about creating gorgeous compositions that pop. This Adobe tutorial equips you with the basics of creating animation on Adobe After Effects with multiple layers and keyframes.
Part 2 How to Create 2D Motion Graphics with After Effects
The astonishing world of intriguing after-effects is vast. Whether you do it as a profession or simply as a hobby, learning how to add after-effects to your 2d motion graphics is always an amazing idea. Worried how you’d understand the tools to add after-effects to your animation? Well, we’ve got you covered! Today we’ll be looking at how you can add after-effects to your 2d animation.

●To make a new 2D graphics in after effects, you need to make a new composition. To do so, head to the composition menu in the menu bar. Upon clicking on the composition menu, a new drop-down menu would open up. From the drop-down menu, click on “new composition”.

●A new setting box would pop up, in this settings box you can alter the settings of the composition. If you do not wish to change any setting, simply click on “ok” and proceed ahead.

●Next, you need to find the tool panel in the main menu bar. Upon clicking on it, a new drop-down menu will appear, click on “star tool”. We’re simply taking the star shape, for instance, alternatively, you can select and another shape too…

●Once you’ve selected the shape you want, draw by clicking your mouse and dragging

●Click on the shape and the layers will appear on the left of your screen. From the popped up screen, click on “properties”. Here you can find multiple animation options and you can even edit frame by frame. Add frames at regular intervals and move according to your wish

Part 3 5 Best Animation After Effects that you must know
1. Stacking animation – YouTube
Stacking animation is an excellent and simple trick that can make any animation look cool and complex. The stacking animation is nothing but the use of the stacking template multiple times. To do so, you just need to duplicate a few of the base layers. Next, you need to offset the duplicated frames by a few frames and finally add some effects. The Adding of stacking animation will result in a slight extension of your animation layers. You can further customize your frames by adding effects or color to enhance the animation.

2. Light sweeps
An advantage of using the after effects software is that it offers several drag and drop features which you can simply drag and drop to your animation to enhance its looks. A light sweep animation is one such animation that can add great value to your animation. You can add this effect by following the steps given below
●Head to “effects” from your main interface
●Here you need to find “generate”
●Now from the list of drag and drop animations, drag and drop “light sweeps” onto your workspace
You can then change and customize almost any aspect of the animation simply by clicking on it and changing the settings

3. Quick shape animation
This is a very cool trick that you can use on your 2d objects! This includes the creation of your own layer(you can use any 2d shape). Further, you need to duplicate your shape and the stagger the animation. This gives the entire animation an interesting and engaging effect. The trick is very resourceful while dealing with 2d objects.

4. Animate your background
When your entire animation looks slightly basic and you wish to give your animation a zest, this trick is highly useful! If you’re working with colored backgrounds, this animation trick can help make it more attractive. This animation is simply just adding motion to your background making it look like it’s moving in or out.

5. Graphics reflection
Although this method is slightly complicated, it could enhance the animation by leaps and bounds. To do so, you need to write a fancy text of your choice, then you need to duplicate this text, and further, you need to flip it vertically. To make it look more realistic, you can add the blur effect. This will make it look like the duplicated text is a reflection of the original text

Part 4 5 Character Animation Tools for After Effects
1. Rubber hose 2
Rubber hose is one of the primitive tools for adding animations. This is mainly because it was found in the early 2000s and back then, animations had wobbly legs and an absurd body structure. This tool has several cool inbuilt functions that make the animation so much simpler. The robust tool. makes animation pretty simple and hassle-free. Rubber hose 2 is an advanced version of rubber hose, it has several advanced features. The plug-in is however not free, you’d need to purchase it at $45 in order to gain a lifetime access.
2. Duik
Duik is one of the most advanced and comprehensive character animation tools in the market. It was initially launched in 2008, but since then there’s been a vast improvement in the tool’s features and today it’s one of the picks to perform animation using rigging and other animation techniques. Duik has several tools that make the animation so convenient. The tool has features such as auto rig, which helps save time while animating. Other tools include effects such as bones, rigging, various filters, and effects.
3. Joystick ‘n sliders
Joystick’n sliders is another highly utilitarian tool for animators. Along with key animation features such as rigging and boning, the tool has other cool and highly useful features to make your animation interesting! The user interface of this tool is a big plus, the simplicity of the user interface makes the tool perfect for beginners and advanced level animators. The tool is simple to use and has a plethora of cool features which could help you make your animation highly engaging.
4. Puppet tool 3
Puppet tool 3 is an after effects plugin that could help you create character animations. The plug-in is different from the in-built puppet tool in after effects. The puppet tool inbuilt into after effects are the Rigging tool for animation, however using the inbuilt tool is slightly sophisticated. Puppet tool 3 is not an individual tool but works in coordination with the inbuilt the puppet tool. Since using the inbuilt tool was complex, puppet tool 3 made it simple. Apart from rigging, the plugin also allows you to work with a few additional features. You can buy the plug-in for only $39.95!
5. Adobe animate character
Adobe character animation is the in-house plugin of Adobe to animate characters. However, the tool is probably still in development. Adobe has been working on releasing this tool for a while now, and in the latest version of after effects, Adobe added the beta version of the character animator. Character animator is probably the most efficient and advanced animation tool. It uses facial recognition for animations and allows you to perform almost all basic animations. The software is perfect when you’re trying to create a complex animated character.
Key Takeaways from This Episode
● Today we’ve dwelled a lot into animation and the tools available for animation.
● We’ve seen how animation could be enhanced using the inbuilt tools available in Adobe after effects.
● We’ve also gone a step further and seen the external plugin tools that you can use to make character animations and highly advanced 2d effects ok animations.
● We’ve also taken an overview on how to create a simple basic 2d motion animation, all in all, we’ve gone from understanding the beginner level animation to understanding advanced animation
02 [How to Create 2D Motion Graphics with After Effects](#Part 2)
03 [5 Best Animation After Effects that you must know](#Part 3)
04 [5 Character Animation Tools for After Effects](#Part 4)
Part 1 Practical Online 2D Animation Courses
Learning After Effects need not be complicated. You can use this tool to help you create amazing designs from your sheer imagination. Here is a list of the best courses which are self-paced so you don’t need to worry about fitting them into your schedule. Some of these courses are primarily for beginners who are seeking to orient themselves to the basics. While other courses have recent insights into the latest techniques curated by the industry experts. The courses in this list are diverse and are from different platforms like Domestika, Coursera, Adobe, and YouTube.
1. Getting Started - Adobe
The official Adobe learning site has its own course for introducing After Effects. After all, the software is a product of Adobe itself. This tutorial is purely for complete beginners and is designed to briefly introduce the interface and basic functioning of Adobe After Effects. It takes you through the manual control and menu options which you will need to familiarize yourself with.
2. The Basics – YouTube
This free-to-watch After Effects tutorial is presented by a very passionate photographer and YouTuber Peter Meckinnon. He walks you through the various elements the Adobe interface puts at your disposal. These elements are quite artistically introduced by Peter as he animates a basic title project on Adobe.
3. How to Animate a line - YouTube
When you are introduced to a vast world of possibilities, it can be a bit overwhelming. Which is why starting from the very basics is always a good idea. This next YouTube tutorial shows you step by step how to animate a line on Adobe After Effects from one point to another.
4. Introduction and Advanced After Effects – Domestika
Domestika is an online learning platform that is great for freelancers and independent artists who can purchase self-paced lessons on topics like graphic design and animation. The Introduction and Advanced After Effects tutorials by Carlos Zensuke Albarran are a comprehensive bundle of lessons that quench your thirst for 2D effects animation a bit further.
5. Typography Animation – Domestika
The mark of a professional is his specialization. As you gain more experience in practicing Adobe After Effects, you can begin trying out more bold and stylistic animations with simple typographic techniques. It would not only make you more confident as a motion graphics designer but also equip you with fluid skills as a freelancer. Typographic motion graphics is a cash cow for many After Effect animators.
6. Vectorial Animation – Domestika
Cartoonist animated videos and motion designs are quite interesting to animate. Vectorial 2D animation is quite popular among YouTube tutorials and explainer videos. They make for excellent corporate animations. You can find an amazing Domestika tutorial on Vectorial that walks you through in simple steps on Frame by Frame style animations.
7. Getting Started with Motion Graphics - Coursera
Coursera is another amazing online learning platform for gaining access to Beginner to Advanced courses on Adobe After Effects. This one tutorial introduces you to Beginner level motion graphics where you can learn from short self-paced videos.
8. Getting Started with Motion Graphics - SkillShare
SkillShare is another amazing online learning platform for gaining access to Beginner to Advanced courses on Adobe After Effects. This one tutorial introduces you to Beginner level motion graphics where you can learn from short self-paced videos. It is guided by a leading professional in motion graphics and visual effects who covers all the bases alongside hands-projects.
9. Make Simple Logo Intro in After Effects – YouTube
Creating Intros for your videos is probably the most cost-effective marketing gizmos employed today. This free tutorial on YouTube from Tech Infusion is a simple-to-follow video that sheds some light on how to create eye-catching intros that instantly catches your audience’s attention.
10. Work with Composition - Adobe
Working with After Effects is all about creating gorgeous compositions that pop. This Adobe tutorial equips you with the basics of creating animation on Adobe After Effects with multiple layers and keyframes.
Part 2 How to Create 2D Motion Graphics with After Effects
The astonishing world of intriguing after-effects is vast. Whether you do it as a profession or simply as a hobby, learning how to add after-effects to your 2d motion graphics is always an amazing idea. Worried how you’d understand the tools to add after-effects to your animation? Well, we’ve got you covered! Today we’ll be looking at how you can add after-effects to your 2d animation.
●To make a new 2D graphics in after effects, you need to make a new composition. To do so, head to the composition menu in the menu bar. Upon clicking on the composition menu, a new drop-down menu would open up. From the drop-down menu, click on “new composition”.
●A new setting box would pop up, in this settings box you can alter the settings of the composition. If you do not wish to change any setting, simply click on “ok” and proceed ahead.
●Next, you need to find the tool panel in the main menu bar. Upon clicking on it, a new drop-down menu will appear, click on “star tool”. We’re simply taking the star shape, for instance, alternatively, you can select and another shape too…
●Once you’ve selected the shape you want, draw by clicking your mouse and dragging
●Click on the shape and the layers will appear on the left of your screen. From the popped up screen, click on “properties”. Here you can find multiple animation options and you can even edit frame by frame. Add frames at regular intervals and move according to your wish
Part 3 5 Best Animation After Effects that you must know
1. Stacking animation – YouTube
Stacking animation is an excellent and simple trick that can make any animation look cool and complex. The stacking animation is nothing but the use of the stacking template multiple times. To do so, you just need to duplicate a few of the base layers. Next, you need to offset the duplicated frames by a few frames and finally add some effects. The Adding of stacking animation will result in a slight extension of your animation layers. You can further customize your frames by adding effects or color to enhance the animation.
2. Light sweeps
An advantage of using the after effects software is that it offers several drag and drop features which you can simply drag and drop to your animation to enhance its looks. A light sweep animation is one such animation that can add great value to your animation. You can add this effect by following the steps given below
●Head to “effects” from your main interface
●Here you need to find “generate”
●Now from the list of drag and drop animations, drag and drop “light sweeps” onto your workspace
You can then change and customize almost any aspect of the animation simply by clicking on it and changing the settings
3. Quick shape animation
This is a very cool trick that you can use on your 2d objects! This includes the creation of your own layer(you can use any 2d shape). Further, you need to duplicate your shape and the stagger the animation. This gives the entire animation an interesting and engaging effect. The trick is very resourceful while dealing with 2d objects.
4. Animate your background
When your entire animation looks slightly basic and you wish to give your animation a zest, this trick is highly useful! If you’re working with colored backgrounds, this animation trick can help make it more attractive. This animation is simply just adding motion to your background making it look like it’s moving in or out.
5. Graphics reflection
Although this method is slightly complicated, it could enhance the animation by leaps and bounds. To do so, you need to write a fancy text of your choice, then you need to duplicate this text, and further, you need to flip it vertically. To make it look more realistic, you can add the blur effect. This will make it look like the duplicated text is a reflection of the original text
Part 4 5 Character Animation Tools for After Effects
1. Rubber hose 2
Rubber hose is one of the primitive tools for adding animations. This is mainly because it was found in the early 2000s and back then, animations had wobbly legs and an absurd body structure. This tool has several cool inbuilt functions that make the animation so much simpler. The robust tool. makes animation pretty simple and hassle-free. Rubber hose 2 is an advanced version of rubber hose, it has several advanced features. The plug-in is however not free, you’d need to purchase it at $45 in order to gain a lifetime access.
2. Duik
Duik is one of the most advanced and comprehensive character animation tools in the market. It was initially launched in 2008, but since then there’s been a vast improvement in the tool’s features and today it’s one of the picks to perform animation using rigging and other animation techniques. Duik has several tools that make the animation so convenient. The tool has features such as auto rig, which helps save time while animating. Other tools include effects such as bones, rigging, various filters, and effects.
3. Joystick ‘n sliders
Joystick’n sliders is another highly utilitarian tool for animators. Along with key animation features such as rigging and boning, the tool has other cool and highly useful features to make your animation interesting! The user interface of this tool is a big plus, the simplicity of the user interface makes the tool perfect for beginners and advanced level animators. The tool is simple to use and has a plethora of cool features which could help you make your animation highly engaging.
4. Puppet tool 3
Puppet tool 3 is an after effects plugin that could help you create character animations. The plug-in is different from the in-built puppet tool in after effects. The puppet tool inbuilt into after effects are the Rigging tool for animation, however using the inbuilt tool is slightly sophisticated. Puppet tool 3 is not an individual tool but works in coordination with the inbuilt the puppet tool. Since using the inbuilt tool was complex, puppet tool 3 made it simple. Apart from rigging, the plugin also allows you to work with a few additional features. You can buy the plug-in for only $39.95!
5. Adobe animate character
Adobe character animation is the in-house plugin of Adobe to animate characters. However, the tool is probably still in development. Adobe has been working on releasing this tool for a while now, and in the latest version of after effects, Adobe added the beta version of the character animator. Character animator is probably the most efficient and advanced animation tool. It uses facial recognition for animations and allows you to perform almost all basic animations. The software is perfect when you’re trying to create a complex animated character.
Key Takeaways from This Episode
● Today we’ve dwelled a lot into animation and the tools available for animation.
● We’ve seen how animation could be enhanced using the inbuilt tools available in Adobe after effects.
● We’ve also gone a step further and seen the external plugin tools that you can use to make character animations and highly advanced 2d effects ok animations.
● We’ve also taken an overview on how to create a simple basic 2d motion animation, all in all, we’ve gone from understanding the beginner level animation to understanding advanced animation
10 Options for Your Need on Animation Makers
10 Options for Your Need on Animation Makers
An easy yet powerful editor
Numerous effects to choose from
Detailed tutorials provided by the official channel
Avatar is the graphic illusion of the user or user’s character to represent them. It has managed to invade different social media networks and applications with more reach than any other way of communication.
Through this article, you will know about online avatar creators, free avatar makers from a photo, get guidance to choose from different YouTube avatar makers, and how you can discord animated avatar makers out of the multitude of online options.
In this article
01 [Why Use Avatars Online?](#Part 1)
02 [How to Make an Avatar?](#Part 2)
03 [Need Avatar Animation? Check the 10 Options to Go With](#Part 3)
Part 1 Why Use Avatars Online?
Online Avatars maker is the best way to create avatars. It can be an excellent way to protect your identity to reduce the risk of theft, especially for children from online social media handles. It helps in creating a single identity across different platforms. Online avatars can be uploaded for a long time and need not be updated regularly. You can keep them for an extended period without worrying about getting updated.
The online avatars are easy to use and can be created quickly. Primarily they support all the formats which you can choose while saving. Some online animated avatar creators support sharing to social media platforms directly from the website, such as YouTube avatar maker or vTuber avatar maker free.
Part 1 How to Make an Avatar?
There are multiple websites, software, and applications to create avatars. So here, you will learn about such avatar makers online for free.
016 Best Avatar Makers for 2022
❶ Avatar Maker
Avatar Maker is an online tool to free avatar creators within seconds. You have all the required options right on the screen without searching for the features. You can download it at a pixel rate of 200 X 200 and 400 X 400, the standard dimensions of profile pictures in social media, and images in Vector format apart from standard PNG format. Options to upload directly Gravatar, which support all Gravatar accessing third–party websites.
![]()
❷ Avachara
Avachara, let us dive into the serious business of animated avatar creators. It has the next level of customization features. There are hundreds of clothes in the wardrobe, and you can customize your Avatar with attributes like a guitar, caps, and the area behind the neck. You can save it in formats like PNG and JPEG. In contrast, PNG has dimensions of 200 X 400, whereas JPEG has more dimensions of 480 X 480.
![]()
❸ Mega Anime Avatar Creator
This is a terrific option to create animated avatars with tools by Doll Divine. The main disadvantage of this creator is it does not have a download or save option. Users can screenshot the resulting image and crop it to use. There are roughly 34 backdrops to pick from in this fantastic collection of backgrounds to blend with the surrounding environment. You can customize your avatar with facial tattoos, moles, scars, and facial shrink.
![]()
❹ Picassohead
Picassohead is a creative online avatar creator tool to create artistic and creative expression. Create digital color painting as your online Avatar. You can drag and drop your nose, lips, and hair to create an avatar in the black canvass. One disadvantage is you cannot share it directly on social media or download it but can send it through email, and you can take a screenshot of a final avatar. Besides, you can try a painting touch to the Avatar.
![]()
❺ Charat
This Charat app is a cute avatar maker app to create chubby characters originating from Japan. It has easy and intrusive for the avatoon app. It has pre-made build templates in which you can customize your Avatar and share it directly on social media websites. A variety of hairdos and costumes are available.
![]()
❻ South Park Avatar Creator
South Park Avatar Creator contains tools directly from South Park Studio itself, one of the best-animated avatar creators. It has all the characteristics of South Avatar Studio that can become an avatar of your customization. It has five different skin tones for other continents. Avatar can be stored under the My avatar section, but login is required.
![]()
02How to Create Your Own Animated Avatar on Facebook
The success of avatar-creating websites is wide in social media, and now it is Facebook’s turn to create an animated avatar. The aim is to compete with Bitmoji and Snapchat to create personalized stickers and use them in chats. It is available on Android and iOS. And here, we show how to create an avatar using Facebook as an Online avatar creator.
Step 1: Where to Find
After signup/login, makes sure you have updated the app to the latest version to create avatars in Google Play Store. Enter to any Facebook post as comments. On the keypad, you’ll see a smiling face icon that will lead you to a gallery of emojis, stickers, and GIFs.
![]()
Step 2: Creating Avatar
In there, you will see a new “Pink Icon” in which you can add features like hair, skin tone, eye, nose, mouth, and other character traits and even accessories. Once you have done all the customization, click on “Done.” Now that you can comment on any post using stickers.
![]()
This way, you can create your animated Avatar on Facebook following the steps mentioned above.
03How to Make Animated Avatar of Yourself?
This will be helpful for cute avatar makers. There are multiple apps available to create your Avatar. You need to download the app simply. You can see many templates in the application and various filters and features, including GIFs. The app will give you animation and artistic effects as you wish. Primarily all apps will come with subscriptions for advanced and unique features. You can pay and get the subscription or use the available features.
Photo Lab App, Toon Me, Photo Cartoon, Sketch Me, BeFuncky, crypko free avatar maker, cat avatar maker, furry avatar maker, and LunaPic are some of the applications that help to create an avatar.
![]()
Part 3 Need Avatar Animation? Let’s check 10 such Options to Go With
You can go with an online avatar maker from your PC that will provide you with a hassle-free avatar-making experience. So, dive into following incredible animated avatar makers online with complete information.
01Adobe Animate
This is a vector and 2D avatar animation maker software accessible through web and mobile apps. For users to build interactive content, vector graphics, and add more effects. It also has in-built templates such as color and tone effects which you can customize to your wish. It allows you to create content with simple drag and drop features. This software is free to use. However, the personal version costs $20.99 per month.
![]()
02Maya
Maya is an award-winning 3D computer graphics and avatar animation creator software, currently owned by Autodesk, more useful for 3D applications like Video games, Tv series, motion pictures, and special effects. It is used in films like “Lord of Rings,” “Spiderman,” “Star Wars,” and “Ice Age.” It supports most operating systems, including Windows, Linux, and Mac. Some unique features are the Clip matching feature, enhanced viewpoint, deep adaptive liquid simulations, DX11 shader rendering engine, lip-syncing technology, Arnold integration, and paint effect feature.
![]()
03Renderforest
This is an online avatar animation creator, logo, and website maker. This is excellent software for designers and business owners who aren’t looking for advanced 3D modeling. People who do not want to hire animaters separately but can do it themselves with simple online avatar maker tutorials can choose Renderforest. Over 50,000 artwork files to choose from. 100+ animated video templates to choose from for your slideshows, introduction, logo reveals, and animated infographics.
![]()
04Pencil2D
This tool is helpful for creative 2D hand-drawn animations. Pencil2D is an open-source and free avatar maker, the cheapest tool on the market. It is also a user-friendly avatar making ideal software for beginners who want to hand-draw character designs. Supporting OS are Windows, Mac, Linux, etc.
![]()
05Animaker
Animaker is a 2D animation software and video editor with in-built video and infographics to create animated avatars, including essential animation work, education tutorials, and classroom teaching. It has cloud-based animation as well video-making facility. Animaker uses HTML and Adobe Flash.
![]()
06OpenToonz
This is an open-source software tool any developer can edit, modify and create an animated avatar. Opentoonz’s main aim is to link academic research and to animate research ideas. Suitable for a high level of customizability, ideal for small and medium businesses and creating education tutorials. It supports many platforms like Windows, Mac, and Linux.
![]()
07Synfig
Synfig is the newest animation tool on the market. It is a free avatar maker, animation software, creates 2D animation, character animation, and vector graphic solutions. Beneficial in creating marketing initiatives, publicity campaigns, and televisions. It has two versions with different attributes: the stable version and the development version.
![]()
08KeyShot
KeyShot is used to produce high-quality 2D and 3D animations. There is no requirement to place another graphic card on your PC. Supports 30+ file types for rendering 3D animation. And has remarkable attributes like interactive labeling, texture mapping, and physical lighting.
![]()
09K – 3D
K – 3D software is an incredible 3D avatar animation creator and modeling software. Above all, it is easy to use and easy to learn with support to both Mac and Windows. It also does 2D animation, however not a free software tool.
![]()
10Wondershare ** Wondershare Filmora Video Editor
It is the best avatar animation maker. With Wondershare Filmora Video Editor , you can make smooth animation easily and quickly. It has a customizable worktable and value graph to adjust the keyframe. To edit videos professionally, we recommend you use Wondershare Wondershare Filmora Video Editor . If you want more control over the movement of animation, character keyframes and value adjust graphs are most helpful.
For Win 7 or later (64-bit)
For macOS 10.12 or later
● Key Takeaways from This Episode →
● Learned about why we need to use online avatar makers.
● Learned how to create an avatar using applications and websites.
● 10 different software for professional avatar animation makers.
● Now that you have learned various animated avatar maker websites, applications, and software methods. We prefer you to use Wondershare Filmora Video Editor software which is professional and easy to use. Animating is very important in the present world to reach customers worldwide. It is an act of bringing life to your Avatar or a cartoon character.
How to Make a Video a Live Photo 2023
How to Make a Video a Live Photo [2022]
An easy yet powerful editor
Numerous effects to choose from
Detailed tutorials provided by the official channel
Looking forward to turn your videos into live photos? Stay tuned to know how!
In this article
01 [How to Save Live Photos as a Video on iPhone/Ipad/Ipod](#Part 1)
02 [How to Turn a Video Into a Live Photo on iOS/Android](#Part 2)
Part 1 How to Save Live Photos as a Video on iPhone/Ipad/Ipod
Live photos are an amazing utility that allow you to save images as short moving snaps. Creating live photos is among the latest spunk of trendsetter stories, whether shared on social media platforms or created and saved just for fun, these definitely sound and look exciting, but that’s just one among the many things you can experiment on live photos.
Creating live photos takes you to a world of exciting features where you can explore your creativity in a number of ways, one of the easiest being turning live photos to videos. This comes handy when you need to share your live photos on platforms that do not have the compatibility to run live photos. If you are an iPhone user and wish to try your hands on experimenting with live photos, see through the following section of this article to learn how to turn live photo into video:
01Save as Video
Step 1: Launch the Photos App
In your iPhone, launch the ‘Photos’ app and navigate to ‘Albums’. All your live photos are present in the ‘Live Photos’ album.
Step 2: Format Selection
In latest versions (iOS 13v and above), you get a direct ‘Save as Video’ option in the ‘Photos’ application. Just click on that, and your live photo will be instantly saved in your iPhone gallery as a video. Here’s how you can use this feature:
● In the ‘Photos’ application, go to the ‘Live Photos’ album to select and open a desired live photo that you wish to convert to a video.
● Click on the ‘Share’ icon.

● Select ‘Save as Video’ from the drop down menu that displays sharing options.

Your created video will be saved in the ‘Photos’ application, next to the live photo you chose to turn into a video.
02iOS Shortcuts
This is a quicker way to save your live photos as videos in your iPhone. To use this feature, you first need to save the ‘Convert LivePhotos to Video’ shortcut in the ‘Shortcuts App’ gallery of your iPhone. You can do this by opening in your iOS internet browser.
Before using the above link, make sure to enable the ‘Allow Untrusted Shortcuts’ feature in your iPhone settings. You can do this as explained below:
● Reach to the ‘Settings’ application of your iPhone.
● Tap on ‘Shortcuts’ from the app’s welcome screen.
● Enable ‘Allow Untrusted Shortcuts’ with a toggle.

Having done that, here’s what you need to follow:
● Open the ‘Shortcuts’ application in your iOS device and tap the ‘Convert LivePhotos to Video’ shortcut.

● The ‘Live Photos’ album of your device opens up. Make a desired selection.

Your converted video gets automatically saved in the ‘Camera Roll’ folder of the ‘Photos’ application. Open the ‘Recents’ album to view your creation.
Part 2 How to Turn a Video Into a Live Photo on iOS/Android
Converting live photos to videos is fine, but going the other way round is all the more exciting and fun! You can even use these converted live photos as live screen wallpapers for your iOS and Android devices. If you are motivated to take up the excitement, look through the following methods to turn video into live photo:
01iOS Devices
Being an iOS user, you can choose among the following tools to convert video to live photo in your iPad, iPod or iPhone:
● Wondershare Filmora
Wondershare Filmora Video Editor is currently leading the software market among converter utilities that cater to various media conversion needs. This one is a free, smart, quick and convenient conversion tool that assures you of a hassle free video to live photo conversion in just a few clicks. What’s more interesting is, you don’t need to limit yourself with sticking to some particular video format, as Filmora conveniently supports almost all common ones.
Wondershare Filmora
Get started easily with Filmora’s powerful performance, intuitive interface, and countless effects!
Try It Free Try It Free Try It Free Learn More >
● IntoLive
This one is a third party application that allows you to convert videos into live photos, quickly and conveniently. This tool works well with devices having iOS 12.0 and later versions. All you have to do is follow the steps mentioned below:
Step 1:
Download the ‘IntoLive’ application from the Apple App Store.

Step 2:
Launch the same on your iOS device and grant the permission to access its ‘Photos’ Album.

Step 3:
In the ‘Videos’ section, choose the desired video that you wish to turn into a live photo.

Step 4:
An editor window will open up. Here, you can edit (cut, crop, trim, etc.) and add desired effects or filters to your selected video. Click on ‘Make’ at the top right when you finish the editing process.

Step 5:
If you have the paid version of the app, you can take up multiple repeats of your live photo; else you can use the free version with no repeats.

Step 6:
Once you are satisfied with the result, click on ‘Save Live Photo’. This will save your created live photo in your device’s gallery.

02VideoToLive
This is a free converter you can choose to turn video into live photo. This is a quite popular tool among iPhone users worldwide and is suitable for iOS versions 11.2 and later. You also have the liberty to share your created live photos on social media with this converter. Take the following steps to begin the conversion process:

Step 1:
Download the application from the Apple App Store and launch it on your iOS device.
Step 2:
Choose a video from your device gallery to convert it into a live photo.
Step 3:
In the video editor screen, crop the video to the preferred section that has to be converted into live photo. You can add video frames to your edited clip from the upper section of the editor screen.
Step 4:
Click on ‘Convert’ at the top right corner to initiate the conversion process.
03Android Devices
Live photos are undoubtedly known to add spark to your cherished moments, but the notch that puts these off with Android devices is that you can enjoy live photos on these devices only as live wallpapers.
Being an iPhone exclusive utility, Android devices lack the flexibility to capture live images. However, you can see them move on being set as live screen wallpapers. A handy alternative to this is converting a turn video into live photo and use it as live wallpaper. Here’s how you can take up the conversion process:
● TurnLive- Live Wallpaper
This one is a convenient, third party tool that lets you turn video into live photo in just a few quick steps. You can either use this application for free, or upgrade to the paid version to enjoy its premium features. To make amazing live photos from videos using this tool, you need to take up the steps given below:

Step 1: App Installation
To begin, visit the Google Playstore in your Android device and download the TurnLive- Live Wallpaper application. Next, you need install and launch the app in your device and accept its terms of service.
Step 2: Select a Video
Once you are done, click on the ‘Live Photo’ icon in the bottom of the app’s opening screen to reach the video selection page. Here, you need to choose ‘Video to Live Wallpaper’ option and grant the required app permissions to access your device’s camera and gallery. Select a desired video from the ones saved in your device and click ‘Done’ at the top right.
Step 3: Edit Your Video
You will now get directed to the app’s editor window, where you need to trim the selected video within a time frame of 1-5 seconds. To do this, select a cover frame within the clip and click ‘Next’. You can now use the video slider at the bottom to trim the clip. Adding suitable video effects and filters is also possible with this tool.
Step 4: It’s Almost Done!
When you finish editing, click ‘Next’ and choose the number of repeats for the created live photo. Wait for the conversion to finish and click on ‘My Wallpapers’ to view your creation.
Step 5: Download Your Live Photo!
Click ‘Download’ and tap ‘Clear’ in the app’s prompt message to remove your device’s current screen wallpaper. Next, allow the app to access your system settings. Once this finishes, tap ‘Clear’ again to download your creation. You will now get directed to a black screen tagged ‘DayTime LWP’. Click on ‘Set Wallpaper’ in this screen to make your live photo, the current wallpaper of your Android device.
● Video Live Wallpaper
This is another free app that you can use to your videos into amazing live photos in just 4 quick steps. All you need to do is explained in the following steps:
Step 1: download the Application
Download the Video Live Wallpaper application in your Android device from Google Playstore and proceed for its installation and launch.

Step 2: Select Your Video
In the app’s opening screen, click ‘Choose Video’ and grant app permissions to access your device’s media. Browse your video gallery to select a desired video that you wish to convert into a live photo.

Step 3: Edit Your Video
You will now get directed to the app’s editor screen. Here, you can explore your editing creativity to edit the selected video. Once you are happy, click the picture icon at the top right corner.

Step 4: Your Live Wallpaper is Ready!
To set the created live photo as your device screen wallpaper, select ‘Set as Wallpaper’ at the bottom right.

● Key Takeaways from This Episode →
● From cherishing moments to sharing them on social media, live photos can do it all.
● Being an iPhone exclusive utility, you need to create these from videos to enjoy them on other platforms and devices.
● Filmora is the best video to live photo converters, available as an easy, quick and convenient conversion tool.
Looking forward to turn your videos into live photos? Stay tuned to know how!
In this article
01 [How to Save Live Photos as a Video on iPhone/Ipad/Ipod](#Part 1)
02 [How to Turn a Video Into a Live Photo on iOS/Android](#Part 2)
Part 1 How to Save Live Photos as a Video on iPhone/Ipad/Ipod
Live photos are an amazing utility that allow you to save images as short moving snaps. Creating live photos is among the latest spunk of trendsetter stories, whether shared on social media platforms or created and saved just for fun, these definitely sound and look exciting, but that’s just one among the many things you can experiment on live photos.
Creating live photos takes you to a world of exciting features where you can explore your creativity in a number of ways, one of the easiest being turning live photos to videos. This comes handy when you need to share your live photos on platforms that do not have the compatibility to run live photos. If you are an iPhone user and wish to try your hands on experimenting with live photos, see through the following section of this article to learn how to turn live photo into video:
01Save as Video
Step 1: Launch the Photos App
In your iPhone, launch the ‘Photos’ app and navigate to ‘Albums’. All your live photos are present in the ‘Live Photos’ album.
Step 2: Format Selection
In latest versions (iOS 13v and above), you get a direct ‘Save as Video’ option in the ‘Photos’ application. Just click on that, and your live photo will be instantly saved in your iPhone gallery as a video. Here’s how you can use this feature:
● In the ‘Photos’ application, go to the ‘Live Photos’ album to select and open a desired live photo that you wish to convert to a video.
● Click on the ‘Share’ icon.
● Select ‘Save as Video’ from the drop down menu that displays sharing options.
Your created video will be saved in the ‘Photos’ application, next to the live photo you chose to turn into a video.
02iOS Shortcuts
This is a quicker way to save your live photos as videos in your iPhone. To use this feature, you first need to save the ‘Convert LivePhotos to Video’ shortcut in the ‘Shortcuts App’ gallery of your iPhone. You can do this by opening in your iOS internet browser.
Before using the above link, make sure to enable the ‘Allow Untrusted Shortcuts’ feature in your iPhone settings. You can do this as explained below:
● Reach to the ‘Settings’ application of your iPhone.
● Tap on ‘Shortcuts’ from the app’s welcome screen.
● Enable ‘Allow Untrusted Shortcuts’ with a toggle.
Having done that, here’s what you need to follow:
● Open the ‘Shortcuts’ application in your iOS device and tap the ‘Convert LivePhotos to Video’ shortcut.
● The ‘Live Photos’ album of your device opens up. Make a desired selection.
Your converted video gets automatically saved in the ‘Camera Roll’ folder of the ‘Photos’ application. Open the ‘Recents’ album to view your creation.
Part 2 How to Turn a Video Into a Live Photo on iOS/Android
Converting live photos to videos is fine, but going the other way round is all the more exciting and fun! You can even use these converted live photos as live screen wallpapers for your iOS and Android devices. If you are motivated to take up the excitement, look through the following methods to turn video into live photo:
01iOS Devices
Being an iOS user, you can choose among the following tools to convert video to live photo in your iPad, iPod or iPhone:
● Wondershare Filmora
Wondershare Filmora Video Editor is currently leading the software market among converter utilities that cater to various media conversion needs. This one is a free, smart, quick and convenient conversion tool that assures you of a hassle free video to live photo conversion in just a few clicks. What’s more interesting is, you don’t need to limit yourself with sticking to some particular video format, as Filmora conveniently supports almost all common ones.
Wondershare Filmora
Get started easily with Filmora’s powerful performance, intuitive interface, and countless effects!
Try It Free Try It Free Try It Free Learn More >
● IntoLive
This one is a third party application that allows you to convert videos into live photos, quickly and conveniently. This tool works well with devices having iOS 12.0 and later versions. All you have to do is follow the steps mentioned below:
Step 1:
Download the ‘IntoLive’ application from the Apple App Store.
Step 2:
Launch the same on your iOS device and grant the permission to access its ‘Photos’ Album.
Step 3:
In the ‘Videos’ section, choose the desired video that you wish to turn into a live photo.
Step 4:
An editor window will open up. Here, you can edit (cut, crop, trim, etc.) and add desired effects or filters to your selected video. Click on ‘Make’ at the top right when you finish the editing process.
Step 5:
If you have the paid version of the app, you can take up multiple repeats of your live photo; else you can use the free version with no repeats.
Step 6:
Once you are satisfied with the result, click on ‘Save Live Photo’. This will save your created live photo in your device’s gallery.
02VideoToLive
This is a free converter you can choose to turn video into live photo. This is a quite popular tool among iPhone users worldwide and is suitable for iOS versions 11.2 and later. You also have the liberty to share your created live photos on social media with this converter. Take the following steps to begin the conversion process:
Step 1:
Download the application from the Apple App Store and launch it on your iOS device.
Step 2:
Choose a video from your device gallery to convert it into a live photo.
Step 3:
In the video editor screen, crop the video to the preferred section that has to be converted into live photo. You can add video frames to your edited clip from the upper section of the editor screen.
Step 4:
Click on ‘Convert’ at the top right corner to initiate the conversion process.
03Android Devices
Live photos are undoubtedly known to add spark to your cherished moments, but the notch that puts these off with Android devices is that you can enjoy live photos on these devices only as live wallpapers.
Being an iPhone exclusive utility, Android devices lack the flexibility to capture live images. However, you can see them move on being set as live screen wallpapers. A handy alternative to this is converting a turn video into live photo and use it as live wallpaper. Here’s how you can take up the conversion process:
● TurnLive- Live Wallpaper
This one is a convenient, third party tool that lets you turn video into live photo in just a few quick steps. You can either use this application for free, or upgrade to the paid version to enjoy its premium features. To make amazing live photos from videos using this tool, you need to take up the steps given below:
Step 1: App Installation
To begin, visit the Google Playstore in your Android device and download the TurnLive- Live Wallpaper application. Next, you need install and launch the app in your device and accept its terms of service.
Step 2: Select a Video
Once you are done, click on the ‘Live Photo’ icon in the bottom of the app’s opening screen to reach the video selection page. Here, you need to choose ‘Video to Live Wallpaper’ option and grant the required app permissions to access your device’s camera and gallery. Select a desired video from the ones saved in your device and click ‘Done’ at the top right.
Step 3: Edit Your Video
You will now get directed to the app’s editor window, where you need to trim the selected video within a time frame of 1-5 seconds. To do this, select a cover frame within the clip and click ‘Next’. You can now use the video slider at the bottom to trim the clip. Adding suitable video effects and filters is also possible with this tool.
Step 4: It’s Almost Done!
When you finish editing, click ‘Next’ and choose the number of repeats for the created live photo. Wait for the conversion to finish and click on ‘My Wallpapers’ to view your creation.
Step 5: Download Your Live Photo!
Click ‘Download’ and tap ‘Clear’ in the app’s prompt message to remove your device’s current screen wallpaper. Next, allow the app to access your system settings. Once this finishes, tap ‘Clear’ again to download your creation. You will now get directed to a black screen tagged ‘DayTime LWP’. Click on ‘Set Wallpaper’ in this screen to make your live photo, the current wallpaper of your Android device.
● Video Live Wallpaper
This is another free app that you can use to your videos into amazing live photos in just 4 quick steps. All you need to do is explained in the following steps:
Step 1: download the Application
Download the Video Live Wallpaper application in your Android device from Google Playstore and proceed for its installation and launch.
Step 2: Select Your Video
In the app’s opening screen, click ‘Choose Video’ and grant app permissions to access your device’s media. Browse your video gallery to select a desired video that you wish to convert into a live photo.
Step 3: Edit Your Video
You will now get directed to the app’s editor screen. Here, you can explore your editing creativity to edit the selected video. Once you are happy, click the picture icon at the top right corner.
Step 4: Your Live Wallpaper is Ready!
To set the created live photo as your device screen wallpaper, select ‘Set as Wallpaper’ at the bottom right.
● Key Takeaways from This Episode →
● From cherishing moments to sharing them on social media, live photos can do it all.
● Being an iPhone exclusive utility, you need to create these from videos to enjoy them on other platforms and devices.
● Filmora is the best video to live photo converters, available as an easy, quick and convenient conversion tool.
Also read:
- Updated In 2024, How to Make Photo 3D Cartoon Online
- Updated 2024 Approved How to Create Animated Video on Canva?
- 2024 Approved Popular Female & Male Disney Cartoon Characters
- Updated 2D Character Animation Everything You Should Know About It for 2024
- Most Effective Ways to Set WhatsApp Status for 2024
- New 2024 Approved The Complete Guide to Whiteboard Animation
- In 2024, Make Creative Animation Videos
- Updated Best GIF Croppers How to Crop an Animated GIF for 2024
- New 15 Best Video to GIF App on iPhone and Android
- New You Can Turn a TikTok Into a GIF Now. Heres How for 2024
- In 2024, 10 Realistic Cartoon Characters You Would Run Away From if You Met in Real Life
- Top Claymation Shows That Make Your Memories Unforgettable for 2024
- New Top 10 Classical Animated Cartoon Types With Examples
- New 2024 Approved You Can Turn a TikTok Into a GIF Now. Heres How
- New Top 10 Animated Photo Collage Apps You Should Know
- New Learn All About Lip-Syncing in Animation
- Updated Complete Guide to Send Gif WhatsApp on Android for 2024
- In 2024, Best 12 Video to GIF Converters High Quality to Check Out
- How to Stop Google Chrome from Tracking Your Location On Infinix Zero 30 5G? | Dr.fone
- How to restore wiped music on Yuva 2
- How to Perform Hard Reset on Xiaomi Redmi 13C? | Dr.fone
- 8 Quick Fixes Unfortunately, Snapchat has Stopped on Samsung Galaxy S24+ | Dr.fone
- In 2024, How To Leave a Life360 Group On Samsung Galaxy Z Fold 5 Without Anyone Knowing? | Dr.fone
- In 2024, A List of The Top SpongeBob Voice Generators
- In 2024, How To Factory Unlock Your Telstra iPhone 14
- 3 Ways to Change Location on Facebook Marketplace for Nokia C22 | Dr.fone
- Pattern Locks Are Unsafe Secure Your Vivo T2x 5G Phone Now with These Tips
- Online signatures for Excel
- In 2024, Top 11 Free Apps to Check IMEI on Apple iPhone 13 Pro Max
- How to Fix It Infinix Zero 30 5G Wont Turn On | Dr.fone
- In 2024, How to Unlock Apple iPhone 13 mini Without Passcode? | Dr.fone
- Possible solutions to restore deleted music from Oppo Reno 9A
- Which is the Best Fake GPS Joystick App On Realme Narzo N53? | Dr.fone
- Title: Updated Create or Find Good Morning/Night GIFs for 2024
- Author: Elon
- Created at : 2024-06-30 12:27:59
- Updated at : 2024-07-01 12:27:59
- Link: https://animation-videos.techidaily.com/updated-create-or-find-good-morningnight-gifs-for-2024/
- License: This work is licensed under CC BY-NC-SA 4.0.
