

Updated Creative Ways to Create iPhone Text GIF
Creative Ways to Create iPhone Text GIF
Creative Ways to Make iPhone Text GIF
An easy yet powerful editor
Numerous effects to choose from
Detailed tutorials provided by the official channel
GIFs add fun and humor to interactions via text messages. GIFs allow you to convey ideas, emotions, and thoughts in much more precise ways than an emoji would. iPhones operating on iOS 10 or later versions have an in-built GIF keyboard, making it super easy to add GIFs. iPhone text GIFs are readily accessible from GIF keyboards. Still, if you do not have one, you can resort to third-party applications like GIPHY and GIF keyboard for more prominent access to GIF libraries.

Let’s now delve into the different ways of adding GIFs in text messages on iPhone and directly sending them using the Messages app.
In this article
01 [How to Text a GIF: For iOS and Android](#Part 1)
02 [How to Text a GIF on an iPhone Using a Third-Party App](#Part 2)
03 [How to Send GIFs on iPhone](#Part 3)
Part 1 How to Text a GIF: For iOS and Android Users
iPhone text GIFs make texting more fun. Hence, we dedicated this part to teaching you how to use iPhone text GIFs to revitalize and better express yourself while texting.
On iPhone, there are two different ways to send iPhone text GIFs – employing the default keyboard or through the help of third-party apps. You can use the iOS default keyboard to search for GIFs in iMessage on iPhones directly. This applies to all iPhones running on iOS 10 and later versions. If your iPhone belongs to this category, follow the simple steps to add GIFs in text messages on iPhone:
01Sending GIFs using the iPhone Default Keyboard
Here’s how you can send iPhone text GIFs using the iOS default keyboard:
Step 1: On your iPhone, click on the iMessage app to open it.

Step 2: Click on the contact you want to send the GIF to from the list. If you have not previously sent a message to the contact, at the top right corner, click the Write icon represented as a square with a pencil, then enter the name of the contact you want to send the GIF to.

Step 3: Click the Images icon from the menu bar below the new message field. The image icon represents a white magnifying glass in the middle of a pink-colored circle.

Step 4: This pops up a GIF keyboard with the prompt, “Find images.” Browse through the library of GIFs to see recently used or popular GIFs. If you’re looking for a specific GIF, type in a search keyword into the Find images search bar to discover the results of GIFs that best match your request. For example, you may type “Compliments of the season” or “Grumpy,” depending on what you want.

Step 5: Scroll through the different GIFs on your screen to find the one that best fits your message. Click on it to automatically add it to your message in the text field. Peradventure you selected the wrong GIF, hit the small “x” icon at the top right corner of the GIF to delete it.

Step 6: Click the Send icon, represented as a blue arrow icon, to send your GIF.

You can add comments to a GIF just before sending it on the iMessage app. Type a message under the GIF before clicking “Send” to get the comment delivered together with the GIF.
From these simple steps, you can tell that sending a GIF from an iOS default keyboard is straightforward.
02Sending GIFs from an Android Device
Adding a GIF while using an Android phone is pretty much straightforward. Using the Gboard keyboard, follow the steps below to add a GIF on Android:
Step 1: Open the Message app and at the bottom of the screen, click the text bubble icon to enter the name of the person you’re texting in the contact field > Click Start.

Step 2: Click the smiley icon on the keyboard > Swipe to browse through GIFs and stickers or enter a search text to find your desired GIF.

Step 3: Select the GIF you want by clicking on it > Hit Send.
Part 2 How to Text a GIF on an iPhone Using a Third-Party App
Sending a GIF from an iPhone is also possible using third-party applications such as GIF Keyboard and GIPHY. These applications are built to add character to text messaging using animated objects called GIFs. Adding a GIF to your texts usually brings in some humor and life. You must have downloaded them from App Store and installed them on your iPhone to use these applications.
You can also visit third-party websites to send GIFs from there. For example, GIPHY supports searching and sending GIFs via iMessage.
Here are the steps to follow to search and send GIFs on iPhone text messages on iMessage using third-party tools:
Step 1: Search for your desired GIF on GIPHY or other GIF websites.

Step 2: Click on the GIF to open it.

Step 3: Long press on the GIF, and from the pop-up options, click Open.

Step 4: Launch Messages, click the Write icon and enter the person’s contact details you want to text.

Step 5: Click on the text box to bring up your iOS keyboard.

Step 6: Click on the text box again to add the paste option.

Step 7: When the GIF appears, click Paste.

Step 8: A preview of the GIF would appear on the text box. Hit Send when you’re ready to send the GIF.

If you use a GIF website other than GIPHY, the sent GIF may appear as a link rather than an image. If you’re okay with that, make sure the address of the shared animated image you end with the file extension, “.gif” if not, iMessage would not be able to load it.
Part 3 How to Send GIFs on iPhone
To save your file with .GIF extension, you need an application or software accessible online and offline. Indeed, many GIF creators are available in the market, both free and paid versions. However, Wondershare Filmora Video Editor is one of the preferable programs for video conversion to GIF. The software is intuitive and does not require any tech knowledge to use it. With this software, you can customize or create your GIFs while adding creative animation effects and texts to them. Filmora supports GIF creation from a variety of video formats including .mpeg, .dat, .mkv, .wmv, .mp4, .avi, and .evo.
Wondershare Filmora
Get started easily with Filmora’s powerful performance, intuitive interface, and countless effects!
Try It Free Try It Free Try It Free Learn More >

With Filmora, you can create and edit your GIFs with its in-built tools like rotation, color correction, cropping, speed alterations, merging, and lots more. What is more, you can also make a GIF online using Filmora online meme maker. This platform allows you to make videos, GIFs, and image memes without a watermark. You need no sign-up, and it is free to use. Create captions for your GIF while changing your text size, position, and color. Your text can be directly placed outside or inside the GIF and rotated to give it an artistic feel. When you finish creating, your GIF is ready to be used across all devices, including your iPhone.
If you’re unsure about how to use Wondershare Filmora for creating your GIF, below is a YouTube clip to guide you through the process for iPhone text GIFs.
● Key Takeaways from This Episode →
● How to create a GIF on an iPhone text and Android device.
● How to text a GIF using third-party tools like GIPHY and GIF Keyboard.
● The use of Wondershare Filmora to create GIFs with animated texts and outstanding edits.
●If you have stayed with us till this point, you’d have learned how to use your iOS default keyboard to send iPhone text GIFs effortlessly. You have also known how to send GIFs using the Gboard keyboard on your Android devices. Finally, you were introduced to Wondershare Filmora, a professional video editing software that allows you to create stunning GIFs in text messages for iPhone online and offline.
GIFs add fun and humor to interactions via text messages. GIFs allow you to convey ideas, emotions, and thoughts in much more precise ways than an emoji would. iPhones operating on iOS 10 or later versions have an in-built GIF keyboard, making it super easy to add GIFs. iPhone text GIFs are readily accessible from GIF keyboards. Still, if you do not have one, you can resort to third-party applications like GIPHY and GIF keyboard for more prominent access to GIF libraries.
Let’s now delve into the different ways of adding GIFs in text messages on iPhone and directly sending them using the Messages app.
In this article
01 [How to Text a GIF: For iOS and Android](#Part 1)
02 [How to Text a GIF on an iPhone Using a Third-Party App](#Part 2)
03 [How to Send GIFs on iPhone](#Part 3)
Part 1 How to Text a GIF: For iOS and Android Users
iPhone text GIFs make texting more fun. Hence, we dedicated this part to teaching you how to use iPhone text GIFs to revitalize and better express yourself while texting.
On iPhone, there are two different ways to send iPhone text GIFs – employing the default keyboard or through the help of third-party apps. You can use the iOS default keyboard to search for GIFs in iMessage on iPhones directly. This applies to all iPhones running on iOS 10 and later versions. If your iPhone belongs to this category, follow the simple steps to add GIFs in text messages on iPhone:
01Sending GIFs using the iPhone Default Keyboard
Here’s how you can send iPhone text GIFs using the iOS default keyboard:
Step 1: On your iPhone, click on the iMessage app to open it.
Step 2: Click on the contact you want to send the GIF to from the list. If you have not previously sent a message to the contact, at the top right corner, click the Write icon represented as a square with a pencil, then enter the name of the contact you want to send the GIF to.
Step 3: Click the Images icon from the menu bar below the new message field. The image icon represents a white magnifying glass in the middle of a pink-colored circle.
Step 4: This pops up a GIF keyboard with the prompt, “Find images.” Browse through the library of GIFs to see recently used or popular GIFs. If you’re looking for a specific GIF, type in a search keyword into the Find images search bar to discover the results of GIFs that best match your request. For example, you may type “Compliments of the season” or “Grumpy,” depending on what you want.
Step 5: Scroll through the different GIFs on your screen to find the one that best fits your message. Click on it to automatically add it to your message in the text field. Peradventure you selected the wrong GIF, hit the small “x” icon at the top right corner of the GIF to delete it.
Step 6: Click the Send icon, represented as a blue arrow icon, to send your GIF.
You can add comments to a GIF just before sending it on the iMessage app. Type a message under the GIF before clicking “Send” to get the comment delivered together with the GIF.
From these simple steps, you can tell that sending a GIF from an iOS default keyboard is straightforward.
02Sending GIFs from an Android Device
Adding a GIF while using an Android phone is pretty much straightforward. Using the Gboard keyboard, follow the steps below to add a GIF on Android:
Step 1: Open the Message app and at the bottom of the screen, click the text bubble icon to enter the name of the person you’re texting in the contact field > Click Start.
Step 2: Click the smiley icon on the keyboard > Swipe to browse through GIFs and stickers or enter a search text to find your desired GIF.
Step 3: Select the GIF you want by clicking on it > Hit Send.
Part 2 How to Text a GIF on an iPhone Using a Third-Party App
Sending a GIF from an iPhone is also possible using third-party applications such as GIF Keyboard and GIPHY. These applications are built to add character to text messaging using animated objects called GIFs. Adding a GIF to your texts usually brings in some humor and life. You must have downloaded them from App Store and installed them on your iPhone to use these applications.
You can also visit third-party websites to send GIFs from there. For example, GIPHY supports searching and sending GIFs via iMessage.
Here are the steps to follow to search and send GIFs on iPhone text messages on iMessage using third-party tools:
Step 1: Search for your desired GIF on GIPHY or other GIF websites.
Step 2: Click on the GIF to open it.
Step 3: Long press on the GIF, and from the pop-up options, click Open.
Step 4: Launch Messages, click the Write icon and enter the person’s contact details you want to text.
Step 5: Click on the text box to bring up your iOS keyboard.
Step 6: Click on the text box again to add the paste option.
Step 7: When the GIF appears, click Paste.
Step 8: A preview of the GIF would appear on the text box. Hit Send when you’re ready to send the GIF.
If you use a GIF website other than GIPHY, the sent GIF may appear as a link rather than an image. If you’re okay with that, make sure the address of the shared animated image you end with the file extension, “.gif” if not, iMessage would not be able to load it.
Part 3 How to Send GIFs on iPhone
To save your file with .GIF extension, you need an application or software accessible online and offline. Indeed, many GIF creators are available in the market, both free and paid versions. However, Wondershare Filmora Video Editor is one of the preferable programs for video conversion to GIF. The software is intuitive and does not require any tech knowledge to use it. With this software, you can customize or create your GIFs while adding creative animation effects and texts to them. Filmora supports GIF creation from a variety of video formats including .mpeg, .dat, .mkv, .wmv, .mp4, .avi, and .evo.
Wondershare Filmora
Get started easily with Filmora’s powerful performance, intuitive interface, and countless effects!
Try It Free Try It Free Try It Free Learn More >
With Filmora, you can create and edit your GIFs with its in-built tools like rotation, color correction, cropping, speed alterations, merging, and lots more. What is more, you can also make a GIF online using Filmora online meme maker. This platform allows you to make videos, GIFs, and image memes without a watermark. You need no sign-up, and it is free to use. Create captions for your GIF while changing your text size, position, and color. Your text can be directly placed outside or inside the GIF and rotated to give it an artistic feel. When you finish creating, your GIF is ready to be used across all devices, including your iPhone.
If you’re unsure about how to use Wondershare Filmora for creating your GIF, below is a YouTube clip to guide you through the process for iPhone text GIFs.
● Key Takeaways from This Episode →
● How to create a GIF on an iPhone text and Android device.
● How to text a GIF using third-party tools like GIPHY and GIF Keyboard.
● The use of Wondershare Filmora to create GIFs with animated texts and outstanding edits.
●If you have stayed with us till this point, you’d have learned how to use your iOS default keyboard to send iPhone text GIFs effortlessly. You have also known how to send GIFs using the Gboard keyboard on your Android devices. Finally, you were introduced to Wondershare Filmora, a professional video editing software that allows you to create stunning GIFs in text messages for iPhone online and offline.
10 Caricature Makers to Turn Your Photo to Caricature Effects
10 Caricature Makers to Turn Your Photo to Caricature Effects
An easy yet powerful editor
Numerous effects to choose from
Detailed tutorials provided by the official channel
We certainly have a couple of recommendations to offer to you. There’s a surprisingly large amount of both caricature photo maker apps and online caricature maker tools.
Today, we’ll be focusing on the apps, to keep things easily accessible. And, in the end, we’ve even included a quick step-by-step guide on how to make a caricature of a photo.
In this article
01 [The 10 Best Makers to Turn Photos to Caricature Effects](#Part 1)
02 [How to Draw a Caricature — Step by Step Guide](#Part 2)
Part 1 The 10 Best Makers to Turn Photos to Caricature Effects
As promised, part one of this article is devoted to a list of the 10 best caricature maker apps that we can find. We’ll be focusing on the Apple App Store, in this case, but it’s important to note that most of these are available on the Google play store as well. (A link to the app has been provided for your convenience as well.)
011. MomentCam Cartoons & Stickers
The first of the caricature maker apps on our list is ‘MomentCam Cartoon & Stickers’ — this app is part of another tool called ‘Avatar Maker Bundle’, but it can be used on its own to create caricature versions of yourself that you can use to express emotions (an avatar, if you will).
This app was made primarily to help the user to create an avatar that matches their look (with accessorization features to complete the set). However, you can interact with other members of the community to create multiple avatars if you wish. Or, you can share your caricature pictures on social media.
URL: https://apps.apple.com/ca/app/momentcam-cartoons-stickers/id687624831

02Color Cartoon Caricature Maker
This next caricature maker app uses a more realistic style akin to what is usually used for a political caricature of famous individuals and politicians. It’s called ‘Color Cartoon Caricature Maker’ and, while not as extensive in its features as the previous app, it can be used to turn an image completely into a caricature (which means that it can be used for photographs with more than one person or focus.)
URL: https://apps.apple.com/ca/app/color-cartoon-caricature-maker/id1448093448

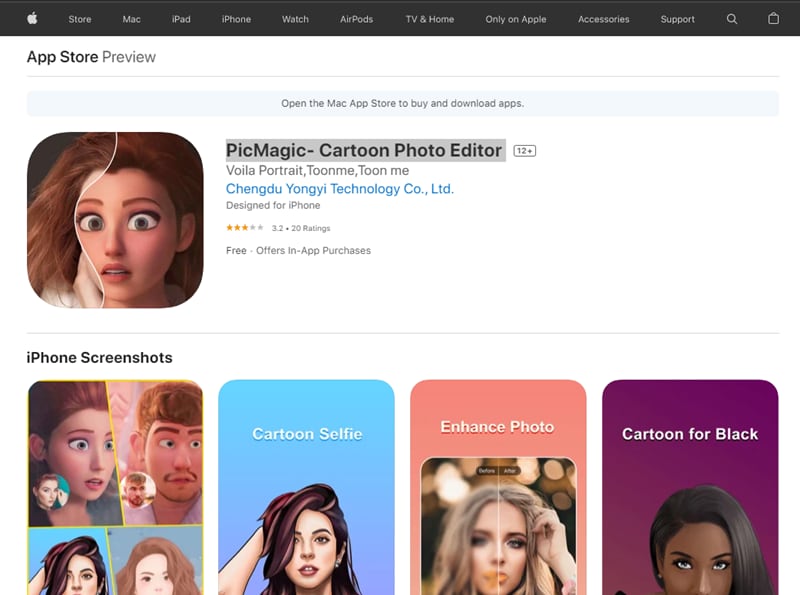
03PicMagic- Cartoon Photo Editor
Up next, we have ‘Pic Magic’ which is better described as a ‘cartoon photo editor’ but still works as a serviceable caricature maker if all you’re looking for is a subtle enhancement of features (unlike what was shown in the political caricature maker we showed previously.)
Much like the second app, while it’s more suitable for enhancing the features of one person, it does work for group pictures as well.
URL: https://apps.apple.com/ca/app/picmagic-cartoon-photo-editor/id1491645007
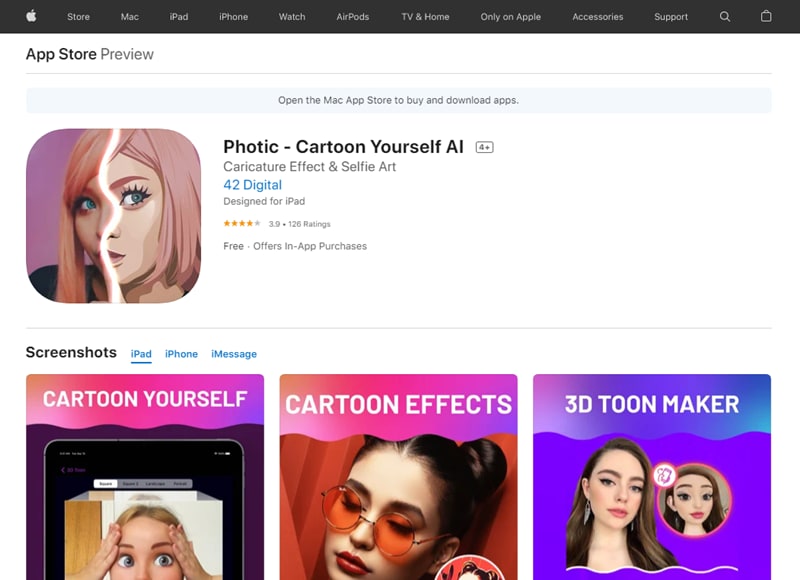
04Photic - Cartoon Yourself AI
This next app, called ‘Photic’ is much like our previously listed app, PicMagic. As you can see from the image provided, it can make a caricature of a photo but in a subtle way that is undeniably more of a ‘cartoony’ style than what you might be looking for. Keep that in mind.
The best part of it is that you can use it along with iMessage — making it very easy to share your finished caricature pictures with friends and family. The downside? It is best used for solo picture caricature-like only.
URL: https://apps.apple.com/ca/app/photic-cartoon-yourself-ai/id1484108330
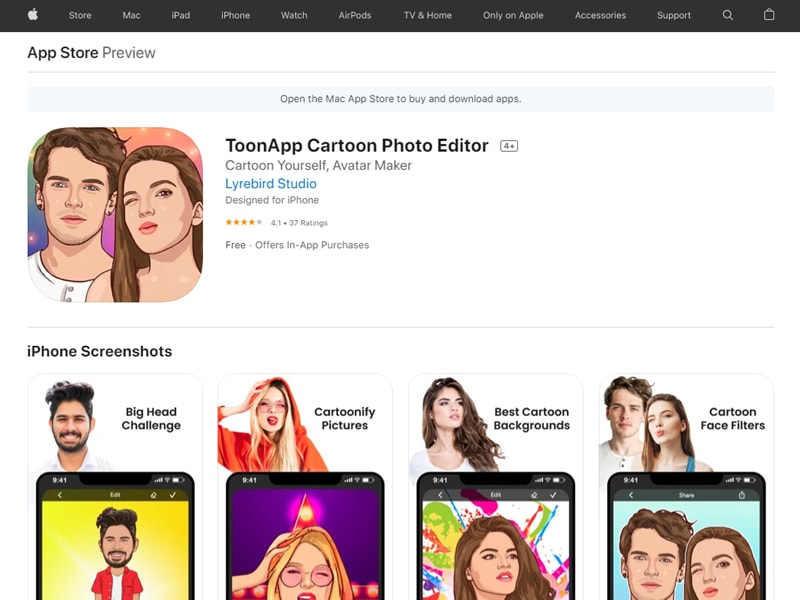
05ToonApp Cartoon Photo Editor
‘ToonApp’ is the next caricature maker on our list. As you can see from the image provided, the style of caricature is a lot more realistic here. Very similar to what you normally see of western comics (which only subtly changes the features of a person to look more rendered.) The best part of this app? Well, unlike some of the other options on this list, it works great for group pictures.
URL: https://apps.apple.com/ca/app/toonapp-cartoon-photo-editor/id1540719743
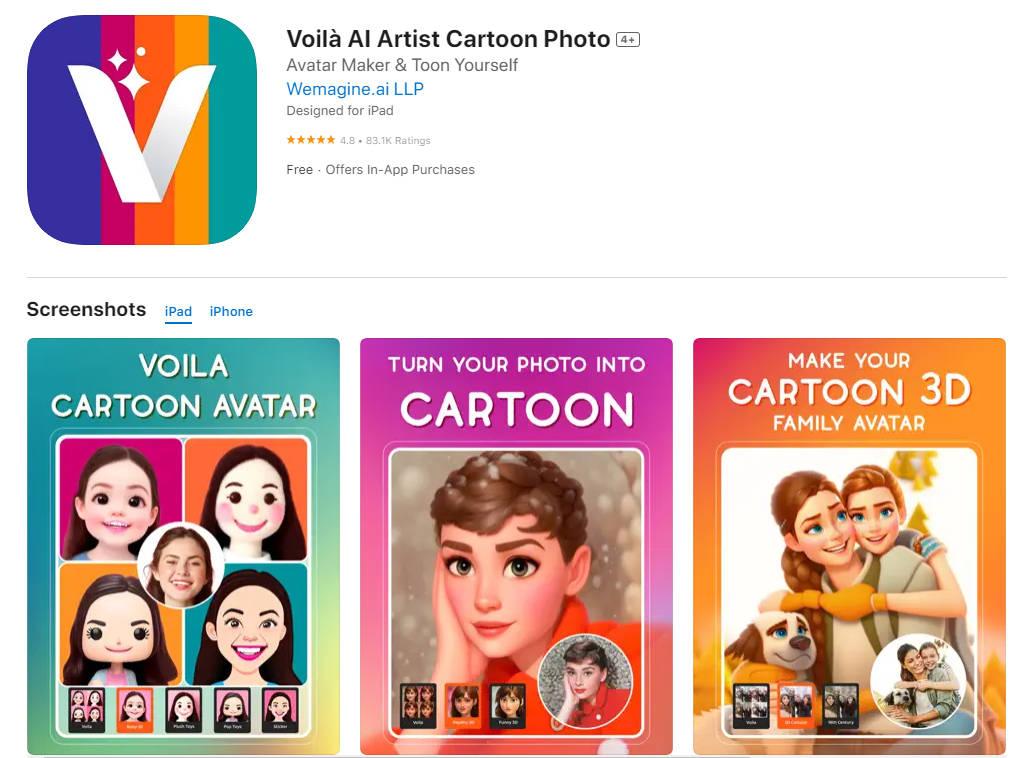
06Voilà AI Artist Cartoon Photo
This next app is very similar to the previous one we introduced. It’s called ‘Voilà AI Artist Cartoon Photo’ and the main difference between it and the ToonApp app that we introduced earlier is that it uses a different caricature style. Not unlike what you see from 3D animations — which is a mix of realism and cartoony.
This tool, much like a lot of other alternatives, is best used for selfies.
URL: https://apps.apple.com/us/app/voil%C3%A0-ai-artist-cartoon-photo/id1558421405
07Caricature Hyper Face Morph
Now we go back to what most people usually consider ‘caricature’ with the ‘Caricature Hyper Face Morph’ app. This app, as you can see from the image below, allows you to morph a photograph into something more exaggerated (turning it into a true-to-form caricature; like what you would see in political caricature segments in newspapers or old animated short films.)
It works for group photographs surprisingly well as well. With the AI recognizing and applying the ‘morph’ effect to everyone.
URL: https://apps.apple.com/ca/app/caricature-hyper-face-morph-from-photos-camera-shots/id587429629
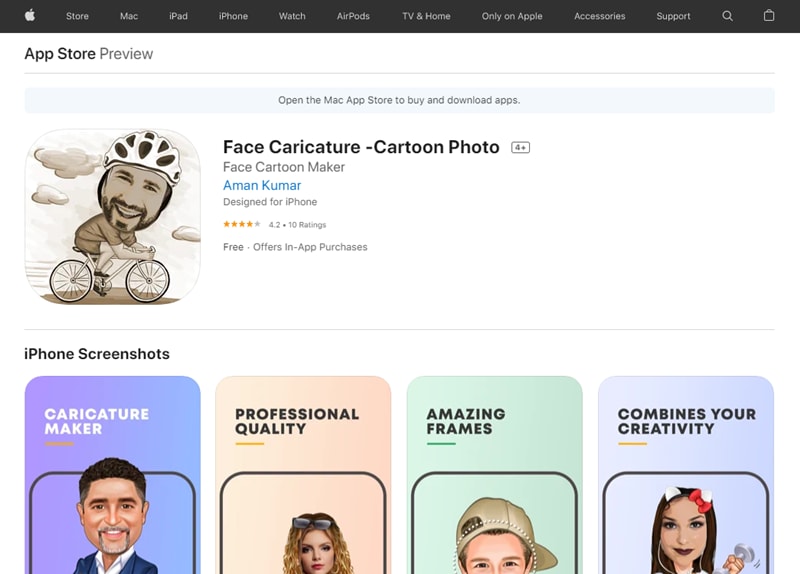
08Face Caricature
The next caricature maker on our list is the app called ‘Face Caricature.’ The best part of this app, undoubtedly, is the fact that it offers several ‘caricature’ styles that you can choose from. So, you aren’t stuck with just one cartoon style. It’s better for selfies, however — it doesn’t work as well as a group picture caricature maker.
URL: https://apps.apple.com/ca/app/face-caricature-cartoon-photo/id1007143753
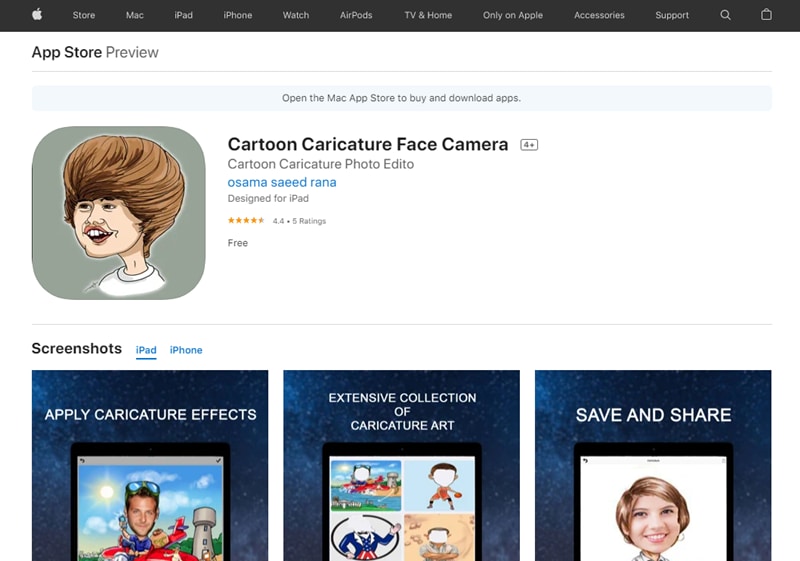
09Cartoon Caricature Face Camera
This is a camera tool that you can use in order to take photographs and turn them into caricatures. There are several caricature art styles for you to choose from, which are always fun. Plus, it offers easy save-and-share features. As a final note, this app works best as a selfie app.
URL: https://apps.apple.com/ca/app/cartoon-caricature-face-camera/id1424277519
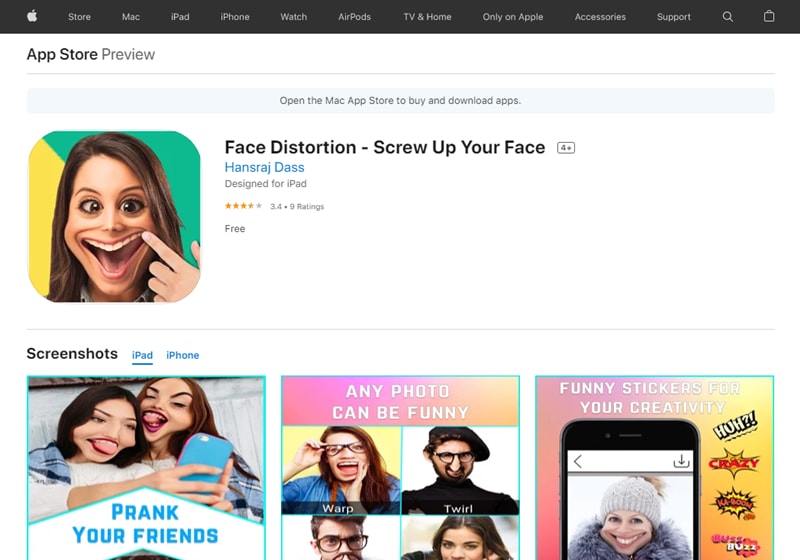
10Face Distortion - Screw Up Your Face
Though this app isn’t exactly a ‘caricature maker‘ it does work like one. It’s just a matter of finding the right distortive effect to mimic the look of an actual caricature sketch. The best part about it is that it’s basically a custom caricature maker — one that allows you to control exactly what features are exaggerated.
URL: https://apps.apple.com/ca/app/face-distortion-screw-up-your-face/id1188623179
Part 2 How to Draw a Caricature — Step by Step Guide
Now for our promised tutorial. Here, we introduce a quick and easy way to draw caricatures. Take it more as an overview of what exactly caricatures are and how you can create them by following a specific set of steps. Ah, but of course, just to make sure that you are getting something out of it, we’ve also included a recommendation for a tool that you can use in order to step up your caricature creation.
Step 1: Get a Reference Photo.
Any good caricature starts with a good reference photo. If you’re not familiar with the term, a reference photo is basically any photograph that you use in order to draw inspiration from.
When making a caricature, that usually means finding a portrait (like the one below) that you can directly refer to when making your caricature sketch.

Step 2: Exaggerate Features.
What is the point of caricatures? Well, it all comes down to the exaggeration of features. Whether that’s enlarging the person’s head to be half the size of a person or distorting the features of their face to make one more prominent than another. There’s an endless number of ways you can go about doing it.
Just remember, when making a caricature sketch, there are no such things as rules. While you do have a reference photo in front of you, you don’t have to draw it exactly as you see it. Make the eyes farther apart, exaggerate the lift of the eyebrows, give them a teeny tiny nose, etc., etc..
Just let your imagination run wild.
Step 3: Find a Reliable Tool.
And, finally, if you really want to take your caricatures to the next level, consider animating them. That is the main point of caricatures, after all.
And, if you’re going to go about doing such a thing, make sure that you have a reliable tool on your side. For example, having something like Wondershare Filmora Video Editor , a video editor that has an endless amount of presets and effects that you can choose from, may prove to be exactly what you need to get to the next stage of your caricature creation.
For Win 7 or later (64-bit)
For macOS 10.12 or later
● Key Takeaways from This Episode →
● Photo to Caricature is now possible in an instant with the use of a caricature maker app. These tools render an existing photograph with the use of filters and effects to create a caricature sketch worthy of any artist’s skill.
● There’s a lot of these caricature makers for you to choose from as well. Proven by the fact that we were able to easily find at least ten — all of which you can use (some in different ways) to transform your photographs into caricature works.
● Of course, if you want to take the traditional route and draw caricatures yourself, that’s possible too. Just remember the three tips that we outlined above: get a reference, exaggerate, and use good tools.
We certainly have a couple of recommendations to offer to you. There’s a surprisingly large amount of both caricature photo maker apps and online caricature maker tools.
Today, we’ll be focusing on the apps, to keep things easily accessible. And, in the end, we’ve even included a quick step-by-step guide on how to make a caricature of a photo.
In this article
01 [The 10 Best Makers to Turn Photos to Caricature Effects](#Part 1)
02 [How to Draw a Caricature — Step by Step Guide](#Part 2)
Part 1 The 10 Best Makers to Turn Photos to Caricature Effects
As promised, part one of this article is devoted to a list of the 10 best caricature maker apps that we can find. We’ll be focusing on the Apple App Store, in this case, but it’s important to note that most of these are available on the Google play store as well. (A link to the app has been provided for your convenience as well.)
011. MomentCam Cartoons & Stickers
The first of the caricature maker apps on our list is ‘MomentCam Cartoon & Stickers’ — this app is part of another tool called ‘Avatar Maker Bundle’, but it can be used on its own to create caricature versions of yourself that you can use to express emotions (an avatar, if you will).
This app was made primarily to help the user to create an avatar that matches their look (with accessorization features to complete the set). However, you can interact with other members of the community to create multiple avatars if you wish. Or, you can share your caricature pictures on social media.
URL: https://apps.apple.com/ca/app/momentcam-cartoons-stickers/id687624831
02Color Cartoon Caricature Maker
This next caricature maker app uses a more realistic style akin to what is usually used for a political caricature of famous individuals and politicians. It’s called ‘Color Cartoon Caricature Maker’ and, while not as extensive in its features as the previous app, it can be used to turn an image completely into a caricature (which means that it can be used for photographs with more than one person or focus.)
URL: https://apps.apple.com/ca/app/color-cartoon-caricature-maker/id1448093448
03PicMagic- Cartoon Photo Editor
Up next, we have ‘Pic Magic’ which is better described as a ‘cartoon photo editor’ but still works as a serviceable caricature maker if all you’re looking for is a subtle enhancement of features (unlike what was shown in the political caricature maker we showed previously.)
Much like the second app, while it’s more suitable for enhancing the features of one person, it does work for group pictures as well.
URL: https://apps.apple.com/ca/app/picmagic-cartoon-photo-editor/id1491645007
04Photic - Cartoon Yourself AI
This next app, called ‘Photic’ is much like our previously listed app, PicMagic. As you can see from the image provided, it can make a caricature of a photo but in a subtle way that is undeniably more of a ‘cartoony’ style than what you might be looking for. Keep that in mind.
The best part of it is that you can use it along with iMessage — making it very easy to share your finished caricature pictures with friends and family. The downside? It is best used for solo picture caricature-like only.
URL: https://apps.apple.com/ca/app/photic-cartoon-yourself-ai/id1484108330
05ToonApp Cartoon Photo Editor
‘ToonApp’ is the next caricature maker on our list. As you can see from the image provided, the style of caricature is a lot more realistic here. Very similar to what you normally see of western comics (which only subtly changes the features of a person to look more rendered.) The best part of this app? Well, unlike some of the other options on this list, it works great for group pictures.
URL: https://apps.apple.com/ca/app/toonapp-cartoon-photo-editor/id1540719743
06Voilà AI Artist Cartoon Photo
This next app is very similar to the previous one we introduced. It’s called ‘Voilà AI Artist Cartoon Photo’ and the main difference between it and the ToonApp app that we introduced earlier is that it uses a different caricature style. Not unlike what you see from 3D animations — which is a mix of realism and cartoony.
This tool, much like a lot of other alternatives, is best used for selfies.
URL: https://apps.apple.com/us/app/voil%C3%A0-ai-artist-cartoon-photo/id1558421405
07Caricature Hyper Face Morph
Now we go back to what most people usually consider ‘caricature’ with the ‘Caricature Hyper Face Morph’ app. This app, as you can see from the image below, allows you to morph a photograph into something more exaggerated (turning it into a true-to-form caricature; like what you would see in political caricature segments in newspapers or old animated short films.)
It works for group photographs surprisingly well as well. With the AI recognizing and applying the ‘morph’ effect to everyone.
URL: https://apps.apple.com/ca/app/caricature-hyper-face-morph-from-photos-camera-shots/id587429629
08Face Caricature
The next caricature maker on our list is the app called ‘Face Caricature.’ The best part of this app, undoubtedly, is the fact that it offers several ‘caricature’ styles that you can choose from. So, you aren’t stuck with just one cartoon style. It’s better for selfies, however — it doesn’t work as well as a group picture caricature maker.
URL: https://apps.apple.com/ca/app/face-caricature-cartoon-photo/id1007143753
09Cartoon Caricature Face Camera
This is a camera tool that you can use in order to take photographs and turn them into caricatures. There are several caricature art styles for you to choose from, which are always fun. Plus, it offers easy save-and-share features. As a final note, this app works best as a selfie app.
URL: https://apps.apple.com/ca/app/cartoon-caricature-face-camera/id1424277519
10Face Distortion - Screw Up Your Face
Though this app isn’t exactly a ‘caricature maker‘ it does work like one. It’s just a matter of finding the right distortive effect to mimic the look of an actual caricature sketch. The best part about it is that it’s basically a custom caricature maker — one that allows you to control exactly what features are exaggerated.
URL: https://apps.apple.com/ca/app/face-distortion-screw-up-your-face/id1188623179
Part 2 How to Draw a Caricature — Step by Step Guide
Now for our promised tutorial. Here, we introduce a quick and easy way to draw caricatures. Take it more as an overview of what exactly caricatures are and how you can create them by following a specific set of steps. Ah, but of course, just to make sure that you are getting something out of it, we’ve also included a recommendation for a tool that you can use in order to step up your caricature creation.
Step 1: Get a Reference Photo.
Any good caricature starts with a good reference photo. If you’re not familiar with the term, a reference photo is basically any photograph that you use in order to draw inspiration from.
When making a caricature, that usually means finding a portrait (like the one below) that you can directly refer to when making your caricature sketch.
Step 2: Exaggerate Features.
What is the point of caricatures? Well, it all comes down to the exaggeration of features. Whether that’s enlarging the person’s head to be half the size of a person or distorting the features of their face to make one more prominent than another. There’s an endless number of ways you can go about doing it.
Just remember, when making a caricature sketch, there are no such things as rules. While you do have a reference photo in front of you, you don’t have to draw it exactly as you see it. Make the eyes farther apart, exaggerate the lift of the eyebrows, give them a teeny tiny nose, etc., etc..
Just let your imagination run wild.
Step 3: Find a Reliable Tool.
And, finally, if you really want to take your caricatures to the next level, consider animating them. That is the main point of caricatures, after all.
And, if you’re going to go about doing such a thing, make sure that you have a reliable tool on your side. For example, having something like Wondershare Filmora Video Editor , a video editor that has an endless amount of presets and effects that you can choose from, may prove to be exactly what you need to get to the next stage of your caricature creation.
For Win 7 or later (64-bit)
For macOS 10.12 or later
● Key Takeaways from This Episode →
● Photo to Caricature is now possible in an instant with the use of a caricature maker app. These tools render an existing photograph with the use of filters and effects to create a caricature sketch worthy of any artist’s skill.
● There’s a lot of these caricature makers for you to choose from as well. Proven by the fact that we were able to easily find at least ten — all of which you can use (some in different ways) to transform your photographs into caricature works.
● Of course, if you want to take the traditional route and draw caricatures yourself, that’s possible too. Just remember the three tips that we outlined above: get a reference, exaggerate, and use good tools.
Formula to Animate Photos From 10 Animate Pictures App
Epic Formula to Animate Photos from These 10 Animate Pictures App
An easy yet powerful editor
Numerous effects to choose from
Detailed tutorials provided by the official channel
With the availability of modern technology, still photos can be seamlessly transformed into live animated photos. Adding motion and movement along with filter effects to still photos is pretty easy with an animated pictures app.
For Win 7 or later (64-bit)
For macOS 10.12 or later
In this article, we have listed 10 of the best animated picture apps available in 2021. You will find all essential details and features of these 10 apps which will help you choose the best option when choosing an app for animating a picture. Let us take a look at these 10 apps!
In this article
01 [10 Animate Pictures Apps](#Part 1)
02 [The contrast of These 10 Animate Pictures Apps](#Part 2)
Part 1 10 Animate Pictures Apps
01 MotionLeap

MotionLeap
● Price
Free, with premium version available.
● OS
Android and iOS
● Key features
You can freeze parts of an image.
Variety of filters can be applied.
Although MotionLeap is free to use there’s a Pro and subscription version with a greater variety of features in it. The best part about this animated pictures app is that it does not put any watermark over the final image.
The app can animate still photos and convert them into short, loop videos. This is done by the programming of the directional cues into the image which is executed by dragging actions of the thumb across your mobile screen.
Although, on MotionLeap, without the pro version, the photo will be saved in video format.
02 GIPHY

GIPHY
● Price
Free
● OS
Android and iOS
● Key features
Simple, easy to use UI
A variety of built-in animation tools
Sticker maker on iOS (for iPhone X and later models)
We might already be acquainted with GIPHY as the most popular search engine for GIFs. Although, what’s unknown is that GIPHY has a mobile app both for Android and iOS which can be used to create GIFs and animate photos.
The app’s key advantage is its highly intuitive and very easy to use interface that makes it really easy to animate photos with the GIPHY app. Above all, it is completely free to use and along with animating pictures, you can also add captions to your animated photos or even capture short videos.
03 Movepic

Movepic
● Price
Free, with premium version available.
● OS
Android and iOS
● Key features
Easy to use.
A range of built in overlays and filters.
Movepic is another excellent app for animating pictures. As an animated pictures app, it is quite similar to MotionLeap owing to the fact that it animates still photos.
A downside of the Movepic free version is that it puts a watermark on the image and you cannot remove it without upgrading to the premium version or VIP account. The app saves the final images as a movie file and not as a GIF.
04 ImgPlay

ImgPlay
● Price
Free, with premium version available.
● OS
Android and iOS
● Key features
Easy to use.
Lay out still photographs side-by-side and use burst photos or videos.
ImgPlay is another very popular and effective animated pictures app. The app makes use of a range of ready-to-use animated photos for the web.
ImgPlay also comes with a range of advanced and easy-to-understand controls. This app, in spite of all its perks, puts a watermark on the image—which, once again, cannot be removed unless you buy the premium version of the app.
05 StoryZ

StoryZ
● Price
Free, with premium version available.
● OS
Android and iOS
● Key features
Programmed movement paths, overlays and color filters.
Saves images automatically as GIFs.
StoryZ is one of the best apps on this list and anyone who has used the app would agree with that. The app can seamlessly animate still photos.
A great thing about this app is that StoryZ enables users to remove the watermark from the image by simply watching a quick ad before saving the file.
06 VIMAGE 3D

VIMAGE 3D
● Price
Free, with premium version available.
● OS
Android and iOS
● Key features
AI enabled.
A range of filters and special effects.
Add sounds to your animated images and videos.
This one is an award winning app for animating pictures and the app won a Google Play award in 2018. The app is simply exceptional in terms of user experience as well as features.
Like most of these apps, you do need to pay to remove the watermark, get access to the full effects library, and the ability to export your images in up to 2560p resolution.
07 Photo Bender

Photo Bender
● Price
Free
● OS
Android
● Key features
A variety of editing tools and features including brushes.
Enables users to export images as MP4s, GIFs, JPEGs, and PNGs.
Photo Bender is an animated pictures app that is specific to the Android platform. The app is popular for its convenience of use and it enables users to digitally warp images and animate photos.
There are a variety of things that can be done to an image with the help of this app. From colouring an image, to bending it, stretching it, and a lot more, you can do it all. You also get a range of brushes to use on the image.
08 Zoetropic

Zoetropic
● Price
Free, with premium version available.
● OS
Android and iOS
● Key features
The app is really fast and efficient.
Simple UI.
Zoetropic helps you animate images in minutes,even if you are using the app for the first time. The app does not come with a lot of features but its simplicity, effectiveness and ease of use makes it a great option for animated pictures app.
09 Lumyer

Lumyer
● Price
Free, with premium version available.
● OS
Android and iOS
● Key features
Seasonal and occasional animation effects.
Easy to use.
This app is another great platform to edit pictures and animate them. It enables you to add a variety of effects to pictures and easily animate them.
From subtle weather effects to sparkle, seasonal animations and a lot more, the app offers a lot of options.
Part 2: The contrast of These 10 Animate Pictures Apps
| Name of The Animated Picture App | Advantages | Disadvantages |
|---|---|---|
| MotionLeap | No watermark+Variety of filters; | File saved in video format without pro version |
| GIPHY | Free to use+Simple UI | Not suitable for advanced editing |
| Movepic | Built-in overlays and filters | Saves final image as video file without pro version Watermark |
| ImgPlay | Easy to use and understand+Ready to go animated photos for the web | Watermark on image |
| StoryZ | Remove watermark by watching an ad+Variety of animation techniques | Boring interface |
| VIMAGE 3D | Neat UI+Endless features+AI enabled | Need to buy premium version to access majority of features |
| Photo Bender | A range of tasks can be executed | Not a very attractive UI |
| Zoetropic | Simple, effective and easy to use | Limited effects on free version |
| Lumyer | Fast and easy to use+Lot of features | Can be expensive due to several in-app purchases |
| Filmora | Easy to Use+fordable+ons of features+Seamless UI+rofessional video editing tools | Not available on mobile |
Key Takeaways from This Episode
● That brings us to the end of the article. Anyone looking for an animated pictures app to animate their images have found 10 of the best apps available in the market right now.
● With the list of these 10 apps, anyone can find the most suitable platform for their own purposes of animating an image.
● Last but not the least, if it comes to an all inclusive platform for video editing and animating pictures, Filmora Pro is definitely the winner on this list! So check out your options and make the best choice!
With the availability of modern technology, still photos can be seamlessly transformed into live animated photos. Adding motion and movement along with filter effects to still photos is pretty easy with an animated pictures app.
For Win 7 or later (64-bit)
For macOS 10.12 or later
In this article, we have listed 10 of the best animated picture apps available in 2021. You will find all essential details and features of these 10 apps which will help you choose the best option when choosing an app for animating a picture. Let us take a look at these 10 apps!
In this article
01 [10 Animate Pictures Apps](#Part 1)
02 [The contrast of These 10 Animate Pictures Apps](#Part 2)
Part 1 10 Animate Pictures Apps
01 MotionLeap
MotionLeap
● Price
Free, with premium version available.
● OS
Android and iOS
● Key features
You can freeze parts of an image.
Variety of filters can be applied.
Although MotionLeap is free to use there’s a Pro and subscription version with a greater variety of features in it. The best part about this animated pictures app is that it does not put any watermark over the final image.
The app can animate still photos and convert them into short, loop videos. This is done by the programming of the directional cues into the image which is executed by dragging actions of the thumb across your mobile screen.
Although, on MotionLeap, without the pro version, the photo will be saved in video format.
02 GIPHY
GIPHY
● Price
Free
● OS
Android and iOS
● Key features
Simple, easy to use UI
A variety of built-in animation tools
Sticker maker on iOS (for iPhone X and later models)
We might already be acquainted with GIPHY as the most popular search engine for GIFs. Although, what’s unknown is that GIPHY has a mobile app both for Android and iOS which can be used to create GIFs and animate photos.
The app’s key advantage is its highly intuitive and very easy to use interface that makes it really easy to animate photos with the GIPHY app. Above all, it is completely free to use and along with animating pictures, you can also add captions to your animated photos or even capture short videos.
03 Movepic
Movepic
● Price
Free, with premium version available.
● OS
Android and iOS
● Key features
Easy to use.
A range of built in overlays and filters.
Movepic is another excellent app for animating pictures. As an animated pictures app, it is quite similar to MotionLeap owing to the fact that it animates still photos.
A downside of the Movepic free version is that it puts a watermark on the image and you cannot remove it without upgrading to the premium version or VIP account. The app saves the final images as a movie file and not as a GIF.
04 ImgPlay
ImgPlay
● Price
Free, with premium version available.
● OS
Android and iOS
● Key features
Easy to use.
Lay out still photographs side-by-side and use burst photos or videos.
ImgPlay is another very popular and effective animated pictures app. The app makes use of a range of ready-to-use animated photos for the web.
ImgPlay also comes with a range of advanced and easy-to-understand controls. This app, in spite of all its perks, puts a watermark on the image—which, once again, cannot be removed unless you buy the premium version of the app.
05 StoryZ
StoryZ
● Price
Free, with premium version available.
● OS
Android and iOS
● Key features
Programmed movement paths, overlays and color filters.
Saves images automatically as GIFs.
StoryZ is one of the best apps on this list and anyone who has used the app would agree with that. The app can seamlessly animate still photos.
A great thing about this app is that StoryZ enables users to remove the watermark from the image by simply watching a quick ad before saving the file.
06 VIMAGE 3D
VIMAGE 3D
● Price
Free, with premium version available.
● OS
Android and iOS
● Key features
AI enabled.
A range of filters and special effects.
Add sounds to your animated images and videos.
This one is an award winning app for animating pictures and the app won a Google Play award in 2018. The app is simply exceptional in terms of user experience as well as features.
Like most of these apps, you do need to pay to remove the watermark, get access to the full effects library, and the ability to export your images in up to 2560p resolution.
07 Photo Bender
Photo Bender
● Price
Free
● OS
Android
● Key features
A variety of editing tools and features including brushes.
Enables users to export images as MP4s, GIFs, JPEGs, and PNGs.
Photo Bender is an animated pictures app that is specific to the Android platform. The app is popular for its convenience of use and it enables users to digitally warp images and animate photos.
There are a variety of things that can be done to an image with the help of this app. From colouring an image, to bending it, stretching it, and a lot more, you can do it all. You also get a range of brushes to use on the image.
08 Zoetropic
Zoetropic
● Price
Free, with premium version available.
● OS
Android and iOS
● Key features
The app is really fast and efficient.
Simple UI.
Zoetropic helps you animate images in minutes,even if you are using the app for the first time. The app does not come with a lot of features but its simplicity, effectiveness and ease of use makes it a great option for animated pictures app.
09 Lumyer
Lumyer
● Price
Free, with premium version available.
● OS
Android and iOS
● Key features
Seasonal and occasional animation effects.
Easy to use.
This app is another great platform to edit pictures and animate them. It enables you to add a variety of effects to pictures and easily animate them.
From subtle weather effects to sparkle, seasonal animations and a lot more, the app offers a lot of options.
Part 2: The contrast of These 10 Animate Pictures Apps
| Name of The Animated Picture App | Advantages | Disadvantages |
|---|---|---|
| MotionLeap | No watermark+Variety of filters; | File saved in video format without pro version |
| GIPHY | Free to use+Simple UI | Not suitable for advanced editing |
| Movepic | Built-in overlays and filters | Saves final image as video file without pro version Watermark |
| ImgPlay | Easy to use and understand+Ready to go animated photos for the web | Watermark on image |
| StoryZ | Remove watermark by watching an ad+Variety of animation techniques | Boring interface |
| VIMAGE 3D | Neat UI+Endless features+AI enabled | Need to buy premium version to access majority of features |
| Photo Bender | A range of tasks can be executed | Not a very attractive UI |
| Zoetropic | Simple, effective and easy to use | Limited effects on free version |
| Lumyer | Fast and easy to use+Lot of features | Can be expensive due to several in-app purchases |
| Filmora | Easy to Use+fordable+ons of features+Seamless UI+rofessional video editing tools | Not available on mobile |
Key Takeaways from This Episode
● That brings us to the end of the article. Anyone looking for an animated pictures app to animate their images have found 10 of the best apps available in the market right now.
● With the list of these 10 apps, anyone can find the most suitable platform for their own purposes of animating an image.
● Last but not the least, if it comes to an all inclusive platform for video editing and animating pictures, Filmora Pro is definitely the winner on this list! So check out your options and make the best choice!
Best 12 Video to GIF Converters [High Quality] to Check Out
Top 12 Video to GIF Converters [High Quality] to Check Out
An easy yet powerful editor
Numerous effects to choose from
Detailed tutorials provided by the official channel
GIFs are images with looping animations for a few seconds and are used a lot over social media sites and other online platforms. There are several sites from where you can download readymade GIFs.
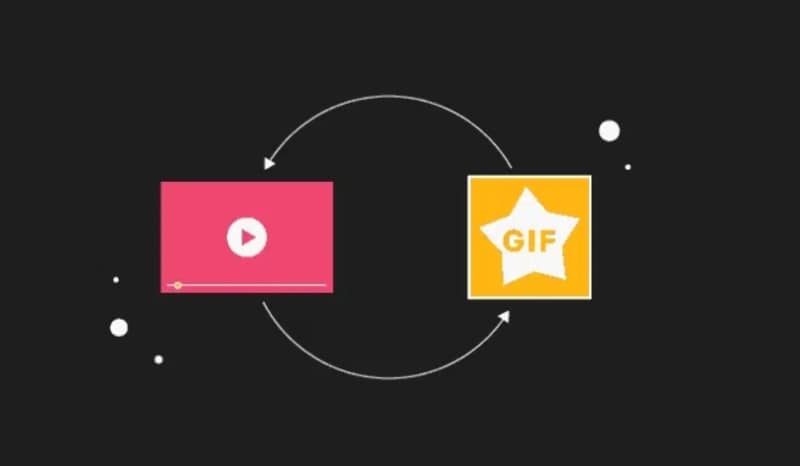
Alternatively, there are countless tools using which customized GIFs can be created from videos. So, if you too are looking for video to GIF converter high quality keep reading.
In this article
01 [The Difference Between A Video And A Gif](#Part 1)
02 [Top 12 Video to GIF Converters](#Part 2)
Part 1 The Difference Between A Video And A Gif
A GIF is a lot in use these days over social media platforms, and other online sites. Standing for Graphics Interchange Format, a GIF is basically a looping animation or a video that has a sequence of frames or images.
Though a lot of people can consider a GIF as a short video, there are a few key differences between the two. The first one lies in the name extension. A GIF file is saved as .gif while a video can be saved into several formats like .mp4, .mov, and more.
A video contains visual information having good quality frames as well as sound while a GIF is a short animation that uses some specific information created from a sequence of frames. Moreover, a GIF does not have a sound and the size is also very small.
Part 2 Top 12 Video to GIF Converters
An array of online and desktop tools is available to convert video to GIF high quality. We have shortlisted the top ones as below.
01** Wondershare Filmora Video Editor
If you are looking for software that lets you create an excellent GIF in a hassle-free manner, Wondershare Filmora is the best choice. This professional software comes with multiple editing and customization capabilities for creating a desired animated file. You can not only create GIFs, but perform a host of additional functions using the tool like video editing, music editing, and more. Once downloaded on your Windows or Mac systems, the software is all set to work as desired without any limitations.
Wondershare Filmora
Get started easily with Filmora’s powerful performance, intuitive interface, and countless effects!
Try It Free Try It Free Try It Free Learn More >
Pros:
● Support to almost all media formats for high quality video to GIF conversion.
● A wide range of editing and customization options are supported.
● Works as a complete video editing tool.
Cons:
● Paid software
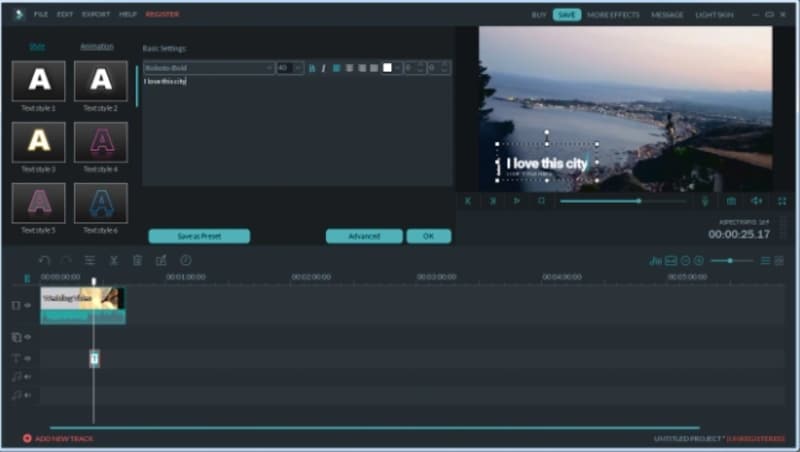
02Giphy
When it comes to GIFs, GIPHY is one of the most widely used tools. The tool allows you to create GIFs not only from the locally saved videos but also from YouTube, Vimeo, and other third-party platforms. There are multiple features for creating GIFs using this tool like selecting the length of the GIF, adding captions, text, frame of the GIF, and more. Not only videos, but the software also allows creating GIFs using multiple static photos.
Pros:
● Create GIFs from local as well as online videos
● User-friendly interface
● Support to multiple platforms and OS
Cons:
● The searching function is not very effective.
● Need to sign-up to use the tool.
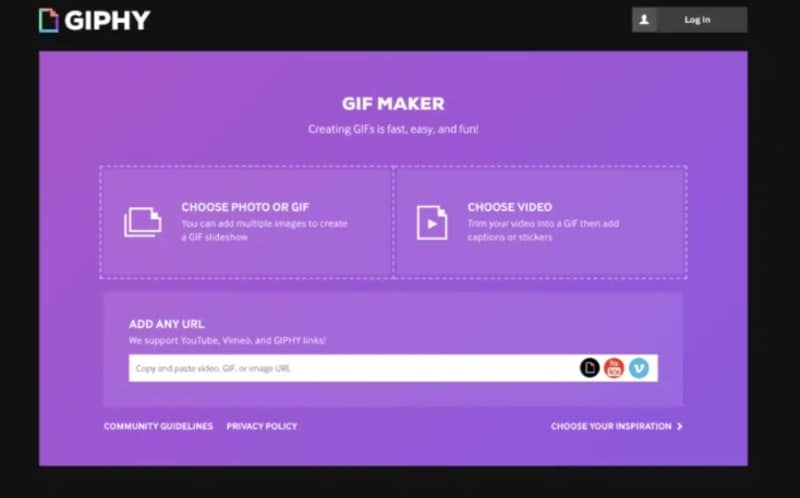
03Adobe Creative Cloud Express
This is a free video conversion tool that allows creating a GIF from videos in an array of formats. The tool gives you the freedom to choose your GIF size option that includes square, portrait, and landscape. Additionally, you can also select the quality of the GIF. Tools for adjusting and editing several parameters of the GIF are also supported by the software.
Pros:
● Allows creating GIFs in 3 size and multiple quality
● Created GIFs can be shared directly to social networking sites.
● Several editing options are available.
Cons:
● Issues of lags and bugs occasionally
● There are no guides
04Movavi
This is a reliable and widely used video editing tool that supports multiple functions including video to GIF conversion. Several useful functions are supported by the software like batch file processing, easy and quick GIF creation, editing options, and more. The tool is available for multiple platforms as well as for different OS.
Pros:
● Support to a wide range of formats
● Multiple editing options
● Available for different platforms and OS
Cons:
● Need to purchase the software after the limited trial period expires.
● The rendering is slow.
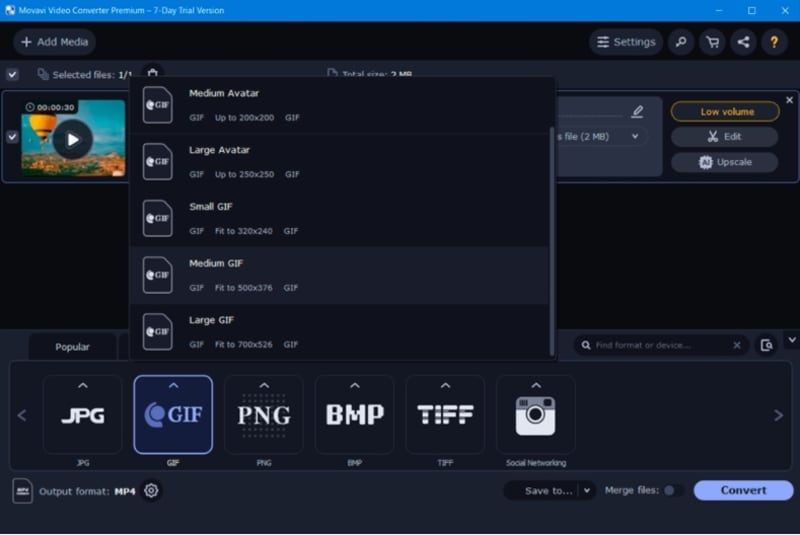
05MakeAGIF
As the name suggests this software is a GIF-making tool that not only converts your videos into a GIF but virtually anything like a collection of pictures, YouTube clips, Facebook clips, and much more. Using the tool you can add captions, stickers, and a lot of other filters to the created GIF. You can even adjust the speed of the GIF and also select the start and the stop time.
Pros:
● Allows creating a GIF from videos, images, URLs, clips, and others.
● Multiple options for GIF customization are available.
● Offers a huge library of GIFs as well.
Cons:
● The free version processes files with a watermark.
● The site has annoying ads.
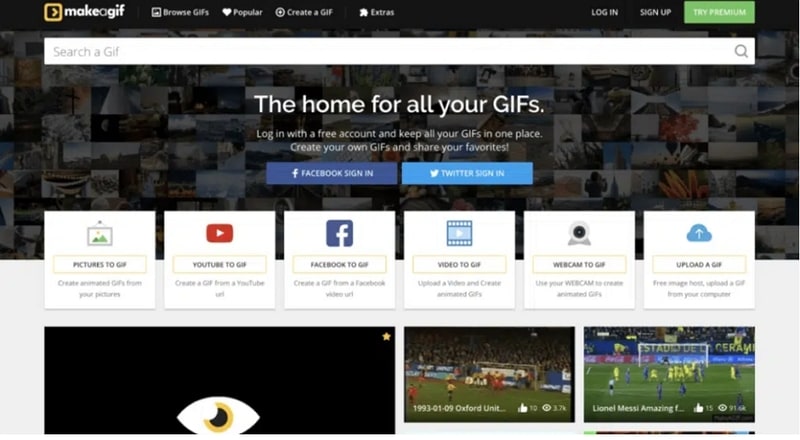
06Freemore Video to GIF Converter
Using this software, videos can be converted into GIFs in a few simple steps. You can also select the frames and also adjust the height and the width of the frames as needed. All key video formats like MP4, MOV, MPEG, and others are supported by the tool. The interface of the tool is simple and the process of creating a GIF is fast.
Pros:
● Free to use software
● Support to multiple video formats
● Allows selecting the exact frames and the width and height of the GIF.
Cons:
● No support for Mac systems.
● Limited customization options as compared to other sites.
07VideoSolo Video Converter Ultimate
Multiple options for creating a GIF are supported by this software that also lets you convert your videos as well as edit them. Using the editing options, you can choose a specific part of the clip, trim a longer video, or can also join multiple clips for creating a GIF. Using the software you can adjust the color grading, saturation, contrast, and other parameters. Also, you can add a picture or text to the GIF to make it look interesting.
Pros:
● Support to a wide range of formats
● Multiple editing options.
● Fast processing speed.
Cons:
● Locating features can be a complicated task.
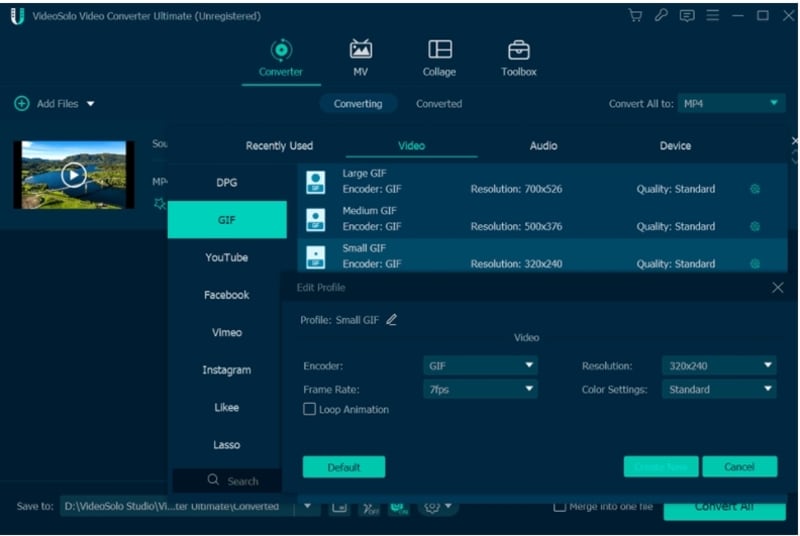
08Ezgif
This is a free online tool for creating GIFs and needs no software download or installation. Simple to use, the program allows adding videos in key formats like MP4, MOV, 3GP, and others for creating a GIF. Local video as well as its URL can be added. The tool allows to trim the unnecessary parts of the video and if not specified the GIF is created using the first 5 seconds of the file.
Pros:
● Free to use online tool.
● Add local videos or online URLs for creating a GIF.
● Allows to trim and crop the added files.
Cons:
● Internet dependency
● The maximum supported file size is 100MB.
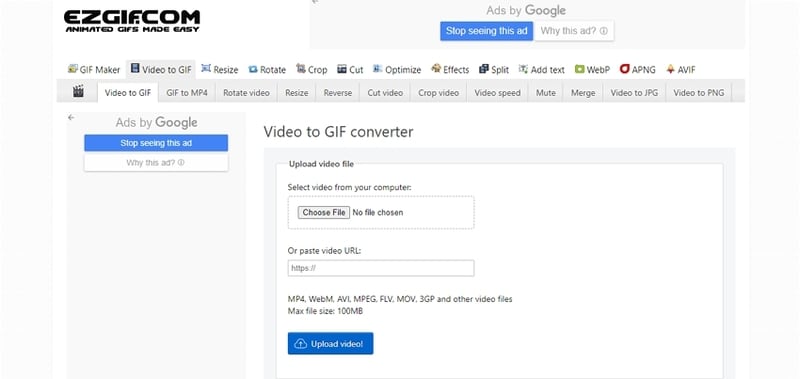
09FlexClip GIF Maker
Using this browser-based tool, videos and images can be quickly converted to GIFs. All the popular media formats are supported by the tool for processing and the interface is user-friendly. Transitions and captions can also be added to GIFs to make them eye-catchy. Other customization options include adjusting the frame, speed, and other parameters.
● No software download or installation is needed.
● Support a wide range of formats.
● Multiple customization options are supported.
Cons:
● Limitation to the video size that can be added.
● Dependency on internet connectivity.
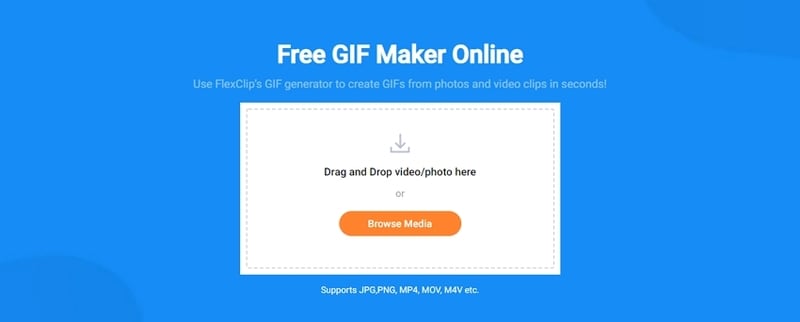
10Convertio
This is a popular online tool that supports video conversion to an array of formats including GIF. Not only local, videos from Google Drive as well as Dropbox can also be added to the interface for processing. If you want a simple tool to create a GIF without much customization and editing, Convertio is the best. The processed files can be saved to the local device or cloud storage.
Pros:
● Add videos from the local device, Google Drive, as well as Dropbox.
● Simple user-interface.
● Processed files can be downloaded and saved to the system as well as the cloud.
Cons:
● The file size limitation of 100MB.
● No option to edit or choose any file specification.
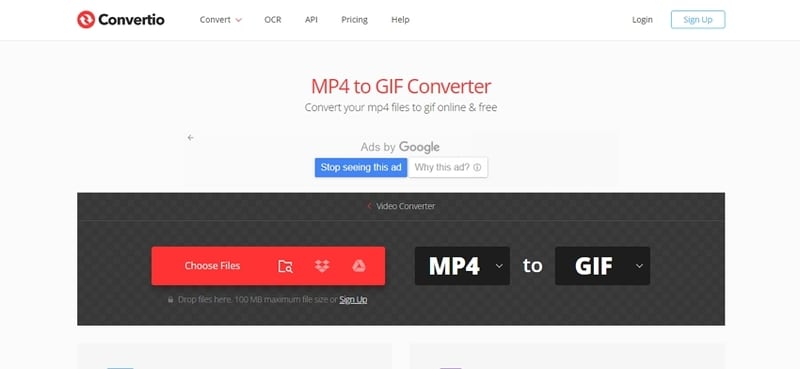
11Zamzar
For a free and quick conversion of videos to GIF, this is an excellent online tool to consider. The process is user-friendly where you just have to add the video or its link and choose GIF as the target format. The tool will automatically convert the added video to a GIF that can be downloaded to the system or can also be sent through an email.
Pros:
● Free and simple to use the tool.
● Support to multiple video formats.
● Processed GIFs can be saved locally or the link can be sent through an email.
Cons:
● Maximum file size support is 50MB.
● No option for selecting any file parameters.
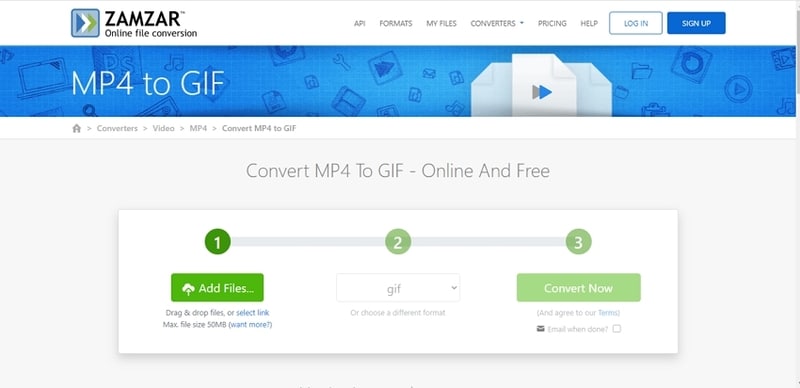
12ImgFlip
Using this online tool, videos and images can be converted to a GIF file quickly. You can either add the media files from your system or also use their link. The tool supports multiple editing and customization options like selecting the size, trimming the video, selecting FPS, adding titles, rotating, and more. You can also save the template of the created file for future use.
Pros:
● GIFs can be created from videos and images.
● Multiple file customization and editing options are supported.
● Multiple options to save, download, and share the created GIF.
Cons:
● The file size limitation of 100MB.
● Internet dependency.
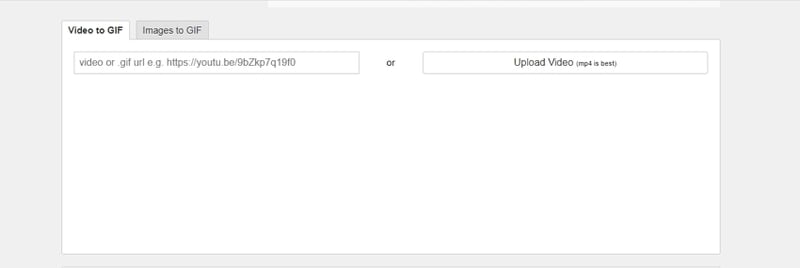
● Key Takeaways from This Episode →
●GIFs are a lot in use these days to express emotion, feelings, or a situation.
●There are several online as well as desktop tools available to convert video to GIF without losing quality.
●Wondershare Filmora is one of the best tools in the category that is simple yet functional and results in high-quality GIF files.
GIFs are images with looping animations for a few seconds and are used a lot over social media sites and other online platforms. There are several sites from where you can download readymade GIFs.
Alternatively, there are countless tools using which customized GIFs can be created from videos. So, if you too are looking for video to GIF converter high quality keep reading.
In this article
01 [The Difference Between A Video And A Gif](#Part 1)
02 [Top 12 Video to GIF Converters](#Part 2)
Part 1 The Difference Between A Video And A Gif
A GIF is a lot in use these days over social media platforms, and other online sites. Standing for Graphics Interchange Format, a GIF is basically a looping animation or a video that has a sequence of frames or images.
Though a lot of people can consider a GIF as a short video, there are a few key differences between the two. The first one lies in the name extension. A GIF file is saved as .gif while a video can be saved into several formats like .mp4, .mov, and more.
A video contains visual information having good quality frames as well as sound while a GIF is a short animation that uses some specific information created from a sequence of frames. Moreover, a GIF does not have a sound and the size is also very small.
Part 2 Top 12 Video to GIF Converters
An array of online and desktop tools is available to convert video to GIF high quality. We have shortlisted the top ones as below.
01** Wondershare Filmora Video Editor
If you are looking for software that lets you create an excellent GIF in a hassle-free manner, Wondershare Filmora is the best choice. This professional software comes with multiple editing and customization capabilities for creating a desired animated file. You can not only create GIFs, but perform a host of additional functions using the tool like video editing, music editing, and more. Once downloaded on your Windows or Mac systems, the software is all set to work as desired without any limitations.
Wondershare Filmora
Get started easily with Filmora’s powerful performance, intuitive interface, and countless effects!
Try It Free Try It Free Try It Free Learn More >
Pros:
● Support to almost all media formats for high quality video to GIF conversion.
● A wide range of editing and customization options are supported.
● Works as a complete video editing tool.
Cons:
● Paid software
02Giphy
When it comes to GIFs, GIPHY is one of the most widely used tools. The tool allows you to create GIFs not only from the locally saved videos but also from YouTube, Vimeo, and other third-party platforms. There are multiple features for creating GIFs using this tool like selecting the length of the GIF, adding captions, text, frame of the GIF, and more. Not only videos, but the software also allows creating GIFs using multiple static photos.
Pros:
● Create GIFs from local as well as online videos
● User-friendly interface
● Support to multiple platforms and OS
Cons:
● The searching function is not very effective.
● Need to sign-up to use the tool.
03Adobe Creative Cloud Express
This is a free video conversion tool that allows creating a GIF from videos in an array of formats. The tool gives you the freedom to choose your GIF size option that includes square, portrait, and landscape. Additionally, you can also select the quality of the GIF. Tools for adjusting and editing several parameters of the GIF are also supported by the software.
Pros:
● Allows creating GIFs in 3 size and multiple quality
● Created GIFs can be shared directly to social networking sites.
● Several editing options are available.
Cons:
● Issues of lags and bugs occasionally
● There are no guides
04Movavi
This is a reliable and widely used video editing tool that supports multiple functions including video to GIF conversion. Several useful functions are supported by the software like batch file processing, easy and quick GIF creation, editing options, and more. The tool is available for multiple platforms as well as for different OS.
Pros:
● Support to a wide range of formats
● Multiple editing options
● Available for different platforms and OS
Cons:
● Need to purchase the software after the limited trial period expires.
● The rendering is slow.
05MakeAGIF
As the name suggests this software is a GIF-making tool that not only converts your videos into a GIF but virtually anything like a collection of pictures, YouTube clips, Facebook clips, and much more. Using the tool you can add captions, stickers, and a lot of other filters to the created GIF. You can even adjust the speed of the GIF and also select the start and the stop time.
Pros:
● Allows creating a GIF from videos, images, URLs, clips, and others.
● Multiple options for GIF customization are available.
● Offers a huge library of GIFs as well.
Cons:
● The free version processes files with a watermark.
● The site has annoying ads.
06Freemore Video to GIF Converter
Using this software, videos can be converted into GIFs in a few simple steps. You can also select the frames and also adjust the height and the width of the frames as needed. All key video formats like MP4, MOV, MPEG, and others are supported by the tool. The interface of the tool is simple and the process of creating a GIF is fast.
Pros:
● Free to use software
● Support to multiple video formats
● Allows selecting the exact frames and the width and height of the GIF.
Cons:
● No support for Mac systems.
● Limited customization options as compared to other sites.
07VideoSolo Video Converter Ultimate
Multiple options for creating a GIF are supported by this software that also lets you convert your videos as well as edit them. Using the editing options, you can choose a specific part of the clip, trim a longer video, or can also join multiple clips for creating a GIF. Using the software you can adjust the color grading, saturation, contrast, and other parameters. Also, you can add a picture or text to the GIF to make it look interesting.
Pros:
● Support to a wide range of formats
● Multiple editing options.
● Fast processing speed.
Cons:
● Locating features can be a complicated task.
08Ezgif
This is a free online tool for creating GIFs and needs no software download or installation. Simple to use, the program allows adding videos in key formats like MP4, MOV, 3GP, and others for creating a GIF. Local video as well as its URL can be added. The tool allows to trim the unnecessary parts of the video and if not specified the GIF is created using the first 5 seconds of the file.
Pros:
● Free to use online tool.
● Add local videos or online URLs for creating a GIF.
● Allows to trim and crop the added files.
Cons:
● Internet dependency
● The maximum supported file size is 100MB.
09FlexClip GIF Maker
Using this browser-based tool, videos and images can be quickly converted to GIFs. All the popular media formats are supported by the tool for processing and the interface is user-friendly. Transitions and captions can also be added to GIFs to make them eye-catchy. Other customization options include adjusting the frame, speed, and other parameters.
● No software download or installation is needed.
● Support a wide range of formats.
● Multiple customization options are supported.
Cons:
● Limitation to the video size that can be added.
● Dependency on internet connectivity.
10Convertio
This is a popular online tool that supports video conversion to an array of formats including GIF. Not only local, videos from Google Drive as well as Dropbox can also be added to the interface for processing. If you want a simple tool to create a GIF without much customization and editing, Convertio is the best. The processed files can be saved to the local device or cloud storage.
Pros:
● Add videos from the local device, Google Drive, as well as Dropbox.
● Simple user-interface.
● Processed files can be downloaded and saved to the system as well as the cloud.
Cons:
● The file size limitation of 100MB.
● No option to edit or choose any file specification.
11Zamzar
For a free and quick conversion of videos to GIF, this is an excellent online tool to consider. The process is user-friendly where you just have to add the video or its link and choose GIF as the target format. The tool will automatically convert the added video to a GIF that can be downloaded to the system or can also be sent through an email.
Pros:
● Free and simple to use the tool.
● Support to multiple video formats.
● Processed GIFs can be saved locally or the link can be sent through an email.
Cons:
● Maximum file size support is 50MB.
● No option for selecting any file parameters.
12ImgFlip
Using this online tool, videos and images can be converted to a GIF file quickly. You can either add the media files from your system or also use their link. The tool supports multiple editing and customization options like selecting the size, trimming the video, selecting FPS, adding titles, rotating, and more. You can also save the template of the created file for future use.
Pros:
● GIFs can be created from videos and images.
● Multiple file customization and editing options are supported.
● Multiple options to save, download, and share the created GIF.
Cons:
● The file size limitation of 100MB.
● Internet dependency.
● Key Takeaways from This Episode →
●GIFs are a lot in use these days to express emotion, feelings, or a situation.
●There are several online as well as desktop tools available to convert video to GIF without losing quality.
●Wondershare Filmora is one of the best tools in the category that is simple yet functional and results in high-quality GIF files.
You Can Turn a TikTok Into a GIF Now
You Can Turn a TikTok Into a GIF Now. Here’s How
An easy yet powerful editor
Numerous effects to choose from
Detailed tutorials provided by the official channel
Want to add sharing flexibility to TikTok videos? Convert them into GIFs!
In this article
01 [What is GIF TikTok?](#Part 1)
02 [How to Make a GIF From a TikTok Video](#Part 2)
Part 1 What Is TikTok GIF?
In today’s IT enhanced lifestyle, having a profound reach on social media is the new name of popularity. Everyone out there is profusely keen on creating and sharing a plethora of content varieties; memes, videos, animations and what not, across social communities. However, TikTok videos lag behind in this race; often lack the ‘Share’ flexibility.
To match up, there are solutions to convert TikTok video into GIFs. A TikTok GIF is a short, impactful and to the point clip that’s here to share fun and exciting content in the most interesting ways. If you have a bunch of TikTok videos to share with your peers, but missing out on an effective sharing solution, you can conveniently look forward to convert those videos into catchy and interesting GIFs that will definitely hold the attention of your viewers.
Feel motivated? See through the rest of this article to know some quick and easy TikTok to GIF conversion tools and software!
Part 2 How to Make a GIF From a TikTok Video
When looking through solutions to create GIF TikTok videos, you will find a pool of methods and tools available on the internet. All you need to do is select the best one for yourself and get started with converting TikTok Videos into GIFs. Given below are some of the best solutions adhering to the aforesaid concern:
01Filmora
Wondershare Filmora Video Editor is one of the best application software to create a TikTok GIF. This is a simple and smart converter application that caters to your concern in just a few minutes. What’s best is that this app is absolutely free to use and is compatible with your PC, smartphone and a variety of other devices. Here’s how you can use Filmora to convert your TikTok videos into GIFs:

Step 1: Import Your Video
Start with importing a desired TikTok video file to the Filmora timeline. You can also ‘Drag and Drop’ the video file to the editor timeline. Using this application, you have the flexibility to import your clip in almost any video format.

Step 2: Edit Your Clip
Suited to your content preferences, you can edit and enhance your clips with a variety of effects, like, cut, trim, rotate, split, etc., and make appropriate speed adjustments. You can even include text messages to make your GIF more impactful.

Wondershare Filmora
Get started easily with Filmora’s powerful performance, intuitive interface, and countless effects!
Try It Free Try It Free Try It Free Learn More >
Step 3: Let’s Save and Share!
When you are happy, save your work using the .gif file extension. That’s it! You are ready to share your creation with your social media peers.

02TikTok’s Inbuilt GIF Converter
TikTok allows you to directly convert its videos into GIFs. You can use the TikTok application in your smartphone to take up the conversion process. All you need to do is follow the steps given below:
Step 1: Select Your TikTok Video
To get started, open the TikTok application in your smartphone and select the video you want to convert into GIF.
Step 2: Share the Video
Click the ‘Share’ icon at the right of the video screen.

Step 3: Format Selection
Scroll down to the bottom of the screen and choose the ‘Share as GIF’ option. This will automatically convert your TikTok video into GIF in a few seconds.

Step 4: Save and Export
Click on the ‘Save Image’ option to save the GIF in your phone’s gallery. You can also export your creation to different social media platforms.
03Wondershare UniConverter
This one is a handy toolbox loaded with a variety of features that allow you to play with your video creativity. Using this tool, you can quickly create GIF for TikTok and also fix the size and duration of the same. This software supports almost all video formats and comes with an inbuilt editor that you can use to add effects and make your GIFs all the more interesting. This is compatible with your Windows or MacOS PC.
Take the following steps to create GIFs from TikTok videos using this software:

Step 1: Download and Launch the Application
Download the Wondershare UniConverter application to your PC from the software’s official website.
Step 2: Open GIF Maker
In the app’s welcome screen, navigate to the ‘Toolbox’ tab and select ‘GIF Maker’ from the panel that gets displayed.
Step 3: Upload Your TikTok Video
In the next pop-up window, select ‘Video to GIF’ and click on the (+) icon in the centre. You can also click on ‘Add Files’ in the top left and choose a saved TikTok video from your PC to upload.

Step 4: Trim Your Video
Trim the uploaded video to the desired portion from where you wish to create the GIF and set adequate time frames for the same. You can even drag the video thumbnail slider to trim the video.

Step 5: Let’s Get Creating!
Set the final size and frame rate from the ‘Output Size’ and ‘Frame Rate’ tabs respectively. To save your creation, browse and choose the desired system folder by clicking on the ‘Save to:’ tab. Lastly, select ‘Create GIF’ to start the conversion process.

04Kapwing GIF Maker
There may be instances where you cannot save or share TikTok videos. To cut the rush in such cases, you can use Kapwing’s GIF Maker to convert videos from TikTok to GIF online. This one is a free video editing tool that works with almost all internet enabled smartphones and supports almost all common video formats. Here’s what you need to do for making GIFs from TikTok videos using this tool:
Step 1: Copy a Video Link
Search your desired TikTok video and click on the ‘Share’ icon. In the drop down menu, select ‘Copy Link’ to save the video link in your device memory. Once this happens, you will get a confirmation message that says, ‘Copied’.

Step 2: Open GIF Maker
Open the GIF Maker tool in your browser and paste the saved TikTok video link in the editor’s URL bar. This will automatically redirect you to the Kapwing Studio, where you have the liberty to trim, crop or split your video clip to the desired time frame. It is better to set a play span of 3-5 seconds.
You can trim the clip by dragging its ends or introduce cuts at specific points using the split button above the editor timeline. To make volume adjustments, select the video layer and click on ‘Edit Video’ and move the adjuster circle to the left or right to decrease, increase and mute the video volume.


Step 3: Download and Share Your Creation
To save your work, tap ‘Export Video’ at the top and select ‘Export as GIF’ from the drop down menu. Wait for the conversion process to finish and click ‘Download’. This will save the GIF to your device.
You will find a watermark at the corner of your clip. Click ‘Sign In to Remove the Watermark’ to remove it. A workspace for the present and later projects will be created, where you can save you work for a couple of days with Kapwing’s free version. To export your work to social media, click ‘Share’. You can even host your creation on websites. Just copy the video link and select ‘Embed’.

05TT Downloader
This one is another online tool you can use to create GIFs from TikTok videos. This is a quick converter tool that transforms TikTok videos to GIFs in 5 easy steps within minutes. It is a browser tool and does not require a software download. All you need to do is explained in the following steps:

Step 1:
Visit the official site of the tool.
Step 2:
Select ‘TikTok to GIF’ to get redirected to the TikTok to GIF Converter home page.
Step 3:
Copy and paste the desired TikTok video link in the converter’s URL bar. To proceed further, click on ‘Get Video’.

Step 4:
Trim your clip within a time frame of 1-10 seconds.
Step 5:
Click ‘Done’ to initiate the conversion process. Once it finishes, you can download the converted GIF to your device.
06MiniTool MovieMaker
You can prefer this tool to convert TikTok videos in your PC into GIFs. This tool gives you the liberty to trim, cut, reverse and rotate GIFs and even add text and filters to them. Here’s how you can use this tool to transform TikTok videos into interesting GIFs:
Step 1:
Download and install this GIF maker tool in your PC. Launch the same when you are done with the installation process.
Step 2:
In the converter window, import and add your desired TikTok clip into the converter timeline.

Step 3:
You are now free to edit and add text to your video.
Step 4:
Once you finish, tap ‘Export’ and choose your output format as GIF.
Step 5:
Hit ‘Export’ to let the conversion process begin.
● Key Takeaways from This Episode →
● TikTok videos often lack the save and share features, which is an obvious necessity of today’s social outlook.
● Varieties of online tools and software are available for converting TikTok videos to GIFs to increase the sharing flexibility.
● Filmora is a quick and intelligent choice to take up the conversion process within a catch of few clicks.
Want to add sharing flexibility to TikTok videos? Convert them into GIFs!
In this article
01 [What is GIF TikTok?](#Part 1)
02 [How to Make a GIF From a TikTok Video](#Part 2)
Part 1 What Is TikTok GIF?
In today’s IT enhanced lifestyle, having a profound reach on social media is the new name of popularity. Everyone out there is profusely keen on creating and sharing a plethora of content varieties; memes, videos, animations and what not, across social communities. However, TikTok videos lag behind in this race; often lack the ‘Share’ flexibility.
To match up, there are solutions to convert TikTok video into GIFs. A TikTok GIF is a short, impactful and to the point clip that’s here to share fun and exciting content in the most interesting ways. If you have a bunch of TikTok videos to share with your peers, but missing out on an effective sharing solution, you can conveniently look forward to convert those videos into catchy and interesting GIFs that will definitely hold the attention of your viewers.
Feel motivated? See through the rest of this article to know some quick and easy TikTok to GIF conversion tools and software!
Part 2 How to Make a GIF From a TikTok Video
When looking through solutions to create GIF TikTok videos, you will find a pool of methods and tools available on the internet. All you need to do is select the best one for yourself and get started with converting TikTok Videos into GIFs. Given below are some of the best solutions adhering to the aforesaid concern:
01Filmora
Wondershare Filmora Video Editor is one of the best application software to create a TikTok GIF. This is a simple and smart converter application that caters to your concern in just a few minutes. What’s best is that this app is absolutely free to use and is compatible with your PC, smartphone and a variety of other devices. Here’s how you can use Filmora to convert your TikTok videos into GIFs:
Step 1: Import Your Video
Start with importing a desired TikTok video file to the Filmora timeline. You can also ‘Drag and Drop’ the video file to the editor timeline. Using this application, you have the flexibility to import your clip in almost any video format.
Step 2: Edit Your Clip
Suited to your content preferences, you can edit and enhance your clips with a variety of effects, like, cut, trim, rotate, split, etc., and make appropriate speed adjustments. You can even include text messages to make your GIF more impactful.
Wondershare Filmora
Get started easily with Filmora’s powerful performance, intuitive interface, and countless effects!
Try It Free Try It Free Try It Free Learn More >
Step 3: Let’s Save and Share!
When you are happy, save your work using the .gif file extension. That’s it! You are ready to share your creation with your social media peers.
02TikTok’s Inbuilt GIF Converter
TikTok allows you to directly convert its videos into GIFs. You can use the TikTok application in your smartphone to take up the conversion process. All you need to do is follow the steps given below:
Step 1: Select Your TikTok Video
To get started, open the TikTok application in your smartphone and select the video you want to convert into GIF.
Step 2: Share the Video
Click the ‘Share’ icon at the right of the video screen.
Step 3: Format Selection
Scroll down to the bottom of the screen and choose the ‘Share as GIF’ option. This will automatically convert your TikTok video into GIF in a few seconds.
Step 4: Save and Export
Click on the ‘Save Image’ option to save the GIF in your phone’s gallery. You can also export your creation to different social media platforms.
03Wondershare UniConverter
This one is a handy toolbox loaded with a variety of features that allow you to play with your video creativity. Using this tool, you can quickly create GIF for TikTok and also fix the size and duration of the same. This software supports almost all video formats and comes with an inbuilt editor that you can use to add effects and make your GIFs all the more interesting. This is compatible with your Windows or MacOS PC.
Take the following steps to create GIFs from TikTok videos using this software:
Step 1: Download and Launch the Application
Download the Wondershare UniConverter application to your PC from the software’s official website.
Step 2: Open GIF Maker
In the app’s welcome screen, navigate to the ‘Toolbox’ tab and select ‘GIF Maker’ from the panel that gets displayed.
Step 3: Upload Your TikTok Video
In the next pop-up window, select ‘Video to GIF’ and click on the (+) icon in the centre. You can also click on ‘Add Files’ in the top left and choose a saved TikTok video from your PC to upload.
Step 4: Trim Your Video
Trim the uploaded video to the desired portion from where you wish to create the GIF and set adequate time frames for the same. You can even drag the video thumbnail slider to trim the video.
Step 5: Let’s Get Creating!
Set the final size and frame rate from the ‘Output Size’ and ‘Frame Rate’ tabs respectively. To save your creation, browse and choose the desired system folder by clicking on the ‘Save to:’ tab. Lastly, select ‘Create GIF’ to start the conversion process.
04Kapwing GIF Maker
There may be instances where you cannot save or share TikTok videos. To cut the rush in such cases, you can use Kapwing’s GIF Maker to convert videos from TikTok to GIF online. This one is a free video editing tool that works with almost all internet enabled smartphones and supports almost all common video formats. Here’s what you need to do for making GIFs from TikTok videos using this tool:
Step 1: Copy a Video Link
Search your desired TikTok video and click on the ‘Share’ icon. In the drop down menu, select ‘Copy Link’ to save the video link in your device memory. Once this happens, you will get a confirmation message that says, ‘Copied’.
Step 2: Open GIF Maker
Open the GIF Maker tool in your browser and paste the saved TikTok video link in the editor’s URL bar. This will automatically redirect you to the Kapwing Studio, where you have the liberty to trim, crop or split your video clip to the desired time frame. It is better to set a play span of 3-5 seconds.
You can trim the clip by dragging its ends or introduce cuts at specific points using the split button above the editor timeline. To make volume adjustments, select the video layer and click on ‘Edit Video’ and move the adjuster circle to the left or right to decrease, increase and mute the video volume.
Step 3: Download and Share Your Creation
To save your work, tap ‘Export Video’ at the top and select ‘Export as GIF’ from the drop down menu. Wait for the conversion process to finish and click ‘Download’. This will save the GIF to your device.
You will find a watermark at the corner of your clip. Click ‘Sign In to Remove the Watermark’ to remove it. A workspace for the present and later projects will be created, where you can save you work for a couple of days with Kapwing’s free version. To export your work to social media, click ‘Share’. You can even host your creation on websites. Just copy the video link and select ‘Embed’.
05TT Downloader
This one is another online tool you can use to create GIFs from TikTok videos. This is a quick converter tool that transforms TikTok videos to GIFs in 5 easy steps within minutes. It is a browser tool and does not require a software download. All you need to do is explained in the following steps:
Step 1:
Visit the official site of the tool.
Step 2:
Select ‘TikTok to GIF’ to get redirected to the TikTok to GIF Converter home page.
Step 3:
Copy and paste the desired TikTok video link in the converter’s URL bar. To proceed further, click on ‘Get Video’.
Step 4:
Trim your clip within a time frame of 1-10 seconds.
Step 5:
Click ‘Done’ to initiate the conversion process. Once it finishes, you can download the converted GIF to your device.
06MiniTool MovieMaker
You can prefer this tool to convert TikTok videos in your PC into GIFs. This tool gives you the liberty to trim, cut, reverse and rotate GIFs and even add text and filters to them. Here’s how you can use this tool to transform TikTok videos into interesting GIFs:
Step 1:
Download and install this GIF maker tool in your PC. Launch the same when you are done with the installation process.
Step 2:
In the converter window, import and add your desired TikTok clip into the converter timeline.
Step 3:
You are now free to edit and add text to your video.
Step 4:
Once you finish, tap ‘Export’ and choose your output format as GIF.
Step 5:
Hit ‘Export’ to let the conversion process begin.
● Key Takeaways from This Episode →
● TikTok videos often lack the save and share features, which is an obvious necessity of today’s social outlook.
● Varieties of online tools and software are available for converting TikTok videos to GIFs to increase the sharing flexibility.
● Filmora is a quick and intelligent choice to take up the conversion process within a catch of few clicks.
How To Make Pinterest Slideshow in Simple Ways
How to Make Pinterest Slideshow in Simple Ways
An easy yet powerful editor
Numerous effects to choose from
Detailed tutorials provided by the official channel
Slideshows are a collection of images arranged together that an audience can quickly swipe through to view the content. Pinterest is known for its one-pin to one post feature. You cannot post more than one image or video in a pin.
Thus, business people could start sharing all of the images or products, services, or articles mostly because it can be stressful to do that. But with the Pinterest slideshow, you can now upload all the images you want to at once in one pin. Moreso, even have people view the pins simultaneously just by swiping through.
In this article
01 [How to display Pinterest’s latest pins in a slideshow?](#Part 1)
02 [How to upload multiple photos to Pinterest?](#Part 2)
03 [How to display Pinterest’s latest pins in a slideshow?](#Part 3)
Part 1 How to Display Pinterest Latest Pins in A Slideshow
Using Pinterest’s latest pins in a slideshow is another way to display the latest pins from any Pinterest user or blogger’s blog. Each image is linked to its pin page on Pinterest instead of the board or profile page if you use the Pinterest profile or board widget.
To install this widget, you need the user or board’s RSS feed URL, then use it as the input for a blogger slide show gadget.
Here are the tricky steps to follow for the Pinterest slide show;
Step 1: Constructing Pinterest RSS feed URL
The Pinterest RSS feed URL of a user is different from aboard.
● It would be the user’s profile URL + feed/RSS for a user. To get your Profile URL, click on your username in the top right corner of your screen, and you will see a URL in your web browser’s URL. That is your profile URL.
● For the board URL, you will get that after clicking on the board from the homepage. The URL would appear on your browser’s URL bar.

Step 2: Reformatting the feed for the slideshow gadget:
The RSS feed from step one is not very compatible with the blogger slideshow gadget. It accepts RSS feed in Media RSS format, but you can convert with Yahoo pipe. Simply plug in your feed URL in the Yahoo pipe URL.
You have to replace the value of the feed URL with the feed URL you got in step one and the pin count with the number of pins displayed on the slide show.
With this, you have successfully converted your feed URL to the media version of the Pinterest feed.
Step 3: Add the slideshow widget
Take the following step to add the slideshow widget.
Go to Dashboard > Layout and click on ‘Add A Gadget.’
Now Add, A Gadget window, scroll down and select Slideshow.

Under Source, select Other.

Put in the converted Pinterest RSS feed URL from step 2 into the Feed URL text box.
Click Save and view your blog.
Part 2 How to Upload Multiple Photos to Pinterest
If you want to display multiple photos of your product or share your brand story with pictures, then this is a feature you will grab. Pinterest allows you to display various products at a time. But first, you must also have a business account to do this.
When you upload multiple photos on Pinterest, they are known as carousel pins. This feature is a great advertising tool and will help you during the Pinterest slideshow.
This is because people would see your carousel on their home feed just like any other pin you have posted. They may also tap on the carousel and swipe through the different photos on the carousel. When the pinner saves it, they have kept the entire image.
Here is a step-by-step method to upload multiple photos to Pinterest.
Step 1: Log into your Pinterest
First, log into your Pinterest business account to access the feature. If you do not have a business account, it is elementary to do so. There is no need for you to enter any billing information if you are wondering about that. It is a straightforward process. Just open your account, click on the drop-down menu near your profile picture, see ‘convert to business,’ then upgrade your account, and you are good to go.
You should also ensure that the photos you want to upload are on your computer. If you have originally planned to use it to explain an article visually, then make sure the particular image that represents that article is correctly saved on your computer. The images should be 1:1 or 2:3 in ratio, and the format either ‘png’ or ‘jpeg.’
Add your pictures and upload. If you want to reorder your pin, you can replace or remove images within the carousel.

Step 2: Add Title
Add a title, description, and website of the carousel pin. Your title will be a snippet of what the blog post or article will be about or the recipe’s title. Your description should be the same as your Pinterest text, and you can also choose to let it appear only on your first image on your carousel pin.
Step 3: Select a Board
The last step is to select a board relevant to your carousel pin. Thus, you have your carousel pin and images. However, you cannot view this immediately as in a standard pin or video pin. But you can go back to your board to view your pin when it is ready.
Part 3 How to Make Pinterest Slideshow In 5 Simple Ways
Slideshows are a beautiful way to enhance your Pinterest account and generate more leads on your Profile. If you’ve been wondering if and how you can make slideshows on Pinterest, here’s a guaranteed step you can follow. But then Pinterest slideshows are instead referred to as a showcase.
However, to access this feature, you must first own a business account on Pinterest.
Here are five (5) simple ways you can make Slideshow on Pinterest:
Step 1: Go to your Pinterest Profile
Click settings next to your profile photo in the top right corner.

Step 2: Select Profile
When the Settings window appears, select Profile.

Step 3: Click Edit
Next to Featured Boards, click Edit.

Step 4: Select Boards
After clicking Edit for your Featured Boards, you’ll reach a screen where you may edit the boards you want to highlight. Select which boards you’d like to feature by clicking on each drop-down menu.
Opening a new Pinterest page is a good idea. Scroll down to Boards with the most Pin impressions under Analytics>Profile. These are the boards that I highlighted.

Step 5: Save
When you’ve decided which boards to include in your Featured, click Save.
● Bonus – Wondershare Filmora
With this feature, you can also tweak your Pinterest slides and make them look professional and befitting to your audience using Wondershare Filmora Video Editor .
For Win 7 or later (64-bit)
For macOS 10.12 or later
Wondershare Filmora is an online video editing software with several unique features, including split-screen, freeze-frame, loop images, and videos to help you create top-notch visual content for your brand. With features like the Chroma key, you can easily create special effects in your Pinterest slideshow background.
You can also use color match and video effects to enhance the quality of the slide.
● Ending Thoughts →
● Making a Pinterest slideshow can be confusing if you do not have the correct information. But if you do, it’ll be a great way to spice up your social media content and create more leads for your business.
● Pinterest is a social media platform that keeps growing and adding more features by the day. It is also increasing the number of users per day. Try out the simple steps stated on how to make a slideshow on Pinterest. Finally, by incorporating Filmora in your levelling up plans, you will be able to bring your brand in front of your target customer and present it nicely.
Slideshows are a collection of images arranged together that an audience can quickly swipe through to view the content. Pinterest is known for its one-pin to one post feature. You cannot post more than one image or video in a pin.
Thus, business people could start sharing all of the images or products, services, or articles mostly because it can be stressful to do that. But with the Pinterest slideshow, you can now upload all the images you want to at once in one pin. Moreso, even have people view the pins simultaneously just by swiping through.
In this article
01 [How to display Pinterest’s latest pins in a slideshow?](#Part 1)
02 [How to upload multiple photos to Pinterest?](#Part 2)
03 [How to display Pinterest’s latest pins in a slideshow?](#Part 3)
Part 1 How to Display Pinterest Latest Pins in A Slideshow
Using Pinterest’s latest pins in a slideshow is another way to display the latest pins from any Pinterest user or blogger’s blog. Each image is linked to its pin page on Pinterest instead of the board or profile page if you use the Pinterest profile or board widget.
To install this widget, you need the user or board’s RSS feed URL, then use it as the input for a blogger slide show gadget.
Here are the tricky steps to follow for the Pinterest slide show;
Step 1: Constructing Pinterest RSS feed URL
The Pinterest RSS feed URL of a user is different from aboard.
● It would be the user’s profile URL + feed/RSS for a user. To get your Profile URL, click on your username in the top right corner of your screen, and you will see a URL in your web browser’s URL. That is your profile URL.
● For the board URL, you will get that after clicking on the board from the homepage. The URL would appear on your browser’s URL bar.
Step 2: Reformatting the feed for the slideshow gadget:
The RSS feed from step one is not very compatible with the blogger slideshow gadget. It accepts RSS feed in Media RSS format, but you can convert with Yahoo pipe. Simply plug in your feed URL in the Yahoo pipe URL.
You have to replace the value of the feed URL with the feed URL you got in step one and the pin count with the number of pins displayed on the slide show.
With this, you have successfully converted your feed URL to the media version of the Pinterest feed.
Step 3: Add the slideshow widget
Take the following step to add the slideshow widget.
Go to Dashboard > Layout and click on ‘Add A Gadget.’
Now Add, A Gadget window, scroll down and select Slideshow.
Under Source, select Other.
Put in the converted Pinterest RSS feed URL from step 2 into the Feed URL text box.
Click Save and view your blog.
Part 2 How to Upload Multiple Photos to Pinterest
If you want to display multiple photos of your product or share your brand story with pictures, then this is a feature you will grab. Pinterest allows you to display various products at a time. But first, you must also have a business account to do this.
When you upload multiple photos on Pinterest, they are known as carousel pins. This feature is a great advertising tool and will help you during the Pinterest slideshow.
This is because people would see your carousel on their home feed just like any other pin you have posted. They may also tap on the carousel and swipe through the different photos on the carousel. When the pinner saves it, they have kept the entire image.
Here is a step-by-step method to upload multiple photos to Pinterest.
Step 1: Log into your Pinterest
First, log into your Pinterest business account to access the feature. If you do not have a business account, it is elementary to do so. There is no need for you to enter any billing information if you are wondering about that. It is a straightforward process. Just open your account, click on the drop-down menu near your profile picture, see ‘convert to business,’ then upgrade your account, and you are good to go.
You should also ensure that the photos you want to upload are on your computer. If you have originally planned to use it to explain an article visually, then make sure the particular image that represents that article is correctly saved on your computer. The images should be 1:1 or 2:3 in ratio, and the format either ‘png’ or ‘jpeg.’
Add your pictures and upload. If you want to reorder your pin, you can replace or remove images within the carousel.
Step 2: Add Title
Add a title, description, and website of the carousel pin. Your title will be a snippet of what the blog post or article will be about or the recipe’s title. Your description should be the same as your Pinterest text, and you can also choose to let it appear only on your first image on your carousel pin.
Step 3: Select a Board
The last step is to select a board relevant to your carousel pin. Thus, you have your carousel pin and images. However, you cannot view this immediately as in a standard pin or video pin. But you can go back to your board to view your pin when it is ready.
Part 3 How to Make Pinterest Slideshow In 5 Simple Ways
Slideshows are a beautiful way to enhance your Pinterest account and generate more leads on your Profile. If you’ve been wondering if and how you can make slideshows on Pinterest, here’s a guaranteed step you can follow. But then Pinterest slideshows are instead referred to as a showcase.
However, to access this feature, you must first own a business account on Pinterest.
Here are five (5) simple ways you can make Slideshow on Pinterest:
Step 1: Go to your Pinterest Profile
Click settings next to your profile photo in the top right corner.
Step 2: Select Profile
When the Settings window appears, select Profile.
Step 3: Click Edit
Next to Featured Boards, click Edit.
Step 4: Select Boards
After clicking Edit for your Featured Boards, you’ll reach a screen where you may edit the boards you want to highlight. Select which boards you’d like to feature by clicking on each drop-down menu.
Opening a new Pinterest page is a good idea. Scroll down to Boards with the most Pin impressions under Analytics>Profile. These are the boards that I highlighted.
Step 5: Save
When you’ve decided which boards to include in your Featured, click Save.
● Bonus – Wondershare Filmora
With this feature, you can also tweak your Pinterest slides and make them look professional and befitting to your audience using Wondershare Filmora Video Editor .
For Win 7 or later (64-bit)
For macOS 10.12 or later
Wondershare Filmora is an online video editing software with several unique features, including split-screen, freeze-frame, loop images, and videos to help you create top-notch visual content for your brand. With features like the Chroma key, you can easily create special effects in your Pinterest slideshow background.
You can also use color match and video effects to enhance the quality of the slide.
● Ending Thoughts →
● Making a Pinterest slideshow can be confusing if you do not have the correct information. But if you do, it’ll be a great way to spice up your social media content and create more leads for your business.
● Pinterest is a social media platform that keeps growing and adding more features by the day. It is also increasing the number of users per day. Try out the simple steps stated on how to make a slideshow on Pinterest. Finally, by incorporating Filmora in your levelling up plans, you will be able to bring your brand in front of your target customer and present it nicely.
Top 12 2D Animation Studios All Should Check Out
Top 12 2D Animation Studios All Should Check Out
An easy yet powerful editor
Numerous effects to choose from
Detailed tutorials provided by the official channel
Now, when it comes to video marketing, the majority of businesses prefer choosing 2D animations. The reason being 2D animations have a lower production cost and they still offer complete liberty over creativity. However, it’s worth noting that editing a visually engaging 2D animation requires expertise.
That’s why it’s always an ideal solution to hire a dedicated 2D animation company. Such organizations have experienced video editors who specialize in 2D video editing and can craft the perfect 2D animation for your brand. In this article, we are going to walk you through a list of the top 12 2D animation studios you can hire to launch an enticing marketing video for your business.
In this article
01 [What is a 2D Animation Video and How Much Does a 2D Animation Video Cost?](#Part 1)
02 [How Much Time Does It Take to Create a 2D Animation Video?](#Part 2)
03 [What Are the Best Company for Creating 2D Animation Video?](#Part 3)
Part 1 What is a 2D Animation Video and How Much Does a 2D Animation Video Cost?
First things first; what is a 2D animation and why is it necessary to hire a 2D animation company? In layman’s terms, a 2D animation is a video where the movements are represented in two-dimensional space. The subjects in the video can either move forward or backward, but they can’t be allowed to move in a third dimension (depth).
Now, even though there are tools you can use to edit a 2D animation on your own, the process is time-consuming and requires certain expertise. And, since the primary objective of creating a 2D animation video is to engage potential customers, it’s always necessary to be super creative with the editing approach. This is the reason why the majority of brands hire professional 2D animation studios for the job.
The cost to create a 2D animation video can range anywhere between $1,000 to $10,000. It all depends on the length of the video, the production company you hire, and the quality you are looking for. But, it’s also worth noting that high pricing does not always mean superior quality as well. You’ll have to be extra cautious while picking through the best 2D animation studios.
Part 2 How Much Time Does It Take to Create a 2D Animation Video?
Due to their immense popularity in the marketing world, many business owners and marketers want to know how much time it takes to create a 2D animation video. Well, the answer is - it depends. If you have hired a team of professional editors or a dedicated 2D animation company, you’ll get your animated video within a week. However, if you try to follow the DIY approach and don’t know where to get started, it can even take up to 3-4 weeks for the video to complete.
Part 3 What Are the Best Company for Creating 2D Animation Video?
Now that you know the cost and time it takes to create a 2D animation video, let’s dive into the list of the most popular 2D animation studios you can hire for the next project. We have listed these companies on the basis of their customer reviews and pricing so that you can make the right decision easily.
01Explain Ninja
Minimum Project Size: $5,000
Team Size: 100-300
Location: Poland
Ratings: 4.5/5
Explain Ninja is a popular Poland-based 2D animation company that offers a wide variety of video production services to global clients. The company has already worked with big brands like Google, Bolt, and MyTaxi and is more than ready to create a 2D animation video for you as well.
The team can create different types of marketing videos including whitepaper animations, explainer videos, conventional 2D animations, etc. Basically, if you have the desired budget and are looking for a professional video production company, Explain Ninja is the right answer.
02** Wondershare Filmora Video Editor
Minimum Project Size: $100 (Depends on the type of video you want to edit)
Team Size: The tool is an ideal choice for DIY editing
Ratings: 5/5
Technically not a 2D animation studio, Wondershare Filmora is a full-scale video editing tool designed to help editors create stunning videos. The tool offers a plethora of features that make it the best choice for people who want to create 2D animations on their own.
Filmroa has a built-in media library where you can find an array of 2D animation templates, video graphics, and transitions that could be integrated into a video within a few seconds. Not to mention, its timeline-based interface will make it a hassle-free job to create high-quality 2D animations that engage the viewers and help you promote your product more effectively.
For Win 7 or later (64-bit)
For macOS 10.12 or later
03Sparkhouse
Minimum Project Size: $10,000
Team Size: 10-50
Location: California
Ratings: 4/5
SparkHouse is another popular 2D animation studio that primarily specializes in corporate and commercial projects. The company is based in California, USA, and has worked with top brands like YouTube and Forever 2Sparkhouse offers a wide variety of video production services including 2D animations, explainer videos, and regular white paper animations.
Unique storytelling and custom transitions are two of the major USPs of Sparkhouse. The only downside of Sparkhouse is its expensive price tag. Due to its extensive popularity, Sparkhouse charges a hefty amount for its projects, which means it’s only ideal for large enterprises with a solid marketing budget.
04Studio Pigeon
Minimum Project Size: $5,000
Team Size: 50-500
Location: Poland
Ratings: 5/5
Studio Pigeon is also a popular Poland-based 2D animation company that provides full-scale video production services to a global clientele. Studio Pigeon’s portfolio includes some of the industry leaders including Microsoft, Ikea, and FOX Networks.
While Studio Pigeon specializes in all types of video production services, 2D explainer videos are their strong point. So, if you are looking to create a stunning explainer video for a newly launched product or service, you can get in touch with Studio Pigeon and let expert designers create a stunning video for you.
05BluBlu Studios
Minimum Project Size: $5,000
Team Size: 50-250
Location: Poland and USA
Ratings: 4.5/5
BluBlu Studios is one of the best 2D animation studios having two different branches in Poland and Chicago, USA. The company is well-renowned for its remarkable work across the industry. Since its inception in 2013, BluBlu Studios has worked with both small-scale businesses and fortune 500s. During this period, the company has also worked with many big brands including The New York Times, IKEA, and Twitter.
Basically, if you want to get a high-quality 2D animation for your product/services, BluBlu Studios is worth the consideration. Even if you own a startup or a small business, BluBlue Studios will allow you to get a stunning 2D animated video without burning a hole in your wallet.
06Epipheo
Minimum Project Size: $12,000
Team Size: 10-100
Location: Los Angeles
Ratings: 5/5
With Google considering it as their official marketing partner, Epipheo is undoubtedly one of the most reliable 2D animation studios you can hire to create a high-quality 2D animation for your marketing campaigns.
In addition to end-to-end video production services, Epipheo also offers other digital services including UI/UX design and marketing assistance. In short, Epiheo can handle the entire online marketing campaign for your brand. However, since the company has Google on its portfolio, the production charges are going to be comparatively higher than other available options.
07Snowy Peak
Minimum Project Size: $3,000
Team Size: 10 Employees
Location: Colorado, USA
Ratings: 3.5/5
Snowy Peak is a Colorado-based video production company that offers full-scale production services to help brands elevate their online presence and attract more customers.
As compared to other available options, Snowy Peak’s services are relatively affordable - so even if you have a limited marketing budget, you can hire them to get your 2D animation video. In addition to end-to-end video production services, Snowy Peak also specializes in direction assistance so that you can launch the most stunning marketing video for your brand.
08Animation Explainers
Minimum Project Size: $2,000
Team Size: 10 Employees
Location: Dublin, Ireland
Ratings: 4.5/5
Animation Explainers is a small-scale video production company that primarily works with startups and small-scale businesses. Based out of Dublin, Ireland, Animation Explainers is working with a vision to help businesses gain better online exposure through high-quality video production. Animation Explainers is an ideal video production studio for brands who want to launch a 2D animation video at a lower production cost.
09Darvideo Animation Studio
Minimum Project Size: $1,000+
Team Size: 50 Employees
Location: UKRAINE
Ratings: 4/5
Darvideo Animation Studio is one of the most affordable video production studios that offer an array of video production services such as explainer videos, 2D animations, 3D animated videos, and explainer videos.
The services start at as low as $1,000, which means you can launch a high-quality animation video without going over budget. Apart from 2D animation videos, Darvideo Animation Studio can also help you launch short-form videos to engage potential buyers across different platforms. Ideally, the company is a suitable choice for small-scale businesses and startups that have a limited marketing budget for 2D animated videos.
10The DVI Group
Minimum Project Size: $10,000+
Team Size: 50 Employees
Location: Atlanta
Ratings: 4.5/5
The DVI Group is a widely popular 2D animation company that has worked with different brands and helped them gain massive exposure in the digital landscape. The DVI team specializes in both 2D as well as 3D animation, which means brands can target different types of customers through dedicated videos. You can also hire the company to get short-form videos to engage customers across different social media platforms.
111Kasra Design
Minimum Project Size: $5,000+
Team Size: 50 Employees
Location: Malaysia
Ratings: 4.5/5
If you are looking for an experienced 2D animation studio, Kasra Design is the right answer. This Malaysia-based 2D animation company has delivered more than 600 2D and 3D animations to different organizations. Their services are relatively affordable, which means you can hire them even with a limited marketing budget.
121Demo Duck
Minimum Project Size: $2,000
Team Size: 100 Employees
Location: Chicago, United States
Rating: 4/5
Last, but certainly not least, Demo Duck is an ideal 2D animation company for businesses who want to step up their marketing game through creativity. The team has highly talented video editors who have years of experience working with a variety of brands from different parts of the world. Even though the company specializes in 2D animation videos, you can also hire them to get explainer videos, 3D animations, and conventional marketing videos.
Key Takeaways from This Episode
● 2D animations are one of the great ways to engage potential customers and drive better brand exposure
● The cost to create a 2D animation varies for each brand and mainly depends on the 2D animation company you hire
● There are dozens of 2D animation studios you can hire to launch a custom 2D animation or use a professional tool like Wondershare Pro to create a dedicated 2D animated video by yourself.
Also read:
- New How to Convert Video to GIF Fast & Easy for 2024
- Updated In 2024, Top 12 Illusion Gifs Top Picks
- 2024 Approved 10 Best Photoshop Cartoon Effects For Creatives
- New Ways to Create Animated Clipart in PowerPoint for 2024
- 2024 Approved Top 12 Video to GIF Converters High Quality to Check Out
- Updated Top 10 Online Animated Logo Makers Everyone Should Know
- New Learn All About Lip-Syncing in Animation for 2024
- Updated Top 3 Ways to Create Gif Images with Great 3D Gif Maker for 2024
- 2024 Approved Before You Learn Facebook Slideshow 5 Things You Should Know
- New How to Make Your Characters Interactive in Unity Animation Rigging for 2024
- New In 2024, What Make Aesthetic Cartoon Drawing More Understandable
- New 2024 Approved 15 Types of Cartoon Drawing Styles Examples
- Updated How to Find & Make Animated Christmas GIFs, In 2024
- Updated 2024 Approved 10 of the Best Disney Animated Shows (Sorted by Popularity Ascending)
- New Whats the Best 10 Photo Animator Templates That Bring Your Images to Life for 2024
- Updated 2024 Approved Little Known Techniques of Motion Graphics in Premiere Pro
- Updated 2024 Approved Top 12 Evil Cartoon Characters of All Time
- In 2024, How to use iSpoofer on Honor 90? | Dr.fone
- How to Rescue Lost Contacts from G2?
- Complete guide for recovering pictures files on Redmi 12.
- How to Fix Android.Process.Media Has Stopped on Realme 12 5G | Dr.fone
- How to get back lost photos from Nokia C22.
- In 2024, Full Guide to Fix iToolab AnyGO Not Working On Samsung Galaxy S24 | Dr.fone
- iSpoofer is not working On Samsung Galaxy A23 5G? Fixed | Dr.fone
- How can I get more stardust in pokemon go On Apple iPhone X? | Dr.fone
- In 2024, Methods to Transfer from Apple iPhone 6 to Android | Dr.fone
- Detailed guide of ispoofer for pogo installation On Realme C67 4G | Dr.fone
- Title: Updated Creative Ways to Create iPhone Text GIF
- Author: Elon
- Created at : 2024-06-30 12:28:14
- Updated at : 2024-07-01 12:28:14
- Link: https://animation-videos.techidaily.com/updated-creative-ways-to-create-iphone-text-gif/
- License: This work is licensed under CC BY-NC-SA 4.0.
