
:max_bytes(150000):strip_icc():format(webp)/tablets-vs-laptops-832333-93961eb085ff44d99d3836a0d0fa486a.png)
Updated How to Analyze an Editorial Cartoon Easily for 2024
How to Analyze an Editorial Cartoon Easily
How to Analyze an Editorial Cartoon
An easy yet powerful editor
Numerous effects to choose from
Detailed tutorials provided by the official channel
We all remember opening our daily newspaper and seeing a graphical representation of some new scoop or story that gives you a gist of what is happening, usually involving humor or sarcasm. That is what one would call and editorial cartoon and they are quite popular amongst newspapers, internet blogs and most recently, Social Media.
Some would even say that ‘Memes’ are an evolved form of editorial cartoons. They are funny, entertaining and can even portray some type of story. Editorial cartoons, in layman terms are a graphical approach to reflect the creator’s ideas. These are usually drawn on a tight deadline; hence feature simple caricatures and whimsical characters.
Cartoonists and hobbyists around the world can save on time using online tools to bring their ideas to life. Today, with some help from the right technology, anybody can try their hands in drawing amazing characters, combining both visual and verbal languages.
If you are someone who feels they have an amazing idea for a cartoon but lacks the skills to draw one can choose from a plethora of tools like Powtown, Photoshop or AI Artist to create amazing sketches and drawing, in half the time.
In this article
01 [Always Be Timely — Editorial Cartoons in a Snap](#Part 1)
02 [The 8 Best Apps to Turn Photos Into Cartoons and Sketches](#Part 2)
03 [How to Make 3D Cartoon From a Photo](#Part 3)
Part 1 Always Be Timely — Editorial Cartoons in a Snap
When a new idea pops into your head, we are usually overwhelmed or excited by its prospects of it that we forget to analyze its features before proceeding to turn it into a cartoon. Here are some tips to help you look into the details of your cartoon.
● Make a note of all the characters in your cartoon strip, what actions are they involved in and the dialogues that are being uttered.
● From which angle or whose angle the story is being told.
● Divide the cartoon design into four quadrants; Top Right & Left, Bottom Right & Left.
● Pay attention to key elements such as use of furniture, tools, technology or signs.
● Define traits like time of day, time of the year or time in history where the context is set.
● Keep in mind the audience you are reaching out to. You can ensure reliability the subtle use of intellect and humour.
Now that you have a clearer picture of what you are trying to depict it is best not to delay the idea and start cracking your creative eggs.
Beginners can use an easy tool like Powtoon, and its simple drag and drop interface to start making cartoons in just three simple steps. You can save up on a lot of time and get your cartoon ready for uploading to your new blog post.
Step 1: Set a Background for your Cartoon
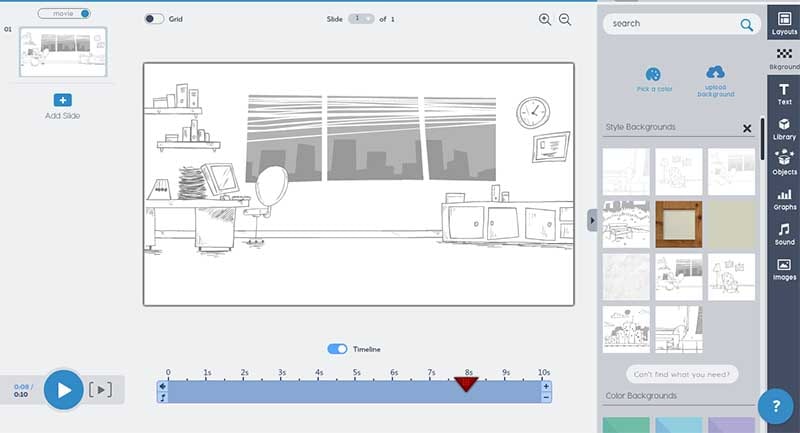
Open the Powtoon Studio on your system and click on ‘Backgrounds’ located on the panel to your right. It will open up a vast library filled with ready to use backgrounds.
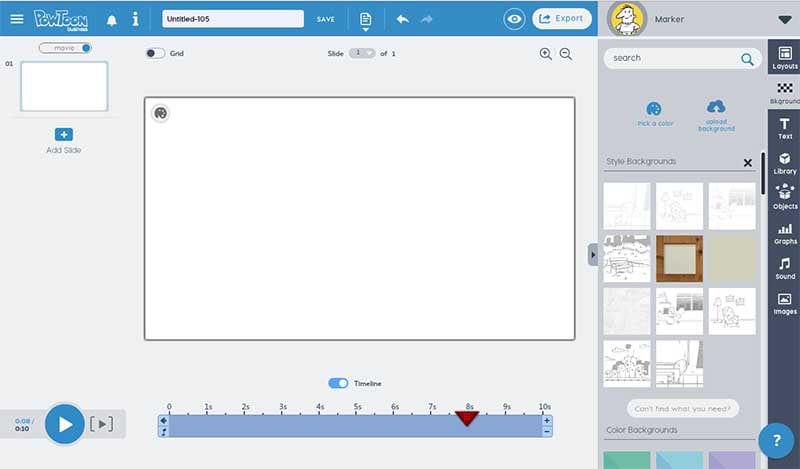
Select any you like to get started. It will intently appear on the board.
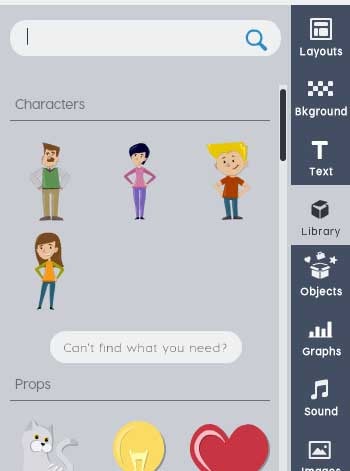
Step 2: Select the Characters for your Cartoon
Well, you have a setting and now it is time to place your characters in it. Click on the ‘Animated Character’ from the panel. Choose any template for your characters.
Step 3: Add the Text
There are various ways you can add dialogues, messages or texts to your cartoon. You can click on ‘Text’ and add a Quote Box or Dialogue Box. You can edit your text by simply clicking on the box.
Part 2 The 8 Best Apps to Turn Photos Into Cartoons and Sketches
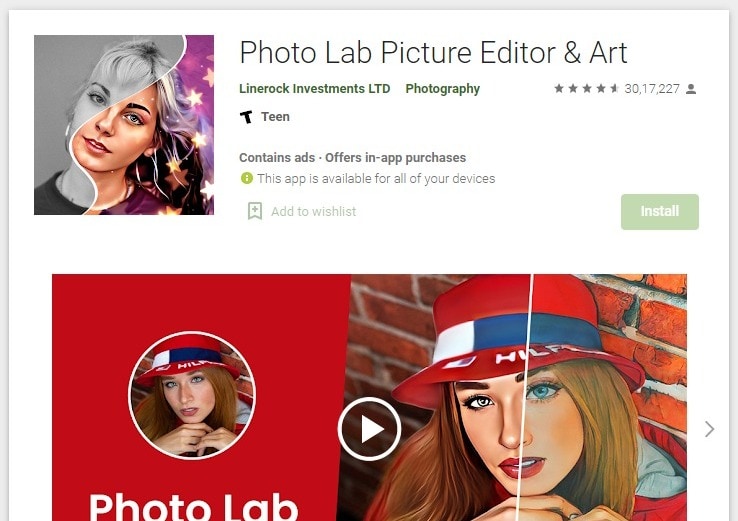
01Photo Lab Picture Editor
Photolab is a great choice for turning your photos into a painting, sketch or a watercolor image. Along with filters you will get montages, borders and frames to make your art work more realistic. You will find all presets in the effects category. It also features filters like digital rain and jigsaw puzzle. Photolab can also be used as a photo editor as it is capable to perform color adjustment, rotate and crop.
Key Features:
● 800+ effects.
● E-card templates for special occasions.
● You can choose a photo from gallery or click one using the camera app.
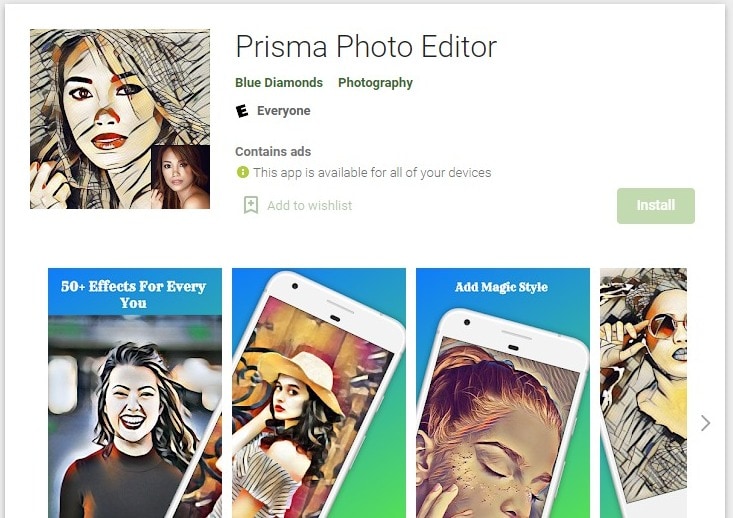
02Prisma Photo Editor
Prisma has the magical ability to turn your photo or sketch into a Van Gogh or Picasso style painting. Wondering how? It has filters that are inspired by the eminent artist around the world. Choose a photo from your gallery and choose from exciting filters. Prisma also have cool editing tools that help you adjust the intensity of the filters applied if you want to.
Key Features
● Online App community.
● Similar to Instagram
● artistic filters.
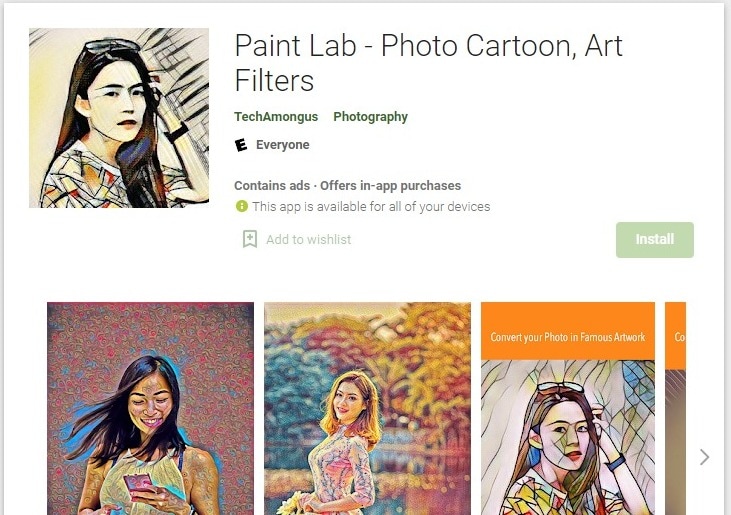
03Paint Lab – Photo Cartoon
Paintlab features an easy to use interface and wide range of filters. With it you can turn any photos into a cartoon or a drawing just in few seconds. Once you are done editing you can share your final work on any social media platform directly from paintlab. It is compatible only with androids.
Key Fetaures
● Fast editing
● Perfect or beginners.
● Includes beautification and imperfection correction tools and effects.
04Cartoon Photo PRO
Using Cartoon Photo Pro alongside your photos you can also turn your videos into cartoon. Effects are artistic and customizable. Only downside it doesn’t come for free. It also has great ratings in Playstore.

Key Features
● User friendly interface
● Animates videos.
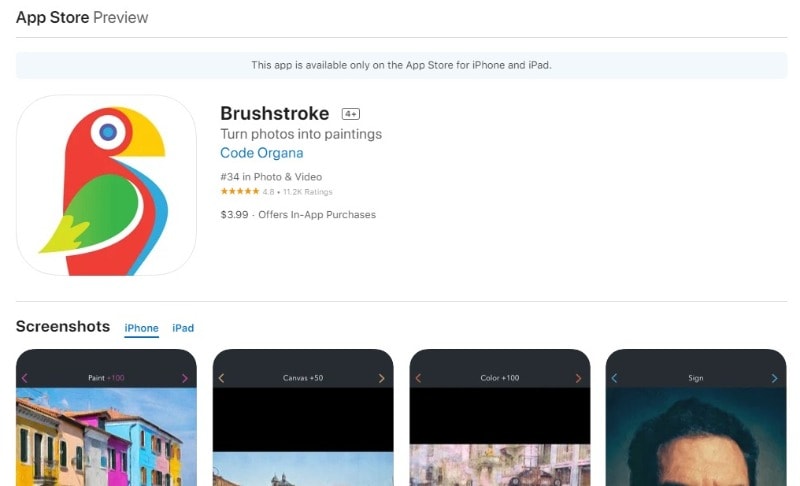
05Brushstroke
Brushstroke is ideal for editing and printing high resolution photos. The app comes with a paint directly option. It is not android compatible. The best feature is apart from filters and painting styles you can also pick the color palette and canvas surface.
Key Features
● You can sign your photos before printing
● Wide range of styles and sub-styles.
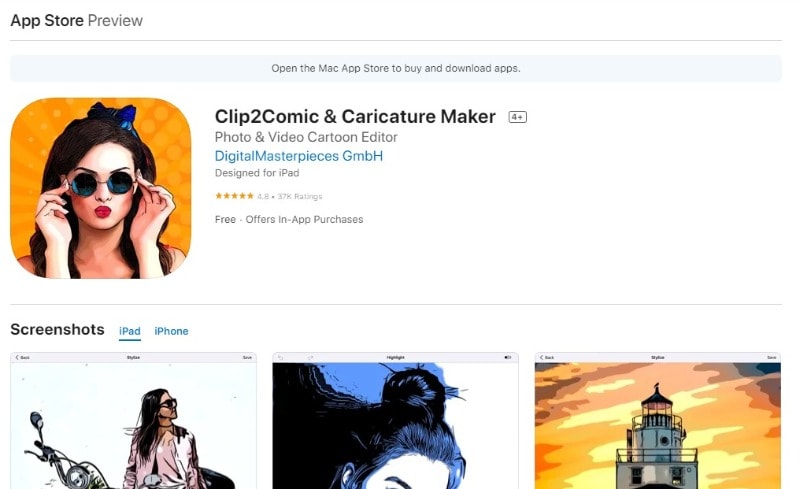
06Clip2Comic
If you like having fun and playing around we bet you would love an photo editing app that turn your close ones’ photo into caricatures. One tap can give you comic-book style drawing and sketches. This is one of best sketch and animation apps suggested for iPhone users. User friendly interface is an added bonus.
Key Features
● Live preview animation camera option.
● Carton-style photo effects.
07PhotoMania
PhotoMania is fun to use, if you want to try out different effects then you are at the right app. It has 400 presets in total including vintage looks and effects for sketches. PhotoMania has a collection of cool and exciting frames that you can add to your photos to make them more interesting. If you are someone who likes to send e-cards here you will get dozens of options. You can also utilize PhotoMania as a photo editor as it features the best exposure settings. And we know how important masking tool is, it helps you create neat photos, the app also has this amazing feature.
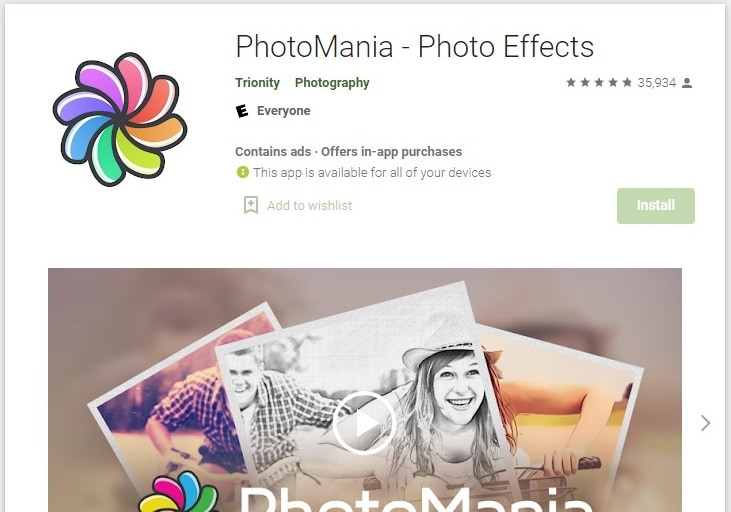
Key Features:
● Advanced photo editing tools and presets, for instance HDR and LOMO.
● It can also make your photo a painting.
● Adds textures and offers holiday templates.
08Toonme
Toonme has similar photo editing features like Clip2Comic. Only it is better. It has AI assistance that helps you create realistic effects. You can choose from the variety of styles and even tweak them to get a personalized style. Toonme is free to download but if you want use pro features you can subscribe to their monthly affordable package. Also, it is compatible with both iOS and Android devices.
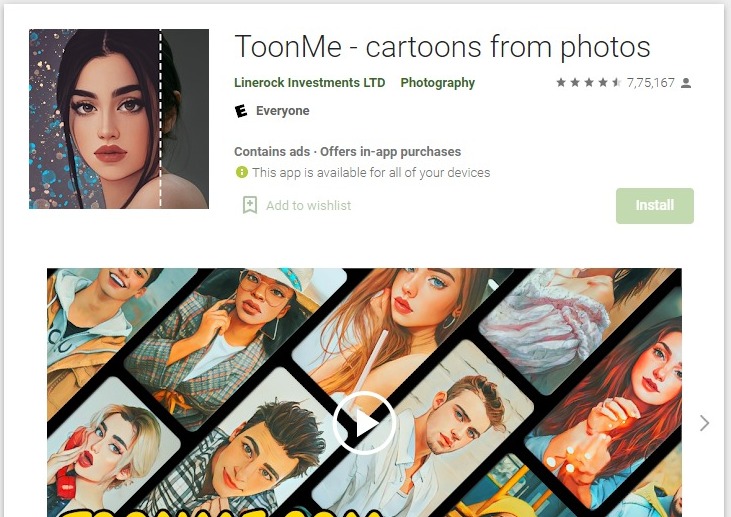
Key Features:
● Offers hand-drawn effects.
● Offers numerous layouts that goes well with profile pictures even instagram stories.
● You can share your work with other Toonme Users.
Part 3 How to Make 3D Cartoon From a Photo
Do you know that animators used to hand sketch every frame and every detail that too with continuation? Thanks to our modern day technology we can take a snap of any object or person and turn that into a cartoon within few seconds. With the right amount of help and creativity you can create characters that are entertaining and engaging at the same time. Wondershare Filmora Video Editor can be used to create animated videos. Amazing features and filters save editing time while making the entire process flexible. Though we have already mentioned eight apps for sketching, animating and caricaturing your photos, Filmora is a complete package. Motion tracking, easy zoom in and out, masking, panning and color correction are some of the best features offered by this editing software. It can run on both PC and Mac. User friendly interface suits both professionals as well as beginner.
For Win 7 or later (64-bit)
For macOS 10.12 or later
● Ending Thoughts →
● Creating an animated video that stands as an exception is now simple and hassle-free.
● Never be afraid to experiment and explore amazing ways of story-telling.
● Things discussed so far will help you analyze and understand cartoons and animation.
We all remember opening our daily newspaper and seeing a graphical representation of some new scoop or story that gives you a gist of what is happening, usually involving humor or sarcasm. That is what one would call and editorial cartoon and they are quite popular amongst newspapers, internet blogs and most recently, Social Media.
Some would even say that ‘Memes’ are an evolved form of editorial cartoons. They are funny, entertaining and can even portray some type of story. Editorial cartoons, in layman terms are a graphical approach to reflect the creator’s ideas. These are usually drawn on a tight deadline; hence feature simple caricatures and whimsical characters.
Cartoonists and hobbyists around the world can save on time using online tools to bring their ideas to life. Today, with some help from the right technology, anybody can try their hands in drawing amazing characters, combining both visual and verbal languages.
If you are someone who feels they have an amazing idea for a cartoon but lacks the skills to draw one can choose from a plethora of tools like Powtown, Photoshop or AI Artist to create amazing sketches and drawing, in half the time.
In this article
01 [Always Be Timely — Editorial Cartoons in a Snap](#Part 1)
02 [The 8 Best Apps to Turn Photos Into Cartoons and Sketches](#Part 2)
03 [How to Make 3D Cartoon From a Photo](#Part 3)
Part 1 Always Be Timely — Editorial Cartoons in a Snap
When a new idea pops into your head, we are usually overwhelmed or excited by its prospects of it that we forget to analyze its features before proceeding to turn it into a cartoon. Here are some tips to help you look into the details of your cartoon.
● Make a note of all the characters in your cartoon strip, what actions are they involved in and the dialogues that are being uttered.
● From which angle or whose angle the story is being told.
● Divide the cartoon design into four quadrants; Top Right & Left, Bottom Right & Left.
● Pay attention to key elements such as use of furniture, tools, technology or signs.
● Define traits like time of day, time of the year or time in history where the context is set.
● Keep in mind the audience you are reaching out to. You can ensure reliability the subtle use of intellect and humour.
Now that you have a clearer picture of what you are trying to depict it is best not to delay the idea and start cracking your creative eggs.
Beginners can use an easy tool like Powtoon, and its simple drag and drop interface to start making cartoons in just three simple steps. You can save up on a lot of time and get your cartoon ready for uploading to your new blog post.
Step 1: Set a Background for your Cartoon
Open the Powtoon Studio on your system and click on ‘Backgrounds’ located on the panel to your right. It will open up a vast library filled with ready to use backgrounds.
Select any you like to get started. It will intently appear on the board.
Step 2: Select the Characters for your Cartoon
Well, you have a setting and now it is time to place your characters in it. Click on the ‘Animated Character’ from the panel. Choose any template for your characters.
Step 3: Add the Text
There are various ways you can add dialogues, messages or texts to your cartoon. You can click on ‘Text’ and add a Quote Box or Dialogue Box. You can edit your text by simply clicking on the box.
Part 2 The 8 Best Apps to Turn Photos Into Cartoons and Sketches
01Photo Lab Picture Editor
Photolab is a great choice for turning your photos into a painting, sketch or a watercolor image. Along with filters you will get montages, borders and frames to make your art work more realistic. You will find all presets in the effects category. It also features filters like digital rain and jigsaw puzzle. Photolab can also be used as a photo editor as it is capable to perform color adjustment, rotate and crop.
Key Features:
● 800+ effects.
● E-card templates for special occasions.
● You can choose a photo from gallery or click one using the camera app.
02Prisma Photo Editor
Prisma has the magical ability to turn your photo or sketch into a Van Gogh or Picasso style painting. Wondering how? It has filters that are inspired by the eminent artist around the world. Choose a photo from your gallery and choose from exciting filters. Prisma also have cool editing tools that help you adjust the intensity of the filters applied if you want to.
Key Features
● Online App community.
● Similar to Instagram
● artistic filters.
03Paint Lab – Photo Cartoon
Paintlab features an easy to use interface and wide range of filters. With it you can turn any photos into a cartoon or a drawing just in few seconds. Once you are done editing you can share your final work on any social media platform directly from paintlab. It is compatible only with androids.
Key Fetaures
● Fast editing
● Perfect or beginners.
● Includes beautification and imperfection correction tools and effects.
04Cartoon Photo PRO
Using Cartoon Photo Pro alongside your photos you can also turn your videos into cartoon. Effects are artistic and customizable. Only downside it doesn’t come for free. It also has great ratings in Playstore.
Key Features
● User friendly interface
● Animates videos.
05Brushstroke
Brushstroke is ideal for editing and printing high resolution photos. The app comes with a paint directly option. It is not android compatible. The best feature is apart from filters and painting styles you can also pick the color palette and canvas surface.
Key Features
● You can sign your photos before printing
● Wide range of styles and sub-styles.
06Clip2Comic
If you like having fun and playing around we bet you would love an photo editing app that turn your close ones’ photo into caricatures. One tap can give you comic-book style drawing and sketches. This is one of best sketch and animation apps suggested for iPhone users. User friendly interface is an added bonus.
Key Features
● Live preview animation camera option.
● Carton-style photo effects.
07PhotoMania
PhotoMania is fun to use, if you want to try out different effects then you are at the right app. It has 400 presets in total including vintage looks and effects for sketches. PhotoMania has a collection of cool and exciting frames that you can add to your photos to make them more interesting. If you are someone who likes to send e-cards here you will get dozens of options. You can also utilize PhotoMania as a photo editor as it features the best exposure settings. And we know how important masking tool is, it helps you create neat photos, the app also has this amazing feature.
Key Features:
● Advanced photo editing tools and presets, for instance HDR and LOMO.
● It can also make your photo a painting.
● Adds textures and offers holiday templates.
08Toonme
Toonme has similar photo editing features like Clip2Comic. Only it is better. It has AI assistance that helps you create realistic effects. You can choose from the variety of styles and even tweak them to get a personalized style. Toonme is free to download but if you want use pro features you can subscribe to their monthly affordable package. Also, it is compatible with both iOS and Android devices.
Key Features:
● Offers hand-drawn effects.
● Offers numerous layouts that goes well with profile pictures even instagram stories.
● You can share your work with other Toonme Users.
Part 3 How to Make 3D Cartoon From a Photo
Do you know that animators used to hand sketch every frame and every detail that too with continuation? Thanks to our modern day technology we can take a snap of any object or person and turn that into a cartoon within few seconds. With the right amount of help and creativity you can create characters that are entertaining and engaging at the same time. Wondershare Filmora Video Editor can be used to create animated videos. Amazing features and filters save editing time while making the entire process flexible. Though we have already mentioned eight apps for sketching, animating and caricaturing your photos, Filmora is a complete package. Motion tracking, easy zoom in and out, masking, panning and color correction are some of the best features offered by this editing software. It can run on both PC and Mac. User friendly interface suits both professionals as well as beginner.
For Win 7 or later (64-bit)
For macOS 10.12 or later
● Ending Thoughts →
● Creating an animated video that stands as an exception is now simple and hassle-free.
● Never be afraid to experiment and explore amazing ways of story-telling.
● Things discussed so far will help you analyze and understand cartoons and animation.
Create Animated Video on Canva
Canva is a simple way—without any graphic design experience—to make professional graphics for social media, newsletters, presentations, business cards, gift certificates, brochures, and more. Flexible design templates offer the ideal layout for your target destination, letting you aim over the design, not the file formatting or the size.
So, can you make an animated video on Canva?
Yes, because Canva lives on the cloud, you can access your graphics from anywhere you can get online while using Canva on the cloud. Learn how you can play, get up, and run with Canva in this short, fun tutorial guide. We’ll discuss adding and editing images, using inbuilt design templates, and working with typography to build your next project with Canva.
In the subsequent sections, we shall learn more about Canva animated videos and how to create one easily on your PC.
In this article
01 [Create an animated video with a Canva template](#Part 1)
02 [Create Canva animated video with your video](#Part 2)
Part 1 Create an animated video with a Canva template
In this section, we’ll explore how to make animated video on Canva, which applies to both the free and pro account of Canva. However, the steps given below got created from Canva’s free account. We suppose that you’ve already created an account on Canva and logged into the platform. So, further steps will proceed as follows:
Go to the Video tab given in the top front panel of Canva and choose any template of your desire. Let’s say we’ve selected the very first template, 1920 × 1080 pixels. There are lots of options provided by Canva from where you can choose your favorites. You can also create a template with a custom size.

After you enter the editing panel, you have the choice of different templates on the left-hand panel. You can search for a template of your choice among them and can create other pages, as shown below. To preview the templates, you can click the Play button with mentioned time duration on the top right corner of the editing screen.

Now, it’s time to add creativity and explore more editing elements within the Canva. You can modify the entire template given and add something of your own.

Now, you can explore various editing Elements given on the left-hand panel, as shown below. There are multiple options available here as well.

You can add some text within the Canva template, and you can search from the left-hand panel. Given above are various options by which you can bold, italicize, and underline the text.

Now, let’s add some music to the video. So, go to the Audio tab and select any one of the options among them. There are different choices for you to explore here as well.

After you’re done, you can hit the Preview Play button on the top and see your project, as shown below.
It’s all done, and you can proceed with the next section.
Part 2 Create Canva animated video with your video
We’ll discuss how to create an animated video by uploading our video in Canva without using any template in this section. After logging in to the Canva account credentials, select the Video tab and choose the different templates offered.
We’ve selected a blank template for the purpose as follows.

Now, you need to head directly towards the Uploads tab and upload your video created over here.

By now, you have most probably got over with uploading your media. Click the uploaded video, and it will automatically enter within the editing panel of Canva, as shown below.

You’re all done now, and it’s all finished! Even though template usage is quite simple, it’s pretty straightforward when you don’t use any ready-made template. However, you can still beautify this simple video with different elements like text, music, etc.
Animation style videos influence people of all ages to whatever generation, or the kind you belong to will be one of them for sure.
Animated ones provoke diverse impacts instead of ordinary videos on the audience utilizing illustration, kinesthetic, etc. But the fact is, due to technological advancements and overexposure to social media sites, we have forgotten its significance.
Want to know some other most accessible software tools that can bring out the artist in you? Here is an alternative that is all you need.
Are you surprised to find that you can go with various animation styles to boost your business or bring out your talents? But are you confused about how to revamp your story and effectively film it? Why should you worry when the best animation maker and Canva’s alternative Wondershare Filmora is here exclusively for you to create fantastic animation videos that could stand out of the box?
Conclusion
Do you aspire to paint with bright colors to videos or want to become an animator? Then, choose animation styles that you most enjoy, find attractive today, start working on them, or create Canva animated videos as the tutorial indicates above. Lastly, don’t forget to give Filmora a chance to upscale your creation and give your animation style a life!
02 [Create Canva animated video with your video](#Part 2)
Part 1 Create an animated video with a Canva template
In this section, we’ll explore how to make animated video on Canva, which applies to both the free and pro account of Canva. However, the steps given below got created from Canva’s free account. We suppose that you’ve already created an account on Canva and logged into the platform. So, further steps will proceed as follows:
Go to the Video tab given in the top front panel of Canva and choose any template of your desire. Let’s say we’ve selected the very first template, 1920 × 1080 pixels. There are lots of options provided by Canva from where you can choose your favorites. You can also create a template with a custom size.
After you enter the editing panel, you have the choice of different templates on the left-hand panel. You can search for a template of your choice among them and can create other pages, as shown below. To preview the templates, you can click the Play button with mentioned time duration on the top right corner of the editing screen.
Now, it’s time to add creativity and explore more editing elements within the Canva. You can modify the entire template given and add something of your own.
Now, you can explore various editing Elements given on the left-hand panel, as shown below. There are multiple options available here as well.
You can add some text within the Canva template, and you can search from the left-hand panel. Given above are various options by which you can bold, italicize, and underline the text.
Now, let’s add some music to the video. So, go to the Audio tab and select any one of the options among them. There are different choices for you to explore here as well.
After you’re done, you can hit the Preview Play button on the top and see your project, as shown below.
It’s all done, and you can proceed with the next section.
Part 2 Create Canva animated video with your video
We’ll discuss how to create an animated video by uploading our video in Canva without using any template in this section. After logging in to the Canva account credentials, select the Video tab and choose the different templates offered.
We’ve selected a blank template for the purpose as follows.
Now, you need to head directly towards the Uploads tab and upload your video created over here.
By now, you have most probably got over with uploading your media. Click the uploaded video, and it will automatically enter within the editing panel of Canva, as shown below.
You’re all done now, and it’s all finished! Even though template usage is quite simple, it’s pretty straightforward when you don’t use any ready-made template. However, you can still beautify this simple video with different elements like text, music, etc.
Animation style videos influence people of all ages to whatever generation, or the kind you belong to will be one of them for sure.
Animated ones provoke diverse impacts instead of ordinary videos on the audience utilizing illustration, kinesthetic, etc. But the fact is, due to technological advancements and overexposure to social media sites, we have forgotten its significance.
Want to know some other most accessible software tools that can bring out the artist in you? Here is an alternative that is all you need.
Are you surprised to find that you can go with various animation styles to boost your business or bring out your talents? But are you confused about how to revamp your story and effectively film it? Why should you worry when the best animation maker and Canva’s alternative Wondershare Filmora is here exclusively for you to create fantastic animation videos that could stand out of the box?
Conclusion
Do you aspire to paint with bright colors to videos or want to become an animator? Then, choose animation styles that you most enjoy, find attractive today, start working on them, or create Canva animated videos as the tutorial indicates above. Lastly, don’t forget to give Filmora a chance to upscale your creation and give your animation style a life!
Methods to Make Photo Motion Effect Online?
Versatile Video Editor - Wondershare Filmora
An easy yet powerful editor
Numerous effects to choose from
Detailed tutorials provided by the official channel
It’s no wonder that the latest technology involving animated images or GIFs has become the prominent attraction center.
These loops are hilarious sometimes and can be used to express what words can’t. What if you wish to create a photo motion effect online with free-to-use animated video software of your choice? Are you also looking for the same?
Well! You can do this yourself now. With the help of this guide article, we will discuss some beneficial motion blur effect online makers that will provide information on how to animate a picture or add a photo motion effect online. So, let’s begin working on those tools and start making our GIFs.
In this article
01 [What is the photo motion effect?](#Part 1)
02 [Websites for photo motion effect online](#Part 2)
03 [Samples for a photo motion effect](#Part 3)
Part 1 What is the photo motion effect?
The photo motion effect online is ideal for creating an animation with your DSLR or still camera. It is just as it feels, the motion through photographs. Usually, with moving photo effects online, the camera is the one moving, along with its subjects. But, we aren’t concerned with the camera usage here as we’re just looking for the effect.
These are a little different than stop-motion, which generally has the fixed subjects are the only things moving bit by bit.
1. Create a Plan
Consider shooting an event or location. Also, ensure there will be lots of movement and motion and movement if it’s an event. Also, consider or brainstorm how you want the camera to move about the space if you’re shooting at a particular location. It could be you only hovering around with the camera, or you could strap it to a bike and take a ride.
2. Click lots of Photos
Keep shooting lots of photos! Most cameras consist of a burst setting, where you can set it to click an image every few seconds. Or, you may tap the shutter button yourself.
3. Import & Edit
Once you finish shooting tons of images, you must get them on your PC to animate them. And, this is where the need for photo motion effect online maker comes in handy. So, let’s discuss them more in further sections without any delay!
Part 2 Websites for photo motion effect online
The following photo motion effect online makers help you transform a static image into a dynamic image in just a few minutes. Some of them even allow you to add or remove things that weren’t in the original shape to your photos. And, they are helpful for both professional designers and beginner photographers or editors.
1. Movepic – Photo Motion

Price: Free, VIP subscription begins from $1.99 per month and consists of a 7-day free trial.
Movepic is a beginner-friendly photo motion effect online maker that you’ll love most probably. Inside the app, you’ll find the standard tools like directional animation, camera motion, and speed controls.
The software also contains a vast gallery of effects that you can use to improve and entirely convert your photo into a dynamic animation. The software recognizes photo elements like the water or sky and contains a variety of animated filters to convert scenery into one from another world.
The only downside is its watermark over your animated picture while you export the project through the accessible version of the app.
2. PixaMotion

Price: Free.
PixaMotion is a free photo motion effect online maker that can do it all pretty much well. Thanks to the sleek modern design, the app is also simple to use. You can animate your photo, add moving elements and audio, and different filters from the app’s gallery to it. The main agenda behind the app is making short loop animations.
PixaMotion contains a few different animation modes. For example, you can select whether you want to animate the entire photo or just some of your photo elements.
You can also select to save it as GIF or video after you’re ok with the completed animated picture. PixaMotion includes a paid subscription, but even the app’s free version allows you to download your photos without a watermark.
3. GIFMaker.me
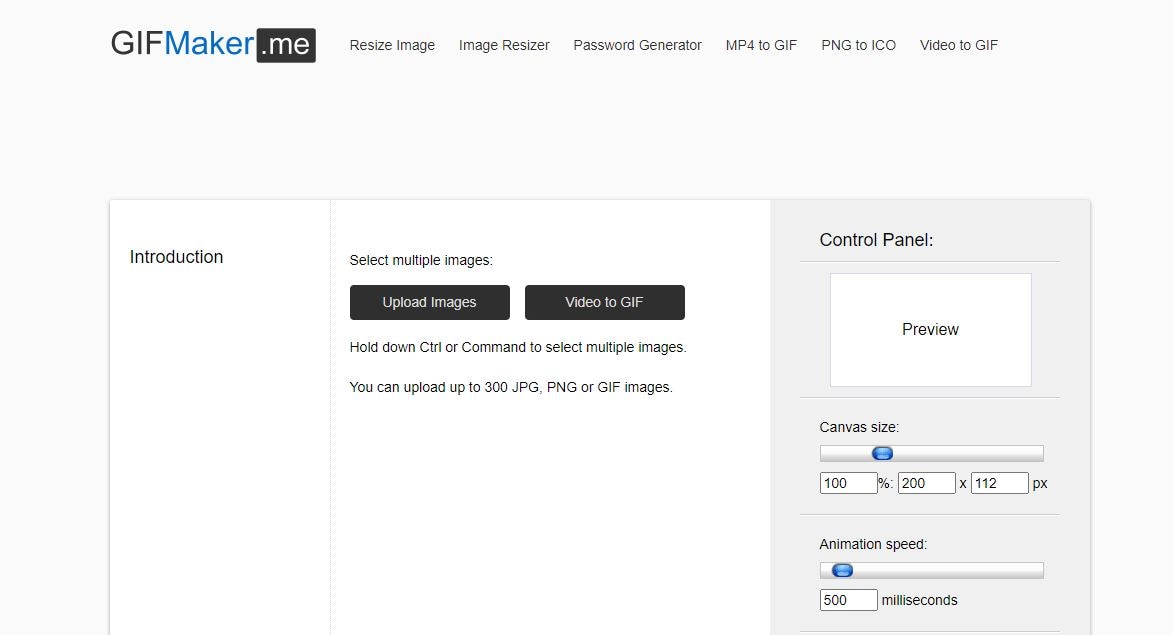
Price: Free.
If you don’t wish to download any apps or hustle through the registration process, you can use GIFMaker.me as another photo motion effect online maker. This tool helps you to animate still images online as well as transform videos into GIFs.
Compared to different apps available on this list, GIFMaker. I am less sophisticated. The app needs you to upload each image or frame separately to create an animated GIF. The 300 is the maximum number of images you can upload here with ease.
Select the desirable canvas size, animation speed, how many times you want the loop to repeat, and hit the Create GIF Animation tab after you’re all done and ready to upload. Moreover, you can upload an audio URL to add music to your GIF.
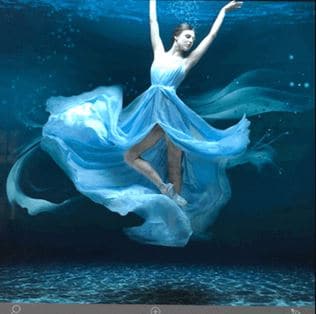
Part 3 Samples for a photo motion effect
1. Cinemagraphs

This effect has been around since about 2011, so you’ve probably seen a few already. It has all the photo properties, except there’s always some little piece of it that feels to be moving magically. The only technique for getting this photo motion effect online is to take a little bit of video and work on it.
2. Plotagraph
A Plotagraph, at first glance, is an essence of morphing technique that can seem a bit like a Cinemagraph, the effect mentioned above. The difference is that you start with a photograph in this Plotagraph and not a video. And instead of pulling a video’s piece to use as animated sections, you’re making the animation out of your image.
3. Photoshop Timeline
Many people don’t realize that Photoshop has assisted you in importing and working on a video for five years. This sample is so great because Photoshop is a much more intuitive and deep program for us photographers. You can go with elements like masks, layers, and retouching in it. Or, you can use any moving photo effect online makers mentioned above to recreate an almost similar effect with fewer complexities.
Wondershare Filmora
Get started easily with Filmora’s powerful performance, intuitive interface, and countless effects!
Try It Free Try It Free Try It Free Learn More >

AI Portrait – The best feature of Wondershare Filmora for gameplay editing
The AI Portrait is a new add-on in Wondershare Filmora. It can easily remove video backgrounds without using a green screen or chroma key, allowing you to add borders, glitch effects, pixelated, noise, or segmentation video effects.

Conclusion
At last, we hope your question, “how to find the best photo motion effect online maker,” has the answer now. We gave multiple solutions to this question, and not one. With these motion blur effect online makers, you can quickly get what you long for. Despite these, you can also consider using Filmora that can be valuable on different platforms for animations. So enjoy doing animations and creating funny and helpful GIFs. Thanks for reading this article!
It’s no wonder that the latest technology involving animated images or GIFs has become the prominent attraction center.
These loops are hilarious sometimes and can be used to express what words can’t. What if you wish to create a photo motion effect online with free-to-use animated video software of your choice? Are you also looking for the same?
Well! You can do this yourself now. With the help of this guide article, we will discuss some beneficial motion blur effect online makers that will provide information on how to animate a picture or add a photo motion effect online. So, let’s begin working on those tools and start making our GIFs.
In this article
01 [What is the photo motion effect?](#Part 1)
02 [Websites for photo motion effect online](#Part 2)
03 [Samples for a photo motion effect](#Part 3)
Part 1 What is the photo motion effect?
The photo motion effect online is ideal for creating an animation with your DSLR or still camera. It is just as it feels, the motion through photographs. Usually, with moving photo effects online, the camera is the one moving, along with its subjects. But, we aren’t concerned with the camera usage here as we’re just looking for the effect.
These are a little different than stop-motion, which generally has the fixed subjects are the only things moving bit by bit.
1. Create a Plan
Consider shooting an event or location. Also, ensure there will be lots of movement and motion and movement if it’s an event. Also, consider or brainstorm how you want the camera to move about the space if you’re shooting at a particular location. It could be you only hovering around with the camera, or you could strap it to a bike and take a ride.
2. Click lots of Photos
Keep shooting lots of photos! Most cameras consist of a burst setting, where you can set it to click an image every few seconds. Or, you may tap the shutter button yourself.
3. Import & Edit
Once you finish shooting tons of images, you must get them on your PC to animate them. And, this is where the need for photo motion effect online maker comes in handy. So, let’s discuss them more in further sections without any delay!
Part 2 Websites for photo motion effect online
The following photo motion effect online makers help you transform a static image into a dynamic image in just a few minutes. Some of them even allow you to add or remove things that weren’t in the original shape to your photos. And, they are helpful for both professional designers and beginner photographers or editors.
1. Movepic – Photo Motion
Price: Free, VIP subscription begins from $1.99 per month and consists of a 7-day free trial.
Movepic is a beginner-friendly photo motion effect online maker that you’ll love most probably. Inside the app, you’ll find the standard tools like directional animation, camera motion, and speed controls.
The software also contains a vast gallery of effects that you can use to improve and entirely convert your photo into a dynamic animation. The software recognizes photo elements like the water or sky and contains a variety of animated filters to convert scenery into one from another world.
The only downside is its watermark over your animated picture while you export the project through the accessible version of the app.
2. PixaMotion
Price: Free.
PixaMotion is a free photo motion effect online maker that can do it all pretty much well. Thanks to the sleek modern design, the app is also simple to use. You can animate your photo, add moving elements and audio, and different filters from the app’s gallery to it. The main agenda behind the app is making short loop animations.
PixaMotion contains a few different animation modes. For example, you can select whether you want to animate the entire photo or just some of your photo elements.
You can also select to save it as GIF or video after you’re ok with the completed animated picture. PixaMotion includes a paid subscription, but even the app’s free version allows you to download your photos without a watermark.
3. GIFMaker.me
Price: Free.
If you don’t wish to download any apps or hustle through the registration process, you can use GIFMaker.me as another photo motion effect online maker. This tool helps you to animate still images online as well as transform videos into GIFs.
Compared to different apps available on this list, GIFMaker. I am less sophisticated. The app needs you to upload each image or frame separately to create an animated GIF. The 300 is the maximum number of images you can upload here with ease.
Select the desirable canvas size, animation speed, how many times you want the loop to repeat, and hit the Create GIF Animation tab after you’re all done and ready to upload. Moreover, you can upload an audio URL to add music to your GIF.
Part 3 Samples for a photo motion effect
1. Cinemagraphs
This effect has been around since about 2011, so you’ve probably seen a few already. It has all the photo properties, except there’s always some little piece of it that feels to be moving magically. The only technique for getting this photo motion effect online is to take a little bit of video and work on it.
2. Plotagraph
A Plotagraph, at first glance, is an essence of morphing technique that can seem a bit like a Cinemagraph, the effect mentioned above. The difference is that you start with a photograph in this Plotagraph and not a video. And instead of pulling a video’s piece to use as animated sections, you’re making the animation out of your image.
3. Photoshop Timeline
Many people don’t realize that Photoshop has assisted you in importing and working on a video for five years. This sample is so great because Photoshop is a much more intuitive and deep program for us photographers. You can go with elements like masks, layers, and retouching in it. Or, you can use any moving photo effect online makers mentioned above to recreate an almost similar effect with fewer complexities.
Wondershare Filmora
Get started easily with Filmora’s powerful performance, intuitive interface, and countless effects!
Try It Free Try It Free Try It Free Learn More >
AI Portrait – The best feature of Wondershare Filmora for gameplay editing
The AI Portrait is a new add-on in Wondershare Filmora. It can easily remove video backgrounds without using a green screen or chroma key, allowing you to add borders, glitch effects, pixelated, noise, or segmentation video effects.
Conclusion
At last, we hope your question, “how to find the best photo motion effect online maker,” has the answer now. We gave multiple solutions to this question, and not one. With these motion blur effect online makers, you can quickly get what you long for. Despite these, you can also consider using Filmora that can be valuable on different platforms for animations. So enjoy doing animations and creating funny and helpful GIFs. Thanks for reading this article!
5 Websites with Animated Logos That Catch Your Eyes
5 Websites with Animated Logos That Can Catch Your Eyes
An easy yet powerful editor
Numerous effects to choose from
Detailed tutorials provided by the official channel
Animated logos could be difficult to make for someone who has no experience with animation. That is why we are here to tell you how you can make an attractive animated logo.
Learn more about websites with animated logos through this article.
In this article
01 [Why You Should Use Logo Animation](#Part 1)
02 [5 Awesome Ways to Use Logo Animation](#Part 2)
03 [6 of the Best Animated Logos](#Part 3)
04 [8 Websites with Premium Animated Logo Templates](#Part 4)
Part 1 Why You Should Use Logo Animation
Those who make it big are known to brave the storm. The ones who follow the crowd just turn out to be ordinary. However, those who innovate, rise to a higher level. Here is why you should go for a website with animated logo!
01They grab viewers attraction
The human mind chooses to believe in the supremacy of what appeals to them visually. It is highly important to grab the user’s attention in order to make a mark. Animated logos help your website to visually appeal to the viewer and grab his/her attention. Potential customers will tend to remember the logo of your website and this would directly impact the conversion rates of your website.

02Increase in brand awareness
Brand awareness is key to a website’s success. As we saw earlier, people often tend to remember brands by their logo and not name. An attractive animated logo will help you create a strong brand awareness among potential customers and help your brand gain popularity.
03Animated logos can convey more
A brand logo is supposed to be the identity of a brand. The logo should be capable enough of explaining your website’s understanding about the field. For instance, if your company is in the cyber security domain, the logo should be good enough to justify your company’s expertise. Animated logos help you establish trust by conveying more through the medium of a logo.
Part 2 4 Awesome Ways to Use Logo Animation
01They can serve as introductions to marketing videos
Video marketing is one of the most commonly used marketing techniques. Research suggested that about 99 percent of brands use video marketing in order to enhance their brand image. Starting of your video with an animated logo will not just look catchy but also make the video all the more professional.
02They can make great outros
Just like animated videos can serve as amazing introductory bits of the video, they can also be the perfect outros to videos. If you haven’t added your animated logo in the introduction of the video then they can be added at the end. This will lead to your viewers remembering your brand for a longer time.
03Look very attractive at trade shows
Trade shows are opportunities where websites and company owners can interact with investors and potential customers face to face. It’s an excellent opportunity to make your mark on the big stage. Logos of companies may be projected on the big screen in such events. At such events when you have just a few seconds to make a mark, you need your logo to grab the viewer’s attention. Hence, animated logos could be very useful.
04They could be a great addition to your company’s email signature
Emails are regarded as the 3rd largest information sources in the B2B industry. It is one of the largest means of communication and marketing. Email signatures have been around for years; however the traditional email signatures have now gone out of fashion. Contemporary email signatures include animated logos to leave a bigger impact on the receiver. Using animated logos, you can add grace to your email signatures and escape the ordinary.
Part 3 6 of the Best Animated Logos
01Mastercard
Mastercard is one of the first companies to use animated logos. The logo is simply fantastic due to the meaning it conveys without any complex animation. The animated logo involves the traditional venn diagram logo of mastercard morphing into several objects. These objects include everything from food to groceries to luxurious products. It basically includes the various kinds of commodities people buy using mastercards.
02Burger king
Another popular brand that uses animated logos is the american fast food giant, burger king. The logo is not highly flashy like we see in mastercard. However, the animated logo does obviously look more attention seeking than the conventional static logo. The logo shows the stacking of the different elements of the logo one by one over each other. This resembles the process of making a burger.
03Fedex
Another logo that would classify as a flashy animated logo is the fedex logo. Initially, fedex had experimented with several logos before sticking to the arrow logo which continues even today. The animated logo involves an arrow making the letter “Fedex” with its trajectory and then finally settling in between letters X and E. The logistics giant delivers couriers from one corner of the world to another, and the arrow symbolizes exactly that!
04Flickr
Flickr is a popular stock image and video hosting platform. Anyone can use the stock images and videos in their content. The logo starts with a blue and pink dot initially. These dots later expand in a whirlpool like motion. The logo starts off with the static logo before it expands. The idea is to show that the online stock image portal goes beyond limits and has every picture and video you’d need
05Bundle
Bundle is a popular app that offers its users rewards upon shopping from selected stores. These stores have an alliance with bundle and upon shopping from them, users seek reward points on the bundle app. The animated logo starts of with a pink screen which later converges to become a large “B” wrapped with a gifting ribbon. Although, the logo is pretty simple it does an amazing job at explaining the brand’s MSP and attracts customers.
06Google
The logo of google has evolved over the years. Google is almost synonymous to attractive logos and it comes up with attractive new logos every now and then. One of the newest logos, an animated one, is by far one of the most attractive animated logos. It aims to depict the numerous things users can search using “Google voice search”.
Part 4 5 Websites with Premium Animated Logo Templates
01RenderForest
There are several applications you can use for animating your next logo for your website. RenderForest is one such software that lets you explore multiple animated logo templates. The tool has an array of templates you can choose from. Each of the templates is unique in its own way and has its own charm. Additionally, the software also has a functionality using which you can animate your static logo using templates.
Developed and managed by Adobe, the editing application is a popular one. The software allows you to use several pre-made templates while animating. The animations that you can find on adobe spark are
02Adobe Spark
Adobe spark seamless and designed perfectly. Using adobe spark, you can give your animated logo a touch of class and perfection. Although the software is paid, it is worth every penny due to the numerous animation templates and video editing tools available.
03Design free logo
Another amazing tool for animation, design free logo is a complete animation tool that offers several animation templates. Additionally, the free software also lets users animate in 3 dimensions. The software is best suited for novice animators who have limited experience with animation. The software is very simple to use unlike its sophisticated counterparts.
04Logo maker plus
If you are looking for an android application that helps you create seamless animated logos, well logo maker plus is just the perfect application for you. The app has more than a 100 templates for animating your logo, hence making it the perfect app for those who want to perform basic animation. Additionally, the app also has multiple visual effects which would enable you to make catchy logos
05Animaker
The final software on this list of amazing softwares is animaker. The software works well to animate logos, presentations, and marketing videos. The software has more than 50 effects. Moreover, using this software you can add filters, effects and sound effects. The software also lets users upload the videos to facebook and youtube directly!
Final Thoughts
● Today, we took a look at a few of the best animated logos which you could idealize.
● Nowadays, even big brands are adopting animated logos.
● They help establish a brand image and take your brand to a higher level.
● We also saw a few softwares that could help you make an animated logo. Wish to make an animated logo? Head to any one of the websites and make your website with animated logos!
Animated logos could be difficult to make for someone who has no experience with animation. That is why we are here to tell you how you can make an attractive animated logo.
Learn more about websites with animated logos through this article.
In this article
01 [Why You Should Use Logo Animation](#Part 1)
02 [5 Awesome Ways to Use Logo Animation](#Part 2)
03 [6 of the Best Animated Logos](#Part 3)
04 [8 Websites with Premium Animated Logo Templates](#Part 4)
Part 1 Why You Should Use Logo Animation
Those who make it big are known to brave the storm. The ones who follow the crowd just turn out to be ordinary. However, those who innovate, rise to a higher level. Here is why you should go for a website with animated logo!
01They grab viewers attraction
The human mind chooses to believe in the supremacy of what appeals to them visually. It is highly important to grab the user’s attention in order to make a mark. Animated logos help your website to visually appeal to the viewer and grab his/her attention. Potential customers will tend to remember the logo of your website and this would directly impact the conversion rates of your website.
02Increase in brand awareness
Brand awareness is key to a website’s success. As we saw earlier, people often tend to remember brands by their logo and not name. An attractive animated logo will help you create a strong brand awareness among potential customers and help your brand gain popularity.
03Animated logos can convey more
A brand logo is supposed to be the identity of a brand. The logo should be capable enough of explaining your website’s understanding about the field. For instance, if your company is in the cyber security domain, the logo should be good enough to justify your company’s expertise. Animated logos help you establish trust by conveying more through the medium of a logo.
Part 2 4 Awesome Ways to Use Logo Animation
01They can serve as introductions to marketing videos
Video marketing is one of the most commonly used marketing techniques. Research suggested that about 99 percent of brands use video marketing in order to enhance their brand image. Starting of your video with an animated logo will not just look catchy but also make the video all the more professional.
02They can make great outros
Just like animated videos can serve as amazing introductory bits of the video, they can also be the perfect outros to videos. If you haven’t added your animated logo in the introduction of the video then they can be added at the end. This will lead to your viewers remembering your brand for a longer time.
03Look very attractive at trade shows
Trade shows are opportunities where websites and company owners can interact with investors and potential customers face to face. It’s an excellent opportunity to make your mark on the big stage. Logos of companies may be projected on the big screen in such events. At such events when you have just a few seconds to make a mark, you need your logo to grab the viewer’s attention. Hence, animated logos could be very useful.
04They could be a great addition to your company’s email signature
Emails are regarded as the 3rd largest information sources in the B2B industry. It is one of the largest means of communication and marketing. Email signatures have been around for years; however the traditional email signatures have now gone out of fashion. Contemporary email signatures include animated logos to leave a bigger impact on the receiver. Using animated logos, you can add grace to your email signatures and escape the ordinary.
Part 3 6 of the Best Animated Logos
01Mastercard
Mastercard is one of the first companies to use animated logos. The logo is simply fantastic due to the meaning it conveys without any complex animation. The animated logo involves the traditional venn diagram logo of mastercard morphing into several objects. These objects include everything from food to groceries to luxurious products. It basically includes the various kinds of commodities people buy using mastercards.
02Burger king
Another popular brand that uses animated logos is the american fast food giant, burger king. The logo is not highly flashy like we see in mastercard. However, the animated logo does obviously look more attention seeking than the conventional static logo. The logo shows the stacking of the different elements of the logo one by one over each other. This resembles the process of making a burger.
03Fedex
Another logo that would classify as a flashy animated logo is the fedex logo. Initially, fedex had experimented with several logos before sticking to the arrow logo which continues even today. The animated logo involves an arrow making the letter “Fedex” with its trajectory and then finally settling in between letters X and E. The logistics giant delivers couriers from one corner of the world to another, and the arrow symbolizes exactly that!
04Flickr
Flickr is a popular stock image and video hosting platform. Anyone can use the stock images and videos in their content. The logo starts with a blue and pink dot initially. These dots later expand in a whirlpool like motion. The logo starts off with the static logo before it expands. The idea is to show that the online stock image portal goes beyond limits and has every picture and video you’d need
05Bundle
Bundle is a popular app that offers its users rewards upon shopping from selected stores. These stores have an alliance with bundle and upon shopping from them, users seek reward points on the bundle app. The animated logo starts of with a pink screen which later converges to become a large “B” wrapped with a gifting ribbon. Although, the logo is pretty simple it does an amazing job at explaining the brand’s MSP and attracts customers.
06Google
The logo of google has evolved over the years. Google is almost synonymous to attractive logos and it comes up with attractive new logos every now and then. One of the newest logos, an animated one, is by far one of the most attractive animated logos. It aims to depict the numerous things users can search using “Google voice search”.
Part 4 5 Websites with Premium Animated Logo Templates
01RenderForest
There are several applications you can use for animating your next logo for your website. RenderForest is one such software that lets you explore multiple animated logo templates. The tool has an array of templates you can choose from. Each of the templates is unique in its own way and has its own charm. Additionally, the software also has a functionality using which you can animate your static logo using templates.
Developed and managed by Adobe, the editing application is a popular one. The software allows you to use several pre-made templates while animating. The animations that you can find on adobe spark are
02Adobe Spark
Adobe spark seamless and designed perfectly. Using adobe spark, you can give your animated logo a touch of class and perfection. Although the software is paid, it is worth every penny due to the numerous animation templates and video editing tools available.
03Design free logo
Another amazing tool for animation, design free logo is a complete animation tool that offers several animation templates. Additionally, the free software also lets users animate in 3 dimensions. The software is best suited for novice animators who have limited experience with animation. The software is very simple to use unlike its sophisticated counterparts.
04Logo maker plus
If you are looking for an android application that helps you create seamless animated logos, well logo maker plus is just the perfect application for you. The app has more than a 100 templates for animating your logo, hence making it the perfect app for those who want to perform basic animation. Additionally, the app also has multiple visual effects which would enable you to make catchy logos
05Animaker
The final software on this list of amazing softwares is animaker. The software works well to animate logos, presentations, and marketing videos. The software has more than 50 effects. Moreover, using this software you can add filters, effects and sound effects. The software also lets users upload the videos to facebook and youtube directly!
Final Thoughts
● Today, we took a look at a few of the best animated logos which you could idealize.
● Nowadays, even big brands are adopting animated logos.
● They help establish a brand image and take your brand to a higher level.
● We also saw a few softwares that could help you make an animated logo. Wish to make an animated logo? Head to any one of the websites and make your website with animated logos!
Best 8 Tools Tell You How to Make Slideshows for Instagram
Top 8 Tools Tell You How to Make Slideshows for Instagram
An easy yet powerful editor
Numerous effects to choose from
Detailed tutorials provided by the official channel
Instagram slideshows land among the latest social media trends of fun and entertainment. Learn how to attract jaw dropping peer attention with creating the same!
In this article
01 [When Should You Use an Instagram Slideshow?](#Part 1)
02 [How to Make an Instagram Slideshow with Music?](#Part 2)
03 [8 Best Instagram Slideshow Apps for Creating Outstanding Slideshow](#Part 3)
Part 1 When Should You Use an Instagram Slideshow?
Revolutions in technology has opened doors to a plenty of new and exciting means of information sharing, entertainment and communication. Playing its part in the game, Instagram slideshow has emerged as an exciting means of quick and impactful content sharing. Diving deeper into the discussion, let us talk about the different areas of working with an Instagram slide show in the following section:
01Explanatory Product Demonstrations and Stepwise Tutorials
Considering the diverse media collaboration entertained by this social media platform, you get the liberty to include 10 media files of videos and images while creating a slideshow on Instagram. This is an affordably sufficient media space to demonstrate your newly launched product in front of the target audience.
The aforesaid characteristic of a slideshow for Instagram can be put to another use of creating detailed, step by step guides and product usage tutorials to create an increased and confident customer reach and brand applicability. A few examples include the presentations of recipes by food blogs and chefs, or a detailed look of the day’s outfit by fashion bloggers.
02Interactive Storytelling or Recreate an Event
Gone are the times when stories and events were restricted to a single image or video with a limited scope of understanding and explanation. You can now work with a combination of multiple images and videos to create more vivid and graphical descriptions of stories, narratives and events.
You can work on creating an engaging slideshow for Instagram to tell an amazing story, voice a narration from the beginning to the end, or share your best moments with your cherished audience, which will surely give them the feel of enjoying the adventure along with you.
03Create a Collection
You can now use a slide show for Instagram to design and present a collection of manifold ideas and products within a single post. You can improvise the collection with displaying a series of related products, showcasing a summary of your different blog posts through the week, or simply present a list of your most reliable inspirations, resources and influencers.
04Exciting Video Teasers
If you have a scheduled video release to entertain your audience, try working with interactive slideshows for Instagram to create some sensational teaser content of the upcoming release to imbibe a natural sense of curiosity within your audience.
You can experiment with releasing a mini photoshoot tour of your filming set, share close up progression details, or include a cliffhanger in the end of your Instagram slideshow to ensure the retrieval of your audience towards watching the release of the actual big content. You can use these short teasers as effective means of creating a campaign buzz, while building a closer connect with your audience.
Part 2 How to Make an Instagram Slideshow with Music?
By now, you must have gathered enough knowledge regarding the credibility of Instagram slideshows in catering to a diversity of commercial, professional and personal content sharing needs. Considering the same, you may conveniently feel motivated to try hands at creating stunning slideshow presentations for Instagram on your own.
Adhering to the concern, let us move ahead with our discussion, while talking about how to make a slideshow for Instagram and supplement the same with adaptable background music to develop amazing content masterpieces and share them with social media peers, while grabbing their obvious attention.
While there are a number of choices in the software market to choose your Instagram slideshow creator tool, the FlexClip tool can be a reliable option. Read though the following section to learn the slideshow creation process in the program with a comprehensive and stepwise tutorial guide:
Step 1: Download the Slideshow Creator Tool
Visit the official website of FlexClip to download and install the slideshow maker software in your preferred device.

Step 2: Start from Scratch
After a successful installation, proceed to launch the tool in your system and wait till the software greets you with its welcome interface. Here, you will have to reach to and tap the ‘Start to Create’ button to begin with the slideshow creation process. You can also select a preset template to work on your slideshow if nothing new clicks in your mind.
Step 3: Select an Aspect Ratio
In the tool’s creator window, navigate to the ‘Options Panel’ at the left and click on ‘More’ to select a suitable aspect ratio. Picking the 9:16 ratio would be a good choice.

Step 4: Upload Your Media
In the same ‘Options Panel’, click on ‘Media’ for dragging and dropping the desired video and image files from your device to the program’s media timeline, followed by applying them to the tool’s storyboard. You can alternatively, choose to directly work with media pages of any preset slideshow template.

Step 5: Customize Your Media
You can now proceed to improvise your media files with amazing texts, filters, stickers, emojis, widgets, etc., by clicking on specific object categories from the ‘Options Panel’.

Step 6: Include Seamless Transitions
Proceed to uplift your creation to the next level with the application of stunning image and video transitions. Navigate to the ‘Options Panel’ and tap ‘Elements’. A variety of transition effects will be displayed to choose from. Select the one you like to add it to your slideshow.

Step 7: Add a Background Music
An in line background audio is the best way to set the mood of your slideshow. Choose to add the same to your creation for making a more engaging impact on the audience. Visit the ‘Options Panel’ again and click on ‘Music’ to open the program’s audio library and select a perfect background music from the huge variety of choices, to include in your slideshow.

Step 8: Preview Your Creation
When you have finished customizing your slideshow, navigate to the top right corner of the editor’s storyboard and hit the ‘Preview’ button to visualize and ensure that your slideshow has everything at the right place. You can continue editing if there is a need to make some changes.
Step 9: Time to Save and Share!
When you are happy with your work, consider saving it either to your device or Google Dropbox, from where you can easily upload the same to your Instagram handle.
Part 3 Best Instagram Slideshow Apps for Creating Outstanding Slideshow
Social media is the talk of the trend in today’s times, which has extended its boundaries to visibly everything around us. Speaking in the light of the fact, slideshow presentations are no exception. Social media platforms today have come up with amazing tools and applications to create and share a stunning slideshow Instagram story with utmost ease and within an affordable time span.
Now that you have developed a comprehensive understanding of the credibility of working with Instagram slideshows and their creation process with the inclusion of complementary background music, let us dive into learning about some of the best and most popular Instagram apps for creating awesome slideshow presentations in the following section:
01Filme Lite
This tool lands among the leading user preferences to work on creating slideshow presentations. The application software is packed with a heap of latest features that form the Instagram trends in current times.
Apart from complementing your slideshow creations with tons of features, this slideshow maker for Instagram grants you the liberty to include your most loved videos and images within your presentation and customize them with a diverse range of effects, along with adjusting their play duration within the slideshow. Additional to image and video customization, you are also allowed to choose the image transition style that perfectly suits your content arrangement within the slides.
Working with the tool, you can be sure of getting an unparalleled slideshow creation experience with a very interactive and user oriented design interface, that is simple enough to be easily understood and worked upon by a newbie to the creative world.
02VivaVideo
If you are working on a detailed presentation and wish to spark up your creation with stunning varieties of jaw dropping special effects, consider creating your PowerPoint slideshows in this application. The tool’s effect library is a storehouse of the most amazing special effects that promise of transforming your slideshow into a visual masterpiece.
You can separately apply these effects to each of the slideshow images or choose to work on a combination of selected effects to include within a single video. Apart from this, you are free to choose an apt background music for your presentation slides from the extensive audio library of the software. The bottom line is; you are assured to a complete fun experience while creating slideshows with this tool.
03Movavi
If you are familiar enough with the fundamental concepts and the trivial anecdotes of working with slideshow presentations and want to take your graphic creativity to the next level, you can try hands at using the Movavi slideshow creator software to design high end PowerPoint presentations of professional quality. The best thing about the tool is, it works online and does not require a software download for usage concerns.
Along with creating online slideshow presentations with ease, the tool permits you to create online videos within minutes and instantly download the same for specific usage. You can further, pop up your presentation slides with wonderful transition and animation effects and also make adjustments in the play duration of each slide. The tool lets you choose and add a perfect background music to your presentation from its conveniently vast audio library.
04Slideshow Lab
If you have just landed into the world of creating slideshow presentations and are looking for easy solutions on how to make a slideshow on Instagram, consider working with this software to polish your design creativity. The simple and user cohesive interface of the tool is best for beginners to understand and get customary with the creation process, that takes the minimum possible time to render an appreciable PowerPoint presentation.
Talking about the slideshow design process, you will need to start with selecting a set of desired images, followed by uploading the same into the tool’s slideshow creator timeline. The next step is to arrange the images in the sequential order of appearance, select an appealing background music and apply smooth image transitions. When you are done with everything, proceed to save the presentation to your device.
05MoShow
While you can choose to create stunning slideshow presentations with almost any class of images, the aforesaid app works best to render Instagram images into a top rated Instagram photo slideshow without compromising with the high resolution image quality of Instagram photos. The application integrates motion pictures and lighting effects to transform the otherwise regular images into lively still captures.
Considering the credibility of the tool in overall user experience, its indeed a thumbs up from graphic creators across the globe, thanks to its smart and interactive interface, in time performance and outstanding creation outputs.
06InVideo Editor
Put an end to your search of effective solutions on how to do a slideshow on Instagram with the InVideo Editor, a smart video and graphic editor that can also be employed to adhere to the requirement of creating amazing slideshow presentations from Instagram media. While the creation process hardly takes a few minutes, you can work with the application to explore your editing creativity to the finest levels. The tool works well with any of your MacOs and Windows compatible devices.
The editor’s effects library is loaded with tons of graphic transitions and filters that are dedicated to enhance the contents of your presentation with utmost ease. You can add creative modifications to the slideshow media, such as, cut, crop and trim videos and images and add the most convincing music, overlays, fonts, etc., and enjoy an additional free access to hundreds of stock videos and slideshow templates.
07LightMV
This one is an online slideshow creator utility that works well with almost any operating system including Windows, iOS, Android and Mac. Essentially a cloud centered editor program, this tool caters to your high quality slideshow creation needs in the most effective way. The design process is quite simple, where you only need to add the images and videos, design your presentation and wait till everything comes to place.
What’s more appealing factor about the tool is that you will never need to download the program in your device or purchase a subscription plan to use the application. All you need to do is land into the tool’s website in your favorite browser and tap on the ‘Slideshow’ option to begin with the creation process. You can select from a heap of preset stunning slideshow templates to create the most enhanced PowerPoint presentation.
08Fliptastic
The Fliptastic slideshow creator app is exclusively developed to adhere to the graphic design concerns of iOS users. This one is a no cost graphic utility with a plethora of versatile features and considerable user backup. The app’s effect library is packed with a unique set of slideshow design templates, transitions, background music choices and filters that work to compliment your presentation with the subtlest look ever.
Paying a bit extra attention to the audio inclusion within the slides, the app offers you a range of free music files to work with, while additionally allowing you to upload and use one from your device or the internet.
09Creating Instagram Slideshows With Filmora
Talking exclusively within the domain of video creation and editing, the credibility of the Wondershare Filmora Video Editor software needs no introduction. Moving ahead with our discussion, let us learn about the process of creating awesome Instagram slideshows with Filmora in the following section:
Step 1: Download and Install the Program
To begin with addressing the concern of how to make a slideshow on Instagram story, navigate to the official Wondershare website and download the Wondershare Filmora Video Editor to your preferred system and proceed to install the same.

Wondershare Filmora - Best Video Editor for Mac/Windows
5,481,435 people have downloaded it.
Build unique custom animations without breaking a sweat.
Focus on creating epic stories and leave the details to Filmora’s auto features.
Start a creative adventure with drag & drop effects and endless possibilities.
Filmora simplifies advanced features to save you time and effort.
Filmora cuts out repetition so you can move on to your next creative breakthrough.
Step 2: Import Your Media
Launch the editor program and wait for the latter’s welcome screen to appear. Here, you need to import the images, videos and other media files to the editor timeline for including them in your slideshow. It is recommended to collect all the image and video files into one single folder before opening a new slideshow design project.
In the editor’s welcome screen, navigate to the ‘Media’ tab at the top left corner and click on the same to open the ‘Import’ menu. From here, you need to choose the ‘Import a Media Folder’ option, followed by navigating to the folder that contains the to be imported media files. When you have reached to the required folder, select it and tap ‘OK’ to import the same into the project timeline. When all the files have been imported, you can see them in the ‘Project Media’ panel.

Step 3: Timeline Positioning of Media Files
Reach to the ‘File’ menu and choose ‘Preferences’ from the latter’s dropdown menu. In the ‘Preferences’ window, hit the ‘Editing’ tab and tap on ‘Photo Preferences’. From the drop down menu that follows, choose the ‘Crop to Fit’ option to adjust the aspect ratio of your imported images in line with the slideshow project. In case your images have the 9:16 vertical aspect ratio, select the ‘Fit’ option to make a proper screen fit.

You can proceed to include the image zoom and camera pan features within your project by clicking on the ‘Pan & Zoom’ option. You can further, modify the preset durations of transitions, effects and photos in the ‘Editing’ tab itself before adding them to the editor timeline. Another way of doing the same is to drag the ends of the media files inward or outward, post the timeline adding process.

When you have finished making the required adjustments, navigate back the ‘Media Panel’ to include the imported media files within the project timeline. You can either click on the files to add them, or choose to ‘Drag and Drop’ the same at a preferred place within the timeline.
When all the images and videos have been added, proceed to arrange them in the desired order of appearance in the slideshow, followed by adjusting their screen time and play durations through any of the methods explained above.
Step 4: Add Transitions to Eliminate Hard Cuts
The smooth play of a slideshow is often distorted by hard cuts, which can be escaped by applying smooth transition effects to the slides. Consider exploring the ‘Transitions’ tab of Filmora to choose from a diversity of easily customizable transition effects and place them at the intersection point of the respective slides in the project timeline.
Instead of applying the same transition to every slide, prefer choosing the one that exclusively suits the content arrangement and flow within particular slides. This would save your slideshow from getting a repetitive look.

Post the timeline adding of a transition, you can double click on the same to reach the ‘Transition Setting Window’, where you are allowed to customize the play duration and select its ‘Transition Mode’. Play durations can alternatively be customised in the project timeline by dragging the slider in a left or right direction.
Step 5: Add Overlays and Filters for an Improvised Colour Scheme
To enhance the thematic appeal of your slideshow, consider desaturating the colours of the included images with the extensive range of visual effects and overlays available in the ‘Effects’ tab of the software’s editing timeline. Opening the tab, you are exposed to a series of ‘Filter and Overlay’ categories, that have further subdivisions of Light Leaks, Sepia Tone and Lomography.
To add a particular effect, place it in the timeline track above the desired clip or image. Observe the changes in the ‘Preview Panel’ and proceed to adjust the effect settings if required, by double clicking on the particular effect.

Step 6: Include Motion Graphic Elements
To supplement your slideshow with elegant motion graphics, navigate to the ‘Elements’ tab in the editor timeline. From here, you can access and choose any suitable motion graphic template from a diversity of available choices, to include within the project timeline. The step is completely optional and you should pay attention to the style of content presentation and the cause of creation of your slideshow when choosing to add these elements to the same.

Step 7: Record Voiceovers and Create Soundtracks
To record a voiceover for your slideshow, navigate to the ‘Media’ tab and tap the ‘Record’ dropdown menu. Click on ‘Record Voiceover’ in the list of options that appears. The ‘Record Audio’ icon pops up and you now need to select a microphone to be used in the recording process. When you are ready, tap the ‘Record’ button to let the recording begin.

You can now see your voice recording appear in the ‘Media’ tab with the previously imported media files, ready to be placed within the audio track of the project timeline. Filmora’s audio library is a storehouse of free access music and audio effects. To add one to your slideshow, navigate and click on the ‘Audio’ tab to select from the extensive Rock, Young & Bright, Electronic, etc., music subcategories till you get the perfect match for your presentation.

Once you have selected all the music tracks, place them one by one on the project timeline and move ahead with adjusting their play durations.
Step 8: Export Your Creation
When you are satisfied with your work, you can export the slideshow directly from Filmora to a number of media sharing platforms. All you need to do is, navigate to and tap the ‘Export’ button in the top right corner of the editor screen and proceed to set the resolution and frame rate, and select the output file format of your created slideshow in the ‘Export Window’ that appears.

When you are ready with everything, click on the ‘Export’ button at the bottom right corner of the screen to share your slideshow across different platforms, including YouTube, Instagram, Vimeo, etc.
The time required by Filmora to render your slideshow on the chosen platform will depend on the output file size. Considering the fact that larger files require a much longer time to be rendered, it would be a smart decision to limit the file size of your slideshow within 500 MB.
● Ending Thoughts →
● Instagram slideshows are exciting means of diving into fun-filled entertainment with your social media peers.
● When looking for solutions on how to create a slideshow on Instagram, there are loads of choices in the software market.
● Talking of best creator alternatives, you can pick the Wondershare Filmora slideshow developer program to make an amazing Insta story slideshow.
Instagram slideshows land among the latest social media trends of fun and entertainment. Learn how to attract jaw dropping peer attention with creating the same!
In this article
01 [When Should You Use an Instagram Slideshow?](#Part 1)
02 [How to Make an Instagram Slideshow with Music?](#Part 2)
03 [8 Best Instagram Slideshow Apps for Creating Outstanding Slideshow](#Part 3)
Part 1 When Should You Use an Instagram Slideshow?
Revolutions in technology has opened doors to a plenty of new and exciting means of information sharing, entertainment and communication. Playing its part in the game, Instagram slideshow has emerged as an exciting means of quick and impactful content sharing. Diving deeper into the discussion, let us talk about the different areas of working with an Instagram slide show in the following section:
01Explanatory Product Demonstrations and Stepwise Tutorials
Considering the diverse media collaboration entertained by this social media platform, you get the liberty to include 10 media files of videos and images while creating a slideshow on Instagram. This is an affordably sufficient media space to demonstrate your newly launched product in front of the target audience.
The aforesaid characteristic of a slideshow for Instagram can be put to another use of creating detailed, step by step guides and product usage tutorials to create an increased and confident customer reach and brand applicability. A few examples include the presentations of recipes by food blogs and chefs, or a detailed look of the day’s outfit by fashion bloggers.
02Interactive Storytelling or Recreate an Event
Gone are the times when stories and events were restricted to a single image or video with a limited scope of understanding and explanation. You can now work with a combination of multiple images and videos to create more vivid and graphical descriptions of stories, narratives and events.
You can work on creating an engaging slideshow for Instagram to tell an amazing story, voice a narration from the beginning to the end, or share your best moments with your cherished audience, which will surely give them the feel of enjoying the adventure along with you.
03Create a Collection
You can now use a slide show for Instagram to design and present a collection of manifold ideas and products within a single post. You can improvise the collection with displaying a series of related products, showcasing a summary of your different blog posts through the week, or simply present a list of your most reliable inspirations, resources and influencers.
04Exciting Video Teasers
If you have a scheduled video release to entertain your audience, try working with interactive slideshows for Instagram to create some sensational teaser content of the upcoming release to imbibe a natural sense of curiosity within your audience.
You can experiment with releasing a mini photoshoot tour of your filming set, share close up progression details, or include a cliffhanger in the end of your Instagram slideshow to ensure the retrieval of your audience towards watching the release of the actual big content. You can use these short teasers as effective means of creating a campaign buzz, while building a closer connect with your audience.
Part 2 How to Make an Instagram Slideshow with Music?
By now, you must have gathered enough knowledge regarding the credibility of Instagram slideshows in catering to a diversity of commercial, professional and personal content sharing needs. Considering the same, you may conveniently feel motivated to try hands at creating stunning slideshow presentations for Instagram on your own.
Adhering to the concern, let us move ahead with our discussion, while talking about how to make a slideshow for Instagram and supplement the same with adaptable background music to develop amazing content masterpieces and share them with social media peers, while grabbing their obvious attention.
While there are a number of choices in the software market to choose your Instagram slideshow creator tool, the FlexClip tool can be a reliable option. Read though the following section to learn the slideshow creation process in the program with a comprehensive and stepwise tutorial guide:
Step 1: Download the Slideshow Creator Tool
Visit the official website of FlexClip to download and install the slideshow maker software in your preferred device.
Step 2: Start from Scratch
After a successful installation, proceed to launch the tool in your system and wait till the software greets you with its welcome interface. Here, you will have to reach to and tap the ‘Start to Create’ button to begin with the slideshow creation process. You can also select a preset template to work on your slideshow if nothing new clicks in your mind.
Step 3: Select an Aspect Ratio
In the tool’s creator window, navigate to the ‘Options Panel’ at the left and click on ‘More’ to select a suitable aspect ratio. Picking the 9:16 ratio would be a good choice.
Step 4: Upload Your Media
In the same ‘Options Panel’, click on ‘Media’ for dragging and dropping the desired video and image files from your device to the program’s media timeline, followed by applying them to the tool’s storyboard. You can alternatively, choose to directly work with media pages of any preset slideshow template.
Step 5: Customize Your Media
You can now proceed to improvise your media files with amazing texts, filters, stickers, emojis, widgets, etc., by clicking on specific object categories from the ‘Options Panel’.
Step 6: Include Seamless Transitions
Proceed to uplift your creation to the next level with the application of stunning image and video transitions. Navigate to the ‘Options Panel’ and tap ‘Elements’. A variety of transition effects will be displayed to choose from. Select the one you like to add it to your slideshow.
Step 7: Add a Background Music
An in line background audio is the best way to set the mood of your slideshow. Choose to add the same to your creation for making a more engaging impact on the audience. Visit the ‘Options Panel’ again and click on ‘Music’ to open the program’s audio library and select a perfect background music from the huge variety of choices, to include in your slideshow.
Step 8: Preview Your Creation
When you have finished customizing your slideshow, navigate to the top right corner of the editor’s storyboard and hit the ‘Preview’ button to visualize and ensure that your slideshow has everything at the right place. You can continue editing if there is a need to make some changes.
Step 9: Time to Save and Share!
When you are happy with your work, consider saving it either to your device or Google Dropbox, from where you can easily upload the same to your Instagram handle.
Part 3 Best Instagram Slideshow Apps for Creating Outstanding Slideshow
Social media is the talk of the trend in today’s times, which has extended its boundaries to visibly everything around us. Speaking in the light of the fact, slideshow presentations are no exception. Social media platforms today have come up with amazing tools and applications to create and share a stunning slideshow Instagram story with utmost ease and within an affordable time span.
Now that you have developed a comprehensive understanding of the credibility of working with Instagram slideshows and their creation process with the inclusion of complementary background music, let us dive into learning about some of the best and most popular Instagram apps for creating awesome slideshow presentations in the following section:
01Filme Lite
This tool lands among the leading user preferences to work on creating slideshow presentations. The application software is packed with a heap of latest features that form the Instagram trends in current times.
Apart from complementing your slideshow creations with tons of features, this slideshow maker for Instagram grants you the liberty to include your most loved videos and images within your presentation and customize them with a diverse range of effects, along with adjusting their play duration within the slideshow. Additional to image and video customization, you are also allowed to choose the image transition style that perfectly suits your content arrangement within the slides.
Working with the tool, you can be sure of getting an unparalleled slideshow creation experience with a very interactive and user oriented design interface, that is simple enough to be easily understood and worked upon by a newbie to the creative world.
02VivaVideo
If you are working on a detailed presentation and wish to spark up your creation with stunning varieties of jaw dropping special effects, consider creating your PowerPoint slideshows in this application. The tool’s effect library is a storehouse of the most amazing special effects that promise of transforming your slideshow into a visual masterpiece.
You can separately apply these effects to each of the slideshow images or choose to work on a combination of selected effects to include within a single video. Apart from this, you are free to choose an apt background music for your presentation slides from the extensive audio library of the software. The bottom line is; you are assured to a complete fun experience while creating slideshows with this tool.
03Movavi
If you are familiar enough with the fundamental concepts and the trivial anecdotes of working with slideshow presentations and want to take your graphic creativity to the next level, you can try hands at using the Movavi slideshow creator software to design high end PowerPoint presentations of professional quality. The best thing about the tool is, it works online and does not require a software download for usage concerns.
Along with creating online slideshow presentations with ease, the tool permits you to create online videos within minutes and instantly download the same for specific usage. You can further, pop up your presentation slides with wonderful transition and animation effects and also make adjustments in the play duration of each slide. The tool lets you choose and add a perfect background music to your presentation from its conveniently vast audio library.
04Slideshow Lab
If you have just landed into the world of creating slideshow presentations and are looking for easy solutions on how to make a slideshow on Instagram, consider working with this software to polish your design creativity. The simple and user cohesive interface of the tool is best for beginners to understand and get customary with the creation process, that takes the minimum possible time to render an appreciable PowerPoint presentation.
Talking about the slideshow design process, you will need to start with selecting a set of desired images, followed by uploading the same into the tool’s slideshow creator timeline. The next step is to arrange the images in the sequential order of appearance, select an appealing background music and apply smooth image transitions. When you are done with everything, proceed to save the presentation to your device.
05MoShow
While you can choose to create stunning slideshow presentations with almost any class of images, the aforesaid app works best to render Instagram images into a top rated Instagram photo slideshow without compromising with the high resolution image quality of Instagram photos. The application integrates motion pictures and lighting effects to transform the otherwise regular images into lively still captures.
Considering the credibility of the tool in overall user experience, its indeed a thumbs up from graphic creators across the globe, thanks to its smart and interactive interface, in time performance and outstanding creation outputs.
06InVideo Editor
Put an end to your search of effective solutions on how to do a slideshow on Instagram with the InVideo Editor, a smart video and graphic editor that can also be employed to adhere to the requirement of creating amazing slideshow presentations from Instagram media. While the creation process hardly takes a few minutes, you can work with the application to explore your editing creativity to the finest levels. The tool works well with any of your MacOs and Windows compatible devices.
The editor’s effects library is loaded with tons of graphic transitions and filters that are dedicated to enhance the contents of your presentation with utmost ease. You can add creative modifications to the slideshow media, such as, cut, crop and trim videos and images and add the most convincing music, overlays, fonts, etc., and enjoy an additional free access to hundreds of stock videos and slideshow templates.
07LightMV
This one is an online slideshow creator utility that works well with almost any operating system including Windows, iOS, Android and Mac. Essentially a cloud centered editor program, this tool caters to your high quality slideshow creation needs in the most effective way. The design process is quite simple, where you only need to add the images and videos, design your presentation and wait till everything comes to place.
What’s more appealing factor about the tool is that you will never need to download the program in your device or purchase a subscription plan to use the application. All you need to do is land into the tool’s website in your favorite browser and tap on the ‘Slideshow’ option to begin with the creation process. You can select from a heap of preset stunning slideshow templates to create the most enhanced PowerPoint presentation.
08Fliptastic
The Fliptastic slideshow creator app is exclusively developed to adhere to the graphic design concerns of iOS users. This one is a no cost graphic utility with a plethora of versatile features and considerable user backup. The app’s effect library is packed with a unique set of slideshow design templates, transitions, background music choices and filters that work to compliment your presentation with the subtlest look ever.
Paying a bit extra attention to the audio inclusion within the slides, the app offers you a range of free music files to work with, while additionally allowing you to upload and use one from your device or the internet.
09Creating Instagram Slideshows With Filmora
Talking exclusively within the domain of video creation and editing, the credibility of the Wondershare Filmora Video Editor software needs no introduction. Moving ahead with our discussion, let us learn about the process of creating awesome Instagram slideshows with Filmora in the following section:
Step 1: Download and Install the Program
To begin with addressing the concern of how to make a slideshow on Instagram story, navigate to the official Wondershare website and download the Wondershare Filmora Video Editor to your preferred system and proceed to install the same.
Wondershare Filmora - Best Video Editor for Mac/Windows
5,481,435 people have downloaded it.
Build unique custom animations without breaking a sweat.
Focus on creating epic stories and leave the details to Filmora’s auto features.
Start a creative adventure with drag & drop effects and endless possibilities.
Filmora simplifies advanced features to save you time and effort.
Filmora cuts out repetition so you can move on to your next creative breakthrough.
Step 2: Import Your Media
Launch the editor program and wait for the latter’s welcome screen to appear. Here, you need to import the images, videos and other media files to the editor timeline for including them in your slideshow. It is recommended to collect all the image and video files into one single folder before opening a new slideshow design project.
In the editor’s welcome screen, navigate to the ‘Media’ tab at the top left corner and click on the same to open the ‘Import’ menu. From here, you need to choose the ‘Import a Media Folder’ option, followed by navigating to the folder that contains the to be imported media files. When you have reached to the required folder, select it and tap ‘OK’ to import the same into the project timeline. When all the files have been imported, you can see them in the ‘Project Media’ panel.
Step 3: Timeline Positioning of Media Files
Reach to the ‘File’ menu and choose ‘Preferences’ from the latter’s dropdown menu. In the ‘Preferences’ window, hit the ‘Editing’ tab and tap on ‘Photo Preferences’. From the drop down menu that follows, choose the ‘Crop to Fit’ option to adjust the aspect ratio of your imported images in line with the slideshow project. In case your images have the 9:16 vertical aspect ratio, select the ‘Fit’ option to make a proper screen fit.
You can proceed to include the image zoom and camera pan features within your project by clicking on the ‘Pan & Zoom’ option. You can further, modify the preset durations of transitions, effects and photos in the ‘Editing’ tab itself before adding them to the editor timeline. Another way of doing the same is to drag the ends of the media files inward or outward, post the timeline adding process.
When you have finished making the required adjustments, navigate back the ‘Media Panel’ to include the imported media files within the project timeline. You can either click on the files to add them, or choose to ‘Drag and Drop’ the same at a preferred place within the timeline.
When all the images and videos have been added, proceed to arrange them in the desired order of appearance in the slideshow, followed by adjusting their screen time and play durations through any of the methods explained above.
Step 4: Add Transitions to Eliminate Hard Cuts
The smooth play of a slideshow is often distorted by hard cuts, which can be escaped by applying smooth transition effects to the slides. Consider exploring the ‘Transitions’ tab of Filmora to choose from a diversity of easily customizable transition effects and place them at the intersection point of the respective slides in the project timeline.
Instead of applying the same transition to every slide, prefer choosing the one that exclusively suits the content arrangement and flow within particular slides. This would save your slideshow from getting a repetitive look.
Post the timeline adding of a transition, you can double click on the same to reach the ‘Transition Setting Window’, where you are allowed to customize the play duration and select its ‘Transition Mode’. Play durations can alternatively be customised in the project timeline by dragging the slider in a left or right direction.
Step 5: Add Overlays and Filters for an Improvised Colour Scheme
To enhance the thematic appeal of your slideshow, consider desaturating the colours of the included images with the extensive range of visual effects and overlays available in the ‘Effects’ tab of the software’s editing timeline. Opening the tab, you are exposed to a series of ‘Filter and Overlay’ categories, that have further subdivisions of Light Leaks, Sepia Tone and Lomography.
To add a particular effect, place it in the timeline track above the desired clip or image. Observe the changes in the ‘Preview Panel’ and proceed to adjust the effect settings if required, by double clicking on the particular effect.
Step 6: Include Motion Graphic Elements
To supplement your slideshow with elegant motion graphics, navigate to the ‘Elements’ tab in the editor timeline. From here, you can access and choose any suitable motion graphic template from a diversity of available choices, to include within the project timeline. The step is completely optional and you should pay attention to the style of content presentation and the cause of creation of your slideshow when choosing to add these elements to the same.
Step 7: Record Voiceovers and Create Soundtracks
To record a voiceover for your slideshow, navigate to the ‘Media’ tab and tap the ‘Record’ dropdown menu. Click on ‘Record Voiceover’ in the list of options that appears. The ‘Record Audio’ icon pops up and you now need to select a microphone to be used in the recording process. When you are ready, tap the ‘Record’ button to let the recording begin.
You can now see your voice recording appear in the ‘Media’ tab with the previously imported media files, ready to be placed within the audio track of the project timeline. Filmora’s audio library is a storehouse of free access music and audio effects. To add one to your slideshow, navigate and click on the ‘Audio’ tab to select from the extensive Rock, Young & Bright, Electronic, etc., music subcategories till you get the perfect match for your presentation.
Once you have selected all the music tracks, place them one by one on the project timeline and move ahead with adjusting their play durations.
Step 8: Export Your Creation
When you are satisfied with your work, you can export the slideshow directly from Filmora to a number of media sharing platforms. All you need to do is, navigate to and tap the ‘Export’ button in the top right corner of the editor screen and proceed to set the resolution and frame rate, and select the output file format of your created slideshow in the ‘Export Window’ that appears.
When you are ready with everything, click on the ‘Export’ button at the bottom right corner of the screen to share your slideshow across different platforms, including YouTube, Instagram, Vimeo, etc.
The time required by Filmora to render your slideshow on the chosen platform will depend on the output file size. Considering the fact that larger files require a much longer time to be rendered, it would be a smart decision to limit the file size of your slideshow within 500 MB.
● Ending Thoughts →
● Instagram slideshows are exciting means of diving into fun-filled entertainment with your social media peers.
● When looking for solutions on how to create a slideshow on Instagram, there are loads of choices in the software market.
● Talking of best creator alternatives, you can pick the Wondershare Filmora slideshow developer program to make an amazing Insta story slideshow.
The Ultimate Cheatsheet to 15 Adobe Animate Alternatives
The Ultimate Cheatsheet to 15 Adobe Animate Alternatives in 2024
An easy yet powerful editor
Numerous effects to choose from
Detailed tutorials provided by the official channel
Like all other Adobe premium software like Photoshop, illustrator, and premiere pro, Adobe Animate is designed for professionals.
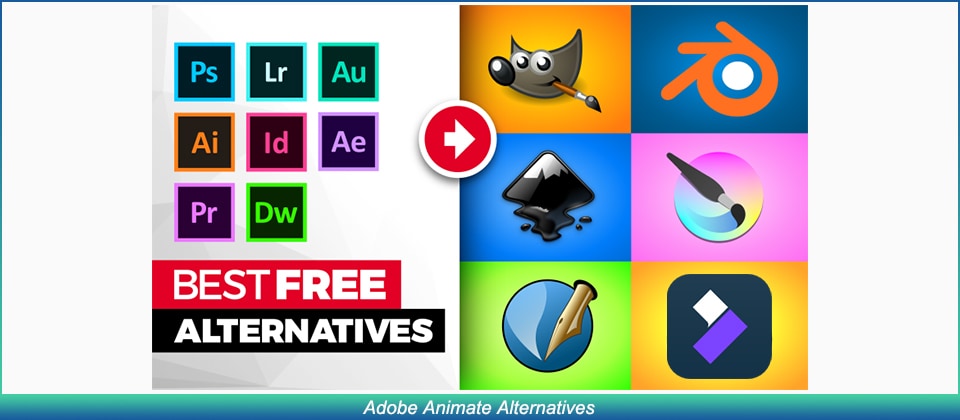
No need to feel discouraged as there are plenty of Adobe Animate free alternatives with which you can polish the animator in you. Let’s check them out.
In this article
01 [Adobe Animate - How It Became a Good Option Without Hesitation?](#Part 1)
02 [Top 10 Adobe Animate Alternatives to Improve Animation Experience](#Part 2)
03 [The Most Comprehensive All-round Comparison Among All Alternatives](#Part 3)
Part 1 Adobe Animate - How It Became a Good Option Without Hesitation?
1. How Much Do You Know About Adobe Animate Key Features?
The Adobe Creative Cloud is constantly updating its range of virtual tools with new features which give users twice more incentive to subscribe. Adobe Animate CC, which is basically the new Adobe Flash, has also received an update recently which installed a bundle of new features to its interface, making it even more irresistible to animators.
What’s new with Adobe Animate?
● Adobe Animate Camera
Adding to Adobe’s line of exclusivity is its all-new Adobe Virtual Camera. Using this feature, Adobe animate users can now control their animation camera movements giving your animation videos a more realistic feel.
● Export any Format
Exporting your animations to your desktop is a convenience every software should provide.
● Audio Syncing
Adobe Animate enables you to synchronize audio to your animations completely easily which is yet another feature that has been recently added.
● Vector Brushes
Though it resembles the same functionality with Adobe Illustrator, Adobe Animate has renewed the tool with the ability to use tilt and pressure effects when drawing with a stylus or pen.
● Web Fonts
Now you can use a vast library of Adobe web fonts with Adobe Animate. These high-quality fonts are available in HTML5 canvas documents.
2. What Lay Behind Adobe Animate Alternative?
When it comes to choosing the best premium animation software, Adobe Animate CC is the obvious choice, but what makes beginners hesitant in using Adobe Animate is the fact that you need to subscribe to Adobe Creative Cloud.
This becomes an obstacle to those who are just starting out and are not that confident in getting their hands on a professional league interface like Animate. It also lacks sufficient facilities for practicing 3D animations.
This is exactly where free Alternatives to Adobe Animate enters the scene. Check out our list and find out which alternative suits your level of animation skills.
Part 2 Top 10 Adobe Animate Alternatives to Improve Animation Experience
No. 1 Krita

The first free-to-use Adobe Alternative on our list is ‘Krita’. It is an open-source animator with an intuitive drag and drop panel which gives users complete flexibility.
Krita llll➤
● UI
It offers over 30 different Dockers which are like toolkits for the program.
● Features
Freehand path tool+Object manipulation+HDR support+Layer Management+Enhanced OpenGL
● Compatibility
Supports various metadata formats like ORA, KRA, PSD, JPEG and PNG files.
● Popularity
Krita has a 4.3 start popularity rating at G2.com.
● Operating System
Compatible with Windows 8 or higher, macOS X 10.12 and Linux Basic.
● Pricing
Free to use.
● Who is Best For?
Krita is an excellent alternative for beginners who are looking to not get overwhelmed by comprehensive features.
● Reviewers say compared to Adobe Animate
Many reviewers have preferred Krita’s simplistic approach to Adobe Animate.
● Verdict
It is an excellent image editor and animator but can be limiting in its professional application.
Strengths
100 preloaded brushes: You can use brush tools in categories like digital, ink, paint, and sketch.
Onion Layer Editing: You can go back and check your previous drawing before moving on to the next.
Counteractive Tools: Efficiently compatible with pressure-sensitive tablets.
Weaknesses
Pixel-based Drawings: Its drawings are pixelated making it harder to achieve precisions around the rough edges.
Added Support: Exporting animation files requires support from a secondary application.
No. 2 Open Toonz

A friendlier platform for cartoon animation lovers and yet another free Adobe Animate Alternative. An open-source platform whose code can be modified by the user to add new features and graphics.
Open Toonz llll➤
● UI
Its interface has separate organized rooms called ‘workspaces’. The tools and windows in each room are different and fulfill a separate function.
● Features
Indexed Colour Palettes+Motion Tracking+Effects and Composting+Effects and Composting+Effects and Composting
● Compatibility
Opentoonz supports a plethora of file formats like AVI, 3GP, BMP, JPG, GIF, MOV, NOL, RGB, SGI, TGA, TIF, and TIFF.
● Popularity
OpenToonz has a standard rating of 4.1 stars on G2.
● Operating System
Compatible with macOS X 10.9, Windows 7 or higher.
● Pricing
Free to use.
● Who is Best For?
Can be used by both professionals and beginners alike.
● Reviewers say compared to Adobe Animate
It is a great platform to familiarize yourself with basic animation.
● Verdict
OpenToonz is an excellent animation tool for beginners but lacks some of the higher-performing functions demanded by professionals.
Strengths
TWAIN Standard Compatible: Images captured on OpenToonx using its digital camera and scanners can be used in animations.
Choose from different animation types: You can choose between standard animation and skeletal animations.
100s of Special Effects: Change the effects of your image however you want using effects like incident light or distortion waves.
Weaknesses
Suitable only for beginners: OpenToonz may still require some work in order to muster the attention of pros.
Lack of automated syncing: You may find it difficult to sync the voices of your characters.
No. 3 Toon Boom

Toon Boom is a more popular alternative to Adobe Animate and is recognized by professional animation studios worldwide. Toon Boom even has its own pro-grade animation software called Harmony which has been used to create various popular TV animated series.
Toon Boom llll➤
● UI
The extremely instinctive interface where you can navigate using various effects like zoom in & out, pan and reset your views.
● Features
Advanced Cut out+Bitmap and Vector Drawing+Bitmap and Vector Drawing+Access to Harmony Server+Access to Harmony Server
● Compatibility
Toon Boom can import dozens of different file formats like BMP, JPEG, PSD, TGA, SGI, TIFF, TVG and PAL.
● Popularity
Toom Boom is rated excellent on G2 with 4.7 stars.
● Operating System
Can run with Windows 7 & 10, macOS High Sierra, Catalina, Mojave.
● Pricing
Basic - $25/month; Advanced - $63/month; Premium - $115/month.
● Who is Best For?
Superb animation software with dozens of features that would attract freelance animators and professionals.
● Reviewers say compared to Adobe Animate
The common opinion amongst reviewers is that Toon Boom offers many more features than Adobe Animate.
● Verdict
Toon Boom is premium software that is excellent for pro-league animators and is one of Adobe Animates biggest competitors.
Strengths
Onion Skinning Feature: You can view your drawings in layers.
Import & Export Different types of files: You can export and import files like paper drawings, digital drawings and 13 other file types.
Peg Animations: You can chart your character’s movements using pegs between two points.
Weaknesses
Lacks Audio Features: You require an external audio application to include audio in your animations.
Do not include pre-made characters: You would need to create your characters from scratch.
No. 4 TVPaint Animation

TVPaint has been a household animation software that has been around for a while. It has considerable features which are great for creating versatile 2D animations.
TVPaint Animation llll➤
● UI
The TVPaint Interface is not too complex and has a wide range of bitmap drawing tools for 2D all 2D animation processes.
● Features
Bitmap Drawing Tools+Bitmap Drawing Tools+Layer Management+Layer Management+Layer Management
● Compatibility
Can import image and video files like WMV, AVI, MOV, MPEG, GIF, JPEG, PNG, and TIFF.
● Popularity
TVPaint has been around for a long while and has a 5-star G2 rating.
● Operating System
Later versions of TVPaint are compatible with Microsoft Windows, macOS X, Android, and Linux.
● Pricing
Standard version 11.0 costs €500; Professional version 11.0 costs €1250.
● Who is Best For?
It is traditionally acclaimed 2D animation software superb for professional animation studios.
● Reviewers say compared to Adobe Animate
Both TV Paint and Animate cc has the ability to perfect frame to frame animation with minor differences in the choice of tools.
● Verdict
TV Paint is a fantastic software amongst animators who wish to perfect their craft.
Strengths
Versatile Drawing Tools: You have access to all essential drawing tools like brushes, color palettes, textures and more.
Strong Painting Engine: Powerful painting tool for sketching and painting backgrounds.
Colour & Texture Generator: This tool provides an enhanced spectrum of colors.
Weaknesses
Learning Curve: TVPaint has its own learning curve as the interface is dissimilar from average animators.
Limited to Bitmap: You can only edit images in Bitmap format.
No. 5 Synfig Studio

Synfig is yet another free-to-use Adobe Animate alternative but is quite powerful in creating fabulous vector animations which are flawless to look at it.
Synfig Studio llll➤
● UI
Synfig is yet another free-to-use Adobe Animate alternative but is quite powerful in creating fabulous vector animations which are flawless to look at it.
● Features
Various different layers+Sound Support+Dozens of Drawing Tools+Dozens of Drawing Tools+Import Facility
● Compatibility
You can render multiple video formats like AVI, MPEG, GIF, and MNG.
● Popularity
Excellent Rating 5 stars for Vector Graphics on G2.
● Operating System
Can run on Windows 7 and above, macOS X 10.8 and Linux.
● Pricing
Free to use.
● Who is Best For?
Synfig is a bit complex but great for animators who are willing to learn.
● Reviewers say compared to Adobe Animate
Much more convenient interface.
● Verdict
Synfig Studios is a great program for animating vector graphics.
Strengths
Vector Tweening: Change the shape of your vectors automatically.
50+ Layers: Choose from multiple gradients, filters, distortions, geometrics and fractals.
Auto Lip-Sync: Your audio will be automatically paired with your characters.
Weaknesses
Continuous Saving: You will need to manually save your files each time.
Learning Curve: The program takes some time to master.
No. 6 Cacani

Here comes CACANi, a new chip off the old block for anime lovers. It has awesome features for drawing vector animations.
Cacani llll➤
● UI
Excellent vector drawing interface which reduces your effort and time by auto-generating drawings.
● Features
Auto-generated Drawings+Personal Drawing Assistant+Max Artist Control+Max Artist Control+Shortcut Customization
● Compatibility
BMP, PNG, JPG, TGA, and TIFF files can all be imported.
● Popularity
Relatively new to the market but is growing in popularity.
● Operating System
Compatible with Windows 7, 8, 10, or higher.
● Pricing
30-day license $20; Yearlong license $180; Lifelong license $499; Team Plans start at $399 for 4 devices; Perpetual Team Plan $799
● Who is Best For?
Animators looking to work with a more powerful set of tools and are willing to pay for it can opt for Cacani.
● Reviewers say compared to Adobe Animate
An advanced tool provides excellent support for smooth and curve drawings.
● Verdict
A premium tool meant for advanced usage and is excellent for instinctive users and animators.
Strengths
Painting Assistance: You can paint one sequence and your color combination will be carried forward to the next sequence.
Drawing Tools: Simplifies all types of vector drawings.
Stroke Correction: You can correct problems in-between frames.
Weaknesses
Cost-effective for individual use: Teams and businesses may find it a bit above budget.
Cost-effective for individual use: Teams and businesses may find it a bit above budget.
No. 7 Wick Editor

Wick Editor is a free-to-use open-source platform that is great for creating standard flash-based animations. It was incepted with the purpose to provide animators with a free platform equipped with easy-to-use toolkits.
Wick Editor llll➤
● UI
Wick’s interface includes a combination of programming and animation systems using tools like Flash and Scratch and HyperCard.
● Features
Interactive Interface+Browser Operated+Browser Operated+Includes Guides and Tutorials
● Compatibility
Requires third-party assistance to convert wick files to GIF, ZIP or HTML.
● Popularity
Moderately rate by first-time users.
● Operating System
Can run online through browsers like Firefox or Chrome.
● Pricing
Free to use.
● Who is Best For?
Suitable marketing animators and freelancers.
● Reviewers say compared to Adobe Animate
Not as comprehensive as Adobe Animate.
● Verdict
Wick Editor is more suited for animating basic promotions but not meant for professional use.
Strengths
User Friendly: Icons, texts, and labels are enlarged for convenience.
Includes Basic Programming: Combines animation elements with a programming interface.
Export to multiple formats: You can use export wick projects in multiple formats.
Weaknesses
Incompatible with Mobile Devices: It is not available for use on mobile devices.
Incompatible with Mobile Devices: It is not available for use on mobile devices.
No. 8 Blender

Animators who are looking to specialize in 3D animations can get their hands on Blender. It is a highly popular open-source 3D animation software.
Blender llll➤
● UI
Animators who are looking to specialize in 3D animations can get their hands on Blender. It is a highly popular open-source 3D animation software.
● Features
3D modelling+Raster Graphics Editing+Fluid and Smoke Simulation+Raster Graphics Editing+Rigging & Skinning
● Compatibility
Blender is compatible with a wide range of file formats namely OBJ, 3DS, FBX, STL, PLY and so on.
● Popularity
Blender has an excellent rating of 4.5 on G2.
● Operating System
Compatible for Windows 10 or higher, macOS 10.13 and Linux.
● Pricing
Free to use.
● Who is Best For?
Blender is used by animators worldwide to create professional animation productions.
● Reviewers say compared to Adobe Animate.
Adobe Animate is comparatively easier to use, but Blender is great for small-scale animation businesses.
● Verdict
An excellent diverse animation tool for small-scale studios, freelancers and hobbyists.
Strengths
Sync Sound: Match your audios with your visuals with auto-sync.
Preset Shortcuts: You can memorize a list of hotkeys for convenient use.
Shape Keys: You can add more detail with the help of shape keys like skeletal rigging.
Weaknesses
Complicated User interface: There are dozens of duplicate buttons which uncoordinated.
Glitches: Open source software is known to be glitchy as they lack premium security.
No. 9 Autodesk Maya

Maya is a well-known 3D graphics editor which is absolutely jam-packed with features and functions like 3D animation, rendering, simulation, composting, modeling and visualization. It can be considered the next level in animation after Adobe Animate.
Krita llll➤
● UI
Maya is a well-known 3D graphics editor which is absolutely jam-packed with features and functions like 3D animation, rendering, simulation, composting, modeling and visualization. It can be considered the next level in animation after Adobe Animate.
● Features
Ready to use graphs+Ready to use graphs+Bifrost Programming Environment+Ocean Simulation Systems+Seamless Import and Export
● Compatibility
Maya can import various file formats, including mayaBinary, mayaLT, mayaAscii, OBJ, audio, EPS, Adobe Illustrator, Image, FBX.
● Popularity
Maya has a standard 4.3 rating on G2.
● Operating System
Compatible with macOS X 10.13, Windows 10 or higher and Linux.
● Pricing
Annual Subscription $1700.
● Who is Best For?
Maya is equipped with a substantial number of features and requires animators to take time learn therefore grooming their animation skills.
● Reviewers say compared to Adobe Animate
Adobe animate has a much more convenient interface when compared to Autodesk Maya but it is more alluring for professional studios.
● Verdict
Autodesk Maya is mighty fine 3D animation software that opens more doors for animators with a keen sense of detail.
Strengths
A complete 3D animation package: Maya hasn’t left any stone unturned in terms of features.
One of the best in the Industry: Simple to create any type of animation.
Python API: Convenient for creating plugins and scripts.
Weaknesses
Lacks Convenient Interface: Maya’s toolkit is a bit more complex than Animate CC.
No. 10 Filmora Pro

Filmora Pro is an excellent Adobe Animate alternative in terms of convenience, versatility and the variation animation features you can explore on its super intuitive interface.
Krita llll➤
● UI
Filmora Pro is basically a video editing software with a unique interface that is simple to understand and master.
● Features
Length Adjustment+Gradient Tool+Evaporate+Linear Wipe+Pinwheel
● Compatibility
You can import a wide range of video files like MP4, MOV, WMV, AVI, F4V, MKV, TS, MPEG-2, GIF, MP3 and WEBM.
● Popularity
Filmora Pro is rated at a whopping 4.6 stars.
● Operating System
Compatible with Windows 7, 8, 10, 11, macOS 10.15, 11, 13, 14.
● Pricing
Per Year subscription $51.99; time Purchase $79.99
● Who is Best For?
Filmora Pro from Wondershare is ideal for users, from vloggers and freelancers to hobbyists and professionals.
● Reviewers say compared to Adobe Animate.
According to most reviewers, Filmora Pro has an easier-to-use interface and an abundance of features compared to Adobe Animate CC. Still, it is essentially a video editing software nonetheless.
● Verdict
Filmora Pro is an all-in-one video editing software that offers tons of editing features for all types of videos.
Strengths
Preset Options: You can experiment with a wide range of presets to edit animations quickly.
Easy Media Upload: Filmora supports a wide range of file formats.
4K video: You can also use Filmora to edit 4K videos.
Weaknesses
Lacks Shortcut Options: It may get a bit difficult to navigate on Filmora.
Cartoonish Transitions: Transition between cuts can require extra care.
Part 1 The Most Comprehensive All-round Comparison Among All Alternatives
| Tools | UI | G2 Rating | OS | Pricing |
|---|---|---|---|---|
| Krita | Versatile | 4.3 | Windows 8 or higher, macOS X 10.12 and Linux | Free |
| Open Toonz | Compartmentalized | 4.1 | MacOS X 10.9, Windows 7 or higher | Free |
| Toon Boom | Instinctive | 4.7 | Windows 7 & 10, macOS High Sierra, Catalina, Mojave | Basic – $25/month; Advanced - $63/month; Premium - $115/month |
| TVPaint Animation | Comprehensive | 5 | Windows, macOS X, Android and Linux. | Standard Version – €500; Pro Version – €1250 |
| Synfig Studio | Versatile | 5 | Windows 7 and above, macOS X 10.8 and Linux | Free |
| Cacani | Effortless | NIL | Windows 7, 8, 10 or higher | 30-day license $20; Yearlong license $180; Lifelong license $499; Team Plans start at $399 for 4 devices; Perpetual Team Plan $799 |
| Wick Editor | Hybrid | NIL | Firefox or Chrome. | Free |
| Blender | Changing | 4.5 | Windows 10 or higher, macOS 10.13 and Linux. | Free |
| Maya | Comprehensive | 4.3 | MacOS X 10.13, Windows 10 or higher and Linux. | Annual Subscription $1700 |
| Filmora Pro | Versatile | 4.6 | Windows 7, 8, 10, 11, macOS 10.15, 11, 13, 14. | Yearly – $51.99; One Time –$79.99 |
Wondershare Filmora - Best Video Editor for Mac/Windows
5,481,435 people have downloaded it.
Build unique custom animations without breaking a sweat.
Focus on creating epic stories and leave the details to Filmora’s auto features.
Start a creative adventure with drag & drop effects and endless possibilities.
Filmora simplifies advanced features to save you time and effort.
Filmora cuts out repetition so you can move on to your next creative breakthrough.
Key Takeaways from This Episode
● There are dozens of free and paid animation software out there, but only a few are ideal Adobe Animate Alternatives.
● Adobe Animate is one of the best 2D and 3D animation software in the market, with versatile tools and many plug-in options.
● You need a monthly or yearly subscription to Adobe Creative Cloud to use Animate CC, which is why we have complied a list of the best Adobe Animate Alternatives.
Like all other Adobe premium software like Photoshop, illustrator, and premiere pro, Adobe Animate is designed for professionals.
No need to feel discouraged as there are plenty of Adobe Animate free alternatives with which you can polish the animator in you. Let’s check them out.
In this article
01 [Adobe Animate - How It Became a Good Option Without Hesitation?](#Part 1)
02 [Top 10 Adobe Animate Alternatives to Improve Animation Experience](#Part 2)
03 [The Most Comprehensive All-round Comparison Among All Alternatives](#Part 3)
Part 1 Adobe Animate - How It Became a Good Option Without Hesitation?
1. How Much Do You Know About Adobe Animate Key Features?
The Adobe Creative Cloud is constantly updating its range of virtual tools with new features which give users twice more incentive to subscribe. Adobe Animate CC, which is basically the new Adobe Flash, has also received an update recently which installed a bundle of new features to its interface, making it even more irresistible to animators.
What’s new with Adobe Animate?
● Adobe Animate Camera
Adding to Adobe’s line of exclusivity is its all-new Adobe Virtual Camera. Using this feature, Adobe animate users can now control their animation camera movements giving your animation videos a more realistic feel.
● Export any Format
Exporting your animations to your desktop is a convenience every software should provide.
● Audio Syncing
Adobe Animate enables you to synchronize audio to your animations completely easily which is yet another feature that has been recently added.
● Vector Brushes
Though it resembles the same functionality with Adobe Illustrator, Adobe Animate has renewed the tool with the ability to use tilt and pressure effects when drawing with a stylus or pen.
● Web Fonts
Now you can use a vast library of Adobe web fonts with Adobe Animate. These high-quality fonts are available in HTML5 canvas documents.
2. What Lay Behind Adobe Animate Alternative?
When it comes to choosing the best premium animation software, Adobe Animate CC is the obvious choice, but what makes beginners hesitant in using Adobe Animate is the fact that you need to subscribe to Adobe Creative Cloud.
This becomes an obstacle to those who are just starting out and are not that confident in getting their hands on a professional league interface like Animate. It also lacks sufficient facilities for practicing 3D animations.
This is exactly where free Alternatives to Adobe Animate enters the scene. Check out our list and find out which alternative suits your level of animation skills.
Part 2 Top 10 Adobe Animate Alternatives to Improve Animation Experience
No. 1 Krita
The first free-to-use Adobe Alternative on our list is ‘Krita’. It is an open-source animator with an intuitive drag and drop panel which gives users complete flexibility.
Krita llll➤
● UI
It offers over 30 different Dockers which are like toolkits for the program.
● Features
Freehand path tool+Object manipulation+HDR support+Layer Management+Enhanced OpenGL
● Compatibility
Supports various metadata formats like ORA, KRA, PSD, JPEG and PNG files.
● Popularity
Krita has a 4.3 start popularity rating at G2.com.
● Operating System
Compatible with Windows 8 or higher, macOS X 10.12 and Linux Basic.
● Pricing
Free to use.
● Who is Best For?
Krita is an excellent alternative for beginners who are looking to not get overwhelmed by comprehensive features.
● Reviewers say compared to Adobe Animate
Many reviewers have preferred Krita’s simplistic approach to Adobe Animate.
● Verdict
It is an excellent image editor and animator but can be limiting in its professional application.
Strengths
100 preloaded brushes: You can use brush tools in categories like digital, ink, paint, and sketch.
Onion Layer Editing: You can go back and check your previous drawing before moving on to the next.
Counteractive Tools: Efficiently compatible with pressure-sensitive tablets.
Weaknesses
Pixel-based Drawings: Its drawings are pixelated making it harder to achieve precisions around the rough edges.
Added Support: Exporting animation files requires support from a secondary application.
No. 2 Open Toonz
A friendlier platform for cartoon animation lovers and yet another free Adobe Animate Alternative. An open-source platform whose code can be modified by the user to add new features and graphics.
Open Toonz llll➤
● UI
Its interface has separate organized rooms called ‘workspaces’. The tools and windows in each room are different and fulfill a separate function.
● Features
Indexed Colour Palettes+Motion Tracking+Effects and Composting+Effects and Composting+Effects and Composting
● Compatibility
Opentoonz supports a plethora of file formats like AVI, 3GP, BMP, JPG, GIF, MOV, NOL, RGB, SGI, TGA, TIF, and TIFF.
● Popularity
OpenToonz has a standard rating of 4.1 stars on G2.
● Operating System
Compatible with macOS X 10.9, Windows 7 or higher.
● Pricing
Free to use.
● Who is Best For?
Can be used by both professionals and beginners alike.
● Reviewers say compared to Adobe Animate
It is a great platform to familiarize yourself with basic animation.
● Verdict
OpenToonz is an excellent animation tool for beginners but lacks some of the higher-performing functions demanded by professionals.
Strengths
TWAIN Standard Compatible: Images captured on OpenToonx using its digital camera and scanners can be used in animations.
Choose from different animation types: You can choose between standard animation and skeletal animations.
100s of Special Effects: Change the effects of your image however you want using effects like incident light or distortion waves.
Weaknesses
Suitable only for beginners: OpenToonz may still require some work in order to muster the attention of pros.
Lack of automated syncing: You may find it difficult to sync the voices of your characters.
No. 3 Toon Boom
Toon Boom is a more popular alternative to Adobe Animate and is recognized by professional animation studios worldwide. Toon Boom even has its own pro-grade animation software called Harmony which has been used to create various popular TV animated series.
Toon Boom llll➤
● UI
The extremely instinctive interface where you can navigate using various effects like zoom in & out, pan and reset your views.
● Features
Advanced Cut out+Bitmap and Vector Drawing+Bitmap and Vector Drawing+Access to Harmony Server+Access to Harmony Server
● Compatibility
Toon Boom can import dozens of different file formats like BMP, JPEG, PSD, TGA, SGI, TIFF, TVG and PAL.
● Popularity
Toom Boom is rated excellent on G2 with 4.7 stars.
● Operating System
Can run with Windows 7 & 10, macOS High Sierra, Catalina, Mojave.
● Pricing
Basic - $25/month; Advanced - $63/month; Premium - $115/month.
● Who is Best For?
Superb animation software with dozens of features that would attract freelance animators and professionals.
● Reviewers say compared to Adobe Animate
The common opinion amongst reviewers is that Toon Boom offers many more features than Adobe Animate.
● Verdict
Toon Boom is premium software that is excellent for pro-league animators and is one of Adobe Animates biggest competitors.
Strengths
Onion Skinning Feature: You can view your drawings in layers.
Import & Export Different types of files: You can export and import files like paper drawings, digital drawings and 13 other file types.
Peg Animations: You can chart your character’s movements using pegs between two points.
Weaknesses
Lacks Audio Features: You require an external audio application to include audio in your animations.
Do not include pre-made characters: You would need to create your characters from scratch.
No. 4 TVPaint Animation
TVPaint has been a household animation software that has been around for a while. It has considerable features which are great for creating versatile 2D animations.
TVPaint Animation llll➤
● UI
The TVPaint Interface is not too complex and has a wide range of bitmap drawing tools for 2D all 2D animation processes.
● Features
Bitmap Drawing Tools+Bitmap Drawing Tools+Layer Management+Layer Management+Layer Management
● Compatibility
Can import image and video files like WMV, AVI, MOV, MPEG, GIF, JPEG, PNG, and TIFF.
● Popularity
TVPaint has been around for a long while and has a 5-star G2 rating.
● Operating System
Later versions of TVPaint are compatible with Microsoft Windows, macOS X, Android, and Linux.
● Pricing
Standard version 11.0 costs €500; Professional version 11.0 costs €1250.
● Who is Best For?
It is traditionally acclaimed 2D animation software superb for professional animation studios.
● Reviewers say compared to Adobe Animate
Both TV Paint and Animate cc has the ability to perfect frame to frame animation with minor differences in the choice of tools.
● Verdict
TV Paint is a fantastic software amongst animators who wish to perfect their craft.
Strengths
Versatile Drawing Tools: You have access to all essential drawing tools like brushes, color palettes, textures and more.
Strong Painting Engine: Powerful painting tool for sketching and painting backgrounds.
Colour & Texture Generator: This tool provides an enhanced spectrum of colors.
Weaknesses
Learning Curve: TVPaint has its own learning curve as the interface is dissimilar from average animators.
Limited to Bitmap: You can only edit images in Bitmap format.
No. 5 Synfig Studio
Synfig is yet another free-to-use Adobe Animate alternative but is quite powerful in creating fabulous vector animations which are flawless to look at it.
Synfig Studio llll➤
● UI
Synfig is yet another free-to-use Adobe Animate alternative but is quite powerful in creating fabulous vector animations which are flawless to look at it.
● Features
Various different layers+Sound Support+Dozens of Drawing Tools+Dozens of Drawing Tools+Import Facility
● Compatibility
You can render multiple video formats like AVI, MPEG, GIF, and MNG.
● Popularity
Excellent Rating 5 stars for Vector Graphics on G2.
● Operating System
Can run on Windows 7 and above, macOS X 10.8 and Linux.
● Pricing
Free to use.
● Who is Best For?
Synfig is a bit complex but great for animators who are willing to learn.
● Reviewers say compared to Adobe Animate
Much more convenient interface.
● Verdict
Synfig Studios is a great program for animating vector graphics.
Strengths
Vector Tweening: Change the shape of your vectors automatically.
50+ Layers: Choose from multiple gradients, filters, distortions, geometrics and fractals.
Auto Lip-Sync: Your audio will be automatically paired with your characters.
Weaknesses
Continuous Saving: You will need to manually save your files each time.
Learning Curve: The program takes some time to master.
No. 6 Cacani
Here comes CACANi, a new chip off the old block for anime lovers. It has awesome features for drawing vector animations.
Cacani llll➤
● UI
Excellent vector drawing interface which reduces your effort and time by auto-generating drawings.
● Features
Auto-generated Drawings+Personal Drawing Assistant+Max Artist Control+Max Artist Control+Shortcut Customization
● Compatibility
BMP, PNG, JPG, TGA, and TIFF files can all be imported.
● Popularity
Relatively new to the market but is growing in popularity.
● Operating System
Compatible with Windows 7, 8, 10, or higher.
● Pricing
30-day license $20; Yearlong license $180; Lifelong license $499; Team Plans start at $399 for 4 devices; Perpetual Team Plan $799
● Who is Best For?
Animators looking to work with a more powerful set of tools and are willing to pay for it can opt for Cacani.
● Reviewers say compared to Adobe Animate
An advanced tool provides excellent support for smooth and curve drawings.
● Verdict
A premium tool meant for advanced usage and is excellent for instinctive users and animators.
Strengths
Painting Assistance: You can paint one sequence and your color combination will be carried forward to the next sequence.
Drawing Tools: Simplifies all types of vector drawings.
Stroke Correction: You can correct problems in-between frames.
Weaknesses
Cost-effective for individual use: Teams and businesses may find it a bit above budget.
Cost-effective for individual use: Teams and businesses may find it a bit above budget.
No. 7 Wick Editor
Wick Editor is a free-to-use open-source platform that is great for creating standard flash-based animations. It was incepted with the purpose to provide animators with a free platform equipped with easy-to-use toolkits.
Wick Editor llll➤
● UI
Wick’s interface includes a combination of programming and animation systems using tools like Flash and Scratch and HyperCard.
● Features
Interactive Interface+Browser Operated+Browser Operated+Includes Guides and Tutorials
● Compatibility
Requires third-party assistance to convert wick files to GIF, ZIP or HTML.
● Popularity
Moderately rate by first-time users.
● Operating System
Can run online through browsers like Firefox or Chrome.
● Pricing
Free to use.
● Who is Best For?
Suitable marketing animators and freelancers.
● Reviewers say compared to Adobe Animate
Not as comprehensive as Adobe Animate.
● Verdict
Wick Editor is more suited for animating basic promotions but not meant for professional use.
Strengths
User Friendly: Icons, texts, and labels are enlarged for convenience.
Includes Basic Programming: Combines animation elements with a programming interface.
Export to multiple formats: You can use export wick projects in multiple formats.
Weaknesses
Incompatible with Mobile Devices: It is not available for use on mobile devices.
Incompatible with Mobile Devices: It is not available for use on mobile devices.
No. 8 Blender
Animators who are looking to specialize in 3D animations can get their hands on Blender. It is a highly popular open-source 3D animation software.
Blender llll➤
● UI
Animators who are looking to specialize in 3D animations can get their hands on Blender. It is a highly popular open-source 3D animation software.
● Features
3D modelling+Raster Graphics Editing+Fluid and Smoke Simulation+Raster Graphics Editing+Rigging & Skinning
● Compatibility
Blender is compatible with a wide range of file formats namely OBJ, 3DS, FBX, STL, PLY and so on.
● Popularity
Blender has an excellent rating of 4.5 on G2.
● Operating System
Compatible for Windows 10 or higher, macOS 10.13 and Linux.
● Pricing
Free to use.
● Who is Best For?
Blender is used by animators worldwide to create professional animation productions.
● Reviewers say compared to Adobe Animate.
Adobe Animate is comparatively easier to use, but Blender is great for small-scale animation businesses.
● Verdict
An excellent diverse animation tool for small-scale studios, freelancers and hobbyists.
Strengths
Sync Sound: Match your audios with your visuals with auto-sync.
Preset Shortcuts: You can memorize a list of hotkeys for convenient use.
Shape Keys: You can add more detail with the help of shape keys like skeletal rigging.
Weaknesses
Complicated User interface: There are dozens of duplicate buttons which uncoordinated.
Glitches: Open source software is known to be glitchy as they lack premium security.
No. 9 Autodesk Maya
Maya is a well-known 3D graphics editor which is absolutely jam-packed with features and functions like 3D animation, rendering, simulation, composting, modeling and visualization. It can be considered the next level in animation after Adobe Animate.
Krita llll➤
● UI
Maya is a well-known 3D graphics editor which is absolutely jam-packed with features and functions like 3D animation, rendering, simulation, composting, modeling and visualization. It can be considered the next level in animation after Adobe Animate.
● Features
Ready to use graphs+Ready to use graphs+Bifrost Programming Environment+Ocean Simulation Systems+Seamless Import and Export
● Compatibility
Maya can import various file formats, including mayaBinary, mayaLT, mayaAscii, OBJ, audio, EPS, Adobe Illustrator, Image, FBX.
● Popularity
Maya has a standard 4.3 rating on G2.
● Operating System
Compatible with macOS X 10.13, Windows 10 or higher and Linux.
● Pricing
Annual Subscription $1700.
● Who is Best For?
Maya is equipped with a substantial number of features and requires animators to take time learn therefore grooming their animation skills.
● Reviewers say compared to Adobe Animate
Adobe animate has a much more convenient interface when compared to Autodesk Maya but it is more alluring for professional studios.
● Verdict
Autodesk Maya is mighty fine 3D animation software that opens more doors for animators with a keen sense of detail.
Strengths
A complete 3D animation package: Maya hasn’t left any stone unturned in terms of features.
One of the best in the Industry: Simple to create any type of animation.
Python API: Convenient for creating plugins and scripts.
Weaknesses
Lacks Convenient Interface: Maya’s toolkit is a bit more complex than Animate CC.
No. 10 Filmora Pro
Filmora Pro is an excellent Adobe Animate alternative in terms of convenience, versatility and the variation animation features you can explore on its super intuitive interface.
Krita llll➤
● UI
Filmora Pro is basically a video editing software with a unique interface that is simple to understand and master.
● Features
Length Adjustment+Gradient Tool+Evaporate+Linear Wipe+Pinwheel
● Compatibility
You can import a wide range of video files like MP4, MOV, WMV, AVI, F4V, MKV, TS, MPEG-2, GIF, MP3 and WEBM.
● Popularity
Filmora Pro is rated at a whopping 4.6 stars.
● Operating System
Compatible with Windows 7, 8, 10, 11, macOS 10.15, 11, 13, 14.
● Pricing
Per Year subscription $51.99; time Purchase $79.99
● Who is Best For?
Filmora Pro from Wondershare is ideal for users, from vloggers and freelancers to hobbyists and professionals.
● Reviewers say compared to Adobe Animate.
According to most reviewers, Filmora Pro has an easier-to-use interface and an abundance of features compared to Adobe Animate CC. Still, it is essentially a video editing software nonetheless.
● Verdict
Filmora Pro is an all-in-one video editing software that offers tons of editing features for all types of videos.
Strengths
Preset Options: You can experiment with a wide range of presets to edit animations quickly.
Easy Media Upload: Filmora supports a wide range of file formats.
4K video: You can also use Filmora to edit 4K videos.
Weaknesses
Lacks Shortcut Options: It may get a bit difficult to navigate on Filmora.
Cartoonish Transitions: Transition between cuts can require extra care.
Part 1 The Most Comprehensive All-round Comparison Among All Alternatives
| Tools | UI | G2 Rating | OS | Pricing |
|---|---|---|---|---|
| Krita | Versatile | 4.3 | Windows 8 or higher, macOS X 10.12 and Linux | Free |
| Open Toonz | Compartmentalized | 4.1 | MacOS X 10.9, Windows 7 or higher | Free |
| Toon Boom | Instinctive | 4.7 | Windows 7 & 10, macOS High Sierra, Catalina, Mojave | Basic – $25/month; Advanced - $63/month; Premium - $115/month |
| TVPaint Animation | Comprehensive | 5 | Windows, macOS X, Android and Linux. | Standard Version – €500; Pro Version – €1250 |
| Synfig Studio | Versatile | 5 | Windows 7 and above, macOS X 10.8 and Linux | Free |
| Cacani | Effortless | NIL | Windows 7, 8, 10 or higher | 30-day license $20; Yearlong license $180; Lifelong license $499; Team Plans start at $399 for 4 devices; Perpetual Team Plan $799 |
| Wick Editor | Hybrid | NIL | Firefox or Chrome. | Free |
| Blender | Changing | 4.5 | Windows 10 or higher, macOS 10.13 and Linux. | Free |
| Maya | Comprehensive | 4.3 | MacOS X 10.13, Windows 10 or higher and Linux. | Annual Subscription $1700 |
| Filmora Pro | Versatile | 4.6 | Windows 7, 8, 10, 11, macOS 10.15, 11, 13, 14. | Yearly – $51.99; One Time –$79.99 |
Wondershare Filmora - Best Video Editor for Mac/Windows
5,481,435 people have downloaded it.
Build unique custom animations without breaking a sweat.
Focus on creating epic stories and leave the details to Filmora’s auto features.
Start a creative adventure with drag & drop effects and endless possibilities.
Filmora simplifies advanced features to save you time and effort.
Filmora cuts out repetition so you can move on to your next creative breakthrough.
Key Takeaways from This Episode
● There are dozens of free and paid animation software out there, but only a few are ideal Adobe Animate Alternatives.
● Adobe Animate is one of the best 2D and 3D animation software in the market, with versatile tools and many plug-in options.
● You need a monthly or yearly subscription to Adobe Creative Cloud to use Animate CC, which is why we have complied a list of the best Adobe Animate Alternatives.
How to Draw Cartoons Step by Step with This Guide
Learn How to Draw Cartoons Step by Step with This Guide
An easy yet powerful editor
Numerous effects to choose from
Detailed tutorials provided by the official channel
Cartoon character drawing is usually a vital aspect of any child’s life who loves to watch cartoon series and can sometimes be someone’s favorite thing in the world.

A cartoon character is a series of single drawings that tell a joke or story. Although cartoons are mostly drawn, they can sometimes be animated. Kids like comics which makes them an essential part of every child’s life. Cartoons are not only used for entertainment purposes but also help kids and young children learn more about the world around them. For example, children learn about love, loss, friendship, and other essential life issues about life by watching cartoons.
However, cartoons are not only limited to children but are also for adults. In addition, cartoons created for an adult audience go deeper into real-life problems and explore darker themes. They aim to create content that matches the maturity and age of the audience. Watching cartoons is fun. But what if you could make them? This article will provide you with a guide on producing cool cartoon drawings that will match different audiences, both older and younger.
In this article
01 [How to Draw Cartoon Characters Step by Step](#Part 1)
02 [Cartoon Easy Drawing with Colour Step by Step](#Part 2)
03 [Cartoon Easy Sketch Drawing Step by Step](#Part 3)
Part 1 How to Draw Cartoon Characters Step by Step
Note that in the world we live in, Professionals were once students, and experts were once beginners. This means that everyone has a starting point, and they all have one thing in common: “learning.” Whether you are aspiring to become an English teacher, an astrophysicist, an artist, or a physician’s assistant, you must first learn the ins and outs of the field.
Those aspiring to become animators and cartoonists must first learn the basics of cartoon character drawing and practice some easy, simple cartoon drawing before cranking out the Mickey-Mouses of the entertainment world. However, we will cover the basic principles of easy cartoon drawing for beginners step by step to get your learning process started. Here is how to draw a Micky-Mouse perfectly:

Step 1:
● Use a pencil to begin your drawing.
● First, create a circle for the head and a curved line on the left side.
● Draw a horizontal line at the center.
Step 2: Next, draw an oval shape for the mouth and a “U” shape added to the bottom, and then you can add another parallel “U” shape and connect it with the oval.
Step 3: Draw the eye using two upside-down “U” shapes, and then you add his large ear on the right and a small one at the top of the head.
Step 4: You can draw a bean shape and another smaller one inside for the body.
Step 5: Add oval shapes for his feet to draw his legs and draw his tail on the right side just above the leg.
Step 6: Draw two elongated shapes for his arms, a small oval for the hand and a basic shape of his fingers.
Step 7: Draw the cheese and add a few small circles inside.
Step 8: Also include the facial features by drawing the inside of the nose, eyebrows, eyes, and whiskers.
Step 9:
● Draw his fingers and hair between his ears.
● Trace your pencil lines with a sharpie.
● Erase the pencil afterward.
Step 10: Finally, you can color your drawing and upload it to your website.
Part 1 Cartoon Easy Drawing with Colour Step by Step
Applying color to a drawing is very important to beautify your drawing and make it look stunning and attractive. Here is how to cartoon easy drawing a flower using a colored pencil:
Step 1: Using a color photocopy of a reference photo, crop and rearrange elements of the poppy composition. With light pressure and HB pencil, draw a composition onto a four-ply, 100% cotton museum board frequently found among framing supplies.
Step 2: With very light pressure, apply the first colored pencil layer and add more emphasis where the values will be deeper. While doing this, note that the pencil application will still appear granular, and the texture of the museum board is still visible.

Step 3: Create the veins in the leaves and the fuzzy texture of the stem and pod, and also, as the individual strands of stamens, put down a sheet of translucent drafting paper. Use heavy tracing paper with a very sharp 7H graphite pencil and apply heavy pressure in drawing the lines for stamens, fuzz, and veins on the drafting paper and impress them into the surface of the museum board. Then, with a contrasting layer of darker color, these features dramatically show up on the stem, leaves, center of the flower, pod, and center of the flower. Then add deeper values of rose in the shadowed areas of the flower petals.

Step 4: To make them appear less granular and intensify the colors, start by blending with a clear, alcohol-based blending marker. The solvent, wax, or vegetable oil then dissolves the binder in the colored pencil layer and fluidly releases the pigment. This will also help to “fill in” the dots of the tooth of the paper and make the color appear denser.

Step 5: Continue to intensify the color by using a non-pigmented blending pencil over a previous layer and repeat a layer or two of color, much like a “color sandwich.” Repeat this “ burnishing “ process for subsequent layerings of color, like a double-decker or triple-decker sandwich.
Also, make sure the rich, dark negative space is carried out the same way, layering colors and burnishing, then repeating the colors for deep, rich saturation.
Render the deep, smeary flecks of pollen by heavily applying “freckles” of burgundy, then slightly smudge them with the tip of a blending marker. Lastly, scratch a few of the tiny wisps of fuzz on the pod and stem carefully into the board via a sharp X-acto knife for a striking contrast of light against the deep background.

Part 2 Cartoon Easy Sketch Drawing Step by Step
This is the initial stage of the drawing process. It requires you to create an outline of the concept you want to draw before adding color. However, it is also referred to as a technique in shading. For example, if you’re going to sketch a cherry fruit, there are a few things to note here.
Try not to look at the cherry as a whole but look at its shapes and name them. This way, you are looking at the parts to the whole and not the entire piece.

Step 1: Draw two overlapping circles and draw two curved lines from each of the circles.
Step 2: Make a small rectangle at the top to join the two stems and draw a second set of curved lines.
Step 3: Draw thick lines inside the rectangle for the bumps and darken the lines and use your finger to smudge them a bit for the shaded effect.
Step 4: Draw a curved line from the stem on the right to the circle’s edge to create the bump.
Step 5: Holding your pencil at an angle, make light strokes going across the front of both cherries. Take note of the places where there is no light. This is where the light source is hitting the cherry the most.
Step 6: To darken, a shade over those places again, keep layering the shading technique until you get the effect you see on the cherries.
Step 7: Use the same technique to shade under the cherries, but use your finger to smudge it to smoother the shadow.
●Bonus:
You can add color, effect, or animate to your cartoon character drawing by using Wondershare Filmora Video Editor , the best editor on the internet. Filmora is a free software program with the same creating abilities and imaging editing similar to Adobe Illustrator. It is open software that runs on various programs, such as Windows, Mac, and Linux. Please get to know more about this exclusive tool from Wondershare on their official website.
For Win 7 or later (64-bit)
For macOS 10.12 or later
● Ending Thoughts →
● A step-by-step guide on drawing easy cartoons for painting and how to sketch your drawing correctly.
● Cartoon character drawings in easy and quick steps.
● Easy cartoon drawing for beginners.
● Lastly, to add color to your drawing, use Filmora software.
● So, use the tips and tricks to make your presentation’s best cartoon characters come alive and be a pro with Filmora.
Cartoon character drawing is usually a vital aspect of any child’s life who loves to watch cartoon series and can sometimes be someone’s favorite thing in the world.
A cartoon character is a series of single drawings that tell a joke or story. Although cartoons are mostly drawn, they can sometimes be animated. Kids like comics which makes them an essential part of every child’s life. Cartoons are not only used for entertainment purposes but also help kids and young children learn more about the world around them. For example, children learn about love, loss, friendship, and other essential life issues about life by watching cartoons.
However, cartoons are not only limited to children but are also for adults. In addition, cartoons created for an adult audience go deeper into real-life problems and explore darker themes. They aim to create content that matches the maturity and age of the audience. Watching cartoons is fun. But what if you could make them? This article will provide you with a guide on producing cool cartoon drawings that will match different audiences, both older and younger.
In this article
01 [How to Draw Cartoon Characters Step by Step](#Part 1)
02 [Cartoon Easy Drawing with Colour Step by Step](#Part 2)
03 [Cartoon Easy Sketch Drawing Step by Step](#Part 3)
Part 1 How to Draw Cartoon Characters Step by Step
Note that in the world we live in, Professionals were once students, and experts were once beginners. This means that everyone has a starting point, and they all have one thing in common: “learning.” Whether you are aspiring to become an English teacher, an astrophysicist, an artist, or a physician’s assistant, you must first learn the ins and outs of the field.
Those aspiring to become animators and cartoonists must first learn the basics of cartoon character drawing and practice some easy, simple cartoon drawing before cranking out the Mickey-Mouses of the entertainment world. However, we will cover the basic principles of easy cartoon drawing for beginners step by step to get your learning process started. Here is how to draw a Micky-Mouse perfectly:
Step 1:
● Use a pencil to begin your drawing.
● First, create a circle for the head and a curved line on the left side.
● Draw a horizontal line at the center.
Step 2: Next, draw an oval shape for the mouth and a “U” shape added to the bottom, and then you can add another parallel “U” shape and connect it with the oval.
Step 3: Draw the eye using two upside-down “U” shapes, and then you add his large ear on the right and a small one at the top of the head.
Step 4: You can draw a bean shape and another smaller one inside for the body.
Step 5: Add oval shapes for his feet to draw his legs and draw his tail on the right side just above the leg.
Step 6: Draw two elongated shapes for his arms, a small oval for the hand and a basic shape of his fingers.
Step 7: Draw the cheese and add a few small circles inside.
Step 8: Also include the facial features by drawing the inside of the nose, eyebrows, eyes, and whiskers.
Step 9:
● Draw his fingers and hair between his ears.
● Trace your pencil lines with a sharpie.
● Erase the pencil afterward.
Step 10: Finally, you can color your drawing and upload it to your website.
Part 1 Cartoon Easy Drawing with Colour Step by Step
Applying color to a drawing is very important to beautify your drawing and make it look stunning and attractive. Here is how to cartoon easy drawing a flower using a colored pencil:
Step 1: Using a color photocopy of a reference photo, crop and rearrange elements of the poppy composition. With light pressure and HB pencil, draw a composition onto a four-ply, 100% cotton museum board frequently found among framing supplies.
Step 2: With very light pressure, apply the first colored pencil layer and add more emphasis where the values will be deeper. While doing this, note that the pencil application will still appear granular, and the texture of the museum board is still visible.
Step 3: Create the veins in the leaves and the fuzzy texture of the stem and pod, and also, as the individual strands of stamens, put down a sheet of translucent drafting paper. Use heavy tracing paper with a very sharp 7H graphite pencil and apply heavy pressure in drawing the lines for stamens, fuzz, and veins on the drafting paper and impress them into the surface of the museum board. Then, with a contrasting layer of darker color, these features dramatically show up on the stem, leaves, center of the flower, pod, and center of the flower. Then add deeper values of rose in the shadowed areas of the flower petals.
Step 4: To make them appear less granular and intensify the colors, start by blending with a clear, alcohol-based blending marker. The solvent, wax, or vegetable oil then dissolves the binder in the colored pencil layer and fluidly releases the pigment. This will also help to “fill in” the dots of the tooth of the paper and make the color appear denser.
Step 5: Continue to intensify the color by using a non-pigmented blending pencil over a previous layer and repeat a layer or two of color, much like a “color sandwich.” Repeat this “ burnishing “ process for subsequent layerings of color, like a double-decker or triple-decker sandwich.
Also, make sure the rich, dark negative space is carried out the same way, layering colors and burnishing, then repeating the colors for deep, rich saturation.
Render the deep, smeary flecks of pollen by heavily applying “freckles” of burgundy, then slightly smudge them with the tip of a blending marker. Lastly, scratch a few of the tiny wisps of fuzz on the pod and stem carefully into the board via a sharp X-acto knife for a striking contrast of light against the deep background.
Part 2 Cartoon Easy Sketch Drawing Step by Step
This is the initial stage of the drawing process. It requires you to create an outline of the concept you want to draw before adding color. However, it is also referred to as a technique in shading. For example, if you’re going to sketch a cherry fruit, there are a few things to note here.
Try not to look at the cherry as a whole but look at its shapes and name them. This way, you are looking at the parts to the whole and not the entire piece.
Step 1: Draw two overlapping circles and draw two curved lines from each of the circles.
Step 2: Make a small rectangle at the top to join the two stems and draw a second set of curved lines.
Step 3: Draw thick lines inside the rectangle for the bumps and darken the lines and use your finger to smudge them a bit for the shaded effect.
Step 4: Draw a curved line from the stem on the right to the circle’s edge to create the bump.
Step 5: Holding your pencil at an angle, make light strokes going across the front of both cherries. Take note of the places where there is no light. This is where the light source is hitting the cherry the most.
Step 6: To darken, a shade over those places again, keep layering the shading technique until you get the effect you see on the cherries.
Step 7: Use the same technique to shade under the cherries, but use your finger to smudge it to smoother the shadow.
●Bonus:
You can add color, effect, or animate to your cartoon character drawing by using Wondershare Filmora Video Editor , the best editor on the internet. Filmora is a free software program with the same creating abilities and imaging editing similar to Adobe Illustrator. It is open software that runs on various programs, such as Windows, Mac, and Linux. Please get to know more about this exclusive tool from Wondershare on their official website.
For Win 7 or later (64-bit)
For macOS 10.12 or later
● Ending Thoughts →
● A step-by-step guide on drawing easy cartoons for painting and how to sketch your drawing correctly.
● Cartoon character drawings in easy and quick steps.
● Easy cartoon drawing for beginners.
● Lastly, to add color to your drawing, use Filmora software.
● So, use the tips and tricks to make your presentation’s best cartoon characters come alive and be a pro with Filmora.
Also read:
- New Learn How to Create Adobe 3D Animation for 2024
- New Amazing Ways to Find Suitable Animated Graphic Maker
- Updated Stunning Ideas About Creating Personalised WhatsApp GIF Sticker
- Updated How to Make Well Done Animated GIF By Yourself for 2024
- New Apps to Animate Still Pictures Which Could Make Your Pictures Become Internet Sensation
- In 2024, Top 15 Greatest Claymation Movies of All Time
- Updated 2024 Approved 12 Aesthetic GIF Instagram for Marketers and Creatives
- New 18 Best Tools and Services to Create Animated Videos for Business 2023 for 2024
- Updated 10 Top Memorable Japanese Cat Cartoons for 2024
- You Can Turn a TikTok Into a GIF Now
- New In 2024, Easy Cartoon Characters Drawing Tutorials for You Who Are Learning to Draw
- New In 2024, The Most Efficient Techniques to Make 3D Animation Character
- 2024 Approved How to Make GIF Instagram
- New In 2024, 15 Iconic Cartoon Characters of All Time
- New 12+ Stunning Instagram GIF Stickers and How to Make & Find for 2024
- Updated In 2024, Animate Graphics in Canva
- New Best GIF to Video Converters
- New In 2024, Simple Shortcut to Convert Videos to Gifs on iPhone
- Updated 2024 Approved 10 Best Animation Makers for Kids to Have Fun
- Something About Types of Motion Graphics for 2024
- The Best Free 12 GIF Meme Maker at a Glance for 2024
- How to Unlock Apple iPhone 14 Plus without Passcode or Face ID | Dr.fone
- Top 10 Fixes for Phone Keep Disconnecting from Wi-Fi On HTC U23 | Dr.fone
- 4 Effective Methods Fake GPS Location on Apple iPhone 15 Plus/iPad | Dr.fone
- Looking For A Location Changer On Realme C67 5G? Look No Further | Dr.fone
- How to Transfer Data from Xiaomi Redmi Note 13 5G to Other Android Devices? | Dr.fone
- How To Restore Missing Contacts Files from Find N3 Flip.
- How to Upgrade iPhone 8 without Data Loss? | Dr.fone
- In 2024, Easy Ways to Manage Your OnePlus Open Location Settings | Dr.fone
- How To Transfer WhatsApp From Apple iPhone 7 Plus to other iPhone 11 Pro Max devices? | Dr.fone
- How to Sign .xlsm document with Digital Signature - (Tutorial)
- Did Your iPhone XR Passcode Change Itself? Unlock It Now
- In 2024, Methods to Transfer from Apple iPhone 15 Plus to Android | Dr.fone
- In 2024, Network Locked SIM Card Inserted On Your Vivo S18e Phone? Unlock It Now
- Tips and Tricks for Setting Up your Xiaomi Redmi Note 13 Pro 5G Phone Pattern Lock
- Unlock Your Disabled Apple iPhone SE Without iTunes in 5 Ways | Dr.fone
- Title: Updated How to Analyze an Editorial Cartoon Easily for 2024
- Author: Elon
- Created at : 2024-05-19 03:05:31
- Updated at : 2024-05-20 03:05:31
- Link: https://animation-videos.techidaily.com/updated-how-to-analyze-an-editorial-cartoon-easily-for-2024/
- License: This work is licensed under CC BY-NC-SA 4.0.
