
:max_bytes(150000):strip_icc():format(webp)/copilot-b197f8dd690845d5bf8ebbc082c89c20.jpg)
Updated How to Animate - Adobe Animate Tutorias for 2024
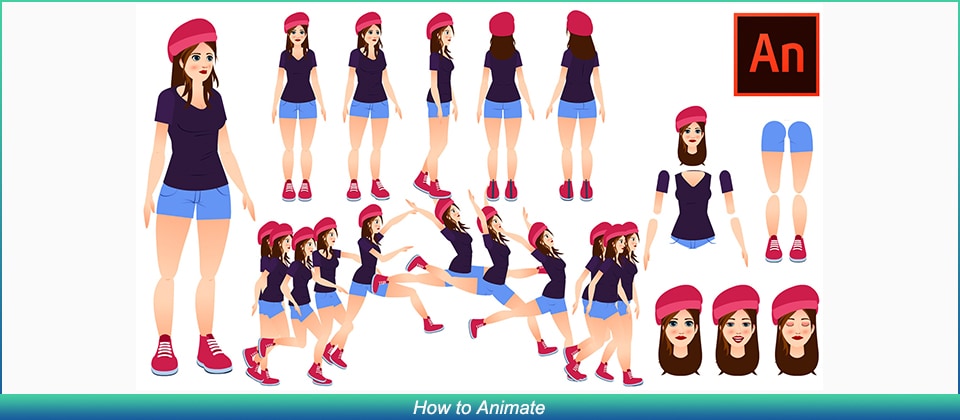
How to Animate - Adobe Animate Tutorial for All
How to Animate - Adobe Animate Tutorial for All
An easy yet powerful editor
Numerous effects to choose from
Detailed tutorials provided by the official channel
Now, since the tool has too many elements to understand, it’s always a good strategy to start your journey with a dedicated Adobe Animate CC tutorial.
In today’s guide, we are going to introduce a few of these tutorials so that you can easily start creating animations in Adobe Animate CC, even if you have zero prior experience with the software.
In this article
01 [Adobe Animate CC tutorial](#Part 1)
02 [How Do You Animate in Adobe Animation?](#Part 2)
03 [Other Rare Tutorials for Self-learning to Learn How to Animate](#Part 3)
Part 1 Is Adobe Animate Good for Beginners?
When people start their careers as graphic designers, they always struggle to pick the right tool to accompany them during their journey. Since there are too many options to choose from, beginners always end up comparing a tool with other available options. They even weigh the pros and cons of each animation software individually to make the best decision. The same is the case with Adobe Animate. Many beginners want to know if Adobe Animate is the right animation software to get started as a professional graphic designer.
Since the Adobe community continues to grow rapidly, you’ll also be able to find a variety of Adobe Animate tutorials quite easily.
So, as far as beginner-friendliness is concerned, Adobe Animate is a complete winner that anyone can use to create stunning animations, designs, and templates right on their PCs.
Part 2 How Do You Animate in Adobe Animation?
1. Introduction to Adobe Animate
For complete beginners, there’s nothing better than a one-stop tutorial that provides a detailed insight into the basics of Adobe Animate and helps them get familiar with different elements of the software.
Well, this 2 hours 30 minutes long YouTube Adobe Animate tutorial by TipTut is what you need to start your journey with the software. The tutorial involves everything, starting from the simple setup to creating your first animation. You can either download this tutorial on your system or watch it online to understand the basic workflow of Adobe Animate.
Key Features:
● Learn how to set up a project in Adobe Animate.
● Adjusting the elements (such as frame rate) of your first animation.
● Completing your first animation using colors, gestures, and simple movement.
2. Creating HTML Banner Ads
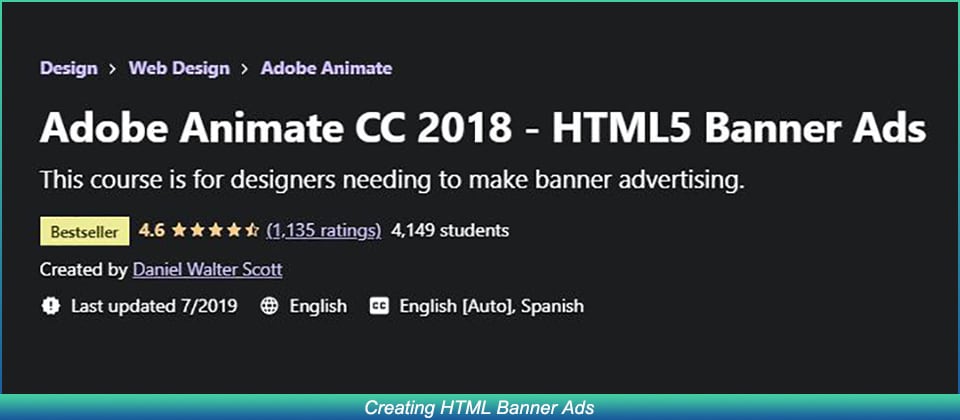
Apart from regular 2D animations, some designers also use Adobe Animate to create dedicated banner ads for their marketing campaigns using HTML 5. This will be a pretty useful Adobe Animate tutorial PDF for anyone who wants to join a marketing firm or plan exclusive marketing campaigns for his own products/services.
Key Features:
● Learn how to build HTML banner ads from scratch.
● Get familiar with the overall process of publishing a banner ad on platforms like Google AdWords.
● Understand how to keep the file size of a banner down to keep it optimized.
3. Animate CC Game Development
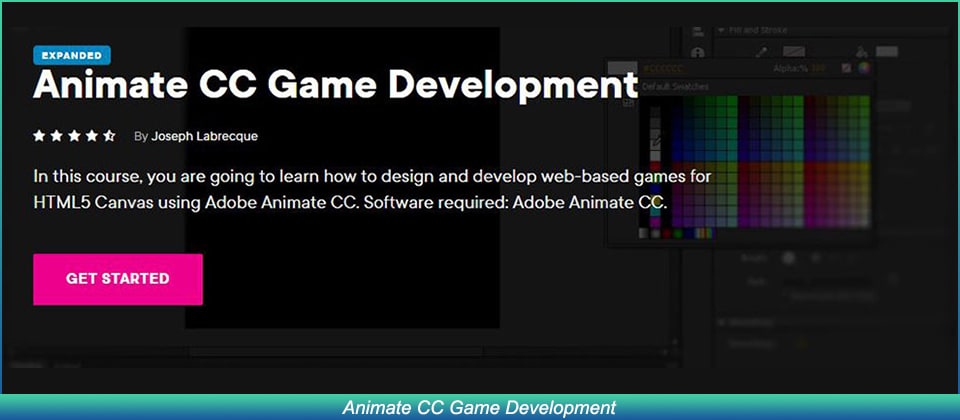
As we mentioned earlier, some people also use Adobe Animate to design games. If you want to follow the same career, this Adobe Animate CC tutorial is for you.
All the games developed in Adobe Animate are designed in HTML 5 and are usually web-based. By the end of this tutorial, you would have built a fully-functional game in Adobe Animate.
Key Features:
● Creating the game world.
● Understanding CreateJS Overview in Adobe Animate CC.
● Building in-game assets and configuring their unique features.
4. 2D Animation for Beginners
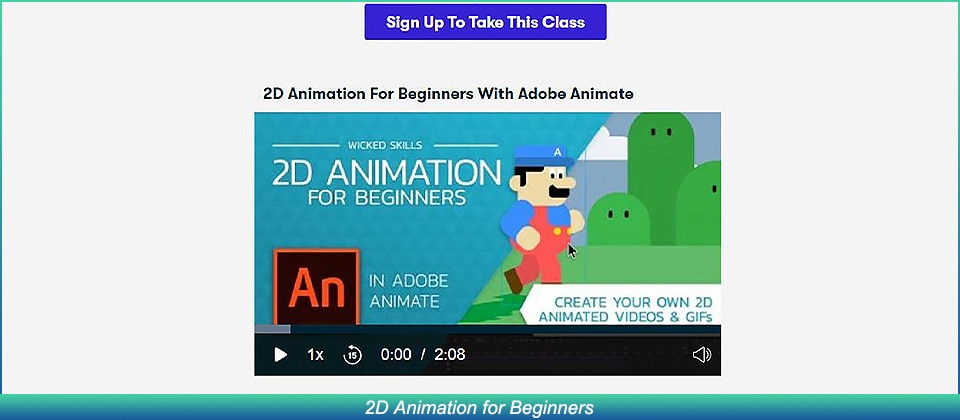
This is another useful Adobe Animate tutorial for all the beginners out there. Compiled by Walt Wonderwolk, the tutorial is separated into 12 parts in which he has explained different features of Adobe Animate in detail.
Key Features:
● Designing graphic vectors in Adobe Animate.
● Each feature is explained with a respective example.
● Learn how to add sounds to your animations to make them visually appealing.
5. Adobe Animate for Social Media
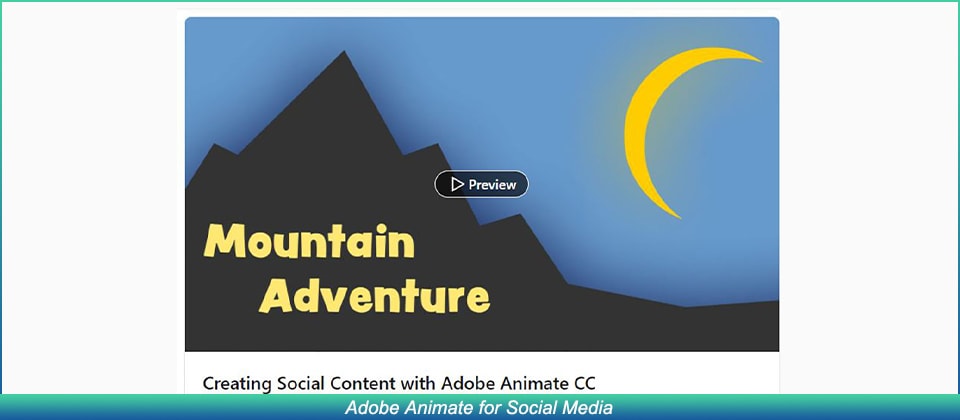
Being a feature-packed animation software, you can also use Adobe Animate to create content for your social media profiles. To do this, however, you must be familiar with all the necessary features of the tool. This 1.5 hours long tutorial will help you get familiar with features such as the tweening system that’ll help you turn regular social media posts into stunning animations.
Key Features:
● Designing simple assets and designs for social media.
● Exporting GIFs and Animated Videos.
● Customizing stills and motion graphics in Adobe Animate.
Key Takeaways from This Episode
● Adobe Animate boasts different applications, ranging from simple 2D animations to game designing
● Since Adobe Animation is an extensive software, it’ll always be a wise decision to get started with Adobe Animate tutorials.
● After you have compiled designs/animations in Adobe Animate, Wondershare Filmora Pro will help you enhance its overall quality.
Now, since the tool has too many elements to understand, it’s always a good strategy to start your journey with a dedicated Adobe Animate CC tutorial.
In today’s guide, we are going to introduce a few of these tutorials so that you can easily start creating animations in Adobe Animate CC, even if you have zero prior experience with the software.
In this article
01 [Adobe Animate CC tutorial](#Part 1)
02 [How Do You Animate in Adobe Animation?](#Part 2)
03 [Other Rare Tutorials for Self-learning to Learn How to Animate](#Part 3)
Part 1 Is Adobe Animate Good for Beginners?
When people start their careers as graphic designers, they always struggle to pick the right tool to accompany them during their journey. Since there are too many options to choose from, beginners always end up comparing a tool with other available options. They even weigh the pros and cons of each animation software individually to make the best decision. The same is the case with Adobe Animate. Many beginners want to know if Adobe Animate is the right animation software to get started as a professional graphic designer.
Since the Adobe community continues to grow rapidly, you’ll also be able to find a variety of Adobe Animate tutorials quite easily.
So, as far as beginner-friendliness is concerned, Adobe Animate is a complete winner that anyone can use to create stunning animations, designs, and templates right on their PCs.
Part 2 How Do You Animate in Adobe Animation?
1. Introduction to Adobe Animate
For complete beginners, there’s nothing better than a one-stop tutorial that provides a detailed insight into the basics of Adobe Animate and helps them get familiar with different elements of the software.
Well, this 2 hours 30 minutes long YouTube Adobe Animate tutorial by TipTut is what you need to start your journey with the software. The tutorial involves everything, starting from the simple setup to creating your first animation. You can either download this tutorial on your system or watch it online to understand the basic workflow of Adobe Animate.
Key Features:
● Learn how to set up a project in Adobe Animate.
● Adjusting the elements (such as frame rate) of your first animation.
● Completing your first animation using colors, gestures, and simple movement.
2. Creating HTML Banner Ads
Apart from regular 2D animations, some designers also use Adobe Animate to create dedicated banner ads for their marketing campaigns using HTML 5. This will be a pretty useful Adobe Animate tutorial PDF for anyone who wants to join a marketing firm or plan exclusive marketing campaigns for his own products/services.
Key Features:
● Learn how to build HTML banner ads from scratch.
● Get familiar with the overall process of publishing a banner ad on platforms like Google AdWords.
● Understand how to keep the file size of a banner down to keep it optimized.
3. Animate CC Game Development
As we mentioned earlier, some people also use Adobe Animate to design games. If you want to follow the same career, this Adobe Animate CC tutorial is for you.
All the games developed in Adobe Animate are designed in HTML 5 and are usually web-based. By the end of this tutorial, you would have built a fully-functional game in Adobe Animate.
Key Features:
● Creating the game world.
● Understanding CreateJS Overview in Adobe Animate CC.
● Building in-game assets and configuring their unique features.
4. 2D Animation for Beginners
This is another useful Adobe Animate tutorial for all the beginners out there. Compiled by Walt Wonderwolk, the tutorial is separated into 12 parts in which he has explained different features of Adobe Animate in detail.
Key Features:
● Designing graphic vectors in Adobe Animate.
● Each feature is explained with a respective example.
● Learn how to add sounds to your animations to make them visually appealing.
5. Adobe Animate for Social Media
Being a feature-packed animation software, you can also use Adobe Animate to create content for your social media profiles. To do this, however, you must be familiar with all the necessary features of the tool. This 1.5 hours long tutorial will help you get familiar with features such as the tweening system that’ll help you turn regular social media posts into stunning animations.
Key Features:
● Designing simple assets and designs for social media.
● Exporting GIFs and Animated Videos.
● Customizing stills and motion graphics in Adobe Animate.
Key Takeaways from This Episode
● Adobe Animate boasts different applications, ranging from simple 2D animations to game designing
● Since Adobe Animation is an extensive software, it’ll always be a wise decision to get started with Adobe Animate tutorials.
● After you have compiled designs/animations in Adobe Animate, Wondershare Filmora Pro will help you enhance its overall quality.
Learn Pencil2D Animation Tutorial Overview
Animation is one of the trendiest technologies. The basics of animation were formulated in the 2000s from the moving page trick. The first few animators learned that animation is nothing but continuous switching of frames from one to another. One animated still is switched to another and then another in a quick sequence such that it makes a sequential moving frame. Today, animation has come a long way from where it started and today it is used for several commercials, tutorials, and even educational lecture videos. Pencil2D animation is an amazing animation tool that can be used by even neophytes. Want to learn more about 2d pencil animation and its super cool features? Well, you’re at the perfect place. Today we’ll be telling you more about pencil 2d animation and giving you a small overview of its usage.
In this article
01 [What is Pencil2D and How to Install?](#Part 1)
02 [Overview of the Application Interface](#Part 2)
03 [How to Create Animations with Pencil2D?](#Part 3)
Part 1 What is Pencil2D and How to Install?
2d pencil animation is popular open-source animation software. The software is pretty cool for those who are newly starting off with animation. The open-source software is available on all major operating systems including Windows, Mac OS, and Unix. Using this amazing software, we can make amazing cartoon characters using traditional cartoon-making techniques such as tracing drawing, skinning. Using this software, you can save animations in the native animation formats or extract the animation to PNG, JPG, or other formats. Wish to explore more about pencil 2d animation software? Follow the steps listed below in order to download the pencil2d animation software.
● Firstly, you need to ensure that your device has ample space on it.
● Next, you need to head to the official website of pencil2d.
● Further, you need to select your operating system. You can find different versions of the software, namely windows 7/8/10, windows XP/ Vista, Mac OS, and Linux
● Once downloaded, you need to start the installation setup. Note that this may take a while to download.
● Once downloaded, you can start familiarizing yourself with the software.
Part 2 Overview of the Application Interface
1. The brush tool
The brush tool must have reminded you of paint software in windows. The brush tool is a popular and highly utilitarian basic tool in Pencil2D animation software. You can either access it via the user interface or quickly access it by using the B key on your keyboard. As the name suggests, the brush tool is literally just a brush that allows you to draw and paint any sort of drawings of different shades, colors, and thickness. If you wish to change the color, you can find a color palette on the left side of the interface.

2. The eraser tool
You’ve a brush tool; it’s almost common sense that there’d be an eraser. The eraser tool has an eraser as its icon. If you wish to use the eraser, click on the eraser tool or simply click the E button on your keyboard. Once you’ve selected the tool, you need to simply hover over the parts you wish to erase.

3. Bucket tool
The bucket tool is another useful tool that you can find in the left tool pane of pencil 2d animation. The tool icon looks like a bucket and it is used to fill an entire area with a particular color. You can choose the color you’d like to fill from the color pallet available on the left side. Alternatively, you can also access the bucket tool by pressing the “K” key on your keyboard.

4. Custom colors
A cool feature that you can find on pencil 2d animation software is the custom color one. You can merge and mix colors according to your choice and create your own color. To do so, you need to click on the small color box that you’ll find at the top right of your screen. By doing so, a huge color wheel will appear on your screen. Now you can either enter values of the R, G, and B if you wish to merge different colors and make a new one or select a particular color from the huge color wheel that appears in front of you. These colors vary in gradient, shade, and a lot of different factors.

5. The Undo button
The Undo button is a highly useful functionality for the lazy ones who do not wish to erase the mistake they made. By undoing, the previous step gets reverted and you can start over again. The traditional undo shortcut, Ctrl+Z does work in the pencil 2d animation. Alternatively, you can also use the undo feature via the user interface. You can do so by heading over to the edit option in the topmost bar. The first option in the drop-down menu would be undo.

Part 3 How to Create Animations with Pencil2D?
Creating animations in pencil 2d is slightly sophisticated and certainly needs minimal practice. Follow the steps listed below in order to learn how to animate through pencil 2d to make your first animation.
1. Ensure that you’ve turned on your bitmap on the first frame
Animation works through quick switching of frame which makes it appear as though the object is in motion. By turning on the bitmap, pencil 2d animation ensures that you’ve no blank frames at the start of your animation.

2. Draw your animated character
Since you’re trying to animate, you need to have an animated character or object. Hence, the first step to making your first animation is by drawing the object or character that you wish to animate. Try to make the character as realistic as possible. To start with, maybe you can try animating just a stick figure; this is because animating a complex character is rather difficult for beginners.

3.The three circular buttons
Once you’re satisfied with the character you draw, you need to spot the 3 circular buttons which are arranged in the “+”,”-“,”+” order. By pressing the first “+” button, you can add an empty slide. If you click on the “-“ button, it will delete the most recent slide and if you click on the next “+” button, it will duplicate the current slide.

4.Repeat until you get an animation
Now that you know how to deal with multiple frames, you can continue creating frames and making the animated characters move by tweaking with the drawing in every frame. For instance, if you wish to show that the animated character is running, in one of the frames the left leg should be forward and in the next one, the right leg should be forward. Keep repeating this process of tweaking with frames until you’ve your desired animated video.

Now that we’ve seen the process of animation via Pencil2D, you must have realized that it’s pretty orthodox and complicated. Moreover, you cannot carry out rigging and other newer animation techniques. Hence, we introduce you to Wondershare Filmora Video Editor , your all in one animation making platform. Here you can animate without any hassle. Wondershare Filmora makes your job easier with multiple animation features, you needn’t even draw your animated character. You can simply import a custom-made character and rig the character. Further, you need not deal with multiple frames and personally pay attention to each frame. All in all, Filmora makes your job simple and your animations much more seamless.
For Win 7 or later (64-bit)
For macOS 10.12 or later
Key Takeaways from This Episode
● Animation is actively being used for multiple purposes.
● Today we took a look at one of the orthodox yet popular animation tools, Pencil2D.
● The Pencil2D animation tool offers you multiple functionalities and allows you to make animations.
● Next, we also took a look at Wondershare Filmora Pro, your one-stop shop for all animation needs. You can find multiple animation features here and it’s all so simple.
● What are you waiting for? Your next animation is just one click away.
02 [Overview of the Application Interface](#Part 2)
03 [How to Create Animations with Pencil2D?](#Part 3)
Part 1 What is Pencil2D and How to Install?
2d pencil animation is popular open-source animation software. The software is pretty cool for those who are newly starting off with animation. The open-source software is available on all major operating systems including Windows, Mac OS, and Unix. Using this amazing software, we can make amazing cartoon characters using traditional cartoon-making techniques such as tracing drawing, skinning. Using this software, you can save animations in the native animation formats or extract the animation to PNG, JPG, or other formats. Wish to explore more about pencil 2d animation software? Follow the steps listed below in order to download the pencil2d animation software.
● Firstly, you need to ensure that your device has ample space on it.
● Next, you need to head to the official website of pencil2d.
● Further, you need to select your operating system. You can find different versions of the software, namely windows 7/8/10, windows XP/ Vista, Mac OS, and Linux
● Once downloaded, you need to start the installation setup. Note that this may take a while to download.
● Once downloaded, you can start familiarizing yourself with the software.
Part 2 Overview of the Application Interface
1. The brush tool
The brush tool must have reminded you of paint software in windows. The brush tool is a popular and highly utilitarian basic tool in Pencil2D animation software. You can either access it via the user interface or quickly access it by using the B key on your keyboard. As the name suggests, the brush tool is literally just a brush that allows you to draw and paint any sort of drawings of different shades, colors, and thickness. If you wish to change the color, you can find a color palette on the left side of the interface.
2. The eraser tool
You’ve a brush tool; it’s almost common sense that there’d be an eraser. The eraser tool has an eraser as its icon. If you wish to use the eraser, click on the eraser tool or simply click the E button on your keyboard. Once you’ve selected the tool, you need to simply hover over the parts you wish to erase.
3. Bucket tool
The bucket tool is another useful tool that you can find in the left tool pane of pencil 2d animation. The tool icon looks like a bucket and it is used to fill an entire area with a particular color. You can choose the color you’d like to fill from the color pallet available on the left side. Alternatively, you can also access the bucket tool by pressing the “K” key on your keyboard.
4. Custom colors
A cool feature that you can find on pencil 2d animation software is the custom color one. You can merge and mix colors according to your choice and create your own color. To do so, you need to click on the small color box that you’ll find at the top right of your screen. By doing so, a huge color wheel will appear on your screen. Now you can either enter values of the R, G, and B if you wish to merge different colors and make a new one or select a particular color from the huge color wheel that appears in front of you. These colors vary in gradient, shade, and a lot of different factors.
5. The Undo button
The Undo button is a highly useful functionality for the lazy ones who do not wish to erase the mistake they made. By undoing, the previous step gets reverted and you can start over again. The traditional undo shortcut, Ctrl+Z does work in the pencil 2d animation. Alternatively, you can also use the undo feature via the user interface. You can do so by heading over to the edit option in the topmost bar. The first option in the drop-down menu would be undo.
Part 3 How to Create Animations with Pencil2D?
Creating animations in pencil 2d is slightly sophisticated and certainly needs minimal practice. Follow the steps listed below in order to learn how to animate through pencil 2d to make your first animation.
1. Ensure that you’ve turned on your bitmap on the first frame
Animation works through quick switching of frame which makes it appear as though the object is in motion. By turning on the bitmap, pencil 2d animation ensures that you’ve no blank frames at the start of your animation.
2. Draw your animated character
Since you’re trying to animate, you need to have an animated character or object. Hence, the first step to making your first animation is by drawing the object or character that you wish to animate. Try to make the character as realistic as possible. To start with, maybe you can try animating just a stick figure; this is because animating a complex character is rather difficult for beginners.
3.The three circular buttons
Once you’re satisfied with the character you draw, you need to spot the 3 circular buttons which are arranged in the “+”,”-“,”+” order. By pressing the first “+” button, you can add an empty slide. If you click on the “-“ button, it will delete the most recent slide and if you click on the next “+” button, it will duplicate the current slide.
4.Repeat until you get an animation
Now that you know how to deal with multiple frames, you can continue creating frames and making the animated characters move by tweaking with the drawing in every frame. For instance, if you wish to show that the animated character is running, in one of the frames the left leg should be forward and in the next one, the right leg should be forward. Keep repeating this process of tweaking with frames until you’ve your desired animated video.
Now that we’ve seen the process of animation via Pencil2D, you must have realized that it’s pretty orthodox and complicated. Moreover, you cannot carry out rigging and other newer animation techniques. Hence, we introduce you to Wondershare Filmora Video Editor , your all in one animation making platform. Here you can animate without any hassle. Wondershare Filmora makes your job easier with multiple animation features, you needn’t even draw your animated character. You can simply import a custom-made character and rig the character. Further, you need not deal with multiple frames and personally pay attention to each frame. All in all, Filmora makes your job simple and your animations much more seamless.
For Win 7 or later (64-bit)
For macOS 10.12 or later
Key Takeaways from This Episode
● Animation is actively being used for multiple purposes.
● Today we took a look at one of the orthodox yet popular animation tools, Pencil2D.
● The Pencil2D animation tool offers you multiple functionalities and allows you to make animations.
● Next, we also took a look at Wondershare Filmora Pro, your one-stop shop for all animation needs. You can find multiple animation features here and it’s all so simple.
● What are you waiting for? Your next animation is just one click away.
What Is Still Motion Animation?
What is Still Motion Animation and How Does It Work?
An easy yet powerful editor
Numerous effects to choose from
Detailed tutorials provided by the official channel
When we talk about motion, it makes us think about moves, but it refers to step motion when speaking about still-motion. So, in simple words, still motion animation refers to the animation that holds picture-to-picture motion animation.
This article covers all the relevant information related to still motion animation, paper motion animation, liquid motion animation. The name may vary, but such motions come under stop motion or still motion techniques to a great extent. That uses picture after picture or stopping camera process from reflecting animation to any inanimate objects or things. Under paper motion animation, images are adjusted in such a manner that results in continual animation reflection.
In this article
01 [Guide to Learn What is Still Motion Animation](#Part 1)
02 [6 Most Satisfying Still Motion Animation Examples](#Part 2)
03 [5 Inspiring Still Motion Animation Websites to Check Out](#Part 3)
04 [How Still Motion Are Animated at Filmora](#Part 4)
Part 1 Guide to Learn What is Still Motion Animation
Still motion animation is also known as walking motion animation and stalk motion animation used to boost a scene in animation. It comes in a frame-to-frame outlook. It can be a booster in horror movies, comedy, and thrillers. It used to express flashbacks, dreams, and summaries of a long scene. Sometimes it could be slower, faster, fade, blur or split frames to discover/show unconscious scenes.
Part 2 6 Most Satisfying Still Motion Animation examples
Before moving ahead with detailing how to process still motion animation, let’s try to understand it with some out-of-the-box examples to make you know what liquid motion animation is with the following criteria?
01Rudolph the Red-Nosed Reindeer

The famous, Rudolph, the Red-Nosed Reindeer, is a 19Christmas movie that shows stop motion animation first. The class one-hour program special mentions many people’s first exposure to the stop motion that Rudolph especially showed, Yukon Cornelius, Sam the snowman, etc. In everlasting memory of Rudolph, people still mention the Island of Misfit Toys and wonder what that seemingly-normal ragdoll is doing there.
02A town called Panic (2009)
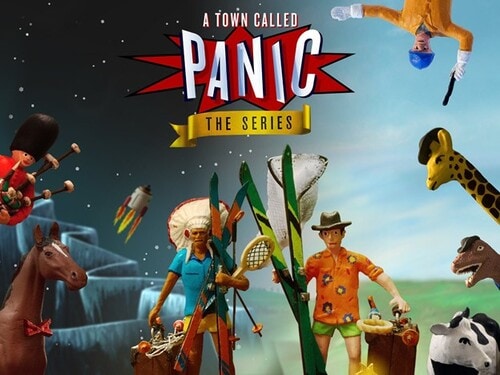
Based on the Belgian puppet on a series of identical names, this demented feature seems to star the playthings you would find packed away with an old model plaything. The plot illustrates how boyish Cowboy and Indian want to offer a birthday gift to their housemate and seemingly surrogate parent, Horse, resulting in mishaps at birthday parties, the frozen north, and also the bottom of the ocean. The persistently surreal feature includes equine music teachers, giant robotic penguins, and livestock used as cannon-fodder. Still, instead of becoming overwhelming annoying, a town called Panic sustains its gleefulness over the long run.
03Chicken Run (1994)
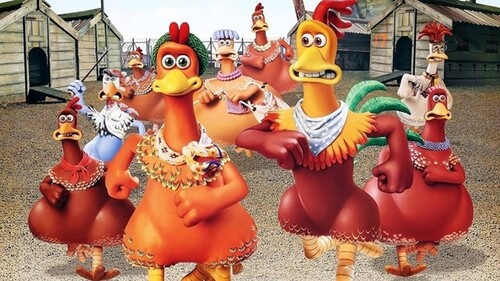
Chicken Run is a still/stop motion animation comedy film produced by Pathe Aardman and Dreamwork animations. It’s a 20stop-motion animated movie. The plot focuses on a group of chickens who see poultry named Rocky as their hope to vacate the farm when their owners prepare to show them chicken meat tarts. He manages to help them in an adventurous, funny way which makes the movie best. Its sequel started developing in 2020.
04Mary and Max (2009)
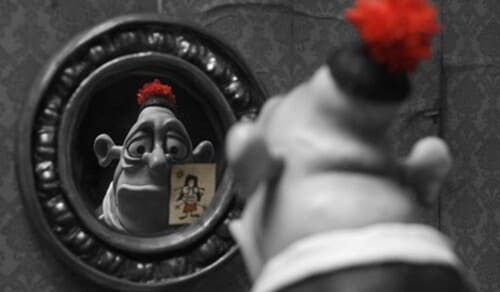
Mary and Max are again a still-motion animation adult comedy-drama film. It is an Australian film written and directed by Adam Elliot, which shows the lives and friendships of two unlikely people. Elliot’s relationship inspires the movie with his friend. He has been writing when his friend had started for over twenty years.
05The Nightmare Before Christmas (1993)

The Nightmare Before Christmas is also known as Tim Burton’s Nightmare before Christmas. It is an American stop-motion animation movie. It shows a musical dark fantasy Halloween film directed by Henry Selick.
It depicts the story of Jack Skellington, the king of “Halloween Town,” who stumbles upon “Christmas town.” He becomes obsessive about celebrating the vacation.
06Fantastic Mr. Fox (2009)
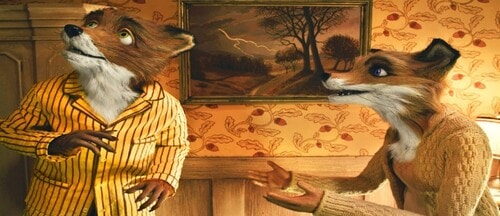
Fantastic Mr. Fox is a comedy film based on stop motion animation directed by Wes Anderson, who co-wrote the screenplay with Noah Baumbach. It is an American 20movie. The project is predicated on the 19children’s novel of the identical name by Roald Dahl. The plot is the titular character Mr. Fox (Clooney), as his spree of thefts leads to his family, and later his community, eventually hunted down by three farmers called Boggis (Robin Hurlstone), Bunce (Hugo Guinness), and Bean (Michael Gambon).
Part 3 5 Inspiring Still Motion Animation Websites to Check out
Here, with your journey of paper motion animation, let’s try to explore some inspiring websites that support still motion animation with the following information:
01Dragonframe Blog
Dragonframe makes a picture capture computer program for halt movement. So, they are kind of specialists on the matter. And they keep a charming web journal around the subject. It supports Still motion animation accurately.
Dragonframe highlights the most recent and most noteworthy halt movement recordings of all sorts in their web journal. They incorporate pictures, video, and a brief compose-up on each one. It’s a fantastic source of motivation and a great way to find out what’s trending within the world of halt movement liveliness.
02Stop MotionAnimation.com
Here’s a thought, if you’re searching for stop movement activity assets, why not see to StopMotionAnimation.com?
StopMotionAnimation.com may be a community location for all things related to the procedure and craftsmanship shape. They have free instructional exercises just like the “The Unique Halt Movement Handbook” in web page shape, recordings that serve as motivation, and a message board that clients can sign up for and take portion in.
They indeed have their claim list of assets to purchase apparatuses and supplies to make your claim’s halt movement liveliness.
03Into film
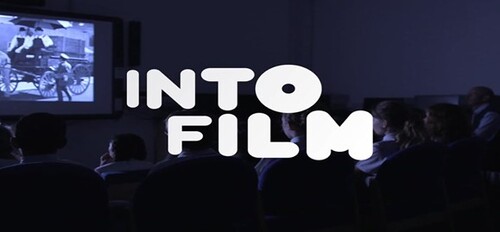
Into Film isn’t a halt movement liveliness location. It’s a location around filmmaking in common, but one specific asset worth checking out for any wannabe halt movement animator.
That’s the “Introduction to Halt Movement Animation” PDF accessible for gratis download. Unquestionably choose this one up on the off chance that you’re unused to the art.
And at that point, hang around Into Film to memorize more recommendations on object motion animation and the craftsmanship of filmmaking.
04Animation Resources.org
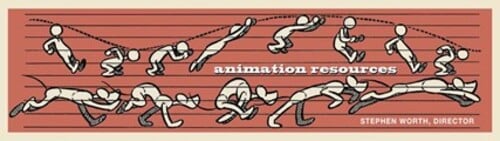
Movement Assets could be a location committed to all sorts of movement procedures. They talk about hypotheses and methods and have a community program through the site.
But they, too, conversation a parcel approximately halt movement and the history of the craftsmanship frame. By searching for “stop motion“ on the location, you’ll get a list of the broad web journal posts on the subject and learn more approximately the roots of halt motion.
05AnimateClay.com

Whereas there are many ways to make halt movement animation, clay is one of the foremost well-known, much obliged in massive portion to Aardman Animation and their motion pictures like Wallace & Gromit.
AnimateClay.com could be an asset, particularly for claymation. They have a vast instructional exercise segment, news, holdings for acquiring supplies, and a podcast devoted to animating with clay.
Part 4How Still Motion Are Animated at Filmora?
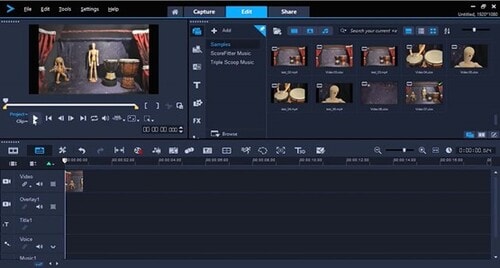
Wondershare Filmora Video Editor is by far one of the best video altering computer program with cool highlights that compares to other competing video altering Softwares. Numerous video-altering programs claimed to offer proficiency come about; Filmora is one of some consumer-level devices that convey.

Wondershare Filmora - Best Video Editor for Mac/Windows
5,481,435 people have downloaded it.
Build unique custom animations without breaking a sweat.
Focus on creating epic stories and leave the details to Filmora’s auto features.
Start a creative adventure with drag & drop effects and endless possibilities.
Filmora simplifies advanced features to save you time and effort.
Filmora cuts out repetition so you can move on to your next creative breakthrough.
01Step 1: Start your video project
However, if you’re not an Animoto client, sign up for a free account to induce begun. Log in and press Make to start a modern video. Select Begin from Scratch, choose a topic and a perspective ratio.
02Step 2: Add a photo burst block
Another step is to tap on the little additional sign symbol at the foot of your workspace. This will open up the Include a Square window. Tap Burst on the left-hand side of the window. Animoto recordings are built by blending and coordinating pieces. The Burst square permits you to include a fast arrangement of up to pictures in your video.
You’ll be inquired to select a move. We prescribe the Difficult Cut move for a clean-looking halt movement effect.
03Step 3: Add your photos in the right order
Another, transfer the photographs that you shot for your halt movement and drag and drop them into the Photo Burst square. Make beyond any doubt you include them in consecutive arrange, from to begin with to last.
If you’ve got more than photos—the most significant number a single Photo Burst square accepts—that’s not an issue. Add a modern Photo Burst after the primary and proceed including your pictures.
04Step 4: Adjust your speed
Once your photographs get included, it’s time to set the speed. Tap the stopwatch symbol within the Burst square, and you’ll discover three-speed options—Slower, Quicker, and Auto. Press through to choose the speed that feels best to you.
05Step 5: Now, finalize your video
Once that’s done, you’re able to place the final finishing touches on your video. You can also add Blocks, text, and music from the library.
● Key Takeaways from This Episode →
● What is meant by Stop motion or still motion animation
● Different examples of paper motion animation to explain the techniques
● Steps to apply walking motion animation with Filmora
When we talk about motion, it makes us think about moves, but it refers to step motion when speaking about still-motion. So, in simple words, still motion animation refers to the animation that holds picture-to-picture motion animation.
This article covers all the relevant information related to still motion animation, paper motion animation, liquid motion animation. The name may vary, but such motions come under stop motion or still motion techniques to a great extent. That uses picture after picture or stopping camera process from reflecting animation to any inanimate objects or things. Under paper motion animation, images are adjusted in such a manner that results in continual animation reflection.
In this article
01 [Guide to Learn What is Still Motion Animation](#Part 1)
02 [6 Most Satisfying Still Motion Animation Examples](#Part 2)
03 [5 Inspiring Still Motion Animation Websites to Check Out](#Part 3)
04 [How Still Motion Are Animated at Filmora](#Part 4)
Part 1 Guide to Learn What is Still Motion Animation
Still motion animation is also known as walking motion animation and stalk motion animation used to boost a scene in animation. It comes in a frame-to-frame outlook. It can be a booster in horror movies, comedy, and thrillers. It used to express flashbacks, dreams, and summaries of a long scene. Sometimes it could be slower, faster, fade, blur or split frames to discover/show unconscious scenes.
Part 2 6 Most Satisfying Still Motion Animation examples
Before moving ahead with detailing how to process still motion animation, let’s try to understand it with some out-of-the-box examples to make you know what liquid motion animation is with the following criteria?
01Rudolph the Red-Nosed Reindeer
The famous, Rudolph, the Red-Nosed Reindeer, is a 19Christmas movie that shows stop motion animation first. The class one-hour program special mentions many people’s first exposure to the stop motion that Rudolph especially showed, Yukon Cornelius, Sam the snowman, etc. In everlasting memory of Rudolph, people still mention the Island of Misfit Toys and wonder what that seemingly-normal ragdoll is doing there.
02A town called Panic (2009)
Based on the Belgian puppet on a series of identical names, this demented feature seems to star the playthings you would find packed away with an old model plaything. The plot illustrates how boyish Cowboy and Indian want to offer a birthday gift to their housemate and seemingly surrogate parent, Horse, resulting in mishaps at birthday parties, the frozen north, and also the bottom of the ocean. The persistently surreal feature includes equine music teachers, giant robotic penguins, and livestock used as cannon-fodder. Still, instead of becoming overwhelming annoying, a town called Panic sustains its gleefulness over the long run.
03Chicken Run (1994)
Chicken Run is a still/stop motion animation comedy film produced by Pathe Aardman and Dreamwork animations. It’s a 20stop-motion animated movie. The plot focuses on a group of chickens who see poultry named Rocky as their hope to vacate the farm when their owners prepare to show them chicken meat tarts. He manages to help them in an adventurous, funny way which makes the movie best. Its sequel started developing in 2020.
04Mary and Max (2009)
Mary and Max are again a still-motion animation adult comedy-drama film. It is an Australian film written and directed by Adam Elliot, which shows the lives and friendships of two unlikely people. Elliot’s relationship inspires the movie with his friend. He has been writing when his friend had started for over twenty years.
05The Nightmare Before Christmas (1993)
The Nightmare Before Christmas is also known as Tim Burton’s Nightmare before Christmas. It is an American stop-motion animation movie. It shows a musical dark fantasy Halloween film directed by Henry Selick.
It depicts the story of Jack Skellington, the king of “Halloween Town,” who stumbles upon “Christmas town.” He becomes obsessive about celebrating the vacation.
06Fantastic Mr. Fox (2009)
Fantastic Mr. Fox is a comedy film based on stop motion animation directed by Wes Anderson, who co-wrote the screenplay with Noah Baumbach. It is an American 20movie. The project is predicated on the 19children’s novel of the identical name by Roald Dahl. The plot is the titular character Mr. Fox (Clooney), as his spree of thefts leads to his family, and later his community, eventually hunted down by three farmers called Boggis (Robin Hurlstone), Bunce (Hugo Guinness), and Bean (Michael Gambon).
Part 3 5 Inspiring Still Motion Animation Websites to Check out
Here, with your journey of paper motion animation, let’s try to explore some inspiring websites that support still motion animation with the following information:
01Dragonframe Blog
Dragonframe makes a picture capture computer program for halt movement. So, they are kind of specialists on the matter. And they keep a charming web journal around the subject. It supports Still motion animation accurately.
Dragonframe highlights the most recent and most noteworthy halt movement recordings of all sorts in their web journal. They incorporate pictures, video, and a brief compose-up on each one. It’s a fantastic source of motivation and a great way to find out what’s trending within the world of halt movement liveliness.
02Stop MotionAnimation.com
Here’s a thought, if you’re searching for stop movement activity assets, why not see to StopMotionAnimation.com?
StopMotionAnimation.com may be a community location for all things related to the procedure and craftsmanship shape. They have free instructional exercises just like the “The Unique Halt Movement Handbook” in web page shape, recordings that serve as motivation, and a message board that clients can sign up for and take portion in.
They indeed have their claim list of assets to purchase apparatuses and supplies to make your claim’s halt movement liveliness.
03Into film
Into Film isn’t a halt movement liveliness location. It’s a location around filmmaking in common, but one specific asset worth checking out for any wannabe halt movement animator.
That’s the “Introduction to Halt Movement Animation” PDF accessible for gratis download. Unquestionably choose this one up on the off chance that you’re unused to the art.
And at that point, hang around Into Film to memorize more recommendations on object motion animation and the craftsmanship of filmmaking.
04Animation Resources.org
Movement Assets could be a location committed to all sorts of movement procedures. They talk about hypotheses and methods and have a community program through the site.
But they, too, conversation a parcel approximately halt movement and the history of the craftsmanship frame. By searching for “stop motion“ on the location, you’ll get a list of the broad web journal posts on the subject and learn more approximately the roots of halt motion.
05AnimateClay.com
Whereas there are many ways to make halt movement animation, clay is one of the foremost well-known, much obliged in massive portion to Aardman Animation and their motion pictures like Wallace & Gromit.
AnimateClay.com could be an asset, particularly for claymation. They have a vast instructional exercise segment, news, holdings for acquiring supplies, and a podcast devoted to animating with clay.
Part 4How Still Motion Are Animated at Filmora?
Wondershare Filmora Video Editor is by far one of the best video altering computer program with cool highlights that compares to other competing video altering Softwares. Numerous video-altering programs claimed to offer proficiency come about; Filmora is one of some consumer-level devices that convey.
Wondershare Filmora - Best Video Editor for Mac/Windows
5,481,435 people have downloaded it.
Build unique custom animations without breaking a sweat.
Focus on creating epic stories and leave the details to Filmora’s auto features.
Start a creative adventure with drag & drop effects and endless possibilities.
Filmora simplifies advanced features to save you time and effort.
Filmora cuts out repetition so you can move on to your next creative breakthrough.
01Step 1: Start your video project
However, if you’re not an Animoto client, sign up for a free account to induce begun. Log in and press Make to start a modern video. Select Begin from Scratch, choose a topic and a perspective ratio.
02Step 2: Add a photo burst block
Another step is to tap on the little additional sign symbol at the foot of your workspace. This will open up the Include a Square window. Tap Burst on the left-hand side of the window. Animoto recordings are built by blending and coordinating pieces. The Burst square permits you to include a fast arrangement of up to pictures in your video.
You’ll be inquired to select a move. We prescribe the Difficult Cut move for a clean-looking halt movement effect.
03Step 3: Add your photos in the right order
Another, transfer the photographs that you shot for your halt movement and drag and drop them into the Photo Burst square. Make beyond any doubt you include them in consecutive arrange, from to begin with to last.
If you’ve got more than photos—the most significant number a single Photo Burst square accepts—that’s not an issue. Add a modern Photo Burst after the primary and proceed including your pictures.
04Step 4: Adjust your speed
Once your photographs get included, it’s time to set the speed. Tap the stopwatch symbol within the Burst square, and you’ll discover three-speed options—Slower, Quicker, and Auto. Press through to choose the speed that feels best to you.
05Step 5: Now, finalize your video
Once that’s done, you’re able to place the final finishing touches on your video. You can also add Blocks, text, and music from the library.
● Key Takeaways from This Episode →
● What is meant by Stop motion or still motion animation
● Different examples of paper motion animation to explain the techniques
● Steps to apply walking motion animation with Filmora
https://images.wondershare.com/filmora/article-images/filmora9-website
2D Character Animation: Everything You Should Know About It
An easy yet powerful editor
Numerous effects to choose from
Detailed tutorials provided by the official channel
2D character animation is one of the significant kinds of animation popularly used for creating animated movies, marketing videos, cartoons, advertisements, educational content, corporate presentations, video games, etc.
With the popularity of video content, more and more businesses tend to use animation for promotion, as they magnify conversion rates by 20%. Some companies hire 2D character animation services; others try to make them online with software help.
In this article
01 [What is 2D Character Animation and What Does 2D Animation Do?](#Part 1)
02 [2D Character Animation Tips and Tricks](#Part 2)
03 [An Ultimate Guide to Create 2D Character Animation Online](#Part 3)
04 [5 Great 2D Character Animation Templates](#Part 4)
Part 1 What is 2D Character Animation and What Does 2D Animation Do?
2D animation is identified by having its characters and objects created in a 2D space. It means that they only have height and width to specify.
However, 2D animation is considered a traditional style, known from the 1800s. Initially, it was designed by merging the frames in which one drawing was followed by another and making them different; every second consists of 24 frames.
We all remember the classic Disney animations. Snow White and the Seven Dwarfs, The Little Mermaid, Bambi, etc. They are some of the highly famous 2D animation styles.
With the advancement of computer technologies, this process also got digitized through various 2D character animation software.
In this guide, we’ll talk about everything relatable to 2D character animation, and let’s proceed with the expert tips and tricks to create inspirational style within animation character 2D.
Part 2 2D Character Animation Tips and Tricks
01Look for a real-time reference
Using a real-world reference for 2D character animation can help you effectively animate faces. For example, when studios collaborate with voice-over artists, they often record their facial movements. It further helps 2D animators to ensure their expressions get captured convincingly.
If it seems impossible, you can consider using your face, so you have something to refer back to. You could also use a mirror and utter the words your character will speak. It will display the correct animated expressions.
02Observe real life
You need to use observation a lot more. One of the primary aspects of 2D character animation is bringing life to animate objections. Therefore, you must carefully consider how emotion can get portrayed and select each movement accordingly.
Take time watching how people in real-life environments talk and interact with each other, how they express emotions, how they move, etc. Please don’t spend much time doing this, as it is valuable to research.
03Simplicity is the key
2D character animation is never complex compared with 3D. Think carefully before creating a scene too complicated. You must not include too much information, which is hard to digest, and you may even find yourself compromising the scene’s realism. Try not to heavy the stage with too many pose changes or other elements, and keep it genuine.
04Draw animation again and again
Drawing animation consumes a lot of time. You can’t complete it within one day, so you better know deep down that one task only can be done after you have revamped it various times. For 2D character animation, you may need to draw objects on paper several times.
You can’t master the skill of animation character 2D quickly. Luckily, all pains will be relieved someday.
05Feedback is important
Feedback is an essential element of artistic development. It’s wise to actively seek out feedback from familiar figures who can help you enhance. Naturally, we may see work we have invested a great deal of time and effort indifferently to someone not so involved in the creative process. Feedback can equate to a valuable learning opportunity that will assist you produce the results hit the spot much more appropriately.
Part 3 An Ultimate Guide to Create 2D Character Animation Online
Let’s now look at making an illustrated 2D character animation move on a screen.
While there are nearly numerous options for 2D character animation tools and software, this tutorial will animate a character in Adobe After Effects.
Steps to create 2D character animation After Effects
01Step 1: Download and Install Duik
You need to install the Duik animation plugin for Adobe After Effects to simplify the whole process. You can animate and rig characters’ entire limbs with Duik using just the placement of their feet and hands.
While this isn’t an essential step, it can be valuable for beginners, as you’ll see in this tutorial. Luckily, Duik is available for free from Rainbox Laboratory.
02Step 2: Design Your Character
You need a moving character before you’re able to start animating. You can create this character in Adobe Illustrator and import it into After Effects.
Try creating a straightforward character with an aim on the character’s limbs.
In the example mentioned below, you can see that the body is a very rudimentary shape—a circle—with long legs that make it simple to consider the animation process.

Check the character’s joints. Making a round joint between the lower and upper parts of the legs, for instance, will help the character move more smoothly.

03Step 3: Make and Import Your Character Artwork
Now, you’ll need to make a few final adjustments before moving your character artwork. Break your character out into layers firstly. Every section of the character that will move independently needs a separate layer.
So, layers include his circular body, face, and the leg’s segments (i.e., lower leg, upper leg, and foot).

To import your character artwork, go to File, click the Import tab, and choose your character file. Ensure that you need to import it as a composition to ensure it includes the layers you just created.
04Step 4: Establish Initial Character Rigging
Now, the 2D character animation is almost over by the initial rigging.
Firstly, lower the opacity of all your layers to above 50% to see the critical joints within the character.
Next, you must ensure that the joints hinge in the ideal direction. It’s simple to do with the anchor point tool. For each character’s layer, place the anchor point at the center of gravity for each layer of the 2D character animation.
The anchor point would probably go between the eyes for the layer of the face (i.e., the nose, eyes, and mouth). For each legs’ section, hold the anchor point where the leg will hinge (e.g., the anchor point would be at the highest point for the leg’s upper portion, where it meets the body).

Then, use the parent tool to join the limbs’ sections. For instance, the parent of the foot would be the lower leg, and the upper portion is the parent of the lower leg.
It makes sure that the leg moves together as one unit with multiple hinge points.
Finally, use the Duik toolbar to create character controllers. Controllers control the rotation and position of critical elements within your character. For the ankles of the 2D character animation, you would select the controller that encompasses both the rotation and position.
05Step 5: Create Your Rig
Use the Duik toolbar to create a rig. Select each layer from the extremities inward from each limb, lasting with your controllers.
You would select the ankle for a leg, followed by the upper portion, the lower leg, and conclusively, the controller at the ankle. Then, select auto-rig within the Rigging area of the Duik toolbar.
The entire leg will move when you move that ankle controller. If your character contains them, repeat the process for the other leg, along with other limbs.
Before proceeding, test the limbs to make sure they hinge and move correctly. You need to adjust the opacity of the character back to 100% once you are satisfied with the movements.

06Step 6: Start Animating Your Character
You can begin animating after completing a rig. First, create keyframes—the ending and beginning points of the character’s movement. The character’s legs are at their most magnified are thus the endpoints for a walk cycle. Make sure that the beginning and ending of keyframes are identical to get an ideal loop.
Start adding in-between frames from there, like when one leg crosses over the other in the middle of a walking stride.
Moreover, you can add ‘easing” to the animation via 2D character animation After Effects’ Easy Ease tab, located under the Animation button, and Keyframe Assistant.
It will smoothen the transition between the keyframes. You will have a primary walking sequence at this instance.

Now, you can make further refinements to add detail and secondary movement, like a bobbing motion of the head. You can also modify elements like the keyframe velocity, further smoothing out the animation.
As you practice, you’ll get a better feel for your animation preferences and develop more advanced realistic 2D animation character design capabilities.
Part 4 5 Great 2D Character Animation Templates
1 – FrameStory Character Animation Toolkit
2 – Explainer Video Character Animation ToolKit
3 – 2D Character Animation After Effects Template
4 – Character Animation ToolKit
5 – Rigged Character Animation Mockup Template
Given above is a list of the best 2D character animation templates worth considering. Yet, if you are tired of using After Effects Templates, why not select Wondershare Filmora Template Mode?
It is a brand-new mode recently launched by Filmora to ramp up your story. It is a simplistic way to use compared with After Effects.
****Wondershare Filmora Video Editor Template Mode**
For Win 7 or later (64-bit)
For macOS 10.12 or later
Filmora Template Mode is a bold breakthrough that helps you create incredible videos in a minute. Forget about dragging n dropping the video clips into a timeline; Filmora template Mode provides you a new way of generating videos automatically by using various stylish video templates.
Steps to create a stunning animated video in 3 levels
01Step 1: Choose a template
Pick up a video template that best suits your needs.

02Step 2: Import Media
Import at least three video clips or images and let AI assist you in ramping the production process without hassle.

03Step 3: Export Project
Export media among multiple social media platforms.

● Key Takeaways from This Episode →
● Understanding 2D character animation tips and tricks
● A step by step guide to creating 2D character animation online
● Five best 2D character animation templates
● The best alternative of using the Template mode directly within the Wondershare Filmora
2D character animation is one of the significant kinds of animation popularly used for creating animated movies, marketing videos, cartoons, advertisements, educational content, corporate presentations, video games, etc.
With the popularity of video content, more and more businesses tend to use animation for promotion, as they magnify conversion rates by 20%. Some companies hire 2D character animation services; others try to make them online with software help.
In this article
01 [What is 2D Character Animation and What Does 2D Animation Do?](#Part 1)
02 [2D Character Animation Tips and Tricks](#Part 2)
03 [An Ultimate Guide to Create 2D Character Animation Online](#Part 3)
04 [5 Great 2D Character Animation Templates](#Part 4)
Part 1 What is 2D Character Animation and What Does 2D Animation Do?
2D animation is identified by having its characters and objects created in a 2D space. It means that they only have height and width to specify.
However, 2D animation is considered a traditional style, known from the 1800s. Initially, it was designed by merging the frames in which one drawing was followed by another and making them different; every second consists of 24 frames.
We all remember the classic Disney animations. Snow White and the Seven Dwarfs, The Little Mermaid, Bambi, etc. They are some of the highly famous 2D animation styles.
With the advancement of computer technologies, this process also got digitized through various 2D character animation software.
In this guide, we’ll talk about everything relatable to 2D character animation, and let’s proceed with the expert tips and tricks to create inspirational style within animation character 2D.
Part 2 2D Character Animation Tips and Tricks
01Look for a real-time reference
Using a real-world reference for 2D character animation can help you effectively animate faces. For example, when studios collaborate with voice-over artists, they often record their facial movements. It further helps 2D animators to ensure their expressions get captured convincingly.
If it seems impossible, you can consider using your face, so you have something to refer back to. You could also use a mirror and utter the words your character will speak. It will display the correct animated expressions.
02Observe real life
You need to use observation a lot more. One of the primary aspects of 2D character animation is bringing life to animate objections. Therefore, you must carefully consider how emotion can get portrayed and select each movement accordingly.
Take time watching how people in real-life environments talk and interact with each other, how they express emotions, how they move, etc. Please don’t spend much time doing this, as it is valuable to research.
03Simplicity is the key
2D character animation is never complex compared with 3D. Think carefully before creating a scene too complicated. You must not include too much information, which is hard to digest, and you may even find yourself compromising the scene’s realism. Try not to heavy the stage with too many pose changes or other elements, and keep it genuine.
04Draw animation again and again
Drawing animation consumes a lot of time. You can’t complete it within one day, so you better know deep down that one task only can be done after you have revamped it various times. For 2D character animation, you may need to draw objects on paper several times.
You can’t master the skill of animation character 2D quickly. Luckily, all pains will be relieved someday.
05Feedback is important
Feedback is an essential element of artistic development. It’s wise to actively seek out feedback from familiar figures who can help you enhance. Naturally, we may see work we have invested a great deal of time and effort indifferently to someone not so involved in the creative process. Feedback can equate to a valuable learning opportunity that will assist you produce the results hit the spot much more appropriately.
Part 3 An Ultimate Guide to Create 2D Character Animation Online
Let’s now look at making an illustrated 2D character animation move on a screen.
While there are nearly numerous options for 2D character animation tools and software, this tutorial will animate a character in Adobe After Effects.
Steps to create 2D character animation After Effects
01Step 1: Download and Install Duik
You need to install the Duik animation plugin for Adobe After Effects to simplify the whole process. You can animate and rig characters’ entire limbs with Duik using just the placement of their feet and hands.
While this isn’t an essential step, it can be valuable for beginners, as you’ll see in this tutorial. Luckily, Duik is available for free from Rainbox Laboratory.
02Step 2: Design Your Character
You need a moving character before you’re able to start animating. You can create this character in Adobe Illustrator and import it into After Effects.
Try creating a straightforward character with an aim on the character’s limbs.
In the example mentioned below, you can see that the body is a very rudimentary shape—a circle—with long legs that make it simple to consider the animation process.
Check the character’s joints. Making a round joint between the lower and upper parts of the legs, for instance, will help the character move more smoothly.
03Step 3: Make and Import Your Character Artwork
Now, you’ll need to make a few final adjustments before moving your character artwork. Break your character out into layers firstly. Every section of the character that will move independently needs a separate layer.
So, layers include his circular body, face, and the leg’s segments (i.e., lower leg, upper leg, and foot).
To import your character artwork, go to File, click the Import tab, and choose your character file. Ensure that you need to import it as a composition to ensure it includes the layers you just created.
04Step 4: Establish Initial Character Rigging
Now, the 2D character animation is almost over by the initial rigging.
Firstly, lower the opacity of all your layers to above 50% to see the critical joints within the character.
Next, you must ensure that the joints hinge in the ideal direction. It’s simple to do with the anchor point tool. For each character’s layer, place the anchor point at the center of gravity for each layer of the 2D character animation.
The anchor point would probably go between the eyes for the layer of the face (i.e., the nose, eyes, and mouth). For each legs’ section, hold the anchor point where the leg will hinge (e.g., the anchor point would be at the highest point for the leg’s upper portion, where it meets the body).
Then, use the parent tool to join the limbs’ sections. For instance, the parent of the foot would be the lower leg, and the upper portion is the parent of the lower leg.
It makes sure that the leg moves together as one unit with multiple hinge points.
Finally, use the Duik toolbar to create character controllers. Controllers control the rotation and position of critical elements within your character. For the ankles of the 2D character animation, you would select the controller that encompasses both the rotation and position.
05Step 5: Create Your Rig
Use the Duik toolbar to create a rig. Select each layer from the extremities inward from each limb, lasting with your controllers.
You would select the ankle for a leg, followed by the upper portion, the lower leg, and conclusively, the controller at the ankle. Then, select auto-rig within the Rigging area of the Duik toolbar.
The entire leg will move when you move that ankle controller. If your character contains them, repeat the process for the other leg, along with other limbs.
Before proceeding, test the limbs to make sure they hinge and move correctly. You need to adjust the opacity of the character back to 100% once you are satisfied with the movements.
06Step 6: Start Animating Your Character
You can begin animating after completing a rig. First, create keyframes—the ending and beginning points of the character’s movement. The character’s legs are at their most magnified are thus the endpoints for a walk cycle. Make sure that the beginning and ending of keyframes are identical to get an ideal loop.
Start adding in-between frames from there, like when one leg crosses over the other in the middle of a walking stride.
Moreover, you can add ‘easing” to the animation via 2D character animation After Effects’ Easy Ease tab, located under the Animation button, and Keyframe Assistant.
It will smoothen the transition between the keyframes. You will have a primary walking sequence at this instance.
Now, you can make further refinements to add detail and secondary movement, like a bobbing motion of the head. You can also modify elements like the keyframe velocity, further smoothing out the animation.
As you practice, you’ll get a better feel for your animation preferences and develop more advanced realistic 2D animation character design capabilities.
Part 4 5 Great 2D Character Animation Templates
1 – FrameStory Character Animation Toolkit
2 – Explainer Video Character Animation ToolKit
3 – 2D Character Animation After Effects Template
4 – Character Animation ToolKit
5 – Rigged Character Animation Mockup Template
Given above is a list of the best 2D character animation templates worth considering. Yet, if you are tired of using After Effects Templates, why not select Wondershare Filmora Template Mode?
It is a brand-new mode recently launched by Filmora to ramp up your story. It is a simplistic way to use compared with After Effects.
****Wondershare Filmora Video Editor Template Mode**
For Win 7 or later (64-bit)
For macOS 10.12 or later
Filmora Template Mode is a bold breakthrough that helps you create incredible videos in a minute. Forget about dragging n dropping the video clips into a timeline; Filmora template Mode provides you a new way of generating videos automatically by using various stylish video templates.
Steps to create a stunning animated video in 3 levels
01Step 1: Choose a template
Pick up a video template that best suits your needs.
02Step 2: Import Media
Import at least three video clips or images and let AI assist you in ramping the production process without hassle.
03Step 3: Export Project
Export media among multiple social media platforms.
● Key Takeaways from This Episode →
● Understanding 2D character animation tips and tricks
● A step by step guide to creating 2D character animation online
● Five best 2D character animation templates
● The best alternative of using the Template mode directly within the Wondershare Filmora
How to Animate Image on Scroll and Text on Scroll?
How to Animate Image on Scroll and Text on Scroll?
An easy yet powerful editor
Numerous effects to choose from
Detailed tutorials provided by the official channel
Over the years, web designers have tried different tactics to make their websites visually engaging. From marquee tags to animated navigation bars, designers tried everything they could to enhance the overall visual appearance of their websites.
One such tactic - that even brands like Sony and Apple - followed was image-on-scroll and text-on-scroll animations.
In this article
01 [How to Make Scroll Image Animation Like Apple?](#Part 1)
02 [How to Create a Scrolling Text Animation (Infinite Loop)](#Part 2)
Part 1 How to Make Scroll Image Animation Like Apple?
First, let’s take a look at different ways to make scroll-image animation like Apple. An image-on-scroll animation is an animation playback that appears on images as you continue to scroll down a website. You can use multiple methods to implement scroll image animations on your website.
01Use Filmora
Wondershare Filmora Video Editor is a feature-packed video editing tool that’s designed to help video editors create high-quality videos in a hassle-free manner. The tool offers a timeline-based interface that streamlines the entire video editing process and helps professionals execute complex video editing tasks in no time. In addition to its basic editing features, Filmora also offers advanced editing functions including color grading, motion tracking, and keyframing. It means you can easily turn your RAW footage into high-quality videos without any hassle.
Using Wondershare Filmora to animate images on scroll will be an ideal solution if you want to integrate a visually appealing element to your website. Let’s walk you through the step-by-step procedure of using Wondershare Filmora to create image-on-scroll animations.
Wondershare Filmora - Best Video Editor for Mac/Windows
5,481,435 people have downloaded it.
Build unique custom animations without breaking a sweat.
Focus on creating epic stories and leave the details to Filmora’s auto features.
Start a creative adventure with drag & drop effects and endless possibilities.
Filmora simplifies advanced features to save you time and effort.
Filmora cuts out repetition so you can move on to your next creative breakthrough.
Step 1 - Launch Filmora on your system and import the video/image that you want to edit. Then, load the selected file to Filmora’s timeline to proceed further.
Step 2 - Now, double-tap the video/image. This will launch the editing panel on your screen. Here, switch to the “Animation” panel.

Step 3 - Here you can either select “Presets” or click the “Customize” tab to create a custom animation through keyframing.

Step 4 - If you want to save time, however, it would be better to choose the “Presets” tab. Then, select the preset that you want to use.
Step 5 - Now, drag the selected preset to the timeline. Again, double-tap the preset layer. An editing panel will appear on your screen. Here you can adjust different elements of the preset to customize its playback.

So, that’s everything you need to know about animating image-on-scroll using Wondershare Filmora.
02Use ScrollSequence
Now, if you are not a professional editor or don’t want to overcomplicate things, you can use ScrollSequence to add image-on-scroll animation to your website. For readers who don’t know, ScrollSequence is a built-in WordPress plugin that you can directly install in your WordPress manager. The tool offers hundreds of ready-to-use animation templates that you can integrate and customize without any hassle.
All the templates offer complete customization, which means you can adjust the animation playback, import your own media files, and even customize the text. It’s worth understanding that this method will only work if you are using WordPress as the CMS platform for your website. ScrollSequence is only available as a WordPress plugin and you won’t be able to use it with any other website builder
03Write Your Own JavaScript Code
Finally, you can also write your own JavaScript code to animate image-on-scroll. However, this method will be a bit complicated as you would require technical expertise to write dedicated JavaScript scripts to animate image-on-scroll. If you choose this solution, you’ll have to start with writing HTML and CSS codes. This will help you style your web page in the beginning. And, once the web design is up and ready, you can move towards writing the JavaScript code to animate image-on-scroll in your web page.
Part 2 How to Create a Scrolling Text Animation (Infinite Loop)
Like image-on-scroll, text-on-scroll is another popular way to add visually appealing animations to your web designs. Text-on-scroll animations work the same way as image-on-scroll animations - the only difference is that these types of animations focus on the text playback instead of images. Again, you can use different methods to animate text on scroll and make your website’s content run in an infinite loop.
Some of these methods include:
01Use Filmora
Thanks to Filmora’s advanced editing panel, you can also use it to animate text within the videos. This will be an ideal solution for users who want to add videos with dedicated text banners and titles on their websites. With Filmora, you’ll be able to animate the text and make custom transitions in a hassle-free manner. Let’s walk you through the detailed procedure of using Wondershare Filmora to add text animation to your videos.
Step 1 - Open Filmora on your system and load the video into its timeline.
Step 2 - Double-tap the video file, and switch to the “Titles” tab. You’ll see a list of different title templates on your screen. Browse through these results and drag the desired template to the timelines. Make sure to adjust the title layer right above the video layer.

Step 3 - Again, double-click the title layer and you’ll see a dedicated text editor on your screen. Here enter the text that you want to display within the video. You can also select text size, orientation, and font to personalize its appearance.
Step 4 - Finally, switch to the “Animation” tab at the left sidebar. Choose any of these animation templates and the text within the video will be animated automatically.

So, that’s how you can use Filmora to animate text-on-scroll to improve the overall visual appearance of your website videos.
02Scroll-Text-Animations for Single Words
Another way to implement scroll-text animations is to modify the HTML & CSS code of your website. Again, this method will only be feasible if you have prior coding experience and know how to write well-optimized code.

The easiest way to animate text scrolls is through single-line animations. In this situation, only one line gets displayed at any particular time, which automatically gets switched to the next one as soon as you scroll down the cursor. If you are planning to create simple text-based animations, this method will help you get the job done easily.
Key Takeaways from This Episode
● You can animate image-on-scroll and text-on-scroll to enhance the overall visual appearance of your websites and make them more engaging for the end-users.
● If you are planning to upload dedicated videos on your website, you can use Wondershare Filmora, a fully-functional video editing tool, to animate both images and text through an easy-to-navigate editing panel.
● You should only opt for the coding method if you are an experienced coder and have worked on HTML/CSS/JavaScript projects in the past.
Over the years, web designers have tried different tactics to make their websites visually engaging. From marquee tags to animated navigation bars, designers tried everything they could to enhance the overall visual appearance of their websites.
One such tactic - that even brands like Sony and Apple - followed was image-on-scroll and text-on-scroll animations.
In this article
01 [How to Make Scroll Image Animation Like Apple?](#Part 1)
02 [How to Create a Scrolling Text Animation (Infinite Loop)](#Part 2)
Part 1 How to Make Scroll Image Animation Like Apple?
First, let’s take a look at different ways to make scroll-image animation like Apple. An image-on-scroll animation is an animation playback that appears on images as you continue to scroll down a website. You can use multiple methods to implement scroll image animations on your website.
01Use Filmora
Wondershare Filmora Video Editor is a feature-packed video editing tool that’s designed to help video editors create high-quality videos in a hassle-free manner. The tool offers a timeline-based interface that streamlines the entire video editing process and helps professionals execute complex video editing tasks in no time. In addition to its basic editing features, Filmora also offers advanced editing functions including color grading, motion tracking, and keyframing. It means you can easily turn your RAW footage into high-quality videos without any hassle.
Using Wondershare Filmora to animate images on scroll will be an ideal solution if you want to integrate a visually appealing element to your website. Let’s walk you through the step-by-step procedure of using Wondershare Filmora to create image-on-scroll animations.
Wondershare Filmora - Best Video Editor for Mac/Windows
5,481,435 people have downloaded it.
Build unique custom animations without breaking a sweat.
Focus on creating epic stories and leave the details to Filmora’s auto features.
Start a creative adventure with drag & drop effects and endless possibilities.
Filmora simplifies advanced features to save you time and effort.
Filmora cuts out repetition so you can move on to your next creative breakthrough.
Step 1 - Launch Filmora on your system and import the video/image that you want to edit. Then, load the selected file to Filmora’s timeline to proceed further.
Step 2 - Now, double-tap the video/image. This will launch the editing panel on your screen. Here, switch to the “Animation” panel.
Step 3 - Here you can either select “Presets” or click the “Customize” tab to create a custom animation through keyframing.
Step 4 - If you want to save time, however, it would be better to choose the “Presets” tab. Then, select the preset that you want to use.
Step 5 - Now, drag the selected preset to the timeline. Again, double-tap the preset layer. An editing panel will appear on your screen. Here you can adjust different elements of the preset to customize its playback.
So, that’s everything you need to know about animating image-on-scroll using Wondershare Filmora.
02Use ScrollSequence
Now, if you are not a professional editor or don’t want to overcomplicate things, you can use ScrollSequence to add image-on-scroll animation to your website. For readers who don’t know, ScrollSequence is a built-in WordPress plugin that you can directly install in your WordPress manager. The tool offers hundreds of ready-to-use animation templates that you can integrate and customize without any hassle.
All the templates offer complete customization, which means you can adjust the animation playback, import your own media files, and even customize the text. It’s worth understanding that this method will only work if you are using WordPress as the CMS platform for your website. ScrollSequence is only available as a WordPress plugin and you won’t be able to use it with any other website builder
03Write Your Own JavaScript Code
Finally, you can also write your own JavaScript code to animate image-on-scroll. However, this method will be a bit complicated as you would require technical expertise to write dedicated JavaScript scripts to animate image-on-scroll. If you choose this solution, you’ll have to start with writing HTML and CSS codes. This will help you style your web page in the beginning. And, once the web design is up and ready, you can move towards writing the JavaScript code to animate image-on-scroll in your web page.
Part 2 How to Create a Scrolling Text Animation (Infinite Loop)
Like image-on-scroll, text-on-scroll is another popular way to add visually appealing animations to your web designs. Text-on-scroll animations work the same way as image-on-scroll animations - the only difference is that these types of animations focus on the text playback instead of images. Again, you can use different methods to animate text on scroll and make your website’s content run in an infinite loop.
Some of these methods include:
01Use Filmora
Thanks to Filmora’s advanced editing panel, you can also use it to animate text within the videos. This will be an ideal solution for users who want to add videos with dedicated text banners and titles on their websites. With Filmora, you’ll be able to animate the text and make custom transitions in a hassle-free manner. Let’s walk you through the detailed procedure of using Wondershare Filmora to add text animation to your videos.
Step 1 - Open Filmora on your system and load the video into its timeline.
Step 2 - Double-tap the video file, and switch to the “Titles” tab. You’ll see a list of different title templates on your screen. Browse through these results and drag the desired template to the timelines. Make sure to adjust the title layer right above the video layer.
Step 3 - Again, double-click the title layer and you’ll see a dedicated text editor on your screen. Here enter the text that you want to display within the video. You can also select text size, orientation, and font to personalize its appearance.
Step 4 - Finally, switch to the “Animation” tab at the left sidebar. Choose any of these animation templates and the text within the video will be animated automatically.
So, that’s how you can use Filmora to animate text-on-scroll to improve the overall visual appearance of your website videos.
02Scroll-Text-Animations for Single Words
Another way to implement scroll-text animations is to modify the HTML & CSS code of your website. Again, this method will only be feasible if you have prior coding experience and know how to write well-optimized code.
The easiest way to animate text scrolls is through single-line animations. In this situation, only one line gets displayed at any particular time, which automatically gets switched to the next one as soon as you scroll down the cursor. If you are planning to create simple text-based animations, this method will help you get the job done easily.
Key Takeaways from This Episode
● You can animate image-on-scroll and text-on-scroll to enhance the overall visual appearance of your websites and make them more engaging for the end-users.
● If you are planning to upload dedicated videos on your website, you can use Wondershare Filmora, a fully-functional video editing tool, to animate both images and text through an easy-to-navigate editing panel.
● You should only opt for the coding method if you are an experienced coder and have worked on HTML/CSS/JavaScript projects in the past.
10 Cartoon Photo Converters You Couldn’t Do Without
D:\【内容】文章录入资料\20220321 Cartoon\35. 10 Cartoon Photo Converters You Couldn’t Do Without
An easy yet powerful editor
Numerous effects to choose from
Detailed tutorials provided by the official channel
We all love to edit our images. Undoubtedly right now, the innovation in technology or day the editing tools available put us at a point where we can do more than editing the photograph. Well, here we are discussing convert picture to cartoon. Yes, you understand it right. This conversion can be done for various projects. We are not saying you to confine this ultimate option to your photos only. If you are a part of social media and create content, these tools will help you to get the best outcome in return.
Well, keep reading till the last as here we explore photo to cartoon online free, and some paid versions that you can try. Let’s get started!
In this article
01 [5 Online Picture to Cartoon Converters](#Part 1)
02 [5 Picture to Cartoon Converters on Your Phone](#Part 2)
03 [How to convert photo to cartoon with the help of FotoSketcher](#Part 3)
Part 1 Online Picture to Cartoon Converters
In this section, we are discussing the best online photo to cartoon converter that you can use and complete this tedious task within a few minutes. The best tools that you can consider include: -
01Befunky
Befunky, an online picture converter, offers a unique way of transforming your photographs into cartoon-like images. You can choose from a 50+ range of styles and adjust the size of the image before you start. The website lets you choose the style of cartoon you want, such as traditional or modern. You can also choose the size of your cartoon and even change the background color.

02Cartoonize
Cartoonize is an online tool that converts pictures into cartoon-style images. It is a free online service that allows users to convert any image into a cartoon-style image in seconds. It has been widely used by bloggers, teachers, and artists for the quick and easy creation of cartoons. This online tool can be used for many purposes, including Blogging, Teaching, Social Media Marketing, and other portals.

03PhotoCartoon
PhotoCartoon is an online image-to cartoon converter that converts photos into cartoons. This tool is helpful for people who want to create a cartoon from an image without having to draw it by hand. The website also provides users with the ability to add text, color, and other effects to the images they have converted into comics. It can be used for creating memes or advertisements as well as personal projects like comics and illustrations.

04Free Photo to cartoon
This online Free Photo to Cartoon Converter allows users to convert a photo into an animated cartoon. It is an easy-to-use tool that provides high-quality results in a short amount of time. It has been proven to be more effective than using traditional methods. The site also offers users the option of using different filters and uploading images from Facebook or Instagram for conversion. Within no time, a user will be able to get the outcome of their choice.

05Picsart
Picsart is a website that lets users draw pictures and make them into cartoons. It offers an easy interface to create personalized cartoons, which can be shared on social media. It has a free version for drawing and sharing custom images, as well as paid subscriptions for more features like making animated GIFs, drawing with your webcam, or using the site’s editor.

Part 2 5 Picture to Cartoon Converters on Your Phone
Well, above, we have discussed the tools that can be used through the website or, say, on the computer. But when you don’t have a computer, you can do it with the help of your phone as well. Now cartoon photo converter for phones is also available that one can try. These are as follows: -
01**Wondershare Filmora Video Editor **
Filmora is an app for users to create videos, collages, and other types of images. It is a free app that comes with different features. It has been downloaded over 100 million times and has been used by numerous industries for completing the editing part. This acts as the best video to cartoon converter online free. It is available on iOS, Android, Windows 10, and Mac OS X.
For Win 7 or later (64-bit)
For macOS 10.12 or later
In general, it allows users to take pictures or videos from their phones and then convert them into a cartoon. The app also allows users to edit their images before converting them into cartoons as they want. The effects added in this tool are so awesome that any can love trying this out.
02Cartoon Photo Editor
This is a photo editor that allows users to turn photos into cartoon drawings. Users can choose from a range of styles and colors to create their own unique cartoons. The app offers different drawing styles, and accordingly, a user can choose one and do the editing easily. It also features abstract designs that lack realism but are still recognizable as cartoons. Users feel great using this app because of its interface and the features available.
03Art Camera – Cartoon, Pencil Sketch Art Effect Photo
Art Camera is a new photo app that allows taking photos that look like pencil drawings or sketches. It uses a sophisticated algorithm and the latest machine learning technology to transform your photos into cartoon-like images. This app is perfect for those who are looking for an artistic way of capturing memories, portraits, or even creating art from their own imagination. It is widely is available on iOS, Android, and Windows Phone devices.
04Tooncam – Cartoon, Pencil Sketch Pic
Tooncam is a free app that helps you to create cartoon images. You can use it on your phone or tablet. It is one of the best apps for creating cartoons on your phone with images with just one click. With this app, you can also share your cartoons with friends or family members and make them laugh out loud with funny pictures.
The app uses the camera of your device and its powerful photo editing tools to convert any photo into a cartoon image in just a few steps.
05Photo To Cartoon Yourself Edit
The app is a picture to cartoon converter on your phone that lets you transform a photo into a cartoon in just one tap. You can use this app to create an animated movie, comic strip, or comic book. The app works by converting the image into vector graphics and then adding colors and shading, and finally exporting it as an animated GIF. The app is available for iOS platforms.
Part 3 How to convert photo to cartoon
We are sure you might be thinking about how you can use these tools. Well, firstly, understand that every tool we have discussed above have the somewhere same interface, and you need to follow some steps to convert photo to cartoon. To help you more, here we are discussing the steps you need to follow while using FotoSketcher for the same purpose.
FotoSketcher is one of the best tools available free of cost for you. You can simply convert the photos into a cartoon and use them over different portals as per your need. There will be no need for you to engage in any complicated process to complete the editing task. The steps are also very simple to follow for this tool, and these are as follows: -
Step 1: firstly, get the FotoSketcher tool on your device.
Step 2: Wait until the installation of the tool gets completed. It is compatible with Windows and Mac both.
Step 3: Now, open the tool and upload the photo you wish to convert.
Step 4: Here, it asks you to select the type. You can either select cartoon 1 or Cartoon 2. These are the special effects being part of this software.
Step 5: Now, from the list of features, select the type of editing you wish to apply. There are multiple options available to choose from. You can choose any of them as per your preference.
Step 6: Blend the colors as needed for the edited photo. Along with it, there are some other parameters too need to look out for editing, and accordingly, you can set them.
Step 7: After setting up the changes, click on “Draw” to apply the changes. Wait until it applies the effects.
Step 8: The resulted image will appear, and you can download it in the required format from here.
● Ending Thoughts →
● Do convert photo to cartoon online in just simple steps without being part of any complicated process.
● Filmora is the best cartoon image converter online available, helping in converting the images as required.
● The photo to cartoon software is quite simple to use and does not require any particular technical knowledge.
We all love to edit our images. Undoubtedly right now, the innovation in technology or day the editing tools available put us at a point where we can do more than editing the photograph. Well, here we are discussing convert picture to cartoon. Yes, you understand it right. This conversion can be done for various projects. We are not saying you to confine this ultimate option to your photos only. If you are a part of social media and create content, these tools will help you to get the best outcome in return.
Well, keep reading till the last as here we explore photo to cartoon online free, and some paid versions that you can try. Let’s get started!
In this article
01 [5 Online Picture to Cartoon Converters](#Part 1)
02 [5 Picture to Cartoon Converters on Your Phone](#Part 2)
03 [How to convert photo to cartoon with the help of FotoSketcher](#Part 3)
Part 1 Online Picture to Cartoon Converters
In this section, we are discussing the best online photo to cartoon converter that you can use and complete this tedious task within a few minutes. The best tools that you can consider include: -
01Befunky
Befunky, an online picture converter, offers a unique way of transforming your photographs into cartoon-like images. You can choose from a 50+ range of styles and adjust the size of the image before you start. The website lets you choose the style of cartoon you want, such as traditional or modern. You can also choose the size of your cartoon and even change the background color.
02Cartoonize
Cartoonize is an online tool that converts pictures into cartoon-style images. It is a free online service that allows users to convert any image into a cartoon-style image in seconds. It has been widely used by bloggers, teachers, and artists for the quick and easy creation of cartoons. This online tool can be used for many purposes, including Blogging, Teaching, Social Media Marketing, and other portals.
03PhotoCartoon
PhotoCartoon is an online image-to cartoon converter that converts photos into cartoons. This tool is helpful for people who want to create a cartoon from an image without having to draw it by hand. The website also provides users with the ability to add text, color, and other effects to the images they have converted into comics. It can be used for creating memes or advertisements as well as personal projects like comics and illustrations.
04Free Photo to cartoon
This online Free Photo to Cartoon Converter allows users to convert a photo into an animated cartoon. It is an easy-to-use tool that provides high-quality results in a short amount of time. It has been proven to be more effective than using traditional methods. The site also offers users the option of using different filters and uploading images from Facebook or Instagram for conversion. Within no time, a user will be able to get the outcome of their choice.
05Picsart
Picsart is a website that lets users draw pictures and make them into cartoons. It offers an easy interface to create personalized cartoons, which can be shared on social media. It has a free version for drawing and sharing custom images, as well as paid subscriptions for more features like making animated GIFs, drawing with your webcam, or using the site’s editor.
Part 2 5 Picture to Cartoon Converters on Your Phone
Well, above, we have discussed the tools that can be used through the website or, say, on the computer. But when you don’t have a computer, you can do it with the help of your phone as well. Now cartoon photo converter for phones is also available that one can try. These are as follows: -
01**Wondershare Filmora Video Editor **
Filmora is an app for users to create videos, collages, and other types of images. It is a free app that comes with different features. It has been downloaded over 100 million times and has been used by numerous industries for completing the editing part. This acts as the best video to cartoon converter online free. It is available on iOS, Android, Windows 10, and Mac OS X.
For Win 7 or later (64-bit)
For macOS 10.12 or later
In general, it allows users to take pictures or videos from their phones and then convert them into a cartoon. The app also allows users to edit their images before converting them into cartoons as they want. The effects added in this tool are so awesome that any can love trying this out.
02Cartoon Photo Editor
This is a photo editor that allows users to turn photos into cartoon drawings. Users can choose from a range of styles and colors to create their own unique cartoons. The app offers different drawing styles, and accordingly, a user can choose one and do the editing easily. It also features abstract designs that lack realism but are still recognizable as cartoons. Users feel great using this app because of its interface and the features available.
03Art Camera – Cartoon, Pencil Sketch Art Effect Photo
Art Camera is a new photo app that allows taking photos that look like pencil drawings or sketches. It uses a sophisticated algorithm and the latest machine learning technology to transform your photos into cartoon-like images. This app is perfect for those who are looking for an artistic way of capturing memories, portraits, or even creating art from their own imagination. It is widely is available on iOS, Android, and Windows Phone devices.
04Tooncam – Cartoon, Pencil Sketch Pic
Tooncam is a free app that helps you to create cartoon images. You can use it on your phone or tablet. It is one of the best apps for creating cartoons on your phone with images with just one click. With this app, you can also share your cartoons with friends or family members and make them laugh out loud with funny pictures.
The app uses the camera of your device and its powerful photo editing tools to convert any photo into a cartoon image in just a few steps.
05Photo To Cartoon Yourself Edit
The app is a picture to cartoon converter on your phone that lets you transform a photo into a cartoon in just one tap. You can use this app to create an animated movie, comic strip, or comic book. The app works by converting the image into vector graphics and then adding colors and shading, and finally exporting it as an animated GIF. The app is available for iOS platforms.
Part 3 How to convert photo to cartoon
We are sure you might be thinking about how you can use these tools. Well, firstly, understand that every tool we have discussed above have the somewhere same interface, and you need to follow some steps to convert photo to cartoon. To help you more, here we are discussing the steps you need to follow while using FotoSketcher for the same purpose.
FotoSketcher is one of the best tools available free of cost for you. You can simply convert the photos into a cartoon and use them over different portals as per your need. There will be no need for you to engage in any complicated process to complete the editing task. The steps are also very simple to follow for this tool, and these are as follows: -
Step 1: firstly, get the FotoSketcher tool on your device.
Step 2: Wait until the installation of the tool gets completed. It is compatible with Windows and Mac both.
Step 3: Now, open the tool and upload the photo you wish to convert.
Step 4: Here, it asks you to select the type. You can either select cartoon 1 or Cartoon 2. These are the special effects being part of this software.
Step 5: Now, from the list of features, select the type of editing you wish to apply. There are multiple options available to choose from. You can choose any of them as per your preference.
Step 6: Blend the colors as needed for the edited photo. Along with it, there are some other parameters too need to look out for editing, and accordingly, you can set them.
Step 7: After setting up the changes, click on “Draw” to apply the changes. Wait until it applies the effects.
Step 8: The resulted image will appear, and you can download it in the required format from here.
● Ending Thoughts →
● Do convert photo to cartoon online in just simple steps without being part of any complicated process.
● Filmora is the best cartoon image converter online available, helping in converting the images as required.
● The photo to cartoon software is quite simple to use and does not require any particular technical knowledge.
Best 10 Popular Cartoons You Forgot Existed
Top 10 Popular Cartoons You Forgot Existed
An easy yet powerful editor
Numerous effects to choose from
Detailed tutorials provided by the official channel
There has been an advancement in the cartoon since the last publication made by “Paste” (a 5,800-word short story by Henry James). However, traditional cable networks have created exciting and new worlds and characters. Various streaming platforms like YouTube have allowed different creators to draw cartoon videos and publish them as they want. It has long been said that cartoons are specifically made for kids to enjoy on Saturday morning, but this is no longer the case as adults now enjoy watching cartoons in their free time.
Have you ever thought, “I want to draw myself as a cartoon“ and turn it into animation? Then you must get inspired. Cartoons now range from more complex characters. Many employ wittier humor and more profound stories to engage people of any age, giving them the ability to tell powerful, relatable, and hilarious stories within the realm of animation. As a result of the dramatic change in the cartoon world, we will be writing out top popular cartoons you may have forgotten that ever existed. This list will be on influence, relatability, and influence when they lived.
In this article
01 [Do You Remember the Very Popular Simpsons?](#Part 1)
02 [The 10 Best Cartoon Shows Since the Simpsons](#Part 2)
Part 1 Do You Remember the Very Popular Simpsons?
The Simpsons is an American animated cartoonist Matt Groening created for the Fox Broadcasting Company. The Simpsons began in 1987 as a short cartoon shot on The Tracey Ullman Show and received acclamation throughout its early seasons in the 1990s, which are generally considered a “golden age.”
The popular cartoon series is a satirical depiction of American life epitomized by the Simpson family, consisting of Bart, Homer, Lisa, Marge, and Maggie. In addition, the show is set to run on television, and the human condition and the fictional town of Springfield parody American culture and society.
However, the Simpsons is a combined production by 20th Television and Gracie Films. Also, on March 3, 2021, the series got renewed for seasons 33 and 34, with 22 episodes for each. Thus, increasing the number of episodes from 706 to 750. Furthermore, its thirty-third (33rd) season came on September 26, 2021.
Before now, the Simpsons was the longest-running American animated cartoon series, an American sitcom, and American scripted primetime television series awarded in terms of seasons and number of episodes.
Part 2 The 10 Best Cartoon Shows Since the Simpsons
You can decide to learn to draw your cartoons or draw yourself as a cartoon to create an animation for TV just like the Simpsons. However, if you are looking for the best tool to help you animate your cartoon much more manageable, we recommend using Wondershare Filmora Video Editor .
For Win 7 or later (64-bit)
For macOS 10.12 or later
Wondershare Filmora
Get started easily with Filmora’s powerful performance, intuitive interface, and countless effects!
Try It Free Try It Free Try It Free Learn More >

Filmora platform offers you tons of materials for learning to draw cartoons, and also it has a keyframing feature that allows you to animate your cartoon with ease.
However, here are the ten best cartoon shows that have existed since the Simpsons:
01Futurama
This popular cartoon series, first released on March 28, 1999, is a cartoon series about utopian or dystopian. The central concept of this series is that it dares to imagine a future that’s pretty similar to the present using a bunch of crazy technology and space travel. Aside from being pretty, it is also hilarious.
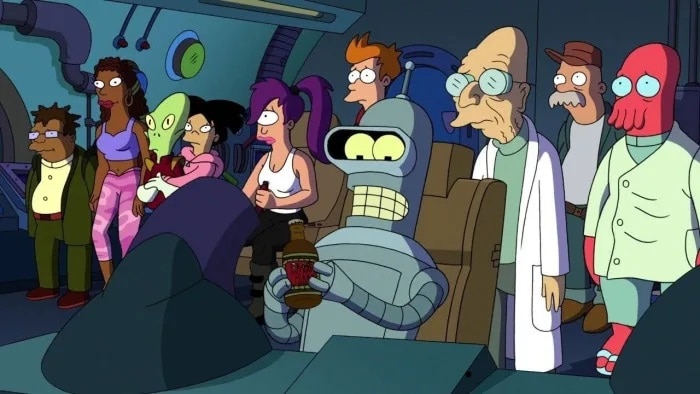
02The Critic
This cartoon series was first created in 1994 by the Simpson’s writers Al Jean and Mike Reiss. This cartoon has ramped up its predecessor’s non sequitur and sight-gag humor featuring Jon Lovitz’s Jay Sherman, an unfortunate portmanteau of Gene Siskel and Roger Ebert.
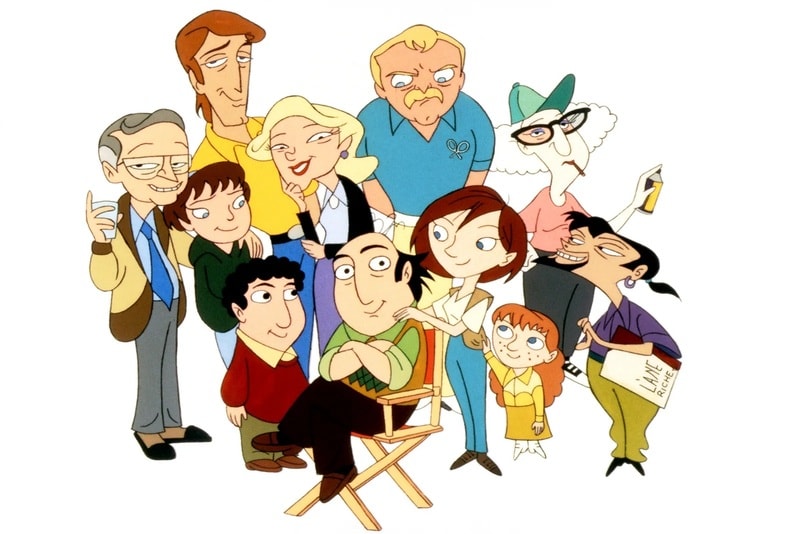
03Bojack Horseman
Bojack Horseman is a dumb cartoon character series first created on August 22, 2014. However, four (4) days later, the series was renewed for a second season, released on July 17, 2015. It is often a searing portrait of addiction, failure, depression, etc., as humans talk to a horse.
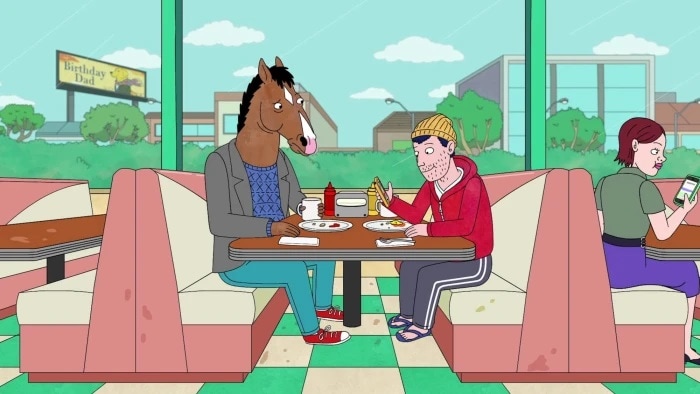
04Family Guy
Family Guy, the snoopy cartoon series, was first created on January 31, 1999, which goes for anything for a laugh style. However, you might not like the Griffin family or the other residents of Quahog, but you have to admit that the show stumbles on a great joke.
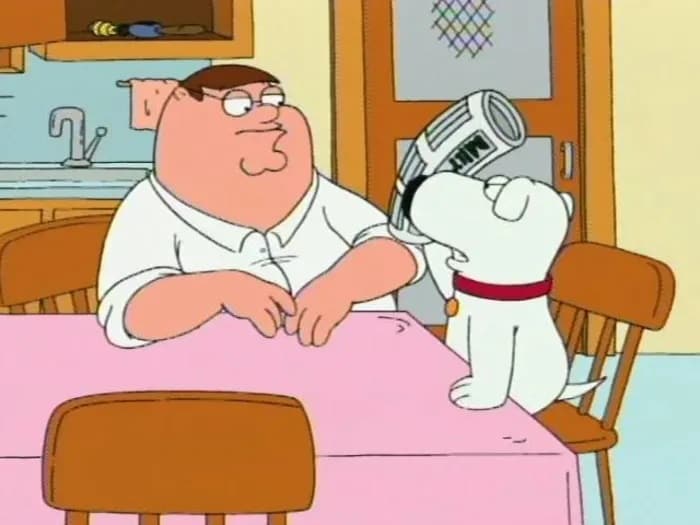
05South Park
South Park debuted with “Cartman Gets an Anal Probe, “ first created on August 13, 1997. Although it started with some cheap animations, it has become one of the iconic animated shows.

06Batman: The Animated Series
The Batman animated cartoon series, created on September 5, 1992, is a favorite for many people, although it is more comedy than an animated drama.
07Gravity Falls
This cartoon animated series was first created on June 15, 2012, and is a mystery story about a few kids with a supernatural bend.
08Teenage Mutant Ninja Turtles
This popular cartoon animated series was first created in 1983 by cartoonists Kevin Eastman and Peter Laird. This cartoon series is the definitive version, brightly colored and fun and fluffy.
09Doug
This cartoon animated series was first created on March 26, 1999, by Jim Jinkins and produced by Jumbo Pictures. It was one of the first animated shows on Nickelodeon before moving to Disney pictures. However, this show is creative and down-to-earth at the same time.

10Hey Arnold
This cartoon animated series came in on October 7, 1996. This show was the second after the first wave of the Nickelodeon show. It was the best of the bunch, and I liked the evolved version of “Doug.”
1
● Ending Thoughts →
● Aside from the list of popular cartoons mentioned in this article, you can also pick the snoopy cartoonswhen talking about comics that once existed.
● Addionally, you can also learn drawing cartoon videos and turn them into animation to publish in TV series.
● Finally, this article also emphasizes Fimora as the best editing tool you can choose from when you want to transform your cartoon drawing for class 6 into an animation.
There has been an advancement in the cartoon since the last publication made by “Paste” (a 5,800-word short story by Henry James). However, traditional cable networks have created exciting and new worlds and characters. Various streaming platforms like YouTube have allowed different creators to draw cartoon videos and publish them as they want. It has long been said that cartoons are specifically made for kids to enjoy on Saturday morning, but this is no longer the case as adults now enjoy watching cartoons in their free time.
Have you ever thought, “I want to draw myself as a cartoon“ and turn it into animation? Then you must get inspired. Cartoons now range from more complex characters. Many employ wittier humor and more profound stories to engage people of any age, giving them the ability to tell powerful, relatable, and hilarious stories within the realm of animation. As a result of the dramatic change in the cartoon world, we will be writing out top popular cartoons you may have forgotten that ever existed. This list will be on influence, relatability, and influence when they lived.
In this article
01 [Do You Remember the Very Popular Simpsons?](#Part 1)
02 [The 10 Best Cartoon Shows Since the Simpsons](#Part 2)
Part 1 Do You Remember the Very Popular Simpsons?
The Simpsons is an American animated cartoonist Matt Groening created for the Fox Broadcasting Company. The Simpsons began in 1987 as a short cartoon shot on The Tracey Ullman Show and received acclamation throughout its early seasons in the 1990s, which are generally considered a “golden age.”
The popular cartoon series is a satirical depiction of American life epitomized by the Simpson family, consisting of Bart, Homer, Lisa, Marge, and Maggie. In addition, the show is set to run on television, and the human condition and the fictional town of Springfield parody American culture and society.
However, the Simpsons is a combined production by 20th Television and Gracie Films. Also, on March 3, 2021, the series got renewed for seasons 33 and 34, with 22 episodes for each. Thus, increasing the number of episodes from 706 to 750. Furthermore, its thirty-third (33rd) season came on September 26, 2021.
Before now, the Simpsons was the longest-running American animated cartoon series, an American sitcom, and American scripted primetime television series awarded in terms of seasons and number of episodes.
Part 2 The 10 Best Cartoon Shows Since the Simpsons
You can decide to learn to draw your cartoons or draw yourself as a cartoon to create an animation for TV just like the Simpsons. However, if you are looking for the best tool to help you animate your cartoon much more manageable, we recommend using Wondershare Filmora Video Editor .
For Win 7 or later (64-bit)
For macOS 10.12 or later
Wondershare Filmora
Get started easily with Filmora’s powerful performance, intuitive interface, and countless effects!
Try It Free Try It Free Try It Free Learn More >
Filmora platform offers you tons of materials for learning to draw cartoons, and also it has a keyframing feature that allows you to animate your cartoon with ease.
However, here are the ten best cartoon shows that have existed since the Simpsons:
01Futurama
This popular cartoon series, first released on March 28, 1999, is a cartoon series about utopian or dystopian. The central concept of this series is that it dares to imagine a future that’s pretty similar to the present using a bunch of crazy technology and space travel. Aside from being pretty, it is also hilarious.
02The Critic
This cartoon series was first created in 1994 by the Simpson’s writers Al Jean and Mike Reiss. This cartoon has ramped up its predecessor’s non sequitur and sight-gag humor featuring Jon Lovitz’s Jay Sherman, an unfortunate portmanteau of Gene Siskel and Roger Ebert.
03Bojack Horseman
Bojack Horseman is a dumb cartoon character series first created on August 22, 2014. However, four (4) days later, the series was renewed for a second season, released on July 17, 2015. It is often a searing portrait of addiction, failure, depression, etc., as humans talk to a horse.
04Family Guy
Family Guy, the snoopy cartoon series, was first created on January 31, 1999, which goes for anything for a laugh style. However, you might not like the Griffin family or the other residents of Quahog, but you have to admit that the show stumbles on a great joke.
05South Park
South Park debuted with “Cartman Gets an Anal Probe, “ first created on August 13, 1997. Although it started with some cheap animations, it has become one of the iconic animated shows.
06Batman: The Animated Series
The Batman animated cartoon series, created on September 5, 1992, is a favorite for many people, although it is more comedy than an animated drama.
07Gravity Falls
This cartoon animated series was first created on June 15, 2012, and is a mystery story about a few kids with a supernatural bend.
08Teenage Mutant Ninja Turtles
This popular cartoon animated series was first created in 1983 by cartoonists Kevin Eastman and Peter Laird. This cartoon series is the definitive version, brightly colored and fun and fluffy.
09Doug
This cartoon animated series was first created on March 26, 1999, by Jim Jinkins and produced by Jumbo Pictures. It was one of the first animated shows on Nickelodeon before moving to Disney pictures. However, this show is creative and down-to-earth at the same time.
10Hey Arnold
This cartoon animated series came in on October 7, 1996. This show was the second after the first wave of the Nickelodeon show. It was the best of the bunch, and I liked the evolved version of “Doug.”
1
● Ending Thoughts →
● Aside from the list of popular cartoons mentioned in this article, you can also pick the snoopy cartoonswhen talking about comics that once existed.
● Addionally, you can also learn drawing cartoon videos and turn them into animation to publish in TV series.
● Finally, this article also emphasizes Fimora as the best editing tool you can choose from when you want to transform your cartoon drawing for class 6 into an animation.
Also read:
- New In 2024, 10 Caricature Makers to Turn Your Photo to Caricature Effects
- New How to Find 3D Animation Studio Meeting All Your Inspiring Needs
- New In 2024, How to Make Creative Animation Videos
- Best 10 Popular Cartoons You Forgot Existed
- New In 2024, Tips for GIF to Animated PNG You Should Know
- New 12 Aesthetic GIF Instagram for Marketers and Creatives
- In 2024, Learn Easy Blender Rigging in Only 2 Minutes
- New In 2024, Top 10 Banned Anime Around the World and Why
- New How to Find & Make Animated Christmas GIFs?
- Updated 2024 Approved 10 Cartoon Photo Converters You Couldnt Do Without
- Updated 4 Things You Should Know About Pinterest GIF for 2024
- New In 2024, Techniques for Creating Animated Logo That Few People Know About
- New In 2024, Top 10 Free Online Animated Logo Makers Everyone Should Know
- Updated 2024 Approved The Most Efficient Techniques to Make 3D Animation Character
- Updated What Is Still Motion Animation?
- Updated 10 Must-Use MP4 to GIF Converters to Get Perfect-Made GIF
- Updated Top 15 2D Animation Software Free That Worth to Try for 2024
- Updated Secret Source to Make a Great Stop Motion Puppet for 2024
- New A Roster of 15 Top Disney Channel Cartoons for 2024
- Apps to Animate Still Pictures Which Could Make Your Pictures Become Internet Sensation for 2024
- New In 2024, 15 Best Sites to Watch Cartoons Online Free And So Can You
- Updated Learn How to Create Adobe 3D Animation for 2024
- Updated Apps to Animate Still Pictures Which Could Make Your Pictures Become Internet Sensation
- New In 2024, Some Techniques for Creating Animated Logo That Few People Know About
- Best 15 Female Anime Characters-Who Is Your Favorite?
- Updated In 2024, Top 10 Apps to Enhance Your Instagram Story Slideshow
- Updated Great Guide for Beginners on 2D Animation Making
- In 2024, Top 10 Free Online Animated Logo Makers Everyone Should Know
- In 2024, Top 10 Cartoon Canvas Painting Ideas for Total Beginners
- New Top 3 Ways to Create Gif Images with Great 3D Gif Maker for 2024
- How to Make a Video a Live Photo 2023 for 2024
- In 2024, 10 Trendy Free Logo Animation Templates
- In 2024, How to Get Started in Stop Motion Claymation
- Updated 2024 Approved Formula to Animate Photos From 10 Animate Pictures App
- Top 15 Greatest Claymation Movies of All Time for 2024
- Updated Top 10 Popular Cartoons You Forgot Existed
- Updated 18 Best Tools and Services to Create Animated Videos for Business 2023 for 2024
- New How to Make Your Own GIF on WhatsApp in Simple Ways for 2024
- New How to Make a Video a Live Photo 2023
- New In 2024, 15 Forgotten Cartoon Characters of All Time You Used to Love
- Updated What Wikipedia Cant Tell You About the 10 Best Batman Cartoons for 2024
- The 10 Most Adorable Aesthetic Cartoon Characters of All Time for 2024
- In 2024, How to Bypass iPhone 14 Plus Passcode Easily Video Inside
- In 2024, Preparation to Beat Giovani in Pokemon Go For Oppo Reno 9A | Dr.fone
- In 2024, How to Unlock a Network Locked Vivo Y56 5G Phone?
- In 2024, How Can You Transfer Files From Honor Magic 6 Lite To iPhone 15/14/13? | Dr.fone
- How to Bypass FRP from Tecno Spark Go (2024)?
- Read This Guide to Find a Reliable Alternative to Fake GPS On Apple iPhone 13 Pro Max | Dr.fone
- Complete Tutorial to Use GPS Joystick to Fake GPS Location On Vivo Y78+ | Dr.fone
- How to Fix It Samsung Galaxy A05 Wont Turn On | Dr.fone
- How to Reset Gmail Password on Xiaomi Redmi Note 12T Pro Devices
- Easy steps to recover deleted music from Nubia Red Magic 9 Pro
- How to identify some outdated your drivers with Windows Device Manager in Windows 10
- How to Unlock Vivo T2x 5G Phone without Any Data Loss
- Android Screen Stuck General Google Pixel Fold Partly Screen Unresponsive | Dr.fone
- In 2024, How to Mirror Your Xiaomi Redmi Note 12 4G Screen to PC with Chromecast | Dr.fone
- Title: Updated How to Animate - Adobe Animate Tutorias for 2024
- Author: Elon
- Created at : 2024-05-19 03:05:17
- Updated at : 2024-05-20 03:05:17
- Link: https://animation-videos.techidaily.com/updated-how-to-animate-adobe-animate-tutorias-for-2024/
- License: This work is licensed under CC BY-NC-SA 4.0.
