

Updated How to Create a Whiteboard Animation Video for 2024
How to Create a Whiteboard Animation Video
Whiteboard animation simply refers to the process of story telling using pictures and drawn resources on a whiteboard or a plane white surface. Its simply the creation of conventional story telling procedure where text, images, diagrams, figures, etc are drawn onto a white surface.
Whiteboard animation video usually work with audio, visual and most times a combination of both audio and visual to sell a particular information to the audience. Another name it has gotten over time which you may come across while surfing the internet is doodle videos.

In creating this type of videos, script writes are usually employed because of the dynamics involved in creating them. The major users of whiteboard animation video are business owners and people in the education fields. Other people make use of it but these two groups are the major users.
Whiteboard animation is important because it helps viewers remember the contents of what they watched better than looking at an image that contains a lot of information that may not always be organized.
Over time, whiteboard videos have become a more compelling and innovative method of dissemination information. They work so well because it’s a more relatable and fun way of making videos. It goes outside the conventional video making techniques and employs the animation standards which is fun to watch, engaging and still maintains the ability to effective pass the required information to the viewers.
Also, it uses a unique style to mix text, animations, and colors to drive the point home. Viewers are usually glued to their screen while watching it. The usual white background equally makes the information being displayed to effective contrast with each other. However, there is a recent movement from the usual white background to any color of choice while still maintaining the contrasting quality of the videos.
Finally, people tend to remember events or information if they are told as stories. This is one of the major objectives of whiteboard animation videos. They use graphics and animations to tell stories, sell products and services while maintaining the fun in it.
Whiteboard animation video usually takes time to create. Its not always as easy as it may seem. It takes dedication and patience before you perfect the video. if you’re new to this, its ok to not have that perfect video immediately. What matters is your will to grow and get better.
Below is an example of a whiteboard animation video created using Animaker. We’ll still look at the various software applications used for creating whiteboard animation videos.
How to Create Your Video
Step1 The first step to creating your whiteboard animation video is to know your topic of choice. Determining your choice topic is based on the purpose of the video. You have to know the reason why the video is being created in the first place to enable you decide the contents, the outlook, the font style and size and the colors to use.
Step2 The next step after you’ve getting your topic is execution of the idea. This involves having a script which usually involves the step-by-step procedure you are to follow to achieve your goal. Writing the script is arguable the most difficult process. However, once you get it right, all the other processes become relatively easy to execute. You might need to employ a professional script writer depending on your budget for the project.
Step3 After that, the next thing is to deicide whether or not to use your own voice or computer voice. This is also called a voice over. Most software provides a text to speech voice over option which usually comes with various alternatives. There is also another option of using your own voice to finish the project.
Step4 Add text, graphics and animation. This step is usually easier when you are working with the script already provided. You include the text, animations, figures, etc. sometimes you might need to import additional resources to complete this task. However, not all software provides for this.
Step5 Organize your work. In organizing your work, you must ensure that you voice over matches properly with what is on display. Check your spellings, grammar, composition and other ‘little’ details that may give your work a bad look.
Step6 Save your work and export. Once your done with your work, you have to save it on your local disk. This also means downloading the work from the website or software onto a local disk. You can now share the video on any social media of your choice. The most popular place to share it is on YouTube which is the most widely used video watching application.
Top 3 Whiteboard Animation Software
When considering which software is best for whiteboard animation creation needs, the most important factor to have at the back of your mind is flexibility and cost. Some software are really flexible to use but cost more than many people can afford. Others are cheap to purchase but do not have all the necessary resources needed to make a great video.
We’ll be looking at various software that combines cost effectiveness and flexibility. Note however that this list is not exhaustive of the software that combines these two features but are worthy of mention for the purpose of this article.
Filmora
At the top of our list is Filmora . This does not make them the best. However, they are relatively easy to use and have a combination of the two features mentioned above. Finally on our list is Filmora. This software offers much more than just whiteboard animation. It’s your go-to software for your video creation and video editing needs. One of the best parts of this software is that it supports 2D and 3D animation.

Free Download For Win 7 or later(64-bit)
Free Download For macOS 10.14 or later
Animaker
It has a lot of free resources which are made available to users after creating and account with them and verifying your email. However, like most other software, the juicy parts of it are locked and can be unlocked with a monthly or yearly subscription. They are 3 packages; Basic which cost $10 per month and $120 per year, starter package which cost $19 per month and $228 per year and the pro package which costs $49 per month and $588 per year.

This software is at the top of our list because the free resources it provides is adequate to make a decent whiteboard animation. Note that it comes with their watermark which cannot be removed without a paid subscription.
Doodly
Doodly is one of the most popular software applications for creating whiteboard videos. Its popularity comes from the fact that no prior skills is needed to use the software other than basic computer and internet usage. A lot of processes are already automated for users. If you’re a user that is concerned about quick responses from their customer care/support, doodly covers you. They have a record time response to issues from their users. Visit https://www.doodly.com/pricing/ to view their pricing.

Conclusion
If you’re wondering why you should chose whiteboard animation over the conventional video creating technique, then you should probably try it out. Animation easily captures the interest of viewers and the slide-by-slide transitioning equally makes it better. You can always try out other software applications to know the one that fits you best.
How to Create Your Video
Step1 The first step to creating your whiteboard animation video is to know your topic of choice. Determining your choice topic is based on the purpose of the video. You have to know the reason why the video is being created in the first place to enable you decide the contents, the outlook, the font style and size and the colors to use.
Step2 The next step after you’ve getting your topic is execution of the idea. This involves having a script which usually involves the step-by-step procedure you are to follow to achieve your goal. Writing the script is arguable the most difficult process. However, once you get it right, all the other processes become relatively easy to execute. You might need to employ a professional script writer depending on your budget for the project.
Step3 After that, the next thing is to deicide whether or not to use your own voice or computer voice. This is also called a voice over. Most software provides a text to speech voice over option which usually comes with various alternatives. There is also another option of using your own voice to finish the project.
Step4 Add text, graphics and animation. This step is usually easier when you are working with the script already provided. You include the text, animations, figures, etc. sometimes you might need to import additional resources to complete this task. However, not all software provides for this.
Step5 Organize your work. In organizing your work, you must ensure that you voice over matches properly with what is on display. Check your spellings, grammar, composition and other ‘little’ details that may give your work a bad look.
Step6 Save your work and export. Once your done with your work, you have to save it on your local disk. This also means downloading the work from the website or software onto a local disk. You can now share the video on any social media of your choice. The most popular place to share it is on YouTube which is the most widely used video watching application.
Top 3 Whiteboard Animation Software
When considering which software is best for whiteboard animation creation needs, the most important factor to have at the back of your mind is flexibility and cost. Some software are really flexible to use but cost more than many people can afford. Others are cheap to purchase but do not have all the necessary resources needed to make a great video.
We’ll be looking at various software that combines cost effectiveness and flexibility. Note however that this list is not exhaustive of the software that combines these two features but are worthy of mention for the purpose of this article.
Filmora
At the top of our list is Filmora . This does not make them the best. However, they are relatively easy to use and have a combination of the two features mentioned above. Finally on our list is Filmora. This software offers much more than just whiteboard animation. It’s your go-to software for your video creation and video editing needs. One of the best parts of this software is that it supports 2D and 3D animation.
Free Download For Win 7 or later(64-bit)
Free Download For macOS 10.14 or later
Animaker
It has a lot of free resources which are made available to users after creating and account with them and verifying your email. However, like most other software, the juicy parts of it are locked and can be unlocked with a monthly or yearly subscription. They are 3 packages; Basic which cost $10 per month and $120 per year, starter package which cost $19 per month and $228 per year and the pro package which costs $49 per month and $588 per year.
This software is at the top of our list because the free resources it provides is adequate to make a decent whiteboard animation. Note that it comes with their watermark which cannot be removed without a paid subscription.
Doodly
Doodly is one of the most popular software applications for creating whiteboard videos. Its popularity comes from the fact that no prior skills is needed to use the software other than basic computer and internet usage. A lot of processes are already automated for users. If you’re a user that is concerned about quick responses from their customer care/support, doodly covers you. They have a record time response to issues from their users. Visit https://www.doodly.com/pricing/ to view their pricing.
Conclusion
If you’re wondering why you should chose whiteboard animation over the conventional video creating technique, then you should probably try it out. Animation easily captures the interest of viewers and the slide-by-slide transitioning equally makes it better. You can always try out other software applications to know the one that fits you best.
Top 10 Online Animated Logo Makers Everyone Should Know
Top 10 Free Online Animated Logo Makers Everyone Should Know
An easy yet powerful editor
Numerous effects to choose from
Detailed tutorials provided by the official channel
And as we all know objects in motion are much more attractive than static visuals, logo animation is the latest trend that is gaining popularity at a fast pace.
![]()
If you too want to create some interesting 3D logo motion and other types of animated logos but are confused about how to start, we are here to help you.
In this article
01 [What are Animated Logos and their benefits](#Part 1)
02 [Top 10 online tools for creating animated logos](#Part 2)
03 [The Best Alternative to Online Animated Logo Makers](#Part 3)
Part 1 What Are Animated Logos and Their Benefits
A logo can be termed as the first face of your brand or a business which gives it a visual identity. A logo works as the foundation of the brand that helps in its growth as well as reputation. The trend has shifted from basic static logos to animated ones which include interesting motion graphics. These logos are catchy and capable of getting the instant attention of the people.
![]()
There are several benefits associated with using logo animation and some of the key ones are enlisted below.
● Create brand awareness A well-designed animated logo can create brand awareness by grabbing the interest of the potential clients and also creating a strong connection with them.
● Goes well with the brand story Animated logos gives you the freedom to use images, sounds, and motion graphics to have a connect with the audience. Thus, using animations logos that match your brand story can be created efficiently.
● Add professionalism and create a modern look Moving ahead with the times is the best thing with its business or promotion. So, a good animated logo will not only add a professional touch to your brand or a business but will also give a modern touch.
Part 2 Top 10 Online Tools for Creating Animated Logos
If you are low on budget or do not want to risk initially with the paid animated logos, free online tools work best. These programs work from your browser, need no software download, and are simple to use. Some of these tools can also be used to create logo to 3D animation. To cut down on your research work, we have shortlisted some of the widely used online animated logo makers as below.
01 Renderforest
When it comes to branding and animations online, this is the top-rated tool in its category. The tool allows creating impressive animated logos in just a few minutes. Pre-set styles are available that can be used according to the brand type.
Key Features:
● Allows creating animated logos using the AI of the tool.
● Intuitive and user-friendly interface.
● Comes with pre-set styles and readymade templates to choose from like minimal, abstract, organic, and more.
● Fonts and icons can be customized.
● High-definition export.
![]()
02 Viddyoze
This is another popular cloud-based tool that helps create interesting animated logos in a few simple clicks. The created animations can be further customized by making changes in the color scheme and other parameters.
Key Features:
● Simple to use online tool for creating 3D animations.
● Offers live-action animation.
● Characters and logos can be mixed and combined in a video.
● Comes with multiple templates and movie filters.
![]()
03 Adobe Spark
Adobe needs no introduction when it comes to editing and animations. Adobe Spark is a feature-packed online tool that helps you perform multiple functions including animated logo creation. Several templates in different categories are available to match your brand or business.
Key Features:
● Cloud-based tool for creating creative animated logos.
● Designs and templates are available in multiple categories.
● Customizable icons, colors, texts, fonts, and others.
● Support a wide range of additional features.
![]()
04 Design Free Logo
This is a free online 3D animated logo maker that comes with several pre-designed samples and templates for creating a perfect animated logo for your company. Simple to use, the tool is apt even for beginners in designing.
Key Features:
● This is 3D animation logo online free tool.
● Comes with a wide range of templates in an array of categories like the abstract, alphabet, floral, food, 3D, and more.
● Logos can be created based on the industry type.
● Simple and user-friendly interface.
![]()
05 PixTeller
Using this browser-based tool, motion to your logo elements can be added to create an impressive animated logo. A wide range of logo shapes, templates, and designs are available and option for customization is also there.
Key Features:
● Create animated logos frame by frame for better editing and customization.
● Comes with more than 100,000 shapes for the logos and over 130 fonts for creating a logo of your choice.
● Multiple customizable templates and designs in different categories are available.
● Support multiple filters like shadow, warp, blur, spacing, height, pixelate, and more.
● Created animated logos can be downloaded in MP4 or GIF format.
![]()
06 Offeo
This online animation tool is apt for creating hi-tech animated logos and the simple interface makes it perfect even for beginners. The tool is known for the perfect blend of creativity and handcraft.
Key Features:
● Create animated logos for websites as well as other platforms easily and quickly.
● Multiple library functions and customizable options are available.
● Allows adjusting the speed of the animation.
● Comes with multiple templates and graphics to choose from.
● Option to choose the ready-made elements or add the local ones.
![]()
07 Animaker
This free online tool just requires free sign-up after which it is all set to help you create rich animated logos. You can choose from the wide range of supported built-in templates as well as characters to match your requirements.
Key Features:
● This free SaaS video animation online tool helps create impressive animated logos, cartoons, and others.
● Comes with multiple templates, designs, characters, icons, charts, maps, and bags to choose from.
● Icons, colors, and other parameters can be customized using this 3D animation logo online free tool**.**
● Allows viewing the logo in different styles using the board style.
● Comes with sound effects and an option for voice recording and text to speech.
● Easy drag and drop interface make functioning quick.
● Software is supported in 50 languages worldwide.
● Created animations can be uploaded to social media sites.
![]()
08 Quince Media
For creating different types of animated media including animated logos this is a decent tool to use. Being an online program, it works from your browser and is free to use. Images in PNG and vector format can be added to the tool for creating the choice of animation.
Key Features:
● Create animated logos and other animated media using this simple and quick online tool.
● Comes with multiple designs and templates.
● 3D animated logos can be created for social media, films, broadcasts, and other platforms.
● Simple and fast to use.
![]()
09 MotionDen
This is a simple and easy online tool that can help you create animated logos in a hassle-free manner. You can even create other animated projects like slideshows, intros, and others using the program.
Key Features:
● A simple online tool with a user-friendly interface for creating logos.
● Comes with multiple templates in different categories like serenity, dark smoke, fire red, and more.
● Support to a wide range of devices including desktop, smartphone, and tablets.
● Allows creating 3D logos.
● Templates can be customized as per the requirements.
![]()
10 Tube Arsenal
This online tool is mainly used for creating YouTube video intros but it supports other functions as well including animated logo creation. The 3D editor of the program will let you add animations as needed. The extensive collection of templates lets you choose the design that best matches your requirements.
Key Features:
● Create animated logos using the 3D editor of the tool.
● Comes with an array of templates to choose from.
● Allows customizing color, text, images, and other parameters.
● This 3D animation logo online free support unlimited quick previews.
● Simple and user-friendly interface.
![]()
Key Takeaways from This Episode
● Logos are an integral part of brands and businesses that helps create brand awareness among potential clients.
● Animated logos are the present-day trend where motion graphics are added to the logos. These logo animation are interesting and can reach a broader audience and leave more impact.
● Several online tools for creating animated logos for free are available. Check out the features of these tools and choose the most suitable one.
● Wondershare Filmoa works as the best online alternative that helps in creating rich animated logos with an option for customization.
5 Must Try Ways to Add and Send GIF in Text Message on Android
5 Must Try Ways to Add and Send GIF in Text Message on Android
An easy yet powerful editor
Numerous effects to choose from
Detailed tutorials provided by the official channel
A much easier and more extraordinary way of expressing yourself is texting with GIFs, and thus, GIFs for texting on Android are so famous now. GIFs, an abbreviation for Graphics Interchange Format, are brief animated images primarily used in a fun way to pass a message during texting and chatting. You do not necessarily have to say a word; a GIF does that for you!

Having GIFs is one thing; it is another to know how to use them effectively during conversations. Almost all operating system keyboards come with their style of sending GIFs to people. Also, you can download GIFs from the internet and go ahead to attach them directly to a text message. There are also third-party applications like GIPHY and GIF Keyboard to get GIFs for texting on Android. GIPHY is undoubtedly the best GIF app for Android texting. With Gboard, the built-in Google keyboard found in most Android devices; you can effortlessly search for GIFs for texting on Android.
In this article
01 [Can You Text a GIF?](#Part 1)
02 [Best 5 Ways to Add and Send GIFs in Text Message on Android](#Part 2)
Part 1 Can You Text a GIF?
The simple answer is yes! It is possible to message a GIF. GIFs for Android text messaging are becoming the new normal, and this is not surprising as they are easy to add to texts and make texting livelier.
To use a GIF for texting on Android, open any messaging app of your choice found on your Android device; it could be WhatsApp or the default message app installed on the Android device. The keyboard would most likely offer you a variety of GIF options. If not, click on the smiley icon at the bottom of the keyboard to reveal other GIFs grouped in categories. Simply clicking on any of your choices would select it, and all you must do is hit the send icon.
Google’s texting app, Google Messages, comes with sending GIFs. To use a GIF in text messages on Android, open the messaging app and start a fresh conversation or open an existing one, then select the square icon with GIF written in the middle. Select your preferred GIF, then click Send. You can also add a brief description or caption before sending the GIF across.
Apart from the built-in apps on Android devices that allow you to send GIFs, there are unique apps like GIPHY (compatible with Android and iOS devices) with an extensive array of GIFs that can fit into different contexts greetings, culture, animals, reactions, etc. You can also employ social media trackers that help you discover popular and trending GIFs. If the available GIFs do not express your intention, you can go ahead to perform a search to find other GIFs. That way, there’s no limitation to the messages you want to pass through GIFs for texting on Android devices.
Part 2 Best 5 Ways to Add and Send GIF in Text Message on Android
There are different ways of using GIFs for Android texting. Apart from using the GIFs available in the built-in keyboard of messaging apps, downloading, and installing an instant messaging app or GIF keyboard is one of the best and easiest ways to access many GIF libraries.
This section would suggest to you the best GIF apps for Android texting and other ways you can explore to send GIFs and make your texting less wordy, more visual, and more expressive:
01Attaching GIF to a text message
This method of using GIFs for Android texting is straightforward. All you need is a messaging app, then follow these steps:
Step 1: On your Android phone’s app list, open Messages, the app represented as a white speech bubble.

Step 2: At the bottom right corner of the app, tap the blue circular button with a white plus sign. This will open a page to select the receiver’s contact.

Step 3: Select the recipient’s number by tapping on it from the contact list or type the number or name of the person directly into the “To” field at the top of the screen.

Step 4: Tap the circular button with the plus sign in the middle on the left side of the message field. Depending on the app, it may be a paper clip icon.

Step 5: Tap the images icon to select an image from your phone media library.

Step 6: Click Gallery to select a previously downloaded GIF.

Step 7: Select the GIF you want to send. This would insert the GIF into a small preview image on the text message. The GIF would play in the preview window.

Step 8: Click the paper icon at the right corner of the text field to send the animated GIF image.

02Gboard
Gboard is a Google keyboard. This is another easy way of adding GIFs for Android text messaging. If you do not have Gboard, download it from Play Store and install it on your Android phone. Follow these to add GIFs to your text messages:
Step 1: Download, install and set up Gboard on your Android phone.

Step 2: Open your text messaging app to write a new text message. If you have previously sent a message to the recipient, click on the ongoing conversation or open a new chat and select the recipient’s contact.
Step 3: Tap the text message field to compose your text message. If your default keyboard is Gboard, then Gboard will be automatically opened.

Step 4: At the bottom of the keyboard, just to the left of the space bar, tap the smiley face icon.

Step 5: Click the GIF button located at the bottom row of the keyboard.

Step 6: Browse through the different categories tab below the GIF to select a GIF or enter a keyword to look for a GIF.

Step 7: Click on the GIF you want to add to the text message you’re typing automatically.

Step 8: Click the Send button, usually represented as a paper airplane icon at the bottom right of the messaging app.

03GIPHY
This is one of the most popular platforms that supports GIFs for texting on Android. It has the largest library of GIFs, making it a perfect search engine for them. GIPHY allows you to personalize your GIFs while finding the latest and trending GIFs. It also allows you to explore visual aspects, including sports highlights, TV shows, movies, etc. Installing this application gives you access to various GIFs that you can directly share with friends on social media or send them to messaging apps like WhatsApp, Facebook Messenger, etc. With GIPHY, you can save and share gifs while also using the animated stickers available on the app.

04SwiftKey Keyboard
This keyboard app comes with many features, including sending GIFs. This keyboard app lends your writing style and adapts to it, making it a highly productive app for typing. Its emoji keyboard allows you to effortlessly search and send fun stickers, emojis, and GIFs while texting. It also has a multilingual feature.

05GIF Keyboard
This keyboard makes it easy for you to directly and conveniently send GIFs from your keyboard. With a library of millions of GIFs, you need to type in a keyword to get the right GIF at any point in time. Send emojis, videos, and animated GIFs with just a single click using GIF Keyboard. You can browse for GIFs by category, save your favorites GIFs, and share them using different messaging apps.

● Key Takeaways from This Episode →
● How to use GIFs for Android texting.
●the Best GIF apps for Android texting.
● Different reliable ways of using GIFs to spice up your texting on Android devices.
●Using GIFs for Android text messaging is the way to go in this modern age. This is because people relate more to visual representations than mere write-ups. Now, you know that it is possible to text GIFs and send them is simple using the extensively discussed methods in this article.
A much easier and more extraordinary way of expressing yourself is texting with GIFs, and thus, GIFs for texting on Android are so famous now. GIFs, an abbreviation for Graphics Interchange Format, are brief animated images primarily used in a fun way to pass a message during texting and chatting. You do not necessarily have to say a word; a GIF does that for you!
Having GIFs is one thing; it is another to know how to use them effectively during conversations. Almost all operating system keyboards come with their style of sending GIFs to people. Also, you can download GIFs from the internet and go ahead to attach them directly to a text message. There are also third-party applications like GIPHY and GIF Keyboard to get GIFs for texting on Android. GIPHY is undoubtedly the best GIF app for Android texting. With Gboard, the built-in Google keyboard found in most Android devices; you can effortlessly search for GIFs for texting on Android.
In this article
01 [Can You Text a GIF?](#Part 1)
02 [Best 5 Ways to Add and Send GIFs in Text Message on Android](#Part 2)
Part 1 Can You Text a GIF?
The simple answer is yes! It is possible to message a GIF. GIFs for Android text messaging are becoming the new normal, and this is not surprising as they are easy to add to texts and make texting livelier.
To use a GIF for texting on Android, open any messaging app of your choice found on your Android device; it could be WhatsApp or the default message app installed on the Android device. The keyboard would most likely offer you a variety of GIF options. If not, click on the smiley icon at the bottom of the keyboard to reveal other GIFs grouped in categories. Simply clicking on any of your choices would select it, and all you must do is hit the send icon.
Google’s texting app, Google Messages, comes with sending GIFs. To use a GIF in text messages on Android, open the messaging app and start a fresh conversation or open an existing one, then select the square icon with GIF written in the middle. Select your preferred GIF, then click Send. You can also add a brief description or caption before sending the GIF across.
Apart from the built-in apps on Android devices that allow you to send GIFs, there are unique apps like GIPHY (compatible with Android and iOS devices) with an extensive array of GIFs that can fit into different contexts greetings, culture, animals, reactions, etc. You can also employ social media trackers that help you discover popular and trending GIFs. If the available GIFs do not express your intention, you can go ahead to perform a search to find other GIFs. That way, there’s no limitation to the messages you want to pass through GIFs for texting on Android devices.
Part 2 Best 5 Ways to Add and Send GIF in Text Message on Android
There are different ways of using GIFs for Android texting. Apart from using the GIFs available in the built-in keyboard of messaging apps, downloading, and installing an instant messaging app or GIF keyboard is one of the best and easiest ways to access many GIF libraries.
This section would suggest to you the best GIF apps for Android texting and other ways you can explore to send GIFs and make your texting less wordy, more visual, and more expressive:
01Attaching GIF to a text message
This method of using GIFs for Android texting is straightforward. All you need is a messaging app, then follow these steps:
Step 1: On your Android phone’s app list, open Messages, the app represented as a white speech bubble.
Step 2: At the bottom right corner of the app, tap the blue circular button with a white plus sign. This will open a page to select the receiver’s contact.
Step 3: Select the recipient’s number by tapping on it from the contact list or type the number or name of the person directly into the “To” field at the top of the screen.
Step 4: Tap the circular button with the plus sign in the middle on the left side of the message field. Depending on the app, it may be a paper clip icon.
Step 5: Tap the images icon to select an image from your phone media library.
Step 6: Click Gallery to select a previously downloaded GIF.
Step 7: Select the GIF you want to send. This would insert the GIF into a small preview image on the text message. The GIF would play in the preview window.
Step 8: Click the paper icon at the right corner of the text field to send the animated GIF image.
02Gboard
Gboard is a Google keyboard. This is another easy way of adding GIFs for Android text messaging. If you do not have Gboard, download it from Play Store and install it on your Android phone. Follow these to add GIFs to your text messages:
Step 1: Download, install and set up Gboard on your Android phone.
Step 2: Open your text messaging app to write a new text message. If you have previously sent a message to the recipient, click on the ongoing conversation or open a new chat and select the recipient’s contact.
Step 3: Tap the text message field to compose your text message. If your default keyboard is Gboard, then Gboard will be automatically opened.
Step 4: At the bottom of the keyboard, just to the left of the space bar, tap the smiley face icon.
Step 5: Click the GIF button located at the bottom row of the keyboard.
Step 6: Browse through the different categories tab below the GIF to select a GIF or enter a keyword to look for a GIF.
Step 7: Click on the GIF you want to add to the text message you’re typing automatically.
Step 8: Click the Send button, usually represented as a paper airplane icon at the bottom right of the messaging app.
03GIPHY
This is one of the most popular platforms that supports GIFs for texting on Android. It has the largest library of GIFs, making it a perfect search engine for them. GIPHY allows you to personalize your GIFs while finding the latest and trending GIFs. It also allows you to explore visual aspects, including sports highlights, TV shows, movies, etc. Installing this application gives you access to various GIFs that you can directly share with friends on social media or send them to messaging apps like WhatsApp, Facebook Messenger, etc. With GIPHY, you can save and share gifs while also using the animated stickers available on the app.
04SwiftKey Keyboard
This keyboard app comes with many features, including sending GIFs. This keyboard app lends your writing style and adapts to it, making it a highly productive app for typing. Its emoji keyboard allows you to effortlessly search and send fun stickers, emojis, and GIFs while texting. It also has a multilingual feature.
05GIF Keyboard
This keyboard makes it easy for you to directly and conveniently send GIFs from your keyboard. With a library of millions of GIFs, you need to type in a keyword to get the right GIF at any point in time. Send emojis, videos, and animated GIFs with just a single click using GIF Keyboard. You can browse for GIFs by category, save your favorites GIFs, and share them using different messaging apps.
● Key Takeaways from This Episode →
● How to use GIFs for Android texting.
●the Best GIF apps for Android texting.
● Different reliable ways of using GIFs to spice up your texting on Android devices.
●Using GIFs for Android text messaging is the way to go in this modern age. This is because people relate more to visual representations than mere write-ups. Now, you know that it is possible to text GIFs and send them is simple using the extensively discussed methods in this article.
How to Make a Video a Live Photo
How to Make a Video a Live Photo [2022]
An easy yet powerful editor
Numerous effects to choose from
Detailed tutorials provided by the official channel
Looking forward to turn your videos into live photos? Stay tuned to know how!
In this article
01 [How to Save Live Photos as a Video on iPhone/Ipad/Ipod](#Part 1)
02 [How to Turn a Video Into a Live Photo on iOS/Android](#Part 2)
Part 1 How to Save Live Photos as a Video on iPhone/Ipad/Ipod
Live photos are an amazing utility that allow you to save images as short moving snaps. Creating live photos is among the latest spunk of trendsetter stories, whether shared on social media platforms or created and saved just for fun, these definitely sound and look exciting, but that’s just one among the many things you can experiment on live photos.
Creating live photos takes you to a world of exciting features where you can explore your creativity in a number of ways, one of the easiest being turning live photos to videos. This comes handy when you need to share your live photos on platforms that do not have the compatibility to run live photos. If you are an iPhone user and wish to try your hands on experimenting with live photos, see through the following section of this article to learn how to turn live photo into video:
01Save as Video
Step 1: Launch the Photos App
In your iPhone, launch the ‘Photos’ app and navigate to ‘Albums’. All your live photos are present in the ‘Live Photos’ album.
Step 2: Format Selection
In latest versions (iOS 13v and above), you get a direct ‘Save as Video’ option in the ‘Photos’ application. Just click on that, and your live photo will be instantly saved in your iPhone gallery as a video. Here’s how you can use this feature:
● In the ‘Photos’ application, go to the ‘Live Photos’ album to select and open a desired live photo that you wish to convert to a video.
● Click on the ‘Share’ icon.

● Select ‘Save as Video’ from the drop down menu that displays sharing options.

Your created video will be saved in the ‘Photos’ application, next to the live photo you chose to turn into a video.
02iOS Shortcuts
This is a quicker way to save your live photos as videos in your iPhone. To use this feature, you first need to save the ‘Convert LivePhotos to Video’ shortcut in the ‘Shortcuts App’ gallery of your iPhone. You can do this by opening in your iOS internet browser.
Before using the above link, make sure to enable the ‘Allow Untrusted Shortcuts’ feature in your iPhone settings. You can do this as explained below:
● Reach to the ‘Settings’ application of your iPhone.
● Tap on ‘Shortcuts’ from the app’s welcome screen.
● Enable ‘Allow Untrusted Shortcuts’ with a toggle.

Having done that, here’s what you need to follow:
● Open the ‘Shortcuts’ application in your iOS device and tap the ‘Convert LivePhotos to Video’ shortcut.

● The ‘Live Photos’ album of your device opens up. Make a desired selection.

Your converted video gets automatically saved in the ‘Camera Roll’ folder of the ‘Photos’ application. Open the ‘Recents’ album to view your creation.
Part 2 How to Turn a Video Into a Live Photo on iOS/Android
Converting live photos to videos is fine, but going the other way round is all the more exciting and fun! You can even use these converted live photos as live screen wallpapers for your iOS and Android devices. If you are motivated to take up the excitement, look through the following methods to turn video into live photo:
01iOS Devices
Being an iOS user, you can choose among the following tools to convert video to live photo in your iPad, iPod or iPhone:
● Wondershare Filmora
Wondershare Filmora Video Editor is currently leading the software market among converter utilities that cater to various media conversion needs. This one is a free, smart, quick and convenient conversion tool that assures you of a hassle free video to live photo conversion in just a few clicks. What’s more interesting is, you don’t need to limit yourself with sticking to some particular video format, as Filmora conveniently supports almost all common ones.
Wondershare Filmora
Get started easily with Filmora’s powerful performance, intuitive interface, and countless effects Try It Free Try It Free Learn More >

● IntoLive
This one is a third party application that allows you to convert videos into live photos, quickly and conveniently. This tool works well with devices having iOS 12.0 and later versions. All you have to do is follow the steps mentioned below:
Step 1:
Download the ‘IntoLive’ application from the Apple App Store.

Step 2:
Launch the same on your iOS device and grant the permission to access its ‘Photos’ Album.

Step 3:
In the ‘Videos’ section, choose the desired video that you wish to turn into a live photo.

Step 4:
An editor window will open up. Here, you can edit (cut, crop, trim, etc.) and add desired effects or filters to your selected video. Click on ‘Make’ at the top right when you finish the editing process.

Step 5:
If you have the paid version of the app, you can take up multiple repeats of your live photo; else you can use the free version with no repeats.

Step 6:
Once you are satisfied with the result, click on ‘Save Live Photo’. This will save your created live photo in your device’s gallery.

02VideoToLive
This is a free converter you can choose to turn video into live photo. This is a quite popular tool among iPhone users worldwide and is suitable for iOS versions 11.2 and later. You also have the liberty to share your created live photos on social media with this converter. Take the following steps to begin the conversion process:

Step 1:
Download the application from the Apple App Store and launch it on your iOS device.
Step 2:
Choose a video from your device gallery to convert it into a live photo.
Step 3:
In the video editor screen, crop the video to the preferred section that has to be converted into live photo. You can add video frames to your edited clip from the upper section of the editor screen.
Step 4:
Click on ‘Convert’ at the top right corner to initiate the conversion process.
03Android Devices
Live photos are undoubtedly known to add spark to your cherished moments, but the notch that puts these off with Android devices is that you can enjoy live photos on these devices only as live wallpapers.
Being an iPhone exclusive utility, Android devices lack the flexibility to capture live images. However, you can see them move on being set as live screen wallpapers. A handy alternative to this is converting a turn video into live photo and use it as live wallpaper. Here’s how you can take up the conversion process:
● TurnLive- Live Wallpaper
This one is a convenient, third party tool that lets you turn video into live photo in just a few quick steps. You can either use this application for free, or upgrade to the paid version to enjoy its premium features. To make amazing live photos from videos using this tool, you need to take up the steps given below:

Step 1: App Installation
To begin, visit the Google Playstore in your Android device and download the TurnLive- Live Wallpaper application. Next, you need install and launch the app in your device and accept its terms of service.
Step 2: Select a Video
Once you are done, click on the ‘Live Photo’ icon in the bottom of the app’s opening screen to reach the video selection page. Here, you need to choose ‘Video to Live Wallpaper’ option and grant the required app permissions to access your device’s camera and gallery. Select a desired video from the ones saved in your device and click ‘Done’ at the top right.
Step 3: Edit Your Video
You will now get directed to the app’s editor window, where you need to trim the selected video within a time frame of 1-5 seconds. To do this, select a cover frame within the clip and click ‘Next’. You can now use the video slider at the bottom to trim the clip. Adding suitable video effects and filters is also possible with this tool.
Step 4: It’s Almost Done!
When you finish editing, click ‘Next’ and choose the number of repeats for the created live photo. Wait for the conversion to finish and click on ‘My Wallpapers’ to view your creation.
Step 5: Download Your Live Photo!
Click ‘Download’ and tap ‘Clear’ in the app’s prompt message to remove your device’s current screen wallpaper. Next, allow the app to access your system settings. Once this finishes, tap ‘Clear’ again to download your creation. You will now get directed to a black screen tagged ‘DayTime LWP’. Click on ‘Set Wallpaper’ in this screen to make your live photo, the current wallpaper of your Android device.
● Video Live Wallpaper
This is another free app that you can use to your videos into amazing live photos in just 4 quick steps. All you need to do is explained in the following steps:
Step 1: download the Application
Download the Video Live Wallpaper application in your Android device from Google Playstore and proceed for its installation and launch.

Step 2: Select Your Video
In the app’s opening screen, click ‘Choose Video’ and grant app permissions to access your device’s media. Browse your video gallery to select a desired video that you wish to convert into a live photo.

Step 3: Edit Your Video
You will now get directed to the app’s editor screen. Here, you can explore your editing creativity to edit the selected video. Once you are happy, click the picture icon at the top right corner.

Step 4: Your Live Wallpaper is Ready!
To set the created live photo as your device screen wallpaper, select ‘Set as Wallpaper’ at the bottom right.

● Key Takeaways from This Episode →
● From cherishing moments to sharing them on social media, live photos can do it all.
● Being an iPhone exclusive utility, you need to create these from videos to enjoy them on other platforms and devices.
● Filmora is the best video to live photo converters, available as an easy, quick and convenient conversion tool.
Looking forward to turn your videos into live photos? Stay tuned to know how!
In this article
01 [How to Save Live Photos as a Video on iPhone/Ipad/Ipod](#Part 1)
02 [How to Turn a Video Into a Live Photo on iOS/Android](#Part 2)
Part 1 How to Save Live Photos as a Video on iPhone/Ipad/Ipod
Live photos are an amazing utility that allow you to save images as short moving snaps. Creating live photos is among the latest spunk of trendsetter stories, whether shared on social media platforms or created and saved just for fun, these definitely sound and look exciting, but that’s just one among the many things you can experiment on live photos.
Creating live photos takes you to a world of exciting features where you can explore your creativity in a number of ways, one of the easiest being turning live photos to videos. This comes handy when you need to share your live photos on platforms that do not have the compatibility to run live photos. If you are an iPhone user and wish to try your hands on experimenting with live photos, see through the following section of this article to learn how to turn live photo into video:
01Save as Video
Step 1: Launch the Photos App
In your iPhone, launch the ‘Photos’ app and navigate to ‘Albums’. All your live photos are present in the ‘Live Photos’ album.
Step 2: Format Selection
In latest versions (iOS 13v and above), you get a direct ‘Save as Video’ option in the ‘Photos’ application. Just click on that, and your live photo will be instantly saved in your iPhone gallery as a video. Here’s how you can use this feature:
● In the ‘Photos’ application, go to the ‘Live Photos’ album to select and open a desired live photo that you wish to convert to a video.
● Click on the ‘Share’ icon.
● Select ‘Save as Video’ from the drop down menu that displays sharing options.
Your created video will be saved in the ‘Photos’ application, next to the live photo you chose to turn into a video.
02iOS Shortcuts
This is a quicker way to save your live photos as videos in your iPhone. To use this feature, you first need to save the ‘Convert LivePhotos to Video’ shortcut in the ‘Shortcuts App’ gallery of your iPhone. You can do this by opening in your iOS internet browser.
Before using the above link, make sure to enable the ‘Allow Untrusted Shortcuts’ feature in your iPhone settings. You can do this as explained below:
● Reach to the ‘Settings’ application of your iPhone.
● Tap on ‘Shortcuts’ from the app’s welcome screen.
● Enable ‘Allow Untrusted Shortcuts’ with a toggle.
Having done that, here’s what you need to follow:
● Open the ‘Shortcuts’ application in your iOS device and tap the ‘Convert LivePhotos to Video’ shortcut.
● The ‘Live Photos’ album of your device opens up. Make a desired selection.
Your converted video gets automatically saved in the ‘Camera Roll’ folder of the ‘Photos’ application. Open the ‘Recents’ album to view your creation.
Part 2 How to Turn a Video Into a Live Photo on iOS/Android
Converting live photos to videos is fine, but going the other way round is all the more exciting and fun! You can even use these converted live photos as live screen wallpapers for your iOS and Android devices. If you are motivated to take up the excitement, look through the following methods to turn video into live photo:
01iOS Devices
Being an iOS user, you can choose among the following tools to convert video to live photo in your iPad, iPod or iPhone:
● Wondershare Filmora
Wondershare Filmora Video Editor is currently leading the software market among converter utilities that cater to various media conversion needs. This one is a free, smart, quick and convenient conversion tool that assures you of a hassle free video to live photo conversion in just a few clicks. What’s more interesting is, you don’t need to limit yourself with sticking to some particular video format, as Filmora conveniently supports almost all common ones.
Wondershare Filmora
Get started easily with Filmora’s powerful performance, intuitive interface, and countless effects Try It Free Try It Free Learn More >
● IntoLive
This one is a third party application that allows you to convert videos into live photos, quickly and conveniently. This tool works well with devices having iOS 12.0 and later versions. All you have to do is follow the steps mentioned below:
Step 1:
Download the ‘IntoLive’ application from the Apple App Store.
Step 2:
Launch the same on your iOS device and grant the permission to access its ‘Photos’ Album.
Step 3:
In the ‘Videos’ section, choose the desired video that you wish to turn into a live photo.
Step 4:
An editor window will open up. Here, you can edit (cut, crop, trim, etc.) and add desired effects or filters to your selected video. Click on ‘Make’ at the top right when you finish the editing process.
Step 5:
If you have the paid version of the app, you can take up multiple repeats of your live photo; else you can use the free version with no repeats.
Step 6:
Once you are satisfied with the result, click on ‘Save Live Photo’. This will save your created live photo in your device’s gallery.
02VideoToLive
This is a free converter you can choose to turn video into live photo. This is a quite popular tool among iPhone users worldwide and is suitable for iOS versions 11.2 and later. You also have the liberty to share your created live photos on social media with this converter. Take the following steps to begin the conversion process:
Step 1:
Download the application from the Apple App Store and launch it on your iOS device.
Step 2:
Choose a video from your device gallery to convert it into a live photo.
Step 3:
In the video editor screen, crop the video to the preferred section that has to be converted into live photo. You can add video frames to your edited clip from the upper section of the editor screen.
Step 4:
Click on ‘Convert’ at the top right corner to initiate the conversion process.
03Android Devices
Live photos are undoubtedly known to add spark to your cherished moments, but the notch that puts these off with Android devices is that you can enjoy live photos on these devices only as live wallpapers.
Being an iPhone exclusive utility, Android devices lack the flexibility to capture live images. However, you can see them move on being set as live screen wallpapers. A handy alternative to this is converting a turn video into live photo and use it as live wallpaper. Here’s how you can take up the conversion process:
● TurnLive- Live Wallpaper
This one is a convenient, third party tool that lets you turn video into live photo in just a few quick steps. You can either use this application for free, or upgrade to the paid version to enjoy its premium features. To make amazing live photos from videos using this tool, you need to take up the steps given below:
Step 1: App Installation
To begin, visit the Google Playstore in your Android device and download the TurnLive- Live Wallpaper application. Next, you need install and launch the app in your device and accept its terms of service.
Step 2: Select a Video
Once you are done, click on the ‘Live Photo’ icon in the bottom of the app’s opening screen to reach the video selection page. Here, you need to choose ‘Video to Live Wallpaper’ option and grant the required app permissions to access your device’s camera and gallery. Select a desired video from the ones saved in your device and click ‘Done’ at the top right.
Step 3: Edit Your Video
You will now get directed to the app’s editor window, where you need to trim the selected video within a time frame of 1-5 seconds. To do this, select a cover frame within the clip and click ‘Next’. You can now use the video slider at the bottom to trim the clip. Adding suitable video effects and filters is also possible with this tool.
Step 4: It’s Almost Done!
When you finish editing, click ‘Next’ and choose the number of repeats for the created live photo. Wait for the conversion to finish and click on ‘My Wallpapers’ to view your creation.
Step 5: Download Your Live Photo!
Click ‘Download’ and tap ‘Clear’ in the app’s prompt message to remove your device’s current screen wallpaper. Next, allow the app to access your system settings. Once this finishes, tap ‘Clear’ again to download your creation. You will now get directed to a black screen tagged ‘DayTime LWP’. Click on ‘Set Wallpaper’ in this screen to make your live photo, the current wallpaper of your Android device.
● Video Live Wallpaper
This is another free app that you can use to your videos into amazing live photos in just 4 quick steps. All you need to do is explained in the following steps:
Step 1: download the Application
Download the Video Live Wallpaper application in your Android device from Google Playstore and proceed for its installation and launch.
Step 2: Select Your Video
In the app’s opening screen, click ‘Choose Video’ and grant app permissions to access your device’s media. Browse your video gallery to select a desired video that you wish to convert into a live photo.
Step 3: Edit Your Video
You will now get directed to the app’s editor screen. Here, you can explore your editing creativity to edit the selected video. Once you are happy, click the picture icon at the top right corner.
Step 4: Your Live Wallpaper is Ready!
To set the created live photo as your device screen wallpaper, select ‘Set as Wallpaper’ at the bottom right.
● Key Takeaways from This Episode →
● From cherishing moments to sharing them on social media, live photos can do it all.
● Being an iPhone exclusive utility, you need to create these from videos to enjoy them on other platforms and devices.
● Filmora is the best video to live photo converters, available as an easy, quick and convenient conversion tool.
Learn How to Do Funny Cartoon Drawings
The Art of Comics - Learn How to Do Funny Cartoon Drawings
An easy yet powerful editor
Numerous effects to choose from
Detailed tutorials provided by the official channel
Whether you want to use a simple short video or an accessible online lesson, you will find everything that you need to learn how to create comic cartoon drawing on this website. This website article contains all the tutorials you need, ranging from your favorite wild animals, places, objects, farm animals, characters, vehicles, and food.

Do not forget that practicing is the key to success, so don’t hesitate to try several drawing lessons to help you improve your abilities. Start today to learn how to draw funny cartoons online at your own pace and comfort with this step-by-step tutorial.
In this article
01 [How to Draw Funny Cartoon Faces](#Part 1)
02 [How to Draw Your Own Cartoon Character](#Part 2)
Part 1 How to Draw Funny Cartoon Faces
Drawing funny faces in cartoons is very easy compared to other drawing styles or drawing complete parts of the comic. All that is need is practice and experiment with different combinations of shapes. This article will guide on how to draw funny cartoon faces of various types using six other steps:
Step 1: To begin, you need to first draw the face outline by drawing the following;
● Any Perfect type of round shape like a circle.
● Any pear shapes
● An upside-down triangle
● A quadrilateral like a trapezium, a square, or any of your choice

Step 2: To draw the nose in the middle of the face, draw somewhere any of the following;
● A round shape that is bulgy
● A U-shape
● A V-shape
● A small dash.

Step 3: Next is that you draw two round shapes for the eyes, and each of them should have a smaller round or dot (for the pupil), which is above the nose. This eye can be in the shape of any of the following;
● Two large circles
● An ovals
● A curvy “M,” like the one you can see in the “McDonalds” logo.

Step 4: You can draw the mouth just below the nose and draw any of the shapes from the list given below. In addition, to make the mouth funnier, you should then add teeth by either drawing a small square sticking out inside the mouth from the upper side, at the roof of the mouth, or a straight horizontal line which is across the mouth and several vertical lines used to form a grid having two rows and many columns.
● A U-shaped curve that is large
● A triangle like a right-angled one which is most preferred
● A circle or an oval shape
● A rectangle shapes
● A straight line shapes

Step 5: You can add any other “extra fittings” such as the ears (in cartoons, ears generally considered to be ‘extra’), wrinkles, collar, hat, hair, etc.

Step 6: Finally, your cartoon face drawing is ready! You can also add different colors to the picture with different funky shades to make it attractive.

Part 2 How to Draw Your Own Cartoon Character
Are you bored? Why not take up a pencil and draw your cartoon comic drawing character? Note that drawing will be a relief from boredom, and it also helps your creativity fly very high.
However, you can easily add some colors and designs or even animate your cartoon character using this free software known as Filmora. Wondershare Filmora Video Editor is the best software to make you cartoon your picture or animate your cartoon characters with tons of filters and effects and its keyframing feature, which allows this with ease.
For Win 7 or later (64-bit)
For macOS 10.12 or later
Read this article on how to draw the perfect cartoon character yourself:
Step 1: The first is to have an idea of what you want to draw, i.e., the picture you want to draw. You can pick any character to draw from your favorite website or WeeWorld.com.
● First, you draw the face but make sure you don’t add a nose but do a black outline.
● Next, you can draw the other features but make sure you don’t use colored pencils. Only use your main writing utensil.
● Then, remember to use your imagination to add the clothes and hairstyle.
● Finally, you can delete any unwanted lines and color with artist utensils, such as crayons, paintbrushes, colored pencils, etc. Also, remember that you can add some detail to your character to make it pop out and be beautiful.

Step 2: Now you have officially made your cartoon, how does it feel?

Step 3: Next, you want to go back and draw again, but this time, not an imitation.

Step 4: Pick up a new piece of paper to be used to draw another character. But this time, you need to change the features. You can decide to make the eyes bigger, neon skin, and maybe crazy hair. You can try clothes that you would love to wear, or ones you wish you could get. Also, try to change the size around to make the features look different and add a nose, and then you can finally color your creation.

Step 5: Now, you can compare the two drawings to notice the difference. You will realize that one is an imitation while the other is all you! Now, you can grab a new piece of notebook paper.

Step 6: Next is that you begin to jot down different ideas. For example, you may want to draw a cute little puppy or a cute baby. Sometimes you can decide that your cartoon could be about a talking apple or something different.

Step 7: Grab another piece of paper and draw any other character you can imagine. You can try using a Sharpie marker for the outline by carefully tracing the pencil. Then you can erase any stray marks on the piece of paper. Next, you can also use any writing utensils like markers, crayons, colored pencils, pastels, or even paint, as it also works well.

Step 8: You can grab your notebook sheet again and then jot down any idea of a comic series. Also, make a plot or funny lines that you could use or any other characters.

Step 9: Next, you fold the blank sheet of paper and make it into about four lines. And then you can draw your main character by just using a pencil first.

Step 10: You can then draw the other characters and all the basic outlines in the drawing.

Step 11: Next is that you can draw the furniture and background, such as trees or anything else, to beautify your drawing.

Step 12: You can go back and add details and outline with Sharpie or black marker and delete any stray marks. You can also color if wanted.

Step 13: Next is for you to add dialogue and actively work with your character drawing.

Step 14: Finally, and there you have it. Congratulation! You now have your perfect, awesome, beautiful, and YOUR cartoon.

● Ending Thoughts →
● This article explained all you need to know about learning how to do funny cartoon drawings very quickly. You can also use these methods to create funny cat cartoon drawings or any other drawing you want for cat lovers.
● However, you can decide to animate your graphic using the best software to carry it out quickly, i.e., Filmora.
Whether you want to use a simple short video or an accessible online lesson, you will find everything that you need to learn how to create comic cartoon drawing on this website. This website article contains all the tutorials you need, ranging from your favorite wild animals, places, objects, farm animals, characters, vehicles, and food.
Do not forget that practicing is the key to success, so don’t hesitate to try several drawing lessons to help you improve your abilities. Start today to learn how to draw funny cartoons online at your own pace and comfort with this step-by-step tutorial.
In this article
01 [How to Draw Funny Cartoon Faces](#Part 1)
02 [How to Draw Your Own Cartoon Character](#Part 2)
Part 1 How to Draw Funny Cartoon Faces
Drawing funny faces in cartoons is very easy compared to other drawing styles or drawing complete parts of the comic. All that is need is practice and experiment with different combinations of shapes. This article will guide on how to draw funny cartoon faces of various types using six other steps:
Step 1: To begin, you need to first draw the face outline by drawing the following;
● Any Perfect type of round shape like a circle.
● Any pear shapes
● An upside-down triangle
● A quadrilateral like a trapezium, a square, or any of your choice
Step 2: To draw the nose in the middle of the face, draw somewhere any of the following;
● A round shape that is bulgy
● A U-shape
● A V-shape
● A small dash.
Step 3: Next is that you draw two round shapes for the eyes, and each of them should have a smaller round or dot (for the pupil), which is above the nose. This eye can be in the shape of any of the following;
● Two large circles
● An ovals
● A curvy “M,” like the one you can see in the “McDonalds” logo.
Step 4: You can draw the mouth just below the nose and draw any of the shapes from the list given below. In addition, to make the mouth funnier, you should then add teeth by either drawing a small square sticking out inside the mouth from the upper side, at the roof of the mouth, or a straight horizontal line which is across the mouth and several vertical lines used to form a grid having two rows and many columns.
● A U-shaped curve that is large
● A triangle like a right-angled one which is most preferred
● A circle or an oval shape
● A rectangle shapes
● A straight line shapes
Step 5: You can add any other “extra fittings” such as the ears (in cartoons, ears generally considered to be ‘extra’), wrinkles, collar, hat, hair, etc.
Step 6: Finally, your cartoon face drawing is ready! You can also add different colors to the picture with different funky shades to make it attractive.
Part 2 How to Draw Your Own Cartoon Character
Are you bored? Why not take up a pencil and draw your cartoon comic drawing character? Note that drawing will be a relief from boredom, and it also helps your creativity fly very high.
However, you can easily add some colors and designs or even animate your cartoon character using this free software known as Filmora. Wondershare Filmora Video Editor is the best software to make you cartoon your picture or animate your cartoon characters with tons of filters and effects and its keyframing feature, which allows this with ease.
For Win 7 or later (64-bit)
For macOS 10.12 or later
Read this article on how to draw the perfect cartoon character yourself:
Step 1: The first is to have an idea of what you want to draw, i.e., the picture you want to draw. You can pick any character to draw from your favorite website or WeeWorld.com.
● First, you draw the face but make sure you don’t add a nose but do a black outline.
● Next, you can draw the other features but make sure you don’t use colored pencils. Only use your main writing utensil.
● Then, remember to use your imagination to add the clothes and hairstyle.
● Finally, you can delete any unwanted lines and color with artist utensils, such as crayons, paintbrushes, colored pencils, etc. Also, remember that you can add some detail to your character to make it pop out and be beautiful.
Step 2: Now you have officially made your cartoon, how does it feel?
Step 3: Next, you want to go back and draw again, but this time, not an imitation.
Step 4: Pick up a new piece of paper to be used to draw another character. But this time, you need to change the features. You can decide to make the eyes bigger, neon skin, and maybe crazy hair. You can try clothes that you would love to wear, or ones you wish you could get. Also, try to change the size around to make the features look different and add a nose, and then you can finally color your creation.
Step 5: Now, you can compare the two drawings to notice the difference. You will realize that one is an imitation while the other is all you! Now, you can grab a new piece of notebook paper.
Step 6: Next is that you begin to jot down different ideas. For example, you may want to draw a cute little puppy or a cute baby. Sometimes you can decide that your cartoon could be about a talking apple or something different.
Step 7: Grab another piece of paper and draw any other character you can imagine. You can try using a Sharpie marker for the outline by carefully tracing the pencil. Then you can erase any stray marks on the piece of paper. Next, you can also use any writing utensils like markers, crayons, colored pencils, pastels, or even paint, as it also works well.
Step 8: You can grab your notebook sheet again and then jot down any idea of a comic series. Also, make a plot or funny lines that you could use or any other characters.
Step 9: Next, you fold the blank sheet of paper and make it into about four lines. And then you can draw your main character by just using a pencil first.
Step 10: You can then draw the other characters and all the basic outlines in the drawing.
Step 11: Next is that you can draw the furniture and background, such as trees or anything else, to beautify your drawing.
Step 12: You can go back and add details and outline with Sharpie or black marker and delete any stray marks. You can also color if wanted.
Step 13: Next is for you to add dialogue and actively work with your character drawing.
Step 14: Finally, and there you have it. Congratulation! You now have your perfect, awesome, beautiful, and YOUR cartoon.
● Ending Thoughts →
● This article explained all you need to know about learning how to do funny cartoon drawings very quickly. You can also use these methods to create funny cat cartoon drawings or any other drawing you want for cat lovers.
● However, you can decide to animate your graphic using the best software to carry it out quickly, i.e., Filmora.
Best GIF to Video Converters
Best GIF to Video Converters

Shanoon Cox
Mar 27, 2024• Proven solutions
GIF files are gaining more popularity these days but still, the strange fact is that some social media sites do not offer support to GIF file format. One of the biggest examples of such platforms is Instagram. But, if you are a real fun lover then this simple issue cannot stop you from uploading interesting animations or videos over the internet. As Instagram does not support GIF images so why not to get them converted to simple video files and then update an entertaining sequence for your audience. That’s really a great idea.
You may also like: How to Upload GIF to Instagram >>
It is much easier to convert GIF images into many popular video file formats like AVI or MOV etc and then can be further shared on YouTube , Instagram and many other sites. So if you are ready to get started with this adventure then keep reading this article. Here you will find details about the best GIF to video converter tools that are popular among professionals as well as beginners.
Best GIF to Video Converters
Desktop Solutions to Converting GIF to Video
1. Wondershare Filmora
One of the best recommendations for your GIF to Video conversion needs is Wondershare Filmora due to its user-friendly interface. This tool works fine on Mac as well as the Windows platform and extends support to all popular video file formats like WMV, MP4 and MKV etc.
Key Features:
- Filmora offers a wide range of editing features like aspect ratio, speed, trim, merge, rotate and crop adjustments.
- Users can also add music to videos to make them more appealing.
- Possesses so many special effects along with text and title editing options.
- Files can be easily exported to iPhone, Android-like devices.
- It allows easy sharing of media on social media sites like Dailymotion, Vimeo, and YouTube, etc.
However, if you want to make a GIF online, Filmora meme maker is your ultimate solution. It helps you make images, GIFs and video memes directly without watermark. It is totally FREE to use and no signup. You can change text size, color, and position to create a caption when you are editing. Filmora meme maker supports converting GIF to video. Just with a few clicks, your GIF is done . Try it nowDownload Mac Version ](https://tools.techidaily.com/wondershare/filmora/download/ )
2. Converter Lite
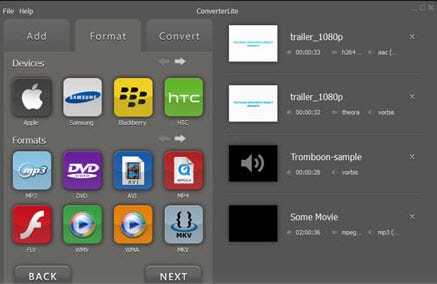
Key Features: Converter Lite extends support to numerous image and video file formats.
- Videos can be easily converted to animated GIFs and vice versa.
- The conversion process can be carried with impressive animation and effects additions.
- The frame rate can be defined by users.
How to Use?
- Import your desired GIF image.
- Select format for the destination file.
- Hit the Convert option.
Pros:
- Users can define the frame rate as per need.
- Provides huge options for the selection of input/ output file formats.
Cons:
- It leaves a watermark on output files.
3. Amazing GIF to Video Converter
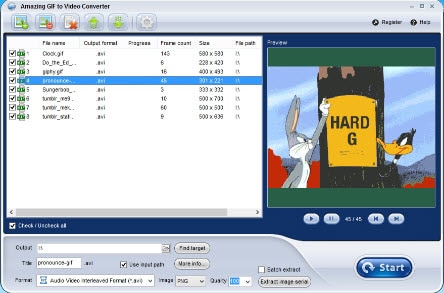
Key Features:
- It assists in the fast conversion of videos to GIF formats and the best part is that users can also clip video files to get their desired end results.
- It generates a preview of the edited file before initiating the actual conversion process.
- The converted animated GIF files can be easily shared on other platforms.
How to Use?
- First of all, users need to upload their GIF images to the software platform.
- Generate a preview of all frames.
- Now adjust your output file parameters to avail customized results.
- Choose your output file format and define the destination.
- Initiate the conversion process.
Pros:
- It extends support to all popular video file formats.
- The interactive interface makes it easier to operate even for beginners.
Cons:
- Reviewers do not rate its performance up to the mark.
4. Movavi Video Converter

Key Features: This tool supports a wide range of editing functions like trim, rotate, crop, etc.
- It can handle multiple media file formats like SWF, MOV, MKV, 3GP, MP4, WAV and FLV, etc.
- Movavi can be used to create captions and watermarks on videos. Marketers find it very useful.
- The most amazing thing to know is that this tool works perfectly on a wide range of devices like Xbox, iPhone, iPad, Sony PlayStation as well as on Android devices.
How to Use?
- Get your files imported on the Movavi timeline.
- Choose your desired output file format and adjust settings accordingly.
- Get your files converted immediately.
Pros:
- User-friendly interface.
- Instant conversion.
Cons:
- It cannot process copy-protected versions of media files or DVDs.
Smartphone App Solutions to Convert GIF to Video
1. GIFShare
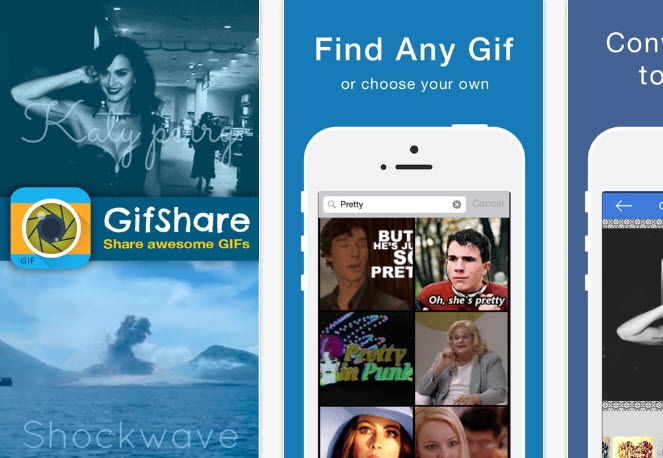
It can be used to convert GIFs into videos and then share them immediately on social media platforms. With GIFShare, you can easily keep your Instagram page updated with all new GIF converted videos.
How to Use?
- Upload your GIF files to the software platform; you can get them from camera roll or from GIFShare.
- Make desired editing on background and speed etc parameters.
- Get it converted with customized size level.
- Upload outputs directly to Instagram.
2. Gifaroo
Here is one more interactive tool that allows users to directly upload GIF converted to Instagram. There are so many customization filters, effects, and background editing options; users can also alter captions with different colors and font styles.
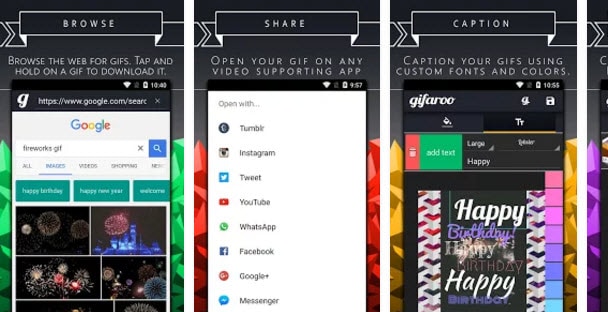
How to Use?
- Start browsing some interesting GIF animations on your Gifaroo app directly.
- Bring the desired one to the editing platform with a single tap.
3. GifVid
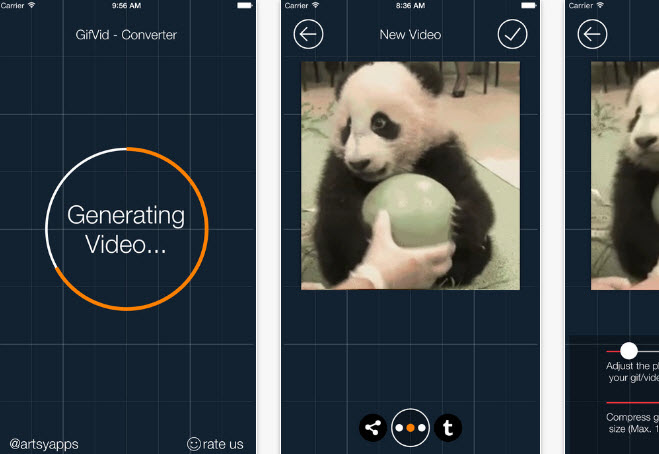
With GifVid you can convert simple videos into GIF animations and collection of GIFs can be turned back to videos with different file formats. Once your file gets converted then you can easily share them on Tumblr, Imgur, iMessage, etc.
Key Features: GifVid is designed with a straight forward and user-friendly design.
- Various editing options.
- This tool can be used in multiple languages.
- Supported Platform: Works on iOS devices like iPad and iPhones.
- Developer: It was developed by Artsy Apps.
Online GIF to Video Converters
1. GIFtovideo.com
Due to the impressive user interface, advanced editing options, and fast conversion rate, this tool is kept at first positing with higher user ratings. It can easily process uploaded video files as well as URL based links hence you can enjoy full flexibility on your portable as well as desktop devices.
Key Features: Beginners can easily handle its intuitive interface.
- The simple layout makes editing tasks much easier and conversion can be completed within very little time.
- Supported Platform: It works on Window platform with an active internet connection.
- Developer: This tool is owned and developed by Studio September that is a popular software developer company at Deutsch.
2. Cloud Convert
On Cloud Convert, users can easily process all popular video file formats to generate high-quality outcomes. It is not just limited to MP4 rather can support all professional-level media extensions. If you wish to make editing with few specific settings like codec adjustments then Cloud Convert can assist you better. If you want to access full feature version then you can get registered to this converter tool as paid users are able to avail more facilities.
Key Features: Cloud Convert can process any video file format with ease so you can bring any desired file to its timeline.
- Here you will get more freedom for customization settings of all converted videos.
- Supported Platforms: This tool is compatible with Windows only and users need to get their device connected to a high-speed internet connection to avail the best services.
- Developer: This tool is designed and maintained y a Germany based company, Lunaweb Ltd.
3. GIF2MP4
Here is one more easy to use yet feature-rich converter tool that can easily process your collection of GIF images to generate an MP4 video as an output. As the name indicates, this tool is intentionally designed for assisting users to get their GIF files converted with MP4 video file extension. There are numerous features hidden inside this online converter tool but once you start working over it your will be able to do awesome creativity with each editing project.
Key Features: It offers fast one-way conversion from GIF to MP4 video files.
- Simple and intuitive design.
- Supported Platforms: Mac and Window but the device must be connected to the internet for its operation.
- Developer: This tool is designed by trubo@zelnet.ru .
Read More to Get: the ultimate guide on How to Convert GIF to Video on your laptop or phone.
If you want to make GIF quickly, Filmora will offer you an online solution for making a GIF. Filmora meme maker can help you make images, GIFs and video memes directly without watermark. It is totally FREE and no signup. You can change text size, color, and position to create a caption.
Frequently Asked Questions About GIF to Video Converters
1. Can You Convert A GIF to Video?
The file format of all GIF files can be changed, but only if you have access to a GIF to Video converter. These apps allow you to choose the video file format to which a GIF file is going to be converted, so you can choose to turn a GIF into an MP4, AVI, or any other popular video file format.
Converting a GIF to a video can be useful if you want to post a GIF to Instagram or some other social media platform that doesn’t offer support for GIF files.
2. How to Save A GIF As A Video from An iPhone?
You must install one of the GIF creator apps for iOS before you can start converting GIFs to videos from your iPhone. Once you go through the installation process, you should launch the app you installed and import a GIF you want to turn into a video into the app. You can then edit the GIF if you want, and then proceed to export it. During the process of exporting a GIF, you should choose one of the available video file formats such as MP4 or MOV and your GIF will be converted into a video.
Shanoon Cox
Shanoon Cox is a writer and a lover of all things video.
Follow @Shanoon Cox
Shanoon Cox
Mar 27, 2024• Proven solutions
GIF files are gaining more popularity these days but still, the strange fact is that some social media sites do not offer support to GIF file format. One of the biggest examples of such platforms is Instagram. But, if you are a real fun lover then this simple issue cannot stop you from uploading interesting animations or videos over the internet. As Instagram does not support GIF images so why not to get them converted to simple video files and then update an entertaining sequence for your audience. That’s really a great idea.
You may also like: How to Upload GIF to Instagram >>
It is much easier to convert GIF images into many popular video file formats like AVI or MOV etc and then can be further shared on YouTube , Instagram and many other sites. So if you are ready to get started with this adventure then keep reading this article. Here you will find details about the best GIF to video converter tools that are popular among professionals as well as beginners.
Best GIF to Video Converters
Desktop Solutions to Converting GIF to Video
1. Wondershare Filmora
One of the best recommendations for your GIF to Video conversion needs is Wondershare Filmora due to its user-friendly interface. This tool works fine on Mac as well as the Windows platform and extends support to all popular video file formats like WMV, MP4 and MKV etc.
Key Features:
- Filmora offers a wide range of editing features like aspect ratio, speed, trim, merge, rotate and crop adjustments.
- Users can also add music to videos to make them more appealing.
- Possesses so many special effects along with text and title editing options.
- Files can be easily exported to iPhone, Android-like devices.
- It allows easy sharing of media on social media sites like Dailymotion, Vimeo, and YouTube, etc.
However, if you want to make a GIF online, Filmora meme maker is your ultimate solution. It helps you make images, GIFs and video memes directly without watermark. It is totally FREE to use and no signup. You can change text size, color, and position to create a caption when you are editing. Filmora meme maker supports converting GIF to video. Just with a few clicks, your GIF is done . Try it nowDownload Mac Version ](https://tools.techidaily.com/wondershare/filmora/download/ )
2. Converter Lite
Key Features: Converter Lite extends support to numerous image and video file formats.
- Videos can be easily converted to animated GIFs and vice versa.
- The conversion process can be carried with impressive animation and effects additions.
- The frame rate can be defined by users.
How to Use?
- Import your desired GIF image.
- Select format for the destination file.
- Hit the Convert option.
Pros:
- Users can define the frame rate as per need.
- Provides huge options for the selection of input/ output file formats.
Cons:
- It leaves a watermark on output files.
3. Amazing GIF to Video Converter
Key Features:
- It assists in the fast conversion of videos to GIF formats and the best part is that users can also clip video files to get their desired end results.
- It generates a preview of the edited file before initiating the actual conversion process.
- The converted animated GIF files can be easily shared on other platforms.
How to Use?
- First of all, users need to upload their GIF images to the software platform.
- Generate a preview of all frames.
- Now adjust your output file parameters to avail customized results.
- Choose your output file format and define the destination.
- Initiate the conversion process.
Pros:
- It extends support to all popular video file formats.
- The interactive interface makes it easier to operate even for beginners.
Cons:
- Reviewers do not rate its performance up to the mark.
4. Movavi Video Converter
Key Features: This tool supports a wide range of editing functions like trim, rotate, crop, etc.
- It can handle multiple media file formats like SWF, MOV, MKV, 3GP, MP4, WAV and FLV, etc.
- Movavi can be used to create captions and watermarks on videos. Marketers find it very useful.
- The most amazing thing to know is that this tool works perfectly on a wide range of devices like Xbox, iPhone, iPad, Sony PlayStation as well as on Android devices.
How to Use?
- Get your files imported on the Movavi timeline.
- Choose your desired output file format and adjust settings accordingly.
- Get your files converted immediately.
Pros:
- User-friendly interface.
- Instant conversion.
Cons:
- It cannot process copy-protected versions of media files or DVDs.
Smartphone App Solutions to Convert GIF to Video
1. GIFShare
It can be used to convert GIFs into videos and then share them immediately on social media platforms. With GIFShare, you can easily keep your Instagram page updated with all new GIF converted videos.
How to Use?
- Upload your GIF files to the software platform; you can get them from camera roll or from GIFShare.
- Make desired editing on background and speed etc parameters.
- Get it converted with customized size level.
- Upload outputs directly to Instagram.
2. Gifaroo
Here is one more interactive tool that allows users to directly upload GIF converted to Instagram. There are so many customization filters, effects, and background editing options; users can also alter captions with different colors and font styles.
How to Use?
- Start browsing some interesting GIF animations on your Gifaroo app directly.
- Bring the desired one to the editing platform with a single tap.
3. GifVid
With GifVid you can convert simple videos into GIF animations and collection of GIFs can be turned back to videos with different file formats. Once your file gets converted then you can easily share them on Tumblr, Imgur, iMessage, etc.
Key Features: GifVid is designed with a straight forward and user-friendly design.
- Various editing options.
- This tool can be used in multiple languages.
- Supported Platform: Works on iOS devices like iPad and iPhones.
- Developer: It was developed by Artsy Apps.
Online GIF to Video Converters
1. GIFtovideo.com
Due to the impressive user interface, advanced editing options, and fast conversion rate, this tool is kept at first positing with higher user ratings. It can easily process uploaded video files as well as URL based links hence you can enjoy full flexibility on your portable as well as desktop devices.
Key Features: Beginners can easily handle its intuitive interface.
- The simple layout makes editing tasks much easier and conversion can be completed within very little time.
- Supported Platform: It works on Window platform with an active internet connection.
- Developer: This tool is owned and developed by Studio September that is a popular software developer company at Deutsch.
2. Cloud Convert
On Cloud Convert, users can easily process all popular video file formats to generate high-quality outcomes. It is not just limited to MP4 rather can support all professional-level media extensions. If you wish to make editing with few specific settings like codec adjustments then Cloud Convert can assist you better. If you want to access full feature version then you can get registered to this converter tool as paid users are able to avail more facilities.
Key Features: Cloud Convert can process any video file format with ease so you can bring any desired file to its timeline.
- Here you will get more freedom for customization settings of all converted videos.
- Supported Platforms: This tool is compatible with Windows only and users need to get their device connected to a high-speed internet connection to avail the best services.
- Developer: This tool is designed and maintained y a Germany based company, Lunaweb Ltd.
3. GIF2MP4
Here is one more easy to use yet feature-rich converter tool that can easily process your collection of GIF images to generate an MP4 video as an output. As the name indicates, this tool is intentionally designed for assisting users to get their GIF files converted with MP4 video file extension. There are numerous features hidden inside this online converter tool but once you start working over it your will be able to do awesome creativity with each editing project.
Key Features: It offers fast one-way conversion from GIF to MP4 video files.
- Simple and intuitive design.
- Supported Platforms: Mac and Window but the device must be connected to the internet for its operation.
- Developer: This tool is designed by trubo@zelnet.ru .
Read More to Get: the ultimate guide on How to Convert GIF to Video on your laptop or phone.
If you want to make GIF quickly, Filmora will offer you an online solution for making a GIF. Filmora meme maker can help you make images, GIFs and video memes directly without watermark. It is totally FREE and no signup. You can change text size, color, and position to create a caption.
Frequently Asked Questions About GIF to Video Converters
1. Can You Convert A GIF to Video?
The file format of all GIF files can be changed, but only if you have access to a GIF to Video converter. These apps allow you to choose the video file format to which a GIF file is going to be converted, so you can choose to turn a GIF into an MP4, AVI, or any other popular video file format.
Converting a GIF to a video can be useful if you want to post a GIF to Instagram or some other social media platform that doesn’t offer support for GIF files.
2. How to Save A GIF As A Video from An iPhone?
You must install one of the GIF creator apps for iOS before you can start converting GIFs to videos from your iPhone. Once you go through the installation process, you should launch the app you installed and import a GIF you want to turn into a video into the app. You can then edit the GIF if you want, and then proceed to export it. During the process of exporting a GIF, you should choose one of the available video file formats such as MP4 or MOV and your GIF will be converted into a video.
Shanoon Cox
Shanoon Cox is a writer and a lover of all things video.
Follow @Shanoon Cox
How To Animate Graphics in Canva
Versatile Video Editor - Wondershare Filmora
An easy yet powerful editor
Numerous effects to choose from
Detailed tutorials provided by the official channel
Canva is a graphic design platform that allows users to create stunning designs for social media posts, presentations, assignments, recipe cards, birthday videos.
With the introduction of Canva’s animation feature, a whole new world of possibilities are open to the public. Also, with pre-designed templates from professional designers, content creation has never been easier than Canva.
Animations themselves have the option of being individually customized element by element. Canva animated graphics makes it easy to unleash your creative potential.
This article will explore how to animate graphics in Canva that can suit every occasion.
In this article
01 [Animate Your Graphic In Canva](#Part 1)
02 [Make A Moving Graphic In Canva](#Part 2)
03 [Pricing for Canva You Should Know](#Part 3)
Part 1 Animate Your Graphic In Canva
People can create animations in Canva in one of two ways. You can select an animation from one of the pre-existing animated templates. This is a time-saving option as it lets you customize ready-made templates to suit your needs
With the pre-set animation templates, you have the option to choose from among
● Invitations
● A4 Documents
● Instagram Post
● Facebook Post
● YouTube Thumbnails
● Presentation
● Flyer/Poster
● Instagram Logo
● Infographic
These options generate the ability to be presented in both portrait and landscape mode. The multitude of options makes it an ideal medium for you to create your animation. The animation options at Canva also come with the opportunity to animate an existing image.

You can choose to animate an existing design. With a few minor edits, you can have a polished and sophisticated post that’s bound to draw viewer attention and earn you kudos.
If this is the case, then you benefit from saving time and the expertise of a professional design team through Canva.
The second option is creating an animation by yourself. Creating your own animation offers you greater flexibility in executing your vision for the design. Without further ado, let’s look at how we can help this happen in the how to make a moving graphic in the Canva section.
Part 2 Make A Moving Graphic In Canva
Making a moving graphic in Canva is easy. Canva offers an “Animation” button that allows users to animate each element in the content. There are four areas that the graphic can touch upon for content. These areas are text, image, audio, and video.
Here’s how you can animate individual elements in Canva.
2.1 How to animate text in Canva?
With text, Canva offers three options. You can choose to create either a title text, a sub-heading text, or regular text for use. Play with different styles and fonts to find one that suits your design. You can also add details like stickers or illustrations to customize the design.
You are now ready to animate once you’re happy with the design. Text animations will help your text jump out from the background. Then choose the “Animate” option in the sidebar after clicking on the selected text.

Allow your font to move around your design with motion. Thanks to “animate,” you can choose between subtle, smooth movement and jagged and sudden motion. You can even mix and match animations for each word.
In Wondershare Filmora, a premier video editing software, the texts are available according to use. For instance, opening and ending credit texts as a template. With options for choosing subtitles, lower 3rds, and call-out templates.
Additionally, users can also save a particular setting as a “preset’. Which makes it easy to reuse the settings in future projects. You can also adjust the duration of the individual text display. It also has an animation option that allows animation of the text according to given presets.
2.2 How do you animate a picture in Canva?
Users have the ability to choose to animate just the image or animate other elements of the picture. They can also make use of options to edit the image using background remover. This allows seamless integration into the presentation.

Users can simply upload their photos. Choose a stock image or upload an image through your photo gallery to use in your design. You can also choose to use “frames,” which are available under the “Elements” tab in Canva.
Make your photo come alive by animating it. Choose from a variety of innovative animation possibilities by selecting the Animation tool. The duration of the animation can be changed using the stopwatch animation icon. It uses a slider to help in setting the duration of each animation. You can also adjust this manually.
2.3 How do you add music to animation in Canva?
Users can find a section dedicated to “Uploads,” allowing creators to use their audio content. The users can use a soundtrack from one of Canva’s audio libraries. This gives users control over their animation’s impact.
One difference between Canva and Wondershare Filmora is that Canva users can only use one audio per presentation. Filmora allows users to overlay multiple soundtracks to their timeline.
Users can also make use of the Audio Effects feature to create audio for “Echo,” “large room,” “small room,” “lobby,” and “phone.” The preview function can help users experience it live before applying the effect.
Filmora Pro’s Auto-Normalization of audio allows intelligent audio analysis and volume adjustment.
2.4 How do you animate video in Canva?
Canva offers presentations that are similar to the explainer-style videos on Youtube. With more modifications, you can convert the presentation to a video format. You can edit individual elements in the presentation to reflect the project details and outcomes.
You can also introduce transition effects to make the presentation a smooth video. Incorporating the three other elements will be a breeze to make a video with animation.

Another noteworthy thing in Canva is that users can upload their videos or use videos provided in the video library. You can also embed videos within a frame from the “Elements” section in Canva. You can trim the video input on the slide for time. It can be presented as a “loop” video.
Filmora offers all the essential video editing tools in addition to AI-powered features called Auto-Highlight and Auro-Reframe. Auto Highlight is a feature that extracts the highlights from a video clip autonomously.
This will save you time while cutting your movie. It also makes it easier to extract the best moments from the video.
Auto Reframe recognizes as well as crops the focal point of your footage, constantly retaining it in the frame. Your film’s primary action or object will never be out of focus within that technique.
Part 3 Pricing for Canva You Should Know
Canva can be used among a multitude of users and companies. The range of access is from a single person use to teams of fifty. It also allows for a custom selection of a number of people.
Canva can be used as free graphic design software. It does display all available options with a few possibilities marked off for Canva Pro users only.
Canva Pro allows up to 5 users per team. A subscription to Canva Pro costs US $119.99 per annum or US $12.99 per month. Pro users have access to unlimited content and newly released tools.
The only difference between Canva Pro and Canva Enterprise is that Canva Pro is for smaller teams. Canva Enterprise allows collaboration between larger teams and franchises.
Canva also offers free Canva Pro subscriptions to non-profit organizations. Students and teachers are offered a special discount for those in educational programs.
Wondershare Filmora
Get started easily with Filmora’s powerful performance, intuitive interface, and countless effects Try It Free Try It Free Learn More >
AI Portrait – The best feature of Wondershare Filmora for gameplay editing
The AI Portrait is a new add-on in Wondershare Filmora. It can easily remove video backgrounds without using a green screen or chroma key, allowing you to add borders, glitch effects, pixelated, noise, or segmentation video effects.

Final Words
We’ve covered how to animate graphics in Canva. You can animate individual elements in Canva or automate it on the whole. Canva’s animate button is an automatic tool that revolutionizes the way traditional animation works.
Wondershare’s Filmora is the video editing tool that is easy to use and offer various animation options.
Canva is a graphic design platform that allows users to create stunning designs for social media posts, presentations, assignments, recipe cards, birthday videos.
With the introduction of Canva’s animation feature, a whole new world of possibilities are open to the public. Also, with pre-designed templates from professional designers, content creation has never been easier than Canva.
Animations themselves have the option of being individually customized element by element. Canva animated graphics makes it easy to unleash your creative potential.
This article will explore how to animate graphics in Canva that can suit every occasion.
In this article
01 [Animate Your Graphic In Canva](#Part 1)
02 [Make A Moving Graphic In Canva](#Part 2)
03 [Pricing for Canva You Should Know](#Part 3)
Part 1 Animate Your Graphic In Canva
People can create animations in Canva in one of two ways. You can select an animation from one of the pre-existing animated templates. This is a time-saving option as it lets you customize ready-made templates to suit your needs
With the pre-set animation templates, you have the option to choose from among
● Invitations
● A4 Documents
● Instagram Post
● Facebook Post
● YouTube Thumbnails
● Presentation
● Flyer/Poster
● Instagram Logo
● Infographic
These options generate the ability to be presented in both portrait and landscape mode. The multitude of options makes it an ideal medium for you to create your animation. The animation options at Canva also come with the opportunity to animate an existing image.
You can choose to animate an existing design. With a few minor edits, you can have a polished and sophisticated post that’s bound to draw viewer attention and earn you kudos.
If this is the case, then you benefit from saving time and the expertise of a professional design team through Canva.
The second option is creating an animation by yourself. Creating your own animation offers you greater flexibility in executing your vision for the design. Without further ado, let’s look at how we can help this happen in the how to make a moving graphic in the Canva section.
Part 2 Make A Moving Graphic In Canva
Making a moving graphic in Canva is easy. Canva offers an “Animation” button that allows users to animate each element in the content. There are four areas that the graphic can touch upon for content. These areas are text, image, audio, and video.
Here’s how you can animate individual elements in Canva.
2.1 How to animate text in Canva?
With text, Canva offers three options. You can choose to create either a title text, a sub-heading text, or regular text for use. Play with different styles and fonts to find one that suits your design. You can also add details like stickers or illustrations to customize the design.
You are now ready to animate once you’re happy with the design. Text animations will help your text jump out from the background. Then choose the “Animate” option in the sidebar after clicking on the selected text.
Allow your font to move around your design with motion. Thanks to “animate,” you can choose between subtle, smooth movement and jagged and sudden motion. You can even mix and match animations for each word.
In Wondershare Filmora, a premier video editing software, the texts are available according to use. For instance, opening and ending credit texts as a template. With options for choosing subtitles, lower 3rds, and call-out templates.
Additionally, users can also save a particular setting as a “preset’. Which makes it easy to reuse the settings in future projects. You can also adjust the duration of the individual text display. It also has an animation option that allows animation of the text according to given presets.
2.2 How do you animate a picture in Canva?
Users have the ability to choose to animate just the image or animate other elements of the picture. They can also make use of options to edit the image using background remover. This allows seamless integration into the presentation.
Users can simply upload their photos. Choose a stock image or upload an image through your photo gallery to use in your design. You can also choose to use “frames,” which are available under the “Elements” tab in Canva.
Make your photo come alive by animating it. Choose from a variety of innovative animation possibilities by selecting the Animation tool. The duration of the animation can be changed using the stopwatch animation icon. It uses a slider to help in setting the duration of each animation. You can also adjust this manually.
2.3 How do you add music to animation in Canva?
Users can find a section dedicated to “Uploads,” allowing creators to use their audio content. The users can use a soundtrack from one of Canva’s audio libraries. This gives users control over their animation’s impact.
One difference between Canva and Wondershare Filmora is that Canva users can only use one audio per presentation. Filmora allows users to overlay multiple soundtracks to their timeline.
Users can also make use of the Audio Effects feature to create audio for “Echo,” “large room,” “small room,” “lobby,” and “phone.” The preview function can help users experience it live before applying the effect.
Filmora Pro’s Auto-Normalization of audio allows intelligent audio analysis and volume adjustment.
2.4 How do you animate video in Canva?
Canva offers presentations that are similar to the explainer-style videos on Youtube. With more modifications, you can convert the presentation to a video format. You can edit individual elements in the presentation to reflect the project details and outcomes.
You can also introduce transition effects to make the presentation a smooth video. Incorporating the three other elements will be a breeze to make a video with animation.
Another noteworthy thing in Canva is that users can upload their videos or use videos provided in the video library. You can also embed videos within a frame from the “Elements” section in Canva. You can trim the video input on the slide for time. It can be presented as a “loop” video.
Filmora offers all the essential video editing tools in addition to AI-powered features called Auto-Highlight and Auro-Reframe. Auto Highlight is a feature that extracts the highlights from a video clip autonomously.
This will save you time while cutting your movie. It also makes it easier to extract the best moments from the video.
Auto Reframe recognizes as well as crops the focal point of your footage, constantly retaining it in the frame. Your film’s primary action or object will never be out of focus within that technique.
Part 3 Pricing for Canva You Should Know
Canva can be used among a multitude of users and companies. The range of access is from a single person use to teams of fifty. It also allows for a custom selection of a number of people.
Canva can be used as free graphic design software. It does display all available options with a few possibilities marked off for Canva Pro users only.
Canva Pro allows up to 5 users per team. A subscription to Canva Pro costs US $119.99 per annum or US $12.99 per month. Pro users have access to unlimited content and newly released tools.
The only difference between Canva Pro and Canva Enterprise is that Canva Pro is for smaller teams. Canva Enterprise allows collaboration between larger teams and franchises.
Canva also offers free Canva Pro subscriptions to non-profit organizations. Students and teachers are offered a special discount for those in educational programs.
Wondershare Filmora
Get started easily with Filmora’s powerful performance, intuitive interface, and countless effects Try It Free Try It Free Learn More >
AI Portrait – The best feature of Wondershare Filmora for gameplay editing
The AI Portrait is a new add-on in Wondershare Filmora. It can easily remove video backgrounds without using a green screen or chroma key, allowing you to add borders, glitch effects, pixelated, noise, or segmentation video effects.
Final Words
We’ve covered how to animate graphics in Canva. You can animate individual elements in Canva or automate it on the whole. Canva’s animate button is an automatic tool that revolutionizes the way traditional animation works.
Wondershare’s Filmora is the video editing tool that is easy to use and offer various animation options.
Also read:
- FREE Top 21 Best Anime Websites to Watch Anime Online
- New 2024 Approved Amazing Ideas About Creating Personalised WhatsApp GIF Sticker
- How To Animate Graphics in Canva for 2024
- Updated 5 Photoshop Alternatives to Animate Logo
- Updated Something About Types of Motion Graphics for 2024
- New 2024 Approved 10 2D/3D Animation Tips & Tricks for You
- Updated 2024 Approved How to Turn Yourself Into a WhatsApp Cartoon
- 2024 Approved 5 Best Adobe Animate Courses & Classes | Beginners Complete Tutorial
- New In 2024, Best 12 Illusion Gifs Top Picks
- 2024 Approved Handy Tips From Adobe Animate Rigging Tutorial for All Learners
- Updated In 2024, Ready to Animate Game Character From Scratch?
- Updated Best Websites to Download Animated GIFs for Free for 2024
- Updated How to Draw Skeleton Cartoon – A Step by Step Guide for 2024
- 2024 Approved What Is Motion Graphics
- 2024 Approved The Most Efficient Techniques to Make 3D Animation Character
- Updated How to Find Some Different Ways to Animated Cartoon of Yourself for 2024
- Updated 10 Realistic Cartoon Characters You Would Run Away From if You Met in Real Life
- Top 10 Popular Cartoons You Forgot Existed for 2024
- Updated Tips on How to Learn Graphics Animation
- In 2024, How to Make Animated Videos for Business – an Ultimate Guide
- Updated In 2024, How to Find 3D Animation Studio
- New In 2024, 5 Photoshop Alternatives to Animate Logo
- In 2024, Learn How to Make Your Characters Interactive in Unity Animation Rigging
- New How to Create a YouTube Intro Animation Like a Pro for 2024
- Updated Top 10 Popular Cartoons You Forgot Existed
- New You Can Turn a TikTok Into a GIF Now
- 10 Photoshop Cartoon Effects For Creatives
- Updated In 2024, Uncensored Top 10 + Free Streaming Sites
- In 2024, Some Must-Know Useful Lego Animation Ideas
- Updated In 2024, How to Make Whiteboard Animation Videos
- Updated Types of Cartoon Styles You May Use for The Next Marketing Project for 2024
- Updated Best GIF Croppers How to Crop an Animated GIF for 2024
- Updated 10 Trendy & Stylish Free Logo Animation Templates
- New In 2024, Top 10 Apps to Enhance Your Instagram Story Slideshow
- New How to Make Photo Motion Effect Online?
- Updated 2024 Approved Top 3 Ways to Create Gif with Great 3D Gif Maker
- Updated 2024 Approved 15 Top Pics Collage Apps
- New How to Animate - Adobe Animate Tutorias for 2024
- New How to Make GIF Instagram
- Create Animated Social Media Posts in Canva
- In 2024, How to Transfer Contacts from Xiaomi 13 Ultra to Outlook | Dr.fone
- How To Bypass iCloud By Checkra1n Even On Apple iPhone 15 Plus If Youve Tried Everything
- 4 Methods to Turn off Life 360 On Honor Magic 5 Lite without Anyone Knowing | Dr.fone
- How to Bypass FRP from Sony Xperia 1 V?
- Complete Guide For Apple iPhone 13 mini Lock Screen
- In 2024, How To Enable USB Debugging on a Locked Vivo Phone
- 7 Ways to Lock Apps on Apple iPhone 14 Pro and iPad Securely
- Does Nubia Red Magic 8S Pro Have Find My Friends? | Dr.fone
- In 2024, How to Remove an AirTag from Your Apple ID Account On iPhone SE?
- In 2024, What to do if your Apple iPhone 6 Plus has bad ESN or blacklisted IMEI?
- Play MKV movies on Motorola , is it possible?
- Ultimate Guide from Motorola G24 Power FRP Bypass
- In 2024, What Legendaries Are In Pokemon Platinum On Oppo Find X6? | Dr.fone
- In 2024, How Can I Use a Fake GPS Without Mock Location On Google Pixel 8 Pro? | Dr.fone
- Title: Updated How to Create a Whiteboard Animation Video for 2024
- Author: Elon
- Created at : 2024-06-23 02:10:18
- Updated at : 2024-06-24 02:10:18
- Link: https://animation-videos.techidaily.com/updated-how-to-create-a-whiteboard-animation-video-for-2024/
- License: This work is licensed under CC BY-NC-SA 4.0.
