
:max_bytes(150000):strip_icc():format(webp)/GettyImages-769729481-5bd367dcc9e77c007c015257.jpg)
Updated How to Draw Skeleton Cartoon – A Step by Step Guide
How to Draw Skeleton Cartoon – A Step by Step Guide
How to Draw Skeleton Cartoon – A Step by Step Guide
An easy yet powerful editor
Numerous effects to choose from
Detailed tutorials provided by the official channel
We often see skeleton cartoons on t-shirts and phone cases. There is a famous skeleton cartoon show. Most of the shows are pretty popular, and the skeleton cartoon in the shows became quite trendy in the fashion industry. The trend of a skeleton cartoon character is very much relevant nowadays. One might think about how this skeleton cartoon is drawn.
Sometimes it is hand drawn or digitally drawn. Here is a step-by-step guide for you if you wonder how to draw a skeleton cartoon. This guide will effortlessly help you draw the most quirky and trendy skeleton cartoon.
In this article
01 [This Is What 5 Skeletons of Famous Cartoon Characters Would Look Like](#Part 1)
02 [How to Draw Cartoon Skeletons With Step by Step](#Part 2)
Part 1 This Is What 5 Skeletons of Famous Cartoon Characters Would Look Like
From our very childhood, we have come across numerous cartoons shows. But have we ever wondered how the skeleton of these cartoon characters would look? No worries if you have not given a thought to this. This article can give you a small tour of the world where you will be able to see skeletons of a few famous cartoon characters that we have known since our childhood. The skeletons of famous cartoon characters are:
01Charlie
Charlie Brown, known as Charlie, is the main character in the comic strip Peanuts. This is a widely recognized American cartoon. Many people can relate to Charlie. Charlie is shy, nervous, and lacks confidence. These characteristics make him relatable to a chunk of common people. Charlie is referred to as the “Loveable Loser.”Charlie is an overwhelmingly short and stout character physically. Have you ever imagined how Charlie’s skeleton version would look? Here is how the skeleton cartoon of Charlie would look.

02Fred Flintstone
I have known very few people who do not know about Fred Flintstone. Fred Flinstone is the protagonist of the famous American sitcom show Yabba-Dabba-Dinosaurs and the entire franchise. The Flinstone is another show that features Fred with his family. Of course, the show’s main attraction is the Flinstone family and the way this show is set. This show is set in a way that romanticizes a family living in a cave. Coming to talk about skeletons, have you ever thought that what if a skeleton cartoon show version of The Flintstone were made. How would this short, fat man with almost a square look as a skeleton? We can look up here how the skeleton version of Fred Flintstone looks:

03Bubbles
The Bubble is one of the main characters of the popular TV cartoon show Powerpuff girls. The other protagonists are Blossom and Buttercup, her sisters. The Bubble is named Bubble because she is the bubbliest and most fun-loving among the three sisters. Bubble is a sweet little girl with a round face and big round eyes and short limbs. These characteristics in this character make it look cuter. But to think, how would we imagine Bubble in a skeleton version. This is how Bubble would look like a skeleton.

04Dexter
Dexter is the protagonist in the show Dexter’s Laboratory. Dexter is one of the most outstanding kid scientists who have made great inventions in his secret laboratory. It would be more appropriate to call Dexter an anti-heroic protagonist. He works in his secret laboratory for various projects like stopping bullying worldwide. Dexter is a short young boy with curly hair. Dexter is mostly seen wearing a white lab coat and semi-circle goggles, like someone who is always working in a lab. Imagining Dexter as a skeleton can be hilarious. But this is how Dexter would look like a skeleton cartoon.

05Pikachu
Pikachu is one of the characters or one of the Pokémons in the famous animated Japanese series Pokémon. Pikachu is a small yellow furry Pokémon. It seems very sweet to the audience and the general public, but it acquires a dangerous skill to give out an electric shock. This small yellow furry creature has featured in many films with the protagonist of the famous show Pokémon Ash Ketchum. This cartoon character has a presence in the fashion industry. It has been used to fashion dresses, bags, and many more. How would it be if we sat to think of a skeleton version of this furry creature? This may not a pleasant experience for everyone. The perfect way to demonstrate pikachu as a skeleton version would be:

Part 2 How to Draw Cartoon Skeletons With Step by Step
Have you ever tried drawing a skeleton cartoon character? You can use a skeleton cartoon to add a quirky effect to your project. You can draw an animated skeleton on your favorite t-shirt and change the vibe of the t-shirt. There are many methods to draw skeleton cartoon. Here we focus mainly on one way to draw cartoon skeleton. The method might seem difficult at the beginning, but the whole process becomes easier and smooth once you start following the steps. The steps are:
Step 1: To start with the drawing of the skeleton, let’s start with the head or the skull. The head should be round, and the jaw area needs to be at some angle or angular and have smaller lines than the long rounded lines on the upper part of the skull.
Step 2: The mouth of the skull must be open, and then we need to concentrate on other features of the face like the teeth, nose, and cheekbone.

Step 3: After the head is complete, we focus on the neck and the chest area. To draw the neck, divide the neck into small sections to show the division in the neck portion, as shown in the picture.
Step 4: To start with the rib cage, we need to draw the spine. The spine can be drawn as a long thick line and should be a continuity of the neck, so the neck and the spine should be drawn in the same way and same line. It is to be drawn at the body’s center, just below the head. You can refer to the example as shown below.
Step 5: After you have drawn the spine, to draw the rib, draw circles around the spine as if the curved lines demonstrating the rib are revolving around the spine.

Step 6: After the head and the chest region is complete. Focus on the hand. You can rest the arms any way you want. Since you are a beginner, this example shows the easiest ways to rest the hands when you are drawing a cartoon skeleton.
Step 7: The left arm will rest on the hips, and the right arm needs to be shown in a way so that it looks that the skeleton body is leaning on some object.
Step 8: Since the arms have divisions, the bones must be drawn the same way shown in the example with the same divisions on the arms.
Step 9: Keep in mind that both the arms must have equal bone divisions; otherwise, the drawing may look weird.
Step 10: Now you need to draw the hand. The hand is made of small bones. To draw the hand, divide it into small sections consisting of very small bones.

Step 11: After the hands are complete, the upper part of the body is complete. Now we need to focus on the lower part of the body.
Step 12: To start with the lower part of the body, we start with the hip portion.
Step 13: Show the hips with curved lines, and draw a round-like shape inside the curve to show the holes in the hips.
Step 14: After the hip is complete, start with the upper half of the legs. Draw a long bone from the hip to demonstrate the upper part of the leg.

Step 15: Now we need to concentrate on the other half of the leg. You can position the legs any way you want. Here in the example, the left leg will be crossed over the right leg.
Step 16: After the lower half of the legs is complete, the standing posture of the skeleton is set.
Step 17: Now we need to add the feet at the end of the leg. The feet are made of tiny pieces of bones; to draw the feet, divide them into small sections, as shown in the example.
Step 18: Draw the feet in a similar way to how you have drawn the hands.

Step 19: You can color your skeleton drawing or give your shading style after your skeleton drawing is done.
You can make quirky skeleton cartoon animations and compile them to a video, adding music effects. You might think you need different apps for the video and the audio editing part. That might be the case for other apps. Here is Wondershare Filmora Video Editor ; you can edit your video, make slideshows, and edit the background sound score. Just imagine of not changing windows while editing your exciting project can be so comfortable!
For Win 7 or later (64-bit)
For macOS 10.12 or later
● Ending Thoughts →
● It might be astonishing for you to see the skeleton versions of your favorite cartoon characters from your childhood.
● It gives a quirky effect to our minds but, at the same time, leaves us wondering about the skeleton drawing cartoon.
● Now you know the methodof drawing a cartoon skeleton. You can make your version of a skeleton cartoon; you can create your style and interpretation. You can create a skeleton dog cartoon.
● You can use the method to make animations or even paint on your t-shirt or wall paintings to add a little quirkiness.
● The cartoon skeleton gives a cool vibe. You can use your animation as your wallpaper. Keep quirking!
We often see skeleton cartoons on t-shirts and phone cases. There is a famous skeleton cartoon show. Most of the shows are pretty popular, and the skeleton cartoon in the shows became quite trendy in the fashion industry. The trend of a skeleton cartoon character is very much relevant nowadays. One might think about how this skeleton cartoon is drawn.
Sometimes it is hand drawn or digitally drawn. Here is a step-by-step guide for you if you wonder how to draw a skeleton cartoon. This guide will effortlessly help you draw the most quirky and trendy skeleton cartoon.
In this article
01 [This Is What 5 Skeletons of Famous Cartoon Characters Would Look Like](#Part 1)
02 [How to Draw Cartoon Skeletons With Step by Step](#Part 2)
Part 1 This Is What 5 Skeletons of Famous Cartoon Characters Would Look Like
From our very childhood, we have come across numerous cartoons shows. But have we ever wondered how the skeleton of these cartoon characters would look? No worries if you have not given a thought to this. This article can give you a small tour of the world where you will be able to see skeletons of a few famous cartoon characters that we have known since our childhood. The skeletons of famous cartoon characters are:
01Charlie
Charlie Brown, known as Charlie, is the main character in the comic strip Peanuts. This is a widely recognized American cartoon. Many people can relate to Charlie. Charlie is shy, nervous, and lacks confidence. These characteristics make him relatable to a chunk of common people. Charlie is referred to as the “Loveable Loser.”Charlie is an overwhelmingly short and stout character physically. Have you ever imagined how Charlie’s skeleton version would look? Here is how the skeleton cartoon of Charlie would look.
02Fred Flintstone
I have known very few people who do not know about Fred Flintstone. Fred Flinstone is the protagonist of the famous American sitcom show Yabba-Dabba-Dinosaurs and the entire franchise. The Flinstone is another show that features Fred with his family. Of course, the show’s main attraction is the Flinstone family and the way this show is set. This show is set in a way that romanticizes a family living in a cave. Coming to talk about skeletons, have you ever thought that what if a skeleton cartoon show version of The Flintstone were made. How would this short, fat man with almost a square look as a skeleton? We can look up here how the skeleton version of Fred Flintstone looks:
03Bubbles
The Bubble is one of the main characters of the popular TV cartoon show Powerpuff girls. The other protagonists are Blossom and Buttercup, her sisters. The Bubble is named Bubble because she is the bubbliest and most fun-loving among the three sisters. Bubble is a sweet little girl with a round face and big round eyes and short limbs. These characteristics in this character make it look cuter. But to think, how would we imagine Bubble in a skeleton version. This is how Bubble would look like a skeleton.
04Dexter
Dexter is the protagonist in the show Dexter’s Laboratory. Dexter is one of the most outstanding kid scientists who have made great inventions in his secret laboratory. It would be more appropriate to call Dexter an anti-heroic protagonist. He works in his secret laboratory for various projects like stopping bullying worldwide. Dexter is a short young boy with curly hair. Dexter is mostly seen wearing a white lab coat and semi-circle goggles, like someone who is always working in a lab. Imagining Dexter as a skeleton can be hilarious. But this is how Dexter would look like a skeleton cartoon.
05Pikachu
Pikachu is one of the characters or one of the Pokémons in the famous animated Japanese series Pokémon. Pikachu is a small yellow furry Pokémon. It seems very sweet to the audience and the general public, but it acquires a dangerous skill to give out an electric shock. This small yellow furry creature has featured in many films with the protagonist of the famous show Pokémon Ash Ketchum. This cartoon character has a presence in the fashion industry. It has been used to fashion dresses, bags, and many more. How would it be if we sat to think of a skeleton version of this furry creature? This may not a pleasant experience for everyone. The perfect way to demonstrate pikachu as a skeleton version would be:
Part 2 How to Draw Cartoon Skeletons With Step by Step
Have you ever tried drawing a skeleton cartoon character? You can use a skeleton cartoon to add a quirky effect to your project. You can draw an animated skeleton on your favorite t-shirt and change the vibe of the t-shirt. There are many methods to draw skeleton cartoon. Here we focus mainly on one way to draw cartoon skeleton. The method might seem difficult at the beginning, but the whole process becomes easier and smooth once you start following the steps. The steps are:
Step 1: To start with the drawing of the skeleton, let’s start with the head or the skull. The head should be round, and the jaw area needs to be at some angle or angular and have smaller lines than the long rounded lines on the upper part of the skull.
Step 2: The mouth of the skull must be open, and then we need to concentrate on other features of the face like the teeth, nose, and cheekbone.
Step 3: After the head is complete, we focus on the neck and the chest area. To draw the neck, divide the neck into small sections to show the division in the neck portion, as shown in the picture.
Step 4: To start with the rib cage, we need to draw the spine. The spine can be drawn as a long thick line and should be a continuity of the neck, so the neck and the spine should be drawn in the same way and same line. It is to be drawn at the body’s center, just below the head. You can refer to the example as shown below.
Step 5: After you have drawn the spine, to draw the rib, draw circles around the spine as if the curved lines demonstrating the rib are revolving around the spine.
Step 6: After the head and the chest region is complete. Focus on the hand. You can rest the arms any way you want. Since you are a beginner, this example shows the easiest ways to rest the hands when you are drawing a cartoon skeleton.
Step 7: The left arm will rest on the hips, and the right arm needs to be shown in a way so that it looks that the skeleton body is leaning on some object.
Step 8: Since the arms have divisions, the bones must be drawn the same way shown in the example with the same divisions on the arms.
Step 9: Keep in mind that both the arms must have equal bone divisions; otherwise, the drawing may look weird.
Step 10: Now you need to draw the hand. The hand is made of small bones. To draw the hand, divide it into small sections consisting of very small bones.
Step 11: After the hands are complete, the upper part of the body is complete. Now we need to focus on the lower part of the body.
Step 12: To start with the lower part of the body, we start with the hip portion.
Step 13: Show the hips with curved lines, and draw a round-like shape inside the curve to show the holes in the hips.
Step 14: After the hip is complete, start with the upper half of the legs. Draw a long bone from the hip to demonstrate the upper part of the leg.
Step 15: Now we need to concentrate on the other half of the leg. You can position the legs any way you want. Here in the example, the left leg will be crossed over the right leg.
Step 16: After the lower half of the legs is complete, the standing posture of the skeleton is set.
Step 17: Now we need to add the feet at the end of the leg. The feet are made of tiny pieces of bones; to draw the feet, divide them into small sections, as shown in the example.
Step 18: Draw the feet in a similar way to how you have drawn the hands.
Step 19: You can color your skeleton drawing or give your shading style after your skeleton drawing is done.
You can make quirky skeleton cartoon animations and compile them to a video, adding music effects. You might think you need different apps for the video and the audio editing part. That might be the case for other apps. Here is Wondershare Filmora Video Editor ; you can edit your video, make slideshows, and edit the background sound score. Just imagine of not changing windows while editing your exciting project can be so comfortable!
For Win 7 or later (64-bit)
For macOS 10.12 or later
● Ending Thoughts →
● It might be astonishing for you to see the skeleton versions of your favorite cartoon characters from your childhood.
● It gives a quirky effect to our minds but, at the same time, leaves us wondering about the skeleton drawing cartoon.
● Now you know the methodof drawing a cartoon skeleton. You can make your version of a skeleton cartoon; you can create your style and interpretation. You can create a skeleton dog cartoon.
● You can use the method to make animations or even paint on your t-shirt or wall paintings to add a little quirkiness.
● The cartoon skeleton gives a cool vibe. You can use your animation as your wallpaper. Keep quirking!
What Are Differences Between 2D And 3D Animation
What Are Differences Between 2D And 3D Animation
An easy yet powerful editor
Numerous effects to choose from
Detailed tutorials provided by the official channel
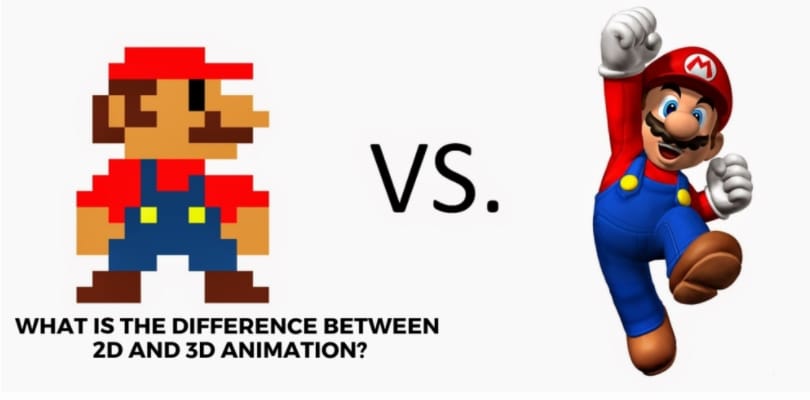
Creating an animation requires multiple processes and tasks to get that final result that we enjoy on the screen. Irrespective of the type of animations like stop-motion, sketch, computer, and others, all of them majorly falls under two main categories- 2D animation and 3D animation. The popular cartoons like Mickey Mouse, Tom & Jerry, and others that became an integral part of all childhood were 2D animations and with technological advancement and 3D animation in use, they are more like aged-veterans.
Toy Story was the first 3D animation movie and after that, there is no stopping. Though 3D animations are more interesting and engaging, they are fields where 2D animations work better. This article will help you to learn in detail about 2D 3D animation, their differences, uses, and other aspects.
In this article
01 [Definition of 2D Animation 3D Animation?](#Part 1)
02 [Key Differences Between 2D Animations and 3D Animations](#Part 2)
03 [Selecting Between 2D Animation and 3D Animation?](#Part 3)
04 [Merging 2D Animation and 3D Animation](#Part 4)
Part 1 Part Definition Of 2D And 3D Animation
012D Animation
The traditional method of animation is termed 2D animation and it has been in use for a long time. A 2D animated video has multiple images in different positions which when moved quickly one after the other simulates a movement. The flipping of the images creates an illusion of movement. Earlier 2D animations were created using hands but now there is advanced computer software that can create these animations in just a few simple clicks. The term 2D means 2 dimensional which means that an image for the animation can be moved in two-dimensional space that is X-axis and Y-axis.
023D Animation
In simplest terms, a 3D animation is an animation that is created in three-dimensional space which makes the characters and objects appear realistic and lively. Thus, a 3D animation has height, width as well as depth. These animations are more complex and the process of creating them is totally different from that of 2D animations. Though 3D animations are used in different industries and platforms these days, majorly they can be found for creating movies, games, and cartoons.
Part 2 Part Key Differences Between 2d Animations and 3d Animations
The major difference between a 2D animation and 3D animation lies in the final appearance. While a 2D animation appears like a flat animation which can be an image or a photograph at a fast movement while a 3D animation looks like real objects that can be seen from all angles and have their front, back, top, as well as the bottom.
The table below will differentiate both these animations on various parameters.
| Features/Type of Animation | 2D Animation | 3D Animation |
|---|---|---|
| Full-Form | Two-dimensional | Three-dimensional |
| Meaning | These animations with 2-dimensional objects appear to be moving when the images are moved at a fast speed. | The objects and characters in these animations look more realistic as their appear in 3-dimensional space. |
| Supported Aspects and axis | Length and height (X-axis and Y-axis) | Length, height, and width (X-axis, Y-axis and Z-axis) |
| Appearance | Appear as flat | Appear lively and realistic |
| Basic elements | It’s all about frames | The animation is all about movements |
| Axis | Images appear at X-axis, and Y axis | Objects appear at X-axis, Y-axis, and Z-axis. |
| Use and target audience | Used for social media sites, demos, animated whiteboard videos, and similar others. | Used for movies, cartoons, video games. |
| Use of software | Hand-drawn images or computer-generated images can be used. | Complex software is needed. |
| Cost | Cheaper than 3D animations | Expensive |
| Examples | Snow White, The Jungle Book, Mickey Mouse, Tom & Jerry, and more. | The Toy Story, Transformers, Incredibles, and more. |
Part 3 Selecting Between 2D Animation and 3D Animation?
Confused between 2D animation and 3D animation? Several factors can be considered to select between the two types of animations. Major ones are enlisted below.
● Target audience: For general explanation and use, 2D animations are a good choice as they are interesting, engaging, and also pocket-friendly. If the target audience is professional people that need in-depth and important information about something, 3D animations are a better choice.
● Availability of software: There are different software used for different types of animations. The availability of the software can also be a deciding factor for selecting between a 2D animation or 3D animation.
● Budget: This is another important factor to be considered. Since 3D animation requires more complex tools and procedures, creating them is expensive. So, depending on how much you are willing to spend, you can choose between the two.
Part 4 Part Merging 2D Animation and 3D Animation
Why choose one, when both can be used? Yes, to get the best of both worlds, 2D animations can be used along with 3D animations depending on the type of the project. Both the styles can be adjusted as per the requirements and for this, good professional software is needed.
We here suggest Wondershare Filmora Video Editor as the best tool as it not only comes equipped with all the latest features but the entire process is also quick and hassle-free. Majorly working as an excellent video editing software, the program supports multiple functions supporting animated videos. Using this Windows and Mac-based tool yon create dynamic animated videos and also edit them and customize them to suit your requirements.
For Win 7 or later (64-bit)
For macOS 10.12 or later
Key features of the software
● Create interesting and engaging animated and other videos using more than 100 media layers, composting tools, and dynamic effects.
● Apply motion elements, filters, and transitions for dynamic videos.
● Audio functions like background noise removal, audio equalizer, keyframe audio editing, and others are supported.
● Fast import, export, and rendering.
● Option to preview the files in high resolution.
● Features like fisheye correction, speed control, stabilization, advanced color correction, 3D LUTs, and others are supported.
● Additional supported functions include import from social media sites, portrait support, camera shake, audio-mixing, screen recording, auto-crop, and others.
● Windows and Mac support.
● Key Takeaways from This Episode →
● 2D and 3D animation are the two major types of animations created for different uses.
● A 2D animation appears in two-dimensional space while a 3D animation appears in a three-dimensional space and looks livelier and more realistic.
● Both 2D and 3D animations can be merged using professional software like Wondershare Filmora Video Editor that supports a wide range of other functions as well.
Samples of Cartoon Character Face
Samples of Cartoon Character Face to Inspire You
An easy yet powerful editor
Numerous effects to choose from
Detailed tutorials provided by the official channel
Being able to draw facial features is an essential skill for any animator. Whether you are a beginner at drawing faces or an experienced cartoon artist that has been drawing for years, this is a skill that can gradually improve with time. With the implementation and use of simple shapes, creating various facial features and cartoon styles can be done quickly.
The methods of creating funny face cartoon characters are suitable for everyone, even if they do not have a single day of illustrating experience. These methods presented in this article are easily accessible to provide you with different results depending on your budget and your desired outcome.
The act of drawing cartoon faces can be effortless, and in this article, we will give you some fundamental samples of how you can draw cartoon faces of your own.
In this article
01 [Learn to Understand the Core of Cartoon Style](#Part 1)
02 [Top 12 Cartoon Face Examples](#Part 2)
03 [How to Draw a Cartoon Face - For Beginners](#Part 3)
04 [How to Easily Turn Yourself into a Cartoon](#Part 4)
Part 1 Learn to Understand the Core of Cartoon Style
First, you need to simplify the different parts of the cartoon character face to pick up on very subtle facial expressions and features. For example, the eyes’ shape and size will help determine if the person is feeling sad, excited, happy, excited, or sad. In addition, the amount of lift under a person’s eyebrows can help determine whether a person is mad or not.
These facial expressions are crucial to how a person communicates. It has got to the point that we can read someone’s face without truly understanding which parts of the face convey that emotion. However, these days we get exposed to everyday adaptations of facial expressions, especially with the invention of Instagram, Snapchat, and cartoon face filters.
Consequently, cartoons are a combination of different shapes that are being put together and are not difficult if the focus is on each shape individually and the process breaks down step by step.
Cartoons are a mixture of different shapes put together. It’s not difficult if you focus on each shape individually and break down the process step by step.
Finally, understanding these unconscious and subtle differences in facial expressions is crucial when planning out an animated character. Afterward, when understood, you can simplify the features to be recognizable by your audience.
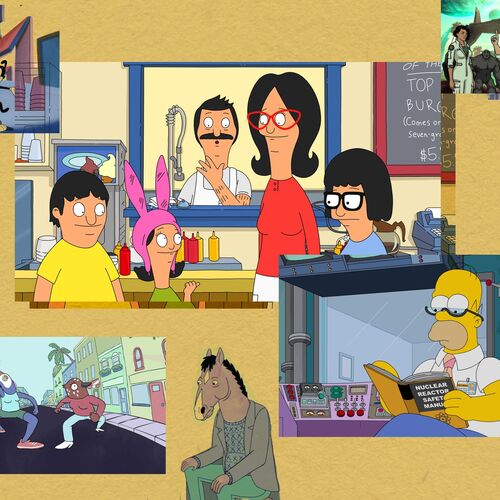
Part 2 Top 12 Cartoon Face Examples
Cartoon character faces are gaining immense importance in design art due to their universality. Cartoon faces can represent people in several situations and add a comic or satirical twist to dull topics by highlighting their importance. However, drawing cartoon faces require a lot of skill and differentiation, and graphic designers, while working on basic and universal templates, always try and introduce unique elements.
Here are the top 10 examples of cartoon character faces you can choose from when you want to make your designs:
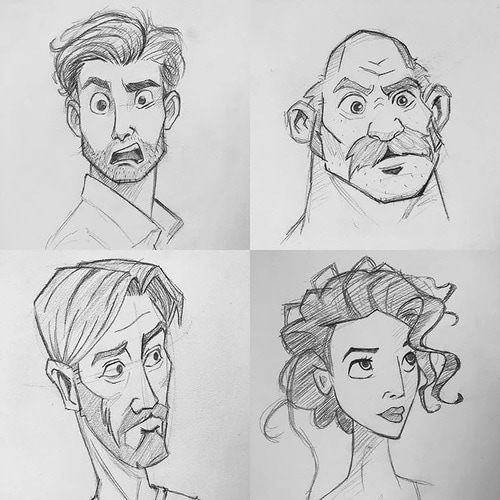
01Men and Women
This sketch features different facial expressions made by older men and women.
02Stretch and Squash
This photo shows the difference between squashing and stretching the face and provides references for extreme squash and extreme stretch.

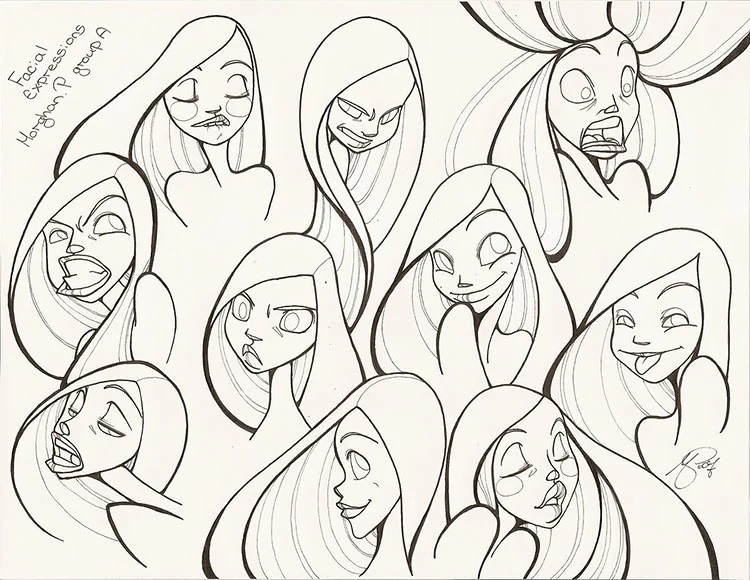
03Dramatic Expressions
The expressions drawn here are super fun and dramatic. However, it is a great way to have fun and practice how to draw facial expressions simultaneously.
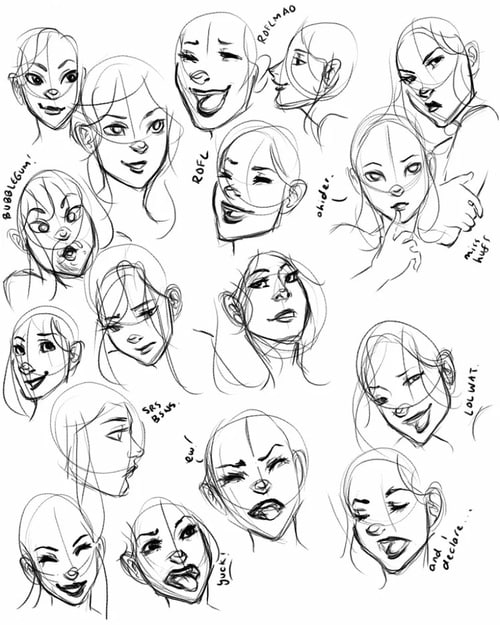
04Quick Expressive Sketches
With this, you can practice how to draw different facial expressions by doing quick sketches like this one. Perhaps you do not need to pay attention to perfection.
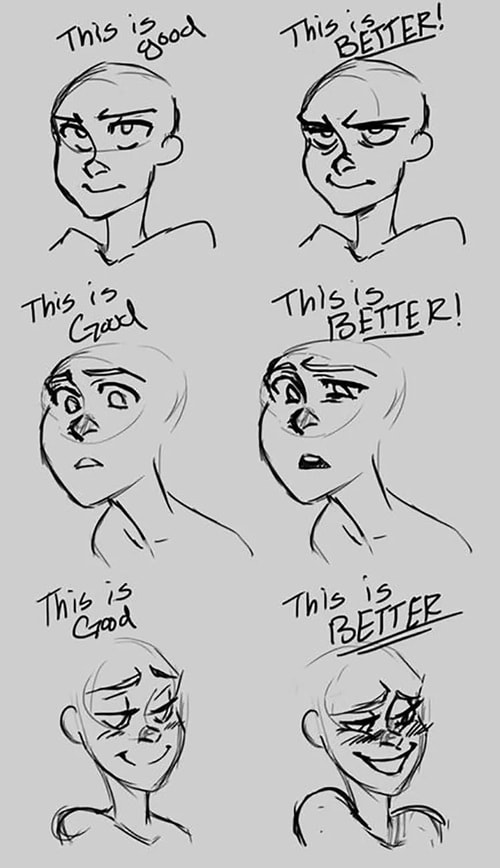
05This Is Good This Is Better
With this facial expression, you can see a good look and an even better expression. It shows the difference that subtle changes can make to your facial expressions**.**
06Male and Female Expressions
This includes both male and female expressions to express the facial reaction of both genders, like some funny cartoon characters face.
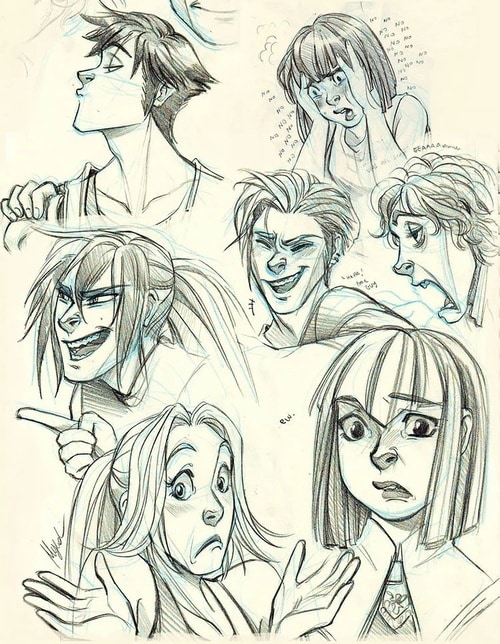
07Quick Sketches
This type of facial expression will help you get better at drawing cartoons, and you can use do some quick sketches every day.

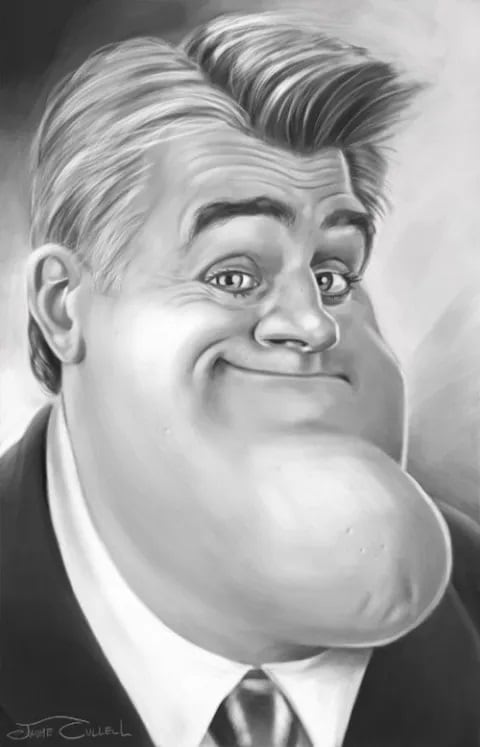
08Jay Leno’s facial expression
Here, it is being exaggerated on a few of his most prominent facial features, including his chin. It is kind of a fat face cartoon character.
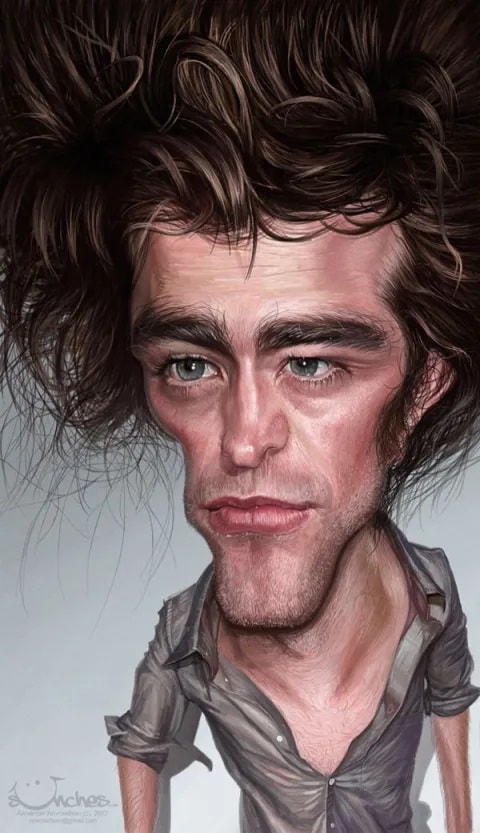
09Robert Pattinson Facials
In this photo, his head shape was distorted to show the thinness of his face, and his big hair also accentuates this prominent feature further.
10A,I,U,O,AE,M Facials
With this, you can practice how to draw your facial expression by pronouncing a, i, u, o, ae, m.

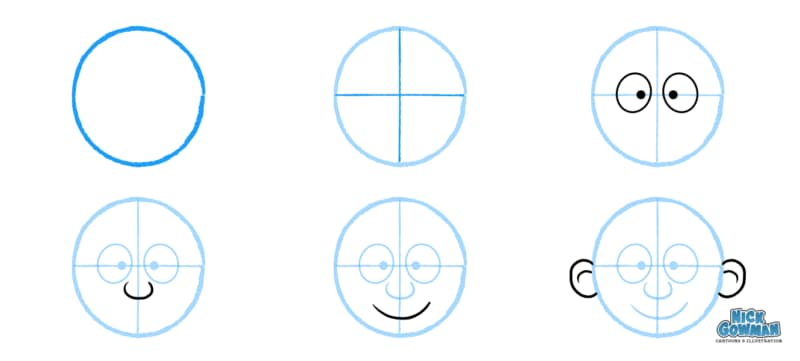
Part 3 How to Draw a Cartoon Face - For Beginners
Here, we have written down 7-step to follow on how to draw a cartoon character face as a beginner effectively.
● Step 1: Plan and Prepare
This is the first step is to plan out exactly what this character will convery through its expression while drawing a cartoon character.
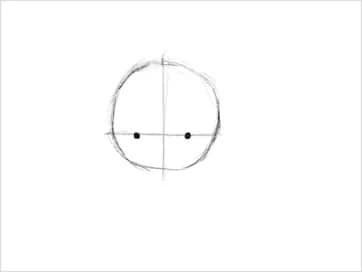
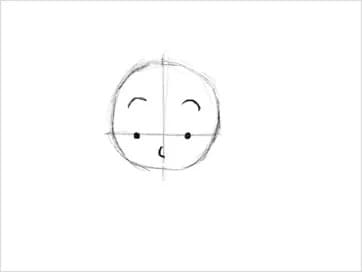
● Step 2: Drawing A Cartoon Head
Next is time to start sketching out the shape of the head based on the plan you have made. Whatsoever shape you decide to use for your character, start with a circle to serve as the basic shape for the head.
● Step 3: Drawing Cartoon Eyes
Now, you need to draw the eye of the character, which is a crucial step because the eye is the essential part of their expression. To get the character’s eyes in the right place, you should carefully sketch the horizontal or vertical dimension lines.
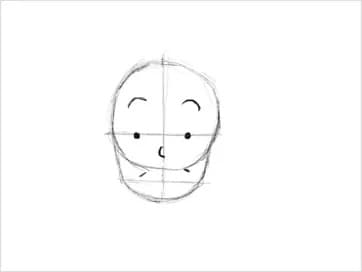
● Step 4: Drawing A Cartoon Nose
The simpler the nose is, the better it looks in a cartoon. Ensure to keep a proper ratio between the mouth, eyes, and nose so that it does not look too crowded together.
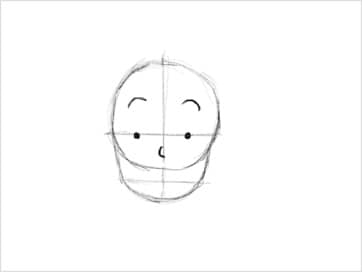
● Step 5: Shaping the Face
In shaping the face, one needs to be mindful of the character, which will help to determine how to shape the jawline and head. For example, for a girl, the face should be narrower and have the chin come to a bit of a point at the end, whereas, for a boy, it requires that the face is a bit bolder and focuses more on the definition of the jawline.
● Step 6: Drawing A Cartoon Mouth
The mouth is another essential part of the cartoon character’s expression and a key indicator of how the character is feeling. It portrays whether you want the character to smile, frown, yell, be nervous, or be neutral.
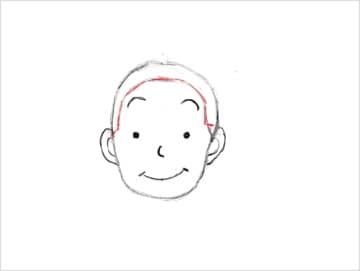
● Step 7: Drawing Cartoon Hair
Next, you need to draw the cartoon hair, and, in some cases, the cartoon hair is a significant part of their appearance as it is a way to convey your character’s personality, appearance, style, or gender.
● Step 8: Coloring
Another part requires you to paint your character to improve the texture and make it beautiful.
Part 4 How to Easily Turn Yourself into a Cartoon
Are you looking to turn yourself into a cartoon? This is very necessary as it provides you with a great way to integrate diverse characters into your brand’s marketing while simultaneously keeping your content personalized.
However, after converting a picture to a cartoon character face, you can decide to animate it, and the best tool is Wondershare Filmora Video Editor . Animation is a great way to advertise your business, especially during times like these. it is a clever way for leaders, CEOs, and managers to connect with their remote workers and boost engagement, company culture, and ultimately work morale. Filmora is also a great tool to create creative and powerful animation with tons of follow-come effect that enables you to carry it out effectively and efficiently. In this section, we will guide you on how to turn yourself into a cartoon easily:
Step 1: Visit Powtoon.com and sign up for a free account, then click on the “build your character” option from the dropdown menu.
Step 2: Next is to select the cartoon gender you want.
Step 3: Finally, you can customize your character’s facial features such as skin, hair, color, clothes, and animated gestures.
Step 4: Once you are satisfied with the result, you can save it on your device or share it on social media
For Win 7 or later (64-bit)
For macOS 10.12 or later
● Ending Thoughts →
● Thus, we saw how to easily cartoon your character’s face via some samples to help you out. With the method listed above, you can easily use it to create a square-faced cartoon character or draw a fat face cartoon character.
● This article also explained how to cartoon yourself. However, to cartoon your video or create a cartoon animated video, we recommend that you use Filmora, its keyframing feature to help you carry this out effectively.
Being able to draw facial features is an essential skill for any animator. Whether you are a beginner at drawing faces or an experienced cartoon artist that has been drawing for years, this is a skill that can gradually improve with time. With the implementation and use of simple shapes, creating various facial features and cartoon styles can be done quickly.
The methods of creating funny face cartoon characters are suitable for everyone, even if they do not have a single day of illustrating experience. These methods presented in this article are easily accessible to provide you with different results depending on your budget and your desired outcome.
The act of drawing cartoon faces can be effortless, and in this article, we will give you some fundamental samples of how you can draw cartoon faces of your own.
In this article
01 [Learn to Understand the Core of Cartoon Style](#Part 1)
02 [Top 12 Cartoon Face Examples](#Part 2)
03 [How to Draw a Cartoon Face - For Beginners](#Part 3)
04 [How to Easily Turn Yourself into a Cartoon](#Part 4)
Part 1 Learn to Understand the Core of Cartoon Style
First, you need to simplify the different parts of the cartoon character face to pick up on very subtle facial expressions and features. For example, the eyes’ shape and size will help determine if the person is feeling sad, excited, happy, excited, or sad. In addition, the amount of lift under a person’s eyebrows can help determine whether a person is mad or not.
These facial expressions are crucial to how a person communicates. It has got to the point that we can read someone’s face without truly understanding which parts of the face convey that emotion. However, these days we get exposed to everyday adaptations of facial expressions, especially with the invention of Instagram, Snapchat, and cartoon face filters.
Consequently, cartoons are a combination of different shapes that are being put together and are not difficult if the focus is on each shape individually and the process breaks down step by step.
Cartoons are a mixture of different shapes put together. It’s not difficult if you focus on each shape individually and break down the process step by step.
Finally, understanding these unconscious and subtle differences in facial expressions is crucial when planning out an animated character. Afterward, when understood, you can simplify the features to be recognizable by your audience.
Part 2 Top 12 Cartoon Face Examples
Cartoon character faces are gaining immense importance in design art due to their universality. Cartoon faces can represent people in several situations and add a comic or satirical twist to dull topics by highlighting their importance. However, drawing cartoon faces require a lot of skill and differentiation, and graphic designers, while working on basic and universal templates, always try and introduce unique elements.
Here are the top 10 examples of cartoon character faces you can choose from when you want to make your designs:
01Men and Women
This sketch features different facial expressions made by older men and women.
02Stretch and Squash
This photo shows the difference between squashing and stretching the face and provides references for extreme squash and extreme stretch.
03Dramatic Expressions
The expressions drawn here are super fun and dramatic. However, it is a great way to have fun and practice how to draw facial expressions simultaneously.
04Quick Expressive Sketches
With this, you can practice how to draw different facial expressions by doing quick sketches like this one. Perhaps you do not need to pay attention to perfection.
05This Is Good This Is Better
With this facial expression, you can see a good look and an even better expression. It shows the difference that subtle changes can make to your facial expressions**.**
06Male and Female Expressions
This includes both male and female expressions to express the facial reaction of both genders, like some funny cartoon characters face.
07Quick Sketches
This type of facial expression will help you get better at drawing cartoons, and you can use do some quick sketches every day.
08Jay Leno’s facial expression
Here, it is being exaggerated on a few of his most prominent facial features, including his chin. It is kind of a fat face cartoon character.
09Robert Pattinson Facials
In this photo, his head shape was distorted to show the thinness of his face, and his big hair also accentuates this prominent feature further.
10A,I,U,O,AE,M Facials
With this, you can practice how to draw your facial expression by pronouncing a, i, u, o, ae, m.
Part 3 How to Draw a Cartoon Face - For Beginners
Here, we have written down 7-step to follow on how to draw a cartoon character face as a beginner effectively.
● Step 1: Plan and Prepare
This is the first step is to plan out exactly what this character will convery through its expression while drawing a cartoon character.
● Step 2: Drawing A Cartoon Head
Next is time to start sketching out the shape of the head based on the plan you have made. Whatsoever shape you decide to use for your character, start with a circle to serve as the basic shape for the head.
● Step 3: Drawing Cartoon Eyes
Now, you need to draw the eye of the character, which is a crucial step because the eye is the essential part of their expression. To get the character’s eyes in the right place, you should carefully sketch the horizontal or vertical dimension lines.
● Step 4: Drawing A Cartoon Nose
The simpler the nose is, the better it looks in a cartoon. Ensure to keep a proper ratio between the mouth, eyes, and nose so that it does not look too crowded together.
● Step 5: Shaping the Face
In shaping the face, one needs to be mindful of the character, which will help to determine how to shape the jawline and head. For example, for a girl, the face should be narrower and have the chin come to a bit of a point at the end, whereas, for a boy, it requires that the face is a bit bolder and focuses more on the definition of the jawline.
● Step 6: Drawing A Cartoon Mouth
The mouth is another essential part of the cartoon character’s expression and a key indicator of how the character is feeling. It portrays whether you want the character to smile, frown, yell, be nervous, or be neutral.
● Step 7: Drawing Cartoon Hair
Next, you need to draw the cartoon hair, and, in some cases, the cartoon hair is a significant part of their appearance as it is a way to convey your character’s personality, appearance, style, or gender.
● Step 8: Coloring
Another part requires you to paint your character to improve the texture and make it beautiful.
Part 4 How to Easily Turn Yourself into a Cartoon
Are you looking to turn yourself into a cartoon? This is very necessary as it provides you with a great way to integrate diverse characters into your brand’s marketing while simultaneously keeping your content personalized.
However, after converting a picture to a cartoon character face, you can decide to animate it, and the best tool is Wondershare Filmora Video Editor . Animation is a great way to advertise your business, especially during times like these. it is a clever way for leaders, CEOs, and managers to connect with their remote workers and boost engagement, company culture, and ultimately work morale. Filmora is also a great tool to create creative and powerful animation with tons of follow-come effect that enables you to carry it out effectively and efficiently. In this section, we will guide you on how to turn yourself into a cartoon easily:
Step 1: Visit Powtoon.com and sign up for a free account, then click on the “build your character” option from the dropdown menu.
Step 2: Next is to select the cartoon gender you want.
Step 3: Finally, you can customize your character’s facial features such as skin, hair, color, clothes, and animated gestures.
Step 4: Once you are satisfied with the result, you can save it on your device or share it on social media
For Win 7 or later (64-bit)
For macOS 10.12 or later
● Ending Thoughts →
● Thus, we saw how to easily cartoon your character’s face via some samples to help you out. With the method listed above, you can easily use it to create a square-faced cartoon character or draw a fat face cartoon character.
● This article also explained how to cartoon yourself. However, to cartoon your video or create a cartoon animated video, we recommend that you use Filmora, its keyframing feature to help you carry this out effectively.
Tips for Canva Animated Elements
Versatile Video Editor - Wondershare Filmora
An easy yet powerful editor
Numerous effects to choose from
Detailed tutorials provided by the official channel
Thanks to the progress of graphic design, users are no longer simply satisfied with everyday designs, no matter how complex the design itself. They want innovation, they want a fresh and mesmerizing new idea. This becomes increasingly harder to achieve and helps push the boundaries of what designers want.
This is where motion can come into play. Movement in graphic design has emerged as a recent design trend. This is where users benefit from valuable tips for Canva animated elements.
Without further ado, let’s dive into everything you need to know to design animated elements in Canva.
In this article
01 [What is Canva?](#Part 1)
02 [Animate An Element In Canva ](#Part 2)
03 [Make Elements Move In Canva](#Part 3)
04 [How About Making Animated Elements On Video](#Part 4)
Part 1 What is Canva?
Canva has become a buzzword in the designing and animation world. It’s a graphic design platform that allows users to create graphic designs for social media, for presentations, documents, cards for any memorable occasion. It was founded by Melanie Perkins, an Australian technology entrepreneur.
Canva has become a buzzword in the designing and animation world. It’s a graphic design platform that allows users to create graphic designs for social media, for presentations, documents, cards for any memorable occasion. It was founded by Melanie Perkins, an Australian technology entrepreneur.
It allows users to work individually or across teams. With real-time live changes made available, Canva is pushing the boundary of what is possible and making it more accessible. With the introduction of animated elements in Canva, the possibilities for design horizons have expanded significantly.
Part 2 Animate An Element In Canva
There are one of two ways to go about creating an animation. You can work off an existing template or create a custom template. If you’re wondering how to animate individual elements in Canva then this guide is for you.
The first step to animation is building your custom static design. For that you need to go to Canva and select “Create a Design” option. Once you do, select the type of content you’re attempting to create- from Instagram posts to a presentation or an A4 document.
Think of the text font you’re going to use.

Then you should look into adding elements that suit your text on the design.

You can upload photographs into your creation with the upload button. This also extends to uploading audio that you want to use on video clips.

Once you’re done with these steps, you should have a customized static design that you can use. Let’s now look at how to animate individual elements in Canva. These elements are the text, the image, audio, and video.
2.1 Image
To add an image to Canva, you need to upload it in the ‘Upload’ tab on Canva. Once you do, the image can then be selected for display on your presentation.
For images, you can also choose to frame them within the “elements” tab. There are two kinds of elements. One which allows photographs to be embedded in them and ones which don’t. You can choose any element as a frame for your embedded image.
The next thing is to choose the “Animate” button. This will open up different options for animation features. The animate button allows a preview of what each animation does in real-time.

The ones with the crown are premium features exclusive to Canva Pro, the paid subscription.
2.2 Text
Add in the text you want to see to the image. The text can be in any style that you choose. Canva offers a variety of fonts that you can use to customize the color, size, and duration of the display.

2.3 Video
If you’re ready to take your content creation skills to the next level, this section is for you. You have the option of adding videos to Canva as well. Just load the video you have on hand to the Canva “Uploads” section. Introduce the video clip to the design.
Another way to embed the video is by using an element and embedding your video within it.
With video, you also have options like cropping, adjusting the playback. With playback, you can choose “Autoplay Video” and “Loop Video.” These are basic options for how the video can be played. The crop function allows you to trim the video to any point in time.
On top of this, you can use the animate button, which can create options for how the video is introduced to the backdrop.

If you want to remove the animation, you need to go to the “Animate” button and select the ‘None’ option to delete the animation from the design.
You can opt to animate either just the elements or you can animate the slide on the whole with “Page Animations.”
Part 3 Make Elements Move In Canva
How To Arrange The Order Of An Animation?
The brilliant thing about Canva is that you can decide the order you want to create your animation. The component elements of a Canva backdrop are the text, audio, images, video. These form the basis for the animated elements in Canva.
You can work on whichever component feels more accessible to you. Canva also allows users to make videos for title sequences and end-cards for video sharing platforms.
How to Change The Duration Of Animated Graphic In Canva
Once you’ve added a video element to your presentation, you’ll notice that the timer disappears from the production. This is because the presentation only lasts the duration of the video.
If you go to the next slide of the presentation, you can often notice a timer available. It has a default duration of five seconds. If you click on the clock symbol, a menu with “Timing” will appear with a slider. You can adjust the timing from 0.1 seconds up to a maximum of 30 seconds.
Part 4 How About Making Animated Elements On Video
If you’ve decided Canva is not the tool for you, you can choose any video editing software to make your animation.
Wondershare Filmora is the tool that can help you level up your content creation. It allows users to increase precision and provides professional video editing options.
AI Portrait – The best feature of Wondershare Filmora for gameplay editing
The AI Portrait is a new add-on in Wondershare Filmora. It can easily remove video backgrounds without using a green screen or chroma key, allowing you to add borders, glitch effects, pixelated, noise, or segmentation video effects.

Conclusion
Now that you understand how to build an animation and the software required, you should differentiate between average and extraordinary editing tools.
Filmora and Canva are the best editing tools in this case. Like you can animate individual elements Canva, you can do the same in the other tool also. It may be used to produce animation videos by introducing keyframes, resulting in a seamless and realistic animation. Aside from that, using color correction and an audio processor can help take your animations to the next tier.
Download it today to make your videos better.
Thanks to the progress of graphic design, users are no longer simply satisfied with everyday designs, no matter how complex the design itself. They want innovation, they want a fresh and mesmerizing new idea. This becomes increasingly harder to achieve and helps push the boundaries of what designers want.
This is where motion can come into play. Movement in graphic design has emerged as a recent design trend. This is where users benefit from valuable tips for Canva animated elements.
Without further ado, let’s dive into everything you need to know to design animated elements in Canva.
In this article
01 [What is Canva?](#Part 1)
02 [Animate An Element In Canva ](#Part 2)
03 [Make Elements Move In Canva](#Part 3)
04 [How About Making Animated Elements On Video](#Part 4)
Part 1 What is Canva?
Canva has become a buzzword in the designing and animation world. It’s a graphic design platform that allows users to create graphic designs for social media, for presentations, documents, cards for any memorable occasion. It was founded by Melanie Perkins, an Australian technology entrepreneur.
Canva has become a buzzword in the designing and animation world. It’s a graphic design platform that allows users to create graphic designs for social media, for presentations, documents, cards for any memorable occasion. It was founded by Melanie Perkins, an Australian technology entrepreneur.
It allows users to work individually or across teams. With real-time live changes made available, Canva is pushing the boundary of what is possible and making it more accessible. With the introduction of animated elements in Canva, the possibilities for design horizons have expanded significantly.
Part 2 Animate An Element In Canva
There are one of two ways to go about creating an animation. You can work off an existing template or create a custom template. If you’re wondering how to animate individual elements in Canva then this guide is for you.
The first step to animation is building your custom static design. For that you need to go to Canva and select “Create a Design” option. Once you do, select the type of content you’re attempting to create- from Instagram posts to a presentation or an A4 document.
Think of the text font you’re going to use.
Then you should look into adding elements that suit your text on the design.
You can upload photographs into your creation with the upload button. This also extends to uploading audio that you want to use on video clips.
Once you’re done with these steps, you should have a customized static design that you can use. Let’s now look at how to animate individual elements in Canva. These elements are the text, the image, audio, and video.
2.1 Image
To add an image to Canva, you need to upload it in the ‘Upload’ tab on Canva. Once you do, the image can then be selected for display on your presentation.
For images, you can also choose to frame them within the “elements” tab. There are two kinds of elements. One which allows photographs to be embedded in them and ones which don’t. You can choose any element as a frame for your embedded image.
The next thing is to choose the “Animate” button. This will open up different options for animation features. The animate button allows a preview of what each animation does in real-time.
The ones with the crown are premium features exclusive to Canva Pro, the paid subscription.
2.2 Text
Add in the text you want to see to the image. The text can be in any style that you choose. Canva offers a variety of fonts that you can use to customize the color, size, and duration of the display.
2.3 Video
If you’re ready to take your content creation skills to the next level, this section is for you. You have the option of adding videos to Canva as well. Just load the video you have on hand to the Canva “Uploads” section. Introduce the video clip to the design.
Another way to embed the video is by using an element and embedding your video within it.
With video, you also have options like cropping, adjusting the playback. With playback, you can choose “Autoplay Video” and “Loop Video.” These are basic options for how the video can be played. The crop function allows you to trim the video to any point in time.
On top of this, you can use the animate button, which can create options for how the video is introduced to the backdrop.
If you want to remove the animation, you need to go to the “Animate” button and select the ‘None’ option to delete the animation from the design.
You can opt to animate either just the elements or you can animate the slide on the whole with “Page Animations.”
Part 3 Make Elements Move In Canva
How To Arrange The Order Of An Animation?
The brilliant thing about Canva is that you can decide the order you want to create your animation. The component elements of a Canva backdrop are the text, audio, images, video. These form the basis for the animated elements in Canva.
You can work on whichever component feels more accessible to you. Canva also allows users to make videos for title sequences and end-cards for video sharing platforms.
How to Change The Duration Of Animated Graphic In Canva
Once you’ve added a video element to your presentation, you’ll notice that the timer disappears from the production. This is because the presentation only lasts the duration of the video.
If you go to the next slide of the presentation, you can often notice a timer available. It has a default duration of five seconds. If you click on the clock symbol, a menu with “Timing” will appear with a slider. You can adjust the timing from 0.1 seconds up to a maximum of 30 seconds.
Part 4 How About Making Animated Elements On Video
If you’ve decided Canva is not the tool for you, you can choose any video editing software to make your animation.
Wondershare Filmora is the tool that can help you level up your content creation. It allows users to increase precision and provides professional video editing options.
AI Portrait – The best feature of Wondershare Filmora for gameplay editing
The AI Portrait is a new add-on in Wondershare Filmora. It can easily remove video backgrounds without using a green screen or chroma key, allowing you to add borders, glitch effects, pixelated, noise, or segmentation video effects.
Conclusion
Now that you understand how to build an animation and the software required, you should differentiate between average and extraordinary editing tools.
Filmora and Canva are the best editing tools in this case. Like you can animate individual elements Canva, you can do the same in the other tool also. It may be used to produce animation videos by introducing keyframes, resulting in a seamless and realistic animation. Aside from that, using color correction and an audio processor can help take your animations to the next tier.
Download it today to make your videos better.
Best 10 Video to GIF Converters: Top Picks
Best 10 Video to GIF Converters: Top Picks
An easy yet powerful editor
Numerous effects to choose from
Detailed tutorials provided by the official channel
Having trouble converting your videos to GIF? Browse the top 10 converters to sort this out!
In this article
01 [Why GIFs are Widely Used and Popular?](#Part 1)
02 [Top 10 Ways to Turn Video into GIF](#Part 2)
Part 1 Why GIFs are Widely Used and Popular?
If you take a poll on the watch preference of GIF versus videos, most of votes you get would be in favor of watching GIFs. There are obvious reasons to the fact that anyone would prefer watching a GIF over a video, irrespective of its length. Some major ones that make it quite annoying to watch videos include the following:
● To begin with, you need to turn the video on and off, depending on your choice of watching a video or surfing through stories and feeds, failing which you get to hear additional sounds through your feed from the already running video. You further need to stop the music or go for a volume control in case you are not interested to watch the video.
● Most of the videos you run turn up to be irrelevant or uninteresting through the middle, but you don’t have a choice to make bit adjustments. If however possible, the method is not quite convenient. You may need to visit a different site in case you run a video that is not integrated with webpage of your searched content, wait for the portal’s interface to load or watch an advertisement.
● GIFs, on the other hand, do not require pausing or turning off, and run automatically. You also don’t need to mute any sounds. These ensure to-the-point message delivery and don’t divert your attention from the primary content you visit the webpage for.
Owing to the above, most of us are now much interested to convert videos to GIFs for an exact, impactful and to the point content creation and sharing. See through the next sections of this article to learn about the best video to GIF conversion tools and software.
Part 1 Top 10 Ways to Turn Video into GIF
Considering the credibility of GIFs, you may often require to convert your long videos into short and content specific GIFs. Given below are the 10 best methods to cater to the need of video to GIF conversion:
01Filmora
Wondershare Filmora Video Editor is one among the most popular and easy methods to convert videos to GIFs. It is compatible with almost all common video formats and is loaded with a plethora of exciting effects and editing tools. Take the following steps to create GIFs from videos using this application:
Wondershare Filmora
Get started easily with Filmora’s powerful performance, intuitive interface, and countless effects!
Try It Free Try It Free Try It Free Learn More >


Step 1: Import Your Video
Launch Filmora and import your desired video in the app’s welcome window. To do this, click on ‘New Project’ followed by ‘Import’ option from the drop down menu to add your video to the Filmora.

Step 2: Timeline Dragging
Add your video to the app’s timeline using the ‘Drag and Drop’ method. You can also extract video frames by taking screenshots and merge these images into your GIF from the media library.

Step 3: Explore Your Editing Skills
You can now edit the imported video in the timeline using a range of interesting effects. Crop, trim, split or make speed adjustments to give your video a catchy look.

Step 4: Include Messages
Try adding texts and supplementary elements to deliver impactful messages through your creation.

Step 5: It’s Time to Share!
Click ‘Export’ to save your GIF to your device. You are now ready to post your work in your social communities to get the most deserved attention of your peers!

02YouTube to GIF
This one is a simple and user-friendly video to GIF converter. You can convert videos to GIFs from your PC or other online platforms with this converter. The converter allows you to play with a variety of editing effects to make your creation more interesting. All you need to do is the following:
● In the video URL bar, type ‘gif’ after ‘www.’ and you will be redirected to converter’s working window. Set the GIF time interval or apply specific effects using the tools from the panel in the left of the working window.


● To set the video time frame, highlight it in the video timeline. Set the desired interval using the ‘Start Time’ and ‘End Time’ options.

● To add a new visual effect, select it from the menu. Below the video timeline, a row of parameters will get displayed. Set the effect parameters to make desired changes.
● Click ‘Create GIF’. In the ‘Settings’ menu, you can rename and add tags to your creation and even make it private.

● That’s it! You can download your GIF now. You may get a converter purchase offer for enabling advanced features. While most users prefer sticking to the free version, it is up to you whether to decline or accept the purchase offer.
● The ‘Download’ feature is exclusive to registered users. However, if you don’t prefer creating an account, just open the GIF download link in a separate tab’s ‘Direct Link’ row. Alternatively, you can replace ‘gif’ with ‘conv’ in the video URL bar and choose ‘Convert to GIF’. However, this process may take some extra minutes.

03Giphy GIF Maker
This is an editing tool that you can use to convert video to GIF online. This one is a reliable converter tool with a user-cohesive interface. It is a simple video editor that is available to you for free. All you need to do is mentioned below:
Step 1: Load your Video
Go to the official app website and paste your desired video link in the search bar. Your video gets uploaded to the app’s editor screen. Specify the time frame and check out your GIF’s preview.

Step 2: Let’s Go Editing!
Select ‘Continue to Decorate’ to edit your GIF with texts, effects, frames and filters. You can even go for a straight upload if your video doesn’t require customization.

Step 3: Time to Share!
Select ‘Continue to Upload’ and add required tags. Tap ‘Upload to Giphy’ to make a social media post or add it to the app’s website through a specific share code.
04Wondershare TunesGo
This is an effective video to GIF creator tool, loaded with extensive features. You can use this application to convert videos, live photos and multiple snaps into interesting GIFs. TunesGo gives you the freedom to edit your work in your own style with a variety of effects. Here’s what you need to do:

Step 1: Launch TunesGo
Download, install and launch the app into your PC. You may be asked for a device connection setup, but you can skip that in case GIF creation is your only requirement.

Step 2: Upload your Video
In the app’s welcome screen, navigate to ‘Toolbox’ at the top. From the drop down interface, choose ‘GIF Maker’. In the new window that pops-up next, click on ‘Add’ to upload the desired video to the app from your PC.

Step 3: Let’s Create!
Set the required time frame for your GIF in the app’s timeline and tap the ‘Create GIF’ button to start the conversion process. On completion, your work gets automatically saved in the ‘Pictures’ folder in your PC. You can also customize your target location.

05Vimeo
Vimeo is also a quick, 3-stepvideo to GIF converter. However, you need to have a Vimeo account to take up the conversion process. This is an easy and hassle free GIF creator, that adheres to your creation needs within minutes. Here’s what you need to do:
Step 1: Upload Your Video
Log in to your Vimeo account. In the opening window, select ’Upload’ from the toolbar at the top. ‘Drag and Drop’ or click ‘Choose Files’ to upload the desired video from your device.

Step 2: Create Your GIF
After you are done uploading the video, select ‘Create a GIF’ from the sidebar at the left. You will be directed to the GIF Editor window. Select a loop section from the video and set a time frame of maximum 6 seconds in the video timeline. Now click ‘Create GIF’.


Step 3: Export Your Creation
Your GIF is ready to download and share. You can also embed your GIF by generating embed codes for specific platforms.
06 Adobe Photoshop
This one is one f the most popular editing applications you can use to make GIF out of video. It’s simple and user-friendly interface does not require you to possess a Photoshop mastery for the conversion purpose. Here’s what you need to follow:
Step 1: Search Your Video
Find a video of your choice from a desired platform. In case you want a YouTube video, add ‘ss’ prior to the video’s service name in YouTube’s URL bar.
STEP 2: Edit Your Video
Use any preferable video splitters and editors to crop, trim and add interesting effects to your video and set a maximum time frame of 3 seconds.
Step 3: Create GIF
Open your edited video in Adobe Photoshop and tap ‘File Import-Video frames into layers’.

Step 4: Adjust Settings
Make required setting adjustments and click on ‘File-Save for Web’. Try adjusting image resolution and color range if your file size exceeds 10 MB.

Step 5: Save Your Work
In the ’Files’ tab at the top, select ‘Save’ and choose the ‘.gif’ extension in the ‘File Type’ dialog box to save your creation to your PC.
07Convertio
This converter provides a simple, 3-step process to create GIF from video. Either use it as a browser extension or download it from Google Chrome Webstore. Take the following steps to convert videos to GIF online.
● Upload your desired video to the service timeline. You can either choose files directly or ‘Drag and Drop’ them from your device.
● Select ‘Convert’ to make GIF from your uploaded video.
● Tap ‘Download’ to save your creation.

You can use this service to make different format conversions. However, this converter does not allow you to edit or add effects your GIF.
08MakeAGif
You can use this tool as a GIF video maker online to create, exchange and share GIFs on different platforms. Additionally, you also get the flexibility to use already saved images in your device to add them to your GIF. The app’s basic version allows you to create GIFs without watermarks. To add watermarks, you will need an account on the app. To convert videos to GIFs using this tool, you should take the following steps:
Step 1: Upload Your Video
In the app’s welcome screen, click on ‘Video to GIF’ and upload a desired video in the editor timeline. Add effects and make speed and time frame adjustments. When satisfied, tap ‘Continue to Publishing’.

Step 2: Add Names and Tags
In the publishing window, give a suitable name and add required tags to your edited video to make it easily identifiable. When you are done, click on ‘Create a GIF’ from the bottom right.

Step 3: Ready to Share!
You can now share your created GIF across social media platforms.

09Adobe Premiere
Similar to Adobe Photoshop, Adobe Premiere too is quite a preferred application for creating GIFs from videos. This is a simple, quick and free application that converts your videos to GIFs in a span of few minutes. Here’s what you need to do to go about the process:

Step 1: Edit your Video
Add a video of your choice in the Adobe Premiere timeline and play with your editing creativity to add desired effects and filters to it. Make sure to set requisite time frames to your edit.

Step 2: Prepare an Export
Click into the app’s video timeline, and prepare a file export using the following path:
File> Export> Media

Step 3: Settings Adjustments
In the Media Export window, navigate to the ‘Format’ tab. From the drop down menu, choose ‘Animated GIF’. Here, you can add your gif file, select its target destination and adjust the required settings.

Step 4: Export Your Work
Click ‘Export’ to share your creation on social media or click on ‘Queue’ to send your GIF to a specific media encoder.

1010. Movavi Video Converter
This is one of the latest video converter software you can rely on to make GIF from video files. This software allows you to create top quality animated GIFs and is compatible with a variety of video formats. Using this converter, you can create amazing GIFs in 5 quick steps: here’s what you need to follow:
Step 1: Download and Install the Software
To begin, download the converter software from its official site and adhere to the user instructions to install the same in your system.
Step 2: Upload Your Video
In the software’s opening window, click on ‘Add Media’ followed by ‘Add Video’ and select a desired video from your system to upload on the Movavi video timeline.

Step 3: Trim Your Video
Select ‘Edit’ from the right of your video file. In the editing window, specify the initial cut of the video by displacing the marker to the desired point. Click on ‘Scissors’ to add multiple cut points to your video. You can even drag the cut points around the editor timeline. Choose the unvented sections and click ‘Trash Can’. When the result satisfies you, click ‘Done’.

Step 4: Choose a Conversion Format
Navigate to the ‘Images’ tab and select ‘GIF’ and set an adequate size for the GIF. Here, you can adjust quality, frame size and rate and resize method using the ‘Cogwheel’ tool.

Step 5: Let’s Get Converting!
Tap ‘Convert’ and wait for the conversion to finish. You will be automatically directed to the folder where your converted files get saved.

● Key Takeaways from This Episode →
● GIFs are short, to the point and convenient to access, providing exact and impactful message delivery.
● The software market is flooded with a variety of editing tools to convert your dull videos to catchy GIFs.
● Filmora is a quick and smart editing tool that envisages your GIF creating experience with a range of exciting features.
Having trouble converting your videos to GIF? Browse the top 10 converters to sort this out!
In this article
01 [Why GIFs are Widely Used and Popular?](#Part 1)
02 [Top 10 Ways to Turn Video into GIF](#Part 2)
Part 1 Why GIFs are Widely Used and Popular?
If you take a poll on the watch preference of GIF versus videos, most of votes you get would be in favor of watching GIFs. There are obvious reasons to the fact that anyone would prefer watching a GIF over a video, irrespective of its length. Some major ones that make it quite annoying to watch videos include the following:
● To begin with, you need to turn the video on and off, depending on your choice of watching a video or surfing through stories and feeds, failing which you get to hear additional sounds through your feed from the already running video. You further need to stop the music or go for a volume control in case you are not interested to watch the video.
● Most of the videos you run turn up to be irrelevant or uninteresting through the middle, but you don’t have a choice to make bit adjustments. If however possible, the method is not quite convenient. You may need to visit a different site in case you run a video that is not integrated with webpage of your searched content, wait for the portal’s interface to load or watch an advertisement.
● GIFs, on the other hand, do not require pausing or turning off, and run automatically. You also don’t need to mute any sounds. These ensure to-the-point message delivery and don’t divert your attention from the primary content you visit the webpage for.
Owing to the above, most of us are now much interested to convert videos to GIFs for an exact, impactful and to the point content creation and sharing. See through the next sections of this article to learn about the best video to GIF conversion tools and software.
Part 1 Top 10 Ways to Turn Video into GIF
Considering the credibility of GIFs, you may often require to convert your long videos into short and content specific GIFs. Given below are the 10 best methods to cater to the need of video to GIF conversion:
01Filmora
Wondershare Filmora Video Editor is one among the most popular and easy methods to convert videos to GIFs. It is compatible with almost all common video formats and is loaded with a plethora of exciting effects and editing tools. Take the following steps to create GIFs from videos using this application:
Wondershare Filmora
Get started easily with Filmora’s powerful performance, intuitive interface, and countless effects!
Try It Free Try It Free Try It Free Learn More >
Step 1: Import Your Video
Launch Filmora and import your desired video in the app’s welcome window. To do this, click on ‘New Project’ followed by ‘Import’ option from the drop down menu to add your video to the Filmora.
Step 2: Timeline Dragging
Add your video to the app’s timeline using the ‘Drag and Drop’ method. You can also extract video frames by taking screenshots and merge these images into your GIF from the media library.
Step 3: Explore Your Editing Skills
You can now edit the imported video in the timeline using a range of interesting effects. Crop, trim, split or make speed adjustments to give your video a catchy look.
Step 4: Include Messages
Try adding texts and supplementary elements to deliver impactful messages through your creation.
Step 5: It’s Time to Share!
Click ‘Export’ to save your GIF to your device. You are now ready to post your work in your social communities to get the most deserved attention of your peers!
02YouTube to GIF
This one is a simple and user-friendly video to GIF converter. You can convert videos to GIFs from your PC or other online platforms with this converter. The converter allows you to play with a variety of editing effects to make your creation more interesting. All you need to do is the following:
● In the video URL bar, type ‘gif’ after ‘www.’ and you will be redirected to converter’s working window. Set the GIF time interval or apply specific effects using the tools from the panel in the left of the working window.
● To set the video time frame, highlight it in the video timeline. Set the desired interval using the ‘Start Time’ and ‘End Time’ options.
● To add a new visual effect, select it from the menu. Below the video timeline, a row of parameters will get displayed. Set the effect parameters to make desired changes.
● Click ‘Create GIF’. In the ‘Settings’ menu, you can rename and add tags to your creation and even make it private.
● That’s it! You can download your GIF now. You may get a converter purchase offer for enabling advanced features. While most users prefer sticking to the free version, it is up to you whether to decline or accept the purchase offer.
● The ‘Download’ feature is exclusive to registered users. However, if you don’t prefer creating an account, just open the GIF download link in a separate tab’s ‘Direct Link’ row. Alternatively, you can replace ‘gif’ with ‘conv’ in the video URL bar and choose ‘Convert to GIF’. However, this process may take some extra minutes.
03Giphy GIF Maker
This is an editing tool that you can use to convert video to GIF online. This one is a reliable converter tool with a user-cohesive interface. It is a simple video editor that is available to you for free. All you need to do is mentioned below:
Step 1: Load your Video
Go to the official app website and paste your desired video link in the search bar. Your video gets uploaded to the app’s editor screen. Specify the time frame and check out your GIF’s preview.
Step 2: Let’s Go Editing!
Select ‘Continue to Decorate’ to edit your GIF with texts, effects, frames and filters. You can even go for a straight upload if your video doesn’t require customization.
Step 3: Time to Share!
Select ‘Continue to Upload’ and add required tags. Tap ‘Upload to Giphy’ to make a social media post or add it to the app’s website through a specific share code.
04Wondershare TunesGo
This is an effective video to GIF creator tool, loaded with extensive features. You can use this application to convert videos, live photos and multiple snaps into interesting GIFs. TunesGo gives you the freedom to edit your work in your own style with a variety of effects. Here’s what you need to do:
Step 1: Launch TunesGo
Download, install and launch the app into your PC. You may be asked for a device connection setup, but you can skip that in case GIF creation is your only requirement.
Step 2: Upload your Video
In the app’s welcome screen, navigate to ‘Toolbox’ at the top. From the drop down interface, choose ‘GIF Maker’. In the new window that pops-up next, click on ‘Add’ to upload the desired video to the app from your PC.
Step 3: Let’s Create!
Set the required time frame for your GIF in the app’s timeline and tap the ‘Create GIF’ button to start the conversion process. On completion, your work gets automatically saved in the ‘Pictures’ folder in your PC. You can also customize your target location.
05Vimeo
Vimeo is also a quick, 3-stepvideo to GIF converter. However, you need to have a Vimeo account to take up the conversion process. This is an easy and hassle free GIF creator, that adheres to your creation needs within minutes. Here’s what you need to do:
Step 1: Upload Your Video
Log in to your Vimeo account. In the opening window, select ’Upload’ from the toolbar at the top. ‘Drag and Drop’ or click ‘Choose Files’ to upload the desired video from your device.
Step 2: Create Your GIF
After you are done uploading the video, select ‘Create a GIF’ from the sidebar at the left. You will be directed to the GIF Editor window. Select a loop section from the video and set a time frame of maximum 6 seconds in the video timeline. Now click ‘Create GIF’.
Step 3: Export Your Creation
Your GIF is ready to download and share. You can also embed your GIF by generating embed codes for specific platforms.
06 Adobe Photoshop
This one is one f the most popular editing applications you can use to make GIF out of video. It’s simple and user-friendly interface does not require you to possess a Photoshop mastery for the conversion purpose. Here’s what you need to follow:
Step 1: Search Your Video
Find a video of your choice from a desired platform. In case you want a YouTube video, add ‘ss’ prior to the video’s service name in YouTube’s URL bar.
STEP 2: Edit Your Video
Use any preferable video splitters and editors to crop, trim and add interesting effects to your video and set a maximum time frame of 3 seconds.
Step 3: Create GIF
Open your edited video in Adobe Photoshop and tap ‘File Import-Video frames into layers’.
Step 4: Adjust Settings
Make required setting adjustments and click on ‘File-Save for Web’. Try adjusting image resolution and color range if your file size exceeds 10 MB.
Step 5: Save Your Work
In the ’Files’ tab at the top, select ‘Save’ and choose the ‘.gif’ extension in the ‘File Type’ dialog box to save your creation to your PC.
07Convertio
This converter provides a simple, 3-step process to create GIF from video. Either use it as a browser extension or download it from Google Chrome Webstore. Take the following steps to convert videos to GIF online.
● Upload your desired video to the service timeline. You can either choose files directly or ‘Drag and Drop’ them from your device.
● Select ‘Convert’ to make GIF from your uploaded video.
● Tap ‘Download’ to save your creation.
You can use this service to make different format conversions. However, this converter does not allow you to edit or add effects your GIF.
08MakeAGif
You can use this tool as a GIF video maker online to create, exchange and share GIFs on different platforms. Additionally, you also get the flexibility to use already saved images in your device to add them to your GIF. The app’s basic version allows you to create GIFs without watermarks. To add watermarks, you will need an account on the app. To convert videos to GIFs using this tool, you should take the following steps:
Step 1: Upload Your Video
In the app’s welcome screen, click on ‘Video to GIF’ and upload a desired video in the editor timeline. Add effects and make speed and time frame adjustments. When satisfied, tap ‘Continue to Publishing’.
Step 2: Add Names and Tags
In the publishing window, give a suitable name and add required tags to your edited video to make it easily identifiable. When you are done, click on ‘Create a GIF’ from the bottom right.
Step 3: Ready to Share!
You can now share your created GIF across social media platforms.
09Adobe Premiere
Similar to Adobe Photoshop, Adobe Premiere too is quite a preferred application for creating GIFs from videos. This is a simple, quick and free application that converts your videos to GIFs in a span of few minutes. Here’s what you need to do to go about the process:
Step 1: Edit your Video
Add a video of your choice in the Adobe Premiere timeline and play with your editing creativity to add desired effects and filters to it. Make sure to set requisite time frames to your edit.
Step 2: Prepare an Export
Click into the app’s video timeline, and prepare a file export using the following path:
File> Export> Media
Step 3: Settings Adjustments
In the Media Export window, navigate to the ‘Format’ tab. From the drop down menu, choose ‘Animated GIF’. Here, you can add your gif file, select its target destination and adjust the required settings.
Step 4: Export Your Work
Click ‘Export’ to share your creation on social media or click on ‘Queue’ to send your GIF to a specific media encoder.
1010. Movavi Video Converter
This is one of the latest video converter software you can rely on to make GIF from video files. This software allows you to create top quality animated GIFs and is compatible with a variety of video formats. Using this converter, you can create amazing GIFs in 5 quick steps: here’s what you need to follow:
Step 1: Download and Install the Software
To begin, download the converter software from its official site and adhere to the user instructions to install the same in your system.
Step 2: Upload Your Video
In the software’s opening window, click on ‘Add Media’ followed by ‘Add Video’ and select a desired video from your system to upload on the Movavi video timeline.
Step 3: Trim Your Video
Select ‘Edit’ from the right of your video file. In the editing window, specify the initial cut of the video by displacing the marker to the desired point. Click on ‘Scissors’ to add multiple cut points to your video. You can even drag the cut points around the editor timeline. Choose the unvented sections and click ‘Trash Can’. When the result satisfies you, click ‘Done’.
Step 4: Choose a Conversion Format
Navigate to the ‘Images’ tab and select ‘GIF’ and set an adequate size for the GIF. Here, you can adjust quality, frame size and rate and resize method using the ‘Cogwheel’ tool.
Step 5: Let’s Get Converting!
Tap ‘Convert’ and wait for the conversion to finish. You will be automatically directed to the folder where your converted files get saved.
● Key Takeaways from This Episode →
● GIFs are short, to the point and convenient to access, providing exact and impactful message delivery.
● The software market is flooded with a variety of editing tools to convert your dull videos to catchy GIFs.
● Filmora is a quick and smart editing tool that envisages your GIF creating experience with a range of exciting features.
How to Convert Video to GIF Fast & Easy
How to Convert Video to GIF (Fast & Easy!)
An easy yet powerful editor
Numerous effects to choose from
Detailed tutorials provided by the official channel
The use of GIFs has increased over time and not only on social media platforms, these interesting animations are used for various purposes like marketing, blogging, WhatsApp chats, and much more.

Though there are several online sites from where you can download the desired GIF, there is also an option to create a customized one using videos of images. So, if you too are keen to create a customized GIF, the article will look after your concerns. Learn how to make video to GIF Photoshop and using other tools. Keep reading!!
In this article
01 [Simple Alternative to Photoshop for creating a GIF from Videos- Wondershare Filmora](#Part 1)
02 [Simple Alternative to Photoshop for creating a GIF from Videos- Wondershare Filmora](#Part 2)
Part 1 Creating GIFs from videos using Photoshop
When it comes to any type of video editing task, the first software that comes to mind is Photoshop. Developed by Adobe, this is an excellent editing tool available for Windows and Mac. The software comes loaded with a wide range of functions that help you create desired graphics including GIFs.
Though the interface and the use of the software are a little complicated, once you get a hang of it, professional-looking files can be created in no time.
Steps to convert video to GIF Photoshop
Step 1. Launch the Photoshop software on your system and select File > Import. Next tap on the “Video Frames to Layers” option. Choose the desired video (compatible format) and tap on Load.
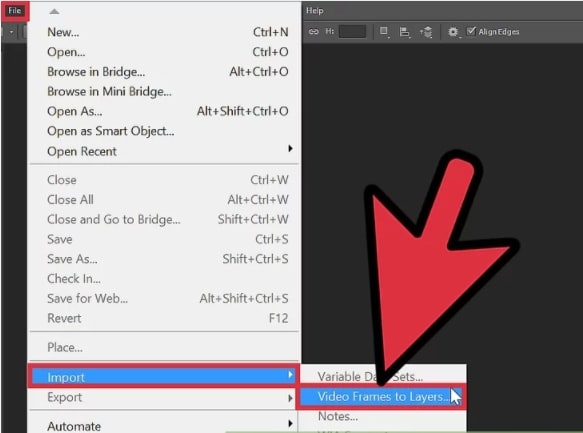
Step 2. Next, you need to select the Range to Import. For a few frames, choose the “Selected Frames Only” option.
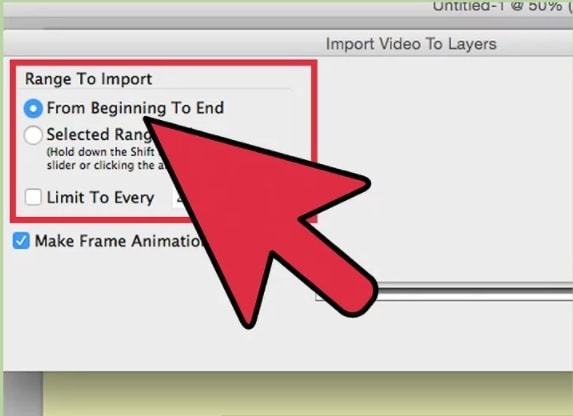
Step 3. You now need to cut the frames that are not needed by going to Window and then selecting the Animation. If needed, new frames can also be added here.
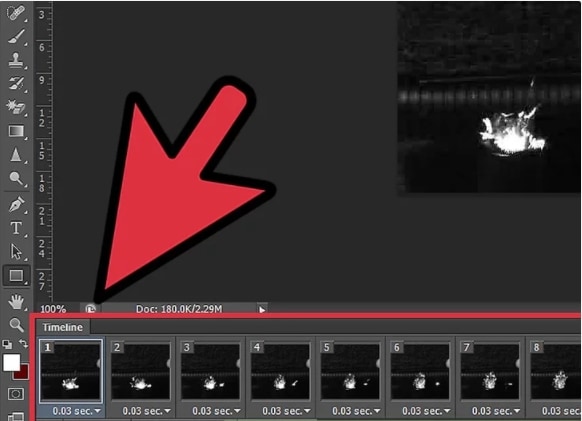
Step 4. To make your animation loop forever, select Forever from the bottom left side of the animation frames.
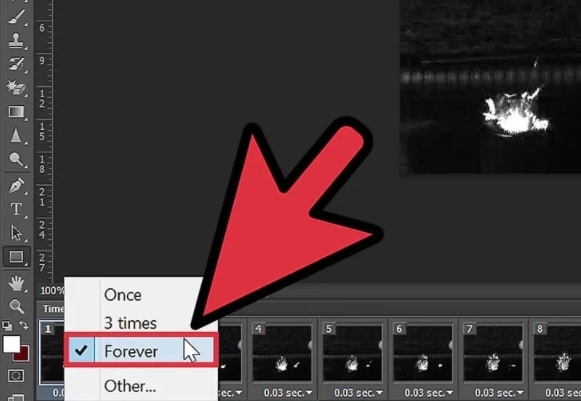
Step 5. Next, at the upper-left corner, go to the Rectangle marquee tool and choose the section you wish to focus on
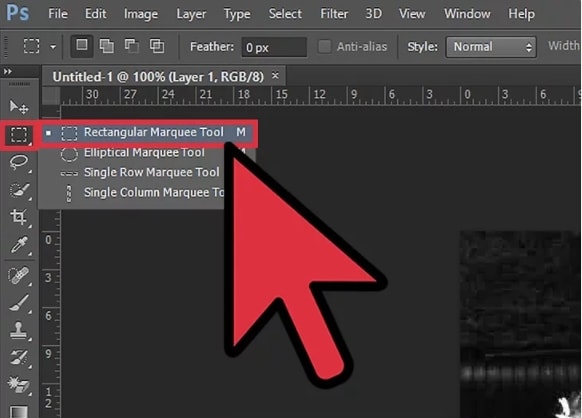
Step 6. Select the image size of the video that will make your GIF look appealing.
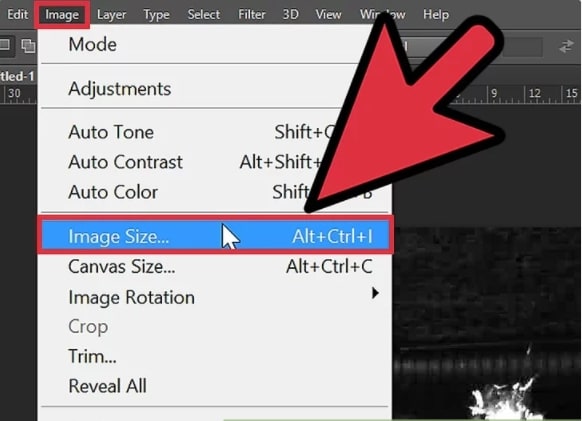
Step 7. Next, go to File > Save for Web & Devices for optimizing the image.
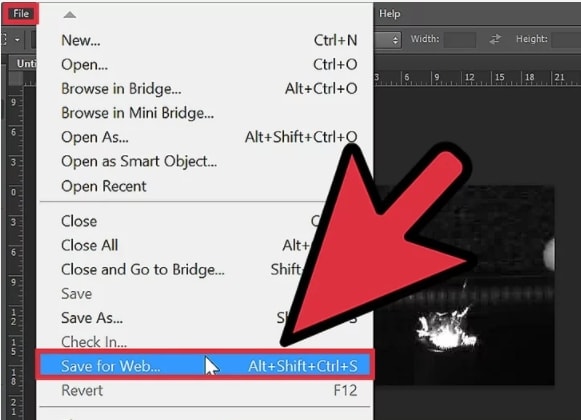
Step 8. Now select GIF at the preset section and check if the animation created is right by clicking on the Preview button.
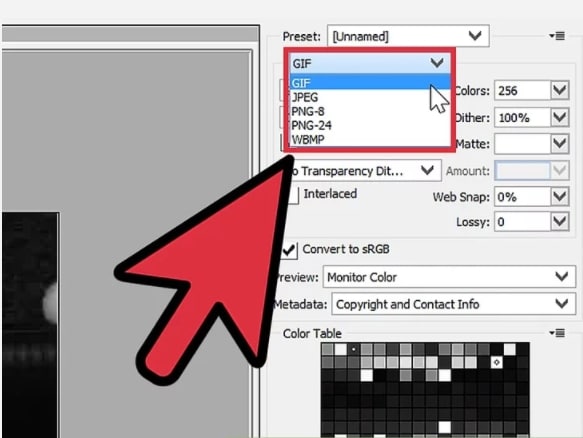
Step 9. Finally, when all is done, click on the Save button and give a desired name to the file.
With the above steps you can make gif from video Photoshop.
Part 2 Simple Alternative to Photoshop for creating a GIF from Videos- Wondershare Filmora
The learning curve of Photoshop is quite steep and to create a GIF from videos using the tool is a complicated process involving multiple steps and especially if you are a beginner and have no prior experience of working with Photoshop software.
So, if you are looking for an alternative that is simple and fast, we suggest Wondershare Filmora Video Editor as the best option.
Wondershare Filmora
Get started easily with Filmora’s powerful performance, intuitive interface, and countless effects!
Try It Free Try It Free Try It Free Learn More >
Using the software videos and images in all key formats can be added to the interface for creating GIF animations. An array of editing options is available like cropping, splitting, rotating, cutting, and more. You can even add text, sound, effects, and other elements for further customization.
In a few simple steps, the software will let you create GIFs of high quality that can be used on several social media and other online platforms.
Steps to create GIF using Wondershare Filmora
Step 1. Download, install, and launch the Wondershare Filmora software on your system and then browse to import the media files from which you want to create a GIF.
Step 2. After the files are added to the interface, move them to the timeline at the bottom by dragging and dropping.
Step 3. Using the editing options you can trim, crop, rotate, and perform other functions.
Step 4. You can even add text, effects, and other elements for further customization.
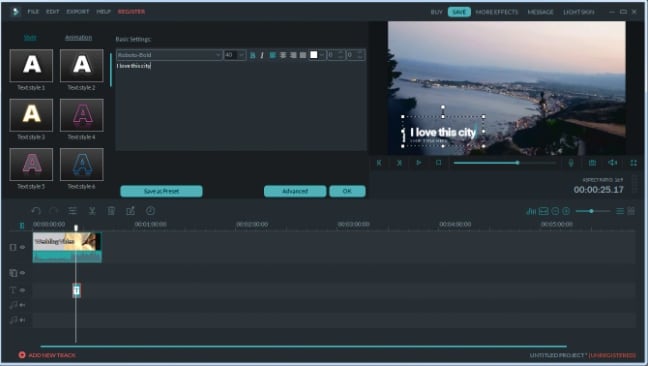
Step 5. Next, choose to save the created file as GIF under the Local tab. Choose the file name and the location, and then finally tap on the EXPORT button to start the processing.
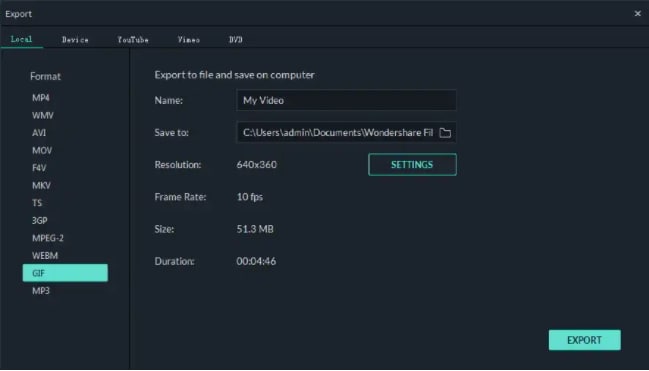
● Key Takeaways from This Episode →
●GIFs are the latest trend that is used all over social media and other online sites.
●Several software and tools can help in creating the desired GIF.
●Adobe Photoshop is one of the widely used software that can create a GIF using videos as well as images, but the process is quite complicated.
●For a simpler and quicker process of creating a GIF, we suggest using Wondershare Filmora.
The use of GIFs has increased over time and not only on social media platforms, these interesting animations are used for various purposes like marketing, blogging, WhatsApp chats, and much more.
Though there are several online sites from where you can download the desired GIF, there is also an option to create a customized one using videos of images. So, if you too are keen to create a customized GIF, the article will look after your concerns. Learn how to make video to GIF Photoshop and using other tools. Keep reading!!
In this article
01 [Simple Alternative to Photoshop for creating a GIF from Videos- Wondershare Filmora](#Part 1)
02 [Simple Alternative to Photoshop for creating a GIF from Videos- Wondershare Filmora](#Part 2)
Part 1 Creating GIFs from videos using Photoshop
When it comes to any type of video editing task, the first software that comes to mind is Photoshop. Developed by Adobe, this is an excellent editing tool available for Windows and Mac. The software comes loaded with a wide range of functions that help you create desired graphics including GIFs.
Though the interface and the use of the software are a little complicated, once you get a hang of it, professional-looking files can be created in no time.
Steps to convert video to GIF Photoshop
Step 1. Launch the Photoshop software on your system and select File > Import. Next tap on the “Video Frames to Layers” option. Choose the desired video (compatible format) and tap on Load.
Step 2. Next, you need to select the Range to Import. For a few frames, choose the “Selected Frames Only” option.
Step 3. You now need to cut the frames that are not needed by going to Window and then selecting the Animation. If needed, new frames can also be added here.
Step 4. To make your animation loop forever, select Forever from the bottom left side of the animation frames.
Step 5. Next, at the upper-left corner, go to the Rectangle marquee tool and choose the section you wish to focus on
Step 6. Select the image size of the video that will make your GIF look appealing.
Step 7. Next, go to File > Save for Web & Devices for optimizing the image.
Step 8. Now select GIF at the preset section and check if the animation created is right by clicking on the Preview button.
Step 9. Finally, when all is done, click on the Save button and give a desired name to the file.
With the above steps you can make gif from video Photoshop.
Part 2 Simple Alternative to Photoshop for creating a GIF from Videos- Wondershare Filmora
The learning curve of Photoshop is quite steep and to create a GIF from videos using the tool is a complicated process involving multiple steps and especially if you are a beginner and have no prior experience of working with Photoshop software.
So, if you are looking for an alternative that is simple and fast, we suggest Wondershare Filmora Video Editor as the best option.
Wondershare Filmora
Get started easily with Filmora’s powerful performance, intuitive interface, and countless effects!
Try It Free Try It Free Try It Free Learn More >
Using the software videos and images in all key formats can be added to the interface for creating GIF animations. An array of editing options is available like cropping, splitting, rotating, cutting, and more. You can even add text, sound, effects, and other elements for further customization.
In a few simple steps, the software will let you create GIFs of high quality that can be used on several social media and other online platforms.
Steps to create GIF using Wondershare Filmora
Step 1. Download, install, and launch the Wondershare Filmora software on your system and then browse to import the media files from which you want to create a GIF.
Step 2. After the files are added to the interface, move them to the timeline at the bottom by dragging and dropping.
Step 3. Using the editing options you can trim, crop, rotate, and perform other functions.
Step 4. You can even add text, effects, and other elements for further customization.
Step 5. Next, choose to save the created file as GIF under the Local tab. Choose the file name and the location, and then finally tap on the EXPORT button to start the processing.
● Key Takeaways from This Episode →
●GIFs are the latest trend that is used all over social media and other online sites.
●Several software and tools can help in creating the desired GIF.
●Adobe Photoshop is one of the widely used software that can create a GIF using videos as well as images, but the process is quite complicated.
●For a simpler and quicker process of creating a GIF, we suggest using Wondershare Filmora.
15 Best Stop Motion Animation Kits to Fuel Creativity
15 Best Stop Motion Animation Kits to Fuel Creativity (2024 Guide)
An easy yet powerful editor
Numerous effects to choose from
Detailed tutorials provided by the official channel
Stop motion animation is becoming more famous by the year, and it’s not even a surprising thing. Creating animated films takes objects, either soft clay items or dolls with joints, and manipulates them.
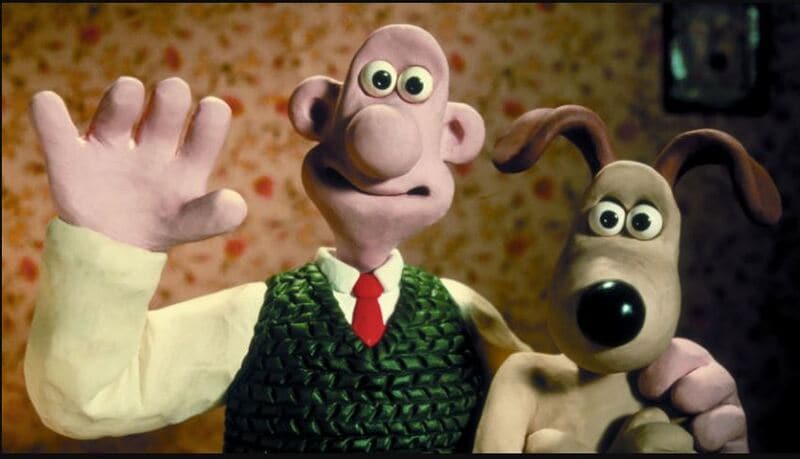
If you wish to make this type of animation, then you want to find the best Stop Motion Animation Kits that you can find. Some options out there are even free. This article will share the eight best options for stop motion animation software, separating them by whether they are for Macs or PC.
In this article
01 [15 Best Stop Motion Animation Kits](#Part 1)
02 [How to Pick the Best Animation Kits for Kids?](#Part 2)
Part 1 15 Best Stop Motion Animation Kits
After introducing you to the concept of Stop Motion Animation Kits, we’ve gathered a list of the top Stop Motion Animation Kits that best suits the kids as follows:
01Hue Animation Studio
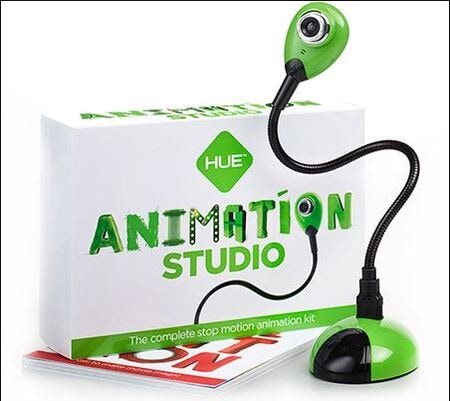
The Hue Animation Studio kit is unique because it can be helpful with any clay or toys you may have. The equipment is ideal for animations featuring anything from Playmobil toys, Lego, or even clay animations.
Features
● The kit includes the guidebook,
● It includes a HUE HD USB camera with a microphone.
● The kit Consists of a license of Stop Motion Animation software.
● There’s a mini stage with a green screen and background.
● The system requirements are Windows or Mac OS 10.5+.
Pros
● Less learning curve
● With an HD camera
● Easy to create time-lapse videos and special effects
Cons
● Old-fashioned interface
● Not ideal for beginners
● Requires a license to buy
02LEGO Make Your Own Movie Activity Kit
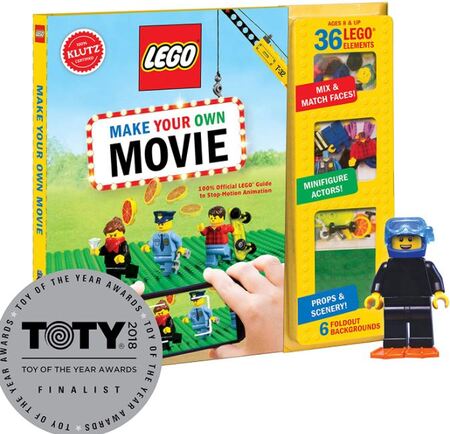
LEGO is one of the top players in the animation industry, and its Stop Motion Animation kit is phenomenal to the mark. The kit offers a complete guide to making your stop motion animations and includes several props and other goodies, as described in the Features below.
Features
● Includes an 8pages book to use while animating.
● It contains official LEGO props and Minifigures.
● You get punch-out animation frames.
● It involves foldout paper backgrounds.
● Best applicable to kids above eight years.
Pros
● Good for beginners
● Great accessories
● Informative book
Cons
● Only basics in the book
● Not all the accessories are there
● No app available
03I Can Animate It Studio
I Can Animate It Studio is another Stop Motion Animation kit by Kudlian. However, the kit looks a little offbeat since it doesn’t come with a guide. However, Kudlian offers instructions and guidelines online to simplify the tasks.
Features
● This animation kit includes a separate webcam for shooting.
● It has an onion skin feature for getting the best results at animation.
● Involves an element to edit with a green screen.
● It also helps create stop-frame animation by creating drawings.
● Compatible with both Windows and Mac OS.
Pros
● Available as App
● Interactive user interface
● Easy to create cute videos
Cons
● Difficult to use the animator pack
● Slow processing
● May need to pay for premium Features
04ZuAnimation Kit

Zuis among the best stop motion animation kits developed by HUE’s initial software. And, it’s the kit that is already usual with kids. So, it generally means that it will involve less learning curve comparatively. And, it has some tiny Features which may leave all other toys in the category.
Features
● A lifetime software with two perpetual licenses.
● Includes a green screen for keying background.
● It Consists of an animation handbook to offer you fantastic tips and advice.
● It contains a webcam with a metal base.
● You get a modeling clay to design characters and a mini set to hold them.
Pros
● Good pack of sound effects, artwork, and more
● Interactive interface
● With animation handbook
Cons
● Some defects with cameras, so check them earlier
● Lack of video signals
● Limited animation Features
05Stop Motion Explosion Animation Kit
The Stop Motion Explosion complete HD stop motion animation is another rival in the industry for the big competitors playing out. The kit also contains an inbuilt microphone to record your audio. And, there’s a precious 29pages book included to provide you a lot. Let’s see more of its Features below.
Features
● It comes with an HD camera and flexible stand with a microphone and manual zoom control.
● It contains a CD with animation software.
● The kit involves a quick start guide.
● It includes lots of free tutorials.
● It Consists of a 29pages book with in-depth information.
Pros
● Interactive user interface
● Contains guided information book
● Lots of free tutorials
Cons
● Lack of fast processing
● Need to use the app alongside book
● High learning curve
06EyeThink BusyBody Animation Toy
As the name also signifies, the kit is pretty different from other stop motion animation kits. It’s one of the coolest of its kind also occupied with the attention of Victorian children in the days gone by. The kit doesn’t include any camera. Instead, it works on the principle of ‘persistence of vision.’ Please scroll below to reveal more of its Features.
Features
● You will get a central snipping base with mirrors.
● It contains bendable figures for easy posing.
● It includes a complete hands-on stop motion animation kit without any complications.
● Includes instructions to give you detailed images on how to pose figures.
● Works on the principle of ‘persistence of vision’ without any camera.
Pros
● Easy to use with good accessibility
● Scalable to younger kids
● Works without a camera
Cons
● More of subjective task
● Maybe hard to understand
● A very different concept of animation
07OgoBild Animate It
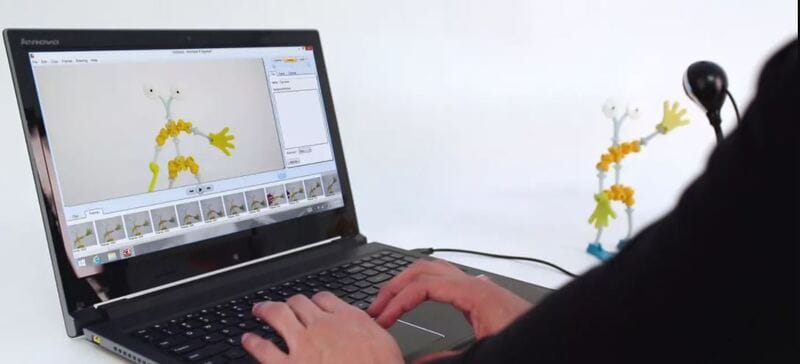
Brought to you from Gromet and Wallace’s creators, this is a super simple Stop Motion Animation kit. It includes hundreds of Construction pieces to begin with. Also, you will get a webcam and stop motion animation software ideally geared towards kids aged 8-years old.
Features
● Compatible with the Windows operating system.
● It contains a camera with an articulated stand to capture from better angles.
● It includes an easy upload to YouTube feature for social sharing.
Pros
● Good for social sharing
● Better accessories
● Ideal for beginners
Cons
● A pretty confusing interface
● Only compatible with Windows
● Slow processing software
08Dragonframe 5
Again, this stop-animation kit isn’t that fancy, but it can compete with all the rivals out there. It only contains Software, though, with a list of functions including Cinematography, Animation, vector-based drawings, and much more.
Features
● It includes Animation and Cinematography tools.
● It contains a frame-based timeline editor.
● Dragonframe 5 includes a lip-sync system for the best audio recording.
● It includes Motion Control and Vector-based drawing tools.
● This kit Consists of a configurable X-sheet.
Pros
● Lots of functions
● Not just a toy
● Friendly and effective to deal with.
Cons
● Too hard for the young kids
● Expensive
● Confusing interface
09VidBox Stop Motion Studio
VidBox Stop Motion Studio has similar software to Dragonframe but it is more suitable for younger kids. Well, you can readily go for this kit if you already have a camera. It also contains the option to upload creations to Facebook and YouTube directly.
Features
● It can create output in different formats, including WMV, MPEG HD resolution, etc.
● It contains an adjustable frame rate to control the video’s speed.
● The Chroma binding effect creates the best setting for the background.
● It includes DSLR camera support.
● It contains Image Editor, String Removal, and Overlay Frames tool to add special effects.
Pros
● It gives detailed instructions
● Too basic Features
● Difficult to handle toys
Cons
● Too much info is intimidating
● Slow process
● Some issues with the Chroma effect
10Animation Studio by Helen Piercy – A Book
As the name suggests, this stop motion studio book isby Helen Piercy, an animator with lots of experience in the field. You will also get all the required Features, such as editing the green screen and more. In addition, tutorials regarding and techniques on puppets are also in the kit.
Features
● You get a mini stage set.
● It involves a press-out puppet monster with movable parts.
● It contains storyboard samples and sheets.
● The book contains an engaging animation handbook.
● It Consists of a variety of press-out props.
Pros
● A highly informative book
● Contains easy to understand animation scenes
● Various and techniques
Cons
● Hard to understand info
● Only a book
● It cannot get you through real practical
11- Minecraft Stop Motion Animation Studio
Though it seems usual to many kids out, there are valid reasons behind that. First, it is different from other Stop Motion Animation kits as it is available in an app rather than any software. Thus, you can use it on a tablet or phone and edit whatever you shoot.
Features
● It includes a variety of props.
● It contains six different backgrounds.
● This kit involves one movie stage.
● It Consists of a device holder.
● Minecraft contains 1additional accessories.
Pros
● No need of a powerful PC
● Lots of accessories
● With different backgrounds
Cons
● The app contains compatibility issues
● Less number of props in quantity
● Lack of software integration
12- Zing StikBot Zanimation Studio Pro
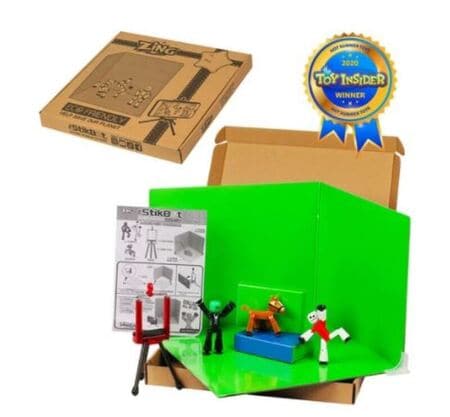
This stop animation kit is a reasonably priced and excellent little package. With this kit, however, you will need your camera. You can manipulate this kit into different poses as the figures have small suction cups on the feet and hands.
Features
● It includes two posable StikBot figures.
● Works on an animation app to record frames.
● It contains a Blue screen or reversible green screen stage.
● It Consists of a tripod stand for a tablet or smartphone camera.
Pros
Simple software
Lots of functions
Included software
Cons
● Lack of app availability
● Not compatible with Linux systems
● Only for Windows and Mac
13- Honestech Stop Motion Studio 4.0
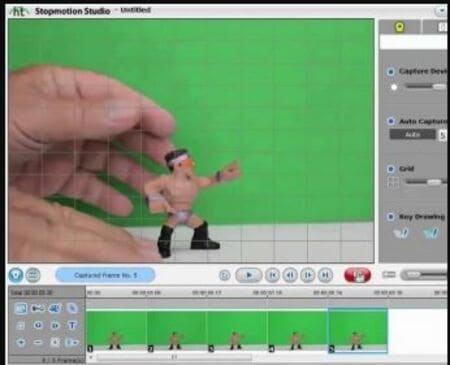
It’s a great entry-level stop motion animation kit that includes a blue or green screen. It also contains accessible Features for background editing, sound effects, background music, etc. Given below are more of its parts.
● A super simple editing interface is appealing to beginner kids.
● String Removal feature for more delicacy and effects.
● Chroma Key and Audio Recording.
● YouTube/Facebook upload feature.
● DSLR camera support.
Pros
● The great Chroma keying feature
● Simple user interface
● Lots of other Features
Cons
● Not for advanced kids
● A bit slow software
● Certain issues with camera integration
14- Crayola Color Alive Easy Animation Studio
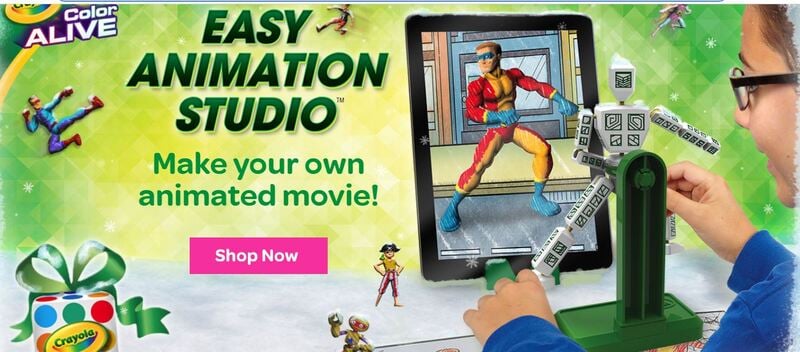
It’s another basic Stop Motion Animation kit to easily create custom animated videos by kids. It also includes easy drawing coloring book characters. And, there are tracking markers to make the job easier for kids.
Features
● Design and color characters pose and capture.
● It includes a stand and mannequin.
● It contains a 30-page booklet with the required information.
● It is compatible with Android and iOS.
● Crayola contains 1twistable color pencils with the device’s stand.
Pros
● Ideal for beginners
● Detailed info book
● Great accessories
Cons
● Slow processing UI
● Inefficient tracking markers
● The app may run certain compatibility issues
15- Claytoon Clay Project Studio
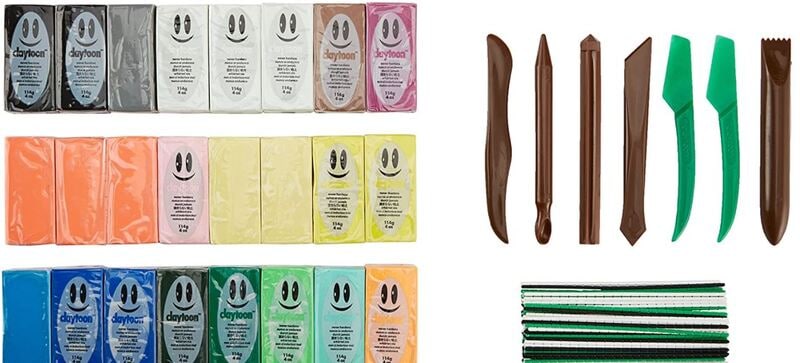
Young kids can easily use this Clay Studio and create impressive figures for their stop motion animation. It has bright colored clays, which are non-hardening and thus suitable for animation projects. And, there’s a good choice in colors with valuable instructions, index cards, and accessories.
Features
● Non-hardening clay material
● Brilliant color range to create amazing characters
● Intermixable clays
● Simple to follow instruction cards
● 5 modeling tools and clay knife
Pros
● Hard clay
● Perfect colors
● Professional for adult usage
Cons
● Maybe be crumbled clays
● Oily material
● It may not contain all the desired colors
Part 2 How to pick the best animation kits for kids?
Below are the factors you need to Consider before buying Stop Motion Animation kits. So, let’s dive into each element in detail.
01Recommended Age
Producing something creative with a Stop Motion Animation kit will be a lengthy process that will involve patience and some informational content to use the Kits properly. So while selecting the best Animation Kit, keep in mind the Recommended Age that the company has specified. If the product is for the young generation, the younger ones might have difficulty using the product.
02Different forms of Kits
You may check a few of them with different Features for the best stop animation kits. However, the significant difference between them is whether they come as complete kits or not. If you buy a complete kit, you will have a camera and other elements with the product.
The only thing you will require other than the entire animation kit would be a computer for software purposes. Moreover, you can also select Kits that do not come with a camera individually.
For this, you must use a smartphone to record the video. Conclusively, the kits present on the market are zoetrope-type kits. However, they are not available with electronics. So you won’t be able to create full films with this one.
03Extra Features
As extra Features, you get Props and full-on sets included with some of the kits. These allow you to create the scenes that you are looking for. You can also transform the orientation of some of the props, which gives you extra functionality.
04Apps
When you’re in the hustle to create a Stop Motion Animation, you need a few things. One of them is the smartphone or a camera. At the same time, the other one will be the App on your phone that will help you merge everything the way you wish it to be.
Some of the companies out there will create their apps, and it will assist you with different integration procedures, but if the kit you select is not available with a dedicated app. There are a lot of good apps on the market right now that you can go for. These 3rd party apps are unique and will get your job done too.
05 Software
You will either need an App or Proper Software for the putting-together part. This Software will need hardware such as either a laptop or a PC. Before deciding on an animation kit, make sure you know the system requirements if the kit is only supported through software.
06Bonus: Create an easy stop motion video via Wondershare Filmora Video Editor
In old times, making stop motion videos was a very hectic task, and sometimes it could take several days to make such videos. With the advancement of technology and editing software like Filmora, it has become effortless. All you need is a camera and video editing software to create your stop motion animations.
For Win 7 or later (64-bit)
For macOS 10.12 or later
Let’s dig deep into the stop motion animations and learn how to create these videos on your own.
07Steps For Making Stop-Motion Video
If you want to create your stop motion animation, follow this step-by-guide.
● Capture The Shots
Move an object and capture its movement frame by frame. Suppose we are making a stop motion video of bottle spin. Place your camera in a steady place, and bring your object in the frame. Move your object slightly and take a shot. Keep doing this until you have at least 12,23or photos of the object’s movement. We took the bottle spin only as an example. You can create your ideas here.
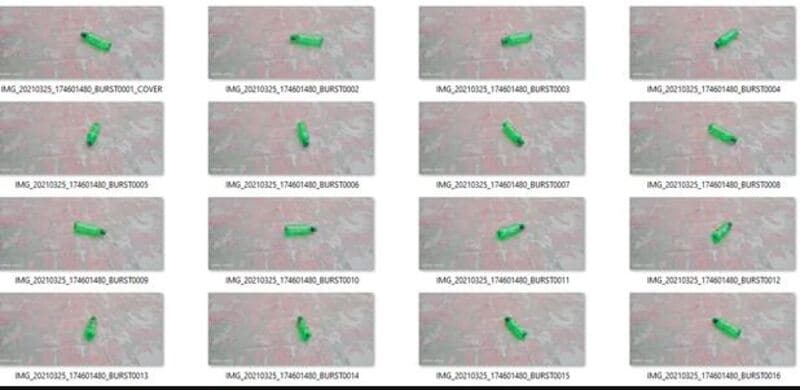
● Download And Start Filmora X
If you haven’t downloaded the Filmora in your system, download it from their official website. If it is already on your PC, then run the program.
● Choose The Suitable Frame Rate In Project Settings.
Begin a new project by hitting the File and selecting the full-wide resolution.
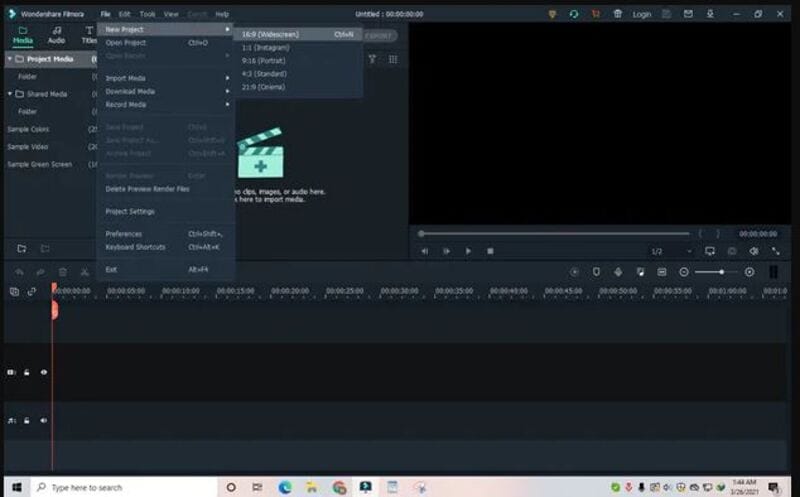
Once you select the resolution, click on the File and go to project settings.
Now select the frame rate you captured the video, i.e., 236etc. If you didn’t Consider the frame rate when taking shots, you could select 24.

● Import The Media Files
Once you have done with the settings above, import the captured images using the import option from the file menu.
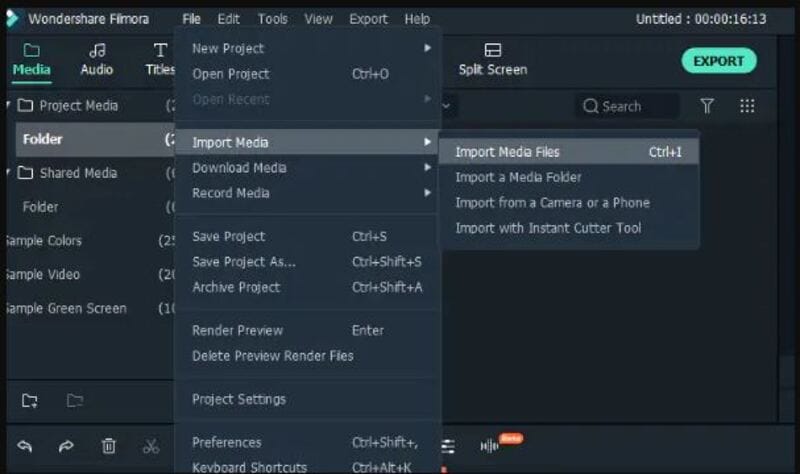
● Adjust the Preferences
Go to File and click select preferences from the menu or press the shortcut key Ctrl+Shift+,
A window will appear on your screen. Click on editing and adjust the photo duration anywhere between 0.2 - 0.5 seconds.
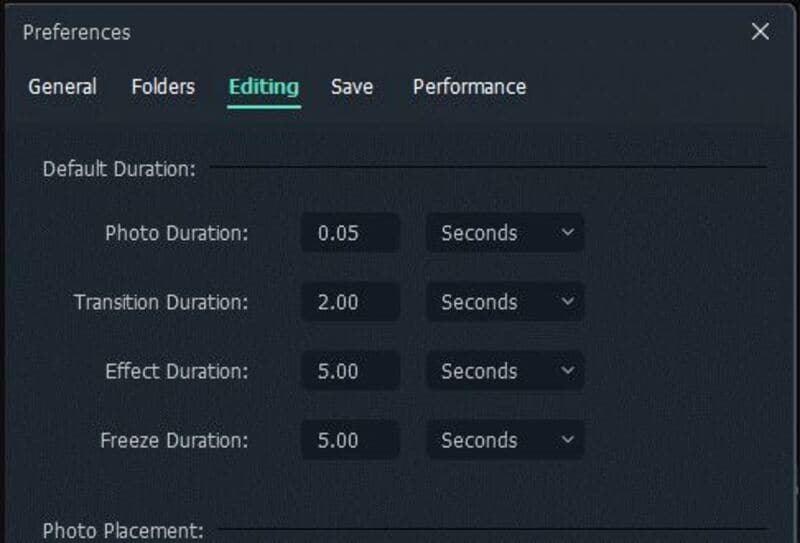
● Create and Export.
Once you complete all the settings mentioned above, import all images timeline-track, and click on play, you will notice that your stop motion animation has been created.
Now click on the export button, select the desired video format, export the video, and share it with your friends.
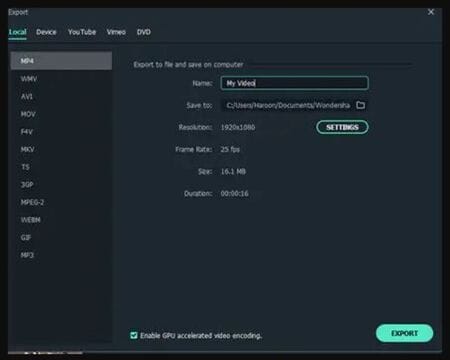
Ok, this is very easy. It’s just time-Consuming if you want to make a big enough project. Here is the result.
Filmora is one of the most straightforward software you can use to create your stop motion animation videos. This magic can be easily created by following the steps mentioned above, even if you have no video editing experience.
● Key Takeaways from This Episode →
● Stop-motion animation kits are a form of art, and with all of the access we have to such technology via our computers, it is a big deal to get started with it. Most of them include Stop Motion animation starter kits as well. That’s why you want to be sure that you look at everything in depth and see what you like. Then, determine which kits will be best for your purposes and see why it makes such a big difference for you and everything you want to accomplish in the long run.
Stop motion animation is becoming more famous by the year, and it’s not even a surprising thing. Creating animated films takes objects, either soft clay items or dolls with joints, and manipulates them.
If you wish to make this type of animation, then you want to find the best Stop Motion Animation Kits that you can find. Some options out there are even free. This article will share the eight best options for stop motion animation software, separating them by whether they are for Macs or PC.
In this article
01 [15 Best Stop Motion Animation Kits](#Part 1)
02 [How to Pick the Best Animation Kits for Kids?](#Part 2)
Part 1 15 Best Stop Motion Animation Kits
After introducing you to the concept of Stop Motion Animation Kits, we’ve gathered a list of the top Stop Motion Animation Kits that best suits the kids as follows:
01Hue Animation Studio
The Hue Animation Studio kit is unique because it can be helpful with any clay or toys you may have. The equipment is ideal for animations featuring anything from Playmobil toys, Lego, or even clay animations.
Features
● The kit includes the guidebook,
● It includes a HUE HD USB camera with a microphone.
● The kit Consists of a license of Stop Motion Animation software.
● There’s a mini stage with a green screen and background.
● The system requirements are Windows or Mac OS 10.5+.
Pros
● Less learning curve
● With an HD camera
● Easy to create time-lapse videos and special effects
Cons
● Old-fashioned interface
● Not ideal for beginners
● Requires a license to buy
02LEGO Make Your Own Movie Activity Kit
LEGO is one of the top players in the animation industry, and its Stop Motion Animation kit is phenomenal to the mark. The kit offers a complete guide to making your stop motion animations and includes several props and other goodies, as described in the Features below.
Features
● Includes an 8pages book to use while animating.
● It contains official LEGO props and Minifigures.
● You get punch-out animation frames.
● It involves foldout paper backgrounds.
● Best applicable to kids above eight years.
Pros
● Good for beginners
● Great accessories
● Informative book
Cons
● Only basics in the book
● Not all the accessories are there
● No app available
03I Can Animate It Studio
I Can Animate It Studio is another Stop Motion Animation kit by Kudlian. However, the kit looks a little offbeat since it doesn’t come with a guide. However, Kudlian offers instructions and guidelines online to simplify the tasks.
Features
● This animation kit includes a separate webcam for shooting.
● It has an onion skin feature for getting the best results at animation.
● Involves an element to edit with a green screen.
● It also helps create stop-frame animation by creating drawings.
● Compatible with both Windows and Mac OS.
Pros
● Available as App
● Interactive user interface
● Easy to create cute videos
Cons
● Difficult to use the animator pack
● Slow processing
● May need to pay for premium Features
04ZuAnimation Kit
Zuis among the best stop motion animation kits developed by HUE’s initial software. And, it’s the kit that is already usual with kids. So, it generally means that it will involve less learning curve comparatively. And, it has some tiny Features which may leave all other toys in the category.
Features
● A lifetime software with two perpetual licenses.
● Includes a green screen for keying background.
● It Consists of an animation handbook to offer you fantastic tips and advice.
● It contains a webcam with a metal base.
● You get a modeling clay to design characters and a mini set to hold them.
Pros
● Good pack of sound effects, artwork, and more
● Interactive interface
● With animation handbook
Cons
● Some defects with cameras, so check them earlier
● Lack of video signals
● Limited animation Features
05Stop Motion Explosion Animation Kit
The Stop Motion Explosion complete HD stop motion animation is another rival in the industry for the big competitors playing out. The kit also contains an inbuilt microphone to record your audio. And, there’s a precious 29pages book included to provide you a lot. Let’s see more of its Features below.
Features
● It comes with an HD camera and flexible stand with a microphone and manual zoom control.
● It contains a CD with animation software.
● The kit involves a quick start guide.
● It includes lots of free tutorials.
● It Consists of a 29pages book with in-depth information.
Pros
● Interactive user interface
● Contains guided information book
● Lots of free tutorials
Cons
● Lack of fast processing
● Need to use the app alongside book
● High learning curve
06EyeThink BusyBody Animation Toy
As the name also signifies, the kit is pretty different from other stop motion animation kits. It’s one of the coolest of its kind also occupied with the attention of Victorian children in the days gone by. The kit doesn’t include any camera. Instead, it works on the principle of ‘persistence of vision.’ Please scroll below to reveal more of its Features.
Features
● You will get a central snipping base with mirrors.
● It contains bendable figures for easy posing.
● It includes a complete hands-on stop motion animation kit without any complications.
● Includes instructions to give you detailed images on how to pose figures.
● Works on the principle of ‘persistence of vision’ without any camera.
Pros
● Easy to use with good accessibility
● Scalable to younger kids
● Works without a camera
Cons
● More of subjective task
● Maybe hard to understand
● A very different concept of animation
07OgoBild Animate It
Brought to you from Gromet and Wallace’s creators, this is a super simple Stop Motion Animation kit. It includes hundreds of Construction pieces to begin with. Also, you will get a webcam and stop motion animation software ideally geared towards kids aged 8-years old.
Features
● Compatible with the Windows operating system.
● It contains a camera with an articulated stand to capture from better angles.
● It includes an easy upload to YouTube feature for social sharing.
Pros
● Good for social sharing
● Better accessories
● Ideal for beginners
Cons
● A pretty confusing interface
● Only compatible with Windows
● Slow processing software
08Dragonframe 5
Again, this stop-animation kit isn’t that fancy, but it can compete with all the rivals out there. It only contains Software, though, with a list of functions including Cinematography, Animation, vector-based drawings, and much more.
Features
● It includes Animation and Cinematography tools.
● It contains a frame-based timeline editor.
● Dragonframe 5 includes a lip-sync system for the best audio recording.
● It includes Motion Control and Vector-based drawing tools.
● This kit Consists of a configurable X-sheet.
Pros
● Lots of functions
● Not just a toy
● Friendly and effective to deal with.
Cons
● Too hard for the young kids
● Expensive
● Confusing interface
09VidBox Stop Motion Studio
VidBox Stop Motion Studio has similar software to Dragonframe but it is more suitable for younger kids. Well, you can readily go for this kit if you already have a camera. It also contains the option to upload creations to Facebook and YouTube directly.
Features
● It can create output in different formats, including WMV, MPEG HD resolution, etc.
● It contains an adjustable frame rate to control the video’s speed.
● The Chroma binding effect creates the best setting for the background.
● It includes DSLR camera support.
● It contains Image Editor, String Removal, and Overlay Frames tool to add special effects.
Pros
● It gives detailed instructions
● Too basic Features
● Difficult to handle toys
Cons
● Too much info is intimidating
● Slow process
● Some issues with the Chroma effect
10Animation Studio by Helen Piercy – A Book
As the name suggests, this stop motion studio book isby Helen Piercy, an animator with lots of experience in the field. You will also get all the required Features, such as editing the green screen and more. In addition, tutorials regarding and techniques on puppets are also in the kit.
Features
● You get a mini stage set.
● It involves a press-out puppet monster with movable parts.
● It contains storyboard samples and sheets.
● The book contains an engaging animation handbook.
● It Consists of a variety of press-out props.
Pros
● A highly informative book
● Contains easy to understand animation scenes
● Various and techniques
Cons
● Hard to understand info
● Only a book
● It cannot get you through real practical
11- Minecraft Stop Motion Animation Studio
Though it seems usual to many kids out, there are valid reasons behind that. First, it is different from other Stop Motion Animation kits as it is available in an app rather than any software. Thus, you can use it on a tablet or phone and edit whatever you shoot.
Features
● It includes a variety of props.
● It contains six different backgrounds.
● This kit involves one movie stage.
● It Consists of a device holder.
● Minecraft contains 1additional accessories.
Pros
● No need of a powerful PC
● Lots of accessories
● With different backgrounds
Cons
● The app contains compatibility issues
● Less number of props in quantity
● Lack of software integration
12- Zing StikBot Zanimation Studio Pro
This stop animation kit is a reasonably priced and excellent little package. With this kit, however, you will need your camera. You can manipulate this kit into different poses as the figures have small suction cups on the feet and hands.
Features
● It includes two posable StikBot figures.
● Works on an animation app to record frames.
● It contains a Blue screen or reversible green screen stage.
● It Consists of a tripod stand for a tablet or smartphone camera.
Pros
Simple software
Lots of functions
Included software
Cons
● Lack of app availability
● Not compatible with Linux systems
● Only for Windows and Mac
13- Honestech Stop Motion Studio 4.0
It’s a great entry-level stop motion animation kit that includes a blue or green screen. It also contains accessible Features for background editing, sound effects, background music, etc. Given below are more of its parts.
● A super simple editing interface is appealing to beginner kids.
● String Removal feature for more delicacy and effects.
● Chroma Key and Audio Recording.
● YouTube/Facebook upload feature.
● DSLR camera support.
Pros
● The great Chroma keying feature
● Simple user interface
● Lots of other Features
Cons
● Not for advanced kids
● A bit slow software
● Certain issues with camera integration
14- Crayola Color Alive Easy Animation Studio
It’s another basic Stop Motion Animation kit to easily create custom animated videos by kids. It also includes easy drawing coloring book characters. And, there are tracking markers to make the job easier for kids.
Features
● Design and color characters pose and capture.
● It includes a stand and mannequin.
● It contains a 30-page booklet with the required information.
● It is compatible with Android and iOS.
● Crayola contains 1twistable color pencils with the device’s stand.
Pros
● Ideal for beginners
● Detailed info book
● Great accessories
Cons
● Slow processing UI
● Inefficient tracking markers
● The app may run certain compatibility issues
15- Claytoon Clay Project Studio
Young kids can easily use this Clay Studio and create impressive figures for their stop motion animation. It has bright colored clays, which are non-hardening and thus suitable for animation projects. And, there’s a good choice in colors with valuable instructions, index cards, and accessories.
Features
● Non-hardening clay material
● Brilliant color range to create amazing characters
● Intermixable clays
● Simple to follow instruction cards
● 5 modeling tools and clay knife
Pros
● Hard clay
● Perfect colors
● Professional for adult usage
Cons
● Maybe be crumbled clays
● Oily material
● It may not contain all the desired colors
Part 2 How to pick the best animation kits for kids?
Below are the factors you need to Consider before buying Stop Motion Animation kits. So, let’s dive into each element in detail.
01Recommended Age
Producing something creative with a Stop Motion Animation kit will be a lengthy process that will involve patience and some informational content to use the Kits properly. So while selecting the best Animation Kit, keep in mind the Recommended Age that the company has specified. If the product is for the young generation, the younger ones might have difficulty using the product.
02Different forms of Kits
You may check a few of them with different Features for the best stop animation kits. However, the significant difference between them is whether they come as complete kits or not. If you buy a complete kit, you will have a camera and other elements with the product.
The only thing you will require other than the entire animation kit would be a computer for software purposes. Moreover, you can also select Kits that do not come with a camera individually.
For this, you must use a smartphone to record the video. Conclusively, the kits present on the market are zoetrope-type kits. However, they are not available with electronics. So you won’t be able to create full films with this one.
03Extra Features
As extra Features, you get Props and full-on sets included with some of the kits. These allow you to create the scenes that you are looking for. You can also transform the orientation of some of the props, which gives you extra functionality.
04Apps
When you’re in the hustle to create a Stop Motion Animation, you need a few things. One of them is the smartphone or a camera. At the same time, the other one will be the App on your phone that will help you merge everything the way you wish it to be.
Some of the companies out there will create their apps, and it will assist you with different integration procedures, but if the kit you select is not available with a dedicated app. There are a lot of good apps on the market right now that you can go for. These 3rd party apps are unique and will get your job done too.
05 Software
You will either need an App or Proper Software for the putting-together part. This Software will need hardware such as either a laptop or a PC. Before deciding on an animation kit, make sure you know the system requirements if the kit is only supported through software.
06Bonus: Create an easy stop motion video via Wondershare Filmora Video Editor
In old times, making stop motion videos was a very hectic task, and sometimes it could take several days to make such videos. With the advancement of technology and editing software like Filmora, it has become effortless. All you need is a camera and video editing software to create your stop motion animations.
For Win 7 or later (64-bit)
For macOS 10.12 or later
Let’s dig deep into the stop motion animations and learn how to create these videos on your own.
07Steps For Making Stop-Motion Video
If you want to create your stop motion animation, follow this step-by-guide.
● Capture The Shots
Move an object and capture its movement frame by frame. Suppose we are making a stop motion video of bottle spin. Place your camera in a steady place, and bring your object in the frame. Move your object slightly and take a shot. Keep doing this until you have at least 12,23or photos of the object’s movement. We took the bottle spin only as an example. You can create your ideas here.
● Download And Start Filmora X
If you haven’t downloaded the Filmora in your system, download it from their official website. If it is already on your PC, then run the program.
● Choose The Suitable Frame Rate In Project Settings.
Begin a new project by hitting the File and selecting the full-wide resolution.
Once you select the resolution, click on the File and go to project settings.
Now select the frame rate you captured the video, i.e., 236etc. If you didn’t Consider the frame rate when taking shots, you could select 24.
● Import The Media Files
Once you have done with the settings above, import the captured images using the import option from the file menu.
● Adjust the Preferences
Go to File and click select preferences from the menu or press the shortcut key Ctrl+Shift+,
A window will appear on your screen. Click on editing and adjust the photo duration anywhere between 0.2 - 0.5 seconds.
● Create and Export.
Once you complete all the settings mentioned above, import all images timeline-track, and click on play, you will notice that your stop motion animation has been created.
Now click on the export button, select the desired video format, export the video, and share it with your friends.
Ok, this is very easy. It’s just time-Consuming if you want to make a big enough project. Here is the result.
Filmora is one of the most straightforward software you can use to create your stop motion animation videos. This magic can be easily created by following the steps mentioned above, even if you have no video editing experience.
● Key Takeaways from This Episode →
● Stop-motion animation kits are a form of art, and with all of the access we have to such technology via our computers, it is a big deal to get started with it. Most of them include Stop Motion animation starter kits as well. That’s why you want to be sure that you look at everything in depth and see what you like. Then, determine which kits will be best for your purposes and see why it makes such a big difference for you and everything you want to accomplish in the long run.
Also read:
- New How To Create Animated Clipart in PowerPoint for 2024
- Updated 2024 Approved Top 8 Anime Name Generators Online-Get Cool Anime Names
- New Top 10 Websites to Download Anime Subtitles for Free for 2024
- How to Turn Yourself Into WhatsApp Cartoon
- New 2024 Approved The Top Free 12 GIF Meme Maker at a Glance
- New In 2024, Some Must-Know Useful Lego Animation Ideas for You
- Updated 2024 Approved Before You Learn 3D Animation Things You Should Know
- New In 2024, 2D Character Animation Everything You Should Know About It
- Ways You Can Master to Make Claymation Videos for 2024
- Updated 2024 Approved Whats Rigging Animation and Why It Matters
- Updated 15 Types of Cartoon Drawing Styles with Examples for 2024
- New Most Effective Tactics to Set WhatsApp Status
- In 2024, 10 Top Tools to Make Pic Collage for Windows
- Updated In 2024, 15 Animated Characters We All Had A Crush On
- Updated 12 Aesthetic GIF Instagram for Marketers and Creatives
- New 10 Must Watch Netflix Cartoon Series
- New In 2024, Best 10 Photo Animator Templates
- In 2024, Top 10 Popular Cartoons You Forgot Existed
- New How to Make Your GIF on WhatsApp in Simple Ways for 2024
- Updated Most Effective Tactics to Set WhatsApp Status for 2024
- Before You Learn Facebook Slideshow 5 Things You Should Know How-TOS
- New How to Create Photo Collage Frame for Free in Minutes?
- New Animated Collage Maker Tips for 2024
- 6 Proven Ways to Dub Anime for Anime Voice Actor for 2024
- In 2024, Great Guide for Beginners on 2D Animation Making
- Updated Learn Simple Blender Rigging in Only 2 Minutes for 2024
- Updated How to Find 3D Animation Studio Meeting All Your Inspiring Needs for 2024
- Updated 2024 Approved Best 10 Animoji Apps You Can Use to Edit Animoji
- Updated In 2024, Great Guide for Beginners on 2D Animation Making
- New The 15 Most Efficient Photo to Cartoon Apps for Android
- New 2024 Approved Tips for Learning Graphics Animation
- New In 2024, What Is Anime? Anime VS Manga VS Cartoon
- 2024 Approved Samples of Cartoon Character Face to Inspire You
- How To Reach More Users by Using Instagram Live Shopping
- In 2024, The Magnificent Art of Pokemon Go Streaming On OnePlus 12R? | Dr.fone
- In 2024, Ultimate guide to get the meltan box pokemon go For Xiaomi Redmi Note 12 Pro 5G | Dr.fone
- In 2024, Ultimate Guide from Motorola Moto G23 FRP Bypass
- Quick Fixes for Why Is My OnePlus Nord N30 5G Black and White | Dr.fone
- How to identify missing or malfunctioning hardware drivers with Windows Device Manager in Windows 11/10
- Remove Google FRP lock on Vivo Y77t
- In 2024, 4 solution to get rid of pokemon fail to detect location On Asus ROG Phone 8 | Dr.fone
- In 2024, Does find my friends work on Realme 12 Pro 5G | Dr.fone
- A Step-by-Step Guide on How to Promote YouTube Channel
- In 2024, How to Change Location on TikTok to See More Content On your Itel P40 | Dr.fone
- In 2024, Set Your Preferred Job Location on LinkedIn App of your OnePlus Open | Dr.fone
- Title: Updated How to Draw Skeleton Cartoon – A Step by Step Guide
- Author: Elon
- Created at : 2024-05-19 03:04:52
- Updated at : 2024-05-20 03:04:52
- Link: https://animation-videos.techidaily.com/updated-how-to-draw-skeleton-cartoon-a-step-by-step-guide/
- License: This work is licensed under CC BY-NC-SA 4.0.
