
:max_bytes(150000):strip_icc():format(webp)/preaknessstakes-5c804f1b46e0fb00019b8ee0.jpg)
Updated How-To Guide Secret Shortcut to Adobe Animate Character Tutorial
How-To Guide: Secret Shortcut to Adobe Animate Character Tutorial
How-to Guide: Secret Shortcut to Adobe Animate Character Tutorial
An easy yet powerful editor
Numerous effects to choose from
Detailed tutorials provided by the official channel
Whether you are a beginner or an experienced graphics designer, you can use Adobe Character Animator to animate 2D characters easily. But, if you are an absolute beginner, it might take a few weeks to get familiar with the software’s features/workflow.

Irrespective of your experience with the tool, this Adobe animate character tutorial will help you get started and edit visually appealing animated shorts.
In this article
01 [How Do I Animate a Character in Adobe Animation?](#Part 1)
02 [Is Adobe Character Animator Easy to Use?](#Part 2)
03 [How to Rig a Simple Character | Adobe Animate Tutorial](#Part 3)
04 [One-Stop Solution to Edit High-Quality Videos in Every Situation](#Part 4)
Part 1 How Do I Animate a Character in Adobe Animation?
1. Start With a Script
If you want to create an animation that engages the customers, you must always start your journey with a script. Like a short movie, even an animated sketch requires a script. It’ll set the tone for the entire animation and help you start sailing in the right direction.

If you have a full production team, the writers will take care of scriptwriting and you’ll just have to suggest a few changes in between. But, if you are working on your own, you’ll have to handle the script writing all-by-yourself. In any case, however, make sure to start by crafting a beautiful script with an amazing storyline.
2. Record the Voiceover
The next step in our Adobe Animate character tutorial is recording the voiceover for the video. Unless you are planning to create a GIF animation, you would need a dedicated voiceover for your animated video to make it more appealing.

Now, before you even begin with animating the character, recording the audio will help you clear out one task from the list. To record the voiceover, you can try different types of audio recording software and equipment.
3. Start Creating the Character
At this point in our Adobe animate character tutorial, we are ready to design the actual character itself. To do this, launch Adobe Character Animator on your system. On its home screen, you’ll see a tab containing different types of characters (along with their dedicated Photoshop and Illustrator versions). Click on any of these characters and it’ll automatically open in the editing panel of Adobe character animator.

Now, you can start with animating the character. In the top-left corner, you’ll see two different options, i.e., “
If you double-tap the “Scene” tab the character will open up in a real-time environment where it’ll react to your movement and speech. Make sure that the webcam stays turned on throughout the process. Then, simply press the “Record” button and start recording the entire scene for your animation.
Part 2 Is Adobe Character Animator Easy to Use?
That’s how you can animate a character in Adobe character animator and create visually stunning animations. However, many beginners want to know if it’s easy to use Adobe character animator. The answer is Yes! With Character Animator, Adobe has developed a relatively easy-to-use interface that anyone can use easily.
Part 3 How to Rig a Simple Character | Adobe Animate Tutorial
Now, if you aspire to become a skilled graphic designer, here are a few tutorials that’ll help you get started with Adobe Character Animator and explore all its features.
1. Getting Started With Adobe Character Animator
This 15 minutes Adobe animate character tutorial by Okay Samurai is the best thing you’ll find on the Internet, especially if you are a complete beginner and want to learn different elements of the software.
2. Creating Illustrator Puppet
Adobe Character Animator lets users create both Illustrator and Photoshop puppets. If you want to become an expert in the former, this hour-long YouTube video is the best tutorial for you.
3. Getting Started With Advanced Rigging
This is another useful Adobe Animate character tutorial that’s exclusively designed to help editors understand the basics of creating a character such as “Surr”. For people who don’t know, it’s a free character in the Illustrator puppet library that you can directly import into your project.
4. Animation Workflow in Adobe Character Animator
If you are looking for an all-in-one tutorial to understand the entire workflow of working with the software, this tutorial by Okay Samurai is the best place to get started.
5. Adding an Illustrator Puppet on Live Footage
In this tutorial, you’ll understand how you can create an Illustrator puppet and add it to real-life footage, even when there’s camera movement.
6. Using the Walk Behavior in Adobe Character Animator
This tutorial will be the perfect knowledge hub. In this tutorial, you’ll learn about the basics of using the walk behavior in Adobe Character Animator and how to apply it to different characters to make it walk across the scene.
7. Creating and Implementing Replays
Replays are one of the most powerful (and one of the latest) features of Adobe Character Animator. With Replays, you can record a gesture/movement and apply a trigger to use it anytime you want throughout the animation. This tutorial will help you understand how to implement the replays in the software and use them to craft the perfect storyline.
8. Cartoon Workflow in Character Animator
Thanks to this amazing 1 hour 40 minutes long Adobe animate character tutorial, you’ll be able to get familiar with the complete workflow of pairing the software with other tools and compiling a cartoon animation at the end using Adobe After Effects.
9. Running an Animated Livestream
If you are a YouTuber or have your own Instagram brand, this will be a pretty exciting way to engage with your audience. Simply use the livestream feature, create a stunning 2D character, and interact with your audience in a more interactive manner.
10. Working With Adobe Fresco and Character Animator
This is also a useful Adobe character animate tutorial by David Werner that’ll help you understand how to use both Adobe Fresco and Character Animator together. After this tutorial, you’ll be able to import your Fresco drawings into Character Animator and customize them to create visually engaging animations.
Key Takeaways from This Episode
● Adobe Character Animator is among the most powerful animation tools you can use in 2021 to create stunning animations
● You should always start designing an animation in Character Animator by writing dedicated scripts.
● You can also pair Adobe Character Animator with other Adobe editing tools such as Illustrator, Photoshop, and Adobe Fresco
Whether you are a beginner or an experienced graphics designer, you can use Adobe Character Animator to animate 2D characters easily. But, if you are an absolute beginner, it might take a few weeks to get familiar with the software’s features/workflow.
Irrespective of your experience with the tool, this Adobe animate character tutorial will help you get started and edit visually appealing animated shorts.
In this article
01 [How Do I Animate a Character in Adobe Animation?](#Part 1)
02 [Is Adobe Character Animator Easy to Use?](#Part 2)
03 [How to Rig a Simple Character | Adobe Animate Tutorial](#Part 3)
04 [One-Stop Solution to Edit High-Quality Videos in Every Situation](#Part 4)
Part 1 How Do I Animate a Character in Adobe Animation?
1. Start With a Script
If you want to create an animation that engages the customers, you must always start your journey with a script. Like a short movie, even an animated sketch requires a script. It’ll set the tone for the entire animation and help you start sailing in the right direction.
If you have a full production team, the writers will take care of scriptwriting and you’ll just have to suggest a few changes in between. But, if you are working on your own, you’ll have to handle the script writing all-by-yourself. In any case, however, make sure to start by crafting a beautiful script with an amazing storyline.
2. Record the Voiceover
The next step in our Adobe Animate character tutorial is recording the voiceover for the video. Unless you are planning to create a GIF animation, you would need a dedicated voiceover for your animated video to make it more appealing.
Now, before you even begin with animating the character, recording the audio will help you clear out one task from the list. To record the voiceover, you can try different types of audio recording software and equipment.
3. Start Creating the Character
At this point in our Adobe animate character tutorial, we are ready to design the actual character itself. To do this, launch Adobe Character Animator on your system. On its home screen, you’ll see a tab containing different types of characters (along with their dedicated Photoshop and Illustrator versions). Click on any of these characters and it’ll automatically open in the editing panel of Adobe character animator.
Now, you can start with animating the character. In the top-left corner, you’ll see two different options, i.e., “
If you double-tap the “Scene” tab the character will open up in a real-time environment where it’ll react to your movement and speech. Make sure that the webcam stays turned on throughout the process. Then, simply press the “Record” button and start recording the entire scene for your animation.
Part 2 Is Adobe Character Animator Easy to Use?
That’s how you can animate a character in Adobe character animator and create visually stunning animations. However, many beginners want to know if it’s easy to use Adobe character animator. The answer is Yes! With Character Animator, Adobe has developed a relatively easy-to-use interface that anyone can use easily.
Part 3 How to Rig a Simple Character | Adobe Animate Tutorial
Now, if you aspire to become a skilled graphic designer, here are a few tutorials that’ll help you get started with Adobe Character Animator and explore all its features.
1. Getting Started With Adobe Character Animator
This 15 minutes Adobe animate character tutorial by Okay Samurai is the best thing you’ll find on the Internet, especially if you are a complete beginner and want to learn different elements of the software.
2. Creating Illustrator Puppet
Adobe Character Animator lets users create both Illustrator and Photoshop puppets. If you want to become an expert in the former, this hour-long YouTube video is the best tutorial for you.
3. Getting Started With Advanced Rigging
This is another useful Adobe Animate character tutorial that’s exclusively designed to help editors understand the basics of creating a character such as “Surr”. For people who don’t know, it’s a free character in the Illustrator puppet library that you can directly import into your project.
4. Animation Workflow in Adobe Character Animator
If you are looking for an all-in-one tutorial to understand the entire workflow of working with the software, this tutorial by Okay Samurai is the best place to get started.
5. Adding an Illustrator Puppet on Live Footage
In this tutorial, you’ll understand how you can create an Illustrator puppet and add it to real-life footage, even when there’s camera movement.
6. Using the Walk Behavior in Adobe Character Animator
This tutorial will be the perfect knowledge hub. In this tutorial, you’ll learn about the basics of using the walk behavior in Adobe Character Animator and how to apply it to different characters to make it walk across the scene.
7. Creating and Implementing Replays
Replays are one of the most powerful (and one of the latest) features of Adobe Character Animator. With Replays, you can record a gesture/movement and apply a trigger to use it anytime you want throughout the animation. This tutorial will help you understand how to implement the replays in the software and use them to craft the perfect storyline.
8. Cartoon Workflow in Character Animator
Thanks to this amazing 1 hour 40 minutes long Adobe animate character tutorial, you’ll be able to get familiar with the complete workflow of pairing the software with other tools and compiling a cartoon animation at the end using Adobe After Effects.
9. Running an Animated Livestream
If you are a YouTuber or have your own Instagram brand, this will be a pretty exciting way to engage with your audience. Simply use the livestream feature, create a stunning 2D character, and interact with your audience in a more interactive manner.
10. Working With Adobe Fresco and Character Animator
This is also a useful Adobe character animate tutorial by David Werner that’ll help you understand how to use both Adobe Fresco and Character Animator together. After this tutorial, you’ll be able to import your Fresco drawings into Character Animator and customize them to create visually engaging animations.
Key Takeaways from This Episode
● Adobe Character Animator is among the most powerful animation tools you can use in 2021 to create stunning animations
● You should always start designing an animation in Character Animator by writing dedicated scripts.
● You can also pair Adobe Character Animator with other Adobe editing tools such as Illustrator, Photoshop, and Adobe Fresco
10 Great Moving Animation PowerPoint Techniques
10 Awesome Moving Animation PowerPoint Techniques
An easy yet powerful editor
Numerous effects to choose from
Detailed tutorials provided by the official channel
PowerPoints can be quite dull without anything to spice it up. So, this question is more than 100% warranted. Fortunately, we were able to pull together a tutorial on creating moving animation PowerPoint presentations.
Complete with some templates that you can start off with (if you’d prefer to make it as simple as possible for yourself.)
In this article
01 [6 Animated Powerpoint Templates with Interactive Features](#Part 1)
02 [How to Create a Moving Animation in Powerpoint](#Part 2)
03 [10 Moving Animation Powerpoint Techniques](#Part 3)
Part 1 6 Animated PowerPoint Templates with Interactive Features
The default people tend to-go-to when it comes to presentations are videos. As they tend to be more engaging on their own. For that, you’ll see people gravitating towards software like Filmora, which can create beautiful, eye-catching presentations that you can easily and quickly share. Not just to an immediate audience, but also on social media and the like.
However, of course, sometimes a personal touch is important in a presentation — important to have a ‘voice’ attached to the image on the screen. But just because this is the case, doesn’t mean that you shouldn’t go all out on your presentation. Hence, why moving animation PowerPoint templates are such a big deal:
01Company Presentation PowerPoint Template
For the first of the Moving Animation PowerPoint templates that we have to introduce, we chose the ‘Company Presentation PowerPoint Template.’ As you can perhaps guess from the name, it’s a very professional template. It comes with a total of 500 sample slides that you can choose from (50 of which are unique), and it’s set up with professional animations that can spice up your presentation without making it look gaudy or over-the-top.

02Move Animated PowerPoint Template
Next is the modern, minimalistic template called “Move Animated.” This one is a lot more versatile, with every single one of the 144 unique slides available suitably animated. The best part of it is definitely the easy way in which it can be used. With the modern, minimalistic style, it’s easy enough to remove the presets and replace them with suitable company or product images to promote your content, idea, or project.

0340 Animated Conceptual Slides for PowerPoint
Again, we have another modern and minimalistic kind of PowerPoint template with ‘40 Animated Conceptual Slides for PowerPoint.’ It comes with 40 modern slides, all of which come fully animated are easy enough to customize with your own branding or content.

04UNIGRAPH - Animated & Creative Template (PPTX)
For a bit more fun, our next template is “UNIGRAPH.” This still definitely fits the description ‘minimalistic’ but the pop of color and effects that it brings to the table gives it a different kind of vibe from all the others. No less professional, but certainly more fun. Of course, most importantly, perhaps, is the fact that each slide is smoothly animated.

05Graph & Charts PowerPoint Presentation
For this next one, we introduce a template set called “Graphs & Charts” for those who may want to present their products, projects, ideas, etc. in the shape of graphs and charts. It’s perfect for professionals, certainly. Especially with its clean look, brightened only by occasional pops of color that can be seen from the graphs and charts that it comes with.

06Laststyle - PowerPoint Template
This next PowerPoint template is most suited for businesses looking to promote their products. The creator of the template has provided five different colored versions of the template, each with 30 unique slides that were carefully sectioned with suitable animations.

Part 2 How to Create a Moving Animation in PowerPoint
Now we come to the point of the article where we speak directly to those who may want to experiment more by personally creating a moving animation PowerPoint. For this example, we’ll be teaching you how to create a path animation PowerPoint with the available tools that the software offers under ‘Animation.’ Stick around if you want to learn more.
01Step 1. Open Project.
First things first, of course. Start a new project. When you’ve started, move on to the Animation tab (which we’ve pointed out in the image below.)

02Step 2. Add Animation.
Then, make sure to select the object or model that you want to animate (in this case, we’ve inserted a 2D model of a businessman), and then click the ‘Add Animation’ button (shown in the image below.)

03Step 3. Choose Animation.
Under ‘Add Animation’ you’ll find several different options for animations that you can choose from. Of course, since our goal is to create a PowerPoint Motion Path Animation, we have selected one of the ‘Motion Path’ options.

04Step 4. Choose Motion Path Animation
In order to make motion animation in PowerPoint, you must select one of the offered ‘Motion Paths’ (i.e., Bounce, Line, Arcs, etc.) and then use the motion path tool that appears to control the direction you wish to make your character move.
In this example, we chose the ‘Lines’ motion path (1) and then used the line tool to create a path for our businessman model. To walk from the right side of the screen towards the left.

05Step 5. Adjust Animation.
With path animation PowerPoint complete, you can adjust as needed with the tools provided. For example, you can have the character start moving as soon as the slide opens, or wait until a minute has passed, you can extend the animation by changing duration, etc.

Part 3 10 Moving Animation PowerPoint Techniques
For this last step, we break down some important PowerPoint 3D Animation need-to-knows. Including the specifics provided by each of the options made available to you and why it’s important to explore every single one to create better and more professional-looking presentations.
01Transitions
When it comes to PowerPoint presentations, most people are no doubt the most familiar with ‘Transitions’ when talking in terms of adding animation into a presentation. This one decides whether you want to shift from one slide to another smoothly, or if you want the previous slide to break into splinters, or rotate into the next slide, and so on and so forth. It’s an ‘in-between’ animation that signals where one ends and the other begins.

02Animations
Now, for the ‘Animations’ tab, we focus on animations that occur in the slide (not in-between like transitions). This can include a wide array of things. Whether it be characters moving (like shown in the tutorial we provided), text boxes appearing and disappearing in short order, images bouncing into view in dramatic fashion, and so on and so forth. There’s lots of potential here.

03Animation - Start
We mentioned this previously in the tutorial, but PowerPoint (which does not offer the more advanced 3D customization options), does still give you the freedom to choose how you want certain animations to work.
In the case of the ‘Animations-Start’ option, the goal is to decide when an animation starts playing. Do you want it to start after a click? Or maybe you want it to start up immediately? Whatever the case may be, this function will let you choose the specifics.

044. Animation - Duration
Next, we decide how long you want the animation to last. For example, if you chose to add a PowerPoint 3D rotation animation into a character, how long do you want it to spin before it settles into place? Perhaps only a second? Perhaps more? Whatever you chose, this is the option that will let you finalize that.

05Animation - Delay
This one is self-explanatory as well. But suffice to say, the ‘Delay’ option is for deciding how much an animation is delayed before starting. For example, if you chose to start it ‘On Click’ you can increase the delay to keep it from playing immediately on click.

06Break Up Presentation into Sections
A lot of PowerPoint templates, you’ll find, are naturally broken into sections. This is because it is easier to consume it in that way. It’s also a good signal to your audience as to what point of the presentation you are on. Are you in the beginning? The middle? Near the end? Etc. In this case, the best option for showing it is transitions that separate the sections from one another.

07Add Animation - Entrance
As promised earlier, we’ll be going through each type of animation is available under the ‘Add Animation’ option. The first is “Entrance” animations. This one is pretty easy to guess. It makes up a variety of animations that serve as its entrance animation. Here are some examples:
● Appear: To have objects appear without any other effect.
● Fade: To have objects fade into view.
● Bounce: To have objects bounce into view.
● Swivel: To have objects swivel into view.

08Add Animation - Emphasis
This next animation style is to give emphasis to an already-present object. For example, at a click, you can have a text box ‘Pulse’ and become the center of attention. You can change ‘Object Color’ to make it stand out. And so on.

099. Add Animation - Exit
Opposite of the ‘Entrance’ animations are the ‘Exit’ animations. You’ll notice that the style of animations is the same here. The only difference is that the animations occur to exit the project out of the presentation. For example, an image exiting to reveal text. Or text flying out to be replaced with more text, etc.

10Add Animation - Motion Path
We’ve already mentioned the PowerPoint Motion Path animation style previously, but just to reiterate some things, this is the most customizable animation feature on PowerPoint. One that allows you to move objects across the slide in whatever way you wish. In our example, we created a motion path animation that took the character from the center of the screen to the left of the screen.

● Key Takeaways from This Episode →
● While videos are the most popular way to share information, there are some presentations that require a heavier guiding hand.
● In these situations, a PowerPoint presentation, carefully animated, can serve in place of an edited video.
● There are templates available that you can take advantage of if you’d prefer to start with something to work from. We introduced some in this article that we think were particularly notable.
● But, of course, more careful personalization is sometimes necessary. In that case, we hope that you find our tutorial and our list of PowerPoint techniques helpful.
PowerPoints can be quite dull without anything to spice it up. So, this question is more than 100% warranted. Fortunately, we were able to pull together a tutorial on creating moving animation PowerPoint presentations.
Complete with some templates that you can start off with (if you’d prefer to make it as simple as possible for yourself.)
In this article
01 [6 Animated Powerpoint Templates with Interactive Features](#Part 1)
02 [How to Create a Moving Animation in Powerpoint](#Part 2)
03 [10 Moving Animation Powerpoint Techniques](#Part 3)
Part 1 6 Animated PowerPoint Templates with Interactive Features
The default people tend to-go-to when it comes to presentations are videos. As they tend to be more engaging on their own. For that, you’ll see people gravitating towards software like Filmora, which can create beautiful, eye-catching presentations that you can easily and quickly share. Not just to an immediate audience, but also on social media and the like.
However, of course, sometimes a personal touch is important in a presentation — important to have a ‘voice’ attached to the image on the screen. But just because this is the case, doesn’t mean that you shouldn’t go all out on your presentation. Hence, why moving animation PowerPoint templates are such a big deal:
01Company Presentation PowerPoint Template
For the first of the Moving Animation PowerPoint templates that we have to introduce, we chose the ‘Company Presentation PowerPoint Template.’ As you can perhaps guess from the name, it’s a very professional template. It comes with a total of 500 sample slides that you can choose from (50 of which are unique), and it’s set up with professional animations that can spice up your presentation without making it look gaudy or over-the-top.
02Move Animated PowerPoint Template
Next is the modern, minimalistic template called “Move Animated.” This one is a lot more versatile, with every single one of the 144 unique slides available suitably animated. The best part of it is definitely the easy way in which it can be used. With the modern, minimalistic style, it’s easy enough to remove the presets and replace them with suitable company or product images to promote your content, idea, or project.
0340 Animated Conceptual Slides for PowerPoint
Again, we have another modern and minimalistic kind of PowerPoint template with ‘40 Animated Conceptual Slides for PowerPoint.’ It comes with 40 modern slides, all of which come fully animated are easy enough to customize with your own branding or content.
04UNIGRAPH - Animated & Creative Template (PPTX)
For a bit more fun, our next template is “UNIGRAPH.” This still definitely fits the description ‘minimalistic’ but the pop of color and effects that it brings to the table gives it a different kind of vibe from all the others. No less professional, but certainly more fun. Of course, most importantly, perhaps, is the fact that each slide is smoothly animated.
05Graph & Charts PowerPoint Presentation
For this next one, we introduce a template set called “Graphs & Charts” for those who may want to present their products, projects, ideas, etc. in the shape of graphs and charts. It’s perfect for professionals, certainly. Especially with its clean look, brightened only by occasional pops of color that can be seen from the graphs and charts that it comes with.
06Laststyle - PowerPoint Template
This next PowerPoint template is most suited for businesses looking to promote their products. The creator of the template has provided five different colored versions of the template, each with 30 unique slides that were carefully sectioned with suitable animations.
Part 2 How to Create a Moving Animation in PowerPoint
Now we come to the point of the article where we speak directly to those who may want to experiment more by personally creating a moving animation PowerPoint. For this example, we’ll be teaching you how to create a path animation PowerPoint with the available tools that the software offers under ‘Animation.’ Stick around if you want to learn more.
01Step 1. Open Project.
First things first, of course. Start a new project. When you’ve started, move on to the Animation tab (which we’ve pointed out in the image below.)
02Step 2. Add Animation.
Then, make sure to select the object or model that you want to animate (in this case, we’ve inserted a 2D model of a businessman), and then click the ‘Add Animation’ button (shown in the image below.)
03Step 3. Choose Animation.
Under ‘Add Animation’ you’ll find several different options for animations that you can choose from. Of course, since our goal is to create a PowerPoint Motion Path Animation, we have selected one of the ‘Motion Path’ options.
04Step 4. Choose Motion Path Animation
In order to make motion animation in PowerPoint, you must select one of the offered ‘Motion Paths’ (i.e., Bounce, Line, Arcs, etc.) and then use the motion path tool that appears to control the direction you wish to make your character move.
In this example, we chose the ‘Lines’ motion path (1) and then used the line tool to create a path for our businessman model. To walk from the right side of the screen towards the left.
05Step 5. Adjust Animation.
With path animation PowerPoint complete, you can adjust as needed with the tools provided. For example, you can have the character start moving as soon as the slide opens, or wait until a minute has passed, you can extend the animation by changing duration, etc.
Part 3 10 Moving Animation PowerPoint Techniques
For this last step, we break down some important PowerPoint 3D Animation need-to-knows. Including the specifics provided by each of the options made available to you and why it’s important to explore every single one to create better and more professional-looking presentations.
01Transitions
When it comes to PowerPoint presentations, most people are no doubt the most familiar with ‘Transitions’ when talking in terms of adding animation into a presentation. This one decides whether you want to shift from one slide to another smoothly, or if you want the previous slide to break into splinters, or rotate into the next slide, and so on and so forth. It’s an ‘in-between’ animation that signals where one ends and the other begins.
02Animations
Now, for the ‘Animations’ tab, we focus on animations that occur in the slide (not in-between like transitions). This can include a wide array of things. Whether it be characters moving (like shown in the tutorial we provided), text boxes appearing and disappearing in short order, images bouncing into view in dramatic fashion, and so on and so forth. There’s lots of potential here.
03Animation - Start
We mentioned this previously in the tutorial, but PowerPoint (which does not offer the more advanced 3D customization options), does still give you the freedom to choose how you want certain animations to work.
In the case of the ‘Animations-Start’ option, the goal is to decide when an animation starts playing. Do you want it to start after a click? Or maybe you want it to start up immediately? Whatever the case may be, this function will let you choose the specifics.
044. Animation - Duration
Next, we decide how long you want the animation to last. For example, if you chose to add a PowerPoint 3D rotation animation into a character, how long do you want it to spin before it settles into place? Perhaps only a second? Perhaps more? Whatever you chose, this is the option that will let you finalize that.
05Animation - Delay
This one is self-explanatory as well. But suffice to say, the ‘Delay’ option is for deciding how much an animation is delayed before starting. For example, if you chose to start it ‘On Click’ you can increase the delay to keep it from playing immediately on click.
06Break Up Presentation into Sections
A lot of PowerPoint templates, you’ll find, are naturally broken into sections. This is because it is easier to consume it in that way. It’s also a good signal to your audience as to what point of the presentation you are on. Are you in the beginning? The middle? Near the end? Etc. In this case, the best option for showing it is transitions that separate the sections from one another.
07Add Animation - Entrance
As promised earlier, we’ll be going through each type of animation is available under the ‘Add Animation’ option. The first is “Entrance” animations. This one is pretty easy to guess. It makes up a variety of animations that serve as its entrance animation. Here are some examples:
● Appear: To have objects appear without any other effect.
● Fade: To have objects fade into view.
● Bounce: To have objects bounce into view.
● Swivel: To have objects swivel into view.
08Add Animation - Emphasis
This next animation style is to give emphasis to an already-present object. For example, at a click, you can have a text box ‘Pulse’ and become the center of attention. You can change ‘Object Color’ to make it stand out. And so on.
099. Add Animation - Exit
Opposite of the ‘Entrance’ animations are the ‘Exit’ animations. You’ll notice that the style of animations is the same here. The only difference is that the animations occur to exit the project out of the presentation. For example, an image exiting to reveal text. Or text flying out to be replaced with more text, etc.
10Add Animation - Motion Path
We’ve already mentioned the PowerPoint Motion Path animation style previously, but just to reiterate some things, this is the most customizable animation feature on PowerPoint. One that allows you to move objects across the slide in whatever way you wish. In our example, we created a motion path animation that took the character from the center of the screen to the left of the screen.
● Key Takeaways from This Episode →
● While videos are the most popular way to share information, there are some presentations that require a heavier guiding hand.
● In these situations, a PowerPoint presentation, carefully animated, can serve in place of an edited video.
● There are templates available that you can take advantage of if you’d prefer to start with something to work from. We introduced some in this article that we think were particularly notable.
● But, of course, more careful personalization is sometimes necessary. In that case, we hope that you find our tutorial and our list of PowerPoint techniques helpful.
That Will Make Aesthetic Cartoon Drawing More Understandable
That Will Make Aesthetic Cartoon Drawing More Understandable
An easy yet powerful editor
Numerous effects to choose from
Detailed tutorials provided by the official channel
When you are trying to make an aesthetic drawings cartoon, the primary thing to focus on is the composition. Composition is the combination, arrangement, and organization of objects within the borders of drawing space. To have a great aesthetic cartoon drawing, you must focus on bringing the eyes of the viewer toward your center of interest within an aesthetically-pleasing composition. When we create illustrations, we are often concerned with putting in a lot of details that will overload the image and lose the meaning that we originally wanted it to convey.

We engage our audience and viewer more by composing a perfect aesthetic drawing. In addition, many rules define a good composition drawing, but these rules are mainly guidelines. Also pay attention to your personal preferences and instincts. In this guide, we’ll teach you how to make an excellent aesthetic cartoon painting more understandable.
In this article
01 [Canvas Aesthetic Painting Ideas](#Part 1)
02 [Blender Aesthetic Painting Ideas](#Part 2)
03 [How to Create Super-Detailed Aesthetic Cartoon Painting](#Part 3)
Part 1 Canvas Aesthetic Painting Ideas
There are times you do not need to be a famous painter or an art professional to create beautiful wall art. Canvas painting is an all-in-one application for all skill levels, from beginners to experts. It also provides you with different painting ideas ranging from beach scenes to abstract designs to create pieces that look stunning and professional.
We have compiled a list of canvas aesthetic painting ideas to help you begin your journey as an aesthetic cartoon painter. Look through the images to determine which ones match the style of painting you wish to add to your drawing and get inspiration to create your designs.
01Disney Canvas Art
These are aesthetic cartoon painting ideas relating to 2020 Disney Canvas Art. You can get ideas from this to begin your journey into the world of painting.

02Hippie Painting Canva Art
If you are also looking for other aesthetic cartoon painting ideas to choose from, you can select from this 2020 Cute Canvas Paintings “Hippie Painting” Canvas Art.

03Spongebob Painting
These painting ideas are a part of the Canvas Aesthetic Cartoon Painting ideas of 2020 called Spongebob Painting Disney Canvas Art.

04Babs Bunny Pa Et Mini Lerret
These are a painting about “Babs Bunny Pa Et Mini Lerret.” A 2020 Mini Canvas Art Hippie Painting Canvas idea that you can choose from

Part 2 Blender Aesthetic Painting Ideas
Blender is an accessible and open-source 3D creation suite that supports the entirety of the 3D pipeline modeling, rigging, animation, simulation, compositing rendering, motion tracking, video editing, and 2D animation pipeline. It is a fact that this is one of the best open-source software you can choose from to make your aesthetic cartoon drawing.
It is entirely free software, and various artists can use it to start digging in and playing with it. Here are some of the blender aesthetic cartoon painting ideas you can choose from:
01Princess Ira and Amina
This is a fictional aesthetic drawing cartoon of an African princess having gold gifted powers with her face painting inspired by Nigerian traditional face decorations. However, her crown is adorned with crosses, crystals, and chains which incorporate several elements from different cultural designs available from all over the world to portray unity.

02Survival Knife Weekly Drills 045
This was a design painting inspired based on BUCK KNIVES in pain texturing and focuses on making a practical game-ready asset.

03Radiance
This is a blender aesthetic cartoon painting idea of a graduation project made for the Concept Art specialized cursus at New3dge School.

04 The character looks dev
This blender cartoon painting’s inspiration came from Edward, the short film’s main character. It is a work in progress but a lovely painting that can inspire you.
Part 3 How to Create Super-Detailed Aesthetic Cartoon Painting
To create a super detailed aesthetic cartoon drawing, you do not need to be a trained artist, nor do you need a fancy cartoon picture maker. All you need to create a cartoon painting photo is a simple and Free picture from a cartoon editor to help you carry out the task more effectively.
However, you can also convert your cartoon paint into creative animation using Wondershare Filmora Video Editor . Filmora is a powerful all-in-one tool for editing that you can use to that can be used for free to animate your cartoon with its tons of effects, filters, and keyframing features that can help you carry this out effectively.
For Win 7 or later (64-bit)
For macOS 10.12 or later
Here is how to create a super detailed aesthetic cartoon painting:

Step 1: Open the Picsart editor on your desktop browser and click on the new project
Step 2: Next is to click on Upload to select the photo that you want to cartoon paint from the computer library of your hard drive
Step 2: Click on the toolbar, select the effect feature from the dropdown above your photo, and click on Magic to view all available one-click cartoon filters. However, almost all of the Magic effects on this editor will help you achieve an aesthetic cartoon photo effect.
Step 4: Click on Adjust and Blend above your photo workspace on the editor. This will help you manually adjust the effects (color burn, fade, saturation, brightness, etc.).
Step 5: Preview your result and once you are happy with the new cartoon photo painting, click on the Share button and download it from the top right corner of the editor to save it on your device.
● Ending Thoughts →
● This article explained creating and gave inspiration and ideas for the aesthetic cartoon painting you can choose from to make yours. In addition, the report also recommends Filmora as an influential editor if you intend to create an animation from your cartoon painting due to its tons of features.
● So, now you can start building your aesthetic drawings and cartoons!
When you are trying to make an aesthetic drawings cartoon, the primary thing to focus on is the composition. Composition is the combination, arrangement, and organization of objects within the borders of drawing space. To have a great aesthetic cartoon drawing, you must focus on bringing the eyes of the viewer toward your center of interest within an aesthetically-pleasing composition. When we create illustrations, we are often concerned with putting in a lot of details that will overload the image and lose the meaning that we originally wanted it to convey.
We engage our audience and viewer more by composing a perfect aesthetic drawing. In addition, many rules define a good composition drawing, but these rules are mainly guidelines. Also pay attention to your personal preferences and instincts. In this guide, we’ll teach you how to make an excellent aesthetic cartoon painting more understandable.
In this article
01 [Canvas Aesthetic Painting Ideas](#Part 1)
02 [Blender Aesthetic Painting Ideas](#Part 2)
03 [How to Create Super-Detailed Aesthetic Cartoon Painting](#Part 3)
Part 1 Canvas Aesthetic Painting Ideas
There are times you do not need to be a famous painter or an art professional to create beautiful wall art. Canvas painting is an all-in-one application for all skill levels, from beginners to experts. It also provides you with different painting ideas ranging from beach scenes to abstract designs to create pieces that look stunning and professional.
We have compiled a list of canvas aesthetic painting ideas to help you begin your journey as an aesthetic cartoon painter. Look through the images to determine which ones match the style of painting you wish to add to your drawing and get inspiration to create your designs.
01Disney Canvas Art
These are aesthetic cartoon painting ideas relating to 2020 Disney Canvas Art. You can get ideas from this to begin your journey into the world of painting.
02Hippie Painting Canva Art
If you are also looking for other aesthetic cartoon painting ideas to choose from, you can select from this 2020 Cute Canvas Paintings “Hippie Painting” Canvas Art.
03Spongebob Painting
These painting ideas are a part of the Canvas Aesthetic Cartoon Painting ideas of 2020 called Spongebob Painting Disney Canvas Art.
04Babs Bunny Pa Et Mini Lerret
These are a painting about “Babs Bunny Pa Et Mini Lerret.” A 2020 Mini Canvas Art Hippie Painting Canvas idea that you can choose from
Part 2 Blender Aesthetic Painting Ideas
Blender is an accessible and open-source 3D creation suite that supports the entirety of the 3D pipeline modeling, rigging, animation, simulation, compositing rendering, motion tracking, video editing, and 2D animation pipeline. It is a fact that this is one of the best open-source software you can choose from to make your aesthetic cartoon drawing.
It is entirely free software, and various artists can use it to start digging in and playing with it. Here are some of the blender aesthetic cartoon painting ideas you can choose from:
01Princess Ira and Amina
This is a fictional aesthetic drawing cartoon of an African princess having gold gifted powers with her face painting inspired by Nigerian traditional face decorations. However, her crown is adorned with crosses, crystals, and chains which incorporate several elements from different cultural designs available from all over the world to portray unity.
02Survival Knife Weekly Drills 045
This was a design painting inspired based on BUCK KNIVES in pain texturing and focuses on making a practical game-ready asset.
03Radiance
This is a blender aesthetic cartoon painting idea of a graduation project made for the Concept Art specialized cursus at New3dge School.
04 The character looks dev
This blender cartoon painting’s inspiration came from Edward, the short film’s main character. It is a work in progress but a lovely painting that can inspire you.
Part 3 How to Create Super-Detailed Aesthetic Cartoon Painting
To create a super detailed aesthetic cartoon drawing, you do not need to be a trained artist, nor do you need a fancy cartoon picture maker. All you need to create a cartoon painting photo is a simple and Free picture from a cartoon editor to help you carry out the task more effectively.
However, you can also convert your cartoon paint into creative animation using Wondershare Filmora Video Editor . Filmora is a powerful all-in-one tool for editing that you can use to that can be used for free to animate your cartoon with its tons of effects, filters, and keyframing features that can help you carry this out effectively.
For Win 7 or later (64-bit)
For macOS 10.12 or later
Here is how to create a super detailed aesthetic cartoon painting:
Step 1: Open the Picsart editor on your desktop browser and click on the new project
Step 2: Next is to click on Upload to select the photo that you want to cartoon paint from the computer library of your hard drive
Step 2: Click on the toolbar, select the effect feature from the dropdown above your photo, and click on Magic to view all available one-click cartoon filters. However, almost all of the Magic effects on this editor will help you achieve an aesthetic cartoon photo effect.
Step 4: Click on Adjust and Blend above your photo workspace on the editor. This will help you manually adjust the effects (color burn, fade, saturation, brightness, etc.).
Step 5: Preview your result and once you are happy with the new cartoon photo painting, click on the Share button and download it from the top right corner of the editor to save it on your device.
● Ending Thoughts →
● This article explained creating and gave inspiration and ideas for the aesthetic cartoon painting you can choose from to make yours. In addition, the report also recommends Filmora as an influential editor if you intend to create an animation from your cartoon painting due to its tons of features.
● So, now you can start building your aesthetic drawings and cartoons!
Ways You Can Master to Make Claymation Videos
Ways You Can Master to Make Claymation Videos
An easy yet powerful editor
Numerous effects to choose from
Detailed tutorials provided by the official channel
Claymation videos appear to be more appealing as compared to other graphical or pictorial videos we create. However, some people still believe that making such a video is not their forte and that they cannot achieve mastery in the field.
So, if you have the same question and want to learn how to make a claymation video quickly and easily, stay tuned with us. In this article, we are covering all the relevant details to help you create the best claymation video possible and the outcome will be as expected. Let’s get started!
In this article
01 [What is Claymation and How It Works](#Part 1)
02 [History of Claymation Movies](#Part 2)
03 [6 Best Claymation Videos of All Time](#Part 3)
04 [How to Make Claymation Videos](#Part 4)
Part 1 What is Claymation and How It Works
With the name Claymation, you might be thinking that there is a use of clay in creating such videos. Well, you are right. These videos are representations of stop-motion animation, which is created with the help of plasticine clay.
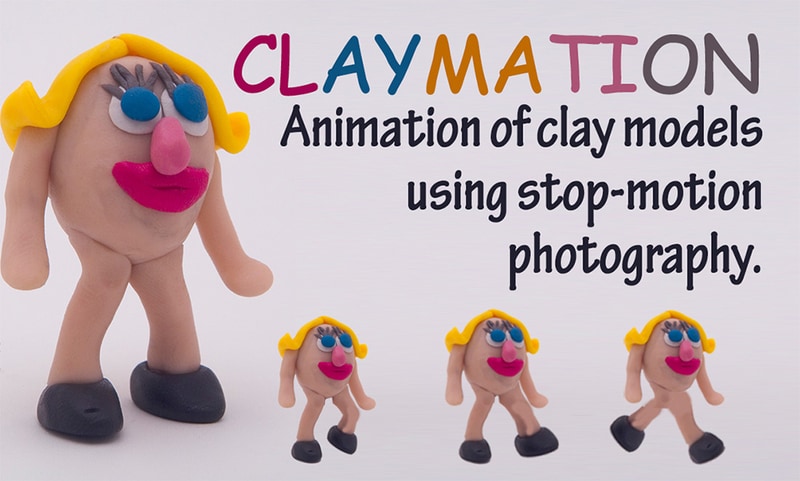
The use of platicsine is not only restricted to the animated characters, but these are also considered for creating the ultimate surroundings. The videos are recorded in such a manner that synchronization must be established with background and character, and viewers will be able to enjoy the same. After creating the videos, they are played in quick succession to get the right appearance of the movement.
Part 2 History of Claymation Movies
01The Beginning of Claymation Movies
Well, you will be surprised to know that the Claymation videos came into existence after the introduction of plasticine. It was founded in 189and since then, clamaytion videos have been able to find their way to silver screens. In earlier times, people used to dip their toes into color and then try to create artwork. But with innovation, the process has been changed and the oldest known extant clay animation film is Long Live the Bull (1926) by Joseph Sunn. The main procedure for creating this film is Claymation.

In the 190as well, there were some productions going on considering the claymation work, and some turned out to be successful, while some had no existence after that. For example, “Animated Putty” (1911), a historic feature by Walter R. Booth, dates back. So, yes, one can consider that this has existed for a very long time.
025 Famous Claymation Examples Over the Years
If we start exploring through some of the best examples of the past, you will be surprised to know that there are some claymation videos that still hit the top of the list of best movies around. These are as follows:
● The Nightmare Before Christmas
● The Life Aquatic with Steve Zissou
● Coraline
● The PJs
And there are some more that excel at utilizing claymation and teaching users how to make a claymation video. Some movies belong to the comedy genre, and some are related to fiction only through having a combination of friendship and others.
03A Look into the Art of Claymation for Film and Video Projects
Claymation has been around for a long time, and it’s becoming more popular. Small projects and big budget features alike are finding new and innovative ways to combine traditional models with other digital filmmaking methodologies like character animation, green screens, etc.
You can see that the team behind Missing Link went to great lengths to create an incredible looking production. They used both practical rigging systems and green screens as props. They used live-action footage and computer animation for more complex water and action sequences. All of them make it more appealing to the audience.
There are a lot of different ways you might want to get into claymation. Hand-drawn stop animation has seen an increase in popularity lately, with people looking for new ways to explore it. Drawing frames by hand is a really satisfying experience, not only because you have the chance to explore your interests and have some fun with them, but also because it pushes you creatively to explore new limits.
So yes, it is right to conclude that there is a great scope for claymation video production and one must be aware of claymation animators to try their hands on it.
Part 3 6 Best Claymation Videos of All Time
People have the curiosity to know the best claymation videos all the time. Well, according to us, the videos you can consider are as follows:
01The Boxtrolls
The Boxtrolls turned out to be one of the best Claymation movies produced to date.The response that was received was not overwhelming, but it came up with a unique setting of clay models and the animation given to this movie was perfect. Also, it received the chance to be premiered during the Venice Film Festival 2014.
02Paranorman
Paranorman is among those claymation movies which cannot be the result of the dark effort put in by the producers. This movie focuses on children. It has different characters integrated, and the printed faces for each character have been utilized. This movie set good records, and children were very happy after seeing it on screen.
03Chicken run
Chicken Run was not the well-known Claymation video of the time, which was intended to be original cinematic peace. There was collaboration between Dreamworks and others to get this exceptional movie available on screen. The storey was so heart-touching, it’s no wonder it received a good response. Due to the availability of technology at that time, this movie was not able to set good records, but after it, most people are aware of the same.
04Consuming Spirits
Consuming spirits come into consideration in 201and it is a story about three residents of a small rust belt town. They are somewhere, living an interconnected life, and things are not fine with them. Also, they are confused about how to fix things for a better lifestyle.

05A town called panic
A town called Panic came into existence in 200and it is an animated movie about a cowboy and an Indian. They are planning to construct a barbecue pit for the birthday but are facing a lot of difficulties in doing so. But somehow they managed to do so. The concept of this movie is quite different as compared to other Claymation movies.
06The Year without a Santa Claus
The Year without a Santa Claus came into existence in 200This movie is focused on the spot where Santa Claus has taken off for the year and others are trying to save Christmas after this announcement. There is a lot more integrated in this movie to watch.
Part 4 How to Make Claymation Videos
If you are looking forward to trying your hands on claymation videos, do it now as this is very simple. For this, you only require a claymation animator like Wondershare Filmora Video Editor for the same. But before choosing it out, be sure to know the steps that will help you make the video easily.
Wondershare Filmora
Get started easily with Filmora’s powerful performance, intuitive interface, and countless effects!
Try It Free Try It Free Try It Free Learn More >

The steps you need to follow are:
Step 1 Make yourself available to the Claymation Animator (you can use Filmora for this task) and sign up for it.
Step 2 Now, to start the project, you need to lockout the photos that are under consideration for creating the project.
Step 3 Arrange all the photos in a sequential order or say whatever you want, and do the editing, considering the speed and other effects.
Step 4 After setting up the effects, review the same for finalization.
Step 5 After finalizing the effects, save the same.
These are the simple steps to follow if you want to create Claymation videos.
Well, as we have discussed Filmora, this is one of the best tools available to help you create claymation videos easily. This tool has an easy-to-use and navigate interface and will assist you in achieving your desired results.
Also, you will be happy to know that an abundance of features have been added to it, making it one of the most considerable tools to have. So, yes, if you are looking for how to create claymation videos, try it now and be ready to get the expected outcome.
● Key Takeaways from This Episode →
● Claymation videos are getting more digitalized.
● Filmora is one of the best claymation animators to use.
● Claymation videos can be edited easily and customised by the user easily.
Claymation videos appear to be more appealing as compared to other graphical or pictorial videos we create. However, some people still believe that making such a video is not their forte and that they cannot achieve mastery in the field.
So, if you have the same question and want to learn how to make a claymation video quickly and easily, stay tuned with us. In this article, we are covering all the relevant details to help you create the best claymation video possible and the outcome will be as expected. Let’s get started!
In this article
01 [What is Claymation and How It Works](#Part 1)
02 [History of Claymation Movies](#Part 2)
03 [6 Best Claymation Videos of All Time](#Part 3)
04 [How to Make Claymation Videos](#Part 4)
Part 1 What is Claymation and How It Works
With the name Claymation, you might be thinking that there is a use of clay in creating such videos. Well, you are right. These videos are representations of stop-motion animation, which is created with the help of plasticine clay.
The use of platicsine is not only restricted to the animated characters, but these are also considered for creating the ultimate surroundings. The videos are recorded in such a manner that synchronization must be established with background and character, and viewers will be able to enjoy the same. After creating the videos, they are played in quick succession to get the right appearance of the movement.
Part 2 History of Claymation Movies
01The Beginning of Claymation Movies
Well, you will be surprised to know that the Claymation videos came into existence after the introduction of plasticine. It was founded in 189and since then, clamaytion videos have been able to find their way to silver screens. In earlier times, people used to dip their toes into color and then try to create artwork. But with innovation, the process has been changed and the oldest known extant clay animation film is Long Live the Bull (1926) by Joseph Sunn. The main procedure for creating this film is Claymation.
In the 190as well, there were some productions going on considering the claymation work, and some turned out to be successful, while some had no existence after that. For example, “Animated Putty” (1911), a historic feature by Walter R. Booth, dates back. So, yes, one can consider that this has existed for a very long time.
025 Famous Claymation Examples Over the Years
If we start exploring through some of the best examples of the past, you will be surprised to know that there are some claymation videos that still hit the top of the list of best movies around. These are as follows:
● The Nightmare Before Christmas
● The Life Aquatic with Steve Zissou
● Coraline
● The PJs
And there are some more that excel at utilizing claymation and teaching users how to make a claymation video. Some movies belong to the comedy genre, and some are related to fiction only through having a combination of friendship and others.
03A Look into the Art of Claymation for Film and Video Projects
Claymation has been around for a long time, and it’s becoming more popular. Small projects and big budget features alike are finding new and innovative ways to combine traditional models with other digital filmmaking methodologies like character animation, green screens, etc.
You can see that the team behind Missing Link went to great lengths to create an incredible looking production. They used both practical rigging systems and green screens as props. They used live-action footage and computer animation for more complex water and action sequences. All of them make it more appealing to the audience.
There are a lot of different ways you might want to get into claymation. Hand-drawn stop animation has seen an increase in popularity lately, with people looking for new ways to explore it. Drawing frames by hand is a really satisfying experience, not only because you have the chance to explore your interests and have some fun with them, but also because it pushes you creatively to explore new limits.
So yes, it is right to conclude that there is a great scope for claymation video production and one must be aware of claymation animators to try their hands on it.
Part 3 6 Best Claymation Videos of All Time
People have the curiosity to know the best claymation videos all the time. Well, according to us, the videos you can consider are as follows:
01The Boxtrolls
The Boxtrolls turned out to be one of the best Claymation movies produced to date.The response that was received was not overwhelming, but it came up with a unique setting of clay models and the animation given to this movie was perfect. Also, it received the chance to be premiered during the Venice Film Festival 2014.
02Paranorman
Paranorman is among those claymation movies which cannot be the result of the dark effort put in by the producers. This movie focuses on children. It has different characters integrated, and the printed faces for each character have been utilized. This movie set good records, and children were very happy after seeing it on screen.
03Chicken run
Chicken Run was not the well-known Claymation video of the time, which was intended to be original cinematic peace. There was collaboration between Dreamworks and others to get this exceptional movie available on screen. The storey was so heart-touching, it’s no wonder it received a good response. Due to the availability of technology at that time, this movie was not able to set good records, but after it, most people are aware of the same.
04Consuming Spirits
Consuming spirits come into consideration in 201and it is a story about three residents of a small rust belt town. They are somewhere, living an interconnected life, and things are not fine with them. Also, they are confused about how to fix things for a better lifestyle.
05A town called panic
A town called Panic came into existence in 200and it is an animated movie about a cowboy and an Indian. They are planning to construct a barbecue pit for the birthday but are facing a lot of difficulties in doing so. But somehow they managed to do so. The concept of this movie is quite different as compared to other Claymation movies.
06The Year without a Santa Claus
The Year without a Santa Claus came into existence in 200This movie is focused on the spot where Santa Claus has taken off for the year and others are trying to save Christmas after this announcement. There is a lot more integrated in this movie to watch.
Part 4 How to Make Claymation Videos
If you are looking forward to trying your hands on claymation videos, do it now as this is very simple. For this, you only require a claymation animator like Wondershare Filmora Video Editor for the same. But before choosing it out, be sure to know the steps that will help you make the video easily.
Wondershare Filmora
Get started easily with Filmora’s powerful performance, intuitive interface, and countless effects!
Try It Free Try It Free Try It Free Learn More >
The steps you need to follow are:
Step 1 Make yourself available to the Claymation Animator (you can use Filmora for this task) and sign up for it.
Step 2 Now, to start the project, you need to lockout the photos that are under consideration for creating the project.
Step 3 Arrange all the photos in a sequential order or say whatever you want, and do the editing, considering the speed and other effects.
Step 4 After setting up the effects, review the same for finalization.
Step 5 After finalizing the effects, save the same.
These are the simple steps to follow if you want to create Claymation videos.
Well, as we have discussed Filmora, this is one of the best tools available to help you create claymation videos easily. This tool has an easy-to-use and navigate interface and will assist you in achieving your desired results.
Also, you will be happy to know that an abundance of features have been added to it, making it one of the most considerable tools to have. So, yes, if you are looking for how to create claymation videos, try it now and be ready to get the expected outcome.
● Key Takeaways from This Episode →
● Claymation videos are getting more digitalized.
● Filmora is one of the best claymation animators to use.
● Claymation videos can be edited easily and customised by the user easily.
How to Make Architecture Animation
Learn How to Make Architecture Animation
An easy yet powerful editor
Numerous effects to choose from
Detailed tutorials provided by the official channel
Architecture Animation is the practice of creating a 3D Animation of a structure. A lot of animation studios offer it as part of their packages, creating 3D Architectural Animation that you can explore to the fullest and make use of as clips for projects for your partners or share with your audience for marketing purposes.
In this article
01 [What is Architectural 3D Animation?](#Part 1)
02 [Top 7 Benefits of 3D Animation in Architecture Design](#Part 2)
03 [5 Famous 3D Animation Services and Studio](#Part 3)
Part 1 What is Architectural 3D Animation?
01How is animation used in architecture?
3D Animation Architecture is the same as a live walkthrough of a home or building, except it’s all done digitally In the literal sense, you can experience a real estate project in full (both interior and exterior design, although some animation studios do offer those services separately.) These animations are usually done with the help of CAD architecture-friendly software. Like Maya, Autodesk, Giza, and so on.
Then they’re either shared as is — fully explorable in all sorts of angles. Or, as finished videos run through on a professional video editor, like Filmora, which can be used to create stunning ‘walk-throughs’ that you can share with clients and partners alike
02Why is 3D Animation Important for the Architecture Industry?
3D Animation Architecture is quite difficult to make, usually involving hours of work rendering everything in proper form. However, these days, Architecture Animation software is not only more accessible but much easier to use as well Because of this, the demand for Architectural Animations grew, with architects and construction engineers preferring only to work with those who could provide them with the kind of detailed project that is usually afforded by 3D Architectural Animation.
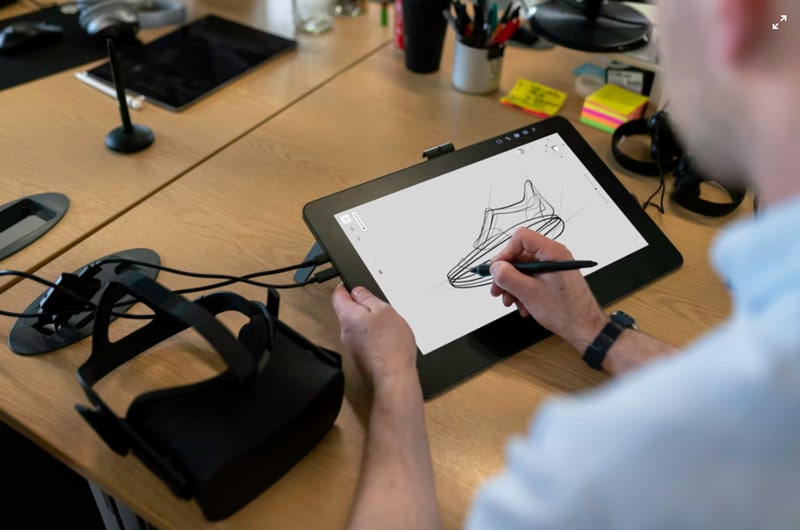
Part 2 Top 7 Benefits of 3D Animation in Architecture Design
We answered this just now in a very broad kind of sense. However, to be truly able to explain why the demand for 3D Architectural Animation has only continued to grow over the years, we’ve also included this section on the many benefits of Architecture Animation and how it can improve your business offerings and help you compete on more even grounds with your competitors
01Detailed Construction Requirements
As mentioned previously, a lot of architects and construction engineers would prefer to work with designers who can show them their vision through 3D Architectural Animation. This gives them an idea of exactly what you want in terms of construction requirements.
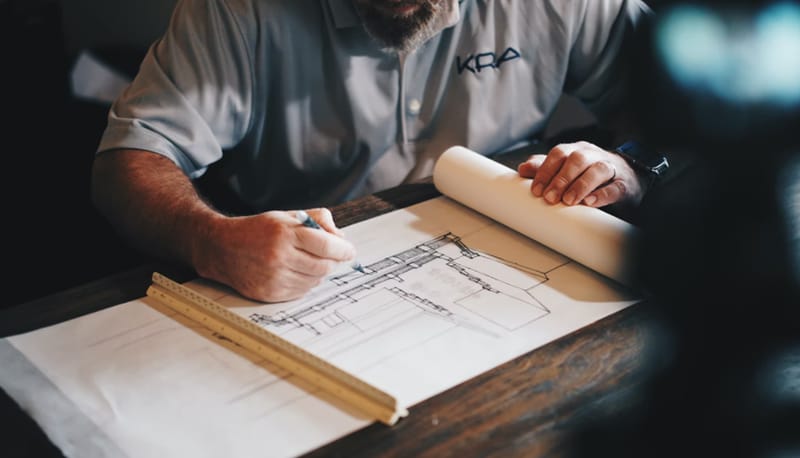
02Complete Visual Touring
Of course, outside of construction parameters, there’s also the major benefit of just being able to see the finished project in its fully rendered form. In the case of designers and construction engineers, it erases any risk of misunderstandings. And, when it comes to clients, they can more easily visualize your plans and the work that is required to make it a reality.
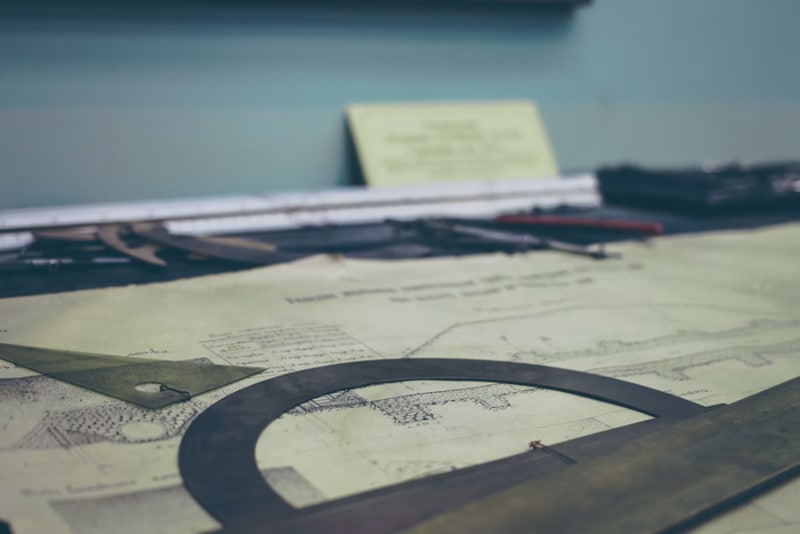
03Scope and Scale of Project
Continuing from the same vein we left off in the previous listing. A 3D Architectural Animation shows off the specific scope and scale of the project. Not just in terms of sizing (although that’s important too), but also the kind of budget that would be required in order to get it done, and what changes could be made in regards to the current real estate property (if there’s any.)
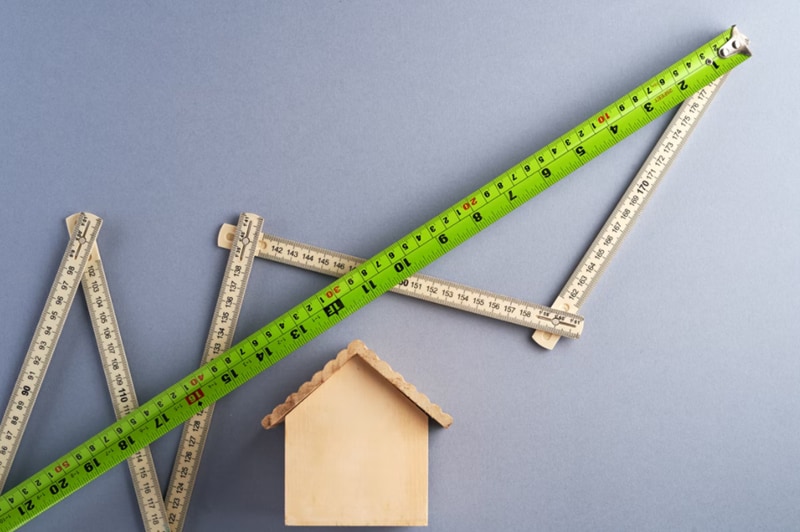
04Architectural Animations Easily Shareable
We mentioned this in passing previously, but architectural animations are great because they are so much easier to share. Now, no longer will you have to come to a project discussion with piles and piles of blueprints that your client is unlikely to truly understand in full
Instead, you can invest in creating stunning walk-throughs or flythroughs of the ‘finished’ property with the use of video editors like Filmora and ensure that they are able to share in your vision from the onset.

05Customer Reassurance Boost
Of course, one great thing about having to show something to your client is that you can give them peace and mind by proving to them that you know what you are doing, that you have a plan, and that this plan is right here. It’s quite relieving, as we’re certain you can understand, to have something solid to ground you when faced with such big, life-changing projects.

06Make Corrections Early and Efficiently
Another benefit of having a fully rendered end-product in front of you is that you can very easily make changes as needed. If the client thinks that this part is a little too small or if they think that this door is unfashionable. You can make the change easily with the right CAD software and then ask their opinion again to ensure that you’ve got the look right this time around
No more illegible notes on paper blueprints. You can get right to editing on the 3D model itself, and see your corrections come to life not long after.
07Architectural Animations Are Promotable Content
So long as you are given permission by your clients, you can use finished projects as promotable content — either by publishing it on YouTube or your website, where it can be discovered by future clients that may be interested in your work In this way, you can show them your previous work without having to go through the trouble of recording an extra live walk-through of the property after the fact It’s already there after all, why not use it?
Part 3 5 Famous 3D Animation Services and Studio
If your goal is to eventually make a name for yourself in the world of 3D Animation Architecture, then it’s a good idea for you to familiarize yourself with some of the more popular 3D Animation Services and Studios (who provide the kind of service required to create architectural animations like that you see in Studio Ghibli Architecture)
01VisEngine
The first on this list of 3D Architecture Studio is “VisEngine.” They offer pop-up 3D Animation, Pop-Up Design, Origami Architecture, Kirigami Animation, and more Their main tools, as you would say, are Corona Renderer, Autodesk 3DS Max, Adobe Photoshop, and Adobe Premiere Pro If you’re curious as to the look of their finished architectural animations, they have some great samples available on YouTube that you can check out
02Exodo Animation Studios
“Exodo Animation Studios” is another animation service provider that provides high-quality 3D Animation work for architecture — although their service, much like other 3D Animation Studios, is not limited to that They’ve had their hand in creating plenty of 3D characters and are a well-known name-brand in the realm of CGI
03Promoshin
Promoshin is perhaps better known for its 3D Character Animation, but that doesn’t mean their architectural work is anything to scoff at They cater, specifically, to brands who want to create 3D Animation promotional content. And, to this end, they’ve worked with quite a lot of name-brands (including NASA, Uber, Cisco, and so on)
04ZOA Studio
ZOA Studio brings us back to Architecture Animation services providers that are well-known in the architectural industry They provide both exterior and interior work for many architects around the world — with a portfolio of great examples of old work available for you to look through on YouTube (it’s a great resource for those looking for inspiration)
05Studio Aiko
Again, this next studio, called “Studio Aiko” is usually better known for its regular 3D Animation work. However, that doesn’t mean that their architectural animations are any lesser in quality They produce very high-quality work fit for any kind of media platform. Making it a fitting solution for many professional architects
● Key Takeaways from This Episode →
● Architectural Animations are now a staple for real estate projects. What with architects and construction engineers alike preferring to work with designers who can hand over a detailed look of their vision from the onset.
● There are many other benefits to 3D Architectural Animation, of course, amongst which is better communication between you, as the designer, and your partners and clients Architecture Animation breathes life into a vision that may have previously existed only in your mind, and it smooths misunderstandings and eases progress
● If you’re looking to start a career in 3D Animation Architecture, we recommend that you look into some of the more popular service providers and studios in your area YouTube is a good platform to start looking if you’re unsure. There, you can find many finished architectural animations that can serve as inspiration for future projects
Architecture Animation is the practice of creating a 3D Animation of a structure. A lot of animation studios offer it as part of their packages, creating 3D Architectural Animation that you can explore to the fullest and make use of as clips for projects for your partners or share with your audience for marketing purposes.
In this article
01 [What is Architectural 3D Animation?](#Part 1)
02 [Top 7 Benefits of 3D Animation in Architecture Design](#Part 2)
03 [5 Famous 3D Animation Services and Studio](#Part 3)
Part 1 What is Architectural 3D Animation?
01How is animation used in architecture?
3D Animation Architecture is the same as a live walkthrough of a home or building, except it’s all done digitally In the literal sense, you can experience a real estate project in full (both interior and exterior design, although some animation studios do offer those services separately.) These animations are usually done with the help of CAD architecture-friendly software. Like Maya, Autodesk, Giza, and so on.
Then they’re either shared as is — fully explorable in all sorts of angles. Or, as finished videos run through on a professional video editor, like Filmora, which can be used to create stunning ‘walk-throughs’ that you can share with clients and partners alike
02Why is 3D Animation Important for the Architecture Industry?
3D Animation Architecture is quite difficult to make, usually involving hours of work rendering everything in proper form. However, these days, Architecture Animation software is not only more accessible but much easier to use as well Because of this, the demand for Architectural Animations grew, with architects and construction engineers preferring only to work with those who could provide them with the kind of detailed project that is usually afforded by 3D Architectural Animation.
Part 2 Top 7 Benefits of 3D Animation in Architecture Design
We answered this just now in a very broad kind of sense. However, to be truly able to explain why the demand for 3D Architectural Animation has only continued to grow over the years, we’ve also included this section on the many benefits of Architecture Animation and how it can improve your business offerings and help you compete on more even grounds with your competitors
01Detailed Construction Requirements
As mentioned previously, a lot of architects and construction engineers would prefer to work with designers who can show them their vision through 3D Architectural Animation. This gives them an idea of exactly what you want in terms of construction requirements.
02Complete Visual Touring
Of course, outside of construction parameters, there’s also the major benefit of just being able to see the finished project in its fully rendered form. In the case of designers and construction engineers, it erases any risk of misunderstandings. And, when it comes to clients, they can more easily visualize your plans and the work that is required to make it a reality.
03Scope and Scale of Project
Continuing from the same vein we left off in the previous listing. A 3D Architectural Animation shows off the specific scope and scale of the project. Not just in terms of sizing (although that’s important too), but also the kind of budget that would be required in order to get it done, and what changes could be made in regards to the current real estate property (if there’s any.)
04Architectural Animations Easily Shareable
We mentioned this in passing previously, but architectural animations are great because they are so much easier to share. Now, no longer will you have to come to a project discussion with piles and piles of blueprints that your client is unlikely to truly understand in full
Instead, you can invest in creating stunning walk-throughs or flythroughs of the ‘finished’ property with the use of video editors like Filmora and ensure that they are able to share in your vision from the onset.
05Customer Reassurance Boost
Of course, one great thing about having to show something to your client is that you can give them peace and mind by proving to them that you know what you are doing, that you have a plan, and that this plan is right here. It’s quite relieving, as we’re certain you can understand, to have something solid to ground you when faced with such big, life-changing projects.
06Make Corrections Early and Efficiently
Another benefit of having a fully rendered end-product in front of you is that you can very easily make changes as needed. If the client thinks that this part is a little too small or if they think that this door is unfashionable. You can make the change easily with the right CAD software and then ask their opinion again to ensure that you’ve got the look right this time around
No more illegible notes on paper blueprints. You can get right to editing on the 3D model itself, and see your corrections come to life not long after.
07Architectural Animations Are Promotable Content
So long as you are given permission by your clients, you can use finished projects as promotable content — either by publishing it on YouTube or your website, where it can be discovered by future clients that may be interested in your work In this way, you can show them your previous work without having to go through the trouble of recording an extra live walk-through of the property after the fact It’s already there after all, why not use it?
Part 3 5 Famous 3D Animation Services and Studio
If your goal is to eventually make a name for yourself in the world of 3D Animation Architecture, then it’s a good idea for you to familiarize yourself with some of the more popular 3D Animation Services and Studios (who provide the kind of service required to create architectural animations like that you see in Studio Ghibli Architecture)
01VisEngine
The first on this list of 3D Architecture Studio is “VisEngine.” They offer pop-up 3D Animation, Pop-Up Design, Origami Architecture, Kirigami Animation, and more Their main tools, as you would say, are Corona Renderer, Autodesk 3DS Max, Adobe Photoshop, and Adobe Premiere Pro If you’re curious as to the look of their finished architectural animations, they have some great samples available on YouTube that you can check out
02Exodo Animation Studios
“Exodo Animation Studios” is another animation service provider that provides high-quality 3D Animation work for architecture — although their service, much like other 3D Animation Studios, is not limited to that They’ve had their hand in creating plenty of 3D characters and are a well-known name-brand in the realm of CGI
03Promoshin
Promoshin is perhaps better known for its 3D Character Animation, but that doesn’t mean their architectural work is anything to scoff at They cater, specifically, to brands who want to create 3D Animation promotional content. And, to this end, they’ve worked with quite a lot of name-brands (including NASA, Uber, Cisco, and so on)
04ZOA Studio
ZOA Studio brings us back to Architecture Animation services providers that are well-known in the architectural industry They provide both exterior and interior work for many architects around the world — with a portfolio of great examples of old work available for you to look through on YouTube (it’s a great resource for those looking for inspiration)
05Studio Aiko
Again, this next studio, called “Studio Aiko” is usually better known for its regular 3D Animation work. However, that doesn’t mean that their architectural animations are any lesser in quality They produce very high-quality work fit for any kind of media platform. Making it a fitting solution for many professional architects
● Key Takeaways from This Episode →
● Architectural Animations are now a staple for real estate projects. What with architects and construction engineers alike preferring to work with designers who can hand over a detailed look of their vision from the onset.
● There are many other benefits to 3D Architectural Animation, of course, amongst which is better communication between you, as the designer, and your partners and clients Architecture Animation breathes life into a vision that may have previously existed only in your mind, and it smooths misunderstandings and eases progress
● If you’re looking to start a career in 3D Animation Architecture, we recommend that you look into some of the more popular service providers and studios in your area YouTube is a good platform to start looking if you’re unsure. There, you can find many finished architectural animations that can serve as inspiration for future projects
Top 10 3D Text Animation Templates
Top 10 3D Text Animation Templates
An easy yet powerful editor
Numerous effects to choose from
Detailed tutorials provided by the official channel
“Where is everyone getting their 3D Text Animation templates?”
To answer this request, we’ve compiled a guide that not only teaches you how to create things like 3D Spinning Text (After Effects) but also gives you an idea of where you can find the kind of resources (i.e., 3D Text Animation templates and presets) that you need to get a head start on your projects.
In this article
01 [Top 10 3D Text Animation Templates ](#Part 1)
02 [How Do I Make 3D Text in After Effects?](#Part 2)
03 [The Best 10 Amazing 3D Text Animation Templates](#Part 3)
04 [Secrets to Learning More Animation Tactics](#Part 4)
Part 1 What’s 3D Text Animation?
Before anything else, let’s talk about text animation. Specifically, 3D Text Animation. The text that you’re reading now, is 2D Text. It’s static, and it lacks depth. It’s just letters on a screen. Meanwhile, 3D Text is usually built for motion, and thus, it has volume and depth — it’s almost tangible. Here’s what that looks like:

As you can see, even without actually moving, in the text shown in the image above, the potential for motion is there — it looks alive.
Now, you’ll see 3D text like this often in movies or promotions. Usually in the form of extravagant title cards or 3D text logo animation. They’re eye-catching, and because they’re 3D, you can play with them as much as you want to really add drama to your creations.
Part 2 How Do I Make 3D Text in After Effects?
As promised, this next section will teach you how to create 3D Text Animation in Adobe After Effects, which is a VFX and motion graphics software used by many animators to bring life to their text. You’ll notice that the following tutorial is really more about introducing the tools that you can use in order to create 3D Text Animation:
01Step 1. Add Your Text
The first thing that you have to do, of course, is to add your text! To do this, go to the ‘Tools’ panel, select the Type tool, and then select the ‘Composition’ panel. The composition is where you type your text!
With After Effects, you also have the following options:
● Change Text Font
● Adjust Text Size
● Adjust Text Color
● Shift Justification (Left, Middle, right)
And so on! Once you’re done with your text composition, it will be generated by After Effects into a layer that you can adjust as needed in the next steps.

01Step 2. Use Animation Presets
With your text now in a layer that you can add animations to… you’ve practically done a third of the job! Or even more than that if you decide to use the animation presets that are provided by After Effects.
These can be found by selecting ‘Browse Presets…’ on the ‘Animation’ tab (shown in the image below.) All you need to apply them is to drag and drop them onto your text layer.
Note: The first keyframe of this built-in text animation will be applied at the location of the Current Time Indicator (CTI), so make sure that you’ve adjusted that accordingly.

01Step 3. Per-Character Animation
If you’d like to personalize your text animation, After Effects does also give you the option to animate per character (or, per letter, in this case.)
This will give you more control over how you decided to animate your text. Of course, it does mean that it is slightly more complicated as well.
● To animate text per layer, select ‘animate’ on that layer and choose a parameter to start working on animations for.
● You’ll be able to previous (or scrub) through your animations in order to see if they are doing what you need them to do.
● You can also remove applied parameters in order to re-work your animation.

01Step 4. Add Graphic Elements to Text
If you really want to make your 3D Animation Text pop, Adobe After Effects also offers the tools needed to add Graphic Elements to your composition — which can be found at the top-most toolbar!

Part 3 The Best 10 Amazing 3D Text Animation Templates
Now, as promised, we’re also going to be introducing a couple of 3D text animation templates that you can try out for your own projects! Each template will have a link that you can go to in order to see what it looks like, as well as an explanation on how you can use it for your projects in the future!
01Real 3D Light Bulb Kit
The first Text Animation Template on our list is the “Logo Light Bulb” 3D Animation from Envato Elements. This one literally glows people! Making it perfect for a quirky, and yet still very impressive Title Card or Logo. Its design is very realistic, and you can also control how it flickers! For example, turning the bulbs on certain characters first, or turning them all off at once in the end.
023D Text Reveal
This next 3D Animation template is also from Envato Market. And, just like the first, it makes for quite the dramatic Title Card or Logo. With this template, your Text can literally zoom in to view while looking its best and sparkiest in High-Chrome.
033D Metallic Text Animation
Our next pick, the 3D Metallic text animation is another great one for those who are looking for something flashy — something that gives off the impression of being impressive right from the gate. Compared to the previous text animation template, this one has a more rugged kind of appearance. Perfect for those looking to promote something more fun rather than professional.
043D Text Box Animation Pack
The next one is a little less ‘impressive’ — in the sense that it isn’t as in your face as the other 3D animation templates that we’ve introduced thus far. And that’s exactly why the 3D Text Box Animation Pack deserves to be on this list! Its 3D spinning text (after effects) elements are very usable — in that it can work for a variety of individuals and styles. It has a more professional look as well. Making it perfect for corporations.
053D Text & Logo Boxes
This next one, the 3D Text & Logo Boxes pack is particularly perfect for 3D logos. The pack gives you several options for box size as well as text parameters. So, you can design your animated 3D Logo however you want and use it for future projects to give them even more dimension than before.
06The Light Bulb Kit
Our next pick, which is the ‘Light Bulb Kit’ also from Envato, is very similar to the first item on our list — in that it features text lit up by lightbulbs. However, it lends an extra bit of photo-realism to it. Less sparkle and more grain — which may exactly be what you want for your new title card or logo.
073D Text Templates
The 3D Text Templates is a very bright and pop-y template that is perfect for creating eye-catching promotions and advertisements. It’s very simple to use, which, again, maybe exactly what you want. Literally, the template will ask you to choose your own text and change the colors to suit that of your own brand, then you’re done!
083D Text Shapes Logo Reveal
The ‘3D Text Shapes Logo Reveal’ template is a pack of 3D text animations that you can use in order to add a little spin to your logo reveals (quite literally, in some cases!) It has a lot of personality to it, and a certain tech-y or science-y feel that would make it perfect for anyone looking for something more technical.
09Bold Titles
The ‘Bold Titles’ template is very loud and proud. But it has a bit of a retro-vibe to it as well. Making it stand out from some of the more minimalistic modern text animation styles that you see these days.
1010. Wave 3D Logo & Text
Looking for something simple and professional? Then the ‘Wave 3D Logo & Text’ template may just be the one for you. We put it last on this list, but it’s actually quite a strong contender. One that just about anyone (for just about any type of project they’re working on), should be able to get some use out of.
Key Takeaways from This Episode
● 3D Text Animation is the practice of bringing text to life! It gives dimension, depth, and, even, movement into what are usually very static properties!
● You see a lot of 3D Text Animation in big pictures these days. And you can start creating your own with the use of Adobe After Effects — a VFX and Motion Graphics Software that a lot of professionals use for their own text animation.
● Of course, if you don’t have the kind of time to create your own 3D Text Animations from scratch, you can always use templates instead! There are hundreds (if not thousands) of them available out there. It should be simple enough to find one that fits the kind of vibe you’re looking for.
● SECRET TIP! If you’re looking for an all-in-one kind of solution, you might want to consider Filmora Pro. It’s a video editor, first and foremost, but that’s not all it is — you can be using it today to start creating your own 3D Text Animations!
“Where is everyone getting their 3D Text Animation templates?”
To answer this request, we’ve compiled a guide that not only teaches you how to create things like 3D Spinning Text (After Effects) but also gives you an idea of where you can find the kind of resources (i.e., 3D Text Animation templates and presets) that you need to get a head start on your projects.
In this article
01 [Top 10 3D Text Animation Templates ](#Part 1)
02 [How Do I Make 3D Text in After Effects?](#Part 2)
03 [The Best 10 Amazing 3D Text Animation Templates](#Part 3)
04 [Secrets to Learning More Animation Tactics](#Part 4)
Part 1 What’s 3D Text Animation?
Before anything else, let’s talk about text animation. Specifically, 3D Text Animation. The text that you’re reading now, is 2D Text. It’s static, and it lacks depth. It’s just letters on a screen. Meanwhile, 3D Text is usually built for motion, and thus, it has volume and depth — it’s almost tangible. Here’s what that looks like:
As you can see, even without actually moving, in the text shown in the image above, the potential for motion is there — it looks alive.
Now, you’ll see 3D text like this often in movies or promotions. Usually in the form of extravagant title cards or 3D text logo animation. They’re eye-catching, and because they’re 3D, you can play with them as much as you want to really add drama to your creations.
Part 2 How Do I Make 3D Text in After Effects?
As promised, this next section will teach you how to create 3D Text Animation in Adobe After Effects, which is a VFX and motion graphics software used by many animators to bring life to their text. You’ll notice that the following tutorial is really more about introducing the tools that you can use in order to create 3D Text Animation:
01Step 1. Add Your Text
The first thing that you have to do, of course, is to add your text! To do this, go to the ‘Tools’ panel, select the Type tool, and then select the ‘Composition’ panel. The composition is where you type your text!
With After Effects, you also have the following options:
● Change Text Font
● Adjust Text Size
● Adjust Text Color
● Shift Justification (Left, Middle, right)
And so on! Once you’re done with your text composition, it will be generated by After Effects into a layer that you can adjust as needed in the next steps.
01Step 2. Use Animation Presets
With your text now in a layer that you can add animations to… you’ve practically done a third of the job! Or even more than that if you decide to use the animation presets that are provided by After Effects.
These can be found by selecting ‘Browse Presets…’ on the ‘Animation’ tab (shown in the image below.) All you need to apply them is to drag and drop them onto your text layer.
Note: The first keyframe of this built-in text animation will be applied at the location of the Current Time Indicator (CTI), so make sure that you’ve adjusted that accordingly.
01Step 3. Per-Character Animation
If you’d like to personalize your text animation, After Effects does also give you the option to animate per character (or, per letter, in this case.)
This will give you more control over how you decided to animate your text. Of course, it does mean that it is slightly more complicated as well.
● To animate text per layer, select ‘animate’ on that layer and choose a parameter to start working on animations for.
● You’ll be able to previous (or scrub) through your animations in order to see if they are doing what you need them to do.
● You can also remove applied parameters in order to re-work your animation.
01Step 4. Add Graphic Elements to Text
If you really want to make your 3D Animation Text pop, Adobe After Effects also offers the tools needed to add Graphic Elements to your composition — which can be found at the top-most toolbar!
Part 3 The Best 10 Amazing 3D Text Animation Templates
Now, as promised, we’re also going to be introducing a couple of 3D text animation templates that you can try out for your own projects! Each template will have a link that you can go to in order to see what it looks like, as well as an explanation on how you can use it for your projects in the future!
01Real 3D Light Bulb Kit
The first Text Animation Template on our list is the “Logo Light Bulb” 3D Animation from Envato Elements. This one literally glows people! Making it perfect for a quirky, and yet still very impressive Title Card or Logo. Its design is very realistic, and you can also control how it flickers! For example, turning the bulbs on certain characters first, or turning them all off at once in the end.
023D Text Reveal
This next 3D Animation template is also from Envato Market. And, just like the first, it makes for quite the dramatic Title Card or Logo. With this template, your Text can literally zoom in to view while looking its best and sparkiest in High-Chrome.
033D Metallic Text Animation
Our next pick, the 3D Metallic text animation is another great one for those who are looking for something flashy — something that gives off the impression of being impressive right from the gate. Compared to the previous text animation template, this one has a more rugged kind of appearance. Perfect for those looking to promote something more fun rather than professional.
043D Text Box Animation Pack
The next one is a little less ‘impressive’ — in the sense that it isn’t as in your face as the other 3D animation templates that we’ve introduced thus far. And that’s exactly why the 3D Text Box Animation Pack deserves to be on this list! Its 3D spinning text (after effects) elements are very usable — in that it can work for a variety of individuals and styles. It has a more professional look as well. Making it perfect for corporations.
053D Text & Logo Boxes
This next one, the 3D Text & Logo Boxes pack is particularly perfect for 3D logos. The pack gives you several options for box size as well as text parameters. So, you can design your animated 3D Logo however you want and use it for future projects to give them even more dimension than before.
06The Light Bulb Kit
Our next pick, which is the ‘Light Bulb Kit’ also from Envato, is very similar to the first item on our list — in that it features text lit up by lightbulbs. However, it lends an extra bit of photo-realism to it. Less sparkle and more grain — which may exactly be what you want for your new title card or logo.
073D Text Templates
The 3D Text Templates is a very bright and pop-y template that is perfect for creating eye-catching promotions and advertisements. It’s very simple to use, which, again, maybe exactly what you want. Literally, the template will ask you to choose your own text and change the colors to suit that of your own brand, then you’re done!
083D Text Shapes Logo Reveal
The ‘3D Text Shapes Logo Reveal’ template is a pack of 3D text animations that you can use in order to add a little spin to your logo reveals (quite literally, in some cases!) It has a lot of personality to it, and a certain tech-y or science-y feel that would make it perfect for anyone looking for something more technical.
09Bold Titles
The ‘Bold Titles’ template is very loud and proud. But it has a bit of a retro-vibe to it as well. Making it stand out from some of the more minimalistic modern text animation styles that you see these days.
1010. Wave 3D Logo & Text
Looking for something simple and professional? Then the ‘Wave 3D Logo & Text’ template may just be the one for you. We put it last on this list, but it’s actually quite a strong contender. One that just about anyone (for just about any type of project they’re working on), should be able to get some use out of.
Key Takeaways from This Episode
● 3D Text Animation is the practice of bringing text to life! It gives dimension, depth, and, even, movement into what are usually very static properties!
● You see a lot of 3D Text Animation in big pictures these days. And you can start creating your own with the use of Adobe After Effects — a VFX and Motion Graphics Software that a lot of professionals use for their own text animation.
● Of course, if you don’t have the kind of time to create your own 3D Text Animations from scratch, you can always use templates instead! There are hundreds (if not thousands) of them available out there. It should be simple enough to find one that fits the kind of vibe you’re looking for.
● SECRET TIP! If you’re looking for an all-in-one kind of solution, you might want to consider Filmora Pro. It’s a video editor, first and foremost, but that’s not all it is — you can be using it today to start creating your own 3D Text Animations!
How to Create A GIF with Sound?
How to Create A GIF with Sound?

Shanoon Cox
Mar 27, 2024• Proven solutions
GIFs are simple animations without any sound. However, modern GIFs have the ability to carry audio and are more preferred. The technology is absolutely new, and you can even add music to GIF files. Today, we will explore the best tools to create GIFs with sound. You can also join the trend and share GIFs with audio bites with your friends and family.
Part 1: How to Create a GIF with Sound on Imgur?
Imgur is a popular image sharing platform . It’s also one of the oldest services, starting its journey way back in 2009.
You can upload images on Imgur and embed them on your websites or blogs. The service is really popular, thanks to forums like Reddit. People love to share images on Imgur, which is fast and convenient.
Now, you can also upload and watch GIFs on Imgur. The platform even introduced a new GIF format to make GIFs more smooth and reliable. Additionally, Imgur even lets you upload GIFs with sound through its iOS app.
You can watch the GIFs with audio from your computer and tablets. Soon, you will be able to access the feature from the Imgur Android app. The new GIFs are really catching on, and people love the sound bites that come along. GIFs with sound are more fun to watch, and you can also easily convey your message.
Here is how you can create and upload GIFs with sound on Imgur.
- Download and run the latest version of the Imgur iOS app from here: https://apps.apple.com/us/app/imgur-funny-meme-gif-maker/id639881495
- Now press the camera button and choose a video from your device. You can add only video files with sound for making a GIF with sound.
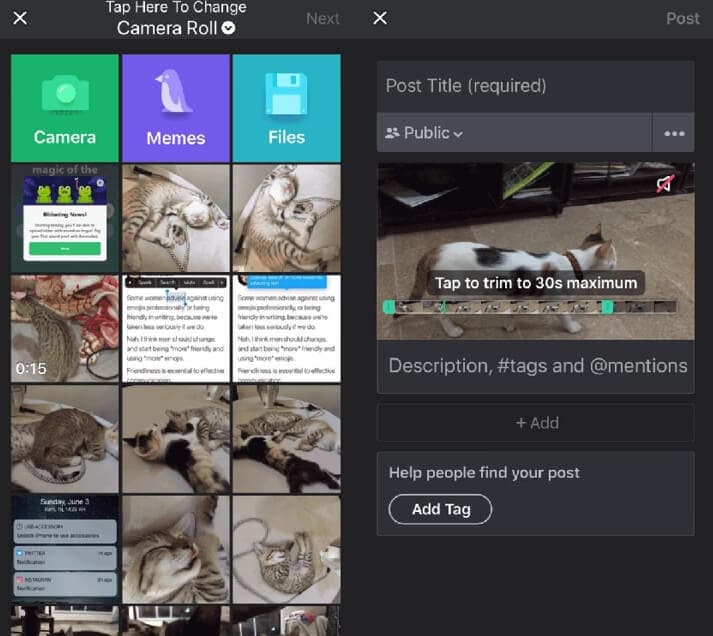
Note: Your GIF with audio cannot be more than 30-seconds long. Use the app the trim your video down to 30-seconds. If you want, you can even trim your video below 30-seconds.
- Now, press the speaker icon on the video to unmute the sound. You can next upload the video with sound and watch it as a GIF.
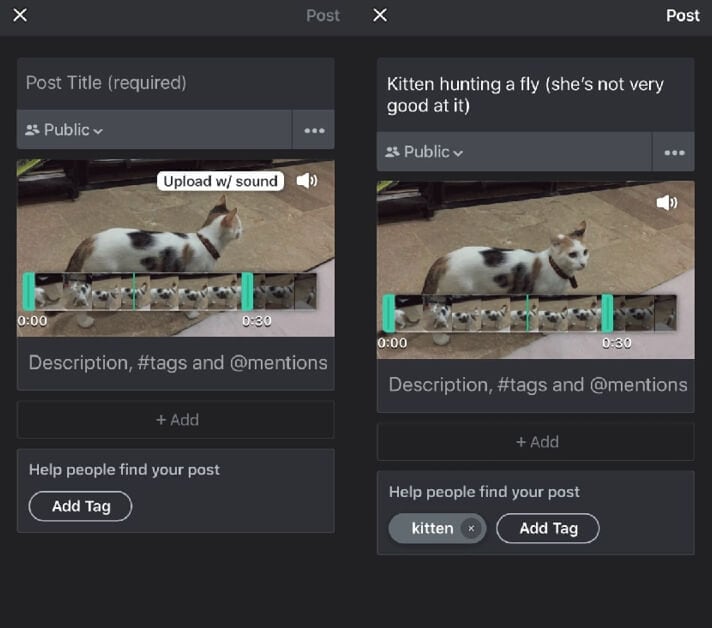
Part 2: How to Create GIF with sound on Gfycat?
Gfycat is one of the largest GIF sharing sites. You can find thousands of GIFs shared by users from all across the world. The GIFs are neatly sorted into categories so that you can find your favorite ones easily.
Gfycat was the pioneer in video to GIF conversion . It first offered the service in 2013 that took the internet by storm. Since then, Gfycat has been the choice of millions of people for sharing memes and short videos.
Gfycat now enables you to share GIFs with sound. You can upload any video and convert it to a GIF without sacrificing the sound. However, you can only upload only up to a minute of GIF that contains sound.
Follow the steps below to create your GIF with sound-
- Launch the Gfycat website and choose the video you want to convert. You can add files from your device or use URLs of video sites. Be sure to choose small file sizes for the best results.
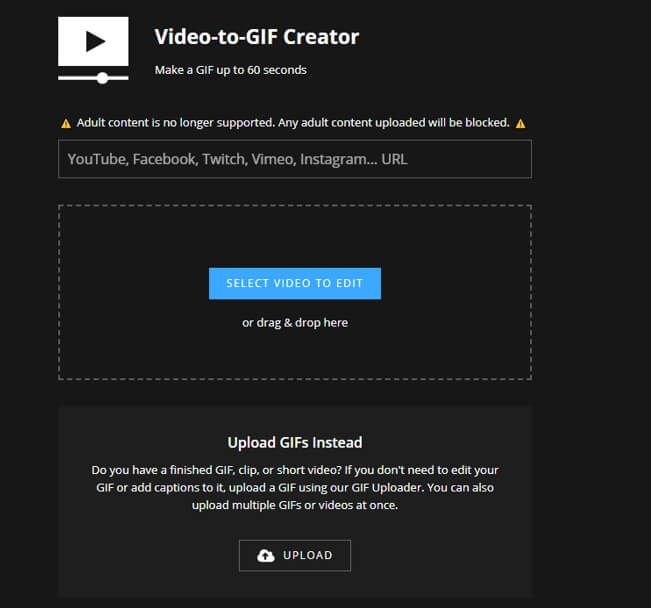
- You can now trim your video down to your desired length. Remember that adding sound will make the file size big. So, it pays to keep your GIFs short to 60 seconds. Use the sliders to select the portion of the video you want to convert and then click Continue.
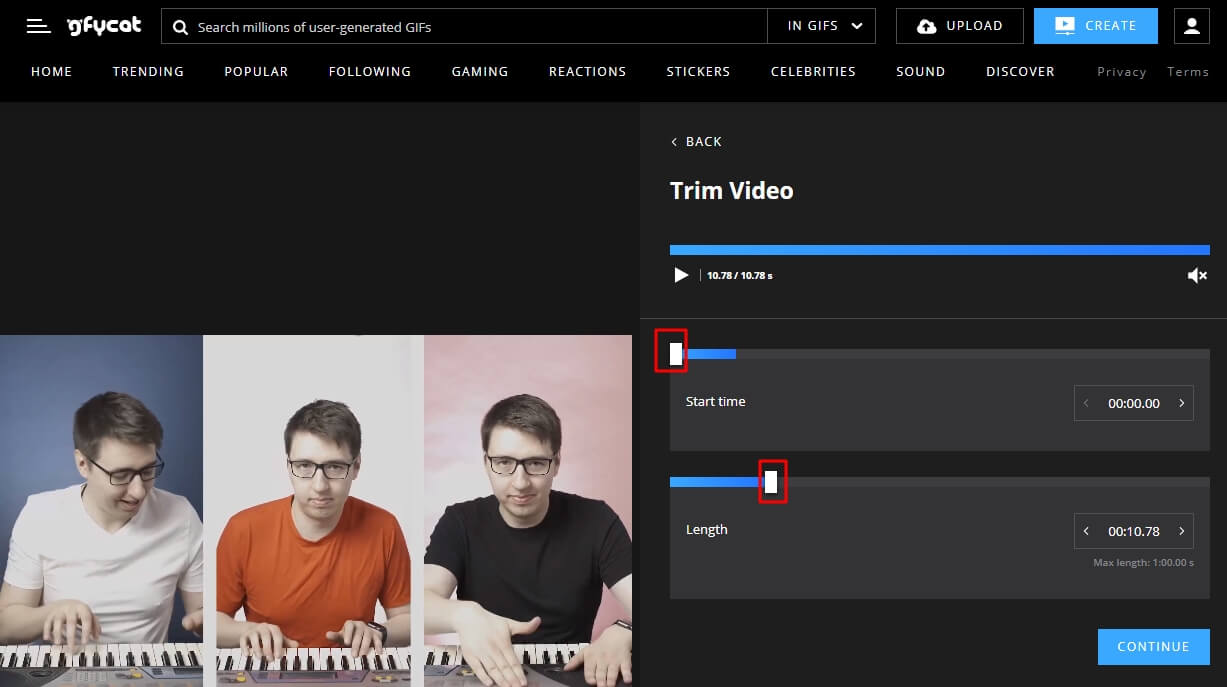
- Besides sound, Gfycat also lets you add texts and captions to your GIFs. You can move the slider to the proper time and then click ADD A CAPTION to add a new text box. If you don’t need to add text, click Continue and jump to the next step.
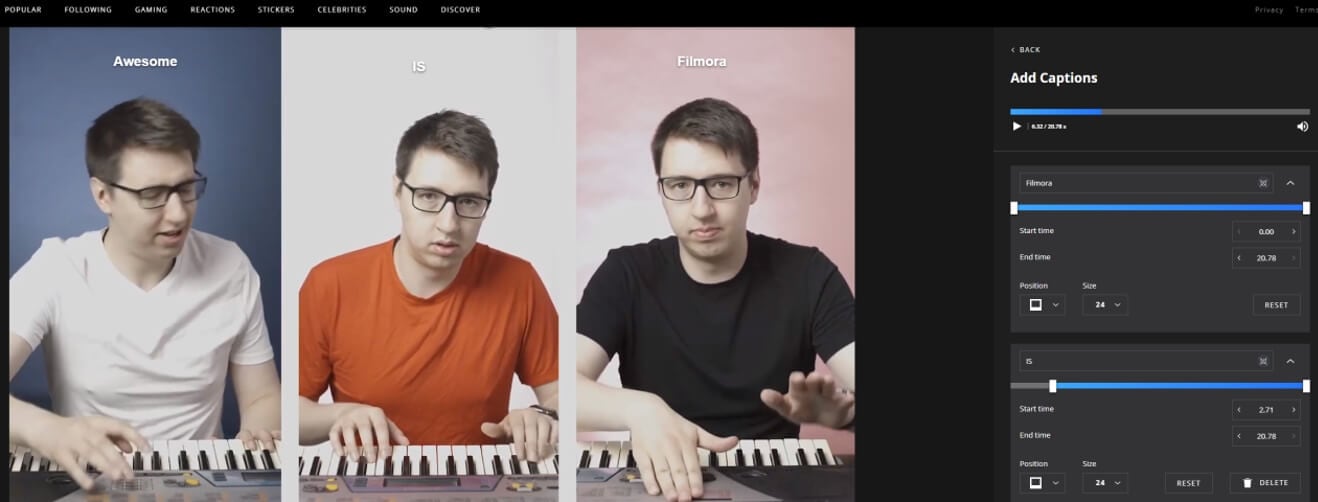
- Now comes the time to add titles and tags to your GIFs. To create and share the GIF with sound, remember to enable the Speaker icon. After you’re done, just click the FINISH button to upload your GIF with sound on Gfycat.
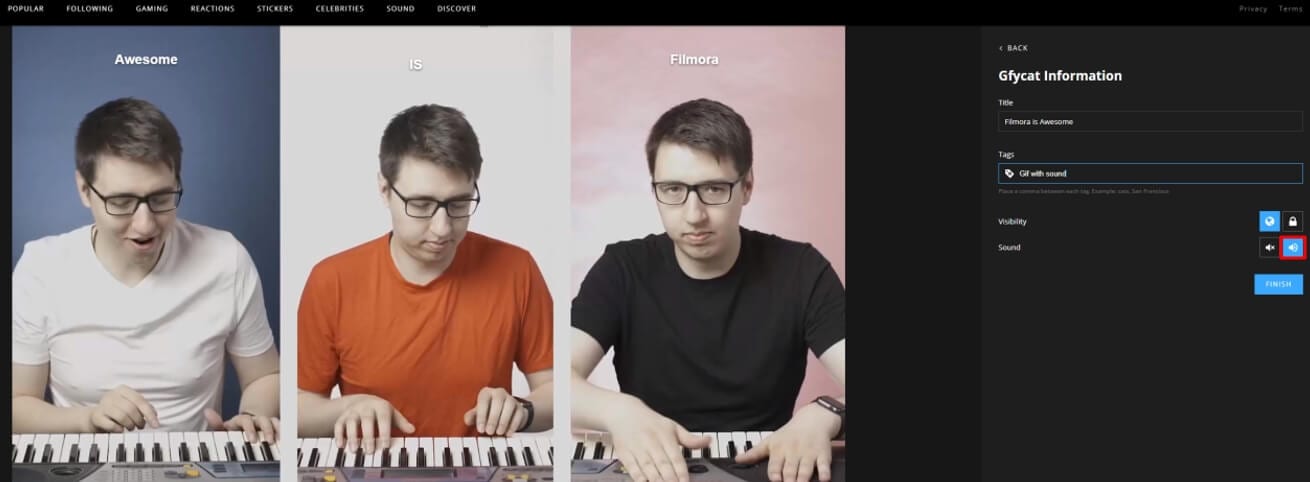
Part 3: How to Add Music And Sound Effect To GIFs With Filmora?
Filmora is a cutting-edge video and GIF editing software. Adding sound to GIFs is really easy and can be done in a few steps. You have several perks like-
1. Vast Audio Library
The Audio library brings you a royalty-free music and sound effect library. You can use a plethora of audio files, sound effects, and music for your GIFs without spending a cent. Besides, the Filmstock effect store provides more sound effects and music to try.
2. Optimum Sync
Filmora features advanced beat detection to detect the hits in the audio and generate markers, you can sync your audio with GIFs perfectly with the help of markers. You don’t have to worry about your GIFs appearing out of sync with your audio.
3. Provide Voiceover
You can use your voiceover for your GIFs to make them awesome. Just hook up your microphone and record your voice for ultimate enjoyment.
How to Add Sound to GIFs in Filmora Video Editor?
- The first step to adding music and sound effect to your GIF is to import them to your timeline.
- Then you can choose to add music and sound effect from the in-built audio library, or record your own voice.
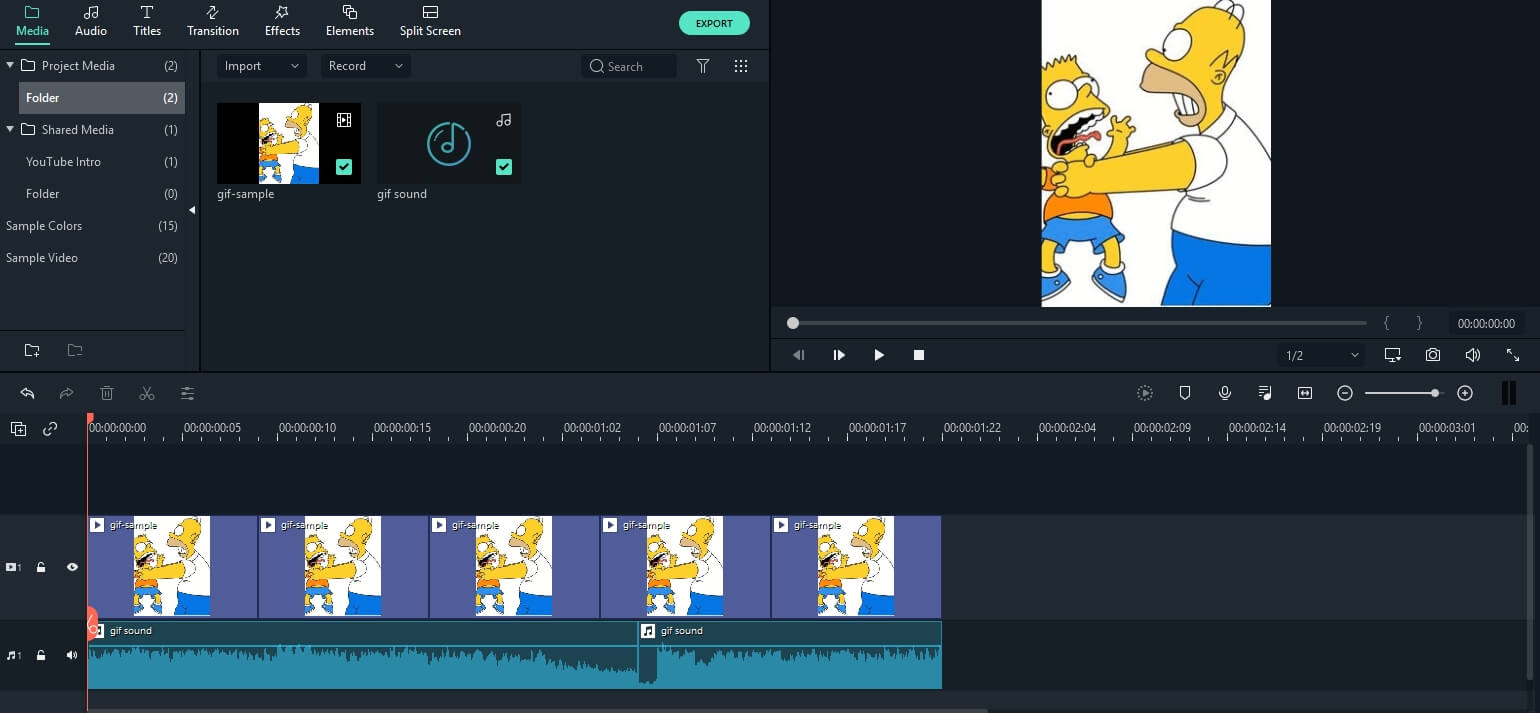
When you’re done, just export your gif file as a video in mp4 or other proper formats. You can also configure the resolution and bits for better results.
FIlmora is very user-friendly, and you don’t need to face any learning curve. You can quickly start adding audio and create GIFs with sound in minutes!
FAQ About Sound GIF
Where can I see GIFs with sound?
Presently, only a few platforms allow you to play GIFs with sounds. For that, you have to first embed an audio file in your image or use a video.
Some platforms like Giphy, Imgur, Gfycat, or Tenor let you watch GIFs with sound. You can also give YouTube a try and find GIFs with audio. Else, you can watch them on your mobiles or tablets.
Creating a GIF with sound is simple, quick and easy with Filmora. Have you tried it out yet?


Shanoon Cox
Shanoon Cox is a writer and a lover of all things video.
Follow @Shanoon Cox
Shanoon Cox
Mar 27, 2024• Proven solutions
GIFs are simple animations without any sound. However, modern GIFs have the ability to carry audio and are more preferred. The technology is absolutely new, and you can even add music to GIF files. Today, we will explore the best tools to create GIFs with sound. You can also join the trend and share GIFs with audio bites with your friends and family.
Part 1: How to Create a GIF with Sound on Imgur?
Imgur is a popular image sharing platform . It’s also one of the oldest services, starting its journey way back in 2009.
You can upload images on Imgur and embed them on your websites or blogs. The service is really popular, thanks to forums like Reddit. People love to share images on Imgur, which is fast and convenient.
Now, you can also upload and watch GIFs on Imgur. The platform even introduced a new GIF format to make GIFs more smooth and reliable. Additionally, Imgur even lets you upload GIFs with sound through its iOS app.
You can watch the GIFs with audio from your computer and tablets. Soon, you will be able to access the feature from the Imgur Android app. The new GIFs are really catching on, and people love the sound bites that come along. GIFs with sound are more fun to watch, and you can also easily convey your message.
Here is how you can create and upload GIFs with sound on Imgur.
- Download and run the latest version of the Imgur iOS app from here: https://apps.apple.com/us/app/imgur-funny-meme-gif-maker/id639881495
- Now press the camera button and choose a video from your device. You can add only video files with sound for making a GIF with sound.
Note: Your GIF with audio cannot be more than 30-seconds long. Use the app the trim your video down to 30-seconds. If you want, you can even trim your video below 30-seconds.
- Now, press the speaker icon on the video to unmute the sound. You can next upload the video with sound and watch it as a GIF.
Part 2: How to Create GIF with sound on Gfycat?
Gfycat is one of the largest GIF sharing sites. You can find thousands of GIFs shared by users from all across the world. The GIFs are neatly sorted into categories so that you can find your favorite ones easily.
Gfycat was the pioneer in video to GIF conversion . It first offered the service in 2013 that took the internet by storm. Since then, Gfycat has been the choice of millions of people for sharing memes and short videos.
Gfycat now enables you to share GIFs with sound. You can upload any video and convert it to a GIF without sacrificing the sound. However, you can only upload only up to a minute of GIF that contains sound.
Follow the steps below to create your GIF with sound-
- Launch the Gfycat website and choose the video you want to convert. You can add files from your device or use URLs of video sites. Be sure to choose small file sizes for the best results.
- You can now trim your video down to your desired length. Remember that adding sound will make the file size big. So, it pays to keep your GIFs short to 60 seconds. Use the sliders to select the portion of the video you want to convert and then click Continue.
- Besides sound, Gfycat also lets you add texts and captions to your GIFs. You can move the slider to the proper time and then click ADD A CAPTION to add a new text box. If you don’t need to add text, click Continue and jump to the next step.
- Now comes the time to add titles and tags to your GIFs. To create and share the GIF with sound, remember to enable the Speaker icon. After you’re done, just click the FINISH button to upload your GIF with sound on Gfycat.
Part 3: How to Add Music And Sound Effect To GIFs With Filmora?
Filmora is a cutting-edge video and GIF editing software. Adding sound to GIFs is really easy and can be done in a few steps. You have several perks like-
1. Vast Audio Library
The Audio library brings you a royalty-free music and sound effect library. You can use a plethora of audio files, sound effects, and music for your GIFs without spending a cent. Besides, the Filmstock effect store provides more sound effects and music to try.
2. Optimum Sync
Filmora features advanced beat detection to detect the hits in the audio and generate markers, you can sync your audio with GIFs perfectly with the help of markers. You don’t have to worry about your GIFs appearing out of sync with your audio.
3. Provide Voiceover
You can use your voiceover for your GIFs to make them awesome. Just hook up your microphone and record your voice for ultimate enjoyment.
How to Add Sound to GIFs in Filmora Video Editor?
- The first step to adding music and sound effect to your GIF is to import them to your timeline.
- Then you can choose to add music and sound effect from the in-built audio library, or record your own voice.
When you’re done, just export your gif file as a video in mp4 or other proper formats. You can also configure the resolution and bits for better results.
FIlmora is very user-friendly, and you don’t need to face any learning curve. You can quickly start adding audio and create GIFs with sound in minutes!
FAQ About Sound GIF
Where can I see GIFs with sound?
Presently, only a few platforms allow you to play GIFs with sounds. For that, you have to first embed an audio file in your image or use a video.
Some platforms like Giphy, Imgur, Gfycat, or Tenor let you watch GIFs with sound. You can also give YouTube a try and find GIFs with audio. Else, you can watch them on your mobiles or tablets.
Creating a GIF with sound is simple, quick and easy with Filmora. Have you tried it out yet?
Shanoon Cox
Shanoon Cox is a writer and a lover of all things video.
Follow @Shanoon Cox
Also read:
- New 18 Best Tools and Services to Create Animated Videos for Your Business
- 2024 Approved How to Make Your Own GIF on WhatsApp in Simple Ways
- New 10 Amazing Cartoon Music Examples You Need to Bookmark for 2024
- Updated Learn Disney Cartoon Drawing to See More Disney Magic Moments for 2024
- New In 2024, 5 Must Try Ways to Add GIF in Text Message on Android
- How to Draw Skeleton Cartoon – A Step by Step Guide for 2024
- Updated In 2024, Best 10 Animated Templates in Canva
- Updated In 2024, Ways to Create an Animated Sticky Navbar
- New Whats Rigging Animation
- New Most Effective Tactics to Set WhatsApp Status
- Updated Secret Shortcut to Adobe Animate Character Tutorial
- New 15 Types of Cartoon Drawing Styles with Examples for 2024
- 2024 Approved 12 Animation Video Maker That Can Triple Your Conversion Rates
- How to Make Animation Characters with the Best Character Creators
- New In 2024, Best 10 Photo Animator Templates
- In 2024, 12 Captivating Websites with Triggered Animate on Scroll Examples
- Updated In 2024, Apps to Animate Still Pictures Which Could Make Your Pictures Become Internet Sensation
- 2024 Approved 10 Best Tools to Make Pic Collage for Windows
- New How to Make Well Done Animated GIF By Yourself?
- Updated 6 Proven Ways to Dub Anime for Anime Voice Actor
- New In 2024, Looking for Love Animated GIFs? Here Are 5 Free Sources For You
- Updated 15 Best Apps to Turn Photos Into Cartoons and Sketches for 2024
- Updated 5 Must Try Ways to Add GIF in Text Message on Android for 2024
- 2024 Approved Top 10 Best Photo to Animation Converters That Give You an Advantage
- 2024 Approved Best 10 Apps to Enhance Your Instagram Story Slideshow
- Updated 20 Best Anime Movies You Cannot Miss 2024 List
- New 2024 Approved How to Make a Video a Live Photo
- 2024 Approved 10 Realistic Cartoon Characters You Would Run Away From if You Met in Real Life
- New Tips for Canva Animated Elements
- New 2024 Approved Creative Ways to Create iPhone Text GIF
- New How to Make a GIF in Photoshop for 2024
- New Adobe Animate Riggings PROPER Tutorial for You for 2024
- 10 Amazing Wallpaper Collage Ideas and Photos for 2024
- How To Create Pinterest Slideshow in Simple Ways
- New Best 10 3D Text Animation Templates for 2024
- New Adobe Animate Riggings Tutorial for You for 2024
- Updated In 2024, Learn How to Do Funny Cartoon Drawings
- Useful Tips for Canva Animated Elements
- Updated 2024 Approved Samples of Cartoon Character Face
- 15 Best Collage Makers to Create Aesthetic Collages
- How to Convert Video to GIF Fast & Easy for 2024
- Ways You Can Master to Find 10 Best Free Animated Text Generator for 2024
- Updated Most Popular Tips on Learning Animate Rigging for 2024
- Updated How to Create an Animated Sticky Navbar for 2024
- Updated In 2024, Best 15 2D Animation Software Free That Worth to Try
- New How to Combine Multiple GIFs Into One with GIF Combiner for 2024
- New A Beginners Guide for Learning 3D Animation
- In 2024, Pokémon Go Cooldown Chart On Vivo Y78t | Dr.fone
- How to Use Face ID make purchases on iPhone SE (2022) ?
- Reset pattern lock Tutorial for Asus ROG Phone 8 Pro
- Best Anti Tracker Software For Samsung Galaxy Z Flip 5 | Dr.fone
- How to Repair a Damaged video file of OnePlus ?
- How to Reset Gmail Password on Xiaomi Redmi Note 12 Pro+ 5G Devices
- In 2024, Ultimate guide to get the meltan box pokemon go For Tecno Spark 20 | Dr.fone
- Hassle-Free Ways to Remove FRP Lock on Oppo A59 5Gwith/without a PC
- In 2024, How To Track IMEI Number Of Vivo Y200e 5G Through Google Earth?
- How To Activate and Use Life360 Ghost Mode On Poco M6 5G | Dr.fone
- How to Stop Google Chrome from Tracking Your Location On Poco C65? | Dr.fone
- How and Where to Find a Shiny Stone Pokémon For Samsung Galaxy A54 5G? | Dr.fone
- Updated Top List Best 10 Android & iOS Voice Cloning Apps Selected
- How to identify missing your hardware drivers with Windows Device Manager in Windows 11 & 10
- V27 Music Recovery - Recover Deleted Music from V27
- How to unlock iPhone 13 Pro screen lock without losing data?
- In 2024, The 10 Best Tools to Bypass iCloud Activation Lock From Apple iPhone 11 You Should Try Out
- Three methods to recover lost data on Infinix
- Possible solutions to restore deleted call logs from Vivo Y17s
- How to Reset your Samsung Galaxy S24 Ultra Lock Screen Password
- In 2024, How to Remove Forgotten PIN Of Your Samsung Galaxy A15 5G
- In 2024, Top IMEI Unlokers for Apple iPhone 7 Plus and Android Phones
- In 2024, Lock Your Vivo Y27 5G Phone in Style The Top 5 Gesture Lock Screen Apps
- Complete Tutorial for Vivo Y78+ Hard Reset | Dr.fone
- In 2024, How to Come up With the Best Pokemon Team On Nokia G310? | Dr.fone
- Update drivers with Device Manager on Windows 10
- Complete Review & Guide to Techeligible FRP Bypass and More For Vivo Y56 5G
- How to Rescue Lost Photos from Oppo Reno 10 5G?
- How To Enable USB Debugging on a Locked Oppo A79 5G Phone
- Authors Recommended The Best Text Voice Generators for All Platforms
- Prevent Cross-Site Tracking on Sony Xperia 10 V and Browser | Dr.fone
- In 2024, Step-by-Step Tutorial How To Bypass Oppo A78 FRP
- In 2024, How to Unlock iPhone 6s Plus When We Dont Have Apple ID or Password?
- In 2024, Complete Tutorial to Use GPS Joystick to Fake GPS Location On Samsung Galaxy A23 5G | Dr.fone
- Here are Some of the Best Pokemon Discord Servers to Join On Realme Narzo 60x 5G | Dr.fone
- In 2024, How to Unlock Disabled iPhone 13 mini/iPad Without Computer | Dr.fone
- In 2024, How to Show Wi-Fi Password on Poco C50
- How to Change Netflix Location to Get More Country Version On Itel P55 5G | Dr.fone
- Bricked Your Nokia C32? Heres A Full Solution | Dr.fone
- 4 Methods to Turn off Life 360 On Poco C55 without Anyone Knowing | Dr.fone
- In 2024, How To Change Samsung Galaxy F14 5G Lock Screen Clock in Seconds
- Title: Updated How-To Guide Secret Shortcut to Adobe Animate Character Tutorial
- Author: Elon
- Created at : 2024-05-19 03:04:52
- Updated at : 2024-05-20 03:04:52
- Link: https://animation-videos.techidaily.com/updated-how-to-guide-secret-shortcut-to-adobe-animate-character-tutorial/
- License: This work is licensed under CC BY-NC-SA 4.0.
