

Updated How To Learn Cartoon Sketch Drawing— Pencil Sketch for Beginners for 2024
How To Learn Cartoon Sketch Drawing
How To Learn Cartoon Sketch Drawing— Pencil Sketch for Beginners
An easy yet powerful editor
Numerous effects to choose from
Detailed tutorials provided by the official channel
If you are learning how to draw, particularly cartoon sketches drawing, you must start at a beginner’s level. No skill is difficult if you just put your mind to it. You can learn the basics of the beginning, what you must do, and a learning curve, but if you have passion for it or love what you are doing, you will give it time to practice.
It all boils down to practicing it. Knowing how to draw beautiful sketch cartoons drawing is not a complex thing to do if you start at the beginner’s level.
So, for all who are reading this article, we will show sketch drawings of cartoons, i.e., how to draw step by step in an understandable manner.
In this article
01 [Collection of 8 Hottest Cartoon Drawings](#Part 1)
02 [How to Draw Cartoon Step by Step Easy Pencil Drawing](#Part 2)
Part 1 Collection of 8 Hottest Cartoon Drawings
Here’s a collection of 8 hottest cartoon love drawing pencil sketches for you.
01Motlu Patlu
This is a sketch of the Motu Patlu cartoon drawing. The artist used some simple forms such as a pear shape while developing the body in making this sketch. The pear shape helps in developing the bodies of cartoon characters.

02Basketball Sketch Drawing
The cartoon basketball drawing is one of our top picks wherein the artist took his time to get every detail in the scene. The image alone tells the story.

03Tom and Jerry Sketch drawing
If you were a lover of the famous cartoon Tom and Jerry, you should know this. Here’s a sketch cartoon drawing of Tom and Jerry.

04Cat Sketch
Isn’t this beautiful sketch cartoon drawing of a cat just it? The way the artist details it and gets the perfect fit made it part of our collection.

05Cute Cartoon love sketch
We couldn’t have finished this list without adding this beautiful sketch cartoon drawing.

06Homer
This cartoon sketch drawing of Homer in the Simpsons is just it. Looking at the body build, you can easily trace the outline of the pear-shaped form.

07Cute Cartoon Drawing
This drawing cartoon sketch caught our attention, and we are sure you would love it. With the round head and pear-shaped belly, you will agree that you can start your learning journey with the steps listed in this article.

08Cartoon love drawing
This sketch cartoon drawing portrays the love between a girl and a boy. It is one attractive sketch that shows details of expressions on the faces.

Part 2 How to Draw Cartoon Step by Step Easy Pencil Drawing
An essential factor you must bear in mind is that you must not let go of your creativity when learning how to draw.
You have to be free with yourself and try to create cartoon sketch drawings of characters that you love.
The more it’s about something you love, the better you get at it.
Here’s a step-by-step process of an easy pencil drawing or sketch cartoon drawing.
● Step 1: Draw a circle
Draw a circle and a “noodle” shape, as shown in the illustration. The head is a circle, and the body is a pear form.
The lower half of the pear is fatter than the top. Take note of how the upper half slightly overlaps the head circle.

● Step 2: Draw a pair of eyes.
As shown in the image, add the perspective guidelines around the head. These recommendations will assist you in correctly positioning your rabbit’s eyes and nose.
Above the horizontal guideline, draw the eyes. Where the parameters cross is where the nose is put.

● Step 3: Draw the cheek and Wings
Make the cheekbones. As shown in the illustration, add the ears and arms. It’s OK if the ear shapes differ somewhat from those displayed.
Notice how the arm contour curve organically emerges from behind the shoulders when you sketch the arms. Make it this way if you can.

● Step 4: Draw the legs
Draw the legs and tail of the animal. The arm and leg curves may appear to be challenging. As a result, be gentle with your pencil. Don’t yank on the pencil too hard!
Your cartoon rabbit’s shape is now plainly evident.

● Step 5: Draw the mouth
Let’s focus on the face for a moment. Draw an iris ellipse and an inner line in the ear inside the eyes. Include the nose. Draw the mouth and the teeth.

● Step 6: Outline the contours
Because rabbits eat carrots, this one eats them in excess. Outline the carrot’s outlines. On the legs, draw the brows and the fingers.
As you may have observed, I messed up the teeth in the previous image. Therefore I deleted the thick black pencil lines that were superfluous.
Erase and Shade (Step 8)

● Step 7: Outline the Character
Now, outline the contours of the entire character with a softer pencil. You can pick up B4 or B6 (if you don’t have either, try HB). Please leave a little bright dot on the nose while darkening it.

● Step 8: Erase and Shade
Remove everything that isn’t required. See? That is how your bunny should seem.
I also advocate using a pencil-type eraser in addition to regular or kneaded erasers. Shade the entire rabbit’s body if you’re using a graphite pencil. The inside of the ear, the belly, the paws, and the tail can all be white or brighter.

●Bonus Software for Beautiful Sketch Cartoon Drawing:
Wondershare Filmora Video Editor is a superb video editing software developed by Wondershare. It is a simple entry-level version with preset video templates and effects. With the numerous powerful features in Filmora, we can add amazing effects to our cartoon sketches to make them look better.
For Win 7 or later (64-bit)
For macOS 10.12 or later
Here’s how to use Filmora for cartoon sketch drawing enhancements.
Chroma key (Green screen): This feature can change the background of your sketched cartoon drawing photo by adding special effects to make it look nice.
Color Match: Color match is a feature in Filmora used to apply color correction settings in a video. You can use this feature to enhance your sketches.
Mask and blend: Filmora mask and blend feature has resourceful modes and is easy to use. You can use them for your pencil sketched cartoon drawing.
● Ending Thoughts →
● Making beautiful sketch cartoon drawings is not rocket science. It is a result of consistent practice.
● In this article, we have given you key points and strategies you can use to start practicing cartoon sketch drawing. However, do begin from our idea, i.e., a circle for the head and a pear for developing the body.
● Thus, your journey to learning how to draw cartoons step by step quickly with a pencil is already a walkover.
If you are learning how to draw, particularly cartoon sketches drawing, you must start at a beginner’s level. No skill is difficult if you just put your mind to it. You can learn the basics of the beginning, what you must do, and a learning curve, but if you have passion for it or love what you are doing, you will give it time to practice.
It all boils down to practicing it. Knowing how to draw beautiful sketch cartoons drawing is not a complex thing to do if you start at the beginner’s level.
So, for all who are reading this article, we will show sketch drawings of cartoons, i.e., how to draw step by step in an understandable manner.
In this article
01 [Collection of 8 Hottest Cartoon Drawings](#Part 1)
02 [How to Draw Cartoon Step by Step Easy Pencil Drawing](#Part 2)
Part 1 Collection of 8 Hottest Cartoon Drawings
Here’s a collection of 8 hottest cartoon love drawing pencil sketches for you.
01Motlu Patlu
This is a sketch of the Motu Patlu cartoon drawing. The artist used some simple forms such as a pear shape while developing the body in making this sketch. The pear shape helps in developing the bodies of cartoon characters.
02Basketball Sketch Drawing
The cartoon basketball drawing is one of our top picks wherein the artist took his time to get every detail in the scene. The image alone tells the story.
03Tom and Jerry Sketch drawing
If you were a lover of the famous cartoon Tom and Jerry, you should know this. Here’s a sketch cartoon drawing of Tom and Jerry.
04Cat Sketch
Isn’t this beautiful sketch cartoon drawing of a cat just it? The way the artist details it and gets the perfect fit made it part of our collection.
05Cute Cartoon love sketch
We couldn’t have finished this list without adding this beautiful sketch cartoon drawing.
06Homer
This cartoon sketch drawing of Homer in the Simpsons is just it. Looking at the body build, you can easily trace the outline of the pear-shaped form.
07Cute Cartoon Drawing
This drawing cartoon sketch caught our attention, and we are sure you would love it. With the round head and pear-shaped belly, you will agree that you can start your learning journey with the steps listed in this article.
08Cartoon love drawing
This sketch cartoon drawing portrays the love between a girl and a boy. It is one attractive sketch that shows details of expressions on the faces.
Part 2 How to Draw Cartoon Step by Step Easy Pencil Drawing
An essential factor you must bear in mind is that you must not let go of your creativity when learning how to draw.
You have to be free with yourself and try to create cartoon sketch drawings of characters that you love.
The more it’s about something you love, the better you get at it.
Here’s a step-by-step process of an easy pencil drawing or sketch cartoon drawing.
● Step 1: Draw a circle
Draw a circle and a “noodle” shape, as shown in the illustration. The head is a circle, and the body is a pear form.
The lower half of the pear is fatter than the top. Take note of how the upper half slightly overlaps the head circle.
● Step 2: Draw a pair of eyes.
As shown in the image, add the perspective guidelines around the head. These recommendations will assist you in correctly positioning your rabbit’s eyes and nose.
Above the horizontal guideline, draw the eyes. Where the parameters cross is where the nose is put.
● Step 3: Draw the cheek and Wings
Make the cheekbones. As shown in the illustration, add the ears and arms. It’s OK if the ear shapes differ somewhat from those displayed.
Notice how the arm contour curve organically emerges from behind the shoulders when you sketch the arms. Make it this way if you can.
● Step 4: Draw the legs
Draw the legs and tail of the animal. The arm and leg curves may appear to be challenging. As a result, be gentle with your pencil. Don’t yank on the pencil too hard!
Your cartoon rabbit’s shape is now plainly evident.
● Step 5: Draw the mouth
Let’s focus on the face for a moment. Draw an iris ellipse and an inner line in the ear inside the eyes. Include the nose. Draw the mouth and the teeth.
● Step 6: Outline the contours
Because rabbits eat carrots, this one eats them in excess. Outline the carrot’s outlines. On the legs, draw the brows and the fingers.
As you may have observed, I messed up the teeth in the previous image. Therefore I deleted the thick black pencil lines that were superfluous.
Erase and Shade (Step 8)
● Step 7: Outline the Character
Now, outline the contours of the entire character with a softer pencil. You can pick up B4 or B6 (if you don’t have either, try HB). Please leave a little bright dot on the nose while darkening it.
● Step 8: Erase and Shade
Remove everything that isn’t required. See? That is how your bunny should seem.
I also advocate using a pencil-type eraser in addition to regular or kneaded erasers. Shade the entire rabbit’s body if you’re using a graphite pencil. The inside of the ear, the belly, the paws, and the tail can all be white or brighter.
●Bonus Software for Beautiful Sketch Cartoon Drawing:
Wondershare Filmora Video Editor is a superb video editing software developed by Wondershare. It is a simple entry-level version with preset video templates and effects. With the numerous powerful features in Filmora, we can add amazing effects to our cartoon sketches to make them look better.
For Win 7 or later (64-bit)
For macOS 10.12 or later
Here’s how to use Filmora for cartoon sketch drawing enhancements.
Chroma key (Green screen): This feature can change the background of your sketched cartoon drawing photo by adding special effects to make it look nice.
Color Match: Color match is a feature in Filmora used to apply color correction settings in a video. You can use this feature to enhance your sketches.
Mask and blend: Filmora mask and blend feature has resourceful modes and is easy to use. You can use them for your pencil sketched cartoon drawing.
● Ending Thoughts →
● Making beautiful sketch cartoon drawings is not rocket science. It is a result of consistent practice.
● In this article, we have given you key points and strategies you can use to start practicing cartoon sketch drawing. However, do begin from our idea, i.e., a circle for the head and a pear for developing the body.
● Thus, your journey to learning how to draw cartoons step by step quickly with a pencil is already a walkover.
A Beginner’s Guide to Tell You What 3D Animation Is
A Beginner’s Guide to Explain What 3D Animation Is
An easy yet powerful editor
Numerous effects to choose from
Detailed tutorials provided by the official channel
With present-day technology, 3D animation has reached all spheres be it entertainment, advertising, architecture, education, and much more. With the increasing use of 3D animation, there is a rise in the tools and programs used for creating such animations.
So, to help you get all the details about 3D animation, 3D modelling and animation process, best tools, tips, and tricks, keep reading the following parts.
In this article
01 [What Does 3D Animation Mean?](#Part 1)
02 [What is the Process of 3D Animation?](#Part 2)
03 [Types of 3D Animations](#Part 3)
04 [Top 5 3D Animation Software](#Part 4)
05 [Top Animation Tips and Tricks](#Part 5)
Part 1 What does 3D animation mean?
In simplest terms, animation is a process of manipulating the images so that they appear to be moving, and when this manipulation is done in three-dimensional space, it is called 3D animation. The objects and the models used for 3D animation can be rotated or moved like the real ones. Some tools can be used to scan real-life objects which can be then used as blueprints for creating animation 3D models.
The characters and the objects in 3D animations have to be moved to make them as realistic as possible. No matter, how interesting or perfect character you may create, if it does not move in an even manner, the overall effect will be ruined. The latest techniques and tools these days are capable of creating lifelike scenes.

Part 2 What is the process of 3D Animation?
Creating a 3D animation is a complex process involving several phases. Below listed are the main 3 phases for creating an animation.
01Modeling
The main thing for any 3D animation is its objects, models, or characters and this phase involves creating these objects. Since the objects are based on 3D computer models, the process is termed 3D modeling. A model by a computer appears like a mesh of geometric shapes including curves, points, lines, and more. These shapes do not look anywhere like real objects and only after when the textures and colors are added to them, they appear like real things.
02Layout and animation
The next step is layout and animation where characters are placed in the scenes and the animation of their movements is done using 3D animation tools. Initially, keyframes are created which are the start and the end pose of any animation, and then later other details like the effects, lighting, camerawork, and more are added to get the desired animation that appears on the screen.
03Rendering
The final step in the 3D creation process is rendering where the created animation is finalized as well as exported. To make sure that the final animation plays seamlessly and looks absolutely perfect, it is essential to check all the minute details.
After the production of 3D animation is done, next comes the post-production which is the phase where effects, music, and voiceovers are added and combined to make the entire animation look complete.

Part 3 Types of 3D animations
Now when we know what is a 3D animation and its process, we also need to know that different types of 3D animations are there. Some of the key ones are as below.
● 3D videos and movies
● 3D Virtual Reality
● Interactive 3D
● Digital 3D
● Clay Motion also termed Stop motion animation
● Pixilation
● Cell-shaded animation
● Paint-on-glass
● Pinscreen
Part 4 Top 5 3D Animation software
When it comes to 3D animation tools, the choices can be overwhelming and the list of promises claimed by the tools can be large. He, you need to shortlist the tools that best match your requirements as well as your skill sets. Below we have narrowed down the top 5 software of the category.
01Autodesk Maya
This is a top-rated animation, modeling, simulation, and rendering tool. Using this versatile tool, complex characters and animated videos can be created with all the needed effects.
Key features:
● Versatile 3D animation tool with support to a wide range of features.
● Available for download on Windows, Mac, and Linux systems.
● Allows creating complex characters, adding realistic effects, custom graphics, and more.
● Arnold’s feature of the tool allows switching between CPU and GPU.
● Animation features like fast-playback, time editing, graph editing, ghost editing, multiple modeling options, and others are supported.

02Blender
This is free and open-source software that can be used for creating 3D animations, motion graphics, computer games, and more. Since the tool has been in use for a long time, several artists keep adding to the tool.
Key features
● Free and open-source animation tool.
● Support to multiple platforms including Windows, Mac, and Linux.
● OpenGL interface which makes the functioning smooth.
● Comprehensive and robust set of tools for creating versatile animations. Some of these include automatic skilling, unwrapping texturing, envelope, skeleton, B-spline interpolated bones, sound synchronization, and more.
● Support input from motion-capture tools.

03Houdini
Used by reputed VFX companies like Pixar, Sony, Disney, and others, this is an excellent software that can be used for creating 3D animations, games, and others. With multi-platform support, it is a paid tool that also comes with a free learning edition.
Key features
● Feature-packed animation tool used by industry pioneers.
● Use node-based workflow for creating animations.
● Create biped and quadruped 3D objects using rigging tools.
● Comes with multiple plans to choose from as per budget and requirements.
● Offers a high level of flexibility and creativity.

04Cinema 4D
This professional animation creation software is known for its features and stability. With the availability of multiple tutorials and guides, learning the tool and its functions is easy.
Key features of the software
● Known to be an excellent tool for motion graphics, illustrations, and visualizations.
● Easy learning curve owing to the availability of tutorials, guides, and training materials. Access to free membership of Cineversity which is a training site.
● Comes with a 14-day free trial version along with a free education version for the teachers and students.
● Functions of the software are tested by QA and Beta testers that offer high stability.
● Support features like automatic keyframing, tag and expressions, effectors, and more.

05** Wondershare Filmora Video Editor
If you are looking for software that is simple and easy to use but supports all advanced features this is one of the best choices. Available for Windows and Mac the tool also works as an excellent video editing tool.
Key features
● This easy 3D animation tool Allows creating sharp and lively animations using features like keyframing, motion-tracking, and others.
● Allows to add the preset motions or even customize your own animations.
● The speed, as well as the duration of the animation, can be changed using the ease-in and ease-out options.
● Make your videos lively with features like warp, distorting, masking, lights & flares, text& titles, and more.
● High-quality presets are available with features like auto-correction, color wheels, scopes, and more.
● Audio features supported like automatic audio sync, audio compression, audio transitions, and noise correction.
For Win 7 or later (64-bit)
For macOS 10.12 or later
Part 5 Top Animation Tips And Tricks
Though 3D animation requires a lot of technical know-how of the process, there are several tips and tricks that can make your task quicker, easier, and smoother. We have gathered a few such tips below.
01Make realistic objects by observing real life
The more you will observe real-life the more you will be able to imitate it into your animations for giving life to your objects, models, and characters. Having some knowledge about real-life, gravity, and similar topics will help you work on your animations more interactively.
02Evolve with latest techniques and technology
The tools, programs, and technology are progressing every day and to make the best use of the same, you need to evolve with the technology. To use the features and functions of the software you need to keep learning and growing.
03Go with the basic first
While working with the animations, it is very easy to get carried away with the process and get into the trap of looking for details. This will eventually move you away from your main track and will lead to a waste of time and effort. Thus, it is always advisable to go with the basics first and then move towards the detailing.
04Learn about the human emotions
Facial expressions are an important element of any 3D animation that brings life to characters. A good animation will portray good and complex emotions and thus it is important to study these emotions in detail so that they can be incorporated into your objects, models, and characters.

● Key Takeaways from This Episode →
● Animations created in 3-dimensional space are termed 3D animations.
● 3D animations involve pre-production, post-production, and several steps.
● For the smooth creation of 3D animations, several tips and tricks can be considered.
● A wide range of tools for creating 3D animations are available and one of the best tools in the category is Wondershare Filmora Video Editor that is effective and easy to use.
With present-day technology, 3D animation has reached all spheres be it entertainment, advertising, architecture, education, and much more. With the increasing use of 3D animation, there is a rise in the tools and programs used for creating such animations.
So, to help you get all the details about 3D animation, 3D modelling and animation process, best tools, tips, and tricks, keep reading the following parts.
In this article
01 [What Does 3D Animation Mean?](#Part 1)
02 [What is the Process of 3D Animation?](#Part 2)
03 [Types of 3D Animations](#Part 3)
04 [Top 5 3D Animation Software](#Part 4)
05 [Top Animation Tips and Tricks](#Part 5)
Part 1 What does 3D animation mean?
In simplest terms, animation is a process of manipulating the images so that they appear to be moving, and when this manipulation is done in three-dimensional space, it is called 3D animation. The objects and the models used for 3D animation can be rotated or moved like the real ones. Some tools can be used to scan real-life objects which can be then used as blueprints for creating animation 3D models.
The characters and the objects in 3D animations have to be moved to make them as realistic as possible. No matter, how interesting or perfect character you may create, if it does not move in an even manner, the overall effect will be ruined. The latest techniques and tools these days are capable of creating lifelike scenes.
Part 2 What is the process of 3D Animation?
Creating a 3D animation is a complex process involving several phases. Below listed are the main 3 phases for creating an animation.
01Modeling
The main thing for any 3D animation is its objects, models, or characters and this phase involves creating these objects. Since the objects are based on 3D computer models, the process is termed 3D modeling. A model by a computer appears like a mesh of geometric shapes including curves, points, lines, and more. These shapes do not look anywhere like real objects and only after when the textures and colors are added to them, they appear like real things.
02Layout and animation
The next step is layout and animation where characters are placed in the scenes and the animation of their movements is done using 3D animation tools. Initially, keyframes are created which are the start and the end pose of any animation, and then later other details like the effects, lighting, camerawork, and more are added to get the desired animation that appears on the screen.
03Rendering
The final step in the 3D creation process is rendering where the created animation is finalized as well as exported. To make sure that the final animation plays seamlessly and looks absolutely perfect, it is essential to check all the minute details.
After the production of 3D animation is done, next comes the post-production which is the phase where effects, music, and voiceovers are added and combined to make the entire animation look complete.
Part 3 Types of 3D animations
Now when we know what is a 3D animation and its process, we also need to know that different types of 3D animations are there. Some of the key ones are as below.
● 3D videos and movies
● 3D Virtual Reality
● Interactive 3D
● Digital 3D
● Clay Motion also termed Stop motion animation
● Pixilation
● Cell-shaded animation
● Paint-on-glass
● Pinscreen
Part 4 Top 5 3D Animation software
When it comes to 3D animation tools, the choices can be overwhelming and the list of promises claimed by the tools can be large. He, you need to shortlist the tools that best match your requirements as well as your skill sets. Below we have narrowed down the top 5 software of the category.
01Autodesk Maya
This is a top-rated animation, modeling, simulation, and rendering tool. Using this versatile tool, complex characters and animated videos can be created with all the needed effects.
Key features:
● Versatile 3D animation tool with support to a wide range of features.
● Available for download on Windows, Mac, and Linux systems.
● Allows creating complex characters, adding realistic effects, custom graphics, and more.
● Arnold’s feature of the tool allows switching between CPU and GPU.
● Animation features like fast-playback, time editing, graph editing, ghost editing, multiple modeling options, and others are supported.
02Blender
This is free and open-source software that can be used for creating 3D animations, motion graphics, computer games, and more. Since the tool has been in use for a long time, several artists keep adding to the tool.
Key features
● Free and open-source animation tool.
● Support to multiple platforms including Windows, Mac, and Linux.
● OpenGL interface which makes the functioning smooth.
● Comprehensive and robust set of tools for creating versatile animations. Some of these include automatic skilling, unwrapping texturing, envelope, skeleton, B-spline interpolated bones, sound synchronization, and more.
● Support input from motion-capture tools.
03Houdini
Used by reputed VFX companies like Pixar, Sony, Disney, and others, this is an excellent software that can be used for creating 3D animations, games, and others. With multi-platform support, it is a paid tool that also comes with a free learning edition.
Key features
● Feature-packed animation tool used by industry pioneers.
● Use node-based workflow for creating animations.
● Create biped and quadruped 3D objects using rigging tools.
● Comes with multiple plans to choose from as per budget and requirements.
● Offers a high level of flexibility and creativity.
04Cinema 4D
This professional animation creation software is known for its features and stability. With the availability of multiple tutorials and guides, learning the tool and its functions is easy.
Key features of the software
● Known to be an excellent tool for motion graphics, illustrations, and visualizations.
● Easy learning curve owing to the availability of tutorials, guides, and training materials. Access to free membership of Cineversity which is a training site.
● Comes with a 14-day free trial version along with a free education version for the teachers and students.
● Functions of the software are tested by QA and Beta testers that offer high stability.
● Support features like automatic keyframing, tag and expressions, effectors, and more.
05** Wondershare Filmora Video Editor
If you are looking for software that is simple and easy to use but supports all advanced features this is one of the best choices. Available for Windows and Mac the tool also works as an excellent video editing tool.
Key features
● This easy 3D animation tool Allows creating sharp and lively animations using features like keyframing, motion-tracking, and others.
● Allows to add the preset motions or even customize your own animations.
● The speed, as well as the duration of the animation, can be changed using the ease-in and ease-out options.
● Make your videos lively with features like warp, distorting, masking, lights & flares, text& titles, and more.
● High-quality presets are available with features like auto-correction, color wheels, scopes, and more.
● Audio features supported like automatic audio sync, audio compression, audio transitions, and noise correction.
For Win 7 or later (64-bit)
For macOS 10.12 or later
Part 5 Top Animation Tips And Tricks
Though 3D animation requires a lot of technical know-how of the process, there are several tips and tricks that can make your task quicker, easier, and smoother. We have gathered a few such tips below.
01Make realistic objects by observing real life
The more you will observe real-life the more you will be able to imitate it into your animations for giving life to your objects, models, and characters. Having some knowledge about real-life, gravity, and similar topics will help you work on your animations more interactively.
02Evolve with latest techniques and technology
The tools, programs, and technology are progressing every day and to make the best use of the same, you need to evolve with the technology. To use the features and functions of the software you need to keep learning and growing.
03Go with the basic first
While working with the animations, it is very easy to get carried away with the process and get into the trap of looking for details. This will eventually move you away from your main track and will lead to a waste of time and effort. Thus, it is always advisable to go with the basics first and then move towards the detailing.
04Learn about the human emotions
Facial expressions are an important element of any 3D animation that brings life to characters. A good animation will portray good and complex emotions and thus it is important to study these emotions in detail so that they can be incorporated into your objects, models, and characters.
● Key Takeaways from This Episode →
● Animations created in 3-dimensional space are termed 3D animations.
● 3D animations involve pre-production, post-production, and several steps.
● For the smooth creation of 3D animations, several tips and tricks can be considered.
● A wide range of tools for creating 3D animations are available and one of the best tools in the category is Wondershare Filmora Video Editor that is effective and easy to use.
6 Unexpected Ways Gif Animation Maker That Affect Your Marketing
6 Unexpected Ways Gif Animation Maker Can Affect Your Marketing
An easy yet powerful editor
Numerous effects to choose from
Detailed tutorials provided by the official channel
Well, if what you’re looking for is a GIF animation maker or software for GIF Animation, we’ve got your back This article starts off with a list of some GIF animation maker tools that you can use to turn your videos into a GIF file (just to give you an idea of how those can help you move forward in your GIF marketing attempts more easily.)
Before ending in a quick rundown, a couple of reasons why GIFs are worth the investment in the first place.
In this article
01 [In What Ways Can You turn videos into a GIF?](#Part 1)
02 [How Gif Animation Maker Affect Your Marketing](#Part 2)
Part 1 In What Ways Can You turn videos into a GIF?
As promised, we’ll be starting off with the tools that you’ll need in order to create GIFs easily (or GIF Animation Maker tools, if you’d prefer). We’ve made sure to pick out a variety for you so that you won’t have to go looking elsewhere for other options We also included what people tend to like and dislike about each option so that you can make a choice as to what you think is the best GIF animation maker more easily.
01** Wondershare Filmora
If what you’re looking for is software for GIF animation, then Filmora is your best bet This software is available for both Mac and Windows users (with options for both a perpetual license and subscription packages for you to choose from.) This is a video editing tool that is capable of making incredibly professional results. And, perhaps more importantly (considering the subject of this article), it will allow you easily turn a video into a 2D Animation GIF that you can use for your marketing
URL: https://filmora.wondershare.com/
What People Like About The Maker
●Comes with advanced video editing functions
●Easily turns videos into 2D Animation GIFs
●Produces High-Quality Results each time
What People Don’t Like About The Maker
●It is a software, which requires download and installation
●The FREE version is limited
●Must pay either a subscription fee or one-time fee for full access

02Canva
If you’ve created marketing projects before, then you’ve no doubt already heard of Canva. This is what a lot of content creators use in order to easily create content for marketing online In this case, of course, we’re looking at it as an online GIF animation maker, one that, unlike Filmora, requires no download (but will require sign-up) for you to use. Canva has its own GIF Animation Maker that you can use (different from the regular Canva you might be more familiar with, as is shown in the UI screenshot below).
URL: https://www.canva.com/create/gif-maker/
What People Like About The Maker
●It is an online tool, no download or installation is required
●Built-in media library for convenient project creation
●Intuitive 2D Animation GIF interface
What People Don’t Like About The Maker
●Not as advanced when it comes to video editing functions
●Limited FREE trial version
●Must unlock Premium version (subscription-based) for full access

03PicMonkey
The next tool on this is another online GIF Animation maker, this time by the name of PicMonkey This tool is very similar to Canva in that many people know it primarily as a photo-editor tool that is great to use for creating content (as it comes with a built-in media library that you can use to quickly finish projects). But it still earned a spot on this list of ours because it allows users to create 2D animation GIFs as well
URL: https://www.picmonkey.com/
What People Like About The Maker
●Built-in media library with animated shapes and images
●GIF Animation editor and creator all-at-once
●FREE trial is available to test out its GIF animation maker functions
What People Don’t Like About The Maker
●In order to have full access, one must pay for the premium solution
●Custom animation is limited in scope
●No advanced video editing functions

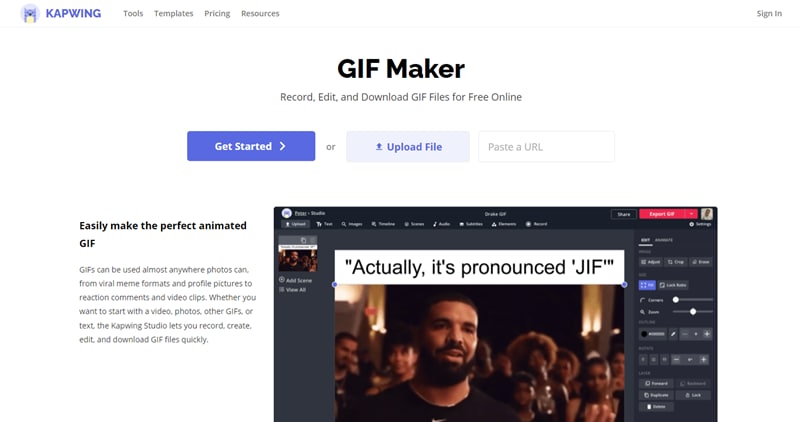
04Kapwing
Kapwing is a free GIF animation creator that will allow you to create GIFs from videos easily The best part about is that it has a FREE version available for use (one that allows you to download finished video projects without watermarks so long as they are under 5 minutes). This should allow you to test out its GIF maker functions before you commit to their premium version (which is subscription-based).
URL: https://www.kapwing.com/gif-maker
What People Like About The Maker
●FREE to use with some limitations
●Quick and easy video-to-GIF conversion
●No watermark on images or video projects under 5 minutes
What People Don’t Like About The Maker
●Full access can only be unlocked by paying for the premium version
●Premium version is subscription-based and expensive
●There is an upload limit
05MakeAGif
MakeAGif is the last GIF animation maker on this list, and it just so happens that it’s one of the easiest to use as well This one is more of a converter tool in that it transforms already-finished videos into a GIF that you can share. A lot of people use it to convert their favorite videos from social media (YouTube, Facebook, etc.) into a GIF that they can share on other platforms.
URL: https://makeagif.com/video-to-gif
What People Like About The Maker
●Free to use with some limitations
●Quick and easy-to-use Video to GIF converter
●Converts pictures, YouTube videos, Facebook videos, etc. to GIF
What People Don’t Like About The Maker
●The tool is more limited in scope than the rest of the tools on this list
●The FREE version is limited
●Premium version requires paying a subscription fee
Part 2 How Gif Animation Maker Affect Your Marketing
Alright, now that you’ve been introduced to what we consider the best GIF Animation maker tools available right now (be they software or online tools), we can move on to actually discussing how you can use GIFs for your marketing efforts We’ve compiled six different ways here, but there are plenty of others, of course. It’s a very open subject.
01GIFs Are Easy to Share Ads
The best part of GIFs is that they are easily consumable media that you can share just about everywhere. For example, you can include them in your email marketing to bring a little life to what could have otherwise been a very dry message You can also have it play out on social media without prompting (different from videos, which the user usually has to play before it starts going.)
GIF LINK: https://media.giphy.com/media/fEkpR6rfmXmZHeVQ22/giphy.gif

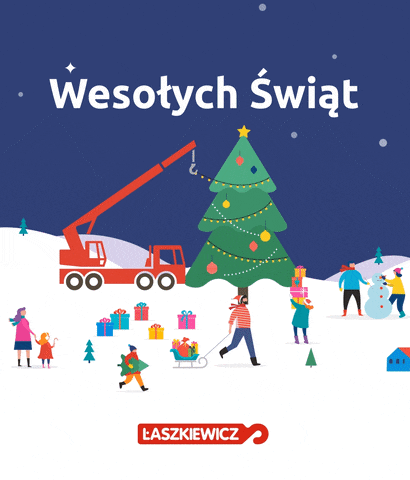
02GIFs Can Be Used for Promoting Events
GIFs are also great for promoting events or holiday sales It’s basically just a moving 2D advertisement (like the one that is shown below). Eye-catching in a way that keeps you looking to catch the movement — in compared to if you were just looking at a still image (which might catch your attention for a moment, but usually bores you the next)
GIF LINK: https://media.giphy.com/media/WtUMnz9ZUuzwojWwij/giphy.gif
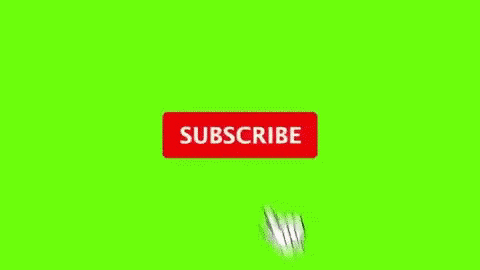
03GIFs Can Be Used for Call-to-Action Pop-Ups
Perhaps you’ve seen this already in some YouTube videos (see the GIF attached for an example), but a lot of content creators now include GIFs on their content to prompt their audience to complete an action — be it subscribing, sharing, downloading a link, buying a product, etc. It’s a great way of getting a message across in a way that is both fun and straightforward
GIF: https://media.giphy.com/media/73oSygWJFG9K1ha75z/giphy.gif
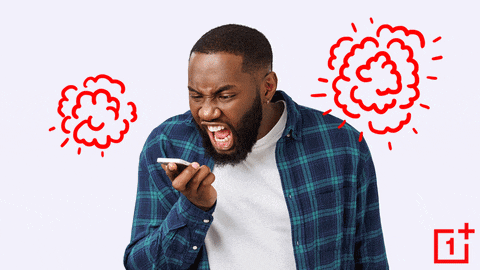
04GIFs Can Be Used to Set the Scene and Express Emotion
GIFs are also a great way to just generally set the scene or express emotion. Text is…very very difficult to make sound like anything but dry reading. Pictures are a little better, but GIFs??? Well, GIFs are great ‘moving’ pictures that offer you more leeway to set the scene by expressing emotion, intent, etc.
GIF: https://media.giphy.com/media/keizDG1zD7Q38yWm3x/giphy.gif
05GIFs Can Be Used to Tell a Story
You know the saying, “A picture can speak a thousand words?” Well, it’s true, but in comparison to GIFs??? Pictures definitely lose out in telling a story. See the attached GIF for example. With just one look, you can probably create an entire story in your head about the woman that is featured This can be very useful for future marketing prospects.
GIF: https://media.giphy.com/media/Kb5zI3B9D7cCulbNOg/giphy.gif

06GIFs Can Be Used to Explain or Share Instructions
In the same way that you can create long infographics to offer instructions or teach a lesson on a particular subject, GIFs can be used to educate your audience. Only, it’s a lot easier to use for this reason No complicated infographics formatting is required You can just put together several stills showing the step-by-step process or record a silent video like the one shown in the GIF below
GIF: https://media.giphy.com/media/FgiHOQyKUJmwg/giphy.gif
● Key Takeaways from This Episode →
● GIFs have been used for years in order to share fun moments and memes, but it has much more potential than that
● With a carefully designed GIF, not only can you catch the attention of your audience, but you can also keep that attention for much longer than you would have been able to if you were just sharing text or a still image Making it a perfect vessel for future marketing efforts
● Now, in order to make sure that you get a good story on your marketing efforts via GIF, we’ve listed some of the best GIF animation maker tools for you in the first part of this article
● A second part has also been added where we discussed all the different ways that you can use 2D Animation GIFs in your future marketing endeavors.
Well, if what you’re looking for is a GIF animation maker or software for GIF Animation, we’ve got your back This article starts off with a list of some GIF animation maker tools that you can use to turn your videos into a GIF file (just to give you an idea of how those can help you move forward in your GIF marketing attempts more easily.)
Before ending in a quick rundown, a couple of reasons why GIFs are worth the investment in the first place.
In this article
01 [In What Ways Can You turn videos into a GIF?](#Part 1)
02 [How Gif Animation Maker Affect Your Marketing](#Part 2)
Part 1 In What Ways Can You turn videos into a GIF?
As promised, we’ll be starting off with the tools that you’ll need in order to create GIFs easily (or GIF Animation Maker tools, if you’d prefer). We’ve made sure to pick out a variety for you so that you won’t have to go looking elsewhere for other options We also included what people tend to like and dislike about each option so that you can make a choice as to what you think is the best GIF animation maker more easily.
01** Wondershare Filmora
If what you’re looking for is software for GIF animation, then Filmora is your best bet This software is available for both Mac and Windows users (with options for both a perpetual license and subscription packages for you to choose from.) This is a video editing tool that is capable of making incredibly professional results. And, perhaps more importantly (considering the subject of this article), it will allow you easily turn a video into a 2D Animation GIF that you can use for your marketing
URL: https://filmora.wondershare.com/
What People Like About The Maker
●Comes with advanced video editing functions
●Easily turns videos into 2D Animation GIFs
●Produces High-Quality Results each time
What People Don’t Like About The Maker
●It is a software, which requires download and installation
●The FREE version is limited
●Must pay either a subscription fee or one-time fee for full access
02Canva
If you’ve created marketing projects before, then you’ve no doubt already heard of Canva. This is what a lot of content creators use in order to easily create content for marketing online In this case, of course, we’re looking at it as an online GIF animation maker, one that, unlike Filmora, requires no download (but will require sign-up) for you to use. Canva has its own GIF Animation Maker that you can use (different from the regular Canva you might be more familiar with, as is shown in the UI screenshot below).
URL: https://www.canva.com/create/gif-maker/
What People Like About The Maker
●It is an online tool, no download or installation is required
●Built-in media library for convenient project creation
●Intuitive 2D Animation GIF interface
What People Don’t Like About The Maker
●Not as advanced when it comes to video editing functions
●Limited FREE trial version
●Must unlock Premium version (subscription-based) for full access
03PicMonkey
The next tool on this is another online GIF Animation maker, this time by the name of PicMonkey This tool is very similar to Canva in that many people know it primarily as a photo-editor tool that is great to use for creating content (as it comes with a built-in media library that you can use to quickly finish projects). But it still earned a spot on this list of ours because it allows users to create 2D animation GIFs as well
URL: https://www.picmonkey.com/
What People Like About The Maker
●Built-in media library with animated shapes and images
●GIF Animation editor and creator all-at-once
●FREE trial is available to test out its GIF animation maker functions
What People Don’t Like About The Maker
●In order to have full access, one must pay for the premium solution
●Custom animation is limited in scope
●No advanced video editing functions
04Kapwing
Kapwing is a free GIF animation creator that will allow you to create GIFs from videos easily The best part about is that it has a FREE version available for use (one that allows you to download finished video projects without watermarks so long as they are under 5 minutes). This should allow you to test out its GIF maker functions before you commit to their premium version (which is subscription-based).
URL: https://www.kapwing.com/gif-maker
What People Like About The Maker
●FREE to use with some limitations
●Quick and easy video-to-GIF conversion
●No watermark on images or video projects under 5 minutes
What People Don’t Like About The Maker
●Full access can only be unlocked by paying for the premium version
●Premium version is subscription-based and expensive
●There is an upload limit
05MakeAGif
MakeAGif is the last GIF animation maker on this list, and it just so happens that it’s one of the easiest to use as well This one is more of a converter tool in that it transforms already-finished videos into a GIF that you can share. A lot of people use it to convert their favorite videos from social media (YouTube, Facebook, etc.) into a GIF that they can share on other platforms.
URL: https://makeagif.com/video-to-gif
What People Like About The Maker
●Free to use with some limitations
●Quick and easy-to-use Video to GIF converter
●Converts pictures, YouTube videos, Facebook videos, etc. to GIF
What People Don’t Like About The Maker
●The tool is more limited in scope than the rest of the tools on this list
●The FREE version is limited
●Premium version requires paying a subscription fee
Part 2 How Gif Animation Maker Affect Your Marketing
Alright, now that you’ve been introduced to what we consider the best GIF Animation maker tools available right now (be they software or online tools), we can move on to actually discussing how you can use GIFs for your marketing efforts We’ve compiled six different ways here, but there are plenty of others, of course. It’s a very open subject.
01GIFs Are Easy to Share Ads
The best part of GIFs is that they are easily consumable media that you can share just about everywhere. For example, you can include them in your email marketing to bring a little life to what could have otherwise been a very dry message You can also have it play out on social media without prompting (different from videos, which the user usually has to play before it starts going.)
GIF LINK: https://media.giphy.com/media/fEkpR6rfmXmZHeVQ22/giphy.gif
02GIFs Can Be Used for Promoting Events
GIFs are also great for promoting events or holiday sales It’s basically just a moving 2D advertisement (like the one that is shown below). Eye-catching in a way that keeps you looking to catch the movement — in compared to if you were just looking at a still image (which might catch your attention for a moment, but usually bores you the next)
GIF LINK: https://media.giphy.com/media/WtUMnz9ZUuzwojWwij/giphy.gif
03GIFs Can Be Used for Call-to-Action Pop-Ups
Perhaps you’ve seen this already in some YouTube videos (see the GIF attached for an example), but a lot of content creators now include GIFs on their content to prompt their audience to complete an action — be it subscribing, sharing, downloading a link, buying a product, etc. It’s a great way of getting a message across in a way that is both fun and straightforward
GIF: https://media.giphy.com/media/73oSygWJFG9K1ha75z/giphy.gif
04GIFs Can Be Used to Set the Scene and Express Emotion
GIFs are also a great way to just generally set the scene or express emotion. Text is…very very difficult to make sound like anything but dry reading. Pictures are a little better, but GIFs??? Well, GIFs are great ‘moving’ pictures that offer you more leeway to set the scene by expressing emotion, intent, etc.
GIF: https://media.giphy.com/media/keizDG1zD7Q38yWm3x/giphy.gif
05GIFs Can Be Used to Tell a Story
You know the saying, “A picture can speak a thousand words?” Well, it’s true, but in comparison to GIFs??? Pictures definitely lose out in telling a story. See the attached GIF for example. With just one look, you can probably create an entire story in your head about the woman that is featured This can be very useful for future marketing prospects.
GIF: https://media.giphy.com/media/Kb5zI3B9D7cCulbNOg/giphy.gif
06GIFs Can Be Used to Explain or Share Instructions
In the same way that you can create long infographics to offer instructions or teach a lesson on a particular subject, GIFs can be used to educate your audience. Only, it’s a lot easier to use for this reason No complicated infographics formatting is required You can just put together several stills showing the step-by-step process or record a silent video like the one shown in the GIF below
GIF: https://media.giphy.com/media/FgiHOQyKUJmwg/giphy.gif
● Key Takeaways from This Episode →
● GIFs have been used for years in order to share fun moments and memes, but it has much more potential than that
● With a carefully designed GIF, not only can you catch the attention of your audience, but you can also keep that attention for much longer than you would have been able to if you were just sharing text or a still image Making it a perfect vessel for future marketing efforts
● Now, in order to make sure that you get a good story on your marketing efforts via GIF, we’ve listed some of the best GIF animation maker tools for you in the first part of this article
● A second part has also been added where we discussed all the different ways that you can use 2D Animation GIFs in your future marketing endeavors.
How To Create Animated Clipart in PowerPoint
How To Create Animated Clipart in PowerPoint
An easy yet powerful editor
Numerous effects to choose from
Detailed tutorials provided by the official channel
Clipart is a special type of graphic art. There are pre-made images that are used to illustrate all sorts of things.

The use of animated clipart is increasing day by day. Here, we will discuss the steps of creating animated clipart for PowerPoint.
In this article
01 [What is Moving Clipart Called?](#Part 1)
02 [Where Can I Find Free Animated Clipart?](#Part 2)
03 [How Do You Add an Animated Clipart to a Slide?](#Part 3)
Part 1 What is Moving Clipart Called?
The moving clipart is basically called animated clipart or Animated Gifs. These are easy and quick ways to present contents that are dynamic, especially on Web pages. The sizes of these files are small compared to the other alternatives for creating dynamic content like Flash and Java. If you would like to learn more about video animation , you can watch this tutorial:
For Win 7 or later (64-bit)
For macOS 10.12 or later
These are several images that are encoded in GIF or Graphic interchange format. This contains a number of frames or images within a single file and can be described by the graphic control extension of its own.

Part 2 Where Can I Find Free Animated Clipart?
We all love to use different types of images to express ourselves. However, the process of finding out better quality, copyright > free and also high > resolution free images a really tough task. To make sure that you can find the right one for you, you can go through some really amazing image resources.
These image resources have a huge collection of CCO or Creative Commons licensed and high > quality pictures to meet your different types of needs. Also, keep in mind to check on to the page that is licensed before using any clipart or animated clip art for copyright infringement.
01 Upsplash

Unsplash is a special site that was launched in the year 2013. This site posts ten photos that are handpicked every ten days. These photos are free of charge. As categorized under CCO, this site offers high > quality resolution images that can add beauty as well as credibility to your work.
02 Pixabay

Pixabay was launched in the year 2016 and has 550,000 free illustrations, photos, and vectors. It is equipped with a search engine that is versatile and can easily customize and broaden the search. Thus, this can offer you accurate results regarding your searches.
If you wish to use high > quality public domain pictures or animated clip art, this site can be your perfect option.
03 Public Domain

This website known as Public Domain has a collection of various high > quality pictures, images, and vectors that you can easily use for your animated videos. Especially, vectors are available here in a big number.
04 Openclipart

Though there are many websites where you can get clip arts, very few of them can provide clip arts of excellent quality. This website known as Openclipart is a reliable source of 11,000 designed clip arts that you can easily use in your animation videos.
05 Bing

Bing is no doubt an extensive search engine that can work similarly to Google. Bing has a special filter that has a large number of superior quality public domain images, vectors, clip arts, and illustrations to amaze you.
06 Photopin

As Photopin has millions of free images, many bloggers prefer to use this for their blog posts. However, Photopin does not come under the CCO license. So, you can use their images but you need to add a link to their website.
07 Pond5 creative

Pond5 is the largest online marketplace of the world for royalty–free stock music has now released the creative common category for media with the target to make it easily accessible to their users.
This site offers not only some superior quality free images, but you can also find some special characters, effects, vectors, sounds, animated clip art, 3D models, and many more. You just have to use the filter showing “Public domain only” to get those free licensed images.
08 Clker.com

Clker is mainly used for clip arts. You can easily get numerous clip arts of different sizes without any charges. This is an amazing source of free graphics, vectors, illustrations, etc. Moreover, this site is also licensed under CCO.
Part 3 How Do You Add an Animated Clipart to a Slide?

You can easily add animated clip art or GIF into the Google slides, to make your creation more visually attractive. To do this task you can choose multiple methods, but the easiest of them is using a GIF URL.
Here is the complete process of how to add a GIF to Google slides using a URL.
01 How to add a GIF to Google Slides using a URL

Step 1Open Your Presentation
Firstly, you need to go to slides.google.com and then open your presentation, or you can also create a new one.
Step 2Choose GIF That You Want to Insert
Click the slide that you want to insert the GIF onto in the sidebar located on the left side.
Step 3Image
In the top toolbar, just select “Insert”, then the “Image” option. After that, select “By URL”.
Step 4Paste URL
Just paste the URL into that box.
Step 5Insert
After that, the GIF will pop up, at that time just click on “Insert”.
02 Can you animate objects in PowerPoint?

How to add animations to the pictures, shapes, texts in a PowerPoint presentation?
Step 1Select the Text
First of all, you have to select the text or object that you wish to animate.
Step 2Select “Animations”
Next, Select “Animations” and choose an animation.
Step 3Choose “Effect Options”
Just choose “Effect Options” and select an effect.
How to manage effects and animations?
● With Previous
You can play an animation simultaneously as the previous animation in you the sequence.
● After previous
You can start an animation right after the previous ones starts.
● On click
You can start an animation or move the animated clip art while you click a slide.
● Delay
You may add time before an effect starts to run.
● Duration
You can also shorten or lengthen an effect.
How to change the order of animations?
● Move the option you desire Later
You can make an animation happen later in the sequence.
● Move the option you desire earlier
You can make an animation appear earlier in the sequence.
How to add animation to the grouped objects?
● Step 1
You need to press “Ctrl” and select the objects you want.
● Step 2
Select “Format> Group> Group” to group those objects or texts.
● Step 3
Select “Animations” and choose an animation.
03 How to Add Animated Clipart in Powerpoint?

Here is the detailed process for you.
Step 1Choose a Clip art image
You need to select the desired image. You can either select an image from the default option in PowerPoint showing Office clipart or you can search for images online or insert your own collection of photos.
Step 2Select an animation effect
You have to go to the “Animation “ tab and click on the option that shows “Add Animation”. From that drop-down menu, you will get several animation effects to animate your static image and create your animated clipart for PowerPoint.
Step 3Choose among different effects
PowerPoint offers animation effects of different types, like motion paths, entrance effects, entrance effects and emphasis effects.
Step 4Bringing transition effects
After creating animated clipart, you can also choose a transition effect to offer a special look to your presentation. In this case, when the slide is revealed this transition effect can easily complement your animation.
04 How Do I Make an Animated Video in Powerpoint?
When you wish to create an animated video for PowerPoint, you can do this easily. The steps are:
Step 1Insert the video into a slide
Insert the video into a slide and then click on “Insert “and select the option “Video”.
Click on the video and align it to the right position and size. Open “Animation Pane”.
Step 2Create a speech bubble
It is not necessary to interrupt your video while inserting an animation. So, it’s important to create a speech bubble.
Click “Shapes” and choose between different arrows, shapes, flow charts, that you can insert into the video.
Step 3Select “Animation Pane”
Click on the speech bubble. Go to “Animations” and select “Animation Pane”.
The animations can be inserted from the “Entrance” area.
Step 4Choose “Inbox”
Click on the speech bubble and choose “Inbox” and then “Fly-In”. The effects will appear in the area of the animation.
By moving the animation on this you can select the time when the animation will appear in the video.
Step 5Play the video
Right-click on “Start With Previous” to allow the animation to start and move.
The speech bubble will appear in the video after just 30 seconds, so move the animation until 30 sec. If you wish to stop the video in just 30 sec, click on the video and add “Play”.
Step 6Move the animation
Click right and choose the “Start With Previous” option. Move the animation to 0 seconds. Add “Pause”.
Click on “Add Animation” and then “Pause”. Then click right and choose “Start With Previous Again”. Move the animation to 30 sec as you need to stop the video from there. You can change the length by inserting the animation “Pause” again.
Step 7Run the video
Click right and select “Start With Previous”. While the continuation of the video, if you want the speech bubble to disappear, click on the bubble and on “Add Animation” and then “Exit” and choose “Fly Out”.
Click right and choose “Start With Previous “again. Move the animation to 60 seconds, as the video will start to run there.
Clipart is a special type of graphic art. There are pre-made images that are used to illustrate all sorts of things.
The use of animated clipart is increasing day by day. Here, we will discuss the steps of creating animated clipart for PowerPoint.
In this article
01 [What is Moving Clipart Called?](#Part 1)
02 [Where Can I Find Free Animated Clipart?](#Part 2)
03 [How Do You Add an Animated Clipart to a Slide?](#Part 3)
Part 1 What is Moving Clipart Called?
The moving clipart is basically called animated clipart or Animated Gifs. These are easy and quick ways to present contents that are dynamic, especially on Web pages. The sizes of these files are small compared to the other alternatives for creating dynamic content like Flash and Java. If you would like to learn more about video animation , you can watch this tutorial:
For Win 7 or later (64-bit)
For macOS 10.12 or later
These are several images that are encoded in GIF or Graphic interchange format. This contains a number of frames or images within a single file and can be described by the graphic control extension of its own.
Part 2 Where Can I Find Free Animated Clipart?
We all love to use different types of images to express ourselves. However, the process of finding out better quality, copyright > free and also high > resolution free images a really tough task. To make sure that you can find the right one for you, you can go through some really amazing image resources.
These image resources have a huge collection of CCO or Creative Commons licensed and high > quality pictures to meet your different types of needs. Also, keep in mind to check on to the page that is licensed before using any clipart or animated clip art for copyright infringement.
01 Upsplash
Unsplash is a special site that was launched in the year 2013. This site posts ten photos that are handpicked every ten days. These photos are free of charge. As categorized under CCO, this site offers high > quality resolution images that can add beauty as well as credibility to your work.
02 Pixabay
Pixabay was launched in the year 2016 and has 550,000 free illustrations, photos, and vectors. It is equipped with a search engine that is versatile and can easily customize and broaden the search. Thus, this can offer you accurate results regarding your searches.
If you wish to use high > quality public domain pictures or animated clip art, this site can be your perfect option.
03 Public Domain
This website known as Public Domain has a collection of various high > quality pictures, images, and vectors that you can easily use for your animated videos. Especially, vectors are available here in a big number.
04 Openclipart
Though there are many websites where you can get clip arts, very few of them can provide clip arts of excellent quality. This website known as Openclipart is a reliable source of 11,000 designed clip arts that you can easily use in your animation videos.
05 Bing
Bing is no doubt an extensive search engine that can work similarly to Google. Bing has a special filter that has a large number of superior quality public domain images, vectors, clip arts, and illustrations to amaze you.
06 Photopin
As Photopin has millions of free images, many bloggers prefer to use this for their blog posts. However, Photopin does not come under the CCO license. So, you can use their images but you need to add a link to their website.
07 Pond5 creative
Pond5 is the largest online marketplace of the world for royalty–free stock music has now released the creative common category for media with the target to make it easily accessible to their users.
This site offers not only some superior quality free images, but you can also find some special characters, effects, vectors, sounds, animated clip art, 3D models, and many more. You just have to use the filter showing “Public domain only” to get those free licensed images.
08 Clker.com
Clker is mainly used for clip arts. You can easily get numerous clip arts of different sizes without any charges. This is an amazing source of free graphics, vectors, illustrations, etc. Moreover, this site is also licensed under CCO.
Part 3 How Do You Add an Animated Clipart to a Slide?
You can easily add animated clip art or GIF into the Google slides, to make your creation more visually attractive. To do this task you can choose multiple methods, but the easiest of them is using a GIF URL.
Here is the complete process of how to add a GIF to Google slides using a URL.
01 How to add a GIF to Google Slides using a URL
Step 1Open Your Presentation
Firstly, you need to go to slides.google.com and then open your presentation, or you can also create a new one.
Step 2Choose GIF That You Want to Insert
Click the slide that you want to insert the GIF onto in the sidebar located on the left side.
Step 3Image
In the top toolbar, just select “Insert”, then the “Image” option. After that, select “By URL”.
Step 4Paste URL
Just paste the URL into that box.
Step 5Insert
After that, the GIF will pop up, at that time just click on “Insert”.
02 Can you animate objects in PowerPoint?
How to add animations to the pictures, shapes, texts in a PowerPoint presentation?
Step 1Select the Text
First of all, you have to select the text or object that you wish to animate.
Step 2Select “Animations”
Next, Select “Animations” and choose an animation.
Step 3Choose “Effect Options”
Just choose “Effect Options” and select an effect.
How to manage effects and animations?
● With Previous
You can play an animation simultaneously as the previous animation in you the sequence.
● After previous
You can start an animation right after the previous ones starts.
● On click
You can start an animation or move the animated clip art while you click a slide.
● Delay
You may add time before an effect starts to run.
● Duration
You can also shorten or lengthen an effect.
How to change the order of animations?
● Move the option you desire Later
You can make an animation happen later in the sequence.
● Move the option you desire earlier
You can make an animation appear earlier in the sequence.
How to add animation to the grouped objects?
● Step 1
You need to press “Ctrl” and select the objects you want.
● Step 2
Select “Format> Group> Group” to group those objects or texts.
● Step 3
Select “Animations” and choose an animation.
03 How to Add Animated Clipart in Powerpoint?
Here is the detailed process for you.
Step 1Choose a Clip art image
You need to select the desired image. You can either select an image from the default option in PowerPoint showing Office clipart or you can search for images online or insert your own collection of photos.
Step 2Select an animation effect
You have to go to the “Animation “ tab and click on the option that shows “Add Animation”. From that drop-down menu, you will get several animation effects to animate your static image and create your animated clipart for PowerPoint.
Step 3Choose among different effects
PowerPoint offers animation effects of different types, like motion paths, entrance effects, entrance effects and emphasis effects.
Step 4Bringing transition effects
After creating animated clipart, you can also choose a transition effect to offer a special look to your presentation. In this case, when the slide is revealed this transition effect can easily complement your animation.
04 How Do I Make an Animated Video in Powerpoint?
When you wish to create an animated video for PowerPoint, you can do this easily. The steps are:
Step 1Insert the video into a slide
Insert the video into a slide and then click on “Insert “and select the option “Video”.
Click on the video and align it to the right position and size. Open “Animation Pane”.
Step 2Create a speech bubble
It is not necessary to interrupt your video while inserting an animation. So, it’s important to create a speech bubble.
Click “Shapes” and choose between different arrows, shapes, flow charts, that you can insert into the video.
Step 3Select “Animation Pane”
Click on the speech bubble. Go to “Animations” and select “Animation Pane”.
The animations can be inserted from the “Entrance” area.
Step 4Choose “Inbox”
Click on the speech bubble and choose “Inbox” and then “Fly-In”. The effects will appear in the area of the animation.
By moving the animation on this you can select the time when the animation will appear in the video.
Step 5Play the video
Right-click on “Start With Previous” to allow the animation to start and move.
The speech bubble will appear in the video after just 30 seconds, so move the animation until 30 sec. If you wish to stop the video in just 30 sec, click on the video and add “Play”.
Step 6Move the animation
Click right and choose the “Start With Previous” option. Move the animation to 0 seconds. Add “Pause”.
Click on “Add Animation” and then “Pause”. Then click right and choose “Start With Previous Again”. Move the animation to 30 sec as you need to stop the video from there. You can change the length by inserting the animation “Pause” again.
Step 7Run the video
Click right and select “Start With Previous”. While the continuation of the video, if you want the speech bubble to disappear, click on the bubble and on “Add Animation” and then “Exit” and choose “Fly Out”.
Click right and choose “Start With Previous “again. Move the animation to 60 seconds, as the video will start to run there.
The Best Free 12 GIF Meme Maker at a Glance
The Best Free 12 GIF Meme Maker at a Glance
An easy yet powerful editor
Numerous effects to choose from
Detailed tutorials provided by the official channel
Do you want to make a meme out of a photo? You can do so with the aid of GIF meme maker, which provides an extensive range of templates, including popular ones and meme fonts and a dedicated interface. Let’s look at some of the excellent meme GIF generators for Android, iPhone, online tools, and desktop computers.
In this article
01 [What Is the Meme GIF Maker?](#Part 1)
02 [How Do You Make a GIF Meme on iPhone?](#Part 2)
03 [12 Meme Generators to Create Your Memes](#Part 3)
Part 1 What Is the Meme GIF Maker?
GIF meme maker allows users to make GIFs from the ground up by collecting or submitting videos or photographs. These GIF caption meme-makers enable users to add different creative effects like emojis, photos, text, filters, and backdrops for added customization. They can also export files, and some of them integrate directly with social networking networks to make uploading more convenient.
Each tool here has its own set of features, so read the entire article before determining which GIF meme generator is ideal for your personal or professional needs.
Part 2 How Do You Make a GIF Meme on iPhone?
Make a unique GIF meme on your iPhone following these few steps:
Step 1: Download and install a GIF maker
On your iPhone, install the GIF meme maker. Not only can you use this meme GIF generator to locate animated GIFs, but you can also use it to make your GIF memes from the start. Go to the Apple store, type GIF maker of your choice into the search field. Now select Get or Install from the drop-down menu.

Step 2: Create an account.
Create an account or log in. Fill in the text boxes with your email address, username, and password. Then press the Sign Up button.
Tap Log In, enter your email address with password if you already have an account.

Step 3: Select a photo or video to use for your GIF
Now it’s your turn to get inventive: Simply tap any of the effects tiles at the bottom of the screen to Construct a meme of a stupid selfie or photo with effects, then swipe left/right to navigate between effects. Press and hold the Shutter option to start a movie, or tap once to snap a shot.
p Create. This is locatedht corner.[1]

Step 4: Add text to meme
Put your meme text here. It’s critical to add your content to the meme because that’s what makes it a meme! To access the text tool, tap the Aa icon and type some text for the meme. Tap Done when you’re finished.
Resize and move your text. After you’ve tapped “Done” and are happy with your text, you can tap, hold, and drag it about your GIF. To alter the size, pinch two fingers together.


Step 5: Save and share
When you complete, tap the purple arrow. Tap this button in the bottom right corner once you’re happy with your meme GIF.
Select the Share GIF from the drop-down menu. If you wish to save the GIF to your camera roll, tap Save GIF.


Part 3 Meme Generators to Create Your Memes
Here are 12 meme generators that you can try out
01IMGFlip (Web)

Features:
• It has many meme templates
• You can easily build memes with your photographs.
• You can make changes to your memes
• It includes over 1000 meme templates.
• Allows you to find the meme template you want quickly.
Pros
• Many templates
• Fonts that you can customize.
• Memes on video
Cons
• Adds a watermark to the image
To make a meme with IMGFlip, follow these steps:
Step 1: Begin by making something.
Go to the website and click the “Create” button to get started. From the menu, select “Make a meme.”
Step 2: Pick a design template
To select the proper template for your meme, use the Search box. Alternatively, you can add your image to the app by clicking “Upload new template.”
Step 3: Insert text
Fill in the blanks with the meme text.
Next, click the options toggle to change the text next to each field. Save the image.
02DrMemes (Web)

Features
• You can easily produce memes for free.
• Create memes without a watermark.
• Change fonts easily
• Add emojis and stickers easily to memes.
• You can turn your photos into a GIF meme.
Pros
• User-friendly interface
• Personalization of fonts
• There is no watermark.
Cons
• A smaller number of templates
Follow these simple steps to make a meme using this website:
Step 1: Select a template
Open drmemes.com and select “Choose meme template” or “Upload picture,” depending on how you want to Construct a meme.
Step 2: Type in your text
Add Text from the side boxes. To change the font, use the settings toggle.
03ILoveIMG (Web)

Features
• Provides a variety of templates
• Allows you to alter the size and style of the font
• It generates memes that are free of watermarks.
• You may also choose whether you want the text to be forced into the image.
Pros
• An extensive library of free templates
• There is no watermark.
• Simple to use
• Can compress, resize, crop, and perform other image-editing activities.
Cons
• You can’t change the font.
Follow these steps to make memes using ILoveIMG:
Step 1: Go to the website.
In a browser, go to the website.
Step 2: Pick a design template
“Select meme template” or “Upload image” are the options.
Step 3: Type in your text
Fill in the blanks with your text.
04Meme Generator (Android/iOS)

Features:
● Over 500 high-quality memes and caption examples included.
● You can change size and color.
● There are a variety of fonts to pick from.
● Use the search or filter options to discover the memes you’re looking for quickly.
● There are no watermarks.
Pros
• Many templates
• Crop, rotate and flip images
• Personalize it with a custom image, font style, and sticker.
image
• There is no watermark.
Cons
• Lots of ads
Follow these simple steps to create a meme using the Meme Generator
Step 1: Add Image
Tap “Custom meme Gallery” to add an image from the gallery or select a meme template in the app.
Step 2: Crop Meme
Using the choices at the top of the app, you can crop the meme or rotate/flip the images.
Step 3: Customize font and Save
Change the font style, color, and alignment by tapping on it. You can also decorate it with a sticker.
When done, tap on “Save” to download the meme or hit “Share” to send it to social media apps.
05Meme Creator (Android)

Features
● A large collection of stock pictures and memes
● Add your quotes to the close captions.
● You can add your watermark.
● There are some fantastic stickers available.
● Simple to use
Pros
● No watermark
● Meme categories
● Custom fonts
Cons
● Occasional ads
Here is a simple step guide:
Step 1: Add Image
The program begins with a gallery of meme template categories, including animals, celebrities, cartoons, and more.
To add your original image, tap on one of these templates or hit the “Gallery” icon at the top.
Step 2: Change font size
Fill in the “Top” and “Bottom” text areas with the meme content. Using the options icon next to the text, change the font style.
Step 3: Save and Share
Use the “Save” or “Share” button at the bottom to download or send memes.
06Video & GIF Memes (Android)

Features
● It enables you to make memes from movies, GIFs and photos.
● No watermarks
● Easy to use
● Compatible on device
● Several stickers for users to leverage on
Pros
● There is no watermark.
● Tenor GIF database access
● You can video cut.
Cons
● Too many ads
There are no image memes.
Here are a few steps to follow:
Step 1: Select file
To begin, open the app and select the source file type.
Step 2: Customize text
When asked, trim the video, and add customizable meme text.
Save the video or GIF joke after changing video characteristics such as frame rate, speed, and quality.
07GIF Maker – Meme GIF Creator (iOS)

Features:
● Make as many GIFs as you like from your videos.
● Make an unlimited number of GIFs from your photos.
● Make an infinite number of memes.
● Filters, Stickers, and Fonts of the highest quality.
● Easy to use
Pros
● There is no watermark.
● User-friendly interphase.
● There are some fantastic stickers available.
Cons
● As others, ads.
Follow these simple steps to make use of this amazing tool:
Step 1: Choose the desired video
After running the app, select “Video to GIF” from the menu and select your video.
If necessary, trim it.
Step 2: Add text
To add amusing meme text to your video, tap “Add text.”
Step 3: Download and Share
To download the video or share it directly with social networking apps, click the Share icon.
08Memeto – Meme Maker & Creator (iOS)

Features:
● Create memes with your picture templates, blank memes, and popular templates.
● Customize options available
● Several different meme text styles to choose from.
● 1000+ stickers.
● Choose your photo from your Photo Gallery to be used as background
Pros
● There is no watermark.
● Various types of memes
Cons
● It lacks a search function.
Step 1: Choose a template
Select a meme template in the app, select the meme, and then hit the “Text” option to add and style meme text.
Step 2: Save and Share
Tap the Share button when you finish to save it to your device.
09Meme Generator Suite (Windows)

Features:
● Thousands of memes are available online
● Make memes out of your photos.
● Make posters with the phrase “KEEP CALM” and Jo Baka memes.
● You can move text, resized, and colored.
● There’s also an Offline Collection with over 300 memes that’s always ready to go!
Pros
• Many memes
• Effective search
• Collection in the offline mode
• There is no watermark.
Cons
• Advertisements
Follow these simple are guide:
Step 1: Select template or photo
Start using a pre-loaded meme template from the app or upload your image by selecting “From gallery.”
Step 2: Download and Save
Change the text settings and click the Save icon to download the image.
You can also immediately submit the image to IMGur or social networking apps.
10Meme Generator

Features:
● Get over 500 high-quality memes and caption examples.
● Size and color are changeable.
● There are a variety of fonts to pick from.
● Search or filter options to discover the memes you’re looking for.
● There are no watermarks.
Pros
• Examples of memes
• There is no watermark.
Cons
• Cannot share straight to social networking apps
Step 1: Click on Meme
To begin editing a meme, click on it.
Step 2: Change font
Change the font color and style of the meme text on the meme editing screen.
1111. Deal With It - GIF Maker

Features :
● This online GIF creator is simple to use.
● No third-party software is required to use this GIF maker.
● This website will complete the GIF conversion promptly.
● This GIF generator website is beneficial to new users.
Pros
● The website’s design is simplistic, making this GIF banner maker too simple to manage and utilize.
● It also intensifies the GIF maker, significantly improving the overall effect of the GIF in question.
Cons
● Because the pace of GIF makers is too slow, users sometimes opt to download installable GIF makers.
● GIF makers cannot create animated GIFs, so it is impossible to utilize this tool.
How to Use this Online GIF Maker
Visit the GIF maker’s official homepage.
Step 1: Choose an image
Because it can also be helpful to create GIFs from photos, you may use the Load Image option to upload an image from your computer.
Step 2: Editing
After that, you may add a phrase and glasses to the loaded image.
12LunaPic

Features:
● This online animated GIF creator has a very user-friendly design.
● No other third-party programs are required to use this online animated GIF creator.
● This website can also be valuable to creating GIF banners.
● You may create animated GIFs from several photographs with this website.
Pros
● With the aid of this program, the user can experience the GIF maker mobile feature; hence it is highly recommended.
● Because the tool is so simple, this banner GIF maker gets the job done in style and according to the user’s specifications.
Cons
● Like the GIF icon maker, this application lacks critical features like speed and accuracy necessary for GIF creation.
● Because this program can’t edit GIFs, it doesn’t have any of the GIF edit maker’s features.
How to use LunaPic
Step 1: Upload Image
To get started, go to LunaPic’s official website. To submit photographs from your computer to this online animated GIF maker, click the Upload button.
Step 2: Enhance the image
With this online GIF creator, you can now alter the images.
Step 3: Save the animated GIF
To save the produced GIF, select GIF as the output and click the Save button at the bottom.
Creating your animated GIF from any video or photo is a fascinating and entertaining undertaking. A video scene can be brutal to manage to owe to its vast size, but GIF forms are ideal for profile posts and sharing with friends in the form of simple jokes.
If you want to generate a GIF online, though, Wondershare Filmora Video Editor ‘s online meme maker is the best option. It allows you to create a watermark-free picture, GIF, and video memes. It is entirely free to use and requires no registration. When creating a caption, you can edit the text size, color, and position to make a caption while you are editing. You can also add text inside or outside in GIF. Just with some clicks, your GIF will be complete. Try it now!

Wondershare Filmora - Best Video Editor for Mac/Windows
5,481,435 people have downloaded it.
Build unique custom animations without breaking a sweat.
Focus on creating epic stories and leave the details to Filmora’s auto features.
Start a creative adventure with drag & drop effects and endless possibilities.
Filmora simplifies advanced features to save you time and effort.
Filmora cuts out repetition so you can move on to your next creative breakthrough.
● Key Takeaways from This Episode →
● Now that you know about the 12 best GIF meme generators and how to use them to make a unique and customized GIF with the simple step guide, you can now try your hands on new things.
● However, Wondershare Filmora is your sure best GIF caption meme maker to help you achieve excellent results as a GIF meme creator. So go for it!
Do you want to make a meme out of a photo? You can do so with the aid of GIF meme maker, which provides an extensive range of templates, including popular ones and meme fonts and a dedicated interface. Let’s look at some of the excellent meme GIF generators for Android, iPhone, online tools, and desktop computers.
In this article
01 [What Is the Meme GIF Maker?](#Part 1)
02 [How Do You Make a GIF Meme on iPhone?](#Part 2)
03 [12 Meme Generators to Create Your Memes](#Part 3)
Part 1 What Is the Meme GIF Maker?
GIF meme maker allows users to make GIFs from the ground up by collecting or submitting videos or photographs. These GIF caption meme-makers enable users to add different creative effects like emojis, photos, text, filters, and backdrops for added customization. They can also export files, and some of them integrate directly with social networking networks to make uploading more convenient.
Each tool here has its own set of features, so read the entire article before determining which GIF meme generator is ideal for your personal or professional needs.
Part 2 How Do You Make a GIF Meme on iPhone?
Make a unique GIF meme on your iPhone following these few steps:
Step 1: Download and install a GIF maker
On your iPhone, install the GIF meme maker. Not only can you use this meme GIF generator to locate animated GIFs, but you can also use it to make your GIF memes from the start. Go to the Apple store, type GIF maker of your choice into the search field. Now select Get or Install from the drop-down menu.
Step 2: Create an account.
Create an account or log in. Fill in the text boxes with your email address, username, and password. Then press the Sign Up button.
Tap Log In, enter your email address with password if you already have an account.
Step 3: Select a photo or video to use for your GIF
Now it’s your turn to get inventive: Simply tap any of the effects tiles at the bottom of the screen to Construct a meme of a stupid selfie or photo with effects, then swipe left/right to navigate between effects. Press and hold the Shutter option to start a movie, or tap once to snap a shot.
p Create. This is locatedht corner.[1]
Step 4: Add text to meme
Put your meme text here. It’s critical to add your content to the meme because that’s what makes it a meme! To access the text tool, tap the Aa icon and type some text for the meme. Tap Done when you’re finished.
Resize and move your text. After you’ve tapped “Done” and are happy with your text, you can tap, hold, and drag it about your GIF. To alter the size, pinch two fingers together.
Step 5: Save and share
When you complete, tap the purple arrow. Tap this button in the bottom right corner once you’re happy with your meme GIF.
Select the Share GIF from the drop-down menu. If you wish to save the GIF to your camera roll, tap Save GIF.
Part 3 Meme Generators to Create Your Memes
Here are 12 meme generators that you can try out
01IMGFlip (Web)
Features:
• It has many meme templates
• You can easily build memes with your photographs.
• You can make changes to your memes
• It includes over 1000 meme templates.
• Allows you to find the meme template you want quickly.
Pros
• Many templates
• Fonts that you can customize.
• Memes on video
Cons
• Adds a watermark to the image
To make a meme with IMGFlip, follow these steps:
Step 1: Begin by making something.
Go to the website and click the “Create” button to get started. From the menu, select “Make a meme.”
Step 2: Pick a design template
To select the proper template for your meme, use the Search box. Alternatively, you can add your image to the app by clicking “Upload new template.”
Step 3: Insert text
Fill in the blanks with the meme text.
Next, click the options toggle to change the text next to each field. Save the image.
02DrMemes (Web)
Features
• You can easily produce memes for free.
• Create memes without a watermark.
• Change fonts easily
• Add emojis and stickers easily to memes.
• You can turn your photos into a GIF meme.
Pros
• User-friendly interface
• Personalization of fonts
• There is no watermark.
Cons
• A smaller number of templates
Follow these simple steps to make a meme using this website:
Step 1: Select a template
Open drmemes.com and select “Choose meme template” or “Upload picture,” depending on how you want to Construct a meme.
Step 2: Type in your text
Add Text from the side boxes. To change the font, use the settings toggle.
03ILoveIMG (Web)
Features
• Provides a variety of templates
• Allows you to alter the size and style of the font
• It generates memes that are free of watermarks.
• You may also choose whether you want the text to be forced into the image.
Pros
• An extensive library of free templates
• There is no watermark.
• Simple to use
• Can compress, resize, crop, and perform other image-editing activities.
Cons
• You can’t change the font.
Follow these steps to make memes using ILoveIMG:
Step 1: Go to the website.
In a browser, go to the website.
Step 2: Pick a design template
“Select meme template” or “Upload image” are the options.
Step 3: Type in your text
Fill in the blanks with your text.
04Meme Generator (Android/iOS)
Features:
● Over 500 high-quality memes and caption examples included.
● You can change size and color.
● There are a variety of fonts to pick from.
● Use the search or filter options to discover the memes you’re looking for quickly.
● There are no watermarks.
Pros
• Many templates
• Crop, rotate and flip images
• Personalize it with a custom image, font style, and sticker.
image
• There is no watermark.
Cons
• Lots of ads
Follow these simple steps to create a meme using the Meme Generator
Step 1: Add Image
Tap “Custom meme Gallery” to add an image from the gallery or select a meme template in the app.
Step 2: Crop Meme
Using the choices at the top of the app, you can crop the meme or rotate/flip the images.
Step 3: Customize font and Save
Change the font style, color, and alignment by tapping on it. You can also decorate it with a sticker.
When done, tap on “Save” to download the meme or hit “Share” to send it to social media apps.
05Meme Creator (Android)
Features
● A large collection of stock pictures and memes
● Add your quotes to the close captions.
● You can add your watermark.
● There are some fantastic stickers available.
● Simple to use
Pros
● No watermark
● Meme categories
● Custom fonts
Cons
● Occasional ads
Here is a simple step guide:
Step 1: Add Image
The program begins with a gallery of meme template categories, including animals, celebrities, cartoons, and more.
To add your original image, tap on one of these templates or hit the “Gallery” icon at the top.
Step 2: Change font size
Fill in the “Top” and “Bottom” text areas with the meme content. Using the options icon next to the text, change the font style.
Step 3: Save and Share
Use the “Save” or “Share” button at the bottom to download or send memes.
06Video & GIF Memes (Android)
Features
● It enables you to make memes from movies, GIFs and photos.
● No watermarks
● Easy to use
● Compatible on device
● Several stickers for users to leverage on
Pros
● There is no watermark.
● Tenor GIF database access
● You can video cut.
Cons
● Too many ads
There are no image memes.
Here are a few steps to follow:
Step 1: Select file
To begin, open the app and select the source file type.
Step 2: Customize text
When asked, trim the video, and add customizable meme text.
Save the video or GIF joke after changing video characteristics such as frame rate, speed, and quality.
07GIF Maker – Meme GIF Creator (iOS)
Features:
● Make as many GIFs as you like from your videos.
● Make an unlimited number of GIFs from your photos.
● Make an infinite number of memes.
● Filters, Stickers, and Fonts of the highest quality.
● Easy to use
Pros
● There is no watermark.
● User-friendly interphase.
● There are some fantastic stickers available.
Cons
● As others, ads.
Follow these simple steps to make use of this amazing tool:
Step 1: Choose the desired video
After running the app, select “Video to GIF” from the menu and select your video.
If necessary, trim it.
Step 2: Add text
To add amusing meme text to your video, tap “Add text.”
Step 3: Download and Share
To download the video or share it directly with social networking apps, click the Share icon.
08Memeto – Meme Maker & Creator (iOS)
Features:
● Create memes with your picture templates, blank memes, and popular templates.
● Customize options available
● Several different meme text styles to choose from.
● 1000+ stickers.
● Choose your photo from your Photo Gallery to be used as background
Pros
● There is no watermark.
● Various types of memes
Cons
● It lacks a search function.
Step 1: Choose a template
Select a meme template in the app, select the meme, and then hit the “Text” option to add and style meme text.
Step 2: Save and Share
Tap the Share button when you finish to save it to your device.
09Meme Generator Suite (Windows)
Features:
● Thousands of memes are available online
● Make memes out of your photos.
● Make posters with the phrase “KEEP CALM” and Jo Baka memes.
● You can move text, resized, and colored.
● There’s also an Offline Collection with over 300 memes that’s always ready to go!
Pros
• Many memes
• Effective search
• Collection in the offline mode
• There is no watermark.
Cons
• Advertisements
Follow these simple are guide:
Step 1: Select template or photo
Start using a pre-loaded meme template from the app or upload your image by selecting “From gallery.”
Step 2: Download and Save
Change the text settings and click the Save icon to download the image.
You can also immediately submit the image to IMGur or social networking apps.
10Meme Generator
Features:
● Get over 500 high-quality memes and caption examples.
● Size and color are changeable.
● There are a variety of fonts to pick from.
● Search or filter options to discover the memes you’re looking for.
● There are no watermarks.
Pros
• Examples of memes
• There is no watermark.
Cons
• Cannot share straight to social networking apps
Step 1: Click on Meme
To begin editing a meme, click on it.
Step 2: Change font
Change the font color and style of the meme text on the meme editing screen.
1111. Deal With It - GIF Maker
Features :
● This online GIF creator is simple to use.
● No third-party software is required to use this GIF maker.
● This website will complete the GIF conversion promptly.
● This GIF generator website is beneficial to new users.
Pros
● The website’s design is simplistic, making this GIF banner maker too simple to manage and utilize.
● It also intensifies the GIF maker, significantly improving the overall effect of the GIF in question.
Cons
● Because the pace of GIF makers is too slow, users sometimes opt to download installable GIF makers.
● GIF makers cannot create animated GIFs, so it is impossible to utilize this tool.
How to Use this Online GIF Maker
Visit the GIF maker’s official homepage.
Step 1: Choose an image
Because it can also be helpful to create GIFs from photos, you may use the Load Image option to upload an image from your computer.
Step 2: Editing
After that, you may add a phrase and glasses to the loaded image.
12LunaPic
Features:
● This online animated GIF creator has a very user-friendly design.
● No other third-party programs are required to use this online animated GIF creator.
● This website can also be valuable to creating GIF banners.
● You may create animated GIFs from several photographs with this website.
Pros
● With the aid of this program, the user can experience the GIF maker mobile feature; hence it is highly recommended.
● Because the tool is so simple, this banner GIF maker gets the job done in style and according to the user’s specifications.
Cons
● Like the GIF icon maker, this application lacks critical features like speed and accuracy necessary for GIF creation.
● Because this program can’t edit GIFs, it doesn’t have any of the GIF edit maker’s features.
How to use LunaPic
Step 1: Upload Image
To get started, go to LunaPic’s official website. To submit photographs from your computer to this online animated GIF maker, click the Upload button.
Step 2: Enhance the image
With this online GIF creator, you can now alter the images.
Step 3: Save the animated GIF
To save the produced GIF, select GIF as the output and click the Save button at the bottom.
Creating your animated GIF from any video or photo is a fascinating and entertaining undertaking. A video scene can be brutal to manage to owe to its vast size, but GIF forms are ideal for profile posts and sharing with friends in the form of simple jokes.
If you want to generate a GIF online, though, Wondershare Filmora Video Editor ‘s online meme maker is the best option. It allows you to create a watermark-free picture, GIF, and video memes. It is entirely free to use and requires no registration. When creating a caption, you can edit the text size, color, and position to make a caption while you are editing. You can also add text inside or outside in GIF. Just with some clicks, your GIF will be complete. Try it now!
Wondershare Filmora - Best Video Editor for Mac/Windows
5,481,435 people have downloaded it.
Build unique custom animations without breaking a sweat.
Focus on creating epic stories and leave the details to Filmora’s auto features.
Start a creative adventure with drag & drop effects and endless possibilities.
Filmora simplifies advanced features to save you time and effort.
Filmora cuts out repetition so you can move on to your next creative breakthrough.
● Key Takeaways from This Episode →
● Now that you know about the 12 best GIF meme generators and how to use them to make a unique and customized GIF with the simple step guide, you can now try your hands on new things.
● However, Wondershare Filmora is your sure best GIF caption meme maker to help you achieve excellent results as a GIF meme creator. So go for it!
Ways to Get the Most up to Date Cartoon Character Design Tips
Ways to Make Sure You Get the Most up to Date Cartoon Character Design Tips
An easy yet powerful editor
Numerous effects to choose from
Detailed tutorials provided by the official channel
Making an overall excellent and unique character design cartoon art style is sometimes hard. The truth is that everyone has a favorite cartoon character, but the question is, how does this character come to life? While you are about to start copying other well-known cartoon or comic characters, you will eventually branch out and come with your own. In addition, there are several ways to come up with ideas for cartoon characters’ concept art to draw. Any of these ways can get you started on populating your world of cartoons.
More so, the process of tackling your character design is often full of hurdles. This process requires a lot of creative thinking to create one’s character from the beginning, although many well-known characters from films, advertising, and cartoons look straightforward. But need to exert a vast amount of skill and effort to make them effective.
In this article
01 [10 Tips for Brilliant Cartoon Character Design](#Part 1)
02 [How to Apply Cartoon Character Design to Filmora Video Editing?](#Part 2)
Part 1 Tips for Brilliant Cartoon Character Design
As a cartoon character designer, here are 10 tips you need to put in place to make a brilliant cartoon character design. They are;
● Do not lose the magic
Make sure you try not to polish all the charm from your characters. Many character designers usually begin their project with a sketch and agree that this is often where the essence of the character gets captured. Therefore, when you start working up a design, make sure you do not lose that magic.
The first thing is to decide what you are trying to communicate and then create loose sketches with flow, acting, and movement. As soon as you tighten up the drawing, some of the dynamics will automatically loosen, so it is crucial to have as much life in the early stages as possible. In addition, movement is all but impossible to add later. Thus, you need to ensure that it is in the initial sketch.
● Avoid reference material
Although inspiration needs to come from somewhere, the aim is to create something original, and you shouldn’t have the reference material right in front of you as you work.
Also, if you take a look at something and when you try and hazily remember it in your mind, that is when you can end up making something new, rather than making a pastiche of something.
● Make research on other characters
For guidance purposes, it can be much help when you try to deconstruct why certain character designs work and why some do not work. Also, there is no shortage of research material to be found, as illustrated characters are appearing everywhere like stickers on fruit, TV commercials, shop signs, cereal boxes, animations on mobile phones, etc. Make sure you study these character designs and think about what makes some successful and the particular thing you like about them.
● Also, take a look elsewhere
It is also a great idea to look beyond some character designs when hunting for inspiration because most times, when you begin a project, you might start with the feeling to evoke. The process usually starts with the designer taking a video of himself as a reference and capturing something of the character’s posture or idea’s movement.
● Try not to lose sight of the original idea
It is elementary to allow your favorite designs to influence you subconsciously. Sometimes when you look back at your initial artworks, it will bring back the feeling you had when you were creating them, and the project you are trying to develop will shift back on track.
● Exaggerate
When you exaggerate the defining features of your character design, it will help it appear larger than real life. Also, exaggerated features help viewers identify the characters’ essential qualities. Exaggeration is key in cartoon caricatures and also helps emphasize certain personality traits. In addition, if your character is strong, try not to give it normal-sized bulging arms, but soup them up so that they are five times as big as they should be. Note that the technique of exaggeration can also apply to characteristics.
● Decide the aim of your character design
When creating a character design, consider your audience as character designs mainly aim at young children, typically designed around bright colors and basic shapes. Also, commissioned character designs are no less creative but are usually more restrictive. Most clients usually have specific needs but want you to do your ‘thing.’ Usually, you need to break down the core features and personality. For example, if the eyes are essential, you will focus the whole design around the face, making this the key element that stands out.
● Make your character distinctive
Whether you are creating a monkey, monster, or robot, you can guarantee that there will be a hundred other similar creations out there. Therefore, your character design is required to be exciting and robust in a visual sense to captivate people’s attention.
● Create clear silhouettes
A silhouette is required to help you understand the character’s gesture which is another good way to differentiate your character and improve its pose. This lets you see how the character ‘reads’ and requires you to make the gesture clearer. It answers the question of; can things be simplified? Do you have a basic understanding of character, emotions, and how the line of action works? In addition, try not to overlap everything and keep the limbs separately.
● Consider line quality
Finally, curved and straight curved lines read by your eyes are at different speeds. The lines drawn are from which your character design is composed can go some way to describing it. Soft, thick, round, and even lines may suggest acute and approachable character, whereas sharp, uneven, scratchy lines may indicate an erratic and uneasy character.
Part 3 How to Apply Cartoon Character Design to Filmora Video Editing?
You can cartoon your character background design in your Video Editing turn a video into a cartoon depending on your device. If you are working on your mobile phone, then you can convert any number of your social media accounts that include film or photos to some degree. The detail or performance level will not be great most of the time.
But if you wish to do it professionally using your PC, then the best video to the cartoon software program for both Windows and Mac is Filmora. Filmora is the best software to convert video to a Cartoon background easily. It will enable you the requisite tools that will act as the right approach to create cartoon characters with appropriate locations and video.
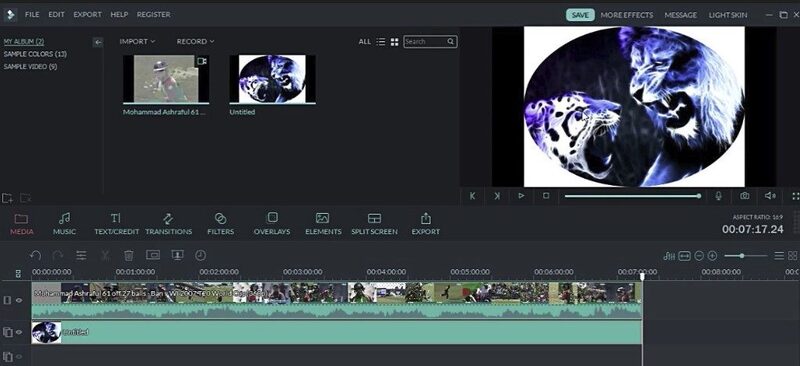
The Wondershare Filmora Video Editor professional video editing software allows you to turn your videos into cartoons easily. The process by which videos get converted into cartoon style on Filmora is straightforward.
Step 1: Import the videos into Filmora
From the official website of Filmora, you will get the link to download, install and launch. Then from the main interface, import your video to it.
Step 2: Add the Cartoon effect under Stylize
You can add different effects or use the Stylize animation effects to your cartoon character.
Step 3: Adjust the cartoon settings and do some basic color corrections to perfect the cartoon result.
Go through different settings to provide the exemplary cartoon character, its background, and full-fledged video edited with Filmora.
For Win 7 or later (64-bit)
For macOS 10.12 or later
● Ending Thoughts →
● This article explained all you require to get the most up-to-date cartoon character design tips. A section of the report gave a list of the information you need to put in place to achieve this. Another area recommended the best video to cartoon editing tools used by cartoon character designers to get the most out of their character design.
● Also, Filmora acts as the right tool to cover up all the necessary editing you might need to create your cartoon character with related background and artistic pieces of equipment.
Making an overall excellent and unique character design cartoon art style is sometimes hard. The truth is that everyone has a favorite cartoon character, but the question is, how does this character come to life? While you are about to start copying other well-known cartoon or comic characters, you will eventually branch out and come with your own. In addition, there are several ways to come up with ideas for cartoon characters’ concept art to draw. Any of these ways can get you started on populating your world of cartoons.
More so, the process of tackling your character design is often full of hurdles. This process requires a lot of creative thinking to create one’s character from the beginning, although many well-known characters from films, advertising, and cartoons look straightforward. But need to exert a vast amount of skill and effort to make them effective.
In this article
01 [10 Tips for Brilliant Cartoon Character Design](#Part 1)
02 [How to Apply Cartoon Character Design to Filmora Video Editing?](#Part 2)
Part 1 Tips for Brilliant Cartoon Character Design
As a cartoon character designer, here are 10 tips you need to put in place to make a brilliant cartoon character design. They are;
● Do not lose the magic
Make sure you try not to polish all the charm from your characters. Many character designers usually begin their project with a sketch and agree that this is often where the essence of the character gets captured. Therefore, when you start working up a design, make sure you do not lose that magic.
The first thing is to decide what you are trying to communicate and then create loose sketches with flow, acting, and movement. As soon as you tighten up the drawing, some of the dynamics will automatically loosen, so it is crucial to have as much life in the early stages as possible. In addition, movement is all but impossible to add later. Thus, you need to ensure that it is in the initial sketch.
● Avoid reference material
Although inspiration needs to come from somewhere, the aim is to create something original, and you shouldn’t have the reference material right in front of you as you work.
Also, if you take a look at something and when you try and hazily remember it in your mind, that is when you can end up making something new, rather than making a pastiche of something.
● Make research on other characters
For guidance purposes, it can be much help when you try to deconstruct why certain character designs work and why some do not work. Also, there is no shortage of research material to be found, as illustrated characters are appearing everywhere like stickers on fruit, TV commercials, shop signs, cereal boxes, animations on mobile phones, etc. Make sure you study these character designs and think about what makes some successful and the particular thing you like about them.
● Also, take a look elsewhere
It is also a great idea to look beyond some character designs when hunting for inspiration because most times, when you begin a project, you might start with the feeling to evoke. The process usually starts with the designer taking a video of himself as a reference and capturing something of the character’s posture or idea’s movement.
● Try not to lose sight of the original idea
It is elementary to allow your favorite designs to influence you subconsciously. Sometimes when you look back at your initial artworks, it will bring back the feeling you had when you were creating them, and the project you are trying to develop will shift back on track.
● Exaggerate
When you exaggerate the defining features of your character design, it will help it appear larger than real life. Also, exaggerated features help viewers identify the characters’ essential qualities. Exaggeration is key in cartoon caricatures and also helps emphasize certain personality traits. In addition, if your character is strong, try not to give it normal-sized bulging arms, but soup them up so that they are five times as big as they should be. Note that the technique of exaggeration can also apply to characteristics.
● Decide the aim of your character design
When creating a character design, consider your audience as character designs mainly aim at young children, typically designed around bright colors and basic shapes. Also, commissioned character designs are no less creative but are usually more restrictive. Most clients usually have specific needs but want you to do your ‘thing.’ Usually, you need to break down the core features and personality. For example, if the eyes are essential, you will focus the whole design around the face, making this the key element that stands out.
● Make your character distinctive
Whether you are creating a monkey, monster, or robot, you can guarantee that there will be a hundred other similar creations out there. Therefore, your character design is required to be exciting and robust in a visual sense to captivate people’s attention.
● Create clear silhouettes
A silhouette is required to help you understand the character’s gesture which is another good way to differentiate your character and improve its pose. This lets you see how the character ‘reads’ and requires you to make the gesture clearer. It answers the question of; can things be simplified? Do you have a basic understanding of character, emotions, and how the line of action works? In addition, try not to overlap everything and keep the limbs separately.
● Consider line quality
Finally, curved and straight curved lines read by your eyes are at different speeds. The lines drawn are from which your character design is composed can go some way to describing it. Soft, thick, round, and even lines may suggest acute and approachable character, whereas sharp, uneven, scratchy lines may indicate an erratic and uneasy character.
Part 3 How to Apply Cartoon Character Design to Filmora Video Editing?
You can cartoon your character background design in your Video Editing turn a video into a cartoon depending on your device. If you are working on your mobile phone, then you can convert any number of your social media accounts that include film or photos to some degree. The detail or performance level will not be great most of the time.
But if you wish to do it professionally using your PC, then the best video to the cartoon software program for both Windows and Mac is Filmora. Filmora is the best software to convert video to a Cartoon background easily. It will enable you the requisite tools that will act as the right approach to create cartoon characters with appropriate locations and video.
The Wondershare Filmora Video Editor professional video editing software allows you to turn your videos into cartoons easily. The process by which videos get converted into cartoon style on Filmora is straightforward.
Step 1: Import the videos into Filmora
From the official website of Filmora, you will get the link to download, install and launch. Then from the main interface, import your video to it.
Step 2: Add the Cartoon effect under Stylize
You can add different effects or use the Stylize animation effects to your cartoon character.
Step 3: Adjust the cartoon settings and do some basic color corrections to perfect the cartoon result.
Go through different settings to provide the exemplary cartoon character, its background, and full-fledged video edited with Filmora.
For Win 7 or later (64-bit)
For macOS 10.12 or later
● Ending Thoughts →
● This article explained all you require to get the most up-to-date cartoon character design tips. A section of the report gave a list of the information you need to put in place to achieve this. Another area recommended the best video to cartoon editing tools used by cartoon character designers to get the most out of their character design.
● Also, Filmora acts as the right tool to cover up all the necessary editing you might need to create your cartoon character with related background and artistic pieces of equipment.
How to Animate - Adobe Animate Tutorial for All
How to Animate - Adobe Animate Tutorial for All
An easy yet powerful editor
Numerous effects to choose from
Detailed tutorials provided by the official channel
Now, since the tool has too many elements to understand, it’s always a good strategy to start your journey with a dedicated Adobe Animate CC tutorial.
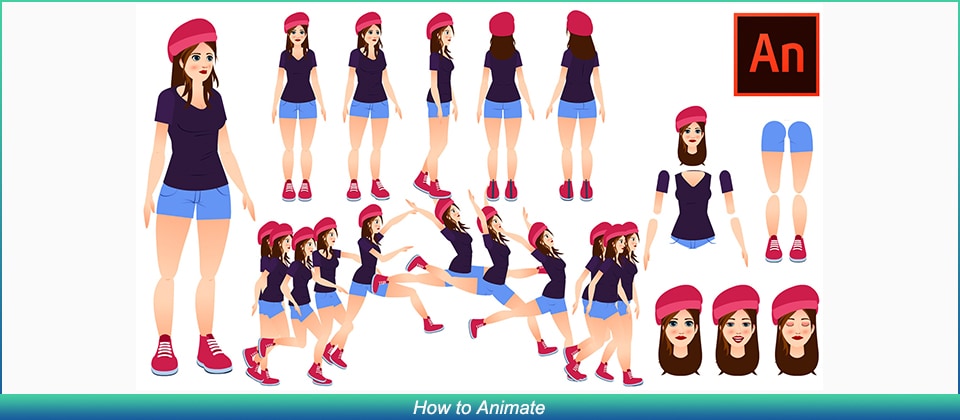
In today’s guide, we are going to introduce a few of these tutorials so that you can easily start creating animations in Adobe Animate CC, even if you have zero prior experience with the software.
In this article
01 [Adobe Animate CC tutorial](#Part 1)
02 [How Do You Animate in Adobe Animation?](#Part 2)
03 [Other Rare Tutorials for Self-learning to Learn How to Animate](#Part 3)
Part 1 Is Adobe Animate Good for Beginners?
When people start their careers as graphic designers, they always struggle to pick the right tool to accompany them during their journey. Since there are too many options to choose from, beginners always end up comparing a tool with other available options. They even weigh the pros and cons of each animation software individually to make the best decision. The same is the case with Adobe Animate. Many beginners want to know if Adobe Animate is the right animation software to get started as a professional graphic designer.
Since the Adobe community continues to grow rapidly, you’ll also be able to find a variety of Adobe Animate tutorials quite easily.
So, as far as beginner-friendliness is concerned, Adobe Animate is a complete winner that anyone can use to create stunning animations, designs, and templates right on their PCs.
Part 2 How Do You Animate in Adobe Animation?
1. Introduction to Adobe Animate
For complete beginners, there’s nothing better than a one-stop tutorial that provides a detailed insight into the basics of Adobe Animate and helps them get familiar with different elements of the software.
Well, this 2 hours 30 minutes long YouTube Adobe Animate tutorial by TipTut is what you need to start your journey with the software. The tutorial involves everything, starting from the simple setup to creating your first animation. You can either download this tutorial on your system or watch it online to understand the basic workflow of Adobe Animate.
Key Features:
● Learn how to set up a project in Adobe Animate.
● Adjusting the elements (such as frame rate) of your first animation.
● Completing your first animation using colors, gestures, and simple movement.
2. Creating HTML Banner Ads
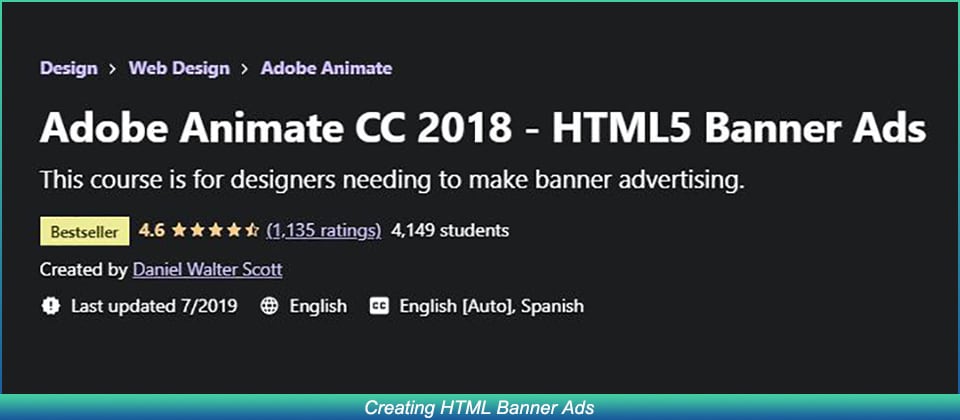
Apart from regular 2D animations, some designers also use Adobe Animate to create dedicated banner ads for their marketing campaigns using HTML 5. This will be a pretty useful Adobe Animate tutorial PDF for anyone who wants to join a marketing firm or plan exclusive marketing campaigns for his own products/services.
Key Features:
● Learn how to build HTML banner ads from scratch.
● Get familiar with the overall process of publishing a banner ad on platforms like Google AdWords.
● Understand how to keep the file size of a banner down to keep it optimized.
3. Animate CC Game Development
As we mentioned earlier, some people also use Adobe Animate to design games. If you want to follow the same career, this Adobe Animate CC tutorial is for you.
All the games developed in Adobe Animate are designed in HTML 5 and are usually web-based. By the end of this tutorial, you would have built a fully-functional game in Adobe Animate.
Key Features:
● Creating the game world.
● Understanding CreateJS Overview in Adobe Animate CC.
● Building in-game assets and configuring their unique features.
4. 2D Animation for Beginners
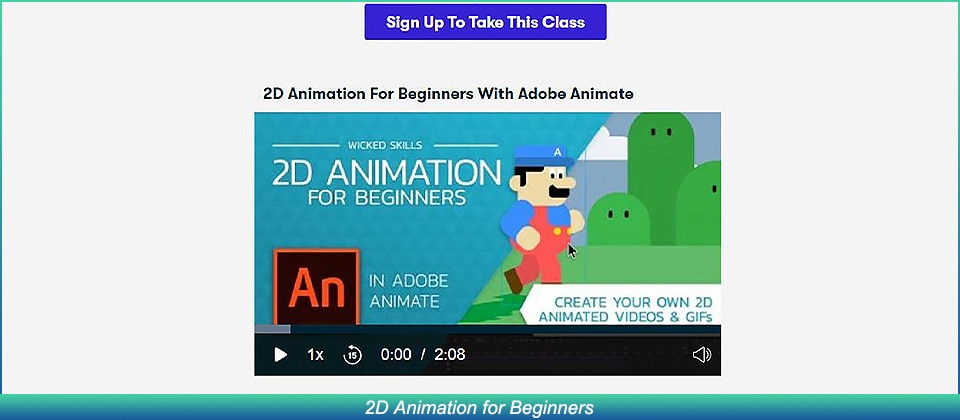
This is another useful Adobe Animate tutorial for all the beginners out there. Compiled by Walt Wonderwolk, the tutorial is separated into 12 parts in which he has explained different features of Adobe Animate in detail.
Key Features:
● Designing graphic vectors in Adobe Animate.
● Each feature is explained with a respective example.
● Learn how to add sounds to your animations to make them visually appealing.
5. Adobe Animate for Social Media
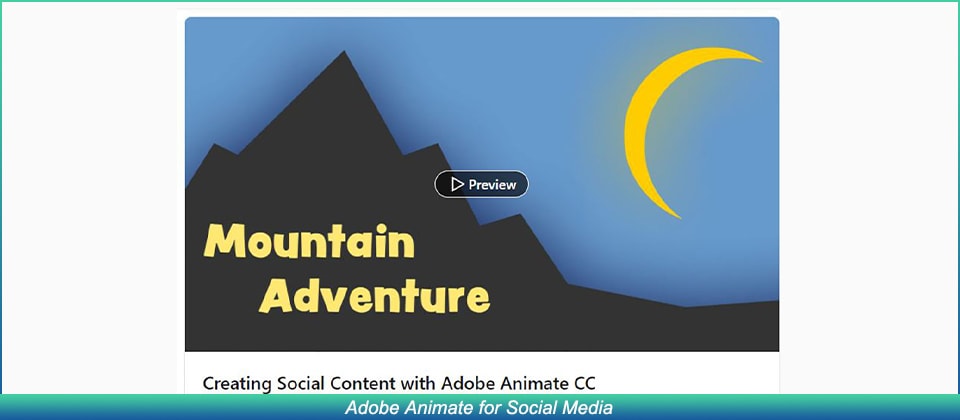
Being a feature-packed animation software, you can also use Adobe Animate to create content for your social media profiles. To do this, however, you must be familiar with all the necessary features of the tool. This 1.5 hours long tutorial will help you get familiar with features such as the tweening system that’ll help you turn regular social media posts into stunning animations.
Key Features:
● Designing simple assets and designs for social media.
● Exporting GIFs and Animated Videos.
● Customizing stills and motion graphics in Adobe Animate.
Key Takeaways from This Episode
● Adobe Animate boasts different applications, ranging from simple 2D animations to game designing
● Since Adobe Animation is an extensive software, it’ll always be a wise decision to get started with Adobe Animate tutorials.
● After you have compiled designs/animations in Adobe Animate, Wondershare Filmora Pro will help you enhance its overall quality.
Now, since the tool has too many elements to understand, it’s always a good strategy to start your journey with a dedicated Adobe Animate CC tutorial.
In today’s guide, we are going to introduce a few of these tutorials so that you can easily start creating animations in Adobe Animate CC, even if you have zero prior experience with the software.
In this article
01 [Adobe Animate CC tutorial](#Part 1)
02 [How Do You Animate in Adobe Animation?](#Part 2)
03 [Other Rare Tutorials for Self-learning to Learn How to Animate](#Part 3)
Part 1 Is Adobe Animate Good for Beginners?
When people start their careers as graphic designers, they always struggle to pick the right tool to accompany them during their journey. Since there are too many options to choose from, beginners always end up comparing a tool with other available options. They even weigh the pros and cons of each animation software individually to make the best decision. The same is the case with Adobe Animate. Many beginners want to know if Adobe Animate is the right animation software to get started as a professional graphic designer.
Since the Adobe community continues to grow rapidly, you’ll also be able to find a variety of Adobe Animate tutorials quite easily.
So, as far as beginner-friendliness is concerned, Adobe Animate is a complete winner that anyone can use to create stunning animations, designs, and templates right on their PCs.
Part 2 How Do You Animate in Adobe Animation?
1. Introduction to Adobe Animate
For complete beginners, there’s nothing better than a one-stop tutorial that provides a detailed insight into the basics of Adobe Animate and helps them get familiar with different elements of the software.
Well, this 2 hours 30 minutes long YouTube Adobe Animate tutorial by TipTut is what you need to start your journey with the software. The tutorial involves everything, starting from the simple setup to creating your first animation. You can either download this tutorial on your system or watch it online to understand the basic workflow of Adobe Animate.
Key Features:
● Learn how to set up a project in Adobe Animate.
● Adjusting the elements (such as frame rate) of your first animation.
● Completing your first animation using colors, gestures, and simple movement.
2. Creating HTML Banner Ads
Apart from regular 2D animations, some designers also use Adobe Animate to create dedicated banner ads for their marketing campaigns using HTML 5. This will be a pretty useful Adobe Animate tutorial PDF for anyone who wants to join a marketing firm or plan exclusive marketing campaigns for his own products/services.
Key Features:
● Learn how to build HTML banner ads from scratch.
● Get familiar with the overall process of publishing a banner ad on platforms like Google AdWords.
● Understand how to keep the file size of a banner down to keep it optimized.
3. Animate CC Game Development
As we mentioned earlier, some people also use Adobe Animate to design games. If you want to follow the same career, this Adobe Animate CC tutorial is for you.
All the games developed in Adobe Animate are designed in HTML 5 and are usually web-based. By the end of this tutorial, you would have built a fully-functional game in Adobe Animate.
Key Features:
● Creating the game world.
● Understanding CreateJS Overview in Adobe Animate CC.
● Building in-game assets and configuring their unique features.
4. 2D Animation for Beginners
This is another useful Adobe Animate tutorial for all the beginners out there. Compiled by Walt Wonderwolk, the tutorial is separated into 12 parts in which he has explained different features of Adobe Animate in detail.
Key Features:
● Designing graphic vectors in Adobe Animate.
● Each feature is explained with a respective example.
● Learn how to add sounds to your animations to make them visually appealing.
5. Adobe Animate for Social Media
Being a feature-packed animation software, you can also use Adobe Animate to create content for your social media profiles. To do this, however, you must be familiar with all the necessary features of the tool. This 1.5 hours long tutorial will help you get familiar with features such as the tweening system that’ll help you turn regular social media posts into stunning animations.
Key Features:
● Designing simple assets and designs for social media.
● Exporting GIFs and Animated Videos.
● Customizing stills and motion graphics in Adobe Animate.
Key Takeaways from This Episode
● Adobe Animate boasts different applications, ranging from simple 2D animations to game designing
● Since Adobe Animation is an extensive software, it’ll always be a wise decision to get started with Adobe Animate tutorials.
● After you have compiled designs/animations in Adobe Animate, Wondershare Filmora Pro will help you enhance its overall quality.
Also read:
- A Roster of 15 Top Disney Channel Cartoons
- New Samples of Cartoon Character Face
- New In 2024, 5 Websites with Animated Logos That Can Catch Your Eyes
- New 2024 Approved How to Find 3D Animation Studio Meeting All Your Inspiring Needs
- New The Only Guide to Make 2D Rigging Clear to You
- New 15 Best Stop Motion Animation Kits to Fuel Creativity (2024 Guide)
- Updated Is It That Easy to Make My Own Animated Character?
- Updated The Most Efficient Techniques to Make 3D Animation Character
- New 2024 Approved The Only Guide Youll Ever Need to Learn About GIF Video Downloader
- New In 2024, 4 Things You Should Know About Pinterest GIF
- Updated 15 Types of Cartoon Drawing Styles with Examples for 2024
- Whats the Best 10 Photo Animator Templates That Bring Your Images to Life for 2024
- Updated 4 Smart Solutions to Create or Find Good Morning/Night GIFs for 2024
- New In 2024, How to Make GIF Instagram | Quick Tips
- Updated 6 Types of Animation You May Like
- New 2024 Approved Beginner Tutorial on Making Unity 2D Animation
- New In 2024, Nurturing the Spirit Through the Top 10 Intellectual Anime Websites
- In 2024, 5 Websites with Animated Logos That Catch Your Eyes
- New How to Create Picsart Cartoon for 2024
- Best 10 Old Cartoons From Cartoon Network That You Miss for 2024
- New In 2024, How to Cartoonize Photo Photoshop in Easy Steps
- 2024 Approved Epic Formula to Animate Photos From These 10 Animate Pictures App
- Apps to Animate Still Pictures Which Could Make Your Pictures Become Internet Sensation for 2024
- In 2024, How to Make Your GIF on WhatsApp in Simple Ways
- 10 Trendy Free Logo Animation Templates
- New 2024 Approved Types of Cartoon Styles You May Use for The Next Marketing Project
- New Nurturing Mind, Heart, and Soul on the Top 5 Anime Streaming Sanctuaries for 2024
- New In 2024, Ideas That Will Help You Out in Learning How to Send WhatsApp Animated Gifs
- 15 Best Collage Makers to Create Aesthetic Collages for 2024
- Ways to Create an Animated Sticky Navbar for 2024
- New Top 10 Free Online Animated Logo Makers Everyone Should Know for 2024
- Updated How to Make Creative Animation Videos
- Updated In 2024, 8 Free GIF Animators to Make Your Own GIF
- 2024 Approved Fuel Creativity with 10 Awesome Collection of 2D Animation Examples
- Updated 2024 Approved Is Blender 2D Animation As Awesome As 3D?
- Updated In 2024, 10 Cartoon Photo Converters
- In 2024, Adobe Animate Text Effects Skills You Need to Know
- How to Create Your Own Avatar Free for 2024
- New 5 Best Adobe Animate Courses & Classes for 2024
- New How to Make an Animation With 7 Steps for 2024
- How to Make Photo 3D Cartoon Online for 2024
- Updated How to Make Well Done Animated GIF By Yourself?
- New 2024 Approved 5 Techniques You Never Heard of for Converting MP4 to GIF in Photoshop
- How to Animate - Adobe Animate Tutorial for All for 2024
- Updated How To Create Animated Clipart in PowerPoint for 2024
- Updated In 2024, Tips to Create Animated Social Media Posts in Canva
- In 2024, 10 2D/3D Animation Tips & Tricks for You
- New Looking for Love Animated GIFs? Here Are 5 Free Sources For You
- New 12 Aesthetic GIF Instagram for Marketers and Creatives
- Honor Play 8T Screen Unresponsive? Heres How to Fix It | Dr.fone
- New Guide How To Check iCloud Activation Lock Status From Your Apple iPhone 6
- In 2024, How to Change Apple iPhone 11 Pro Max Location on Skout | Dr.fone
- In 2024, The Ultimate Guide to Get the Rare Candy on Pokemon Go Fire Red On Apple iPhone 12 Pro | Dr.fone
- How To Repair iOS of iPhone XS? | Dr.fone
- Ultimate Guide from Xiaomi Redmi Note 13 Pro 5G FRP Bypass
- In 2024, Your Account Has Been Disabled in the App Store and iTunes From iPhone 6s?
- All Must-Knows to Use Fake GPS GO Location Spoofer On OnePlus Nord N30 5G | Dr.fone
- In 2024, Rootjunky APK To Bypass Google FRP Lock For Samsung Galaxy S23 FE
- Top 9 Oppo A1 5G Monitoring Apps for Parental Controls | Dr.fone
- 7 Ways to Lock Apps on Apple iPhone 6 Plus and iPad Securely
- In 2024, iSpoofer is not working On Tecno Pova 5? Fixed | Dr.fone
- How To Unlock iPhone XS Max Without Passcode? 4 Easy Methods
- In 2024, About Samsung Galaxy S23 Tactical Edition FRP Bypass
- How To Update or Downgrade Apple iPhone 6s Plus Without Data Loss? | Dr.fone
- Turn Off Screen Lock - 100
- Apply These Techniques to Improve How to Detect Fake GPS Location On Oppo A78 | Dr.fone
- Want to Uninstall Google Play Service from Infinix Zero 5G 2023 Turbo? Here is How | Dr.fone
- Everything You Need To Know About Unlocked Apple iPhone 14 Pro | Dr.fone
- Super Easy Ways To Deal with Sony Xperia 10 V Unresponsive Screen | Dr.fone
- How to Hide/Fake Snapchat Location on Your Samsung Galaxy A14 4G | Dr.fone
- How to Reset a Locked Nubia Red Magic 8S Pro+ Phone
- In 2024, What Pokémon Evolve with A Dawn Stone For Vivo Y27s? | Dr.fone
- How to Track Lava Yuva 2 Location by Number | Dr.fone
- In 2024, List of Pokémon Go Joysticks On Samsung Galaxy A54 5G | Dr.fone
- 7 Solutions to Fix Error Code 963 on Google Play Of Vivo X100 | Dr.fone
- How to Rescue Lost Videos from 90
- In 2024, 9 Best Free Android Monitoring Apps to Monitor Phone Remotely For your Oppo A59 5G | Dr.fone
- In 2024, 10 Free Location Spoofers to Fake GPS Location on your Asus ROG Phone 8 Pro | Dr.fone
- Title: Updated How To Learn Cartoon Sketch Drawing— Pencil Sketch for Beginners for 2024
- Author: Elon
- Created at : 2024-06-30 12:27:44
- Updated at : 2024-07-01 12:27:44
- Link: https://animation-videos.techidaily.com/updated-how-to-learn-cartoon-sketch-drawing-pencil-sketch-for-beginners-for-2024/
- License: This work is licensed under CC BY-NC-SA 4.0.
