
:max_bytes(150000):strip_icc():format(webp)/GettyImages-849896688-6d69f22bcf0a4ff092f444abe6e1c19f.jpg)
Updated How to Make an Animated Travel Map Video?
How to Make an Animated Travel Map Video?
How to Make an Animated Travel Map Video?

Benjamin Arango
Mar 27, 2024• Proven solutions
Animated travel map videos make it easy for the viewers to follow the routes from the source to destination locations right on the single screen. While the static maps would only allow the audience to see the markers from where the journey would start and is expected to end, the animated ones show the real-time movements and therefore look more interactive when viewed.
That said, here you will learn how to create an attractive and engaging animated travel map video using one of the easiest post-production applications, Wondershare Filmora, which is widely appreciated by amateurs and professionals throughout the globe. In another section, you will also learn about an alternative program that might be of some help in case you are more into online designing.
- Method 1: Make Animated Travel Map Videos with Location Video Maker - [Video Tutorial]
- Method 2: Make Interactive Animated Travel Map with Pictramap
- Method 3: Create Animated Travel Map Using Multidev
Method 1 Make Animated Travel Map Videos with Location Video Maker
The entire process of creating an animated travel map video in Wondershare’s Filmora is categorized into two parts, wherein the first part you will collect all the ingredients that are needed to get started, and in the second part you will actually make an animated map using the tools and features present in Filmora.
Watch a video tutorial to see how to make an animated map for a video:
For Win 7 or later (64-bit)
 Secure Download
For macOS 10.14 or later
Secure Download


Part 1: Prepare the Travel Map Materials
Following are the ingredients and the methods to collect them for animated travel map preparation:
Step 1: Get the Map
The first thing that you would need to prepare an animated map is an image of a realistic map. Thanks to Google and Microsoft, these things are now pretty easy to arrange. The process is given below:
- Launch your preferred web browser
- Type google.com in the address bar or the search box and hit Enter
- Scroll to zoom out so you can see the entire world map on one screen

- Type Snipping Tool in the Cortana search box present on the left side of the Taskbar
- Launch Snipping Tool, and use it to capture the screenshot of the map
Note: Snipping Tool is a built-in app in Windows 10 and is available for free. If you are using any other operating system, or have a different program to capture the screenshots, feel free to use it according to your convenience.
- Save the screenshot you captured as a JPG file on your PC
Step 2: Mark Out the Map Path
The next step in the process of preparing an animated travel map is to mark your route on it. To do so, you can use any of your preferred photo editing tools. However, to keep this illustration simple, Microsoft Paint is used here, and the method is given below:
- Right-click the screenshot you just captured
- Go to Open with on the context menu, and then click Paint from the submenu that appears
- Pick your preferred color from the pallet of the Paint interface. It is advisable to use an eye-catchy shade such as Red
- Use the Sphere shape tool to draw a circle over the source and destination locations on the map
- Use the Line tool to draw a line from the source point to the destination. Try giving the line a few turns to make it look realistic
- Go to File > Save As, and save the marked image with a different name
Note: Once this is done, you should have two image files of the map, i.e., one without the marks and one with it
Step 3: Download Some Travel Icons
Another important ingredient in an effective travel map animation is touring icons such as location marker image, a traveling medium symbol like a helicopter, airplane, car/bike (for short distances), etc. A couple of websites that offer royalty-free stock photos at absolutely no cost are listed below:
Note: Although the websites given above allow you to download and use their stock images and icons for free, you may need to give credits to the designers/creators of the symbols while using their objects. Therefore, you are suggested to check the Terms & Conditions and norms of usage of the elements before downloading and adding them to your projects.
Part 2: Make Animated Travel Map Videos with Filmora
After you have gathered all the necessary ingredients that are required to create a travel map animation, it is now time to get to work. The following instructions would guide you through the step-by-step process of preparing a decent and realistic animated travel map in Wondershare Filmora :
For Win 7 or later (64-bit)
Secure Download
For macOS 10.14 or later
Secure Download
Step 1: Import Ingredients to Filmora and Add Them to the Timeline
Launch the video editor on your computer, click anywhere inside the Media window at the upper-left area, and import all the images and icons that you collected earlier to program. Next, drag both the images of the map, i.e., with and without the marks to the Timeline, and ensure that they are of the same duration and are placed on the same track.

Note: Be sure to put the map without the marks first, and then the one with the marks. Also note that the images have the playback duration of 5 seconds in the Timeline by default, and this tenure can be reduced or increased by dragging the side handle of the media to the left or right respectively.
Step 2: Add Transition for Illusion of Route Appearance
Go to Transition from the standard toolbar at the top, locate the Erase Slide transition effect from the available presets, and place it in between the two image files that you earlier added to the Timeline. Next, click and drag either of the side handles of the transition to the end of the media clip. Notice how the other side of the effect is expanded in equal proportion.

Step 3: Preview and Export
Press the Spacebar on the keyboard to preview the video and see if the route appears as if it is being drawn on the map. Once the animation looks acceptable, click EXPORT from the top-center, go to the Local tab on the Export window, select MP4 from the formats list in the left, and click EXPORT from the bottom-right corner to export the current animation to MP4.
Step 4: Customize the Travel Map Media
Either start a new project and import the video of the map you exported in the previous step to the app and then to the Timeline, or remove the existing media from the Timeline in the same project, and add the exported video to it for convenience.

For Win 7 or later (64-bit)
Secure Download
For macOS 10.14 or later
Secure Download
Next, position the Skimmer (Playhead) a couple of frames before the one the route line appears and starts stretching from, and click the Split icon from the editing toolbar above the Timeline itself. Repeat this process for the other side of the media, i.e., position the Skimmer a couple of frames after the route line reaches the destination location, and click the Split icon again. Then remove the separated segments from both the sides by selecting them and pressing Delete on the keyboard, leaving only the portion where the animation is visible.

Optionally, right-click the media that is left behind in the Timeline, and go to Speed and Duration from the context menu. On the Custom Speed box, drag the Speed slider to the left to decrease the playback speed resulting in the increased duration of the media. Alternatively, you can manually enter a value in the Speed box to get precise tenure. Click OK when you are done.

Step 5: Add Animations to Travel Map
Right-click the media in the Timeline, and go to Add Animation from the context menu. Make sure that the Skimmer is on the first frame, and add several keyframes as explained below:
- Click Add to add the first keyframe

- Move a couple of frames further, and click Add one more time. Now, while you are on this second keyframe, use the Scale slider to zoom in to the map so the source location remains within focus.

- Next, move the Playhead further and add another keyframe a couple of frames before the route line hits the edge of the window.
- After this, move the Playhead again and position it where the route line reaches its destination location. Add another keyframe here as well, and move the map in the Preview window so the focus is now on the destination.
- Move the Playhead a few frames further, add another keyframe, and use the Scale slider to zoom a bit more into the map to make the entire animation look realistic. Click OK to save the changes.
Step 6: Add Icons and Titles, and Export the Project
Drag the image of the traveling medium to the Timeline, and place it on the frame the route line starts from. Make sure to place the image on the track above the map, and stretch it to the end so it remains visible throughout the animation. Next, use the method explained above to add keyframes to move the medium along with the route line from the source to the destination. Optionally, add the image of the location marker at the destination point, go to Transition, and add your preferred transition effect, preferably Dissolve, to the marker track in the Timeline so it looks as if it has appeared as the medium arrived the destination.
For Win 7 or later (64-bit)
Secure Download
For macOS 10.14 or later
Secure Download
Get back to the first frame in the Timeline, go to Titles on the standard toolbar, and add a title preset somewhere near the source location. Resize the text, change the format as needed, and add your preferred caption to it such as the start time, name, etc. Reduce the duration of the track so the title appears for a few frames, preferably before the map animation starts. Click OK when done. Repeat this process for the destination point as well.
Once everything is complete, click the Play button in the Preview window to review your work. If the video looks acceptable, click EXPORT from the top-center of the interface, and use the method explained earlier to export the animated travel map in your preferred format.
![]()
Method 2 How to Make Interactive Animated Travel Map with Pictramap
If you don’t want to install a dedicated animation software on your computer due to limited hardware resources or some other reason, there is an online solution called Pictramap to create a travel map animation using a web browser. The web app offers a lucrative interface that could be easily understood and worked with to produce an animated map for free.
The process to create an animated travel map with Pictramap is given below:
Step 1: Create a Project
Launch your favorite web browser, go to https://www.pictramap.com/ , click Create yours now, it’s free, and sign up to Pictramap using your preferred method. When you are on the Dashboard, enter a name in the field available under the My Projects section, and click Create to create a new project (the animated map).

Step 2: Define the Locations and Method of Commute
On the map, right-click the location you want to start your journey from, enter the name of the location or any other significant title, and click Add. Click the location marker, click the Travel Mode icon, and select your preferred mode of traveling. Repeat this process to mark the destination location as well.

Step 3: Preview the Animation
Click the View Animation button from the upper-right corner of the page to see the animated travel map.

Downsides of Using Pictramap to Create Animated Travel Map Video
Although Pictramap allows you to create a travel map animation with ease and extremely quickly, at the time of this writing, it offers no way of downloading the animation to your PC, and therefore it couldn’t be used in your projects.
If you are using Wondershare Filmora, you can use its built-in screen recording feature to record the animation that Pictramap plays, and then save the captured footage as MP4 or any other format on your computer. This video can then be imported to your projects for further uses.
![]()
A cross-platform for making videos anywhere for all creators

Why your video editing isn’t good enough? How about some creative inspo?
- 100 Million+ Users
- 150+ Countries and Regions
- 4 Million+ Social Media Followers
- 5 Million+ Stock Media for Use
* Secure Download

Method 3 How To Make Animated Travel Map Using Multidev
Multi.dev is still a new web-based application to build awesome animated maps, but it’s good! The application helps you create presentations about all your recent and previous trips. And the interface is also hassle-free.
So, follow this step-by-step guide to making animated maps with Multi.dev.
Step 1: Open Multi.dev
Visit Multi.dev from your internet browser.

Once the tool gets open, you will see a demo video. This example clip will have animated maps of different locations. So it is up to you whether to use the same example and edit the places you have been to or are planning to visit. Or, simply create a new animated map from scratch.
Step 2: Choose Your First Location
Take your mouse cursor on the left side of the application and type the first location in the search bar. As soon as you do it, you will see that the “travel arrow” will automatically begin from there. Likewise, type and select the next location through the search bar.
Once you type the location, you will see 8 travel modes, including airplane, bus, and train. You can select the same mode for all sites or a different mode for another place. Totally up to you!

Step 3: Select Map Themes
All your chosen places will be highlighted in the software’s minimalistic map.

Step 4: Download Map on Your Computer
If you’re happy with the animated map, click the “Create Video” button to save the animated map on your computer in a few minutes.


Contrarily, you can also share the animation by choosing the “Share Animation” option.
Conclusion
An animated travel map plays an important role to add a realistic touring effect to your motion picture projects. While you can use a web app like Pictramap to create such an animation online easily and for free, the limitations it comes along with might keep you from choosing this method.
Instead, you may want to get more inclined toward a dedicated post-production software like Wondershare Filmora that gives you full control over the process, and the freedom to choose your preferred format to export the animation to for independent usage.
For Win 7 or later (64-bit)
Secure Download
For macOS 10.14 or later
Secure Download
Benjamin Arango
Benjamin Arango is a writer and a lover of all things video.
Follow @Benjamin Arango
Benjamin Arango
Mar 27, 2024• Proven solutions
Animated travel map videos make it easy for the viewers to follow the routes from the source to destination locations right on the single screen. While the static maps would only allow the audience to see the markers from where the journey would start and is expected to end, the animated ones show the real-time movements and therefore look more interactive when viewed.
That said, here you will learn how to create an attractive and engaging animated travel map video using one of the easiest post-production applications, Wondershare Filmora, which is widely appreciated by amateurs and professionals throughout the globe. In another section, you will also learn about an alternative program that might be of some help in case you are more into online designing.
- Method 1: Make Animated Travel Map Videos with Location Video Maker - [Video Tutorial]
- Method 2: Make Interactive Animated Travel Map with Pictramap
- Method 3: Create Animated Travel Map Using Multidev
Method 1 Make Animated Travel Map Videos with Location Video Maker
The entire process of creating an animated travel map video in Wondershare’s Filmora is categorized into two parts, wherein the first part you will collect all the ingredients that are needed to get started, and in the second part you will actually make an animated map using the tools and features present in Filmora.
Watch a video tutorial to see how to make an animated map for a video:
For Win 7 or later (64-bit)
Secure Download
For macOS 10.14 or later
Secure Download
Part 1: Prepare the Travel Map Materials
Following are the ingredients and the methods to collect them for animated travel map preparation:
Step 1: Get the Map
The first thing that you would need to prepare an animated map is an image of a realistic map. Thanks to Google and Microsoft, these things are now pretty easy to arrange. The process is given below:
- Launch your preferred web browser
- Type google.com in the address bar or the search box and hit Enter
- Scroll to zoom out so you can see the entire world map on one screen
- Type Snipping Tool in the Cortana search box present on the left side of the Taskbar
- Launch Snipping Tool, and use it to capture the screenshot of the map
Note: Snipping Tool is a built-in app in Windows 10 and is available for free. If you are using any other operating system, or have a different program to capture the screenshots, feel free to use it according to your convenience.
- Save the screenshot you captured as a JPG file on your PC
Step 2: Mark Out the Map Path
The next step in the process of preparing an animated travel map is to mark your route on it. To do so, you can use any of your preferred photo editing tools. However, to keep this illustration simple, Microsoft Paint is used here, and the method is given below:
- Right-click the screenshot you just captured
- Go to Open with on the context menu, and then click Paint from the submenu that appears
- Pick your preferred color from the pallet of the Paint interface. It is advisable to use an eye-catchy shade such as Red
- Use the Sphere shape tool to draw a circle over the source and destination locations on the map
- Use the Line tool to draw a line from the source point to the destination. Try giving the line a few turns to make it look realistic
- Go to File > Save As, and save the marked image with a different name
Note: Once this is done, you should have two image files of the map, i.e., one without the marks and one with it
Step 3: Download Some Travel Icons
Another important ingredient in an effective travel map animation is touring icons such as location marker image, a traveling medium symbol like a helicopter, airplane, car/bike (for short distances), etc. A couple of websites that offer royalty-free stock photos at absolutely no cost are listed below:
Note: Although the websites given above allow you to download and use their stock images and icons for free, you may need to give credits to the designers/creators of the symbols while using their objects. Therefore, you are suggested to check the Terms & Conditions and norms of usage of the elements before downloading and adding them to your projects.
Part 2: Make Animated Travel Map Videos with Filmora
After you have gathered all the necessary ingredients that are required to create a travel map animation, it is now time to get to work. The following instructions would guide you through the step-by-step process of preparing a decent and realistic animated travel map in Wondershare Filmora :
For Win 7 or later (64-bit)
Secure Download
For macOS 10.14 or later
Secure Download
Step 1: Import Ingredients to Filmora and Add Them to the Timeline
Launch the video editor on your computer, click anywhere inside the Media window at the upper-left area, and import all the images and icons that you collected earlier to program. Next, drag both the images of the map, i.e., with and without the marks to the Timeline, and ensure that they are of the same duration and are placed on the same track.
Note: Be sure to put the map without the marks first, and then the one with the marks. Also note that the images have the playback duration of 5 seconds in the Timeline by default, and this tenure can be reduced or increased by dragging the side handle of the media to the left or right respectively.
Step 2: Add Transition for Illusion of Route Appearance
Go to Transition from the standard toolbar at the top, locate the Erase Slide transition effect from the available presets, and place it in between the two image files that you earlier added to the Timeline. Next, click and drag either of the side handles of the transition to the end of the media clip. Notice how the other side of the effect is expanded in equal proportion.
Step 3: Preview and Export
Press the Spacebar on the keyboard to preview the video and see if the route appears as if it is being drawn on the map. Once the animation looks acceptable, click EXPORT from the top-center, go to the Local tab on the Export window, select MP4 from the formats list in the left, and click EXPORT from the bottom-right corner to export the current animation to MP4.
Step 4: Customize the Travel Map Media
Either start a new project and import the video of the map you exported in the previous step to the app and then to the Timeline, or remove the existing media from the Timeline in the same project, and add the exported video to it for convenience.
For Win 7 or later (64-bit)
Secure Download
For macOS 10.14 or later
Secure Download
Next, position the Skimmer (Playhead) a couple of frames before the one the route line appears and starts stretching from, and click the Split icon from the editing toolbar above the Timeline itself. Repeat this process for the other side of the media, i.e., position the Skimmer a couple of frames after the route line reaches the destination location, and click the Split icon again. Then remove the separated segments from both the sides by selecting them and pressing Delete on the keyboard, leaving only the portion where the animation is visible.
Optionally, right-click the media that is left behind in the Timeline, and go to Speed and Duration from the context menu. On the Custom Speed box, drag the Speed slider to the left to decrease the playback speed resulting in the increased duration of the media. Alternatively, you can manually enter a value in the Speed box to get precise tenure. Click OK when you are done.
Step 5: Add Animations to Travel Map
Right-click the media in the Timeline, and go to Add Animation from the context menu. Make sure that the Skimmer is on the first frame, and add several keyframes as explained below:
- Click Add to add the first keyframe
- Move a couple of frames further, and click Add one more time. Now, while you are on this second keyframe, use the Scale slider to zoom in to the map so the source location remains within focus.
- Next, move the Playhead further and add another keyframe a couple of frames before the route line hits the edge of the window.
- After this, move the Playhead again and position it where the route line reaches its destination location. Add another keyframe here as well, and move the map in the Preview window so the focus is now on the destination.
- Move the Playhead a few frames further, add another keyframe, and use the Scale slider to zoom a bit more into the map to make the entire animation look realistic. Click OK to save the changes.
Step 6: Add Icons and Titles, and Export the Project
Drag the image of the traveling medium to the Timeline, and place it on the frame the route line starts from. Make sure to place the image on the track above the map, and stretch it to the end so it remains visible throughout the animation. Next, use the method explained above to add keyframes to move the medium along with the route line from the source to the destination. Optionally, add the image of the location marker at the destination point, go to Transition, and add your preferred transition effect, preferably Dissolve, to the marker track in the Timeline so it looks as if it has appeared as the medium arrived the destination.
For Win 7 or later (64-bit)
Secure Download
For macOS 10.14 or later
Secure Download
Get back to the first frame in the Timeline, go to Titles on the standard toolbar, and add a title preset somewhere near the source location. Resize the text, change the format as needed, and add your preferred caption to it such as the start time, name, etc. Reduce the duration of the track so the title appears for a few frames, preferably before the map animation starts. Click OK when done. Repeat this process for the destination point as well.
Once everything is complete, click the Play button in the Preview window to review your work. If the video looks acceptable, click EXPORT from the top-center of the interface, and use the method explained earlier to export the animated travel map in your preferred format.
![]()
Method 2 How to Make Interactive Animated Travel Map with Pictramap
If you don’t want to install a dedicated animation software on your computer due to limited hardware resources or some other reason, there is an online solution called Pictramap to create a travel map animation using a web browser. The web app offers a lucrative interface that could be easily understood and worked with to produce an animated map for free.
The process to create an animated travel map with Pictramap is given below:
Step 1: Create a Project
Launch your favorite web browser, go to https://www.pictramap.com/ , click Create yours now, it’s free, and sign up to Pictramap using your preferred method. When you are on the Dashboard, enter a name in the field available under the My Projects section, and click Create to create a new project (the animated map).
Step 2: Define the Locations and Method of Commute
On the map, right-click the location you want to start your journey from, enter the name of the location or any other significant title, and click Add. Click the location marker, click the Travel Mode icon, and select your preferred mode of traveling. Repeat this process to mark the destination location as well.
Step 3: Preview the Animation
Click the View Animation button from the upper-right corner of the page to see the animated travel map.
Downsides of Using Pictramap to Create Animated Travel Map Video
Although Pictramap allows you to create a travel map animation with ease and extremely quickly, at the time of this writing, it offers no way of downloading the animation to your PC, and therefore it couldn’t be used in your projects.
If you are using Wondershare Filmora, you can use its built-in screen recording feature to record the animation that Pictramap plays, and then save the captured footage as MP4 or any other format on your computer. This video can then be imported to your projects for further uses.
![]()
A cross-platform for making videos anywhere for all creators
Why your video editing isn’t good enough? How about some creative inspo?
- 100 Million+ Users
- 150+ Countries and Regions
- 4 Million+ Social Media Followers
- 5 Million+ Stock Media for Use
* Secure Download
Method 3 How To Make Animated Travel Map Using Multidev
Multi.dev is still a new web-based application to build awesome animated maps, but it’s good! The application helps you create presentations about all your recent and previous trips. And the interface is also hassle-free.
So, follow this step-by-step guide to making animated maps with Multi.dev.
Step 1: Open Multi.dev
Visit Multi.dev from your internet browser.
Once the tool gets open, you will see a demo video. This example clip will have animated maps of different locations. So it is up to you whether to use the same example and edit the places you have been to or are planning to visit. Or, simply create a new animated map from scratch.
Step 2: Choose Your First Location
Take your mouse cursor on the left side of the application and type the first location in the search bar. As soon as you do it, you will see that the “travel arrow” will automatically begin from there. Likewise, type and select the next location through the search bar.
Once you type the location, you will see 8 travel modes, including airplane, bus, and train. You can select the same mode for all sites or a different mode for another place. Totally up to you!
Step 3: Select Map Themes
All your chosen places will be highlighted in the software’s minimalistic map.
Step 4: Download Map on Your Computer
If you’re happy with the animated map, click the “Create Video” button to save the animated map on your computer in a few minutes.
Contrarily, you can also share the animation by choosing the “Share Animation” option.
Conclusion
An animated travel map plays an important role to add a realistic touring effect to your motion picture projects. While you can use a web app like Pictramap to create such an animation online easily and for free, the limitations it comes along with might keep you from choosing this method.
Instead, you may want to get more inclined toward a dedicated post-production software like Wondershare Filmora that gives you full control over the process, and the freedom to choose your preferred format to export the animation to for independent usage.
For Win 7 or later (64-bit)
Secure Download
For macOS 10.14 or later
Secure Download
Benjamin Arango
Benjamin Arango is a writer and a lover of all things video.
Follow @Benjamin Arango
Thousands Already Found 15 Best Sites to Watch Cartoons Online Free And So Can You
Thousands Already Found 15 Best Sites to Watch Cartoons Online Free And So Can You
An easy yet powerful editor
Numerous effects to choose from
Detailed tutorials provided by the official channel
Some of the greatest cartoons are available on televisions or streamed at particular locations or channels only. In this case, you can watch cartoons online.
In this article
01 [Pow! Bam! Ka-Boom! 15 Ways to Watch Cartoons Online](#Part 1)
02 [How to Make Cartoon Animation, Even if You Are New to Animation](#Part 2)
Part 1 Pow! Bam! Ka-Boom! 15 Ways to Watch Cartoons Online
01Boomerang
Popular Cartoon Resources: Scooby-Doo, Looney Tunes, and the Flintstones to Dorothy and the Wizard of Oz and Bunnicula.
Date of establishment: 1992
Recommended reasons: Boomerang allows you to try their free plan first. If you like it, then you can move to purchase their plan for $4.99 per month or $39.99 per year. It has all the classic cartoons stored in it. You can enjoy any classic cartoon at any time. You can also watch it on a television subscription.

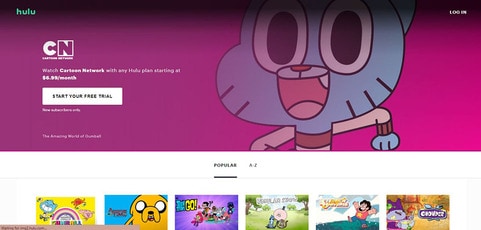
02Hulu
Popular Cartoon Resources: All types of cartoons and animations, including Jimmy Neutron, Rugrats, Doug, Arnolds, etc.
Average viewing capacity: 82M
Website traffic:
Date of establishment: October 29, 2007
Recommended reasons: Hulu offers unlimited instant streaming. It is an ad-free website. You can watch cartoons anytime from your choice of device. You can download them and view them later offline.
03YouTube
Popular Cartoon Resources: All cartoons from Disney, Cartoon Network, famous cartoons like Tom and Jerry, Pink Panther, Mickey Mouse, Talking Tom, and Friends are available here.
Average viewing capacity: 1B
Website traffic: 37% of all mobile traffic
Date of establishment: February 14, 2005
Recommended reasons: You can watch all cartoons free of cost. It supports videos at various resolutions and dimensions. YouTube also has a vast collection of animated films. You can share your favorite cartoons with friends directly from YouTube.

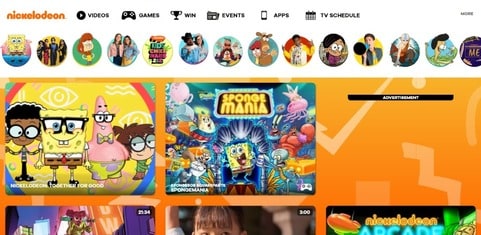
04Nick
Popular Cartoon Resources: Rocko’s Modern Life, All That, The Amanda Show, The Adventures of Pete & Pete, Double Dare, Kenan & Kel, etc.
Average viewing capacity: 1.231M
Website traffic:
Date of establishment: 1977
Recommended reasons: Nick is one of the most popular sites for watching cartoons online. It has a massive collection of Nickelodeon cartoons and animated shows. Not only that, Nick holds interesting contests for children with exciting prizes.
05Comedy Central
Popular Cartoon Resources: Ugly Americans, Lil’ Bush, Kid Notorious, Drawn Together, Futurama, etc.
Average viewing capacity: 1.3M
Website traffic:
Date of establishment: April 1, 1991
Recommended reasons: You can watch cartoons here for free. Signing up or downloading the app is not mandatory in Comedy Central. It has a vast collection of animated movies too.

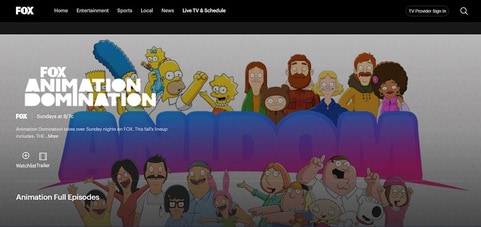
06Fox
Popular Cartoon Resources: The Simpsons, Family Guy, Bob’s Burgers, and more
Average viewing capacity: 2.5M
Website traffic: 68.37% traffic
Date of establishment: October 9, 1986
Recommended reasons: Fox is an entertainment site that offers you free cartoons in HD. You can watch it from your mobile phone or connect it with television. Fox has other amazing shows too.
07AT & T TV
Popular Cartoon Resources: Cartoons from famous channels like Disney, cartoon networks, and Nick.
Average viewing capacity: 15M
Website traffic: 48.37% traffic from this channel
Date of establishment: November 30, 2016
Recommended reasons: Using this website, you can view three simultaneous devices. It allows you to watch your favorite cartoons and animated movies on any compatible device. It has parental control option too.

08Vudu
Popular Cartoon Resources: Finn collection, Jake collection, My little pony, Etc.
Average viewing capacity:
Website traffic: 52.70%
Date of establishment: January 1, 2004
Recommended reasons: Vudu offers free titles that release or updated every week. It allows a cloud-digital locker so that you can store all cartoons in one place. You can arrange cartoons based on their release date, Genres, etc.

09Disney+
Popular Cartoon Resources: The little mermaid, Lilo, Stitch, Pinocchio, Toy story, etc.
Average viewing capacity: 126M
Website traffic:
Date of establishment: November 12, 2019
Recommended reasons: This is the best website to watch all Disney classics, non-classics, animated, non-animated cartoons in one place. You will get access to short exclusives with their premium version.

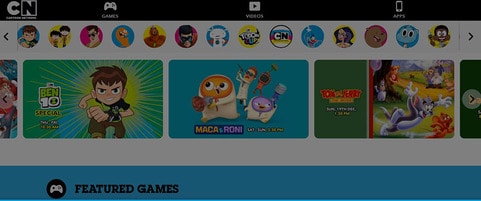
10Cartoon Network
Popular Cartoon Resources: Tom & Jerry, Amazing world of Gumball, Teen Titans Go, etc.
Average viewing capacity: 94M
Website traffic:
Date of establishment: October 1, 1992
Recommended reasons: This is an entirely free website for mobile app and website users. It has a huge library of classic and modern cartoons for children and adults.
11SideReel
Popular Cartoon Resources: Road Runner, Tweety Bird, Speedy Gonzales, Porky Pig, and more
Average viewing capacity:
Website traffic:
Date of establishment: April 2007
Recommended reasons: SideReel has a collection of more than 1,000 cartoons that children love to watch daily. It gives you the latest episode alert of famous cartoons. You can track your favorite shows too from this website.

12SuperCartoons
Popular Cartoon Resources: Classic Disney cartoons, Looney Tunes, Tom & Jerry, Road Runner, etc.
Average viewing capacity:
Website traffic:
Date of establishment: 1923
Recommended reasons: This website has 1000+ classic cartoons. You can watch them at 0 costs. It views cartoons by genres, characters, and channels too.
13Netflix
Popular Cartoon Resources: Big Mouth, BoJack Horseman, F Is For Family, etc.
Average viewing capacity: 192.25M
Website traffic: 15% of all internet traffic globally
Date of establishment: August 29, 1997
Recommended reasons: Netflix is one of the most-streamed websites. It has a huge collection of cartoons. All you need is their subscription, and you can enjoy thousands of cartoons, animated movies, etc.

14ToonJet
Popular Cartoon Resources: Betty Boop, Popeye, Looney Tunes, etc.
Average viewing capacity: 2.18M
Website traffic:
Date of establishment: 2005
Recommended reasons: Want to go down memory lane? ToonJet is the best place to watch your favorite old classics. You will get all types of cartons available here.

15Voot Kids
Popular Cartoon Resources: Motu Patlu, Ben10, Peppa Pig, Talking Tom, Pokemon, Paw Petrol, etc.
Average viewing capacity: 24M
Website traffic:
Date of establishment: March 26, 2016
Recommended reasons: Voot Kid is an animation cartoon streaming website. Children can listen to storybooks and learn a lot from this website. Here you can watch cartoons both online and offline.

16Crunchyroll
Popular Cartoon Resources: My hero academia, Naruto, Fate series, Toradora, etc.
Average viewing capacity:
Website traffic:
Date of establishment: 2006
Recommended reasons: Crunchyroll is the perfect place for your favorite cartoons and anime. You can stream them free. You can also put reviews on the anime series you are watching.

Part 2 How to Make Cartoon Animation, Even if You Are New to Animation
Do you wish to make cool and professional cartoon animations? Does the budget of making one make a step back? You need not worry about that anymore. With the advancement in technology, you can create cartoon animation easily, even if you are a newbie. Filmora Pro is right there for you. In Filmora Pro, you will get features to animate your video, adjust video clarity, sound, duration, add realistic effects, etc. And the best part is they offer you their free trial for a month. You can try the software for a month and then decide whether to purchase it or not. Here, we will discuss its key features that will help you quickly make a professional cartoon animation.
Animation
● Motion Tracking: Input graphics or texts at moving points of your video
● Animate: Customize your animation with preset motions or keyframes
● Pan and zoom: Create a realistic camera movement
● Ease in and Ease out feature: Create fluid motions by changing speed and durations.
Video editing
● Advanced editing: Filmora Pro has advanced editing features to ensure your work has a professional finish.
● Unlimited tracks: Add any track of your choice from the endless options.
● Automatic stabilization: It can fix your video.
● Preset Transition: The preset transition feature is built to give the video a realistic touch.
● Built-in screen recorder: Helps you in live-recording of games.
Sound editing
● Automatic Audio sync: You can replace the original audio with a different higher-quality audio file.
● Audio noise reduction: Eliminate the background noise and narrate your story with clarity.
● Audio compressor: Adjust the high and low in your audio and normalize the volume.
● Audio Transitions: Overlap audio or out in crossfades to create a smooth change in between clips.
Key Takeaways from This Episode
● With modern technology advancing, it is easy to stream cartoons online.
● Some multiple websites and apps offer both free and paid cartoon streaming.
● The websites are user-friendly and compatible with all devices.
Some of the greatest cartoons are available on televisions or streamed at particular locations or channels only. In this case, you can watch cartoons online.
In this article
01 [Pow! Bam! Ka-Boom! 15 Ways to Watch Cartoons Online](#Part 1)
02 [How to Make Cartoon Animation, Even if You Are New to Animation](#Part 2)
Part 1 Pow! Bam! Ka-Boom! 15 Ways to Watch Cartoons Online
01Boomerang
Popular Cartoon Resources: Scooby-Doo, Looney Tunes, and the Flintstones to Dorothy and the Wizard of Oz and Bunnicula.
Date of establishment: 1992
Recommended reasons: Boomerang allows you to try their free plan first. If you like it, then you can move to purchase their plan for $4.99 per month or $39.99 per year. It has all the classic cartoons stored in it. You can enjoy any classic cartoon at any time. You can also watch it on a television subscription.
02Hulu
Popular Cartoon Resources: All types of cartoons and animations, including Jimmy Neutron, Rugrats, Doug, Arnolds, etc.
Average viewing capacity: 82M
Website traffic:
Date of establishment: October 29, 2007
Recommended reasons: Hulu offers unlimited instant streaming. It is an ad-free website. You can watch cartoons anytime from your choice of device. You can download them and view them later offline.
03YouTube
Popular Cartoon Resources: All cartoons from Disney, Cartoon Network, famous cartoons like Tom and Jerry, Pink Panther, Mickey Mouse, Talking Tom, and Friends are available here.
Average viewing capacity: 1B
Website traffic: 37% of all mobile traffic
Date of establishment: February 14, 2005
Recommended reasons: You can watch all cartoons free of cost. It supports videos at various resolutions and dimensions. YouTube also has a vast collection of animated films. You can share your favorite cartoons with friends directly from YouTube.
04Nick
Popular Cartoon Resources: Rocko’s Modern Life, All That, The Amanda Show, The Adventures of Pete & Pete, Double Dare, Kenan & Kel, etc.
Average viewing capacity: 1.231M
Website traffic:
Date of establishment: 1977
Recommended reasons: Nick is one of the most popular sites for watching cartoons online. It has a massive collection of Nickelodeon cartoons and animated shows. Not only that, Nick holds interesting contests for children with exciting prizes.
05Comedy Central
Popular Cartoon Resources: Ugly Americans, Lil’ Bush, Kid Notorious, Drawn Together, Futurama, etc.
Average viewing capacity: 1.3M
Website traffic:
Date of establishment: April 1, 1991
Recommended reasons: You can watch cartoons here for free. Signing up or downloading the app is not mandatory in Comedy Central. It has a vast collection of animated movies too.
06Fox
Popular Cartoon Resources: The Simpsons, Family Guy, Bob’s Burgers, and more
Average viewing capacity: 2.5M
Website traffic: 68.37% traffic
Date of establishment: October 9, 1986
Recommended reasons: Fox is an entertainment site that offers you free cartoons in HD. You can watch it from your mobile phone or connect it with television. Fox has other amazing shows too.
07AT & T TV
Popular Cartoon Resources: Cartoons from famous channels like Disney, cartoon networks, and Nick.
Average viewing capacity: 15M
Website traffic: 48.37% traffic from this channel
Date of establishment: November 30, 2016
Recommended reasons: Using this website, you can view three simultaneous devices. It allows you to watch your favorite cartoons and animated movies on any compatible device. It has parental control option too.
08Vudu
Popular Cartoon Resources: Finn collection, Jake collection, My little pony, Etc.
Average viewing capacity:
Website traffic: 52.70%
Date of establishment: January 1, 2004
Recommended reasons: Vudu offers free titles that release or updated every week. It allows a cloud-digital locker so that you can store all cartoons in one place. You can arrange cartoons based on their release date, Genres, etc.
09Disney+
Popular Cartoon Resources: The little mermaid, Lilo, Stitch, Pinocchio, Toy story, etc.
Average viewing capacity: 126M
Website traffic:
Date of establishment: November 12, 2019
Recommended reasons: This is the best website to watch all Disney classics, non-classics, animated, non-animated cartoons in one place. You will get access to short exclusives with their premium version.
10Cartoon Network
Popular Cartoon Resources: Tom & Jerry, Amazing world of Gumball, Teen Titans Go, etc.
Average viewing capacity: 94M
Website traffic:
Date of establishment: October 1, 1992
Recommended reasons: This is an entirely free website for mobile app and website users. It has a huge library of classic and modern cartoons for children and adults.
11SideReel
Popular Cartoon Resources: Road Runner, Tweety Bird, Speedy Gonzales, Porky Pig, and more
Average viewing capacity:
Website traffic:
Date of establishment: April 2007
Recommended reasons: SideReel has a collection of more than 1,000 cartoons that children love to watch daily. It gives you the latest episode alert of famous cartoons. You can track your favorite shows too from this website.
12SuperCartoons
Popular Cartoon Resources: Classic Disney cartoons, Looney Tunes, Tom & Jerry, Road Runner, etc.
Average viewing capacity:
Website traffic:
Date of establishment: 1923
Recommended reasons: This website has 1000+ classic cartoons. You can watch them at 0 costs. It views cartoons by genres, characters, and channels too.
13Netflix
Popular Cartoon Resources: Big Mouth, BoJack Horseman, F Is For Family, etc.
Average viewing capacity: 192.25M
Website traffic: 15% of all internet traffic globally
Date of establishment: August 29, 1997
Recommended reasons: Netflix is one of the most-streamed websites. It has a huge collection of cartoons. All you need is their subscription, and you can enjoy thousands of cartoons, animated movies, etc.
14ToonJet
Popular Cartoon Resources: Betty Boop, Popeye, Looney Tunes, etc.
Average viewing capacity: 2.18M
Website traffic:
Date of establishment: 2005
Recommended reasons: Want to go down memory lane? ToonJet is the best place to watch your favorite old classics. You will get all types of cartons available here.
15Voot Kids
Popular Cartoon Resources: Motu Patlu, Ben10, Peppa Pig, Talking Tom, Pokemon, Paw Petrol, etc.
Average viewing capacity: 24M
Website traffic:
Date of establishment: March 26, 2016
Recommended reasons: Voot Kid is an animation cartoon streaming website. Children can listen to storybooks and learn a lot from this website. Here you can watch cartoons both online and offline.
16Crunchyroll
Popular Cartoon Resources: My hero academia, Naruto, Fate series, Toradora, etc.
Average viewing capacity:
Website traffic:
Date of establishment: 2006
Recommended reasons: Crunchyroll is the perfect place for your favorite cartoons and anime. You can stream them free. You can also put reviews on the anime series you are watching.
Part 2 How to Make Cartoon Animation, Even if You Are New to Animation
Do you wish to make cool and professional cartoon animations? Does the budget of making one make a step back? You need not worry about that anymore. With the advancement in technology, you can create cartoon animation easily, even if you are a newbie. Filmora Pro is right there for you. In Filmora Pro, you will get features to animate your video, adjust video clarity, sound, duration, add realistic effects, etc. And the best part is they offer you their free trial for a month. You can try the software for a month and then decide whether to purchase it or not. Here, we will discuss its key features that will help you quickly make a professional cartoon animation.
Animation
● Motion Tracking: Input graphics or texts at moving points of your video
● Animate: Customize your animation with preset motions or keyframes
● Pan and zoom: Create a realistic camera movement
● Ease in and Ease out feature: Create fluid motions by changing speed and durations.
Video editing
● Advanced editing: Filmora Pro has advanced editing features to ensure your work has a professional finish.
● Unlimited tracks: Add any track of your choice from the endless options.
● Automatic stabilization: It can fix your video.
● Preset Transition: The preset transition feature is built to give the video a realistic touch.
● Built-in screen recorder: Helps you in live-recording of games.
Sound editing
● Automatic Audio sync: You can replace the original audio with a different higher-quality audio file.
● Audio noise reduction: Eliminate the background noise and narrate your story with clarity.
● Audio compressor: Adjust the high and low in your audio and normalize the volume.
● Audio Transitions: Overlap audio or out in crossfades to create a smooth change in between clips.
Key Takeaways from This Episode
● With modern technology advancing, it is easy to stream cartoons online.
● Some multiple websites and apps offer both free and paid cartoon streaming.
● The websites are user-friendly and compatible with all devices.
Adobe Animate Text Effects Skills That You Need to Know
Adobe Animate Text Effects Skills That You Need to Know
An easy yet powerful editor
Numerous effects to choose from
Detailed tutorials provided by the official channel
Adobe Animate Text Effects can be created with the use of Adobe Animate. As well as a couple of other models of Adobe.
We’ve outline a thorough explanation on the subject so that you can be prepared as you can be, so continue reading in order to learn more.
In this article
01 [What’s Text Animation?](#Part 1)
02 [What Adobe Program is Best for Text Animation?](#Part 2)
03 [5 Creative Ways to Animate Text in After Effects](#Part 3)
04 [Adobe Alternative to Make Text Animation](#Part 4)
Part 1 What’s Text Animation?
“Text Animation“ refers to moving letters, words, sentences, and even whole paragraphs. The animation, or movement, rather, can be anything. It can move from side to side, jump up and down, create a dizzying circle, recede from view, etc. Usually, said movement is placed on an endless repeat, a pattern that the text is coded to follow decided by the animator who created it!
Part 2 What Adobe Program is Best for Text Animation?
Adobe Animate is Adobe’s very own software developed for animators. Whether they be working on movies, shows, short videos for online posting, games, or text animations. As mentioned at the beginning of this article, this is the software most professionals use in order to bring life to their digital creations. It’s also the one that we’d recommend if you’re looking into advanced adobe animate text animation!
Part 3 5 Creative Ways to Animate Text in After Effects
Now, we should make it very clear, of course. That while Adobe Animate is considered the best for animation (whether it be text or character models), there are other tools that you can use in order to get the same effect. For example, there’s adobe spark animate text, adobe premiere pro animate text, and this next one, also from Adobe, called After Effects, is a VFX and motion graphics software used to create movie titles, intros, transitions, logos, and so much more.
We’ve listed some of the more creative ways you can use After Effects to create what could very well be Adobe Animate text effects below to help you along:
01METHOD 1: After Effects Animation Presets
The first, and easiest, way of animating your text with After Effects is to use presets! After Effects offers multiple animations presets that you can try in order to test out certain settings. (This is also a good way of getting to know the possibilities and limits of text animation and how you can work within those bounds.
02METHOD 2: After Effects Text Animators
If the presets aren’t working out for you, you can also try out After Effect’s “animators” and “selectors”. To clarify, you add ‘animators’ to your text (it will mark the object(s) to be animated). And then, you use a ‘selector’ in order to specify how you want the properties to be animated. This is a great way of truly getting the exact effect that you want, although it might take some finagling to get it to work completely.
03METHOD 3: Per-Character 3D Text Properties
If you want to step up your game even more, you can always make your texts into 3D characters on their own! This is easier to do in Adobe Dimension, which (from the example image below) you can see has a “Text” preset that you can use in order to start creating 3D Text Properties immediately! The beauty of this method, of course, is that your text can be adjusted like any 3D character. Making the possibilities endless!
04METHOD 4: Path Animation
The next method of animating with After Effects is a little more constrained than the others we’ve introduced thus far. However, it has its uses! As you can see from the image below, you can animate your text to follow a mask (which you set over your text layer). This will make it possible for you to animate along a path.

05METHOD 5: After Effects Selectors
This next method is related to the ‘Animators’ methods we introduced second. It also works a lot like the masks we mentioned in Method 4–which, as mentioned, you can use in order to set up a foundation or limits for your animation.

Adobe Animate Text Effects can be created with the use of Adobe Animate. As well as a couple of other models of Adobe.
We’ve outline a thorough explanation on the subject so that you can be prepared as you can be, so continue reading in order to learn more.
In this article
01 [What’s Text Animation?](#Part 1)
02 [What Adobe Program is Best for Text Animation?](#Part 2)
03 [5 Creative Ways to Animate Text in After Effects](#Part 3)
04 [Adobe Alternative to Make Text Animation](#Part 4)
Part 1 What’s Text Animation?
“Text Animation“ refers to moving letters, words, sentences, and even whole paragraphs. The animation, or movement, rather, can be anything. It can move from side to side, jump up and down, create a dizzying circle, recede from view, etc. Usually, said movement is placed on an endless repeat, a pattern that the text is coded to follow decided by the animator who created it!
Part 2 What Adobe Program is Best for Text Animation?
Adobe Animate is Adobe’s very own software developed for animators. Whether they be working on movies, shows, short videos for online posting, games, or text animations. As mentioned at the beginning of this article, this is the software most professionals use in order to bring life to their digital creations. It’s also the one that we’d recommend if you’re looking into advanced adobe animate text animation!
Part 3 5 Creative Ways to Animate Text in After Effects
Now, we should make it very clear, of course. That while Adobe Animate is considered the best for animation (whether it be text or character models), there are other tools that you can use in order to get the same effect. For example, there’s adobe spark animate text, adobe premiere pro animate text, and this next one, also from Adobe, called After Effects, is a VFX and motion graphics software used to create movie titles, intros, transitions, logos, and so much more.
We’ve listed some of the more creative ways you can use After Effects to create what could very well be Adobe Animate text effects below to help you along:
01METHOD 1: After Effects Animation Presets
The first, and easiest, way of animating your text with After Effects is to use presets! After Effects offers multiple animations presets that you can try in order to test out certain settings. (This is also a good way of getting to know the possibilities and limits of text animation and how you can work within those bounds.
02METHOD 2: After Effects Text Animators
If the presets aren’t working out for you, you can also try out After Effect’s “animators” and “selectors”. To clarify, you add ‘animators’ to your text (it will mark the object(s) to be animated). And then, you use a ‘selector’ in order to specify how you want the properties to be animated. This is a great way of truly getting the exact effect that you want, although it might take some finagling to get it to work completely.
03METHOD 3: Per-Character 3D Text Properties
If you want to step up your game even more, you can always make your texts into 3D characters on their own! This is easier to do in Adobe Dimension, which (from the example image below) you can see has a “Text” preset that you can use in order to start creating 3D Text Properties immediately! The beauty of this method, of course, is that your text can be adjusted like any 3D character. Making the possibilities endless!
04METHOD 4: Path Animation
The next method of animating with After Effects is a little more constrained than the others we’ve introduced thus far. However, it has its uses! As you can see from the image below, you can animate your text to follow a mask (which you set over your text layer). This will make it possible for you to animate along a path.
05METHOD 5: After Effects Selectors
This next method is related to the ‘Animators’ methods we introduced second. It also works a lot like the masks we mentioned in Method 4–which, as mentioned, you can use in order to set up a foundation or limits for your animation.
How to Make GIF Instagram
How to Make GIF Instagram | Quick Tips
An easy yet powerful editor
Numerous effects to choose from
Detailed tutorials provided by the official channel
Creating gif for Instagram to make stories engaging in easy steps. Making Instagram stories by converting gif to video to attract more people.
In this article
01 [10 Best Instagram Gifs for Your Stories](#Part 1)
02 [How to Create a GIF for Instagram](#Part 2)
03 [How to Convert GIF to Video for Instagram](#Part 3)
Part 1 10 Best Instagram Gifs for Your Stories
All of you might know that GIF is also known as Graphics Interchange Format. It was created for the first time in the year 1987. With it you can decrease the size of photos and short animated images. With this kind of technology a gif instagram can also be made with the greatest ease. The GIF instagram story is a fun oriented task that all of you will appreciate in the long run. Here you can even add animated stickers and paste them to your story. With this way you can also make more stickers by changing their size in the long way. Instagram logo gif can also be made easily by following some keywords to get the desired gif over Instagram.
So, to make an Instagram story more happening some of the top gif galleries are:
01Bohemian
As the name suggests, the gif are Bohemian themed. Those who love to add some cute Bohemian things and pictures in gif style; they can type Bohemian on the search bar and choose the best one to make an Instagram story Bohemian themed. Colorful flowers, star, dream catcher, cute girl and days name are available in the said gif style.
02Chicayeye
Various gifs available at this keyword are warm colors themed. They make any Instagram story pleasing with simple yet beautiful color combinations. With matching color combinations of pictures and words, instagram stories can be made more interesting.
03Kindcomments
The name itself indicates, there will be a lot of quotes or sayings. Those who are fond of posting some beautiful and engaging quotes on social media accounts, they will definitely love to add gif from Kindcomments.
04Scarletpin

It is seen that food lovers always post their story when they have a lunch or dinner. Making people know what new they are having at a place through Instagram stories seems to be very interesting. So, for those SCARLETPIN has a wide collection of food gifs. It has bright and colorful pictures of food to make the stories more interesting.
05Gladdest
Adorable gif for insta can make any Instagram story look so sweet and engaging. So, when you need a soft tone gif with a lot of sayings, stars, flowers, a piece of cake and music, then type Gladdest at your search result and get some vintage styles gif that make your Instagram story adorable. This will make people to shower love and hearts at your story.
06Hanmade
A lot of gif in instagram that seems to be written with hands can be searched through “handmade”. It has some adorable pink and cute designs. Days and the months are written in some amazing style. An Instagram story can be made attractive by including some heart gif and sayings gif. Those who wish to add some cute stories on Christmas day, they can even get some cute wishes gif in it.
07Hygge
Season’s gif are most common gifs that are included in any Instagram story by the social media users. The most lovable season is the winters where the users have a lot of stuff to include in the story. Looking for winter’s gif for story? Then type Hygge at your search results. ???It will show various gif for a mood of coziness. One can find cozy mugs, stars, snowman, and seasonal stickers to make interesting story over Instagram.
08Vipapier
Some users look for a place where they can get most of the best instagram gifs for their Instagram stories. From sayings to cute pictures of hearts, flowers and stars all can be taken from Vipapier. The best thing is that it has muted color scheme and paint gif that can be applied anywhere in the background of the text. So, search Vipapier over the search results of Instagram and add one that fits in your space.
09LINE & LINES

This is a simple yet very good gif available to make text in the Instgaram look amazing and stylish. One can underline something or write something interesting in break up to give the text a new look. So, various lines can be seen at LINE & LINES to include the same in the Instagram stories.
10Square & Rectangle
Basic shapes are loved by every Instagram user who updates their stories every day. The reason is that they give a new and cool look to any picture. So, if you need basic shape, then ‘square’ or ‘rectangle’ are great way to make your new post look different and impress your followers. They are simple to create and can be added as background theme for the pictures of videos.
Part 2 How to Create a GIF for Instagram
Posting an Instagram GIF is easy using an application for both iPhone and Android. So, let’s see one by one how to make gifs for instagram and post the same on the Instagram stories. To begin with:
01How to Post an Instagram GIF Using App for iPhone
When you are in need to post Gifs to instagram story then you have to take some essential steps. These steps have been taken by GIPHY as well as from GIF stickers that you can add to your content at social media sites like Instagram.
● Install the Giphy app on your iPhone and open it.
● Look for the desired GIF which you want to include in your story on GIPHY.
● Click on the paper-airplane icon located under the GIF.
● Tap the Instagram button. A permission screen will open asking for giving permission for access to open Instagram.
● After giving permission, the selected GIF will open inside Instagram. Select Feed to post the selected GIF to your Instagram feed. This will be a new post over the Instagram.
● In case you need to edit of add filters, you can go with that by moving on to Next.
● Further tap next again to add caption and hash tags if required.
● After creation of GIF post is over, tap Share.
Here you will get more benefits like increasing and decreasing the size of images. Instagram story gif is an issue that is to be done for every kind of need and all the Instagram stories. By good fortune GIPHY has many tons of GIFs that can be selected for this kind of conditions. You just need a special kind of flair when you are making texts for your GIF interface. Even then you have to adopt gif instagram story aesthetic so that your task of doing any promotion on social media sites could become an easy one.
02How to Post an Instagram GIF Using App for Android
Gif can be posted easily using GIPHY Cam for Android. Here you can even open the app of instagram media with the help of an android. The simple steps are:
Save the GIF to the Download folder which you want to share to the Instagram.
Tap to the camera roll after opening GIPHY CAM.
Choose the GIF and move to the next button.
Let the GIF convert and then go to Instagram and share.
Part 3 How to Convert GIF to Video for Instagram
A gif can be converted into video by using various applications. Converting Gif by adding some filter, light effects and sound into video make it more attractive for Instagram stories. One can try Filmora to convert gif to video for instagram in just simple steps.
01**Wondershare Filmora Video Editor ** –A GIF resource

Wondershare Filmora - Best Video Editor for Mac/Windows
5,481,435 people have downloaded it.
Build unique custom animations without breaking a sweat.
Focus on creating epic stories and leave the details to Filmora’s auto features.
Start a creative adventure with drag & drop effects and endless possibilities.
Filmora simplifies advanced features to save you time and effort.
Filmora cuts out repetition so you can move on to your next creative breakthrough.
There are many applications and web tools that offer to convert beautiful gifs to videos and sharing the same over Instagram stories. Filmora V11 is one of the best video editor applications which assist the users to convert gif to video with minimal effort. It is a user-friendly tool that has media editing features. It allows the users to enhance their video with wide variety of sound, light effects, and beautiful gifs and share them to their Instagram stories.
For creating video or converting gifs to video, Filmora V11 can be used. It makes easy for the beginners to convert gift into videos in a few simple steps. Filmora V11 app is required to be installed on the system and media files can be imported there. The best thing is that it supports most of the video formats such as MP4, AVI, H261, FLV, MKV, 3GP, MOV, MPEG, VOB, RMVB, M4V, TS, M2TS, WMV, ASF and many more. To customize gifs and then converting it to video, the Filmora Meme maker can be used. Templates and captions are also found at the application.
02Steps to convert GIF to video for Instagram
● The first step is to download the application Filmora at your computer and open it. Choose the GIF file from the Filmora file.
● Do the necessary editing. This including adding some text, colors and effects to the gif.
● After adding all the effects and editing, tap to create a video from it. Export the same in MP4 format and save it over the mobile. The application will convert the gift into video and is ready for uploading.
● At last in the uploading process, open the Instagram application, select the video from the gallery.
● Captions or description can be added and then uploaded.
● Key Takeaways from This Episode →
● Instagram story gifs are concerned with mainstream creation for graphics interchange format. With these formats you can make the best and interesting story. So, to make gif, maximum use of GIPHY can be made to make your work look to be the best promotional one. Some of the best gifs can be searched by tapping keywords like Bohemian, Hanmade, LINE & LINES and Square & Rectangle
● Posting gif can be understood in just simple steps. If you desire to know how to create gifs for instagram, then you can explore various applications for both iPhone and Android. You may even search well on your GIF and then select the desired gif that can be added well to your instagram story.
● Instagram stories can be made more attractive by converting gif into videos. The same can be done with ease with some user friendly and high tech applications. Filmora can be the best software application for doing the magic over Instagram stories. It can be used to turn gif into videos or videos to gif. So, give your creativity a new height with some good application and impress your followers.
Creating gif for Instagram to make stories engaging in easy steps. Making Instagram stories by converting gif to video to attract more people.
In this article
01 [10 Best Instagram Gifs for Your Stories](#Part 1)
02 [How to Create a GIF for Instagram](#Part 2)
03 [How to Convert GIF to Video for Instagram](#Part 3)
Part 1 10 Best Instagram Gifs for Your Stories
All of you might know that GIF is also known as Graphics Interchange Format. It was created for the first time in the year 1987. With it you can decrease the size of photos and short animated images. With this kind of technology a gif instagram can also be made with the greatest ease. The GIF instagram story is a fun oriented task that all of you will appreciate in the long run. Here you can even add animated stickers and paste them to your story. With this way you can also make more stickers by changing their size in the long way. Instagram logo gif can also be made easily by following some keywords to get the desired gif over Instagram.
So, to make an Instagram story more happening some of the top gif galleries are:
01Bohemian
As the name suggests, the gif are Bohemian themed. Those who love to add some cute Bohemian things and pictures in gif style; they can type Bohemian on the search bar and choose the best one to make an Instagram story Bohemian themed. Colorful flowers, star, dream catcher, cute girl and days name are available in the said gif style.
02Chicayeye
Various gifs available at this keyword are warm colors themed. They make any Instagram story pleasing with simple yet beautiful color combinations. With matching color combinations of pictures and words, instagram stories can be made more interesting.
03Kindcomments
The name itself indicates, there will be a lot of quotes or sayings. Those who are fond of posting some beautiful and engaging quotes on social media accounts, they will definitely love to add gif from Kindcomments.
04Scarletpin
It is seen that food lovers always post their story when they have a lunch or dinner. Making people know what new they are having at a place through Instagram stories seems to be very interesting. So, for those SCARLETPIN has a wide collection of food gifs. It has bright and colorful pictures of food to make the stories more interesting.
05Gladdest
Adorable gif for insta can make any Instagram story look so sweet and engaging. So, when you need a soft tone gif with a lot of sayings, stars, flowers, a piece of cake and music, then type Gladdest at your search result and get some vintage styles gif that make your Instagram story adorable. This will make people to shower love and hearts at your story.
06Hanmade
A lot of gif in instagram that seems to be written with hands can be searched through “handmade”. It has some adorable pink and cute designs. Days and the months are written in some amazing style. An Instagram story can be made attractive by including some heart gif and sayings gif. Those who wish to add some cute stories on Christmas day, they can even get some cute wishes gif in it.
07Hygge
Season’s gif are most common gifs that are included in any Instagram story by the social media users. The most lovable season is the winters where the users have a lot of stuff to include in the story. Looking for winter’s gif for story? Then type Hygge at your search results. ???It will show various gif for a mood of coziness. One can find cozy mugs, stars, snowman, and seasonal stickers to make interesting story over Instagram.
08Vipapier
Some users look for a place where they can get most of the best instagram gifs for their Instagram stories. From sayings to cute pictures of hearts, flowers and stars all can be taken from Vipapier. The best thing is that it has muted color scheme and paint gif that can be applied anywhere in the background of the text. So, search Vipapier over the search results of Instagram and add one that fits in your space.
09LINE & LINES
This is a simple yet very good gif available to make text in the Instgaram look amazing and stylish. One can underline something or write something interesting in break up to give the text a new look. So, various lines can be seen at LINE & LINES to include the same in the Instagram stories.
10Square & Rectangle
Basic shapes are loved by every Instagram user who updates their stories every day. The reason is that they give a new and cool look to any picture. So, if you need basic shape, then ‘square’ or ‘rectangle’ are great way to make your new post look different and impress your followers. They are simple to create and can be added as background theme for the pictures of videos.
Part 2 How to Create a GIF for Instagram
Posting an Instagram GIF is easy using an application for both iPhone and Android. So, let’s see one by one how to make gifs for instagram and post the same on the Instagram stories. To begin with:
01How to Post an Instagram GIF Using App for iPhone
When you are in need to post Gifs to instagram story then you have to take some essential steps. These steps have been taken by GIPHY as well as from GIF stickers that you can add to your content at social media sites like Instagram.
● Install the Giphy app on your iPhone and open it.
● Look for the desired GIF which you want to include in your story on GIPHY.
● Click on the paper-airplane icon located under the GIF.
● Tap the Instagram button. A permission screen will open asking for giving permission for access to open Instagram.
● After giving permission, the selected GIF will open inside Instagram. Select Feed to post the selected GIF to your Instagram feed. This will be a new post over the Instagram.
● In case you need to edit of add filters, you can go with that by moving on to Next.
● Further tap next again to add caption and hash tags if required.
● After creation of GIF post is over, tap Share.
Here you will get more benefits like increasing and decreasing the size of images. Instagram story gif is an issue that is to be done for every kind of need and all the Instagram stories. By good fortune GIPHY has many tons of GIFs that can be selected for this kind of conditions. You just need a special kind of flair when you are making texts for your GIF interface. Even then you have to adopt gif instagram story aesthetic so that your task of doing any promotion on social media sites could become an easy one.
02How to Post an Instagram GIF Using App for Android
Gif can be posted easily using GIPHY Cam for Android. Here you can even open the app of instagram media with the help of an android. The simple steps are:
Save the GIF to the Download folder which you want to share to the Instagram.
Tap to the camera roll after opening GIPHY CAM.
Choose the GIF and move to the next button.
Let the GIF convert and then go to Instagram and share.
Part 3 How to Convert GIF to Video for Instagram
A gif can be converted into video by using various applications. Converting Gif by adding some filter, light effects and sound into video make it more attractive for Instagram stories. One can try Filmora to convert gif to video for instagram in just simple steps.
01**Wondershare Filmora Video Editor ** –A GIF resource
Wondershare Filmora - Best Video Editor for Mac/Windows
5,481,435 people have downloaded it.
Build unique custom animations without breaking a sweat.
Focus on creating epic stories and leave the details to Filmora’s auto features.
Start a creative adventure with drag & drop effects and endless possibilities.
Filmora simplifies advanced features to save you time and effort.
Filmora cuts out repetition so you can move on to your next creative breakthrough.
There are many applications and web tools that offer to convert beautiful gifs to videos and sharing the same over Instagram stories. Filmora V11 is one of the best video editor applications which assist the users to convert gif to video with minimal effort. It is a user-friendly tool that has media editing features. It allows the users to enhance their video with wide variety of sound, light effects, and beautiful gifs and share them to their Instagram stories.
For creating video or converting gifs to video, Filmora V11 can be used. It makes easy for the beginners to convert gift into videos in a few simple steps. Filmora V11 app is required to be installed on the system and media files can be imported there. The best thing is that it supports most of the video formats such as MP4, AVI, H261, FLV, MKV, 3GP, MOV, MPEG, VOB, RMVB, M4V, TS, M2TS, WMV, ASF and many more. To customize gifs and then converting it to video, the Filmora Meme maker can be used. Templates and captions are also found at the application.
02Steps to convert GIF to video for Instagram
● The first step is to download the application Filmora at your computer and open it. Choose the GIF file from the Filmora file.
● Do the necessary editing. This including adding some text, colors and effects to the gif.
● After adding all the effects and editing, tap to create a video from it. Export the same in MP4 format and save it over the mobile. The application will convert the gift into video and is ready for uploading.
● At last in the uploading process, open the Instagram application, select the video from the gallery.
● Captions or description can be added and then uploaded.
● Key Takeaways from This Episode →
● Instagram story gifs are concerned with mainstream creation for graphics interchange format. With these formats you can make the best and interesting story. So, to make gif, maximum use of GIPHY can be made to make your work look to be the best promotional one. Some of the best gifs can be searched by tapping keywords like Bohemian, Hanmade, LINE & LINES and Square & Rectangle
● Posting gif can be understood in just simple steps. If you desire to know how to create gifs for instagram, then you can explore various applications for both iPhone and Android. You may even search well on your GIF and then select the desired gif that can be added well to your instagram story.
● Instagram stories can be made more attractive by converting gif into videos. The same can be done with ease with some user friendly and high tech applications. Filmora can be the best software application for doing the magic over Instagram stories. It can be used to turn gif into videos or videos to gif. So, give your creativity a new height with some good application and impress your followers.
How to Draw Skeleton Cartoon – A Step by Step Guide
How to Draw Skeleton Cartoon – A Step by Step Guide
An easy yet powerful editor
Numerous effects to choose from
Detailed tutorials provided by the official channel
We often see skeleton cartoons on t-shirts and phone cases. There is a famous skeleton cartoon show. Most of the shows are pretty popular, and the skeleton cartoon in the shows became quite trendy in the fashion industry. The trend of a skeleton cartoon character is very much relevant nowadays. One might think about how this skeleton cartoon is drawn.
Sometimes it is hand drawn or digitally drawn. Here is a step-by-step guide for you if you wonder how to draw a skeleton cartoon. This guide will effortlessly help you draw the most quirky and trendy skeleton cartoon.
In this article
01 [This Is What 5 Skeletons of Famous Cartoon Characters Would Look Like](#Part 1)
02 [How to Draw Cartoon Skeletons With Step by Step](#Part 2)
Part 1 This Is What 5 Skeletons of Famous Cartoon Characters Would Look Like
From our very childhood, we have come across numerous cartoons shows. But have we ever wondered how the skeleton of these cartoon characters would look? No worries if you have not given a thought to this. This article can give you a small tour of the world where you will be able to see skeletons of a few famous cartoon characters that we have known since our childhood. The skeletons of famous cartoon characters are:
01Charlie
Charlie Brown, known as Charlie, is the main character in the comic strip Peanuts. This is a widely recognized American cartoon. Many people can relate to Charlie. Charlie is shy, nervous, and lacks confidence. These characteristics make him relatable to a chunk of common people. Charlie is referred to as the “Loveable Loser.”Charlie is an overwhelmingly short and stout character physically. Have you ever imagined how Charlie’s skeleton version would look? Here is how the skeleton cartoon of Charlie would look.

02Fred Flintstone
I have known very few people who do not know about Fred Flintstone. Fred Flinstone is the protagonist of the famous American sitcom show Yabba-Dabba-Dinosaurs and the entire franchise. The Flinstone is another show that features Fred with his family. Of course, the show’s main attraction is the Flinstone family and the way this show is set. This show is set in a way that romanticizes a family living in a cave. Coming to talk about skeletons, have you ever thought that what if a skeleton cartoon show version of The Flintstone were made. How would this short, fat man with almost a square look as a skeleton? We can look up here how the skeleton version of Fred Flintstone looks:

03Bubbles
The Bubble is one of the main characters of the popular TV cartoon show Powerpuff girls. The other protagonists are Blossom and Buttercup, her sisters. The Bubble is named Bubble because she is the bubbliest and most fun-loving among the three sisters. Bubble is a sweet little girl with a round face and big round eyes and short limbs. These characteristics in this character make it look cuter. But to think, how would we imagine Bubble in a skeleton version. This is how Bubble would look like a skeleton.

04Dexter
Dexter is the protagonist in the show Dexter’s Laboratory. Dexter is one of the most outstanding kid scientists who have made great inventions in his secret laboratory. It would be more appropriate to call Dexter an anti-heroic protagonist. He works in his secret laboratory for various projects like stopping bullying worldwide. Dexter is a short young boy with curly hair. Dexter is mostly seen wearing a white lab coat and semi-circle goggles, like someone who is always working in a lab. Imagining Dexter as a skeleton can be hilarious. But this is how Dexter would look like a skeleton cartoon.

05Pikachu
Pikachu is one of the characters or one of the Pokémons in the famous animated Japanese series Pokémon. Pikachu is a small yellow furry Pokémon. It seems very sweet to the audience and the general public, but it acquires a dangerous skill to give out an electric shock. This small yellow furry creature has featured in many films with the protagonist of the famous show Pokémon Ash Ketchum. This cartoon character has a presence in the fashion industry. It has been used to fashion dresses, bags, and many more. How would it be if we sat to think of a skeleton version of this furry creature? This may not a pleasant experience for everyone. The perfect way to demonstrate pikachu as a skeleton version would be:

Part 2 How to Draw Cartoon Skeletons With Step by Step
Have you ever tried drawing a skeleton cartoon character? You can use a skeleton cartoon to add a quirky effect to your project. You can draw an animated skeleton on your favorite t-shirt and change the vibe of the t-shirt. There are many methods to draw skeleton cartoon. Here we focus mainly on one way to draw cartoon skeleton. The method might seem difficult at the beginning, but the whole process becomes easier and smooth once you start following the steps. The steps are:
Step 1: To start with the drawing of the skeleton, let’s start with the head or the skull. The head should be round, and the jaw area needs to be at some angle or angular and have smaller lines than the long rounded lines on the upper part of the skull.
Step 2: The mouth of the skull must be open, and then we need to concentrate on other features of the face like the teeth, nose, and cheekbone.

Step 3: After the head is complete, we focus on the neck and the chest area. To draw the neck, divide the neck into small sections to show the division in the neck portion, as shown in the picture.
Step 4: To start with the rib cage, we need to draw the spine. The spine can be drawn as a long thick line and should be a continuity of the neck, so the neck and the spine should be drawn in the same way and same line. It is to be drawn at the body’s center, just below the head. You can refer to the example as shown below.
Step 5: After you have drawn the spine, to draw the rib, draw circles around the spine as if the curved lines demonstrating the rib are revolving around the spine.

Step 6: After the head and the chest region is complete. Focus on the hand. You can rest the arms any way you want. Since you are a beginner, this example shows the easiest ways to rest the hands when you are drawing a cartoon skeleton.
Step 7: The left arm will rest on the hips, and the right arm needs to be shown in a way so that it looks that the skeleton body is leaning on some object.
Step 8: Since the arms have divisions, the bones must be drawn the same way shown in the example with the same divisions on the arms.
Step 9: Keep in mind that both the arms must have equal bone divisions; otherwise, the drawing may look weird.
Step 10: Now you need to draw the hand. The hand is made of small bones. To draw the hand, divide it into small sections consisting of very small bones.

Step 11: After the hands are complete, the upper part of the body is complete. Now we need to focus on the lower part of the body.
Step 12: To start with the lower part of the body, we start with the hip portion.
Step 13: Show the hips with curved lines, and draw a round-like shape inside the curve to show the holes in the hips.
Step 14: After the hip is complete, start with the upper half of the legs. Draw a long bone from the hip to demonstrate the upper part of the leg.

Step 15: Now we need to concentrate on the other half of the leg. You can position the legs any way you want. Here in the example, the left leg will be crossed over the right leg.
Step 16: After the lower half of the legs is complete, the standing posture of the skeleton is set.
Step 17: Now we need to add the feet at the end of the leg. The feet are made of tiny pieces of bones; to draw the feet, divide them into small sections, as shown in the example.
Step 18: Draw the feet in a similar way to how you have drawn the hands.

Step 19: You can color your skeleton drawing or give your shading style after your skeleton drawing is done.
You can make quirky skeleton cartoon animations and compile them to a video, adding music effects. You might think you need different apps for the video and the audio editing part. That might be the case for other apps. Here is Wondershare Filmora Video Editor ; you can edit your video, make slideshows, and edit the background sound score. Just imagine of not changing windows while editing your exciting project can be so comfortable!
For Win 7 or later (64-bit)
For macOS 10.12 or later
● Ending Thoughts →
● It might be astonishing for you to see the skeleton versions of your favorite cartoon characters from your childhood.
● It gives a quirky effect to our minds but, at the same time, leaves us wondering about the skeleton drawing cartoon.
● Now you know the methodof drawing a cartoon skeleton. You can make your version of a skeleton cartoon; you can create your style and interpretation. You can create a skeleton dog cartoon.
● You can use the method to make animations or even paint on your t-shirt or wall paintings to add a little quirkiness.
● The cartoon skeleton gives a cool vibe. You can use your animation as your wallpaper. Keep quirking!
We often see skeleton cartoons on t-shirts and phone cases. There is a famous skeleton cartoon show. Most of the shows are pretty popular, and the skeleton cartoon in the shows became quite trendy in the fashion industry. The trend of a skeleton cartoon character is very much relevant nowadays. One might think about how this skeleton cartoon is drawn.
Sometimes it is hand drawn or digitally drawn. Here is a step-by-step guide for you if you wonder how to draw a skeleton cartoon. This guide will effortlessly help you draw the most quirky and trendy skeleton cartoon.
In this article
01 [This Is What 5 Skeletons of Famous Cartoon Characters Would Look Like](#Part 1)
02 [How to Draw Cartoon Skeletons With Step by Step](#Part 2)
Part 1 This Is What 5 Skeletons of Famous Cartoon Characters Would Look Like
From our very childhood, we have come across numerous cartoons shows. But have we ever wondered how the skeleton of these cartoon characters would look? No worries if you have not given a thought to this. This article can give you a small tour of the world where you will be able to see skeletons of a few famous cartoon characters that we have known since our childhood. The skeletons of famous cartoon characters are:
01Charlie
Charlie Brown, known as Charlie, is the main character in the comic strip Peanuts. This is a widely recognized American cartoon. Many people can relate to Charlie. Charlie is shy, nervous, and lacks confidence. These characteristics make him relatable to a chunk of common people. Charlie is referred to as the “Loveable Loser.”Charlie is an overwhelmingly short and stout character physically. Have you ever imagined how Charlie’s skeleton version would look? Here is how the skeleton cartoon of Charlie would look.
02Fred Flintstone
I have known very few people who do not know about Fred Flintstone. Fred Flinstone is the protagonist of the famous American sitcom show Yabba-Dabba-Dinosaurs and the entire franchise. The Flinstone is another show that features Fred with his family. Of course, the show’s main attraction is the Flinstone family and the way this show is set. This show is set in a way that romanticizes a family living in a cave. Coming to talk about skeletons, have you ever thought that what if a skeleton cartoon show version of The Flintstone were made. How would this short, fat man with almost a square look as a skeleton? We can look up here how the skeleton version of Fred Flintstone looks:
03Bubbles
The Bubble is one of the main characters of the popular TV cartoon show Powerpuff girls. The other protagonists are Blossom and Buttercup, her sisters. The Bubble is named Bubble because she is the bubbliest and most fun-loving among the three sisters. Bubble is a sweet little girl with a round face and big round eyes and short limbs. These characteristics in this character make it look cuter. But to think, how would we imagine Bubble in a skeleton version. This is how Bubble would look like a skeleton.
04Dexter
Dexter is the protagonist in the show Dexter’s Laboratory. Dexter is one of the most outstanding kid scientists who have made great inventions in his secret laboratory. It would be more appropriate to call Dexter an anti-heroic protagonist. He works in his secret laboratory for various projects like stopping bullying worldwide. Dexter is a short young boy with curly hair. Dexter is mostly seen wearing a white lab coat and semi-circle goggles, like someone who is always working in a lab. Imagining Dexter as a skeleton can be hilarious. But this is how Dexter would look like a skeleton cartoon.
05Pikachu
Pikachu is one of the characters or one of the Pokémons in the famous animated Japanese series Pokémon. Pikachu is a small yellow furry Pokémon. It seems very sweet to the audience and the general public, but it acquires a dangerous skill to give out an electric shock. This small yellow furry creature has featured in many films with the protagonist of the famous show Pokémon Ash Ketchum. This cartoon character has a presence in the fashion industry. It has been used to fashion dresses, bags, and many more. How would it be if we sat to think of a skeleton version of this furry creature? This may not a pleasant experience for everyone. The perfect way to demonstrate pikachu as a skeleton version would be:
Part 2 How to Draw Cartoon Skeletons With Step by Step
Have you ever tried drawing a skeleton cartoon character? You can use a skeleton cartoon to add a quirky effect to your project. You can draw an animated skeleton on your favorite t-shirt and change the vibe of the t-shirt. There are many methods to draw skeleton cartoon. Here we focus mainly on one way to draw cartoon skeleton. The method might seem difficult at the beginning, but the whole process becomes easier and smooth once you start following the steps. The steps are:
Step 1: To start with the drawing of the skeleton, let’s start with the head or the skull. The head should be round, and the jaw area needs to be at some angle or angular and have smaller lines than the long rounded lines on the upper part of the skull.
Step 2: The mouth of the skull must be open, and then we need to concentrate on other features of the face like the teeth, nose, and cheekbone.
Step 3: After the head is complete, we focus on the neck and the chest area. To draw the neck, divide the neck into small sections to show the division in the neck portion, as shown in the picture.
Step 4: To start with the rib cage, we need to draw the spine. The spine can be drawn as a long thick line and should be a continuity of the neck, so the neck and the spine should be drawn in the same way and same line. It is to be drawn at the body’s center, just below the head. You can refer to the example as shown below.
Step 5: After you have drawn the spine, to draw the rib, draw circles around the spine as if the curved lines demonstrating the rib are revolving around the spine.
Step 6: After the head and the chest region is complete. Focus on the hand. You can rest the arms any way you want. Since you are a beginner, this example shows the easiest ways to rest the hands when you are drawing a cartoon skeleton.
Step 7: The left arm will rest on the hips, and the right arm needs to be shown in a way so that it looks that the skeleton body is leaning on some object.
Step 8: Since the arms have divisions, the bones must be drawn the same way shown in the example with the same divisions on the arms.
Step 9: Keep in mind that both the arms must have equal bone divisions; otherwise, the drawing may look weird.
Step 10: Now you need to draw the hand. The hand is made of small bones. To draw the hand, divide it into small sections consisting of very small bones.
Step 11: After the hands are complete, the upper part of the body is complete. Now we need to focus on the lower part of the body.
Step 12: To start with the lower part of the body, we start with the hip portion.
Step 13: Show the hips with curved lines, and draw a round-like shape inside the curve to show the holes in the hips.
Step 14: After the hip is complete, start with the upper half of the legs. Draw a long bone from the hip to demonstrate the upper part of the leg.
Step 15: Now we need to concentrate on the other half of the leg. You can position the legs any way you want. Here in the example, the left leg will be crossed over the right leg.
Step 16: After the lower half of the legs is complete, the standing posture of the skeleton is set.
Step 17: Now we need to add the feet at the end of the leg. The feet are made of tiny pieces of bones; to draw the feet, divide them into small sections, as shown in the example.
Step 18: Draw the feet in a similar way to how you have drawn the hands.
Step 19: You can color your skeleton drawing or give your shading style after your skeleton drawing is done.
You can make quirky skeleton cartoon animations and compile them to a video, adding music effects. You might think you need different apps for the video and the audio editing part. That might be the case for other apps. Here is Wondershare Filmora Video Editor ; you can edit your video, make slideshows, and edit the background sound score. Just imagine of not changing windows while editing your exciting project can be so comfortable!
For Win 7 or later (64-bit)
For macOS 10.12 or later
● Ending Thoughts →
● It might be astonishing for you to see the skeleton versions of your favorite cartoon characters from your childhood.
● It gives a quirky effect to our minds but, at the same time, leaves us wondering about the skeleton drawing cartoon.
● Now you know the methodof drawing a cartoon skeleton. You can make your version of a skeleton cartoon; you can create your style and interpretation. You can create a skeleton dog cartoon.
● You can use the method to make animations or even paint on your t-shirt or wall paintings to add a little quirkiness.
● The cartoon skeleton gives a cool vibe. You can use your animation as your wallpaper. Keep quirking!
10 Cartoon Canvas Painting Ideas for Total Beginners
10 Cartoon Canvas Painting Ideas for Total Beginners
An easy yet powerful editor
Numerous effects to choose from
Detailed tutorials provided by the official channel
Beginning your streak into cartoon canvas painting? Stay tuned to learn about the 10 most amazing ideas to design your best cartoon canvas art in no time!
In this article
01 [10 Cartoon Canvas Painting Ideas](#Part 1)
02 [How To Paint A Cartoon On Canvas](#Part 2)
Part 1 Cartoon Canvas Painting Ideas
Cartoon are an evergreen favourite for almost everyone around. After all, who would mind sparing a laugh on the adorable musings of the cutest cat and mouse duo in Tom and Jerry, or long for a dive into the fantasy of icy adventures with the Frozen fairy tale! While the huge caricature repository has the best of fun to offer, watching them peep at you from the canvas painting on your art wall is no less of a delight.
When starting to create your own cartoon canvas art, end your search of the most striking painting idea with the amazingly stunning choices in the following section:
01Tom and Jerry
These two are undoubtedly the pioneers of the entire cartoon story that has affordably existed till date. The naughty duo promises to lighten up your day with a mere gaze through the art wall in your room, in the same way as their show sets the mood in. Painting them on your room’s wall canvas will certainly add life to the place.
02Super Mario
Who can forget this adorable red plumber, who conveniently takes the credit for giving us the fondest childhood memories? Whether or not a regular console gamer, this adventure hero is an undisputed favorite of everyone around. So why not make him a member of your art collection through a cartoon canvas painting!
03Characters from the Frozen Land
The adorable cartoon characters from the icy landscapes of this winter fairy saga are possibly the best way to begin your exciting journey of cartoon canvas painting. While the magical storyline of the pixie quest has a diversity of the coolest and the most adorable characters to choose from, you are always free to pick your favorite one and start your design spree.
04Kung fu Panda
If you are a parallel admirer of martial arts and caricature heroes, this cartoon character would be an apt choice to satisfy your love for canvas painting. The adorably cute bear eyeing at you from the painting in his best warlike posture would certainly motivate you to work on keeping a check of your fitness levels!
05Sponge Bob
Living up to his name, this spongy creature has created a separate and strong fan base among viewers of all age groups beyond time. Choosing this character for your cartoon canvas art is surely going to spark up your day with the vibrancy of a real rainbow, even in between the sulkiest of moments, as they say, it’s time to brighten up your life with Bob!
06Homer Simpson
If you are convincingly fascinated by the lures of life overseas, this American toon character is all set to give you the perfect feel of the day to day American lifestyle. Try hands at painting a scene from the eventful life of the Simpson family that is ready to add a fun angle to the most boring chores, while giving you a parodical glimpse of the American society and culture.
07Characters from the Avenger Series
Avengers must be your absolute favorite if you have a love for battle and combat games. Bring your adventure feel back to life with creating a canvas painting art of your most admired avenger, or consider including all of them on a king size canvas if you are having a tough time picking the best from the best!
08Angry Birds
These furious creatures have been a global sensation since their entry into the world of gaming. While these star birds take you on a stunning adventure realism with an amazing graphic excellence, a caricature canvas art of these in your painting collection will certainly add the missing spunk to your graphic creativity.
09Members and Trainers of the Pokémon Species
From TV series to gaming adventures, the love for Pokémon has stood the tests of time in every dimension. When it comes to adding these characters to your canvas painting, you have a storehouse of choices from the cute Pikachu and the meticulous Ash to the nasty team Rocket and other amazing members of the Pokémon species.
10Donald Duck
If you are keen on adding a touch of nostalgia to your creative drawing, consider designing a masterpiece of cartoon canvas artwork portraying this bubbly ad quaky creature that has given you the best of childhood entertainment in the form of possibly the most reliable financial advisor and the cutest good luck charm of toon land.
Now that the graphic design technology has reached its par, you can explore your creativity to design these characters for various uses, such as, illustrative, animated, gag, editorial and political cartoons, or caricatures on comic panels and strips.
Part 2 How To Paint A Cartoon On Canvas
Now that you have come cross the exciting ideas of creating cartoon canvas art, this must be a sufficient motivation to experiment with creating a top class caricature canvas painting for yourself. Read through the following section to get an insight into the knowhow of painting a cartoon on canvas in the easiest possible way!
User’s Guide to Create a Cartoon Canvas Painting on Wondershare Filmora Video Editor
Before entering into the actual design task, you will require a download, installation and launch of the Wondershare Filmora application to any of your Windows or Mac supported devices. Visit the following link for a free download of the software program:
Wondershare Filmora - Best Video Editor for Mac/Windows
5,481,435 people have downloaded it.
Build unique custom animations without breaking a sweat.
Focus on creating epic stories and leave the details to Filmora’s auto features.
Start a creative adventure with drag & drop effects and endless possibilities.
Filmora simplifies advanced features to save you time and effort.
Filmora cuts out repetition so you can move on to your next creative breakthrough.
Painting a Young Character
Take the following steps to draw the caricature form of a young or middle aged character in Wondershare Filmora:
Step 1:
Launch Wondershare Filmora on your system and then start new project. Now import the video from your computer in the software interface.

Step 2:
Once you have added the video then simply drag and drop it in the timeline.

Step 3
Once you have added video to the timeline double click on the added video in timeline to open the video editing menu of Wondershare Filmora.

Step 4:
Now, click the “Animation” tab in the editing options at the left side of interface then you can select anyone from the available preset options.

Step 5:
Select any preset from the available list and then drag and drop it in the timeline to apply the preset on the video. After applying you can use the play button to preview the file. This is the way to create beautiful animation with the Wondershare Filmora. Just like this you can quickly create the best Cartoon canvas as well.

Step 5
After doing all necessary editing you just need to click the “Export” button and save it on your computer.

● Ending Thoughts →
● Cartoon canvas art has gained immense popularity in recent times having a reliable economic and creation advantage with the growth of animation design.
● There are a variety of cartoon painting ideas that you can choose to explore your graphic design creativity.
● When looking for the best solutions to work on creating caricature canvas art, Wondershare Filmora is your worthiest choice.
Beginning your streak into cartoon canvas painting? Stay tuned to learn about the 10 most amazing ideas to design your best cartoon canvas art in no time!
In this article
01 [10 Cartoon Canvas Painting Ideas](#Part 1)
02 [How To Paint A Cartoon On Canvas](#Part 2)
Part 1 Cartoon Canvas Painting Ideas
Cartoon are an evergreen favourite for almost everyone around. After all, who would mind sparing a laugh on the adorable musings of the cutest cat and mouse duo in Tom and Jerry, or long for a dive into the fantasy of icy adventures with the Frozen fairy tale! While the huge caricature repository has the best of fun to offer, watching them peep at you from the canvas painting on your art wall is no less of a delight.
When starting to create your own cartoon canvas art, end your search of the most striking painting idea with the amazingly stunning choices in the following section:
01Tom and Jerry
These two are undoubtedly the pioneers of the entire cartoon story that has affordably existed till date. The naughty duo promises to lighten up your day with a mere gaze through the art wall in your room, in the same way as their show sets the mood in. Painting them on your room’s wall canvas will certainly add life to the place.
02Super Mario
Who can forget this adorable red plumber, who conveniently takes the credit for giving us the fondest childhood memories? Whether or not a regular console gamer, this adventure hero is an undisputed favorite of everyone around. So why not make him a member of your art collection through a cartoon canvas painting!
03Characters from the Frozen Land
The adorable cartoon characters from the icy landscapes of this winter fairy saga are possibly the best way to begin your exciting journey of cartoon canvas painting. While the magical storyline of the pixie quest has a diversity of the coolest and the most adorable characters to choose from, you are always free to pick your favorite one and start your design spree.
04Kung fu Panda
If you are a parallel admirer of martial arts and caricature heroes, this cartoon character would be an apt choice to satisfy your love for canvas painting. The adorably cute bear eyeing at you from the painting in his best warlike posture would certainly motivate you to work on keeping a check of your fitness levels!
05Sponge Bob
Living up to his name, this spongy creature has created a separate and strong fan base among viewers of all age groups beyond time. Choosing this character for your cartoon canvas art is surely going to spark up your day with the vibrancy of a real rainbow, even in between the sulkiest of moments, as they say, it’s time to brighten up your life with Bob!
06Homer Simpson
If you are convincingly fascinated by the lures of life overseas, this American toon character is all set to give you the perfect feel of the day to day American lifestyle. Try hands at painting a scene from the eventful life of the Simpson family that is ready to add a fun angle to the most boring chores, while giving you a parodical glimpse of the American society and culture.
07Characters from the Avenger Series
Avengers must be your absolute favorite if you have a love for battle and combat games. Bring your adventure feel back to life with creating a canvas painting art of your most admired avenger, or consider including all of them on a king size canvas if you are having a tough time picking the best from the best!
08Angry Birds
These furious creatures have been a global sensation since their entry into the world of gaming. While these star birds take you on a stunning adventure realism with an amazing graphic excellence, a caricature canvas art of these in your painting collection will certainly add the missing spunk to your graphic creativity.
09Members and Trainers of the Pokémon Species
From TV series to gaming adventures, the love for Pokémon has stood the tests of time in every dimension. When it comes to adding these characters to your canvas painting, you have a storehouse of choices from the cute Pikachu and the meticulous Ash to the nasty team Rocket and other amazing members of the Pokémon species.
10Donald Duck
If you are keen on adding a touch of nostalgia to your creative drawing, consider designing a masterpiece of cartoon canvas artwork portraying this bubbly ad quaky creature that has given you the best of childhood entertainment in the form of possibly the most reliable financial advisor and the cutest good luck charm of toon land.
Now that the graphic design technology has reached its par, you can explore your creativity to design these characters for various uses, such as, illustrative, animated, gag, editorial and political cartoons, or caricatures on comic panels and strips.
Part 2 How To Paint A Cartoon On Canvas
Now that you have come cross the exciting ideas of creating cartoon canvas art, this must be a sufficient motivation to experiment with creating a top class caricature canvas painting for yourself. Read through the following section to get an insight into the knowhow of painting a cartoon on canvas in the easiest possible way!
User’s Guide to Create a Cartoon Canvas Painting on Wondershare Filmora Video Editor
Before entering into the actual design task, you will require a download, installation and launch of the Wondershare Filmora application to any of your Windows or Mac supported devices. Visit the following link for a free download of the software program:
Wondershare Filmora - Best Video Editor for Mac/Windows
5,481,435 people have downloaded it.
Build unique custom animations without breaking a sweat.
Focus on creating epic stories and leave the details to Filmora’s auto features.
Start a creative adventure with drag & drop effects and endless possibilities.
Filmora simplifies advanced features to save you time and effort.
Filmora cuts out repetition so you can move on to your next creative breakthrough.
Painting a Young Character
Take the following steps to draw the caricature form of a young or middle aged character in Wondershare Filmora:
Step 1:
Launch Wondershare Filmora on your system and then start new project. Now import the video from your computer in the software interface.
Step 2:
Once you have added the video then simply drag and drop it in the timeline.
Step 3
Once you have added video to the timeline double click on the added video in timeline to open the video editing menu of Wondershare Filmora.
Step 4:
Now, click the “Animation” tab in the editing options at the left side of interface then you can select anyone from the available preset options.
Step 5:
Select any preset from the available list and then drag and drop it in the timeline to apply the preset on the video. After applying you can use the play button to preview the file. This is the way to create beautiful animation with the Wondershare Filmora. Just like this you can quickly create the best Cartoon canvas as well.
Step 5
After doing all necessary editing you just need to click the “Export” button and save it on your computer.
● Ending Thoughts →
● Cartoon canvas art has gained immense popularity in recent times having a reliable economic and creation advantage with the growth of animation design.
● There are a variety of cartoon painting ideas that you can choose to explore your graphic design creativity.
● When looking for the best solutions to work on creating caricature canvas art, Wondershare Filmora is your worthiest choice.
Also read:
- New In 2024, Most Effective Ways to Set WhatsApp Status
- Updated Most Effective Ways to Set WhatsApp Status for 2024
- 2024 Approved Techniques on How to Make After Effects 2D Animation
- Updated The 15 Most Efficient Photo to Cartoon Software for Android
- Updated Whats Rigging Animation for 2024
- New 2024 Approved Want to Make a Meme GIF? Heres How to Do
- In 2024, Best 10 Anime Websites to Watch Dubbed Anime Free
- Updated In 2024, 5 Foolproof Amazing Anime Text to Speech Tips for Makers
- New Creative Ways to Make iPhone Text GIF for 2024
- New How To Learn Cartoon Sketch Drawing— Pencil Sketch for Beginners
- 2024 Approved How to Make Architecture Animation
- New How to Make Animated Videos for Business Simple Guide for 2024
- In-Depth Study of Cartoon Painting Starts From Learning to Draw It
- Looking for Love Animated GIFs? Here Are 5 Free Sources For You for 2024
- How To Animate Graphics in Canva
- New In 2024, 5 Websites with Animated Logos That Catch Your Eyes
- In 2024, 10 Must-Use MP4 to GIF Converters to Get Perfect-Made GIF
- Updated In 2024, 10 Cartoon Character Makers to Create Animated Characters
- Updated In 2024, Tutorial on Making Unity 2D Animation
- In 2024, Best GIF Croppers How to Crop an Animated GIF
- Updated How To Turn Yourself Into Anime Character
- New The Ultimate Cheatsheet to 15 Adobe Animate Alternatives
- Updated What Is the Best Collage Photo Grid Maker - Experts Choice for 2024
- New 10 Great MP4 to GIF Converters to Get Perfect-Made GIF
- New In 2024, 20 Free After Effects Logo Reveal Templates
- New 2024 Approved 12 Websites with Triggered Animate on Scroll Examples
- Updated Apps to Animate Still Pictures Which Could Make Your Pictures Become Internet Sensation
- New 10 Best Romance Anime Movies You Need to Watch
- New Best 15 Greatest Claymation Movies of All Time
- New 2024 Approved How to Create Your Own Avatar Free
- Best 10 Animated DP for WhatsApp
- Updated 2024 Approved Top 10 Sketch Animation Video Makers
- New 2024 Approved What Make Aesthetic Cartoon Drawing More Understandable
- New In 2024, Top 10 Popular Cartoons You Forgot Existed
- New In 2024, Top 8 Anime Name & Title Generators Online-Get Cool Anime Names
- In 2024, Top 10 Video to GIF Converters Top Picks
- How to Draw Cartoons Step by Step with This Guide for 2024
- Updated Learn About Lip-Syncing in Animation
- How to Transfer Data from Gionee F3 Pro to Samsung Phone | Dr.fone
- In 2024, 5 Techniques to Transfer Data from Oppo A58 4G to iPhone 15/14/13/12 | Dr.fone
- In 2024, Ultimate guide to get the meltan box pokemon go For Samsung Galaxy Z Flip 5 | Dr.fone
- In 2024, About Vivo Y200 FRP Bypass
- Complete Guide to Hard Reset Your Honor Magic5 Ultimate | Dr.fone
- What Is AI Background Generator? | Wondershare Virbo Glossary
- In 2024, 10 Fake GPS Location Apps on Android Of your Realme 11X 5G | Dr.fone
- How to Mirror Oppo A1x 5G to Mac? | Dr.fone
- Why does the pokemon go battle league not available On Samsung Galaxy A15 5G | Dr.fone
- Reliable User Guide to Fix Realme 11 Pro+ Running Slow and Freezing | Dr.fone
- Title: Updated How to Make an Animated Travel Map Video?
- Author: Elon
- Created at : 2024-05-19 03:04:53
- Updated at : 2024-05-20 03:04:53
- Link: https://animation-videos.techidaily.com/updated-how-to-make-an-animated-travel-map-video/
- License: This work is licensed under CC BY-NC-SA 4.0.
