

Updated In 2024, 12 Captivating Websites with Triggered Animate on Scroll Examples
12 Captivating Websites with Triggered Animate on Scroll Examples
12 Captivating Websites with Triggered Animate on Scroll Examples
An easy yet powerful editor
Numerous effects to choose from
Detailed tutorials provided by the official channel
It is impossible to imagine any website that doesn’t have any dynamic elements. It has almost become a compulsion to use dynamic elements in websites. Nowadays we look for websites that are more engaging and interactive.
This is where the popular Scroll-Triggered Animations in websites come in. Filmora Pro is one of the best website development companies that develops websites with a triggered animate scroll for customers all around the world. Filmora Pro wonderfully animate elements on scroll for the websites they develop.
In this article
01 [What Are Scroll-Triggered Animations?](#Part 1)
02 [Best 12 Websites With Triggered Animate On Scroll Examples](#Part 2)
Part 1 What Are Scroll-Triggered Animations?
Scroll-triggered animations are that strong trend that has been with us for many years. It is the most effective way to animate elements on scrolls like the graphics, texts, videos, and photos and bring all of them to life while you scroll down a website page. Scroll animations are used to grab the attention of the user and make a website more interesting and attractive.
Part 2 Best 12 Websites with triggered animate on scroll examples
Given below are the 12 best Websites with triggered animate on scroll examples.
01Joey Bada$ Political MC

The website of Joey Bada$ Political MC is considered to be one of the most exquisite examples of how scroll-triggered animations can be used effectively to say a story. This website is a collaboration between Shoes Up - The French magazine and American MC. This is a satirical website and resembles a political campaign. To build this website scroll-triggered animation was used all through. The scrolling is designed in such a way that it changes from horizontal to vertical. Each scroll delivers many interesting facts about Joey’s political beliefs.
02Vincent Saïsset

Vincent Saïsset, the first thing that you will see is a white background with a very big white letter V on it. The letter V symbolizes the artist’s initials. There is an arrow pointing downward that encourages you to start exploring the website. As you start to scroll you will see a wave of animated typefaces with a monochromatic interplay. The website is designed with horizontal and vertical scroll transitions. It also has a playful micro-interaction that is there between the letters and the cursor.
03Home Société

The website of Home Société amazingly depicts all the interior design work of the company. The design of this website is very simple but at the same rich with graphic elements, animations, and typography. The animated elements used are rhythmically intersecting and overlapping with each other. The images that are used in the background are changing constantly with eye-catching typefaces. The best part that it makes different from other websites is the horizontal scroll; this portrays a whole new dimension giving the users an experience of infinite scroll.
04Sally

This company is from NYC and they rent cars to Lyft, Via Juno, and Uber. The website of Sally might look minimal when it comes to color and designs or exquisite detailing. But what makes the website captivating is a car’s 3D model and seventy other animations which gives the look that the car is moving. It is the perfect example where you can animate elements on scroll one can move the model from one section to the other by moving the cursor or just scrolling. All the transitions used are synchronized eloquently and there is no hitch in the entire website.
05Yuto Takahashi

The website of Yuto Takahashi’s is that of a portfolio website. This website is another amazing example of scroll-triggered animations. The very first thing that one will notice is a rotating circle that is made with the words of the artist’s name. Then instructions will pop up and ask one to hold on to the mouse to access the artist’s works. The typefaces used are Serif that surrounds the photographs. With every new scroll, some sort of liquid animation can be viewed over the photographs. While if one clicks any of the featured works one can see scroll-triggered animations are used on every single work.
06Editorial New

The website of Editorial New is a collaboration between the Pangram Pangram Foundry and the Locomotive. The typeface of this website has a reflection of the designs of the ‘90s. The website starts with a newspaper look-alike section that keeps rotating as you scroll and stops until it covers the screen completely. You will then come across various typefaces showcasing their versatility. You will also find a magazine cover being created by using the beautiful font. While you click on the Randomize button you will see that the cover changes and shows font in various other sizes.
07Danilo De Marco

The website of Danilo De Marco’s is a collaboration with Studio K95. This website is developed with the view of promoting all these works. In this website, the scroll-triggered animations are used in some specific sections, yet they are prominent. The logo along with the font used is animated in an enchanting way. The vibrant green color used will not let you move away from the screen. The typography used is very dominant. And if you click on any of his featured work you will be directed to reach the page that is solely dedicated to that particular work. While scrolling the photographs it will seem as they are drifting further away.
08K24 Moscow

K24 Moscow is one of the most captivating websites built for a modern architectural project. The website recalls the spirit of Russian suprematism and avant-garde. Scroll-triggered animations are used to animate elements on scroll throughout the full presentation. With every new scroll, you will discover something new. The combination of white, black, and red color sections that move and overlap with changes in size make a distinct typeface. These combine to make it an exciting website while keeping the Russian avant-garde spirit.
09Green Chameleon

The website of Green Chameleon was created to showcase all of their cherished achievements and memories from 2018. On the website at the very beginning, you will be greeted with an introductory graphic and then you will begin exploring the site. You will have the feeling like you have entered into a time capsule. You will be able to see the works month by month. And when you click on any particular project the picture will get displayed right on the center of the screen. With it, you will find relevant information underneath. The background color keeps changing while navigating through a 3D space.
10Bewegen

The website of Bewegen is a showcase of animations, rich content, and interactions. Bewegen is a popular world-class system known for sharing bikes. The scroll-triggered animations along with the zoom shots give a detailed view of the popular Bewegen Pedelec bike. While one scroll down further one will get related information about the bike-sharing system and also get details on how to use it. There is also the option where anyone can create their sharing system just by choosing the city and the number of heads to be included in the project while choosing the color and other features of the bike.
11Wtower

The website of Wtower is built to an interactive virtual world that tells the story of the world’s largest water tower in past - Ural’s White Tower. This website is another amazing storytelling website where the scroll-triggered animation fits like puzzle pieces. The scrolling takes to a 3D space where you will be able to learn how the tower originated and what the current state is in present. You will find a progress bar at the bottom and this appears every time there is some useful element to be delivered. Also, you can check how much of the story you have listened to and how much is left.
12Parmigiani Fleurier

The website of Parmigiani Fleurier is a website for Swiss watchmakers. This website is also another amazing animate on scroll example. The layout of the website is elegant as well as demure. While one scroll one can explore the entire collection by using the rows used on both sides of the screen. After you find the model that attracts your eye, you can view the detailed information that shows in an asymmetrical pattern around the watch. You will also come to know about other details like the case, dial, strap, winding system, and other technical specifications. The animations used are very subtle and well-balanced.
Part 3 Advantages and Disadvantages of These 12 Websites
| Name of Website | Advantage | Disadvantage |
|---|---|---|
| Joey Bada$ Political MC | Scroll-triggered animation was used all through. The scrolling is designed in such a way that it changes from horizontal to vertical. | Resource intensive. |
| Vincent Saïsset | It has a playful micro-interaction that is there between the letters and the cursor. | Components use is intensive. |
| Home Société | The horizontal scroll portrays a whole new dimension giving the users an experience of infinite scroll. | Memory usage is high. |
| Sally | The captivating part is the car’s 3D model and seventy other animations which give the look that the car is moving. | Very resource intensive. |
| Yuto Takahashi | With every new scroll, some sort of liquid animation can be viewed over the photographs | Requires High Bandwidth. |
| Editorial New | While a click is made on the Randomize button it will be seen that the cover changes and shows font in various other sizes. | Needs good Internet. |
| Danilo De Marco | The typography used is very dominant. | Resource intensive. |
| K24 Moscow | The combination of white, black, and red color sections that move and overlap with changes in size make a distinct typeface. | Requires High Bandwidth. |
| Green Chameleon | One will have the feeling like one has entered into a time capsule. | The website is resource-intensive. |
| Bewegen | There is also the option where anyone can create their sharing system just by choosing the city and the number of heads to be included in the project while choosing the color and other features of the bike. | Components use is intensive. |
| Wtower | A progress bar at the bottom and appears every time there is some useful element to be delivered. | The website is resource-intensive. |
| Parmigiani Fleurier | One can explore the entire collection by using the rows used on both sides of the screen. | Very resource-intensive |
Key Takeaways from This Episode
● At the end of this article, you have understood what Scroll-triggered animations are all about.
● You also got the view as to why you need Scroll-triggered animations while you develop a website for yourself.
● The article also tells you about the 12 best captivating Scroll-triggered animation websites which will give you various ideas for your next website.
It is impossible to imagine any website that doesn’t have any dynamic elements. It has almost become a compulsion to use dynamic elements in websites. Nowadays we look for websites that are more engaging and interactive.
This is where the popular Scroll-Triggered Animations in websites come in. Filmora Pro is one of the best website development companies that develops websites with a triggered animate scroll for customers all around the world. Filmora Pro wonderfully animate elements on scroll for the websites they develop.
In this article
01 [What Are Scroll-Triggered Animations?](#Part 1)
02 [Best 12 Websites With Triggered Animate On Scroll Examples](#Part 2)
Part 1 What Are Scroll-Triggered Animations?
Scroll-triggered animations are that strong trend that has been with us for many years. It is the most effective way to animate elements on scrolls like the graphics, texts, videos, and photos and bring all of them to life while you scroll down a website page. Scroll animations are used to grab the attention of the user and make a website more interesting and attractive.
Part 2 Best 12 Websites with triggered animate on scroll examples
Given below are the 12 best Websites with triggered animate on scroll examples.
01Joey Bada$ Political MC
The website of Joey Bada$ Political MC is considered to be one of the most exquisite examples of how scroll-triggered animations can be used effectively to say a story. This website is a collaboration between Shoes Up - The French magazine and American MC. This is a satirical website and resembles a political campaign. To build this website scroll-triggered animation was used all through. The scrolling is designed in such a way that it changes from horizontal to vertical. Each scroll delivers many interesting facts about Joey’s political beliefs.
02Vincent Saïsset
Vincent Saïsset, the first thing that you will see is a white background with a very big white letter V on it. The letter V symbolizes the artist’s initials. There is an arrow pointing downward that encourages you to start exploring the website. As you start to scroll you will see a wave of animated typefaces with a monochromatic interplay. The website is designed with horizontal and vertical scroll transitions. It also has a playful micro-interaction that is there between the letters and the cursor.
03Home Société
The website of Home Société amazingly depicts all the interior design work of the company. The design of this website is very simple but at the same rich with graphic elements, animations, and typography. The animated elements used are rhythmically intersecting and overlapping with each other. The images that are used in the background are changing constantly with eye-catching typefaces. The best part that it makes different from other websites is the horizontal scroll; this portrays a whole new dimension giving the users an experience of infinite scroll.
04Sally
This company is from NYC and they rent cars to Lyft, Via Juno, and Uber. The website of Sally might look minimal when it comes to color and designs or exquisite detailing. But what makes the website captivating is a car’s 3D model and seventy other animations which gives the look that the car is moving. It is the perfect example where you can animate elements on scroll one can move the model from one section to the other by moving the cursor or just scrolling. All the transitions used are synchronized eloquently and there is no hitch in the entire website.
05Yuto Takahashi
The website of Yuto Takahashi’s is that of a portfolio website. This website is another amazing example of scroll-triggered animations. The very first thing that one will notice is a rotating circle that is made with the words of the artist’s name. Then instructions will pop up and ask one to hold on to the mouse to access the artist’s works. The typefaces used are Serif that surrounds the photographs. With every new scroll, some sort of liquid animation can be viewed over the photographs. While if one clicks any of the featured works one can see scroll-triggered animations are used on every single work.
06Editorial New
The website of Editorial New is a collaboration between the Pangram Pangram Foundry and the Locomotive. The typeface of this website has a reflection of the designs of the ‘90s. The website starts with a newspaper look-alike section that keeps rotating as you scroll and stops until it covers the screen completely. You will then come across various typefaces showcasing their versatility. You will also find a magazine cover being created by using the beautiful font. While you click on the Randomize button you will see that the cover changes and shows font in various other sizes.
07Danilo De Marco
The website of Danilo De Marco’s is a collaboration with Studio K95. This website is developed with the view of promoting all these works. In this website, the scroll-triggered animations are used in some specific sections, yet they are prominent. The logo along with the font used is animated in an enchanting way. The vibrant green color used will not let you move away from the screen. The typography used is very dominant. And if you click on any of his featured work you will be directed to reach the page that is solely dedicated to that particular work. While scrolling the photographs it will seem as they are drifting further away.
08K24 Moscow
K24 Moscow is one of the most captivating websites built for a modern architectural project. The website recalls the spirit of Russian suprematism and avant-garde. Scroll-triggered animations are used to animate elements on scroll throughout the full presentation. With every new scroll, you will discover something new. The combination of white, black, and red color sections that move and overlap with changes in size make a distinct typeface. These combine to make it an exciting website while keeping the Russian avant-garde spirit.
09Green Chameleon
The website of Green Chameleon was created to showcase all of their cherished achievements and memories from 2018. On the website at the very beginning, you will be greeted with an introductory graphic and then you will begin exploring the site. You will have the feeling like you have entered into a time capsule. You will be able to see the works month by month. And when you click on any particular project the picture will get displayed right on the center of the screen. With it, you will find relevant information underneath. The background color keeps changing while navigating through a 3D space.
10Bewegen
The website of Bewegen is a showcase of animations, rich content, and interactions. Bewegen is a popular world-class system known for sharing bikes. The scroll-triggered animations along with the zoom shots give a detailed view of the popular Bewegen Pedelec bike. While one scroll down further one will get related information about the bike-sharing system and also get details on how to use it. There is also the option where anyone can create their sharing system just by choosing the city and the number of heads to be included in the project while choosing the color and other features of the bike.
11Wtower
The website of Wtower is built to an interactive virtual world that tells the story of the world’s largest water tower in past - Ural’s White Tower. This website is another amazing storytelling website where the scroll-triggered animation fits like puzzle pieces. The scrolling takes to a 3D space where you will be able to learn how the tower originated and what the current state is in present. You will find a progress bar at the bottom and this appears every time there is some useful element to be delivered. Also, you can check how much of the story you have listened to and how much is left.
12Parmigiani Fleurier
The website of Parmigiani Fleurier is a website for Swiss watchmakers. This website is also another amazing animate on scroll example. The layout of the website is elegant as well as demure. While one scroll one can explore the entire collection by using the rows used on both sides of the screen. After you find the model that attracts your eye, you can view the detailed information that shows in an asymmetrical pattern around the watch. You will also come to know about other details like the case, dial, strap, winding system, and other technical specifications. The animations used are very subtle and well-balanced.
Part 3 Advantages and Disadvantages of These 12 Websites
| Name of Website | Advantage | Disadvantage |
|---|---|---|
| Joey Bada$ Political MC | Scroll-triggered animation was used all through. The scrolling is designed in such a way that it changes from horizontal to vertical. | Resource intensive. |
| Vincent Saïsset | It has a playful micro-interaction that is there between the letters and the cursor. | Components use is intensive. |
| Home Société | The horizontal scroll portrays a whole new dimension giving the users an experience of infinite scroll. | Memory usage is high. |
| Sally | The captivating part is the car’s 3D model and seventy other animations which give the look that the car is moving. | Very resource intensive. |
| Yuto Takahashi | With every new scroll, some sort of liquid animation can be viewed over the photographs | Requires High Bandwidth. |
| Editorial New | While a click is made on the Randomize button it will be seen that the cover changes and shows font in various other sizes. | Needs good Internet. |
| Danilo De Marco | The typography used is very dominant. | Resource intensive. |
| K24 Moscow | The combination of white, black, and red color sections that move and overlap with changes in size make a distinct typeface. | Requires High Bandwidth. |
| Green Chameleon | One will have the feeling like one has entered into a time capsule. | The website is resource-intensive. |
| Bewegen | There is also the option where anyone can create their sharing system just by choosing the city and the number of heads to be included in the project while choosing the color and other features of the bike. | Components use is intensive. |
| Wtower | A progress bar at the bottom and appears every time there is some useful element to be delivered. | The website is resource-intensive. |
| Parmigiani Fleurier | One can explore the entire collection by using the rows used on both sides of the screen. | Very resource-intensive |
Key Takeaways from This Episode
● At the end of this article, you have understood what Scroll-triggered animations are all about.
● You also got the view as to why you need Scroll-triggered animations while you develop a website for yourself.
● The article also tells you about the 12 best captivating Scroll-triggered animation websites which will give you various ideas for your next website.
6 Proven Ways to Dub Anime for Anime Voice Actor
6 Proven Ways to Dub Anime for Anime Voice Actor

Shanoon Cox
Mar 27, 2024• Proven solutions
Watching anime is one thing majority of the world has come to appreciate. Their engaging storylines, their emotional endings, and hooks, it’s pretty difficult not to like one unless, of course, it’s time for subtitling. Reading subtitles can be stressful and strenuous so most persons just prefer dubbed animes. Dubbed animes are those animes whose voiceovers have been changed to a more preferred language, usually English. Who wouldn’t want to watch their favorite anime dubbed in their language? With great anime voice actors becoming rampant, it’s now easy to get a dubbed version of your favorite anime movies.
6 Ways To Dub Anime For You
So, what if you want to become an anime voice actor so that you can start dubbing? That would be awesome, wouldn’t it? It’s not exactly very easy but it’s also not too hard to achieve. The following steps will help you master how to dub animes.
1. Be An Anime Fan (Know The Anime Culture)
To be able to do something, you have to understand how that thing works. Before you can become a good anime voice actor, you have to actually understand the anime culture. How do animes usually set up for particular genres? Study the storylines, the hooks, the emotion required for different kinds of scenes. You need to actually know your stuff before you can even start thinking about dubbing any anime. Don’t ever decide to become an anime voice actor if you don’t like animes. Most of the scenes may appear silly to you not to talk of the vocabulary which may just sound weird and annoying to one who is not a fan.
2. Train Your Voice Regularly
The next thing you need to do when you’re trying to become an anime voice actor is to train your voice. One thing is to use your natural voice, another thing is to tweak your voice to suit a role. Of course, that won’t come cheap. You should be able to learn and master how to use your voice on demand. Train your voice to sound the way you want, consistently. This is very important because, during dubbing, you’re going to get lines that require you to speak for two or more minutes.
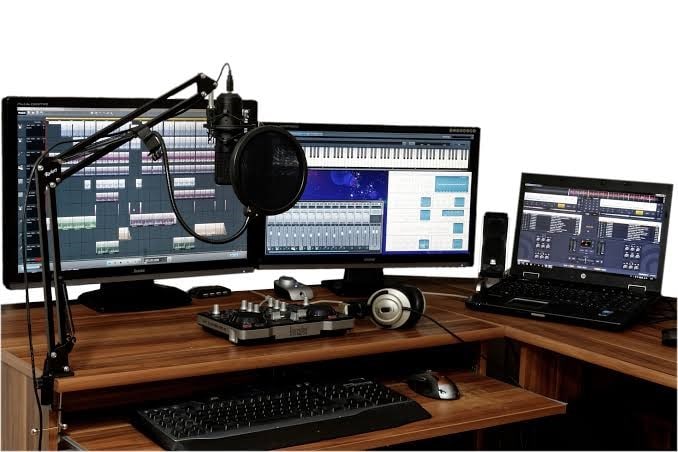
3. Practice Anime Voice Acting Daily (Set Up A Home Studio)
This is almost the same as training your voice. Practicing to be a voice actor comes with a lot of demands, you may need to set up a home studio. Scratch that! You actually need to set up a home studio, this will help you successfully practice your voicing on various animes. You can easily pick any of your favorite anime and start dubbing it, to see how your voice would sound and if you’d be able to match a level of consistency.
4. Try to Network
No man is an island! In as much as you’re trying hard to become a good voice actor and dub your favorite anime. You should look out for people with similar objectives like you. There are lots of people who like you, want to become good voice actors as well. It may not necessarily be anime voicing, it may be for normal movies, commercials or cartoons but you’d be able to learn a thing or two by networking. Linking up with them and seeing how you can help each other.
5. Audition, Audition, Audition
There is no way you will become a voice actor if you don’t audition, is there? When you’re fully sure you can face the crowd with your voice then it’s time to go for auditions. Don’t get me wrong, you don’t actually have to be perfect before you go for auditions but make sure you know a thing or two about what you’re doing. Make sure you understand what needs to be done, make sure you have a good grasp of what you need to do. Apply for auditions at different places and confidently give them your best. You’re bound to get a gig.
6. Be Consistent And Never Give Up
If peradventure you don’t get selected for any of your auditions, it’s important you don’t give up. Stay active, remain consistent with your activeness, don’t allow any emotion to weigh you down. Just be sure that you know what you’re doing and keep at it, continue applying for auditions while mastering your voice. You’re bound to strike a great gig one day.
The Future Of Anime Dubbing

Anime dubbing like most technological advancement has come to stay, it’s alright to embrace it. The fact that anime dubbing is actually helping fans all over the world appreciate their favorite animes, even more, means, more attention should be paid to it. Of course, in recent years the number of great anime voice actors has increased. A lot of them are so good that they have two or three movies to work with at every point in time. The industry is still young and it would be amazing if you as a voice actor is able to work your way to the top here.
Conclusion
Like we said earlier, to be able to do anything, you have to actually know what it is you’re doing. Anime dubbing is fun and amazing when done right, the fact that it helps many anime lovers appreciate their favorite anime movies in their own language makes it worthwhile too. If you ever wish to become a voice actor, it’s good to be consistent, pay close attention to your training, don’t ever assume your voice is already perfect. If you do actually have a great voice, aim for more, master how to tweak your voice to sound differently. This way you will be able to land more gigs in the world of anime dubbing.
Shanoon Cox
Shanoon Cox is a writer and a lover of all things video.
Follow @Shanoon Cox
Shanoon Cox
Mar 27, 2024• Proven solutions
Watching anime is one thing majority of the world has come to appreciate. Their engaging storylines, their emotional endings, and hooks, it’s pretty difficult not to like one unless, of course, it’s time for subtitling. Reading subtitles can be stressful and strenuous so most persons just prefer dubbed animes. Dubbed animes are those animes whose voiceovers have been changed to a more preferred language, usually English. Who wouldn’t want to watch their favorite anime dubbed in their language? With great anime voice actors becoming rampant, it’s now easy to get a dubbed version of your favorite anime movies.
6 Ways To Dub Anime For You
So, what if you want to become an anime voice actor so that you can start dubbing? That would be awesome, wouldn’t it? It’s not exactly very easy but it’s also not too hard to achieve. The following steps will help you master how to dub animes.
1. Be An Anime Fan (Know The Anime Culture)
To be able to do something, you have to understand how that thing works. Before you can become a good anime voice actor, you have to actually understand the anime culture. How do animes usually set up for particular genres? Study the storylines, the hooks, the emotion required for different kinds of scenes. You need to actually know your stuff before you can even start thinking about dubbing any anime. Don’t ever decide to become an anime voice actor if you don’t like animes. Most of the scenes may appear silly to you not to talk of the vocabulary which may just sound weird and annoying to one who is not a fan.
2. Train Your Voice Regularly
The next thing you need to do when you’re trying to become an anime voice actor is to train your voice. One thing is to use your natural voice, another thing is to tweak your voice to suit a role. Of course, that won’t come cheap. You should be able to learn and master how to use your voice on demand. Train your voice to sound the way you want, consistently. This is very important because, during dubbing, you’re going to get lines that require you to speak for two or more minutes.
3. Practice Anime Voice Acting Daily (Set Up A Home Studio)
This is almost the same as training your voice. Practicing to be a voice actor comes with a lot of demands, you may need to set up a home studio. Scratch that! You actually need to set up a home studio, this will help you successfully practice your voicing on various animes. You can easily pick any of your favorite anime and start dubbing it, to see how your voice would sound and if you’d be able to match a level of consistency.
4. Try to Network
No man is an island! In as much as you’re trying hard to become a good voice actor and dub your favorite anime. You should look out for people with similar objectives like you. There are lots of people who like you, want to become good voice actors as well. It may not necessarily be anime voicing, it may be for normal movies, commercials or cartoons but you’d be able to learn a thing or two by networking. Linking up with them and seeing how you can help each other.
5. Audition, Audition, Audition
There is no way you will become a voice actor if you don’t audition, is there? When you’re fully sure you can face the crowd with your voice then it’s time to go for auditions. Don’t get me wrong, you don’t actually have to be perfect before you go for auditions but make sure you know a thing or two about what you’re doing. Make sure you understand what needs to be done, make sure you have a good grasp of what you need to do. Apply for auditions at different places and confidently give them your best. You’re bound to get a gig.
6. Be Consistent And Never Give Up
If peradventure you don’t get selected for any of your auditions, it’s important you don’t give up. Stay active, remain consistent with your activeness, don’t allow any emotion to weigh you down. Just be sure that you know what you’re doing and keep at it, continue applying for auditions while mastering your voice. You’re bound to strike a great gig one day.
The Future Of Anime Dubbing
Anime dubbing like most technological advancement has come to stay, it’s alright to embrace it. The fact that anime dubbing is actually helping fans all over the world appreciate their favorite animes, even more, means, more attention should be paid to it. Of course, in recent years the number of great anime voice actors has increased. A lot of them are so good that they have two or three movies to work with at every point in time. The industry is still young and it would be amazing if you as a voice actor is able to work your way to the top here.
Conclusion
Like we said earlier, to be able to do anything, you have to actually know what it is you’re doing. Anime dubbing is fun and amazing when done right, the fact that it helps many anime lovers appreciate their favorite anime movies in their own language makes it worthwhile too. If you ever wish to become a voice actor, it’s good to be consistent, pay close attention to your training, don’t ever assume your voice is already perfect. If you do actually have a great voice, aim for more, master how to tweak your voice to sound differently. This way you will be able to land more gigs in the world of anime dubbing.
Shanoon Cox
Shanoon Cox is a writer and a lover of all things video.
Follow @Shanoon Cox
Apps to Animate Still Pictures Which Could Make Your Pictures Become Internet Sensation
Apps to Animate Still Pictures Which Could Make Your Pictures Become Internet Sensation
An easy yet powerful editor
Numerous effects to choose from
Detailed tutorials provided by the official channel
Now, it is a question of what to do with all those still photos lying in your phone. You can be pretty certain that you won’t be retiring from clicking images anytime soon. A tip to help make posting images more interesting would be using apps to animate your photos.
You can also find an app that animates your face specifically, which is great for instagram content and has a greater chance of getting reactions or comments. So without further to do let’s get animating.
In this article
01 [Review of General Methods: Can You Animate Still Pictures?](#Part 1)
02 [10 Best apps to animate still photos on Android & iOS](#Part 2)
03 [Additional Extension: 5 Apps to Animate Old Photos](#Part 3)
Part 1 Review of General Methods: Can You Animate Still Pictures?
It’s pretty obvious that you can! These days you can do whatever you want online so animating still pictures should be a piece of cake if you know-how.
A video is basically an entire collage of moving pictures. So if you can cut out pictures from a video why not turn still pictures into animations.
There are a number of ways you can use to animate still images →
● Videos are multiple pictures that move at a frame rate. Make short copies of a video by cutting out the essential moments and playing them in a loop.
● Add and play video animation elements over a picture. With the right software, this task is as easy as copy-pasting over another image.
● Apply an animated 3D image with a transparent background over another image. Remember, the bigger the element the closer it is. So size is directly translated as distance.
● You can use multiple filters and effects on an image with an animated portrait app. Find out what app you can use further on in this article.
● Turn an image into a GIF. No matter its small size and cartoonish style, GIF animation has a very wide appeal as online content.
Part 2 10 Best apps to animate still photos on Android & iOS
01GIPHY
Giphy is the largest internet catalog for GIF files, clips & stickers. No matter if it is a scene from a movie or an animation you have watched somewhere, using this application you can easily find, save & share or simply create something new.
Price: Free
Pros
● Quickly turns still photos into an animation.
● Easily share your work through all social media channels.
Cons
● Search tags are varied; you may need to search using unlikely words to get desired results.
Applicable System: Android
02GIPHY
One of the best ways to turn your photos & videos into GIFs is using ImgPlay. It has a clearer interface making it easy to use. Imgplay comes with paid- premium and non-paid version making it suitable for personal & professional application.
Price: Pro $4.99.
Pros
● It is not packed with unnecessary features.
Cons
● ImgPlay slaps a watermark on all its non-premium versions.
Applicable System: Android & iOS.
03Loopsie
The best Part is that Loopsie provides spectacular cinematographic effects to your animated stills. Stabilization algorithm efficiently removes shaking effects & blurs.
Price: Free.
Pros
● User friendly UI
● Easy to share on social media platforms.
Cons
● Paid version is a bit pricey.
Applicable System: Only on iOS.
04StoryZ
Looking for ways to create animated visuals form still images? This is where your quest ends. An advanced editing platform that offers overlays, movement & color filters. Banner Ads & watermarks can be removed by paying a small subscription fee.
Price: Free version available. Premium costs INR 789 a year.
Pros
● Double exposure effect combines video overlay & static imagery.
Cons
● Contains Ad & watermark.
Applicable System: Android.
05Animate Me
Animate Me offers you a package of postcards & greeting snapshots that you can animate according to your need. The paid subscription will get you updated sounds & effects every now & then.
Price: Free.
Pros
● Easy to use & beginners friendly.
Cons
● Editing features & tools are limited.
Applicable System: Windows**.**
06Movepic
Create animated stills, GIFs, live-wallpapers all with Movepic. It allows you to animate simply anything by drawing a path. You can also adjust the speed of animation manually.
Price: Free.
Pros
● Animate in a light motion.
● Easy to use.
Cons
● Free version leaves a watermark on images.
Applicable System: Android & iOS.
07Pixaloop
Pixaloop is a fun app packed with significant animation & editing features. 100% free to use software delivers live animated images in a few clicks. User friendly interface edits images using powerful & precise animation tools.
Price- Free.
Pros
● Offers all the necessary features & core tools.
● Provides accuracy & flexibility to the users.
Cons
● The animation process is a bit time consuming.
Applicable System: Android & iOS.
08Zoetropic
Zoetropic has a combination of 3D tools and Camera FX to animate your images. User friendly interface allows you to mask the still areas if you wish to keep it still.
Price: $199 (Pro)
Pros
● Easily customize motion areas.
● Apply overlays & audios.
Cons
● App price is higher than similar available apps.
Applicable System: Android & iOS.
9Motionleap
It is one of the most top reviewed apps on Playstore related to animating still photos. It has several features like programming directional cues, freeze portions of your photo or even apply filters.
Price: Free version. Pro version; $3.50/month, $18/year and $55 lifetime.
Pros
● Its free version does not apply watermark.
● Intuitive Interface.
Cons
● Best features are locked in Pro version.
Applicable System: Android & iOS.
Part 3 Additional Extension: 5 Apps to Animate Old Photos
It can be unanimously agreed upon that people have been storing photos for decades as a means of preserving memories. We don’t get much opportunity to meet familiar faces too often so why not just try and animate still images of relatives. Now we already know how we can start animating images on apps but restoring original images maybe a tad more complicated than that. This time a bit of the animation is dependent on the physical state of the picture so be sure it’s in mint condition.
These photos can be restored or manipulated digitally with the help of smart AI. We have listed down some of the apps to animate old photos and reconstruct faces;
01Photos Revive
You can add colour to old worn out photos and make them look more realistic in terms of tonal colorization using artificial intelligence. The app also asks you recollect any details of the photo that you might remember in terms of the image.
Applicable OS: iOS only.

02Remini
After going through several improvements and upgrades, you can use the app Remini to confidently restore low resolution images that are either pixelated, blurred or damaged into High Definition images. This app has already been used by users to process a hundred million photos.
Applicable OS: Android 1.7.2 or higher, & iOS 9.3 or higher.

03Colorize
Another app that uses AI to add colorization to your old images. It is a popular animate your family photo app which has amazing other tools and filters to try out.
Applicable OS: Android and iOS.

04Deep Nostalgia
Using this app which has been innovated by the geology platform MyHeritage uses ai to add gestures to still images to evoke nostalgia in the users.
Applicable OS: Online.

04Google Photoscan
Google scanner is a futuristic app for restoring photos of the past. The app uses a smart scanning technology that provides several scans of the same photo automatically.
Applicable OS: Android or iOS.

Key Takeaways from This Episode
● Animating photos are a new way of reimagining still images into moving live content. There are many methods and approaches you can choose to animate your images.
● Some of them being video animations, transparent background elements, Filters and effects and of course GIFs.
● There are dozens of apps with built in smart artificial intelligence to help restore old photos or make short animations out of them. Some of them are applicable for desktops while others available both on Android and iOS.
Now, it is a question of what to do with all those still photos lying in your phone. You can be pretty certain that you won’t be retiring from clicking images anytime soon. A tip to help make posting images more interesting would be using apps to animate your photos.
You can also find an app that animates your face specifically, which is great for instagram content and has a greater chance of getting reactions or comments. So without further to do let’s get animating.
In this article
01 [Review of General Methods: Can You Animate Still Pictures?](#Part 1)
02 [10 Best apps to animate still photos on Android & iOS](#Part 2)
03 [Additional Extension: 5 Apps to Animate Old Photos](#Part 3)
Part 1 Review of General Methods: Can You Animate Still Pictures?
It’s pretty obvious that you can! These days you can do whatever you want online so animating still pictures should be a piece of cake if you know-how.
A video is basically an entire collage of moving pictures. So if you can cut out pictures from a video why not turn still pictures into animations.
There are a number of ways you can use to animate still images →
● Videos are multiple pictures that move at a frame rate. Make short copies of a video by cutting out the essential moments and playing them in a loop.
● Add and play video animation elements over a picture. With the right software, this task is as easy as copy-pasting over another image.
● Apply an animated 3D image with a transparent background over another image. Remember, the bigger the element the closer it is. So size is directly translated as distance.
● You can use multiple filters and effects on an image with an animated portrait app. Find out what app you can use further on in this article.
● Turn an image into a GIF. No matter its small size and cartoonish style, GIF animation has a very wide appeal as online content.
Part 2 10 Best apps to animate still photos on Android & iOS
01GIPHY
Giphy is the largest internet catalog for GIF files, clips & stickers. No matter if it is a scene from a movie or an animation you have watched somewhere, using this application you can easily find, save & share or simply create something new.
Price: Free
Pros
● Quickly turns still photos into an animation.
● Easily share your work through all social media channels.
Cons
● Search tags are varied; you may need to search using unlikely words to get desired results.
Applicable System: Android
02GIPHY
One of the best ways to turn your photos & videos into GIFs is using ImgPlay. It has a clearer interface making it easy to use. Imgplay comes with paid- premium and non-paid version making it suitable for personal & professional application.
Price: Pro $4.99.
Pros
● It is not packed with unnecessary features.
Cons
● ImgPlay slaps a watermark on all its non-premium versions.
Applicable System: Android & iOS.
03Loopsie
The best Part is that Loopsie provides spectacular cinematographic effects to your animated stills. Stabilization algorithm efficiently removes shaking effects & blurs.
Price: Free.
Pros
● User friendly UI
● Easy to share on social media platforms.
Cons
● Paid version is a bit pricey.
Applicable System: Only on iOS.
04StoryZ
Looking for ways to create animated visuals form still images? This is where your quest ends. An advanced editing platform that offers overlays, movement & color filters. Banner Ads & watermarks can be removed by paying a small subscription fee.
Price: Free version available. Premium costs INR 789 a year.
Pros
● Double exposure effect combines video overlay & static imagery.
Cons
● Contains Ad & watermark.
Applicable System: Android.
05Animate Me
Animate Me offers you a package of postcards & greeting snapshots that you can animate according to your need. The paid subscription will get you updated sounds & effects every now & then.
Price: Free.
Pros
● Easy to use & beginners friendly.
Cons
● Editing features & tools are limited.
Applicable System: Windows**.**
06Movepic
Create animated stills, GIFs, live-wallpapers all with Movepic. It allows you to animate simply anything by drawing a path. You can also adjust the speed of animation manually.
Price: Free.
Pros
● Animate in a light motion.
● Easy to use.
Cons
● Free version leaves a watermark on images.
Applicable System: Android & iOS.
07Pixaloop
Pixaloop is a fun app packed with significant animation & editing features. 100% free to use software delivers live animated images in a few clicks. User friendly interface edits images using powerful & precise animation tools.
Price- Free.
Pros
● Offers all the necessary features & core tools.
● Provides accuracy & flexibility to the users.
Cons
● The animation process is a bit time consuming.
Applicable System: Android & iOS.
08Zoetropic
Zoetropic has a combination of 3D tools and Camera FX to animate your images. User friendly interface allows you to mask the still areas if you wish to keep it still.
Price: $199 (Pro)
Pros
● Easily customize motion areas.
● Apply overlays & audios.
Cons
● App price is higher than similar available apps.
Applicable System: Android & iOS.
9Motionleap
It is one of the most top reviewed apps on Playstore related to animating still photos. It has several features like programming directional cues, freeze portions of your photo or even apply filters.
Price: Free version. Pro version; $3.50/month, $18/year and $55 lifetime.
Pros
● Its free version does not apply watermark.
● Intuitive Interface.
Cons
● Best features are locked in Pro version.
Applicable System: Android & iOS.
Part 3 Additional Extension: 5 Apps to Animate Old Photos
It can be unanimously agreed upon that people have been storing photos for decades as a means of preserving memories. We don’t get much opportunity to meet familiar faces too often so why not just try and animate still images of relatives. Now we already know how we can start animating images on apps but restoring original images maybe a tad more complicated than that. This time a bit of the animation is dependent on the physical state of the picture so be sure it’s in mint condition.
These photos can be restored or manipulated digitally with the help of smart AI. We have listed down some of the apps to animate old photos and reconstruct faces;
01Photos Revive
You can add colour to old worn out photos and make them look more realistic in terms of tonal colorization using artificial intelligence. The app also asks you recollect any details of the photo that you might remember in terms of the image.
Applicable OS: iOS only.
02Remini
After going through several improvements and upgrades, you can use the app Remini to confidently restore low resolution images that are either pixelated, blurred or damaged into High Definition images. This app has already been used by users to process a hundred million photos.
Applicable OS: Android 1.7.2 or higher, & iOS 9.3 or higher.
03Colorize
Another app that uses AI to add colorization to your old images. It is a popular animate your family photo app which has amazing other tools and filters to try out.
Applicable OS: Android and iOS.
04Deep Nostalgia
Using this app which has been innovated by the geology platform MyHeritage uses ai to add gestures to still images to evoke nostalgia in the users.
Applicable OS: Online.
04Google Photoscan
Google scanner is a futuristic app for restoring photos of the past. The app uses a smart scanning technology that provides several scans of the same photo automatically.
Applicable OS: Android or iOS.
Key Takeaways from This Episode
● Animating photos are a new way of reimagining still images into moving live content. There are many methods and approaches you can choose to animate your images.
● Some of them being video animations, transparent background elements, Filters and effects and of course GIFs.
● There are dozens of apps with built in smart artificial intelligence to help restore old photos or make short animations out of them. Some of them are applicable for desktops while others available both on Android and iOS.
How to Make an Animated Travel Map Video?
How to Make an Animated Travel Map Video?

Benjamin Arango
Mar 27, 2024• Proven solutions
Animated travel map videos make it easy for the viewers to follow the routes from the source to destination locations right on the single screen. While the static maps would only allow the audience to see the markers from where the journey would start and is expected to end, the animated ones show the real-time movements and therefore look more interactive when viewed.
That said, here you will learn how to create an attractive and engaging animated travel map video using one of the easiest post-production applications, Wondershare Filmora, which is widely appreciated by amateurs and professionals throughout the globe. In another section, you will also learn about an alternative program that might be of some help in case you are more into online designing.
- Method 1: Make Animated Travel Map Videos with Location Video Maker - [Video Tutorial]
- Method 2: Make Interactive Animated Travel Map with Pictramap
- Method 3: Create Animated Travel Map Using Multidev
Method 1 Make Animated Travel Map Videos with Location Video Maker
The entire process of creating an animated travel map video in Wondershare’s Filmora is categorized into two parts, wherein the first part you will collect all the ingredients that are needed to get started, and in the second part you will actually make an animated map using the tools and features present in Filmora.
Watch a video tutorial to see how to make an animated map for a video:
For Win 7 or later (64-bit)
 Secure Download
For macOS 10.14 or later
Secure Download


Part 1: Prepare the Travel Map Materials
Following are the ingredients and the methods to collect them for animated travel map preparation:
Step 1: Get the Map
The first thing that you would need to prepare an animated map is an image of a realistic map. Thanks to Google and Microsoft, these things are now pretty easy to arrange. The process is given below:
- Launch your preferred web browser
- Type google.com in the address bar or the search box and hit Enter
- Scroll to zoom out so you can see the entire world map on one screen

- Type Snipping Tool in the Cortana search box present on the left side of the Taskbar
- Launch Snipping Tool, and use it to capture the screenshot of the map
Note: Snipping Tool is a built-in app in Windows 10 and is available for free. If you are using any other operating system, or have a different program to capture the screenshots, feel free to use it according to your convenience.
- Save the screenshot you captured as a JPG file on your PC
Step 2: Mark Out the Map Path
The next step in the process of preparing an animated travel map is to mark your route on it. To do so, you can use any of your preferred photo editing tools. However, to keep this illustration simple, Microsoft Paint is used here, and the method is given below:
- Right-click the screenshot you just captured
- Go to Open with on the context menu, and then click Paint from the submenu that appears
- Pick your preferred color from the pallet of the Paint interface. It is advisable to use an eye-catchy shade such as Red
- Use the Sphere shape tool to draw a circle over the source and destination locations on the map
- Use the Line tool to draw a line from the source point to the destination. Try giving the line a few turns to make it look realistic
- Go to File > Save As, and save the marked image with a different name
Note: Once this is done, you should have two image files of the map, i.e., one without the marks and one with it
Step 3: Download Some Travel Icons
Another important ingredient in an effective travel map animation is touring icons such as location marker image, a traveling medium symbol like a helicopter, airplane, car/bike (for short distances), etc. A couple of websites that offer royalty-free stock photos at absolutely no cost are listed below:
Note: Although the websites given above allow you to download and use their stock images and icons for free, you may need to give credits to the designers/creators of the symbols while using their objects. Therefore, you are suggested to check the Terms & Conditions and norms of usage of the elements before downloading and adding them to your projects.
Part 2: Make Animated Travel Map Videos with Filmora
After you have gathered all the necessary ingredients that are required to create a travel map animation, it is now time to get to work. The following instructions would guide you through the step-by-step process of preparing a decent and realistic animated travel map in Wondershare Filmora :
For Win 7 or later (64-bit)
Secure Download
For macOS 10.14 or later
Secure Download
Step 1: Import Ingredients to Filmora and Add Them to the Timeline
Launch the video editor on your computer, click anywhere inside the Media window at the upper-left area, and import all the images and icons that you collected earlier to program. Next, drag both the images of the map, i.e., with and without the marks to the Timeline, and ensure that they are of the same duration and are placed on the same track.

Note: Be sure to put the map without the marks first, and then the one with the marks. Also note that the images have the playback duration of 5 seconds in the Timeline by default, and this tenure can be reduced or increased by dragging the side handle of the media to the left or right respectively.
Step 2: Add Transition for Illusion of Route Appearance
Go to Transition from the standard toolbar at the top, locate the Erase Slide transition effect from the available presets, and place it in between the two image files that you earlier added to the Timeline. Next, click and drag either of the side handles of the transition to the end of the media clip. Notice how the other side of the effect is expanded in equal proportion.

Step 3: Preview and Export
Press the Spacebar on the keyboard to preview the video and see if the route appears as if it is being drawn on the map. Once the animation looks acceptable, click EXPORT from the top-center, go to the Local tab on the Export window, select MP4 from the formats list in the left, and click EXPORT from the bottom-right corner to export the current animation to MP4.
Step 4: Customize the Travel Map Media
Either start a new project and import the video of the map you exported in the previous step to the app and then to the Timeline, or remove the existing media from the Timeline in the same project, and add the exported video to it for convenience.

For Win 7 or later (64-bit)
Secure Download
For macOS 10.14 or later
Secure Download
Next, position the Skimmer (Playhead) a couple of frames before the one the route line appears and starts stretching from, and click the Split icon from the editing toolbar above the Timeline itself. Repeat this process for the other side of the media, i.e., position the Skimmer a couple of frames after the route line reaches the destination location, and click the Split icon again. Then remove the separated segments from both the sides by selecting them and pressing Delete on the keyboard, leaving only the portion where the animation is visible.

Optionally, right-click the media that is left behind in the Timeline, and go to Speed and Duration from the context menu. On the Custom Speed box, drag the Speed slider to the left to decrease the playback speed resulting in the increased duration of the media. Alternatively, you can manually enter a value in the Speed box to get precise tenure. Click OK when you are done.

Step 5: Add Animations to Travel Map
Right-click the media in the Timeline, and go to Add Animation from the context menu. Make sure that the Skimmer is on the first frame, and add several keyframes as explained below:
- Click Add to add the first keyframe

- Move a couple of frames further, and click Add one more time. Now, while you are on this second keyframe, use the Scale slider to zoom in to the map so the source location remains within focus.

- Next, move the Playhead further and add another keyframe a couple of frames before the route line hits the edge of the window.
- After this, move the Playhead again and position it where the route line reaches its destination location. Add another keyframe here as well, and move the map in the Preview window so the focus is now on the destination.
- Move the Playhead a few frames further, add another keyframe, and use the Scale slider to zoom a bit more into the map to make the entire animation look realistic. Click OK to save the changes.
Step 6: Add Icons and Titles, and Export the Project
Drag the image of the traveling medium to the Timeline, and place it on the frame the route line starts from. Make sure to place the image on the track above the map, and stretch it to the end so it remains visible throughout the animation. Next, use the method explained above to add keyframes to move the medium along with the route line from the source to the destination. Optionally, add the image of the location marker at the destination point, go to Transition, and add your preferred transition effect, preferably Dissolve, to the marker track in the Timeline so it looks as if it has appeared as the medium arrived the destination.
For Win 7 or later (64-bit)
Secure Download
For macOS 10.14 or later
Secure Download
Get back to the first frame in the Timeline, go to Titles on the standard toolbar, and add a title preset somewhere near the source location. Resize the text, change the format as needed, and add your preferred caption to it such as the start time, name, etc. Reduce the duration of the track so the title appears for a few frames, preferably before the map animation starts. Click OK when done. Repeat this process for the destination point as well.
Once everything is complete, click the Play button in the Preview window to review your work. If the video looks acceptable, click EXPORT from the top-center of the interface, and use the method explained earlier to export the animated travel map in your preferred format.
![]()
Method 2 How to Make Interactive Animated Travel Map with Pictramap
If you don’t want to install a dedicated animation software on your computer due to limited hardware resources or some other reason, there is an online solution called Pictramap to create a travel map animation using a web browser. The web app offers a lucrative interface that could be easily understood and worked with to produce an animated map for free.
The process to create an animated travel map with Pictramap is given below:
Step 1: Create a Project
Launch your favorite web browser, go to https://www.pictramap.com/ , click Create yours now, it’s free, and sign up to Pictramap using your preferred method. When you are on the Dashboard, enter a name in the field available under the My Projects section, and click Create to create a new project (the animated map).

Step 2: Define the Locations and Method of Commute
On the map, right-click the location you want to start your journey from, enter the name of the location or any other significant title, and click Add. Click the location marker, click the Travel Mode icon, and select your preferred mode of traveling. Repeat this process to mark the destination location as well.

Step 3: Preview the Animation
Click the View Animation button from the upper-right corner of the page to see the animated travel map.

Downsides of Using Pictramap to Create Animated Travel Map Video
Although Pictramap allows you to create a travel map animation with ease and extremely quickly, at the time of this writing, it offers no way of downloading the animation to your PC, and therefore it couldn’t be used in your projects.
If you are using Wondershare Filmora, you can use its built-in screen recording feature to record the animation that Pictramap plays, and then save the captured footage as MP4 or any other format on your computer. This video can then be imported to your projects for further uses.
![]()
A cross-platform for making videos anywhere for all creators

Why your video editing isn’t good enough? How about some creative inspo?
- 100 Million+ Users
- 150+ Countries and Regions
- 4 Million+ Social Media Followers
- 5 Million+ Stock Media for Use
* Secure Download

Method 3 How To Make Animated Travel Map Using Multidev
Multi.dev is still a new web-based application to build awesome animated maps, but it’s good! The application helps you create presentations about all your recent and previous trips. And the interface is also hassle-free.
So, follow this step-by-step guide to making animated maps with Multi.dev.
Step 1: Open Multi.dev
Visit Multi.dev from your internet browser.

Once the tool gets open, you will see a demo video. This example clip will have animated maps of different locations. So it is up to you whether to use the same example and edit the places you have been to or are planning to visit. Or, simply create a new animated map from scratch.
Step 2: Choose Your First Location
Take your mouse cursor on the left side of the application and type the first location in the search bar. As soon as you do it, you will see that the “travel arrow” will automatically begin from there. Likewise, type and select the next location through the search bar.
Once you type the location, you will see 8 travel modes, including airplane, bus, and train. You can select the same mode for all sites or a different mode for another place. Totally up to you!

Step 3: Select Map Themes
All your chosen places will be highlighted in the software’s minimalistic map.

Step 4: Download Map on Your Computer
If you’re happy with the animated map, click the “Create Video” button to save the animated map on your computer in a few minutes.


Contrarily, you can also share the animation by choosing the “Share Animation” option.
Conclusion
An animated travel map plays an important role to add a realistic touring effect to your motion picture projects. While you can use a web app like Pictramap to create such an animation online easily and for free, the limitations it comes along with might keep you from choosing this method.
Instead, you may want to get more inclined toward a dedicated post-production software like Wondershare Filmora that gives you full control over the process, and the freedom to choose your preferred format to export the animation to for independent usage.
For Win 7 or later (64-bit)
Secure Download
For macOS 10.14 or later
Secure Download
Benjamin Arango
Benjamin Arango is a writer and a lover of all things video.
Follow @Benjamin Arango
Benjamin Arango
Mar 27, 2024• Proven solutions
Animated travel map videos make it easy for the viewers to follow the routes from the source to destination locations right on the single screen. While the static maps would only allow the audience to see the markers from where the journey would start and is expected to end, the animated ones show the real-time movements and therefore look more interactive when viewed.
That said, here you will learn how to create an attractive and engaging animated travel map video using one of the easiest post-production applications, Wondershare Filmora, which is widely appreciated by amateurs and professionals throughout the globe. In another section, you will also learn about an alternative program that might be of some help in case you are more into online designing.
- Method 1: Make Animated Travel Map Videos with Location Video Maker - [Video Tutorial]
- Method 2: Make Interactive Animated Travel Map with Pictramap
- Method 3: Create Animated Travel Map Using Multidev
Method 1 Make Animated Travel Map Videos with Location Video Maker
The entire process of creating an animated travel map video in Wondershare’s Filmora is categorized into two parts, wherein the first part you will collect all the ingredients that are needed to get started, and in the second part you will actually make an animated map using the tools and features present in Filmora.
Watch a video tutorial to see how to make an animated map for a video:
For Win 7 or later (64-bit)
Secure Download
For macOS 10.14 or later
Secure Download
Part 1: Prepare the Travel Map Materials
Following are the ingredients and the methods to collect them for animated travel map preparation:
Step 1: Get the Map
The first thing that you would need to prepare an animated map is an image of a realistic map. Thanks to Google and Microsoft, these things are now pretty easy to arrange. The process is given below:
- Launch your preferred web browser
- Type google.com in the address bar or the search box and hit Enter
- Scroll to zoom out so you can see the entire world map on one screen
- Type Snipping Tool in the Cortana search box present on the left side of the Taskbar
- Launch Snipping Tool, and use it to capture the screenshot of the map
Note: Snipping Tool is a built-in app in Windows 10 and is available for free. If you are using any other operating system, or have a different program to capture the screenshots, feel free to use it according to your convenience.
- Save the screenshot you captured as a JPG file on your PC
Step 2: Mark Out the Map Path
The next step in the process of preparing an animated travel map is to mark your route on it. To do so, you can use any of your preferred photo editing tools. However, to keep this illustration simple, Microsoft Paint is used here, and the method is given below:
- Right-click the screenshot you just captured
- Go to Open with on the context menu, and then click Paint from the submenu that appears
- Pick your preferred color from the pallet of the Paint interface. It is advisable to use an eye-catchy shade such as Red
- Use the Sphere shape tool to draw a circle over the source and destination locations on the map
- Use the Line tool to draw a line from the source point to the destination. Try giving the line a few turns to make it look realistic
- Go to File > Save As, and save the marked image with a different name
Note: Once this is done, you should have two image files of the map, i.e., one without the marks and one with it
Step 3: Download Some Travel Icons
Another important ingredient in an effective travel map animation is touring icons such as location marker image, a traveling medium symbol like a helicopter, airplane, car/bike (for short distances), etc. A couple of websites that offer royalty-free stock photos at absolutely no cost are listed below:
Note: Although the websites given above allow you to download and use their stock images and icons for free, you may need to give credits to the designers/creators of the symbols while using their objects. Therefore, you are suggested to check the Terms & Conditions and norms of usage of the elements before downloading and adding them to your projects.
Part 2: Make Animated Travel Map Videos with Filmora
After you have gathered all the necessary ingredients that are required to create a travel map animation, it is now time to get to work. The following instructions would guide you through the step-by-step process of preparing a decent and realistic animated travel map in Wondershare Filmora :
For Win 7 or later (64-bit)
Secure Download
For macOS 10.14 or later
Secure Download
Step 1: Import Ingredients to Filmora and Add Them to the Timeline
Launch the video editor on your computer, click anywhere inside the Media window at the upper-left area, and import all the images and icons that you collected earlier to program. Next, drag both the images of the map, i.e., with and without the marks to the Timeline, and ensure that they are of the same duration and are placed on the same track.
Note: Be sure to put the map without the marks first, and then the one with the marks. Also note that the images have the playback duration of 5 seconds in the Timeline by default, and this tenure can be reduced or increased by dragging the side handle of the media to the left or right respectively.
Step 2: Add Transition for Illusion of Route Appearance
Go to Transition from the standard toolbar at the top, locate the Erase Slide transition effect from the available presets, and place it in between the two image files that you earlier added to the Timeline. Next, click and drag either of the side handles of the transition to the end of the media clip. Notice how the other side of the effect is expanded in equal proportion.
Step 3: Preview and Export
Press the Spacebar on the keyboard to preview the video and see if the route appears as if it is being drawn on the map. Once the animation looks acceptable, click EXPORT from the top-center, go to the Local tab on the Export window, select MP4 from the formats list in the left, and click EXPORT from the bottom-right corner to export the current animation to MP4.
Step 4: Customize the Travel Map Media
Either start a new project and import the video of the map you exported in the previous step to the app and then to the Timeline, or remove the existing media from the Timeline in the same project, and add the exported video to it for convenience.
For Win 7 or later (64-bit)
Secure Download
For macOS 10.14 or later
Secure Download
Next, position the Skimmer (Playhead) a couple of frames before the one the route line appears and starts stretching from, and click the Split icon from the editing toolbar above the Timeline itself. Repeat this process for the other side of the media, i.e., position the Skimmer a couple of frames after the route line reaches the destination location, and click the Split icon again. Then remove the separated segments from both the sides by selecting them and pressing Delete on the keyboard, leaving only the portion where the animation is visible.
Optionally, right-click the media that is left behind in the Timeline, and go to Speed and Duration from the context menu. On the Custom Speed box, drag the Speed slider to the left to decrease the playback speed resulting in the increased duration of the media. Alternatively, you can manually enter a value in the Speed box to get precise tenure. Click OK when you are done.
Step 5: Add Animations to Travel Map
Right-click the media in the Timeline, and go to Add Animation from the context menu. Make sure that the Skimmer is on the first frame, and add several keyframes as explained below:
- Click Add to add the first keyframe
- Move a couple of frames further, and click Add one more time. Now, while you are on this second keyframe, use the Scale slider to zoom in to the map so the source location remains within focus.
- Next, move the Playhead further and add another keyframe a couple of frames before the route line hits the edge of the window.
- After this, move the Playhead again and position it where the route line reaches its destination location. Add another keyframe here as well, and move the map in the Preview window so the focus is now on the destination.
- Move the Playhead a few frames further, add another keyframe, and use the Scale slider to zoom a bit more into the map to make the entire animation look realistic. Click OK to save the changes.
Step 6: Add Icons and Titles, and Export the Project
Drag the image of the traveling medium to the Timeline, and place it on the frame the route line starts from. Make sure to place the image on the track above the map, and stretch it to the end so it remains visible throughout the animation. Next, use the method explained above to add keyframes to move the medium along with the route line from the source to the destination. Optionally, add the image of the location marker at the destination point, go to Transition, and add your preferred transition effect, preferably Dissolve, to the marker track in the Timeline so it looks as if it has appeared as the medium arrived the destination.
For Win 7 or later (64-bit)
Secure Download
For macOS 10.14 or later
Secure Download
Get back to the first frame in the Timeline, go to Titles on the standard toolbar, and add a title preset somewhere near the source location. Resize the text, change the format as needed, and add your preferred caption to it such as the start time, name, etc. Reduce the duration of the track so the title appears for a few frames, preferably before the map animation starts. Click OK when done. Repeat this process for the destination point as well.
Once everything is complete, click the Play button in the Preview window to review your work. If the video looks acceptable, click EXPORT from the top-center of the interface, and use the method explained earlier to export the animated travel map in your preferred format.
![]()
Method 2 How to Make Interactive Animated Travel Map with Pictramap
If you don’t want to install a dedicated animation software on your computer due to limited hardware resources or some other reason, there is an online solution called Pictramap to create a travel map animation using a web browser. The web app offers a lucrative interface that could be easily understood and worked with to produce an animated map for free.
The process to create an animated travel map with Pictramap is given below:
Step 1: Create a Project
Launch your favorite web browser, go to https://www.pictramap.com/ , click Create yours now, it’s free, and sign up to Pictramap using your preferred method. When you are on the Dashboard, enter a name in the field available under the My Projects section, and click Create to create a new project (the animated map).
Step 2: Define the Locations and Method of Commute
On the map, right-click the location you want to start your journey from, enter the name of the location or any other significant title, and click Add. Click the location marker, click the Travel Mode icon, and select your preferred mode of traveling. Repeat this process to mark the destination location as well.
Step 3: Preview the Animation
Click the View Animation button from the upper-right corner of the page to see the animated travel map.
Downsides of Using Pictramap to Create Animated Travel Map Video
Although Pictramap allows you to create a travel map animation with ease and extremely quickly, at the time of this writing, it offers no way of downloading the animation to your PC, and therefore it couldn’t be used in your projects.
If you are using Wondershare Filmora, you can use its built-in screen recording feature to record the animation that Pictramap plays, and then save the captured footage as MP4 or any other format on your computer. This video can then be imported to your projects for further uses.
![]()
A cross-platform for making videos anywhere for all creators
Why your video editing isn’t good enough? How about some creative inspo?
- 100 Million+ Users
- 150+ Countries and Regions
- 4 Million+ Social Media Followers
- 5 Million+ Stock Media for Use
* Secure Download
Method 3 How To Make Animated Travel Map Using Multidev
Multi.dev is still a new web-based application to build awesome animated maps, but it’s good! The application helps you create presentations about all your recent and previous trips. And the interface is also hassle-free.
So, follow this step-by-step guide to making animated maps with Multi.dev.
Step 1: Open Multi.dev
Visit Multi.dev from your internet browser.
Once the tool gets open, you will see a demo video. This example clip will have animated maps of different locations. So it is up to you whether to use the same example and edit the places you have been to or are planning to visit. Or, simply create a new animated map from scratch.
Step 2: Choose Your First Location
Take your mouse cursor on the left side of the application and type the first location in the search bar. As soon as you do it, you will see that the “travel arrow” will automatically begin from there. Likewise, type and select the next location through the search bar.
Once you type the location, you will see 8 travel modes, including airplane, bus, and train. You can select the same mode for all sites or a different mode for another place. Totally up to you!
Step 3: Select Map Themes
All your chosen places will be highlighted in the software’s minimalistic map.
Step 4: Download Map on Your Computer
If you’re happy with the animated map, click the “Create Video” button to save the animated map on your computer in a few minutes.
Contrarily, you can also share the animation by choosing the “Share Animation” option.
Conclusion
An animated travel map plays an important role to add a realistic touring effect to your motion picture projects. While you can use a web app like Pictramap to create such an animation online easily and for free, the limitations it comes along with might keep you from choosing this method.
Instead, you may want to get more inclined toward a dedicated post-production software like Wondershare Filmora that gives you full control over the process, and the freedom to choose your preferred format to export the animation to for independent usage.
For Win 7 or later (64-bit)
Secure Download
For macOS 10.14 or later
Secure Download
Benjamin Arango
Benjamin Arango is a writer and a lover of all things video.
Follow @Benjamin Arango
10 Top Tools to Make Pic Collage for Windows
10 Best Tools to Make Pic Collage for Windows
An easy yet powerful editor
Numerous effects to choose from
Detailed tutorials provided by the official channel
Collages are a great way to assemble all your favorite pictures in one place. You can share these collages with your friends, relatives, and dear ones or can also use them for posting on social media sites and other online platforms. Though creating a collage may sound simple, a lot of considerations need to be taken for creating an interesting and eye-catchy collage, and for this, a help of a professional tool can be taken. In the following parts of the topic, you can learn about the best tools for photo collage Windows 10 and other OS.

In the following parts of the topic, you can learn about the best tools for photo collage Windows 10 and other OS.
In this article
01 [Top 10 Pic Collage for Windows Tools](#Part 1)
02 [The Best Tool to Get Stock Images for Creating Collages](#Part 2)
Part 1 Top 10 Pic Collage for Windows Tools
Checkout the best collage for Windows below.
01PhotoPad Photo Editing Software
This is a complete photo editing tool supporting an array of features including the creation of a photo collage. This software from NCH software can let you add the desired images manually and also support using the auto grid to add an unlimited number of pictures. The tool also lets you choose the collage orientation size and set the background as needed.
Pros:
● Create collage Windows manually or automatically.
● Allows adding a background color, image, or from the available background options.
● Spacing and corners between the images can be selected.
● The size of the tool is small.
Cons:
● Stickers and filters to individual images cannot be added.
● Cannot choose a custom collage size.

02PhotoScapeX
Available for download on Windows 10 and higher versions this is another widely used photo editing tool that can also let you create collages manually as well as automatically. Multiple frames are available that can be selected as desired and there are additional features like adding filters, and also edit them in multiple ways.
Pros:
● Allows creating collage manually and automatically.
● Multiple editing tools for customization like filters, crop, zoom, doodle, and more.
● Picture alignment can be done in 3 modes- vertical, horizontal, and tile.
● Option to change and customize image size, spacing, margin, and others.
Cons:
● Limited photos can be added.
● The size of the tool is large in comparison to other tools.

03Phototastic Collage
This is free to use Windows-based tool that can create impressive collages in no time. Multiple designs, frames, and other options are available to create a customized collage as needed.
Pros:
● Multiple customization options are available for creating the desired collage.
● User-friendly and simple interface.
● An array of templates is available.
Cons:
● The free version has limited features.
● Limitation to the number of images that can be added.
● Ads in the app.

04PicCollage
Unleash your creativity by creating an interesting collage using this excellent collage-making app. There are multiple templates and customization options supports.
Pros
● Create collage manually or automatically
● The earlier created collage can be edited.
● Allows creating a collage in 3 options- grid, template, freestyle.
Cons
● Watermark on the created collage.
● The image size cannot be customized.

05Collage Maker-Photo Grid and Montage
Using this free Windows tool, you can create an interesting photo collage or a free-styled montage as needed. A wide range of layouts and templates are available that can be further customized to get the desired collage.
Pros:
● Free Windows software.
● Come with multiple filters, layout, and editing tools.
● The user interface is easy.
● Preview option available.
Cons:
● Performance glitches due to bugs.
● Custom collage size cannot be set.
● Watermark on the collage.

06Fotor
If you are looking for a simple and basic collage-making tool, Fotor is the right choice. Collage in the grid, freestyle, and photo-stitch style can be created and basic customization features are supported.
Pros:
● Simple to use tool that is apt for beginners.
● Border can be changed from a solid color to a background.
Cons:
● Customization options are limited.
● Border and the image size cannot be changed.

07El Collagero
Just like its name, this is an interesting Windows-based tool for creating a collage of your choice. A wide range of options for customization is available that can let you edit the images, choose a template and then also edit the file.
Pros:
● A wide range of templates and designs for collages is available.
● Allows adding text, symbols, and other elements.
● Created collage can be shared on social media sites.
Cons:
● In comparison to other professional tools, the functions are limited.

08Atlantas Photo Collage Studio
This Windows-based tool will let you create collages of all types and for all occasions. You can choose from over 100 templates that best match your collage theme and image content.
Pros:
● More than 100 templates for collage designs are available.
● The size of the layout can be changed.
● Multiple editing and customization options are supported like zoom, opacity selection, and more.
Cons:
● Limitation of adding 45 images.
● For the advanced functions, need to subscribe to the paid version.

09PhotoJoiner
Using this Windows tool, pick up your favorite images and turn them into a beautiful collage with customized design and style.
Pros:
● A simple and basic tool for creating a collage.
● Created collage can be saved or shared to the social media site.
● Change the order of the images, margins, and other aspects.
Cons
● Collage templates are limited.
● Advanced features are missing.

1010. Blend Photo
To create a collage of images with a blending effect, this is the right tool to use. Available for download on the Windows system this tool lets you create collages telling interesting stories.
Pros:
● Simple and easy collage-making tool.
● Add blending effect to your collages.
● Over 50 custom shapes for image cropping are available along with the option for free-hand cropping.
● Multiple filters can be added.
Cons:
● Limited Editing and customization options.

Part 2 The Best Tool to Get Stock Images for Creating Collages
Several times, the captured and stored images may not fit in the collage theme you wish to create and, in such situations, you can use the stock images available online at several sites. One of the best tools where you can check out the images in different categories is Wondershare Filmora. This versatile software from Wondershare Filmora Video Editor is an advanced video editing tool that also has a huge collection of stock media including images.
Additionally, the split-screen feature of the software can be used for creating a video collage. Available for Windows and Mac systems, Wondershare Filmora will look after all your advanced video editing and customized requirements.

Wondershare Filmora - Best Video Editor for Mac/Windows
5,481,435 people have downloaded it.
Build unique custom animations without breaking a sweat.
Focus on creating epic stories and leave the details to Filmora’s auto features.
Start a creative adventure with drag & drop effects and endless possibilities.
Filmora simplifies advanced features to save you time and effort.
Filmora cuts out repetition so you can move on to your next creative breakthrough.
● Key Takeaways from This Episode →
● Collage-making tools help in creating an interesting and eye-catchy collage in a hassle-free manner.
●Several Windows-based tools are available for quick download.
●Wondershare Filmora is a great software to find a collection of stock images in different categories.
Collages are a great way to assemble all your favorite pictures in one place. You can share these collages with your friends, relatives, and dear ones or can also use them for posting on social media sites and other online platforms. Though creating a collage may sound simple, a lot of considerations need to be taken for creating an interesting and eye-catchy collage, and for this, a help of a professional tool can be taken. In the following parts of the topic, you can learn about the best tools for photo collage Windows 10 and other OS.
In the following parts of the topic, you can learn about the best tools for photo collage Windows 10 and other OS.
In this article
01 [Top 10 Pic Collage for Windows Tools](#Part 1)
02 [The Best Tool to Get Stock Images for Creating Collages](#Part 2)
Part 1 Top 10 Pic Collage for Windows Tools
Checkout the best collage for Windows below.
01PhotoPad Photo Editing Software
This is a complete photo editing tool supporting an array of features including the creation of a photo collage. This software from NCH software can let you add the desired images manually and also support using the auto grid to add an unlimited number of pictures. The tool also lets you choose the collage orientation size and set the background as needed.
Pros:
● Create collage Windows manually or automatically.
● Allows adding a background color, image, or from the available background options.
● Spacing and corners between the images can be selected.
● The size of the tool is small.
Cons:
● Stickers and filters to individual images cannot be added.
● Cannot choose a custom collage size.
02PhotoScapeX
Available for download on Windows 10 and higher versions this is another widely used photo editing tool that can also let you create collages manually as well as automatically. Multiple frames are available that can be selected as desired and there are additional features like adding filters, and also edit them in multiple ways.
Pros:
● Allows creating collage manually and automatically.
● Multiple editing tools for customization like filters, crop, zoom, doodle, and more.
● Picture alignment can be done in 3 modes- vertical, horizontal, and tile.
● Option to change and customize image size, spacing, margin, and others.
Cons:
● Limited photos can be added.
● The size of the tool is large in comparison to other tools.
03Phototastic Collage
This is free to use Windows-based tool that can create impressive collages in no time. Multiple designs, frames, and other options are available to create a customized collage as needed.
Pros:
● Multiple customization options are available for creating the desired collage.
● User-friendly and simple interface.
● An array of templates is available.
Cons:
● The free version has limited features.
● Limitation to the number of images that can be added.
● Ads in the app.
04PicCollage
Unleash your creativity by creating an interesting collage using this excellent collage-making app. There are multiple templates and customization options supports.
Pros
● Create collage manually or automatically
● The earlier created collage can be edited.
● Allows creating a collage in 3 options- grid, template, freestyle.
Cons
● Watermark on the created collage.
● The image size cannot be customized.
05Collage Maker-Photo Grid and Montage
Using this free Windows tool, you can create an interesting photo collage or a free-styled montage as needed. A wide range of layouts and templates are available that can be further customized to get the desired collage.
Pros:
● Free Windows software.
● Come with multiple filters, layout, and editing tools.
● The user interface is easy.
● Preview option available.
Cons:
● Performance glitches due to bugs.
● Custom collage size cannot be set.
● Watermark on the collage.
06Fotor
If you are looking for a simple and basic collage-making tool, Fotor is the right choice. Collage in the grid, freestyle, and photo-stitch style can be created and basic customization features are supported.
Pros:
● Simple to use tool that is apt for beginners.
● Border can be changed from a solid color to a background.
Cons:
● Customization options are limited.
● Border and the image size cannot be changed.
07El Collagero
Just like its name, this is an interesting Windows-based tool for creating a collage of your choice. A wide range of options for customization is available that can let you edit the images, choose a template and then also edit the file.
Pros:
● A wide range of templates and designs for collages is available.
● Allows adding text, symbols, and other elements.
● Created collage can be shared on social media sites.
Cons:
● In comparison to other professional tools, the functions are limited.
08Atlantas Photo Collage Studio
This Windows-based tool will let you create collages of all types and for all occasions. You can choose from over 100 templates that best match your collage theme and image content.
Pros:
● More than 100 templates for collage designs are available.
● The size of the layout can be changed.
● Multiple editing and customization options are supported like zoom, opacity selection, and more.
Cons:
● Limitation of adding 45 images.
● For the advanced functions, need to subscribe to the paid version.
09PhotoJoiner
Using this Windows tool, pick up your favorite images and turn them into a beautiful collage with customized design and style.
Pros:
● A simple and basic tool for creating a collage.
● Created collage can be saved or shared to the social media site.
● Change the order of the images, margins, and other aspects.
Cons
● Collage templates are limited.
● Advanced features are missing.
1010. Blend Photo
To create a collage of images with a blending effect, this is the right tool to use. Available for download on the Windows system this tool lets you create collages telling interesting stories.
Pros:
● Simple and easy collage-making tool.
● Add blending effect to your collages.
● Over 50 custom shapes for image cropping are available along with the option for free-hand cropping.
● Multiple filters can be added.
Cons:
● Limited Editing and customization options.
Part 2 The Best Tool to Get Stock Images for Creating Collages
Several times, the captured and stored images may not fit in the collage theme you wish to create and, in such situations, you can use the stock images available online at several sites. One of the best tools where you can check out the images in different categories is Wondershare Filmora. This versatile software from Wondershare Filmora Video Editor is an advanced video editing tool that also has a huge collection of stock media including images.
Additionally, the split-screen feature of the software can be used for creating a video collage. Available for Windows and Mac systems, Wondershare Filmora will look after all your advanced video editing and customized requirements.
Wondershare Filmora - Best Video Editor for Mac/Windows
5,481,435 people have downloaded it.
Build unique custom animations without breaking a sweat.
Focus on creating epic stories and leave the details to Filmora’s auto features.
Start a creative adventure with drag & drop effects and endless possibilities.
Filmora simplifies advanced features to save you time and effort.
Filmora cuts out repetition so you can move on to your next creative breakthrough.
● Key Takeaways from This Episode →
● Collage-making tools help in creating an interesting and eye-catchy collage in a hassle-free manner.
●Several Windows-based tools are available for quick download.
●Wondershare Filmora is a great software to find a collection of stock images in different categories.
How to Send and Add Snapchat GIFs 100% The Easy Way
How to Send and Add Snapchat GIFs 100% The Easy Way
An easy yet powerful editor
Numerous effects to choose from
Detailed tutorials provided by the official channel
GIFs make texting so much more fun. You can express many emotions and include entertaining animations to give your messages a human touch. Users may share and receive GIFs on most social networking networks, and Snapchat is no exception. We’ll show you how to send GIFs on Snapchat, whether you’re an Android or iOS user, in this article.
This covers instructions on how to get GIFs in Snapchat and how to transmit GIFs in chat rooms and on Snapchat Stories updates. Let’s get started.
In this article
01 [How to Send GIFs on Snapchat](#Part 1)
02 [How to Get GIFs on Snapchat Snaps and Messages?](#Part 2)
Part 1 How to Send GIFs on Snapchat
Here is a simple step guide on how to send Snapchat GIF:
Step 1: Take a photo
Start your Snapchat app as usual and snap a photo or video.

Step 2: Tap the Sticker icon
From the row on the right side of the screen, tap the Sticker icon.
To add a GIF to your photo or video, scroll down and select one. You can also use the search option to locate more particular GIFs by entering a term or phrase.

Step 3: Drag GIF
Drag the GIF you added to the screen’s desired location.
Pinch your screen to change the GIF’s size as needed.
Step 4: Save and Share
You can then share your Snap with other social networking platforms by sending it to your Stories, friends/contacts, or just saving it to your gallery.

Part 2 How to Get GIFs on Snapchat Snaps and Messages?
Getting a GIF on Snapchat can be tasking, but here is a simple guide to achieving that.
Step 1: Make use of a Gboard.
Enter the chat of the friend or person to whom you want to send the GIF and maximize or open the keyboard using the text bar.

Step 2: Select the GIF you want.
Choose a GIF from the collection or catalog that you’d want to utilize and submit it.

You can use the same snap to apply many stickers. Drag and drop it on the trashcan icon to get rid of it.
Here’s how to get Gboard on your Android device if it didn’t come with it:
• Download the Gboard from the Play Store or whichever playstore you want.
• Go to Settings> System> Languages and Input> Virtual Keyboard and select it.
• Double-check that Gboard is selected as your primary keyboard.
After that, grant any permissions it requires so that you can use it right away in Snapchat.
Now that it’s as simple as it gets, let’s send comparable GIFs utilizing iOS devices.
For iPhone/iPad:
For iPhone users, you must first download and install the giphy app on your phone. Once you have successfully set the giphy app as your default keyboard, you can send Snapchat GIFs chat by following the steps below:
Step 1: Press the Globe icon
Continuously press and hold the globe icon to the left of the space bar to reveal the available keyboard, then choose a specific or favorite GIF from the giphy list.

Step 2: Find GIF
Find the GIF you wish to send and tap it to copy it.

Step 3: Paste GIF
Return to the conversation, paste the GIF into the text box, and press the send button.

For those who don’t know how to use the Giphy app on their iPhones or iPads, read the following instructions:
• Go to the Settings menu and pick the General icon.
•To see your keyboard options, go to the keyboard setting and tap it.
• To see the accessible keyboard, tap on the part labelled keyboard.
• Select Add a New Keyboard.
• The Giphy keyboard will undoubtedly be among the third-party keyboards.
• Once you’ve included or added the keyboard, it’ll appear in the “active keyboard” section.
• Select the Allow Full Access option.
Have you heard of Filmora before? I’m afraid not, Wondershare Filmora Video Editor is a video editing program that allows you to edit videos in various ways.
It’s exciting and amusing to make your animated GIF from any video or photo. Due to their large size, video scenes might be challenging to manage, but GIFs are perfect for profile posts and sharing with friends as simple jokes.
However, if you wish to create a GIF online, Filmora’s online meme maker is the ideal choice. You may use it to make a watermark-free photo, GIF, and video memes. It is free to use, and there is no need to register. You can change the text size, color, and position when you’re altering a caption. You can also add text to the inside or outside in a GIF.
Wondershare Filmora
Get started easily with Filmora’s powerful performance, intuitive interface, and countless effects!
Try It Free Try It Free Try It Free Learn More >

GIFs may be created from a collection of static photographs or even moving movies, and the process is effortless enough for anyone to do. We recommend Wondershare Filmora for you to complete this task quickly and easily. The rationale for this suggestion is the software tool’s user-friendly and engaging interface. You can soon mix a lot of stills into GIFs or convert small videos into GIFs with Filmora. What’s more, the Filmora platform enables easy modification of GIFs, with users able to add overlays, components, and text to their GIFs.
● Key Takeaways from This Episode →
● You must have gotten one or two tips on how to send and add Snapchat GIFs, all that is for you is to grab your phone, be it an Android or iOS, and make your chat, conversations, photos, and videos more interesting by making use of GIFs on Snapchat.
● iPhone users must ensure that the Giphy app is installed to achieve this.It is also important to note that you can create your exciting GIFs using Wondershare Filmora, and this can help you easily create an awesome GIF in no time. Get to it!!
GIFs make texting so much more fun. You can express many emotions and include entertaining animations to give your messages a human touch. Users may share and receive GIFs on most social networking networks, and Snapchat is no exception. We’ll show you how to send GIFs on Snapchat, whether you’re an Android or iOS user, in this article.
This covers instructions on how to get GIFs in Snapchat and how to transmit GIFs in chat rooms and on Snapchat Stories updates. Let’s get started.
In this article
01 [How to Send GIFs on Snapchat](#Part 1)
02 [How to Get GIFs on Snapchat Snaps and Messages?](#Part 2)
Part 1 How to Send GIFs on Snapchat
Here is a simple step guide on how to send Snapchat GIF:
Step 1: Take a photo
Start your Snapchat app as usual and snap a photo or video.
Step 2: Tap the Sticker icon
From the row on the right side of the screen, tap the Sticker icon.
To add a GIF to your photo or video, scroll down and select one. You can also use the search option to locate more particular GIFs by entering a term or phrase.
Step 3: Drag GIF
Drag the GIF you added to the screen’s desired location.
Pinch your screen to change the GIF’s size as needed.
Step 4: Save and Share
You can then share your Snap with other social networking platforms by sending it to your Stories, friends/contacts, or just saving it to your gallery.
Part 2 How to Get GIFs on Snapchat Snaps and Messages?
Getting a GIF on Snapchat can be tasking, but here is a simple guide to achieving that.
Step 1: Make use of a Gboard.
Enter the chat of the friend or person to whom you want to send the GIF and maximize or open the keyboard using the text bar.
Step 2: Select the GIF you want.
Choose a GIF from the collection or catalog that you’d want to utilize and submit it.
You can use the same snap to apply many stickers. Drag and drop it on the trashcan icon to get rid of it.
Here’s how to get Gboard on your Android device if it didn’t come with it:
• Download the Gboard from the Play Store or whichever playstore you want.
• Go to Settings> System> Languages and Input> Virtual Keyboard and select it.
• Double-check that Gboard is selected as your primary keyboard.
After that, grant any permissions it requires so that you can use it right away in Snapchat.
Now that it’s as simple as it gets, let’s send comparable GIFs utilizing iOS devices.
For iPhone/iPad:
For iPhone users, you must first download and install the giphy app on your phone. Once you have successfully set the giphy app as your default keyboard, you can send Snapchat GIFs chat by following the steps below:
Step 1: Press the Globe icon
Continuously press and hold the globe icon to the left of the space bar to reveal the available keyboard, then choose a specific or favorite GIF from the giphy list.
Step 2: Find GIF
Find the GIF you wish to send and tap it to copy it.
Step 3: Paste GIF
Return to the conversation, paste the GIF into the text box, and press the send button.
For those who don’t know how to use the Giphy app on their iPhones or iPads, read the following instructions:
• Go to the Settings menu and pick the General icon.
•To see your keyboard options, go to the keyboard setting and tap it.
• To see the accessible keyboard, tap on the part labelled keyboard.
• Select Add a New Keyboard.
• The Giphy keyboard will undoubtedly be among the third-party keyboards.
• Once you’ve included or added the keyboard, it’ll appear in the “active keyboard” section.
• Select the Allow Full Access option.
Have you heard of Filmora before? I’m afraid not, Wondershare Filmora Video Editor is a video editing program that allows you to edit videos in various ways.
It’s exciting and amusing to make your animated GIF from any video or photo. Due to their large size, video scenes might be challenging to manage, but GIFs are perfect for profile posts and sharing with friends as simple jokes.
However, if you wish to create a GIF online, Filmora’s online meme maker is the ideal choice. You may use it to make a watermark-free photo, GIF, and video memes. It is free to use, and there is no need to register. You can change the text size, color, and position when you’re altering a caption. You can also add text to the inside or outside in a GIF.
Wondershare Filmora
Get started easily with Filmora’s powerful performance, intuitive interface, and countless effects!
Try It Free Try It Free Try It Free Learn More >
GIFs may be created from a collection of static photographs or even moving movies, and the process is effortless enough for anyone to do. We recommend Wondershare Filmora for you to complete this task quickly and easily. The rationale for this suggestion is the software tool’s user-friendly and engaging interface. You can soon mix a lot of stills into GIFs or convert small videos into GIFs with Filmora. What’s more, the Filmora platform enables easy modification of GIFs, with users able to add overlays, components, and text to their GIFs.
● Key Takeaways from This Episode →
● You must have gotten one or two tips on how to send and add Snapchat GIFs, all that is for you is to grab your phone, be it an Android or iOS, and make your chat, conversations, photos, and videos more interesting by making use of GIFs on Snapchat.
● iPhone users must ensure that the Giphy app is installed to achieve this.It is also important to note that you can create your exciting GIFs using Wondershare Filmora, and this can help you easily create an awesome GIF in no time. Get to it!!
Pencil2D Animation Tutorial Overview
Animation is one of the trendiest technologies. The basics of animation were formulated in the 2000s from the moving page trick. The first few animators learned that animation is nothing but continuous switching of frames from one to another. One animated still is switched to another and then another in a quick sequence such that it makes a sequential moving frame. Today, animation has come a long way from where it started and today it is used for several commercials, tutorials, and even educational lecture videos. Pencil2D animation is an amazing animation tool that can be used by even neophytes. Want to learn more about 2d pencil animation and its super cool features? Well, you’re at the perfect place. Today we’ll be telling you more about pencil 2d animation and giving you a small overview of its usage.
In this article
01 [What is Pencil2D and How to Install?](#Part 1)
02 [Overview of the Application Interface](#Part 2)
03 [How to Create Animations with Pencil2D?](#Part 3)
Part 1 What is Pencil2D and How to Install?
2d pencil animation is popular open-source animation software. The software is pretty cool for those who are newly starting off with animation. The open-source software is available on all major operating systems including Windows, Mac OS, and Unix. Using this amazing software, we can make amazing cartoon characters using traditional cartoon-making techniques such as tracing drawing, skinning. Using this software, you can save animations in the native animation formats or extract the animation to PNG, JPG, or other formats. Wish to explore more about pencil 2d animation software? Follow the steps listed below in order to download the pencil2d animation software.
● Firstly, you need to ensure that your device has ample space on it.
● Next, you need to head to the official website of pencil2d.
● Further, you need to select your operating system. You can find different versions of the software, namely windows 7/8/10, windows XP/ Vista, Mac OS, and Linux
● Once downloaded, you need to start the installation setup. Note that this may take a while to download.
● Once downloaded, you can start familiarizing yourself with the software.
Part 2 Overview of the Application Interface
1. The brush tool
The brush tool must have reminded you of paint software in windows. The brush tool is a popular and highly utilitarian basic tool in Pencil2D animation software. You can either access it via the user interface or quickly access it by using the B key on your keyboard. As the name suggests, the brush tool is literally just a brush that allows you to draw and paint any sort of drawings of different shades, colors, and thickness. If you wish to change the color, you can find a color palette on the left side of the interface.

2. The eraser tool
You’ve a brush tool; it’s almost common sense that there’d be an eraser. The eraser tool has an eraser as its icon. If you wish to use the eraser, click on the eraser tool or simply click the E button on your keyboard. Once you’ve selected the tool, you need to simply hover over the parts you wish to erase.

3. Bucket tool
The bucket tool is another useful tool that you can find in the left tool pane of pencil 2d animation. The tool icon looks like a bucket and it is used to fill an entire area with a particular color. You can choose the color you’d like to fill from the color pallet available on the left side. Alternatively, you can also access the bucket tool by pressing the “K” key on your keyboard.

4. Custom colors
A cool feature that you can find on pencil 2d animation software is the custom color one. You can merge and mix colors according to your choice and create your own color. To do so, you need to click on the small color box that you’ll find at the top right of your screen. By doing so, a huge color wheel will appear on your screen. Now you can either enter values of the R, G, and B if you wish to merge different colors and make a new one or select a particular color from the huge color wheel that appears in front of you. These colors vary in gradient, shade, and a lot of different factors.

5. The Undo button
The Undo button is a highly useful functionality for the lazy ones who do not wish to erase the mistake they made. By undoing, the previous step gets reverted and you can start over again. The traditional undo shortcut, Ctrl+Z does work in the pencil 2d animation. Alternatively, you can also use the undo feature via the user interface. You can do so by heading over to the edit option in the topmost bar. The first option in the drop-down menu would be undo.

Part 3 How to Create Animations with Pencil2D?
Creating animations in pencil 2d is slightly sophisticated and certainly needs minimal practice. Follow the steps listed below in order to learn how to animate through pencil 2d to make your first animation.
1. Ensure that you’ve turned on your bitmap on the first frame
Animation works through quick switching of frame which makes it appear as though the object is in motion. By turning on the bitmap, pencil 2d animation ensures that you’ve no blank frames at the start of your animation.

2. Draw your animated character
Since you’re trying to animate, you need to have an animated character or object. Hence, the first step to making your first animation is by drawing the object or character that you wish to animate. Try to make the character as realistic as possible. To start with, maybe you can try animating just a stick figure; this is because animating a complex character is rather difficult for beginners.

3.The three circular buttons
Once you’re satisfied with the character you draw, you need to spot the 3 circular buttons which are arranged in the “+”,”-“,”+” order. By pressing the first “+” button, you can add an empty slide. If you click on the “-“ button, it will delete the most recent slide and if you click on the next “+” button, it will duplicate the current slide.

4.Repeat until you get an animation
Now that you know how to deal with multiple frames, you can continue creating frames and making the animated characters move by tweaking with the drawing in every frame. For instance, if you wish to show that the animated character is running, in one of the frames the left leg should be forward and in the next one, the right leg should be forward. Keep repeating this process of tweaking with frames until you’ve your desired animated video.

Now that we’ve seen the process of animation via Pencil2D, you must have realized that it’s pretty orthodox and complicated. Moreover, you cannot carry out rigging and other newer animation techniques. Hence, we introduce you to Wondershare Filmora Video Editor , your all in one animation making platform. Here you can animate without any hassle. Wondershare Filmora makes your job easier with multiple animation features, you needn’t even draw your animated character. You can simply import a custom-made character and rig the character. Further, you need not deal with multiple frames and personally pay attention to each frame. All in all, Filmora makes your job simple and your animations much more seamless.
For Win 7 or later (64-bit)
For macOS 10.12 or later
Key Takeaways from This Episode
● Animation is actively being used for multiple purposes.
● Today we took a look at one of the orthodox yet popular animation tools, Pencil2D.
● The Pencil2D animation tool offers you multiple functionalities and allows you to make animations.
● Next, we also took a look at Wondershare Filmora Pro, your one-stop shop for all animation needs. You can find multiple animation features here and it’s all so simple.
● What are you waiting for? Your next animation is just one click away.
02 [Overview of the Application Interface](#Part 2)
03 [How to Create Animations with Pencil2D?](#Part 3)
Part 1 What is Pencil2D and How to Install?
2d pencil animation is popular open-source animation software. The software is pretty cool for those who are newly starting off with animation. The open-source software is available on all major operating systems including Windows, Mac OS, and Unix. Using this amazing software, we can make amazing cartoon characters using traditional cartoon-making techniques such as tracing drawing, skinning. Using this software, you can save animations in the native animation formats or extract the animation to PNG, JPG, or other formats. Wish to explore more about pencil 2d animation software? Follow the steps listed below in order to download the pencil2d animation software.
● Firstly, you need to ensure that your device has ample space on it.
● Next, you need to head to the official website of pencil2d.
● Further, you need to select your operating system. You can find different versions of the software, namely windows 7/8/10, windows XP/ Vista, Mac OS, and Linux
● Once downloaded, you need to start the installation setup. Note that this may take a while to download.
● Once downloaded, you can start familiarizing yourself with the software.
Part 2 Overview of the Application Interface
1. The brush tool
The brush tool must have reminded you of paint software in windows. The brush tool is a popular and highly utilitarian basic tool in Pencil2D animation software. You can either access it via the user interface or quickly access it by using the B key on your keyboard. As the name suggests, the brush tool is literally just a brush that allows you to draw and paint any sort of drawings of different shades, colors, and thickness. If you wish to change the color, you can find a color palette on the left side of the interface.
2. The eraser tool
You’ve a brush tool; it’s almost common sense that there’d be an eraser. The eraser tool has an eraser as its icon. If you wish to use the eraser, click on the eraser tool or simply click the E button on your keyboard. Once you’ve selected the tool, you need to simply hover over the parts you wish to erase.
3. Bucket tool
The bucket tool is another useful tool that you can find in the left tool pane of pencil 2d animation. The tool icon looks like a bucket and it is used to fill an entire area with a particular color. You can choose the color you’d like to fill from the color pallet available on the left side. Alternatively, you can also access the bucket tool by pressing the “K” key on your keyboard.
4. Custom colors
A cool feature that you can find on pencil 2d animation software is the custom color one. You can merge and mix colors according to your choice and create your own color. To do so, you need to click on the small color box that you’ll find at the top right of your screen. By doing so, a huge color wheel will appear on your screen. Now you can either enter values of the R, G, and B if you wish to merge different colors and make a new one or select a particular color from the huge color wheel that appears in front of you. These colors vary in gradient, shade, and a lot of different factors.
5. The Undo button
The Undo button is a highly useful functionality for the lazy ones who do not wish to erase the mistake they made. By undoing, the previous step gets reverted and you can start over again. The traditional undo shortcut, Ctrl+Z does work in the pencil 2d animation. Alternatively, you can also use the undo feature via the user interface. You can do so by heading over to the edit option in the topmost bar. The first option in the drop-down menu would be undo.
Part 3 How to Create Animations with Pencil2D?
Creating animations in pencil 2d is slightly sophisticated and certainly needs minimal practice. Follow the steps listed below in order to learn how to animate through pencil 2d to make your first animation.
1. Ensure that you’ve turned on your bitmap on the first frame
Animation works through quick switching of frame which makes it appear as though the object is in motion. By turning on the bitmap, pencil 2d animation ensures that you’ve no blank frames at the start of your animation.
2. Draw your animated character
Since you’re trying to animate, you need to have an animated character or object. Hence, the first step to making your first animation is by drawing the object or character that you wish to animate. Try to make the character as realistic as possible. To start with, maybe you can try animating just a stick figure; this is because animating a complex character is rather difficult for beginners.
3.The three circular buttons
Once you’re satisfied with the character you draw, you need to spot the 3 circular buttons which are arranged in the “+”,”-“,”+” order. By pressing the first “+” button, you can add an empty slide. If you click on the “-“ button, it will delete the most recent slide and if you click on the next “+” button, it will duplicate the current slide.
4.Repeat until you get an animation
Now that you know how to deal with multiple frames, you can continue creating frames and making the animated characters move by tweaking with the drawing in every frame. For instance, if you wish to show that the animated character is running, in one of the frames the left leg should be forward and in the next one, the right leg should be forward. Keep repeating this process of tweaking with frames until you’ve your desired animated video.
Now that we’ve seen the process of animation via Pencil2D, you must have realized that it’s pretty orthodox and complicated. Moreover, you cannot carry out rigging and other newer animation techniques. Hence, we introduce you to Wondershare Filmora Video Editor , your all in one animation making platform. Here you can animate without any hassle. Wondershare Filmora makes your job easier with multiple animation features, you needn’t even draw your animated character. You can simply import a custom-made character and rig the character. Further, you need not deal with multiple frames and personally pay attention to each frame. All in all, Filmora makes your job simple and your animations much more seamless.
For Win 7 or later (64-bit)
For macOS 10.12 or later
Key Takeaways from This Episode
● Animation is actively being used for multiple purposes.
● Today we took a look at one of the orthodox yet popular animation tools, Pencil2D.
● The Pencil2D animation tool offers you multiple functionalities and allows you to make animations.
● Next, we also took a look at Wondershare Filmora Pro, your one-stop shop for all animation needs. You can find multiple animation features here and it’s all so simple.
● What are you waiting for? Your next animation is just one click away.
Also read:
- Updated Finding Some Different Ways to Animated Cartoon of Yourself
- New 2024 Approved 10 Realistic Cartoon Characters You Will Run Away From if You Met in R
- How to Obtain and Create Animated GIF Icons Like a Pro, In 2024
- New 2024 Approved 10 Cartoon Photo Converters
- Updated 2024 Approved Learn Disney Cartoon Drawing to See More Disney Magic Moments
- New In 2024, Top 7 Best Free GIF Apps for Android
- In 2024, Uncensored Top 10 + Free Streaming Sites
- New 2024 Approved Adobe Rigger Is AWESOME
- Ways on How to Get Started in Stop Motion Claymation
- In 2024, How You Can Turn Yourself Into Anime Character Using Anime Filter
- Updated Stunning Ideas About Creating Personalised WhatsApp GIF Sticker for 2024
- Updated In 2024, How to Find 3D Animation Studio Meeting All Your Inspiring Needs
- New Best 15 Greatest Claymation Movies of All Time for 2024
- New What Are Differences Between 2D And 3D Animation for 2024
- 21 Top Free Anime Websites to Watch Anime Online-Anime for 2024
- In 2024, The Secret Sauce for Making GIF Instagram Story More Aesthetic
- Updated Popular Female & Male Disney Cartoon Characters
- 2024 Approved Ways to Make Sure You Get the Most up to Date Cartoon Character Design Tips
- Updated 2024 Approved Great Guide for Beginners on 2D Animation Making
- Tutorial Guide to Animate Pictures in Canva for 2024
- Updated In 2024, Great Guide for Beginners on 2D Animation Making
- Updated Easy Shortcut to Convert Videos to Gifs on iPhone for 2024
- 2024 Approved How You Can Turn Yourself Into Anime Character Using Anime Filter
- Updated 2024 Approved Create Animated Video on Canva
- New In 2024, 10 Realistic Cartoon Characters You Would Run Away From if You Met in Real Life
- 2024 Approved Guide on Creating GIF in WhatsApp iPhone
- New In 2024, Whats Music Video GIF & How to Add Music to Your GIF Files
- Updated 2024 Approved 10 Realistic Cartoon Characters You Will Run Away From if You Met in R
- New In 2024, Tutorial Guide to Animate Pictures in Canva
- Apps to Animate Still Pictures Which Could Make Your Pictures Become Internet Sensation for 2024
- New Incredible Ways to Find Suitable Animated Graphic Maker for 2024
- 2024 Approved 10 Best Photoshop Cartoon Effects For Creatives
- New Secret Source to Make a Stop Motion Puppet
- In 2024, 10 Great Apps to Turn Funny Animated Images Into Comics
- New 4 Smart Solutions to Create or Find Good Morning/Night GIFs for 2024
- Updated How to Cartoonize Photo Photoshop in Simple Steps
- Updated 2024 Approved Top 3 Ways to Create Gif Images with Great 3D Gif Maker
- Updated Adobe Animate Text Effects Skills You Need to Know for 2024
- 2024 Approved Tips on How to Learn Graphics Animation
- What Is the Meaning of Motion Graphics
- In 2024, The Best iSpoofer Alternative to Try On Vivo Y100i | Dr.fone
- How to share/fake gps on Uber for Vivo Y100 | Dr.fone
- In 2024, Fake Android Location without Rooting For Your Oppo A18 | Dr.fone
- 5 Solutions For Infinix Note 30i Unlock Without Password
- How to Transfer Data from Vivo X Flip to Samsung Phone | Dr.fone
- In 2024, Effective Guide to Cast Apple iPhone XS Max to MacBook without Hindrance | Dr.fone
- How To Unlock Any Xiaomi 14 Phone Password Using Emergency Call
- Mastering Lock Screen Settings How to Enable and Disable on Itel P55 5G
- 3 Ways to Fake GPS Without Root On Xiaomi Redmi Note 12 4G | Dr.fone
- In 2024, The Ultimate Guide to Get the Rare Candy on Pokemon Go Fire Red On Samsung Galaxy A15 5G | Dr.fone
- In 2024, How To Delete iCloud Account Remove Your Apple ID Permanently On Apple iPhone 14 Pro
- Remove Realme unlock screen
- In 2024, The Ultimate Guide How to Bypass Swipe Screen to Unlock on Samsung Galaxy S23 Ultra Device
- In 2024, How to Unlock Realme Phone Password Without Factory Reset?
- How to use Pokemon Go Joystick on OnePlus Nord CE 3 Lite 5G? | Dr.fone
- Title: Updated In 2024, 12 Captivating Websites with Triggered Animate on Scroll Examples
- Author: Elon
- Created at : 2024-06-30 12:27:22
- Updated at : 2024-07-01 12:27:22
- Link: https://animation-videos.techidaily.com/updated-in-2024-12-captivating-websites-with-triggered-animate-on-scroll-examples/
- License: This work is licensed under CC BY-NC-SA 4.0.
