
:max_bytes(150000):strip_icc():format(webp)/tiktok-smart-tv-12dcac76114b4747b9b3db8bb3551ddc.jpg)
Updated In 2024, 15 Best Video to GIF App on iPhone and Android
15 Top Video to GIF App on iPhone and Android
15 Best Video to GIF App on iPhone and Android
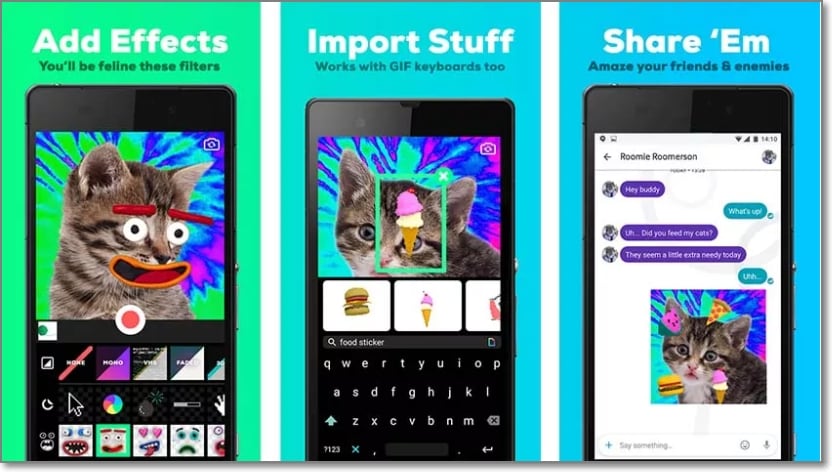
An easy yet powerful editor
Numerous effects to choose from
Detailed tutorials provided by the official channel
In the last few years, GIF has taken the internet by storm and is present everywhere be it social media sites, messaging apps, blogs, or sites. Though there are several sites available from where you can download interesting GIFs, you can even create customized ones. Several apps for Android and iPhone are available using which the GIF can be created from video.

Using these apps, you can create good morning GIF video for WhatsApp , cute GIF, birthday GIF, and other.
In this article
01 [Top Gif Apps for Iphone](#Part 1)
02 [Top Apps for Android](#Part 2)
03 [Top Apps for Both Android and Iphone](#Part 3)
04 [Best Desktop Software to Create Customized Gif- Wondershare Filmora](#Part 4)
Part 1 Top GIF Apps for iPhone
Check the below app to turn video into GIF on your iPhone.
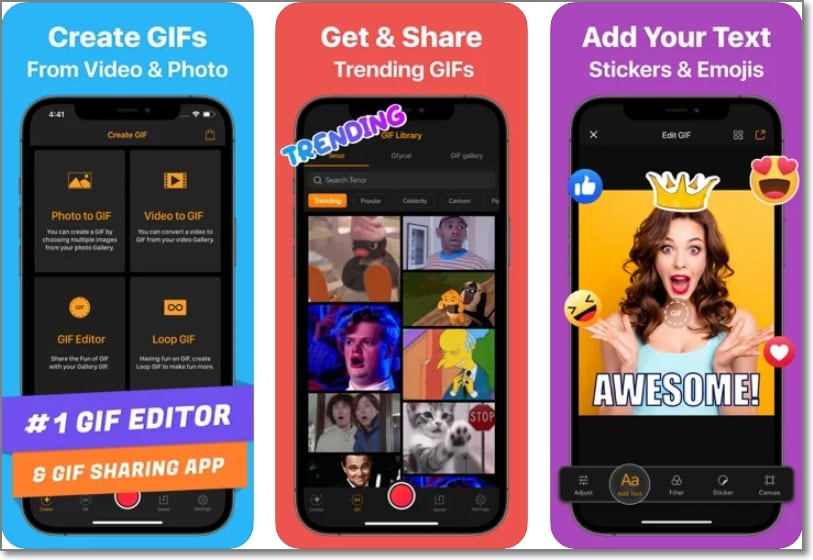
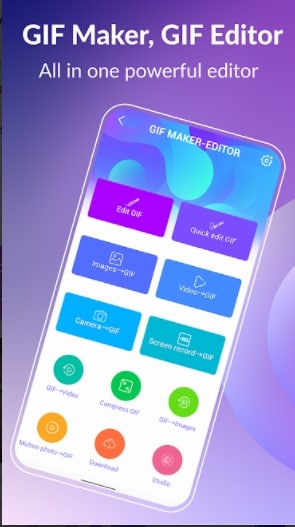
01GIF Maker
This is a free app with IAP that allows creating a GIF from videos as well as photos.
Key features: :
● Create GIFs, boomerangs, and memes using videos and photos.
● Allows creating GIFs using live cameras.
● Using this iPhone video to GIF app, loop videos can also be created.
● Multiple GIF editing options like adding text, adding filters, adjusting frame speed, adding emojis, artwork, and more.
● Allows sharing created GIFs to Facebook, Messenger, Instagram, and other sites.
● Free to use for the first 3 days after which a subscription of $9.99 has to be paid.
● Monthly and Lifetime subscriptions are available as well
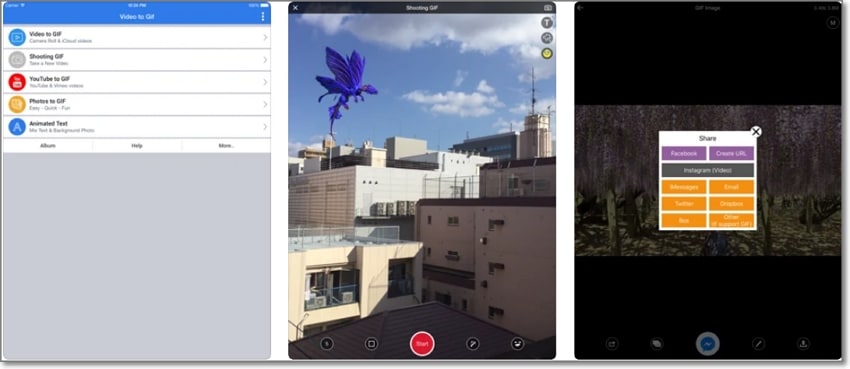
02Video to GIF
Developed by Ngo Ngoc Chien this is a popular app for the iPhone that is free and comes with IAP.
Key features:
● Allows creating a watermark-free GIF from the videos present on your phone.
● Videos can be recorded for creating a GIF.
● Option to use YouTube or any other online video for GIF creation.
● Comes with 15 image effect templates to create a GIF using photos.
● Additionally, live photos, as well as Burst photos can also be used for GIFs.
● Created GIFs can be shared to Twitter, Facebook, Instagram, Dropbox, Email, and other sites.
● Multiple editing options are supported like rotate, quality selection, reverse, and more.
● Option to save GIF as URL and also get URL of the created GIF.
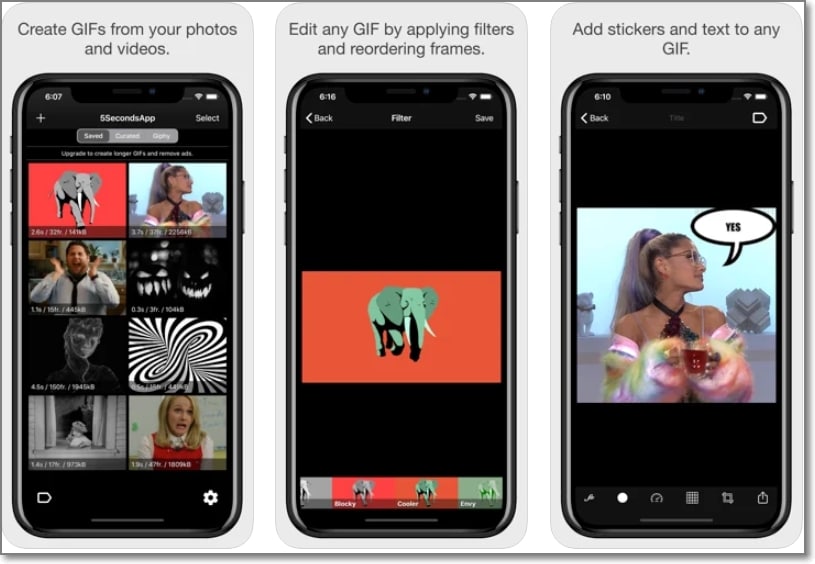
035Seconds App
With a 4.8 rating, this free app is designed by Eric Marschner and offers IAP as well.
Key features: :
● Allows creating a GIF from photos and videos present on your device.
● New images and videos can be captured for GIFs.
● GIFs can be imported from other sources and edited as needed.
● Multiple options for editing are supported like using filters, stickers, text, and more.
● Free app with a simple interface without any need for sign-ups.
● Allows sharing the created GIF as a file or as a link.
04Giffer Pro GIF Maker
With a 4 rating, this is a paid video to GIF converter app developed by Taber Buhl.
Key features:
● Allows creating interesting GIFs in larger and longer sizes.
● GIFs can be created using live video, photos, videos, burst photos, and other GIF frames.
● Simple to use with support to advanced features like adjusting frames, speed, position, and others.
● Allows creating different types of GIFs like stop motion, wiggle, time-lapse, seamless loop, reaction, and many more.
● Share created GIFs to social media sites like Instagram, Twitter, Tumblr, and others.
● Option to export GIFs as live photos and videos.
● Support multiple in-app camera modes, playback modes, and sharing options
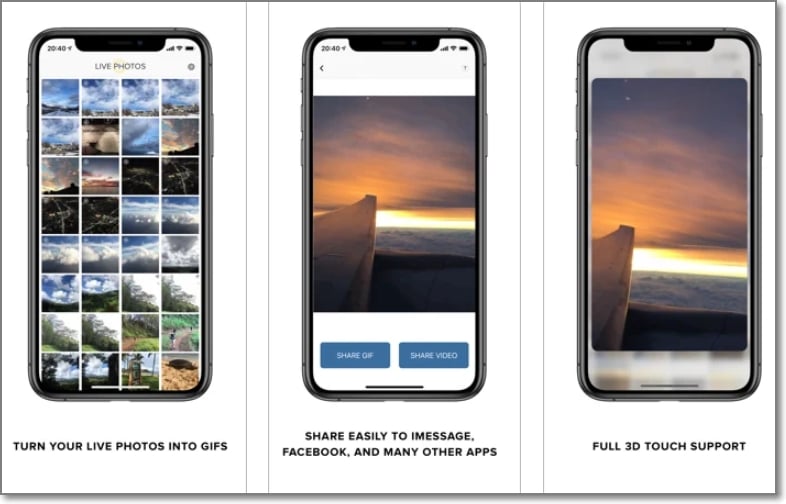
05Live GIF
Designed for iPhone and iPad, this is a paid app by Priime, Inc supporting multiple features.
Key features:
● Using this iOS app, Live Photos can be converted to videos and GIFs.
● Simple and intuitive interface without any complicated process.
● Allows sharing the created GIF to several sites like Twitter, iMessage, Facebook, and more.
● Compatible working with devices capable of taking Live Photos.
06Gifx
This is a paid app for iOS devices that comes with powerful features.
Key features:
● GIFs can be created using photos, videos, animated PNG files, bursts images, live photos, and other media.
● Stickers and annotations can be added to the GIF.
● Support multiple editing options like rearranging the frames, controlling the speed, and more.
● Option to share the GIF through MMS, email, and also clipboard.
● GIF files can be saved to the device as a video or animated PNG.
Part 2 Top Apps for Android
Below listed are the top apps for Android devices.
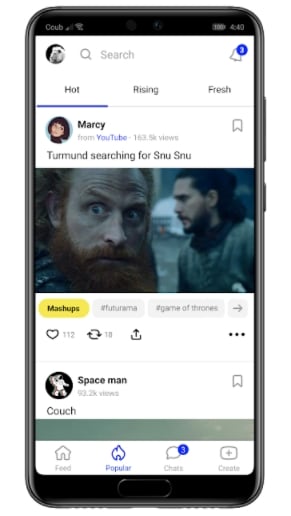
01Coub
This is a free video GIF maker app with a 4 rating that is simple to use.
Key features:
● Allows creating loops of videos from camera, YouTube, Library, and other sources.
● Allows trimming the video to choose the desired part.
● HD quality coubs are created in different formats like horizontal, vertical, and others.
● Created coubs appear on the subscriber’s timeline and channel.
02GIF Camera
This is an easy-to-use app for Android devices to create GIFs.
Key features:
● Allows creating GIFs by recording a video using an Android camera.
● GIFs can be created for up to 10 seconds or less.
● Allows editing GIFs.
● Created GIFs can be saved to the phone or can also be shared directly on social media sites.
● Lightweight app with user-friendly interface.
03Giphy Cam
This Android-based app from Giphy allows creating interesting GIFs. The app is free to use.
Key features:
● Create GIFs by recording videos using the Android camera.
● Support a wide range of editing tools like filters, text, special effects, and more.
● Intuitive interface that makes the process quick and simple.
● The created GIF animation can be saved to the system or can be shared with other apps as well.
04GIF Maker
With a 4.7 rating, this is a free and powerful app for creating interesting GIFs.
Key features: :
● Allows creating GIFs using the videos clips on your device or by recording a live video.
● Option to record the screen video and create a GIF.
● Multiple images can also be used for creating a GIF file.
● A wide range of editing functions are supported like trim, crop, resize, filters, emoji, and more.
● High-quality GIFs can be created supporting up to 400 images and 50fps.
● Additional features include GIF compression, GIF to video conversion, selecting GIF background, sharing GIF on social media sites, and more.
05GIFBoom
This app for Android devices is free to use and allows to quickly create GIFs.
Key features:
● Allows creating high-resolution GIFs.
● GIFs can be created using the images and videos on your phone.
● Live video can also be recorded for creating GIFs.
● GIFs can be sent over email, Twitter, Instagram, and other social media sites.
● Allows adding music to GIF files.
Part 3 Top Apps for Android and iPhone
There are a number of apps that are available for both Android and iOS platforms. These apps can be downloaded from their respective app stores. The top ones are enlisted below.
01Gif Me! Camera
This app for Android and iOS devices supports the quick creation of GIF files.
Key features:
● Allows creating GIFs using videos and images on the device.
● Option to add special effects, filters, and other elements.
● Option to import GIF from online services.
● Stop-motion, loop, time-lapse, and other animations can be created.
● Save the created GIF file to your device or share them over social media sites.
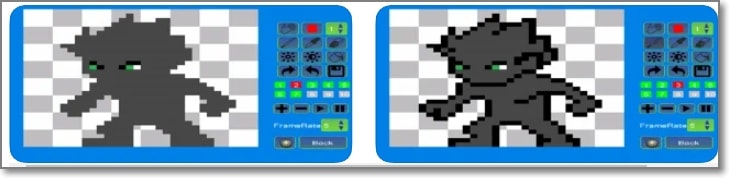
02Pixel Animator- GIF Maker
This Android and iOS-based app allow creating pixel-based GIF files.
Key features:
● Create pixel-based GIFs and art using an existing image or a cartoon.
● Allows adjusting the picture frame.
● Multiple options for editing the GIF animations.
● Share the created pixel over different sites and platforms.
03GIF Toaster
This is a free app with an IAP option available for download on Android and iOS devices.
Key features:
● Simple to use app that can create GIFs from videos and images on the device.
● Support almost all popular media formats for creating GIF files.
● Allows creating GIFs using bursts, panoramas, as well as time-lapses.
● Facilitate creating photo collages as well.
● Simple and quick processing.

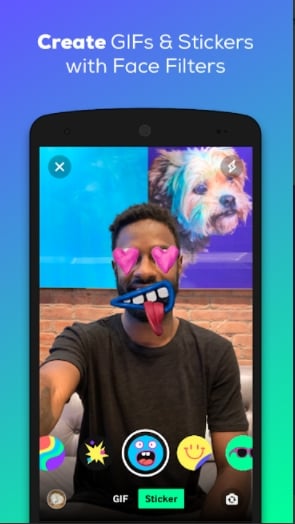
04GIPHY
When it comes to searching or creating a GIF this is the most popular and widely used app available for both Android and iOS devices.
Key features:
● Create GIFs by uploading videos or capturing one using the device camera.
● Allows creating stickers with custom face filters and text cartoons.
● Created stickers can be accessed from all GIPHY accessible places.
● Search from a huge library of GIFs and clips.
● Option to share GIF through email, Messenger, Instagram, Twitter, and other sites.
● Created animation can also be saved to the clipboard.
Part 4 Best Desktop Software To Create Customized Gif- Wondershare Filmora Video Editor
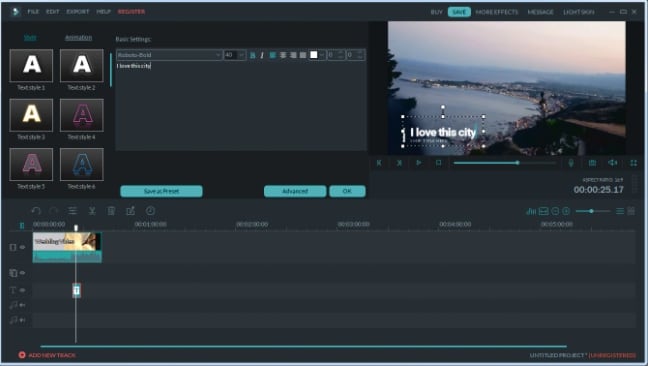
If you are looking for a desktop tool that can let you create customized GIFs using videos, Wondershare Filmora is the best choice. This software is available for download on Windows and Mac systems and supports creating a GIF from videos in all popular formats like MP4, MOV, MKV, and many others.
You can add filters, effects, and other elements to the GIF and can further customize them using features like trim, crop, and more.
Wondershare Filmora
Get started easily with Filmora’s powerful performance, intuitive interface, and countless effects!
Try It Free Try It Free Try It Free Learn More >

The process of creating a GIF is simple and quick where you just need to add the video, edit them and choose to save them as a GIF file which can be used anywhere as needed.
● Key Takeaways from This Episode →
●A wide range of apps is available for creating GIFs using videos.
●These apps are available for Android, as well as iOS devices and can be selected based on your requirements and budget.
●Wondershare Filmora is an excellent desktop software for creating a GIF using videos.
In the last few years, GIF has taken the internet by storm and is present everywhere be it social media sites, messaging apps, blogs, or sites. Though there are several sites available from where you can download interesting GIFs, you can even create customized ones. Several apps for Android and iPhone are available using which the GIF can be created from video.
Using these apps, you can create good morning GIF video for WhatsApp , cute GIF, birthday GIF, and other.
In this article
01 [Top Gif Apps for Iphone](#Part 1)
02 [Top Apps for Android](#Part 2)
03 [Top Apps for Both Android and Iphone](#Part 3)
04 [Best Desktop Software to Create Customized Gif- Wondershare Filmora](#Part 4)
Part 1 Top GIF Apps for iPhone
Check the below app to turn video into GIF on your iPhone.
01GIF Maker
This is a free app with IAP that allows creating a GIF from videos as well as photos.
Key features: :
● Create GIFs, boomerangs, and memes using videos and photos.
● Allows creating GIFs using live cameras.
● Using this iPhone video to GIF app, loop videos can also be created.
● Multiple GIF editing options like adding text, adding filters, adjusting frame speed, adding emojis, artwork, and more.
● Allows sharing created GIFs to Facebook, Messenger, Instagram, and other sites.
● Free to use for the first 3 days after which a subscription of $9.99 has to be paid.
● Monthly and Lifetime subscriptions are available as well
02Video to GIF
Developed by Ngo Ngoc Chien this is a popular app for the iPhone that is free and comes with IAP.
Key features:
● Allows creating a watermark-free GIF from the videos present on your phone.
● Videos can be recorded for creating a GIF.
● Option to use YouTube or any other online video for GIF creation.
● Comes with 15 image effect templates to create a GIF using photos.
● Additionally, live photos, as well as Burst photos can also be used for GIFs.
● Created GIFs can be shared to Twitter, Facebook, Instagram, Dropbox, Email, and other sites.
● Multiple editing options are supported like rotate, quality selection, reverse, and more.
● Option to save GIF as URL and also get URL of the created GIF.
035Seconds App
With a 4.8 rating, this free app is designed by Eric Marschner and offers IAP as well.
Key features: :
● Allows creating a GIF from photos and videos present on your device.
● New images and videos can be captured for GIFs.
● GIFs can be imported from other sources and edited as needed.
● Multiple options for editing are supported like using filters, stickers, text, and more.
● Free app with a simple interface without any need for sign-ups.
● Allows sharing the created GIF as a file or as a link.
04Giffer Pro GIF Maker
With a 4 rating, this is a paid video to GIF converter app developed by Taber Buhl.
Key features:
● Allows creating interesting GIFs in larger and longer sizes.
● GIFs can be created using live video, photos, videos, burst photos, and other GIF frames.
● Simple to use with support to advanced features like adjusting frames, speed, position, and others.
● Allows creating different types of GIFs like stop motion, wiggle, time-lapse, seamless loop, reaction, and many more.
● Share created GIFs to social media sites like Instagram, Twitter, Tumblr, and others.
● Option to export GIFs as live photos and videos.
● Support multiple in-app camera modes, playback modes, and sharing options
05Live GIF
Designed for iPhone and iPad, this is a paid app by Priime, Inc supporting multiple features.
Key features:
● Using this iOS app, Live Photos can be converted to videos and GIFs.
● Simple and intuitive interface without any complicated process.
● Allows sharing the created GIF to several sites like Twitter, iMessage, Facebook, and more.
● Compatible working with devices capable of taking Live Photos.
06Gifx
This is a paid app for iOS devices that comes with powerful features.
Key features:
● GIFs can be created using photos, videos, animated PNG files, bursts images, live photos, and other media.
● Stickers and annotations can be added to the GIF.
● Support multiple editing options like rearranging the frames, controlling the speed, and more.
● Option to share the GIF through MMS, email, and also clipboard.
● GIF files can be saved to the device as a video or animated PNG.
Part 2 Top Apps for Android
Below listed are the top apps for Android devices.
01Coub
This is a free video GIF maker app with a 4 rating that is simple to use.
Key features:
● Allows creating loops of videos from camera, YouTube, Library, and other sources.
● Allows trimming the video to choose the desired part.
● HD quality coubs are created in different formats like horizontal, vertical, and others.
● Created coubs appear on the subscriber’s timeline and channel.
02GIF Camera
This is an easy-to-use app for Android devices to create GIFs.
Key features:
● Allows creating GIFs by recording a video using an Android camera.
● GIFs can be created for up to 10 seconds or less.
● Allows editing GIFs.
● Created GIFs can be saved to the phone or can also be shared directly on social media sites.
● Lightweight app with user-friendly interface.
03Giphy Cam
This Android-based app from Giphy allows creating interesting GIFs. The app is free to use.
Key features:
● Create GIFs by recording videos using the Android camera.
● Support a wide range of editing tools like filters, text, special effects, and more.
● Intuitive interface that makes the process quick and simple.
● The created GIF animation can be saved to the system or can be shared with other apps as well.
04GIF Maker
With a 4.7 rating, this is a free and powerful app for creating interesting GIFs.
Key features: :
● Allows creating GIFs using the videos clips on your device or by recording a live video.
● Option to record the screen video and create a GIF.
● Multiple images can also be used for creating a GIF file.
● A wide range of editing functions are supported like trim, crop, resize, filters, emoji, and more.
● High-quality GIFs can be created supporting up to 400 images and 50fps.
● Additional features include GIF compression, GIF to video conversion, selecting GIF background, sharing GIF on social media sites, and more.
05GIFBoom
This app for Android devices is free to use and allows to quickly create GIFs.
Key features:
● Allows creating high-resolution GIFs.
● GIFs can be created using the images and videos on your phone.
● Live video can also be recorded for creating GIFs.
● GIFs can be sent over email, Twitter, Instagram, and other social media sites.
● Allows adding music to GIF files.
Part 3 Top Apps for Android and iPhone
There are a number of apps that are available for both Android and iOS platforms. These apps can be downloaded from their respective app stores. The top ones are enlisted below.
01Gif Me! Camera
This app for Android and iOS devices supports the quick creation of GIF files.
Key features:
● Allows creating GIFs using videos and images on the device.
● Option to add special effects, filters, and other elements.
● Option to import GIF from online services.
● Stop-motion, loop, time-lapse, and other animations can be created.
● Save the created GIF file to your device or share them over social media sites.
02Pixel Animator- GIF Maker
This Android and iOS-based app allow creating pixel-based GIF files.
Key features:
● Create pixel-based GIFs and art using an existing image or a cartoon.
● Allows adjusting the picture frame.
● Multiple options for editing the GIF animations.
● Share the created pixel over different sites and platforms.
03GIF Toaster
This is a free app with an IAP option available for download on Android and iOS devices.
Key features:
● Simple to use app that can create GIFs from videos and images on the device.
● Support almost all popular media formats for creating GIF files.
● Allows creating GIFs using bursts, panoramas, as well as time-lapses.
● Facilitate creating photo collages as well.
● Simple and quick processing.
04GIPHY
When it comes to searching or creating a GIF this is the most popular and widely used app available for both Android and iOS devices.
Key features:
● Create GIFs by uploading videos or capturing one using the device camera.
● Allows creating stickers with custom face filters and text cartoons.
● Created stickers can be accessed from all GIPHY accessible places.
● Search from a huge library of GIFs and clips.
● Option to share GIF through email, Messenger, Instagram, Twitter, and other sites.
● Created animation can also be saved to the clipboard.
Part 4 Best Desktop Software To Create Customized Gif- Wondershare Filmora Video Editor
If you are looking for a desktop tool that can let you create customized GIFs using videos, Wondershare Filmora is the best choice. This software is available for download on Windows and Mac systems and supports creating a GIF from videos in all popular formats like MP4, MOV, MKV, and many others.
You can add filters, effects, and other elements to the GIF and can further customize them using features like trim, crop, and more.
Wondershare Filmora
Get started easily with Filmora’s powerful performance, intuitive interface, and countless effects!
Try It Free Try It Free Try It Free Learn More >
The process of creating a GIF is simple and quick where you just need to add the video, edit them and choose to save them as a GIF file which can be used anywhere as needed.
● Key Takeaways from This Episode →
●A wide range of apps is available for creating GIFs using videos.
●These apps are available for Android, as well as iOS devices and can be selected based on your requirements and budget.
●Wondershare Filmora is an excellent desktop software for creating a GIF using videos.
How to Create Animated Video on Canva?
Canva is a simple way—without any graphic design experience—to make professional graphics for social media, newsletters, presentations, business cards, gift certificates, brochures, and more. Flexible design templates offer the ideal layout for your target destination, letting you aim over the design, not the file formatting or the size.
So, can you make an animated video on Canva?
Yes, because Canva lives on the cloud, you can access your graphics from anywhere you can get online while using Canva on the cloud. Learn how you can play, get up, and run with Canva in this short, fun tutorial guide. We’ll discuss adding and editing images, using inbuilt design templates, and working with typography to build your next project with Canva.
In the subsequent sections, we shall learn more about Canva animated videos and how to create one easily on your PC.
In this article
01 [Create an animated video with a Canva template](#Part 1)
02 [Create Canva animated video with your video](#Part 2)
Part 1 Create an animated video with a Canva template
In this section, we’ll explore how to make animated video on Canva, which applies to both the free and pro account of Canva. However, the steps given below got created from Canva’s free account. We suppose that you’ve already created an account on Canva and logged into the platform. So, further steps will proceed as follows:
Go to the Video tab given in the top front panel of Canva and choose any template of your desire. Let’s say we’ve selected the very first template, 1920 × 1080 pixels. There are lots of options provided by Canva from where you can choose your favorites. You can also create a template with a custom size.

After you enter the editing panel, you have the choice of different templates on the left-hand panel. You can search for a template of your choice among them and can create other pages, as shown below. To preview the templates, you can click the Play button with mentioned time duration on the top right corner of the editing screen.

Now, it’s time to add creativity and explore more editing elements within the Canva. You can modify the entire template given and add something of your own.

Now, you can explore various editing Elements given on the left-hand panel, as shown below. There are multiple options available here as well.

You can add some text within the Canva template, and you can search from the left-hand panel. Given above are various options by which you can bold, italicize, and underline the text.

Now, let’s add some music to the video. So, go to the Audio tab and select any one of the options among them. There are different choices for you to explore here as well.

After you’re done, you can hit the Preview Play button on the top and see your project, as shown below.
It’s all done, and you can proceed with the next section.
Part 2 Create Canva animated video with your video
We’ll discuss how to create an animated video by uploading our video in Canva without using any template in this section. After logging in to the Canva account credentials, select the Video tab and choose the different templates offered.
We’ve selected a blank template for the purpose as follows.

Now, you need to head directly towards the Uploads tab and upload your video created over here.

By now, you have most probably got over with uploading your media. Click the uploaded video, and it will automatically enter within the editing panel of Canva, as shown below.

You’re all done now, and it’s all finished! Even though template usage is quite simple, it’s pretty straightforward when you don’t use any ready-made template. However, you can still beautify this simple video with different elements like text, music, etc.
Animation style videos influence people of all ages to whatever generation, or the kind you belong to will be one of them for sure.
Animated ones provoke diverse impacts instead of ordinary videos on the audience utilizing illustration, kinesthetic, etc. But the fact is, due to technological advancements and overexposure to social media sites, we have forgotten its significance.
Want to know some other most accessible software tools that can bring out the artist in you? Here is an alternative that is all you need.
Are you surprised to find that you can go with various animation styles to boost your business or bring out your talents? But are you confused about how to revamp your story and effectively film it? Why should you worry when the best animation maker and Canva’s alternative Wondershare Filmora is here exclusively for you to create fantastic animation videos that could stand out of the box?
Conclusion
Do you aspire to paint with bright colors to videos or want to become an animator? Then, choose animation styles that you most enjoy, find attractive today, start working on them, or create Canva animated videos as the tutorial indicates above. Lastly, don’t forget to give Filmora a chance to upscale your creation and give your animation style a life!
02 [Create Canva animated video with your video](#Part 2)
Part 1 Create an animated video with a Canva template
In this section, we’ll explore how to make animated video on Canva, which applies to both the free and pro account of Canva. However, the steps given below got created from Canva’s free account. We suppose that you’ve already created an account on Canva and logged into the platform. So, further steps will proceed as follows:
Go to the Video tab given in the top front panel of Canva and choose any template of your desire. Let’s say we’ve selected the very first template, 1920 × 1080 pixels. There are lots of options provided by Canva from where you can choose your favorites. You can also create a template with a custom size.
After you enter the editing panel, you have the choice of different templates on the left-hand panel. You can search for a template of your choice among them and can create other pages, as shown below. To preview the templates, you can click the Play button with mentioned time duration on the top right corner of the editing screen.
Now, it’s time to add creativity and explore more editing elements within the Canva. You can modify the entire template given and add something of your own.
Now, you can explore various editing Elements given on the left-hand panel, as shown below. There are multiple options available here as well.
You can add some text within the Canva template, and you can search from the left-hand panel. Given above are various options by which you can bold, italicize, and underline the text.
Now, let’s add some music to the video. So, go to the Audio tab and select any one of the options among them. There are different choices for you to explore here as well.
After you’re done, you can hit the Preview Play button on the top and see your project, as shown below.
It’s all done, and you can proceed with the next section.
Part 2 Create Canva animated video with your video
We’ll discuss how to create an animated video by uploading our video in Canva without using any template in this section. After logging in to the Canva account credentials, select the Video tab and choose the different templates offered.
We’ve selected a blank template for the purpose as follows.
Now, you need to head directly towards the Uploads tab and upload your video created over here.
By now, you have most probably got over with uploading your media. Click the uploaded video, and it will automatically enter within the editing panel of Canva, as shown below.
You’re all done now, and it’s all finished! Even though template usage is quite simple, it’s pretty straightforward when you don’t use any ready-made template. However, you can still beautify this simple video with different elements like text, music, etc.
Animation style videos influence people of all ages to whatever generation, or the kind you belong to will be one of them for sure.
Animated ones provoke diverse impacts instead of ordinary videos on the audience utilizing illustration, kinesthetic, etc. But the fact is, due to technological advancements and overexposure to social media sites, we have forgotten its significance.
Want to know some other most accessible software tools that can bring out the artist in you? Here is an alternative that is all you need.
Are you surprised to find that you can go with various animation styles to boost your business or bring out your talents? But are you confused about how to revamp your story and effectively film it? Why should you worry when the best animation maker and Canva’s alternative Wondershare Filmora is here exclusively for you to create fantastic animation videos that could stand out of the box?
Conclusion
Do you aspire to paint with bright colors to videos or want to become an animator? Then, choose animation styles that you most enjoy, find attractive today, start working on them, or create Canva animated videos as the tutorial indicates above. Lastly, don’t forget to give Filmora a chance to upscale your creation and give your animation style a life!
How to Send and Add Snapchat GIFs 100% The Easy Way
How to Send and Add Snapchat GIFs 100% The Easy Way
An easy yet powerful editor
Numerous effects to choose from
Detailed tutorials provided by the official channel
GIFs make texting so much more fun. You can express many emotions and include entertaining animations to give your messages a human touch. Users may share and receive GIFs on most social networking networks, and Snapchat is no exception. We’ll show you how to send GIFs on Snapchat, whether you’re an Android or iOS user, in this article.
This covers instructions on how to get GIFs in Snapchat and how to transmit GIFs in chat rooms and on Snapchat Stories updates. Let’s get started.
In this article
01 [How to Send GIFs on Snapchat](#Part 1)
02 [How to Get GIFs on Snapchat Snaps and Messages?](#Part 2)
Part 1 How to Send GIFs on Snapchat
Here is a simple step guide on how to send Snapchat GIF:
Step 1: Take a photo
Start your Snapchat app as usual and snap a photo or video.

Step 2: Tap the Sticker icon
From the row on the right side of the screen, tap the Sticker icon.
To add a GIF to your photo or video, scroll down and select one. You can also use the search option to locate more particular GIFs by entering a term or phrase.

Step 3: Drag GIF
Drag the GIF you added to the screen’s desired location.
Pinch your screen to change the GIF’s size as needed.
Step 4: Save and Share
You can then share your Snap with other social networking platforms by sending it to your Stories, friends/contacts, or just saving it to your gallery.

Part 2 How to Get GIFs on Snapchat Snaps and Messages?
Getting a GIF on Snapchat can be tasking, but here is a simple guide to achieving that.
Step 1: Make use of a Gboard.
Enter the chat of the friend or person to whom you want to send the GIF and maximize or open the keyboard using the text bar.

Step 2: Select the GIF you want.
Choose a GIF from the collection or catalog that you’d want to utilize and submit it.

You can use the same snap to apply many stickers. Drag and drop it on the trashcan icon to get rid of it.
Here’s how to get Gboard on your Android device if it didn’t come with it:
• Download the Gboard from the Play Store or whichever playstore you want.
• Go to Settings> System> Languages and Input> Virtual Keyboard and select it.
• Double-check that Gboard is selected as your primary keyboard.
After that, grant any permissions it requires so that you can use it right away in Snapchat.
Now that it’s as simple as it gets, let’s send comparable GIFs utilizing iOS devices.
For iPhone/iPad:
For iPhone users, you must first download and install the giphy app on your phone. Once you have successfully set the giphy app as your default keyboard, you can send Snapchat GIFs chat by following the steps below:
Step 1: Press the Globe icon
Continuously press and hold the globe icon to the left of the space bar to reveal the available keyboard, then choose a specific or favorite GIF from the giphy list.

Step 2: Find GIF
Find the GIF you wish to send and tap it to copy it.

Step 3: Paste GIF
Return to the conversation, paste the GIF into the text box, and press the send button.

For those who don’t know how to use the Giphy app on their iPhones or iPads, read the following instructions:
• Go to the Settings menu and pick the General icon.
•To see your keyboard options, go to the keyboard setting and tap it.
• To see the accessible keyboard, tap on the part labelled keyboard.
• Select Add a New Keyboard.
• The Giphy keyboard will undoubtedly be among the third-party keyboards.
• Once you’ve included or added the keyboard, it’ll appear in the “active keyboard” section.
• Select the Allow Full Access option.
Have you heard of Filmora before? I’m afraid not, Wondershare Filmora Video Editor is a video editing program that allows you to edit videos in various ways.
It’s exciting and amusing to make your animated GIF from any video or photo. Due to their large size, video scenes might be challenging to manage, but GIFs are perfect for profile posts and sharing with friends as simple jokes.
However, if you wish to create a GIF online, Filmora’s online meme maker is the ideal choice. You may use it to make a watermark-free photo, GIF, and video memes. It is free to use, and there is no need to register. You can change the text size, color, and position when you’re altering a caption. You can also add text to the inside or outside in a GIF.
Wondershare Filmora
Get started easily with Filmora’s powerful performance, intuitive interface, and countless effects!
Try It Free Try It Free Try It Free Learn More >
GIFs may be created from a collection of static photographs or even moving movies, and the process is effortless enough for anyone to do. We recommend Wondershare Filmora for you to complete this task quickly and easily. The rationale for this suggestion is the software tool’s user-friendly and engaging interface. You can soon mix a lot of stills into GIFs or convert small videos into GIFs with Filmora. What’s more, the Filmora platform enables easy modification of GIFs, with users able to add overlays, components, and text to their GIFs.
● Key Takeaways from This Episode →
● You must have gotten one or two tips on how to send and add Snapchat GIFs, all that is for you is to grab your phone, be it an Android or iOS, and make your chat, conversations, photos, and videos more interesting by making use of GIFs on Snapchat.
● iPhone users must ensure that the Giphy app is installed to achieve this.It is also important to note that you can create your exciting GIFs using Wondershare Filmora, and this can help you easily create an awesome GIF in no time. Get to it!!
GIFs make texting so much more fun. You can express many emotions and include entertaining animations to give your messages a human touch. Users may share and receive GIFs on most social networking networks, and Snapchat is no exception. We’ll show you how to send GIFs on Snapchat, whether you’re an Android or iOS user, in this article.
This covers instructions on how to get GIFs in Snapchat and how to transmit GIFs in chat rooms and on Snapchat Stories updates. Let’s get started.
In this article
01 [How to Send GIFs on Snapchat](#Part 1)
02 [How to Get GIFs on Snapchat Snaps and Messages?](#Part 2)
Part 1 How to Send GIFs on Snapchat
Here is a simple step guide on how to send Snapchat GIF:
Step 1: Take a photo
Start your Snapchat app as usual and snap a photo or video.
Step 2: Tap the Sticker icon
From the row on the right side of the screen, tap the Sticker icon.
To add a GIF to your photo or video, scroll down and select one. You can also use the search option to locate more particular GIFs by entering a term or phrase.
Step 3: Drag GIF
Drag the GIF you added to the screen’s desired location.
Pinch your screen to change the GIF’s size as needed.
Step 4: Save and Share
You can then share your Snap with other social networking platforms by sending it to your Stories, friends/contacts, or just saving it to your gallery.
Part 2 How to Get GIFs on Snapchat Snaps and Messages?
Getting a GIF on Snapchat can be tasking, but here is a simple guide to achieving that.
Step 1: Make use of a Gboard.
Enter the chat of the friend or person to whom you want to send the GIF and maximize or open the keyboard using the text bar.
Step 2: Select the GIF you want.
Choose a GIF from the collection or catalog that you’d want to utilize and submit it.
You can use the same snap to apply many stickers. Drag and drop it on the trashcan icon to get rid of it.
Here’s how to get Gboard on your Android device if it didn’t come with it:
• Download the Gboard from the Play Store or whichever playstore you want.
• Go to Settings> System> Languages and Input> Virtual Keyboard and select it.
• Double-check that Gboard is selected as your primary keyboard.
After that, grant any permissions it requires so that you can use it right away in Snapchat.
Now that it’s as simple as it gets, let’s send comparable GIFs utilizing iOS devices.
For iPhone/iPad:
For iPhone users, you must first download and install the giphy app on your phone. Once you have successfully set the giphy app as your default keyboard, you can send Snapchat GIFs chat by following the steps below:
Step 1: Press the Globe icon
Continuously press and hold the globe icon to the left of the space bar to reveal the available keyboard, then choose a specific or favorite GIF from the giphy list.
Step 2: Find GIF
Find the GIF you wish to send and tap it to copy it.
Step 3: Paste GIF
Return to the conversation, paste the GIF into the text box, and press the send button.
For those who don’t know how to use the Giphy app on their iPhones or iPads, read the following instructions:
• Go to the Settings menu and pick the General icon.
•To see your keyboard options, go to the keyboard setting and tap it.
• To see the accessible keyboard, tap on the part labelled keyboard.
• Select Add a New Keyboard.
• The Giphy keyboard will undoubtedly be among the third-party keyboards.
• Once you’ve included or added the keyboard, it’ll appear in the “active keyboard” section.
• Select the Allow Full Access option.
Have you heard of Filmora before? I’m afraid not, Wondershare Filmora Video Editor is a video editing program that allows you to edit videos in various ways.
It’s exciting and amusing to make your animated GIF from any video or photo. Due to their large size, video scenes might be challenging to manage, but GIFs are perfect for profile posts and sharing with friends as simple jokes.
However, if you wish to create a GIF online, Filmora’s online meme maker is the ideal choice. You may use it to make a watermark-free photo, GIF, and video memes. It is free to use, and there is no need to register. You can change the text size, color, and position when you’re altering a caption. You can also add text to the inside or outside in a GIF.
Wondershare Filmora
Get started easily with Filmora’s powerful performance, intuitive interface, and countless effects!
Try It Free Try It Free Try It Free Learn More >
GIFs may be created from a collection of static photographs or even moving movies, and the process is effortless enough for anyone to do. We recommend Wondershare Filmora for you to complete this task quickly and easily. The rationale for this suggestion is the software tool’s user-friendly and engaging interface. You can soon mix a lot of stills into GIFs or convert small videos into GIFs with Filmora. What’s more, the Filmora platform enables easy modification of GIFs, with users able to add overlays, components, and text to their GIFs.
● Key Takeaways from This Episode →
● You must have gotten one or two tips on how to send and add Snapchat GIFs, all that is for you is to grab your phone, be it an Android or iOS, and make your chat, conversations, photos, and videos more interesting by making use of GIFs on Snapchat.
● iPhone users must ensure that the Giphy app is installed to achieve this.It is also important to note that you can create your exciting GIFs using Wondershare Filmora, and this can help you easily create an awesome GIF in no time. Get to it!!
Learn Disney Cartoon Drawing to See Disney Magic Moments
Learn Disney Cartoon Drawing to See More Disney Magic Moments
An easy yet powerful editor
Numerous effects to choose from
Detailed tutorials provided by the official channel
How to Draw a Disney Caricature

Disney-Inspired Ipad Drawing Class for Beginners
In this article
01 [How to Draw a Disney Caricature](#Part 1)
02 [Disney-Inspired Ipad Drawing Class for Beginners](#Part 2)
Part 1 How to Draw a Disney Caricature
Below is the step-by-step guide to making a Disney cartoon drawing with colors from the comfort of your home:
01How to Draw Mickey

Unarguably, Mickey Mouse is one of the most famous anime characters globally. This character was created in 1928 and is a famous Disney cartoon drawing by animators. Here are straightforward steps to help you draw a Mickey Mouse:
Step 1: Sketch the general but carefully observed features of Mickey Mouse, including the position of ears, body shape (reverse C shape), body proportions including eyes, limbs, and arms, length of arms, button on his pants, and angle on the hands.
Step 2: Take your pencil and paper, and using gentle and weak strokes, make a simple sketch of the head, neck, belly, and limbs.

Step 3: Draw contours of the mouth, ears, and nose.

Step 4: Specify the face features like a smiling opened mouth, tip of the nose, and eyes.

Step 5: Draw the hands carefully, observing the length of both arms and their proportion to the size of the character’s head.

Step 6: Sketch the outline contours of the shoes, the legs, and the pants.

Step 7: Sketch the final outline contour of the body, then erase excess lines where necessary. Add the two buttons on Mickey mouse pants.

Step 8: Draw his nose’s tail, tongue, and ellipse.

Step 9: First, use a 2B or 4B or any soft black color pencil to color the black parts.

Step 10: Depending on your preference, you can color with water, acrylic paints, or pastels.

02How to Draw Captain America
Follow these simple steps to make a Disney cartoon drawing of Captain America:
Step 1: Draw the head and chest
Draw the outlines of his masked face using smooth lines. Draw a curved line across his face to divide his face from his mask. Draw a large letter A and add tiny wings beside it on his forehead. Draw his mouth, eyes, and nose. Use curved lines to indicate his shoulder and chest, then draw a star on his chest.

Step 2: Draw his arm and waist
Draw a curved line on the shoulder to represent the bicep, then draw his gloved arm curled to form a fist. Draw curved lines beneath the chest to represent his muscular weight, then draw the pouches on his belt and use more curved lines to draw his waist.

Step 3: Draw his legs
Here, we shall portray Captain America in action. Use curved lines to show his extended right leg with boots. The left leg should appear more petite.

Step 4: Draw his shield
Against his right arm, carefully draw a flattened circular shape. You can achieve this by drawing concentric circles with a large star in the middle. Draw his arm poking out from behind his shield.

Step 5: Include the final details
Add some vertical lines across his waist and some details on his boots.

Step 6: Colour Captain America
Using colors of the American flag, color your drawing with red, white, and blue colors.

03How to Draw Stitch
Stitch is a bulletproof and fireproof alien from the Lilo and Stitch animations. Here’s how you can draw Stitch:
Step 1: Draw a circle that would form Stitch’s head

Step 2: Using a long curved line, draw an irregular peanut shape beneath the head to represent its body.

Step 3: To form its light underbelly, enclose a small shape parallel to the outline of Stitch’s body using a long curved line. On the chest region, draw a series of small “V” shapes to indicate the presence of fur.

Step 4: Draw Stitch’s arm using curved lines for the upper arm and another pair for the lower arm. Draw his bent hands and fingers using short lines. At the tip of its fingers, draw small pointed triangles to represent its claws.

Step 5: Erase the guidelines from Stitch’s arm

Step 6: Draw Stitch’s outstretched arm using a pair of curved lines and small “C” shaped lines to represent the fingers. Use short lines to connect the fingers. Draw small “V” shapes at the tip of the fingers for the triangular claws.

Step 7: Use a pair of curved lines to sketch each leg, then enclose the toes using C-shaped lines

Step 8: Sketch the ears using long curved lines to indicate the base and folds. Sketch the fur on top of Stitch’s head using a series of curved lines.

Step 9: Draw a big circle for the nose and use curved lines to indicate the nostrils. For the eyes, draw irregular rounded shapes, one within the other. Sketch too long curved lines to show the mouth and small blonde triangles for the teeth. Above the eyes and nose, draw curved lines.

Step 10: Use different shades of blue to colour Stitch.

Part 2 Disney-Inspired Ipad Drawing Class for Beginner
Here is a list of classes for beginners interested in drawing Disney characters.
01Dive into the world of Animation with a Disney-Inspired Ipad Drawing Course

This Disney-inspired lesson focuses on real-life scenarios that are beautiful and adorable. Create your everyday settings by sketching backgrounds and outfitting figures.
It will assist you in developing a straightforward approach to drawing cartoon characters through experimentation and time. Follow along and sketch characters, then make your new character.
02Drawing Faces: A Beginner‘s Guide

Ira Marcks, a graphic novelist, will teach you everything you need to know about drawing faces. Are you completely new when it comes to drawing? No worries; follow along with Ira’s bite-sized lectures, and you’ll be ready to delve into a class project by the end of the course.
Do you prefer to set your speed and work at it? If yes, then extend your learning beyond the classroom, download Ira’s Drawing Faces Book.
03Disney Inspired Drawings: Faces and Expressions

Learners will look at sketching a cartoon image of themselves or people they know while exploring the specific traits of Disney-style characters in this one-time live drawing lesson.
Learners will collaborate with the teacher while working on their art projects. This is a technique class, so the focus will be on the process and working towards a finished goal. Nevertheless, a piece may get completed outside of class.
This program is for students who have a basic understanding of drawing and proportion, are open to artistic growth, and are comfortable appearing on camera and sharing their work in a small group setting. All to help each other, and the classroom environment will support all students.
04Free Art Lessons By The Parks’ Imagineers
This lesson will teach how to create your theme park, design virtual landscapes, and even sketch unique costumes!
You’ll also learn how to draw characters from Frozen 2 like Anna and Elsa and classics like Mickey Mouse, Daisy Duck, Pluto, and others.
Your class experience can be enjoyable when using an easy-to-use tool like Wondershare Filmora.
Wondershare Filmora Video Editor is a robust and easy-to-use video editor for users of all skill levels, from beginner to advanced. Its advanced tools, adjustable keyframing, smoothing effects, and motion blur will considerably assist you in creating a high-quality animation video. Furthermore, the auto color correction and audio mixing will elevate your 2D animation film to new heights. Filmora is the best solution if you want more productivity, control, and customization options for your Disney cartoon drawings and animation.
For Win 7 or later (64-bit)
For macOS 10.12 or later
● Ending Thoughts →
● How to make a Disney cartoon drawing
● A step-by-step guide to drawing your favorite Disney cartoon drawing with colors
● How to use Filmora to create animations
● Different Disney-inspired beginner classes for iPad users.
How to Draw a Disney Caricature
Disney-Inspired Ipad Drawing Class for Beginners
In this article
01 [How to Draw a Disney Caricature](#Part 1)
02 [Disney-Inspired Ipad Drawing Class for Beginners](#Part 2)
Part 1 How to Draw a Disney Caricature
Below is the step-by-step guide to making a Disney cartoon drawing with colors from the comfort of your home:
01How to Draw Mickey
Unarguably, Mickey Mouse is one of the most famous anime characters globally. This character was created in 1928 and is a famous Disney cartoon drawing by animators. Here are straightforward steps to help you draw a Mickey Mouse:
Step 1: Sketch the general but carefully observed features of Mickey Mouse, including the position of ears, body shape (reverse C shape), body proportions including eyes, limbs, and arms, length of arms, button on his pants, and angle on the hands.
Step 2: Take your pencil and paper, and using gentle and weak strokes, make a simple sketch of the head, neck, belly, and limbs.
Step 3: Draw contours of the mouth, ears, and nose.
Step 4: Specify the face features like a smiling opened mouth, tip of the nose, and eyes.
Step 5: Draw the hands carefully, observing the length of both arms and their proportion to the size of the character’s head.
Step 6: Sketch the outline contours of the shoes, the legs, and the pants.
Step 7: Sketch the final outline contour of the body, then erase excess lines where necessary. Add the two buttons on Mickey mouse pants.
Step 8: Draw his nose’s tail, tongue, and ellipse.
Step 9: First, use a 2B or 4B or any soft black color pencil to color the black parts.
Step 10: Depending on your preference, you can color with water, acrylic paints, or pastels.
02How to Draw Captain America
Follow these simple steps to make a Disney cartoon drawing of Captain America:
Step 1: Draw the head and chest
Draw the outlines of his masked face using smooth lines. Draw a curved line across his face to divide his face from his mask. Draw a large letter A and add tiny wings beside it on his forehead. Draw his mouth, eyes, and nose. Use curved lines to indicate his shoulder and chest, then draw a star on his chest.
Step 2: Draw his arm and waist
Draw a curved line on the shoulder to represent the bicep, then draw his gloved arm curled to form a fist. Draw curved lines beneath the chest to represent his muscular weight, then draw the pouches on his belt and use more curved lines to draw his waist.
Step 3: Draw his legs
Here, we shall portray Captain America in action. Use curved lines to show his extended right leg with boots. The left leg should appear more petite.
Step 4: Draw his shield
Against his right arm, carefully draw a flattened circular shape. You can achieve this by drawing concentric circles with a large star in the middle. Draw his arm poking out from behind his shield.
Step 5: Include the final details
Add some vertical lines across his waist and some details on his boots.
Step 6: Colour Captain America
Using colors of the American flag, color your drawing with red, white, and blue colors.
03How to Draw Stitch
Stitch is a bulletproof and fireproof alien from the Lilo and Stitch animations. Here’s how you can draw Stitch:
Step 1: Draw a circle that would form Stitch’s head
Step 2: Using a long curved line, draw an irregular peanut shape beneath the head to represent its body.
Step 3: To form its light underbelly, enclose a small shape parallel to the outline of Stitch’s body using a long curved line. On the chest region, draw a series of small “V” shapes to indicate the presence of fur.
Step 4: Draw Stitch’s arm using curved lines for the upper arm and another pair for the lower arm. Draw his bent hands and fingers using short lines. At the tip of its fingers, draw small pointed triangles to represent its claws.
Step 5: Erase the guidelines from Stitch’s arm
Step 6: Draw Stitch’s outstretched arm using a pair of curved lines and small “C” shaped lines to represent the fingers. Use short lines to connect the fingers. Draw small “V” shapes at the tip of the fingers for the triangular claws.
Step 7: Use a pair of curved lines to sketch each leg, then enclose the toes using C-shaped lines
Step 8: Sketch the ears using long curved lines to indicate the base and folds. Sketch the fur on top of Stitch’s head using a series of curved lines.
Step 9: Draw a big circle for the nose and use curved lines to indicate the nostrils. For the eyes, draw irregular rounded shapes, one within the other. Sketch too long curved lines to show the mouth and small blonde triangles for the teeth. Above the eyes and nose, draw curved lines.
Step 10: Use different shades of blue to colour Stitch.
Part 2 Disney-Inspired Ipad Drawing Class for Beginner
Here is a list of classes for beginners interested in drawing Disney characters.
01Dive into the world of Animation with a Disney-Inspired Ipad Drawing Course
This Disney-inspired lesson focuses on real-life scenarios that are beautiful and adorable. Create your everyday settings by sketching backgrounds and outfitting figures.
It will assist you in developing a straightforward approach to drawing cartoon characters through experimentation and time. Follow along and sketch characters, then make your new character.
02Drawing Faces: A Beginner‘s Guide
Ira Marcks, a graphic novelist, will teach you everything you need to know about drawing faces. Are you completely new when it comes to drawing? No worries; follow along with Ira’s bite-sized lectures, and you’ll be ready to delve into a class project by the end of the course.
Do you prefer to set your speed and work at it? If yes, then extend your learning beyond the classroom, download Ira’s Drawing Faces Book.
03Disney Inspired Drawings: Faces and Expressions
Learners will look at sketching a cartoon image of themselves or people they know while exploring the specific traits of Disney-style characters in this one-time live drawing lesson.
Learners will collaborate with the teacher while working on their art projects. This is a technique class, so the focus will be on the process and working towards a finished goal. Nevertheless, a piece may get completed outside of class.
This program is for students who have a basic understanding of drawing and proportion, are open to artistic growth, and are comfortable appearing on camera and sharing their work in a small group setting. All to help each other, and the classroom environment will support all students.
04Free Art Lessons By The Parks’ Imagineers
This lesson will teach how to create your theme park, design virtual landscapes, and even sketch unique costumes!
You’ll also learn how to draw characters from Frozen 2 like Anna and Elsa and classics like Mickey Mouse, Daisy Duck, Pluto, and others.
Your class experience can be enjoyable when using an easy-to-use tool like Wondershare Filmora.
Wondershare Filmora Video Editor is a robust and easy-to-use video editor for users of all skill levels, from beginner to advanced. Its advanced tools, adjustable keyframing, smoothing effects, and motion blur will considerably assist you in creating a high-quality animation video. Furthermore, the auto color correction and audio mixing will elevate your 2D animation film to new heights. Filmora is the best solution if you want more productivity, control, and customization options for your Disney cartoon drawings and animation.
For Win 7 or later (64-bit)
For macOS 10.12 or later
● Ending Thoughts →
● How to make a Disney cartoon drawing
● A step-by-step guide to drawing your favorite Disney cartoon drawing with colors
● How to use Filmora to create animations
● Different Disney-inspired beginner classes for iPad users.
15 Best Collage Makers to Create Aesthetic Collages
15 Best Collage Makers to Create Aesthetic Collages
An easy yet powerful editor
Numerous effects to choose from
Detailed tutorials provided by the official channel
It is rightly said that a picture is worth a thousand words and what if there are multiple pictures? It becomes a story!! Creating collages have been popular among people for a long and with high-end cameras, mobile phones, and excellent tools the task has become even easier and quicker.

So, if you too are willing to create an aesthetic collage for yourself or loved ones, there is no dearth of collage-making tools. So, to prevent you from the hassles of selecting one such tool, we have shortlisted the popular ones.
In this article
01 [Need for a collage-making tool?](#Part 1)
02 [Top 15 collage makers to create aesthetic collages](#Part 2)
03 [Best software to create video collages and edit videos professionally – Wondershare Filmora](#Part 3)
Part 1 Need for a collage-making tool?
Though aesthetic collage wallpaper making may sound simple, it is an artwork to create an impressive-looking collage. Adjusting the images in the right format, cropping their sizes, setting a background, setting colors, adding text are some of the many factors that go into the making of a visually appealing collage. So now, all these considerations can be taken care of by a good collage-making tool. All you need to do is pick up your choice of images, select a template and let the tool do its work.
In no time, a collage of your choice will be ready.
Part 2 Top 15 collage makers to create aesthetic collages
There is a wide range of online, desktop, and app-based collage-making tools available that can be selected based on your requirements. Check out the most popular ones as below.
01Free Collage Maker Online
This is a free-to-use online tool that can be used for creating impressive aesthetic wallpaper collage quickly. The tool gives you the option to either choose your own layout or use one of the readymade templates. Multiple editing options are supported like adjust9ing exposure, contrast, shadows, white balance, and more. You can even turn, rotate, and distort the images. Using this online tool, you can even add the text and also customize it. A wide range of formats is supported by a tool like RAW, JPEG, PSD, PNG, and others.
022. Canva
This is a widely used online tool that supports multiple functions including image collage creation and image editing. The tool allows adding images in all popular formats for creating a collage using several templates. The position of the photos, font of the text, shades, and other parameters can be adjusted as required. The tool also has a huge collection of images in different categories that can also be used for making aesthetic photo collage. Created collages can be saved in JPEG, PDF, and PNG format.
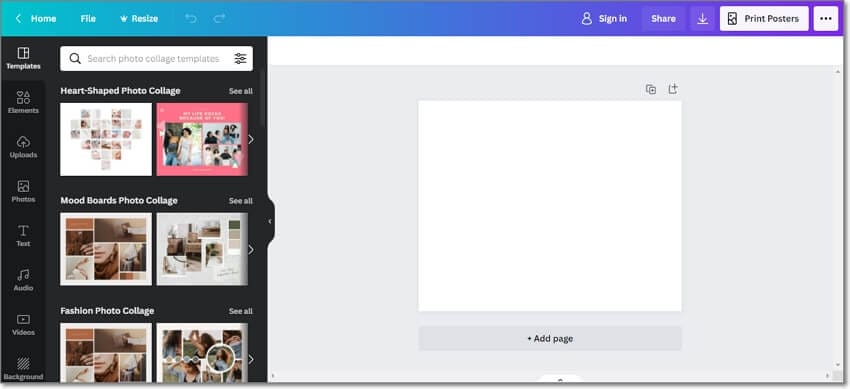
03Fotor
Creating high-quality trendy photo collages is easy and quick using this online tool that supports all popular image formats. There are several grids and template options available for you to create the desired collage. Stickers and text can be added to the created collage to add some fun elements. Several adjustments can be made like frame width, rounded corners, background color, aspect ratio, adding filters, effects, and more. With multiple features, the interface becomes quite confusing.
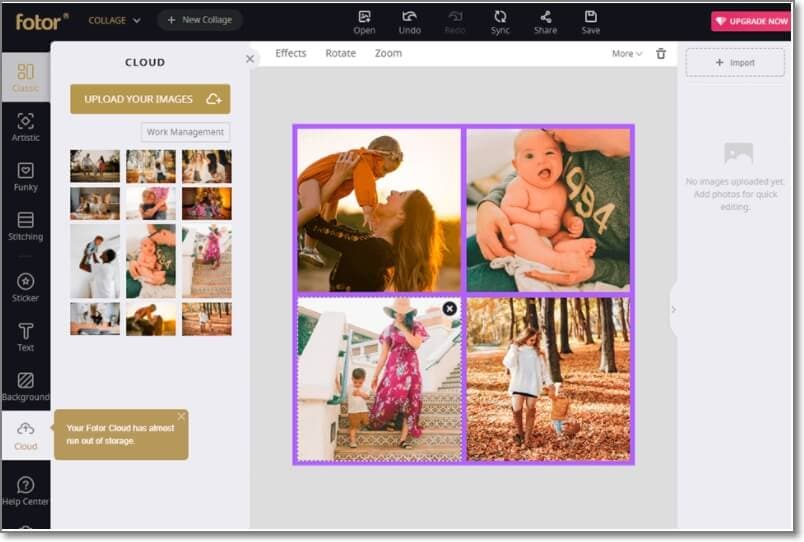
04Adobe Creative Cloud Express
Adobe is one of the most widely used tools when it comes to images and videos and creating a picture collage is one of the supported features. Using the online version of this tool, collages can be created quickly and only a free sign-up is needed. In addition to your images, you can even choose from the wide collection of royalty-free pictures. Theme-based templates are available to match your requirements and for customization, all basic editing features are supported. You can even add texts, filters, and effects to your collages.
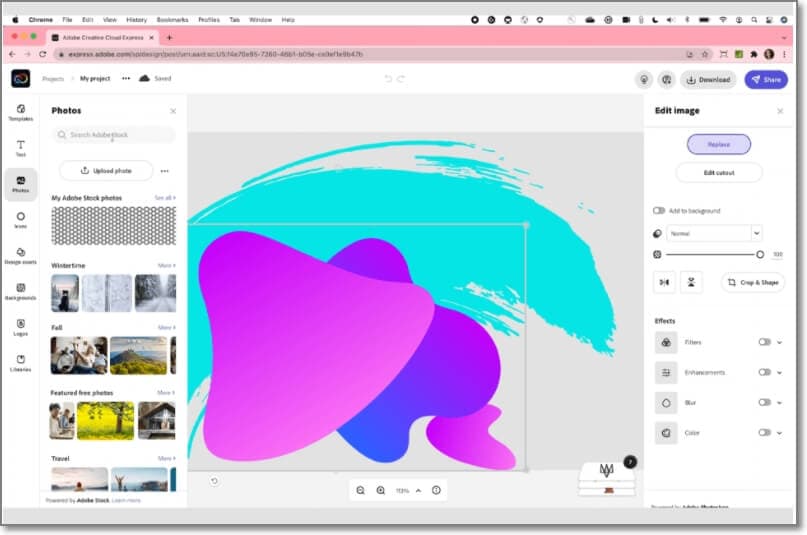
05Shape Collage
This automatic collage maker lets you create the desired collage in just a few simple steps. The interface is simple and all the basic editing functions for customization are supported. You can change the background, frame, the distance between the images, and several other factors. The tool is available to be used as desktop software, an online program, and also as an app that can be downloaded on a phone.
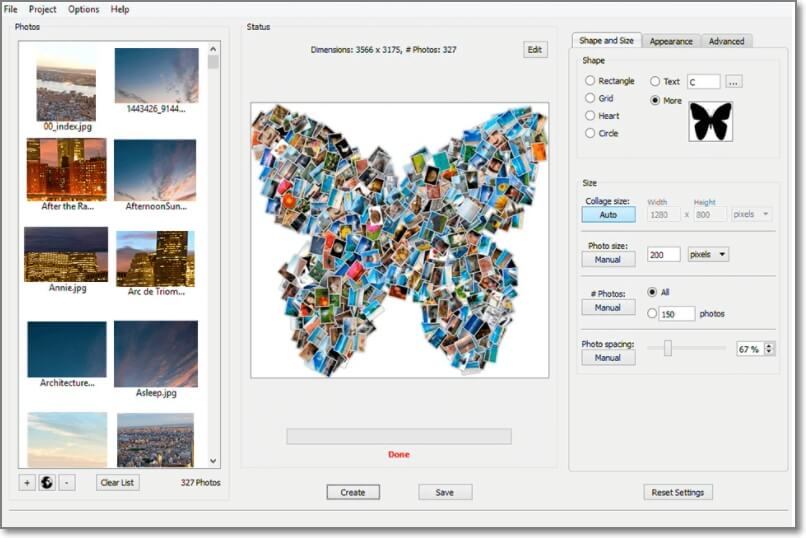
06Kapwing Collage Maker
Using this free online tool, collages can be made using images, videos, GIFs, as well as music files. The tool allows you to choose either a blank canvas or choose from multiple templates available at the site. The drag and drop features are supported and there are multiple editing options as well. The free version has a watermark on the created collages which can be removed after creating a free account. The created collage can be saved to the system or its URL can be obtained.
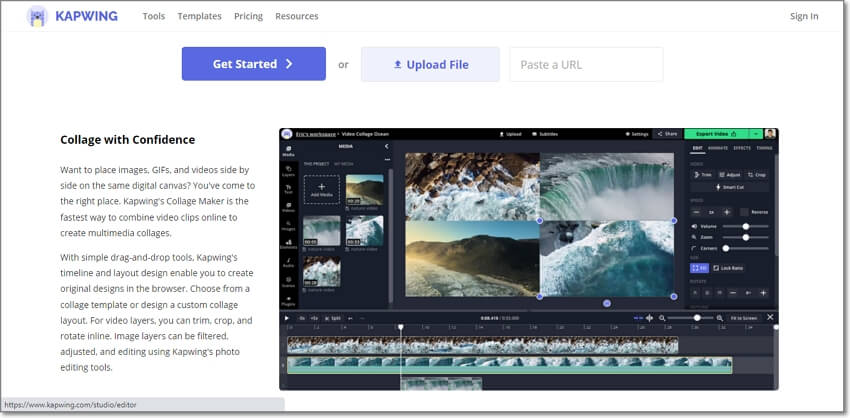
07Photo Joiner
As the name suggests, this is a photo joining tool that works from your browser and allows creating a picture collage. The interface is user-friendly and the work process is smooth where you just need to add the images, choose the layout, add text, and make required settings to create your choice of a template. The tool allows changing the image size, as well as the background. Using the tool, you can also create an FB cover in a simple step.
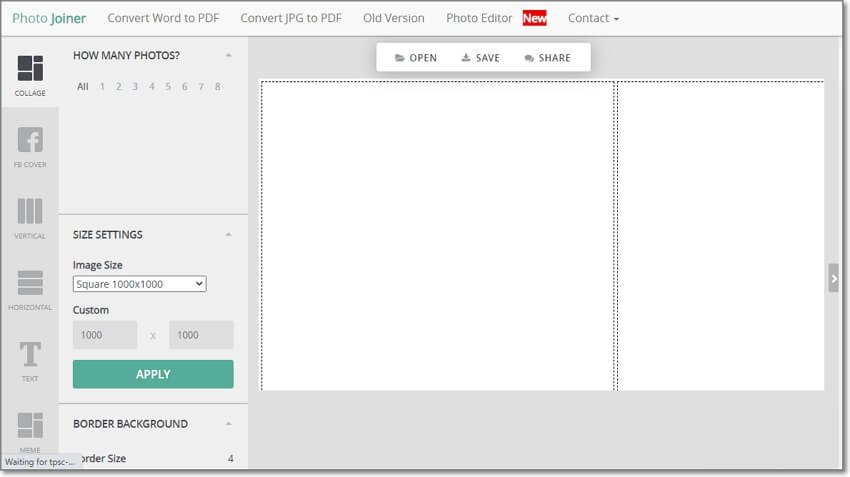
08Ribbet
This is a widely used photo editing tool that performs an array of additional features as well including collage making. The tool is available in a free as well as a premium paid version. The interface is smart and comes packed in with all basic collage-making functions. Decent templates are available to choose from with the option to adjust the size, edit exposure, lighting, and other parameters.
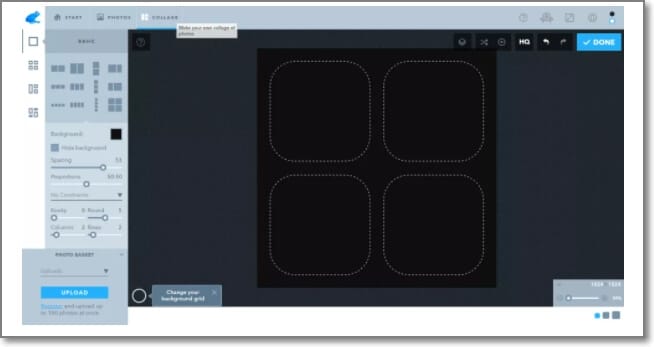
09BeFunky
Creating aesthetic, funky, and all types of different collages is quick and easy using this online tool. A variety of customizable layout options are available at the site to match your requirements. The images can be enhanced by changing the background color, pattern, adding fonts, effects, filters, and more. The free version of the tool supports basic functions while for more advanced options you need to purchase the premium plan. The tool is also available as an app for Android and iOS devices.
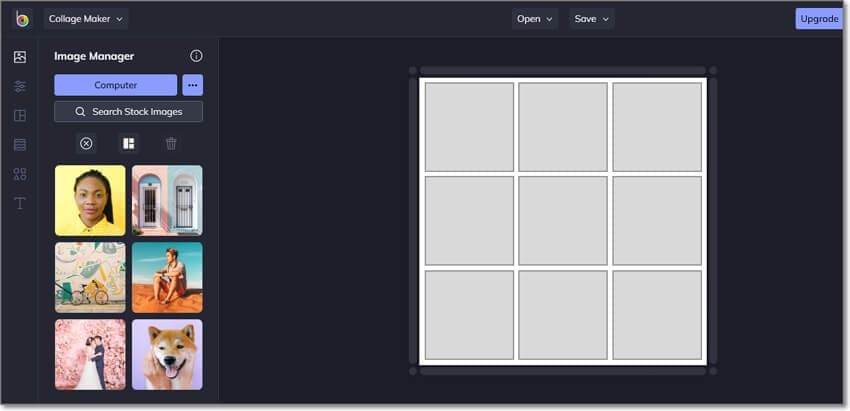
10Kizoa
This is a free online slideshow maker that allows creating a slideshow in different aspect ratios which is suitable for all types of platforms and screen sizes. An array of static and animated templates is available and you can even add multiple effects, text, and other elements to customize the collage as desired. There is also a paid version of the tool with added features and functions.
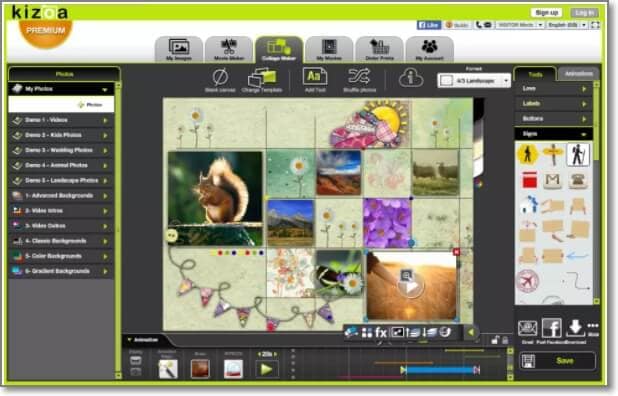
11PicMonkey
This is another popular name when it comes to collage-making tools. The tool allows creating freestyle as well as grid-based collages and in addition to the images, you can even add videos. Hundreds of collage layouts are available that can be further customized as needed. The function of auto-cell resizing adjusts all the images to the grids perfectly. Apart from your media files, you can even choose from the free stock of images and videos available at the site.
12piZap
Just like its interesting name, this online tool allows you to create interesting collages. The interface is intuitive and there are multiple templates to choose from. Further, the templates can be customized using an editing tool, adding filters, texts, effects, and other elements. The Facebook banner template is one of the interesting and useful features. For ad-free experience and additional functions, the pro-paid version can be selected.
13FotoJet
Using this browser-based tool you can create collages, posters, photo cards, YouTube banners, fun images, Facebook covers, and others. The templates in different categories are available to match your themes and create interesting collages. You can even choose to create a classic collage to keep it simple. Upgrading the tool to the paid version offers additional resources and features.

14Picsart Collage Maker
This is another simple to use free online collage-making tool that can create aesthetic and other types of collages. The interface of the tool is clean which makes the working smooth and quick and the images can be added from your system as well as from your social media accounts. Multiple effects, filters, clip-art, and other elements can be added to make the collage look impressive.
15Photovisi
Using this free online collage-making tool, you will have access to templates in different categories like abstract, magic, love, nature, and many categories more. You can even create Facebook covers, E-cards, and YouTube channel banners using the program. An array of built-in effects is available to customize the file and the tool also offers collaboration options. The created collage can be saved locally or can also be shared through an email.
Part 3 Best software to create video collages and edit videos professionally – Wondershare Filmora
Above we have listed the best tools for creating image collages and a few of them also has a feature to add videos. If you are want to create a video collage and looking for a tool that can edit your videos professionally, Wondershare Filmora is the best tool to consider. The animated split screen effect of the software allows you to view your videos on a split-screen thus making it look like a collage.
For all types of video editing requirements, this is an excellent tool available for download on Windows and Mac systems.
For Win 7 or later (64-bit)
For macOS 10.12 or later
● Key Takeaways from This Episode →
● To create aesthetics and other types of collages, a wide range of collage-maker tools are available.
● Choose from desktop tools, online programs, or apps as needed.
● To edit videos and create decent video collages, Wondershare Filmora is an excellent tool.
It is rightly said that a picture is worth a thousand words and what if there are multiple pictures? It becomes a story!! Creating collages have been popular among people for a long and with high-end cameras, mobile phones, and excellent tools the task has become even easier and quicker.
So, if you too are willing to create an aesthetic collage for yourself or loved ones, there is no dearth of collage-making tools. So, to prevent you from the hassles of selecting one such tool, we have shortlisted the popular ones.
In this article
01 [Need for a collage-making tool?](#Part 1)
02 [Top 15 collage makers to create aesthetic collages](#Part 2)
03 [Best software to create video collages and edit videos professionally – Wondershare Filmora](#Part 3)
Part 1 Need for a collage-making tool?
Though aesthetic collage wallpaper making may sound simple, it is an artwork to create an impressive-looking collage. Adjusting the images in the right format, cropping their sizes, setting a background, setting colors, adding text are some of the many factors that go into the making of a visually appealing collage. So now, all these considerations can be taken care of by a good collage-making tool. All you need to do is pick up your choice of images, select a template and let the tool do its work.
In no time, a collage of your choice will be ready.
Part 2 Top 15 collage makers to create aesthetic collages
There is a wide range of online, desktop, and app-based collage-making tools available that can be selected based on your requirements. Check out the most popular ones as below.
01Free Collage Maker Online
This is a free-to-use online tool that can be used for creating impressive aesthetic wallpaper collage quickly. The tool gives you the option to either choose your own layout or use one of the readymade templates. Multiple editing options are supported like adjust9ing exposure, contrast, shadows, white balance, and more. You can even turn, rotate, and distort the images. Using this online tool, you can even add the text and also customize it. A wide range of formats is supported by a tool like RAW, JPEG, PSD, PNG, and others.
022. Canva
This is a widely used online tool that supports multiple functions including image collage creation and image editing. The tool allows adding images in all popular formats for creating a collage using several templates. The position of the photos, font of the text, shades, and other parameters can be adjusted as required. The tool also has a huge collection of images in different categories that can also be used for making aesthetic photo collage. Created collages can be saved in JPEG, PDF, and PNG format.
03Fotor
Creating high-quality trendy photo collages is easy and quick using this online tool that supports all popular image formats. There are several grids and template options available for you to create the desired collage. Stickers and text can be added to the created collage to add some fun elements. Several adjustments can be made like frame width, rounded corners, background color, aspect ratio, adding filters, effects, and more. With multiple features, the interface becomes quite confusing.
04Adobe Creative Cloud Express
Adobe is one of the most widely used tools when it comes to images and videos and creating a picture collage is one of the supported features. Using the online version of this tool, collages can be created quickly and only a free sign-up is needed. In addition to your images, you can even choose from the wide collection of royalty-free pictures. Theme-based templates are available to match your requirements and for customization, all basic editing features are supported. You can even add texts, filters, and effects to your collages.
05Shape Collage
This automatic collage maker lets you create the desired collage in just a few simple steps. The interface is simple and all the basic editing functions for customization are supported. You can change the background, frame, the distance between the images, and several other factors. The tool is available to be used as desktop software, an online program, and also as an app that can be downloaded on a phone.
06Kapwing Collage Maker
Using this free online tool, collages can be made using images, videos, GIFs, as well as music files. The tool allows you to choose either a blank canvas or choose from multiple templates available at the site. The drag and drop features are supported and there are multiple editing options as well. The free version has a watermark on the created collages which can be removed after creating a free account. The created collage can be saved to the system or its URL can be obtained.
07Photo Joiner
As the name suggests, this is a photo joining tool that works from your browser and allows creating a picture collage. The interface is user-friendly and the work process is smooth where you just need to add the images, choose the layout, add text, and make required settings to create your choice of a template. The tool allows changing the image size, as well as the background. Using the tool, you can also create an FB cover in a simple step.
08Ribbet
This is a widely used photo editing tool that performs an array of additional features as well including collage making. The tool is available in a free as well as a premium paid version. The interface is smart and comes packed in with all basic collage-making functions. Decent templates are available to choose from with the option to adjust the size, edit exposure, lighting, and other parameters.
09BeFunky
Creating aesthetic, funky, and all types of different collages is quick and easy using this online tool. A variety of customizable layout options are available at the site to match your requirements. The images can be enhanced by changing the background color, pattern, adding fonts, effects, filters, and more. The free version of the tool supports basic functions while for more advanced options you need to purchase the premium plan. The tool is also available as an app for Android and iOS devices.
10Kizoa
This is a free online slideshow maker that allows creating a slideshow in different aspect ratios which is suitable for all types of platforms and screen sizes. An array of static and animated templates is available and you can even add multiple effects, text, and other elements to customize the collage as desired. There is also a paid version of the tool with added features and functions.
11PicMonkey
This is another popular name when it comes to collage-making tools. The tool allows creating freestyle as well as grid-based collages and in addition to the images, you can even add videos. Hundreds of collage layouts are available that can be further customized as needed. The function of auto-cell resizing adjusts all the images to the grids perfectly. Apart from your media files, you can even choose from the free stock of images and videos available at the site.
12piZap
Just like its interesting name, this online tool allows you to create interesting collages. The interface is intuitive and there are multiple templates to choose from. Further, the templates can be customized using an editing tool, adding filters, texts, effects, and other elements. The Facebook banner template is one of the interesting and useful features. For ad-free experience and additional functions, the pro-paid version can be selected.
13FotoJet
Using this browser-based tool you can create collages, posters, photo cards, YouTube banners, fun images, Facebook covers, and others. The templates in different categories are available to match your themes and create interesting collages. You can even choose to create a classic collage to keep it simple. Upgrading the tool to the paid version offers additional resources and features.
14Picsart Collage Maker
This is another simple to use free online collage-making tool that can create aesthetic and other types of collages. The interface of the tool is clean which makes the working smooth and quick and the images can be added from your system as well as from your social media accounts. Multiple effects, filters, clip-art, and other elements can be added to make the collage look impressive.
15Photovisi
Using this free online collage-making tool, you will have access to templates in different categories like abstract, magic, love, nature, and many categories more. You can even create Facebook covers, E-cards, and YouTube channel banners using the program. An array of built-in effects is available to customize the file and the tool also offers collaboration options. The created collage can be saved locally or can also be shared through an email.
Part 3 Best software to create video collages and edit videos professionally – Wondershare Filmora
Above we have listed the best tools for creating image collages and a few of them also has a feature to add videos. If you are want to create a video collage and looking for a tool that can edit your videos professionally, Wondershare Filmora is the best tool to consider. The animated split screen effect of the software allows you to view your videos on a split-screen thus making it look like a collage.
For all types of video editing requirements, this is an excellent tool available for download on Windows and Mac systems.
For Win 7 or later (64-bit)
For macOS 10.12 or later
● Key Takeaways from This Episode →
● To create aesthetics and other types of collages, a wide range of collage-maker tools are available.
● Choose from desktop tools, online programs, or apps as needed.
● To edit videos and create decent video collages, Wondershare Filmora is an excellent tool.
Formula to Animate Photos From 10 Animate Pictures App
Epic Formula to Animate Photos from These 10 Animate Pictures App
An easy yet powerful editor
Numerous effects to choose from
Detailed tutorials provided by the official channel
With the availability of modern technology, still photos can be seamlessly transformed into live animated photos. Adding motion and movement along with filter effects to still photos is pretty easy with an animated pictures app.
For Win 7 or later (64-bit)
For macOS 10.12 or later
In this article, we have listed 10 of the best animated picture apps available in 2021. You will find all essential details and features of these 10 apps which will help you choose the best option when choosing an app for animating a picture. Let us take a look at these 10 apps!
In this article
01 [10 Animate Pictures Apps](#Part 1)
02 [The contrast of These 10 Animate Pictures Apps](#Part 2)
Part 1 10 Animate Pictures Apps
01 MotionLeap

MotionLeap
● Price
Free, with premium version available.
● OS
Android and iOS
● Key features
You can freeze parts of an image.
Variety of filters can be applied.
Although MotionLeap is free to use there’s a Pro and subscription version with a greater variety of features in it. The best part about this animated pictures app is that it does not put any watermark over the final image.
The app can animate still photos and convert them into short, loop videos. This is done by the programming of the directional cues into the image which is executed by dragging actions of the thumb across your mobile screen.
Although, on MotionLeap, without the pro version, the photo will be saved in video format.
02 GIPHY

GIPHY
● Price
Free
● OS
Android and iOS
● Key features
Simple, easy to use UI
A variety of built-in animation tools
Sticker maker on iOS (for iPhone X and later models)
We might already be acquainted with GIPHY as the most popular search engine for GIFs. Although, what’s unknown is that GIPHY has a mobile app both for Android and iOS which can be used to create GIFs and animate photos.
The app’s key advantage is its highly intuitive and very easy to use interface that makes it really easy to animate photos with the GIPHY app. Above all, it is completely free to use and along with animating pictures, you can also add captions to your animated photos or even capture short videos.
03 Movepic

Movepic
● Price
Free, with premium version available.
● OS
Android and iOS
● Key features
Easy to use.
A range of built in overlays and filters.
Movepic is another excellent app for animating pictures. As an animated pictures app, it is quite similar to MotionLeap owing to the fact that it animates still photos.
A downside of the Movepic free version is that it puts a watermark on the image and you cannot remove it without upgrading to the premium version or VIP account. The app saves the final images as a movie file and not as a GIF.
04 ImgPlay

ImgPlay
● Price
Free, with premium version available.
● OS
Android and iOS
● Key features
Easy to use.
Lay out still photographs side-by-side and use burst photos or videos.
ImgPlay is another very popular and effective animated pictures app. The app makes use of a range of ready-to-use animated photos for the web.
ImgPlay also comes with a range of advanced and easy-to-understand controls. This app, in spite of all its perks, puts a watermark on the image—which, once again, cannot be removed unless you buy the premium version of the app.
05 StoryZ

StoryZ
● Price
Free, with premium version available.
● OS
Android and iOS
● Key features
Programmed movement paths, overlays and color filters.
Saves images automatically as GIFs.
StoryZ is one of the best apps on this list and anyone who has used the app would agree with that. The app can seamlessly animate still photos.
A great thing about this app is that StoryZ enables users to remove the watermark from the image by simply watching a quick ad before saving the file.
06 VIMAGE 3D

VIMAGE 3D
● Price
Free, with premium version available.
● OS
Android and iOS
● Key features
AI enabled.
A range of filters and special effects.
Add sounds to your animated images and videos.
This one is an award winning app for animating pictures and the app won a Google Play award in 2018. The app is simply exceptional in terms of user experience as well as features.
Like most of these apps, you do need to pay to remove the watermark, get access to the full effects library, and the ability to export your images in up to 2560p resolution.
07 Photo Bender

Photo Bender
● Price
Free
● OS
Android
● Key features
A variety of editing tools and features including brushes.
Enables users to export images as MP4s, GIFs, JPEGs, and PNGs.
Photo Bender is an animated pictures app that is specific to the Android platform. The app is popular for its convenience of use and it enables users to digitally warp images and animate photos.
There are a variety of things that can be done to an image with the help of this app. From colouring an image, to bending it, stretching it, and a lot more, you can do it all. You also get a range of brushes to use on the image.
08 Zoetropic

Zoetropic
● Price
Free, with premium version available.
● OS
Android and iOS
● Key features
The app is really fast and efficient.
Simple UI.
Zoetropic helps you animate images in minutes,even if you are using the app for the first time. The app does not come with a lot of features but its simplicity, effectiveness and ease of use makes it a great option for animated pictures app.
09 Lumyer

Lumyer
● Price
Free, with premium version available.
● OS
Android and iOS
● Key features
Seasonal and occasional animation effects.
Easy to use.
This app is another great platform to edit pictures and animate them. It enables you to add a variety of effects to pictures and easily animate them.
From subtle weather effects to sparkle, seasonal animations and a lot more, the app offers a lot of options.
Part 2: The contrast of These 10 Animate Pictures Apps
| Name of The Animated Picture App | Advantages | Disadvantages |
|---|---|---|
| MotionLeap | No watermark+Variety of filters; | File saved in video format without pro version |
| GIPHY | Free to use+Simple UI | Not suitable for advanced editing |
| Movepic | Built-in overlays and filters | Saves final image as video file without pro version Watermark |
| ImgPlay | Easy to use and understand+Ready to go animated photos for the web | Watermark on image |
| StoryZ | Remove watermark by watching an ad+Variety of animation techniques | Boring interface |
| VIMAGE 3D | Neat UI+Endless features+AI enabled | Need to buy premium version to access majority of features |
| Photo Bender | A range of tasks can be executed | Not a very attractive UI |
| Zoetropic | Simple, effective and easy to use | Limited effects on free version |
| Lumyer | Fast and easy to use+Lot of features | Can be expensive due to several in-app purchases |
| Filmora | Easy to Use+fordable+ons of features+Seamless UI+rofessional video editing tools | Not available on mobile |
Key Takeaways from This Episode
● That brings us to the end of the article. Anyone looking for an animated pictures app to animate their images have found 10 of the best apps available in the market right now.
● With the list of these 10 apps, anyone can find the most suitable platform for their own purposes of animating an image.
● Last but not the least, if it comes to an all inclusive platform for video editing and animating pictures, Filmora Pro is definitely the winner on this list! So check out your options and make the best choice!
With the availability of modern technology, still photos can be seamlessly transformed into live animated photos. Adding motion and movement along with filter effects to still photos is pretty easy with an animated pictures app.
For Win 7 or later (64-bit)
For macOS 10.12 or later
In this article, we have listed 10 of the best animated picture apps available in 2021. You will find all essential details and features of these 10 apps which will help you choose the best option when choosing an app for animating a picture. Let us take a look at these 10 apps!
In this article
01 [10 Animate Pictures Apps](#Part 1)
02 [The contrast of These 10 Animate Pictures Apps](#Part 2)
Part 1 10 Animate Pictures Apps
01 MotionLeap
MotionLeap
● Price
Free, with premium version available.
● OS
Android and iOS
● Key features
You can freeze parts of an image.
Variety of filters can be applied.
Although MotionLeap is free to use there’s a Pro and subscription version with a greater variety of features in it. The best part about this animated pictures app is that it does not put any watermark over the final image.
The app can animate still photos and convert them into short, loop videos. This is done by the programming of the directional cues into the image which is executed by dragging actions of the thumb across your mobile screen.
Although, on MotionLeap, without the pro version, the photo will be saved in video format.
02 GIPHY
GIPHY
● Price
Free
● OS
Android and iOS
● Key features
Simple, easy to use UI
A variety of built-in animation tools
Sticker maker on iOS (for iPhone X and later models)
We might already be acquainted with GIPHY as the most popular search engine for GIFs. Although, what’s unknown is that GIPHY has a mobile app both for Android and iOS which can be used to create GIFs and animate photos.
The app’s key advantage is its highly intuitive and very easy to use interface that makes it really easy to animate photos with the GIPHY app. Above all, it is completely free to use and along with animating pictures, you can also add captions to your animated photos or even capture short videos.
03 Movepic
Movepic
● Price
Free, with premium version available.
● OS
Android and iOS
● Key features
Easy to use.
A range of built in overlays and filters.
Movepic is another excellent app for animating pictures. As an animated pictures app, it is quite similar to MotionLeap owing to the fact that it animates still photos.
A downside of the Movepic free version is that it puts a watermark on the image and you cannot remove it without upgrading to the premium version or VIP account. The app saves the final images as a movie file and not as a GIF.
04 ImgPlay
ImgPlay
● Price
Free, with premium version available.
● OS
Android and iOS
● Key features
Easy to use.
Lay out still photographs side-by-side and use burst photos or videos.
ImgPlay is another very popular and effective animated pictures app. The app makes use of a range of ready-to-use animated photos for the web.
ImgPlay also comes with a range of advanced and easy-to-understand controls. This app, in spite of all its perks, puts a watermark on the image—which, once again, cannot be removed unless you buy the premium version of the app.
05 StoryZ
StoryZ
● Price
Free, with premium version available.
● OS
Android and iOS
● Key features
Programmed movement paths, overlays and color filters.
Saves images automatically as GIFs.
StoryZ is one of the best apps on this list and anyone who has used the app would agree with that. The app can seamlessly animate still photos.
A great thing about this app is that StoryZ enables users to remove the watermark from the image by simply watching a quick ad before saving the file.
06 VIMAGE 3D
VIMAGE 3D
● Price
Free, with premium version available.
● OS
Android and iOS
● Key features
AI enabled.
A range of filters and special effects.
Add sounds to your animated images and videos.
This one is an award winning app for animating pictures and the app won a Google Play award in 2018. The app is simply exceptional in terms of user experience as well as features.
Like most of these apps, you do need to pay to remove the watermark, get access to the full effects library, and the ability to export your images in up to 2560p resolution.
07 Photo Bender
Photo Bender
● Price
Free
● OS
Android
● Key features
A variety of editing tools and features including brushes.
Enables users to export images as MP4s, GIFs, JPEGs, and PNGs.
Photo Bender is an animated pictures app that is specific to the Android platform. The app is popular for its convenience of use and it enables users to digitally warp images and animate photos.
There are a variety of things that can be done to an image with the help of this app. From colouring an image, to bending it, stretching it, and a lot more, you can do it all. You also get a range of brushes to use on the image.
08 Zoetropic
Zoetropic
● Price
Free, with premium version available.
● OS
Android and iOS
● Key features
The app is really fast and efficient.
Simple UI.
Zoetropic helps you animate images in minutes,even if you are using the app for the first time. The app does not come with a lot of features but its simplicity, effectiveness and ease of use makes it a great option for animated pictures app.
09 Lumyer
Lumyer
● Price
Free, with premium version available.
● OS
Android and iOS
● Key features
Seasonal and occasional animation effects.
Easy to use.
This app is another great platform to edit pictures and animate them. It enables you to add a variety of effects to pictures and easily animate them.
From subtle weather effects to sparkle, seasonal animations and a lot more, the app offers a lot of options.
Part 2: The contrast of These 10 Animate Pictures Apps
| Name of The Animated Picture App | Advantages | Disadvantages |
|---|---|---|
| MotionLeap | No watermark+Variety of filters; | File saved in video format without pro version |
| GIPHY | Free to use+Simple UI | Not suitable for advanced editing |
| Movepic | Built-in overlays and filters | Saves final image as video file without pro version Watermark |
| ImgPlay | Easy to use and understand+Ready to go animated photos for the web | Watermark on image |
| StoryZ | Remove watermark by watching an ad+Variety of animation techniques | Boring interface |
| VIMAGE 3D | Neat UI+Endless features+AI enabled | Need to buy premium version to access majority of features |
| Photo Bender | A range of tasks can be executed | Not a very attractive UI |
| Zoetropic | Simple, effective and easy to use | Limited effects on free version |
| Lumyer | Fast and easy to use+Lot of features | Can be expensive due to several in-app purchases |
| Filmora | Easy to Use+fordable+ons of features+Seamless UI+rofessional video editing tools | Not available on mobile |
Key Takeaways from This Episode
● That brings us to the end of the article. Anyone looking for an animated pictures app to animate their images have found 10 of the best apps available in the market right now.
● With the list of these 10 apps, anyone can find the most suitable platform for their own purposes of animating an image.
● Last but not the least, if it comes to an all inclusive platform for video editing and animating pictures, Filmora Pro is definitely the winner on this list! So check out your options and make the best choice!
Amazing Techniques of Motion Graphics in Premiere Pro
Little Known Techniques of Motion Graphics in Premiere Pro
An easy yet powerful editor
Numerous effects to choose from
Detailed tutorials provided by the official channel
Video editing has recently gained momentum in content design, and with Motion Graphics Premiere Pro editing templates, it has all the fun in the house.
In this article
01 [5 Editing Motion Graphics Techniques in Adobe Premiere Pro](#Part 1)
02 [10 Free Motion Graphics Templates for Premiere Pro](#Part 2)
03 [How to Use Motion Graphics Templates in Premiere Pro](#Part 3)
Part 1 5 Editing Motion Graphics Techniques in Adobe Premiere Pro
A variety of editing techniques of motion graphics for Premiere Pro are ready to give a classy touch to your videos. Let’s brush up through the best you can have.
01Cropping Clips
Cropping your videos allows you to fit them into your required size frames. To remove any unwanted portions of your edits, crop them in adobe Premiere Pro with your desired aspect ratio to give that ‘just perfect’ look to your edits.
Start from importing and adding your footage to your project panel, followed by creating a fresh composition. Now, choose ‘Crop’ from the Effects panel to add it to your clip, either by double-clicking or dragging and dropping.
02Trimming Clips
If you want to adjust the ‘In and Out’ play back sequence of your edited clips, you can go for trimming them. You can trim your clips in the Source and Program monitors, or even in the Premiere Pro timeline. You can choose from the standard cut, jump cut, B-roll cut etc, to suit your editing needs and styles.
All you need to do is open the clip, mark the In and Out points, adjust their sequence with previous or next edits in your cue and that’s it. You can also use keyboard shortcuts for this purpose. However, you need to preset these shortcuts before you begin editing your clips.
03Adding Text
You can try adding simple and formatted texts to enhance your video outlook. This comes handy when you are aiming to deliver specific messages to your audience. You can add normal write-ups, callout quotations and customize your text in a number of exciting styles. Just go to the Type tool, format your text in the Text Box and you’re done!
04Audio Level Adjustment
Want to add spark to your clips with a synchronized audio visual effect? After you finish trimming and cropping, consider opting for an in-line audio adjustment. This will definitely enhance your video and take your craft to the next level.
All you need to do is select an audio clip, click on ‘Audio Gain’ in the drop down menu, set desired Decibel count in the Audio Gain Box and select ‘OK’.
05Exporting Videos
Once you are done with your video craft, you should certainly look forward to making it available for social exposure. To do this, select appropriate sequence constraints in the Export window, choose the export platform, format and Codec, make fine tuning and bit rate adjustments and finish export either in Premiere Pro or Media Encoder. You may also save these settings for your next exports.
Part 2 Free Motion Graphics Templates for Premiere Pro
Let’s have a look into your best choices of free motion graphic templates for Premiere Pro:
0114 Premiere Pro Lumetri Looks
Want to enhance your video creativity with that amazing Hollywood feel? You can undoubtedly opt for the Premiere Lumetri Looks template that gives you the liberty to provide a Hollywood oriented color scheme to your videos, just like those incredible color patterns one would see in Dr. Strangelove, The Martian and many more famous Hollywood flicks.

0215 Animated Lower Thirds
This template comes handy when you need to add lower thirds to your videos, either to introduce different content varieties or to objectify your video components. You can use this template with ease in your personal as well as commercial videos to give them that explicit professional touch.

03Horror Trailer Titles
If horror videos turn you on, use this template in video creations to customize them with that intense and scary feel! This template helps you add scary title slates that are just enough to add a terrifying quotient to your videos. From personal to professional, this template can add intensity to any video type.
04Instagram Stories Premiere Pro Template
This template is a definite catch for those Instagram lovers who constantly experiment to post engaging stories on the platform. If you want your IG stories to grab the talk, go for this animation template to customize photos and text so that they get the buzz among your followers.

05Dust Overlays
Comprising of studio-like effects, this template allows you to enhance your films with high quality dynamic animation in appealing texture variations. Use this template to create videos with those attractive misty backgrounds with cohesive variations in lighting with adjustable power effects.
06Travel Stories Premiere Pro Template
If you are into travel blogging and trying to add spunk to your stories and videos, this template is there to help you out with its catchy text animations and flowy transitions. Available in an upgraded configuration, this template is everything you need to make your travel blogs hover the trending charts.

07Digital Slideshow
Go for this template to add spark to your graphic presentations. Designed primarily for professional usage, it is equally effective in personal projects also. Developed by Evanto Elements, the company offers unlimited access on subscription.

08Free Quotes Premiere Pro Template
If you want to add animated quotes to your video creations, this template is a must try for you. Providing 6 quoting options and a ‘click to change’ text and color interface with convenient customizability keeps it among the top choices for hastle free motion editing.

09Cinematic Title Style Library
If you are bored with those conventional Premiere Pro titles but don’t want to invest time in creating styles of your own, you can use the modernized title styles from this library to enhance your creations with that intense cinematic feel. You can use them comfortably for personal and commercial purposes.

10Space Background Elements
This set of background templates is designed to provide realistic settings to video creators who work on science fiction and space oriented themes. Loaded with different real-time effects, this template provides the ultimate feel of a space travel in 4K.

Part 2 Alternatives to Premiere Pro: Filmora
If not Premiere Pro, you can go for Filmora as a dependable alternative. It’s an exquisite set of amazing and top-notch tools for creating g and editing videos. Wondershare introduced Filmora as an effective, easy-to-use editing software that’s equally caters to the editing pace of beginners as well as experts. You can use Filmora with Windows and macOS.
Packed with a range of appealing customization choices, Filmora comes to you in four principal versions:
● Wondershare Filmora Video Editor
Suitable for beginners, this is the basic and the simplest version having inbuilt editing templates. It’s desktop compatible software.
For Win 7 or later (64-bit)
For macOS 10.12 or later
● Filmora
Android and iOS compatibility in this version of Filmora brought video editing from PCs and laptops into smartphones.

● FilmoraScrn
This version allows you to record your editing screen if you’re a working on Windows.

Part 4 How to Use Motion Graphics Templates in Premiere Pro
After getting familiar with Premiere Pro editing and templates, let’s get into using these adobe premiere motion graphics templates for an exemplary video creating experience. Take up the following steps to get started.
● Go to Premiere Pro Essential Graphics Panel
In the Premiere Pro startup page, select ‘Window’ from the toolbar and select ‘Essential Graphics’ from the drop down menu.
● Add Motion Graphics Templates to Library
Click the ‘Import’ button present at the bottom in the right side of the Essential Graphics Panel. Go to and choose your downloaded motion graphics template file and select ‘Open’. Your file is added to the Essential Graphics Library.
● Drag-Drop the MOGRT to Timeline
‘Drag’ your motion graphics template from the library and ‘Drop’ it on your Timeline.
● Customize Your Template
Go to the ‘Edit’ option in the Essential Graphics Panel to look for customization choices available for your selected motion graphics adobe template.
● Key Takeaways from This Episode →
● Adobe Premiere Pro is an amazing video creation and editing tool that ensures to give a professional class to your edits. Be it personal creativity or professional expertise, this software is all set to give you a wholesome editing experience you will never forget.
● Loaded with an extensive variety of editing templates, available for free and on subscription, adobe premiere pro is a one stop access to all your editing concerns. Its customizable effects will certainly make your creations stand out in the league.
● Video editing is a high in demand craft of excellence. With advancements in software developments, the creative market offers you a pool of over the top editing software that is ready to give that classy spunk to your videos. So just your own from the pool and go on a spree of creating trend setting videos that never miss out on grabbing the attention of everyone around!
Video editing has recently gained momentum in content design, and with Motion Graphics Premiere Pro editing templates, it has all the fun in the house.
In this article
01 [5 Editing Motion Graphics Techniques in Adobe Premiere Pro](#Part 1)
02 [10 Free Motion Graphics Templates for Premiere Pro](#Part 2)
03 [How to Use Motion Graphics Templates in Premiere Pro](#Part 3)
Part 1 5 Editing Motion Graphics Techniques in Adobe Premiere Pro
A variety of editing techniques of motion graphics for Premiere Pro are ready to give a classy touch to your videos. Let’s brush up through the best you can have.
01Cropping Clips
Cropping your videos allows you to fit them into your required size frames. To remove any unwanted portions of your edits, crop them in adobe Premiere Pro with your desired aspect ratio to give that ‘just perfect’ look to your edits.
Start from importing and adding your footage to your project panel, followed by creating a fresh composition. Now, choose ‘Crop’ from the Effects panel to add it to your clip, either by double-clicking or dragging and dropping.
02Trimming Clips
If you want to adjust the ‘In and Out’ play back sequence of your edited clips, you can go for trimming them. You can trim your clips in the Source and Program monitors, or even in the Premiere Pro timeline. You can choose from the standard cut, jump cut, B-roll cut etc, to suit your editing needs and styles.
All you need to do is open the clip, mark the In and Out points, adjust their sequence with previous or next edits in your cue and that’s it. You can also use keyboard shortcuts for this purpose. However, you need to preset these shortcuts before you begin editing your clips.
03Adding Text
You can try adding simple and formatted texts to enhance your video outlook. This comes handy when you are aiming to deliver specific messages to your audience. You can add normal write-ups, callout quotations and customize your text in a number of exciting styles. Just go to the Type tool, format your text in the Text Box and you’re done!
04Audio Level Adjustment
Want to add spark to your clips with a synchronized audio visual effect? After you finish trimming and cropping, consider opting for an in-line audio adjustment. This will definitely enhance your video and take your craft to the next level.
All you need to do is select an audio clip, click on ‘Audio Gain’ in the drop down menu, set desired Decibel count in the Audio Gain Box and select ‘OK’.
05Exporting Videos
Once you are done with your video craft, you should certainly look forward to making it available for social exposure. To do this, select appropriate sequence constraints in the Export window, choose the export platform, format and Codec, make fine tuning and bit rate adjustments and finish export either in Premiere Pro or Media Encoder. You may also save these settings for your next exports.
Part 2 Free Motion Graphics Templates for Premiere Pro
Let’s have a look into your best choices of free motion graphic templates for Premiere Pro:
0114 Premiere Pro Lumetri Looks
Want to enhance your video creativity with that amazing Hollywood feel? You can undoubtedly opt for the Premiere Lumetri Looks template that gives you the liberty to provide a Hollywood oriented color scheme to your videos, just like those incredible color patterns one would see in Dr. Strangelove, The Martian and many more famous Hollywood flicks.
0215 Animated Lower Thirds
This template comes handy when you need to add lower thirds to your videos, either to introduce different content varieties or to objectify your video components. You can use this template with ease in your personal as well as commercial videos to give them that explicit professional touch.
03Horror Trailer Titles
If horror videos turn you on, use this template in video creations to customize them with that intense and scary feel! This template helps you add scary title slates that are just enough to add a terrifying quotient to your videos. From personal to professional, this template can add intensity to any video type.
04Instagram Stories Premiere Pro Template
This template is a definite catch for those Instagram lovers who constantly experiment to post engaging stories on the platform. If you want your IG stories to grab the talk, go for this animation template to customize photos and text so that they get the buzz among your followers.
05Dust Overlays
Comprising of studio-like effects, this template allows you to enhance your films with high quality dynamic animation in appealing texture variations. Use this template to create videos with those attractive misty backgrounds with cohesive variations in lighting with adjustable power effects.
06Travel Stories Premiere Pro Template
If you are into travel blogging and trying to add spunk to your stories and videos, this template is there to help you out with its catchy text animations and flowy transitions. Available in an upgraded configuration, this template is everything you need to make your travel blogs hover the trending charts.
07Digital Slideshow
Go for this template to add spark to your graphic presentations. Designed primarily for professional usage, it is equally effective in personal projects also. Developed by Evanto Elements, the company offers unlimited access on subscription.
08Free Quotes Premiere Pro Template
If you want to add animated quotes to your video creations, this template is a must try for you. Providing 6 quoting options and a ‘click to change’ text and color interface with convenient customizability keeps it among the top choices for hastle free motion editing.
09Cinematic Title Style Library
If you are bored with those conventional Premiere Pro titles but don’t want to invest time in creating styles of your own, you can use the modernized title styles from this library to enhance your creations with that intense cinematic feel. You can use them comfortably for personal and commercial purposes.
10Space Background Elements
This set of background templates is designed to provide realistic settings to video creators who work on science fiction and space oriented themes. Loaded with different real-time effects, this template provides the ultimate feel of a space travel in 4K.
Part 2 Alternatives to Premiere Pro: Filmora
If not Premiere Pro, you can go for Filmora as a dependable alternative. It’s an exquisite set of amazing and top-notch tools for creating g and editing videos. Wondershare introduced Filmora as an effective, easy-to-use editing software that’s equally caters to the editing pace of beginners as well as experts. You can use Filmora with Windows and macOS.
Packed with a range of appealing customization choices, Filmora comes to you in four principal versions:
● Wondershare Filmora Video Editor
Suitable for beginners, this is the basic and the simplest version having inbuilt editing templates. It’s desktop compatible software.
For Win 7 or later (64-bit)
For macOS 10.12 or later
● Filmora
Android and iOS compatibility in this version of Filmora brought video editing from PCs and laptops into smartphones.
● FilmoraScrn
This version allows you to record your editing screen if you’re a working on Windows.
Part 4 How to Use Motion Graphics Templates in Premiere Pro
After getting familiar with Premiere Pro editing and templates, let’s get into using these adobe premiere motion graphics templates for an exemplary video creating experience. Take up the following steps to get started.
● Go to Premiere Pro Essential Graphics Panel
In the Premiere Pro startup page, select ‘Window’ from the toolbar and select ‘Essential Graphics’ from the drop down menu.
● Add Motion Graphics Templates to Library
Click the ‘Import’ button present at the bottom in the right side of the Essential Graphics Panel. Go to and choose your downloaded motion graphics template file and select ‘Open’. Your file is added to the Essential Graphics Library.
● Drag-Drop the MOGRT to Timeline
‘Drag’ your motion graphics template from the library and ‘Drop’ it on your Timeline.
● Customize Your Template
Go to the ‘Edit’ option in the Essential Graphics Panel to look for customization choices available for your selected motion graphics adobe template.
● Key Takeaways from This Episode →
● Adobe Premiere Pro is an amazing video creation and editing tool that ensures to give a professional class to your edits. Be it personal creativity or professional expertise, this software is all set to give you a wholesome editing experience you will never forget.
● Loaded with an extensive variety of editing templates, available for free and on subscription, adobe premiere pro is a one stop access to all your editing concerns. Its customizable effects will certainly make your creations stand out in the league.
● Video editing is a high in demand craft of excellence. With advancements in software developments, the creative market offers you a pool of over the top editing software that is ready to give that classy spunk to your videos. So just your own from the pool and go on a spree of creating trend setting videos that never miss out on grabbing the attention of everyone around!
Also read:
- Beginners Guide for Learning 3D Animation for 2024
- Most Popular Tips on Learning Animate Rigging for 2024
- In 2024, Creative Ways to Create iPhone Text GIF
- Updated 15 Iconic Cartoon Characters of All Time for 2024
- Updated What Is the Best Collage Photo Grid Maker - Experts Choice for 2024
- New Simple Guide to Create New and Exciting Blackboard Animation
- Updated FREE Best Anime Streaming Sites to Download Anime for 2024
- How To Remove The Endless Loop From Animated GIF for 2024
- New Top 10 Popular Cartoons You Forgot Existed for 2024
- Updated In 2024, 12+ Stunning Instagram GIF Stickers and How to Make & Find
- New In 2024, A Roster of 15 Best Disney Channel Cartoons
- New Top 7 Best Animated Lyric Video Software for FREE
- Updated How to Make Well Done Animated GIF By Yourself for 2024
- Updated 2024 Approved Top 12 Video to GIF Converters High Quality to Check Out
- Updated Make Well Done Animated GIF
- Tutorial Guide to Animate Pictures in Canva for 2024
- New Christmas Is Coming! How to Find & Make Animated Christmas GIFs for 2024
- New 2024 Approved Top 7 Animated GIF Text Makers
- New 2024 Approved Top 7 Best Free GIF Apps for Android
- In 2024, How To Animate Graphics in Canva
- 2024 Approved How to Create Photo Collage Frame for Free in Minutes?
- In 2024, 10 Best Tools to Make Pic Collage for Windows
- New OBS Animated Lower Thirds Alternatives for 2024
- Updated In 2024, You Can Turn a TikTok Into a GIF Now
- Updated Top 5 Tools to Convert Text to Audio Online for Free
- In 2024, 3 Effective Methods to Fake GPS location on Android For your Oppo Find N3 | Dr.fone
- 4 Most-Known Ways to Find Someone on Tinder For Poco X5 Pro by Name | Dr.fone
- 11 Proven Solutions to Fix Google Play Store Not Working Issue on Oppo Reno 10 Pro 5G | Dr.fone
- Hassle-Free Ways to Remove FRP Lock from Vivo X90S Phones with/without a PC
- New Exploring the Magic of AI Selfie Generators
- How to restore wiped videos on Asus ROG Phone 8
- In 2024, How to Unlock iPhone 6 Plus without Passcode or Face ID | Dr.fone
- In 2024, Bypassing Google Account With vnROM Bypass For Vivo S18
- 11 Proven Solutions to Fix Google Play Store Not Working Issue on Samsung Galaxy S24 | Dr.fone
- How to Fix Locked Apple ID from Apple iPhone 7 Plus
- In 2024, How To Leave a Life360 Group On Realme 12 Pro+ 5G Without Anyone Knowing? | Dr.fone
- In 2024, Here are Some of the Best Pokemon Discord Servers to Join On Lava Blaze Curve 5G | Dr.fone
- In 2024, Can I Bypass a Forgotten Phone Password Of Nubia Z50 Ultra?
- Title: Updated In 2024, 15 Best Video to GIF App on iPhone and Android
- Author: Elon
- Created at : 2024-05-19 03:05:12
- Updated at : 2024-05-20 03:05:12
- Link: https://animation-videos.techidaily.com/updated-in-2024-15-best-video-to-gif-app-on-iphone-and-android/
- License: This work is licensed under CC BY-NC-SA 4.0.
