
:max_bytes(150000):strip_icc():format(webp)/reddit-app-for-andoird-652f6fcd646245e9807afbac25a072ee.jpg)
Updated In 2024, 5 Best Adobe Animate Courses & Classes
5 Best Adobe Animate Courses & Classes
5 Best Adobe Animate Courses & Classes | Beginners Complete Tutorial
An easy yet powerful editor
Numerous effects to choose from
Detailed tutorials provided by official channel
Professional animation is hence one of the fields that has a bright future. Willing to learn more about animation?

Don’t worry! We’ve got you covered, follow this article and find out more about the best 5 Adobe animate courses.
In this article
01 [What is Adobe Animate CC?](#Part 1)
02 [Top 8 FULL ADOBE ANIMATE COURSES | Beginners Complete Tutorial](#Part 2)
03 [How to Quickly Learn the Skills of Adobe Animate Course](#Part 3)
Part 1 What is Adobe Animate CC?
1. Who should take Adobe Animate course?
Learning is never bound. Anyone willing to learn can put in effort and time. As long as you wish to learn, and have an interest in it you can take it up. Those of you who wish to make a career in animation are highly recommended to take up this course. The Adobe animate course can help you kickstart your career as a professional animator.
2. Are there prerequisites to Adobe Animate course?
Animation is one such field that does not require a lot of prerequisites. In fact, even a beginner who has absolutely no idea about animation can take up the adobe animate course.
Part 2 Top 5 FULL ADOBE ANIMATE COURSES | Beginners Complete Tutorial
1. Adobe animate CC 2018- HTML5 Banner Ads
Adobe animate CC 2018- HTML5 Banner Ads is one of the most comprehensive courses on adobe animate. It teaches you several relevant skills associated with animation and marketing (one of the primary applications of animation).

Skills you will learn:
● Basics of HTML5 banner ads using adobe animate
● Understanding the importance of Adobe animate CC in web advertisements
● Through this course, you’d become an expert at publishing ad networks
● The course will help you explore tools and techniques related to banner advertising
Udemy: Udemy Duration: About 5 hours
Pros
The course is beginner-friendly; it helps you advance your career in animation from scratch.
The course covers even complex concepts.
You receive a course completion certificate
Cons
The course is paid and you need to pay a nominal fee in order to access the lecture videos.
The course is monotonous i.e. there is no live teaching.
2. 2D animation for beginners with adobe animate, Walt Wonderwolk
If you’re looking for a well-designed course that covers almost all the necessary concepts, then this course is just the right one for you. Through this course, you can learn all about Adobe animate. All the primary concepts are explained in detail in this course.

Skills you will learn:
● All the primary concepts of computer-generated animations using Adobe animate.
● You will learn important concepts such as eases, symbols, vector drawings, tweens, and key frames.
● You will also learn how to add sound to your animation
● You will gain hands-on knowledge about drawing, composition, and animation of characters.
Udemy: skillshare
Pros
The course is great for beginners to start learning about Adobe animate
The course covers fundamental concepts of animation
Cons
You need a skillshare membership in order to access the lecture videos.
You need to pay in order to get a skillshare membership
You do not get a course completion certificate
3. Rigging and animating in Adobe animate
Looking for a quick crash course about Adobe animate? Well, this course is perfect for you. As the name suggests, in this course you shall learn all about rigging and animating 2d characters.

Skills you will learn:
● rigging and animating adobe animate
● Through this course, you will know how to efficiently animate any character
● Discover the utilization of vectors and images for rigging
● You will get a clear understanding of important concepts such as layer parenting, motion tweening, and symbols.
Udemy: Udemy Duration: around 4 hours
Pros
You will learn the major concepts of animation.
You will learn about rigging in detail, one of the core concepts of animation.
The course is available on Udemy, one of the most accessible platforms.
Cons
The course is not free, you need to pay a nominal amount to access the course.
It is not a renowned course.
The course is not Beginner friendly, it needs you to have some understanding of animation.
4. Learning Adobe Animate CC: Animation, LinkedIn learning
LinkedIn’s new platform, LinkedIn learning has several professional courses. Learning Adobe animate CC is one of the courses available on LinkedIn learning. It teaches you all about digital transformations. By the end of this course, you will be able to create a handy bit of animation.

Skills you will learn:
● Fundamentals of digital animation on Adobe animate CC
● Understanding and implementation of concepts such as keyframes, symbols, tweening, and drawing tools.
● Understand about the creation of natural effects and shape tweens.
● Adding music and sound effects to your animation.
Udemy: LinkedIn learning Duration: Around 3 hours
Pros
The course duration is considerably shorter.
All the primary concepts of animation are given importance in this course.
You get additional quizzes and study material along with the lecture videos
Cons
You need to have an active LinkedIn learning membership.
You need to pay for the LinkedIn learning membership.
The course is fast-paced, you need to grasp the concepts quickly.
5. Animate a walk cycle frame by frame in Adobe animate
This hands-on course is perfect for those who prefer experimenting as they watch the lecture videos. The course teaches you how to animate 2D and 3D characters smoothly. As you near the end of this course, you will have a clear understanding of how animation works and how to animate a hand-drawn character from scratch.

Skills you will learn:
● You will learn how to animate a hand-drawn character from scratch.
● You shall learn how to set up a working canvas and design a character.
● You will learn about the essential features of designing such as color fills, overlapping actions, shadows, and cleanup strokes.
Udemy: skillshare
Pros
The course focuses on the design aspect of animated characters.
The course gives you a hands-on experience with animation tools.
The course helps you learn how to create creative hand drawn characters.
Cons
You need an active skillshare membership to access the lecture videos
Skillshare membership is a paid one.
There are courses from more popular counterparts such as Udemy.
Part 3 How to Quickly Learn the Skills of Adobe Animate Course
Now that you’ve decided to get your hands dirty by dwelling into animation, you must give Wondershare Filmora Pro a try. What’s Wondershare Filmora ?
It’s essentially a one-stop shop for all your video editing needs. From video editing to rigging Wwondershare Filmora Pro has got it all. Using this platform, even a beginner can create exquisite animated videos.
The platform offers you several tools that are easy to use.
Even a neophyte could easily create beautiful animations by using Wondershare Filmora Pro. Using Wondershare Filmora Pro, you can not only animate characters but also define their motion, add sound effects, and edit videos. Filmora Pro offers you animation tools that are easier to operate and resultantly help you make amazing animated videos.
Wondershare Filmora
Get started easily with Filmora’s powerful performance, intuitive interface, and countless effects!
Try It Free Try It Free Try It Free Learn More >

Key Takeaways from This Episode
● As we see, today we’ve taken a look at a few of the best Adobe animate courses.
● Each of the courses can help you learn the basics of animation.
● Animation is indeed one of the budding fields, and with these fruitful courses, you can learn all about animation and possibly begin your journey as a freelancer or a professional in animation.
● Through these courses, you can create animated advertisement videos with ease. Wondershare Filmora Pro however can make your job easier by offering you amazing tools for generating animated videos!<
● Well, on this note we shall take leave! Wishing you good luck on your journey as an animator!
Professional animation is hence one of the fields that has a bright future. Willing to learn more about animation?
Don’t worry! We’ve got you covered, follow this article and find out more about the best 5 Adobe animate courses.
In this article
01 [What is Adobe Animate CC?](#Part 1)
02 [Top 8 FULL ADOBE ANIMATE COURSES | Beginners Complete Tutorial](#Part 2)
03 [How to Quickly Learn the Skills of Adobe Animate Course](#Part 3)
Part 1 What is Adobe Animate CC?
1. Who should take Adobe Animate course?
Learning is never bound. Anyone willing to learn can put in effort and time. As long as you wish to learn, and have an interest in it you can take it up. Those of you who wish to make a career in animation are highly recommended to take up this course. The Adobe animate course can help you kickstart your career as a professional animator.
2. Are there prerequisites to Adobe Animate course?
Animation is one such field that does not require a lot of prerequisites. In fact, even a beginner who has absolutely no idea about animation can take up the adobe animate course.
Part 2 Top 5 FULL ADOBE ANIMATE COURSES | Beginners Complete Tutorial
1. Adobe animate CC 2018- HTML5 Banner Ads
Adobe animate CC 2018- HTML5 Banner Ads is one of the most comprehensive courses on adobe animate. It teaches you several relevant skills associated with animation and marketing (one of the primary applications of animation).
Skills you will learn:
● Basics of HTML5 banner ads using adobe animate
● Understanding the importance of Adobe animate CC in web advertisements
● Through this course, you’d become an expert at publishing ad networks
● The course will help you explore tools and techniques related to banner advertising
Udemy: Udemy Duration: About 5 hours
Pros
The course is beginner-friendly; it helps you advance your career in animation from scratch.
The course covers even complex concepts.
You receive a course completion certificate
Cons
The course is paid and you need to pay a nominal fee in order to access the lecture videos.
The course is monotonous i.e. there is no live teaching.
2. 2D animation for beginners with adobe animate, Walt Wonderwolk
If you’re looking for a well-designed course that covers almost all the necessary concepts, then this course is just the right one for you. Through this course, you can learn all about Adobe animate. All the primary concepts are explained in detail in this course.
Skills you will learn:
● All the primary concepts of computer-generated animations using Adobe animate.
● You will learn important concepts such as eases, symbols, vector drawings, tweens, and key frames.
● You will also learn how to add sound to your animation
● You will gain hands-on knowledge about drawing, composition, and animation of characters.
Udemy: skillshare
Pros
The course is great for beginners to start learning about Adobe animate
The course covers fundamental concepts of animation
Cons
You need a skillshare membership in order to access the lecture videos.
You need to pay in order to get a skillshare membership
You do not get a course completion certificate
3. Rigging and animating in Adobe animate
Looking for a quick crash course about Adobe animate? Well, this course is perfect for you. As the name suggests, in this course you shall learn all about rigging and animating 2d characters.
Skills you will learn:
● rigging and animating adobe animate
● Through this course, you will know how to efficiently animate any character
● Discover the utilization of vectors and images for rigging
● You will get a clear understanding of important concepts such as layer parenting, motion tweening, and symbols.
Udemy: Udemy Duration: around 4 hours
Pros
You will learn the major concepts of animation.
You will learn about rigging in detail, one of the core concepts of animation.
The course is available on Udemy, one of the most accessible platforms.
Cons
The course is not free, you need to pay a nominal amount to access the course.
It is not a renowned course.
The course is not Beginner friendly, it needs you to have some understanding of animation.
4. Learning Adobe Animate CC: Animation, LinkedIn learning
LinkedIn’s new platform, LinkedIn learning has several professional courses. Learning Adobe animate CC is one of the courses available on LinkedIn learning. It teaches you all about digital transformations. By the end of this course, you will be able to create a handy bit of animation.
Skills you will learn:
● Fundamentals of digital animation on Adobe animate CC
● Understanding and implementation of concepts such as keyframes, symbols, tweening, and drawing tools.
● Understand about the creation of natural effects and shape tweens.
● Adding music and sound effects to your animation.
Udemy: LinkedIn learning Duration: Around 3 hours
Pros
The course duration is considerably shorter.
All the primary concepts of animation are given importance in this course.
You get additional quizzes and study material along with the lecture videos
Cons
You need to have an active LinkedIn learning membership.
You need to pay for the LinkedIn learning membership.
The course is fast-paced, you need to grasp the concepts quickly.
5. Animate a walk cycle frame by frame in Adobe animate
This hands-on course is perfect for those who prefer experimenting as they watch the lecture videos. The course teaches you how to animate 2D and 3D characters smoothly. As you near the end of this course, you will have a clear understanding of how animation works and how to animate a hand-drawn character from scratch.
Skills you will learn:
● You will learn how to animate a hand-drawn character from scratch.
● You shall learn how to set up a working canvas and design a character.
● You will learn about the essential features of designing such as color fills, overlapping actions, shadows, and cleanup strokes.
Udemy: skillshare
Pros
The course focuses on the design aspect of animated characters.
The course gives you a hands-on experience with animation tools.
The course helps you learn how to create creative hand drawn characters.
Cons
You need an active skillshare membership to access the lecture videos
Skillshare membership is a paid one.
There are courses from more popular counterparts such as Udemy.
Part 3 How to Quickly Learn the Skills of Adobe Animate Course
Now that you’ve decided to get your hands dirty by dwelling into animation, you must give Wondershare Filmora Pro a try. What’s Wondershare Filmora ?
It’s essentially a one-stop shop for all your video editing needs. From video editing to rigging Wwondershare Filmora Pro has got it all. Using this platform, even a beginner can create exquisite animated videos.
The platform offers you several tools that are easy to use.
Even a neophyte could easily create beautiful animations by using Wondershare Filmora Pro. Using Wondershare Filmora Pro, you can not only animate characters but also define their motion, add sound effects, and edit videos. Filmora Pro offers you animation tools that are easier to operate and resultantly help you make amazing animated videos.
Wondershare Filmora
Get started easily with Filmora’s powerful performance, intuitive interface, and countless effects!
Try It Free Try It Free Try It Free Learn More >
Key Takeaways from This Episode
● As we see, today we’ve taken a look at a few of the best Adobe animate courses.
● Each of the courses can help you learn the basics of animation.
● Animation is indeed one of the budding fields, and with these fruitful courses, you can learn all about animation and possibly begin your journey as a freelancer or a professional in animation.
● Through these courses, you can create animated advertisement videos with ease. Wondershare Filmora Pro however can make your job easier by offering you amazing tools for generating animated videos!<
● Well, on this note we shall take leave! Wishing you good luck on your journey as an animator!
12+ Stunning Instagram GIF Stickers and How to Make & Find
12+ Stunning Instagram GIF Stickers and How to Make & Find
An easy yet powerful editor
Numerous effects to choose from
Detailed tutorials provided by the official channel
Creating gif stickers for Instagram is an easy step. Know how to make Instagram gif stickers. Find Instagram gif stickers.
In this article
01 [What’s Top 12 Amazing Instagram GIF Stickers](#Part 1)
02 [Where to Find Instagram GIF Stickers](#Part 2)
03 [How to Make Instagram GIF Stickers](#Part 3)
Part 1 What’s Top 12 Amazing Instagram GIF Stickers
Instagram stories have become routine for every social media lover. Their day is never complete without a new and interesting story that their viewers love to watch and cannot wait for a new one. There are always some new updates on Instagram and to be in trend, it is a must to include some quirky and engaging content in the stories. The introduction of GIF to Instagram has made it easy for users to add some unique elements and content to their Instagram stories. GIF on Instagram has been powered by GIPHY. Several gifs have been uploaded and they can be searched easily on the search bar over Instagram. Instagram gif stickers are used by Instagram users to express their feelings and influence people. There are various gifs for different moods and occasions. So these gif stickers become a must-have element in Instagram stories.
So, let’s see some of the top 12 Amazing Instagram GIF Stickers that can make your Instagram story more engaging and interesting.
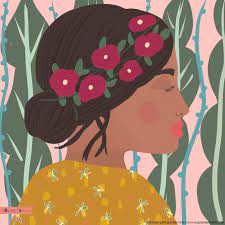
01THE UNCOMMON PLACE
The uncommon place is having a perfect set of gifs that are based on seasons. These gifs are best for nature lovers who wish to add some of them to their Instagram stories. This gif is created by a well-known designer and Illustrator from California called Katie Theirjung. This gif has spider web, candy for Halloween, flowers, stars, and some sayings. It has some cheerful gifs in warm colors. The uncommon place gif over morning Instagram stories can be pleasing and yet engaging.
02QUEENBEMONYEI
Girls, who are always active in handling their Instagram stories, love to search for Queenbemonyei. It has beautiful and the best Instagram gif stickers for girls to express their style and mood. It has a beautiful rich jewel tone and stickers of African-American women.
03OURSECOND
Instagram users who love the outdoors and update stuff on Instagram stories related to their outings, OURSECOND is the best kind of gif to make their Instagram stories more happening and interesting. Tress, campfire essential, tent, and natural stickers are available here. It can be searched easily by typing OURSEC and all the OURSECOND gifs will appear for applying.
04SCRIPTBYNORA
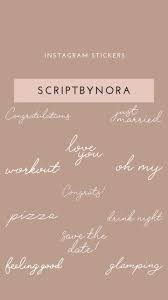
Sayings and cute words with Instagram stories are just amazing things to share. If you are fond of writing something catchy on your Instagram stories, SCRIPTBYNORA is the great place to get some great writing gifs. It includes days and seasons names like Sunday, Friday, summer night, playtime, saves the date, and many more gifs.
05NEUTRAL
Some cute colorful gifs can be obtained by searching NEUTRAL on Instagram. It is a great collection of some assorted cute stickers such as stars, hearts, decorative lights, sunshine, and many others. These gifs are a great way to beautify any Instagram stories.
06PAINT & BRUSH
Paint and Brush Instagram gif sticker is good for the artists who keep on presenting something new to their viewers. They can be applied to the backgrounds of text and make them more attractive. Cute paint and brush stickers draw the attention of the viewers when they read the Instagram stories.
07GLADDEST
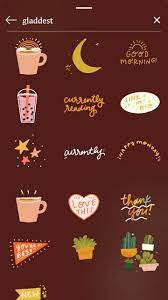
This Gif is created by Mac Ford, an illustrator in Vancouver. For those who want some sparkles and cute fonts, gladdest gifs are the best option. An amazing collection of party stuff, stars, music, heart, and some cute words in gladdest can make Instagram stories unique and stylish. New posts can be added on Instagram stories with cute gifs of gladdest. It can be searched easily by typing gladdest and all the gifs will pop up.
08AISFORAI

One of the most attractive Instagram sticker gif is Aisforai. This is very popular on GIPHY and has more than 20.5B GIF views. This is a special one as it relates to love and children. It shows that ‘love is all around them, even when their loved ones are not with them. To add them to Instagram stories, search Aisforai and get them for your stories.
09LAURENBLAIR
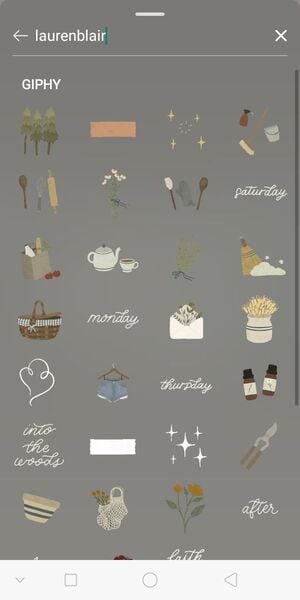
Laurenblair Gifs are perfect for posting outdoor and homely Instagram stories. It has an amazing collection of days and months. Gif of cottages and stuff that is good to post at the weekends and afternoon can be found here. Several stickers can pop up when one searches for Laurenblair at the Instagram account.
10 ODSANYU
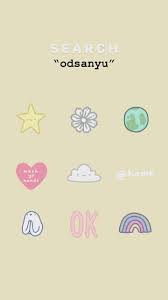
For those who love adventure, Odsanyu have several gifs perfect for adventurous Instagram stories. It contains hearts, smiley faces, and adventure time characters. Selling prints and illusions stickers of Odsanyu make the Instagram stories aesthetic.
1111. FLOWERINGWORDS
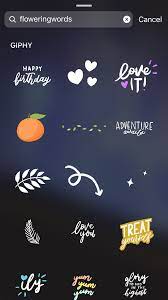
Flashing cursive words with some cute gifts can be used in creating attractive Instagram stories from floweringwords. These gifs are good when an Instagram user desires to make an engaging story during winters and celebrations. Hearts, cute sayings, and stars are included in it. They can be searched by typing Floweringwords are the search bar.
1212. PASTEL
The Instagram users who love simple, being, and white colors inside their Instagram stories, Pastel has all for them. Some of the cute gifs like animals, hearts, and birthdays are there to make Instagram stories more creative.
So, these are some of the top Instagram stickers which can make any Instagram story look cool and awesome.
Part 2 Where to Find Instagram GIF Stickers
Gif sticker Instagram has given a new level to the Instagram stories. The stickers have added more fun and interesting elements to every story posted over Instagram. It connects with the audience and helps a business to generate leads. But, there are several Instagram Gifs available, and finding the suitable one is very difficult. So, if you are wondering where to find Instagram gif stickers list. Here are some options where one can get their favorite Instagram stickers to bring life to the Instagram stories.
● Vipapier: It has vintage touch gifs and stickers. Flowers and cute words are available. Those who love vintage gifs to be included in their Instagram stories can search over Vipapier.
● Lidiaontheroad: Those who are looking for some motivational and inspirational gifs, it be searched on Lidiaontheroad.
● Ohlalalita: Cute Instagram stories can be made with Ohlalalita gifs. It can be searched by typing it on the search bar. It can make any picture or video attractive.
● Illustragabs: Funny and cheerful gifs can be searched at Illustragabs. For those who wish to make their Instagram stories funny and visually attractive, this is a great option.
● All things Lilly Anne: Instagram users who love creativity and add color combos to their Instagram stories can get it on all things Lilly Anne.
● Mikylacreates: Those who are looking for daisy and candy hearts to include in the Instagram stories; they can get the same at Mikylacreates.
● Greendotori: Short stories can be made interesting with some cute pictures of coffee, hearts, and stars. One can get it at Greendotori.
● Dindaps: Feminine lovers may get some amazing modern gifs at Dindaps. A lot of stickers will pop up when searching Dindaps at the search bar.
Apart from these, there are many other places where some trending gifs can be searched. Animated, sparkling, stylish, and attractive gifs can be used by taking them from great sources powered by GIPHY.
Part 3 How to Make Instagram GIF Stickers
Making Instagram stories filled with wonderful stickers and gif brings more followers and views. So, Instagram GIF stickers can be made in just a few simple steps. Let’s see it:
Apply for Giphy’s brand account: After uploading at least five GIFs, one can process having an account at GIPHY. The requirements can be read out and after approval, one can begin making gifs and uploading them.
Creating gif sticker through Filmora:
Wondershare Filmora Video Editor is a well-known professional video editing program. Bestowed with great features and being user-friendly, this is the best application for gif making. This is a good place where video editing, adding transition effects, captions can be done.
Filmora is easy-to-use digital creativity software that has taken advanced digital technology to take video, sound, and text to the next level with magical effects, interesting stickers, and filters. It has various simplified tools to make content engaging.
Following steps shall be followed to create a Gif over Filmora:
● Download the application Filmora and install it on your PC. Locate and select the media file from the PC and open it to import the Gif on the application.
● Click on +icon appearing at the thumbnail center. Click MATCH TO MEDIA for adding the file to the timeline.
● Move to the project setting and choose the aspect ratio from the drop-down list.
● Click on export from the media library, select the MP4 format. Perform other required adjustments and click on exports to convert gifs to Instagram videos. Open the Instagram app and upload the gif video to your profile.
● The other method of uploading and sharing gifs is through the GIPHY app. Any video which requires modification, the Filmora app can be used to trim it.
So, if you are looking for how to create gif stickers for Instagram, explore Filmora and create some amazing gifs from videos or videos from Gif. You can do it in simple steps with Filmora.
● Key Takeaways from This Episode →
● Instagram stories can be made more impactful with some effects, sparkles, good sayings, colorful stickers, and some cute pictures. All this is possible by adding some amazing gifs. Gifs are a great way to complement any text posted over Instagram stories. Some aesthetic Gifs can be found at the uncommon place, queenbemonyei,oursecond, scriptbynora, neutral, and many more.
● There are several gifs available for Instagram stories, but finding the best source is a must to create some engaging and customized stories. Based on the expressions and mood, there are many gifs that can guide the viewers. So, they can be accessed at Vipapier, Lidiaontheroad, Ohlalalita, Illustragabs, All things Lilly Anne, Mikylacreates, and many more sections.
● Attractive Gif can be created by following some simple steps. One of the great applications that can make your gif and stickers amazing for Instagram stories is Filmora.
Creating gif stickers for Instagram is an easy step. Know how to make Instagram gif stickers. Find Instagram gif stickers.
In this article
01 [What’s Top 12 Amazing Instagram GIF Stickers](#Part 1)
02 [Where to Find Instagram GIF Stickers](#Part 2)
03 [How to Make Instagram GIF Stickers](#Part 3)
Part 1 What’s Top 12 Amazing Instagram GIF Stickers
Instagram stories have become routine for every social media lover. Their day is never complete without a new and interesting story that their viewers love to watch and cannot wait for a new one. There are always some new updates on Instagram and to be in trend, it is a must to include some quirky and engaging content in the stories. The introduction of GIF to Instagram has made it easy for users to add some unique elements and content to their Instagram stories. GIF on Instagram has been powered by GIPHY. Several gifs have been uploaded and they can be searched easily on the search bar over Instagram. Instagram gif stickers are used by Instagram users to express their feelings and influence people. There are various gifs for different moods and occasions. So these gif stickers become a must-have element in Instagram stories.
So, let’s see some of the top 12 Amazing Instagram GIF Stickers that can make your Instagram story more engaging and interesting.
01THE UNCOMMON PLACE
The uncommon place is having a perfect set of gifs that are based on seasons. These gifs are best for nature lovers who wish to add some of them to their Instagram stories. This gif is created by a well-known designer and Illustrator from California called Katie Theirjung. This gif has spider web, candy for Halloween, flowers, stars, and some sayings. It has some cheerful gifs in warm colors. The uncommon place gif over morning Instagram stories can be pleasing and yet engaging.
02QUEENBEMONYEI
Girls, who are always active in handling their Instagram stories, love to search for Queenbemonyei. It has beautiful and the best Instagram gif stickers for girls to express their style and mood. It has a beautiful rich jewel tone and stickers of African-American women.
03OURSECOND
Instagram users who love the outdoors and update stuff on Instagram stories related to their outings, OURSECOND is the best kind of gif to make their Instagram stories more happening and interesting. Tress, campfire essential, tent, and natural stickers are available here. It can be searched easily by typing OURSEC and all the OURSECOND gifs will appear for applying.
04SCRIPTBYNORA
Sayings and cute words with Instagram stories are just amazing things to share. If you are fond of writing something catchy on your Instagram stories, SCRIPTBYNORA is the great place to get some great writing gifs. It includes days and seasons names like Sunday, Friday, summer night, playtime, saves the date, and many more gifs.
05NEUTRAL
Some cute colorful gifs can be obtained by searching NEUTRAL on Instagram. It is a great collection of some assorted cute stickers such as stars, hearts, decorative lights, sunshine, and many others. These gifs are a great way to beautify any Instagram stories.
06PAINT & BRUSH
Paint and Brush Instagram gif sticker is good for the artists who keep on presenting something new to their viewers. They can be applied to the backgrounds of text and make them more attractive. Cute paint and brush stickers draw the attention of the viewers when they read the Instagram stories.
07GLADDEST
This Gif is created by Mac Ford, an illustrator in Vancouver. For those who want some sparkles and cute fonts, gladdest gifs are the best option. An amazing collection of party stuff, stars, music, heart, and some cute words in gladdest can make Instagram stories unique and stylish. New posts can be added on Instagram stories with cute gifs of gladdest. It can be searched easily by typing gladdest and all the gifs will pop up.
08AISFORAI
One of the most attractive Instagram sticker gif is Aisforai. This is very popular on GIPHY and has more than 20.5B GIF views. This is a special one as it relates to love and children. It shows that ‘love is all around them, even when their loved ones are not with them. To add them to Instagram stories, search Aisforai and get them for your stories.
09LAURENBLAIR
Laurenblair Gifs are perfect for posting outdoor and homely Instagram stories. It has an amazing collection of days and months. Gif of cottages and stuff that is good to post at the weekends and afternoon can be found here. Several stickers can pop up when one searches for Laurenblair at the Instagram account.
10 ODSANYU
For those who love adventure, Odsanyu have several gifs perfect for adventurous Instagram stories. It contains hearts, smiley faces, and adventure time characters. Selling prints and illusions stickers of Odsanyu make the Instagram stories aesthetic.
1111. FLOWERINGWORDS
Flashing cursive words with some cute gifts can be used in creating attractive Instagram stories from floweringwords. These gifs are good when an Instagram user desires to make an engaging story during winters and celebrations. Hearts, cute sayings, and stars are included in it. They can be searched by typing Floweringwords are the search bar.
1212. PASTEL
The Instagram users who love simple, being, and white colors inside their Instagram stories, Pastel has all for them. Some of the cute gifs like animals, hearts, and birthdays are there to make Instagram stories more creative.
So, these are some of the top Instagram stickers which can make any Instagram story look cool and awesome.
Part 2 Where to Find Instagram GIF Stickers
Gif sticker Instagram has given a new level to the Instagram stories. The stickers have added more fun and interesting elements to every story posted over Instagram. It connects with the audience and helps a business to generate leads. But, there are several Instagram Gifs available, and finding the suitable one is very difficult. So, if you are wondering where to find Instagram gif stickers list. Here are some options where one can get their favorite Instagram stickers to bring life to the Instagram stories.
● Vipapier: It has vintage touch gifs and stickers. Flowers and cute words are available. Those who love vintage gifs to be included in their Instagram stories can search over Vipapier.
● Lidiaontheroad: Those who are looking for some motivational and inspirational gifs, it be searched on Lidiaontheroad.
● Ohlalalita: Cute Instagram stories can be made with Ohlalalita gifs. It can be searched by typing it on the search bar. It can make any picture or video attractive.
● Illustragabs: Funny and cheerful gifs can be searched at Illustragabs. For those who wish to make their Instagram stories funny and visually attractive, this is a great option.
● All things Lilly Anne: Instagram users who love creativity and add color combos to their Instagram stories can get it on all things Lilly Anne.
● Mikylacreates: Those who are looking for daisy and candy hearts to include in the Instagram stories; they can get the same at Mikylacreates.
● Greendotori: Short stories can be made interesting with some cute pictures of coffee, hearts, and stars. One can get it at Greendotori.
● Dindaps: Feminine lovers may get some amazing modern gifs at Dindaps. A lot of stickers will pop up when searching Dindaps at the search bar.
Apart from these, there are many other places where some trending gifs can be searched. Animated, sparkling, stylish, and attractive gifs can be used by taking them from great sources powered by GIPHY.
Part 3 How to Make Instagram GIF Stickers
Making Instagram stories filled with wonderful stickers and gif brings more followers and views. So, Instagram GIF stickers can be made in just a few simple steps. Let’s see it:
Apply for Giphy’s brand account: After uploading at least five GIFs, one can process having an account at GIPHY. The requirements can be read out and after approval, one can begin making gifs and uploading them.
Creating gif sticker through Filmora:
Wondershare Filmora Video Editor is a well-known professional video editing program. Bestowed with great features and being user-friendly, this is the best application for gif making. This is a good place where video editing, adding transition effects, captions can be done.
Filmora is easy-to-use digital creativity software that has taken advanced digital technology to take video, sound, and text to the next level with magical effects, interesting stickers, and filters. It has various simplified tools to make content engaging.
Following steps shall be followed to create a Gif over Filmora:
● Download the application Filmora and install it on your PC. Locate and select the media file from the PC and open it to import the Gif on the application.
● Click on +icon appearing at the thumbnail center. Click MATCH TO MEDIA for adding the file to the timeline.
● Move to the project setting and choose the aspect ratio from the drop-down list.
● Click on export from the media library, select the MP4 format. Perform other required adjustments and click on exports to convert gifs to Instagram videos. Open the Instagram app and upload the gif video to your profile.
● The other method of uploading and sharing gifs is through the GIPHY app. Any video which requires modification, the Filmora app can be used to trim it.
So, if you are looking for how to create gif stickers for Instagram, explore Filmora and create some amazing gifs from videos or videos from Gif. You can do it in simple steps with Filmora.
● Key Takeaways from This Episode →
● Instagram stories can be made more impactful with some effects, sparkles, good sayings, colorful stickers, and some cute pictures. All this is possible by adding some amazing gifs. Gifs are a great way to complement any text posted over Instagram stories. Some aesthetic Gifs can be found at the uncommon place, queenbemonyei,oursecond, scriptbynora, neutral, and many more.
● There are several gifs available for Instagram stories, but finding the best source is a must to create some engaging and customized stories. Based on the expressions and mood, there are many gifs that can guide the viewers. So, they can be accessed at Vipapier, Lidiaontheroad, Ohlalalita, Illustragabs, All things Lilly Anne, Mikylacreates, and many more sections.
● Attractive Gif can be created by following some simple steps. One of the great applications that can make your gif and stickers amazing for Instagram stories is Filmora.
How to Cartoonize Photo Photoshop in Easy Steps
How to Cartoonize Photo Photoshop in Easy Steps
An easy yet powerful editor
Numerous effects to choose from
Detailed tutorials provided by the official channel
Cartoons, an already catchy entertainment source, can upgrade other media utilities on integration. Look through the easiest ways of creating cartoonize photo Photoshop stills!
In this article
01 [Types of Cartoon Effects in Photoshop](#Part 1)
02 [Easiest Ways to Cartoonize Photo in Photoshop](#Part 2)
03 [How to Use a Variety of Photoshop Special Effects to Create the Final Caricature Look](#Part 3)
Part 1 Types of Cartoon Effects in Photoshop
It is an absolute fun activity to explore your editing creativity in the realm of cartoonizing the otherwise ordinary still captures. Talking of the most convenient cartoon creator and editor applications, you can safely rely on the Photoshop Image Editor application to choose from a pool of cartoon editing effects for adding that spunky and funny element to your image files.
Presented in the following section, is a discussion of some of the most stunning and visibly amazing cartoon effects in the application’s Editor Library to cartoonize Photoshop images:
01Pop Art Photoshop Action
The effect is a predominantly preferred as a cartoon action Photoshop utility to caricaturize a normal image, along with customizing the same to change the colors and background of the original still capture for creating a brand new appearance with utmost ease. Apart from this, the aforesaid effect allows you to exclusively customize the globally acclaimed graphic masterpieces of Roy Lichtenstein. Working with the effect, you can edit a self-portrait or the favorite image of your pet to give the latter, a funny retro feel.

02Vintage Comic Creator
If the idea of sticking to just the creation of cartoon images is not enough to satisfy you, the Vintage Comic Creator effect allows you to expand your creativity level to work on cartoon based shape and text edits. You can use the effect to enhance an image logo or plain text with a comic book oriented text. A download of this cartoon effect template facilitates you with diversities of customizable layer styles, overlays and patterns.

03GTA Photoshop Action
This is a complete pleasure for the creative fan of Grand Theft Auto, the wicked chasing game series. Additional to creating a stark variety of edited cartoon stills, you are free to reinvent the aforesaid game’s most popular caricature edits, while using the GTA Photoshop Action editing filter. Launched by Indworks, the effect package consisting of 15 vibrant themes and 5 collage templates; promises a quick mimicry of your most cherished video and console games.

04Vector Paint Photoshop Action
The one is an amazing Photoshop effect for creating cartoon edits, which works through a merger of two different ingenious art themes or styles for transforming basic images into cartoonized stills.
The effect grants you the liberty to use varieties of art styles, such as, comic, photo retouching and energetic oil to obtain editing results comparable to that of any original photograph. The template is conveniently simple to use and assures you of quick results. All this, just at a nominal price of $6! Interesting, right?

05Ultra Realistic 3D Space Effect
Considering the fact of you being a space admirer, this one is the perfect image editor for you to add the vibrancy of stunning space elements and backgrounds within your cartoonized edits. The effect lets you play with the diverse range of customizable text and exciting caricature backgrounds. When downloading the template, you get a main setup file, a few editing examples and a web link to the free fonts present in the effect.

06Animated Zombie Grime Art Photoshop Action
Are you in love with the latest zombie grimes? If yes, then this action set is exclusive editor package for you. Working with the aforesaid image template, you can effortlessly add the perfect zombie theme to your cartoon edits, along with simultaneously creating a stunning animation, which you can use to enhance your video or GIF uploads on social media. Not forgetting the best part, you get a free access to this amazing utility.

Part 2 Easiest Ways to Cartoonize Photo in Photoshop
Having known about the amazing varieties of cartoonized editor templates in Photoshop, it is a natural instinct to feel motivated to create your own caricature images from normal capture stills. Addressing the concern of image transformation methods to turn a photo into a cartoon Photoshop, let us dive into some of the most affordable methods of creating cartoonized photos in the aforesaid editing application.
Talking of the most basic Photoshop tools for creating caricature images, you can start your editing spree with using the Graphic Tablet, Brush Tool, Layer Masks and a graphic pen to create amateur cartoonized edits from your still photographs, getting a full control on image tracing.
01Brush Tool
A few usage examples include working with a combination of the graphic tablet pen and the editor brushes to trace your image, using the brush in a masked or a fresh layer to avoid altering the actual image, and much more.
02Graphic Tablet
It is best to use the Photoshop Graphic Tablet for adhering to the concern of tracing cartoonized images. You can alternatively cater to the job with a trackpad, mouse, or even your hand. It is however, difficult to assure steady hand postures for image tracing, lest you are using a stylus pen.
03Pen Tool
Using the Pen Tool for cartoonizing your portrait, allows you to draw outlines along the desired figure within the image, along with its important elements, so that you can easily use these outlined paths to introduce different color blocks.
Similar to the Brush Tool, the Photoshop Pen utility grants you the freedom to vary the degree of detailing in your cartoon edit, from being highly expressive to only remaining around the shore. Working with the Pen Tool can, however be a bit tiring and time taking, with respect to the extent of detailing you wish to add to the caricature edits.
Additional to the aforementioned tools, you can also consider using the default image filters of the Photoshop application to get comparable results. This is an exclusively better option to choose, compared to the Pen Tool, when you are working without a Graphic Tablet. To get over the top realistic caricature renderings, you will need to supplement the use of Photoshop filters with the application’s editing channels and other adjustments.
Part 3 How to Use a Variety of Photoshop Special Effects to Create the Final Caricature Look
Considering the extensive discussion on the credibility of the Photoshop Image Editor application in the realm of creating stunning caricature images in high end resolution, let us proceed to learn about using the diversity of Photoshop’s special effects to get the last stage cartoonized appearance of ordinary still images.
User’s Guide to Create High End Cartoonized Look
The following tutorial is a stepwise explanation of the process to convert photo into cartoon Photoshop in the easiest possible way. Stick to the method for getting affordable results in a quick span.
Step 1: Download and Launch the Program
Visit the official website of Photoshop Image Editor for a free download of the software program in your system, followed by installing and launching the same in your device.
Step 2: Upload Your Image
On a successful launch of the editor program, you will be directed to the ‘Photoshop Editor’ window, where you are required to upload any desired still image from your device for creating a cartoonized edit. To do this, either simply add your image to the editor workspace using the ‘Drag and Drop’ method, or navigate to the ‘File’ tab in the top toolbar and click on ‘Open’ in the dropdown menu.
Step 3: Edge Enhancement
Once your image appears in the editor timeline, proceed to sharpen the edges of the face and body of the portrait. Start with navigating to and clicking on the ‘Filter’ option, followed by tapping on ‘Filter Gallery’ and selecting the ‘Artistic’ folder, where you need to choose the ‘Poster Edges’ option. Observe the effect of these setting on the portrait and make necessary changes.

Step 4: Background Setting
Ensure that the background and foreground of your image are set to white and black colors respectively. If not, proceed to adjust the same as required.

Step 5: Distorting the Edges
You now need to introduce some distortion in the edges of your portrait. Navigate to the ‘Filter’ option again, open the ‘Filter Gallery’ and choose ‘Torn Edges’ from the menu that drops down. Select the desired parameter values in accordance with your creative suitability.


Step 6: Using the Channels Panel
The next step is to select and copy your portrait using the ‘Ctrl + A’ and Ctrl + C commands respectively. Navigate to the ‘Channels’ panel at the right of the Photoshop workspace. At the panel’s bottom right, proceed with creating a new channel. It will be assigned the name ‘Alpha 1’ by Photoshop, which you are most welcome to change.


Step 7: Color Inversion
When you finish creating the channel, use the ‘Ctrl + V’ command to paste your portrait in the same. Proceed with inverting the image colors by navigating to the ‘Image’ option, followed by choosing the ‘Adjustment’ and ‘Invert’ options from the consecutive drop downs. Now, make a selection of the ‘White’ regions of your portrait by pressing the ‘Ctrl’ key and clicking on the ‘Alpha 1 Channel thumbnail.

Step 8: Layer Creation
Navigate to the ‘Layers’ panel at the right of the Photoshop workspace, and click on the ‘New Layer’ icon for creating a fresh layer. Fill the just created layer with black color, either by pressing ‘g’ from your system’s keyboard, or using the ‘Paint Bucket’ tool. Don’t forget to assign a suitable name to the layer.

Repeat the above process to create a separate layer and e fill the same with white color. The layer creation process is essential to separate the white and black colors of the actual image.

Step 10: Layer Dragging
In the ‘Layers’ panel, drag the ‘Black’ layer above the ‘White’ one.

Step 11: Creating Additional Layers
You are now required to create three more layers, with the same process as for the above two, for adding effects to the Skin, Clothes and Teeth/Eyes of the portrait. When you finish creation, assign suitable names to the layers, followed by dragging them below the ‘Black’ one within the ‘Layers’ panel.

Step 12: Color Selection and Application
Choose the respective colors for the clothes, skin and teeth/eyes of the cartoonized edit. To proceed with color application, navigate to the toolbar at the left of the Photoshop workspace and choose the ‘Brush Tool’. Finally, choose a particular layer and apply careful brush strokes to add color to the specific area of the portrait that you wish to edit. Follow the same process to add colors to the remaining layers to get the desired result in all areas of your cartoonized edit.

Step 13: Using the Gradient Tool
Navigate to the ‘Layers’ panel again and create a new ‘Gradient’ layer to further enhance your creation. You now need to select the ‘Gradient Tool’ from the toolbar at the left of the Photoshop workspace. The ‘Gradient Editor’ pops up with the continuously running ‘Gradient Bar’, as soon as you make the selection. Double click on the gradient boxes at both ends to select them, followed by making your color choices. Tap on ‘OK’ when you are satisfied with your work.

Step 14: Filling the Gradients
To proceed with gradient filling, press and hold the mouse button on the image at the bottom left and continue to drag the cursor to its top right corner. Leave the mouse and navigate to the ‘Layers’ panel for dragging and dropping the ‘Gradient’ layer above the ‘White’ layer.

You are now done with the process of creating a caricature edit from a normal still portrait. Your final image output will appear something like the following:

Cartoons, an already catchy entertainment source, can upgrade other media utilities on integration. Look through the easiest ways of creating cartoonize photo Photoshop stills!
In this article
01 [Types of Cartoon Effects in Photoshop](#Part 1)
02 [Easiest Ways to Cartoonize Photo in Photoshop](#Part 2)
03 [How to Use a Variety of Photoshop Special Effects to Create the Final Caricature Look](#Part 3)
Part 1 Types of Cartoon Effects in Photoshop
It is an absolute fun activity to explore your editing creativity in the realm of cartoonizing the otherwise ordinary still captures. Talking of the most convenient cartoon creator and editor applications, you can safely rely on the Photoshop Image Editor application to choose from a pool of cartoon editing effects for adding that spunky and funny element to your image files.
Presented in the following section, is a discussion of some of the most stunning and visibly amazing cartoon effects in the application’s Editor Library to cartoonize Photoshop images:
01Pop Art Photoshop Action
The effect is a predominantly preferred as a cartoon action Photoshop utility to caricaturize a normal image, along with customizing the same to change the colors and background of the original still capture for creating a brand new appearance with utmost ease. Apart from this, the aforesaid effect allows you to exclusively customize the globally acclaimed graphic masterpieces of Roy Lichtenstein. Working with the effect, you can edit a self-portrait or the favorite image of your pet to give the latter, a funny retro feel.
02Vintage Comic Creator
If the idea of sticking to just the creation of cartoon images is not enough to satisfy you, the Vintage Comic Creator effect allows you to expand your creativity level to work on cartoon based shape and text edits. You can use the effect to enhance an image logo or plain text with a comic book oriented text. A download of this cartoon effect template facilitates you with diversities of customizable layer styles, overlays and patterns.
03GTA Photoshop Action
This is a complete pleasure for the creative fan of Grand Theft Auto, the wicked chasing game series. Additional to creating a stark variety of edited cartoon stills, you are free to reinvent the aforesaid game’s most popular caricature edits, while using the GTA Photoshop Action editing filter. Launched by Indworks, the effect package consisting of 15 vibrant themes and 5 collage templates; promises a quick mimicry of your most cherished video and console games.
04Vector Paint Photoshop Action
The one is an amazing Photoshop effect for creating cartoon edits, which works through a merger of two different ingenious art themes or styles for transforming basic images into cartoonized stills.
The effect grants you the liberty to use varieties of art styles, such as, comic, photo retouching and energetic oil to obtain editing results comparable to that of any original photograph. The template is conveniently simple to use and assures you of quick results. All this, just at a nominal price of $6! Interesting, right?
05Ultra Realistic 3D Space Effect
Considering the fact of you being a space admirer, this one is the perfect image editor for you to add the vibrancy of stunning space elements and backgrounds within your cartoonized edits. The effect lets you play with the diverse range of customizable text and exciting caricature backgrounds. When downloading the template, you get a main setup file, a few editing examples and a web link to the free fonts present in the effect.
06Animated Zombie Grime Art Photoshop Action
Are you in love with the latest zombie grimes? If yes, then this action set is exclusive editor package for you. Working with the aforesaid image template, you can effortlessly add the perfect zombie theme to your cartoon edits, along with simultaneously creating a stunning animation, which you can use to enhance your video or GIF uploads on social media. Not forgetting the best part, you get a free access to this amazing utility.
Part 2 Easiest Ways to Cartoonize Photo in Photoshop
Having known about the amazing varieties of cartoonized editor templates in Photoshop, it is a natural instinct to feel motivated to create your own caricature images from normal capture stills. Addressing the concern of image transformation methods to turn a photo into a cartoon Photoshop, let us dive into some of the most affordable methods of creating cartoonized photos in the aforesaid editing application.
Talking of the most basic Photoshop tools for creating caricature images, you can start your editing spree with using the Graphic Tablet, Brush Tool, Layer Masks and a graphic pen to create amateur cartoonized edits from your still photographs, getting a full control on image tracing.
01Brush Tool
A few usage examples include working with a combination of the graphic tablet pen and the editor brushes to trace your image, using the brush in a masked or a fresh layer to avoid altering the actual image, and much more.
02Graphic Tablet
It is best to use the Photoshop Graphic Tablet for adhering to the concern of tracing cartoonized images. You can alternatively cater to the job with a trackpad, mouse, or even your hand. It is however, difficult to assure steady hand postures for image tracing, lest you are using a stylus pen.
03Pen Tool
Using the Pen Tool for cartoonizing your portrait, allows you to draw outlines along the desired figure within the image, along with its important elements, so that you can easily use these outlined paths to introduce different color blocks.
Similar to the Brush Tool, the Photoshop Pen utility grants you the freedom to vary the degree of detailing in your cartoon edit, from being highly expressive to only remaining around the shore. Working with the Pen Tool can, however be a bit tiring and time taking, with respect to the extent of detailing you wish to add to the caricature edits.
Additional to the aforementioned tools, you can also consider using the default image filters of the Photoshop application to get comparable results. This is an exclusively better option to choose, compared to the Pen Tool, when you are working without a Graphic Tablet. To get over the top realistic caricature renderings, you will need to supplement the use of Photoshop filters with the application’s editing channels and other adjustments.
Part 3 How to Use a Variety of Photoshop Special Effects to Create the Final Caricature Look
Considering the extensive discussion on the credibility of the Photoshop Image Editor application in the realm of creating stunning caricature images in high end resolution, let us proceed to learn about using the diversity of Photoshop’s special effects to get the last stage cartoonized appearance of ordinary still images.
User’s Guide to Create High End Cartoonized Look
The following tutorial is a stepwise explanation of the process to convert photo into cartoon Photoshop in the easiest possible way. Stick to the method for getting affordable results in a quick span.
Step 1: Download and Launch the Program
Visit the official website of Photoshop Image Editor for a free download of the software program in your system, followed by installing and launching the same in your device.
Step 2: Upload Your Image
On a successful launch of the editor program, you will be directed to the ‘Photoshop Editor’ window, where you are required to upload any desired still image from your device for creating a cartoonized edit. To do this, either simply add your image to the editor workspace using the ‘Drag and Drop’ method, or navigate to the ‘File’ tab in the top toolbar and click on ‘Open’ in the dropdown menu.
Step 3: Edge Enhancement
Once your image appears in the editor timeline, proceed to sharpen the edges of the face and body of the portrait. Start with navigating to and clicking on the ‘Filter’ option, followed by tapping on ‘Filter Gallery’ and selecting the ‘Artistic’ folder, where you need to choose the ‘Poster Edges’ option. Observe the effect of these setting on the portrait and make necessary changes.
Step 4: Background Setting
Ensure that the background and foreground of your image are set to white and black colors respectively. If not, proceed to adjust the same as required.
Step 5: Distorting the Edges
You now need to introduce some distortion in the edges of your portrait. Navigate to the ‘Filter’ option again, open the ‘Filter Gallery’ and choose ‘Torn Edges’ from the menu that drops down. Select the desired parameter values in accordance with your creative suitability.
Step 6: Using the Channels Panel
The next step is to select and copy your portrait using the ‘Ctrl + A’ and Ctrl + C commands respectively. Navigate to the ‘Channels’ panel at the right of the Photoshop workspace. At the panel’s bottom right, proceed with creating a new channel. It will be assigned the name ‘Alpha 1’ by Photoshop, which you are most welcome to change.
Step 7: Color Inversion
When you finish creating the channel, use the ‘Ctrl + V’ command to paste your portrait in the same. Proceed with inverting the image colors by navigating to the ‘Image’ option, followed by choosing the ‘Adjustment’ and ‘Invert’ options from the consecutive drop downs. Now, make a selection of the ‘White’ regions of your portrait by pressing the ‘Ctrl’ key and clicking on the ‘Alpha 1 Channel thumbnail.
Step 8: Layer Creation
Navigate to the ‘Layers’ panel at the right of the Photoshop workspace, and click on the ‘New Layer’ icon for creating a fresh layer. Fill the just created layer with black color, either by pressing ‘g’ from your system’s keyboard, or using the ‘Paint Bucket’ tool. Don’t forget to assign a suitable name to the layer.
Repeat the above process to create a separate layer and e fill the same with white color. The layer creation process is essential to separate the white and black colors of the actual image.
Step 10: Layer Dragging
In the ‘Layers’ panel, drag the ‘Black’ layer above the ‘White’ one.
Step 11: Creating Additional Layers
You are now required to create three more layers, with the same process as for the above two, for adding effects to the Skin, Clothes and Teeth/Eyes of the portrait. When you finish creation, assign suitable names to the layers, followed by dragging them below the ‘Black’ one within the ‘Layers’ panel.
Step 12: Color Selection and Application
Choose the respective colors for the clothes, skin and teeth/eyes of the cartoonized edit. To proceed with color application, navigate to the toolbar at the left of the Photoshop workspace and choose the ‘Brush Tool’. Finally, choose a particular layer and apply careful brush strokes to add color to the specific area of the portrait that you wish to edit. Follow the same process to add colors to the remaining layers to get the desired result in all areas of your cartoonized edit.
Step 13: Using the Gradient Tool
Navigate to the ‘Layers’ panel again and create a new ‘Gradient’ layer to further enhance your creation. You now need to select the ‘Gradient Tool’ from the toolbar at the left of the Photoshop workspace. The ‘Gradient Editor’ pops up with the continuously running ‘Gradient Bar’, as soon as you make the selection. Double click on the gradient boxes at both ends to select them, followed by making your color choices. Tap on ‘OK’ when you are satisfied with your work.
Step 14: Filling the Gradients
To proceed with gradient filling, press and hold the mouse button on the image at the bottom left and continue to drag the cursor to its top right corner. Leave the mouse and navigate to the ‘Layers’ panel for dragging and dropping the ‘Gradient’ layer above the ‘White’ layer.
You are now done with the process of creating a caricature edit from a normal still portrait. Your final image output will appear something like the following:
10 Classical Animated Cartoon Types With Examples
10 Classical Animated Cartoon Types With Examples
An easy yet powerful editor
Numerous effects to choose from
Detailed tutorials provided by the official channel
In today’s time, animation has advanced way more and we can name more than one series, starting from “BoJack Horseman” to “The Flintstones” which can be simply termed as a funny cartoon.
In this article, we will look at the 10 best classical animated cartoon types along with relevant examples to help you understand.
In this article
01 [The Best Animated Series of All Time](#Part 1)
02 [Anyway We Can Create Animation Ourselves?](#Part 2)
Part 1 The Best Animated Series of All Time
Here are 10 classical animated cartoon types with an example for each of them. A lot of us have our earliest TV memories tied to an animated series or the nostalgia of one of the very popular 90s cartoons. In this list, you might as well find one of those funny cartoons or even one of your very favorite Disney cartoons.
01 Doug (1991-1994)
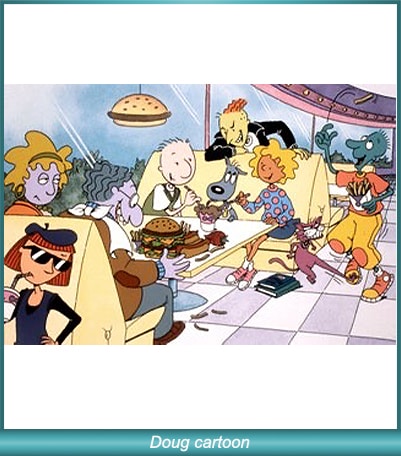
For people who were more into Nickelodeon than Disney/ABC, Doug was one of the most popular 90s cartoons. The funny cartoon show was rated to be one of the most relatable goobers on children’s TV. Along with that, the funny cartoon was known for the ingenuity and creative character names like Doug Funnie, Patti Mayonnaise, Skeeter, Porkchop, Tippi Dink, Roger Klotz, and Mosquito Valentine.
02 Popeye The Sailor (1960-1963)
“Popeye” initially started out as a comic strip in newspapers, but after the theatrical short features started airing on TV during the 1950s, soon 220 cartoons were created in just two years, making it one of the most popular television shows of all time. It had rudimentary animation and focused on the popularity of the character “Popeye the Sailor” which is still a very well-known character.
03 Pokemon (1997-Present)
It’s that good and it keeps going on. Pokemon was initially a series of games for the Nintendo Gameboy and from there it grew to be immensely popular where children across the globe simply loved the cute cartoon characters in the show. The Japanese pocket monsters became an integral part of life when the animated television series started airing.
04 Dexter’s Laboratory (1996-2003)
In 1996 Cartoon Network audiences were introduced to a show named Dexter’s Laboratory with Dexter as the primary character of the cartoon show. The boy genius had a massive hidden laboratory under his house. Every episode would feature Dexter planning an exciting experiment which was a favorite of kids. The series is one of the highest-rated series on the Cartoon Network and it also received a Primetime Emmy Award in 1996.
05 Alvin and the Chipmunks (1983-1990)
Alvin and the Chipmunks have been known since the 1960s. Although the show “Alvin and the Chipmunks’’ became popular on NBC in 1983. It featured three main characters: Alvin, Simon, and the loveable Theodore who got into all kinds of hijinks. The series had a large following, especially after the Chip-ettes, female versions of the Chipmunks, were introduced.
06 Scooby Doo, Where Are You! (1969-1970)

Barely any other two-season title has ever become as popular as “Scooby Doo, Where Are You!” The animation franchise is existent even today. The main attraction of this very funny cartoon was the cowardly Great Dane with a speech impediment. The dog solved crimes with teen friends and perfectly captured the imaginations of children as well as teenagers with subtle horror elements and some really hilarious catchphrases.
07 The Flintstones (1960-1966)

The Flintstones is inspired by “The Honeymooners’’ and was also the first animated series released in primetime. It was also the most successful one of its kind until “The Simpsons” was released 30 years later. The popularity of the series was because of its satirical take on modern suburban culture through the use of absurd, anachronistic elements in a Stone Age setting.
08 The Simpsons (1987-1990)

The Simpsons are simply one of the most popular and revolutionary 90s cartoons. It became a cultural juggernaut during its time and has been rated highly by viewers of all ages. The series emphasizes animation which has increased its appeal to modern viewers.
09 Sealab 2021 (2000-2005)
Sealab 2021 is one of Adult Swim’s initial launches of cartoons. It follows a forgotten ’70s adventure cartoon that turns the environmentally-friendly adventure into a blend of workplace resentments and absurd humor.
10 Teen Titans Go (2013- Present)
This is one of the modern and fast-paced animated series with jokes infused in every quarter of a minute. The funny cartoon animation is popular for its pop-culture references, sly hits at the DC universe, and a well-presented set of self-deprecating jokes.
Part 2 Anyway We Can Create Animation Ourselves?
There can be a number of reasons why you may need to create an animation. With modern technology, it is very easy and possible to quickly and effectively create animations suited for your purposes. Before you go on to creating animations, you need to know about the 5 key kinds of animation popular in modern times. They are:
3D computer animation
Traditional animation
Stop motion
2D Vector-based animation
Motion graphics
No matter which one you are going to create, what you need is an efficient and versatile tool like the Wondershare Filmora . This tool is an advanced and highly functional tool that is used and recommended by professionals all across the globe. The tool enables you to create all kinds of animations with increased ease. The video editing tool comes with a vast range of professional tools that can help you create the perfect video for storytelling.
With Filmora you can create animations just as you imagine. With a range of customization options, you can actually, “breathe life into your clips.” Amongst the key features of the tools, the mentionable ones are:
Motion tracking
A vast range of animation options
Ease in and ease out features
Pan and zoom
A range of text styles and editing options to adjust lights and flares warps and distorts, etc.
Filmora is the perfect tool to bring your imagination to life and express your cinematic flair. The vast range of tools and easy usability help you make the most of your venture and create the perfect animations for your purposes, seamlessly and really quickly.
Key Takeaways from This Episode
● Animation is a vast and versatile field. With the advancement of computer technology and the transformation of the animation industry, we have moved far ahead with our approaches than where we were with the 90s cartoons.
● This article has brought forward the various animation styles that have been a part of the animation industry.
● From the old funny cartoons to the latest dramatic animated web series, you have read about it all to help you better understand the distinctions and the evolution of animation over time.
● Along with BoJack Horseman or just one of the popular Disney cartoons, you have also read about how to create your own animations all by yourself. Filmora Pro is the perfect tool for making animations for a variety of purposes, including marketing videos.
● We hope all of that information will help you make the most of your animation venture!
In today’s time, animation has advanced way more and we can name more than one series, starting from “BoJack Horseman” to “The Flintstones” which can be simply termed as a funny cartoon.
In this article, we will look at the 10 best classical animated cartoon types along with relevant examples to help you understand.
In this article
01 [The Best Animated Series of All Time](#Part 1)
02 [Anyway We Can Create Animation Ourselves?](#Part 2)
Part 1 The Best Animated Series of All Time
Here are 10 classical animated cartoon types with an example for each of them. A lot of us have our earliest TV memories tied to an animated series or the nostalgia of one of the very popular 90s cartoons. In this list, you might as well find one of those funny cartoons or even one of your very favorite Disney cartoons.
01 Doug (1991-1994)
For people who were more into Nickelodeon than Disney/ABC, Doug was one of the most popular 90s cartoons. The funny cartoon show was rated to be one of the most relatable goobers on children’s TV. Along with that, the funny cartoon was known for the ingenuity and creative character names like Doug Funnie, Patti Mayonnaise, Skeeter, Porkchop, Tippi Dink, Roger Klotz, and Mosquito Valentine.
02 Popeye The Sailor (1960-1963)
“Popeye” initially started out as a comic strip in newspapers, but after the theatrical short features started airing on TV during the 1950s, soon 220 cartoons were created in just two years, making it one of the most popular television shows of all time. It had rudimentary animation and focused on the popularity of the character “Popeye the Sailor” which is still a very well-known character.
03 Pokemon (1997-Present)
It’s that good and it keeps going on. Pokemon was initially a series of games for the Nintendo Gameboy and from there it grew to be immensely popular where children across the globe simply loved the cute cartoon characters in the show. The Japanese pocket monsters became an integral part of life when the animated television series started airing.
04 Dexter’s Laboratory (1996-2003)
In 1996 Cartoon Network audiences were introduced to a show named Dexter’s Laboratory with Dexter as the primary character of the cartoon show. The boy genius had a massive hidden laboratory under his house. Every episode would feature Dexter planning an exciting experiment which was a favorite of kids. The series is one of the highest-rated series on the Cartoon Network and it also received a Primetime Emmy Award in 1996.
05 Alvin and the Chipmunks (1983-1990)
Alvin and the Chipmunks have been known since the 1960s. Although the show “Alvin and the Chipmunks’’ became popular on NBC in 1983. It featured three main characters: Alvin, Simon, and the loveable Theodore who got into all kinds of hijinks. The series had a large following, especially after the Chip-ettes, female versions of the Chipmunks, were introduced.
06 Scooby Doo, Where Are You! (1969-1970)
Barely any other two-season title has ever become as popular as “Scooby Doo, Where Are You!” The animation franchise is existent even today. The main attraction of this very funny cartoon was the cowardly Great Dane with a speech impediment. The dog solved crimes with teen friends and perfectly captured the imaginations of children as well as teenagers with subtle horror elements and some really hilarious catchphrases.
07 The Flintstones (1960-1966)
The Flintstones is inspired by “The Honeymooners’’ and was also the first animated series released in primetime. It was also the most successful one of its kind until “The Simpsons” was released 30 years later. The popularity of the series was because of its satirical take on modern suburban culture through the use of absurd, anachronistic elements in a Stone Age setting.
08 The Simpsons (1987-1990)
The Simpsons are simply one of the most popular and revolutionary 90s cartoons. It became a cultural juggernaut during its time and has been rated highly by viewers of all ages. The series emphasizes animation which has increased its appeal to modern viewers.
09 Sealab 2021 (2000-2005)
Sealab 2021 is one of Adult Swim’s initial launches of cartoons. It follows a forgotten ’70s adventure cartoon that turns the environmentally-friendly adventure into a blend of workplace resentments and absurd humor.
10 Teen Titans Go (2013- Present)
This is one of the modern and fast-paced animated series with jokes infused in every quarter of a minute. The funny cartoon animation is popular for its pop-culture references, sly hits at the DC universe, and a well-presented set of self-deprecating jokes.
Part 2 Anyway We Can Create Animation Ourselves?
There can be a number of reasons why you may need to create an animation. With modern technology, it is very easy and possible to quickly and effectively create animations suited for your purposes. Before you go on to creating animations, you need to know about the 5 key kinds of animation popular in modern times. They are:
3D computer animation
Traditional animation
Stop motion
2D Vector-based animation
Motion graphics
No matter which one you are going to create, what you need is an efficient and versatile tool like the Wondershare Filmora . This tool is an advanced and highly functional tool that is used and recommended by professionals all across the globe. The tool enables you to create all kinds of animations with increased ease. The video editing tool comes with a vast range of professional tools that can help you create the perfect video for storytelling.
With Filmora you can create animations just as you imagine. With a range of customization options, you can actually, “breathe life into your clips.” Amongst the key features of the tools, the mentionable ones are:
Motion tracking
A vast range of animation options
Ease in and ease out features
Pan and zoom
A range of text styles and editing options to adjust lights and flares warps and distorts, etc.
Filmora is the perfect tool to bring your imagination to life and express your cinematic flair. The vast range of tools and easy usability help you make the most of your venture and create the perfect animations for your purposes, seamlessly and really quickly.
Key Takeaways from This Episode
● Animation is a vast and versatile field. With the advancement of computer technology and the transformation of the animation industry, we have moved far ahead with our approaches than where we were with the 90s cartoons.
● This article has brought forward the various animation styles that have been a part of the animation industry.
● From the old funny cartoons to the latest dramatic animated web series, you have read about it all to help you better understand the distinctions and the evolution of animation over time.
● Along with BoJack Horseman or just one of the popular Disney cartoons, you have also read about how to create your own animations all by yourself. Filmora Pro is the perfect tool for making animations for a variety of purposes, including marketing videos.
● We hope all of that information will help you make the most of your animation venture!
How to Make Your Characters Interactive in Unity Animation Rigging
Learn How to Make Your Characters Interactive in Unity Animation Rigging
An easy yet powerful editor
Numerous effects to choose from
Detailed tutorials provided by the official channel
Animation is one such aspect that is formed from the integration of several varied factors and processes. One of the most vital ones is the process of rigging. Thus, we will be discussing Unity character rigging as Unity is one of the most efficient platforms for animation.
Additionally, we will introduce you to one of the best tools you can use to edit videos and nurture the creative skills you carry in yourself. So, without any further delay, let us start our discussion.
In this article
01 [What is Unity Rigging?](#Part 1)
02 [Is It Better to Rig in Unity or Blender?](#Part 2)
03 [How To Use Animation Rigging In Unity](#Part 3)
Part 1 What is Unity Rigging?
To understand what Unity rigging is, we must start our discussion first by discussing rigging in animation. In animation, rigging is the process in which your animation characters are separated into two parts. One is the mesh-like structure of the characters. And the other is the skeletal structure given to the characters.
You integrate bones and joints and join them accordingly in the characters present in your animation. It is similar to the presence of the human skeletal system. Moreover, just like the skeletal system in humans helps in the movements of the different parts of the body, the bone and joint structure through rigging also enables the characters in animation to move.
Therefore, we can say that rigging is the process by which you can enable your characters’ in animation to move and show different facial expressions, etc. So, it is obvious that without the process of rigging, the animation is impossible, which makes rigging one of the most crucial aspects of animation.
Now that we know what rigging in animation is, we will be discussing what is animation rigging in Unity. Unity technologies have developed a cross-platform gaming engine called ‘Unity’. And this platform also offers the ones interested in animation to learn animation rigging.
The Unity platform offers robust and effective tools for animation rigging. And these tools assist the animators to create real-time rigs in Unity. Most commonly, the set of tools in Unity for rigging is used on the characters. But, if one likes, they can also use the tools on ani Game Object that includes animations and skeletons.
Therefore, when you utilise the platform of Unity or the toolsets of Unity to perform rigging in animation, it can be referred to as unity rigging. It is one of the most powerful and renowned platforms for animation, creating the finest and most professional animation creations.

Part 2 Is It Better to Rig in Unity or Blender?
Another platform that can ideally assist you in animation is Blender. A common question arises as to whether one should choose blender rigging over Unity or vice versa. We have laid down the following table to compare the different features of Blender with that of Unity.
| | Unity | Blender | |
| ——————- | ————————————————————————————————————————- | ————————————————————————————————————————————— |
| About | It is a game engine that enables you in creating human-machine interfaces, AR simulations, customize splash screens, etc. | It is a computer graphics software that is open source and is mainly used for creating 3D models. |
| Types Supported | Supports 3D | |
| Best Purpose | Ideal for film, architecture, automotive, transportation, and other industries | Ideal for animation and design that assists in VFX, simulation, organizations of all sizes with rendering, modeling, and video editing. |
There are many features that Blender lacks, but Unity includes. The features included in Unity but are absent in Blender are as follows.
● Drawing
● Games
● In-Game Analytics
● Multi-player Gaming Network
● Player Management
● Virtual Reality
● IT Asset Management
● Prototype Creation
Therefore, it is preferred to opt for Unity rigging than Blender rigging, as Blender lacks a considerable number of features.
Part 3 How To Use Animation Rigging In Unity
Now, we will be introducing you to the different steps that will help you in unity rig animation. The following list includes the steps in the sequence that, when you deploy, will help you rig in the platform of Unity.
Step 1Installation
The first step is to install the “animation rigging package” of Unity. You will get the animation rigging package in the “Package Manager”. You will be able to avail of this animation package in Unity 2019.1 and above.
This package offers you a library that consists of rig constraints. And this library of rig constraints enables you to create procedural motion during the runtime. And the general term used for this is called “runtime rigging”.
The “Asset’s Animator Root” consist of the “Rig Builder Component”, which is the source where the rigs are accumulated. The rigs here are the constraints put together in groups. With these steps you will be able to create Unity humanoid rig that will make your animation creations look the finest, most realistic and most professional.

Step 2Rig Builder set-up
After installing the unity animation rigging package, the next step is to set up the rig builder. You will have to use the “Animator component” in this step. Using the “Animator component”, integrate the “Rig Builder component” with the “GameObject”. Generally, in the hierarchy of rig, it is the topmost “Transform”.
Then, you will have to make a new child GameObject. To which, you will have to integrate the “Rig component”. After this step, you need to access the “Animator root”, where you will find the “Rig Builder component”. In the “Rig Builder component”, you need to assign the “Rig to the Rig Layers” list.
It will complete the task of creating the most basic rig. The further steps will help you install the required behaviours in the character or characters.

Step 3Bone Rendering
Whether it is unity rigging or 3D, bone rendering is the most crucial step to enable your animation characters to gain movement. The “Unity Editor” will help you interact and work with the character’s skeleton in the “Scene view.”
You can add “Transform” lists and then display them in various visual styles with the help of the “Bone Renderer: component. It enables you to integrate numerous “Bone Renderer” components, each of them having its unique style of display. As a result, gameplay debugging, rig setup, keyframing, and other artist workflows are facilitated.

Step 4Adding Rig Effectors
This step enables one to add Gizmos to Transforms, facilitating selection and visualisation. The “Effector” are invisible during “Game View”, and this step enhances the quality of the character animation.

Step 5Managing the Rig Constraints
Your characters gain “runtime animation” through the rig constraints, and thus, these are the building blocks facilitating assembling the rigs. The rigs are combined in multiple and varied ways to obtain the desired motions and movements in the characters.

Step 6Working with the Two Bone IK Constraint
The first step here is to rest your character to the “Bind Pose.” you can do so by opting for the “Menu Bar” and selecting the “Animation Rigging” option. You will find the “Bind Pose” option there, and you will have to click on it.

Then add a child GameObject below “Character Rig”. Then add a new child GameObject below “Right Arm IK”. Integrate two new child GameObjects beneath the “Right Arm Ik” by naming the first and the second one “RH IK Target” and “RH IK Hint”, respectively.

Integrate the “Rig Builder Component” with the “Animator root GameObject”. Then proceed with selecting the “CharecterRig GameObject” and integrating a “Rig Component”. Select “Two Bone IK Contrainst” to the “Right Arm IK.”

Then, incorporate a “Box Effector” to the RH IK Target. Integrate a “Ball Effector” to the “RH IK Hint”.

Then select the “RH IK Hint” and “Right Elbow”. Select “Animation Rigging>align Transform”. Move away from the “Ball Effector”. Select the “Right Arm IK GameObject” and integrate the required bones. Integrate the Character Rig GameObkect with Rig Layer list by selecting the option of “Ninja”. Then press “Play” and see your creation come to life.

Now, you might as well want to showcase your creativity in editing and video making. For that, we have the best tool for you- FILMORA. This is the finest video editing tool with the most proficient features included in the following list.
● Over 8effects for editing videos
● Keyboard shortcut, audio ducking colour, colour match
● You can also change the speed of the videos
● Every professional-level video editing tool that you need is included in Wondershare Filmora Video Editor
The features are innumerable and so can not be possibly listed differently. So, you can readily try out this tool yourself, and if you do not want to purchase in the first instance, you can easily avail of its free trial. Although, we can guarantee that after using its free trial, you would definitely want to use every avail feature of the tool!

For Win 7 or later (64-bit)
For macOS 10.12 or later
● Key Takeaways from This Episode →
● A short introduction to the process of rigging, with which we proceeded on describing and understanding what unity rigging is. We also stated how important it is in the sphere of animation.
● Next, we compared rigging in Blender and Unity. After comparing the different factors, we decided that it is optimum to choose Unity for character rigging because of the lack of features in Blender.
● Lastly, we introduced you to the best video editing tool that will equally assist you in nurturing your creativity, video editing, and animation skills.
Animation is one such aspect that is formed from the integration of several varied factors and processes. One of the most vital ones is the process of rigging. Thus, we will be discussing Unity character rigging as Unity is one of the most efficient platforms for animation.
Additionally, we will introduce you to one of the best tools you can use to edit videos and nurture the creative skills you carry in yourself. So, without any further delay, let us start our discussion.
In this article
01 [What is Unity Rigging?](#Part 1)
02 [Is It Better to Rig in Unity or Blender?](#Part 2)
03 [How To Use Animation Rigging In Unity](#Part 3)
Part 1 What is Unity Rigging?
To understand what Unity rigging is, we must start our discussion first by discussing rigging in animation. In animation, rigging is the process in which your animation characters are separated into two parts. One is the mesh-like structure of the characters. And the other is the skeletal structure given to the characters.
You integrate bones and joints and join them accordingly in the characters present in your animation. It is similar to the presence of the human skeletal system. Moreover, just like the skeletal system in humans helps in the movements of the different parts of the body, the bone and joint structure through rigging also enables the characters in animation to move.
Therefore, we can say that rigging is the process by which you can enable your characters’ in animation to move and show different facial expressions, etc. So, it is obvious that without the process of rigging, the animation is impossible, which makes rigging one of the most crucial aspects of animation.
Now that we know what rigging in animation is, we will be discussing what is animation rigging in Unity. Unity technologies have developed a cross-platform gaming engine called ‘Unity’. And this platform also offers the ones interested in animation to learn animation rigging.
The Unity platform offers robust and effective tools for animation rigging. And these tools assist the animators to create real-time rigs in Unity. Most commonly, the set of tools in Unity for rigging is used on the characters. But, if one likes, they can also use the tools on ani Game Object that includes animations and skeletons.
Therefore, when you utilise the platform of Unity or the toolsets of Unity to perform rigging in animation, it can be referred to as unity rigging. It is one of the most powerful and renowned platforms for animation, creating the finest and most professional animation creations.
Part 2 Is It Better to Rig in Unity or Blender?
Another platform that can ideally assist you in animation is Blender. A common question arises as to whether one should choose blender rigging over Unity or vice versa. We have laid down the following table to compare the different features of Blender with that of Unity.
| | Unity | Blender | |
| ——————- | ————————————————————————————————————————- | ————————————————————————————————————————————— |
| About | It is a game engine that enables you in creating human-machine interfaces, AR simulations, customize splash screens, etc. | It is a computer graphics software that is open source and is mainly used for creating 3D models. |
| Types Supported | Supports 3D | |
| Best Purpose | Ideal for film, architecture, automotive, transportation, and other industries | Ideal for animation and design that assists in VFX, simulation, organizations of all sizes with rendering, modeling, and video editing. |
There are many features that Blender lacks, but Unity includes. The features included in Unity but are absent in Blender are as follows.
● Drawing
● Games
● In-Game Analytics
● Multi-player Gaming Network
● Player Management
● Virtual Reality
● IT Asset Management
● Prototype Creation
Therefore, it is preferred to opt for Unity rigging than Blender rigging, as Blender lacks a considerable number of features.
Part 3 How To Use Animation Rigging In Unity
Now, we will be introducing you to the different steps that will help you in unity rig animation. The following list includes the steps in the sequence that, when you deploy, will help you rig in the platform of Unity.
Step 1Installation
The first step is to install the “animation rigging package” of Unity. You will get the animation rigging package in the “Package Manager”. You will be able to avail of this animation package in Unity 2019.1 and above.
This package offers you a library that consists of rig constraints. And this library of rig constraints enables you to create procedural motion during the runtime. And the general term used for this is called “runtime rigging”.
The “Asset’s Animator Root” consist of the “Rig Builder Component”, which is the source where the rigs are accumulated. The rigs here are the constraints put together in groups. With these steps you will be able to create Unity humanoid rig that will make your animation creations look the finest, most realistic and most professional.
Step 2Rig Builder set-up
After installing the unity animation rigging package, the next step is to set up the rig builder. You will have to use the “Animator component” in this step. Using the “Animator component”, integrate the “Rig Builder component” with the “GameObject”. Generally, in the hierarchy of rig, it is the topmost “Transform”.
Then, you will have to make a new child GameObject. To which, you will have to integrate the “Rig component”. After this step, you need to access the “Animator root”, where you will find the “Rig Builder component”. In the “Rig Builder component”, you need to assign the “Rig to the Rig Layers” list.
It will complete the task of creating the most basic rig. The further steps will help you install the required behaviours in the character or characters.
Step 3Bone Rendering
Whether it is unity rigging or 3D, bone rendering is the most crucial step to enable your animation characters to gain movement. The “Unity Editor” will help you interact and work with the character’s skeleton in the “Scene view.”
You can add “Transform” lists and then display them in various visual styles with the help of the “Bone Renderer: component. It enables you to integrate numerous “Bone Renderer” components, each of them having its unique style of display. As a result, gameplay debugging, rig setup, keyframing, and other artist workflows are facilitated.
Step 4Adding Rig Effectors
This step enables one to add Gizmos to Transforms, facilitating selection and visualisation. The “Effector” are invisible during “Game View”, and this step enhances the quality of the character animation.
Step 5Managing the Rig Constraints
Your characters gain “runtime animation” through the rig constraints, and thus, these are the building blocks facilitating assembling the rigs. The rigs are combined in multiple and varied ways to obtain the desired motions and movements in the characters.
Step 6Working with the Two Bone IK Constraint
The first step here is to rest your character to the “Bind Pose.” you can do so by opting for the “Menu Bar” and selecting the “Animation Rigging” option. You will find the “Bind Pose” option there, and you will have to click on it.
Then add a child GameObject below “Character Rig”. Then add a new child GameObject below “Right Arm IK”. Integrate two new child GameObjects beneath the “Right Arm Ik” by naming the first and the second one “RH IK Target” and “RH IK Hint”, respectively.
Integrate the “Rig Builder Component” with the “Animator root GameObject”. Then proceed with selecting the “CharecterRig GameObject” and integrating a “Rig Component”. Select “Two Bone IK Contrainst” to the “Right Arm IK.”
Then, incorporate a “Box Effector” to the RH IK Target. Integrate a “Ball Effector” to the “RH IK Hint”.
Then select the “RH IK Hint” and “Right Elbow”. Select “Animation Rigging>align Transform”. Move away from the “Ball Effector”. Select the “Right Arm IK GameObject” and integrate the required bones. Integrate the Character Rig GameObkect with Rig Layer list by selecting the option of “Ninja”. Then press “Play” and see your creation come to life.
Now, you might as well want to showcase your creativity in editing and video making. For that, we have the best tool for you- FILMORA. This is the finest video editing tool with the most proficient features included in the following list.
● Over 8effects for editing videos
● Keyboard shortcut, audio ducking colour, colour match
● You can also change the speed of the videos
● Every professional-level video editing tool that you need is included in Wondershare Filmora Video Editor
The features are innumerable and so can not be possibly listed differently. So, you can readily try out this tool yourself, and if you do not want to purchase in the first instance, you can easily avail of its free trial. Although, we can guarantee that after using its free trial, you would definitely want to use every avail feature of the tool!
For Win 7 or later (64-bit)
For macOS 10.12 or later
● Key Takeaways from This Episode →
● A short introduction to the process of rigging, with which we proceeded on describing and understanding what unity rigging is. We also stated how important it is in the sphere of animation.
● Next, we compared rigging in Blender and Unity. After comparing the different factors, we decided that it is optimum to choose Unity for character rigging because of the lack of features in Blender.
● Lastly, we introduced you to the best video editing tool that will equally assist you in nurturing your creativity, video editing, and animation skills.
10 Cartoon Photo Converters
D:\【内容】文章录入资料\20220321 Cartoon\35. 10 Cartoon Photo Converters You Couldn’t Do Without
An easy yet powerful editor
Numerous effects to choose from
Detailed tutorials provided by the official channel
We all love to edit our images. Undoubtedly right now, the innovation in technology or day the editing tools available put us at a point where we can do more than editing the photograph. Well, here we are discussing convert picture to cartoon. Yes, you understand it right. This conversion can be done for various projects. We are not saying you to confine this ultimate option to your photos only. If you are a part of social media and create content, these tools will help you to get the best outcome in return.
Well, keep reading till the last as here we explore photo to cartoon online free, and some paid versions that you can try. Let’s get started!
In this article
01 [5 Online Picture to Cartoon Converters](#Part 1)
02 [5 Picture to Cartoon Converters on Your Phone](#Part 2)
03 [How to convert photo to cartoon with the help of FotoSketcher](#Part 3)
Part 1 Online Picture to Cartoon Converters
In this section, we are discussing the best online photo to cartoon converter that you can use and complete this tedious task within a few minutes. The best tools that you can consider include: -
01Befunky
Befunky, an online picture converter, offers a unique way of transforming your photographs into cartoon-like images. You can choose from a 50+ range of styles and adjust the size of the image before you start. The website lets you choose the style of cartoon you want, such as traditional or modern. You can also choose the size of your cartoon and even change the background color.

02Cartoonize
Cartoonize is an online tool that converts pictures into cartoon-style images. It is a free online service that allows users to convert any image into a cartoon-style image in seconds. It has been widely used by bloggers, teachers, and artists for the quick and easy creation of cartoons. This online tool can be used for many purposes, including Blogging, Teaching, Social Media Marketing, and other portals.

03PhotoCartoon
PhotoCartoon is an online image-to cartoon converter that converts photos into cartoons. This tool is helpful for people who want to create a cartoon from an image without having to draw it by hand. The website also provides users with the ability to add text, color, and other effects to the images they have converted into comics. It can be used for creating memes or advertisements as well as personal projects like comics and illustrations.

04Free Photo to cartoon
This online Free Photo to Cartoon Converter allows users to convert a photo into an animated cartoon. It is an easy-to-use tool that provides high-quality results in a short amount of time. It has been proven to be more effective than using traditional methods. The site also offers users the option of using different filters and uploading images from Facebook or Instagram for conversion. Within no time, a user will be able to get the outcome of their choice.

05Picsart
Picsart is a website that lets users draw pictures and make them into cartoons. It offers an easy interface to create personalized cartoons, which can be shared on social media. It has a free version for drawing and sharing custom images, as well as paid subscriptions for more features like making animated GIFs, drawing with your webcam, or using the site’s editor.

Part 2 5 Picture to Cartoon Converters on Your Phone
Well, above, we have discussed the tools that can be used through the website or, say, on the computer. But when you don’t have a computer, you can do it with the help of your phone as well. Now cartoon photo converter for phones is also available that one can try. These are as follows: -
01**Wondershare Filmora Video Editor **
Filmora is an app for users to create videos, collages, and other types of images. It is a free app that comes with different features. It has been downloaded over 100 million times and has been used by numerous industries for completing the editing part. This acts as the best video to cartoon converter online free. It is available on iOS, Android, Windows 10, and Mac OS X.
For Win 7 or later (64-bit)
For macOS 10.12 or later
In general, it allows users to take pictures or videos from their phones and then convert them into a cartoon. The app also allows users to edit their images before converting them into cartoons as they want. The effects added in this tool are so awesome that any can love trying this out.
02Cartoon Photo Editor
This is a photo editor that allows users to turn photos into cartoon drawings. Users can choose from a range of styles and colors to create their own unique cartoons. The app offers different drawing styles, and accordingly, a user can choose one and do the editing easily. It also features abstract designs that lack realism but are still recognizable as cartoons. Users feel great using this app because of its interface and the features available.
03Art Camera – Cartoon, Pencil Sketch Art Effect Photo
Art Camera is a new photo app that allows taking photos that look like pencil drawings or sketches. It uses a sophisticated algorithm and the latest machine learning technology to transform your photos into cartoon-like images. This app is perfect for those who are looking for an artistic way of capturing memories, portraits, or even creating art from their own imagination. It is widely is available on iOS, Android, and Windows Phone devices.
04Tooncam – Cartoon, Pencil Sketch Pic
Tooncam is a free app that helps you to create cartoon images. You can use it on your phone or tablet. It is one of the best apps for creating cartoons on your phone with images with just one click. With this app, you can also share your cartoons with friends or family members and make them laugh out loud with funny pictures.
The app uses the camera of your device and its powerful photo editing tools to convert any photo into a cartoon image in just a few steps.
05Photo To Cartoon Yourself Edit
The app is a picture to cartoon converter on your phone that lets you transform a photo into a cartoon in just one tap. You can use this app to create an animated movie, comic strip, or comic book. The app works by converting the image into vector graphics and then adding colors and shading, and finally exporting it as an animated GIF. The app is available for iOS platforms.
Part 3 How to convert photo to cartoon
We are sure you might be thinking about how you can use these tools. Well, firstly, understand that every tool we have discussed above have the somewhere same interface, and you need to follow some steps to convert photo to cartoon. To help you more, here we are discussing the steps you need to follow while using FotoSketcher for the same purpose.
FotoSketcher is one of the best tools available free of cost for you. You can simply convert the photos into a cartoon and use them over different portals as per your need. There will be no need for you to engage in any complicated process to complete the editing task. The steps are also very simple to follow for this tool, and these are as follows: -
Step 1: firstly, get the FotoSketcher tool on your device.
Step 2: Wait until the installation of the tool gets completed. It is compatible with Windows and Mac both.
Step 3: Now, open the tool and upload the photo you wish to convert.
Step 4: Here, it asks you to select the type. You can either select cartoon 1 or Cartoon 2. These are the special effects being part of this software.
Step 5: Now, from the list of features, select the type of editing you wish to apply. There are multiple options available to choose from. You can choose any of them as per your preference.
Step 6: Blend the colors as needed for the edited photo. Along with it, there are some other parameters too need to look out for editing, and accordingly, you can set them.
Step 7: After setting up the changes, click on “Draw” to apply the changes. Wait until it applies the effects.
Step 8: The resulted image will appear, and you can download it in the required format from here.
● Ending Thoughts →
● Do convert photo to cartoon online in just simple steps without being part of any complicated process.
● Filmora is the best cartoon image converter online available, helping in converting the images as required.
● The photo to cartoon software is quite simple to use and does not require any particular technical knowledge.
We all love to edit our images. Undoubtedly right now, the innovation in technology or day the editing tools available put us at a point where we can do more than editing the photograph. Well, here we are discussing convert picture to cartoon. Yes, you understand it right. This conversion can be done for various projects. We are not saying you to confine this ultimate option to your photos only. If you are a part of social media and create content, these tools will help you to get the best outcome in return.
Well, keep reading till the last as here we explore photo to cartoon online free, and some paid versions that you can try. Let’s get started!
In this article
01 [5 Online Picture to Cartoon Converters](#Part 1)
02 [5 Picture to Cartoon Converters on Your Phone](#Part 2)
03 [How to convert photo to cartoon with the help of FotoSketcher](#Part 3)
Part 1 Online Picture to Cartoon Converters
In this section, we are discussing the best online photo to cartoon converter that you can use and complete this tedious task within a few minutes. The best tools that you can consider include: -
01Befunky
Befunky, an online picture converter, offers a unique way of transforming your photographs into cartoon-like images. You can choose from a 50+ range of styles and adjust the size of the image before you start. The website lets you choose the style of cartoon you want, such as traditional or modern. You can also choose the size of your cartoon and even change the background color.
02Cartoonize
Cartoonize is an online tool that converts pictures into cartoon-style images. It is a free online service that allows users to convert any image into a cartoon-style image in seconds. It has been widely used by bloggers, teachers, and artists for the quick and easy creation of cartoons. This online tool can be used for many purposes, including Blogging, Teaching, Social Media Marketing, and other portals.
03PhotoCartoon
PhotoCartoon is an online image-to cartoon converter that converts photos into cartoons. This tool is helpful for people who want to create a cartoon from an image without having to draw it by hand. The website also provides users with the ability to add text, color, and other effects to the images they have converted into comics. It can be used for creating memes or advertisements as well as personal projects like comics and illustrations.
04Free Photo to cartoon
This online Free Photo to Cartoon Converter allows users to convert a photo into an animated cartoon. It is an easy-to-use tool that provides high-quality results in a short amount of time. It has been proven to be more effective than using traditional methods. The site also offers users the option of using different filters and uploading images from Facebook or Instagram for conversion. Within no time, a user will be able to get the outcome of their choice.
05Picsart
Picsart is a website that lets users draw pictures and make them into cartoons. It offers an easy interface to create personalized cartoons, which can be shared on social media. It has a free version for drawing and sharing custom images, as well as paid subscriptions for more features like making animated GIFs, drawing with your webcam, or using the site’s editor.
Part 2 5 Picture to Cartoon Converters on Your Phone
Well, above, we have discussed the tools that can be used through the website or, say, on the computer. But when you don’t have a computer, you can do it with the help of your phone as well. Now cartoon photo converter for phones is also available that one can try. These are as follows: -
01**Wondershare Filmora Video Editor **
Filmora is an app for users to create videos, collages, and other types of images. It is a free app that comes with different features. It has been downloaded over 100 million times and has been used by numerous industries for completing the editing part. This acts as the best video to cartoon converter online free. It is available on iOS, Android, Windows 10, and Mac OS X.
For Win 7 or later (64-bit)
For macOS 10.12 or later
In general, it allows users to take pictures or videos from their phones and then convert them into a cartoon. The app also allows users to edit their images before converting them into cartoons as they want. The effects added in this tool are so awesome that any can love trying this out.
02Cartoon Photo Editor
This is a photo editor that allows users to turn photos into cartoon drawings. Users can choose from a range of styles and colors to create their own unique cartoons. The app offers different drawing styles, and accordingly, a user can choose one and do the editing easily. It also features abstract designs that lack realism but are still recognizable as cartoons. Users feel great using this app because of its interface and the features available.
03Art Camera – Cartoon, Pencil Sketch Art Effect Photo
Art Camera is a new photo app that allows taking photos that look like pencil drawings or sketches. It uses a sophisticated algorithm and the latest machine learning technology to transform your photos into cartoon-like images. This app is perfect for those who are looking for an artistic way of capturing memories, portraits, or even creating art from their own imagination. It is widely is available on iOS, Android, and Windows Phone devices.
04Tooncam – Cartoon, Pencil Sketch Pic
Tooncam is a free app that helps you to create cartoon images. You can use it on your phone or tablet. It is one of the best apps for creating cartoons on your phone with images with just one click. With this app, you can also share your cartoons with friends or family members and make them laugh out loud with funny pictures.
The app uses the camera of your device and its powerful photo editing tools to convert any photo into a cartoon image in just a few steps.
05Photo To Cartoon Yourself Edit
The app is a picture to cartoon converter on your phone that lets you transform a photo into a cartoon in just one tap. You can use this app to create an animated movie, comic strip, or comic book. The app works by converting the image into vector graphics and then adding colors and shading, and finally exporting it as an animated GIF. The app is available for iOS platforms.
Part 3 How to convert photo to cartoon
We are sure you might be thinking about how you can use these tools. Well, firstly, understand that every tool we have discussed above have the somewhere same interface, and you need to follow some steps to convert photo to cartoon. To help you more, here we are discussing the steps you need to follow while using FotoSketcher for the same purpose.
FotoSketcher is one of the best tools available free of cost for you. You can simply convert the photos into a cartoon and use them over different portals as per your need. There will be no need for you to engage in any complicated process to complete the editing task. The steps are also very simple to follow for this tool, and these are as follows: -
Step 1: firstly, get the FotoSketcher tool on your device.
Step 2: Wait until the installation of the tool gets completed. It is compatible with Windows and Mac both.
Step 3: Now, open the tool and upload the photo you wish to convert.
Step 4: Here, it asks you to select the type. You can either select cartoon 1 or Cartoon 2. These are the special effects being part of this software.
Step 5: Now, from the list of features, select the type of editing you wish to apply. There are multiple options available to choose from. You can choose any of them as per your preference.
Step 6: Blend the colors as needed for the edited photo. Along with it, there are some other parameters too need to look out for editing, and accordingly, you can set them.
Step 7: After setting up the changes, click on “Draw” to apply the changes. Wait until it applies the effects.
Step 8: The resulted image will appear, and you can download it in the required format from here.
● Ending Thoughts →
● Do convert photo to cartoon online in just simple steps without being part of any complicated process.
● Filmora is the best cartoon image converter online available, helping in converting the images as required.
● The photo to cartoon software is quite simple to use and does not require any particular technical knowledge.
How to Create Free Photo Collage Frame in Minutes?
How to Create Photo Collage Frame for Free in Minutes?
An easy yet powerful editor
Numerous effects to choose from
Detailed tutorials provided by the official channel
Decoration of pictures and collages can be done by making beautiful and stylish frames. A family picture or collage can be beautified by adding an attractive frame to it. Know about Best App for Photo Frames Online so you can create photo collages easily in minutes.
In this article
01 [How Do You Make a Collage Picture Frame?](#Part 1)
02 [What is the Best App for Photo Frames?](#Part 2)
Part 1 How Do You Make a Collage Picture Frame?
A beautiful collage without a stylish frame will not be attractive. When a family collage is accompanied by an artistic frame, it adds beauty to it and will be an attraction point for the visitors in the home. Wondering where to get it from? You can do it easily through some most popular apps. Yes, you can get your photo collage framed by yourself.

A wall can be decorated with collage picture frames by following just a few simple steps. Let’s begin with!!!
● Selection of the place where the collage frame is required to be hung: The place should be selected based on certain factors such as being easily approachable, proper lighting, and matching with the theme of the home. The place should be sufficient to add on some more picture frames in the future. The wall picture collage frames shall be created based on the room themes like kid’s room, living room, or bedroom. The position of the frames should be marked with tape so that the exact dimension can be known.
● 2. Select the online application to create frames: There are many applications available online that offer pictures collage frames. Choose one application as per the interest and explore it over the phone or desktop. There are various collage picture frame templates available at the application.
● 3. Uploading the pictures: Select the frame that is best for the picture. The frames shall be selected as per the size of the collage. Several pictures can be selected to make a collage and fix the frame. The frame style can be changed that suits best to the picture or collage. A family picture can be uploaded to create a beautiful and perfect size family photo frame collage.
● 4. Customization: The Photo Collage Frame can be even made better with customization over online applications. Text and style can be included in the frames to give it a better look. Grid frame for picture collage is also available which can be created that fits perfectly to the pictures.
● 5. A collage photo frame is ready to hang on the wall & share: The photo collage with frame can be downloaded from the application. A beautiful picture frame collage wall can be hung in the living room or can be shared online with family and friends to print the same. More frames can be added in the future by choosing the same theme and customization.
Part 2 Part2 what is the Best App for Photo Frames?
Selecting the best App for a photo frame enhances the appearance of any ordinary picture. Some of the top Applications used for frame collage wall are as mentioned:

02 PhotoDirector
This app is popular due to its great AI tools, attractive picture effects, and advanced color control. It has a massive collection of frames that fits perfectly for a single picture as well as a collage. The style options of frames available on the app are classic, modern, and whimsical. Animation and glitch effects add an extra feature to this app.
Pros:
1. Wide range of frames is available.
2. It is easy to use as it can work on Android, iOS, macOS, and Windows devices.
3. Free version is available and photo frames can be shared over social media platforms.
Cons:
1. a Large number of editing options makes it confusing.
2. Fewer features are available.
3. Difficulty in finding plug-in features.

03PicsArt-Our Choice
PicsArt-Our Choice app is having a good combination best photo frames and multi-functional photo editing tools. Clip art, text option, frame editing, and making attractive collages make this app a masterpiece. This app can be used over smartphones and the pictures can be easily shared over social media platforms.
Pros:
1. Availability of tools to make clipart and collages.
2. Option to edit frames and objects.
3. Fully packed with a lot of stickers, frames, and filter options.
Cons:
1. The processing of images is slower.
2. Frequent ads disturb the process of editing and frame creation.
3. The application requires more space on downloading over the phone

04 PicFrame
This application has features to combine multiple pictures in one frame and the created frames can be easily shared over social media platforms. A great artwork can be done by using advanced tools such as filters, attractive frames, and drawing tools. The adjustable photo effects, background patterns and fully customized frames allow creating some attractive pictures and collage frame design.
Pros:
1. Option to save pictures in different resolutions.
2. Great tools for reshaping pictures and wide frame patterns
3. Work also on iPhone and iPad.
Cons:
1. With more new and advanced apps, it has become slightly outdated.
2. It closes very frequently, so sometimes work done on the application is lost.
3. Time to create frames is longer.

05Photo Grid
Photo Grid is an App that offers great photo editing features with more than three hundred layouts to give an attractive look to a picture. The users can transform their various pictures into beautiful collages. Filters, stickers, makeup tools, animated emoticons, and customized background features have made this app a bit popular. Extra pages can be added and the Lightbox feature makes it good for presentation.
Pros:
1. Massive collection of photo frames with customized features
2. Easy to use.
3. Various photo editing option
Cons:
1. It comes with various ads that trouble making frames and collages.
2. Lot of flexibility is not there regarding making videos with pictures.
3. Own frames cannot be created.

06ImgLabs
ImgLabs is one of the best applications to decorate photos and add creativity to them. Easy editing, beautify and stickers can be done over pictures and can be easily shared over Instagram and Facebook. More than twenty images can be added along with beautiful frames through this app. Cool photo filters, drawing tools, collage photo frame design tools, and texture effects make it a great photo frame application.
Pros:
1. The Android and iOS versions of the app are easy to use.
2. Attractive blurring and background effects give an attractive look to the images and picture frames.
3. Well-developed photo editing tools are available.
Cons:
1. The frames available are less as compared to other photo & frame editing applications.
2. Difference in functions is noticed in iOS and Android apps.
3. Installation issues in photo edit and stickers

So, these were some of the applications that offer to make some creative photo edits, collages, and frames. Turning to high definition of pictures and frames, most of the applications are coming up with new and advanced features to give the best picture experience to people. One of the applications which any creative person loves to use is Filmora.
****Wondershare Filmora Video Editor ** that creates attractive and professional quality videos for both business and personal purposes. It transforms the video by adding various stylish effects. One can edit the clips, add watermarks, and can adjust the brightness of the videos in simple steps. A wide range of stickers, animated texts, sound effects, filters, and inserting colorful borders over videos make it a great app.
For Win 7 or later (64-bit)
For macOS 10.12 or later
The videos can be made in different file formats such as mp4, wmv, avi, gif, and mp3 and can be easily shared over social media platforms. This app has great importance for business as it offers various facilities such as Multi-channel marketing, social advertising, and social promotion. It is good for user and brand management also.
So, making any video from pictures or movies through Filmora app will be an amazing idea. With advanced texting, color tuning, and 3D effects, one can be so creative. Even Filmora can be used to create video projects.
● Key Takeaways from This Episode →
● Simple pictures or collages can be taken to next level by adding alluring frames to them. With advanced drawing tools, pictures, and light effects, a stylish collage photo frame design can be created online. It allows bringing so many memories of people in one beautiful frame.
● Photo frame collage wall can be created over many applications. There are Android applications that offer many advanced features required to give a fine touch to the pictures, collages, and frames. They can be used and frames for family pictures can be made easily by following simple steps.
● he selection of the application should be made based on the several options available with the app. For example, an app that has easy to use, is good for all devices, has great editing features, eye-catching eye work and mesmerizing effect shall be preferred.
● So, try some amazing and advanced online Apps to create beautiful picture frames for you and your family now!!!
Decoration of pictures and collages can be done by making beautiful and stylish frames. A family picture or collage can be beautified by adding an attractive frame to it. Know about Best App for Photo Frames Online so you can create photo collages easily in minutes.
In this article
01 [How Do You Make a Collage Picture Frame?](#Part 1)
02 [What is the Best App for Photo Frames?](#Part 2)
Part 1 How Do You Make a Collage Picture Frame?
A beautiful collage without a stylish frame will not be attractive. When a family collage is accompanied by an artistic frame, it adds beauty to it and will be an attraction point for the visitors in the home. Wondering where to get it from? You can do it easily through some most popular apps. Yes, you can get your photo collage framed by yourself.
A wall can be decorated with collage picture frames by following just a few simple steps. Let’s begin with!!!
● Selection of the place where the collage frame is required to be hung: The place should be selected based on certain factors such as being easily approachable, proper lighting, and matching with the theme of the home. The place should be sufficient to add on some more picture frames in the future. The wall picture collage frames shall be created based on the room themes like kid’s room, living room, or bedroom. The position of the frames should be marked with tape so that the exact dimension can be known.
● 2. Select the online application to create frames: There are many applications available online that offer pictures collage frames. Choose one application as per the interest and explore it over the phone or desktop. There are various collage picture frame templates available at the application.
● 3. Uploading the pictures: Select the frame that is best for the picture. The frames shall be selected as per the size of the collage. Several pictures can be selected to make a collage and fix the frame. The frame style can be changed that suits best to the picture or collage. A family picture can be uploaded to create a beautiful and perfect size family photo frame collage.
● 4. Customization: The Photo Collage Frame can be even made better with customization over online applications. Text and style can be included in the frames to give it a better look. Grid frame for picture collage is also available which can be created that fits perfectly to the pictures.
● 5. A collage photo frame is ready to hang on the wall & share: The photo collage with frame can be downloaded from the application. A beautiful picture frame collage wall can be hung in the living room or can be shared online with family and friends to print the same. More frames can be added in the future by choosing the same theme and customization.
Part 2 Part2 what is the Best App for Photo Frames?
Selecting the best App for a photo frame enhances the appearance of any ordinary picture. Some of the top Applications used for frame collage wall are as mentioned:
02 PhotoDirector
This app is popular due to its great AI tools, attractive picture effects, and advanced color control. It has a massive collection of frames that fits perfectly for a single picture as well as a collage. The style options of frames available on the app are classic, modern, and whimsical. Animation and glitch effects add an extra feature to this app.
Pros:
1. Wide range of frames is available.
2. It is easy to use as it can work on Android, iOS, macOS, and Windows devices.
3. Free version is available and photo frames can be shared over social media platforms.
Cons:
1. a Large number of editing options makes it confusing.
2. Fewer features are available.
3. Difficulty in finding plug-in features.
03PicsArt-Our Choice
PicsArt-Our Choice app is having a good combination best photo frames and multi-functional photo editing tools. Clip art, text option, frame editing, and making attractive collages make this app a masterpiece. This app can be used over smartphones and the pictures can be easily shared over social media platforms.
Pros:
1. Availability of tools to make clipart and collages.
2. Option to edit frames and objects.
3. Fully packed with a lot of stickers, frames, and filter options.
Cons:
1. The processing of images is slower.
2. Frequent ads disturb the process of editing and frame creation.
3. The application requires more space on downloading over the phone
04 PicFrame
This application has features to combine multiple pictures in one frame and the created frames can be easily shared over social media platforms. A great artwork can be done by using advanced tools such as filters, attractive frames, and drawing tools. The adjustable photo effects, background patterns and fully customized frames allow creating some attractive pictures and collage frame design.
Pros:
1. Option to save pictures in different resolutions.
2. Great tools for reshaping pictures and wide frame patterns
3. Work also on iPhone and iPad.
Cons:
1. With more new and advanced apps, it has become slightly outdated.
2. It closes very frequently, so sometimes work done on the application is lost.
3. Time to create frames is longer.
05Photo Grid
Photo Grid is an App that offers great photo editing features with more than three hundred layouts to give an attractive look to a picture. The users can transform their various pictures into beautiful collages. Filters, stickers, makeup tools, animated emoticons, and customized background features have made this app a bit popular. Extra pages can be added and the Lightbox feature makes it good for presentation.
Pros:
1. Massive collection of photo frames with customized features
2. Easy to use.
3. Various photo editing option
Cons:
1. It comes with various ads that trouble making frames and collages.
2. Lot of flexibility is not there regarding making videos with pictures.
3. Own frames cannot be created.
06ImgLabs
ImgLabs is one of the best applications to decorate photos and add creativity to them. Easy editing, beautify and stickers can be done over pictures and can be easily shared over Instagram and Facebook. More than twenty images can be added along with beautiful frames through this app. Cool photo filters, drawing tools, collage photo frame design tools, and texture effects make it a great photo frame application.
Pros:
1. The Android and iOS versions of the app are easy to use.
2. Attractive blurring and background effects give an attractive look to the images and picture frames.
3. Well-developed photo editing tools are available.
Cons:
1. The frames available are less as compared to other photo & frame editing applications.
2. Difference in functions is noticed in iOS and Android apps.
3. Installation issues in photo edit and stickers
So, these were some of the applications that offer to make some creative photo edits, collages, and frames. Turning to high definition of pictures and frames, most of the applications are coming up with new and advanced features to give the best picture experience to people. One of the applications which any creative person loves to use is Filmora.
****Wondershare Filmora Video Editor ** that creates attractive and professional quality videos for both business and personal purposes. It transforms the video by adding various stylish effects. One can edit the clips, add watermarks, and can adjust the brightness of the videos in simple steps. A wide range of stickers, animated texts, sound effects, filters, and inserting colorful borders over videos make it a great app.
For Win 7 or later (64-bit)
For macOS 10.12 or later
The videos can be made in different file formats such as mp4, wmv, avi, gif, and mp3 and can be easily shared over social media platforms. This app has great importance for business as it offers various facilities such as Multi-channel marketing, social advertising, and social promotion. It is good for user and brand management also.
So, making any video from pictures or movies through Filmora app will be an amazing idea. With advanced texting, color tuning, and 3D effects, one can be so creative. Even Filmora can be used to create video projects.
● Key Takeaways from This Episode →
● Simple pictures or collages can be taken to next level by adding alluring frames to them. With advanced drawing tools, pictures, and light effects, a stylish collage photo frame design can be created online. It allows bringing so many memories of people in one beautiful frame.
● Photo frame collage wall can be created over many applications. There are Android applications that offer many advanced features required to give a fine touch to the pictures, collages, and frames. They can be used and frames for family pictures can be made easily by following simple steps.
● he selection of the application should be made based on the several options available with the app. For example, an app that has easy to use, is good for all devices, has great editing features, eye-catching eye work and mesmerizing effect shall be preferred.
● So, try some amazing and advanced online Apps to create beautiful picture frames for you and your family now!!!
Also read:
- Before You Learn Facebook Slideshow 5 Things You Should Know How-TOS for 2024
- 2024 Approved How To Learn Cartoon Sketch Drawing
- 2024 Approved 12 Aesthetic GIF Instagram for Marketers
- Updated In 2024, What Wikipedia Cant Tell You About the 10 Best Batman Cartoons
- New 2024 Approved How to Create Picsart Cartoon in Simple Ways
- New Top 10 Online Animated Logo Makers Everyone Should Know
- How to Cartoonize Photo Photoshop in Easy Steps
- Updated What Is A GIF
- New Top 15 2D Animation Software Free That Worth to Try for 2024
- Updated In 2024, Top 8 Anime Name Generators Online-Get Cool Anime Names
- 2024 Approved Is Blender 2D Animation As Awesome As 3D?
- Updated 2024 Approved 12 Websites with Triggered Animate on Scroll Examples
- Updated 5 Websites with Animated Logos That Catch Your Eyes
- In 2024, 15 Types of Cartoon Drawing Styles with Examples
- Updated In 2024, Before You Learn Facebook Slideshow 5 Things You Should Know How-TOS
- Updated Easy Cartoon Characters Drawing Tutorials for You Beginners
- In 2024, Best 15 Horror Animes That Will Trigger a Heart Attack
- Updated In 2024, Want to Make a Meme GIF? Heres How to Do
- New 2024 Approved How to Create Slideshow in LinkedIn
- Updated 2024 Approved How to Create Benime Whiteboard Animation on Android
- New 15 Forgotten Cartoon Characters of All Time for 2024
- Updated In-Depth Study of Cartoon Painting Starts
- Updated FREE Top 21 Best Anime Websites to Watch Anime Online for 2024
- New 2024 Approved How to Make GIF Stickers for WhatsApp 100 The Simple Way
- New 2024 Approved The Coolest Anime Characters Ever| List of Top Favorites
- In 2024, Top 7 Animated GIF Text Makers
- New Handy Tips From Adobe Animate Rigging Tutorial for All Learners
- Proven Ways to Fix There Was A Problem Parsing the Package on Realme 12 5G | Dr.fone
- Ultimate Guide to Catch the Regional-Located Pokemon For Oppo Reno 10 5G | Dr.fone
- In 2024, Does Life360 Notify When You Log Out On Xiaomi Redmi K70E? | Dr.fone
- How to Change Netflix Location to Get More Country Version On Honor Magic 5 Lite | Dr.fone
- How to Reset a Vivo Y56 5G Phone That Is Locked | Dr.fone
- Pokémon Go Cooldown Chart On Poco M6 Pro 5G | Dr.fone
- In 2024, How to Cast OnePlus Nord CE 3 5G to Computer for iPhone and Android? | Dr.fone
- Where Is the Best Place to Catch Dratini On Realme C33 2023 | Dr.fone
- In 2024, Does Airplane Mode Turn off GPS Location On Vivo S18e? | Dr.fone
- Can I use iTools gpx file to catch the rare Pokemon On Apple iPhone 8 | Dr.fone
- In 2024, Learn How To Lock Stolen Your Apple iPhone XS Max Properly
- In 2024, How To Change Your Apple ID Password On your Apple iPhone 14 Pro | Dr.fone
- In 2024, How to Transfer Contacts from Oppo A58 4G to iPhone XS/11 | Dr.fone
- 5 Easy Ways to Transfer Contacts from Apple iPhone 14 Pro Max to Android | Dr.fone
- 4 Ways to Fix Android Blue Screen of Death On Itel A70 | Dr.fone
- In 2024, How to Bypass Google FRP Lock from Vivo Y77t Devices
- How To Restore Missing Pictures Files from Asus ROG Phone 8.
- Title: Updated In 2024, 5 Best Adobe Animate Courses & Classes
- Author: Elon
- Created at : 2024-05-19 03:05:17
- Updated at : 2024-05-20 03:05:17
- Link: https://animation-videos.techidaily.com/updated-in-2024-5-best-adobe-animate-courses-and-classes/
- License: This work is licensed under CC BY-NC-SA 4.0.
