
:max_bytes(150000):strip_icc():format(webp)/GettyImages-1218764238-30613399ad1b4cffab4ab474184b9c88.jpg)
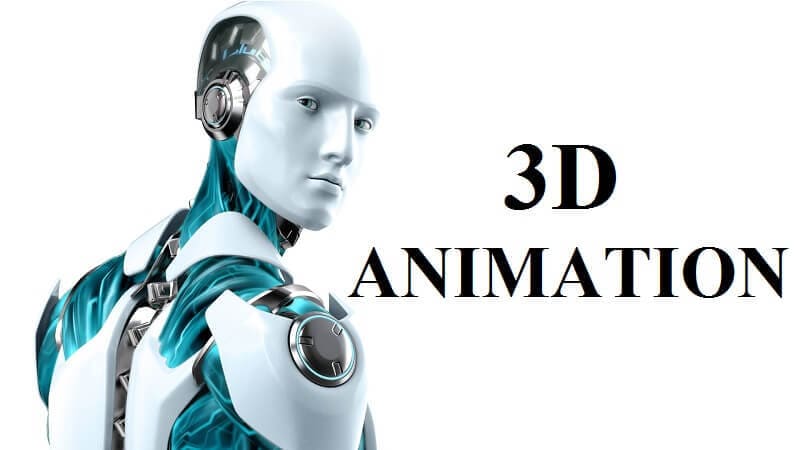
Updated In 2024, A Beginners Guide for Learning 3D Animation
A Beginners Guide for Learning 3D Animation
A Beginners Guide for Learning 3D Animation
An easy yet powerful editor
Numerous effects to choose from
Detailed tutorials provided by the official channel
“I am still finding it difficult to go into animation even after covering some basic concepts of animation, hardware, software, books, and courses. Is there a way I can learn 3D animation and graphic design courses quickly and easily?”
This guide will show you what professional 3D animators go through and share how you can start your animation career. Sit back and enjoy this all-encompassing and educating guide to learn 3D Animation for beginners!
In this article
01 [Should You Study 3D Animation?](#Part 1)
02 [Top 5 Programs for 3D Animation](#Part 2)
03 [The Best 10 Online Courses to Learn 3D Animation for Beginners](#Part 3)
04 [Recommended 3D Animation Learning Books and Resources](#Part 4)
Part 1 Should You Study 3D Animation?
3D animation is a graphic design technique that uses motions to bring props, characters, objects, etc., to life. For a long time, 3D animation has created TV shows, films, and games, but now it is widely used to create materials for businesses that help them advertise their services and products. The most common usage of 3D animation is creating three-dimensional moving objects and placing them in a digital environment. There is software used to generate these objects specifically for 3D animation with 3D animation courses online for free to learn how to use such software. This software helps 3D animators to create the illusion of movement needed to bring these objects to life.
As the popularity of 3D animation begins to grow, its usage also increases. 3D animation can be useful for the following:
● Many businesses use 3D animation for presentation and more examples and graphics.
● 3D animation is used in real estate as many apartment complexes use it to create interior and exterior renders for their properties. 3D animation allows renters or buyers to view the property without visiting it.
● 3D animation can also be valuable in the medical industry to create exciting graphics for presentation.
You can divide the process of 3D animation into three primary phases:
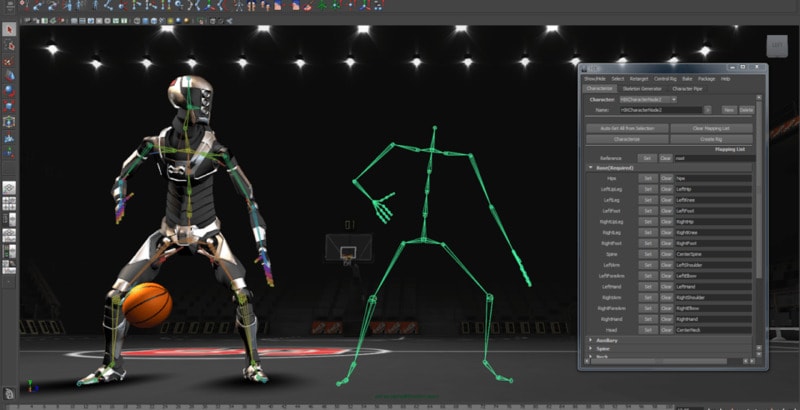
● Modeling: The modeling stage is how characters or objects get created. This stage can include scanning natural objects into a computer or using a modeling tool. Both methods are helpful and outstanding. When you scan real-world objects into your computer, it saves a lot of time; creating a model entirely by yourself using a tool will give you control over the entire look. Irrespective of the methods used, textures must be added to the character or objects before moving to the next stage.
● Animation and layout: At this stage, the created models are animated and positioned into a particular scene, first determining a layout by creating a set and adding objects into it. The characters and things must be animated by assigning animation variables, and then models within the scene can be given life through motion capture and keyframing.
● Rendering: This stage is where the scene generates into the finished image by using a specific software as the process of rendering cannot be handled by a typical computer
For learning 3D animation, practice, to make yourself perfect for getting your 3D animation as smooth and precise as you would like it to take some time. If your set goal is to create 3D characters, you first need to know how to recreate people in a digital form. According to the 3D animation forum, it takes at least eight months to learn how to animate if only you spend about three to four hours every day. It takes firm dedication to learn 3D animation and graphic design courses.
Part 2 Top 5 Programs for 3D Animation
Aside from the three basic phases involved in 3D animation, there are other individual steps that and needed in 3D animation and 3D animation graphic design courses which include:
● Step 1: creating the story and conceptualizing
● Step 2: making the 3D models
● Step 3: rigging, texturing, and animation
● Step 4: setting up the cameras and lightning
● Step 5: rendering
● Step 6: applying special effects and compositing
● Step 7: editing, music, and Foley
● Step 8: the final output
The best part of 3D animation is finding free animation programs without watermarks that are very useful for creating content on Windows and Mac. These best 3D animation courses include:
01Filmora
For Win 7 or later (64-bit)
For macOS 10.12 or later
Wondershare Filmora Video Editor is a straightforward and powerful animation software to create 3D animated text, shapes, elements, or transitions you want for your videos with its 800+ stunning effects. This software comes with a keyframing, green screen, video stabilization, color tuning, split and zoom, amongst others, that help you create precise and smooth animation effects. Filmora program works perfectly on your Windows and Mac computer.
02Blender
Blender is an open-source, powerful 3D animation software for professional users. This animation software does not easily make an image and mission since it focuses on 3D. It takes your animation projects to a whole new level as this program works perfectly on your Mac computer.
03DAZ Studio
DAZ Studio is a potent and completely free tool for 3D animation creation that lets you create short videos whether you are using this for pleasure or business. This 3D animation creator is complicated to use, and 3D effects are at the core focus of this software. This software is highly compatible with Windows 64 bit, and you can build a model, render, and pose animation within the skin texture level.
04Terragen

Terragen is a completely free 3D animation program for Windows tablets and computers. It allows you to create a photo-realistic CG environment and 3D animation that you want. The featured image gallery on this software homepage will give you a profound idea of the outcome when you use the program.
05Anim8or
Anim8or Easy free 3D animation program supports 3D modeler and Truetype fonts to meet your advanced needs. This program is difficult for beginners but allows you to create a unique work according to your needs.
Part 3 The Best 10 Online Courses to Learn 3D Animation for Beginners
There are online 3D animation courses for beginners to learn from and these courses include:
01Introduction to Voxel Art for Character Design by Zach Soares
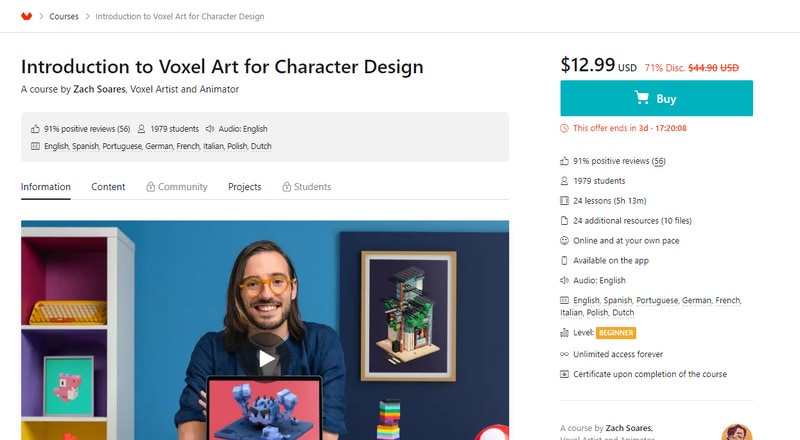
Price: $12.99
Certificate: Available upon completion of the course
02Psychedelic Animation with Photoshop and After Effects by Klarens Malluta
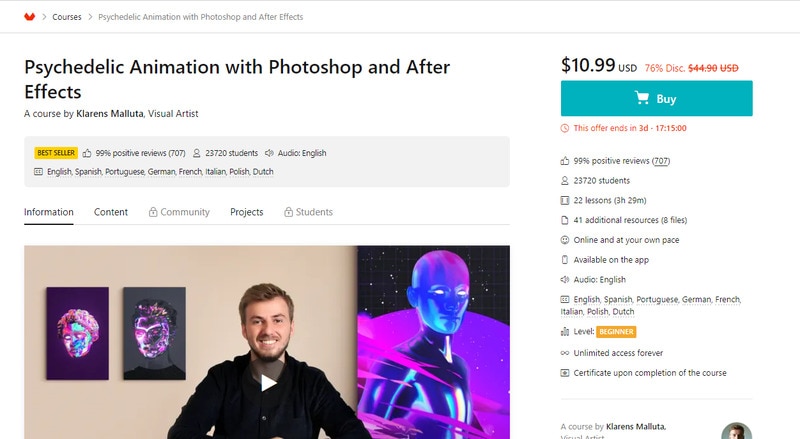
Price: $10.99
Certificate: Available upon completion of the course
032D and 3D Animation with After Effects and Cinema 4D by Andrea Gendusa
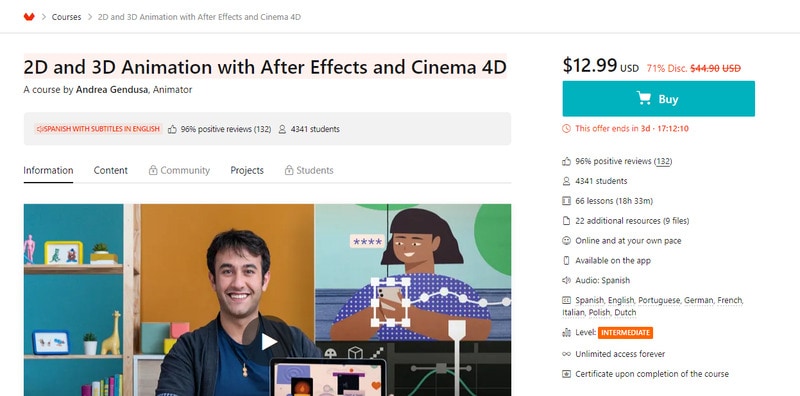
Price: $12.99
Certificate: Available upon completion of the course
04Blender for Beginners by Carlos Sifuentes Haro
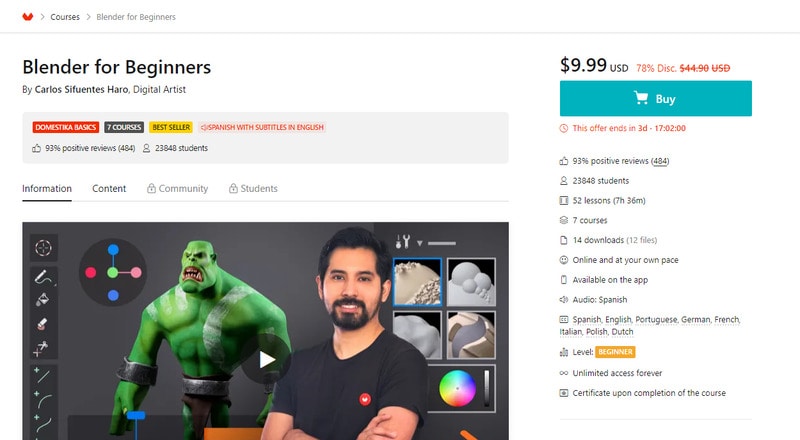
Price: $9.99
Certificate: Available upon completion of the course
05Adobe After Effects for Beginners by Manuel Neto
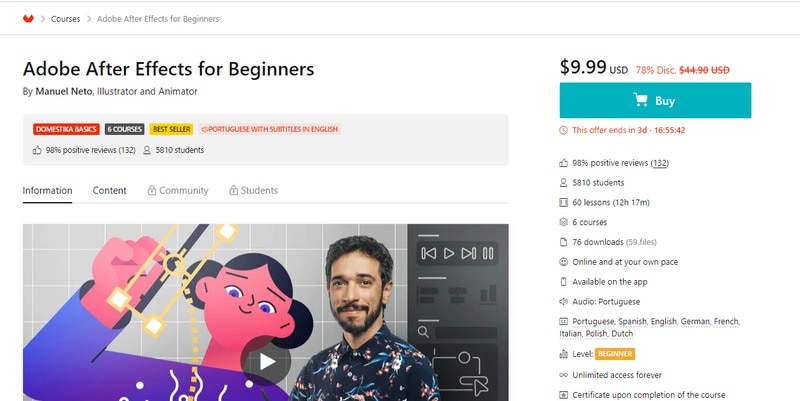
Price: $9.99
Certificate: Available upon completion of the course
06Animation for Typographic Compositions by Holke 79
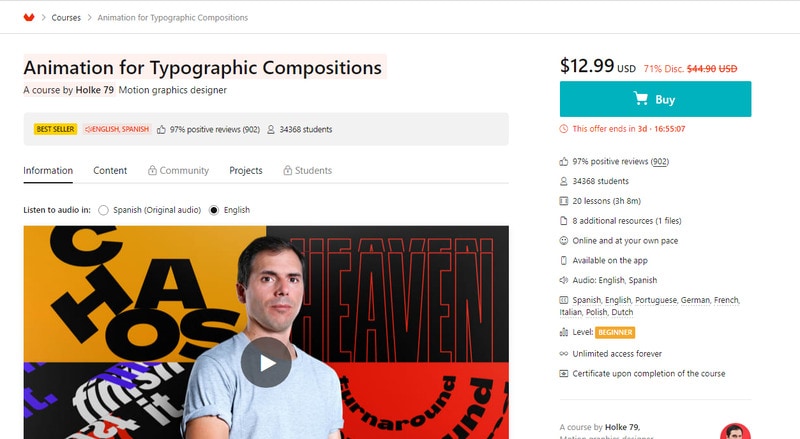
Price: $12.99
Certificate: Available upon completion of the course
07Adobe After Effects for Character Animation By Facundo López
Price: $9.99
Certificate: Available upon completion of the course
08Animation Techniques with 3D Effects in After Effects by Moncho Massé
Price: $10.99
Certificate: Available upon completion of the course
093D Typography: Playing with Color and Volume by Thomas Burden
Price: $12.99
Certificate: Available upon completion of the course
103D Animation for Non Animators with Cinema 4D by Zigor Samaniego

Price: $11.99
Certificate: Certificate upon completion of the course
Part 4 Part 4 Recommended 3D Animation Learning Books and Resources
Learn 3D animation with the best 3D animation courses, learning books, and resources. Books and Resources for learning 3D animation include but are not limited to:
● 3D Animation Essentials by Andy Beane
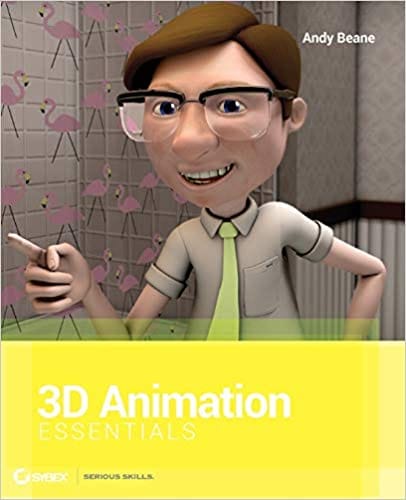
3D Animation Essentials by Andy Beane is a comprehensive book on the fundamentals and principles of 3D animation for films and video games.
● 3D Art Essential by Ami Chopine
3D Art Essential by Ami Chopine is all about the hows and whys of 3D animation and teachers why certain techniques and styles work for a particular project.
● Key Takeaways from This Episode →
● Understanding 3D Animation
● Top 5 Programs used for learning 3D Animation
● The Best 10 Online 3D Animation Courses for Beginners
● 3D Animation Graphic Design Courses, Learning Books and Resources
“I am still finding it difficult to go into animation even after covering some basic concepts of animation, hardware, software, books, and courses. Is there a way I can learn 3D animation and graphic design courses quickly and easily?”
This guide will show you what professional 3D animators go through and share how you can start your animation career. Sit back and enjoy this all-encompassing and educating guide to learn 3D Animation for beginners!
In this article
01 [Should You Study 3D Animation?](#Part 1)
02 [Top 5 Programs for 3D Animation](#Part 2)
03 [The Best 10 Online Courses to Learn 3D Animation for Beginners](#Part 3)
04 [Recommended 3D Animation Learning Books and Resources](#Part 4)
Part 1 Should You Study 3D Animation?
3D animation is a graphic design technique that uses motions to bring props, characters, objects, etc., to life. For a long time, 3D animation has created TV shows, films, and games, but now it is widely used to create materials for businesses that help them advertise their services and products. The most common usage of 3D animation is creating three-dimensional moving objects and placing them in a digital environment. There is software used to generate these objects specifically for 3D animation with 3D animation courses online for free to learn how to use such software. This software helps 3D animators to create the illusion of movement needed to bring these objects to life.
As the popularity of 3D animation begins to grow, its usage also increases. 3D animation can be useful for the following:
● Many businesses use 3D animation for presentation and more examples and graphics.
● 3D animation is used in real estate as many apartment complexes use it to create interior and exterior renders for their properties. 3D animation allows renters or buyers to view the property without visiting it.
● 3D animation can also be valuable in the medical industry to create exciting graphics for presentation.
You can divide the process of 3D animation into three primary phases:
● Modeling: The modeling stage is how characters or objects get created. This stage can include scanning natural objects into a computer or using a modeling tool. Both methods are helpful and outstanding. When you scan real-world objects into your computer, it saves a lot of time; creating a model entirely by yourself using a tool will give you control over the entire look. Irrespective of the methods used, textures must be added to the character or objects before moving to the next stage.
● Animation and layout: At this stage, the created models are animated and positioned into a particular scene, first determining a layout by creating a set and adding objects into it. The characters and things must be animated by assigning animation variables, and then models within the scene can be given life through motion capture and keyframing.
● Rendering: This stage is where the scene generates into the finished image by using a specific software as the process of rendering cannot be handled by a typical computer
For learning 3D animation, practice, to make yourself perfect for getting your 3D animation as smooth and precise as you would like it to take some time. If your set goal is to create 3D characters, you first need to know how to recreate people in a digital form. According to the 3D animation forum, it takes at least eight months to learn how to animate if only you spend about three to four hours every day. It takes firm dedication to learn 3D animation and graphic design courses.
Part 2 Top 5 Programs for 3D Animation
Aside from the three basic phases involved in 3D animation, there are other individual steps that and needed in 3D animation and 3D animation graphic design courses which include:
● Step 1: creating the story and conceptualizing
● Step 2: making the 3D models
● Step 3: rigging, texturing, and animation
● Step 4: setting up the cameras and lightning
● Step 5: rendering
● Step 6: applying special effects and compositing
● Step 7: editing, music, and Foley
● Step 8: the final output
The best part of 3D animation is finding free animation programs without watermarks that are very useful for creating content on Windows and Mac. These best 3D animation courses include:
01Filmora
For Win 7 or later (64-bit)
For macOS 10.12 or later
Wondershare Filmora Video Editor is a straightforward and powerful animation software to create 3D animated text, shapes, elements, or transitions you want for your videos with its 800+ stunning effects. This software comes with a keyframing, green screen, video stabilization, color tuning, split and zoom, amongst others, that help you create precise and smooth animation effects. Filmora program works perfectly on your Windows and Mac computer.
02Blender
Blender is an open-source, powerful 3D animation software for professional users. This animation software does not easily make an image and mission since it focuses on 3D. It takes your animation projects to a whole new level as this program works perfectly on your Mac computer.
03DAZ Studio
DAZ Studio is a potent and completely free tool for 3D animation creation that lets you create short videos whether you are using this for pleasure or business. This 3D animation creator is complicated to use, and 3D effects are at the core focus of this software. This software is highly compatible with Windows 64 bit, and you can build a model, render, and pose animation within the skin texture level.
04Terragen
Terragen is a completely free 3D animation program for Windows tablets and computers. It allows you to create a photo-realistic CG environment and 3D animation that you want. The featured image gallery on this software homepage will give you a profound idea of the outcome when you use the program.
05Anim8or
Anim8or Easy free 3D animation program supports 3D modeler and Truetype fonts to meet your advanced needs. This program is difficult for beginners but allows you to create a unique work according to your needs.
Part 3 The Best 10 Online Courses to Learn 3D Animation for Beginners
There are online 3D animation courses for beginners to learn from and these courses include:
01Introduction to Voxel Art for Character Design by Zach Soares
Price: $12.99
Certificate: Available upon completion of the course
02Psychedelic Animation with Photoshop and After Effects by Klarens Malluta
Price: $10.99
Certificate: Available upon completion of the course
032D and 3D Animation with After Effects and Cinema 4D by Andrea Gendusa
Price: $12.99
Certificate: Available upon completion of the course
04Blender for Beginners by Carlos Sifuentes Haro
Price: $9.99
Certificate: Available upon completion of the course
05Adobe After Effects for Beginners by Manuel Neto
Price: $9.99
Certificate: Available upon completion of the course
06Animation for Typographic Compositions by Holke 79
Price: $12.99
Certificate: Available upon completion of the course
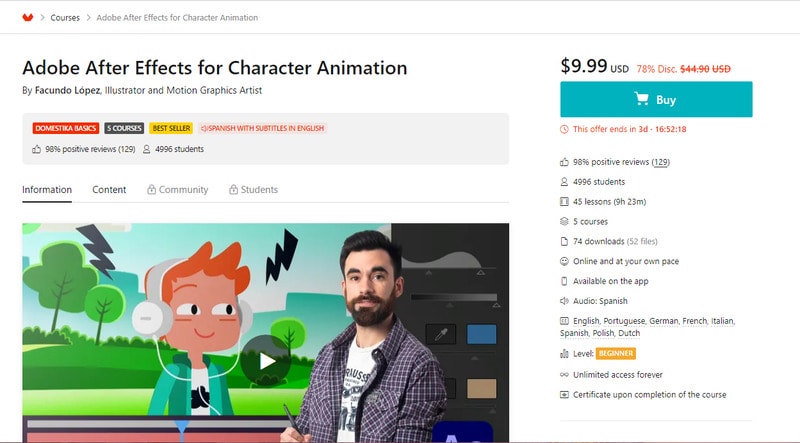
07Adobe After Effects for Character Animation By Facundo López
Price: $9.99
Certificate: Available upon completion of the course
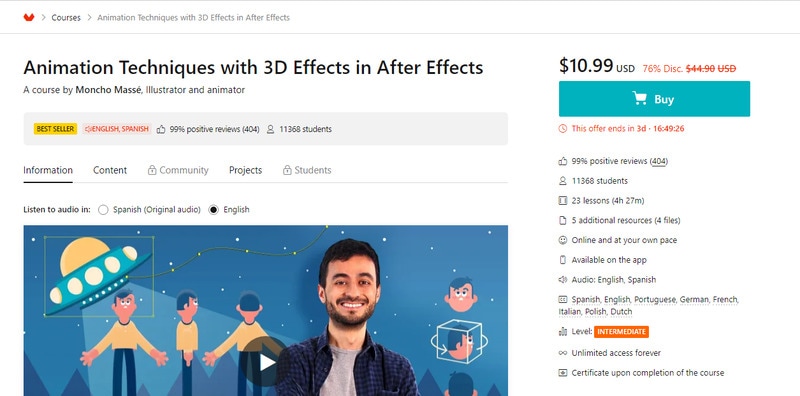
08Animation Techniques with 3D Effects in After Effects by Moncho Massé
Price: $10.99
Certificate: Available upon completion of the course
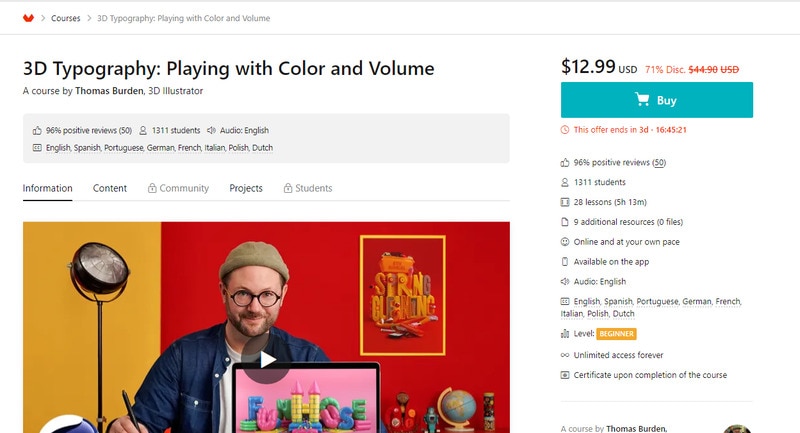
093D Typography: Playing with Color and Volume by Thomas Burden
Price: $12.99
Certificate: Available upon completion of the course
103D Animation for Non Animators with Cinema 4D by Zigor Samaniego
Price: $11.99
Certificate: Certificate upon completion of the course
Part 4 Part 4 Recommended 3D Animation Learning Books and Resources
Learn 3D animation with the best 3D animation courses, learning books, and resources. Books and Resources for learning 3D animation include but are not limited to:
● 3D Animation Essentials by Andy Beane
3D Animation Essentials by Andy Beane is a comprehensive book on the fundamentals and principles of 3D animation for films and video games.
● 3D Art Essential by Ami Chopine
3D Art Essential by Ami Chopine is all about the hows and whys of 3D animation and teachers why certain techniques and styles work for a particular project.
● Key Takeaways from This Episode →
● Understanding 3D Animation
● Top 5 Programs used for learning 3D Animation
● The Best 10 Online 3D Animation Courses for Beginners
● 3D Animation Graphic Design Courses, Learning Books and Resources
“I am still finding it difficult to go into animation even after covering some basic concepts of animation, hardware, software, books, and courses. Is there a way I can learn 3D animation and graphic design courses quickly and easily?”
This guide will show you what professional 3D animators go through and share how you can start your animation career. Sit back and enjoy this all-encompassing and educating guide to learn 3D Animation for beginners!
In this article
01 [Should You Study 3D Animation?](#Part 1)
02 [Top 5 Programs for 3D Animation](#Part 2)
03 [The Best 10 Online Courses to Learn 3D Animation for Beginners](#Part 3)
04 [Recommended 3D Animation Learning Books and Resources](#Part 4)
Part 1 Should You Study 3D Animation?
3D animation is a graphic design technique that uses motions to bring props, characters, objects, etc., to life. For a long time, 3D animation has created TV shows, films, and games, but now it is widely used to create materials for businesses that help them advertise their services and products. The most common usage of 3D animation is creating three-dimensional moving objects and placing them in a digital environment. There is software used to generate these objects specifically for 3D animation with 3D animation courses online for free to learn how to use such software. This software helps 3D animators to create the illusion of movement needed to bring these objects to life.
As the popularity of 3D animation begins to grow, its usage also increases. 3D animation can be useful for the following:
● Many businesses use 3D animation for presentation and more examples and graphics.
● 3D animation is used in real estate as many apartment complexes use it to create interior and exterior renders for their properties. 3D animation allows renters or buyers to view the property without visiting it.
● 3D animation can also be valuable in the medical industry to create exciting graphics for presentation.
You can divide the process of 3D animation into three primary phases:
● Modeling: The modeling stage is how characters or objects get created. This stage can include scanning natural objects into a computer or using a modeling tool. Both methods are helpful and outstanding. When you scan real-world objects into your computer, it saves a lot of time; creating a model entirely by yourself using a tool will give you control over the entire look. Irrespective of the methods used, textures must be added to the character or objects before moving to the next stage.
● Animation and layout: At this stage, the created models are animated and positioned into a particular scene, first determining a layout by creating a set and adding objects into it. The characters and things must be animated by assigning animation variables, and then models within the scene can be given life through motion capture and keyframing.
● Rendering: This stage is where the scene generates into the finished image by using a specific software as the process of rendering cannot be handled by a typical computer
For learning 3D animation, practice, to make yourself perfect for getting your 3D animation as smooth and precise as you would like it to take some time. If your set goal is to create 3D characters, you first need to know how to recreate people in a digital form. According to the 3D animation forum, it takes at least eight months to learn how to animate if only you spend about three to four hours every day. It takes firm dedication to learn 3D animation and graphic design courses.
Part 2 Top 5 Programs for 3D Animation
Aside from the three basic phases involved in 3D animation, there are other individual steps that and needed in 3D animation and 3D animation graphic design courses which include:
● Step 1: creating the story and conceptualizing
● Step 2: making the 3D models
● Step 3: rigging, texturing, and animation
● Step 4: setting up the cameras and lightning
● Step 5: rendering
● Step 6: applying special effects and compositing
● Step 7: editing, music, and Foley
● Step 8: the final output
The best part of 3D animation is finding free animation programs without watermarks that are very useful for creating content on Windows and Mac. These best 3D animation courses include:
01Filmora
For Win 7 or later (64-bit)
For macOS 10.12 or later
Wondershare Filmora Video Editor is a straightforward and powerful animation software to create 3D animated text, shapes, elements, or transitions you want for your videos with its 800+ stunning effects. This software comes with a keyframing, green screen, video stabilization, color tuning, split and zoom, amongst others, that help you create precise and smooth animation effects. Filmora program works perfectly on your Windows and Mac computer.
02Blender
Blender is an open-source, powerful 3D animation software for professional users. This animation software does not easily make an image and mission since it focuses on 3D. It takes your animation projects to a whole new level as this program works perfectly on your Mac computer.
03DAZ Studio
DAZ Studio is a potent and completely free tool for 3D animation creation that lets you create short videos whether you are using this for pleasure or business. This 3D animation creator is complicated to use, and 3D effects are at the core focus of this software. This software is highly compatible with Windows 64 bit, and you can build a model, render, and pose animation within the skin texture level.
04Terragen
Terragen is a completely free 3D animation program for Windows tablets and computers. It allows you to create a photo-realistic CG environment and 3D animation that you want. The featured image gallery on this software homepage will give you a profound idea of the outcome when you use the program.
05Anim8or
Anim8or Easy free 3D animation program supports 3D modeler and Truetype fonts to meet your advanced needs. This program is difficult for beginners but allows you to create a unique work according to your needs.
Part 3 The Best 10 Online Courses to Learn 3D Animation for Beginners
There are online 3D animation courses for beginners to learn from and these courses include:
01Introduction to Voxel Art for Character Design by Zach Soares
Price: $12.99
Certificate: Available upon completion of the course
02Psychedelic Animation with Photoshop and After Effects by Klarens Malluta
Price: $10.99
Certificate: Available upon completion of the course
032D and 3D Animation with After Effects and Cinema 4D by Andrea Gendusa
Price: $12.99
Certificate: Available upon completion of the course
04Blender for Beginners by Carlos Sifuentes Haro
Price: $9.99
Certificate: Available upon completion of the course
05Adobe After Effects for Beginners by Manuel Neto
Price: $9.99
Certificate: Available upon completion of the course
06Animation for Typographic Compositions by Holke 79
Price: $12.99
Certificate: Available upon completion of the course
07Adobe After Effects for Character Animation By Facundo López
Price: $9.99
Certificate: Available upon completion of the course
08Animation Techniques with 3D Effects in After Effects by Moncho Massé
Price: $10.99
Certificate: Available upon completion of the course
093D Typography: Playing with Color and Volume by Thomas Burden
Price: $12.99
Certificate: Available upon completion of the course
103D Animation for Non Animators with Cinema 4D by Zigor Samaniego
Price: $11.99
Certificate: Certificate upon completion of the course
Part 4 Part 4 Recommended 3D Animation Learning Books and Resources
Learn 3D animation with the best 3D animation courses, learning books, and resources. Books and Resources for learning 3D animation include but are not limited to:
● 3D Animation Essentials by Andy Beane
3D Animation Essentials by Andy Beane is a comprehensive book on the fundamentals and principles of 3D animation for films and video games.
● 3D Art Essential by Ami Chopine
3D Art Essential by Ami Chopine is all about the hows and whys of 3D animation and teachers why certain techniques and styles work for a particular project.
● Key Takeaways from This Episode →
● Understanding 3D Animation
● Top 5 Programs used for learning 3D Animation
● The Best 10 Online 3D Animation Courses for Beginners
● 3D Animation Graphic Design Courses, Learning Books and Resources
10 Top Tools to Make Pic Collage for Windows
10 Best Tools to Make Pic Collage for Windows
An easy yet powerful editor
Numerous effects to choose from
Detailed tutorials provided by the official channel
Collages are a great way to assemble all your favorite pictures in one place. You can share these collages with your friends, relatives, and dear ones or can also use them for posting on social media sites and other online platforms. Though creating a collage may sound simple, a lot of considerations need to be taken for creating an interesting and eye-catchy collage, and for this, a help of a professional tool can be taken. In the following parts of the topic, you can learn about the best tools for photo collage Windows 10 and other OS.

In the following parts of the topic, you can learn about the best tools for photo collage Windows 10 and other OS.
In this article
01 [Top 10 Pic Collage for Windows Tools](#Part 1)
02 [The Best Tool to Get Stock Images for Creating Collages](#Part 2)
Part 1 Top 10 Pic Collage for Windows Tools
Checkout the best collage for Windows below.
01PhotoPad Photo Editing Software
This is a complete photo editing tool supporting an array of features including the creation of a photo collage. This software from NCH software can let you add the desired images manually and also support using the auto grid to add an unlimited number of pictures. The tool also lets you choose the collage orientation size and set the background as needed.
Pros:
● Create collage Windows manually or automatically.
● Allows adding a background color, image, or from the available background options.
● Spacing and corners between the images can be selected.
● The size of the tool is small.
Cons:
● Stickers and filters to individual images cannot be added.
● Cannot choose a custom collage size.

02PhotoScapeX
Available for download on Windows 10 and higher versions this is another widely used photo editing tool that can also let you create collages manually as well as automatically. Multiple frames are available that can be selected as desired and there are additional features like adding filters, and also edit them in multiple ways.
Pros:
● Allows creating collage manually and automatically.
● Multiple editing tools for customization like filters, crop, zoom, doodle, and more.
● Picture alignment can be done in 3 modes- vertical, horizontal, and tile.
● Option to change and customize image size, spacing, margin, and others.
Cons:
● Limited photos can be added.
● The size of the tool is large in comparison to other tools.

03Phototastic Collage
This is free to use Windows-based tool that can create impressive collages in no time. Multiple designs, frames, and other options are available to create a customized collage as needed.
Pros:
● Multiple customization options are available for creating the desired collage.
● User-friendly and simple interface.
● An array of templates is available.
Cons:
● The free version has limited features.
● Limitation to the number of images that can be added.
● Ads in the app.

04PicCollage
Unleash your creativity by creating an interesting collage using this excellent collage-making app. There are multiple templates and customization options supports.
Pros
● Create collage manually or automatically
● The earlier created collage can be edited.
● Allows creating a collage in 3 options- grid, template, freestyle.
Cons
● Watermark on the created collage.
● The image size cannot be customized.

05Collage Maker-Photo Grid and Montage
Using this free Windows tool, you can create an interesting photo collage or a free-styled montage as needed. A wide range of layouts and templates are available that can be further customized to get the desired collage.
Pros:
● Free Windows software.
● Come with multiple filters, layout, and editing tools.
● The user interface is easy.
● Preview option available.
Cons:
● Performance glitches due to bugs.
● Custom collage size cannot be set.
● Watermark on the collage.

06Fotor
If you are looking for a simple and basic collage-making tool, Fotor is the right choice. Collage in the grid, freestyle, and photo-stitch style can be created and basic customization features are supported.
Pros:
● Simple to use tool that is apt for beginners.
● Border can be changed from a solid color to a background.
Cons:
● Customization options are limited.
● Border and the image size cannot be changed.

07El Collagero
Just like its name, this is an interesting Windows-based tool for creating a collage of your choice. A wide range of options for customization is available that can let you edit the images, choose a template and then also edit the file.
Pros:
● A wide range of templates and designs for collages is available.
● Allows adding text, symbols, and other elements.
● Created collage can be shared on social media sites.
Cons:
● In comparison to other professional tools, the functions are limited.

08Atlantas Photo Collage Studio
This Windows-based tool will let you create collages of all types and for all occasions. You can choose from over 100 templates that best match your collage theme and image content.
Pros:
● More than 100 templates for collage designs are available.
● The size of the layout can be changed.
● Multiple editing and customization options are supported like zoom, opacity selection, and more.
Cons:
● Limitation of adding 45 images.
● For the advanced functions, need to subscribe to the paid version.

09PhotoJoiner
Using this Windows tool, pick up your favorite images and turn them into a beautiful collage with customized design and style.
Pros:
● A simple and basic tool for creating a collage.
● Created collage can be saved or shared to the social media site.
● Change the order of the images, margins, and other aspects.
Cons
● Collage templates are limited.
● Advanced features are missing.

1010. Blend Photo
To create a collage of images with a blending effect, this is the right tool to use. Available for download on the Windows system this tool lets you create collages telling interesting stories.
Pros:
● Simple and easy collage-making tool.
● Add blending effect to your collages.
● Over 50 custom shapes for image cropping are available along with the option for free-hand cropping.
● Multiple filters can be added.
Cons:
● Limited Editing and customization options.

Part 2 The Best Tool to Get Stock Images for Creating Collages
Several times, the captured and stored images may not fit in the collage theme you wish to create and, in such situations, you can use the stock images available online at several sites. One of the best tools where you can check out the images in different categories is Wondershare Filmora. This versatile software from Wondershare Filmora Video Editor is an advanced video editing tool that also has a huge collection of stock media including images.
Additionally, the split-screen feature of the software can be used for creating a video collage. Available for Windows and Mac systems, Wondershare Filmora will look after all your advanced video editing and customized requirements.

Wondershare Filmora - Best Video Editor for Mac/Windows
5,481,435 people have downloaded it.
Build unique custom animations without breaking a sweat.
Focus on creating epic stories and leave the details to Filmora’s auto features.
Start a creative adventure with drag & drop effects and endless possibilities.
Filmora simplifies advanced features to save you time and effort.
Filmora cuts out repetition so you can move on to your next creative breakthrough.
● Key Takeaways from This Episode →
● Collage-making tools help in creating an interesting and eye-catchy collage in a hassle-free manner.
●Several Windows-based tools are available for quick download.
●Wondershare Filmora is a great software to find a collection of stock images in different categories.
Collages are a great way to assemble all your favorite pictures in one place. You can share these collages with your friends, relatives, and dear ones or can also use them for posting on social media sites and other online platforms. Though creating a collage may sound simple, a lot of considerations need to be taken for creating an interesting and eye-catchy collage, and for this, a help of a professional tool can be taken. In the following parts of the topic, you can learn about the best tools for photo collage Windows 10 and other OS.
In the following parts of the topic, you can learn about the best tools for photo collage Windows 10 and other OS.
In this article
01 [Top 10 Pic Collage for Windows Tools](#Part 1)
02 [The Best Tool to Get Stock Images for Creating Collages](#Part 2)
Part 1 Top 10 Pic Collage for Windows Tools
Checkout the best collage for Windows below.
01PhotoPad Photo Editing Software
This is a complete photo editing tool supporting an array of features including the creation of a photo collage. This software from NCH software can let you add the desired images manually and also support using the auto grid to add an unlimited number of pictures. The tool also lets you choose the collage orientation size and set the background as needed.
Pros:
● Create collage Windows manually or automatically.
● Allows adding a background color, image, or from the available background options.
● Spacing and corners between the images can be selected.
● The size of the tool is small.
Cons:
● Stickers and filters to individual images cannot be added.
● Cannot choose a custom collage size.
02PhotoScapeX
Available for download on Windows 10 and higher versions this is another widely used photo editing tool that can also let you create collages manually as well as automatically. Multiple frames are available that can be selected as desired and there are additional features like adding filters, and also edit them in multiple ways.
Pros:
● Allows creating collage manually and automatically.
● Multiple editing tools for customization like filters, crop, zoom, doodle, and more.
● Picture alignment can be done in 3 modes- vertical, horizontal, and tile.
● Option to change and customize image size, spacing, margin, and others.
Cons:
● Limited photos can be added.
● The size of the tool is large in comparison to other tools.
03Phototastic Collage
This is free to use Windows-based tool that can create impressive collages in no time. Multiple designs, frames, and other options are available to create a customized collage as needed.
Pros:
● Multiple customization options are available for creating the desired collage.
● User-friendly and simple interface.
● An array of templates is available.
Cons:
● The free version has limited features.
● Limitation to the number of images that can be added.
● Ads in the app.
04PicCollage
Unleash your creativity by creating an interesting collage using this excellent collage-making app. There are multiple templates and customization options supports.
Pros
● Create collage manually or automatically
● The earlier created collage can be edited.
● Allows creating a collage in 3 options- grid, template, freestyle.
Cons
● Watermark on the created collage.
● The image size cannot be customized.
05Collage Maker-Photo Grid and Montage
Using this free Windows tool, you can create an interesting photo collage or a free-styled montage as needed. A wide range of layouts and templates are available that can be further customized to get the desired collage.
Pros:
● Free Windows software.
● Come with multiple filters, layout, and editing tools.
● The user interface is easy.
● Preview option available.
Cons:
● Performance glitches due to bugs.
● Custom collage size cannot be set.
● Watermark on the collage.
06Fotor
If you are looking for a simple and basic collage-making tool, Fotor is the right choice. Collage in the grid, freestyle, and photo-stitch style can be created and basic customization features are supported.
Pros:
● Simple to use tool that is apt for beginners.
● Border can be changed from a solid color to a background.
Cons:
● Customization options are limited.
● Border and the image size cannot be changed.
07El Collagero
Just like its name, this is an interesting Windows-based tool for creating a collage of your choice. A wide range of options for customization is available that can let you edit the images, choose a template and then also edit the file.
Pros:
● A wide range of templates and designs for collages is available.
● Allows adding text, symbols, and other elements.
● Created collage can be shared on social media sites.
Cons:
● In comparison to other professional tools, the functions are limited.
08Atlantas Photo Collage Studio
This Windows-based tool will let you create collages of all types and for all occasions. You can choose from over 100 templates that best match your collage theme and image content.
Pros:
● More than 100 templates for collage designs are available.
● The size of the layout can be changed.
● Multiple editing and customization options are supported like zoom, opacity selection, and more.
Cons:
● Limitation of adding 45 images.
● For the advanced functions, need to subscribe to the paid version.
09PhotoJoiner
Using this Windows tool, pick up your favorite images and turn them into a beautiful collage with customized design and style.
Pros:
● A simple and basic tool for creating a collage.
● Created collage can be saved or shared to the social media site.
● Change the order of the images, margins, and other aspects.
Cons
● Collage templates are limited.
● Advanced features are missing.
1010. Blend Photo
To create a collage of images with a blending effect, this is the right tool to use. Available for download on the Windows system this tool lets you create collages telling interesting stories.
Pros:
● Simple and easy collage-making tool.
● Add blending effect to your collages.
● Over 50 custom shapes for image cropping are available along with the option for free-hand cropping.
● Multiple filters can be added.
Cons:
● Limited Editing and customization options.
Part 2 The Best Tool to Get Stock Images for Creating Collages
Several times, the captured and stored images may not fit in the collage theme you wish to create and, in such situations, you can use the stock images available online at several sites. One of the best tools where you can check out the images in different categories is Wondershare Filmora. This versatile software from Wondershare Filmora Video Editor is an advanced video editing tool that also has a huge collection of stock media including images.
Additionally, the split-screen feature of the software can be used for creating a video collage. Available for Windows and Mac systems, Wondershare Filmora will look after all your advanced video editing and customized requirements.
Wondershare Filmora - Best Video Editor for Mac/Windows
5,481,435 people have downloaded it.
Build unique custom animations without breaking a sweat.
Focus on creating epic stories and leave the details to Filmora’s auto features.
Start a creative adventure with drag & drop effects and endless possibilities.
Filmora simplifies advanced features to save you time and effort.
Filmora cuts out repetition so you can move on to your next creative breakthrough.
● Key Takeaways from This Episode →
● Collage-making tools help in creating an interesting and eye-catchy collage in a hassle-free manner.
●Several Windows-based tools are available for quick download.
●Wondershare Filmora is a great software to find a collection of stock images in different categories.
18 Best Tools and Services to Create Animated Videos for Your Business
18 Best Tools and Services to Create Animated Videos for Your Business

Shanoon Cox
Mar 27, 2024• Proven solutions
Video content is dominating the market with a huge arena to explore. Be it a short clip that explains your company/product or a user guide kind of thing, when you are up for business explainer videos, there is nothing better than illustrative animated videos.
These animated videos can be made without much hassle and can bring exceptional results for your business. All that you need to do is, figure out the right animation tool or service for business animation and convey your message aptly to the audience, and then rest will be history.
Make Your Marketing Videos Shine
Recently, video marketing has become an unstoppable trend. Celebrities and businesses earn great fortune through high-quality marketing videos. To join the profitable video marketing era , you can create your own marketing videos now!
- Part 1: Best Tools and Services to Make Animated Videos for Business
- Part 2: The Benefits of Animated Videos for Your Business
- Part 3: FAQ to Create Animated Videos
Part 1: Best Tools and Services to Make Animated Videos for Business
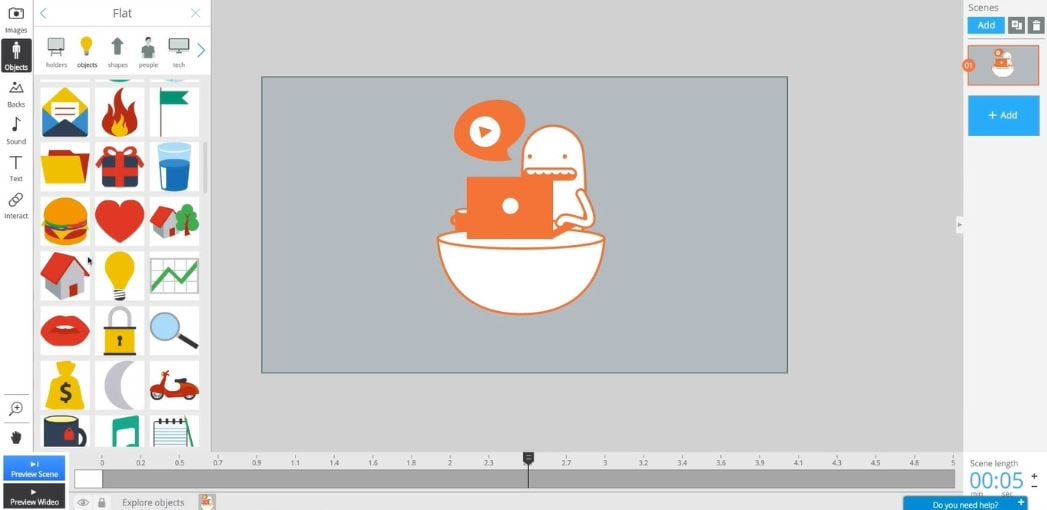
1. Wideo
Among 2D animtion makers , this can let you edit, create, and share animated videos for business intuitively. You get more than 80 ready-to-edit video templates for business or build them from scratch to suit your business demands. These templates are completely customizable for your needs and make Wideo a much liked tool.
Features:
- You can build amazing animated videos effortlessly.
- You just spend 5 minutes to pick the template and customize by drag and drop, and you are sorted to create a professional looking animated business.
- Either download as a MP4 or share on social media sites like Facebook and YouTube, Wideo does it all.
2. Moovly
Being in your budget and still creating fabulous videos which are intuitive and simple for your business is possible with Moovly. Using this tool you can create animated video, banners, Ads, Whiteboard animation, YouTube intro, and engaging explainer video.
Features:
- You don’t need to install it, as it can directly be done on your desktop.
- You need not more than 15 minutes to do a video.
- More than 600000 free samples, videos, animations and sounds are readily available and you are allowed to use your own media too.

3. Powtoon
PowToon can create engaging explainer animated videos for business, which can captivate the audience. Be it marketing, HR, IT, report making or training your videos always standout. These videos are useful for creating personal videos to surprise your loved ones, make attention grabbing learning material, and captivating office presentations.
Features:
- Anyday a PowToon weighs over video as it can engage, explain and market your idea in the work place.
- With inbuilt drag and drop template a high quality PowToon is just made within 20 minutes.
- With a growing community of fellow designers, you can easily get help for a new video from them.

4. Piehole.tv
They have a simple and stress free process to create an animation.
Features:
- They arrange a call for you to get a creative brief and start the process.
- Be it script, voiceover, design, or animation, they can integrate it better.
5. Blender
This open source video animator has is free to use and has 3D creation suite. Rigging, modeling, animation, rendering, simulation, motion tracking and compositing, game creation, as well as video editing is possible with Blender.
Features:
- You can get attractive ultra-realistic rendering with cycle render engine from Blender.
- This is a public project by numbers of scientists, VFX experts, artists animators and the likes.
- The high end modeling tools help in sculpting, modeling, and UV features are remarkable.
- 3D painting using textured brushes and masking allows crisper out comes.

6. Animate CC
Creating vector business animations and publish them instantly is made easy. These animations include – apps, web, and games to name a few. You can reach the target audience through mobile, desktop, and TV.
Features:
- With animation and illustration tools creating web-based interactive content is easy now, be it game environments, player sprites, or interfaces your games and Ads will stand out.
- You can export the animations to multiple platforms like WebGL, HTML5 Canvas, Flash/Adobe AIR and the likes.
- Create interactive web banners and lively expressive characters using tilt and pressure sensitive brushes.

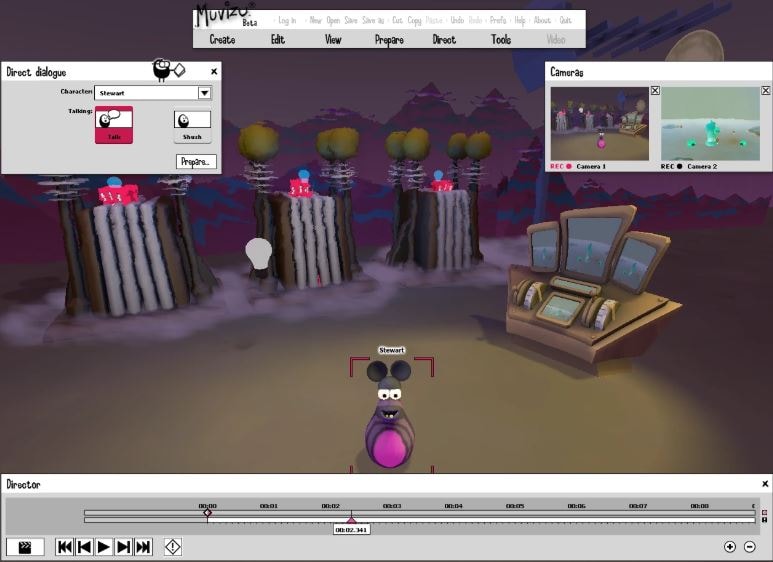
7. Muvizu
Your business explainer videos can be flawlessly designed with interactive 3D animation package like Muvizu. You can drag and drop the customizable animated characters with sets and use the automatic lip-synching feature for a great video.
Features:
- Worldwide it’s a great tool for demonstrators to use as a lesson building element that reaches students with the right message.
- With their easy commercial terms, you can earn money from your animations without any hassle.
- Engaging content that can reach the audience quickly with super-fast controls.
8. CrazyTalk Animator 3
Revered as the easiest 2D animation program it allows animators to create compelling business animations. You can add life to logos, images, and props using the elastic motion effects as well as the inbuilt templates. 2D talking characters are built using bone ridge editors, facial puppet, motion libraries for web, videos, apps, games, and presentations.
Features:
- It comes with a preview camera for reviewing scenes and live camera for using key frames to animate the position of the camera.
- A rich environment to edit animation, actors, special effects and scenes.
- You can navigate scenes using perspective mode in order to experience the movements of the camera in realistic 3D feel.

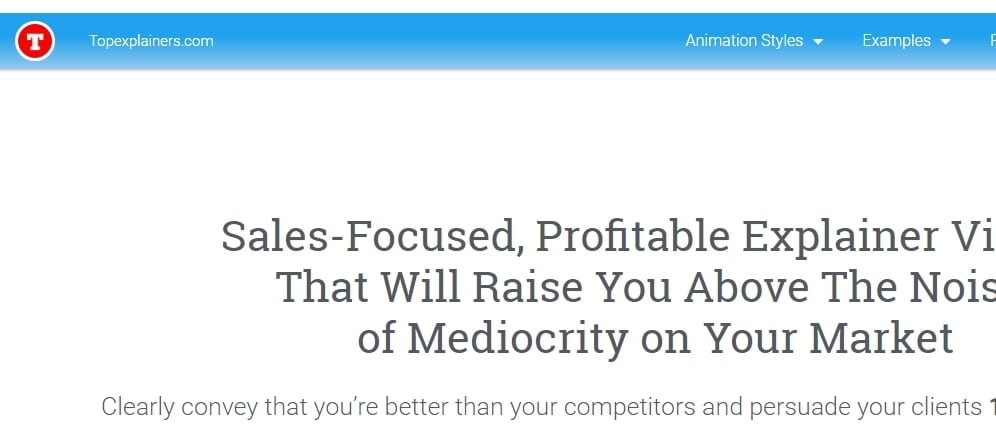
9. Topexplainers
Topexplainers help the business to make high-quality professional videos for your business including 50% of animation technology and 50% of marketing techniques. With Topexplainers, you can reach your clients and convey your message in just a few seconds. The team makes clear, short, and convincing videos to explain your business in a very simple way. The powers of content and visuals have no match. The Topexplainers video animation services help to make customized videos to garner 5 times more positive engagements and 65% more attention from the users.
Pricing – There are 3 packages in Topexplainers. Firstly, the 30-second package priced at $397. Secondly, the 60-second package at $597, and finally, the 90-second package priced at $797.
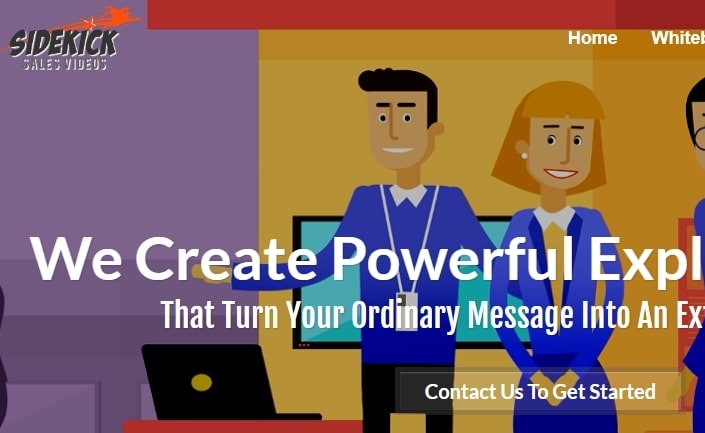
10. Side Kick Sales Videos
The value of business animation videos is increasing with each passing day. Side Kick Sales Videos team aims at creating highly-effective, ingenious, result-driven online videos that can help in fighting the rat-race and get the attention of the viewers. From graphics animation to royalty free music and highly converting the script to visual design, Side Kick Sales Videos personalizes video animation services to create an enhancing package and create your brand awareness.
Pricing – Side Kick Sales Videos offer 3 packages for 30 seconds, 60 seconds, and 90 seconds explainer videos respectively. The price for 30 seconds video is $247, 60 seconds is $349, and 90 seconds is $449.
11. Explainify
The team at Explainify understands your brand and your ideas to create the right tone of the message that you wish to convey to your customers. From scripting the 60-90 seconds pitch to showing you the storyboard and helping you understand what the final video will be like with animations, sound, and vocals, Explainify offers great video animation services.

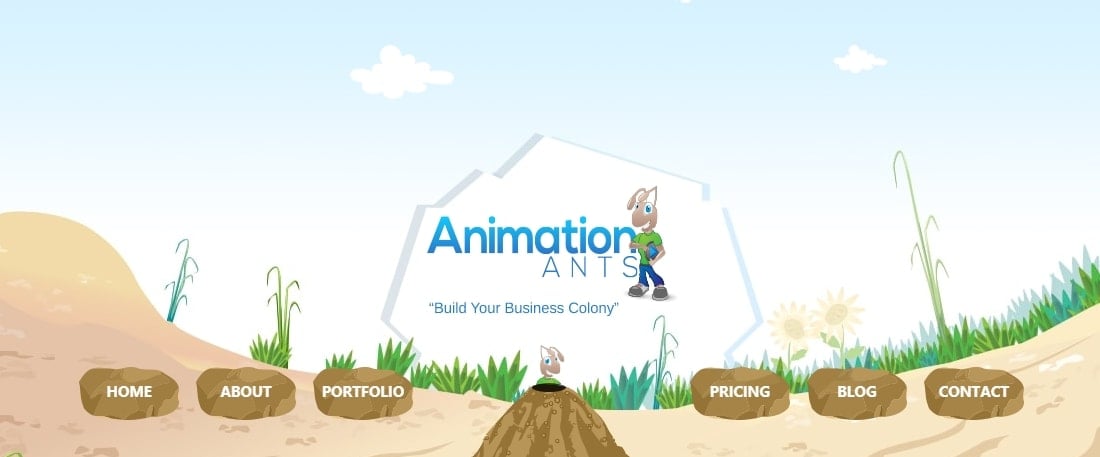
12. Animation ANTS
The business animation explainer videos have the power to strengthen your marketing efforts. Animation ANTS helps to create stunning, short, and crisp videos within an affordable budget to deliver your message to the masses. Your customers receive a concise message with the videos created by the Animation ANTS.
Pricing – The custom videos have different package names like Leaf, Seed, and Rock. Each of the packages is priced at $3900, $4700, and $5400 respectively. Other than the packages, Animation Ants also offer more template style videos at a discounted price.
13. 90 Seconds
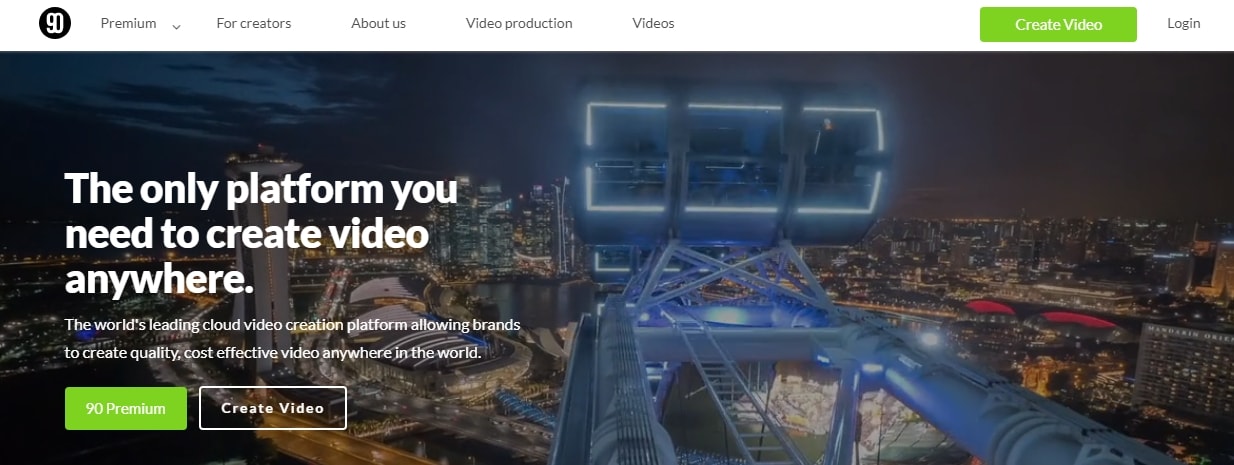
Yes, the name says it all. Within 90 seconds you can create a business animation video, just plan, shoot, edit and review your video from your mobile device. The entire process of creating a video is simple, quick, and easy with the 90 seconds video animation services. You get access to the 90 seconds marketplace of over 12,000 video creative professionals in over 160 countries. You can choose from 70 categories that include photographers, videographers, animators and more.
Pricing – The pricing is flexible for 90 Seconds. Firstly, there’s standard fixed pricing, especially effective for one-time projects. Second, comes the pre-pay starting from US$20000 which is good for the on-going massive content requirement with a flexible timeline. Finally, the subscription model starts from US$3500/month for the brands that regularly need video content and loves what 90-Seconds offer.
14. Idea Rocket Animation
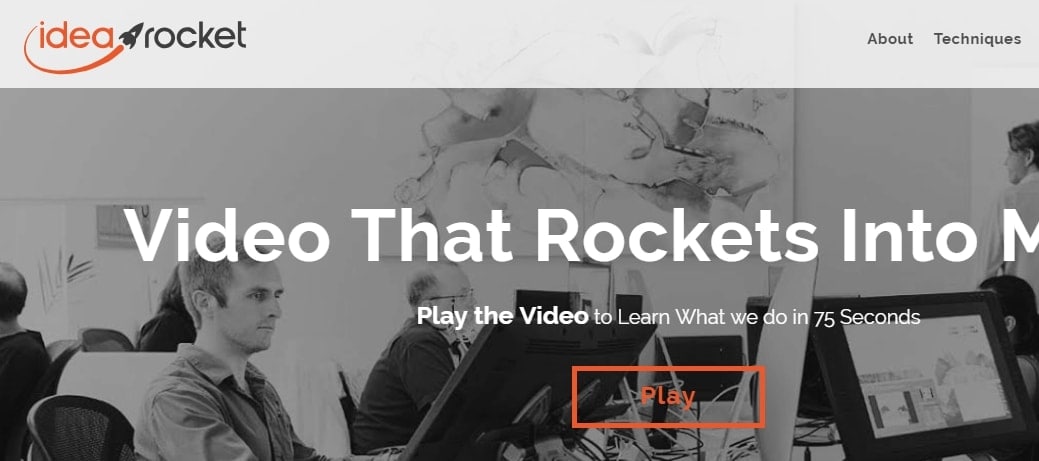
If you are looking for a perfect solution for the most complex problem, turn to Idea Rocket Animation. It takes a brief from you to understand your brand and requirements and then designs the business animation video online. The Idea Rocket Animation takes your message and pitches it to a story, creating a visually appealing design, animations, and sounds.
Pricing – The pricing of business animation videos with Idea Rocket Animation is between $5,000 and $35,000 per minute depending on your choice of animation styles, studios, etc. Budget pricing is also available for creating animation videos between $2000 to $5000 where you need to satisfy with budget studios, DIY software, and freelance professionals.
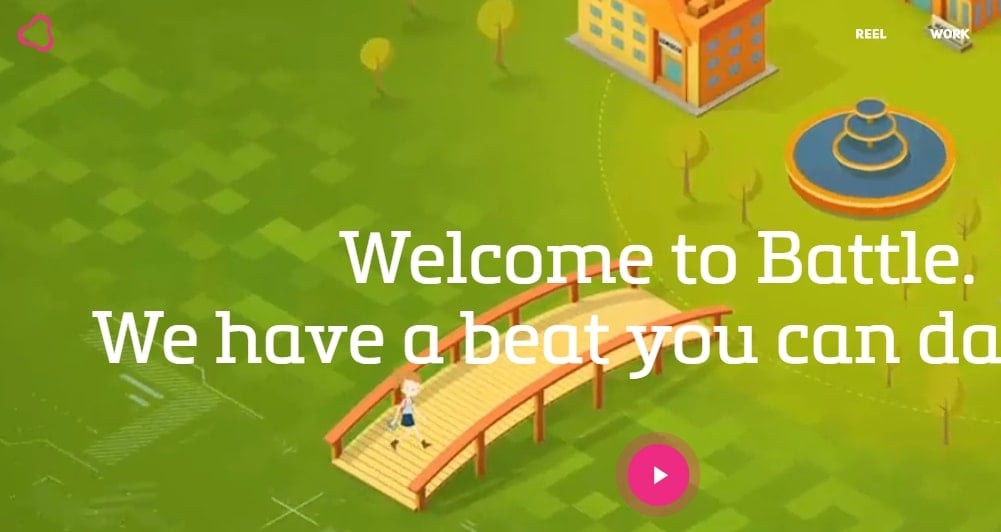
15. Battle Media Lab
The Battle Media Lab bridges the gaps between brands, design, animations, sound, bringing all together beautifully into one video that is appealing to the viewers. This is one of the most trusted video animation services that influence your brand positively by defining the essence of your products and services and how it benefits the community through an eye-catching and impressive video.
16. Epipheo
Creating a business animation video with Epipheo, lets you explain what you do and offer, why do your products, services, and presence matters or how you’re unique and different from the rest of the companies in the similar niche through an appealing video that can draw the attention of the viewers.
Pricing – The different categories of videos that Epipheo offers are – a video case study, internal video, storytelling video, trade show videos, 3D explainer videos and more. You need to ask for a quote as per your requirement.
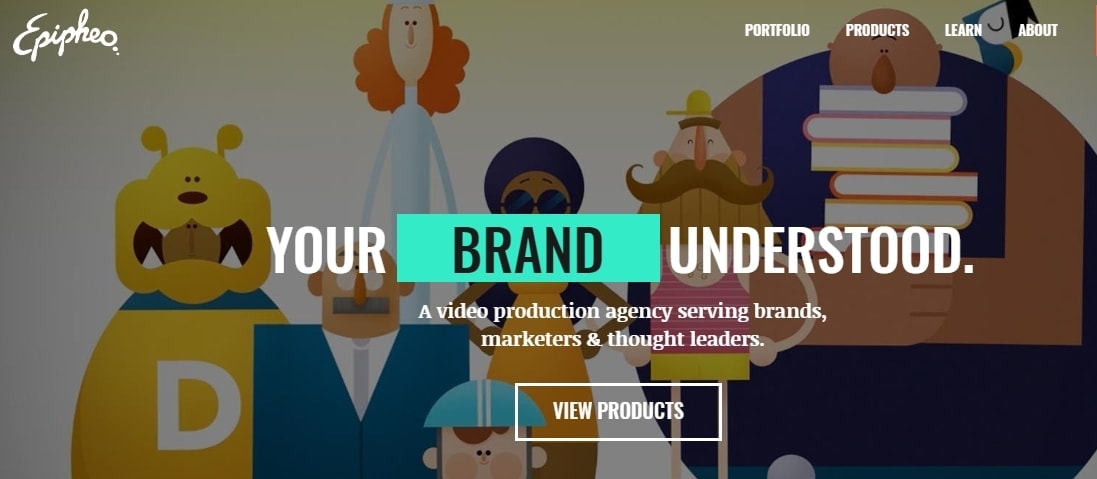
17. Promoshin
Do you wish to avoid in-house video cost or hefty fees for several one-time projects? Turn to Promoshin that allows you to create unlimited customized video content at a flat fee per month. With Promoshin you get to access a team of 8 creative experts who can create any kind of video for your company with unlimited revisions.
Pricing – You need to fill a form to get the pricing detail.
18. Tell us Talk
You get a special admin interface which can access by one or more users as per your control. Tell us talk helps the small businesses to create a manageable comprehensive web interface that can be used by users to manage the administrative tasks of the company. It makes your task easy and simple to deal with the customers through customer admin interface used by the web administrators with the help of toolbox function. From internal billing to API access and sending SMS and MMS, Tell us Talk creates a personal interactive platform to keep in touch with your customers and win their trust.
Pricing – Tell us Talk basic fees is 46.8 EUR/month per user. For additional users, the charge is 1.8 EUR/month. The extended option costs 57.8 EUR/month with additional users charged at 1.8 EUR/month.
Part 2: The Benefits of Animated Videos for Your Business
1. Exposure for your brand extensively
Animated videos for business is a great medium for brand development as they wonderfully collaborate color schemes, logos, brand images with the right kind of audio visuals for creating a complete packaged deal.
These animated audio visuals make your branding more appealing by creating recurrent themes, which keeps the background or foundation intact, while the characters in the clip move.
Animation also helps you to develop more sophisticated creatives and brand icons that can strengthen your marketing pitch. It doesn’t matter whether you are a seasoned player in online marketing or an amateur, the right animated video can speak volumes to promote your business.
2. High quality yet low budget
With animated videos you save plenty of money and time that gets wasted with traditionally shot videos. The surging costs to track a location, hire a crew, pay the artists, pay for top-notch equipment, arrange the set, etc. can make a hole in your pocket.
But, business animation can drastically reverse the expenses by creating a beautiful amalgamation of voiceover, visual, and audio content to deliver a beautiful story. The right animation artist and the correct tool can help you woo your audience like never before.
If you don’t like something in an animated video, then only that part is chopped and edited to add something more substantial.
3. More engagement
A video content is always appealing to the audience, as apart from plain text it is loaded with interesting audio visuals. Human brain being thirsty for knowledge through sight and experience is keen to consume more of audio visual things.
This in turn helps you create better engagement with your target group. Animated videos being a popular medium of imparting knowledge and message, deliver a clear and crisp message in a short span of tome and encourage audio visual learning.
Part 3: FAQ to Create Animated Videos
1. Which software is used to make animated videos?
In the world of animation, different software programs represent various tools to create animated videos with. You will often need to deal separately with 3D animation than 2D, you might need another for modeling and yet a third for rendering. Maya is a good all-round program that can help. Other tools to create animated videos include Adobe Animate and Moho. Each is a decent all-round program with great features.
2. How do I make an animated video for free?
There are tools to create animated videos that are available online, for free, if you know where to look. One of the tops of the list is Filmora, from Wondershare. Although any exported files will contain their watermark unless you unlock the paid version – you can still animate on it. Their Animation 101 pack has both features and learning tools, which will help you to succeed. Best of all, Filmora has an online learning library packed full of resources, as well as a multitude of plugins to help you broaden your animation horizons. It’s an excellent program for a beginner and a unique program for the more experienced editor, so everyone wins.
3. How to start a career in animation?
There are several steps to becoming a full-time animation artist – but it is possible. You should start by getting the relevant College qualifications in animation, or by entering a digital animation degree program. As you learn, save up your successes for both a CV and a portfolio. If you can put together a good demo reel, then all the better. Accept any work experience you can get, and, with a little luck, you will finish your studies with all the tools to create animated videos that you could ever need.
Final Verdict
Apart from using the above mentioned tools for creating business explainer videos, you could use Wondershare Filmora and edit your video while rendering powerful effects. We are sure that with this tool, there is no room for being disappointed. It can seamlessly create the most engaging videos with the least professional video editing.
Shanoon Cox
Shanoon Cox is a writer and a lover of all things video.
Follow @Shanoon Cox
Shanoon Cox
Mar 27, 2024• Proven solutions
Video content is dominating the market with a huge arena to explore. Be it a short clip that explains your company/product or a user guide kind of thing, when you are up for business explainer videos, there is nothing better than illustrative animated videos.
These animated videos can be made without much hassle and can bring exceptional results for your business. All that you need to do is, figure out the right animation tool or service for business animation and convey your message aptly to the audience, and then rest will be history.
Make Your Marketing Videos Shine
Recently, video marketing has become an unstoppable trend. Celebrities and businesses earn great fortune through high-quality marketing videos. To join the profitable video marketing era , you can create your own marketing videos now!
- Part 1: Best Tools and Services to Make Animated Videos for Business
- Part 2: The Benefits of Animated Videos for Your Business
- Part 3: FAQ to Create Animated Videos
Part 1: Best Tools and Services to Make Animated Videos for Business
1. Wideo
Among 2D animtion makers , this can let you edit, create, and share animated videos for business intuitively. You get more than 80 ready-to-edit video templates for business or build them from scratch to suit your business demands. These templates are completely customizable for your needs and make Wideo a much liked tool.
Features:
- You can build amazing animated videos effortlessly.
- You just spend 5 minutes to pick the template and customize by drag and drop, and you are sorted to create a professional looking animated business.
- Either download as a MP4 or share on social media sites like Facebook and YouTube, Wideo does it all.
2. Moovly
Being in your budget and still creating fabulous videos which are intuitive and simple for your business is possible with Moovly. Using this tool you can create animated video, banners, Ads, Whiteboard animation, YouTube intro, and engaging explainer video.
Features:
- You don’t need to install it, as it can directly be done on your desktop.
- You need not more than 15 minutes to do a video.
- More than 600000 free samples, videos, animations and sounds are readily available and you are allowed to use your own media too.
3. Powtoon
PowToon can create engaging explainer animated videos for business, which can captivate the audience. Be it marketing, HR, IT, report making or training your videos always standout. These videos are useful for creating personal videos to surprise your loved ones, make attention grabbing learning material, and captivating office presentations.
Features:
- Anyday a PowToon weighs over video as it can engage, explain and market your idea in the work place.
- With inbuilt drag and drop template a high quality PowToon is just made within 20 minutes.
- With a growing community of fellow designers, you can easily get help for a new video from them.
4. Piehole.tv
They have a simple and stress free process to create an animation.
Features:
- They arrange a call for you to get a creative brief and start the process.
- Be it script, voiceover, design, or animation, they can integrate it better.
5. Blender
This open source video animator has is free to use and has 3D creation suite. Rigging, modeling, animation, rendering, simulation, motion tracking and compositing, game creation, as well as video editing is possible with Blender.
Features:
- You can get attractive ultra-realistic rendering with cycle render engine from Blender.
- This is a public project by numbers of scientists, VFX experts, artists animators and the likes.
- The high end modeling tools help in sculpting, modeling, and UV features are remarkable.
- 3D painting using textured brushes and masking allows crisper out comes.
6. Animate CC
Creating vector business animations and publish them instantly is made easy. These animations include – apps, web, and games to name a few. You can reach the target audience through mobile, desktop, and TV.
Features:
- With animation and illustration tools creating web-based interactive content is easy now, be it game environments, player sprites, or interfaces your games and Ads will stand out.
- You can export the animations to multiple platforms like WebGL, HTML5 Canvas, Flash/Adobe AIR and the likes.
- Create interactive web banners and lively expressive characters using tilt and pressure sensitive brushes.
7. Muvizu
Your business explainer videos can be flawlessly designed with interactive 3D animation package like Muvizu. You can drag and drop the customizable animated characters with sets and use the automatic lip-synching feature for a great video.
Features:
- Worldwide it’s a great tool for demonstrators to use as a lesson building element that reaches students with the right message.
- With their easy commercial terms, you can earn money from your animations without any hassle.
- Engaging content that can reach the audience quickly with super-fast controls.
8. CrazyTalk Animator 3
Revered as the easiest 2D animation program it allows animators to create compelling business animations. You can add life to logos, images, and props using the elastic motion effects as well as the inbuilt templates. 2D talking characters are built using bone ridge editors, facial puppet, motion libraries for web, videos, apps, games, and presentations.
Features:
- It comes with a preview camera for reviewing scenes and live camera for using key frames to animate the position of the camera.
- A rich environment to edit animation, actors, special effects and scenes.
- You can navigate scenes using perspective mode in order to experience the movements of the camera in realistic 3D feel.
9. Topexplainers
Topexplainers help the business to make high-quality professional videos for your business including 50% of animation technology and 50% of marketing techniques. With Topexplainers, you can reach your clients and convey your message in just a few seconds. The team makes clear, short, and convincing videos to explain your business in a very simple way. The powers of content and visuals have no match. The Topexplainers video animation services help to make customized videos to garner 5 times more positive engagements and 65% more attention from the users.
Pricing – There are 3 packages in Topexplainers. Firstly, the 30-second package priced at $397. Secondly, the 60-second package at $597, and finally, the 90-second package priced at $797.
10. Side Kick Sales Videos
The value of business animation videos is increasing with each passing day. Side Kick Sales Videos team aims at creating highly-effective, ingenious, result-driven online videos that can help in fighting the rat-race and get the attention of the viewers. From graphics animation to royalty free music and highly converting the script to visual design, Side Kick Sales Videos personalizes video animation services to create an enhancing package and create your brand awareness.
Pricing – Side Kick Sales Videos offer 3 packages for 30 seconds, 60 seconds, and 90 seconds explainer videos respectively. The price for 30 seconds video is $247, 60 seconds is $349, and 90 seconds is $449.
11. Explainify
The team at Explainify understands your brand and your ideas to create the right tone of the message that you wish to convey to your customers. From scripting the 60-90 seconds pitch to showing you the storyboard and helping you understand what the final video will be like with animations, sound, and vocals, Explainify offers great video animation services.
12. Animation ANTS
The business animation explainer videos have the power to strengthen your marketing efforts. Animation ANTS helps to create stunning, short, and crisp videos within an affordable budget to deliver your message to the masses. Your customers receive a concise message with the videos created by the Animation ANTS.
Pricing – The custom videos have different package names like Leaf, Seed, and Rock. Each of the packages is priced at $3900, $4700, and $5400 respectively. Other than the packages, Animation Ants also offer more template style videos at a discounted price.
13. 90 Seconds
Yes, the name says it all. Within 90 seconds you can create a business animation video, just plan, shoot, edit and review your video from your mobile device. The entire process of creating a video is simple, quick, and easy with the 90 seconds video animation services. You get access to the 90 seconds marketplace of over 12,000 video creative professionals in over 160 countries. You can choose from 70 categories that include photographers, videographers, animators and more.
Pricing – The pricing is flexible for 90 Seconds. Firstly, there’s standard fixed pricing, especially effective for one-time projects. Second, comes the pre-pay starting from US$20000 which is good for the on-going massive content requirement with a flexible timeline. Finally, the subscription model starts from US$3500/month for the brands that regularly need video content and loves what 90-Seconds offer.
14. Idea Rocket Animation
If you are looking for a perfect solution for the most complex problem, turn to Idea Rocket Animation. It takes a brief from you to understand your brand and requirements and then designs the business animation video online. The Idea Rocket Animation takes your message and pitches it to a story, creating a visually appealing design, animations, and sounds.
Pricing – The pricing of business animation videos with Idea Rocket Animation is between $5,000 and $35,000 per minute depending on your choice of animation styles, studios, etc. Budget pricing is also available for creating animation videos between $2000 to $5000 where you need to satisfy with budget studios, DIY software, and freelance professionals.
15. Battle Media Lab
The Battle Media Lab bridges the gaps between brands, design, animations, sound, bringing all together beautifully into one video that is appealing to the viewers. This is one of the most trusted video animation services that influence your brand positively by defining the essence of your products and services and how it benefits the community through an eye-catching and impressive video.
16. Epipheo
Creating a business animation video with Epipheo, lets you explain what you do and offer, why do your products, services, and presence matters or how you’re unique and different from the rest of the companies in the similar niche through an appealing video that can draw the attention of the viewers.
Pricing – The different categories of videos that Epipheo offers are – a video case study, internal video, storytelling video, trade show videos, 3D explainer videos and more. You need to ask for a quote as per your requirement.
17. Promoshin
Do you wish to avoid in-house video cost or hefty fees for several one-time projects? Turn to Promoshin that allows you to create unlimited customized video content at a flat fee per month. With Promoshin you get to access a team of 8 creative experts who can create any kind of video for your company with unlimited revisions.
Pricing – You need to fill a form to get the pricing detail.
18. Tell us Talk
You get a special admin interface which can access by one or more users as per your control. Tell us talk helps the small businesses to create a manageable comprehensive web interface that can be used by users to manage the administrative tasks of the company. It makes your task easy and simple to deal with the customers through customer admin interface used by the web administrators with the help of toolbox function. From internal billing to API access and sending SMS and MMS, Tell us Talk creates a personal interactive platform to keep in touch with your customers and win their trust.
Pricing – Tell us Talk basic fees is 46.8 EUR/month per user. For additional users, the charge is 1.8 EUR/month. The extended option costs 57.8 EUR/month with additional users charged at 1.8 EUR/month.
Part 2: The Benefits of Animated Videos for Your Business
1. Exposure for your brand extensively
Animated videos for business is a great medium for brand development as they wonderfully collaborate color schemes, logos, brand images with the right kind of audio visuals for creating a complete packaged deal.
These animated audio visuals make your branding more appealing by creating recurrent themes, which keeps the background or foundation intact, while the characters in the clip move.
Animation also helps you to develop more sophisticated creatives and brand icons that can strengthen your marketing pitch. It doesn’t matter whether you are a seasoned player in online marketing or an amateur, the right animated video can speak volumes to promote your business.
2. High quality yet low budget
With animated videos you save plenty of money and time that gets wasted with traditionally shot videos. The surging costs to track a location, hire a crew, pay the artists, pay for top-notch equipment, arrange the set, etc. can make a hole in your pocket.
But, business animation can drastically reverse the expenses by creating a beautiful amalgamation of voiceover, visual, and audio content to deliver a beautiful story. The right animation artist and the correct tool can help you woo your audience like never before.
If you don’t like something in an animated video, then only that part is chopped and edited to add something more substantial.
3. More engagement
A video content is always appealing to the audience, as apart from plain text it is loaded with interesting audio visuals. Human brain being thirsty for knowledge through sight and experience is keen to consume more of audio visual things.
This in turn helps you create better engagement with your target group. Animated videos being a popular medium of imparting knowledge and message, deliver a clear and crisp message in a short span of tome and encourage audio visual learning.
Part 3: FAQ to Create Animated Videos
1. Which software is used to make animated videos?
In the world of animation, different software programs represent various tools to create animated videos with. You will often need to deal separately with 3D animation than 2D, you might need another for modeling and yet a third for rendering. Maya is a good all-round program that can help. Other tools to create animated videos include Adobe Animate and Moho. Each is a decent all-round program with great features.
2. How do I make an animated video for free?
There are tools to create animated videos that are available online, for free, if you know where to look. One of the tops of the list is Filmora, from Wondershare. Although any exported files will contain their watermark unless you unlock the paid version – you can still animate on it. Their Animation 101 pack has both features and learning tools, which will help you to succeed. Best of all, Filmora has an online learning library packed full of resources, as well as a multitude of plugins to help you broaden your animation horizons. It’s an excellent program for a beginner and a unique program for the more experienced editor, so everyone wins.
3. How to start a career in animation?
There are several steps to becoming a full-time animation artist – but it is possible. You should start by getting the relevant College qualifications in animation, or by entering a digital animation degree program. As you learn, save up your successes for both a CV and a portfolio. If you can put together a good demo reel, then all the better. Accept any work experience you can get, and, with a little luck, you will finish your studies with all the tools to create animated videos that you could ever need.
Final Verdict
Apart from using the above mentioned tools for creating business explainer videos, you could use Wondershare Filmora and edit your video while rendering powerful effects. We are sure that with this tool, there is no room for being disappointed. It can seamlessly create the most engaging videos with the least professional video editing.
Shanoon Cox
Shanoon Cox is a writer and a lover of all things video.
Follow @Shanoon Cox
https://images.wondershare.com/filmora/article-images/filmora9-website
2D Character Animation: Everything You Should Know About It
An easy yet powerful editor
Numerous effects to choose from
Detailed tutorials provided by the official channel
2D character animation is one of the significant kinds of animation popularly used for creating animated movies, marketing videos, cartoons, advertisements, educational content, corporate presentations, video games, etc.
With the popularity of video content, more and more businesses tend to use animation for promotion, as they magnify conversion rates by 20%. Some companies hire 2D character animation services; others try to make them online with software help.
In this article
01 [What is 2D Character Animation and What Does 2D Animation Do?](#Part 1)
02 [2D Character Animation Tips and Tricks](#Part 2)
03 [An Ultimate Guide to Create 2D Character Animation Online](#Part 3)
04 [5 Great 2D Character Animation Templates](#Part 4)
Part 1 What is 2D Character Animation and What Does 2D Animation Do?
2D animation is identified by having its characters and objects created in a 2D space. It means that they only have height and width to specify.
However, 2D animation is considered a traditional style, known from the 1800s. Initially, it was designed by merging the frames in which one drawing was followed by another and making them different; every second consists of 24 frames.
We all remember the classic Disney animations. Snow White and the Seven Dwarfs, The Little Mermaid, Bambi, etc. They are some of the highly famous 2D animation styles.
With the advancement of computer technologies, this process also got digitized through various 2D character animation software.
In this guide, we’ll talk about everything relatable to 2D character animation, and let’s proceed with the expert tips and tricks to create inspirational style within animation character 2D.
Part 2 2D Character Animation Tips and Tricks
01Look for a real-time reference
Using a real-world reference for 2D character animation can help you effectively animate faces. For example, when studios collaborate with voice-over artists, they often record their facial movements. It further helps 2D animators to ensure their expressions get captured convincingly.
If it seems impossible, you can consider using your face, so you have something to refer back to. You could also use a mirror and utter the words your character will speak. It will display the correct animated expressions.
02Observe real life
You need to use observation a lot more. One of the primary aspects of 2D character animation is bringing life to animate objections. Therefore, you must carefully consider how emotion can get portrayed and select each movement accordingly.
Take time watching how people in real-life environments talk and interact with each other, how they express emotions, how they move, etc. Please don’t spend much time doing this, as it is valuable to research.
03Simplicity is the key
2D character animation is never complex compared with 3D. Think carefully before creating a scene too complicated. You must not include too much information, which is hard to digest, and you may even find yourself compromising the scene’s realism. Try not to heavy the stage with too many pose changes or other elements, and keep it genuine.
04Draw animation again and again
Drawing animation consumes a lot of time. You can’t complete it within one day, so you better know deep down that one task only can be done after you have revamped it various times. For 2D character animation, you may need to draw objects on paper several times.
You can’t master the skill of animation character 2D quickly. Luckily, all pains will be relieved someday.
05Feedback is important
Feedback is an essential element of artistic development. It’s wise to actively seek out feedback from familiar figures who can help you enhance. Naturally, we may see work we have invested a great deal of time and effort indifferently to someone not so involved in the creative process. Feedback can equate to a valuable learning opportunity that will assist you produce the results hit the spot much more appropriately.
Part 3 An Ultimate Guide to Create 2D Character Animation Online
Let’s now look at making an illustrated 2D character animation move on a screen.
While there are nearly numerous options for 2D character animation tools and software, this tutorial will animate a character in Adobe After Effects.
Steps to create 2D character animation After Effects
01Step 1: Download and Install Duik
You need to install the Duik animation plugin for Adobe After Effects to simplify the whole process. You can animate and rig characters’ entire limbs with Duik using just the placement of their feet and hands.
While this isn’t an essential step, it can be valuable for beginners, as you’ll see in this tutorial. Luckily, Duik is available for free from Rainbox Laboratory.
02Step 2: Design Your Character
You need a moving character before you’re able to start animating. You can create this character in Adobe Illustrator and import it into After Effects.
Try creating a straightforward character with an aim on the character’s limbs.
In the example mentioned below, you can see that the body is a very rudimentary shape—a circle—with long legs that make it simple to consider the animation process.

Check the character’s joints. Making a round joint between the lower and upper parts of the legs, for instance, will help the character move more smoothly.

03Step 3: Make and Import Your Character Artwork
Now, you’ll need to make a few final adjustments before moving your character artwork. Break your character out into layers firstly. Every section of the character that will move independently needs a separate layer.
So, layers include his circular body, face, and the leg’s segments (i.e., lower leg, upper leg, and foot).

To import your character artwork, go to File, click the Import tab, and choose your character file. Ensure that you need to import it as a composition to ensure it includes the layers you just created.
04Step 4: Establish Initial Character Rigging
Now, the 2D character animation is almost over by the initial rigging.
Firstly, lower the opacity of all your layers to above 50% to see the critical joints within the character.
Next, you must ensure that the joints hinge in the ideal direction. It’s simple to do with the anchor point tool. For each character’s layer, place the anchor point at the center of gravity for each layer of the 2D character animation.
The anchor point would probably go between the eyes for the layer of the face (i.e., the nose, eyes, and mouth). For each legs’ section, hold the anchor point where the leg will hinge (e.g., the anchor point would be at the highest point for the leg’s upper portion, where it meets the body).

Then, use the parent tool to join the limbs’ sections. For instance, the parent of the foot would be the lower leg, and the upper portion is the parent of the lower leg.
It makes sure that the leg moves together as one unit with multiple hinge points.
Finally, use the Duik toolbar to create character controllers. Controllers control the rotation and position of critical elements within your character. For the ankles of the 2D character animation, you would select the controller that encompasses both the rotation and position.
05Step 5: Create Your Rig
Use the Duik toolbar to create a rig. Select each layer from the extremities inward from each limb, lasting with your controllers.
You would select the ankle for a leg, followed by the upper portion, the lower leg, and conclusively, the controller at the ankle. Then, select auto-rig within the Rigging area of the Duik toolbar.
The entire leg will move when you move that ankle controller. If your character contains them, repeat the process for the other leg, along with other limbs.
Before proceeding, test the limbs to make sure they hinge and move correctly. You need to adjust the opacity of the character back to 100% once you are satisfied with the movements.

06Step 6: Start Animating Your Character
You can begin animating after completing a rig. First, create keyframes—the ending and beginning points of the character’s movement. The character’s legs are at their most magnified are thus the endpoints for a walk cycle. Make sure that the beginning and ending of keyframes are identical to get an ideal loop.
Start adding in-between frames from there, like when one leg crosses over the other in the middle of a walking stride.
Moreover, you can add ‘easing” to the animation via 2D character animation After Effects’ Easy Ease tab, located under the Animation button, and Keyframe Assistant.
It will smoothen the transition between the keyframes. You will have a primary walking sequence at this instance.

Now, you can make further refinements to add detail and secondary movement, like a bobbing motion of the head. You can also modify elements like the keyframe velocity, further smoothing out the animation.
As you practice, you’ll get a better feel for your animation preferences and develop more advanced realistic 2D animation character design capabilities.
Part 4 5 Great 2D Character Animation Templates
1 – FrameStory Character Animation Toolkit
2 – Explainer Video Character Animation ToolKit
3 – 2D Character Animation After Effects Template
4 – Character Animation ToolKit
5 – Rigged Character Animation Mockup Template
Given above is a list of the best 2D character animation templates worth considering. Yet, if you are tired of using After Effects Templates, why not select Wondershare Filmora Template Mode?
It is a brand-new mode recently launched by Filmora to ramp up your story. It is a simplistic way to use compared with After Effects.
****Wondershare Filmora Video Editor Template Mode**
For Win 7 or later (64-bit)
For macOS 10.12 or later
Filmora Template Mode is a bold breakthrough that helps you create incredible videos in a minute. Forget about dragging n dropping the video clips into a timeline; Filmora template Mode provides you a new way of generating videos automatically by using various stylish video templates.
Steps to create a stunning animated video in 3 levels
01Step 1: Choose a template
Pick up a video template that best suits your needs.

02Step 2: Import Media
Import at least three video clips or images and let AI assist you in ramping the production process without hassle.

03Step 3: Export Project
Export media among multiple social media platforms.

● Key Takeaways from This Episode →
● Understanding 2D character animation tips and tricks
● A step by step guide to creating 2D character animation online
● Five best 2D character animation templates
● The best alternative of using the Template mode directly within the Wondershare Filmora
2D character animation is one of the significant kinds of animation popularly used for creating animated movies, marketing videos, cartoons, advertisements, educational content, corporate presentations, video games, etc.
With the popularity of video content, more and more businesses tend to use animation for promotion, as they magnify conversion rates by 20%. Some companies hire 2D character animation services; others try to make them online with software help.
In this article
01 [What is 2D Character Animation and What Does 2D Animation Do?](#Part 1)
02 [2D Character Animation Tips and Tricks](#Part 2)
03 [An Ultimate Guide to Create 2D Character Animation Online](#Part 3)
04 [5 Great 2D Character Animation Templates](#Part 4)
Part 1 What is 2D Character Animation and What Does 2D Animation Do?
2D animation is identified by having its characters and objects created in a 2D space. It means that they only have height and width to specify.
However, 2D animation is considered a traditional style, known from the 1800s. Initially, it was designed by merging the frames in which one drawing was followed by another and making them different; every second consists of 24 frames.
We all remember the classic Disney animations. Snow White and the Seven Dwarfs, The Little Mermaid, Bambi, etc. They are some of the highly famous 2D animation styles.
With the advancement of computer technologies, this process also got digitized through various 2D character animation software.
In this guide, we’ll talk about everything relatable to 2D character animation, and let’s proceed with the expert tips and tricks to create inspirational style within animation character 2D.
Part 2 2D Character Animation Tips and Tricks
01Look for a real-time reference
Using a real-world reference for 2D character animation can help you effectively animate faces. For example, when studios collaborate with voice-over artists, they often record their facial movements. It further helps 2D animators to ensure their expressions get captured convincingly.
If it seems impossible, you can consider using your face, so you have something to refer back to. You could also use a mirror and utter the words your character will speak. It will display the correct animated expressions.
02Observe real life
You need to use observation a lot more. One of the primary aspects of 2D character animation is bringing life to animate objections. Therefore, you must carefully consider how emotion can get portrayed and select each movement accordingly.
Take time watching how people in real-life environments talk and interact with each other, how they express emotions, how they move, etc. Please don’t spend much time doing this, as it is valuable to research.
03Simplicity is the key
2D character animation is never complex compared with 3D. Think carefully before creating a scene too complicated. You must not include too much information, which is hard to digest, and you may even find yourself compromising the scene’s realism. Try not to heavy the stage with too many pose changes or other elements, and keep it genuine.
04Draw animation again and again
Drawing animation consumes a lot of time. You can’t complete it within one day, so you better know deep down that one task only can be done after you have revamped it various times. For 2D character animation, you may need to draw objects on paper several times.
You can’t master the skill of animation character 2D quickly. Luckily, all pains will be relieved someday.
05Feedback is important
Feedback is an essential element of artistic development. It’s wise to actively seek out feedback from familiar figures who can help you enhance. Naturally, we may see work we have invested a great deal of time and effort indifferently to someone not so involved in the creative process. Feedback can equate to a valuable learning opportunity that will assist you produce the results hit the spot much more appropriately.
Part 3 An Ultimate Guide to Create 2D Character Animation Online
Let’s now look at making an illustrated 2D character animation move on a screen.
While there are nearly numerous options for 2D character animation tools and software, this tutorial will animate a character in Adobe After Effects.
Steps to create 2D character animation After Effects
01Step 1: Download and Install Duik
You need to install the Duik animation plugin for Adobe After Effects to simplify the whole process. You can animate and rig characters’ entire limbs with Duik using just the placement of their feet and hands.
While this isn’t an essential step, it can be valuable for beginners, as you’ll see in this tutorial. Luckily, Duik is available for free from Rainbox Laboratory.
02Step 2: Design Your Character
You need a moving character before you’re able to start animating. You can create this character in Adobe Illustrator and import it into After Effects.
Try creating a straightforward character with an aim on the character’s limbs.
In the example mentioned below, you can see that the body is a very rudimentary shape—a circle—with long legs that make it simple to consider the animation process.
Check the character’s joints. Making a round joint between the lower and upper parts of the legs, for instance, will help the character move more smoothly.
03Step 3: Make and Import Your Character Artwork
Now, you’ll need to make a few final adjustments before moving your character artwork. Break your character out into layers firstly. Every section of the character that will move independently needs a separate layer.
So, layers include his circular body, face, and the leg’s segments (i.e., lower leg, upper leg, and foot).
To import your character artwork, go to File, click the Import tab, and choose your character file. Ensure that you need to import it as a composition to ensure it includes the layers you just created.
04Step 4: Establish Initial Character Rigging
Now, the 2D character animation is almost over by the initial rigging.
Firstly, lower the opacity of all your layers to above 50% to see the critical joints within the character.
Next, you must ensure that the joints hinge in the ideal direction. It’s simple to do with the anchor point tool. For each character’s layer, place the anchor point at the center of gravity for each layer of the 2D character animation.
The anchor point would probably go between the eyes for the layer of the face (i.e., the nose, eyes, and mouth). For each legs’ section, hold the anchor point where the leg will hinge (e.g., the anchor point would be at the highest point for the leg’s upper portion, where it meets the body).
Then, use the parent tool to join the limbs’ sections. For instance, the parent of the foot would be the lower leg, and the upper portion is the parent of the lower leg.
It makes sure that the leg moves together as one unit with multiple hinge points.
Finally, use the Duik toolbar to create character controllers. Controllers control the rotation and position of critical elements within your character. For the ankles of the 2D character animation, you would select the controller that encompasses both the rotation and position.
05Step 5: Create Your Rig
Use the Duik toolbar to create a rig. Select each layer from the extremities inward from each limb, lasting with your controllers.
You would select the ankle for a leg, followed by the upper portion, the lower leg, and conclusively, the controller at the ankle. Then, select auto-rig within the Rigging area of the Duik toolbar.
The entire leg will move when you move that ankle controller. If your character contains them, repeat the process for the other leg, along with other limbs.
Before proceeding, test the limbs to make sure they hinge and move correctly. You need to adjust the opacity of the character back to 100% once you are satisfied with the movements.
06Step 6: Start Animating Your Character
You can begin animating after completing a rig. First, create keyframes—the ending and beginning points of the character’s movement. The character’s legs are at their most magnified are thus the endpoints for a walk cycle. Make sure that the beginning and ending of keyframes are identical to get an ideal loop.
Start adding in-between frames from there, like when one leg crosses over the other in the middle of a walking stride.
Moreover, you can add ‘easing” to the animation via 2D character animation After Effects’ Easy Ease tab, located under the Animation button, and Keyframe Assistant.
It will smoothen the transition between the keyframes. You will have a primary walking sequence at this instance.
Now, you can make further refinements to add detail and secondary movement, like a bobbing motion of the head. You can also modify elements like the keyframe velocity, further smoothing out the animation.
As you practice, you’ll get a better feel for your animation preferences and develop more advanced realistic 2D animation character design capabilities.
Part 4 5 Great 2D Character Animation Templates
1 – FrameStory Character Animation Toolkit
2 – Explainer Video Character Animation ToolKit
3 – 2D Character Animation After Effects Template
4 – Character Animation ToolKit
5 – Rigged Character Animation Mockup Template
Given above is a list of the best 2D character animation templates worth considering. Yet, if you are tired of using After Effects Templates, why not select Wondershare Filmora Template Mode?
It is a brand-new mode recently launched by Filmora to ramp up your story. It is a simplistic way to use compared with After Effects.
****Wondershare Filmora Video Editor Template Mode**
For Win 7 or later (64-bit)
For macOS 10.12 or later
Filmora Template Mode is a bold breakthrough that helps you create incredible videos in a minute. Forget about dragging n dropping the video clips into a timeline; Filmora template Mode provides you a new way of generating videos automatically by using various stylish video templates.
Steps to create a stunning animated video in 3 levels
01Step 1: Choose a template
Pick up a video template that best suits your needs.
02Step 2: Import Media
Import at least three video clips or images and let AI assist you in ramping the production process without hassle.
03Step 3: Export Project
Export media among multiple social media platforms.
● Key Takeaways from This Episode →
● Understanding 2D character animation tips and tricks
● A step by step guide to creating 2D character animation online
● Five best 2D character animation templates
● The best alternative of using the Template mode directly within the Wondershare Filmora
Learn Simple Blender Rigging in Only 2 Minutes
Learn Simple Blender Rigging in Only 2 Minutes
An easy yet powerful editor
Numerous effects to choose from
Detailed tutorials provided by the official channel
Blender is a FREE, open-source 3D Animation program that is very popular for beginner animators. It’s a good way of starting if you’re not yet sure about how far you want to go into animation as it won’t demand any immediate monetary commitment.
Now, as for its features, today, we’ll be focusing on Blender Rigging features.
In this article
01 [Why Use Blender Rigging?](#Part 1)
02 [The Art of Effective Rigging in Blender [TUTORIAL]](#Part 2)
03 [Introduction to Rigging in Blender Course](#Part 3)
Part 1 Why Use Blender Rigging?
Blender Character Rigging is a great way of creating truly beautiful and realistic animations. Despite being an open-source program, it’s capable of doing just as much, if not more, than some of the more premium Animation software out there.
So, if you want to create video projects for your audience’s entertainment or edification with animation, then Blender Rigging is definitely something that you should consider. With this tool, you can create the complex animations that you need and then polish it up in a video editor like Wondershare Filmora Video Editor (which is a premium, video-editing tool that you can use to perfect your finished Blender Rigging animations.)

Part 2 The Art of Effective Rigging in Blender [TUTORIAL]
For this next section, we’re going to be introducing a couple of tutorials that you can look into to teach you more about Blender Character Rigging, Blender Facial Rigging, Blender Muscle Rig, and so on.
These topics are each very long-winded on their own though, so we’ve linked appropriate video tutorials that you can learn more and reserved ourselves to a brief description of each technique so that you can determine whether it’s something that interests you (although, of course, our recommendation is that you check each one out so that you can get the full ‘Blender’ experience.)
01Blender Character Rigging
The main thing people usually look at Blender for is, Blender Character Rigging. And, because it was created to emulate professional animation software, Blender has this function down to pat. To give you an idea of what features you can expect: Blender comes with custom bone shapes for easy Blender character rigging, it also comes with envelope skinny, skeleton skinning, and automatic skinning. With these alone, you can be assured that you will be able to create complex animations without much trouble.
02Blender Facial Rigging
Facial Rigging is usually a more complex subject that is avoided by animators without much experience. But, with Blender, facial rigging is possible. The YouTube video should show you the process of going about Blender Facial Rigging from start to finish (from sculpting the character face itself and then making use of Blender Rigging tools for setting up a skeletal structure for your face’s character to become animated.)
03Blender Muscle Rigging
Creating a Blender Muscle Rig is exactly what it sounds like. It is, of course, much more complicated than normal rigging, but it is a good subject to familiarize yourself with anyway, as it will allow you to go to the ‘next stage’ as you say, with your Animations. The video that we’ve attached is from Pierrick Picaut, who has released a series of videos on the subject of Blender Rigging in general and has extensively explained how to create a Blender Human Rig from the general body, the face, the muscles, and so on.
04Blender Rigging
Although a lot of Animation relies on more ‘traditional’ methods of expressing movement, one can still make use of more modern animation practices, like rigs, to set up their animations for movement. It’s an especially good skill to learn if you’re more interested in content-friendly animations (rather than creating a film of your own.)
05Blender Rigging
This next tutorial is an introduction to basic Blender Rigging. It’s a good one to both start and end on, as it was created for beginners specifically, and uses an example that is perhaps easier to understand most. Make sure to give it a shot just in case.
Part 3 Introduction to Rigging in Blender Course
For this next part, we introduce two other resources that you can take advantage of to learn more about Blender Rigging. Whether it be about Blender character rigging, Blender facial rigging, free blender rigs, creating muscle rigs, and so and so forth. These resources have got your back.
01Where to Learn the Course?
The first major course that we think you might be interested in is Mark Masters’ blender rigging course. You can find this course at PluralSight (which is a website that is focused on helping users of software develop their skills). Mark Masters, the instructor for this course, is a professional animator and works as a Animator for the animation studio, Steelhouse Productions. So, you can be sure that there is much that you can learn from him.

02Other Tools to Learn Rigging
As for other places to learn? We suggest the “Blender Fundamentals” course that Blender themselves have posted on YouTube. They have several of these courses (for all of the more recent versions of Blender). So, you can pick out a course that works for you. One of their more recent series is “Blender Fundamentals 2.which currently has videos all on the subject of Blender rigging (including Blender rigging and Blender rigging videos.)

● Key Takeaways from This Episode →
● If you’re interested in trying out blender rigging yourself, you’ll probably want to study the subject a little before beginning.
● Blender Rigging is quite a complex subject for beginners but having something to start with should help you on your way.
● For that, we recommend checking out the videos that we mentioned in section two of this article, where we recommend some popular tutorials regarding some of the more common Blender Rigging subjects.
● If you’re looking for something more comprehensive or put together though. A course might be more up to your taste. For that, we recommend either Mark Master’s introduction to rigging and animation over at PluralSight or Blender’s own “Blender Fundamental” series on YouTube (which should introduce all the functions you’ll need to know.)
Blender is a FREE, open-source 3D Animation program that is very popular for beginner animators. It’s a good way of starting if you’re not yet sure about how far you want to go into animation as it won’t demand any immediate monetary commitment.
Now, as for its features, today, we’ll be focusing on Blender Rigging features.
In this article
01 [Why Use Blender Rigging?](#Part 1)
02 [The Art of Effective Rigging in Blender [TUTORIAL]](#Part 2)
03 [Introduction to Rigging in Blender Course](#Part 3)
Part 1 Why Use Blender Rigging?
Blender Character Rigging is a great way of creating truly beautiful and realistic animations. Despite being an open-source program, it’s capable of doing just as much, if not more, than some of the more premium Animation software out there.
So, if you want to create video projects for your audience’s entertainment or edification with animation, then Blender Rigging is definitely something that you should consider. With this tool, you can create the complex animations that you need and then polish it up in a video editor like Wondershare Filmora Video Editor (which is a premium, video-editing tool that you can use to perfect your finished Blender Rigging animations.)
Part 2 The Art of Effective Rigging in Blender [TUTORIAL]
For this next section, we’re going to be introducing a couple of tutorials that you can look into to teach you more about Blender Character Rigging, Blender Facial Rigging, Blender Muscle Rig, and so on.
These topics are each very long-winded on their own though, so we’ve linked appropriate video tutorials that you can learn more and reserved ourselves to a brief description of each technique so that you can determine whether it’s something that interests you (although, of course, our recommendation is that you check each one out so that you can get the full ‘Blender’ experience.)
01Blender Character Rigging
The main thing people usually look at Blender for is, Blender Character Rigging. And, because it was created to emulate professional animation software, Blender has this function down to pat. To give you an idea of what features you can expect: Blender comes with custom bone shapes for easy Blender character rigging, it also comes with envelope skinny, skeleton skinning, and automatic skinning. With these alone, you can be assured that you will be able to create complex animations without much trouble.
02Blender Facial Rigging
Facial Rigging is usually a more complex subject that is avoided by animators without much experience. But, with Blender, facial rigging is possible. The YouTube video should show you the process of going about Blender Facial Rigging from start to finish (from sculpting the character face itself and then making use of Blender Rigging tools for setting up a skeletal structure for your face’s character to become animated.)
03Blender Muscle Rigging
Creating a Blender Muscle Rig is exactly what it sounds like. It is, of course, much more complicated than normal rigging, but it is a good subject to familiarize yourself with anyway, as it will allow you to go to the ‘next stage’ as you say, with your Animations. The video that we’ve attached is from Pierrick Picaut, who has released a series of videos on the subject of Blender Rigging in general and has extensively explained how to create a Blender Human Rig from the general body, the face, the muscles, and so on.
04Blender Rigging
Although a lot of Animation relies on more ‘traditional’ methods of expressing movement, one can still make use of more modern animation practices, like rigs, to set up their animations for movement. It’s an especially good skill to learn if you’re more interested in content-friendly animations (rather than creating a film of your own.)
05Blender Rigging
This next tutorial is an introduction to basic Blender Rigging. It’s a good one to both start and end on, as it was created for beginners specifically, and uses an example that is perhaps easier to understand most. Make sure to give it a shot just in case.
Part 3 Introduction to Rigging in Blender Course
For this next part, we introduce two other resources that you can take advantage of to learn more about Blender Rigging. Whether it be about Blender character rigging, Blender facial rigging, free blender rigs, creating muscle rigs, and so and so forth. These resources have got your back.
01Where to Learn the Course?
The first major course that we think you might be interested in is Mark Masters’ blender rigging course. You can find this course at PluralSight (which is a website that is focused on helping users of software develop their skills). Mark Masters, the instructor for this course, is a professional animator and works as a Animator for the animation studio, Steelhouse Productions. So, you can be sure that there is much that you can learn from him.
02Other Tools to Learn Rigging
As for other places to learn? We suggest the “Blender Fundamentals” course that Blender themselves have posted on YouTube. They have several of these courses (for all of the more recent versions of Blender). So, you can pick out a course that works for you. One of their more recent series is “Blender Fundamentals 2.which currently has videos all on the subject of Blender rigging (including Blender rigging and Blender rigging videos.)
● Key Takeaways from This Episode →
● If you’re interested in trying out blender rigging yourself, you’ll probably want to study the subject a little before beginning.
● Blender Rigging is quite a complex subject for beginners but having something to start with should help you on your way.
● For that, we recommend checking out the videos that we mentioned in section two of this article, where we recommend some popular tutorials regarding some of the more common Blender Rigging subjects.
● If you’re looking for something more comprehensive or put together though. A course might be more up to your taste. For that, we recommend either Mark Master’s introduction to rigging and animation over at PluralSight or Blender’s own “Blender Fundamental” series on YouTube (which should introduce all the functions you’ll need to know.)
Make Well Done Animated GIF
Versatile Video Editor - Wondershare Filmora
An easy yet powerful editor
Numerous effects to choose from
Detailed tutorials provided by the official channel
GIF refers to Graphics Interchange Format, and you can generally discover this animated graphic image on web pages. You will see them like a twirling icon or a banner or just a few letters that go huge like magic. Note that well done animated GIF file mentions as a GIF89a, and this single file is helpful to contain various images inside a particular folder.
Moreover, these well-done animated GIF files are excellent for social media platforms, ad banners, and web pages.
They also want to add many funny words, bringing in interesting front outcomes at all times. Of course, it all boils down to the experience you wish to gain, but GIFs are always great to share online, and they bring in tons of fantastic fun moments that you can enjoy with your family.
Today, we will explore the ideal tool to create well done animated GIF along with a well-framed animated GIF tutorial. So, let’s join the trend and share the same with your friends and family.
In this article
01 [Make well done animated GIF with Filmora](#Part 1)
02 [Samples for Well Done Animated GIF](#Part 2)
Part 1 Make well done animated GIF with Filmora
You may easily find multiples of GIF files over different social media channels. These day’s people are using them mainly to entertain the audience on their channels or pages. They are also active in use for active conversations in other replies or comments.
Lots of people use GIFs to convey unique reactions on the internet on various channels. They are also valuable for illustrations, and one of the most prominent implications is in the business world for marketing requirements. It allows explaining your business products with increased user engagement and entertainment. The artistic world of GIFs can quickly boost your customers online.
It is possible to create well-done animated GIFs from still images or even from moving videos. This task is pretty straightforward than anyone can perform. To execute this task with much simplicity, we would like to recommend Wondershare Filmora for you.
Wondershare Filmora
Get started easily with Filmora’s powerful performance, intuitive interface, and countless effects!
Try It Free Try It Free Try It Free Learn More >

Using Filmora, you can quickly transform small videos into GIFs or combine several stills into GIFs. The more exciting thing is that Filmora also allows easy GIF customization as users can add different elements, overlays, text, etc., to their GIFs using the Filmora platform.
With Filmora, no matter what video formats you get, including FLV, MKV, WMV, MP4, etc. You can also introduce various advanced elements, animations, overlays, text to customize your GIFs.
Yet, if you are looking for an animated GIF tutorial, Filmora makes it all convenient for you. It assists you in creating an image, video memes, and GIFs directly without a watermark. It is FREE to use and has no signup.
You can change text size, position, and color to create a caption during the editing process. Then, just with a few clicks, your GIF is done. Try it now!
How to make GIFs with Wondershare Filmora
Here are a few simple steps to accomplish this task:
Step 1 Upload video or an image
Primarily, you have to import some editable video files or a collection of photos to the timeline of Wondershare Filmora.
Step 2 Drag to timeline
You can drag their imported media in Step 1 and drop it on the Filmora timeline.

Step 3 Edit media files
There are tons of editing options with pretty cool Filmora features. Users can easily choose among options like speed up, slow down, combine, rotate, crop, split, etc., to create a compelling video as per the content available.
Step 4 Add text effect to GIF files
It is the right time to update text-based information GIFs. Few text messages always appear good in GIFs. Or, you can add other elements here like sound, etc.

Step 5 Save and export
Once you have finished all the steps, save your file with a GIF extension and get ready to upload it on various social media platforms.

Part 2 Samples for Well Done Animated GIF
They say that an image is worth looking at a thousand words, so you must consider an animated GIF even more regarding this statement. In the current scenario, email marketers are revamping the boundaries of email design by including well-done animated GIFs to showcase their services and products in action.
Here is a collection of 5 beautiful samples of well-done animated GIFs in email marketing that proved to be very creative, engaging, and colorful.
1. ShoeMint
This cute GIF syncs pretty well with the ShoeMint’s email marketing template’s title – “C’mon, Get Happy!.” You can smile when you see the colorful socks swaying in a carefree manner.
2. Mr. Porter
This is an animated fireplace in the email marketing newsletter of Mr. Porter. It gives a pretty cozy and warm feel and atmosphere to the entire image, which is what they’re looking for or wandering for with the casual clothes the man is wearing.
3. American Apparel
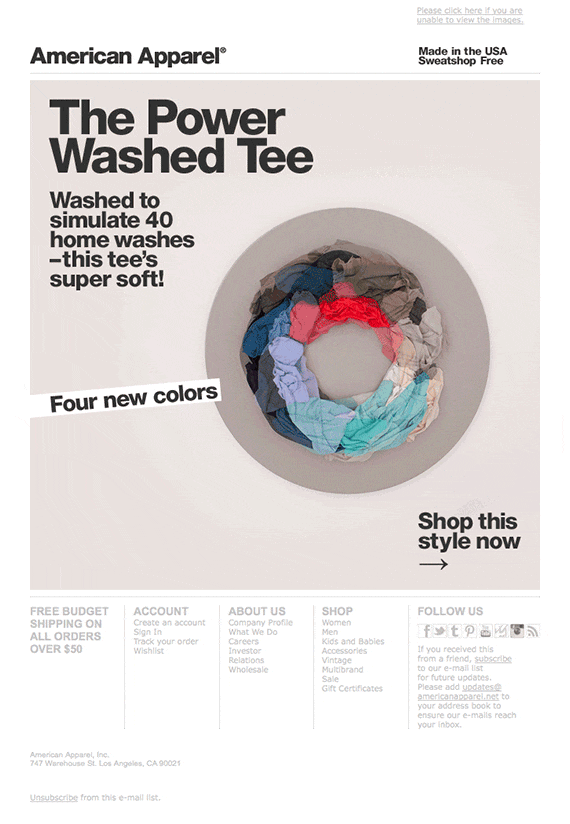
American Apparel sells “power washed” T-shirts to make them “super soft.”
This critical merit would not attract many users if it weren’t for simulating the animated GIF of the T-shirts getting washed in an imaginary washing machine.
4. Looper
One of the major motion pictures was Looper, that introduced us to the world’s first “official” GIF movie poster when the film premiered. The clock GIF inside the first O is exclusively creative, and the incredible animated dust effect suggests that both characters are fading away due to the events in the movie.
5. West Elm
West Elm offers modern furniture and various home decorations. In this email newsletter, they are presenting a selection of lamps, and what better way to showcase them than a GIF of them turning on at the same time.
Thus, these were the top five samples of our animated GIF tutorial you can take cue from right away.
Versatile Video Editor - Wondershare Filmora
An easy yet powerful editor
Numerous effects to choose from
Detailed tutorials provided by the official channel
Conclusion
While the lots of GIF makers available might prove to be good at times, they won’t be able to provide the value you want all the time. That’s what makes Wondershare Filmora an ideal pick to use for finishing well done animated GIF and one that will undoubtedly deliver on its promise. Creating a well-done animated GIF is simple, easy, and quick with Filmora. Have you tried it out yet?
GIF refers to Graphics Interchange Format, and you can generally discover this animated graphic image on web pages. You will see them like a twirling icon or a banner or just a few letters that go huge like magic. Note that well done animated GIF file mentions as a GIF89a, and this single file is helpful to contain various images inside a particular folder.
Moreover, these well-done animated GIF files are excellent for social media platforms, ad banners, and web pages.
They also want to add many funny words, bringing in interesting front outcomes at all times. Of course, it all boils down to the experience you wish to gain, but GIFs are always great to share online, and they bring in tons of fantastic fun moments that you can enjoy with your family.
Today, we will explore the ideal tool to create well done animated GIF along with a well-framed animated GIF tutorial. So, let’s join the trend and share the same with your friends and family.
In this article
01 [Make well done animated GIF with Filmora](#Part 1)
02 [Samples for Well Done Animated GIF](#Part 2)
Part 1 Make well done animated GIF with Filmora
You may easily find multiples of GIF files over different social media channels. These day’s people are using them mainly to entertain the audience on their channels or pages. They are also active in use for active conversations in other replies or comments.
Lots of people use GIFs to convey unique reactions on the internet on various channels. They are also valuable for illustrations, and one of the most prominent implications is in the business world for marketing requirements. It allows explaining your business products with increased user engagement and entertainment. The artistic world of GIFs can quickly boost your customers online.
It is possible to create well-done animated GIFs from still images or even from moving videos. This task is pretty straightforward than anyone can perform. To execute this task with much simplicity, we would like to recommend Wondershare Filmora for you.
Wondershare Filmora
Get started easily with Filmora’s powerful performance, intuitive interface, and countless effects!
Try It Free Try It Free Try It Free Learn More >
Using Filmora, you can quickly transform small videos into GIFs or combine several stills into GIFs. The more exciting thing is that Filmora also allows easy GIF customization as users can add different elements, overlays, text, etc., to their GIFs using the Filmora platform.
With Filmora, no matter what video formats you get, including FLV, MKV, WMV, MP4, etc. You can also introduce various advanced elements, animations, overlays, text to customize your GIFs.
Yet, if you are looking for an animated GIF tutorial, Filmora makes it all convenient for you. It assists you in creating an image, video memes, and GIFs directly without a watermark. It is FREE to use and has no signup.
You can change text size, position, and color to create a caption during the editing process. Then, just with a few clicks, your GIF is done. Try it now!
How to make GIFs with Wondershare Filmora
Here are a few simple steps to accomplish this task:
Step 1 Upload video or an image
Primarily, you have to import some editable video files or a collection of photos to the timeline of Wondershare Filmora.
Step 2 Drag to timeline
You can drag their imported media in Step 1 and drop it on the Filmora timeline.
Step 3 Edit media files
There are tons of editing options with pretty cool Filmora features. Users can easily choose among options like speed up, slow down, combine, rotate, crop, split, etc., to create a compelling video as per the content available.
Step 4 Add text effect to GIF files
It is the right time to update text-based information GIFs. Few text messages always appear good in GIFs. Or, you can add other elements here like sound, etc.
Step 5 Save and export
Once you have finished all the steps, save your file with a GIF extension and get ready to upload it on various social media platforms.
Part 2 Samples for Well Done Animated GIF
They say that an image is worth looking at a thousand words, so you must consider an animated GIF even more regarding this statement. In the current scenario, email marketers are revamping the boundaries of email design by including well-done animated GIFs to showcase their services and products in action.
Here is a collection of 5 beautiful samples of well-done animated GIFs in email marketing that proved to be very creative, engaging, and colorful.
1. ShoeMint
This cute GIF syncs pretty well with the ShoeMint’s email marketing template’s title – “C’mon, Get Happy!.” You can smile when you see the colorful socks swaying in a carefree manner.
2. Mr. Porter
This is an animated fireplace in the email marketing newsletter of Mr. Porter. It gives a pretty cozy and warm feel and atmosphere to the entire image, which is what they’re looking for or wandering for with the casual clothes the man is wearing.
3. American Apparel
American Apparel sells “power washed” T-shirts to make them “super soft.”
This critical merit would not attract many users if it weren’t for simulating the animated GIF of the T-shirts getting washed in an imaginary washing machine.
4. Looper
One of the major motion pictures was Looper, that introduced us to the world’s first “official” GIF movie poster when the film premiered. The clock GIF inside the first O is exclusively creative, and the incredible animated dust effect suggests that both characters are fading away due to the events in the movie.
5. West Elm
West Elm offers modern furniture and various home decorations. In this email newsletter, they are presenting a selection of lamps, and what better way to showcase them than a GIF of them turning on at the same time.
Thus, these were the top five samples of our animated GIF tutorial you can take cue from right away.
Versatile Video Editor - Wondershare Filmora
An easy yet powerful editor
Numerous effects to choose from
Detailed tutorials provided by the official channel
Conclusion
While the lots of GIF makers available might prove to be good at times, they won’t be able to provide the value you want all the time. That’s what makes Wondershare Filmora an ideal pick to use for finishing well done animated GIF and one that will undoubtedly deliver on its promise. Creating a well-done animated GIF is simple, easy, and quick with Filmora. Have you tried it out yet?
How to Convert Video to GIF (Fast & Easy!)
How to Convert Video to GIF (Fast & Easy!)
An easy yet powerful editor
Numerous effects to choose from
Detailed tutorials provided by the official channel
The use of GIFs has increased over time and not only on social media platforms, these interesting animations are used for various purposes like marketing, blogging, WhatsApp chats, and much more.

Though there are several online sites from where you can download the desired GIF, there is also an option to create a customized one using videos of images. So, if you too are keen to create a customized GIF, the article will look after your concerns. Learn how to make video to GIF Photoshop and using other tools. Keep reading!!
In this article
01 [Simple Alternative to Photoshop for creating a GIF from Videos- Wondershare Filmora](#Part 1)
02 [Simple Alternative to Photoshop for creating a GIF from Videos- Wondershare Filmora](#Part 2)
Part 1 Creating GIFs from videos using Photoshop
When it comes to any type of video editing task, the first software that comes to mind is Photoshop. Developed by Adobe, this is an excellent editing tool available for Windows and Mac. The software comes loaded with a wide range of functions that help you create desired graphics including GIFs.
Though the interface and the use of the software are a little complicated, once you get a hang of it, professional-looking files can be created in no time.
Steps to convert video to GIF Photoshop
Step 1. Launch the Photoshop software on your system and select File > Import. Next tap on the “Video Frames to Layers” option. Choose the desired video (compatible format) and tap on Load.
Step 2. Next, you need to select the Range to Import. For a few frames, choose the “Selected Frames Only” option.
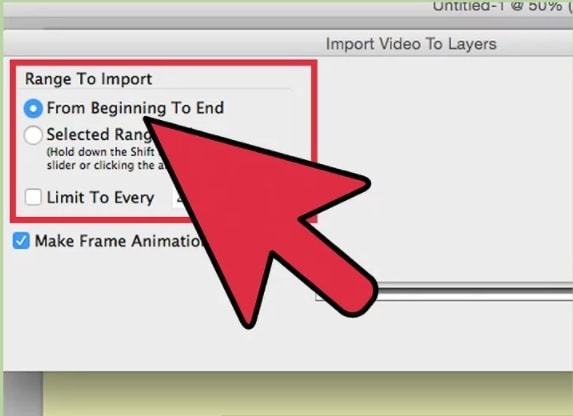
Step 3. You now need to cut the frames that are not needed by going to Window and then selecting the Animation. If needed, new frames can also be added here.
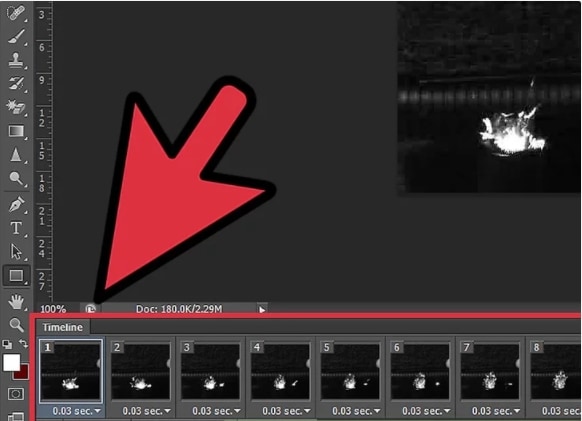
Step 4. To make your animation loop forever, select Forever from the bottom left side of the animation frames.
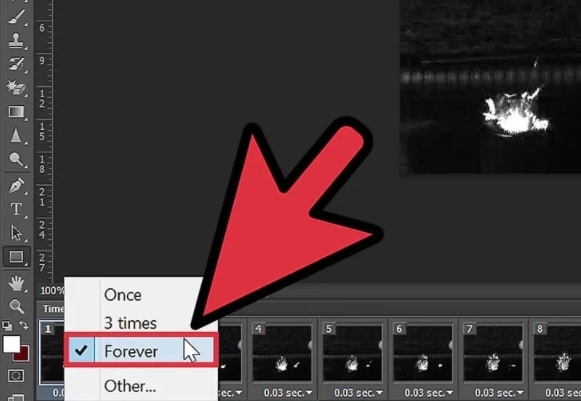
Step 5. Next, at the upper-left corner, go to the Rectangle marquee tool and choose the section you wish to focus on
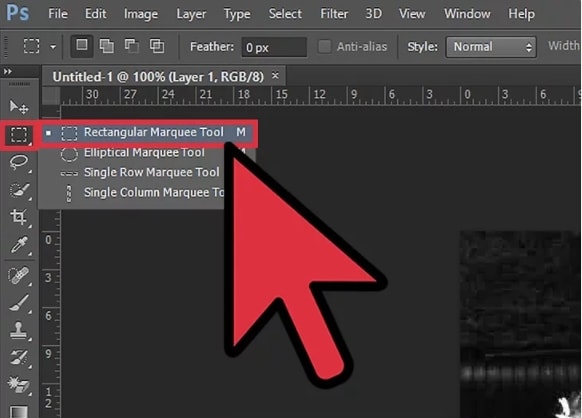
Step 6. Select the image size of the video that will make your GIF look appealing.
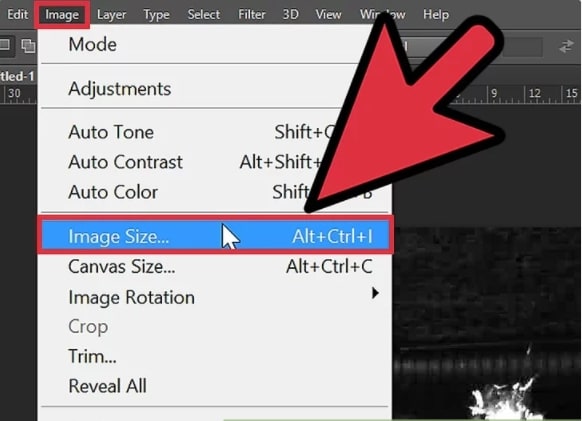
Step 7. Next, go to File > Save for Web & Devices for optimizing the image.
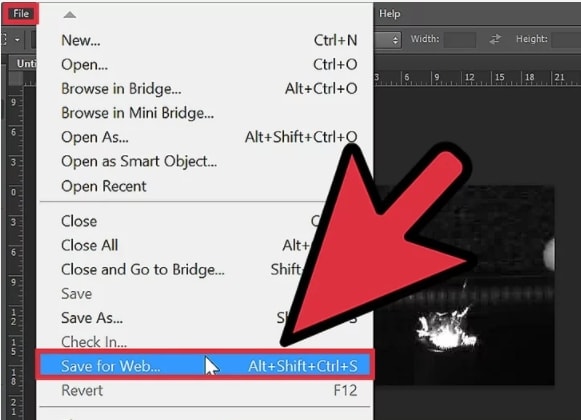
Step 8. Now select GIF at the preset section and check if the animation created is right by clicking on the Preview button.
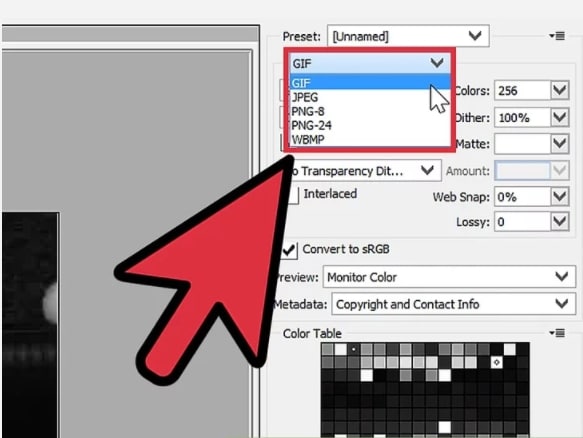
Step 9. Finally, when all is done, click on the Save button and give a desired name to the file.
With the above steps you can make gif from video Photoshop.
Part 2 Simple Alternative to Photoshop for creating a GIF from Videos- Wondershare Filmora
The learning curve of Photoshop is quite steep and to create a GIF from videos using the tool is a complicated process involving multiple steps and especially if you are a beginner and have no prior experience of working with Photoshop software.
So, if you are looking for an alternative that is simple and fast, we suggest Wondershare Filmora Video Editor as the best option.
Wondershare Filmora
Get started easily with Filmora’s powerful performance, intuitive interface, and countless effects!
Try It Free Try It Free Try It Free Learn More >
Using the software videos and images in all key formats can be added to the interface for creating GIF animations. An array of editing options is available like cropping, splitting, rotating, cutting, and more. You can even add text, sound, effects, and other elements for further customization.
In a few simple steps, the software will let you create GIFs of high quality that can be used on several social media and other online platforms.
Steps to create GIF using Wondershare Filmora
Step 1. Download, install, and launch the Wondershare Filmora software on your system and then browse to import the media files from which you want to create a GIF.
Step 2. After the files are added to the interface, move them to the timeline at the bottom by dragging and dropping.
Step 3. Using the editing options you can trim, crop, rotate, and perform other functions.
Step 4. You can even add text, effects, and other elements for further customization.
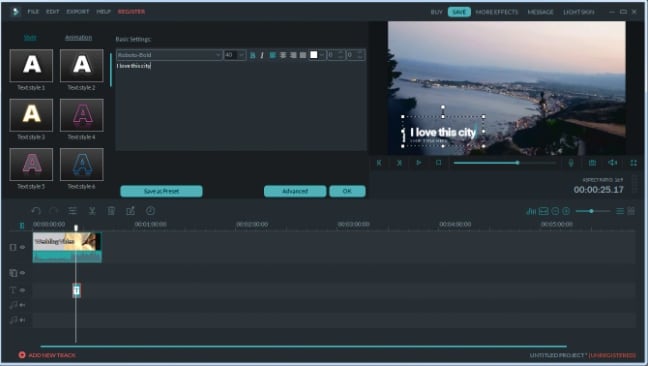
Step 5. Next, choose to save the created file as GIF under the Local tab. Choose the file name and the location, and then finally tap on the EXPORT button to start the processing.
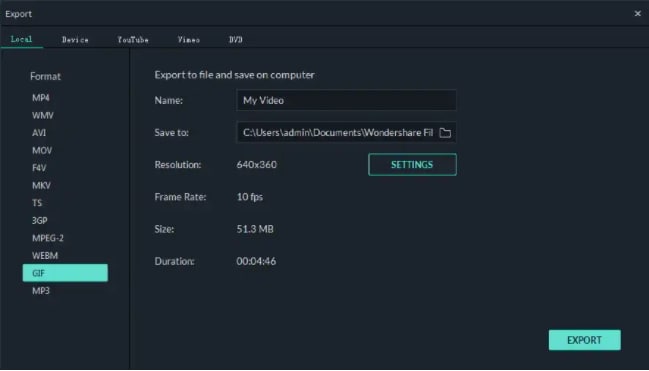
● Key Takeaways from This Episode →
●GIFs are the latest trend that is used all over social media and other online sites.
●Several software and tools can help in creating the desired GIF.
●Adobe Photoshop is one of the widely used software that can create a GIF using videos as well as images, but the process is quite complicated.
●For a simpler and quicker process of creating a GIF, we suggest using Wondershare Filmora.
The use of GIFs has increased over time and not only on social media platforms, these interesting animations are used for various purposes like marketing, blogging, WhatsApp chats, and much more.
Though there are several online sites from where you can download the desired GIF, there is also an option to create a customized one using videos of images. So, if you too are keen to create a customized GIF, the article will look after your concerns. Learn how to make video to GIF Photoshop and using other tools. Keep reading!!
In this article
01 [Simple Alternative to Photoshop for creating a GIF from Videos- Wondershare Filmora](#Part 1)
02 [Simple Alternative to Photoshop for creating a GIF from Videos- Wondershare Filmora](#Part 2)
Part 1 Creating GIFs from videos using Photoshop
When it comes to any type of video editing task, the first software that comes to mind is Photoshop. Developed by Adobe, this is an excellent editing tool available for Windows and Mac. The software comes loaded with a wide range of functions that help you create desired graphics including GIFs.
Though the interface and the use of the software are a little complicated, once you get a hang of it, professional-looking files can be created in no time.
Steps to convert video to GIF Photoshop
Step 1. Launch the Photoshop software on your system and select File > Import. Next tap on the “Video Frames to Layers” option. Choose the desired video (compatible format) and tap on Load.
Step 2. Next, you need to select the Range to Import. For a few frames, choose the “Selected Frames Only” option.
Step 3. You now need to cut the frames that are not needed by going to Window and then selecting the Animation. If needed, new frames can also be added here.
Step 4. To make your animation loop forever, select Forever from the bottom left side of the animation frames.
Step 5. Next, at the upper-left corner, go to the Rectangle marquee tool and choose the section you wish to focus on
Step 6. Select the image size of the video that will make your GIF look appealing.
Step 7. Next, go to File > Save for Web & Devices for optimizing the image.
Step 8. Now select GIF at the preset section and check if the animation created is right by clicking on the Preview button.
Step 9. Finally, when all is done, click on the Save button and give a desired name to the file.
With the above steps you can make gif from video Photoshop.
Part 2 Simple Alternative to Photoshop for creating a GIF from Videos- Wondershare Filmora
The learning curve of Photoshop is quite steep and to create a GIF from videos using the tool is a complicated process involving multiple steps and especially if you are a beginner and have no prior experience of working with Photoshop software.
So, if you are looking for an alternative that is simple and fast, we suggest Wondershare Filmora Video Editor as the best option.
Wondershare Filmora
Get started easily with Filmora’s powerful performance, intuitive interface, and countless effects!
Try It Free Try It Free Try It Free Learn More >
Using the software videos and images in all key formats can be added to the interface for creating GIF animations. An array of editing options is available like cropping, splitting, rotating, cutting, and more. You can even add text, sound, effects, and other elements for further customization.
In a few simple steps, the software will let you create GIFs of high quality that can be used on several social media and other online platforms.
Steps to create GIF using Wondershare Filmora
Step 1. Download, install, and launch the Wondershare Filmora software on your system and then browse to import the media files from which you want to create a GIF.
Step 2. After the files are added to the interface, move them to the timeline at the bottom by dragging and dropping.
Step 3. Using the editing options you can trim, crop, rotate, and perform other functions.
Step 4. You can even add text, effects, and other elements for further customization.
Step 5. Next, choose to save the created file as GIF under the Local tab. Choose the file name and the location, and then finally tap on the EXPORT button to start the processing.
● Key Takeaways from This Episode →
●GIFs are the latest trend that is used all over social media and other online sites.
●Several software and tools can help in creating the desired GIF.
●Adobe Photoshop is one of the widely used software that can create a GIF using videos as well as images, but the process is quite complicated.
●For a simpler and quicker process of creating a GIF, we suggest using Wondershare Filmora.
Also read:
- 2024 Approved Handy Tip From Adobe Animate Rigging Tutorial for All Learners
- Updated 6 Unexpected Ways Gif Animation Maker Can Affect Your Marketing for 2024
- New Best 10 Animated Templates in Canva for 2024
- Updated 2024 Approved What Wikipedia Cant Tell You About the 10 Batman Cartoons
- New Great Ways to Make Claymation Videos
- New 12 Animated Slideshow PowerPoint Templates for 2024
- New 2024 Approved Tutorials to Make Animated Images – Even if Youre Just Starting Out
- New Whiteboard Animation Services Top 15 Animation Companies to Pick
- A Beginners Guide to Explain What 3D Animation Is for 2024
- New 2024 Approved Can I Do Animated Logo Design Without Design Skills?
- 2024 Approved How to Animate Picture Online Without Learning From Scratch
- New Learn How to Do Funny Cartoon Drawings
- 15 Best Sites to Watch Cartoons Online Free And So Can You
- What Is the Meaning of Motion Graphics
- New Techniques on How to Make After Effects 2D Animation
- New 5 Different Animation Styles A Simple but Complete Guide
- 2024 Approved How To Remove The Endless Loop From Animated GIF
- New In 2024, How to Make GIF Stickers for WhatsApp 100 The Easy Way
- New In 2024, Learn All About Lip-Syncing in Animation
- 10 Best Free GIF Apps for iPhone and iPad for 2024
- Updated Before You Learn 3D Animation Things You Should Know for 2024
- New How to Make Photo 3D Cartoon Online
- New Top 7 Animated GIF Text Makers for 2024
- New 10 Trendy Free Logo Animation Templates for 2024
- New 2024 Approved 8 Top Motion Graphics Online Tools for Your Inspiration
- Updated How to Make GIF Stickers for WhatsApp 100 The Easy Way
- Updated In 2024, Top 12 2D Animation Studios All Should Check Out
- 2024 Approved How to Convert Video to GIF Fast & Easy
- In 2024, Learn Disney Cartoon Drawing to See Disney Magic Moments
- Updated 2024 Approved Learn Pencil2D Animation Tutorial Overview
- What Is Motion Graphics
- 15 Best Sites to Watch Cartoons Online Free And So Can You for 2024
- 2024 Approved 15 Best Apps to Turn Photos Into Cartoons and Sketches
- New In 2024, How to Make Animated Videos for Business Simple Guide
- In 2024, How to Reset Gmail Password on Realme C33 2023 Devices
- The Best iSpoofer Alternative to Try On Poco F5 5G | Dr.fone
- A Complete Guide To OEM Unlocking on Lava Yuva 3 Pro
- In 2024, How Can Samsung Galaxy A14 4GMirror Share to PC? | Dr.fone
- How to Cast Honor X8b to Computer for iPhone and Android? | Dr.fone
- In 2024, 8 Best Apps for Screen Mirroring Sony Xperia 10 V PC | Dr.fone
- How To Bypass FRP on Infinix GT 10 Pro
- How to Remove Apple ID from Apple iPhone 14 without Password?
- In 2024, Simple and Effective Ways to Change Your Country on YouTube App Of your Apple iPhone 13 mini | Dr.fone
- In 2024, The Best Android Unlock Software For Lava Storm 5G Device Top 5 Picks to Remove Android Locks
- Apple iPhone 13 Asking for Passcode after iOS 17/14 Update, What to Do? | Dr.fone
- How to Transfer Text Messages from Tecno Spark Go (2023) to New Phone | Dr.fone
- In 2024, The Top 5 Android Apps That Use Fingerprint Sensor to Lock Your Apps On Realme GT Neo 5 SE
- Undelete lost pictures from Oppo F23 5G.
- How To Unlink Your iPhone 8 Plus From Your Apple ID
- Fake Android Location without Rooting For Your Xiaomi 14 | Dr.fone
- In 2024, How To Unlock Nokia C12 Pro Phone Without Password?
- In 2024, Unlock iPhone 14 Plus Without Passcode Easily | Dr.fone
- In 2024, How to Get and Use Pokemon Go Promo Codes On Vivo T2x 5G | Dr.fone
- In 2024, How Can Nubia Red Magic 9 Pro+Mirror Share to PC? | Dr.fone
- Preparation to Beat Giovani in Pokemon Go For Apple iPhone 11 Pro | Dr.fone
- Android Safe Mode - How to Turn off Safe Mode on Nokia 105 Classic? | Dr.fone
- In 2024, Step-by-Step Tutorial How To Bypass Itel S23+ FRP
- How To Transfer Data From Apple iPhone 11 Pro To Other iPhone 15 Pro devices? | Dr.fone
- How to Rescue Lost Music from G42 5G
- In 2024, Why Apple Account Disabled On your iPhone SE? How to Fix
- In 2024, Top 15 Augmented Reality Games Like Pokémon GO To Play On Honor X50i | Dr.fone
- Cellular Network Not Available for Voice Calls On Vivo Y36i | Dr.fone
- 7 Ways to Unlock a Locked Realme 11X 5G Phone
- In 2024, Pokemon Go Error 12 Failed to Detect Location On Nokia C12 Plus? | Dr.fone
- Title: Updated In 2024, A Beginners Guide for Learning 3D Animation
- Author: Elon
- Created at : 2024-05-19 03:05:16
- Updated at : 2024-05-20 03:05:16
- Link: https://animation-videos.techidaily.com/updated-in-2024-a-beginners-guide-for-learning-3d-animation/
- License: This work is licensed under CC BY-NC-SA 4.0.
