
:max_bytes(150000):strip_icc():format(webp)/macOS-Sonoma-Banner-fe4ffda2caaf4040b81ae0b66f2d6dc0.jpg)
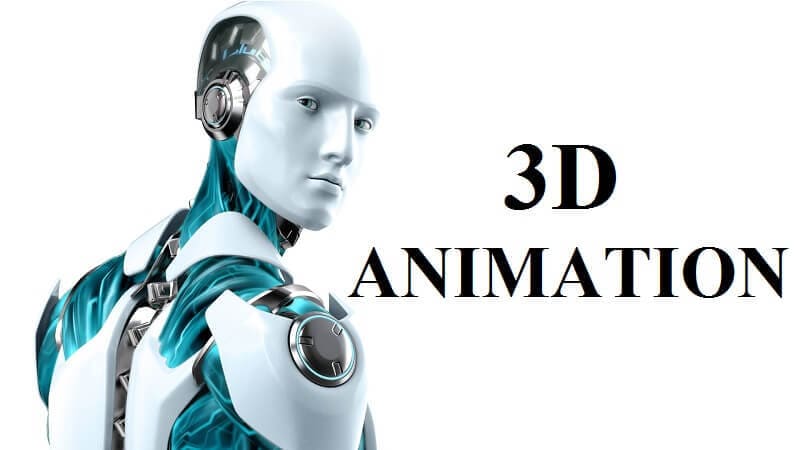
Updated In 2024, Beginners Guide for Learning 3D Animation
Beginners Guide for Learning 3D Animation
A Beginners Guide for Learning 3D Animation
An easy yet powerful editor
Numerous effects to choose from
Detailed tutorials provided by the official channel
“I am still finding it difficult to go into animation even after covering some basic concepts of animation, hardware, software, books, and courses. Is there a way I can learn 3D animation and graphic design courses quickly and easily?”
This guide will show you what professional 3D animators go through and share how you can start your animation career. Sit back and enjoy this all-encompassing and educating guide to learn 3D Animation for beginners!
In this article
01 [Should You Study 3D Animation?](#Part 1)
02 [Top 5 Programs for 3D Animation](#Part 2)
03 [The Best 10 Online Courses to Learn 3D Animation for Beginners](#Part 3)
04 [Recommended 3D Animation Learning Books and Resources](#Part 4)
Part 1 Should You Study 3D Animation?
3D animation is a graphic design technique that uses motions to bring props, characters, objects, etc., to life. For a long time, 3D animation has created TV shows, films, and games, but now it is widely used to create materials for businesses that help them advertise their services and products. The most common usage of 3D animation is creating three-dimensional moving objects and placing them in a digital environment. There is software used to generate these objects specifically for 3D animation with 3D animation courses online for free to learn how to use such software. This software helps 3D animators to create the illusion of movement needed to bring these objects to life.
As the popularity of 3D animation begins to grow, its usage also increases. 3D animation can be useful for the following:
● Many businesses use 3D animation for presentation and more examples and graphics.
● 3D animation is used in real estate as many apartment complexes use it to create interior and exterior renders for their properties. 3D animation allows renters or buyers to view the property without visiting it.
● 3D animation can also be valuable in the medical industry to create exciting graphics for presentation.
You can divide the process of 3D animation into three primary phases:
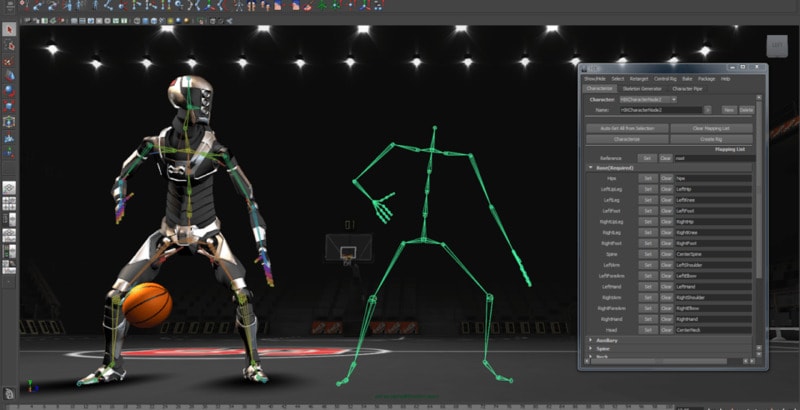
● Modeling: The modeling stage is how characters or objects get created. This stage can include scanning natural objects into a computer or using a modeling tool. Both methods are helpful and outstanding. When you scan real-world objects into your computer, it saves a lot of time; creating a model entirely by yourself using a tool will give you control over the entire look. Irrespective of the methods used, textures must be added to the character or objects before moving to the next stage.
● Animation and layout: At this stage, the created models are animated and positioned into a particular scene, first determining a layout by creating a set and adding objects into it. The characters and things must be animated by assigning animation variables, and then models within the scene can be given life through motion capture and keyframing.
● Rendering: This stage is where the scene generates into the finished image by using a specific software as the process of rendering cannot be handled by a typical computer
For learning 3D animation, practice, to make yourself perfect for getting your 3D animation as smooth and precise as you would like it to take some time. If your set goal is to create 3D characters, you first need to know how to recreate people in a digital form. According to the 3D animation forum, it takes at least eight months to learn how to animate if only you spend about three to four hours every day. It takes firm dedication to learn 3D animation and graphic design courses.
Part 2 Top 5 Programs for 3D Animation
Aside from the three basic phases involved in 3D animation, there are other individual steps that and needed in 3D animation and 3D animation graphic design courses which include:
● Step 1: creating the story and conceptualizing
● Step 2: making the 3D models
● Step 3: rigging, texturing, and animation
● Step 4: setting up the cameras and lightning
● Step 5: rendering
● Step 6: applying special effects and compositing
● Step 7: editing, music, and Foley
● Step 8: the final output
The best part of 3D animation is finding free animation programs without watermarks that are very useful for creating content on Windows and Mac. These best 3D animation courses include:
01Filmora
For Win 7 or later (64-bit)
For macOS 10.12 or later
Wondershare Filmora Video Editor is a straightforward and powerful animation software to create 3D animated text, shapes, elements, or transitions you want for your videos with its 800+ stunning effects. This software comes with a keyframing, green screen, video stabilization, color tuning, split and zoom, amongst others, that help you create precise and smooth animation effects. Filmora program works perfectly on your Windows and Mac computer.
02Blender
Blender is an open-source, powerful 3D animation software for professional users. This animation software does not easily make an image and mission since it focuses on 3D. It takes your animation projects to a whole new level as this program works perfectly on your Mac computer.
03DAZ Studio
DAZ Studio is a potent and completely free tool for 3D animation creation that lets you create short videos whether you are using this for pleasure or business. This 3D animation creator is complicated to use, and 3D effects are at the core focus of this software. This software is highly compatible with Windows 64 bit, and you can build a model, render, and pose animation within the skin texture level.
04Terragen

Terragen is a completely free 3D animation program for Windows tablets and computers. It allows you to create a photo-realistic CG environment and 3D animation that you want. The featured image gallery on this software homepage will give you a profound idea of the outcome when you use the program.
05Anim8or
Anim8or Easy free 3D animation program supports 3D modeler and Truetype fonts to meet your advanced needs. This program is difficult for beginners but allows you to create a unique work according to your needs.
Part 3 The Best 10 Online Courses to Learn 3D Animation for Beginners
There are online 3D animation courses for beginners to learn from and these courses include:
01Introduction to Voxel Art for Character Design by Zach Soares
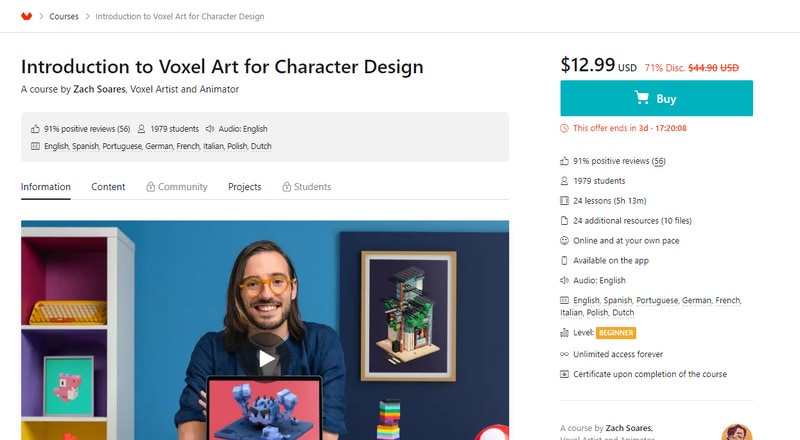
Price: $12.99
Certificate: Available upon completion of the course
02Psychedelic Animation with Photoshop and After Effects by Klarens Malluta
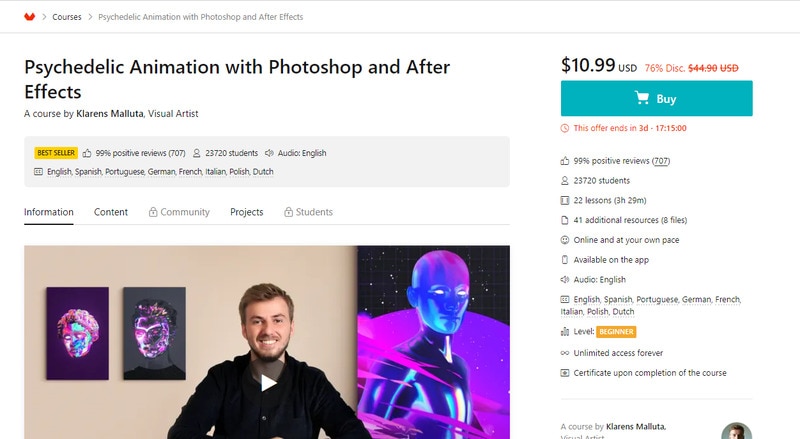
Price: $10.99
Certificate: Available upon completion of the course
032D and 3D Animation with After Effects and Cinema 4D by Andrea Gendusa
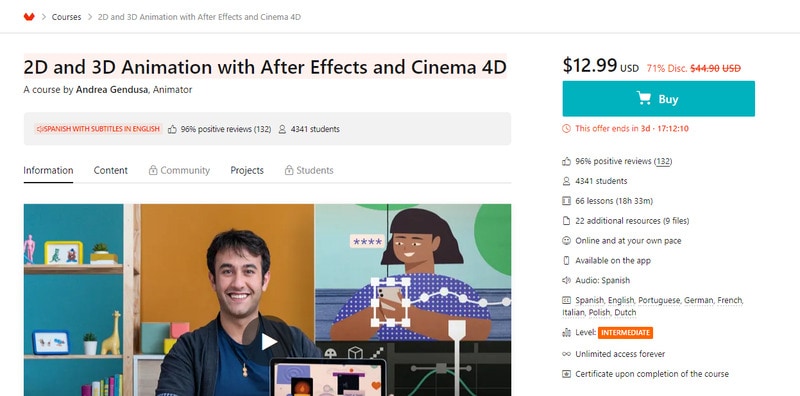
Price: $12.99
Certificate: Available upon completion of the course
04Blender for Beginners by Carlos Sifuentes Haro
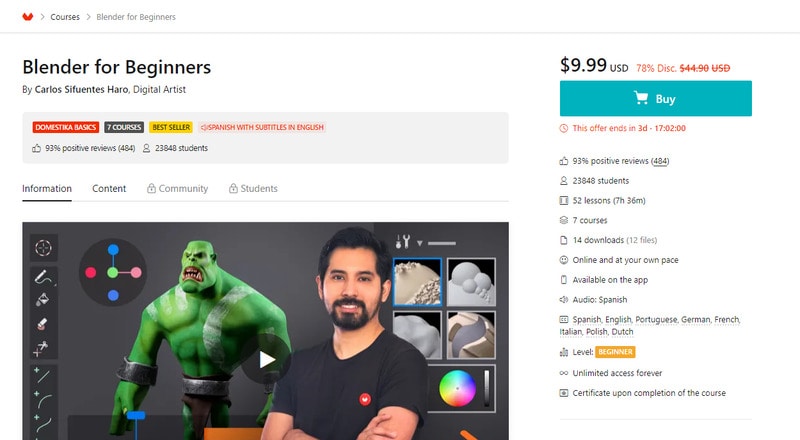
Price: $9.99
Certificate: Available upon completion of the course
05Adobe After Effects for Beginners by Manuel Neto
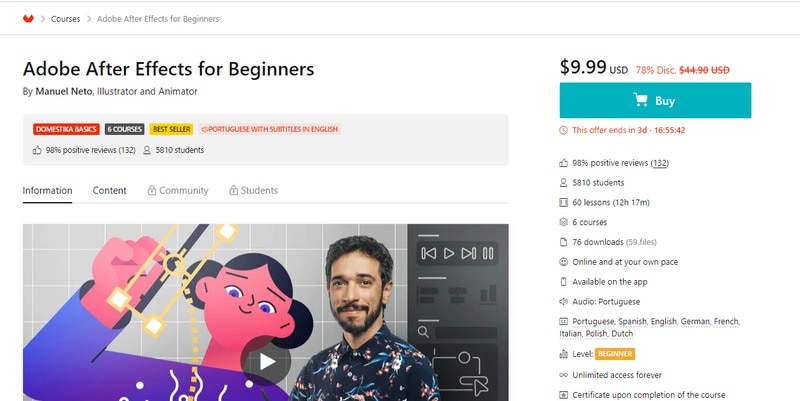
Price: $9.99
Certificate: Available upon completion of the course
06Animation for Typographic Compositions by Holke 79
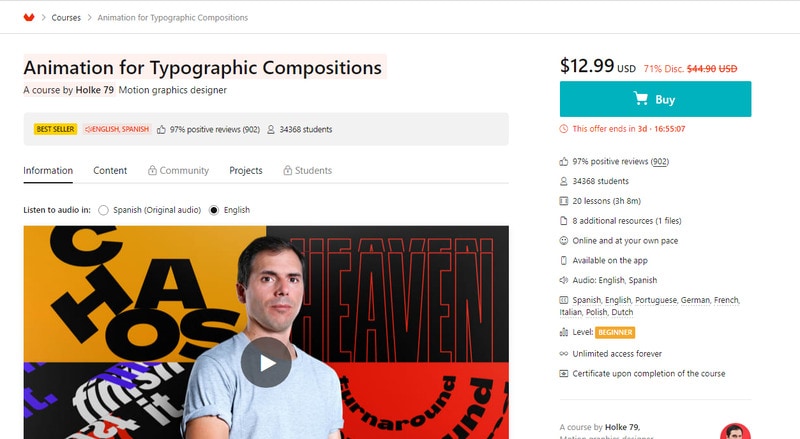
Price: $12.99
Certificate: Available upon completion of the course
07Adobe After Effects for Character Animation By Facundo López
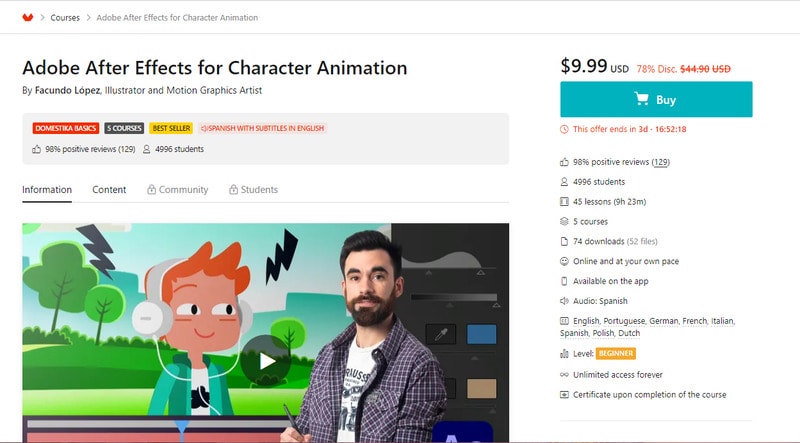
Price: $9.99
Certificate: Available upon completion of the course
08Animation Techniques with 3D Effects in After Effects by Moncho Massé
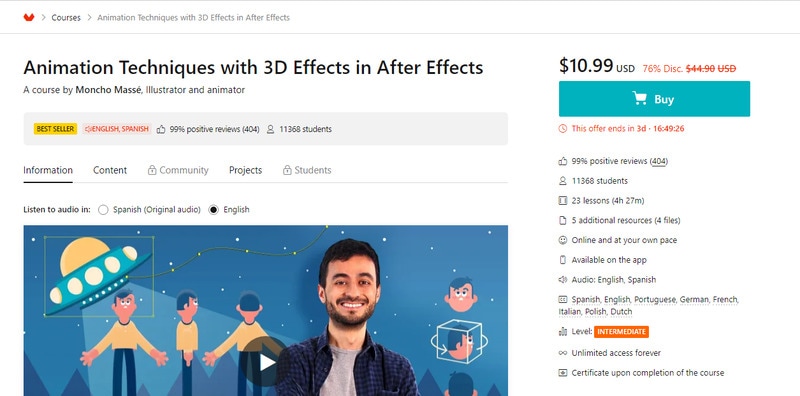
Price: $10.99
Certificate: Available upon completion of the course
093D Typography: Playing with Color and Volume by Thomas Burden
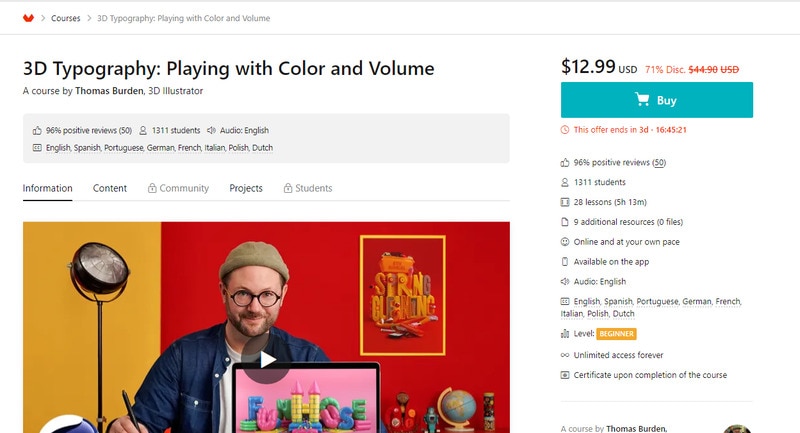
Price: $12.99
Certificate: Available upon completion of the course
103D Animation for Non Animators with Cinema 4D by Zigor Samaniego

Price: $11.99
Certificate: Certificate upon completion of the course
Part 4 Part 4 Recommended 3D Animation Learning Books and Resources
Learn 3D animation with the best 3D animation courses, learning books, and resources. Books and Resources for learning 3D animation include but are not limited to:
● 3D Animation Essentials by Andy Beane
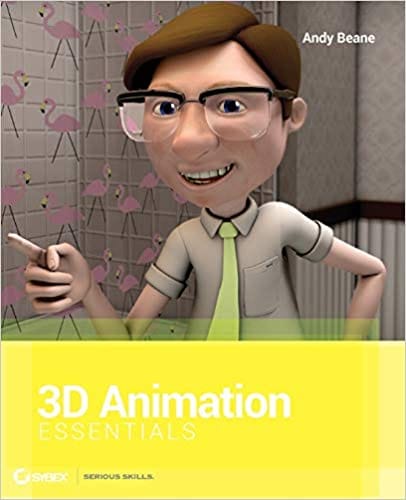
3D Animation Essentials by Andy Beane is a comprehensive book on the fundamentals and principles of 3D animation for films and video games.
● 3D Art Essential by Ami Chopine
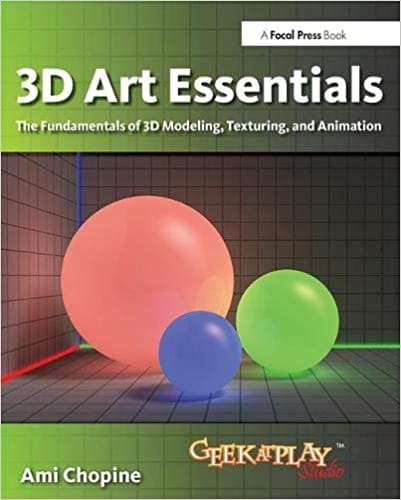
3D Art Essential by Ami Chopine is all about the hows and whys of 3D animation and teachers why certain techniques and styles work for a particular project.
● Key Takeaways from This Episode →
● Understanding 3D Animation
● Top 5 Programs used for learning 3D Animation
● The Best 10 Online 3D Animation Courses for Beginners
● 3D Animation Graphic Design Courses, Learning Books and Resources
“I am still finding it difficult to go into animation even after covering some basic concepts of animation, hardware, software, books, and courses. Is there a way I can learn 3D animation and graphic design courses quickly and easily?”
This guide will show you what professional 3D animators go through and share how you can start your animation career. Sit back and enjoy this all-encompassing and educating guide to learn 3D Animation for beginners!
In this article
01 [Should You Study 3D Animation?](#Part 1)
02 [Top 5 Programs for 3D Animation](#Part 2)
03 [The Best 10 Online Courses to Learn 3D Animation for Beginners](#Part 3)
04 [Recommended 3D Animation Learning Books and Resources](#Part 4)
Part 1 Should You Study 3D Animation?
3D animation is a graphic design technique that uses motions to bring props, characters, objects, etc., to life. For a long time, 3D animation has created TV shows, films, and games, but now it is widely used to create materials for businesses that help them advertise their services and products. The most common usage of 3D animation is creating three-dimensional moving objects and placing them in a digital environment. There is software used to generate these objects specifically for 3D animation with 3D animation courses online for free to learn how to use such software. This software helps 3D animators to create the illusion of movement needed to bring these objects to life.
As the popularity of 3D animation begins to grow, its usage also increases. 3D animation can be useful for the following:
● Many businesses use 3D animation for presentation and more examples and graphics.
● 3D animation is used in real estate as many apartment complexes use it to create interior and exterior renders for their properties. 3D animation allows renters or buyers to view the property without visiting it.
● 3D animation can also be valuable in the medical industry to create exciting graphics for presentation.
You can divide the process of 3D animation into three primary phases:
● Modeling: The modeling stage is how characters or objects get created. This stage can include scanning natural objects into a computer or using a modeling tool. Both methods are helpful and outstanding. When you scan real-world objects into your computer, it saves a lot of time; creating a model entirely by yourself using a tool will give you control over the entire look. Irrespective of the methods used, textures must be added to the character or objects before moving to the next stage.
● Animation and layout: At this stage, the created models are animated and positioned into a particular scene, first determining a layout by creating a set and adding objects into it. The characters and things must be animated by assigning animation variables, and then models within the scene can be given life through motion capture and keyframing.
● Rendering: This stage is where the scene generates into the finished image by using a specific software as the process of rendering cannot be handled by a typical computer
For learning 3D animation, practice, to make yourself perfect for getting your 3D animation as smooth and precise as you would like it to take some time. If your set goal is to create 3D characters, you first need to know how to recreate people in a digital form. According to the 3D animation forum, it takes at least eight months to learn how to animate if only you spend about three to four hours every day. It takes firm dedication to learn 3D animation and graphic design courses.
Part 2 Top 5 Programs for 3D Animation
Aside from the three basic phases involved in 3D animation, there are other individual steps that and needed in 3D animation and 3D animation graphic design courses which include:
● Step 1: creating the story and conceptualizing
● Step 2: making the 3D models
● Step 3: rigging, texturing, and animation
● Step 4: setting up the cameras and lightning
● Step 5: rendering
● Step 6: applying special effects and compositing
● Step 7: editing, music, and Foley
● Step 8: the final output
The best part of 3D animation is finding free animation programs without watermarks that are very useful for creating content on Windows and Mac. These best 3D animation courses include:
01Filmora
For Win 7 or later (64-bit)
For macOS 10.12 or later
Wondershare Filmora Video Editor is a straightforward and powerful animation software to create 3D animated text, shapes, elements, or transitions you want for your videos with its 800+ stunning effects. This software comes with a keyframing, green screen, video stabilization, color tuning, split and zoom, amongst others, that help you create precise and smooth animation effects. Filmora program works perfectly on your Windows and Mac computer.
02Blender
Blender is an open-source, powerful 3D animation software for professional users. This animation software does not easily make an image and mission since it focuses on 3D. It takes your animation projects to a whole new level as this program works perfectly on your Mac computer.
03DAZ Studio
DAZ Studio is a potent and completely free tool for 3D animation creation that lets you create short videos whether you are using this for pleasure or business. This 3D animation creator is complicated to use, and 3D effects are at the core focus of this software. This software is highly compatible with Windows 64 bit, and you can build a model, render, and pose animation within the skin texture level.
04Terragen
Terragen is a completely free 3D animation program for Windows tablets and computers. It allows you to create a photo-realistic CG environment and 3D animation that you want. The featured image gallery on this software homepage will give you a profound idea of the outcome when you use the program.
05Anim8or
Anim8or Easy free 3D animation program supports 3D modeler and Truetype fonts to meet your advanced needs. This program is difficult for beginners but allows you to create a unique work according to your needs.
Part 3 The Best 10 Online Courses to Learn 3D Animation for Beginners
There are online 3D animation courses for beginners to learn from and these courses include:
01Introduction to Voxel Art for Character Design by Zach Soares
Price: $12.99
Certificate: Available upon completion of the course
02Psychedelic Animation with Photoshop and After Effects by Klarens Malluta
Price: $10.99
Certificate: Available upon completion of the course
032D and 3D Animation with After Effects and Cinema 4D by Andrea Gendusa
Price: $12.99
Certificate: Available upon completion of the course
04Blender for Beginners by Carlos Sifuentes Haro
Price: $9.99
Certificate: Available upon completion of the course
05Adobe After Effects for Beginners by Manuel Neto
Price: $9.99
Certificate: Available upon completion of the course
06Animation for Typographic Compositions by Holke 79
Price: $12.99
Certificate: Available upon completion of the course
07Adobe After Effects for Character Animation By Facundo López
Price: $9.99
Certificate: Available upon completion of the course
08Animation Techniques with 3D Effects in After Effects by Moncho Massé
Price: $10.99
Certificate: Available upon completion of the course
093D Typography: Playing with Color and Volume by Thomas Burden
Price: $12.99
Certificate: Available upon completion of the course
103D Animation for Non Animators with Cinema 4D by Zigor Samaniego
Price: $11.99
Certificate: Certificate upon completion of the course
Part 4 Part 4 Recommended 3D Animation Learning Books and Resources
Learn 3D animation with the best 3D animation courses, learning books, and resources. Books and Resources for learning 3D animation include but are not limited to:
● 3D Animation Essentials by Andy Beane
3D Animation Essentials by Andy Beane is a comprehensive book on the fundamentals and principles of 3D animation for films and video games.
● 3D Art Essential by Ami Chopine
3D Art Essential by Ami Chopine is all about the hows and whys of 3D animation and teachers why certain techniques and styles work for a particular project.
● Key Takeaways from This Episode →
● Understanding 3D Animation
● Top 5 Programs used for learning 3D Animation
● The Best 10 Online 3D Animation Courses for Beginners
● 3D Animation Graphic Design Courses, Learning Books and Resources
How To Create Pinterest Slideshow in Simple Ways
How to Make Pinterest Slideshow in Simple Ways
An easy yet powerful editor
Numerous effects to choose from
Detailed tutorials provided by the official channel
Slideshows are a collection of images arranged together that an audience can quickly swipe through to view the content. Pinterest is known for its one-pin to one post feature. You cannot post more than one image or video in a pin.
Thus, business people could start sharing all of the images or products, services, or articles mostly because it can be stressful to do that. But with the Pinterest slideshow, you can now upload all the images you want to at once in one pin. Moreso, even have people view the pins simultaneously just by swiping through.
In this article
01 [How to display Pinterest’s latest pins in a slideshow? ](#Part 1)
02 [How to upload multiple photos to Pinterest?](#Part 2)
03 [How to display Pinterest’s latest pins in a slideshow? ](#Part 3)
Part 1 How to Display Pinterest Latest Pins in A Slideshow
Using Pinterest’s latest pins in a slideshow is another way to display the latest pins from any Pinterest user or blogger’s blog. Each image is linked to its pin page on Pinterest instead of the board or profile page if you use the Pinterest profile or board widget.
To install this widget, you need the user or board’s RSS feed URL, then use it as the input for a blogger slide show gadget.
Here are the tricky steps to follow for the Pinterest slide show;
Step 1: Constructing Pinterest RSS feed URL
The Pinterest RSS feed URL of a user is different from aboard.
● It would be the user’s profile URL + feed/RSS for a user. To get your Profile URL, click on your username in the top right corner of your screen, and you will see a URL in your web browser’s URL. That is your profile URL.
● For the board URL, you will get that after clicking on the board from the homepage. The URL would appear on your browser’s URL bar.

Step 2: Reformatting the feed for the slideshow gadget:
The RSS feed from step one is not very compatible with the blogger slideshow gadget. It accepts RSS feed in Media RSS format, but you can convert with Yahoo pipe. Simply plug in your feed URL in the Yahoo pipe URL.
You have to replace the value of the feed URL with the feed URL you got in step one and the pin count with the number of pins displayed on the slide show.
With this, you have successfully converted your feed URL to the media version of the Pinterest feed.
Step 3: Add the slideshow widget
Take the following step to add the slideshow widget.
Go to Dashboard > Layout and click on ‘Add A Gadget.’
Now Add, A Gadget window, scroll down and select Slideshow.

Under Source, select Other.

Put in the converted Pinterest RSS feed URL from step 2 into the Feed URL text box.
Click Save and view your blog.
Part 2 How to Upload Multiple Photos to Pinterest
If you want to display multiple photos of your product or share your brand story with pictures, then this is a feature you will grab. Pinterest allows you to display various products at a time. But first, you must also have a business account to do this.
When you upload multiple photos on Pinterest, they are known as carousel pins. This feature is a great advertising tool and will help you during the Pinterest slideshow.
This is because people would see your carousel on their home feed just like any other pin you have posted. They may also tap on the carousel and swipe through the different photos on the carousel. When the pinner saves it, they have kept the entire image.
Here is a step-by-step method to upload multiple photos to Pinterest.
Step 1: Log into your Pinterest
First, log into your Pinterest business account to access the feature. If you do not have a business account, it is elementary to do so. There is no need for you to enter any billing information if you are wondering about that. It is a straightforward process. Just open your account, click on the drop-down menu near your profile picture, see ‘convert to business,’ then upgrade your account, and you are good to go.
You should also ensure that the photos you want to upload are on your computer. If you have originally planned to use it to explain an article visually, then make sure the particular image that represents that article is correctly saved on your computer. The images should be 1:1 or 2:3 in ratio, and the format either ‘png’ or ‘jpeg.’
Add your pictures and upload. If you want to reorder your pin, you can replace or remove images within the carousel.

Step 2: Add Title
Add a title, description, and website of the carousel pin. Your title will be a snippet of what the blog post or article will be about or the recipe’s title. Your description should be the same as your Pinterest text, and you can also choose to let it appear only on your first image on your carousel pin.
Step 3: Select a Board
The last step is to select a board relevant to your carousel pin. Thus, you have your carousel pin and images. However, you cannot view this immediately as in a standard pin or video pin. But you can go back to your board to view your pin when it is ready.
Part 3 How to Make Pinterest Slideshow In 5 Simple Ways
Slideshows are a beautiful way to enhance your Pinterest account and generate more leads on your Profile. If you’ve been wondering if and how you can make slideshows on Pinterest, here’s a guaranteed step you can follow. But then Pinterest slideshows are instead referred to as a showcase.
However, to access this feature, you must first own a business account on Pinterest.
Here are five (5) simple ways you can make Slideshow on Pinterest:
Step 1: Go to your Pinterest Profile
Click settings next to your profile photo in the top right corner.

Step 2: Select Profile
When the Settings window appears, select Profile.

Step 3: Click Edit
Next to Featured Boards, click Edit.

Step 4: Select Boards
After clicking Edit for your Featured Boards, you’ll reach a screen where you may edit the boards you want to highlight. Select which boards you’d like to feature by clicking on each drop-down menu.
Opening a new Pinterest page is a good idea. Scroll down to Boards with the most Pin impressions under Analytics>Profile. These are the boards that I highlighted.

Step 5: Save
When you’ve decided which boards to include in your Featured, click Save.
● Bonus – Wondershare Filmora
With this feature, you can also tweak your Pinterest slides and make them look professional and befitting to your audience using Wondershare Filmora Video Editor .
For Win 7 or later (64-bit)
For macOS 10.12 or later
Wondershare Filmora is an online video editing software with several unique features, including split-screen, freeze-frame, loop images, and videos to help you create top-notch visual content for your brand. With features like the Chroma key, you can easily create special effects in your Pinterest slideshow background.
You can also use color match and video effects to enhance the quality of the slide.
● Ending Thoughts →
● Making a Pinterest slideshow can be confusing if you do not have the correct information. But if you do, it’ll be a great way to spice up your social media content and create more leads for your business.
● Pinterest is a social media platform that keeps growing and adding more features by the day. It is also increasing the number of users per day. Try out the simple steps stated on how to make a slideshow on Pinterest. Finally, by incorporating Filmora in your levelling up plans, you will be able to bring your brand in front of your target customer and present it nicely.
Slideshows are a collection of images arranged together that an audience can quickly swipe through to view the content. Pinterest is known for its one-pin to one post feature. You cannot post more than one image or video in a pin.
Thus, business people could start sharing all of the images or products, services, or articles mostly because it can be stressful to do that. But with the Pinterest slideshow, you can now upload all the images you want to at once in one pin. Moreso, even have people view the pins simultaneously just by swiping through.
In this article
01 [How to display Pinterest’s latest pins in a slideshow? ](#Part 1)
02 [How to upload multiple photos to Pinterest?](#Part 2)
03 [How to display Pinterest’s latest pins in a slideshow? ](#Part 3)
Part 1 How to Display Pinterest Latest Pins in A Slideshow
Using Pinterest’s latest pins in a slideshow is another way to display the latest pins from any Pinterest user or blogger’s blog. Each image is linked to its pin page on Pinterest instead of the board or profile page if you use the Pinterest profile or board widget.
To install this widget, you need the user or board’s RSS feed URL, then use it as the input for a blogger slide show gadget.
Here are the tricky steps to follow for the Pinterest slide show;
Step 1: Constructing Pinterest RSS feed URL
The Pinterest RSS feed URL of a user is different from aboard.
● It would be the user’s profile URL + feed/RSS for a user. To get your Profile URL, click on your username in the top right corner of your screen, and you will see a URL in your web browser’s URL. That is your profile URL.
● For the board URL, you will get that after clicking on the board from the homepage. The URL would appear on your browser’s URL bar.
Step 2: Reformatting the feed for the slideshow gadget:
The RSS feed from step one is not very compatible with the blogger slideshow gadget. It accepts RSS feed in Media RSS format, but you can convert with Yahoo pipe. Simply plug in your feed URL in the Yahoo pipe URL.
You have to replace the value of the feed URL with the feed URL you got in step one and the pin count with the number of pins displayed on the slide show.
With this, you have successfully converted your feed URL to the media version of the Pinterest feed.
Step 3: Add the slideshow widget
Take the following step to add the slideshow widget.
Go to Dashboard > Layout and click on ‘Add A Gadget.’
Now Add, A Gadget window, scroll down and select Slideshow.
Under Source, select Other.
Put in the converted Pinterest RSS feed URL from step 2 into the Feed URL text box.
Click Save and view your blog.
Part 2 How to Upload Multiple Photos to Pinterest
If you want to display multiple photos of your product or share your brand story with pictures, then this is a feature you will grab. Pinterest allows you to display various products at a time. But first, you must also have a business account to do this.
When you upload multiple photos on Pinterest, they are known as carousel pins. This feature is a great advertising tool and will help you during the Pinterest slideshow.
This is because people would see your carousel on their home feed just like any other pin you have posted. They may also tap on the carousel and swipe through the different photos on the carousel. When the pinner saves it, they have kept the entire image.
Here is a step-by-step method to upload multiple photos to Pinterest.
Step 1: Log into your Pinterest
First, log into your Pinterest business account to access the feature. If you do not have a business account, it is elementary to do so. There is no need for you to enter any billing information if you are wondering about that. It is a straightforward process. Just open your account, click on the drop-down menu near your profile picture, see ‘convert to business,’ then upgrade your account, and you are good to go.
You should also ensure that the photos you want to upload are on your computer. If you have originally planned to use it to explain an article visually, then make sure the particular image that represents that article is correctly saved on your computer. The images should be 1:1 or 2:3 in ratio, and the format either ‘png’ or ‘jpeg.’
Add your pictures and upload. If you want to reorder your pin, you can replace or remove images within the carousel.
Step 2: Add Title
Add a title, description, and website of the carousel pin. Your title will be a snippet of what the blog post or article will be about or the recipe’s title. Your description should be the same as your Pinterest text, and you can also choose to let it appear only on your first image on your carousel pin.
Step 3: Select a Board
The last step is to select a board relevant to your carousel pin. Thus, you have your carousel pin and images. However, you cannot view this immediately as in a standard pin or video pin. But you can go back to your board to view your pin when it is ready.
Part 3 How to Make Pinterest Slideshow In 5 Simple Ways
Slideshows are a beautiful way to enhance your Pinterest account and generate more leads on your Profile. If you’ve been wondering if and how you can make slideshows on Pinterest, here’s a guaranteed step you can follow. But then Pinterest slideshows are instead referred to as a showcase.
However, to access this feature, you must first own a business account on Pinterest.
Here are five (5) simple ways you can make Slideshow on Pinterest:
Step 1: Go to your Pinterest Profile
Click settings next to your profile photo in the top right corner.
Step 2: Select Profile
When the Settings window appears, select Profile.
Step 3: Click Edit
Next to Featured Boards, click Edit.
Step 4: Select Boards
After clicking Edit for your Featured Boards, you’ll reach a screen where you may edit the boards you want to highlight. Select which boards you’d like to feature by clicking on each drop-down menu.
Opening a new Pinterest page is a good idea. Scroll down to Boards with the most Pin impressions under Analytics>Profile. These are the boards that I highlighted.
Step 5: Save
When you’ve decided which boards to include in your Featured, click Save.
● Bonus – Wondershare Filmora
With this feature, you can also tweak your Pinterest slides and make them look professional and befitting to your audience using Wondershare Filmora Video Editor .
For Win 7 or later (64-bit)
For macOS 10.12 or later
Wondershare Filmora is an online video editing software with several unique features, including split-screen, freeze-frame, loop images, and videos to help you create top-notch visual content for your brand. With features like the Chroma key, you can easily create special effects in your Pinterest slideshow background.
You can also use color match and video effects to enhance the quality of the slide.
● Ending Thoughts →
● Making a Pinterest slideshow can be confusing if you do not have the correct information. But if you do, it’ll be a great way to spice up your social media content and create more leads for your business.
● Pinterest is a social media platform that keeps growing and adding more features by the day. It is also increasing the number of users per day. Try out the simple steps stated on how to make a slideshow on Pinterest. Finally, by incorporating Filmora in your levelling up plans, you will be able to bring your brand in front of your target customer and present it nicely.
What’s Your No. 1 Maker to Animate Your Logo Online Free
What’s Your No. 1 Maker to Animate Your Logo Online Free
An easy yet powerful editor
Numerous effects to choose from
Detailed tutorials provided by the official channel
A logo can be referred to as the heart of a brand or business. A logo presents the characteristics of a business or a product.
With the help of various applications and tools available online animated graphics can be created. And when we use the same, you can easily animate your logo online.
In this article
01 [Can an Animated Logo Help to Grow Brand?](#Part 1)
02 [What Kind of Animated Logo Maker Can Grab Attention at the Soonest?](#Part 2)
Part 1 Can an Animated Logo Help to Grow Brand?
01Where to Use Animated Logo?
The target of an animated logo is to draw attention to views in all the available digital spaces. The purpose is different for different cases. The following will give an idea of where you can use your animated logo:
● Company website
Websites are considered as a CV for an organization. So it is very important and necessary to see that the website is working effectively. An animated logo will help in improving the brand image website along with it will also boost Search Engine Optimization (SEO). Visitors or consumers are visiting the website or the page will get to see the animated logo whenever they visit the site and thus spend more time on the website. This will also bring an impact on the rank of the websites in regards to the search results.
![]()
● Promo Videos
Promo video acts as marketing tools for companies. Brands and companies make profits and earn revenue through Promo videos. So while promoting a brand’s promo video, you can include an animated logo with it. This combination of promo video and animated logo will certainly accomplish various marketing goals. You can animate your logo online for free if you don’t have one yet.
![]()
● Social Networks
Social networking platforms nowadays are considered to be one of the important platforms for various product promotions. Usually, people spend a lot of time online making communications through social networks such as Twitter, Instagram, Pinterest, and Facebook. We have already learned that video content can be used as a marketing tool. These videos with the animated logo are easy to share as well as access. Also, you can convert your animated logo into a GIF which can be used for a social posting. Thus they get shared all across the social networking platform.
![]()
● Presentations
Companies often hold various presentations from time to time. It can be a presentation at a business meeting or brand promotion or demonstration. While giving these presentations, you can always include your animated logo with the presentation. By doing this, you will also end up adding an element of creativity and originality to your presentation.
![]()
023 Reasons Why Animated Logos Help to Grow Brand
![]()
We all know why a logo is important for branding a product and the business. The logo symbolizes the brand and the product. It also helps the consumers to identify a specific brand. A logo is considered to be the face of the brand or the business. We have also learned the importance of an animated logo.
Tips:
● Animated Logos helps in Increasing Brand Awareness
● Animated Logos tells an engaging story about your brand
● Animated Logos captures the Viewers Attention
Part 2 What Kind of Animated Logo Maker Can Grab Attention at the Soonest?
011.5 Amazing Templates for Jaw-Dropping Logos
● Octopus
![]()
● LUX
![]()
● Giant Owl
![]()
● 500px
![]()
● Zoom
![]()
02These 8 Makers Make Animating Logos Easier Than Ever
When you consider animating your logo online, there are various logo makers in the industry, and you might question yourself that ‘How can I animate my logo online?’ Here is the list of the eight best logo makers who can help you to animate your logo online are:
● Renderforest
5 key features are:
● Amazing logo fonts
● Wide variety of logo styles
● Amazing layout designs
● Logos can be created on the cloud with built-in tools
● Logo can be edited anytime without any hassle
Rating: Renderforest rating is 10 out of 10
Review: I found Renderforest to be very fast and effective in making an animated logo. The amazing logo fonts are available with the vast logo style library. It made the work much easier and smoother. I found Renderforest to be the apt logo maker for my work. If I had assigned some logo artist to do the same, the cost would have been much higher.
![]()
● OFFEO’s Logo
5 key features are:
● Compatible and affordable with all existing programs
● Availability of a huge library
● Animation speed can be customized
● Availability of various color palettes for every single template
● No limitations regarding the length of animation one wish to create
Rating: OFFEO’s Logo rating is 4.7 out of 5
Review: I was looking for a good animation maker for my vlogging site when I came across OFFEO’s Logo. The best part of this maker is that it is very easy to use. And I have made a professional animated logo just with a click of a button. Now I don’t need a pro for any further animated videos.
![]()
● Animaker
5 key features are:
● One can customize the logo
● Availability of awesome sound effects
● Logos can be sketched with the Tetris style and others
● Exclusive library of logo styles
● Largest animation library
Rating: The rating is 4 out of 5
Review: I had a marvelous experience with Animaker. It has been a bag full of positive surprises. Animaker made it possible to create some unique content in a very short time and with very little operational costs.
![]()
● Viddyoze
5 key features are:
● Availability of live-action animation
● Multi rendering processing
● Availability of hundreds of unique templates
● Ready-made logo designs are available
● Logos and characters can be mixed to make one single video
Rating: The rating is 4.2 out of 5
Review: My experience with Viddyoze is amazing. I have made some amazing videos and logos by Viddyoze for my own personal use, as well as helping my friend with his business. I will always use Viddyoze for creating animated logos.
![]()
● Reallusion
5 key features are:
● Creative control features are present
● Modified interface control
● Material generation assistant help available
● Drag and drop for creating 2D motion effect
● Hundreds of ready-made logo designs are available
Rating: The rating is 3.5 out of 5
Review: I was amazed at the character animation and the rendering features available. It is a very user-friendly logo maker with straightforward features available in comparison to other 3D animation software.
![]()
● PixTeller
5 key features are:
● More than 100,000 logo shapes are available
● Unique Text Properties helps to create exclusive text for logos
● Logos created can be downloaded as GIF or MP4 format
● One can create frame by frame tailored logo animations
● Availability of a huge number of logo templates
Rating: The rating is 4.6 out of 5
Review: The best thing about PixTeller are its edit and create images in a simple and placid way. With PixTeller my job has been a smooth one, whereas previously, creating an animated logo with other makers was a headache.
![]()
● Quince MEDIA
5 key features are:
● Availability of Architectural 3D animation
● 2D animators can use this for commercial use
● Presence of 3D illustration and character
● Availability of Promo video motion graphics
● One can create characters with unbeatable graphics
Rating: The rating is 4.4 out of 5
Review: After using Quince MEDIA, I was just left awestruck. I was able to create some exquisite 3D animated logos with the available 3D illustration and characters. Also, I was able to create some unique graphics for my company’s animated logo.
![]()
● Biteable
5 key features are:
● Availability of a large color scheme
● One can share logos directly to Facebook, Instagram, YouTube, and others
● Drag and drop feature available
● Features are built for enterprise uses
● Fast interaction lets animated logos created in a few minutes
Rating: The rating is 4.4 out of 5
Review: After using Biteable, I was able to create videos and animated logos of high quality with a professional outlook. Earlier I used to spend days creating small videos, but now it can be done in an hour or so. Adding my own music is now easier.
![]()
Key Takeaways from This Episode
● At the end of this article, you have understood the importance of having an animated logo instead of a static image logo.
● Also, you got the view as to how an animated logo helps you in the growth of your brand and business.
● And finally, you got an idea that what are the various types of animated logos that grab the viewer’s attention the most.
● So, animate your logo online for your brand and make a mark in your business.
15 Best Stop Motion Animation Kits to Fuel Creativity (2024 Guide)
15 Best Stop Motion Animation Kits to Fuel Creativity (2024 Guide)
An easy yet powerful editor
Numerous effects to choose from
Detailed tutorials provided by the official channel
Stop motion animation is becoming more famous by the year, and it’s not even a surprising thing. Creating animated films takes objects, either soft clay items or dolls with joints, and manipulates them.
If you wish to make this type of animation, then you want to find the best Stop Motion Animation Kits that you can find. Some options out there are even free. This article will share the eight best options for stop motion animation software, separating them by whether they are for Macs or PC.
In this article
01 [15 Best Stop Motion Animation Kits](#Part 1)
02 [How to Pick the Best Animation Kits for Kids?](#Part 2)
Part 1 15 Best Stop Motion Animation Kits
After introducing you to the concept of Stop Motion Animation Kits, we’ve gathered a list of the top Stop Motion Animation Kits that best suits the kids as follows:
01Hue Animation Studio
The Hue Animation Studio kit is unique because it can be helpful with any clay or toys you may have. The equipment is ideal for animations featuring anything from Playmobil toys, Lego, or even clay animations.
Features
● The kit includes the guidebook,
● It includes a HUE HD USB camera with a microphone.
● The kit Consists of a license of Stop Motion Animation software.
● There’s a mini stage with a green screen and background.
● The system requirements are Windows or Mac OS 10.5+.
Pros
● Less learning curve
● With an HD camera
● Easy to create time-lapse videos and special effects
Cons
● Old-fashioned interface
● Not ideal for beginners
● Requires a license to buy
02LEGO Make Your Own Movie Activity Kit
LEGO is one of the top players in the animation industry, and its Stop Motion Animation kit is phenomenal to the mark. The kit offers a complete guide to making your stop motion animations and includes several props and other goodies, as described in the Features below.
Features
● Includes an 8pages book to use while animating.
● It contains official LEGO props and Minifigures.
● You get punch-out animation frames.
● It involves foldout paper backgrounds.
● Best applicable to kids above eight years.
Pros
● Good for beginners
● Great accessories
● Informative book
Cons
● Only basics in the book
● Not all the accessories are there
● No app available
03I Can Animate It Studio
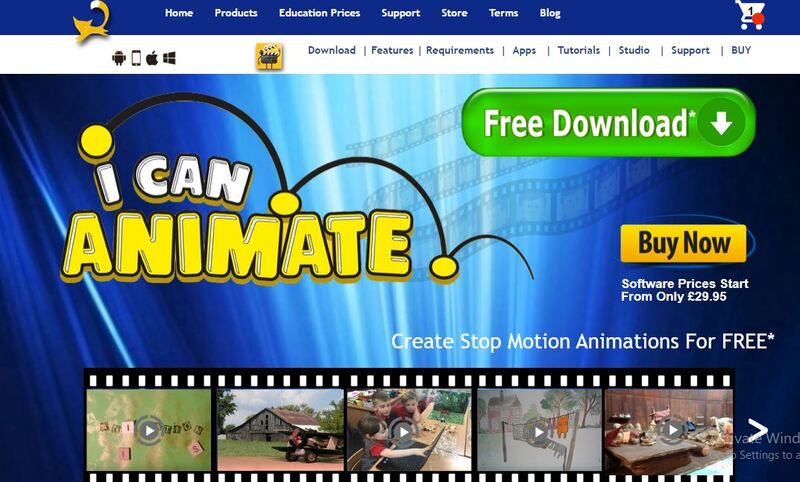
I Can Animate It Studio is another Stop Motion Animation kit by Kudlian. However, the kit looks a little offbeat since it doesn’t come with a guide. However, Kudlian offers instructions and guidelines online to simplify the tasks.
Features
● This animation kit includes a separate webcam for shooting.
● It has an onion skin feature for getting the best results at animation.
● Involves an element to edit with a green screen.
● It also helps create stop-frame animation by creating drawings.
● Compatible with both Windows and Mac OS.
Pros
● Available as App
● Interactive user interface
● Easy to create cute videos
Cons
● Difficult to use the animator pack
● Slow processing
● May need to pay for premium Features
04ZuAnimation Kit

Zuis among the best stop motion animation kits developed by HUE’s initial software. And, it’s the kit that is already usual with kids. So, it generally means that it will involve less learning curve comparatively. And, it has some tiny Features which may leave all other toys in the category.
Features
● A lifetime software with two perpetual licenses.
● Includes a green screen for keying background.
● It Consists of an animation handbook to offer you fantastic tips and advice.
● It contains a webcam with a metal base.
● You get a modeling clay to design characters and a mini set to hold them.
Pros
● Good pack of sound effects, artwork, and more
● Interactive interface
● With animation handbook
Cons
● Some defects with cameras, so check them earlier
● Lack of video signals
● Limited animation Features
05Stop Motion Explosion Animation Kit
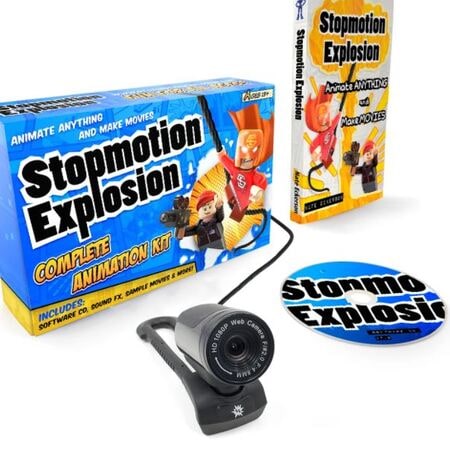
The Stop Motion Explosion complete HD stop motion animation is another rival in the industry for the big competitors playing out. The kit also contains an inbuilt microphone to record your audio. And, there’s a precious 29pages book included to provide you a lot. Let’s see more of its Features below.
Features
● It comes with an HD camera and flexible stand with a microphone and manual zoom control.
● It contains a CD with animation software.
● The kit involves a quick start guide.
● It includes lots of free tutorials.
● It Consists of a 29pages book with in-depth information.
Pros
● Interactive user interface
● Contains guided information book
● Lots of free tutorials
Cons
● Lack of fast processing
● Need to use the app alongside book
● High learning curve
06EyeThink BusyBody Animation Toy
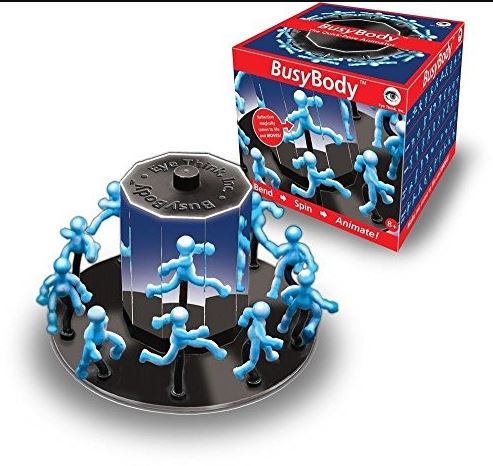
As the name also signifies, the kit is pretty different from other stop motion animation kits. It’s one of the coolest of its kind also occupied with the attention of Victorian children in the days gone by. The kit doesn’t include any camera. Instead, it works on the principle of ‘persistence of vision.’ Please scroll below to reveal more of its Features.
Features
● You will get a central snipping base with mirrors.
● It contains bendable figures for easy posing.
● It includes a complete hands-on stop motion animation kit without any complications.
● Includes instructions to give you detailed images on how to pose figures.
● Works on the principle of ‘persistence of vision’ without any camera.
Pros
● Easy to use with good accessibility
● Scalable to younger kids
● Works without a camera
Cons
● More of subjective task
● Maybe hard to understand
● A very different concept of animation
07OgoBild Animate It
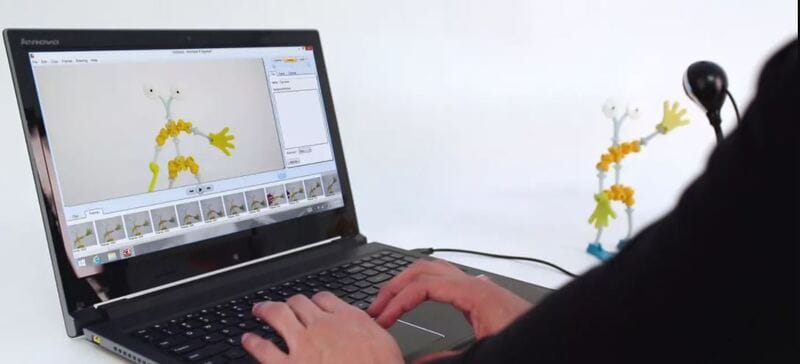
Brought to you from Gromet and Wallace’s creators, this is a super simple Stop Motion Animation kit. It includes hundreds of Construction pieces to begin with. Also, you will get a webcam and stop motion animation software ideally geared towards kids aged 8-years old.
Features
● Compatible with the Windows operating system.
● It contains a camera with an articulated stand to capture from better angles.
● It includes an easy upload to YouTube feature for social sharing.
Pros
● Good for social sharing
● Better accessories
● Ideal for beginners
Cons
● A pretty confusing interface
● Only compatible with Windows
● Slow processing software
08Dragonframe 5
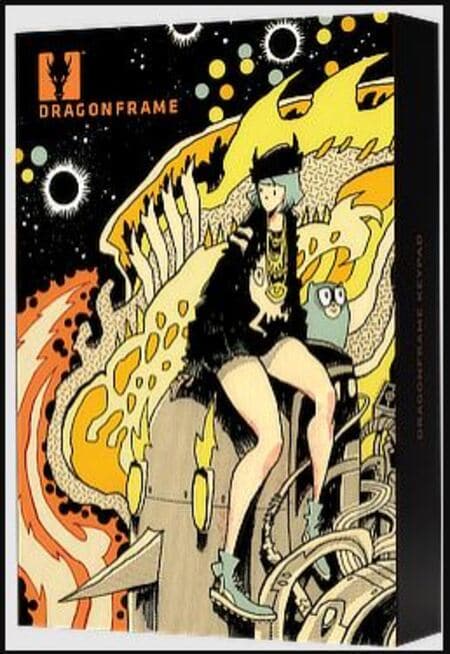
Again, this stop-animation kit isn’t that fancy, but it can compete with all the rivals out there. It only contains Software, though, with a list of functions including Cinematography, Animation, vector-based drawings, and much more.
Features
● It includes Animation and Cinematography tools.
● It contains a frame-based timeline editor.
● Dragonframe 5 includes a lip-sync system for the best audio recording.
● It includes Motion Control and Vector-based drawing tools.
● This kit Consists of a configurable X-sheet.
Pros
● Lots of functions
● Not just a toy
● Friendly and effective to deal with.
Cons
● Too hard for the young kids
● Expensive
● Confusing interface
09VidBox Stop Motion Studio
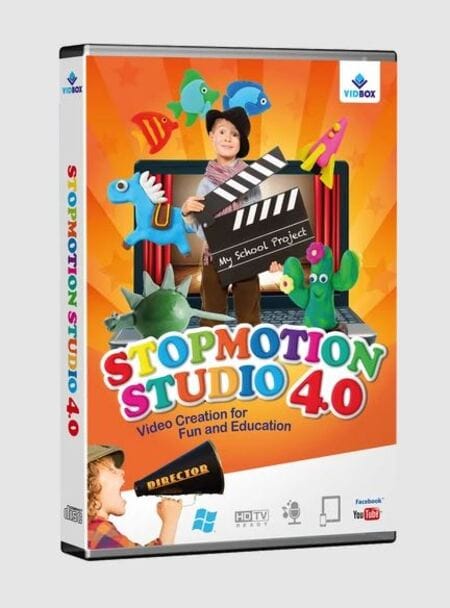
VidBox Stop Motion Studio has similar software to Dragonframe but it is more suitable for younger kids. Well, you can readily go for this kit if you already have a camera. It also contains the option to upload creations to Facebook and YouTube directly.
Features
● It can create output in different formats, including WMV, MPEG HD resolution, etc.
● It contains an adjustable frame rate to control the video’s speed.
● The Chroma binding effect creates the best setting for the background.
● It includes DSLR camera support.
● It contains Image Editor, String Removal, and Overlay Frames tool to add special effects.
Pros
● It gives detailed instructions
● Too basic Features
● Difficult to handle toys
Cons
● Too much info is intimidating
● Slow process
● Some issues with the Chroma effect
10Animation Studio by Helen Piercy – A Book
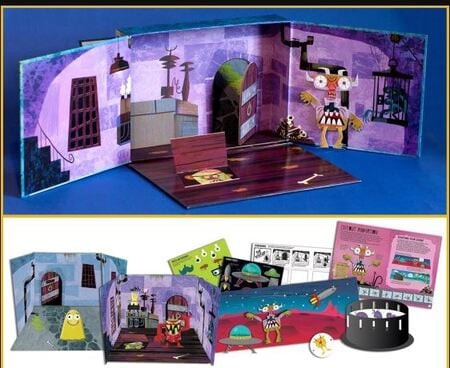
As the name suggests, this stop motion studio book isby Helen Piercy, an animator with lots of experience in the field. You will also get all the required Features, such as editing the green screen and more. In addition, tutorials regarding and techniques on puppets are also in the kit.
Features
● You get a mini stage set.
● It involves a press-out puppet monster with movable parts.
● It contains storyboard samples and sheets.
● The book contains an engaging animation handbook.
● It Consists of a variety of press-out props.
Pros
● A highly informative book
● Contains easy to understand animation scenes
● Various and techniques
Cons
● Hard to understand info
● Only a book
● It cannot get you through real practical
11- Minecraft Stop Motion Animation Studio
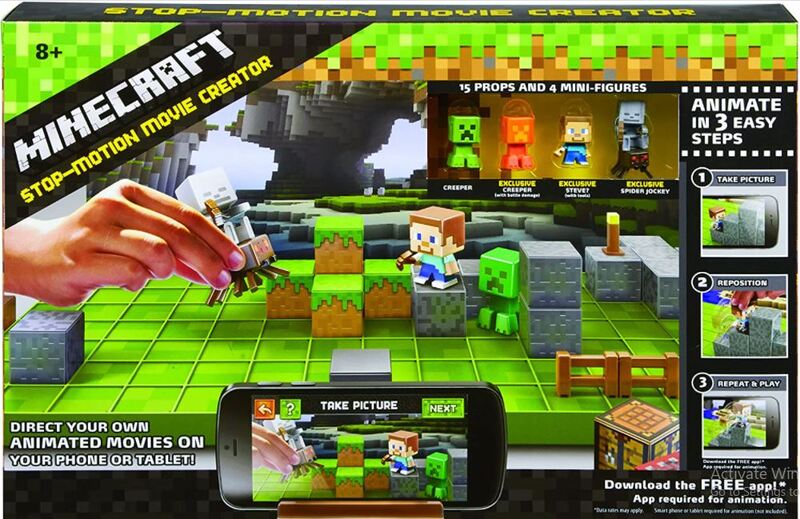
Though it seems usual to many kids out, there are valid reasons behind that. First, it is different from other Stop Motion Animation kits as it is available in an app rather than any software. Thus, you can use it on a tablet or phone and edit whatever you shoot.
Features
● It includes a variety of props.
● It contains six different backgrounds.
● This kit involves one movie stage.
● It Consists of a device holder.
● Minecraft contains 1additional accessories.
Pros
● No need of a powerful PC
● Lots of accessories
● With different backgrounds
Cons
● The app contains compatibility issues
● Less number of props in quantity
● Lack of software integration
12- Zing StikBot Zanimation Studio Pro
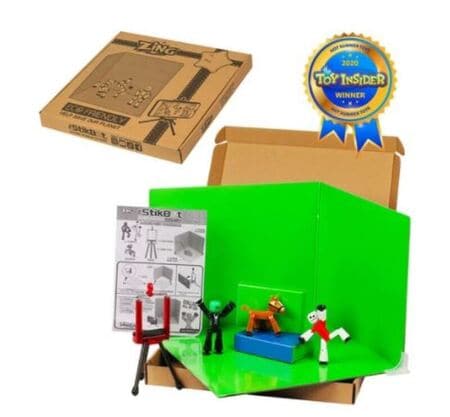
This stop animation kit is a reasonably priced and excellent little package. With this kit, however, you will need your camera. You can manipulate this kit into different poses as the figures have small suction cups on the feet and hands.
Features
● It includes two posable StikBot figures.
● Works on an animation app to record frames.
● It contains a Blue screen or reversible green screen stage.
● It Consists of a tripod stand for a tablet or smartphone camera.
Pros
Simple software
Lots of functions
Included software
Cons
● Lack of app availability
● Not compatible with Linux systems
● Only for Windows and Mac
13- Honestech Stop Motion Studio 4.0
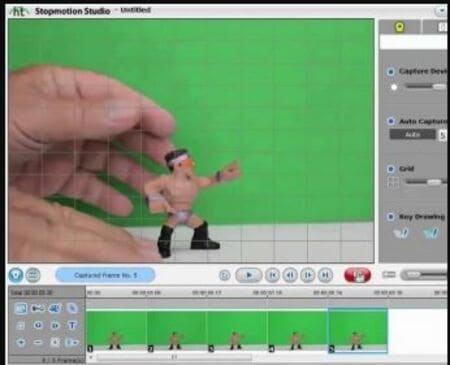
It’s a great entry-level stop motion animation kit that includes a blue or green screen. It also contains accessible Features for background editing, sound effects, background music, etc. Given below are more of its parts.
● A super simple editing interface is appealing to beginner kids.
● String Removal feature for more delicacy and effects.
● Chroma Key and Audio Recording.
● YouTube/Facebook upload feature.
● DSLR camera support.
Pros
● The great Chroma keying feature
● Simple user interface
● Lots of other Features
Cons
● Not for advanced kids
● A bit slow software
● Certain issues with camera integration
14- Crayola Color Alive Easy Animation Studio
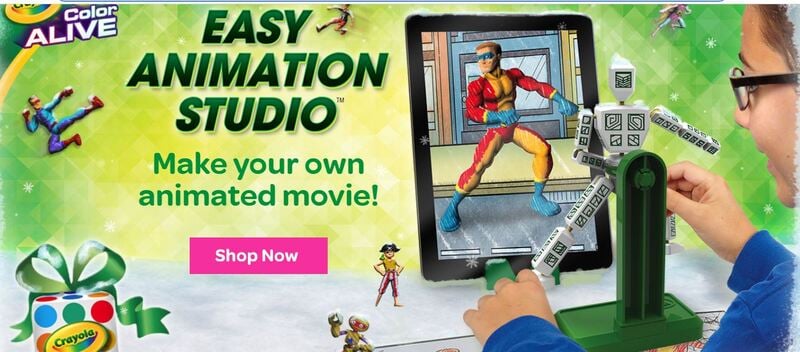
It’s another basic Stop Motion Animation kit to easily create custom animated videos by kids. It also includes easy drawing coloring book characters. And, there are tracking markers to make the job easier for kids.
Features
● Design and color characters pose and capture.
● It includes a stand and mannequin.
● It contains a 30-page booklet with the required information.
● It is compatible with Android and iOS.
● Crayola contains 1twistable color pencils with the device’s stand.
Pros
● Ideal for beginners
● Detailed info book
● Great accessories
Cons
● Slow processing UI
● Inefficient tracking markers
● The app may run certain compatibility issues
15- Claytoon Clay Project Studio
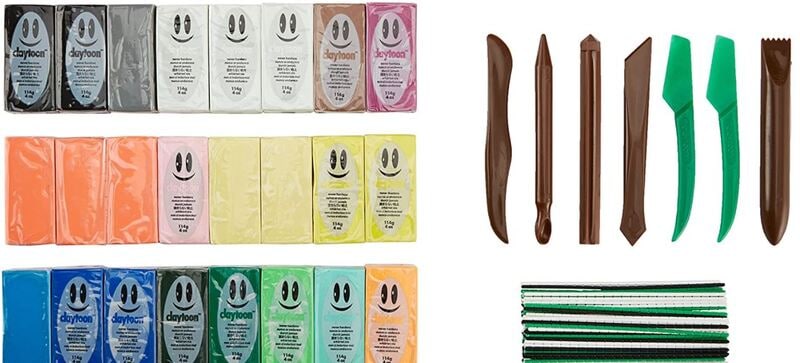
Young kids can easily use this Clay Studio and create impressive figures for their stop motion animation. It has bright colored clays, which are non-hardening and thus suitable for animation projects. And, there’s a good choice in colors with valuable instructions, index cards, and accessories.
Features
● Non-hardening clay material
● Brilliant color range to create amazing characters
● Intermixable clays
● Simple to follow instruction cards
● 5 modeling tools and clay knife
Pros
● Hard clay
● Perfect colors
● Professional for adult usage
Cons
● Maybe be crumbled clays
● Oily material
● It may not contain all the desired colors
Part 2 How to pick the best animation kits for kids?
Below are the factors you need to Consider before buying Stop Motion Animation kits. So, let’s dive into each element in detail.
01Recommended Age
Producing something creative with a Stop Motion Animation kit will be a lengthy process that will involve patience and some informational content to use the Kits properly. So while selecting the best Animation Kit, keep in mind the Recommended Age that the company has specified. If the product is for the young generation, the younger ones might have difficulty using the product.
02Different forms of Kits
You may check a few of them with different Features for the best stop animation kits. However, the significant difference between them is whether they come as complete kits or not. If you buy a complete kit, you will have a camera and other elements with the product.
The only thing you will require other than the entire animation kit would be a computer for software purposes. Moreover, you can also select Kits that do not come with a camera individually.
For this, you must use a smartphone to record the video. Conclusively, the kits present on the market are zoetrope-type kits. However, they are not available with electronics. So you won’t be able to create full films with this one.
03Extra Features
As extra Features, you get Props and full-on sets included with some of the kits. These allow you to create the scenes that you are looking for. You can also transform the orientation of some of the props, which gives you extra functionality.
04Apps
When you’re in the hustle to create a Stop Motion Animation, you need a few things. One of them is the smartphone or a camera. At the same time, the other one will be the App on your phone that will help you merge everything the way you wish it to be.
Some of the companies out there will create their apps, and it will assist you with different integration procedures, but if the kit you select is not available with a dedicated app. There are a lot of good apps on the market right now that you can go for. These 3rd party apps are unique and will get your job done too.
05 Software
You will either need an App or Proper Software for the putting-together part. This Software will need hardware such as either a laptop or a PC. Before deciding on an animation kit, make sure you know the system requirements if the kit is only supported through software.
06Bonus: Create an easy stop motion video via Wondershare Filmora Video Editor
In old times, making stop motion videos was a very hectic task, and sometimes it could take several days to make such videos. With the advancement of technology and editing software like Filmora, it has become effortless. All you need is a camera and video editing software to create your stop motion animations.
For Win 7 or later (64-bit)
For macOS 10.12 or later
Let’s dig deep into the stop motion animations and learn how to create these videos on your own.
07Steps For Making Stop-Motion Video
If you want to create your stop motion animation, follow this step-by-guide.
● Capture The Shots
Move an object and capture its movement frame by frame. Suppose we are making a stop motion video of bottle spin. Place your camera in a steady place, and bring your object in the frame. Move your object slightly and take a shot. Keep doing this until you have at least 12,23or photos of the object’s movement. We took the bottle spin only as an example. You can create your ideas here.
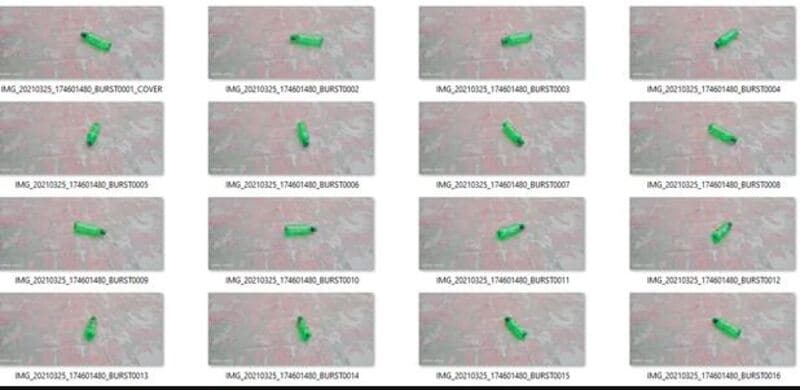
● Download And Start Filmora X
If you haven’t downloaded the Filmora in your system, download it from their official website. If it is already on your PC, then run the program.
● Choose The Suitable Frame Rate In Project Settings.
Begin a new project by hitting the File and selecting the full-wide resolution.
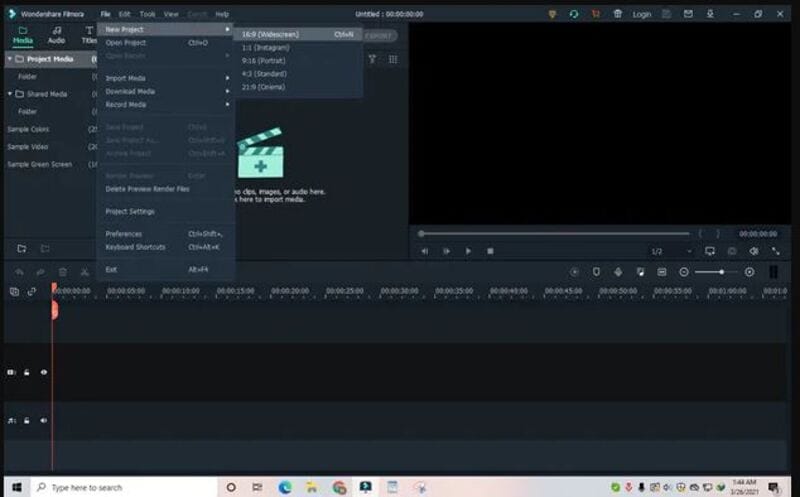
Once you select the resolution, click on the File and go to project settings.
Now select the frame rate you captured the video, i.e., 236etc. If you didn’t Consider the frame rate when taking shots, you could select 24.

● Import The Media Files
Once you have done with the settings above, import the captured images using the import option from the file menu.
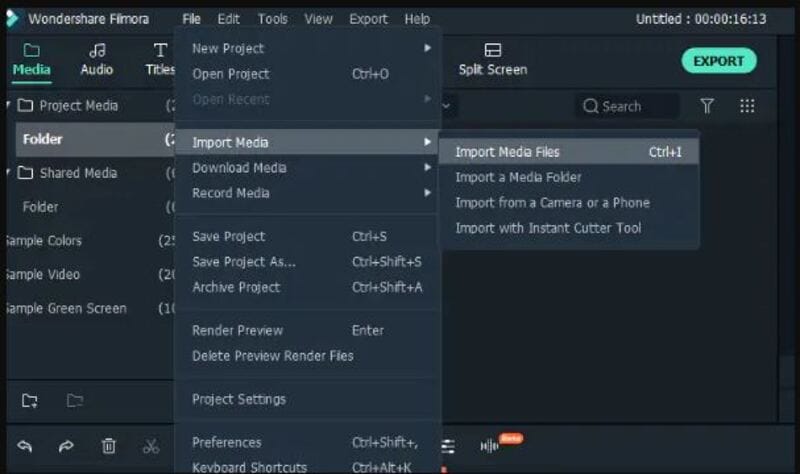
● Adjust the Preferences
Go to File and click select preferences from the menu or press the shortcut key Ctrl+Shift+,
A window will appear on your screen. Click on editing and adjust the photo duration anywhere between 0.2 - 0.5 seconds.
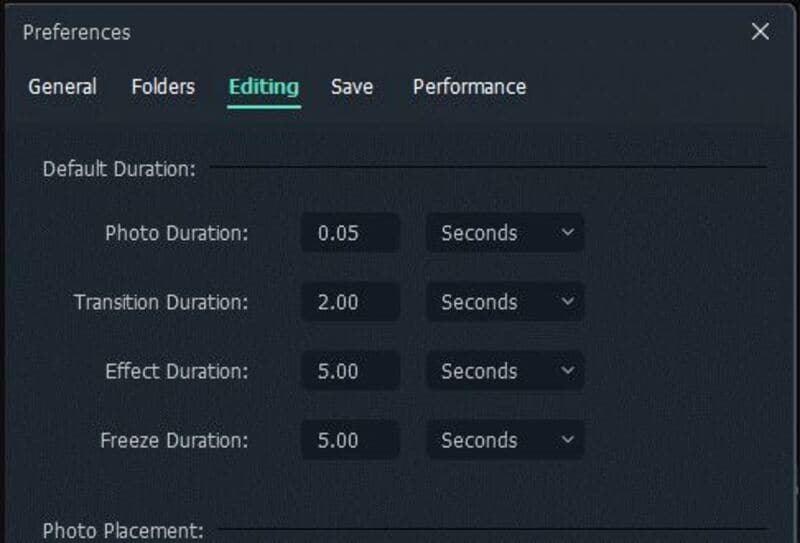
● Create and Export.
Once you complete all the settings mentioned above, import all images timeline-track, and click on play, you will notice that your stop motion animation has been created.
Now click on the export button, select the desired video format, export the video, and share it with your friends.
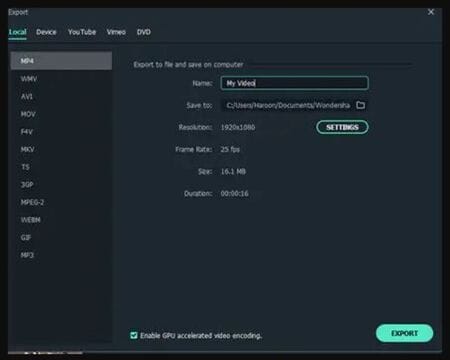
Ok, this is very easy. It’s just time-Consuming if you want to make a big enough project. Here is the result.
Filmora is one of the most straightforward software you can use to create your stop motion animation videos. This magic can be easily created by following the steps mentioned above, even if you have no video editing experience.
● Key Takeaways from This Episode →
● Stop-motion animation kits are a form of art, and with all of the access we have to such technology via our computers, it is a big deal to get started with it. Most of them include Stop Motion animation starter kits as well. That’s why you want to be sure that you look at everything in depth and see what you like. Then, determine which kits will be best for your purposes and see why it makes such a big difference for you and everything you want to accomplish in the long run.
Stop motion animation is becoming more famous by the year, and it’s not even a surprising thing. Creating animated films takes objects, either soft clay items or dolls with joints, and manipulates them.
If you wish to make this type of animation, then you want to find the best Stop Motion Animation Kits that you can find. Some options out there are even free. This article will share the eight best options for stop motion animation software, separating them by whether they are for Macs or PC.
In this article
01 [15 Best Stop Motion Animation Kits](#Part 1)
02 [How to Pick the Best Animation Kits for Kids?](#Part 2)
Part 1 15 Best Stop Motion Animation Kits
After introducing you to the concept of Stop Motion Animation Kits, we’ve gathered a list of the top Stop Motion Animation Kits that best suits the kids as follows:
01Hue Animation Studio
The Hue Animation Studio kit is unique because it can be helpful with any clay or toys you may have. The equipment is ideal for animations featuring anything from Playmobil toys, Lego, or even clay animations.
Features
● The kit includes the guidebook,
● It includes a HUE HD USB camera with a microphone.
● The kit Consists of a license of Stop Motion Animation software.
● There’s a mini stage with a green screen and background.
● The system requirements are Windows or Mac OS 10.5+.
Pros
● Less learning curve
● With an HD camera
● Easy to create time-lapse videos and special effects
Cons
● Old-fashioned interface
● Not ideal for beginners
● Requires a license to buy
02LEGO Make Your Own Movie Activity Kit
LEGO is one of the top players in the animation industry, and its Stop Motion Animation kit is phenomenal to the mark. The kit offers a complete guide to making your stop motion animations and includes several props and other goodies, as described in the Features below.
Features
● Includes an 8pages book to use while animating.
● It contains official LEGO props and Minifigures.
● You get punch-out animation frames.
● It involves foldout paper backgrounds.
● Best applicable to kids above eight years.
Pros
● Good for beginners
● Great accessories
● Informative book
Cons
● Only basics in the book
● Not all the accessories are there
● No app available
03I Can Animate It Studio
I Can Animate It Studio is another Stop Motion Animation kit by Kudlian. However, the kit looks a little offbeat since it doesn’t come with a guide. However, Kudlian offers instructions and guidelines online to simplify the tasks.
Features
● This animation kit includes a separate webcam for shooting.
● It has an onion skin feature for getting the best results at animation.
● Involves an element to edit with a green screen.
● It also helps create stop-frame animation by creating drawings.
● Compatible with both Windows and Mac OS.
Pros
● Available as App
● Interactive user interface
● Easy to create cute videos
Cons
● Difficult to use the animator pack
● Slow processing
● May need to pay for premium Features
04ZuAnimation Kit
Zuis among the best stop motion animation kits developed by HUE’s initial software. And, it’s the kit that is already usual with kids. So, it generally means that it will involve less learning curve comparatively. And, it has some tiny Features which may leave all other toys in the category.
Features
● A lifetime software with two perpetual licenses.
● Includes a green screen for keying background.
● It Consists of an animation handbook to offer you fantastic tips and advice.
● It contains a webcam with a metal base.
● You get a modeling clay to design characters and a mini set to hold them.
Pros
● Good pack of sound effects, artwork, and more
● Interactive interface
● With animation handbook
Cons
● Some defects with cameras, so check them earlier
● Lack of video signals
● Limited animation Features
05Stop Motion Explosion Animation Kit
The Stop Motion Explosion complete HD stop motion animation is another rival in the industry for the big competitors playing out. The kit also contains an inbuilt microphone to record your audio. And, there’s a precious 29pages book included to provide you a lot. Let’s see more of its Features below.
Features
● It comes with an HD camera and flexible stand with a microphone and manual zoom control.
● It contains a CD with animation software.
● The kit involves a quick start guide.
● It includes lots of free tutorials.
● It Consists of a 29pages book with in-depth information.
Pros
● Interactive user interface
● Contains guided information book
● Lots of free tutorials
Cons
● Lack of fast processing
● Need to use the app alongside book
● High learning curve
06EyeThink BusyBody Animation Toy
As the name also signifies, the kit is pretty different from other stop motion animation kits. It’s one of the coolest of its kind also occupied with the attention of Victorian children in the days gone by. The kit doesn’t include any camera. Instead, it works on the principle of ‘persistence of vision.’ Please scroll below to reveal more of its Features.
Features
● You will get a central snipping base with mirrors.
● It contains bendable figures for easy posing.
● It includes a complete hands-on stop motion animation kit without any complications.
● Includes instructions to give you detailed images on how to pose figures.
● Works on the principle of ‘persistence of vision’ without any camera.
Pros
● Easy to use with good accessibility
● Scalable to younger kids
● Works without a camera
Cons
● More of subjective task
● Maybe hard to understand
● A very different concept of animation
07OgoBild Animate It
Brought to you from Gromet and Wallace’s creators, this is a super simple Stop Motion Animation kit. It includes hundreds of Construction pieces to begin with. Also, you will get a webcam and stop motion animation software ideally geared towards kids aged 8-years old.
Features
● Compatible with the Windows operating system.
● It contains a camera with an articulated stand to capture from better angles.
● It includes an easy upload to YouTube feature for social sharing.
Pros
● Good for social sharing
● Better accessories
● Ideal for beginners
Cons
● A pretty confusing interface
● Only compatible with Windows
● Slow processing software
08Dragonframe 5
Again, this stop-animation kit isn’t that fancy, but it can compete with all the rivals out there. It only contains Software, though, with a list of functions including Cinematography, Animation, vector-based drawings, and much more.
Features
● It includes Animation and Cinematography tools.
● It contains a frame-based timeline editor.
● Dragonframe 5 includes a lip-sync system for the best audio recording.
● It includes Motion Control and Vector-based drawing tools.
● This kit Consists of a configurable X-sheet.
Pros
● Lots of functions
● Not just a toy
● Friendly and effective to deal with.
Cons
● Too hard for the young kids
● Expensive
● Confusing interface
09VidBox Stop Motion Studio
VidBox Stop Motion Studio has similar software to Dragonframe but it is more suitable for younger kids. Well, you can readily go for this kit if you already have a camera. It also contains the option to upload creations to Facebook and YouTube directly.
Features
● It can create output in different formats, including WMV, MPEG HD resolution, etc.
● It contains an adjustable frame rate to control the video’s speed.
● The Chroma binding effect creates the best setting for the background.
● It includes DSLR camera support.
● It contains Image Editor, String Removal, and Overlay Frames tool to add special effects.
Pros
● It gives detailed instructions
● Too basic Features
● Difficult to handle toys
Cons
● Too much info is intimidating
● Slow process
● Some issues with the Chroma effect
10Animation Studio by Helen Piercy – A Book
As the name suggests, this stop motion studio book isby Helen Piercy, an animator with lots of experience in the field. You will also get all the required Features, such as editing the green screen and more. In addition, tutorials regarding and techniques on puppets are also in the kit.
Features
● You get a mini stage set.
● It involves a press-out puppet monster with movable parts.
● It contains storyboard samples and sheets.
● The book contains an engaging animation handbook.
● It Consists of a variety of press-out props.
Pros
● A highly informative book
● Contains easy to understand animation scenes
● Various and techniques
Cons
● Hard to understand info
● Only a book
● It cannot get you through real practical
11- Minecraft Stop Motion Animation Studio
Though it seems usual to many kids out, there are valid reasons behind that. First, it is different from other Stop Motion Animation kits as it is available in an app rather than any software. Thus, you can use it on a tablet or phone and edit whatever you shoot.
Features
● It includes a variety of props.
● It contains six different backgrounds.
● This kit involves one movie stage.
● It Consists of a device holder.
● Minecraft contains 1additional accessories.
Pros
● No need of a powerful PC
● Lots of accessories
● With different backgrounds
Cons
● The app contains compatibility issues
● Less number of props in quantity
● Lack of software integration
12- Zing StikBot Zanimation Studio Pro
This stop animation kit is a reasonably priced and excellent little package. With this kit, however, you will need your camera. You can manipulate this kit into different poses as the figures have small suction cups on the feet and hands.
Features
● It includes two posable StikBot figures.
● Works on an animation app to record frames.
● It contains a Blue screen or reversible green screen stage.
● It Consists of a tripod stand for a tablet or smartphone camera.
Pros
Simple software
Lots of functions
Included software
Cons
● Lack of app availability
● Not compatible with Linux systems
● Only for Windows and Mac
13- Honestech Stop Motion Studio 4.0
It’s a great entry-level stop motion animation kit that includes a blue or green screen. It also contains accessible Features for background editing, sound effects, background music, etc. Given below are more of its parts.
● A super simple editing interface is appealing to beginner kids.
● String Removal feature for more delicacy and effects.
● Chroma Key and Audio Recording.
● YouTube/Facebook upload feature.
● DSLR camera support.
Pros
● The great Chroma keying feature
● Simple user interface
● Lots of other Features
Cons
● Not for advanced kids
● A bit slow software
● Certain issues with camera integration
14- Crayola Color Alive Easy Animation Studio
It’s another basic Stop Motion Animation kit to easily create custom animated videos by kids. It also includes easy drawing coloring book characters. And, there are tracking markers to make the job easier for kids.
Features
● Design and color characters pose and capture.
● It includes a stand and mannequin.
● It contains a 30-page booklet with the required information.
● It is compatible with Android and iOS.
● Crayola contains 1twistable color pencils with the device’s stand.
Pros
● Ideal for beginners
● Detailed info book
● Great accessories
Cons
● Slow processing UI
● Inefficient tracking markers
● The app may run certain compatibility issues
15- Claytoon Clay Project Studio
Young kids can easily use this Clay Studio and create impressive figures for their stop motion animation. It has bright colored clays, which are non-hardening and thus suitable for animation projects. And, there’s a good choice in colors with valuable instructions, index cards, and accessories.
Features
● Non-hardening clay material
● Brilliant color range to create amazing characters
● Intermixable clays
● Simple to follow instruction cards
● 5 modeling tools and clay knife
Pros
● Hard clay
● Perfect colors
● Professional for adult usage
Cons
● Maybe be crumbled clays
● Oily material
● It may not contain all the desired colors
Part 2 How to pick the best animation kits for kids?
Below are the factors you need to Consider before buying Stop Motion Animation kits. So, let’s dive into each element in detail.
01Recommended Age
Producing something creative with a Stop Motion Animation kit will be a lengthy process that will involve patience and some informational content to use the Kits properly. So while selecting the best Animation Kit, keep in mind the Recommended Age that the company has specified. If the product is for the young generation, the younger ones might have difficulty using the product.
02Different forms of Kits
You may check a few of them with different Features for the best stop animation kits. However, the significant difference between them is whether they come as complete kits or not. If you buy a complete kit, you will have a camera and other elements with the product.
The only thing you will require other than the entire animation kit would be a computer for software purposes. Moreover, you can also select Kits that do not come with a camera individually.
For this, you must use a smartphone to record the video. Conclusively, the kits present on the market are zoetrope-type kits. However, they are not available with electronics. So you won’t be able to create full films with this one.
03Extra Features
As extra Features, you get Props and full-on sets included with some of the kits. These allow you to create the scenes that you are looking for. You can also transform the orientation of some of the props, which gives you extra functionality.
04Apps
When you’re in the hustle to create a Stop Motion Animation, you need a few things. One of them is the smartphone or a camera. At the same time, the other one will be the App on your phone that will help you merge everything the way you wish it to be.
Some of the companies out there will create their apps, and it will assist you with different integration procedures, but if the kit you select is not available with a dedicated app. There are a lot of good apps on the market right now that you can go for. These 3rd party apps are unique and will get your job done too.
05 Software
You will either need an App or Proper Software for the putting-together part. This Software will need hardware such as either a laptop or a PC. Before deciding on an animation kit, make sure you know the system requirements if the kit is only supported through software.
06Bonus: Create an easy stop motion video via Wondershare Filmora Video Editor
In old times, making stop motion videos was a very hectic task, and sometimes it could take several days to make such videos. With the advancement of technology and editing software like Filmora, it has become effortless. All you need is a camera and video editing software to create your stop motion animations.
For Win 7 or later (64-bit)
For macOS 10.12 or later
Let’s dig deep into the stop motion animations and learn how to create these videos on your own.
07Steps For Making Stop-Motion Video
If you want to create your stop motion animation, follow this step-by-guide.
● Capture The Shots
Move an object and capture its movement frame by frame. Suppose we are making a stop motion video of bottle spin. Place your camera in a steady place, and bring your object in the frame. Move your object slightly and take a shot. Keep doing this until you have at least 12,23or photos of the object’s movement. We took the bottle spin only as an example. You can create your ideas here.
● Download And Start Filmora X
If you haven’t downloaded the Filmora in your system, download it from their official website. If it is already on your PC, then run the program.
● Choose The Suitable Frame Rate In Project Settings.
Begin a new project by hitting the File and selecting the full-wide resolution.
Once you select the resolution, click on the File and go to project settings.
Now select the frame rate you captured the video, i.e., 236etc. If you didn’t Consider the frame rate when taking shots, you could select 24.
● Import The Media Files
Once you have done with the settings above, import the captured images using the import option from the file menu.
● Adjust the Preferences
Go to File and click select preferences from the menu or press the shortcut key Ctrl+Shift+,
A window will appear on your screen. Click on editing and adjust the photo duration anywhere between 0.2 - 0.5 seconds.
● Create and Export.
Once you complete all the settings mentioned above, import all images timeline-track, and click on play, you will notice that your stop motion animation has been created.
Now click on the export button, select the desired video format, export the video, and share it with your friends.
Ok, this is very easy. It’s just time-Consuming if you want to make a big enough project. Here is the result.
Filmora is one of the most straightforward software you can use to create your stop motion animation videos. This magic can be easily created by following the steps mentioned above, even if you have no video editing experience.
● Key Takeaways from This Episode →
● Stop-motion animation kits are a form of art, and with all of the access we have to such technology via our computers, it is a big deal to get started with it. Most of them include Stop Motion animation starter kits as well. That’s why you want to be sure that you look at everything in depth and see what you like. Then, determine which kits will be best for your purposes and see why it makes such a big difference for you and everything you want to accomplish in the long run.
Before You Learn 3D Animation: Things You Should Know
Before You Learn 3D Animation: Some Things You Should Know
An easy yet powerful editor
Numerous effects to choose from
Detailed tutorials provided by the official channel
Before you delve into the profession of creating 3d cartoon filters, you need to understand or decide if creating animated characters is something you would like to do. It’s not going to be smooth as you will get frustrated at some point, you will get confused, and it will be challenging, but in the end, it is rewarding because it is an expression of your mind coming to life. You are the one to breathe life into your characters who represent your imaginations. You will also have to infuse a great deal of your creativity to create beautiful and exciting characters for others to enjoy. Meanwhile, let’s first understand what 3d animations mean.
Becoming a 3d animator is not a feat you can achieve in a short time. It is not days, weeks, months, or even years. Like any other profession, a professional 3d animator must have put in a great deal of work, mixed with a lot of passion and love for what he is doing. To become successful as a 3d animator, you must love what you are doing or be ready to put in the work.
This article will expose what you should learn to create beautiful 3d animation cartoons, including what to expect as a 3d animator.
In this article
01 [What are 3d animation and the process of 3d animation?](#Part 1)
02 [Differences between 2d animation and 3d animation](#Part 2)
03 [A roaster of 8 best 3d animation software.](#Part 3)
04 [Top 3 3d animation making mistakes to avoid](#Part 4)
Part 1 What Is 3D Animation And The Process of 3D Animation?
animation is a term that describes the art of creating 3-dimensional images and placing them in a digital environment. It is a process that uses motion to bring objects, characters, etc., to life.
It is also known as computer-generated imagery, and it is currently the most common animation type for feature films.
Various software and programs are designed specifically for 3d animations and allow the animators to bring the objects to life.
The process of 3d animation happens in three(3) stages;
● Modeling
● Layout and animation
● Rendering
Modeling in 3d animation involves generating the objects or characters either by using a modeling tool or using a real thing. The real object is scanned directly into the computer, where other processes follow. You have total control over your character and how you want them to appear by modeling. You decide the weight, specifications, feel, etc. However, scanning objects save a lot of time. You must add texture before modeling your character or reviewing it before moving to the following layout and animation.
Layout and animation stage: A layout is determined when the generated objects move to this stage. It involves creating a set/scene where the objects can position. Layout first happens before animation does. After adding the objects and characters, they get animated using animation variables. After this, you use motion capture or keyframing to give life to the models in the scenes.
Rendering: Rendering is using software or programs. It is not something to do using just your computer. These tools can generate the scenes into the finished image according to the client’s requirements or set goals.
Creating cartoon background images or any other form of animations is a process that requires a lot of planning and work, which sums up a lot of time. To learn 3d animation, you must be ready to give in ample time as it is a profession that requires some time to handle.
The process listed above also shows the creativity requirement required to succeed in the 3d animation industry. To think that you must create the scenes, which is the layout stage, means you have to be creative in your imagination. If you then decide to model your character from scratch using modeling tools. That also requires another job of thinking and extracting a lot of your creative juices.
Part 2 What is the difference between 2d animation and 3d animation?
Anyone can decide to learn animation with no plan in mind or understanding of what the profession involves. animation is different from 2d animation, and if you want to learn animation, you need to understand the distinction between these two.
animation can have a lot of creative possibilities, whereas 3d animation has a lot of natural abilities. The visual style of both types of animation is explicitly different.
3d animation is a more intensive technical process than the various stages mentioned earlier. It would most likely involve different specialists to handle them to get a more professional output. However, 2d animation consists of drawing the characters frame by frame.
animated cartoons are in The Simpsons, Pinocchio, the Lion king, etc.

animations are like the ones Dreamworks, Pixar, produce. They include the avengers, the bad guys, etc.


Part 3 A Roaster Of 8 Best 3D Animation Software

Several 3D animation software exists in the market, both free and paid. If you are a animation creator or love animation for fun, you can use the free software to make your videos, cartoon photos, 3d cartoon faces, etc.
With many animation software available in the market, you can only fully trust a few.
Here’s a roaster of 8 best 3D animation software you could use to create the cartoon monsters you’ve always been curious about;
● Filmora
● Blender
● Maya
● Wings 3d
● Adobe Animate
● Cinema 4d
● K-3D
● Milcamo
Filmora Video animation tool: This is a highly recommended 3D animation tool with many features and pros. It has a wide range of keyframes, about six of which make your cartoon background images smooth and natural.
| Software | Features | OS | Pro |
|---|---|---|---|
| Wondershare Filmora Video Editor | It has an auto-color correction It has smooth keyframes | Windows, Mac | You can apply light flare effects You can apply an audio mixer |
| Blender | It has textured brushes and masking for 3d painting. It has add-ons and customised tools with high python scripting. | Windows, Linux, Mac computers | It has Virtual reality rendering, Strong camera restoration. It had both manual and automatic tracking. |
| Maya | Free trial of 30 days. Can create complex technical effects | Windows, Max | Good Control and perfect accuracy. Can collect motion capture data. |
| Wings 3d | Auto UV mapping system It has support for light and material effects. | Windows, Linux, and Mac OS | Advanced 3d and 2d modeling tools. It is free to use |
| Adobe animate | Virtual camera functionality gives a realistic view. Adoptive animation effects, zooming, panning etc. | Windows, Mac | Effective audio syncing technology. Customizable font, styling etc. |
| Cinema 4d | Concepts develop without time modeling Large library of preset scenes. | Windows, Mac | Customised with a huge asset range It is a faster tool than Maya Dissect complete scene and is faster than Maya. |
| K-3D | It has property adjustment capabilities with handy strong features. I5 is made up of basic tools for animation, curves, patches. | Mac OS X, Linux, FreeBSD, windows platforms | It is very flexible for either complex or basic workflows. It has a wide selection of plugins. |
| Mixamo | Streamlined user experience It has a faster search function that is accurate | Windows, Mac | It has fast character and animation browsing. Download multiple animations at a go |
For Win 7 or later (64-bit)
For macOS 10.12 or later
Part 4 Top Three (3) 3d Animation Making Mistakes To Avoid

As we initially mentioned, 3d animation requires an intensive technical process. It is a skill that you need to hone over the years by paying attention to detail, being highly creative, and daring to succeed.
Here are 3 mistakes you must avoid during the animation process;
● Forgetting the ‘why’ factor
● Over-animating a scene
● Not giving your viewers time to take it in
Forgetting the why: In a animation cartoon, every move, walking step, and smile is essential. Every character represented in your cartoon background is there for a specific reason.
You would be making a mistake that will affect the result if you lose focus on this reason. Your viewers won’t find your cartoon believable if the moves and acting don’t add up.
Your characters don’t just move because they want to move. Something must have spurred the motion or reaction. It could be for what happened to them, what they heard, or saw another character did in the scene. Do not neglect the why of the act.
While animating, focus on why and keep revisiting until all your characters and objects are knitted closely together.
Over-animating a scene: This is another mistake animators should avoid. If you animate your characters, everything may be a mess if you animate the background and foreground. Simplicity is how to get this thing, keep it simple and focused.
Do not have much going on in each scene but only where you need the attention of your viewers. Animators that do this end up confusing their viewers with no direction.
You can use camera effects such as depth of field to make your audience focus on the point you are trying to make in the particular scene.
Not giving your viewers time to take it in: This is another 3d animation making a mistake you should be careful of. Not giving your viewers time to process the happenings on the scene before the next.
This can be avoided by timing and measuring cuts such that any animation at the start of a new scene is timed to enable the viewers to take it in. You can ask for third-party criticism on your work to find out how your animation is received and see pointers to mistakes such as this. The third party could be your colleague or friend.
Note: You can easily avoid any error or mistake or modify your 3D animation with the help of the Wondershare Filmora video editor. That will provide a solid base for featuring 3D animation.
● Ending Thoughts →
● 3D animation refers to using motion to breathe life into inanimate objects, and they can create animated videos and animation cartoons.
● 3D animation is highly technical, unlike 2d animation
● You can avoid the above 3d mistakes if you remain objective and open, and ready to accept constructive criticism.
● Becoming an animator is a fun thing to do, and it allows you to be free to express your creativity while entertaining other people entirely.
● Before you start learning 3d animation and create cartoon photos, ensure that you have read through all that we have explained here to have good information about what you are going into.
Before you delve into the profession of creating 3d cartoon filters, you need to understand or decide if creating animated characters is something you would like to do. It’s not going to be smooth as you will get frustrated at some point, you will get confused, and it will be challenging, but in the end, it is rewarding because it is an expression of your mind coming to life. You are the one to breathe life into your characters who represent your imaginations. You will also have to infuse a great deal of your creativity to create beautiful and exciting characters for others to enjoy. Meanwhile, let’s first understand what 3d animations mean.
Becoming a 3d animator is not a feat you can achieve in a short time. It is not days, weeks, months, or even years. Like any other profession, a professional 3d animator must have put in a great deal of work, mixed with a lot of passion and love for what he is doing. To become successful as a 3d animator, you must love what you are doing or be ready to put in the work.
This article will expose what you should learn to create beautiful 3d animation cartoons, including what to expect as a 3d animator.
In this article
01 [What are 3d animation and the process of 3d animation?](#Part 1)
02 [Differences between 2d animation and 3d animation](#Part 2)
03 [A roaster of 8 best 3d animation software.](#Part 3)
04 [Top 3 3d animation making mistakes to avoid](#Part 4)
Part 1 What Is 3D Animation And The Process of 3D Animation?
animation is a term that describes the art of creating 3-dimensional images and placing them in a digital environment. It is a process that uses motion to bring objects, characters, etc., to life.
It is also known as computer-generated imagery, and it is currently the most common animation type for feature films.
Various software and programs are designed specifically for 3d animations and allow the animators to bring the objects to life.
The process of 3d animation happens in three(3) stages;
● Modeling
● Layout and animation
● Rendering
Modeling in 3d animation involves generating the objects or characters either by using a modeling tool or using a real thing. The real object is scanned directly into the computer, where other processes follow. You have total control over your character and how you want them to appear by modeling. You decide the weight, specifications, feel, etc. However, scanning objects save a lot of time. You must add texture before modeling your character or reviewing it before moving to the following layout and animation.
Layout and animation stage: A layout is determined when the generated objects move to this stage. It involves creating a set/scene where the objects can position. Layout first happens before animation does. After adding the objects and characters, they get animated using animation variables. After this, you use motion capture or keyframing to give life to the models in the scenes.
Rendering: Rendering is using software or programs. It is not something to do using just your computer. These tools can generate the scenes into the finished image according to the client’s requirements or set goals.
Creating cartoon background images or any other form of animations is a process that requires a lot of planning and work, which sums up a lot of time. To learn 3d animation, you must be ready to give in ample time as it is a profession that requires some time to handle.
The process listed above also shows the creativity requirement required to succeed in the 3d animation industry. To think that you must create the scenes, which is the layout stage, means you have to be creative in your imagination. If you then decide to model your character from scratch using modeling tools. That also requires another job of thinking and extracting a lot of your creative juices.
Part 2 What is the difference between 2d animation and 3d animation?
Anyone can decide to learn animation with no plan in mind or understanding of what the profession involves. animation is different from 2d animation, and if you want to learn animation, you need to understand the distinction between these two.
animation can have a lot of creative possibilities, whereas 3d animation has a lot of natural abilities. The visual style of both types of animation is explicitly different.
3d animation is a more intensive technical process than the various stages mentioned earlier. It would most likely involve different specialists to handle them to get a more professional output. However, 2d animation consists of drawing the characters frame by frame.
animated cartoons are in The Simpsons, Pinocchio, the Lion king, etc.
animations are like the ones Dreamworks, Pixar, produce. They include the avengers, the bad guys, etc.
Part 3 A Roaster Of 8 Best 3D Animation Software
Several 3D animation software exists in the market, both free and paid. If you are a animation creator or love animation for fun, you can use the free software to make your videos, cartoon photos, 3d cartoon faces, etc.
With many animation software available in the market, you can only fully trust a few.
Here’s a roaster of 8 best 3D animation software you could use to create the cartoon monsters you’ve always been curious about;
● Filmora
● Blender
● Maya
● Wings 3d
● Adobe Animate
● Cinema 4d
● K-3D
● Milcamo
Filmora Video animation tool: This is a highly recommended 3D animation tool with many features and pros. It has a wide range of keyframes, about six of which make your cartoon background images smooth and natural.
| Software | Features | OS | Pro |
|---|---|---|---|
| Wondershare Filmora Video Editor | It has an auto-color correction It has smooth keyframes | Windows, Mac | You can apply light flare effects You can apply an audio mixer |
| Blender | It has textured brushes and masking for 3d painting. It has add-ons and customised tools with high python scripting. | Windows, Linux, Mac computers | It has Virtual reality rendering, Strong camera restoration. It had both manual and automatic tracking. |
| Maya | Free trial of 30 days. Can create complex technical effects | Windows, Max | Good Control and perfect accuracy. Can collect motion capture data. |
| Wings 3d | Auto UV mapping system It has support for light and material effects. | Windows, Linux, and Mac OS | Advanced 3d and 2d modeling tools. It is free to use |
| Adobe animate | Virtual camera functionality gives a realistic view. Adoptive animation effects, zooming, panning etc. | Windows, Mac | Effective audio syncing technology. Customizable font, styling etc. |
| Cinema 4d | Concepts develop without time modeling Large library of preset scenes. | Windows, Mac | Customised with a huge asset range It is a faster tool than Maya Dissect complete scene and is faster than Maya. |
| K-3D | It has property adjustment capabilities with handy strong features. I5 is made up of basic tools for animation, curves, patches. | Mac OS X, Linux, FreeBSD, windows platforms | It is very flexible for either complex or basic workflows. It has a wide selection of plugins. |
| Mixamo | Streamlined user experience It has a faster search function that is accurate | Windows, Mac | It has fast character and animation browsing. Download multiple animations at a go |
For Win 7 or later (64-bit)
For macOS 10.12 or later
Part 4 Top Three (3) 3d Animation Making Mistakes To Avoid
As we initially mentioned, 3d animation requires an intensive technical process. It is a skill that you need to hone over the years by paying attention to detail, being highly creative, and daring to succeed.
Here are 3 mistakes you must avoid during the animation process;
● Forgetting the ‘why’ factor
● Over-animating a scene
● Not giving your viewers time to take it in
Forgetting the why: In a animation cartoon, every move, walking step, and smile is essential. Every character represented in your cartoon background is there for a specific reason.
You would be making a mistake that will affect the result if you lose focus on this reason. Your viewers won’t find your cartoon believable if the moves and acting don’t add up.
Your characters don’t just move because they want to move. Something must have spurred the motion or reaction. It could be for what happened to them, what they heard, or saw another character did in the scene. Do not neglect the why of the act.
While animating, focus on why and keep revisiting until all your characters and objects are knitted closely together.
Over-animating a scene: This is another mistake animators should avoid. If you animate your characters, everything may be a mess if you animate the background and foreground. Simplicity is how to get this thing, keep it simple and focused.
Do not have much going on in each scene but only where you need the attention of your viewers. Animators that do this end up confusing their viewers with no direction.
You can use camera effects such as depth of field to make your audience focus on the point you are trying to make in the particular scene.
Not giving your viewers time to take it in: This is another 3d animation making a mistake you should be careful of. Not giving your viewers time to process the happenings on the scene before the next.
This can be avoided by timing and measuring cuts such that any animation at the start of a new scene is timed to enable the viewers to take it in. You can ask for third-party criticism on your work to find out how your animation is received and see pointers to mistakes such as this. The third party could be your colleague or friend.
Note: You can easily avoid any error or mistake or modify your 3D animation with the help of the Wondershare Filmora video editor. That will provide a solid base for featuring 3D animation.
● Ending Thoughts →
● 3D animation refers to using motion to breathe life into inanimate objects, and they can create animated videos and animation cartoons.
● 3D animation is highly technical, unlike 2d animation
● You can avoid the above 3d mistakes if you remain objective and open, and ready to accept constructive criticism.
● Becoming an animator is a fun thing to do, and it allows you to be free to express your creativity while entertaining other people entirely.
● Before you start learning 3d animation and create cartoon photos, ensure that you have read through all that we have explained here to have good information about what you are going into.
How to Make a 3D Cartoon of Yourself
How to Make a 3D Cartoon of Yourself
An easy yet powerful editor
Numerous effects to choose from
Detailed tutorials provided by the official channel
From among the several trends that emerged on Social Media, making a 3D cartoon of yourself is probably the most popular.
Learning how to make 3D cartoons may just be in the height of demand in the near future.
In this article
01 [What is AI Artist? Plus how to cartoon yourself with it ](#Part 1)
02 [How to Create a 3D Cartoon of Yourself for Meta ](#Part 2)
03 [How to make 3D Cartoon From a Photo ](#Part 3)
04 [Five 3D cartoon Disney-Fied yourself apps ](#Part 4)
05 [More New Useful Tools to Upgrade Your Animation/Cartoon](#Part 5)
Part 1 What is AI Artist? Plus how to cartoon yourself with it
We all remember the Cartoon filter challenge on Facebook, right? Everyone was excited to transform themselves into a cartoon. The options of making personalized cartoon representations of yourself was pretty limited back then. With the Voila AI artist app you can choose at least 3 different cartoon variations of yourself.

The Voila AI artist app can be downloaded from the Apple App store and Android Play Store. You can use the app for free but for faster editing and an ad free experience, you will need to upgrade to the paid version. Other than just creating a cartoon of yourself, you can also create renaissance portraits and caricatures.
● Step 1: Download the Voila AI artist App for your device, and complete the installation process. Allow the app to access your Phone’s Camera rolling permission.
● Step 2: Select the style option you want to use. What we are using here is 3D cartoon (other options: 2D Cartoon, Caricature & and the rest). Touch the arrow and start.
● Step 3: Now, with your camera roll open, click a new one or choose from your gallery. You can also find a celebrities option where you can search for celebrities. This generates a four-grid choice. If you are using the free version, then be prepared to encounter one or two ads. After a few seconds, you can exit out and get back to your images.
● Step 4: You will receive a composite grid of four options; your original image, plus three cartoon representations (Royalty 3D, Baby 3D & Cartoon 3D). Here, you can select the option you like the most and start editing. Locate the up arrow button to immediately share on your preferred social media or simply save a copy in your device.
If the AI artist app has any paid and premium version, upon subscribing you will get ad free & watermark free animated representations.
Part 2 How to Create a 3D Cartoon of Yourself for Meta
Facebook only recently rebranded themselves as Meta. This has now started the rush to create a live virtual interaction space, and big companies like Microsoft and Nvidia are now competing with each other to bridge the gap.
Soon, activities like convening meetings, attending live events or even dating online would take place in virtual environments. So best be prepared for the future by creating a 3D avatar for yourself.
Your virtual avatar would be able to interact with the real world through a virtual platform by using VR headsets and other tech. Sensing your virtual presence would be almost the same as the real world for your peers and colleagues. You can attend a meeting without ever having to travel.
The process behind creating a 3D cartoon of yourself for Meta platforms starts by establishing a facial rig which is like a framework for the cartoon animations to sit on. These days, most apps come with automatic FACS facial rigging which is why certain Instagram filters like the Puppy nose filter was possible.
Presently, creating a complete 3D virtual model of yourself is a bit complicated to do on your own but soon this service will be automated in an app for you.
Part 3 How to make 3D Cartoon From a Photo
Photoshop is no doubt one of the most influential digital assets that allow you to do virtually anything with your photos. Of course, this includes turning your photos into 3D cartoon.
There are advanced techniques and tools you can use to retouch your image to achieve an animated like look for your portraits.
Of course, you can find multiple Photoshop hacks online but the following guide can give you an easy to follow idea of how to go about creating your own 3D cartoon out of an image.

Note; These steps are to be perceived as a simplified overview of your objectives when editing on Photoshop;
● To start out on turning your image into a 3D character, you need to learn how to create layers and then stack them on each other.
● You can then ‘liquify’ these layers to form a mould for your image.
● Apply skin softening techniques to take away the realistic features of the photo before working on turning it into a cartoon.
● Now you can start focus on applying the details to features like eyes, hair, nose and facial lines on your cartoon image.
● You can also change the colour of any individual features on your image. This method is applicable in making caricatures of your photo as well.
Part 4 Five 3D cartoon Disney-Fied yourself apps
Vibrant colours, gorgeous large eyes and shiny hair – pretty much sums up every Disney character you have ever seen. Now, everyone is obsessed with making their own Disney avatar and for good reason. You can use it as filter or upload it on your profile. Here are some of the most in-trend AI powered 3D Disneyfied apps you can use;
01Voila AI Artist

The Voila AI Artist app was released back in March of 2021 and has been the rage among Disneyfied apps. To clarify, the app has nothing to do with the Disney animation company but is perceived by users as the most successful app for disneyfication. Its on-board AI can create 3D and 2D renderings for your image along with hand drawn caricatures. You can download the app on App Store and Google Play.
02ToonMe

The next best app on our Disneyfied list is ToonMe. It also uses AI to turn photos into Disney Characters. The app keeps updating new cartoonish filters which you can use over your images. There are various other features which you can try as well like recreating your photos into classic vectors. The results are of extraordinary quality and can be uploaded on Instagram. You can download the app for free from Play store and App store.
03Snapchat

Snapchat has been around for some time now so you might already have it on your phone. Snapchat offers a vast range of filters and effects that of course includes Disneyfied filters and 3D cartoon images. You can look for them on the Snapchat search bar. New filters keep popping up every day which you can apply over your own images.
04Prisma

Prisma is a notoriously well know pop photo editor – which means it makes your photos ‘pop’. You can use it to edit photos on both Android and iPhone. It also comes with its own range of filters for turning your photos into cartoon images. There are hundreds of variations to choose from so you will definitely be spoilt for choices.
05Clip2Comic Cartoon

This app is only available on the App stores and is well known among iPhone users for turning photos into cartoons and caricatures. It is not exactly a Disneyfied app but it has a plethora of filters and a combination of editing tools to help personalize your 3D photos and comics. You can also directly upload these photos to your Social Media Accounts.
Key Takeaways from This Episode
● With the help of AI and other amazing features, you can use your everyday pictures to make a 3D cartoon of yourself.
● The Metaverse is her and soon we all will be interacting in a virtual space. So best learn how to rig your face with an animation filter.
● Apps like Voila AI artist, you can disneyfy your images quite easily. Explore dozens of such filters and effects with Disneyfied apps.
From among the several trends that emerged on Social Media, making a 3D cartoon of yourself is probably the most popular.
Learning how to make 3D cartoons may just be in the height of demand in the near future.
In this article
01 [What is AI Artist? Plus how to cartoon yourself with it ](#Part 1)
02 [How to Create a 3D Cartoon of Yourself for Meta ](#Part 2)
03 [How to make 3D Cartoon From a Photo ](#Part 3)
04 [Five 3D cartoon Disney-Fied yourself apps ](#Part 4)
05 [More New Useful Tools to Upgrade Your Animation/Cartoon](#Part 5)
Part 1 What is AI Artist? Plus how to cartoon yourself with it
We all remember the Cartoon filter challenge on Facebook, right? Everyone was excited to transform themselves into a cartoon. The options of making personalized cartoon representations of yourself was pretty limited back then. With the Voila AI artist app you can choose at least 3 different cartoon variations of yourself.
The Voila AI artist app can be downloaded from the Apple App store and Android Play Store. You can use the app for free but for faster editing and an ad free experience, you will need to upgrade to the paid version. Other than just creating a cartoon of yourself, you can also create renaissance portraits and caricatures.
● Step 1: Download the Voila AI artist App for your device, and complete the installation process. Allow the app to access your Phone’s Camera rolling permission.
● Step 2: Select the style option you want to use. What we are using here is 3D cartoon (other options: 2D Cartoon, Caricature & and the rest). Touch the arrow and start.
● Step 3: Now, with your camera roll open, click a new one or choose from your gallery. You can also find a celebrities option where you can search for celebrities. This generates a four-grid choice. If you are using the free version, then be prepared to encounter one or two ads. After a few seconds, you can exit out and get back to your images.
● Step 4: You will receive a composite grid of four options; your original image, plus three cartoon representations (Royalty 3D, Baby 3D & Cartoon 3D). Here, you can select the option you like the most and start editing. Locate the up arrow button to immediately share on your preferred social media or simply save a copy in your device.
If the AI artist app has any paid and premium version, upon subscribing you will get ad free & watermark free animated representations.
Part 2 How to Create a 3D Cartoon of Yourself for Meta
Facebook only recently rebranded themselves as Meta. This has now started the rush to create a live virtual interaction space, and big companies like Microsoft and Nvidia are now competing with each other to bridge the gap.
Soon, activities like convening meetings, attending live events or even dating online would take place in virtual environments. So best be prepared for the future by creating a 3D avatar for yourself.
Your virtual avatar would be able to interact with the real world through a virtual platform by using VR headsets and other tech. Sensing your virtual presence would be almost the same as the real world for your peers and colleagues. You can attend a meeting without ever having to travel.
The process behind creating a 3D cartoon of yourself for Meta platforms starts by establishing a facial rig which is like a framework for the cartoon animations to sit on. These days, most apps come with automatic FACS facial rigging which is why certain Instagram filters like the Puppy nose filter was possible.
Presently, creating a complete 3D virtual model of yourself is a bit complicated to do on your own but soon this service will be automated in an app for you.
Part 3 How to make 3D Cartoon From a Photo
Photoshop is no doubt one of the most influential digital assets that allow you to do virtually anything with your photos. Of course, this includes turning your photos into 3D cartoon.
There are advanced techniques and tools you can use to retouch your image to achieve an animated like look for your portraits.
Of course, you can find multiple Photoshop hacks online but the following guide can give you an easy to follow idea of how to go about creating your own 3D cartoon out of an image.
Note; These steps are to be perceived as a simplified overview of your objectives when editing on Photoshop;
● To start out on turning your image into a 3D character, you need to learn how to create layers and then stack them on each other.
● You can then ‘liquify’ these layers to form a mould for your image.
● Apply skin softening techniques to take away the realistic features of the photo before working on turning it into a cartoon.
● Now you can start focus on applying the details to features like eyes, hair, nose and facial lines on your cartoon image.
● You can also change the colour of any individual features on your image. This method is applicable in making caricatures of your photo as well.
Part 4 Five 3D cartoon Disney-Fied yourself apps
Vibrant colours, gorgeous large eyes and shiny hair – pretty much sums up every Disney character you have ever seen. Now, everyone is obsessed with making their own Disney avatar and for good reason. You can use it as filter or upload it on your profile. Here are some of the most in-trend AI powered 3D Disneyfied apps you can use;
01Voila AI Artist
The Voila AI Artist app was released back in March of 2021 and has been the rage among Disneyfied apps. To clarify, the app has nothing to do with the Disney animation company but is perceived by users as the most successful app for disneyfication. Its on-board AI can create 3D and 2D renderings for your image along with hand drawn caricatures. You can download the app on App Store and Google Play.
02ToonMe
The next best app on our Disneyfied list is ToonMe. It also uses AI to turn photos into Disney Characters. The app keeps updating new cartoonish filters which you can use over your images. There are various other features which you can try as well like recreating your photos into classic vectors. The results are of extraordinary quality and can be uploaded on Instagram. You can download the app for free from Play store and App store.
03Snapchat
Snapchat has been around for some time now so you might already have it on your phone. Snapchat offers a vast range of filters and effects that of course includes Disneyfied filters and 3D cartoon images. You can look for them on the Snapchat search bar. New filters keep popping up every day which you can apply over your own images.
04Prisma
Prisma is a notoriously well know pop photo editor – which means it makes your photos ‘pop’. You can use it to edit photos on both Android and iPhone. It also comes with its own range of filters for turning your photos into cartoon images. There are hundreds of variations to choose from so you will definitely be spoilt for choices.
05Clip2Comic Cartoon
This app is only available on the App stores and is well known among iPhone users for turning photos into cartoons and caricatures. It is not exactly a Disneyfied app but it has a plethora of filters and a combination of editing tools to help personalize your 3D photos and comics. You can also directly upload these photos to your Social Media Accounts.
Key Takeaways from This Episode
● With the help of AI and other amazing features, you can use your everyday pictures to make a 3D cartoon of yourself.
● The Metaverse is her and soon we all will be interacting in a virtual space. So best learn how to rig your face with an animation filter.
● Apps like Voila AI artist, you can disneyfy your images quite easily. Explore dozens of such filters and effects with Disneyfied apps.
Also read:
- Updated In 2024, The Best 10 Sketch Animation Video Makers
- Adobe Auto Rigger Is AWESOME
- New Secrets to Make 2D Game Animation for 2024
- Best 15 Anime Fonts-Find Your Favorite One
- Updated Top 10 Sketch Animation Video Makers for 2024
- Updated 2024 Approved Top 10 Popular Cartoons You Forgot Existed
- In 2024, 5 Ways You Never Heard of for Converting MP4 to GIF in Photoshop
- Updated In 2024, How to Turn Yourself Into a WhatsApp Cartoon
- 2024 Approved How to Make Well Done Animated GIF By Yourself?
- Want to Make a Meme GIF for 2024
- New Animate Graphics in Canva for 2024
- Updated Is It That Easy to Make My Animated Character
- FREE Top 10 Best Convert Video Between GIF and Software High Quality, 2024
- Updated In 2024, Learn How to Draw Cartoons Step by Step with This Guide
- Updated 2024 Approved Guide on Creating GIF in WhatsApp iPhone
- New 2024 Approved What Is A GIF
- Updated Some Techniques for Creating Animated Logo That Few People Know About for 2024
- 12 Best Stop Motion Studios Worth Recommending for 2024
- Updated The Only Guide Youll Ever Need to Learn About GIF Video Downloader
- Updated Finding The Best Animated Profile Picture Maker for 2024
- New 2024 Approved Top 15 Male Anime Characters By Voting
- New 2024 Approved The Secret Sauce for Making GIF Instagram Story More Aesthetic
- In 2024, How to Create a Whiteboard Animation Video
- 2024 Approved The 15 Most Efficient Photo to Cartoon Apps for Android
- New 2024 Approved What Is the Meaning of Motion Graphics
- New In 2024, Best 10 Popular Cartoons You Forgot Existed
- 12+ Stunning Instagram GIF Stickers
- New 2024 Approved
- Guide on Creating GIF in WhatsApp iPhone for 2024
- In 2024, Best 10 Photo Animator Templates
- Updated Top 10 Sketch Animation Video Makers
- Some Must-Know Useful Lego Animation Ideas
- Ways to Create Animated Clipart in PowerPoint
- New 6 Unexpected Ways Gif Animation Maker Can Affect Your Marketing
- Updated Is It That Easy to Make My Own Animated Character, In 2024
- In 2024, Amazing Ideas About Creating Personalised WhatsApp GIF Sticker
- New 2024 Approved The Best 8 Places for High-Quality Royalty Free Gifs
- New Apps to Animate Still Pictures for 2024
- New 2024 Approved Create or Find Good Morning/Night GIFs
- 5 Foolproof Amazing Anime Text to Speech Tips for 2024
- Updated How to Find & Make Animated Christmas GIFs?
- Updated 2024 Approved Can I Do Animated Logo Design Without Design Skills?
- How to Stop My Spouse from Spying on My Itel P40+ | Dr.fone
- How To Restore a Bricked Samsung Galaxy F14 5G Back to Operation | Dr.fone
- How do i add my signature to Word 2007
- The way to recover deleted photos on Razr 40 Ultra without backup.
- Catch or Beat Sleeping Snorlax on Pokemon Go For Oppo F23 5G | Dr.fone
- In 2024, How to Transfer Data from Oppo A38 to Samsung Phone | Dr.fone
- In 2024, 3 Ways for Android Pokemon Go Spoofing On Oppo Reno 10 Pro+ 5G | Dr.fone
- Unlock Your Boost Mobile Apple iPhone 12 Pro Before the Plan Expires
- Unlock Apple ID without Phone Number On iPhone 8
- How to Intercept Text Messages on Poco X6 | Dr.fone
- 11 Ways to Fix it When My Itel P55T Wont Charge | Dr.fone
- In 2024, How to Unlock Xiaomi Redmi Note 12 4G Phone Pattern Lock without Factory Reset
- Itel P55 5G Stuck on Screen – Finding Solutions For Stuck on Boot | Dr.fone
- In 2024, Top 10 Telegram Spy Tools On Poco X6 for Parents | Dr.fone
- 5 Hassle-Free Solutions to Fake Location on Find My Friends Of Realme 10T 5G | Dr.fone
- Preparation to Beat Giovani in Pokemon Go For Tecno Phantom V Flip | Dr.fone
- In 2024, How to Track OnePlus Nord N30 SE Location by Number | Dr.fone
- In 2024, Complete Tutorial to Use VPNa to Fake GPS Location On Motorola Moto G73 5G | Dr.fone
- How To Remove Screen Lock PIN On Itel S23+ Like A Pro 5 Easy Ways
- How To Do Tecno Spark 10 5G Screen Sharing | Dr.fone
- In 2024, How to Change GPS Location on Vivo Y56 5G Easily & Safely | Dr.fone
- How to Upgrade iPhone 11 without Losing Data? | Dr.fone
- In 2024, Detailed Review of doctorSIM Unlock Service For iPhone 11 Pro Max
- Title: Updated In 2024, Beginners Guide for Learning 3D Animation
- Author: Elon
- Created at : 2024-05-19 03:05:42
- Updated at : 2024-05-20 03:05:42
- Link: https://animation-videos.techidaily.com/updated-in-2024-beginners-guide-for-learning-3d-animation/
- License: This work is licensed under CC BY-NC-SA 4.0.
