
:max_bytes(150000):strip_icc():format(webp)/GettyImages-919006240-ee5ef631cb6f4e4997bce403b8bafa77.jpg)
Updated In 2024, Some Techniques for Creating Animated Logo That Few People Know About
Techniques for Creating Animated Logo That Few People Know About
Some Techniques for Creating Animated Logo That Few People Know About
An easy yet powerful editor
Numerous effects to choose from
Detailed tutorials provided by the official channel
How you present your brand on the digital landscape has a huge impact on your company’s overall conversions.
![]()
This guide will walk you through different procedures for creating an animated logo using different solutions.
In this article
01 [Are There Wow Factors in Your Branding with Animation Effects?](#Part 1)
02 [How to Make an Animated Logo: a Step-by-step Guide](#Part 2)
03 [5 Steps to Animate Your Logo](#Part 3)
04 [What is the Best Software to Animate a Logo?](#Part 4)
05 [Want to Explore More Advanced Animation Skills?](#Part 5)
Part 1 Are There Wow Factors in Your Branding with Animation Effects?
As we mentioned in the earlier paragraph, an animated logo can do wonders for your digital presence. How? When you publish an animated logo on your website or any other social media profile, it’ll automatically help you garner the attention from website visitors. Creating an animated logo will also make it easier for the customers to remember your business days after they visited your website.
However, when you are creating an animated logo, it’ll be crucial to follow a few tips to achieve the best results. Here are a few factors that’ll help you create the best animated logo.
● Always start with a simple research to analyze the customer behavior
● Instead of starting with the final design, take your time and work on a few sketches at the beginning
● Understand where you are going to publish the logo and then, choose the right color-scheme accordingly
● When it comes to animated logos, overdoing the animations can also damage the overall visual appearance of your logo
Part 2 How to Make an Animated Logo: a Step-by-step Guide
So, now that we’ve explained the importance of animated logos, let’s start with the step-by-step process of creating an animated logo using different solutions. First, we’ll take a look at some of the premade logo templates that you can integrate and customize to speed up the entire process.
01Vortex Logo Reveal
If you want to use your animated logo in a dedicated video, Vortex logo reveal can be an ideal choice for the job. The template contains a 3-5 seconds animation that’ll reveal your actual logo in a suspenseful manner.
023D Logo Animation
This is a pre-made animated logo template in After Effects that you can integrate with a single tap. The template simply shatters the logo into pieces after the initial reveal to create a dramatic effect for the viewers.
03Gold Luxury Logo Reveal
If you’re worried that using 3D-effects might overdo the animations, you can use this simple gold luxury logo reveal template. As compared to the previous two templates, this one has a simple animation and will help you convey your message more effectively.
04Waving 3D Logo Reveal
This logo is a widely popular AE animated logo template that many users buy to make their logos more appealing. The template utilizes motion graphics and a clean animation to reveal the actual brand logo while keeping the viewers engaged throughout the process.
05Infinite Zoom Logo Reveal
Want to reveal your animated logo in a unique manner? This template has got you covered. The After Effects logo template will allow you to use different pictures to reveal the logo with the traditional zoom-out transition. You can use all the pictures that represent your brand to add the required business values to your logo.
06Space Animation
Space animation is another After Effects template that’s ideal for brands who want to reveal their brand logo in a visually appealing manner. Different stars in the cosmos will combine together to represent your logo and leave a great first impression on the viewers.
Part 3 5 Steps to Animate Your Logo
Now, let’s move towards the next phase of creating an animated logo, i.e., animating the logo itself. It doesn’t matter which software you use to get the job done, you can adhere to the following steps to achieve the best results and create a visually stunning animated logo.
01Prepare the Simple Logo
In every situation, you’ll first have to prepare the simple one-dimension logo that you’ve been using so far. To create this logo, you can use a wide variety of tools such as Adobe Photoshop or even a simple logo maker such as Canva. Keep in mind that you should implement all the customization on the design during this stage only.
02Import the Logo File
The next step towards creating the animated logo is to simply import your logo file into the tool that you want to use to do the job. For instance, if you are planning to use Adobe After Effects, simply click “File > Open” and select the logo file to load it into AE’s editing panel. Once the file is successfully imported, you can move towards the next step.
03Choose the Right Animation Template
Now, you can proceed towards choosing the right animation template for your animated logo. It doesn’t matter which software you’re using for creating an animated logo, you’ll find dozens of built-in templates that can be integrated into the design with one click. Choose any of these templates and move towards the next step.
04Apply the Keyframes
After you’ve successfully imported the file and chosen a dedicated animation template, the next step would be to apply the keyframes. In tools like After Effects, you’ll find a built-in slider that’ll allow you to adjust the keyframes to customize the animation.
05Make the Final Adjustments
Finally, make the final adjustments to the animation. For instance, you can customize the color scheme or color-grade the logo for better visual appearance. You can also add other objects on top of the design to enhance the overall quality of the logo.
Part 4 What is the Best Software to Animate a Logo?
Here are the top three software you can use to get started with your animated logo and complete the process.
01Pixteller
![]()
Pixteller is an online logo maker designed to allow users to animate their logos in an easy-to-use interface. Even if you are not an experienced designer, you’ll find it pretty easy to animate the logo using Pixteller. The tool has a plethora of built-in templates that’ll allow you to edit your logo without any hassle.
02Crello
![]()
Crello is another easy-to-use online tool you can use to animate your logos without any technical skills. Being a web-based software, you can use Crello anywhere you want. In every situation, it’ll allow you to design a visually appealing logo with high-quality animation.
03Adobe After Effects
![]()
Now, if you are an experienced designer and are familiar with the Adobe ecosystem, After Effects is the most reliable tool to get the job done. Even though AE has a pretty complicated user interface, it’ll allow you to design a stunning logo animation, especially if you are familiar with all its editing tools.
Key Takeaways from This Episode
● Creating an animated logo is one of the most reliable ways to boost your brand visibility and attract new customers
● While creating an animated logo, it’s crucial to follow a dedicated process to attain the best results
● To use animated logos in your promotional videos, you can use Filmora Pro and its built-in features to get the job done.
10 of the Best Disney Animated Shows
10 of the Best Disney Animated Shows (Sorted by Popularity Ascending)
An easy yet powerful editor
Numerous effects to choose from
Detailed tutorials provided by the official channel
Just last year, the old-school animated slapstick comedy, Animaniacs was revived and given new life. This Animaniacs reboot was a long-time in coming for many fans of the show in the 1990s. In any case, the Animaniacs (2020) has inspired many fans of animated movies to start to rewatch their favorites shows in the past couple of decades.
Today, in order to give these fans something to be excited over, we’ve compiled a list of some of the Best Animated TV shows from Disney
Alright, let’s kick things off with our list As mentioned, this will be a comprehensive list of some of the best Disney Animated Shows that you can watch right now We’ve ordered them by popularity so that you can have an easier time trying to figure out what to watch
Of course, if you’re more interested in actually learning about how to create your own animated shows, you may be interested in looking in a different direction For that, we recommend looking towards the premium video editor, Wondershare Filmora — which comes packed with everything that you can possibly want in order to begin exploring the realm of animation
Top 10 Star vs. the Forces of Evil
Duration: 2015–2019 [4 Seasons, 22m per episode]
Genre: Animation, Action, Adventure
Rating: TV-Y7
Metascore: N/A
Director: Aaron Hammersley, Dominic Bisignano, Brett Varon, Sabrina Cotugno, Piero Piluso, Tyler Chen, Giancarlo Volpe, David Wasson, Michael Mullen , John Davis Infantino, and Amelia Lorenz.
Stars: 7.9
Votes: 13,266
Summary: The first on this ascending list of ours is the TV series, ‘Star vs. the Forces of Evil’ This is an American animated ‘magical-girl’ television show that was inspired by similar tropes of the kind that were popular in the East. The show has long run its course, with the last episodes having been aired in 2019 (making it a perfect show to binge from start to finish)
The main character of the show, Star Butterfly, is a magical princess and the heir to the royal throne of the Butterfly Kingdom. From this alone, you could probably guess the kind of demographics this show has But, to explain further, once she reached the age of 14, she was given the family heirloom wand — only to accidentally set fire to the family castle and be sent over to Earth to train her magic more carefully
Top 9 Gargoyles
Duration: 1994–1996 [2 Seasons, 30m per episode]
Genre: Animation, Action, Adventure
Rating: TV-Y7
Metascore: N/A
Director: Dennis Woodyard, Frank Paur, Kazuo Terada, Saburo Hashimoto, Bob Kline, Takamitsu Kawamura, and Butch Lukic.
Stars: 8.1
Votes: 15,813
Summary: We go back into the older Disney animated shows a bit with this next series It ran from 1994 to 1996 for two seasons (with the third season having been called ‘Gargoyles: The Goliath Chronicles’ instead.) Unlike the next item on this list, this one is definitely more suitable for an older audience. The tone of the story is quite grim, despite being your general action/adventure show.
It tells the story of preternatural creatures called Gargoyles — all of whom were cursed for over a thousand years to turn to stone during the day Modern times see the release of this curse, however. And, now, these gargoyles must contend with the realities of living in modern-day (at the time the series was aired) New York City.
Top 8 Mickey Mouse Clubhouse
Duration: 2006–2016 [4 Seasons, 30m per episode]
Genre: Animation, Adventure, Comedy
Rating: TV-Y
Metascore: N/A
Director: Donovan Cook, Howy Parkins, Sherie Pollack, Rob LaDuca, Phil Weinstein, Broni Likomanov, and Victor Cook.
Stars: 5.8
Votes: 3,364
Summary: The Mickey Mouse Clubhouse sees the revival of the classic, Mickey Mouse character (who had been snubbed an extended spot on the big screen outside of the previews and was really only featured in the old film ‘Fantasia) The show was a long-running one. Having aired between 2006 to 2016 with exactly 125 episodes around 30 minutes long.
The demographics for this one mainly comprises of very young children. But, if you like, it’s a safe-for-viewing show that you can have your kids watch and keep distracted And, perhaps, along the way, you can find some joy in these classic characters coming back to life.
Top 7 A Goofy Movie
Duration: 1995 [78 min]
Genre: Animation, Adventure, Comedy
Rating: G
Metascore: N/A
Director: Kevin Lima
Stars: 6.9
Votes: 51,043
Summary: The Goofy Movie is not actually a TV show, but it is a part of the list of the best Disney animated shows on IMDB because it was based on an established television series called ‘Goof Troop’ The movie saw its premiere in 1995 and it starts off a couple of years after the end of the Goof Troop show.
Which, spoilers, sees the main characters (Goody and his son, Max) into their newest adventures Max is in high school in this film, far older than he was in the TV show. It gives the film a different sort of feel. But it’s not less comedic than before And, with the extra splash of adventure, it’s sure to provide a good time
Top 6 Monsters at Work
Duration: 2021– [1 Season, 22m per episode]
Genre: Animation, Adventure, Comedy
Rating: TV-G
Metascore: N/A
Director: Stephen J. Anderson, Kaitlyn Ritter, Kathleen Thorson Good, and Shane Zalvin.
Stars: 7.1
Votes: 5,862
Summary: When people talk of the best-animated films of all time, they usually do not forget to mention Monsters, Inc And well, this next show on our list, ‘Monsters at Work’, is meant to be a direct adaptation of the original work This series launched just last year (in 2021) and is currently ongoing and available for streaming on Disney+.
It kicks off on the day the main villain of the original story, Henry J. Waternoose III was arrested. Think of the show as a sequel, one that covers the inevitable transition of power with beloved characters Mike and Sulley at the helm
Top 5 DuckTales
Duration: 2017–2021 [3 Seasons, 21m per episode]
Genre: Animation, Action, Adventure
Rating: TV-Y
Metascore: N/A
Director: Matthew Humphreys, Tanner Johnson, Jason Zurek, John Aoshima, Dana Terrace, Tom Owens, Matt Youngberg, Vince Aparo, Jason Reicher, Stephanie Gonzaga, and Sam King.
Stars: 8.2
Votes: 8,826
Summary: Next up, we have ‘Duck Tales’ Duck Tales is actually a reboot, much like the Animianics (2020) reboot The original series, which had premiered all the way back in September of 1987, had run for over 100 episodes (with the last of the episodes having been aired in November of 1990). In any case, the nostalgia factor is strong with this one The series has inspired many adaptations. And, with its revival on Disney XD in 2015, its popularity has only continued to grow
Just in case you’re unfamiliar with this zany cast of characters. It all starts off with Donald Duck, who kicks off the show by joining the US Navy and handing off the care of his nephews, Huey, Dewey, and Louie to his uncle Scrooge McDuck
Top 4 Phineas and Ferb
Duration: (2007–2015) [4 Seasons, 15m per episode]
Genre: Animation, Short, Action
Rating: TV-G
Metascore: N/A
Director: Robert Hughes, Zac Moncrief, George Elliott, Keith Oliver, Jay Lender, Dan Povenmire, Sue Perrotto, Jeff ‘Swampy’ Marsh, Derek Lee Thompson, Kim Roberson, Russell Calabrese.
Stars: 8.0
Votes: 41,251
Summary: The fourth most popular of the Disney animated shows on IMBD is Phineas and Ferb This is an action/comedy series that ran all from 2007 to 2015 And yes, that does mean that this show is 100% now binge-able from start to end
This show follows the story of Phineas Flynn and his stepbrother Ferb Fletcher. The two are quite young (which perhaps is at odds with the actual demographics of the show, which make up primarily of young adults and adults), not having even reached their early teenage years just yet Each episode starts with the two brothers working on something new and exciting projects to do with construction. Often not very feasible for children of their age, but hey That doesn’t make it any less fun
Top 3 Amphibia
Duration: 2019– [3 Seasons, 23m per episode]
Genre: Animation, Short, Action
Rating: TV-Y7
Metascore: N/A
Director: Kyler Spears, Joseph D. Johnston, Jennifer Strickland, Derek Kirk Kim, Bert Youn, Roxann Cole
Stars: 8.1
Votes: 3,949
Summary: With ‘Amphibia’ we introduce another Disney animated show that is not quite finished It had its premiere on the Disney Channel in June of 2020, with the latest season, the third season, having begun airing in October of 2021.
This story features a teenage heroine as its protagonist. Her name is Anne Bonnchuy. And, much like Luz from ‘The Owl House’ (the next show on our list) she is transported into another world that is very different from the one she knew Only, she has friends Sasha and Marcy Wu with her as her company.
Top 2 The Owl House
Duration: 2020- [2 Seasons, 22m per episode]
Genre: Animation, Action, Adventure
Rating: TV-Y7-FV
Metascore: N/A
Director: Aminder Dhaliwal, Stu Livingston, Sabrina Cotugno, Stephen Sandoval, Amelia Lorenz, Bosook Coburn, Bridget Underwood
Stars: 8.1
Votes: 7,522
Summary: While still quite new and yet to be finished (the series is ongoing and had its premiere in 2020 on the Disney Channel), ‘The Owl House’ is another Disney animated show that you may be interested in This story was created by Dana Terrace, and was quite well-regarded for having unabashedly LGBTQ+ character representation (it was even the first Disney property to feature a same-sex couple as main characters)
The story’s main protagonist is Luz Noceda. She’s a teenage girl that somehow ended up traveling into another world. There she meets “The Owl Lady” Elda Clawthorne and her housemate King as a human without any powers of her own, the world is quite unusual for Luz, but that doesn’t stop her from trudging forward in an attempt to become a witch by apprenticing at the Owl House.
Top 1 Gravity Falls
Duration: 2012–2016 [2 Seasons, 23m per episode]
Genre: Animation, Action, Adventure
Rating: TV-Y7
Metascore: Joe Pitt, John Aoshima, Matt Braly, Aaron Springer, Stephen Sandoval, Sunil Hall, Rob Renzetti.
Stars: 8.9
Votes: 90,593
Summary: The first of the Disney Animated Shows on our list is ‘Gravity Falls’ This is highly rated by viewers on IMDB — having scored a total of 8.9 stars and over 90,000 votes The film was created by Alex Hirsch and it’s available for streaming on both Disney Channel and Disney XD. The series has since finished, so you can binge it from start to finish with your children now if you like
The story follows the adventure of Dipper Pines and his sister Mabel as they explore the supernaturally-active town that is Gravity Falls, Oregon It was popular with young children, teenagers, and young adults alike, having run from 2012-2016 with the main genres being mystery and comedy
● Key Takeaways from This Episode →
● There really is something wonderful about seeing an old, classic work given new life The new Animaniacs reboot was exactly this and it caught the attention of many modern fans of animated works
● Whether you’re interested in watching more classic works or discovering a new one that you can enjoy with the next generation of fans of animated media, we’ve compiled a list based on recent popularity on IMDB
● Perhaps this list will even inspire you to start working on creating a new animated work of your own If so, don’t let the thought of failure stop you. You never know, it may just become the next, big thing
Step-by-Step Guide to Send Gif WhatsApp on Android
Step-by-step Guide to Send Gif WhatsApp on Android
An easy yet powerful editor
Numerous effects to choose from
Detailed tutorials provided by the official channel
While chatting with your friends and dear ones on WhatsApp, you can not only send videos and images but also some GIFs. The GIF files will convey your mood and feelings using short animations.
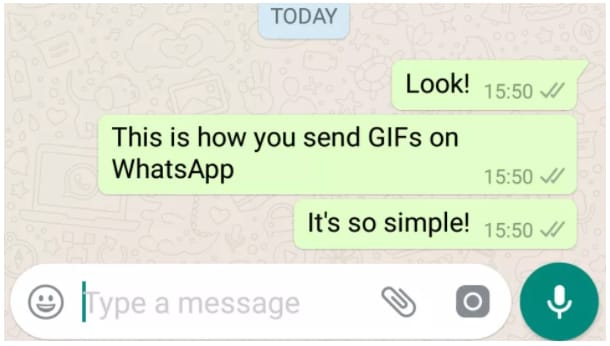
On your Android device, these files can be either selected from the collection available at WhatsApp or can be imported from Giphy. Additionally, you can also create your own customized WhatsApp GIFs Android using images or videos.
In this article
01 [How to send WhatsApp GIF on Android](#Part 1)
02 [How to create a custom GIF on WhatsApp Android](#Part 2)
03 [Create professional-looking GIF using Wondershare Filmora](#Part 3)
Part 1 How to send WhatsApp GIF on Android
To send GIFs to your contacts in WhatsApp it is important to ensure that you have the latest version of the messaging app installed on your phone. There is an integrated library of GIFs on your Android phone from where you can search like tom and jerry gif stickers for WhatsApp, peach and Goma gif for WhatsApp, and more.
Step 1.Launch WhatsApp on your Android device and open any conversation to which you wish to send a GIF.
Step 2.Click on the Emoji icon at the bottom left corner of the chat window.
Step 3.At the bottom middle of the screen, click on the GIF button and the list of options available at the integrated library will appear on the screen. You can even search for the desired GIF by entering the keyword at the search icon.
Step 4.Next, tap on the selected GIF to preview it. You can also add a message using Add a caption… button
Step 5.Finally, click on the green Send button (white paper plane icon) at the bottom-right corner. The GIF will be sent to your conversation.
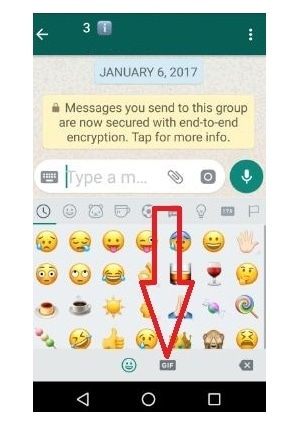
Part 2 How to create a custom GIF on WhatsApp Android
WhatsApp allows you to create a customized GIF using images and videos on your Android phone. The steps for the same are as follows
Step 1.Open the WhatsApp chat to whom you wish to send the customized GIF.
Step 2.At the bottom of the screen, click the camera icon. Either choose to record a desired video or import from the phone gallery to create a GIF.
Step 3.Once the video is added, trim it using the slider at the top. (To create a GIF, the video cannot be more than 5 seconds). You can even add a text message using Add a caption. option at the bottom of the screen.
Step 4.Next, click on the GIF button under the slider and then click on the send button at the bottom-right corner.
GIF created using the video will be sent to your contact.
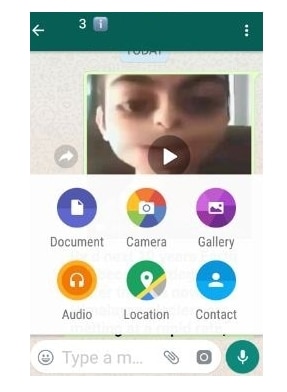
Part 3 Create professional-looking GIF using Wondershare Filmora Video Editor
Though WhatsApp allows creating GIFs using videos and images, the options for customizations are not there. So, to facilitate you creating professional-looking GIFs in no time, we suggest using Wondershare Filmora. Images and videos can be added to this versatile Windows and Mac-based tool for creating artistic animations. There are multiple options for customizing the file like adding elements, sound, text, and more.
Wondershare Filmora
Get started easily with Filmora’s powerful performance, intuitive interface, and countless effects!
Try It Free Try It Free Try It Free Learn More >

You can also speed up, slow down, rotate, crop, and perform other editing tasks. The software allows adding media files in all widely used formats like MO4, MOV, MKV, and more. The software has a user-friendly interface that makes it apt for users even without any prior experience in creating animations.
Steps to create a customized GIF WhstaApp Android using Wondershare Filmora
Step 1.Download, install and open the Wondershare Filmora software on your system. Browse and import the videos and images from your system from which you wish to create a GIF.
Step 2.After the files are added, drag and drop them to the timeline of the software at the bottom.
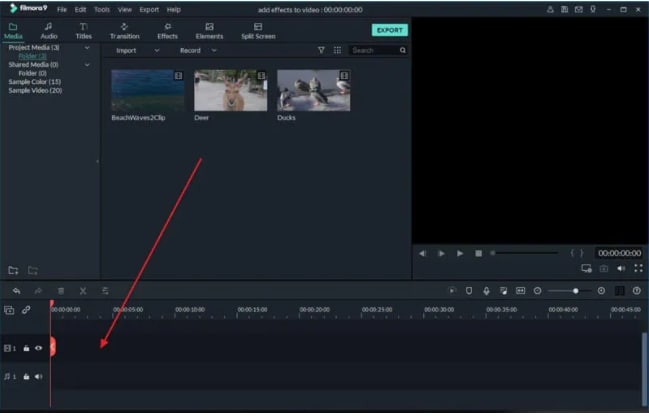
Step 3.Next comes the editing. Using multiple editing functions of the software you can rotate, crop, speed up, slow down, and perform a wide range of tasks as needed.
Step 4.You can even add the text messages to your animations and also choose the font and other parameters of the text.

Step 5.Once all the selections and editing are done, choose GIF at the Local tab to save your created media file as GIF. Finally, click on the EXPORT button to start processing and saving the file as GIF.
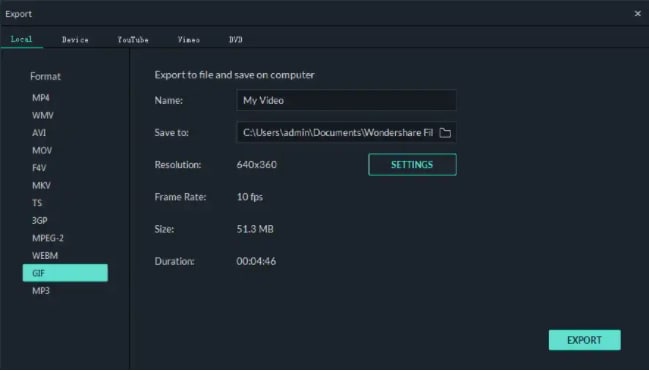
The created GIF can now be used for WhatsApp chat, social media sites, and other online sites.
● Key Takeaways from This Episode →
●GIF animations can be added to WhatsApp chats on your Android phone using an integrated library or GIPHY.
●WhatsApp also allows creating GIFs using videos and images on your device or by recording one.
●To create a professional and appealing GIF, Wondershare Filmora is the best tool. The software can also be used for several other video editing tasks.
While chatting with your friends and dear ones on WhatsApp, you can not only send videos and images but also some GIFs. The GIF files will convey your mood and feelings using short animations.
On your Android device, these files can be either selected from the collection available at WhatsApp or can be imported from Giphy. Additionally, you can also create your own customized WhatsApp GIFs Android using images or videos.
In this article
01 [How to send WhatsApp GIF on Android](#Part 1)
02 [How to create a custom GIF on WhatsApp Android](#Part 2)
03 [Create professional-looking GIF using Wondershare Filmora](#Part 3)
Part 1 How to send WhatsApp GIF on Android
To send GIFs to your contacts in WhatsApp it is important to ensure that you have the latest version of the messaging app installed on your phone. There is an integrated library of GIFs on your Android phone from where you can search like tom and jerry gif stickers for WhatsApp, peach and Goma gif for WhatsApp, and more.
Step 1.Launch WhatsApp on your Android device and open any conversation to which you wish to send a GIF.
Step 2.Click on the Emoji icon at the bottom left corner of the chat window.
Step 3.At the bottom middle of the screen, click on the GIF button and the list of options available at the integrated library will appear on the screen. You can even search for the desired GIF by entering the keyword at the search icon.
Step 4.Next, tap on the selected GIF to preview it. You can also add a message using Add a caption… button
Step 5.Finally, click on the green Send button (white paper plane icon) at the bottom-right corner. The GIF will be sent to your conversation.
Part 2 How to create a custom GIF on WhatsApp Android
WhatsApp allows you to create a customized GIF using images and videos on your Android phone. The steps for the same are as follows
Step 1.Open the WhatsApp chat to whom you wish to send the customized GIF.
Step 2.At the bottom of the screen, click the camera icon. Either choose to record a desired video or import from the phone gallery to create a GIF.
Step 3.Once the video is added, trim it using the slider at the top. (To create a GIF, the video cannot be more than 5 seconds). You can even add a text message using Add a caption. option at the bottom of the screen.
Step 4.Next, click on the GIF button under the slider and then click on the send button at the bottom-right corner.
GIF created using the video will be sent to your contact.
Part 3 Create professional-looking GIF using Wondershare Filmora Video Editor
Though WhatsApp allows creating GIFs using videos and images, the options for customizations are not there. So, to facilitate you creating professional-looking GIFs in no time, we suggest using Wondershare Filmora. Images and videos can be added to this versatile Windows and Mac-based tool for creating artistic animations. There are multiple options for customizing the file like adding elements, sound, text, and more.
Wondershare Filmora
Get started easily with Filmora’s powerful performance, intuitive interface, and countless effects!
Try It Free Try It Free Try It Free Learn More >
You can also speed up, slow down, rotate, crop, and perform other editing tasks. The software allows adding media files in all widely used formats like MO4, MOV, MKV, and more. The software has a user-friendly interface that makes it apt for users even without any prior experience in creating animations.
Steps to create a customized GIF WhstaApp Android using Wondershare Filmora
Step 1.Download, install and open the Wondershare Filmora software on your system. Browse and import the videos and images from your system from which you wish to create a GIF.
Step 2.After the files are added, drag and drop them to the timeline of the software at the bottom.
Step 3.Next comes the editing. Using multiple editing functions of the software you can rotate, crop, speed up, slow down, and perform a wide range of tasks as needed.
Step 4.You can even add the text messages to your animations and also choose the font and other parameters of the text.
Step 5.Once all the selections and editing are done, choose GIF at the Local tab to save your created media file as GIF. Finally, click on the EXPORT button to start processing and saving the file as GIF.
The created GIF can now be used for WhatsApp chat, social media sites, and other online sites.
● Key Takeaways from This Episode →
●GIF animations can be added to WhatsApp chats on your Android phone using an integrated library or GIPHY.
●WhatsApp also allows creating GIFs using videos and images on your device or by recording one.
●To create a professional and appealing GIF, Wondershare Filmora is the best tool. The software can also be used for several other video editing tasks.
Best Claymation Shows That Make Your Memories Unforgettable
Best Claymation Shows That Make Your Memories Unforgettable
An easy yet powerful editor
Numerous effects to choose from
Detailed tutorials provided by the official channel
There are plenty of things that the 90s have given us. And when we revisit them now, it gives us an inimitable feeling of nostalgia which we would like to store forever with us. And one of the things that can bring back tons of cherished memories from the 90s is the claymation tv shows.
The claymation shows were called the clay animation shows. The reason for such a name was because the characters in the shows were made from malleable or deformable materials, especially out of clay. They have been one of the most revolutionary and entertaining components of that time.
These shows were one of the forms among the numerous forms of stop-motion animations. We will cover what these shows were about, their cast, and where you can watch them today. And in the following discussion, we will be discussing the ten best 90s claymation shows to bring back wonderful nostalgic memories.

Here is the list of the top claymation tv shows and all the information, including the sites and apps you can watch even today!
01Plasmo
Plasmo was an Australian science fiction TV series about a two and a half-year-old space orphan. The show first premiered in 199starring Abbe Holmes, Phillip Houghton and Pia Morley. You can watch this show on YouTube.

02Plonsters
The Plonsters was a show that premiered in 19which showed the characters Plif, Plops and Plummy, babble and morph, and their wonderful adventures. The show starred Ralph Thiekötter, and you can watch this show on Netflix and Tubi.
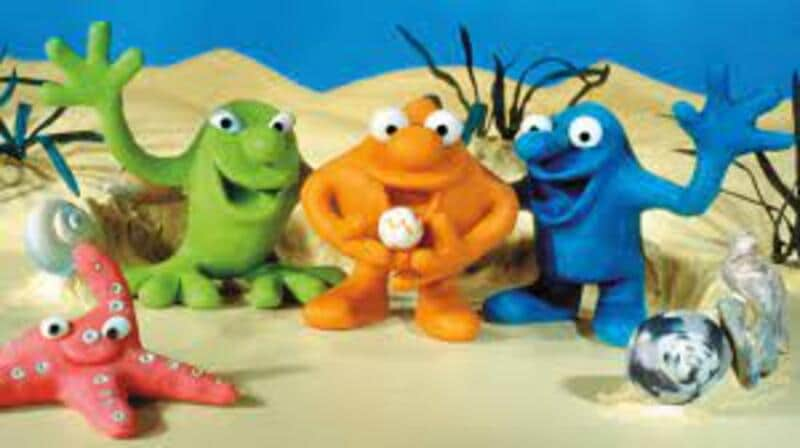
04Rex the Runt
Rex the Runt was a comedy show that premiered in 199The show was about the adventures of intrepid Rex and his plasticine companions. It starred about nine celebrities. Steve Box, Elisabeth Hadley, Andrew Jeffers, and Kevin Wrench were among them. You can watch this show even today on Amazon Prime.

05Mio Mao
Mia Mao first premiered in 197starring Derek Griffiths as cast. The show was about two plasticine kittens, Mia and Mao, exploring and finding different objects and animals who hide in their garden. You can watch this show on Amazon Prime.
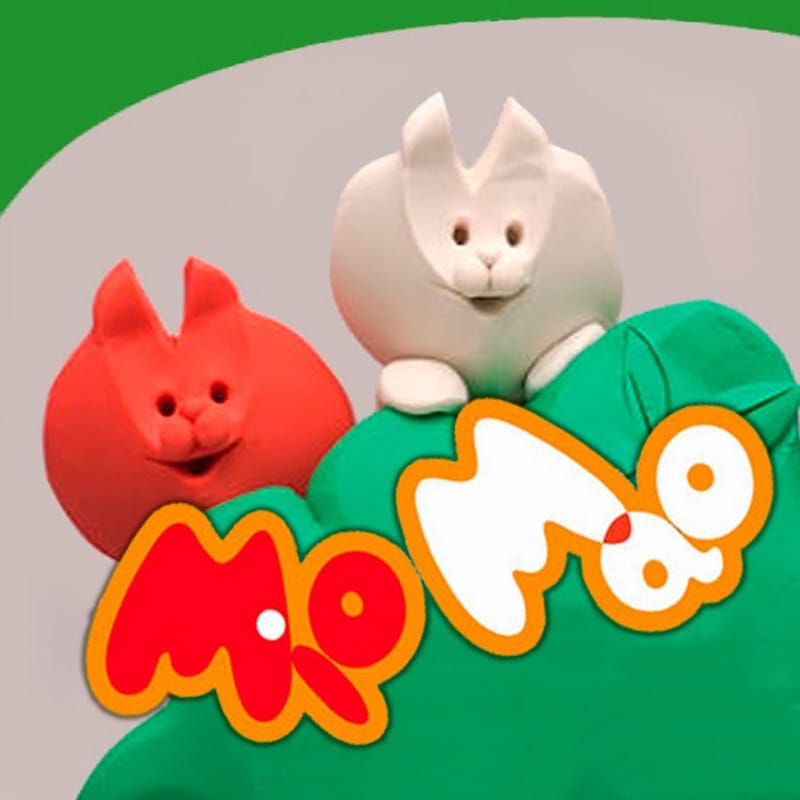
06Celebrity Death
The Celebrity Deathmatch featured numerous celebrities who were shown as clay-animated characters. Their characters would have quite an intense fight in a boxing ring, and the match would be pretty different from the ordinary boxing matches.
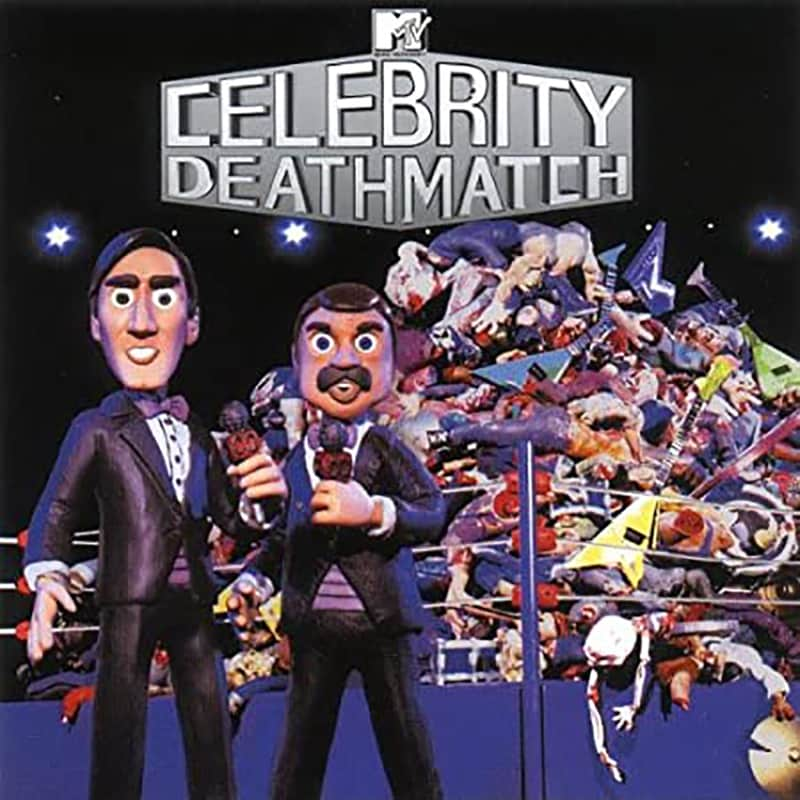
Most of the boxing matches ended with the death of the celebrities, which was the reason for the show to get its name “Celebrity Deathmatch”. It was one of the most favourite and popular 9claymation shows on MTV, an absolute treat and entertainment to watch.
The show premiered on January 2199and it continued to air till the year 2007., with its final episode on March 3200Its cast included a series of celebrities, including Maurice Schlafer, Lean Maxwell, Mills Lane, David Wills, Steve Austin, Masasa Moyo and several other celebrities.
You can readily watch this show today on Amazon Instant Video, iTunes, Paramount+ or Amazon Prime Video.
07The Gumby Show
The Gumby Show was yet another popular tv show of the 9that premiered first on March 1195It featured a green-titular character, a humanoid that was a creation and the model of Art Clokey.
This character has been the reason behind two tv series, another feature-length movie and several other media. The ones to star in this tv show are Dal McKennon and Dick Beals. The show is about Gumby experiencing different adventures through various times and environments in history. The show also features his constant companion, a titular, red coloured talking pony named Pokey.
You can watch the show on Netflix and Amazon Prime.
08Pat & Mat
Pat & Mat was an entertaining and fun-to-watch television show of the 90s. The show first premiered in 19and starred David Nykl and Peter Alton, who played the role of Pat and Mat, respectively.
The show was about two neighbours, Pat and Mat, who faced self-created problems. And then, they solved these problems through any possible and impossible remedy.
You can watch this show now on Zee5 and Mx Player for free.
09Pingu
Pingu was a television show about a clumsy yet sweet penguin who lived with his family in the polar ice cap of Antarctica. Pingu, along with his seal friend Robby and sister, Punga, go on different adventures.
This show first premiered on May 2198with Carlo Bonomi, David Sant and Marcello Magni starring in it. You can watch the episodes of this unforgettable and entertaining tv show on ITV Hub and Amazon Prime.
10The Red and the Blue
The Red and the Blue was an Italian television series for children that first premiered in 197The show was about two antagonist clay shape-shifting characters who detected against an undifferentiated background, white.
The cast of this tv show included Carlo Bonomi, and you can see this show today on YouTube.
11The PJs
The PJs was a popular and loved tv show that premiered on 10th January 199About twenty celebrities were starring in this show, and naming a few among them were Eddie Murphy, Ja’Net DuBois, Loretta Devine, Shawn Michael Howard, Snoop Dog and many more.
The show was about Thurgood Stubbs, the superintendent of Lawrence Hilton-Jacobs housing project and lived with his wife, Muriel. This comedy show satirically featured the difficulties one faces in a big-city housing project, which the protagonist Thurgood Stubbs and his friends faced.
You can watch this show on Peacock Tv.
● Bonus:
Now, without video editing, these fantastic shows of the 9could not have been created. But To your surprise, you too can create such incredible videos effortlessly. And that can be possible through an efficient and effective video editing tool.
You can find innumerable video editing tools available in this present world, but you must choose the best. So, let us introduce you to the best video editing tool, with which you can showcase all your editing skills and creativity-Wondershare Filmora Video Editor !
We call this tool the best video editing tool because its numerous features make it the most proficient video editing tool. Let us now look into its numerous effective features below.
● Professional editing tools
Filmora is the video editing tool that incorporates all the professional editing features to make your videos of the best and the professional quality. The elements envelop every aspect of the finest quality video editing works, which brings out the best of skills and creativity in you.
● Easy to use
Although Filmora has every professional editing tool, you will face no difficulty figuring out how the tools work. Even if you are a beginner, you can effortlessly use this editing tool to not only initiate your video editing journey but also enrich your skills.
● Free trial
You need not buy the proceed features on your first try. You can readily avail of the free trial of Filmora and its paid features. And as you try and find the features pleasing, you can proceed to purchase the aid features.
● Personalize and edit your videos
You can avail of the various features such as rotating, cropping, trimming and splitting the videos to edit. Also, there are other features where you can change the speed of the videos. Therefore, the features you get in these tools are of the most proficient quality.
● Over 8effects
The Filmora editing tool offers you more than 8editing effects that will never make you feel lacking any features and effects you need. And this helps you in making the best videos most effortlessly.
● Get the tool on any devices
Filmora believes that editing skills should be made discoverable anywhere and everywhere. Thus, you can download or use this tool on any device that you use. So, you need not have any specific device to avail of this incredible video editing tool, and you can make and edit videos on any device you want.
● Key Takeaways from This Episode →
● These are the best ten claymation tv shows and series that you can watch even today to bring back all the memories and revisit your early days of the 90s. So, to wrap up our discussion, we would conclude by retracing the aspects and factors that we covered in our discussion. We had enveloped the following topics effectively.
● We discussed the claymation picture through a little interdiction.
● Then, we discussed the ten best claymation TV shows popular in the 90s. We discussed their stories, their casts, their premieres and also the sites and apps where you can watch them even today.
● Lastly, we introduced you to the best editing tool, Filmora, that will help you edit any video of your choice and explore your video editing skills with the finest professional features and infinite effects.
There are plenty of things that the 90s have given us. And when we revisit them now, it gives us an inimitable feeling of nostalgia which we would like to store forever with us. And one of the things that can bring back tons of cherished memories from the 90s is the claymation tv shows.
The claymation shows were called the clay animation shows. The reason for such a name was because the characters in the shows were made from malleable or deformable materials, especially out of clay. They have been one of the most revolutionary and entertaining components of that time.
These shows were one of the forms among the numerous forms of stop-motion animations. We will cover what these shows were about, their cast, and where you can watch them today. And in the following discussion, we will be discussing the ten best 90s claymation shows to bring back wonderful nostalgic memories.
Here is the list of the top claymation tv shows and all the information, including the sites and apps you can watch even today!
01Plasmo
Plasmo was an Australian science fiction TV series about a two and a half-year-old space orphan. The show first premiered in 199starring Abbe Holmes, Phillip Houghton and Pia Morley. You can watch this show on YouTube.
02Plonsters
The Plonsters was a show that premiered in 19which showed the characters Plif, Plops and Plummy, babble and morph, and their wonderful adventures. The show starred Ralph Thiekötter, and you can watch this show on Netflix and Tubi.
04Rex the Runt
Rex the Runt was a comedy show that premiered in 199The show was about the adventures of intrepid Rex and his plasticine companions. It starred about nine celebrities. Steve Box, Elisabeth Hadley, Andrew Jeffers, and Kevin Wrench were among them. You can watch this show even today on Amazon Prime.
05Mio Mao
Mia Mao first premiered in 197starring Derek Griffiths as cast. The show was about two plasticine kittens, Mia and Mao, exploring and finding different objects and animals who hide in their garden. You can watch this show on Amazon Prime.
06Celebrity Death
The Celebrity Deathmatch featured numerous celebrities who were shown as clay-animated characters. Their characters would have quite an intense fight in a boxing ring, and the match would be pretty different from the ordinary boxing matches.
Most of the boxing matches ended with the death of the celebrities, which was the reason for the show to get its name “Celebrity Deathmatch”. It was one of the most favourite and popular 9claymation shows on MTV, an absolute treat and entertainment to watch.
The show premiered on January 2199and it continued to air till the year 2007., with its final episode on March 3200Its cast included a series of celebrities, including Maurice Schlafer, Lean Maxwell, Mills Lane, David Wills, Steve Austin, Masasa Moyo and several other celebrities.
You can readily watch this show today on Amazon Instant Video, iTunes, Paramount+ or Amazon Prime Video.
07The Gumby Show
The Gumby Show was yet another popular tv show of the 9that premiered first on March 1195It featured a green-titular character, a humanoid that was a creation and the model of Art Clokey.
This character has been the reason behind two tv series, another feature-length movie and several other media. The ones to star in this tv show are Dal McKennon and Dick Beals. The show is about Gumby experiencing different adventures through various times and environments in history. The show also features his constant companion, a titular, red coloured talking pony named Pokey.
You can watch the show on Netflix and Amazon Prime.
08Pat & Mat
Pat & Mat was an entertaining and fun-to-watch television show of the 90s. The show first premiered in 19and starred David Nykl and Peter Alton, who played the role of Pat and Mat, respectively.
The show was about two neighbours, Pat and Mat, who faced self-created problems. And then, they solved these problems through any possible and impossible remedy.
You can watch this show now on Zee5 and Mx Player for free.
09Pingu
Pingu was a television show about a clumsy yet sweet penguin who lived with his family in the polar ice cap of Antarctica. Pingu, along with his seal friend Robby and sister, Punga, go on different adventures.
This show first premiered on May 2198with Carlo Bonomi, David Sant and Marcello Magni starring in it. You can watch the episodes of this unforgettable and entertaining tv show on ITV Hub and Amazon Prime.
10The Red and the Blue
The Red and the Blue was an Italian television series for children that first premiered in 197The show was about two antagonist clay shape-shifting characters who detected against an undifferentiated background, white.
The cast of this tv show included Carlo Bonomi, and you can see this show today on YouTube.
11The PJs
The PJs was a popular and loved tv show that premiered on 10th January 199About twenty celebrities were starring in this show, and naming a few among them were Eddie Murphy, Ja’Net DuBois, Loretta Devine, Shawn Michael Howard, Snoop Dog and many more.
The show was about Thurgood Stubbs, the superintendent of Lawrence Hilton-Jacobs housing project and lived with his wife, Muriel. This comedy show satirically featured the difficulties one faces in a big-city housing project, which the protagonist Thurgood Stubbs and his friends faced.
You can watch this show on Peacock Tv.
● Bonus:
Now, without video editing, these fantastic shows of the 9could not have been created. But To your surprise, you too can create such incredible videos effortlessly. And that can be possible through an efficient and effective video editing tool.
You can find innumerable video editing tools available in this present world, but you must choose the best. So, let us introduce you to the best video editing tool, with which you can showcase all your editing skills and creativity-Wondershare Filmora Video Editor !
We call this tool the best video editing tool because its numerous features make it the most proficient video editing tool. Let us now look into its numerous effective features below.
● Professional editing tools
Filmora is the video editing tool that incorporates all the professional editing features to make your videos of the best and the professional quality. The elements envelop every aspect of the finest quality video editing works, which brings out the best of skills and creativity in you.
● Easy to use
Although Filmora has every professional editing tool, you will face no difficulty figuring out how the tools work. Even if you are a beginner, you can effortlessly use this editing tool to not only initiate your video editing journey but also enrich your skills.
● Free trial
You need not buy the proceed features on your first try. You can readily avail of the free trial of Filmora and its paid features. And as you try and find the features pleasing, you can proceed to purchase the aid features.
● Personalize and edit your videos
You can avail of the various features such as rotating, cropping, trimming and splitting the videos to edit. Also, there are other features where you can change the speed of the videos. Therefore, the features you get in these tools are of the most proficient quality.
● Over 8effects
The Filmora editing tool offers you more than 8editing effects that will never make you feel lacking any features and effects you need. And this helps you in making the best videos most effortlessly.
● Get the tool on any devices
Filmora believes that editing skills should be made discoverable anywhere and everywhere. Thus, you can download or use this tool on any device that you use. So, you need not have any specific device to avail of this incredible video editing tool, and you can make and edit videos on any device you want.
● Key Takeaways from This Episode →
● These are the best ten claymation tv shows and series that you can watch even today to bring back all the memories and revisit your early days of the 90s. So, to wrap up our discussion, we would conclude by retracing the aspects and factors that we covered in our discussion. We had enveloped the following topics effectively.
● We discussed the claymation picture through a little interdiction.
● Then, we discussed the ten best claymation TV shows popular in the 90s. We discussed their stories, their casts, their premieres and also the sites and apps where you can watch them even today.
● Lastly, we introduced you to the best editing tool, Filmora, that will help you edit any video of your choice and explore your video editing skills with the finest professional features and infinite effects.
Stunning Ideas About Creating Personalised WhatsApp GIF Sticker
Stunning Ideas About Creating Personalised WhatsApp GIF Sticker
An easy yet powerful editor
Numerous effects to choose from
Detailed tutorials provided by the official channel
WhatsApp has become the most popularly and widely used medium for text conversation and with the reach of the platform increasing every day, new features are added from time to time to keep the users hooked. In the same line, WhatsApp now allows creating customized animated GIF stickers to be used in the chats.
Animated stickers will let you express your feeling and thoughts through animations which will surely make the conversation more interesting. These stickers can be created on your Android as well as iPhone. The article below will help you to know the detailed process to create GIF sticker WhatsApp and also how these stickers can be used in your videos to make the videos more entertaining.
In this article
01 [How to Create Custom Animated WhatsApp Stickers on Android and iPhone](#Part 1)
02 [How to Use Custom Stickers in Filmora?](#Part 2)
Part 1 How to Create Custom Animated WhatsApp Stickers on Android and iPhone
Animated third-party stickers cannot be added directly to WhatsApp and thus you can create a customized one. To create these GIF stickers for WhatsApp, you would need the help of third-party apps.
For Android devices, one such popular app is the Sticker Maker app. For iPhone, we suggest using Sticker Maker Studio app.
Once these apps are installed on your device, GIF stickers can be made in no time.
Steps to make sticker GIF WhatsApp on Android phone
Step 1. Download, install and open the Sticker maker app on your Android device.
Step 2. Tap on the “Create a new sticker pack” option on your app.
Step 3. Give the desired name to your sticker pack and click on the Create button.
Step 4. To add the animated stickers, click on the created sticker pack.
Step 5. Next, click on the first box, and then from the menu choose the Select file option.

Step 6. Next, choose the video from your phone from which you wish to create a sticker. You can even add a GIF file. After the media file is added, the app will compress it and will turn it into an animated sticker automatically.
Step 7. Now, you need to add 3 animated stickers to the other boxes of the sticker app (as mentioned in step 5).
Note: Multiple stickers can be added using the same process.
Step 8. Click on the “Add to WhatsApp” button after a minimum of 3 stickers are added to the pack.
Step 9. Now, your stickers are ready. Open the WhatsApp chat and launch the sticker panel where you can see your created GIF stickers. Choose the sticker you want, add it to your chat, and send it.

Steps to make WhatsApp Sticker GIF on iPhone
Step 1. On your iPhone, download, install and launch the Sticker Maker Studio app from the app store.
Step 2. Choose the sticker pack and also the name of the author at the respective boxes and then click on the Create button.
Step 3. Next, click on the new sticker pack that is created.

Step 4. Multiple boxes will now appear from which you need to choose the first one and then
select the Files option.
Step 5. Choose the desired Video from your device from which sticker has to be created. You can also create GIF to WhatsApp sticker. Other stickers to the pack can be added similarly. The app will automatically convert the added file to a sticker.
Step 6. After the stickers are added (at least 3), click on the Add to WhatsApp button at the generated Tray icon.

Note: If you see your tray icon to be blank, click on it else there will be issues adding the stickers to the WhatsApp chat later. A tray icon can be selected from the images.
Step 7. Next, you will be asked if you wish to open WhatsApp, click on Okay.
Step 8. Now, to add the animated GIF stickers to WhatsApp, you need to click on the Save button and your stickers are ready to be used in the chat.

Part 2 How to Use Custom Stickers in Wondershare Filmora Video Editor ?
For Win 7 or later (64-bit)
For macOS 10.12 or later
Why use your customized GIF stickers only in WhatsApp chats when they can be used in Videos as well? Yes, using Wondershare Filmora software you can use your customized animated stickers in your videos as well to make them more eye-catchy and interesting. Additionally, you can also add the effects to your videos using the software.
Wondershare Filmora is a feature-packed that allows creating stunning and professional-looking videos using its wide range of functions like motion tracking, adding effects, color matching, noise enhancement, keyframe animations, adding captions, and much more.
The user-friendly interface makes the tool apt even for beginners.
Steps to add GIF animations to videos using Wondershare Filmora
Step 1. On your Windows or Mac system, launch the software and choose Media > Import> Import Media Files on the main interface.

Step 2. Next, choose and add the created animated sticker to the software interface. Alternatively, you can also select the sticker from Elements. Drag and drop the added sticker to the video.

Step 3. To adjust the parameters like the size and the rotation of the sticker, you need to double-click on the sticker at the timeline. Additionally, color adjustments can also be made and if needed, you can also add 3D motion.

Step 4. To change the size and the location of the sticker, you need to drag it accordingly in
the viewer panel.
Step 5. Next, at the Local tab, choose the video format, resolution, and desktop folder. Finally, click on the Export button to start processing.
Note: The created video can also be saved to DVD or can be uploaded to YouTube and Vimeo directly using the software.

● Key Takeaways from This Episode →
●The latest GIF sticker feature of WhatsApp allows adding interesting animations to your chats.
●To create customized GIF stickers on Android and iPhone, third-party apps have to be used.
●The customized stickers can also be added to your videos using Wondershare Filmora.
WhatsApp has become the most popularly and widely used medium for text conversation and with the reach of the platform increasing every day, new features are added from time to time to keep the users hooked. In the same line, WhatsApp now allows creating customized animated GIF stickers to be used in the chats.
Animated stickers will let you express your feeling and thoughts through animations which will surely make the conversation more interesting. These stickers can be created on your Android as well as iPhone. The article below will help you to know the detailed process to create GIF sticker WhatsApp and also how these stickers can be used in your videos to make the videos more entertaining.
In this article
01 [How to Create Custom Animated WhatsApp Stickers on Android and iPhone](#Part 1)
02 [How to Use Custom Stickers in Filmora?](#Part 2)
Part 1 How to Create Custom Animated WhatsApp Stickers on Android and iPhone
Animated third-party stickers cannot be added directly to WhatsApp and thus you can create a customized one. To create these GIF stickers for WhatsApp, you would need the help of third-party apps.
For Android devices, one such popular app is the Sticker Maker app. For iPhone, we suggest using Sticker Maker Studio app.
Once these apps are installed on your device, GIF stickers can be made in no time.
Steps to make sticker GIF WhatsApp on Android phone
Step 1. Download, install and open the Sticker maker app on your Android device.
Step 2. Tap on the “Create a new sticker pack” option on your app.
Step 3. Give the desired name to your sticker pack and click on the Create button.
Step 4. To add the animated stickers, click on the created sticker pack.
Step 5. Next, click on the first box, and then from the menu choose the Select file option.
Step 6. Next, choose the video from your phone from which you wish to create a sticker. You can even add a GIF file. After the media file is added, the app will compress it and will turn it into an animated sticker automatically.
Step 7. Now, you need to add 3 animated stickers to the other boxes of the sticker app (as mentioned in step 5).
Note: Multiple stickers can be added using the same process.
Step 8. Click on the “Add to WhatsApp” button after a minimum of 3 stickers are added to the pack.
Step 9. Now, your stickers are ready. Open the WhatsApp chat and launch the sticker panel where you can see your created GIF stickers. Choose the sticker you want, add it to your chat, and send it.
Steps to make WhatsApp Sticker GIF on iPhone
Step 1. On your iPhone, download, install and launch the Sticker Maker Studio app from the app store.
Step 2. Choose the sticker pack and also the name of the author at the respective boxes and then click on the Create button.
Step 3. Next, click on the new sticker pack that is created.
Step 4. Multiple boxes will now appear from which you need to choose the first one and then
select the Files option.
Step 5. Choose the desired Video from your device from which sticker has to be created. You can also create GIF to WhatsApp sticker. Other stickers to the pack can be added similarly. The app will automatically convert the added file to a sticker.
Step 6. After the stickers are added (at least 3), click on the Add to WhatsApp button at the generated Tray icon.
Note: If you see your tray icon to be blank, click on it else there will be issues adding the stickers to the WhatsApp chat later. A tray icon can be selected from the images.
Step 7. Next, you will be asked if you wish to open WhatsApp, click on Okay.
Step 8. Now, to add the animated GIF stickers to WhatsApp, you need to click on the Save button and your stickers are ready to be used in the chat.
Part 2 How to Use Custom Stickers in Wondershare Filmora Video Editor ?
For Win 7 or later (64-bit)
For macOS 10.12 or later
Why use your customized GIF stickers only in WhatsApp chats when they can be used in Videos as well? Yes, using Wondershare Filmora software you can use your customized animated stickers in your videos as well to make them more eye-catchy and interesting. Additionally, you can also add the effects to your videos using the software.
Wondershare Filmora is a feature-packed that allows creating stunning and professional-looking videos using its wide range of functions like motion tracking, adding effects, color matching, noise enhancement, keyframe animations, adding captions, and much more.
The user-friendly interface makes the tool apt even for beginners.
Steps to add GIF animations to videos using Wondershare Filmora
Step 1. On your Windows or Mac system, launch the software and choose Media > Import> Import Media Files on the main interface.
Step 2. Next, choose and add the created animated sticker to the software interface. Alternatively, you can also select the sticker from Elements. Drag and drop the added sticker to the video.
Step 3. To adjust the parameters like the size and the rotation of the sticker, you need to double-click on the sticker at the timeline. Additionally, color adjustments can also be made and if needed, you can also add 3D motion.
Step 4. To change the size and the location of the sticker, you need to drag it accordingly in
the viewer panel.
Step 5. Next, at the Local tab, choose the video format, resolution, and desktop folder. Finally, click on the Export button to start processing.
Note: The created video can also be saved to DVD or can be uploaded to YouTube and Vimeo directly using the software.
● Key Takeaways from This Episode →
●The latest GIF sticker feature of WhatsApp allows adding interesting animations to your chats.
●To create customized GIF stickers on Android and iPhone, third-party apps have to be used.
●The customized stickers can also be added to your videos using Wondershare Filmora.
10 2D/3D Animation Tips & Tricks to Bring New Ideas to You
10 2D/3D Animation Tips & Tricks to Bring New Ideas to You

Shanoon Cox
Mar 27, 2024• Proven solutions
Animation is a skill that you need years to practice. However, the learning process can be boosted if you master some animation tips. If you’re looking for great 2D/3D animation tips and tricks, this is what we will offer here.
There are some overlaps between 2D and 3D animation tips like practicing and object pose, but in essence, animation tips can be learned commonly.
These animation tips will help you make your 2D and 3D animations as bold and creative as possible, while reduce your workload and enable you to get your work out into the world quicker with excellent animation software . Let’s take a look at the top 10 2D/3D animation tips and tricks right now.
- Part 1: 2D Animation Tips for Beginners
- Part 2: 3D Animation Tips for Beginners
- Part 3: Frequently Asked Questions about Animation Tips
You may also like: Top 10 Anime Websites to Watch Anime Free
Part 1: 2D Animation Tips for Beginners
1. Find a reference in the real world
This first 2D animation tip is to find a reference. Using a real-world reference can help you animate faces effectively. When studios work with voice-over artists , they often record their facial movements so 2D animators can work with them and ensure their expressions are captured convincingly.
If this isn’t possible, consider using your face, so you have something to refer back to. You could use a mirror and speak the words your character will be saying into it. This can help you get the animated expressions just right.

2. Observe real life
The second animation tip is about observation. One of the key aspects of 2D animation is bringing life to animate objections. You need to think hard about how emotion can be portrayed and choose each movement carefully.
Spend time watching how people in real-life environments talk and interact with each one another, how they move, and how they express emotion. People-watching can be worth its weight in gold when it comes to preparing animations for 2D. Don’t be afraid to spend a great deal of time doing this, as it can be counted as valuable research.

3. Simplicity is the key
2D animation is never complicated compared with 3D. Think carefully before making a scene too complex. If there is too much information to digest, the overall effect can be one of confusion, and you may even find yourself compromising the realism of the scene. Try not to litter the scene with too many pose changes or other elements, and keep it authentic.

4. Draw animation again and again
Drawing animation takes a lot of time. It can’t be finished within one day, so you better know deep down that one piece of work only can be done after you have revised it many times. For 2D animation, it means you need to draw objects on paper many times.
In other words, the animation is a skill that needs practice and time. You can’t master it quickly. Luckily, all pains will be rewarded someday.

5. Feedback is crucial
Feedback is an essential part of artistic development . It’s wise to actively seek out commentary from knowledgeable figures who can help you improve. Naturally, we may see work we have invested a great deal of time and effort indifferently to someone not so involved in the creative process. Feedback can equate to a valuable learning opportunity that will help you make the result hit the spot much more convincingly.

Part 2: 3D Animation Tips for Beginners
Speaking of 3D animation, we think it is not easy to start at first. In this case, you need more tips and tricks.
6. Carefully use keyframing
3D Animation is all about poses. Remember, this animation tip is crucial. Individual frames come together to create movement and tell a story. The keyframes in 3D animation videos are the first and last movements in any sequence. You need to create strong first and last poses for your movements before deciding what happens between them. You must make these poses as memorable and powerful as you can.

7. Evaluate constructive criticism
It’s vital to pay attention to constructive criticism rather than simply choosing to ignore it. Most examples of constructive criticism aren’t about offending you, and friendly advice can play a pivotal role in helping you get the results that you are looking for.
This 3D animation tip can take years to reach the level you want to when it comes to the animation industry. Even if you don’t receive a great deal of or even any positive feedback, the people offering their comments may simply be trying to help you so you can improve. You may find that the criticism is being made purely because of personal preference on the part of the commentator.

8. Take the rhythm in animation
For 3D stop motion animation video, rhythm is an element to do storytelling. The best 3D animations have a strong sense of rhythm and a natural movement flow. Many inexperienced animators have found themselves animating too fast or slow. Don’t worry if you have this problem in the early days, as chances are you’ll start to get it right with time. Timing and spacing between your frames create movement in your animation. With time, you will get a better idea of how many frames you need to move the object from point A to B.

9. Basic model
You may see your system working too hard when you use a high-res model , and this can dramatically slow down the animation process. When you playback the animation in real-time, you may not see every frame. If you are working on the motion of a character, use a simple proxy 3D model to prevent this problem. You can then work more effectively with movement and return the more complex model to the process later.

10. Use ‘shark fin’
This is a advanced 3D animation tip for you. A curve known as the ‘shark fin’ is often used for facial animation processes. This can help you represent rapid facial movements, including those involving the lips and eyebrows. Faces can move very quickly, so it’s wise to make expressions occur within just one or two frames, or three if the spacing demands it.

Part 3: Frequently Asked Questions about Animation Tips
Below are four FAQs about 2D and 3D animation tips that people have asked many times. Hope they are helpful.
1. Are there any animation tricks to use?
We must say muting dialogue is one trick you should know. If your audio is on, you need to listen to it again and again. Thus, audio can disturb your creating process. After you finished the animation, you can turn audio on to revise the animation.
Besides, when you do animation, another trick is you can pause the post before the character goes into the next pose. It is a commonly used trick used by professionals, so you might think it is useful.
2. Is animation hard to learn?
Many beginners are wondering is it difficult to learn animation. The answer is NO if you are about to learn 2D animation. Many tutorials and lessons are easy to find in the market. However, if you start on 3D animation, it will be much harder than you thought. In this case, we recommend you learning 2D animation first.
3. Can I learn animation on my own?
You can learn animation on your own, but that’s not the best way. We recommend you learning animation by attending a training class , especially if you are a starter. You can build a solid animation knowledge base fast compared with learning on your own.
4. How can I get better at animation?
The best answer to get better is to imitate and practice. This tip is the most useful, practical, but difficult to complete one. If you can practice like half a year, you will get much better at animation.
Conclusion
By taking the above animation tips, you can create engaging, inspiring, and unforgettable animations that will captivate your audience. Why not get started following these animation tips right now?
Shanoon Cox
Shanoon Cox is a writer and a lover of all things video.
Follow @Shanoon Cox
Shanoon Cox
Mar 27, 2024• Proven solutions
Animation is a skill that you need years to practice. However, the learning process can be boosted if you master some animation tips. If you’re looking for great 2D/3D animation tips and tricks, this is what we will offer here.
There are some overlaps between 2D and 3D animation tips like practicing and object pose, but in essence, animation tips can be learned commonly.
These animation tips will help you make your 2D and 3D animations as bold and creative as possible, while reduce your workload and enable you to get your work out into the world quicker with excellent animation software . Let’s take a look at the top 10 2D/3D animation tips and tricks right now.
- Part 1: 2D Animation Tips for Beginners
- Part 2: 3D Animation Tips for Beginners
- Part 3: Frequently Asked Questions about Animation Tips
You may also like: Top 10 Anime Websites to Watch Anime Free
Part 1: 2D Animation Tips for Beginners
1. Find a reference in the real world
This first 2D animation tip is to find a reference. Using a real-world reference can help you animate faces effectively. When studios work with voice-over artists , they often record their facial movements so 2D animators can work with them and ensure their expressions are captured convincingly.
If this isn’t possible, consider using your face, so you have something to refer back to. You could use a mirror and speak the words your character will be saying into it. This can help you get the animated expressions just right.
2. Observe real life
The second animation tip is about observation. One of the key aspects of 2D animation is bringing life to animate objections. You need to think hard about how emotion can be portrayed and choose each movement carefully.
Spend time watching how people in real-life environments talk and interact with each one another, how they move, and how they express emotion. People-watching can be worth its weight in gold when it comes to preparing animations for 2D. Don’t be afraid to spend a great deal of time doing this, as it can be counted as valuable research.
3. Simplicity is the key
2D animation is never complicated compared with 3D. Think carefully before making a scene too complex. If there is too much information to digest, the overall effect can be one of confusion, and you may even find yourself compromising the realism of the scene. Try not to litter the scene with too many pose changes or other elements, and keep it authentic.
4. Draw animation again and again
Drawing animation takes a lot of time. It can’t be finished within one day, so you better know deep down that one piece of work only can be done after you have revised it many times. For 2D animation, it means you need to draw objects on paper many times.
In other words, the animation is a skill that needs practice and time. You can’t master it quickly. Luckily, all pains will be rewarded someday.
5. Feedback is crucial
Feedback is an essential part of artistic development . It’s wise to actively seek out commentary from knowledgeable figures who can help you improve. Naturally, we may see work we have invested a great deal of time and effort indifferently to someone not so involved in the creative process. Feedback can equate to a valuable learning opportunity that will help you make the result hit the spot much more convincingly.
Part 2: 3D Animation Tips for Beginners
Speaking of 3D animation, we think it is not easy to start at first. In this case, you need more tips and tricks.
6. Carefully use keyframing
3D Animation is all about poses. Remember, this animation tip is crucial. Individual frames come together to create movement and tell a story. The keyframes in 3D animation videos are the first and last movements in any sequence. You need to create strong first and last poses for your movements before deciding what happens between them. You must make these poses as memorable and powerful as you can.
7. Evaluate constructive criticism
It’s vital to pay attention to constructive criticism rather than simply choosing to ignore it. Most examples of constructive criticism aren’t about offending you, and friendly advice can play a pivotal role in helping you get the results that you are looking for.
This 3D animation tip can take years to reach the level you want to when it comes to the animation industry. Even if you don’t receive a great deal of or even any positive feedback, the people offering their comments may simply be trying to help you so you can improve. You may find that the criticism is being made purely because of personal preference on the part of the commentator.
8. Take the rhythm in animation
For 3D stop motion animation video, rhythm is an element to do storytelling. The best 3D animations have a strong sense of rhythm and a natural movement flow. Many inexperienced animators have found themselves animating too fast or slow. Don’t worry if you have this problem in the early days, as chances are you’ll start to get it right with time. Timing and spacing between your frames create movement in your animation. With time, you will get a better idea of how many frames you need to move the object from point A to B.
9. Basic model
You may see your system working too hard when you use a high-res model , and this can dramatically slow down the animation process. When you playback the animation in real-time, you may not see every frame. If you are working on the motion of a character, use a simple proxy 3D model to prevent this problem. You can then work more effectively with movement and return the more complex model to the process later.
10. Use ‘shark fin’
This is a advanced 3D animation tip for you. A curve known as the ‘shark fin’ is often used for facial animation processes. This can help you represent rapid facial movements, including those involving the lips and eyebrows. Faces can move very quickly, so it’s wise to make expressions occur within just one or two frames, or three if the spacing demands it.
Part 3: Frequently Asked Questions about Animation Tips
Below are four FAQs about 2D and 3D animation tips that people have asked many times. Hope they are helpful.
1. Are there any animation tricks to use?
We must say muting dialogue is one trick you should know. If your audio is on, you need to listen to it again and again. Thus, audio can disturb your creating process. After you finished the animation, you can turn audio on to revise the animation.
Besides, when you do animation, another trick is you can pause the post before the character goes into the next pose. It is a commonly used trick used by professionals, so you might think it is useful.
2. Is animation hard to learn?
Many beginners are wondering is it difficult to learn animation. The answer is NO if you are about to learn 2D animation. Many tutorials and lessons are easy to find in the market. However, if you start on 3D animation, it will be much harder than you thought. In this case, we recommend you learning 2D animation first.
3. Can I learn animation on my own?
You can learn animation on your own, but that’s not the best way. We recommend you learning animation by attending a training class , especially if you are a starter. You can build a solid animation knowledge base fast compared with learning on your own.
4. How can I get better at animation?
The best answer to get better is to imitate and practice. This tip is the most useful, practical, but difficult to complete one. If you can practice like half a year, you will get much better at animation.
Conclusion
By taking the above animation tips, you can create engaging, inspiring, and unforgettable animations that will captivate your audience. Why not get started following these animation tips right now?
Shanoon Cox
Shanoon Cox is a writer and a lover of all things video.
Follow @Shanoon Cox
How to Make an Animated Travel Map Video?
How to Make an Animated Travel Map Video?

Benjamin Arango
Mar 27, 2024• Proven solutions
Animated travel map videos make it easy for the viewers to follow the routes from the source to destination locations right on the single screen. While the static maps would only allow the audience to see the markers from where the journey would start and is expected to end, the animated ones show the real-time movements and therefore look more interactive when viewed.
That said, here you will learn how to create an attractive and engaging animated travel map video using one of the easiest post-production applications, Wondershare Filmora, which is widely appreciated by amateurs and professionals throughout the globe. In another section, you will also learn about an alternative program that might be of some help in case you are more into online designing.
- Method 1: Make Animated Travel Map Videos with Location Video Maker - [Video Tutorial]
- Method 2: Make Interactive Animated Travel Map with Pictramap
- Method 3: Create Animated Travel Map Using Multidev
Method 1 Make Animated Travel Map Videos with Location Video Maker
The entire process of creating an animated travel map video in Wondershare’s Filmora is categorized into two parts, wherein the first part you will collect all the ingredients that are needed to get started, and in the second part you will actually make an animated map using the tools and features present in Filmora.
Watch a video tutorial to see how to make an animated map for a video:
For Win 7 or later (64-bit)
 Secure Download
For macOS 10.14 or later
Secure Download


Part 1: Prepare the Travel Map Materials
Following are the ingredients and the methods to collect them for animated travel map preparation:
Step 1: Get the Map
The first thing that you would need to prepare an animated map is an image of a realistic map. Thanks to Google and Microsoft, these things are now pretty easy to arrange. The process is given below:
- Launch your preferred web browser
- Type google.com in the address bar or the search box and hit Enter
- Scroll to zoom out so you can see the entire world map on one screen

- Type Snipping Tool in the Cortana search box present on the left side of the Taskbar
- Launch Snipping Tool, and use it to capture the screenshot of the map
Note: Snipping Tool is a built-in app in Windows 10 and is available for free. If you are using any other operating system, or have a different program to capture the screenshots, feel free to use it according to your convenience.
- Save the screenshot you captured as a JPG file on your PC
Step 2: Mark Out the Map Path
The next step in the process of preparing an animated travel map is to mark your route on it. To do so, you can use any of your preferred photo editing tools. However, to keep this illustration simple, Microsoft Paint is used here, and the method is given below:
- Right-click the screenshot you just captured
- Go to Open with on the context menu, and then click Paint from the submenu that appears
- Pick your preferred color from the pallet of the Paint interface. It is advisable to use an eye-catchy shade such as Red
- Use the Sphere shape tool to draw a circle over the source and destination locations on the map
- Use the Line tool to draw a line from the source point to the destination. Try giving the line a few turns to make it look realistic
- Go to File > Save As, and save the marked image with a different name
Note: Once this is done, you should have two image files of the map, i.e., one without the marks and one with it
Step 3: Download Some Travel Icons
Another important ingredient in an effective travel map animation is touring icons such as location marker image, a traveling medium symbol like a helicopter, airplane, car/bike (for short distances), etc. A couple of websites that offer royalty-free stock photos at absolutely no cost are listed below:
Note: Although the websites given above allow you to download and use their stock images and icons for free, you may need to give credits to the designers/creators of the symbols while using their objects. Therefore, you are suggested to check the Terms & Conditions and norms of usage of the elements before downloading and adding them to your projects.
Part 2: Make Animated Travel Map Videos with Filmora
After you have gathered all the necessary ingredients that are required to create a travel map animation, it is now time to get to work. The following instructions would guide you through the step-by-step process of preparing a decent and realistic animated travel map in Wondershare Filmora :
For Win 7 or later (64-bit)
Secure Download
For macOS 10.14 or later
Secure Download
Step 1: Import Ingredients to Filmora and Add Them to the Timeline
Launch the video editor on your computer, click anywhere inside the Media window at the upper-left area, and import all the images and icons that you collected earlier to program. Next, drag both the images of the map, i.e., with and without the marks to the Timeline, and ensure that they are of the same duration and are placed on the same track.

Note: Be sure to put the map without the marks first, and then the one with the marks. Also note that the images have the playback duration of 5 seconds in the Timeline by default, and this tenure can be reduced or increased by dragging the side handle of the media to the left or right respectively.
Step 2: Add Transition for Illusion of Route Appearance
Go to Transition from the standard toolbar at the top, locate the Erase Slide transition effect from the available presets, and place it in between the two image files that you earlier added to the Timeline. Next, click and drag either of the side handles of the transition to the end of the media clip. Notice how the other side of the effect is expanded in equal proportion.

Step 3: Preview and Export
Press the Spacebar on the keyboard to preview the video and see if the route appears as if it is being drawn on the map. Once the animation looks acceptable, click EXPORT from the top-center, go to the Local tab on the Export window, select MP4 from the formats list in the left, and click EXPORT from the bottom-right corner to export the current animation to MP4.
Step 4: Customize the Travel Map Media
Either start a new project and import the video of the map you exported in the previous step to the app and then to the Timeline, or remove the existing media from the Timeline in the same project, and add the exported video to it for convenience.

For Win 7 or later (64-bit)
Secure Download
For macOS 10.14 or later
Secure Download
Next, position the Skimmer (Playhead) a couple of frames before the one the route line appears and starts stretching from, and click the Split icon from the editing toolbar above the Timeline itself. Repeat this process for the other side of the media, i.e., position the Skimmer a couple of frames after the route line reaches the destination location, and click the Split icon again. Then remove the separated segments from both the sides by selecting them and pressing Delete on the keyboard, leaving only the portion where the animation is visible.

Optionally, right-click the media that is left behind in the Timeline, and go to Speed and Duration from the context menu. On the Custom Speed box, drag the Speed slider to the left to decrease the playback speed resulting in the increased duration of the media. Alternatively, you can manually enter a value in the Speed box to get precise tenure. Click OK when you are done.

Step 5: Add Animations to Travel Map
Right-click the media in the Timeline, and go to Add Animation from the context menu. Make sure that the Skimmer is on the first frame, and add several keyframes as explained below:
- Click Add to add the first keyframe

- Move a couple of frames further, and click Add one more time. Now, while you are on this second keyframe, use the Scale slider to zoom in to the map so the source location remains within focus.

- Next, move the Playhead further and add another keyframe a couple of frames before the route line hits the edge of the window.
- After this, move the Playhead again and position it where the route line reaches its destination location. Add another keyframe here as well, and move the map in the Preview window so the focus is now on the destination.
- Move the Playhead a few frames further, add another keyframe, and use the Scale slider to zoom a bit more into the map to make the entire animation look realistic. Click OK to save the changes.
Step 6: Add Icons and Titles, and Export the Project
Drag the image of the traveling medium to the Timeline, and place it on the frame the route line starts from. Make sure to place the image on the track above the map, and stretch it to the end so it remains visible throughout the animation. Next, use the method explained above to add keyframes to move the medium along with the route line from the source to the destination. Optionally, add the image of the location marker at the destination point, go to Transition, and add your preferred transition effect, preferably Dissolve, to the marker track in the Timeline so it looks as if it has appeared as the medium arrived the destination.
For Win 7 or later (64-bit)
Secure Download
For macOS 10.14 or later
Secure Download
Get back to the first frame in the Timeline, go to Titles on the standard toolbar, and add a title preset somewhere near the source location. Resize the text, change the format as needed, and add your preferred caption to it such as the start time, name, etc. Reduce the duration of the track so the title appears for a few frames, preferably before the map animation starts. Click OK when done. Repeat this process for the destination point as well.
Once everything is complete, click the Play button in the Preview window to review your work. If the video looks acceptable, click EXPORT from the top-center of the interface, and use the method explained earlier to export the animated travel map in your preferred format.
![]()
Method 2 How to Make Interactive Animated Travel Map with Pictramap
If you don’t want to install a dedicated animation software on your computer due to limited hardware resources or some other reason, there is an online solution called Pictramap to create a travel map animation using a web browser. The web app offers a lucrative interface that could be easily understood and worked with to produce an animated map for free.
The process to create an animated travel map with Pictramap is given below:
Step 1: Create a Project
Launch your favorite web browser, go to https://www.pictramap.com/ , click Create yours now, it’s free, and sign up to Pictramap using your preferred method. When you are on the Dashboard, enter a name in the field available under the My Projects section, and click Create to create a new project (the animated map).

Step 2: Define the Locations and Method of Commute
On the map, right-click the location you want to start your journey from, enter the name of the location or any other significant title, and click Add. Click the location marker, click the Travel Mode icon, and select your preferred mode of traveling. Repeat this process to mark the destination location as well.

Step 3: Preview the Animation
Click the View Animation button from the upper-right corner of the page to see the animated travel map.

Downsides of Using Pictramap to Create Animated Travel Map Video
Although Pictramap allows you to create a travel map animation with ease and extremely quickly, at the time of this writing, it offers no way of downloading the animation to your PC, and therefore it couldn’t be used in your projects.
If you are using Wondershare Filmora, you can use its built-in screen recording feature to record the animation that Pictramap plays, and then save the captured footage as MP4 or any other format on your computer. This video can then be imported to your projects for further uses.
![]()
A cross-platform for making videos anywhere for all creators

Why your video editing isn’t good enough? How about some creative inspo?
- 100 Million+ Users
- 150+ Countries and Regions
- 4 Million+ Social Media Followers
- 5 Million+ Stock Media for Use
* Secure Download

Method 3 How To Make Animated Travel Map Using Multidev
Multi.dev is still a new web-based application to build awesome animated maps, but it’s good! The application helps you create presentations about all your recent and previous trips. And the interface is also hassle-free.
So, follow this step-by-step guide to making animated maps with Multi.dev.
Step 1: Open Multi.dev
Visit Multi.dev from your internet browser.

Once the tool gets open, you will see a demo video. This example clip will have animated maps of different locations. So it is up to you whether to use the same example and edit the places you have been to or are planning to visit. Or, simply create a new animated map from scratch.
Step 2: Choose Your First Location
Take your mouse cursor on the left side of the application and type the first location in the search bar. As soon as you do it, you will see that the “travel arrow” will automatically begin from there. Likewise, type and select the next location through the search bar.
Once you type the location, you will see 8 travel modes, including airplane, bus, and train. You can select the same mode for all sites or a different mode for another place. Totally up to you!

Step 3: Select Map Themes
All your chosen places will be highlighted in the software’s minimalistic map.

Step 4: Download Map on Your Computer
If you’re happy with the animated map, click the “Create Video” button to save the animated map on your computer in a few minutes.


Contrarily, you can also share the animation by choosing the “Share Animation” option.
Conclusion
An animated travel map plays an important role to add a realistic touring effect to your motion picture projects. While you can use a web app like Pictramap to create such an animation online easily and for free, the limitations it comes along with might keep you from choosing this method.
Instead, you may want to get more inclined toward a dedicated post-production software like Wondershare Filmora that gives you full control over the process, and the freedom to choose your preferred format to export the animation to for independent usage.
For Win 7 or later (64-bit)
Secure Download
For macOS 10.14 or later
Secure Download
Benjamin Arango
Benjamin Arango is a writer and a lover of all things video.
Follow @Benjamin Arango
Benjamin Arango
Mar 27, 2024• Proven solutions
Animated travel map videos make it easy for the viewers to follow the routes from the source to destination locations right on the single screen. While the static maps would only allow the audience to see the markers from where the journey would start and is expected to end, the animated ones show the real-time movements and therefore look more interactive when viewed.
That said, here you will learn how to create an attractive and engaging animated travel map video using one of the easiest post-production applications, Wondershare Filmora, which is widely appreciated by amateurs and professionals throughout the globe. In another section, you will also learn about an alternative program that might be of some help in case you are more into online designing.
- Method 1: Make Animated Travel Map Videos with Location Video Maker - [Video Tutorial]
- Method 2: Make Interactive Animated Travel Map with Pictramap
- Method 3: Create Animated Travel Map Using Multidev
Method 1 Make Animated Travel Map Videos with Location Video Maker
The entire process of creating an animated travel map video in Wondershare’s Filmora is categorized into two parts, wherein the first part you will collect all the ingredients that are needed to get started, and in the second part you will actually make an animated map using the tools and features present in Filmora.
Watch a video tutorial to see how to make an animated map for a video:
For Win 7 or later (64-bit)
Secure Download
For macOS 10.14 or later
Secure Download
Part 1: Prepare the Travel Map Materials
Following are the ingredients and the methods to collect them for animated travel map preparation:
Step 1: Get the Map
The first thing that you would need to prepare an animated map is an image of a realistic map. Thanks to Google and Microsoft, these things are now pretty easy to arrange. The process is given below:
- Launch your preferred web browser
- Type google.com in the address bar or the search box and hit Enter
- Scroll to zoom out so you can see the entire world map on one screen
- Type Snipping Tool in the Cortana search box present on the left side of the Taskbar
- Launch Snipping Tool, and use it to capture the screenshot of the map
Note: Snipping Tool is a built-in app in Windows 10 and is available for free. If you are using any other operating system, or have a different program to capture the screenshots, feel free to use it according to your convenience.
- Save the screenshot you captured as a JPG file on your PC
Step 2: Mark Out the Map Path
The next step in the process of preparing an animated travel map is to mark your route on it. To do so, you can use any of your preferred photo editing tools. However, to keep this illustration simple, Microsoft Paint is used here, and the method is given below:
- Right-click the screenshot you just captured
- Go to Open with on the context menu, and then click Paint from the submenu that appears
- Pick your preferred color from the pallet of the Paint interface. It is advisable to use an eye-catchy shade such as Red
- Use the Sphere shape tool to draw a circle over the source and destination locations on the map
- Use the Line tool to draw a line from the source point to the destination. Try giving the line a few turns to make it look realistic
- Go to File > Save As, and save the marked image with a different name
Note: Once this is done, you should have two image files of the map, i.e., one without the marks and one with it
Step 3: Download Some Travel Icons
Another important ingredient in an effective travel map animation is touring icons such as location marker image, a traveling medium symbol like a helicopter, airplane, car/bike (for short distances), etc. A couple of websites that offer royalty-free stock photos at absolutely no cost are listed below:
Note: Although the websites given above allow you to download and use their stock images and icons for free, you may need to give credits to the designers/creators of the symbols while using their objects. Therefore, you are suggested to check the Terms & Conditions and norms of usage of the elements before downloading and adding them to your projects.
Part 2: Make Animated Travel Map Videos with Filmora
After you have gathered all the necessary ingredients that are required to create a travel map animation, it is now time to get to work. The following instructions would guide you through the step-by-step process of preparing a decent and realistic animated travel map in Wondershare Filmora :
For Win 7 or later (64-bit)
Secure Download
For macOS 10.14 or later
Secure Download
Step 1: Import Ingredients to Filmora and Add Them to the Timeline
Launch the video editor on your computer, click anywhere inside the Media window at the upper-left area, and import all the images and icons that you collected earlier to program. Next, drag both the images of the map, i.e., with and without the marks to the Timeline, and ensure that they are of the same duration and are placed on the same track.
Note: Be sure to put the map without the marks first, and then the one with the marks. Also note that the images have the playback duration of 5 seconds in the Timeline by default, and this tenure can be reduced or increased by dragging the side handle of the media to the left or right respectively.
Step 2: Add Transition for Illusion of Route Appearance
Go to Transition from the standard toolbar at the top, locate the Erase Slide transition effect from the available presets, and place it in between the two image files that you earlier added to the Timeline. Next, click and drag either of the side handles of the transition to the end of the media clip. Notice how the other side of the effect is expanded in equal proportion.
Step 3: Preview and Export
Press the Spacebar on the keyboard to preview the video and see if the route appears as if it is being drawn on the map. Once the animation looks acceptable, click EXPORT from the top-center, go to the Local tab on the Export window, select MP4 from the formats list in the left, and click EXPORT from the bottom-right corner to export the current animation to MP4.
Step 4: Customize the Travel Map Media
Either start a new project and import the video of the map you exported in the previous step to the app and then to the Timeline, or remove the existing media from the Timeline in the same project, and add the exported video to it for convenience.
For Win 7 or later (64-bit)
Secure Download
For macOS 10.14 or later
Secure Download
Next, position the Skimmer (Playhead) a couple of frames before the one the route line appears and starts stretching from, and click the Split icon from the editing toolbar above the Timeline itself. Repeat this process for the other side of the media, i.e., position the Skimmer a couple of frames after the route line reaches the destination location, and click the Split icon again. Then remove the separated segments from both the sides by selecting them and pressing Delete on the keyboard, leaving only the portion where the animation is visible.
Optionally, right-click the media that is left behind in the Timeline, and go to Speed and Duration from the context menu. On the Custom Speed box, drag the Speed slider to the left to decrease the playback speed resulting in the increased duration of the media. Alternatively, you can manually enter a value in the Speed box to get precise tenure. Click OK when you are done.
Step 5: Add Animations to Travel Map
Right-click the media in the Timeline, and go to Add Animation from the context menu. Make sure that the Skimmer is on the first frame, and add several keyframes as explained below:
- Click Add to add the first keyframe
- Move a couple of frames further, and click Add one more time. Now, while you are on this second keyframe, use the Scale slider to zoom in to the map so the source location remains within focus.
- Next, move the Playhead further and add another keyframe a couple of frames before the route line hits the edge of the window.
- After this, move the Playhead again and position it where the route line reaches its destination location. Add another keyframe here as well, and move the map in the Preview window so the focus is now on the destination.
- Move the Playhead a few frames further, add another keyframe, and use the Scale slider to zoom a bit more into the map to make the entire animation look realistic. Click OK to save the changes.
Step 6: Add Icons and Titles, and Export the Project
Drag the image of the traveling medium to the Timeline, and place it on the frame the route line starts from. Make sure to place the image on the track above the map, and stretch it to the end so it remains visible throughout the animation. Next, use the method explained above to add keyframes to move the medium along with the route line from the source to the destination. Optionally, add the image of the location marker at the destination point, go to Transition, and add your preferred transition effect, preferably Dissolve, to the marker track in the Timeline so it looks as if it has appeared as the medium arrived the destination.
For Win 7 or later (64-bit)
Secure Download
For macOS 10.14 or later
Secure Download
Get back to the first frame in the Timeline, go to Titles on the standard toolbar, and add a title preset somewhere near the source location. Resize the text, change the format as needed, and add your preferred caption to it such as the start time, name, etc. Reduce the duration of the track so the title appears for a few frames, preferably before the map animation starts. Click OK when done. Repeat this process for the destination point as well.
Once everything is complete, click the Play button in the Preview window to review your work. If the video looks acceptable, click EXPORT from the top-center of the interface, and use the method explained earlier to export the animated travel map in your preferred format.
![]()
Method 2 How to Make Interactive Animated Travel Map with Pictramap
If you don’t want to install a dedicated animation software on your computer due to limited hardware resources or some other reason, there is an online solution called Pictramap to create a travel map animation using a web browser. The web app offers a lucrative interface that could be easily understood and worked with to produce an animated map for free.
The process to create an animated travel map with Pictramap is given below:
Step 1: Create a Project
Launch your favorite web browser, go to https://www.pictramap.com/ , click Create yours now, it’s free, and sign up to Pictramap using your preferred method. When you are on the Dashboard, enter a name in the field available under the My Projects section, and click Create to create a new project (the animated map).
Step 2: Define the Locations and Method of Commute
On the map, right-click the location you want to start your journey from, enter the name of the location or any other significant title, and click Add. Click the location marker, click the Travel Mode icon, and select your preferred mode of traveling. Repeat this process to mark the destination location as well.
Step 3: Preview the Animation
Click the View Animation button from the upper-right corner of the page to see the animated travel map.
Downsides of Using Pictramap to Create Animated Travel Map Video
Although Pictramap allows you to create a travel map animation with ease and extremely quickly, at the time of this writing, it offers no way of downloading the animation to your PC, and therefore it couldn’t be used in your projects.
If you are using Wondershare Filmora, you can use its built-in screen recording feature to record the animation that Pictramap plays, and then save the captured footage as MP4 or any other format on your computer. This video can then be imported to your projects for further uses.
![]()
A cross-platform for making videos anywhere for all creators
Why your video editing isn’t good enough? How about some creative inspo?
- 100 Million+ Users
- 150+ Countries and Regions
- 4 Million+ Social Media Followers
- 5 Million+ Stock Media for Use
* Secure Download
Method 3 How To Make Animated Travel Map Using Multidev
Multi.dev is still a new web-based application to build awesome animated maps, but it’s good! The application helps you create presentations about all your recent and previous trips. And the interface is also hassle-free.
So, follow this step-by-step guide to making animated maps with Multi.dev.
Step 1: Open Multi.dev
Visit Multi.dev from your internet browser.
Once the tool gets open, you will see a demo video. This example clip will have animated maps of different locations. So it is up to you whether to use the same example and edit the places you have been to or are planning to visit. Or, simply create a new animated map from scratch.
Step 2: Choose Your First Location
Take your mouse cursor on the left side of the application and type the first location in the search bar. As soon as you do it, you will see that the “travel arrow” will automatically begin from there. Likewise, type and select the next location through the search bar.
Once you type the location, you will see 8 travel modes, including airplane, bus, and train. You can select the same mode for all sites or a different mode for another place. Totally up to you!
Step 3: Select Map Themes
All your chosen places will be highlighted in the software’s minimalistic map.
Step 4: Download Map on Your Computer
If you’re happy with the animated map, click the “Create Video” button to save the animated map on your computer in a few minutes.
Contrarily, you can also share the animation by choosing the “Share Animation” option.
Conclusion
An animated travel map plays an important role to add a realistic touring effect to your motion picture projects. While you can use a web app like Pictramap to create such an animation online easily and for free, the limitations it comes along with might keep you from choosing this method.
Instead, you may want to get more inclined toward a dedicated post-production software like Wondershare Filmora that gives you full control over the process, and the freedom to choose your preferred format to export the animation to for independent usage.
For Win 7 or later (64-bit)
Secure Download
For macOS 10.14 or later
Secure Download
Benjamin Arango
Benjamin Arango is a writer and a lover of all things video.
Follow @Benjamin Arango
Also read:
- New Handy Tip From Adobe Animate Rigging Tutorial for All Learners
- New How To Turn Yourself Into Anime Character
- New 2024 Approved Learn 3D Logo Animation and Templates
- Updated In 2024, Top 10 Best Photo to Animation Converters That Give You an Advantage
- Updated 2024 Approved Stunning Ideas About Creating Personalised WhatsApp GIF Sticker
- 2024 Approved 20 Free After Effects Logo Reveal Templates
- A Roster of 15 Top Disney Channel Cartoons
- Updated In 2024, 5 Ways You Never Heard of for Converting MP4 to GIF in Photoshop
- New 2024 Approved 15 Iconic Cartoon Characters of All Time
- What Is Anime? Anime VS Manga VS Cartoon for 2024
- Updated 5 Foolproof Amazing Anime Text to Speech Tips for 2024
- Updated In 2024, How to Create Benime Whiteboard Animation in Android
- New How to Make Whiteboard Animation Videos
- Updated 10 Stunning Stop Motion Movies That You Should Not Miss
- New How to Find & Make Animated Christmas GIFs?
- In 2024, Have You Seen the Facebook Cartoon App Everyones Using Lately
- New Animated Business Logos and Tools to Create for 2024
- Updated 2024 Approved How to Make Whiteboard Animation Videos
- New In 2024, Christmas Is Coming! How to Find & Make Animated Christmas GIFs?
- New Simple Guide to Create New and Exciting Blackboard Animation for 2024
- 2024 Approved 10 Amazing Wallpaper Collage Ideas and Photos
- Updated 2024 Approved How to Make a Video a Live Photo 2023
- In 2024, How to Come up With the Best Pokemon Team On Apple iPhone 15 Pro? | Dr.fone
- Recover your pictures after Infinix Hot 40 Pro has been deleted.
- Fake the Location to Get Around the MLB Blackouts on Infinix GT 10 Pro | Dr.fone
- In 2024, How to Successfully Bypass iCloud Activation Lock from iPhone 13
- Where Is the Best Place to Catch Dratini On Vivo Y200e 5G | Dr.fone
- Full Tutorial to Bypass Your Samsung Face Lock?
- Fixing Foneazy MockGo Not Working On Vivo Y78+ | Dr.fone
- Top 10 AirPlay Apps in Nokia C210 for Streaming | Dr.fone
- Three Solutions to Hard Reset Samsung Galaxy S23 FE? | Dr.fone
- How To Unbrick a Dead Tecno Spark 10 Pro | Dr.fone
- In 2024, How to Transfer Apps from Samsung Galaxy M34 to Another | Dr.fone
- Best Methods for Vivo Y78 5G Wont Turn On | Dr.fone
- How to use Pokemon Go Joystick on Tecno Spark 10 4G? | Dr.fone
- Title: Updated In 2024, Some Techniques for Creating Animated Logo That Few People Know About
- Author: Elon
- Created at : 2024-05-19 03:05:48
- Updated at : 2024-05-20 03:05:48
- Link: https://animation-videos.techidaily.com/updated-in-2024-some-techniques-for-creating-animated-logo-that-few-people-know-about/
- License: This work is licensed under CC BY-NC-SA 4.0.
