
:max_bytes(150000):strip_icc():format(webp)/GettyImages-667603173-fac0b8f4b1d9453c866d332dc73821f8.jpg)
Updated In 2024, The Only Guide Youll Ever Need to Learn That Make 2D Rigging Clear to You
The Only Guide to Make 2D Rigging Clear to You
The Only Guide You’ll Ever Need to Learn That Make 2D Rigging Clear to You
An easy yet powerful editor
Numerous effects to choose from
Detailed tutorials provided by the official channel
If you’re looking to get a head start in 2D Rigging or 2D Animation in general, then this guide should get you to where you need to go.
We’ll be introducing 2D Rigging in a comprehensive way — perfect for beginners who aren’t familiar with the subject and want something more solid as their foundation.
In this article
01 [All You Need to Know About 2D Rigging](#Part 1)
02 [What is the Difference and Connection Between 2D and 3D](#Part 2)
03 [What Are the Best 2D Rigging Animation Tools?](#Part 3)
Part 1 All You Need to Know About Rigging
For this first part, we’re going to talk about Rigging in a general way. Think of it as an introduction to the subject. One that should, hopefully, set you off on the right foot. It should also help clarify things that you might need to know as we delve into deeper and more advanced subjects in the next sections of this article.
01What is the Meaning of Rigging in Animation?
Alright, so what does rigging 2D characters actually do? What meaning, or effect, does it have? These questions can be quickly answered with this: Rigging (whether it’s or 3D) is the practice of attaching ‘bones’ to a character model. Bones that, in the future, you can use to create motion.
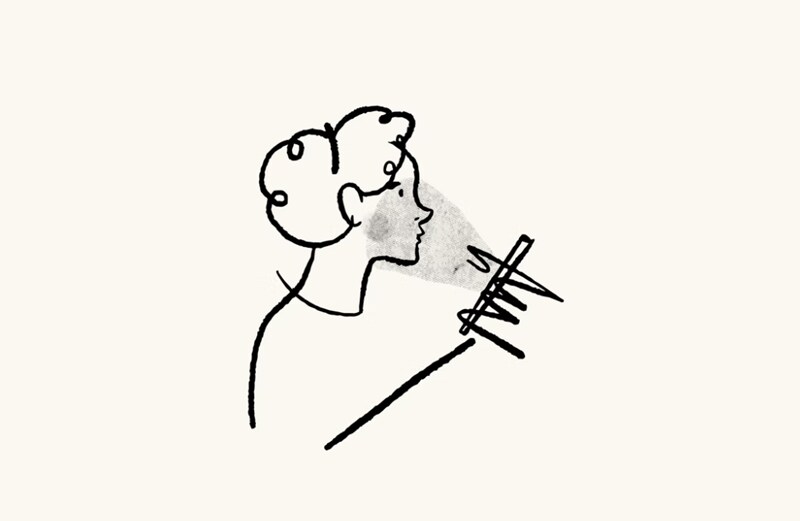
If you’re an artist, then you’re probably familiar with the concept of creating an initial sketch that you put the final drawing on top of — done with the sole purpose of creating a structure that will allow you to move forward more easily in your art.
That’s exactly what you do when Rigging. You’re building a structure that will allow you to easily create animated characters that you can move at will in the future.
02Why Use Animation?
Alright, so what’s the difference between creating a Face Rig and a Face Rig? Is there any? To answer this, the simple answer is, yes. There is quite the difference.
A lot of animators prefer to practice Animation over Animation because it is more traditional and requires less complicated software (not that it doesn’t come with complications of its own.) Specifically, animation requires quite a lengthy character creation and rigging process.
You should consider the subject more based on what project you’re working on. Things that you might want to keep in mind include your project timeline, project budget, character rig usability in the future, length of the project, and so on.
(There’s also a more in-depth breakdown of this in of this guide.)
03What is Animation Rigging Software?
Now, for the last section of this Rigging overview, let’s talk about Rigging Animation Software. You should be able to guess what it’s meant for, but how you can use it is a little different, especially with the many different varieties of Rigging Animation Software available.
We’ll be introducing some in the third part of this guide — so you can learn more about the differences there. For now, all you need to know is that it usually comes with advanced rigging and character deformer tools that you can use to easily (and efficiently) animate your characters.
Part 2 What is the Difference and Connection Between and 3D
As promised, this next section will be devoted to clarifying the differences and similarities between Animation and Animation. As we mentioned previously, most animators prefer Animation. But, more often than not, they switch between both forms in order to create something suitable for their current project.
01How and Animations Are Created
First, let’s talk about the process involved. In the end, this can be described simply as: it starts off the same, but then becomes significantly more and more dissimilar the further you go along. More specifically, whether you’re working on a or Animation, you usually start with working through your vision for the project.
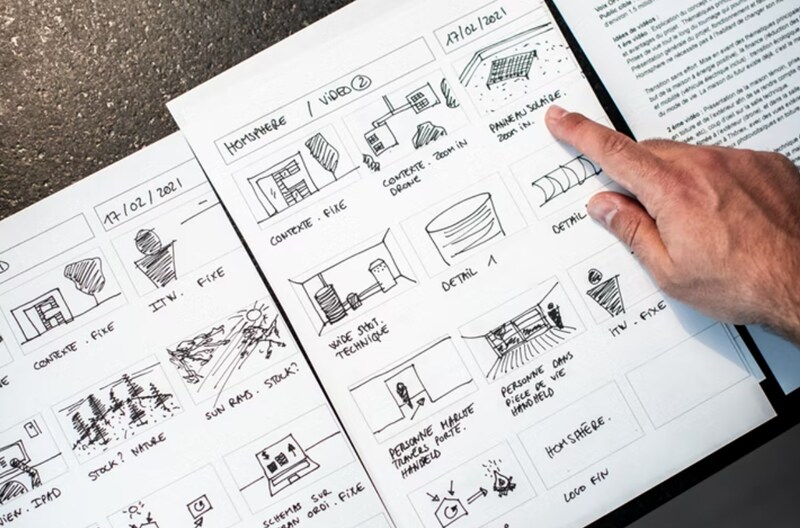
That means exploring ideas and creating hand-illustrated storyboards (which will serve as the foundation for the project as a whole). Then, the next steps involve media gathering (i.e., character creation, sound clips, voice-overs, sound effects, etc.) So that everything would be ready for the project.
This is when the difference starts. Animation involves hand-drawing characters in different poses and angles (with the standard being frames for a second) and can be completed with basic rigging (i.e., face rig for moving mouths or eyes). It’s normal in Animation as well for characters to remain static for several frames. While, with 3D, it is the exact opposite — the characters must be in constant motion so as to remain realistic (which can be done with extensive rigging.)
02Time Investments for Creating and Animations
Next, let’s talk about time investments. This can be a bit tricky to differentiate. Animations, as mentioned, are generally easier to create because it requires less rigging (but more drawings for certain scenes and angles makes it take more time). Meanwhile, Animation usually involves a front-heavy timeline — since you’re looking at intensive character creation and rigging. Once all this is set up though? The rest of the process is much faster than Animation.
You’ll also have to consider the work that you have to put in after your animations have been created. For example, the work you’ll need to put into finalizing your project with a video editor like Wondershare Filmora Video Editor (which would work great with animations especially, as it will allow you to actively add into the timeline as you go.)
For Win 7 or later (64-bit)
For macOS 10.12 or later
Part 3 What Are the Best Rigging Animation Tools?
For this final section of the guide, we’re finally moving on to our introduction to Rigging Animation Software. As mentioned, we’ve picked quite the variety to make sure that you have a good idea of how each will work. (A sample video has also been attached to make sure that you know what kind of projects can be created with these Rigging tools. Take the opportunity to explore those, too. If only for further edification.)
01Reallusion – Cartoon Animator 4
The first of the Rigging Animation Software on this list is Reallusion’s Cartoon Animator 4 (previously known as CrazyTalk Animator). This software was originally developed in order to allow everyone (from beginners to professionals) to create advanced animations with very little effort. To that end, it comes with a lot of motion templates and Auto Rig functions (i.e., audio lip-syncing) that the user can use to seriously cut down on the work required.
02Harmony ToonBoom
Harmony ToonBoom is well-known in the Rigging Animation Software industry. It’s the software that is used by many professionals. According to the Toon Boom Harmony website, this software was even used to create popular television shows like Rick and Morty, Bob’s Burgers, The Simpsons, and Futurama. It’s considerably more difficult to use for beginners, but it comes with many advanced functions that allow its users to create truly complex and beautiful Animations.
03Synfig Studio
The best thing about Synfig Studio (right from the onset), is that it is FREE. There are two versions of this tool — one that is ‘stable’ and the other in ‘development.’ The developmental version offers more advanced functions, of course, but for most beginners, the ‘stable’ version would serve just as well.
04Adobe Animate
Adobe Animate is software that belongs in Adobe’s long line of professional-level products. It’s a part of the classic ‘Adobe Suite.’ As a professional software, however, keep in mind that it might be more difficult to get used to at first (there’s a steep, learning curve right off the bat). But, if used correctly, it can be used to create quite impressive and eye-catching interactive animations (i.e., game content or website elements.)
05Animaker
Animaker is quite popular for beginners. It offers templates, so you can start off with an easy project if that’s what you’d like. But it also offers a lot of custom-creation tools that can be used for creating complex and professional Animations — although perhaps not at the level as the ones you might see from other alternatives (this software is most suitable for simple animations.)
06Moho Pro
Moho Pro (previously known as Anime Studio Pro) is a popular Animation program that fans of anime really love. This is one of the best software to use if you’re more interested in traditional animation (which involves a lot of free-hand drawing). Although, despite that fact, it has many advanced rigging functions as well (so you can create a mix of traditional and modern animation if you wish.)
07Pencil 2D
Pencil 2D, much like Synfig Studio, is FREE, cross-platform software. It’s quite old, but it’s matured over the years to include more and more functions (you might already be personally aware of it, in fact. It had its time to shine in the early 2010s.) The important thing to remember though is the fact that this is definitely more of a ‘traditional animation’ software. It does offer some basic rigging, but it’s best used by those who would prefer to practice the art of frame-by-frame animation.
08OpenToonz
OpenToonz is another free Rigging Animation Software (although it should be noted that there is a premium version, called Toonz, that is quite well known.) The best part about it is that it is a combination of software. One that you can use both for traditional animation and Animation. It’s also pretty easy to use, making it a good option for those just starting out.
● Key Takeaways from This Episode →
● 2D Rigging is the practice of creating ‘structure’ or ‘bones’ from which you can move characters or models. In these are usually ‘pins’ placed in bendable areas (i.e., the elbow, for bending the arm.)
● There are many differences between Animation and Animation. What you end up choosing should be decided by your project.
● Remember though, that Animations usually take longer to create even though Animations require more complex riggings.
● If you’re serious about getting into Rigging, make sure to consider the Rigging Animation Software that you choose to use very carefully. Each one has its own pros and cons.
If you’re looking to get a head start in 2D Rigging or 2D Animation in general, then this guide should get you to where you need to go.
We’ll be introducing 2D Rigging in a comprehensive way — perfect for beginners who aren’t familiar with the subject and want something more solid as their foundation.
In this article
01 [All You Need to Know About 2D Rigging](#Part 1)
02 [What is the Difference and Connection Between 2D and 3D](#Part 2)
03 [What Are the Best 2D Rigging Animation Tools?](#Part 3)
Part 1 All You Need to Know About Rigging
For this first part, we’re going to talk about Rigging in a general way. Think of it as an introduction to the subject. One that should, hopefully, set you off on the right foot. It should also help clarify things that you might need to know as we delve into deeper and more advanced subjects in the next sections of this article.
01What is the Meaning of Rigging in Animation?
Alright, so what does rigging 2D characters actually do? What meaning, or effect, does it have? These questions can be quickly answered with this: Rigging (whether it’s or 3D) is the practice of attaching ‘bones’ to a character model. Bones that, in the future, you can use to create motion.
If you’re an artist, then you’re probably familiar with the concept of creating an initial sketch that you put the final drawing on top of — done with the sole purpose of creating a structure that will allow you to move forward more easily in your art.
That’s exactly what you do when Rigging. You’re building a structure that will allow you to easily create animated characters that you can move at will in the future.
02Why Use Animation?
Alright, so what’s the difference between creating a Face Rig and a Face Rig? Is there any? To answer this, the simple answer is, yes. There is quite the difference.
A lot of animators prefer to practice Animation over Animation because it is more traditional and requires less complicated software (not that it doesn’t come with complications of its own.) Specifically, animation requires quite a lengthy character creation and rigging process.
You should consider the subject more based on what project you’re working on. Things that you might want to keep in mind include your project timeline, project budget, character rig usability in the future, length of the project, and so on.
(There’s also a more in-depth breakdown of this in of this guide.)
03What is Animation Rigging Software?
Now, for the last section of this Rigging overview, let’s talk about Rigging Animation Software. You should be able to guess what it’s meant for, but how you can use it is a little different, especially with the many different varieties of Rigging Animation Software available.
We’ll be introducing some in the third part of this guide — so you can learn more about the differences there. For now, all you need to know is that it usually comes with advanced rigging and character deformer tools that you can use to easily (and efficiently) animate your characters.
Part 2 What is the Difference and Connection Between and 3D
As promised, this next section will be devoted to clarifying the differences and similarities between Animation and Animation. As we mentioned previously, most animators prefer Animation. But, more often than not, they switch between both forms in order to create something suitable for their current project.
01How and Animations Are Created
First, let’s talk about the process involved. In the end, this can be described simply as: it starts off the same, but then becomes significantly more and more dissimilar the further you go along. More specifically, whether you’re working on a or Animation, you usually start with working through your vision for the project.
That means exploring ideas and creating hand-illustrated storyboards (which will serve as the foundation for the project as a whole). Then, the next steps involve media gathering (i.e., character creation, sound clips, voice-overs, sound effects, etc.) So that everything would be ready for the project.
This is when the difference starts. Animation involves hand-drawing characters in different poses and angles (with the standard being frames for a second) and can be completed with basic rigging (i.e., face rig for moving mouths or eyes). It’s normal in Animation as well for characters to remain static for several frames. While, with 3D, it is the exact opposite — the characters must be in constant motion so as to remain realistic (which can be done with extensive rigging.)
02Time Investments for Creating and Animations
Next, let’s talk about time investments. This can be a bit tricky to differentiate. Animations, as mentioned, are generally easier to create because it requires less rigging (but more drawings for certain scenes and angles makes it take more time). Meanwhile, Animation usually involves a front-heavy timeline — since you’re looking at intensive character creation and rigging. Once all this is set up though? The rest of the process is much faster than Animation.
You’ll also have to consider the work that you have to put in after your animations have been created. For example, the work you’ll need to put into finalizing your project with a video editor like Wondershare Filmora Video Editor (which would work great with animations especially, as it will allow you to actively add into the timeline as you go.)
For Win 7 or later (64-bit)
For macOS 10.12 or later
Part 3 What Are the Best Rigging Animation Tools?
For this final section of the guide, we’re finally moving on to our introduction to Rigging Animation Software. As mentioned, we’ve picked quite the variety to make sure that you have a good idea of how each will work. (A sample video has also been attached to make sure that you know what kind of projects can be created with these Rigging tools. Take the opportunity to explore those, too. If only for further edification.)
01Reallusion – Cartoon Animator 4
The first of the Rigging Animation Software on this list is Reallusion’s Cartoon Animator 4 (previously known as CrazyTalk Animator). This software was originally developed in order to allow everyone (from beginners to professionals) to create advanced animations with very little effort. To that end, it comes with a lot of motion templates and Auto Rig functions (i.e., audio lip-syncing) that the user can use to seriously cut down on the work required.
02Harmony ToonBoom
Harmony ToonBoom is well-known in the Rigging Animation Software industry. It’s the software that is used by many professionals. According to the Toon Boom Harmony website, this software was even used to create popular television shows like Rick and Morty, Bob’s Burgers, The Simpsons, and Futurama. It’s considerably more difficult to use for beginners, but it comes with many advanced functions that allow its users to create truly complex and beautiful Animations.
03Synfig Studio
The best thing about Synfig Studio (right from the onset), is that it is FREE. There are two versions of this tool — one that is ‘stable’ and the other in ‘development.’ The developmental version offers more advanced functions, of course, but for most beginners, the ‘stable’ version would serve just as well.
04Adobe Animate
Adobe Animate is software that belongs in Adobe’s long line of professional-level products. It’s a part of the classic ‘Adobe Suite.’ As a professional software, however, keep in mind that it might be more difficult to get used to at first (there’s a steep, learning curve right off the bat). But, if used correctly, it can be used to create quite impressive and eye-catching interactive animations (i.e., game content or website elements.)
05Animaker
Animaker is quite popular for beginners. It offers templates, so you can start off with an easy project if that’s what you’d like. But it also offers a lot of custom-creation tools that can be used for creating complex and professional Animations — although perhaps not at the level as the ones you might see from other alternatives (this software is most suitable for simple animations.)
06Moho Pro
Moho Pro (previously known as Anime Studio Pro) is a popular Animation program that fans of anime really love. This is one of the best software to use if you’re more interested in traditional animation (which involves a lot of free-hand drawing). Although, despite that fact, it has many advanced rigging functions as well (so you can create a mix of traditional and modern animation if you wish.)
07Pencil 2D
Pencil 2D, much like Synfig Studio, is FREE, cross-platform software. It’s quite old, but it’s matured over the years to include more and more functions (you might already be personally aware of it, in fact. It had its time to shine in the early 2010s.) The important thing to remember though is the fact that this is definitely more of a ‘traditional animation’ software. It does offer some basic rigging, but it’s best used by those who would prefer to practice the art of frame-by-frame animation.
08OpenToonz
OpenToonz is another free Rigging Animation Software (although it should be noted that there is a premium version, called Toonz, that is quite well known.) The best part about it is that it is a combination of software. One that you can use both for traditional animation and Animation. It’s also pretty easy to use, making it a good option for those just starting out.
● Key Takeaways from This Episode →
● 2D Rigging is the practice of creating ‘structure’ or ‘bones’ from which you can move characters or models. In these are usually ‘pins’ placed in bendable areas (i.e., the elbow, for bending the arm.)
● There are many differences between Animation and Animation. What you end up choosing should be decided by your project.
● Remember though, that Animations usually take longer to create even though Animations require more complex riggings.
● If you’re serious about getting into Rigging, make sure to consider the Rigging Animation Software that you choose to use very carefully. Each one has its own pros and cons.
20 Free After Effects Logo Reveal Templates
20 Free After Effects Logo Reveal Templates You Will Want to Know
An easy yet powerful editor
Numerous effects to choose from
Detailed tutorials provided by the official channel
The free After Effects logo reveals templates is a creative and clean animation that is very easy to use and customizable in just a few clicks. This template allows you to change the color, edit the text, add your logo, and click on render and contains two different logo animations for you to choose from. It does not require any plugin, and you can use it for your following modern and professional logo animation.
![]()
By incorporating a logo animation into your video, you can make your brand memorable and choose a suitable template for your brand personality. So, get ready for all the free logo reveal templates in this article.
In this article
01 [20 Best Logo Reveal Templates for After Effects 2022](#Part 1)
02 [Learn How to Use After Effects Logo Reveal Templates](#Part 2)
Part 1 Best Logo Reveal Templates for After Effects 2022
You can use an animated logo reveal if you need to add spice to your marketing campaigns and branded videos. An animated logo reveal is explained as a Great way to capture your audience’s attention as they screw through their newsfeed and stand you out from the competition. This section of the article will give you After Effects logo reveal templates for free that you can choose from this 2022:
![]()
01[Fast Flip Logo Reveal Template](https://dsqqu7oxq6o1v.cloudfront.net/preview-215084-pWlBMUhYg4-high.mp4 target=)
Fast Flip logo reveal template free to download is perfect for those on a budget and uses stock photography which can be replaced with photos of a company or team to review and an elegant logo at the end. All that is required is to customize the color, replace the images, and add your logo.
02Logo Web Search
Logo Web Search is an easy-to-use, stylish and simple animation for a company website. It allows you to change colors quickly and free sound effects, and all you need to do is change the logo text and click on render.
03Search Logo Reveal
Search Logo Reveal After Effect template for free allows you to customize the text and easily drag and drop in your logo. It provides a unique way to review your logo by using an animated search bar with a sample question and bringing up your logo as the answer. It can be a great add on to websites with search options.
04Colors Logo Reveal
Colors Logo Reveal is a super clean and straightforward After Effects logo reveal template that is very easy to use for designers and creators. It contains two different logos animations that you can choose from and requires no plugin. Add your logo, change the color, edit the text, and click on render.
05Logo Reveal
Logo Reveal is perfect for small business companies and startups with an easy-to-use template that comes with detailed instruction on how to customize and render your logo reveal Project.
06Unlock Phone Logo Reveal
Unlock Phone Logo Reveal is one of the dynamic logo reveal After Effects templates for free with a modern design, smooth transition effects, and simple text animation that is super easy to use. All that is required is to edit the text, drag and drop in your media, and click on render. It comprises a cool intro or opener to presentations, slideshows, promotions, and event videos to impress your audience.
07Orbital Free HUD Logo Reveal
Orbital Free HUD Logo Reveal is perfect for any tech company, and it’s done up in futuristic style and includes the complete. AEP project file with background texture and elements.
08Corporate logo reveal
Corporate Logo Reveal template is a stylish and contemporary template that features a simple shape that is elegantly animated and combined with reviewing your logo. It has one logo placeholder, editable text layers, and an easy-to-use color controller. An excellent logo reveals the Premiere Pro template free to download for companies like stockbrokers.
09White Scroll Logo Reveals
White Scroll Logo Reveals perfect for a more classic logo opener and comes with three background versions and three different logo placement options.
10Shape Logo Reveal
Shape Logo Reveal is a stylish logo reveal template with colorful shape layers and lines that beautifully form a clean-looking logo reveal. It is a short intro for a business slideshow, promotions, events, TV shows, videos, commercials, corporate presentations, etc.
11Free Animated Logo Reveals
Free Animated Logo Reveals is packed with three different logos reveal, which a suitable for corporates and an excellent option for one who wants a modern and professional logo show.
12Clean Titles And Logo Reveal
Clean Titles and Logo Reveal offers stylish templates which an eye-catching design and contains two text placeholders and one logo placeholder. It is effortless to use and a short introduction to TV shows, commercials, slideshows, promotions, Facebook and YouTube videos, etc.
13Hi-Tech Logo Reveal 02
Hi-Tech Logo Reveal is a premium animated logo reveal that features a dark blue background joint with light blue HUD elements and a perfect logo reveal template for a company that wants to stand out online.
14Testimonials Logo Reveal
Testimonials logo Reveal is a stylish and clean project that is perfect for displaying the company’s testimonials and reviews. This After Effects logo reveal template for free features six title placeholders, one logo holder, and six photo placeholders, requiring no plugin.
15Elegant Logo Reveal
Elegant logo Reveals perfect for a feminine background. It features chrome logo pens with a silky dark background, enabling you to easily add your text, insert your logo, and change the colors.
16Logo Web Search II
Logo Web Search II is a stylish and straightforward animation mainly for company websites. It is elementary to use.
17Battle Logo Reveal
Blue Action Logo Reveal is for those looking for a minimalist logo opener and features a dynamic animation style, including an editable text layer and a logo placeholder. It also allows you to adjust the colors easily.
18Blue Action Logo Reveal
Blue Action Logo Reveal is majorly for those looking for a minimalist logo opener and features a dynamic animation style including an editable text layer and a logo placeholder. It also allows you to easily adjust the colors.
19Logo Introduction Template
Logo Introduction Template is a free logo reveal from Premiere Pro. It is perfect for the ones looking for a Tudor style logo reveal and allows you to easily customize the colors and insert your logo with a detailed help file.
20Minimal Logo Klick
Minimal Logo Klick comes in a sleek and modern design with playful animation. It encompasses a logo placeholder, an editable text layer, and an intelligent color controller. If you are searching for an unfussy and free logo reveal online, this one is for you.
Part 2 Learn How to Use After Effects Logo Reveal Templates
This section provides you with a basic tutorial on using the logo reveal After Effects template for free. However, this is a professional video editing software, but if video editing is new to you, you can try out Filmora, which is powerful, easy to use for new users. In Filmora, you will use the logo reveal template as a professional even if you are a beginner.
Below is how to use the After Effects logo reveals template:
01Open After Effects and Begin
Open your After Effect software and set up your Project ready. To begin face, create a composition using composition>New. You can also search the web resolution to 3x 2for this Project.
![]()
02Start Creating Logo
Next is to create a solid layer for your logo by using layers>new>solid, and select an appropriate color to match your composition.
![]()
Next is the creator logo by adding the pre-prepared logo artwork. Go to layer>new>text to create a text layer and adjust the text size and color to see.
![]()
03Add Animation to Logo
Manipulate your logo to create an animation and ensure that everything is right where you want it.
![]()
04Add Effects and Keyframe
Add Effect by going to Effect>Simulation>CC Particle World or click on Effects and Presets panel on the right to drag the CC Particle World effect onto your solid layer.
![]()
Set off your animation by adding a keyframe and controlling the animation of the particles effect through the birth rate setting, which is found by expanding the settings in the timeline panel for the solid layer.
![]()
05Import Vector Graphics and Finish
Finally, import your vector graphics into the After Effects by dragging and dropping the file into the Project panel, which brings up an import dialogue.
For Win 7 or later (64-bit)
For macOS 10.12 or later
That’s it! You successfully made use of the logo reveal maker.
● Key Takeaways from This Episode →
● The top 20 logo reveal Premiere Pro templates free to download.
● THow to make logo with After Effects – the logo reveal maker.
● TLastly, the logo reveal, free online tool, Filmora.
● TI hope I’ve gave you a few ideas on the After Effects logo reveal template for your Project and provided a breakdown of other software you can use for free logo reveal, such as Filmora. The article also lists the best logo reveal templates for after-effects that you can choose from this 202You can also use other software for your free logo reveal, but we all need to start somewhere.
How to Make an Animated Travel Map Video?
How to Make an Animated Travel Map Video?

Benjamin Arango
Mar 27, 2024• Proven solutions
Animated travel map videos make it easy for the viewers to follow the routes from the source to destination locations right on the single screen. While the static maps would only allow the audience to see the markers from where the journey would start and is expected to end, the animated ones show the real-time movements and therefore look more interactive when viewed.
That said, here you will learn how to create an attractive and engaging animated travel map video using one of the easiest post-production applications, Wondershare Filmora, which is widely appreciated by amateurs and professionals throughout the globe. In another section, you will also learn about an alternative program that might be of some help in case you are more into online designing.
- Method 1: Make Animated Travel Map Videos with Location Video Maker - [Video Tutorial]
- Method 2: Make Interactive Animated Travel Map with Pictramap
- Method 3: Create Animated Travel Map Using Multidev
Method 1 Make Animated Travel Map Videos with Location Video Maker
The entire process of creating an animated travel map video in Wondershare’s Filmora is categorized into two parts, wherein the first part you will collect all the ingredients that are needed to get started, and in the second part you will actually make an animated map using the tools and features present in Filmora.
Watch a video tutorial to see how to make an animated map for a video:
For Win 7 or later (64-bit)
 Secure Download
For macOS 10.14 or later
Secure Download


Part 1: Prepare the Travel Map Materials
Following are the ingredients and the methods to collect them for animated travel map preparation:
Step 1: Get the Map
The first thing that you would need to prepare an animated map is an image of a realistic map. Thanks to Google and Microsoft, these things are now pretty easy to arrange. The process is given below:
- Launch your preferred web browser
- Type google.com in the address bar or the search box and hit Enter
- Scroll to zoom out so you can see the entire world map on one screen

- Type Snipping Tool in the Cortana search box present on the left side of the Taskbar
- Launch Snipping Tool, and use it to capture the screenshot of the map
Note: Snipping Tool is a built-in app in Windows 10 and is available for free. If you are using any other operating system, or have a different program to capture the screenshots, feel free to use it according to your convenience.
- Save the screenshot you captured as a JPG file on your PC
Step 2: Mark Out the Map Path
The next step in the process of preparing an animated travel map is to mark your route on it. To do so, you can use any of your preferred photo editing tools. However, to keep this illustration simple, Microsoft Paint is used here, and the method is given below:
- Right-click the screenshot you just captured
- Go to Open with on the context menu, and then click Paint from the submenu that appears
- Pick your preferred color from the pallet of the Paint interface. It is advisable to use an eye-catchy shade such as Red
- Use the Sphere shape tool to draw a circle over the source and destination locations on the map
- Use the Line tool to draw a line from the source point to the destination. Try giving the line a few turns to make it look realistic
- Go to File > Save As, and save the marked image with a different name
Note: Once this is done, you should have two image files of the map, i.e., one without the marks and one with it
Step 3: Download Some Travel Icons
Another important ingredient in an effective travel map animation is touring icons such as location marker image, a traveling medium symbol like a helicopter, airplane, car/bike (for short distances), etc. A couple of websites that offer royalty-free stock photos at absolutely no cost are listed below:
Note: Although the websites given above allow you to download and use their stock images and icons for free, you may need to give credits to the designers/creators of the symbols while using their objects. Therefore, you are suggested to check the Terms & Conditions and norms of usage of the elements before downloading and adding them to your projects.
Part 2: Make Animated Travel Map Videos with Filmora
After you have gathered all the necessary ingredients that are required to create a travel map animation, it is now time to get to work. The following instructions would guide you through the step-by-step process of preparing a decent and realistic animated travel map in Wondershare Filmora :
For Win 7 or later (64-bit)
Secure Download
For macOS 10.14 or later
Secure Download
Step 1: Import Ingredients to Filmora and Add Them to the Timeline
Launch the video editor on your computer, click anywhere inside the Media window at the upper-left area, and import all the images and icons that you collected earlier to program. Next, drag both the images of the map, i.e., with and without the marks to the Timeline, and ensure that they are of the same duration and are placed on the same track.

Note: Be sure to put the map without the marks first, and then the one with the marks. Also note that the images have the playback duration of 5 seconds in the Timeline by default, and this tenure can be reduced or increased by dragging the side handle of the media to the left or right respectively.
Step 2: Add Transition for Illusion of Route Appearance
Go to Transition from the standard toolbar at the top, locate the Erase Slide transition effect from the available presets, and place it in between the two image files that you earlier added to the Timeline. Next, click and drag either of the side handles of the transition to the end of the media clip. Notice how the other side of the effect is expanded in equal proportion.

Step 3: Preview and Export
Press the Spacebar on the keyboard to preview the video and see if the route appears as if it is being drawn on the map. Once the animation looks acceptable, click EXPORT from the top-center, go to the Local tab on the Export window, select MP4 from the formats list in the left, and click EXPORT from the bottom-right corner to export the current animation to MP4.
Step 4: Customize the Travel Map Media
Either start a new project and import the video of the map you exported in the previous step to the app and then to the Timeline, or remove the existing media from the Timeline in the same project, and add the exported video to it for convenience.

For Win 7 or later (64-bit)
Secure Download
For macOS 10.14 or later
Secure Download
Next, position the Skimmer (Playhead) a couple of frames before the one the route line appears and starts stretching from, and click the Split icon from the editing toolbar above the Timeline itself. Repeat this process for the other side of the media, i.e., position the Skimmer a couple of frames after the route line reaches the destination location, and click the Split icon again. Then remove the separated segments from both the sides by selecting them and pressing Delete on the keyboard, leaving only the portion where the animation is visible.

Optionally, right-click the media that is left behind in the Timeline, and go to Speed and Duration from the context menu. On the Custom Speed box, drag the Speed slider to the left to decrease the playback speed resulting in the increased duration of the media. Alternatively, you can manually enter a value in the Speed box to get precise tenure. Click OK when you are done.

Step 5: Add Animations to Travel Map
Right-click the media in the Timeline, and go to Add Animation from the context menu. Make sure that the Skimmer is on the first frame, and add several keyframes as explained below:
- Click Add to add the first keyframe

- Move a couple of frames further, and click Add one more time. Now, while you are on this second keyframe, use the Scale slider to zoom in to the map so the source location remains within focus.

- Next, move the Playhead further and add another keyframe a couple of frames before the route line hits the edge of the window.
- After this, move the Playhead again and position it where the route line reaches its destination location. Add another keyframe here as well, and move the map in the Preview window so the focus is now on the destination.
- Move the Playhead a few frames further, add another keyframe, and use the Scale slider to zoom a bit more into the map to make the entire animation look realistic. Click OK to save the changes.
Step 6: Add Icons and Titles, and Export the Project
Drag the image of the traveling medium to the Timeline, and place it on the frame the route line starts from. Make sure to place the image on the track above the map, and stretch it to the end so it remains visible throughout the animation. Next, use the method explained above to add keyframes to move the medium along with the route line from the source to the destination. Optionally, add the image of the location marker at the destination point, go to Transition, and add your preferred transition effect, preferably Dissolve, to the marker track in the Timeline so it looks as if it has appeared as the medium arrived the destination.
For Win 7 or later (64-bit)
Secure Download
For macOS 10.14 or later
Secure Download
Get back to the first frame in the Timeline, go to Titles on the standard toolbar, and add a title preset somewhere near the source location. Resize the text, change the format as needed, and add your preferred caption to it such as the start time, name, etc. Reduce the duration of the track so the title appears for a few frames, preferably before the map animation starts. Click OK when done. Repeat this process for the destination point as well.
Once everything is complete, click the Play button in the Preview window to review your work. If the video looks acceptable, click EXPORT from the top-center of the interface, and use the method explained earlier to export the animated travel map in your preferred format.
![]()
Method 2 How to Make Interactive Animated Travel Map with Pictramap
If you don’t want to install a dedicated animation software on your computer due to limited hardware resources or some other reason, there is an online solution called Pictramap to create a travel map animation using a web browser. The web app offers a lucrative interface that could be easily understood and worked with to produce an animated map for free.
The process to create an animated travel map with Pictramap is given below:
Step 1: Create a Project
Launch your favorite web browser, go to https://www.pictramap.com/ , click Create yours now, it’s free, and sign up to Pictramap using your preferred method. When you are on the Dashboard, enter a name in the field available under the My Projects section, and click Create to create a new project (the animated map).

Step 2: Define the Locations and Method of Commute
On the map, right-click the location you want to start your journey from, enter the name of the location or any other significant title, and click Add. Click the location marker, click the Travel Mode icon, and select your preferred mode of traveling. Repeat this process to mark the destination location as well.

Step 3: Preview the Animation
Click the View Animation button from the upper-right corner of the page to see the animated travel map.

Downsides of Using Pictramap to Create Animated Travel Map Video
Although Pictramap allows you to create a travel map animation with ease and extremely quickly, at the time of this writing, it offers no way of downloading the animation to your PC, and therefore it couldn’t be used in your projects.
If you are using Wondershare Filmora, you can use its built-in screen recording feature to record the animation that Pictramap plays, and then save the captured footage as MP4 or any other format on your computer. This video can then be imported to your projects for further uses.
![]()
A cross-platform for making videos anywhere for all creators

Why your video editing isn’t good enough? How about some creative inspo?
- 100 Million+ Users
- 150+ Countries and Regions
- 4 Million+ Social Media Followers
- 5 Million+ Stock Media for Use
* Secure Download

Method 3 How To Make Animated Travel Map Using Multidev
Multi.dev is still a new web-based application to build awesome animated maps, but it’s good! The application helps you create presentations about all your recent and previous trips. And the interface is also hassle-free.
So, follow this step-by-step guide to making animated maps with Multi.dev.
Step 1: Open Multi.dev
Visit Multi.dev from your internet browser.

Once the tool gets open, you will see a demo video. This example clip will have animated maps of different locations. So it is up to you whether to use the same example and edit the places you have been to or are planning to visit. Or, simply create a new animated map from scratch.
Step 2: Choose Your First Location
Take your mouse cursor on the left side of the application and type the first location in the search bar. As soon as you do it, you will see that the “travel arrow” will automatically begin from there. Likewise, type and select the next location through the search bar.
Once you type the location, you will see 8 travel modes, including airplane, bus, and train. You can select the same mode for all sites or a different mode for another place. Totally up to you!

Step 3: Select Map Themes
All your chosen places will be highlighted in the software’s minimalistic map.

Step 4: Download Map on Your Computer
If you’re happy with the animated map, click the “Create Video” button to save the animated map on your computer in a few minutes.


Contrarily, you can also share the animation by choosing the “Share Animation” option.
Conclusion
An animated travel map plays an important role to add a realistic touring effect to your motion picture projects. While you can use a web app like Pictramap to create such an animation online easily and for free, the limitations it comes along with might keep you from choosing this method.
Instead, you may want to get more inclined toward a dedicated post-production software like Wondershare Filmora that gives you full control over the process, and the freedom to choose your preferred format to export the animation to for independent usage.
For Win 7 or later (64-bit)
Secure Download
For macOS 10.14 or later
Secure Download
Benjamin Arango
Benjamin Arango is a writer and a lover of all things video.
Follow @Benjamin Arango
Benjamin Arango
Mar 27, 2024• Proven solutions
Animated travel map videos make it easy for the viewers to follow the routes from the source to destination locations right on the single screen. While the static maps would only allow the audience to see the markers from where the journey would start and is expected to end, the animated ones show the real-time movements and therefore look more interactive when viewed.
That said, here you will learn how to create an attractive and engaging animated travel map video using one of the easiest post-production applications, Wondershare Filmora, which is widely appreciated by amateurs and professionals throughout the globe. In another section, you will also learn about an alternative program that might be of some help in case you are more into online designing.
- Method 1: Make Animated Travel Map Videos with Location Video Maker - [Video Tutorial]
- Method 2: Make Interactive Animated Travel Map with Pictramap
- Method 3: Create Animated Travel Map Using Multidev
Method 1 Make Animated Travel Map Videos with Location Video Maker
The entire process of creating an animated travel map video in Wondershare’s Filmora is categorized into two parts, wherein the first part you will collect all the ingredients that are needed to get started, and in the second part you will actually make an animated map using the tools and features present in Filmora.
Watch a video tutorial to see how to make an animated map for a video:
For Win 7 or later (64-bit)
Secure Download
For macOS 10.14 or later
Secure Download
Part 1: Prepare the Travel Map Materials
Following are the ingredients and the methods to collect them for animated travel map preparation:
Step 1: Get the Map
The first thing that you would need to prepare an animated map is an image of a realistic map. Thanks to Google and Microsoft, these things are now pretty easy to arrange. The process is given below:
- Launch your preferred web browser
- Type google.com in the address bar or the search box and hit Enter
- Scroll to zoom out so you can see the entire world map on one screen
- Type Snipping Tool in the Cortana search box present on the left side of the Taskbar
- Launch Snipping Tool, and use it to capture the screenshot of the map
Note: Snipping Tool is a built-in app in Windows 10 and is available for free. If you are using any other operating system, or have a different program to capture the screenshots, feel free to use it according to your convenience.
- Save the screenshot you captured as a JPG file on your PC
Step 2: Mark Out the Map Path
The next step in the process of preparing an animated travel map is to mark your route on it. To do so, you can use any of your preferred photo editing tools. However, to keep this illustration simple, Microsoft Paint is used here, and the method is given below:
- Right-click the screenshot you just captured
- Go to Open with on the context menu, and then click Paint from the submenu that appears
- Pick your preferred color from the pallet of the Paint interface. It is advisable to use an eye-catchy shade such as Red
- Use the Sphere shape tool to draw a circle over the source and destination locations on the map
- Use the Line tool to draw a line from the source point to the destination. Try giving the line a few turns to make it look realistic
- Go to File > Save As, and save the marked image with a different name
Note: Once this is done, you should have two image files of the map, i.e., one without the marks and one with it
Step 3: Download Some Travel Icons
Another important ingredient in an effective travel map animation is touring icons such as location marker image, a traveling medium symbol like a helicopter, airplane, car/bike (for short distances), etc. A couple of websites that offer royalty-free stock photos at absolutely no cost are listed below:
Note: Although the websites given above allow you to download and use their stock images and icons for free, you may need to give credits to the designers/creators of the symbols while using their objects. Therefore, you are suggested to check the Terms & Conditions and norms of usage of the elements before downloading and adding them to your projects.
Part 2: Make Animated Travel Map Videos with Filmora
After you have gathered all the necessary ingredients that are required to create a travel map animation, it is now time to get to work. The following instructions would guide you through the step-by-step process of preparing a decent and realistic animated travel map in Wondershare Filmora :
For Win 7 or later (64-bit)
Secure Download
For macOS 10.14 or later
Secure Download
Step 1: Import Ingredients to Filmora and Add Them to the Timeline
Launch the video editor on your computer, click anywhere inside the Media window at the upper-left area, and import all the images and icons that you collected earlier to program. Next, drag both the images of the map, i.e., with and without the marks to the Timeline, and ensure that they are of the same duration and are placed on the same track.
Note: Be sure to put the map without the marks first, and then the one with the marks. Also note that the images have the playback duration of 5 seconds in the Timeline by default, and this tenure can be reduced or increased by dragging the side handle of the media to the left or right respectively.
Step 2: Add Transition for Illusion of Route Appearance
Go to Transition from the standard toolbar at the top, locate the Erase Slide transition effect from the available presets, and place it in between the two image files that you earlier added to the Timeline. Next, click and drag either of the side handles of the transition to the end of the media clip. Notice how the other side of the effect is expanded in equal proportion.
Step 3: Preview and Export
Press the Spacebar on the keyboard to preview the video and see if the route appears as if it is being drawn on the map. Once the animation looks acceptable, click EXPORT from the top-center, go to the Local tab on the Export window, select MP4 from the formats list in the left, and click EXPORT from the bottom-right corner to export the current animation to MP4.
Step 4: Customize the Travel Map Media
Either start a new project and import the video of the map you exported in the previous step to the app and then to the Timeline, or remove the existing media from the Timeline in the same project, and add the exported video to it for convenience.
For Win 7 or later (64-bit)
Secure Download
For macOS 10.14 or later
Secure Download
Next, position the Skimmer (Playhead) a couple of frames before the one the route line appears and starts stretching from, and click the Split icon from the editing toolbar above the Timeline itself. Repeat this process for the other side of the media, i.e., position the Skimmer a couple of frames after the route line reaches the destination location, and click the Split icon again. Then remove the separated segments from both the sides by selecting them and pressing Delete on the keyboard, leaving only the portion where the animation is visible.
Optionally, right-click the media that is left behind in the Timeline, and go to Speed and Duration from the context menu. On the Custom Speed box, drag the Speed slider to the left to decrease the playback speed resulting in the increased duration of the media. Alternatively, you can manually enter a value in the Speed box to get precise tenure. Click OK when you are done.
Step 5: Add Animations to Travel Map
Right-click the media in the Timeline, and go to Add Animation from the context menu. Make sure that the Skimmer is on the first frame, and add several keyframes as explained below:
- Click Add to add the first keyframe
- Move a couple of frames further, and click Add one more time. Now, while you are on this second keyframe, use the Scale slider to zoom in to the map so the source location remains within focus.
- Next, move the Playhead further and add another keyframe a couple of frames before the route line hits the edge of the window.
- After this, move the Playhead again and position it where the route line reaches its destination location. Add another keyframe here as well, and move the map in the Preview window so the focus is now on the destination.
- Move the Playhead a few frames further, add another keyframe, and use the Scale slider to zoom a bit more into the map to make the entire animation look realistic. Click OK to save the changes.
Step 6: Add Icons and Titles, and Export the Project
Drag the image of the traveling medium to the Timeline, and place it on the frame the route line starts from. Make sure to place the image on the track above the map, and stretch it to the end so it remains visible throughout the animation. Next, use the method explained above to add keyframes to move the medium along with the route line from the source to the destination. Optionally, add the image of the location marker at the destination point, go to Transition, and add your preferred transition effect, preferably Dissolve, to the marker track in the Timeline so it looks as if it has appeared as the medium arrived the destination.
For Win 7 or later (64-bit)
Secure Download
For macOS 10.14 or later
Secure Download
Get back to the first frame in the Timeline, go to Titles on the standard toolbar, and add a title preset somewhere near the source location. Resize the text, change the format as needed, and add your preferred caption to it such as the start time, name, etc. Reduce the duration of the track so the title appears for a few frames, preferably before the map animation starts. Click OK when done. Repeat this process for the destination point as well.
Once everything is complete, click the Play button in the Preview window to review your work. If the video looks acceptable, click EXPORT from the top-center of the interface, and use the method explained earlier to export the animated travel map in your preferred format.
![]()
Method 2 How to Make Interactive Animated Travel Map with Pictramap
If you don’t want to install a dedicated animation software on your computer due to limited hardware resources or some other reason, there is an online solution called Pictramap to create a travel map animation using a web browser. The web app offers a lucrative interface that could be easily understood and worked with to produce an animated map for free.
The process to create an animated travel map with Pictramap is given below:
Step 1: Create a Project
Launch your favorite web browser, go to https://www.pictramap.com/ , click Create yours now, it’s free, and sign up to Pictramap using your preferred method. When you are on the Dashboard, enter a name in the field available under the My Projects section, and click Create to create a new project (the animated map).
Step 2: Define the Locations and Method of Commute
On the map, right-click the location you want to start your journey from, enter the name of the location or any other significant title, and click Add. Click the location marker, click the Travel Mode icon, and select your preferred mode of traveling. Repeat this process to mark the destination location as well.
Step 3: Preview the Animation
Click the View Animation button from the upper-right corner of the page to see the animated travel map.
Downsides of Using Pictramap to Create Animated Travel Map Video
Although Pictramap allows you to create a travel map animation with ease and extremely quickly, at the time of this writing, it offers no way of downloading the animation to your PC, and therefore it couldn’t be used in your projects.
If you are using Wondershare Filmora, you can use its built-in screen recording feature to record the animation that Pictramap plays, and then save the captured footage as MP4 or any other format on your computer. This video can then be imported to your projects for further uses.
![]()
A cross-platform for making videos anywhere for all creators
Why your video editing isn’t good enough? How about some creative inspo?
- 100 Million+ Users
- 150+ Countries and Regions
- 4 Million+ Social Media Followers
- 5 Million+ Stock Media for Use
* Secure Download
Method 3 How To Make Animated Travel Map Using Multidev
Multi.dev is still a new web-based application to build awesome animated maps, but it’s good! The application helps you create presentations about all your recent and previous trips. And the interface is also hassle-free.
So, follow this step-by-step guide to making animated maps with Multi.dev.
Step 1: Open Multi.dev
Visit Multi.dev from your internet browser.
Once the tool gets open, you will see a demo video. This example clip will have animated maps of different locations. So it is up to you whether to use the same example and edit the places you have been to or are planning to visit. Or, simply create a new animated map from scratch.
Step 2: Choose Your First Location
Take your mouse cursor on the left side of the application and type the first location in the search bar. As soon as you do it, you will see that the “travel arrow” will automatically begin from there. Likewise, type and select the next location through the search bar.
Once you type the location, you will see 8 travel modes, including airplane, bus, and train. You can select the same mode for all sites or a different mode for another place. Totally up to you!
Step 3: Select Map Themes
All your chosen places will be highlighted in the software’s minimalistic map.
Step 4: Download Map on Your Computer
If you’re happy with the animated map, click the “Create Video” button to save the animated map on your computer in a few minutes.
Contrarily, you can also share the animation by choosing the “Share Animation” option.
Conclusion
An animated travel map plays an important role to add a realistic touring effect to your motion picture projects. While you can use a web app like Pictramap to create such an animation online easily and for free, the limitations it comes along with might keep you from choosing this method.
Instead, you may want to get more inclined toward a dedicated post-production software like Wondershare Filmora that gives you full control over the process, and the freedom to choose your preferred format to export the animation to for independent usage.
For Win 7 or later (64-bit)
Secure Download
For macOS 10.14 or later
Secure Download
Benjamin Arango
Benjamin Arango is a writer and a lover of all things video.
Follow @Benjamin Arango
What Wikipedia Can’t Tell You About the 10 Batman Cartoons
What Wikipedia Can’t Tell You About the 10 Best Batman Cartoons
An easy yet powerful editor
Numerous effects to choose from
Detailed tutorials provided by the official channel
Who does not admire the caped crusader? Over the years, Batman has been a part of our childhood through cartoons, movies, and comics, and it is still quite prevalent today, as seen by how well The Batman (2022), starring Robert Pattinson, did in theatres.
The Batman movies are probably how most of us know him, but another great way to enjoy our favorite superhero is through the animated series. These animations feature beautiful visuals and great storylines, which is why the batman cartoon series is still so popular. Here is the top 10 best batman cartoon you need to watch right now!
01The Adventures of Batman
● Name of the movie - The Adventures of Batman (1968-1969)
● Rating - 7.3/10
● Duration - 1hr
● Directors - Anatole Kirsanoff (3 Episodes, 1968)), Hal Sutherland (3 Episodes, 1968)
● Votes - 1,387
● Synopsis -
“The Adventures of Batman,” starred by Adam West, gained huge popularity in 1968. This series consisted of short segments of videos from the popular show “The Batman/Superman Hour.” This show helped launch the later gained popularity show “Super Friends.” This show was renamed a few years later as “Batman With Robin The Boy Wonder”; however that was just the beginning of the success it gained.
02The New Adventures of Batman
● Name of the movie - The New Adventures of Batman (1977–1978)
● Rating - 6.9/10
● Duration - 30min
● Directors - Don Towsley (16 Episodes, 1977)
● Votes - 1,157
● Synopsis -
“The New Adventures of Batman” is a continuation of the series “The Adventures of Batman.” This is one of the most famous series on Batman. This is the show that comes to the mind of the “Dark Knight”s fans is “The New Adventures of Batman.” This show concentrated on much nuanced objects of the character, which attracted the kids especially. At the same time, it was equally entertaining and thoughtful for its adult entertainers. This show is considered one of the most extraordinary shows made within the Batman Series collection.
03Batman Beyond
● Name of the movie - Batman Beyond (1999-2001)
● Rating - 8.1/10
● Duration - 23min
● Directors - Butch Lukic (16 Episodes, 1999-2000), Dan Riba (14 Episodes, 1999-2001), Curt Geda (11 Episodes, 1999-2000), James Tucker (5 Episodes, 2000-2001), Kyung Won Lim (7 Episodes, 1999-2001), Yukio Suzuki (2 Episodes, 1999)
● Votes - 26,997
● Synopsis -
“Batman Beyond” was debuted in 1999. Due to severe health conditions, Wayne Bruce took a break from his work in Cyberpunks’s Gotham City. This movie was a game-changer for him as he helped in the last few seasons of this show. This show took a cult turn among its fans and became a huge success. Later, this show got canceled.
04The Brave And The Bold
● Name of the movie - Batman - The Brave And The Bold (2008-2011)
● Rating - 7.3/10
● Duration - 30 min
● Directors - Ben Jones (25 Episodes, 2008-2011), Brandon Vietti (9 Episodes, 2008-2009), Lauren Montgomery (1 Episode, 2011), Michael Chang (17 Episodes, 2008-2011), Michael Goguen (15 Episodes, 2009-2011)
● Votes - 8,801
● Synopsis -
In the “Batman, The Brave And The Bold” series, “Superhero Team-Ups” was featured. Many viewers have commented on this movie as fresh and exciting. Several DC heroes or characters were featured in this movie. This was one of the shows through which the Gen Z’s were introduced to shows like Blue Beetle. This show had very interesting scripting and animation. “Batman: The Brave And The Bold” was very popular and aired for a long time on the Cartoon Network channel.
05Beware the Batman
● Name of the movie - Beware the Batman (2013-2014)
● Rating - 7.3/10
● Duration - 22 min
● Directors - Butch Lukic (26 Episodes, 2013-2014), Curt Geda (8 Episodes, 2013-2014), Sam Liu (9 Episodes, 2013-2014), Rick Morales (9 Episodes, 2013-2014)
● Votes - 4,228
● Synopsis -
“Beware the Batman” was starred Anthony Ruivivar. If you are an action fan, this series can be a delicious item on your plate for you. This series also has a detective thriller side to it. The most fantastic thing about this movie is that this movie is extraordinary about other Batman series. The famous series “Katana” was also introduced in this popular series. It was at the top of success and gained huge fandom in 2013, one of the reasons being its outstanding animation and scripting.
06The Long Halloween
● Name of the movie - Batman - The Long Halloween (2021)
● Rating - 7.3/10
● Duration - 1hr 25min
● Directors - Chris Palmer
● Votes - 14,099
● Synopsis -
This movie is a two-part movie that is it has two parts which were released in the year 2021. In this movie, Batman, Jim Gordon, and Harvey Dent work together on solving a murder mystery. The excellent character development of the character “Batman” makes this movie an exceptional piece of art. Many Batman followers and the author commented that this is one of the best adaptations done in the history of animated movies. This movie takes its viewers on a roller coaster ride through outstanding animation, action, and scripting. It is a must-watch movie for Batman followers.
07Batman - Year One
● Name of the movie - Batman - Year One (2011)
● Rating - 7.4/10
● Duration - 1hr 4min
● Directors - Sam Liu and Lauren Montgomery
● Votes - 34,586
● Synopsis -
Batman: Year One starring Bryan Canston, Ben McKenzie, and Eliza Dushku. The most fantastic thing about this movie is the casting and their outstanding acting. There has been a common reaction from its viewers that it is a pretty straightforward Batman movie. Nonetheless, some people have the feeling that it is very similar to Christopher Nolan’s “Batman Begins,” and having that kind of reaction is understandable because the authors of the movies are the same. This movie is considered one of the most popular adaptations made in the batman cartoon.
08The Dark Knight Returns
● Name of the movie - Batman - The Dark Knight Returns(2012-2013)
● Rating - 8.1/10
● Duration - 1hr 16min
● Directors - Jay Oliva
● Votes - 57,776
● Synopsis -
This movie is also two-part with two parts. This movie is considered one of the most definitive works on Batman and his greatest work. The first movie is set so that he has not been seen in ten years, and in this movie, he makes his entry. This movie sets off the final mission of fifty-five-year-old Batman, who has to confront his old enemies. The graphics on blood and violence have not been compromised in this movie, yet it remains one of the best-reviewed batman movies. The vivid graphics, story-telling, and scripting made this movie a masterpiece in the action and adventure genre.
09Mask Of The Phantasm
● Name of the movie - Batman - Mask Of The Phantasm (1993)
● Rating - 7.8/10
● Duration - 1hr 16min
● Directors - Kevin Altieri, Boyd Kirkland, Frank Paur
● Votes - 49,147
● Synopsis -
In “Batman: Mask of the Phantasm” remains one of the most outstanding animated movies made by Batman. The storyline of this movie concentrates on both the past and future of Bruce. The most exciting fact about this movie is its climaxes. This movie features Kevin Conroy and Mark Hamill as Batman and Joker, respectively. This movie remains one of the masterpieces because of its outstanding scripting and acting. The extraordinary climaxes remain to be one of the attractions for Batman followers.
10Under the Red Hood
● Name of the movie - Batman - Under the Red Hood (2013)
● Rating - 8.0/10
● Duration - 1hr 15min
● Directors - Brandon Vietti
● Votes - 60,539
● Synopsis -
This movie is slightly different from other Batman animated movies because this is the only movie that has made considerable changes in its script. They did not depend solely on the original text instead inserted their ideas. Another exciting thing about this movie is the impeccable performance by Bruce Greenwood in the role of Batman. This movie has received a great deal of appreciation from the viewers. The viewers have commented that this movie can be considered one of the best-animated Batman featuring movies. This is another Batman movie that tops the must-watch list.
● Ending Thoughts →
● Animation is often an underrated genre. It is often dismissed as children’s cartoons and is not taken seriously. However, it has proved that powerful stories and complex characters can be portrayed through animation.
● These batman shows are both critically sound as well as provide good entertainment. You can enjoy these series and movies in your leisure time. The batman cartoon is still viral. Along with the batman cartoon, one more thing that is equally watched to date is the Batman and superman cartoon.
● Are you looking for a video editing app? Here is the best photo editing app for you, Wondershare Filmora Video Editor . You can use this app for personal as well as professional use. This app is quite popular amongst professional video editors because of its user-friendly interface and fantastic editing features. You can draw batman cartoons and make slideshows using this app.
Techniques for Creating Animated Logo That Few People Know About
Some Techniques for Creating Animated Logo That Few People Know About
An easy yet powerful editor
Numerous effects to choose from
Detailed tutorials provided by the official channel
How you present your brand on the digital landscape has a huge impact on your company’s overall conversions.
![]()
This guide will walk you through different procedures for creating an animated logo using different solutions.
In this article
01 [Are There Wow Factors in Your Branding with Animation Effects?](#Part 1)
02 [How to Make an Animated Logo: a Step-by-step Guide](#Part 2)
03 [5 Steps to Animate Your Logo](#Part 3)
04 [What is the Best Software to Animate a Logo?](#Part 4)
05 [Want to Explore More Advanced Animation Skills?](#Part 5)
Part 1 Are There Wow Factors in Your Branding with Animation Effects?
As we mentioned in the earlier paragraph, an animated logo can do wonders for your digital presence. How? When you publish an animated logo on your website or any other social media profile, it’ll automatically help you garner the attention from website visitors. Creating an animated logo will also make it easier for the customers to remember your business days after they visited your website.
However, when you are creating an animated logo, it’ll be crucial to follow a few tips to achieve the best results. Here are a few factors that’ll help you create the best animated logo.
● Always start with a simple research to analyze the customer behavior
● Instead of starting with the final design, take your time and work on a few sketches at the beginning
● Understand where you are going to publish the logo and then, choose the right color-scheme accordingly
● When it comes to animated logos, overdoing the animations can also damage the overall visual appearance of your logo
Part 2 How to Make an Animated Logo: a Step-by-step Guide
So, now that we’ve explained the importance of animated logos, let’s start with the step-by-step process of creating an animated logo using different solutions. First, we’ll take a look at some of the premade logo templates that you can integrate and customize to speed up the entire process.
01Vortex Logo Reveal
If you want to use your animated logo in a dedicated video, Vortex logo reveal can be an ideal choice for the job. The template contains a 3-5 seconds animation that’ll reveal your actual logo in a suspenseful manner.
023D Logo Animation
This is a pre-made animated logo template in After Effects that you can integrate with a single tap. The template simply shatters the logo into pieces after the initial reveal to create a dramatic effect for the viewers.
03Gold Luxury Logo Reveal
If you’re worried that using 3D-effects might overdo the animations, you can use this simple gold luxury logo reveal template. As compared to the previous two templates, this one has a simple animation and will help you convey your message more effectively.
04Waving 3D Logo Reveal
This logo is a widely popular AE animated logo template that many users buy to make their logos more appealing. The template utilizes motion graphics and a clean animation to reveal the actual brand logo while keeping the viewers engaged throughout the process.
05Infinite Zoom Logo Reveal
Want to reveal your animated logo in a unique manner? This template has got you covered. The After Effects logo template will allow you to use different pictures to reveal the logo with the traditional zoom-out transition. You can use all the pictures that represent your brand to add the required business values to your logo.
06Space Animation
Space animation is another After Effects template that’s ideal for brands who want to reveal their brand logo in a visually appealing manner. Different stars in the cosmos will combine together to represent your logo and leave a great first impression on the viewers.
Part 3 5 Steps to Animate Your Logo
Now, let’s move towards the next phase of creating an animated logo, i.e., animating the logo itself. It doesn’t matter which software you use to get the job done, you can adhere to the following steps to achieve the best results and create a visually stunning animated logo.
01Prepare the Simple Logo
In every situation, you’ll first have to prepare the simple one-dimension logo that you’ve been using so far. To create this logo, you can use a wide variety of tools such as Adobe Photoshop or even a simple logo maker such as Canva. Keep in mind that you should implement all the customization on the design during this stage only.
02Import the Logo File
The next step towards creating the animated logo is to simply import your logo file into the tool that you want to use to do the job. For instance, if you are planning to use Adobe After Effects, simply click “File > Open” and select the logo file to load it into AE’s editing panel. Once the file is successfully imported, you can move towards the next step.
03Choose the Right Animation Template
Now, you can proceed towards choosing the right animation template for your animated logo. It doesn’t matter which software you’re using for creating an animated logo, you’ll find dozens of built-in templates that can be integrated into the design with one click. Choose any of these templates and move towards the next step.
04Apply the Keyframes
After you’ve successfully imported the file and chosen a dedicated animation template, the next step would be to apply the keyframes. In tools like After Effects, you’ll find a built-in slider that’ll allow you to adjust the keyframes to customize the animation.
05Make the Final Adjustments
Finally, make the final adjustments to the animation. For instance, you can customize the color scheme or color-grade the logo for better visual appearance. You can also add other objects on top of the design to enhance the overall quality of the logo.
Part 4 What is the Best Software to Animate a Logo?
Here are the top three software you can use to get started with your animated logo and complete the process.
01Pixteller
![]()
Pixteller is an online logo maker designed to allow users to animate their logos in an easy-to-use interface. Even if you are not an experienced designer, you’ll find it pretty easy to animate the logo using Pixteller. The tool has a plethora of built-in templates that’ll allow you to edit your logo without any hassle.
02Crello
![]()
Crello is another easy-to-use online tool you can use to animate your logos without any technical skills. Being a web-based software, you can use Crello anywhere you want. In every situation, it’ll allow you to design a visually appealing logo with high-quality animation.
03Adobe After Effects
![]()
Now, if you are an experienced designer and are familiar with the Adobe ecosystem, After Effects is the most reliable tool to get the job done. Even though AE has a pretty complicated user interface, it’ll allow you to design a stunning logo animation, especially if you are familiar with all its editing tools.
Key Takeaways from This Episode
● Creating an animated logo is one of the most reliable ways to boost your brand visibility and attract new customers
● While creating an animated logo, it’s crucial to follow a dedicated process to attain the best results
● To use animated logos in your promotional videos, you can use Filmora Pro and its built-in features to get the job done.
All About Types of Motion Graphics
All about Types of Motion Graphics
An easy yet powerful editor
Numerous effects to choose from
Detailed tutorials provided by the official channel
Motion graphics has bought an ultimate change in the sectors of creative industries. In this guide you will get to know the various types of motion graphics and some examples of the same.
In this article
01 [What are Motion Graphics?](#Part 1)
02 [15 Types of Motion Graphics You Should Know](#Part 2)
03 [8 Stunning Motion Graphic Examples](#Part 3)
Part 1 What are Motion Graphics?
01Definition of Motion Graphics
Motion graphics simples means that graphics which are in motion or movement. In other words, you can say that such graphics create an illusion of movement on the screen and most commonly they are combined with various audios for different purposes of multimedia. Although motion graphics are not like animations as here are some limitations of producing the content.
02Motion Graphics vs. Video: is there a Difference?
You can say that every graphic motion is a video. To understand this you will need to know the applications of motion graphics and videos. Here mentioned are some of them:
● If you are creating something in the format of animation then it can done via motion graphics and videos too.
● When you are making a live action video then that could not be created in motion graphics but in the video format.
● Although if you are creating live action videos with animation overlay then you can use motion graphics as well as video formats too.
● Next is the slideshow video format, here the images and videos can be created in slideshow using both motion graphics and videos.
03When to Use Motion Graphics and Video?
Well, the question is how you can get to know that motion graphics is the best choice for creating your visual content. The answer depends on several factors including the users’ experience, the reach that you want to make and a lot more. Here are few factors to consider:
Enhance the users’ experience - using the motion graphics to enhance the users’ experience can be an excellent idea. In motion graphics the user can make benefits of the features like rewind and fast forwarding it. Here they can also get the skip sections which are not their way of interacting with the videos. Thus, you can curate as well as boost your audience experience by suing such content.
Attention at expo booth - At different platforms the users prefer to watch the videos in different sound effects. This means on Facebook the videos are watched on mute mostly. This is the way how people interact on different platforms. So, as a creator if you want to seek attention then you will need to prepare the content as per the audience demands. This is what motion graphics can do for you at the expo booths and various platforms.
Conversions and engagement - Users’ engagement and conversions are the two important needs of any content creator. Video marketing is an excellent idea to boost both of them. All you have to do is invest in high quality motion graphicssound effects videos and you can see that the users will take interest in your landing pages and will ultimately boost your conversion rates.
Part 2 Types of Motion Graphics You Should Know
There are several types of best motion graphicsvideos that can effectively suit your needs. You only need to choose the perfect amongst them and mentioned here are some different types of motion graphics videos:
01Explainer videos
This is the commonest type of motion graphic videos. These videos tell about the working of your product. If you are marketing or selling your product then you will definitely going to need these videos. Needing these videos do not mean that you are having issues in your product, this simply boosts the value of your product and can also be used as marketing of that brand and product.

02Promotional videos
In these videos, your main aim will be grabbing the attentions and conversions of the audience. This is really important as a business and you can easily achieve it through the motion graphics as it will focus on each and every important and crucial aspect of your product and business.
03Emotive videos
If you want your audience to feel something about your brand and product as well as take immediate action then these emotive videos are the perfect ones. This can connect your audience emotionally.

04Logos and icons
There is nothing better than a logo to make your brand keep remembered for a long period of time. This becomes more interesting if the logo will be in motion and this is what the logo motion graphics known for. Icons are equally important for any brand and if you manipulate them into motions then it could be really beneficial for you.
05Infographics
No matter if you are showing interesting stats of Infographics, the audience can skim over it. The reason is it could be boring sometimes. However, using the movements in those Infographics stats can keep the eye of your audience still on it.
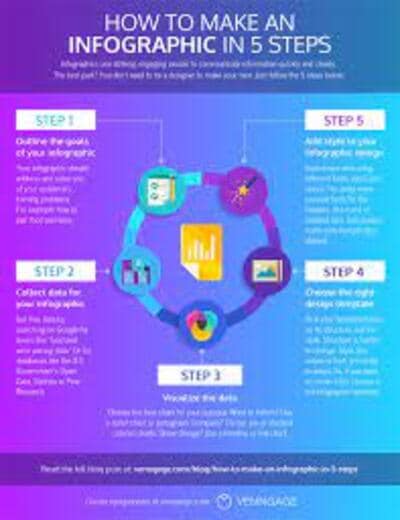
06GIFs
If you are active on social media platforms, then you would know how GIFs work on various platforms. These are a pretty popular type of motion graphics that is greatly loved by the audience. Some of the live action videos are turned into GIFs and sometimes they are created especially for that purpose only.

07Animated typography
In simple words this can be said as the moving text. Sometimes it is also termed as the kinetic typography and you can use it to create the explainer videos too. These videos are great in order to add a brand wordmark to your products and brands.
08UI and UX animations
These can also be said as a part of explainer videos only but they offer you with a different feature. This means that you can expect the same interface in which it is explained. Moreover, you will be getting some extra elements too.

09Template editing
The existing templates that you might be using to create the motion graphics can be edited and transformed into more advanced ones. You can even add your customized templates to the purpose or you can also use the tools for making your videos better.
10Animated ads
The animated ads are designed to highlight the key features of your business, product or brand in a short span of time. If this is done in a more engaging manner then this will ultimately boost your conversions as well as the customers’ engagement too. These work as the explainer videos but are little bit different from them.

11Graphic loops
These are short animated videos that tend to loop continuously. You have to use the vector, photo elements, text, etc. These video loops are eye-catching and grabs the attention faster.
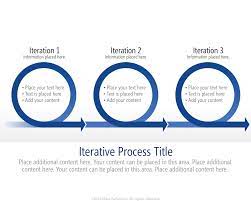
12Animated titles
The animated titles can greatly work for expressing the message in a simpler way to the audience. These titles are somewhere in the category of animated typography but the use can be different. You can use them to enhance a particular message, pointing a specific feature or object in that particular video.
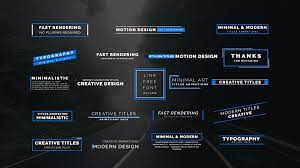
13Animated assets
These are also very much similar to the animated titles only but they work pretty similar like the PNG images. These are completely transparent so that they can be placed in your video footage easily. These animated assets can be perfect for the intros, transitions or outros. The animated titles and assets can add a spice to your videos.

14Presentations
You can be an excellent speaker sometimes, but if you are not able to present the ideas on screen in an effective way then it could be a barrier in the success of your presentations. Using the motion graphics in presentations, you can boost the interest of your audience as well as keep them engaged.
15Instructional videos
This video works similar to that of explainer videos. The instructional videos are great to teach and make your audience learn about the implementation of your product and brand. You can go for using the live-action videos for this purpose but motion graphics is best if you want to go with the trend.
Part 3 8 Stunning Motion Graphic Examples
01Haikus in motion
In these videos there is a use of expressive imagery and those imagery effects are perfect to convey the message. Here the motion graphics bring the poetry into life. The poetry sounds to be so true in the videos of Haikus.
02Cinematics
In this beautiful animation series you can see the charm of classic cinema in a completely fresh manner. These videos bring the classic cinema and its stories as well as characters in to life in a fresh and new way. The sound and other effects make the videos nostalgic.
03Subprime
By these videos, you can understand the market crash of the US in an effective way. The motion graphics that are used in these videos can also be used in other videos of same kind with the realistic as well as highly advanced effects.
04Digital Ocean
In order to make the short videos impactful, you can take the examples of videos from Digital Ocean. The videos are short yet very compiling and perfect to deliver the message in short span of time.
05Better light, better life
These videos are created to spread the message that how important light is in people’s life. Perfectly sound in delivering the message you can use these videos to create awareness amongst your audience.
06Reddit
If you want to see how motion graphics work in light hearted style then this is the perfect example of it. These videos also have a pinch of humor in them and are so vibrant too. For promoting any particular website or any mobile application then these videos created through the motion graphics can be an excellent referral.
07Quadro
The videos of Quadro which are created with the help of Wondershare Filmora Video Editor tool are perfect in passing their message. The creation is so dynamic and vibrant that you need not think about the quality. Filmora tool is perfect for adding such vibrancy and dynamics to the motion graphic videos. Many features like text to speech, adding speech and text, conversion of script into videos makes it a good choice to be used for video creations.
Wondershare Filmora
Get started easily with Filmora’s powerful performance, intuitive interface, and countless effects!
Try It Free Try It Free Try It Free Learn More >

08Scribble live
This is an excellent example of motion graphics video in which you can understand the illustrations in a simpler way and that also without any chaos. The narrative of the video is so clear that it gives you a perfect illustration of how the software works. It also suites in his appearance as well as provide you with an effective guide.
● Key Takeaways from This Episode →
● Motion graphics can be said as the subset of graphic designing. Here you can add motion to your ideas when you are making them real. This can be beneficial in so many ways as well as it is loved by the audience too.
● There are different types of motion graphics that are used for different purposes. Moreover, you can choose amongst them which are most suitable for your needs.
● If you are willing to create the motion graphics videos then you can take the help of mentioned examples for understanding the way of creating such graphics. Also it is worth considering that many tools like Wondershare Filmora, are available for creating such motion graphics
Motion graphics has bought an ultimate change in the sectors of creative industries. In this guide you will get to know the various types of motion graphics and some examples of the same.
In this article
01 [What are Motion Graphics?](#Part 1)
02 [15 Types of Motion Graphics You Should Know](#Part 2)
03 [8 Stunning Motion Graphic Examples](#Part 3)
Part 1 What are Motion Graphics?
01Definition of Motion Graphics
Motion graphics simples means that graphics which are in motion or movement. In other words, you can say that such graphics create an illusion of movement on the screen and most commonly they are combined with various audios for different purposes of multimedia. Although motion graphics are not like animations as here are some limitations of producing the content.
02Motion Graphics vs. Video: is there a Difference?
You can say that every graphic motion is a video. To understand this you will need to know the applications of motion graphics and videos. Here mentioned are some of them:
● If you are creating something in the format of animation then it can done via motion graphics and videos too.
● When you are making a live action video then that could not be created in motion graphics but in the video format.
● Although if you are creating live action videos with animation overlay then you can use motion graphics as well as video formats too.
● Next is the slideshow video format, here the images and videos can be created in slideshow using both motion graphics and videos.
03When to Use Motion Graphics and Video?
Well, the question is how you can get to know that motion graphics is the best choice for creating your visual content. The answer depends on several factors including the users’ experience, the reach that you want to make and a lot more. Here are few factors to consider:
Enhance the users’ experience - using the motion graphics to enhance the users’ experience can be an excellent idea. In motion graphics the user can make benefits of the features like rewind and fast forwarding it. Here they can also get the skip sections which are not their way of interacting with the videos. Thus, you can curate as well as boost your audience experience by suing such content.
Attention at expo booth - At different platforms the users prefer to watch the videos in different sound effects. This means on Facebook the videos are watched on mute mostly. This is the way how people interact on different platforms. So, as a creator if you want to seek attention then you will need to prepare the content as per the audience demands. This is what motion graphics can do for you at the expo booths and various platforms.
Conversions and engagement - Users’ engagement and conversions are the two important needs of any content creator. Video marketing is an excellent idea to boost both of them. All you have to do is invest in high quality motion graphicssound effects videos and you can see that the users will take interest in your landing pages and will ultimately boost your conversion rates.
Part 2 Types of Motion Graphics You Should Know
There are several types of best motion graphicsvideos that can effectively suit your needs. You only need to choose the perfect amongst them and mentioned here are some different types of motion graphics videos:
01Explainer videos
This is the commonest type of motion graphic videos. These videos tell about the working of your product. If you are marketing or selling your product then you will definitely going to need these videos. Needing these videos do not mean that you are having issues in your product, this simply boosts the value of your product and can also be used as marketing of that brand and product.
02Promotional videos
In these videos, your main aim will be grabbing the attentions and conversions of the audience. This is really important as a business and you can easily achieve it through the motion graphics as it will focus on each and every important and crucial aspect of your product and business.
03Emotive videos
If you want your audience to feel something about your brand and product as well as take immediate action then these emotive videos are the perfect ones. This can connect your audience emotionally.
04Logos and icons
There is nothing better than a logo to make your brand keep remembered for a long period of time. This becomes more interesting if the logo will be in motion and this is what the logo motion graphics known for. Icons are equally important for any brand and if you manipulate them into motions then it could be really beneficial for you.
05Infographics
No matter if you are showing interesting stats of Infographics, the audience can skim over it. The reason is it could be boring sometimes. However, using the movements in those Infographics stats can keep the eye of your audience still on it.
06GIFs
If you are active on social media platforms, then you would know how GIFs work on various platforms. These are a pretty popular type of motion graphics that is greatly loved by the audience. Some of the live action videos are turned into GIFs and sometimes they are created especially for that purpose only.
07Animated typography
In simple words this can be said as the moving text. Sometimes it is also termed as the kinetic typography and you can use it to create the explainer videos too. These videos are great in order to add a brand wordmark to your products and brands.
08UI and UX animations
These can also be said as a part of explainer videos only but they offer you with a different feature. This means that you can expect the same interface in which it is explained. Moreover, you will be getting some extra elements too.
09Template editing
The existing templates that you might be using to create the motion graphics can be edited and transformed into more advanced ones. You can even add your customized templates to the purpose or you can also use the tools for making your videos better.
10Animated ads
The animated ads are designed to highlight the key features of your business, product or brand in a short span of time. If this is done in a more engaging manner then this will ultimately boost your conversions as well as the customers’ engagement too. These work as the explainer videos but are little bit different from them.
11Graphic loops
These are short animated videos that tend to loop continuously. You have to use the vector, photo elements, text, etc. These video loops are eye-catching and grabs the attention faster.
12Animated titles
The animated titles can greatly work for expressing the message in a simpler way to the audience. These titles are somewhere in the category of animated typography but the use can be different. You can use them to enhance a particular message, pointing a specific feature or object in that particular video.
13Animated assets
These are also very much similar to the animated titles only but they work pretty similar like the PNG images. These are completely transparent so that they can be placed in your video footage easily. These animated assets can be perfect for the intros, transitions or outros. The animated titles and assets can add a spice to your videos.
14Presentations
You can be an excellent speaker sometimes, but if you are not able to present the ideas on screen in an effective way then it could be a barrier in the success of your presentations. Using the motion graphics in presentations, you can boost the interest of your audience as well as keep them engaged.
15Instructional videos
This video works similar to that of explainer videos. The instructional videos are great to teach and make your audience learn about the implementation of your product and brand. You can go for using the live-action videos for this purpose but motion graphics is best if you want to go with the trend.
Part 3 8 Stunning Motion Graphic Examples
01Haikus in motion
In these videos there is a use of expressive imagery and those imagery effects are perfect to convey the message. Here the motion graphics bring the poetry into life. The poetry sounds to be so true in the videos of Haikus.
02Cinematics
In this beautiful animation series you can see the charm of classic cinema in a completely fresh manner. These videos bring the classic cinema and its stories as well as characters in to life in a fresh and new way. The sound and other effects make the videos nostalgic.
03Subprime
By these videos, you can understand the market crash of the US in an effective way. The motion graphics that are used in these videos can also be used in other videos of same kind with the realistic as well as highly advanced effects.
04Digital Ocean
In order to make the short videos impactful, you can take the examples of videos from Digital Ocean. The videos are short yet very compiling and perfect to deliver the message in short span of time.
05Better light, better life
These videos are created to spread the message that how important light is in people’s life. Perfectly sound in delivering the message you can use these videos to create awareness amongst your audience.
06Reddit
If you want to see how motion graphics work in light hearted style then this is the perfect example of it. These videos also have a pinch of humor in them and are so vibrant too. For promoting any particular website or any mobile application then these videos created through the motion graphics can be an excellent referral.
07Quadro
The videos of Quadro which are created with the help of Wondershare Filmora Video Editor tool are perfect in passing their message. The creation is so dynamic and vibrant that you need not think about the quality. Filmora tool is perfect for adding such vibrancy and dynamics to the motion graphic videos. Many features like text to speech, adding speech and text, conversion of script into videos makes it a good choice to be used for video creations.
Wondershare Filmora
Get started easily with Filmora’s powerful performance, intuitive interface, and countless effects!
Try It Free Try It Free Try It Free Learn More >
08Scribble live
This is an excellent example of motion graphics video in which you can understand the illustrations in a simpler way and that also without any chaos. The narrative of the video is so clear that it gives you a perfect illustration of how the software works. It also suites in his appearance as well as provide you with an effective guide.
● Key Takeaways from This Episode →
● Motion graphics can be said as the subset of graphic designing. Here you can add motion to your ideas when you are making them real. This can be beneficial in so many ways as well as it is loved by the audience too.
● There are different types of motion graphics that are used for different purposes. Moreover, you can choose amongst them which are most suitable for your needs.
● If you are willing to create the motion graphics videos then you can take the help of mentioned examples for understanding the way of creating such graphics. Also it is worth considering that many tools like Wondershare Filmora, are available for creating such motion graphics
That Will Make Aesthetic Cartoon Drawing More Understandable
That Will Make Aesthetic Cartoon Drawing More Understandable
An easy yet powerful editor
Numerous effects to choose from
Detailed tutorials provided by the official channel
When you are trying to make an aesthetic drawings cartoon, the primary thing to focus on is the composition. Composition is the combination, arrangement, and organization of objects within the borders of drawing space. To have a great aesthetic cartoon drawing, you must focus on bringing the eyes of the viewer toward your center of interest within an aesthetically-pleasing composition. When we create illustrations, we are often concerned with putting in a lot of details that will overload the image and lose the meaning that we originally wanted it to convey.

We engage our audience and viewer more by composing a perfect aesthetic drawing. In addition, many rules define a good composition drawing, but these rules are mainly guidelines. Also pay attention to your personal preferences and instincts. In this guide, we’ll teach you how to make an excellent aesthetic cartoon painting more understandable.
In this article
01 [Canvas Aesthetic Painting Ideas](#Part 1)
02 [Blender Aesthetic Painting Ideas](#Part 2)
03 [How to Create Super-Detailed Aesthetic Cartoon Painting](#Part 3)
Part 1 Canvas Aesthetic Painting Ideas
There are times you do not need to be a famous painter or an art professional to create beautiful wall art. Canvas painting is an all-in-one application for all skill levels, from beginners to experts. It also provides you with different painting ideas ranging from beach scenes to abstract designs to create pieces that look stunning and professional.
We have compiled a list of canvas aesthetic painting ideas to help you begin your journey as an aesthetic cartoon painter. Look through the images to determine which ones match the style of painting you wish to add to your drawing and get inspiration to create your designs.
01Disney Canvas Art
These are aesthetic cartoon painting ideas relating to 2020 Disney Canvas Art. You can get ideas from this to begin your journey into the world of painting.

02Hippie Painting Canva Art
If you are also looking for other aesthetic cartoon painting ideas to choose from, you can select from this 2020 Cute Canvas Paintings “Hippie Painting” Canvas Art.

03Spongebob Painting
These painting ideas are a part of the Canvas Aesthetic Cartoon Painting ideas of 2020 called Spongebob Painting Disney Canvas Art.

04Babs Bunny Pa Et Mini Lerret
These are a painting about “Babs Bunny Pa Et Mini Lerret.” A 2020 Mini Canvas Art Hippie Painting Canvas idea that you can choose from

Part 2 Blender Aesthetic Painting Ideas
Blender is an accessible and open-source 3D creation suite that supports the entirety of the 3D pipeline modeling, rigging, animation, simulation, compositing rendering, motion tracking, video editing, and 2D animation pipeline. It is a fact that this is one of the best open-source software you can choose from to make your aesthetic cartoon drawing.
It is entirely free software, and various artists can use it to start digging in and playing with it. Here are some of the blender aesthetic cartoon painting ideas you can choose from:
01Princess Ira and Amina
This is a fictional aesthetic drawing cartoon of an African princess having gold gifted powers with her face painting inspired by Nigerian traditional face decorations. However, her crown is adorned with crosses, crystals, and chains which incorporate several elements from different cultural designs available from all over the world to portray unity.

02Survival Knife Weekly Drills 045
This was a design painting inspired based on BUCK KNIVES in pain texturing and focuses on making a practical game-ready asset.

03Radiance
This is a blender aesthetic cartoon painting idea of a graduation project made for the Concept Art specialized cursus at New3dge School.

04 The character looks dev
This blender cartoon painting’s inspiration came from Edward, the short film’s main character. It is a work in progress but a lovely painting that can inspire you.
Part 3 How to Create Super-Detailed Aesthetic Cartoon Painting
To create a super detailed aesthetic cartoon drawing, you do not need to be a trained artist, nor do you need a fancy cartoon picture maker. All you need to create a cartoon painting photo is a simple and Free picture from a cartoon editor to help you carry out the task more effectively.
However, you can also convert your cartoon paint into creative animation using Wondershare Filmora Video Editor . Filmora is a powerful all-in-one tool for editing that you can use to that can be used for free to animate your cartoon with its tons of effects, filters, and keyframing features that can help you carry this out effectively.
For Win 7 or later (64-bit)
For macOS 10.12 or later
Here is how to create a super detailed aesthetic cartoon painting:

Step 1: Open the Picsart editor on your desktop browser and click on the new project
Step 2: Next is to click on Upload to select the photo that you want to cartoon paint from the computer library of your hard drive
Step 2: Click on the toolbar, select the effect feature from the dropdown above your photo, and click on Magic to view all available one-click cartoon filters. However, almost all of the Magic effects on this editor will help you achieve an aesthetic cartoon photo effect.
Step 4: Click on Adjust and Blend above your photo workspace on the editor. This will help you manually adjust the effects (color burn, fade, saturation, brightness, etc.).
Step 5: Preview your result and once you are happy with the new cartoon photo painting, click on the Share button and download it from the top right corner of the editor to save it on your device.
● Ending Thoughts →
● This article explained creating and gave inspiration and ideas for the aesthetic cartoon painting you can choose from to make yours. In addition, the report also recommends Filmora as an influential editor if you intend to create an animation from your cartoon painting due to its tons of features.
● So, now you can start building your aesthetic drawings and cartoons!
When you are trying to make an aesthetic drawings cartoon, the primary thing to focus on is the composition. Composition is the combination, arrangement, and organization of objects within the borders of drawing space. To have a great aesthetic cartoon drawing, you must focus on bringing the eyes of the viewer toward your center of interest within an aesthetically-pleasing composition. When we create illustrations, we are often concerned with putting in a lot of details that will overload the image and lose the meaning that we originally wanted it to convey.
We engage our audience and viewer more by composing a perfect aesthetic drawing. In addition, many rules define a good composition drawing, but these rules are mainly guidelines. Also pay attention to your personal preferences and instincts. In this guide, we’ll teach you how to make an excellent aesthetic cartoon painting more understandable.
In this article
01 [Canvas Aesthetic Painting Ideas](#Part 1)
02 [Blender Aesthetic Painting Ideas](#Part 2)
03 [How to Create Super-Detailed Aesthetic Cartoon Painting](#Part 3)
Part 1 Canvas Aesthetic Painting Ideas
There are times you do not need to be a famous painter or an art professional to create beautiful wall art. Canvas painting is an all-in-one application for all skill levels, from beginners to experts. It also provides you with different painting ideas ranging from beach scenes to abstract designs to create pieces that look stunning and professional.
We have compiled a list of canvas aesthetic painting ideas to help you begin your journey as an aesthetic cartoon painter. Look through the images to determine which ones match the style of painting you wish to add to your drawing and get inspiration to create your designs.
01Disney Canvas Art
These are aesthetic cartoon painting ideas relating to 2020 Disney Canvas Art. You can get ideas from this to begin your journey into the world of painting.
02Hippie Painting Canva Art
If you are also looking for other aesthetic cartoon painting ideas to choose from, you can select from this 2020 Cute Canvas Paintings “Hippie Painting” Canvas Art.
03Spongebob Painting
These painting ideas are a part of the Canvas Aesthetic Cartoon Painting ideas of 2020 called Spongebob Painting Disney Canvas Art.
04Babs Bunny Pa Et Mini Lerret
These are a painting about “Babs Bunny Pa Et Mini Lerret.” A 2020 Mini Canvas Art Hippie Painting Canvas idea that you can choose from
Part 2 Blender Aesthetic Painting Ideas
Blender is an accessible and open-source 3D creation suite that supports the entirety of the 3D pipeline modeling, rigging, animation, simulation, compositing rendering, motion tracking, video editing, and 2D animation pipeline. It is a fact that this is one of the best open-source software you can choose from to make your aesthetic cartoon drawing.
It is entirely free software, and various artists can use it to start digging in and playing with it. Here are some of the blender aesthetic cartoon painting ideas you can choose from:
01Princess Ira and Amina
This is a fictional aesthetic drawing cartoon of an African princess having gold gifted powers with her face painting inspired by Nigerian traditional face decorations. However, her crown is adorned with crosses, crystals, and chains which incorporate several elements from different cultural designs available from all over the world to portray unity.
02Survival Knife Weekly Drills 045
This was a design painting inspired based on BUCK KNIVES in pain texturing and focuses on making a practical game-ready asset.
03Radiance
This is a blender aesthetic cartoon painting idea of a graduation project made for the Concept Art specialized cursus at New3dge School.
04 The character looks dev
This blender cartoon painting’s inspiration came from Edward, the short film’s main character. It is a work in progress but a lovely painting that can inspire you.
Part 3 How to Create Super-Detailed Aesthetic Cartoon Painting
To create a super detailed aesthetic cartoon drawing, you do not need to be a trained artist, nor do you need a fancy cartoon picture maker. All you need to create a cartoon painting photo is a simple and Free picture from a cartoon editor to help you carry out the task more effectively.
However, you can also convert your cartoon paint into creative animation using Wondershare Filmora Video Editor . Filmora is a powerful all-in-one tool for editing that you can use to that can be used for free to animate your cartoon with its tons of effects, filters, and keyframing features that can help you carry this out effectively.
For Win 7 or later (64-bit)
For macOS 10.12 or later
Here is how to create a super detailed aesthetic cartoon painting:
Step 1: Open the Picsart editor on your desktop browser and click on the new project
Step 2: Next is to click on Upload to select the photo that you want to cartoon paint from the computer library of your hard drive
Step 2: Click on the toolbar, select the effect feature from the dropdown above your photo, and click on Magic to view all available one-click cartoon filters. However, almost all of the Magic effects on this editor will help you achieve an aesthetic cartoon photo effect.
Step 4: Click on Adjust and Blend above your photo workspace on the editor. This will help you manually adjust the effects (color burn, fade, saturation, brightness, etc.).
Step 5: Preview your result and once you are happy with the new cartoon photo painting, click on the Share button and download it from the top right corner of the editor to save it on your device.
● Ending Thoughts →
● This article explained creating and gave inspiration and ideas for the aesthetic cartoon painting you can choose from to make yours. In addition, the report also recommends Filmora as an influential editor if you intend to create an animation from your cartoon painting due to its tons of features.
● So, now you can start building your aesthetic drawings and cartoons!
Also read:
- New In 2024, Beginners Guide for Learning 3D Animation
- In 2024, How to Make a Photoshop Collage in EASY Steps
- Updated 2024 Approved 10 Cartoon Photo Converters You Couldnt Do Without
- In 2024, The Secret Sauce for Making GIF Instagram Story More Stunning
- New Ways to Stop Animation From Looping in Unity
- Updated 2024 Approved Easy Cartoon Characters Drawing Tutorials for You Beginners
- The Most Efficient Techniques for You to Make 3D Animation Character
- Updated In 2024, In-Depth Study of Cartoon Painting Starts
- Updated 2024 Approved Whats the Best 10 Photo Animator Templates That Bring Your Images to Life?
- Updated In 2024, How to Make Your Characters Interactive in Unity Animation Rigging
- Updated In 2024, Top 10 Online Animated Logo Makers Everyone Should Know
- New Ideas of Learning How to Send WhatsApp Animated Gifs for 2024
- 15 Types of Cartoon Drawing Styles with Examples
- New In 2024, Top 10 Websites to Download Anime Subtitles for Free
- Updated In 2024, 15 Best Pics Collage Apps Top Picks
- New The Only Guide Youll Ever Need to Learn That Make 2D Rigging Clear to You for 2024
- In 2024, Top Claymation Shows That Make Your Memories Unforgettable
- Updated 5 Techniques You Never Heard of for Converting MP4 to GIF in Photoshop for 2024
- New How to Create Your Own Avatar Free for 2024
- New In 2024, Apps to Animate Still Pictures
- Updated 12 Animated Slideshow PowerPoint Templates and Tools to Make Them for 2024
- New 2024 Approved Top 12 Evil Cartoon Characters of All Time
- Updated In 2024, 15 Horror Animes That Will Trigger a Heart Attack
- Updated Top 10 Best and Fast Ways to Turn Image Into Gif for 2024
- Updated In 2024, 10 Amazing Wallpaper Collage Ideas and Photos
- In 2024, Convert Animated GIF From Video
- iSpoofer is not working On Apple iPhone SE? Fixed | Dr.fone
- How to Fix Pokemon Go Route Not Working On Honor 90 GT? | Dr.fone
- In 2024, The Best iSpoofer Alternative to Try On Oppo Find X6 | Dr.fone
- In 2024, The Magnificent Art of Pokemon Go Streaming On Realme 12 5G? | Dr.fone
- In 2024, How to Transfer Contacts from Lava Blaze 2 Pro to Other Android Devices Using Bluetooth? | Dr.fone
- In 2024, What is the best Pokemon for pokemon pvp ranking On Vivo Y27s? | Dr.fone
- Want to Uninstall Google Play Service from Itel P55? Here is How | Dr.fone
- In 2024, How Do You Get Sun Stone Evolutions in Pokémon For Apple iPhone SE? | Dr.fone
- 10 Easy-to-Use FRP Bypass Tools for Unlocking Google Accounts On Itel A60
- Top IMEI Unlokers for iPhone 12 mini and Android Phones
- In 2024, How to Bypass FRP on Vivo Y55s 5G (2023)?
- 3 Ways to Unlock iPhone SE without Passcode or Face ID
- How to Fake GPS on Android without Mock Location For your Oppo K11 5G | Dr.fone
- 7 Ways to Unlock a Locked Samsung Galaxy XCover 6 Pro Tactical Edition Phone
- Top 10 Password Cracking Tools For Xiaomi Redmi 13C
- Title: Updated In 2024, The Only Guide Youll Ever Need to Learn That Make 2D Rigging Clear to You
- Author: Elon
- Created at : 2024-05-19 03:05:51
- Updated at : 2024-05-20 03:05:51
- Link: https://animation-videos.techidaily.com/updated-in-2024-the-only-guide-youll-ever-need-to-learn-that-make-2d-rigging-clear-to-you/
- License: This work is licensed under CC BY-NC-SA 4.0.
