
:max_bytes(150000):strip_icc():format(webp)/iOS-wwdc-7d655ca37a3b43b99fd9dac09bec13c4.jpg)
Updated In 2024, The Ultimate Cheatsheet to 15 Adobe Animate Alternatives
The Ultimate Cheatsheet to 15 Adobe Animate Alternatives
The Ultimate Cheatsheet to 15 Adobe Animate Alternatives in 2024
An easy yet powerful editor
Numerous effects to choose from
Detailed tutorials provided by the official channel
Like all other Adobe premium software like Photoshop, illustrator, and premiere pro, Adobe Animate is designed for professionals.
No need to feel discouraged as there are plenty of Adobe Animate free alternatives with which you can polish the animator in you. Let’s check them out.
In this article
01 [Adobe Animate - How It Became a Good Option Without Hesitation?](#Part 1)
02 [Top 10 Adobe Animate Alternatives to Improve Animation Experience](#Part 2)
03 [The Most Comprehensive All-round Comparison Among All Alternatives](#Part 3)
Part 1 Adobe Animate - How It Became a Good Option Without Hesitation?
1. How Much Do You Know About Adobe Animate Key Features?
The Adobe Creative Cloud is constantly updating its range of virtual tools with new features which give users twice more incentive to subscribe. Adobe Animate CC, which is basically the new Adobe Flash, has also received an update recently which installed a bundle of new features to its interface, making it even more irresistible to animators.
What’s new with Adobe Animate?
● Adobe Animate Camera
Adding to Adobe’s line of exclusivity is its all-new Adobe Virtual Camera. Using this feature, Adobe animate users can now control their animation camera movements giving your animation videos a more realistic feel.
● Export any Format
Exporting your animations to your desktop is a convenience every software should provide.
● Audio Syncing
Adobe Animate enables you to synchronize audio to your animations completely easily which is yet another feature that has been recently added.
● Vector Brushes
Though it resembles the same functionality with Adobe Illustrator, Adobe Animate has renewed the tool with the ability to use tilt and pressure effects when drawing with a stylus or pen.
● Web Fonts
Now you can use a vast library of Adobe web fonts with Adobe Animate. These high-quality fonts are available in HTML5 canvas documents.
2. What Lay Behind Adobe Animate Alternative?
When it comes to choosing the best premium animation software, Adobe Animate CC is the obvious choice, but what makes beginners hesitant in using Adobe Animate is the fact that you need to subscribe to Adobe Creative Cloud.
This becomes an obstacle to those who are just starting out and are not that confident in getting their hands on a professional league interface like Animate. It also lacks sufficient facilities for practicing 3D animations.
This is exactly where free Alternatives to Adobe Animate enters the scene. Check out our list and find out which alternative suits your level of animation skills.
Part 2 Top 10 Adobe Animate Alternatives to Improve Animation Experience
No. 1 Krita

The first free-to-use Adobe Alternative on our list is ‘Krita’. It is an open-source animator with an intuitive drag and drop panel which gives users complete flexibility.
Krita llll➤
● UI
It offers over 30 different Dockers which are like toolkits for the program.
● Features
Freehand path tool+Object manipulation+HDR support+Layer Management+Enhanced OpenGL
● Compatibility
Supports various metadata formats like ORA, KRA, PSD, JPEG and PNG files.
● Popularity
Krita has a 4.3 start popularity rating at G2.com.
● Operating System
Compatible with Windows 8 or higher, macOS X 10.12 and Linux Basic.
● Pricing
Free to use.
● Who is Best For?
Krita is an excellent alternative for beginners who are looking to not get overwhelmed by comprehensive features.
● Reviewers say compared to Adobe Animate
Many reviewers have preferred Krita’s simplistic approach to Adobe Animate.
● Verdict
It is an excellent image editor and animator but can be limiting in its professional application.
Strengths
100 preloaded brushes: You can use brush tools in categories like digital, ink, paint, and sketch.
Onion Layer Editing: You can go back and check your previous drawing before moving on to the next.
Counteractive Tools: Efficiently compatible with pressure-sensitive tablets.
Weaknesses
Pixel-based Drawings: Its drawings are pixelated making it harder to achieve precisions around the rough edges.
Added Support: Exporting animation files requires support from a secondary application.
No. 2 Open Toonz

A friendlier platform for cartoon animation lovers and yet another free Adobe Animate Alternative. An open-source platform whose code can be modified by the user to add new features and graphics.
Open Toonz llll➤
● UI
Its interface has separate organized rooms called ‘workspaces’. The tools and windows in each room are different and fulfill a separate function.
● Features
Indexed Colour Palettes+Motion Tracking+Effects and Composting+Effects and Composting+Effects and Composting
● Compatibility
Opentoonz supports a plethora of file formats like AVI, 3GP, BMP, JPG, GIF, MOV, NOL, RGB, SGI, TGA, TIF, and TIFF.
● Popularity
OpenToonz has a standard rating of 4.1 stars on G2.
● Operating System
Compatible with macOS X 10.9, Windows 7 or higher.
● Pricing
Free to use.
● Who is Best For?
Can be used by both professionals and beginners alike.
● Reviewers say compared to Adobe Animate
It is a great platform to familiarize yourself with basic animation.
● Verdict
OpenToonz is an excellent animation tool for beginners but lacks some of the higher-performing functions demanded by professionals.
Strengths
TWAIN Standard Compatible: Images captured on OpenToonx using its digital camera and scanners can be used in animations.
Choose from different animation types: You can choose between standard animation and skeletal animations.
100s of Special Effects: Change the effects of your image however you want using effects like incident light or distortion waves.
Weaknesses
Suitable only for beginners: OpenToonz may still require some work in order to muster the attention of pros.
Lack of automated syncing: You may find it difficult to sync the voices of your characters.
No. 3 Toon Boom

Toon Boom is a more popular alternative to Adobe Animate and is recognized by professional animation studios worldwide. Toon Boom even has its own pro-grade animation software called Harmony which has been used to create various popular TV animated series.
Toon Boom llll➤
● UI
The extremely instinctive interface where you can navigate using various effects like zoom in & out, pan and reset your views.
● Features
Advanced Cut out+Bitmap and Vector Drawing+Bitmap and Vector Drawing+Access to Harmony Server+Access to Harmony Server
● Compatibility
Toon Boom can import dozens of different file formats like BMP, JPEG, PSD, TGA, SGI, TIFF, TVG and PAL.
● Popularity
Toom Boom is rated excellent on G2 with 4.7 stars.
● Operating System
Can run with Windows 7 & 10, macOS High Sierra, Catalina, Mojave.
● Pricing
Basic - $25/month; Advanced - $63/month; Premium - $115/month.
● Who is Best For?
Superb animation software with dozens of features that would attract freelance animators and professionals.
● Reviewers say compared to Adobe Animate
The common opinion amongst reviewers is that Toon Boom offers many more features than Adobe Animate.
● Verdict
Toon Boom is premium software that is excellent for pro-league animators and is one of Adobe Animates biggest competitors.
Strengths
Onion Skinning Feature: You can view your drawings in layers.
Import & Export Different types of files: You can export and import files like paper drawings, digital drawings and 13 other file types.
Peg Animations: You can chart your character’s movements using pegs between two points.
Weaknesses
Lacks Audio Features: You require an external audio application to include audio in your animations.
Do not include pre-made characters: You would need to create your characters from scratch.
No. 4 TVPaint Animation

TVPaint has been a household animation software that has been around for a while. It has considerable features which are great for creating versatile 2D animations.
TVPaint Animation llll➤
● UI
The TVPaint Interface is not too complex and has a wide range of bitmap drawing tools for 2D all 2D animation processes.
● Features
Bitmap Drawing Tools+Bitmap Drawing Tools+Layer Management+Layer Management+Layer Management
● Compatibility
Can import image and video files like WMV, AVI, MOV, MPEG, GIF, JPEG, PNG, and TIFF.
● Popularity
TVPaint has been around for a long while and has a 5-star G2 rating.
● Operating System
Later versions of TVPaint are compatible with Microsoft Windows, macOS X, Android, and Linux.
● Pricing
Standard version 11.0 costs €500; Professional version 11.0 costs €1250.
● Who is Best For?
It is traditionally acclaimed 2D animation software superb for professional animation studios.
● Reviewers say compared to Adobe Animate
Both TV Paint and Animate cc has the ability to perfect frame to frame animation with minor differences in the choice of tools.
● Verdict
TV Paint is a fantastic software amongst animators who wish to perfect their craft.
Strengths
Versatile Drawing Tools: You have access to all essential drawing tools like brushes, color palettes, textures and more.
Strong Painting Engine: Powerful painting tool for sketching and painting backgrounds.
Colour & Texture Generator: This tool provides an enhanced spectrum of colors.
Weaknesses
Learning Curve: TVPaint has its own learning curve as the interface is dissimilar from average animators.
Limited to Bitmap: You can only edit images in Bitmap format.
No. 5 Synfig Studio

Synfig is yet another free-to-use Adobe Animate alternative but is quite powerful in creating fabulous vector animations which are flawless to look at it.
Synfig Studio llll➤
● UI
Synfig is yet another free-to-use Adobe Animate alternative but is quite powerful in creating fabulous vector animations which are flawless to look at it.
● Features
Various different layers+Sound Support+Dozens of Drawing Tools+Dozens of Drawing Tools+Import Facility
● Compatibility
You can render multiple video formats like AVI, MPEG, GIF, and MNG.
● Popularity
Excellent Rating 5 stars for Vector Graphics on G2.
● Operating System
Can run on Windows 7 and above, macOS X 10.8 and Linux.
● Pricing
Free to use.
● Who is Best For?
Synfig is a bit complex but great for animators who are willing to learn.
● Reviewers say compared to Adobe Animate
Much more convenient interface.
● Verdict
Synfig Studios is a great program for animating vector graphics.
Strengths
Vector Tweening: Change the shape of your vectors automatically.
50+ Layers: Choose from multiple gradients, filters, distortions, geometrics and fractals.
Auto Lip-Sync: Your audio will be automatically paired with your characters.
Weaknesses
Continuous Saving: You will need to manually save your files each time.
Learning Curve: The program takes some time to master.
No. 6 Cacani

Here comes CACANi, a new chip off the old block for anime lovers. It has awesome features for drawing vector animations.
Cacani llll➤
● UI
Excellent vector drawing interface which reduces your effort and time by auto-generating drawings.
● Features
Auto-generated Drawings+Personal Drawing Assistant+Max Artist Control+Max Artist Control+Shortcut Customization
● Compatibility
BMP, PNG, JPG, TGA, and TIFF files can all be imported.
● Popularity
Relatively new to the market but is growing in popularity.
● Operating System
Compatible with Windows 7, 8, 10, or higher.
● Pricing
30-day license $20; Yearlong license $180; Lifelong license $499; Team Plans start at $399 for 4 devices; Perpetual Team Plan $799
● Who is Best For?
Animators looking to work with a more powerful set of tools and are willing to pay for it can opt for Cacani.
● Reviewers say compared to Adobe Animate
An advanced tool provides excellent support for smooth and curve drawings.
● Verdict
A premium tool meant for advanced usage and is excellent for instinctive users and animators.
Strengths
Painting Assistance: You can paint one sequence and your color combination will be carried forward to the next sequence.
Drawing Tools: Simplifies all types of vector drawings.
Stroke Correction: You can correct problems in-between frames.
Weaknesses
Cost-effective for individual use: Teams and businesses may find it a bit above budget.
Cost-effective for individual use: Teams and businesses may find it a bit above budget.
No. 7 Wick Editor

Wick Editor is a free-to-use open-source platform that is great for creating standard flash-based animations. It was incepted with the purpose to provide animators with a free platform equipped with easy-to-use toolkits.
Wick Editor llll➤
● UI
Wick’s interface includes a combination of programming and animation systems using tools like Flash and Scratch and HyperCard.
● Features
Interactive Interface+Browser Operated+Browser Operated+Includes Guides and Tutorials
● Compatibility
Requires third-party assistance to convert wick files to GIF, ZIP or HTML.
● Popularity
Moderately rate by first-time users.
● Operating System
Can run online through browsers like Firefox or Chrome.
● Pricing
Free to use.
● Who is Best For?
Suitable marketing animators and freelancers.
● Reviewers say compared to Adobe Animate
Not as comprehensive as Adobe Animate.
● Verdict
Wick Editor is more suited for animating basic promotions but not meant for professional use.
Strengths
User Friendly: Icons, texts, and labels are enlarged for convenience.
Includes Basic Programming: Combines animation elements with a programming interface.
Export to multiple formats: You can use export wick projects in multiple formats.
Weaknesses
Incompatible with Mobile Devices: It is not available for use on mobile devices.
Incompatible with Mobile Devices: It is not available for use on mobile devices.
No. 8 Blender

Animators who are looking to specialize in 3D animations can get their hands on Blender. It is a highly popular open-source 3D animation software.
Blender llll➤
● UI
Animators who are looking to specialize in 3D animations can get their hands on Blender. It is a highly popular open-source 3D animation software.
● Features
3D modelling+Raster Graphics Editing+Fluid and Smoke Simulation+Raster Graphics Editing+Rigging & Skinning
● Compatibility
Blender is compatible with a wide range of file formats namely OBJ, 3DS, FBX, STL, PLY and so on.
● Popularity
Blender has an excellent rating of 4.5 on G2.
● Operating System
Compatible for Windows 10 or higher, macOS 10.13 and Linux.
● Pricing
Free to use.
● Who is Best For?
Blender is used by animators worldwide to create professional animation productions.
● Reviewers say compared to Adobe Animate.
Adobe Animate is comparatively easier to use, but Blender is great for small-scale animation businesses.
● Verdict
An excellent diverse animation tool for small-scale studios, freelancers and hobbyists.
Strengths
Sync Sound: Match your audios with your visuals with auto-sync.
Preset Shortcuts: You can memorize a list of hotkeys for convenient use.
Shape Keys: You can add more detail with the help of shape keys like skeletal rigging.
Weaknesses
Complicated User interface: There are dozens of duplicate buttons which uncoordinated.
Glitches: Open source software is known to be glitchy as they lack premium security.
No. 9 Autodesk Maya

Maya is a well-known 3D graphics editor which is absolutely jam-packed with features and functions like 3D animation, rendering, simulation, composting, modeling and visualization. It can be considered the next level in animation after Adobe Animate.
Krita llll➤
● UI
Maya is a well-known 3D graphics editor which is absolutely jam-packed with features and functions like 3D animation, rendering, simulation, composting, modeling and visualization. It can be considered the next level in animation after Adobe Animate.
● Features
Ready to use graphs+Ready to use graphs+Bifrost Programming Environment+Ocean Simulation Systems+Seamless Import and Export
● Compatibility
Maya can import various file formats, including mayaBinary, mayaLT, mayaAscii, OBJ, audio, EPS, Adobe Illustrator, Image, FBX.
● Popularity
Maya has a standard 4.3 rating on G2.
● Operating System
Compatible with macOS X 10.13, Windows 10 or higher and Linux.
● Pricing
Annual Subscription $1700.
● Who is Best For?
Maya is equipped with a substantial number of features and requires animators to take time learn therefore grooming their animation skills.
● Reviewers say compared to Adobe Animate
Adobe animate has a much more convenient interface when compared to Autodesk Maya but it is more alluring for professional studios.
● Verdict
Autodesk Maya is mighty fine 3D animation software that opens more doors for animators with a keen sense of detail.
Strengths
A complete 3D animation package: Maya hasn’t left any stone unturned in terms of features.
One of the best in the Industry: Simple to create any type of animation.
Python API: Convenient for creating plugins and scripts.
Weaknesses
Lacks Convenient Interface: Maya’s toolkit is a bit more complex than Animate CC.
No. 10 Filmora Pro

Filmora Pro is an excellent Adobe Animate alternative in terms of convenience, versatility and the variation animation features you can explore on its super intuitive interface.
Krita llll➤
● UI
Filmora Pro is basically a video editing software with a unique interface that is simple to understand and master.
● Features
Length Adjustment+Gradient Tool+Evaporate+Linear Wipe+Pinwheel
● Compatibility
You can import a wide range of video files like MP4, MOV, WMV, AVI, F4V, MKV, TS, MPEG-2, GIF, MP3 and WEBM.
● Popularity
Filmora Pro is rated at a whopping 4.6 stars.
● Operating System
Compatible with Windows 7, 8, 10, 11, macOS 10.15, 11, 13, 14.
● Pricing
Per Year subscription $51.99; time Purchase $79.99
● Who is Best For?
Filmora Pro from Wondershare is ideal for users, from vloggers and freelancers to hobbyists and professionals.
● Reviewers say compared to Adobe Animate.
According to most reviewers, Filmora Pro has an easier-to-use interface and an abundance of features compared to Adobe Animate CC. Still, it is essentially a video editing software nonetheless.
● Verdict
Filmora Pro is an all-in-one video editing software that offers tons of editing features for all types of videos.
Strengths
Preset Options: You can experiment with a wide range of presets to edit animations quickly.
Easy Media Upload: Filmora supports a wide range of file formats.
4K video: You can also use Filmora to edit 4K videos.
Weaknesses
Lacks Shortcut Options: It may get a bit difficult to navigate on Filmora.
Cartoonish Transitions: Transition between cuts can require extra care.
Part 1 The Most Comprehensive All-round Comparison Among All Alternatives
| Tools | UI | G2 Rating | OS | Pricing |
|---|---|---|---|---|
| Krita | Versatile | 4.3 | Windows 8 or higher, macOS X 10.12 and Linux | Free |
| Open Toonz | Compartmentalized | 4.1 | MacOS X 10.9, Windows 7 or higher | Free |
| Toon Boom | Instinctive | 4.7 | Windows 7 & 10, macOS High Sierra, Catalina, Mojave | Basic – $25/month; Advanced - $63/month; Premium - $115/month |
| TVPaint Animation | Comprehensive | 5 | Windows, macOS X, Android and Linux. | Standard Version – €500; Pro Version – €1250 |
| Synfig Studio | Versatile | 5 | Windows 7 and above, macOS X 10.8 and Linux | Free |
| Cacani | Effortless | NIL | Windows 7, 8, 10 or higher | 30-day license $20; Yearlong license $180; Lifelong license $499; Team Plans start at $399 for 4 devices; Perpetual Team Plan $799 |
| Wick Editor | Hybrid | NIL | Firefox or Chrome. | Free |
| Blender | Changing | 4.5 | Windows 10 or higher, macOS 10.13 and Linux. | Free |
| Maya | Comprehensive | 4.3 | MacOS X 10.13, Windows 10 or higher and Linux. | Annual Subscription $1700 |
| Filmora Pro | Versatile | 4.6 | Windows 7, 8, 10, 11, macOS 10.15, 11, 13, 14. | Yearly – $51.99; One Time –$79.99 |

Wondershare Filmora - Best Video Editor for Mac/Windows
5,481,435 people have downloaded it.
Build unique custom animations without breaking a sweat.
Focus on creating epic stories and leave the details to Filmora’s auto features.
Start a creative adventure with drag & drop effects and endless possibilities.
Filmora simplifies advanced features to save you time and effort.
Filmora cuts out repetition so you can move on to your next creative breakthrough.
Key Takeaways from This Episode
● There are dozens of free and paid animation software out there, but only a few are ideal Adobe Animate Alternatives.
● Adobe Animate is one of the best 2D and 3D animation software in the market, with versatile tools and many plug-in options.
● You need a monthly or yearly subscription to Adobe Creative Cloud to use Animate CC, which is why we have complied a list of the best Adobe Animate Alternatives.
Like all other Adobe premium software like Photoshop, illustrator, and premiere pro, Adobe Animate is designed for professionals.
No need to feel discouraged as there are plenty of Adobe Animate free alternatives with which you can polish the animator in you. Let’s check them out.
In this article
01 [Adobe Animate - How It Became a Good Option Without Hesitation?](#Part 1)
02 [Top 10 Adobe Animate Alternatives to Improve Animation Experience](#Part 2)
03 [The Most Comprehensive All-round Comparison Among All Alternatives](#Part 3)
Part 1 Adobe Animate - How It Became a Good Option Without Hesitation?
1. How Much Do You Know About Adobe Animate Key Features?
The Adobe Creative Cloud is constantly updating its range of virtual tools with new features which give users twice more incentive to subscribe. Adobe Animate CC, which is basically the new Adobe Flash, has also received an update recently which installed a bundle of new features to its interface, making it even more irresistible to animators.
What’s new with Adobe Animate?
● Adobe Animate Camera
Adding to Adobe’s line of exclusivity is its all-new Adobe Virtual Camera. Using this feature, Adobe animate users can now control their animation camera movements giving your animation videos a more realistic feel.
● Export any Format
Exporting your animations to your desktop is a convenience every software should provide.
● Audio Syncing
Adobe Animate enables you to synchronize audio to your animations completely easily which is yet another feature that has been recently added.
● Vector Brushes
Though it resembles the same functionality with Adobe Illustrator, Adobe Animate has renewed the tool with the ability to use tilt and pressure effects when drawing with a stylus or pen.
● Web Fonts
Now you can use a vast library of Adobe web fonts with Adobe Animate. These high-quality fonts are available in HTML5 canvas documents.
2. What Lay Behind Adobe Animate Alternative?
When it comes to choosing the best premium animation software, Adobe Animate CC is the obvious choice, but what makes beginners hesitant in using Adobe Animate is the fact that you need to subscribe to Adobe Creative Cloud.
This becomes an obstacle to those who are just starting out and are not that confident in getting their hands on a professional league interface like Animate. It also lacks sufficient facilities for practicing 3D animations.
This is exactly where free Alternatives to Adobe Animate enters the scene. Check out our list and find out which alternative suits your level of animation skills.
Part 2 Top 10 Adobe Animate Alternatives to Improve Animation Experience
No. 1 Krita
The first free-to-use Adobe Alternative on our list is ‘Krita’. It is an open-source animator with an intuitive drag and drop panel which gives users complete flexibility.
Krita llll➤
● UI
It offers over 30 different Dockers which are like toolkits for the program.
● Features
Freehand path tool+Object manipulation+HDR support+Layer Management+Enhanced OpenGL
● Compatibility
Supports various metadata formats like ORA, KRA, PSD, JPEG and PNG files.
● Popularity
Krita has a 4.3 start popularity rating at G2.com.
● Operating System
Compatible with Windows 8 or higher, macOS X 10.12 and Linux Basic.
● Pricing
Free to use.
● Who is Best For?
Krita is an excellent alternative for beginners who are looking to not get overwhelmed by comprehensive features.
● Reviewers say compared to Adobe Animate
Many reviewers have preferred Krita’s simplistic approach to Adobe Animate.
● Verdict
It is an excellent image editor and animator but can be limiting in its professional application.
Strengths
100 preloaded brushes: You can use brush tools in categories like digital, ink, paint, and sketch.
Onion Layer Editing: You can go back and check your previous drawing before moving on to the next.
Counteractive Tools: Efficiently compatible with pressure-sensitive tablets.
Weaknesses
Pixel-based Drawings: Its drawings are pixelated making it harder to achieve precisions around the rough edges.
Added Support: Exporting animation files requires support from a secondary application.
No. 2 Open Toonz
A friendlier platform for cartoon animation lovers and yet another free Adobe Animate Alternative. An open-source platform whose code can be modified by the user to add new features and graphics.
Open Toonz llll➤
● UI
Its interface has separate organized rooms called ‘workspaces’. The tools and windows in each room are different and fulfill a separate function.
● Features
Indexed Colour Palettes+Motion Tracking+Effects and Composting+Effects and Composting+Effects and Composting
● Compatibility
Opentoonz supports a plethora of file formats like AVI, 3GP, BMP, JPG, GIF, MOV, NOL, RGB, SGI, TGA, TIF, and TIFF.
● Popularity
OpenToonz has a standard rating of 4.1 stars on G2.
● Operating System
Compatible with macOS X 10.9, Windows 7 or higher.
● Pricing
Free to use.
● Who is Best For?
Can be used by both professionals and beginners alike.
● Reviewers say compared to Adobe Animate
It is a great platform to familiarize yourself with basic animation.
● Verdict
OpenToonz is an excellent animation tool for beginners but lacks some of the higher-performing functions demanded by professionals.
Strengths
TWAIN Standard Compatible: Images captured on OpenToonx using its digital camera and scanners can be used in animations.
Choose from different animation types: You can choose between standard animation and skeletal animations.
100s of Special Effects: Change the effects of your image however you want using effects like incident light or distortion waves.
Weaknesses
Suitable only for beginners: OpenToonz may still require some work in order to muster the attention of pros.
Lack of automated syncing: You may find it difficult to sync the voices of your characters.
No. 3 Toon Boom
Toon Boom is a more popular alternative to Adobe Animate and is recognized by professional animation studios worldwide. Toon Boom even has its own pro-grade animation software called Harmony which has been used to create various popular TV animated series.
Toon Boom llll➤
● UI
The extremely instinctive interface where you can navigate using various effects like zoom in & out, pan and reset your views.
● Features
Advanced Cut out+Bitmap and Vector Drawing+Bitmap and Vector Drawing+Access to Harmony Server+Access to Harmony Server
● Compatibility
Toon Boom can import dozens of different file formats like BMP, JPEG, PSD, TGA, SGI, TIFF, TVG and PAL.
● Popularity
Toom Boom is rated excellent on G2 with 4.7 stars.
● Operating System
Can run with Windows 7 & 10, macOS High Sierra, Catalina, Mojave.
● Pricing
Basic - $25/month; Advanced - $63/month; Premium - $115/month.
● Who is Best For?
Superb animation software with dozens of features that would attract freelance animators and professionals.
● Reviewers say compared to Adobe Animate
The common opinion amongst reviewers is that Toon Boom offers many more features than Adobe Animate.
● Verdict
Toon Boom is premium software that is excellent for pro-league animators and is one of Adobe Animates biggest competitors.
Strengths
Onion Skinning Feature: You can view your drawings in layers.
Import & Export Different types of files: You can export and import files like paper drawings, digital drawings and 13 other file types.
Peg Animations: You can chart your character’s movements using pegs between two points.
Weaknesses
Lacks Audio Features: You require an external audio application to include audio in your animations.
Do not include pre-made characters: You would need to create your characters from scratch.
No. 4 TVPaint Animation
TVPaint has been a household animation software that has been around for a while. It has considerable features which are great for creating versatile 2D animations.
TVPaint Animation llll➤
● UI
The TVPaint Interface is not too complex and has a wide range of bitmap drawing tools for 2D all 2D animation processes.
● Features
Bitmap Drawing Tools+Bitmap Drawing Tools+Layer Management+Layer Management+Layer Management
● Compatibility
Can import image and video files like WMV, AVI, MOV, MPEG, GIF, JPEG, PNG, and TIFF.
● Popularity
TVPaint has been around for a long while and has a 5-star G2 rating.
● Operating System
Later versions of TVPaint are compatible with Microsoft Windows, macOS X, Android, and Linux.
● Pricing
Standard version 11.0 costs €500; Professional version 11.0 costs €1250.
● Who is Best For?
It is traditionally acclaimed 2D animation software superb for professional animation studios.
● Reviewers say compared to Adobe Animate
Both TV Paint and Animate cc has the ability to perfect frame to frame animation with minor differences in the choice of tools.
● Verdict
TV Paint is a fantastic software amongst animators who wish to perfect their craft.
Strengths
Versatile Drawing Tools: You have access to all essential drawing tools like brushes, color palettes, textures and more.
Strong Painting Engine: Powerful painting tool for sketching and painting backgrounds.
Colour & Texture Generator: This tool provides an enhanced spectrum of colors.
Weaknesses
Learning Curve: TVPaint has its own learning curve as the interface is dissimilar from average animators.
Limited to Bitmap: You can only edit images in Bitmap format.
No. 5 Synfig Studio
Synfig is yet another free-to-use Adobe Animate alternative but is quite powerful in creating fabulous vector animations which are flawless to look at it.
Synfig Studio llll➤
● UI
Synfig is yet another free-to-use Adobe Animate alternative but is quite powerful in creating fabulous vector animations which are flawless to look at it.
● Features
Various different layers+Sound Support+Dozens of Drawing Tools+Dozens of Drawing Tools+Import Facility
● Compatibility
You can render multiple video formats like AVI, MPEG, GIF, and MNG.
● Popularity
Excellent Rating 5 stars for Vector Graphics on G2.
● Operating System
Can run on Windows 7 and above, macOS X 10.8 and Linux.
● Pricing
Free to use.
● Who is Best For?
Synfig is a bit complex but great for animators who are willing to learn.
● Reviewers say compared to Adobe Animate
Much more convenient interface.
● Verdict
Synfig Studios is a great program for animating vector graphics.
Strengths
Vector Tweening: Change the shape of your vectors automatically.
50+ Layers: Choose from multiple gradients, filters, distortions, geometrics and fractals.
Auto Lip-Sync: Your audio will be automatically paired with your characters.
Weaknesses
Continuous Saving: You will need to manually save your files each time.
Learning Curve: The program takes some time to master.
No. 6 Cacani
Here comes CACANi, a new chip off the old block for anime lovers. It has awesome features for drawing vector animations.
Cacani llll➤
● UI
Excellent vector drawing interface which reduces your effort and time by auto-generating drawings.
● Features
Auto-generated Drawings+Personal Drawing Assistant+Max Artist Control+Max Artist Control+Shortcut Customization
● Compatibility
BMP, PNG, JPG, TGA, and TIFF files can all be imported.
● Popularity
Relatively new to the market but is growing in popularity.
● Operating System
Compatible with Windows 7, 8, 10, or higher.
● Pricing
30-day license $20; Yearlong license $180; Lifelong license $499; Team Plans start at $399 for 4 devices; Perpetual Team Plan $799
● Who is Best For?
Animators looking to work with a more powerful set of tools and are willing to pay for it can opt for Cacani.
● Reviewers say compared to Adobe Animate
An advanced tool provides excellent support for smooth and curve drawings.
● Verdict
A premium tool meant for advanced usage and is excellent for instinctive users and animators.
Strengths
Painting Assistance: You can paint one sequence and your color combination will be carried forward to the next sequence.
Drawing Tools: Simplifies all types of vector drawings.
Stroke Correction: You can correct problems in-between frames.
Weaknesses
Cost-effective for individual use: Teams and businesses may find it a bit above budget.
Cost-effective for individual use: Teams and businesses may find it a bit above budget.
No. 7 Wick Editor
Wick Editor is a free-to-use open-source platform that is great for creating standard flash-based animations. It was incepted with the purpose to provide animators with a free platform equipped with easy-to-use toolkits.
Wick Editor llll➤
● UI
Wick’s interface includes a combination of programming and animation systems using tools like Flash and Scratch and HyperCard.
● Features
Interactive Interface+Browser Operated+Browser Operated+Includes Guides and Tutorials
● Compatibility
Requires third-party assistance to convert wick files to GIF, ZIP or HTML.
● Popularity
Moderately rate by first-time users.
● Operating System
Can run online through browsers like Firefox or Chrome.
● Pricing
Free to use.
● Who is Best For?
Suitable marketing animators and freelancers.
● Reviewers say compared to Adobe Animate
Not as comprehensive as Adobe Animate.
● Verdict
Wick Editor is more suited for animating basic promotions but not meant for professional use.
Strengths
User Friendly: Icons, texts, and labels are enlarged for convenience.
Includes Basic Programming: Combines animation elements with a programming interface.
Export to multiple formats: You can use export wick projects in multiple formats.
Weaknesses
Incompatible with Mobile Devices: It is not available for use on mobile devices.
Incompatible with Mobile Devices: It is not available for use on mobile devices.
No. 8 Blender
Animators who are looking to specialize in 3D animations can get their hands on Blender. It is a highly popular open-source 3D animation software.
Blender llll➤
● UI
Animators who are looking to specialize in 3D animations can get their hands on Blender. It is a highly popular open-source 3D animation software.
● Features
3D modelling+Raster Graphics Editing+Fluid and Smoke Simulation+Raster Graphics Editing+Rigging & Skinning
● Compatibility
Blender is compatible with a wide range of file formats namely OBJ, 3DS, FBX, STL, PLY and so on.
● Popularity
Blender has an excellent rating of 4.5 on G2.
● Operating System
Compatible for Windows 10 or higher, macOS 10.13 and Linux.
● Pricing
Free to use.
● Who is Best For?
Blender is used by animators worldwide to create professional animation productions.
● Reviewers say compared to Adobe Animate.
Adobe Animate is comparatively easier to use, but Blender is great for small-scale animation businesses.
● Verdict
An excellent diverse animation tool for small-scale studios, freelancers and hobbyists.
Strengths
Sync Sound: Match your audios with your visuals with auto-sync.
Preset Shortcuts: You can memorize a list of hotkeys for convenient use.
Shape Keys: You can add more detail with the help of shape keys like skeletal rigging.
Weaknesses
Complicated User interface: There are dozens of duplicate buttons which uncoordinated.
Glitches: Open source software is known to be glitchy as they lack premium security.
No. 9 Autodesk Maya
Maya is a well-known 3D graphics editor which is absolutely jam-packed with features and functions like 3D animation, rendering, simulation, composting, modeling and visualization. It can be considered the next level in animation after Adobe Animate.
Krita llll➤
● UI
Maya is a well-known 3D graphics editor which is absolutely jam-packed with features and functions like 3D animation, rendering, simulation, composting, modeling and visualization. It can be considered the next level in animation after Adobe Animate.
● Features
Ready to use graphs+Ready to use graphs+Bifrost Programming Environment+Ocean Simulation Systems+Seamless Import and Export
● Compatibility
Maya can import various file formats, including mayaBinary, mayaLT, mayaAscii, OBJ, audio, EPS, Adobe Illustrator, Image, FBX.
● Popularity
Maya has a standard 4.3 rating on G2.
● Operating System
Compatible with macOS X 10.13, Windows 10 or higher and Linux.
● Pricing
Annual Subscription $1700.
● Who is Best For?
Maya is equipped with a substantial number of features and requires animators to take time learn therefore grooming their animation skills.
● Reviewers say compared to Adobe Animate
Adobe animate has a much more convenient interface when compared to Autodesk Maya but it is more alluring for professional studios.
● Verdict
Autodesk Maya is mighty fine 3D animation software that opens more doors for animators with a keen sense of detail.
Strengths
A complete 3D animation package: Maya hasn’t left any stone unturned in terms of features.
One of the best in the Industry: Simple to create any type of animation.
Python API: Convenient for creating plugins and scripts.
Weaknesses
Lacks Convenient Interface: Maya’s toolkit is a bit more complex than Animate CC.
No. 10 Filmora Pro
Filmora Pro is an excellent Adobe Animate alternative in terms of convenience, versatility and the variation animation features you can explore on its super intuitive interface.
Krita llll➤
● UI
Filmora Pro is basically a video editing software with a unique interface that is simple to understand and master.
● Features
Length Adjustment+Gradient Tool+Evaporate+Linear Wipe+Pinwheel
● Compatibility
You can import a wide range of video files like MP4, MOV, WMV, AVI, F4V, MKV, TS, MPEG-2, GIF, MP3 and WEBM.
● Popularity
Filmora Pro is rated at a whopping 4.6 stars.
● Operating System
Compatible with Windows 7, 8, 10, 11, macOS 10.15, 11, 13, 14.
● Pricing
Per Year subscription $51.99; time Purchase $79.99
● Who is Best For?
Filmora Pro from Wondershare is ideal for users, from vloggers and freelancers to hobbyists and professionals.
● Reviewers say compared to Adobe Animate.
According to most reviewers, Filmora Pro has an easier-to-use interface and an abundance of features compared to Adobe Animate CC. Still, it is essentially a video editing software nonetheless.
● Verdict
Filmora Pro is an all-in-one video editing software that offers tons of editing features for all types of videos.
Strengths
Preset Options: You can experiment with a wide range of presets to edit animations quickly.
Easy Media Upload: Filmora supports a wide range of file formats.
4K video: You can also use Filmora to edit 4K videos.
Weaknesses
Lacks Shortcut Options: It may get a bit difficult to navigate on Filmora.
Cartoonish Transitions: Transition between cuts can require extra care.
Part 1 The Most Comprehensive All-round Comparison Among All Alternatives
| Tools | UI | G2 Rating | OS | Pricing |
|---|---|---|---|---|
| Krita | Versatile | 4.3 | Windows 8 or higher, macOS X 10.12 and Linux | Free |
| Open Toonz | Compartmentalized | 4.1 | MacOS X 10.9, Windows 7 or higher | Free |
| Toon Boom | Instinctive | 4.7 | Windows 7 & 10, macOS High Sierra, Catalina, Mojave | Basic – $25/month; Advanced - $63/month; Premium - $115/month |
| TVPaint Animation | Comprehensive | 5 | Windows, macOS X, Android and Linux. | Standard Version – €500; Pro Version – €1250 |
| Synfig Studio | Versatile | 5 | Windows 7 and above, macOS X 10.8 and Linux | Free |
| Cacani | Effortless | NIL | Windows 7, 8, 10 or higher | 30-day license $20; Yearlong license $180; Lifelong license $499; Team Plans start at $399 for 4 devices; Perpetual Team Plan $799 |
| Wick Editor | Hybrid | NIL | Firefox or Chrome. | Free |
| Blender | Changing | 4.5 | Windows 10 or higher, macOS 10.13 and Linux. | Free |
| Maya | Comprehensive | 4.3 | MacOS X 10.13, Windows 10 or higher and Linux. | Annual Subscription $1700 |
| Filmora Pro | Versatile | 4.6 | Windows 7, 8, 10, 11, macOS 10.15, 11, 13, 14. | Yearly – $51.99; One Time –$79.99 |
Wondershare Filmora - Best Video Editor for Mac/Windows
5,481,435 people have downloaded it.
Build unique custom animations without breaking a sweat.
Focus on creating epic stories and leave the details to Filmora’s auto features.
Start a creative adventure with drag & drop effects and endless possibilities.
Filmora simplifies advanced features to save you time and effort.
Filmora cuts out repetition so you can move on to your next creative breakthrough.
Key Takeaways from This Episode
● There are dozens of free and paid animation software out there, but only a few are ideal Adobe Animate Alternatives.
● Adobe Animate is one of the best 2D and 3D animation software in the market, with versatile tools and many plug-in options.
● You need a monthly or yearly subscription to Adobe Creative Cloud to use Animate CC, which is why we have complied a list of the best Adobe Animate Alternatives.
Techniques on How to Make After Effects 2D Animation
Adobe After Effects is probably the most versatile software you can add to your arsenal of skills on your journey to learn After Effects 2D animation. Both beginners and professionals can brush up their animation skills on After Effects with some help from tutorials and videos. When it comes to experimenting with visual effects, motion graphics, and 3D composting, Adobe After Effects is recommended as an industry-standard software. So it should come as no surprise that there is a surplus of After Effects tutorials and information on the internet. To help simplify things, here’s a compiled list of Adobe After Effects courses along with a few tips to get started.
In this article
01 [Practical Online 2D Animation Courses](#Part 1)
02 [How to Create 2D Motion Graphics with After Effects](#Part 2)
03 [5 Best Animation After Effects that you must know](#Part 3)
04 [5 Character Animation Tools for After Effects](#Part 4)
Part 1 Practical Online 2D Animation Courses
Learning After Effects need not be complicated. You can use this tool to help you create amazing designs from your sheer imagination. Here is a list of the best courses which are self-paced so you don’t need to worry about fitting them into your schedule. Some of these courses are primarily for beginners who are seeking to orient themselves to the basics. While other courses have recent insights into the latest techniques curated by the industry experts. The courses in this list are diverse and are from different platforms like Domestika, Coursera, Adobe, and YouTube.
1. Getting Started - Adobe
The official Adobe learning site has its own course for introducing After Effects. After all, the software is a product of Adobe itself. This tutorial is purely for complete beginners and is designed to briefly introduce the interface and basic functioning of Adobe After Effects. It takes you through the manual control and menu options which you will need to familiarize yourself with.
2. The Basics – YouTube
This free-to-watch After Effects tutorial is presented by a very passionate photographer and YouTuber Peter Meckinnon. He walks you through the various elements the Adobe interface puts at your disposal. These elements are quite artistically introduced by Peter as he animates a basic title project on Adobe.
3. How to Animate a line - YouTube
When you are introduced to a vast world of possibilities, it can be a bit overwhelming. Which is why starting from the very basics is always a good idea. This next YouTube tutorial shows you step by step how to animate a line on Adobe After Effects from one point to another.
4. Introduction and Advanced After Effects – Domestika
Domestika is an online learning platform that is great for freelancers and independent artists who can purchase self-paced lessons on topics like graphic design and animation. The Introduction and Advanced After Effects tutorials by Carlos Zensuke Albarran are a comprehensive bundle of lessons that quench your thirst for 2D effects animation a bit further.
5. Typography Animation – Domestika
The mark of a professional is his specialization. As you gain more experience in practicing Adobe After Effects, you can begin trying out more bold and stylistic animations with simple typographic techniques. It would not only make you more confident as a motion graphics designer but also equip you with fluid skills as a freelancer. Typographic motion graphics is a cash cow for many After Effect animators.
6. Vectorial Animation – Domestika
Cartoonist animated videos and motion designs are quite interesting to animate. Vectorial 2D animation is quite popular among YouTube tutorials and explainer videos. They make for excellent corporate animations. You can find an amazing Domestika tutorial on Vectorial that walks you through in simple steps on Frame by Frame style animations.
7. Getting Started with Motion Graphics - Coursera
Coursera is another amazing online learning platform for gaining access to Beginner to Advanced courses on Adobe After Effects. This one tutorial introduces you to Beginner level motion graphics where you can learn from short self-paced videos.
8. Getting Started with Motion Graphics - SkillShare
SkillShare is another amazing online learning platform for gaining access to Beginner to Advanced courses on Adobe After Effects. This one tutorial introduces you to Beginner level motion graphics where you can learn from short self-paced videos. It is guided by a leading professional in motion graphics and visual effects who covers all the bases alongside hands-projects.
9. Make Simple Logo Intro in After Effects – YouTube
Creating Intros for your videos is probably the most cost-effective marketing gizmos employed today. This free tutorial on YouTube from Tech Infusion is a simple-to-follow video that sheds some light on how to create eye-catching intros that instantly catches your audience’s attention.
10. Work with Composition - Adobe
Working with After Effects is all about creating gorgeous compositions that pop. This Adobe tutorial equips you with the basics of creating animation on Adobe After Effects with multiple layers and keyframes.
Part 2 How to Create 2D Motion Graphics with After Effects
The astonishing world of intriguing after-effects is vast. Whether you do it as a profession or simply as a hobby, learning how to add after-effects to your 2d motion graphics is always an amazing idea. Worried how you’d understand the tools to add after-effects to your animation? Well, we’ve got you covered! Today we’ll be looking at how you can add after-effects to your 2d animation.

●To make a new 2D graphics in after effects, you need to make a new composition. To do so, head to the composition menu in the menu bar. Upon clicking on the composition menu, a new drop-down menu would open up. From the drop-down menu, click on “new composition”.

●A new setting box would pop up, in this settings box you can alter the settings of the composition. If you do not wish to change any setting, simply click on “ok” and proceed ahead.

●Next, you need to find the tool panel in the main menu bar. Upon clicking on it, a new drop-down menu will appear, click on “star tool”. We’re simply taking the star shape, for instance, alternatively, you can select and another shape too…

●Once you’ve selected the shape you want, draw by clicking your mouse and dragging

●Click on the shape and the layers will appear on the left of your screen. From the popped up screen, click on “properties”. Here you can find multiple animation options and you can even edit frame by frame. Add frames at regular intervals and move according to your wish

Part 3 5 Best Animation After Effects that you must know
1. Stacking animation – YouTube
Stacking animation is an excellent and simple trick that can make any animation look cool and complex. The stacking animation is nothing but the use of the stacking template multiple times. To do so, you just need to duplicate a few of the base layers. Next, you need to offset the duplicated frames by a few frames and finally add some effects. The Adding of stacking animation will result in a slight extension of your animation layers. You can further customize your frames by adding effects or color to enhance the animation.

2. Light sweeps
An advantage of using the after effects software is that it offers several drag and drop features which you can simply drag and drop to your animation to enhance its looks. A light sweep animation is one such animation that can add great value to your animation. You can add this effect by following the steps given below
●Head to “effects” from your main interface
●Here you need to find “generate”
●Now from the list of drag and drop animations, drag and drop “light sweeps” onto your workspace
You can then change and customize almost any aspect of the animation simply by clicking on it and changing the settings

3. Quick shape animation
This is a very cool trick that you can use on your 2d objects! This includes the creation of your own layer(you can use any 2d shape). Further, you need to duplicate your shape and the stagger the animation. This gives the entire animation an interesting and engaging effect. The trick is very resourceful while dealing with 2d objects.

4. Animate your background
When your entire animation looks slightly basic and you wish to give your animation a zest, this trick is highly useful! If you’re working with colored backgrounds, this animation trick can help make it more attractive. This animation is simply just adding motion to your background making it look like it’s moving in or out.

5. Graphics reflection
Although this method is slightly complicated, it could enhance the animation by leaps and bounds. To do so, you need to write a fancy text of your choice, then you need to duplicate this text, and further, you need to flip it vertically. To make it look more realistic, you can add the blur effect. This will make it look like the duplicated text is a reflection of the original text

Part 4 5 Character Animation Tools for After Effects
1. Rubber hose 2
Rubber hose is one of the primitive tools for adding animations. This is mainly because it was found in the early 2000s and back then, animations had wobbly legs and an absurd body structure. This tool has several cool inbuilt functions that make the animation so much simpler. The robust tool. makes animation pretty simple and hassle-free. Rubber hose 2 is an advanced version of rubber hose, it has several advanced features. The plug-in is however not free, you’d need to purchase it at $45 in order to gain a lifetime access.
2. Duik
Duik is one of the most advanced and comprehensive character animation tools in the market. It was initially launched in 2008, but since then there’s been a vast improvement in the tool’s features and today it’s one of the picks to perform animation using rigging and other animation techniques. Duik has several tools that make the animation so convenient. The tool has features such as auto rig, which helps save time while animating. Other tools include effects such as bones, rigging, various filters, and effects.
3. Joystick ‘n sliders
Joystick’n sliders is another highly utilitarian tool for animators. Along with key animation features such as rigging and boning, the tool has other cool and highly useful features to make your animation interesting! The user interface of this tool is a big plus, the simplicity of the user interface makes the tool perfect for beginners and advanced level animators. The tool is simple to use and has a plethora of cool features which could help you make your animation highly engaging.
4. Puppet tool 3
Puppet tool 3 is an after effects plugin that could help you create character animations. The plug-in is different from the in-built puppet tool in after effects. The puppet tool inbuilt into after effects are the Rigging tool for animation, however using the inbuilt tool is slightly sophisticated. Puppet tool 3 is not an individual tool but works in coordination with the inbuilt the puppet tool. Since using the inbuilt tool was complex, puppet tool 3 made it simple. Apart from rigging, the plugin also allows you to work with a few additional features. You can buy the plug-in for only $39.95!
5. Adobe animate character
Adobe character animation is the in-house plugin of Adobe to animate characters. However, the tool is probably still in development. Adobe has been working on releasing this tool for a while now, and in the latest version of after effects, Adobe added the beta version of the character animator. Character animator is probably the most efficient and advanced animation tool. It uses facial recognition for animations and allows you to perform almost all basic animations. The software is perfect when you’re trying to create a complex animated character.
Key Takeaways from This Episode
● Today we’ve dwelled a lot into animation and the tools available for animation.
● We’ve seen how animation could be enhanced using the inbuilt tools available in Adobe after effects.
● We’ve also gone a step further and seen the external plugin tools that you can use to make character animations and highly advanced 2d effects ok animations.
● We’ve also taken an overview on how to create a simple basic 2d motion animation, all in all, we’ve gone from understanding the beginner level animation to understanding advanced animation
02 [How to Create 2D Motion Graphics with After Effects](#Part 2)
03 [5 Best Animation After Effects that you must know](#Part 3)
04 [5 Character Animation Tools for After Effects](#Part 4)
Part 1 Practical Online 2D Animation Courses
Learning After Effects need not be complicated. You can use this tool to help you create amazing designs from your sheer imagination. Here is a list of the best courses which are self-paced so you don’t need to worry about fitting them into your schedule. Some of these courses are primarily for beginners who are seeking to orient themselves to the basics. While other courses have recent insights into the latest techniques curated by the industry experts. The courses in this list are diverse and are from different platforms like Domestika, Coursera, Adobe, and YouTube.
1. Getting Started - Adobe
The official Adobe learning site has its own course for introducing After Effects. After all, the software is a product of Adobe itself. This tutorial is purely for complete beginners and is designed to briefly introduce the interface and basic functioning of Adobe After Effects. It takes you through the manual control and menu options which you will need to familiarize yourself with.
2. The Basics – YouTube
This free-to-watch After Effects tutorial is presented by a very passionate photographer and YouTuber Peter Meckinnon. He walks you through the various elements the Adobe interface puts at your disposal. These elements are quite artistically introduced by Peter as he animates a basic title project on Adobe.
3. How to Animate a line - YouTube
When you are introduced to a vast world of possibilities, it can be a bit overwhelming. Which is why starting from the very basics is always a good idea. This next YouTube tutorial shows you step by step how to animate a line on Adobe After Effects from one point to another.
4. Introduction and Advanced After Effects – Domestika
Domestika is an online learning platform that is great for freelancers and independent artists who can purchase self-paced lessons on topics like graphic design and animation. The Introduction and Advanced After Effects tutorials by Carlos Zensuke Albarran are a comprehensive bundle of lessons that quench your thirst for 2D effects animation a bit further.
5. Typography Animation – Domestika
The mark of a professional is his specialization. As you gain more experience in practicing Adobe After Effects, you can begin trying out more bold and stylistic animations with simple typographic techniques. It would not only make you more confident as a motion graphics designer but also equip you with fluid skills as a freelancer. Typographic motion graphics is a cash cow for many After Effect animators.
6. Vectorial Animation – Domestika
Cartoonist animated videos and motion designs are quite interesting to animate. Vectorial 2D animation is quite popular among YouTube tutorials and explainer videos. They make for excellent corporate animations. You can find an amazing Domestika tutorial on Vectorial that walks you through in simple steps on Frame by Frame style animations.
7. Getting Started with Motion Graphics - Coursera
Coursera is another amazing online learning platform for gaining access to Beginner to Advanced courses on Adobe After Effects. This one tutorial introduces you to Beginner level motion graphics where you can learn from short self-paced videos.
8. Getting Started with Motion Graphics - SkillShare
SkillShare is another amazing online learning platform for gaining access to Beginner to Advanced courses on Adobe After Effects. This one tutorial introduces you to Beginner level motion graphics where you can learn from short self-paced videos. It is guided by a leading professional in motion graphics and visual effects who covers all the bases alongside hands-projects.
9. Make Simple Logo Intro in After Effects – YouTube
Creating Intros for your videos is probably the most cost-effective marketing gizmos employed today. This free tutorial on YouTube from Tech Infusion is a simple-to-follow video that sheds some light on how to create eye-catching intros that instantly catches your audience’s attention.
10. Work with Composition - Adobe
Working with After Effects is all about creating gorgeous compositions that pop. This Adobe tutorial equips you with the basics of creating animation on Adobe After Effects with multiple layers and keyframes.
Part 2 How to Create 2D Motion Graphics with After Effects
The astonishing world of intriguing after-effects is vast. Whether you do it as a profession or simply as a hobby, learning how to add after-effects to your 2d motion graphics is always an amazing idea. Worried how you’d understand the tools to add after-effects to your animation? Well, we’ve got you covered! Today we’ll be looking at how you can add after-effects to your 2d animation.
●To make a new 2D graphics in after effects, you need to make a new composition. To do so, head to the composition menu in the menu bar. Upon clicking on the composition menu, a new drop-down menu would open up. From the drop-down menu, click on “new composition”.
●A new setting box would pop up, in this settings box you can alter the settings of the composition. If you do not wish to change any setting, simply click on “ok” and proceed ahead.
●Next, you need to find the tool panel in the main menu bar. Upon clicking on it, a new drop-down menu will appear, click on “star tool”. We’re simply taking the star shape, for instance, alternatively, you can select and another shape too…
●Once you’ve selected the shape you want, draw by clicking your mouse and dragging
●Click on the shape and the layers will appear on the left of your screen. From the popped up screen, click on “properties”. Here you can find multiple animation options and you can even edit frame by frame. Add frames at regular intervals and move according to your wish
Part 3 5 Best Animation After Effects that you must know
1. Stacking animation – YouTube
Stacking animation is an excellent and simple trick that can make any animation look cool and complex. The stacking animation is nothing but the use of the stacking template multiple times. To do so, you just need to duplicate a few of the base layers. Next, you need to offset the duplicated frames by a few frames and finally add some effects. The Adding of stacking animation will result in a slight extension of your animation layers. You can further customize your frames by adding effects or color to enhance the animation.
2. Light sweeps
An advantage of using the after effects software is that it offers several drag and drop features which you can simply drag and drop to your animation to enhance its looks. A light sweep animation is one such animation that can add great value to your animation. You can add this effect by following the steps given below
●Head to “effects” from your main interface
●Here you need to find “generate”
●Now from the list of drag and drop animations, drag and drop “light sweeps” onto your workspace
You can then change and customize almost any aspect of the animation simply by clicking on it and changing the settings
3. Quick shape animation
This is a very cool trick that you can use on your 2d objects! This includes the creation of your own layer(you can use any 2d shape). Further, you need to duplicate your shape and the stagger the animation. This gives the entire animation an interesting and engaging effect. The trick is very resourceful while dealing with 2d objects.
4. Animate your background
When your entire animation looks slightly basic and you wish to give your animation a zest, this trick is highly useful! If you’re working with colored backgrounds, this animation trick can help make it more attractive. This animation is simply just adding motion to your background making it look like it’s moving in or out.
5. Graphics reflection
Although this method is slightly complicated, it could enhance the animation by leaps and bounds. To do so, you need to write a fancy text of your choice, then you need to duplicate this text, and further, you need to flip it vertically. To make it look more realistic, you can add the blur effect. This will make it look like the duplicated text is a reflection of the original text
Part 4 5 Character Animation Tools for After Effects
1. Rubber hose 2
Rubber hose is one of the primitive tools for adding animations. This is mainly because it was found in the early 2000s and back then, animations had wobbly legs and an absurd body structure. This tool has several cool inbuilt functions that make the animation so much simpler. The robust tool. makes animation pretty simple and hassle-free. Rubber hose 2 is an advanced version of rubber hose, it has several advanced features. The plug-in is however not free, you’d need to purchase it at $45 in order to gain a lifetime access.
2. Duik
Duik is one of the most advanced and comprehensive character animation tools in the market. It was initially launched in 2008, but since then there’s been a vast improvement in the tool’s features and today it’s one of the picks to perform animation using rigging and other animation techniques. Duik has several tools that make the animation so convenient. The tool has features such as auto rig, which helps save time while animating. Other tools include effects such as bones, rigging, various filters, and effects.
3. Joystick ‘n sliders
Joystick’n sliders is another highly utilitarian tool for animators. Along with key animation features such as rigging and boning, the tool has other cool and highly useful features to make your animation interesting! The user interface of this tool is a big plus, the simplicity of the user interface makes the tool perfect for beginners and advanced level animators. The tool is simple to use and has a plethora of cool features which could help you make your animation highly engaging.
4. Puppet tool 3
Puppet tool 3 is an after effects plugin that could help you create character animations. The plug-in is different from the in-built puppet tool in after effects. The puppet tool inbuilt into after effects are the Rigging tool for animation, however using the inbuilt tool is slightly sophisticated. Puppet tool 3 is not an individual tool but works in coordination with the inbuilt the puppet tool. Since using the inbuilt tool was complex, puppet tool 3 made it simple. Apart from rigging, the plugin also allows you to work with a few additional features. You can buy the plug-in for only $39.95!
5. Adobe animate character
Adobe character animation is the in-house plugin of Adobe to animate characters. However, the tool is probably still in development. Adobe has been working on releasing this tool for a while now, and in the latest version of after effects, Adobe added the beta version of the character animator. Character animator is probably the most efficient and advanced animation tool. It uses facial recognition for animations and allows you to perform almost all basic animations. The software is perfect when you’re trying to create a complex animated character.
Key Takeaways from This Episode
● Today we’ve dwelled a lot into animation and the tools available for animation.
● We’ve seen how animation could be enhanced using the inbuilt tools available in Adobe after effects.
● We’ve also gone a step further and seen the external plugin tools that you can use to make character animations and highly advanced 2d effects ok animations.
● We’ve also taken an overview on how to create a simple basic 2d motion animation, all in all, we’ve gone from understanding the beginner level animation to understanding advanced animation
10 Great Apps for Turning Funny Animated Images Into Comics
10 Great Apps for Turning Funny Animated Images into Comics
An easy yet powerful editor
Numerous effects to choose from
Detailed tutorials provided by the official channel
There are several apps available that can let you create interesting funny animated images, cartoons, and comics by adding speech bubbles, animations, and other effects.
In this article
01 [Top apps to turn pictures into cartoons](#Part 1)
02 [Best Alternative to Cartoon Apps- Wondershare Filmorapro](#Part 2)
03 [Key Takeaways](#Part 3)
Part 1 Top apps to turn pictures into cartoons
To add some fun elements to your regular images and make them even more interesting you can convert them into cartoons and comics. The task of conversion can seem to be difficult and tricky but with the availability of several apps and programs, you can achieve the desired results in just a few clicks.
With multiple options available, you are bound to get confused while selecting an app. Helping you with the same, we have shortlisted the top 10 apps in the category as below.
01 Prisma Photo Editor
Available for download on Android and iOS devices this is an excellent photo editing app that comes with over 300 art filters and animations. You can quickly convert your images into funny and interesting cartoons using the app in no time. Additionally, several image parameters like sharpness, exposure, brightness, and others can also be adjusted as needed.
02 Photo Lab Picture Editor
This is free to use app on the Google Play Store with the IAP option. With a 4.6 high rating, the app is simple to use and offers more than 900 funny and stylish effects that can be added to your images. You can choose from photo montages, animations, filters, and other effects that match your requirements. You can even add photo frames to make your image look impressive. Create professional-looking cartoons in no time using this wonderful app.
03 MomentCam Cartoons & Stickers
This free app on Google Play Store with a 4 rating is just perfect for creating interesting cartoons and emoticons using images. The process is simple and quick where you just need to add the image and create its personalized avatar. Interesting background can also be added to further enhance the cartoon. The app also gives you the option to share the created cartoon on social media sites.

04 ToonMe
Create cartoons using your selfies and other images on your phone in just a few clicks using this high-rated app on Google Play Store. The AI of the app allows the creation of interesting full-body cartoons as well as vector portrait templates. Multiple layouts and designs are also available to choose from. The interface is simple and the app is also available for download Apple Play Store.

05 Pixlr- Free Photo Editor
This is a widely used image editing app that is simple and free to use. A wide range of image editing features and filters are available with the app including cartoon filters that will let you unleash your creativity and design impressive cartoons and other images. Also available for iOS devices the app also facilitates sharing the created images over social media and emails. Additional features include auto-fix, double exposure, adjusting image tone, and others.
06 Painnt- Pro Art Filters
This feature-packed app on Google Store lets you create professional-looking art pieces from the images using filters and animations. With more than 1000 filters in several categories including cartoons, classical, abstract, and others you can have a creation of your choice. App uses AI and also has an option for preview and fine-tuning. You can even share your creations with the app community and over social networking sites.
07 Clip2Comic & Caricature Maker
This is among the best app for iPhone users that allows creating funny and interesting cartoons, caricatures, and other artwork using images. Several other editing tools and filters are also available that support customizing high-quality and high-resolution images. Additionally, the app also supports editing the videos and converting them into animated clippings. The deformation filter further makes your creation look funny and interesting.
08 Deep Art Effects
This free app for Android and iOS devices comes with more than 100 effects and filters of different types including cartoon-based. Using the AI of the app, you can create impressive artwork in HD resolution. The app supports fast image processing and also supports sharing the artwork with the community. A paid premium version of the app is also available that has no ads, watermark, allows creating own filters, and has additional features.
09 Cartoon Photo Editor
This free app for iOS devices will let you turn your images into cartoons like a pro. The app comes with more than 15 cartoon filters to choose from and you can even choose the art style as a retro cartoon, Minecraft, and others. The images from the device can be added to the app or you can even capture one using the camera. The created cartoons can also be shared over social media sites using the app. The pro-paid version offers additional features and functions.
10 Comica- Comics and cartoon maker
As the name suggests, this is a comics and cartoon creating an app on Google Play Store. This lightweight app is free to use and comes with legit-looking effects and allows adding speech balloons. You can even create your memes using the app and take your creativity to a new level.

Key Takeaways from This Episode
● Check out the images on your smartphone or system that can be used for creating interesting cartoons.
● Analyze multiple apps and programs that can let you add cartoon and comic effects to your selected images.
● Finalize the tool that offers the best features, is simple to use, and can quickly convert your images to funny animated images and cartoons with added functionalities.
There are several apps available that can let you create interesting funny animated images, cartoons, and comics by adding speech bubbles, animations, and other effects.
In this article
01 [Top apps to turn pictures into cartoons](#Part 1)
02 [Best Alternative to Cartoon Apps- Wondershare Filmorapro](#Part 2)
03 [Key Takeaways](#Part 3)
Part 1 Top apps to turn pictures into cartoons
To add some fun elements to your regular images and make them even more interesting you can convert them into cartoons and comics. The task of conversion can seem to be difficult and tricky but with the availability of several apps and programs, you can achieve the desired results in just a few clicks.
With multiple options available, you are bound to get confused while selecting an app. Helping you with the same, we have shortlisted the top 10 apps in the category as below.
01 Prisma Photo Editor
Available for download on Android and iOS devices this is an excellent photo editing app that comes with over 300 art filters and animations. You can quickly convert your images into funny and interesting cartoons using the app in no time. Additionally, several image parameters like sharpness, exposure, brightness, and others can also be adjusted as needed.
02 Photo Lab Picture Editor
This is free to use app on the Google Play Store with the IAP option. With a 4.6 high rating, the app is simple to use and offers more than 900 funny and stylish effects that can be added to your images. You can choose from photo montages, animations, filters, and other effects that match your requirements. You can even add photo frames to make your image look impressive. Create professional-looking cartoons in no time using this wonderful app.
03 MomentCam Cartoons & Stickers
This free app on Google Play Store with a 4 rating is just perfect for creating interesting cartoons and emoticons using images. The process is simple and quick where you just need to add the image and create its personalized avatar. Interesting background can also be added to further enhance the cartoon. The app also gives you the option to share the created cartoon on social media sites.
04 ToonMe
Create cartoons using your selfies and other images on your phone in just a few clicks using this high-rated app on Google Play Store. The AI of the app allows the creation of interesting full-body cartoons as well as vector portrait templates. Multiple layouts and designs are also available to choose from. The interface is simple and the app is also available for download Apple Play Store.
05 Pixlr- Free Photo Editor
This is a widely used image editing app that is simple and free to use. A wide range of image editing features and filters are available with the app including cartoon filters that will let you unleash your creativity and design impressive cartoons and other images. Also available for iOS devices the app also facilitates sharing the created images over social media and emails. Additional features include auto-fix, double exposure, adjusting image tone, and others.
06 Painnt- Pro Art Filters
This feature-packed app on Google Store lets you create professional-looking art pieces from the images using filters and animations. With more than 1000 filters in several categories including cartoons, classical, abstract, and others you can have a creation of your choice. App uses AI and also has an option for preview and fine-tuning. You can even share your creations with the app community and over social networking sites.
07 Clip2Comic & Caricature Maker
This is among the best app for iPhone users that allows creating funny and interesting cartoons, caricatures, and other artwork using images. Several other editing tools and filters are also available that support customizing high-quality and high-resolution images. Additionally, the app also supports editing the videos and converting them into animated clippings. The deformation filter further makes your creation look funny and interesting.
08 Deep Art Effects
This free app for Android and iOS devices comes with more than 100 effects and filters of different types including cartoon-based. Using the AI of the app, you can create impressive artwork in HD resolution. The app supports fast image processing and also supports sharing the artwork with the community. A paid premium version of the app is also available that has no ads, watermark, allows creating own filters, and has additional features.
09 Cartoon Photo Editor
This free app for iOS devices will let you turn your images into cartoons like a pro. The app comes with more than 15 cartoon filters to choose from and you can even choose the art style as a retro cartoon, Minecraft, and others. The images from the device can be added to the app or you can even capture one using the camera. The created cartoons can also be shared over social media sites using the app. The pro-paid version offers additional features and functions.
10 Comica- Comics and cartoon maker
As the name suggests, this is a comics and cartoon creating an app on Google Play Store. This lightweight app is free to use and comes with legit-looking effects and allows adding speech balloons. You can even create your memes using the app and take your creativity to a new level.
Key Takeaways from This Episode
● Check out the images on your smartphone or system that can be used for creating interesting cartoons.
● Analyze multiple apps and programs that can let you add cartoon and comic effects to your selected images.
● Finalize the tool that offers the best features, is simple to use, and can quickly convert your images to funny animated images and cartoons with added functionalities.
Ultimate Guide to Animated Characters Drawings
Interesting Fundamentals and Ultimate Guide to Animated Characters Drawings
An easy yet powerful editor
Numerous effects to choose from
Detailed tutorials provided by the official channel
Cartoon character have stamped their faces in our hearts from childhood. A cartoon artist represents a cartoon or a natural person’s unique features with simple shapes accurately to recognize the person with the drawing and does not require a lot of patience to do this. The goal of the cartoon is to attract, and the child should get attracted when they see a cartoon image as well as adults. Though the sparkle may appear a little dull, it remains unaltered.
Let us grab a chance to recreate our cartoon characters with easy tutorials about animated characters to draw. In addition to that, you will learn about basic drawing exercises to lead into cool animated characters to draw through this guide in a step-by-step manner.
In this article
01 [What Do I Need to Start Learning Animated Characters Drawings? ](#Part 1)
02 [6 Cartoon Characters that Anyone Can Draw (Provided with Free Video Tutorials)](#Part 2)
03 [4 Best Drawing Exercises for Creating Cartoon Characters](#Part 3)
Part 1 What Do I Need to Start Learning Animated Characters Drawings?
There are many software’s available, and anyone can create an animated character drawing, but still, the art of creating a perfect character needs a master. You don’t have to be a Disney-grade animator to make it; start with simple minor characters. Animation is the art of bringing a 3D illustrated cartoon into life. It is created by projecting a sequence of images one after the other immediately. Let us discuss the essential things you need to note before animating characters.
●Timeline is the most important for animation. Depending on the software, you have various options to change the duration and add effects.
●Animation is generally preferable in 24 frames per second, which means the total number of people in the frame for one second.
●There are two types of working they are one’s and two’s. 2D Animation is usually done in two’s, whereas 3D Animation is in one’s.
●In hand-drawn animations, keyframes are more critical to maintain. The keyframe is the position for the cartoon as per animator has decided.
●Breakdowns combine one or two keyframes, which decide the motion in between the keys.
●In-betweens are all the frames that come between to smooth the motion—automatically generated by the computer to move from key to key.
●Composting is creating or joining two or more images to create a single cartoon frame.
Part 2 6 Cartoon Characters that Anyone can Draw (With free Video Tutorials)
We will discuss animated characters to draw in hand. There are many cartoon characters, but we will look into six cartoon character drawings with their tutorial videos.
01 Smurfette
Smurfette stands out as the lone female Smurf in the entire bunch of blue critters around the village area. One of the rare designs with long hair and a dress is hers. Her design is a lot of fun to sketch.
So, in general, it’s best to work through the lesson as is, then turn it into Brainy, Papa, Joker, or even Smurf.
01Angelica Pickles
Angelica Pickles is one of the most challenging characters to depict from The Rugrats. But her design is so intricate that getting it proper will give you a true sense of accomplishment. Her pigtails, like her leggings, might be challenging to master, so keep practicing.
03Yogi Bear
Yogi Bear is a cartoon character on the sweeter side of the comic animal variety. Yogi Bear is a beloved character from Jellystone Park. As long as you get his tie and collar just right, this guy is a breeze to draw.
04Magilla Gorilla
Magilla Gorilla is another bizarre creature from Hanna-catalog. Barbera’s Because he comes with a bow tie, a little cap, and suspenders, this design is a little more complicated. Not to mention his enormous clown shoes. These small details can be a pain to draw, but Magilla is a very charming gorilla.
05Top Cat
Even further back in time, in the 1960s, there was the ever-popular Top Cat. He’s wearing a cap and a button-down vest, and he’s making some reasonably fancy dances. Give Top Cat a shot if you like The Flintstones’ basic Hanna-Barbera art style.
<
06Helga. G. Pataki
Helga is another character with some wacky hair. There’s a lot that’s bizarre about her. And half the fun of drawing her is figuring out how to do it. Just keep an eye on her head since getting it correct, especially with her rectangle hairdo, can be a little odd.
These are some of the cool animated characters to draw.
Part 3 4 Best Drawing Exercise for Creating Cartoon Characters
You’ll learn how to create cartoon characters individually, including their faces, hair, and facial expressions.
01How to Draw Cartoon Characters
We’ll go through the fundamentals of human perception before getting into cartoon face drawing. Humans have a unique ability to synthesize the details that make up a structure or object in highly complicated ways into fundamental and simple ones. We can express everything with a few curves and geometric forms in this way. In cartoon face, we need to identify the character just by looking like looking at the below picture a girl and a boy.
02Here, you will learn How to Draw a Cartoon Face
Let us begin with a sketch of a cartoon face. A circle is a basic cartoon shape. All you need is a circle. As seen in the image below, draw a vertical and horizontal line intersecting at the center.
Let us have a look at how to make cartoon eyeballs. Draw an oval shape with a slight lean to the side at the top for the eyes. Repeat on the other side.
Slightly thicken the characteristic to represent our character eyelashes at the top of the circle, place the brows above the eyelashes to create a shocking appearance, draw both pupils to the center in the same direction.
When creating a nose from the front, it’s typical to leave off many details. Even if you merely sketch its tip, it will likely provide a convincing impact. Drawing only one side of the nose is also quite frequent. Children’s mouths are extremely simple in cartoon style, regardless of gender.
The ears are viewed from the front; therefore, the internal holes are not visible. The circle has already established the shape of our head.
03Let’s learn about How to Draw a Cartoon Hair
Keep in mind that our characters’ hair is essential for identifying their personalities, and it can also indicate their age. So, all we need is an effortless and playful haircut to bring our boy to life. Because there is no particular method for drawing hair, you’ll have to experiment until you find the perfect look. Look for photo references on the internet! Take a look at a magazine shoot or a Google search.
03How to Draw Characters with different Facial Expressions
By simply following the instructions below, you’ll notice that you can completely transform his expression: Lowering one brow and raising the other, eyelashes are used to cut the eyes in half, putting a smile on the face one side is higher.
To stay under the eyelashes, move the eye pupils up. That’s all there is to it! With just a few tweaks, we achieved the desired result. The circular form of the eyes, hair, ears, nose, chin and the circular shape of the ears are all the same! It’s that simple!
While working in cartooning or video making, Wondershare Wondershare Filmora Video Editor comes out with pros in mind, which can effortlessly convert conventional films into cartoon videos. If you want greater control over your cartoon video, you may also use keyframing to create it. You can fine-tune the parameters in Effects to achieve the best results. You can even change the Animation color after it has been created. It also allows you to use different text themes to showcase your videos.
We propose Wondershare Filmora Video Editor , in this case, to create animation videos by adding keyframes, resulting in a smooth and natural animation. To get started with Animation, all you need is a white plane. Aside from that, color correction and an audio mixer will take your animation video to the next level.
For Win 7 or later (64-bit)
For macOS 10.12 or later
● Key Takeaways from This Episode →
● Learn what are the key elements to make animation videos using software
● Tutorial on how to draw a cartoon character accurately
● In comparison, Wondershare Wondershare Filmora Video Editor is superior in making animation videos.
How To Remove The Endless Loop From Animated GIF
How To Remove The Endless Loop From Animated GIF

Shanoon Cox
Mar 27, 2024• Proven solutions
People may discover for themselves a lot of eye-catching looping gifs on the Internet that is of great interest to them. But sometimes, you may want to give an ending for your gif for a special effect. Then, here this article will show you how to do it with ease.
How to Remove Loop From GIFs
The answer to the problem is very simple. Just open a GIF editor (or an editor that supports GIFs), then choose Remove loop option, and resave it. There are many freeware or online GIF editors that can help you achieve this. If you have no idea which one to choose and how to use it, this guide will help you a lot.
Do you want to convert video to GIF or do you want to edit your GIFs? Wondershare Filmora is the best choice for you to create GIFs from videos and photos, while you can add text, overlays, or combine multiple GIFs together easily with Filmora.
However, if you want to make a GIF online, Filmora meme maker is your ultimate solution. It helps you make image, GIF and video memes directly without watermark. It is totally FREE to use and no sign up. You can change text size, color and position to create caption when you are editing. You can also put text inside or outside in GIF. Just with a few clicks, your GIF is done . Try it now!
 Download Mac Version ](https://tools.techidaily.com/wondershare/filmora/download/ )
Online Solutions to Stop Endless GIF Loop
1. Lunapic
How:
- First, you head over to the Lunapic website.
- Click the Browse icon to upload your GIF image from your home computer. You can also type out the URL, then select Open from URL and select Go. It is that simple.
- Select or click on the Animation icon from the top menu.
- Select Edit GIF Animation.
- Click the drop down menu and decide on the number of loops for the GIF image.
- Hit the Apply button.
Pros:
- User friendly and free
- Zooming, adding text, splitting and rotating are excellent tools to use on this application
Cons:
- Not being able to use it without Internet.
- Very slowly while uploading large files.
2. GIFCREATOR.ME:
How:
- Upload the GIF pictures from your laptop computer.
- Compress the size of your GIF pictures.
- Set repeat times, 0=infinite loop
- Click Create Animation icon button
Pros:
- User friendly and easy to use. Free
Cons:
- Cannot be used without an internet connection.
- Cannot perform any other editing like correcting the color, adding additional text or cropping a GIF photo.
3. Ezgif.com

How:
- Choose the GIF image file that you want to use.
- Upload the image to Ezgif.com.
- Drag or drop your photos in the order that you desire.
- Set the Loop with the count of how many times you want it to loop. If it is empty, the loop is infinite.
- Select Animate It.
Pros:
- User friendly and free.
- Can do basic editing like adding new text, effects, cropping photos, splitting, and resizing your images. Cons: very slow, interface not intuitive
Cons:
- very slow, interface not intuitive Ask internet connection
Desktop Solutions to Removing Loops from GIFs
1. Photoshop

How:
- Open your file on the Photoshop.
- Select the File icon and press the Save for Web icon.
- Check if the Animation button on the bottom of the save dialog is no longer the color of grey.
- Set looping count and then click on the preview menu for the animation. Then, you click Save.
Pros:
- Professional, offers you many other advanced editing features
Cons:
- Pricy, complicated.
2. Beneton Movie GIF
How:
- Open your GIF images.
- Uncheck the ‘loop’ box in the bottom left
- Save.
Pros:
- a very small program that can get the job done.
Cons:
- crash sometimes.
3. Falco GIF Animator

How:
- Open your GIF using the program
- Uncheck the “repeat forever” box in the bottom right
- Then “save as” from the file menu
Pros:
- Opens large GIFs without problems
- Simple and straightforward.
- A lot of useful GIF editing functions that you will like if you need to work with GIFs in general.
Cons:
- Bundled with some other software you might not need. So be sure to uncheck the options you don’t want.
4. GIMP
How:
- Open your GIF, then resave it.
- You will be presented with a number of screens during the saving process.
- Make sure to ‘save as animation’ and then uncheck ‘loop forever’ as shown in the screenshots above.
Pros:
- Upload large GIFs without problems
Cons:
- It may be too large if you just want to a quick solution for GIF
- Changes the color of white spaces in GIFs
Frequently Asked Questions About Removing Loops from GIFs
1. How To Stop A GIF From Looping?
Even though GIFs can be saved as infinite loops, this isn’t a mandatory option, as most GIF editors enable you to choose if you want a GIF to be a loop or not. Import a GIF into the editor you are using and then make sure that the Remove Loop option is selected.
This will effectively stop the GIF file from replaying once it reaches the end, so you can proceed to export the GIF from the editor. Keep in mind that some GIF editors don’t allow you to set the Loop count and leaving this box empty will create an infinite loop.
2. How To Set A GIF Loop Count?
Nearly all GIF editors allow you to specify how many loops a GIF is going to make before it comes to a stop. All you need to do in order to set the loop count for a GIF is import it into a GIF editor and click the Edit GIF option.
You will see the loop count box, among other options so you can simply insert the value you want and confirm the changes you’ve made. Afterward, you should export the GIF you edited and it will have the loop as many times as you specified.
Shanoon Cox
Shanoon Cox is a writer and a lover of all things video.
Follow @Shanoon Cox
Shanoon Cox
Mar 27, 2024• Proven solutions
People may discover for themselves a lot of eye-catching looping gifs on the Internet that is of great interest to them. But sometimes, you may want to give an ending for your gif for a special effect. Then, here this article will show you how to do it with ease.
How to Remove Loop From GIFs
The answer to the problem is very simple. Just open a GIF editor (or an editor that supports GIFs), then choose Remove loop option, and resave it. There are many freeware or online GIF editors that can help you achieve this. If you have no idea which one to choose and how to use it, this guide will help you a lot.
Do you want to convert video to GIF or do you want to edit your GIFs? Wondershare Filmora is the best choice for you to create GIFs from videos and photos, while you can add text, overlays, or combine multiple GIFs together easily with Filmora.
However, if you want to make a GIF online, Filmora meme maker is your ultimate solution. It helps you make image, GIF and video memes directly without watermark. It is totally FREE to use and no sign up. You can change text size, color and position to create caption when you are editing. You can also put text inside or outside in GIF. Just with a few clicks, your GIF is done . Try it now!
Download Mac Version ](https://tools.techidaily.com/wondershare/filmora/download/ )
Online Solutions to Stop Endless GIF Loop
1. Lunapic
How:
- First, you head over to the Lunapic website.
- Click the Browse icon to upload your GIF image from your home computer. You can also type out the URL, then select Open from URL and select Go. It is that simple.
- Select or click on the Animation icon from the top menu.
- Select Edit GIF Animation.
- Click the drop down menu and decide on the number of loops for the GIF image.
- Hit the Apply button.
Pros:
- User friendly and free
- Zooming, adding text, splitting and rotating are excellent tools to use on this application
Cons:
- Not being able to use it without Internet.
- Very slowly while uploading large files.
2. GIFCREATOR.ME:
How:
- Upload the GIF pictures from your laptop computer.
- Compress the size of your GIF pictures.
- Set repeat times, 0=infinite loop
- Click Create Animation icon button
Pros:
- User friendly and easy to use. Free
Cons:
- Cannot be used without an internet connection.
- Cannot perform any other editing like correcting the color, adding additional text or cropping a GIF photo.
3. Ezgif.com
How:
- Choose the GIF image file that you want to use.
- Upload the image to Ezgif.com.
- Drag or drop your photos in the order that you desire.
- Set the Loop with the count of how many times you want it to loop. If it is empty, the loop is infinite.
- Select Animate It.
Pros:
- User friendly and free.
- Can do basic editing like adding new text, effects, cropping photos, splitting, and resizing your images. Cons: very slow, interface not intuitive
Cons:
- very slow, interface not intuitive Ask internet connection
Desktop Solutions to Removing Loops from GIFs
1. Photoshop
How:
- Open your file on the Photoshop.
- Select the File icon and press the Save for Web icon.
- Check if the Animation button on the bottom of the save dialog is no longer the color of grey.
- Set looping count and then click on the preview menu for the animation. Then, you click Save.
Pros:
- Professional, offers you many other advanced editing features
Cons:
- Pricy, complicated.
2. Beneton Movie GIF
How:
- Open your GIF images.
- Uncheck the ‘loop’ box in the bottom left
- Save.
Pros:
- a very small program that can get the job done.
Cons:
- crash sometimes.
3. Falco GIF Animator
How:
- Open your GIF using the program
- Uncheck the “repeat forever” box in the bottom right
- Then “save as” from the file menu
Pros:
- Opens large GIFs without problems
- Simple and straightforward.
- A lot of useful GIF editing functions that you will like if you need to work with GIFs in general.
Cons:
- Bundled with some other software you might not need. So be sure to uncheck the options you don’t want.
4. GIMP
How:
- Open your GIF, then resave it.
- You will be presented with a number of screens during the saving process.
- Make sure to ‘save as animation’ and then uncheck ‘loop forever’ as shown in the screenshots above.
Pros:
- Upload large GIFs without problems
Cons:
- It may be too large if you just want to a quick solution for GIF
- Changes the color of white spaces in GIFs
Frequently Asked Questions About Removing Loops from GIFs
1. How To Stop A GIF From Looping?
Even though GIFs can be saved as infinite loops, this isn’t a mandatory option, as most GIF editors enable you to choose if you want a GIF to be a loop or not. Import a GIF into the editor you are using and then make sure that the Remove Loop option is selected.
This will effectively stop the GIF file from replaying once it reaches the end, so you can proceed to export the GIF from the editor. Keep in mind that some GIF editors don’t allow you to set the Loop count and leaving this box empty will create an infinite loop.
2. How To Set A GIF Loop Count?
Nearly all GIF editors allow you to specify how many loops a GIF is going to make before it comes to a stop. All you need to do in order to set the loop count for a GIF is import it into a GIF editor and click the Edit GIF option.
You will see the loop count box, among other options so you can simply insert the value you want and confirm the changes you’ve made. Afterward, you should export the GIF you edited and it will have the loop as many times as you specified.
Shanoon Cox
Shanoon Cox is a writer and a lover of all things video.
Follow @Shanoon Cox
Adobe Animate Text Effects Skills You Need to Know
Adobe Animate Text Effects Skills That You Need to Know
An easy yet powerful editor
Numerous effects to choose from
Detailed tutorials provided by the official channel
Adobe Animate Text Effects can be created with the use of Adobe Animate. As well as a couple of other models of Adobe.
We’ve outline a thorough explanation on the subject so that you can be prepared as you can be, so continue reading in order to learn more.
In this article
01 [What’s Text Animation?](#Part 1)
02 [What Adobe Program is Best for Text Animation?](#Part 2)
03 [5 Creative Ways to Animate Text in After Effects](#Part 3)
04 [Adobe Alternative to Make Text Animation](#Part 4)
Part 1 What’s Text Animation?
“Text Animation“ refers to moving letters, words, sentences, and even whole paragraphs. The animation, or movement, rather, can be anything. It can move from side to side, jump up and down, create a dizzying circle, recede from view, etc. Usually, said movement is placed on an endless repeat, a pattern that the text is coded to follow decided by the animator who created it!
Part 2 What Adobe Program is Best for Text Animation?
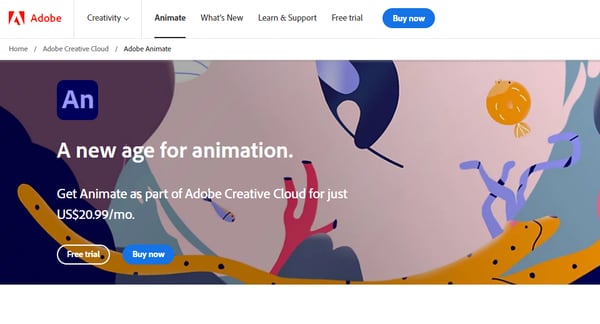
Adobe Animate is Adobe’s very own software developed for animators. Whether they be working on movies, shows, short videos for online posting, games, or text animations. As mentioned at the beginning of this article, this is the software most professionals use in order to bring life to their digital creations. It’s also the one that we’d recommend if you’re looking into advanced adobe animate text animation!
Part 3 5 Creative Ways to Animate Text in After Effects
Now, we should make it very clear, of course. That while Adobe Animate is considered the best for animation (whether it be text or character models), there are other tools that you can use in order to get the same effect. For example, there’s adobe spark animate text, adobe premiere pro animate text, and this next one, also from Adobe, called After Effects, is a VFX and motion graphics software used to create movie titles, intros, transitions, logos, and so much more.
We’ve listed some of the more creative ways you can use After Effects to create what could very well be Adobe Animate text effects below to help you along:
01METHOD 1: After Effects Animation Presets
The first, and easiest, way of animating your text with After Effects is to use presets! After Effects offers multiple animations presets that you can try in order to test out certain settings. (This is also a good way of getting to know the possibilities and limits of text animation and how you can work within those bounds.
02METHOD 2: After Effects Text Animators
If the presets aren’t working out for you, you can also try out After Effect’s “animators” and “selectors”. To clarify, you add ‘animators’ to your text (it will mark the object(s) to be animated). And then, you use a ‘selector’ in order to specify how you want the properties to be animated. This is a great way of truly getting the exact effect that you want, although it might take some finagling to get it to work completely.
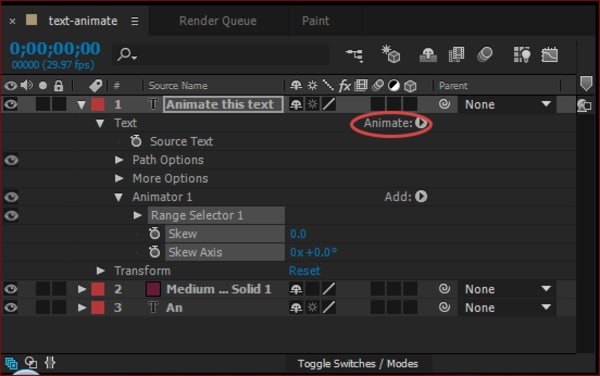
03METHOD 3: Per-Character 3D Text Properties
If you want to step up your game even more, you can always make your texts into 3D characters on their own! This is easier to do in Adobe Dimension, which (from the example image below) you can see has a “Text” preset that you can use in order to start creating 3D Text Properties immediately! The beauty of this method, of course, is that your text can be adjusted like any 3D character. Making the possibilities endless!
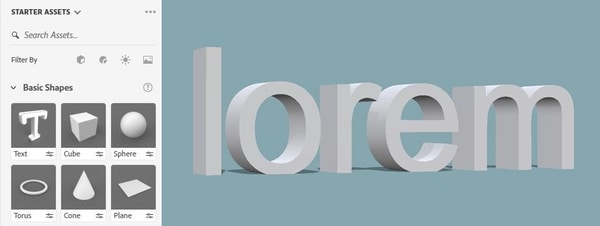
04METHOD 4: Path Animation
The next method of animating with After Effects is a little more constrained than the others we’ve introduced thus far. However, it has its uses! As you can see from the image below, you can animate your text to follow a mask (which you set over your text layer). This will make it possible for you to animate along a path.

05METHOD 5: After Effects Selectors
This next method is related to the ‘Animators’ methods we introduced second. It also works a lot like the masks we mentioned in Method 4–which, as mentioned, you can use in order to set up a foundation or limits for your animation.

Adobe Animate Text Effects can be created with the use of Adobe Animate. As well as a couple of other models of Adobe.
We’ve outline a thorough explanation on the subject so that you can be prepared as you can be, so continue reading in order to learn more.
In this article
01 [What’s Text Animation?](#Part 1)
02 [What Adobe Program is Best for Text Animation?](#Part 2)
03 [5 Creative Ways to Animate Text in After Effects](#Part 3)
04 [Adobe Alternative to Make Text Animation](#Part 4)
Part 1 What’s Text Animation?
“Text Animation“ refers to moving letters, words, sentences, and even whole paragraphs. The animation, or movement, rather, can be anything. It can move from side to side, jump up and down, create a dizzying circle, recede from view, etc. Usually, said movement is placed on an endless repeat, a pattern that the text is coded to follow decided by the animator who created it!
Part 2 What Adobe Program is Best for Text Animation?
Adobe Animate is Adobe’s very own software developed for animators. Whether they be working on movies, shows, short videos for online posting, games, or text animations. As mentioned at the beginning of this article, this is the software most professionals use in order to bring life to their digital creations. It’s also the one that we’d recommend if you’re looking into advanced adobe animate text animation!
Part 3 5 Creative Ways to Animate Text in After Effects
Now, we should make it very clear, of course. That while Adobe Animate is considered the best for animation (whether it be text or character models), there are other tools that you can use in order to get the same effect. For example, there’s adobe spark animate text, adobe premiere pro animate text, and this next one, also from Adobe, called After Effects, is a VFX and motion graphics software used to create movie titles, intros, transitions, logos, and so much more.
We’ve listed some of the more creative ways you can use After Effects to create what could very well be Adobe Animate text effects below to help you along:
01METHOD 1: After Effects Animation Presets
The first, and easiest, way of animating your text with After Effects is to use presets! After Effects offers multiple animations presets that you can try in order to test out certain settings. (This is also a good way of getting to know the possibilities and limits of text animation and how you can work within those bounds.
02METHOD 2: After Effects Text Animators
If the presets aren’t working out for you, you can also try out After Effect’s “animators” and “selectors”. To clarify, you add ‘animators’ to your text (it will mark the object(s) to be animated). And then, you use a ‘selector’ in order to specify how you want the properties to be animated. This is a great way of truly getting the exact effect that you want, although it might take some finagling to get it to work completely.
03METHOD 3: Per-Character 3D Text Properties
If you want to step up your game even more, you can always make your texts into 3D characters on their own! This is easier to do in Adobe Dimension, which (from the example image below) you can see has a “Text” preset that you can use in order to start creating 3D Text Properties immediately! The beauty of this method, of course, is that your text can be adjusted like any 3D character. Making the possibilities endless!
04METHOD 4: Path Animation
The next method of animating with After Effects is a little more constrained than the others we’ve introduced thus far. However, it has its uses! As you can see from the image below, you can animate your text to follow a mask (which you set over your text layer). This will make it possible for you to animate along a path.
05METHOD 5: After Effects Selectors
This next method is related to the ‘Animators’ methods we introduced second. It also works a lot like the masks we mentioned in Method 4–which, as mentioned, you can use in order to set up a foundation or limits for your animation.
How to Make a Photoshop Collage in EASY Steps
How to Make a Photoshop Collage in EASY Steps
An easy yet powerful editor
Numerous effects to choose from
Detailed tutorials provided by the official channel
Photographs are a way of capturing and stopping the time in a small frame. They hold millions of memories that we want to cherish forever in our lives. And sometimes, we want to make a cluster of all the happy memories by making a collage of the photos.

Also, what can be a better gift to someone than presenting them a collection of all the cherishable memories you have with them in photographs? And that can be made possible through various photoshop collage ideas.
In this article
01 [Does Photoshop Have Collage Templates?](#Part 1)
02 [How to Make Your Own Collage with Photoshop Templates](#Part 2)
03 [How to Custom a Photoshop Collage in 9 Simple Steps](#Part 3)
Part 1 Does Photoshop Have Collage Templates?
There is numerous photo collage template in photoshop, and you even access and use some of them for free. Additionally, you can also create your template in Photoshop and use them in making your collage. If you want to make your template in Photoshop, here is how.
Step 1: Make a new layer and fill it up with your choice of colour.
Step 2: Resize and duplicate the layer to create the pattern you want for your collage.
Step 3: Integrate a “Clipping Mask.”
Step 4: For every image, create new clipping masks.
Step 5: Your collage template is ready so, export it to use!
Part 2 How to Make Your Own Collage with Photoshop Templates
Now that we know that you can access numerous incredible photoshop templates for free, you might want to create a collage for yourself in Photoshop. So, this is how you can use the photoshop collage template to make your collage with Photoshop Templates.
First, you need to select the images you want to create a collage with. Then you will have to import them. You can either “select and import” them one at a time or even batch import all of them together. Then, you can readily choose the template you want to use, or you can also create one for yourself.
Then you can resize or edit the images in the way you want and place them in the desired order. After you are done arranging and creating the collage perfectly, save the file in JPEG format and then export it to access it whenever you want!
Part 3 How to Custom a Photoshop Collage in 9 Simple Steps
If you do not know the answer to the question: how to make a collage in photoshop, there is absolutely nothing to worry about. Because the answer to this question is simple and includes not more than nine steps.
So now, we will be discussing the nine simple steps that will help you make a custom photo collage in photoshop. Here is the list of steps that will help you in doing so.
● Step 1: Selecting your favorite photos
The first step to making a collage in photoshop is to select all the photos you would like your collage to have. Now, it will be best for you to choose your photos wisely. We understand that each photograph is equally sweet and cherishable. But, when you select the images for your collage in a thoughtful manner, the collage turns out much better than expected.
You can use different collage ideas for photoshop, such as following a particular storyline, where you collage the photos so that it recreates the memory or the moments in sequence. Another way to select your photos is by sticking to a particular theme, and it can be vintage or on one specific color or the like. It will help your collage turn out in the best and the most thoughtful way.
● Step 2: Opening the photos you have selected, in collage maker photoshop
Now that you have selected which images you would want your collage to have, the next step will require you to open those images in the collage maker Photoshop. For this, you will have to select the option “File”. There, you will find the option “Open”. Then you will open the images you have chosen in Photoshop.
Also, you can simply press the “ctrl” and the “O” keys on your keyboard and it will automatically help you open the images you have selected for the photo collage on photoshop.

Another way to open the pages you have selected for your collage is through the “Drag and Drop” function. It is more effortless to choose the images and open them in Photoshop. After you have opened the photos in Photoshop, it will open in a different tab and look like in the following picture.

● Step 3: Make a new file for your collage on photoshop
The third step requires you to make a new file for your photo collage in photoshop. For this, you need to select or click on the “File” option on Photoshop. Then, click on the “New” option. It will help you make a new file for your collage. You can also select the “ctrl” and “N” together.
As you click on the “New” option, you will be given options to choose from. Choose the one that matches your preference.
When you are working on photoshop to make a collage, the images will need a collage background because it is on this background that the photos will assemble. If you have made a collage before on photoshop, you can use the old collage photoshop template. Otherwise, you need to create a new document for the collage.

● Step 4: Add the selected images one-by-one
Adding the images can be done in many ways. One way to do so is by opening the photo and clicking on it. Another way of doing so is to use the “Marquee Tool” of Photoshop.

Another way of doing so is by pressing the “ctrl” and “A” keys on your keyboard together. You will find the matching ants border around the image when you do this.

Then, go to the “Edit” option and choose “Copy” there. Or, you can also select the “ctrl” and “C” keys on your keywords together. Then go to your new document and select the option of “Paste” from the “Edit” option, or you can also press the “ctrl” and “V” keys together to do so.
The photo will be added in its own layer on the new document.

● Step 5: Arrange the images
Now, arrange the images in the way you want. If you have chosen to tell a story through your collage creator in photoshop, then arrange the photos accordingly. You can do so with the help of the “Move” tool or simply tap V. You can also use the “Free Transform” tool to edit and transform the images in the way you want. You can resize, rotate and edit the photos in many other ways through the “Free Transform” tool.
Step 6: Integrate image space
To create a collage in photoshop in a better and more spaced-out manner, you need to add some spacing between the images you have in your collage. There are two ways to add spacing between the pictures; one way is by creating a thin, white border around each image.
And the second method is by accessing and using the “Layers” feature in Photoshop.

● Step 7: Merge all the Layers
This step is necessary when you have used the “Layer” feature to create the spacing among the images present in your collage. You will be able to do so from the “Layer” option. So, go to the “Layer” option and select the “Merge Invisible” option present there.

● Step 8: cropping the final picture
Before the final step, it is important that you crop the final picture. And to do so, you can opt for the “Crop tool”. You will be able to access it easily, or you can also simply tap C to use the “Crop tool.”

● Step 9: Save the final collage and export
After you have done all the necessary changes and are satisfied with the final collage, then, save the file. To do so, go to the “File” option and select the “Save as” option.

Then choose the file type to be “JPEG”. Type the name you would want the collage to be saved as. This completes the process of saving the file. Then choose the image quality you would want the collage to be exported in.

● Key Takeaways from This Episode →
● In this discussion, we have covered the following topics.
● We discussed whether Photoshop has collage templates.
● Then we proceeded with discussing how we can create a collage in photoshop using the templates in it.
● Lastly, we wrapped up our discussion with the nine-step tutorial about customizing a collage in Photoshop.
Photographs are a way of capturing and stopping the time in a small frame. They hold millions of memories that we want to cherish forever in our lives. And sometimes, we want to make a cluster of all the happy memories by making a collage of the photos.
Also, what can be a better gift to someone than presenting them a collection of all the cherishable memories you have with them in photographs? And that can be made possible through various photoshop collage ideas.
In this article
01 [Does Photoshop Have Collage Templates?](#Part 1)
02 [How to Make Your Own Collage with Photoshop Templates](#Part 2)
03 [How to Custom a Photoshop Collage in 9 Simple Steps](#Part 3)
Part 1 Does Photoshop Have Collage Templates?
There is numerous photo collage template in photoshop, and you even access and use some of them for free. Additionally, you can also create your template in Photoshop and use them in making your collage. If you want to make your template in Photoshop, here is how.
Step 1: Make a new layer and fill it up with your choice of colour.
Step 2: Resize and duplicate the layer to create the pattern you want for your collage.
Step 3: Integrate a “Clipping Mask.”
Step 4: For every image, create new clipping masks.
Step 5: Your collage template is ready so, export it to use!
Part 2 How to Make Your Own Collage with Photoshop Templates
Now that we know that you can access numerous incredible photoshop templates for free, you might want to create a collage for yourself in Photoshop. So, this is how you can use the photoshop collage template to make your collage with Photoshop Templates.
First, you need to select the images you want to create a collage with. Then you will have to import them. You can either “select and import” them one at a time or even batch import all of them together. Then, you can readily choose the template you want to use, or you can also create one for yourself.
Then you can resize or edit the images in the way you want and place them in the desired order. After you are done arranging and creating the collage perfectly, save the file in JPEG format and then export it to access it whenever you want!
Part 3 How to Custom a Photoshop Collage in 9 Simple Steps
If you do not know the answer to the question: how to make a collage in photoshop, there is absolutely nothing to worry about. Because the answer to this question is simple and includes not more than nine steps.
So now, we will be discussing the nine simple steps that will help you make a custom photo collage in photoshop. Here is the list of steps that will help you in doing so.
● Step 1: Selecting your favorite photos
The first step to making a collage in photoshop is to select all the photos you would like your collage to have. Now, it will be best for you to choose your photos wisely. We understand that each photograph is equally sweet and cherishable. But, when you select the images for your collage in a thoughtful manner, the collage turns out much better than expected.
You can use different collage ideas for photoshop, such as following a particular storyline, where you collage the photos so that it recreates the memory or the moments in sequence. Another way to select your photos is by sticking to a particular theme, and it can be vintage or on one specific color or the like. It will help your collage turn out in the best and the most thoughtful way.
● Step 2: Opening the photos you have selected, in collage maker photoshop
Now that you have selected which images you would want your collage to have, the next step will require you to open those images in the collage maker Photoshop. For this, you will have to select the option “File”. There, you will find the option “Open”. Then you will open the images you have chosen in Photoshop.
Also, you can simply press the “ctrl” and the “O” keys on your keyboard and it will automatically help you open the images you have selected for the photo collage on photoshop.
Another way to open the pages you have selected for your collage is through the “Drag and Drop” function. It is more effortless to choose the images and open them in Photoshop. After you have opened the photos in Photoshop, it will open in a different tab and look like in the following picture.
● Step 3: Make a new file for your collage on photoshop
The third step requires you to make a new file for your photo collage in photoshop. For this, you need to select or click on the “File” option on Photoshop. Then, click on the “New” option. It will help you make a new file for your collage. You can also select the “ctrl” and “N” together.
As you click on the “New” option, you will be given options to choose from. Choose the one that matches your preference.
When you are working on photoshop to make a collage, the images will need a collage background because it is on this background that the photos will assemble. If you have made a collage before on photoshop, you can use the old collage photoshop template. Otherwise, you need to create a new document for the collage.
● Step 4: Add the selected images one-by-one
Adding the images can be done in many ways. One way to do so is by opening the photo and clicking on it. Another way of doing so is to use the “Marquee Tool” of Photoshop.
Another way of doing so is by pressing the “ctrl” and “A” keys on your keyboard together. You will find the matching ants border around the image when you do this.
Then, go to the “Edit” option and choose “Copy” there. Or, you can also select the “ctrl” and “C” keys on your keywords together. Then go to your new document and select the option of “Paste” from the “Edit” option, or you can also press the “ctrl” and “V” keys together to do so.
The photo will be added in its own layer on the new document.
● Step 5: Arrange the images
Now, arrange the images in the way you want. If you have chosen to tell a story through your collage creator in photoshop, then arrange the photos accordingly. You can do so with the help of the “Move” tool or simply tap V. You can also use the “Free Transform” tool to edit and transform the images in the way you want. You can resize, rotate and edit the photos in many other ways through the “Free Transform” tool.
Step 6: Integrate image space
To create a collage in photoshop in a better and more spaced-out manner, you need to add some spacing between the images you have in your collage. There are two ways to add spacing between the pictures; one way is by creating a thin, white border around each image.
And the second method is by accessing and using the “Layers” feature in Photoshop.
● Step 7: Merge all the Layers
This step is necessary when you have used the “Layer” feature to create the spacing among the images present in your collage. You will be able to do so from the “Layer” option. So, go to the “Layer” option and select the “Merge Invisible” option present there.
● Step 8: cropping the final picture
Before the final step, it is important that you crop the final picture. And to do so, you can opt for the “Crop tool”. You will be able to access it easily, or you can also simply tap C to use the “Crop tool.”
● Step 9: Save the final collage and export
After you have done all the necessary changes and are satisfied with the final collage, then, save the file. To do so, go to the “File” option and select the “Save as” option.
Then choose the file type to be “JPEG”. Type the name you would want the collage to be saved as. This completes the process of saving the file. Then choose the image quality you would want the collage to be exported in.
● Key Takeaways from This Episode →
● In this discussion, we have covered the following topics.
● We discussed whether Photoshop has collage templates.
● Then we proceeded with discussing how we can create a collage in photoshop using the templates in it.
● Lastly, we wrapped up our discussion with the nine-step tutorial about customizing a collage in Photoshop.
Also read:
- New In 2024, Best 10 Animated Templates in Canva
- 2024 Approved Best Tips for Effortless Unity 3D Animation
- New How to Find & Make Animated Christmas GIFs, In 2024
- New 10 Best Free GIF Apps for iPhone and iPad for 2024
- New Best Claymation Shows That Make Your Memories Unforgettable
- New Make Well Done Animated GIF
- Updated How to Make Animated Videos for Business – an Ultimate Guide
- 2024 Approved Best 10 Animated DP for WhatsApp
- New 2024 Approved Top 10 Apps to Enhance Your Instagram Story Slideshow
- New 15 Iconic Cartoon Characters of All Time for 2024
- 15 Top Collage Makers to Create Aesthetic Collages for 2024
- Some Must-Know Useful Lego Animation Ideas
- Updated FREE Top 10 Best Convert Video Between GIF and Software High Quality, 2024
- Updated 2024 Approved 26 Cool Anime Girl Names and Their Meanings
- Updated 6 Proven Ways to Dub Anime for Anime Voice Actor
- Updated 2024 Approved Adobe Auto Rigger Is AWESOME
- New How to Liven Up Your Animate Website on Scroll
- 2024 Approved How to Make GIF Stickers for WhatsApp 100 The Easy Way
- New In 2024, Best Websites to Download Animated GIFs for Free-Free GIF Download
- New In 2024, Best 10 Anime Series of All Time | Watch Anime Online
- New Whats the Best 10 Photo Animator Templates That Bring Your Images to Life for 2024
- In 2024, How to Make My Photo 3D Cartoon Online
- New In 2024, Ideas of Learning How to Send WhatsApp Animated Gifs
- Updated 2024 Approved How to Make Slideshow in LinkedIn
- Updated 10 Best Tools to Make Pic Collage for Windows
- New DP Animation Maker Tutorial for Finding The Best Animated Profile Picture Maker
- 2024 Approved Samples of Cartoon Character Face to Inspire You
- New How to Send and Add Snapchat GIFs 100 in Easy Way
- New 12 Animated Slideshow PowerPoint Templates and Tools to Make Them for 2024
- Updated Have You Seen the Facebook Cartoon App Everyones Using Recently
- Updated In 2024, Top 7 Best Free GIF Apps for Android
- New Ways on How to Liven Up Your Animate Website on Scroll for 2024
- In 2024, How to Make an Animation With 7 Steps
- In 2024, 15 Animated Characters We All Had A Crush On
- Updated 2024 Approved How-To Guide Make Animation Characters with the Best Animated Character Creators
- 2024 Approved Best GIF Resizers to Reduce GIF Size
- Updated 2024 Approved Can I Still Do Animated Logo Design Without Design Skills?
- New Techniques on How to Make After Effects 2D Animation for 2024
- Updated 10 of the Best Disney Animated Shows
- New 12 Aesthetic GIF Instagram for Marketers
- Best 12 Illusion Gifs Top Picks for 2024
- New 2024 Approved Techniques for Making After Effects 2D Animation
- Updated In 2024, Guide on How to Create GIF in WhatsApp iPhone
- About Vivo Y27s FRP Bypass
- How to Fix Error 495 While Download/Updating Android Apps On Realme Narzo N53 | Dr.fone
- How to recover old videos from your Nokia C12
- Does Redmi Note 12 Pro+ 5G has native MOV support?
- In 2024, Top 15 Augmented Reality Games Like Pokémon GO To Play On Honor 90 GT | Dr.fone
- Can Life360 Track You When Your Nokia C12 Plus is off? | Dr.fone
- In 2024, How to Transfer Data from Apple iPhone 8 Plus to ZTE Phones | Dr.fone
- In 2024, 15 Best Strongest Pokémon To Use in Pokémon GO PvP Leagues For Samsung Galaxy A05s | Dr.fone
- Reliable User Guide to Fix Honor 90 Pro Running Slow and Freezing | Dr.fone
- New Facebook Live Shopping A Comprehensive Guide for 2024
- How to Unlock Disabled Apple iPhone 6 Plus/iPad Without Computer | Dr.fone
- How To Transfer WhatsApp From iPhone XS Max to other iPhone devices? | Dr.fone
- Reliable User Guide to Fix Vivo S17e Running Slow and Freezing | Dr.fone
- In 2024, A How-To Guide on Bypassing Apple iPhone 13 iCloud Activation Lock
- Change Location on Yik Yak For your OnePlus 11 5G to Enjoy More Fun | Dr.fone
- How to Reset a Locked Vivo Y28 5G Phone
- In 2024, Top 5 Tracking Apps to Track Xiaomi Redmi 12 without Them Knowing | Dr.fone
- Fix Unfortunately Settings Has Stopped on Xiaomi 13 Ultra Quickly | Dr.fone
- Top 6 Apps/Services to Trace Any Samsung Galaxy M34 Location By Mobile Number | Dr.fone
- How to Unlock Poco C65 Phone Password Without Factory Reset?
- In 2024, Why is iPogo not working On Apple iPhone SE (2020)? Fixed | Dr.fone
- What to Do if Google Play Services Keeps Stopping on Xiaomi 14 | Dr.fone
- Title: Updated In 2024, The Ultimate Cheatsheet to 15 Adobe Animate Alternatives
- Author: Elon
- Created at : 2024-05-19 03:05:16
- Updated at : 2024-05-20 03:05:16
- Link: https://animation-videos.techidaily.com/updated-in-2024-the-ultimate-cheatsheet-to-15-adobe-animate-alternatives/
- License: This work is licensed under CC BY-NC-SA 4.0.
