

Updated In 2024, Top 10 Video to GIF Converters Top Picks
Top 10 Video to GIF Converters: Top Picks
Best 10 Video to GIF Converters: Top Picks
An easy yet powerful editor
Numerous effects to choose from
Detailed tutorials provided by the official channel
Having trouble converting your videos to GIF? Browse the top 10 converters to sort this out!
In this article
01 [Why GIFs are Widely Used and Popular?](#Part 1)
02 [Top 10 Ways to Turn Video into GIF](#Part 2)
Part 1 Why GIFs are Widely Used and Popular?
If you take a poll on the watch preference of GIF versus videos, most of votes you get would be in favor of watching GIFs. There are obvious reasons to the fact that anyone would prefer watching a GIF over a video, irrespective of its length. Some major ones that make it quite annoying to watch videos include the following:
● To begin with, you need to turn the video on and off, depending on your choice of watching a video or surfing through stories and feeds, failing which you get to hear additional sounds through your feed from the already running video. You further need to stop the music or go for a volume control in case you are not interested to watch the video.
● Most of the videos you run turn up to be irrelevant or uninteresting through the middle, but you don’t have a choice to make bit adjustments. If however possible, the method is not quite convenient. You may need to visit a different site in case you run a video that is not integrated with webpage of your searched content, wait for the portal’s interface to load or watch an advertisement.
● GIFs, on the other hand, do not require pausing or turning off, and run automatically. You also don’t need to mute any sounds. These ensure to-the-point message delivery and don’t divert your attention from the primary content you visit the webpage for.
Owing to the above, most of us are now much interested to convert videos to GIFs for an exact, impactful and to the point content creation and sharing. See through the next sections of this article to learn about the best video to GIF conversion tools and software.
Part 1 Top 10 Ways to Turn Video into GIF
Considering the credibility of GIFs, you may often require to convert your long videos into short and content specific GIFs. Given below are the 10 best methods to cater to the need of video to GIF conversion:
01Filmora
Wondershare Filmora Video Editor is one among the most popular and easy methods to convert videos to GIFs. It is compatible with almost all common video formats and is loaded with a plethora of exciting effects and editing tools. Take the following steps to create GIFs from videos using this application:
Wondershare Filmora
Get started easily with Filmora’s powerful performance, intuitive interface, and countless effects!
Try It Free Try It Free Try It Free Learn More >


Step 1: Import Your Video
Launch Filmora and import your desired video in the app’s welcome window. To do this, click on ‘New Project’ followed by ‘Import’ option from the drop down menu to add your video to the Filmora.

Step 2: Timeline Dragging
Add your video to the app’s timeline using the ‘Drag and Drop’ method. You can also extract video frames by taking screenshots and merge these images into your GIF from the media library.

Step 3: Explore Your Editing Skills
You can now edit the imported video in the timeline using a range of interesting effects. Crop, trim, split or make speed adjustments to give your video a catchy look.

Step 4: Include Messages
Try adding texts and supplementary elements to deliver impactful messages through your creation.

Step 5: It’s Time to Share!
Click ‘Export’ to save your GIF to your device. You are now ready to post your work in your social communities to get the most deserved attention of your peers!

02YouTube to GIF
This one is a simple and user-friendly video to GIF converter. You can convert videos to GIFs from your PC or other online platforms with this converter. The converter allows you to play with a variety of editing effects to make your creation more interesting. All you need to do is the following:
● In the video URL bar, type ‘gif’ after ‘www.’ and you will be redirected to converter’s working window. Set the GIF time interval or apply specific effects using the tools from the panel in the left of the working window.


● To set the video time frame, highlight it in the video timeline. Set the desired interval using the ‘Start Time’ and ‘End Time’ options.

● To add a new visual effect, select it from the menu. Below the video timeline, a row of parameters will get displayed. Set the effect parameters to make desired changes.
● Click ‘Create GIF’. In the ‘Settings’ menu, you can rename and add tags to your creation and even make it private.

● That’s it! You can download your GIF now. You may get a converter purchase offer for enabling advanced features. While most users prefer sticking to the free version, it is up to you whether to decline or accept the purchase offer.
● The ‘Download’ feature is exclusive to registered users. However, if you don’t prefer creating an account, just open the GIF download link in a separate tab’s ‘Direct Link’ row. Alternatively, you can replace ‘gif’ with ‘conv’ in the video URL bar and choose ‘Convert to GIF’. However, this process may take some extra minutes.

03Giphy GIF Maker
This is an editing tool that you can use to convert video to GIF online. This one is a reliable converter tool with a user-cohesive interface. It is a simple video editor that is available to you for free. All you need to do is mentioned below:
Step 1: Load your Video
Go to the official app website and paste your desired video link in the search bar. Your video gets uploaded to the app’s editor screen. Specify the time frame and check out your GIF’s preview.

Step 2: Let’s Go Editing!
Select ‘Continue to Decorate’ to edit your GIF with texts, effects, frames and filters. You can even go for a straight upload if your video doesn’t require customization.

Step 3: Time to Share!
Select ‘Continue to Upload’ and add required tags. Tap ‘Upload to Giphy’ to make a social media post or add it to the app’s website through a specific share code.
04Wondershare TunesGo
This is an effective video to GIF creator tool, loaded with extensive features. You can use this application to convert videos, live photos and multiple snaps into interesting GIFs. TunesGo gives you the freedom to edit your work in your own style with a variety of effects. Here’s what you need to do:

Step 1: Launch TunesGo
Download, install and launch the app into your PC. You may be asked for a device connection setup, but you can skip that in case GIF creation is your only requirement.

Step 2: Upload your Video
In the app’s welcome screen, navigate to ‘Toolbox’ at the top. From the drop down interface, choose ‘GIF Maker’. In the new window that pops-up next, click on ‘Add’ to upload the desired video to the app from your PC.

Step 3: Let’s Create!
Set the required time frame for your GIF in the app’s timeline and tap the ‘Create GIF’ button to start the conversion process. On completion, your work gets automatically saved in the ‘Pictures’ folder in your PC. You can also customize your target location.

05Vimeo
Vimeo is also a quick, 3-stepvideo to GIF converter. However, you need to have a Vimeo account to take up the conversion process. This is an easy and hassle free GIF creator, that adheres to your creation needs within minutes. Here’s what you need to do:
Step 1: Upload Your Video
Log in to your Vimeo account. In the opening window, select ’Upload’ from the toolbar at the top. ‘Drag and Drop’ or click ‘Choose Files’ to upload the desired video from your device.

Step 2: Create Your GIF
After you are done uploading the video, select ‘Create a GIF’ from the sidebar at the left. You will be directed to the GIF Editor window. Select a loop section from the video and set a time frame of maximum 6 seconds in the video timeline. Now click ‘Create GIF’.


Step 3: Export Your Creation
Your GIF is ready to download and share. You can also embed your GIF by generating embed codes for specific platforms.
06 Adobe Photoshop
This one is one f the most popular editing applications you can use to make GIF out of video. It’s simple and user-friendly interface does not require you to possess a Photoshop mastery for the conversion purpose. Here’s what you need to follow:
Step 1: Search Your Video
Find a video of your choice from a desired platform. In case you want a YouTube video, add ‘ss’ prior to the video’s service name in YouTube’s URL bar.
STEP 2: Edit Your Video
Use any preferable video splitters and editors to crop, trim and add interesting effects to your video and set a maximum time frame of 3 seconds.
Step 3: Create GIF
Open your edited video in Adobe Photoshop and tap ‘File Import-Video frames into layers’.

Step 4: Adjust Settings
Make required setting adjustments and click on ‘File-Save for Web’. Try adjusting image resolution and color range if your file size exceeds 10 MB.

Step 5: Save Your Work
In the ’Files’ tab at the top, select ‘Save’ and choose the ‘.gif’ extension in the ‘File Type’ dialog box to save your creation to your PC.
07Convertio
This converter provides a simple, 3-step process to create GIF from video. Either use it as a browser extension or download it from Google Chrome Webstore. Take the following steps to convert videos to GIF online.
● Upload your desired video to the service timeline. You can either choose files directly or ‘Drag and Drop’ them from your device.
● Select ‘Convert’ to make GIF from your uploaded video.
● Tap ‘Download’ to save your creation.

You can use this service to make different format conversions. However, this converter does not allow you to edit or add effects your GIF.
08MakeAGif
You can use this tool as a GIF video maker online to create, exchange and share GIFs on different platforms. Additionally, you also get the flexibility to use already saved images in your device to add them to your GIF. The app’s basic version allows you to create GIFs without watermarks. To add watermarks, you will need an account on the app. To convert videos to GIFs using this tool, you should take the following steps:
Step 1: Upload Your Video
In the app’s welcome screen, click on ‘Video to GIF’ and upload a desired video in the editor timeline. Add effects and make speed and time frame adjustments. When satisfied, tap ‘Continue to Publishing’.

Step 2: Add Names and Tags
In the publishing window, give a suitable name and add required tags to your edited video to make it easily identifiable. When you are done, click on ‘Create a GIF’ from the bottom right.

Step 3: Ready to Share!
You can now share your created GIF across social media platforms.

09Adobe Premiere
Similar to Adobe Photoshop, Adobe Premiere too is quite a preferred application for creating GIFs from videos. This is a simple, quick and free application that converts your videos to GIFs in a span of few minutes. Here’s what you need to do to go about the process:

Step 1: Edit your Video
Add a video of your choice in the Adobe Premiere timeline and play with your editing creativity to add desired effects and filters to it. Make sure to set requisite time frames to your edit.

Step 2: Prepare an Export
Click into the app’s video timeline, and prepare a file export using the following path:
File> Export> Media

Step 3: Settings Adjustments
In the Media Export window, navigate to the ‘Format’ tab. From the drop down menu, choose ‘Animated GIF’. Here, you can add your gif file, select its target destination and adjust the required settings.

Step 4: Export Your Work
Click ‘Export’ to share your creation on social media or click on ‘Queue’ to send your GIF to a specific media encoder.

1010. Movavi Video Converter
This is one of the latest video converter software you can rely on to make GIF from video files. This software allows you to create top quality animated GIFs and is compatible with a variety of video formats. Using this converter, you can create amazing GIFs in 5 quick steps: here’s what you need to follow:
Step 1: Download and Install the Software
To begin, download the converter software from its official site and adhere to the user instructions to install the same in your system.
Step 2: Upload Your Video
In the software’s opening window, click on ‘Add Media’ followed by ‘Add Video’ and select a desired video from your system to upload on the Movavi video timeline.

Step 3: Trim Your Video
Select ‘Edit’ from the right of your video file. In the editing window, specify the initial cut of the video by displacing the marker to the desired point. Click on ‘Scissors’ to add multiple cut points to your video. You can even drag the cut points around the editor timeline. Choose the unvented sections and click ‘Trash Can’. When the result satisfies you, click ‘Done’.

Step 4: Choose a Conversion Format
Navigate to the ‘Images’ tab and select ‘GIF’ and set an adequate size for the GIF. Here, you can adjust quality, frame size and rate and resize method using the ‘Cogwheel’ tool.

Step 5: Let’s Get Converting!
Tap ‘Convert’ and wait for the conversion to finish. You will be automatically directed to the folder where your converted files get saved.

● Key Takeaways from This Episode →
● GIFs are short, to the point and convenient to access, providing exact and impactful message delivery.
● The software market is flooded with a variety of editing tools to convert your dull videos to catchy GIFs.
● Filmora is a quick and smart editing tool that envisages your GIF creating experience with a range of exciting features.
Having trouble converting your videos to GIF? Browse the top 10 converters to sort this out!
In this article
01 [Why GIFs are Widely Used and Popular?](#Part 1)
02 [Top 10 Ways to Turn Video into GIF](#Part 2)
Part 1 Why GIFs are Widely Used and Popular?
If you take a poll on the watch preference of GIF versus videos, most of votes you get would be in favor of watching GIFs. There are obvious reasons to the fact that anyone would prefer watching a GIF over a video, irrespective of its length. Some major ones that make it quite annoying to watch videos include the following:
● To begin with, you need to turn the video on and off, depending on your choice of watching a video or surfing through stories and feeds, failing which you get to hear additional sounds through your feed from the already running video. You further need to stop the music or go for a volume control in case you are not interested to watch the video.
● Most of the videos you run turn up to be irrelevant or uninteresting through the middle, but you don’t have a choice to make bit adjustments. If however possible, the method is not quite convenient. You may need to visit a different site in case you run a video that is not integrated with webpage of your searched content, wait for the portal’s interface to load or watch an advertisement.
● GIFs, on the other hand, do not require pausing or turning off, and run automatically. You also don’t need to mute any sounds. These ensure to-the-point message delivery and don’t divert your attention from the primary content you visit the webpage for.
Owing to the above, most of us are now much interested to convert videos to GIFs for an exact, impactful and to the point content creation and sharing. See through the next sections of this article to learn about the best video to GIF conversion tools and software.
Part 1 Top 10 Ways to Turn Video into GIF
Considering the credibility of GIFs, you may often require to convert your long videos into short and content specific GIFs. Given below are the 10 best methods to cater to the need of video to GIF conversion:
01Filmora
Wondershare Filmora Video Editor is one among the most popular and easy methods to convert videos to GIFs. It is compatible with almost all common video formats and is loaded with a plethora of exciting effects and editing tools. Take the following steps to create GIFs from videos using this application:
Wondershare Filmora
Get started easily with Filmora’s powerful performance, intuitive interface, and countless effects!
Try It Free Try It Free Try It Free Learn More >
Step 1: Import Your Video
Launch Filmora and import your desired video in the app’s welcome window. To do this, click on ‘New Project’ followed by ‘Import’ option from the drop down menu to add your video to the Filmora.
Step 2: Timeline Dragging
Add your video to the app’s timeline using the ‘Drag and Drop’ method. You can also extract video frames by taking screenshots and merge these images into your GIF from the media library.
Step 3: Explore Your Editing Skills
You can now edit the imported video in the timeline using a range of interesting effects. Crop, trim, split or make speed adjustments to give your video a catchy look.
Step 4: Include Messages
Try adding texts and supplementary elements to deliver impactful messages through your creation.
Step 5: It’s Time to Share!
Click ‘Export’ to save your GIF to your device. You are now ready to post your work in your social communities to get the most deserved attention of your peers!
02YouTube to GIF
This one is a simple and user-friendly video to GIF converter. You can convert videos to GIFs from your PC or other online platforms with this converter. The converter allows you to play with a variety of editing effects to make your creation more interesting. All you need to do is the following:
● In the video URL bar, type ‘gif’ after ‘www.’ and you will be redirected to converter’s working window. Set the GIF time interval or apply specific effects using the tools from the panel in the left of the working window.
● To set the video time frame, highlight it in the video timeline. Set the desired interval using the ‘Start Time’ and ‘End Time’ options.
● To add a new visual effect, select it from the menu. Below the video timeline, a row of parameters will get displayed. Set the effect parameters to make desired changes.
● Click ‘Create GIF’. In the ‘Settings’ menu, you can rename and add tags to your creation and even make it private.
● That’s it! You can download your GIF now. You may get a converter purchase offer for enabling advanced features. While most users prefer sticking to the free version, it is up to you whether to decline or accept the purchase offer.
● The ‘Download’ feature is exclusive to registered users. However, if you don’t prefer creating an account, just open the GIF download link in a separate tab’s ‘Direct Link’ row. Alternatively, you can replace ‘gif’ with ‘conv’ in the video URL bar and choose ‘Convert to GIF’. However, this process may take some extra minutes.
03Giphy GIF Maker
This is an editing tool that you can use to convert video to GIF online. This one is a reliable converter tool with a user-cohesive interface. It is a simple video editor that is available to you for free. All you need to do is mentioned below:
Step 1: Load your Video
Go to the official app website and paste your desired video link in the search bar. Your video gets uploaded to the app’s editor screen. Specify the time frame and check out your GIF’s preview.
Step 2: Let’s Go Editing!
Select ‘Continue to Decorate’ to edit your GIF with texts, effects, frames and filters. You can even go for a straight upload if your video doesn’t require customization.
Step 3: Time to Share!
Select ‘Continue to Upload’ and add required tags. Tap ‘Upload to Giphy’ to make a social media post or add it to the app’s website through a specific share code.
04Wondershare TunesGo
This is an effective video to GIF creator tool, loaded with extensive features. You can use this application to convert videos, live photos and multiple snaps into interesting GIFs. TunesGo gives you the freedom to edit your work in your own style with a variety of effects. Here’s what you need to do:
Step 1: Launch TunesGo
Download, install and launch the app into your PC. You may be asked for a device connection setup, but you can skip that in case GIF creation is your only requirement.
Step 2: Upload your Video
In the app’s welcome screen, navigate to ‘Toolbox’ at the top. From the drop down interface, choose ‘GIF Maker’. In the new window that pops-up next, click on ‘Add’ to upload the desired video to the app from your PC.
Step 3: Let’s Create!
Set the required time frame for your GIF in the app’s timeline and tap the ‘Create GIF’ button to start the conversion process. On completion, your work gets automatically saved in the ‘Pictures’ folder in your PC. You can also customize your target location.
05Vimeo
Vimeo is also a quick, 3-stepvideo to GIF converter. However, you need to have a Vimeo account to take up the conversion process. This is an easy and hassle free GIF creator, that adheres to your creation needs within minutes. Here’s what you need to do:
Step 1: Upload Your Video
Log in to your Vimeo account. In the opening window, select ’Upload’ from the toolbar at the top. ‘Drag and Drop’ or click ‘Choose Files’ to upload the desired video from your device.
Step 2: Create Your GIF
After you are done uploading the video, select ‘Create a GIF’ from the sidebar at the left. You will be directed to the GIF Editor window. Select a loop section from the video and set a time frame of maximum 6 seconds in the video timeline. Now click ‘Create GIF’.
Step 3: Export Your Creation
Your GIF is ready to download and share. You can also embed your GIF by generating embed codes for specific platforms.
06 Adobe Photoshop
This one is one f the most popular editing applications you can use to make GIF out of video. It’s simple and user-friendly interface does not require you to possess a Photoshop mastery for the conversion purpose. Here’s what you need to follow:
Step 1: Search Your Video
Find a video of your choice from a desired platform. In case you want a YouTube video, add ‘ss’ prior to the video’s service name in YouTube’s URL bar.
STEP 2: Edit Your Video
Use any preferable video splitters and editors to crop, trim and add interesting effects to your video and set a maximum time frame of 3 seconds.
Step 3: Create GIF
Open your edited video in Adobe Photoshop and tap ‘File Import-Video frames into layers’.
Step 4: Adjust Settings
Make required setting adjustments and click on ‘File-Save for Web’. Try adjusting image resolution and color range if your file size exceeds 10 MB.
Step 5: Save Your Work
In the ’Files’ tab at the top, select ‘Save’ and choose the ‘.gif’ extension in the ‘File Type’ dialog box to save your creation to your PC.
07Convertio
This converter provides a simple, 3-step process to create GIF from video. Either use it as a browser extension or download it from Google Chrome Webstore. Take the following steps to convert videos to GIF online.
● Upload your desired video to the service timeline. You can either choose files directly or ‘Drag and Drop’ them from your device.
● Select ‘Convert’ to make GIF from your uploaded video.
● Tap ‘Download’ to save your creation.
You can use this service to make different format conversions. However, this converter does not allow you to edit or add effects your GIF.
08MakeAGif
You can use this tool as a GIF video maker online to create, exchange and share GIFs on different platforms. Additionally, you also get the flexibility to use already saved images in your device to add them to your GIF. The app’s basic version allows you to create GIFs without watermarks. To add watermarks, you will need an account on the app. To convert videos to GIFs using this tool, you should take the following steps:
Step 1: Upload Your Video
In the app’s welcome screen, click on ‘Video to GIF’ and upload a desired video in the editor timeline. Add effects and make speed and time frame adjustments. When satisfied, tap ‘Continue to Publishing’.
Step 2: Add Names and Tags
In the publishing window, give a suitable name and add required tags to your edited video to make it easily identifiable. When you are done, click on ‘Create a GIF’ from the bottom right.
Step 3: Ready to Share!
You can now share your created GIF across social media platforms.
09Adobe Premiere
Similar to Adobe Photoshop, Adobe Premiere too is quite a preferred application for creating GIFs from videos. This is a simple, quick and free application that converts your videos to GIFs in a span of few minutes. Here’s what you need to do to go about the process:
Step 1: Edit your Video
Add a video of your choice in the Adobe Premiere timeline and play with your editing creativity to add desired effects and filters to it. Make sure to set requisite time frames to your edit.
Step 2: Prepare an Export
Click into the app’s video timeline, and prepare a file export using the following path:
File> Export> Media
Step 3: Settings Adjustments
In the Media Export window, navigate to the ‘Format’ tab. From the drop down menu, choose ‘Animated GIF’. Here, you can add your gif file, select its target destination and adjust the required settings.
Step 4: Export Your Work
Click ‘Export’ to share your creation on social media or click on ‘Queue’ to send your GIF to a specific media encoder.
1010. Movavi Video Converter
This is one of the latest video converter software you can rely on to make GIF from video files. This software allows you to create top quality animated GIFs and is compatible with a variety of video formats. Using this converter, you can create amazing GIFs in 5 quick steps: here’s what you need to follow:
Step 1: Download and Install the Software
To begin, download the converter software from its official site and adhere to the user instructions to install the same in your system.
Step 2: Upload Your Video
In the software’s opening window, click on ‘Add Media’ followed by ‘Add Video’ and select a desired video from your system to upload on the Movavi video timeline.
Step 3: Trim Your Video
Select ‘Edit’ from the right of your video file. In the editing window, specify the initial cut of the video by displacing the marker to the desired point. Click on ‘Scissors’ to add multiple cut points to your video. You can even drag the cut points around the editor timeline. Choose the unvented sections and click ‘Trash Can’. When the result satisfies you, click ‘Done’.
Step 4: Choose a Conversion Format
Navigate to the ‘Images’ tab and select ‘GIF’ and set an adequate size for the GIF. Here, you can adjust quality, frame size and rate and resize method using the ‘Cogwheel’ tool.
Step 5: Let’s Get Converting!
Tap ‘Convert’ and wait for the conversion to finish. You will be automatically directed to the folder where your converted files get saved.
● Key Takeaways from This Episode →
● GIFs are short, to the point and convenient to access, providing exact and impactful message delivery.
● The software market is flooded with a variety of editing tools to convert your dull videos to catchy GIFs.
● Filmora is a quick and smart editing tool that envisages your GIF creating experience with a range of exciting features.
10 Great Moving Animation PowerPoint Techniques
10 Awesome Moving Animation PowerPoint Techniques
An easy yet powerful editor
Numerous effects to choose from
Detailed tutorials provided by the official channel
PowerPoints can be quite dull without anything to spice it up. So, this question is more than 100% warranted. Fortunately, we were able to pull together a tutorial on creating moving animation PowerPoint presentations.
Complete with some templates that you can start off with (if you’d prefer to make it as simple as possible for yourself.)
In this article
01 [6 Animated Powerpoint Templates with Interactive Features](#Part 1)
02 [How to Create a Moving Animation in Powerpoint](#Part 2)
03 [10 Moving Animation Powerpoint Techniques](#Part 3)
Part 1 6 Animated PowerPoint Templates with Interactive Features
The default people tend to-go-to when it comes to presentations are videos. As they tend to be more engaging on their own. For that, you’ll see people gravitating towards software like Filmora, which can create beautiful, eye-catching presentations that you can easily and quickly share. Not just to an immediate audience, but also on social media and the like.
However, of course, sometimes a personal touch is important in a presentation — important to have a ‘voice’ attached to the image on the screen. But just because this is the case, doesn’t mean that you shouldn’t go all out on your presentation. Hence, why moving animation PowerPoint templates are such a big deal:
01Company Presentation PowerPoint Template
For the first of the Moving Animation PowerPoint templates that we have to introduce, we chose the ‘Company Presentation PowerPoint Template.’ As you can perhaps guess from the name, it’s a very professional template. It comes with a total of 500 sample slides that you can choose from (50 of which are unique), and it’s set up with professional animations that can spice up your presentation without making it look gaudy or over-the-top.

02Move Animated PowerPoint Template
Next is the modern, minimalistic template called “Move Animated.” This one is a lot more versatile, with every single one of the 144 unique slides available suitably animated. The best part of it is definitely the easy way in which it can be used. With the modern, minimalistic style, it’s easy enough to remove the presets and replace them with suitable company or product images to promote your content, idea, or project.

0340 Animated Conceptual Slides for PowerPoint
Again, we have another modern and minimalistic kind of PowerPoint template with ‘40 Animated Conceptual Slides for PowerPoint.’ It comes with 40 modern slides, all of which come fully animated are easy enough to customize with your own branding or content.

04UNIGRAPH - Animated & Creative Template (PPTX)
For a bit more fun, our next template is “UNIGRAPH.” This still definitely fits the description ‘minimalistic’ but the pop of color and effects that it brings to the table gives it a different kind of vibe from all the others. No less professional, but certainly more fun. Of course, most importantly, perhaps, is the fact that each slide is smoothly animated.

05Graph & Charts PowerPoint Presentation
For this next one, we introduce a template set called “Graphs & Charts” for those who may want to present their products, projects, ideas, etc. in the shape of graphs and charts. It’s perfect for professionals, certainly. Especially with its clean look, brightened only by occasional pops of color that can be seen from the graphs and charts that it comes with.

06Laststyle - PowerPoint Template
This next PowerPoint template is most suited for businesses looking to promote their products. The creator of the template has provided five different colored versions of the template, each with 30 unique slides that were carefully sectioned with suitable animations.

Part 2 How to Create a Moving Animation in PowerPoint
Now we come to the point of the article where we speak directly to those who may want to experiment more by personally creating a moving animation PowerPoint. For this example, we’ll be teaching you how to create a path animation PowerPoint with the available tools that the software offers under ‘Animation.’ Stick around if you want to learn more.
01Step 1. Open Project.
First things first, of course. Start a new project. When you’ve started, move on to the Animation tab (which we’ve pointed out in the image below.)

02Step 2. Add Animation.
Then, make sure to select the object or model that you want to animate (in this case, we’ve inserted a 2D model of a businessman), and then click the ‘Add Animation’ button (shown in the image below.)

03Step 3. Choose Animation.
Under ‘Add Animation’ you’ll find several different options for animations that you can choose from. Of course, since our goal is to create a PowerPoint Motion Path Animation, we have selected one of the ‘Motion Path’ options.

04Step 4. Choose Motion Path Animation
In order to make motion animation in PowerPoint, you must select one of the offered ‘Motion Paths’ (i.e., Bounce, Line, Arcs, etc.) and then use the motion path tool that appears to control the direction you wish to make your character move.
In this example, we chose the ‘Lines’ motion path (1) and then used the line tool to create a path for our businessman model. To walk from the right side of the screen towards the left.

05Step 5. Adjust Animation.
With path animation PowerPoint complete, you can adjust as needed with the tools provided. For example, you can have the character start moving as soon as the slide opens, or wait until a minute has passed, you can extend the animation by changing duration, etc.

Part 3 10 Moving Animation PowerPoint Techniques
For this last step, we break down some important PowerPoint 3D Animation need-to-knows. Including the specifics provided by each of the options made available to you and why it’s important to explore every single one to create better and more professional-looking presentations.
01Transitions
When it comes to PowerPoint presentations, most people are no doubt the most familiar with ‘Transitions’ when talking in terms of adding animation into a presentation. This one decides whether you want to shift from one slide to another smoothly, or if you want the previous slide to break into splinters, or rotate into the next slide, and so on and so forth. It’s an ‘in-between’ animation that signals where one ends and the other begins.

02Animations
Now, for the ‘Animations’ tab, we focus on animations that occur in the slide (not in-between like transitions). This can include a wide array of things. Whether it be characters moving (like shown in the tutorial we provided), text boxes appearing and disappearing in short order, images bouncing into view in dramatic fashion, and so on and so forth. There’s lots of potential here.

03Animation - Start
We mentioned this previously in the tutorial, but PowerPoint (which does not offer the more advanced 3D customization options), does still give you the freedom to choose how you want certain animations to work.
In the case of the ‘Animations-Start’ option, the goal is to decide when an animation starts playing. Do you want it to start after a click? Or maybe you want it to start up immediately? Whatever the case may be, this function will let you choose the specifics.

044. Animation - Duration
Next, we decide how long you want the animation to last. For example, if you chose to add a PowerPoint 3D rotation animation into a character, how long do you want it to spin before it settles into place? Perhaps only a second? Perhaps more? Whatever you chose, this is the option that will let you finalize that.

05Animation - Delay
This one is self-explanatory as well. But suffice to say, the ‘Delay’ option is for deciding how much an animation is delayed before starting. For example, if you chose to start it ‘On Click’ you can increase the delay to keep it from playing immediately on click.

06Break Up Presentation into Sections
A lot of PowerPoint templates, you’ll find, are naturally broken into sections. This is because it is easier to consume it in that way. It’s also a good signal to your audience as to what point of the presentation you are on. Are you in the beginning? The middle? Near the end? Etc. In this case, the best option for showing it is transitions that separate the sections from one another.

07Add Animation - Entrance
As promised earlier, we’ll be going through each type of animation is available under the ‘Add Animation’ option. The first is “Entrance” animations. This one is pretty easy to guess. It makes up a variety of animations that serve as its entrance animation. Here are some examples:
● Appear: To have objects appear without any other effect.
● Fade: To have objects fade into view.
● Bounce: To have objects bounce into view.
● Swivel: To have objects swivel into view.

08Add Animation - Emphasis
This next animation style is to give emphasis to an already-present object. For example, at a click, you can have a text box ‘Pulse’ and become the center of attention. You can change ‘Object Color’ to make it stand out. And so on.

099. Add Animation - Exit
Opposite of the ‘Entrance’ animations are the ‘Exit’ animations. You’ll notice that the style of animations is the same here. The only difference is that the animations occur to exit the project out of the presentation. For example, an image exiting to reveal text. Or text flying out to be replaced with more text, etc.

10Add Animation - Motion Path
We’ve already mentioned the PowerPoint Motion Path animation style previously, but just to reiterate some things, this is the most customizable animation feature on PowerPoint. One that allows you to move objects across the slide in whatever way you wish. In our example, we created a motion path animation that took the character from the center of the screen to the left of the screen.

● Key Takeaways from This Episode →
● While videos are the most popular way to share information, there are some presentations that require a heavier guiding hand.
● In these situations, a PowerPoint presentation, carefully animated, can serve in place of an edited video.
● There are templates available that you can take advantage of if you’d prefer to start with something to work from. We introduced some in this article that we think were particularly notable.
● But, of course, more careful personalization is sometimes necessary. In that case, we hope that you find our tutorial and our list of PowerPoint techniques helpful.
PowerPoints can be quite dull without anything to spice it up. So, this question is more than 100% warranted. Fortunately, we were able to pull together a tutorial on creating moving animation PowerPoint presentations.
Complete with some templates that you can start off with (if you’d prefer to make it as simple as possible for yourself.)
In this article
01 [6 Animated Powerpoint Templates with Interactive Features](#Part 1)
02 [How to Create a Moving Animation in Powerpoint](#Part 2)
03 [10 Moving Animation Powerpoint Techniques](#Part 3)
Part 1 6 Animated PowerPoint Templates with Interactive Features
The default people tend to-go-to when it comes to presentations are videos. As they tend to be more engaging on their own. For that, you’ll see people gravitating towards software like Filmora, which can create beautiful, eye-catching presentations that you can easily and quickly share. Not just to an immediate audience, but also on social media and the like.
However, of course, sometimes a personal touch is important in a presentation — important to have a ‘voice’ attached to the image on the screen. But just because this is the case, doesn’t mean that you shouldn’t go all out on your presentation. Hence, why moving animation PowerPoint templates are such a big deal:
01Company Presentation PowerPoint Template
For the first of the Moving Animation PowerPoint templates that we have to introduce, we chose the ‘Company Presentation PowerPoint Template.’ As you can perhaps guess from the name, it’s a very professional template. It comes with a total of 500 sample slides that you can choose from (50 of which are unique), and it’s set up with professional animations that can spice up your presentation without making it look gaudy or over-the-top.
02Move Animated PowerPoint Template
Next is the modern, minimalistic template called “Move Animated.” This one is a lot more versatile, with every single one of the 144 unique slides available suitably animated. The best part of it is definitely the easy way in which it can be used. With the modern, minimalistic style, it’s easy enough to remove the presets and replace them with suitable company or product images to promote your content, idea, or project.
0340 Animated Conceptual Slides for PowerPoint
Again, we have another modern and minimalistic kind of PowerPoint template with ‘40 Animated Conceptual Slides for PowerPoint.’ It comes with 40 modern slides, all of which come fully animated are easy enough to customize with your own branding or content.
04UNIGRAPH - Animated & Creative Template (PPTX)
For a bit more fun, our next template is “UNIGRAPH.” This still definitely fits the description ‘minimalistic’ but the pop of color and effects that it brings to the table gives it a different kind of vibe from all the others. No less professional, but certainly more fun. Of course, most importantly, perhaps, is the fact that each slide is smoothly animated.
05Graph & Charts PowerPoint Presentation
For this next one, we introduce a template set called “Graphs & Charts” for those who may want to present their products, projects, ideas, etc. in the shape of graphs and charts. It’s perfect for professionals, certainly. Especially with its clean look, brightened only by occasional pops of color that can be seen from the graphs and charts that it comes with.
06Laststyle - PowerPoint Template
This next PowerPoint template is most suited for businesses looking to promote their products. The creator of the template has provided five different colored versions of the template, each with 30 unique slides that were carefully sectioned with suitable animations.
Part 2 How to Create a Moving Animation in PowerPoint
Now we come to the point of the article where we speak directly to those who may want to experiment more by personally creating a moving animation PowerPoint. For this example, we’ll be teaching you how to create a path animation PowerPoint with the available tools that the software offers under ‘Animation.’ Stick around if you want to learn more.
01Step 1. Open Project.
First things first, of course. Start a new project. When you’ve started, move on to the Animation tab (which we’ve pointed out in the image below.)
02Step 2. Add Animation.
Then, make sure to select the object or model that you want to animate (in this case, we’ve inserted a 2D model of a businessman), and then click the ‘Add Animation’ button (shown in the image below.)
03Step 3. Choose Animation.
Under ‘Add Animation’ you’ll find several different options for animations that you can choose from. Of course, since our goal is to create a PowerPoint Motion Path Animation, we have selected one of the ‘Motion Path’ options.
04Step 4. Choose Motion Path Animation
In order to make motion animation in PowerPoint, you must select one of the offered ‘Motion Paths’ (i.e., Bounce, Line, Arcs, etc.) and then use the motion path tool that appears to control the direction you wish to make your character move.
In this example, we chose the ‘Lines’ motion path (1) and then used the line tool to create a path for our businessman model. To walk from the right side of the screen towards the left.
05Step 5. Adjust Animation.
With path animation PowerPoint complete, you can adjust as needed with the tools provided. For example, you can have the character start moving as soon as the slide opens, or wait until a minute has passed, you can extend the animation by changing duration, etc.
Part 3 10 Moving Animation PowerPoint Techniques
For this last step, we break down some important PowerPoint 3D Animation need-to-knows. Including the specifics provided by each of the options made available to you and why it’s important to explore every single one to create better and more professional-looking presentations.
01Transitions
When it comes to PowerPoint presentations, most people are no doubt the most familiar with ‘Transitions’ when talking in terms of adding animation into a presentation. This one decides whether you want to shift from one slide to another smoothly, or if you want the previous slide to break into splinters, or rotate into the next slide, and so on and so forth. It’s an ‘in-between’ animation that signals where one ends and the other begins.
02Animations
Now, for the ‘Animations’ tab, we focus on animations that occur in the slide (not in-between like transitions). This can include a wide array of things. Whether it be characters moving (like shown in the tutorial we provided), text boxes appearing and disappearing in short order, images bouncing into view in dramatic fashion, and so on and so forth. There’s lots of potential here.
03Animation - Start
We mentioned this previously in the tutorial, but PowerPoint (which does not offer the more advanced 3D customization options), does still give you the freedom to choose how you want certain animations to work.
In the case of the ‘Animations-Start’ option, the goal is to decide when an animation starts playing. Do you want it to start after a click? Or maybe you want it to start up immediately? Whatever the case may be, this function will let you choose the specifics.
044. Animation - Duration
Next, we decide how long you want the animation to last. For example, if you chose to add a PowerPoint 3D rotation animation into a character, how long do you want it to spin before it settles into place? Perhaps only a second? Perhaps more? Whatever you chose, this is the option that will let you finalize that.
05Animation - Delay
This one is self-explanatory as well. But suffice to say, the ‘Delay’ option is for deciding how much an animation is delayed before starting. For example, if you chose to start it ‘On Click’ you can increase the delay to keep it from playing immediately on click.
06Break Up Presentation into Sections
A lot of PowerPoint templates, you’ll find, are naturally broken into sections. This is because it is easier to consume it in that way. It’s also a good signal to your audience as to what point of the presentation you are on. Are you in the beginning? The middle? Near the end? Etc. In this case, the best option for showing it is transitions that separate the sections from one another.
07Add Animation - Entrance
As promised earlier, we’ll be going through each type of animation is available under the ‘Add Animation’ option. The first is “Entrance” animations. This one is pretty easy to guess. It makes up a variety of animations that serve as its entrance animation. Here are some examples:
● Appear: To have objects appear without any other effect.
● Fade: To have objects fade into view.
● Bounce: To have objects bounce into view.
● Swivel: To have objects swivel into view.
08Add Animation - Emphasis
This next animation style is to give emphasis to an already-present object. For example, at a click, you can have a text box ‘Pulse’ and become the center of attention. You can change ‘Object Color’ to make it stand out. And so on.
099. Add Animation - Exit
Opposite of the ‘Entrance’ animations are the ‘Exit’ animations. You’ll notice that the style of animations is the same here. The only difference is that the animations occur to exit the project out of the presentation. For example, an image exiting to reveal text. Or text flying out to be replaced with more text, etc.
10Add Animation - Motion Path
We’ve already mentioned the PowerPoint Motion Path animation style previously, but just to reiterate some things, this is the most customizable animation feature on PowerPoint. One that allows you to move objects across the slide in whatever way you wish. In our example, we created a motion path animation that took the character from the center of the screen to the left of the screen.
● Key Takeaways from This Episode →
● While videos are the most popular way to share information, there are some presentations that require a heavier guiding hand.
● In these situations, a PowerPoint presentation, carefully animated, can serve in place of an edited video.
● There are templates available that you can take advantage of if you’d prefer to start with something to work from. We introduced some in this article that we think were particularly notable.
● But, of course, more careful personalization is sometimes necessary. In that case, we hope that you find our tutorial and our list of PowerPoint techniques helpful.
How to Make My Photo 3D Cartoon Online
How to Make My Photo 3D Cartoon Online
An easy yet powerful editor
Numerous effects to choose from
Detailed tutorials provided by the official channel
Animated pictures are picking up the pace on the list of the top trends since they are able to convey so much in a fraction of a second which normal pictures or videos are incapable of.
From creating vlogs to making your photos into a 3D cartoon online, everything is possible with the right software or app.
In this article
01 [3 Secrets to Creating an (amazing) Animated Video](#Part 1)
02 [Best 10 3D Photo Maker and Photo Animator Apps](#Part 2)
03 [How to Make Your Own Photo into Cartoon?](#Part 3)
Part 1 3 Secrets to Creating an (amazing) Animated Video
Animation is the perfect tool to boost any campaign. It is a medium of brand communication that has the potential to reach out to a wide variety of audiences. Most recently, photo animations like GIFs, cartooned pictures and motion graphic posters are becoming widely popular.

Marketers and content creators can take full advantage of online apps to develop amazing animated videos that would instantly grasp the viewer’s attention. Here are three secrets you should know about creating an amazing animated video:
Storytelling:
● It is easier to tell a story with moving pictures.
● They add a different level of visual charisma to the storytelling process.
● With the help of a few interesting and easy-to-use apps, you can create stunning cinematic images and establish your own unique style of storytelling.

Persuasive Call to Action:
● A call-to-action is a standard way of telling people what you want them to do such as making a purchase, downloading an e-book or registering for a subscription.
● It helps your audience if you guide them step-by-step with the help of images.
● Try out a combination of both written and animated graphics to boost your content’s persuasion.
● It is easier to convince people when they have the information laid out in front of their eyes.

Simplify the Complex:
● It helps if you imagine your audience like children who need a picture book to learn their lessons.
● It is easier to retain information when they are visually stimulating.
● Designing animated graphics is pretty easy when you understand the purpose behind it.
● Scrutinize your work to check if it is causing any hindrance in keeping up with the information.

Animating images can be a fun and engaging process. It only involves understanding the mindset of your target audience. This process need not be complicated. You can start out by converting your photos into 3D animations using a 3D animated photo maker.
Part 2 Best 10 3D Photo Maker and Photo Animator Apps 800
No. 1 LucidPix

Lucidpix permits you to explore your creative side in fun ways. An app that captures depth-enhanced pictures! Anyone with a smart device (mobile or tablet) can start creating 3D photos using lucidpix.
YouTube Product Demo Video ↓ ↓ ↓
| Name of maker | Size | Rating | Operating System |
|---|---|---|---|
| Lucid Inc. | 39 to 154 MB | 3.6/5 on playstore. | Android and iOS. |
Pros
Free download
User-friendly UI
Easily converts a regular photo into 3D
Cons
Contains Ads
Always offers & insists users to buy app
App is still under development
No. 2 Wigglegram

Wigglegram creates a single 3D image after combining multiple photographs. It turns all the captured photos into one single animated photo to make it look like a 3D image.
YouTube Product Demo Video ↓ ↓ ↓
| Name of maker | Size | Rating | Operating System |
|---|---|---|---|
| n4no | 8.7MB | 3.0/5 on Playstore | Android & iOS |
Pros
Direct social media share option.
Helps create reaction Gifs.
Super easy and fast 3D photo-making experience.
Cons
It doesn’t have good ratings.
App contains Ads.
App size is below 10MB.
No. 3 MotionLeap

Earlier branded as Pixaloop, Motionleap is a great option to animate still images. It also has cool features like animated rains, snow, butterfly & diamond.
YouTube Product Demo Video ↓ ↓ ↓
| Name of maker | Size | Rating | Operating System |
|---|---|---|---|
| Lightricks Ltd | 84 to 197 MB | 4.2/5 Playstore | iOS and Android |
Pros
Easy to use & accurate.
Elements opacity can be controlled.
Neat & clean effects, elements and overlays.
Cons
Better source photos are required.
Animation takes more time in comparison to other apps.
No. 4 Movepic

This super cool app offers effects that let you add glitches, flowing water and even a live sky to your images by just selecting the area you wish to apply the effects and is not that heavy to download.
YouTube Product Demo Video ↓ ↓ ↓
| Name of maker | Size | Rating | Operating System |
|---|---|---|---|
| ryzenrise | 48.16 MB | 4.3/5 on Playstore | Android and iOS (alternative) |
Pros
Is it a secure app to use?
Great for applying photo motion.
Regularly updated for bug fixes.
Cons
Regularly updated for bug fixes.
Lacks certain editing features
No. 5 Adobe Spark

Adobe Spark is a free-to-use photo animation software and has Adobe trust with it. It offers hundreds of fonts and templates for any type of photo though you would bear a watermark for the free version.
YouTube Product Demo Video ↓ ↓ ↓
| Name of maker | Size | Rating | Operating System |
|---|---|---|---|
| Adobe | 2.5 MB | 4.5/5 on Playstore | Android and iOS |
Pros
Hundreds of exclusive templates.
Intuitive interface best suited for beginners.
Easy to view dashboard.
Cons
Limited features in the free version.
Glitches in design.
No. 6 PopPic 6

PopPic 6 is a 3D camera with which you can directly click and apply a 3D filter effect to your flat images in order to make them pop.
YouTube Product Demo Video ↓ ↓ ↓
| Name of maker | Size | Rating | Operating System |
|---|---|---|---|
| PopPic 3D LLC | 36.9 MB | 4.7/5 on Applestore | iOS |
Pros
Ready to click 3D camera.
Dozens of filters.
Stylish and simple app design.
Cons
Limited functionality.
Low performance.
No. 7 ImgPlay

ImgPlay is kind of a cross between the features of Werble and Motionleap. There are hundreds of ready-to-use animations for your photos.
YouTube Product Demo Video ↓ ↓ ↓
| Name of maker | Size | Rating | Operating System |
|---|---|---|---|
| ImgBase Inc | 139 MB | 3.9/5 on Applestore | Android and iOS |
Pros
The convenient app to create easy GIFs.
Click, save and share feature.
Live photo features.
Cons
Limited editing options.
Not for professional graphics.
No. 8 GIPHY

Giphy is like a search engine for GIFs but also has an app version that lets you create amazing GIF animations that are ready for upload.
YouTube Product Demo Video ↓ ↓ ↓
| Name of maker | Size | Rating | Operating System |
|---|---|---|---|
| GIPHY | 100 MB | 4.8/5 on Playstore. | Android and iOS. |
Pros
Great for simple animations.
Create GIFs for promotions.
A vast range of options.
Cons
Limited color options.
Only suitable for GIF animations.
No. 9 Photo Bender

Photo Bender is more specifically designed for Android users. It is an app that enables you to warp your images against an animated effect. There are slight editing features also available in the app like bending and stretching an image.
YouTube Product Demo Video ↓ ↓ ↓
| Name of maker | Size | Rating | Operating System |
|---|---|---|---|
| Smart Photo Editor | 3.5 MB | 3.5/5 on Playstore | Android |
Pros
Export GIF, JPEG and PNG files.
Use simple editing features like coloring, stretching, and brushing.
Completely free to use.
Cons
Limited only to Android.
No. 10 Vimage 3D

An award-winning app for creating awe-inspiring animated images. Programmed to automatically detect what edits your images need. Does involve paying a premium.
YouTube Product Demo Video ↓ ↓ ↓
| Name of maker | Size | Rating | Operating System |
|---|---|---|---|
| Vimage | 21MB | 5.0/5 on Playstore | Android and iOS |
Pros
A large variety of filters, sounds and animated effects.
Max 2560p resolution.
Intuitive app interface.
Cons
Best features are limited to the premium version.
The free version comes with a non-removable watermark.
Part 3 How to Make Your Own Photo into Cartoon?
Prior to the digital age, creating a cartoon would require an entire team of professional animators such as in the house of Disney. A Cartoon animation meant sketching each frame by hand while maintaining continuity.
Now with the help of smart video effects, you can literally turn any image into a cartoon. These cartoonish animations can be both engaging and entertaining with some help from Wondershare Filmora .
Though we have enlisted 10 exceptional apps for ‘cartooning’ your images, Filmora gives you the flexibility which other apps don’t. You can create awesome animated videos online using Filmora while saving a ton of time.
You can use Filmora on both Mac and PC. Turn selfies, stock pictures, and snapshots into inspiring cartoon visuals using dozens of amazing filters and features on Filmora Pro.
Some of the exclusive features of Filmora Pro;
Audio Features →
● Noise Reduction.
● Audio Sync.
● Transition Audio.
● Compressor.
Animation Features →
● Motion Tracking.
● Ease In/Ease Out.
● Pan & Zoom
Movie Editing →
● Add Titles and Texts.
● Cinematic Lighting.
● Masking.
● Distortion and Wrapping.
Colouring Features →
● Colour Wheels
● Colour Correction
● Scopes.
By now you should know that Filmora Pro has a ton of customizable features that you can experiment with but this can be a bit confusing for beginners.
Key Takeaways from This Episode
● You can now turn your images into amazing animated cartoons using a wide range of 3d animated image-makers available online.
● Creating an exceptional animated video is a matter of storytelling, visual engagement and simplifying complex information.
● Use Filmora Pro to get your hands on professional editing software which is jam-packed with a bunch of exclusive features.
Animated pictures are picking up the pace on the list of the top trends since they are able to convey so much in a fraction of a second which normal pictures or videos are incapable of.
From creating vlogs to making your photos into a 3D cartoon online, everything is possible with the right software or app.
In this article
01 [3 Secrets to Creating an (amazing) Animated Video](#Part 1)
02 [Best 10 3D Photo Maker and Photo Animator Apps](#Part 2)
03 [How to Make Your Own Photo into Cartoon?](#Part 3)
Part 1 3 Secrets to Creating an (amazing) Animated Video
Animation is the perfect tool to boost any campaign. It is a medium of brand communication that has the potential to reach out to a wide variety of audiences. Most recently, photo animations like GIFs, cartooned pictures and motion graphic posters are becoming widely popular.
Marketers and content creators can take full advantage of online apps to develop amazing animated videos that would instantly grasp the viewer’s attention. Here are three secrets you should know about creating an amazing animated video:
Storytelling:
● It is easier to tell a story with moving pictures.
● They add a different level of visual charisma to the storytelling process.
● With the help of a few interesting and easy-to-use apps, you can create stunning cinematic images and establish your own unique style of storytelling.
Persuasive Call to Action:
● A call-to-action is a standard way of telling people what you want them to do such as making a purchase, downloading an e-book or registering for a subscription.
● It helps your audience if you guide them step-by-step with the help of images.
● Try out a combination of both written and animated graphics to boost your content’s persuasion.
● It is easier to convince people when they have the information laid out in front of their eyes.
Simplify the Complex:
● It helps if you imagine your audience like children who need a picture book to learn their lessons.
● It is easier to retain information when they are visually stimulating.
● Designing animated graphics is pretty easy when you understand the purpose behind it.
● Scrutinize your work to check if it is causing any hindrance in keeping up with the information.
Animating images can be a fun and engaging process. It only involves understanding the mindset of your target audience. This process need not be complicated. You can start out by converting your photos into 3D animations using a 3D animated photo maker.
Part 2 Best 10 3D Photo Maker and Photo Animator Apps 800
No. 1 LucidPix
Lucidpix permits you to explore your creative side in fun ways. An app that captures depth-enhanced pictures! Anyone with a smart device (mobile or tablet) can start creating 3D photos using lucidpix.
YouTube Product Demo Video ↓ ↓ ↓
| Name of maker | Size | Rating | Operating System |
|---|---|---|---|
| Lucid Inc. | 39 to 154 MB | 3.6/5 on playstore. | Android and iOS. |
Pros
Free download
User-friendly UI
Easily converts a regular photo into 3D
Cons
Contains Ads
Always offers & insists users to buy app
App is still under development
No. 2 Wigglegram
Wigglegram creates a single 3D image after combining multiple photographs. It turns all the captured photos into one single animated photo to make it look like a 3D image.
YouTube Product Demo Video ↓ ↓ ↓
| Name of maker | Size | Rating | Operating System |
|---|---|---|---|
| n4no | 8.7MB | 3.0/5 on Playstore | Android & iOS |
Pros
Direct social media share option.
Helps create reaction Gifs.
Super easy and fast 3D photo-making experience.
Cons
It doesn’t have good ratings.
App contains Ads.
App size is below 10MB.
No. 3 MotionLeap
Earlier branded as Pixaloop, Motionleap is a great option to animate still images. It also has cool features like animated rains, snow, butterfly & diamond.
YouTube Product Demo Video ↓ ↓ ↓
| Name of maker | Size | Rating | Operating System |
|---|---|---|---|
| Lightricks Ltd | 84 to 197 MB | 4.2/5 Playstore | iOS and Android |
Pros
Easy to use & accurate.
Elements opacity can be controlled.
Neat & clean effects, elements and overlays.
Cons
Better source photos are required.
Animation takes more time in comparison to other apps.
No. 4 Movepic
This super cool app offers effects that let you add glitches, flowing water and even a live sky to your images by just selecting the area you wish to apply the effects and is not that heavy to download.
YouTube Product Demo Video ↓ ↓ ↓
| Name of maker | Size | Rating | Operating System |
|---|---|---|---|
| ryzenrise | 48.16 MB | 4.3/5 on Playstore | Android and iOS (alternative) |
Pros
Is it a secure app to use?
Great for applying photo motion.
Regularly updated for bug fixes.
Cons
Regularly updated for bug fixes.
Lacks certain editing features
No. 5 Adobe Spark
Adobe Spark is a free-to-use photo animation software and has Adobe trust with it. It offers hundreds of fonts and templates for any type of photo though you would bear a watermark for the free version.
YouTube Product Demo Video ↓ ↓ ↓
| Name of maker | Size | Rating | Operating System |
|---|---|---|---|
| Adobe | 2.5 MB | 4.5/5 on Playstore | Android and iOS |
Pros
Hundreds of exclusive templates.
Intuitive interface best suited for beginners.
Easy to view dashboard.
Cons
Limited features in the free version.
Glitches in design.
No. 6 PopPic 6
PopPic 6 is a 3D camera with which you can directly click and apply a 3D filter effect to your flat images in order to make them pop.
YouTube Product Demo Video ↓ ↓ ↓
| Name of maker | Size | Rating | Operating System |
|---|---|---|---|
| PopPic 3D LLC | 36.9 MB | 4.7/5 on Applestore | iOS |
Pros
Ready to click 3D camera.
Dozens of filters.
Stylish and simple app design.
Cons
Limited functionality.
Low performance.
No. 7 ImgPlay
ImgPlay is kind of a cross between the features of Werble and Motionleap. There are hundreds of ready-to-use animations for your photos.
YouTube Product Demo Video ↓ ↓ ↓
| Name of maker | Size | Rating | Operating System |
|---|---|---|---|
| ImgBase Inc | 139 MB | 3.9/5 on Applestore | Android and iOS |
Pros
The convenient app to create easy GIFs.
Click, save and share feature.
Live photo features.
Cons
Limited editing options.
Not for professional graphics.
No. 8 GIPHY
Giphy is like a search engine for GIFs but also has an app version that lets you create amazing GIF animations that are ready for upload.
YouTube Product Demo Video ↓ ↓ ↓
| Name of maker | Size | Rating | Operating System |
|---|---|---|---|
| GIPHY | 100 MB | 4.8/5 on Playstore. | Android and iOS. |
Pros
Great for simple animations.
Create GIFs for promotions.
A vast range of options.
Cons
Limited color options.
Only suitable for GIF animations.
No. 9 Photo Bender
Photo Bender is more specifically designed for Android users. It is an app that enables you to warp your images against an animated effect. There are slight editing features also available in the app like bending and stretching an image.
YouTube Product Demo Video ↓ ↓ ↓
| Name of maker | Size | Rating | Operating System |
|---|---|---|---|
| Smart Photo Editor | 3.5 MB | 3.5/5 on Playstore | Android |
Pros
Export GIF, JPEG and PNG files.
Use simple editing features like coloring, stretching, and brushing.
Completely free to use.
Cons
Limited only to Android.
No. 10 Vimage 3D
An award-winning app for creating awe-inspiring animated images. Programmed to automatically detect what edits your images need. Does involve paying a premium.
YouTube Product Demo Video ↓ ↓ ↓
| Name of maker | Size | Rating | Operating System |
|---|---|---|---|
| Vimage | 21MB | 5.0/5 on Playstore | Android and iOS |
Pros
A large variety of filters, sounds and animated effects.
Max 2560p resolution.
Intuitive app interface.
Cons
Best features are limited to the premium version.
The free version comes with a non-removable watermark.
Part 3 How to Make Your Own Photo into Cartoon?
Prior to the digital age, creating a cartoon would require an entire team of professional animators such as in the house of Disney. A Cartoon animation meant sketching each frame by hand while maintaining continuity.
Now with the help of smart video effects, you can literally turn any image into a cartoon. These cartoonish animations can be both engaging and entertaining with some help from Wondershare Filmora .
Though we have enlisted 10 exceptional apps for ‘cartooning’ your images, Filmora gives you the flexibility which other apps don’t. You can create awesome animated videos online using Filmora while saving a ton of time.
You can use Filmora on both Mac and PC. Turn selfies, stock pictures, and snapshots into inspiring cartoon visuals using dozens of amazing filters and features on Filmora Pro.
Some of the exclusive features of Filmora Pro;
Audio Features →
● Noise Reduction.
● Audio Sync.
● Transition Audio.
● Compressor.
Animation Features →
● Motion Tracking.
● Ease In/Ease Out.
● Pan & Zoom
Movie Editing →
● Add Titles and Texts.
● Cinematic Lighting.
● Masking.
● Distortion and Wrapping.
Colouring Features →
● Colour Wheels
● Colour Correction
● Scopes.
By now you should know that Filmora Pro has a ton of customizable features that you can experiment with but this can be a bit confusing for beginners.
Key Takeaways from This Episode
● You can now turn your images into amazing animated cartoons using a wide range of 3d animated image-makers available online.
● Creating an exceptional animated video is a matter of storytelling, visual engagement and simplifying complex information.
● Use Filmora Pro to get your hands on professional editing software which is jam-packed with a bunch of exclusive features.
5 Recommended Websites for Text GIF Maker
Versatile Video Editor - Wondershare Filmora
An easy yet powerful editor
Numerous effects to choose from
Detailed tutorials provided by the official channel
Arguably the hilarious moment of online communication, GIFs are a sequence of static images that throw a unique effect when strung together. They add excitement to social media posts, energy to email conversations, and even standard text, and usually create the internet (and this post) the funniest place to be.
Many people like to create GIFs on their websites, on digital platforms, or within their social media. We’ve collected a list of the best-animated GIF text makers around and reviewed them, so you don’t have to. You’ve come to the perfect article if you’re also one among them.
Top 7 Animated GIF Text Makers 2022
Without further ado, let’s jump in! Here are the five best-recommended websites or text GIF makers worth considering in 2021.
1. Bloggif
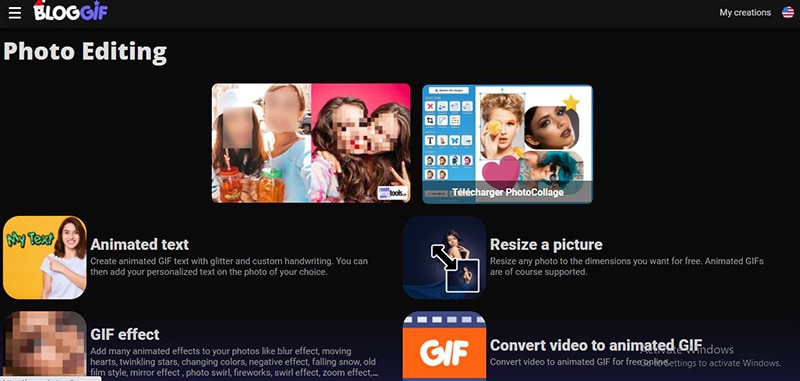
This site shows an appropriate GIF for just about anything you’re wondering. Based upon what you’re looking for, there are numerous ways to uncover a perfect match.
One way is to search among the dropdown menus on the main website’s interface. These menus allow users to surface GIFs such as animated text, resize a picture, GIF slideshow, GIF effect, and more.
2. Gfycat
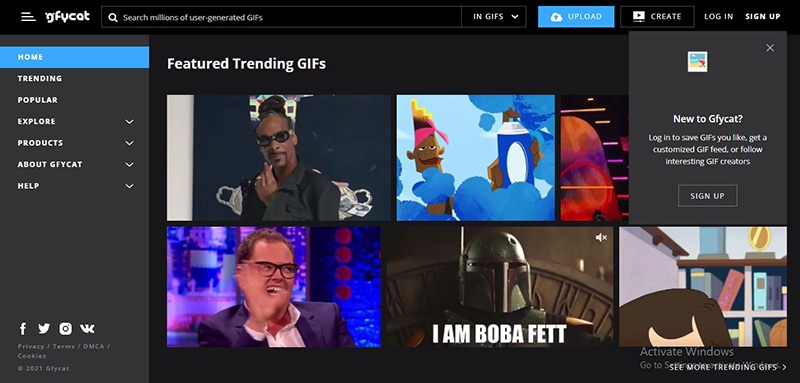
Gfycat is another online text GIF maker with millions of GIFs to dive into as a GIF text generator. Not only is it one of the highly famous GIF sites, but it has a simple animated GIF text maker to turn your favorite Vimeo, Twitter, and Twitch streams into your library of memes.
You can easily navigate its wide variety of GIFs from the search bar or left menu, select from the latest “Explore” or “Trending” section to look for multiple categories of stickers or GIFs.
3. GIPHY
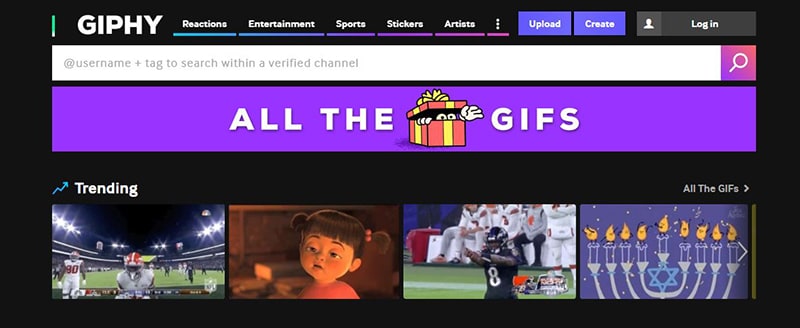
This is another go-to resource for text GIF maker hunting. Alex Chung and Jace Cooke launched it; GIPHY began as a search engine for GIFs. The platform has seen significant growth by introducing integrations, partnering with brands, and making browser extensions, and a lot more. (Check out GIPHY Labs to explore their expansion efforts.)
The best part? Looking for the database of GIFs couldn’t be easier: Users can browse categories — Music, Adjectives, Nature, Science, Nature, etc. — or seek out a specific phrase or a word using the search feature.
4. Make a GIF
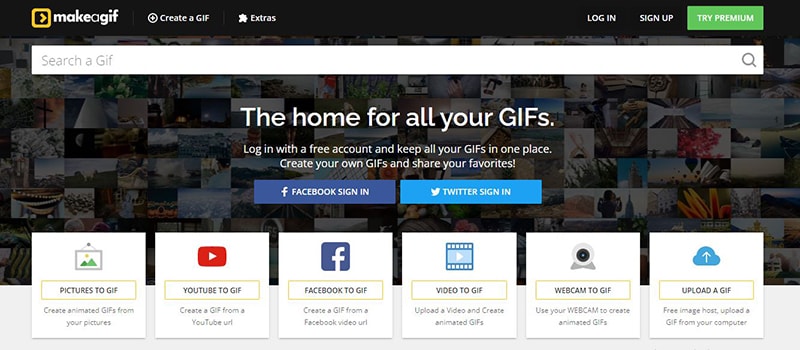
Make A GIF allows you to create a GIF from many images, a video from your computer, a Facebook or YouTube video, or directly from your webcam.
With this tool, it’s pretty simple to customize the order of the photos and rearrange them via drag-and-drop editor. You can also resize its images and create a personalized animation speed. In addition, there is a captioning tool included to add text on top of your GIF, but you can’t preview it before creating the GIF or change where the text GIF maker is displayed.
You can save the GIF to your PC and copy its URL to find it online once created. It further consists of options for making your GIF public, private, or unlisted. You can even link directly to the GIF file.
5. ImgFlip

ImgFlip displays a preview of your GIF during the creation, which is valuable. You can develop these GIFs from images, a GIF URL, a video URL, or a video you upload yourself.
Besides, you can alter animation delay, width, height, photo order, and quality for a GIF created with images. There’s also a crop option, text tool, and the ability to rotate the GIF, change the play count, reverse it, and change the background color.
You can download your GIF and share it over a few social media sites once done, or not post it online while setting it as private.
A watermark displayed on all GIFs created is here at Imgflip. Also, most of the custom settings for making a GIF from this GIF text generator are usable only if you subscribe to ImgFlip Pro.
Tip: Make animated GIF Text in video
Now you may be wandering to create your GIF. The market comes loaded with many websites, tools, and the above-mentioned animated GIF text makers.
Additionally, you can use Adobe Photoshop too or some other popular software for the purpose. If we talk about online tools, the above-mentioned animated text generator GIFs are the standard options.
It is also relatively easier to find text GIF maker online applications for smartphones or mobile devices. It is possible to develop gifs from the collection of still images or even from moving videos, and this task is much easier than anyone can perform. To execute this task with simplicity, we would like to recommend Wondershare Filmora
Wondershare Filmora - Best Video Editor for Mac/Windows
5,481,435 people have downloaded it.
Build unique custom animations without breaking a sweat.
Focus on creating epic stories and leave the details to Filmora’s auto features.
Start a creative adventure with drag & drop effects and endless possibilities.
Filmora simplifies advanced features to save you time and effort.
Filmora cuts out repetition so you can move on to your next creative breakthrough.
This recommendation is the most interactive yet simple to understand interface of this software tool. You can easily combine various stills into GIFs using Filmora or turn small videos into GIFs. The more exciting thing is that Filmora also helps in easy Gifs customization as users can add elements, overlays, text, etc., to their GIFs using this platform as the ideal animated GIF text maker.
How to make GIFs with Wondershare Filmora
Here are a few easy to execute steps to accomplish this operation:
Step 1 Upload media files
The primary task is to import some editable video files or collections of photos to the Wondershare Filmora’s timeline. This software tool is compatible with more than 150 media file formats to easily upload any of your images ranging somewhere between png, jpg, avi, mpg, wav, mkv, mp4, or WMV, etc.
For Win 7 or later (64-bit)
For macOS 10.12 or later
Step 2 Drag to timeline
Users can drag their image/video file and drop it on the timeline of Wondershare Filmora. Once your file goes there, it will be easily edited using a wide range of tools.

Step 3 Edit media files
There are unlimited editing elements and tools with numerous exciting features of Filmora.
Users can easily select among options like slow down, speed up, combine, rotate, split, crop, etc., to develop eye-catching video as per available content.
Step 4 Add text effect to GIF files
It is the right time to update text-based GIFs. There are certain small messages used that always appear suitable in GIFs.

Step 5 Save and export
Once you complete all these steps, save your file with a GIF extension and get it uploaded on social media platforms, if you wish so.

Conclusion
Thus, there are plenty of websites to choose from among animated GIF text makers when it comes to searching for some genuine yet cool GIFs. Whether you must send one to the email chain of your coworker’s birthday, or make your brother, Zayn, laugh at the dinner table, we hope this list helps narrow down your search for the perfect maker to create text GIF.
Arguably the hilarious moment of online communication, GIFs are a sequence of static images that throw a unique effect when strung together. They add excitement to social media posts, energy to email conversations, and even standard text, and usually create the internet (and this post) the funniest place to be.
Many people like to create GIFs on their websites, on digital platforms, or within their social media. We’ve collected a list of the best-animated GIF text makers around and reviewed them, so you don’t have to. You’ve come to the perfect article if you’re also one among them.
Top 7 Animated GIF Text Makers 2022
Without further ado, let’s jump in! Here are the five best-recommended websites or text GIF makers worth considering in 2021.
1. Bloggif
This site shows an appropriate GIF for just about anything you’re wondering. Based upon what you’re looking for, there are numerous ways to uncover a perfect match.
One way is to search among the dropdown menus on the main website’s interface. These menus allow users to surface GIFs such as animated text, resize a picture, GIF slideshow, GIF effect, and more.
2. Gfycat
Gfycat is another online text GIF maker with millions of GIFs to dive into as a GIF text generator. Not only is it one of the highly famous GIF sites, but it has a simple animated GIF text maker to turn your favorite Vimeo, Twitter, and Twitch streams into your library of memes.
You can easily navigate its wide variety of GIFs from the search bar or left menu, select from the latest “Explore” or “Trending” section to look for multiple categories of stickers or GIFs.
3. GIPHY
This is another go-to resource for text GIF maker hunting. Alex Chung and Jace Cooke launched it; GIPHY began as a search engine for GIFs. The platform has seen significant growth by introducing integrations, partnering with brands, and making browser extensions, and a lot more. (Check out GIPHY Labs to explore their expansion efforts.)
The best part? Looking for the database of GIFs couldn’t be easier: Users can browse categories — Music, Adjectives, Nature, Science, Nature, etc. — or seek out a specific phrase or a word using the search feature.
4. Make a GIF
Make A GIF allows you to create a GIF from many images, a video from your computer, a Facebook or YouTube video, or directly from your webcam.
With this tool, it’s pretty simple to customize the order of the photos and rearrange them via drag-and-drop editor. You can also resize its images and create a personalized animation speed. In addition, there is a captioning tool included to add text on top of your GIF, but you can’t preview it before creating the GIF or change where the text GIF maker is displayed.
You can save the GIF to your PC and copy its URL to find it online once created. It further consists of options for making your GIF public, private, or unlisted. You can even link directly to the GIF file.
5. ImgFlip
ImgFlip displays a preview of your GIF during the creation, which is valuable. You can develop these GIFs from images, a GIF URL, a video URL, or a video you upload yourself.
Besides, you can alter animation delay, width, height, photo order, and quality for a GIF created with images. There’s also a crop option, text tool, and the ability to rotate the GIF, change the play count, reverse it, and change the background color.
You can download your GIF and share it over a few social media sites once done, or not post it online while setting it as private.
A watermark displayed on all GIFs created is here at Imgflip. Also, most of the custom settings for making a GIF from this GIF text generator are usable only if you subscribe to ImgFlip Pro.
Tip: Make animated GIF Text in video
Now you may be wandering to create your GIF. The market comes loaded with many websites, tools, and the above-mentioned animated GIF text makers.
Additionally, you can use Adobe Photoshop too or some other popular software for the purpose. If we talk about online tools, the above-mentioned animated text generator GIFs are the standard options.
It is also relatively easier to find text GIF maker online applications for smartphones or mobile devices. It is possible to develop gifs from the collection of still images or even from moving videos, and this task is much easier than anyone can perform. To execute this task with simplicity, we would like to recommend Wondershare Filmora
Wondershare Filmora - Best Video Editor for Mac/Windows
5,481,435 people have downloaded it.
Build unique custom animations without breaking a sweat.
Focus on creating epic stories and leave the details to Filmora’s auto features.
Start a creative adventure with drag & drop effects and endless possibilities.
Filmora simplifies advanced features to save you time and effort.
Filmora cuts out repetition so you can move on to your next creative breakthrough.
This recommendation is the most interactive yet simple to understand interface of this software tool. You can easily combine various stills into GIFs using Filmora or turn small videos into GIFs. The more exciting thing is that Filmora also helps in easy Gifs customization as users can add elements, overlays, text, etc., to their GIFs using this platform as the ideal animated GIF text maker.
How to make GIFs with Wondershare Filmora
Here are a few easy to execute steps to accomplish this operation:
Step 1 Upload media files
The primary task is to import some editable video files or collections of photos to the Wondershare Filmora’s timeline. This software tool is compatible with more than 150 media file formats to easily upload any of your images ranging somewhere between png, jpg, avi, mpg, wav, mkv, mp4, or WMV, etc.
For Win 7 or later (64-bit)
For macOS 10.12 or later
Step 2 Drag to timeline
Users can drag their image/video file and drop it on the timeline of Wondershare Filmora. Once your file goes there, it will be easily edited using a wide range of tools.
Step 3 Edit media files
There are unlimited editing elements and tools with numerous exciting features of Filmora.
Users can easily select among options like slow down, speed up, combine, rotate, split, crop, etc., to develop eye-catching video as per available content.
Step 4 Add text effect to GIF files
It is the right time to update text-based GIFs. There are certain small messages used that always appear suitable in GIFs.
Step 5 Save and export
Once you complete all these steps, save your file with a GIF extension and get it uploaded on social media platforms, if you wish so.
Conclusion
Thus, there are plenty of websites to choose from among animated GIF text makers when it comes to searching for some genuine yet cool GIFs. Whether you must send one to the email chain of your coworker’s birthday, or make your brother, Zayn, laugh at the dinner table, we hope this list helps narrow down your search for the perfect maker to create text GIF.
What Wikipedia Won’t Tell You About Character Rigging
What Wikipedia Won’t Tell You Specifically About Character Rigging
An easy yet powerful editor
Numerous effects to choose from
Detailed tutorials provided by the official channel
The function of character rigging can easily be compared to that of bones, muscles and joints. They act as skeletons to virtual animations. You can also imagine them as strings used on dolls. These digitalized bones function inter-connectedly in a 3D animation.
In this article
01 [Intro to Character Rigging](#Part 1)
02 [8 Tips for Character Rigging](#Part 2)
03 [10 Best Character Rigging Services to Buy Online](#Part 3)
04 [How to Make 3d Character Rig? Are There Any Plugins or Easy](#Part 4)
Part 1 Intro to Character Rigging
As you already know by now that the process of rigging a character can be quite a tedious task. It involves a lot of creative thinking, precision and a keen eye to notice all the small details.
Once you have a model character to work on, riggers set off to creating a skeleton to match the character. These skele-animations can be used to move the entire model as if tugging on strings (not literally).
The movement of the chain of skeletons or rigs is interdependent. Which means if you pull on any one bone, it moves all the other bones in the same sequence. Similar to how bones move within the human body.
Riggers use programs and tools to create a series of bone like structures that can deformed and animated freely according to the preference of the animators.
Movements like positioning, curving and rotation can be recorded and then played back in the animation.
This requires the rigger to constantly coordinate between modelers, animators till the end of the project. This entire process can take weeks or even months.
Amazingly enough, its 20and there are online tools and tutorials you can use to easily learn complex animations like they make in large scale movies and games.
Part 2 8 Tips for Character Rigging
01The Right Rig for the Job
Rigging is a skill all animators gets good at overtime. The more you practice the more familiar you are with the tools you are using. It will also help you understand that not all rigs are meant for the same set of movements.
You need to be able to discern what rig is it that you need and discard what you don’t. If the rig is being used in a game, then the focus will be more on the experience while for movies its attention.
02Deformers for Facial Rigging
Constructing a realistic facial rig can be quite a task but is indeed satisfying once finished. Human facial features require a great degree of flexibility which is why using a variety of deformers for different parts of the face. They are better suited for creating joints over the face and can be done more quickly.
03IK and FK
Though you can use one without the other, it is best to use both of them in an animation. You can’t work without both arms can you? Applying both Inverse and Forward Kinematics in your rig design can help it make more stylistic.
04Learn Python and Maya API: Learn Python and Maya API
If you wish to take your rigging skills to the next level then learning Maya API and Python are great millstones. This way, you can create high quality and sophisticated rigs with high intense flexibility on Maya. Also, Python allows you to write new scripts for PlugIns.
05Delegate to an Animator
After rigging for several hours it is easy to feel like you are only seeing from one perspective. Get in touch with an animator earlier on in the project can help you get feedback to stay consistent in the rigging process.
06Learn Web Technologies: Learn Web Technologies
To be a good animator or rigging specialist involves a lot of learning. Animation technology is constantly changing therefore it is highly recommended to stay up to date with the latest web technologies. Learning HTML, Java Script and CSS is becoming vital to being a part of the gaming world.
07Use Scalable Tools
Not all the characters or objects you rig are going to be of the same size. Selecting the right rigging software is crucial for you to be able to scale your animations. You won’t need to use everything, just the tools that serve your purpose.
08Use a Clean Interface
If you have ever heard of the phrase ‘clean workplace – cleaner work’ then you should know how an untidy interface can affect your workflow. This won’t necessarily change the results but can surely better your experience.
Part 3 Best Character Rigging Services to Buy Online
Don’t feel confused about where to begin. The first step to get into rigging is to master a software, any software, here are of the best ones you can choose from;
01Maya
Offers the best animation features on the market.

02Blender
Vast variety of tools for sculpting, rigging or VFX.

03Modo
Has a more simplified approach towards modelling and rigging.

043ds Max
Leverages high flexibility and ease of use to riggers.
05Sculptris
Excellentfor beginners who need a gateway software to start art.

06ZBrush
Lets you work on your sculpting skills with digital clay.

07Cheetah 3D
Developed by Macintosh to be an easy to learn modelling software.

08Rhinoceros 3D
Harbours a mathematical approach to modelling and modular design.

09Fusion 360
Offers a wide range of simulation tools.

10Cinema 4D
Recognized by professionals for well-equipped arsenal of digital rendering.

Part 4 How to Make Character Rig? Are There Any Plugins or Easy
How to Make Character Rig? Are There Any Plugins or Easy
When we imagine animation, most of the time we are baffled by the end product? But what really goes on behind the mesmerizing colors and whimsical characters.
The basic is of course building rigs to support the entire movement of the character and confine it to actual physical laws that makes it almost a mimic of reality. The entire process of rigging rather simplifies the path to achieve that goal.
In Cinema, character rigging has multiple layers that goes into creating the entire skeleton animation. Setting up a character rig can take anywhere between a few hours or a few days. It probably takes mainstream movies ten times that time.
Let us break down the process of making a rig so that it is simpler to understand.
The process;
Weight Painting: An integral part of the entire rigging process. Although, weight painting can be rendered automatically by the software that you are using, but that can end up making the animation look less realistic. You can instead fine tune the weight of each bone in the rig. You can also copy similar looking bones and apply them to different mesh and repurpose them to function differently.
Placing Bones: After designing a bone structure of character, you can copy the same and use it for similar characters. This is why in games and animation, you notice characters with similar features and traits.
Inverse Kinematics: Not all bones are meant to move in a forward direction. This is why inverses Kinematics are applied to certain bones like the legs, shoulders or even a dragon’s tail. Setting up the IK of your rig would keep specific bones pointed in the right direction so as to make the animation look more natural.
Applying Constraints: The physical realm is built with restrictions. There are things you can do or can’t do according to the natural order of things so as to make your character movement more naturalistic.
Simulation Skeletons: Now comes the part where the magic happens. After fully completing a skeletal animation you can now simulate the motion over the mesh and record the result of the simulation through a series of frames.
Create an animated movie: You can play back the simulation in an animation software such as Blender and then create your own animated movie with Filmora with its easy drag and drop interface. Movies are a collage of frames, so you need to animate according to the fps you want for your video.
Facial Rigs: Facial expressions are more complex than whole body movements. It requires the attention dedicated to a project of its own. Here is where you can play with deforming shapes together to replicate facial muscle movement.
● Key Takeaways from This Episode →
● Rigging has become science in its own right but that does not mean you can’t be artistic with it.
● What you should remember that creating skeletal animation is all about movement and applying physical restrictions to it.
● Start simple and practice until you master the most complex features of any of the top rigging software services raging in the market.
The function of character rigging can easily be compared to that of bones, muscles and joints. They act as skeletons to virtual animations. You can also imagine them as strings used on dolls. These digitalized bones function inter-connectedly in a 3D animation.
In this article
01 [Intro to Character Rigging](#Part 1)
02 [8 Tips for Character Rigging](#Part 2)
03 [10 Best Character Rigging Services to Buy Online](#Part 3)
04 [How to Make 3d Character Rig? Are There Any Plugins or Easy](#Part 4)
Part 1 Intro to Character Rigging
As you already know by now that the process of rigging a character can be quite a tedious task. It involves a lot of creative thinking, precision and a keen eye to notice all the small details.
Once you have a model character to work on, riggers set off to creating a skeleton to match the character. These skele-animations can be used to move the entire model as if tugging on strings (not literally).
The movement of the chain of skeletons or rigs is interdependent. Which means if you pull on any one bone, it moves all the other bones in the same sequence. Similar to how bones move within the human body.
Riggers use programs and tools to create a series of bone like structures that can deformed and animated freely according to the preference of the animators.
Movements like positioning, curving and rotation can be recorded and then played back in the animation.
This requires the rigger to constantly coordinate between modelers, animators till the end of the project. This entire process can take weeks or even months.
Amazingly enough, its 20and there are online tools and tutorials you can use to easily learn complex animations like they make in large scale movies and games.
Part 2 8 Tips for Character Rigging
01The Right Rig for the Job
Rigging is a skill all animators gets good at overtime. The more you practice the more familiar you are with the tools you are using. It will also help you understand that not all rigs are meant for the same set of movements.
You need to be able to discern what rig is it that you need and discard what you don’t. If the rig is being used in a game, then the focus will be more on the experience while for movies its attention.
02Deformers for Facial Rigging
Constructing a realistic facial rig can be quite a task but is indeed satisfying once finished. Human facial features require a great degree of flexibility which is why using a variety of deformers for different parts of the face. They are better suited for creating joints over the face and can be done more quickly.
03IK and FK
Though you can use one without the other, it is best to use both of them in an animation. You can’t work without both arms can you? Applying both Inverse and Forward Kinematics in your rig design can help it make more stylistic.
04Learn Python and Maya API: Learn Python and Maya API
If you wish to take your rigging skills to the next level then learning Maya API and Python are great millstones. This way, you can create high quality and sophisticated rigs with high intense flexibility on Maya. Also, Python allows you to write new scripts for PlugIns.
05Delegate to an Animator
After rigging for several hours it is easy to feel like you are only seeing from one perspective. Get in touch with an animator earlier on in the project can help you get feedback to stay consistent in the rigging process.
06Learn Web Technologies: Learn Web Technologies
To be a good animator or rigging specialist involves a lot of learning. Animation technology is constantly changing therefore it is highly recommended to stay up to date with the latest web technologies. Learning HTML, Java Script and CSS is becoming vital to being a part of the gaming world.
07Use Scalable Tools
Not all the characters or objects you rig are going to be of the same size. Selecting the right rigging software is crucial for you to be able to scale your animations. You won’t need to use everything, just the tools that serve your purpose.
08Use a Clean Interface
If you have ever heard of the phrase ‘clean workplace – cleaner work’ then you should know how an untidy interface can affect your workflow. This won’t necessarily change the results but can surely better your experience.
Part 3 Best Character Rigging Services to Buy Online
Don’t feel confused about where to begin. The first step to get into rigging is to master a software, any software, here are of the best ones you can choose from;
01Maya
Offers the best animation features on the market.
02Blender
Vast variety of tools for sculpting, rigging or VFX.
03Modo
Has a more simplified approach towards modelling and rigging.
043ds Max
Leverages high flexibility and ease of use to riggers.
05Sculptris
Excellentfor beginners who need a gateway software to start art.
06ZBrush
Lets you work on your sculpting skills with digital clay.
07Cheetah 3D
Developed by Macintosh to be an easy to learn modelling software.
08Rhinoceros 3D
Harbours a mathematical approach to modelling and modular design.
09Fusion 360
Offers a wide range of simulation tools.
10Cinema 4D
Recognized by professionals for well-equipped arsenal of digital rendering.
Part 4 How to Make Character Rig? Are There Any Plugins or Easy
How to Make Character Rig? Are There Any Plugins or Easy
When we imagine animation, most of the time we are baffled by the end product? But what really goes on behind the mesmerizing colors and whimsical characters.
The basic is of course building rigs to support the entire movement of the character and confine it to actual physical laws that makes it almost a mimic of reality. The entire process of rigging rather simplifies the path to achieve that goal.
In Cinema, character rigging has multiple layers that goes into creating the entire skeleton animation. Setting up a character rig can take anywhere between a few hours or a few days. It probably takes mainstream movies ten times that time.
Let us break down the process of making a rig so that it is simpler to understand.
The process;
Weight Painting: An integral part of the entire rigging process. Although, weight painting can be rendered automatically by the software that you are using, but that can end up making the animation look less realistic. You can instead fine tune the weight of each bone in the rig. You can also copy similar looking bones and apply them to different mesh and repurpose them to function differently.
Placing Bones: After designing a bone structure of character, you can copy the same and use it for similar characters. This is why in games and animation, you notice characters with similar features and traits.
Inverse Kinematics: Not all bones are meant to move in a forward direction. This is why inverses Kinematics are applied to certain bones like the legs, shoulders or even a dragon’s tail. Setting up the IK of your rig would keep specific bones pointed in the right direction so as to make the animation look more natural.
Applying Constraints: The physical realm is built with restrictions. There are things you can do or can’t do according to the natural order of things so as to make your character movement more naturalistic.
Simulation Skeletons: Now comes the part where the magic happens. After fully completing a skeletal animation you can now simulate the motion over the mesh and record the result of the simulation through a series of frames.
Create an animated movie: You can play back the simulation in an animation software such as Blender and then create your own animated movie with Filmora with its easy drag and drop interface. Movies are a collage of frames, so you need to animate according to the fps you want for your video.
Facial Rigs: Facial expressions are more complex than whole body movements. It requires the attention dedicated to a project of its own. Here is where you can play with deforming shapes together to replicate facial muscle movement.
● Key Takeaways from This Episode →
● Rigging has become science in its own right but that does not mean you can’t be artistic with it.
● What you should remember that creating skeletal animation is all about movement and applying physical restrictions to it.
● Start simple and practice until you master the most complex features of any of the top rigging software services raging in the market.
10 Most Memorable Japanese Cat Cartoons
10 Most Memorable Japanese Cat Cartoons
An easy yet powerful editor
Numerous effects to choose from
Detailed tutorials provided by the official channel
Japanese cartoon series has a huge fan base from all over the world. These shows fascinate the kids of age group 1-10 years. Japanese shows are always remembered because of their unique stories and lovely characters. All these shows have a unique cat character.
Cat is the most loved pet animal that is found in almost every Japanese household. Cats are cute and naughty at the same time, that’s why they are the most loved cartoon characters from all the Japanese cartoon shows.
All Japanese cartoons generally have at least one cat character, but some of them have a separate fan base due to their unique personalities and roles. We have listed the 10 most memorable Japanese cat cartoons below:
01Doraemon
Doraemon is the most loved cartoon character from Japan. Children from all over the world are very fond of this cartoon series. Doraemon is a cute, blue robot cat from the future. He often uses his gadgets from the 22nd century to help Nobita. These gadgets are kept in his magical pocket.
The series shows that Nobita is bullied by his school friends and then Doraemon helps him to solve the problems. Some episodes even show violent acts, but the overall content is good for children. All the episodes of this wonderful Japanese cat cartoon are full of fun and teach moral values at the end.
Rating: 7.4/10
Stars: 3.8
Votes: 10,522
02Chi’s Sweet Home
This is another Japanese cartoon series that kids love very much. Chi is a small and cute cat who lost her family. A young boy named Youhie and his mother adopt her. After the adoption, Chi feels loved and likes her new family. Parents should make their young kids watch the show rather playing video games. This show is overloaded with family values and friendship.
It is a must-watch cartoon show for kids. Both Youhie and Chi share a cute and strong bond of friendship. With each passing episode, they make new friends and wonderful memories.
Rating: 7.7/10
Stars: 4
Votes: 25,419
03The Cat Returns
The Cat Returns is another adventurous and magical animated series from Japan. The character of this series is Haru Yoshioka – a shy, 17-year-old high-school girl. She can talk with the cats. One day, she saves an extraordinary cat from a truck. That extraordinary cat turns out to be the Prince of the Cat Kingdom.
As a token of thanks, the cat offers her to get married to Lune – the Prince of the Cat Kingdom. Here, comes the savior Baron. He is a statue of a cat that comes to life. He saves Haru from being transformed into a cat and getting married to Lune.
Rating: 7.2/10
Stars: 4.7
Votes: 54,838
04Pokémon
Pokémon is one of the most loved adventurous Japanese cartoon series. This series became so popular that there are Pokémon video games, card games, etc. All the characters of Pokémon are loved and have a separate fan base. This series shows a beautiful and strong bond of friendship.
The main character of this series is Ash, who wants to become the world’s best Pokémon trainer. This series shows his journey into the Pokémon battlefield along with his yellow pet – Pikachu and his friends. There are many cat-based Pokémon in this series, but out of those Meowth is the most popular. He walks and talks like a human and he is one of the characters who is known all over the world. He is a member of the Rocket Team, portraying the negative character.
Rating: 7.5/10
Stars: 4
Votes: 41,767
05Natsume’s Book of Friends
This is another adventurous series of Japanese cartoons. In this series, the main character is Takashi Natsume. He has got a special ability to see spirits inherited from his grandmother. He spends a lonely childhood because of his extraordinary ability to see the spirits and feels left out.
When his grandmother is about to die, she hands him her Book of Friends, which contains the names of all the spirits that she has seen and helped in her life. Many good spirits visit Takashi for help and bad spirits visit him for the possession of the Book of Friends.
That’s where the cat-based character Nyanko enters for helping him. Nyanko has got the special abilities to talk, fly, and has an amazing strength to scare away bad spirits. The series also shows the strong bond of friendship between Takashi and Nyanko.
Rating: 8.3/10
Stars: 4
Votes: 167,646
06The Prince of Tennis
This cartoon series revolves around the life of a young Tennis player – Ryoma Echizen. The protagonist joins a famous academy for the most talented tennis players. While his fast grasping skills, Ryoma quickly makes his position as one of the top tennis players.
He aims at winning National Middle School Tennis Championship. In his journey toward his aim, he makes new friends and learns different and complex techniques of Tennis. As the series moves forward, Ryoma realizes his passion and love for the game.
Ryoma also has a cute cat as his pet. The name of the cat is Karupin. It is a brown and white colored small creature with blue eyes. Ryoma shares a beautiful bond with Karupin.
Rating: 7.9/10
Stars: 4
Votes: 77,350
07Yokai Watch
This series is based on the mythical creatures of Japan. It excites the children with its great storytelling concept and supernatural creatures. It revolves around different Yokai haunting the city. The main character of this anime is Keita. He gets a friendship medal every time he befriends a Yokai. This friendship medal helps him to summon his friend Yokai. He can make him do anything like fighting other Yokai, helping people, etc.
Moving further, the cartoon shows the special bond of friendship between Keita and Whisper. Whisper is Keita’s cat Yokai. They both set on an adventurous journey and Whisper helps him to befriend other Yokais, who he later summons using the friendship medal and his Yokai watch to help him throughout his journey.
Rating: 6.5/10
Stars: 3.6
Votes: 11,777
08Kiki’s Delivery Service
It is a lovely Japanese cartoon series based on the fantasy world. The protagonist of this series is a trainee 13-year-old witch, who leaves the house with his black cat – Jiji. After this, she starts her delivery service business. Her first delivery becomes a complete mess when she drops the black toy cat while flying on his broomstick. She sends Jiji, who pretends to be the toy cat to a client’s house and searches for the toy to rescue Jiji.
Kiki shares a cute bond with a boy named Tombo, who largely admires her flying skills. One bad delivery reaction depresses her and she loses all her powers and ability to fly. Later, Ursula visits her and tells her that she will regain all her powers after getting a new purpose in her life.
Rating: 7.8/10
Stars: 4
Votes: 138,823
09Fairy Tail
This is an adventurous anime series from Japan. Natsu Dragneel is a Dragon Slayor wizard who teams up with 17-year-old Lucy while searching for his lost father. Lucy makes a great team with her cat-like pet Happy and other members named Grey Fullbuster, Erza Scarlet, Wendy Marvell, and Carla.
They all start their adventurous journey in the Fairy Tale guild. The character of Happy is memorable as a cute cat with a lot of magical powers. He can talk, fly, and perform different magics. He is Lucy’s best friend and appears a lot in the series.
Rating: 7.6/10
Stars: 4
Votes: 919,985
10 Nichijou – My Ordinary Life
It is a comedy Japanese cartoon series. The main character of this series is Hakase – the Professor. She is an 8-year-old girl, who made Nano. Nano is an android school girl. She finds a black cat named Sakamoto. Initially, Sakamoto was a normal cat, but later she gets the ability to speak. She gets this ability when she wears a pink scarf made by the professor.
Watching the funny gestures of Sakamoto is the real fun that the children would love.
Rating: 8.5/10
Stars: 4
Votes: 318,287
● Ending Thoughts →
● No doubt, Japanese cartoon cats are memorable characters full of life and fun. These cats are not only loved and remembered in Japan but all over the world. Small kids are fond of Japanese cartoon shows.
● Japanese cartoon series is not only fun-filled but they also teach moral and family values to the kids.
● A strong bond of friendship is shown in every cartoon show from Japan. Japanese cartoons are evergreen and they will never fade away in this digital world of video games.
Learn About Lip-Syncing in Animation
Learn all about Lip-Syncing in Animation
An easy yet powerful editor
Numerous effects to choose from
Detailed tutorials provided by the official channel
Lip syncing is one of the important parts of animations that need to be done perfectly. As children we have all enjoyed the special way in which Donald Duck or Mickey Mouse used to talk in cartoons, this is all because of the perfect lip-syncing.

Lip-sync animation tutorial are available that can assist you with the task.
In this article
01 [What is lip-syncing and its importance in animations?](#Part 1)
02 [Key factors to consider while lip-syncing in animations.](#Part 2)
03 [Best software for lip-syncing animations.](#Part 3)
04 [Best all-in-one video editing software for creating impressive animations.](#Part 4)
Part 1 What is Lip-syncing and Its Importance in Animations
In the simplest terms, lip-syncing can be termed as the process and way in which the sound is synchronized to the characters in animation. It is lip-syncing which brings life to the characters and makes them look talking. The process of lip-syncing in animations includes the dialogues and the mouth charts. The dialogues are broken into the phonetic syllables and the frames required for these syllables are then accessed.
Animations are moving and talking images and liveliness come from the dialogues that they speak. So, to make these talks appear real, flawless lip-syncing is very important.
Part 2 Key Factors to Consider While Lip-syncing in Animations
To make the lip-syncing in your animation look perfect several factors need to be taken care of. Some of these important ones are enlisted below.
01 Perfect Match of the Keyframes
The keyframes for the shapes of the words phrase by phrase needs to be perfect to make it look right. The right lip sync will have the correct timings from the mouth open to the mouth close.
02 Adding Body Language
To make the characters in your animations look real and lively, adding gestures and body language will play a huge role. Moreover, lip-syncing along with facial expressions will add to the overall richness of the animations.
03 Watch Yourself or Record Sample Videos
To get the correct lip-syncing for your animations, you can first try and practice by using a mirror or recording some trial videos. In these videos, you can speak and observe the jaw motion.
04 Use Blending
The technique of blending can also be used where the focus is on the most important shape of the mouth rather than each syllable. These shapes can then be blended and used in different ways and combinations.
05 Emphasize Eyes
Eyes need special focus as they can be used for expressing several emotions. Especially during the close-up shots in animations, a person looks at the eyes before the rest of the face.
06 Use the Apt Voice
No matter how perfectly the lip-syncing is done, it will not look good if the voice does not match the characters in your animations. So, make sure to select the voice that matches the looks and the personality of your characters.
Part 3 Best Software for Lip-syncing Animations
Lip sync in animations has become an easier and hassle-free task thanks to the advanced technology and several software and programs available. These 2D and 3D animation-supported tools allow syncing the mouth of the animated character with the dialogues and audio tracks. A few widely used tools for the task are enlisted below.
01 Anime Studio
This is a Windows and Mac-based professional software that supports multiple advanced functions like bone-rigging, automatic image tracing, integrated lip-synching, motion tracking, 3D shape design, character wizard, and many more. Using the vector-based tools of the software, you can add drawings and images for creating customized characters. There is a built-in character wizard that can be used for quick drawing and rigging the characters from the starting. Anime Studio allows recording the sound clip and then these can be synced to the animated characters. Several pre-set props, scenes, videos, stock audio, and characters are also available to choose from.

02 DAZ Studio
This is free-to-use software that can create impressive animations using multiple advanced features. The simple interface and functioning of the software make it apt even for users who have no prior experience in animations. The lip-sync feature of the software can be used to add audio to the created animations. Additional functions include morphing, adjusting different camera angles, plug-ins with advanced capabilities, and more.

03 Crazy Talk
To create impressive animations and add lip-syncing this is one of the popularly used tools. Quick to download, the software allows adding images and pictures to the tool, and then the head, mouth, and eye movement can be added along with lip-synced audio for creating impressive animations. The built-in timeline of the software offers you complete control over the animations, audio, and other parameters. Detailed customization options are supported including the teeth in the mouth of the character. The software is available for Windows and Mac systems.

04 Toon Boom Studio
To help you create rich animations for movies, games, learning, social media sites and any other purpose this is an apt tool to use. The software has a basic version for beginners while an advanced version for professionals. You can import media files in an array of formats like AI, JPEG, TGA, GIF, and others to create animations of your choice. Audio files in WAV, AIFF, and MP3 formats can be added to the created animations and the lip-sync analyzer tool can be used for that perfect syncing. Additional features include zoom-in, zoom-out, skeleton effect, support to the 3D background, multiple formats for exporting files, and more.

05 Crazy Talk Animator
This 2D animation tool can be used for creating rich animations by adding motion and different effects to your images. You can also create landscapes and scenes to further enhance the overall clip. Lip-sync to the animations is supported by the tool and you can even create marks for facial expression and use them to morph. Several tutorials and web resources are available for a better understanding of the tool and its functioning.

Adobe is also a good tool for all types of animation requirements and you can also check the adobe animate lip sync tutorial for your lip-syncing task.
Key Takeaways from This Episode
● Lip-syncing is an important and inevitable part of animations. Lip-syncing brings richness and liveliness to the clips.
● An array of tools and software are available that can help you effortlessly lip-sync animations.
● or all types of video editing needs and for creating animations, Wondershare Filmora works as an excellent all-in-one software.
Lip syncing is one of the important parts of animations that need to be done perfectly. As children we have all enjoyed the special way in which Donald Duck or Mickey Mouse used to talk in cartoons, this is all because of the perfect lip-syncing.
Lip-sync animation tutorial are available that can assist you with the task.
In this article
01 [What is lip-syncing and its importance in animations?](#Part 1)
02 [Key factors to consider while lip-syncing in animations.](#Part 2)
03 [Best software for lip-syncing animations.](#Part 3)
04 [Best all-in-one video editing software for creating impressive animations.](#Part 4)
Part 1 What is Lip-syncing and Its Importance in Animations
In the simplest terms, lip-syncing can be termed as the process and way in which the sound is synchronized to the characters in animation. It is lip-syncing which brings life to the characters and makes them look talking. The process of lip-syncing in animations includes the dialogues and the mouth charts. The dialogues are broken into the phonetic syllables and the frames required for these syllables are then accessed.
Animations are moving and talking images and liveliness come from the dialogues that they speak. So, to make these talks appear real, flawless lip-syncing is very important.
Part 2 Key Factors to Consider While Lip-syncing in Animations
To make the lip-syncing in your animation look perfect several factors need to be taken care of. Some of these important ones are enlisted below.
01 Perfect Match of the Keyframes
The keyframes for the shapes of the words phrase by phrase needs to be perfect to make it look right. The right lip sync will have the correct timings from the mouth open to the mouth close.
02 Adding Body Language
To make the characters in your animations look real and lively, adding gestures and body language will play a huge role. Moreover, lip-syncing along with facial expressions will add to the overall richness of the animations.
03 Watch Yourself or Record Sample Videos
To get the correct lip-syncing for your animations, you can first try and practice by using a mirror or recording some trial videos. In these videos, you can speak and observe the jaw motion.
04 Use Blending
The technique of blending can also be used where the focus is on the most important shape of the mouth rather than each syllable. These shapes can then be blended and used in different ways and combinations.
05 Emphasize Eyes
Eyes need special focus as they can be used for expressing several emotions. Especially during the close-up shots in animations, a person looks at the eyes before the rest of the face.
06 Use the Apt Voice
No matter how perfectly the lip-syncing is done, it will not look good if the voice does not match the characters in your animations. So, make sure to select the voice that matches the looks and the personality of your characters.
Part 3 Best Software for Lip-syncing Animations
Lip sync in animations has become an easier and hassle-free task thanks to the advanced technology and several software and programs available. These 2D and 3D animation-supported tools allow syncing the mouth of the animated character with the dialogues and audio tracks. A few widely used tools for the task are enlisted below.
01 Anime Studio
This is a Windows and Mac-based professional software that supports multiple advanced functions like bone-rigging, automatic image tracing, integrated lip-synching, motion tracking, 3D shape design, character wizard, and many more. Using the vector-based tools of the software, you can add drawings and images for creating customized characters. There is a built-in character wizard that can be used for quick drawing and rigging the characters from the starting. Anime Studio allows recording the sound clip and then these can be synced to the animated characters. Several pre-set props, scenes, videos, stock audio, and characters are also available to choose from.
02 DAZ Studio
This is free-to-use software that can create impressive animations using multiple advanced features. The simple interface and functioning of the software make it apt even for users who have no prior experience in animations. The lip-sync feature of the software can be used to add audio to the created animations. Additional functions include morphing, adjusting different camera angles, plug-ins with advanced capabilities, and more.
03 Crazy Talk
To create impressive animations and add lip-syncing this is one of the popularly used tools. Quick to download, the software allows adding images and pictures to the tool, and then the head, mouth, and eye movement can be added along with lip-synced audio for creating impressive animations. The built-in timeline of the software offers you complete control over the animations, audio, and other parameters. Detailed customization options are supported including the teeth in the mouth of the character. The software is available for Windows and Mac systems.
04 Toon Boom Studio
To help you create rich animations for movies, games, learning, social media sites and any other purpose this is an apt tool to use. The software has a basic version for beginners while an advanced version for professionals. You can import media files in an array of formats like AI, JPEG, TGA, GIF, and others to create animations of your choice. Audio files in WAV, AIFF, and MP3 formats can be added to the created animations and the lip-sync analyzer tool can be used for that perfect syncing. Additional features include zoom-in, zoom-out, skeleton effect, support to the 3D background, multiple formats for exporting files, and more.
05 Crazy Talk Animator
This 2D animation tool can be used for creating rich animations by adding motion and different effects to your images. You can also create landscapes and scenes to further enhance the overall clip. Lip-sync to the animations is supported by the tool and you can even create marks for facial expression and use them to morph. Several tutorials and web resources are available for a better understanding of the tool and its functioning.
Adobe is also a good tool for all types of animation requirements and you can also check the adobe animate lip sync tutorial for your lip-syncing task.
Key Takeaways from This Episode
● Lip-syncing is an important and inevitable part of animations. Lip-syncing brings richness and liveliness to the clips.
● An array of tools and software are available that can help you effortlessly lip-sync animations.
● or all types of video editing needs and for creating animations, Wondershare Filmora works as an excellent all-in-one software.
Also read:
- 10 Great Apps to Turn Funny Animated Images Into Comics
- New In 2024, 12 Animated Slideshow PowerPoint Templates and Tools to Make Them
- 2024 Approved How-To Guide Make Animation Characters with the Best Animated Character Creators
- New How to Analyze an Editorial Cartoon
- Top 10 Cartoon Canvas Painting Ideas for Total Beginners for 2024
- Some Techniques for Creating Animated Logo That Few People Know About for 2024
- 2024 Approved 5 Foolproof Amazing Anime Text to Speech Tips for Makers
- New In 2024, 15 Best Collage Makers to Create Aesthetic Collages
- Updated Types of Cartoon Styles You May Use for The Next Marketing Project
- How to Create Photo Collage Frame for Free in Minutes for 2024
- Best 10 Video to GIF Converters Top Picks for 2024
- The Complete Guide to Whiteboard Animation
- In 2024, Secret Source to Make a Stop Motion Puppet
- Updated Most Popular Tips on Learning Animate Rigging for 2024
- New 2024 Approved All About 3D Medical Animation And Its Uses
- New Top 10 Classical Animated Cartoon Types With Examples for 2024
- Updated 2024 Approved How to Make My Photo 3D Cartoon Online
- New 2024 Approved Best Guide for Beginners on 2D Animation Making
- How Screen Mirroring Apple iPhone 14 Pro to TV or PC? | Dr.fone
- Easy steps to recover deleted pictures from Samsung Galaxy M14 5G.
- Fake Android Location without Rooting For Your Vivo S17t | Dr.fone
- Best Anti Tracker Software For Samsung Galaxy M54 5G | Dr.fone
- In 2024, How To Bypass Motorola Moto E13 FRP In 3 Different Ways
- Full Guide to Fix iToolab AnyGO Not Working On Apple iPhone 12 Pro | Dr.fone
- In 2024, Complete Tutorial to Use VPNa to Fake GPS Location On Apple iPhone 6 Plus | Dr.fone
- Super Easy Ways To Deal with Samsung Galaxy Z Flip 5 Unresponsive Screen | Dr.fone
- In 2024, How to Screen Mirroring Realme Narzo 60 Pro 5G to PC? | Dr.fone
- Catch or Beat Sleeping Snorlax on Pokemon Go For Vivo V30 Pro | Dr.fone
- Ultimate Guide to Free PPTP VPN For Beginners On Realme 12+ 5G | Dr.fone
- How To Transfer Data From iPhone SE (2022) To Others devices? | Dr.fone
- 3 Best Tools to Hard Reset Xiaomi Redmi Note 12R | Dr.fone
- In 2024, How to Unlock Infinix Note 30 VIP Racing Edition Phone without Google Account?
- Catch or Beat Sleeping Snorlax on Pokemon Go For Apple iPhone 11 Pro | Dr.fone
- How to Unlock Nokia C12 Plus Bootloader Easily
- Lock Your Xiaomi Redmi Note 12 4G Phone in Style The Top 5 Gesture Lock Screen Apps
- Title: Updated In 2024, Top 10 Video to GIF Converters Top Picks
- Author: Elon
- Created at : 2024-06-15 11:22:55
- Updated at : 2024-06-16 11:22:55
- Link: https://animation-videos.techidaily.com/updated-in-2024-top-10-video-to-gif-converters-top-picks/
- License: This work is licensed under CC BY-NC-SA 4.0.
