
:max_bytes(150000):strip_icc():format(webp)/001_best-movies-on-hulu-right-now-5025149-3c80b5664f6541b4a0698333fc447251.jpg)
Updated Learn All About Lip-Syncing in Animation for 2024
Learn All About Lip-Syncing in Animation
Learn all about Lip-Syncing in Animation
An easy yet powerful editor
Numerous effects to choose from
Detailed tutorials provided by the official channel
Lip syncing is one of the important parts of animations that need to be done perfectly. As children we have all enjoyed the special way in which Donald Duck or Mickey Mouse used to talk in cartoons, this is all because of the perfect lip-syncing.

Lip-sync animation tutorial are available that can assist you with the task.
In this article
01 [What is lip-syncing and its importance in animations?](#Part 1)
02 [Key factors to consider while lip-syncing in animations.](#Part 2)
03 [Best software for lip-syncing animations.](#Part 3)
04 [Best all-in-one video editing software for creating impressive animations.](#Part 4)
Part 1 What is Lip-syncing and Its Importance in Animations
In the simplest terms, lip-syncing can be termed as the process and way in which the sound is synchronized to the characters in animation. It is lip-syncing which brings life to the characters and makes them look talking. The process of lip-syncing in animations includes the dialogues and the mouth charts. The dialogues are broken into the phonetic syllables and the frames required for these syllables are then accessed.
Animations are moving and talking images and liveliness come from the dialogues that they speak. So, to make these talks appear real, flawless lip-syncing is very important.
Part 2 Key Factors to Consider While Lip-syncing in Animations
To make the lip-syncing in your animation look perfect several factors need to be taken care of. Some of these important ones are enlisted below.
01 Perfect Match of the Keyframes
The keyframes for the shapes of the words phrase by phrase needs to be perfect to make it look right. The right lip sync will have the correct timings from the mouth open to the mouth close.
02 Adding Body Language
To make the characters in your animations look real and lively, adding gestures and body language will play a huge role. Moreover, lip-syncing along with facial expressions will add to the overall richness of the animations.
03 Watch Yourself or Record Sample Videos
To get the correct lip-syncing for your animations, you can first try and practice by using a mirror or recording some trial videos. In these videos, you can speak and observe the jaw motion.
04 Use Blending
The technique of blending can also be used where the focus is on the most important shape of the mouth rather than each syllable. These shapes can then be blended and used in different ways and combinations.
05 Emphasize Eyes
Eyes need special focus as they can be used for expressing several emotions. Especially during the close-up shots in animations, a person looks at the eyes before the rest of the face.
06 Use the Apt Voice
No matter how perfectly the lip-syncing is done, it will not look good if the voice does not match the characters in your animations. So, make sure to select the voice that matches the looks and the personality of your characters.
Part 3 Best Software for Lip-syncing Animations
Lip sync in animations has become an easier and hassle-free task thanks to the advanced technology and several software and programs available. These 2D and 3D animation-supported tools allow syncing the mouth of the animated character with the dialogues and audio tracks. A few widely used tools for the task are enlisted below.
01 Anime Studio
This is a Windows and Mac-based professional software that supports multiple advanced functions like bone-rigging, automatic image tracing, integrated lip-synching, motion tracking, 3D shape design, character wizard, and many more. Using the vector-based tools of the software, you can add drawings and images for creating customized characters. There is a built-in character wizard that can be used for quick drawing and rigging the characters from the starting. Anime Studio allows recording the sound clip and then these can be synced to the animated characters. Several pre-set props, scenes, videos, stock audio, and characters are also available to choose from.

02 DAZ Studio
This is free-to-use software that can create impressive animations using multiple advanced features. The simple interface and functioning of the software make it apt even for users who have no prior experience in animations. The lip-sync feature of the software can be used to add audio to the created animations. Additional functions include morphing, adjusting different camera angles, plug-ins with advanced capabilities, and more.

03 Crazy Talk
To create impressive animations and add lip-syncing this is one of the popularly used tools. Quick to download, the software allows adding images and pictures to the tool, and then the head, mouth, and eye movement can be added along with lip-synced audio for creating impressive animations. The built-in timeline of the software offers you complete control over the animations, audio, and other parameters. Detailed customization options are supported including the teeth in the mouth of the character. The software is available for Windows and Mac systems.

04 Toon Boom Studio
To help you create rich animations for movies, games, learning, social media sites and any other purpose this is an apt tool to use. The software has a basic version for beginners while an advanced version for professionals. You can import media files in an array of formats like AI, JPEG, TGA, GIF, and others to create animations of your choice. Audio files in WAV, AIFF, and MP3 formats can be added to the created animations and the lip-sync analyzer tool can be used for that perfect syncing. Additional features include zoom-in, zoom-out, skeleton effect, support to the 3D background, multiple formats for exporting files, and more.

05 Crazy Talk Animator
This 2D animation tool can be used for creating rich animations by adding motion and different effects to your images. You can also create landscapes and scenes to further enhance the overall clip. Lip-sync to the animations is supported by the tool and you can even create marks for facial expression and use them to morph. Several tutorials and web resources are available for a better understanding of the tool and its functioning.

Adobe is also a good tool for all types of animation requirements and you can also check the adobe animate lip sync tutorial for your lip-syncing task.
Key Takeaways from This Episode
● Lip-syncing is an important and inevitable part of animations. Lip-syncing brings richness and liveliness to the clips.
● An array of tools and software are available that can help you effortlessly lip-sync animations.
● or all types of video editing needs and for creating animations, Wondershare Filmora works as an excellent all-in-one software.
Lip syncing is one of the important parts of animations that need to be done perfectly. As children we have all enjoyed the special way in which Donald Duck or Mickey Mouse used to talk in cartoons, this is all because of the perfect lip-syncing.
Lip-sync animation tutorial are available that can assist you with the task.
In this article
01 [What is lip-syncing and its importance in animations?](#Part 1)
02 [Key factors to consider while lip-syncing in animations.](#Part 2)
03 [Best software for lip-syncing animations.](#Part 3)
04 [Best all-in-one video editing software for creating impressive animations.](#Part 4)
Part 1 What is Lip-syncing and Its Importance in Animations
In the simplest terms, lip-syncing can be termed as the process and way in which the sound is synchronized to the characters in animation. It is lip-syncing which brings life to the characters and makes them look talking. The process of lip-syncing in animations includes the dialogues and the mouth charts. The dialogues are broken into the phonetic syllables and the frames required for these syllables are then accessed.
Animations are moving and talking images and liveliness come from the dialogues that they speak. So, to make these talks appear real, flawless lip-syncing is very important.
Part 2 Key Factors to Consider While Lip-syncing in Animations
To make the lip-syncing in your animation look perfect several factors need to be taken care of. Some of these important ones are enlisted below.
01 Perfect Match of the Keyframes
The keyframes for the shapes of the words phrase by phrase needs to be perfect to make it look right. The right lip sync will have the correct timings from the mouth open to the mouth close.
02 Adding Body Language
To make the characters in your animations look real and lively, adding gestures and body language will play a huge role. Moreover, lip-syncing along with facial expressions will add to the overall richness of the animations.
03 Watch Yourself or Record Sample Videos
To get the correct lip-syncing for your animations, you can first try and practice by using a mirror or recording some trial videos. In these videos, you can speak and observe the jaw motion.
04 Use Blending
The technique of blending can also be used where the focus is on the most important shape of the mouth rather than each syllable. These shapes can then be blended and used in different ways and combinations.
05 Emphasize Eyes
Eyes need special focus as they can be used for expressing several emotions. Especially during the close-up shots in animations, a person looks at the eyes before the rest of the face.
06 Use the Apt Voice
No matter how perfectly the lip-syncing is done, it will not look good if the voice does not match the characters in your animations. So, make sure to select the voice that matches the looks and the personality of your characters.
Part 3 Best Software for Lip-syncing Animations
Lip sync in animations has become an easier and hassle-free task thanks to the advanced technology and several software and programs available. These 2D and 3D animation-supported tools allow syncing the mouth of the animated character with the dialogues and audio tracks. A few widely used tools for the task are enlisted below.
01 Anime Studio
This is a Windows and Mac-based professional software that supports multiple advanced functions like bone-rigging, automatic image tracing, integrated lip-synching, motion tracking, 3D shape design, character wizard, and many more. Using the vector-based tools of the software, you can add drawings and images for creating customized characters. There is a built-in character wizard that can be used for quick drawing and rigging the characters from the starting. Anime Studio allows recording the sound clip and then these can be synced to the animated characters. Several pre-set props, scenes, videos, stock audio, and characters are also available to choose from.
02 DAZ Studio
This is free-to-use software that can create impressive animations using multiple advanced features. The simple interface and functioning of the software make it apt even for users who have no prior experience in animations. The lip-sync feature of the software can be used to add audio to the created animations. Additional functions include morphing, adjusting different camera angles, plug-ins with advanced capabilities, and more.
03 Crazy Talk
To create impressive animations and add lip-syncing this is one of the popularly used tools. Quick to download, the software allows adding images and pictures to the tool, and then the head, mouth, and eye movement can be added along with lip-synced audio for creating impressive animations. The built-in timeline of the software offers you complete control over the animations, audio, and other parameters. Detailed customization options are supported including the teeth in the mouth of the character. The software is available for Windows and Mac systems.
04 Toon Boom Studio
To help you create rich animations for movies, games, learning, social media sites and any other purpose this is an apt tool to use. The software has a basic version for beginners while an advanced version for professionals. You can import media files in an array of formats like AI, JPEG, TGA, GIF, and others to create animations of your choice. Audio files in WAV, AIFF, and MP3 formats can be added to the created animations and the lip-sync analyzer tool can be used for that perfect syncing. Additional features include zoom-in, zoom-out, skeleton effect, support to the 3D background, multiple formats for exporting files, and more.
05 Crazy Talk Animator
This 2D animation tool can be used for creating rich animations by adding motion and different effects to your images. You can also create landscapes and scenes to further enhance the overall clip. Lip-sync to the animations is supported by the tool and you can even create marks for facial expression and use them to morph. Several tutorials and web resources are available for a better understanding of the tool and its functioning.
Adobe is also a good tool for all types of animation requirements and you can also check the adobe animate lip sync tutorial for your lip-syncing task.
Key Takeaways from This Episode
● Lip-syncing is an important and inevitable part of animations. Lip-syncing brings richness and liveliness to the clips.
● An array of tools and software are available that can help you effortlessly lip-sync animations.
● or all types of video editing needs and for creating animations, Wondershare Filmora works as an excellent all-in-one software.
Tutorials for Animating Picture Online Without Learning From Scratch
How to Animate Picture Online Without Learning from Scratch
An easy yet powerful editor
Numerous effects to choose from
Detailed tutorials provided by the official channel
The Internet is flooded with thousands of tools that aim to provide the best-animated video. But trusting all of them every time is not a go-to thing for everyone.

If you also fall into the same category of people who are looking to add animation to designs but are not able to find the best tools, you are on the right page.
In this article
01 [Ready to Add Animation to Your Designs?](#Part 1)
02 [The Secret of Animating Pictures Online](#Part 2)
Part 1 Ready to Add Animation to Your Designs?
Here we are discussing the top three Animated picture maker that is used for creating different videos with differnt types of online picture tools. These are as follows:
1. Powtoon
Powtoon is an interactive yet simple tool available to add animation to designs. It has all the basic functions available for motion graphics that are useful for presentation. It has a variety of characters and animations available, along with simple textual animation. A user can easily prepare the video with full animation.
(This video indicates how to use the Powtoon tool for creating the best-animated videos, along with an example.)
1. Animaker
Animaker is one of the wonderful animation programs to add animation to designs in an interactive yet simple manner. It has all the best features integrated into it, which let a user create the video of their choice. It is safe to use and, being a web-based program, offers all the options.
(This video indicates how to use the Animaker tool for creating the best-animated videos, along with an example.)
3. Moovly
Moovly is also one of the best animation tools available to add animation to the content. On the main page, the “add content” option is available from where a user can simply update the video and add animation to it.
(This video indicates how to use the Moovly tool for creating the best-animated videos, along with an example.)
Note: These tools are among those that even a layman can use. But some users are still not happy with the interface of these animate picture online tools and feel like they are lacking features. For all those out there, we have some other options too.
Part 2 The Secret of Animating Pictures Online
The secret behind animating pictures online is to save time and effort. With the help of online tools, one can get the outcome with the help of inbuilt templates. There will be no need to install any application or plugin when they wish to add any particular animation to the content. Some tools you can consider using to add animation to designs are as follows:
1. Pixtellar
Pixtellar is a great tool that helps in creating animated videos and images too. Along with creating animated videos and images, one can easily create posters, logos, photo collages, and so on.
However, before using it, be sure to do the registration, as without it, using it is impossible. After registering, the steps you need to follow to use it are as follows:
Step 1Create from Scratch
Choose the template of your choice or click on “Create from Scratch”. Here we are choosing the templates.

Step 2Choose social media
It will be redirected to the next page where you will find out templates according to the selected category. (Here we choose social media).

Step 3Click on “Animate”
Choose any of them based on your preferences. You will head to the next page where you can do the editing as per your needs by clicking on “Animate”.

Step 4Save the image
After making the changes and adding the animations, you are all set to save the image. The “Save” button is right at the top of the page!

2. Adobe Spark
Adobe Spark is a tool that has pre-built templates available for adding animations to the designs. From adding animations to editing the image and video, all the options are featured in this. It also gives users an idea of how they can simply create the video and images with the help of animations and other effects.
However, when you are using it, registration is a must. After performing the registration, you are all set to use it. The steps you need to follow to use this tool are as follows:
Step 1Start editing
After completing the registration, you will reach the main page where you can choose the option of your choice and start editing. Here we have chosen the template option.

Step 2Create From This Template
It asks you to be sure and click on “Create From This Template.”

Step 3Do the editing
It takes a few seconds to present the same in front of you. On this page, you are all set to do the editing as per your needs.

Step 4Save the image
After doing all the editing, you are all set to save the image. The “Save” button is right there at the top. Click on it and save the image!

3. Crello or VistaCreate
Crello, which turns out to be VistaCreate, is one of the most famous tools for adding motion to images. It has almost 8,000+ animated designs and motion graphics available, which are helpful in creating eye-catching videos.
When you are using this feature, registration or sign-up is important. On the main page, the signup option is available, helping users do it. After that, the steps are as follows:
Step 1Click on the “Template”
On the home page, you can either create your own or click on the “Template” option available. (We chose the template option here).

Step 2Select the template
Now select the template of your choice. Here we have selected the Happy New Year one.

Step 3Do the editing as required
Now you are all set to do the editing as required. Here all the options are available, which help in adding all the basic to advanced details to the image. You can use it.

Step 4Download the image
After doing the editing, you are all set to download the image. The downloading button is right there at the top.

Key Takeaways from This Episode
● Animated videos are eye-catching, and tools are helpful in making them more enhanced.
● Animation tools are very easy to use and precisely make the video.
● Editing options are available in the tools, which are helpful in adding extra effects to the image.
● The tools are free to use with all the in-built templates and other features.
The Internet is flooded with thousands of tools that aim to provide the best-animated video. But trusting all of them every time is not a go-to thing for everyone.
If you also fall into the same category of people who are looking to add animation to designs but are not able to find the best tools, you are on the right page.
In this article
01 [Ready to Add Animation to Your Designs?](#Part 1)
02 [The Secret of Animating Pictures Online](#Part 2)
Part 1 Ready to Add Animation to Your Designs?
Here we are discussing the top three Animated picture maker that is used for creating different videos with differnt types of online picture tools. These are as follows:
1. Powtoon
Powtoon is an interactive yet simple tool available to add animation to designs. It has all the basic functions available for motion graphics that are useful for presentation. It has a variety of characters and animations available, along with simple textual animation. A user can easily prepare the video with full animation.
(This video indicates how to use the Powtoon tool for creating the best-animated videos, along with an example.)
1. Animaker
Animaker is one of the wonderful animation programs to add animation to designs in an interactive yet simple manner. It has all the best features integrated into it, which let a user create the video of their choice. It is safe to use and, being a web-based program, offers all the options.
(This video indicates how to use the Animaker tool for creating the best-animated videos, along with an example.)
3. Moovly
Moovly is also one of the best animation tools available to add animation to the content. On the main page, the “add content” option is available from where a user can simply update the video and add animation to it.
(This video indicates how to use the Moovly tool for creating the best-animated videos, along with an example.)
Note: These tools are among those that even a layman can use. But some users are still not happy with the interface of these animate picture online tools and feel like they are lacking features. For all those out there, we have some other options too.
Part 2 The Secret of Animating Pictures Online
The secret behind animating pictures online is to save time and effort. With the help of online tools, one can get the outcome with the help of inbuilt templates. There will be no need to install any application or plugin when they wish to add any particular animation to the content. Some tools you can consider using to add animation to designs are as follows:
1. Pixtellar
Pixtellar is a great tool that helps in creating animated videos and images too. Along with creating animated videos and images, one can easily create posters, logos, photo collages, and so on.
However, before using it, be sure to do the registration, as without it, using it is impossible. After registering, the steps you need to follow to use it are as follows:
Step 1Create from Scratch
Choose the template of your choice or click on “Create from Scratch”. Here we are choosing the templates.
Step 2Choose social media
It will be redirected to the next page where you will find out templates according to the selected category. (Here we choose social media).
Step 3Click on “Animate”
Choose any of them based on your preferences. You will head to the next page where you can do the editing as per your needs by clicking on “Animate”.
Step 4Save the image
After making the changes and adding the animations, you are all set to save the image. The “Save” button is right at the top of the page!
2. Adobe Spark
Adobe Spark is a tool that has pre-built templates available for adding animations to the designs. From adding animations to editing the image and video, all the options are featured in this. It also gives users an idea of how they can simply create the video and images with the help of animations and other effects.
However, when you are using it, registration is a must. After performing the registration, you are all set to use it. The steps you need to follow to use this tool are as follows:
Step 1Start editing
After completing the registration, you will reach the main page where you can choose the option of your choice and start editing. Here we have chosen the template option.
Step 2Create From This Template
It asks you to be sure and click on “Create From This Template.”
Step 3Do the editing
It takes a few seconds to present the same in front of you. On this page, you are all set to do the editing as per your needs.
Step 4Save the image
After doing all the editing, you are all set to save the image. The “Save” button is right there at the top. Click on it and save the image!
3. Crello or VistaCreate
Crello, which turns out to be VistaCreate, is one of the most famous tools for adding motion to images. It has almost 8,000+ animated designs and motion graphics available, which are helpful in creating eye-catching videos.
When you are using this feature, registration or sign-up is important. On the main page, the signup option is available, helping users do it. After that, the steps are as follows:
Step 1Click on the “Template”
On the home page, you can either create your own or click on the “Template” option available. (We chose the template option here).
Step 2Select the template
Now select the template of your choice. Here we have selected the Happy New Year one.
Step 3Do the editing as required
Now you are all set to do the editing as required. Here all the options are available, which help in adding all the basic to advanced details to the image. You can use it.
Step 4Download the image
After doing the editing, you are all set to download the image. The downloading button is right there at the top.
Key Takeaways from This Episode
● Animated videos are eye-catching, and tools are helpful in making them more enhanced.
● Animation tools are very easy to use and precisely make the video.
● Editing options are available in the tools, which are helpful in adding extra effects to the image.
● The tools are free to use with all the in-built templates and other features.
Beginner Tutorial on Making Unity 2D Animation
Beginner Tutorial on Making Unity 2D Animation
An easy yet powerful editor
Numerous effects to choose from
Detailed tutorials provided by the official channel
Now, ideally, Unity is considered to be a suitable tool for 3D games that have too many animated elements. But, this doesn’t mean that you cannot design 2D animations with Unity.
In this guide, we are going to show you how to get started with 2D animations in Unity and incorporate them into your games to enhance the overall gameplay.
In this article
01 [Can Unity Be Used for 2D Animation?](#Part 1)
02 [How Do You Make a 2D Animation in Unity?](#Part 2)
Part 1 Can Unity Be Used for 2D Animation?
First, things first; can Unity be used for 2D animations. The answer is Yes! Being a full-scale gaming engine, developers/designers can use Unity to create stunning Unity 2D animations for their games. The tool has dedicated 2D animation packages that contain all the elements you’ll need to create high-quality 2D animations for your games.
Keep in mind that for each object, you’ll have to create a separate 2D sprite sheet and use it to configure the 2D animation. However, there are other 2D animation packages that you can install, using sprite sheets is the most common method to get the job done. The latest versions of Unity also offer a dedicated Stripe library where you can add multiple Stripe Sheets and it becomes relatively easier to manage them.
With the Sprite library, 2D animations with Unity becomes a hassle-free job. Designers can even manage dozens of 2D animations without any hassle. The Sprite editor will also let you control the overall movement of different moving objects in your animation and make it look more sleek. In general, if you are planning to create 2D animations for your videos or even a dedicated mobile game, Unity can be a suitable software for the job.
Part 2 How Do You Make a 2D Animation in Unity?
To create a 2D animation with Unity, the first step would be to create a dedicated Sprite sheet. Now, you can use a wide variety of third-party programs to create the desired Sprite sheet. In general, it depends on the project requirements and the personal preferences of the designer himself. However, whichever tool you use to create the Stripe sheets, make sure that the final image is a transparent PNG file as it’ll make your job much easier while animating objects in Unity.
After you have successfully designed the stripe (a transparent image file) in an external application, the next step would be to import it to Unity. When you import the Stripe file, make sure to create a separate Sprite folder so that you can easily manage all these files in one place. Also, a dedicated Stripe folder will allow you to keep a check on each Stripe file in a hassle-free manner.

While importing 2D animations into Unity, you can also configure its settings to ensure that it matches the overall game design. Ideally, we recommend keeping the Pixels Per Unit to the same size as all your visual components. This will allow you to maintain the desired consistency throughout the project and make it visually enticing.
Now, before proceeding any further, make sure to switch to the “Stripe Editor” window. With the “Stripe Editor”, you’ll be able to control the overall settings of each animation individually and control the movement to make it look crisper. In the Stripe window, you can also adjust the slice settings and save your work to avoid any potential data loss.
At this point, you can move towards creating the 2D animation with Unity. To do this, you’ll have to bring both the Animation and the Animator tabs to UnityParts editing panel. You can make them visible by tapping the “Windows” option on your screen.

That’s it; a timeline-based editing panel will appear on your screen. From here onwards, you can get started with animating the object. Each animation will depend on your specific game requirements. So, feel free to unleash your creativity and use different elements of Unity to bring your 2D animations to life.
Part 3 Part 3 Creating 2D Animations for Your Videos - An Effective Solution for Video Editors
Now, when it comes to creating 2D animations for videos, you may not want to use a tool like Unity to get the job done. Why? Because Unity is more suitable for animating objects for games. Not to mention, Unity has a steep learning curve and if you are not an experienced Unity developer, you may fail to create a 2D animation properly.
So, if you only need a 2D animation for videos, we have a better alternative for the job. Instead of Unity, you can use Wondershare Filmora Video Editor for the job. It’s a full-scale video editing software that’s specifically designed to edit high-quality videos. Whether you are a YouTube or simply edit videos for your clients, using Wondershare Filmora will help you showcase your creativity more effectively.

Filmora has a built-in media library that offers a plethora of ready-to-use animation templates as well as video effects. You can import these animations into your video with a single click and enhance the overall quality of the video to drive better engagement. These animations are also customizable, which means you can tweak their appearance to match the overall theme of your video itself. The media player also offers audio effects that’ll make your videos more dramatic.
And, finally, you’ll also find a wide variety of advanced editing options such as keyframing, motion detection, and green screen editing. All these features will allow you to uplift the production quality of your videos and engage potential viewers more effectively.
For Win 7 or later (64-bit)
For macOS 10.12 or later
A few key features of Filmora that make it the most reliable video editing software include:
● Thousands of ready-to-use animation templates and video effects
● Easy-to-use timeline-based editing panel
● Dedicated audio editor to control the sound quality
● Cross-platform compatibility
So, if you are also planning to launch a high-scale video for YouTube or any other platform by adding
Key Takeaways from This Episode
● Creating 2D animations with Unity is possible, however, you must be an expert game developer with extensive experience in Unity game development
● To create Unity 2D animations, you’ll have to use Sprite Sheets and then import them into Unity to turn them into animation.
● Now, if you are a regular video editor and only want to create 2D animations for videos, you can also use full-scale software such as Wondershare Filmora Pro.
Now, ideally, Unity is considered to be a suitable tool for 3D games that have too many animated elements. But, this doesn’t mean that you cannot design 2D animations with Unity.
In this guide, we are going to show you how to get started with 2D animations in Unity and incorporate them into your games to enhance the overall gameplay.
In this article
01 [Can Unity Be Used for 2D Animation?](#Part 1)
02 [How Do You Make a 2D Animation in Unity?](#Part 2)
Part 1 Can Unity Be Used for 2D Animation?
First, things first; can Unity be used for 2D animations. The answer is Yes! Being a full-scale gaming engine, developers/designers can use Unity to create stunning Unity 2D animations for their games. The tool has dedicated 2D animation packages that contain all the elements you’ll need to create high-quality 2D animations for your games.
Keep in mind that for each object, you’ll have to create a separate 2D sprite sheet and use it to configure the 2D animation. However, there are other 2D animation packages that you can install, using sprite sheets is the most common method to get the job done. The latest versions of Unity also offer a dedicated Stripe library where you can add multiple Stripe Sheets and it becomes relatively easier to manage them.
With the Sprite library, 2D animations with Unity becomes a hassle-free job. Designers can even manage dozens of 2D animations without any hassle. The Sprite editor will also let you control the overall movement of different moving objects in your animation and make it look more sleek. In general, if you are planning to create 2D animations for your videos or even a dedicated mobile game, Unity can be a suitable software for the job.
Part 2 How Do You Make a 2D Animation in Unity?
To create a 2D animation with Unity, the first step would be to create a dedicated Sprite sheet. Now, you can use a wide variety of third-party programs to create the desired Sprite sheet. In general, it depends on the project requirements and the personal preferences of the designer himself. However, whichever tool you use to create the Stripe sheets, make sure that the final image is a transparent PNG file as it’ll make your job much easier while animating objects in Unity.
After you have successfully designed the stripe (a transparent image file) in an external application, the next step would be to import it to Unity. When you import the Stripe file, make sure to create a separate Sprite folder so that you can easily manage all these files in one place. Also, a dedicated Stripe folder will allow you to keep a check on each Stripe file in a hassle-free manner.
While importing 2D animations into Unity, you can also configure its settings to ensure that it matches the overall game design. Ideally, we recommend keeping the Pixels Per Unit to the same size as all your visual components. This will allow you to maintain the desired consistency throughout the project and make it visually enticing.
Now, before proceeding any further, make sure to switch to the “Stripe Editor” window. With the “Stripe Editor”, you’ll be able to control the overall settings of each animation individually and control the movement to make it look crisper. In the Stripe window, you can also adjust the slice settings and save your work to avoid any potential data loss.
At this point, you can move towards creating the 2D animation with Unity. To do this, you’ll have to bring both the Animation and the Animator tabs to UnityParts editing panel. You can make them visible by tapping the “Windows” option on your screen.
That’s it; a timeline-based editing panel will appear on your screen. From here onwards, you can get started with animating the object. Each animation will depend on your specific game requirements. So, feel free to unleash your creativity and use different elements of Unity to bring your 2D animations to life.
Part 3 Part 3 Creating 2D Animations for Your Videos - An Effective Solution for Video Editors
Now, when it comes to creating 2D animations for videos, you may not want to use a tool like Unity to get the job done. Why? Because Unity is more suitable for animating objects for games. Not to mention, Unity has a steep learning curve and if you are not an experienced Unity developer, you may fail to create a 2D animation properly.
So, if you only need a 2D animation for videos, we have a better alternative for the job. Instead of Unity, you can use Wondershare Filmora Video Editor for the job. It’s a full-scale video editing software that’s specifically designed to edit high-quality videos. Whether you are a YouTube or simply edit videos for your clients, using Wondershare Filmora will help you showcase your creativity more effectively.
Filmora has a built-in media library that offers a plethora of ready-to-use animation templates as well as video effects. You can import these animations into your video with a single click and enhance the overall quality of the video to drive better engagement. These animations are also customizable, which means you can tweak their appearance to match the overall theme of your video itself. The media player also offers audio effects that’ll make your videos more dramatic.
And, finally, you’ll also find a wide variety of advanced editing options such as keyframing, motion detection, and green screen editing. All these features will allow you to uplift the production quality of your videos and engage potential viewers more effectively.
For Win 7 or later (64-bit)
For macOS 10.12 or later
A few key features of Filmora that make it the most reliable video editing software include:
● Thousands of ready-to-use animation templates and video effects
● Easy-to-use timeline-based editing panel
● Dedicated audio editor to control the sound quality
● Cross-platform compatibility
So, if you are also planning to launch a high-scale video for YouTube or any other platform by adding
Key Takeaways from This Episode
● Creating 2D animations with Unity is possible, however, you must be an expert game developer with extensive experience in Unity game development
● To create Unity 2D animations, you’ll have to use Sprite Sheets and then import them into Unity to turn them into animation.
● Now, if you are a regular video editor and only want to create 2D animations for videos, you can also use full-scale software such as Wondershare Filmora Pro.
Top 10 Animated DP for WhatsApp
Top 10 Animated DP for WhatsApp
An easy yet powerful editor
Numerous effects to choose from
Detailed tutorials provided by the official channel
Variation in WhatsApp DPs is the current trend of the time. We all want to make our presence on social media attractive.
Putting animated dp for WhatsApp is the the simplest way, but there are people who prefer to use animated DPs due to privacy reasons or simply because they like the animated ones.
In this article
01 [How Do You Add A GIF File As a Whatsapp DP?](#Part 1)
02 [Best 10 Fascinating Animated DP for Whatsapp](#Part 2)
03 [How to Turn Your Animated DP into Video?](#Part 3)
Part 1 How Do You Add A GIF File As a Whatsapp DP?
01Can you put a GIF as a WhatsApp picture?
There have been times when you might have thought of adding an Animated DP for WhatsApp or a GIF DP for WhatsApp and have tried various methods to upload it. So here is a piece of information, and that, “you will not be able to upload GIF DP for WhatsApp, as WhatsApp does not have the technical settings that are required for a GIF to get uploaded as DP.
02How do you add a GIF to DP?
WhatsApp only supports the JPEG format for uploading a DP in WhatsApp. You can only use the first frame of the animated GIF and create an Animated DP for WhatsApp.
03How do I make myself a GIF for WhatsApp?
As a WhatsApp user, you now know that you can send GIFs to other users. But are you aware of the fact that you can also design and customize your own GIF? The answer is most of you are not aware of it. Even if you know it lately you are not sure that how it is made.
The next few steps will help you to understand that how can you design your own WhatsApp GIF:
● Open the WhatsApp application and open a chat window.
● You need to locate the attachment icon and tap it on. Then choose the video from your smartphone gallery that you wish to customize as a GIF.
● You will get the option of “trim the video”, with add emojis, texts and etc.
● You need to trim the part you want by sliding the trim bars. After doing it choose the GIF option.
● When it is done, tap on the send button and share it.
Part 2 Best 10 Fascinating Animated DP for Whatsapp
01Madoka Kaname
Madoka Kaname is one of the most like animated DP. The reason for it being liked by people is her selfless act of saving people. Madoka is a character from Puella Magi Madoka Magica. Madoka becomes a magical girl and erases the witches completely. In the end, she is considered a deity and sacrifices the life of a normal girl. The IMDb rating is 8.3/10.
02Emma
Emma is another most loved character from The Promised Neverland. She is a young girl of The Promised Neverland who fights for her survival as well as for all humans. Her only goal is safely to escape to the Human World. A place where there will be no terror. She is popular for her bravery. The IMDb rating is 8.4/10
03Kaori Miyazono
Kaori is the iconic character from Your Lie in April. She is considered to be a character that bears a lot of burden at a very young age and fights back till the end. From childhood, she has always been ill and was aware that she won’t live much, yet she decided to live her life full. Her willpower is the reason for being liked by people. The IMDb rating is 6.7/10
04Levi Ackerman
Levi Ackerman from Attack on Titan is also famous among people. In the series when the humans are suffering due to the Titans, Levi pledges to put an end to it. He leads the squad. Levi is determined to see the destruction of the Titans. Levi has all of the strength and courage to face the Titans. The IMDB rating is 9/10
05Dororo
Another famous anime character is Dororo from the series Dororo who learns to survive in a world of cruelty. She starts throwing herself into danger. A young girl learns to adapt at a very tender age. After joining Hyakkimaru she faces great danger but she never left at the worst situation and him and helped him to get back his humanity. Her faithfulness makes her famous among people. The IMDb rating is 8.4/10
06Ash Ketchum- Pokemon
This anime story tells how Ash Ketchum becomes a Pokemon Master. The journey of unknowns and dangers, the risks he takes up and saves all them he loves. In his entire journey, he comes across many villains like Hunter J, Team Rocket, and others. He is loved by all because he is always there to face challenges. Ash Ketchum is never found to back down but when required he is never scared to put his life in danger. The IMDb rating is 7.5/10
07Nagisa Furukawa
Nagisa Furukawa is an anime character from Clannad. Even though she is weak yet she is loved by people because of the inner strength she possesses and love for her daughter. In the series, it was found that her life is in danger due to her pregnancy. She is aware giving birth to Ushio might even risk her life. Yet she delivers the baby and brings Ushio to this world. But in the end, she sacrifices her life for her daughter. The IMDB rating is 8.6/10
08Tohru

This animated character is from the series Fruit Basket. When Tohru’s mother dies her life is devastated. She tries to learn to be self-sufficient and several times put others before her desires. She is famous for her bravery in spite of being in trauma. All the while she tries to be that hardest person that her mother always wanted. The IMDB rating is 8.6/10
09Kagome Higurashi
Kagome Higurashi a student suddenly reaches the Feudal Era. The series is from Inuyasha. She travels back to 500 years and discovers she is in the modern-day and reincarnation of Priestess Kikyo. There she joins Inuyasha to collect Shikon Jewel. She fought bravely with demons and villainous Naraku. Her fearless attitude makes her famous among people. In the end, she is found to be the strongest and capable fighter. The IMDb rating is 7.9/10
10Subaru
Subaru from Re: Zero franchise is one of the weakest protagonists. Yet he portrays bravery and untimely death many times. He has the power to return back from death. This ability makes Subaru’s life difficult both mentally and emotionally. He suffers traumas after each death. But his inner strength makes him fight all obstacles. This inner strength makes Subaru famous among the people. The IMDb rating is 8.1/10
Key Takeaways from This Episode
● By the end of this article, you have got an idea that how you can turn your animated DP into a video with the help of Fimora Pro.
● Also, you got a basic understanding as to why you cannot use GIF DP for WhatsApp.
● Finally, the 10 best-animated DP that is liked most.
Variation in WhatsApp DPs is the current trend of the time. We all want to make our presence on social media attractive.
Putting animated dp for WhatsApp is the the simplest way, but there are people who prefer to use animated DPs due to privacy reasons or simply because they like the animated ones.
In this article
01 [How Do You Add A GIF File As a Whatsapp DP?](#Part 1)
02 [Best 10 Fascinating Animated DP for Whatsapp](#Part 2)
03 [How to Turn Your Animated DP into Video?](#Part 3)
Part 1 How Do You Add A GIF File As a Whatsapp DP?
01Can you put a GIF as a WhatsApp picture?
There have been times when you might have thought of adding an Animated DP for WhatsApp or a GIF DP for WhatsApp and have tried various methods to upload it. So here is a piece of information, and that, “you will not be able to upload GIF DP for WhatsApp, as WhatsApp does not have the technical settings that are required for a GIF to get uploaded as DP.
02How do you add a GIF to DP?
WhatsApp only supports the JPEG format for uploading a DP in WhatsApp. You can only use the first frame of the animated GIF and create an Animated DP for WhatsApp.
03How do I make myself a GIF for WhatsApp?
As a WhatsApp user, you now know that you can send GIFs to other users. But are you aware of the fact that you can also design and customize your own GIF? The answer is most of you are not aware of it. Even if you know it lately you are not sure that how it is made.
The next few steps will help you to understand that how can you design your own WhatsApp GIF:
● Open the WhatsApp application and open a chat window.
● You need to locate the attachment icon and tap it on. Then choose the video from your smartphone gallery that you wish to customize as a GIF.
● You will get the option of “trim the video”, with add emojis, texts and etc.
● You need to trim the part you want by sliding the trim bars. After doing it choose the GIF option.
● When it is done, tap on the send button and share it.
Part 2 Best 10 Fascinating Animated DP for Whatsapp
01Madoka Kaname
Madoka Kaname is one of the most like animated DP. The reason for it being liked by people is her selfless act of saving people. Madoka is a character from Puella Magi Madoka Magica. Madoka becomes a magical girl and erases the witches completely. In the end, she is considered a deity and sacrifices the life of a normal girl. The IMDb rating is 8.3/10.
02Emma
Emma is another most loved character from The Promised Neverland. She is a young girl of The Promised Neverland who fights for her survival as well as for all humans. Her only goal is safely to escape to the Human World. A place where there will be no terror. She is popular for her bravery. The IMDb rating is 8.4/10
03Kaori Miyazono
Kaori is the iconic character from Your Lie in April. She is considered to be a character that bears a lot of burden at a very young age and fights back till the end. From childhood, she has always been ill and was aware that she won’t live much, yet she decided to live her life full. Her willpower is the reason for being liked by people. The IMDb rating is 6.7/10
04Levi Ackerman
Levi Ackerman from Attack on Titan is also famous among people. In the series when the humans are suffering due to the Titans, Levi pledges to put an end to it. He leads the squad. Levi is determined to see the destruction of the Titans. Levi has all of the strength and courage to face the Titans. The IMDB rating is 9/10
05Dororo
Another famous anime character is Dororo from the series Dororo who learns to survive in a world of cruelty. She starts throwing herself into danger. A young girl learns to adapt at a very tender age. After joining Hyakkimaru she faces great danger but she never left at the worst situation and him and helped him to get back his humanity. Her faithfulness makes her famous among people. The IMDb rating is 8.4/10
06Ash Ketchum- Pokemon
This anime story tells how Ash Ketchum becomes a Pokemon Master. The journey of unknowns and dangers, the risks he takes up and saves all them he loves. In his entire journey, he comes across many villains like Hunter J, Team Rocket, and others. He is loved by all because he is always there to face challenges. Ash Ketchum is never found to back down but when required he is never scared to put his life in danger. The IMDb rating is 7.5/10
07Nagisa Furukawa
Nagisa Furukawa is an anime character from Clannad. Even though she is weak yet she is loved by people because of the inner strength she possesses and love for her daughter. In the series, it was found that her life is in danger due to her pregnancy. She is aware giving birth to Ushio might even risk her life. Yet she delivers the baby and brings Ushio to this world. But in the end, she sacrifices her life for her daughter. The IMDB rating is 8.6/10
08Tohru
This animated character is from the series Fruit Basket. When Tohru’s mother dies her life is devastated. She tries to learn to be self-sufficient and several times put others before her desires. She is famous for her bravery in spite of being in trauma. All the while she tries to be that hardest person that her mother always wanted. The IMDB rating is 8.6/10
09Kagome Higurashi
Kagome Higurashi a student suddenly reaches the Feudal Era. The series is from Inuyasha. She travels back to 500 years and discovers she is in the modern-day and reincarnation of Priestess Kikyo. There she joins Inuyasha to collect Shikon Jewel. She fought bravely with demons and villainous Naraku. Her fearless attitude makes her famous among people. In the end, she is found to be the strongest and capable fighter. The IMDb rating is 7.9/10
10Subaru
Subaru from Re: Zero franchise is one of the weakest protagonists. Yet he portrays bravery and untimely death many times. He has the power to return back from death. This ability makes Subaru’s life difficult both mentally and emotionally. He suffers traumas after each death. But his inner strength makes him fight all obstacles. This inner strength makes Subaru famous among the people. The IMDb rating is 8.1/10
Key Takeaways from This Episode
● By the end of this article, you have got an idea that how you can turn your animated DP into a video with the help of Fimora Pro.
● Also, you got a basic understanding as to why you cannot use GIF DP for WhatsApp.
● Finally, the 10 best-animated DP that is liked most.
How to Create a Whiteboard Animation Video
Whiteboard animation simply refers to the process of story telling using pictures and drawn resources on a whiteboard or a plane white surface. Its simply the creation of conventional story telling procedure where text, images, diagrams, figures, etc are drawn onto a white surface.
Whiteboard animation video usually work with audio, visual and most times a combination of both audio and visual to sell a particular information to the audience. Another name it has gotten over time which you may come across while surfing the internet is doodle videos.

In creating this type of videos, script writes are usually employed because of the dynamics involved in creating them. The major users of whiteboard animation video are business owners and people in the education fields. Other people make use of it but these two groups are the major users.
Whiteboard animation is important because it helps viewers remember the contents of what they watched better than looking at an image that contains a lot of information that may not always be organized.
Over time, whiteboard videos have become a more compelling and innovative method of dissemination information. They work so well because it’s a more relatable and fun way of making videos. It goes outside the conventional video making techniques and employs the animation standards which is fun to watch, engaging and still maintains the ability to effective pass the required information to the viewers.
Also, it uses a unique style to mix text, animations, and colors to drive the point home. Viewers are usually glued to their screen while watching it. The usual white background equally makes the information being displayed to effective contrast with each other. However, there is a recent movement from the usual white background to any color of choice while still maintaining the contrasting quality of the videos.
Finally, people tend to remember events or information if they are told as stories. This is one of the major objectives of whiteboard animation videos. They use graphics and animations to tell stories, sell products and services while maintaining the fun in it.
Whiteboard animation video usually takes time to create. Its not always as easy as it may seem. It takes dedication and patience before you perfect the video. if you’re new to this, its ok to not have that perfect video immediately. What matters is your will to grow and get better.
Below is an example of a whiteboard animation video created using Animaker. We’ll still look at the various software applications used for creating whiteboard animation videos.
How to Create Your Video
Step1 The first step to creating your whiteboard animation video is to know your topic of choice. Determining your choice topic is based on the purpose of the video. You have to know the reason why the video is being created in the first place to enable you decide the contents, the outlook, the font style and size and the colors to use.
Step2 The next step after you’ve getting your topic is execution of the idea. This involves having a script which usually involves the step-by-step procedure you are to follow to achieve your goal. Writing the script is arguable the most difficult process. However, once you get it right, all the other processes become relatively easy to execute. You might need to employ a professional script writer depending on your budget for the project.
Step3 After that, the next thing is to deicide whether or not to use your own voice or computer voice. This is also called a voice over. Most software provides a text to speech voice over option which usually comes with various alternatives. There is also another option of using your own voice to finish the project.
Step4 Add text, graphics and animation. This step is usually easier when you are working with the script already provided. You include the text, animations, figures, etc. sometimes you might need to import additional resources to complete this task. However, not all software provides for this.
Step5 Organize your work. In organizing your work, you must ensure that you voice over matches properly with what is on display. Check your spellings, grammar, composition and other ‘little’ details that may give your work a bad look.
Step6 Save your work and export. Once your done with your work, you have to save it on your local disk. This also means downloading the work from the website or software onto a local disk. You can now share the video on any social media of your choice. The most popular place to share it is on YouTube which is the most widely used video watching application.
Top 3 Whiteboard Animation Software
When considering which software is best for whiteboard animation creation needs, the most important factor to have at the back of your mind is flexibility and cost. Some software are really flexible to use but cost more than many people can afford. Others are cheap to purchase but do not have all the necessary resources needed to make a great video.
We’ll be looking at various software that combines cost effectiveness and flexibility. Note however that this list is not exhaustive of the software that combines these two features but are worthy of mention for the purpose of this article.
Filmora
At the top of our list is Filmora . This does not make them the best. However, they are relatively easy to use and have a combination of the two features mentioned above. Finally on our list is Filmora. This software offers much more than just whiteboard animation. It’s your go-to software for your video creation and video editing needs. One of the best parts of this software is that it supports 2D and 3D animation.

Free Download For Win 7 or later(64-bit)
Free Download For macOS 10.14 or later
Animaker
It has a lot of free resources which are made available to users after creating and account with them and verifying your email. However, like most other software, the juicy parts of it are locked and can be unlocked with a monthly or yearly subscription. They are 3 packages; Basic which cost $10 per month and $120 per year, starter package which cost $19 per month and $228 per year and the pro package which costs $49 per month and $588 per year.

This software is at the top of our list because the free resources it provides is adequate to make a decent whiteboard animation. Note that it comes with their watermark which cannot be removed without a paid subscription.
Doodly
Doodly is one of the most popular software applications for creating whiteboard videos. Its popularity comes from the fact that no prior skills is needed to use the software other than basic computer and internet usage. A lot of processes are already automated for users. If you’re a user that is concerned about quick responses from their customer care/support, doodly covers you. They have a record time response to issues from their users. Visit https://www.doodly.com/pricing/ to view their pricing.

Conclusion
If you’re wondering why you should chose whiteboard animation over the conventional video creating technique, then you should probably try it out. Animation easily captures the interest of viewers and the slide-by-slide transitioning equally makes it better. You can always try out other software applications to know the one that fits you best.
How to Create Your Video
Step1 The first step to creating your whiteboard animation video is to know your topic of choice. Determining your choice topic is based on the purpose of the video. You have to know the reason why the video is being created in the first place to enable you decide the contents, the outlook, the font style and size and the colors to use.
Step2 The next step after you’ve getting your topic is execution of the idea. This involves having a script which usually involves the step-by-step procedure you are to follow to achieve your goal. Writing the script is arguable the most difficult process. However, once you get it right, all the other processes become relatively easy to execute. You might need to employ a professional script writer depending on your budget for the project.
Step3 After that, the next thing is to deicide whether or not to use your own voice or computer voice. This is also called a voice over. Most software provides a text to speech voice over option which usually comes with various alternatives. There is also another option of using your own voice to finish the project.
Step4 Add text, graphics and animation. This step is usually easier when you are working with the script already provided. You include the text, animations, figures, etc. sometimes you might need to import additional resources to complete this task. However, not all software provides for this.
Step5 Organize your work. In organizing your work, you must ensure that you voice over matches properly with what is on display. Check your spellings, grammar, composition and other ‘little’ details that may give your work a bad look.
Step6 Save your work and export. Once your done with your work, you have to save it on your local disk. This also means downloading the work from the website or software onto a local disk. You can now share the video on any social media of your choice. The most popular place to share it is on YouTube which is the most widely used video watching application.
Top 3 Whiteboard Animation Software
When considering which software is best for whiteboard animation creation needs, the most important factor to have at the back of your mind is flexibility and cost. Some software are really flexible to use but cost more than many people can afford. Others are cheap to purchase but do not have all the necessary resources needed to make a great video.
We’ll be looking at various software that combines cost effectiveness and flexibility. Note however that this list is not exhaustive of the software that combines these two features but are worthy of mention for the purpose of this article.
Filmora
At the top of our list is Filmora . This does not make them the best. However, they are relatively easy to use and have a combination of the two features mentioned above. Finally on our list is Filmora. This software offers much more than just whiteboard animation. It’s your go-to software for your video creation and video editing needs. One of the best parts of this software is that it supports 2D and 3D animation.
Free Download For Win 7 or later(64-bit)
Free Download For macOS 10.14 or later
Animaker
It has a lot of free resources which are made available to users after creating and account with them and verifying your email. However, like most other software, the juicy parts of it are locked and can be unlocked with a monthly or yearly subscription. They are 3 packages; Basic which cost $10 per month and $120 per year, starter package which cost $19 per month and $228 per year and the pro package which costs $49 per month and $588 per year.
This software is at the top of our list because the free resources it provides is adequate to make a decent whiteboard animation. Note that it comes with their watermark which cannot be removed without a paid subscription.
Doodly
Doodly is one of the most popular software applications for creating whiteboard videos. Its popularity comes from the fact that no prior skills is needed to use the software other than basic computer and internet usage. A lot of processes are already automated for users. If you’re a user that is concerned about quick responses from their customer care/support, doodly covers you. They have a record time response to issues from their users. Visit https://www.doodly.com/pricing/ to view their pricing.
Conclusion
If you’re wondering why you should chose whiteboard animation over the conventional video creating technique, then you should probably try it out. Animation easily captures the interest of viewers and the slide-by-slide transitioning equally makes it better. You can always try out other software applications to know the one that fits you best.
Types of Cartoon Styles You May Use for Your Next Marketing Project
Types of Cartoon Styles You May Use for Your Next Marketing Project
An easy yet powerful editor
Numerous effects to choose from
Detailed tutorials provided by the official channel
The whole concept of animation originated mainly from Japan. The cartoons that are shown on TV have different cartoon art styles. These cartoon art styles have their history of origin. These numerous cartoon styles play a significant role in the whole animation industry. If you find which cartoon illustration styles to use for your next project, this is the perfect place for your answer.
You can use any cartoon art style in your upcoming marketing project and make it a success. This article focuses on different cartoon art styles and how you can develop your anime cartoon style. You can use these methods to draw cartoon styles of yourself.
In this article
01 [10 Types of Cartoon Styles With Examples](#Part 1)
02 [Drawing Myself in 5 Different Cartoon Styles](#Part 2)
03 [How You Can Develop a Cartoon Style for Animation](#Part 3)
Part 1 Types of Cartoon Styles With Examples
There are numerous kinds of cartoon styles. Different animators use different cartoon styles. You can even develop your anime cartoon style. The different types of Animation are:
012D Animation
animations are trendy cartoon styles. This style of animation needs no introduction. This type of anime cartoon style was produced by Walt Disney. The most exciting features of the images were that they had only two dimensions: height and width.
Even though several people suggested that 2D art styles cartoon were invented during the early twentieth century. Back then, it was not much popular; Walt Disney made these cartoon styles famous. Example:

02Traditional Animation
As the name suggests, traditional Animation is an old cartoon art style. These cartoon styles were first seen in the year 1877. Emil Reynaud discovered a new tool for demonstrating objects that are moving. In this type of Animation, all the images are drawn manually on paper with a pencil. This method of making cartoon styles is time-consuming. However, later computer applications and programs were developed, making this task much easier and more efficient. Example:

03Animation
animation cartoon styles came into existence with graphics and visual software development. The first 3D dimensional image was created in the year 1972. However, an attempt to make 3D Animation was made in 1961. Nowadays, 3D Animation is a widely used animation style. It is used in the entertainment industry and medical imaging to adequately explain the body and organisms. Example:

04Flipbook Animation
In flipbook animation, each frame is drawn on each notebook page. After drawing all the frames is complete, turn the pages quickly. When the pages are turned quickly, it seems to be a moving video because of the different frames drawn on each page. Example:

05Clay Animation
This animation method turns out to be very funny after it is completed. This method of Animation is quite tricky. In this animation method, the characters are made out of clay at first, and then the movements are recorded in a camera. These movements are then made smooth and compiled like a video with different scenes using the software. The main audience for this kind of Animation is children. Example:

06Typography Animation
Typography animation is also called kinetic typography. This style of Animation is text animation. This method was originated in the year 1899. Back then, this Animation was not much popular. This style of typography animation gained popularity after 60 years it first originated. Typography animation is considered a good method for e-learning while training employees. Example:

07Stop-Motion Animation
Stop-Motion animation is an age-old animation technique. The attempt to use this type of Animation was made 150 years ago. The specialty of this type of Animation is that the animator takes pictures of different frames by moving the objects in different positions and clicking the picture of each frame. These pictures are compiled to create a continuous video. This method of Animation is straightforward to go. Example:

08Sand Animation
Sand Animation was invented in the year 1969. This type of Animation involves sand and a luminous surface on which the Animation is done. This method is used in cartoon anime styles or different shows. In this type of Animation, the sand is used to create 2D images. This type of Animation is used for storytelling in reality shows. Example:

09Motion Graphics
Motion design was invented in the year 1960. It is one of the most popular cartoon art styles used nowadays. This type of Animation creates promotional videos, game screensavers, commercial advertising videos, etc. It is one of the universal animation techniques used globally for various purposes. Example:

10Mechanical Animation
Mechanical Animation is mainly used in producing technical equipment. The most fantastic thing about this animation method is that you can make changes to a product that has not yet been developed. This kind of Animation is used with 3D Animation to show the working of machines in and out. It is done together with 3D Animation to clearly visualize the machine.

Part 2 Drawing Myself in 5 Different Cartoon Styles
You can draw yourself using these 5 different cartoon styles:
01You can use 3D filters on Snapchat to draw a Pixar-like picture of yourself
The steps are:
Step 1: Install and run the “Snapchat” app on your phone.
Step2: Open the app and turn on the camera.
Step 3: There is a smiling face symbol on the right side of the camera button, tap on that.
Step 4: Click on the explore menu and select the “Cartoon 3D Style” option.
Step 5: Capture your video
Step 6: Then your cartoon character-like video is ready.
02You can also use Instagram to create a Disney-like character of yourself
The steps are:
Step 1: Open your Instagram account.
Step 2: Click on the ‘+’ icon. Select the “Story” option.
Step 3: Different effects appear on the screen.
Step 4: Scroll the effects and find an icon of a magnifying glass.
Step 5: Click on that icon and type cartoon on the search bar.
Step 6: After your search is finished, different cartoon filters will appear on your screen.
Step 7: Tap on any one of the effects. The effect opens.
Step 8: Tap on the bookmark icon to save the cartoon effect.
Step 9: Now you can go back to the effects options to use the cartoon effect.
Your Disney-like cartoon picture is ready!
03You can use Google meet
Step 1: When you open the Google meet app, there are filters to use while on a call.
Step 2: Choose one of the filters that have a cartoon effect.
Step 3: When you join any meeting, you will appear like a cartoon character from TV.
04You can use B612
Step 1: Install and open the app on your phone.
Step 2: After you open the app, a circle button appears at the bottom of your screen in the middle.
Step 3: Tap on the circle.
Step 4: Numerous filters will appear.
Step 5: Choose one cartoon-like filter from the options of effect in the menu.
Step 6: After selecting one effect, make a video of yourself using an effect.
Step 7: Your cartoon video is ready on your screen.
05You can use Wondershare Filmora Video Editor
For Win 7 or later (64-bit)
For macOS 10.12 or later
Step 1: Capture a video of yourself using your phone’s camera.
Step 2: Install and open the Filmora app on your phone.
Step 3: After you open the app, you will be given the option to choose a video.
Step 4: Choose the video of yourself.
Step 5: After choosing your video, there is an option “click edit” tap on that.
Step 6: A menu appears; select the “effects” option from the menu.
Step 7: Different effects will appear on your screen.
Step 8: Select the cartoon effect you want to use in your video.
Step 9: After you have selected the effect, it will take some time to process.
Step 10: Your cartoon-like video is ready.
How You Can Develop a Cartoon Style for Animation
Anyone can develop new cartoon styles by following these simple procedures or habits. The procedures are:
● You can take references from real-life objects.
Most of the Animation we see here has been taken from real-life references, be it a cat, car, house, etc. So, to develop the cartoon styles, you can take references from real-life objects. You can also search for a particular characteristic in things you won’t use as your reference. If you want to draw a cat, you can use a living cat as your reference.
● You can copy and try to make Animation like your favorite animator.
If you use this method, this will help you improve your skill. No animation is 100% real, no matter what kind of Animation it is or who is creating it. However, you cannot keep on making animations like your favorite animator because you will not be able to find your anime art styles and skills.
● You can create an animated character of your own.
After taking your reference from real-life objects and knowing about the animation styles and the basic principles of Animation, you can create your animated character. If you create your character, keeping all the skills and techniques in mind, you can develop outstanding animation styles.
● To develop your cartoon style, you need to practice drawing regularly.
To get s grasp this whole process of Animation, you need to draw and practice different cartoon art styles. You can draw anything you like, or you don’t like on paper or on a drawing tablet. You can also color sketchbooks to improve your skills in Animation.
You can use Filmora to make cartoon videos and, at the same time, make cartoon videos of normally captured videos. These cartoon videos can be compiled into one video. You can use this video to edit different types of videos. Filmora has a user-friendly interface that can help you create your cartoon video effortlessly.
● Ending Thoughts →
● I hope you have understood the different types of anime cartoon styles by now.
● These methods can help you make the best for your next marketing project.
● These methods are easy, efficient, and efficient. All the aforementioned methods were discovered in the late nineteenth and early twentieth century.
● With the advancement of technology, the process has become more accessible. However, you can use any cartoon-style art.
The whole concept of animation originated mainly from Japan. The cartoons that are shown on TV have different cartoon art styles. These cartoon art styles have their history of origin. These numerous cartoon styles play a significant role in the whole animation industry. If you find which cartoon illustration styles to use for your next project, this is the perfect place for your answer.
You can use any cartoon art style in your upcoming marketing project and make it a success. This article focuses on different cartoon art styles and how you can develop your anime cartoon style. You can use these methods to draw cartoon styles of yourself.
In this article
01 [10 Types of Cartoon Styles With Examples](#Part 1)
02 [Drawing Myself in 5 Different Cartoon Styles](#Part 2)
03 [How You Can Develop a Cartoon Style for Animation](#Part 3)
Part 1 Types of Cartoon Styles With Examples
There are numerous kinds of cartoon styles. Different animators use different cartoon styles. You can even develop your anime cartoon style. The different types of Animation are:
012D Animation
animations are trendy cartoon styles. This style of animation needs no introduction. This type of anime cartoon style was produced by Walt Disney. The most exciting features of the images were that they had only two dimensions: height and width.
Even though several people suggested that 2D art styles cartoon were invented during the early twentieth century. Back then, it was not much popular; Walt Disney made these cartoon styles famous. Example:
02Traditional Animation
As the name suggests, traditional Animation is an old cartoon art style. These cartoon styles were first seen in the year 1877. Emil Reynaud discovered a new tool for demonstrating objects that are moving. In this type of Animation, all the images are drawn manually on paper with a pencil. This method of making cartoon styles is time-consuming. However, later computer applications and programs were developed, making this task much easier and more efficient. Example:
03Animation
animation cartoon styles came into existence with graphics and visual software development. The first 3D dimensional image was created in the year 1972. However, an attempt to make 3D Animation was made in 1961. Nowadays, 3D Animation is a widely used animation style. It is used in the entertainment industry and medical imaging to adequately explain the body and organisms. Example:
04Flipbook Animation
In flipbook animation, each frame is drawn on each notebook page. After drawing all the frames is complete, turn the pages quickly. When the pages are turned quickly, it seems to be a moving video because of the different frames drawn on each page. Example:
05Clay Animation
This animation method turns out to be very funny after it is completed. This method of Animation is quite tricky. In this animation method, the characters are made out of clay at first, and then the movements are recorded in a camera. These movements are then made smooth and compiled like a video with different scenes using the software. The main audience for this kind of Animation is children. Example:
06Typography Animation
Typography animation is also called kinetic typography. This style of Animation is text animation. This method was originated in the year 1899. Back then, this Animation was not much popular. This style of typography animation gained popularity after 60 years it first originated. Typography animation is considered a good method for e-learning while training employees. Example:
07Stop-Motion Animation
Stop-Motion animation is an age-old animation technique. The attempt to use this type of Animation was made 150 years ago. The specialty of this type of Animation is that the animator takes pictures of different frames by moving the objects in different positions and clicking the picture of each frame. These pictures are compiled to create a continuous video. This method of Animation is straightforward to go. Example:
08Sand Animation
Sand Animation was invented in the year 1969. This type of Animation involves sand and a luminous surface on which the Animation is done. This method is used in cartoon anime styles or different shows. In this type of Animation, the sand is used to create 2D images. This type of Animation is used for storytelling in reality shows. Example:
09Motion Graphics
Motion design was invented in the year 1960. It is one of the most popular cartoon art styles used nowadays. This type of Animation creates promotional videos, game screensavers, commercial advertising videos, etc. It is one of the universal animation techniques used globally for various purposes. Example:
10Mechanical Animation
Mechanical Animation is mainly used in producing technical equipment. The most fantastic thing about this animation method is that you can make changes to a product that has not yet been developed. This kind of Animation is used with 3D Animation to show the working of machines in and out. It is done together with 3D Animation to clearly visualize the machine.
Part 2 Drawing Myself in 5 Different Cartoon Styles
You can draw yourself using these 5 different cartoon styles:
01You can use 3D filters on Snapchat to draw a Pixar-like picture of yourself
The steps are:
Step 1: Install and run the “Snapchat” app on your phone.
Step2: Open the app and turn on the camera.
Step 3: There is a smiling face symbol on the right side of the camera button, tap on that.
Step 4: Click on the explore menu and select the “Cartoon 3D Style” option.
Step 5: Capture your video
Step 6: Then your cartoon character-like video is ready.
02You can also use Instagram to create a Disney-like character of yourself
The steps are:
Step 1: Open your Instagram account.
Step 2: Click on the ‘+’ icon. Select the “Story” option.
Step 3: Different effects appear on the screen.
Step 4: Scroll the effects and find an icon of a magnifying glass.
Step 5: Click on that icon and type cartoon on the search bar.
Step 6: After your search is finished, different cartoon filters will appear on your screen.
Step 7: Tap on any one of the effects. The effect opens.
Step 8: Tap on the bookmark icon to save the cartoon effect.
Step 9: Now you can go back to the effects options to use the cartoon effect.
Your Disney-like cartoon picture is ready!
03You can use Google meet
Step 1: When you open the Google meet app, there are filters to use while on a call.
Step 2: Choose one of the filters that have a cartoon effect.
Step 3: When you join any meeting, you will appear like a cartoon character from TV.
04You can use B612
Step 1: Install and open the app on your phone.
Step 2: After you open the app, a circle button appears at the bottom of your screen in the middle.
Step 3: Tap on the circle.
Step 4: Numerous filters will appear.
Step 5: Choose one cartoon-like filter from the options of effect in the menu.
Step 6: After selecting one effect, make a video of yourself using an effect.
Step 7: Your cartoon video is ready on your screen.
05You can use Wondershare Filmora Video Editor
For Win 7 or later (64-bit)
For macOS 10.12 or later
Step 1: Capture a video of yourself using your phone’s camera.
Step 2: Install and open the Filmora app on your phone.
Step 3: After you open the app, you will be given the option to choose a video.
Step 4: Choose the video of yourself.
Step 5: After choosing your video, there is an option “click edit” tap on that.
Step 6: A menu appears; select the “effects” option from the menu.
Step 7: Different effects will appear on your screen.
Step 8: Select the cartoon effect you want to use in your video.
Step 9: After you have selected the effect, it will take some time to process.
Step 10: Your cartoon-like video is ready.
How You Can Develop a Cartoon Style for Animation
Anyone can develop new cartoon styles by following these simple procedures or habits. The procedures are:
● You can take references from real-life objects.
Most of the Animation we see here has been taken from real-life references, be it a cat, car, house, etc. So, to develop the cartoon styles, you can take references from real-life objects. You can also search for a particular characteristic in things you won’t use as your reference. If you want to draw a cat, you can use a living cat as your reference.
● You can copy and try to make Animation like your favorite animator.
If you use this method, this will help you improve your skill. No animation is 100% real, no matter what kind of Animation it is or who is creating it. However, you cannot keep on making animations like your favorite animator because you will not be able to find your anime art styles and skills.
● You can create an animated character of your own.
After taking your reference from real-life objects and knowing about the animation styles and the basic principles of Animation, you can create your animated character. If you create your character, keeping all the skills and techniques in mind, you can develop outstanding animation styles.
● To develop your cartoon style, you need to practice drawing regularly.
To get s grasp this whole process of Animation, you need to draw and practice different cartoon art styles. You can draw anything you like, or you don’t like on paper or on a drawing tablet. You can also color sketchbooks to improve your skills in Animation.
You can use Filmora to make cartoon videos and, at the same time, make cartoon videos of normally captured videos. These cartoon videos can be compiled into one video. You can use this video to edit different types of videos. Filmora has a user-friendly interface that can help you create your cartoon video effortlessly.
● Ending Thoughts →
● I hope you have understood the different types of anime cartoon styles by now.
● These methods can help you make the best for your next marketing project.
● These methods are easy, efficient, and efficient. All the aforementioned methods were discovered in the late nineteenth and early twentieth century.
● With the advancement of technology, the process has become more accessible. However, you can use any cartoon-style art.
10 Creative Wallpaper Collage Ideas and Photos
10 Creative Wallpaper Collage Ideas and Photos for 2024
An easy yet powerful editor
Numerous effects to choose from
Detailed tutorials provided by the official channel
Photos are not only some captured moments, but memories for lifetime. So, why not relive these happy and special moments by creating a wallpaper of these photos in a collage format. You can choose from the huge collection of your photos and create wallpaper collages. Set a theme for different rooms and then create interesting wall picture collage. In this article we will help you to learn about some creative wallpaper collage ideas and photos for 2024.
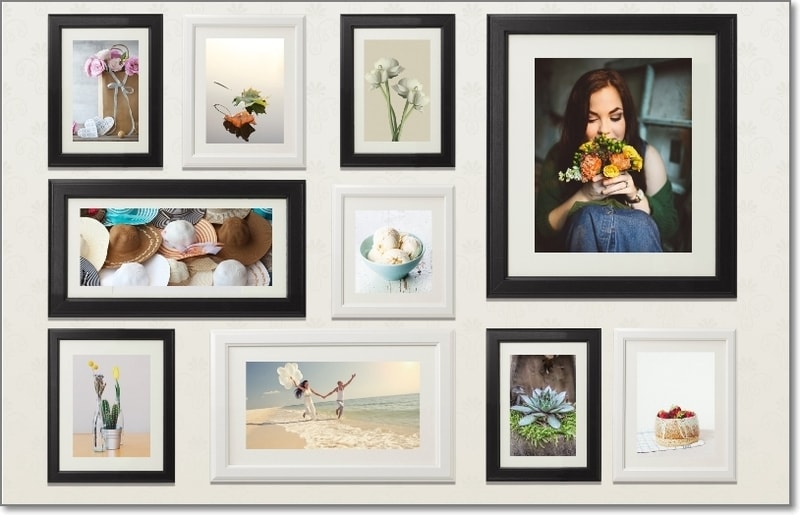
In this article
01 [Top 10 wall collage ideas](#Part 1)
02 [How can wondershare filmora help you design your desired wall collage](#Part 2)
Part 1 Top 10 wall collage ideas
There is no dearth of ideas, themes, and designs when it comes to wall photo collages and wallpaper. To make your selection task a little easier, we have shortlisted some of the popular and creative wall collage ideas that can be used in 2024.
01A simple traditional collage
As it is said simplicity is the best, the same goes with the wall collages. A traditional collage having multiple images set in an order never goes out of fashion. Depending on the size of the wall, you can choose the shape and the number of the pictures to be added to the wallpaper.
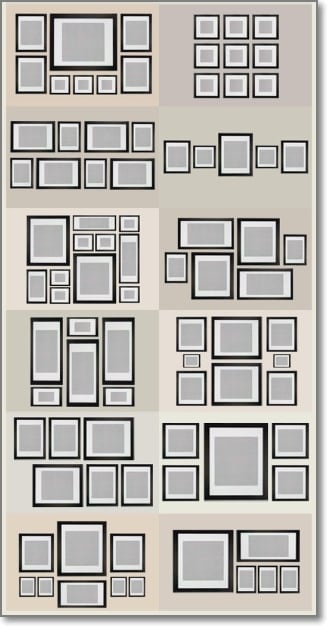
02Full wall collage
This is one of the easiest ways of creating a collage, where you can get all your favourite pics printed and framed and put up randomly on an entire wall. Besides the captured images, you can also choose some of the stock images available at several online sites like Filmora, Canva, and more.
03Creating a photo grid
Besides putting the photos on a wall directly, you can even place them on some rack to create a collage. Creating a wallpaper on a frame or a grid has multiple benefits like it will keep your walls clean, can be moved at any place of your choice and add to overall looks to the room.
04Creating a collage using polaroid
Instead of getting your images printed and framed, simply take polaroid prints and hang them on a fairy light. This is one of the pocket-friendly collage wall ideas that will also will add warmth and coziness to your room and living space.

05Creating a collage in some shape
Choose a shape of your choice and then set all the desired pictures in that particular shape. This wall collage will look interesting and creative as well. While setting the images in a particular shape ensure that all the pictures are more or less of the same size to make it look symmetrical.
06Adding neon sign to collages
Another interesting way to pep up your wall collage is by adding a neon sign like a heart shape, cloud, or any other amidst your photos on the wall. Neon signs in different shapes, sizes, and colors are available online at pocket friendly prices. As per the theme of your photos, you can add one or more neon signs.
07Wall collage in a letter shape
Create a photo collage in the shape of your name initial or an entire name. You can also create collages for each room in the initials of the name of the person staying in those room. These collages will give a personalised touch to your room.
08Caricature wall collage
To add some fun elements to your wall, use caricature of your photos, instead of the simple pictures. There are several online sites that can help you convert your regular images into caricatures that can be used for creating wallpapers.
09Cartoon wall collage
If you want to decorate a kid’s room wall then nothing can be better than using pictures of their favorite cartoon characters for creating a collage. You can even create an interesting wall of your room if you too like cartoon characters. Stock images of these characters in high quality are available on several online sites.
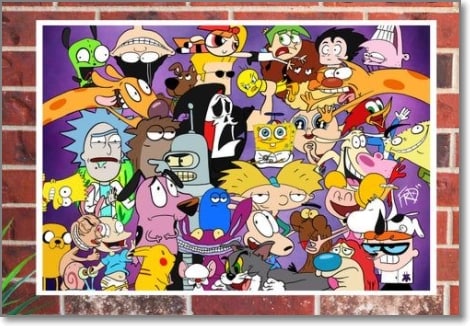
10World Map wall collage
This is one of the best collage ideas if you love to travel. You can create a world map on your wall and then add your own captured images to the places which you have visited.
Part 2 How can Wondershare Filmora help you design your desired wall collage
Using your own captured images for creating a wall collage is a good idea but to further enhance the wallpaper or use the pictures that would match the desired theme you could select the images from the stock library available at several sites.
One such excellent tool is Wondershare Filmora where you can get a huge collection of images in an array of themes and categories. The royalty free images at Wondershare can be used without any worries.
Additionally, the software also has a collection of music and sound effects that can be used for creating online presentations. Wondershare Filmora Video Editor is complete video editing software that can be used for creating professional looking videos. Some of the key features of the tool include adding filters, overlays, transitions, titles, and much more.

Wondershare Filmora - Best Video Editor for Mac/Windows
5,481,435 people have downloaded it.
Build unique custom animations without breaking a sweat.
Focus on creating epic stories and leave the details to Filmora’s auto features.
Start a creative adventure with drag & drop effects and endless possibilities.
Filmora simplifies advanced features to save you time and effort.
Filmora cuts out repetition so you can move on to your next creative breakthrough.
The software is available for download on Windows and Mac systems.
● Key Takeaways from This Episode →
● Wall collages using captured pictures and stock images is an interesting way to decorate your walls.
● There are several creative ideas for wall collage.
● Wondershare Filmora is an excellent tool to find a huge collection of stock images in an array of categories and for all video editing requirements.
Photos are not only some captured moments, but memories for lifetime. So, why not relive these happy and special moments by creating a wallpaper of these photos in a collage format. You can choose from the huge collection of your photos and create wallpaper collages. Set a theme for different rooms and then create interesting wall picture collage. In this article we will help you to learn about some creative wallpaper collage ideas and photos for 2024.
In this article
01 [Top 10 wall collage ideas](#Part 1)
02 [How can wondershare filmora help you design your desired wall collage](#Part 2)
Part 1 Top 10 wall collage ideas
There is no dearth of ideas, themes, and designs when it comes to wall photo collages and wallpaper. To make your selection task a little easier, we have shortlisted some of the popular and creative wall collage ideas that can be used in 2024.
01A simple traditional collage
As it is said simplicity is the best, the same goes with the wall collages. A traditional collage having multiple images set in an order never goes out of fashion. Depending on the size of the wall, you can choose the shape and the number of the pictures to be added to the wallpaper.
02Full wall collage
This is one of the easiest ways of creating a collage, where you can get all your favourite pics printed and framed and put up randomly on an entire wall. Besides the captured images, you can also choose some of the stock images available at several online sites like Filmora, Canva, and more.
03Creating a photo grid
Besides putting the photos on a wall directly, you can even place them on some rack to create a collage. Creating a wallpaper on a frame or a grid has multiple benefits like it will keep your walls clean, can be moved at any place of your choice and add to overall looks to the room.
04Creating a collage using polaroid
Instead of getting your images printed and framed, simply take polaroid prints and hang them on a fairy light. This is one of the pocket-friendly collage wall ideas that will also will add warmth and coziness to your room and living space.
05Creating a collage in some shape
Choose a shape of your choice and then set all the desired pictures in that particular shape. This wall collage will look interesting and creative as well. While setting the images in a particular shape ensure that all the pictures are more or less of the same size to make it look symmetrical.
06Adding neon sign to collages
Another interesting way to pep up your wall collage is by adding a neon sign like a heart shape, cloud, or any other amidst your photos on the wall. Neon signs in different shapes, sizes, and colors are available online at pocket friendly prices. As per the theme of your photos, you can add one or more neon signs.
07Wall collage in a letter shape
Create a photo collage in the shape of your name initial or an entire name. You can also create collages for each room in the initials of the name of the person staying in those room. These collages will give a personalised touch to your room.
08Caricature wall collage
To add some fun elements to your wall, use caricature of your photos, instead of the simple pictures. There are several online sites that can help you convert your regular images into caricatures that can be used for creating wallpapers.
09Cartoon wall collage
If you want to decorate a kid’s room wall then nothing can be better than using pictures of their favorite cartoon characters for creating a collage. You can even create an interesting wall of your room if you too like cartoon characters. Stock images of these characters in high quality are available on several online sites.
10World Map wall collage
This is one of the best collage ideas if you love to travel. You can create a world map on your wall and then add your own captured images to the places which you have visited.
Part 2 How can Wondershare Filmora help you design your desired wall collage
Using your own captured images for creating a wall collage is a good idea but to further enhance the wallpaper or use the pictures that would match the desired theme you could select the images from the stock library available at several sites.
One such excellent tool is Wondershare Filmora where you can get a huge collection of images in an array of themes and categories. The royalty free images at Wondershare can be used without any worries.
Additionally, the software also has a collection of music and sound effects that can be used for creating online presentations. Wondershare Filmora Video Editor is complete video editing software that can be used for creating professional looking videos. Some of the key features of the tool include adding filters, overlays, transitions, titles, and much more.
Wondershare Filmora - Best Video Editor for Mac/Windows
5,481,435 people have downloaded it.
Build unique custom animations without breaking a sweat.
Focus on creating epic stories and leave the details to Filmora’s auto features.
Start a creative adventure with drag & drop effects and endless possibilities.
Filmora simplifies advanced features to save you time and effort.
Filmora cuts out repetition so you can move on to your next creative breakthrough.
The software is available for download on Windows and Mac systems.
● Key Takeaways from This Episode →
● Wall collages using captured pictures and stock images is an interesting way to decorate your walls.
● There are several creative ideas for wall collage.
● Wondershare Filmora is an excellent tool to find a huge collection of stock images in an array of categories and for all video editing requirements.
Also read:
- Secret Shortcut to Adobe Animate Character Tutorial for 2024
- How to Make Animation Characters with the Best Character Creators for 2024
- New Ready to Animate Game Character From Scratch, In 2024
- New 2024 Approved Top 3 Ways to Create Gif with Great 3D Gif Maker
- In 2024, Popular Female & Male Disney Cartoon Characters To Empower You
- In 2024, What This Post Can Teach You About Clay Animation
- New You Can Turn a TikTok Into a GIF Now
- Updated 2024 Approved 10 Amazing Cartoon Music Examples You Need to Bookmark
- 15 Iconic Cartoon Characters of All Time
- Updated In 2024, 6 Proven Ways to Dub Anime for Anime Voice Actor
- Updated In 2024, Cartoon Fundamentals How to Learn Cartoon Characters Sketch Quickly
- In 2024, 18 Best Tools and Services to Create Animated Videos for Your Business
- Updated 2024 Approved A Beginners Guide to Explain What 3D Animation Is
- Updated Before You Learn 3D Animation Things You Should Know for 2024
- New Best 10 Apps to Enhance Your Instagram Story Slideshow for 2024
- In 2024, How to Create a Whiteboard Video Step by Step
- New In 2024, How to Stop Animation From Looping in Unity
- New 10 Classical Animated Cartoon Types With Examples
- Updated In 2024, 15 Best Sites to Watch Cartoons Online Free And So Can You
- Updated Adobe Animate CC Everything You Need to Know for 2024
- Adobe Animate Riggings PROPER Tutorial for You
- New In 2024, What Wikipedia Wont Tell You About Character Rigging
- Updated OBS Animated Lower Thirds Alternatives
- What Wikipedia Wont Tell You Specifically About Character Rigging for 2024
- New Learn What Are Differences Between 2D And 3D Animation for 2024
- New Most Popular Tips on Learning Animate Rigging
- In 2024, 10 Most Memorable Japanese Cat Cartoons
- Adobe Animate CC Everything You Need to Know
- New 8 Best Motion Graphics Online Tools for Your Inspiration for 2024
- 2024 Approved The Definitive Guide to Whiteboard Animation
- New Top 8 Anime Name & Title Generators Online-Get Cool Anime Names for 2024
- Updated In 2024, Best 10 Animoji Apps You Can Use to Edit Animoji
- How to Track a Lost Xiaomi Civi 3 Disney 100th Anniversary Edition for Free? | Dr.fone
- Reasons for Oppo Reno 8T 5G Stuck on Startup Screen and Ways To Fix Them | Dr.fone
- In 2024, Best ZTE Pattern Lock Removal Tools Remove Android Pattern Lock Without Losing Data
- In 2024, A Perfect Guide To Remove or Disable Google Smart Lock On Vivo Y36
- How to Unlock Samsung Galaxy M34 5G Phone without PIN
- In 2024, AI Avatar | Wondershare Virbo Online
- In 2024, Solved How To Transfer From Apple iPhone 12 Pro Max to iPhone 15 | Dr.fone
- 4 Ways to Transfer Messages from Apple iPhone 12 Pro Max to iPhone Including iPhone 15 | Dr.fone
- In 2024, What Is a SIM Network Unlock PIN? Get Your Samsung Galaxy S23 Ultra Phone Network-Ready
- How to Transfer Data from Samsung Galaxy S23 Tactical Edition to Samsung Phone | Dr.fone
- 11 Proven Solutions to Fix Google Play Store Not Working Issue on Nubia Red Magic 8S Pro+ | Dr.fone
- How To Restore Missing Music Files from Vivo S18e
- Three Solutions to Hard Reset Realme 11 Pro+? | Dr.fone
- Locked Out of Apple iPhone 6s? 5 Ways to get into a Locked Apple iPhone 6s
- Top 10 Vivo Y27s Android SIM Unlock APK
- Ways to trade pokemon go from far away On Samsung Galaxy S24+? | Dr.fone
- In 2024, Tips and Tricks for Setting Up your Vivo Y77t Phone Pattern Lock
- In 2024, Unova Stone Pokémon Go Evolution List and How Catch Them For Vivo S17 | Dr.fone
- 8 Workable Fixes to the SIM not provisioned MM#2 Error on Honor X9b | Dr.fone
- In 2024, Unova Stone Pokémon Go Evolution List and How Catch Them For Realme Narzo 60x 5G | Dr.fone
- Title: Updated Learn All About Lip-Syncing in Animation for 2024
- Author: Elon
- Created at : 2024-05-19 03:05:41
- Updated at : 2024-05-20 03:05:41
- Link: https://animation-videos.techidaily.com/updated-learn-all-about-lip-syncing-in-animation-for-2024/
- License: This work is licensed under CC BY-NC-SA 4.0.
