

Updated Learn What Are Differences Between 2D And 3D Animation
Learn What Are Differences Between 2D And 3D Animation
What Are Differences Between 2D And 3D Animation
An easy yet powerful editor
Numerous effects to choose from
Detailed tutorials provided by the official channel
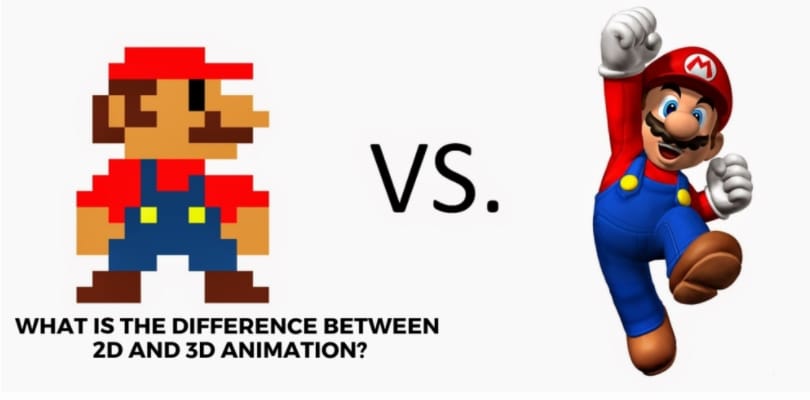
Creating an animation requires multiple processes and tasks to get that final result that we enjoy on the screen. Irrespective of the type of animations like stop-motion, sketch, computer, and others, all of them majorly falls under two main categories- 2D animation and 3D animation. The popular cartoons like Mickey Mouse, Tom & Jerry, and others that became an integral part of all childhood were 2D animations and with technological advancement and 3D animation in use, they are more like aged-veterans.
Toy Story was the first 3D animation movie and after that, there is no stopping. Though 3D animations are more interesting and engaging, they are fields where 2D animations work better. This article will help you to learn in detail about 2D 3D animation, their differences, uses, and other aspects.
In this article
01 [Definition of 2D Animation 3D Animation?](#Part 1)
02 [Key Differences Between 2D Animations and 3D Animations](#Part 2)
03 [Selecting Between 2D Animation and 3D Animation?](#Part 3)
04 [Merging 2D Animation and 3D Animation](#Part 4)
Part 1 Part Definition Of 2D And 3D Animation
012D Animation
The traditional method of animation is termed 2D animation and it has been in use for a long time. A 2D animated video has multiple images in different positions which when moved quickly one after the other simulates a movement. The flipping of the images creates an illusion of movement. Earlier 2D animations were created using hands but now there is advanced computer software that can create these animations in just a few simple clicks. The term 2D means 2 dimensional which means that an image for the animation can be moved in two-dimensional space that is X-axis and Y-axis.
023D Animation
In simplest terms, a 3D animation is an animation that is created in three-dimensional space which makes the characters and objects appear realistic and lively. Thus, a 3D animation has height, width as well as depth. These animations are more complex and the process of creating them is totally different from that of 2D animations. Though 3D animations are used in different industries and platforms these days, majorly they can be found for creating movies, games, and cartoons.
Part 2 Part Key Differences Between 2d Animations and 3d Animations
The major difference between a 2D animation and 3D animation lies in the final appearance. While a 2D animation appears like a flat animation which can be an image or a photograph at a fast movement while a 3D animation looks like real objects that can be seen from all angles and have their front, back, top, as well as the bottom.
The table below will differentiate both these animations on various parameters.
| Features/Type of Animation | 2D Animation | 3D Animation |
|---|---|---|
| Full-Form | Two-dimensional | Three-dimensional |
| Meaning | These animations with 2-dimensional objects appear to be moving when the images are moved at a fast speed. | The objects and characters in these animations look more realistic as their appear in 3-dimensional space. |
| Supported Aspects and axis | Length and height (X-axis and Y-axis) | Length, height, and width (X-axis, Y-axis and Z-axis) |
| Appearance | Appear as flat | Appear lively and realistic |
| Basic elements | It’s all about frames | The animation is all about movements |
| Axis | Images appear at X-axis, and Y axis | Objects appear at X-axis, Y-axis, and Z-axis. |
| Use and target audience | Used for social media sites, demos, animated whiteboard videos, and similar others. | Used for movies, cartoons, video games. |
| Use of software | Hand-drawn images or computer-generated images can be used. | Complex software is needed. |
| Cost | Cheaper than 3D animations | Expensive |
| Examples | Snow White, The Jungle Book, Mickey Mouse, Tom & Jerry, and more. | The Toy Story, Transformers, Incredibles, and more. |
Part 3 Selecting Between 2D Animation and 3D Animation?
Confused between 2D animation and 3D animation? Several factors can be considered to select between the two types of animations. Major ones are enlisted below.
● Target audience: For general explanation and use, 2D animations are a good choice as they are interesting, engaging, and also pocket-friendly. If the target audience is professional people that need in-depth and important information about something, 3D animations are a better choice.
● Availability of software: There are different software used for different types of animations. The availability of the software can also be a deciding factor for selecting between a 2D animation or 3D animation.
● Budget: This is another important factor to be considered. Since 3D animation requires more complex tools and procedures, creating them is expensive. So, depending on how much you are willing to spend, you can choose between the two.
Part 4 Part Merging 2D Animation and 3D Animation
Why choose one, when both can be used? Yes, to get the best of both worlds, 2D animations can be used along with 3D animations depending on the type of the project. Both the styles can be adjusted as per the requirements and for this, good professional software is needed.
We here suggest Wondershare Filmora Video Editor as the best tool as it not only comes equipped with all the latest features but the entire process is also quick and hassle-free. Majorly working as an excellent video editing software, the program supports multiple functions supporting animated videos. Using this Windows and Mac-based tool yon create dynamic animated videos and also edit them and customize them to suit your requirements.
For Win 7 or later (64-bit)
For macOS 10.12 or later
Key features of the software
● Create interesting and engaging animated and other videos using more than 100 media layers, composting tools, and dynamic effects.
● Apply motion elements, filters, and transitions for dynamic videos.
● Audio functions like background noise removal, audio equalizer, keyframe audio editing, and others are supported.
● Fast import, export, and rendering.
● Option to preview the files in high resolution.
● Features like fisheye correction, speed control, stabilization, advanced color correction, 3D LUTs, and others are supported.
● Additional supported functions include import from social media sites, portrait support, camera shake, audio-mixing, screen recording, auto-crop, and others.
● Windows and Mac support.
● Key Takeaways from This Episode →
● 2D and 3D animation are the two major types of animations created for different uses.
● A 2D animation appears in two-dimensional space while a 3D animation appears in a three-dimensional space and looks livelier and more realistic.
● Both 2D and 3D animations can be merged using professional software like Wondershare Filmora Video Editor that supports a wide range of other functions as well.
15 Types of Cartoon Drawing Styles Examples
15 Types of Cartoon Drawing Styles with Examples
An easy yet powerful editor
Numerous effects to choose from
Detailed tutorials provided by the official channel
The perfect, if not the best, place to begin cartoon drawing style as an artist is drawings or sketches since you don’t need a lot of drawing equipment to start this type of drawing. What you chiefly need is just your pen and paper to begin.
So, let’s move ahead as this content will show you different cartoon drawing styles, and in no time, you’ll master the art.
In this article
01 [15 Types of Cartoon You May Use for Your Next Marketing Project](#Part 1)
02 [How To Draw Myself In Five Different Cartoon Styles](#Part 2)
Part 1 Types of Cartoon You May Use for Your Next Marketing Project
As I’ve mentioned before, there are various types and styles of cartoon drawings. Below are a few cartoon drawing styles you may want to use for your next project.
01Modern Cartoon Style
This style is currently the most common art style displayed on TV channels like Cartoon Network.
Note that this cartoon-style drawing’s main features are the thick outlines, geometric shapes, and bright colors.
One of the significant reasons this drawing style is this way is that using simple shapes without much detail makes the overall animation process much faster and saves resources for the studios. Nonetheless, it is a beautiful and captivating cartoon drawing style!
This drawing style is used by many modern cartoons. Here are a few examples:
● The Powerpuff Girls
● Dexter’s Laboratory
● Codename: Kids Next Door
● Gravity Falls
02Realistic Cartoon Style
This cartoon drawing style is more quirky since, generally, cartoon drawing is more likely to simplify shapes. The realistic cartoon-style drawing adds more details and keeps figures much more in line with reality. This drawing style is typical among artists who vectorize people’s photographs.
You can also, to some extent, include Caricatures in this category. Caricatures are generally very realistic besides the whole enlargement and shrinking of specific body parts!
Few examples of realistic cartoon drawing styles:
● Ugly Americans
● General Caricataures
● Archer
03Modern Anime
This style tends to be more complex, primarily seen in drawings where the characters seem to be in motion, like in comic books. Modern-day drawings of this style have a lot of shadows and highlights in their character and environment, giving them a relatively new level of complexity.
Here are a few examples of modern animes that follow this Japanese cartoon drawing style.
● My Hero Academia
● Sword Art Online
● Attack on Titan
● Fullmetal Alchemist Brotherhood
04Classic Manga
The old Japanese manga characters tend to possess human-like attributes (proportions) in terms of the body. The difference is the big eyes they have the most time.
Generally, this cartoon drawing style focuses more on feminine bodies, possessing angular chins and thin bodies. Some drawing styles tend to make some parts of the body overtly long compared to the rest of the body; for instance, the legs are mostly longer than other parts.
A few examples of classic manga possessing this cartoon style drawing are:
● Oh My Goddess
● Urusei Yatsura
● Sailor Moon
● Hellsing
05Chibi Drawing Style
The Chibi Cartoon Drawing Style mainly focuses on making the characters into a tiny version of themselves as if being compressed or compacted into a small container.
Examples of where this drawing style is used:
● Lucky Star
● Bottle Fairy
● Himouto! Umaru-chan
06The Simpsons Cartoon Drawing Style
This cartoon-style drawing is widely famous. Though this style has undergone some evolution throughout the years, the main features remained constant! That is to say, the yellow bodies and big and white sphere-like eyes remained.
07Classic Disney
This drawing style was a staple for years, though this drawing style has had an evolutionary cartoon drawing style over the years.
08Mid 20th Century Disney
Disney upped their game during the mid 20th century and started working more with live actors, drawing from references, and filming shots before drawing the cartoons.
Some remarkable examples of this cartoon drawing style are
● Alice in Wonderland
● Cinderella
● Beauty and the Beast
09Modern Disney Drawing Style
This cartoon-style drawing is an immediate improvement of the mid-20th 20th drawing style. This cartoon style is brighter, more detailed, and more complex generally.
Although Disney has stopped creating 2D cartoon drawings, there are still some examples of this more refined art style:
● The Princess and the Frog
● Lilo and Stitch
10Old Cartoon Drawing Style
This drawing style is mostly in black and white format, with very high contrast body parts. The features of this style are having short bodies and long limbs. Sometimes, this type of drawing is referred to as Noodle drawing because the character’s body moves as if there are no bones in their body.
Some examples of this cartoon drawing style include:
● Mickey Mouse
● Betty Boop
11South Park
South Park cartoon drawing style is aptly geometric and has little depth. Shadows or highlights in this cartoon-style are rare. The colors are pretty solid and clean.
12Chrono Trigger/ Dragon Ball (Akira Toriyama)
Akira Toriyama’s cartoon drawing style characterizes having big and almost rectangular eyes and a lot of geometric shapes and definitions in the muscles.
13Crayon Shin-Chan
This cartoon-style drawing is effortless. An exciting aspect of this style is that it doesn’t mind pushing the limits of the character.
The lines generally are thin, and the eyes are prominent in black and white colors.
14Betty Boop
Betty Boop’s cartoon drawing style possesses contrasting black and white colors. Fragile lines with the characters contain a very high amount of black shapes.
15Adventure Time
Adventure Time’s art is incredibly geometric, and its characters are nearly boneless, making it a more current example of a cartoon drawing style.
More fluid animation is possible as a result of this. The art is also quite brilliant, with vibrant hues that leap off the screen.
Aside from that, the characters’ eyes are usually tiny (with a few exceptions), and the lines are skinny.
Part 2 How to draw myself in five different cartoon styles
There are loads of cartoon characters to choose from when trying to draw me. To sketch yourself as a cartoon, first, you have to determine what cartoon drawing style to appear in. This will give you hints on how to go about the drawing.
● The traditional drawing method is a pencil and paper.
● Online Avatar builders
● Adobe character animator
● Outsource to designers or illustrators
● Hire a studio or a freelancer
● Wondershare Filmora Video Editor

Wondershare Filmora - Best Video Editor for Mac/Windows
5,481,435 people have downloaded it.
Build unique custom animations without breaking a sweat.
Focus on creating epic stories and leave the details to Filmora’s auto features.
Start a creative adventure with drag & drop effects and endless possibilities.
Filmora simplifies advanced features to save you time and effort.
Filmora cuts out repetition so you can move on to your next creative breakthrough.
The Filmora software is an easy-to-use editing app with many beautiful features that can make your animation or cartoon-style drawing more vibrant.
● Split-screen makes it easier to tell a story or draw with multiple screens.
● Preset templates are superb for turning your drawings into creative videos.
● Motion graphics
● Keyframing
● Screen recorder and other unique features.
● Ending Thoughts →
● We’ve looked at the various cartoon drawing styles.
● How to draw self in cartoon style.
● The Filmora software to upbeat your sketches at the professional level.
● hus, go check out any cartoon-style drawings and see which one you like best. Make sure to study the reference drawing and practice more to perfect the artist in you.
The perfect, if not the best, place to begin cartoon drawing style as an artist is drawings or sketches since you don’t need a lot of drawing equipment to start this type of drawing. What you chiefly need is just your pen and paper to begin.
So, let’s move ahead as this content will show you different cartoon drawing styles, and in no time, you’ll master the art.
In this article
01 [15 Types of Cartoon You May Use for Your Next Marketing Project](#Part 1)
02 [How To Draw Myself In Five Different Cartoon Styles](#Part 2)
Part 1 Types of Cartoon You May Use for Your Next Marketing Project
As I’ve mentioned before, there are various types and styles of cartoon drawings. Below are a few cartoon drawing styles you may want to use for your next project.
01Modern Cartoon Style
This style is currently the most common art style displayed on TV channels like Cartoon Network.
Note that this cartoon-style drawing’s main features are the thick outlines, geometric shapes, and bright colors.
One of the significant reasons this drawing style is this way is that using simple shapes without much detail makes the overall animation process much faster and saves resources for the studios. Nonetheless, it is a beautiful and captivating cartoon drawing style!
This drawing style is used by many modern cartoons. Here are a few examples:
● The Powerpuff Girls
● Dexter’s Laboratory
● Codename: Kids Next Door
● Gravity Falls
02Realistic Cartoon Style
This cartoon drawing style is more quirky since, generally, cartoon drawing is more likely to simplify shapes. The realistic cartoon-style drawing adds more details and keeps figures much more in line with reality. This drawing style is typical among artists who vectorize people’s photographs.
You can also, to some extent, include Caricatures in this category. Caricatures are generally very realistic besides the whole enlargement and shrinking of specific body parts!
Few examples of realistic cartoon drawing styles:
● Ugly Americans
● General Caricataures
● Archer
03Modern Anime
This style tends to be more complex, primarily seen in drawings where the characters seem to be in motion, like in comic books. Modern-day drawings of this style have a lot of shadows and highlights in their character and environment, giving them a relatively new level of complexity.
Here are a few examples of modern animes that follow this Japanese cartoon drawing style.
● My Hero Academia
● Sword Art Online
● Attack on Titan
● Fullmetal Alchemist Brotherhood
04Classic Manga
The old Japanese manga characters tend to possess human-like attributes (proportions) in terms of the body. The difference is the big eyes they have the most time.
Generally, this cartoon drawing style focuses more on feminine bodies, possessing angular chins and thin bodies. Some drawing styles tend to make some parts of the body overtly long compared to the rest of the body; for instance, the legs are mostly longer than other parts.
A few examples of classic manga possessing this cartoon style drawing are:
● Oh My Goddess
● Urusei Yatsura
● Sailor Moon
● Hellsing
05Chibi Drawing Style
The Chibi Cartoon Drawing Style mainly focuses on making the characters into a tiny version of themselves as if being compressed or compacted into a small container.
Examples of where this drawing style is used:
● Lucky Star
● Bottle Fairy
● Himouto! Umaru-chan
06The Simpsons Cartoon Drawing Style
This cartoon-style drawing is widely famous. Though this style has undergone some evolution throughout the years, the main features remained constant! That is to say, the yellow bodies and big and white sphere-like eyes remained.
07Classic Disney
This drawing style was a staple for years, though this drawing style has had an evolutionary cartoon drawing style over the years.
08Mid 20th Century Disney
Disney upped their game during the mid 20th century and started working more with live actors, drawing from references, and filming shots before drawing the cartoons.
Some remarkable examples of this cartoon drawing style are
● Alice in Wonderland
● Cinderella
● Beauty and the Beast
09Modern Disney Drawing Style
This cartoon-style drawing is an immediate improvement of the mid-20th 20th drawing style. This cartoon style is brighter, more detailed, and more complex generally.
Although Disney has stopped creating 2D cartoon drawings, there are still some examples of this more refined art style:
● The Princess and the Frog
● Lilo and Stitch
10Old Cartoon Drawing Style
This drawing style is mostly in black and white format, with very high contrast body parts. The features of this style are having short bodies and long limbs. Sometimes, this type of drawing is referred to as Noodle drawing because the character’s body moves as if there are no bones in their body.
Some examples of this cartoon drawing style include:
● Mickey Mouse
● Betty Boop
11South Park
South Park cartoon drawing style is aptly geometric and has little depth. Shadows or highlights in this cartoon-style are rare. The colors are pretty solid and clean.
12Chrono Trigger/ Dragon Ball (Akira Toriyama)
Akira Toriyama’s cartoon drawing style characterizes having big and almost rectangular eyes and a lot of geometric shapes and definitions in the muscles.
13Crayon Shin-Chan
This cartoon-style drawing is effortless. An exciting aspect of this style is that it doesn’t mind pushing the limits of the character.
The lines generally are thin, and the eyes are prominent in black and white colors.
14Betty Boop
Betty Boop’s cartoon drawing style possesses contrasting black and white colors. Fragile lines with the characters contain a very high amount of black shapes.
15Adventure Time
Adventure Time’s art is incredibly geometric, and its characters are nearly boneless, making it a more current example of a cartoon drawing style.
More fluid animation is possible as a result of this. The art is also quite brilliant, with vibrant hues that leap off the screen.
Aside from that, the characters’ eyes are usually tiny (with a few exceptions), and the lines are skinny.
Part 2 How to draw myself in five different cartoon styles
There are loads of cartoon characters to choose from when trying to draw me. To sketch yourself as a cartoon, first, you have to determine what cartoon drawing style to appear in. This will give you hints on how to go about the drawing.
● The traditional drawing method is a pencil and paper.
● Online Avatar builders
● Adobe character animator
● Outsource to designers or illustrators
● Hire a studio or a freelancer
● Wondershare Filmora Video Editor
Wondershare Filmora - Best Video Editor for Mac/Windows
5,481,435 people have downloaded it.
Build unique custom animations without breaking a sweat.
Focus on creating epic stories and leave the details to Filmora’s auto features.
Start a creative adventure with drag & drop effects and endless possibilities.
Filmora simplifies advanced features to save you time and effort.
Filmora cuts out repetition so you can move on to your next creative breakthrough.
The Filmora software is an easy-to-use editing app with many beautiful features that can make your animation or cartoon-style drawing more vibrant.
● Split-screen makes it easier to tell a story or draw with multiple screens.
● Preset templates are superb for turning your drawings into creative videos.
● Motion graphics
● Keyframing
● Screen recorder and other unique features.
● Ending Thoughts →
● We’ve looked at the various cartoon drawing styles.
● How to draw self in cartoon style.
● The Filmora software to upbeat your sketches at the professional level.
● hus, go check out any cartoon-style drawings and see which one you like best. Make sure to study the reference drawing and practice more to perfect the artist in you.
Tips on How to Get Awesome Background for Slideshow in PowerPoint
Tips That Show Anybody How to Get Awesome Background for Slideshow in Powerpoint
An easy yet powerful editor
Numerous effects to choose from
Detailed tutorials provided by the official channel
Amazing slideshow background are an absolute attention grabber in the realm of creative PowerPoint presentations. If you wish to upgrade yours with the same, be here to learn how!
In this article
01 [How to Add Video Background in PowerPoint?](#Part 1)
02 [How to Create Moving Backgrounds in Microsoft PowerPoint?](#Part 2)
03 [Some Tips for You to Get Awesome PowerPoint Backgrounds & Templates](#Part 3)
Part 1 How to Add Video Background in PowerPoint?
When the talk is about engaging means to deliver a precise information, PowerPoint slideshows are an absolute stunner. While these are already a captivating utility to present your thing, the output and audience engagement is at par with the inclusion of attractive design elements in the presentation. As is evident, there are enormous diversities of supplementary elements to complement your presentation, let us centre our discussion to the application of video background for slideshow in PowerPoint.
User’s Guide to Add Video Background in a PowerPoint Slideshow
The following section presents a detailed explanation of the steps to supplement your PowerPoint presentations with classic video backgrounds in just a few quick steps:
Step 1: Launch Your Presentation
Start with opening the desired PowerPoint presentation to which you want to add the video background, in any of your preferred devices.
Step 2: Add a Video to Your Slide
Browse through your presentation slides to locate the one you want to add the video background to. When you have made your choice, navigate to the PowerPoint toolbar at the top and hit the ‘Insert’ tab and choose the ‘Video’ option.
You will now be presented with 2 choices, either uploading a video from your device or insert one from the web by pasting its YouTube URL into the slide. If you are uploading a video from your device, proceed with selecting the desired video and tap ‘Insert’.

Step 3: Move and Resize Your Video
After uploading your video to the slide, you need to make suitable adjustments in its size and alignment to synchronize the same with the contents of the slide. To do this, drag the top left corner of the video to that of the slide to set the top alignment ratio. In the same way, move the bottom right corner of the video to be in sync with that of the slide. You will see the video occupying the entire slide at the end of the adjustment process.

Step 4: Set the Video Background
You will now need to set the video as the background of your slide, so that the latter’s contents are displayed over the video. You can do this by right clicking on the video and choosing the ‘Send to Back’ option from the dropdown that follows. This will cause the contents of your slide to get displayed over the video.

Step 5: Playback Edit and Customization Choices
Before proceeding towards making changes in the video playback and formatting, prefer taking a quick preview of your work till here. Once you are satisfied, navigate to the PowerPoint Toolbar at the top, hit the ‘Video Tools’ tab, followed by clicking on the ‘Playback’ tab.
It is recommended to introduce the following changes in your video for the most affordable slideshow output:
● Loop Your Video
Creating a video loop will facilitate you with an automatic replay of your video without the need to restart it every time with a click. You can loop your video by navigating to the ‘Video Options’ section and choose ‘Loop Until Stopped’ by clicking within the checkbox next to it. The background video will now continue to play until you switch to a different slide.
● Automatically Start Your Video
To avoid clicking on the slide amid your presentation for the video loop to begin, adjust the latter’s settings for an automatic start. Navigate to the ‘Start’ dropdown menu and select ‘Automatically’.
● Trim Your Video
You can work with some basic video editing tools in PowerPoint, like trimming and cropping your background video to a desired length. If you wish to ward off certain portions of your video, reach to and click o the ‘Trim Video’ button. Following this, drag the slider of the video to select the desired portions of the clip and exclude the rest.
You can further work with some more editing effects to create the perfect video backgrounds for your presentation slides in line with your specific preferences.

Step 6: Annotate Your Video Background
When you are done with the video editing process, take a preview of the same to ensure that everything is set in the proper order and at the proper place. Lastly, if you wish to add suitable text annotations to your video, you can do this with the ‘ClassPoint’ tool to write over the video background. All you need to do is select a preferred pen colour and start writing on your slide screen. You can further, save the annotations for a work record.

Part 2 How to Create Moving Backgrounds in Microsoft PowerPoint?
Moving PowerPoint slideshow background is another aspect of graphic creativity at its best, which can be used in a number of ways to grab considerable viewer attention. When choosing to add moving backgrounds to your presentation, the latter can aid in improving the style of content presentation, making your audience curious about how and what happens next.
Having learnt about the utility and creation process of video backgrounds in the PowerPoint presentation tool, let us extend our discussion to the method of creating a moving slide show background in the same in the following section:
User’s Guide to Create Moving Backgrounds for PowerPoint Presentations
Discussed below is an explanatory procedure for designing moving backgrounds with an awesome appearance for slideshow presentations in Microsoft PowerPoint:
Step 1: Open Your Presentation
To begin with, launch the PowerPoint tool in your preferred device and open the presentation on which you will be working to add the moving background. After the presentation gets loaded, navigate through the same and select the desired slide to proceed with the aforesaid task.
Step 2: Choose a Video Location
To add your desired video to the slide, navigate to the PowerPoint ribbon at the top and click on the ‘Insert’ tab. Select ‘Video’ from the list of options that appears, followed by choosing one of the ‘Online Video’ or ‘Video on My PC’ options from the video selection prompt. It is further recommended to select a video in the MP4 format, as the latter gives best results of moving and video backgrounds.
Step 3: Insert Your Video
Choose the second option in the selection prompt to upload a video from your device. You will now be asked to browse through your device and locate the desired video in the ‘Insert Video’ dialog box that appears. Select your video and tap the ‘Insert’ button to add your video.
To upload videos from an online source, choose the ‘Online Video’ option in the selection prompt and proceed to search the video from PowerPoint or paste its embed code to recover the video. The chosen video will begin to download and can be added to the PowerPoint presentation after the download process comes to an end.

Step 4: Playback Editing and Video Customization
Before proceeding further, consider paying your video once by clicking on the ‘Start’ button. You can also add different effects, trim and crop or add a bookmark to your video by navigating to and clicking on the ‘Video Tools’ tab, followed by selecting the ‘Format’ option. To work with the start and playback options for the video, click on ‘Playback’ in the dropdown menu of the ‘Video Tools’ tab.

Part 3 Some Tips for You to Get Awesome PowerPoint Backgrounds & Templates
Now that you have developed a comprehensive understanding of the utility of adding video and moving background for slideshow presentation, let us look through some easy tips and tricks to conveniently access the top rated and the most popular PowerPoint slideshow templates and backgrounds in the following section:
01Cool Slide Backgrounds
Slideshow presentations in PowerPoint are supplemented with a visual spark through amazing and vibrant backgrounds that are a sign of excellent graphic creativity. When working with a PowerPoint presentation of your own, do take the liberty to use some cool slide backgrounds to your creative advantage.
When the talk is about complementing your presentation with a cohesive and upbeat background, you can either select the most suitable one from a heap of pre made slideshow templates available both in the PowerPoint slideshow creator tool as well as across the web. However, if you wish to take the excitement to another level, try hands at creating an awesome and cool backgrounds for PowerPoint slides of your own!
Talking about some really cool tips and tricks to design a slideshow presentation background in PowerPoint, start with including some specific shapes and color overlays to the background capture, experiment with a polygon background, work on enhancing the background image with classic and artistic effects and apply a mix of colors, textures and patterns to give a classy look to your slideshow backgrounds.

02Professional Slideshow Backgrounds
If you are aiming at creating a PowerPoint slideshow presentation with a business centered design approach, you will need to cut down on some extra elements that you would ideally choose to include in a personal purpose based slideshow. Paying attention to the fact that business and corporate centered presentations should be simple, subtle and to the point, it would be an intelligent step to avoid adding too many expressive elements in the background.
Whether you are creating a professional slideshow background of your own or working with a pre designed template, take care to include a complementary play of a light background theme with a maximum of 2 balancing shades.
Avoid too much vibrancy and abstain from applying over the top effects and quick transitions, lest your presentation may look a bit too crowed. If your slides have lot of written content, prefer using a white color background text in a professional font style.
If you have decided on picking a pre made template, you can browse through a diversity of suggestions across the web, while keeping the aforesaid constraints in mind. Consider taking a look at the figure given below to have a more comprehensive understating of the prerequisites of selecting a professional sideshow background template:

03Happy Birthday Slide Backgrounds
Birthday parties are the most appealing synonyms of fun and entertainment. If you are into the profession of organizing events that renders smiling and happy faces, slideshow presentations could be of great help to you in discussing about services, types of social gentries and event targets with your clients.
When looking through different options to select the perfect birthday template, either for a professional event, or just to go down the memory lane of your most cherished moments, take caution to search for a vibrant alternative with colorful images, different background designs and party oriented cool themes, wide aspect ratio with high screen resolution for a mass display and conveniently editable graphics.
If you are creating a happy birthday slide background of your own, there are variety of realms to explore your graphic design creativity, owing to the fact that the subject of creation is highly expressive and multi-dimensional. While you are free to extend your creativity to the next level, do pay attention to the above constraints for a more elusive and outstanding creation output, while maintaining the fun and entertainment quotient intact.

04Wedding Slide Backgrounds
Considering the fact that wedding events are pronounced means of fun, leisure, enjoyment and beautiful memories, anything that aims to be a part of the celebrations, should be equally ecstatic and engaging. Infusing festive occasions with technology, slideshow based wedding invitations and moment captures are the top rated modern trends of celebrating this significant life event.
If you are keen on designing the perfect slideshow presentation for wedding invitations, photo albums and thank you cards, prefer to choose a wedding slide background template with aesthetic layout and flowing element inclusions, like that of floral borders and scented candles. Look though the elements of a subtle thematic setup with soothing color combinations, preferably in complementary pastel shades, like pink and white.
Talking of template customizability, the latter should have placeholders to include names of the bride and groom, the wedding date and venue, and of course the wedding photographs. The beautiful slide background template should have enough design space to include the most elusive play of text colors and fonts to suit specific preferences of creating special memories of a cherished event.

05Slideshow Backgrounds and Templates in Filmora
When looking for the most convenient lead to an extensive variety of beautiful slideshow templates and background, the template library of Wondershare Filmora Video Editor slideshow creator program can be your most affordable destination. The aforesaid software library is known to possess the best and most perfect template choices to suit the creation constraints of almost every slideshow presentation style and objective you can possibly think of.
For Win 7 or later (64-bit)
For macOS 10.12 or later
The elusive templates are further supplemented with a plethora of design flexibilities and customization features that are all set to deliver you the most appreciable creation output. Stressing a bit on the template customization choices of the software, you can work with the tool to uplift your slideshow backgrounds with artistic image effects and overlays, annotate them with beautiful text formations in a variety of colors, fonts and sizes and lots more.
Moving a bit deeper into the creative aspect, you can upgrade the visual style of your presentations with the most perfect and seamless image and video transitions and text animations. The bottom line is, working with the aforesaid slideshow creator program, you are entitled to get jaw dropping applaud from your audience, while making a confident and a content delivery through your slideshow presentation.

● Ending Thoughts →
● Using an expressive and complementing background in your slideshow presentation uplifts its visual credibility in captivating your audience.
● Browsing through the web, you get to access a vast range of amazing slideshow backgrounds and templates to make your presentation, a visual masterpiece.
● When looking for the most distributed storehouse of slideshow backgrounds and templates, the Wondershare Filmora library is your ultimate solution.
Amazing slideshow background are an absolute attention grabber in the realm of creative PowerPoint presentations. If you wish to upgrade yours with the same, be here to learn how!
In this article
01 [How to Add Video Background in PowerPoint?](#Part 1)
02 [How to Create Moving Backgrounds in Microsoft PowerPoint?](#Part 2)
03 [Some Tips for You to Get Awesome PowerPoint Backgrounds & Templates](#Part 3)
Part 1 How to Add Video Background in PowerPoint?
When the talk is about engaging means to deliver a precise information, PowerPoint slideshows are an absolute stunner. While these are already a captivating utility to present your thing, the output and audience engagement is at par with the inclusion of attractive design elements in the presentation. As is evident, there are enormous diversities of supplementary elements to complement your presentation, let us centre our discussion to the application of video background for slideshow in PowerPoint.
User’s Guide to Add Video Background in a PowerPoint Slideshow
The following section presents a detailed explanation of the steps to supplement your PowerPoint presentations with classic video backgrounds in just a few quick steps:
Step 1: Launch Your Presentation
Start with opening the desired PowerPoint presentation to which you want to add the video background, in any of your preferred devices.
Step 2: Add a Video to Your Slide
Browse through your presentation slides to locate the one you want to add the video background to. When you have made your choice, navigate to the PowerPoint toolbar at the top and hit the ‘Insert’ tab and choose the ‘Video’ option.
You will now be presented with 2 choices, either uploading a video from your device or insert one from the web by pasting its YouTube URL into the slide. If you are uploading a video from your device, proceed with selecting the desired video and tap ‘Insert’.
Step 3: Move and Resize Your Video
After uploading your video to the slide, you need to make suitable adjustments in its size and alignment to synchronize the same with the contents of the slide. To do this, drag the top left corner of the video to that of the slide to set the top alignment ratio. In the same way, move the bottom right corner of the video to be in sync with that of the slide. You will see the video occupying the entire slide at the end of the adjustment process.
Step 4: Set the Video Background
You will now need to set the video as the background of your slide, so that the latter’s contents are displayed over the video. You can do this by right clicking on the video and choosing the ‘Send to Back’ option from the dropdown that follows. This will cause the contents of your slide to get displayed over the video.
Step 5: Playback Edit and Customization Choices
Before proceeding towards making changes in the video playback and formatting, prefer taking a quick preview of your work till here. Once you are satisfied, navigate to the PowerPoint Toolbar at the top, hit the ‘Video Tools’ tab, followed by clicking on the ‘Playback’ tab.
It is recommended to introduce the following changes in your video for the most affordable slideshow output:
● Loop Your Video
Creating a video loop will facilitate you with an automatic replay of your video without the need to restart it every time with a click. You can loop your video by navigating to the ‘Video Options’ section and choose ‘Loop Until Stopped’ by clicking within the checkbox next to it. The background video will now continue to play until you switch to a different slide.
● Automatically Start Your Video
To avoid clicking on the slide amid your presentation for the video loop to begin, adjust the latter’s settings for an automatic start. Navigate to the ‘Start’ dropdown menu and select ‘Automatically’.
● Trim Your Video
You can work with some basic video editing tools in PowerPoint, like trimming and cropping your background video to a desired length. If you wish to ward off certain portions of your video, reach to and click o the ‘Trim Video’ button. Following this, drag the slider of the video to select the desired portions of the clip and exclude the rest.
You can further work with some more editing effects to create the perfect video backgrounds for your presentation slides in line with your specific preferences.
Step 6: Annotate Your Video Background
When you are done with the video editing process, take a preview of the same to ensure that everything is set in the proper order and at the proper place. Lastly, if you wish to add suitable text annotations to your video, you can do this with the ‘ClassPoint’ tool to write over the video background. All you need to do is select a preferred pen colour and start writing on your slide screen. You can further, save the annotations for a work record.
Part 2 How to Create Moving Backgrounds in Microsoft PowerPoint?
Moving PowerPoint slideshow background is another aspect of graphic creativity at its best, which can be used in a number of ways to grab considerable viewer attention. When choosing to add moving backgrounds to your presentation, the latter can aid in improving the style of content presentation, making your audience curious about how and what happens next.
Having learnt about the utility and creation process of video backgrounds in the PowerPoint presentation tool, let us extend our discussion to the method of creating a moving slide show background in the same in the following section:
User’s Guide to Create Moving Backgrounds for PowerPoint Presentations
Discussed below is an explanatory procedure for designing moving backgrounds with an awesome appearance for slideshow presentations in Microsoft PowerPoint:
Step 1: Open Your Presentation
To begin with, launch the PowerPoint tool in your preferred device and open the presentation on which you will be working to add the moving background. After the presentation gets loaded, navigate through the same and select the desired slide to proceed with the aforesaid task.
Step 2: Choose a Video Location
To add your desired video to the slide, navigate to the PowerPoint ribbon at the top and click on the ‘Insert’ tab. Select ‘Video’ from the list of options that appears, followed by choosing one of the ‘Online Video’ or ‘Video on My PC’ options from the video selection prompt. It is further recommended to select a video in the MP4 format, as the latter gives best results of moving and video backgrounds.
Step 3: Insert Your Video
Choose the second option in the selection prompt to upload a video from your device. You will now be asked to browse through your device and locate the desired video in the ‘Insert Video’ dialog box that appears. Select your video and tap the ‘Insert’ button to add your video.
To upload videos from an online source, choose the ‘Online Video’ option in the selection prompt and proceed to search the video from PowerPoint or paste its embed code to recover the video. The chosen video will begin to download and can be added to the PowerPoint presentation after the download process comes to an end.
Step 4: Playback Editing and Video Customization
Before proceeding further, consider paying your video once by clicking on the ‘Start’ button. You can also add different effects, trim and crop or add a bookmark to your video by navigating to and clicking on the ‘Video Tools’ tab, followed by selecting the ‘Format’ option. To work with the start and playback options for the video, click on ‘Playback’ in the dropdown menu of the ‘Video Tools’ tab.
Part 3 Some Tips for You to Get Awesome PowerPoint Backgrounds & Templates
Now that you have developed a comprehensive understanding of the utility of adding video and moving background for slideshow presentation, let us look through some easy tips and tricks to conveniently access the top rated and the most popular PowerPoint slideshow templates and backgrounds in the following section:
01Cool Slide Backgrounds
Slideshow presentations in PowerPoint are supplemented with a visual spark through amazing and vibrant backgrounds that are a sign of excellent graphic creativity. When working with a PowerPoint presentation of your own, do take the liberty to use some cool slide backgrounds to your creative advantage.
When the talk is about complementing your presentation with a cohesive and upbeat background, you can either select the most suitable one from a heap of pre made slideshow templates available both in the PowerPoint slideshow creator tool as well as across the web. However, if you wish to take the excitement to another level, try hands at creating an awesome and cool backgrounds for PowerPoint slides of your own!
Talking about some really cool tips and tricks to design a slideshow presentation background in PowerPoint, start with including some specific shapes and color overlays to the background capture, experiment with a polygon background, work on enhancing the background image with classic and artistic effects and apply a mix of colors, textures and patterns to give a classy look to your slideshow backgrounds.
02Professional Slideshow Backgrounds
If you are aiming at creating a PowerPoint slideshow presentation with a business centered design approach, you will need to cut down on some extra elements that you would ideally choose to include in a personal purpose based slideshow. Paying attention to the fact that business and corporate centered presentations should be simple, subtle and to the point, it would be an intelligent step to avoid adding too many expressive elements in the background.
Whether you are creating a professional slideshow background of your own or working with a pre designed template, take care to include a complementary play of a light background theme with a maximum of 2 balancing shades.
Avoid too much vibrancy and abstain from applying over the top effects and quick transitions, lest your presentation may look a bit too crowed. If your slides have lot of written content, prefer using a white color background text in a professional font style.
If you have decided on picking a pre made template, you can browse through a diversity of suggestions across the web, while keeping the aforesaid constraints in mind. Consider taking a look at the figure given below to have a more comprehensive understating of the prerequisites of selecting a professional sideshow background template:
03Happy Birthday Slide Backgrounds
Birthday parties are the most appealing synonyms of fun and entertainment. If you are into the profession of organizing events that renders smiling and happy faces, slideshow presentations could be of great help to you in discussing about services, types of social gentries and event targets with your clients.
When looking through different options to select the perfect birthday template, either for a professional event, or just to go down the memory lane of your most cherished moments, take caution to search for a vibrant alternative with colorful images, different background designs and party oriented cool themes, wide aspect ratio with high screen resolution for a mass display and conveniently editable graphics.
If you are creating a happy birthday slide background of your own, there are variety of realms to explore your graphic design creativity, owing to the fact that the subject of creation is highly expressive and multi-dimensional. While you are free to extend your creativity to the next level, do pay attention to the above constraints for a more elusive and outstanding creation output, while maintaining the fun and entertainment quotient intact.
04Wedding Slide Backgrounds
Considering the fact that wedding events are pronounced means of fun, leisure, enjoyment and beautiful memories, anything that aims to be a part of the celebrations, should be equally ecstatic and engaging. Infusing festive occasions with technology, slideshow based wedding invitations and moment captures are the top rated modern trends of celebrating this significant life event.
If you are keen on designing the perfect slideshow presentation for wedding invitations, photo albums and thank you cards, prefer to choose a wedding slide background template with aesthetic layout and flowing element inclusions, like that of floral borders and scented candles. Look though the elements of a subtle thematic setup with soothing color combinations, preferably in complementary pastel shades, like pink and white.
Talking of template customizability, the latter should have placeholders to include names of the bride and groom, the wedding date and venue, and of course the wedding photographs. The beautiful slide background template should have enough design space to include the most elusive play of text colors and fonts to suit specific preferences of creating special memories of a cherished event.
05Slideshow Backgrounds and Templates in Filmora
When looking for the most convenient lead to an extensive variety of beautiful slideshow templates and background, the template library of Wondershare Filmora Video Editor slideshow creator program can be your most affordable destination. The aforesaid software library is known to possess the best and most perfect template choices to suit the creation constraints of almost every slideshow presentation style and objective you can possibly think of.
For Win 7 or later (64-bit)
For macOS 10.12 or later
The elusive templates are further supplemented with a plethora of design flexibilities and customization features that are all set to deliver you the most appreciable creation output. Stressing a bit on the template customization choices of the software, you can work with the tool to uplift your slideshow backgrounds with artistic image effects and overlays, annotate them with beautiful text formations in a variety of colors, fonts and sizes and lots more.
Moving a bit deeper into the creative aspect, you can upgrade the visual style of your presentations with the most perfect and seamless image and video transitions and text animations. The bottom line is, working with the aforesaid slideshow creator program, you are entitled to get jaw dropping applaud from your audience, while making a confident and a content delivery through your slideshow presentation.
● Ending Thoughts →
● Using an expressive and complementing background in your slideshow presentation uplifts its visual credibility in captivating your audience.
● Browsing through the web, you get to access a vast range of amazing slideshow backgrounds and templates to make your presentation, a visual masterpiece.
● When looking for the most distributed storehouse of slideshow backgrounds and templates, the Wondershare Filmora library is your ultimate solution.
10 Amazing Cartoon Music Examples You Need to Bookmark
10 Amazing Cartoon Music Examples You Need to Bookmark in 2022
An easy yet powerful editor
Numerous effects to choose from
Detailed tutorials provided by the official channel
If cartoon music turns you on, this is preferably the right place for you! Stay tuned to learn about the top 10 exciting alternatives of cartoon audios!
In this article
01 [Top 10 Cartoon Music](#Part 1)
02 [How to Add Cartoon Music in Video Editing Clips](#Part 2)
Part 1 Top 10 Cartoon Music
Talking of the fascinating and exciting world of cartoons, the subject is an evergreen source of entertainment for almost all age groups; after all, the essence of enjoying something cannot be limited within age boundaries. Diving into some specific details, the fundamental reason behind the extreme popularity of cartoon films and television series is, without any doubt, the stunning graphics and catchy background music.
Speaking of the sound credibility in particular, the following section presents a discussion on some of the choicest audio alternatives from cartoon media creations. If you have enjoyed the bliss of streaming those century old classic opera songs, you can easily relate to the entries in the upcoming list:
01Tales from the Vienna Woods
This was a masterpiece in the world of cartoon music, originally heard in the caricature series, A Corny Concerto in 1943, directed by Bob Clampett under the globally known Disney production house. The composition is essentially a repetition of Fantasia, which was released in 1940.
Talking about the exact music placement within the storyline, the inaugural audio segment, with a special emphasis on the ‘’wythm of woodwinds’’, when Porky Pig, the hero of the storyline, along with his obedient dog, traverses in search of Bugs.
Concerning on the popularity of the music, the latter has received positive music reviews from almost all the leading media critic platforms.
02The Blue Danube
Again an inclusion of the 1943 release, A corny Concerto, this was predominantly a comic version of the original track. It was used to complement the second stage of the storyline, where, a mother swan is seen humming the music to her little ones, giving the classic melody, the feel of a birdsong cover. As the audio swings in, the toddler Daffy Duck is seen paddling over an unwanted honking, while his mother is worried until everything ends up to be fine.
On the take of preference credibility, the music was quite well appreciated by the globally known media critics.
03Dance of the Comedians
This music piece originally belongs to the music album, The Bartered Bride, and was first used in Zoom and Bored in 1957, to uplift the combating theme of the cartoon series. While aptly supplementing the quest of Wile E. Coyote, the protagonist of the story, against Road Runner, his nasty opponent, the climax of the music turns out to be the most loved operas of Czech origin.
About the fan base of the audio snippet, the composition claimed welcoming responses from a worldwide audience.
04Minute Waltz in D-Flat
This one was an explicitly stunning piece of background audio, which was added to the Hyde and Hare cartoon series of 1955, to complement the latter’s storyline with the best suited sound effects.
Entering into the storyline, you will find Bugs, the cutest of rabbits, tends to locate a piano in Dr. Jekyll’s yard, and the latter being the most sophisticated lagomorph ever; begins to explore his musical skills on the instrument. Things however, take an unwanted turn when Mr. Hyde, the antagonist barges in with an attempt of destroying everything.
While the music piece came to be known as the favorite pick of Waltz lovers, the latter received considerable applaud from other media critics as well.
05Morning, Noon and Night in Vienna
This audio background was an exclusive media add-on to Baton Bunny, the 1959 released musical cartoon movies series, which was a further episode of Bugs’ journey that features this adorable, broad toothed rabbit, taking on a conducting task in the land of Vienna.
It is interesting to note that von Suppe, the developer of this music piece, also happened to work on a conducting profile, although on a comic note, the latter did not receive any appreciation for running behind odd smelling flies amid his performance!
Talking of the audience credibility, this one was a musical masterpiece, which received a large scale appreciation from listeners across the globe for featuring the most funny cartoon music ever!
06The Barber of Seville Overture
Like its aforesaid counterparts, this one was also an appreciated piece of audio, first heard in The Rabbit of Seville cartoon series, released in 1950. The musical luxury aims to compliment the combat Bugs, the adorable rabbit, against Elmer Fudd, the antagonist of the storyline, after the latter chases Bugs to a local stage. The music piece is a classic opera composition by Rossini that fails to miss out on a single beat or encounter a tempo breakdown.
The composition was fortunate enough to gain a positive critical acclaim from global audience as well as renowned critics of the artwork.
07Beethoven’s 7th
This music piece is an addition to the list of classic opera melodies by Beethoven. Talking of the inaugural release, the operatic audio was first heard in A Ham in a Role, the 1949 cartoon series. The storyline of the show talks of a speech fluent dog, longing for recognition in theatres commemorating the Shakespearean era, who is forced to lay back with his plans, thanks to the nasty pranks of the Goofy Gophers.
One of the antagonists attiring up like our poor dog, takes the credit of the efforts made by the latter and manages to get cast for a thrilling ghost scene in the Shakespearean tragedy of Hamlet.
Talking of the appreciation catered by the melody, the snippet was a somewhat strange composition, which made the critics, think of Beethoven being in a drunk state while creating the same.
08Traumerei Dreaming
This one is a short 38 seconds snippet on a tender theme, which runs to supplement the assumption of Bugs, the protagonist bunny as dead by Oalfish Canine, the latter’s newest opponent. The cult line of the music piece was gloomy enough to get a removal from the censor board, leading to a considerable edit of the audio before its theatrical showcase. The final audio was, however, still too heavy on the modernized audience to undertake.
As is evident, critics of the audio regard it to be a bit hefty, though the sound is somewhat appealing to opera lovers.
09Largo al Factotum
This high end opera was a rehearsal favorite of Giovanni Jones, the famous opera singer in The Long-Haired Hare, a well-known cartoon classic released in 1949. The star is supported in his streak by our adorable Bugs, who strums out loud on his banjo at a little distance.
All seemed well until Jones, in an annoyed state barges into break the poor rabbit’s instruments, while stretching him upwards through his long and pointed ears. The incident eventually transforms into war by the adorable bunny, who had been enraged by the time.
The music piece is catchy and captivating, considering the fact that it is a popular opera classic sung by a music star in the series.
10Johannes Brahms’ Hungarian Dances
This musical masterpiece was a part of the set of 21 Hungarian Dance compositions to supplement the country’s folk music. First heard in the cartoon series released under the name of Pigs in a Polka in 1943, the melody is essentially a miscellany of the aforesaid 21 music pieces, highlighting the catchiest elements from each.
Considering the fact that the musical delight is an assortment of some of the already best compositions, this excellent audio snippet was bound to receive a welcoming critical acclaim, and was greatly enjoyed by different sets of audiences across the world.
Part 2 How to Add Cartoon Music in Video Editing Clips
Having a significant insight of the stunning varieties of cartoon music, you can try hands at creating a masterpiece of your own by adding appealing caricature music to your video footage and clips. If you are concerned about the take away of the process, rest assured and see through the following section to understand the stepwise method to complement your video with appropriate cartoon music.
Before entering into the music adding process, let us have a formal acquaintance with Filmora, that is, the video editing software being used to cater to the aforesaid concern.
Wondershare Filmora Video Editor
Wondershare Filmora - Best Video Editor for Mac/Windows
5,481,435 people have downloaded it.
Build unique custom animations without breaking a sweat.
Focus on creating epic stories and leave the details to Filmora’s auto features.
Start a creative adventure with drag & drop effects and endless possibilities.
Filmora simplifies advanced features to save you time and effort.
Filmora cuts out repetition so you can move on to your next creative breakthrough.
To begin with, this one is the most reliable audio visual editing program, which you can use to add that extra spunk and a classic professional touch to your normal video footage. The software grants you complete liberty to explore your graphic editing skills and create visual masterpieces by choosing the perfect effects and filters from the latter’s extensive media library.
The program interface is the sweetest of all, making you cling to the editing fun in videos on a roll. Apart from this, the software is quick and smart, allowing you to create beautiful and stunning audio visual artworks within a few seconds.
User’s Guide to Add Cartoon Music to Video Clips in Filmora
Step 1: Download and Install Filmora
From the program’s official website, undertake a free download of Filmora into your MacOs or Windows supported PC or desktop.
Step 2: Import Your Video
After a successful installation of the Filmora Video Editor program in your system, proceed to launch the same in your device, followed by click on ‘Import’ in the app’s opening interface. This will allow you to select and upload any desired videos from your device to the program’s media album.
As an alternative, you can always prefer the ‘Drag and Drop’ method to upload selected video files. Your uploaded footage will be shown in the media panel at the left of the main editor window. Additional to video clips, you can also add still captures to complement them with appropriate audio.
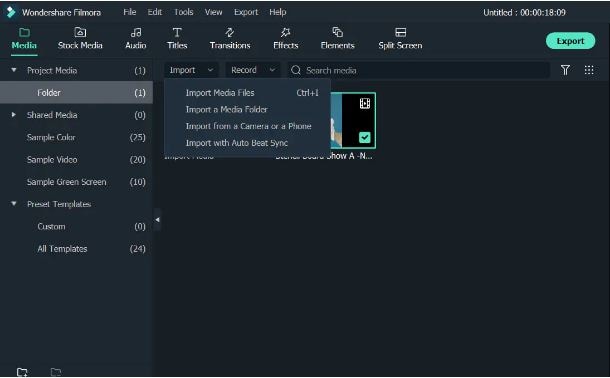
Step 3: Adding a Suitable Cartoon Music
Start with dragging the uploaded video files, one at a time, from Filmora’s media album to its timeline tracks. Take caution of the serial and non-redundant arrangement of the footage files in cohesion with the desired play sequence.
Next, proceed with adding the desired cartoon background music track above the already created video track, by using the conventional ‘Drag and Drop’ method. Check for any trimming requirements for adjusting the audio track length and position to be in concord with the video play time. While making position adjustments, you can simultaneously examine your changes in the editor’s ‘Preview Window’ and fine tune the same in real time.
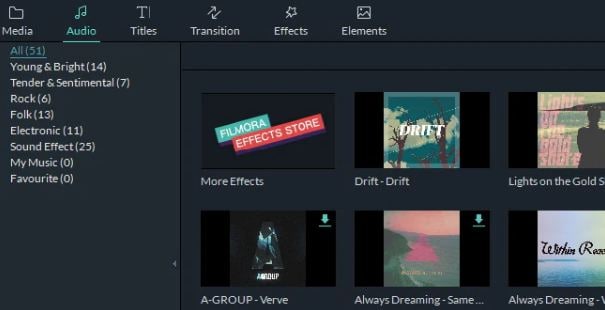
Step 4: Editing the Cartoon Music
To edit your music, open the audio editing panel by double clicking the music file in the editor’s audio track. The feature allows you to enhance your cartoon music track by adding a variety of sound effects, like, fade in, fade out, volume adjustment, pitch tuning and setting up the Audio Equalizer.
You can also try hands on making a slow motion or fast forward version of the footage by varying the audio speed, while applying the ‘Reverse Speed’ effect for a reverse playback of the audio.
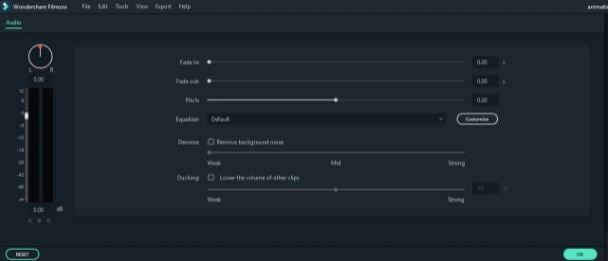
Step 5: Export Your Creation
When you are happy with your work, navigate to and click on the ‘Export’ tab at the bottom right corner of the program’s editor timeline. Save the edited cartoon music video to your device in any preferred file format in the pop-up window that appears next.
You can additionally create videos for iOS devices as well as upload your creations to various media sharing platforms, while also conveniently burning the same to a DVD for a television watch. For looping the cartoon music, just drag the audio clip to the exact length of the video footage.
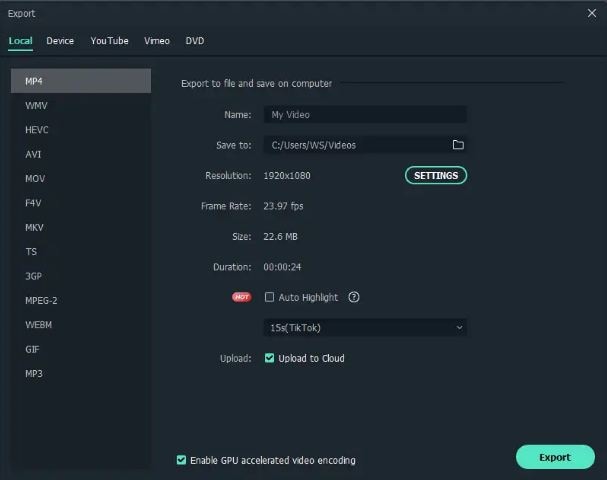
● Ending Thoughts →
● The extreme craze of cartoon music has achieved an evergreen essence over decades of release.
● Among the plethora of music varieties, some specific tracks have maintained a separate fan base.
● When experimenting on creating your own video edits with cartoon music, the Filmora Video Editor is the best tool you can pick.
If cartoon music turns you on, this is preferably the right place for you! Stay tuned to learn about the top 10 exciting alternatives of cartoon audios!
In this article
01 [Top 10 Cartoon Music](#Part 1)
02 [How to Add Cartoon Music in Video Editing Clips](#Part 2)
Part 1 Top 10 Cartoon Music
Talking of the fascinating and exciting world of cartoons, the subject is an evergreen source of entertainment for almost all age groups; after all, the essence of enjoying something cannot be limited within age boundaries. Diving into some specific details, the fundamental reason behind the extreme popularity of cartoon films and television series is, without any doubt, the stunning graphics and catchy background music.
Speaking of the sound credibility in particular, the following section presents a discussion on some of the choicest audio alternatives from cartoon media creations. If you have enjoyed the bliss of streaming those century old classic opera songs, you can easily relate to the entries in the upcoming list:
01Tales from the Vienna Woods
This was a masterpiece in the world of cartoon music, originally heard in the caricature series, A Corny Concerto in 1943, directed by Bob Clampett under the globally known Disney production house. The composition is essentially a repetition of Fantasia, which was released in 1940.
Talking about the exact music placement within the storyline, the inaugural audio segment, with a special emphasis on the ‘’wythm of woodwinds’’, when Porky Pig, the hero of the storyline, along with his obedient dog, traverses in search of Bugs.
Concerning on the popularity of the music, the latter has received positive music reviews from almost all the leading media critic platforms.
02The Blue Danube
Again an inclusion of the 1943 release, A corny Concerto, this was predominantly a comic version of the original track. It was used to complement the second stage of the storyline, where, a mother swan is seen humming the music to her little ones, giving the classic melody, the feel of a birdsong cover. As the audio swings in, the toddler Daffy Duck is seen paddling over an unwanted honking, while his mother is worried until everything ends up to be fine.
On the take of preference credibility, the music was quite well appreciated by the globally known media critics.
03Dance of the Comedians
This music piece originally belongs to the music album, The Bartered Bride, and was first used in Zoom and Bored in 1957, to uplift the combating theme of the cartoon series. While aptly supplementing the quest of Wile E. Coyote, the protagonist of the story, against Road Runner, his nasty opponent, the climax of the music turns out to be the most loved operas of Czech origin.
About the fan base of the audio snippet, the composition claimed welcoming responses from a worldwide audience.
04Minute Waltz in D-Flat
This one was an explicitly stunning piece of background audio, which was added to the Hyde and Hare cartoon series of 1955, to complement the latter’s storyline with the best suited sound effects.
Entering into the storyline, you will find Bugs, the cutest of rabbits, tends to locate a piano in Dr. Jekyll’s yard, and the latter being the most sophisticated lagomorph ever; begins to explore his musical skills on the instrument. Things however, take an unwanted turn when Mr. Hyde, the antagonist barges in with an attempt of destroying everything.
While the music piece came to be known as the favorite pick of Waltz lovers, the latter received considerable applaud from other media critics as well.
05Morning, Noon and Night in Vienna
This audio background was an exclusive media add-on to Baton Bunny, the 1959 released musical cartoon movies series, which was a further episode of Bugs’ journey that features this adorable, broad toothed rabbit, taking on a conducting task in the land of Vienna.
It is interesting to note that von Suppe, the developer of this music piece, also happened to work on a conducting profile, although on a comic note, the latter did not receive any appreciation for running behind odd smelling flies amid his performance!
Talking of the audience credibility, this one was a musical masterpiece, which received a large scale appreciation from listeners across the globe for featuring the most funny cartoon music ever!
06The Barber of Seville Overture
Like its aforesaid counterparts, this one was also an appreciated piece of audio, first heard in The Rabbit of Seville cartoon series, released in 1950. The musical luxury aims to compliment the combat Bugs, the adorable rabbit, against Elmer Fudd, the antagonist of the storyline, after the latter chases Bugs to a local stage. The music piece is a classic opera composition by Rossini that fails to miss out on a single beat or encounter a tempo breakdown.
The composition was fortunate enough to gain a positive critical acclaim from global audience as well as renowned critics of the artwork.
07Beethoven’s 7th
This music piece is an addition to the list of classic opera melodies by Beethoven. Talking of the inaugural release, the operatic audio was first heard in A Ham in a Role, the 1949 cartoon series. The storyline of the show talks of a speech fluent dog, longing for recognition in theatres commemorating the Shakespearean era, who is forced to lay back with his plans, thanks to the nasty pranks of the Goofy Gophers.
One of the antagonists attiring up like our poor dog, takes the credit of the efforts made by the latter and manages to get cast for a thrilling ghost scene in the Shakespearean tragedy of Hamlet.
Talking of the appreciation catered by the melody, the snippet was a somewhat strange composition, which made the critics, think of Beethoven being in a drunk state while creating the same.
08Traumerei Dreaming
This one is a short 38 seconds snippet on a tender theme, which runs to supplement the assumption of Bugs, the protagonist bunny as dead by Oalfish Canine, the latter’s newest opponent. The cult line of the music piece was gloomy enough to get a removal from the censor board, leading to a considerable edit of the audio before its theatrical showcase. The final audio was, however, still too heavy on the modernized audience to undertake.
As is evident, critics of the audio regard it to be a bit hefty, though the sound is somewhat appealing to opera lovers.
09Largo al Factotum
This high end opera was a rehearsal favorite of Giovanni Jones, the famous opera singer in The Long-Haired Hare, a well-known cartoon classic released in 1949. The star is supported in his streak by our adorable Bugs, who strums out loud on his banjo at a little distance.
All seemed well until Jones, in an annoyed state barges into break the poor rabbit’s instruments, while stretching him upwards through his long and pointed ears. The incident eventually transforms into war by the adorable bunny, who had been enraged by the time.
The music piece is catchy and captivating, considering the fact that it is a popular opera classic sung by a music star in the series.
10Johannes Brahms’ Hungarian Dances
This musical masterpiece was a part of the set of 21 Hungarian Dance compositions to supplement the country’s folk music. First heard in the cartoon series released under the name of Pigs in a Polka in 1943, the melody is essentially a miscellany of the aforesaid 21 music pieces, highlighting the catchiest elements from each.
Considering the fact that the musical delight is an assortment of some of the already best compositions, this excellent audio snippet was bound to receive a welcoming critical acclaim, and was greatly enjoyed by different sets of audiences across the world.
Part 2 How to Add Cartoon Music in Video Editing Clips
Having a significant insight of the stunning varieties of cartoon music, you can try hands at creating a masterpiece of your own by adding appealing caricature music to your video footage and clips. If you are concerned about the take away of the process, rest assured and see through the following section to understand the stepwise method to complement your video with appropriate cartoon music.
Before entering into the music adding process, let us have a formal acquaintance with Filmora, that is, the video editing software being used to cater to the aforesaid concern.
Wondershare Filmora Video Editor
Wondershare Filmora - Best Video Editor for Mac/Windows
5,481,435 people have downloaded it.
Build unique custom animations without breaking a sweat.
Focus on creating epic stories and leave the details to Filmora’s auto features.
Start a creative adventure with drag & drop effects and endless possibilities.
Filmora simplifies advanced features to save you time and effort.
Filmora cuts out repetition so you can move on to your next creative breakthrough.
To begin with, this one is the most reliable audio visual editing program, which you can use to add that extra spunk and a classic professional touch to your normal video footage. The software grants you complete liberty to explore your graphic editing skills and create visual masterpieces by choosing the perfect effects and filters from the latter’s extensive media library.
The program interface is the sweetest of all, making you cling to the editing fun in videos on a roll. Apart from this, the software is quick and smart, allowing you to create beautiful and stunning audio visual artworks within a few seconds.
User’s Guide to Add Cartoon Music to Video Clips in Filmora
Step 1: Download and Install Filmora
From the program’s official website, undertake a free download of Filmora into your MacOs or Windows supported PC or desktop.
Step 2: Import Your Video
After a successful installation of the Filmora Video Editor program in your system, proceed to launch the same in your device, followed by click on ‘Import’ in the app’s opening interface. This will allow you to select and upload any desired videos from your device to the program’s media album.
As an alternative, you can always prefer the ‘Drag and Drop’ method to upload selected video files. Your uploaded footage will be shown in the media panel at the left of the main editor window. Additional to video clips, you can also add still captures to complement them with appropriate audio.
Step 3: Adding a Suitable Cartoon Music
Start with dragging the uploaded video files, one at a time, from Filmora’s media album to its timeline tracks. Take caution of the serial and non-redundant arrangement of the footage files in cohesion with the desired play sequence.
Next, proceed with adding the desired cartoon background music track above the already created video track, by using the conventional ‘Drag and Drop’ method. Check for any trimming requirements for adjusting the audio track length and position to be in concord with the video play time. While making position adjustments, you can simultaneously examine your changes in the editor’s ‘Preview Window’ and fine tune the same in real time.
Step 4: Editing the Cartoon Music
To edit your music, open the audio editing panel by double clicking the music file in the editor’s audio track. The feature allows you to enhance your cartoon music track by adding a variety of sound effects, like, fade in, fade out, volume adjustment, pitch tuning and setting up the Audio Equalizer.
You can also try hands on making a slow motion or fast forward version of the footage by varying the audio speed, while applying the ‘Reverse Speed’ effect for a reverse playback of the audio.
Step 5: Export Your Creation
When you are happy with your work, navigate to and click on the ‘Export’ tab at the bottom right corner of the program’s editor timeline. Save the edited cartoon music video to your device in any preferred file format in the pop-up window that appears next.
You can additionally create videos for iOS devices as well as upload your creations to various media sharing platforms, while also conveniently burning the same to a DVD for a television watch. For looping the cartoon music, just drag the audio clip to the exact length of the video footage.
● Ending Thoughts →
● The extreme craze of cartoon music has achieved an evergreen essence over decades of release.
● Among the plethora of music varieties, some specific tracks have maintained a separate fan base.
● When experimenting on creating your own video edits with cartoon music, the Filmora Video Editor is the best tool you can pick.
6 Proven Ways to Dub Anime for Anime Voice Actor
6 Proven Ways to Dub Anime for Anime Voice Actor

Shanoon Cox
Mar 27, 2024• Proven solutions
Watching anime is one thing majority of the world has come to appreciate. Their engaging storylines, their emotional endings, and hooks, it’s pretty difficult not to like one unless, of course, it’s time for subtitling. Reading subtitles can be stressful and strenuous so most persons just prefer dubbed animes. Dubbed animes are those animes whose voiceovers have been changed to a more preferred language, usually English. Who wouldn’t want to watch their favorite anime dubbed in their language? With great anime voice actors becoming rampant, it’s now easy to get a dubbed version of your favorite anime movies.
6 Ways To Dub Anime For You
So, what if you want to become an anime voice actor so that you can start dubbing? That would be awesome, wouldn’t it? It’s not exactly very easy but it’s also not too hard to achieve. The following steps will help you master how to dub animes.
1. Be An Anime Fan (Know The Anime Culture)
To be able to do something, you have to understand how that thing works. Before you can become a good anime voice actor, you have to actually understand the anime culture. How do animes usually set up for particular genres? Study the storylines, the hooks, the emotion required for different kinds of scenes. You need to actually know your stuff before you can even start thinking about dubbing any anime. Don’t ever decide to become an anime voice actor if you don’t like animes. Most of the scenes may appear silly to you not to talk of the vocabulary which may just sound weird and annoying to one who is not a fan.
2. Train Your Voice Regularly
The next thing you need to do when you’re trying to become an anime voice actor is to train your voice. One thing is to use your natural voice, another thing is to tweak your voice to suit a role. Of course, that won’t come cheap. You should be able to learn and master how to use your voice on demand. Train your voice to sound the way you want, consistently. This is very important because, during dubbing, you’re going to get lines that require you to speak for two or more minutes.
3. Practice Anime Voice Acting Daily (Set Up A Home Studio)
This is almost the same as training your voice. Practicing to be a voice actor comes with a lot of demands, you may need to set up a home studio. Scratch that! You actually need to set up a home studio, this will help you successfully practice your voicing on various animes. You can easily pick any of your favorite anime and start dubbing it, to see how your voice would sound and if you’d be able to match a level of consistency.
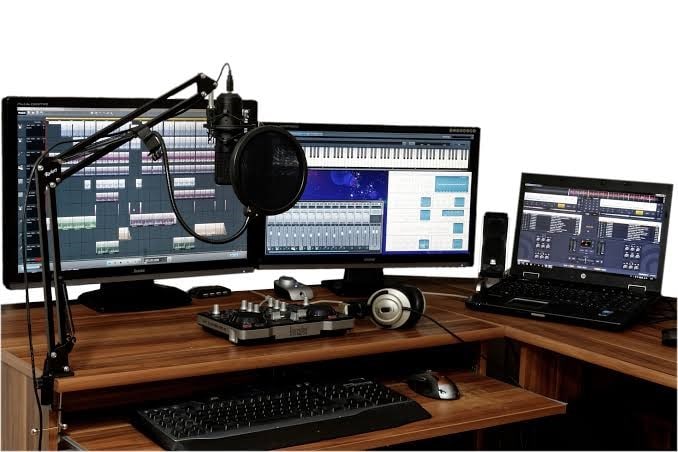
4. Try to Network
No man is an island! In as much as you’re trying hard to become a good voice actor and dub your favorite anime. You should look out for people with similar objectives like you. There are lots of people who like you, want to become good voice actors as well. It may not necessarily be anime voicing, it may be for normal movies, commercials or cartoons but you’d be able to learn a thing or two by networking. Linking up with them and seeing how you can help each other.
5. Audition, Audition, Audition
There is no way you will become a voice actor if you don’t audition, is there? When you’re fully sure you can face the crowd with your voice then it’s time to go for auditions. Don’t get me wrong, you don’t actually have to be perfect before you go for auditions but make sure you know a thing or two about what you’re doing. Make sure you understand what needs to be done, make sure you have a good grasp of what you need to do. Apply for auditions at different places and confidently give them your best. You’re bound to get a gig.
6. Be Consistent And Never Give Up
If peradventure you don’t get selected for any of your auditions, it’s important you don’t give up. Stay active, remain consistent with your activeness, don’t allow any emotion to weigh you down. Just be sure that you know what you’re doing and keep at it, continue applying for auditions while mastering your voice. You’re bound to strike a great gig one day.
The Future Of Anime Dubbing
Anime dubbing like most technological advancement has come to stay, it’s alright to embrace it. The fact that anime dubbing is actually helping fans all over the world appreciate their favorite animes, even more, means, more attention should be paid to it. Of course, in recent years the number of great anime voice actors has increased. A lot of them are so good that they have two or three movies to work with at every point in time. The industry is still young and it would be amazing if you as a voice actor is able to work your way to the top here.
Conclusion
Like we said earlier, to be able to do anything, you have to actually know what it is you’re doing. Anime dubbing is fun and amazing when done right, the fact that it helps many anime lovers appreciate their favorite anime movies in their own language makes it worthwhile too. If you ever wish to become a voice actor, it’s good to be consistent, pay close attention to your training, don’t ever assume your voice is already perfect. If you do actually have a great voice, aim for more, master how to tweak your voice to sound differently. This way you will be able to land more gigs in the world of anime dubbing.
Shanoon Cox
Shanoon Cox is a writer and a lover of all things video.
Follow @Shanoon Cox
Shanoon Cox
Mar 27, 2024• Proven solutions
Watching anime is one thing majority of the world has come to appreciate. Their engaging storylines, their emotional endings, and hooks, it’s pretty difficult not to like one unless, of course, it’s time for subtitling. Reading subtitles can be stressful and strenuous so most persons just prefer dubbed animes. Dubbed animes are those animes whose voiceovers have been changed to a more preferred language, usually English. Who wouldn’t want to watch their favorite anime dubbed in their language? With great anime voice actors becoming rampant, it’s now easy to get a dubbed version of your favorite anime movies.
6 Ways To Dub Anime For You
So, what if you want to become an anime voice actor so that you can start dubbing? That would be awesome, wouldn’t it? It’s not exactly very easy but it’s also not too hard to achieve. The following steps will help you master how to dub animes.
1. Be An Anime Fan (Know The Anime Culture)
To be able to do something, you have to understand how that thing works. Before you can become a good anime voice actor, you have to actually understand the anime culture. How do animes usually set up for particular genres? Study the storylines, the hooks, the emotion required for different kinds of scenes. You need to actually know your stuff before you can even start thinking about dubbing any anime. Don’t ever decide to become an anime voice actor if you don’t like animes. Most of the scenes may appear silly to you not to talk of the vocabulary which may just sound weird and annoying to one who is not a fan.
2. Train Your Voice Regularly
The next thing you need to do when you’re trying to become an anime voice actor is to train your voice. One thing is to use your natural voice, another thing is to tweak your voice to suit a role. Of course, that won’t come cheap. You should be able to learn and master how to use your voice on demand. Train your voice to sound the way you want, consistently. This is very important because, during dubbing, you’re going to get lines that require you to speak for two or more minutes.
3. Practice Anime Voice Acting Daily (Set Up A Home Studio)
This is almost the same as training your voice. Practicing to be a voice actor comes with a lot of demands, you may need to set up a home studio. Scratch that! You actually need to set up a home studio, this will help you successfully practice your voicing on various animes. You can easily pick any of your favorite anime and start dubbing it, to see how your voice would sound and if you’d be able to match a level of consistency.
4. Try to Network
No man is an island! In as much as you’re trying hard to become a good voice actor and dub your favorite anime. You should look out for people with similar objectives like you. There are lots of people who like you, want to become good voice actors as well. It may not necessarily be anime voicing, it may be for normal movies, commercials or cartoons but you’d be able to learn a thing or two by networking. Linking up with them and seeing how you can help each other.
5. Audition, Audition, Audition
There is no way you will become a voice actor if you don’t audition, is there? When you’re fully sure you can face the crowd with your voice then it’s time to go for auditions. Don’t get me wrong, you don’t actually have to be perfect before you go for auditions but make sure you know a thing or two about what you’re doing. Make sure you understand what needs to be done, make sure you have a good grasp of what you need to do. Apply for auditions at different places and confidently give them your best. You’re bound to get a gig.
6. Be Consistent And Never Give Up
If peradventure you don’t get selected for any of your auditions, it’s important you don’t give up. Stay active, remain consistent with your activeness, don’t allow any emotion to weigh you down. Just be sure that you know what you’re doing and keep at it, continue applying for auditions while mastering your voice. You’re bound to strike a great gig one day.
The Future Of Anime Dubbing
Anime dubbing like most technological advancement has come to stay, it’s alright to embrace it. The fact that anime dubbing is actually helping fans all over the world appreciate their favorite animes, even more, means, more attention should be paid to it. Of course, in recent years the number of great anime voice actors has increased. A lot of them are so good that they have two or three movies to work with at every point in time. The industry is still young and it would be amazing if you as a voice actor is able to work your way to the top here.
Conclusion
Like we said earlier, to be able to do anything, you have to actually know what it is you’re doing. Anime dubbing is fun and amazing when done right, the fact that it helps many anime lovers appreciate their favorite anime movies in their own language makes it worthwhile too. If you ever wish to become a voice actor, it’s good to be consistent, pay close attention to your training, don’t ever assume your voice is already perfect. If you do actually have a great voice, aim for more, master how to tweak your voice to sound differently. This way you will be able to land more gigs in the world of anime dubbing.
Shanoon Cox
Shanoon Cox is a writer and a lover of all things video.
Follow @Shanoon Cox
Best 10 3D Text Animation Templates
Top 10 3D Text Animation Templates
An easy yet powerful editor
Numerous effects to choose from
Detailed tutorials provided by the official channel
“Where is everyone getting their 3D Text Animation templates?”
To answer this request, we’ve compiled a guide that not only teaches you how to create things like 3D Spinning Text (After Effects) but also gives you an idea of where you can find the kind of resources (i.e., 3D Text Animation templates and presets) that you need to get a head start on your projects.
In this article
01 [Top 10 3D Text Animation Templates ](#Part 1)
02 [How Do I Make 3D Text in After Effects?](#Part 2)
03 [The Best 10 Amazing 3D Text Animation Templates](#Part 3)
04 [Secrets to Learning More Animation Tactics](#Part 4)
Part 1 What’s 3D Text Animation?
Before anything else, let’s talk about text animation. Specifically, 3D Text Animation. The text that you’re reading now, is 2D Text. It’s static, and it lacks depth. It’s just letters on a screen. Meanwhile, 3D Text is usually built for motion, and thus, it has volume and depth — it’s almost tangible. Here’s what that looks like:

As you can see, even without actually moving, in the text shown in the image above, the potential for motion is there — it looks alive.
Now, you’ll see 3D text like this often in movies or promotions. Usually in the form of extravagant title cards or 3D text logo animation. They’re eye-catching, and because they’re 3D, you can play with them as much as you want to really add drama to your creations.
Part 2 How Do I Make 3D Text in After Effects?
As promised, this next section will teach you how to create 3D Text Animation in Adobe After Effects, which is a VFX and motion graphics software used by many animators to bring life to their text. You’ll notice that the following tutorial is really more about introducing the tools that you can use in order to create 3D Text Animation:
01Step 1. Add Your Text
The first thing that you have to do, of course, is to add your text! To do this, go to the ‘Tools’ panel, select the Type tool, and then select the ‘Composition’ panel. The composition is where you type your text!
With After Effects, you also have the following options:
● Change Text Font
● Adjust Text Size
● Adjust Text Color
● Shift Justification (Left, Middle, right)
And so on! Once you’re done with your text composition, it will be generated by After Effects into a layer that you can adjust as needed in the next steps.

01Step 2. Use Animation Presets
With your text now in a layer that you can add animations to… you’ve practically done a third of the job! Or even more than that if you decide to use the animation presets that are provided by After Effects.
These can be found by selecting ‘Browse Presets…’ on the ‘Animation’ tab (shown in the image below.) All you need to apply them is to drag and drop them onto your text layer.
Note: The first keyframe of this built-in text animation will be applied at the location of the Current Time Indicator (CTI), so make sure that you’ve adjusted that accordingly.

01Step 3. Per-Character Animation
If you’d like to personalize your text animation, After Effects does also give you the option to animate per character (or, per letter, in this case.)
This will give you more control over how you decided to animate your text. Of course, it does mean that it is slightly more complicated as well.
● To animate text per layer, select ‘animate’ on that layer and choose a parameter to start working on animations for.
● You’ll be able to previous (or scrub) through your animations in order to see if they are doing what you need them to do.
● You can also remove applied parameters in order to re-work your animation.

01Step 4. Add Graphic Elements to Text
If you really want to make your 3D Animation Text pop, Adobe After Effects also offers the tools needed to add Graphic Elements to your composition — which can be found at the top-most toolbar!

Part 3 The Best 10 Amazing 3D Text Animation Templates
Now, as promised, we’re also going to be introducing a couple of 3D text animation templates that you can try out for your own projects! Each template will have a link that you can go to in order to see what it looks like, as well as an explanation on how you can use it for your projects in the future!
01Real 3D Light Bulb Kit
The first Text Animation Template on our list is the “Logo Light Bulb” 3D Animation from Envato Elements. This one literally glows people! Making it perfect for a quirky, and yet still very impressive Title Card or Logo. Its design is very realistic, and you can also control how it flickers! For example, turning the bulbs on certain characters first, or turning them all off at once in the end.
023D Text Reveal
This next 3D Animation template is also from Envato Market. And, just like the first, it makes for quite the dramatic Title Card or Logo. With this template, your Text can literally zoom in to view while looking its best and sparkiest in High-Chrome.
033D Metallic Text Animation
Our next pick, the 3D Metallic text animation is another great one for those who are looking for something flashy — something that gives off the impression of being impressive right from the gate. Compared to the previous text animation template, this one has a more rugged kind of appearance. Perfect for those looking to promote something more fun rather than professional.
043D Text Box Animation Pack
The next one is a little less ‘impressive’ — in the sense that it isn’t as in your face as the other 3D animation templates that we’ve introduced thus far. And that’s exactly why the 3D Text Box Animation Pack deserves to be on this list! Its 3D spinning text (after effects) elements are very usable — in that it can work for a variety of individuals and styles. It has a more professional look as well. Making it perfect for corporations.
053D Text & Logo Boxes
This next one, the 3D Text & Logo Boxes pack is particularly perfect for 3D logos. The pack gives you several options for box size as well as text parameters. So, you can design your animated 3D Logo however you want and use it for future projects to give them even more dimension than before.
06The Light Bulb Kit
Our next pick, which is the ‘Light Bulb Kit’ also from Envato, is very similar to the first item on our list — in that it features text lit up by lightbulbs. However, it lends an extra bit of photo-realism to it. Less sparkle and more grain — which may exactly be what you want for your new title card or logo.
073D Text Templates
The 3D Text Templates is a very bright and pop-y template that is perfect for creating eye-catching promotions and advertisements. It’s very simple to use, which, again, maybe exactly what you want. Literally, the template will ask you to choose your own text and change the colors to suit that of your own brand, then you’re done!
083D Text Shapes Logo Reveal
The ‘3D Text Shapes Logo Reveal’ template is a pack of 3D text animations that you can use in order to add a little spin to your logo reveals (quite literally, in some cases!) It has a lot of personality to it, and a certain tech-y or science-y feel that would make it perfect for anyone looking for something more technical.
09Bold Titles
The ‘Bold Titles’ template is very loud and proud. But it has a bit of a retro-vibe to it as well. Making it stand out from some of the more minimalistic modern text animation styles that you see these days.
1010. Wave 3D Logo & Text
Looking for something simple and professional? Then the ‘Wave 3D Logo & Text’ template may just be the one for you. We put it last on this list, but it’s actually quite a strong contender. One that just about anyone (for just about any type of project they’re working on), should be able to get some use out of.
Key Takeaways from This Episode
● 3D Text Animation is the practice of bringing text to life! It gives dimension, depth, and, even, movement into what are usually very static properties!
● You see a lot of 3D Text Animation in big pictures these days. And you can start creating your own with the use of Adobe After Effects — a VFX and Motion Graphics Software that a lot of professionals use for their own text animation.
● Of course, if you don’t have the kind of time to create your own 3D Text Animations from scratch, you can always use templates instead! There are hundreds (if not thousands) of them available out there. It should be simple enough to find one that fits the kind of vibe you’re looking for.
● SECRET TIP! If you’re looking for an all-in-one kind of solution, you might want to consider Filmora Pro. It’s a video editor, first and foremost, but that’s not all it is — you can be using it today to start creating your own 3D Text Animations!
“Where is everyone getting their 3D Text Animation templates?”
To answer this request, we’ve compiled a guide that not only teaches you how to create things like 3D Spinning Text (After Effects) but also gives you an idea of where you can find the kind of resources (i.e., 3D Text Animation templates and presets) that you need to get a head start on your projects.
In this article
01 [Top 10 3D Text Animation Templates ](#Part 1)
02 [How Do I Make 3D Text in After Effects?](#Part 2)
03 [The Best 10 Amazing 3D Text Animation Templates](#Part 3)
04 [Secrets to Learning More Animation Tactics](#Part 4)
Part 1 What’s 3D Text Animation?
Before anything else, let’s talk about text animation. Specifically, 3D Text Animation. The text that you’re reading now, is 2D Text. It’s static, and it lacks depth. It’s just letters on a screen. Meanwhile, 3D Text is usually built for motion, and thus, it has volume and depth — it’s almost tangible. Here’s what that looks like:
As you can see, even without actually moving, in the text shown in the image above, the potential for motion is there — it looks alive.
Now, you’ll see 3D text like this often in movies or promotions. Usually in the form of extravagant title cards or 3D text logo animation. They’re eye-catching, and because they’re 3D, you can play with them as much as you want to really add drama to your creations.
Part 2 How Do I Make 3D Text in After Effects?
As promised, this next section will teach you how to create 3D Text Animation in Adobe After Effects, which is a VFX and motion graphics software used by many animators to bring life to their text. You’ll notice that the following tutorial is really more about introducing the tools that you can use in order to create 3D Text Animation:
01Step 1. Add Your Text
The first thing that you have to do, of course, is to add your text! To do this, go to the ‘Tools’ panel, select the Type tool, and then select the ‘Composition’ panel. The composition is where you type your text!
With After Effects, you also have the following options:
● Change Text Font
● Adjust Text Size
● Adjust Text Color
● Shift Justification (Left, Middle, right)
And so on! Once you’re done with your text composition, it will be generated by After Effects into a layer that you can adjust as needed in the next steps.
01Step 2. Use Animation Presets
With your text now in a layer that you can add animations to… you’ve practically done a third of the job! Or even more than that if you decide to use the animation presets that are provided by After Effects.
These can be found by selecting ‘Browse Presets…’ on the ‘Animation’ tab (shown in the image below.) All you need to apply them is to drag and drop them onto your text layer.
Note: The first keyframe of this built-in text animation will be applied at the location of the Current Time Indicator (CTI), so make sure that you’ve adjusted that accordingly.
01Step 3. Per-Character Animation
If you’d like to personalize your text animation, After Effects does also give you the option to animate per character (or, per letter, in this case.)
This will give you more control over how you decided to animate your text. Of course, it does mean that it is slightly more complicated as well.
● To animate text per layer, select ‘animate’ on that layer and choose a parameter to start working on animations for.
● You’ll be able to previous (or scrub) through your animations in order to see if they are doing what you need them to do.
● You can also remove applied parameters in order to re-work your animation.
01Step 4. Add Graphic Elements to Text
If you really want to make your 3D Animation Text pop, Adobe After Effects also offers the tools needed to add Graphic Elements to your composition — which can be found at the top-most toolbar!
Part 3 The Best 10 Amazing 3D Text Animation Templates
Now, as promised, we’re also going to be introducing a couple of 3D text animation templates that you can try out for your own projects! Each template will have a link that you can go to in order to see what it looks like, as well as an explanation on how you can use it for your projects in the future!
01Real 3D Light Bulb Kit
The first Text Animation Template on our list is the “Logo Light Bulb” 3D Animation from Envato Elements. This one literally glows people! Making it perfect for a quirky, and yet still very impressive Title Card or Logo. Its design is very realistic, and you can also control how it flickers! For example, turning the bulbs on certain characters first, or turning them all off at once in the end.
023D Text Reveal
This next 3D Animation template is also from Envato Market. And, just like the first, it makes for quite the dramatic Title Card or Logo. With this template, your Text can literally zoom in to view while looking its best and sparkiest in High-Chrome.
033D Metallic Text Animation
Our next pick, the 3D Metallic text animation is another great one for those who are looking for something flashy — something that gives off the impression of being impressive right from the gate. Compared to the previous text animation template, this one has a more rugged kind of appearance. Perfect for those looking to promote something more fun rather than professional.
043D Text Box Animation Pack
The next one is a little less ‘impressive’ — in the sense that it isn’t as in your face as the other 3D animation templates that we’ve introduced thus far. And that’s exactly why the 3D Text Box Animation Pack deserves to be on this list! Its 3D spinning text (after effects) elements are very usable — in that it can work for a variety of individuals and styles. It has a more professional look as well. Making it perfect for corporations.
053D Text & Logo Boxes
This next one, the 3D Text & Logo Boxes pack is particularly perfect for 3D logos. The pack gives you several options for box size as well as text parameters. So, you can design your animated 3D Logo however you want and use it for future projects to give them even more dimension than before.
06The Light Bulb Kit
Our next pick, which is the ‘Light Bulb Kit’ also from Envato, is very similar to the first item on our list — in that it features text lit up by lightbulbs. However, it lends an extra bit of photo-realism to it. Less sparkle and more grain — which may exactly be what you want for your new title card or logo.
073D Text Templates
The 3D Text Templates is a very bright and pop-y template that is perfect for creating eye-catching promotions and advertisements. It’s very simple to use, which, again, maybe exactly what you want. Literally, the template will ask you to choose your own text and change the colors to suit that of your own brand, then you’re done!
083D Text Shapes Logo Reveal
The ‘3D Text Shapes Logo Reveal’ template is a pack of 3D text animations that you can use in order to add a little spin to your logo reveals (quite literally, in some cases!) It has a lot of personality to it, and a certain tech-y or science-y feel that would make it perfect for anyone looking for something more technical.
09Bold Titles
The ‘Bold Titles’ template is very loud and proud. But it has a bit of a retro-vibe to it as well. Making it stand out from some of the more minimalistic modern text animation styles that you see these days.
1010. Wave 3D Logo & Text
Looking for something simple and professional? Then the ‘Wave 3D Logo & Text’ template may just be the one for you. We put it last on this list, but it’s actually quite a strong contender. One that just about anyone (for just about any type of project they’re working on), should be able to get some use out of.
Key Takeaways from This Episode
● 3D Text Animation is the practice of bringing text to life! It gives dimension, depth, and, even, movement into what are usually very static properties!
● You see a lot of 3D Text Animation in big pictures these days. And you can start creating your own with the use of Adobe After Effects — a VFX and Motion Graphics Software that a lot of professionals use for their own text animation.
● Of course, if you don’t have the kind of time to create your own 3D Text Animations from scratch, you can always use templates instead! There are hundreds (if not thousands) of them available out there. It should be simple enough to find one that fits the kind of vibe you’re looking for.
● SECRET TIP! If you’re looking for an all-in-one kind of solution, you might want to consider Filmora Pro. It’s a video editor, first and foremost, but that’s not all it is — you can be using it today to start creating your own 3D Text Animations!
How to Insert a GIF Into Powerpoint
How to Insert a GIF into Powerpoint
Shanoon Cox
Mar 27, 2024• Proven solutions
Microsoft Powerpoint has been on the Internet for quite some time now. People who use this application make a common mistake of using too many slides with huge amounts of text and that is a major turnoff for the audience. Huge text is seen as a disaster. You should be able to convey an interesting story to your attentive audience without explaining every single detail on your slides for your presentation. Using a GIF to explain complicate things or just set it as a background can be much interesting.
You may also like: Top 26 Best Free GIF Makers Online >>
Why we need to insert GIF into the Powerpoint
- It allows us to instantly grab the audience’s short attention span.
- It allows the presentation to answer a lot of preconceived notion from the audience with less words.
- It is a good guide to bring up a pressing issue.
Tips when adding gif to your Powerpoint presentation
- Keep it easy to follow along.
- Make use of humor
- Combine GIF images with your text together.
Part 1: Make GIFs by yourself
There are many animated gif images on the internet, you can also make one by yourself. Wondershare Filmora is a powerful editing tools that allow you to convert video into GIF images, no matter what kind of video formats you got, including MKV, FLV, WMV, MP4, etc. You can also add advanced elements, animations, text, overlays to personlize your GIFs.
However, if you want to make a GIF online, Filmora meme maker is your ultimate solution. It helps you make image, GIF and video memes directly without watermark. It is totally FREE to use and no sign up. You can change text size, color and position to create caption when you are editing. You can also put text inside or outside in GIF. Just with a few clicks, your GIF is done . Try it now!
 Download Mac Version ](https://tools.techidaily.com/wondershare/filmora/download/ )
Part 2: How to Insert a GIF into Powerpoint
There are three main methods on using Microsoft Powerpoint to your advantage when you are trying to insert a GIF image into your presentation.
Method 1: Powerpoint Picture Insert Utility
Select the Insert tab located at the top of the Powerpoint application.
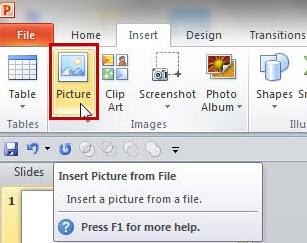
The next step is to select the Picture icon located in the Images ribbon area located also at the top of the computer window. Look for the image that you desire to add to the Powerpoint slide, then make sure to double click on the file to successfully insert your image.
You also have the option to move the GIF image on the page by clicking and dragging the image to the location that you want to place the picture.
Method 2: Copy and Paste
A helpful step is to first locate your desired GIF image, using Control + C to copy it first. Then, paste your image on the Powerpoint slide by pressing Control + V.
You can also highlight the file name, and then use the drag and drop feature to put your image directly into the Powerpoint slide of your choice.
Method 3: Embedding GIF’s from the web
The final method is to embed GIF images on the Internet into a Powerpoint slide. You can achieve this function by using the Insert Ribbon’s Pictures icon.
Select Pictures, then write in the image URL directly in the File input box. Then, select Insert. The Powerpoint application will download the GIF image that you selected into the current Powerpoint slide for your presentation. The GIF image is still available for you to access anytime if you are not connected to the Internet. It is due to being embedded.
Here we recommend the method 1 and 2, the method 3 will take a little time while Powerpoint downloading the GIF picture.
Customize the GIFs in Powerpoint
There are some important ways to customize your GIF images in the Powerpoint application.
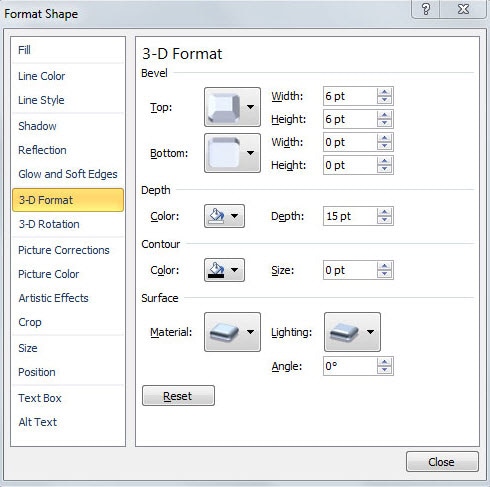
If you desire on changing the physical size of your GIF file or changing the appearance of the image, you can right click on your desired image and select Format Pictures. It will open up a brand new Format Picture window that will have a good variety of image editing menus at your fingertips at the left side of the computer window.
There is a feature where you can change the brightness and contrast on your images by selecting the Picture Corrections icon. Experiment and have fun.
Shanoon Cox
Shanoon Cox is a writer and a lover of all things video.
Follow @Shanoon Cox
Shanoon Cox
Mar 27, 2024• Proven solutions
Microsoft Powerpoint has been on the Internet for quite some time now. People who use this application make a common mistake of using too many slides with huge amounts of text and that is a major turnoff for the audience. Huge text is seen as a disaster. You should be able to convey an interesting story to your attentive audience without explaining every single detail on your slides for your presentation. Using a GIF to explain complicate things or just set it as a background can be much interesting.
You may also like: Top 26 Best Free GIF Makers Online >>
Why we need to insert GIF into the Powerpoint
- It allows us to instantly grab the audience’s short attention span.
- It allows the presentation to answer a lot of preconceived notion from the audience with less words.
- It is a good guide to bring up a pressing issue.
Tips when adding gif to your Powerpoint presentation
- Keep it easy to follow along.
- Make use of humor
- Combine GIF images with your text together.
Part 1: Make GIFs by yourself
There are many animated gif images on the internet, you can also make one by yourself. Wondershare Filmora is a powerful editing tools that allow you to convert video into GIF images, no matter what kind of video formats you got, including MKV, FLV, WMV, MP4, etc. You can also add advanced elements, animations, text, overlays to personlize your GIFs.
However, if you want to make a GIF online, Filmora meme maker is your ultimate solution. It helps you make image, GIF and video memes directly without watermark. It is totally FREE to use and no sign up. You can change text size, color and position to create caption when you are editing. You can also put text inside or outside in GIF. Just with a few clicks, your GIF is done . Try it now!
Download Mac Version ](https://tools.techidaily.com/wondershare/filmora/download/ )
Part 2: How to Insert a GIF into Powerpoint
There are three main methods on using Microsoft Powerpoint to your advantage when you are trying to insert a GIF image into your presentation.
Method 1: Powerpoint Picture Insert Utility
Select the Insert tab located at the top of the Powerpoint application.
The next step is to select the Picture icon located in the Images ribbon area located also at the top of the computer window. Look for the image that you desire to add to the Powerpoint slide, then make sure to double click on the file to successfully insert your image.
You also have the option to move the GIF image on the page by clicking and dragging the image to the location that you want to place the picture.
Method 2: Copy and Paste
A helpful step is to first locate your desired GIF image, using Control + C to copy it first. Then, paste your image on the Powerpoint slide by pressing Control + V.
You can also highlight the file name, and then use the drag and drop feature to put your image directly into the Powerpoint slide of your choice.
Method 3: Embedding GIF’s from the web
The final method is to embed GIF images on the Internet into a Powerpoint slide. You can achieve this function by using the Insert Ribbon’s Pictures icon.
Select Pictures, then write in the image URL directly in the File input box. Then, select Insert. The Powerpoint application will download the GIF image that you selected into the current Powerpoint slide for your presentation. The GIF image is still available for you to access anytime if you are not connected to the Internet. It is due to being embedded.
Here we recommend the method 1 and 2, the method 3 will take a little time while Powerpoint downloading the GIF picture.
Customize the GIFs in Powerpoint
There are some important ways to customize your GIF images in the Powerpoint application.
If you desire on changing the physical size of your GIF file or changing the appearance of the image, you can right click on your desired image and select Format Pictures. It will open up a brand new Format Picture window that will have a good variety of image editing menus at your fingertips at the left side of the computer window.
There is a feature where you can change the brightness and contrast on your images by selecting the Picture Corrections icon. Experiment and have fun.
Shanoon Cox
Shanoon Cox is a writer and a lover of all things video.
Follow @Shanoon Cox
Also read:
- New 10 Best Free GIF Apps for iPhone and iPad
- New 10 Realistic Cartoon Characters You Will Run Away From if You Met in R
- New 5 Free Animated Gif Sources You Must Check for 2024
- New Animate Your Photo Online with These Awesome Tools for 2024
- New In 2024, What Is the Meaning of Motion Graphics
- Updated In 2024, Learn How to Make Architecture Animation
- New Want to Make a Meme GIF, In 2024
- Updated In 2024, What Wikipedia Wont Tell You Specifically About Character Rigging
- New 2024 Approved Uncensored Top 10 + Free Streaming Sites
- Updated In 2024, Ways to Create Animated Clipart in PowerPoint
- Amazing Ways to Find Suitable Animated Graphic Maker
- New Amazing Ways to Find Suitable Animated Graphic Maker
- New 5 Techniques You Never Heard of for Converting MP4 to GIF in Photoshop for 2024
- New 2024 Approved Obtain and Create Animated GIF Icons
- Learn What Are Differences Between 2D And 3D Animation for 2024
- New 2024 Approved Techniques for Making After Effects 2D Animation
- That Will Make Aesthetic Cartoon Drawing More Understandable for 2024
- 2024 Approved Top 10 Websites to Download Anime Subtitles for Free
- New 2024 Approved How to Make a 3D Cartoon of Yourself
- Updated Create Animated Video on Canva
- Updated 2024 Approved Some Techniques for Creating Animated Logo That Few People Know About
- New Uncensored Top 10 + Free Streaming Sites for 2024
- New In 2024, 15 Best Pics Collage Apps Top Picks
- Updated 10 Cartoon Characters That Should Top Your List
- Updated Guide on Creating GIF in WhatsApp iPhone
- New Best 10 Apps to Enhance Your Instagram Story Slideshow for 2024
- Popular Female & Male Disney Cartoon Characters for 2024
- Updated In 2024, Techniques on Making After Effects 2D Animation
- New 2024 Approved The Most Efficient Techniques to Make 3D Animation Character
- Updated In 2024, What Is Motion Graphics
- Updated In 2024, That Will Make Aesthetic Cartoon Drawing More Understandable
- Updated 2024 Approved Learn Easy Blender Rigging in Only 2 Minutes
- In 2024, Detailed guide of ispoofer for pogo installation On Realme C67 5G | Dr.fone
- How to Unlock Verizon iPhone 12 mini
- Is GSM Flasher ADB Legit? Full Review To Bypass Your Itel A70 Phone FRP Lock
- In 2024, Pokemon Go No GPS Signal? Heres Every Possible Solution On Realme GT Neo 5 SE | Dr.fone
- 7 Solutions to Fix Chrome Crashes or Wont Open on Vivo X90S | Dr.fone
- Remove Google FRP lock on Motorola Moto E13
- In 2024, How To Bypass iCloud Activation Lock On iPod and Apple iPhone SE (2020) The Right Way
- The Best iSpoofer Alternative to Try On Huawei P60 | Dr.fone
- Why Apple Account Disabled From your Apple iPhone XR? How to Fix
- How to Transfer Music from Tecno Spark 20C to iPod | Dr.fone
- Does find my friends work on Nokia C210 | Dr.fone
- In 2024, How To Unlock The Apple iPhone 12 Pro SIM Lock 4 Easy Methods
- How to Unlock Vivo S18 Pro Bootloader Easily
- How to Stop My Spouse from Spying on My Oppo Reno 8T 5G | Dr.fone
- How to Change/Add Location Filters on Snapchat For your Samsung Galaxy A05 | Dr.fone
- What is Fake GPS Location Pro and Is It Good On Poco C55? | Dr.fone
- Top 4 Android System Repair Software for Motorola Moto G14 Bricked Devices | Dr.fone
- In 2024, Solutions to Spy on Oppo A78 with and without jailbreak | Dr.fone
- How to Downgrade Apple iPhone 13 mini without iTunes? | Dr.fone
- Can I recover permanently deleted photos from Honor X8b
- Title: Updated Learn What Are Differences Between 2D And 3D Animation
- Author: Elon
- Created at : 2024-06-15 11:22:32
- Updated at : 2024-06-16 11:22:32
- Link: https://animation-videos.techidaily.com/updated-learn-what-are-differences-between-2d-and-3d-animation/
- License: This work is licensed under CC BY-NC-SA 4.0.
