
:max_bytes(150000):strip_icc():format(webp)/streamfreesportsonline-5b1994178023b900364a81e5.jpg)
Updated Learn What Are Differences Between 2D And 3D Animation for 2024
Learn What Are Differences Between 2D And 3D Animation
What Are Differences Between 2D And 3D Animation
An easy yet powerful editor
Numerous effects to choose from
Detailed tutorials provided by the official channel
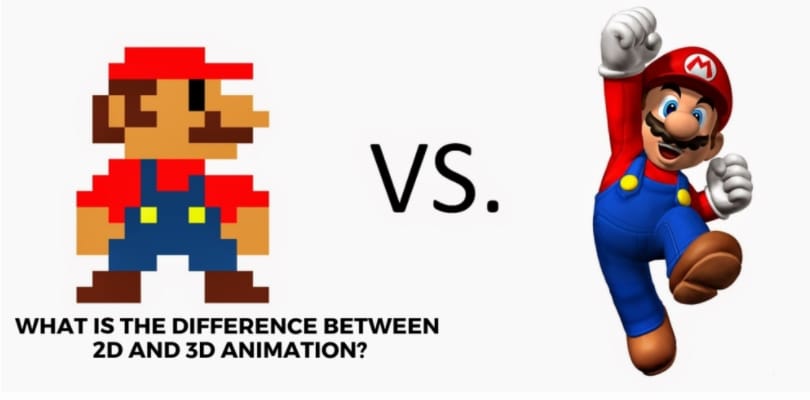
Creating an animation requires multiple processes and tasks to get that final result that we enjoy on the screen. Irrespective of the type of animations like stop-motion, sketch, computer, and others, all of them majorly falls under two main categories- 2D animation and 3D animation. The popular cartoons like Mickey Mouse, Tom & Jerry, and others that became an integral part of all childhood were 2D animations and with technological advancement and 3D animation in use, they are more like aged-veterans.
Toy Story was the first 3D animation movie and after that, there is no stopping. Though 3D animations are more interesting and engaging, they are fields where 2D animations work better. This article will help you to learn in detail about 2D 3D animation, their differences, uses, and other aspects.
In this article
01 [Definition of 2D Animation 3D Animation?](#Part 1)
02 [Key Differences Between 2D Animations and 3D Animations](#Part 2)
03 [Selecting Between 2D Animation and 3D Animation?](#Part 3)
04 [Merging 2D Animation and 3D Animation](#Part 4)
Part 1 Part Definition Of 2D And 3D Animation
012D Animation
The traditional method of animation is termed 2D animation and it has been in use for a long time. A 2D animated video has multiple images in different positions which when moved quickly one after the other simulates a movement. The flipping of the images creates an illusion of movement. Earlier 2D animations were created using hands but now there is advanced computer software that can create these animations in just a few simple clicks. The term 2D means 2 dimensional which means that an image for the animation can be moved in two-dimensional space that is X-axis and Y-axis.
023D Animation
In simplest terms, a 3D animation is an animation that is created in three-dimensional space which makes the characters and objects appear realistic and lively. Thus, a 3D animation has height, width as well as depth. These animations are more complex and the process of creating them is totally different from that of 2D animations. Though 3D animations are used in different industries and platforms these days, majorly they can be found for creating movies, games, and cartoons.
Part 2 Part Key Differences Between 2d Animations and 3d Animations
The major difference between a 2D animation and 3D animation lies in the final appearance. While a 2D animation appears like a flat animation which can be an image or a photograph at a fast movement while a 3D animation looks like real objects that can be seen from all angles and have their front, back, top, as well as the bottom.
The table below will differentiate both these animations on various parameters.
| Features/Type of Animation | 2D Animation | 3D Animation |
|---|---|---|
| Full-Form | Two-dimensional | Three-dimensional |
| Meaning | These animations with 2-dimensional objects appear to be moving when the images are moved at a fast speed. | The objects and characters in these animations look more realistic as their appear in 3-dimensional space. |
| Supported Aspects and axis | Length and height (X-axis and Y-axis) | Length, height, and width (X-axis, Y-axis and Z-axis) |
| Appearance | Appear as flat | Appear lively and realistic |
| Basic elements | It’s all about frames | The animation is all about movements |
| Axis | Images appear at X-axis, and Y axis | Objects appear at X-axis, Y-axis, and Z-axis. |
| Use and target audience | Used for social media sites, demos, animated whiteboard videos, and similar others. | Used for movies, cartoons, video games. |
| Use of software | Hand-drawn images or computer-generated images can be used. | Complex software is needed. |
| Cost | Cheaper than 3D animations | Expensive |
| Examples | Snow White, The Jungle Book, Mickey Mouse, Tom & Jerry, and more. | The Toy Story, Transformers, Incredibles, and more. |
Part 3 Selecting Between 2D Animation and 3D Animation?
Confused between 2D animation and 3D animation? Several factors can be considered to select between the two types of animations. Major ones are enlisted below.
● Target audience: For general explanation and use, 2D animations are a good choice as they are interesting, engaging, and also pocket-friendly. If the target audience is professional people that need in-depth and important information about something, 3D animations are a better choice.
● Availability of software: There are different software used for different types of animations. The availability of the software can also be a deciding factor for selecting between a 2D animation or 3D animation.
● Budget: This is another important factor to be considered. Since 3D animation requires more complex tools and procedures, creating them is expensive. So, depending on how much you are willing to spend, you can choose between the two.
Part 4 Part Merging 2D Animation and 3D Animation
Why choose one, when both can be used? Yes, to get the best of both worlds, 2D animations can be used along with 3D animations depending on the type of the project. Both the styles can be adjusted as per the requirements and for this, good professional software is needed.
We here suggest Wondershare Filmora Video Editor as the best tool as it not only comes equipped with all the latest features but the entire process is also quick and hassle-free. Majorly working as an excellent video editing software, the program supports multiple functions supporting animated videos. Using this Windows and Mac-based tool yon create dynamic animated videos and also edit them and customize them to suit your requirements.
For Win 7 or later (64-bit)
For macOS 10.12 or later
Key features of the software
● Create interesting and engaging animated and other videos using more than 100 media layers, composting tools, and dynamic effects.
● Apply motion elements, filters, and transitions for dynamic videos.
● Audio functions like background noise removal, audio equalizer, keyframe audio editing, and others are supported.
● Fast import, export, and rendering.
● Option to preview the files in high resolution.
● Features like fisheye correction, speed control, stabilization, advanced color correction, 3D LUTs, and others are supported.
● Additional supported functions include import from social media sites, portrait support, camera shake, audio-mixing, screen recording, auto-crop, and others.
● Windows and Mac support.
● Key Takeaways from This Episode →
● 2D and 3D animation are the two major types of animations created for different uses.
● A 2D animation appears in two-dimensional space while a 3D animation appears in a three-dimensional space and looks livelier and more realistic.
● Both 2D and 3D animations can be merged using professional software like Wondershare Filmora Video Editor that supports a wide range of other functions as well.
How to Make a Video a Live Photo
How to Make a Video a Live Photo [2022]
An easy yet powerful editor
Numerous effects to choose from
Detailed tutorials provided by the official channel
Looking forward to turn your videos into live photos? Stay tuned to know how!
In this article
01 [How to Save Live Photos as a Video on iPhone/Ipad/Ipod](#Part 1)
02 [How to Turn a Video Into a Live Photo on iOS/Android](#Part 2)
Part 1 How to Save Live Photos as a Video on iPhone/Ipad/Ipod
Live photos are an amazing utility that allow you to save images as short moving snaps. Creating live photos is among the latest spunk of trendsetter stories, whether shared on social media platforms or created and saved just for fun, these definitely sound and look exciting, but that’s just one among the many things you can experiment on live photos.
Creating live photos takes you to a world of exciting features where you can explore your creativity in a number of ways, one of the easiest being turning live photos to videos. This comes handy when you need to share your live photos on platforms that do not have the compatibility to run live photos. If you are an iPhone user and wish to try your hands on experimenting with live photos, see through the following section of this article to learn how to turn live photo into video:
01Save as Video
Step 1: Launch the Photos App
In your iPhone, launch the ‘Photos’ app and navigate to ‘Albums’. All your live photos are present in the ‘Live Photos’ album.
Step 2: Format Selection
In latest versions (iOS 13v and above), you get a direct ‘Save as Video’ option in the ‘Photos’ application. Just click on that, and your live photo will be instantly saved in your iPhone gallery as a video. Here’s how you can use this feature:
● In the ‘Photos’ application, go to the ‘Live Photos’ album to select and open a desired live photo that you wish to convert to a video.
● Click on the ‘Share’ icon.

● Select ‘Save as Video’ from the drop down menu that displays sharing options.

Your created video will be saved in the ‘Photos’ application, next to the live photo you chose to turn into a video.
02iOS Shortcuts
This is a quicker way to save your live photos as videos in your iPhone. To use this feature, you first need to save the ‘Convert LivePhotos to Video’ shortcut in the ‘Shortcuts App’ gallery of your iPhone. You can do this by opening in your iOS internet browser.
Before using the above link, make sure to enable the ‘Allow Untrusted Shortcuts’ feature in your iPhone settings. You can do this as explained below:
● Reach to the ‘Settings’ application of your iPhone.
● Tap on ‘Shortcuts’ from the app’s welcome screen.
● Enable ‘Allow Untrusted Shortcuts’ with a toggle.

Having done that, here’s what you need to follow:
● Open the ‘Shortcuts’ application in your iOS device and tap the ‘Convert LivePhotos to Video’ shortcut.

● The ‘Live Photos’ album of your device opens up. Make a desired selection.

Your converted video gets automatically saved in the ‘Camera Roll’ folder of the ‘Photos’ application. Open the ‘Recents’ album to view your creation.
Part 2 How to Turn a Video Into a Live Photo on iOS/Android
Converting live photos to videos is fine, but going the other way round is all the more exciting and fun! You can even use these converted live photos as live screen wallpapers for your iOS and Android devices. If you are motivated to take up the excitement, look through the following methods to turn video into live photo:
01iOS Devices
Being an iOS user, you can choose among the following tools to convert video to live photo in your iPad, iPod or iPhone:
● Wondershare Filmora
Wondershare Filmora Video Editor is currently leading the software market among converter utilities that cater to various media conversion needs. This one is a free, smart, quick and convenient conversion tool that assures you of a hassle free video to live photo conversion in just a few clicks. What’s more interesting is, you don’t need to limit yourself with sticking to some particular video format, as Filmora conveniently supports almost all common ones.
Wondershare Filmora
Get started easily with Filmora’s powerful performance, intuitive interface, and countless effects!
Try It Free Try It Free Try It Free Learn More >

● IntoLive
This one is a third party application that allows you to convert videos into live photos, quickly and conveniently. This tool works well with devices having iOS 12.0 and later versions. All you have to do is follow the steps mentioned below:
Step 1:
Download the ‘IntoLive’ application from the Apple App Store.

Step 2:
Launch the same on your iOS device and grant the permission to access its ‘Photos’ Album.

Step 3:
In the ‘Videos’ section, choose the desired video that you wish to turn into a live photo.

Step 4:
An editor window will open up. Here, you can edit (cut, crop, trim, etc.) and add desired effects or filters to your selected video. Click on ‘Make’ at the top right when you finish the editing process.

Step 5:
If you have the paid version of the app, you can take up multiple repeats of your live photo; else you can use the free version with no repeats.

Step 6:
Once you are satisfied with the result, click on ‘Save Live Photo’. This will save your created live photo in your device’s gallery.

02VideoToLive
This is a free converter you can choose to turn video into live photo. This is a quite popular tool among iPhone users worldwide and is suitable for iOS versions 11.2 and later. You also have the liberty to share your created live photos on social media with this converter. Take the following steps to begin the conversion process:

Step 1:
Download the application from the Apple App Store and launch it on your iOS device.
Step 2:
Choose a video from your device gallery to convert it into a live photo.
Step 3:
In the video editor screen, crop the video to the preferred section that has to be converted into live photo. You can add video frames to your edited clip from the upper section of the editor screen.
Step 4:
Click on ‘Convert’ at the top right corner to initiate the conversion process.
03Android Devices
Live photos are undoubtedly known to add spark to your cherished moments, but the notch that puts these off with Android devices is that you can enjoy live photos on these devices only as live wallpapers.
Being an iPhone exclusive utility, Android devices lack the flexibility to capture live images. However, you can see them move on being set as live screen wallpapers. A handy alternative to this is converting a turn video into live photo and use it as live wallpaper. Here’s how you can take up the conversion process:
● TurnLive- Live Wallpaper
This one is a convenient, third party tool that lets you turn video into live photo in just a few quick steps. You can either use this application for free, or upgrade to the paid version to enjoy its premium features. To make amazing live photos from videos using this tool, you need to take up the steps given below:

Step 1: App Installation
To begin, visit the Google Playstore in your Android device and download the TurnLive- Live Wallpaper application. Next, you need install and launch the app in your device and accept its terms of service.
Step 2: Select a Video
Once you are done, click on the ‘Live Photo’ icon in the bottom of the app’s opening screen to reach the video selection page. Here, you need to choose ‘Video to Live Wallpaper’ option and grant the required app permissions to access your device’s camera and gallery. Select a desired video from the ones saved in your device and click ‘Done’ at the top right.
Step 3: Edit Your Video
You will now get directed to the app’s editor window, where you need to trim the selected video within a time frame of 1-5 seconds. To do this, select a cover frame within the clip and click ‘Next’. You can now use the video slider at the bottom to trim the clip. Adding suitable video effects and filters is also possible with this tool.
Step 4: It’s Almost Done!
When you finish editing, click ‘Next’ and choose the number of repeats for the created live photo. Wait for the conversion to finish and click on ‘My Wallpapers’ to view your creation.
Step 5: Download Your Live Photo!
Click ‘Download’ and tap ‘Clear’ in the app’s prompt message to remove your device’s current screen wallpaper. Next, allow the app to access your system settings. Once this finishes, tap ‘Clear’ again to download your creation. You will now get directed to a black screen tagged ‘DayTime LWP’. Click on ‘Set Wallpaper’ in this screen to make your live photo, the current wallpaper of your Android device.
● Video Live Wallpaper
This is another free app that you can use to your videos into amazing live photos in just 4 quick steps. All you need to do is explained in the following steps:
Step 1: download the Application
Download the Video Live Wallpaper application in your Android device from Google Playstore and proceed for its installation and launch.

Step 2: Select Your Video
In the app’s opening screen, click ‘Choose Video’ and grant app permissions to access your device’s media. Browse your video gallery to select a desired video that you wish to convert into a live photo.

Step 3: Edit Your Video
You will now get directed to the app’s editor screen. Here, you can explore your editing creativity to edit the selected video. Once you are happy, click the picture icon at the top right corner.

Step 4: Your Live Wallpaper is Ready!
To set the created live photo as your device screen wallpaper, select ‘Set as Wallpaper’ at the bottom right.

● Key Takeaways from This Episode →
● From cherishing moments to sharing them on social media, live photos can do it all.
● Being an iPhone exclusive utility, you need to create these from videos to enjoy them on other platforms and devices.
● Filmora is the best video to live photo converters, available as an easy, quick and convenient conversion tool.
Looking forward to turn your videos into live photos? Stay tuned to know how!
In this article
01 [How to Save Live Photos as a Video on iPhone/Ipad/Ipod](#Part 1)
02 [How to Turn a Video Into a Live Photo on iOS/Android](#Part 2)
Part 1 How to Save Live Photos as a Video on iPhone/Ipad/Ipod
Live photos are an amazing utility that allow you to save images as short moving snaps. Creating live photos is among the latest spunk of trendsetter stories, whether shared on social media platforms or created and saved just for fun, these definitely sound and look exciting, but that’s just one among the many things you can experiment on live photos.
Creating live photos takes you to a world of exciting features where you can explore your creativity in a number of ways, one of the easiest being turning live photos to videos. This comes handy when you need to share your live photos on platforms that do not have the compatibility to run live photos. If you are an iPhone user and wish to try your hands on experimenting with live photos, see through the following section of this article to learn how to turn live photo into video:
01Save as Video
Step 1: Launch the Photos App
In your iPhone, launch the ‘Photos’ app and navigate to ‘Albums’. All your live photos are present in the ‘Live Photos’ album.
Step 2: Format Selection
In latest versions (iOS 13v and above), you get a direct ‘Save as Video’ option in the ‘Photos’ application. Just click on that, and your live photo will be instantly saved in your iPhone gallery as a video. Here’s how you can use this feature:
● In the ‘Photos’ application, go to the ‘Live Photos’ album to select and open a desired live photo that you wish to convert to a video.
● Click on the ‘Share’ icon.
● Select ‘Save as Video’ from the drop down menu that displays sharing options.
Your created video will be saved in the ‘Photos’ application, next to the live photo you chose to turn into a video.
02iOS Shortcuts
This is a quicker way to save your live photos as videos in your iPhone. To use this feature, you first need to save the ‘Convert LivePhotos to Video’ shortcut in the ‘Shortcuts App’ gallery of your iPhone. You can do this by opening in your iOS internet browser.
Before using the above link, make sure to enable the ‘Allow Untrusted Shortcuts’ feature in your iPhone settings. You can do this as explained below:
● Reach to the ‘Settings’ application of your iPhone.
● Tap on ‘Shortcuts’ from the app’s welcome screen.
● Enable ‘Allow Untrusted Shortcuts’ with a toggle.
Having done that, here’s what you need to follow:
● Open the ‘Shortcuts’ application in your iOS device and tap the ‘Convert LivePhotos to Video’ shortcut.
● The ‘Live Photos’ album of your device opens up. Make a desired selection.
Your converted video gets automatically saved in the ‘Camera Roll’ folder of the ‘Photos’ application. Open the ‘Recents’ album to view your creation.
Part 2 How to Turn a Video Into a Live Photo on iOS/Android
Converting live photos to videos is fine, but going the other way round is all the more exciting and fun! You can even use these converted live photos as live screen wallpapers for your iOS and Android devices. If you are motivated to take up the excitement, look through the following methods to turn video into live photo:
01iOS Devices
Being an iOS user, you can choose among the following tools to convert video to live photo in your iPad, iPod or iPhone:
● Wondershare Filmora
Wondershare Filmora Video Editor is currently leading the software market among converter utilities that cater to various media conversion needs. This one is a free, smart, quick and convenient conversion tool that assures you of a hassle free video to live photo conversion in just a few clicks. What’s more interesting is, you don’t need to limit yourself with sticking to some particular video format, as Filmora conveniently supports almost all common ones.
Wondershare Filmora
Get started easily with Filmora’s powerful performance, intuitive interface, and countless effects!
Try It Free Try It Free Try It Free Learn More >
● IntoLive
This one is a third party application that allows you to convert videos into live photos, quickly and conveniently. This tool works well with devices having iOS 12.0 and later versions. All you have to do is follow the steps mentioned below:
Step 1:
Download the ‘IntoLive’ application from the Apple App Store.
Step 2:
Launch the same on your iOS device and grant the permission to access its ‘Photos’ Album.
Step 3:
In the ‘Videos’ section, choose the desired video that you wish to turn into a live photo.
Step 4:
An editor window will open up. Here, you can edit (cut, crop, trim, etc.) and add desired effects or filters to your selected video. Click on ‘Make’ at the top right when you finish the editing process.
Step 5:
If you have the paid version of the app, you can take up multiple repeats of your live photo; else you can use the free version with no repeats.
Step 6:
Once you are satisfied with the result, click on ‘Save Live Photo’. This will save your created live photo in your device’s gallery.
02VideoToLive
This is a free converter you can choose to turn video into live photo. This is a quite popular tool among iPhone users worldwide and is suitable for iOS versions 11.2 and later. You also have the liberty to share your created live photos on social media with this converter. Take the following steps to begin the conversion process:
Step 1:
Download the application from the Apple App Store and launch it on your iOS device.
Step 2:
Choose a video from your device gallery to convert it into a live photo.
Step 3:
In the video editor screen, crop the video to the preferred section that has to be converted into live photo. You can add video frames to your edited clip from the upper section of the editor screen.
Step 4:
Click on ‘Convert’ at the top right corner to initiate the conversion process.
03Android Devices
Live photos are undoubtedly known to add spark to your cherished moments, but the notch that puts these off with Android devices is that you can enjoy live photos on these devices only as live wallpapers.
Being an iPhone exclusive utility, Android devices lack the flexibility to capture live images. However, you can see them move on being set as live screen wallpapers. A handy alternative to this is converting a turn video into live photo and use it as live wallpaper. Here’s how you can take up the conversion process:
● TurnLive- Live Wallpaper
This one is a convenient, third party tool that lets you turn video into live photo in just a few quick steps. You can either use this application for free, or upgrade to the paid version to enjoy its premium features. To make amazing live photos from videos using this tool, you need to take up the steps given below:
Step 1: App Installation
To begin, visit the Google Playstore in your Android device and download the TurnLive- Live Wallpaper application. Next, you need install and launch the app in your device and accept its terms of service.
Step 2: Select a Video
Once you are done, click on the ‘Live Photo’ icon in the bottom of the app’s opening screen to reach the video selection page. Here, you need to choose ‘Video to Live Wallpaper’ option and grant the required app permissions to access your device’s camera and gallery. Select a desired video from the ones saved in your device and click ‘Done’ at the top right.
Step 3: Edit Your Video
You will now get directed to the app’s editor window, where you need to trim the selected video within a time frame of 1-5 seconds. To do this, select a cover frame within the clip and click ‘Next’. You can now use the video slider at the bottom to trim the clip. Adding suitable video effects and filters is also possible with this tool.
Step 4: It’s Almost Done!
When you finish editing, click ‘Next’ and choose the number of repeats for the created live photo. Wait for the conversion to finish and click on ‘My Wallpapers’ to view your creation.
Step 5: Download Your Live Photo!
Click ‘Download’ and tap ‘Clear’ in the app’s prompt message to remove your device’s current screen wallpaper. Next, allow the app to access your system settings. Once this finishes, tap ‘Clear’ again to download your creation. You will now get directed to a black screen tagged ‘DayTime LWP’. Click on ‘Set Wallpaper’ in this screen to make your live photo, the current wallpaper of your Android device.
● Video Live Wallpaper
This is another free app that you can use to your videos into amazing live photos in just 4 quick steps. All you need to do is explained in the following steps:
Step 1: download the Application
Download the Video Live Wallpaper application in your Android device from Google Playstore and proceed for its installation and launch.
Step 2: Select Your Video
In the app’s opening screen, click ‘Choose Video’ and grant app permissions to access your device’s media. Browse your video gallery to select a desired video that you wish to convert into a live photo.
Step 3: Edit Your Video
You will now get directed to the app’s editor screen. Here, you can explore your editing creativity to edit the selected video. Once you are happy, click the picture icon at the top right corner.
Step 4: Your Live Wallpaper is Ready!
To set the created live photo as your device screen wallpaper, select ‘Set as Wallpaper’ at the bottom right.
● Key Takeaways from This Episode →
● From cherishing moments to sharing them on social media, live photos can do it all.
● Being an iPhone exclusive utility, you need to create these from videos to enjoy them on other platforms and devices.
● Filmora is the best video to live photo converters, available as an easy, quick and convenient conversion tool.
How to Make GIF Stickers for WhatsApp 100% The Simple Way
How to Make GIF Stickers for WhatsApp 100% The Easy Way
An easy yet powerful editor
Numerous effects to choose from
Detailed tutorials provided by the official channel
Wish your dear friends and loved ones on their special days using some interesting WhatsApp stickers. There is an integrated library of these stickers in different categories on your Android as well as iPhone.

Still, if you want a more personalized one, you can create a customized sticker using videos on your phone or using third-party apps and tools. Learn about how to use the integrated stickers and create customized in the following parts of the topic.
In this article
01 [Using stickers from integrated library](#Part 1)
02 [Best tools to create animated GIF sticker – Wondershare Filmora](#Part 2)
03 [Using iPhone and Android videos to make GIF stickers](#Part 3)
Part 1 Using stickers from integrated library
WhatsApp on your Android and iPhone has a decent collection of stickers that can send to your contacts. You simply need to look for the sticker in the desired category and send it and the steps for adding GIFs to WhatsApp are listed below.
Step 1. Open the WhatsApp contact to which you wish to send the sticker. To open the animation library on your Android device, tap on the emoji icon and choose the GIF option. On an iPhone, the library opens by clicking on the sticker icon.
Step 2. Search and select the desired sticker from the available options.
Step 3. To finally share the selected one, click on the sticker and then on the Send button.

Part 2 Best tools to create animated GIF sticker – Wondershare Filmora
If you are in search of a tool that lets you create a professional-looking animated GIF easily Wondershare Filmora Video Editor is the best WhatsApp GIF maker tool. This software once downloaded on your Windows or Mac system, is all set to look after multiple video editing tasks including GIF creation.
Wondershare Filmora
Get started easily with Filmora’s powerful performance, intuitive interface, and countless effects!
Try It Free Try It Free Try It Free Learn More >
Your videos in MP4, MKV, MOV, and several other key formats can be converted to a GIF file using the program and multiple options for editing are available as well like crop, trim, add effects, add texts, and more.
The intuitive interface of the software makes it easy to use even by non-techy people.
Steps on how to make WhatsApp GIF sticker using Wondershare Filmora
**Step 1.**On your Windows or Mac, download, install, and launch the Wondershare software and then import the video files from which GIF has to be created.
Step 2. The added files have to be now dragged and dropped to the timeline.

Step 3. Editing tools for customization can be used.
**Step 4.**For further personalization by adding text, effects, and more the related functions can be used.

Step 5. Next, choose the GIF option as the target file format from the Local tab. Select the file name and the location. Clicking on the EXPORT button will start the processing.

Part 3 Using iPhone and Android videos to make GIF stickers
If you do not wish to use any third-party tools, basic stickers can also be created using the videos on your Android and iPhone. A video cannot be more than 6 seconds in length to be used as a GIF and thus longer videos need to be trimmed.
Steps on how to make a GIF stickers for WhatsApp
Step 1. Launch the WhatsApp contact to which you wish to send the GIF. Add the video from the device gallery by clicking on the camera button. A video using the camera can also be recorded.
Note: Ensure that video length is not more than 6 seconds. If it is more, use the slider at the top to trim the video.
Step 2. Next, you can add the text using the Caption option.
Step 3. Now to convert this video into a GIF click on the GIF button under the video and then tap on the Send button to share this animation with the contact.

● Key Takeaways from This Episode →
●WhatsApp has an integrated library of GIF stickers in a wide range of categories.
●For creating customized stickers, Wondershare Filmora works as the best software as it is simple, quick, and has multiple editing options.
●Using the videos from the gallery, GIF stickers can also be created on your Android and iPhone.
Wish your dear friends and loved ones on their special days using some interesting WhatsApp stickers. There is an integrated library of these stickers in different categories on your Android as well as iPhone.
Still, if you want a more personalized one, you can create a customized sticker using videos on your phone or using third-party apps and tools. Learn about how to use the integrated stickers and create customized in the following parts of the topic.
In this article
01 [Using stickers from integrated library](#Part 1)
02 [Best tools to create animated GIF sticker – Wondershare Filmora](#Part 2)
03 [Using iPhone and Android videos to make GIF stickers](#Part 3)
Part 1 Using stickers from integrated library
WhatsApp on your Android and iPhone has a decent collection of stickers that can send to your contacts. You simply need to look for the sticker in the desired category and send it and the steps for adding GIFs to WhatsApp are listed below.
Step 1. Open the WhatsApp contact to which you wish to send the sticker. To open the animation library on your Android device, tap on the emoji icon and choose the GIF option. On an iPhone, the library opens by clicking on the sticker icon.
Step 2. Search and select the desired sticker from the available options.
Step 3. To finally share the selected one, click on the sticker and then on the Send button.
Part 2 Best tools to create animated GIF sticker – Wondershare Filmora
If you are in search of a tool that lets you create a professional-looking animated GIF easily Wondershare Filmora Video Editor is the best WhatsApp GIF maker tool. This software once downloaded on your Windows or Mac system, is all set to look after multiple video editing tasks including GIF creation.
Wondershare Filmora
Get started easily with Filmora’s powerful performance, intuitive interface, and countless effects!
Try It Free Try It Free Try It Free Learn More >
Your videos in MP4, MKV, MOV, and several other key formats can be converted to a GIF file using the program and multiple options for editing are available as well like crop, trim, add effects, add texts, and more.
The intuitive interface of the software makes it easy to use even by non-techy people.
Steps on how to make WhatsApp GIF sticker using Wondershare Filmora
**Step 1.**On your Windows or Mac, download, install, and launch the Wondershare software and then import the video files from which GIF has to be created.
Step 2. The added files have to be now dragged and dropped to the timeline.
Step 3. Editing tools for customization can be used.
**Step 4.**For further personalization by adding text, effects, and more the related functions can be used.
Step 5. Next, choose the GIF option as the target file format from the Local tab. Select the file name and the location. Clicking on the EXPORT button will start the processing.
Part 3 Using iPhone and Android videos to make GIF stickers
If you do not wish to use any third-party tools, basic stickers can also be created using the videos on your Android and iPhone. A video cannot be more than 6 seconds in length to be used as a GIF and thus longer videos need to be trimmed.
Steps on how to make a GIF stickers for WhatsApp
Step 1. Launch the WhatsApp contact to which you wish to send the GIF. Add the video from the device gallery by clicking on the camera button. A video using the camera can also be recorded.
Note: Ensure that video length is not more than 6 seconds. If it is more, use the slider at the top to trim the video.
Step 2. Next, you can add the text using the Caption option.
Step 3. Now to convert this video into a GIF click on the GIF button under the video and then tap on the Send button to share this animation with the contact.
● Key Takeaways from This Episode →
●WhatsApp has an integrated library of GIF stickers in a wide range of categories.
●For creating customized stickers, Wondershare Filmora works as the best software as it is simple, quick, and has multiple editing options.
●Using the videos from the gallery, GIF stickers can also be created on your Android and iPhone.
Top Practices on Online 3D Avatar Creator
Best Practices on Online 3D Avatar Creator
An easy yet powerful editor
Numerous effects to choose from
Detailed tutorials provided by the official channel
Avatar will match your personality to your social media profiles, YouTube videos, Snapchat, and many others. With 3D Avatar makers online, designing an Avatar is about customizing the color, layout, typography, and other designs and instantly sharing your Avatar to the social media digital platform as easy as choosing a template, customizing, and sharing.
The new software involved in AR and VR technologies uses these realistically customized Avatars. The accurate representation of virtual reality will give a feeling of being in an absolute sense. Users will love to create an avatar representing themselves in the virtual spaces. Making an avatar does not mean you lock your personality; you can change it anytime. This Avatar is created by capturing a webcam, ensuring it is perfect. We will discuss many free 3D Avatar creators online.
In this article
01 [What is a 3D Avatar?](#Part 1)
02 [Best 10 Practices on How to Create an Avatar for Spatial](#Part 2)
03 [How to Create a Gallery in Spatial for Your Art (NFT and Non-NFT)](#Part 3)
04 [How to Build Your Own 3D Avatar Accurately?](#Part 4)
Part 1 What is a 3D Avatar?
In Computer graphics, Avatar is the virtual representation of the user. This can be in the 2D illustration used as a profile picture and 3D representation used in games, VR, and AR technologies. Lately, termed as “Picons,” which means personal icons, but not used now. The use of these avatars was first coined by Neal Stephenson in 1992, which is a stepping stone for the vast Metaverse Universe. A graphic representation by which users wish to represent themselves. It is a caricature of a person, not precisely a photography of that person, is a simple fancy cartoon and bizarre structure; however, the images of natural objects identify the shape and design.
They are widely in online games and websites. They are an integral part of online chat, messaging systems, blogs, and artificial intelligence, especially VR. There are many Online 3D Avatar Creators available, and we shall you get the right match.
01What is Avatar Social Media?
These days’ social media play an integral part in our lives personally and professionally. We can connect with friends and customers easily sitting at the desk. An Avatar can be a profile picture on social media such as Bitmoji. Most users use their photos, sometimes supplemented by digital frames. There are various definitions to represent Avatar-like on social media it is a tiny cartoon picture representing us or our business in social media. Even if it is small, it can significantly impact the people who visit our profile to contact us, so we need to make sure it accurately represents who we are by utilizing an avatar. Keeping a profile picture is very important in social media, which creates a great impression to the followers than visiting a default profile picture set by the applications. There are many free 3D Avatar creators online from which you can create a free 3D avatar and directly share it on your social media.
02Why Do You Need a 3d Avatar?
These 3D avatars show a sense of seriousness and trust. Customers and people who communicate with them directly using avatars feel as if they are physically present in front of them, which makes them joyful, confident, and satisfied. Intelligent technologies like IoT and Machine learning have converted their way of working with 3D avatars having the central part. This is the beginning of the Metaverse universe, where we will have 3D Avatars in malls as salespersons and waiters in restaurants, and many more.
Part 2 Best 10 Practices On How To Create An Avatar For Spatial
Avatars being the most exciting topic for us today, let us get into creating the best Avatar and 3D avatar creator online for free. Besides, we shall see the software and unique features available in it.
01What Are the Best Avatar Creator?
Creating an Avatar can be seen to be complicated, but it is not. You need not even use complex software to create avatars. Let us discuss some Best Avatar Creators in the market to date.
❶ Face Your Manga
Face Your Manga is a 3D Avatar creator Online. We have truly outstanding and most generally utilized Avatar creators getting going our list. Face Your Manga allows you to make a graphical cartoon version of yourself, and it offers a ton of customization features like skin tone, structure, and shape.
There are some default formats, yet you can change them if you feel more innovative. The site is simple to use and free, so you have nothing to lose to create a free 3D Avatar.
![]()
❷ Bitmoji
Bitmoji is the most popular and well-known option on this list, and it’s also the best option for having Animoji on Android! It’s the most popular application in the Play Store, with around 100 million downloads.
With Bitmoji, you can undoubtedly make a ton of stickers and emojis with your face, which means you’ll have the option to effectively and completely put yourself out there. It incorporates a face-like, laughing, crying face, and that’s just the beginning. This is a free 3D avatar creator online that you can get from the Play Store.
![]()
❸ BeFuncky
BeFuncky is a 3D Avatar creator online to edit your photo creatively. This is extraordinary for the people who need to make an Avatar taking motivation from an image without the expectation of making it too cartoony.
You can blow up colors, including a few genuinely fascinating impacts, or essentially change the contrast. Regardless, the site creates a free 3D Avatar loaded with choices!
![]()
❹ PickaFace
A genuinely excellent site we can suggest you use is PickaFace, as it is a 3D avatar creator online. It has a creative drawing style, extraordinary for the people after something more careful than most applications and sites offer.
Considering all the things it offers, including a ton of customization choices, we can say, PickaFace creates a free 3D avatar like no other subscription software.
![]()
❺ Doppelme
We have Doppelme among the best 3D Avatar maker online to finalize the list. The site is similar to other choices we’ve discussed, with numerous customization choices.
The figures and cartoons you create can be changed in any way you choose, whether for your symbol or your friends.
![]()
02Top 8 Practices On How To Create An Avatar For Spatial
To begin creating avatars in spatial, you only need to submit a single photo of yourself. Spatial believes that avatars will have a significant impact on the internet.
●Start by creating a Spatial Account for you using Google, Microsoft, or Slack accounts. The best practice in Spatial is to add good light and color to the Avatar.
●After this, you have to create an avatar with the first step with your webcam, make sure the photo is clear and has perfect light on it.
●Later in your profile, you will have an edit menu to edit your Avatar anytime.
Light is an essential feature in avatar creation. That will create a better light than artificial lightning.
●Spatial will begin to generate a 3D avatar of you once it has a good photo of you.
●You may modify the shirt, skin tone, and color. After you’ve used all of your ingenuity, click “Looks Good,” and you’re done.
●Next, you can customize your Avatar. There is the customization of body, shape for men, woman. Users love to make the Avatar look like themselves. You can make a hand body effect while using VR headsets if you are a hand talker. If joined from the web, you will have different movements with keyboards like dancing.
●Make changes to spatial VR avatar anytime and update. You can change the skin tone, color of the shirt, and your name. The realistic effects create a real presence in VR meetings.
❶ Spatial – Collaborate From Anywhere In Ar.
This is the launch film of Spatial, “A short real-time in Spatial,” a better way to build and work together, a way that brought us to sit next to each other face to face.
●Spatial is a collaborative computing environment that combines all the creativity and visualizes it in the room.
●All of your digital devices are seamlessly tied together into an infinite workspace.
●With a click, you can expand the world’s information with all the power.
●Using AR, infinite canvas pixels become tactile, letting you manipulate them like clay.
●You can sketch a drawing on paper and have them in front of you as a visual.
❷ Spatial Passthrough Prototype
●With this passthrough, you will feel a completely immersive experience.
●To avoid this, Facebook has partnered with spatial and Logitech for the K830 keyboard, which will help users prevent mixed sensations and provide a complete VR experience.
●Facebook says this will provide an infinite office experience.
●There are multiple customizable screens and multiple monitor setups.
●Companies have already collaborated with spatial to bring up infinite offices.
❸ Microsoft Build Keynote collaboration with Spatial
Microsoft and Teams have worked with Spatial.
●A Spatial option on the team’s channel allows you to enter a 2D meeting with avatars.
●To turn something into 3D, scan the QR code and put on the VR or AR Hololens glasses.
●Through Hololens, they can access data with Microsoft productivity apps.
●They can also adjust the position of the robot.
●The eye-tracking is good, which enables the avatars to convey user emoticon.
❹ Qualcomm Snapdragon Summit Keynote
The stage where the digital world is changing, where virtually everyone and everything is connected. We are moving into the world of VR, which is the next noble platform.
●We are all going to wear glasses for effective and interactive communication.
●Spatial tools are already used in companies like Purina to bring the teams together.
●Spatial allows all people on Oculus, Hololens, and even AR-capable smartphones to engage in one virtual environment.
●These are used in games like Pokémon.
●There will be a vast development in technology with these features.
❺ Hololens 2 Launch Keynote
●Hololens is very comfortable and fits like a hat.
●And it signs in as we put on the device.
●After recognizing your Hololens, recognize your hands and then the world.
●You can touch the holo, move it and even resize it.
●Hololens collaborated with Spatial with many more features involved in connecting people, playing games, etc.
❻ Spatial In the Wall Street Journal
●With Virtual reality headsets like Hololens and Oculus Quest with virtual reality platforms like Spatial, you can meet up and collaborate with colleagues and friends.
●You can switch to any world you choose using VR Headsets within a second.
●Before this pandemic, VR used in the market was forecasted at about 829 million in 2018.
●If you wear a holographic headset, you can feel like someone is there with you in the room, and it feels natural.
●Connecting through Spatial is very simple. You need to need to sign in through a Spatial account.
❼ Spatial on TED
This is a video of the Co-founder talking about the improvement of technologies and the transformative nature of Holographic Telepresence.
●The technology improvement from wired telephones to phones and now zoom meetings to VR and AR meetings.
●The troubles in ordinary meetings end through these VR technologies.
●TED has collaborated with Spatial to increase its market.
●TED is an online broadcast that focuses on the target audience with scripted logic.
●The seized extend how to use most of the Spatial features.
❼ AR Insider – A Publication about Spatial Computing
●AR insider profiles as the most significant innovation in VR technologies.
●This is the most crucial feature in Spatial Computing producing the best VR experiences.
●This is like a launchpad to update daily insights of Spatial computing.
●They collect data from top sources.
●It is also seen as a business angle because it has fun games in AR and VR and technical.
Part 3 How To Create A Gallery In Spatial For Your Art (Nft And Non-Nft)
Many artists and creators have been working in Spatial to show their talents on social platforms.
Provide the 3D models the stage they deserve.
You can directly drag/drop your files into Spatial directly.
NFT artists and collectors can import directly from the collections via the Metamask integration.
You can use the gorgeous environment in the library or use your 3D model of yours to set a unique customer environment.
The technologies will be helpful to create an Avatar and Digital Twins to humanize the remote work as companies move to the hybrid work methods.
The future of the world will look like a science fiction movie.
The AR and VR promise to revolutionize the workplace.
The digital twins will be the following way to show ourselves to the digital environment in a decade.
VR headsets are getting cost-efficient, and people are starting to use them. It has to be still improved to be more efficient and lighter.
Part 4 How to Build Your Own 3D Avatar Accurately?
Turning into an Avatar or Disney character is now accessible using AI software like Wondershare Wondershare Filmora Video Editor . Among the various trends in social media, creating an Avatar is getting trendy nowadays. Let us discuss the steps to create a 3D Avatar creator online.
For Win 7 or later (64-bit)
For macOS 10.12 or later
Step 1: To start learning to create a 3D avatar, you need to know how to make layers and stack them on each other.
Step 2: Later, you can “Liquify” the layers to form a mold for your Avatar.
Step 3: Before turning it into a cartoon, apply the skin smoothening effects to create a more realistic image.
Step 4: Now, you can apply details like eyes, nose, hairs, dress, and facial lines to your Avatars.
Step 5: You can change the color of any particular feature.
Compared to all other 3D Avatar creators online free, Wondershare Filmora Video Editor is the most user-friendly and efficient software.
● Key Takeaways from This Episode →
● Learned about multiple applications available for creating 3D Avatars
● Looked into the future world through Spatial
● Discussed the steps involved in making a 3D Avatar maker online using Wondershare Filmora Video Editor
10 Great Apps for Turning Funny Animated Images Into Comics
10 Great Apps for Turning Funny Animated Images into Comics
An easy yet powerful editor
Numerous effects to choose from
Detailed tutorials provided by the official channel
There are several apps available that can let you create interesting funny animated images, cartoons, and comics by adding speech bubbles, animations, and other effects.
In this article
01 [Top apps to turn pictures into cartoons](#Part 1)
02 [Best Alternative to Cartoon Apps- Wondershare Filmorapro](#Part 2)
03 [Key Takeaways](#Part 3)
Part 1 Top apps to turn pictures into cartoons
To add some fun elements to your regular images and make them even more interesting you can convert them into cartoons and comics. The task of conversion can seem to be difficult and tricky but with the availability of several apps and programs, you can achieve the desired results in just a few clicks.
With multiple options available, you are bound to get confused while selecting an app. Helping you with the same, we have shortlisted the top 10 apps in the category as below.
01 Prisma Photo Editor
Available for download on Android and iOS devices this is an excellent photo editing app that comes with over 300 art filters and animations. You can quickly convert your images into funny and interesting cartoons using the app in no time. Additionally, several image parameters like sharpness, exposure, brightness, and others can also be adjusted as needed.
02 Photo Lab Picture Editor
This is free to use app on the Google Play Store with the IAP option. With a 4.6 high rating, the app is simple to use and offers more than 900 funny and stylish effects that can be added to your images. You can choose from photo montages, animations, filters, and other effects that match your requirements. You can even add photo frames to make your image look impressive. Create professional-looking cartoons in no time using this wonderful app.
03 MomentCam Cartoons & Stickers
This free app on Google Play Store with a 4 rating is just perfect for creating interesting cartoons and emoticons using images. The process is simple and quick where you just need to add the image and create its personalized avatar. Interesting background can also be added to further enhance the cartoon. The app also gives you the option to share the created cartoon on social media sites.

04 ToonMe
Create cartoons using your selfies and other images on your phone in just a few clicks using this high-rated app on Google Play Store. The AI of the app allows the creation of interesting full-body cartoons as well as vector portrait templates. Multiple layouts and designs are also available to choose from. The interface is simple and the app is also available for download Apple Play Store.

05 Pixlr- Free Photo Editor
This is a widely used image editing app that is simple and free to use. A wide range of image editing features and filters are available with the app including cartoon filters that will let you unleash your creativity and design impressive cartoons and other images. Also available for iOS devices the app also facilitates sharing the created images over social media and emails. Additional features include auto-fix, double exposure, adjusting image tone, and others.
06 Painnt- Pro Art Filters
This feature-packed app on Google Store lets you create professional-looking art pieces from the images using filters and animations. With more than 1000 filters in several categories including cartoons, classical, abstract, and others you can have a creation of your choice. App uses AI and also has an option for preview and fine-tuning. You can even share your creations with the app community and over social networking sites.
07 Clip2Comic & Caricature Maker
This is among the best app for iPhone users that allows creating funny and interesting cartoons, caricatures, and other artwork using images. Several other editing tools and filters are also available that support customizing high-quality and high-resolution images. Additionally, the app also supports editing the videos and converting them into animated clippings. The deformation filter further makes your creation look funny and interesting.
08 Deep Art Effects
This free app for Android and iOS devices comes with more than 100 effects and filters of different types including cartoon-based. Using the AI of the app, you can create impressive artwork in HD resolution. The app supports fast image processing and also supports sharing the artwork with the community. A paid premium version of the app is also available that has no ads, watermark, allows creating own filters, and has additional features.
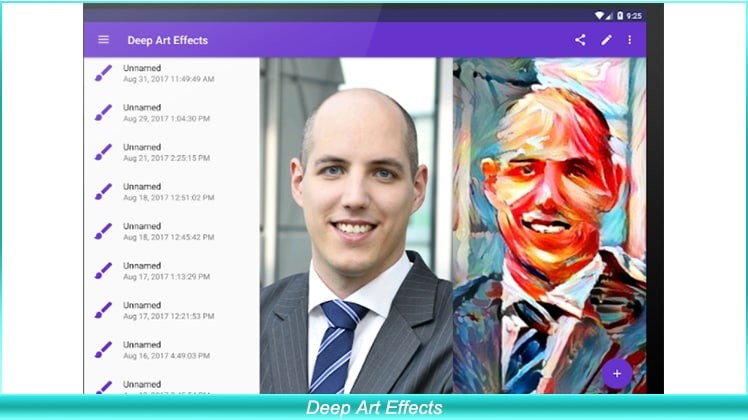
09 Cartoon Photo Editor
This free app for iOS devices will let you turn your images into cartoons like a pro. The app comes with more than 15 cartoon filters to choose from and you can even choose the art style as a retro cartoon, Minecraft, and others. The images from the device can be added to the app or you can even capture one using the camera. The created cartoons can also be shared over social media sites using the app. The pro-paid version offers additional features and functions.
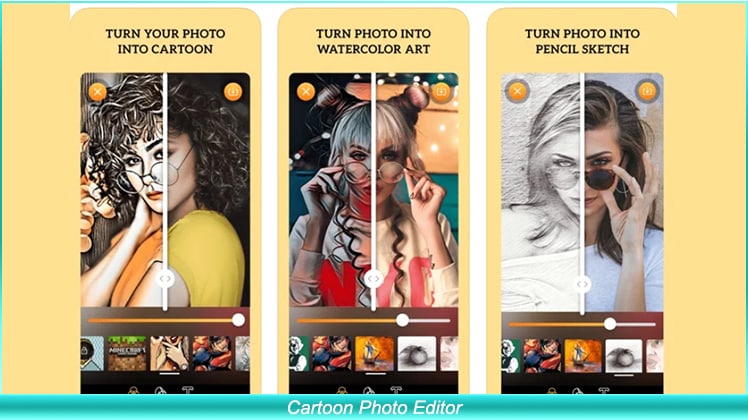
10 Comica- Comics and cartoon maker
As the name suggests, this is a comics and cartoon creating an app on Google Play Store. This lightweight app is free to use and comes with legit-looking effects and allows adding speech balloons. You can even create your memes using the app and take your creativity to a new level.

Key Takeaways from This Episode
● Check out the images on your smartphone or system that can be used for creating interesting cartoons.
● Analyze multiple apps and programs that can let you add cartoon and comic effects to your selected images.
● Finalize the tool that offers the best features, is simple to use, and can quickly convert your images to funny animated images and cartoons with added functionalities.
There are several apps available that can let you create interesting funny animated images, cartoons, and comics by adding speech bubbles, animations, and other effects.
In this article
01 [Top apps to turn pictures into cartoons](#Part 1)
02 [Best Alternative to Cartoon Apps- Wondershare Filmorapro](#Part 2)
03 [Key Takeaways](#Part 3)
Part 1 Top apps to turn pictures into cartoons
To add some fun elements to your regular images and make them even more interesting you can convert them into cartoons and comics. The task of conversion can seem to be difficult and tricky but with the availability of several apps and programs, you can achieve the desired results in just a few clicks.
With multiple options available, you are bound to get confused while selecting an app. Helping you with the same, we have shortlisted the top 10 apps in the category as below.
01 Prisma Photo Editor
Available for download on Android and iOS devices this is an excellent photo editing app that comes with over 300 art filters and animations. You can quickly convert your images into funny and interesting cartoons using the app in no time. Additionally, several image parameters like sharpness, exposure, brightness, and others can also be adjusted as needed.
02 Photo Lab Picture Editor
This is free to use app on the Google Play Store with the IAP option. With a 4.6 high rating, the app is simple to use and offers more than 900 funny and stylish effects that can be added to your images. You can choose from photo montages, animations, filters, and other effects that match your requirements. You can even add photo frames to make your image look impressive. Create professional-looking cartoons in no time using this wonderful app.
03 MomentCam Cartoons & Stickers
This free app on Google Play Store with a 4 rating is just perfect for creating interesting cartoons and emoticons using images. The process is simple and quick where you just need to add the image and create its personalized avatar. Interesting background can also be added to further enhance the cartoon. The app also gives you the option to share the created cartoon on social media sites.
04 ToonMe
Create cartoons using your selfies and other images on your phone in just a few clicks using this high-rated app on Google Play Store. The AI of the app allows the creation of interesting full-body cartoons as well as vector portrait templates. Multiple layouts and designs are also available to choose from. The interface is simple and the app is also available for download Apple Play Store.
05 Pixlr- Free Photo Editor
This is a widely used image editing app that is simple and free to use. A wide range of image editing features and filters are available with the app including cartoon filters that will let you unleash your creativity and design impressive cartoons and other images. Also available for iOS devices the app also facilitates sharing the created images over social media and emails. Additional features include auto-fix, double exposure, adjusting image tone, and others.
06 Painnt- Pro Art Filters
This feature-packed app on Google Store lets you create professional-looking art pieces from the images using filters and animations. With more than 1000 filters in several categories including cartoons, classical, abstract, and others you can have a creation of your choice. App uses AI and also has an option for preview and fine-tuning. You can even share your creations with the app community and over social networking sites.
07 Clip2Comic & Caricature Maker
This is among the best app for iPhone users that allows creating funny and interesting cartoons, caricatures, and other artwork using images. Several other editing tools and filters are also available that support customizing high-quality and high-resolution images. Additionally, the app also supports editing the videos and converting them into animated clippings. The deformation filter further makes your creation look funny and interesting.
08 Deep Art Effects
This free app for Android and iOS devices comes with more than 100 effects and filters of different types including cartoon-based. Using the AI of the app, you can create impressive artwork in HD resolution. The app supports fast image processing and also supports sharing the artwork with the community. A paid premium version of the app is also available that has no ads, watermark, allows creating own filters, and has additional features.
09 Cartoon Photo Editor
This free app for iOS devices will let you turn your images into cartoons like a pro. The app comes with more than 15 cartoon filters to choose from and you can even choose the art style as a retro cartoon, Minecraft, and others. The images from the device can be added to the app or you can even capture one using the camera. The created cartoons can also be shared over social media sites using the app. The pro-paid version offers additional features and functions.
10 Comica- Comics and cartoon maker
As the name suggests, this is a comics and cartoon creating an app on Google Play Store. This lightweight app is free to use and comes with legit-looking effects and allows adding speech balloons. You can even create your memes using the app and take your creativity to a new level.
Key Takeaways from This Episode
● Check out the images on your smartphone or system that can be used for creating interesting cartoons.
● Analyze multiple apps and programs that can let you add cartoon and comic effects to your selected images.
● Finalize the tool that offers the best features, is simple to use, and can quickly convert your images to funny animated images and cartoons with added functionalities.
Samples of Cartoon Character Face
Samples of Cartoon Character Face to Inspire You
An easy yet powerful editor
Numerous effects to choose from
Detailed tutorials provided by the official channel
Being able to draw facial features is an essential skill for any animator. Whether you are a beginner at drawing faces or an experienced cartoon artist that has been drawing for years, this is a skill that can gradually improve with time. With the implementation and use of simple shapes, creating various facial features and cartoon styles can be done quickly.
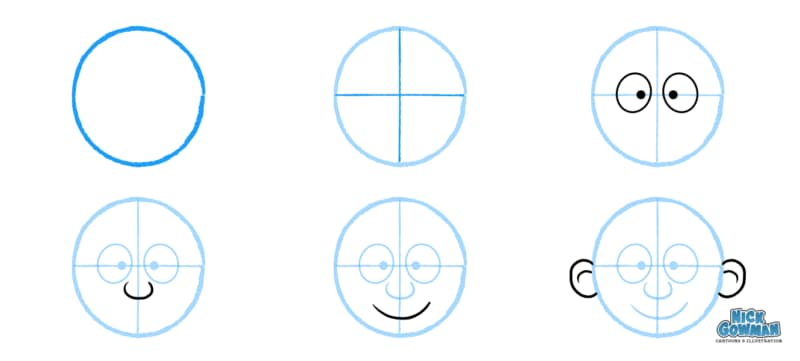
The methods of creating funny face cartoon characters are suitable for everyone, even if they do not have a single day of illustrating experience. These methods presented in this article are easily accessible to provide you with different results depending on your budget and your desired outcome.
The act of drawing cartoon faces can be effortless, and in this article, we will give you some fundamental samples of how you can draw cartoon faces of your own.
In this article
01 [Learn to Understand the Core of Cartoon Style](#Part 1)
02 [Top 12 Cartoon Face Examples](#Part 2)
03 [How to Draw a Cartoon Face - For Beginners](#Part 3)
04 [How to Easily Turn Yourself into a Cartoon](#Part 4)
Part 1 Learn to Understand the Core of Cartoon Style
First, you need to simplify the different parts of the cartoon character face to pick up on very subtle facial expressions and features. For example, the eyes’ shape and size will help determine if the person is feeling sad, excited, happy, excited, or sad. In addition, the amount of lift under a person’s eyebrows can help determine whether a person is mad or not.
These facial expressions are crucial to how a person communicates. It has got to the point that we can read someone’s face without truly understanding which parts of the face convey that emotion. However, these days we get exposed to everyday adaptations of facial expressions, especially with the invention of Instagram, Snapchat, and cartoon face filters.
Consequently, cartoons are a combination of different shapes that are being put together and are not difficult if the focus is on each shape individually and the process breaks down step by step.
Cartoons are a mixture of different shapes put together. It’s not difficult if you focus on each shape individually and break down the process step by step.
Finally, understanding these unconscious and subtle differences in facial expressions is crucial when planning out an animated character. Afterward, when understood, you can simplify the features to be recognizable by your audience.
Part 2 Top 12 Cartoon Face Examples
Cartoon character faces are gaining immense importance in design art due to their universality. Cartoon faces can represent people in several situations and add a comic or satirical twist to dull topics by highlighting their importance. However, drawing cartoon faces require a lot of skill and differentiation, and graphic designers, while working on basic and universal templates, always try and introduce unique elements.
Here are the top 10 examples of cartoon character faces you can choose from when you want to make your designs:
01Men and Women
This sketch features different facial expressions made by older men and women.
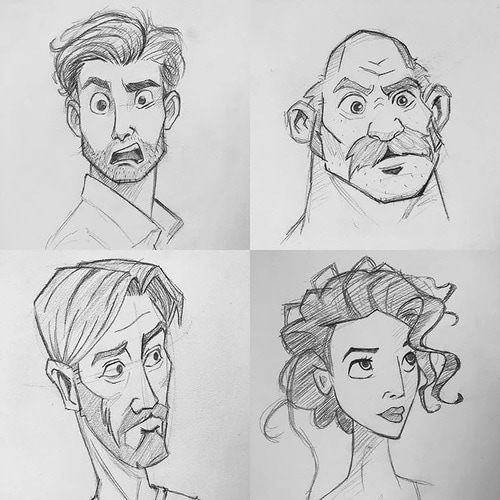
02Stretch and Squash
This photo shows the difference between squashing and stretching the face and provides references for extreme squash and extreme stretch.

03Dramatic Expressions
The expressions drawn here are super fun and dramatic. However, it is a great way to have fun and practice how to draw facial expressions simultaneously.
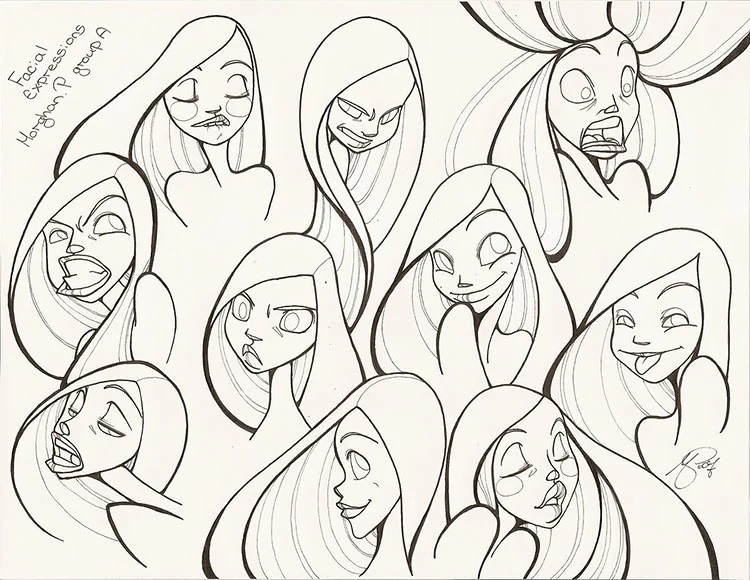
04Quick Expressive Sketches
With this, you can practice how to draw different facial expressions by doing quick sketches like this one. Perhaps you do not need to pay attention to perfection.
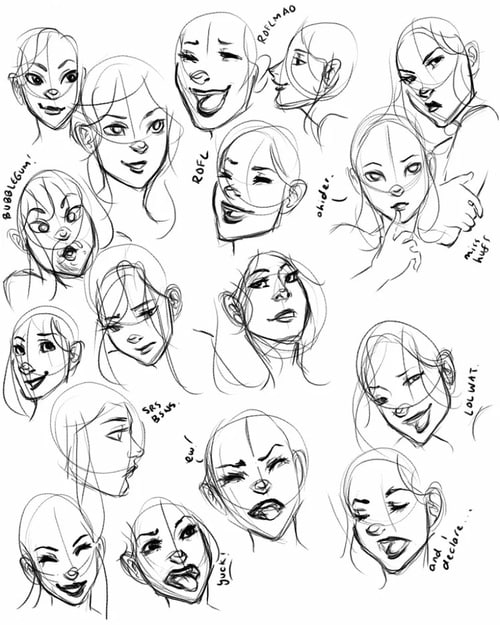
05This Is Good This Is Better
With this facial expression, you can see a good look and an even better expression. It shows the difference that subtle changes can make to your facial expressions**.**
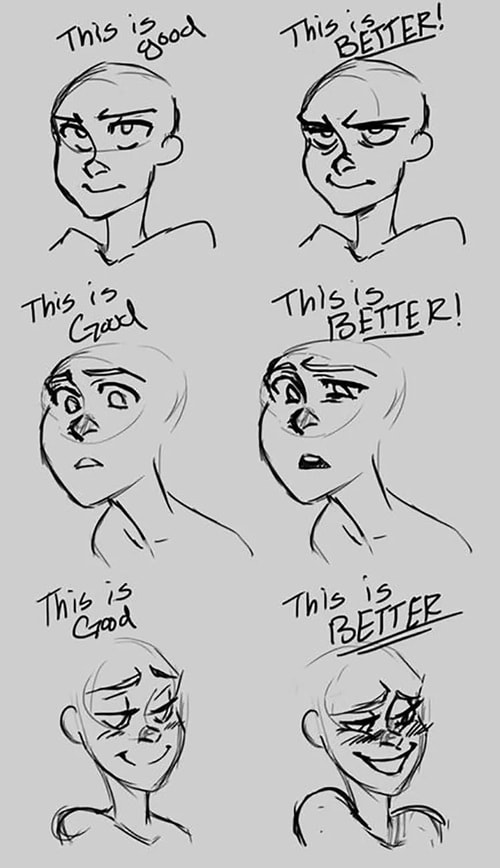
06Male and Female Expressions
This includes both male and female expressions to express the facial reaction of both genders, like some funny cartoon characters face.
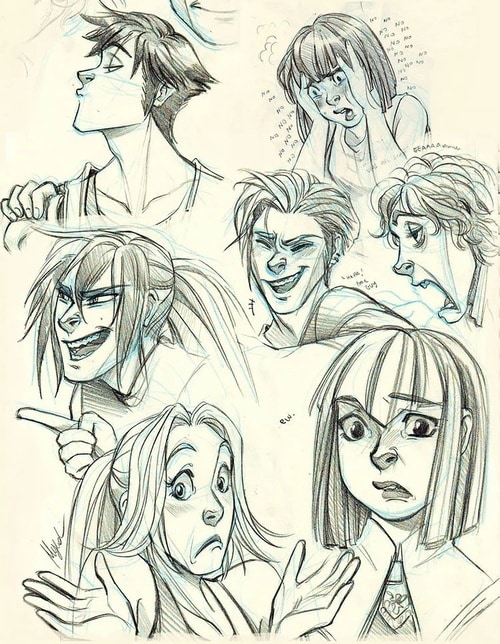
07Quick Sketches
This type of facial expression will help you get better at drawing cartoons, and you can use do some quick sketches every day.

08Jay Leno’s facial expression
Here, it is being exaggerated on a few of his most prominent facial features, including his chin. It is kind of a fat face cartoon character.
09Robert Pattinson Facials
In this photo, his head shape was distorted to show the thinness of his face, and his big hair also accentuates this prominent feature further.
10A,I,U,O,AE,M Facials
With this, you can practice how to draw your facial expression by pronouncing a, i, u, o, ae, m.

Part 3 How to Draw a Cartoon Face - For Beginners
Here, we have written down 7-step to follow on how to draw a cartoon character face as a beginner effectively.
● Step 1: Plan and Prepare
This is the first step is to plan out exactly what this character will convery through its expression while drawing a cartoon character.
● Step 2: Drawing A Cartoon Head
Next is time to start sketching out the shape of the head based on the plan you have made. Whatsoever shape you decide to use for your character, start with a circle to serve as the basic shape for the head.
● Step 3: Drawing Cartoon Eyes
Now, you need to draw the eye of the character, which is a crucial step because the eye is the essential part of their expression. To get the character’s eyes in the right place, you should carefully sketch the horizontal or vertical dimension lines.
● Step 4: Drawing A Cartoon Nose
The simpler the nose is, the better it looks in a cartoon. Ensure to keep a proper ratio between the mouth, eyes, and nose so that it does not look too crowded together.
● Step 5: Shaping the Face
In shaping the face, one needs to be mindful of the character, which will help to determine how to shape the jawline and head. For example, for a girl, the face should be narrower and have the chin come to a bit of a point at the end, whereas, for a boy, it requires that the face is a bit bolder and focuses more on the definition of the jawline.
● Step 6: Drawing A Cartoon Mouth
The mouth is another essential part of the cartoon character’s expression and a key indicator of how the character is feeling. It portrays whether you want the character to smile, frown, yell, be nervous, or be neutral.
● Step 7: Drawing Cartoon Hair
Next, you need to draw the cartoon hair, and, in some cases, the cartoon hair is a significant part of their appearance as it is a way to convey your character’s personality, appearance, style, or gender.
● Step 8: Coloring
Another part requires you to paint your character to improve the texture and make it beautiful.
Part 4 How to Easily Turn Yourself into a Cartoon
Are you looking to turn yourself into a cartoon? This is very necessary as it provides you with a great way to integrate diverse characters into your brand’s marketing while simultaneously keeping your content personalized.
However, after converting a picture to a cartoon character face, you can decide to animate it, and the best tool is Wondershare Filmora Video Editor . Animation is a great way to advertise your business, especially during times like these. it is a clever way for leaders, CEOs, and managers to connect with their remote workers and boost engagement, company culture, and ultimately work morale. Filmora is also a great tool to create creative and powerful animation with tons of follow-come effect that enables you to carry it out effectively and efficiently. In this section, we will guide you on how to turn yourself into a cartoon easily:
Step 1: Visit Powtoon.com and sign up for a free account, then click on the “build your character” option from the dropdown menu.
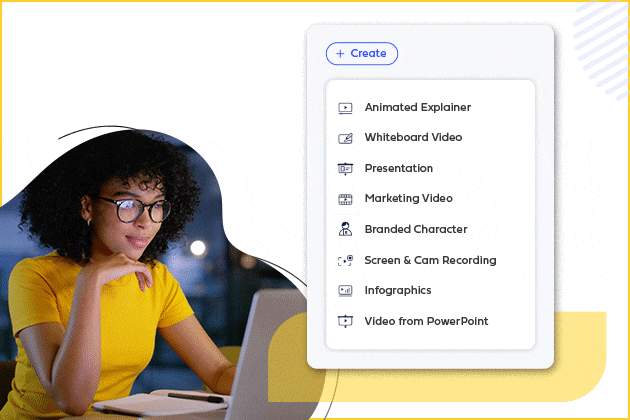
Step 2: Next is to select the cartoon gender you want.
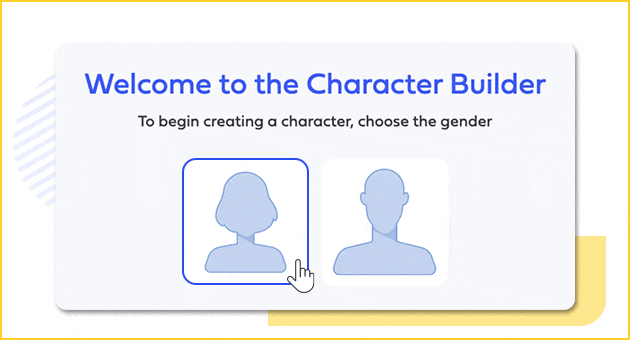
Step 3: Finally, you can customize your character’s facial features such as skin, hair, color, clothes, and animated gestures.
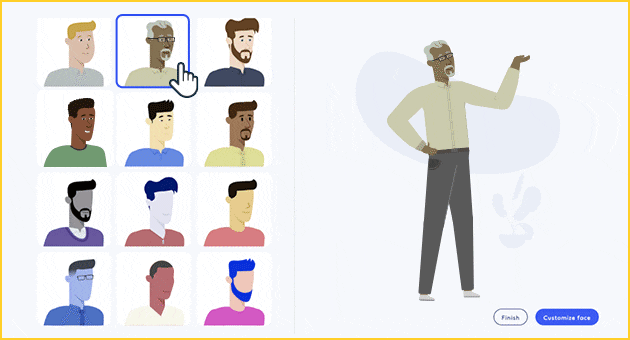
Step 4: Once you are satisfied with the result, you can save it on your device or share it on social media
For Win 7 or later (64-bit)
For macOS 10.12 or later
● Ending Thoughts →
● Thus, we saw how to easily cartoon your character’s face via some samples to help you out. With the method listed above, you can easily use it to create a square-faced cartoon character or draw a fat face cartoon character.
● This article also explained how to cartoon yourself. However, to cartoon your video or create a cartoon animated video, we recommend that you use Filmora, its keyframing feature to help you carry this out effectively.
Being able to draw facial features is an essential skill for any animator. Whether you are a beginner at drawing faces or an experienced cartoon artist that has been drawing for years, this is a skill that can gradually improve with time. With the implementation and use of simple shapes, creating various facial features and cartoon styles can be done quickly.
The methods of creating funny face cartoon characters are suitable for everyone, even if they do not have a single day of illustrating experience. These methods presented in this article are easily accessible to provide you with different results depending on your budget and your desired outcome.
The act of drawing cartoon faces can be effortless, and in this article, we will give you some fundamental samples of how you can draw cartoon faces of your own.
In this article
01 [Learn to Understand the Core of Cartoon Style](#Part 1)
02 [Top 12 Cartoon Face Examples](#Part 2)
03 [How to Draw a Cartoon Face - For Beginners](#Part 3)
04 [How to Easily Turn Yourself into a Cartoon](#Part 4)
Part 1 Learn to Understand the Core of Cartoon Style
First, you need to simplify the different parts of the cartoon character face to pick up on very subtle facial expressions and features. For example, the eyes’ shape and size will help determine if the person is feeling sad, excited, happy, excited, or sad. In addition, the amount of lift under a person’s eyebrows can help determine whether a person is mad or not.
These facial expressions are crucial to how a person communicates. It has got to the point that we can read someone’s face without truly understanding which parts of the face convey that emotion. However, these days we get exposed to everyday adaptations of facial expressions, especially with the invention of Instagram, Snapchat, and cartoon face filters.
Consequently, cartoons are a combination of different shapes that are being put together and are not difficult if the focus is on each shape individually and the process breaks down step by step.
Cartoons are a mixture of different shapes put together. It’s not difficult if you focus on each shape individually and break down the process step by step.
Finally, understanding these unconscious and subtle differences in facial expressions is crucial when planning out an animated character. Afterward, when understood, you can simplify the features to be recognizable by your audience.
Part 2 Top 12 Cartoon Face Examples
Cartoon character faces are gaining immense importance in design art due to their universality. Cartoon faces can represent people in several situations and add a comic or satirical twist to dull topics by highlighting their importance. However, drawing cartoon faces require a lot of skill and differentiation, and graphic designers, while working on basic and universal templates, always try and introduce unique elements.
Here are the top 10 examples of cartoon character faces you can choose from when you want to make your designs:
01Men and Women
This sketch features different facial expressions made by older men and women.
02Stretch and Squash
This photo shows the difference between squashing and stretching the face and provides references for extreme squash and extreme stretch.
03Dramatic Expressions
The expressions drawn here are super fun and dramatic. However, it is a great way to have fun and practice how to draw facial expressions simultaneously.
04Quick Expressive Sketches
With this, you can practice how to draw different facial expressions by doing quick sketches like this one. Perhaps you do not need to pay attention to perfection.
05This Is Good This Is Better
With this facial expression, you can see a good look and an even better expression. It shows the difference that subtle changes can make to your facial expressions**.**
06Male and Female Expressions
This includes both male and female expressions to express the facial reaction of both genders, like some funny cartoon characters face.
07Quick Sketches
This type of facial expression will help you get better at drawing cartoons, and you can use do some quick sketches every day.
08Jay Leno’s facial expression
Here, it is being exaggerated on a few of his most prominent facial features, including his chin. It is kind of a fat face cartoon character.
09Robert Pattinson Facials
In this photo, his head shape was distorted to show the thinness of his face, and his big hair also accentuates this prominent feature further.
10A,I,U,O,AE,M Facials
With this, you can practice how to draw your facial expression by pronouncing a, i, u, o, ae, m.
Part 3 How to Draw a Cartoon Face - For Beginners
Here, we have written down 7-step to follow on how to draw a cartoon character face as a beginner effectively.
● Step 1: Plan and Prepare
This is the first step is to plan out exactly what this character will convery through its expression while drawing a cartoon character.
● Step 2: Drawing A Cartoon Head
Next is time to start sketching out the shape of the head based on the plan you have made. Whatsoever shape you decide to use for your character, start with a circle to serve as the basic shape for the head.
● Step 3: Drawing Cartoon Eyes
Now, you need to draw the eye of the character, which is a crucial step because the eye is the essential part of their expression. To get the character’s eyes in the right place, you should carefully sketch the horizontal or vertical dimension lines.
● Step 4: Drawing A Cartoon Nose
The simpler the nose is, the better it looks in a cartoon. Ensure to keep a proper ratio between the mouth, eyes, and nose so that it does not look too crowded together.
● Step 5: Shaping the Face
In shaping the face, one needs to be mindful of the character, which will help to determine how to shape the jawline and head. For example, for a girl, the face should be narrower and have the chin come to a bit of a point at the end, whereas, for a boy, it requires that the face is a bit bolder and focuses more on the definition of the jawline.
● Step 6: Drawing A Cartoon Mouth
The mouth is another essential part of the cartoon character’s expression and a key indicator of how the character is feeling. It portrays whether you want the character to smile, frown, yell, be nervous, or be neutral.
● Step 7: Drawing Cartoon Hair
Next, you need to draw the cartoon hair, and, in some cases, the cartoon hair is a significant part of their appearance as it is a way to convey your character’s personality, appearance, style, or gender.
● Step 8: Coloring
Another part requires you to paint your character to improve the texture and make it beautiful.
Part 4 How to Easily Turn Yourself into a Cartoon
Are you looking to turn yourself into a cartoon? This is very necessary as it provides you with a great way to integrate diverse characters into your brand’s marketing while simultaneously keeping your content personalized.
However, after converting a picture to a cartoon character face, you can decide to animate it, and the best tool is Wondershare Filmora Video Editor . Animation is a great way to advertise your business, especially during times like these. it is a clever way for leaders, CEOs, and managers to connect with their remote workers and boost engagement, company culture, and ultimately work morale. Filmora is also a great tool to create creative and powerful animation with tons of follow-come effect that enables you to carry it out effectively and efficiently. In this section, we will guide you on how to turn yourself into a cartoon easily:
Step 1: Visit Powtoon.com and sign up for a free account, then click on the “build your character” option from the dropdown menu.
Step 2: Next is to select the cartoon gender you want.
Step 3: Finally, you can customize your character’s facial features such as skin, hair, color, clothes, and animated gestures.
Step 4: Once you are satisfied with the result, you can save it on your device or share it on social media
For Win 7 or later (64-bit)
For macOS 10.12 or later
● Ending Thoughts →
● Thus, we saw how to easily cartoon your character’s face via some samples to help you out. With the method listed above, you can easily use it to create a square-faced cartoon character or draw a fat face cartoon character.
● This article also explained how to cartoon yourself. However, to cartoon your video or create a cartoon animated video, we recommend that you use Filmora, its keyframing feature to help you carry this out effectively.
Best 10 Animated Templates in Canva
Versatile Video Editor - Wondershare Filmora
An easy yet powerful editor
Numerous effects to choose from
Detailed tutorials provided by the official channel
Canva is one of the premier graphic design platforms available to users. They can create Instagram posts, make YouTube thumbnails, infographics, invitations, business cards, and more.
The platform is beginner-friendly and extremely customizable, ideal for everyday use. More brands and companies use data visualized through graphic design, creating greater understanding and impact on users.
With Canva animated templates, you can show more with less work. This has wide-ranging effects from diversifying education to elaborating business reports and lucrative marketing opportunities.
In the article below, take a look at ten of the best Canva animated templates.
In this article
01 [Can You Animate in Canva?](#Part 1)
02 [Where Can I Find Animated Elements In Canva?](#Part 2)
03 [How Do I Get More Animations in Canva? ](#Part 3)
Part 1 Can You Animate in Canva?
Animation is an evergreen storytelling style as it’s versatile enough to be used in various types of content. Animations can last from a few seconds to a few minutes. According to HubSpot, A video-based email increases click rates by 300%.
1. Customization
Canva can be used to create customized animation. This can be done by creating an image and animating each element. Users can choose to create a textured background and edit images uploaded to Canva.
Users can also overlay audio to enhance the quality of the animation. The text can be refined to suit the style of the animation.
2. Automation
Canva has also launched a comprehensive suite of features under the “Animation” button. This automates the process and allows static images to be converted to animations. The animations range from simple motion to complex creations.
3. Movement
With the animation button, users can choose the type of animation they would like to use. The choices range from subtle animations like ‘Fade’, ‘Drift’ to bursts of motion like ‘Tumble’ and ‘Block’ and everything in-between.
4. Overview
Canva helps create high-quality animations at affordable prices. Creating an animation has never been easier with ready-made design templates by experienced designers.
Let’s look at how to animate the various elements of an image and the various animated templates in Canva.
Part 2 Where Can I Find Animated Elements In Canva?
With Canva’s many layouts and features to choose from, it might be difficult to figure out where to start. So, let’s start with the basics.
You have four basic facets to consider when choosing to animate. They are text, audio, image, and video. Every animation is crafted from varied combinations of these four basic steps.
One other consideration is the style of presentation you’d like to choose. Is it in portrait mode or landscape mode?
Do you want a previously crafted presentation ready to go? If so, Canva offers two options.
Step1 Select the “Create a Design” option on Canva
This allows users to create content in any format ranging from Instagram videos and reels, YouTube thumbnails and Facebook covers, logos, and more.
Step2 You can edit images and add the necessary text to your content. Bolster your content with video clips and audio to create the primary image you want
Edit the content to your preferences.
Step3 You are now ready to animate the construct
Select the animate button and look for “Page Animations” to animate the entire presentation. You can choose to animate any element on the page. You can also add borders or other design elements and animate them.
Step4 Here, you can choose from any myriad options for animation styles
You can also adjust the length of each animation with the stopwatch icon next to the animate button.
You can change the length of your video if you have one. You can also modify the audio clip to suit each animation.

Step5 Once you’ve animated the features according to your preference, you can now save the file in pdf, jpg, png or gif, or mp4 formats
Please note that all these options are for Canva Pro. Canva with the free subscription may allow limited format downloads. This is why you should consider tools like Wondershare Filmore for video animation.
Wondershare Filmora Pro for Video Animation
With Wondershare Filmora Pro, animation has never been easier. With its innovative keyframe technology, it makes animations easy to use. Animations can be easily created and, with the help of Filmora’s automation tool, fine-tuned for a professional finish.
Filmora provides a pioneering opportunity to create a visual masterpiece with a beginner’s experience with a simple functional drag and drop. With motion tracking, the ability to create split-screen, green screen, and blending capabilities, the Filmora Pro experience is unparalleled.
Part 3 How Do I Get More Animations in Canva?
Canva has filters allowing users to sort presentations by style, like “Animated,” “Minimalist,” “Corporate” and more. Canva has a series of ready-made animated templates available for use. Let’s explore a few of them.
It also allows sorting by themes like “Pink” or “Business” or “Background” depending on your needs. Users can also choose to sort out presentations according to the presentation’s color scheme.
Pink and Violet Simple Hot Neon Gradients Creative Presentation
With a gradient background that’s a popular website trend, this presentation boasts twenty-six slides with a signature animation you can tweak to suit your needs.
Blue Timeline Cycle Presentation
This presentation is useful for compact information with a clean and modern outlook. With ten power-packed slides, this animated template allows researchers and businesses to use data visualization to convey ideas.
Blue and White Illustrated Medical Healthcare in the 21st Century Education Presentation
With fourteen slides, this animation perfectly creates a visual treat for viewers. You can also convey vital information in bite-sized morsels. You can illustrate your point with lively animation designs while captivating your audience.
Neon Cyber Monday Sale Animated Video Facebook Ad Post
A fresh offering from Canva is this neon Facebook Ad Post with a captivating starry background and neon text elements.
You can customize this video to edit the text, the color palette, the duration of the video, and more.
Yellow Happy Wildlife Conservation Day Animated Video
For a child-friendly video with animation, head on over to this presentation. This animation allows children to marvel at the motion and pay rapt attention when listening to essential issues with soothing attention-grabbing colors.
Green and Orange Business Hip Tech Weekly Team Updates Presentation
As the perfect complement of colors, this presentation is suited for everything from a YouTube thumbnail to a business meeting. With nineteen slides, the variations of animations found are endless.
Brown Cute Start Healthy Lifestyle Explainer Video Animation
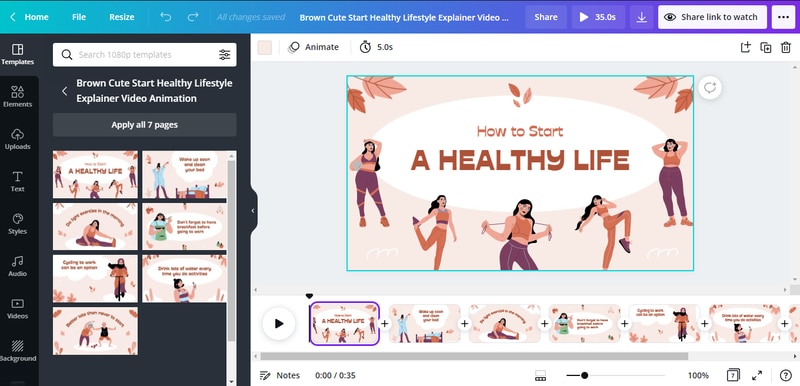
These cute animations make it straightforward to craft an explainer video around fitness. You can also use this for an Instagram post or story reel.
With seven slides, you can craft a compelling explainer video that keeps your viewers glued to the screen.
Sweet Fruit Candy Animated Group Project Presentation
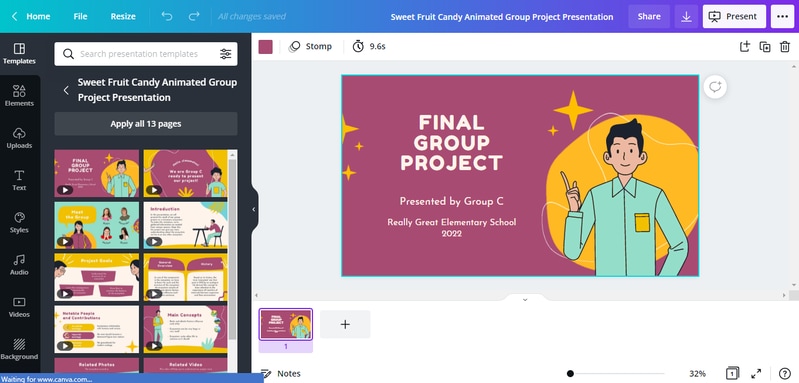
This presentation is perfect for group presentations. It’s an ideal template to break down large amounts of information in a versatile and easily created presentation.
With over thirteen slides, it’s a perfect slide set to breathe new life into your homework.
Pink and Cream Minimalist Food Animated Presentation

For a simple personalized food-related presentation, this slide set has you covered. With gorgeous visuals and space to write recipes, the history.
This presentation, with fourteen slides, remains a favorite among culinary enthusiasts.
Marketing Agency Animated Facebook Cover
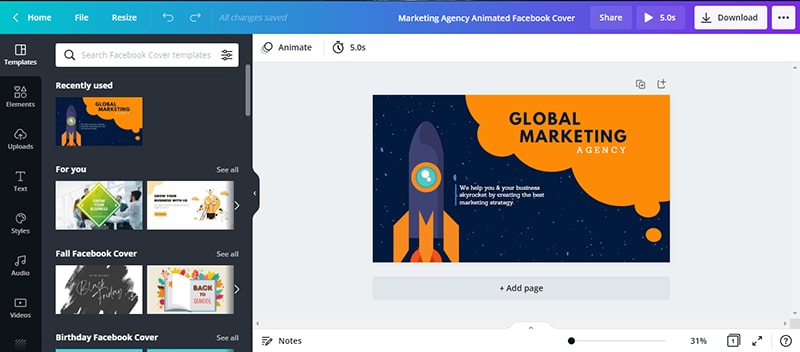
Motion is identified as a compelling website design trend for 2022. Colorful, animated art in vibrant color themes can win more visitors to your page and attention in a saturated market.
Use this theme to illustrate a gorgeous campaign ad for your social media feed.
Wondershare Filmora
Get started easily with Filmora’s powerful performance, intuitive interface, and countless effects!
Try It Free Try It Free Try It Free Learn More >
AI Portrait – The best feature of Wondershare Filmora for gameplay editing
The AI Portrait is a new add-on in Wondershare Filmora. It can easily remove video backgrounds without using a green screen or chroma key, allowing you to add borders, glitch effects, pixelated, noise, or segmentation video effects.

Final Words
Canva is a great tool for animated videos and you can use animated Canva templates to create a unique animation in images. It is a great tool and can be used easily to create any length of animated video. But if you are looking for an advanced and easy-to-use video animation tool, then give a try to Wondershare Filmora.
Canva is one of the premier graphic design platforms available to users. They can create Instagram posts, make YouTube thumbnails, infographics, invitations, business cards, and more.
The platform is beginner-friendly and extremely customizable, ideal for everyday use. More brands and companies use data visualized through graphic design, creating greater understanding and impact on users.
With Canva animated templates, you can show more with less work. This has wide-ranging effects from diversifying education to elaborating business reports and lucrative marketing opportunities.
In the article below, take a look at ten of the best Canva animated templates.
In this article
01 [Can You Animate in Canva?](#Part 1)
02 [Where Can I Find Animated Elements In Canva?](#Part 2)
03 [How Do I Get More Animations in Canva? ](#Part 3)
Part 1 Can You Animate in Canva?
Animation is an evergreen storytelling style as it’s versatile enough to be used in various types of content. Animations can last from a few seconds to a few minutes. According to HubSpot, A video-based email increases click rates by 300%.
1. Customization
Canva can be used to create customized animation. This can be done by creating an image and animating each element. Users can choose to create a textured background and edit images uploaded to Canva.
Users can also overlay audio to enhance the quality of the animation. The text can be refined to suit the style of the animation.
2. Automation
Canva has also launched a comprehensive suite of features under the “Animation” button. This automates the process and allows static images to be converted to animations. The animations range from simple motion to complex creations.
3. Movement
With the animation button, users can choose the type of animation they would like to use. The choices range from subtle animations like ‘Fade’, ‘Drift’ to bursts of motion like ‘Tumble’ and ‘Block’ and everything in-between.
4. Overview
Canva helps create high-quality animations at affordable prices. Creating an animation has never been easier with ready-made design templates by experienced designers.
Let’s look at how to animate the various elements of an image and the various animated templates in Canva.
Part 2 Where Can I Find Animated Elements In Canva?
With Canva’s many layouts and features to choose from, it might be difficult to figure out where to start. So, let’s start with the basics.
You have four basic facets to consider when choosing to animate. They are text, audio, image, and video. Every animation is crafted from varied combinations of these four basic steps.
One other consideration is the style of presentation you’d like to choose. Is it in portrait mode or landscape mode?
Do you want a previously crafted presentation ready to go? If so, Canva offers two options.
Step1 Select the “Create a Design” option on Canva
This allows users to create content in any format ranging from Instagram videos and reels, YouTube thumbnails and Facebook covers, logos, and more.
Step2 You can edit images and add the necessary text to your content. Bolster your content with video clips and audio to create the primary image you want
Edit the content to your preferences.
Step3 You are now ready to animate the construct
Select the animate button and look for “Page Animations” to animate the entire presentation. You can choose to animate any element on the page. You can also add borders or other design elements and animate them.
Step4 Here, you can choose from any myriad options for animation styles
You can also adjust the length of each animation with the stopwatch icon next to the animate button.
You can change the length of your video if you have one. You can also modify the audio clip to suit each animation.
Step5 Once you’ve animated the features according to your preference, you can now save the file in pdf, jpg, png or gif, or mp4 formats
Please note that all these options are for Canva Pro. Canva with the free subscription may allow limited format downloads. This is why you should consider tools like Wondershare Filmore for video animation.
Wondershare Filmora Pro for Video Animation
With Wondershare Filmora Pro, animation has never been easier. With its innovative keyframe technology, it makes animations easy to use. Animations can be easily created and, with the help of Filmora’s automation tool, fine-tuned for a professional finish.
Filmora provides a pioneering opportunity to create a visual masterpiece with a beginner’s experience with a simple functional drag and drop. With motion tracking, the ability to create split-screen, green screen, and blending capabilities, the Filmora Pro experience is unparalleled.
Part 3 How Do I Get More Animations in Canva?
Canva has filters allowing users to sort presentations by style, like “Animated,” “Minimalist,” “Corporate” and more. Canva has a series of ready-made animated templates available for use. Let’s explore a few of them.
It also allows sorting by themes like “Pink” or “Business” or “Background” depending on your needs. Users can also choose to sort out presentations according to the presentation’s color scheme.
Pink and Violet Simple Hot Neon Gradients Creative Presentation
With a gradient background that’s a popular website trend, this presentation boasts twenty-six slides with a signature animation you can tweak to suit your needs.
Blue Timeline Cycle Presentation
This presentation is useful for compact information with a clean and modern outlook. With ten power-packed slides, this animated template allows researchers and businesses to use data visualization to convey ideas.
Blue and White Illustrated Medical Healthcare in the 21st Century Education Presentation
With fourteen slides, this animation perfectly creates a visual treat for viewers. You can also convey vital information in bite-sized morsels. You can illustrate your point with lively animation designs while captivating your audience.
Neon Cyber Monday Sale Animated Video Facebook Ad Post
A fresh offering from Canva is this neon Facebook Ad Post with a captivating starry background and neon text elements.
You can customize this video to edit the text, the color palette, the duration of the video, and more.
Yellow Happy Wildlife Conservation Day Animated Video
For a child-friendly video with animation, head on over to this presentation. This animation allows children to marvel at the motion and pay rapt attention when listening to essential issues with soothing attention-grabbing colors.
Green and Orange Business Hip Tech Weekly Team Updates Presentation
As the perfect complement of colors, this presentation is suited for everything from a YouTube thumbnail to a business meeting. With nineteen slides, the variations of animations found are endless.
Brown Cute Start Healthy Lifestyle Explainer Video Animation
These cute animations make it straightforward to craft an explainer video around fitness. You can also use this for an Instagram post or story reel.
With seven slides, you can craft a compelling explainer video that keeps your viewers glued to the screen.
Sweet Fruit Candy Animated Group Project Presentation
This presentation is perfect for group presentations. It’s an ideal template to break down large amounts of information in a versatile and easily created presentation.
With over thirteen slides, it’s a perfect slide set to breathe new life into your homework.
Pink and Cream Minimalist Food Animated Presentation
For a simple personalized food-related presentation, this slide set has you covered. With gorgeous visuals and space to write recipes, the history.
This presentation, with fourteen slides, remains a favorite among culinary enthusiasts.
Marketing Agency Animated Facebook Cover
Motion is identified as a compelling website design trend for 2022. Colorful, animated art in vibrant color themes can win more visitors to your page and attention in a saturated market.
Use this theme to illustrate a gorgeous campaign ad for your social media feed.
Wondershare Filmora
Get started easily with Filmora’s powerful performance, intuitive interface, and countless effects!
Try It Free Try It Free Try It Free Learn More >
AI Portrait – The best feature of Wondershare Filmora for gameplay editing
The AI Portrait is a new add-on in Wondershare Filmora. It can easily remove video backgrounds without using a green screen or chroma key, allowing you to add borders, glitch effects, pixelated, noise, or segmentation video effects.
Final Words
Canva is a great tool for animated videos and you can use animated Canva templates to create a unique animation in images. It is a great tool and can be used easily to create any length of animated video. But if you are looking for an advanced and easy-to-use video animation tool, then give a try to Wondershare Filmora.
Also read:
- New Best 8 Tools Tell You How to Make Slideshows for Instagram
- New 2024 Approved Step-by-Step Guide to Send Gif WhatsApp on Android
- In 2024, Amazing Ideas About Creating Personalised WhatsApp GIF Sticker
- Updated In 2024, Stunning Ideas About Creating Personalised WhatsApp GIF Sticker
- New 2024 Approved Before You Learn 3D Animation Things You Should Know
- 10 Great Moving Animation PowerPoint Techniques
- New 15 Best Stop Motion Animation Kits to Fuel Creativity
- New 10 Best Tools to Make Pic Collage for Windows
- How to Obtain and Create Animated GIF Icons Like a Pro for 2024
- Updated Top 10 Best and Fast Ways to Turn Image Into Gif for 2024
- Learn All About 3D Logo Animation and Templates for 2024
- 10 Popular Cartoon Characters That You Wont Want to Miss for 2024
- Easy Shortcut to Convert Videos to Gifs on iPhone
- New What Wikipedia Cant Tell You About the 10 Best Batman Cartoons for 2024
- Updated 2024 Approved 6 Proven Ways to Dub Anime for Anime Voice Actor
- Updated 2024 Approved Learn Disney Cartoon Drawing to See More Disney Magic Moments
- Is It That Easy to Make My Animated Character
- 2024 Approved 10 Cartoon Character Makers to Make Animated Characters
- New 2024 Approved Why These 10+ Top Text Motion Templates Are Worth Your Attention
- Popular Female & Male Disney Cartoon Characters To Empower You
- Updated 2024 Approved How-To Guide Make Animation Characters with the Best Animated Character Creators
- New Best GIF Maker Software for Windows and Mac
- Updated 2024 Approved How to Create Animated Video on Canva?
- Updated The Top 20 Motion Graphics Companies & Studios for 2024
- Updated In 2024, 12 Animation Video Maker That Can Triple Conversion Rates
- Updated In 2024, Learn About Lip-Syncing in Animation
- Updated 2024 Approved 10 Must Watch Netflix Cartoon Series For You
- Updated 15 Iconic Cartoon Characters of All Time
- In 2024, Creative Ways to Make iPhone Text GIF
- New How to Obtain and Create Animated GIF Icons Like a Pro, In 2024
- In 2024, 10 of the Best Disney Animated Shows
- Updated How to Become a Motion Graphic Designer for 2024
- New Adobe Auto Rigger Is AWESOME
- Updated 5 Websites with Animated Logos That Catch Your Eyes for 2024
- Updated Best 15 Greatest Claymation Movies of All Time
- Learn Simple Blender Rigging in Only 2 Minutes for 2024
- In 2024, Best Websites to Download Animated GIFs for Free-Free GIF Download
- Updated In 2024, How You Can Turn Yourself Into Anime Character Using Anime Filter
- Handy Tip From Adobe Animate Rigging Tutorial for All Learners
- New 2024 Approved Top 15 2D Animation Software Free That Worth to Try
- New Step-by-Step Guide to Send Gif WhatsApp on Android
- 2024 Approved Popular Female & Male Disney Cartoon Characters
- In 2024, How to use Snapchat Location Spoofer to Protect Your Privacy On Xiaomi Redmi Note 12R? | Dr.fone
- In 2024, How can I get more stardust in pokemon go On Realme Narzo N55? | Dr.fone
- A Working Guide For Pachirisu Pokemon Go Map On Oppo A1x 5G | Dr.fone
- In 2024, 3 Effective Ways to Bypass Activation Lock on Apple iPhone 14 Pro
- Complete Tutorial to Use VPNa to Fake GPS Location On Poco C55 | Dr.fone
- How To Recover Data from Apple iPhone SE (2022)? | Dr.fone
- In 2024, Top 10 Password Cracking Tools For Infinix Hot 40 Pro
- 4 Ways to Transfer Music from Infinix Note 30 to iPhone | Dr.fone
- Bricked Your Motorola G24 Power? Heres A Full Solution | Dr.fone
- 6 Solutions to Fix Error 505 in Google Play Store on Infinix Hot 40 Pro | Dr.fone
- How to Track Nokia C110 Location by Number | Dr.fone
- How to bypass Hot 40’s lock screen pattern, PIN or password
- In 2024, How to Enable, Disable, and Change Safari Location on Apple iPhone 6s Plus | Dr.fone
- In 2024, How Do You Get Sun Stone Evolutions in Pokémon For Oppo A18? | Dr.fone
- Best Ways to Bypass iCloud Activation Lock on Apple iPhone 13 Pro/iPad/iPod
- Reinstall drivers with Device Manager on Windows 11 & 10
- In 2024, How to Bypass Activation Lock on Apple iPhone 11 or iPad?
- Here Are Some Reliable Ways to Get Pokemon Go Friend Codes For Tecno Pova 6 Pro 5G | Dr.fone
- How to Transfer Data from Realme C67 4G to Other Android Devices? | Dr.fone
- 4 solution to get rid of pokemon fail to detect location On Oppo F25 Pro 5G | Dr.fone
- In 2024, 7 Ways to Unlock a Locked Realme Note 50 Phone
- Best 10 Mock Location Apps Worth Trying On Motorola Edge 40 Pro | Dr.fone
- How to Bypass Apple iPhone 8 Plus Passcode Easily Video Inside | Dr.fone
- In 2024, Ultimate guide to get the meltan box pokemon go For Nokia 130 Music | Dr.fone
- Complete Tutorial for Samsung Galaxy A23 5G Hard Reset | Dr.fone
- In 2024, Hassle-Free Ways to Remove FRP Lock from Xiaomi Redmi K70 Phones with/without a PC
- How to Fix Android App Not Installed Error on OnePlus Ace 3 Quickly? | Dr.fone
- In 2024, Top 15 Augmented Reality Games Like Pokémon GO To Play On Tecno Camon 20 | Dr.fone
- Downloading SamFw FRP Tool 3.0 for Realme C53
- In 2024, Top 10 Password Cracking Tools For Poco C50
- Best software to Fix and Repair Corrupt MP4,MOV,AVI video files of Infinix
- In 2024, How to Change/Add Location Filters on Snapchat For your Realme 11 5G | Dr.fone
- How to Factory Reset OnePlus Open without Losing Data | Dr.fone
- Title: Updated Learn What Are Differences Between 2D And 3D Animation for 2024
- Author: Elon
- Created at : 2024-04-21 09:30:40
- Updated at : 2024-04-22 09:30:40
- Link: https://animation-videos.techidaily.com/updated-learn-what-are-differences-between-2d-and-3d-animation-for-2024/
- License: This work is licensed under CC BY-NC-SA 4.0.
