
:max_bytes(150000):strip_icc():format(webp)/how-to-fix-a-critical-process-dies-windows-11-error-952a1ad6325f455aaef36516fb3f7120.jpg)
Updated Secret Source to Make a Great Stop Motion Puppet
Secret Source to Make a Great Stop Motion Puppet
Secret Source to Make a Stop Motion Puppetd
An easy yet powerful editor
Numerous effects to choose from
Detailed tutorials provided by the official channel
The significant difference between a stop-motion puppet and other types is that they have an armature inside. An armature is the puppet’s skeleton, a must to hold its position without sleeping for each captured frame. The stop motion puppet makeover should be precise to prevent it from breaking down or falling quickly. In addition, buying a stop-motion puppet armature might be pretty expensive, so making them by yourself is much more fun and cheaper.

To prevent any mishap during your stop-motion puppet making, your pupils should be as durable and lightweight as possible, and they must be designed based on what you will be doing and what kind of movement will be required of them. In essence, your story’s overall purpose for creating the animation will be the ultimate factor in how your character is built and designed.
In this article
01 [8 Popular Stop Motion Puppet Examples](#Part 1)
02 [How to Make a Stop Motion Puppet](#Part 2)
Part 1 8 Popular Stop Motion Puppet Examples
While wandering all through the web world, you will encounter many famous stop motion puppets. Some of them are very popular stop-motion puppets for sale, and this section of the article is about to explore eight (of them and what they stand for:
01Rudolph the Red-Nosed Reindeer

Rudolph, the Red-Nosed Reindeer, is a pleasant Christmas stop motion animated TV special in 19produced by video craft international limited. These figures starred in the perennially beloved stop motion animation Christmas special.
02Nestor the Long-Eared Christmas Donkey

The Long-Eared Christmas Donkey, Nestor is a Christmas stop motion animated TV special in 19produced by Rankin-Bass productions. The story is back in the Roman Empire days when miniature donkeys were born with very long years and kept getting into trouble. When the owner decides to throw him out of the stable, his mother sacrifices her life to save him from a blizzard.
03Santa Claus is Comin’ to Town

This is a stop-motion animation TV special in 19made by Rankin-bass productions. The story tells all about Santa Claus when he was a baby and growing up with the Kringles. The story is told and sang by a special delivery Kluger voiced by Fred Astaire.
04Negative Space
This one is one of the world’s wide appreciated and Oscar-nominated stop motion puppet animations that reflect the son and father relationship in an interactive way. It is a must to watch animation effects.

05Fantastic Mr. Fox

Fantastic Mr. Fox is a 20puppet animation movie that talks about an urban fox that cannot resist returning to his farm and must help his community survive the farmer’s retaliation.
06Coraline

Coraline is a 20Pope x animation TV series that talks about an adventurous 11-year-old girl that finds another strange world that is an idealized version of her frustrating home.
07The Nightmare before Christmas

The nightmare before Christmas is a puppet animation TV series that talks about Jack Skellington, the king of Halloween Town, and discovers Christmas town but his attempts to bring Christmas to his home result in confusion.
07Corpse bride

Corpse Bride is a puppet animated family TV series in 20talks about a shy groom practicing his wedding vow in the inadvertent presence of a deceased young woman as she rises from the grave, assuming that he has married her.
Part 2 How to Make a Stop Motion Puppet
Do you have a story, and you need some puppets to take the place of your actors, and you want to double in stop motion animation. The fact is there are different ways to create your Stop Motion Puppet, and as per your storyboard requirement, you can go with other methods. Such as, you can either use tools to build your puppet armature, otherwise can make some puppets from clothes and threads to give it a structure, else can use clay to assign a static puppet structure. It’s all your choice, so all in all what you need is:
● A Storyboard
● Puppet armature tools
● Camera setup
● Editing Software (in our case, we are going to use Wondershare Filmora Video Editor )
In this tutorial, we will be teaching you how to make stop-motion puppets in a way that is relatively cost-effective to produce durable means whose construction requires little or no time or extra equipment:

Wondershare Filmora - Best Video Editor for Mac/Windows
5,481,435 people have downloaded it.
Build unique custom animations without breaking a sweat.
Focus on creating epic stories and leave the details to Filmora’s auto features.
Start a creative adventure with drag & drop effects and endless possibilities.
Filmora simplifies advanced features to save you time and effort.
Filmora cuts out repetition so you can move on to your next creative breakthrough.
Materials:
● Ball head screws (M2.5)
● Small screws (M3)
● Ball head screws (2xand brass pipes whose diameter is less than ball head screws
● Brass plate (strips 2mm thick)
Tools:
● M3 thread tap
● M2.5 thread tap
● Screwdriver
● Pliers
● Drill press
● Drills of 2.5 mm, 2 mm, 3 mm
● Power sander
● Loctite
● File
● Bandsaw
Step
● Use the brass to mark the length of the bone
● Cut the tube according to the length
● Sandpaper or file it Square
● On both sides of the tube, use the tap to cause the tread
● Use the screws in the brass tube to screw the ball head

Step 2:
● On each sides of the brass strip, drill 2.5 mm holes
● Then, between holes of the holes you drill, drill 2.5 mm holes
● Between the other 2.5 mm holes, drill 3mm holes

Step 3:
● On the 2.5 mm holes on the sides, use the 3mm drill to create some cup
● With the 3 mm tap, cut the thread in the 2 mm holes in the middle

Step 4:
● Without damaging the holes, file the end of the strip with all the holes as close to the first 3
● From the strip, cut the parts with the first three holes
● Also, as close to the most used flyer to file the other side.
Note: Make sure you are careful while filing as this will get very hot

**Step 5:**Join all the parts together and make sure that the cup on the outer holes of the two plates is two words each other and tighten the bolts to hold the bones

Step 6: Join to strip of bras together and form a torso. Then cut the torso and form the feet

Step 7: When your puppet is the way you want it, lock teeth styles by fixing the ball head screw in place

Animation Editing:
Also, you can make a stop motion video on Filmora by considering the following factors:
● Camera Steadiness is a must for every shot you plan for Stop Motion Video. Shaking a camera is not good. Else, your video won’t be smooth.
● Ensure capture the shot under consistent light and prevent light exposure from changing on the object; otherwise, there will be inconsistency in the video.
● To make it easier, play the film in advance, as the more friends your video, the smoother the video will be.
Here are steps to make a stop motion video on Filmora:
Step 1 Place the camera steady and bring your object in the frame. Lightly move your things and capture the movement frame by frame.

Step 2 Download and start, or if you have already installed, run the Filmora program and choose a suitable frame rate in the project settings. After selecting the resolution, click on the file and go to the project setting.

Step 3 Now import the media file using the import option from the file menu and import the captured images.

Step 4 Adjust the menu’s preference or press the shortcut key Ctrl+Shift+, and a window will appear on your screen. Select the editing panel and change the photo duration between 0.2 to 0.5 seconds.

Step 5 Once done with all the settings and satisfied with the results, click on export and select your desired video format. Your video will be exported and saved in your library so you can share it with friends.

● Key Takeaways from This Episode →
● Get to know about what is stop motion puppets.
● Different examples of how dinosaur stop motion puppet or other puppet animation form works.
● The process to create your stop motion puppet and how Filmora will assist you in it.
The significant difference between a stop-motion puppet and other types is that they have an armature inside. An armature is the puppet’s skeleton, a must to hold its position without sleeping for each captured frame. The stop motion puppet makeover should be precise to prevent it from breaking down or falling quickly. In addition, buying a stop-motion puppet armature might be pretty expensive, so making them by yourself is much more fun and cheaper.
To prevent any mishap during your stop-motion puppet making, your pupils should be as durable and lightweight as possible, and they must be designed based on what you will be doing and what kind of movement will be required of them. In essence, your story’s overall purpose for creating the animation will be the ultimate factor in how your character is built and designed.
In this article
01 [8 Popular Stop Motion Puppet Examples](#Part 1)
02 [How to Make a Stop Motion Puppet](#Part 2)
Part 1 8 Popular Stop Motion Puppet Examples
While wandering all through the web world, you will encounter many famous stop motion puppets. Some of them are very popular stop-motion puppets for sale, and this section of the article is about to explore eight (of them and what they stand for:
01Rudolph the Red-Nosed Reindeer
Rudolph, the Red-Nosed Reindeer, is a pleasant Christmas stop motion animated TV special in 19produced by video craft international limited. These figures starred in the perennially beloved stop motion animation Christmas special.
02Nestor the Long-Eared Christmas Donkey
The Long-Eared Christmas Donkey, Nestor is a Christmas stop motion animated TV special in 19produced by Rankin-Bass productions. The story is back in the Roman Empire days when miniature donkeys were born with very long years and kept getting into trouble. When the owner decides to throw him out of the stable, his mother sacrifices her life to save him from a blizzard.
03Santa Claus is Comin’ to Town
This is a stop-motion animation TV special in 19made by Rankin-bass productions. The story tells all about Santa Claus when he was a baby and growing up with the Kringles. The story is told and sang by a special delivery Kluger voiced by Fred Astaire.
04Negative Space
This one is one of the world’s wide appreciated and Oscar-nominated stop motion puppet animations that reflect the son and father relationship in an interactive way. It is a must to watch animation effects.
05Fantastic Mr. Fox
Fantastic Mr. Fox is a 20puppet animation movie that talks about an urban fox that cannot resist returning to his farm and must help his community survive the farmer’s retaliation.
06Coraline
Coraline is a 20Pope x animation TV series that talks about an adventurous 11-year-old girl that finds another strange world that is an idealized version of her frustrating home.
07The Nightmare before Christmas
The nightmare before Christmas is a puppet animation TV series that talks about Jack Skellington, the king of Halloween Town, and discovers Christmas town but his attempts to bring Christmas to his home result in confusion.
07Corpse bride
Corpse Bride is a puppet animated family TV series in 20talks about a shy groom practicing his wedding vow in the inadvertent presence of a deceased young woman as she rises from the grave, assuming that he has married her.
Part 2 How to Make a Stop Motion Puppet
Do you have a story, and you need some puppets to take the place of your actors, and you want to double in stop motion animation. The fact is there are different ways to create your Stop Motion Puppet, and as per your storyboard requirement, you can go with other methods. Such as, you can either use tools to build your puppet armature, otherwise can make some puppets from clothes and threads to give it a structure, else can use clay to assign a static puppet structure. It’s all your choice, so all in all what you need is:
● A Storyboard
● Puppet armature tools
● Camera setup
● Editing Software (in our case, we are going to use Wondershare Filmora Video Editor )
In this tutorial, we will be teaching you how to make stop-motion puppets in a way that is relatively cost-effective to produce durable means whose construction requires little or no time or extra equipment:
Wondershare Filmora - Best Video Editor for Mac/Windows
5,481,435 people have downloaded it.
Build unique custom animations without breaking a sweat.
Focus on creating epic stories and leave the details to Filmora’s auto features.
Start a creative adventure with drag & drop effects and endless possibilities.
Filmora simplifies advanced features to save you time and effort.
Filmora cuts out repetition so you can move on to your next creative breakthrough.
Materials:
● Ball head screws (M2.5)
● Small screws (M3)
● Ball head screws (2xand brass pipes whose diameter is less than ball head screws
● Brass plate (strips 2mm thick)
Tools:
● M3 thread tap
● M2.5 thread tap
● Screwdriver
● Pliers
● Drill press
● Drills of 2.5 mm, 2 mm, 3 mm
● Power sander
● Loctite
● File
● Bandsaw
Step
● Use the brass to mark the length of the bone
● Cut the tube according to the length
● Sandpaper or file it Square
● On both sides of the tube, use the tap to cause the tread
● Use the screws in the brass tube to screw the ball head
Step 2:
● On each sides of the brass strip, drill 2.5 mm holes
● Then, between holes of the holes you drill, drill 2.5 mm holes
● Between the other 2.5 mm holes, drill 3mm holes
Step 3:
● On the 2.5 mm holes on the sides, use the 3mm drill to create some cup
● With the 3 mm tap, cut the thread in the 2 mm holes in the middle
Step 4:
● Without damaging the holes, file the end of the strip with all the holes as close to the first 3
● From the strip, cut the parts with the first three holes
● Also, as close to the most used flyer to file the other side.
Note: Make sure you are careful while filing as this will get very hot
**Step 5:**Join all the parts together and make sure that the cup on the outer holes of the two plates is two words each other and tighten the bolts to hold the bones
Step 6: Join to strip of bras together and form a torso. Then cut the torso and form the feet
Step 7: When your puppet is the way you want it, lock teeth styles by fixing the ball head screw in place
Animation Editing:
Also, you can make a stop motion video on Filmora by considering the following factors:
● Camera Steadiness is a must for every shot you plan for Stop Motion Video. Shaking a camera is not good. Else, your video won’t be smooth.
● Ensure capture the shot under consistent light and prevent light exposure from changing on the object; otherwise, there will be inconsistency in the video.
● To make it easier, play the film in advance, as the more friends your video, the smoother the video will be.
Here are steps to make a stop motion video on Filmora:
Step 1 Place the camera steady and bring your object in the frame. Lightly move your things and capture the movement frame by frame.
Step 2 Download and start, or if you have already installed, run the Filmora program and choose a suitable frame rate in the project settings. After selecting the resolution, click on the file and go to the project setting.
Step 3 Now import the media file using the import option from the file menu and import the captured images.
Step 4 Adjust the menu’s preference or press the shortcut key Ctrl+Shift+, and a window will appear on your screen. Select the editing panel and change the photo duration between 0.2 to 0.5 seconds.
Step 5 Once done with all the settings and satisfied with the results, click on export and select your desired video format. Your video will be exported and saved in your library so you can share it with friends.
● Key Takeaways from This Episode →
● Get to know about what is stop motion puppets.
● Different examples of how dinosaur stop motion puppet or other puppet animation form works.
● The process to create your stop motion puppet and how Filmora will assist you in it.
Tips That Show Anybody How to Get Awesome Background for Slideshow in PowerPoint
Tips That Show Anybody How to Get Awesome Background for Slideshow in Powerpoint
An easy yet powerful editor
Numerous effects to choose from
Detailed tutorials provided by the official channel
Amazing slideshow background are an absolute attention grabber in the realm of creative PowerPoint presentations. If you wish to upgrade yours with the same, be here to learn how!
In this article
01 [How to Add Video Background in PowerPoint?](#Part 1)
02 [How to Create Moving Backgrounds in Microsoft PowerPoint?](#Part 2)
03 [Some Tips for You to Get Awesome PowerPoint Backgrounds & Templates](#Part 3)
Part 1 How to Add Video Background in PowerPoint?
When the talk is about engaging means to deliver a precise information, PowerPoint slideshows are an absolute stunner. While these are already a captivating utility to present your thing, the output and audience engagement is at par with the inclusion of attractive design elements in the presentation. As is evident, there are enormous diversities of supplementary elements to complement your presentation, let us centre our discussion to the application of video background for slideshow in PowerPoint.
User’s Guide to Add Video Background in a PowerPoint Slideshow
The following section presents a detailed explanation of the steps to supplement your PowerPoint presentations with classic video backgrounds in just a few quick steps:
Step 1: Launch Your Presentation
Start with opening the desired PowerPoint presentation to which you want to add the video background, in any of your preferred devices.
Step 2: Add a Video to Your Slide
Browse through your presentation slides to locate the one you want to add the video background to. When you have made your choice, navigate to the PowerPoint toolbar at the top and hit the ‘Insert’ tab and choose the ‘Video’ option.
You will now be presented with 2 choices, either uploading a video from your device or insert one from the web by pasting its YouTube URL into the slide. If you are uploading a video from your device, proceed with selecting the desired video and tap ‘Insert’.

Step 3: Move and Resize Your Video
After uploading your video to the slide, you need to make suitable adjustments in its size and alignment to synchronize the same with the contents of the slide. To do this, drag the top left corner of the video to that of the slide to set the top alignment ratio. In the same way, move the bottom right corner of the video to be in sync with that of the slide. You will see the video occupying the entire slide at the end of the adjustment process.

Step 4: Set the Video Background
You will now need to set the video as the background of your slide, so that the latter’s contents are displayed over the video. You can do this by right clicking on the video and choosing the ‘Send to Back’ option from the dropdown that follows. This will cause the contents of your slide to get displayed over the video.

Step 5: Playback Edit and Customization Choices
Before proceeding towards making changes in the video playback and formatting, prefer taking a quick preview of your work till here. Once you are satisfied, navigate to the PowerPoint Toolbar at the top, hit the ‘Video Tools’ tab, followed by clicking on the ‘Playback’ tab.
It is recommended to introduce the following changes in your video for the most affordable slideshow output:
● Loop Your Video
Creating a video loop will facilitate you with an automatic replay of your video without the need to restart it every time with a click. You can loop your video by navigating to the ‘Video Options’ section and choose ‘Loop Until Stopped’ by clicking within the checkbox next to it. The background video will now continue to play until you switch to a different slide.
● Automatically Start Your Video
To avoid clicking on the slide amid your presentation for the video loop to begin, adjust the latter’s settings for an automatic start. Navigate to the ‘Start’ dropdown menu and select ‘Automatically’.
● Trim Your Video
You can work with some basic video editing tools in PowerPoint, like trimming and cropping your background video to a desired length. If you wish to ward off certain portions of your video, reach to and click o the ‘Trim Video’ button. Following this, drag the slider of the video to select the desired portions of the clip and exclude the rest.
You can further work with some more editing effects to create the perfect video backgrounds for your presentation slides in line with your specific preferences.

Step 6: Annotate Your Video Background
When you are done with the video editing process, take a preview of the same to ensure that everything is set in the proper order and at the proper place. Lastly, if you wish to add suitable text annotations to your video, you can do this with the ‘ClassPoint’ tool to write over the video background. All you need to do is select a preferred pen colour and start writing on your slide screen. You can further, save the annotations for a work record.

Part 2 How to Create Moving Backgrounds in Microsoft PowerPoint?
Moving PowerPoint slideshow background is another aspect of graphic creativity at its best, which can be used in a number of ways to grab considerable viewer attention. When choosing to add moving backgrounds to your presentation, the latter can aid in improving the style of content presentation, making your audience curious about how and what happens next.
Having learnt about the utility and creation process of video backgrounds in the PowerPoint presentation tool, let us extend our discussion to the method of creating a moving slide show background in the same in the following section:
User’s Guide to Create Moving Backgrounds for PowerPoint Presentations
Discussed below is an explanatory procedure for designing moving backgrounds with an awesome appearance for slideshow presentations in Microsoft PowerPoint:
Step 1: Open Your Presentation
To begin with, launch the PowerPoint tool in your preferred device and open the presentation on which you will be working to add the moving background. After the presentation gets loaded, navigate through the same and select the desired slide to proceed with the aforesaid task.
Step 2: Choose a Video Location
To add your desired video to the slide, navigate to the PowerPoint ribbon at the top and click on the ‘Insert’ tab. Select ‘Video’ from the list of options that appears, followed by choosing one of the ‘Online Video’ or ‘Video on My PC’ options from the video selection prompt. It is further recommended to select a video in the MP4 format, as the latter gives best results of moving and video backgrounds.
Step 3: Insert Your Video
Choose the second option in the selection prompt to upload a video from your device. You will now be asked to browse through your device and locate the desired video in the ‘Insert Video’ dialog box that appears. Select your video and tap the ‘Insert’ button to add your video.
To upload videos from an online source, choose the ‘Online Video’ option in the selection prompt and proceed to search the video from PowerPoint or paste its embed code to recover the video. The chosen video will begin to download and can be added to the PowerPoint presentation after the download process comes to an end.

Step 4: Playback Editing and Video Customization
Before proceeding further, consider paying your video once by clicking on the ‘Start’ button. You can also add different effects, trim and crop or add a bookmark to your video by navigating to and clicking on the ‘Video Tools’ tab, followed by selecting the ‘Format’ option. To work with the start and playback options for the video, click on ‘Playback’ in the dropdown menu of the ‘Video Tools’ tab.

Part 3 Some Tips for You to Get Awesome PowerPoint Backgrounds & Templates
Now that you have developed a comprehensive understanding of the utility of adding video and moving background for slideshow presentation, let us look through some easy tips and tricks to conveniently access the top rated and the most popular PowerPoint slideshow templates and backgrounds in the following section:
01Cool Slide Backgrounds
Slideshow presentations in PowerPoint are supplemented with a visual spark through amazing and vibrant backgrounds that are a sign of excellent graphic creativity. When working with a PowerPoint presentation of your own, do take the liberty to use some cool slide backgrounds to your creative advantage.
When the talk is about complementing your presentation with a cohesive and upbeat background, you can either select the most suitable one from a heap of pre made slideshow templates available both in the PowerPoint slideshow creator tool as well as across the web. However, if you wish to take the excitement to another level, try hands at creating an awesome and cool backgrounds for PowerPoint slides of your own!
Talking about some really cool tips and tricks to design a slideshow presentation background in PowerPoint, start with including some specific shapes and color overlays to the background capture, experiment with a polygon background, work on enhancing the background image with classic and artistic effects and apply a mix of colors, textures and patterns to give a classy look to your slideshow backgrounds.

02Professional Slideshow Backgrounds
If you are aiming at creating a PowerPoint slideshow presentation with a business centered design approach, you will need to cut down on some extra elements that you would ideally choose to include in a personal purpose based slideshow. Paying attention to the fact that business and corporate centered presentations should be simple, subtle and to the point, it would be an intelligent step to avoid adding too many expressive elements in the background.
Whether you are creating a professional slideshow background of your own or working with a pre designed template, take care to include a complementary play of a light background theme with a maximum of 2 balancing shades.
Avoid too much vibrancy and abstain from applying over the top effects and quick transitions, lest your presentation may look a bit too crowed. If your slides have lot of written content, prefer using a white color background text in a professional font style.
If you have decided on picking a pre made template, you can browse through a diversity of suggestions across the web, while keeping the aforesaid constraints in mind. Consider taking a look at the figure given below to have a more comprehensive understating of the prerequisites of selecting a professional sideshow background template:

03Happy Birthday Slide Backgrounds
Birthday parties are the most appealing synonyms of fun and entertainment. If you are into the profession of organizing events that renders smiling and happy faces, slideshow presentations could be of great help to you in discussing about services, types of social gentries and event targets with your clients.
When looking through different options to select the perfect birthday template, either for a professional event, or just to go down the memory lane of your most cherished moments, take caution to search for a vibrant alternative with colorful images, different background designs and party oriented cool themes, wide aspect ratio with high screen resolution for a mass display and conveniently editable graphics.
If you are creating a happy birthday slide background of your own, there are variety of realms to explore your graphic design creativity, owing to the fact that the subject of creation is highly expressive and multi-dimensional. While you are free to extend your creativity to the next level, do pay attention to the above constraints for a more elusive and outstanding creation output, while maintaining the fun and entertainment quotient intact.

04Wedding Slide Backgrounds
Considering the fact that wedding events are pronounced means of fun, leisure, enjoyment and beautiful memories, anything that aims to be a part of the celebrations, should be equally ecstatic and engaging. Infusing festive occasions with technology, slideshow based wedding invitations and moment captures are the top rated modern trends of celebrating this significant life event.
If you are keen on designing the perfect slideshow presentation for wedding invitations, photo albums and thank you cards, prefer to choose a wedding slide background template with aesthetic layout and flowing element inclusions, like that of floral borders and scented candles. Look though the elements of a subtle thematic setup with soothing color combinations, preferably in complementary pastel shades, like pink and white.
Talking of template customizability, the latter should have placeholders to include names of the bride and groom, the wedding date and venue, and of course the wedding photographs. The beautiful slide background template should have enough design space to include the most elusive play of text colors and fonts to suit specific preferences of creating special memories of a cherished event.

05Slideshow Backgrounds and Templates in Filmora
When looking for the most convenient lead to an extensive variety of beautiful slideshow templates and background, the template library of Wondershare Filmora Video Editor slideshow creator program can be your most affordable destination. The aforesaid software library is known to possess the best and most perfect template choices to suit the creation constraints of almost every slideshow presentation style and objective you can possibly think of.
For Win 7 or later (64-bit)
For macOS 10.12 or later
The elusive templates are further supplemented with a plethora of design flexibilities and customization features that are all set to deliver you the most appreciable creation output. Stressing a bit on the template customization choices of the software, you can work with the tool to uplift your slideshow backgrounds with artistic image effects and overlays, annotate them with beautiful text formations in a variety of colors, fonts and sizes and lots more.
Moving a bit deeper into the creative aspect, you can upgrade the visual style of your presentations with the most perfect and seamless image and video transitions and text animations. The bottom line is, working with the aforesaid slideshow creator program, you are entitled to get jaw dropping applaud from your audience, while making a confident and a content delivery through your slideshow presentation.

● Ending Thoughts →
● Using an expressive and complementing background in your slideshow presentation uplifts its visual credibility in captivating your audience.
● Browsing through the web, you get to access a vast range of amazing slideshow backgrounds and templates to make your presentation, a visual masterpiece.
● When looking for the most distributed storehouse of slideshow backgrounds and templates, the Wondershare Filmora library is your ultimate solution.
Amazing slideshow background are an absolute attention grabber in the realm of creative PowerPoint presentations. If you wish to upgrade yours with the same, be here to learn how!
In this article
01 [How to Add Video Background in PowerPoint?](#Part 1)
02 [How to Create Moving Backgrounds in Microsoft PowerPoint?](#Part 2)
03 [Some Tips for You to Get Awesome PowerPoint Backgrounds & Templates](#Part 3)
Part 1 How to Add Video Background in PowerPoint?
When the talk is about engaging means to deliver a precise information, PowerPoint slideshows are an absolute stunner. While these are already a captivating utility to present your thing, the output and audience engagement is at par with the inclusion of attractive design elements in the presentation. As is evident, there are enormous diversities of supplementary elements to complement your presentation, let us centre our discussion to the application of video background for slideshow in PowerPoint.
User’s Guide to Add Video Background in a PowerPoint Slideshow
The following section presents a detailed explanation of the steps to supplement your PowerPoint presentations with classic video backgrounds in just a few quick steps:
Step 1: Launch Your Presentation
Start with opening the desired PowerPoint presentation to which you want to add the video background, in any of your preferred devices.
Step 2: Add a Video to Your Slide
Browse through your presentation slides to locate the one you want to add the video background to. When you have made your choice, navigate to the PowerPoint toolbar at the top and hit the ‘Insert’ tab and choose the ‘Video’ option.
You will now be presented with 2 choices, either uploading a video from your device or insert one from the web by pasting its YouTube URL into the slide. If you are uploading a video from your device, proceed with selecting the desired video and tap ‘Insert’.
Step 3: Move and Resize Your Video
After uploading your video to the slide, you need to make suitable adjustments in its size and alignment to synchronize the same with the contents of the slide. To do this, drag the top left corner of the video to that of the slide to set the top alignment ratio. In the same way, move the bottom right corner of the video to be in sync with that of the slide. You will see the video occupying the entire slide at the end of the adjustment process.
Step 4: Set the Video Background
You will now need to set the video as the background of your slide, so that the latter’s contents are displayed over the video. You can do this by right clicking on the video and choosing the ‘Send to Back’ option from the dropdown that follows. This will cause the contents of your slide to get displayed over the video.
Step 5: Playback Edit and Customization Choices
Before proceeding towards making changes in the video playback and formatting, prefer taking a quick preview of your work till here. Once you are satisfied, navigate to the PowerPoint Toolbar at the top, hit the ‘Video Tools’ tab, followed by clicking on the ‘Playback’ tab.
It is recommended to introduce the following changes in your video for the most affordable slideshow output:
● Loop Your Video
Creating a video loop will facilitate you with an automatic replay of your video without the need to restart it every time with a click. You can loop your video by navigating to the ‘Video Options’ section and choose ‘Loop Until Stopped’ by clicking within the checkbox next to it. The background video will now continue to play until you switch to a different slide.
● Automatically Start Your Video
To avoid clicking on the slide amid your presentation for the video loop to begin, adjust the latter’s settings for an automatic start. Navigate to the ‘Start’ dropdown menu and select ‘Automatically’.
● Trim Your Video
You can work with some basic video editing tools in PowerPoint, like trimming and cropping your background video to a desired length. If you wish to ward off certain portions of your video, reach to and click o the ‘Trim Video’ button. Following this, drag the slider of the video to select the desired portions of the clip and exclude the rest.
You can further work with some more editing effects to create the perfect video backgrounds for your presentation slides in line with your specific preferences.
Step 6: Annotate Your Video Background
When you are done with the video editing process, take a preview of the same to ensure that everything is set in the proper order and at the proper place. Lastly, if you wish to add suitable text annotations to your video, you can do this with the ‘ClassPoint’ tool to write over the video background. All you need to do is select a preferred pen colour and start writing on your slide screen. You can further, save the annotations for a work record.
Part 2 How to Create Moving Backgrounds in Microsoft PowerPoint?
Moving PowerPoint slideshow background is another aspect of graphic creativity at its best, which can be used in a number of ways to grab considerable viewer attention. When choosing to add moving backgrounds to your presentation, the latter can aid in improving the style of content presentation, making your audience curious about how and what happens next.
Having learnt about the utility and creation process of video backgrounds in the PowerPoint presentation tool, let us extend our discussion to the method of creating a moving slide show background in the same in the following section:
User’s Guide to Create Moving Backgrounds for PowerPoint Presentations
Discussed below is an explanatory procedure for designing moving backgrounds with an awesome appearance for slideshow presentations in Microsoft PowerPoint:
Step 1: Open Your Presentation
To begin with, launch the PowerPoint tool in your preferred device and open the presentation on which you will be working to add the moving background. After the presentation gets loaded, navigate through the same and select the desired slide to proceed with the aforesaid task.
Step 2: Choose a Video Location
To add your desired video to the slide, navigate to the PowerPoint ribbon at the top and click on the ‘Insert’ tab. Select ‘Video’ from the list of options that appears, followed by choosing one of the ‘Online Video’ or ‘Video on My PC’ options from the video selection prompt. It is further recommended to select a video in the MP4 format, as the latter gives best results of moving and video backgrounds.
Step 3: Insert Your Video
Choose the second option in the selection prompt to upload a video from your device. You will now be asked to browse through your device and locate the desired video in the ‘Insert Video’ dialog box that appears. Select your video and tap the ‘Insert’ button to add your video.
To upload videos from an online source, choose the ‘Online Video’ option in the selection prompt and proceed to search the video from PowerPoint or paste its embed code to recover the video. The chosen video will begin to download and can be added to the PowerPoint presentation after the download process comes to an end.
Step 4: Playback Editing and Video Customization
Before proceeding further, consider paying your video once by clicking on the ‘Start’ button. You can also add different effects, trim and crop or add a bookmark to your video by navigating to and clicking on the ‘Video Tools’ tab, followed by selecting the ‘Format’ option. To work with the start and playback options for the video, click on ‘Playback’ in the dropdown menu of the ‘Video Tools’ tab.
Part 3 Some Tips for You to Get Awesome PowerPoint Backgrounds & Templates
Now that you have developed a comprehensive understanding of the utility of adding video and moving background for slideshow presentation, let us look through some easy tips and tricks to conveniently access the top rated and the most popular PowerPoint slideshow templates and backgrounds in the following section:
01Cool Slide Backgrounds
Slideshow presentations in PowerPoint are supplemented with a visual spark through amazing and vibrant backgrounds that are a sign of excellent graphic creativity. When working with a PowerPoint presentation of your own, do take the liberty to use some cool slide backgrounds to your creative advantage.
When the talk is about complementing your presentation with a cohesive and upbeat background, you can either select the most suitable one from a heap of pre made slideshow templates available both in the PowerPoint slideshow creator tool as well as across the web. However, if you wish to take the excitement to another level, try hands at creating an awesome and cool backgrounds for PowerPoint slides of your own!
Talking about some really cool tips and tricks to design a slideshow presentation background in PowerPoint, start with including some specific shapes and color overlays to the background capture, experiment with a polygon background, work on enhancing the background image with classic and artistic effects and apply a mix of colors, textures and patterns to give a classy look to your slideshow backgrounds.
02Professional Slideshow Backgrounds
If you are aiming at creating a PowerPoint slideshow presentation with a business centered design approach, you will need to cut down on some extra elements that you would ideally choose to include in a personal purpose based slideshow. Paying attention to the fact that business and corporate centered presentations should be simple, subtle and to the point, it would be an intelligent step to avoid adding too many expressive elements in the background.
Whether you are creating a professional slideshow background of your own or working with a pre designed template, take care to include a complementary play of a light background theme with a maximum of 2 balancing shades.
Avoid too much vibrancy and abstain from applying over the top effects and quick transitions, lest your presentation may look a bit too crowed. If your slides have lot of written content, prefer using a white color background text in a professional font style.
If you have decided on picking a pre made template, you can browse through a diversity of suggestions across the web, while keeping the aforesaid constraints in mind. Consider taking a look at the figure given below to have a more comprehensive understating of the prerequisites of selecting a professional sideshow background template:
03Happy Birthday Slide Backgrounds
Birthday parties are the most appealing synonyms of fun and entertainment. If you are into the profession of organizing events that renders smiling and happy faces, slideshow presentations could be of great help to you in discussing about services, types of social gentries and event targets with your clients.
When looking through different options to select the perfect birthday template, either for a professional event, or just to go down the memory lane of your most cherished moments, take caution to search for a vibrant alternative with colorful images, different background designs and party oriented cool themes, wide aspect ratio with high screen resolution for a mass display and conveniently editable graphics.
If you are creating a happy birthday slide background of your own, there are variety of realms to explore your graphic design creativity, owing to the fact that the subject of creation is highly expressive and multi-dimensional. While you are free to extend your creativity to the next level, do pay attention to the above constraints for a more elusive and outstanding creation output, while maintaining the fun and entertainment quotient intact.
04Wedding Slide Backgrounds
Considering the fact that wedding events are pronounced means of fun, leisure, enjoyment and beautiful memories, anything that aims to be a part of the celebrations, should be equally ecstatic and engaging. Infusing festive occasions with technology, slideshow based wedding invitations and moment captures are the top rated modern trends of celebrating this significant life event.
If you are keen on designing the perfect slideshow presentation for wedding invitations, photo albums and thank you cards, prefer to choose a wedding slide background template with aesthetic layout and flowing element inclusions, like that of floral borders and scented candles. Look though the elements of a subtle thematic setup with soothing color combinations, preferably in complementary pastel shades, like pink and white.
Talking of template customizability, the latter should have placeholders to include names of the bride and groom, the wedding date and venue, and of course the wedding photographs. The beautiful slide background template should have enough design space to include the most elusive play of text colors and fonts to suit specific preferences of creating special memories of a cherished event.
05Slideshow Backgrounds and Templates in Filmora
When looking for the most convenient lead to an extensive variety of beautiful slideshow templates and background, the template library of Wondershare Filmora Video Editor slideshow creator program can be your most affordable destination. The aforesaid software library is known to possess the best and most perfect template choices to suit the creation constraints of almost every slideshow presentation style and objective you can possibly think of.
For Win 7 or later (64-bit)
For macOS 10.12 or later
The elusive templates are further supplemented with a plethora of design flexibilities and customization features that are all set to deliver you the most appreciable creation output. Stressing a bit on the template customization choices of the software, you can work with the tool to uplift your slideshow backgrounds with artistic image effects and overlays, annotate them with beautiful text formations in a variety of colors, fonts and sizes and lots more.
Moving a bit deeper into the creative aspect, you can upgrade the visual style of your presentations with the most perfect and seamless image and video transitions and text animations. The bottom line is, working with the aforesaid slideshow creator program, you are entitled to get jaw dropping applaud from your audience, while making a confident and a content delivery through your slideshow presentation.
● Ending Thoughts →
● Using an expressive and complementing background in your slideshow presentation uplifts its visual credibility in captivating your audience.
● Browsing through the web, you get to access a vast range of amazing slideshow backgrounds and templates to make your presentation, a visual masterpiece.
● When looking for the most distributed storehouse of slideshow backgrounds and templates, the Wondershare Filmora library is your ultimate solution.
Learn 3D Logo Animation and Templates
Learn All About 3D Logo Animation and Templates
An easy yet powerful editor
Numerous effects to choose from
Detailed tutorials provided by the official channel
If you too are keen to have an animated logo for your brand, product, or business several readymade templates can be used.
![]()
There are types of 3D logo animation tools available that can be used for customizing these templates or creating a logo from scratch as per your requirements.
In this article
01 [Benefits of Using 3d Logo Animation?](#Part 1)
02 [Where to Use Animated Logos?](#Part 2)
03 [Tips to make animated logos effective](#Part 3)
04 [Top 3D-logo Animation Template Sites](#Part 4)
05 [Top Software for Creating 3D Animated Logos](#Part 5)
Part 1 Benefits of using 3D logo animation?
Animated logos offers multiple benefits to a business or a brand. Some of the major ones are gathered for you as below.
01Increase brand awareness
Animations add life to your logos and thus can help in raising brand awareness and creating an instant connection with the clients and audience. The chances of remembering an animated logo are high and this in turn will get the attention and engagement of the audience.
02Better storytelling
The combination of images, sound, and motion in a 3D logo helps in creating an emotional connection with the audience. An animated logo supports the brand story more efficiently than a static logo and can further help to create a detailed explanation of the story.
03Adds a modern and professional look
An animated logo will add a professional and modern look to your business, product, brand, company, site, and others. An animated logo will make the audience feel that you are innovative and go with the latest trends that in turn add to the professionalism.
04Look unique and stand out from the crowd
With similar-looking designs and logos, animation can make your brand and business look apart from the others and thus get the attention of prospective clients and customers.
05Creates a pleasant first impression
It is the first impression that can make or break the image of a brand or a product. So, to ensure that the first impression of your brand or business is excellent, animated logos works to a great extent.
![]()
Part 2 Where to use Animated Logos?
Though animated logos can be used for an array of business types and platforms, there are a few certain ones where they are most effective. Check these as below.
● Social Media
● Paid Ads
● Branded Videos
● Email signatures
● Websites
● Brands and business
● Products and e-commerce
Part 3 Tips to make animated logos effective
Animated logos are created to get the attention of the audience and thus create brand awareness and for this, several factors can be considered.
● Firstly, analyze the goals of the company before creating an animated logo. It is important to know what will be the brand personality that you wish to portray through the logo.
● The logos should be created based on the preferences of the users and thus making research of the same before finalizing the animation is important.
● Animated logos should be short and interesting. Long ones are boring and will also result in the loss of interest.
● It is interesting to include a surprise element in your logo by creating them in a manner so that they are unpredictable.
● Use professional software to create impressive software that will not only make the task easier but will also save time.
![]()
Part 4 Top 3D-logo animation template sites
There are several sites where you can check readymade animated logo templates that will make your animation creating task quick and easy. These templates have a readymade design for the animated logo and these designs can be further customized to create a logo of your choice. Most of the sites with templates also have a built-in editor that can be used for editing the templates. If not, you can download the template and can then edit them using professional editing software like Wondershare Filmora Video Editor .
Some of the sites where you can check 3D logo animation free download and paid download of the templates in different categories.
● Storyblocks
● FlexClip
● MotionArray
● AfterEffects and more.
You can check out the various templates available at one of these sites and choose the one that best matches your company or product’s personality and fit your requirements.
Part 5 Top software for creating 3D Animated Logos
If you want a customized logo to be created as per your needs or want to edit the templates, there are several animations creating software available. Below we have shortlisted some of the major ones.
01**Wondershare Filmora Video Editor **
This Windows and Mac-based software is an excellent tool for all types of video editing and creating requirements. Using the tool, you can create a 3D animated logo or can even edit the templates to meet your requirements. A simple interface makes the software apt for all users and the process is also fast.
Key features:
● Create the desired animation using keyframing.
● Use motion-blur to enhance the animation.
● Edit the animation and other videos using multiple editing effects.
● Allows adding interesting effects like transitions, filters, and more.
● Enhanced audio using features like background noise removal, audio equalizer, keyframe audio editing, and more.
● Support fast rendering and fast import and export of the files.
● Windows and Mac support.
For Win 7 or later (64-bit)
For macOS 10.12 or later
02Viddyoze
This is another popular and user-friendly software that can be used for creating 3D animated logos and other animations. The tool comes packed with multiple features and templates that allow creating the desired animation in no time.
Key features
● A user-friendly tool with an intuitive interface.
● Comes with multiple templates to choose from.
● The template can be customized by changing several parameters like text, colors, and more.
● Comes with multiple editing tools and has multi-font support.
● The custom-created audio track for live templates.
● Support multi-ratio templates to make them compatible with different platforms and sites.
![]()
03Renderforest
This is an online 3D animated logo maker that comes with multiple templates and tools. Simple to use, the tool needs no software download or installation.
Key features
● This 3D logo animation online free tool is simple to use and does not require any software download.
● Comes with multiple templates and animation designs like fire logo, shattering logo, splash logo, and more.
● 3D effects of the tool can be used for creating 3D animated logos.
![]()
04Adobe After Effects
Adobe is a reputed software for all types of video editing requirements and its long list of functions also includes 3D animated logo making. Though the learning curve of the software is steep, once you get the hang of it, you can easily create professional animations and edit files.
Key features
● Create high-quality animations including 3D logos.
● Allows adding keyframes for animations and add exciting effects.
● Support features like the 3D ground plane, 3D draught preview, extended viewport, 3D transform gizmos, and more.
● Comes with a wide range of readymade templates for creating logos.
● 3D logo animation after effects tool allows media replacement in motion graphic templates.
![]()
05Animaker
This is another widely used online tool that allows creating of decent 3D animated logos. The interface is simple and there is no requirement for any software download.
Key features
● Simple and user-friendly interface with support to drop and drag.
● Comes with over 20 readymade templates for creating animated logos.
● Audio files and music to the animations can also be added.
● Support to more than 50 languages which makes it accessible across the world.
● Created animations can also be uploaded to YouTube and Facebook.
![]()
● Key Takeaways from This Episode →
● 3D animated logos work magic for your business and brand by creating awareness, catching the attention of the audience, and also keeping them engaged.
● Animated logos are used by different types of businesses and industries and for different platforms.
● There are several sites where readymade templates for creating 3D animated logos are available. These templates can be customized as needed.
● An array of 3D animated logo-making software is available and one of the best on the list is Wondershare Filmora Video Editor that is effective and also user-friendly.
How to Create Your Avatar Free
How to Create Your Own Avatar Free
An easy yet powerful editor
Numerous effects to choose from
Detailed tutorials provided by the official channel
As a profile image, you can use your Facebook avatar. You can choose from a range of faces, hairstyles, and costumes for your avatar.
This article will help in creating your own avatar app and let you understand how to make your own my little pony avatar.
In this article
01 [Avatar Maker Tutorial | Create your Avatar for Free](#Part 1)
02 [5 Apps to Build Your Avatar](#Part 2)
Part 1 Avatar Maker Tutorial | Create your Avatar for Free
Adobe Creative Cloud Express is an online tool to make your own avatars for free. With Adobe, you can create a handcrafted avatar to match your personality for your social media profiles, YouTube videos, and so much more. Adobe lets you think out of the box, easy as choosing a template and sharing. Let us discuss the steps to create your own avatar for free using Adobe.
![]()
01Step 1: Start with Inspiration
You can never start from an empty canvas; there are several templates available you can choose any one of them by browsing with color, aesthetic, mood, and many other categories to have an idea of creating an avatar. Once you find a suitable graphic, you can click or tap on it starts editing as a document in the editor.
![]()
02Step 2: Remix
You can customize your avatar templates in a variety of ways. Change the font and copy. Substitute your photos for the imagery. Alternatively, you can use Creative Cloud Express to search through thousands of free pictures. Design your own by spending as little time as you wish.
![]()
03Step 3: Amplify Up the Flair
You can be as creative as you can by adding flair and personality to your projects with design assets. Add animated text and GIF to your project in one tap. They have cleared all the other technical issues to focus on your style and message.
![]()
04Step 4: Resize
The days where you have to remember the dimension of the image are gone. Once you have selected the design, you can modify and resize using the Auto magical resize available feature. Duplicate the project, select “Hit Resize,” and choose the platform to adapt it, and our AI will take care of the rest. Enjoy sharing it on other media.
[Well, this feature is a premium feature, so if you wish to access it, you need to do a subscription.]
![]()
05Step 5: Save and Share
Once you have applied all your creativity to your project, click on the “Publish” button and share your creations. Creative Cloud saves your project in your profile so that you can revisit and edit your projects whenever required.
Explore these professional templates to make your own avatar-free. Browse for themes like logos, icons, personalized fonts, and other elements to create an authentic look.
![]()
Part 2 5 Apps to Build Your Avatars
Having your avatar as your profile picture is freaking excellent and fun. There are many apps to create your avatars; let’s discuss some of them.
01Boo App–3D Avatar Emoji
Boo creates 3D characters that look similar to you within minutes. There are plenty of outfit options that can be customized separately for your styles to match your daily fashion. With this app, make your own avatars for free.
Highlights
●It offers a ton of features like skin tones, hair colors, eye colors, and hairstyles
●It assists in making your own my little pony avatar to give a unique style.
●New items are updated regularly.
Limits
●Limited color options
●Background glitch
●Sometimes after clicking the color option, it gets changed.
Review/Ratings
It has a rating of about 4.4 and many good reviews from users.
02Faceq
This application provides multiple facial features and an extensive trendy wardrobe. Even the tiniest characteristics on the face, such as beauty marks, facial hair, and brows, are essential. Hair accessories to make you own my little pony avatar. It looks as beautiful as when you apply your creativity to the maximum level.
Highlights
●Inclusive of many tabs for obvious face form, hairdo, and attire.
●Add more life to your avatars like text bubbles, hand gestures, etc.
●Multiple facial features
Limits
●Limited makeup options
●More dressing options expected
●Some slogans may be inappropriate
Ratings/Review
It has a rating of 3.1
03 SuperMe
This application is mainly for girls, and it offers 1000+ facial expressions and more materials. You can create and share animated videos of your avatars with the world and chat with people to make new friends. You can use this application to create my animated avatar.
Highlights
●There are 100 animations facilities where you can randomly apply by a simple handshake.
●A straightforward procedure to use.
●Multiple Facial expressions.
Limits
●You need to buy coins. It would be good if available for free.
●Primarily for girls
●The limitation of this application is that the language is still in its original language (Chinese).
Ratings/Review
This app has a rating of about 4
04Zmoji
Zmoji, a personal emoji creator, enables chatting with multiple versions of yours, and thus this way, you can make your own my little pony avatar. There are many unique features introduced to create a more appropriate.
Highlights
●It has a simple interface.
●It allows you to build a vivid cartoon avatar that matches your style quickly.
●It has Emoji Keyboard, which will enable you to send emojis directly from your keyboard in iMessage and third-party apps.
Limits
●The app also requires a subscription for some activities, which is disappointing.
●The subscription cost is high.
Ratings/Reviews
This app has a review of about 4.6
05Wondershare Wondershare Filmora Video Editor
To create my animated avatar, you can choose Wondershare Wondershare Filmora Video Editor . It is something magical that allows you to do anything with your photo. Of course, including changing to an avatar or a cartoon character. In this journal, you will see many different ways to make your own avatar for free, but Wondershare Filmora Video Editor offers to be all. It contains many templates, font styles, animation effects, wardrobes, and what less. Wondershare Filmora Video Editor is easier to use; with a few steps, you can create an avatar representing you more accurately than any other software could do.
It just goes with creating layers, liquefying, smoothening and additional features. And simply, you can share it to any social media directly from the software. Wondershare Wondershare Filmora Video Editor is mainly used to create my animated avatar.
Highlights
●Simple and easy interface.
●User friendly
●Multitude of features
Limits
●Advanced version need a subscription
Reviews
4.4 as per user reviews
For Win 7 or later (64-bit)
For macOS 10.12 or later
● Key Takeaways from This Episode →
● Understanding Adobe Creative Cloud Express
● Five different Apps used in creating my animated avatar
● Compared to all other online tools and programs, Wondershare Wondershare Filmora Video Editor is superior.
Finding Some Different Ways to Animated Cartoon of Yourself
How to Find Some Different Ways to Animated Cartoon of Yourself
An easy yet powerful editor
Numerous effects to choose from
Detailed tutorials provided by the official channel
Illustrations and transforming pictures into cartoon characters have become famous these days. Are you keen to make one but unable to find the right apps that animate your pictures to do so?
This article will help you find the perfect match for you. You can make an animated cartoon of yourself.
In this article
01 [8 Ways to Get Creative With Your Photos into Cartoon Online Or With Apps](#Part 1)
02 [How to Make Animated Cartoon of Yourself in PowerPoint](#Part 2)
03 [Best 5 Apps to Cartoon Yourself on iPhone, iPad, and Android](#Part 3)
Part 1 8 Ways to Get Creative With Your Photos into Cartoon Online Or With Apps
01ToonCamera
Pros:
● ToonCamera is famous for its tremendous and in-time customer support.
● It has got a variety of high-quality filters for your pictures.
● The best part is that it allows you to apply filters in existing photos or videos and real-time.
Cons:
● ToonCamera comes only with the basic set of tools. You will get multiple filters but not various tools.
● It works only on iOS 8.1 or the later versions.
● The app will charge $1.99.

Hot comments from netizens:
ToonCamera allows you to crop and resize your photos. You can add any filter from its huge filter collection and give your picture an animated effect or Edit.
02Cartoon Camera Free
Pros:
● Cartoon Camera Free is an application that is very easy to use.
● The interface of this app is intuitive.
● You will have high-resolution export as output using a cartoon camera free for editing.
Cons:
● The shortcoming of this app is that it asks you to update frequently.
● The settings in the application are entirely automatic and already set.
● You cannot try your creativity or make changes in the editing according to your choice. It has only two effects.

Hot comments from netizens:
Cartoon Camera Free allows you to apply cartoon and pencil sketch effects to your photos. It is a tremendous animate your pictures app. Not only that, this app will enable you to view the impact in real-time.
03Clip2Comic & Caricature Maker
Pros:
● Clip2Comic & Caricature Maker has 1080p at export.
● This application can transform your pictures into posters, cartoons, and sketch art.
● The best of the app is that it allows you to reset image settings
Cons:
● It works only on iOS platforms.
● The app will leave back their watermark on your pictures. You need to get the paid version to remove the watermark.
● It is an expensive app compared to other editing apps.

Hot Comments from netizens:
People love this editing app. There are eight different comics, sketches, and cartoon characters. The app comes with a caricature and deformation tool and multiple image editing and enhancing tools.
04Cartoon Yourself Video Effects
Pros:
● The editing in this app allows you to keep realistic emotions in your videos and photos.
● The interface is very intuitive.
● The app imitates perfect emotions and has a wide variety for you.
Cons:
● Cartoon Yourself Video Effects may lag sometimes
● The effects may not work at times.
● You may require in-app purchases.

Hot Comments from netizens:
This app gives you access to a brand spectrum of emotions giving the perfect realistic touch to your video. You can share animated videos and gifs with your friends from this app.
05Cartoon Sketch Camera Pro
Pros:
● Cartoon Sketch Camera Pro has a sleek user interface.
● It has got eight cartoon effects and filters for your photos.
● It supports iOS13.
Cons:
● There are no image editors’ options.
● You may face image reporting issues.
● The app will cost you $1.99 to get rid of ads and distances.

Hot Comments from netizens:
Cartoon Sketch Camera Pro Cartoon has effects likePixellate, Sketch, Halftone, Dots, Crosshatch Swirl, and Emboss. You can pally these effects on your photos to get the desired output.
06Photo to Cartoon yourself Edit
Pros:
● You can directly click photos using the app that you want to edit.
● This app allows you to share the cartooned image via email.
● There are a lot of effects and textures available.
Cons:
● You may need in-app purchases to access all effects.
● You will not be able to stretch images to get more photo details.
● You cannot share files from here on social media.

Hot Comments from netizens:
Photo to Cartoon yourself Edit is an app that makes your picture look animated and transforms them into funny and beautiful cartoons in seconds. You can adjust the image in all formats and make the color look more vivid.
07Artist – Video and Photo Editor with Art Filters
Pros:
● Artist allows you to use cartoon filter with just a single click
● This app has multiple filters for every emotion.
● You can create square videos in low quality too.
Cons
● For video edits, the app supports only 30-sec duration.
● You may require in-app purchases to access some features.
● The app may lag at times.

Hot Comments from netizens:
Artist is a straightforward and helpful app. It has multiple features and effects for creating animated pictures. It offers video editing options that look fun. You can turn your selfie into cartoon characters using artisto in just one click.
08Moment Cartoon Caricature Cam
Pros:
● Moment Cartoon Caricature Cam holds an exciting selfie contest for users.
● The app has multiple collections of stickers.
● There are a variety of photo-enhancing tools.
Cons:
● The app is relatively slow at loading
● It includes a lot of ads.
● There are sometimes photo uploading issues.

Hot Comments from netizens:
Using Moment Cartoon Caricature Cam you can edit and enhance your photos. You can create a cartoon version of your selfies and participate in selfie contests.
Part 2 How to Make Animated Cartoon of Yourself in PowerPoint
To turn yourself into an animated character in PowerPoint, it is best to have an image with transparent or white background for best results. You can then use the picture effects, and other tools present in PowerPoint as mentioned to get your output.
● If the target picture has a background, your first step is to isolate it from its background. Remove the background or make it white.
● Now you need to sharpen the picture by 50%. This is available in the picture corrections effect.
● Next, copy the image and paste it back as a picture.
● Repeat these steps four times to make the lines in the image stand out sharply.
● In the end, add the color effect of Black and White at 20%.
● You will get quite a fairly detailed output.
Part 3 Best 5 Apps to Cartoon Yourself on iPhone, iPad, and Android
Five apps to cartoon yourself on iOS and Android platforms.
01Cartoon Yourself
Pros:
● It is a verybasic and simple to use photo to cartoon app for everyone.
● One does not require any editing skills to use this app.
● It contains nice and beautiful cartoons effects
Cons:
● The number of free filters and effects is minimal.
● You may require in-app purchases to access some features.
● It does not allow to click photos or record videos.
Hot Comments from netizens:
Cartoon Yourself is a great app to effortlessly turn your photos into animated versions. You have to add pictures from your gallery and then start editing. You will find a lot of editing tools in this app.
02Paint- art and cartoon filters
Pros:
● It has more than a thousand filters and effects
● Customized cartoon filters are set with various parameters
● It is also an artwork community
Cons:
● Even if you use the paid version, there might be bugs on thedesktop version.
● It needs almost regular updates.
● You may require in-app purchases to access some features.
Hot Comments from netizens:
Paint is an excellent app with thousands of filters and effects to choose from. It allows you to experiment with your creativity and create animated pictures.
03MomentCam cartoons and stickers
Pros:
● Here, you can create your cartoon effects
● It has a very active art community to share photos and win prizes.
● It has an easy user interface
Cons:
● There might be errors in loading if you connect with wifi.
● You may require in-app purchases to access some features
● Ads are very annoying.
Hot comments from netizens:
This app offers you a wide range of filters and emoticons. You can easily edit your photos and convert them into cartoon versions.
04Cart
Pros:
● It is a user-friendly app.
● It has got an intuitive interface
● The effects present here are very interesting
Cons:
● The app contains a lot of ads
● The app may freeze sometimes
● It includes an ad.
Hot comments from netizens:
Camaro offers you a wide range of effects like pencil, sketch, carton, watermarks, etc. You can customize the parameters of each filter.
05Sketch Me! Sketch and Cartoon
Pros:
● You can save the image directly from here
● It has opacity adjustments and distinct edges
● There are multiple video effects, including cartoons
Cons:
● There are issues with image importing
● It costs $1.99 in the app store
● May lag at times
Hot comments from netizens:
Sketch Me! Sketch and Cartoon is a great app that allows you to edit images, manage settings, adjust sharpness, opacity, and create the best-animated version of your photo.
Key Takeaways from This Episode
● Creating cartoon versions of your photos is very simple.
● You need not be a skilled editor for that.
● You can work out your creativity seamlessly by accessing these apps, tools, and software.
● Take help from the aforementioned apps and get the desired results. Happy animating!
Illustrations and transforming pictures into cartoon characters have become famous these days. Are you keen to make one but unable to find the right apps that animate your pictures to do so?
This article will help you find the perfect match for you. You can make an animated cartoon of yourself.
In this article
01 [8 Ways to Get Creative With Your Photos into Cartoon Online Or With Apps](#Part 1)
02 [How to Make Animated Cartoon of Yourself in PowerPoint](#Part 2)
03 [Best 5 Apps to Cartoon Yourself on iPhone, iPad, and Android](#Part 3)
Part 1 8 Ways to Get Creative With Your Photos into Cartoon Online Or With Apps
01ToonCamera
Pros:
● ToonCamera is famous for its tremendous and in-time customer support.
● It has got a variety of high-quality filters for your pictures.
● The best part is that it allows you to apply filters in existing photos or videos and real-time.
Cons:
● ToonCamera comes only with the basic set of tools. You will get multiple filters but not various tools.
● It works only on iOS 8.1 or the later versions.
● The app will charge $1.99.
Hot comments from netizens:
ToonCamera allows you to crop and resize your photos. You can add any filter from its huge filter collection and give your picture an animated effect or Edit.
02Cartoon Camera Free
Pros:
● Cartoon Camera Free is an application that is very easy to use.
● The interface of this app is intuitive.
● You will have high-resolution export as output using a cartoon camera free for editing.
Cons:
● The shortcoming of this app is that it asks you to update frequently.
● The settings in the application are entirely automatic and already set.
● You cannot try your creativity or make changes in the editing according to your choice. It has only two effects.
Hot comments from netizens:
Cartoon Camera Free allows you to apply cartoon and pencil sketch effects to your photos. It is a tremendous animate your pictures app. Not only that, this app will enable you to view the impact in real-time.
03Clip2Comic & Caricature Maker
Pros:
● Clip2Comic & Caricature Maker has 1080p at export.
● This application can transform your pictures into posters, cartoons, and sketch art.
● The best of the app is that it allows you to reset image settings
Cons:
● It works only on iOS platforms.
● The app will leave back their watermark on your pictures. You need to get the paid version to remove the watermark.
● It is an expensive app compared to other editing apps.
Hot Comments from netizens:
People love this editing app. There are eight different comics, sketches, and cartoon characters. The app comes with a caricature and deformation tool and multiple image editing and enhancing tools.
04Cartoon Yourself Video Effects
Pros:
● The editing in this app allows you to keep realistic emotions in your videos and photos.
● The interface is very intuitive.
● The app imitates perfect emotions and has a wide variety for you.
Cons:
● Cartoon Yourself Video Effects may lag sometimes
● The effects may not work at times.
● You may require in-app purchases.
Hot Comments from netizens:
This app gives you access to a brand spectrum of emotions giving the perfect realistic touch to your video. You can share animated videos and gifs with your friends from this app.
05Cartoon Sketch Camera Pro
Pros:
● Cartoon Sketch Camera Pro has a sleek user interface.
● It has got eight cartoon effects and filters for your photos.
● It supports iOS13.
Cons:
● There are no image editors’ options.
● You may face image reporting issues.
● The app will cost you $1.99 to get rid of ads and distances.
Hot Comments from netizens:
Cartoon Sketch Camera Pro Cartoon has effects likePixellate, Sketch, Halftone, Dots, Crosshatch Swirl, and Emboss. You can pally these effects on your photos to get the desired output.
06Photo to Cartoon yourself Edit
Pros:
● You can directly click photos using the app that you want to edit.
● This app allows you to share the cartooned image via email.
● There are a lot of effects and textures available.
Cons:
● You may need in-app purchases to access all effects.
● You will not be able to stretch images to get more photo details.
● You cannot share files from here on social media.
Hot Comments from netizens:
Photo to Cartoon yourself Edit is an app that makes your picture look animated and transforms them into funny and beautiful cartoons in seconds. You can adjust the image in all formats and make the color look more vivid.
07Artist – Video and Photo Editor with Art Filters
Pros:
● Artist allows you to use cartoon filter with just a single click
● This app has multiple filters for every emotion.
● You can create square videos in low quality too.
Cons
● For video edits, the app supports only 30-sec duration.
● You may require in-app purchases to access some features.
● The app may lag at times.
Hot Comments from netizens:
Artist is a straightforward and helpful app. It has multiple features and effects for creating animated pictures. It offers video editing options that look fun. You can turn your selfie into cartoon characters using artisto in just one click.
08Moment Cartoon Caricature Cam
Pros:
● Moment Cartoon Caricature Cam holds an exciting selfie contest for users.
● The app has multiple collections of stickers.
● There are a variety of photo-enhancing tools.
Cons:
● The app is relatively slow at loading
● It includes a lot of ads.
● There are sometimes photo uploading issues.
Hot Comments from netizens:
Using Moment Cartoon Caricature Cam you can edit and enhance your photos. You can create a cartoon version of your selfies and participate in selfie contests.
Part 2 How to Make Animated Cartoon of Yourself in PowerPoint
To turn yourself into an animated character in PowerPoint, it is best to have an image with transparent or white background for best results. You can then use the picture effects, and other tools present in PowerPoint as mentioned to get your output.
● If the target picture has a background, your first step is to isolate it from its background. Remove the background or make it white.
● Now you need to sharpen the picture by 50%. This is available in the picture corrections effect.
● Next, copy the image and paste it back as a picture.
● Repeat these steps four times to make the lines in the image stand out sharply.
● In the end, add the color effect of Black and White at 20%.
● You will get quite a fairly detailed output.
Part 3 Best 5 Apps to Cartoon Yourself on iPhone, iPad, and Android
Five apps to cartoon yourself on iOS and Android platforms.
01Cartoon Yourself
Pros:
● It is a verybasic and simple to use photo to cartoon app for everyone.
● One does not require any editing skills to use this app.
● It contains nice and beautiful cartoons effects
Cons:
● The number of free filters and effects is minimal.
● You may require in-app purchases to access some features.
● It does not allow to click photos or record videos.
Hot Comments from netizens:
Cartoon Yourself is a great app to effortlessly turn your photos into animated versions. You have to add pictures from your gallery and then start editing. You will find a lot of editing tools in this app.
02Paint- art and cartoon filters
Pros:
● It has more than a thousand filters and effects
● Customized cartoon filters are set with various parameters
● It is also an artwork community
Cons:
● Even if you use the paid version, there might be bugs on thedesktop version.
● It needs almost regular updates.
● You may require in-app purchases to access some features.
Hot Comments from netizens:
Paint is an excellent app with thousands of filters and effects to choose from. It allows you to experiment with your creativity and create animated pictures.
03MomentCam cartoons and stickers
Pros:
● Here, you can create your cartoon effects
● It has a very active art community to share photos and win prizes.
● It has an easy user interface
Cons:
● There might be errors in loading if you connect with wifi.
● You may require in-app purchases to access some features
● Ads are very annoying.
Hot comments from netizens:
This app offers you a wide range of filters and emoticons. You can easily edit your photos and convert them into cartoon versions.
04Cart
Pros:
● It is a user-friendly app.
● It has got an intuitive interface
● The effects present here are very interesting
Cons:
● The app contains a lot of ads
● The app may freeze sometimes
● It includes an ad.
Hot comments from netizens:
Camaro offers you a wide range of effects like pencil, sketch, carton, watermarks, etc. You can customize the parameters of each filter.
05Sketch Me! Sketch and Cartoon
Pros:
● You can save the image directly from here
● It has opacity adjustments and distinct edges
● There are multiple video effects, including cartoons
Cons:
● There are issues with image importing
● It costs $1.99 in the app store
● May lag at times
Hot comments from netizens:
Sketch Me! Sketch and Cartoon is a great app that allows you to edit images, manage settings, adjust sharpness, opacity, and create the best-animated version of your photo.
Key Takeaways from This Episode
● Creating cartoon versions of your photos is very simple.
● You need not be a skilled editor for that.
● You can work out your creativity seamlessly by accessing these apps, tools, and software.
● Take help from the aforementioned apps and get the desired results. Happy animating!
Top 20+ Best Free GIF Makers Online to Quickly Edit GIF
Top 20+ Best Free GIF Makers Online to Quickly Edit GIF

Shanoon Cox
Mar 27, 2024• Proven solutions
GIF sharing images are gaining more and more popularity these days because of their lesser loading time and small file size. The best part is that they can be constructed with ease using a few editing tools online. Most of the online GIF editors are available for free and they allow users to develop customized interactive images with the advanced feature sets, which simplify the creation process of GIF images and videos. However, there are still some GIF makers online that are not easy to use.
We need an easy to use and free GIF editor online to use for quickly making a GIF and share it with friends to have fun. The following list are great makers to edit GIF from video or image. Check it out!
Recommendation – Filmora: Easy GIF Maker Software Free Download for PC and Mac
Wondershare Filmora is often recommended due to its rich feature set that allows easy customization, editing and conversion. If you are looking forward to working on GIF images and videos then probably Filmora can solve all your troubles. You can add text/title to edit your GIF. Besides, various stickers and overlays are also available to use. Below are few incredible features of Wondershare Filmora .
- This GIF editor can process all popular media file formats with ease and it works perfectly on Windows as well as Mac devices.
- Export images and videos to GIF format directly, or save the gif to the mobile device for sharing.
- Share the GIF Video to YouTube or Vimeo directly.
- It does not demand any active internet connection. Users simply need to download their tool and start working offline.
- It is possible to edit already created GIF images in Filmora and you can access inbuilt tools for this purpose. The list of commonly used editing tools includes overlays, elements and text etc.
- Users need not waste time uploading or downloading images because its drag and drop tools make everything much easier and laborious tasks can be completed within a fraction of seconds.
Check this video tutorial to know more details:
 Download Mac Version ](https://tools.techidaily.com/wondershare/filmora/download/ )
The article below includes the list of best online GIF maker tools that you can use to make GIF from images or videos with ease online.
Top 20+ Best Free GIF Makers Online
1. Filmora meme maker

Filmora meme maker is your ultimate solution. It helps you make image, GIF and video memes directly without watermark. It is totally FREE to use and no sign up. You can change text size, color and position to create caption when you are using this online GIF editor. You can also put text inside or outside in GIF. Just with a few clicks, your GIF is done . Try it now!
How to make a GIF online?
Some people are wondering how do I make a GIF online? Well, don’t worry. We will let you know the steps to make a GIF online with Filmora meme maker. You just need to open it and then follow the steps below. Check it out!
1. Import video/image first
To make a gif online, you need to import your media and gif material to Filmora meme maker. You can make a GIF from video or image, and Filmora meme maker supports all. You can drag gif resource to the center of the page, or directly click it to upload.
2. Edit the GIF online
If you want to make GIF from video. Just import the video to this tool. The file size must be under 50MB size. After it is uploaded, you need to trim one part you like. Drag the slider to left or right to get it. If your uploaded file is image, you can flip and rotate it first. You can enter your text from inside and outside. Besides, you can change font type, size and color. Just position your text field to anywhere.
3. Export the GIF file
After selecting the format you want, click create to export this GIF. You can preview it online. Click download if you like it. It may take a while according to your file size.

See, make gif online with Filmora online maker is easy.
3. GIFMaker.me:
This photo to GIF online maker can easily process almost all media file formats like JPG, GIF and PNG so that interactive GIFs can be created. Users can also enjoy live preview of all changes before exporting created GIF image to device, so it is a great GIF editor online to use.
4. Giphy:

This popular GIF search engine and interactive design tool can develop results of your choice instantly. Giphy allows you to make GIF slideshow with images as well as videos. You can add multiple images or paste the YouTube, Vimeo or Giphy URL to upload the video. You can adjust the duration of each frame/image, and add captions, stickers, filters to the GIF file or draw on it. And you can choose different styles and animations when adding captions when editing GIF.
5. GIFMakerOnline.com:

You can use it to make GIF online. Those who are searching for a super quick way to develops GIFs with additional watermarks and image quality settings can prefer to move t GIFMakerOnline.com. It can directly upload your resulting GIF files on popular social media sites.
6. GIFMake.com:
If you have already collected images in png, jpeg and gif format and now want to create one interesting animated GIF image by merging them then GIFMake.com can help you better. You can this online gif editor to make a GIF with dragging and dropping.
7. ImgFlip:
This online animated GIF maker allows users to create GIFs from images, photos and videos. You can add a MP4/OGG video from computer or paste a video URL to upload the video footage. You can upload several images to make a GIF and adjust the width, height and quality.
It will help you to watch preview of your GIF before it is created and that is definitely important for generating good results. Users can alter quality of GIF with animations, photo order adjustments and resizing features. Besides that, you can also add text to GIF or crop and rotate GIFs.
8. MakeaGIF.com:
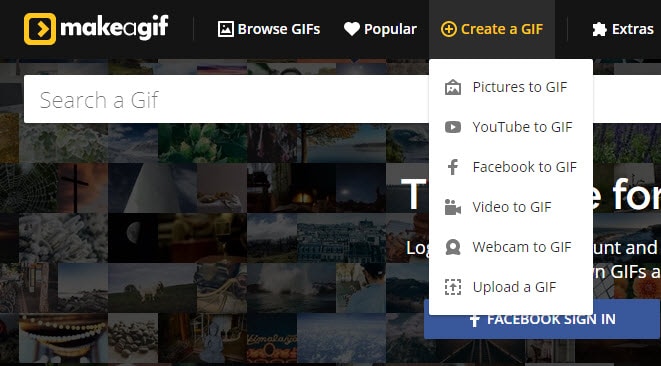
This GIF editor can help users to develop a high quality GIF from collection of images or from a video file. It can also process webcam recordings or YouTube videos for creation of GIFs.
9. Animated GIF Maker:
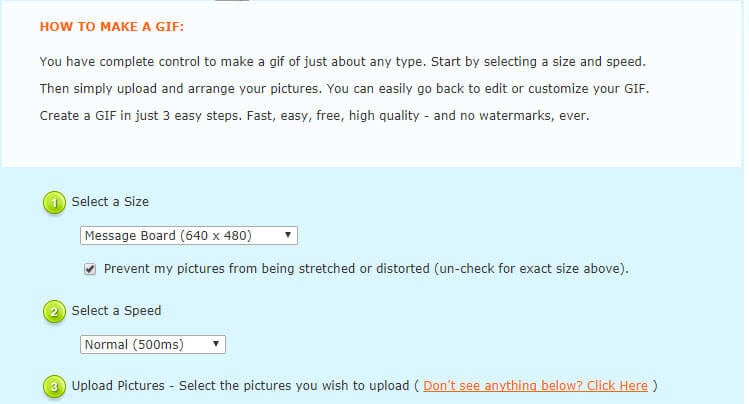
This animated GIF maker is a portable solution for all GIF creators with only 2MB file size. It is designed with intuitive and easier to use interface that can develop classic GIFs for you with better adjustments over quality, frame delays and size, though it still provides the Size and Speed preset. However, this GIF Maker only allows you to upload images to make GIF.
10. Convertio:
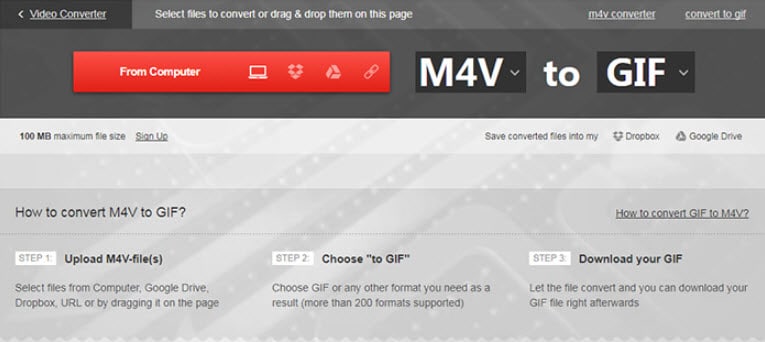
Convertio is an online GIF maker which is able to easily process all file formats so that users can easily upload any image or video for development of application specific GIFs.
This online GIF editor allows you to upload image or videos in several ways: uploading from your computer, from Dropbox, from Google Drive, or pasting the file URL or website URL. The maximum file size is 100MB. Besides converting image or videos to GIF, you can also convert GIF files to MP4 videos.
11. Convert Image:
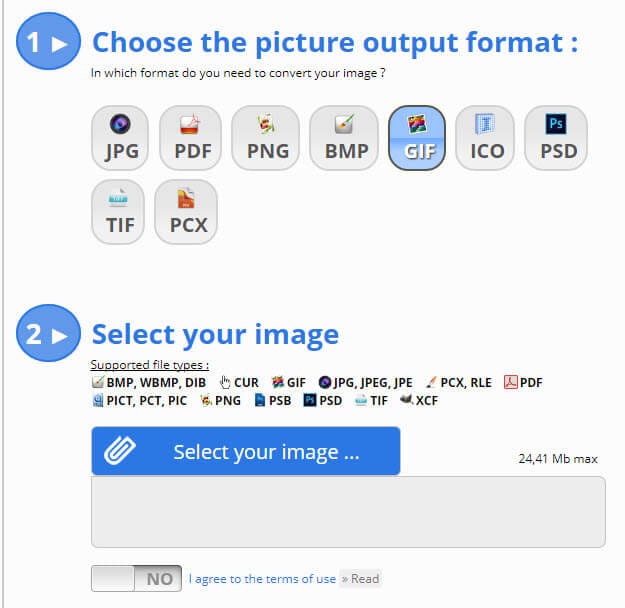
This GIF maker tool is be used to convert png, jpg and many other images formats into animated GIFs with ease. However, you can upload one image at a time and the maximum file size is 24MB.
12. CreateGIF.net:
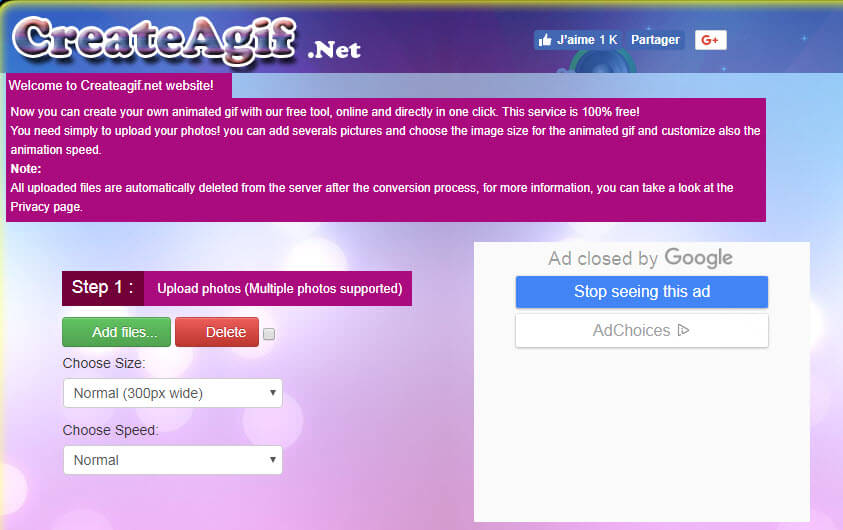
Here is a free and easy to use online GIF animator tool that helps users to select multiple images from computer. After manipulating details about speed and size of GIFs, it can help you to generate quality GIF images.
This online GIF Maker allows you to re-order the multiple images and compose several images into one GIF file. However, the biggest pixel is 450px wide. There is no indication about the maximum file size that you can upload, but when I upload a 700KB, it reports error.
13. EditPhotoForFree.com:
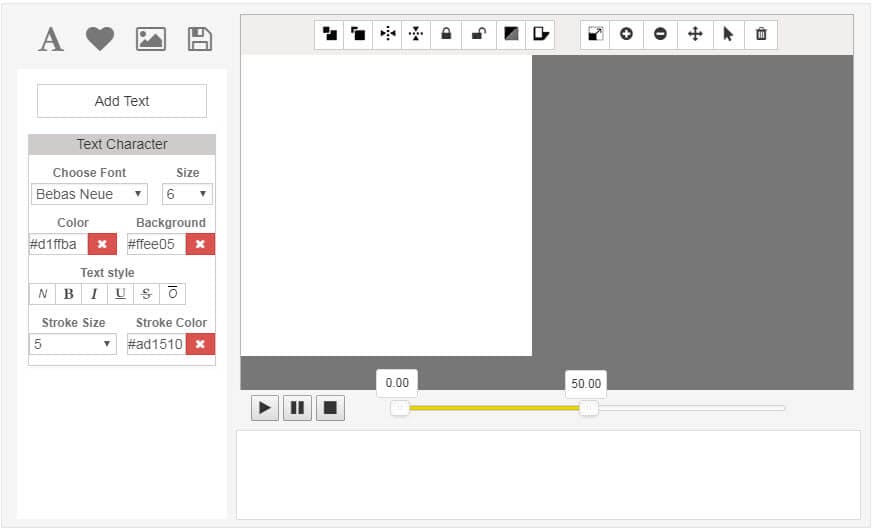
There are so many unique features and colour manipulation options on EditPhotoForFree.com. Users can easily access to many customizable features on this platform for development of application specific GIFs.
This online GIF creator allows you to add images in JPG and PNG formats, animated gif and video in Mp4, WebM and OGG formats to make a GIF. It also allows you to record webcam to make a GIF and add shapes in SVG format. You can add GIF effects like text and background. There are some editing features built in, such as flip horizontal and flip vertical, and shadow and opacity settings. But the preview window is not reacted timely.
14. GIFPal:

This creative GIF maker can show you effect of all changes that you made to your imported files before saving the final results. One can customize GIF content with hue, saturation, contrast, text and drawing tools. You also can edit GIF by adding text.
15. GIFNinja:
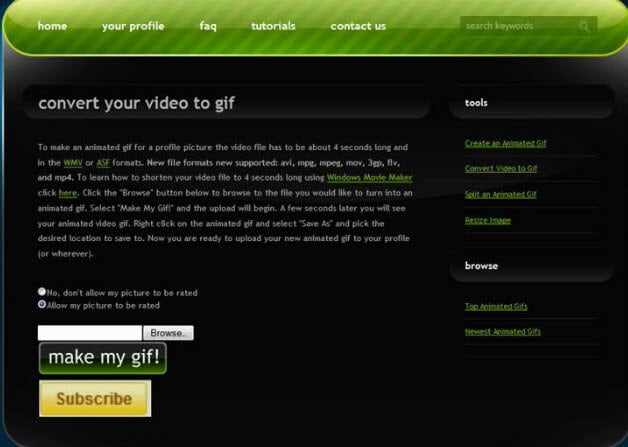
It can easily split or create animated GIF files as per user’s specifications. This online GIF editor can help you make GIF in a minute.
16. GIFGear.com:
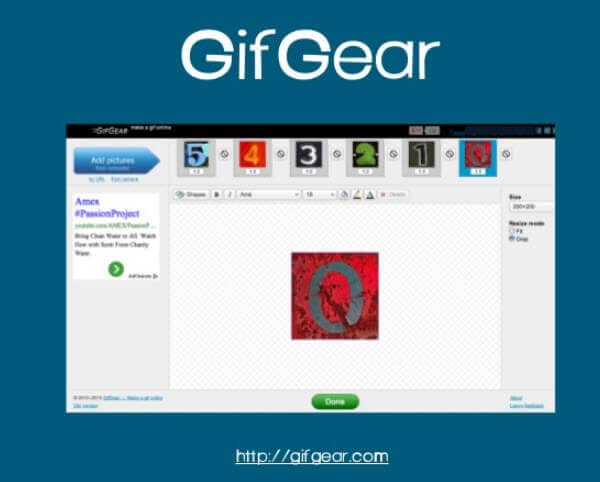
GIFGear.com allows users to develop interactive GIF images with particular size and customization options. One can also decide duration of animation and several effects can be added in form of frames, overlays, pixelations and fade etc.
17. Gickr.com:
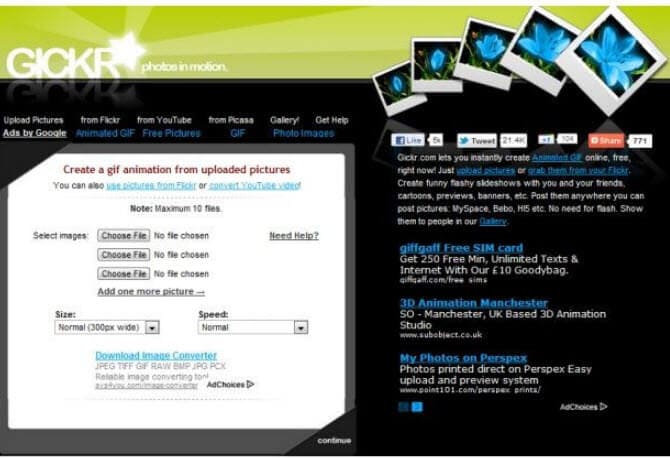
Gickr.com allows users to develop animated GIFs within few seconds and this platform can be accessed by anyone for free. Users simply need to uploaded images, add desired effects and convert project to GIF extension.
18. Gifup.com:
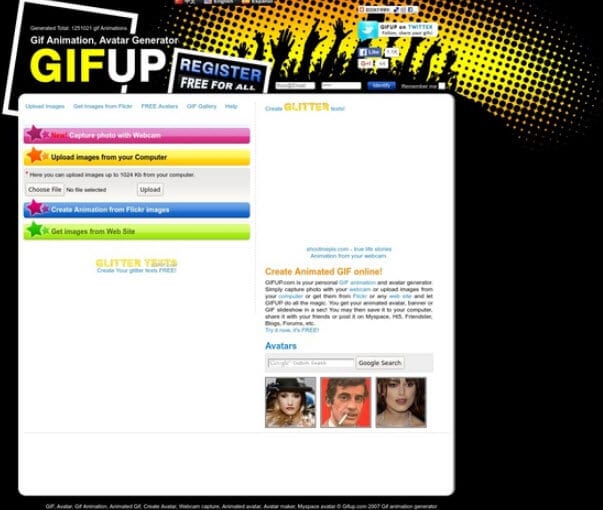
Here is your advanced yet personal GIF creator that can provide impressive results instantly. It allows users to upload 1024 Kb file size with ease and uploaded images can be easily processed for generation of classic GIFs. Its interface is easy to understand. If you like to make GIF like a pro, you can this one to make a GIF. Have a try!
19. IMGUR:
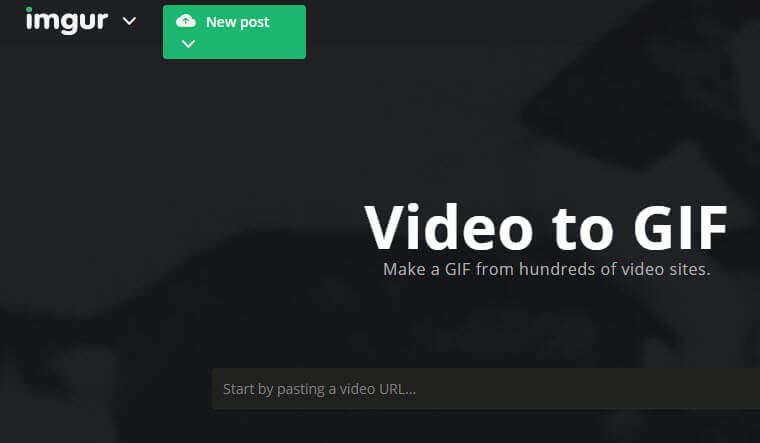
Here is one of the most widely used GIF image sharing center that can easily process raw content from computer or in form of provided URLs.
20. Meme Center:

This platform is being popularly used for development of meme with so many quick features. It is really impressive to add reactions to GIFs or select already existing videos/images to get desired results. You can still edit GIF thought it is a meme center.
21. Online Image Converter:

This tool works on your browser and can share resulting GIF files on other popular websites with ease. The process is smooth to edit GIF online.
22. Picasion:

It assists users to develop classic GIFs with images that can be uploaded from computer or using video URLs. One can also import images from webcam or try stills from Flickr or Picasa.
23. Toolson.Net’s GIF Maker:
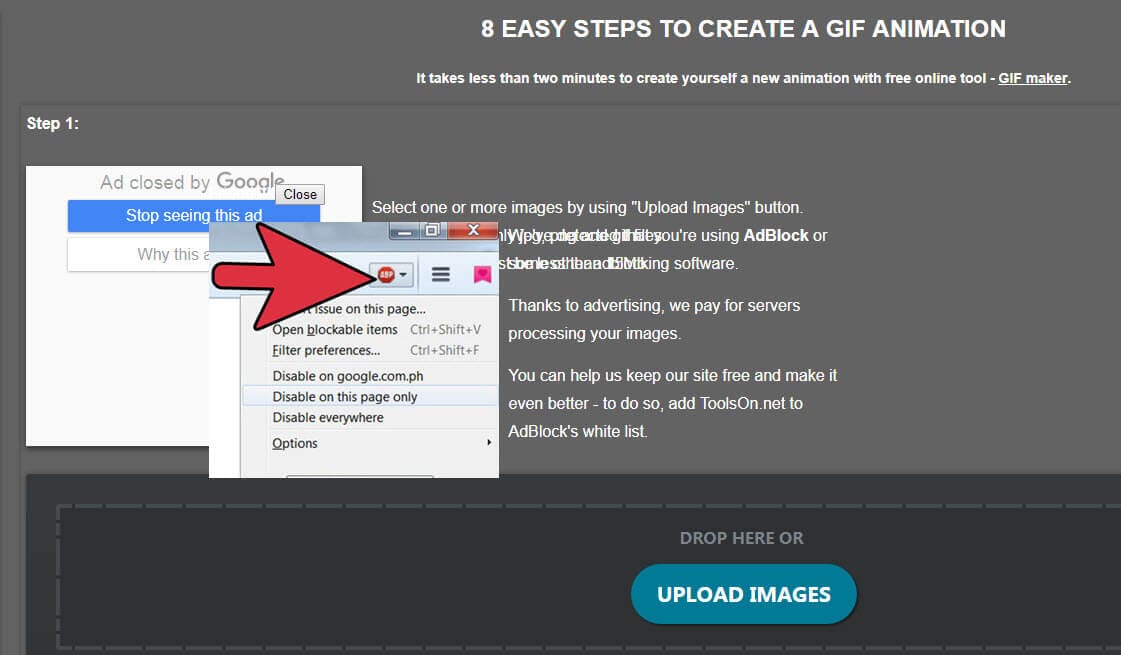
With this GIF maker tool you can easily arrange your uploaded images in any order and then apply GIF based animation effect to that sequence. One can also add borders, frames and filters to this content.
24. Zamzar:
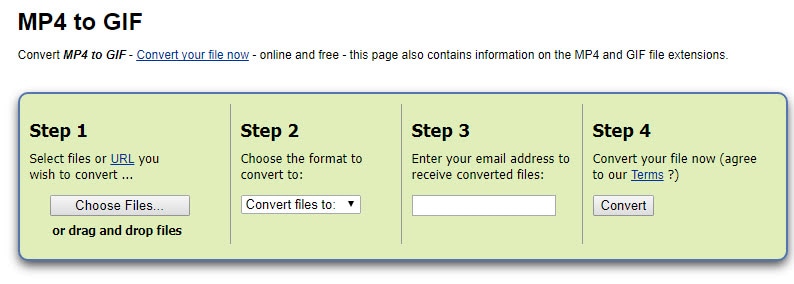
This name is popular among professional image editors due to its wide set of features and impressive capabilities.
Conclusion
These free online GIF makers discussed above allows you to turning images or videos to looping and animated GIFs quickly. If you want to try more offline GIF creators, you can check our picks ofbest free GIF creators in 2019 , which includes both offline and online gif creators. Which one(s) will you use to make a GIF online? Share with us in the comment section below.
Download Mac Version ](https://tools.techidaily.com/wondershare/filmora/download/ )
Frequently Asked Questions about Making GIFs Online
1. How to make a GIF without a watermark?
You’ll need a GIF maker or a video editing software that allows you to export GIF files without a watermark. We recommend EZGIF or Filmora Meme Maker because you can use them for free and none of your GIFs are going to be watermarked, regardless of how many you create on a daily or weekly level.
EZGIF lets you combine up to 2000 images in a single GIF file, and it supports all common image files, so that you don’t have to worry about the format in which pictures you want to include in your GIF are saved. Filmora Meme Maker is the right choice for you if you want to add text to the GIFs you create.
2. What are GIFs made of?
GIFs consist of a series of pictures that simulate a movement, and they can either be comprised of still or moving images.
In case you want to create a GIF out of photos, you will have to take a number of consecutive photos with your camera and then merge them into a GIF. The number of photos you will have to take depends on the duration of the GIF you want to create, and it varies from just five to more than one thousand.
Optionally, you can also create GIFs from video files, but you should keep in mind that the sound is going to be removed automatically, as GIF files cannot contain audio.
Shanoon Cox
Shanoon Cox is a writer and a lover of all things video.
Follow @Shanoon Cox
Shanoon Cox
Mar 27, 2024• Proven solutions
GIF sharing images are gaining more and more popularity these days because of their lesser loading time and small file size. The best part is that they can be constructed with ease using a few editing tools online. Most of the online GIF editors are available for free and they allow users to develop customized interactive images with the advanced feature sets, which simplify the creation process of GIF images and videos. However, there are still some GIF makers online that are not easy to use.
We need an easy to use and free GIF editor online to use for quickly making a GIF and share it with friends to have fun. The following list are great makers to edit GIF from video or image. Check it out!
Recommendation – Filmora: Easy GIF Maker Software Free Download for PC and Mac
Wondershare Filmora is often recommended due to its rich feature set that allows easy customization, editing and conversion. If you are looking forward to working on GIF images and videos then probably Filmora can solve all your troubles. You can add text/title to edit your GIF. Besides, various stickers and overlays are also available to use. Below are few incredible features of Wondershare Filmora .
- This GIF editor can process all popular media file formats with ease and it works perfectly on Windows as well as Mac devices.
- Export images and videos to GIF format directly, or save the gif to the mobile device for sharing.
- Share the GIF Video to YouTube or Vimeo directly.
- It does not demand any active internet connection. Users simply need to download their tool and start working offline.
- It is possible to edit already created GIF images in Filmora and you can access inbuilt tools for this purpose. The list of commonly used editing tools includes overlays, elements and text etc.
- Users need not waste time uploading or downloading images because its drag and drop tools make everything much easier and laborious tasks can be completed within a fraction of seconds.
Check this video tutorial to know more details:
Download Mac Version ](https://tools.techidaily.com/wondershare/filmora/download/ )
The article below includes the list of best online GIF maker tools that you can use to make GIF from images or videos with ease online.
Top 20+ Best Free GIF Makers Online
1. Filmora meme maker
Filmora meme maker is your ultimate solution. It helps you make image, GIF and video memes directly without watermark. It is totally FREE to use and no sign up. You can change text size, color and position to create caption when you are using this online GIF editor. You can also put text inside or outside in GIF. Just with a few clicks, your GIF is done . Try it now!
How to make a GIF online?
Some people are wondering how do I make a GIF online? Well, don’t worry. We will let you know the steps to make a GIF online with Filmora meme maker. You just need to open it and then follow the steps below. Check it out!
1. Import video/image first
To make a gif online, you need to import your media and gif material to Filmora meme maker. You can make a GIF from video or image, and Filmora meme maker supports all. You can drag gif resource to the center of the page, or directly click it to upload.
2. Edit the GIF online
If you want to make GIF from video. Just import the video to this tool. The file size must be under 50MB size. After it is uploaded, you need to trim one part you like. Drag the slider to left or right to get it. If your uploaded file is image, you can flip and rotate it first. You can enter your text from inside and outside. Besides, you can change font type, size and color. Just position your text field to anywhere.
3. Export the GIF file
After selecting the format you want, click create to export this GIF. You can preview it online. Click download if you like it. It may take a while according to your file size.
See, make gif online with Filmora online maker is easy.
3. GIFMaker.me:
This photo to GIF online maker can easily process almost all media file formats like JPG, GIF and PNG so that interactive GIFs can be created. Users can also enjoy live preview of all changes before exporting created GIF image to device, so it is a great GIF editor online to use.
4. Giphy:
This popular GIF search engine and interactive design tool can develop results of your choice instantly. Giphy allows you to make GIF slideshow with images as well as videos. You can add multiple images or paste the YouTube, Vimeo or Giphy URL to upload the video. You can adjust the duration of each frame/image, and add captions, stickers, filters to the GIF file or draw on it. And you can choose different styles and animations when adding captions when editing GIF.
5. GIFMakerOnline.com:
You can use it to make GIF online. Those who are searching for a super quick way to develops GIFs with additional watermarks and image quality settings can prefer to move t GIFMakerOnline.com. It can directly upload your resulting GIF files on popular social media sites.
6. GIFMake.com:
If you have already collected images in png, jpeg and gif format and now want to create one interesting animated GIF image by merging them then GIFMake.com can help you better. You can this online gif editor to make a GIF with dragging and dropping.
7. ImgFlip:
This online animated GIF maker allows users to create GIFs from images, photos and videos. You can add a MP4/OGG video from computer or paste a video URL to upload the video footage. You can upload several images to make a GIF and adjust the width, height and quality.
It will help you to watch preview of your GIF before it is created and that is definitely important for generating good results. Users can alter quality of GIF with animations, photo order adjustments and resizing features. Besides that, you can also add text to GIF or crop and rotate GIFs.
8. MakeaGIF.com:
This GIF editor can help users to develop a high quality GIF from collection of images or from a video file. It can also process webcam recordings or YouTube videos for creation of GIFs.
9. Animated GIF Maker:
This animated GIF maker is a portable solution for all GIF creators with only 2MB file size. It is designed with intuitive and easier to use interface that can develop classic GIFs for you with better adjustments over quality, frame delays and size, though it still provides the Size and Speed preset. However, this GIF Maker only allows you to upload images to make GIF.
10. Convertio:
Convertio is an online GIF maker which is able to easily process all file formats so that users can easily upload any image or video for development of application specific GIFs.
This online GIF editor allows you to upload image or videos in several ways: uploading from your computer, from Dropbox, from Google Drive, or pasting the file URL or website URL. The maximum file size is 100MB. Besides converting image or videos to GIF, you can also convert GIF files to MP4 videos.
11. Convert Image:
This GIF maker tool is be used to convert png, jpg and many other images formats into animated GIFs with ease. However, you can upload one image at a time and the maximum file size is 24MB.
12. CreateGIF.net:
Here is a free and easy to use online GIF animator tool that helps users to select multiple images from computer. After manipulating details about speed and size of GIFs, it can help you to generate quality GIF images.
This online GIF Maker allows you to re-order the multiple images and compose several images into one GIF file. However, the biggest pixel is 450px wide. There is no indication about the maximum file size that you can upload, but when I upload a 700KB, it reports error.
13. EditPhotoForFree.com:
There are so many unique features and colour manipulation options on EditPhotoForFree.com. Users can easily access to many customizable features on this platform for development of application specific GIFs.
This online GIF creator allows you to add images in JPG and PNG formats, animated gif and video in Mp4, WebM and OGG formats to make a GIF. It also allows you to record webcam to make a GIF and add shapes in SVG format. You can add GIF effects like text and background. There are some editing features built in, such as flip horizontal and flip vertical, and shadow and opacity settings. But the preview window is not reacted timely.
14. GIFPal:
This creative GIF maker can show you effect of all changes that you made to your imported files before saving the final results. One can customize GIF content with hue, saturation, contrast, text and drawing tools. You also can edit GIF by adding text.
15. GIFNinja:
It can easily split or create animated GIF files as per user’s specifications. This online GIF editor can help you make GIF in a minute.
16. GIFGear.com:
GIFGear.com allows users to develop interactive GIF images with particular size and customization options. One can also decide duration of animation and several effects can be added in form of frames, overlays, pixelations and fade etc.
17. Gickr.com:
Gickr.com allows users to develop animated GIFs within few seconds and this platform can be accessed by anyone for free. Users simply need to uploaded images, add desired effects and convert project to GIF extension.
18. Gifup.com:
Here is your advanced yet personal GIF creator that can provide impressive results instantly. It allows users to upload 1024 Kb file size with ease and uploaded images can be easily processed for generation of classic GIFs. Its interface is easy to understand. If you like to make GIF like a pro, you can this one to make a GIF. Have a try!
19. IMGUR:
Here is one of the most widely used GIF image sharing center that can easily process raw content from computer or in form of provided URLs.
20. Meme Center:
This platform is being popularly used for development of meme with so many quick features. It is really impressive to add reactions to GIFs or select already existing videos/images to get desired results. You can still edit GIF thought it is a meme center.
21. Online Image Converter:
This tool works on your browser and can share resulting GIF files on other popular websites with ease. The process is smooth to edit GIF online.
22. Picasion:
It assists users to develop classic GIFs with images that can be uploaded from computer or using video URLs. One can also import images from webcam or try stills from Flickr or Picasa.
23. Toolson.Net’s GIF Maker:
With this GIF maker tool you can easily arrange your uploaded images in any order and then apply GIF based animation effect to that sequence. One can also add borders, frames and filters to this content.
24. Zamzar:
This name is popular among professional image editors due to its wide set of features and impressive capabilities.
Conclusion
These free online GIF makers discussed above allows you to turning images or videos to looping and animated GIFs quickly. If you want to try more offline GIF creators, you can check our picks ofbest free GIF creators in 2019 , which includes both offline and online gif creators. Which one(s) will you use to make a GIF online? Share with us in the comment section below.
Download Mac Version ](https://tools.techidaily.com/wondershare/filmora/download/ )
Frequently Asked Questions about Making GIFs Online
1. How to make a GIF without a watermark?
You’ll need a GIF maker or a video editing software that allows you to export GIF files without a watermark. We recommend EZGIF or Filmora Meme Maker because you can use them for free and none of your GIFs are going to be watermarked, regardless of how many you create on a daily or weekly level.
EZGIF lets you combine up to 2000 images in a single GIF file, and it supports all common image files, so that you don’t have to worry about the format in which pictures you want to include in your GIF are saved. Filmora Meme Maker is the right choice for you if you want to add text to the GIFs you create.
2. What are GIFs made of?
GIFs consist of a series of pictures that simulate a movement, and they can either be comprised of still or moving images.
In case you want to create a GIF out of photos, you will have to take a number of consecutive photos with your camera and then merge them into a GIF. The number of photos you will have to take depends on the duration of the GIF you want to create, and it varies from just five to more than one thousand.
Optionally, you can also create GIFs from video files, but you should keep in mind that the sound is going to be removed automatically, as GIF files cannot contain audio.
Shanoon Cox
Shanoon Cox is a writer and a lover of all things video.
Follow @Shanoon Cox
Simple Shortcut to Convert Videos to Gifs on iPhone
Simple Shortcut to Convert Videos to Gifs on iPhone
An easy yet powerful editor
Numerous effects to choose from
Detailed tutorials provided by the official channel
To create iPhone video to GIF there are several third-party apps available. You can even choose the online sites for the task, but the editing and other options will be limited. The GIFs on your iPhone can be created using videos as well as Live photos.

One of the best ways to create a GIF is using the Shortcuts app that comes pre-installed on devices running on iOS 13 and later versions of the OS. The app has shortcuts to accomplish several tasks on your iPhone including GIF creation. Learn about using Shortcuts and other tools for creating a GIF on iPhone.
In this article
01 [How to make GIF from Video on iPhone using Shortcut App](#Part 1)
02 [How to save Live Photos as GIF on iPhone](#Part 2)
03 [How to save Live Photos as GIF on iPhone](#Part 3)
04 [How to save videos as live photos on your iPhone?](#Part 4)
05 [Best tool for creating GIFs and video editing on your Windows and Mac- Wondershare Filmora](#Part 5)
Part 1 How to make GIF from Video on iPhone using Shortcut App
One of the easiest ways to convert video GIF iPhone is by using the Shortcuts app. If you have deleted the app, you can reinstall it from the app store. Once the app is installed, you would next need to allow the untrusted shortcuts and for this go to Settings > Shortcuts> toggle Add Untrusted Shortcuts to add the shortcuts created by the user. The further steps for converting video to GIF iPhone are as follows.
Step 1. On your iPhone, download the Video to GIF shortcut. You can download it using iCloud or RoutineHub. Find the shortcut and click on Get Shortcut will let you check the action of the shortcut.
Move down and click on the red Add Untrusted Shortcut button that will add the shortcut for the library.

Step 2. Go to the My Shortcuts tab and click on the Video to GIF section. If you are using it for the first time, you need to grant permission to use the videos and photos. Click on the OK button and continue.

Step 3. Next, browse and add the video from which you wish to create the GIF. Since GIF animations are short, it is always recommended to use short videos.
Step 4. Video processing will start and during this, the Video to GIF shortcut will be greyed out.

Step 5. Once done, the preview of the GIF will appear on the screen. Finally, you can save the GIF to your Photos app on iPhone or can also share it through email, AirDrop, iMessage, and other third-party services as needed.

Part 2 How to save Live Photos as GIF on iPhone
Live Photo is an interesting feature of the iPhone where an image is captured in an animated form for a couple of seconds. These Live Photos can be easily converted to GIFs using the steps below.
Step 1. On your iPhone Photo app, open the Live Photo that you want to save as GIF.
Step 2. Darg the selected photo upwards and will see multiple effects options along with other image details.
Step 3 To save the selected image as GIF, choose Loop or Bounce animation. Once done, share the image on mail and other services listed or save it to the device.

Part 3 How to save Live Photo as video on iPhone
You can also convert your live photos to videos and then use them for making GIFs and for other uses. The steps for iPhone live photo to video are as follows.
Step 1. On your iPhone, open the Photos app and choose the Live Photo that you want to convert.
Step 2. Next, click on the share button at the bottom of the screen and multiple options will be seen.
Step 3. Scroll down and choose Save as Video option and with this, the live photo will be saved as a Video.
Additionally, you can also convert the LivePhotos to videos using the shortcut app.

Part 4 How to save videos as live photos on your iPhone?
If you need to convert your videos to live photos on iPhone, there are several third-party tools available and one of the widely used is IntoLive. Using this app, videos, as well as GIFs, can be converted into live photos.
Steps on how to turn a video into a live photo iPhone
Step 1. Download, install and launch the IntoLive app from the app store.
Step 2. Next, browse and add the desired video.
Step 3. If needed, the added video can be customized using several supported features.
Step 4. Next, click on the Make option at the top-right corner and then choose the repeats you want for a Live Photo.
Step 5. Finally, click on the Live Photo and your Live Photo will be saved to the device.

Part 5 Best tool for creating GIFs and video editing on your Windows and Mac- Wondershare Filmora
Above we have listed several ways to create GIFs on your iPhone and also to convert videos to LivePhotos and vice-versa. Installing different tools for different tasks is a hassle and also a time-consuming task. So, if you are looking for an all-in-one tool that allows you to create GIFs, and professionally edit your media files, Wondershare Filmora Video Editor is the best tool to consider. Available for quick download on your Windows and Mac system, this feature-packed software has an intuitive and user-friendly interface.
Wondershare Filmora
Get started easily with Filmora’s powerful performance, intuitive interface, and countless effects!
Try It Free Try It Free Try It Free Learn More >

Media files in all key formats are supported by the tool and there are multiple options for editing and video creation like splitting, rotating, cutting, adding effects, sounds, text, and other elements. In a few simple steps, your customized GIF and other professional-looking media files will be ready.
Steps to create GIF using Wondershare Filmora
Step 1. Launch the installed software on your system and add the video or images from the system.
Step 2. The added media files next need to be dragged and dropped to the timeline at the bottom of the interface.
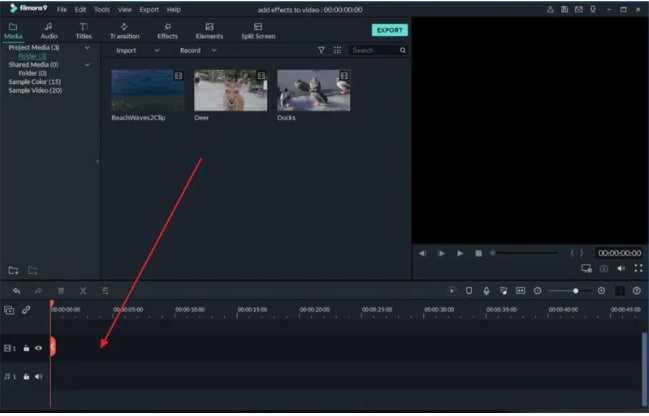
Step 3. After the files are moved, you can customize them using several editing tools like rotate, crop, cut, and more.
Step 4. Next, add text, effects, sound, and other elements as needed.

Step 5. Finally choose to export the file and then from the Local tab, select the GIF option. Choose a file name and location and then finally click on the EXPORT button.

● Key Takeaways from This Episode →
●There are several ways to turn video into GIF iPhone.
●Using shortcuts is one of the most straightforward methods for creating GIFs using videos.
●You can also convert videos to LivePhoto and vice versa on your iPhone using third-party apps.
●Wondershare Filmora is an excellent software to make GIFs and professionally edit media files.
To create iPhone video to GIF there are several third-party apps available. You can even choose the online sites for the task, but the editing and other options will be limited. The GIFs on your iPhone can be created using videos as well as Live photos.
One of the best ways to create a GIF is using the Shortcuts app that comes pre-installed on devices running on iOS 13 and later versions of the OS. The app has shortcuts to accomplish several tasks on your iPhone including GIF creation. Learn about using Shortcuts and other tools for creating a GIF on iPhone.
In this article
01 [How to make GIF from Video on iPhone using Shortcut App](#Part 1)
02 [How to save Live Photos as GIF on iPhone](#Part 2)
03 [How to save Live Photos as GIF on iPhone](#Part 3)
04 [How to save videos as live photos on your iPhone?](#Part 4)
05 [Best tool for creating GIFs and video editing on your Windows and Mac- Wondershare Filmora](#Part 5)
Part 1 How to make GIF from Video on iPhone using Shortcut App
One of the easiest ways to convert video GIF iPhone is by using the Shortcuts app. If you have deleted the app, you can reinstall it from the app store. Once the app is installed, you would next need to allow the untrusted shortcuts and for this go to Settings > Shortcuts> toggle Add Untrusted Shortcuts to add the shortcuts created by the user. The further steps for converting video to GIF iPhone are as follows.
Step 1. On your iPhone, download the Video to GIF shortcut. You can download it using iCloud or RoutineHub. Find the shortcut and click on Get Shortcut will let you check the action of the shortcut.
Move down and click on the red Add Untrusted Shortcut button that will add the shortcut for the library.
Step 2. Go to the My Shortcuts tab and click on the Video to GIF section. If you are using it for the first time, you need to grant permission to use the videos and photos. Click on the OK button and continue.
Step 3. Next, browse and add the video from which you wish to create the GIF. Since GIF animations are short, it is always recommended to use short videos.
Step 4. Video processing will start and during this, the Video to GIF shortcut will be greyed out.
Step 5. Once done, the preview of the GIF will appear on the screen. Finally, you can save the GIF to your Photos app on iPhone or can also share it through email, AirDrop, iMessage, and other third-party services as needed.
Part 2 How to save Live Photos as GIF on iPhone
Live Photo is an interesting feature of the iPhone where an image is captured in an animated form for a couple of seconds. These Live Photos can be easily converted to GIFs using the steps below.
Step 1. On your iPhone Photo app, open the Live Photo that you want to save as GIF.
Step 2. Darg the selected photo upwards and will see multiple effects options along with other image details.
Step 3 To save the selected image as GIF, choose Loop or Bounce animation. Once done, share the image on mail and other services listed or save it to the device.
Part 3 How to save Live Photo as video on iPhone
You can also convert your live photos to videos and then use them for making GIFs and for other uses. The steps for iPhone live photo to video are as follows.
Step 1. On your iPhone, open the Photos app and choose the Live Photo that you want to convert.
Step 2. Next, click on the share button at the bottom of the screen and multiple options will be seen.
Step 3. Scroll down and choose Save as Video option and with this, the live photo will be saved as a Video.
Additionally, you can also convert the LivePhotos to videos using the shortcut app.
Part 4 How to save videos as live photos on your iPhone?
If you need to convert your videos to live photos on iPhone, there are several third-party tools available and one of the widely used is IntoLive. Using this app, videos, as well as GIFs, can be converted into live photos.
Steps on how to turn a video into a live photo iPhone
Step 1. Download, install and launch the IntoLive app from the app store.
Step 2. Next, browse and add the desired video.
Step 3. If needed, the added video can be customized using several supported features.
Step 4. Next, click on the Make option at the top-right corner and then choose the repeats you want for a Live Photo.
Step 5. Finally, click on the Live Photo and your Live Photo will be saved to the device.
Part 5 Best tool for creating GIFs and video editing on your Windows and Mac- Wondershare Filmora
Above we have listed several ways to create GIFs on your iPhone and also to convert videos to LivePhotos and vice-versa. Installing different tools for different tasks is a hassle and also a time-consuming task. So, if you are looking for an all-in-one tool that allows you to create GIFs, and professionally edit your media files, Wondershare Filmora Video Editor is the best tool to consider. Available for quick download on your Windows and Mac system, this feature-packed software has an intuitive and user-friendly interface.
Wondershare Filmora
Get started easily with Filmora’s powerful performance, intuitive interface, and countless effects!
Try It Free Try It Free Try It Free Learn More >
Media files in all key formats are supported by the tool and there are multiple options for editing and video creation like splitting, rotating, cutting, adding effects, sounds, text, and other elements. In a few simple steps, your customized GIF and other professional-looking media files will be ready.
Steps to create GIF using Wondershare Filmora
Step 1. Launch the installed software on your system and add the video or images from the system.
Step 2. The added media files next need to be dragged and dropped to the timeline at the bottom of the interface.
Step 3. After the files are moved, you can customize them using several editing tools like rotate, crop, cut, and more.
Step 4. Next, add text, effects, sound, and other elements as needed.
Step 5. Finally choose to export the file and then from the Local tab, select the GIF option. Choose a file name and location and then finally click on the EXPORT button.
● Key Takeaways from This Episode →
●There are several ways to turn video into GIF iPhone.
●Using shortcuts is one of the most straightforward methods for creating GIFs using videos.
●You can also convert videos to LivePhoto and vice versa on your iPhone using third-party apps.
●Wondershare Filmora is an excellent software to make GIFs and professionally edit media files.
Also read:
- Ideas That Will Help You Out in Learning How to Send WhatsApp Animated Gifs
- 2024 Approved Best 10 3D Text Animation Templates
- Top 10 Best Batman Anime Movies 2024 Updated
- New 10 Great MP4 to GIF Converters to Get Perfect-Made GIF for 2024
- What Wikipedia Cant Tell You About the 10 Batman Cartoons
- Updated In 2024, The 15 Best Apps to Turn Photos Into Cartoons and Sketches
- New In 2024, How To Remove The Endless Loop From Animated GIF
- New How to Animate Image on Scroll and Text on Scroll, In 2024
- Updated 2024 Approved Great Guide for Beginners on 2D Animation Making
- Top 15 2D Animation Software Free That Worth to Try for 2024
- In 2024, How To Remove The Endless Loop From Animated GIF
- In 2024, All About 3D Medical Animation And Its Uses
- Updated How to Make GIF Stickers for WhatsApp 100 The Easy Way
- New In 2024, 5 Free Animated Gif Sources You Must Check
- Updated Best 10 Animated Templates in Canva for 2024
- Some Techniques for Creating Animated Logo That Few People Know About
- Best 15 Horror Animes That Will Trigger a Heart Attack
- New Ways on How to Get Started in Stop Motion Claymation for 2024
- Updated 4 Things You Should Know About Pinterest GIF
- How to Obtain and Create Animated GIF Icons Like a Pro for 2024
- In 2024, 15 Types of Cartoon Drawing Styles with Examples
- New 2024 Approved 8 Best Motion Graphics Online Tools for Your Inspiration
- Updated What Is Still Motion Animation, In 2024
- Updated 20 Best Anime Movies You Cannot Miss 2024 Update
- Updated 2024 Approved Top 15 2D Animation Software Free That Worth to Try
- Updated 2024 Approved Handy Tip From Adobe Animate Rigging Tutorial for All Learners
- New How to Animate Picture Online Without Learning From Scratch for 2024
- New The Best 10 Sketch Animation Video Makers
- New Ready to Animate Game Character From Scratch for 2024
- Google Play Services Wont Update? 12 Fixes are Here on Oppo A1x 5G | Dr.fone
- In 2024, How to use Snapchat Location Spoofer to Protect Your Privacy On Lava Yuva 2 Pro? | Dr.fone
- 4 Most-Known Ways to Find Someone on Tinder For Apple iPhone SE (2022) by Name | Dr.fone
- Complete guide for recovering video files on Tecno Spark 10 Pro
- 3 Solutions to Find Your Infinix Note 30 5G Current Location of a Mobile Number | Dr.fone
- In 2024, Can I Bypass a Forgotten Phone Password Of Vivo Y27 5G?
- App Wont Open on Your Infinix Smart 8 Plus? Here Are All Fixes | Dr.fone
- In 2024, The 6 Best SIM Unlock Services That Actually Work On Your Asus Device
- In 2024, Still Using Pattern Locks with Nubia? Tips, Tricks and Helpful Advice
- Unova Stone Pokémon Go Evolution List and How Catch Them For Samsung Galaxy F15 5G | Dr.fone
- Still Using Pattern Locks with Samsung Galaxy A54 5G? Tips, Tricks and Helpful Advice
- In 2024, Top 10 AirPlay Apps in Asus ROG Phone 7 for Streaming | Dr.fone
- In 2024, AddROM Bypass An Android Tool to Unlock FRP Lock Screen For your Samsung Galaxy M54 5G
- Easy Ways to Manage Your OnePlus Nord CE 3 Lite 5G Location Settings | Dr.fone
- How to install hardware device drivers manually on Windows 10
- All About Apple iPhone 11 Pro Max Unlock Chip You Need to Know
- Ultimate Guide on Infinix Note 30 Pro FRP Bypass
- 3 Solutions to Hard Reset Samsung Galaxy A15 5G Phone Using PC | Dr.fone
- The Best iSpoofer Alternative to Try On Oppo A1x 5G | Dr.fone
- How to Soft Reset Vivo X90S phone? | Dr.fone
- In 2024, Preparation to Beat Giovani in Pokemon Go For Vivo Y78+ | Dr.fone
- In 2024, How to Cast Samsung Galaxy M14 5G to Computer for iPhone and Android? | Dr.fone
- In 2024, How to Mirror Apple iPhone 15 Plus to Windows 10? | Dr.fone
- All Things You Need to Know about Wipe Data/Factory Reset For Oppo Reno 11 5G | Dr.fone
- Title: Updated Secret Source to Make a Great Stop Motion Puppet
- Author: Elon
- Created at : 2024-05-19 03:05:02
- Updated at : 2024-05-20 03:05:02
- Link: https://animation-videos.techidaily.com/updated-secret-source-to-make-a-great-stop-motion-puppet/
- License: This work is licensed under CC BY-NC-SA 4.0.
