
Updated Secrets to Make 2D Game Animation
Secrets to Make 2D Game Animation
Secrets to Make 2D Game Animation
An easy yet powerful editor
Numerous effects to choose from
Detailed tutorials provided by the official channel
In this dominated era by 2D game animation, when even the latest versions of Super Mario Bros and Street Fighter. are created of polygonized characters, quality sprite-based 2D games are rare.
In this article
01 [2D Game Animation Courses and Tutorials](#Part 1)
02 [5 Best Game Animation Services to Buy Online](#Part 2)
03 [Best 5 Game Animation Tools for Development As of 2022](#Part 3)
04 [3 Tips for Making Great Animations for 2D Games](#Part 4)
05 [How to Make 2D Animation for Games](#Part 5)
Part 1 2D Game Animation Courses and Tutorials
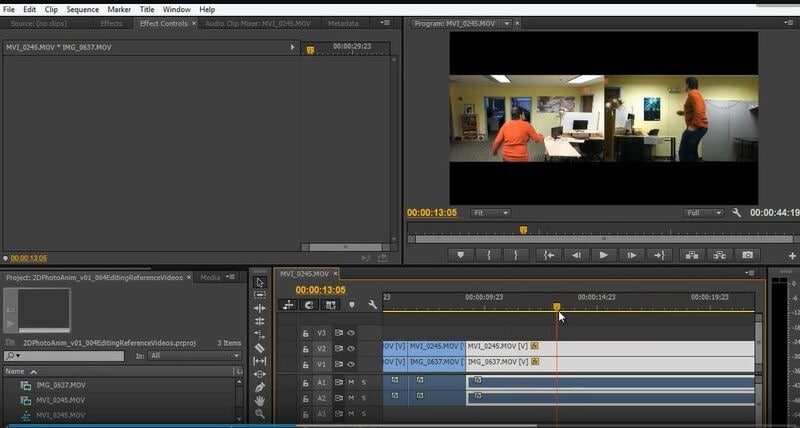
01Animating a 2D Character within Live-Action Video in Photoshop and Premiere
This tutorial greatly defines the process of creating traditional 2D animation in Photoshop implacable over live-action video. We’ll discuss the live-action planning shots with animation in mind, continuity of video editing, and making references for video animation. You will also know how to create the critical poses via rough animation to finish the entire movement and make final line images.
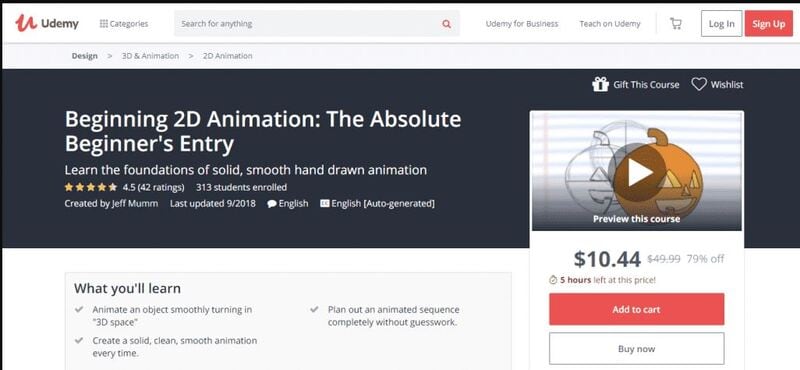
02Beginning 2D Animation: The Absolute Beginner’s Entry with Jeff Mumm
This course lays a solid foundation for absolute beginners entering the exciting world of 2D game animation. Here, we describe the detailed steps to create unique and great-looking animations.
You will also learn ‘easing,’ one of the twelve animation principles, and ultimately plan an animated sequence.
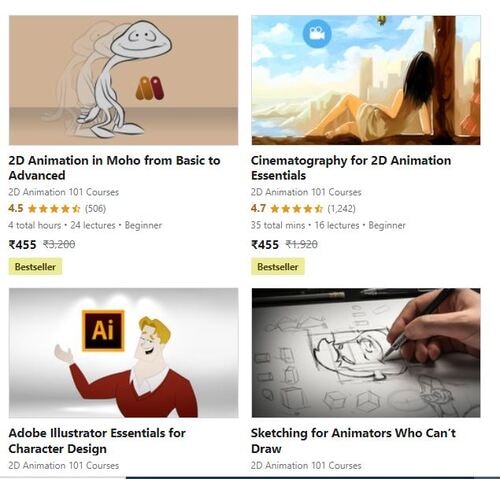
032D Animation in Moho from Basic to Advanced
This course focuses on applying the principles of animation to create an organic walk cycle for the character. This tutorial or course will also teach you how to rig and prepare your animated characters and do 2D game animation.
You will also learn how to trace characters in Moho and use different drawing tools.
Also, you will learn how to create an organic walk cycle by applying advanced animation principles.

042D Animation 101 Courses
This is one of the free online and the ultimate 2D game character design and animation courses that offer free online certificates. Autumn Leave Films has ten years of experience in the film industry and a great collection of short films – nearly 30 2D Animation 101 Courses.
2D Animation 101 provides eight courses, plus free and proprietary 2D game character animation software. In addition, their “Free Step-by-Step Plan” is specifically compelling to beginners in the 2D Animation arena.
It includes daily 10-minute lessons, online 2D game character animation tutorials, suggestions, and tips on using the required software.
05Skillshare -2D Animation for Beginners with Adobe Animate
This is one of the free online 2D animation courses that offer free online animation courses with certificates. You can learn 2D animation online by following Walt’s course. This course is designed for beginners and demonstrates how to create animated characters by providing students with an understanding of the fundamental principles and vivid examples. This tutorial covers various topics, including vector art basics in Animate, nested animations, adding audio to animations, and more.
This short course or tutorial is ideal for animation for personal rather than professional reasons.

Part 2 5 Best Game Animation Services to Buy Online
Rather than using and learning the best 2D animation software for game development, we’d like to describe a list of the top 5 freelancing platforms to rely upon for the best game animation services.
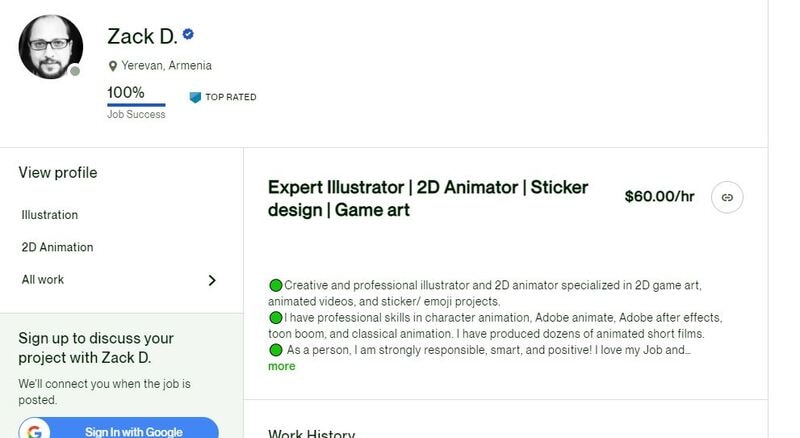
01Upwork
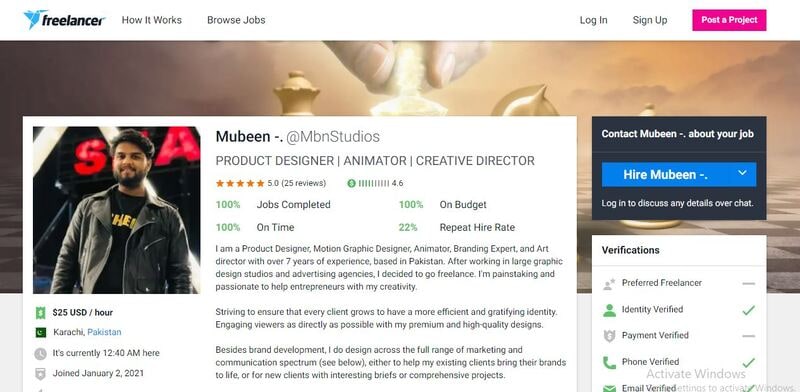
02Freelancer
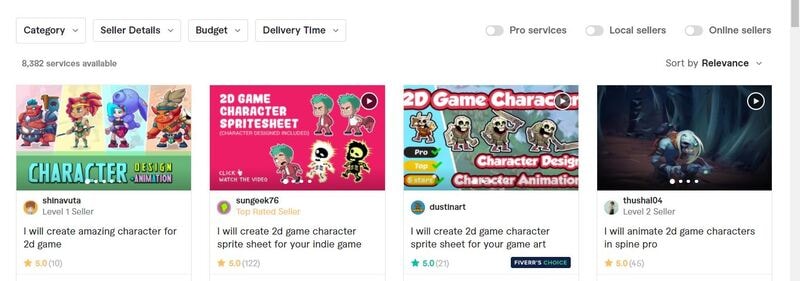
03Fiverr
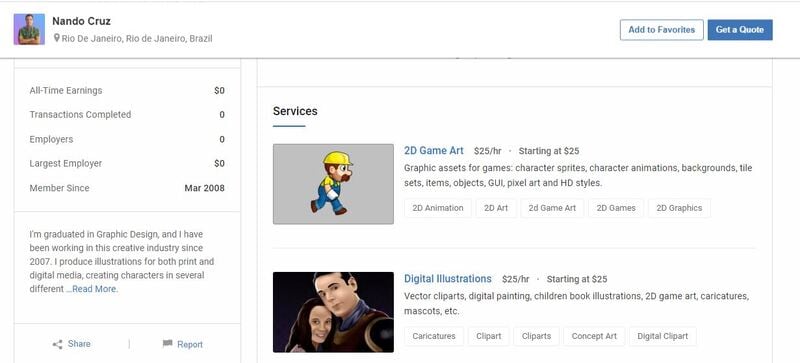
04Guru
05PeoplePerHour
Part 3 Best 5 Game Animation Tools for Development As of 2022
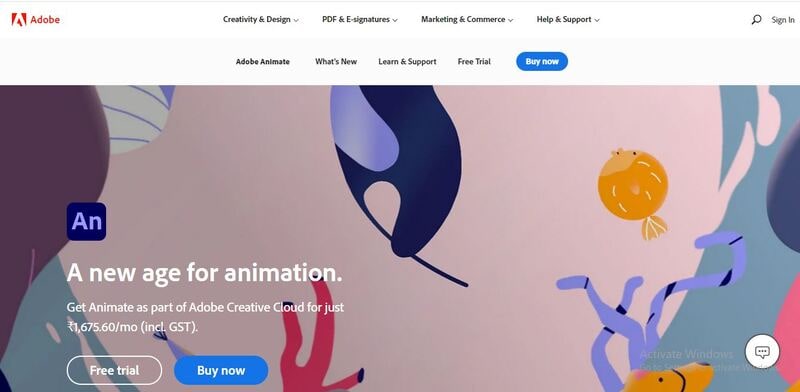
01Adobe Animate
It is a program from Adobe’s Creative Cloud. It offers the ability to make many varieties of animated features, games, or other Flash multimedia. The program was called Adobe Flash Professional for more than ten years; that name was retired in 2015.
The main features of Animate are as follows:
● Integration with your Adobe cloud library of assets
● Easy cross-platform use with other Adobe products
● Creates animated movies, cartoons, or clips
● Creates Flash games or interactive Flash utilities
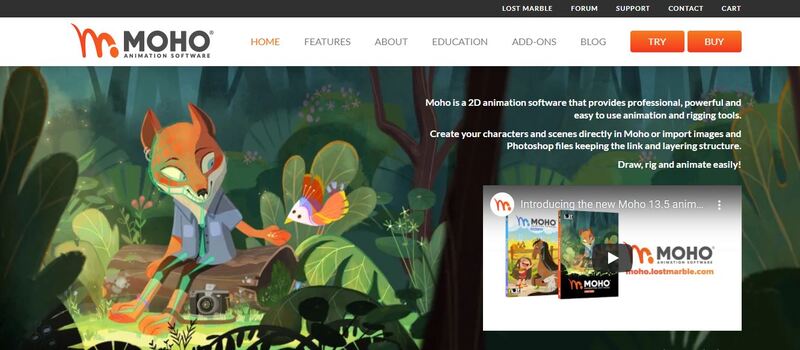
02Moho
It’s a comprehensive and best 2D game animation software where your animations are basically on the level of some of your favorite creations. It’s projected toward animators looking to hone their craft.
You could create some fantastic stuff if you’re up to the task (and the price). Moreover, they’re constantly adding updates.
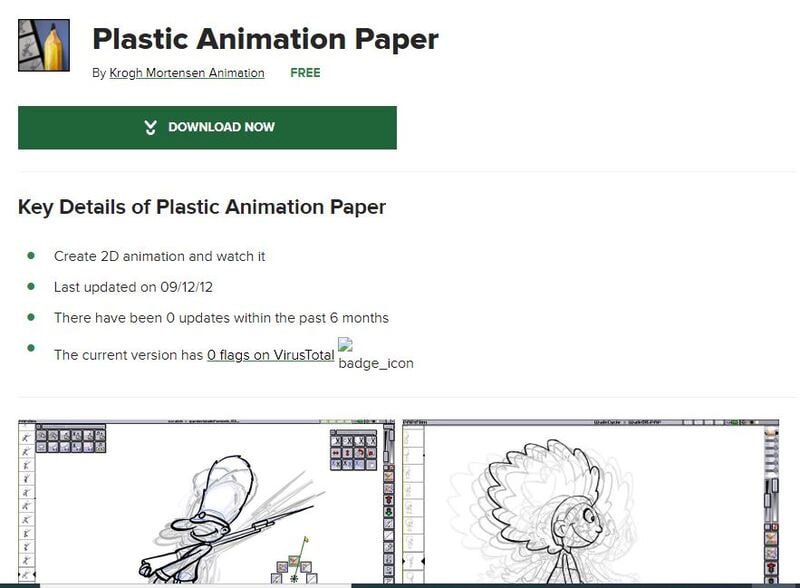
03Plastic Animation Paper
Plastic Animation Paper is another best 2D game character animation software that deals heavily with the concept of pencil drawing.
The program is designed for the most straightforward use and involves clear resolution. You can do whatever you wish with your drawings and elevate yourself to the next level.
04Stop Motion Studio
‘Want to create movies like Wallace and those groovy Lego shorts on YouTube? Stop Motion Studio allows you to create terrific stop action movies with a bucket of specialized features.’
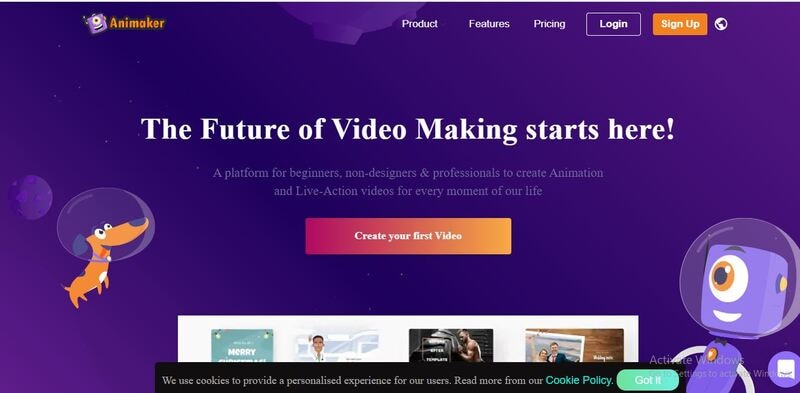
05Animaker
Learning how to make 2D animation for games with Animaker is also good to set up a storyboard and animate the characters or props in that scene. It’s used by companies like Verizon, Google, Pepsi, etc.
It’s appropriate for ad placement on websites and simplistic for beginners. They make it easy and super-fast to get lost for hours animating.
Part 4 3 Tips for Making Great Animations for 2D Games
Now that you have some initial idea of 2D game animation let’s jump to the top 3 tips that will help you create the best and unique 2D game character animation designs with ease.
It will be beneficial while knowing how to make 2D animation for games.
01Focus on the story and start with simple movements
You need to focus on the storyline so that outcome will come accordingly. Focus on every detail while sketching, and don’t miss out on simple movements. Take paper and pencil and start drawing simple exercises like the movement of a bouncing ball etc.
02Use keyframes properly
You need to carefully use keyframes’ start and endpoints to have robust storytelling and movements. To adequately describe the first and last, you need to consider effectively using the keyframes.
03Enliven your characters
You need to give life to your characters so that audience can best relate to the story. Also, pay good attention to facial expressions, sound, tickling movements, etc.
Although these may look like the most straightforward tips ever, these are the most practical 2D game animation strategies that can do wonders if used effectively.
Part 5 How to Make 2D Animation for Games
Making 2D game character animation isn’t a straightforward process and thus needs detailed knowledge that we will describe below.
Let’s use Unity as the best 2D animation software for games without further ado!
Essential awareness of the Unity Editor (how to navigate and open tabs) is required to work with the Unity Animation window.
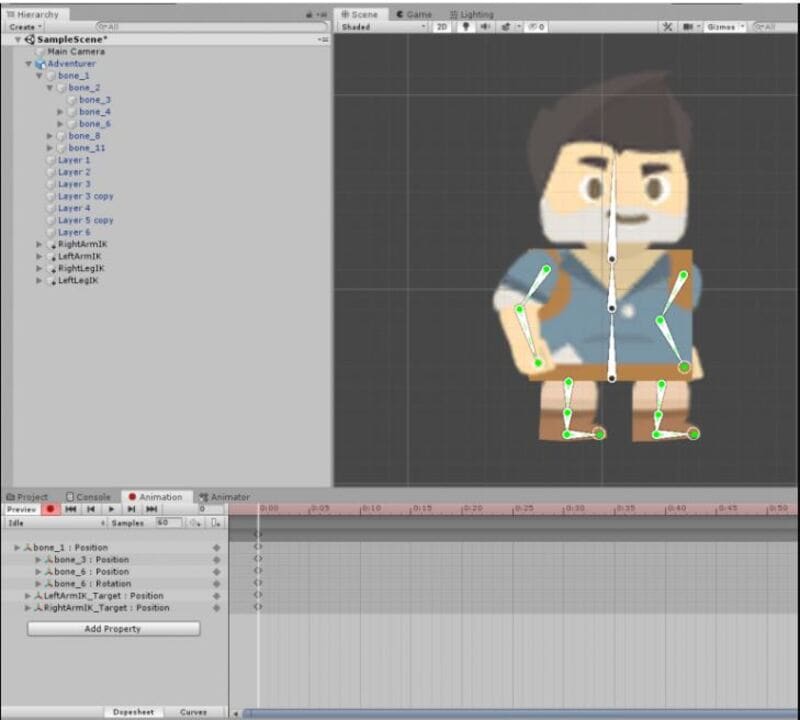
01Step 1: Start the Animation tab
Choose the Adventurer character and launch the Animation tab.
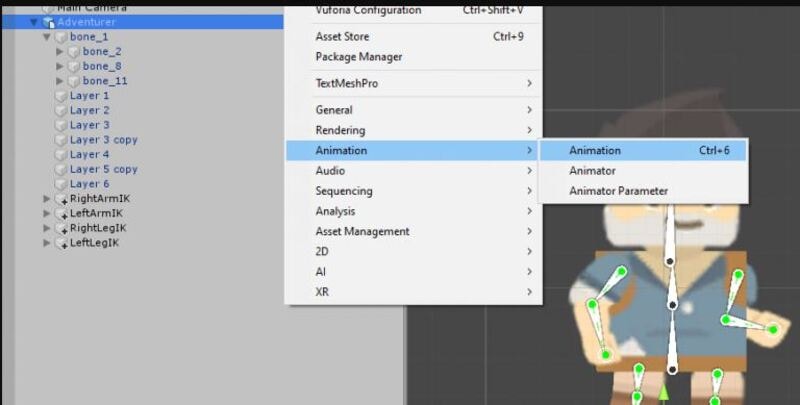
Dock this next to your project tab and console tab. Head towards the project tab and name with the Adventurer folder. Make a new folder known as “Animation.”
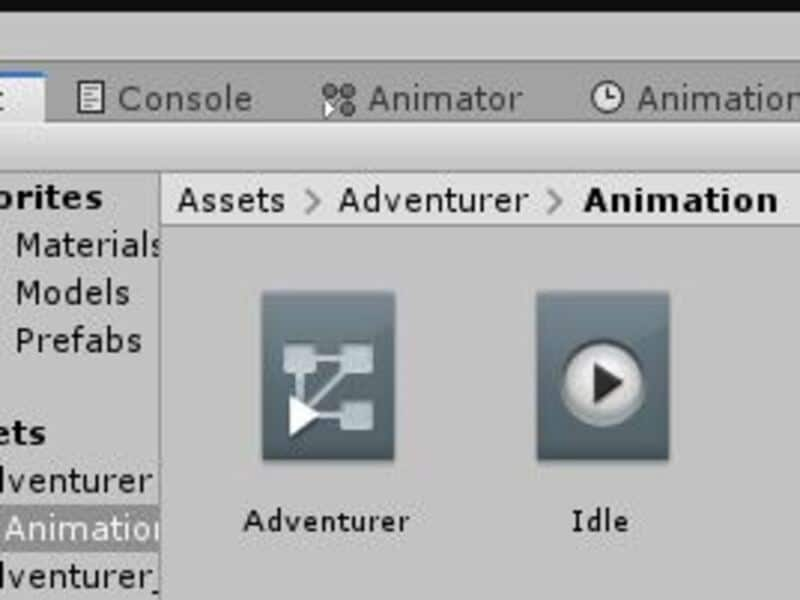
With the Animation tab, create a new animation known as “Idle” placed in our Animation folder.
It also creates an Animator Controller in that same folder.
Now, let’s start animating this character!
02Step 2: Proceed with the Idle Animation
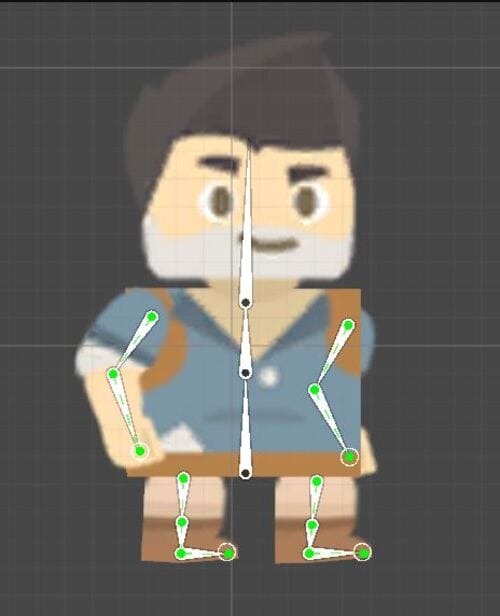
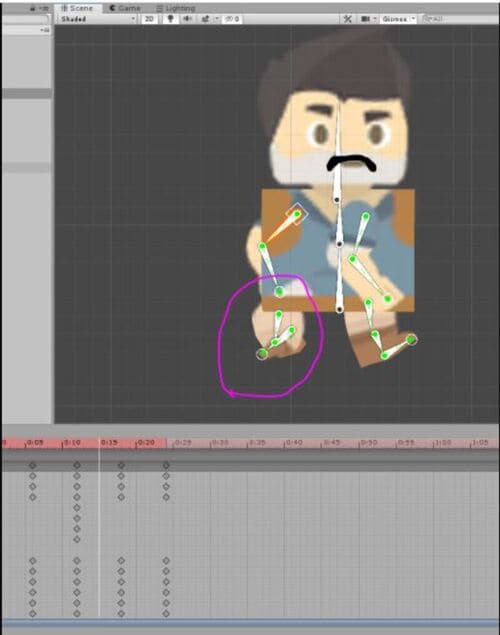
IKs contribute a lot to the efficiency and speed of animating when it comes to idle animation. We must animate a subtle movement very similar to a breathing motion. Tap the red record button and move the character to this position:
Now go about fifty frames ahead and barely move the top torso bone straight down.
Drag the arm IKs to the side to contain less bend in them and display a sort of “swinging” motion. Here is the pose that I chose:
A subtle tweak is there. It makes the idle animation look strange if we create large movements. Then, choose the first group of keyframes and tap the Ctrl-C (Command-C on a Mac).
Then, paste these frame-centric keyframes on number 1:50.
So, the nice looping animation is over now! It looks genuine, but we need to add some head motion to improve the illusion.
Just rotate the head back ever so slightly. But, as you can see, it makes a huge difference. Alright! Congratulations! We now have an idle animation!
03Step 3: Start walk animation
Create a new animation clip called ‘Walk.”
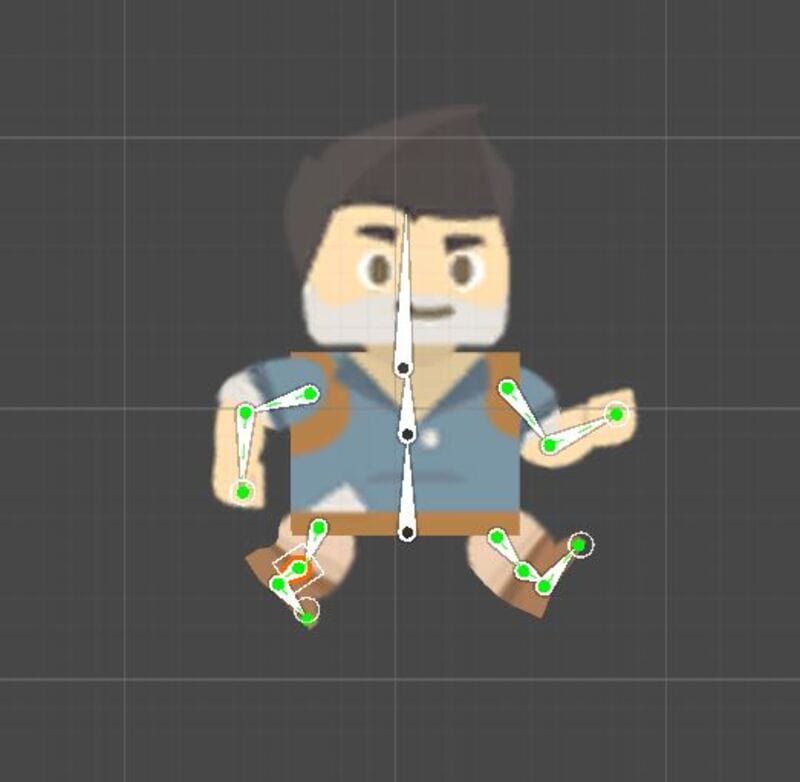
This animation is a bit more technical. Here, we need to know a few essential things about walk locomotion. The walk animation’s primary function is that the character is always touching the ground. Therefore, we should never have a pose where our character is airborne. Also, I use the word “pose” intentionally. When we animate in 2D, an action comprises certain key poses. In the scenario of the walk animation, we have one posture like this:
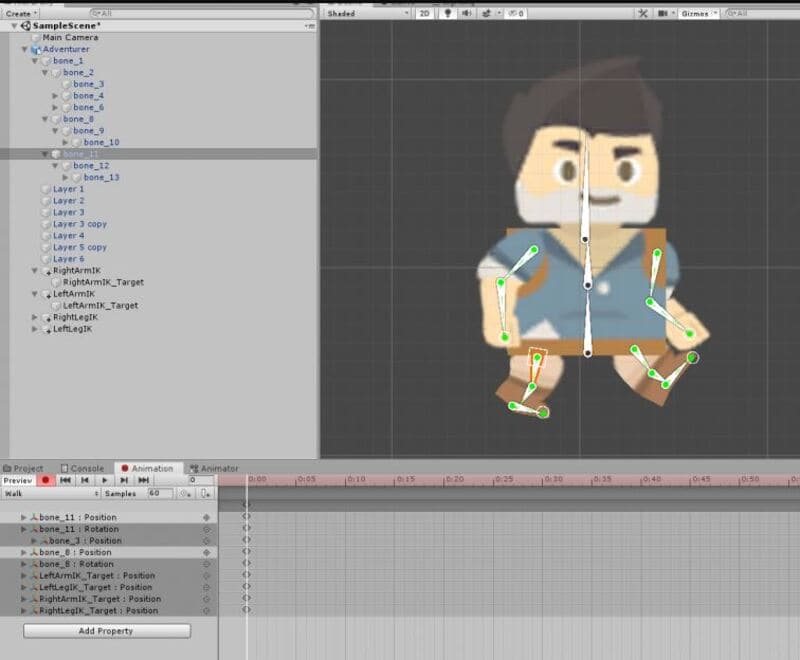
Here we have the right foot (relative to the character) touching the ground as you wander.
Then, about six frames ahead, we have a “passing pose.”
It contains a slight movement downwards. It further adds a realistic bobbing motion.
We must animate the character moving forward by moving the entire character game object. Don’t move the surface by any other means except by dragging the character as the whole object.
Then, the “dynamic pose” with the left foot touching the ground this time.
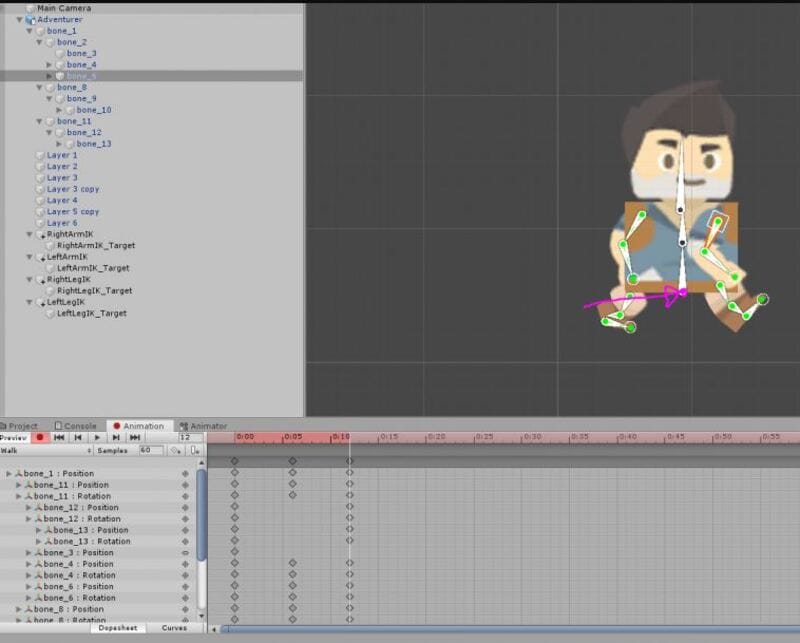
This happens at frame twelve, and we are still forwarding the character.
Now, we just require a final passing pose.
And then we recreate the same pose!
Now, copy the first keyframe and paste it. Reposition the character on the X-axis to match the forward motion. Now, go back to your animation and tweak any limbs bending in the wrong direction.
We are done!
04Step 4: Run animation
For the Run animation, create one pose with the airborne character. The distance covered is also more significant than the walk animation. Besides, the run animation has a similar general structure, but we add one extra pose to improve the illusion ultimately.
Create a new animation folder or clip called “Run.”
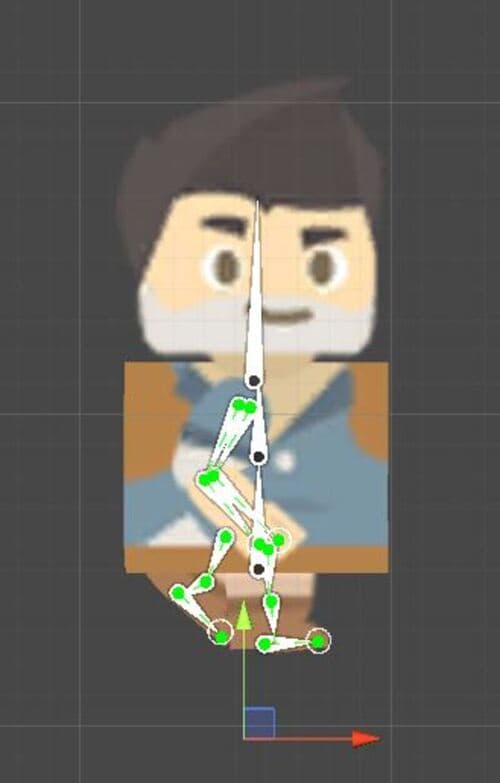
Tap the record tab and move the limbs to this pose:
The armature, we found, was very fiddly, so be patient while trying to create this pose. This first dynamic pose means that we need to have the whole character move slightly up on the y-axis. Then, after forwarding the six frames, we drag the character in different positions and down while limbs reposition to make the first passing pose.
Go through these two keyframes to check if you have an experimental animation. Reposition the feet to avoid foot sliding.
Then, the second dynamic pose happens six frames forward:
Now, we have another passing posture at frame number 18:
And conclusively, we have our final dynamic pose and make it look like the first pose. An excellent place to begin is to copy the first frame and paste it at the end. Drag the character forward on the X-axis into the ideal place. Now move the limbs into roughly the exact position as the beginning pose.
05Step 5: Go back to animation and check
Now, you can go back through the animation and consider checking two things. Firstly, correct any unnaturally bent limbs.
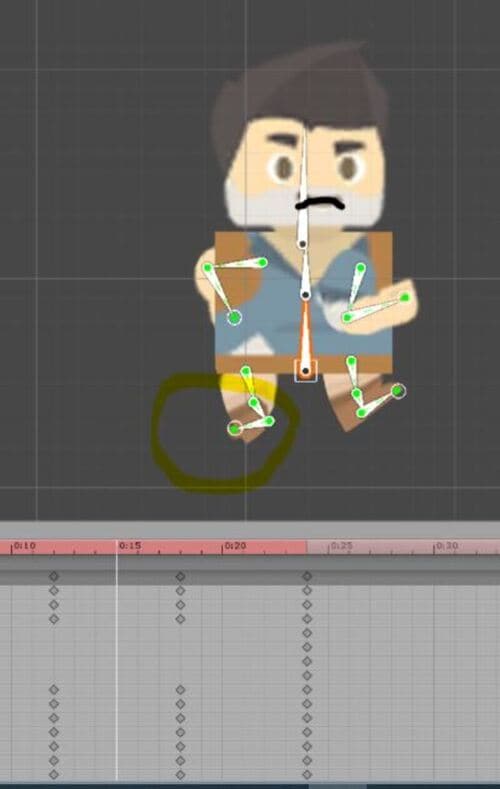
06Step 6: Create a contact pose
Secondly, we are required to add a unique pose to this run cycle called a “Contact Pose,” where we can visibly see the character make contact with the ground. This pose occurs a few frames after the dynamic pose and a few before the passing pose. It is simply the forward leg making early contact with the ground.

We need one of these before every passing pose. Also, while we’re here, let’s add a little more toe movement after passing each passing pose to make it look like the character got pushed off the ground.
So, this is the procedure to use the best 2D animation software for game development via Unity, and you can similarly continue to make jump animations, root motion, and more.
This tutorial mainly focused on animating a 2D character and dove deeper into the actual structure of an animation. Knowing these things will allow you to animate 2D characters and 3D characters as the principles are the same for each medium.
Easiest Solution for 2D Game Character Animation
Animating 2D games with Filmora Pro is a perfect choice. You get to try out its excellent 2D and 3D animation functions that are highly affordable and simple to use for both Android and iOS devices. You can consider using keyframe animations and letting them look realistic.
You can also get your fingers on a vast range of video editing tools with Wondershare Filmora Video Editor , such as color correction and grading, motion tracking, keying, simulations, and more. It allows you to make incredible animated videos and cinematic reels.
How to animate games with Wondershare Filmora
More advancement means more and kinds of games are fading out to obscurity. You can now animate 2D games underrated and add a bit of your touch to them via software like Filmora Pro and others like it.
For example, Filmora Pro features a dozen different transition effects like Centre Wipe, Evaporate, or Linear Wipe.
For Win 7 or later (64-bit)
For macOS 10.12 or later
You can also apply 3D rendering techniques to your games’ light and shadow effects.
● Key Takeaways from This Episode →
● A guide to the ultimate 2d game character design & animation course
● A guide to 5 best game animation services
● Learning five best 2D game character animation tools
● Tips for making excellent 2D game animations
● A step by ultimate step guide to making 2D game animation character in Unity
● Exploring the easiest solution for 2D game animation
In this dominated era by 2D game animation, when even the latest versions of Super Mario Bros and Street Fighter. are created of polygonized characters, quality sprite-based 2D games are rare.
In this article
01 [2D Game Animation Courses and Tutorials](#Part 1)
02 [5 Best Game Animation Services to Buy Online](#Part 2)
03 [Best 5 Game Animation Tools for Development As of 2022](#Part 3)
04 [3 Tips for Making Great Animations for 2D Games](#Part 4)
05 [How to Make 2D Animation for Games](#Part 5)
Part 1 2D Game Animation Courses and Tutorials
01Animating a 2D Character within Live-Action Video in Photoshop and Premiere
This tutorial greatly defines the process of creating traditional 2D animation in Photoshop implacable over live-action video. We’ll discuss the live-action planning shots with animation in mind, continuity of video editing, and making references for video animation. You will also know how to create the critical poses via rough animation to finish the entire movement and make final line images.
02Beginning 2D Animation: The Absolute Beginner’s Entry with Jeff Mumm
This course lays a solid foundation for absolute beginners entering the exciting world of 2D game animation. Here, we describe the detailed steps to create unique and great-looking animations.
You will also learn ‘easing,’ one of the twelve animation principles, and ultimately plan an animated sequence.
032D Animation in Moho from Basic to Advanced
This course focuses on applying the principles of animation to create an organic walk cycle for the character. This tutorial or course will also teach you how to rig and prepare your animated characters and do 2D game animation.
You will also learn how to trace characters in Moho and use different drawing tools.
Also, you will learn how to create an organic walk cycle by applying advanced animation principles.
042D Animation 101 Courses
This is one of the free online and the ultimate 2D game character design and animation courses that offer free online certificates. Autumn Leave Films has ten years of experience in the film industry and a great collection of short films – nearly 30 2D Animation 101 Courses.
2D Animation 101 provides eight courses, plus free and proprietary 2D game character animation software. In addition, their “Free Step-by-Step Plan” is specifically compelling to beginners in the 2D Animation arena.
It includes daily 10-minute lessons, online 2D game character animation tutorials, suggestions, and tips on using the required software.
05Skillshare -2D Animation for Beginners with Adobe Animate
This is one of the free online 2D animation courses that offer free online animation courses with certificates. You can learn 2D animation online by following Walt’s course. This course is designed for beginners and demonstrates how to create animated characters by providing students with an understanding of the fundamental principles and vivid examples. This tutorial covers various topics, including vector art basics in Animate, nested animations, adding audio to animations, and more.
This short course or tutorial is ideal for animation for personal rather than professional reasons.
Part 2 5 Best Game Animation Services to Buy Online
Rather than using and learning the best 2D animation software for game development, we’d like to describe a list of the top 5 freelancing platforms to rely upon for the best game animation services.
01Upwork
02Freelancer
03Fiverr
04Guru
05PeoplePerHour
Part 3 Best 5 Game Animation Tools for Development As of 2022
01Adobe Animate
It is a program from Adobe’s Creative Cloud. It offers the ability to make many varieties of animated features, games, or other Flash multimedia. The program was called Adobe Flash Professional for more than ten years; that name was retired in 2015.
The main features of Animate are as follows:
● Integration with your Adobe cloud library of assets
● Easy cross-platform use with other Adobe products
● Creates animated movies, cartoons, or clips
● Creates Flash games or interactive Flash utilities
02Moho
It’s a comprehensive and best 2D game animation software where your animations are basically on the level of some of your favorite creations. It’s projected toward animators looking to hone their craft.
You could create some fantastic stuff if you’re up to the task (and the price). Moreover, they’re constantly adding updates.
03Plastic Animation Paper
Plastic Animation Paper is another best 2D game character animation software that deals heavily with the concept of pencil drawing.
The program is designed for the most straightforward use and involves clear resolution. You can do whatever you wish with your drawings and elevate yourself to the next level.
04Stop Motion Studio
‘Want to create movies like Wallace and those groovy Lego shorts on YouTube? Stop Motion Studio allows you to create terrific stop action movies with a bucket of specialized features.’
05Animaker
Learning how to make 2D animation for games with Animaker is also good to set up a storyboard and animate the characters or props in that scene. It’s used by companies like Verizon, Google, Pepsi, etc.
It’s appropriate for ad placement on websites and simplistic for beginners. They make it easy and super-fast to get lost for hours animating.
Part 4 3 Tips for Making Great Animations for 2D Games
Now that you have some initial idea of 2D game animation let’s jump to the top 3 tips that will help you create the best and unique 2D game character animation designs with ease.
It will be beneficial while knowing how to make 2D animation for games.
01Focus on the story and start with simple movements
You need to focus on the storyline so that outcome will come accordingly. Focus on every detail while sketching, and don’t miss out on simple movements. Take paper and pencil and start drawing simple exercises like the movement of a bouncing ball etc.
02Use keyframes properly
You need to carefully use keyframes’ start and endpoints to have robust storytelling and movements. To adequately describe the first and last, you need to consider effectively using the keyframes.
03Enliven your characters
You need to give life to your characters so that audience can best relate to the story. Also, pay good attention to facial expressions, sound, tickling movements, etc.
Although these may look like the most straightforward tips ever, these are the most practical 2D game animation strategies that can do wonders if used effectively.
Part 5 How to Make 2D Animation for Games
Making 2D game character animation isn’t a straightforward process and thus needs detailed knowledge that we will describe below.
Let’s use Unity as the best 2D animation software for games without further ado!
Essential awareness of the Unity Editor (how to navigate and open tabs) is required to work with the Unity Animation window.
01Step 1: Start the Animation tab
Choose the Adventurer character and launch the Animation tab.
Dock this next to your project tab and console tab. Head towards the project tab and name with the Adventurer folder. Make a new folder known as “Animation.”
With the Animation tab, create a new animation known as “Idle” placed in our Animation folder.
It also creates an Animator Controller in that same folder.
Now, let’s start animating this character!
02Step 2: Proceed with the Idle Animation
IKs contribute a lot to the efficiency and speed of animating when it comes to idle animation. We must animate a subtle movement very similar to a breathing motion. Tap the red record button and move the character to this position:
Now go about fifty frames ahead and barely move the top torso bone straight down.
Drag the arm IKs to the side to contain less bend in them and display a sort of “swinging” motion. Here is the pose that I chose:
A subtle tweak is there. It makes the idle animation look strange if we create large movements. Then, choose the first group of keyframes and tap the Ctrl-C (Command-C on a Mac).
Then, paste these frame-centric keyframes on number 1:50.
So, the nice looping animation is over now! It looks genuine, but we need to add some head motion to improve the illusion.
Just rotate the head back ever so slightly. But, as you can see, it makes a huge difference. Alright! Congratulations! We now have an idle animation!
03Step 3: Start walk animation
Create a new animation clip called ‘Walk.”
This animation is a bit more technical. Here, we need to know a few essential things about walk locomotion. The walk animation’s primary function is that the character is always touching the ground. Therefore, we should never have a pose where our character is airborne. Also, I use the word “pose” intentionally. When we animate in 2D, an action comprises certain key poses. In the scenario of the walk animation, we have one posture like this:
Here we have the right foot (relative to the character) touching the ground as you wander.
Then, about six frames ahead, we have a “passing pose.”
It contains a slight movement downwards. It further adds a realistic bobbing motion.
We must animate the character moving forward by moving the entire character game object. Don’t move the surface by any other means except by dragging the character as the whole object.
Then, the “dynamic pose” with the left foot touching the ground this time.
This happens at frame twelve, and we are still forwarding the character.
Now, we just require a final passing pose.
And then we recreate the same pose!
Now, copy the first keyframe and paste it. Reposition the character on the X-axis to match the forward motion. Now, go back to your animation and tweak any limbs bending in the wrong direction.
We are done!
04Step 4: Run animation
For the Run animation, create one pose with the airborne character. The distance covered is also more significant than the walk animation. Besides, the run animation has a similar general structure, but we add one extra pose to improve the illusion ultimately.
Create a new animation folder or clip called “Run.”
Tap the record tab and move the limbs to this pose:
The armature, we found, was very fiddly, so be patient while trying to create this pose. This first dynamic pose means that we need to have the whole character move slightly up on the y-axis. Then, after forwarding the six frames, we drag the character in different positions and down while limbs reposition to make the first passing pose.
Go through these two keyframes to check if you have an experimental animation. Reposition the feet to avoid foot sliding.
Then, the second dynamic pose happens six frames forward:
Now, we have another passing posture at frame number 18:
And conclusively, we have our final dynamic pose and make it look like the first pose. An excellent place to begin is to copy the first frame and paste it at the end. Drag the character forward on the X-axis into the ideal place. Now move the limbs into roughly the exact position as the beginning pose.
05Step 5: Go back to animation and check
Now, you can go back through the animation and consider checking two things. Firstly, correct any unnaturally bent limbs.
06Step 6: Create a contact pose
Secondly, we are required to add a unique pose to this run cycle called a “Contact Pose,” where we can visibly see the character make contact with the ground. This pose occurs a few frames after the dynamic pose and a few before the passing pose. It is simply the forward leg making early contact with the ground.
We need one of these before every passing pose. Also, while we’re here, let’s add a little more toe movement after passing each passing pose to make it look like the character got pushed off the ground.
So, this is the procedure to use the best 2D animation software for game development via Unity, and you can similarly continue to make jump animations, root motion, and more.
This tutorial mainly focused on animating a 2D character and dove deeper into the actual structure of an animation. Knowing these things will allow you to animate 2D characters and 3D characters as the principles are the same for each medium.
Easiest Solution for 2D Game Character Animation
Animating 2D games with Filmora Pro is a perfect choice. You get to try out its excellent 2D and 3D animation functions that are highly affordable and simple to use for both Android and iOS devices. You can consider using keyframe animations and letting them look realistic.
You can also get your fingers on a vast range of video editing tools with Wondershare Filmora Video Editor , such as color correction and grading, motion tracking, keying, simulations, and more. It allows you to make incredible animated videos and cinematic reels.
How to animate games with Wondershare Filmora
More advancement means more and kinds of games are fading out to obscurity. You can now animate 2D games underrated and add a bit of your touch to them via software like Filmora Pro and others like it.
For example, Filmora Pro features a dozen different transition effects like Centre Wipe, Evaporate, or Linear Wipe.
For Win 7 or later (64-bit)
For macOS 10.12 or later
You can also apply 3D rendering techniques to your games’ light and shadow effects.
● Key Takeaways from This Episode →
● A guide to the ultimate 2d game character design & animation course
● A guide to 5 best game animation services
● Learning five best 2D game character animation tools
● Tips for making excellent 2D game animations
● A step by ultimate step guide to making 2D game animation character in Unity
● Exploring the easiest solution for 2D game animation
The Secret Sauce for Making GIF Instagram Story More Stunning
The Secret Sauce for Making GIF Instagram Story More Aesthetic
An easy yet powerful editor
Numerous effects to choose from
Detailed tutorials provided by the official channel
Adding own gift stickers to an Instagram story is in trend. An Instagram story can be made more creative with an Instagram gif story. Make a powerful impact with a gif on an Instagram story.
In this article
01 [How to Post Gifs to Instagram Story](#Part 1)
02 [8 Cute Instagram Stickers to Make Your Stories Aesthetic](#Part 2)
03 [How to Create Custom Gifs for Instagram Stories](#Part 3)
Part 1 How to Post Gifs to Instagram Story
Instagram stories are one of the best mediums to get connected to people at large. To be in trends and grab maximum people’s attention, it is very necessary to be updated with the new elements of Instagram stories. Gif Instagram story is a new way to increase the followers and be in trends. Adding these gifs in Instagram stories will improve your business by creating more engaging content for business promotion. Let’s see how this can be done?
● Go to the Instagram app installed on your phone. While adding a sticker to a picture of videos in Instagram stories, a GIF option will appear.
● When you tap it, you can find several attractive gifs in the library powered by GIPHY.
● Tap add sticker button that appears on the top of the Instagram stories. Tap the ‘GIF’ icon; the library of trending gifs will appear.
● Look for the gif you need to add to your story. You also have a search option to find your favorite or trending gif.
● After selecting the desired gif, you can add it to your photo or video after resizing it as you desired.
● After finishing, tap on the ‘Your story’ icon.
So, this way, it is easy to create gif story instagram with just a few simple steps.
Part 2 Cute Instagram Stickers to Make Your Stories Aesthetic
Cute Instagram stickers are the best way to lift the creativity of your Instagram stories. Adding stickers are an amazing idea to add design to Instagram stories. Stickers make stories more creative and interesting. Some of the amazing stickers to beautify Instagram stories are:
01BOHO
Boho stickers are good when you search for new stickers. They add fun to the story and give an amazing look for any lifestyle picture over an Instagram story. Boho white is also one type of sticker where are of them are white. Applying white boho to the picture background highlights the space and looks good. One has so many options from cute stars, hearts, lines, and flowers.
02FOOPKLO
For those who want words and saying gif on instagram story, there are some cute pink stickers available. These can be searched as FOOPKLO. Pink flowers, clusters, sayings, hearts, and some more cute stickers are there which can make Instagram stories lovelier.
03HALEYIVERS
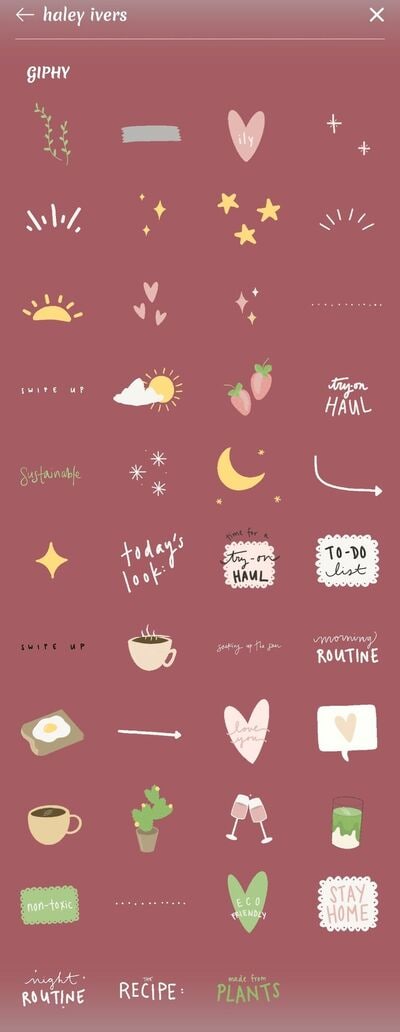
For those who are active Instagram users and update their stories every day, the old stickers may not entertain them. So, for those, there are HALEYIVERS stickers. Good morning, days, sunshine, coffee, stars, and hearts add a great style to the Instagram stories. So, next time you need some punch over Instagram stories add some HALEYIVERS stickers.
04OHLALALITA
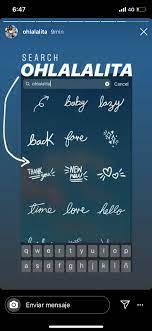
Instagram story gif is one of the great ways to even express your thoughts and moods in a summarized way. So, for those who wish to add a short story on Instagram, OHLALALITA has the best stickers. Loaded with so many cute words such as Tank you, Made with love, chill, glow, bye-bye, Wow, and many more, it makes any story in just simple words.
05SCARLETPIN
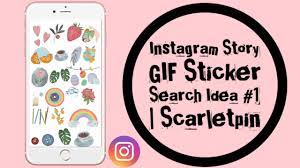
Instagram story gifs are a gift to those who are food lovers. Now with some new additions of gifs from GIPHY, they can post their food stories over their Instagram stories. The range of stickers that can help them is SCARLETPIN. These consist of some bright and colorful stickers of food. Red strawberries, tea, leaves, and oranges are great stuff to include in the morning Instagram stories.
06CURSIVE

Gif for Instagram story is also available in attractive writings. CURSIVE is the most attractive form of writing stories. Popular and cute sayings can be checked on CURSIVE and can be included in the stories. They can be searched and remembered easily. Cursive phrases can be added to the Instagram stories that look visually appealing to the viewers.
07EMOJIS
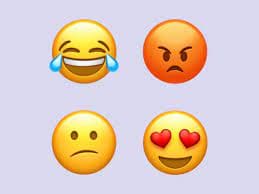
Emojis are the most lovable stickers available and can be part of any Instagram story. Typing on emojis can be done easily and they can be searched on the search bar. Perfect emojis gifs can be applied to an Instagram story that suits the situation. It can be moved or resized as per the requirement. These emojis gifs add a fun element to the Instagram stories.
08PAINT & BRUSH
Instagram gif story can be made creative with paint and brush. Earlier the users can add text with plain background only. But, paint and brush have enhanced it. Now users can add paint behind the text to make it more engaging. They are simple yet very attractive when added to the stories.
Part 3 How to Create Custom Gifs for Instagram Stories
Funny and expressive Instagram stories of your own always win the hearts of followers. Custom-made gif for Instagram is a great tool for business owners as it brings volume to their business by increasing leads. Custom-made gifs over Instagram stories are eye-catching and thus people get interested in the business. This helps in creating a good brand image for the business.
So, some of the ways to create fascinating custom Gifs Instagram stories for self and business are:
01Pin Instagram stories
Visiting a place and letting people know where you are through Instagram stories is always loved by all. Now, this can be done attractively by using the Pin feature. One can pin on the pictures and videos over the Instagram stories to a particular place. This is the most interesting element to make an Instagram story catchy. It can be done easily by tapping and holding it till it shows a pin at the little bar. This was one can pin gif at the desired location. This gif can pop up at a certain location only. It can be applied to videos one has made of a certain location by moving the gif to a place where one desires.
02Using Gif to give life to any image
To make gif Instagram story aesthetic, adding some moves with sparkles will be the right option. An Instagram user can give life to a picture by including animated elements. Gif adds a fun and surprising element to any Instagram story. When movement in any picture is added through gif, it catches the attention of the viewers and they follow it. A business can make its content engaging with gifs and can achieve its goal.
03Gifs Instagram story to catch viewer’s attention
Gif can be used effectively to create attractive Instagram stories. These gifs are good for the business to highlight their important elements. Gifs like the link in bio, sound on, and swipe up are created for a call to action from the viewers. Adding arrows and signals through gif in the Instagram stories direct the people to spend some minutes on the stories and find something new.
04Highlighting text with gif effects
A customized Instagram story can be made by highlighting text through adding gifs. Sparkle, stars, and highlights gifs can be searched easily and can be applied to any Instagram story. By adding a gif, the text looks stunning and grabs the attention of the viewers. GIPHY has several text-based gifs which can take an ordinary text over the story at a great level. It can be searched by mentioning related keywords.
05Adding gifs to customize selfies
Selfies to Instagram stories are very common. But they can be made even better with some amazing gifs from GIPHY. One can add sunglasses, hats, jewelry, and other fun props to the selfies. Filters can be added by creating their own story through a gif.
06Filmora V11 – A GIF resource
Wondershare Filmora Video Editor (The Filmora Meme maker) : Some many apps and websites offer beautiful gifs to beautify Instagram stories. One of the places where Instagram users can find a wide collection of attractive gifs is Filmora V11. It is a user-friendly tool that has media editing features. It can be used to add sound, light effects, and beautiful gifs to Instagram stories.

Wondershare Filmora - Best Video Editor for Mac/Windows
5,481,435 people have downloaded it.
Build unique custom animations without breaking a sweat.
Focus on creating epic stories and leave the details to Filmora’s auto features.
Start a creative adventure with drag & drop effects and endless possibilities.
Filmora simplifies advanced features to save you time and effort.
Filmora cuts out repetition so you can move on to your next creative breakthrough.
For creating gifs, Filmora V11 can be used and it can be made in a few simple steps. Filmora V11 app is required to be installed on the system and media files can be imported there. Files can be dragged for creating gifs. Filters, stickers, and other effects can be added. They can be further customized as per the requirement of the users. After adding background effects, music, and sound, the gif can be previewed also. The media can be saved as GIFs and can be easily exported also. To customize gifs, the Filmora Meme maker can be used. Captions can be added to GIFs and can be customized by using templates available at Filmora.
So, next time you need to know how to add your own gif to Instagram story, go to Filmora V11. This is one of the great platforms to create some amazing custom gifs to add to Instagram stories. If you want to surprise your viewers with some interesting gifs, try Filmora V11.
● Key Takeaways from This Episode →
● Instagram stories are the most effective way to mark a great impression on the viewers. It is also one of the effective tools to lift any business. Best results can be obtained when attractive and interesting gifs are added to Instagram stories.
● Instagram stories gifs are becoming trendy and there are so many cute and amazing gif stickers available to create Instagram stories. Some of the widely used gifs and stickers are Boho, FOOPKLO, HALEYIVERS, OHLALALITA, and EMOJIS. Instagram users can explore these cute and funny stickers and add them to beautify their Instagram stories.
● Customized gif has spiced up the Instagram stories and amazed the people. This feature helps a business to influence people towards their work and attract more people. The content becomes more engaging and interesting through a customized gif.
Adding own gift stickers to an Instagram story is in trend. An Instagram story can be made more creative with an Instagram gif story. Make a powerful impact with a gif on an Instagram story.
In this article
01 [How to Post Gifs to Instagram Story](#Part 1)
02 [8 Cute Instagram Stickers to Make Your Stories Aesthetic](#Part 2)
03 [How to Create Custom Gifs for Instagram Stories](#Part 3)
Part 1 How to Post Gifs to Instagram Story
Instagram stories are one of the best mediums to get connected to people at large. To be in trends and grab maximum people’s attention, it is very necessary to be updated with the new elements of Instagram stories. Gif Instagram story is a new way to increase the followers and be in trends. Adding these gifs in Instagram stories will improve your business by creating more engaging content for business promotion. Let’s see how this can be done?
● Go to the Instagram app installed on your phone. While adding a sticker to a picture of videos in Instagram stories, a GIF option will appear.
● When you tap it, you can find several attractive gifs in the library powered by GIPHY.
● Tap add sticker button that appears on the top of the Instagram stories. Tap the ‘GIF’ icon; the library of trending gifs will appear.
● Look for the gif you need to add to your story. You also have a search option to find your favorite or trending gif.
● After selecting the desired gif, you can add it to your photo or video after resizing it as you desired.
● After finishing, tap on the ‘Your story’ icon.
So, this way, it is easy to create gif story instagram with just a few simple steps.
Part 2 Cute Instagram Stickers to Make Your Stories Aesthetic
Cute Instagram stickers are the best way to lift the creativity of your Instagram stories. Adding stickers are an amazing idea to add design to Instagram stories. Stickers make stories more creative and interesting. Some of the amazing stickers to beautify Instagram stories are:
01BOHO
Boho stickers are good when you search for new stickers. They add fun to the story and give an amazing look for any lifestyle picture over an Instagram story. Boho white is also one type of sticker where are of them are white. Applying white boho to the picture background highlights the space and looks good. One has so many options from cute stars, hearts, lines, and flowers.
02FOOPKLO
For those who want words and saying gif on instagram story, there are some cute pink stickers available. These can be searched as FOOPKLO. Pink flowers, clusters, sayings, hearts, and some more cute stickers are there which can make Instagram stories lovelier.
03HALEYIVERS
For those who are active Instagram users and update their stories every day, the old stickers may not entertain them. So, for those, there are HALEYIVERS stickers. Good morning, days, sunshine, coffee, stars, and hearts add a great style to the Instagram stories. So, next time you need some punch over Instagram stories add some HALEYIVERS stickers.
04OHLALALITA
Instagram story gif is one of the great ways to even express your thoughts and moods in a summarized way. So, for those who wish to add a short story on Instagram, OHLALALITA has the best stickers. Loaded with so many cute words such as Tank you, Made with love, chill, glow, bye-bye, Wow, and many more, it makes any story in just simple words.
05SCARLETPIN
Instagram story gifs are a gift to those who are food lovers. Now with some new additions of gifs from GIPHY, they can post their food stories over their Instagram stories. The range of stickers that can help them is SCARLETPIN. These consist of some bright and colorful stickers of food. Red strawberries, tea, leaves, and oranges are great stuff to include in the morning Instagram stories.
06CURSIVE
Gif for Instagram story is also available in attractive writings. CURSIVE is the most attractive form of writing stories. Popular and cute sayings can be checked on CURSIVE and can be included in the stories. They can be searched and remembered easily. Cursive phrases can be added to the Instagram stories that look visually appealing to the viewers.
07EMOJIS
Emojis are the most lovable stickers available and can be part of any Instagram story. Typing on emojis can be done easily and they can be searched on the search bar. Perfect emojis gifs can be applied to an Instagram story that suits the situation. It can be moved or resized as per the requirement. These emojis gifs add a fun element to the Instagram stories.
08PAINT & BRUSH
Instagram gif story can be made creative with paint and brush. Earlier the users can add text with plain background only. But, paint and brush have enhanced it. Now users can add paint behind the text to make it more engaging. They are simple yet very attractive when added to the stories.
Part 3 How to Create Custom Gifs for Instagram Stories
Funny and expressive Instagram stories of your own always win the hearts of followers. Custom-made gif for Instagram is a great tool for business owners as it brings volume to their business by increasing leads. Custom-made gifs over Instagram stories are eye-catching and thus people get interested in the business. This helps in creating a good brand image for the business.
So, some of the ways to create fascinating custom Gifs Instagram stories for self and business are:
01Pin Instagram stories
Visiting a place and letting people know where you are through Instagram stories is always loved by all. Now, this can be done attractively by using the Pin feature. One can pin on the pictures and videos over the Instagram stories to a particular place. This is the most interesting element to make an Instagram story catchy. It can be done easily by tapping and holding it till it shows a pin at the little bar. This was one can pin gif at the desired location. This gif can pop up at a certain location only. It can be applied to videos one has made of a certain location by moving the gif to a place where one desires.
02Using Gif to give life to any image
To make gif Instagram story aesthetic, adding some moves with sparkles will be the right option. An Instagram user can give life to a picture by including animated elements. Gif adds a fun and surprising element to any Instagram story. When movement in any picture is added through gif, it catches the attention of the viewers and they follow it. A business can make its content engaging with gifs and can achieve its goal.
03Gifs Instagram story to catch viewer’s attention
Gif can be used effectively to create attractive Instagram stories. These gifs are good for the business to highlight their important elements. Gifs like the link in bio, sound on, and swipe up are created for a call to action from the viewers. Adding arrows and signals through gif in the Instagram stories direct the people to spend some minutes on the stories and find something new.
04Highlighting text with gif effects
A customized Instagram story can be made by highlighting text through adding gifs. Sparkle, stars, and highlights gifs can be searched easily and can be applied to any Instagram story. By adding a gif, the text looks stunning and grabs the attention of the viewers. GIPHY has several text-based gifs which can take an ordinary text over the story at a great level. It can be searched by mentioning related keywords.
05Adding gifs to customize selfies
Selfies to Instagram stories are very common. But they can be made even better with some amazing gifs from GIPHY. One can add sunglasses, hats, jewelry, and other fun props to the selfies. Filters can be added by creating their own story through a gif.
06Filmora V11 – A GIF resource
Wondershare Filmora Video Editor (The Filmora Meme maker) : Some many apps and websites offer beautiful gifs to beautify Instagram stories. One of the places where Instagram users can find a wide collection of attractive gifs is Filmora V11. It is a user-friendly tool that has media editing features. It can be used to add sound, light effects, and beautiful gifs to Instagram stories.
Wondershare Filmora - Best Video Editor for Mac/Windows
5,481,435 people have downloaded it.
Build unique custom animations without breaking a sweat.
Focus on creating epic stories and leave the details to Filmora’s auto features.
Start a creative adventure with drag & drop effects and endless possibilities.
Filmora simplifies advanced features to save you time and effort.
Filmora cuts out repetition so you can move on to your next creative breakthrough.
For creating gifs, Filmora V11 can be used and it can be made in a few simple steps. Filmora V11 app is required to be installed on the system and media files can be imported there. Files can be dragged for creating gifs. Filters, stickers, and other effects can be added. They can be further customized as per the requirement of the users. After adding background effects, music, and sound, the gif can be previewed also. The media can be saved as GIFs and can be easily exported also. To customize gifs, the Filmora Meme maker can be used. Captions can be added to GIFs and can be customized by using templates available at Filmora.
So, next time you need to know how to add your own gif to Instagram story, go to Filmora V11. This is one of the great platforms to create some amazing custom gifs to add to Instagram stories. If you want to surprise your viewers with some interesting gifs, try Filmora V11.
● Key Takeaways from This Episode →
● Instagram stories are the most effective way to mark a great impression on the viewers. It is also one of the effective tools to lift any business. Best results can be obtained when attractive and interesting gifs are added to Instagram stories.
● Instagram stories gifs are becoming trendy and there are so many cute and amazing gif stickers available to create Instagram stories. Some of the widely used gifs and stickers are Boho, FOOPKLO, HALEYIVERS, OHLALALITA, and EMOJIS. Instagram users can explore these cute and funny stickers and add them to beautify their Instagram stories.
● Customized gif has spiced up the Instagram stories and amazed the people. This feature helps a business to influence people towards their work and attract more people. The content becomes more engaging and interesting through a customized gif.
Tips on How to Get Awesome Background for Slideshow in PowerPoint
Tips That Show Anybody How to Get Awesome Background for Slideshow in Powerpoint
An easy yet powerful editor
Numerous effects to choose from
Detailed tutorials provided by the official channel
Amazing slideshow background are an absolute attention grabber in the realm of creative PowerPoint presentations. If you wish to upgrade yours with the same, be here to learn how!
In this article
01 [How to Add Video Background in PowerPoint?](#Part 1)
02 [How to Create Moving Backgrounds in Microsoft PowerPoint?](#Part 2)
03 [Some Tips for You to Get Awesome PowerPoint Backgrounds & Templates](#Part 3)
Part 1 How to Add Video Background in PowerPoint?
When the talk is about engaging means to deliver a precise information, PowerPoint slideshows are an absolute stunner. While these are already a captivating utility to present your thing, the output and audience engagement is at par with the inclusion of attractive design elements in the presentation. As is evident, there are enormous diversities of supplementary elements to complement your presentation, let us centre our discussion to the application of video background for slideshow in PowerPoint.
User’s Guide to Add Video Background in a PowerPoint Slideshow
The following section presents a detailed explanation of the steps to supplement your PowerPoint presentations with classic video backgrounds in just a few quick steps:
Step 1: Launch Your Presentation
Start with opening the desired PowerPoint presentation to which you want to add the video background, in any of your preferred devices.
Step 2: Add a Video to Your Slide
Browse through your presentation slides to locate the one you want to add the video background to. When you have made your choice, navigate to the PowerPoint toolbar at the top and hit the ‘Insert’ tab and choose the ‘Video’ option.
You will now be presented with 2 choices, either uploading a video from your device or insert one from the web by pasting its YouTube URL into the slide. If you are uploading a video from your device, proceed with selecting the desired video and tap ‘Insert’.

Step 3: Move and Resize Your Video
After uploading your video to the slide, you need to make suitable adjustments in its size and alignment to synchronize the same with the contents of the slide. To do this, drag the top left corner of the video to that of the slide to set the top alignment ratio. In the same way, move the bottom right corner of the video to be in sync with that of the slide. You will see the video occupying the entire slide at the end of the adjustment process.

Step 4: Set the Video Background
You will now need to set the video as the background of your slide, so that the latter’s contents are displayed over the video. You can do this by right clicking on the video and choosing the ‘Send to Back’ option from the dropdown that follows. This will cause the contents of your slide to get displayed over the video.

Step 5: Playback Edit and Customization Choices
Before proceeding towards making changes in the video playback and formatting, prefer taking a quick preview of your work till here. Once you are satisfied, navigate to the PowerPoint Toolbar at the top, hit the ‘Video Tools’ tab, followed by clicking on the ‘Playback’ tab.
It is recommended to introduce the following changes in your video for the most affordable slideshow output:
● Loop Your Video
Creating a video loop will facilitate you with an automatic replay of your video without the need to restart it every time with a click. You can loop your video by navigating to the ‘Video Options’ section and choose ‘Loop Until Stopped’ by clicking within the checkbox next to it. The background video will now continue to play until you switch to a different slide.
● Automatically Start Your Video
To avoid clicking on the slide amid your presentation for the video loop to begin, adjust the latter’s settings for an automatic start. Navigate to the ‘Start’ dropdown menu and select ‘Automatically’.
● Trim Your Video
You can work with some basic video editing tools in PowerPoint, like trimming and cropping your background video to a desired length. If you wish to ward off certain portions of your video, reach to and click o the ‘Trim Video’ button. Following this, drag the slider of the video to select the desired portions of the clip and exclude the rest.
You can further work with some more editing effects to create the perfect video backgrounds for your presentation slides in line with your specific preferences.

Step 6: Annotate Your Video Background
When you are done with the video editing process, take a preview of the same to ensure that everything is set in the proper order and at the proper place. Lastly, if you wish to add suitable text annotations to your video, you can do this with the ‘ClassPoint’ tool to write over the video background. All you need to do is select a preferred pen colour and start writing on your slide screen. You can further, save the annotations for a work record.

Part 2 How to Create Moving Backgrounds in Microsoft PowerPoint?
Moving PowerPoint slideshow background is another aspect of graphic creativity at its best, which can be used in a number of ways to grab considerable viewer attention. When choosing to add moving backgrounds to your presentation, the latter can aid in improving the style of content presentation, making your audience curious about how and what happens next.
Having learnt about the utility and creation process of video backgrounds in the PowerPoint presentation tool, let us extend our discussion to the method of creating a moving slide show background in the same in the following section:
User’s Guide to Create Moving Backgrounds for PowerPoint Presentations
Discussed below is an explanatory procedure for designing moving backgrounds with an awesome appearance for slideshow presentations in Microsoft PowerPoint:
Step 1: Open Your Presentation
To begin with, launch the PowerPoint tool in your preferred device and open the presentation on which you will be working to add the moving background. After the presentation gets loaded, navigate through the same and select the desired slide to proceed with the aforesaid task.
Step 2: Choose a Video Location
To add your desired video to the slide, navigate to the PowerPoint ribbon at the top and click on the ‘Insert’ tab. Select ‘Video’ from the list of options that appears, followed by choosing one of the ‘Online Video’ or ‘Video on My PC’ options from the video selection prompt. It is further recommended to select a video in the MP4 format, as the latter gives best results of moving and video backgrounds.
Step 3: Insert Your Video
Choose the second option in the selection prompt to upload a video from your device. You will now be asked to browse through your device and locate the desired video in the ‘Insert Video’ dialog box that appears. Select your video and tap the ‘Insert’ button to add your video.
To upload videos from an online source, choose the ‘Online Video’ option in the selection prompt and proceed to search the video from PowerPoint or paste its embed code to recover the video. The chosen video will begin to download and can be added to the PowerPoint presentation after the download process comes to an end.

Step 4: Playback Editing and Video Customization
Before proceeding further, consider paying your video once by clicking on the ‘Start’ button. You can also add different effects, trim and crop or add a bookmark to your video by navigating to and clicking on the ‘Video Tools’ tab, followed by selecting the ‘Format’ option. To work with the start and playback options for the video, click on ‘Playback’ in the dropdown menu of the ‘Video Tools’ tab.

Part 3 Some Tips for You to Get Awesome PowerPoint Backgrounds & Templates
Now that you have developed a comprehensive understanding of the utility of adding video and moving background for slideshow presentation, let us look through some easy tips and tricks to conveniently access the top rated and the most popular PowerPoint slideshow templates and backgrounds in the following section:
01Cool Slide Backgrounds
Slideshow presentations in PowerPoint are supplemented with a visual spark through amazing and vibrant backgrounds that are a sign of excellent graphic creativity. When working with a PowerPoint presentation of your own, do take the liberty to use some cool slide backgrounds to your creative advantage.
When the talk is about complementing your presentation with a cohesive and upbeat background, you can either select the most suitable one from a heap of pre made slideshow templates available both in the PowerPoint slideshow creator tool as well as across the web. However, if you wish to take the excitement to another level, try hands at creating an awesome and cool backgrounds for PowerPoint slides of your own!
Talking about some really cool tips and tricks to design a slideshow presentation background in PowerPoint, start with including some specific shapes and color overlays to the background capture, experiment with a polygon background, work on enhancing the background image with classic and artistic effects and apply a mix of colors, textures and patterns to give a classy look to your slideshow backgrounds.

02Professional Slideshow Backgrounds
If you are aiming at creating a PowerPoint slideshow presentation with a business centered design approach, you will need to cut down on some extra elements that you would ideally choose to include in a personal purpose based slideshow. Paying attention to the fact that business and corporate centered presentations should be simple, subtle and to the point, it would be an intelligent step to avoid adding too many expressive elements in the background.
Whether you are creating a professional slideshow background of your own or working with a pre designed template, take care to include a complementary play of a light background theme with a maximum of 2 balancing shades.
Avoid too much vibrancy and abstain from applying over the top effects and quick transitions, lest your presentation may look a bit too crowed. If your slides have lot of written content, prefer using a white color background text in a professional font style.
If you have decided on picking a pre made template, you can browse through a diversity of suggestions across the web, while keeping the aforesaid constraints in mind. Consider taking a look at the figure given below to have a more comprehensive understating of the prerequisites of selecting a professional sideshow background template:

03Happy Birthday Slide Backgrounds
Birthday parties are the most appealing synonyms of fun and entertainment. If you are into the profession of organizing events that renders smiling and happy faces, slideshow presentations could be of great help to you in discussing about services, types of social gentries and event targets with your clients.
When looking through different options to select the perfect birthday template, either for a professional event, or just to go down the memory lane of your most cherished moments, take caution to search for a vibrant alternative with colorful images, different background designs and party oriented cool themes, wide aspect ratio with high screen resolution for a mass display and conveniently editable graphics.
If you are creating a happy birthday slide background of your own, there are variety of realms to explore your graphic design creativity, owing to the fact that the subject of creation is highly expressive and multi-dimensional. While you are free to extend your creativity to the next level, do pay attention to the above constraints for a more elusive and outstanding creation output, while maintaining the fun and entertainment quotient intact.

04Wedding Slide Backgrounds
Considering the fact that wedding events are pronounced means of fun, leisure, enjoyment and beautiful memories, anything that aims to be a part of the celebrations, should be equally ecstatic and engaging. Infusing festive occasions with technology, slideshow based wedding invitations and moment captures are the top rated modern trends of celebrating this significant life event.
If you are keen on designing the perfect slideshow presentation for wedding invitations, photo albums and thank you cards, prefer to choose a wedding slide background template with aesthetic layout and flowing element inclusions, like that of floral borders and scented candles. Look though the elements of a subtle thematic setup with soothing color combinations, preferably in complementary pastel shades, like pink and white.
Talking of template customizability, the latter should have placeholders to include names of the bride and groom, the wedding date and venue, and of course the wedding photographs. The beautiful slide background template should have enough design space to include the most elusive play of text colors and fonts to suit specific preferences of creating special memories of a cherished event.

05Slideshow Backgrounds and Templates in Filmora
When looking for the most convenient lead to an extensive variety of beautiful slideshow templates and background, the template library of Wondershare Filmora Video Editor slideshow creator program can be your most affordable destination. The aforesaid software library is known to possess the best and most perfect template choices to suit the creation constraints of almost every slideshow presentation style and objective you can possibly think of.
For Win 7 or later (64-bit)
For macOS 10.12 or later
The elusive templates are further supplemented with a plethora of design flexibilities and customization features that are all set to deliver you the most appreciable creation output. Stressing a bit on the template customization choices of the software, you can work with the tool to uplift your slideshow backgrounds with artistic image effects and overlays, annotate them with beautiful text formations in a variety of colors, fonts and sizes and lots more.
Moving a bit deeper into the creative aspect, you can upgrade the visual style of your presentations with the most perfect and seamless image and video transitions and text animations. The bottom line is, working with the aforesaid slideshow creator program, you are entitled to get jaw dropping applaud from your audience, while making a confident and a content delivery through your slideshow presentation.

● Ending Thoughts →
● Using an expressive and complementing background in your slideshow presentation uplifts its visual credibility in captivating your audience.
● Browsing through the web, you get to access a vast range of amazing slideshow backgrounds and templates to make your presentation, a visual masterpiece.
● When looking for the most distributed storehouse of slideshow backgrounds and templates, the Wondershare Filmora library is your ultimate solution.
Amazing slideshow background are an absolute attention grabber in the realm of creative PowerPoint presentations. If you wish to upgrade yours with the same, be here to learn how!
In this article
01 [How to Add Video Background in PowerPoint?](#Part 1)
02 [How to Create Moving Backgrounds in Microsoft PowerPoint?](#Part 2)
03 [Some Tips for You to Get Awesome PowerPoint Backgrounds & Templates](#Part 3)
Part 1 How to Add Video Background in PowerPoint?
When the talk is about engaging means to deliver a precise information, PowerPoint slideshows are an absolute stunner. While these are already a captivating utility to present your thing, the output and audience engagement is at par with the inclusion of attractive design elements in the presentation. As is evident, there are enormous diversities of supplementary elements to complement your presentation, let us centre our discussion to the application of video background for slideshow in PowerPoint.
User’s Guide to Add Video Background in a PowerPoint Slideshow
The following section presents a detailed explanation of the steps to supplement your PowerPoint presentations with classic video backgrounds in just a few quick steps:
Step 1: Launch Your Presentation
Start with opening the desired PowerPoint presentation to which you want to add the video background, in any of your preferred devices.
Step 2: Add a Video to Your Slide
Browse through your presentation slides to locate the one you want to add the video background to. When you have made your choice, navigate to the PowerPoint toolbar at the top and hit the ‘Insert’ tab and choose the ‘Video’ option.
You will now be presented with 2 choices, either uploading a video from your device or insert one from the web by pasting its YouTube URL into the slide. If you are uploading a video from your device, proceed with selecting the desired video and tap ‘Insert’.
Step 3: Move and Resize Your Video
After uploading your video to the slide, you need to make suitable adjustments in its size and alignment to synchronize the same with the contents of the slide. To do this, drag the top left corner of the video to that of the slide to set the top alignment ratio. In the same way, move the bottom right corner of the video to be in sync with that of the slide. You will see the video occupying the entire slide at the end of the adjustment process.
Step 4: Set the Video Background
You will now need to set the video as the background of your slide, so that the latter’s contents are displayed over the video. You can do this by right clicking on the video and choosing the ‘Send to Back’ option from the dropdown that follows. This will cause the contents of your slide to get displayed over the video.
Step 5: Playback Edit and Customization Choices
Before proceeding towards making changes in the video playback and formatting, prefer taking a quick preview of your work till here. Once you are satisfied, navigate to the PowerPoint Toolbar at the top, hit the ‘Video Tools’ tab, followed by clicking on the ‘Playback’ tab.
It is recommended to introduce the following changes in your video for the most affordable slideshow output:
● Loop Your Video
Creating a video loop will facilitate you with an automatic replay of your video without the need to restart it every time with a click. You can loop your video by navigating to the ‘Video Options’ section and choose ‘Loop Until Stopped’ by clicking within the checkbox next to it. The background video will now continue to play until you switch to a different slide.
● Automatically Start Your Video
To avoid clicking on the slide amid your presentation for the video loop to begin, adjust the latter’s settings for an automatic start. Navigate to the ‘Start’ dropdown menu and select ‘Automatically’.
● Trim Your Video
You can work with some basic video editing tools in PowerPoint, like trimming and cropping your background video to a desired length. If you wish to ward off certain portions of your video, reach to and click o the ‘Trim Video’ button. Following this, drag the slider of the video to select the desired portions of the clip and exclude the rest.
You can further work with some more editing effects to create the perfect video backgrounds for your presentation slides in line with your specific preferences.
Step 6: Annotate Your Video Background
When you are done with the video editing process, take a preview of the same to ensure that everything is set in the proper order and at the proper place. Lastly, if you wish to add suitable text annotations to your video, you can do this with the ‘ClassPoint’ tool to write over the video background. All you need to do is select a preferred pen colour and start writing on your slide screen. You can further, save the annotations for a work record.
Part 2 How to Create Moving Backgrounds in Microsoft PowerPoint?
Moving PowerPoint slideshow background is another aspect of graphic creativity at its best, which can be used in a number of ways to grab considerable viewer attention. When choosing to add moving backgrounds to your presentation, the latter can aid in improving the style of content presentation, making your audience curious about how and what happens next.
Having learnt about the utility and creation process of video backgrounds in the PowerPoint presentation tool, let us extend our discussion to the method of creating a moving slide show background in the same in the following section:
User’s Guide to Create Moving Backgrounds for PowerPoint Presentations
Discussed below is an explanatory procedure for designing moving backgrounds with an awesome appearance for slideshow presentations in Microsoft PowerPoint:
Step 1: Open Your Presentation
To begin with, launch the PowerPoint tool in your preferred device and open the presentation on which you will be working to add the moving background. After the presentation gets loaded, navigate through the same and select the desired slide to proceed with the aforesaid task.
Step 2: Choose a Video Location
To add your desired video to the slide, navigate to the PowerPoint ribbon at the top and click on the ‘Insert’ tab. Select ‘Video’ from the list of options that appears, followed by choosing one of the ‘Online Video’ or ‘Video on My PC’ options from the video selection prompt. It is further recommended to select a video in the MP4 format, as the latter gives best results of moving and video backgrounds.
Step 3: Insert Your Video
Choose the second option in the selection prompt to upload a video from your device. You will now be asked to browse through your device and locate the desired video in the ‘Insert Video’ dialog box that appears. Select your video and tap the ‘Insert’ button to add your video.
To upload videos from an online source, choose the ‘Online Video’ option in the selection prompt and proceed to search the video from PowerPoint or paste its embed code to recover the video. The chosen video will begin to download and can be added to the PowerPoint presentation after the download process comes to an end.
Step 4: Playback Editing and Video Customization
Before proceeding further, consider paying your video once by clicking on the ‘Start’ button. You can also add different effects, trim and crop or add a bookmark to your video by navigating to and clicking on the ‘Video Tools’ tab, followed by selecting the ‘Format’ option. To work with the start and playback options for the video, click on ‘Playback’ in the dropdown menu of the ‘Video Tools’ tab.
Part 3 Some Tips for You to Get Awesome PowerPoint Backgrounds & Templates
Now that you have developed a comprehensive understanding of the utility of adding video and moving background for slideshow presentation, let us look through some easy tips and tricks to conveniently access the top rated and the most popular PowerPoint slideshow templates and backgrounds in the following section:
01Cool Slide Backgrounds
Slideshow presentations in PowerPoint are supplemented with a visual spark through amazing and vibrant backgrounds that are a sign of excellent graphic creativity. When working with a PowerPoint presentation of your own, do take the liberty to use some cool slide backgrounds to your creative advantage.
When the talk is about complementing your presentation with a cohesive and upbeat background, you can either select the most suitable one from a heap of pre made slideshow templates available both in the PowerPoint slideshow creator tool as well as across the web. However, if you wish to take the excitement to another level, try hands at creating an awesome and cool backgrounds for PowerPoint slides of your own!
Talking about some really cool tips and tricks to design a slideshow presentation background in PowerPoint, start with including some specific shapes and color overlays to the background capture, experiment with a polygon background, work on enhancing the background image with classic and artistic effects and apply a mix of colors, textures and patterns to give a classy look to your slideshow backgrounds.
02Professional Slideshow Backgrounds
If you are aiming at creating a PowerPoint slideshow presentation with a business centered design approach, you will need to cut down on some extra elements that you would ideally choose to include in a personal purpose based slideshow. Paying attention to the fact that business and corporate centered presentations should be simple, subtle and to the point, it would be an intelligent step to avoid adding too many expressive elements in the background.
Whether you are creating a professional slideshow background of your own or working with a pre designed template, take care to include a complementary play of a light background theme with a maximum of 2 balancing shades.
Avoid too much vibrancy and abstain from applying over the top effects and quick transitions, lest your presentation may look a bit too crowed. If your slides have lot of written content, prefer using a white color background text in a professional font style.
If you have decided on picking a pre made template, you can browse through a diversity of suggestions across the web, while keeping the aforesaid constraints in mind. Consider taking a look at the figure given below to have a more comprehensive understating of the prerequisites of selecting a professional sideshow background template:
03Happy Birthday Slide Backgrounds
Birthday parties are the most appealing synonyms of fun and entertainment. If you are into the profession of organizing events that renders smiling and happy faces, slideshow presentations could be of great help to you in discussing about services, types of social gentries and event targets with your clients.
When looking through different options to select the perfect birthday template, either for a professional event, or just to go down the memory lane of your most cherished moments, take caution to search for a vibrant alternative with colorful images, different background designs and party oriented cool themes, wide aspect ratio with high screen resolution for a mass display and conveniently editable graphics.
If you are creating a happy birthday slide background of your own, there are variety of realms to explore your graphic design creativity, owing to the fact that the subject of creation is highly expressive and multi-dimensional. While you are free to extend your creativity to the next level, do pay attention to the above constraints for a more elusive and outstanding creation output, while maintaining the fun and entertainment quotient intact.
04Wedding Slide Backgrounds
Considering the fact that wedding events are pronounced means of fun, leisure, enjoyment and beautiful memories, anything that aims to be a part of the celebrations, should be equally ecstatic and engaging. Infusing festive occasions with technology, slideshow based wedding invitations and moment captures are the top rated modern trends of celebrating this significant life event.
If you are keen on designing the perfect slideshow presentation for wedding invitations, photo albums and thank you cards, prefer to choose a wedding slide background template with aesthetic layout and flowing element inclusions, like that of floral borders and scented candles. Look though the elements of a subtle thematic setup with soothing color combinations, preferably in complementary pastel shades, like pink and white.
Talking of template customizability, the latter should have placeholders to include names of the bride and groom, the wedding date and venue, and of course the wedding photographs. The beautiful slide background template should have enough design space to include the most elusive play of text colors and fonts to suit specific preferences of creating special memories of a cherished event.
05Slideshow Backgrounds and Templates in Filmora
When looking for the most convenient lead to an extensive variety of beautiful slideshow templates and background, the template library of Wondershare Filmora Video Editor slideshow creator program can be your most affordable destination. The aforesaid software library is known to possess the best and most perfect template choices to suit the creation constraints of almost every slideshow presentation style and objective you can possibly think of.
For Win 7 or later (64-bit)
For macOS 10.12 or later
The elusive templates are further supplemented with a plethora of design flexibilities and customization features that are all set to deliver you the most appreciable creation output. Stressing a bit on the template customization choices of the software, you can work with the tool to uplift your slideshow backgrounds with artistic image effects and overlays, annotate them with beautiful text formations in a variety of colors, fonts and sizes and lots more.
Moving a bit deeper into the creative aspect, you can upgrade the visual style of your presentations with the most perfect and seamless image and video transitions and text animations. The bottom line is, working with the aforesaid slideshow creator program, you are entitled to get jaw dropping applaud from your audience, while making a confident and a content delivery through your slideshow presentation.
● Ending Thoughts →
● Using an expressive and complementing background in your slideshow presentation uplifts its visual credibility in captivating your audience.
● Browsing through the web, you get to access a vast range of amazing slideshow backgrounds and templates to make your presentation, a visual masterpiece.
● When looking for the most distributed storehouse of slideshow backgrounds and templates, the Wondershare Filmora library is your ultimate solution.
What’s Music Video GIF & How to Add Music to GIF Files
What’s Music Video GIF & How to Add Music to Your GIF Files
An easy yet powerful editor
Numerous effects to choose from
Detailed tutorials provided by the official channel
Want to make your GIFs more catchy and interesting? Try adding music videos to multiply the fun!
In this article
01 [What’s Music Video GIF](#Part 1)
02 [How to Easily Add Music to Your GIF](#Part 2)
03 [How To Make a GIF With Music to Post on Instagram?](#Part 3)
Part 1 What’s Music Video GIF?
GIFs are essentially animated image files that already form an effective and interesting means of communication and media sharing. Your messages get additional spunk and appeal when you add relatable audios to your GIFs. A music video GIF is one that you create by adding sound to the originally mute GIF files. Additionally, creating music enabled GIFs is a fun activity on its own. You get to explore your editing creativity on different levels as you play with the exciting features that come with the latest editing tools available in the software market.
Whether create them casually or use them as a marketing tool, sound effects tend to considerably upgrade the utility of an animated or unmoving snap. If you are a social media freak and want to get your Instagram and Facebook stories be the talk among your friends on the internet, do consider trying these editing tricks to add that extra notch to your otherwise simple and soundless GIFs. After all, your creativity should never go unnoticed and get the attention it deserves!
If this gets you motivated and you have decided to level up your editing skills, do spare your valuable time to see through further sections of this article for quick and easy tools and methods to introduce audio and sound effects to those mute GIFs and never let your social media posts and stories miss a catch!

Part 2 How to Easily Add Music to Your GIF?
Musical GIF videos are quite interesting, no doubt on that, but what is noticeable here is that GIFs do not have inbuilt audio features. You need to add sound additionally to these files to create musical GIF videos. When trying to make your own music GIF video, you can take help of the following tools:
01Kapwing Editor
This one is a free online tool that helps you add audio to your GIFs. This application is free from issues of spam and watermark requirements. It assures you of a quality editing experience without supporting unnecessary and annoying advertisements.
Using this tool, you can create musical GIF videos in two different ways. Take the following steps to create musical GIF videos with this application:
● Using The Kapwing Studio:
Open the Studio and select the GIF and music files you want to merge. Upload the selected files in the tool.
Customize your audio in the Studio timeline to trim the sound file to the specific segment you wish to add to your GIF. You can also introduce volume adjustments and waveform effects to enhance your music video for GIF for an extra catch.
You can further add text and make size adjustments to your GIF using the sidebar controls.
Once you have finalized everything, click ‘Export’ to download the GIF music video in MP4 format. Note that if you download the GIF format, your video will lose the sound effect.
● Copy-Paste Method
You can also merge GIFs and music videos using the direct copy-paste method in the Kapwing Editor. To create one for yourself, here’s what you need to follow:
Step 1: GIF Upload
Select a GIF from your smartphone or PC gallery and upload it to the Kapwing Editor. You can even copy a GIF link from other apps like, YouTube, GIFHY, etc, and paste it in the editor timeline.
Step 2: Audio Upload
Next, you need to upload the audio file you want to get stitched with your GIF. Choose a file either from your system or copy-paste the YouTube URL of the selected video in the Kapwing timeline.
Step 3: Export Your Creation
That it! You are done with your creation. Click ‘Export’ to share your musical GIF video on different social platforms.

02VEED’S GIF Maker
Like the Kapwing Editor, this one is also a free online tool that you can use to add sound to your originally mute GIF files. What’s more interesting is, apart from adding music, you have the flexibility to draw over, add text and images to your GIFs before you proceed with adding sound to your selected GIF.
Follow the steps given below to start creating GIF music videos with this application:
Step 1: Upload GIF File
To begin, upload your selected GIF file to the application’s pop-up window using ‘Drag and Drop’ method. Alternatively, you can click on ‘Choose GIF File’ tab on the app’s welcome window. Select a file from your system’s gallery and click ‘Open’ to upload it.

Step 2: Add Music
To add audio files, select ‘Upload’ or tap the (+) sign at the bottom right to choose the desired music files. Drag them to VEED’s timeline to set them in the order of your preference.

Step 3: Download Your Creation
Your video gets created in MP4 format. Tap ‘Export’ to directly share it with your peers on Twitter, Facebook or other social platforms.
Part 3 How to Make a GIF With Music to Post on Instagram?
Exploring your creative skills is one thing, while attracting attention to your work is the other. You would definitely want your social media communities to notice and compliment your work. Instagram is one among the best media sharing apps you can use to share your creations.
To adhere to the concern of creating audio enabled GIFs compatible for sharing to your Instagram stories and feeds, you can any of the following editing tools:
01Filmora
Wondershare Filmora Video Editor is one of the best and most preferred editing software you can use to add sound to your GIFs and videos. You can play with your editing creativity to make exciting musical GIF videos with this software in just a few minutes.

Using this tool for your editing work promises you the following advantages:
Wondershare Filmora
Get started easily with Filmora’s powerful performance, intuitive interface, and countless effects!
Try It Free Try It Free Try It Free Learn More >

● Huge Audio Library
Filmora audio library exposes you with a diverse range of audio and music files and a variety of exciting and relatable sound effects to choose from. You can browse through this storehouse for that perfect music for your GIF absolutely free of cost. The library has an additional Filmstock Effect Store that further increases your audio choice bandwidth.
● Optimal Sync
Filmora allows you to establish the perfect sync between your GIF and audio. Its beat detection feature identifies audio hits to produce markers that you can use to obtain the ideal audio-GIF synchronization in your creations.
● Voiceover Applicable
Filmora gives you the flexibility to record and add you own voiceover using your microphone to make your creations more impactful.
Steps to Create Audio Enabled GIFs Using Filmora
Take the following steps to enhance your GIFs with music and sound effects:
● Select and import your GIF file to the Filmora timeline
● In the software’s audio library, select your desired music and sound effects to add them to the imported GIF file. You can even choose to add your own voiceover to the GIF.
● That’s it! You are now ready to share your work on your Instagram handle and other media sharing platforms. Just click ‘Export’ and your creation gets uploaded on social media in MP4 format. Make sure to adjust the resolution and bit settings for best results.

02Artwork
Like Filmora, Artwork is another application you can use to add sound to GIF files. This one is a browser tool that allows you to create sound enabled videos with static and animated images. Take up the following process to make your own musical GIF with Artwork:
● To begin, signup to Artwork’s free trial feature. Choose your desired sound file in MP3 format and trim it to a play duration of 1 minute. This is essential because Instagram doesn’t allow you to post longer GIFs.
● Add your selected GIF and trimmed MP3 files in Artwork’s pop-up window. Click ‘Save’ and wait till the process to finish.
● Your creation is ready. Download and share it on Instagram.
● Key Takeaways from This Episode →
● Adding music and sound to your GIF is both a fun and exciting activity and also has the potential to enhance the quality and reach of the message you desire to deliver through your GIF. Besides this, it enhances your editing creativity and skill, which is a complement in itself.
● A number of software and online tools available on the internet are ready to help you get through the task. You can rely on these tools to add audio to your GIFs within minutes absolutely free of cost and share them directly on social media.
● Filmora is one among the best GIF editing tools for sharing your creations on Instagram. You can access its huge audio library for selected sound effects, set a perfect sync between your GIF and its audio and even add your own voiceover to boost your creativity using this software.
Want to make your GIFs more catchy and interesting? Try adding music videos to multiply the fun!
In this article
01 [What’s Music Video GIF](#Part 1)
02 [How to Easily Add Music to Your GIF](#Part 2)
03 [How To Make a GIF With Music to Post on Instagram?](#Part 3)
Part 1 What’s Music Video GIF?
GIFs are essentially animated image files that already form an effective and interesting means of communication and media sharing. Your messages get additional spunk and appeal when you add relatable audios to your GIFs. A music video GIF is one that you create by adding sound to the originally mute GIF files. Additionally, creating music enabled GIFs is a fun activity on its own. You get to explore your editing creativity on different levels as you play with the exciting features that come with the latest editing tools available in the software market.
Whether create them casually or use them as a marketing tool, sound effects tend to considerably upgrade the utility of an animated or unmoving snap. If you are a social media freak and want to get your Instagram and Facebook stories be the talk among your friends on the internet, do consider trying these editing tricks to add that extra notch to your otherwise simple and soundless GIFs. After all, your creativity should never go unnoticed and get the attention it deserves!
If this gets you motivated and you have decided to level up your editing skills, do spare your valuable time to see through further sections of this article for quick and easy tools and methods to introduce audio and sound effects to those mute GIFs and never let your social media posts and stories miss a catch!
Part 2 How to Easily Add Music to Your GIF?
Musical GIF videos are quite interesting, no doubt on that, but what is noticeable here is that GIFs do not have inbuilt audio features. You need to add sound additionally to these files to create musical GIF videos. When trying to make your own music GIF video, you can take help of the following tools:
01Kapwing Editor
This one is a free online tool that helps you add audio to your GIFs. This application is free from issues of spam and watermark requirements. It assures you of a quality editing experience without supporting unnecessary and annoying advertisements.
Using this tool, you can create musical GIF videos in two different ways. Take the following steps to create musical GIF videos with this application:
● Using The Kapwing Studio:
Open the Studio and select the GIF and music files you want to merge. Upload the selected files in the tool.
Customize your audio in the Studio timeline to trim the sound file to the specific segment you wish to add to your GIF. You can also introduce volume adjustments and waveform effects to enhance your music video for GIF for an extra catch.
You can further add text and make size adjustments to your GIF using the sidebar controls.
Once you have finalized everything, click ‘Export’ to download the GIF music video in MP4 format. Note that if you download the GIF format, your video will lose the sound effect.
● Copy-Paste Method
You can also merge GIFs and music videos using the direct copy-paste method in the Kapwing Editor. To create one for yourself, here’s what you need to follow:
Step 1: GIF Upload
Select a GIF from your smartphone or PC gallery and upload it to the Kapwing Editor. You can even copy a GIF link from other apps like, YouTube, GIFHY, etc, and paste it in the editor timeline.
Step 2: Audio Upload
Next, you need to upload the audio file you want to get stitched with your GIF. Choose a file either from your system or copy-paste the YouTube URL of the selected video in the Kapwing timeline.
Step 3: Export Your Creation
That it! You are done with your creation. Click ‘Export’ to share your musical GIF video on different social platforms.
02VEED’S GIF Maker
Like the Kapwing Editor, this one is also a free online tool that you can use to add sound to your originally mute GIF files. What’s more interesting is, apart from adding music, you have the flexibility to draw over, add text and images to your GIFs before you proceed with adding sound to your selected GIF.
Follow the steps given below to start creating GIF music videos with this application:
Step 1: Upload GIF File
To begin, upload your selected GIF file to the application’s pop-up window using ‘Drag and Drop’ method. Alternatively, you can click on ‘Choose GIF File’ tab on the app’s welcome window. Select a file from your system’s gallery and click ‘Open’ to upload it.
Step 2: Add Music
To add audio files, select ‘Upload’ or tap the (+) sign at the bottom right to choose the desired music files. Drag them to VEED’s timeline to set them in the order of your preference.
Step 3: Download Your Creation
Your video gets created in MP4 format. Tap ‘Export’ to directly share it with your peers on Twitter, Facebook or other social platforms.
Part 3 How to Make a GIF With Music to Post on Instagram?
Exploring your creative skills is one thing, while attracting attention to your work is the other. You would definitely want your social media communities to notice and compliment your work. Instagram is one among the best media sharing apps you can use to share your creations.
To adhere to the concern of creating audio enabled GIFs compatible for sharing to your Instagram stories and feeds, you can any of the following editing tools:
01Filmora
Wondershare Filmora Video Editor is one of the best and most preferred editing software you can use to add sound to your GIFs and videos. You can play with your editing creativity to make exciting musical GIF videos with this software in just a few minutes.
Using this tool for your editing work promises you the following advantages:
Wondershare Filmora
Get started easily with Filmora’s powerful performance, intuitive interface, and countless effects!
Try It Free Try It Free Try It Free Learn More >
● Huge Audio Library
Filmora audio library exposes you with a diverse range of audio and music files and a variety of exciting and relatable sound effects to choose from. You can browse through this storehouse for that perfect music for your GIF absolutely free of cost. The library has an additional Filmstock Effect Store that further increases your audio choice bandwidth.
● Optimal Sync
Filmora allows you to establish the perfect sync between your GIF and audio. Its beat detection feature identifies audio hits to produce markers that you can use to obtain the ideal audio-GIF synchronization in your creations.
● Voiceover Applicable
Filmora gives you the flexibility to record and add you own voiceover using your microphone to make your creations more impactful.
Steps to Create Audio Enabled GIFs Using Filmora
Take the following steps to enhance your GIFs with music and sound effects:
● Select and import your GIF file to the Filmora timeline
● In the software’s audio library, select your desired music and sound effects to add them to the imported GIF file. You can even choose to add your own voiceover to the GIF.
● That’s it! You are now ready to share your work on your Instagram handle and other media sharing platforms. Just click ‘Export’ and your creation gets uploaded on social media in MP4 format. Make sure to adjust the resolution and bit settings for best results.
02Artwork
Like Filmora, Artwork is another application you can use to add sound to GIF files. This one is a browser tool that allows you to create sound enabled videos with static and animated images. Take up the following process to make your own musical GIF with Artwork:
● To begin, signup to Artwork’s free trial feature. Choose your desired sound file in MP3 format and trim it to a play duration of 1 minute. This is essential because Instagram doesn’t allow you to post longer GIFs.
● Add your selected GIF and trimmed MP3 files in Artwork’s pop-up window. Click ‘Save’ and wait till the process to finish.
● Your creation is ready. Download and share it on Instagram.
● Key Takeaways from This Episode →
● Adding music and sound to your GIF is both a fun and exciting activity and also has the potential to enhance the quality and reach of the message you desire to deliver through your GIF. Besides this, it enhances your editing creativity and skill, which is a complement in itself.
● A number of software and online tools available on the internet are ready to help you get through the task. You can rely on these tools to add audio to your GIFs within minutes absolutely free of cost and share them directly on social media.
● Filmora is one among the best GIF editing tools for sharing your creations on Instagram. You can access its huge audio library for selected sound effects, set a perfect sync between your GIF and its audio and even add your own voiceover to boost your creativity using this software.
How to Cartoonize Photo Photoshop in Easy Steps
How to Cartoonize Photo Photoshop in Easy Steps
An easy yet powerful editor
Numerous effects to choose from
Detailed tutorials provided by the official channel
Cartoons, an already catchy entertainment source, can upgrade other media utilities on integration. Look through the easiest ways of creating cartoonize photo Photoshop stills!
In this article
01 [Types of Cartoon Effects in Photoshop](#Part 1)
02 [Easiest Ways to Cartoonize Photo in Photoshop](#Part 2)
03 [How to Use a Variety of Photoshop Special Effects to Create the Final Caricature Look](#Part 3)
Part 1 Types of Cartoon Effects in Photoshop
It is an absolute fun activity to explore your editing creativity in the realm of cartoonizing the otherwise ordinary still captures. Talking of the most convenient cartoon creator and editor applications, you can safely rely on the Photoshop Image Editor application to choose from a pool of cartoon editing effects for adding that spunky and funny element to your image files.
Presented in the following section, is a discussion of some of the most stunning and visibly amazing cartoon effects in the application’s Editor Library to cartoonize Photoshop images:
01Pop Art Photoshop Action
The effect is a predominantly preferred as a cartoon action Photoshop utility to caricaturize a normal image, along with customizing the same to change the colors and background of the original still capture for creating a brand new appearance with utmost ease. Apart from this, the aforesaid effect allows you to exclusively customize the globally acclaimed graphic masterpieces of Roy Lichtenstein. Working with the effect, you can edit a self-portrait or the favorite image of your pet to give the latter, a funny retro feel.

02Vintage Comic Creator
If the idea of sticking to just the creation of cartoon images is not enough to satisfy you, the Vintage Comic Creator effect allows you to expand your creativity level to work on cartoon based shape and text edits. You can use the effect to enhance an image logo or plain text with a comic book oriented text. A download of this cartoon effect template facilitates you with diversities of customizable layer styles, overlays and patterns.

03GTA Photoshop Action
This is a complete pleasure for the creative fan of Grand Theft Auto, the wicked chasing game series. Additional to creating a stark variety of edited cartoon stills, you are free to reinvent the aforesaid game’s most popular caricature edits, while using the GTA Photoshop Action editing filter. Launched by Indworks, the effect package consisting of 15 vibrant themes and 5 collage templates; promises a quick mimicry of your most cherished video and console games.

04Vector Paint Photoshop Action
The one is an amazing Photoshop effect for creating cartoon edits, which works through a merger of two different ingenious art themes or styles for transforming basic images into cartoonized stills.
The effect grants you the liberty to use varieties of art styles, such as, comic, photo retouching and energetic oil to obtain editing results comparable to that of any original photograph. The template is conveniently simple to use and assures you of quick results. All this, just at a nominal price of $6! Interesting, right?

05Ultra Realistic 3D Space Effect
Considering the fact of you being a space admirer, this one is the perfect image editor for you to add the vibrancy of stunning space elements and backgrounds within your cartoonized edits. The effect lets you play with the diverse range of customizable text and exciting caricature backgrounds. When downloading the template, you get a main setup file, a few editing examples and a web link to the free fonts present in the effect.

06Animated Zombie Grime Art Photoshop Action
Are you in love with the latest zombie grimes? If yes, then this action set is exclusive editor package for you. Working with the aforesaid image template, you can effortlessly add the perfect zombie theme to your cartoon edits, along with simultaneously creating a stunning animation, which you can use to enhance your video or GIF uploads on social media. Not forgetting the best part, you get a free access to this amazing utility.

Part 2 Easiest Ways to Cartoonize Photo in Photoshop
Having known about the amazing varieties of cartoonized editor templates in Photoshop, it is a natural instinct to feel motivated to create your own caricature images from normal capture stills. Addressing the concern of image transformation methods to turn a photo into a cartoon Photoshop, let us dive into some of the most affordable methods of creating cartoonized photos in the aforesaid editing application.
Talking of the most basic Photoshop tools for creating caricature images, you can start your editing spree with using the Graphic Tablet, Brush Tool, Layer Masks and a graphic pen to create amateur cartoonized edits from your still photographs, getting a full control on image tracing.
01Brush Tool
A few usage examples include working with a combination of the graphic tablet pen and the editor brushes to trace your image, using the brush in a masked or a fresh layer to avoid altering the actual image, and much more.
02Graphic Tablet
It is best to use the Photoshop Graphic Tablet for adhering to the concern of tracing cartoonized images. You can alternatively cater to the job with a trackpad, mouse, or even your hand. It is however, difficult to assure steady hand postures for image tracing, lest you are using a stylus pen.
03Pen Tool
Using the Pen Tool for cartoonizing your portrait, allows you to draw outlines along the desired figure within the image, along with its important elements, so that you can easily use these outlined paths to introduce different color blocks.
Similar to the Brush Tool, the Photoshop Pen utility grants you the freedom to vary the degree of detailing in your cartoon edit, from being highly expressive to only remaining around the shore. Working with the Pen Tool can, however be a bit tiring and time taking, with respect to the extent of detailing you wish to add to the caricature edits.
Additional to the aforementioned tools, you can also consider using the default image filters of the Photoshop application to get comparable results. This is an exclusively better option to choose, compared to the Pen Tool, when you are working without a Graphic Tablet. To get over the top realistic caricature renderings, you will need to supplement the use of Photoshop filters with the application’s editing channels and other adjustments.
Part 3 How to Use a Variety of Photoshop Special Effects to Create the Final Caricature Look
Considering the extensive discussion on the credibility of the Photoshop Image Editor application in the realm of creating stunning caricature images in high end resolution, let us proceed to learn about using the diversity of Photoshop’s special effects to get the last stage cartoonized appearance of ordinary still images.
User’s Guide to Create High End Cartoonized Look
The following tutorial is a stepwise explanation of the process to convert photo into cartoon Photoshop in the easiest possible way. Stick to the method for getting affordable results in a quick span.
Step 1: Download and Launch the Program
Visit the official website of Photoshop Image Editor for a free download of the software program in your system, followed by installing and launching the same in your device.
Step 2: Upload Your Image
On a successful launch of the editor program, you will be directed to the ‘Photoshop Editor’ window, where you are required to upload any desired still image from your device for creating a cartoonized edit. To do this, either simply add your image to the editor workspace using the ‘Drag and Drop’ method, or navigate to the ‘File’ tab in the top toolbar and click on ‘Open’ in the dropdown menu.
Step 3: Edge Enhancement
Once your image appears in the editor timeline, proceed to sharpen the edges of the face and body of the portrait. Start with navigating to and clicking on the ‘Filter’ option, followed by tapping on ‘Filter Gallery’ and selecting the ‘Artistic’ folder, where you need to choose the ‘Poster Edges’ option. Observe the effect of these setting on the portrait and make necessary changes.

Step 4: Background Setting
Ensure that the background and foreground of your image are set to white and black colors respectively. If not, proceed to adjust the same as required.

Step 5: Distorting the Edges
You now need to introduce some distortion in the edges of your portrait. Navigate to the ‘Filter’ option again, open the ‘Filter Gallery’ and choose ‘Torn Edges’ from the menu that drops down. Select the desired parameter values in accordance with your creative suitability.


Step 6: Using the Channels Panel
The next step is to select and copy your portrait using the ‘Ctrl + A’ and Ctrl + C commands respectively. Navigate to the ‘Channels’ panel at the right of the Photoshop workspace. At the panel’s bottom right, proceed with creating a new channel. It will be assigned the name ‘Alpha 1’ by Photoshop, which you are most welcome to change.


Step 7: Color Inversion
When you finish creating the channel, use the ‘Ctrl + V’ command to paste your portrait in the same. Proceed with inverting the image colors by navigating to the ‘Image’ option, followed by choosing the ‘Adjustment’ and ‘Invert’ options from the consecutive drop downs. Now, make a selection of the ‘White’ regions of your portrait by pressing the ‘Ctrl’ key and clicking on the ‘Alpha 1 Channel thumbnail.

Step 8: Layer Creation
Navigate to the ‘Layers’ panel at the right of the Photoshop workspace, and click on the ‘New Layer’ icon for creating a fresh layer. Fill the just created layer with black color, either by pressing ‘g’ from your system’s keyboard, or using the ‘Paint Bucket’ tool. Don’t forget to assign a suitable name to the layer.

Repeat the above process to create a separate layer and e fill the same with white color. The layer creation process is essential to separate the white and black colors of the actual image.

Step 10: Layer Dragging
In the ‘Layers’ panel, drag the ‘Black’ layer above the ‘White’ one.

Step 11: Creating Additional Layers
You are now required to create three more layers, with the same process as for the above two, for adding effects to the Skin, Clothes and Teeth/Eyes of the portrait. When you finish creation, assign suitable names to the layers, followed by dragging them below the ‘Black’ one within the ‘Layers’ panel.

Step 12: Color Selection and Application
Choose the respective colors for the clothes, skin and teeth/eyes of the cartoonized edit. To proceed with color application, navigate to the toolbar at the left of the Photoshop workspace and choose the ‘Brush Tool’. Finally, choose a particular layer and apply careful brush strokes to add color to the specific area of the portrait that you wish to edit. Follow the same process to add colors to the remaining layers to get the desired result in all areas of your cartoonized edit.

Step 13: Using the Gradient Tool
Navigate to the ‘Layers’ panel again and create a new ‘Gradient’ layer to further enhance your creation. You now need to select the ‘Gradient Tool’ from the toolbar at the left of the Photoshop workspace. The ‘Gradient Editor’ pops up with the continuously running ‘Gradient Bar’, as soon as you make the selection. Double click on the gradient boxes at both ends to select them, followed by making your color choices. Tap on ‘OK’ when you are satisfied with your work.

Step 14: Filling the Gradients
To proceed with gradient filling, press and hold the mouse button on the image at the bottom left and continue to drag the cursor to its top right corner. Leave the mouse and navigate to the ‘Layers’ panel for dragging and dropping the ‘Gradient’ layer above the ‘White’ layer.

You are now done with the process of creating a caricature edit from a normal still portrait. Your final image output will appear something like the following:

Cartoons, an already catchy entertainment source, can upgrade other media utilities on integration. Look through the easiest ways of creating cartoonize photo Photoshop stills!
In this article
01 [Types of Cartoon Effects in Photoshop](#Part 1)
02 [Easiest Ways to Cartoonize Photo in Photoshop](#Part 2)
03 [How to Use a Variety of Photoshop Special Effects to Create the Final Caricature Look](#Part 3)
Part 1 Types of Cartoon Effects in Photoshop
It is an absolute fun activity to explore your editing creativity in the realm of cartoonizing the otherwise ordinary still captures. Talking of the most convenient cartoon creator and editor applications, you can safely rely on the Photoshop Image Editor application to choose from a pool of cartoon editing effects for adding that spunky and funny element to your image files.
Presented in the following section, is a discussion of some of the most stunning and visibly amazing cartoon effects in the application’s Editor Library to cartoonize Photoshop images:
01Pop Art Photoshop Action
The effect is a predominantly preferred as a cartoon action Photoshop utility to caricaturize a normal image, along with customizing the same to change the colors and background of the original still capture for creating a brand new appearance with utmost ease. Apart from this, the aforesaid effect allows you to exclusively customize the globally acclaimed graphic masterpieces of Roy Lichtenstein. Working with the effect, you can edit a self-portrait or the favorite image of your pet to give the latter, a funny retro feel.
02Vintage Comic Creator
If the idea of sticking to just the creation of cartoon images is not enough to satisfy you, the Vintage Comic Creator effect allows you to expand your creativity level to work on cartoon based shape and text edits. You can use the effect to enhance an image logo or plain text with a comic book oriented text. A download of this cartoon effect template facilitates you with diversities of customizable layer styles, overlays and patterns.
03GTA Photoshop Action
This is a complete pleasure for the creative fan of Grand Theft Auto, the wicked chasing game series. Additional to creating a stark variety of edited cartoon stills, you are free to reinvent the aforesaid game’s most popular caricature edits, while using the GTA Photoshop Action editing filter. Launched by Indworks, the effect package consisting of 15 vibrant themes and 5 collage templates; promises a quick mimicry of your most cherished video and console games.
04Vector Paint Photoshop Action
The one is an amazing Photoshop effect for creating cartoon edits, which works through a merger of two different ingenious art themes or styles for transforming basic images into cartoonized stills.
The effect grants you the liberty to use varieties of art styles, such as, comic, photo retouching and energetic oil to obtain editing results comparable to that of any original photograph. The template is conveniently simple to use and assures you of quick results. All this, just at a nominal price of $6! Interesting, right?
05Ultra Realistic 3D Space Effect
Considering the fact of you being a space admirer, this one is the perfect image editor for you to add the vibrancy of stunning space elements and backgrounds within your cartoonized edits. The effect lets you play with the diverse range of customizable text and exciting caricature backgrounds. When downloading the template, you get a main setup file, a few editing examples and a web link to the free fonts present in the effect.
06Animated Zombie Grime Art Photoshop Action
Are you in love with the latest zombie grimes? If yes, then this action set is exclusive editor package for you. Working with the aforesaid image template, you can effortlessly add the perfect zombie theme to your cartoon edits, along with simultaneously creating a stunning animation, which you can use to enhance your video or GIF uploads on social media. Not forgetting the best part, you get a free access to this amazing utility.
Part 2 Easiest Ways to Cartoonize Photo in Photoshop
Having known about the amazing varieties of cartoonized editor templates in Photoshop, it is a natural instinct to feel motivated to create your own caricature images from normal capture stills. Addressing the concern of image transformation methods to turn a photo into a cartoon Photoshop, let us dive into some of the most affordable methods of creating cartoonized photos in the aforesaid editing application.
Talking of the most basic Photoshop tools for creating caricature images, you can start your editing spree with using the Graphic Tablet, Brush Tool, Layer Masks and a graphic pen to create amateur cartoonized edits from your still photographs, getting a full control on image tracing.
01Brush Tool
A few usage examples include working with a combination of the graphic tablet pen and the editor brushes to trace your image, using the brush in a masked or a fresh layer to avoid altering the actual image, and much more.
02Graphic Tablet
It is best to use the Photoshop Graphic Tablet for adhering to the concern of tracing cartoonized images. You can alternatively cater to the job with a trackpad, mouse, or even your hand. It is however, difficult to assure steady hand postures for image tracing, lest you are using a stylus pen.
03Pen Tool
Using the Pen Tool for cartoonizing your portrait, allows you to draw outlines along the desired figure within the image, along with its important elements, so that you can easily use these outlined paths to introduce different color blocks.
Similar to the Brush Tool, the Photoshop Pen utility grants you the freedom to vary the degree of detailing in your cartoon edit, from being highly expressive to only remaining around the shore. Working with the Pen Tool can, however be a bit tiring and time taking, with respect to the extent of detailing you wish to add to the caricature edits.
Additional to the aforementioned tools, you can also consider using the default image filters of the Photoshop application to get comparable results. This is an exclusively better option to choose, compared to the Pen Tool, when you are working without a Graphic Tablet. To get over the top realistic caricature renderings, you will need to supplement the use of Photoshop filters with the application’s editing channels and other adjustments.
Part 3 How to Use a Variety of Photoshop Special Effects to Create the Final Caricature Look
Considering the extensive discussion on the credibility of the Photoshop Image Editor application in the realm of creating stunning caricature images in high end resolution, let us proceed to learn about using the diversity of Photoshop’s special effects to get the last stage cartoonized appearance of ordinary still images.
User’s Guide to Create High End Cartoonized Look
The following tutorial is a stepwise explanation of the process to convert photo into cartoon Photoshop in the easiest possible way. Stick to the method for getting affordable results in a quick span.
Step 1: Download and Launch the Program
Visit the official website of Photoshop Image Editor for a free download of the software program in your system, followed by installing and launching the same in your device.
Step 2: Upload Your Image
On a successful launch of the editor program, you will be directed to the ‘Photoshop Editor’ window, where you are required to upload any desired still image from your device for creating a cartoonized edit. To do this, either simply add your image to the editor workspace using the ‘Drag and Drop’ method, or navigate to the ‘File’ tab in the top toolbar and click on ‘Open’ in the dropdown menu.
Step 3: Edge Enhancement
Once your image appears in the editor timeline, proceed to sharpen the edges of the face and body of the portrait. Start with navigating to and clicking on the ‘Filter’ option, followed by tapping on ‘Filter Gallery’ and selecting the ‘Artistic’ folder, where you need to choose the ‘Poster Edges’ option. Observe the effect of these setting on the portrait and make necessary changes.
Step 4: Background Setting
Ensure that the background and foreground of your image are set to white and black colors respectively. If not, proceed to adjust the same as required.
Step 5: Distorting the Edges
You now need to introduce some distortion in the edges of your portrait. Navigate to the ‘Filter’ option again, open the ‘Filter Gallery’ and choose ‘Torn Edges’ from the menu that drops down. Select the desired parameter values in accordance with your creative suitability.
Step 6: Using the Channels Panel
The next step is to select and copy your portrait using the ‘Ctrl + A’ and Ctrl + C commands respectively. Navigate to the ‘Channels’ panel at the right of the Photoshop workspace. At the panel’s bottom right, proceed with creating a new channel. It will be assigned the name ‘Alpha 1’ by Photoshop, which you are most welcome to change.
Step 7: Color Inversion
When you finish creating the channel, use the ‘Ctrl + V’ command to paste your portrait in the same. Proceed with inverting the image colors by navigating to the ‘Image’ option, followed by choosing the ‘Adjustment’ and ‘Invert’ options from the consecutive drop downs. Now, make a selection of the ‘White’ regions of your portrait by pressing the ‘Ctrl’ key and clicking on the ‘Alpha 1 Channel thumbnail.
Step 8: Layer Creation
Navigate to the ‘Layers’ panel at the right of the Photoshop workspace, and click on the ‘New Layer’ icon for creating a fresh layer. Fill the just created layer with black color, either by pressing ‘g’ from your system’s keyboard, or using the ‘Paint Bucket’ tool. Don’t forget to assign a suitable name to the layer.
Repeat the above process to create a separate layer and e fill the same with white color. The layer creation process is essential to separate the white and black colors of the actual image.
Step 10: Layer Dragging
In the ‘Layers’ panel, drag the ‘Black’ layer above the ‘White’ one.
Step 11: Creating Additional Layers
You are now required to create three more layers, with the same process as for the above two, for adding effects to the Skin, Clothes and Teeth/Eyes of the portrait. When you finish creation, assign suitable names to the layers, followed by dragging them below the ‘Black’ one within the ‘Layers’ panel.
Step 12: Color Selection and Application
Choose the respective colors for the clothes, skin and teeth/eyes of the cartoonized edit. To proceed with color application, navigate to the toolbar at the left of the Photoshop workspace and choose the ‘Brush Tool’. Finally, choose a particular layer and apply careful brush strokes to add color to the specific area of the portrait that you wish to edit. Follow the same process to add colors to the remaining layers to get the desired result in all areas of your cartoonized edit.
Step 13: Using the Gradient Tool
Navigate to the ‘Layers’ panel again and create a new ‘Gradient’ layer to further enhance your creation. You now need to select the ‘Gradient Tool’ from the toolbar at the left of the Photoshop workspace. The ‘Gradient Editor’ pops up with the continuously running ‘Gradient Bar’, as soon as you make the selection. Double click on the gradient boxes at both ends to select them, followed by making your color choices. Tap on ‘OK’ when you are satisfied with your work.
Step 14: Filling the Gradients
To proceed with gradient filling, press and hold the mouse button on the image at the bottom left and continue to drag the cursor to its top right corner. Leave the mouse and navigate to the ‘Layers’ panel for dragging and dropping the ‘Gradient’ layer above the ‘White’ layer.
You are now done with the process of creating a caricature edit from a normal still portrait. Your final image output will appear something like the following:
5 Different Animation Styles: A Simple but Comprehensive Guide
5 Different Animation Styles: A Simple but Comprehensive Guide

Shanoon Cox
Mar 27, 2024• Proven solutions
To whatever generation or kind one could belong to, animation style videos attract people of all ages, and you will be one of them for sure. Rather than ordinary videos, animated ones provoke diverse impacts on the audience utilizing kinesthetic, illustration, and aural. But the reality or fact is, due to overexposure to social media sites and technological advancements, we have forgotten its importance. They are on the verge of existence at present. Are you an art lover who wishes to know more about animation styles? Want to know some of the software tools that can bring out the artist in you? Here is a complete guide that is all you need.
- Part 1: 5 Different Animation Styles
- Part 2: Create Your Animation Videos with Professional Video Editor
5 Different Animation Styles
Ready to enter into the world of animation along with us? We are all set to take you through a ride of different animation styles, their importance, and some of the videos that one should give a try!
1. 2D Animation
Let’s start with 2D as our fist animation style, which is the traditional or oldest form in practice for more than 100 years since 1908. 2D has widely been in usage to create animated short films, cartoon characters, games, marketing videos, and educational materials. In 2D animation, the characters or items, creatures, and backgrounds get crafted in a two-dimensional space. It produces a graphic of movement with the drawings played serially one after another.
Recommended Software: At present, various free animator tools like Creatoon, Blender, and Pencil 2D, whereas, for professionals, Encore, Flash, Toon Boom Harmony, and Adobe Photoshop can be handy!
The above 2D animation style video is a short film “Dark Dark Woods” directed by the students at “The Animation Workshop.” It is all about the young princess, Maria, drenched, and tired of living a royal life being filled with rules, duties, lessons, responsibilities, and customs. One night, she enters into an adventurous event where she finds herself in a mysterious monster-filled dark wood. Watch the film and find did she find out there!
2. 3D Animation
As the next version of 2D, in the animation industry, 3D revolutionized the market since its first appearance in 1972. Like 2D, 3D finds applications in varied platforms like a business, education, and entertainment. Still, the difference is they are unique and created in three-dimensional space using computer graphics and cinematography techniques as well. The pictures or characters look perfected with cutting-edge technology where toy story movie is an outstanding example.
Recommended Software: One can try some of the 3D modeling software packs like Maya, Houdini, Modo, ZBrush, and Lightwave 3D.
Do you know how it feels if you are trapped alone on a deserted island? “It’s a Cinch!” is a fantastic, funny 3D short film that is an adventurous movie made by the ESMA team at CGI. For sure, you will like this funny movie all about atrocities happening with a man and a pelican and enjoy it as much as I did!
3. Motion Graphics
Our next animation style is motion graphics of the animated graphic design, where text appears to be the main enhancing factor. It is a piece of animation or digital footage that illuminates a motion or notation incorporated with audio. It is a new way of communicating to the audience and in driving them deep into the story. You can categorize it under the visual effect technique, which involves the movement of graphic images or elements like logos or text, sound, music, and motion. Motion graphics are best to be found in action and finds a place in multimedia projects, advertising agencies, branding, television title making, and storytelling.
Recommended Software: Tools that are best for motion graphics is Mocha AE, After Effects, Illustrator, and Cinema 4D.
The world is a great place, but we always forget another beautiful hidden green world behind the fantastic buildings we reside in. Yes, “Beautiful World” is a motion graphic video by Blasterjaxx & DBSTF feat. Ryder presents how we humans have developed a great empire by destroying the other beautiful part of the world.
4. Stop Motion
Stop motion is one of the traditional animation styles that is the most popular filmmaking technique that uses hand-crafted or manipulated objects, mostly clay models. Puppets, silhouettes, and cut-outs can also be implemented as stop motion aids to produce animation. It is labor-intensive, a form of art, and has its flavor in animation, although 3D and visual effects have replaced it quite a long time before. But still, filmmakers like Tim Burton use stop motion in their films, making it to withstand the animation industry.
Recommended Software: You can make your stop motion video with software like Dragon frame, Stop Motion Pro Eclipse, and IKITMovie.
Although stop motion has gone before ages, there is still a fantastic introduction. Here is an award-winning short film, “Tokri (the basket),” which is a clumsy accident that leads a juvenile girl onto Mumbai’s streets with the trust of making things correct. Studio Eeksaurus, an Indian bastion animation company, has depicted a father and daughter’s tender emotive tale.
5. Paint-On-Glass Animation
Here is a Paint-on-Glass animation style that is a technique used for making animated films that gives a lot of fun. Artists paint short stories on glasses using oil paints and film them by recording it frame-by-frame. Russian animator Aleksandr Petrov is a famous artist well known for making award-winning paint-on-glass animation. Animators use different objects like brick dust, sand, pastels, and charcoal, to create outstanding drama in their films.
Recommended Software: You can also become a paint-on-glass animator now with tools like Pencil 2D, Blender, Krita, and GIMP.
Suppose you are wondering whether you could find any paint-on-glass animated movie on social media sites. In that case, there are numerous animated films, like “The Old Man and the Sea,” and “My Love,” produced by the experts of pictures of Aleksandr Petrov animation. Surprisingly, this bind-blowing introduction is a result of oil paints on a sheet of glass.
Conclusion
Do you aspire to become an animator and come up painting bright colors to videos? Choose animation styles that you most enjoy, find attractive today, and start working on it. Lastly, do not forget to give Filmora a chance to uplift your creation and give your animation style a life!
Shanoon Cox
Shanoon Cox is a writer and a lover of all things video.
Follow @Shanoon Cox
Shanoon Cox
Mar 27, 2024• Proven solutions
To whatever generation or kind one could belong to, animation style videos attract people of all ages, and you will be one of them for sure. Rather than ordinary videos, animated ones provoke diverse impacts on the audience utilizing kinesthetic, illustration, and aural. But the reality or fact is, due to overexposure to social media sites and technological advancements, we have forgotten its importance. They are on the verge of existence at present. Are you an art lover who wishes to know more about animation styles? Want to know some of the software tools that can bring out the artist in you? Here is a complete guide that is all you need.
- Part 1: 5 Different Animation Styles
- Part 2: Create Your Animation Videos with Professional Video Editor
5 Different Animation Styles
Ready to enter into the world of animation along with us? We are all set to take you through a ride of different animation styles, their importance, and some of the videos that one should give a try!
1. 2D Animation
Let’s start with 2D as our fist animation style, which is the traditional or oldest form in practice for more than 100 years since 1908. 2D has widely been in usage to create animated short films, cartoon characters, games, marketing videos, and educational materials. In 2D animation, the characters or items, creatures, and backgrounds get crafted in a two-dimensional space. It produces a graphic of movement with the drawings played serially one after another.
Recommended Software: At present, various free animator tools like Creatoon, Blender, and Pencil 2D, whereas, for professionals, Encore, Flash, Toon Boom Harmony, and Adobe Photoshop can be handy!
The above 2D animation style video is a short film “Dark Dark Woods” directed by the students at “The Animation Workshop.” It is all about the young princess, Maria, drenched, and tired of living a royal life being filled with rules, duties, lessons, responsibilities, and customs. One night, she enters into an adventurous event where she finds herself in a mysterious monster-filled dark wood. Watch the film and find did she find out there!
2. 3D Animation
As the next version of 2D, in the animation industry, 3D revolutionized the market since its first appearance in 1972. Like 2D, 3D finds applications in varied platforms like a business, education, and entertainment. Still, the difference is they are unique and created in three-dimensional space using computer graphics and cinematography techniques as well. The pictures or characters look perfected with cutting-edge technology where toy story movie is an outstanding example.
Recommended Software: One can try some of the 3D modeling software packs like Maya, Houdini, Modo, ZBrush, and Lightwave 3D.
Do you know how it feels if you are trapped alone on a deserted island? “It’s a Cinch!” is a fantastic, funny 3D short film that is an adventurous movie made by the ESMA team at CGI. For sure, you will like this funny movie all about atrocities happening with a man and a pelican and enjoy it as much as I did!
3. Motion Graphics
Our next animation style is motion graphics of the animated graphic design, where text appears to be the main enhancing factor. It is a piece of animation or digital footage that illuminates a motion or notation incorporated with audio. It is a new way of communicating to the audience and in driving them deep into the story. You can categorize it under the visual effect technique, which involves the movement of graphic images or elements like logos or text, sound, music, and motion. Motion graphics are best to be found in action and finds a place in multimedia projects, advertising agencies, branding, television title making, and storytelling.
Recommended Software: Tools that are best for motion graphics is Mocha AE, After Effects, Illustrator, and Cinema 4D.
The world is a great place, but we always forget another beautiful hidden green world behind the fantastic buildings we reside in. Yes, “Beautiful World” is a motion graphic video by Blasterjaxx & DBSTF feat. Ryder presents how we humans have developed a great empire by destroying the other beautiful part of the world.
4. Stop Motion
Stop motion is one of the traditional animation styles that is the most popular filmmaking technique that uses hand-crafted or manipulated objects, mostly clay models. Puppets, silhouettes, and cut-outs can also be implemented as stop motion aids to produce animation. It is labor-intensive, a form of art, and has its flavor in animation, although 3D and visual effects have replaced it quite a long time before. But still, filmmakers like Tim Burton use stop motion in their films, making it to withstand the animation industry.
Recommended Software: You can make your stop motion video with software like Dragon frame, Stop Motion Pro Eclipse, and IKITMovie.
Although stop motion has gone before ages, there is still a fantastic introduction. Here is an award-winning short film, “Tokri (the basket),” which is a clumsy accident that leads a juvenile girl onto Mumbai’s streets with the trust of making things correct. Studio Eeksaurus, an Indian bastion animation company, has depicted a father and daughter’s tender emotive tale.
5. Paint-On-Glass Animation
Here is a Paint-on-Glass animation style that is a technique used for making animated films that gives a lot of fun. Artists paint short stories on glasses using oil paints and film them by recording it frame-by-frame. Russian animator Aleksandr Petrov is a famous artist well known for making award-winning paint-on-glass animation. Animators use different objects like brick dust, sand, pastels, and charcoal, to create outstanding drama in their films.
Recommended Software: You can also become a paint-on-glass animator now with tools like Pencil 2D, Blender, Krita, and GIMP.
Suppose you are wondering whether you could find any paint-on-glass animated movie on social media sites. In that case, there are numerous animated films, like “The Old Man and the Sea,” and “My Love,” produced by the experts of pictures of Aleksandr Petrov animation. Surprisingly, this bind-blowing introduction is a result of oil paints on a sheet of glass.
Conclusion
Do you aspire to become an animator and come up painting bright colors to videos? Choose animation styles that you most enjoy, find attractive today, and start working on it. Lastly, do not forget to give Filmora a chance to uplift your creation and give your animation style a life!
Shanoon Cox
Shanoon Cox is a writer and a lover of all things video.
Follow @Shanoon Cox
OBS Animated Lower Thirds Alternatives
OBS Animated Lower Thirds Alternatives
An easy yet powerful editor
Numerous effects to choose from
Detailed tutorials provided by the official channel
It’s worth noting that people commonly use built-in OBS animated lower thirds for the job, but you can also use other editing tools to create custom animations and import them in your OBS Livestream.
This guide will walk you through everything you need to know about OBS animated lower thirds and their best alternatives you can use in 2022 and beyond.
In this article
01 [What are Lower Thirds in Animation?](#Part 1)
02 [How To Set Up An Animated Lower Third In OBS Studio](#Part 2)
03 [8 AMAZING OBS Animated Lower Thirds Alternatives](#Part 3)
Part 1 What is Lower Thirds in Animation?
To put it in simple words, a lower third is simply a graphic overlay that appears on top of the actual footage. As the name implies, the contents of the lower third usually occur at the lower end of the screen, but streamers can also configure the OBS settings to change their position within the screen. Ideally, lower third animations are utilized to give a context of the overall video.
Let’s say you are life streaming your GTA V gameplay on YouTube. So, to help first-time viewers get the overall context, you can add GTA-related elements in the lower third animation and maximize viewer acquisition. In addition to this, you can also use OBS animated lower-thirds to display exclusive offers and discounts throughout the live stream.
Part 2 How To Set Up An Animated Lower Third In OBS Studio
So, now that you know the major benefits of using animated lower thirds in OBS studio, let’s understand how to set them up to make your live streams more engaging. It’s worth noting that OBS works around the concept of layers that you can manage individually to run your live streams. So, to add an animated lower third in OBS studio, all you have to do is add a dedicated layer and place it right above the video layer.
When it comes to setting up the lower-third, you’ll first need to create the graphics you want to display on top of the live streams. You can use Photoshop to design a custom lower-third animation if you are a professional designer. But, if you have just stepped into the world of live streams and don’t have any prior experience with Photoshop, you can also purchase one of the ready-to-use lower-third packages and import them directly to OBS.
Either way, it would be crucial to ensure that your OBS animated lower-third graphics do not interfere with the actual video. Why? Because this will make the video look more cluttered, and you’ll end up losing potential viewers.
Here’s a YouTube video that’ll walk you through the step-by-step procedure of creating lower-third animations in OBS Studio.
Part 3 8 AMAZING OBS Animated Lower Thirds Alternatives
While OBS is a great tool to add lower-third animations to your live streams, it has its fair share of drawbacks. For instance, OBS has a pretty complicated interface, which means if you are an absolute beginner, you may not easily set up your live streams. Not to mention, OBS is heavy software - so if you don’t have a high-configuration system, you won’t be able to run the tool at all.
So, what’s your next best option? Fortunately, there are several OBS alternatives that you can use to set up OBS animated lower-third graphics and enhance the overall quality of your live streams. To make your job easier, we have cherry-picked 8 of the most reliable OBS alternatives that you can use to add lower-third animations to a Livestream video.
01Wirecast

Like OBS, Wirecast is a popular video streaming platform that many content creators use to live stream on their social media handles. It also offers a layer-based architecture, which means users can add multiple layers separately and manage them through an easy-to-navigate panel.
One of the key reasons Wirecast is an ideal choice to add animated lower-third graphics to your live streams is its built-in collections. The tool already has several ready-to-integrate lower-third animations that one could import into their project without any hassle.
Pros:
● Built-in lower-third graphic templates
● Easy-to-use Interface
● Switch between multiple camera angles with one click
Cons:
● Unlike OBS Studio, Wirecast isn’t available for free
Why Do We Recommend Wirecast?
Wirecast is a fully functional video streaming platform where you can easily manage all your live streams. Wirecast offers far better functionality than OBS Studio despite having a relatively easy-to-use UI.
02vMix

vMix is a feature-rich video production software that offers everything one would need to create stunning videos. However, it also has a dedicated live stream manager to manage your live streams, switch between multiple camera angles, and add overlay animations to keep the viewers engaged. Unlike OBS Studio, vMix doesn’t have a layering system, which means you can overlay multiple channels easily.
As far as OBS animated lower-thirds are concerned, there are different ways you can add these animations to your live streams. You can either import dedicated PSD files, embed HTML codes, or choose one of the ready-to-use lower-third templates to do the job. In either case, vMix will help you add stunning lower-third animations within a few minutes.
Pros:
● Full-scale video production software
● Built-in support for audio mixing
● Add and Manage Multiple Camera Inputs
Cons:
● If you want to relish all the benefits of vMix, you would have to purchase its pro version, which costs $1200. As compared to other available options, vMix is significantly expensive.
Why Do We Recommend vMix?
vMix is ideal for users who want to upgrade from OBS and can spend $1200 on a live stream manager. It’ll provide everything you need to live stream across different social media platforms.
03Restream Studio

Restream Studio is a browser-based live stream tool that offers an easy-to-navigate panel to manage your live streams. Restream is ideal for beginners who don’t want to spend a hefty amount on their live streaming software. With restream, you can upload your brand logos, graphic overlays, and text details and save them in the “Favorites” tab for future use.
This way, whenever you are live streaming, you can directly choose one of these overlays and switch between them easily. The tool also has a dedicated “Hide/Show” button that’ll allow you to change the display status of the lower-third animations.
Pros:
● Cross-platform Compatibility
● Ideal for Beginners and Novice YouTubers
● Save Multiple Graphic Overlays for Future Use
Cons:
● You won’t get any advanced functionality like Wirecast or OBS Studio
Why Do We Recommend Restream Studio?
Restream Studio is the perfect solution for users who don’t want to get overwhelmed with the complex features of OBS Studio. With its browser-friendly UI, you’ll be able to run Restream Studio across different platforms and add OBS animated lower-third graphics to your live streams easily.
04Lightstream

Lightstream is another free live stream manager that offers many features to execute hassle-free live streams across different platforms, including YouTube, Facebook, and Twitch. Even though the tool doesn’t provide advanced features like OBS Studio or Wirecast, it has everything you require to stream live on your social media handles. One of the key features of Lightstream is that you can add multiple scenes/overlays and switch between them with a single click.
Pros:
● Being open-source, Lightstream is available for free
● Lightstream is a cloud-based tool, which means it offers cross-platform compatibility
● Easy to set up, even if you are a beginner
Cons:
● Lacks advanced editing features
Why Do We Recommend Lightstream?
Lightstream is the most reliable live stream manager for users looking for a simple and cross-platform tool to manage live streams and add overlays.
05Adobe Photoshop

Before you act surprised, let us clarify that Adobe Photoshop isn’t an alternative to OBS Studio. However, you can use it to create customized overlays and lower-third graphics to add a personal touch to your live streams. Suppose you are already familiar with Photoshop and have been using it for a few years. In that case, it’ll allow you to design personalized text overlays, graphics, animations, and logos for your live streams.
And, once you have successfully designed the lower-third overlays, you can use any of the live stream managers to add them to your live streams.
Pros:
● Design custom overlays for your social media live streams
● Offers advanced editing options to customize logos and lower-third graphics
Cons:
● Photoshop has a steep learning curve, and if you are not an experienced designer, you won’t be able to design custom overlays
Why Do We Recommend Adobe Photoshop?
Adobe Photoshop is a reliable choice for creators who find the built-in media libraries of a live stream manager limited. With Photoshop, you’ll be able to design custom overlays for your live streams.
06ShareX

ShareX is also an open-source screen recorder and lives stream manager that offers all the OBS features you’ll need to manage your live streams and add multiple lower-third overlays. The only downside of ShareX is that it has a complicated user interface. Even if you have used OBS in the past, you’ll find ShareX’s user interface relatively complex. So, you should only sign up for ShareX if you are comfortable with complex user interfaces.
Pros:
● Upload and save pictures, videos, logos for lower-third overlays
● Record your entire screen or a specific window
● Assign hotkeys to switch between multiple windows during the Livestream
Cons:
● The user interface isn’t as friendly as other available options
Why Do We Recommend ShareX?
ShareX is an ideal OBS animated lower-third alternative for users who need a free-of-cost solution to manage their live streams.
07Canva

Again, Canva doesn’t support live stream management at all. However, like Adobe Photoshop, you can use Canva to create stunning lower-third overlays for your Livestream sessions. The major benefit of using Canva is that it has thousands of pre-made templates that you can import to your design with one click. All these templates are fully customizable - so you’ll be able to design custom lower-third overlays for your live streams.
Pros:
● Comparatively less complicated than Adobe Photoshop
● Canva is affordable
● Being a web-based designing tool, you can access Canva on any device
Cons:
● The premium version of Canva is relatively expensive than its competitors.
Why Do We Recommend Canva?
Canva is a one-stop solution for content creators looking for an additional designing tool to create custom OBS animated lower thirds for their live streams.
Key Takeaways from This Episode
● OBS animated lower-thirds are one of the most effective ways to share the context of a live stream with your viewers
● With OBS Studio, you have the liberty to import custom animated lower-third animations and overlays and add them to the live stream through its layered architecture
● Apart from OBS Studio, there are several other tools (such as Wondershare Filmora Pro) to add animated lower-thirds to live streams.
It’s worth noting that people commonly use built-in OBS animated lower thirds for the job, but you can also use other editing tools to create custom animations and import them in your OBS Livestream.
This guide will walk you through everything you need to know about OBS animated lower thirds and their best alternatives you can use in 2022 and beyond.
In this article
01 [What are Lower Thirds in Animation?](#Part 1)
02 [How To Set Up An Animated Lower Third In OBS Studio](#Part 2)
03 [8 AMAZING OBS Animated Lower Thirds Alternatives](#Part 3)
Part 1 What is Lower Thirds in Animation?
To put it in simple words, a lower third is simply a graphic overlay that appears on top of the actual footage. As the name implies, the contents of the lower third usually occur at the lower end of the screen, but streamers can also configure the OBS settings to change their position within the screen. Ideally, lower third animations are utilized to give a context of the overall video.
Let’s say you are life streaming your GTA V gameplay on YouTube. So, to help first-time viewers get the overall context, you can add GTA-related elements in the lower third animation and maximize viewer acquisition. In addition to this, you can also use OBS animated lower-thirds to display exclusive offers and discounts throughout the live stream.
Part 2 How To Set Up An Animated Lower Third In OBS Studio
So, now that you know the major benefits of using animated lower thirds in OBS studio, let’s understand how to set them up to make your live streams more engaging. It’s worth noting that OBS works around the concept of layers that you can manage individually to run your live streams. So, to add an animated lower third in OBS studio, all you have to do is add a dedicated layer and place it right above the video layer.
When it comes to setting up the lower-third, you’ll first need to create the graphics you want to display on top of the live streams. You can use Photoshop to design a custom lower-third animation if you are a professional designer. But, if you have just stepped into the world of live streams and don’t have any prior experience with Photoshop, you can also purchase one of the ready-to-use lower-third packages and import them directly to OBS.
Either way, it would be crucial to ensure that your OBS animated lower-third graphics do not interfere with the actual video. Why? Because this will make the video look more cluttered, and you’ll end up losing potential viewers.
Here’s a YouTube video that’ll walk you through the step-by-step procedure of creating lower-third animations in OBS Studio.
Part 3 8 AMAZING OBS Animated Lower Thirds Alternatives
While OBS is a great tool to add lower-third animations to your live streams, it has its fair share of drawbacks. For instance, OBS has a pretty complicated interface, which means if you are an absolute beginner, you may not easily set up your live streams. Not to mention, OBS is heavy software - so if you don’t have a high-configuration system, you won’t be able to run the tool at all.
So, what’s your next best option? Fortunately, there are several OBS alternatives that you can use to set up OBS animated lower-third graphics and enhance the overall quality of your live streams. To make your job easier, we have cherry-picked 8 of the most reliable OBS alternatives that you can use to add lower-third animations to a Livestream video.
01Wirecast
Like OBS, Wirecast is a popular video streaming platform that many content creators use to live stream on their social media handles. It also offers a layer-based architecture, which means users can add multiple layers separately and manage them through an easy-to-navigate panel.
One of the key reasons Wirecast is an ideal choice to add animated lower-third graphics to your live streams is its built-in collections. The tool already has several ready-to-integrate lower-third animations that one could import into their project without any hassle.
Pros:
● Built-in lower-third graphic templates
● Easy-to-use Interface
● Switch between multiple camera angles with one click
Cons:
● Unlike OBS Studio, Wirecast isn’t available for free
Why Do We Recommend Wirecast?
Wirecast is a fully functional video streaming platform where you can easily manage all your live streams. Wirecast offers far better functionality than OBS Studio despite having a relatively easy-to-use UI.
02vMix
vMix is a feature-rich video production software that offers everything one would need to create stunning videos. However, it also has a dedicated live stream manager to manage your live streams, switch between multiple camera angles, and add overlay animations to keep the viewers engaged. Unlike OBS Studio, vMix doesn’t have a layering system, which means you can overlay multiple channels easily.
As far as OBS animated lower-thirds are concerned, there are different ways you can add these animations to your live streams. You can either import dedicated PSD files, embed HTML codes, or choose one of the ready-to-use lower-third templates to do the job. In either case, vMix will help you add stunning lower-third animations within a few minutes.
Pros:
● Full-scale video production software
● Built-in support for audio mixing
● Add and Manage Multiple Camera Inputs
Cons:
● If you want to relish all the benefits of vMix, you would have to purchase its pro version, which costs $1200. As compared to other available options, vMix is significantly expensive.
Why Do We Recommend vMix?
vMix is ideal for users who want to upgrade from OBS and can spend $1200 on a live stream manager. It’ll provide everything you need to live stream across different social media platforms.
03Restream Studio
Restream Studio is a browser-based live stream tool that offers an easy-to-navigate panel to manage your live streams. Restream is ideal for beginners who don’t want to spend a hefty amount on their live streaming software. With restream, you can upload your brand logos, graphic overlays, and text details and save them in the “Favorites” tab for future use.
This way, whenever you are live streaming, you can directly choose one of these overlays and switch between them easily. The tool also has a dedicated “Hide/Show” button that’ll allow you to change the display status of the lower-third animations.
Pros:
● Cross-platform Compatibility
● Ideal for Beginners and Novice YouTubers
● Save Multiple Graphic Overlays for Future Use
Cons:
● You won’t get any advanced functionality like Wirecast or OBS Studio
Why Do We Recommend Restream Studio?
Restream Studio is the perfect solution for users who don’t want to get overwhelmed with the complex features of OBS Studio. With its browser-friendly UI, you’ll be able to run Restream Studio across different platforms and add OBS animated lower-third graphics to your live streams easily.
04Lightstream
Lightstream is another free live stream manager that offers many features to execute hassle-free live streams across different platforms, including YouTube, Facebook, and Twitch. Even though the tool doesn’t provide advanced features like OBS Studio or Wirecast, it has everything you require to stream live on your social media handles. One of the key features of Lightstream is that you can add multiple scenes/overlays and switch between them with a single click.
Pros:
● Being open-source, Lightstream is available for free
● Lightstream is a cloud-based tool, which means it offers cross-platform compatibility
● Easy to set up, even if you are a beginner
Cons:
● Lacks advanced editing features
Why Do We Recommend Lightstream?
Lightstream is the most reliable live stream manager for users looking for a simple and cross-platform tool to manage live streams and add overlays.
05Adobe Photoshop
Before you act surprised, let us clarify that Adobe Photoshop isn’t an alternative to OBS Studio. However, you can use it to create customized overlays and lower-third graphics to add a personal touch to your live streams. Suppose you are already familiar with Photoshop and have been using it for a few years. In that case, it’ll allow you to design personalized text overlays, graphics, animations, and logos for your live streams.
And, once you have successfully designed the lower-third overlays, you can use any of the live stream managers to add them to your live streams.
Pros:
● Design custom overlays for your social media live streams
● Offers advanced editing options to customize logos and lower-third graphics
Cons:
● Photoshop has a steep learning curve, and if you are not an experienced designer, you won’t be able to design custom overlays
Why Do We Recommend Adobe Photoshop?
Adobe Photoshop is a reliable choice for creators who find the built-in media libraries of a live stream manager limited. With Photoshop, you’ll be able to design custom overlays for your live streams.
06ShareX
ShareX is also an open-source screen recorder and lives stream manager that offers all the OBS features you’ll need to manage your live streams and add multiple lower-third overlays. The only downside of ShareX is that it has a complicated user interface. Even if you have used OBS in the past, you’ll find ShareX’s user interface relatively complex. So, you should only sign up for ShareX if you are comfortable with complex user interfaces.
Pros:
● Upload and save pictures, videos, logos for lower-third overlays
● Record your entire screen or a specific window
● Assign hotkeys to switch between multiple windows during the Livestream
Cons:
● The user interface isn’t as friendly as other available options
Why Do We Recommend ShareX?
ShareX is an ideal OBS animated lower-third alternative for users who need a free-of-cost solution to manage their live streams.
07Canva
Again, Canva doesn’t support live stream management at all. However, like Adobe Photoshop, you can use Canva to create stunning lower-third overlays for your Livestream sessions. The major benefit of using Canva is that it has thousands of pre-made templates that you can import to your design with one click. All these templates are fully customizable - so you’ll be able to design custom lower-third overlays for your live streams.
Pros:
● Comparatively less complicated than Adobe Photoshop
● Canva is affordable
● Being a web-based designing tool, you can access Canva on any device
Cons:
● The premium version of Canva is relatively expensive than its competitors.
Why Do We Recommend Canva?
Canva is a one-stop solution for content creators looking for an additional designing tool to create custom OBS animated lower thirds for their live streams.
Key Takeaways from This Episode
● OBS animated lower-thirds are one of the most effective ways to share the context of a live stream with your viewers
● With OBS Studio, you have the liberty to import custom animated lower-third animations and overlays and add them to the live stream through its layered architecture
● Apart from OBS Studio, there are several other tools (such as Wondershare Filmora Pro) to add animated lower-thirds to live streams.
Tips to Create Animated Social Media Posts in Canva
Versatile Video Editor - Wondershare Filmora
An easy yet powerful editor
Numerous effects to choose from
Detailed tutorials provided by the official channel
Eye-catching social media posts are an excellent, attention-grabbing way to make your ideal clients stop scrolling. Today, we’ll describe how to create animated social media posts through Canva posts entirely free and without any design experience required on Canva.
Level up your next social media campaign by adding beautifully designed graphics! You can choose from our library of professionally designed Canva layouts for Facebook, Pinterest, Twitter, Instagram, and more.
Without any further ado, let’s get into the process as follows!
In this article
01 [Which social media animated posts can be created on Canva?](#Part 1)
02 [What Canva can help with animated social media posts?](#Part 2)
03 [Steps to create animated social media pictures in Canva](#Part 3)
04 [Steps to create animated social media videos in Canva](#Part 4)
Part 1 Which social media animated posts can be created on Canva?
With the latest Canva Pro feature, you can go for Canva Animator!
Yes, you can easily create animated social media posts via Canva, like Facebook stories or animated Instagram stories. And, you can also create ads for any other social media platform using its Custom Design feature.
It consists of ready-made templates for Facebook, Twitter, Instagram, and more.
To explore the entire animated social media templates, visit the Canva official website, log in, and type in the vibrant social media to see different options below.

All of the templates that will come upon Canva are fully customizable as per your requirements. If you prefer, you can also select a blank animated story template, which is probably the first among these options.
Part 2 What Canva can help with animated social media posts?
As already discussed, Canva consists of thousands of templates to choose from among the category of animated social media posts. Moreover, there are lots of free as well as paid templates.
Another thing that Canva can help you with these templates is complete customization. You can easily customize the entire template ranging from its colors selection to images to elements etc. And, you can even remove aspects if you don’t like anything among the template designs.
Understand the pros of Canva to get our point better as follows:
Canva provides a range of features due to which has gained popularity among millions of people. The benefits of using Canva are −
1. Free Design Platform
Canva is free to use platform for everyone. You can use it for creating attention-grabbing designs for marketing campaigns, social media, or projects.
There are certain features in Canva that are useful for professionals. You can get Canva Pro to access those features with a premium library of stock photos, shapes, fonts, and templates.
You can also go for in-app purchases if you are not looking to purchase the Pro version.
2. No skills or experience required
To use Canva, you don’t need any prior experience as a graphic designer. You can swap between images and fonts to create a professional design with many layouts and tools available.
3. Ease of use with multiple templates and fonts
Canva has a library of different backgrounds, images, templates, fonts, stickers to ensure that you get outstanding outcomes. You can create an engaging design in just a few clicks with these tools. The only thing you need is creativity.

4. Endless options
Canva has every digital design option covered, from Pinterest and Facebook posts to Resume, e−book

5. User−friendly interface
The Canva’s layout is pretty simple to use.
On the design page of Canva, there are the grids for templates, photos, stickers, and background on the left-hand side. Above the design are the color palettes, font tabs, and other formatting tools. You can use these tools with the drag and drop editor in your design in a few clicks.

6. Create a team
You can make your Canva team so that they can have access to the designs. You can determine the kind of access your team members or employees have through the shareable links to make edits.

Part 3 Steps to create animated social media pictures in Canva
Unleash your creativity by animating your design pages, elements, and text.
Make or open an existing design.
- Hit to choose the page, element, or text box that you wish to animate.
- Once you hit the Animate tab above the editor on the toolbar, you will see the displayed options on the side panel.
- Please hover your mouse over it to preview an option. Then, you’ll see your design animate.
- Click on it to apply.
- For pages: To control the animation timing, click to select the page, and then click on the stopwatch icon above the editor.
- Download your design in GIF or video format.
You can also directly share them on social media or schedule them for later.
Part 4 Steps to create animated social media videos in Canva
1. Select your template
Sign in to Canva, then choose and make your social media story template. There are two vastly different ways to explore this: You can either select “Create a design” at the top or go for a particular template to get the ideal dimensions.
2. Animate your video
Here’s where the fun begins! Now that you are ready to start editing your selected template, you can add animated and unique elements to your story in three various ways.
- Add a video
You’re ready to add in your video once you’ve chosen your template! Upload or select any video you might want to use and drag it into a placeholder on your story chosen template. If needed, adjust the size and positioning until it fits.
- Animated design elements
Another option to animate your social media posts videos is through the Elements feature in Canva by choosing the “Stickers” tab.
You can either enter your requirement in the search bar or scroll through Canva’s huge graphics and enter “animated {insert the word you’re searching for, i.e., lines, arrows}. Then, you can drag and drop them right into your design.
There are specific search terms for your reference: Animated Sparkle, Animated Arrow, Animated Word, and Animated Line.
- Use the Animate button.
There’s an “Animate” button you’ll see at the top when you’re in your design. Hit on the page you wish to animate, and the Animate tab will pop up on the top left.
Use these three features to create an animated video individually or all together – they’ll be sure to up-level your stories in a fun and unique way.
3. Preview and Download
You can preview your animated stories once you finish the action by hitting the “Play” tab at the top of your screen.
There you have your Canva animated social media creation!
For quick reference, be sure to download my Animated Canva Elements document, all my favorite animated elements. Head to the video to grab them!
As you know how to create an animation and the steps needed, you must also be aware of one of the best editing software available.
Here we recommend using Filmora. You can use it to create compelling animation videos than the animated social media on Canva posts so that the animation will come out smooth and natural by adding keyframes. You are just required to frame a white plane to begin creating animation. Despite this, its audio mixer and color correction editing elements will increase your animation video to a new level. Download it to have a try (Free)!
Wondershare Filmora
Get started easily with Filmora’s powerful performance, intuitive interface, and countless effects!
Try It Free Try It Free Try It Free Learn More >
AI Portrait – The best feature of Wondershare Filmora for gameplay editing
The AI Portrait is a new add-on in Wondershare Filmora. It can easily remove video backgrounds without using a green screen or chroma key, allowing you to add borders, glitch effects, pixelated, noise, or segmentation video effects.

Conclusion
And that, my friends, is how you can create your unique animated graphics quickly and easily. So, now it’s your turn! With our above tutorial, you can now permit yourself to make and craft your first and exclusive Canva animated GIFs for social media!
Besides, do not forget to try out the Wondershare FilmorPro for any video editing that you may need for your animated social media videos via Canva.
I can’t wait to hear all about it. See you next time.
Eye-catching social media posts are an excellent, attention-grabbing way to make your ideal clients stop scrolling. Today, we’ll describe how to create animated social media posts through Canva posts entirely free and without any design experience required on Canva.
Level up your next social media campaign by adding beautifully designed graphics! You can choose from our library of professionally designed Canva layouts for Facebook, Pinterest, Twitter, Instagram, and more.
Without any further ado, let’s get into the process as follows!
In this article
01 [Which social media animated posts can be created on Canva?](#Part 1)
02 [What Canva can help with animated social media posts?](#Part 2)
03 [Steps to create animated social media pictures in Canva](#Part 3)
04 [Steps to create animated social media videos in Canva](#Part 4)
Part 1 Which social media animated posts can be created on Canva?
With the latest Canva Pro feature, you can go for Canva Animator!
Yes, you can easily create animated social media posts via Canva, like Facebook stories or animated Instagram stories. And, you can also create ads for any other social media platform using its Custom Design feature.
It consists of ready-made templates for Facebook, Twitter, Instagram, and more.
To explore the entire animated social media templates, visit the Canva official website, log in, and type in the vibrant social media to see different options below.
All of the templates that will come upon Canva are fully customizable as per your requirements. If you prefer, you can also select a blank animated story template, which is probably the first among these options.
Part 2 What Canva can help with animated social media posts?
As already discussed, Canva consists of thousands of templates to choose from among the category of animated social media posts. Moreover, there are lots of free as well as paid templates.
Another thing that Canva can help you with these templates is complete customization. You can easily customize the entire template ranging from its colors selection to images to elements etc. And, you can even remove aspects if you don’t like anything among the template designs.
Understand the pros of Canva to get our point better as follows:
Canva provides a range of features due to which has gained popularity among millions of people. The benefits of using Canva are −
1. Free Design Platform
Canva is free to use platform for everyone. You can use it for creating attention-grabbing designs for marketing campaigns, social media, or projects.
There are certain features in Canva that are useful for professionals. You can get Canva Pro to access those features with a premium library of stock photos, shapes, fonts, and templates.
You can also go for in-app purchases if you are not looking to purchase the Pro version.
2. No skills or experience required
To use Canva, you don’t need any prior experience as a graphic designer. You can swap between images and fonts to create a professional design with many layouts and tools available.
3. Ease of use with multiple templates and fonts
Canva has a library of different backgrounds, images, templates, fonts, stickers to ensure that you get outstanding outcomes. You can create an engaging design in just a few clicks with these tools. The only thing you need is creativity.
4. Endless options
Canva has every digital design option covered, from Pinterest and Facebook posts to Resume, e−book
5. User−friendly interface
The Canva’s layout is pretty simple to use.
On the design page of Canva, there are the grids for templates, photos, stickers, and background on the left-hand side. Above the design are the color palettes, font tabs, and other formatting tools. You can use these tools with the drag and drop editor in your design in a few clicks.
6. Create a team
You can make your Canva team so that they can have access to the designs. You can determine the kind of access your team members or employees have through the shareable links to make edits.
Part 3 Steps to create animated social media pictures in Canva
Unleash your creativity by animating your design pages, elements, and text.
Make or open an existing design.
- Hit to choose the page, element, or text box that you wish to animate.
- Once you hit the Animate tab above the editor on the toolbar, you will see the displayed options on the side panel.
- Please hover your mouse over it to preview an option. Then, you’ll see your design animate.
- Click on it to apply.
- For pages: To control the animation timing, click to select the page, and then click on the stopwatch icon above the editor.
- Download your design in GIF or video format.
You can also directly share them on social media or schedule them for later.
Part 4 Steps to create animated social media videos in Canva
1. Select your template
Sign in to Canva, then choose and make your social media story template. There are two vastly different ways to explore this: You can either select “Create a design” at the top or go for a particular template to get the ideal dimensions.
2. Animate your video
Here’s where the fun begins! Now that you are ready to start editing your selected template, you can add animated and unique elements to your story in three various ways.
- Add a video
You’re ready to add in your video once you’ve chosen your template! Upload or select any video you might want to use and drag it into a placeholder on your story chosen template. If needed, adjust the size and positioning until it fits.
- Animated design elements
Another option to animate your social media posts videos is through the Elements feature in Canva by choosing the “Stickers” tab.
You can either enter your requirement in the search bar or scroll through Canva’s huge graphics and enter “animated {insert the word you’re searching for, i.e., lines, arrows}. Then, you can drag and drop them right into your design.
There are specific search terms for your reference: Animated Sparkle, Animated Arrow, Animated Word, and Animated Line.
- Use the Animate button.
There’s an “Animate” button you’ll see at the top when you’re in your design. Hit on the page you wish to animate, and the Animate tab will pop up on the top left.
Use these three features to create an animated video individually or all together – they’ll be sure to up-level your stories in a fun and unique way.
3. Preview and Download
You can preview your animated stories once you finish the action by hitting the “Play” tab at the top of your screen.
There you have your Canva animated social media creation!
For quick reference, be sure to download my Animated Canva Elements document, all my favorite animated elements. Head to the video to grab them!
As you know how to create an animation and the steps needed, you must also be aware of one of the best editing software available.
Here we recommend using Filmora. You can use it to create compelling animation videos than the animated social media on Canva posts so that the animation will come out smooth and natural by adding keyframes. You are just required to frame a white plane to begin creating animation. Despite this, its audio mixer and color correction editing elements will increase your animation video to a new level. Download it to have a try (Free)!
Wondershare Filmora
Get started easily with Filmora’s powerful performance, intuitive interface, and countless effects!
Try It Free Try It Free Try It Free Learn More >
AI Portrait – The best feature of Wondershare Filmora for gameplay editing
The AI Portrait is a new add-on in Wondershare Filmora. It can easily remove video backgrounds without using a green screen or chroma key, allowing you to add borders, glitch effects, pixelated, noise, or segmentation video effects.
Conclusion
And that, my friends, is how you can create your unique animated graphics quickly and easily. So, now it’s your turn! With our above tutorial, you can now permit yourself to make and craft your first and exclusive Canva animated GIFs for social media!
Besides, do not forget to try out the Wondershare FilmorPro for any video editing that you may need for your animated social media videos via Canva.
I can’t wait to hear all about it. See you next time.
Also read:
- Updated 2024 Approved What Is Still Motion Animation and How Does It Work?
- New 2024 Approved Top 10 Animated Photo Collage Apps You Should Know
- New A Beginners Guide to Explain What 3D Animation Is for 2024
- Updated Is It That Easy to Make My Animated Character
- New 15 Best Video to GIF App on iPhone and Android for 2024
- 2024 Approved Best GIF to Video Converters
- Updated 2024 Approved Animate Your Photo Online with These Awesome Tools
- Updated In 2024, Ways to Master to Find 10 Best Free Animated Text Generator
- Updated 2024 Approved Top 10 Video to GIF Converters Top Picks
- Updated In 2024, Best 15 Horror Animes That Will Trigger a Heart Attack
- Updated In 2024, Looking for Love Animated GIFs? Here Are 5 Free Sources For You
- Updated 2024 Approved How to Become a Motion Graphic Designer
- Best 10 Anime Websites to Watch Dubbed Anime Free
- New 2024 Approved 12 Animation Video Maker That Can Triple Your Conversion Rates
- 2024 Approved What Is Anime? Anime VS Manga VS Cartoon
- Updated The Coolest Anime Characters Ever| List of Top Favorites
- New In 2024, Stunning Ideas About Creating Personalised WhatsApp GIF Sticker
- New Methods to Make Photo Motion Effect Online, In 2024
- New Top 12 Evil Cartoon Characters of All Time for 2024
- New 2024 Approved Best 10 Old Cartoons From Cartoon Network That You Miss
- New How to Make Photo 3D Cartoon Online for 2024
- Updated In 2024, How to Make a Photoshop Collage in EASY Steps
- New Best 10 Animated Templates in Canva for 2024
- How to Create Picsart Cartoon in Simple Ways
- In 2024, Best 10 Animated DP for WhatsApp
- In 2024, Apps to Animate Still Pictures
- Updated In 2024, How to Make a Video a Live Photo 2023
- In 2024, 15 Best Collage Makers to Create Aesthetic Collages
- New In 2024, 8 Blender 3D Animation Tutorials for Beginners
- Why These 10 Top Text Motion Templates Are Worth Your Attention for 2024
- Updated In 2024, Ways to Get the Most up to Date Cartoon Character Design Tips
- Ready to Animate Game Character From Scratch?
- Tips That Show Anybody How to Get Awesome Background for Slideshow in PowerPoint for 2024
- New 2024 Approved 15 Best Collage Makers to Create Aesthetic Collages
- Updated 2024 Approved Why These 10+ Top Text Motion Templates Are Worth Your Attention
- New In 2024, Top 15 2D Animation Software Free That Worth to Try
- Updated Adobe Auto Rigger Is AWESOME for 2024
- New 12 Dubbed Anime Websites to Watch for Free
- How to Make Animated Videos for Business – an Ultimate Guide
- S17 Pro Messages Recovery - Recover Deleted Messages from S17 Pro
- Best Honor 90 GT Pattern Lock Removal Tools Remove Android Pattern Lock Without Losing Data
- How To Restore Missing Contacts Files from Nokia C12.
- How To Change Country on App Store for Apple iPhone 12 Pro Max With 7 Methods
- Reasons for Nokia C22 Stuck on Startup Screen and Ways To Fix Them | Dr.fone
- 3 Easy Ways to Factory Reset a Locked iPhone 7 Plus Without iTunes
- 4 Solutions to Fix Unfortunately Your App Has Stopped Error on Vivo X Flip | Dr.fone
- In 2024, How To Unlock a Xiaomi Mix Fold 3 Easily?
- Recommended Best Applications for Mirroring Your Honor 90 Screen | Dr.fone
- Tips and Tricks for Setting Up your Realme 12 5G Phone Pattern Lock
- In 2024, Top Apps and Online Tools To Track Poco C51 Phone With/Without IMEI Number
- In 2024, Complete Tutorial to Use VPNa to Fake GPS Location On Infinix Zero 5G 2023 Turbo | Dr.fone
- In 2024, A Guide Oppo A2 Wireless and Wired Screen Mirroring | Dr.fone
- Best Fixes For Honor Play 40C Hard Reset | Dr.fone
- Does Airplane Mode Turn off GPS Location On Vivo Y36? | Dr.fone
- Will iSpoofer update On Xiaomi Civi 3 | Dr.fone
- In 2024, Preparation to Beat Giovani in Pokemon Go For Realme GT 5 | Dr.fone
- Easy Steps on How To Create a New Apple ID Account On Apple iPhone 6 Plus
- How to Screen Mirroring Realme 12 Pro+ 5G to PC? | Dr.fone
- In 2024, How To Use Special Features - Virtual Location On Huawei Nova Y91? | Dr.fone
- How to Perform Hard Reset on Honor Magic 5 Pro? | Dr.fone
- How to Transfer Photos From Honor X8b to Samsung Galaxy S21 Ultra | Dr.fone
- Guide on How To Erase iPhone 7 Plus Data Completely | Dr.fone
- In 2024, Top 10 Best Spy Watches For your Samsung Galaxy F54 5G | Dr.fone
- How Can I Use a Fake GPS Without Mock Location On OnePlus Ace 3? | Dr.fone
- Easy steps to recover deleted data from Motorola
- In 2024, CatchEmAll Celebrate National Pokémon Day with Virtual Location On Honor Magic 6 | Dr.fone
- Does Airplane Mode Turn off GPS Location On Realme Narzo 60 5G? | Dr.fone
- Reasons for Infinix Hot 30i Stuck on Startup Screen and Ways To Fix Them | Dr.fone
- In 2024, How and Where to Find a Shiny Stone Pokémon For Tecno Spark 20 Pro+? | Dr.fone
- In 2024, Is GSM Flasher ADB Legit? Full Review To Bypass Your Asus ROG Phone 8 Pro Phone FRP Lock
- How to Transfer Everything from Apple iPhone 15 Pro Max to iPhone 8/X/11 | Dr.fone
- Top 10 Telegram Spy Tools On Oppo Find X7 for Parents | Dr.fone
- In 2024, How to Change Lock Screen Wallpaper on Samsung Galaxy M34 5G
- Possible solutions to restore deleted music from Xiaomi
- Android Safe Mode - How to Turn off Safe Mode on Tecno Camon 20? | Dr.fone
- 11 Best Location Changers for Infinix Note 30 Pro | Dr.fone
- In 2024, 5 Ways To Teach You To Transfer Files from Itel A70 to Other Android Devices Easily | Dr.fone
- Title: Updated Secrets to Make 2D Game Animation
- Author: Elon
- Created at : 2024-06-15 11:22:30
- Updated at : 2024-06-16 11:22:30
- Link: https://animation-videos.techidaily.com/updated-secrets-to-make-2d-game-animation/
- License: This work is licensed under CC BY-NC-SA 4.0.
