
Updated Something About Types of Motion Graphics for 2024
Something About Types of Motion Graphics
All about Types of Motion Graphics
An easy yet powerful editor
Numerous effects to choose from
Detailed tutorials provided by the official channel
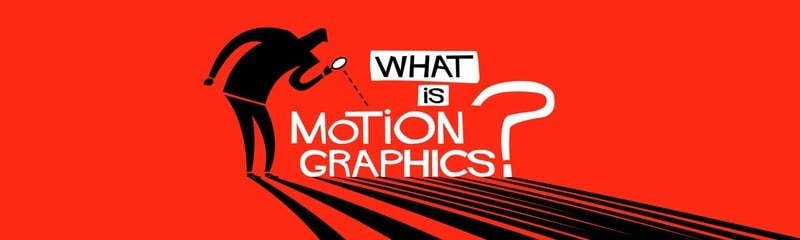
Motion graphics has bought an ultimate change in the sectors of creative industries. In this guide you will get to know the various types of motion graphics and some examples of the same.
In this article
01 [What are Motion Graphics?](#Part 1)
02 [15 Types of Motion Graphics You Should Know](#Part 2)
03 [8 Stunning Motion Graphic Examples](#Part 3)
Part 1 What are Motion Graphics?
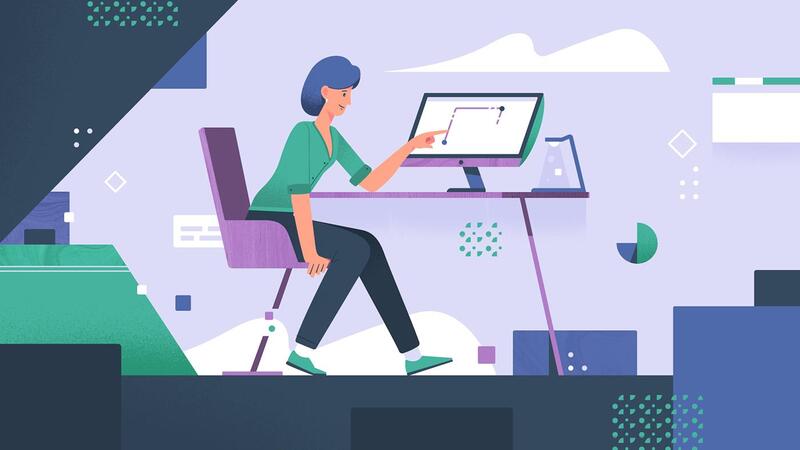
01Definition of Motion Graphics
Motion graphics simples means that graphics which are in motion or movement. In other words, you can say that such graphics create an illusion of movement on the screen and most commonly they are combined with various audios for different purposes of multimedia. Although motion graphics are not like animations as here are some limitations of producing the content.
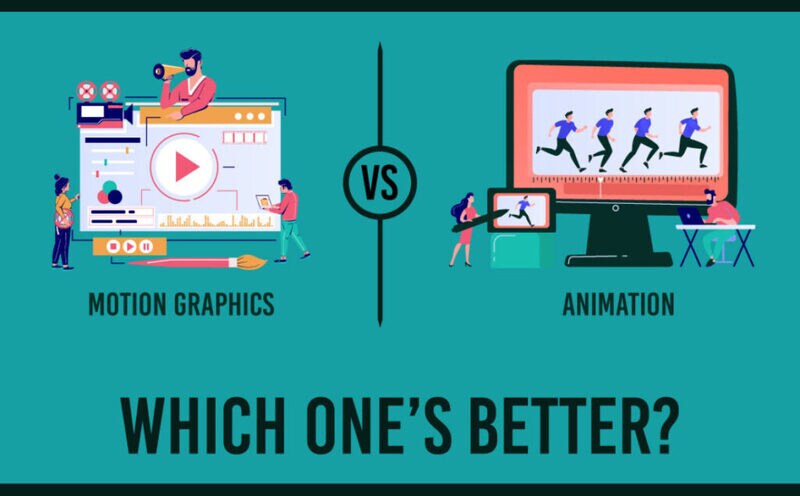
02Motion Graphics vs. Video: is there a Difference?
You can say that every graphic motion is a video. To understand this you will need to know the applications of motion graphics and videos. Here mentioned are some of them:
● If you are creating something in the format of animation then it can done via motion graphics and videos too.
● When you are making a live action video then that could not be created in motion graphics but in the video format.
● Although if you are creating live action videos with animation overlay then you can use motion graphics as well as video formats too.
● Next is the slideshow video format, here the images and videos can be created in slideshow using both motion graphics and videos.
03When to Use Motion Graphics and Video?
Well, the question is how you can get to know that motion graphics is the best choice for creating your visual content. The answer depends on several factors including the users’ experience, the reach that you want to make and a lot more. Here are few factors to consider:
Enhance the users’ experience - using the motion graphics to enhance the users’ experience can be an excellent idea. In motion graphics the user can make benefits of the features like rewind and fast forwarding it. Here they can also get the skip sections which are not their way of interacting with the videos. Thus, you can curate as well as boost your audience experience by suing such content.
Attention at expo booth - At different platforms the users prefer to watch the videos in different sound effects. This means on Facebook the videos are watched on mute mostly. This is the way how people interact on different platforms. So, as a creator if you want to seek attention then you will need to prepare the content as per the audience demands. This is what motion graphics can do for you at the expo booths and various platforms.
Conversions and engagement - Users’ engagement and conversions are the two important needs of any content creator. Video marketing is an excellent idea to boost both of them. All you have to do is invest in high quality motion graphicssound effects videos and you can see that the users will take interest in your landing pages and will ultimately boost your conversion rates.
Part 2 Types of Motion Graphics You Should Know
There are several types of best motion graphicsvideos that can effectively suit your needs. You only need to choose the perfect amongst them and mentioned here are some different types of motion graphics videos:
01Explainer videos
This is the commonest type of motion graphic videos. These videos tell about the working of your product. If you are marketing or selling your product then you will definitely going to need these videos. Needing these videos do not mean that you are having issues in your product, this simply boosts the value of your product and can also be used as marketing of that brand and product.
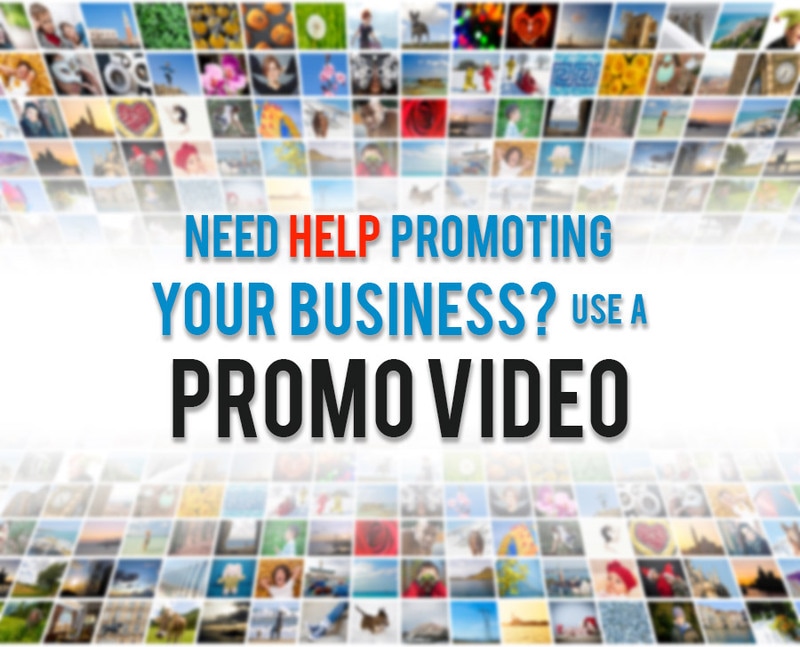
02Promotional videos
In these videos, your main aim will be grabbing the attentions and conversions of the audience. This is really important as a business and you can easily achieve it through the motion graphics as it will focus on each and every important and crucial aspect of your product and business.
03Emotive videos
If you want your audience to feel something about your brand and product as well as take immediate action then these emotive videos are the perfect ones. This can connect your audience emotionally.

04Logos and icons
There is nothing better than a logo to make your brand keep remembered for a long period of time. This becomes more interesting if the logo will be in motion and this is what the logo motion graphics known for. Icons are equally important for any brand and if you manipulate them into motions then it could be really beneficial for you.
05Infographics
No matter if you are showing interesting stats of Infographics, the audience can skim over it. The reason is it could be boring sometimes. However, using the movements in those Infographics stats can keep the eye of your audience still on it.
06GIFs
If you are active on social media platforms, then you would know how GIFs work on various platforms. These are a pretty popular type of motion graphics that is greatly loved by the audience. Some of the live action videos are turned into GIFs and sometimes they are created especially for that purpose only.
07Animated typography
In simple words this can be said as the moving text. Sometimes it is also termed as the kinetic typography and you can use it to create the explainer videos too. These videos are great in order to add a brand wordmark to your products and brands.
08UI and UX animations
These can also be said as a part of explainer videos only but they offer you with a different feature. This means that you can expect the same interface in which it is explained. Moreover, you will be getting some extra elements too.

09Template editing
The existing templates that you might be using to create the motion graphics can be edited and transformed into more advanced ones. You can even add your customized templates to the purpose or you can also use the tools for making your videos better.
10Animated ads
The animated ads are designed to highlight the key features of your business, product or brand in a short span of time. If this is done in a more engaging manner then this will ultimately boost your conversions as well as the customers’ engagement too. These work as the explainer videos but are little bit different from them.

11Graphic loops
These are short animated videos that tend to loop continuously. You have to use the vector, photo elements, text, etc. These video loops are eye-catching and grabs the attention faster.
12Animated titles
The animated titles can greatly work for expressing the message in a simpler way to the audience. These titles are somewhere in the category of animated typography but the use can be different. You can use them to enhance a particular message, pointing a specific feature or object in that particular video.
13Animated assets
These are also very much similar to the animated titles only but they work pretty similar like the PNG images. These are completely transparent so that they can be placed in your video footage easily. These animated assets can be perfect for the intros, transitions or outros. The animated titles and assets can add a spice to your videos.
14Presentations
You can be an excellent speaker sometimes, but if you are not able to present the ideas on screen in an effective way then it could be a barrier in the success of your presentations. Using the motion graphics in presentations, you can boost the interest of your audience as well as keep them engaged.
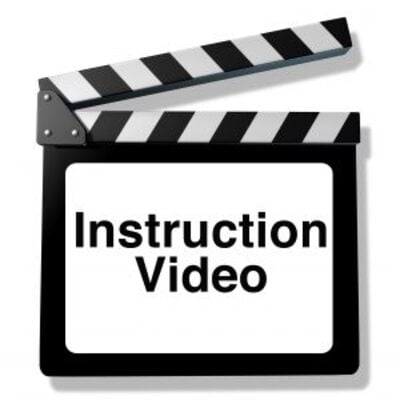
15Instructional videos
This video works similar to that of explainer videos. The instructional videos are great to teach and make your audience learn about the implementation of your product and brand. You can go for using the live-action videos for this purpose but motion graphics is best if you want to go with the trend.
Part 3 8 Stunning Motion Graphic Examples
01Haikus in motion
In these videos there is a use of expressive imagery and those imagery effects are perfect to convey the message. Here the motion graphics bring the poetry into life. The poetry sounds to be so true in the videos of Haikus.
02Cinematics
In this beautiful animation series you can see the charm of classic cinema in a completely fresh manner. These videos bring the classic cinema and its stories as well as characters in to life in a fresh and new way. The sound and other effects make the videos nostalgic.
03Subprime
By these videos, you can understand the market crash of the US in an effective way. The motion graphics that are used in these videos can also be used in other videos of same kind with the realistic as well as highly advanced effects.
04Digital Ocean
In order to make the short videos impactful, you can take the examples of videos from Digital Ocean. The videos are short yet very compiling and perfect to deliver the message in short span of time.
05Better light, better life
These videos are created to spread the message that how important light is in people’s life. Perfectly sound in delivering the message you can use these videos to create awareness amongst your audience.
06Reddit
If you want to see how motion graphics work in light hearted style then this is the perfect example of it. These videos also have a pinch of humor in them and are so vibrant too. For promoting any particular website or any mobile application then these videos created through the motion graphics can be an excellent referral.
07Quadro
The videos of Quadro which are created with the help of Wondershare Filmora Video Editor tool are perfect in passing their message. The creation is so dynamic and vibrant that you need not think about the quality. Filmora tool is perfect for adding such vibrancy and dynamics to the motion graphic videos. Many features like text to speech, adding speech and text, conversion of script into videos makes it a good choice to be used for video creations.
Wondershare Filmora
Get started easily with Filmora’s powerful performance, intuitive interface, and countless effects!
Try It Free Try It Free Try It Free Learn More >

08Scribble live
This is an excellent example of motion graphics video in which you can understand the illustrations in a simpler way and that also without any chaos. The narrative of the video is so clear that it gives you a perfect illustration of how the software works. It also suites in his appearance as well as provide you with an effective guide.
● Key Takeaways from This Episode →
● Motion graphics can be said as the subset of graphic designing. Here you can add motion to your ideas when you are making them real. This can be beneficial in so many ways as well as it is loved by the audience too.
● There are different types of motion graphics that are used for different purposes. Moreover, you can choose amongst them which are most suitable for your needs.
● If you are willing to create the motion graphics videos then you can take the help of mentioned examples for understanding the way of creating such graphics. Also it is worth considering that many tools like Wondershare Filmora, are available for creating such motion graphics
Motion graphics has bought an ultimate change in the sectors of creative industries. In this guide you will get to know the various types of motion graphics and some examples of the same.
In this article
01 [What are Motion Graphics?](#Part 1)
02 [15 Types of Motion Graphics You Should Know](#Part 2)
03 [8 Stunning Motion Graphic Examples](#Part 3)
Part 1 What are Motion Graphics?
01Definition of Motion Graphics
Motion graphics simples means that graphics which are in motion or movement. In other words, you can say that such graphics create an illusion of movement on the screen and most commonly they are combined with various audios for different purposes of multimedia. Although motion graphics are not like animations as here are some limitations of producing the content.
02Motion Graphics vs. Video: is there a Difference?
You can say that every graphic motion is a video. To understand this you will need to know the applications of motion graphics and videos. Here mentioned are some of them:
● If you are creating something in the format of animation then it can done via motion graphics and videos too.
● When you are making a live action video then that could not be created in motion graphics but in the video format.
● Although if you are creating live action videos with animation overlay then you can use motion graphics as well as video formats too.
● Next is the slideshow video format, here the images and videos can be created in slideshow using both motion graphics and videos.
03When to Use Motion Graphics and Video?
Well, the question is how you can get to know that motion graphics is the best choice for creating your visual content. The answer depends on several factors including the users’ experience, the reach that you want to make and a lot more. Here are few factors to consider:
Enhance the users’ experience - using the motion graphics to enhance the users’ experience can be an excellent idea. In motion graphics the user can make benefits of the features like rewind and fast forwarding it. Here they can also get the skip sections which are not their way of interacting with the videos. Thus, you can curate as well as boost your audience experience by suing such content.
Attention at expo booth - At different platforms the users prefer to watch the videos in different sound effects. This means on Facebook the videos are watched on mute mostly. This is the way how people interact on different platforms. So, as a creator if you want to seek attention then you will need to prepare the content as per the audience demands. This is what motion graphics can do for you at the expo booths and various platforms.
Conversions and engagement - Users’ engagement and conversions are the two important needs of any content creator. Video marketing is an excellent idea to boost both of them. All you have to do is invest in high quality motion graphicssound effects videos and you can see that the users will take interest in your landing pages and will ultimately boost your conversion rates.
Part 2 Types of Motion Graphics You Should Know
There are several types of best motion graphicsvideos that can effectively suit your needs. You only need to choose the perfect amongst them and mentioned here are some different types of motion graphics videos:
01Explainer videos
This is the commonest type of motion graphic videos. These videos tell about the working of your product. If you are marketing or selling your product then you will definitely going to need these videos. Needing these videos do not mean that you are having issues in your product, this simply boosts the value of your product and can also be used as marketing of that brand and product.
02Promotional videos
In these videos, your main aim will be grabbing the attentions and conversions of the audience. This is really important as a business and you can easily achieve it through the motion graphics as it will focus on each and every important and crucial aspect of your product and business.
03Emotive videos
If you want your audience to feel something about your brand and product as well as take immediate action then these emotive videos are the perfect ones. This can connect your audience emotionally.
04Logos and icons
There is nothing better than a logo to make your brand keep remembered for a long period of time. This becomes more interesting if the logo will be in motion and this is what the logo motion graphics known for. Icons are equally important for any brand and if you manipulate them into motions then it could be really beneficial for you.
05Infographics
No matter if you are showing interesting stats of Infographics, the audience can skim over it. The reason is it could be boring sometimes. However, using the movements in those Infographics stats can keep the eye of your audience still on it.
06GIFs
If you are active on social media platforms, then you would know how GIFs work on various platforms. These are a pretty popular type of motion graphics that is greatly loved by the audience. Some of the live action videos are turned into GIFs and sometimes they are created especially for that purpose only.
07Animated typography
In simple words this can be said as the moving text. Sometimes it is also termed as the kinetic typography and you can use it to create the explainer videos too. These videos are great in order to add a brand wordmark to your products and brands.
08UI and UX animations
These can also be said as a part of explainer videos only but they offer you with a different feature. This means that you can expect the same interface in which it is explained. Moreover, you will be getting some extra elements too.
09Template editing
The existing templates that you might be using to create the motion graphics can be edited and transformed into more advanced ones. You can even add your customized templates to the purpose or you can also use the tools for making your videos better.
10Animated ads
The animated ads are designed to highlight the key features of your business, product or brand in a short span of time. If this is done in a more engaging manner then this will ultimately boost your conversions as well as the customers’ engagement too. These work as the explainer videos but are little bit different from them.
11Graphic loops
These are short animated videos that tend to loop continuously. You have to use the vector, photo elements, text, etc. These video loops are eye-catching and grabs the attention faster.
12Animated titles
The animated titles can greatly work for expressing the message in a simpler way to the audience. These titles are somewhere in the category of animated typography but the use can be different. You can use them to enhance a particular message, pointing a specific feature or object in that particular video.
13Animated assets
These are also very much similar to the animated titles only but they work pretty similar like the PNG images. These are completely transparent so that they can be placed in your video footage easily. These animated assets can be perfect for the intros, transitions or outros. The animated titles and assets can add a spice to your videos.
14Presentations
You can be an excellent speaker sometimes, but if you are not able to present the ideas on screen in an effective way then it could be a barrier in the success of your presentations. Using the motion graphics in presentations, you can boost the interest of your audience as well as keep them engaged.
15Instructional videos
This video works similar to that of explainer videos. The instructional videos are great to teach and make your audience learn about the implementation of your product and brand. You can go for using the live-action videos for this purpose but motion graphics is best if you want to go with the trend.
Part 3 8 Stunning Motion Graphic Examples
01Haikus in motion
In these videos there is a use of expressive imagery and those imagery effects are perfect to convey the message. Here the motion graphics bring the poetry into life. The poetry sounds to be so true in the videos of Haikus.
02Cinematics
In this beautiful animation series you can see the charm of classic cinema in a completely fresh manner. These videos bring the classic cinema and its stories as well as characters in to life in a fresh and new way. The sound and other effects make the videos nostalgic.
03Subprime
By these videos, you can understand the market crash of the US in an effective way. The motion graphics that are used in these videos can also be used in other videos of same kind with the realistic as well as highly advanced effects.
04Digital Ocean
In order to make the short videos impactful, you can take the examples of videos from Digital Ocean. The videos are short yet very compiling and perfect to deliver the message in short span of time.
05Better light, better life
These videos are created to spread the message that how important light is in people’s life. Perfectly sound in delivering the message you can use these videos to create awareness amongst your audience.
06Reddit
If you want to see how motion graphics work in light hearted style then this is the perfect example of it. These videos also have a pinch of humor in them and are so vibrant too. For promoting any particular website or any mobile application then these videos created through the motion graphics can be an excellent referral.
07Quadro
The videos of Quadro which are created with the help of Wondershare Filmora Video Editor tool are perfect in passing their message. The creation is so dynamic and vibrant that you need not think about the quality. Filmora tool is perfect for adding such vibrancy and dynamics to the motion graphic videos. Many features like text to speech, adding speech and text, conversion of script into videos makes it a good choice to be used for video creations.
Wondershare Filmora
Get started easily with Filmora’s powerful performance, intuitive interface, and countless effects!
Try It Free Try It Free Try It Free Learn More >
08Scribble live
This is an excellent example of motion graphics video in which you can understand the illustrations in a simpler way and that also without any chaos. The narrative of the video is so clear that it gives you a perfect illustration of how the software works. It also suites in his appearance as well as provide you with an effective guide.
● Key Takeaways from This Episode →
● Motion graphics can be said as the subset of graphic designing. Here you can add motion to your ideas when you are making them real. This can be beneficial in so many ways as well as it is loved by the audience too.
● There are different types of motion graphics that are used for different purposes. Moreover, you can choose amongst them which are most suitable for your needs.
● If you are willing to create the motion graphics videos then you can take the help of mentioned examples for understanding the way of creating such graphics. Also it is worth considering that many tools like Wondershare Filmora, are available for creating such motion graphics
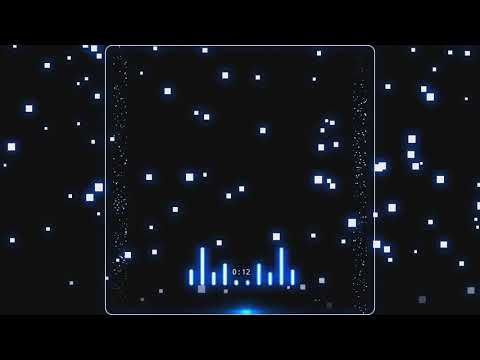
What’s Music Video GIF & How to Add Music to GIF Files
What’s Music Video GIF & How to Add Music to Your GIF Files
An easy yet powerful editor
Numerous effects to choose from
Detailed tutorials provided by the official channel
Want to make your GIFs more catchy and interesting? Try adding music videos to multiply the fun!
In this article
01 [What’s Music Video GIF](#Part 1)
02 [How to Easily Add Music to Your GIF](#Part 2)
03 [How To Make a GIF With Music to Post on Instagram?](#Part 3)
Part 1 What’s Music Video GIF?
GIFs are essentially animated image files that already form an effective and interesting means of communication and media sharing. Your messages get additional spunk and appeal when you add relatable audios to your GIFs. A music video GIF is one that you create by adding sound to the originally mute GIF files. Additionally, creating music enabled GIFs is a fun activity on its own. You get to explore your editing creativity on different levels as you play with the exciting features that come with the latest editing tools available in the software market.
Whether create them casually or use them as a marketing tool, sound effects tend to considerably upgrade the utility of an animated or unmoving snap. If you are a social media freak and want to get your Instagram and Facebook stories be the talk among your friends on the internet, do consider trying these editing tricks to add that extra notch to your otherwise simple and soundless GIFs. After all, your creativity should never go unnoticed and get the attention it deserves!
If this gets you motivated and you have decided to level up your editing skills, do spare your valuable time to see through further sections of this article for quick and easy tools and methods to introduce audio and sound effects to those mute GIFs and never let your social media posts and stories miss a catch!

Part 2 How to Easily Add Music to Your GIF?
Musical GIF videos are quite interesting, no doubt on that, but what is noticeable here is that GIFs do not have inbuilt audio features. You need to add sound additionally to these files to create musical GIF videos. When trying to make your own music GIF video, you can take help of the following tools:
01Kapwing Editor
This one is a free online tool that helps you add audio to your GIFs. This application is free from issues of spam and watermark requirements. It assures you of a quality editing experience without supporting unnecessary and annoying advertisements.
Using this tool, you can create musical GIF videos in two different ways. Take the following steps to create musical GIF videos with this application:
● Using The Kapwing Studio:
Open the Studio and select the GIF and music files you want to merge. Upload the selected files in the tool.
Customize your audio in the Studio timeline to trim the sound file to the specific segment you wish to add to your GIF. You can also introduce volume adjustments and waveform effects to enhance your music video for GIF for an extra catch.
You can further add text and make size adjustments to your GIF using the sidebar controls.
Once you have finalized everything, click ‘Export’ to download the GIF music video in MP4 format. Note that if you download the GIF format, your video will lose the sound effect.
● Copy-Paste Method
You can also merge GIFs and music videos using the direct copy-paste method in the Kapwing Editor. To create one for yourself, here’s what you need to follow:
Step 1: GIF Upload
Select a GIF from your smartphone or PC gallery and upload it to the Kapwing Editor. You can even copy a GIF link from other apps like, YouTube, GIFHY, etc, and paste it in the editor timeline.
Step 2: Audio Upload
Next, you need to upload the audio file you want to get stitched with your GIF. Choose a file either from your system or copy-paste the YouTube URL of the selected video in the Kapwing timeline.
Step 3: Export Your Creation
That it! You are done with your creation. Click ‘Export’ to share your musical GIF video on different social platforms.

02VEED’S GIF Maker
Like the Kapwing Editor, this one is also a free online tool that you can use to add sound to your originally mute GIF files. What’s more interesting is, apart from adding music, you have the flexibility to draw over, add text and images to your GIFs before you proceed with adding sound to your selected GIF.
Follow the steps given below to start creating GIF music videos with this application:
Step 1: Upload GIF File
To begin, upload your selected GIF file to the application’s pop-up window using ‘Drag and Drop’ method. Alternatively, you can click on ‘Choose GIF File’ tab on the app’s welcome window. Select a file from your system’s gallery and click ‘Open’ to upload it.

Step 2: Add Music
To add audio files, select ‘Upload’ or tap the (+) sign at the bottom right to choose the desired music files. Drag them to VEED’s timeline to set them in the order of your preference.

Step 3: Download Your Creation
Your video gets created in MP4 format. Tap ‘Export’ to directly share it with your peers on Twitter, Facebook or other social platforms.
Part 3 How to Make a GIF With Music to Post on Instagram?
Exploring your creative skills is one thing, while attracting attention to your work is the other. You would definitely want your social media communities to notice and compliment your work. Instagram is one among the best media sharing apps you can use to share your creations.
To adhere to the concern of creating audio enabled GIFs compatible for sharing to your Instagram stories and feeds, you can any of the following editing tools:
01Filmora
Wondershare Filmora Video Editor is one of the best and most preferred editing software you can use to add sound to your GIFs and videos. You can play with your editing creativity to make exciting musical GIF videos with this software in just a few minutes.

Using this tool for your editing work promises you the following advantages:
Wondershare Filmora
Get started easily with Filmora’s powerful performance, intuitive interface, and countless effects!
Try It Free Try It Free Try It Free Learn More >
● Huge Audio Library
Filmora audio library exposes you with a diverse range of audio and music files and a variety of exciting and relatable sound effects to choose from. You can browse through this storehouse for that perfect music for your GIF absolutely free of cost. The library has an additional Filmstock Effect Store that further increases your audio choice bandwidth.
● Optimal Sync
Filmora allows you to establish the perfect sync between your GIF and audio. Its beat detection feature identifies audio hits to produce markers that you can use to obtain the ideal audio-GIF synchronization in your creations.
● Voiceover Applicable
Filmora gives you the flexibility to record and add you own voiceover using your microphone to make your creations more impactful.
Steps to Create Audio Enabled GIFs Using Filmora
Take the following steps to enhance your GIFs with music and sound effects:
● Select and import your GIF file to the Filmora timeline
● In the software’s audio library, select your desired music and sound effects to add them to the imported GIF file. You can even choose to add your own voiceover to the GIF.
● That’s it! You are now ready to share your work on your Instagram handle and other media sharing platforms. Just click ‘Export’ and your creation gets uploaded on social media in MP4 format. Make sure to adjust the resolution and bit settings for best results.

02Artwork
Like Filmora, Artwork is another application you can use to add sound to GIF files. This one is a browser tool that allows you to create sound enabled videos with static and animated images. Take up the following process to make your own musical GIF with Artwork:
● To begin, signup to Artwork’s free trial feature. Choose your desired sound file in MP3 format and trim it to a play duration of 1 minute. This is essential because Instagram doesn’t allow you to post longer GIFs.
● Add your selected GIF and trimmed MP3 files in Artwork’s pop-up window. Click ‘Save’ and wait till the process to finish.
● Your creation is ready. Download and share it on Instagram.
● Key Takeaways from This Episode →
● Adding music and sound to your GIF is both a fun and exciting activity and also has the potential to enhance the quality and reach of the message you desire to deliver through your GIF. Besides this, it enhances your editing creativity and skill, which is a complement in itself.
● A number of software and online tools available on the internet are ready to help you get through the task. You can rely on these tools to add audio to your GIFs within minutes absolutely free of cost and share them directly on social media.
● Filmora is one among the best GIF editing tools for sharing your creations on Instagram. You can access its huge audio library for selected sound effects, set a perfect sync between your GIF and its audio and even add your own voiceover to boost your creativity using this software.
Want to make your GIFs more catchy and interesting? Try adding music videos to multiply the fun!
In this article
01 [What’s Music Video GIF](#Part 1)
02 [How to Easily Add Music to Your GIF](#Part 2)
03 [How To Make a GIF With Music to Post on Instagram?](#Part 3)
Part 1 What’s Music Video GIF?
GIFs are essentially animated image files that already form an effective and interesting means of communication and media sharing. Your messages get additional spunk and appeal when you add relatable audios to your GIFs. A music video GIF is one that you create by adding sound to the originally mute GIF files. Additionally, creating music enabled GIFs is a fun activity on its own. You get to explore your editing creativity on different levels as you play with the exciting features that come with the latest editing tools available in the software market.
Whether create them casually or use them as a marketing tool, sound effects tend to considerably upgrade the utility of an animated or unmoving snap. If you are a social media freak and want to get your Instagram and Facebook stories be the talk among your friends on the internet, do consider trying these editing tricks to add that extra notch to your otherwise simple and soundless GIFs. After all, your creativity should never go unnoticed and get the attention it deserves!
If this gets you motivated and you have decided to level up your editing skills, do spare your valuable time to see through further sections of this article for quick and easy tools and methods to introduce audio and sound effects to those mute GIFs and never let your social media posts and stories miss a catch!
Part 2 How to Easily Add Music to Your GIF?
Musical GIF videos are quite interesting, no doubt on that, but what is noticeable here is that GIFs do not have inbuilt audio features. You need to add sound additionally to these files to create musical GIF videos. When trying to make your own music GIF video, you can take help of the following tools:
01Kapwing Editor
This one is a free online tool that helps you add audio to your GIFs. This application is free from issues of spam and watermark requirements. It assures you of a quality editing experience without supporting unnecessary and annoying advertisements.
Using this tool, you can create musical GIF videos in two different ways. Take the following steps to create musical GIF videos with this application:
● Using The Kapwing Studio:
Open the Studio and select the GIF and music files you want to merge. Upload the selected files in the tool.
Customize your audio in the Studio timeline to trim the sound file to the specific segment you wish to add to your GIF. You can also introduce volume adjustments and waveform effects to enhance your music video for GIF for an extra catch.
You can further add text and make size adjustments to your GIF using the sidebar controls.
Once you have finalized everything, click ‘Export’ to download the GIF music video in MP4 format. Note that if you download the GIF format, your video will lose the sound effect.
● Copy-Paste Method
You can also merge GIFs and music videos using the direct copy-paste method in the Kapwing Editor. To create one for yourself, here’s what you need to follow:
Step 1: GIF Upload
Select a GIF from your smartphone or PC gallery and upload it to the Kapwing Editor. You can even copy a GIF link from other apps like, YouTube, GIFHY, etc, and paste it in the editor timeline.
Step 2: Audio Upload
Next, you need to upload the audio file you want to get stitched with your GIF. Choose a file either from your system or copy-paste the YouTube URL of the selected video in the Kapwing timeline.
Step 3: Export Your Creation
That it! You are done with your creation. Click ‘Export’ to share your musical GIF video on different social platforms.
02VEED’S GIF Maker
Like the Kapwing Editor, this one is also a free online tool that you can use to add sound to your originally mute GIF files. What’s more interesting is, apart from adding music, you have the flexibility to draw over, add text and images to your GIFs before you proceed with adding sound to your selected GIF.
Follow the steps given below to start creating GIF music videos with this application:
Step 1: Upload GIF File
To begin, upload your selected GIF file to the application’s pop-up window using ‘Drag and Drop’ method. Alternatively, you can click on ‘Choose GIF File’ tab on the app’s welcome window. Select a file from your system’s gallery and click ‘Open’ to upload it.
Step 2: Add Music
To add audio files, select ‘Upload’ or tap the (+) sign at the bottom right to choose the desired music files. Drag them to VEED’s timeline to set them in the order of your preference.
Step 3: Download Your Creation
Your video gets created in MP4 format. Tap ‘Export’ to directly share it with your peers on Twitter, Facebook or other social platforms.
Part 3 How to Make a GIF With Music to Post on Instagram?
Exploring your creative skills is one thing, while attracting attention to your work is the other. You would definitely want your social media communities to notice and compliment your work. Instagram is one among the best media sharing apps you can use to share your creations.
To adhere to the concern of creating audio enabled GIFs compatible for sharing to your Instagram stories and feeds, you can any of the following editing tools:
01Filmora
Wondershare Filmora Video Editor is one of the best and most preferred editing software you can use to add sound to your GIFs and videos. You can play with your editing creativity to make exciting musical GIF videos with this software in just a few minutes.
Using this tool for your editing work promises you the following advantages:
Wondershare Filmora
Get started easily with Filmora’s powerful performance, intuitive interface, and countless effects!
Try It Free Try It Free Try It Free Learn More >
● Huge Audio Library
Filmora audio library exposes you with a diverse range of audio and music files and a variety of exciting and relatable sound effects to choose from. You can browse through this storehouse for that perfect music for your GIF absolutely free of cost. The library has an additional Filmstock Effect Store that further increases your audio choice bandwidth.
● Optimal Sync
Filmora allows you to establish the perfect sync between your GIF and audio. Its beat detection feature identifies audio hits to produce markers that you can use to obtain the ideal audio-GIF synchronization in your creations.
● Voiceover Applicable
Filmora gives you the flexibility to record and add you own voiceover using your microphone to make your creations more impactful.
Steps to Create Audio Enabled GIFs Using Filmora
Take the following steps to enhance your GIFs with music and sound effects:
● Select and import your GIF file to the Filmora timeline
● In the software’s audio library, select your desired music and sound effects to add them to the imported GIF file. You can even choose to add your own voiceover to the GIF.
● That’s it! You are now ready to share your work on your Instagram handle and other media sharing platforms. Just click ‘Export’ and your creation gets uploaded on social media in MP4 format. Make sure to adjust the resolution and bit settings for best results.
02Artwork
Like Filmora, Artwork is another application you can use to add sound to GIF files. This one is a browser tool that allows you to create sound enabled videos with static and animated images. Take up the following process to make your own musical GIF with Artwork:
● To begin, signup to Artwork’s free trial feature. Choose your desired sound file in MP3 format and trim it to a play duration of 1 minute. This is essential because Instagram doesn’t allow you to post longer GIFs.
● Add your selected GIF and trimmed MP3 files in Artwork’s pop-up window. Click ‘Save’ and wait till the process to finish.
● Your creation is ready. Download and share it on Instagram.
● Key Takeaways from This Episode →
● Adding music and sound to your GIF is both a fun and exciting activity and also has the potential to enhance the quality and reach of the message you desire to deliver through your GIF. Besides this, it enhances your editing creativity and skill, which is a complement in itself.
● A number of software and online tools available on the internet are ready to help you get through the task. You can rely on these tools to add audio to your GIFs within minutes absolutely free of cost and share them directly on social media.
● Filmora is one among the best GIF editing tools for sharing your creations on Instagram. You can access its huge audio library for selected sound effects, set a perfect sync between your GIF and its audio and even add your own voiceover to boost your creativity using this software.
10 Scary Anime Girls That Will Make You Creepy
10 Scary Anime Girls That Will Make You Creepy

Shanoon Cox
Mar 27, 2024• Proven solutions
Animes have been one of the widely enjoyed forms of entertainment by people all over the world for decades. There are certain animes that attract people due to their scariness and the characters in them.
Even though girls are usually displayed as cute and pinkish and lovely, some animes display them as creepy. And believe me, these creepy anime girls have a huge fan base and are capable of giving the audience a chill over the spine while watching them.
The creepiness of the anime girls adds to the horror of animes and people enjoy watching them. So let’s find out more about these scary anime girls and why their scary character is loved by the fans.
10 Scary Anime Girls in the Scary Animes
There are a lot of animes with different genres. But some of the animes have some characters that stand out due to their weirdness and creepiness. Let’s talk about 10 such scary anime girls that still give the audience creeps:
- 1. Ai Enma (Hell Girl)
- 2. Shion Sonozaki (Higurashi: When They Cry)
- 3. Sachiko Shinozaki (Corpse Party)
- 4. Shiro (Deadman Wonderland)
- 5. Megumi Shimizu (Shiki)
- 6. Esdeath (Akame Ga Kill!)
- 7. Himiko Toga (My Hero Academia)
- 8. Hana Midorikawa (Prison School)
- 9. Isabella (The Promised Neverland)
- 10. Lucy (Elfen Lied)
1. Ai Enma (Hell Girl)
Ai Enma is one of the cute-looking characters in Hell Girl, but do not be deceived by her looks. She was a girl who was buried alive when she was seven, by her own villagers. Enma crawled out of the ground and burned the entire village, killing every single person living there as an act of vengeance.
Later as a punishment for her horrific doings, she was cast out and sentenced to live out her afterlife as Hell Girl. Still, in her childhood, Ai was assigned the job of dragging dead souls to hell, whether they deserved it or not. The coldness in her eyes and the way she does things without a shiver is what makes her creepy.
2. Shion Sonozaki (Higurashi: When They Cry)
Shion Sonozaki from Higurashi: When They Cry is a dark character who is not exactly what she seems outside. The town she lives in is cursed and she is trying to break that dark cycle that offers only death and tragedy.
There is too much to the story, and saying more about it may reveal the suspense. The story is filled with horror and adventure, and the character of Shion absorbs some of the darkness of the town, which gives a scary impact on the audience.
3. Sachiko Shinozaki (Corpse Party)
Sachiko from Corpse Party is a friendly-looking but scary character who loves to rip out the tongues of some of her fellow characters. She tortures students in Heavenly Host Elementry School which is a living hell in the anime.
Sachiko unleashes a lot of horror in the series and she plays the part of an elementary school ghost breaking all the expectations of the audience. Torturing her fellow mates and cutting their tongues out before death is something that makes Sachiko a perfect scary anime girl.
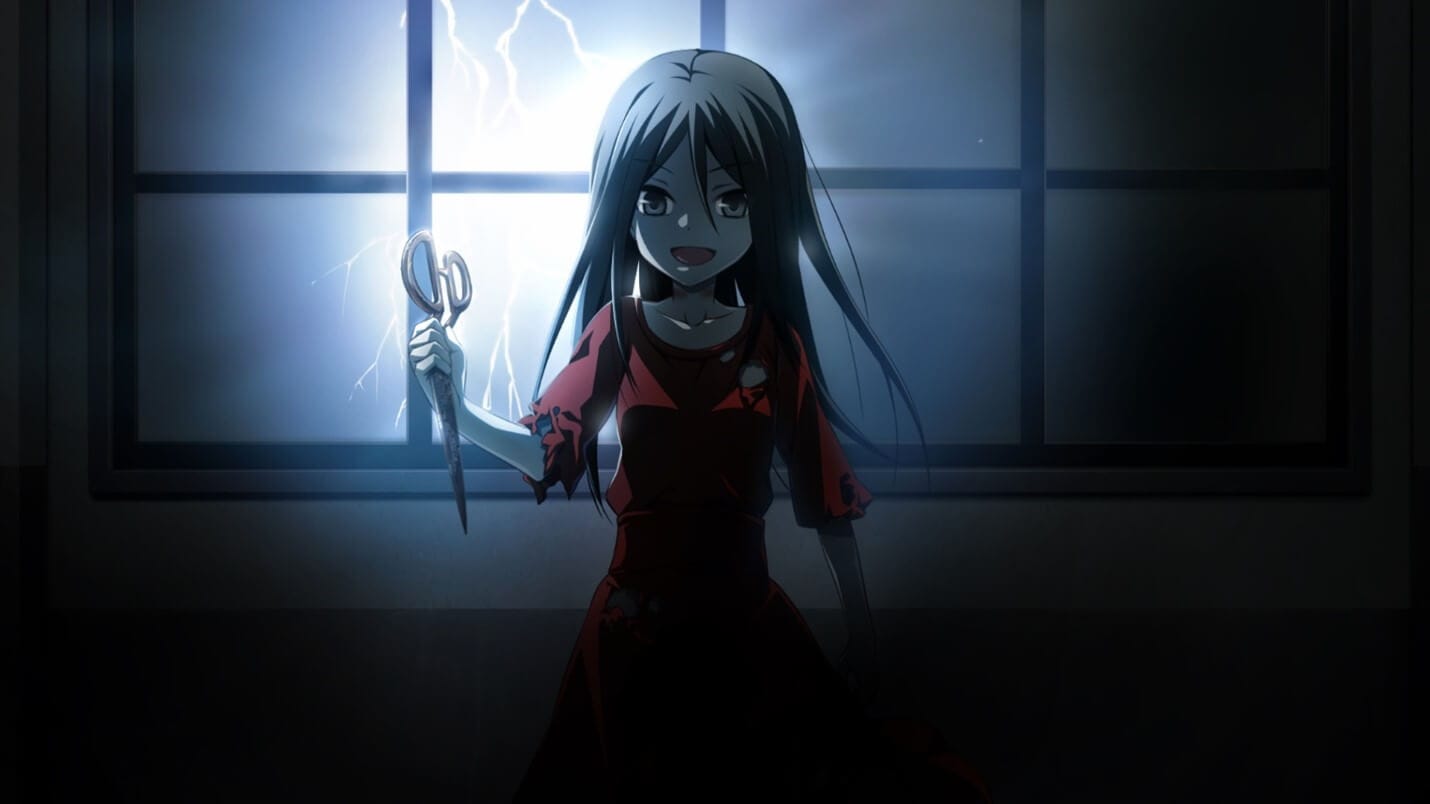
4. Shiro (Deadman Wonderland)
Shiro, the creepy-looking girl from Deadman Wonderland is another character to be scared of. She was adopted for the only purpose of being used as a human experiment in her childhood. The experiments instilled a very scary character in her which gives a horror nature to the anime in total.
The experiments on here were very painful and multiple personalities called “The Wretched Egg” were developed by her to cope up with torture. The creepy nature and the use of her special skills to murder some characters in the anime and frame her adopted brother for it is very dark and scary.
5. Megumi Shimizu (Shiki)
Megumi Shimizu of Shiki is a young girl and the first of all to be killed by the Kirishiki family. She was the first person who died who was not Yamairi and also the first to rise as Shiki.
After becoming a Shiki Megumi became very malicious and attacked the villagers. She enjoyed attacking them and that is very creepy. She also was ready to kill Tohru Mutou and Kaori’s father due to some small reasons. Her character without a drop of sympathy or care for the people around her is very scary and makes her very unpredictable.

6. Esdeath (Akame Ga Kill!)
Esdeath in Akame Ga Kill who is also known as the ice queen of the empire is a very manipulative character and a sadist. She follows the motto, the strong survive and the weak die, and justifies killing innocents and torturing enemies because of it.
Esdeath once made a prince who lost to strip naked before her and lick her boots, before killing his which is a different level of dark. She keeps her sadistic character in check to be in power which is very scary and dangerous for someone with power. She unleashing her cruelty on defenseless people is another thing that makes her a perfect scary anime girl.

7. Himiko Toga (My Hero Academia)
Himiko is a cute-looking girl that possesses the ability to shapeshift to anything she wants. The creepy part is, in order to shapeshift she has to ingest another person’s blood.
Though Himiko appears to be a typical funny school girl, she can turn into a murderous beast in the blink of an eye. Her twister view of relationships and her trying to befriend people while trying to kill them at the same time all give us creepy chills while watching the anime.
8. Hana Midorikawa (Prison School)
Though Hana Midorikawa looks very cute and innocent she is as creepy as any girl can get. The story evolves in an underground prison school which is an explainable aspect that made Hana the sadist she is.
At first, Hana might seem to be a cute girl who does not belong at the place she currently is, but going deeper the opinion of the audience changes extremely. Hana happens to be a violent sociopath with a lot of dangerous thoughts and a urination fetish, and that is just the beginning of her creepiness.
9. Isabella (The Promised Neverland)
Isabella who is also known as Mama is one of the main characters in the Promised Land. Being a caretaker to children, though she appears to be loving and affectionate to her children, that’s not the real case.
Isabella has a twisted character and shows detachment to her tragedies. This character shows antagonism, betrayal, and a twisted nature enough for the fans to feel creepy about her.
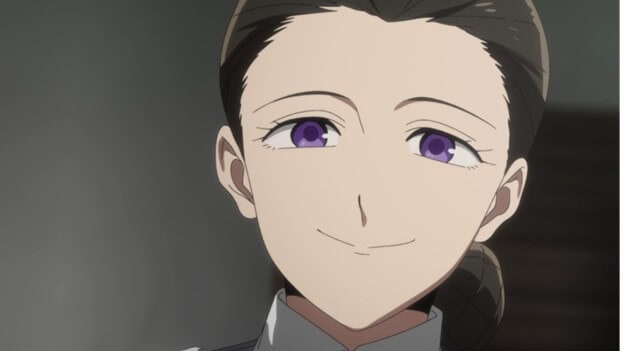
10. Lucy (Elfen Lied)
Lucy in Elfen Lied is a character that sometimes gets sympathy and other times creeps the audience out. She has difficulty drawing a line between good and evil. She can be seen as being sadistically tormented and ruthlessly tormenting about the cruelty around her.
Her surroundings and the people are responsible for how she is and that is why despite being creepy she is loved by a lot of people.
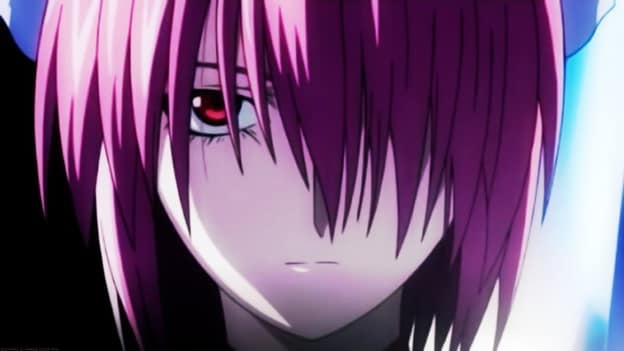
Final thoughts
Though most animes are fun to watch, horror animes are also enjoyed by a lot of people. The main aspect of these horror animes is the scary characters that make the audience wonder.
We have listed the top 10 scary anime girls of different animes that are equally liked and hated by the audience all over the world. The way they act, their cruelty, sadism all define their scary character. These scary anime girls have created such a huge impact that a fan might forget the anime name but never the name of the scary anime girl who gives him/her chills all over the body.
Shanoon Cox
Shanoon Cox is a writer and a lover of all things video.
Follow @Shanoon Cox
Shanoon Cox
Mar 27, 2024• Proven solutions
Animes have been one of the widely enjoyed forms of entertainment by people all over the world for decades. There are certain animes that attract people due to their scariness and the characters in them.
Even though girls are usually displayed as cute and pinkish and lovely, some animes display them as creepy. And believe me, these creepy anime girls have a huge fan base and are capable of giving the audience a chill over the spine while watching them.
The creepiness of the anime girls adds to the horror of animes and people enjoy watching them. So let’s find out more about these scary anime girls and why their scary character is loved by the fans.
10 Scary Anime Girls in the Scary Animes
There are a lot of animes with different genres. But some of the animes have some characters that stand out due to their weirdness and creepiness. Let’s talk about 10 such scary anime girls that still give the audience creeps:
- 1. Ai Enma (Hell Girl)
- 2. Shion Sonozaki (Higurashi: When They Cry)
- 3. Sachiko Shinozaki (Corpse Party)
- 4. Shiro (Deadman Wonderland)
- 5. Megumi Shimizu (Shiki)
- 6. Esdeath (Akame Ga Kill!)
- 7. Himiko Toga (My Hero Academia)
- 8. Hana Midorikawa (Prison School)
- 9. Isabella (The Promised Neverland)
- 10. Lucy (Elfen Lied)
1. Ai Enma (Hell Girl)
Ai Enma is one of the cute-looking characters in Hell Girl, but do not be deceived by her looks. She was a girl who was buried alive when she was seven, by her own villagers. Enma crawled out of the ground and burned the entire village, killing every single person living there as an act of vengeance.
Later as a punishment for her horrific doings, she was cast out and sentenced to live out her afterlife as Hell Girl. Still, in her childhood, Ai was assigned the job of dragging dead souls to hell, whether they deserved it or not. The coldness in her eyes and the way she does things without a shiver is what makes her creepy.
2. Shion Sonozaki (Higurashi: When They Cry)
Shion Sonozaki from Higurashi: When They Cry is a dark character who is not exactly what she seems outside. The town she lives in is cursed and she is trying to break that dark cycle that offers only death and tragedy.
There is too much to the story, and saying more about it may reveal the suspense. The story is filled with horror and adventure, and the character of Shion absorbs some of the darkness of the town, which gives a scary impact on the audience.
3. Sachiko Shinozaki (Corpse Party)
Sachiko from Corpse Party is a friendly-looking but scary character who loves to rip out the tongues of some of her fellow characters. She tortures students in Heavenly Host Elementry School which is a living hell in the anime.
Sachiko unleashes a lot of horror in the series and she plays the part of an elementary school ghost breaking all the expectations of the audience. Torturing her fellow mates and cutting their tongues out before death is something that makes Sachiko a perfect scary anime girl.
4. Shiro (Deadman Wonderland)
Shiro, the creepy-looking girl from Deadman Wonderland is another character to be scared of. She was adopted for the only purpose of being used as a human experiment in her childhood. The experiments instilled a very scary character in her which gives a horror nature to the anime in total.
The experiments on here were very painful and multiple personalities called “The Wretched Egg” were developed by her to cope up with torture. The creepy nature and the use of her special skills to murder some characters in the anime and frame her adopted brother for it is very dark and scary.
5. Megumi Shimizu (Shiki)
Megumi Shimizu of Shiki is a young girl and the first of all to be killed by the Kirishiki family. She was the first person who died who was not Yamairi and also the first to rise as Shiki.
After becoming a Shiki Megumi became very malicious and attacked the villagers. She enjoyed attacking them and that is very creepy. She also was ready to kill Tohru Mutou and Kaori’s father due to some small reasons. Her character without a drop of sympathy or care for the people around her is very scary and makes her very unpredictable.
6. Esdeath (Akame Ga Kill!)
Esdeath in Akame Ga Kill who is also known as the ice queen of the empire is a very manipulative character and a sadist. She follows the motto, the strong survive and the weak die, and justifies killing innocents and torturing enemies because of it.
Esdeath once made a prince who lost to strip naked before her and lick her boots, before killing his which is a different level of dark. She keeps her sadistic character in check to be in power which is very scary and dangerous for someone with power. She unleashing her cruelty on defenseless people is another thing that makes her a perfect scary anime girl.
7. Himiko Toga (My Hero Academia)
Himiko is a cute-looking girl that possesses the ability to shapeshift to anything she wants. The creepy part is, in order to shapeshift she has to ingest another person’s blood.
Though Himiko appears to be a typical funny school girl, she can turn into a murderous beast in the blink of an eye. Her twister view of relationships and her trying to befriend people while trying to kill them at the same time all give us creepy chills while watching the anime.
8. Hana Midorikawa (Prison School)
Though Hana Midorikawa looks very cute and innocent she is as creepy as any girl can get. The story evolves in an underground prison school which is an explainable aspect that made Hana the sadist she is.
At first, Hana might seem to be a cute girl who does not belong at the place she currently is, but going deeper the opinion of the audience changes extremely. Hana happens to be a violent sociopath with a lot of dangerous thoughts and a urination fetish, and that is just the beginning of her creepiness.
9. Isabella (The Promised Neverland)
Isabella who is also known as Mama is one of the main characters in the Promised Land. Being a caretaker to children, though she appears to be loving and affectionate to her children, that’s not the real case.
Isabella has a twisted character and shows detachment to her tragedies. This character shows antagonism, betrayal, and a twisted nature enough for the fans to feel creepy about her.
10. Lucy (Elfen Lied)
Lucy in Elfen Lied is a character that sometimes gets sympathy and other times creeps the audience out. She has difficulty drawing a line between good and evil. She can be seen as being sadistically tormented and ruthlessly tormenting about the cruelty around her.
Her surroundings and the people are responsible for how she is and that is why despite being creepy she is loved by a lot of people.
Final thoughts
Though most animes are fun to watch, horror animes are also enjoyed by a lot of people. The main aspect of these horror animes is the scary characters that make the audience wonder.
We have listed the top 10 scary anime girls of different animes that are equally liked and hated by the audience all over the world. The way they act, their cruelty, sadism all define their scary character. These scary anime girls have created such a huge impact that a fan might forget the anime name but never the name of the scary anime girl who gives him/her chills all over the body.
Shanoon Cox
Shanoon Cox is a writer and a lover of all things video.
Follow @Shanoon Cox
5 Photoshop Alternatives to Animate Your Logo
5 Photoshop Alternatives to Animate Logo
An easy yet powerful editor
Numerous effects to choose from
Detailed tutorials provided by the official channel
Photoshop offers everything that you can use to create a high-quality animated logo and use it to maximize your brand visibility.
![]()
How can you animate your logo in Photoshop? For people who are not familiar with the photo editing tool, it’s always a bit challenging to get started with logo animation.
In this article
01 [Why Do You Need a Gif Logo](#Part 1)
02 [A Step-by-step Guide to Logo Animation in Photoshop](#Part 2)
03 [Most Effective Tactics to Animate Logo with These 5 Photoshop Alternatives](#Part 3)
Part 1 Why Do You Need a Gif Logo
Now, before we start with the guide to animate your logo in Photoshop, let’s first understand how an animation logo can help your brand. The truth is an animated logo has the desired uniqueness factor that’ll help your brand establish a strong digital presence. An animated logo will also set you apart in the crowd, considering other companies will be using simple one-dimensional logos.
Not to mention, you can also use an animated logo in your promotional videos and apply visual effects to enhance the overall production quality of the videos. In a nutshell, there are endless possibilities of using animated logos - all you have to do is unleash your creativity and animate a logo without any hassle.
Part 2 A Step-by-step Guide to Logo Animation in Photoshop
So, now that you know the top reasons why it’s important to use an animated logo, let’s start with the step-by-step guide to animate your logo in Photoshop. It’s worth understanding that animating a logo in Photoshop is not a challenging process. However, it may take a few minutes for you to get the job done because the process is quite time-consuming.
Step 1Open Adobe Photoshop
Open Adobe Photoshop on your computer. Click “File > Scripts” and then tap “Load Files into Stack”.
![]()
Step 2Browse
On the next screen, click “Browse” and load all the JPEG files that you want to use to animate the logo.
![]()
Step 3Timeline
Wait for pictures to load into Photoshop’s timeline. Then, click “Windows” and select “Timeline” from the drop-down menu.
![]()
Step 4Make Frames from Layers
Select all the layers and tap the little “Animation” icon. Click “Make Frames from Layers” to proceed further.
![]()
Step 5Adjust the time span
Select all the frames to adjust the time span for the animation.
Step 6Select looping options
Click on “Select Looping Options” and specify the number of times you want the animation to play itself in the loop.
![]()
Step 7Final export
Your GIF animation is ready for the final export. Simply click “File>Save for Web” and then choose the final output format to export the logo in GIF format.
Part 3 Most Effective Tactics to Animate Logo with These 4 Photoshop Alternatives
Even though Photoshop is a great software to create animated logos, it’s no secret that its complex UI might seem overwhelming for some users. If that’s the case, you can look for Photoshop alternatives and use them to animate your logo online. Here we have shared five of the best alternatives to Photoshop that offer all the essential tools to animate a logo with fewer complications. All these tools have an intuitive interface and allow users to create animated logos within a few minutes.
These Photoshop alternatives include:
01 Figma
![]()
Figma is undoubtedly one of the best editing tools that you can use to animate your logos for free. Even though the tool isn’t as feature-loaded as Photoshop, it’s still one of the best Photoshop alternatives you can use to create animated logos. The tool offers a user-friendly interface where everything you need is right on your screen. Since there aren’t too many hidden menus, you’ll find it quite easier to animate your logos in Figma. There are pre-installed animation templates and transitions that you can customize to meet your business requirements and accelerate the entire designing process.
Key Features:
● Intuitive User Interface
● Support for Team Collaboration
● Can be used for UX/UI designing too
Pros
Dedicated free version for one-time users
Perfect for Novice Designers
Can be used within a professional organization for advanced editing
Cons
You will not get all the features with the free model
If you are looking to design animated logos with keyframes, Figma may not be the right choice for the job
02 Canva
![]()
Canva is another popular online editing tool that’s designed to help users fulfill different editing needs right on their browsers. Whether you want to create a banner for an event or an animated logo for your website, Canva will help you get the job done in every situation.
Being a web-based tool, Canva supports cross-platform compatibility, which means you can access it on any device you want. There are even dedicated iOS and Android apps for Canva that’ll allow you to edit logos right on your smartphone. Basically, if you want to animate your logos online free, Canva is the most suitable solution. You can also use Canva if you are looking for a long-term logo maker.
Key Features:
●Cross-Platform Compatibility
●Thousands of built-in templates with customization support
●The media library gets updated regularly
Pros
All the basic features are available in the free version
One-account to access Canva on any device you want
Ideal for one-time use as well
Cons
When it comes to customization, Canva has limited features
You won’t find advanced editing options like Photoshop
03 Luminar
![]()
Luminar is a paid editing tool that comes with built-in AI support for high-quality editing. Basically, its AI feature can automatically analyze the pictures and suggest you with the best animation templates accordingly. While many users are skeptical about the AI-support, stay assured that it’ll prove to be helpful in 80% of the situations. And, even if you don’t like the suggested templates, you can always go back to the media library and pick a template by yourself.
With AI coming into the picture, Luminar instantly speeds up the entire editing process. You won’t have to spend several hours browsing through the template options. Simply select one of the suggested templates and you’ll be able to initiate the editing process instantly.
Key Features:
●An extensive built-in media library
●Dedicated AI support for precise editing
●Edit your RAW images and add logos easily
Pros
Luminar is an ideal choice for long-time users
Available for both Windows and macOS
Apply templates to multiple images with one click
Cons
With $99 price tag, Luminar is certainly expensive
In the beginning, you may find the user interface a bit overwhelming
04 Fotor
![]()
Fotor is also an online editing tool that can be used to animate your logos online for free. Being a simple online editor, you can’t expect Fotor to offer advanced editing features like some of the other tools we have mentioned in the list.
However, stay assured that when it comes to animating logos, Fotor has everything you’ll need to get the job done. The web-based tool offers 100,000 templates that are designed for different industries. You can choose any of these templates, customize them, and create bespoke animated logos for your brand.
Key Features:
● Different templates to choose from
● Easy drag-&-drop compatibility
● Ideal for first-time as well as professional users
Pros
Available for free
Perfect for social media managers
Customizable templates
Cons
Lacks advanced editing support
The premium version doesn’t have too many useful features
Key Takeaways from This Episode
● Animate your logo in Photoshop and make it visually appealing with 5-easy steps
● If you want to integrate your animated logo into a video, you can use Wondershare Filmora Pro to get the job done within a few minutes
● If you are a beginner, you can also use web-based editing tools to animate your logo online for free.
How to Create a Whiteboard Animation Video
Whiteboard animation simply refers to the process of story telling using pictures and drawn resources on a whiteboard or a plane white surface. Its simply the creation of conventional story telling procedure where text, images, diagrams, figures, etc are drawn onto a white surface.
Whiteboard animation video usually work with audio, visual and most times a combination of both audio and visual to sell a particular information to the audience. Another name it has gotten over time which you may come across while surfing the internet is doodle videos.

In creating this type of videos, script writes are usually employed because of the dynamics involved in creating them. The major users of whiteboard animation video are business owners and people in the education fields. Other people make use of it but these two groups are the major users.
Whiteboard animation is important because it helps viewers remember the contents of what they watched better than looking at an image that contains a lot of information that may not always be organized.
Over time, whiteboard videos have become a more compelling and innovative method of dissemination information. They work so well because it’s a more relatable and fun way of making videos. It goes outside the conventional video making techniques and employs the animation standards which is fun to watch, engaging and still maintains the ability to effective pass the required information to the viewers.
Also, it uses a unique style to mix text, animations, and colors to drive the point home. Viewers are usually glued to their screen while watching it. The usual white background equally makes the information being displayed to effective contrast with each other. However, there is a recent movement from the usual white background to any color of choice while still maintaining the contrasting quality of the videos.
Finally, people tend to remember events or information if they are told as stories. This is one of the major objectives of whiteboard animation videos. They use graphics and animations to tell stories, sell products and services while maintaining the fun in it.
Whiteboard animation video usually takes time to create. Its not always as easy as it may seem. It takes dedication and patience before you perfect the video. if you’re new to this, its ok to not have that perfect video immediately. What matters is your will to grow and get better.
Below is an example of a whiteboard animation video created using Animaker. We’ll still look at the various software applications used for creating whiteboard animation videos.
How to Create Your Video
Step1 The first step to creating your whiteboard animation video is to know your topic of choice. Determining your choice topic is based on the purpose of the video. You have to know the reason why the video is being created in the first place to enable you decide the contents, the outlook, the font style and size and the colors to use.
Step2 The next step after you’ve getting your topic is execution of the idea. This involves having a script which usually involves the step-by-step procedure you are to follow to achieve your goal. Writing the script is arguable the most difficult process. However, once you get it right, all the other processes become relatively easy to execute. You might need to employ a professional script writer depending on your budget for the project.
Step3 After that, the next thing is to deicide whether or not to use your own voice or computer voice. This is also called a voice over. Most software provides a text to speech voice over option which usually comes with various alternatives. There is also another option of using your own voice to finish the project.
Step4 Add text, graphics and animation. This step is usually easier when you are working with the script already provided. You include the text, animations, figures, etc. sometimes you might need to import additional resources to complete this task. However, not all software provides for this.
Step5 Organize your work. In organizing your work, you must ensure that you voice over matches properly with what is on display. Check your spellings, grammar, composition and other ‘little’ details that may give your work a bad look.
Step6 Save your work and export. Once your done with your work, you have to save it on your local disk. This also means downloading the work from the website or software onto a local disk. You can now share the video on any social media of your choice. The most popular place to share it is on YouTube which is the most widely used video watching application.
Top 3 Whiteboard Animation Software
When considering which software is best for whiteboard animation creation needs, the most important factor to have at the back of your mind is flexibility and cost. Some software are really flexible to use but cost more than many people can afford. Others are cheap to purchase but do not have all the necessary resources needed to make a great video.
We’ll be looking at various software that combines cost effectiveness and flexibility. Note however that this list is not exhaustive of the software that combines these two features but are worthy of mention for the purpose of this article.
Filmora
At the top of our list is Filmora . This does not make them the best. However, they are relatively easy to use and have a combination of the two features mentioned above. Finally on our list is Filmora. This software offers much more than just whiteboard animation. It’s your go-to software for your video creation and video editing needs. One of the best parts of this software is that it supports 2D and 3D animation.

Free Download For Win 7 or later(64-bit)
Free Download For macOS 10.14 or later
Animaker
It has a lot of free resources which are made available to users after creating and account with them and verifying your email. However, like most other software, the juicy parts of it are locked and can be unlocked with a monthly or yearly subscription. They are 3 packages; Basic which cost $10 per month and $120 per year, starter package which cost $19 per month and $228 per year and the pro package which costs $49 per month and $588 per year.

This software is at the top of our list because the free resources it provides is adequate to make a decent whiteboard animation. Note that it comes with their watermark which cannot be removed without a paid subscription.
Doodly
Doodly is one of the most popular software applications for creating whiteboard videos. Its popularity comes from the fact that no prior skills is needed to use the software other than basic computer and internet usage. A lot of processes are already automated for users. If you’re a user that is concerned about quick responses from their customer care/support, doodly covers you. They have a record time response to issues from their users. Visit https://www.doodly.com/pricing/ to view their pricing.

Conclusion
If you’re wondering why you should chose whiteboard animation over the conventional video creating technique, then you should probably try it out. Animation easily captures the interest of viewers and the slide-by-slide transitioning equally makes it better. You can always try out other software applications to know the one that fits you best.
How to Create Your Video
Step1 The first step to creating your whiteboard animation video is to know your topic of choice. Determining your choice topic is based on the purpose of the video. You have to know the reason why the video is being created in the first place to enable you decide the contents, the outlook, the font style and size and the colors to use.
Step2 The next step after you’ve getting your topic is execution of the idea. This involves having a script which usually involves the step-by-step procedure you are to follow to achieve your goal. Writing the script is arguable the most difficult process. However, once you get it right, all the other processes become relatively easy to execute. You might need to employ a professional script writer depending on your budget for the project.
Step3 After that, the next thing is to deicide whether or not to use your own voice or computer voice. This is also called a voice over. Most software provides a text to speech voice over option which usually comes with various alternatives. There is also another option of using your own voice to finish the project.
Step4 Add text, graphics and animation. This step is usually easier when you are working with the script already provided. You include the text, animations, figures, etc. sometimes you might need to import additional resources to complete this task. However, not all software provides for this.
Step5 Organize your work. In organizing your work, you must ensure that you voice over matches properly with what is on display. Check your spellings, grammar, composition and other ‘little’ details that may give your work a bad look.
Step6 Save your work and export. Once your done with your work, you have to save it on your local disk. This also means downloading the work from the website or software onto a local disk. You can now share the video on any social media of your choice. The most popular place to share it is on YouTube which is the most widely used video watching application.
Top 3 Whiteboard Animation Software
When considering which software is best for whiteboard animation creation needs, the most important factor to have at the back of your mind is flexibility and cost. Some software are really flexible to use but cost more than many people can afford. Others are cheap to purchase but do not have all the necessary resources needed to make a great video.
We’ll be looking at various software that combines cost effectiveness and flexibility. Note however that this list is not exhaustive of the software that combines these two features but are worthy of mention for the purpose of this article.
Filmora
At the top of our list is Filmora . This does not make them the best. However, they are relatively easy to use and have a combination of the two features mentioned above. Finally on our list is Filmora. This software offers much more than just whiteboard animation. It’s your go-to software for your video creation and video editing needs. One of the best parts of this software is that it supports 2D and 3D animation.
Free Download For Win 7 or later(64-bit)
Free Download For macOS 10.14 or later
Animaker
It has a lot of free resources which are made available to users after creating and account with them and verifying your email. However, like most other software, the juicy parts of it are locked and can be unlocked with a monthly or yearly subscription. They are 3 packages; Basic which cost $10 per month and $120 per year, starter package which cost $19 per month and $228 per year and the pro package which costs $49 per month and $588 per year.
This software is at the top of our list because the free resources it provides is adequate to make a decent whiteboard animation. Note that it comes with their watermark which cannot be removed without a paid subscription.
Doodly
Doodly is one of the most popular software applications for creating whiteboard videos. Its popularity comes from the fact that no prior skills is needed to use the software other than basic computer and internet usage. A lot of processes are already automated for users. If you’re a user that is concerned about quick responses from their customer care/support, doodly covers you. They have a record time response to issues from their users. Visit https://www.doodly.com/pricing/ to view their pricing.
Conclusion
If you’re wondering why you should chose whiteboard animation over the conventional video creating technique, then you should probably try it out. Animation easily captures the interest of viewers and the slide-by-slide transitioning equally makes it better. You can always try out other software applications to know the one that fits you best.
Top 10 Best and Fast Ways to Turn Image Into Gif
[Top 10] Best and Fast Ways to Turn Image into Gif
An easy yet powerful editor
Numerous effects to choose from
Detailed tutorials provided by the official channel
There are in fact ways to turn an image into GIF easily We’ll be showing off a couple of some of the easier ways below, including in-depth tutorials of some of the best methods so that you will no longer have to be troubled.
These tutorials, of course, will focus on teaching you how to create GIF from photos If that’s something you’re interested in, continue reading
In this article
01 [Why GIF?](#Part 1)
02 [How to Add an Image to a GIF?](#Part 2)
Part 1 Why GIF?
Before we move on to the tutorials, let’s do a brief account on GIF files We’ve also answered some of the more common questions regarding using a GIF image maker below for your edification
But, first: Why GIF? Well, it all comes down to what you’re looking for A lot of people use GIF files to create animated icons that they can use for their accounts. Some just genuinely want to create a GIF file that they can share with their friends and families (either for a laugh or something else) GIF files are a convenient vessel for doing this because they have a lot of flexibility and are accepted by most platforms
01Why Gif from My Images Are Blurry?
One of the biggest issues people tend to have when turning an image into GIF is that they come out of the process with a blurry end-product. No one wants that But, how are you supposed to avoid it? Well, it all depends on the tool that you’re using and your initial picture For the former, it’s best to review the upload requirements of your chosen GIF maker to get a better end result. For the latter, it’s best to pick a good, high-quality GIF creator for a better outcome
02There Are Jaggy Strokes Around Gif?
Another issue that you might suffer from while trying to create GIFs from photos is jaggy or raggedy strokes around the GIF when converted. These occur often with GIF makers that support transparency If you find these happening to you, adjust the transparency settings to get rid of the white pixel outline around your converted GIF.
Part 2 How to Add an Image to a GIF?
Now it’s finally time for the tutorials that we promised at the beginning of this article These tutorials will range from online to software solutions — so that you can get a clear idea of what you can expect from all these different GIF makers. To be more specific, we’ll be demonstrating with an online images to GIF converter, how to create animated GIF photoshop, and how to easily turn any image into GIF with the photo GIF creator, Wondershare Filmora Video Editor.
01Image to GIF: How to Turn Photos into Animated GIFs
For our first tutorial, we’re going to be demonstrating how to create GIF from photos with an online photo GIF creator More specifically, we’ll be demonstrating with Loading.IO, which is an online tool that you can use to create animated icons for your profiles or on your video content It comes with several animation options and other settings that you can use to quickly create GIFs from photos
**Step 1: Go to Loading.IO
Of course, we start off this tutorial by opening the GIF maker. In this case, since the tool is hosted online, that’s as easy as opening the link that we’ve provided below It will take you directly to the online GIF creator.
URL: https://loading.io/animation/icon/

**Step 2: Upload Photo
Once on-site, it’s time to upload the photo that you want to turn into a GIF As this is an icon creator, you should pick a photo with the proper parameters
To upload your icon for animating, select the ‘Upload’ button and browse your computer or your Google Drive for the image in question.

**Step 3: Choose animation Style
Next, choose how you want the uploaded photo to be animated Loading.IO offers a couple of animations that you can choose from Including the ‘beat’ animation, which is what we choose for our example

**Step 4: Adjust Settings
This step is technically optional, as there are default settings already prepared if you have no other specifications for your image-turned GIF. But, if you want, you can adjust certain settings for a better outcome
For example, you can speed up the animation with the ‘Speed’ slider. Or, you can increase the number of times the GIF loops by adjusting the ‘Repeat’ slider. Test out a couple of settings to get the best result

**Step 5: Download as GIF
To wrap things up, it’s time to download your finished animation Loading.IO gives several options for this. But, of course, in our case, we choose to ‘Download As: GIF’

02How to Make an Animated GIF in Photoshop [Tutorial]
For the next tutorial, we’ll be showing you how to use Photoshop to create and edit an animated GIF This process is fairly lengthy and is not recommended for beginners. But, it is a very professional method of creating an animated GIF — one that will allow you to control every step of the process (which may be exactly what you want)
**Step 1: Import Images into an Image Stack
First, starting on a new product, upload the images that you want to turn into a GIF into a photoshop ‘Image Stack’. This can be done by clicking the ‘File’ tab and selecting the ‘Scripts > Load Files into Stack…’ option
Afterward, a pop-up window will appear where you will be prompted to browse your computer for the aforementioned images Click ‘OK’ when done

**Step 2: Organize Layers
Check the ‘Layers’ panel for the images that you uploaded and organize them based on how you want them to appear for your animated GIF

**Step 3: (Optional) Import Video
If you want to work on a video to turn into a GIF instead, you can do such by selecting the ‘File’ tab and clicking on the ‘Import > Video Frames to Layers…’ option. This will get you to the same place shown in Step 2
Note: Just be careful that you do not transfer an image that is too long Photoshop may not be able to properly break it down, if so.

**Step 4: Open Timeline Then Create Frame Animation
Next, in order to start working on your animation, open the Timeline Window This can be done by clicking the ‘Window’ tab and selecting ‘Timeline’
With the ‘Timeline’ Window now open, select the ‘Create Frame Animation’ option to begin working

**Step 5: Make Frame from Layers
In order to transfer your uploaded images from the ‘Layers’ panel to your timeline, select the ‘Menu’ option on the top-right hand corner of the ‘Timeline’ window and select the ‘Make Frames From Layers’ option

**Step 6: Preview Animation and Adjust as Needed
To preview your animation, click the ‘Play’ button This is the best time to check that your frames have been organized correctly If they are not, you can adjust them by dragging and dropping them on the timeline.
OR, you can use the ‘Reverse Frames’ option if your animation has been completely flipped around

**Step 7: Create an Animation Loop
In order to be a proper looped GIF, the animation should repeat endlessly You can make sure of this by changing the ‘Repeat’ option to ‘Forever’ (as is shown in the image below).

**Step 8: Export Finished Animation to Gif
In order to finish turning your image into GIF, you’ll need to export it in the proper format This is possible by selecting the ‘File’ tab and then clicking the ‘Export > Save for Web (Legacy)…’ option
A pop-up window should appear where you can control export settings Do so in order to ensure that you have the best outcome

03How To Make an Animated GIF in Wondershare Filmora Video Editor (Fast & Easy)
For Win 7 or later (64-bit)
For macOS 10.12 or later
For our last tutorial, we’ll be showing you how to make an animated GIF with the use of Wondershare Wondershare Filmora Video Editor . Filmora is a video editor, one that is used by professionals all over to produce high-quality content And, of course, as a video editor, it works just as well as a GIF maker. One that you can use to create images into a GIF easily
**Step 1: Launch Filmora
First, download and install Filmora If you want to follow along with this demonstration, you can Wondershare offers a FREE trial where you can test out all of the software’s functions before making a commitment

Step 2: Upload Video to Turn into GIF
For this next step, we do something akin to what we did earlier with Photoshop. And that is to upload images or a video to fit into a timeline
This process is started by first uploading images, which you can do by clicking the ‘File’ tab and selecting the ‘Import Media > Import Media Files’ option

**Step 3: Drag Media to Timeline
With Filmora, the ‘Timeline’ window is already open Also, you won’t have to do anything complicated to get your media onto the said timeline. Just drag and drop it from the Media library (as is shown in the image below).

**Step 4: Edit or Adjust GIF
Before moving forward, you should take this chance to make adjustments to the media that you uploaded into your timeline There are many things that you can do at this stage so feel free to experiment
For our example, we cut down the video that we uploaded by using the ‘Trim’ option (which you can find by right-clicking on video media).

**Step 5: Export into GIF
Finally, to finish us off, we export our finished GIF This can be done by selecting the ‘Export’ tab and then clicking the ‘Create Video’ option A pop-up window will appear where you can adjust export settings

● Key Takeaways from This Episode →
● GIFs are fun and easy-to-share content It’s accepted by most platforms and can even be used to create professional, animated icons to be added to video content
● The process of turning an image into a GIF can be a bit tricky. But, don’t worry, so long as you start with high-quality media and use a reliable Photo-GIF Creator, then you should be fine
● If you’re struggling with turning your images into GIFs, check out one of the tutorials that we’ve offered We specifically chose the three GIF creators that we demonstrated to offer multiple methods that you can choose from
There are in fact ways to turn an image into GIF easily We’ll be showing off a couple of some of the easier ways below, including in-depth tutorials of some of the best methods so that you will no longer have to be troubled.
These tutorials, of course, will focus on teaching you how to create GIF from photos If that’s something you’re interested in, continue reading
In this article
01 [Why GIF?](#Part 1)
02 [How to Add an Image to a GIF?](#Part 2)
Part 1 Why GIF?
Before we move on to the tutorials, let’s do a brief account on GIF files We’ve also answered some of the more common questions regarding using a GIF image maker below for your edification
But, first: Why GIF? Well, it all comes down to what you’re looking for A lot of people use GIF files to create animated icons that they can use for their accounts. Some just genuinely want to create a GIF file that they can share with their friends and families (either for a laugh or something else) GIF files are a convenient vessel for doing this because they have a lot of flexibility and are accepted by most platforms
01Why Gif from My Images Are Blurry?
One of the biggest issues people tend to have when turning an image into GIF is that they come out of the process with a blurry end-product. No one wants that But, how are you supposed to avoid it? Well, it all depends on the tool that you’re using and your initial picture For the former, it’s best to review the upload requirements of your chosen GIF maker to get a better end result. For the latter, it’s best to pick a good, high-quality GIF creator for a better outcome
02There Are Jaggy Strokes Around Gif?
Another issue that you might suffer from while trying to create GIFs from photos is jaggy or raggedy strokes around the GIF when converted. These occur often with GIF makers that support transparency If you find these happening to you, adjust the transparency settings to get rid of the white pixel outline around your converted GIF.
Part 2 How to Add an Image to a GIF?
Now it’s finally time for the tutorials that we promised at the beginning of this article These tutorials will range from online to software solutions — so that you can get a clear idea of what you can expect from all these different GIF makers. To be more specific, we’ll be demonstrating with an online images to GIF converter, how to create animated GIF photoshop, and how to easily turn any image into GIF with the photo GIF creator, Wondershare Filmora Video Editor.
01Image to GIF: How to Turn Photos into Animated GIFs
For our first tutorial, we’re going to be demonstrating how to create GIF from photos with an online photo GIF creator More specifically, we’ll be demonstrating with Loading.IO, which is an online tool that you can use to create animated icons for your profiles or on your video content It comes with several animation options and other settings that you can use to quickly create GIFs from photos
**Step 1: Go to Loading.IO
Of course, we start off this tutorial by opening the GIF maker. In this case, since the tool is hosted online, that’s as easy as opening the link that we’ve provided below It will take you directly to the online GIF creator.
URL: https://loading.io/animation/icon/
**Step 2: Upload Photo
Once on-site, it’s time to upload the photo that you want to turn into a GIF As this is an icon creator, you should pick a photo with the proper parameters
To upload your icon for animating, select the ‘Upload’ button and browse your computer or your Google Drive for the image in question.
**Step 3: Choose animation Style
Next, choose how you want the uploaded photo to be animated Loading.IO offers a couple of animations that you can choose from Including the ‘beat’ animation, which is what we choose for our example
**Step 4: Adjust Settings
This step is technically optional, as there are default settings already prepared if you have no other specifications for your image-turned GIF. But, if you want, you can adjust certain settings for a better outcome
For example, you can speed up the animation with the ‘Speed’ slider. Or, you can increase the number of times the GIF loops by adjusting the ‘Repeat’ slider. Test out a couple of settings to get the best result
**Step 5: Download as GIF
To wrap things up, it’s time to download your finished animation Loading.IO gives several options for this. But, of course, in our case, we choose to ‘Download As: GIF’
02How to Make an Animated GIF in Photoshop [Tutorial]
For the next tutorial, we’ll be showing you how to use Photoshop to create and edit an animated GIF This process is fairly lengthy and is not recommended for beginners. But, it is a very professional method of creating an animated GIF — one that will allow you to control every step of the process (which may be exactly what you want)
**Step 1: Import Images into an Image Stack
First, starting on a new product, upload the images that you want to turn into a GIF into a photoshop ‘Image Stack’. This can be done by clicking the ‘File’ tab and selecting the ‘Scripts > Load Files into Stack…’ option
Afterward, a pop-up window will appear where you will be prompted to browse your computer for the aforementioned images Click ‘OK’ when done
**Step 2: Organize Layers
Check the ‘Layers’ panel for the images that you uploaded and organize them based on how you want them to appear for your animated GIF
**Step 3: (Optional) Import Video
If you want to work on a video to turn into a GIF instead, you can do such by selecting the ‘File’ tab and clicking on the ‘Import > Video Frames to Layers…’ option. This will get you to the same place shown in Step 2
Note: Just be careful that you do not transfer an image that is too long Photoshop may not be able to properly break it down, if so.
**Step 4: Open Timeline Then Create Frame Animation
Next, in order to start working on your animation, open the Timeline Window This can be done by clicking the ‘Window’ tab and selecting ‘Timeline’
With the ‘Timeline’ Window now open, select the ‘Create Frame Animation’ option to begin working
**Step 5: Make Frame from Layers
In order to transfer your uploaded images from the ‘Layers’ panel to your timeline, select the ‘Menu’ option on the top-right hand corner of the ‘Timeline’ window and select the ‘Make Frames From Layers’ option
**Step 6: Preview Animation and Adjust as Needed
To preview your animation, click the ‘Play’ button This is the best time to check that your frames have been organized correctly If they are not, you can adjust them by dragging and dropping them on the timeline.
OR, you can use the ‘Reverse Frames’ option if your animation has been completely flipped around
**Step 7: Create an Animation Loop
In order to be a proper looped GIF, the animation should repeat endlessly You can make sure of this by changing the ‘Repeat’ option to ‘Forever’ (as is shown in the image below).
**Step 8: Export Finished Animation to Gif
In order to finish turning your image into GIF, you’ll need to export it in the proper format This is possible by selecting the ‘File’ tab and then clicking the ‘Export > Save for Web (Legacy)…’ option
A pop-up window should appear where you can control export settings Do so in order to ensure that you have the best outcome
03How To Make an Animated GIF in Wondershare Filmora Video Editor (Fast & Easy)
For Win 7 or later (64-bit)
For macOS 10.12 or later
For our last tutorial, we’ll be showing you how to make an animated GIF with the use of Wondershare Wondershare Filmora Video Editor . Filmora is a video editor, one that is used by professionals all over to produce high-quality content And, of course, as a video editor, it works just as well as a GIF maker. One that you can use to create images into a GIF easily
**Step 1: Launch Filmora
First, download and install Filmora If you want to follow along with this demonstration, you can Wondershare offers a FREE trial where you can test out all of the software’s functions before making a commitment
Step 2: Upload Video to Turn into GIF
For this next step, we do something akin to what we did earlier with Photoshop. And that is to upload images or a video to fit into a timeline
This process is started by first uploading images, which you can do by clicking the ‘File’ tab and selecting the ‘Import Media > Import Media Files’ option
**Step 3: Drag Media to Timeline
With Filmora, the ‘Timeline’ window is already open Also, you won’t have to do anything complicated to get your media onto the said timeline. Just drag and drop it from the Media library (as is shown in the image below).
**Step 4: Edit or Adjust GIF
Before moving forward, you should take this chance to make adjustments to the media that you uploaded into your timeline There are many things that you can do at this stage so feel free to experiment
For our example, we cut down the video that we uploaded by using the ‘Trim’ option (which you can find by right-clicking on video media).
**Step 5: Export into GIF
Finally, to finish us off, we export our finished GIF This can be done by selecting the ‘Export’ tab and then clicking the ‘Create Video’ option A pop-up window will appear where you can adjust export settings
● Key Takeaways from This Episode →
● GIFs are fun and easy-to-share content It’s accepted by most platforms and can even be used to create professional, animated icons to be added to video content
● The process of turning an image into a GIF can be a bit tricky. But, don’t worry, so long as you start with high-quality media and use a reliable Photo-GIF Creator, then you should be fine
● If you’re struggling with turning your images into GIFs, check out one of the tutorials that we’ve offered We specifically chose the three GIF creators that we demonstrated to offer multiple methods that you can choose from
The Only Guide to Make 2D Rigging Clear to You
The Only Guide You’ll Ever Need to Learn That Make 2D Rigging Clear to You
An easy yet powerful editor
Numerous effects to choose from
Detailed tutorials provided by the official channel
If you’re looking to get a head start in 2D Rigging or 2D Animation in general, then this guide should get you to where you need to go.
We’ll be introducing 2D Rigging in a comprehensive way — perfect for beginners who aren’t familiar with the subject and want something more solid as their foundation.
In this article
01 [All You Need to Know About 2D Rigging](#Part 1)
02 [What is the Difference and Connection Between 2D and 3D](#Part 2)
03 [What Are the Best 2D Rigging Animation Tools?](#Part 3)
Part 1 All You Need to Know About Rigging
For this first part, we’re going to talk about Rigging in a general way. Think of it as an introduction to the subject. One that should, hopefully, set you off on the right foot. It should also help clarify things that you might need to know as we delve into deeper and more advanced subjects in the next sections of this article.
01What is the Meaning of Rigging in Animation?
Alright, so what does rigging 2D characters actually do? What meaning, or effect, does it have? These questions can be quickly answered with this: Rigging (whether it’s or 3D) is the practice of attaching ‘bones’ to a character model. Bones that, in the future, you can use to create motion.
If you’re an artist, then you’re probably familiar with the concept of creating an initial sketch that you put the final drawing on top of — done with the sole purpose of creating a structure that will allow you to move forward more easily in your art.
That’s exactly what you do when Rigging. You’re building a structure that will allow you to easily create animated characters that you can move at will in the future.
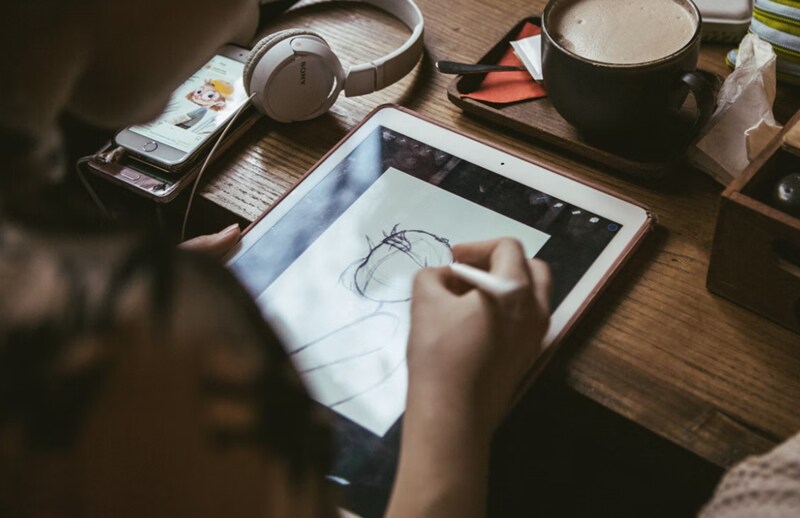
02Why Use Animation?
Alright, so what’s the difference between creating a Face Rig and a Face Rig? Is there any? To answer this, the simple answer is, yes. There is quite the difference.
A lot of animators prefer to practice Animation over Animation because it is more traditional and requires less complicated software (not that it doesn’t come with complications of its own.) Specifically, animation requires quite a lengthy character creation and rigging process.
You should consider the subject more based on what project you’re working on. Things that you might want to keep in mind include your project timeline, project budget, character rig usability in the future, length of the project, and so on.
(There’s also a more in-depth breakdown of this in of this guide.)
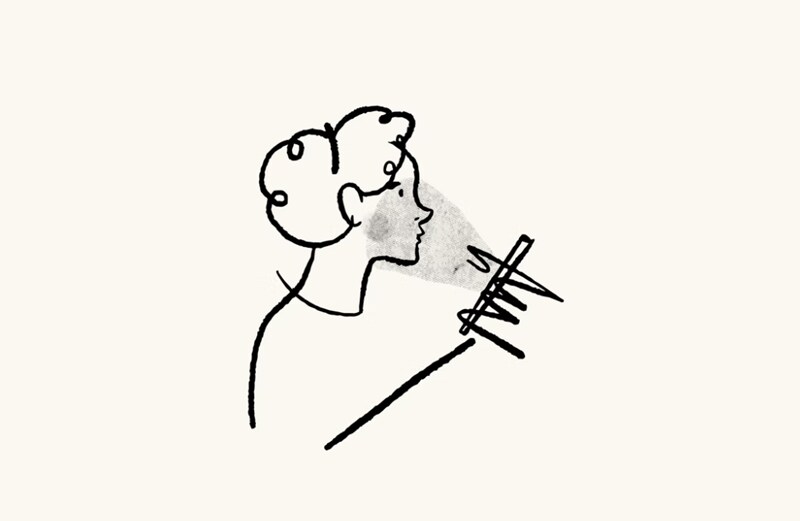
03What is Animation Rigging Software?
Now, for the last section of this Rigging overview, let’s talk about Rigging Animation Software. You should be able to guess what it’s meant for, but how you can use it is a little different, especially with the many different varieties of Rigging Animation Software available.
We’ll be introducing some in the third part of this guide — so you can learn more about the differences there. For now, all you need to know is that it usually comes with advanced rigging and character deformer tools that you can use to easily (and efficiently) animate your characters.
Part 2 What is the Difference and Connection Between and 3D
As promised, this next section will be devoted to clarifying the differences and similarities between Animation and Animation. As we mentioned previously, most animators prefer Animation. But, more often than not, they switch between both forms in order to create something suitable for their current project.
01How and Animations Are Created
First, let’s talk about the process involved. In the end, this can be described simply as: it starts off the same, but then becomes significantly more and more dissimilar the further you go along. More specifically, whether you’re working on a or Animation, you usually start with working through your vision for the project.
That means exploring ideas and creating hand-illustrated storyboards (which will serve as the foundation for the project as a whole). Then, the next steps involve media gathering (i.e., character creation, sound clips, voice-overs, sound effects, etc.) So that everything would be ready for the project.
This is when the difference starts. Animation involves hand-drawing characters in different poses and angles (with the standard being frames for a second) and can be completed with basic rigging (i.e., face rig for moving mouths or eyes). It’s normal in Animation as well for characters to remain static for several frames. While, with 3D, it is the exact opposite — the characters must be in constant motion so as to remain realistic (which can be done with extensive rigging.)
02Time Investments for Creating and Animations
Next, let’s talk about time investments. This can be a bit tricky to differentiate. Animations, as mentioned, are generally easier to create because it requires less rigging (but more drawings for certain scenes and angles makes it take more time). Meanwhile, Animation usually involves a front-heavy timeline — since you’re looking at intensive character creation and rigging. Once all this is set up though? The rest of the process is much faster than Animation.
You’ll also have to consider the work that you have to put in after your animations have been created. For example, the work you’ll need to put into finalizing your project with a video editor like Wondershare Filmora Video Editor (which would work great with animations especially, as it will allow you to actively add into the timeline as you go.)
For Win 7 or later (64-bit)
For macOS 10.12 or later
Part 3 What Are the Best Rigging Animation Tools?
For this final section of the guide, we’re finally moving on to our introduction to Rigging Animation Software. As mentioned, we’ve picked quite the variety to make sure that you have a good idea of how each will work. (A sample video has also been attached to make sure that you know what kind of projects can be created with these Rigging tools. Take the opportunity to explore those, too. If only for further edification.)
01Reallusion – Cartoon Animator 4
The first of the Rigging Animation Software on this list is Reallusion’s Cartoon Animator 4 (previously known as CrazyTalk Animator). This software was originally developed in order to allow everyone (from beginners to professionals) to create advanced animations with very little effort. To that end, it comes with a lot of motion templates and Auto Rig functions (i.e., audio lip-syncing) that the user can use to seriously cut down on the work required.
02Harmony ToonBoom
Harmony ToonBoom is well-known in the Rigging Animation Software industry. It’s the software that is used by many professionals. According to the Toon Boom Harmony website, this software was even used to create popular television shows like Rick and Morty, Bob’s Burgers, The Simpsons, and Futurama. It’s considerably more difficult to use for beginners, but it comes with many advanced functions that allow its users to create truly complex and beautiful Animations.
03Synfig Studio
The best thing about Synfig Studio (right from the onset), is that it is FREE. There are two versions of this tool — one that is ‘stable’ and the other in ‘development.’ The developmental version offers more advanced functions, of course, but for most beginners, the ‘stable’ version would serve just as well.
04Adobe Animate
Adobe Animate is software that belongs in Adobe’s long line of professional-level products. It’s a part of the classic ‘Adobe Suite.’ As a professional software, however, keep in mind that it might be more difficult to get used to at first (there’s a steep, learning curve right off the bat). But, if used correctly, it can be used to create quite impressive and eye-catching interactive animations (i.e., game content or website elements.)
05Animaker
Animaker is quite popular for beginners. It offers templates, so you can start off with an easy project if that’s what you’d like. But it also offers a lot of custom-creation tools that can be used for creating complex and professional Animations — although perhaps not at the level as the ones you might see from other alternatives (this software is most suitable for simple animations.)
06Moho Pro
Moho Pro (previously known as Anime Studio Pro) is a popular Animation program that fans of anime really love. This is one of the best software to use if you’re more interested in traditional animation (which involves a lot of free-hand drawing). Although, despite that fact, it has many advanced rigging functions as well (so you can create a mix of traditional and modern animation if you wish.)
07Pencil 2D
Pencil 2D, much like Synfig Studio, is FREE, cross-platform software. It’s quite old, but it’s matured over the years to include more and more functions (you might already be personally aware of it, in fact. It had its time to shine in the early 2010s.) The important thing to remember though is the fact that this is definitely more of a ‘traditional animation’ software. It does offer some basic rigging, but it’s best used by those who would prefer to practice the art of frame-by-frame animation.
08OpenToonz
OpenToonz is another free Rigging Animation Software (although it should be noted that there is a premium version, called Toonz, that is quite well known.) The best part about it is that it is a combination of software. One that you can use both for traditional animation and Animation. It’s also pretty easy to use, making it a good option for those just starting out.
● Key Takeaways from This Episode →
● 2D Rigging is the practice of creating ‘structure’ or ‘bones’ from which you can move characters or models. In these are usually ‘pins’ placed in bendable areas (i.e., the elbow, for bending the arm.)
● There are many differences between Animation and Animation. What you end up choosing should be decided by your project.
● Remember though, that Animations usually take longer to create even though Animations require more complex riggings.
● If you’re serious about getting into Rigging, make sure to consider the Rigging Animation Software that you choose to use very carefully. Each one has its own pros and cons.
If you’re looking to get a head start in 2D Rigging or 2D Animation in general, then this guide should get you to where you need to go.
We’ll be introducing 2D Rigging in a comprehensive way — perfect for beginners who aren’t familiar with the subject and want something more solid as their foundation.
In this article
01 [All You Need to Know About 2D Rigging](#Part 1)
02 [What is the Difference and Connection Between 2D and 3D](#Part 2)
03 [What Are the Best 2D Rigging Animation Tools?](#Part 3)
Part 1 All You Need to Know About Rigging
For this first part, we’re going to talk about Rigging in a general way. Think of it as an introduction to the subject. One that should, hopefully, set you off on the right foot. It should also help clarify things that you might need to know as we delve into deeper and more advanced subjects in the next sections of this article.
01What is the Meaning of Rigging in Animation?
Alright, so what does rigging 2D characters actually do? What meaning, or effect, does it have? These questions can be quickly answered with this: Rigging (whether it’s or 3D) is the practice of attaching ‘bones’ to a character model. Bones that, in the future, you can use to create motion.
If you’re an artist, then you’re probably familiar with the concept of creating an initial sketch that you put the final drawing on top of — done with the sole purpose of creating a structure that will allow you to move forward more easily in your art.
That’s exactly what you do when Rigging. You’re building a structure that will allow you to easily create animated characters that you can move at will in the future.
02Why Use Animation?
Alright, so what’s the difference between creating a Face Rig and a Face Rig? Is there any? To answer this, the simple answer is, yes. There is quite the difference.
A lot of animators prefer to practice Animation over Animation because it is more traditional and requires less complicated software (not that it doesn’t come with complications of its own.) Specifically, animation requires quite a lengthy character creation and rigging process.
You should consider the subject more based on what project you’re working on. Things that you might want to keep in mind include your project timeline, project budget, character rig usability in the future, length of the project, and so on.
(There’s also a more in-depth breakdown of this in of this guide.)
03What is Animation Rigging Software?
Now, for the last section of this Rigging overview, let’s talk about Rigging Animation Software. You should be able to guess what it’s meant for, but how you can use it is a little different, especially with the many different varieties of Rigging Animation Software available.
We’ll be introducing some in the third part of this guide — so you can learn more about the differences there. For now, all you need to know is that it usually comes with advanced rigging and character deformer tools that you can use to easily (and efficiently) animate your characters.
Part 2 What is the Difference and Connection Between and 3D
As promised, this next section will be devoted to clarifying the differences and similarities between Animation and Animation. As we mentioned previously, most animators prefer Animation. But, more often than not, they switch between both forms in order to create something suitable for their current project.
01How and Animations Are Created
First, let’s talk about the process involved. In the end, this can be described simply as: it starts off the same, but then becomes significantly more and more dissimilar the further you go along. More specifically, whether you’re working on a or Animation, you usually start with working through your vision for the project.
That means exploring ideas and creating hand-illustrated storyboards (which will serve as the foundation for the project as a whole). Then, the next steps involve media gathering (i.e., character creation, sound clips, voice-overs, sound effects, etc.) So that everything would be ready for the project.
This is when the difference starts. Animation involves hand-drawing characters in different poses and angles (with the standard being frames for a second) and can be completed with basic rigging (i.e., face rig for moving mouths or eyes). It’s normal in Animation as well for characters to remain static for several frames. While, with 3D, it is the exact opposite — the characters must be in constant motion so as to remain realistic (which can be done with extensive rigging.)
02Time Investments for Creating and Animations
Next, let’s talk about time investments. This can be a bit tricky to differentiate. Animations, as mentioned, are generally easier to create because it requires less rigging (but more drawings for certain scenes and angles makes it take more time). Meanwhile, Animation usually involves a front-heavy timeline — since you’re looking at intensive character creation and rigging. Once all this is set up though? The rest of the process is much faster than Animation.
You’ll also have to consider the work that you have to put in after your animations have been created. For example, the work you’ll need to put into finalizing your project with a video editor like Wondershare Filmora Video Editor (which would work great with animations especially, as it will allow you to actively add into the timeline as you go.)
For Win 7 or later (64-bit)
For macOS 10.12 or later
Part 3 What Are the Best Rigging Animation Tools?
For this final section of the guide, we’re finally moving on to our introduction to Rigging Animation Software. As mentioned, we’ve picked quite the variety to make sure that you have a good idea of how each will work. (A sample video has also been attached to make sure that you know what kind of projects can be created with these Rigging tools. Take the opportunity to explore those, too. If only for further edification.)
01Reallusion – Cartoon Animator 4
The first of the Rigging Animation Software on this list is Reallusion’s Cartoon Animator 4 (previously known as CrazyTalk Animator). This software was originally developed in order to allow everyone (from beginners to professionals) to create advanced animations with very little effort. To that end, it comes with a lot of motion templates and Auto Rig functions (i.e., audio lip-syncing) that the user can use to seriously cut down on the work required.
02Harmony ToonBoom
Harmony ToonBoom is well-known in the Rigging Animation Software industry. It’s the software that is used by many professionals. According to the Toon Boom Harmony website, this software was even used to create popular television shows like Rick and Morty, Bob’s Burgers, The Simpsons, and Futurama. It’s considerably more difficult to use for beginners, but it comes with many advanced functions that allow its users to create truly complex and beautiful Animations.
03Synfig Studio
The best thing about Synfig Studio (right from the onset), is that it is FREE. There are two versions of this tool — one that is ‘stable’ and the other in ‘development.’ The developmental version offers more advanced functions, of course, but for most beginners, the ‘stable’ version would serve just as well.
04Adobe Animate
Adobe Animate is software that belongs in Adobe’s long line of professional-level products. It’s a part of the classic ‘Adobe Suite.’ As a professional software, however, keep in mind that it might be more difficult to get used to at first (there’s a steep, learning curve right off the bat). But, if used correctly, it can be used to create quite impressive and eye-catching interactive animations (i.e., game content or website elements.)
05Animaker
Animaker is quite popular for beginners. It offers templates, so you can start off with an easy project if that’s what you’d like. But it also offers a lot of custom-creation tools that can be used for creating complex and professional Animations — although perhaps not at the level as the ones you might see from other alternatives (this software is most suitable for simple animations.)
06Moho Pro
Moho Pro (previously known as Anime Studio Pro) is a popular Animation program that fans of anime really love. This is one of the best software to use if you’re more interested in traditional animation (which involves a lot of free-hand drawing). Although, despite that fact, it has many advanced rigging functions as well (so you can create a mix of traditional and modern animation if you wish.)
07Pencil 2D
Pencil 2D, much like Synfig Studio, is FREE, cross-platform software. It’s quite old, but it’s matured over the years to include more and more functions (you might already be personally aware of it, in fact. It had its time to shine in the early 2010s.) The important thing to remember though is the fact that this is definitely more of a ‘traditional animation’ software. It does offer some basic rigging, but it’s best used by those who would prefer to practice the art of frame-by-frame animation.
08OpenToonz
OpenToonz is another free Rigging Animation Software (although it should be noted that there is a premium version, called Toonz, that is quite well known.) The best part about it is that it is a combination of software. One that you can use both for traditional animation and Animation. It’s also pretty easy to use, making it a good option for those just starting out.
● Key Takeaways from This Episode →
● 2D Rigging is the practice of creating ‘structure’ or ‘bones’ from which you can move characters or models. In these are usually ‘pins’ placed in bendable areas (i.e., the elbow, for bending the arm.)
● There are many differences between Animation and Animation. What you end up choosing should be decided by your project.
● Remember though, that Animations usually take longer to create even though Animations require more complex riggings.
● If you’re serious about getting into Rigging, make sure to consider the Rigging Animation Software that you choose to use very carefully. Each one has its own pros and cons.
Also read:
- Best 15 Greatest Claymation Movies of All Time
- Updated 2024 Approved Best 10 Photo Animator Templates
- 2024 Approved 12+ Stunning Instagram GIF Stickers and How to Make & Find
- In 2024, The 10 Most Adorable Aesthetic Cartoon Characters
- Updated How to Create a YouTube Intro Animation Like a Pro for 2024
- 2024 Approved Nurturing Mind, Heart, and Soul on the Top 5 Anime Streaming Sanctuaries
- Updated 2024 Approved 5 Recommended Websites for Text GIF Maker
- 2024 Approved How to Make Your GIF on WhatsApp in Simple Ways
- Updated Best GIF Maker Software for Windows and Mac
- New 21 Top Free Anime Websites to Watch Anime Online-Anime
- Updated 2024 Approved Ideas of Learning How to Send WhatsApp Animated Gifs
- Thousands Already Found 15 Best Sites to Watch Cartoons Online Free And So Can You for 2024
- Updated That Will Make Aesthetic Cartoon Drawing More Understandable for 2024
- 2024 Approved How to Create YouTube Intro Animation Like a Pro
- New 2024 Approved Dead Simple Guide to Create New and Exciting Blackboard Animation
- Updated Tutorial Guide to Animate Pictures in Canva for 2024
- Updated Secret Source to Make a Great Stop Motion Puppet for 2024
- 2024 Approved Best Claymation Shows That Make Your Memories Unforgettable
- Updated Learn How to Create Adobe 3D Animation for 2024
- How to Make GIF Instagram for 2024
- Updated 2024 Approved How to Animate - Adobe Animate Tutorial for All
- New 2024 Approved 5 Best Adobe Animate Courses & Classes
- Best 10 Old Cartoons From Cartoon Network That You Miss for 2024
- In 2024, How-To Guide Make Animation Characters with the Best Animated Character Creators
- Updated Stunning Ideas About Creating Personalised WhatsApp GIF Sticker
- New How to Make Animation Characters with the Best Character Creators
- New 2024 Approved How to Create Your Avatar Free
- Updated Learn How to Do Funny Cartoon Drawings for 2024
- New Top 10 Classical Animated Cartoon Types With Examples
- Updated Top 8 Anime Name & Title Generators Online-Get Cool Anime Names for 2024
- Updated 2024 Approved OBS Animated Alternatives
- Updated In 2024, 15 Top Pics Collage Apps
- 2024 Approved Top Practices on Online 3D Avatar Creator
- New How to Send and Add Snapchat GIFs 100 in Easy Way
- Updated 2024 Approved 6 Proven Ways to Dub Anime for Anime Voice Actor
- In 2024, Best Tips for Effortless Unity 3D Animation
- In 2024, 15 Top Pics Collage Apps
- How to Fix Nokia C300 Find My Friends No Location Found? | Dr.fone
- How To Open Your Apple iPhone 12 Pro Max Without a Home Button | Dr.fone
- 6 Solutions to Fix Error 505 in Google Play Store on Infinix Note 30 | Dr.fone
- How to Bypass iPhone 8 Plus Passcode Easily Video Inside | Dr.fone
- In 2024, Pokemon Go Error 12 Failed to Detect Location On Oppo Reno 8T? | Dr.fone
- Stuck at Android System Recovery Of Tecno Spark 20 Pro+ ? Fix It Easily | Dr.fone
- App Wont Open on Your Realme 12 5G? Here Are All Fixes | Dr.fone
- In 2024, How To Unlock A Found iPhone 6s? | Dr.fone
- In 2024, How to Reset your Infinix Lock Screen Password
- How to Fix iPad or iPhone 14 Plus Stuck On Activation Lock?
- Solutions to restore deleted files from Motorola Moto G14
- How To Change Your SIM PIN Code on Your Motorola Moto G24 Phone
- Title: Updated Something About Types of Motion Graphics for 2024
- Author: Elon
- Created at : 2024-05-19 03:05:54
- Updated at : 2024-05-20 03:05:54
- Link: https://animation-videos.techidaily.com/updated-something-about-types-of-motion-graphics-for-2024/
- License: This work is licensed under CC BY-NC-SA 4.0.
