
:max_bytes(150000):strip_icc():format(webp)/GettyImages-185223738-56a691fd5f9b58b7d0e3a1d9.jpg)
Updated The Best 10 Sketch Animation Video Makers for 2024
The Best 10 Sketch Animation Video Makers
The Best 10 Sketch Animation Video Makers
An easy yet powerful editor
Numerous effects to choose from
Detailed tutorials provided by the official channel
Sketch animation has been in style for a very long time, and there is no doubt that it is a time-consuming process. But the sketch animation maker available these days helps us a lot. Are you aware of all these? Do you know how these are helping us currently?
Don’t worry if you are unaware because here we are discussing the same in detail and will help you to get the best tool for the same too. Let’s get started!
In this article
01 [What is a Sketch Animation?](#Part 1)
02 [How to Create Sketch Animation Videos with 10 Best Software](#Part 2)
03 [How to Make Sketch Animations](#Part 3)
Part 1 What is a Sketch Animation?
A sketch animation is a series of sketches that bring an idea to life. The drawings are usually rough and not perfect, but they are enough to tell a story. Sketch animations are used for many purposes, from advertising to product design. They can be used as a way to show a process or a product design in an easy-to-understand way.
Sketch animations can also be used for marketing purposes, such as explaining the features of a new product or promoting it with humour or through storytelling.
But to be someone who knows how to create the best sketches or videos, one needs to try their hands on the best sketch animation video maker too. One cannot achieve the desired results unless and until they are aware of a tool.
Part 2 How to Create Sketch Animation Videos with Best Software
In this section, we are discussing the best software to help you with Sketchup animation easily. All this software will cater to your needs for creating the best animations seamlessly. These are as follows:
01Animaker
Animaker is the most famous name in the list of software when you are looking for a whiteboard sketch animation maker. It features a drag and drop animation option, helping you to create the content easily. It is a suitable tool for professionals and beginners alike. It also offers thousands of templates that can be customised as per the needs of the user. You can simply utilise the stock videos and photos for better results.

Pros:
● Easy to use.
● The results are delivered quickly.
● It is suitable for professionals and beginners alike.
Cons:
● Some users complain about its interface.
● Sometimes video creation takes a lot of time.
02Renderforest video maker
Renderforest video maker is the best platform for all those who are looking to create sketch animation and other videos. It provides a free plan, and the same is available limitlessly for users. It features thousands of stock clips and a library of music tracks for creating the content seamlessly.

Pros:
● Easy to use.
● Different features are integrated.
● Impressive interface.
Cons:
● complaint about the content’s quality
03Powtoon
Powtoon is among the best visual communication platforms available, helping in creating short videos with animation. It features professionally designed templates along with some additional tools, including clips, audio, characters, and so on, which a user can utilize while creating the animation video. It comes up with paid and free options, and users can utilize any of them.

Pros:
● Easy to use.
● Templates are innovative.
● It makes engaging content.
Cons:
● Some find it difficult to use.
04Vyond
Vyond is among the best sketch animation makers and offers a free trial to all users. This is especially true for professionals with all the skills. Some pre-built templates are also there to help users create the content seamlessly. It features royalty-free music along with some stock characters that can be utilised in the content.

Pros:
● Good video creation tool.
● Many functions are integrated.
● One can upload content directly and get the animation.
Cons:
● Not for beginners,
05Keyshot
Keyshot is the best sketch animation software available these days. It features file formats along with some photorealistic rendering. The outcome created with it appears to be a real animation, and users can also add on some interactive visual studio. It also comes with a free trial, so users can use it and analyse whether they want to go for the paid version or not.

Pros:
● Innovative interface
● Support for two different extensions of models.
● A library of materials and textures is available.
Cons:
● Utilizing all the features seems to be difficult.
063ds Max Design
3ds Max design is the best sketch animation software for users when they are looking to create sketch animations. The best part is that it offers realistic animation behaviour along with all the sophisticated particle effects. There are certain third-party extensions that are available that a user can integrate for better results.

Pros:
● Third-party extensions are available.
● Realistic animation behaviour
● Procedural tools are available.
Cons:
● Beginners find it difficult to use.
07Moovly
Moovly is a cloud-based software with a drag and drop interface. Whenever you are looking to create sketch animations, this tool will help you out with it. It also has millions of free stock images and other content available, helping in creating the content as a user requires.

Pros:
● Simple to use
● Innovative interface
● Limitless features
Cons:
● The interface appears to be buggy sometimes.
08Harmony
Harmony is also among the best reproduction animation software available, which is helpful in creating the content with special lighting, shading, and special effects. There are certain options and features available to help in creating the content with the texture and sound management options. It comes in free and paid versions, and the free trial version will help users analyse whether they want to go for it or not.

Pros:
● Easy to use.
● Clean interface.
● Bugs free.
Cons:
● Beginners find it difficult to use.
09Modo
Modo is the best modeling, rendering, texturing, and sketch animation software available. Whenever you are looking for a sketch animation maker, this tool will definitely hit the top. The navigation through the software is really very easy, and users can get the outcome immediately as they want.

Pros:
● Navigation throughout is easy.
● The interface is innovative.
● by 7 community is available to help in case of issues
Cons:
● Outcome delivered bit lately.
10Cinema 4D
Cinema is among the software available for sketch animation that has an innovative interface along with some additional features. It comes with object tracking and some cartoon styling features that help users get the outcome they want. A free trial option is also integrated for convenience.

Pros:
● Easy to use.
● Additional layouts are integrated.
● Mouse shortcuts are easy to use.
Cons:
● Beginners find it difficult to use.
Part 3 How to Make Sketch Animations
Well, when it comes to making sketch animations, users are confused about the steps that they need to follow for the same. Well, do know that the steps are very simple to follow and one can easily complete the task with a few steps. The steps needed to be followed are:
01Step 1 Write and record the script
Writing and recording the script is the primary step a user needs to follow. It is helpful in analyzing where to start and how they want the animation sketch to come out. Get the organizational structures available and then integrate them according to the recorded script.
02Step 2 Create a storyboard
Get the storyboard or, say, the sketch animation maker like Filmora, available and start keeping the recorded stuff over the same in the best manner possible. After implementing the changes, test the same.
03Step 3 Draw it out
After managing all the things, it is integral to sketch the same. The tools are integrated into the software like Filmora, helping you to put things accordingly. You can also do the customizations required if required.
04Step 4 Scanning and editing
Now you need to scan the complete content and do any editing required. This part is among the most crucial ones because, after finalizing the outcome, you will not be able to do the editing. However, if you want to do the editing, you need to repeat the entire process. Check things out mindfully.
05Step 5 Play Filmora once more
When you are done editing the images and creating the sketch animation, put them on Filmora for the final results.
Wondershare Filmora Video Editor is one of the efficient tools available for users to create sketch animated videos easily. This tool has all the advanced features integrated, making the task easy to achieve. Also, it features a customization option, helping users to add on or extract things or effects easily and rapidly.
Wondershare Filmora
Get started easily with Filmora’s powerful performance, intuitive interface, and countless effects!
Try It Free Try It Free Try It Free Learn More >

● Key Takeaways from This Episode →
● Sketch animation is a new art form used for many purposes.
● Filmora is one of the best sketch animation video makers.
● Sketch animsation tools are best for us for creating the desired outcome.
Sketch animation has been in style for a very long time, and there is no doubt that it is a time-consuming process. But the sketch animation maker available these days helps us a lot. Are you aware of all these? Do you know how these are helping us currently?
Don’t worry if you are unaware because here we are discussing the same in detail and will help you to get the best tool for the same too. Let’s get started!
In this article
01 [What is a Sketch Animation?](#Part 1)
02 [How to Create Sketch Animation Videos with 10 Best Software](#Part 2)
03 [How to Make Sketch Animations](#Part 3)
Part 1 What is a Sketch Animation?
A sketch animation is a series of sketches that bring an idea to life. The drawings are usually rough and not perfect, but they are enough to tell a story. Sketch animations are used for many purposes, from advertising to product design. They can be used as a way to show a process or a product design in an easy-to-understand way.
Sketch animations can also be used for marketing purposes, such as explaining the features of a new product or promoting it with humour or through storytelling.
But to be someone who knows how to create the best sketches or videos, one needs to try their hands on the best sketch animation video maker too. One cannot achieve the desired results unless and until they are aware of a tool.
Part 2 How to Create Sketch Animation Videos with Best Software
In this section, we are discussing the best software to help you with Sketchup animation easily. All this software will cater to your needs for creating the best animations seamlessly. These are as follows:
01Animaker
Animaker is the most famous name in the list of software when you are looking for a whiteboard sketch animation maker. It features a drag and drop animation option, helping you to create the content easily. It is a suitable tool for professionals and beginners alike. It also offers thousands of templates that can be customised as per the needs of the user. You can simply utilise the stock videos and photos for better results.
Pros:
● Easy to use.
● The results are delivered quickly.
● It is suitable for professionals and beginners alike.
Cons:
● Some users complain about its interface.
● Sometimes video creation takes a lot of time.
02Renderforest video maker
Renderforest video maker is the best platform for all those who are looking to create sketch animation and other videos. It provides a free plan, and the same is available limitlessly for users. It features thousands of stock clips and a library of music tracks for creating the content seamlessly.
Pros:
● Easy to use.
● Different features are integrated.
● Impressive interface.
Cons:
● complaint about the content’s quality
03Powtoon
Powtoon is among the best visual communication platforms available, helping in creating short videos with animation. It features professionally designed templates along with some additional tools, including clips, audio, characters, and so on, which a user can utilize while creating the animation video. It comes up with paid and free options, and users can utilize any of them.
Pros:
● Easy to use.
● Templates are innovative.
● It makes engaging content.
Cons:
● Some find it difficult to use.
04Vyond
Vyond is among the best sketch animation makers and offers a free trial to all users. This is especially true for professionals with all the skills. Some pre-built templates are also there to help users create the content seamlessly. It features royalty-free music along with some stock characters that can be utilised in the content.
Pros:
● Good video creation tool.
● Many functions are integrated.
● One can upload content directly and get the animation.
Cons:
● Not for beginners,
05Keyshot
Keyshot is the best sketch animation software available these days. It features file formats along with some photorealistic rendering. The outcome created with it appears to be a real animation, and users can also add on some interactive visual studio. It also comes with a free trial, so users can use it and analyse whether they want to go for the paid version or not.
Pros:
● Innovative interface
● Support for two different extensions of models.
● A library of materials and textures is available.
Cons:
● Utilizing all the features seems to be difficult.
063ds Max Design
3ds Max design is the best sketch animation software for users when they are looking to create sketch animations. The best part is that it offers realistic animation behaviour along with all the sophisticated particle effects. There are certain third-party extensions that are available that a user can integrate for better results.
Pros:
● Third-party extensions are available.
● Realistic animation behaviour
● Procedural tools are available.
Cons:
● Beginners find it difficult to use.
07Moovly
Moovly is a cloud-based software with a drag and drop interface. Whenever you are looking to create sketch animations, this tool will help you out with it. It also has millions of free stock images and other content available, helping in creating the content as a user requires.
Pros:
● Simple to use
● Innovative interface
● Limitless features
Cons:
● The interface appears to be buggy sometimes.
08Harmony
Harmony is also among the best reproduction animation software available, which is helpful in creating the content with special lighting, shading, and special effects. There are certain options and features available to help in creating the content with the texture and sound management options. It comes in free and paid versions, and the free trial version will help users analyse whether they want to go for it or not.
Pros:
● Easy to use.
● Clean interface.
● Bugs free.
Cons:
● Beginners find it difficult to use.
09Modo
Modo is the best modeling, rendering, texturing, and sketch animation software available. Whenever you are looking for a sketch animation maker, this tool will definitely hit the top. The navigation through the software is really very easy, and users can get the outcome immediately as they want.
Pros:
● Navigation throughout is easy.
● The interface is innovative.
● by 7 community is available to help in case of issues
Cons:
● Outcome delivered bit lately.
10Cinema 4D
Cinema is among the software available for sketch animation that has an innovative interface along with some additional features. It comes with object tracking and some cartoon styling features that help users get the outcome they want. A free trial option is also integrated for convenience.
Pros:
● Easy to use.
● Additional layouts are integrated.
● Mouse shortcuts are easy to use.
Cons:
● Beginners find it difficult to use.
Part 3 How to Make Sketch Animations
Well, when it comes to making sketch animations, users are confused about the steps that they need to follow for the same. Well, do know that the steps are very simple to follow and one can easily complete the task with a few steps. The steps needed to be followed are:
01Step 1 Write and record the script
Writing and recording the script is the primary step a user needs to follow. It is helpful in analyzing where to start and how they want the animation sketch to come out. Get the organizational structures available and then integrate them according to the recorded script.
02Step 2 Create a storyboard
Get the storyboard or, say, the sketch animation maker like Filmora, available and start keeping the recorded stuff over the same in the best manner possible. After implementing the changes, test the same.
03Step 3 Draw it out
After managing all the things, it is integral to sketch the same. The tools are integrated into the software like Filmora, helping you to put things accordingly. You can also do the customizations required if required.
04Step 4 Scanning and editing
Now you need to scan the complete content and do any editing required. This part is among the most crucial ones because, after finalizing the outcome, you will not be able to do the editing. However, if you want to do the editing, you need to repeat the entire process. Check things out mindfully.
05Step 5 Play Filmora once more
When you are done editing the images and creating the sketch animation, put them on Filmora for the final results.
Wondershare Filmora Video Editor is one of the efficient tools available for users to create sketch animated videos easily. This tool has all the advanced features integrated, making the task easy to achieve. Also, it features a customization option, helping users to add on or extract things or effects easily and rapidly.
Wondershare Filmora
Get started easily with Filmora’s powerful performance, intuitive interface, and countless effects!
Try It Free Try It Free Try It Free Learn More >
● Key Takeaways from This Episode →
● Sketch animation is a new art form used for many purposes.
● Filmora is one of the best sketch animation video makers.
● Sketch animsation tools are best for us for creating the desired outcome.
OBS Animated Alternatives
OBS Animated Lower Thirds Alternatives
An easy yet powerful editor
Numerous effects to choose from
Detailed tutorials provided by the official channel
It’s worth noting that people commonly use built-in OBS animated lower thirds for the job, but you can also use other editing tools to create custom animations and import them in your OBS Livestream.
This guide will walk you through everything you need to know about OBS animated lower thirds and their best alternatives you can use in 2022 and beyond.
In this article
01 [What are Lower Thirds in Animation?](#Part 1)
02 [How To Set Up An Animated Lower Third In OBS Studio](#Part 2)
03 [8 AMAZING OBS Animated Lower Thirds Alternatives](#Part 3)
Part 1 What is Lower Thirds in Animation?
To put it in simple words, a lower third is simply a graphic overlay that appears on top of the actual footage. As the name implies, the contents of the lower third usually occur at the lower end of the screen, but streamers can also configure the OBS settings to change their position within the screen. Ideally, lower third animations are utilized to give a context of the overall video.
Let’s say you are life streaming your GTA V gameplay on YouTube. So, to help first-time viewers get the overall context, you can add GTA-related elements in the lower third animation and maximize viewer acquisition. In addition to this, you can also use OBS animated lower-thirds to display exclusive offers and discounts throughout the live stream.
Part 2 How To Set Up An Animated Lower Third In OBS Studio
So, now that you know the major benefits of using animated lower thirds in OBS studio, let’s understand how to set them up to make your live streams more engaging. It’s worth noting that OBS works around the concept of layers that you can manage individually to run your live streams. So, to add an animated lower third in OBS studio, all you have to do is add a dedicated layer and place it right above the video layer.
When it comes to setting up the lower-third, you’ll first need to create the graphics you want to display on top of the live streams. You can use Photoshop to design a custom lower-third animation if you are a professional designer. But, if you have just stepped into the world of live streams and don’t have any prior experience with Photoshop, you can also purchase one of the ready-to-use lower-third packages and import them directly to OBS.
Either way, it would be crucial to ensure that your OBS animated lower-third graphics do not interfere with the actual video. Why? Because this will make the video look more cluttered, and you’ll end up losing potential viewers.
Here’s a YouTube video that’ll walk you through the step-by-step procedure of creating lower-third animations in OBS Studio.
Part 3 8 AMAZING OBS Animated Lower Thirds Alternatives
While OBS is a great tool to add lower-third animations to your live streams, it has its fair share of drawbacks. For instance, OBS has a pretty complicated interface, which means if you are an absolute beginner, you may not easily set up your live streams. Not to mention, OBS is heavy software - so if you don’t have a high-configuration system, you won’t be able to run the tool at all.
So, what’s your next best option? Fortunately, there are several OBS alternatives that you can use to set up OBS animated lower-third graphics and enhance the overall quality of your live streams. To make your job easier, we have cherry-picked 8 of the most reliable OBS alternatives that you can use to add lower-third animations to a Livestream video.
01Wirecast

Like OBS, Wirecast is a popular video streaming platform that many content creators use to live stream on their social media handles. It also offers a layer-based architecture, which means users can add multiple layers separately and manage them through an easy-to-navigate panel.
One of the key reasons Wirecast is an ideal choice to add animated lower-third graphics to your live streams is its built-in collections. The tool already has several ready-to-integrate lower-third animations that one could import into their project without any hassle.
Pros:
● Built-in lower-third graphic templates
● Easy-to-use Interface
● Switch between multiple camera angles with one click
Cons:
● Unlike OBS Studio, Wirecast isn’t available for free
Why Do We Recommend Wirecast?
Wirecast is a fully functional video streaming platform where you can easily manage all your live streams. Wirecast offers far better functionality than OBS Studio despite having a relatively easy-to-use UI.
02vMix

vMix is a feature-rich video production software that offers everything one would need to create stunning videos. However, it also has a dedicated live stream manager to manage your live streams, switch between multiple camera angles, and add overlay animations to keep the viewers engaged. Unlike OBS Studio, vMix doesn’t have a layering system, which means you can overlay multiple channels easily.
As far as OBS animated lower-thirds are concerned, there are different ways you can add these animations to your live streams. You can either import dedicated PSD files, embed HTML codes, or choose one of the ready-to-use lower-third templates to do the job. In either case, vMix will help you add stunning lower-third animations within a few minutes.
Pros:
● Full-scale video production software
● Built-in support for audio mixing
● Add and Manage Multiple Camera Inputs
Cons:
● If you want to relish all the benefits of vMix, you would have to purchase its pro version, which costs $1200. As compared to other available options, vMix is significantly expensive.
Why Do We Recommend vMix?
vMix is ideal for users who want to upgrade from OBS and can spend $1200 on a live stream manager. It’ll provide everything you need to live stream across different social media platforms.
03Restream Studio

Restream Studio is a browser-based live stream tool that offers an easy-to-navigate panel to manage your live streams. Restream is ideal for beginners who don’t want to spend a hefty amount on their live streaming software. With restream, you can upload your brand logos, graphic overlays, and text details and save them in the “Favorites” tab for future use.
This way, whenever you are live streaming, you can directly choose one of these overlays and switch between them easily. The tool also has a dedicated “Hide/Show” button that’ll allow you to change the display status of the lower-third animations.
Pros:
● Cross-platform Compatibility
● Ideal for Beginners and Novice YouTubers
● Save Multiple Graphic Overlays for Future Use
Cons:
● You won’t get any advanced functionality like Wirecast or OBS Studio
Why Do We Recommend Restream Studio?
Restream Studio is the perfect solution for users who don’t want to get overwhelmed with the complex features of OBS Studio. With its browser-friendly UI, you’ll be able to run Restream Studio across different platforms and add OBS animated lower-third graphics to your live streams easily.
04Lightstream

Lightstream is another free live stream manager that offers many features to execute hassle-free live streams across different platforms, including YouTube, Facebook, and Twitch. Even though the tool doesn’t provide advanced features like OBS Studio or Wirecast, it has everything you require to stream live on your social media handles. One of the key features of Lightstream is that you can add multiple scenes/overlays and switch between them with a single click.
Pros:
● Being open-source, Lightstream is available for free
● Lightstream is a cloud-based tool, which means it offers cross-platform compatibility
● Easy to set up, even if you are a beginner
Cons:
● Lacks advanced editing features
Why Do We Recommend Lightstream?
Lightstream is the most reliable live stream manager for users looking for a simple and cross-platform tool to manage live streams and add overlays.
05Adobe Photoshop

Before you act surprised, let us clarify that Adobe Photoshop isn’t an alternative to OBS Studio. However, you can use it to create customized overlays and lower-third graphics to add a personal touch to your live streams. Suppose you are already familiar with Photoshop and have been using it for a few years. In that case, it’ll allow you to design personalized text overlays, graphics, animations, and logos for your live streams.
And, once you have successfully designed the lower-third overlays, you can use any of the live stream managers to add them to your live streams.
Pros:
● Design custom overlays for your social media live streams
● Offers advanced editing options to customize logos and lower-third graphics
Cons:
● Photoshop has a steep learning curve, and if you are not an experienced designer, you won’t be able to design custom overlays
Why Do We Recommend Adobe Photoshop?
Adobe Photoshop is a reliable choice for creators who find the built-in media libraries of a live stream manager limited. With Photoshop, you’ll be able to design custom overlays for your live streams.
06ShareX

ShareX is also an open-source screen recorder and lives stream manager that offers all the OBS features you’ll need to manage your live streams and add multiple lower-third overlays. The only downside of ShareX is that it has a complicated user interface. Even if you have used OBS in the past, you’ll find ShareX’s user interface relatively complex. So, you should only sign up for ShareX if you are comfortable with complex user interfaces.
Pros:
● Upload and save pictures, videos, logos for lower-third overlays
● Record your entire screen or a specific window
● Assign hotkeys to switch between multiple windows during the Livestream
Cons:
● The user interface isn’t as friendly as other available options
Why Do We Recommend ShareX?
ShareX is an ideal OBS animated lower-third alternative for users who need a free-of-cost solution to manage their live streams.
07Canva

Again, Canva doesn’t support live stream management at all. However, like Adobe Photoshop, you can use Canva to create stunning lower-third overlays for your Livestream sessions. The major benefit of using Canva is that it has thousands of pre-made templates that you can import to your design with one click. All these templates are fully customizable - so you’ll be able to design custom lower-third overlays for your live streams.
Pros:
● Comparatively less complicated than Adobe Photoshop
● Canva is affordable
● Being a web-based designing tool, you can access Canva on any device
Cons:
● The premium version of Canva is relatively expensive than its competitors.
Why Do We Recommend Canva?
Canva is a one-stop solution for content creators looking for an additional designing tool to create custom OBS animated lower thirds for their live streams.
Key Takeaways from This Episode
● OBS animated lower-thirds are one of the most effective ways to share the context of a live stream with your viewers
● With OBS Studio, you have the liberty to import custom animated lower-third animations and overlays and add them to the live stream through its layered architecture
● Apart from OBS Studio, there are several other tools (such as Wondershare Filmora Pro) to add animated lower-thirds to live streams.
It’s worth noting that people commonly use built-in OBS animated lower thirds for the job, but you can also use other editing tools to create custom animations and import them in your OBS Livestream.
This guide will walk you through everything you need to know about OBS animated lower thirds and their best alternatives you can use in 2022 and beyond.
In this article
01 [What are Lower Thirds in Animation?](#Part 1)
02 [How To Set Up An Animated Lower Third In OBS Studio](#Part 2)
03 [8 AMAZING OBS Animated Lower Thirds Alternatives](#Part 3)
Part 1 What is Lower Thirds in Animation?
To put it in simple words, a lower third is simply a graphic overlay that appears on top of the actual footage. As the name implies, the contents of the lower third usually occur at the lower end of the screen, but streamers can also configure the OBS settings to change their position within the screen. Ideally, lower third animations are utilized to give a context of the overall video.
Let’s say you are life streaming your GTA V gameplay on YouTube. So, to help first-time viewers get the overall context, you can add GTA-related elements in the lower third animation and maximize viewer acquisition. In addition to this, you can also use OBS animated lower-thirds to display exclusive offers and discounts throughout the live stream.
Part 2 How To Set Up An Animated Lower Third In OBS Studio
So, now that you know the major benefits of using animated lower thirds in OBS studio, let’s understand how to set them up to make your live streams more engaging. It’s worth noting that OBS works around the concept of layers that you can manage individually to run your live streams. So, to add an animated lower third in OBS studio, all you have to do is add a dedicated layer and place it right above the video layer.
When it comes to setting up the lower-third, you’ll first need to create the graphics you want to display on top of the live streams. You can use Photoshop to design a custom lower-third animation if you are a professional designer. But, if you have just stepped into the world of live streams and don’t have any prior experience with Photoshop, you can also purchase one of the ready-to-use lower-third packages and import them directly to OBS.
Either way, it would be crucial to ensure that your OBS animated lower-third graphics do not interfere with the actual video. Why? Because this will make the video look more cluttered, and you’ll end up losing potential viewers.
Here’s a YouTube video that’ll walk you through the step-by-step procedure of creating lower-third animations in OBS Studio.
Part 3 8 AMAZING OBS Animated Lower Thirds Alternatives
While OBS is a great tool to add lower-third animations to your live streams, it has its fair share of drawbacks. For instance, OBS has a pretty complicated interface, which means if you are an absolute beginner, you may not easily set up your live streams. Not to mention, OBS is heavy software - so if you don’t have a high-configuration system, you won’t be able to run the tool at all.
So, what’s your next best option? Fortunately, there are several OBS alternatives that you can use to set up OBS animated lower-third graphics and enhance the overall quality of your live streams. To make your job easier, we have cherry-picked 8 of the most reliable OBS alternatives that you can use to add lower-third animations to a Livestream video.
01Wirecast
Like OBS, Wirecast is a popular video streaming platform that many content creators use to live stream on their social media handles. It also offers a layer-based architecture, which means users can add multiple layers separately and manage them through an easy-to-navigate panel.
One of the key reasons Wirecast is an ideal choice to add animated lower-third graphics to your live streams is its built-in collections. The tool already has several ready-to-integrate lower-third animations that one could import into their project without any hassle.
Pros:
● Built-in lower-third graphic templates
● Easy-to-use Interface
● Switch between multiple camera angles with one click
Cons:
● Unlike OBS Studio, Wirecast isn’t available for free
Why Do We Recommend Wirecast?
Wirecast is a fully functional video streaming platform where you can easily manage all your live streams. Wirecast offers far better functionality than OBS Studio despite having a relatively easy-to-use UI.
02vMix
vMix is a feature-rich video production software that offers everything one would need to create stunning videos. However, it also has a dedicated live stream manager to manage your live streams, switch between multiple camera angles, and add overlay animations to keep the viewers engaged. Unlike OBS Studio, vMix doesn’t have a layering system, which means you can overlay multiple channels easily.
As far as OBS animated lower-thirds are concerned, there are different ways you can add these animations to your live streams. You can either import dedicated PSD files, embed HTML codes, or choose one of the ready-to-use lower-third templates to do the job. In either case, vMix will help you add stunning lower-third animations within a few minutes.
Pros:
● Full-scale video production software
● Built-in support for audio mixing
● Add and Manage Multiple Camera Inputs
Cons:
● If you want to relish all the benefits of vMix, you would have to purchase its pro version, which costs $1200. As compared to other available options, vMix is significantly expensive.
Why Do We Recommend vMix?
vMix is ideal for users who want to upgrade from OBS and can spend $1200 on a live stream manager. It’ll provide everything you need to live stream across different social media platforms.
03Restream Studio
Restream Studio is a browser-based live stream tool that offers an easy-to-navigate panel to manage your live streams. Restream is ideal for beginners who don’t want to spend a hefty amount on their live streaming software. With restream, you can upload your brand logos, graphic overlays, and text details and save them in the “Favorites” tab for future use.
This way, whenever you are live streaming, you can directly choose one of these overlays and switch between them easily. The tool also has a dedicated “Hide/Show” button that’ll allow you to change the display status of the lower-third animations.
Pros:
● Cross-platform Compatibility
● Ideal for Beginners and Novice YouTubers
● Save Multiple Graphic Overlays for Future Use
Cons:
● You won’t get any advanced functionality like Wirecast or OBS Studio
Why Do We Recommend Restream Studio?
Restream Studio is the perfect solution for users who don’t want to get overwhelmed with the complex features of OBS Studio. With its browser-friendly UI, you’ll be able to run Restream Studio across different platforms and add OBS animated lower-third graphics to your live streams easily.
04Lightstream
Lightstream is another free live stream manager that offers many features to execute hassle-free live streams across different platforms, including YouTube, Facebook, and Twitch. Even though the tool doesn’t provide advanced features like OBS Studio or Wirecast, it has everything you require to stream live on your social media handles. One of the key features of Lightstream is that you can add multiple scenes/overlays and switch between them with a single click.
Pros:
● Being open-source, Lightstream is available for free
● Lightstream is a cloud-based tool, which means it offers cross-platform compatibility
● Easy to set up, even if you are a beginner
Cons:
● Lacks advanced editing features
Why Do We Recommend Lightstream?
Lightstream is the most reliable live stream manager for users looking for a simple and cross-platform tool to manage live streams and add overlays.
05Adobe Photoshop
Before you act surprised, let us clarify that Adobe Photoshop isn’t an alternative to OBS Studio. However, you can use it to create customized overlays and lower-third graphics to add a personal touch to your live streams. Suppose you are already familiar with Photoshop and have been using it for a few years. In that case, it’ll allow you to design personalized text overlays, graphics, animations, and logos for your live streams.
And, once you have successfully designed the lower-third overlays, you can use any of the live stream managers to add them to your live streams.
Pros:
● Design custom overlays for your social media live streams
● Offers advanced editing options to customize logos and lower-third graphics
Cons:
● Photoshop has a steep learning curve, and if you are not an experienced designer, you won’t be able to design custom overlays
Why Do We Recommend Adobe Photoshop?
Adobe Photoshop is a reliable choice for creators who find the built-in media libraries of a live stream manager limited. With Photoshop, you’ll be able to design custom overlays for your live streams.
06ShareX
ShareX is also an open-source screen recorder and lives stream manager that offers all the OBS features you’ll need to manage your live streams and add multiple lower-third overlays. The only downside of ShareX is that it has a complicated user interface. Even if you have used OBS in the past, you’ll find ShareX’s user interface relatively complex. So, you should only sign up for ShareX if you are comfortable with complex user interfaces.
Pros:
● Upload and save pictures, videos, logos for lower-third overlays
● Record your entire screen or a specific window
● Assign hotkeys to switch between multiple windows during the Livestream
Cons:
● The user interface isn’t as friendly as other available options
Why Do We Recommend ShareX?
ShareX is an ideal OBS animated lower-third alternative for users who need a free-of-cost solution to manage their live streams.
07Canva
Again, Canva doesn’t support live stream management at all. However, like Adobe Photoshop, you can use Canva to create stunning lower-third overlays for your Livestream sessions. The major benefit of using Canva is that it has thousands of pre-made templates that you can import to your design with one click. All these templates are fully customizable - so you’ll be able to design custom lower-third overlays for your live streams.
Pros:
● Comparatively less complicated than Adobe Photoshop
● Canva is affordable
● Being a web-based designing tool, you can access Canva on any device
Cons:
● The premium version of Canva is relatively expensive than its competitors.
Why Do We Recommend Canva?
Canva is a one-stop solution for content creators looking for an additional designing tool to create custom OBS animated lower thirds for their live streams.
Key Takeaways from This Episode
● OBS animated lower-thirds are one of the most effective ways to share the context of a live stream with your viewers
● With OBS Studio, you have the liberty to import custom animated lower-third animations and overlays and add them to the live stream through its layered architecture
● Apart from OBS Studio, there are several other tools (such as Wondershare Filmora Pro) to add animated lower-thirds to live streams.
Techniques on How to Make After Effects 2D Animation
Adobe After Effects is probably the most versatile software you can add to your arsenal of skills on your journey to learn After Effects 2D animation. Both beginners and professionals can brush up their animation skills on After Effects with some help from tutorials and videos. When it comes to experimenting with visual effects, motion graphics, and 3D composting, Adobe After Effects is recommended as an industry-standard software. So it should come as no surprise that there is a surplus of After Effects tutorials and information on the internet. To help simplify things, here’s a compiled list of Adobe After Effects courses along with a few tips to get started.
In this article
01 [Practical Online 2D Animation Courses](#Part 1)
02 [How to Create 2D Motion Graphics with After Effects](#Part 2)
03 [5 Best Animation After Effects that you must know](#Part 3)
04 [5 Character Animation Tools for After Effects](#Part 4)
Part 1 Practical Online 2D Animation Courses
Learning After Effects need not be complicated. You can use this tool to help you create amazing designs from your sheer imagination. Here is a list of the best courses which are self-paced so you don’t need to worry about fitting them into your schedule. Some of these courses are primarily for beginners who are seeking to orient themselves to the basics. While other courses have recent insights into the latest techniques curated by the industry experts. The courses in this list are diverse and are from different platforms like Domestika, Coursera, Adobe, and YouTube.
1. Getting Started - Adobe
The official Adobe learning site has its own course for introducing After Effects. After all, the software is a product of Adobe itself. This tutorial is purely for complete beginners and is designed to briefly introduce the interface and basic functioning of Adobe After Effects. It takes you through the manual control and menu options which you will need to familiarize yourself with.
2. The Basics – YouTube
This free-to-watch After Effects tutorial is presented by a very passionate photographer and YouTuber Peter Meckinnon. He walks you through the various elements the Adobe interface puts at your disposal. These elements are quite artistically introduced by Peter as he animates a basic title project on Adobe.
3. How to Animate a line - YouTube
When you are introduced to a vast world of possibilities, it can be a bit overwhelming. Which is why starting from the very basics is always a good idea. This next YouTube tutorial shows you step by step how to animate a line on Adobe After Effects from one point to another.
4. Introduction and Advanced After Effects – Domestika
Domestika is an online learning platform that is great for freelancers and independent artists who can purchase self-paced lessons on topics like graphic design and animation. The Introduction and Advanced After Effects tutorials by Carlos Zensuke Albarran are a comprehensive bundle of lessons that quench your thirst for 2D effects animation a bit further.
5. Typography Animation – Domestika
The mark of a professional is his specialization. As you gain more experience in practicing Adobe After Effects, you can begin trying out more bold and stylistic animations with simple typographic techniques. It would not only make you more confident as a motion graphics designer but also equip you with fluid skills as a freelancer. Typographic motion graphics is a cash cow for many After Effect animators.
6. Vectorial Animation – Domestika
Cartoonist animated videos and motion designs are quite interesting to animate. Vectorial 2D animation is quite popular among YouTube tutorials and explainer videos. They make for excellent corporate animations. You can find an amazing Domestika tutorial on Vectorial that walks you through in simple steps on Frame by Frame style animations.
7. Getting Started with Motion Graphics - Coursera
Coursera is another amazing online learning platform for gaining access to Beginner to Advanced courses on Adobe After Effects. This one tutorial introduces you to Beginner level motion graphics where you can learn from short self-paced videos.
8. Getting Started with Motion Graphics - SkillShare
SkillShare is another amazing online learning platform for gaining access to Beginner to Advanced courses on Adobe After Effects. This one tutorial introduces you to Beginner level motion graphics where you can learn from short self-paced videos. It is guided by a leading professional in motion graphics and visual effects who covers all the bases alongside hands-projects.
9. Make Simple Logo Intro in After Effects – YouTube
Creating Intros for your videos is probably the most cost-effective marketing gizmos employed today. This free tutorial on YouTube from Tech Infusion is a simple-to-follow video that sheds some light on how to create eye-catching intros that instantly catches your audience’s attention.
10. Work with Composition - Adobe
Working with After Effects is all about creating gorgeous compositions that pop. This Adobe tutorial equips you with the basics of creating animation on Adobe After Effects with multiple layers and keyframes.
Part 2 How to Create 2D Motion Graphics with After Effects
The astonishing world of intriguing after-effects is vast. Whether you do it as a profession or simply as a hobby, learning how to add after-effects to your 2d motion graphics is always an amazing idea. Worried how you’d understand the tools to add after-effects to your animation? Well, we’ve got you covered! Today we’ll be looking at how you can add after-effects to your 2d animation.

●To make a new 2D graphics in after effects, you need to make a new composition. To do so, head to the composition menu in the menu bar. Upon clicking on the composition menu, a new drop-down menu would open up. From the drop-down menu, click on “new composition”.

●A new setting box would pop up, in this settings box you can alter the settings of the composition. If you do not wish to change any setting, simply click on “ok” and proceed ahead.

●Next, you need to find the tool panel in the main menu bar. Upon clicking on it, a new drop-down menu will appear, click on “star tool”. We’re simply taking the star shape, for instance, alternatively, you can select and another shape too…

●Once you’ve selected the shape you want, draw by clicking your mouse and dragging

●Click on the shape and the layers will appear on the left of your screen. From the popped up screen, click on “properties”. Here you can find multiple animation options and you can even edit frame by frame. Add frames at regular intervals and move according to your wish

Part 3 5 Best Animation After Effects that you must know
1. Stacking animation – YouTube
Stacking animation is an excellent and simple trick that can make any animation look cool and complex. The stacking animation is nothing but the use of the stacking template multiple times. To do so, you just need to duplicate a few of the base layers. Next, you need to offset the duplicated frames by a few frames and finally add some effects. The Adding of stacking animation will result in a slight extension of your animation layers. You can further customize your frames by adding effects or color to enhance the animation.

2. Light sweeps
An advantage of using the after effects software is that it offers several drag and drop features which you can simply drag and drop to your animation to enhance its looks. A light sweep animation is one such animation that can add great value to your animation. You can add this effect by following the steps given below
●Head to “effects” from your main interface
●Here you need to find “generate”
●Now from the list of drag and drop animations, drag and drop “light sweeps” onto your workspace
You can then change and customize almost any aspect of the animation simply by clicking on it and changing the settings

3. Quick shape animation
This is a very cool trick that you can use on your 2d objects! This includes the creation of your own layer(you can use any 2d shape). Further, you need to duplicate your shape and the stagger the animation. This gives the entire animation an interesting and engaging effect. The trick is very resourceful while dealing with 2d objects.

4. Animate your background
When your entire animation looks slightly basic and you wish to give your animation a zest, this trick is highly useful! If you’re working with colored backgrounds, this animation trick can help make it more attractive. This animation is simply just adding motion to your background making it look like it’s moving in or out.

5. Graphics reflection
Although this method is slightly complicated, it could enhance the animation by leaps and bounds. To do so, you need to write a fancy text of your choice, then you need to duplicate this text, and further, you need to flip it vertically. To make it look more realistic, you can add the blur effect. This will make it look like the duplicated text is a reflection of the original text

Part 4 5 Character Animation Tools for After Effects
1. Rubber hose 2
Rubber hose is one of the primitive tools for adding animations. This is mainly because it was found in the early 2000s and back then, animations had wobbly legs and an absurd body structure. This tool has several cool inbuilt functions that make the animation so much simpler. The robust tool. makes animation pretty simple and hassle-free. Rubber hose 2 is an advanced version of rubber hose, it has several advanced features. The plug-in is however not free, you’d need to purchase it at $45 in order to gain a lifetime access.
2. Duik
Duik is one of the most advanced and comprehensive character animation tools in the market. It was initially launched in 2008, but since then there’s been a vast improvement in the tool’s features and today it’s one of the picks to perform animation using rigging and other animation techniques. Duik has several tools that make the animation so convenient. The tool has features such as auto rig, which helps save time while animating. Other tools include effects such as bones, rigging, various filters, and effects.
3. Joystick ‘n sliders
Joystick’n sliders is another highly utilitarian tool for animators. Along with key animation features such as rigging and boning, the tool has other cool and highly useful features to make your animation interesting! The user interface of this tool is a big plus, the simplicity of the user interface makes the tool perfect for beginners and advanced level animators. The tool is simple to use and has a plethora of cool features which could help you make your animation highly engaging.
4. Puppet tool 3
Puppet tool 3 is an after effects plugin that could help you create character animations. The plug-in is different from the in-built puppet tool in after effects. The puppet tool inbuilt into after effects are the Rigging tool for animation, however using the inbuilt tool is slightly sophisticated. Puppet tool 3 is not an individual tool but works in coordination with the inbuilt the puppet tool. Since using the inbuilt tool was complex, puppet tool 3 made it simple. Apart from rigging, the plugin also allows you to work with a few additional features. You can buy the plug-in for only $39.95!
5. Adobe animate character
Adobe character animation is the in-house plugin of Adobe to animate characters. However, the tool is probably still in development. Adobe has been working on releasing this tool for a while now, and in the latest version of after effects, Adobe added the beta version of the character animator. Character animator is probably the most efficient and advanced animation tool. It uses facial recognition for animations and allows you to perform almost all basic animations. The software is perfect when you’re trying to create a complex animated character.
Key Takeaways from This Episode
● Today we’ve dwelled a lot into animation and the tools available for animation.
● We’ve seen how animation could be enhanced using the inbuilt tools available in Adobe after effects.
● We’ve also gone a step further and seen the external plugin tools that you can use to make character animations and highly advanced 2d effects ok animations.
● We’ve also taken an overview on how to create a simple basic 2d motion animation, all in all, we’ve gone from understanding the beginner level animation to understanding advanced animation
02 [How to Create 2D Motion Graphics with After Effects](#Part 2)
03 [5 Best Animation After Effects that you must know](#Part 3)
04 [5 Character Animation Tools for After Effects](#Part 4)
Part 1 Practical Online 2D Animation Courses
Learning After Effects need not be complicated. You can use this tool to help you create amazing designs from your sheer imagination. Here is a list of the best courses which are self-paced so you don’t need to worry about fitting them into your schedule. Some of these courses are primarily for beginners who are seeking to orient themselves to the basics. While other courses have recent insights into the latest techniques curated by the industry experts. The courses in this list are diverse and are from different platforms like Domestika, Coursera, Adobe, and YouTube.
1. Getting Started - Adobe
The official Adobe learning site has its own course for introducing After Effects. After all, the software is a product of Adobe itself. This tutorial is purely for complete beginners and is designed to briefly introduce the interface and basic functioning of Adobe After Effects. It takes you through the manual control and menu options which you will need to familiarize yourself with.
2. The Basics – YouTube
This free-to-watch After Effects tutorial is presented by a very passionate photographer and YouTuber Peter Meckinnon. He walks you through the various elements the Adobe interface puts at your disposal. These elements are quite artistically introduced by Peter as he animates a basic title project on Adobe.
3. How to Animate a line - YouTube
When you are introduced to a vast world of possibilities, it can be a bit overwhelming. Which is why starting from the very basics is always a good idea. This next YouTube tutorial shows you step by step how to animate a line on Adobe After Effects from one point to another.
4. Introduction and Advanced After Effects – Domestika
Domestika is an online learning platform that is great for freelancers and independent artists who can purchase self-paced lessons on topics like graphic design and animation. The Introduction and Advanced After Effects tutorials by Carlos Zensuke Albarran are a comprehensive bundle of lessons that quench your thirst for 2D effects animation a bit further.
5. Typography Animation – Domestika
The mark of a professional is his specialization. As you gain more experience in practicing Adobe After Effects, you can begin trying out more bold and stylistic animations with simple typographic techniques. It would not only make you more confident as a motion graphics designer but also equip you with fluid skills as a freelancer. Typographic motion graphics is a cash cow for many After Effect animators.
6. Vectorial Animation – Domestika
Cartoonist animated videos and motion designs are quite interesting to animate. Vectorial 2D animation is quite popular among YouTube tutorials and explainer videos. They make for excellent corporate animations. You can find an amazing Domestika tutorial on Vectorial that walks you through in simple steps on Frame by Frame style animations.
7. Getting Started with Motion Graphics - Coursera
Coursera is another amazing online learning platform for gaining access to Beginner to Advanced courses on Adobe After Effects. This one tutorial introduces you to Beginner level motion graphics where you can learn from short self-paced videos.
8. Getting Started with Motion Graphics - SkillShare
SkillShare is another amazing online learning platform for gaining access to Beginner to Advanced courses on Adobe After Effects. This one tutorial introduces you to Beginner level motion graphics where you can learn from short self-paced videos. It is guided by a leading professional in motion graphics and visual effects who covers all the bases alongside hands-projects.
9. Make Simple Logo Intro in After Effects – YouTube
Creating Intros for your videos is probably the most cost-effective marketing gizmos employed today. This free tutorial on YouTube from Tech Infusion is a simple-to-follow video that sheds some light on how to create eye-catching intros that instantly catches your audience’s attention.
10. Work with Composition - Adobe
Working with After Effects is all about creating gorgeous compositions that pop. This Adobe tutorial equips you with the basics of creating animation on Adobe After Effects with multiple layers and keyframes.
Part 2 How to Create 2D Motion Graphics with After Effects
The astonishing world of intriguing after-effects is vast. Whether you do it as a profession or simply as a hobby, learning how to add after-effects to your 2d motion graphics is always an amazing idea. Worried how you’d understand the tools to add after-effects to your animation? Well, we’ve got you covered! Today we’ll be looking at how you can add after-effects to your 2d animation.
●To make a new 2D graphics in after effects, you need to make a new composition. To do so, head to the composition menu in the menu bar. Upon clicking on the composition menu, a new drop-down menu would open up. From the drop-down menu, click on “new composition”.
●A new setting box would pop up, in this settings box you can alter the settings of the composition. If you do not wish to change any setting, simply click on “ok” and proceed ahead.
●Next, you need to find the tool panel in the main menu bar. Upon clicking on it, a new drop-down menu will appear, click on “star tool”. We’re simply taking the star shape, for instance, alternatively, you can select and another shape too…
●Once you’ve selected the shape you want, draw by clicking your mouse and dragging
●Click on the shape and the layers will appear on the left of your screen. From the popped up screen, click on “properties”. Here you can find multiple animation options and you can even edit frame by frame. Add frames at regular intervals and move according to your wish
Part 3 5 Best Animation After Effects that you must know
1. Stacking animation – YouTube
Stacking animation is an excellent and simple trick that can make any animation look cool and complex. The stacking animation is nothing but the use of the stacking template multiple times. To do so, you just need to duplicate a few of the base layers. Next, you need to offset the duplicated frames by a few frames and finally add some effects. The Adding of stacking animation will result in a slight extension of your animation layers. You can further customize your frames by adding effects or color to enhance the animation.
2. Light sweeps
An advantage of using the after effects software is that it offers several drag and drop features which you can simply drag and drop to your animation to enhance its looks. A light sweep animation is one such animation that can add great value to your animation. You can add this effect by following the steps given below
●Head to “effects” from your main interface
●Here you need to find “generate”
●Now from the list of drag and drop animations, drag and drop “light sweeps” onto your workspace
You can then change and customize almost any aspect of the animation simply by clicking on it and changing the settings
3. Quick shape animation
This is a very cool trick that you can use on your 2d objects! This includes the creation of your own layer(you can use any 2d shape). Further, you need to duplicate your shape and the stagger the animation. This gives the entire animation an interesting and engaging effect. The trick is very resourceful while dealing with 2d objects.
4. Animate your background
When your entire animation looks slightly basic and you wish to give your animation a zest, this trick is highly useful! If you’re working with colored backgrounds, this animation trick can help make it more attractive. This animation is simply just adding motion to your background making it look like it’s moving in or out.
5. Graphics reflection
Although this method is slightly complicated, it could enhance the animation by leaps and bounds. To do so, you need to write a fancy text of your choice, then you need to duplicate this text, and further, you need to flip it vertically. To make it look more realistic, you can add the blur effect. This will make it look like the duplicated text is a reflection of the original text
Part 4 5 Character Animation Tools for After Effects
1. Rubber hose 2
Rubber hose is one of the primitive tools for adding animations. This is mainly because it was found in the early 2000s and back then, animations had wobbly legs and an absurd body structure. This tool has several cool inbuilt functions that make the animation so much simpler. The robust tool. makes animation pretty simple and hassle-free. Rubber hose 2 is an advanced version of rubber hose, it has several advanced features. The plug-in is however not free, you’d need to purchase it at $45 in order to gain a lifetime access.
2. Duik
Duik is one of the most advanced and comprehensive character animation tools in the market. It was initially launched in 2008, but since then there’s been a vast improvement in the tool’s features and today it’s one of the picks to perform animation using rigging and other animation techniques. Duik has several tools that make the animation so convenient. The tool has features such as auto rig, which helps save time while animating. Other tools include effects such as bones, rigging, various filters, and effects.
3. Joystick ‘n sliders
Joystick’n sliders is another highly utilitarian tool for animators. Along with key animation features such as rigging and boning, the tool has other cool and highly useful features to make your animation interesting! The user interface of this tool is a big plus, the simplicity of the user interface makes the tool perfect for beginners and advanced level animators. The tool is simple to use and has a plethora of cool features which could help you make your animation highly engaging.
4. Puppet tool 3
Puppet tool 3 is an after effects plugin that could help you create character animations. The plug-in is different from the in-built puppet tool in after effects. The puppet tool inbuilt into after effects are the Rigging tool for animation, however using the inbuilt tool is slightly sophisticated. Puppet tool 3 is not an individual tool but works in coordination with the inbuilt the puppet tool. Since using the inbuilt tool was complex, puppet tool 3 made it simple. Apart from rigging, the plugin also allows you to work with a few additional features. You can buy the plug-in for only $39.95!
5. Adobe animate character
Adobe character animation is the in-house plugin of Adobe to animate characters. However, the tool is probably still in development. Adobe has been working on releasing this tool for a while now, and in the latest version of after effects, Adobe added the beta version of the character animator. Character animator is probably the most efficient and advanced animation tool. It uses facial recognition for animations and allows you to perform almost all basic animations. The software is perfect when you’re trying to create a complex animated character.
Key Takeaways from This Episode
● Today we’ve dwelled a lot into animation and the tools available for animation.
● We’ve seen how animation could be enhanced using the inbuilt tools available in Adobe after effects.
● We’ve also gone a step further and seen the external plugin tools that you can use to make character animations and highly advanced 2d effects ok animations.
● We’ve also taken an overview on how to create a simple basic 2d motion animation, all in all, we’ve gone from understanding the beginner level animation to understanding advanced animation
How To Make Pinterest Slideshow in Simple Ways
How to Make Pinterest Slideshow in Simple Ways
An easy yet powerful editor
Numerous effects to choose from
Detailed tutorials provided by the official channel
Slideshows are a collection of images arranged together that an audience can quickly swipe through to view the content. Pinterest is known for its one-pin to one post feature. You cannot post more than one image or video in a pin.
Thus, business people could start sharing all of the images or products, services, or articles mostly because it can be stressful to do that. But with the Pinterest slideshow, you can now upload all the images you want to at once in one pin. Moreso, even have people view the pins simultaneously just by swiping through.
In this article
01 [How to display Pinterest’s latest pins in a slideshow? ](#Part 1)
02 [How to upload multiple photos to Pinterest?](#Part 2)
03 [How to display Pinterest’s latest pins in a slideshow? ](#Part 3)
Part 1 How to Display Pinterest Latest Pins in A Slideshow
Using Pinterest’s latest pins in a slideshow is another way to display the latest pins from any Pinterest user or blogger’s blog. Each image is linked to its pin page on Pinterest instead of the board or profile page if you use the Pinterest profile or board widget.
To install this widget, you need the user or board’s RSS feed URL, then use it as the input for a blogger slide show gadget.
Here are the tricky steps to follow for the Pinterest slide show;
Step 1: Constructing Pinterest RSS feed URL
The Pinterest RSS feed URL of a user is different from aboard.
● It would be the user’s profile URL + feed/RSS for a user. To get your Profile URL, click on your username in the top right corner of your screen, and you will see a URL in your web browser’s URL. That is your profile URL.
● For the board URL, you will get that after clicking on the board from the homepage. The URL would appear on your browser’s URL bar.

Step 2: Reformatting the feed for the slideshow gadget:
The RSS feed from step one is not very compatible with the blogger slideshow gadget. It accepts RSS feed in Media RSS format, but you can convert with Yahoo pipe. Simply plug in your feed URL in the Yahoo pipe URL.
You have to replace the value of the feed URL with the feed URL you got in step one and the pin count with the number of pins displayed on the slide show.
With this, you have successfully converted your feed URL to the media version of the Pinterest feed.
Step 3: Add the slideshow widget
Take the following step to add the slideshow widget.
Go to Dashboard > Layout and click on ‘Add A Gadget.’
Now Add, A Gadget window, scroll down and select Slideshow.

Under Source, select Other.

Put in the converted Pinterest RSS feed URL from step 2 into the Feed URL text box.
Click Save and view your blog.
Part 2 How to Upload Multiple Photos to Pinterest
If you want to display multiple photos of your product or share your brand story with pictures, then this is a feature you will grab. Pinterest allows you to display various products at a time. But first, you must also have a business account to do this.
When you upload multiple photos on Pinterest, they are known as carousel pins. This feature is a great advertising tool and will help you during the Pinterest slideshow.
This is because people would see your carousel on their home feed just like any other pin you have posted. They may also tap on the carousel and swipe through the different photos on the carousel. When the pinner saves it, they have kept the entire image.
Here is a step-by-step method to upload multiple photos to Pinterest.
Step 1: Log into your Pinterest
First, log into your Pinterest business account to access the feature. If you do not have a business account, it is elementary to do so. There is no need for you to enter any billing information if you are wondering about that. It is a straightforward process. Just open your account, click on the drop-down menu near your profile picture, see ‘convert to business,’ then upgrade your account, and you are good to go.
You should also ensure that the photos you want to upload are on your computer. If you have originally planned to use it to explain an article visually, then make sure the particular image that represents that article is correctly saved on your computer. The images should be 1:1 or 2:3 in ratio, and the format either ‘png’ or ‘jpeg.’
Add your pictures and upload. If you want to reorder your pin, you can replace or remove images within the carousel.

Step 2: Add Title
Add a title, description, and website of the carousel pin. Your title will be a snippet of what the blog post or article will be about or the recipe’s title. Your description should be the same as your Pinterest text, and you can also choose to let it appear only on your first image on your carousel pin.
Step 3: Select a Board
The last step is to select a board relevant to your carousel pin. Thus, you have your carousel pin and images. However, you cannot view this immediately as in a standard pin or video pin. But you can go back to your board to view your pin when it is ready.
Part 3 How to Make Pinterest Slideshow In 5 Simple Ways
Slideshows are a beautiful way to enhance your Pinterest account and generate more leads on your Profile. If you’ve been wondering if and how you can make slideshows on Pinterest, here’s a guaranteed step you can follow. But then Pinterest slideshows are instead referred to as a showcase.
However, to access this feature, you must first own a business account on Pinterest.
Here are five (5) simple ways you can make Slideshow on Pinterest:
Step 1: Go to your Pinterest Profile
Click settings next to your profile photo in the top right corner.

Step 2: Select Profile
When the Settings window appears, select Profile.

Step 3: Click Edit
Next to Featured Boards, click Edit.

Step 4: Select Boards
After clicking Edit for your Featured Boards, you’ll reach a screen where you may edit the boards you want to highlight. Select which boards you’d like to feature by clicking on each drop-down menu.
Opening a new Pinterest page is a good idea. Scroll down to Boards with the most Pin impressions under Analytics>Profile. These are the boards that I highlighted.

Step 5: Save
When you’ve decided which boards to include in your Featured, click Save.
● Bonus – Wondershare Filmora
With this feature, you can also tweak your Pinterest slides and make them look professional and befitting to your audience using Wondershare Filmora Video Editor .
For Win 7 or later (64-bit)
For macOS 10.12 or later
Wondershare Filmora is an online video editing software with several unique features, including split-screen, freeze-frame, loop images, and videos to help you create top-notch visual content for your brand. With features like the Chroma key, you can easily create special effects in your Pinterest slideshow background.
You can also use color match and video effects to enhance the quality of the slide.
● Ending Thoughts →
● Making a Pinterest slideshow can be confusing if you do not have the correct information. But if you do, it’ll be a great way to spice up your social media content and create more leads for your business.
● Pinterest is a social media platform that keeps growing and adding more features by the day. It is also increasing the number of users per day. Try out the simple steps stated on how to make a slideshow on Pinterest. Finally, by incorporating Filmora in your levelling up plans, you will be able to bring your brand in front of your target customer and present it nicely.
Slideshows are a collection of images arranged together that an audience can quickly swipe through to view the content. Pinterest is known for its one-pin to one post feature. You cannot post more than one image or video in a pin.
Thus, business people could start sharing all of the images or products, services, or articles mostly because it can be stressful to do that. But with the Pinterest slideshow, you can now upload all the images you want to at once in one pin. Moreso, even have people view the pins simultaneously just by swiping through.
In this article
01 [How to display Pinterest’s latest pins in a slideshow? ](#Part 1)
02 [How to upload multiple photos to Pinterest?](#Part 2)
03 [How to display Pinterest’s latest pins in a slideshow? ](#Part 3)
Part 1 How to Display Pinterest Latest Pins in A Slideshow
Using Pinterest’s latest pins in a slideshow is another way to display the latest pins from any Pinterest user or blogger’s blog. Each image is linked to its pin page on Pinterest instead of the board or profile page if you use the Pinterest profile or board widget.
To install this widget, you need the user or board’s RSS feed URL, then use it as the input for a blogger slide show gadget.
Here are the tricky steps to follow for the Pinterest slide show;
Step 1: Constructing Pinterest RSS feed URL
The Pinterest RSS feed URL of a user is different from aboard.
● It would be the user’s profile URL + feed/RSS for a user. To get your Profile URL, click on your username in the top right corner of your screen, and you will see a URL in your web browser’s URL. That is your profile URL.
● For the board URL, you will get that after clicking on the board from the homepage. The URL would appear on your browser’s URL bar.
Step 2: Reformatting the feed for the slideshow gadget:
The RSS feed from step one is not very compatible with the blogger slideshow gadget. It accepts RSS feed in Media RSS format, but you can convert with Yahoo pipe. Simply plug in your feed URL in the Yahoo pipe URL.
You have to replace the value of the feed URL with the feed URL you got in step one and the pin count with the number of pins displayed on the slide show.
With this, you have successfully converted your feed URL to the media version of the Pinterest feed.
Step 3: Add the slideshow widget
Take the following step to add the slideshow widget.
Go to Dashboard > Layout and click on ‘Add A Gadget.’
Now Add, A Gadget window, scroll down and select Slideshow.
Under Source, select Other.
Put in the converted Pinterest RSS feed URL from step 2 into the Feed URL text box.
Click Save and view your blog.
Part 2 How to Upload Multiple Photos to Pinterest
If you want to display multiple photos of your product or share your brand story with pictures, then this is a feature you will grab. Pinterest allows you to display various products at a time. But first, you must also have a business account to do this.
When you upload multiple photos on Pinterest, they are known as carousel pins. This feature is a great advertising tool and will help you during the Pinterest slideshow.
This is because people would see your carousel on their home feed just like any other pin you have posted. They may also tap on the carousel and swipe through the different photos on the carousel. When the pinner saves it, they have kept the entire image.
Here is a step-by-step method to upload multiple photos to Pinterest.
Step 1: Log into your Pinterest
First, log into your Pinterest business account to access the feature. If you do not have a business account, it is elementary to do so. There is no need for you to enter any billing information if you are wondering about that. It is a straightforward process. Just open your account, click on the drop-down menu near your profile picture, see ‘convert to business,’ then upgrade your account, and you are good to go.
You should also ensure that the photos you want to upload are on your computer. If you have originally planned to use it to explain an article visually, then make sure the particular image that represents that article is correctly saved on your computer. The images should be 1:1 or 2:3 in ratio, and the format either ‘png’ or ‘jpeg.’
Add your pictures and upload. If you want to reorder your pin, you can replace or remove images within the carousel.
Step 2: Add Title
Add a title, description, and website of the carousel pin. Your title will be a snippet of what the blog post or article will be about or the recipe’s title. Your description should be the same as your Pinterest text, and you can also choose to let it appear only on your first image on your carousel pin.
Step 3: Select a Board
The last step is to select a board relevant to your carousel pin. Thus, you have your carousel pin and images. However, you cannot view this immediately as in a standard pin or video pin. But you can go back to your board to view your pin when it is ready.
Part 3 How to Make Pinterest Slideshow In 5 Simple Ways
Slideshows are a beautiful way to enhance your Pinterest account and generate more leads on your Profile. If you’ve been wondering if and how you can make slideshows on Pinterest, here’s a guaranteed step you can follow. But then Pinterest slideshows are instead referred to as a showcase.
However, to access this feature, you must first own a business account on Pinterest.
Here are five (5) simple ways you can make Slideshow on Pinterest:
Step 1: Go to your Pinterest Profile
Click settings next to your profile photo in the top right corner.
Step 2: Select Profile
When the Settings window appears, select Profile.
Step 3: Click Edit
Next to Featured Boards, click Edit.
Step 4: Select Boards
After clicking Edit for your Featured Boards, you’ll reach a screen where you may edit the boards you want to highlight. Select which boards you’d like to feature by clicking on each drop-down menu.
Opening a new Pinterest page is a good idea. Scroll down to Boards with the most Pin impressions under Analytics>Profile. These are the boards that I highlighted.
Step 5: Save
When you’ve decided which boards to include in your Featured, click Save.
● Bonus – Wondershare Filmora
With this feature, you can also tweak your Pinterest slides and make them look professional and befitting to your audience using Wondershare Filmora Video Editor .
For Win 7 or later (64-bit)
For macOS 10.12 or later
Wondershare Filmora is an online video editing software with several unique features, including split-screen, freeze-frame, loop images, and videos to help you create top-notch visual content for your brand. With features like the Chroma key, you can easily create special effects in your Pinterest slideshow background.
You can also use color match and video effects to enhance the quality of the slide.
● Ending Thoughts →
● Making a Pinterest slideshow can be confusing if you do not have the correct information. But if you do, it’ll be a great way to spice up your social media content and create more leads for your business.
● Pinterest is a social media platform that keeps growing and adding more features by the day. It is also increasing the number of users per day. Try out the simple steps stated on how to make a slideshow on Pinterest. Finally, by incorporating Filmora in your levelling up plans, you will be able to bring your brand in front of your target customer and present it nicely.
The 15 Best Apps to Turn Photos Into Cartoons and Sketches
The 15 Best Apps to Turn Photos into Cartoons and Sketches
An easy yet powerful editor
Numerous effects to choose from
Detailed tutorials provided by the official channel
Our mobile phones give a plethora of capabilities for making them seem creative and one-of-a-kind. One method is to convert ordinary pictures into cartoons or sketches.
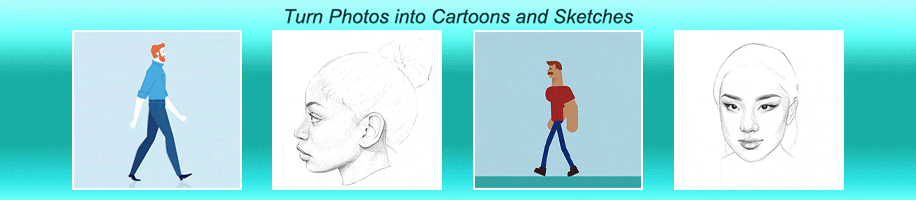
And if you want to test an app that can convert any picture into a cartoon, this post is for you.
In this article
01 [The 10 best apps to turn photos into cartoons ](#Part 1)
02 [The 5 best apps to turn photos into sketches](#Part 2)
Part 1 The 10 Best Apps to Turn Photos into Cartoons
We all love clicking pictures and exploring what more effects could be added to the click. Converting your images into cartoons is one such effect that most digital art lovers out there would love to unleash their creativity. If you would like to learn more about Filmora video animation , you can watch this tutorial:
For Win 7 or later (64-bit)
For macOS 10.12 or later
Below is the list of top 10 apps that one can use to convert photos to cartoons.
01Cartoon Pictures
Compatibility: Android
Rating: 4.1/5
Key Features: Free of cost with diverse options for cartoon filters.
Verdict:
For people looking to convert photos into cartoons, the Cartoon Pictures app is the one-stop for all. With its compatibility currently offered to both android and iOS, Cartoon Pictures offers a wide range of options. A person can modify their pictures using filters and effects on their image converted to cartoon.
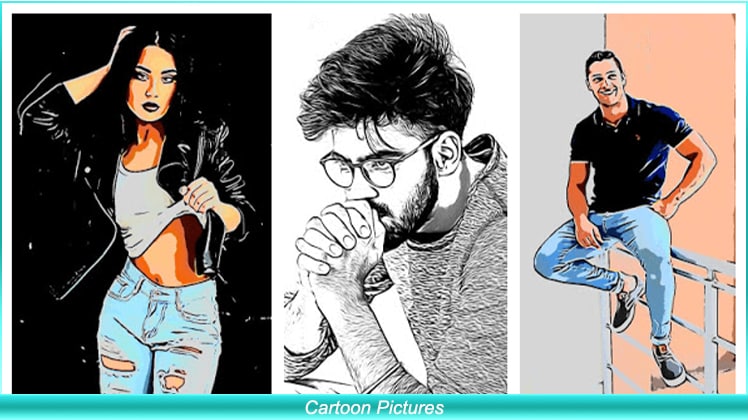
Cartoon pictures are on the top of our list due to the positive review. Overall, the app optimises memory consumption, i.e. 13MB with Cartoon Me’s gallery of filters, drawings, art pieces, editions, cartoons, oil paintings, artistic pictures, effects, and photos.
02Snapchat
Compatibility: Android/iOS
Rating: Android: 4.2/5, iOS: 3.6/5
Key Features: Popular app allowing you to not only use filters but connect with people from all over the world.
Verdict:
Although the app is famous worldwide as a photo-sharing app, Snapchat can be used for much more than that. Snapchat has launched a new effect that allows users to convert their photographs into Disney characters. It changes your look into “a modern-day prince(ess).”
According to the firm, numerous Snapchatters across the world have been using this filter to click a cartoon portrait and has been watched over 1.7 billion times. Snapchat has several other filters that help you convert your real-life photo into a cartoon. Snapchat is free for all, with several positive reviews from across the globe.
03ToonMe
Compatibility: Android/iOS
Rating: Android 4.2/5, iOS: 4.6/5
Key Features: Easy to use UI with several options to cartoonify image
Verdict:
ToonMe is the most simple to use; this app is on our list with an easy UI to use. Compared to all the other photo to cartoon apps, toonme best suits the people who are looking to convert their images readily. You may use your phone or existing photographs to make a cartoon using free built-in editing features.
The software is only 16 MB in size and is free to download from both the Google play store and the Apple app store. You may download it right now and start transforming yourself into cartoons.
04Wondershare Filmora
Compatibility: Win/Mac
Rating: Win: 4.5/5, Mac: 4.6/5
Key Features: Several options for video and photo editing in HD+.
Verdict:
Wondershare Filmora Video Editor is a well renowned and well-recognised name for those in the video-editing industry. It is well known for its wide range of tools and implementations that can be made on one image using Filmora. It has a user-friendly interface and an easy-to-use photo to cartoon converter tool.
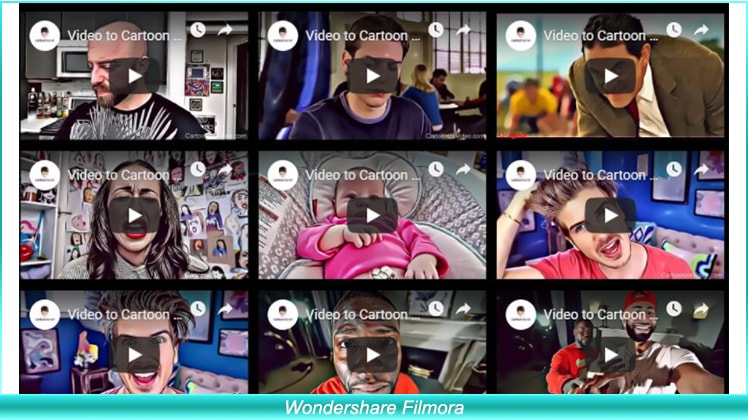
Although there is wide use of Filmora in this section, we would be talking about its ability to convert images into cartoons. The app is available for both Win and Mac, which is entirely justifiable for the feature it offers.

Wondershare Filmora - Best Video Editor for Mac/Windows
5,481,435 people have downloaded it.
Build unique custom animations without breaking a sweat.
Focus on creating epic stories and leave the details to Filmora’s auto features.
Start a creative adventure with drag & drop effects and endless possibilities.
Filmora simplifies advanced features to save you time and effort.
Filmora cuts out repetition so you can move on to your next creative breakthrough.
05Comics and Cartoon Maker
Compatibility: Android
Rating: 4.0/5
Key Features: Readily converts images to animate photos with a comic effect.
Verdict:
Are you a comic fan looking to convert your photos into animated images? Comic Cartoon Maker is the right app for you. With several options to convert your image into a cartoon. Comic Cartoon Maker is available for both Android and iOS and occupies 20MB of space in both.
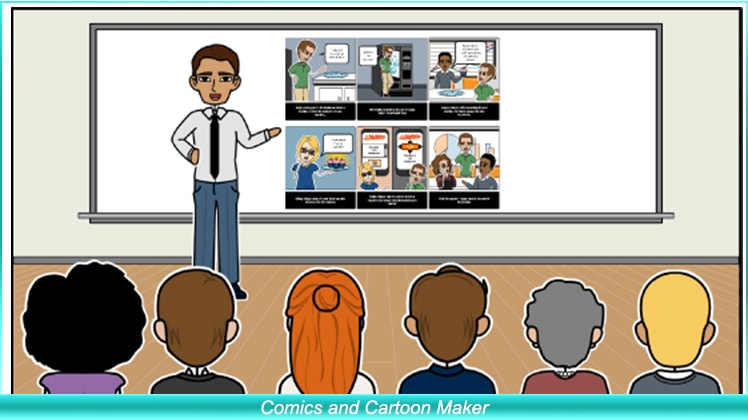
You may choose a photo from your collection or snap a fresh one with the app. After you’ve selected your filter, you may add speaking balloons to create a more believable “comic effect.” This is the simplest approach to “cartoon yourself” that you will discover on the internet.
06Avatoon
Compatibility: Android/iOS
Rating: Android: 4.5/5, iOS: 4.6/5
Key Features: Facial recognition, snapshots, stickers, avatars, and animated profile picture style options.
Verdict:
If you want to transform yourself into animated pictures, this is the programme you use. Anyone can transform themselves into animated characters with a simple click, which may then be made into stickers. These Stickers may be shared among your acquaintances via the WhatsApp app as well as other major social networking sites such as Instagram, Facebook, and many others.
The software is 53 MB in size and is downloadable on both the Play Store and the App Store. The app has been reviewed positively due to the diverse usability of its features.
07Reface
Compatibility: Android/iOS
Rating: Android: 4.2/ 5, iOS: 4.7/5
Key Features: Swap your face with celebrities and animated cartoons.
Verdict:
It’s a famous cartoon picture maker, a face-swapping app available on both the Play Store and App stores. You may change your appearance to that of celebrities featuring animated Disney characters. The software is a lot of fun and very simple to use.
The app is available in both paid and free editions. Although you will be limited to setting and swapping space per day using the free versions, The app consumes a total of 14MB and comes with unique features such as GIF, stickers, meme maker, etc.
08Prisma Photo Editor
Compatibility: Android/iOS
Rating: Android: 4.4/5, iOS: 4.6/5
Key Features: Most optimised AI which converts pictures into cartoons and much more
Verdict:
Prisma picture designer is an older and well-known photo editing tool for both Android and iOS users. It is a picture editing software with the ability to create cartoon pictures in a short amount of time. This programme is a multifunctional photo editor that allows you to edit images and make yourself into a cartoon effortlessly**.**
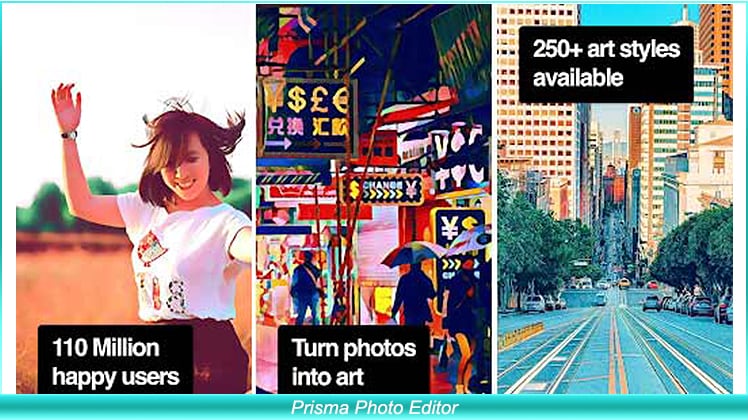
It features a variety of picture filter choices as well as a unique feed. You can simply change a photograph into a magnificent piece of artwork in the style of Munk, Picasso, or any other design you like, which has led to such good reviews by users. Although the app consumes 68MB it is yet most compatible and easy to convert pictures to cartoons.
09Sketch Drawing Photo Editor
Compatibility: Android
Rating: 4.3/5
Key Features: Create animated pics, drawings and sketches with this free animated photo maker
Verdict:
Pencil Photo Sketch is a professional photo programme that can transform your images into stunning hand-drawn pencil drawings or comic cartoon-like illustrations. Choose an image from your album or take a photo with your smartphone to create a pencil sketch or drawing effect.

The app UI is straightforward to use; all you have to do is import a picture or choose a snapshot from your collection and transform it into a magnificent pencil drawing. The software is around 19 MB in size and therefore is downloadable on both the play store and the app store.
10Moments Cartoon Caricature
Compatibility: Android
Rating: 3.2/5
Key Features: Helps you turn your photo into an animated caricature cartoon.
Verdict:
You’ll be able to enter selfie challenges or merely appreciate the great caricature tools that will allow you to convert a regular event into a funny photo. The app’s photo editor has a plethora of tools for transforming photos into cartoons in whatever way you desire.
You’ll also have the option of exploring with monochrome caricatures. All of the options available in the Moments Cartoon Caricature software are intended to assist you in creating great social media photographs.
Part 2 The 5 Best Apps to Turn Photos into Sketches
Now that we are done editing the cartoons, next on our list is sketches. Several digital artists look forward to creating a sketch-like effect to their photos. Below is the list of five apps that would help users turn their photos into sketches.
01PicsArt
Compatibility: Android, iOS
Rating: Android: 4.2/5, iOS:4.6/5
Key Features: Several filters, effects and modifications that one can do to their clicks
Verdict: Looking to transform your pictures into an artwork or sketch? Don’t worry PicsArt has got you covered. The app is compatible with Android and iOS and takes around 75MB on your device.
The app can be used to convert images to sketches and much more, making the app multipurpose. The user friendly UI and magnificent quality of filters have given them a reputed stand in their field.
02GoArt
Compatibility: Android,iOS
Rating: Android: 4.3/5, iOS:3.7/5
Key Features: Turns photos into HD paintings that can be printed and framed.
Verdict: GoArt was created to print the images you make as a key focus. This provides some incredible benefits as well as a few possible drawbacks for your photography requirements. The programme transforms the snapshot into an artistic composition by utilising AI technology.
Even though it produces a clear and high-quality image, it might take a couple of minutes to process, as opposed to other fast solutions.
03PhotoLab
Compatibility: Android,iOS
Rating: Android: 4.0/5, iOS:4.3/5
Key Features: Photo filters, sketchbook effect, collages and montage for quick touch-ups.
Verdict: PhotoLab is the software for you if you enjoy playing with hilarious, innovative, and attractive effects. The AI-powered technology is incredibly simple to use and will instantly do modifications such as trimming for you.
You may quickly publish your picture to social media or share it on a platform developed particularly for publishing digital art from the app.
04Instatoon
Compatibility: iOS
Rating: 4.4/5
Key Features: Helps iOS users convert their images into real-life portraits.
Verdict:
Instatoon has a large fan base since it provides a high-quality product that genuinely does what you ask for! This programme has fewer picture editing options because it focuses solely on producing art from your photographs.
Scroll through the list of possible filters until you discover the ideal match. Numerous filter choices are available, such as black and white sketch designs, oil paintings, and cartoons.
05BeCasso
Compatibility: iOS
Rating: 4.6/5
Key Features: Artificial intelligence, neural networks, and aesthetic picture filters form a potent mix.
Verdict:
BeCasso is packed with excellent creative filters inspired by your favourite painters, such as Vincent Van Gogh and Pablo Picasso.
After importing your chosen photo, scroll through a big variety of different artistic styles and choose the filters you want. You would like to edit your images prior sharing them because most of the photo editing capabilities in this programme are only available when you pay for a membership.
Key Takeaways from This Episode
● Using various software, making sketches and cartoons can be tedious and time-consuming for digital enthusiasts. This brings us to a more leisurely resort to propose an effortless and hassle-free way to convert their images into cartoons and sketches.
● So far, we have learned about the various ways we can use animated pic maker and software to animate pictures and form sketch-like effects using apps made for android and iOS.
● With every app having its diversified use and application, users can download the one that suits them the best, reading through the given content to help them save time and plan better.
Our mobile phones give a plethora of capabilities for making them seem creative and one-of-a-kind. One method is to convert ordinary pictures into cartoons or sketches.
And if you want to test an app that can convert any picture into a cartoon, this post is for you.
In this article
01 [The 10 best apps to turn photos into cartoons ](#Part 1)
02 [The 5 best apps to turn photos into sketches](#Part 2)
Part 1 The 10 Best Apps to Turn Photos into Cartoons
We all love clicking pictures and exploring what more effects could be added to the click. Converting your images into cartoons is one such effect that most digital art lovers out there would love to unleash their creativity. If you would like to learn more about Filmora video animation , you can watch this tutorial:
For Win 7 or later (64-bit)
For macOS 10.12 or later
Below is the list of top 10 apps that one can use to convert photos to cartoons.
01Cartoon Pictures
Compatibility: Android
Rating: 4.1/5
Key Features: Free of cost with diverse options for cartoon filters.
Verdict:
For people looking to convert photos into cartoons, the Cartoon Pictures app is the one-stop for all. With its compatibility currently offered to both android and iOS, Cartoon Pictures offers a wide range of options. A person can modify their pictures using filters and effects on their image converted to cartoon.
Cartoon pictures are on the top of our list due to the positive review. Overall, the app optimises memory consumption, i.e. 13MB with Cartoon Me’s gallery of filters, drawings, art pieces, editions, cartoons, oil paintings, artistic pictures, effects, and photos.
02Snapchat
Compatibility: Android/iOS
Rating: Android: 4.2/5, iOS: 3.6/5
Key Features: Popular app allowing you to not only use filters but connect with people from all over the world.
Verdict:
Although the app is famous worldwide as a photo-sharing app, Snapchat can be used for much more than that. Snapchat has launched a new effect that allows users to convert their photographs into Disney characters. It changes your look into “a modern-day prince(ess).”
According to the firm, numerous Snapchatters across the world have been using this filter to click a cartoon portrait and has been watched over 1.7 billion times. Snapchat has several other filters that help you convert your real-life photo into a cartoon. Snapchat is free for all, with several positive reviews from across the globe.
03ToonMe
Compatibility: Android/iOS
Rating: Android 4.2/5, iOS: 4.6/5
Key Features: Easy to use UI with several options to cartoonify image
Verdict:
ToonMe is the most simple to use; this app is on our list with an easy UI to use. Compared to all the other photo to cartoon apps, toonme best suits the people who are looking to convert their images readily. You may use your phone or existing photographs to make a cartoon using free built-in editing features.
The software is only 16 MB in size and is free to download from both the Google play store and the Apple app store. You may download it right now and start transforming yourself into cartoons.
04Wondershare Filmora
Compatibility: Win/Mac
Rating: Win: 4.5/5, Mac: 4.6/5
Key Features: Several options for video and photo editing in HD+.
Verdict:
Wondershare Filmora Video Editor is a well renowned and well-recognised name for those in the video-editing industry. It is well known for its wide range of tools and implementations that can be made on one image using Filmora. It has a user-friendly interface and an easy-to-use photo to cartoon converter tool.
Although there is wide use of Filmora in this section, we would be talking about its ability to convert images into cartoons. The app is available for both Win and Mac, which is entirely justifiable for the feature it offers.
Wondershare Filmora - Best Video Editor for Mac/Windows
5,481,435 people have downloaded it.
Build unique custom animations without breaking a sweat.
Focus on creating epic stories and leave the details to Filmora’s auto features.
Start a creative adventure with drag & drop effects and endless possibilities.
Filmora simplifies advanced features to save you time and effort.
Filmora cuts out repetition so you can move on to your next creative breakthrough.
05Comics and Cartoon Maker
Compatibility: Android
Rating: 4.0/5
Key Features: Readily converts images to animate photos with a comic effect.
Verdict:
Are you a comic fan looking to convert your photos into animated images? Comic Cartoon Maker is the right app for you. With several options to convert your image into a cartoon. Comic Cartoon Maker is available for both Android and iOS and occupies 20MB of space in both.
You may choose a photo from your collection or snap a fresh one with the app. After you’ve selected your filter, you may add speaking balloons to create a more believable “comic effect.” This is the simplest approach to “cartoon yourself” that you will discover on the internet.
06Avatoon
Compatibility: Android/iOS
Rating: Android: 4.5/5, iOS: 4.6/5
Key Features: Facial recognition, snapshots, stickers, avatars, and animated profile picture style options.
Verdict:
If you want to transform yourself into animated pictures, this is the programme you use. Anyone can transform themselves into animated characters with a simple click, which may then be made into stickers. These Stickers may be shared among your acquaintances via the WhatsApp app as well as other major social networking sites such as Instagram, Facebook, and many others.
The software is 53 MB in size and is downloadable on both the Play Store and the App Store. The app has been reviewed positively due to the diverse usability of its features.
07Reface
Compatibility: Android/iOS
Rating: Android: 4.2/ 5, iOS: 4.7/5
Key Features: Swap your face with celebrities and animated cartoons.
Verdict:
It’s a famous cartoon picture maker, a face-swapping app available on both the Play Store and App stores. You may change your appearance to that of celebrities featuring animated Disney characters. The software is a lot of fun and very simple to use.
The app is available in both paid and free editions. Although you will be limited to setting and swapping space per day using the free versions, The app consumes a total of 14MB and comes with unique features such as GIF, stickers, meme maker, etc.
08Prisma Photo Editor
Compatibility: Android/iOS
Rating: Android: 4.4/5, iOS: 4.6/5
Key Features: Most optimised AI which converts pictures into cartoons and much more
Verdict:
Prisma picture designer is an older and well-known photo editing tool for both Android and iOS users. It is a picture editing software with the ability to create cartoon pictures in a short amount of time. This programme is a multifunctional photo editor that allows you to edit images and make yourself into a cartoon effortlessly**.**
It features a variety of picture filter choices as well as a unique feed. You can simply change a photograph into a magnificent piece of artwork in the style of Munk, Picasso, or any other design you like, which has led to such good reviews by users. Although the app consumes 68MB it is yet most compatible and easy to convert pictures to cartoons.
09Sketch Drawing Photo Editor
Compatibility: Android
Rating: 4.3/5
Key Features: Create animated pics, drawings and sketches with this free animated photo maker
Verdict:
Pencil Photo Sketch is a professional photo programme that can transform your images into stunning hand-drawn pencil drawings or comic cartoon-like illustrations. Choose an image from your album or take a photo with your smartphone to create a pencil sketch or drawing effect.
The app UI is straightforward to use; all you have to do is import a picture or choose a snapshot from your collection and transform it into a magnificent pencil drawing. The software is around 19 MB in size and therefore is downloadable on both the play store and the app store.
10Moments Cartoon Caricature
Compatibility: Android
Rating: 3.2/5
Key Features: Helps you turn your photo into an animated caricature cartoon.
Verdict:
You’ll be able to enter selfie challenges or merely appreciate the great caricature tools that will allow you to convert a regular event into a funny photo. The app’s photo editor has a plethora of tools for transforming photos into cartoons in whatever way you desire.
You’ll also have the option of exploring with monochrome caricatures. All of the options available in the Moments Cartoon Caricature software are intended to assist you in creating great social media photographs.
Part 2 The 5 Best Apps to Turn Photos into Sketches
Now that we are done editing the cartoons, next on our list is sketches. Several digital artists look forward to creating a sketch-like effect to their photos. Below is the list of five apps that would help users turn their photos into sketches.
01PicsArt
Compatibility: Android, iOS
Rating: Android: 4.2/5, iOS:4.6/5
Key Features: Several filters, effects and modifications that one can do to their clicks
Verdict: Looking to transform your pictures into an artwork or sketch? Don’t worry PicsArt has got you covered. The app is compatible with Android and iOS and takes around 75MB on your device.
The app can be used to convert images to sketches and much more, making the app multipurpose. The user friendly UI and magnificent quality of filters have given them a reputed stand in their field.
02GoArt
Compatibility: Android,iOS
Rating: Android: 4.3/5, iOS:3.7/5
Key Features: Turns photos into HD paintings that can be printed and framed.
Verdict: GoArt was created to print the images you make as a key focus. This provides some incredible benefits as well as a few possible drawbacks for your photography requirements. The programme transforms the snapshot into an artistic composition by utilising AI technology.
Even though it produces a clear and high-quality image, it might take a couple of minutes to process, as opposed to other fast solutions.
03PhotoLab
Compatibility: Android,iOS
Rating: Android: 4.0/5, iOS:4.3/5
Key Features: Photo filters, sketchbook effect, collages and montage for quick touch-ups.
Verdict: PhotoLab is the software for you if you enjoy playing with hilarious, innovative, and attractive effects. The AI-powered technology is incredibly simple to use and will instantly do modifications such as trimming for you.
You may quickly publish your picture to social media or share it on a platform developed particularly for publishing digital art from the app.
04Instatoon
Compatibility: iOS
Rating: 4.4/5
Key Features: Helps iOS users convert their images into real-life portraits.
Verdict:
Instatoon has a large fan base since it provides a high-quality product that genuinely does what you ask for! This programme has fewer picture editing options because it focuses solely on producing art from your photographs.
Scroll through the list of possible filters until you discover the ideal match. Numerous filter choices are available, such as black and white sketch designs, oil paintings, and cartoons.
05BeCasso
Compatibility: iOS
Rating: 4.6/5
Key Features: Artificial intelligence, neural networks, and aesthetic picture filters form a potent mix.
Verdict:
BeCasso is packed with excellent creative filters inspired by your favourite painters, such as Vincent Van Gogh and Pablo Picasso.
After importing your chosen photo, scroll through a big variety of different artistic styles and choose the filters you want. You would like to edit your images prior sharing them because most of the photo editing capabilities in this programme are only available when you pay for a membership.
Key Takeaways from This Episode
● Using various software, making sketches and cartoons can be tedious and time-consuming for digital enthusiasts. This brings us to a more leisurely resort to propose an effortless and hassle-free way to convert their images into cartoons and sketches.
● So far, we have learned about the various ways we can use animated pic maker and software to animate pictures and form sketch-like effects using apps made for android and iOS.
● With every app having its diversified use and application, users can download the one that suits them the best, reading through the given content to help them save time and plan better.
Handy Tip From Adobe Animate Rigging Tutorial for All Learners
Handy Tips from Adobe Animate Rigging Tutorial for All Learners
An easy yet powerful editor
Numerous effects to choose from
Detailed tutorials provided by the official channel
Rigging is a technology that is not known to everyone. However, an animation freak must know the technology in depth.

If you are an animator, you must be wondering how to implement rigging. Follow this tutorial and get a complete insight on the adobe animate rigging tutorial.
In this article
01 [Do You Understand How Auto Rig Mapping Works?](#Part 1)
02 [How Do I Use Rig Mapping in Adobe Animate?](#Part 2)
03 [Where to Rig and Animate More Characters?](#Part 3)
Part 1 Do You Understand How Auto Rig Mapping Works?
The primary goal of animation is to animate or construct human-like characters that tend to mimic the structure of a human body or animal body. The closer is the resemblance of the motion, the better is the animation. However, mimicking a human-like motion with precision is rather difficult. This is because humans have a sophisticated structure, and the mimicry of a complex motion like that performed by human beings through animation is indeed difficult.
For countering this, animators decided to use rigging. Rigging is essentially a technology wherein the skeletal structure of the animated character must be designed prior to the final character. The primary components of the skeletal structure, i.e. the skull, the jaw, the limbs (arm and leg) are modeled to finally form a whole skeleton.
The structure is fine tuned and the skeleton is given rotatory motion, and prismatic motion wherever needed. Each part of the animated character is enabled to move and mimic complex motion.
Part 2 How Do I Use Rig Mapping in Adobe Animate?
1. How Do You Rig a 2d Character in an Animation?
❶ Mango animate character animation maker
Mango animate character animation maker is an amazing software that can perform the task of animation in a very simple manner. We can rightfully comment that the software does make the job of animators rather simple. The rigging animation software automatically generates an energetic skeletal figure of the static character image. Using this skeleton, the software helps you to animate the character.
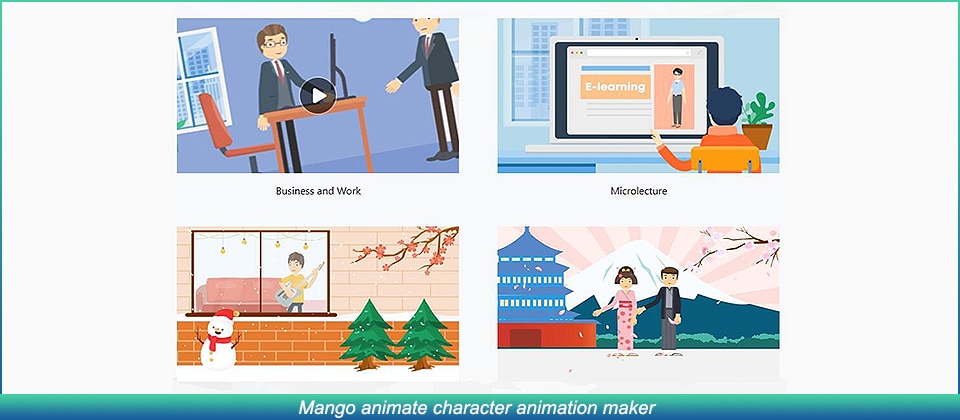
❷ Cartoon Animator 4
The software is one that suffices to almost every level of animator, be it a novice, intermediate, or an expert. The animation maker has super cool features and could make you animate characters very easily. The rigging tool can again convert a static image of the character you intend to animate into its skeletal structure.
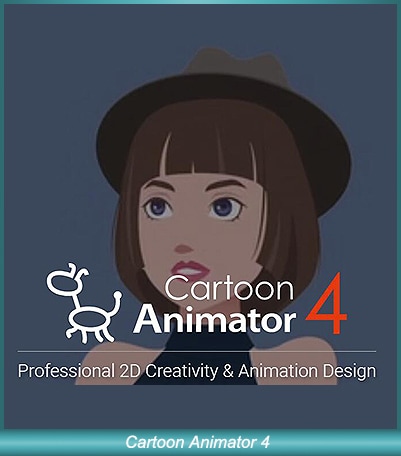
❸ Blender
Now any professional animator reading this will obviously know about blender. It is indeed one of the most popular tools available to perform any kind of animation. Moreover, most professional courses teach the basics of animation using blender.

❹ Toon boom harmony
Toon boom harmony is another software that offers pretty decent rigging features. The software is pretty popular among novice animators who just wish to animate 2d characters. The advanced tool offers animation, rigging, and drawing features.
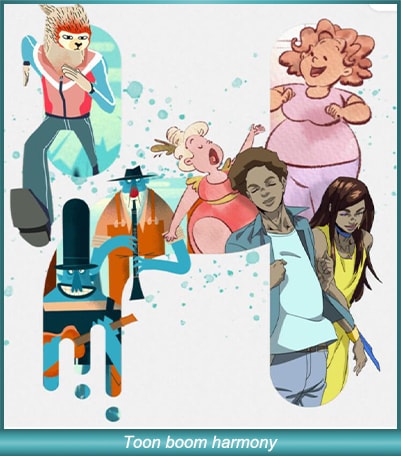
❺ Synig studio
Synig studio is another popular software among the animation community. The software is meant for animators of all levels, ranging from beginners to professionals, anybody can use this tool to animate. The software uses complex technologies in order to ensure that the character is animated seamlessly.
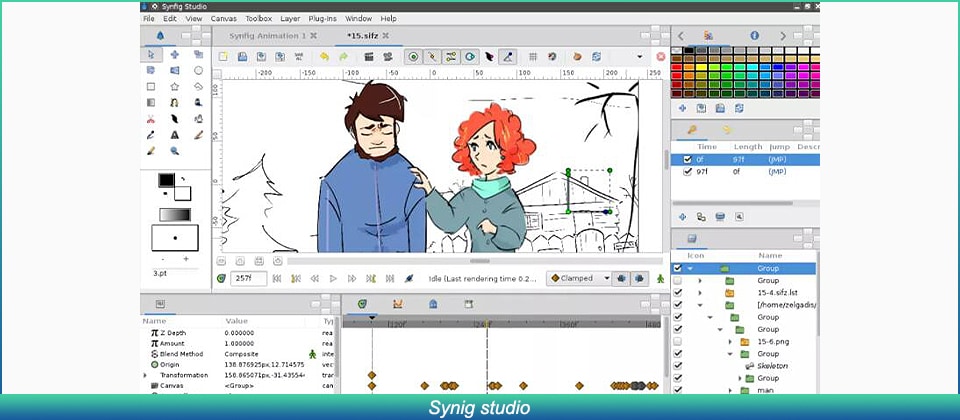
2. How Do You Animate a Custom Rig?
If you want to try animating custom rigs, it is indeed very simple, if you use beginner-friendly software, all you need to do is input the static image of your character. Select the motion template that you’d like to apply to your character. You’re good to go! However, you can’t animate custom motions using beginner-friendly software, you can only choose from the available templates.
Part 3 Where to Rig and Animate More Characters?
Comfort and convenience are what we always prioritize. Wondershare Filmora offers you exactly the same. With Wondershare Filmora Pro, you can easily animate and make desirable structures. The several features that Filmora Pro offers include:
Audio Features →
● Audio transition
● Audio compression
● Noise reduction
Video Features →
● Animation
● Motion tracking
● Video editing
The features listed above are just a few of the many features Wondershare Filmora Pro offers. If you’re looking to try out animation, then we highly recommend you to give it a go. It’s a one-stop shop for your animation needs.
Key Takeaways from This Episode
● As we reach the end of the article, we can say that it was indeed a fruitful read as we understood about several different tools to perform animations and rigging.
● The tools we looked at today make life easier for animators and video editors, using these tools, animations can be performed in minutes.
● We hope that the adobe animated rigging tutorial helped you understand the challenges of animation and how to counter them! We’d like to recommend Wondershare Filmora Pro to you, a comprehensive feature-rich tool that provides you with several different features. Think video editing? Think Filmora Pro!
Rigging is a technology that is not known to everyone. However, an animation freak must know the technology in depth.
If you are an animator, you must be wondering how to implement rigging. Follow this tutorial and get a complete insight on the adobe animate rigging tutorial.
In this article
01 [Do You Understand How Auto Rig Mapping Works?](#Part 1)
02 [How Do I Use Rig Mapping in Adobe Animate?](#Part 2)
03 [Where to Rig and Animate More Characters?](#Part 3)
Part 1 Do You Understand How Auto Rig Mapping Works?
The primary goal of animation is to animate or construct human-like characters that tend to mimic the structure of a human body or animal body. The closer is the resemblance of the motion, the better is the animation. However, mimicking a human-like motion with precision is rather difficult. This is because humans have a sophisticated structure, and the mimicry of a complex motion like that performed by human beings through animation is indeed difficult.
For countering this, animators decided to use rigging. Rigging is essentially a technology wherein the skeletal structure of the animated character must be designed prior to the final character. The primary components of the skeletal structure, i.e. the skull, the jaw, the limbs (arm and leg) are modeled to finally form a whole skeleton.
The structure is fine tuned and the skeleton is given rotatory motion, and prismatic motion wherever needed. Each part of the animated character is enabled to move and mimic complex motion.
Part 2 How Do I Use Rig Mapping in Adobe Animate?
1. How Do You Rig a 2d Character in an Animation?
❶ Mango animate character animation maker
Mango animate character animation maker is an amazing software that can perform the task of animation in a very simple manner. We can rightfully comment that the software does make the job of animators rather simple. The rigging animation software automatically generates an energetic skeletal figure of the static character image. Using this skeleton, the software helps you to animate the character.
❷ Cartoon Animator 4
The software is one that suffices to almost every level of animator, be it a novice, intermediate, or an expert. The animation maker has super cool features and could make you animate characters very easily. The rigging tool can again convert a static image of the character you intend to animate into its skeletal structure.
❸ Blender
Now any professional animator reading this will obviously know about blender. It is indeed one of the most popular tools available to perform any kind of animation. Moreover, most professional courses teach the basics of animation using blender.
❹ Toon boom harmony
Toon boom harmony is another software that offers pretty decent rigging features. The software is pretty popular among novice animators who just wish to animate 2d characters. The advanced tool offers animation, rigging, and drawing features.
❺ Synig studio
Synig studio is another popular software among the animation community. The software is meant for animators of all levels, ranging from beginners to professionals, anybody can use this tool to animate. The software uses complex technologies in order to ensure that the character is animated seamlessly.
2. How Do You Animate a Custom Rig?
If you want to try animating custom rigs, it is indeed very simple, if you use beginner-friendly software, all you need to do is input the static image of your character. Select the motion template that you’d like to apply to your character. You’re good to go! However, you can’t animate custom motions using beginner-friendly software, you can only choose from the available templates.
Part 3 Where to Rig and Animate More Characters?
Comfort and convenience are what we always prioritize. Wondershare Filmora offers you exactly the same. With Wondershare Filmora Pro, you can easily animate and make desirable structures. The several features that Filmora Pro offers include:
Audio Features →
● Audio transition
● Audio compression
● Noise reduction
Video Features →
● Animation
● Motion tracking
● Video editing
The features listed above are just a few of the many features Wondershare Filmora Pro offers. If you’re looking to try out animation, then we highly recommend you to give it a go. It’s a one-stop shop for your animation needs.
Key Takeaways from This Episode
● As we reach the end of the article, we can say that it was indeed a fruitful read as we understood about several different tools to perform animations and rigging.
● The tools we looked at today make life easier for animators and video editors, using these tools, animations can be performed in minutes.
● We hope that the adobe animated rigging tutorial helped you understand the challenges of animation and how to counter them! We’d like to recommend Wondershare Filmora Pro to you, a comprehensive feature-rich tool that provides you with several different features. Think video editing? Think Filmora Pro!
Ideas of Learning How to Send WhatsApp Animated Gifs
Ideas That Will Help You Out in Learning How to Send WhatsApp Animated Gifs
An easy yet powerful editor
Numerous effects to choose from
Detailed tutorials provided by the official channel
While chatting on WhatsApp, expressing your thoughts, suggestions, and situations become easier if assisted with some animations and for this GIFs are available.

So, if you too are keen to try these animated images but clueless about how to use them, we are here to help you. Learn about different ways to send WhatsApp animated GIFs in the following parts.
In this article
01 [How to send WhatsApp GIF using Integrated library](#Part 1)
02 [How to send GIF Stored on your device](#Part 2)
03 [How to create WhatsApp GIF using videos](#Part 3)
04 [Best tool for creating interesting GIFs in a hassle-free manner- Wondershare Filmora](#Part 4)
Part 1 How to send WhatsApp GIF using Integrated library
The WhatsApp feature on your iPhone as well as Android devices comes integrated with a GIF library powered by Tenor that allows you to search for GIFs using desired keywords. The steps to send GIFs through the method for both iPhone, as well as Android, are almost the same.
Step 1. Open WhatsApp and select the contact or the group chat to whom you wish to send the GIF.
On your Android phone, click on the smiley emoji at the input section and then choose GIF at the bottom of the screen. A sample of GIF will appear. On your iPhone, you need to click on the sticker icon to launch GIF options.
Step 2. Enter the desired keyword at the search icon to look out for a more specific GIF.
Step 3. Tap on the selected GIF and then if needed add a caption as well.
Step 4. Finally, click on the Send icon to share the GIF to the chat.
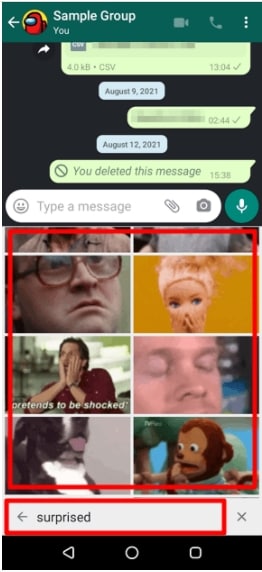
Part 2 How to send GIF Stored on your device
Several third-party apps can let you create GIFs as needed. Moreover, you can also download these animations from online sites to your device.
Once you have done WhatsApp animated GIF download to your device, these GIF files can be sent on WhatsApp by attaching them like any other image or video.
Step 1. Launch WhatsApp and select the desired contact. Click on the attach or gallery icon at the input area to browse and add the saved GIF.
Note: The size of the GIF has to be less than 16MB.
Step 2. Add a caption if needed.
Step 3. Click on the Send icon.
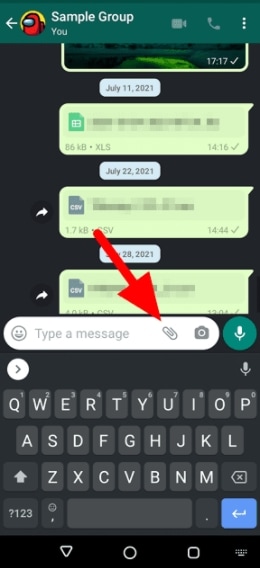
Part 3 How to create WhatsApp GIF using videos
Another way is by creating GIFs using the videos on your device. The videos to be shared as GIF has to be less than 6 seconds and thus the longer videos need to be trimmed.
Steps to create WhatsApp GIF using videos
Step 1. Launch the WhatsApp chat to which you want to send the GIF. Click on the gallery icon to browse and add the video from the device. Alternatively, you can also record a video to be used as GIF.
Step 2. After the video is added, trim it under 6 seconds using the slider at the top. Add the caption or other available elements if needed.
Step 3. Click on the GIF button and then tap on the Send icon.
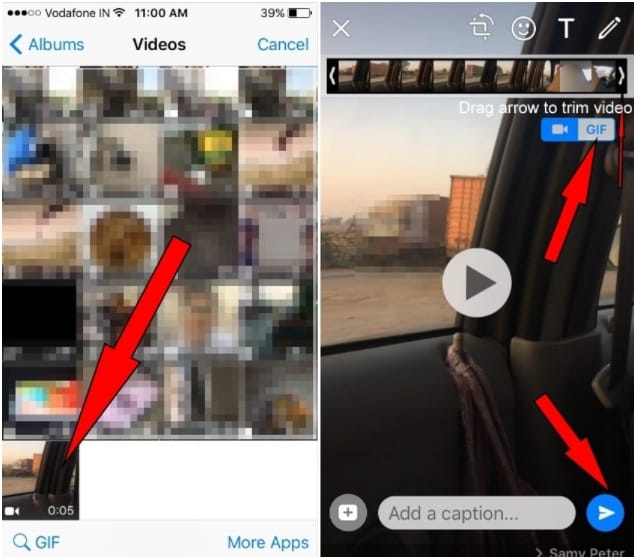
Part 4 Best tool for creating interesting GIFs in a hassle-free manner- Wondershare Filmora
Above we have mentioned in part 2 that there are several third-party apps available that can be used for creating GIFs. Among the myriad of options available, we suggest Wondershare Filmora Video Editor owing to its user-friendly interface and fast processing.
Wondershare Filmora
Get started easily with Filmora’s powerful performance, intuitive interface, and countless effects!
Try It Free Try It Free Try It Free Learn More >
Using the software, you can quickly create animated GIF stickers for WhatsApp using images and videos in all key formats. Several elements to further pep up your animations can be added like text, sound, effects, and more. Additionally, you can even edit the added media files using features like rotate, split, trim, speed-up, speed-down, and more.
Once installed on your Windows or Mac devices, Wondershare Filmora works as a complete video editing tool.
Steps to create Animated WhatsApp GIF using Wondershare Filmora
Step 1. Run the software on your system, browse and import the images and videos from which animations have to be created.
Step 2. Next, drag and move the media files to the timeline of the tool.
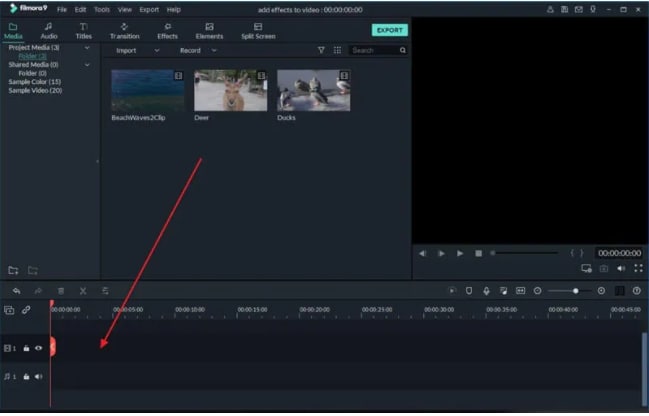
Step 3. Next, add effects, text, and other elements as needed..
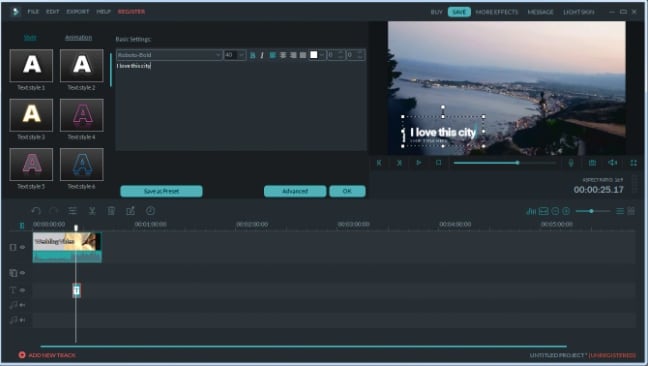
Step 4. At the Local section, save the created media file as GIF. Give the desired name and then select the desktop location. Click on the EXPORT button to start processing.
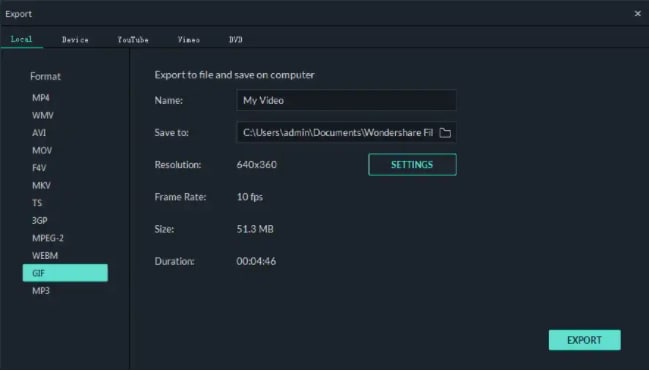
● Key Takeaways from This Episode →
●WhatsApp GIFs on your phone can be sent by either searching them from the integrated library or using the ones saved to your device.
●GIFs can also be created using videos.
●Wondershare Filmora is the best third-party app for effortlessly creating impressing GIFs.
While chatting on WhatsApp, expressing your thoughts, suggestions, and situations become easier if assisted with some animations and for this GIFs are available.
So, if you too are keen to try these animated images but clueless about how to use them, we are here to help you. Learn about different ways to send WhatsApp animated GIFs in the following parts.
In this article
01 [How to send WhatsApp GIF using Integrated library](#Part 1)
02 [How to send GIF Stored on your device](#Part 2)
03 [How to create WhatsApp GIF using videos](#Part 3)
04 [Best tool for creating interesting GIFs in a hassle-free manner- Wondershare Filmora](#Part 4)
Part 1 How to send WhatsApp GIF using Integrated library
The WhatsApp feature on your iPhone as well as Android devices comes integrated with a GIF library powered by Tenor that allows you to search for GIFs using desired keywords. The steps to send GIFs through the method for both iPhone, as well as Android, are almost the same.
Step 1. Open WhatsApp and select the contact or the group chat to whom you wish to send the GIF.
On your Android phone, click on the smiley emoji at the input section and then choose GIF at the bottom of the screen. A sample of GIF will appear. On your iPhone, you need to click on the sticker icon to launch GIF options.
Step 2. Enter the desired keyword at the search icon to look out for a more specific GIF.
Step 3. Tap on the selected GIF and then if needed add a caption as well.
Step 4. Finally, click on the Send icon to share the GIF to the chat.
Part 2 How to send GIF Stored on your device
Several third-party apps can let you create GIFs as needed. Moreover, you can also download these animations from online sites to your device.
Once you have done WhatsApp animated GIF download to your device, these GIF files can be sent on WhatsApp by attaching them like any other image or video.
Step 1. Launch WhatsApp and select the desired contact. Click on the attach or gallery icon at the input area to browse and add the saved GIF.
Note: The size of the GIF has to be less than 16MB.
Step 2. Add a caption if needed.
Step 3. Click on the Send icon.
Part 3 How to create WhatsApp GIF using videos
Another way is by creating GIFs using the videos on your device. The videos to be shared as GIF has to be less than 6 seconds and thus the longer videos need to be trimmed.
Steps to create WhatsApp GIF using videos
Step 1. Launch the WhatsApp chat to which you want to send the GIF. Click on the gallery icon to browse and add the video from the device. Alternatively, you can also record a video to be used as GIF.
Step 2. After the video is added, trim it under 6 seconds using the slider at the top. Add the caption or other available elements if needed.
Step 3. Click on the GIF button and then tap on the Send icon.
Part 4 Best tool for creating interesting GIFs in a hassle-free manner- Wondershare Filmora
Above we have mentioned in part 2 that there are several third-party apps available that can be used for creating GIFs. Among the myriad of options available, we suggest Wondershare Filmora Video Editor owing to its user-friendly interface and fast processing.
Wondershare Filmora
Get started easily with Filmora’s powerful performance, intuitive interface, and countless effects!
Try It Free Try It Free Try It Free Learn More >
Using the software, you can quickly create animated GIF stickers for WhatsApp using images and videos in all key formats. Several elements to further pep up your animations can be added like text, sound, effects, and more. Additionally, you can even edit the added media files using features like rotate, split, trim, speed-up, speed-down, and more.
Once installed on your Windows or Mac devices, Wondershare Filmora works as a complete video editing tool.
Steps to create Animated WhatsApp GIF using Wondershare Filmora
Step 1. Run the software on your system, browse and import the images and videos from which animations have to be created.
Step 2. Next, drag and move the media files to the timeline of the tool.
Step 3. Next, add effects, text, and other elements as needed..
Step 4. At the Local section, save the created media file as GIF. Give the desired name and then select the desktop location. Click on the EXPORT button to start processing.
● Key Takeaways from This Episode →
●WhatsApp GIFs on your phone can be sent by either searching them from the integrated library or using the ones saved to your device.
●GIFs can also be created using videos.
●Wondershare Filmora is the best third-party app for effortlessly creating impressing GIFs.
Also read:
- New In 2024, 10 Must-Use MP4 to GIF Converters to Get Perfect-Made GIF
- Best 10 Anime Series of All Time | Watch Anime Online
- How to Reduce GIF Size and Best GIF Resizers for 2024
- OBS Animated Lower Thirds Alternatives
- New In 2024, 5 Recommended Websites for Text GIF Maker
- Top 10 Classical Animated Cartoon Types With Examples for 2024
- How to Make Your Characters Interactive in Unity Animation Rigging
- 2024 Approved Top 10 Best and Fast Ways to Turn Image Into Gif
- Updated What Is Still Motion Animation and How Does It Work for 2024
- Types of Cartoon Styles You May Use for The Next Marketing Project
- New In 2024, How to Insert a GIF Into Powerpoint
- New Top Claymation Shows That Make Your Memories Unforgettable
- New In 2024, Adobe Auto Rigger Is AWESOME
- Top 12 2D Animation Studios All Should Check Out for 2024
- New In 2024, Whats the Best 10 Photo Animator Templates That Bring Your Images to Life?
- Updated Methods to Make Photo Motion Effect Online for 2024
- How to Remove and Reset Face ID on iPhone 8 Plus | Dr.fone
- CatchEmAll Celebrate National Pokémon Day with Virtual Location On Oppo Find X7 Ultra | Dr.fone
- In 2024, Why does the pokemon go battle league not available On Tecno Spark 10C | Dr.fone
- Can I Bypass a Forgotten Phone Password Of Honor Magic 6 Pro?
- How to share/fake gps on Uber for Nokia G42 5G | Dr.fone
- iPogo will be the new iSpoofer On OnePlus 11R? | Dr.fone
- In 2024, Best 4 Morgan Freeman Voice Generator Tools for Voice Cloning
- Three Solutions to Hard Reset Vivo V30? | Dr.fone
- In 2024, Complete Guide For iPhone 14 Pro Max Lock Screen | Dr.fone
- How to Transfer Data from Samsung Galaxy M14 5G to BlackBerry | Dr.fone
- How To Bypass Oppo Reno 8T 5G FRP In 3 Different Ways
- Title: Updated The Best 10 Sketch Animation Video Makers for 2024
- Author: Elon
- Created at : 2024-05-19 03:05:50
- Updated at : 2024-05-20 03:05:50
- Link: https://animation-videos.techidaily.com/updated-the-best-10-sketch-animation-video-makers-for-2024/
- License: This work is licensed under CC BY-NC-SA 4.0.
