
:max_bytes(150000):strip_icc():format(webp)/0010_21-best-teen-movies-on-netflix-5104880-b0e9832746854cabb4f33cafef96214b.jpg)
Updated The Top Free 12 GIF Meme Maker at a Glance
The Top Free 12 GIF Meme Maker at a Glance
The Best Free 12 GIF Meme Maker at a Glance
An easy yet powerful editor
Numerous effects to choose from
Detailed tutorials provided by the official channel
Do you want to make a meme out of a photo? You can do so with the aid of GIF meme maker, which provides an extensive range of templates, including popular ones and meme fonts and a dedicated interface. Let’s look at some of the excellent meme GIF generators for Android, iPhone, online tools, and desktop computers.
In this article
01 [What Is the Meme GIF Maker?](#Part 1)
02 [How Do You Make a GIF Meme on iPhone?](#Part 2)
03 [12 Meme Generators to Create Your Memes](#Part 3)
Part 1 What Is the Meme GIF Maker?
GIF meme maker allows users to make GIFs from the ground up by collecting or submitting videos or photographs. These GIF caption meme-makers enable users to add different creative effects like emojis, photos, text, filters, and backdrops for added customization. They can also export files, and some of them integrate directly with social networking networks to make uploading more convenient.
Each tool here has its own set of features, so read the entire article before determining which GIF meme generator is ideal for your personal or professional needs.
Part 2 How Do You Make a GIF Meme on iPhone?
Make a unique GIF meme on your iPhone following these few steps:
Step 1: Download and install a GIF maker
On your iPhone, install the GIF meme maker. Not only can you use this meme GIF generator to locate animated GIFs, but you can also use it to make your GIF memes from the start. Go to the Apple store, type GIF maker of your choice into the search field. Now select Get or Install from the drop-down menu.

Step 2: Create an account.
Create an account or log in. Fill in the text boxes with your email address, username, and password. Then press the Sign Up button.
Tap Log In, enter your email address with password if you already have an account.

Step 3: Select a photo or video to use for your GIF
Now it’s your turn to get inventive: Simply tap any of the effects tiles at the bottom of the screen to Construct a meme of a stupid selfie or photo with effects, then swipe left/right to navigate between effects. Press and hold the Shutter option to start a movie, or tap once to snap a shot.
p Create. This is locatedht corner.[1]

Step 4: Add text to meme
Put your meme text here. It’s critical to add your content to the meme because that’s what makes it a meme! To access the text tool, tap the Aa icon and type some text for the meme. Tap Done when you’re finished.
Resize and move your text. After you’ve tapped “Done” and are happy with your text, you can tap, hold, and drag it about your GIF. To alter the size, pinch two fingers together.


Step 5: Save and share
When you complete, tap the purple arrow. Tap this button in the bottom right corner once you’re happy with your meme GIF.
Select the Share GIF from the drop-down menu. If you wish to save the GIF to your camera roll, tap Save GIF.


Part 3 Meme Generators to Create Your Memes
Here are 12 meme generators that you can try out
01IMGFlip (Web)

Features:
• It has many meme templates
• You can easily build memes with your photographs.
• You can make changes to your memes
• It includes over 1000 meme templates.
• Allows you to find the meme template you want quickly.
Pros
• Many templates
• Fonts that you can customize.
• Memes on video
Cons
• Adds a watermark to the image
To make a meme with IMGFlip, follow these steps:
Step 1: Begin by making something.
Go to the website and click the “Create” button to get started. From the menu, select “Make a meme.”
Step 2: Pick a design template
To select the proper template for your meme, use the Search box. Alternatively, you can add your image to the app by clicking “Upload new template.”
Step 3: Insert text
Fill in the blanks with the meme text.
Next, click the options toggle to change the text next to each field. Save the image.
02DrMemes (Web)

Features
• You can easily produce memes for free.
• Create memes without a watermark.
• Change fonts easily
• Add emojis and stickers easily to memes.
• You can turn your photos into a GIF meme.
Pros
• User-friendly interface
• Personalization of fonts
• There is no watermark.
Cons
• A smaller number of templates
Follow these simple steps to make a meme using this website:
Step 1: Select a template
Open drmemes.com and select “Choose meme template” or “Upload picture,” depending on how you want to Construct a meme.
Step 2: Type in your text
Add Text from the side boxes. To change the font, use the settings toggle.
03ILoveIMG (Web)

Features
• Provides a variety of templates
• Allows you to alter the size and style of the font
• It generates memes that are free of watermarks.
• You may also choose whether you want the text to be forced into the image.
Pros
• An extensive library of free templates
• There is no watermark.
• Simple to use
• Can compress, resize, crop, and perform other image-editing activities.
Cons
• You can’t change the font.
Follow these steps to make memes using ILoveIMG:
Step 1: Go to the website.
In a browser, go to the website.
Step 2: Pick a design template
“Select meme template” or “Upload image” are the options.
Step 3: Type in your text
Fill in the blanks with your text.
04Meme Generator (Android/iOS)

Features:
● Over 500 high-quality memes and caption examples included.
● You can change size and color.
● There are a variety of fonts to pick from.
● Use the search or filter options to discover the memes you’re looking for quickly.
● There are no watermarks.
Pros
• Many templates
• Crop, rotate and flip images
• Personalize it with a custom image, font style, and sticker.
image
• There is no watermark.
Cons
• Lots of ads
Follow these simple steps to create a meme using the Meme Generator
Step 1: Add Image
Tap “Custom meme Gallery” to add an image from the gallery or select a meme template in the app.
Step 2: Crop Meme
Using the choices at the top of the app, you can crop the meme or rotate/flip the images.
Step 3: Customize font and Save
Change the font style, color, and alignment by tapping on it. You can also decorate it with a sticker.
When done, tap on “Save” to download the meme or hit “Share” to send it to social media apps.
05Meme Creator (Android)

Features
● A large collection of stock pictures and memes
● Add your quotes to the close captions.
● You can add your watermark.
● There are some fantastic stickers available.
● Simple to use
Pros
● No watermark
● Meme categories
● Custom fonts
Cons
● Occasional ads
Here is a simple step guide:
Step 1: Add Image
The program begins with a gallery of meme template categories, including animals, celebrities, cartoons, and more.
To add your original image, tap on one of these templates or hit the “Gallery” icon at the top.
Step 2: Change font size
Fill in the “Top” and “Bottom” text areas with the meme content. Using the options icon next to the text, change the font style.
Step 3: Save and Share
Use the “Save” or “Share” button at the bottom to download or send memes.
06Video & GIF Memes (Android)

Features
● It enables you to make memes from movies, GIFs and photos.
● No watermarks
● Easy to use
● Compatible on device
● Several stickers for users to leverage on
Pros
● There is no watermark.
● Tenor GIF database access
● You can video cut.
Cons
● Too many ads
There are no image memes.
Here are a few steps to follow:
Step 1: Select file
To begin, open the app and select the source file type.
Step 2: Customize text
When asked, trim the video, and add customizable meme text.
Save the video or GIF joke after changing video characteristics such as frame rate, speed, and quality.
07GIF Maker – Meme GIF Creator (iOS)

Features:
● Make as many GIFs as you like from your videos.
● Make an unlimited number of GIFs from your photos.
● Make an infinite number of memes.
● Filters, Stickers, and Fonts of the highest quality.
● Easy to use
Pros
● There is no watermark.
● User-friendly interphase.
● There are some fantastic stickers available.
Cons
● As others, ads.
Follow these simple steps to make use of this amazing tool:
Step 1: Choose the desired video
After running the app, select “Video to GIF” from the menu and select your video.
If necessary, trim it.
Step 2: Add text
To add amusing meme text to your video, tap “Add text.”
Step 3: Download and Share
To download the video or share it directly with social networking apps, click the Share icon.
08Memeto – Meme Maker & Creator (iOS)

Features:
● Create memes with your picture templates, blank memes, and popular templates.
● Customize options available
● Several different meme text styles to choose from.
● 1000+ stickers.
● Choose your photo from your Photo Gallery to be used as background
Pros
● There is no watermark.
● Various types of memes
Cons
● It lacks a search function.
Step 1: Choose a template
Select a meme template in the app, select the meme, and then hit the “Text” option to add and style meme text.
Step 2: Save and Share
Tap the Share button when you finish to save it to your device.
09Meme Generator Suite (Windows)

Features:
● Thousands of memes are available online
● Make memes out of your photos.
● Make posters with the phrase “KEEP CALM” and Jo Baka memes.
● You can move text, resized, and colored.
● There’s also an Offline Collection with over 300 memes that’s always ready to go!
Pros
• Many memes
• Effective search
• Collection in the offline mode
• There is no watermark.
Cons
• Advertisements
Follow these simple are guide:
Step 1: Select template or photo
Start using a pre-loaded meme template from the app or upload your image by selecting “From gallery.”
Step 2: Download and Save
Change the text settings and click the Save icon to download the image.
You can also immediately submit the image to IMGur or social networking apps.
10Meme Generator

Features:
● Get over 500 high-quality memes and caption examples.
● Size and color are changeable.
● There are a variety of fonts to pick from.
● Search or filter options to discover the memes you’re looking for.
● There are no watermarks.
Pros
• Examples of memes
• There is no watermark.
Cons
• Cannot share straight to social networking apps
Step 1: Click on Meme
To begin editing a meme, click on it.
Step 2: Change font
Change the font color and style of the meme text on the meme editing screen.
1111. Deal With It - GIF Maker

Features :
● This online GIF creator is simple to use.
● No third-party software is required to use this GIF maker.
● This website will complete the GIF conversion promptly.
● This GIF generator website is beneficial to new users.
Pros
● The website’s design is simplistic, making this GIF banner maker too simple to manage and utilize.
● It also intensifies the GIF maker, significantly improving the overall effect of the GIF in question.
Cons
● Because the pace of GIF makers is too slow, users sometimes opt to download installable GIF makers.
● GIF makers cannot create animated GIFs, so it is impossible to utilize this tool.
How to Use this Online GIF Maker
Visit the GIF maker’s official homepage.
Step 1: Choose an image
Because it can also be helpful to create GIFs from photos, you may use the Load Image option to upload an image from your computer.
Step 2: Editing
After that, you may add a phrase and glasses to the loaded image.
12LunaPic

Features:
● This online animated GIF creator has a very user-friendly design.
● No other third-party programs are required to use this online animated GIF creator.
● This website can also be valuable to creating GIF banners.
● You may create animated GIFs from several photographs with this website.
Pros
● With the aid of this program, the user can experience the GIF maker mobile feature; hence it is highly recommended.
● Because the tool is so simple, this banner GIF maker gets the job done in style and according to the user’s specifications.
Cons
● Like the GIF icon maker, this application lacks critical features like speed and accuracy necessary for GIF creation.
● Because this program can’t edit GIFs, it doesn’t have any of the GIF edit maker’s features.
How to use LunaPic
Step 1: Upload Image
To get started, go to LunaPic’s official website. To submit photographs from your computer to this online animated GIF maker, click the Upload button.
Step 2: Enhance the image
With this online GIF creator, you can now alter the images.
Step 3: Save the animated GIF
To save the produced GIF, select GIF as the output and click the Save button at the bottom.
Creating your animated GIF from any video or photo is a fascinating and entertaining undertaking. A video scene can be brutal to manage to owe to its vast size, but GIF forms are ideal for profile posts and sharing with friends in the form of simple jokes.
If you want to generate a GIF online, though, Wondershare Filmora Video Editor ‘s online meme maker is the best option. It allows you to create a watermark-free picture, GIF, and video memes. It is entirely free to use and requires no registration. When creating a caption, you can edit the text size, color, and position to make a caption while you are editing. You can also add text inside or outside in GIF. Just with some clicks, your GIF will be complete. Try it now!

Wondershare Filmora - Best Video Editor for Mac/Windows
5,481,435 people have downloaded it.
Build unique custom animations without breaking a sweat.
Focus on creating epic stories and leave the details to Filmora’s auto features.
Start a creative adventure with drag & drop effects and endless possibilities.
Filmora simplifies advanced features to save you time and effort.
Filmora cuts out repetition so you can move on to your next creative breakthrough.
● Key Takeaways from This Episode →
● Now that you know about the 12 best GIF meme generators and how to use them to make a unique and customized GIF with the simple step guide, you can now try your hands on new things.
● However, Wondershare Filmora is your sure best GIF caption meme maker to help you achieve excellent results as a GIF meme creator. So go for it!
Do you want to make a meme out of a photo? You can do so with the aid of GIF meme maker, which provides an extensive range of templates, including popular ones and meme fonts and a dedicated interface. Let’s look at some of the excellent meme GIF generators for Android, iPhone, online tools, and desktop computers.
In this article
01 [What Is the Meme GIF Maker?](#Part 1)
02 [How Do You Make a GIF Meme on iPhone?](#Part 2)
03 [12 Meme Generators to Create Your Memes](#Part 3)
Part 1 What Is the Meme GIF Maker?
GIF meme maker allows users to make GIFs from the ground up by collecting or submitting videos or photographs. These GIF caption meme-makers enable users to add different creative effects like emojis, photos, text, filters, and backdrops for added customization. They can also export files, and some of them integrate directly with social networking networks to make uploading more convenient.
Each tool here has its own set of features, so read the entire article before determining which GIF meme generator is ideal for your personal or professional needs.
Part 2 How Do You Make a GIF Meme on iPhone?
Make a unique GIF meme on your iPhone following these few steps:
Step 1: Download and install a GIF maker
On your iPhone, install the GIF meme maker. Not only can you use this meme GIF generator to locate animated GIFs, but you can also use it to make your GIF memes from the start. Go to the Apple store, type GIF maker of your choice into the search field. Now select Get or Install from the drop-down menu.
Step 2: Create an account.
Create an account or log in. Fill in the text boxes with your email address, username, and password. Then press the Sign Up button.
Tap Log In, enter your email address with password if you already have an account.
Step 3: Select a photo or video to use for your GIF
Now it’s your turn to get inventive: Simply tap any of the effects tiles at the bottom of the screen to Construct a meme of a stupid selfie or photo with effects, then swipe left/right to navigate between effects. Press and hold the Shutter option to start a movie, or tap once to snap a shot.
p Create. This is locatedht corner.[1]
Step 4: Add text to meme
Put your meme text here. It’s critical to add your content to the meme because that’s what makes it a meme! To access the text tool, tap the Aa icon and type some text for the meme. Tap Done when you’re finished.
Resize and move your text. After you’ve tapped “Done” and are happy with your text, you can tap, hold, and drag it about your GIF. To alter the size, pinch two fingers together.
Step 5: Save and share
When you complete, tap the purple arrow. Tap this button in the bottom right corner once you’re happy with your meme GIF.
Select the Share GIF from the drop-down menu. If you wish to save the GIF to your camera roll, tap Save GIF.
Part 3 Meme Generators to Create Your Memes
Here are 12 meme generators that you can try out
01IMGFlip (Web)
Features:
• It has many meme templates
• You can easily build memes with your photographs.
• You can make changes to your memes
• It includes over 1000 meme templates.
• Allows you to find the meme template you want quickly.
Pros
• Many templates
• Fonts that you can customize.
• Memes on video
Cons
• Adds a watermark to the image
To make a meme with IMGFlip, follow these steps:
Step 1: Begin by making something.
Go to the website and click the “Create” button to get started. From the menu, select “Make a meme.”
Step 2: Pick a design template
To select the proper template for your meme, use the Search box. Alternatively, you can add your image to the app by clicking “Upload new template.”
Step 3: Insert text
Fill in the blanks with the meme text.
Next, click the options toggle to change the text next to each field. Save the image.
02DrMemes (Web)
Features
• You can easily produce memes for free.
• Create memes without a watermark.
• Change fonts easily
• Add emojis and stickers easily to memes.
• You can turn your photos into a GIF meme.
Pros
• User-friendly interface
• Personalization of fonts
• There is no watermark.
Cons
• A smaller number of templates
Follow these simple steps to make a meme using this website:
Step 1: Select a template
Open drmemes.com and select “Choose meme template” or “Upload picture,” depending on how you want to Construct a meme.
Step 2: Type in your text
Add Text from the side boxes. To change the font, use the settings toggle.
03ILoveIMG (Web)
Features
• Provides a variety of templates
• Allows you to alter the size and style of the font
• It generates memes that are free of watermarks.
• You may also choose whether you want the text to be forced into the image.
Pros
• An extensive library of free templates
• There is no watermark.
• Simple to use
• Can compress, resize, crop, and perform other image-editing activities.
Cons
• You can’t change the font.
Follow these steps to make memes using ILoveIMG:
Step 1: Go to the website.
In a browser, go to the website.
Step 2: Pick a design template
“Select meme template” or “Upload image” are the options.
Step 3: Type in your text
Fill in the blanks with your text.
04Meme Generator (Android/iOS)
Features:
● Over 500 high-quality memes and caption examples included.
● You can change size and color.
● There are a variety of fonts to pick from.
● Use the search or filter options to discover the memes you’re looking for quickly.
● There are no watermarks.
Pros
• Many templates
• Crop, rotate and flip images
• Personalize it with a custom image, font style, and sticker.
image
• There is no watermark.
Cons
• Lots of ads
Follow these simple steps to create a meme using the Meme Generator
Step 1: Add Image
Tap “Custom meme Gallery” to add an image from the gallery or select a meme template in the app.
Step 2: Crop Meme
Using the choices at the top of the app, you can crop the meme or rotate/flip the images.
Step 3: Customize font and Save
Change the font style, color, and alignment by tapping on it. You can also decorate it with a sticker.
When done, tap on “Save” to download the meme or hit “Share” to send it to social media apps.
05Meme Creator (Android)
Features
● A large collection of stock pictures and memes
● Add your quotes to the close captions.
● You can add your watermark.
● There are some fantastic stickers available.
● Simple to use
Pros
● No watermark
● Meme categories
● Custom fonts
Cons
● Occasional ads
Here is a simple step guide:
Step 1: Add Image
The program begins with a gallery of meme template categories, including animals, celebrities, cartoons, and more.
To add your original image, tap on one of these templates or hit the “Gallery” icon at the top.
Step 2: Change font size
Fill in the “Top” and “Bottom” text areas with the meme content. Using the options icon next to the text, change the font style.
Step 3: Save and Share
Use the “Save” or “Share” button at the bottom to download or send memes.
06Video & GIF Memes (Android)
Features
● It enables you to make memes from movies, GIFs and photos.
● No watermarks
● Easy to use
● Compatible on device
● Several stickers for users to leverage on
Pros
● There is no watermark.
● Tenor GIF database access
● You can video cut.
Cons
● Too many ads
There are no image memes.
Here are a few steps to follow:
Step 1: Select file
To begin, open the app and select the source file type.
Step 2: Customize text
When asked, trim the video, and add customizable meme text.
Save the video or GIF joke after changing video characteristics such as frame rate, speed, and quality.
07GIF Maker – Meme GIF Creator (iOS)
Features:
● Make as many GIFs as you like from your videos.
● Make an unlimited number of GIFs from your photos.
● Make an infinite number of memes.
● Filters, Stickers, and Fonts of the highest quality.
● Easy to use
Pros
● There is no watermark.
● User-friendly interphase.
● There are some fantastic stickers available.
Cons
● As others, ads.
Follow these simple steps to make use of this amazing tool:
Step 1: Choose the desired video
After running the app, select “Video to GIF” from the menu and select your video.
If necessary, trim it.
Step 2: Add text
To add amusing meme text to your video, tap “Add text.”
Step 3: Download and Share
To download the video or share it directly with social networking apps, click the Share icon.
08Memeto – Meme Maker & Creator (iOS)
Features:
● Create memes with your picture templates, blank memes, and popular templates.
● Customize options available
● Several different meme text styles to choose from.
● 1000+ stickers.
● Choose your photo from your Photo Gallery to be used as background
Pros
● There is no watermark.
● Various types of memes
Cons
● It lacks a search function.
Step 1: Choose a template
Select a meme template in the app, select the meme, and then hit the “Text” option to add and style meme text.
Step 2: Save and Share
Tap the Share button when you finish to save it to your device.
09Meme Generator Suite (Windows)
Features:
● Thousands of memes are available online
● Make memes out of your photos.
● Make posters with the phrase “KEEP CALM” and Jo Baka memes.
● You can move text, resized, and colored.
● There’s also an Offline Collection with over 300 memes that’s always ready to go!
Pros
• Many memes
• Effective search
• Collection in the offline mode
• There is no watermark.
Cons
• Advertisements
Follow these simple are guide:
Step 1: Select template or photo
Start using a pre-loaded meme template from the app or upload your image by selecting “From gallery.”
Step 2: Download and Save
Change the text settings and click the Save icon to download the image.
You can also immediately submit the image to IMGur or social networking apps.
10Meme Generator
Features:
● Get over 500 high-quality memes and caption examples.
● Size and color are changeable.
● There are a variety of fonts to pick from.
● Search or filter options to discover the memes you’re looking for.
● There are no watermarks.
Pros
• Examples of memes
• There is no watermark.
Cons
• Cannot share straight to social networking apps
Step 1: Click on Meme
To begin editing a meme, click on it.
Step 2: Change font
Change the font color and style of the meme text on the meme editing screen.
1111. Deal With It - GIF Maker
Features :
● This online GIF creator is simple to use.
● No third-party software is required to use this GIF maker.
● This website will complete the GIF conversion promptly.
● This GIF generator website is beneficial to new users.
Pros
● The website’s design is simplistic, making this GIF banner maker too simple to manage and utilize.
● It also intensifies the GIF maker, significantly improving the overall effect of the GIF in question.
Cons
● Because the pace of GIF makers is too slow, users sometimes opt to download installable GIF makers.
● GIF makers cannot create animated GIFs, so it is impossible to utilize this tool.
How to Use this Online GIF Maker
Visit the GIF maker’s official homepage.
Step 1: Choose an image
Because it can also be helpful to create GIFs from photos, you may use the Load Image option to upload an image from your computer.
Step 2: Editing
After that, you may add a phrase and glasses to the loaded image.
12LunaPic
Features:
● This online animated GIF creator has a very user-friendly design.
● No other third-party programs are required to use this online animated GIF creator.
● This website can also be valuable to creating GIF banners.
● You may create animated GIFs from several photographs with this website.
Pros
● With the aid of this program, the user can experience the GIF maker mobile feature; hence it is highly recommended.
● Because the tool is so simple, this banner GIF maker gets the job done in style and according to the user’s specifications.
Cons
● Like the GIF icon maker, this application lacks critical features like speed and accuracy necessary for GIF creation.
● Because this program can’t edit GIFs, it doesn’t have any of the GIF edit maker’s features.
How to use LunaPic
Step 1: Upload Image
To get started, go to LunaPic’s official website. To submit photographs from your computer to this online animated GIF maker, click the Upload button.
Step 2: Enhance the image
With this online GIF creator, you can now alter the images.
Step 3: Save the animated GIF
To save the produced GIF, select GIF as the output and click the Save button at the bottom.
Creating your animated GIF from any video or photo is a fascinating and entertaining undertaking. A video scene can be brutal to manage to owe to its vast size, but GIF forms are ideal for profile posts and sharing with friends in the form of simple jokes.
If you want to generate a GIF online, though, Wondershare Filmora Video Editor ‘s online meme maker is the best option. It allows you to create a watermark-free picture, GIF, and video memes. It is entirely free to use and requires no registration. When creating a caption, you can edit the text size, color, and position to make a caption while you are editing. You can also add text inside or outside in GIF. Just with some clicks, your GIF will be complete. Try it now!
Wondershare Filmora - Best Video Editor for Mac/Windows
5,481,435 people have downloaded it.
Build unique custom animations without breaking a sweat.
Focus on creating epic stories and leave the details to Filmora’s auto features.
Start a creative adventure with drag & drop effects and endless possibilities.
Filmora simplifies advanced features to save you time and effort.
Filmora cuts out repetition so you can move on to your next creative breakthrough.
● Key Takeaways from This Episode →
● Now that you know about the 12 best GIF meme generators and how to use them to make a unique and customized GIF with the simple step guide, you can now try your hands on new things.
● However, Wondershare Filmora is your sure best GIF caption meme maker to help you achieve excellent results as a GIF meme creator. So go for it!
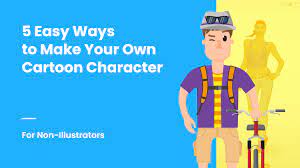
10 Cartoon Character Makers to Create Animated Characters
10 Cartoon Character Makers to Create Animated Characters
An easy yet powerful editor
Numerous effects to choose from
Detailed tutorials provided by the official channel
Learning cartoon making is easy through various application or makers online. Draw cartoon characters sketch in easy steps.

With the changing marketing and business trends, people and business owners are adopting different patterns in the pictures to make them visually good and attractive. Videos and pictures with animated characters look so amazing and gain maximum customers views. This ultimately helps the business owners to generate more leads for their business.
Not only business, but the presence of animated characters is also seen in the stories and status of the people over social media accounts. People impress others through making their own cartoon characters and animated pictures or characters. Earlier it has very tough to create cartoon character, but with so many online makers today, one can easily draw and create cartoon characters. There are various platforms that use software to turn a picture into a cartoon character or even animated picture. There are easy and interesting ways to create cartoon characters. If you love to see and are interested in drawing cartoon characters, then you can make it through various platforms. Let’s see some easy way to create own cartoon character.
In this article
01 [5 Easy Ways to Create Your Own Cartoon Character [For Non-illustrators] ](#Part 1)
02 [5 Create Cartoon Characters to Create Animated Characters for PRO](#Part 2)
03 [How to Create a Cartoon Character: A General Guide](#Part 3)
Part 1 5 Easy Ways to Create Your Own Cartoon Character [For Non-illustrators]
01Through Online Avatar Builders
Avatar building is an extraordinary way of presenting yourself. The best thing with avatar builders is that there is no need to download any application. You can easily do it in your device through online websites. They are the easiest and economical way of creating cartoon. You can add fun elements with these Avatar builders. Some of the websites that offer avatar building tools are:
Cartoonize: You can instantly make cartoon or avatar characters through Cartoonize. It can be used for face customization and adding colors. Face features like eyes, nose, hair style and expressions can be perfectly drawn with this tool. You can learn more by going to their official website.
The process is simple. You can upload your picture, go to cartoonize option at the top of the menu, do the necessary edits and features. Save it and your avatar cartoon is ready.
The other avatar building platforms are charatoon and Face your Manga. For Face your Manga, Adobe Flash Player is required. The gallery can be explored with some famous avatar of popular personalities.
02Character builders
The other way to create your own cartoon character is through character builders. The difference of this cartoon making is that one can create a complete cartoon with complete features. Like from head to toe. GraphicMama Character Maker Packs is one that offers kit to make customized cartoons.
03Tools for converting pictures into cartoons
A perfect cartoon can be made when it resemble truly as you are. The best method for doing that is using software to turn a picture into a cartoon. Filters, facial expressions and styles can be added through this way. Adobe Character Animator is a tool that can be used to convert a picture, catch the facial expression and voice.
You can learn to create cartoon character from photo by following the video
The other two ways are related to taking help of others in making the cartoon characters. Some of them are:
04Outsourcing designers or illustrators
When the perfection level is not achieved through own creation, the other option is to get it done through designers or illustrators. There are freelancers and studio who offer such services. They create cartoon as per the requirement of the customers.
05Modification in Stock cartoon characters
Those who are not having any experience of making cartoons, they can use the stocks cartoon characters and can change them with the use of software.
Part 2 5 Create Cartoon Characters to Create Animated Characters for PRO
A professional cartoon maker need some advance tools and features to give a unique and perfect look to his cartoon drawn. So, for them some applications or cartoon character maker is good. Let’s see some of the makers that are specifically designed for professionals:
01Animaker
This has various themes to make your cartoon look great. It brings life to a character. The steps involve in making a cartoon character is as under:
● As required, select the animated template.
● You can add customized features as such as backgrounds, pictures and animated text.
● Music can also be added and can be selected from the library.
● After the character is ready, you can share or download the video.
02Adobe
This is the most widely platform or maker for creating high quality contents, cartoon avatar and games. Sketch and drawing tool are there in the maker that gives real experience to the cartoon. The platform facilitates exploring the file to WebGL, SVG and Adobe AIR.
You can view how it works and the process in the video-
03Reallusion
Text and voice has given a new definition to the cartoon world. If you desire to add some interesting elements in cartoon through text and voices, then Reallusion is a good option for you. It has 3D head creation tool which can be used to make animated cartoons for mails and e-cards.
You can view how it works and the process in the video-
04Renderforest
This cartoon maker has some great collection of professionally designed templates, to make cartoon making process easy and perfect. Templates for kids, education, character adventure, healthcare and iconic animation are some of the collections one can find in this maker.
The process of cartoon creation is easy with following steps:
● Choose the most excellent cartoon templates or start from zero through sketch,
● You can edit the already available stories. Even animated characters can be used.
● Add some customized features like voice or music, style or colors.
● This is how you can create exclusive vibrant cartoons.
Video can be watched at-
05Biteable
Biteable has several templates like leadership skill tips, travel agent explainer and many more. The video clips, music, animated templates of this maker create engaging cartoon characters.
The process to develop a cartoon video through Biteable is as under:
● Open the maker Biteable
● As per your requirement, pick the one cartoon template
● Log in the account
● You can add many effects like backing music, clips and text.
● As made in the website, you can share on social media and emails.
Part 3 How to Create a Cartoon Character: A General Guide
A professional cartoon expert becomes an expert after a continuous practice. It’s not easy to learn making cartoons. Therefore to be an expert one need to learn the basics and other important principles for cartoon making. A general guide for the same is as under:
● Begin with basic steps
Learn the basic shapes like making ovals, circles and other shapes. This will help you to be perfection in making the basic outline of the cartoon. This will improve you skill and you can explore more possibilities with the basic outlines.
● Shape improvement
This is an advance stage of basic step. This step will help you to define the shape of the cartoon character you are going to draw. It gives structure and design to a character.
● Including details
This stage is more about designing a character. Pose, expression, attires, props are selected in this step. The personality of a character is made better. It makes the character more interesting and engaging.
● Shadow of cartoon character
Before giving a final touch to the character, it is necessary to check the shadow of the picture drawn. It will show whether you are on right path or not.
● Final touch
The last step is adding all details in the character. It may be straight teeth, big smile, messy hairs or anything. Lines can be made fine and clean. You can add colors of your choice.
The other platform or cartoon maker that can be checked out is Filmora.
Wondershare Filmora Video Editor is software used for making, editing and adding effects to pictures or videos. It is easy to use application loaded with many advanced tools and features to make picture and video editing simple. Those who are looking for a robust application for capturing some precious moments through picture and videos, then Filmora is a perfect application.
Filmora can be used to draw and insert cartoon characters in any video. Animation, text and music can be added effectively with Filmora. A beginner can easily learn to create cartoon character online.
Wondershare Filmora
Get started easily with Filmora’s powerful performance, intuitive interface, and countless effects!
Try It Free Try It Free Try It Free Learn More >

● Ending Thoughts →
● Cartoon characters making is not an easy task. But now there are cartoon character maker free which has made easy to learn cartoon making. The various tools used are Avatar maker, cartoon making, turning picture into cartoon and through experts support.
● The different professional cartoon character maker online are Animaker, Reallusion, Biteable and Adobe. Through these cartoon makers making cartoon characters are easy with advanced features.
● Filmora is one of the popular picture and video making and editing software which can also be used for making amazing cartoon characters.
Learning cartoon making is easy through various application or makers online. Draw cartoon characters sketch in easy steps.
With the changing marketing and business trends, people and business owners are adopting different patterns in the pictures to make them visually good and attractive. Videos and pictures with animated characters look so amazing and gain maximum customers views. This ultimately helps the business owners to generate more leads for their business.
Not only business, but the presence of animated characters is also seen in the stories and status of the people over social media accounts. People impress others through making their own cartoon characters and animated pictures or characters. Earlier it has very tough to create cartoon character, but with so many online makers today, one can easily draw and create cartoon characters. There are various platforms that use software to turn a picture into a cartoon character or even animated picture. There are easy and interesting ways to create cartoon characters. If you love to see and are interested in drawing cartoon characters, then you can make it through various platforms. Let’s see some easy way to create own cartoon character.
In this article
01 [5 Easy Ways to Create Your Own Cartoon Character [For Non-illustrators] ](#Part 1)
02 [5 Create Cartoon Characters to Create Animated Characters for PRO](#Part 2)
03 [How to Create a Cartoon Character: A General Guide](#Part 3)
Part 1 5 Easy Ways to Create Your Own Cartoon Character [For Non-illustrators]
01Through Online Avatar Builders
Avatar building is an extraordinary way of presenting yourself. The best thing with avatar builders is that there is no need to download any application. You can easily do it in your device through online websites. They are the easiest and economical way of creating cartoon. You can add fun elements with these Avatar builders. Some of the websites that offer avatar building tools are:
Cartoonize: You can instantly make cartoon or avatar characters through Cartoonize. It can be used for face customization and adding colors. Face features like eyes, nose, hair style and expressions can be perfectly drawn with this tool. You can learn more by going to their official website.
The process is simple. You can upload your picture, go to cartoonize option at the top of the menu, do the necessary edits and features. Save it and your avatar cartoon is ready.
The other avatar building platforms are charatoon and Face your Manga. For Face your Manga, Adobe Flash Player is required. The gallery can be explored with some famous avatar of popular personalities.
02Character builders
The other way to create your own cartoon character is through character builders. The difference of this cartoon making is that one can create a complete cartoon with complete features. Like from head to toe. GraphicMama Character Maker Packs is one that offers kit to make customized cartoons.
03Tools for converting pictures into cartoons
A perfect cartoon can be made when it resemble truly as you are. The best method for doing that is using software to turn a picture into a cartoon. Filters, facial expressions and styles can be added through this way. Adobe Character Animator is a tool that can be used to convert a picture, catch the facial expression and voice.
You can learn to create cartoon character from photo by following the video
The other two ways are related to taking help of others in making the cartoon characters. Some of them are:
04Outsourcing designers or illustrators
When the perfection level is not achieved through own creation, the other option is to get it done through designers or illustrators. There are freelancers and studio who offer such services. They create cartoon as per the requirement of the customers.
05Modification in Stock cartoon characters
Those who are not having any experience of making cartoons, they can use the stocks cartoon characters and can change them with the use of software.
Part 2 5 Create Cartoon Characters to Create Animated Characters for PRO
A professional cartoon maker need some advance tools and features to give a unique and perfect look to his cartoon drawn. So, for them some applications or cartoon character maker is good. Let’s see some of the makers that are specifically designed for professionals:
01Animaker
This has various themes to make your cartoon look great. It brings life to a character. The steps involve in making a cartoon character is as under:
● As required, select the animated template.
● You can add customized features as such as backgrounds, pictures and animated text.
● Music can also be added and can be selected from the library.
● After the character is ready, you can share or download the video.
02Adobe
This is the most widely platform or maker for creating high quality contents, cartoon avatar and games. Sketch and drawing tool are there in the maker that gives real experience to the cartoon. The platform facilitates exploring the file to WebGL, SVG and Adobe AIR.
You can view how it works and the process in the video-
03Reallusion
Text and voice has given a new definition to the cartoon world. If you desire to add some interesting elements in cartoon through text and voices, then Reallusion is a good option for you. It has 3D head creation tool which can be used to make animated cartoons for mails and e-cards.
You can view how it works and the process in the video-
04Renderforest
This cartoon maker has some great collection of professionally designed templates, to make cartoon making process easy and perfect. Templates for kids, education, character adventure, healthcare and iconic animation are some of the collections one can find in this maker.
The process of cartoon creation is easy with following steps:
● Choose the most excellent cartoon templates or start from zero through sketch,
● You can edit the already available stories. Even animated characters can be used.
● Add some customized features like voice or music, style or colors.
● This is how you can create exclusive vibrant cartoons.
Video can be watched at-
05Biteable
Biteable has several templates like leadership skill tips, travel agent explainer and many more. The video clips, music, animated templates of this maker create engaging cartoon characters.
The process to develop a cartoon video through Biteable is as under:
● Open the maker Biteable
● As per your requirement, pick the one cartoon template
● Log in the account
● You can add many effects like backing music, clips and text.
● As made in the website, you can share on social media and emails.
Part 3 How to Create a Cartoon Character: A General Guide
A professional cartoon expert becomes an expert after a continuous practice. It’s not easy to learn making cartoons. Therefore to be an expert one need to learn the basics and other important principles for cartoon making. A general guide for the same is as under:
● Begin with basic steps
Learn the basic shapes like making ovals, circles and other shapes. This will help you to be perfection in making the basic outline of the cartoon. This will improve you skill and you can explore more possibilities with the basic outlines.
● Shape improvement
This is an advance stage of basic step. This step will help you to define the shape of the cartoon character you are going to draw. It gives structure and design to a character.
● Including details
This stage is more about designing a character. Pose, expression, attires, props are selected in this step. The personality of a character is made better. It makes the character more interesting and engaging.
● Shadow of cartoon character
Before giving a final touch to the character, it is necessary to check the shadow of the picture drawn. It will show whether you are on right path or not.
● Final touch
The last step is adding all details in the character. It may be straight teeth, big smile, messy hairs or anything. Lines can be made fine and clean. You can add colors of your choice.
The other platform or cartoon maker that can be checked out is Filmora.
Wondershare Filmora Video Editor is software used for making, editing and adding effects to pictures or videos. It is easy to use application loaded with many advanced tools and features to make picture and video editing simple. Those who are looking for a robust application for capturing some precious moments through picture and videos, then Filmora is a perfect application.
Filmora can be used to draw and insert cartoon characters in any video. Animation, text and music can be added effectively with Filmora. A beginner can easily learn to create cartoon character online.
Wondershare Filmora
Get started easily with Filmora’s powerful performance, intuitive interface, and countless effects!
Try It Free Try It Free Try It Free Learn More >
● Ending Thoughts →
● Cartoon characters making is not an easy task. But now there are cartoon character maker free which has made easy to learn cartoon making. The various tools used are Avatar maker, cartoon making, turning picture into cartoon and through experts support.
● The different professional cartoon character maker online are Animaker, Reallusion, Biteable and Adobe. Through these cartoon makers making cartoon characters are easy with advanced features.
● Filmora is one of the popular picture and video making and editing software which can also be used for making amazing cartoon characters.
Animate Photo Online with These Awesome Tools
Animate Your Photo Online with These Awesome Tools
An easy yet powerful editor
Numerous effects to choose from
Detailed tutorials provided by the official channel
Animating your family photos online will not only make you nostalgic but will also make you relive that moment. Adding on to this, animating your photos can also make your boring ppt interesting.
This article helps you understand how to animate your pictures online for free and the different features you can use.
In this article
01 [How Can I Turn My Photo into a Cartoon Online?](#Part 1)
02 [Some Other Tools/Plugins to Help You Improve Photo Animate](#Part 2)
Part 1 Part 1: How Can I Turn My Photo into a Cartoon Online?
Animation gives life to your lifeless photos, makes them more interesting, and attracts an audience. You can add more fun to your normal photos by turning your photos into a cartoon. One of the simplest ways is by turning your photo into a cartoon by using online tools. In this section of the article, we will explore more on some online tools which will help you to turn your photos into a cartoon online.
01Befunky
An online cartoonizer that processes your photo online at a very good speed and gives you a cartoon version of the photo in seconds.
A single click on your cartoonizer and you’ll go from photo to cartoon in seconds. Go to the photo editor and click on the artsy section. You will have five classic cartoonizer effects and you will be one click away from your beautiful results.
Pros
Can upload several photos simultaneously.
Very simple interface that supports drag and drop feature.
It is possible to download photos from the stream.
Cons
Many functions are not free.
Too much advertising.
Price $4.95/month
Rating 4.1/5
“Great collage maker and photo editing tools.” - Fayak. A
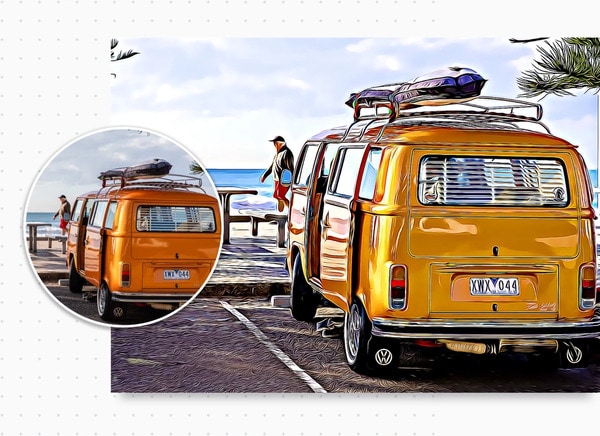
02Painnt- Art & Cartoon Filters
Painnt is one of the best cartoons yourself apps on the market with more than a thousand filters and effects. It is also a creative community which not only helps you animate your photo online but also helps you discover the artwork of your taste or meet like-minded people.
Pros
Regularly updates its software to support more features.
Customize cartoon filter settings with various parameters.
Cons
Bugs might cause trouble to your system even if you have a purchases version.
Price Free/ in-app purchases will not cost more than $9.99
Rating 4.5/ 5
“Great app lots of fun don’t put no money into the custom style.” - SB
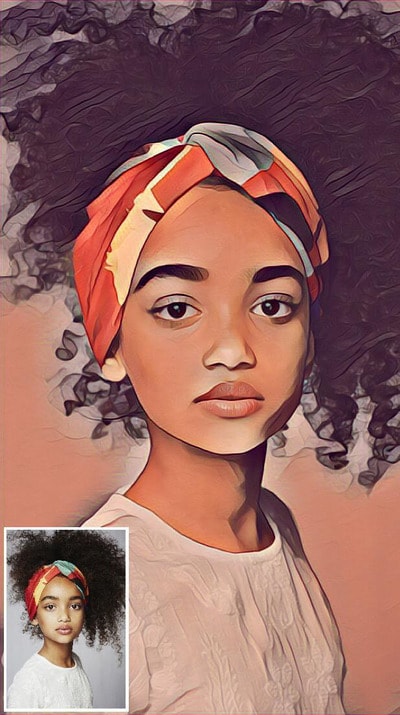
03Prisma Photo Editor
A few years ago, Prisma is one of the most popular applications to animate your photo online. Though its popularity has reduced it still has some cool features.
Pros
Has a good number of filters and you will have a lot of options.
Every image you try will be automatically saved to your camera roll.
Create unique-looking features.
Cons
Create unique-looking features.
Users have no control over how the app reads every image and gives output.
Price Users have no control over how the app reads every image and gives output.
Rating 4.6/5
“I am seriously addicted to this app. I use it to change my 360 pics into mind blowing Virtual Reality 3D photosphere.” -Leighton Scharf
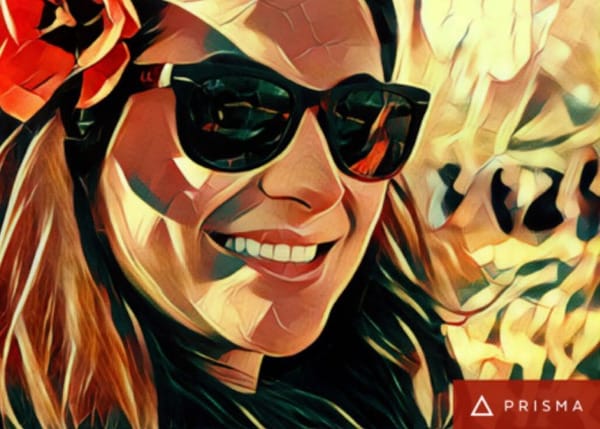
04Cartoon Sketch Camera Pro
Sketch, Cartoon, Halftone, Swirl, Pixellate, Emboss, Crosshatch, or Dots effects can be used to cartoon a photo in this app. but there are only a limited amount of cartoon effects which makes the cartoon sketch camera pro, not one of the best options to animate your photo online free.
Pros
It includes 8 different filters and effects.
You can save a photo to your cartoon library.
Cons
Supported by only Mac products.
Limited filters and effects
Issues wid bugs
Annoying ads
Price Free/In-app purchases.
Rating 3.6/5
“Get ready to watch a lot of application ads”
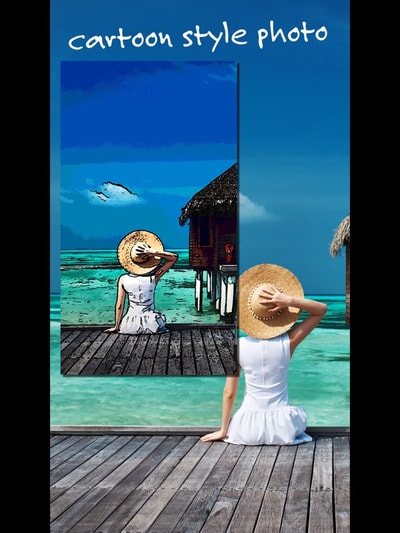
05Cartoon Photo Editor
The cartoon photo editor app helps you create animated pictures online for free. All effects can be previewed in real-time, which helps you to see your results before capturing a picture or recording a video.
Pros
Supports autofocus when shooting a video, picture.
Can also use cartoon effects on previously captured pictures.
Cons
Ads can be bothersome.
Price Free/ In-app purchases.
Rating 4.4 /5
“Not the most well-developed app.” - Nunya
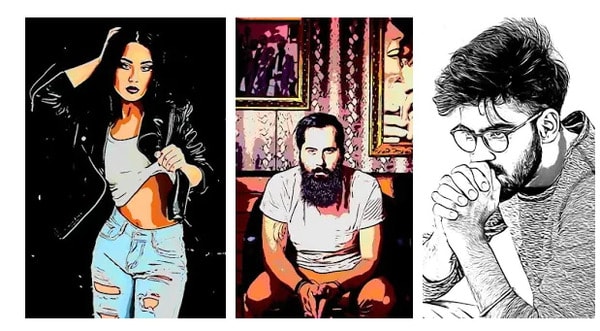
06Photo Lab
Pros
Has an immense number of filters.
Can easily share pictures on social media.
Easy interface
Cons
It’s an internet-based app, so limited features when using offline.
Price Free/ PRO subscription- $4.99/month
Rating 4.6/5
“I love so many aspects of this app.” - creativeme
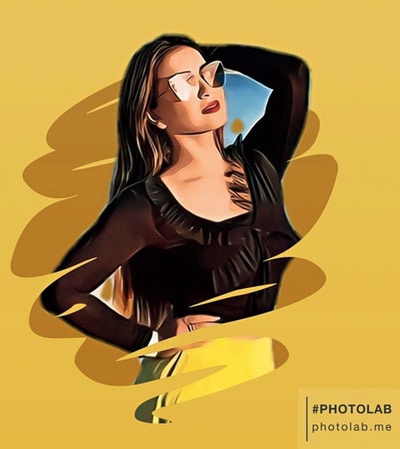
07Toon Me
Special AI developed algorithm in Toon me app instantly gives you, your cartoon picture. Just take a picture and upload it and get ready to meet your cartoon self. Toon me is one of the easiest ways to animate your photo online.
Pros
Easy to use.
Cool filters which are unique from normal toon apps.
No adds.
Cons
Good filters are only available after paid subscriptions.
Some add ons are and filters are strange.
The App doesn’t let you cartoon any photo. it has to have a face on it.
Price The App doesn’t let you cartoon any photo. it has to have a face on it.
Rating 4.5/5
“Great app. I’m thinking of actually paying for it to try some of the other cool filters,” - Angel
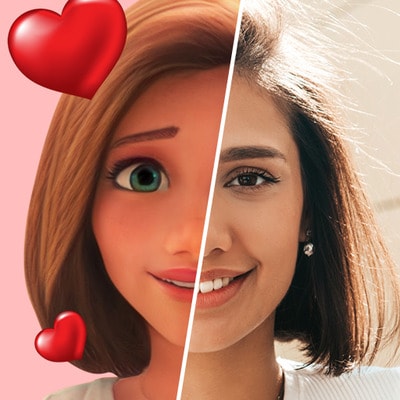
08MomentCam Cartoons and stickers
This app offers a wide range of filters and stickers. besides this, MomentCam is a community that awards prizes to its most creative members. You can accessorize your cartoon with hairbands, sunglasses, pick hairstyles or beards.
Pros
Great cartoon effects.
Easy to use.
Cons
Bugs to be fixed.
May witness errors while connected to a network.
New updates are causing issues.
Price Free/ Subscription $4.99/month
Rating 4.5 / 5
“Disappointed in the new update. Interface is confusing to use.” - Kristie
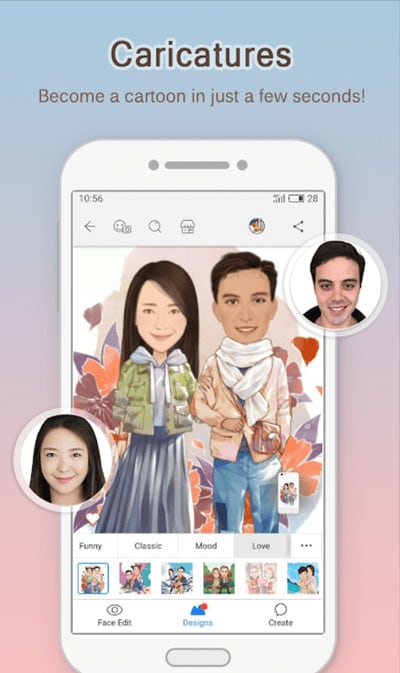
Part 2 Some Other Tools/Plugins to Help You Improve Photo Animate
012D Photography Online
An animation is a vital tool for any digital artist. Leaving your images to normal static pictures can sometimes bore your audience. Your 2d photography can be animated easily online. To animate your photos online you have several online tools like -
Open Toonz It is a powerful tool that is also open-source software.
Piskel Piskel is an online tool for creating animated sprites and pixel art. It’s easy to use and requires no sign-up.
Asperite Is another online tool that can animate your 2d photography online. You can purchase the software for $19.99.
023D Photography Online
3D This- 3Dthis is a unique animation platform that supports 3D animation with the help of amazing in-app tools. It can create 3D models of people’s faces to morph animations. You can convert any picture to a 3D image. Being free software it helps you to learn and explore and create 3D animated pictures online for free.
03Animated Photo Frame Online Editor
Animated photo frames and effects will instantly turn any photo into an awesome greeting card. You can now creatively make your greeting cards for any occasion by using these animations which will convert into gif form.
04Animate Face from Photo Online
This particular type of animation has created a huge trend on social media. Animating faces online you can see how a person in the photograph smiles, moves their head around, etc. People often use it to relive their nostalgic moments of their ancestor’s pictures. My heritage blog is one of the websites which makes still faces move. With the help of My heritage blog, you can animate any of the faces in your photos to see them move, blink, and smile. My heritage easily helps you to animate your family photos online.
Now that we have seen various kinds of animation tools and pros and cons, let us look into one such amazing tool that can animate your photo online easily and very professionally.
Key Takeaways from This Episode
● In this article we have seen how animating a picture can make a static picture into an interesting art piece.
● We have also explored various tools that can make a cartoon and animate your photo online. We have also explored each tool’s pros and cons, their pricing, reviews, and ratings. We have also seen various other tools which help you improve your photo animate. We have also seen. With the advancement of technology, we learned that old pictures of our ancestors can be bought into motion.
● In the later part of the article, we also learned about a specific software called Filmora Pro that has awesome features. In addition to this, Filmora Pro gives a very professional result.
Animating your family photos online will not only make you nostalgic but will also make you relive that moment. Adding on to this, animating your photos can also make your boring ppt interesting.
This article helps you understand how to animate your pictures online for free and the different features you can use.
In this article
01 [How Can I Turn My Photo into a Cartoon Online?](#Part 1)
02 [Some Other Tools/Plugins to Help You Improve Photo Animate](#Part 2)
Part 1 Part 1: How Can I Turn My Photo into a Cartoon Online?
Animation gives life to your lifeless photos, makes them more interesting, and attracts an audience. You can add more fun to your normal photos by turning your photos into a cartoon. One of the simplest ways is by turning your photo into a cartoon by using online tools. In this section of the article, we will explore more on some online tools which will help you to turn your photos into a cartoon online.
01Befunky
An online cartoonizer that processes your photo online at a very good speed and gives you a cartoon version of the photo in seconds.
A single click on your cartoonizer and you’ll go from photo to cartoon in seconds. Go to the photo editor and click on the artsy section. You will have five classic cartoonizer effects and you will be one click away from your beautiful results.
Pros
Can upload several photos simultaneously.
Very simple interface that supports drag and drop feature.
It is possible to download photos from the stream.
Cons
Many functions are not free.
Too much advertising.
Price $4.95/month
Rating 4.1/5
“Great collage maker and photo editing tools.” - Fayak. A
02Painnt- Art & Cartoon Filters
Painnt is one of the best cartoons yourself apps on the market with more than a thousand filters and effects. It is also a creative community which not only helps you animate your photo online but also helps you discover the artwork of your taste or meet like-minded people.
Pros
Regularly updates its software to support more features.
Customize cartoon filter settings with various parameters.
Cons
Bugs might cause trouble to your system even if you have a purchases version.
Price Free/ in-app purchases will not cost more than $9.99
Rating 4.5/ 5
“Great app lots of fun don’t put no money into the custom style.” - SB
03Prisma Photo Editor
A few years ago, Prisma is one of the most popular applications to animate your photo online. Though its popularity has reduced it still has some cool features.
Pros
Has a good number of filters and you will have a lot of options.
Every image you try will be automatically saved to your camera roll.
Create unique-looking features.
Cons
Create unique-looking features.
Users have no control over how the app reads every image and gives output.
Price Users have no control over how the app reads every image and gives output.
Rating 4.6/5
“I am seriously addicted to this app. I use it to change my 360 pics into mind blowing Virtual Reality 3D photosphere.” -Leighton Scharf
04Cartoon Sketch Camera Pro
Sketch, Cartoon, Halftone, Swirl, Pixellate, Emboss, Crosshatch, or Dots effects can be used to cartoon a photo in this app. but there are only a limited amount of cartoon effects which makes the cartoon sketch camera pro, not one of the best options to animate your photo online free.
Pros
It includes 8 different filters and effects.
You can save a photo to your cartoon library.
Cons
Supported by only Mac products.
Limited filters and effects
Issues wid bugs
Annoying ads
Price Free/In-app purchases.
Rating 3.6/5
“Get ready to watch a lot of application ads”
05Cartoon Photo Editor
The cartoon photo editor app helps you create animated pictures online for free. All effects can be previewed in real-time, which helps you to see your results before capturing a picture or recording a video.
Pros
Supports autofocus when shooting a video, picture.
Can also use cartoon effects on previously captured pictures.
Cons
Ads can be bothersome.
Price Free/ In-app purchases.
Rating 4.4 /5
“Not the most well-developed app.” - Nunya
06Photo Lab
Pros
Has an immense number of filters.
Can easily share pictures on social media.
Easy interface
Cons
It’s an internet-based app, so limited features when using offline.
Price Free/ PRO subscription- $4.99/month
Rating 4.6/5
“I love so many aspects of this app.” - creativeme
07Toon Me
Special AI developed algorithm in Toon me app instantly gives you, your cartoon picture. Just take a picture and upload it and get ready to meet your cartoon self. Toon me is one of the easiest ways to animate your photo online.
Pros
Easy to use.
Cool filters which are unique from normal toon apps.
No adds.
Cons
Good filters are only available after paid subscriptions.
Some add ons are and filters are strange.
The App doesn’t let you cartoon any photo. it has to have a face on it.
Price The App doesn’t let you cartoon any photo. it has to have a face on it.
Rating 4.5/5
“Great app. I’m thinking of actually paying for it to try some of the other cool filters,” - Angel
08MomentCam Cartoons and stickers
This app offers a wide range of filters and stickers. besides this, MomentCam is a community that awards prizes to its most creative members. You can accessorize your cartoon with hairbands, sunglasses, pick hairstyles or beards.
Pros
Great cartoon effects.
Easy to use.
Cons
Bugs to be fixed.
May witness errors while connected to a network.
New updates are causing issues.
Price Free/ Subscription $4.99/month
Rating 4.5 / 5
“Disappointed in the new update. Interface is confusing to use.” - Kristie
Part 2 Some Other Tools/Plugins to Help You Improve Photo Animate
012D Photography Online
An animation is a vital tool for any digital artist. Leaving your images to normal static pictures can sometimes bore your audience. Your 2d photography can be animated easily online. To animate your photos online you have several online tools like -
Open Toonz It is a powerful tool that is also open-source software.
Piskel Piskel is an online tool for creating animated sprites and pixel art. It’s easy to use and requires no sign-up.
Asperite Is another online tool that can animate your 2d photography online. You can purchase the software for $19.99.
023D Photography Online
3D This- 3Dthis is a unique animation platform that supports 3D animation with the help of amazing in-app tools. It can create 3D models of people’s faces to morph animations. You can convert any picture to a 3D image. Being free software it helps you to learn and explore and create 3D animated pictures online for free.
03Animated Photo Frame Online Editor
Animated photo frames and effects will instantly turn any photo into an awesome greeting card. You can now creatively make your greeting cards for any occasion by using these animations which will convert into gif form.
04Animate Face from Photo Online
This particular type of animation has created a huge trend on social media. Animating faces online you can see how a person in the photograph smiles, moves their head around, etc. People often use it to relive their nostalgic moments of their ancestor’s pictures. My heritage blog is one of the websites which makes still faces move. With the help of My heritage blog, you can animate any of the faces in your photos to see them move, blink, and smile. My heritage easily helps you to animate your family photos online.
Now that we have seen various kinds of animation tools and pros and cons, let us look into one such amazing tool that can animate your photo online easily and very professionally.
Key Takeaways from This Episode
● In this article we have seen how animating a picture can make a static picture into an interesting art piece.
● We have also explored various tools that can make a cartoon and animate your photo online. We have also explored each tool’s pros and cons, their pricing, reviews, and ratings. We have also seen various other tools which help you improve your photo animate. We have also seen. With the advancement of technology, we learned that old pictures of our ancestors can be bought into motion.
● In the later part of the article, we also learned about a specific software called Filmora Pro that has awesome features. In addition to this, Filmora Pro gives a very professional result.
How to Create Picsart Cartoon in Simple Ways
How to Create Picsart Cartoon
An easy yet powerful editor
Numerous effects to choose from
Detailed tutorials provided by the official channel
Cartoonized images are a convenient source of fun and media entertainment in present times. Try hands at creating your own caricature masterpieces with Picsart!
In this article
01 [How To Edit Cartoon Picture in Picsart](#Part 1)
02 [How To Make A Cartoon On Your Phone](#Part 2)
03 [How to Cartoon Yourself on Picsart](#Part 3)
Part 1 How to Edit Cartoon Picture in Picsart
Cartoonized pictures as you must be aware of, are comic transformations of real-time images and are widely used on social media to add a funny angle to the diversity of conversation going on, or even just as a source of plentiful amusement.
If you often feel motivated to experiment with the art and are looking for a perfect solution, see through the following section for a detailed and stepwise guide to create and edit a Picsart cartoon with utmost ease and within a quick time span:
User’s Guide to Edit Cartoon Pictures in Picsart
Step 1: Download the Picsart Application
Visit the official Picsart website to download the desktop version of the app in your Windows or MacOs supported PC.
Step 2: Make a Selection
Launch the app in your system to reach the Picsart welcome screen. Navigate to the bottom and tap the ‘+’ symbol. You are now required to choose a desired image to create the cartoon edit. You can either browse through your system gallery or search a specific one from the Picsart photo library in the ‘Search Bar’ at the top of the app screen.

Step 3: Let’s Get Editing!
When you have made your choice, navigate to the toolbar at the bottom of the app screen and click on the ‘Effects’ tab. Make a side scroll to choose a specific effect category, like that of ‘Artistic’ or ‘Magic’ to open a library of effects in the selected category.
As an example, selecting the ‘Cartoonizer’ option in the ‘Artistic’ effects category can add an immediate caricature feel to your selected real-time image. You can further include manual adjustments to get the perfect cartoon look by pressing and holding the ‘Cartoonizer’ option. There are a whole variety of magical effects, such as, Neo Pop, Soul, Badlands, Animation and Paw in the ‘Magic’ effects category, that are just perfect in giving your edit a fantasizing look with a Picsart cartoon background.
If you are looking for a quicker editing process, prefer adding cartoonized elements, like ‘Picsart Stickers’ to your image instead of going for a complete caricature edit. To do this, open the ‘Picsart Photo Editor’, navigates to the ‘Sticker’ symbol and click on it, followed by searching ‘Cartoon Sticker’. You can alternatively search a specific keyword with the ‘Cartoon’ descriptor, if you are clear on what you want to add.
You can further, resize your selected sticker with a ‘Two Finger Pinch’ or use the ‘Eraser’ tool to ward off any unwanted portions from the same. You are free to take as many repetitions of the process as you wish, till you get the perfect result for saving to your device and sharing on your social media handles.

Step 4: Time to Save and Share!
When you are satisfied with your work, navigate to the right hand corner and tap ‘Apply’ to finalize your changes, followed by clicking on the ‘Next’ button at the top right corner of the app screen to save and export your creation.
Part 2 How to Make a Cartoon on Your Phone
After a detailed analysis of the cartoon editing procedure in your desktops, let us see thro ugh the method of creating cartoonized images on your MacOs and Android smartphones on the following section:
Stepwise Procedure for Creating Cartoonized Images on Phone
Step 1: Download the Application
When going to use the Picsart editor application on your smartphone, you will first require a download of the same in your concerned device. You can do this by visiting the ‘Google PlayStore’ for an Android device or the ‘Apple App Store’ for MacOs smartphones.
Step 2: Choose a Real-time Image
After a successful launch of the ‘Picsart Editor’ application in your smartphone, reach to and click on the ‘+’ icon at the bottom of the app’s working interface. This needs to be followed by selecting any specific real-time image, either from your smartphone gallery or the Picsart photo library using the top ‘Search Bar’ of the interface, for creating a cartoonized edit.

Step 3: Editing Begins!
Once you are done with selecting the image, proceed to add effects to your selection by clicking the ‘Effects’ tab in the bottom toolbar, succeeded by picking a desired effect type through a right scroll. Tap on any category, such as, Magic, Artistic, etc, to open the effect library of the same.
For instance, you can click on the ‘Cartoonizer’ option within Artistic’ effects to supplement your uploaded real-time image with an instant cartoonized effect. You are also granted the liberty to make manual changes to set the caricature image effects as per your preferences, which you can do with a ‘Press and Hold’ of the ‘Cartoonizer’ tab. If you have a diversion towards complementing your cartoonized images with magical effects, choose from Animation, Neo Pop, Paw, Badlands, Paw, and other amazing options in the ‘Magic’ category.

Step 4: Save and Export
When you have completed the editing process and the changes satisfy you, go to the ‘Apply’ tab at the right side of the editor screen to see the changes appear in your edit. You can now navigate to the upper right corner of the app screen and click on ‘Next’ to save your work locally to your device, along with exporting the same across different media platforms.
Part 3 How to Cartoon Yourself on Picsart
Having learnt about the interesting ways to edit cartoon pictures and create cartoons on your smartphone, you might like to try hands on creating a cartoon portrait of yourself in the Picsart editor for a variety of reasons, like that of creating cartoon profile pics of yourself. Let us have a look of the procedure for the same using the Picsart Online Image Editor tool in the following section:
User’s Guide to Create a Cartoon Portrait With Picsart Online Photo Editor
Step 1: Launch the Application
In any of your favorite internet browsers, search for and open ‘Picsart Desktop Editor’. In the app’s working interface, tap ‘Upload’ or ‘New Project’ to choose an image from your device or the free to use Picsart image library respectively, for proceeding with the cartoonized transformations.

Step 2: Edit Your Selection
Tap on the ‘Effects’ tab from the editing toolbar at the top of your image and select a desired effect category to access the diversity of cartoonifying filters. It is recommended to select the ‘Magic’ category for the most splendid cartoon effects, such as, Paw, Badland, Animation, Soul and Neo Pop among many others.

You can even make manual adjustments in the brightness, color, saturation, burn and fade, etc., of the image by clicking on the ‘Adjust’ and ‘Blend’ options at the top of the image workspace.

Step 3: Download and Share Your Work
When you are done editing, navigate to and click on the ‘Share’ option at the upper right corner of the editor screen to download your cartoonized image.

****Wondershare Filmora Video Editor Cartoon Image Creator**
For Win 7 or later (64-bit)
For macOS 10.12 or later
Picsart is certainly a dependable solution to create caricature images, but if you are keen on looking for an alternative application to cater to the need, Introduced to the software market by Wondershare, the Filmora Cartoon Image Creator can be a convenient rescue. The app promises you of a high quality cartoonized edit with a plethora of editing effects to suit your most specific editing preferences.
● Ending Thoughts →
● Creating cartoonized edits from real time images is a fun and entertaining activity along with being the latest media trend.
● The Picsart editor application allows making caricature images from actual stills through desktop, smartphone and online compatible image editing program.
● Talking of suitable Picsart alternatives, you can rely on the Filmora Cartoon Image Creator application for high quality cartoonized image creation.
Cartoonized images are a convenient source of fun and media entertainment in present times. Try hands at creating your own caricature masterpieces with Picsart!
In this article
01 [How To Edit Cartoon Picture in Picsart](#Part 1)
02 [How To Make A Cartoon On Your Phone](#Part 2)
03 [How to Cartoon Yourself on Picsart](#Part 3)
Part 1 How to Edit Cartoon Picture in Picsart
Cartoonized pictures as you must be aware of, are comic transformations of real-time images and are widely used on social media to add a funny angle to the diversity of conversation going on, or even just as a source of plentiful amusement.
If you often feel motivated to experiment with the art and are looking for a perfect solution, see through the following section for a detailed and stepwise guide to create and edit a Picsart cartoon with utmost ease and within a quick time span:
User’s Guide to Edit Cartoon Pictures in Picsart
Step 1: Download the Picsart Application
Visit the official Picsart website to download the desktop version of the app in your Windows or MacOs supported PC.
Step 2: Make a Selection
Launch the app in your system to reach the Picsart welcome screen. Navigate to the bottom and tap the ‘+’ symbol. You are now required to choose a desired image to create the cartoon edit. You can either browse through your system gallery or search a specific one from the Picsart photo library in the ‘Search Bar’ at the top of the app screen.
Step 3: Let’s Get Editing!
When you have made your choice, navigate to the toolbar at the bottom of the app screen and click on the ‘Effects’ tab. Make a side scroll to choose a specific effect category, like that of ‘Artistic’ or ‘Magic’ to open a library of effects in the selected category.
As an example, selecting the ‘Cartoonizer’ option in the ‘Artistic’ effects category can add an immediate caricature feel to your selected real-time image. You can further include manual adjustments to get the perfect cartoon look by pressing and holding the ‘Cartoonizer’ option. There are a whole variety of magical effects, such as, Neo Pop, Soul, Badlands, Animation and Paw in the ‘Magic’ effects category, that are just perfect in giving your edit a fantasizing look with a Picsart cartoon background.
If you are looking for a quicker editing process, prefer adding cartoonized elements, like ‘Picsart Stickers’ to your image instead of going for a complete caricature edit. To do this, open the ‘Picsart Photo Editor’, navigates to the ‘Sticker’ symbol and click on it, followed by searching ‘Cartoon Sticker’. You can alternatively search a specific keyword with the ‘Cartoon’ descriptor, if you are clear on what you want to add.
You can further, resize your selected sticker with a ‘Two Finger Pinch’ or use the ‘Eraser’ tool to ward off any unwanted portions from the same. You are free to take as many repetitions of the process as you wish, till you get the perfect result for saving to your device and sharing on your social media handles.
Step 4: Time to Save and Share!
When you are satisfied with your work, navigate to the right hand corner and tap ‘Apply’ to finalize your changes, followed by clicking on the ‘Next’ button at the top right corner of the app screen to save and export your creation.
Part 2 How to Make a Cartoon on Your Phone
After a detailed analysis of the cartoon editing procedure in your desktops, let us see thro ugh the method of creating cartoonized images on your MacOs and Android smartphones on the following section:
Stepwise Procedure for Creating Cartoonized Images on Phone
Step 1: Download the Application
When going to use the Picsart editor application on your smartphone, you will first require a download of the same in your concerned device. You can do this by visiting the ‘Google PlayStore’ for an Android device or the ‘Apple App Store’ for MacOs smartphones.
Step 2: Choose a Real-time Image
After a successful launch of the ‘Picsart Editor’ application in your smartphone, reach to and click on the ‘+’ icon at the bottom of the app’s working interface. This needs to be followed by selecting any specific real-time image, either from your smartphone gallery or the Picsart photo library using the top ‘Search Bar’ of the interface, for creating a cartoonized edit.
Step 3: Editing Begins!
Once you are done with selecting the image, proceed to add effects to your selection by clicking the ‘Effects’ tab in the bottom toolbar, succeeded by picking a desired effect type through a right scroll. Tap on any category, such as, Magic, Artistic, etc, to open the effect library of the same.
For instance, you can click on the ‘Cartoonizer’ option within Artistic’ effects to supplement your uploaded real-time image with an instant cartoonized effect. You are also granted the liberty to make manual changes to set the caricature image effects as per your preferences, which you can do with a ‘Press and Hold’ of the ‘Cartoonizer’ tab. If you have a diversion towards complementing your cartoonized images with magical effects, choose from Animation, Neo Pop, Paw, Badlands, Paw, and other amazing options in the ‘Magic’ category.
Step 4: Save and Export
When you have completed the editing process and the changes satisfy you, go to the ‘Apply’ tab at the right side of the editor screen to see the changes appear in your edit. You can now navigate to the upper right corner of the app screen and click on ‘Next’ to save your work locally to your device, along with exporting the same across different media platforms.
Part 3 How to Cartoon Yourself on Picsart
Having learnt about the interesting ways to edit cartoon pictures and create cartoons on your smartphone, you might like to try hands on creating a cartoon portrait of yourself in the Picsart editor for a variety of reasons, like that of creating cartoon profile pics of yourself. Let us have a look of the procedure for the same using the Picsart Online Image Editor tool in the following section:
User’s Guide to Create a Cartoon Portrait With Picsart Online Photo Editor
Step 1: Launch the Application
In any of your favorite internet browsers, search for and open ‘Picsart Desktop Editor’. In the app’s working interface, tap ‘Upload’ or ‘New Project’ to choose an image from your device or the free to use Picsart image library respectively, for proceeding with the cartoonized transformations.
Step 2: Edit Your Selection
Tap on the ‘Effects’ tab from the editing toolbar at the top of your image and select a desired effect category to access the diversity of cartoonifying filters. It is recommended to select the ‘Magic’ category for the most splendid cartoon effects, such as, Paw, Badland, Animation, Soul and Neo Pop among many others.
You can even make manual adjustments in the brightness, color, saturation, burn and fade, etc., of the image by clicking on the ‘Adjust’ and ‘Blend’ options at the top of the image workspace.
Step 3: Download and Share Your Work
When you are done editing, navigate to and click on the ‘Share’ option at the upper right corner of the editor screen to download your cartoonized image.
****Wondershare Filmora Video Editor Cartoon Image Creator**
For Win 7 or later (64-bit)
For macOS 10.12 or later
Picsart is certainly a dependable solution to create caricature images, but if you are keen on looking for an alternative application to cater to the need, Introduced to the software market by Wondershare, the Filmora Cartoon Image Creator can be a convenient rescue. The app promises you of a high quality cartoonized edit with a plethora of editing effects to suit your most specific editing preferences.
● Ending Thoughts →
● Creating cartoonized edits from real time images is a fun and entertaining activity along with being the latest media trend.
● The Picsart editor application allows making caricature images from actual stills through desktop, smartphone and online compatible image editing program.
● Talking of suitable Picsart alternatives, you can rely on the Filmora Cartoon Image Creator application for high quality cartoonized image creation.
The Secret Sauce for Making GIF Instagram Story More Stunning
The Secret Sauce for Making GIF Instagram Story More Aesthetic
An easy yet powerful editor
Numerous effects to choose from
Detailed tutorials provided by the official channel
Adding own gift stickers to an Instagram story is in trend. An Instagram story can be made more creative with an Instagram gif story. Make a powerful impact with a gif on an Instagram story.
In this article
01 [How to Post Gifs to Instagram Story](#Part 1)
02 [8 Cute Instagram Stickers to Make Your Stories Aesthetic](#Part 2)
03 [How to Create Custom Gifs for Instagram Stories](#Part 3)
Part 1 How to Post Gifs to Instagram Story
Instagram stories are one of the best mediums to get connected to people at large. To be in trends and grab maximum people’s attention, it is very necessary to be updated with the new elements of Instagram stories. Gif Instagram story is a new way to increase the followers and be in trends. Adding these gifs in Instagram stories will improve your business by creating more engaging content for business promotion. Let’s see how this can be done?
● Go to the Instagram app installed on your phone. While adding a sticker to a picture of videos in Instagram stories, a GIF option will appear.
● When you tap it, you can find several attractive gifs in the library powered by GIPHY.
● Tap add sticker button that appears on the top of the Instagram stories. Tap the ‘GIF’ icon; the library of trending gifs will appear.
● Look for the gif you need to add to your story. You also have a search option to find your favorite or trending gif.
● After selecting the desired gif, you can add it to your photo or video after resizing it as you desired.
● After finishing, tap on the ‘Your story’ icon.
So, this way, it is easy to create gif story instagram with just a few simple steps.
Part 2 Cute Instagram Stickers to Make Your Stories Aesthetic
Cute Instagram stickers are the best way to lift the creativity of your Instagram stories. Adding stickers are an amazing idea to add design to Instagram stories. Stickers make stories more creative and interesting. Some of the amazing stickers to beautify Instagram stories are:
01BOHO
Boho stickers are good when you search for new stickers. They add fun to the story and give an amazing look for any lifestyle picture over an Instagram story. Boho white is also one type of sticker where are of them are white. Applying white boho to the picture background highlights the space and looks good. One has so many options from cute stars, hearts, lines, and flowers.
02FOOPKLO
For those who want words and saying gif on instagram story, there are some cute pink stickers available. These can be searched as FOOPKLO. Pink flowers, clusters, sayings, hearts, and some more cute stickers are there which can make Instagram stories lovelier.
03HALEYIVERS
For those who are active Instagram users and update their stories every day, the old stickers may not entertain them. So, for those, there are HALEYIVERS stickers. Good morning, days, sunshine, coffee, stars, and hearts add a great style to the Instagram stories. So, next time you need some punch over Instagram stories add some HALEYIVERS stickers.
04OHLALALITA
Instagram story gif is one of the great ways to even express your thoughts and moods in a summarized way. So, for those who wish to add a short story on Instagram, OHLALALITA has the best stickers. Loaded with so many cute words such as Tank you, Made with love, chill, glow, bye-bye, Wow, and many more, it makes any story in just simple words.
05SCARLETPIN
Instagram story gifs are a gift to those who are food lovers. Now with some new additions of gifs from GIPHY, they can post their food stories over their Instagram stories. The range of stickers that can help them is SCARLETPIN. These consist of some bright and colorful stickers of food. Red strawberries, tea, leaves, and oranges are great stuff to include in the morning Instagram stories.
06CURSIVE

Gif for Instagram story is also available in attractive writings. CURSIVE is the most attractive form of writing stories. Popular and cute sayings can be checked on CURSIVE and can be included in the stories. They can be searched and remembered easily. Cursive phrases can be added to the Instagram stories that look visually appealing to the viewers.
07EMOJIS
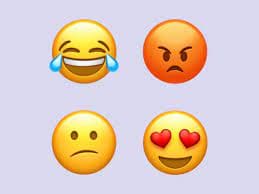
Emojis are the most lovable stickers available and can be part of any Instagram story. Typing on emojis can be done easily and they can be searched on the search bar. Perfect emojis gifs can be applied to an Instagram story that suits the situation. It can be moved or resized as per the requirement. These emojis gifs add a fun element to the Instagram stories.
08PAINT & BRUSH
Instagram gif story can be made creative with paint and brush. Earlier the users can add text with plain background only. But, paint and brush have enhanced it. Now users can add paint behind the text to make it more engaging. They are simple yet very attractive when added to the stories.
Part 3 How to Create Custom Gifs for Instagram Stories
Funny and expressive Instagram stories of your own always win the hearts of followers. Custom-made gif for Instagram is a great tool for business owners as it brings volume to their business by increasing leads. Custom-made gifs over Instagram stories are eye-catching and thus people get interested in the business. This helps in creating a good brand image for the business.
So, some of the ways to create fascinating custom Gifs Instagram stories for self and business are:
01Pin Instagram stories
Visiting a place and letting people know where you are through Instagram stories is always loved by all. Now, this can be done attractively by using the Pin feature. One can pin on the pictures and videos over the Instagram stories to a particular place. This is the most interesting element to make an Instagram story catchy. It can be done easily by tapping and holding it till it shows a pin at the little bar. This was one can pin gif at the desired location. This gif can pop up at a certain location only. It can be applied to videos one has made of a certain location by moving the gif to a place where one desires.
02Using Gif to give life to any image
To make gif Instagram story aesthetic, adding some moves with sparkles will be the right option. An Instagram user can give life to a picture by including animated elements. Gif adds a fun and surprising element to any Instagram story. When movement in any picture is added through gif, it catches the attention of the viewers and they follow it. A business can make its content engaging with gifs and can achieve its goal.
03Gifs Instagram story to catch viewer’s attention
Gif can be used effectively to create attractive Instagram stories. These gifs are good for the business to highlight their important elements. Gifs like the link in bio, sound on, and swipe up are created for a call to action from the viewers. Adding arrows and signals through gif in the Instagram stories direct the people to spend some minutes on the stories and find something new.
04Highlighting text with gif effects
A customized Instagram story can be made by highlighting text through adding gifs. Sparkle, stars, and highlights gifs can be searched easily and can be applied to any Instagram story. By adding a gif, the text looks stunning and grabs the attention of the viewers. GIPHY has several text-based gifs which can take an ordinary text over the story at a great level. It can be searched by mentioning related keywords.
05Adding gifs to customize selfies
Selfies to Instagram stories are very common. But they can be made even better with some amazing gifs from GIPHY. One can add sunglasses, hats, jewelry, and other fun props to the selfies. Filters can be added by creating their own story through a gif.
06Filmora V11 – A GIF resource
Wondershare Filmora Video Editor (The Filmora Meme maker) : Some many apps and websites offer beautiful gifs to beautify Instagram stories. One of the places where Instagram users can find a wide collection of attractive gifs is Filmora V11. It is a user-friendly tool that has media editing features. It can be used to add sound, light effects, and beautiful gifs to Instagram stories.
Wondershare Filmora - Best Video Editor for Mac/Windows
5,481,435 people have downloaded it.
Build unique custom animations without breaking a sweat.
Focus on creating epic stories and leave the details to Filmora’s auto features.
Start a creative adventure with drag & drop effects and endless possibilities.
Filmora simplifies advanced features to save you time and effort.
Filmora cuts out repetition so you can move on to your next creative breakthrough.
For creating gifs, Filmora V11 can be used and it can be made in a few simple steps. Filmora V11 app is required to be installed on the system and media files can be imported there. Files can be dragged for creating gifs. Filters, stickers, and other effects can be added. They can be further customized as per the requirement of the users. After adding background effects, music, and sound, the gif can be previewed also. The media can be saved as GIFs and can be easily exported also. To customize gifs, the Filmora Meme maker can be used. Captions can be added to GIFs and can be customized by using templates available at Filmora.
So, next time you need to know how to add your own gif to Instagram story, go to Filmora V11. This is one of the great platforms to create some amazing custom gifs to add to Instagram stories. If you want to surprise your viewers with some interesting gifs, try Filmora V11.
● Key Takeaways from This Episode →
● Instagram stories are the most effective way to mark a great impression on the viewers. It is also one of the effective tools to lift any business. Best results can be obtained when attractive and interesting gifs are added to Instagram stories.
● Instagram stories gifs are becoming trendy and there are so many cute and amazing gif stickers available to create Instagram stories. Some of the widely used gifs and stickers are Boho, FOOPKLO, HALEYIVERS, OHLALALITA, and EMOJIS. Instagram users can explore these cute and funny stickers and add them to beautify their Instagram stories.
● Customized gif has spiced up the Instagram stories and amazed the people. This feature helps a business to influence people towards their work and attract more people. The content becomes more engaging and interesting through a customized gif.
Adding own gift stickers to an Instagram story is in trend. An Instagram story can be made more creative with an Instagram gif story. Make a powerful impact with a gif on an Instagram story.
In this article
01 [How to Post Gifs to Instagram Story](#Part 1)
02 [8 Cute Instagram Stickers to Make Your Stories Aesthetic](#Part 2)
03 [How to Create Custom Gifs for Instagram Stories](#Part 3)
Part 1 How to Post Gifs to Instagram Story
Instagram stories are one of the best mediums to get connected to people at large. To be in trends and grab maximum people’s attention, it is very necessary to be updated with the new elements of Instagram stories. Gif Instagram story is a new way to increase the followers and be in trends. Adding these gifs in Instagram stories will improve your business by creating more engaging content for business promotion. Let’s see how this can be done?
● Go to the Instagram app installed on your phone. While adding a sticker to a picture of videos in Instagram stories, a GIF option will appear.
● When you tap it, you can find several attractive gifs in the library powered by GIPHY.
● Tap add sticker button that appears on the top of the Instagram stories. Tap the ‘GIF’ icon; the library of trending gifs will appear.
● Look for the gif you need to add to your story. You also have a search option to find your favorite or trending gif.
● After selecting the desired gif, you can add it to your photo or video after resizing it as you desired.
● After finishing, tap on the ‘Your story’ icon.
So, this way, it is easy to create gif story instagram with just a few simple steps.
Part 2 Cute Instagram Stickers to Make Your Stories Aesthetic
Cute Instagram stickers are the best way to lift the creativity of your Instagram stories. Adding stickers are an amazing idea to add design to Instagram stories. Stickers make stories more creative and interesting. Some of the amazing stickers to beautify Instagram stories are:
01BOHO
Boho stickers are good when you search for new stickers. They add fun to the story and give an amazing look for any lifestyle picture over an Instagram story. Boho white is also one type of sticker where are of them are white. Applying white boho to the picture background highlights the space and looks good. One has so many options from cute stars, hearts, lines, and flowers.
02FOOPKLO
For those who want words and saying gif on instagram story, there are some cute pink stickers available. These can be searched as FOOPKLO. Pink flowers, clusters, sayings, hearts, and some more cute stickers are there which can make Instagram stories lovelier.
03HALEYIVERS
For those who are active Instagram users and update their stories every day, the old stickers may not entertain them. So, for those, there are HALEYIVERS stickers. Good morning, days, sunshine, coffee, stars, and hearts add a great style to the Instagram stories. So, next time you need some punch over Instagram stories add some HALEYIVERS stickers.
04OHLALALITA
Instagram story gif is one of the great ways to even express your thoughts and moods in a summarized way. So, for those who wish to add a short story on Instagram, OHLALALITA has the best stickers. Loaded with so many cute words such as Tank you, Made with love, chill, glow, bye-bye, Wow, and many more, it makes any story in just simple words.
05SCARLETPIN
Instagram story gifs are a gift to those who are food lovers. Now with some new additions of gifs from GIPHY, they can post their food stories over their Instagram stories. The range of stickers that can help them is SCARLETPIN. These consist of some bright and colorful stickers of food. Red strawberries, tea, leaves, and oranges are great stuff to include in the morning Instagram stories.
06CURSIVE
Gif for Instagram story is also available in attractive writings. CURSIVE is the most attractive form of writing stories. Popular and cute sayings can be checked on CURSIVE and can be included in the stories. They can be searched and remembered easily. Cursive phrases can be added to the Instagram stories that look visually appealing to the viewers.
07EMOJIS
Emojis are the most lovable stickers available and can be part of any Instagram story. Typing on emojis can be done easily and they can be searched on the search bar. Perfect emojis gifs can be applied to an Instagram story that suits the situation. It can be moved or resized as per the requirement. These emojis gifs add a fun element to the Instagram stories.
08PAINT & BRUSH
Instagram gif story can be made creative with paint and brush. Earlier the users can add text with plain background only. But, paint and brush have enhanced it. Now users can add paint behind the text to make it more engaging. They are simple yet very attractive when added to the stories.
Part 3 How to Create Custom Gifs for Instagram Stories
Funny and expressive Instagram stories of your own always win the hearts of followers. Custom-made gif for Instagram is a great tool for business owners as it brings volume to their business by increasing leads. Custom-made gifs over Instagram stories are eye-catching and thus people get interested in the business. This helps in creating a good brand image for the business.
So, some of the ways to create fascinating custom Gifs Instagram stories for self and business are:
01Pin Instagram stories
Visiting a place and letting people know where you are through Instagram stories is always loved by all. Now, this can be done attractively by using the Pin feature. One can pin on the pictures and videos over the Instagram stories to a particular place. This is the most interesting element to make an Instagram story catchy. It can be done easily by tapping and holding it till it shows a pin at the little bar. This was one can pin gif at the desired location. This gif can pop up at a certain location only. It can be applied to videos one has made of a certain location by moving the gif to a place where one desires.
02Using Gif to give life to any image
To make gif Instagram story aesthetic, adding some moves with sparkles will be the right option. An Instagram user can give life to a picture by including animated elements. Gif adds a fun and surprising element to any Instagram story. When movement in any picture is added through gif, it catches the attention of the viewers and they follow it. A business can make its content engaging with gifs and can achieve its goal.
03Gifs Instagram story to catch viewer’s attention
Gif can be used effectively to create attractive Instagram stories. These gifs are good for the business to highlight their important elements. Gifs like the link in bio, sound on, and swipe up are created for a call to action from the viewers. Adding arrows and signals through gif in the Instagram stories direct the people to spend some minutes on the stories and find something new.
04Highlighting text with gif effects
A customized Instagram story can be made by highlighting text through adding gifs. Sparkle, stars, and highlights gifs can be searched easily and can be applied to any Instagram story. By adding a gif, the text looks stunning and grabs the attention of the viewers. GIPHY has several text-based gifs which can take an ordinary text over the story at a great level. It can be searched by mentioning related keywords.
05Adding gifs to customize selfies
Selfies to Instagram stories are very common. But they can be made even better with some amazing gifs from GIPHY. One can add sunglasses, hats, jewelry, and other fun props to the selfies. Filters can be added by creating their own story through a gif.
06Filmora V11 – A GIF resource
Wondershare Filmora Video Editor (The Filmora Meme maker) : Some many apps and websites offer beautiful gifs to beautify Instagram stories. One of the places where Instagram users can find a wide collection of attractive gifs is Filmora V11. It is a user-friendly tool that has media editing features. It can be used to add sound, light effects, and beautiful gifs to Instagram stories.
Wondershare Filmora - Best Video Editor for Mac/Windows
5,481,435 people have downloaded it.
Build unique custom animations without breaking a sweat.
Focus on creating epic stories and leave the details to Filmora’s auto features.
Start a creative adventure with drag & drop effects and endless possibilities.
Filmora simplifies advanced features to save you time and effort.
Filmora cuts out repetition so you can move on to your next creative breakthrough.
For creating gifs, Filmora V11 can be used and it can be made in a few simple steps. Filmora V11 app is required to be installed on the system and media files can be imported there. Files can be dragged for creating gifs. Filters, stickers, and other effects can be added. They can be further customized as per the requirement of the users. After adding background effects, music, and sound, the gif can be previewed also. The media can be saved as GIFs and can be easily exported also. To customize gifs, the Filmora Meme maker can be used. Captions can be added to GIFs and can be customized by using templates available at Filmora.
So, next time you need to know how to add your own gif to Instagram story, go to Filmora V11. This is one of the great platforms to create some amazing custom gifs to add to Instagram stories. If you want to surprise your viewers with some interesting gifs, try Filmora V11.
● Key Takeaways from This Episode →
● Instagram stories are the most effective way to mark a great impression on the viewers. It is also one of the effective tools to lift any business. Best results can be obtained when attractive and interesting gifs are added to Instagram stories.
● Instagram stories gifs are becoming trendy and there are so many cute and amazing gif stickers available to create Instagram stories. Some of the widely used gifs and stickers are Boho, FOOPKLO, HALEYIVERS, OHLALALITA, and EMOJIS. Instagram users can explore these cute and funny stickers and add them to beautify their Instagram stories.
● Customized gif has spiced up the Instagram stories and amazed the people. This feature helps a business to influence people towards their work and attract more people. The content becomes more engaging and interesting through a customized gif.
How to Convert Video to GIF Fast & Easy
How to Convert Video to GIF (Fast & Easy!)
An easy yet powerful editor
Numerous effects to choose from
Detailed tutorials provided by the official channel
The use of GIFs has increased over time and not only on social media platforms, these interesting animations are used for various purposes like marketing, blogging, WhatsApp chats, and much more.

Though there are several online sites from where you can download the desired GIF, there is also an option to create a customized one using videos of images. So, if you too are keen to create a customized GIF, the article will look after your concerns. Learn how to make video to GIF Photoshop and using other tools. Keep reading!!
In this article
01 [Simple Alternative to Photoshop for creating a GIF from Videos- Wondershare Filmora](#Part 1)
02 [Simple Alternative to Photoshop for creating a GIF from Videos- Wondershare Filmora](#Part 2)
Part 1 Creating GIFs from videos using Photoshop
When it comes to any type of video editing task, the first software that comes to mind is Photoshop. Developed by Adobe, this is an excellent editing tool available for Windows and Mac. The software comes loaded with a wide range of functions that help you create desired graphics including GIFs.
Though the interface and the use of the software are a little complicated, once you get a hang of it, professional-looking files can be created in no time.
Steps to convert video to GIF Photoshop
Step 1. Launch the Photoshop software on your system and select File > Import. Next tap on the “Video Frames to Layers” option. Choose the desired video (compatible format) and tap on Load.
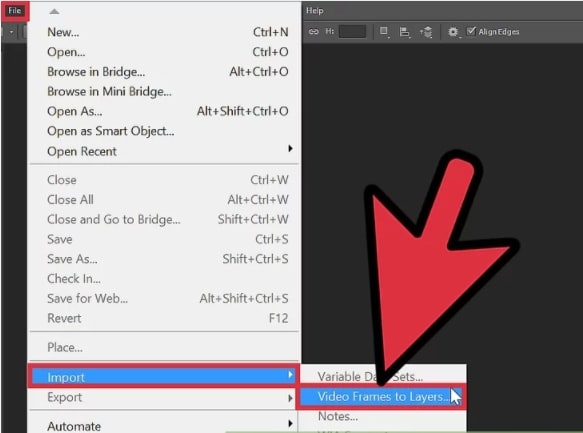
Step 2. Next, you need to select the Range to Import. For a few frames, choose the “Selected Frames Only” option.
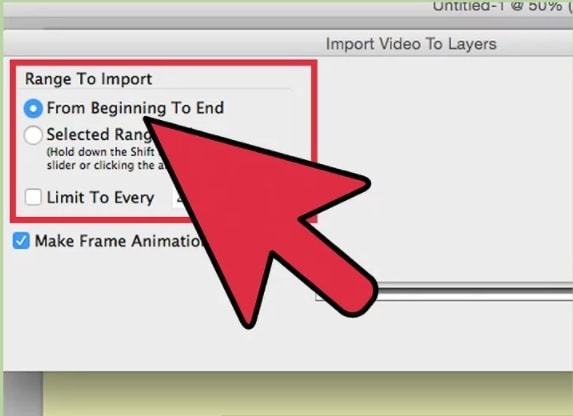
Step 3. You now need to cut the frames that are not needed by going to Window and then selecting the Animation. If needed, new frames can also be added here.
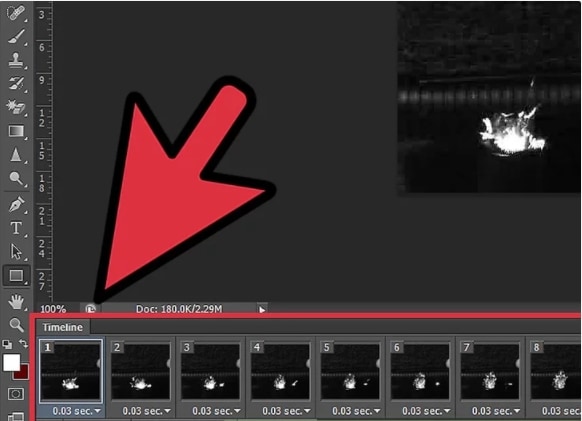
Step 4. To make your animation loop forever, select Forever from the bottom left side of the animation frames.
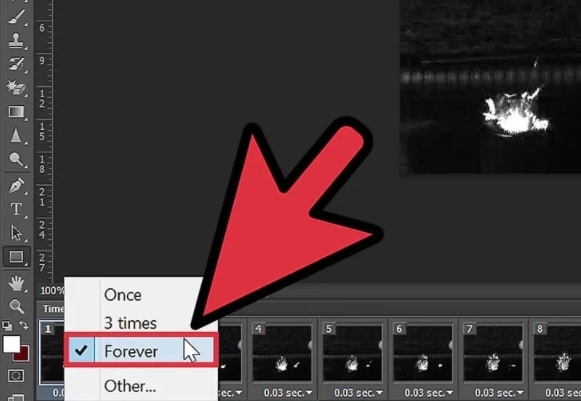
Step 5. Next, at the upper-left corner, go to the Rectangle marquee tool and choose the section you wish to focus on
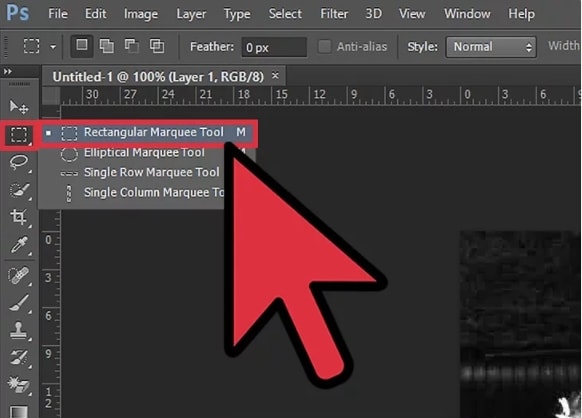
Step 6. Select the image size of the video that will make your GIF look appealing.
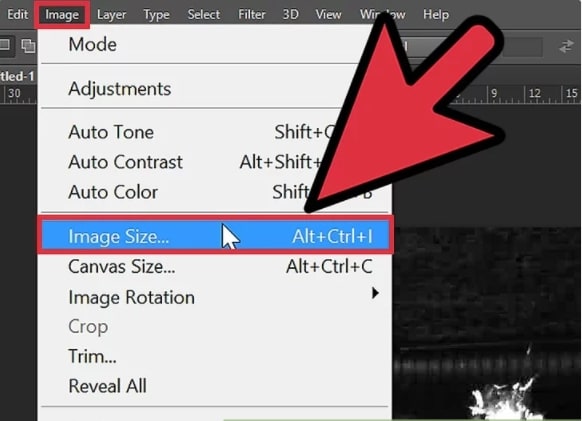
Step 7. Next, go to File > Save for Web & Devices for optimizing the image.
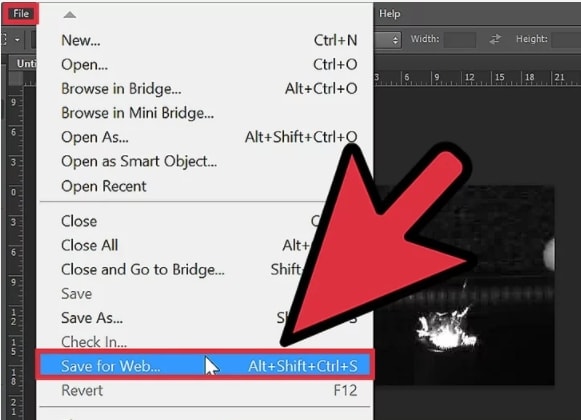
Step 8. Now select GIF at the preset section and check if the animation created is right by clicking on the Preview button.
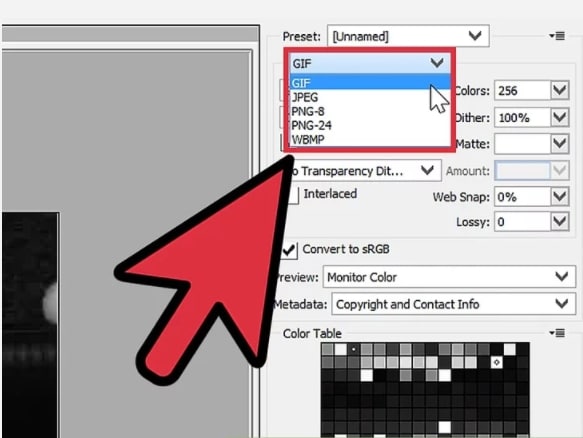
Step 9. Finally, when all is done, click on the Save button and give a desired name to the file.
With the above steps you can make gif from video Photoshop.
Part 2 Simple Alternative to Photoshop for creating a GIF from Videos- Wondershare Filmora
The learning curve of Photoshop is quite steep and to create a GIF from videos using the tool is a complicated process involving multiple steps and especially if you are a beginner and have no prior experience of working with Photoshop software.
So, if you are looking for an alternative that is simple and fast, we suggest Wondershare Filmora Video Editor as the best option.
Wondershare Filmora
Get started easily with Filmora’s powerful performance, intuitive interface, and countless effects!
Try It Free Try It Free Try It Free Learn More >
Using the software videos and images in all key formats can be added to the interface for creating GIF animations. An array of editing options is available like cropping, splitting, rotating, cutting, and more. You can even add text, sound, effects, and other elements for further customization.
In a few simple steps, the software will let you create GIFs of high quality that can be used on several social media and other online platforms.
Steps to create GIF using Wondershare Filmora
Step 1. Download, install, and launch the Wondershare Filmora software on your system and then browse to import the media files from which you want to create a GIF.
Step 2. After the files are added to the interface, move them to the timeline at the bottom by dragging and dropping.
Step 3. Using the editing options you can trim, crop, rotate, and perform other functions.
Step 4. You can even add text, effects, and other elements for further customization.
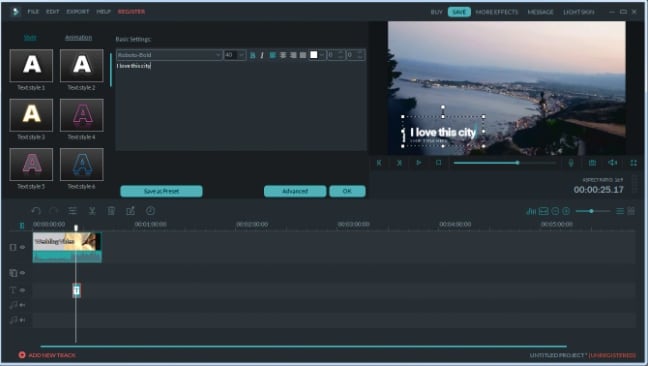
Step 5. Next, choose to save the created file as GIF under the Local tab. Choose the file name and the location, and then finally tap on the EXPORT button to start the processing.
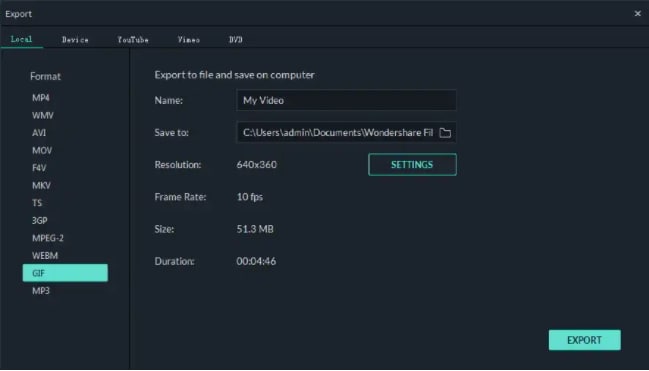
● Key Takeaways from This Episode →
●GIFs are the latest trend that is used all over social media and other online sites.
●Several software and tools can help in creating the desired GIF.
●Adobe Photoshop is one of the widely used software that can create a GIF using videos as well as images, but the process is quite complicated.
●For a simpler and quicker process of creating a GIF, we suggest using Wondershare Filmora.
The use of GIFs has increased over time and not only on social media platforms, these interesting animations are used for various purposes like marketing, blogging, WhatsApp chats, and much more.
Though there are several online sites from where you can download the desired GIF, there is also an option to create a customized one using videos of images. So, if you too are keen to create a customized GIF, the article will look after your concerns. Learn how to make video to GIF Photoshop and using other tools. Keep reading!!
In this article
01 [Simple Alternative to Photoshop for creating a GIF from Videos- Wondershare Filmora](#Part 1)
02 [Simple Alternative to Photoshop for creating a GIF from Videos- Wondershare Filmora](#Part 2)
Part 1 Creating GIFs from videos using Photoshop
When it comes to any type of video editing task, the first software that comes to mind is Photoshop. Developed by Adobe, this is an excellent editing tool available for Windows and Mac. The software comes loaded with a wide range of functions that help you create desired graphics including GIFs.
Though the interface and the use of the software are a little complicated, once you get a hang of it, professional-looking files can be created in no time.
Steps to convert video to GIF Photoshop
Step 1. Launch the Photoshop software on your system and select File > Import. Next tap on the “Video Frames to Layers” option. Choose the desired video (compatible format) and tap on Load.
Step 2. Next, you need to select the Range to Import. For a few frames, choose the “Selected Frames Only” option.
Step 3. You now need to cut the frames that are not needed by going to Window and then selecting the Animation. If needed, new frames can also be added here.
Step 4. To make your animation loop forever, select Forever from the bottom left side of the animation frames.
Step 5. Next, at the upper-left corner, go to the Rectangle marquee tool and choose the section you wish to focus on
Step 6. Select the image size of the video that will make your GIF look appealing.
Step 7. Next, go to File > Save for Web & Devices for optimizing the image.
Step 8. Now select GIF at the preset section and check if the animation created is right by clicking on the Preview button.
Step 9. Finally, when all is done, click on the Save button and give a desired name to the file.
With the above steps you can make gif from video Photoshop.
Part 2 Simple Alternative to Photoshop for creating a GIF from Videos- Wondershare Filmora
The learning curve of Photoshop is quite steep and to create a GIF from videos using the tool is a complicated process involving multiple steps and especially if you are a beginner and have no prior experience of working with Photoshop software.
So, if you are looking for an alternative that is simple and fast, we suggest Wondershare Filmora Video Editor as the best option.
Wondershare Filmora
Get started easily with Filmora’s powerful performance, intuitive interface, and countless effects!
Try It Free Try It Free Try It Free Learn More >
Using the software videos and images in all key formats can be added to the interface for creating GIF animations. An array of editing options is available like cropping, splitting, rotating, cutting, and more. You can even add text, sound, effects, and other elements for further customization.
In a few simple steps, the software will let you create GIFs of high quality that can be used on several social media and other online platforms.
Steps to create GIF using Wondershare Filmora
Step 1. Download, install, and launch the Wondershare Filmora software on your system and then browse to import the media files from which you want to create a GIF.
Step 2. After the files are added to the interface, move them to the timeline at the bottom by dragging and dropping.
Step 3. Using the editing options you can trim, crop, rotate, and perform other functions.
Step 4. You can even add text, effects, and other elements for further customization.
Step 5. Next, choose to save the created file as GIF under the Local tab. Choose the file name and the location, and then finally tap on the EXPORT button to start the processing.
● Key Takeaways from This Episode →
●GIFs are the latest trend that is used all over social media and other online sites.
●Several software and tools can help in creating the desired GIF.
●Adobe Photoshop is one of the widely used software that can create a GIF using videos as well as images, but the process is quite complicated.
●For a simpler and quicker process of creating a GIF, we suggest using Wondershare Filmora.
Best 10 Animated Templates in Canva
Versatile Video Editor - Wondershare Filmora
An easy yet powerful editor
Numerous effects to choose from
Detailed tutorials provided by the official channel
Canva is one of the premier graphic design platforms available to users. They can create Instagram posts, make YouTube thumbnails, infographics, invitations, business cards, and more.
The platform is beginner-friendly and extremely customizable, ideal for everyday use. More brands and companies use data visualized through graphic design, creating greater understanding and impact on users.
With Canva animated templates, you can show more with less work. This has wide-ranging effects from diversifying education to elaborating business reports and lucrative marketing opportunities.
In the article below, take a look at ten of the best Canva animated templates.
In this article
01 [Can You Animate in Canva?](#Part 1)
02 [Where Can I Find Animated Elements In Canva?](#Part 2)
03 [How Do I Get More Animations in Canva? ](#Part 3)
Part 1 Can You Animate in Canva?
Animation is an evergreen storytelling style as it’s versatile enough to be used in various types of content. Animations can last from a few seconds to a few minutes. According to HubSpot, A video-based email increases click rates by 300%.
1. Customization
Canva can be used to create customized animation. This can be done by creating an image and animating each element. Users can choose to create a textured background and edit images uploaded to Canva.
Users can also overlay audio to enhance the quality of the animation. The text can be refined to suit the style of the animation.
2. Automation
Canva has also launched a comprehensive suite of features under the “Animation” button. This automates the process and allows static images to be converted to animations. The animations range from simple motion to complex creations.
3. Movement
With the animation button, users can choose the type of animation they would like to use. The choices range from subtle animations like ‘Fade’, ‘Drift’ to bursts of motion like ‘Tumble’ and ‘Block’ and everything in-between.
4. Overview
Canva helps create high-quality animations at affordable prices. Creating an animation has never been easier with ready-made design templates by experienced designers.
Let’s look at how to animate the various elements of an image and the various animated templates in Canva.
Part 2 Where Can I Find Animated Elements In Canva?
With Canva’s many layouts and features to choose from, it might be difficult to figure out where to start. So, let’s start with the basics.
You have four basic facets to consider when choosing to animate. They are text, audio, image, and video. Every animation is crafted from varied combinations of these four basic steps.
One other consideration is the style of presentation you’d like to choose. Is it in portrait mode or landscape mode?
Do you want a previously crafted presentation ready to go? If so, Canva offers two options.
Step1 Select the “Create a Design” option on Canva
This allows users to create content in any format ranging from Instagram videos and reels, YouTube thumbnails and Facebook covers, logos, and more.
Step2 You can edit images and add the necessary text to your content. Bolster your content with video clips and audio to create the primary image you want
Edit the content to your preferences.
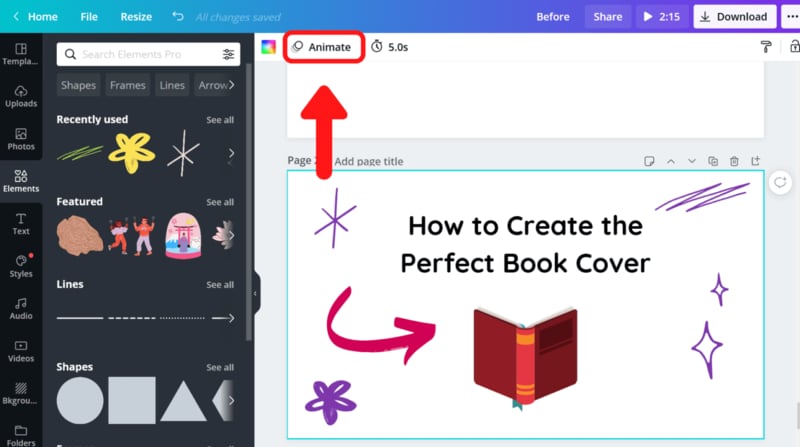
Step3 You are now ready to animate the construct
Select the animate button and look for “Page Animations” to animate the entire presentation. You can choose to animate any element on the page. You can also add borders or other design elements and animate them.
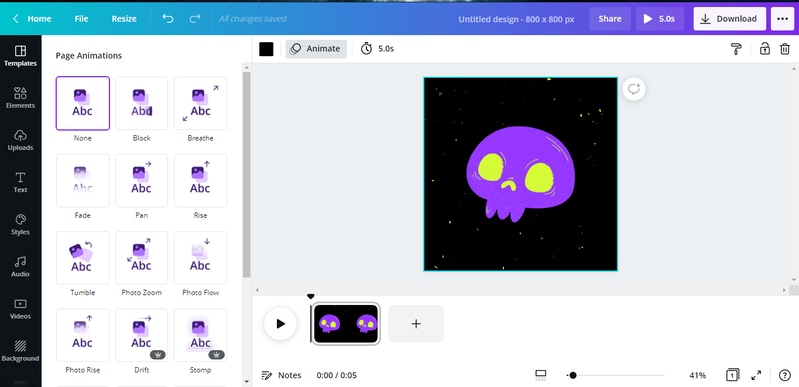
Step4 Here, you can choose from any myriad options for animation styles
You can also adjust the length of each animation with the stopwatch icon next to the animate button.
You can change the length of your video if you have one. You can also modify the audio clip to suit each animation.

Step5 Once you’ve animated the features according to your preference, you can now save the file in pdf, jpg, png or gif, or mp4 formats
Please note that all these options are for Canva Pro. Canva with the free subscription may allow limited format downloads. This is why you should consider tools like Wondershare Filmore for video animation.
Wondershare Filmora Pro for Video Animation
With Wondershare Filmora Pro, animation has never been easier. With its innovative keyframe technology, it makes animations easy to use. Animations can be easily created and, with the help of Filmora’s automation tool, fine-tuned for a professional finish.
Filmora provides a pioneering opportunity to create a visual masterpiece with a beginner’s experience with a simple functional drag and drop. With motion tracking, the ability to create split-screen, green screen, and blending capabilities, the Filmora Pro experience is unparalleled.
Part 3 How Do I Get More Animations in Canva?
Canva has filters allowing users to sort presentations by style, like “Animated,” “Minimalist,” “Corporate” and more. Canva has a series of ready-made animated templates available for use. Let’s explore a few of them.
It also allows sorting by themes like “Pink” or “Business” or “Background” depending on your needs. Users can also choose to sort out presentations according to the presentation’s color scheme.
Pink and Violet Simple Hot Neon Gradients Creative Presentation
With a gradient background that’s a popular website trend, this presentation boasts twenty-six slides with a signature animation you can tweak to suit your needs.
Blue Timeline Cycle Presentation
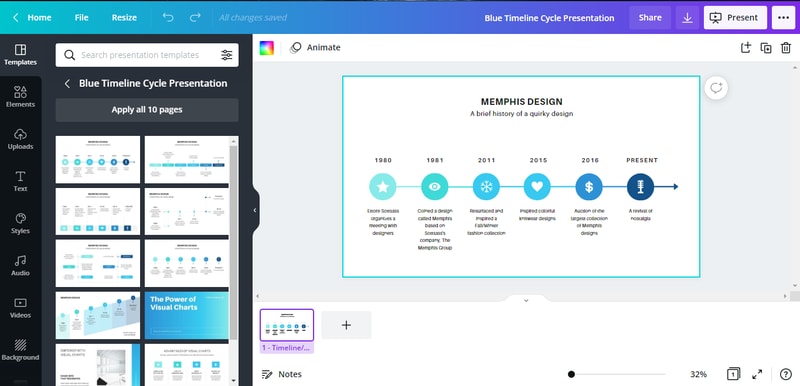
This presentation is useful for compact information with a clean and modern outlook. With ten power-packed slides, this animated template allows researchers and businesses to use data visualization to convey ideas.
Blue and White Illustrated Medical Healthcare in the 21st Century Education Presentation
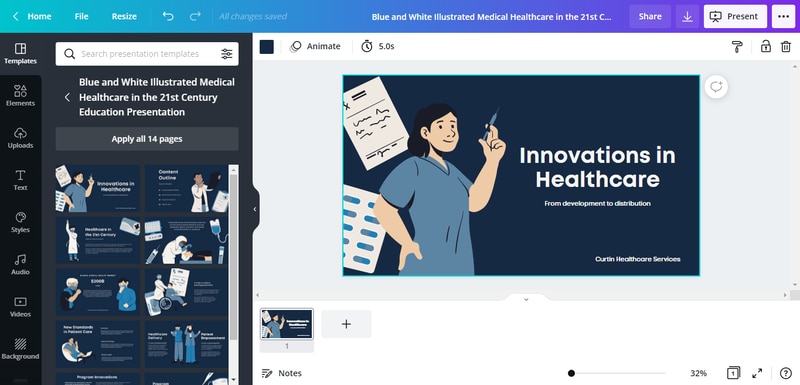
With fourteen slides, this animation perfectly creates a visual treat for viewers. You can also convey vital information in bite-sized morsels. You can illustrate your point with lively animation designs while captivating your audience.
Neon Cyber Monday Sale Animated Video Facebook Ad Post
A fresh offering from Canva is this neon Facebook Ad Post with a captivating starry background and neon text elements.
You can customize this video to edit the text, the color palette, the duration of the video, and more.
Yellow Happy Wildlife Conservation Day Animated Video
For a child-friendly video with animation, head on over to this presentation. This animation allows children to marvel at the motion and pay rapt attention when listening to essential issues with soothing attention-grabbing colors.
Green and Orange Business Hip Tech Weekly Team Updates Presentation
As the perfect complement of colors, this presentation is suited for everything from a YouTube thumbnail to a business meeting. With nineteen slides, the variations of animations found are endless.
Brown Cute Start Healthy Lifestyle Explainer Video Animation
These cute animations make it straightforward to craft an explainer video around fitness. You can also use this for an Instagram post or story reel.
With seven slides, you can craft a compelling explainer video that keeps your viewers glued to the screen.
Sweet Fruit Candy Animated Group Project Presentation
This presentation is perfect for group presentations. It’s an ideal template to break down large amounts of information in a versatile and easily created presentation.
With over thirteen slides, it’s a perfect slide set to breathe new life into your homework.
Pink and Cream Minimalist Food Animated Presentation

For a simple personalized food-related presentation, this slide set has you covered. With gorgeous visuals and space to write recipes, the history.
This presentation, with fourteen slides, remains a favorite among culinary enthusiasts.
Marketing Agency Animated Facebook Cover
Motion is identified as a compelling website design trend for 2022. Colorful, animated art in vibrant color themes can win more visitors to your page and attention in a saturated market.
Use this theme to illustrate a gorgeous campaign ad for your social media feed.
Wondershare Filmora
Get started easily with Filmora’s powerful performance, intuitive interface, and countless effects!
Try It Free Try It Free Try It Free Learn More >
AI Portrait – The best feature of Wondershare Filmora for gameplay editing
The AI Portrait is a new add-on in Wondershare Filmora. It can easily remove video backgrounds without using a green screen or chroma key, allowing you to add borders, glitch effects, pixelated, noise, or segmentation video effects.

Final Words
Canva is a great tool for animated videos and you can use animated Canva templates to create a unique animation in images. It is a great tool and can be used easily to create any length of animated video. But if you are looking for an advanced and easy-to-use video animation tool, then give a try to Wondershare Filmora.
Canva is one of the premier graphic design platforms available to users. They can create Instagram posts, make YouTube thumbnails, infographics, invitations, business cards, and more.
The platform is beginner-friendly and extremely customizable, ideal for everyday use. More brands and companies use data visualized through graphic design, creating greater understanding and impact on users.
With Canva animated templates, you can show more with less work. This has wide-ranging effects from diversifying education to elaborating business reports and lucrative marketing opportunities.
In the article below, take a look at ten of the best Canva animated templates.
In this article
01 [Can You Animate in Canva?](#Part 1)
02 [Where Can I Find Animated Elements In Canva?](#Part 2)
03 [How Do I Get More Animations in Canva? ](#Part 3)
Part 1 Can You Animate in Canva?
Animation is an evergreen storytelling style as it’s versatile enough to be used in various types of content. Animations can last from a few seconds to a few minutes. According to HubSpot, A video-based email increases click rates by 300%.
1. Customization
Canva can be used to create customized animation. This can be done by creating an image and animating each element. Users can choose to create a textured background and edit images uploaded to Canva.
Users can also overlay audio to enhance the quality of the animation. The text can be refined to suit the style of the animation.
2. Automation
Canva has also launched a comprehensive suite of features under the “Animation” button. This automates the process and allows static images to be converted to animations. The animations range from simple motion to complex creations.
3. Movement
With the animation button, users can choose the type of animation they would like to use. The choices range from subtle animations like ‘Fade’, ‘Drift’ to bursts of motion like ‘Tumble’ and ‘Block’ and everything in-between.
4. Overview
Canva helps create high-quality animations at affordable prices. Creating an animation has never been easier with ready-made design templates by experienced designers.
Let’s look at how to animate the various elements of an image and the various animated templates in Canva.
Part 2 Where Can I Find Animated Elements In Canva?
With Canva’s many layouts and features to choose from, it might be difficult to figure out where to start. So, let’s start with the basics.
You have four basic facets to consider when choosing to animate. They are text, audio, image, and video. Every animation is crafted from varied combinations of these four basic steps.
One other consideration is the style of presentation you’d like to choose. Is it in portrait mode or landscape mode?
Do you want a previously crafted presentation ready to go? If so, Canva offers two options.
Step1 Select the “Create a Design” option on Canva
This allows users to create content in any format ranging from Instagram videos and reels, YouTube thumbnails and Facebook covers, logos, and more.
Step2 You can edit images and add the necessary text to your content. Bolster your content with video clips and audio to create the primary image you want
Edit the content to your preferences.
Step3 You are now ready to animate the construct
Select the animate button and look for “Page Animations” to animate the entire presentation. You can choose to animate any element on the page. You can also add borders or other design elements and animate them.
Step4 Here, you can choose from any myriad options for animation styles
You can also adjust the length of each animation with the stopwatch icon next to the animate button.
You can change the length of your video if you have one. You can also modify the audio clip to suit each animation.
Step5 Once you’ve animated the features according to your preference, you can now save the file in pdf, jpg, png or gif, or mp4 formats
Please note that all these options are for Canva Pro. Canva with the free subscription may allow limited format downloads. This is why you should consider tools like Wondershare Filmore for video animation.
Wondershare Filmora Pro for Video Animation
With Wondershare Filmora Pro, animation has never been easier. With its innovative keyframe technology, it makes animations easy to use. Animations can be easily created and, with the help of Filmora’s automation tool, fine-tuned for a professional finish.
Filmora provides a pioneering opportunity to create a visual masterpiece with a beginner’s experience with a simple functional drag and drop. With motion tracking, the ability to create split-screen, green screen, and blending capabilities, the Filmora Pro experience is unparalleled.
Part 3 How Do I Get More Animations in Canva?
Canva has filters allowing users to sort presentations by style, like “Animated,” “Minimalist,” “Corporate” and more. Canva has a series of ready-made animated templates available for use. Let’s explore a few of them.
It also allows sorting by themes like “Pink” or “Business” or “Background” depending on your needs. Users can also choose to sort out presentations according to the presentation’s color scheme.
Pink and Violet Simple Hot Neon Gradients Creative Presentation
With a gradient background that’s a popular website trend, this presentation boasts twenty-six slides with a signature animation you can tweak to suit your needs.
Blue Timeline Cycle Presentation
This presentation is useful for compact information with a clean and modern outlook. With ten power-packed slides, this animated template allows researchers and businesses to use data visualization to convey ideas.
Blue and White Illustrated Medical Healthcare in the 21st Century Education Presentation
With fourteen slides, this animation perfectly creates a visual treat for viewers. You can also convey vital information in bite-sized morsels. You can illustrate your point with lively animation designs while captivating your audience.
Neon Cyber Monday Sale Animated Video Facebook Ad Post
A fresh offering from Canva is this neon Facebook Ad Post with a captivating starry background and neon text elements.
You can customize this video to edit the text, the color palette, the duration of the video, and more.
Yellow Happy Wildlife Conservation Day Animated Video
For a child-friendly video with animation, head on over to this presentation. This animation allows children to marvel at the motion and pay rapt attention when listening to essential issues with soothing attention-grabbing colors.
Green and Orange Business Hip Tech Weekly Team Updates Presentation
As the perfect complement of colors, this presentation is suited for everything from a YouTube thumbnail to a business meeting. With nineteen slides, the variations of animations found are endless.
Brown Cute Start Healthy Lifestyle Explainer Video Animation
These cute animations make it straightforward to craft an explainer video around fitness. You can also use this for an Instagram post or story reel.
With seven slides, you can craft a compelling explainer video that keeps your viewers glued to the screen.
Sweet Fruit Candy Animated Group Project Presentation
This presentation is perfect for group presentations. It’s an ideal template to break down large amounts of information in a versatile and easily created presentation.
With over thirteen slides, it’s a perfect slide set to breathe new life into your homework.
Pink and Cream Minimalist Food Animated Presentation
For a simple personalized food-related presentation, this slide set has you covered. With gorgeous visuals and space to write recipes, the history.
This presentation, with fourteen slides, remains a favorite among culinary enthusiasts.
Marketing Agency Animated Facebook Cover
Motion is identified as a compelling website design trend for 2022. Colorful, animated art in vibrant color themes can win more visitors to your page and attention in a saturated market.
Use this theme to illustrate a gorgeous campaign ad for your social media feed.
Wondershare Filmora
Get started easily with Filmora’s powerful performance, intuitive interface, and countless effects!
Try It Free Try It Free Try It Free Learn More >
AI Portrait – The best feature of Wondershare Filmora for gameplay editing
The AI Portrait is a new add-on in Wondershare Filmora. It can easily remove video backgrounds without using a green screen or chroma key, allowing you to add borders, glitch effects, pixelated, noise, or segmentation video effects.
Final Words
Canva is a great tool for animated videos and you can use animated Canva templates to create a unique animation in images. It is a great tool and can be used easily to create any length of animated video. But if you are looking for an advanced and easy-to-use video animation tool, then give a try to Wondershare Filmora.
Also read:
- Updated 5 Websites with Animated Logos That Catch Your Eyes for 2024
- Updated Secret Source to Make a Stop Motion Puppet
- New 2024 Approved 10 Classical Animated Cartoon Types With Examples
- 2024 Approved Top 10 Animated Photo Collage Apps You Should Know
- Updated Is Blender 2D Animation As Awesome As 3D for 2024
- Updated Learn How to Create Adobe 3D Animation
- Updated 2024 Approved 5 Recommended Websites for Text GIF Maker
- New In 2024, Top 10 Free Online Animated Logo Makers Everyone Should Know
- Updated Handy Tips From Adobe Animate Rigging Tutorial for All Learners for 2024
- Updated Ways to Master to Find 10 Best Free Animated Text Generator for 2024
- New Amazing Ways to Find Suitable Animated Graphic Maker
- 2024 Approved Techniques on How to Make After Effects 2D Animation
- In 2024, Ways You Can Master to Find 10 Best Free Animated Text Generator
- New In 2024, 10 Cartoon Character Makers to Create Animated Characters
- New 2024 Approved Popular Female & Male Disney Cartoon Characters To Empower You
- Updated In 2024, Best Websites to Download Animated GIFs for Free
- New How to Create Your Own Avatar Free for 2024
- New 10 Photoshop Cartoon Effects For Creatives
- Updated In 2024, Top 3 Ways to Create Gif with Great 3D Gif Maker
- New In 2024, 12+ Stunning Instagram GIF Stickers and How to Make & Find
- 15 Best Collage Makers to Create Aesthetic Collages
- Updated Looking for Love Animated GIFs? Here Are 5 Free Sources For You for 2024
- New In 2024, 15 Best Sites to Watch Cartoons Online Free And So Can You
- Animated Business Logos and Tools to Create for 2024
- In 2024, Popular Female & Male Disney Cartoon Characters
- New 2024 Approved 10 Must Watch Netflix Cartoon Series
- Ways to Get the Most up to Date Cartoon Character Design Tips for 2024
- Updated 2024 Approved The Coolest Anime Characters Ever| List of Top Favorites
- 2D Character Animation Everything You Should Know About It
- New In 2024, Top 12 Video to GIF Converters High Quality to Check Out
- In 2024, 21 Top Free Anime Websites to Watch Anime Online-Anime
- In 2024, Best 15 Anime Shows That Are Great to Binge Watch
- Updated What Is Still Motion Animation for 2024
- Undelete lost messages from Oppo Find X7 Ultra
- How To Restore Missing Photos Files from Infinix Smart 8 HD.
- Top 4 Android System Repair Software for Samsung Galaxy S23 Tactical Edition Bricked Devices | Dr.fone
- How to Fix Life360 Shows Wrong Location On Vivo Y100? | Dr.fone
- Proven Ways in How To Hide Location on Life360 For Vivo Y78t | Dr.fone
- How Can We Bypass Xiaomi Mix Fold 3 FRP?
- In 2024, How to Track Oppo Find X7 Ultra Location without Installing Software? | Dr.fone
- In 2024, 6 Proven Ways to Unlock Poco X6 Pro Phone When You Forget the Password
- Solved Warning Camera Failed on Samsung Galaxy S23 FE | Dr.fone
- Prevent Cross-Site Tracking on Lava Storm 5G and Browser | Dr.fone
- Can I view AVCHD .mts files on HTC ?
- How to Transfer Data After Switching From Itel A70 to Latest Samsung | Dr.fone
- In 2024, For People Wanting to Mock GPS on Samsung Galaxy F15 5G Devices | Dr.fone
- Spoofing Life360 How to Do it on Google Pixel 8 Pro? | Dr.fone
- How To Unlock Any Xiaomi Redmi Note 12 Pro 5G Phone Password Using Emergency Call
- Two Ways to Track My Boyfriends Realme V30T without Him Knowing | Dr.fone
- How Can We Unlock Our Vivo V29 Phone Screen?
- Undelete lost messages from Realme C53
- Oppo Data Retrieval tool – restore lost data from Oppo A78 5G
- In 2024, 9 Best Free Android Monitoring Apps to Monitor Phone Remotely For your Vivo Y36 | Dr.fone
- Reasons for Infinix Hot 30i Stuck on Startup Screen and Ways To Fix Them | Dr.fone
- How to Fix Locked Apple ID on Apple iPhone 15 Plus
- In 2024, Locked Out of iPhone 14? 5 Ways to get into a Locked iPhone 14 | Dr.fone
- In 2024, 6 Proven Ways to Unlock Xiaomi 14 Pro Phone When You Forget the Password
- Why Is My Xiaomi Redmi A2 Offline? Troubleshooting Guide | Dr.fone
- In 2024, Trouble with Apple iPhone 7 Plus Swipe-Up? Try These 11 Solutions
- How to Track Realme GT Neo 5 by Phone Number | Dr.fone
- In 2024, How Can I Use a Fake GPS Without Mock Location On Realme GT 3? | Dr.fone
- How to Intercept Text Messages on Apple iPhone 8 | Dr.fone
- How To Leave a Life360 Group On Meizu 21 Without Anyone Knowing? | Dr.fone
- How to Mirror Your Samsung Galaxy M34 Screen to PC with Chromecast | Dr.fone
- How to Fix Vivo X100 Pro Find My Friends No Location Found? | Dr.fone
- Recover Deleted iPhone 15 WhatsApp Attachments on Mac and Windows | Stellar
- Title: Updated The Top Free 12 GIF Meme Maker at a Glance
- Author: Elon
- Created at : 2024-05-19 03:04:49
- Updated at : 2024-05-20 03:04:49
- Link: https://animation-videos.techidaily.com/updated-the-top-free-12-gif-meme-maker-at-a-glance/
- License: This work is licensed under CC BY-NC-SA 4.0.
