
:max_bytes(150000):strip_icc():format(webp)/GettyImages-155096051-5b1bf60d43a1030036cfac94.jpg)
Updated Top 10 Online Animated Logo Makers Everyone Should Know
Top 10 Online Animated Logo Makers Everyone Should Know
Top 10 Free Online Animated Logo Makers Everyone Should Know
An easy yet powerful editor
Numerous effects to choose from
Detailed tutorials provided by the official channel
And as we all know objects in motion are much more attractive than static visuals, logo animation is the latest trend that is gaining popularity at a fast pace.
![]()
If you too want to create some interesting 3D logo motion and other types of animated logos but are confused about how to start, we are here to help you.
In this article
01 [What are Animated Logos and their benefits](#Part 1)
02 [Top 10 online tools for creating animated logos ](#Part 2)
03 [The Best Alternative to Online Animated Logo Makers](#Part 3)
Part 1 What Are Animated Logos and Their Benefits
A logo can be termed as the first face of your brand or a business which gives it a visual identity. A logo works as the foundation of the brand that helps in its growth as well as reputation. The trend has shifted from basic static logos to animated ones which include interesting motion graphics. These logos are catchy and capable of getting the instant attention of the people.
![]()
There are several benefits associated with using logo animation and some of the key ones are enlisted below.
● Create brand awareness A well-designed animated logo can create brand awareness by grabbing the interest of the potential clients and also creating a strong connection with them.
● Goes well with the brand story Animated logos gives you the freedom to use images, sounds, and motion graphics to have a connect with the audience. Thus, using animations logos that match your brand story can be created efficiently.
● Add professionalism and create a modern look Moving ahead with the times is the best thing with its business or promotion. So, a good animated logo will not only add a professional touch to your brand or a business but will also give a modern touch.
Part 2 Top 10 Online Tools for Creating Animated Logos
If you are low on budget or do not want to risk initially with the paid animated logos, free online tools work best. These programs work from your browser, need no software download, and are simple to use. Some of these tools can also be used to create logo to 3D animation. To cut down on your research work, we have shortlisted some of the widely used online animated logo makers as below.
01 Renderforest
When it comes to branding and animations online, this is the top-rated tool in its category. The tool allows creating impressive animated logos in just a few minutes. Pre-set styles are available that can be used according to the brand type.
Key Features:
● Allows creating animated logos using the AI of the tool.
● Intuitive and user-friendly interface.
● Comes with pre-set styles and readymade templates to choose from like minimal, abstract, organic, and more.
● Fonts and icons can be customized.
● High-definition export.
![]()
02 Viddyoze
This is another popular cloud-based tool that helps create interesting animated logos in a few simple clicks. The created animations can be further customized by making changes in the color scheme and other parameters.
Key Features:
● Simple to use online tool for creating 3D animations.
● Offers live-action animation.
● Characters and logos can be mixed and combined in a video.
● Comes with multiple templates and movie filters.
![]()
03 Adobe Spark
Adobe needs no introduction when it comes to editing and animations. Adobe Spark is a feature-packed online tool that helps you perform multiple functions including animated logo creation. Several templates in different categories are available to match your brand or business.
Key Features:
● Cloud-based tool for creating creative animated logos.
● Designs and templates are available in multiple categories.
● Customizable icons, colors, texts, fonts, and others.
● Support a wide range of additional features.
![]()
04 Design Free Logo
This is a free online 3D animated logo maker that comes with several pre-designed samples and templates for creating a perfect animated logo for your company. Simple to use, the tool is apt even for beginners in designing.
Key Features:
● This is 3D animation logo online free tool.
● Comes with a wide range of templates in an array of categories like the abstract, alphabet, floral, food, 3D, and more.
● Logos can be created based on the industry type.
● Simple and user-friendly interface.
![]()
05 PixTeller
Using this browser-based tool, motion to your logo elements can be added to create an impressive animated logo. A wide range of logo shapes, templates, and designs are available and option for customization is also there.
Key Features:
● Create animated logos frame by frame for better editing and customization.
● Comes with more than 100,000 shapes for the logos and over 130 fonts for creating a logo of your choice.
● Multiple customizable templates and designs in different categories are available.
● Support multiple filters like shadow, warp, blur, spacing, height, pixelate, and more.
● Created animated logos can be downloaded in MP4 or GIF format.
![]()
06 Offeo
This online animation tool is apt for creating hi-tech animated logos and the simple interface makes it perfect even for beginners. The tool is known for the perfect blend of creativity and handcraft.
Key Features:
● Create animated logos for websites as well as other platforms easily and quickly.
● Multiple library functions and customizable options are available.
● Allows adjusting the speed of the animation.
● Comes with multiple templates and graphics to choose from.
● Option to choose the ready-made elements or add the local ones.
![]()
07 Animaker
This free online tool just requires free sign-up after which it is all set to help you create rich animated logos. You can choose from the wide range of supported built-in templates as well as characters to match your requirements.
Key Features:
● This free SaaS video animation online tool helps create impressive animated logos, cartoons, and others.
● Comes with multiple templates, designs, characters, icons, charts, maps, and bags to choose from.
● Icons, colors, and other parameters can be customized using this 3D animation logo online free tool**.**
● Allows viewing the logo in different styles using the board style.
● Comes with sound effects and an option for voice recording and text to speech.
● Easy drag and drop interface make functioning quick.
● Software is supported in 50 languages worldwide.
● Created animations can be uploaded to social media sites.
![]()
08 Quince Media
For creating different types of animated media including animated logos this is a decent tool to use. Being an online program, it works from your browser and is free to use. Images in PNG and vector format can be added to the tool for creating the choice of animation.
Key Features:
● Create animated logos and other animated media using this simple and quick online tool.
● Comes with multiple designs and templates.
● 3D animated logos can be created for social media, films, broadcasts, and other platforms.
● Simple and fast to use.
![]()
09 MotionDen
This is a simple and easy online tool that can help you create animated logos in a hassle-free manner. You can even create other animated projects like slideshows, intros, and others using the program.
Key Features:
● A simple online tool with a user-friendly interface for creating logos.
● Comes with multiple templates in different categories like serenity, dark smoke, fire red, and more.
● Support to a wide range of devices including desktop, smartphone, and tablets.
● Allows creating 3D logos.
● Templates can be customized as per the requirements.
![]()
10 Tube Arsenal
This online tool is mainly used for creating YouTube video intros but it supports other functions as well including animated logo creation. The 3D editor of the program will let you add animations as needed. The extensive collection of templates lets you choose the design that best matches your requirements.
Key Features:
● Create animated logos using the 3D editor of the tool.
● Comes with an array of templates to choose from.
● Allows customizing color, text, images, and other parameters.
● This 3D animation logo online free support unlimited quick previews.
● Simple and user-friendly interface.
![]()
Key Takeaways from This Episode
● Logos are an integral part of brands and businesses that helps create brand awareness among potential clients.
● Animated logos are the present-day trend where motion graphics are added to the logos. These logo animation are interesting and can reach a broader audience and leave more impact.
● Several online tools for creating animated logos for free are available. Check out the features of these tools and choose the most suitable one.
● Wondershare Filmoa works as the best online alternative that helps in creating rich animated logos with an option for customization.
Tips on How to Get Awesome Background for Slideshow in PowerPoint
Tips That Show Anybody How to Get Awesome Background for Slideshow in Powerpoint
An easy yet powerful editor
Numerous effects to choose from
Detailed tutorials provided by the official channel
Amazing slideshow background are an absolute attention grabber in the realm of creative PowerPoint presentations. If you wish to upgrade yours with the same, be here to learn how!
In this article
01 [How to Add Video Background in PowerPoint?](#Part 1)
02 [How to Create Moving Backgrounds in Microsoft PowerPoint?](#Part 2)
03 [Some Tips for You to Get Awesome PowerPoint Backgrounds & Templates](#Part 3)
Part 1 How to Add Video Background in PowerPoint?
When the talk is about engaging means to deliver a precise information, PowerPoint slideshows are an absolute stunner. While these are already a captivating utility to present your thing, the output and audience engagement is at par with the inclusion of attractive design elements in the presentation. As is evident, there are enormous diversities of supplementary elements to complement your presentation, let us centre our discussion to the application of video background for slideshow in PowerPoint.
User’s Guide to Add Video Background in a PowerPoint Slideshow
The following section presents a detailed explanation of the steps to supplement your PowerPoint presentations with classic video backgrounds in just a few quick steps:
Step 1: Launch Your Presentation
Start with opening the desired PowerPoint presentation to which you want to add the video background, in any of your preferred devices.
Step 2: Add a Video to Your Slide
Browse through your presentation slides to locate the one you want to add the video background to. When you have made your choice, navigate to the PowerPoint toolbar at the top and hit the ‘Insert’ tab and choose the ‘Video’ option.
You will now be presented with 2 choices, either uploading a video from your device or insert one from the web by pasting its YouTube URL into the slide. If you are uploading a video from your device, proceed with selecting the desired video and tap ‘Insert’.

Step 3: Move and Resize Your Video
After uploading your video to the slide, you need to make suitable adjustments in its size and alignment to synchronize the same with the contents of the slide. To do this, drag the top left corner of the video to that of the slide to set the top alignment ratio. In the same way, move the bottom right corner of the video to be in sync with that of the slide. You will see the video occupying the entire slide at the end of the adjustment process.

Step 4: Set the Video Background
You will now need to set the video as the background of your slide, so that the latter’s contents are displayed over the video. You can do this by right clicking on the video and choosing the ‘Send to Back’ option from the dropdown that follows. This will cause the contents of your slide to get displayed over the video.

Step 5: Playback Edit and Customization Choices
Before proceeding towards making changes in the video playback and formatting, prefer taking a quick preview of your work till here. Once you are satisfied, navigate to the PowerPoint Toolbar at the top, hit the ‘Video Tools’ tab, followed by clicking on the ‘Playback’ tab.
It is recommended to introduce the following changes in your video for the most affordable slideshow output:
● Loop Your Video
Creating a video loop will facilitate you with an automatic replay of your video without the need to restart it every time with a click. You can loop your video by navigating to the ‘Video Options’ section and choose ‘Loop Until Stopped’ by clicking within the checkbox next to it. The background video will now continue to play until you switch to a different slide.
● Automatically Start Your Video
To avoid clicking on the slide amid your presentation for the video loop to begin, adjust the latter’s settings for an automatic start. Navigate to the ‘Start’ dropdown menu and select ‘Automatically’.
● Trim Your Video
You can work with some basic video editing tools in PowerPoint, like trimming and cropping your background video to a desired length. If you wish to ward off certain portions of your video, reach to and click o the ‘Trim Video’ button. Following this, drag the slider of the video to select the desired portions of the clip and exclude the rest.
You can further work with some more editing effects to create the perfect video backgrounds for your presentation slides in line with your specific preferences.

Step 6: Annotate Your Video Background
When you are done with the video editing process, take a preview of the same to ensure that everything is set in the proper order and at the proper place. Lastly, if you wish to add suitable text annotations to your video, you can do this with the ‘ClassPoint’ tool to write over the video background. All you need to do is select a preferred pen colour and start writing on your slide screen. You can further, save the annotations for a work record.

Part 2 How to Create Moving Backgrounds in Microsoft PowerPoint?
Moving PowerPoint slideshow background is another aspect of graphic creativity at its best, which can be used in a number of ways to grab considerable viewer attention. When choosing to add moving backgrounds to your presentation, the latter can aid in improving the style of content presentation, making your audience curious about how and what happens next.
Having learnt about the utility and creation process of video backgrounds in the PowerPoint presentation tool, let us extend our discussion to the method of creating a moving slide show background in the same in the following section:
User’s Guide to Create Moving Backgrounds for PowerPoint Presentations
Discussed below is an explanatory procedure for designing moving backgrounds with an awesome appearance for slideshow presentations in Microsoft PowerPoint:
Step 1: Open Your Presentation
To begin with, launch the PowerPoint tool in your preferred device and open the presentation on which you will be working to add the moving background. After the presentation gets loaded, navigate through the same and select the desired slide to proceed with the aforesaid task.
Step 2: Choose a Video Location
To add your desired video to the slide, navigate to the PowerPoint ribbon at the top and click on the ‘Insert’ tab. Select ‘Video’ from the list of options that appears, followed by choosing one of the ‘Online Video’ or ‘Video on My PC’ options from the video selection prompt. It is further recommended to select a video in the MP4 format, as the latter gives best results of moving and video backgrounds.
Step 3: Insert Your Video
Choose the second option in the selection prompt to upload a video from your device. You will now be asked to browse through your device and locate the desired video in the ‘Insert Video’ dialog box that appears. Select your video and tap the ‘Insert’ button to add your video.
To upload videos from an online source, choose the ‘Online Video’ option in the selection prompt and proceed to search the video from PowerPoint or paste its embed code to recover the video. The chosen video will begin to download and can be added to the PowerPoint presentation after the download process comes to an end.

Step 4: Playback Editing and Video Customization
Before proceeding further, consider paying your video once by clicking on the ‘Start’ button. You can also add different effects, trim and crop or add a bookmark to your video by navigating to and clicking on the ‘Video Tools’ tab, followed by selecting the ‘Format’ option. To work with the start and playback options for the video, click on ‘Playback’ in the dropdown menu of the ‘Video Tools’ tab.

Part 3 Some Tips for You to Get Awesome PowerPoint Backgrounds & Templates
Now that you have developed a comprehensive understanding of the utility of adding video and moving background for slideshow presentation, let us look through some easy tips and tricks to conveniently access the top rated and the most popular PowerPoint slideshow templates and backgrounds in the following section:
01Cool Slide Backgrounds
Slideshow presentations in PowerPoint are supplemented with a visual spark through amazing and vibrant backgrounds that are a sign of excellent graphic creativity. When working with a PowerPoint presentation of your own, do take the liberty to use some cool slide backgrounds to your creative advantage.
When the talk is about complementing your presentation with a cohesive and upbeat background, you can either select the most suitable one from a heap of pre made slideshow templates available both in the PowerPoint slideshow creator tool as well as across the web. However, if you wish to take the excitement to another level, try hands at creating an awesome and cool backgrounds for PowerPoint slides of your own!
Talking about some really cool tips and tricks to design a slideshow presentation background in PowerPoint, start with including some specific shapes and color overlays to the background capture, experiment with a polygon background, work on enhancing the background image with classic and artistic effects and apply a mix of colors, textures and patterns to give a classy look to your slideshow backgrounds.

02Professional Slideshow Backgrounds
If you are aiming at creating a PowerPoint slideshow presentation with a business centered design approach, you will need to cut down on some extra elements that you would ideally choose to include in a personal purpose based slideshow. Paying attention to the fact that business and corporate centered presentations should be simple, subtle and to the point, it would be an intelligent step to avoid adding too many expressive elements in the background.
Whether you are creating a professional slideshow background of your own or working with a pre designed template, take care to include a complementary play of a light background theme with a maximum of 2 balancing shades.
Avoid too much vibrancy and abstain from applying over the top effects and quick transitions, lest your presentation may look a bit too crowed. If your slides have lot of written content, prefer using a white color background text in a professional font style.
If you have decided on picking a pre made template, you can browse through a diversity of suggestions across the web, while keeping the aforesaid constraints in mind. Consider taking a look at the figure given below to have a more comprehensive understating of the prerequisites of selecting a professional sideshow background template:

03Happy Birthday Slide Backgrounds
Birthday parties are the most appealing synonyms of fun and entertainment. If you are into the profession of organizing events that renders smiling and happy faces, slideshow presentations could be of great help to you in discussing about services, types of social gentries and event targets with your clients.
When looking through different options to select the perfect birthday template, either for a professional event, or just to go down the memory lane of your most cherished moments, take caution to search for a vibrant alternative with colorful images, different background designs and party oriented cool themes, wide aspect ratio with high screen resolution for a mass display and conveniently editable graphics.
If you are creating a happy birthday slide background of your own, there are variety of realms to explore your graphic design creativity, owing to the fact that the subject of creation is highly expressive and multi-dimensional. While you are free to extend your creativity to the next level, do pay attention to the above constraints for a more elusive and outstanding creation output, while maintaining the fun and entertainment quotient intact.

04Wedding Slide Backgrounds
Considering the fact that wedding events are pronounced means of fun, leisure, enjoyment and beautiful memories, anything that aims to be a part of the celebrations, should be equally ecstatic and engaging. Infusing festive occasions with technology, slideshow based wedding invitations and moment captures are the top rated modern trends of celebrating this significant life event.
If you are keen on designing the perfect slideshow presentation for wedding invitations, photo albums and thank you cards, prefer to choose a wedding slide background template with aesthetic layout and flowing element inclusions, like that of floral borders and scented candles. Look though the elements of a subtle thematic setup with soothing color combinations, preferably in complementary pastel shades, like pink and white.
Talking of template customizability, the latter should have placeholders to include names of the bride and groom, the wedding date and venue, and of course the wedding photographs. The beautiful slide background template should have enough design space to include the most elusive play of text colors and fonts to suit specific preferences of creating special memories of a cherished event.

05Slideshow Backgrounds and Templates in Filmora
When looking for the most convenient lead to an extensive variety of beautiful slideshow templates and background, the template library of Wondershare Filmora Video Editor slideshow creator program can be your most affordable destination. The aforesaid software library is known to possess the best and most perfect template choices to suit the creation constraints of almost every slideshow presentation style and objective you can possibly think of.
For Win 7 or later (64-bit)
For macOS 10.12 or later
The elusive templates are further supplemented with a plethora of design flexibilities and customization features that are all set to deliver you the most appreciable creation output. Stressing a bit on the template customization choices of the software, you can work with the tool to uplift your slideshow backgrounds with artistic image effects and overlays, annotate them with beautiful text formations in a variety of colors, fonts and sizes and lots more.
Moving a bit deeper into the creative aspect, you can upgrade the visual style of your presentations with the most perfect and seamless image and video transitions and text animations. The bottom line is, working with the aforesaid slideshow creator program, you are entitled to get jaw dropping applaud from your audience, while making a confident and a content delivery through your slideshow presentation.

● Ending Thoughts →
● Using an expressive and complementing background in your slideshow presentation uplifts its visual credibility in captivating your audience.
● Browsing through the web, you get to access a vast range of amazing slideshow backgrounds and templates to make your presentation, a visual masterpiece.
● When looking for the most distributed storehouse of slideshow backgrounds and templates, the Wondershare Filmora library is your ultimate solution.
Amazing slideshow background are an absolute attention grabber in the realm of creative PowerPoint presentations. If you wish to upgrade yours with the same, be here to learn how!
In this article
01 [How to Add Video Background in PowerPoint?](#Part 1)
02 [How to Create Moving Backgrounds in Microsoft PowerPoint?](#Part 2)
03 [Some Tips for You to Get Awesome PowerPoint Backgrounds & Templates](#Part 3)
Part 1 How to Add Video Background in PowerPoint?
When the talk is about engaging means to deliver a precise information, PowerPoint slideshows are an absolute stunner. While these are already a captivating utility to present your thing, the output and audience engagement is at par with the inclusion of attractive design elements in the presentation. As is evident, there are enormous diversities of supplementary elements to complement your presentation, let us centre our discussion to the application of video background for slideshow in PowerPoint.
User’s Guide to Add Video Background in a PowerPoint Slideshow
The following section presents a detailed explanation of the steps to supplement your PowerPoint presentations with classic video backgrounds in just a few quick steps:
Step 1: Launch Your Presentation
Start with opening the desired PowerPoint presentation to which you want to add the video background, in any of your preferred devices.
Step 2: Add a Video to Your Slide
Browse through your presentation slides to locate the one you want to add the video background to. When you have made your choice, navigate to the PowerPoint toolbar at the top and hit the ‘Insert’ tab and choose the ‘Video’ option.
You will now be presented with 2 choices, either uploading a video from your device or insert one from the web by pasting its YouTube URL into the slide. If you are uploading a video from your device, proceed with selecting the desired video and tap ‘Insert’.
Step 3: Move and Resize Your Video
After uploading your video to the slide, you need to make suitable adjustments in its size and alignment to synchronize the same with the contents of the slide. To do this, drag the top left corner of the video to that of the slide to set the top alignment ratio. In the same way, move the bottom right corner of the video to be in sync with that of the slide. You will see the video occupying the entire slide at the end of the adjustment process.
Step 4: Set the Video Background
You will now need to set the video as the background of your slide, so that the latter’s contents are displayed over the video. You can do this by right clicking on the video and choosing the ‘Send to Back’ option from the dropdown that follows. This will cause the contents of your slide to get displayed over the video.
Step 5: Playback Edit and Customization Choices
Before proceeding towards making changes in the video playback and formatting, prefer taking a quick preview of your work till here. Once you are satisfied, navigate to the PowerPoint Toolbar at the top, hit the ‘Video Tools’ tab, followed by clicking on the ‘Playback’ tab.
It is recommended to introduce the following changes in your video for the most affordable slideshow output:
● Loop Your Video
Creating a video loop will facilitate you with an automatic replay of your video without the need to restart it every time with a click. You can loop your video by navigating to the ‘Video Options’ section and choose ‘Loop Until Stopped’ by clicking within the checkbox next to it. The background video will now continue to play until you switch to a different slide.
● Automatically Start Your Video
To avoid clicking on the slide amid your presentation for the video loop to begin, adjust the latter’s settings for an automatic start. Navigate to the ‘Start’ dropdown menu and select ‘Automatically’.
● Trim Your Video
You can work with some basic video editing tools in PowerPoint, like trimming and cropping your background video to a desired length. If you wish to ward off certain portions of your video, reach to and click o the ‘Trim Video’ button. Following this, drag the slider of the video to select the desired portions of the clip and exclude the rest.
You can further work with some more editing effects to create the perfect video backgrounds for your presentation slides in line with your specific preferences.
Step 6: Annotate Your Video Background
When you are done with the video editing process, take a preview of the same to ensure that everything is set in the proper order and at the proper place. Lastly, if you wish to add suitable text annotations to your video, you can do this with the ‘ClassPoint’ tool to write over the video background. All you need to do is select a preferred pen colour and start writing on your slide screen. You can further, save the annotations for a work record.
Part 2 How to Create Moving Backgrounds in Microsoft PowerPoint?
Moving PowerPoint slideshow background is another aspect of graphic creativity at its best, which can be used in a number of ways to grab considerable viewer attention. When choosing to add moving backgrounds to your presentation, the latter can aid in improving the style of content presentation, making your audience curious about how and what happens next.
Having learnt about the utility and creation process of video backgrounds in the PowerPoint presentation tool, let us extend our discussion to the method of creating a moving slide show background in the same in the following section:
User’s Guide to Create Moving Backgrounds for PowerPoint Presentations
Discussed below is an explanatory procedure for designing moving backgrounds with an awesome appearance for slideshow presentations in Microsoft PowerPoint:
Step 1: Open Your Presentation
To begin with, launch the PowerPoint tool in your preferred device and open the presentation on which you will be working to add the moving background. After the presentation gets loaded, navigate through the same and select the desired slide to proceed with the aforesaid task.
Step 2: Choose a Video Location
To add your desired video to the slide, navigate to the PowerPoint ribbon at the top and click on the ‘Insert’ tab. Select ‘Video’ from the list of options that appears, followed by choosing one of the ‘Online Video’ or ‘Video on My PC’ options from the video selection prompt. It is further recommended to select a video in the MP4 format, as the latter gives best results of moving and video backgrounds.
Step 3: Insert Your Video
Choose the second option in the selection prompt to upload a video from your device. You will now be asked to browse through your device and locate the desired video in the ‘Insert Video’ dialog box that appears. Select your video and tap the ‘Insert’ button to add your video.
To upload videos from an online source, choose the ‘Online Video’ option in the selection prompt and proceed to search the video from PowerPoint or paste its embed code to recover the video. The chosen video will begin to download and can be added to the PowerPoint presentation after the download process comes to an end.
Step 4: Playback Editing and Video Customization
Before proceeding further, consider paying your video once by clicking on the ‘Start’ button. You can also add different effects, trim and crop or add a bookmark to your video by navigating to and clicking on the ‘Video Tools’ tab, followed by selecting the ‘Format’ option. To work with the start and playback options for the video, click on ‘Playback’ in the dropdown menu of the ‘Video Tools’ tab.
Part 3 Some Tips for You to Get Awesome PowerPoint Backgrounds & Templates
Now that you have developed a comprehensive understanding of the utility of adding video and moving background for slideshow presentation, let us look through some easy tips and tricks to conveniently access the top rated and the most popular PowerPoint slideshow templates and backgrounds in the following section:
01Cool Slide Backgrounds
Slideshow presentations in PowerPoint are supplemented with a visual spark through amazing and vibrant backgrounds that are a sign of excellent graphic creativity. When working with a PowerPoint presentation of your own, do take the liberty to use some cool slide backgrounds to your creative advantage.
When the talk is about complementing your presentation with a cohesive and upbeat background, you can either select the most suitable one from a heap of pre made slideshow templates available both in the PowerPoint slideshow creator tool as well as across the web. However, if you wish to take the excitement to another level, try hands at creating an awesome and cool backgrounds for PowerPoint slides of your own!
Talking about some really cool tips and tricks to design a slideshow presentation background in PowerPoint, start with including some specific shapes and color overlays to the background capture, experiment with a polygon background, work on enhancing the background image with classic and artistic effects and apply a mix of colors, textures and patterns to give a classy look to your slideshow backgrounds.
02Professional Slideshow Backgrounds
If you are aiming at creating a PowerPoint slideshow presentation with a business centered design approach, you will need to cut down on some extra elements that you would ideally choose to include in a personal purpose based slideshow. Paying attention to the fact that business and corporate centered presentations should be simple, subtle and to the point, it would be an intelligent step to avoid adding too many expressive elements in the background.
Whether you are creating a professional slideshow background of your own or working with a pre designed template, take care to include a complementary play of a light background theme with a maximum of 2 balancing shades.
Avoid too much vibrancy and abstain from applying over the top effects and quick transitions, lest your presentation may look a bit too crowed. If your slides have lot of written content, prefer using a white color background text in a professional font style.
If you have decided on picking a pre made template, you can browse through a diversity of suggestions across the web, while keeping the aforesaid constraints in mind. Consider taking a look at the figure given below to have a more comprehensive understating of the prerequisites of selecting a professional sideshow background template:
03Happy Birthday Slide Backgrounds
Birthday parties are the most appealing synonyms of fun and entertainment. If you are into the profession of organizing events that renders smiling and happy faces, slideshow presentations could be of great help to you in discussing about services, types of social gentries and event targets with your clients.
When looking through different options to select the perfect birthday template, either for a professional event, or just to go down the memory lane of your most cherished moments, take caution to search for a vibrant alternative with colorful images, different background designs and party oriented cool themes, wide aspect ratio with high screen resolution for a mass display and conveniently editable graphics.
If you are creating a happy birthday slide background of your own, there are variety of realms to explore your graphic design creativity, owing to the fact that the subject of creation is highly expressive and multi-dimensional. While you are free to extend your creativity to the next level, do pay attention to the above constraints for a more elusive and outstanding creation output, while maintaining the fun and entertainment quotient intact.
04Wedding Slide Backgrounds
Considering the fact that wedding events are pronounced means of fun, leisure, enjoyment and beautiful memories, anything that aims to be a part of the celebrations, should be equally ecstatic and engaging. Infusing festive occasions with technology, slideshow based wedding invitations and moment captures are the top rated modern trends of celebrating this significant life event.
If you are keen on designing the perfect slideshow presentation for wedding invitations, photo albums and thank you cards, prefer to choose a wedding slide background template with aesthetic layout and flowing element inclusions, like that of floral borders and scented candles. Look though the elements of a subtle thematic setup with soothing color combinations, preferably in complementary pastel shades, like pink and white.
Talking of template customizability, the latter should have placeholders to include names of the bride and groom, the wedding date and venue, and of course the wedding photographs. The beautiful slide background template should have enough design space to include the most elusive play of text colors and fonts to suit specific preferences of creating special memories of a cherished event.
05Slideshow Backgrounds and Templates in Filmora
When looking for the most convenient lead to an extensive variety of beautiful slideshow templates and background, the template library of Wondershare Filmora Video Editor slideshow creator program can be your most affordable destination. The aforesaid software library is known to possess the best and most perfect template choices to suit the creation constraints of almost every slideshow presentation style and objective you can possibly think of.
For Win 7 or later (64-bit)
For macOS 10.12 or later
The elusive templates are further supplemented with a plethora of design flexibilities and customization features that are all set to deliver you the most appreciable creation output. Stressing a bit on the template customization choices of the software, you can work with the tool to uplift your slideshow backgrounds with artistic image effects and overlays, annotate them with beautiful text formations in a variety of colors, fonts and sizes and lots more.
Moving a bit deeper into the creative aspect, you can upgrade the visual style of your presentations with the most perfect and seamless image and video transitions and text animations. The bottom line is, working with the aforesaid slideshow creator program, you are entitled to get jaw dropping applaud from your audience, while making a confident and a content delivery through your slideshow presentation.
● Ending Thoughts →
● Using an expressive and complementing background in your slideshow presentation uplifts its visual credibility in captivating your audience.
● Browsing through the web, you get to access a vast range of amazing slideshow backgrounds and templates to make your presentation, a visual masterpiece.
● When looking for the most distributed storehouse of slideshow backgrounds and templates, the Wondershare Filmora library is your ultimate solution.
How to Animate Image on Scroll and Text on Scroll?
How to Animate Image on Scroll and Text on Scroll?
An easy yet powerful editor
Numerous effects to choose from
Detailed tutorials provided by the official channel
Over the years, web designers have tried different tactics to make their websites visually engaging. From marquee tags to animated navigation bars, designers tried everything they could to enhance the overall visual appearance of their websites.
One such tactic - that even brands like Sony and Apple - followed was image-on-scroll and text-on-scroll animations.
In this article
01 [How to Make Scroll Image Animation Like Apple?](#Part 1)
02 [How to Create a Scrolling Text Animation (Infinite Loop)](#Part 2)
Part 1 How to Make Scroll Image Animation Like Apple?
First, let’s take a look at different ways to make scroll-image animation like Apple. An image-on-scroll animation is an animation playback that appears on images as you continue to scroll down a website. You can use multiple methods to implement scroll image animations on your website.
01Use Filmora
Wondershare Filmora Video Editor is a feature-packed video editing tool that’s designed to help video editors create high-quality videos in a hassle-free manner. The tool offers a timeline-based interface that streamlines the entire video editing process and helps professionals execute complex video editing tasks in no time. In addition to its basic editing features, Filmora also offers advanced editing functions including color grading, motion tracking, and keyframing. It means you can easily turn your RAW footage into high-quality videos without any hassle.
Using Wondershare Filmora to animate images on scroll will be an ideal solution if you want to integrate a visually appealing element to your website. Let’s walk you through the step-by-step procedure of using Wondershare Filmora to create image-on-scroll animations.

Wondershare Filmora - Best Video Editor for Mac/Windows
5,481,435 people have downloaded it.
Build unique custom animations without breaking a sweat.
Focus on creating epic stories and leave the details to Filmora’s auto features.
Start a creative adventure with drag & drop effects and endless possibilities.
Filmora simplifies advanced features to save you time and effort.
Filmora cuts out repetition so you can move on to your next creative breakthrough.
Step 1 - Launch Filmora on your system and import the video/image that you want to edit. Then, load the selected file to Filmora’s timeline to proceed further.
Step 2 - Now, double-tap the video/image. This will launch the editing panel on your screen. Here, switch to the “Animation” panel.

Step 3 - Here you can either select “Presets” or click the “Customize” tab to create a custom animation through keyframing.

Step 4 - If you want to save time, however, it would be better to choose the “Presets” tab. Then, select the preset that you want to use.
Step 5 - Now, drag the selected preset to the timeline. Again, double-tap the preset layer. An editing panel will appear on your screen. Here you can adjust different elements of the preset to customize its playback.

So, that’s everything you need to know about animating image-on-scroll using Wondershare Filmora.
02Use ScrollSequence
Now, if you are not a professional editor or don’t want to overcomplicate things, you can use ScrollSequence to add image-on-scroll animation to your website. For readers who don’t know, ScrollSequence is a built-in WordPress plugin that you can directly install in your WordPress manager. The tool offers hundreds of ready-to-use animation templates that you can integrate and customize without any hassle.
All the templates offer complete customization, which means you can adjust the animation playback, import your own media files, and even customize the text. It’s worth understanding that this method will only work if you are using WordPress as the CMS platform for your website. ScrollSequence is only available as a WordPress plugin and you won’t be able to use it with any other website builder
03Write Your Own JavaScript Code
Finally, you can also write your own JavaScript code to animate image-on-scroll. However, this method will be a bit complicated as you would require technical expertise to write dedicated JavaScript scripts to animate image-on-scroll. If you choose this solution, you’ll have to start with writing HTML and CSS codes. This will help you style your web page in the beginning. And, once the web design is up and ready, you can move towards writing the JavaScript code to animate image-on-scroll in your web page.
Part 2 How to Create a Scrolling Text Animation (Infinite Loop)
Like image-on-scroll, text-on-scroll is another popular way to add visually appealing animations to your web designs. Text-on-scroll animations work the same way as image-on-scroll animations - the only difference is that these types of animations focus on the text playback instead of images. Again, you can use different methods to animate text on scroll and make your website’s content run in an infinite loop.
Some of these methods include:
01Use Filmora
Thanks to Filmora’s advanced editing panel, you can also use it to animate text within the videos. This will be an ideal solution for users who want to add videos with dedicated text banners and titles on their websites. With Filmora, you’ll be able to animate the text and make custom transitions in a hassle-free manner. Let’s walk you through the detailed procedure of using Wondershare Filmora to add text animation to your videos.
Step 1 - Open Filmora on your system and load the video into its timeline.
Step 2 - Double-tap the video file, and switch to the “Titles” tab. You’ll see a list of different title templates on your screen. Browse through these results and drag the desired template to the timelines. Make sure to adjust the title layer right above the video layer.

Step 3 - Again, double-click the title layer and you’ll see a dedicated text editor on your screen. Here enter the text that you want to display within the video. You can also select text size, orientation, and font to personalize its appearance.
Step 4 - Finally, switch to the “Animation” tab at the left sidebar. Choose any of these animation templates and the text within the video will be animated automatically.

So, that’s how you can use Filmora to animate text-on-scroll to improve the overall visual appearance of your website videos.
02Scroll-Text-Animations for Single Words
Another way to implement scroll-text animations is to modify the HTML & CSS code of your website. Again, this method will only be feasible if you have prior coding experience and know how to write well-optimized code.

The easiest way to animate text scrolls is through single-line animations. In this situation, only one line gets displayed at any particular time, which automatically gets switched to the next one as soon as you scroll down the cursor. If you are planning to create simple text-based animations, this method will help you get the job done easily.
Key Takeaways from This Episode
● You can animate image-on-scroll and text-on-scroll to enhance the overall visual appearance of your websites and make them more engaging for the end-users.
● If you are planning to upload dedicated videos on your website, you can use Wondershare Filmora, a fully-functional video editing tool, to animate both images and text through an easy-to-navigate editing panel.
● You should only opt for the coding method if you are an experienced coder and have worked on HTML/CSS/JavaScript projects in the past.
Over the years, web designers have tried different tactics to make their websites visually engaging. From marquee tags to animated navigation bars, designers tried everything they could to enhance the overall visual appearance of their websites.
One such tactic - that even brands like Sony and Apple - followed was image-on-scroll and text-on-scroll animations.
In this article
01 [How to Make Scroll Image Animation Like Apple?](#Part 1)
02 [How to Create a Scrolling Text Animation (Infinite Loop)](#Part 2)
Part 1 How to Make Scroll Image Animation Like Apple?
First, let’s take a look at different ways to make scroll-image animation like Apple. An image-on-scroll animation is an animation playback that appears on images as you continue to scroll down a website. You can use multiple methods to implement scroll image animations on your website.
01Use Filmora
Wondershare Filmora Video Editor is a feature-packed video editing tool that’s designed to help video editors create high-quality videos in a hassle-free manner. The tool offers a timeline-based interface that streamlines the entire video editing process and helps professionals execute complex video editing tasks in no time. In addition to its basic editing features, Filmora also offers advanced editing functions including color grading, motion tracking, and keyframing. It means you can easily turn your RAW footage into high-quality videos without any hassle.
Using Wondershare Filmora to animate images on scroll will be an ideal solution if you want to integrate a visually appealing element to your website. Let’s walk you through the step-by-step procedure of using Wondershare Filmora to create image-on-scroll animations.
Wondershare Filmora - Best Video Editor for Mac/Windows
5,481,435 people have downloaded it.
Build unique custom animations without breaking a sweat.
Focus on creating epic stories and leave the details to Filmora’s auto features.
Start a creative adventure with drag & drop effects and endless possibilities.
Filmora simplifies advanced features to save you time and effort.
Filmora cuts out repetition so you can move on to your next creative breakthrough.
Step 1 - Launch Filmora on your system and import the video/image that you want to edit. Then, load the selected file to Filmora’s timeline to proceed further.
Step 2 - Now, double-tap the video/image. This will launch the editing panel on your screen. Here, switch to the “Animation” panel.
Step 3 - Here you can either select “Presets” or click the “Customize” tab to create a custom animation through keyframing.
Step 4 - If you want to save time, however, it would be better to choose the “Presets” tab. Then, select the preset that you want to use.
Step 5 - Now, drag the selected preset to the timeline. Again, double-tap the preset layer. An editing panel will appear on your screen. Here you can adjust different elements of the preset to customize its playback.
So, that’s everything you need to know about animating image-on-scroll using Wondershare Filmora.
02Use ScrollSequence
Now, if you are not a professional editor or don’t want to overcomplicate things, you can use ScrollSequence to add image-on-scroll animation to your website. For readers who don’t know, ScrollSequence is a built-in WordPress plugin that you can directly install in your WordPress manager. The tool offers hundreds of ready-to-use animation templates that you can integrate and customize without any hassle.
All the templates offer complete customization, which means you can adjust the animation playback, import your own media files, and even customize the text. It’s worth understanding that this method will only work if you are using WordPress as the CMS platform for your website. ScrollSequence is only available as a WordPress plugin and you won’t be able to use it with any other website builder
03Write Your Own JavaScript Code
Finally, you can also write your own JavaScript code to animate image-on-scroll. However, this method will be a bit complicated as you would require technical expertise to write dedicated JavaScript scripts to animate image-on-scroll. If you choose this solution, you’ll have to start with writing HTML and CSS codes. This will help you style your web page in the beginning. And, once the web design is up and ready, you can move towards writing the JavaScript code to animate image-on-scroll in your web page.
Part 2 How to Create a Scrolling Text Animation (Infinite Loop)
Like image-on-scroll, text-on-scroll is another popular way to add visually appealing animations to your web designs. Text-on-scroll animations work the same way as image-on-scroll animations - the only difference is that these types of animations focus on the text playback instead of images. Again, you can use different methods to animate text on scroll and make your website’s content run in an infinite loop.
Some of these methods include:
01Use Filmora
Thanks to Filmora’s advanced editing panel, you can also use it to animate text within the videos. This will be an ideal solution for users who want to add videos with dedicated text banners and titles on their websites. With Filmora, you’ll be able to animate the text and make custom transitions in a hassle-free manner. Let’s walk you through the detailed procedure of using Wondershare Filmora to add text animation to your videos.
Step 1 - Open Filmora on your system and load the video into its timeline.
Step 2 - Double-tap the video file, and switch to the “Titles” tab. You’ll see a list of different title templates on your screen. Browse through these results and drag the desired template to the timelines. Make sure to adjust the title layer right above the video layer.
Step 3 - Again, double-click the title layer and you’ll see a dedicated text editor on your screen. Here enter the text that you want to display within the video. You can also select text size, orientation, and font to personalize its appearance.
Step 4 - Finally, switch to the “Animation” tab at the left sidebar. Choose any of these animation templates and the text within the video will be animated automatically.
So, that’s how you can use Filmora to animate text-on-scroll to improve the overall visual appearance of your website videos.
02Scroll-Text-Animations for Single Words
Another way to implement scroll-text animations is to modify the HTML & CSS code of your website. Again, this method will only be feasible if you have prior coding experience and know how to write well-optimized code.
The easiest way to animate text scrolls is through single-line animations. In this situation, only one line gets displayed at any particular time, which automatically gets switched to the next one as soon as you scroll down the cursor. If you are planning to create simple text-based animations, this method will help you get the job done easily.
Key Takeaways from This Episode
● You can animate image-on-scroll and text-on-scroll to enhance the overall visual appearance of your websites and make them more engaging for the end-users.
● If you are planning to upload dedicated videos on your website, you can use Wondershare Filmora, a fully-functional video editing tool, to animate both images and text through an easy-to-navigate editing panel.
● You should only opt for the coding method if you are an experienced coder and have worked on HTML/CSS/JavaScript projects in the past.
Handy Tip From Adobe Animate Rigging Tutorial for All Learners
Handy Tips from Adobe Animate Rigging Tutorial for All Learners
An easy yet powerful editor
Numerous effects to choose from
Detailed tutorials provided by the official channel
Rigging is a technology that is not known to everyone. However, an animation freak must know the technology in depth.

If you are an animator, you must be wondering how to implement rigging. Follow this tutorial and get a complete insight on the adobe animate rigging tutorial.
In this article
01 [Do You Understand How Auto Rig Mapping Works?](#Part 1)
02 [How Do I Use Rig Mapping in Adobe Animate?](#Part 2)
03 [Where to Rig and Animate More Characters?](#Part 3)
Part 1 Do You Understand How Auto Rig Mapping Works?
The primary goal of animation is to animate or construct human-like characters that tend to mimic the structure of a human body or animal body. The closer is the resemblance of the motion, the better is the animation. However, mimicking a human-like motion with precision is rather difficult. This is because humans have a sophisticated structure, and the mimicry of a complex motion like that performed by human beings through animation is indeed difficult.
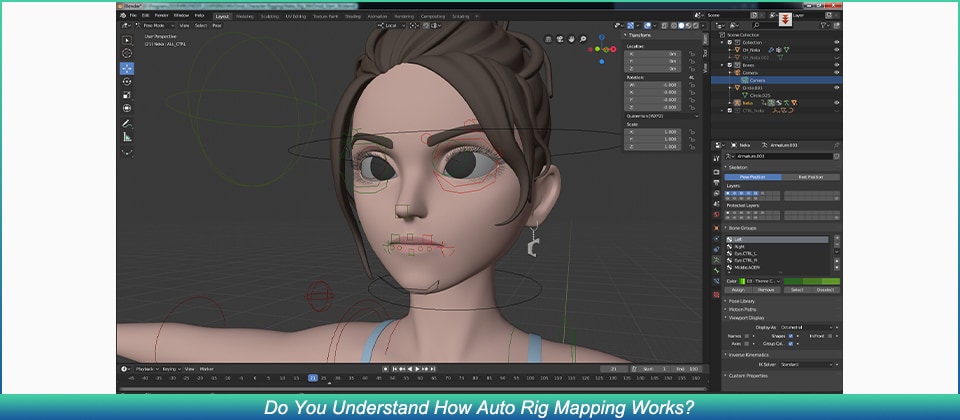
For countering this, animators decided to use rigging. Rigging is essentially a technology wherein the skeletal structure of the animated character must be designed prior to the final character. The primary components of the skeletal structure, i.e. the skull, the jaw, the limbs (arm and leg) are modeled to finally form a whole skeleton.
The structure is fine tuned and the skeleton is given rotatory motion, and prismatic motion wherever needed. Each part of the animated character is enabled to move and mimic complex motion.
Part 2 How Do I Use Rig Mapping in Adobe Animate?
1. How Do You Rig a 2d Character in an Animation?
❶ Mango animate character animation maker
Mango animate character animation maker is an amazing software that can perform the task of animation in a very simple manner. We can rightfully comment that the software does make the job of animators rather simple. The rigging animation software automatically generates an energetic skeletal figure of the static character image. Using this skeleton, the software helps you to animate the character.
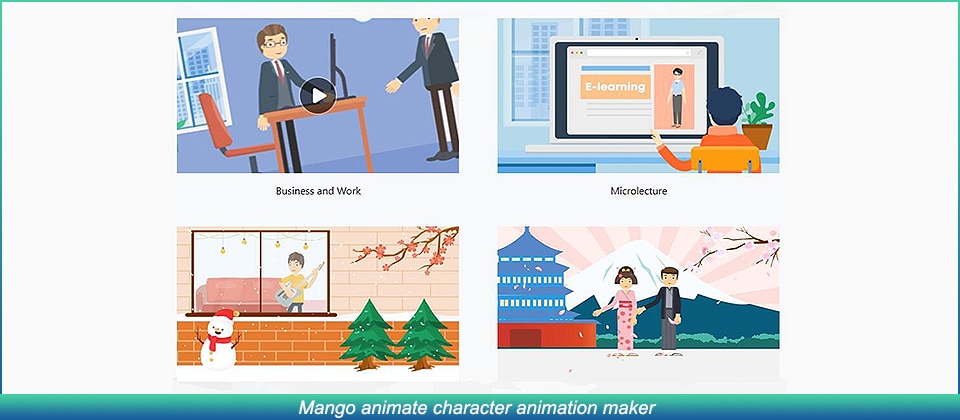
❷ Cartoon Animator 4
The software is one that suffices to almost every level of animator, be it a novice, intermediate, or an expert. The animation maker has super cool features and could make you animate characters very easily. The rigging tool can again convert a static image of the character you intend to animate into its skeletal structure.
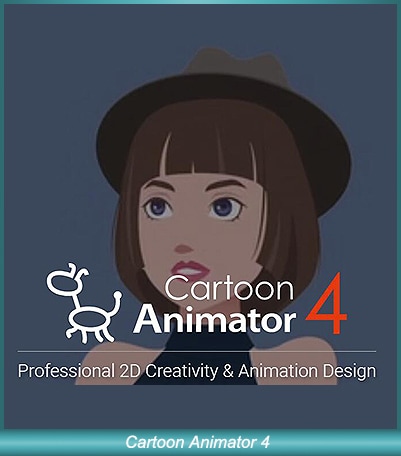
❸ Blender
Now any professional animator reading this will obviously know about blender. It is indeed one of the most popular tools available to perform any kind of animation. Moreover, most professional courses teach the basics of animation using blender.

❹ Toon boom harmony
Toon boom harmony is another software that offers pretty decent rigging features. The software is pretty popular among novice animators who just wish to animate 2d characters. The advanced tool offers animation, rigging, and drawing features.
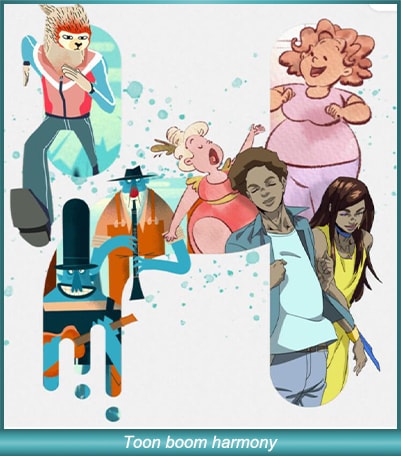
❺ Synig studio
Synig studio is another popular software among the animation community. The software is meant for animators of all levels, ranging from beginners to professionals, anybody can use this tool to animate. The software uses complex technologies in order to ensure that the character is animated seamlessly.
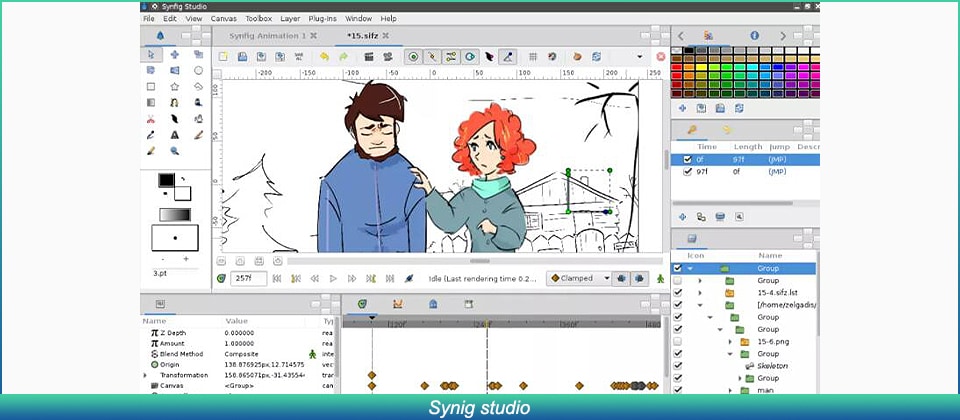
2. How Do You Animate a Custom Rig?
If you want to try animating custom rigs, it is indeed very simple, if you use beginner-friendly software, all you need to do is input the static image of your character. Select the motion template that you’d like to apply to your character. You’re good to go! However, you can’t animate custom motions using beginner-friendly software, you can only choose from the available templates.
Part 3 Where to Rig and Animate More Characters?
Comfort and convenience are what we always prioritize. Wondershare Filmora offers you exactly the same. With Wondershare Filmora Pro, you can easily animate and make desirable structures. The several features that Filmora Pro offers include:
Audio Features →
● Audio transition
● Audio compression
● Noise reduction
Video Features →
● Animation
● Motion tracking
● Video editing
The features listed above are just a few of the many features Wondershare Filmora Pro offers. If you’re looking to try out animation, then we highly recommend you to give it a go. It’s a one-stop shop for your animation needs.
Key Takeaways from This Episode
● As we reach the end of the article, we can say that it was indeed a fruitful read as we understood about several different tools to perform animations and rigging.
● The tools we looked at today make life easier for animators and video editors, using these tools, animations can be performed in minutes.
● We hope that the adobe animated rigging tutorial helped you understand the challenges of animation and how to counter them! We’d like to recommend Wondershare Filmora Pro to you, a comprehensive feature-rich tool that provides you with several different features. Think video editing? Think Filmora Pro!
Rigging is a technology that is not known to everyone. However, an animation freak must know the technology in depth.
If you are an animator, you must be wondering how to implement rigging. Follow this tutorial and get a complete insight on the adobe animate rigging tutorial.
In this article
01 [Do You Understand How Auto Rig Mapping Works?](#Part 1)
02 [How Do I Use Rig Mapping in Adobe Animate?](#Part 2)
03 [Where to Rig and Animate More Characters?](#Part 3)
Part 1 Do You Understand How Auto Rig Mapping Works?
The primary goal of animation is to animate or construct human-like characters that tend to mimic the structure of a human body or animal body. The closer is the resemblance of the motion, the better is the animation. However, mimicking a human-like motion with precision is rather difficult. This is because humans have a sophisticated structure, and the mimicry of a complex motion like that performed by human beings through animation is indeed difficult.
For countering this, animators decided to use rigging. Rigging is essentially a technology wherein the skeletal structure of the animated character must be designed prior to the final character. The primary components of the skeletal structure, i.e. the skull, the jaw, the limbs (arm and leg) are modeled to finally form a whole skeleton.
The structure is fine tuned and the skeleton is given rotatory motion, and prismatic motion wherever needed. Each part of the animated character is enabled to move and mimic complex motion.
Part 2 How Do I Use Rig Mapping in Adobe Animate?
1. How Do You Rig a 2d Character in an Animation?
❶ Mango animate character animation maker
Mango animate character animation maker is an amazing software that can perform the task of animation in a very simple manner. We can rightfully comment that the software does make the job of animators rather simple. The rigging animation software automatically generates an energetic skeletal figure of the static character image. Using this skeleton, the software helps you to animate the character.
❷ Cartoon Animator 4
The software is one that suffices to almost every level of animator, be it a novice, intermediate, or an expert. The animation maker has super cool features and could make you animate characters very easily. The rigging tool can again convert a static image of the character you intend to animate into its skeletal structure.
❸ Blender
Now any professional animator reading this will obviously know about blender. It is indeed one of the most popular tools available to perform any kind of animation. Moreover, most professional courses teach the basics of animation using blender.
❹ Toon boom harmony
Toon boom harmony is another software that offers pretty decent rigging features. The software is pretty popular among novice animators who just wish to animate 2d characters. The advanced tool offers animation, rigging, and drawing features.
❺ Synig studio
Synig studio is another popular software among the animation community. The software is meant for animators of all levels, ranging from beginners to professionals, anybody can use this tool to animate. The software uses complex technologies in order to ensure that the character is animated seamlessly.
2. How Do You Animate a Custom Rig?
If you want to try animating custom rigs, it is indeed very simple, if you use beginner-friendly software, all you need to do is input the static image of your character. Select the motion template that you’d like to apply to your character. You’re good to go! However, you can’t animate custom motions using beginner-friendly software, you can only choose from the available templates.
Part 3 Where to Rig and Animate More Characters?
Comfort and convenience are what we always prioritize. Wondershare Filmora offers you exactly the same. With Wondershare Filmora Pro, you can easily animate and make desirable structures. The several features that Filmora Pro offers include:
Audio Features →
● Audio transition
● Audio compression
● Noise reduction
Video Features →
● Animation
● Motion tracking
● Video editing
The features listed above are just a few of the many features Wondershare Filmora Pro offers. If you’re looking to try out animation, then we highly recommend you to give it a go. It’s a one-stop shop for your animation needs.
Key Takeaways from This Episode
● As we reach the end of the article, we can say that it was indeed a fruitful read as we understood about several different tools to perform animations and rigging.
● The tools we looked at today make life easier for animators and video editors, using these tools, animations can be performed in minutes.
● We hope that the adobe animated rigging tutorial helped you understand the challenges of animation and how to counter them! We’d like to recommend Wondershare Filmora Pro to you, a comprehensive feature-rich tool that provides you with several different features. Think video editing? Think Filmora Pro!
Creative Ways to Create iPhone Text GIF
Creative Ways to Make iPhone Text GIF
An easy yet powerful editor
Numerous effects to choose from
Detailed tutorials provided by the official channel
GIFs add fun and humor to interactions via text messages. GIFs allow you to convey ideas, emotions, and thoughts in much more precise ways than an emoji would. iPhones operating on iOS 10 or later versions have an in-built GIF keyboard, making it super easy to add GIFs. iPhone text GIFs are readily accessible from GIF keyboards. Still, if you do not have one, you can resort to third-party applications like GIPHY and GIF keyboard for more prominent access to GIF libraries.

Let’s now delve into the different ways of adding GIFs in text messages on iPhone and directly sending them using the Messages app.
In this article
01 [How to Text a GIF: For iOS and Android](#Part 1)
02 [How to Text a GIF on an iPhone Using a Third-Party App](#Part 2)
03 [How to Send GIFs on iPhone](#Part 3)
Part 1 How to Text a GIF: For iOS and Android Users
iPhone text GIFs make texting more fun. Hence, we dedicated this part to teaching you how to use iPhone text GIFs to revitalize and better express yourself while texting.
On iPhone, there are two different ways to send iPhone text GIFs – employing the default keyboard or through the help of third-party apps. You can use the iOS default keyboard to search for GIFs in iMessage on iPhones directly. This applies to all iPhones running on iOS 10 and later versions. If your iPhone belongs to this category, follow the simple steps to add GIFs in text messages on iPhone:
01Sending GIFs using the iPhone Default Keyboard
Here’s how you can send iPhone text GIFs using the iOS default keyboard:
Step 1: On your iPhone, click on the iMessage app to open it.

Step 2: Click on the contact you want to send the GIF to from the list. If you have not previously sent a message to the contact, at the top right corner, click the Write icon represented as a square with a pencil, then enter the name of the contact you want to send the GIF to.

Step 3: Click the Images icon from the menu bar below the new message field. The image icon represents a white magnifying glass in the middle of a pink-colored circle.

Step 4: This pops up a GIF keyboard with the prompt, “Find images.” Browse through the library of GIFs to see recently used or popular GIFs. If you’re looking for a specific GIF, type in a search keyword into the Find images search bar to discover the results of GIFs that best match your request. For example, you may type “Compliments of the season” or “Grumpy,” depending on what you want.

Step 5: Scroll through the different GIFs on your screen to find the one that best fits your message. Click on it to automatically add it to your message in the text field. Peradventure you selected the wrong GIF, hit the small “x” icon at the top right corner of the GIF to delete it.

Step 6: Click the Send icon, represented as a blue arrow icon, to send your GIF.

You can add comments to a GIF just before sending it on the iMessage app. Type a message under the GIF before clicking “Send” to get the comment delivered together with the GIF.
From these simple steps, you can tell that sending a GIF from an iOS default keyboard is straightforward.
02Sending GIFs from an Android Device
Adding a GIF while using an Android phone is pretty much straightforward. Using the Gboard keyboard, follow the steps below to add a GIF on Android:
Step 1: Open the Message app and at the bottom of the screen, click the text bubble icon to enter the name of the person you’re texting in the contact field > Click Start.

Step 2: Click the smiley icon on the keyboard > Swipe to browse through GIFs and stickers or enter a search text to find your desired GIF.

Step 3: Select the GIF you want by clicking on it > Hit Send.
Part 2 How to Text a GIF on an iPhone Using a Third-Party App
Sending a GIF from an iPhone is also possible using third-party applications such as GIF Keyboard and GIPHY. These applications are built to add character to text messaging using animated objects called GIFs. Adding a GIF to your texts usually brings in some humor and life. You must have downloaded them from App Store and installed them on your iPhone to use these applications.
You can also visit third-party websites to send GIFs from there. For example, GIPHY supports searching and sending GIFs via iMessage.
Here are the steps to follow to search and send GIFs on iPhone text messages on iMessage using third-party tools:
Step 1: Search for your desired GIF on GIPHY or other GIF websites.

Step 2: Click on the GIF to open it.

Step 3: Long press on the GIF, and from the pop-up options, click Open.

Step 4: Launch Messages, click the Write icon and enter the person’s contact details you want to text.

Step 5: Click on the text box to bring up your iOS keyboard.

Step 6: Click on the text box again to add the paste option.

Step 7: When the GIF appears, click Paste.

Step 8: A preview of the GIF would appear on the text box. Hit Send when you’re ready to send the GIF.

If you use a GIF website other than GIPHY, the sent GIF may appear as a link rather than an image. If you’re okay with that, make sure the address of the shared animated image you end with the file extension, “.gif” if not, iMessage would not be able to load it.
Part 3 How to Send GIFs on iPhone
To save your file with .GIF extension, you need an application or software accessible online and offline. Indeed, many GIF creators are available in the market, both free and paid versions. However, Wondershare Filmora Video Editor is one of the preferable programs for video conversion to GIF. The software is intuitive and does not require any tech knowledge to use it. With this software, you can customize or create your GIFs while adding creative animation effects and texts to them. Filmora supports GIF creation from a variety of video formats including .mpeg, .dat, .mkv, .wmv, .mp4, .avi, and .evo.
Wondershare Filmora
Get started easily with Filmora’s powerful performance, intuitive interface, and countless effects!
Try It Free Try It Free Try It Free Learn More >

With Filmora, you can create and edit your GIFs with its in-built tools like rotation, color correction, cropping, speed alterations, merging, and lots more. What is more, you can also make a GIF online using Filmora online meme maker. This platform allows you to make videos, GIFs, and image memes without a watermark. You need no sign-up, and it is free to use. Create captions for your GIF while changing your text size, position, and color. Your text can be directly placed outside or inside the GIF and rotated to give it an artistic feel. When you finish creating, your GIF is ready to be used across all devices, including your iPhone.
If you’re unsure about how to use Wondershare Filmora for creating your GIF, below is a YouTube clip to guide you through the process for iPhone text GIFs.
● Key Takeaways from This Episode →
● How to create a GIF on an iPhone text and Android device.
● How to text a GIF using third-party tools like GIPHY and GIF Keyboard.
● The use of Wondershare Filmora to create GIFs with animated texts and outstanding edits.
●If you have stayed with us till this point, you’d have learned how to use your iOS default keyboard to send iPhone text GIFs effortlessly. You have also known how to send GIFs using the Gboard keyboard on your Android devices. Finally, you were introduced to Wondershare Filmora, a professional video editing software that allows you to create stunning GIFs in text messages for iPhone online and offline.
GIFs add fun and humor to interactions via text messages. GIFs allow you to convey ideas, emotions, and thoughts in much more precise ways than an emoji would. iPhones operating on iOS 10 or later versions have an in-built GIF keyboard, making it super easy to add GIFs. iPhone text GIFs are readily accessible from GIF keyboards. Still, if you do not have one, you can resort to third-party applications like GIPHY and GIF keyboard for more prominent access to GIF libraries.
Let’s now delve into the different ways of adding GIFs in text messages on iPhone and directly sending them using the Messages app.
In this article
01 [How to Text a GIF: For iOS and Android](#Part 1)
02 [How to Text a GIF on an iPhone Using a Third-Party App](#Part 2)
03 [How to Send GIFs on iPhone](#Part 3)
Part 1 How to Text a GIF: For iOS and Android Users
iPhone text GIFs make texting more fun. Hence, we dedicated this part to teaching you how to use iPhone text GIFs to revitalize and better express yourself while texting.
On iPhone, there are two different ways to send iPhone text GIFs – employing the default keyboard or through the help of third-party apps. You can use the iOS default keyboard to search for GIFs in iMessage on iPhones directly. This applies to all iPhones running on iOS 10 and later versions. If your iPhone belongs to this category, follow the simple steps to add GIFs in text messages on iPhone:
01Sending GIFs using the iPhone Default Keyboard
Here’s how you can send iPhone text GIFs using the iOS default keyboard:
Step 1: On your iPhone, click on the iMessage app to open it.
Step 2: Click on the contact you want to send the GIF to from the list. If you have not previously sent a message to the contact, at the top right corner, click the Write icon represented as a square with a pencil, then enter the name of the contact you want to send the GIF to.
Step 3: Click the Images icon from the menu bar below the new message field. The image icon represents a white magnifying glass in the middle of a pink-colored circle.
Step 4: This pops up a GIF keyboard with the prompt, “Find images.” Browse through the library of GIFs to see recently used or popular GIFs. If you’re looking for a specific GIF, type in a search keyword into the Find images search bar to discover the results of GIFs that best match your request. For example, you may type “Compliments of the season” or “Grumpy,” depending on what you want.
Step 5: Scroll through the different GIFs on your screen to find the one that best fits your message. Click on it to automatically add it to your message in the text field. Peradventure you selected the wrong GIF, hit the small “x” icon at the top right corner of the GIF to delete it.
Step 6: Click the Send icon, represented as a blue arrow icon, to send your GIF.
You can add comments to a GIF just before sending it on the iMessage app. Type a message under the GIF before clicking “Send” to get the comment delivered together with the GIF.
From these simple steps, you can tell that sending a GIF from an iOS default keyboard is straightforward.
02Sending GIFs from an Android Device
Adding a GIF while using an Android phone is pretty much straightforward. Using the Gboard keyboard, follow the steps below to add a GIF on Android:
Step 1: Open the Message app and at the bottom of the screen, click the text bubble icon to enter the name of the person you’re texting in the contact field > Click Start.
Step 2: Click the smiley icon on the keyboard > Swipe to browse through GIFs and stickers or enter a search text to find your desired GIF.
Step 3: Select the GIF you want by clicking on it > Hit Send.
Part 2 How to Text a GIF on an iPhone Using a Third-Party App
Sending a GIF from an iPhone is also possible using third-party applications such as GIF Keyboard and GIPHY. These applications are built to add character to text messaging using animated objects called GIFs. Adding a GIF to your texts usually brings in some humor and life. You must have downloaded them from App Store and installed them on your iPhone to use these applications.
You can also visit third-party websites to send GIFs from there. For example, GIPHY supports searching and sending GIFs via iMessage.
Here are the steps to follow to search and send GIFs on iPhone text messages on iMessage using third-party tools:
Step 1: Search for your desired GIF on GIPHY or other GIF websites.
Step 2: Click on the GIF to open it.
Step 3: Long press on the GIF, and from the pop-up options, click Open.
Step 4: Launch Messages, click the Write icon and enter the person’s contact details you want to text.
Step 5: Click on the text box to bring up your iOS keyboard.
Step 6: Click on the text box again to add the paste option.
Step 7: When the GIF appears, click Paste.
Step 8: A preview of the GIF would appear on the text box. Hit Send when you’re ready to send the GIF.
If you use a GIF website other than GIPHY, the sent GIF may appear as a link rather than an image. If you’re okay with that, make sure the address of the shared animated image you end with the file extension, “.gif” if not, iMessage would not be able to load it.
Part 3 How to Send GIFs on iPhone
To save your file with .GIF extension, you need an application or software accessible online and offline. Indeed, many GIF creators are available in the market, both free and paid versions. However, Wondershare Filmora Video Editor is one of the preferable programs for video conversion to GIF. The software is intuitive and does not require any tech knowledge to use it. With this software, you can customize or create your GIFs while adding creative animation effects and texts to them. Filmora supports GIF creation from a variety of video formats including .mpeg, .dat, .mkv, .wmv, .mp4, .avi, and .evo.
Wondershare Filmora
Get started easily with Filmora’s powerful performance, intuitive interface, and countless effects!
Try It Free Try It Free Try It Free Learn More >
With Filmora, you can create and edit your GIFs with its in-built tools like rotation, color correction, cropping, speed alterations, merging, and lots more. What is more, you can also make a GIF online using Filmora online meme maker. This platform allows you to make videos, GIFs, and image memes without a watermark. You need no sign-up, and it is free to use. Create captions for your GIF while changing your text size, position, and color. Your text can be directly placed outside or inside the GIF and rotated to give it an artistic feel. When you finish creating, your GIF is ready to be used across all devices, including your iPhone.
If you’re unsure about how to use Wondershare Filmora for creating your GIF, below is a YouTube clip to guide you through the process for iPhone text GIFs.
● Key Takeaways from This Episode →
● How to create a GIF on an iPhone text and Android device.
● How to text a GIF using third-party tools like GIPHY and GIF Keyboard.
● The use of Wondershare Filmora to create GIFs with animated texts and outstanding edits.
●If you have stayed with us till this point, you’d have learned how to use your iOS default keyboard to send iPhone text GIFs effortlessly. You have also known how to send GIFs using the Gboard keyboard on your Android devices. Finally, you were introduced to Wondershare Filmora, a professional video editing software that allows you to create stunning GIFs in text messages for iPhone online and offline.
Animate Photo Online with These Awesome Tools
Animate Your Photo Online with These Awesome Tools
An easy yet powerful editor
Numerous effects to choose from
Detailed tutorials provided by the official channel
Animating your family photos online will not only make you nostalgic but will also make you relive that moment. Adding on to this, animating your photos can also make your boring ppt interesting.
This article helps you understand how to animate your pictures online for free and the different features you can use.
In this article
01 [How Can I Turn My Photo into a Cartoon Online?](#Part 1)
02 [Some Other Tools/Plugins to Help You Improve Photo Animate](#Part 2)
Part 1 Part 1: How Can I Turn My Photo into a Cartoon Online?
Animation gives life to your lifeless photos, makes them more interesting, and attracts an audience. You can add more fun to your normal photos by turning your photos into a cartoon. One of the simplest ways is by turning your photo into a cartoon by using online tools. In this section of the article, we will explore more on some online tools which will help you to turn your photos into a cartoon online.
01Befunky
An online cartoonizer that processes your photo online at a very good speed and gives you a cartoon version of the photo in seconds.
A single click on your cartoonizer and you’ll go from photo to cartoon in seconds. Go to the photo editor and click on the artsy section. You will have five classic cartoonizer effects and you will be one click away from your beautiful results.
Pros
Can upload several photos simultaneously.
Very simple interface that supports drag and drop feature.
It is possible to download photos from the stream.
Cons
Many functions are not free.
Too much advertising.
Price $4.95/month
Rating 4.1/5
“Great collage maker and photo editing tools.” - Fayak. A
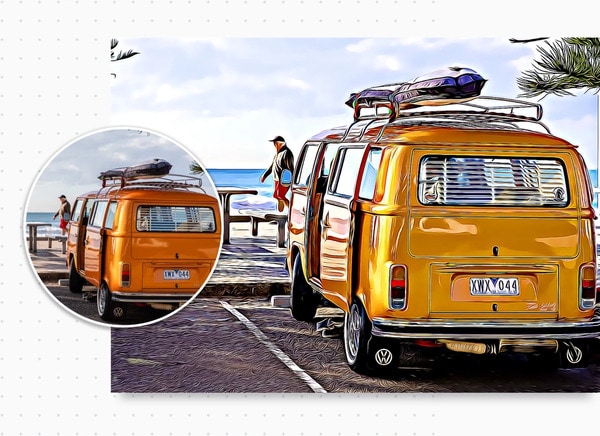
02Painnt- Art & Cartoon Filters
Painnt is one of the best cartoons yourself apps on the market with more than a thousand filters and effects. It is also a creative community which not only helps you animate your photo online but also helps you discover the artwork of your taste or meet like-minded people.
Pros
Regularly updates its software to support more features.
Customize cartoon filter settings with various parameters.
Cons
Bugs might cause trouble to your system even if you have a purchases version.
Price Free/ in-app purchases will not cost more than $9.99
Rating 4.5/ 5
“Great app lots of fun don’t put no money into the custom style.” - SB
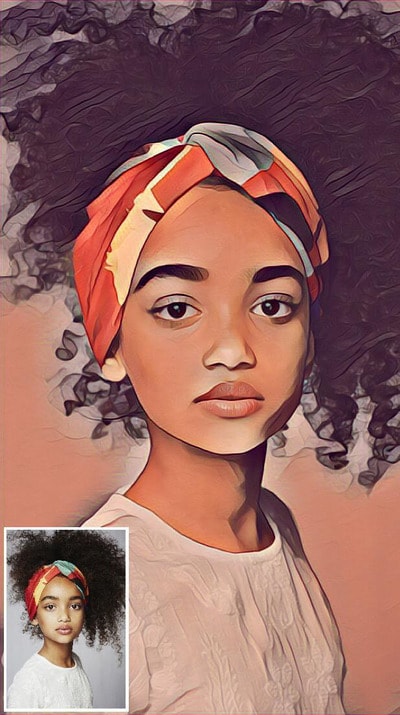
03Prisma Photo Editor
A few years ago, Prisma is one of the most popular applications to animate your photo online. Though its popularity has reduced it still has some cool features.
Pros
Has a good number of filters and you will have a lot of options.
Every image you try will be automatically saved to your camera roll.
Create unique-looking features.
Cons
Create unique-looking features.
Users have no control over how the app reads every image and gives output.
Price Users have no control over how the app reads every image and gives output.
Rating 4.6/5
“I am seriously addicted to this app. I use it to change my 360 pics into mind blowing Virtual Reality 3D photosphere.” -Leighton Scharf
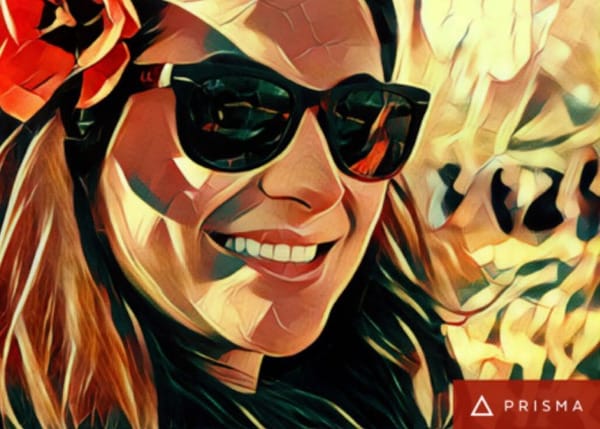
04Cartoon Sketch Camera Pro
Sketch, Cartoon, Halftone, Swirl, Pixellate, Emboss, Crosshatch, or Dots effects can be used to cartoon a photo in this app. but there are only a limited amount of cartoon effects which makes the cartoon sketch camera pro, not one of the best options to animate your photo online free.
Pros
It includes 8 different filters and effects.
You can save a photo to your cartoon library.
Cons
Supported by only Mac products.
Limited filters and effects
Issues wid bugs
Annoying ads
Price Free/In-app purchases.
Rating 3.6/5
“Get ready to watch a lot of application ads”
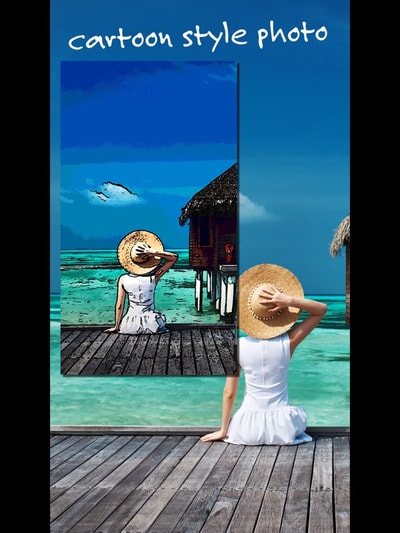
05Cartoon Photo Editor
The cartoon photo editor app helps you create animated pictures online for free. All effects can be previewed in real-time, which helps you to see your results before capturing a picture or recording a video.
Pros
Supports autofocus when shooting a video, picture.
Can also use cartoon effects on previously captured pictures.
Cons
Ads can be bothersome.
Price Free/ In-app purchases.
Rating 4.4 /5
“Not the most well-developed app.” - Nunya
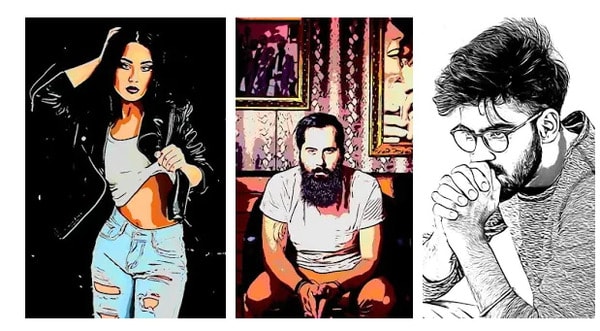
06Photo Lab
Pros
Has an immense number of filters.
Can easily share pictures on social media.
Easy interface
Cons
It’s an internet-based app, so limited features when using offline.
Price Free/ PRO subscription- $4.99/month
Rating 4.6/5
“I love so many aspects of this app.” - creativeme
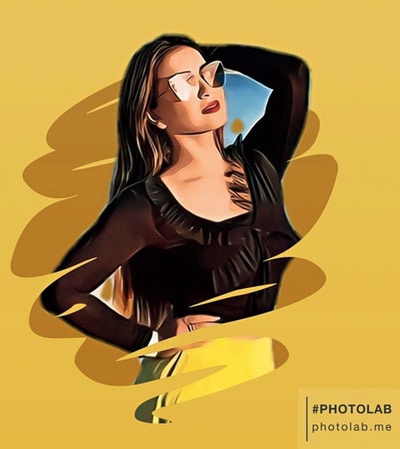
07Toon Me
Special AI developed algorithm in Toon me app instantly gives you, your cartoon picture. Just take a picture and upload it and get ready to meet your cartoon self. Toon me is one of the easiest ways to animate your photo online.
Pros
Easy to use.
Cool filters which are unique from normal toon apps.
No adds.
Cons
Good filters are only available after paid subscriptions.
Some add ons are and filters are strange.
The App doesn’t let you cartoon any photo. it has to have a face on it.
Price The App doesn’t let you cartoon any photo. it has to have a face on it.
Rating 4.5/5
“Great app. I’m thinking of actually paying for it to try some of the other cool filters,” - Angel
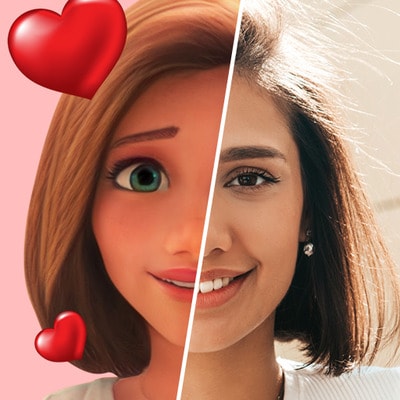
08MomentCam Cartoons and stickers
This app offers a wide range of filters and stickers. besides this, MomentCam is a community that awards prizes to its most creative members. You can accessorize your cartoon with hairbands, sunglasses, pick hairstyles or beards.
Pros
Great cartoon effects.
Easy to use.
Cons
Bugs to be fixed.
May witness errors while connected to a network.
New updates are causing issues.
Price Free/ Subscription $4.99/month
Rating 4.5 / 5
“Disappointed in the new update. Interface is confusing to use.” - Kristie
Part 2 Some Other Tools/Plugins to Help You Improve Photo Animate
012D Photography Online
An animation is a vital tool for any digital artist. Leaving your images to normal static pictures can sometimes bore your audience. Your 2d photography can be animated easily online. To animate your photos online you have several online tools like -
Open Toonz It is a powerful tool that is also open-source software.
Piskel Piskel is an online tool for creating animated sprites and pixel art. It’s easy to use and requires no sign-up.
Asperite Is another online tool that can animate your 2d photography online. You can purchase the software for $19.99.
023D Photography Online
3D This- 3Dthis is a unique animation platform that supports 3D animation with the help of amazing in-app tools. It can create 3D models of people’s faces to morph animations. You can convert any picture to a 3D image. Being free software it helps you to learn and explore and create 3D animated pictures online for free.
03Animated Photo Frame Online Editor
Animated photo frames and effects will instantly turn any photo into an awesome greeting card. You can now creatively make your greeting cards for any occasion by using these animations which will convert into gif form.
04Animate Face from Photo Online
This particular type of animation has created a huge trend on social media. Animating faces online you can see how a person in the photograph smiles, moves their head around, etc. People often use it to relive their nostalgic moments of their ancestor’s pictures. My heritage blog is one of the websites which makes still faces move. With the help of My heritage blog, you can animate any of the faces in your photos to see them move, blink, and smile. My heritage easily helps you to animate your family photos online.
Now that we have seen various kinds of animation tools and pros and cons, let us look into one such amazing tool that can animate your photo online easily and very professionally.
Key Takeaways from This Episode
● In this article we have seen how animating a picture can make a static picture into an interesting art piece.
● We have also explored various tools that can make a cartoon and animate your photo online. We have also explored each tool’s pros and cons, their pricing, reviews, and ratings. We have also seen various other tools which help you improve your photo animate. We have also seen. With the advancement of technology, we learned that old pictures of our ancestors can be bought into motion.
● In the later part of the article, we also learned about a specific software called Filmora Pro that has awesome features. In addition to this, Filmora Pro gives a very professional result.
Animating your family photos online will not only make you nostalgic but will also make you relive that moment. Adding on to this, animating your photos can also make your boring ppt interesting.
This article helps you understand how to animate your pictures online for free and the different features you can use.
In this article
01 [How Can I Turn My Photo into a Cartoon Online?](#Part 1)
02 [Some Other Tools/Plugins to Help You Improve Photo Animate](#Part 2)
Part 1 Part 1: How Can I Turn My Photo into a Cartoon Online?
Animation gives life to your lifeless photos, makes them more interesting, and attracts an audience. You can add more fun to your normal photos by turning your photos into a cartoon. One of the simplest ways is by turning your photo into a cartoon by using online tools. In this section of the article, we will explore more on some online tools which will help you to turn your photos into a cartoon online.
01Befunky
An online cartoonizer that processes your photo online at a very good speed and gives you a cartoon version of the photo in seconds.
A single click on your cartoonizer and you’ll go from photo to cartoon in seconds. Go to the photo editor and click on the artsy section. You will have five classic cartoonizer effects and you will be one click away from your beautiful results.
Pros
Can upload several photos simultaneously.
Very simple interface that supports drag and drop feature.
It is possible to download photos from the stream.
Cons
Many functions are not free.
Too much advertising.
Price $4.95/month
Rating 4.1/5
“Great collage maker and photo editing tools.” - Fayak. A
02Painnt- Art & Cartoon Filters
Painnt is one of the best cartoons yourself apps on the market with more than a thousand filters and effects. It is also a creative community which not only helps you animate your photo online but also helps you discover the artwork of your taste or meet like-minded people.
Pros
Regularly updates its software to support more features.
Customize cartoon filter settings with various parameters.
Cons
Bugs might cause trouble to your system even if you have a purchases version.
Price Free/ in-app purchases will not cost more than $9.99
Rating 4.5/ 5
“Great app lots of fun don’t put no money into the custom style.” - SB
03Prisma Photo Editor
A few years ago, Prisma is one of the most popular applications to animate your photo online. Though its popularity has reduced it still has some cool features.
Pros
Has a good number of filters and you will have a lot of options.
Every image you try will be automatically saved to your camera roll.
Create unique-looking features.
Cons
Create unique-looking features.
Users have no control over how the app reads every image and gives output.
Price Users have no control over how the app reads every image and gives output.
Rating 4.6/5
“I am seriously addicted to this app. I use it to change my 360 pics into mind blowing Virtual Reality 3D photosphere.” -Leighton Scharf
04Cartoon Sketch Camera Pro
Sketch, Cartoon, Halftone, Swirl, Pixellate, Emboss, Crosshatch, or Dots effects can be used to cartoon a photo in this app. but there are only a limited amount of cartoon effects which makes the cartoon sketch camera pro, not one of the best options to animate your photo online free.
Pros
It includes 8 different filters and effects.
You can save a photo to your cartoon library.
Cons
Supported by only Mac products.
Limited filters and effects
Issues wid bugs
Annoying ads
Price Free/In-app purchases.
Rating 3.6/5
“Get ready to watch a lot of application ads”
05Cartoon Photo Editor
The cartoon photo editor app helps you create animated pictures online for free. All effects can be previewed in real-time, which helps you to see your results before capturing a picture or recording a video.
Pros
Supports autofocus when shooting a video, picture.
Can also use cartoon effects on previously captured pictures.
Cons
Ads can be bothersome.
Price Free/ In-app purchases.
Rating 4.4 /5
“Not the most well-developed app.” - Nunya
06Photo Lab
Pros
Has an immense number of filters.
Can easily share pictures on social media.
Easy interface
Cons
It’s an internet-based app, so limited features when using offline.
Price Free/ PRO subscription- $4.99/month
Rating 4.6/5
“I love so many aspects of this app.” - creativeme
07Toon Me
Special AI developed algorithm in Toon me app instantly gives you, your cartoon picture. Just take a picture and upload it and get ready to meet your cartoon self. Toon me is one of the easiest ways to animate your photo online.
Pros
Easy to use.
Cool filters which are unique from normal toon apps.
No adds.
Cons
Good filters are only available after paid subscriptions.
Some add ons are and filters are strange.
The App doesn’t let you cartoon any photo. it has to have a face on it.
Price The App doesn’t let you cartoon any photo. it has to have a face on it.
Rating 4.5/5
“Great app. I’m thinking of actually paying for it to try some of the other cool filters,” - Angel
08MomentCam Cartoons and stickers
This app offers a wide range of filters and stickers. besides this, MomentCam is a community that awards prizes to its most creative members. You can accessorize your cartoon with hairbands, sunglasses, pick hairstyles or beards.
Pros
Great cartoon effects.
Easy to use.
Cons
Bugs to be fixed.
May witness errors while connected to a network.
New updates are causing issues.
Price Free/ Subscription $4.99/month
Rating 4.5 / 5
“Disappointed in the new update. Interface is confusing to use.” - Kristie
Part 2 Some Other Tools/Plugins to Help You Improve Photo Animate
012D Photography Online
An animation is a vital tool for any digital artist. Leaving your images to normal static pictures can sometimes bore your audience. Your 2d photography can be animated easily online. To animate your photos online you have several online tools like -
Open Toonz It is a powerful tool that is also open-source software.
Piskel Piskel is an online tool for creating animated sprites and pixel art. It’s easy to use and requires no sign-up.
Asperite Is another online tool that can animate your 2d photography online. You can purchase the software for $19.99.
023D Photography Online
3D This- 3Dthis is a unique animation platform that supports 3D animation with the help of amazing in-app tools. It can create 3D models of people’s faces to morph animations. You can convert any picture to a 3D image. Being free software it helps you to learn and explore and create 3D animated pictures online for free.
03Animated Photo Frame Online Editor
Animated photo frames and effects will instantly turn any photo into an awesome greeting card. You can now creatively make your greeting cards for any occasion by using these animations which will convert into gif form.
04Animate Face from Photo Online
This particular type of animation has created a huge trend on social media. Animating faces online you can see how a person in the photograph smiles, moves their head around, etc. People often use it to relive their nostalgic moments of their ancestor’s pictures. My heritage blog is one of the websites which makes still faces move. With the help of My heritage blog, you can animate any of the faces in your photos to see them move, blink, and smile. My heritage easily helps you to animate your family photos online.
Now that we have seen various kinds of animation tools and pros and cons, let us look into one such amazing tool that can animate your photo online easily and very professionally.
Key Takeaways from This Episode
● In this article we have seen how animating a picture can make a static picture into an interesting art piece.
● We have also explored various tools that can make a cartoon and animate your photo online. We have also explored each tool’s pros and cons, their pricing, reviews, and ratings. We have also seen various other tools which help you improve your photo animate. We have also seen. With the advancement of technology, we learned that old pictures of our ancestors can be bought into motion.
● In the later part of the article, we also learned about a specific software called Filmora Pro that has awesome features. In addition to this, Filmora Pro gives a very professional result.
How to Make GIF Stickers for WhatsApp 100% The Simple Way
How to Make GIF Stickers for WhatsApp 100% The Easy Way
An easy yet powerful editor
Numerous effects to choose from
Detailed tutorials provided by the official channel
Wish your dear friends and loved ones on their special days using some interesting WhatsApp stickers. There is an integrated library of these stickers in different categories on your Android as well as iPhone.

Still, if you want a more personalized one, you can create a customized sticker using videos on your phone or using third-party apps and tools. Learn about how to use the integrated stickers and create customized in the following parts of the topic.
In this article
01 [Using stickers from integrated library](#Part 1)
02 [Best tools to create animated GIF sticker – Wondershare Filmora](#Part 2)
03 [Using iPhone and Android videos to make GIF stickers](#Part 3)
Part 1 Using stickers from integrated library
WhatsApp on your Android and iPhone has a decent collection of stickers that can send to your contacts. You simply need to look for the sticker in the desired category and send it and the steps for adding GIFs to WhatsApp are listed below.
Step 1. Open the WhatsApp contact to which you wish to send the sticker. To open the animation library on your Android device, tap on the emoji icon and choose the GIF option. On an iPhone, the library opens by clicking on the sticker icon.
Step 2. Search and select the desired sticker from the available options.
Step 3. To finally share the selected one, click on the sticker and then on the Send button.

Part 2 Best tools to create animated GIF sticker – Wondershare Filmora
If you are in search of a tool that lets you create a professional-looking animated GIF easily Wondershare Filmora Video Editor is the best WhatsApp GIF maker tool. This software once downloaded on your Windows or Mac system, is all set to look after multiple video editing tasks including GIF creation.
Wondershare Filmora
Get started easily with Filmora’s powerful performance, intuitive interface, and countless effects!
Try It Free Try It Free Try It Free Learn More >
Your videos in MP4, MKV, MOV, and several other key formats can be converted to a GIF file using the program and multiple options for editing are available as well like crop, trim, add effects, add texts, and more.
The intuitive interface of the software makes it easy to use even by non-techy people.
Steps on how to make WhatsApp GIF sticker using Wondershare Filmora
**Step 1.**On your Windows or Mac, download, install, and launch the Wondershare software and then import the video files from which GIF has to be created.
Step 2. The added files have to be now dragged and dropped to the timeline.

Step 3. Editing tools for customization can be used.
**Step 4.**For further personalization by adding text, effects, and more the related functions can be used.

Step 5. Next, choose the GIF option as the target file format from the Local tab. Select the file name and the location. Clicking on the EXPORT button will start the processing.

Part 3 Using iPhone and Android videos to make GIF stickers
If you do not wish to use any third-party tools, basic stickers can also be created using the videos on your Android and iPhone. A video cannot be more than 6 seconds in length to be used as a GIF and thus longer videos need to be trimmed.
Steps on how to make a GIF stickers for WhatsApp
Step 1. Launch the WhatsApp contact to which you wish to send the GIF. Add the video from the device gallery by clicking on the camera button. A video using the camera can also be recorded.
Note: Ensure that video length is not more than 6 seconds. If it is more, use the slider at the top to trim the video.
Step 2. Next, you can add the text using the Caption option.
Step 3. Now to convert this video into a GIF click on the GIF button under the video and then tap on the Send button to share this animation with the contact.

● Key Takeaways from This Episode →
●WhatsApp has an integrated library of GIF stickers in a wide range of categories.
●For creating customized stickers, Wondershare Filmora works as the best software as it is simple, quick, and has multiple editing options.
●Using the videos from the gallery, GIF stickers can also be created on your Android and iPhone.
Wish your dear friends and loved ones on their special days using some interesting WhatsApp stickers. There is an integrated library of these stickers in different categories on your Android as well as iPhone.
Still, if you want a more personalized one, you can create a customized sticker using videos on your phone or using third-party apps and tools. Learn about how to use the integrated stickers and create customized in the following parts of the topic.
In this article
01 [Using stickers from integrated library](#Part 1)
02 [Best tools to create animated GIF sticker – Wondershare Filmora](#Part 2)
03 [Using iPhone and Android videos to make GIF stickers](#Part 3)
Part 1 Using stickers from integrated library
WhatsApp on your Android and iPhone has a decent collection of stickers that can send to your contacts. You simply need to look for the sticker in the desired category and send it and the steps for adding GIFs to WhatsApp are listed below.
Step 1. Open the WhatsApp contact to which you wish to send the sticker. To open the animation library on your Android device, tap on the emoji icon and choose the GIF option. On an iPhone, the library opens by clicking on the sticker icon.
Step 2. Search and select the desired sticker from the available options.
Step 3. To finally share the selected one, click on the sticker and then on the Send button.
Part 2 Best tools to create animated GIF sticker – Wondershare Filmora
If you are in search of a tool that lets you create a professional-looking animated GIF easily Wondershare Filmora Video Editor is the best WhatsApp GIF maker tool. This software once downloaded on your Windows or Mac system, is all set to look after multiple video editing tasks including GIF creation.
Wondershare Filmora
Get started easily with Filmora’s powerful performance, intuitive interface, and countless effects!
Try It Free Try It Free Try It Free Learn More >
Your videos in MP4, MKV, MOV, and several other key formats can be converted to a GIF file using the program and multiple options for editing are available as well like crop, trim, add effects, add texts, and more.
The intuitive interface of the software makes it easy to use even by non-techy people.
Steps on how to make WhatsApp GIF sticker using Wondershare Filmora
**Step 1.**On your Windows or Mac, download, install, and launch the Wondershare software and then import the video files from which GIF has to be created.
Step 2. The added files have to be now dragged and dropped to the timeline.
Step 3. Editing tools for customization can be used.
**Step 4.**For further personalization by adding text, effects, and more the related functions can be used.
Step 5. Next, choose the GIF option as the target file format from the Local tab. Select the file name and the location. Clicking on the EXPORT button will start the processing.
Part 3 Using iPhone and Android videos to make GIF stickers
If you do not wish to use any third-party tools, basic stickers can also be created using the videos on your Android and iPhone. A video cannot be more than 6 seconds in length to be used as a GIF and thus longer videos need to be trimmed.
Steps on how to make a GIF stickers for WhatsApp
Step 1. Launch the WhatsApp contact to which you wish to send the GIF. Add the video from the device gallery by clicking on the camera button. A video using the camera can also be recorded.
Note: Ensure that video length is not more than 6 seconds. If it is more, use the slider at the top to trim the video.
Step 2. Next, you can add the text using the Caption option.
Step 3. Now to convert this video into a GIF click on the GIF button under the video and then tap on the Send button to share this animation with the contact.
● Key Takeaways from This Episode →
●WhatsApp has an integrated library of GIF stickers in a wide range of categories.
●For creating customized stickers, Wondershare Filmora works as the best software as it is simple, quick, and has multiple editing options.
●Using the videos from the gallery, GIF stickers can also be created on your Android and iPhone.
Also read:
- How To Make Pinterest Slideshow in Simple Ways for 2024
- New In 2024, Apps to Animate Still Pictures
- Updated 2024 Approved 5 Free Animated Gif Sources You Must Check
- New In 2024, Best Tips for Effortless Unity 3D Animation
- How to Make Animation Characters with the Best Character Creators for 2024
- New In 2024, Top 10 Best Photo to Animation Converters That Give You an Advantage
- New Some Must-Know Useful Lego Animation Ideas for 2024
- Updated 10 Must Watch Netflix Cartoon Series For You
- New In 2024, Are You Head Over Heels With 3D Animation Design?
- What Make Aesthetic Cartoon Drawing More Understandable
- Fuel Your Creativity with 10 Awesome Collection of 2D Animation Examples for 2024
- How to Make Your GIF on WhatsApp in Simple Ways for 2024
- Updated Step-by-Step Guide to Send Gif WhatsApp on Android
- New In 2024, No. 1 Maker to Animate Your Logo Online Free
- New 2024 Approved Best GIF Croppers How to Crop an Animated GIF
- 2024 Approved 12 Dubbed Anime Websites to Watch for Free
- Updated Have You Seen the Facebook Cartoon App Everyones Using Lately
- New Tips That Show Anybody How to Get Awesome Background for Slideshow in PowerPoint
- Updated 2024 Approved Samples of Cartoon Character Face
- Updated Create Animated Video on Canva for 2024
- Updated How to Create Free Photo Collage Frame in Minutes?
- Tutorials to Make Animated Images – Even if Youre Just Starting Out for 2024
- Updated 2024 Approved Top 7 Animated GIF Text Makers
- New Tutorial Guide to Animate Pictures in Canva
- In 2024, What Is the Meaning of Motion Graphics
- Ready to Animate Game Character From Scratch, In 2024
- New 10 Cartoon Characters That Should Top Your List
- New 2024 Approved Finding The Best Animated Profile Picture Maker
- Updated In 2024, Ultimate Guide to Animated Characters Drawings
- Can I recover permanently deleted photos from Realme 11X 5G
- In 2024, 4 solution to get rid of pokemon fail to detect location On Apple iPhone XS Max | Dr.fone
- Top 4 SIM Location Trackers To Easily Find Your Lost Oppo F25 Pro 5G Device
- How To Change Your Apple iPhone 7 Apple ID on MacBook
- 10 Best Fake GPS Location Spoofers for Poco M6 Pro 5G | Dr.fone
- Solved Warning Camera Failed on Huawei Nova Y91 | Dr.fone
- Full Guide to Catch 100 IV Pokémon Using a Map On Honor 70 Lite 5G | Dr.fone
- How to Change Spotify Location After Moving to Another Country On Honor X50i | Dr.fone
- How to Mirror Your Realme GT 3 Screen to PC with Chromecast | Dr.fone
- How To Use Special Features - Virtual Location On Poco F5 Pro 5G? | Dr.fone
- Title: Updated Top 10 Online Animated Logo Makers Everyone Should Know
- Author: Elon
- Created at : 2024-05-19 03:04:32
- Updated at : 2024-05-20 03:04:32
- Link: https://animation-videos.techidaily.com/updated-top-10-online-animated-logo-makers-everyone-should-know/
- License: This work is licensed under CC BY-NC-SA 4.0.
