
:max_bytes(150000):strip_icc():format(webp)/operationcouldnotcomplete-95695abe458d4062a2c2f7e46e656b08.png)
Updated Top 12 Video to GIF Converters High Quality to Check Out
Top 12 Video to GIF Converters [High Quality] to Check Out
Top 12 Video to GIF Converters [High Quality] to Check Out
An easy yet powerful editor
Numerous effects to choose from
Detailed tutorials provided by the official channel
GIFs are images with looping animations for a few seconds and are used a lot over social media sites and other online platforms. There are several sites from where you can download readymade GIFs.
Alternatively, there are countless tools using which customized GIFs can be created from videos. So, if you too are looking for video to GIF converter high quality keep reading.
In this article
01 [The Difference Between A Video And A Gif](#Part 1)
02 [Top 12 Video to GIF Converters](#Part 2)
Part 1 The Difference Between A Video And A Gif
A GIF is a lot in use these days over social media platforms, and other online sites. Standing for Graphics Interchange Format, a GIF is basically a looping animation or a video that has a sequence of frames or images.
Though a lot of people can consider a GIF as a short video, there are a few key differences between the two. The first one lies in the name extension. A GIF file is saved as .gif while a video can be saved into several formats like .mp4, .mov, and more.
A video contains visual information having good quality frames as well as sound while a GIF is a short animation that uses some specific information created from a sequence of frames. Moreover, a GIF does not have a sound and the size is also very small.
Part 2 Top 12 Video to GIF Converters
An array of online and desktop tools is available to convert video to GIF high quality. We have shortlisted the top ones as below.
01**Wondershare Filmora Video Editor **
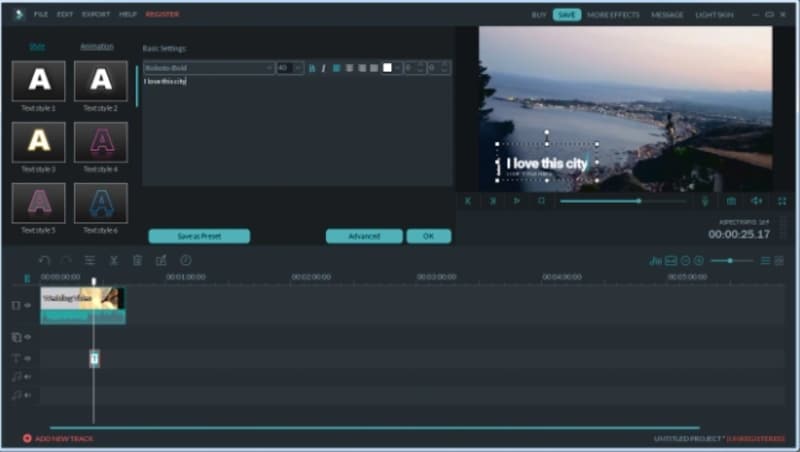
If you are looking for software that lets you create an excellent GIF in a hassle-free manner, Wondershare Filmora is the best choice. This professional software comes with multiple editing and customization capabilities for creating a desired animated file. You can not only create GIFs, but perform a host of additional functions using the tool like video editing, music editing, and more. Once downloaded on your Windows or Mac systems, the software is all set to work as desired without any limitations.
Wondershare Filmora
Get started easily with Filmora’s powerful performance, intuitive interface, and countless effects!
Try It Free Try It Free Try It Free Learn More >

Pros:
● Support to almost all media formats for high quality video to GIF conversion.
● A wide range of editing and customization options are supported.
● Works as a complete video editing tool.
Cons:
● Paid software
02Giphy
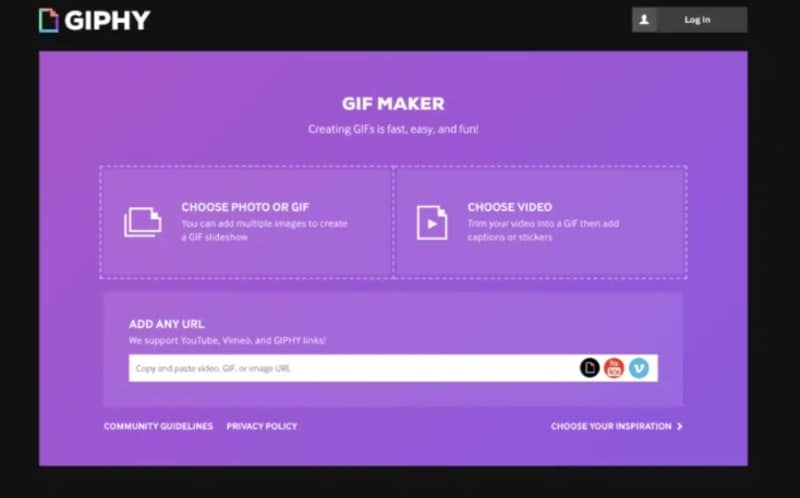
When it comes to GIFs, GIPHY is one of the most widely used tools. The tool allows you to create GIFs not only from the locally saved videos but also from YouTube, Vimeo, and other third-party platforms. There are multiple features for creating GIFs using this tool like selecting the length of the GIF, adding captions, text, frame of the GIF, and more. Not only videos, but the software also allows creating GIFs using multiple static photos.
Pros:
● Create GIFs from local as well as online videos
● User-friendly interface
● Support to multiple platforms and OS
Cons:
● The searching function is not very effective.
● Need to sign-up to use the tool.
03Adobe Creative Cloud Express
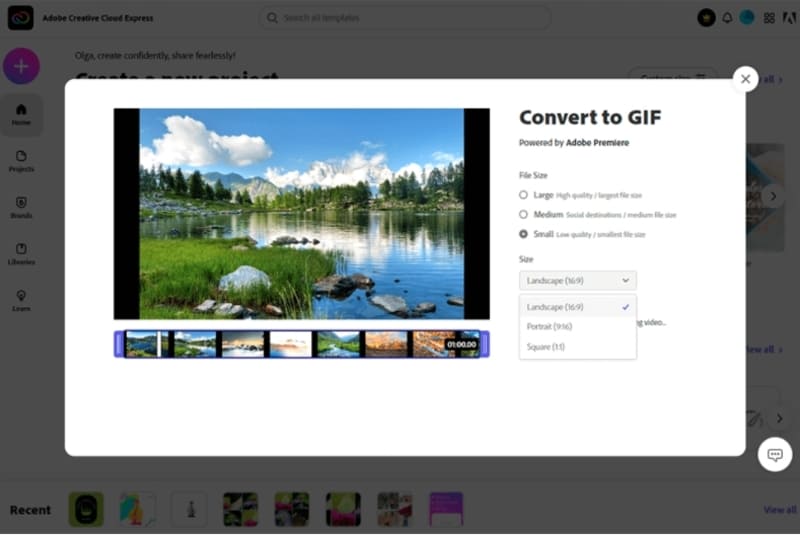
This is a free video conversion tool that allows creating a GIF from videos in an array of formats. The tool gives you the freedom to choose your GIF size option that includes square, portrait, and landscape. Additionally, you can also select the quality of the GIF. Tools for adjusting and editing several parameters of the GIF are also supported by the software.
Pros:
● Allows creating GIFs in 3 size and multiple quality
● Created GIFs can be shared directly to social networking sites.
● Several editing options are available.
Cons:
● Issues of lags and bugs occasionally
● There are no guides
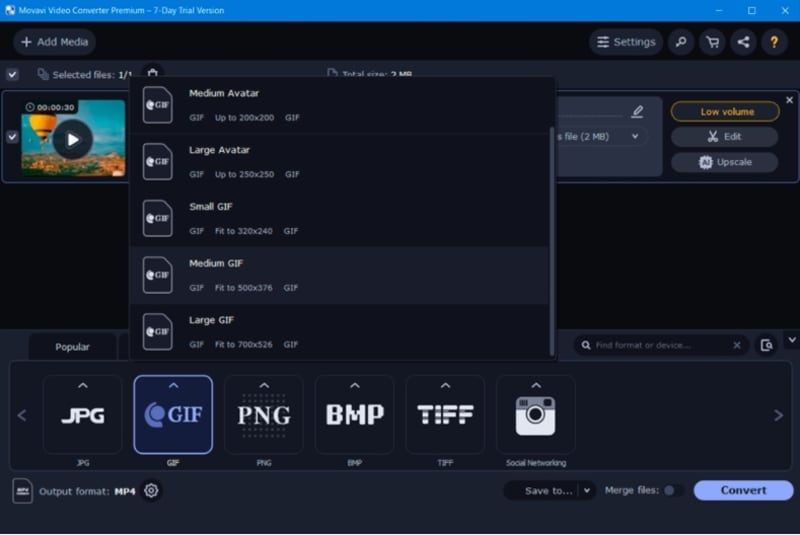
04Movavi
This is a reliable and widely used video editing tool that supports multiple functions including video to GIF conversion. Several useful functions are supported by the software like batch file processing, easy and quick GIF creation, editing options, and more. The tool is available for multiple platforms as well as for different OS.
Pros:
● Support to a wide range of formats
● Multiple editing options
● Available for different platforms and OS
Cons:
● Need to purchase the software after the limited trial period expires.
● The rendering is slow.
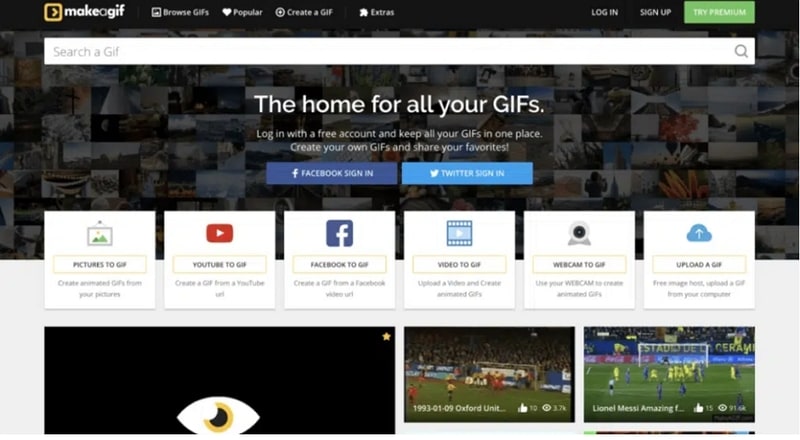
05MakeAGIF
As the name suggests this software is a GIF-making tool that not only converts your videos into a GIF but virtually anything like a collection of pictures, YouTube clips, Facebook clips, and much more. Using the tool you can add captions, stickers, and a lot of other filters to the created GIF. You can even adjust the speed of the GIF and also select the start and the stop time.
Pros:
● Allows creating a GIF from videos, images, URLs, clips, and others.
● Multiple options for GIF customization are available.
● Offers a huge library of GIFs as well.
Cons:
● The free version processes files with a watermark.
● The site has annoying ads.
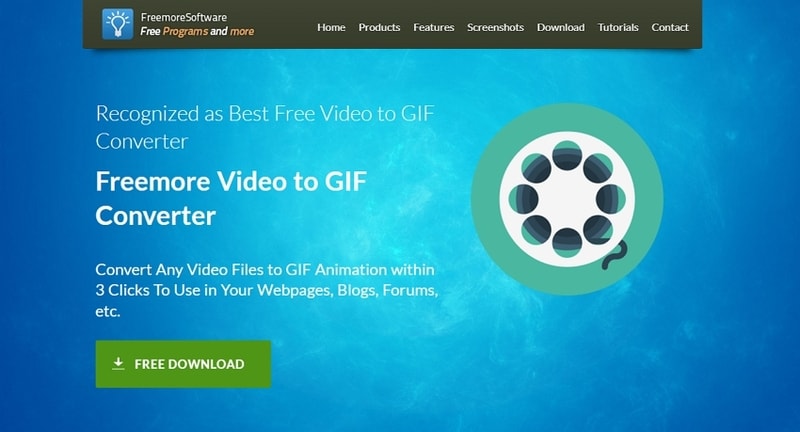
06Freemore Video to GIF Converter
Using this software, videos can be converted into GIFs in a few simple steps. You can also select the frames and also adjust the height and the width of the frames as needed. All key video formats like MP4, MOV, MPEG, and others are supported by the tool. The interface of the tool is simple and the process of creating a GIF is fast.
Pros:
● Free to use software
● Support to multiple video formats
● Allows selecting the exact frames and the width and height of the GIF.
Cons:
● No support for Mac systems.
● Limited customization options as compared to other sites.
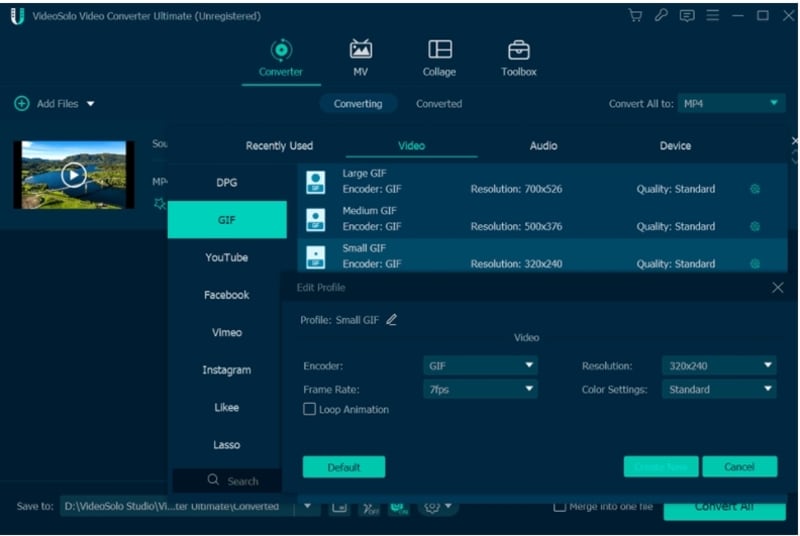
07VideoSolo Video Converter Ultimate
Multiple options for creating a GIF are supported by this software that also lets you convert your videos as well as edit them. Using the editing options, you can choose a specific part of the clip, trim a longer video, or can also join multiple clips for creating a GIF. Using the software you can adjust the color grading, saturation, contrast, and other parameters. Also, you can add a picture or text to the GIF to make it look interesting.
Pros:
● Support to a wide range of formats
● Multiple editing options.
● Fast processing speed.
Cons:
● Locating features can be a complicated task.
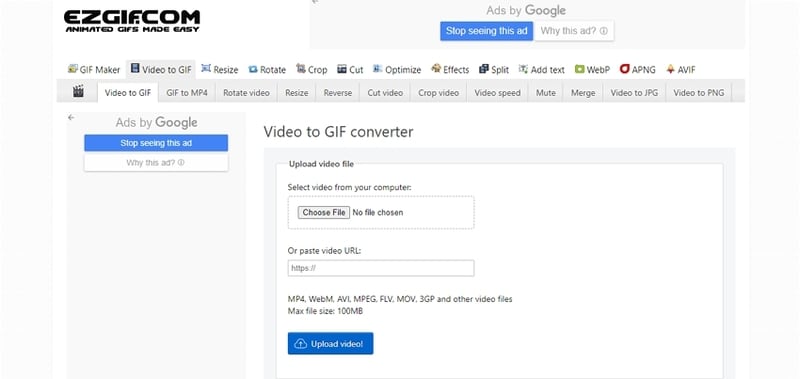
08Ezgif
This is a free online tool for creating GIFs and needs no software download or installation. Simple to use, the program allows adding videos in key formats like MP4, MOV, 3GP, and others for creating a GIF. Local video as well as its URL can be added. The tool allows to trim the unnecessary parts of the video and if not specified the GIF is created using the first 5 seconds of the file.
Pros:
● Free to use online tool.
● Add local videos or online URLs for creating a GIF.
● Allows to trim and crop the added files.
Cons:
● Internet dependency
● The maximum supported file size is 100MB.
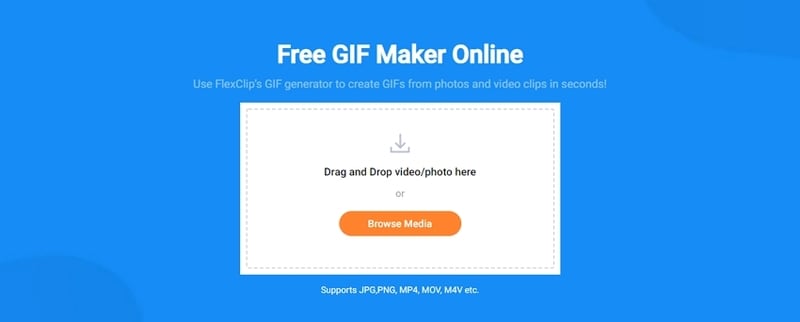
09FlexClip GIF Maker
Using this browser-based tool, videos and images can be quickly converted to GIFs. All the popular media formats are supported by the tool for processing and the interface is user-friendly. Transitions and captions can also be added to GIFs to make them eye-catchy. Other customization options include adjusting the frame, speed, and other parameters.
● No software download or installation is needed.
● Support a wide range of formats.
● Multiple customization options are supported.
Cons:
● Limitation to the video size that can be added.
● Dependency on internet connectivity.
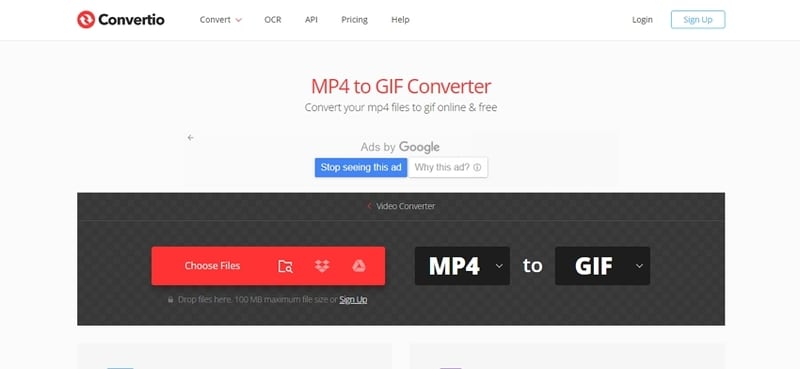
10Convertio
This is a popular online tool that supports video conversion to an array of formats including GIF. Not only local, videos from Google Drive as well as Dropbox can also be added to the interface for processing. If you want a simple tool to create a GIF without much customization and editing, Convertio is the best. The processed files can be saved to the local device or cloud storage.
Pros:
● Add videos from the local device, Google Drive, as well as Dropbox.
● Simple user-interface.
● Processed files can be downloaded and saved to the system as well as the cloud.
Cons:
● The file size limitation of 100MB.
● No option to edit or choose any file specification.
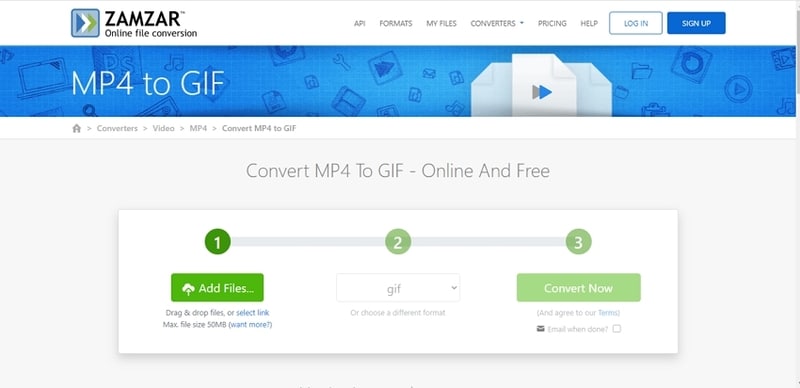
11Zamzar
For a free and quick conversion of videos to GIF, this is an excellent online tool to consider. The process is user-friendly where you just have to add the video or its link and choose GIF as the target format. The tool will automatically convert the added video to a GIF that can be downloaded to the system or can also be sent through an email.
Pros:
● Free and simple to use the tool.
● Support to multiple video formats.
● Processed GIFs can be saved locally or the link can be sent through an email.
Cons:
● Maximum file size support is 50MB.
● No option for selecting any file parameters.
12ImgFlip
Using this online tool, videos and images can be converted to a GIF file quickly. You can either add the media files from your system or also use their link. The tool supports multiple editing and customization options like selecting the size, trimming the video, selecting FPS, adding titles, rotating, and more. You can also save the template of the created file for future use.
Pros:
● GIFs can be created from videos and images.
● Multiple file customization and editing options are supported.
● Multiple options to save, download, and share the created GIF.
Cons:
● The file size limitation of 100MB.
● Internet dependency.
● Key Takeaways from This Episode →
●GIFs are a lot in use these days to express emotion, feelings, or a situation.
●There are several online as well as desktop tools available to convert video to GIF without losing quality.
●Wondershare Filmora is one of the best tools in the category that is simple yet functional and results in high-quality GIF files.
GIFs are images with looping animations for a few seconds and are used a lot over social media sites and other online platforms. There are several sites from where you can download readymade GIFs.
Alternatively, there are countless tools using which customized GIFs can be created from videos. So, if you too are looking for video to GIF converter high quality keep reading.
In this article
01 [The Difference Between A Video And A Gif](#Part 1)
02 [Top 12 Video to GIF Converters](#Part 2)
Part 1 The Difference Between A Video And A Gif
A GIF is a lot in use these days over social media platforms, and other online sites. Standing for Graphics Interchange Format, a GIF is basically a looping animation or a video that has a sequence of frames or images.
Though a lot of people can consider a GIF as a short video, there are a few key differences between the two. The first one lies in the name extension. A GIF file is saved as .gif while a video can be saved into several formats like .mp4, .mov, and more.
A video contains visual information having good quality frames as well as sound while a GIF is a short animation that uses some specific information created from a sequence of frames. Moreover, a GIF does not have a sound and the size is also very small.
Part 2 Top 12 Video to GIF Converters
An array of online and desktop tools is available to convert video to GIF high quality. We have shortlisted the top ones as below.
01**Wondershare Filmora Video Editor **
If you are looking for software that lets you create an excellent GIF in a hassle-free manner, Wondershare Filmora is the best choice. This professional software comes with multiple editing and customization capabilities for creating a desired animated file. You can not only create GIFs, but perform a host of additional functions using the tool like video editing, music editing, and more. Once downloaded on your Windows or Mac systems, the software is all set to work as desired without any limitations.
Wondershare Filmora
Get started easily with Filmora’s powerful performance, intuitive interface, and countless effects!
Try It Free Try It Free Try It Free Learn More >
Pros:
● Support to almost all media formats for high quality video to GIF conversion.
● A wide range of editing and customization options are supported.
● Works as a complete video editing tool.
Cons:
● Paid software
02Giphy
When it comes to GIFs, GIPHY is one of the most widely used tools. The tool allows you to create GIFs not only from the locally saved videos but also from YouTube, Vimeo, and other third-party platforms. There are multiple features for creating GIFs using this tool like selecting the length of the GIF, adding captions, text, frame of the GIF, and more. Not only videos, but the software also allows creating GIFs using multiple static photos.
Pros:
● Create GIFs from local as well as online videos
● User-friendly interface
● Support to multiple platforms and OS
Cons:
● The searching function is not very effective.
● Need to sign-up to use the tool.
03Adobe Creative Cloud Express
This is a free video conversion tool that allows creating a GIF from videos in an array of formats. The tool gives you the freedom to choose your GIF size option that includes square, portrait, and landscape. Additionally, you can also select the quality of the GIF. Tools for adjusting and editing several parameters of the GIF are also supported by the software.
Pros:
● Allows creating GIFs in 3 size and multiple quality
● Created GIFs can be shared directly to social networking sites.
● Several editing options are available.
Cons:
● Issues of lags and bugs occasionally
● There are no guides
04Movavi
This is a reliable and widely used video editing tool that supports multiple functions including video to GIF conversion. Several useful functions are supported by the software like batch file processing, easy and quick GIF creation, editing options, and more. The tool is available for multiple platforms as well as for different OS.
Pros:
● Support to a wide range of formats
● Multiple editing options
● Available for different platforms and OS
Cons:
● Need to purchase the software after the limited trial period expires.
● The rendering is slow.
05MakeAGIF
As the name suggests this software is a GIF-making tool that not only converts your videos into a GIF but virtually anything like a collection of pictures, YouTube clips, Facebook clips, and much more. Using the tool you can add captions, stickers, and a lot of other filters to the created GIF. You can even adjust the speed of the GIF and also select the start and the stop time.
Pros:
● Allows creating a GIF from videos, images, URLs, clips, and others.
● Multiple options for GIF customization are available.
● Offers a huge library of GIFs as well.
Cons:
● The free version processes files with a watermark.
● The site has annoying ads.
06Freemore Video to GIF Converter
Using this software, videos can be converted into GIFs in a few simple steps. You can also select the frames and also adjust the height and the width of the frames as needed. All key video formats like MP4, MOV, MPEG, and others are supported by the tool. The interface of the tool is simple and the process of creating a GIF is fast.
Pros:
● Free to use software
● Support to multiple video formats
● Allows selecting the exact frames and the width and height of the GIF.
Cons:
● No support for Mac systems.
● Limited customization options as compared to other sites.
07VideoSolo Video Converter Ultimate
Multiple options for creating a GIF are supported by this software that also lets you convert your videos as well as edit them. Using the editing options, you can choose a specific part of the clip, trim a longer video, or can also join multiple clips for creating a GIF. Using the software you can adjust the color grading, saturation, contrast, and other parameters. Also, you can add a picture or text to the GIF to make it look interesting.
Pros:
● Support to a wide range of formats
● Multiple editing options.
● Fast processing speed.
Cons:
● Locating features can be a complicated task.
08Ezgif
This is a free online tool for creating GIFs and needs no software download or installation. Simple to use, the program allows adding videos in key formats like MP4, MOV, 3GP, and others for creating a GIF. Local video as well as its URL can be added. The tool allows to trim the unnecessary parts of the video and if not specified the GIF is created using the first 5 seconds of the file.
Pros:
● Free to use online tool.
● Add local videos or online URLs for creating a GIF.
● Allows to trim and crop the added files.
Cons:
● Internet dependency
● The maximum supported file size is 100MB.
09FlexClip GIF Maker
Using this browser-based tool, videos and images can be quickly converted to GIFs. All the popular media formats are supported by the tool for processing and the interface is user-friendly. Transitions and captions can also be added to GIFs to make them eye-catchy. Other customization options include adjusting the frame, speed, and other parameters.
● No software download or installation is needed.
● Support a wide range of formats.
● Multiple customization options are supported.
Cons:
● Limitation to the video size that can be added.
● Dependency on internet connectivity.
10Convertio
This is a popular online tool that supports video conversion to an array of formats including GIF. Not only local, videos from Google Drive as well as Dropbox can also be added to the interface for processing. If you want a simple tool to create a GIF without much customization and editing, Convertio is the best. The processed files can be saved to the local device or cloud storage.
Pros:
● Add videos from the local device, Google Drive, as well as Dropbox.
● Simple user-interface.
● Processed files can be downloaded and saved to the system as well as the cloud.
Cons:
● The file size limitation of 100MB.
● No option to edit or choose any file specification.
11Zamzar
For a free and quick conversion of videos to GIF, this is an excellent online tool to consider. The process is user-friendly where you just have to add the video or its link and choose GIF as the target format. The tool will automatically convert the added video to a GIF that can be downloaded to the system or can also be sent through an email.
Pros:
● Free and simple to use the tool.
● Support to multiple video formats.
● Processed GIFs can be saved locally or the link can be sent through an email.
Cons:
● Maximum file size support is 50MB.
● No option for selecting any file parameters.
12ImgFlip
Using this online tool, videos and images can be converted to a GIF file quickly. You can either add the media files from your system or also use their link. The tool supports multiple editing and customization options like selecting the size, trimming the video, selecting FPS, adding titles, rotating, and more. You can also save the template of the created file for future use.
Pros:
● GIFs can be created from videos and images.
● Multiple file customization and editing options are supported.
● Multiple options to save, download, and share the created GIF.
Cons:
● The file size limitation of 100MB.
● Internet dependency.
● Key Takeaways from This Episode →
●GIFs are a lot in use these days to express emotion, feelings, or a situation.
●There are several online as well as desktop tools available to convert video to GIF without losing quality.
●Wondershare Filmora is one of the best tools in the category that is simple yet functional and results in high-quality GIF files.
Top 8 Tools Tell You How to Make Slideshows for Instagram
Top 8 Tools Tell You How to Make Slideshows for Instagram
An easy yet powerful editor
Numerous effects to choose from
Detailed tutorials provided by the official channel
Instagram slideshows land among the latest social media trends of fun and entertainment. Learn how to attract jaw dropping peer attention with creating the same!
In this article
01 [When Should You Use an Instagram Slideshow?](#Part 1)
02 [How to Make an Instagram Slideshow with Music?](#Part 2)
03 [8 Best Instagram Slideshow Apps for Creating Outstanding Slideshow](#Part 3)
Part 1 When Should You Use an Instagram Slideshow?
Revolutions in technology has opened doors to a plenty of new and exciting means of information sharing, entertainment and communication. Playing its part in the game, Instagram slideshow has emerged as an exciting means of quick and impactful content sharing. Diving deeper into the discussion, let us talk about the different areas of working with an Instagram slide show in the following section:
01Explanatory Product Demonstrations and Stepwise Tutorials
Considering the diverse media collaboration entertained by this social media platform, you get the liberty to include 10 media files of videos and images while creating a slideshow on Instagram. This is an affordably sufficient media space to demonstrate your newly launched product in front of the target audience.
The aforesaid characteristic of a slideshow for Instagram can be put to another use of creating detailed, step by step guides and product usage tutorials to create an increased and confident customer reach and brand applicability. A few examples include the presentations of recipes by food blogs and chefs, or a detailed look of the day’s outfit by fashion bloggers.
02Interactive Storytelling or Recreate an Event
Gone are the times when stories and events were restricted to a single image or video with a limited scope of understanding and explanation. You can now work with a combination of multiple images and videos to create more vivid and graphical descriptions of stories, narratives and events.
You can work on creating an engaging slideshow for Instagram to tell an amazing story, voice a narration from the beginning to the end, or share your best moments with your cherished audience, which will surely give them the feel of enjoying the adventure along with you.
03Create a Collection
You can now use a slide show for Instagram to design and present a collection of manifold ideas and products within a single post. You can improvise the collection with displaying a series of related products, showcasing a summary of your different blog posts through the week, or simply present a list of your most reliable inspirations, resources and influencers.
04Exciting Video Teasers
If you have a scheduled video release to entertain your audience, try working with interactive slideshows for Instagram to create some sensational teaser content of the upcoming release to imbibe a natural sense of curiosity within your audience.
You can experiment with releasing a mini photoshoot tour of your filming set, share close up progression details, or include a cliffhanger in the end of your Instagram slideshow to ensure the retrieval of your audience towards watching the release of the actual big content. You can use these short teasers as effective means of creating a campaign buzz, while building a closer connect with your audience.
Part 2 How to Make an Instagram Slideshow with Music?
By now, you must have gathered enough knowledge regarding the credibility of Instagram slideshows in catering to a diversity of commercial, professional and personal content sharing needs. Considering the same, you may conveniently feel motivated to try hands at creating stunning slideshow presentations for Instagram on your own.
Adhering to the concern, let us move ahead with our discussion, while talking about how to make a slideshow for Instagram and supplement the same with adaptable background music to develop amazing content masterpieces and share them with social media peers, while grabbing their obvious attention.
While there are a number of choices in the software market to choose your Instagram slideshow creator tool, the FlexClip tool can be a reliable option. Read though the following section to learn the slideshow creation process in the program with a comprehensive and stepwise tutorial guide:
Step 1: Download the Slideshow Creator Tool
Visit the official website of FlexClip to download and install the slideshow maker software in your preferred device.

Step 2: Start from Scratch
After a successful installation, proceed to launch the tool in your system and wait till the software greets you with its welcome interface. Here, you will have to reach to and tap the ‘Start to Create’ button to begin with the slideshow creation process. You can also select a preset template to work on your slideshow if nothing new clicks in your mind.
Step 3: Select an Aspect Ratio
In the tool’s creator window, navigate to the ‘Options Panel’ at the left and click on ‘More’ to select a suitable aspect ratio. Picking the 9:16 ratio would be a good choice.

Step 4: Upload Your Media
In the same ‘Options Panel’, click on ‘Media’ for dragging and dropping the desired video and image files from your device to the program’s media timeline, followed by applying them to the tool’s storyboard. You can alternatively, choose to directly work with media pages of any preset slideshow template.

Step 5: Customize Your Media
You can now proceed to improvise your media files with amazing texts, filters, stickers, emojis, widgets, etc., by clicking on specific object categories from the ‘Options Panel’.

Step 6: Include Seamless Transitions
Proceed to uplift your creation to the next level with the application of stunning image and video transitions. Navigate to the ‘Options Panel’ and tap ‘Elements’. A variety of transition effects will be displayed to choose from. Select the one you like to add it to your slideshow.

Step 7: Add a Background Music
An in line background audio is the best way to set the mood of your slideshow. Choose to add the same to your creation for making a more engaging impact on the audience. Visit the ‘Options Panel’ again and click on ‘Music’ to open the program’s audio library and select a perfect background music from the huge variety of choices, to include in your slideshow.

Step 8: Preview Your Creation
When you have finished customizing your slideshow, navigate to the top right corner of the editor’s storyboard and hit the ‘Preview’ button to visualize and ensure that your slideshow has everything at the right place. You can continue editing if there is a need to make some changes.
Step 9: Time to Save and Share!
When you are happy with your work, consider saving it either to your device or Google Dropbox, from where you can easily upload the same to your Instagram handle.
Part 3 Best Instagram Slideshow Apps for Creating Outstanding Slideshow
Social media is the talk of the trend in today’s times, which has extended its boundaries to visibly everything around us. Speaking in the light of the fact, slideshow presentations are no exception. Social media platforms today have come up with amazing tools and applications to create and share a stunning slideshow Instagram story with utmost ease and within an affordable time span.
Now that you have developed a comprehensive understanding of the credibility of working with Instagram slideshows and their creation process with the inclusion of complementary background music, let us dive into learning about some of the best and most popular Instagram apps for creating awesome slideshow presentations in the following section:
01Filme Lite
This tool lands among the leading user preferences to work on creating slideshow presentations. The application software is packed with a heap of latest features that form the Instagram trends in current times.
Apart from complementing your slideshow creations with tons of features, this slideshow maker for Instagram grants you the liberty to include your most loved videos and images within your presentation and customize them with a diverse range of effects, along with adjusting their play duration within the slideshow. Additional to image and video customization, you are also allowed to choose the image transition style that perfectly suits your content arrangement within the slides.
Working with the tool, you can be sure of getting an unparalleled slideshow creation experience with a very interactive and user oriented design interface, that is simple enough to be easily understood and worked upon by a newbie to the creative world.
02VivaVideo
If you are working on a detailed presentation and wish to spark up your creation with stunning varieties of jaw dropping special effects, consider creating your PowerPoint slideshows in this application. The tool’s effect library is a storehouse of the most amazing special effects that promise of transforming your slideshow into a visual masterpiece.
You can separately apply these effects to each of the slideshow images or choose to work on a combination of selected effects to include within a single video. Apart from this, you are free to choose an apt background music for your presentation slides from the extensive audio library of the software. The bottom line is; you are assured to a complete fun experience while creating slideshows with this tool.
03Movavi
If you are familiar enough with the fundamental concepts and the trivial anecdotes of working with slideshow presentations and want to take your graphic creativity to the next level, you can try hands at using the Movavi slideshow creator software to design high end PowerPoint presentations of professional quality. The best thing about the tool is, it works online and does not require a software download for usage concerns.
Along with creating online slideshow presentations with ease, the tool permits you to create online videos within minutes and instantly download the same for specific usage. You can further, pop up your presentation slides with wonderful transition and animation effects and also make adjustments in the play duration of each slide. The tool lets you choose and add a perfect background music to your presentation from its conveniently vast audio library.
04Slideshow Lab
If you have just landed into the world of creating slideshow presentations and are looking for easy solutions on how to make a slideshow on Instagram, consider working with this software to polish your design creativity. The simple and user cohesive interface of the tool is best for beginners to understand and get customary with the creation process, that takes the minimum possible time to render an appreciable PowerPoint presentation.
Talking about the slideshow design process, you will need to start with selecting a set of desired images, followed by uploading the same into the tool’s slideshow creator timeline. The next step is to arrange the images in the sequential order of appearance, select an appealing background music and apply smooth image transitions. When you are done with everything, proceed to save the presentation to your device.
05MoShow
While you can choose to create stunning slideshow presentations with almost any class of images, the aforesaid app works best to render Instagram images into a top rated Instagram photo slideshow without compromising with the high resolution image quality of Instagram photos. The application integrates motion pictures and lighting effects to transform the otherwise regular images into lively still captures.
Considering the credibility of the tool in overall user experience, its indeed a thumbs up from graphic creators across the globe, thanks to its smart and interactive interface, in time performance and outstanding creation outputs.
06InVideo Editor
Put an end to your search of effective solutions on how to do a slideshow on Instagram with the InVideo Editor, a smart video and graphic editor that can also be employed to adhere to the requirement of creating amazing slideshow presentations from Instagram media. While the creation process hardly takes a few minutes, you can work with the application to explore your editing creativity to the finest levels. The tool works well with any of your MacOs and Windows compatible devices.
The editor’s effects library is loaded with tons of graphic transitions and filters that are dedicated to enhance the contents of your presentation with utmost ease. You can add creative modifications to the slideshow media, such as, cut, crop and trim videos and images and add the most convincing music, overlays, fonts, etc., and enjoy an additional free access to hundreds of stock videos and slideshow templates.
07LightMV
This one is an online slideshow creator utility that works well with almost any operating system including Windows, iOS, Android and Mac. Essentially a cloud centered editor program, this tool caters to your high quality slideshow creation needs in the most effective way. The design process is quite simple, where you only need to add the images and videos, design your presentation and wait till everything comes to place.
What’s more appealing factor about the tool is that you will never need to download the program in your device or purchase a subscription plan to use the application. All you need to do is land into the tool’s website in your favorite browser and tap on the ‘Slideshow’ option to begin with the creation process. You can select from a heap of preset stunning slideshow templates to create the most enhanced PowerPoint presentation.
08Fliptastic
The Fliptastic slideshow creator app is exclusively developed to adhere to the graphic design concerns of iOS users. This one is a no cost graphic utility with a plethora of versatile features and considerable user backup. The app’s effect library is packed with a unique set of slideshow design templates, transitions, background music choices and filters that work to compliment your presentation with the subtlest look ever.
Paying a bit extra attention to the audio inclusion within the slides, the app offers you a range of free music files to work with, while additionally allowing you to upload and use one from your device or the internet.
09Creating Instagram Slideshows With Filmora
Talking exclusively within the domain of video creation and editing, the credibility of the Wondershare Filmora Video Editor software needs no introduction. Moving ahead with our discussion, let us learn about the process of creating awesome Instagram slideshows with Filmora in the following section:
Step 1: Download and Install the Program
To begin with addressing the concern of how to make a slideshow on Instagram story, navigate to the official Wondershare website and download the Wondershare Filmora Video Editor to your preferred system and proceed to install the same.

Wondershare Filmora - Best Video Editor for Mac/Windows
5,481,435 people have downloaded it.
Build unique custom animations without breaking a sweat.
Focus on creating epic stories and leave the details to Filmora’s auto features.
Start a creative adventure with drag & drop effects and endless possibilities.
Filmora simplifies advanced features to save you time and effort.
Filmora cuts out repetition so you can move on to your next creative breakthrough.
Step 2: Import Your Media
Launch the editor program and wait for the latter’s welcome screen to appear. Here, you need to import the images, videos and other media files to the editor timeline for including them in your slideshow. It is recommended to collect all the image and video files into one single folder before opening a new slideshow design project.
In the editor’s welcome screen, navigate to the ‘Media’ tab at the top left corner and click on the same to open the ‘Import’ menu. From here, you need to choose the ‘Import a Media Folder’ option, followed by navigating to the folder that contains the to be imported media files. When you have reached to the required folder, select it and tap ‘OK’ to import the same into the project timeline. When all the files have been imported, you can see them in the ‘Project Media’ panel.

Step 3: Timeline Positioning of Media Files
Reach to the ‘File’ menu and choose ‘Preferences’ from the latter’s dropdown menu. In the ‘Preferences’ window, hit the ‘Editing’ tab and tap on ‘Photo Preferences’. From the drop down menu that follows, choose the ‘Crop to Fit’ option to adjust the aspect ratio of your imported images in line with the slideshow project. In case your images have the 9:16 vertical aspect ratio, select the ‘Fit’ option to make a proper screen fit.

You can proceed to include the image zoom and camera pan features within your project by clicking on the ‘Pan & Zoom’ option. You can further, modify the preset durations of transitions, effects and photos in the ‘Editing’ tab itself before adding them to the editor timeline. Another way of doing the same is to drag the ends of the media files inward or outward, post the timeline adding process.

When you have finished making the required adjustments, navigate back the ‘Media Panel’ to include the imported media files within the project timeline. You can either click on the files to add them, or choose to ‘Drag and Drop’ the same at a preferred place within the timeline.
When all the images and videos have been added, proceed to arrange them in the desired order of appearance in the slideshow, followed by adjusting their screen time and play durations through any of the methods explained above.
Step 4: Add Transitions to Eliminate Hard Cuts
The smooth play of a slideshow is often distorted by hard cuts, which can be escaped by applying smooth transition effects to the slides. Consider exploring the ‘Transitions’ tab of Filmora to choose from a diversity of easily customizable transition effects and place them at the intersection point of the respective slides in the project timeline.
Instead of applying the same transition to every slide, prefer choosing the one that exclusively suits the content arrangement and flow within particular slides. This would save your slideshow from getting a repetitive look.

Post the timeline adding of a transition, you can double click on the same to reach the ‘Transition Setting Window’, where you are allowed to customize the play duration and select its ‘Transition Mode’. Play durations can alternatively be customised in the project timeline by dragging the slider in a left or right direction.
Step 5: Add Overlays and Filters for an Improvised Colour Scheme
To enhance the thematic appeal of your slideshow, consider desaturating the colours of the included images with the extensive range of visual effects and overlays available in the ‘Effects’ tab of the software’s editing timeline. Opening the tab, you are exposed to a series of ‘Filter and Overlay’ categories, that have further subdivisions of Light Leaks, Sepia Tone and Lomography.
To add a particular effect, place it in the timeline track above the desired clip or image. Observe the changes in the ‘Preview Panel’ and proceed to adjust the effect settings if required, by double clicking on the particular effect.

Step 6: Include Motion Graphic Elements
To supplement your slideshow with elegant motion graphics, navigate to the ‘Elements’ tab in the editor timeline. From here, you can access and choose any suitable motion graphic template from a diversity of available choices, to include within the project timeline. The step is completely optional and you should pay attention to the style of content presentation and the cause of creation of your slideshow when choosing to add these elements to the same.

Step 7: Record Voiceovers and Create Soundtracks
To record a voiceover for your slideshow, navigate to the ‘Media’ tab and tap the ‘Record’ dropdown menu. Click on ‘Record Voiceover’ in the list of options that appears. The ‘Record Audio’ icon pops up and you now need to select a microphone to be used in the recording process. When you are ready, tap the ‘Record’ button to let the recording begin.

You can now see your voice recording appear in the ‘Media’ tab with the previously imported media files, ready to be placed within the audio track of the project timeline. Filmora’s audio library is a storehouse of free access music and audio effects. To add one to your slideshow, navigate and click on the ‘Audio’ tab to select from the extensive Rock, Young & Bright, Electronic, etc., music subcategories till you get the perfect match for your presentation.

Once you have selected all the music tracks, place them one by one on the project timeline and move ahead with adjusting their play durations.
Step 8: Export Your Creation
When you are satisfied with your work, you can export the slideshow directly from Filmora to a number of media sharing platforms. All you need to do is, navigate to and tap the ‘Export’ button in the top right corner of the editor screen and proceed to set the resolution and frame rate, and select the output file format of your created slideshow in the ‘Export Window’ that appears.

When you are ready with everything, click on the ‘Export’ button at the bottom right corner of the screen to share your slideshow across different platforms, including YouTube, Instagram, Vimeo, etc.
The time required by Filmora to render your slideshow on the chosen platform will depend on the output file size. Considering the fact that larger files require a much longer time to be rendered, it would be a smart decision to limit the file size of your slideshow within 500 MB.
● Ending Thoughts →
● Instagram slideshows are exciting means of diving into fun-filled entertainment with your social media peers.
● When looking for solutions on how to create a slideshow on Instagram, there are loads of choices in the software market.
● Talking of best creator alternatives, you can pick the Wondershare Filmora slideshow developer program to make an amazing Insta story slideshow.
Instagram slideshows land among the latest social media trends of fun and entertainment. Learn how to attract jaw dropping peer attention with creating the same!
In this article
01 [When Should You Use an Instagram Slideshow?](#Part 1)
02 [How to Make an Instagram Slideshow with Music?](#Part 2)
03 [8 Best Instagram Slideshow Apps for Creating Outstanding Slideshow](#Part 3)
Part 1 When Should You Use an Instagram Slideshow?
Revolutions in technology has opened doors to a plenty of new and exciting means of information sharing, entertainment and communication. Playing its part in the game, Instagram slideshow has emerged as an exciting means of quick and impactful content sharing. Diving deeper into the discussion, let us talk about the different areas of working with an Instagram slide show in the following section:
01Explanatory Product Demonstrations and Stepwise Tutorials
Considering the diverse media collaboration entertained by this social media platform, you get the liberty to include 10 media files of videos and images while creating a slideshow on Instagram. This is an affordably sufficient media space to demonstrate your newly launched product in front of the target audience.
The aforesaid characteristic of a slideshow for Instagram can be put to another use of creating detailed, step by step guides and product usage tutorials to create an increased and confident customer reach and brand applicability. A few examples include the presentations of recipes by food blogs and chefs, or a detailed look of the day’s outfit by fashion bloggers.
02Interactive Storytelling or Recreate an Event
Gone are the times when stories and events were restricted to a single image or video with a limited scope of understanding and explanation. You can now work with a combination of multiple images and videos to create more vivid and graphical descriptions of stories, narratives and events.
You can work on creating an engaging slideshow for Instagram to tell an amazing story, voice a narration from the beginning to the end, or share your best moments with your cherished audience, which will surely give them the feel of enjoying the adventure along with you.
03Create a Collection
You can now use a slide show for Instagram to design and present a collection of manifold ideas and products within a single post. You can improvise the collection with displaying a series of related products, showcasing a summary of your different blog posts through the week, or simply present a list of your most reliable inspirations, resources and influencers.
04Exciting Video Teasers
If you have a scheduled video release to entertain your audience, try working with interactive slideshows for Instagram to create some sensational teaser content of the upcoming release to imbibe a natural sense of curiosity within your audience.
You can experiment with releasing a mini photoshoot tour of your filming set, share close up progression details, or include a cliffhanger in the end of your Instagram slideshow to ensure the retrieval of your audience towards watching the release of the actual big content. You can use these short teasers as effective means of creating a campaign buzz, while building a closer connect with your audience.
Part 2 How to Make an Instagram Slideshow with Music?
By now, you must have gathered enough knowledge regarding the credibility of Instagram slideshows in catering to a diversity of commercial, professional and personal content sharing needs. Considering the same, you may conveniently feel motivated to try hands at creating stunning slideshow presentations for Instagram on your own.
Adhering to the concern, let us move ahead with our discussion, while talking about how to make a slideshow for Instagram and supplement the same with adaptable background music to develop amazing content masterpieces and share them with social media peers, while grabbing their obvious attention.
While there are a number of choices in the software market to choose your Instagram slideshow creator tool, the FlexClip tool can be a reliable option. Read though the following section to learn the slideshow creation process in the program with a comprehensive and stepwise tutorial guide:
Step 1: Download the Slideshow Creator Tool
Visit the official website of FlexClip to download and install the slideshow maker software in your preferred device.
Step 2: Start from Scratch
After a successful installation, proceed to launch the tool in your system and wait till the software greets you with its welcome interface. Here, you will have to reach to and tap the ‘Start to Create’ button to begin with the slideshow creation process. You can also select a preset template to work on your slideshow if nothing new clicks in your mind.
Step 3: Select an Aspect Ratio
In the tool’s creator window, navigate to the ‘Options Panel’ at the left and click on ‘More’ to select a suitable aspect ratio. Picking the 9:16 ratio would be a good choice.
Step 4: Upload Your Media
In the same ‘Options Panel’, click on ‘Media’ for dragging and dropping the desired video and image files from your device to the program’s media timeline, followed by applying them to the tool’s storyboard. You can alternatively, choose to directly work with media pages of any preset slideshow template.
Step 5: Customize Your Media
You can now proceed to improvise your media files with amazing texts, filters, stickers, emojis, widgets, etc., by clicking on specific object categories from the ‘Options Panel’.
Step 6: Include Seamless Transitions
Proceed to uplift your creation to the next level with the application of stunning image and video transitions. Navigate to the ‘Options Panel’ and tap ‘Elements’. A variety of transition effects will be displayed to choose from. Select the one you like to add it to your slideshow.
Step 7: Add a Background Music
An in line background audio is the best way to set the mood of your slideshow. Choose to add the same to your creation for making a more engaging impact on the audience. Visit the ‘Options Panel’ again and click on ‘Music’ to open the program’s audio library and select a perfect background music from the huge variety of choices, to include in your slideshow.
Step 8: Preview Your Creation
When you have finished customizing your slideshow, navigate to the top right corner of the editor’s storyboard and hit the ‘Preview’ button to visualize and ensure that your slideshow has everything at the right place. You can continue editing if there is a need to make some changes.
Step 9: Time to Save and Share!
When you are happy with your work, consider saving it either to your device or Google Dropbox, from where you can easily upload the same to your Instagram handle.
Part 3 Best Instagram Slideshow Apps for Creating Outstanding Slideshow
Social media is the talk of the trend in today’s times, which has extended its boundaries to visibly everything around us. Speaking in the light of the fact, slideshow presentations are no exception. Social media platforms today have come up with amazing tools and applications to create and share a stunning slideshow Instagram story with utmost ease and within an affordable time span.
Now that you have developed a comprehensive understanding of the credibility of working with Instagram slideshows and their creation process with the inclusion of complementary background music, let us dive into learning about some of the best and most popular Instagram apps for creating awesome slideshow presentations in the following section:
01Filme Lite
This tool lands among the leading user preferences to work on creating slideshow presentations. The application software is packed with a heap of latest features that form the Instagram trends in current times.
Apart from complementing your slideshow creations with tons of features, this slideshow maker for Instagram grants you the liberty to include your most loved videos and images within your presentation and customize them with a diverse range of effects, along with adjusting their play duration within the slideshow. Additional to image and video customization, you are also allowed to choose the image transition style that perfectly suits your content arrangement within the slides.
Working with the tool, you can be sure of getting an unparalleled slideshow creation experience with a very interactive and user oriented design interface, that is simple enough to be easily understood and worked upon by a newbie to the creative world.
02VivaVideo
If you are working on a detailed presentation and wish to spark up your creation with stunning varieties of jaw dropping special effects, consider creating your PowerPoint slideshows in this application. The tool’s effect library is a storehouse of the most amazing special effects that promise of transforming your slideshow into a visual masterpiece.
You can separately apply these effects to each of the slideshow images or choose to work on a combination of selected effects to include within a single video. Apart from this, you are free to choose an apt background music for your presentation slides from the extensive audio library of the software. The bottom line is; you are assured to a complete fun experience while creating slideshows with this tool.
03Movavi
If you are familiar enough with the fundamental concepts and the trivial anecdotes of working with slideshow presentations and want to take your graphic creativity to the next level, you can try hands at using the Movavi slideshow creator software to design high end PowerPoint presentations of professional quality. The best thing about the tool is, it works online and does not require a software download for usage concerns.
Along with creating online slideshow presentations with ease, the tool permits you to create online videos within minutes and instantly download the same for specific usage. You can further, pop up your presentation slides with wonderful transition and animation effects and also make adjustments in the play duration of each slide. The tool lets you choose and add a perfect background music to your presentation from its conveniently vast audio library.
04Slideshow Lab
If you have just landed into the world of creating slideshow presentations and are looking for easy solutions on how to make a slideshow on Instagram, consider working with this software to polish your design creativity. The simple and user cohesive interface of the tool is best for beginners to understand and get customary with the creation process, that takes the minimum possible time to render an appreciable PowerPoint presentation.
Talking about the slideshow design process, you will need to start with selecting a set of desired images, followed by uploading the same into the tool’s slideshow creator timeline. The next step is to arrange the images in the sequential order of appearance, select an appealing background music and apply smooth image transitions. When you are done with everything, proceed to save the presentation to your device.
05MoShow
While you can choose to create stunning slideshow presentations with almost any class of images, the aforesaid app works best to render Instagram images into a top rated Instagram photo slideshow without compromising with the high resolution image quality of Instagram photos. The application integrates motion pictures and lighting effects to transform the otherwise regular images into lively still captures.
Considering the credibility of the tool in overall user experience, its indeed a thumbs up from graphic creators across the globe, thanks to its smart and interactive interface, in time performance and outstanding creation outputs.
06InVideo Editor
Put an end to your search of effective solutions on how to do a slideshow on Instagram with the InVideo Editor, a smart video and graphic editor that can also be employed to adhere to the requirement of creating amazing slideshow presentations from Instagram media. While the creation process hardly takes a few minutes, you can work with the application to explore your editing creativity to the finest levels. The tool works well with any of your MacOs and Windows compatible devices.
The editor’s effects library is loaded with tons of graphic transitions and filters that are dedicated to enhance the contents of your presentation with utmost ease. You can add creative modifications to the slideshow media, such as, cut, crop and trim videos and images and add the most convincing music, overlays, fonts, etc., and enjoy an additional free access to hundreds of stock videos and slideshow templates.
07LightMV
This one is an online slideshow creator utility that works well with almost any operating system including Windows, iOS, Android and Mac. Essentially a cloud centered editor program, this tool caters to your high quality slideshow creation needs in the most effective way. The design process is quite simple, where you only need to add the images and videos, design your presentation and wait till everything comes to place.
What’s more appealing factor about the tool is that you will never need to download the program in your device or purchase a subscription plan to use the application. All you need to do is land into the tool’s website in your favorite browser and tap on the ‘Slideshow’ option to begin with the creation process. You can select from a heap of preset stunning slideshow templates to create the most enhanced PowerPoint presentation.
08Fliptastic
The Fliptastic slideshow creator app is exclusively developed to adhere to the graphic design concerns of iOS users. This one is a no cost graphic utility with a plethora of versatile features and considerable user backup. The app’s effect library is packed with a unique set of slideshow design templates, transitions, background music choices and filters that work to compliment your presentation with the subtlest look ever.
Paying a bit extra attention to the audio inclusion within the slides, the app offers you a range of free music files to work with, while additionally allowing you to upload and use one from your device or the internet.
09Creating Instagram Slideshows With Filmora
Talking exclusively within the domain of video creation and editing, the credibility of the Wondershare Filmora Video Editor software needs no introduction. Moving ahead with our discussion, let us learn about the process of creating awesome Instagram slideshows with Filmora in the following section:
Step 1: Download and Install the Program
To begin with addressing the concern of how to make a slideshow on Instagram story, navigate to the official Wondershare website and download the Wondershare Filmora Video Editor to your preferred system and proceed to install the same.
Wondershare Filmora - Best Video Editor for Mac/Windows
5,481,435 people have downloaded it.
Build unique custom animations without breaking a sweat.
Focus on creating epic stories and leave the details to Filmora’s auto features.
Start a creative adventure with drag & drop effects and endless possibilities.
Filmora simplifies advanced features to save you time and effort.
Filmora cuts out repetition so you can move on to your next creative breakthrough.
Step 2: Import Your Media
Launch the editor program and wait for the latter’s welcome screen to appear. Here, you need to import the images, videos and other media files to the editor timeline for including them in your slideshow. It is recommended to collect all the image and video files into one single folder before opening a new slideshow design project.
In the editor’s welcome screen, navigate to the ‘Media’ tab at the top left corner and click on the same to open the ‘Import’ menu. From here, you need to choose the ‘Import a Media Folder’ option, followed by navigating to the folder that contains the to be imported media files. When you have reached to the required folder, select it and tap ‘OK’ to import the same into the project timeline. When all the files have been imported, you can see them in the ‘Project Media’ panel.
Step 3: Timeline Positioning of Media Files
Reach to the ‘File’ menu and choose ‘Preferences’ from the latter’s dropdown menu. In the ‘Preferences’ window, hit the ‘Editing’ tab and tap on ‘Photo Preferences’. From the drop down menu that follows, choose the ‘Crop to Fit’ option to adjust the aspect ratio of your imported images in line with the slideshow project. In case your images have the 9:16 vertical aspect ratio, select the ‘Fit’ option to make a proper screen fit.
You can proceed to include the image zoom and camera pan features within your project by clicking on the ‘Pan & Zoom’ option. You can further, modify the preset durations of transitions, effects and photos in the ‘Editing’ tab itself before adding them to the editor timeline. Another way of doing the same is to drag the ends of the media files inward or outward, post the timeline adding process.
When you have finished making the required adjustments, navigate back the ‘Media Panel’ to include the imported media files within the project timeline. You can either click on the files to add them, or choose to ‘Drag and Drop’ the same at a preferred place within the timeline.
When all the images and videos have been added, proceed to arrange them in the desired order of appearance in the slideshow, followed by adjusting their screen time and play durations through any of the methods explained above.
Step 4: Add Transitions to Eliminate Hard Cuts
The smooth play of a slideshow is often distorted by hard cuts, which can be escaped by applying smooth transition effects to the slides. Consider exploring the ‘Transitions’ tab of Filmora to choose from a diversity of easily customizable transition effects and place them at the intersection point of the respective slides in the project timeline.
Instead of applying the same transition to every slide, prefer choosing the one that exclusively suits the content arrangement and flow within particular slides. This would save your slideshow from getting a repetitive look.
Post the timeline adding of a transition, you can double click on the same to reach the ‘Transition Setting Window’, where you are allowed to customize the play duration and select its ‘Transition Mode’. Play durations can alternatively be customised in the project timeline by dragging the slider in a left or right direction.
Step 5: Add Overlays and Filters for an Improvised Colour Scheme
To enhance the thematic appeal of your slideshow, consider desaturating the colours of the included images with the extensive range of visual effects and overlays available in the ‘Effects’ tab of the software’s editing timeline. Opening the tab, you are exposed to a series of ‘Filter and Overlay’ categories, that have further subdivisions of Light Leaks, Sepia Tone and Lomography.
To add a particular effect, place it in the timeline track above the desired clip or image. Observe the changes in the ‘Preview Panel’ and proceed to adjust the effect settings if required, by double clicking on the particular effect.
Step 6: Include Motion Graphic Elements
To supplement your slideshow with elegant motion graphics, navigate to the ‘Elements’ tab in the editor timeline. From here, you can access and choose any suitable motion graphic template from a diversity of available choices, to include within the project timeline. The step is completely optional and you should pay attention to the style of content presentation and the cause of creation of your slideshow when choosing to add these elements to the same.
Step 7: Record Voiceovers and Create Soundtracks
To record a voiceover for your slideshow, navigate to the ‘Media’ tab and tap the ‘Record’ dropdown menu. Click on ‘Record Voiceover’ in the list of options that appears. The ‘Record Audio’ icon pops up and you now need to select a microphone to be used in the recording process. When you are ready, tap the ‘Record’ button to let the recording begin.
You can now see your voice recording appear in the ‘Media’ tab with the previously imported media files, ready to be placed within the audio track of the project timeline. Filmora’s audio library is a storehouse of free access music and audio effects. To add one to your slideshow, navigate and click on the ‘Audio’ tab to select from the extensive Rock, Young & Bright, Electronic, etc., music subcategories till you get the perfect match for your presentation.
Once you have selected all the music tracks, place them one by one on the project timeline and move ahead with adjusting their play durations.
Step 8: Export Your Creation
When you are satisfied with your work, you can export the slideshow directly from Filmora to a number of media sharing platforms. All you need to do is, navigate to and tap the ‘Export’ button in the top right corner of the editor screen and proceed to set the resolution and frame rate, and select the output file format of your created slideshow in the ‘Export Window’ that appears.
When you are ready with everything, click on the ‘Export’ button at the bottom right corner of the screen to share your slideshow across different platforms, including YouTube, Instagram, Vimeo, etc.
The time required by Filmora to render your slideshow on the chosen platform will depend on the output file size. Considering the fact that larger files require a much longer time to be rendered, it would be a smart decision to limit the file size of your slideshow within 500 MB.
● Ending Thoughts →
● Instagram slideshows are exciting means of diving into fun-filled entertainment with your social media peers.
● When looking for solutions on how to create a slideshow on Instagram, there are loads of choices in the software market.
● Talking of best creator alternatives, you can pick the Wondershare Filmora slideshow developer program to make an amazing Insta story slideshow.
Adobe Animate Rigging’s PROPER Tutorial for You
Adobe Animate Rigging’s PROPER Tutorial for You
An easy yet powerful editor
Numerous effects to choose from
Detailed tutorials provided by the official channel
Character rigging involves some easy steps. And the best way for it is Adobe animate rigging. We have laid down the following discussion to help you learn the easiest method of character rigging. And along with it, we will also help you understand both 2D and 3D character designing most effortlessly.
Lastly, and most importantly, it is vital to opt for the simplest yet feature-loaded tool for any animation work. Thus, we will also mention the best tool for animation and video editing. So, without any further wait, let us start our discussion.
In this article
01 [How to Rig a Simple Character | Adobe Animate Tutorial](#Part 1)
02 [Step by Step to Help You Understand 2D/3D Character Design](#Part 2)
Part 1 How to Rig a Simple Character | Adobe Animate Tutorial
Character rigging in Adobe is effortless and straightforward. There are a few steps for rigging in adobe animate, and we will be discussing and explaining the different steps that will help you learn rigging characters for your animation works.
The following are the steps to help you create a rig in Adobe animate.
Step 1: The first step involves selecting the shape for rigging. Otherwise, you can also use bitmap on stage for it.
**Step 2:**Look for the “Asset warp tool” present in the tool panel. This tool will help you in the process of rigging.

Step 3: Create the first joint using the “Asset warp tool” by clicking on the image or the bitmap with the tool. You will see that a triangular mesh-like structure has been formed on your image or bitmap. And the part where you clicked on the image or the bitmap with the “Asset warp tool” forms the first joint.

Step 4: The next step involves making more joints on the image and instilling bones between the joints. For that, go to the “Warp Options” and choose the “Tools” tab. There you will see the option of “Create bones”. Ensure to enable the “Create bones” option; otherwise, you will not create bones between the different joints.

Step 5: Complete the rig formation by joining all the joints correctly with each other with the help of the bones.

The above steps would help you create the rig for the image or bitmap you want to animate. And now, the following steps will help you learn the steps for modifying the rig as well as tweening.
The first process for it is deformation. So, the following are the steps that help you perform the process of deformation in animation.
Step 6: You need to deform the mesh, and you can do so by holding and dragging the joint with the help of the “Asset warp tool”.

**Step 7:**You can also rotate a bone by clicking and dragging the bone you want to rotate when you drag a joint, the size of the joint changes, which is not the case when you drag a bone. Its size remains constant.

Now, we will help you learn to work with the different keyframes. The keyframes enable the image or the bitmap to acquire different poses, vital for animation. The “Edit Multiple Frames” mode helps you work with different keyframes.
You can readily create new keyframes and deform the image through joints or bones. Each keyframe retains its own set, and you can integrate different transforms after setting one pose for the image in the keyframe.

Part 2 Step by Step to Help You Understand 2D/Character Design
Animation is immensely enjoyable and takes the best of our creativity. And as we know, there are two major and most renowned types of it. One is the 2-dimensional animation, which we know as the animation. And the other one is 3-dimensional, better known as animation.
Now, there are different aspects that are essential for anyone aspiring to animate, whether in or 3D, to know. One of the aspects is designing characters for animation. And we have ideally put forth a discussion about the different factors you need to know about character designing in and animation.
01Animate Character Design
There are some steps involved in the designing a character for animation. And those steps are pretty diverse. So, we have enlisted all the required steps and factors to help you learn and understand character designing for animation. The list is as follows.
02Understanding your audience
To create the best character design, it is essential that you understand your target audience. If your target audience includes the kids and the children, your character design will primarily be based on cartoons.
Ensure which genre of animation does your audience prefer? If it is funny or mythological or any other genre, you design your characters accordingly.

03Understand the type of characters or animation you are going to create
There are different types of animation or characters in animation. Different types serve different purposes and genres. So, let us know about the different types of animations, and this will help you understand which one would suit your requirements.
● Pop-style Characters
The characters you see in the comics and superhero animation movies are pop-style characters. They are highly expressive, become the centre of attraction and always are dominant on the screen. They tend to deliver an energy that reaches the audience impeccably.

● Iconic design
These characters are less fancy but highly expressive. They usually have a block face yet connect to an audience of all types. They are generally best for the corporate videos and those with some messages to be delivered.

● Editorial Style Characters
These characters are highly elegant and bold. These are characters that we see in different publications. They consist of great style, realisticity and cleanliness. They are mainly used to express the quality of presence.

● Sketch and experiment
Now that you know about the different character types, it will help you understand which one would match the genre of animation you prefer to work on. So, start sketching your imagination in a draft.
Decide on the different poses your character might have. Track them down in a draft. It helps you become organised and put down your plan and creativity collectively.
Trial and error are one of the best ways to achieve perfection. So, it is crucial to sketch and then take feedback. If they do not appear praiseworthy, continue sketching and then get feedback again.
● Animate and execute
Lastly, it would be best to execute all your drafts and imaginations. Try using the animation tools that suit your skill capacity and genre of animation the best.
04Animate Character Design
There are five simple steps that will help you animate a character design in 3D. The steps are as follows.
● Contrivance the ideas
Try to include such characters that include several layers. It helps in better animation and also makes your creativity sphere widen.

● Designing the character
Your main character has a large to play. So, use all the necessary tools, starting from photoshop to all the other significant factors, to make your character attain all the features necessary for standing out. It also ensures that you can readily apply all the animation techniques and give your creativity shape.

● Modelling the environment
Adding props to the background is an option. You may choose not to include any props as well. You can add the required props and accessories to your main characters. It includes clothes, scars and the like.

● Animation
It is the main step. Use the best tool for animation and instill all the necessary animation processes. Use the different layers in your main character. Set up the primary constraints and animate the background and the props. Ensure proper light settings and set the handheld camera movements as well.

● Playblast settings
Here you choose the appropriate size of your animation video. It is also an important step, which completes your animation of the character in animation.

Now that we know about the different essential aspects of and animation and character design knowing which tool can help us in the most effortless yet best quality video editing. So, as promised before, we will now discuss the best video editing tool, Wondershare Filmora Video Editor !
Here are the best features of Filmora that can ideally help you in video editing.
● Professional quality video editing tools include video stabilization, noise removal, colour tuning, audio mixer, advanced text editor, editing support, scene detection, and an audio equalizer.
● Although it is ideal for professional use, the tool is simple and effortless ot use. You face no difficulties in understating the features of the tool.
● There are over 8effects available that you can use in your videos.
● You can download it for free!
● You can readily opt for its free trial that enables you to be sure of what you are using before buying it!

For Win 7 or later (64-bit)
For macOS 10.12 or later
● Key Takeaways from This Episode →
● A piece of general information about character rigging in animation and how it is beneficial.
● A simple tutorial for character designing in and animation
● The features of the best video editing tool- Filmora.
Character rigging involves some easy steps. And the best way for it is Adobe animate rigging. We have laid down the following discussion to help you learn the easiest method of character rigging. And along with it, we will also help you understand both 2D and 3D character designing most effortlessly.
Lastly, and most importantly, it is vital to opt for the simplest yet feature-loaded tool for any animation work. Thus, we will also mention the best tool for animation and video editing. So, without any further wait, let us start our discussion.
In this article
01 [How to Rig a Simple Character | Adobe Animate Tutorial](#Part 1)
02 [Step by Step to Help You Understand 2D/3D Character Design](#Part 2)
Part 1 How to Rig a Simple Character | Adobe Animate Tutorial
Character rigging in Adobe is effortless and straightforward. There are a few steps for rigging in adobe animate, and we will be discussing and explaining the different steps that will help you learn rigging characters for your animation works.
The following are the steps to help you create a rig in Adobe animate.
Step 1: The first step involves selecting the shape for rigging. Otherwise, you can also use bitmap on stage for it.
**Step 2:**Look for the “Asset warp tool” present in the tool panel. This tool will help you in the process of rigging.
Step 3: Create the first joint using the “Asset warp tool” by clicking on the image or the bitmap with the tool. You will see that a triangular mesh-like structure has been formed on your image or bitmap. And the part where you clicked on the image or the bitmap with the “Asset warp tool” forms the first joint.
Step 4: The next step involves making more joints on the image and instilling bones between the joints. For that, go to the “Warp Options” and choose the “Tools” tab. There you will see the option of “Create bones”. Ensure to enable the “Create bones” option; otherwise, you will not create bones between the different joints.
Step 5: Complete the rig formation by joining all the joints correctly with each other with the help of the bones.
The above steps would help you create the rig for the image or bitmap you want to animate. And now, the following steps will help you learn the steps for modifying the rig as well as tweening.
The first process for it is deformation. So, the following are the steps that help you perform the process of deformation in animation.
Step 6: You need to deform the mesh, and you can do so by holding and dragging the joint with the help of the “Asset warp tool”.
**Step 7:**You can also rotate a bone by clicking and dragging the bone you want to rotate when you drag a joint, the size of the joint changes, which is not the case when you drag a bone. Its size remains constant.
Now, we will help you learn to work with the different keyframes. The keyframes enable the image or the bitmap to acquire different poses, vital for animation. The “Edit Multiple Frames” mode helps you work with different keyframes.
You can readily create new keyframes and deform the image through joints or bones. Each keyframe retains its own set, and you can integrate different transforms after setting one pose for the image in the keyframe.
Part 2 Step by Step to Help You Understand 2D/Character Design
Animation is immensely enjoyable and takes the best of our creativity. And as we know, there are two major and most renowned types of it. One is the 2-dimensional animation, which we know as the animation. And the other one is 3-dimensional, better known as animation.
Now, there are different aspects that are essential for anyone aspiring to animate, whether in or 3D, to know. One of the aspects is designing characters for animation. And we have ideally put forth a discussion about the different factors you need to know about character designing in and animation.
01Animate Character Design
There are some steps involved in the designing a character for animation. And those steps are pretty diverse. So, we have enlisted all the required steps and factors to help you learn and understand character designing for animation. The list is as follows.
02Understanding your audience
To create the best character design, it is essential that you understand your target audience. If your target audience includes the kids and the children, your character design will primarily be based on cartoons.
Ensure which genre of animation does your audience prefer? If it is funny or mythological or any other genre, you design your characters accordingly.
03Understand the type of characters or animation you are going to create
There are different types of animation or characters in animation. Different types serve different purposes and genres. So, let us know about the different types of animations, and this will help you understand which one would suit your requirements.
● Pop-style Characters
The characters you see in the comics and superhero animation movies are pop-style characters. They are highly expressive, become the centre of attraction and always are dominant on the screen. They tend to deliver an energy that reaches the audience impeccably.
● Iconic design
These characters are less fancy but highly expressive. They usually have a block face yet connect to an audience of all types. They are generally best for the corporate videos and those with some messages to be delivered.
● Editorial Style Characters
These characters are highly elegant and bold. These are characters that we see in different publications. They consist of great style, realisticity and cleanliness. They are mainly used to express the quality of presence.
● Sketch and experiment
Now that you know about the different character types, it will help you understand which one would match the genre of animation you prefer to work on. So, start sketching your imagination in a draft.
Decide on the different poses your character might have. Track them down in a draft. It helps you become organised and put down your plan and creativity collectively.
Trial and error are one of the best ways to achieve perfection. So, it is crucial to sketch and then take feedback. If they do not appear praiseworthy, continue sketching and then get feedback again.
● Animate and execute
Lastly, it would be best to execute all your drafts and imaginations. Try using the animation tools that suit your skill capacity and genre of animation the best.
04Animate Character Design
There are five simple steps that will help you animate a character design in 3D. The steps are as follows.
● Contrivance the ideas
Try to include such characters that include several layers. It helps in better animation and also makes your creativity sphere widen.
● Designing the character
Your main character has a large to play. So, use all the necessary tools, starting from photoshop to all the other significant factors, to make your character attain all the features necessary for standing out. It also ensures that you can readily apply all the animation techniques and give your creativity shape.
● Modelling the environment
Adding props to the background is an option. You may choose not to include any props as well. You can add the required props and accessories to your main characters. It includes clothes, scars and the like.
● Animation
It is the main step. Use the best tool for animation and instill all the necessary animation processes. Use the different layers in your main character. Set up the primary constraints and animate the background and the props. Ensure proper light settings and set the handheld camera movements as well.
● Playblast settings
Here you choose the appropriate size of your animation video. It is also an important step, which completes your animation of the character in animation.
Now that we know about the different essential aspects of and animation and character design knowing which tool can help us in the most effortless yet best quality video editing. So, as promised before, we will now discuss the best video editing tool, Wondershare Filmora Video Editor !
Here are the best features of Filmora that can ideally help you in video editing.
● Professional quality video editing tools include video stabilization, noise removal, colour tuning, audio mixer, advanced text editor, editing support, scene detection, and an audio equalizer.
● Although it is ideal for professional use, the tool is simple and effortless ot use. You face no difficulties in understating the features of the tool.
● There are over 8effects available that you can use in your videos.
● You can download it for free!
● You can readily opt for its free trial that enables you to be sure of what you are using before buying it!
For Win 7 or later (64-bit)
For macOS 10.12 or later
● Key Takeaways from This Episode →
● A piece of general information about character rigging in animation and how it is beneficial.
● A simple tutorial for character designing in and animation
● The features of the best video editing tool- Filmora.
Formula to Animate Photos From 10 Animate Pictures App
Epic Formula to Animate Photos from These 10 Animate Pictures App
An easy yet powerful editor
Numerous effects to choose from
Detailed tutorials provided by the official channel
With the availability of modern technology, still photos can be seamlessly transformed into live animated photos. Adding motion and movement along with filter effects to still photos is pretty easy with an animated pictures app.
For Win 7 or later (64-bit)
For macOS 10.12 or later
In this article, we have listed 10 of the best animated picture apps available in 2021. You will find all essential details and features of these 10 apps which will help you choose the best option when choosing an app for animating a picture. Let us take a look at these 10 apps!
In this article
01 [10 Animate Pictures Apps](#Part 1)
02 [The contrast of These 10 Animate Pictures Apps](#Part 2)
Part 1 10 Animate Pictures Apps
01 MotionLeap

MotionLeap
● Price
Free, with premium version available.
● OS
Android and iOS
● Key features
You can freeze parts of an image.
Variety of filters can be applied.
Although MotionLeap is free to use there’s a Pro and subscription version with a greater variety of features in it. The best part about this animated pictures app is that it does not put any watermark over the final image.
The app can animate still photos and convert them into short, loop videos. This is done by the programming of the directional cues into the image which is executed by dragging actions of the thumb across your mobile screen.
Although, on MotionLeap, without the pro version, the photo will be saved in video format.
02 GIPHY

GIPHY
● Price
Free
● OS
Android and iOS
● Key features
Simple, easy to use UI
A variety of built-in animation tools
Sticker maker on iOS (for iPhone X and later models)
We might already be acquainted with GIPHY as the most popular search engine for GIFs. Although, what’s unknown is that GIPHY has a mobile app both for Android and iOS which can be used to create GIFs and animate photos.
The app’s key advantage is its highly intuitive and very easy to use interface that makes it really easy to animate photos with the GIPHY app. Above all, it is completely free to use and along with animating pictures, you can also add captions to your animated photos or even capture short videos.
03 Movepic

Movepic
● Price
Free, with premium version available.
● OS
Android and iOS
● Key features
Easy to use.
A range of built in overlays and filters.
Movepic is another excellent app for animating pictures. As an animated pictures app, it is quite similar to MotionLeap owing to the fact that it animates still photos.
A downside of the Movepic free version is that it puts a watermark on the image and you cannot remove it without upgrading to the premium version or VIP account. The app saves the final images as a movie file and not as a GIF.
04 ImgPlay

ImgPlay
● Price
Free, with premium version available.
● OS
Android and iOS
● Key features
Easy to use.
Lay out still photographs side-by-side and use burst photos or videos.
ImgPlay is another very popular and effective animated pictures app. The app makes use of a range of ready-to-use animated photos for the web.
ImgPlay also comes with a range of advanced and easy-to-understand controls. This app, in spite of all its perks, puts a watermark on the image—which, once again, cannot be removed unless you buy the premium version of the app.
05 StoryZ

StoryZ
● Price
Free, with premium version available.
● OS
Android and iOS
● Key features
Programmed movement paths, overlays and color filters.
Saves images automatically as GIFs.
StoryZ is one of the best apps on this list and anyone who has used the app would agree with that. The app can seamlessly animate still photos.
A great thing about this app is that StoryZ enables users to remove the watermark from the image by simply watching a quick ad before saving the file.
06 VIMAGE 3D

VIMAGE 3D
● Price
Free, with premium version available.
● OS
Android and iOS
● Key features
AI enabled.
A range of filters and special effects.
Add sounds to your animated images and videos.
This one is an award winning app for animating pictures and the app won a Google Play award in 2018. The app is simply exceptional in terms of user experience as well as features.
Like most of these apps, you do need to pay to remove the watermark, get access to the full effects library, and the ability to export your images in up to 2560p resolution.
07 Photo Bender

Photo Bender
● Price
Free
● OS
Android
● Key features
A variety of editing tools and features including brushes.
Enables users to export images as MP4s, GIFs, JPEGs, and PNGs.
Photo Bender is an animated pictures app that is specific to the Android platform. The app is popular for its convenience of use and it enables users to digitally warp images and animate photos.
There are a variety of things that can be done to an image with the help of this app. From colouring an image, to bending it, stretching it, and a lot more, you can do it all. You also get a range of brushes to use on the image.
08 Zoetropic

Zoetropic
● Price
Free, with premium version available.
● OS
Android and iOS
● Key features
The app is really fast and efficient.
Simple UI.
Zoetropic helps you animate images in minutes,even if you are using the app for the first time. The app does not come with a lot of features but its simplicity, effectiveness and ease of use makes it a great option for animated pictures app.
09 Lumyer

Lumyer
● Price
Free, with premium version available.
● OS
Android and iOS
● Key features
Seasonal and occasional animation effects.
Easy to use.
This app is another great platform to edit pictures and animate them. It enables you to add a variety of effects to pictures and easily animate them.
From subtle weather effects to sparkle, seasonal animations and a lot more, the app offers a lot of options.
Part 2: The contrast of These 10 Animate Pictures Apps
| Name of The Animated Picture App | Advantages | Disadvantages |
|---|---|---|
| MotionLeap | No watermark+Variety of filters; | File saved in video format without pro version |
| GIPHY | Free to use+Simple UI | Not suitable for advanced editing |
| Movepic | Built-in overlays and filters | Saves final image as video file without pro version Watermark |
| ImgPlay | Easy to use and understand+Ready to go animated photos for the web | Watermark on image |
| StoryZ | Remove watermark by watching an ad+Variety of animation techniques | Boring interface |
| VIMAGE 3D | Neat UI+Endless features+AI enabled | Need to buy premium version to access majority of features |
| Photo Bender | A range of tasks can be executed | Not a very attractive UI |
| Zoetropic | Simple, effective and easy to use | Limited effects on free version |
| Lumyer | Fast and easy to use+Lot of features | Can be expensive due to several in-app purchases |
| Filmora | Easy to Use+fordable+ons of features+Seamless UI+rofessional video editing tools | Not available on mobile |
Key Takeaways from This Episode
● That brings us to the end of the article. Anyone looking for an animated pictures app to animate their images have found 10 of the best apps available in the market right now.
● With the list of these 10 apps, anyone can find the most suitable platform for their own purposes of animating an image.
● Last but not the least, if it comes to an all inclusive platform for video editing and animating pictures, Filmora Pro is definitely the winner on this list! So check out your options and make the best choice!
With the availability of modern technology, still photos can be seamlessly transformed into live animated photos. Adding motion and movement along with filter effects to still photos is pretty easy with an animated pictures app.
For Win 7 or later (64-bit)
For macOS 10.12 or later
In this article, we have listed 10 of the best animated picture apps available in 2021. You will find all essential details and features of these 10 apps which will help you choose the best option when choosing an app for animating a picture. Let us take a look at these 10 apps!
In this article
01 [10 Animate Pictures Apps](#Part 1)
02 [The contrast of These 10 Animate Pictures Apps](#Part 2)
Part 1 10 Animate Pictures Apps
01 MotionLeap
MotionLeap
● Price
Free, with premium version available.
● OS
Android and iOS
● Key features
You can freeze parts of an image.
Variety of filters can be applied.
Although MotionLeap is free to use there’s a Pro and subscription version with a greater variety of features in it. The best part about this animated pictures app is that it does not put any watermark over the final image.
The app can animate still photos and convert them into short, loop videos. This is done by the programming of the directional cues into the image which is executed by dragging actions of the thumb across your mobile screen.
Although, on MotionLeap, without the pro version, the photo will be saved in video format.
02 GIPHY
GIPHY
● Price
Free
● OS
Android and iOS
● Key features
Simple, easy to use UI
A variety of built-in animation tools
Sticker maker on iOS (for iPhone X and later models)
We might already be acquainted with GIPHY as the most popular search engine for GIFs. Although, what’s unknown is that GIPHY has a mobile app both for Android and iOS which can be used to create GIFs and animate photos.
The app’s key advantage is its highly intuitive and very easy to use interface that makes it really easy to animate photos with the GIPHY app. Above all, it is completely free to use and along with animating pictures, you can also add captions to your animated photos or even capture short videos.
03 Movepic
Movepic
● Price
Free, with premium version available.
● OS
Android and iOS
● Key features
Easy to use.
A range of built in overlays and filters.
Movepic is another excellent app for animating pictures. As an animated pictures app, it is quite similar to MotionLeap owing to the fact that it animates still photos.
A downside of the Movepic free version is that it puts a watermark on the image and you cannot remove it without upgrading to the premium version or VIP account. The app saves the final images as a movie file and not as a GIF.
04 ImgPlay
ImgPlay
● Price
Free, with premium version available.
● OS
Android and iOS
● Key features
Easy to use.
Lay out still photographs side-by-side and use burst photos or videos.
ImgPlay is another very popular and effective animated pictures app. The app makes use of a range of ready-to-use animated photos for the web.
ImgPlay also comes with a range of advanced and easy-to-understand controls. This app, in spite of all its perks, puts a watermark on the image—which, once again, cannot be removed unless you buy the premium version of the app.
05 StoryZ
StoryZ
● Price
Free, with premium version available.
● OS
Android and iOS
● Key features
Programmed movement paths, overlays and color filters.
Saves images automatically as GIFs.
StoryZ is one of the best apps on this list and anyone who has used the app would agree with that. The app can seamlessly animate still photos.
A great thing about this app is that StoryZ enables users to remove the watermark from the image by simply watching a quick ad before saving the file.
06 VIMAGE 3D
VIMAGE 3D
● Price
Free, with premium version available.
● OS
Android and iOS
● Key features
AI enabled.
A range of filters and special effects.
Add sounds to your animated images and videos.
This one is an award winning app for animating pictures and the app won a Google Play award in 2018. The app is simply exceptional in terms of user experience as well as features.
Like most of these apps, you do need to pay to remove the watermark, get access to the full effects library, and the ability to export your images in up to 2560p resolution.
07 Photo Bender
Photo Bender
● Price
Free
● OS
Android
● Key features
A variety of editing tools and features including brushes.
Enables users to export images as MP4s, GIFs, JPEGs, and PNGs.
Photo Bender is an animated pictures app that is specific to the Android platform. The app is popular for its convenience of use and it enables users to digitally warp images and animate photos.
There are a variety of things that can be done to an image with the help of this app. From colouring an image, to bending it, stretching it, and a lot more, you can do it all. You also get a range of brushes to use on the image.
08 Zoetropic
Zoetropic
● Price
Free, with premium version available.
● OS
Android and iOS
● Key features
The app is really fast and efficient.
Simple UI.
Zoetropic helps you animate images in minutes,even if you are using the app for the first time. The app does not come with a lot of features but its simplicity, effectiveness and ease of use makes it a great option for animated pictures app.
09 Lumyer
Lumyer
● Price
Free, with premium version available.
● OS
Android and iOS
● Key features
Seasonal and occasional animation effects.
Easy to use.
This app is another great platform to edit pictures and animate them. It enables you to add a variety of effects to pictures and easily animate them.
From subtle weather effects to sparkle, seasonal animations and a lot more, the app offers a lot of options.
Part 2: The contrast of These 10 Animate Pictures Apps
| Name of The Animated Picture App | Advantages | Disadvantages |
|---|---|---|
| MotionLeap | No watermark+Variety of filters; | File saved in video format without pro version |
| GIPHY | Free to use+Simple UI | Not suitable for advanced editing |
| Movepic | Built-in overlays and filters | Saves final image as video file without pro version Watermark |
| ImgPlay | Easy to use and understand+Ready to go animated photos for the web | Watermark on image |
| StoryZ | Remove watermark by watching an ad+Variety of animation techniques | Boring interface |
| VIMAGE 3D | Neat UI+Endless features+AI enabled | Need to buy premium version to access majority of features |
| Photo Bender | A range of tasks can be executed | Not a very attractive UI |
| Zoetropic | Simple, effective and easy to use | Limited effects on free version |
| Lumyer | Fast and easy to use+Lot of features | Can be expensive due to several in-app purchases |
| Filmora | Easy to Use+fordable+ons of features+Seamless UI+rofessional video editing tools | Not available on mobile |
Key Takeaways from This Episode
● That brings us to the end of the article. Anyone looking for an animated pictures app to animate their images have found 10 of the best apps available in the market right now.
● With the list of these 10 apps, anyone can find the most suitable platform for their own purposes of animating an image.
● Last but not the least, if it comes to an all inclusive platform for video editing and animating pictures, Filmora Pro is definitely the winner on this list! So check out your options and make the best choice!
The 15 Best Apps to Turn Photos Into Cartoons and Sketches
The 15 Best Apps to Turn Photos into Cartoons and Sketches
An easy yet powerful editor
Numerous effects to choose from
Detailed tutorials provided by the official channel
Our mobile phones give a plethora of capabilities for making them seem creative and one-of-a-kind. One method is to convert ordinary pictures into cartoons or sketches.
And if you want to test an app that can convert any picture into a cartoon, this post is for you.
In this article
01 [The 10 best apps to turn photos into cartoons ](#Part 1)
02 [The 5 best apps to turn photos into sketches](#Part 2)
Part 1 The 10 Best Apps to Turn Photos into Cartoons
We all love clicking pictures and exploring what more effects could be added to the click. Converting your images into cartoons is one such effect that most digital art lovers out there would love to unleash their creativity. If you would like to learn more about Filmora video animation , you can watch this tutorial:
For Win 7 or later (64-bit)
For macOS 10.12 or later
Below is the list of top 10 apps that one can use to convert photos to cartoons.
01Cartoon Pictures
Compatibility: Android
Rating: 4.1/5
Key Features: Free of cost with diverse options for cartoon filters.
Verdict:
For people looking to convert photos into cartoons, the Cartoon Pictures app is the one-stop for all. With its compatibility currently offered to both android and iOS, Cartoon Pictures offers a wide range of options. A person can modify their pictures using filters and effects on their image converted to cartoon.
Cartoon pictures are on the top of our list due to the positive review. Overall, the app optimises memory consumption, i.e. 13MB with Cartoon Me’s gallery of filters, drawings, art pieces, editions, cartoons, oil paintings, artistic pictures, effects, and photos.
02Snapchat
Compatibility: Android/iOS
Rating: Android: 4.2/5, iOS: 3.6/5
Key Features: Popular app allowing you to not only use filters but connect with people from all over the world.
Verdict:
Although the app is famous worldwide as a photo-sharing app, Snapchat can be used for much more than that. Snapchat has launched a new effect that allows users to convert their photographs into Disney characters. It changes your look into “a modern-day prince(ess).”
According to the firm, numerous Snapchatters across the world have been using this filter to click a cartoon portrait and has been watched over 1.7 billion times. Snapchat has several other filters that help you convert your real-life photo into a cartoon. Snapchat is free for all, with several positive reviews from across the globe.
03ToonMe
Compatibility: Android/iOS
Rating: Android 4.2/5, iOS: 4.6/5
Key Features: Easy to use UI with several options to cartoonify image
Verdict:
ToonMe is the most simple to use; this app is on our list with an easy UI to use. Compared to all the other photo to cartoon apps, toonme best suits the people who are looking to convert their images readily. You may use your phone or existing photographs to make a cartoon using free built-in editing features.
The software is only 16 MB in size and is free to download from both the Google play store and the Apple app store. You may download it right now and start transforming yourself into cartoons.
04Wondershare Filmora
Compatibility: Win/Mac
Rating: Win: 4.5/5, Mac: 4.6/5
Key Features: Several options for video and photo editing in HD+.
Verdict:
Wondershare Filmora Video Editor is a well renowned and well-recognised name for those in the video-editing industry. It is well known for its wide range of tools and implementations that can be made on one image using Filmora. It has a user-friendly interface and an easy-to-use photo to cartoon converter tool.
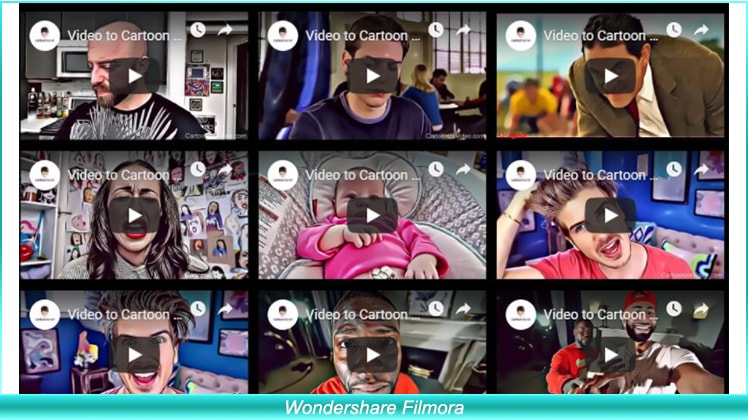
Although there is wide use of Filmora in this section, we would be talking about its ability to convert images into cartoons. The app is available for both Win and Mac, which is entirely justifiable for the feature it offers.
Wondershare Filmora - Best Video Editor for Mac/Windows
5,481,435 people have downloaded it.
Build unique custom animations without breaking a sweat.
Focus on creating epic stories and leave the details to Filmora’s auto features.
Start a creative adventure with drag & drop effects and endless possibilities.
Filmora simplifies advanced features to save you time and effort.
Filmora cuts out repetition so you can move on to your next creative breakthrough.
05Comics and Cartoon Maker
Compatibility: Android
Rating: 4.0/5
Key Features: Readily converts images to animate photos with a comic effect.
Verdict:
Are you a comic fan looking to convert your photos into animated images? Comic Cartoon Maker is the right app for you. With several options to convert your image into a cartoon. Comic Cartoon Maker is available for both Android and iOS and occupies 20MB of space in both.
You may choose a photo from your collection or snap a fresh one with the app. After you’ve selected your filter, you may add speaking balloons to create a more believable “comic effect.” This is the simplest approach to “cartoon yourself” that you will discover on the internet.
06Avatoon
Compatibility: Android/iOS
Rating: Android: 4.5/5, iOS: 4.6/5
Key Features: Facial recognition, snapshots, stickers, avatars, and animated profile picture style options.
Verdict:
If you want to transform yourself into animated pictures, this is the programme you use. Anyone can transform themselves into animated characters with a simple click, which may then be made into stickers. These Stickers may be shared among your acquaintances via the WhatsApp app as well as other major social networking sites such as Instagram, Facebook, and many others.
The software is 53 MB in size and is downloadable on both the Play Store and the App Store. The app has been reviewed positively due to the diverse usability of its features.
07Reface
Compatibility: Android/iOS
Rating: Android: 4.2/ 5, iOS: 4.7/5
Key Features: Swap your face with celebrities and animated cartoons.
Verdict:
It’s a famous cartoon picture maker, a face-swapping app available on both the Play Store and App stores. You may change your appearance to that of celebrities featuring animated Disney characters. The software is a lot of fun and very simple to use.
The app is available in both paid and free editions. Although you will be limited to setting and swapping space per day using the free versions, The app consumes a total of 14MB and comes with unique features such as GIF, stickers, meme maker, etc.
08Prisma Photo Editor
Compatibility: Android/iOS
Rating: Android: 4.4/5, iOS: 4.6/5
Key Features: Most optimised AI which converts pictures into cartoons and much more
Verdict:
Prisma picture designer is an older and well-known photo editing tool for both Android and iOS users. It is a picture editing software with the ability to create cartoon pictures in a short amount of time. This programme is a multifunctional photo editor that allows you to edit images and make yourself into a cartoon effortlessly**.**
It features a variety of picture filter choices as well as a unique feed. You can simply change a photograph into a magnificent piece of artwork in the style of Munk, Picasso, or any other design you like, which has led to such good reviews by users. Although the app consumes 68MB it is yet most compatible and easy to convert pictures to cartoons.
09Sketch Drawing Photo Editor
Compatibility: Android
Rating: 4.3/5
Key Features: Create animated pics, drawings and sketches with this free animated photo maker
Verdict:
Pencil Photo Sketch is a professional photo programme that can transform your images into stunning hand-drawn pencil drawings or comic cartoon-like illustrations. Choose an image from your album or take a photo with your smartphone to create a pencil sketch or drawing effect.

The app UI is straightforward to use; all you have to do is import a picture or choose a snapshot from your collection and transform it into a magnificent pencil drawing. The software is around 19 MB in size and therefore is downloadable on both the play store and the app store.
10Moments Cartoon Caricature
Compatibility: Android
Rating: 3.2/5
Key Features: Helps you turn your photo into an animated caricature cartoon.
Verdict:
You’ll be able to enter selfie challenges or merely appreciate the great caricature tools that will allow you to convert a regular event into a funny photo. The app’s photo editor has a plethora of tools for transforming photos into cartoons in whatever way you desire.
You’ll also have the option of exploring with monochrome caricatures. All of the options available in the Moments Cartoon Caricature software are intended to assist you in creating great social media photographs.
Part 2 The 5 Best Apps to Turn Photos into Sketches
Now that we are done editing the cartoons, next on our list is sketches. Several digital artists look forward to creating a sketch-like effect to their photos. Below is the list of five apps that would help users turn their photos into sketches.
01PicsArt
Compatibility: Android, iOS
Rating: Android: 4.2/5, iOS:4.6/5
Key Features: Several filters, effects and modifications that one can do to their clicks
Verdict: Looking to transform your pictures into an artwork or sketch? Don’t worry PicsArt has got you covered. The app is compatible with Android and iOS and takes around 75MB on your device.
The app can be used to convert images to sketches and much more, making the app multipurpose. The user friendly UI and magnificent quality of filters have given them a reputed stand in their field.
02GoArt
Compatibility: Android,iOS
Rating: Android: 4.3/5, iOS:3.7/5
Key Features: Turns photos into HD paintings that can be printed and framed.
Verdict: GoArt was created to print the images you make as a key focus. This provides some incredible benefits as well as a few possible drawbacks for your photography requirements. The programme transforms the snapshot into an artistic composition by utilising AI technology.
Even though it produces a clear and high-quality image, it might take a couple of minutes to process, as opposed to other fast solutions.
03PhotoLab
Compatibility: Android,iOS
Rating: Android: 4.0/5, iOS:4.3/5
Key Features: Photo filters, sketchbook effect, collages and montage for quick touch-ups.
Verdict: PhotoLab is the software for you if you enjoy playing with hilarious, innovative, and attractive effects. The AI-powered technology is incredibly simple to use and will instantly do modifications such as trimming for you.
You may quickly publish your picture to social media or share it on a platform developed particularly for publishing digital art from the app.
04Instatoon
Compatibility: iOS
Rating: 4.4/5
Key Features: Helps iOS users convert their images into real-life portraits.
Verdict:
Instatoon has a large fan base since it provides a high-quality product that genuinely does what you ask for! This programme has fewer picture editing options because it focuses solely on producing art from your photographs.
Scroll through the list of possible filters until you discover the ideal match. Numerous filter choices are available, such as black and white sketch designs, oil paintings, and cartoons.
05BeCasso
Compatibility: iOS
Rating: 4.6/5
Key Features: Artificial intelligence, neural networks, and aesthetic picture filters form a potent mix.
Verdict:
BeCasso is packed with excellent creative filters inspired by your favourite painters, such as Vincent Van Gogh and Pablo Picasso.
After importing your chosen photo, scroll through a big variety of different artistic styles and choose the filters you want. You would like to edit your images prior sharing them because most of the photo editing capabilities in this programme are only available when you pay for a membership.
Key Takeaways from This Episode
● Using various software, making sketches and cartoons can be tedious and time-consuming for digital enthusiasts. This brings us to a more leisurely resort to propose an effortless and hassle-free way to convert their images into cartoons and sketches.
● So far, we have learned about the various ways we can use animated pic maker and software to animate pictures and form sketch-like effects using apps made for android and iOS.
● With every app having its diversified use and application, users can download the one that suits them the best, reading through the given content to help them save time and plan better.
Our mobile phones give a plethora of capabilities for making them seem creative and one-of-a-kind. One method is to convert ordinary pictures into cartoons or sketches.
And if you want to test an app that can convert any picture into a cartoon, this post is for you.
In this article
01 [The 10 best apps to turn photos into cartoons ](#Part 1)
02 [The 5 best apps to turn photos into sketches](#Part 2)
Part 1 The 10 Best Apps to Turn Photos into Cartoons
We all love clicking pictures and exploring what more effects could be added to the click. Converting your images into cartoons is one such effect that most digital art lovers out there would love to unleash their creativity. If you would like to learn more about Filmora video animation , you can watch this tutorial:
For Win 7 or later (64-bit)
For macOS 10.12 or later
Below is the list of top 10 apps that one can use to convert photos to cartoons.
01Cartoon Pictures
Compatibility: Android
Rating: 4.1/5
Key Features: Free of cost with diverse options for cartoon filters.
Verdict:
For people looking to convert photos into cartoons, the Cartoon Pictures app is the one-stop for all. With its compatibility currently offered to both android and iOS, Cartoon Pictures offers a wide range of options. A person can modify their pictures using filters and effects on their image converted to cartoon.
Cartoon pictures are on the top of our list due to the positive review. Overall, the app optimises memory consumption, i.e. 13MB with Cartoon Me’s gallery of filters, drawings, art pieces, editions, cartoons, oil paintings, artistic pictures, effects, and photos.
02Snapchat
Compatibility: Android/iOS
Rating: Android: 4.2/5, iOS: 3.6/5
Key Features: Popular app allowing you to not only use filters but connect with people from all over the world.
Verdict:
Although the app is famous worldwide as a photo-sharing app, Snapchat can be used for much more than that. Snapchat has launched a new effect that allows users to convert their photographs into Disney characters. It changes your look into “a modern-day prince(ess).”
According to the firm, numerous Snapchatters across the world have been using this filter to click a cartoon portrait and has been watched over 1.7 billion times. Snapchat has several other filters that help you convert your real-life photo into a cartoon. Snapchat is free for all, with several positive reviews from across the globe.
03ToonMe
Compatibility: Android/iOS
Rating: Android 4.2/5, iOS: 4.6/5
Key Features: Easy to use UI with several options to cartoonify image
Verdict:
ToonMe is the most simple to use; this app is on our list with an easy UI to use. Compared to all the other photo to cartoon apps, toonme best suits the people who are looking to convert their images readily. You may use your phone or existing photographs to make a cartoon using free built-in editing features.
The software is only 16 MB in size and is free to download from both the Google play store and the Apple app store. You may download it right now and start transforming yourself into cartoons.
04Wondershare Filmora
Compatibility: Win/Mac
Rating: Win: 4.5/5, Mac: 4.6/5
Key Features: Several options for video and photo editing in HD+.
Verdict:
Wondershare Filmora Video Editor is a well renowned and well-recognised name for those in the video-editing industry. It is well known for its wide range of tools and implementations that can be made on one image using Filmora. It has a user-friendly interface and an easy-to-use photo to cartoon converter tool.
Although there is wide use of Filmora in this section, we would be talking about its ability to convert images into cartoons. The app is available for both Win and Mac, which is entirely justifiable for the feature it offers.
Wondershare Filmora - Best Video Editor for Mac/Windows
5,481,435 people have downloaded it.
Build unique custom animations without breaking a sweat.
Focus on creating epic stories and leave the details to Filmora’s auto features.
Start a creative adventure with drag & drop effects and endless possibilities.
Filmora simplifies advanced features to save you time and effort.
Filmora cuts out repetition so you can move on to your next creative breakthrough.
05Comics and Cartoon Maker
Compatibility: Android
Rating: 4.0/5
Key Features: Readily converts images to animate photos with a comic effect.
Verdict:
Are you a comic fan looking to convert your photos into animated images? Comic Cartoon Maker is the right app for you. With several options to convert your image into a cartoon. Comic Cartoon Maker is available for both Android and iOS and occupies 20MB of space in both.
You may choose a photo from your collection or snap a fresh one with the app. After you’ve selected your filter, you may add speaking balloons to create a more believable “comic effect.” This is the simplest approach to “cartoon yourself” that you will discover on the internet.
06Avatoon
Compatibility: Android/iOS
Rating: Android: 4.5/5, iOS: 4.6/5
Key Features: Facial recognition, snapshots, stickers, avatars, and animated profile picture style options.
Verdict:
If you want to transform yourself into animated pictures, this is the programme you use. Anyone can transform themselves into animated characters with a simple click, which may then be made into stickers. These Stickers may be shared among your acquaintances via the WhatsApp app as well as other major social networking sites such as Instagram, Facebook, and many others.
The software is 53 MB in size and is downloadable on both the Play Store and the App Store. The app has been reviewed positively due to the diverse usability of its features.
07Reface
Compatibility: Android/iOS
Rating: Android: 4.2/ 5, iOS: 4.7/5
Key Features: Swap your face with celebrities and animated cartoons.
Verdict:
It’s a famous cartoon picture maker, a face-swapping app available on both the Play Store and App stores. You may change your appearance to that of celebrities featuring animated Disney characters. The software is a lot of fun and very simple to use.
The app is available in both paid and free editions. Although you will be limited to setting and swapping space per day using the free versions, The app consumes a total of 14MB and comes with unique features such as GIF, stickers, meme maker, etc.
08Prisma Photo Editor
Compatibility: Android/iOS
Rating: Android: 4.4/5, iOS: 4.6/5
Key Features: Most optimised AI which converts pictures into cartoons and much more
Verdict:
Prisma picture designer is an older and well-known photo editing tool for both Android and iOS users. It is a picture editing software with the ability to create cartoon pictures in a short amount of time. This programme is a multifunctional photo editor that allows you to edit images and make yourself into a cartoon effortlessly**.**
It features a variety of picture filter choices as well as a unique feed. You can simply change a photograph into a magnificent piece of artwork in the style of Munk, Picasso, or any other design you like, which has led to such good reviews by users. Although the app consumes 68MB it is yet most compatible and easy to convert pictures to cartoons.
09Sketch Drawing Photo Editor
Compatibility: Android
Rating: 4.3/5
Key Features: Create animated pics, drawings and sketches with this free animated photo maker
Verdict:
Pencil Photo Sketch is a professional photo programme that can transform your images into stunning hand-drawn pencil drawings or comic cartoon-like illustrations. Choose an image from your album or take a photo with your smartphone to create a pencil sketch or drawing effect.
The app UI is straightforward to use; all you have to do is import a picture or choose a snapshot from your collection and transform it into a magnificent pencil drawing. The software is around 19 MB in size and therefore is downloadable on both the play store and the app store.
10Moments Cartoon Caricature
Compatibility: Android
Rating: 3.2/5
Key Features: Helps you turn your photo into an animated caricature cartoon.
Verdict:
You’ll be able to enter selfie challenges or merely appreciate the great caricature tools that will allow you to convert a regular event into a funny photo. The app’s photo editor has a plethora of tools for transforming photos into cartoons in whatever way you desire.
You’ll also have the option of exploring with monochrome caricatures. All of the options available in the Moments Cartoon Caricature software are intended to assist you in creating great social media photographs.
Part 2 The 5 Best Apps to Turn Photos into Sketches
Now that we are done editing the cartoons, next on our list is sketches. Several digital artists look forward to creating a sketch-like effect to their photos. Below is the list of five apps that would help users turn their photos into sketches.
01PicsArt
Compatibility: Android, iOS
Rating: Android: 4.2/5, iOS:4.6/5
Key Features: Several filters, effects and modifications that one can do to their clicks
Verdict: Looking to transform your pictures into an artwork or sketch? Don’t worry PicsArt has got you covered. The app is compatible with Android and iOS and takes around 75MB on your device.
The app can be used to convert images to sketches and much more, making the app multipurpose. The user friendly UI and magnificent quality of filters have given them a reputed stand in their field.
02GoArt
Compatibility: Android,iOS
Rating: Android: 4.3/5, iOS:3.7/5
Key Features: Turns photos into HD paintings that can be printed and framed.
Verdict: GoArt was created to print the images you make as a key focus. This provides some incredible benefits as well as a few possible drawbacks for your photography requirements. The programme transforms the snapshot into an artistic composition by utilising AI technology.
Even though it produces a clear and high-quality image, it might take a couple of minutes to process, as opposed to other fast solutions.
03PhotoLab
Compatibility: Android,iOS
Rating: Android: 4.0/5, iOS:4.3/5
Key Features: Photo filters, sketchbook effect, collages and montage for quick touch-ups.
Verdict: PhotoLab is the software for you if you enjoy playing with hilarious, innovative, and attractive effects. The AI-powered technology is incredibly simple to use and will instantly do modifications such as trimming for you.
You may quickly publish your picture to social media or share it on a platform developed particularly for publishing digital art from the app.
04Instatoon
Compatibility: iOS
Rating: 4.4/5
Key Features: Helps iOS users convert their images into real-life portraits.
Verdict:
Instatoon has a large fan base since it provides a high-quality product that genuinely does what you ask for! This programme has fewer picture editing options because it focuses solely on producing art from your photographs.
Scroll through the list of possible filters until you discover the ideal match. Numerous filter choices are available, such as black and white sketch designs, oil paintings, and cartoons.
05BeCasso
Compatibility: iOS
Rating: 4.6/5
Key Features: Artificial intelligence, neural networks, and aesthetic picture filters form a potent mix.
Verdict:
BeCasso is packed with excellent creative filters inspired by your favourite painters, such as Vincent Van Gogh and Pablo Picasso.
After importing your chosen photo, scroll through a big variety of different artistic styles and choose the filters you want. You would like to edit your images prior sharing them because most of the photo editing capabilities in this programme are only available when you pay for a membership.
Key Takeaways from This Episode
● Using various software, making sketches and cartoons can be tedious and time-consuming for digital enthusiasts. This brings us to a more leisurely resort to propose an effortless and hassle-free way to convert their images into cartoons and sketches.
● So far, we have learned about the various ways we can use animated pic maker and software to animate pictures and form sketch-like effects using apps made for android and iOS.
● With every app having its diversified use and application, users can download the one that suits them the best, reading through the given content to help them save time and plan better.
Types of Cartoon Styles You May Use for The Next Marketing Project
Types of Cartoon Styles You May Use for Your Next Marketing Project
An easy yet powerful editor
Numerous effects to choose from
Detailed tutorials provided by the official channel
The whole concept of animation originated mainly from Japan. The cartoons that are shown on TV have different cartoon art styles. These cartoon art styles have their history of origin. These numerous cartoon styles play a significant role in the whole animation industry. If you find which cartoon illustration styles to use for your next project, this is the perfect place for your answer.
You can use any cartoon art style in your upcoming marketing project and make it a success. This article focuses on different cartoon art styles and how you can develop your anime cartoon style. You can use these methods to draw cartoon styles of yourself.
In this article
01 [10 Types of Cartoon Styles With Examples](#Part 1)
02 [Drawing Myself in 5 Different Cartoon Styles](#Part 2)
03 [How You Can Develop a Cartoon Style for Animation](#Part 3)
Part 1 Types of Cartoon Styles With Examples
There are numerous kinds of cartoon styles. Different animators use different cartoon styles. You can even develop your anime cartoon style. The different types of Animation are:
012D Animation
animations are trendy cartoon styles. This style of animation needs no introduction. This type of anime cartoon style was produced by Walt Disney. The most exciting features of the images were that they had only two dimensions: height and width.
Even though several people suggested that 2D art styles cartoon were invented during the early twentieth century. Back then, it was not much popular; Walt Disney made these cartoon styles famous. Example:

02Traditional Animation
As the name suggests, traditional Animation is an old cartoon art style. These cartoon styles were first seen in the year 1877. Emil Reynaud discovered a new tool for demonstrating objects that are moving. In this type of Animation, all the images are drawn manually on paper with a pencil. This method of making cartoon styles is time-consuming. However, later computer applications and programs were developed, making this task much easier and more efficient. Example:

03Animation
animation cartoon styles came into existence with graphics and visual software development. The first 3D dimensional image was created in the year 1972. However, an attempt to make 3D Animation was made in 1961. Nowadays, 3D Animation is a widely used animation style. It is used in the entertainment industry and medical imaging to adequately explain the body and organisms. Example:

04Flipbook Animation
In flipbook animation, each frame is drawn on each notebook page. After drawing all the frames is complete, turn the pages quickly. When the pages are turned quickly, it seems to be a moving video because of the different frames drawn on each page. Example:

05Clay Animation
This animation method turns out to be very funny after it is completed. This method of Animation is quite tricky. In this animation method, the characters are made out of clay at first, and then the movements are recorded in a camera. These movements are then made smooth and compiled like a video with different scenes using the software. The main audience for this kind of Animation is children. Example:

06Typography Animation
Typography animation is also called kinetic typography. This style of Animation is text animation. This method was originated in the year 1899. Back then, this Animation was not much popular. This style of typography animation gained popularity after 60 years it first originated. Typography animation is considered a good method for e-learning while training employees. Example:

07Stop-Motion Animation
Stop-Motion animation is an age-old animation technique. The attempt to use this type of Animation was made 150 years ago. The specialty of this type of Animation is that the animator takes pictures of different frames by moving the objects in different positions and clicking the picture of each frame. These pictures are compiled to create a continuous video. This method of Animation is straightforward to go. Example:

08Sand Animation
Sand Animation was invented in the year 1969. This type of Animation involves sand and a luminous surface on which the Animation is done. This method is used in cartoon anime styles or different shows. In this type of Animation, the sand is used to create 2D images. This type of Animation is used for storytelling in reality shows. Example:

09Motion Graphics
Motion design was invented in the year 1960. It is one of the most popular cartoon art styles used nowadays. This type of Animation creates promotional videos, game screensavers, commercial advertising videos, etc. It is one of the universal animation techniques used globally for various purposes. Example:

10Mechanical Animation
Mechanical Animation is mainly used in producing technical equipment. The most fantastic thing about this animation method is that you can make changes to a product that has not yet been developed. This kind of Animation is used with 3D Animation to show the working of machines in and out. It is done together with 3D Animation to clearly visualize the machine.

Part 2 Drawing Myself in 5 Different Cartoon Styles
You can draw yourself using these 5 different cartoon styles:
01You can use 3D filters on Snapchat to draw a Pixar-like picture of yourself
The steps are:
Step 1: Install and run the “Snapchat” app on your phone.
Step2: Open the app and turn on the camera.
Step 3: There is a smiling face symbol on the right side of the camera button, tap on that.
Step 4: Click on the explore menu and select the “Cartoon 3D Style” option.
Step 5: Capture your video
Step 6: Then your cartoon character-like video is ready.
02You can also use Instagram to create a Disney-like character of yourself
The steps are:
Step 1: Open your Instagram account.
Step 2: Click on the ‘+’ icon. Select the “Story” option.
Step 3: Different effects appear on the screen.
Step 4: Scroll the effects and find an icon of a magnifying glass.
Step 5: Click on that icon and type cartoon on the search bar.
Step 6: After your search is finished, different cartoon filters will appear on your screen.
Step 7: Tap on any one of the effects. The effect opens.
Step 8: Tap on the bookmark icon to save the cartoon effect.
Step 9: Now you can go back to the effects options to use the cartoon effect.
Your Disney-like cartoon picture is ready!
03You can use Google meet
Step 1: When you open the Google meet app, there are filters to use while on a call.
Step 2: Choose one of the filters that have a cartoon effect.
Step 3: When you join any meeting, you will appear like a cartoon character from TV.
04You can use B612
Step 1: Install and open the app on your phone.
Step 2: After you open the app, a circle button appears at the bottom of your screen in the middle.
Step 3: Tap on the circle.
Step 4: Numerous filters will appear.
Step 5: Choose one cartoon-like filter from the options of effect in the menu.
Step 6: After selecting one effect, make a video of yourself using an effect.
Step 7: Your cartoon video is ready on your screen.
05You can use Wondershare Filmora Video Editor
For Win 7 or later (64-bit)
For macOS 10.12 or later
Step 1: Capture a video of yourself using your phone’s camera.
Step 2: Install and open the Filmora app on your phone.
Step 3: After you open the app, you will be given the option to choose a video.
Step 4: Choose the video of yourself.
Step 5: After choosing your video, there is an option “click edit” tap on that.
Step 6: A menu appears; select the “effects” option from the menu.
Step 7: Different effects will appear on your screen.
Step 8: Select the cartoon effect you want to use in your video.
Step 9: After you have selected the effect, it will take some time to process.
Step 10: Your cartoon-like video is ready.
How You Can Develop a Cartoon Style for Animation
Anyone can develop new cartoon styles by following these simple procedures or habits. The procedures are:
● You can take references from real-life objects.
Most of the Animation we see here has been taken from real-life references, be it a cat, car, house, etc. So, to develop the cartoon styles, you can take references from real-life objects. You can also search for a particular characteristic in things you won’t use as your reference. If you want to draw a cat, you can use a living cat as your reference.
● You can copy and try to make Animation like your favorite animator.
If you use this method, this will help you improve your skill. No animation is 100% real, no matter what kind of Animation it is or who is creating it. However, you cannot keep on making animations like your favorite animator because you will not be able to find your anime art styles and skills.
● You can create an animated character of your own.
After taking your reference from real-life objects and knowing about the animation styles and the basic principles of Animation, you can create your animated character. If you create your character, keeping all the skills and techniques in mind, you can develop outstanding animation styles.
● To develop your cartoon style, you need to practice drawing regularly.
To get s grasp this whole process of Animation, you need to draw and practice different cartoon art styles. You can draw anything you like, or you don’t like on paper or on a drawing tablet. You can also color sketchbooks to improve your skills in Animation.
You can use Filmora to make cartoon videos and, at the same time, make cartoon videos of normally captured videos. These cartoon videos can be compiled into one video. You can use this video to edit different types of videos. Filmora has a user-friendly interface that can help you create your cartoon video effortlessly.
● Ending Thoughts →
● I hope you have understood the different types of anime cartoon styles by now.
● These methods can help you make the best for your next marketing project.
● These methods are easy, efficient, and efficient. All the aforementioned methods were discovered in the late nineteenth and early twentieth century.
● With the advancement of technology, the process has become more accessible. However, you can use any cartoon-style art.
The whole concept of animation originated mainly from Japan. The cartoons that are shown on TV have different cartoon art styles. These cartoon art styles have their history of origin. These numerous cartoon styles play a significant role in the whole animation industry. If you find which cartoon illustration styles to use for your next project, this is the perfect place for your answer.
You can use any cartoon art style in your upcoming marketing project and make it a success. This article focuses on different cartoon art styles and how you can develop your anime cartoon style. You can use these methods to draw cartoon styles of yourself.
In this article
01 [10 Types of Cartoon Styles With Examples](#Part 1)
02 [Drawing Myself in 5 Different Cartoon Styles](#Part 2)
03 [How You Can Develop a Cartoon Style for Animation](#Part 3)
Part 1 Types of Cartoon Styles With Examples
There are numerous kinds of cartoon styles. Different animators use different cartoon styles. You can even develop your anime cartoon style. The different types of Animation are:
012D Animation
animations are trendy cartoon styles. This style of animation needs no introduction. This type of anime cartoon style was produced by Walt Disney. The most exciting features of the images were that they had only two dimensions: height and width.
Even though several people suggested that 2D art styles cartoon were invented during the early twentieth century. Back then, it was not much popular; Walt Disney made these cartoon styles famous. Example:
02Traditional Animation
As the name suggests, traditional Animation is an old cartoon art style. These cartoon styles were first seen in the year 1877. Emil Reynaud discovered a new tool for demonstrating objects that are moving. In this type of Animation, all the images are drawn manually on paper with a pencil. This method of making cartoon styles is time-consuming. However, later computer applications and programs were developed, making this task much easier and more efficient. Example:
03Animation
animation cartoon styles came into existence with graphics and visual software development. The first 3D dimensional image was created in the year 1972. However, an attempt to make 3D Animation was made in 1961. Nowadays, 3D Animation is a widely used animation style. It is used in the entertainment industry and medical imaging to adequately explain the body and organisms. Example:
04Flipbook Animation
In flipbook animation, each frame is drawn on each notebook page. After drawing all the frames is complete, turn the pages quickly. When the pages are turned quickly, it seems to be a moving video because of the different frames drawn on each page. Example:
05Clay Animation
This animation method turns out to be very funny after it is completed. This method of Animation is quite tricky. In this animation method, the characters are made out of clay at first, and then the movements are recorded in a camera. These movements are then made smooth and compiled like a video with different scenes using the software. The main audience for this kind of Animation is children. Example:
06Typography Animation
Typography animation is also called kinetic typography. This style of Animation is text animation. This method was originated in the year 1899. Back then, this Animation was not much popular. This style of typography animation gained popularity after 60 years it first originated. Typography animation is considered a good method for e-learning while training employees. Example:
07Stop-Motion Animation
Stop-Motion animation is an age-old animation technique. The attempt to use this type of Animation was made 150 years ago. The specialty of this type of Animation is that the animator takes pictures of different frames by moving the objects in different positions and clicking the picture of each frame. These pictures are compiled to create a continuous video. This method of Animation is straightforward to go. Example:
08Sand Animation
Sand Animation was invented in the year 1969. This type of Animation involves sand and a luminous surface on which the Animation is done. This method is used in cartoon anime styles or different shows. In this type of Animation, the sand is used to create 2D images. This type of Animation is used for storytelling in reality shows. Example:
09Motion Graphics
Motion design was invented in the year 1960. It is one of the most popular cartoon art styles used nowadays. This type of Animation creates promotional videos, game screensavers, commercial advertising videos, etc. It is one of the universal animation techniques used globally for various purposes. Example:
10Mechanical Animation
Mechanical Animation is mainly used in producing technical equipment. The most fantastic thing about this animation method is that you can make changes to a product that has not yet been developed. This kind of Animation is used with 3D Animation to show the working of machines in and out. It is done together with 3D Animation to clearly visualize the machine.
Part 2 Drawing Myself in 5 Different Cartoon Styles
You can draw yourself using these 5 different cartoon styles:
01You can use 3D filters on Snapchat to draw a Pixar-like picture of yourself
The steps are:
Step 1: Install and run the “Snapchat” app on your phone.
Step2: Open the app and turn on the camera.
Step 3: There is a smiling face symbol on the right side of the camera button, tap on that.
Step 4: Click on the explore menu and select the “Cartoon 3D Style” option.
Step 5: Capture your video
Step 6: Then your cartoon character-like video is ready.
02You can also use Instagram to create a Disney-like character of yourself
The steps are:
Step 1: Open your Instagram account.
Step 2: Click on the ‘+’ icon. Select the “Story” option.
Step 3: Different effects appear on the screen.
Step 4: Scroll the effects and find an icon of a magnifying glass.
Step 5: Click on that icon and type cartoon on the search bar.
Step 6: After your search is finished, different cartoon filters will appear on your screen.
Step 7: Tap on any one of the effects. The effect opens.
Step 8: Tap on the bookmark icon to save the cartoon effect.
Step 9: Now you can go back to the effects options to use the cartoon effect.
Your Disney-like cartoon picture is ready!
03You can use Google meet
Step 1: When you open the Google meet app, there are filters to use while on a call.
Step 2: Choose one of the filters that have a cartoon effect.
Step 3: When you join any meeting, you will appear like a cartoon character from TV.
04You can use B612
Step 1: Install and open the app on your phone.
Step 2: After you open the app, a circle button appears at the bottom of your screen in the middle.
Step 3: Tap on the circle.
Step 4: Numerous filters will appear.
Step 5: Choose one cartoon-like filter from the options of effect in the menu.
Step 6: After selecting one effect, make a video of yourself using an effect.
Step 7: Your cartoon video is ready on your screen.
05You can use Wondershare Filmora Video Editor
For Win 7 or later (64-bit)
For macOS 10.12 or later
Step 1: Capture a video of yourself using your phone’s camera.
Step 2: Install and open the Filmora app on your phone.
Step 3: After you open the app, you will be given the option to choose a video.
Step 4: Choose the video of yourself.
Step 5: After choosing your video, there is an option “click edit” tap on that.
Step 6: A menu appears; select the “effects” option from the menu.
Step 7: Different effects will appear on your screen.
Step 8: Select the cartoon effect you want to use in your video.
Step 9: After you have selected the effect, it will take some time to process.
Step 10: Your cartoon-like video is ready.
How You Can Develop a Cartoon Style for Animation
Anyone can develop new cartoon styles by following these simple procedures or habits. The procedures are:
● You can take references from real-life objects.
Most of the Animation we see here has been taken from real-life references, be it a cat, car, house, etc. So, to develop the cartoon styles, you can take references from real-life objects. You can also search for a particular characteristic in things you won’t use as your reference. If you want to draw a cat, you can use a living cat as your reference.
● You can copy and try to make Animation like your favorite animator.
If you use this method, this will help you improve your skill. No animation is 100% real, no matter what kind of Animation it is or who is creating it. However, you cannot keep on making animations like your favorite animator because you will not be able to find your anime art styles and skills.
● You can create an animated character of your own.
After taking your reference from real-life objects and knowing about the animation styles and the basic principles of Animation, you can create your animated character. If you create your character, keeping all the skills and techniques in mind, you can develop outstanding animation styles.
● To develop your cartoon style, you need to practice drawing regularly.
To get s grasp this whole process of Animation, you need to draw and practice different cartoon art styles. You can draw anything you like, or you don’t like on paper or on a drawing tablet. You can also color sketchbooks to improve your skills in Animation.
You can use Filmora to make cartoon videos and, at the same time, make cartoon videos of normally captured videos. These cartoon videos can be compiled into one video. You can use this video to edit different types of videos. Filmora has a user-friendly interface that can help you create your cartoon video effortlessly.
● Ending Thoughts →
● I hope you have understood the different types of anime cartoon styles by now.
● These methods can help you make the best for your next marketing project.
● These methods are easy, efficient, and efficient. All the aforementioned methods were discovered in the late nineteenth and early twentieth century.
● With the advancement of technology, the process has become more accessible. However, you can use any cartoon-style art.
10 Great Moving Animation PowerPoint Techniques
10 Awesome Moving Animation PowerPoint Techniques
An easy yet powerful editor
Numerous effects to choose from
Detailed tutorials provided by the official channel
PowerPoints can be quite dull without anything to spice it up. So, this question is more than 100% warranted. Fortunately, we were able to pull together a tutorial on creating moving animation PowerPoint presentations.
Complete with some templates that you can start off with (if you’d prefer to make it as simple as possible for yourself.)
In this article
01 [6 Animated Powerpoint Templates with Interactive Features](#Part 1)
02 [How to Create a Moving Animation in Powerpoint](#Part 2)
03 [10 Moving Animation Powerpoint Techniques](#Part 3)
Part 1 6 Animated PowerPoint Templates with Interactive Features
The default people tend to-go-to when it comes to presentations are videos. As they tend to be more engaging on their own. For that, you’ll see people gravitating towards software like Filmora, which can create beautiful, eye-catching presentations that you can easily and quickly share. Not just to an immediate audience, but also on social media and the like.
However, of course, sometimes a personal touch is important in a presentation — important to have a ‘voice’ attached to the image on the screen. But just because this is the case, doesn’t mean that you shouldn’t go all out on your presentation. Hence, why moving animation PowerPoint templates are such a big deal:
01Company Presentation PowerPoint Template
For the first of the Moving Animation PowerPoint templates that we have to introduce, we chose the ‘Company Presentation PowerPoint Template.’ As you can perhaps guess from the name, it’s a very professional template. It comes with a total of 500 sample slides that you can choose from (50 of which are unique), and it’s set up with professional animations that can spice up your presentation without making it look gaudy or over-the-top.

02Move Animated PowerPoint Template
Next is the modern, minimalistic template called “Move Animated.” This one is a lot more versatile, with every single one of the 144 unique slides available suitably animated. The best part of it is definitely the easy way in which it can be used. With the modern, minimalistic style, it’s easy enough to remove the presets and replace them with suitable company or product images to promote your content, idea, or project.

0340 Animated Conceptual Slides for PowerPoint
Again, we have another modern and minimalistic kind of PowerPoint template with ‘40 Animated Conceptual Slides for PowerPoint.’ It comes with 40 modern slides, all of which come fully animated are easy enough to customize with your own branding or content.

04UNIGRAPH - Animated & Creative Template (PPTX)
For a bit more fun, our next template is “UNIGRAPH.” This still definitely fits the description ‘minimalistic’ but the pop of color and effects that it brings to the table gives it a different kind of vibe from all the others. No less professional, but certainly more fun. Of course, most importantly, perhaps, is the fact that each slide is smoothly animated.

05Graph & Charts PowerPoint Presentation
For this next one, we introduce a template set called “Graphs & Charts” for those who may want to present their products, projects, ideas, etc. in the shape of graphs and charts. It’s perfect for professionals, certainly. Especially with its clean look, brightened only by occasional pops of color that can be seen from the graphs and charts that it comes with.

06Laststyle - PowerPoint Template
This next PowerPoint template is most suited for businesses looking to promote their products. The creator of the template has provided five different colored versions of the template, each with 30 unique slides that were carefully sectioned with suitable animations.

Part 2 How to Create a Moving Animation in PowerPoint
Now we come to the point of the article where we speak directly to those who may want to experiment more by personally creating a moving animation PowerPoint. For this example, we’ll be teaching you how to create a path animation PowerPoint with the available tools that the software offers under ‘Animation.’ Stick around if you want to learn more.
01Step 1. Open Project.
First things first, of course. Start a new project. When you’ve started, move on to the Animation tab (which we’ve pointed out in the image below.)

02Step 2. Add Animation.
Then, make sure to select the object or model that you want to animate (in this case, we’ve inserted a 2D model of a businessman), and then click the ‘Add Animation’ button (shown in the image below.)

03Step 3. Choose Animation.
Under ‘Add Animation’ you’ll find several different options for animations that you can choose from. Of course, since our goal is to create a PowerPoint Motion Path Animation, we have selected one of the ‘Motion Path’ options.

04Step 4. Choose Motion Path Animation
In order to make motion animation in PowerPoint, you must select one of the offered ‘Motion Paths’ (i.e., Bounce, Line, Arcs, etc.) and then use the motion path tool that appears to control the direction you wish to make your character move.
In this example, we chose the ‘Lines’ motion path (1) and then used the line tool to create a path for our businessman model. To walk from the right side of the screen towards the left.

05Step 5. Adjust Animation.
With path animation PowerPoint complete, you can adjust as needed with the tools provided. For example, you can have the character start moving as soon as the slide opens, or wait until a minute has passed, you can extend the animation by changing duration, etc.

Part 3 10 Moving Animation PowerPoint Techniques
For this last step, we break down some important PowerPoint 3D Animation need-to-knows. Including the specifics provided by each of the options made available to you and why it’s important to explore every single one to create better and more professional-looking presentations.
01Transitions
When it comes to PowerPoint presentations, most people are no doubt the most familiar with ‘Transitions’ when talking in terms of adding animation into a presentation. This one decides whether you want to shift from one slide to another smoothly, or if you want the previous slide to break into splinters, or rotate into the next slide, and so on and so forth. It’s an ‘in-between’ animation that signals where one ends and the other begins.

02Animations
Now, for the ‘Animations’ tab, we focus on animations that occur in the slide (not in-between like transitions). This can include a wide array of things. Whether it be characters moving (like shown in the tutorial we provided), text boxes appearing and disappearing in short order, images bouncing into view in dramatic fashion, and so on and so forth. There’s lots of potential here.

03Animation - Start
We mentioned this previously in the tutorial, but PowerPoint (which does not offer the more advanced 3D customization options), does still give you the freedom to choose how you want certain animations to work.
In the case of the ‘Animations-Start’ option, the goal is to decide when an animation starts playing. Do you want it to start after a click? Or maybe you want it to start up immediately? Whatever the case may be, this function will let you choose the specifics.

044. Animation - Duration
Next, we decide how long you want the animation to last. For example, if you chose to add a PowerPoint 3D rotation animation into a character, how long do you want it to spin before it settles into place? Perhaps only a second? Perhaps more? Whatever you chose, this is the option that will let you finalize that.

05Animation - Delay
This one is self-explanatory as well. But suffice to say, the ‘Delay’ option is for deciding how much an animation is delayed before starting. For example, if you chose to start it ‘On Click’ you can increase the delay to keep it from playing immediately on click.

06Break Up Presentation into Sections
A lot of PowerPoint templates, you’ll find, are naturally broken into sections. This is because it is easier to consume it in that way. It’s also a good signal to your audience as to what point of the presentation you are on. Are you in the beginning? The middle? Near the end? Etc. In this case, the best option for showing it is transitions that separate the sections from one another.

07Add Animation - Entrance
As promised earlier, we’ll be going through each type of animation is available under the ‘Add Animation’ option. The first is “Entrance” animations. This one is pretty easy to guess. It makes up a variety of animations that serve as its entrance animation. Here are some examples:
● Appear: To have objects appear without any other effect.
● Fade: To have objects fade into view.
● Bounce: To have objects bounce into view.
● Swivel: To have objects swivel into view.

08Add Animation - Emphasis
This next animation style is to give emphasis to an already-present object. For example, at a click, you can have a text box ‘Pulse’ and become the center of attention. You can change ‘Object Color’ to make it stand out. And so on.

099. Add Animation - Exit
Opposite of the ‘Entrance’ animations are the ‘Exit’ animations. You’ll notice that the style of animations is the same here. The only difference is that the animations occur to exit the project out of the presentation. For example, an image exiting to reveal text. Or text flying out to be replaced with more text, etc.

10Add Animation - Motion Path
We’ve already mentioned the PowerPoint Motion Path animation style previously, but just to reiterate some things, this is the most customizable animation feature on PowerPoint. One that allows you to move objects across the slide in whatever way you wish. In our example, we created a motion path animation that took the character from the center of the screen to the left of the screen.

● Key Takeaways from This Episode →
● While videos are the most popular way to share information, there are some presentations that require a heavier guiding hand.
● In these situations, a PowerPoint presentation, carefully animated, can serve in place of an edited video.
● There are templates available that you can take advantage of if you’d prefer to start with something to work from. We introduced some in this article that we think were particularly notable.
● But, of course, more careful personalization is sometimes necessary. In that case, we hope that you find our tutorial and our list of PowerPoint techniques helpful.
PowerPoints can be quite dull without anything to spice it up. So, this question is more than 100% warranted. Fortunately, we were able to pull together a tutorial on creating moving animation PowerPoint presentations.
Complete with some templates that you can start off with (if you’d prefer to make it as simple as possible for yourself.)
In this article
01 [6 Animated Powerpoint Templates with Interactive Features](#Part 1)
02 [How to Create a Moving Animation in Powerpoint](#Part 2)
03 [10 Moving Animation Powerpoint Techniques](#Part 3)
Part 1 6 Animated PowerPoint Templates with Interactive Features
The default people tend to-go-to when it comes to presentations are videos. As they tend to be more engaging on their own. For that, you’ll see people gravitating towards software like Filmora, which can create beautiful, eye-catching presentations that you can easily and quickly share. Not just to an immediate audience, but also on social media and the like.
However, of course, sometimes a personal touch is important in a presentation — important to have a ‘voice’ attached to the image on the screen. But just because this is the case, doesn’t mean that you shouldn’t go all out on your presentation. Hence, why moving animation PowerPoint templates are such a big deal:
01Company Presentation PowerPoint Template
For the first of the Moving Animation PowerPoint templates that we have to introduce, we chose the ‘Company Presentation PowerPoint Template.’ As you can perhaps guess from the name, it’s a very professional template. It comes with a total of 500 sample slides that you can choose from (50 of which are unique), and it’s set up with professional animations that can spice up your presentation without making it look gaudy or over-the-top.
02Move Animated PowerPoint Template
Next is the modern, minimalistic template called “Move Animated.” This one is a lot more versatile, with every single one of the 144 unique slides available suitably animated. The best part of it is definitely the easy way in which it can be used. With the modern, minimalistic style, it’s easy enough to remove the presets and replace them with suitable company or product images to promote your content, idea, or project.
0340 Animated Conceptual Slides for PowerPoint
Again, we have another modern and minimalistic kind of PowerPoint template with ‘40 Animated Conceptual Slides for PowerPoint.’ It comes with 40 modern slides, all of which come fully animated are easy enough to customize with your own branding or content.
04UNIGRAPH - Animated & Creative Template (PPTX)
For a bit more fun, our next template is “UNIGRAPH.” This still definitely fits the description ‘minimalistic’ but the pop of color and effects that it brings to the table gives it a different kind of vibe from all the others. No less professional, but certainly more fun. Of course, most importantly, perhaps, is the fact that each slide is smoothly animated.
05Graph & Charts PowerPoint Presentation
For this next one, we introduce a template set called “Graphs & Charts” for those who may want to present their products, projects, ideas, etc. in the shape of graphs and charts. It’s perfect for professionals, certainly. Especially with its clean look, brightened only by occasional pops of color that can be seen from the graphs and charts that it comes with.
06Laststyle - PowerPoint Template
This next PowerPoint template is most suited for businesses looking to promote their products. The creator of the template has provided five different colored versions of the template, each with 30 unique slides that were carefully sectioned with suitable animations.
Part 2 How to Create a Moving Animation in PowerPoint
Now we come to the point of the article where we speak directly to those who may want to experiment more by personally creating a moving animation PowerPoint. For this example, we’ll be teaching you how to create a path animation PowerPoint with the available tools that the software offers under ‘Animation.’ Stick around if you want to learn more.
01Step 1. Open Project.
First things first, of course. Start a new project. When you’ve started, move on to the Animation tab (which we’ve pointed out in the image below.)
02Step 2. Add Animation.
Then, make sure to select the object or model that you want to animate (in this case, we’ve inserted a 2D model of a businessman), and then click the ‘Add Animation’ button (shown in the image below.)
03Step 3. Choose Animation.
Under ‘Add Animation’ you’ll find several different options for animations that you can choose from. Of course, since our goal is to create a PowerPoint Motion Path Animation, we have selected one of the ‘Motion Path’ options.
04Step 4. Choose Motion Path Animation
In order to make motion animation in PowerPoint, you must select one of the offered ‘Motion Paths’ (i.e., Bounce, Line, Arcs, etc.) and then use the motion path tool that appears to control the direction you wish to make your character move.
In this example, we chose the ‘Lines’ motion path (1) and then used the line tool to create a path for our businessman model. To walk from the right side of the screen towards the left.
05Step 5. Adjust Animation.
With path animation PowerPoint complete, you can adjust as needed with the tools provided. For example, you can have the character start moving as soon as the slide opens, or wait until a minute has passed, you can extend the animation by changing duration, etc.
Part 3 10 Moving Animation PowerPoint Techniques
For this last step, we break down some important PowerPoint 3D Animation need-to-knows. Including the specifics provided by each of the options made available to you and why it’s important to explore every single one to create better and more professional-looking presentations.
01Transitions
When it comes to PowerPoint presentations, most people are no doubt the most familiar with ‘Transitions’ when talking in terms of adding animation into a presentation. This one decides whether you want to shift from one slide to another smoothly, or if you want the previous slide to break into splinters, or rotate into the next slide, and so on and so forth. It’s an ‘in-between’ animation that signals where one ends and the other begins.
02Animations
Now, for the ‘Animations’ tab, we focus on animations that occur in the slide (not in-between like transitions). This can include a wide array of things. Whether it be characters moving (like shown in the tutorial we provided), text boxes appearing and disappearing in short order, images bouncing into view in dramatic fashion, and so on and so forth. There’s lots of potential here.
03Animation - Start
We mentioned this previously in the tutorial, but PowerPoint (which does not offer the more advanced 3D customization options), does still give you the freedom to choose how you want certain animations to work.
In the case of the ‘Animations-Start’ option, the goal is to decide when an animation starts playing. Do you want it to start after a click? Or maybe you want it to start up immediately? Whatever the case may be, this function will let you choose the specifics.
044. Animation - Duration
Next, we decide how long you want the animation to last. For example, if you chose to add a PowerPoint 3D rotation animation into a character, how long do you want it to spin before it settles into place? Perhaps only a second? Perhaps more? Whatever you chose, this is the option that will let you finalize that.
05Animation - Delay
This one is self-explanatory as well. But suffice to say, the ‘Delay’ option is for deciding how much an animation is delayed before starting. For example, if you chose to start it ‘On Click’ you can increase the delay to keep it from playing immediately on click.
06Break Up Presentation into Sections
A lot of PowerPoint templates, you’ll find, are naturally broken into sections. This is because it is easier to consume it in that way. It’s also a good signal to your audience as to what point of the presentation you are on. Are you in the beginning? The middle? Near the end? Etc. In this case, the best option for showing it is transitions that separate the sections from one another.
07Add Animation - Entrance
As promised earlier, we’ll be going through each type of animation is available under the ‘Add Animation’ option. The first is “Entrance” animations. This one is pretty easy to guess. It makes up a variety of animations that serve as its entrance animation. Here are some examples:
● Appear: To have objects appear without any other effect.
● Fade: To have objects fade into view.
● Bounce: To have objects bounce into view.
● Swivel: To have objects swivel into view.
08Add Animation - Emphasis
This next animation style is to give emphasis to an already-present object. For example, at a click, you can have a text box ‘Pulse’ and become the center of attention. You can change ‘Object Color’ to make it stand out. And so on.
099. Add Animation - Exit
Opposite of the ‘Entrance’ animations are the ‘Exit’ animations. You’ll notice that the style of animations is the same here. The only difference is that the animations occur to exit the project out of the presentation. For example, an image exiting to reveal text. Or text flying out to be replaced with more text, etc.
10Add Animation - Motion Path
We’ve already mentioned the PowerPoint Motion Path animation style previously, but just to reiterate some things, this is the most customizable animation feature on PowerPoint. One that allows you to move objects across the slide in whatever way you wish. In our example, we created a motion path animation that took the character from the center of the screen to the left of the screen.
● Key Takeaways from This Episode →
● While videos are the most popular way to share information, there are some presentations that require a heavier guiding hand.
● In these situations, a PowerPoint presentation, carefully animated, can serve in place of an edited video.
● There are templates available that you can take advantage of if you’d prefer to start with something to work from. We introduced some in this article that we think were particularly notable.
● But, of course, more careful personalization is sometimes necessary. In that case, we hope that you find our tutorial and our list of PowerPoint techniques helpful.
Also read:
- New How to Make Photo Motion Effect Online, In 2024
- 10 Realistic Cartoon Characters You Will Run Away From if You Met in R for 2024
- 2024 Approved Top 10 Classical Animated Cartoon Types With Examples
- Types of Cartoon Styles You May Use for The Next Marketing Project
- New 2024 Approved Ways to Create an Adobe Collage
- Updated 10 Best Animation Makers for Kids to Have Fun
- How-To Guide Secret Shortcut to Adobe Animate Character Tutorial
- New Best GIF Resizers to Reduce GIF Size for 2024
- Ways on How to Liven Up Your Animate Website on Scroll
- 2024 Approved 10 Best Romance Anime Movies You Need to Watch
- New Best Tips for Effortless Unity 3D Animation for 2024
- Updated Ways to Master to Find 10 Best Free Animated Text Generator
- 2024 Approved 10 of the Best Disney Animated Shows
- New Learn All About 3D Logo Animation and Templates
- New The 15 Best Apps to Turn Photos Into Cartoons and Sketches for 2024
- New In 2024, 10 Best Photoshop Cartoon Effects For Creatives
- Updated How to Animate - Adobe Animate Tutorias for 2024
- Updated 2024 Approved How To Learn Cartoon Sketch Drawing
- Updated 10 Amazing Wallpaper Collage Ideas and Photos
- In 2024, The 10 Most Adorable Aesthetic Cartoon Characters of All Time
- New In 2024, Learn All About Lip-Syncing in Animation
- 2024 Approved A Beginners Guide to Explain What 3D Animation Is
- 2024 Approved How to Make a GIF in Photoshop
- Updated 10 Amazing Cartoon Music Examples You Need to Bookmark for 2024
- New Create Animated Video on Canva for 2024
- New How to Turn Yourself Into a WhatsApp Cartoon for 2024
- New In 2024, What Is the Meaning of Motion Graphics
- New 2024 Approved How to Create a YouTube Intro Animation Like a Pro
- Updated 2024 Approved Tips for GIF to Animated PNG
- How to Make Animated Videos for Business Simple Guide for 2024
- Is It That Easy to Make My Animated Character
- New Animated Collage Maker Tips
- New Incredible Ways to Find Suitable Animated Graphic Maker for 2024
- Updated The 10 Best Batman Anime Movies- 2024 Updated
- 2024 Approved Top 7 Animated GIF Text Makers
- Updated Want to Make a Meme GIF for 2024
- Updated 2024 Approved How I Animate Discord Profile Pictures (& You Can Too)
- In 2024, How to Stop Animation From Looping in Unity
- Updated 5 Best Adobe Animate Courses & Classes
- In 2024, Best 15 Classics Animated Cartoon Movies
- Top 3 Ways to Create Gif Images with Great 3D Gif Maker
- New In 2024, How to Create Picsart Cartoon
- In 2024, Can I Still Do Animated Logo Design Without Design Skills?
- Updated Have You Seen the Facebook Cartoon App Everyones Using Lately for 2024
- Useful Tips for Canva Animated Elements for 2024
- New 2024 Approved Learn How to Draw Cartoons Step by Step with This Guide
- Updated Ways on How to Get Started in Stop Motion Claymation
- Updated Great Guide for Beginners on 2D Animation Making
- Tips for GIF to Animated PNG You Should Know for 2024
- 2024 Approved Looking for Love Animated GIFs? Here Are 5 Free Sources For You
- New In 2024, Unveiling the Secrets of Shopee Livestream Selling System
- Calls on Vivo V29e Go Straight to Voicemail? 12 Fixes | Dr.fone
- In 2024, Unlock Your Samsung Galaxy A05s Phone with Ease The 3 Best Lock Screen Removal Tools
- In 2024, Best Ways on How to Unlock/Bypass/Swipe/Remove Samsung Galaxy A23 5G Fingerprint Lock
- All Things You Need to Know about Wipe Data/Factory Reset For Realme V30T | Dr.fone
- In 2024, Why is iPogo not working On Samsung Galaxy S23 FE? Fixed | Dr.fone
- In 2024, How to Change Location On Facebook Dating for your Realme C67 5G | Dr.fone
- Set Your Preferred Job Location on LinkedIn App of your Honor X50 GT | Dr.fone
- How to Change Netflix Location to Get More Country Version On Oppo Find X6 Pro | Dr.fone
- In 2024, How to Transfer Contacts from Xiaomi Civi 3 to Other Android Devices Devices? | Dr.fone
- In 2024, 8 Ways to Transfer Photos from Honor Magic 5 Pro to iPhone Easily | Dr.fone
- 2024 Approved How to Create Marketing Videos Ultimate Guide
- In 2024, How and Where to Find a Shiny Stone Pokémon For Oppo K11x? | Dr.fone
- In 2024, How To Reach More Users by Using Instagram Live Shopping
- Three methods to recover lost data on M6 5G
- Overview of the Best Realme 11 5G Screen Mirroring App | Dr.fone
- Hard Reset Xiaomi Redmi Note 13 5G in 3 Efficient Ways | Dr.fone
- Fixes for Apps Keep Crashing on Google Pixel Fold | Dr.fone
- In 2024, Different Methods To Unlock Your iPhone X | Dr.fone
- 5 Ways to Restart Tecno Phantom V Fold Without Power Button | Dr.fone
- In 2024, Disabled iPhone 6s How to Unlock a Disabled iPhone 6s?
- Looking For A Location Changer On Nokia C300? Look No Further | Dr.fone
- In 2024, Full Guide on Mirroring Your Nokia G310 to Your PC/Mac | Dr.fone
- 9 Quick Fixes to Unfortunately TouchWiz has stopped Of Vivo Y100i | Dr.fone
- How to Upgrade Apple iPhone 6 without Losing Data? | Dr.fone
- New Text to Speech
- Tutorial to Change OnePlus 11R IMEI without Root A Comprehensive Guide
- How to Delete iCloud Account On Apple iPhone 14 without Password?
- Title: Updated Top 12 Video to GIF Converters High Quality to Check Out
- Author: Elon
- Created at : 2024-05-19 03:05:06
- Updated at : 2024-05-20 03:05:06
- Link: https://animation-videos.techidaily.com/updated-top-12-video-to-gif-converters-high-quality-to-check-out/
- License: This work is licensed under CC BY-NC-SA 4.0.
