
:max_bytes(150000):strip_icc():format(webp)/GettyImages-758317893-3ab5c26f770448db8b4a58205fb549f1.jpg)
Updated Ways to Create an Adobe Collage for 2024
Ways to Create an Adobe Collage
How to Create an Adobe Collage?
An easy yet powerful editor
Numerous effects to choose from
Detailed tutorials provided by the official channel
All of you might know that an adobe collage was created first of all by Ewelina Karpowiak in the working field of Adobe Photoshop. Here these professionals have the need to mix different shapes and types of textures.
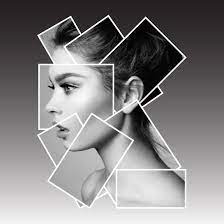
They can also create illustrations that appear well like 3D looking pictures.
In this article
01 [What Are Collage Portrait?](#Part 1)
02 [How to Create a Photo Collage in Adobe Spark?](#Part 2)
03 [Where to Find More Photo Collage Resources](#Part 3)
Part 1 What Are Collage Portrait?
A collage portrait is the perfect technique with which you can easily make a picture by gathering other pieces of photos. Here you have to use the most perfect graphical pieces. In this way you can make a composite photo with the help of this technology. When you make use of an adobe spark collage then you will get more benefit with this kind of technique in the long way. In brief you can conclude that a collage portrait is a nice and good way to make a photo with as many portrait pictures. Here you can also make and create a good looking family pictures with such kind of pieces of photos. You can also give publicity to these kinds of photos in the long way.
Part 2 How to Create a Photo Collage in Adobe Spark?
When you take help of spark adobe collage then you can know how to create a photo collage in Adobe Spark. Just see the steps below with which you can genuine success in this task and motive:-
● You will need to choose and select your favorite collage photos.
● Just open the chosen photos in Photoshop.
● Just make a new file for your collage Photoshop.
● Add or upload images at the same time.
● Make proper arrangements of your chosen photos.
● Create proper spaces and merge all the graphic layers with one another.
Part 3 Where to Find More Photo Collage Resources
With the help of a collage adobe spark you can get help to get more photo collage resources. Just collect accessories like magazine photos, fancy papers and photographs. You can make all these kinds steps when you feel interested in creating collages. In this way you can gather these things to commence the process of adobe collage and its essential resources.
Wondershare Filmora
Get started easily with Filmora’s powerful performance, intuitive interface, and countless effects!
Try It Free Try It Free Try It Free Learn More >

Wondershare Filmora Video Editor ‘s stock media is now being very much high in the market of Adobe and photography. It is a very much non-stop stock media with media that is made with stock images. When you choose stock images then your photos will not get banned and spammed when you upload on the internet.
01The attraction of Filmora stock images and photos
When you chooseFilmora V11’s stock media then you can also easily add special video effects so that your Photoshop work will appear glittering in the long way. When you combine the technology of Adobe Collage with the above mentioned stock images related to Filmora then you will not have to pay any kind of royalty fee in the long way.
Here you can also customize the video effects with the greatest ease. Just choose the option of stock footage so that nobody will charge you of stealing photos from other websites on the internet. When you make videos related to the technique of collage adobe then you will see that you can give special video effects and music lyrics to enhance the attraction of such kind of these videos. You can even easily download all such useful resources from Filmora as well as software like Adobe. Just have completed access to such video making software like Adobe and merge it well with the stock images concerned with Filmora. Today most creators of collage adobe can make marvelous videos with applying these attractive video and pictorial effects.
Image Name- how-to-create-an-adobe-collage5
Alt tag- Filmora stock images and photos
01The final summary
● When you talk more about any adobe collage then you will see that it was created first of all by Ewelina Karpowiak. She was working as a Adobe Photoshop developer. You can see as well as realize that you can create a collage adobe by mixing as many pieces of portraits into a single picture in the long way. These pictures will appear well like good 3D looking pictures. You can give good publicity to these pictures in many ways.
● You can get the best support from a spark adobe collage when you need to make a good photo collage from the technique of Adobe Spark. When you do this then you will have to choose the best photos for your collage. You will need to open those photos that you will see in Photoshop. You might even upload and add the needed images at the same time duration. Even you have to make a new file for the sake of your collage Photoshop. You might even add and upload images at the same duration of time. You have to make proper arrangements for the photos that you have selected. You will also need to make proper spaces for sake of arranging your selected images.
● When you make active use of collage adobe spark then you will find more resources of photo collage. Here you can get accessories like fancy papers and magazine photos as well as good looking photographs. When you are in a mood to create more good appearing collages then you can have all these resources. You might even see that Filmora V11’s stock media has attained a very high popularity in the market of photos. When you use these techniques then you will get free stock photos that you can use and add anywhere. After you make your mind to make an adobe collage then you can also make very much attractive media. When you are in a mood to do Filmora stock photography then you can use stock images to make images as well as attractive videos. Here you can also make use of special video effects and good hearing music tunes. You can easily download these effective resources from Filmora stock photos. Their software is such with which you can make excellent videos and even here collage adobe will help you well in the long run. Just make these attractive videos with marvelous pictorial and image related effects.
01Some more things to know
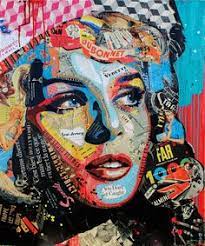
● Today even adobe collage is being used in making and creating love portrait photography. Here you can take a fresh start when you want to create a nice picture or photo with the pieces of colorful portraits. Here you can also make dynamic photos with combined pieces of portraits. This task can be done quickly in a very simple way. Thus this kind of technology can be used to make good looking and colored posters, images of social media and covers of commercial and personal magazines. Here you might also see that adobe Photoshop is also being utilized to make such portraits that are made with collage technology. Here you can also make attractive designs. You have to also test and judge the effects of color effects. Just also take the help of incorporating textures to make a professional looking poster and collage adobe.
● You can also use an adobe spark collage to make anarchic newspapers. Here you have to use the cutting style to make the collage portraits with the best editorial design. Here you can get more beneficial results by mixing colorful images and media technology with one another. As far as fashion concerning portraits is concerned you can get the benefits of having an edgy twist with them. You can also make changes and blending of these images with some elements like patterns that look like bionomical images.
● The spark adobe collage is very much essential as here you can make or create as many colorful images with this unique technology. With it you can also make a brand new portrait by combining the pieces of a colorful picture. Just combine as many images to create a brand new print. This could be the best example to make a high quality designed picture. All the collage portraits require an image that works on the technique of anchoring. Never forget that such an image needs high resolution pixels that can be mapped at anytime.
● Key Takeaways from This Episode →
● Finally we want to say that the technology of adobe collage is the best way to make good looking colorful pictures with the pieces of portraits.
● Here you will see that when you are in need of making high quality colorful images then you can make use of stock images that are available free on the web or internet.
● When you make use of these photos then no one will charge you of stealing the photo images of others on the web.
All of you might know that an adobe collage was created first of all by Ewelina Karpowiak in the working field of Adobe Photoshop. Here these professionals have the need to mix different shapes and types of textures.
They can also create illustrations that appear well like 3D looking pictures.
In this article
01 [What Are Collage Portrait?](#Part 1)
02 [How to Create a Photo Collage in Adobe Spark?](#Part 2)
03 [Where to Find More Photo Collage Resources](#Part 3)
Part 1 What Are Collage Portrait?
A collage portrait is the perfect technique with which you can easily make a picture by gathering other pieces of photos. Here you have to use the most perfect graphical pieces. In this way you can make a composite photo with the help of this technology. When you make use of an adobe spark collage then you will get more benefit with this kind of technique in the long way. In brief you can conclude that a collage portrait is a nice and good way to make a photo with as many portrait pictures. Here you can also make and create a good looking family pictures with such kind of pieces of photos. You can also give publicity to these kinds of photos in the long way.
Part 2 How to Create a Photo Collage in Adobe Spark?
When you take help of spark adobe collage then you can know how to create a photo collage in Adobe Spark. Just see the steps below with which you can genuine success in this task and motive:-
● You will need to choose and select your favorite collage photos.
● Just open the chosen photos in Photoshop.
● Just make a new file for your collage Photoshop.
● Add or upload images at the same time.
● Make proper arrangements of your chosen photos.
● Create proper spaces and merge all the graphic layers with one another.
Part 3 Where to Find More Photo Collage Resources
With the help of a collage adobe spark you can get help to get more photo collage resources. Just collect accessories like magazine photos, fancy papers and photographs. You can make all these kinds steps when you feel interested in creating collages. In this way you can gather these things to commence the process of adobe collage and its essential resources.
Wondershare Filmora
Get started easily with Filmora’s powerful performance, intuitive interface, and countless effects!
Try It Free Try It Free Try It Free Learn More >
Wondershare Filmora Video Editor ‘s stock media is now being very much high in the market of Adobe and photography. It is a very much non-stop stock media with media that is made with stock images. When you choose stock images then your photos will not get banned and spammed when you upload on the internet.
01The attraction of Filmora stock images and photos
When you chooseFilmora V11’s stock media then you can also easily add special video effects so that your Photoshop work will appear glittering in the long way. When you combine the technology of Adobe Collage with the above mentioned stock images related to Filmora then you will not have to pay any kind of royalty fee in the long way.
Here you can also customize the video effects with the greatest ease. Just choose the option of stock footage so that nobody will charge you of stealing photos from other websites on the internet. When you make videos related to the technique of collage adobe then you will see that you can give special video effects and music lyrics to enhance the attraction of such kind of these videos. You can even easily download all such useful resources from Filmora as well as software like Adobe. Just have completed access to such video making software like Adobe and merge it well with the stock images concerned with Filmora. Today most creators of collage adobe can make marvelous videos with applying these attractive video and pictorial effects.
Image Name- how-to-create-an-adobe-collage5
Alt tag- Filmora stock images and photos
01The final summary
● When you talk more about any adobe collage then you will see that it was created first of all by Ewelina Karpowiak. She was working as a Adobe Photoshop developer. You can see as well as realize that you can create a collage adobe by mixing as many pieces of portraits into a single picture in the long way. These pictures will appear well like good 3D looking pictures. You can give good publicity to these pictures in many ways.
● You can get the best support from a spark adobe collage when you need to make a good photo collage from the technique of Adobe Spark. When you do this then you will have to choose the best photos for your collage. You will need to open those photos that you will see in Photoshop. You might even upload and add the needed images at the same time duration. Even you have to make a new file for the sake of your collage Photoshop. You might even add and upload images at the same duration of time. You have to make proper arrangements for the photos that you have selected. You will also need to make proper spaces for sake of arranging your selected images.
● When you make active use of collage adobe spark then you will find more resources of photo collage. Here you can get accessories like fancy papers and magazine photos as well as good looking photographs. When you are in a mood to create more good appearing collages then you can have all these resources. You might even see that Filmora V11’s stock media has attained a very high popularity in the market of photos. When you use these techniques then you will get free stock photos that you can use and add anywhere. After you make your mind to make an adobe collage then you can also make very much attractive media. When you are in a mood to do Filmora stock photography then you can use stock images to make images as well as attractive videos. Here you can also make use of special video effects and good hearing music tunes. You can easily download these effective resources from Filmora stock photos. Their software is such with which you can make excellent videos and even here collage adobe will help you well in the long run. Just make these attractive videos with marvelous pictorial and image related effects.
01Some more things to know
● Today even adobe collage is being used in making and creating love portrait photography. Here you can take a fresh start when you want to create a nice picture or photo with the pieces of colorful portraits. Here you can also make dynamic photos with combined pieces of portraits. This task can be done quickly in a very simple way. Thus this kind of technology can be used to make good looking and colored posters, images of social media and covers of commercial and personal magazines. Here you might also see that adobe Photoshop is also being utilized to make such portraits that are made with collage technology. Here you can also make attractive designs. You have to also test and judge the effects of color effects. Just also take the help of incorporating textures to make a professional looking poster and collage adobe.
● You can also use an adobe spark collage to make anarchic newspapers. Here you have to use the cutting style to make the collage portraits with the best editorial design. Here you can get more beneficial results by mixing colorful images and media technology with one another. As far as fashion concerning portraits is concerned you can get the benefits of having an edgy twist with them. You can also make changes and blending of these images with some elements like patterns that look like bionomical images.
● The spark adobe collage is very much essential as here you can make or create as many colorful images with this unique technology. With it you can also make a brand new portrait by combining the pieces of a colorful picture. Just combine as many images to create a brand new print. This could be the best example to make a high quality designed picture. All the collage portraits require an image that works on the technique of anchoring. Never forget that such an image needs high resolution pixels that can be mapped at anytime.
● Key Takeaways from This Episode →
● Finally we want to say that the technology of adobe collage is the best way to make good looking colorful pictures with the pieces of portraits.
● Here you will see that when you are in need of making high quality colorful images then you can make use of stock images that are available free on the web or internet.
● When you make use of these photos then no one will charge you of stealing the photo images of others on the web.
Learn Easy Blender Rigging in Only 2 Minutes
Learn Simple Blender Rigging in Only 2 Minutes
An easy yet powerful editor
Numerous effects to choose from
Detailed tutorials provided by the official channel
Blender is a FREE, open-source 3D Animation program that is very popular for beginner animators. It’s a good way of starting if you’re not yet sure about how far you want to go into animation as it won’t demand any immediate monetary commitment.
Now, as for its features, today, we’ll be focusing on Blender Rigging features.
In this article
01 [Why Use Blender Rigging?](#Part 1)
02 [The Art of Effective Rigging in Blender [TUTORIAL]](#Part 2)
03 [Introduction to Rigging in Blender Course](#Part 3)
Part 1 Why Use Blender Rigging?
Blender Character Rigging is a great way of creating truly beautiful and realistic animations. Despite being an open-source program, it’s capable of doing just as much, if not more, than some of the more premium Animation software out there.
So, if you want to create video projects for your audience’s entertainment or edification with animation, then Blender Rigging is definitely something that you should consider. With this tool, you can create the complex animations that you need and then polish it up in a video editor like Wondershare Filmora Video Editor (which is a premium, video-editing tool that you can use to perfect your finished Blender Rigging animations.)

Part 2 The Art of Effective Rigging in Blender [TUTORIAL]
For this next section, we’re going to be introducing a couple of tutorials that you can look into to teach you more about Blender Character Rigging, Blender Facial Rigging, Blender Muscle Rig, and so on.
These topics are each very long-winded on their own though, so we’ve linked appropriate video tutorials that you can learn more and reserved ourselves to a brief description of each technique so that you can determine whether it’s something that interests you (although, of course, our recommendation is that you check each one out so that you can get the full ‘Blender’ experience.)
01Blender Character Rigging
The main thing people usually look at Blender for is, Blender Character Rigging. And, because it was created to emulate professional animation software, Blender has this function down to pat. To give you an idea of what features you can expect: Blender comes with custom bone shapes for easy Blender character rigging, it also comes with envelope skinny, skeleton skinning, and automatic skinning. With these alone, you can be assured that you will be able to create complex animations without much trouble.
02Blender Facial Rigging
Facial Rigging is usually a more complex subject that is avoided by animators without much experience. But, with Blender, facial rigging is possible. The YouTube video should show you the process of going about Blender Facial Rigging from start to finish (from sculpting the character face itself and then making use of Blender Rigging tools for setting up a skeletal structure for your face’s character to become animated.)
03Blender Muscle Rigging
Creating a Blender Muscle Rig is exactly what it sounds like. It is, of course, much more complicated than normal rigging, but it is a good subject to familiarize yourself with anyway, as it will allow you to go to the ‘next stage’ as you say, with your Animations. The video that we’ve attached is from Pierrick Picaut, who has released a series of videos on the subject of Blender Rigging in general and has extensively explained how to create a Blender Human Rig from the general body, the face, the muscles, and so on.
04Blender Rigging
Although a lot of Animation relies on more ‘traditional’ methods of expressing movement, one can still make use of more modern animation practices, like rigs, to set up their animations for movement. It’s an especially good skill to learn if you’re more interested in content-friendly animations (rather than creating a film of your own.)
05Blender Rigging
This next tutorial is an introduction to basic Blender Rigging. It’s a good one to both start and end on, as it was created for beginners specifically, and uses an example that is perhaps easier to understand most. Make sure to give it a shot just in case.
Part 3 Introduction to Rigging in Blender Course
For this next part, we introduce two other resources that you can take advantage of to learn more about Blender Rigging. Whether it be about Blender character rigging, Blender facial rigging, free blender rigs, creating muscle rigs, and so and so forth. These resources have got your back.
01Where to Learn the Course?
The first major course that we think you might be interested in is Mark Masters’ blender rigging course. You can find this course at PluralSight (which is a website that is focused on helping users of software develop their skills). Mark Masters, the instructor for this course, is a professional animator and works as a Animator for the animation studio, Steelhouse Productions. So, you can be sure that there is much that you can learn from him.

02Other Tools to Learn Rigging
As for other places to learn? We suggest the “Blender Fundamentals” course that Blender themselves have posted on YouTube. They have several of these courses (for all of the more recent versions of Blender). So, you can pick out a course that works for you. One of their more recent series is “Blender Fundamentals 2.which currently has videos all on the subject of Blender rigging (including Blender rigging and Blender rigging videos.)

● Key Takeaways from This Episode →
● If you’re interested in trying out blender rigging yourself, you’ll probably want to study the subject a little before beginning.
● Blender Rigging is quite a complex subject for beginners but having something to start with should help you on your way.
● For that, we recommend checking out the videos that we mentioned in section two of this article, where we recommend some popular tutorials regarding some of the more common Blender Rigging subjects.
● If you’re looking for something more comprehensive or put together though. A course might be more up to your taste. For that, we recommend either Mark Master’s introduction to rigging and animation over at PluralSight or Blender’s own “Blender Fundamental” series on YouTube (which should introduce all the functions you’ll need to know.)
Blender is a FREE, open-source 3D Animation program that is very popular for beginner animators. It’s a good way of starting if you’re not yet sure about how far you want to go into animation as it won’t demand any immediate monetary commitment.
Now, as for its features, today, we’ll be focusing on Blender Rigging features.
In this article
01 [Why Use Blender Rigging?](#Part 1)
02 [The Art of Effective Rigging in Blender [TUTORIAL]](#Part 2)
03 [Introduction to Rigging in Blender Course](#Part 3)
Part 1 Why Use Blender Rigging?
Blender Character Rigging is a great way of creating truly beautiful and realistic animations. Despite being an open-source program, it’s capable of doing just as much, if not more, than some of the more premium Animation software out there.
So, if you want to create video projects for your audience’s entertainment or edification with animation, then Blender Rigging is definitely something that you should consider. With this tool, you can create the complex animations that you need and then polish it up in a video editor like Wondershare Filmora Video Editor (which is a premium, video-editing tool that you can use to perfect your finished Blender Rigging animations.)
Part 2 The Art of Effective Rigging in Blender [TUTORIAL]
For this next section, we’re going to be introducing a couple of tutorials that you can look into to teach you more about Blender Character Rigging, Blender Facial Rigging, Blender Muscle Rig, and so on.
These topics are each very long-winded on their own though, so we’ve linked appropriate video tutorials that you can learn more and reserved ourselves to a brief description of each technique so that you can determine whether it’s something that interests you (although, of course, our recommendation is that you check each one out so that you can get the full ‘Blender’ experience.)
01Blender Character Rigging
The main thing people usually look at Blender for is, Blender Character Rigging. And, because it was created to emulate professional animation software, Blender has this function down to pat. To give you an idea of what features you can expect: Blender comes with custom bone shapes for easy Blender character rigging, it also comes with envelope skinny, skeleton skinning, and automatic skinning. With these alone, you can be assured that you will be able to create complex animations without much trouble.
02Blender Facial Rigging
Facial Rigging is usually a more complex subject that is avoided by animators without much experience. But, with Blender, facial rigging is possible. The YouTube video should show you the process of going about Blender Facial Rigging from start to finish (from sculpting the character face itself and then making use of Blender Rigging tools for setting up a skeletal structure for your face’s character to become animated.)
03Blender Muscle Rigging
Creating a Blender Muscle Rig is exactly what it sounds like. It is, of course, much more complicated than normal rigging, but it is a good subject to familiarize yourself with anyway, as it will allow you to go to the ‘next stage’ as you say, with your Animations. The video that we’ve attached is from Pierrick Picaut, who has released a series of videos on the subject of Blender Rigging in general and has extensively explained how to create a Blender Human Rig from the general body, the face, the muscles, and so on.
04Blender Rigging
Although a lot of Animation relies on more ‘traditional’ methods of expressing movement, one can still make use of more modern animation practices, like rigs, to set up their animations for movement. It’s an especially good skill to learn if you’re more interested in content-friendly animations (rather than creating a film of your own.)
05Blender Rigging
This next tutorial is an introduction to basic Blender Rigging. It’s a good one to both start and end on, as it was created for beginners specifically, and uses an example that is perhaps easier to understand most. Make sure to give it a shot just in case.
Part 3 Introduction to Rigging in Blender Course
For this next part, we introduce two other resources that you can take advantage of to learn more about Blender Rigging. Whether it be about Blender character rigging, Blender facial rigging, free blender rigs, creating muscle rigs, and so and so forth. These resources have got your back.
01Where to Learn the Course?
The first major course that we think you might be interested in is Mark Masters’ blender rigging course. You can find this course at PluralSight (which is a website that is focused on helping users of software develop their skills). Mark Masters, the instructor for this course, is a professional animator and works as a Animator for the animation studio, Steelhouse Productions. So, you can be sure that there is much that you can learn from him.
02Other Tools to Learn Rigging
As for other places to learn? We suggest the “Blender Fundamentals” course that Blender themselves have posted on YouTube. They have several of these courses (for all of the more recent versions of Blender). So, you can pick out a course that works for you. One of their more recent series is “Blender Fundamentals 2.which currently has videos all on the subject of Blender rigging (including Blender rigging and Blender rigging videos.)
● Key Takeaways from This Episode →
● If you’re interested in trying out blender rigging yourself, you’ll probably want to study the subject a little before beginning.
● Blender Rigging is quite a complex subject for beginners but having something to start with should help you on your way.
● For that, we recommend checking out the videos that we mentioned in section two of this article, where we recommend some popular tutorials regarding some of the more common Blender Rigging subjects.
● If you’re looking for something more comprehensive or put together though. A course might be more up to your taste. For that, we recommend either Mark Master’s introduction to rigging and animation over at PluralSight or Blender’s own “Blender Fundamental” series on YouTube (which should introduce all the functions you’ll need to know.)
[Top 10] Best Photo to Animation Converters That Give You an Advantage
[Top 10] Best Photo to Animation Converters That Give You an Advantage
An easy yet powerful editor
Numerous effects to choose from
Detailed tutorials provided by the official channel
We do have a couple of recommendations to give. There’s a wide variety of tools out there that will allow you to make animated pictures. With some actually allowing you to add animation (or motion) to your photographs while others bring a pop-up of life to your pictures with artistic filters and effects.
Have a look at our list of the top ten best photos to animation converter tools below to see if one of them catches your eye.
Alright, let’s get straight to our list of the best photo to animation converter tools available. As mentioned, we’ve picked quite the variety — including both software and online photo animator tools so that you can find one that best suits the kind of projects that you’re working on.
For your convenience, we’ve included the pros and cons of each converter as well as the most common scenarios each application can be used.
01Filmora
Rating and Reviews: [Techradar: 4.5/5]
Wondershare Filmora Video Editor , while, first and foremost, is an advanced video editor, is the first photo animation maker on this list of ours. This software is highly-rated online and it comes with a bunch of presets, filters, and effects, that you can use in order to animate your photographs. Its more advanced video editing functions would no doubt prove to be useful in the future as well, allowing you to increase the complexity of your projects and achieve more and more things.
● With Filmora, you have access to a built-in library of Effects and Elements that you can use in order to make animated pictures.
● The advanced video editing functions can also be used to create more complex motion animations that you are unlikely to see in other alternatives.
URL: https://filmora.wondershare.com/
| PROS | CONS |
|---|---|
| ● Access to built-in effects and elements library.● Advanced editing functions.● A FREE trial is available to try out its many features. | ● As a downloadable software, Filmora will require downloading and installing.● Some of its features and functions are locked in the FREE version as well.● Payment is either subscription-based or one-time for a perpetual license. |
For Win 7 or later (64-bit)
For macOS 10.12 or later
02PicMonkey
Rating and Reviews: [G2: 4.4/5]
When it comes to online photo animator tools, PicMonkey is definitely one of the first that people recommend. It’s premium software, so you’ll have to pay to use all of its functions — with the cheapest plan worth $72 annually or $7.99 monthly. The best part about it is, undoubtedly, the fact that it was developed by Shutterstock, which is highly regarded in the photography industry. So, you can surely rely on stable support.
● Photo Animation maker with lots of built-in animation effects and templates that allow users to easily make animated pictures.
URL: https://www.picmonkey.com/design/photo-animation-maker
| PROS | CONS |
|---|---|
| ● A FREE trial is available to test out its functions.● Developed by a reliable company.● Packed with lots of built-in animated effects and presets. | ● Packed with lots of built-in animated effects and presets.● No software version for use without the internet.● Does not come equipped with advanced custom animation tools. |

03Adobe Creative Cloud Express
Rating and Reviews: [Creative Bloq: 4/5]
The Adobe Creative Cloud Express is both an online photo animator and an application that you can download and install on your phone. As is expected from any Adobe product, it’s quite premium in make and is better suited for more serious photo animations — especially as you’ll need to pay in order to be able to use it to its fullest extent.
● Comes with a veritable library of templates, effects, and filters for advanced photo editing and photo animation.
URL: https://www.adobe.com/express/create/social-media-graphic
| PROS | CONS |
|---|---|
| ● Advanced photo editing tool.● Available both online and as an app.● Reliable and trustworthy adobe product. | ● The FREE trial is limited.● The FREE trial is limited.● Advanced photo editing is not suitable for beginners. |

04ColorCinch
Rating and Reviews: [Crozdesk: 4/5]
ColorCinch, or Cartoonize, as it is also called, is another popular online photo animator that you might have heard about already. This one features quite a few presets that you can use to quickly change the look of your photographs.
● Photo editing functions for breathing new life into existing photographs.
● Presets, templates, filters, and effects are available for easy and efficient photo editing.
URL: https://www.cartoonize.net/
| PROS | CONS |
|---|---|
| ● Beginner-friendly UI.● Comes with lots of filters and effects built-in.● Cartoonizer effect for simple photo animation onlinep. | ● Paid tool Limited FREE trial.● Subscription-based packages.● Limited customer animation functions. |

05Photo Cartoon
Rating and Reviews: N/A
Photo Cartoon is an online photo animator that specifically alters your photos and ‘cartoon-izes’ it (with several effects to choose from as to the specific style that you want). This single-use, while definitely not the most advanced on this list of ours, offers the user an easy way to change the look of their photographs.
● Transform photos into cartoons, paintings, drawings, and caricatures.
URL: https://photocartoon.net/
| PROS | CONS |
|---|---|
| ● Quick and easy to use● Online software, good for all devices● The finished photo animation can be downloaded and shared. | ● Very basic functions.● Limited effects/filters to choose from. ● Not highly rated online. |
06BeFunky
Rating and Reviews: [G2: 4.2/5]
With BeFunky, we go back to somewhat more advanced online photo animator tools. This one works quite simply as well though. Similar to the previous tool we introduced, BeFunky is meant primarily for quickly and easily adding filters and effects to photographs to change its style to look more like a cartoon or animation.
● Create a cartoon version of your images easily and quickly.
URL: https://www.befunky.com/features/photo-to-cartoon/
| PROS | CONS |
|---|---|
| ● Easy-to-use and beginner-friendly● Easy-to-use and beginner-friendly.● Available online and thus compatible with most devices. | ● Limited photo editing scope.● Sign-up is required for long-term use.● No advanced custom animation functions. |

077. ASPOSE
Rating and Reviews: N/A
Although not very well-known, ASPOSE is an easy way of animating pictures online. All you really have to do is upload your file (in the way that is suggested) and you’re good to go. You’ll be given a choice in what kind of animations you want to put on your photograph thereafter. And, when the conversion is complete, it’ll be FREE to download and share.
● Easily make animated pictures online by uploading photographs to be animated.
URL: https://products.aspose.app/imaging/animation-maker
| PROS | CONS |
|---|---|
| ● FREE photo to animation converter● Easy-to-use and efficient.● Motion animations available. | ● Internet is required for use.● Not the most advanced filters/effects/animations are available.● No custom animation function. |

08TheCartoonist.me
Rating and Reviews: N/A
We’re approaching more and more obscure territory the further we go along this list, with many of the tools, including this next one, called ‘The Cartoonist.me’, not having been rated by the usual tech websites. But, that doesn’t mean that the tool itself is any less useful. This one, in particular, is akin to the other cartoon-izers that we introduced earlier — in that it changes the look of photographs into one similar to what is used in animations.
● Picture animator online that allows you to turn your pictures into cartoon versions of their former self.
URL: https://thecartoonist.me/
| PROS | CONS |
|---|---|
| ● FREE photo animation maker.● Basic cartoon effects available.● Upload and Download | ● No advanced photo editing.● No advanced photo editing.● Not highly rated. |

09Snapstouch
Rating and Reviews: N/A
Snapstouch is another obscure, but no less useful, photo editing tool that adds a touch animation to your photographs. This online tool offers sketch, painting, pencil sketch, outline, cartoon, and many other filters that you can apply to your photographs to directly change their look.
● Change the look of your photographs with an easily applied filter.
URL: http://www.snapstouch.com/
| PROS | CONS |
|---|---|
| ● Easy-to-use (upload then download)● FREE to use online tool.● Several effects to choose from. | ● A limited selection of filter effects.● Old and dated UI.● Not highly rated. |

10AnyMaking
Rating and Reviews: N/A
AnyMaking is a basic online photo editor that comes with a variety of photo effects that you can apply to your photographs to change their looks. Much like the previous tools, AnyMaking offers ‘animation’ style filters that can turn your photographs into something that looks like they came from one of your favorite animated films.
● Turn your photographs completely anew with fun photo effects.
| PROS | CONS |
|---|---|
| ● FREE-to-use photo effects tool.● Cartoonizer effect for animating photographs.● Easy-to-use (upload then download) | ● Limited photo effects.● No custom photo animation functions.● Not highly rated. |

● Key Takeaways from This Episode →
● Photo to Animation is quite a broad subject and, fittingly, that means that the tools that allow for it are varied indeed.
● Some photo to animation converters will allow you to completely change the look of your photograph with a single application of a filter. While others are more involved (and thus, more flexible) and require more careful customization.
● We’ve included both types (and all the types between) in our list of photo to animation converters. Hopefully, you’ll find one that can help you make the animated pictures that you want to make.
We do have a couple of recommendations to give. There’s a wide variety of tools out there that will allow you to make animated pictures. With some actually allowing you to add animation (or motion) to your photographs while others bring a pop-up of life to your pictures with artistic filters and effects.
Have a look at our list of the top ten best photos to animation converter tools below to see if one of them catches your eye.
Alright, let’s get straight to our list of the best photo to animation converter tools available. As mentioned, we’ve picked quite the variety — including both software and online photo animator tools so that you can find one that best suits the kind of projects that you’re working on.
For your convenience, we’ve included the pros and cons of each converter as well as the most common scenarios each application can be used.
01Filmora
Rating and Reviews: [Techradar: 4.5/5]
Wondershare Filmora Video Editor , while, first and foremost, is an advanced video editor, is the first photo animation maker on this list of ours. This software is highly-rated online and it comes with a bunch of presets, filters, and effects, that you can use in order to animate your photographs. Its more advanced video editing functions would no doubt prove to be useful in the future as well, allowing you to increase the complexity of your projects and achieve more and more things.
● With Filmora, you have access to a built-in library of Effects and Elements that you can use in order to make animated pictures.
● The advanced video editing functions can also be used to create more complex motion animations that you are unlikely to see in other alternatives.
URL: https://filmora.wondershare.com/
| PROS | CONS |
|---|---|
| ● Access to built-in effects and elements library.● Advanced editing functions.● A FREE trial is available to try out its many features. | ● As a downloadable software, Filmora will require downloading and installing.● Some of its features and functions are locked in the FREE version as well.● Payment is either subscription-based or one-time for a perpetual license. |
For Win 7 or later (64-bit)
For macOS 10.12 or later
02PicMonkey
Rating and Reviews: [G2: 4.4/5]
When it comes to online photo animator tools, PicMonkey is definitely one of the first that people recommend. It’s premium software, so you’ll have to pay to use all of its functions — with the cheapest plan worth $72 annually or $7.99 monthly. The best part about it is, undoubtedly, the fact that it was developed by Shutterstock, which is highly regarded in the photography industry. So, you can surely rely on stable support.
● Photo Animation maker with lots of built-in animation effects and templates that allow users to easily make animated pictures.
URL: https://www.picmonkey.com/design/photo-animation-maker
| PROS | CONS |
|---|---|
| ● A FREE trial is available to test out its functions.● Developed by a reliable company.● Packed with lots of built-in animated effects and presets. | ● Packed with lots of built-in animated effects and presets.● No software version for use without the internet.● Does not come equipped with advanced custom animation tools. |
03Adobe Creative Cloud Express
Rating and Reviews: [Creative Bloq: 4/5]
The Adobe Creative Cloud Express is both an online photo animator and an application that you can download and install on your phone. As is expected from any Adobe product, it’s quite premium in make and is better suited for more serious photo animations — especially as you’ll need to pay in order to be able to use it to its fullest extent.
● Comes with a veritable library of templates, effects, and filters for advanced photo editing and photo animation.
URL: https://www.adobe.com/express/create/social-media-graphic
| PROS | CONS |
|---|---|
| ● Advanced photo editing tool.● Available both online and as an app.● Reliable and trustworthy adobe product. | ● The FREE trial is limited.● The FREE trial is limited.● Advanced photo editing is not suitable for beginners. |
04ColorCinch
Rating and Reviews: [Crozdesk: 4/5]
ColorCinch, or Cartoonize, as it is also called, is another popular online photo animator that you might have heard about already. This one features quite a few presets that you can use to quickly change the look of your photographs.
● Photo editing functions for breathing new life into existing photographs.
● Presets, templates, filters, and effects are available for easy and efficient photo editing.
URL: https://www.cartoonize.net/
| PROS | CONS |
|---|---|
| ● Beginner-friendly UI.● Comes with lots of filters and effects built-in.● Cartoonizer effect for simple photo animation onlinep. | ● Paid tool Limited FREE trial.● Subscription-based packages.● Limited customer animation functions. |
05Photo Cartoon
Rating and Reviews: N/A
Photo Cartoon is an online photo animator that specifically alters your photos and ‘cartoon-izes’ it (with several effects to choose from as to the specific style that you want). This single-use, while definitely not the most advanced on this list of ours, offers the user an easy way to change the look of their photographs.
● Transform photos into cartoons, paintings, drawings, and caricatures.
URL: https://photocartoon.net/
| PROS | CONS |
|---|---|
| ● Quick and easy to use● Online software, good for all devices● The finished photo animation can be downloaded and shared. | ● Very basic functions.● Limited effects/filters to choose from. ● Not highly rated online. |
06BeFunky
Rating and Reviews: [G2: 4.2/5]
With BeFunky, we go back to somewhat more advanced online photo animator tools. This one works quite simply as well though. Similar to the previous tool we introduced, BeFunky is meant primarily for quickly and easily adding filters and effects to photographs to change its style to look more like a cartoon or animation.
● Create a cartoon version of your images easily and quickly.
URL: https://www.befunky.com/features/photo-to-cartoon/
| PROS | CONS |
|---|---|
| ● Easy-to-use and beginner-friendly● Easy-to-use and beginner-friendly.● Available online and thus compatible with most devices. | ● Limited photo editing scope.● Sign-up is required for long-term use.● No advanced custom animation functions. |
077. ASPOSE
Rating and Reviews: N/A
Although not very well-known, ASPOSE is an easy way of animating pictures online. All you really have to do is upload your file (in the way that is suggested) and you’re good to go. You’ll be given a choice in what kind of animations you want to put on your photograph thereafter. And, when the conversion is complete, it’ll be FREE to download and share.
● Easily make animated pictures online by uploading photographs to be animated.
URL: https://products.aspose.app/imaging/animation-maker
| PROS | CONS |
|---|---|
| ● FREE photo to animation converter● Easy-to-use and efficient.● Motion animations available. | ● Internet is required for use.● Not the most advanced filters/effects/animations are available.● No custom animation function. |
08TheCartoonist.me
Rating and Reviews: N/A
We’re approaching more and more obscure territory the further we go along this list, with many of the tools, including this next one, called ‘The Cartoonist.me’, not having been rated by the usual tech websites. But, that doesn’t mean that the tool itself is any less useful. This one, in particular, is akin to the other cartoon-izers that we introduced earlier — in that it changes the look of photographs into one similar to what is used in animations.
● Picture animator online that allows you to turn your pictures into cartoon versions of their former self.
URL: https://thecartoonist.me/
| PROS | CONS |
|---|---|
| ● FREE photo animation maker.● Basic cartoon effects available.● Upload and Download | ● No advanced photo editing.● No advanced photo editing.● Not highly rated. |
09Snapstouch
Rating and Reviews: N/A
Snapstouch is another obscure, but no less useful, photo editing tool that adds a touch animation to your photographs. This online tool offers sketch, painting, pencil sketch, outline, cartoon, and many other filters that you can apply to your photographs to directly change their look.
● Change the look of your photographs with an easily applied filter.
URL: http://www.snapstouch.com/
| PROS | CONS |
|---|---|
| ● Easy-to-use (upload then download)● FREE to use online tool.● Several effects to choose from. | ● A limited selection of filter effects.● Old and dated UI.● Not highly rated. |
10AnyMaking
Rating and Reviews: N/A
AnyMaking is a basic online photo editor that comes with a variety of photo effects that you can apply to your photographs to change their looks. Much like the previous tools, AnyMaking offers ‘animation’ style filters that can turn your photographs into something that looks like they came from one of your favorite animated films.
● Turn your photographs completely anew with fun photo effects.
| PROS | CONS |
|---|---|
| ● FREE-to-use photo effects tool.● Cartoonizer effect for animating photographs.● Easy-to-use (upload then download) | ● Limited photo effects.● No custom photo animation functions.● Not highly rated. |
● Key Takeaways from This Episode →
● Photo to Animation is quite a broad subject and, fittingly, that means that the tools that allow for it are varied indeed.
● Some photo to animation converters will allow you to completely change the look of your photograph with a single application of a filter. While others are more involved (and thus, more flexible) and require more careful customization.
● We’ve included both types (and all the types between) in our list of photo to animation converters. Hopefully, you’ll find one that can help you make the animated pictures that you want to make.
Before You Learn 3D Animation: Things You Should Know
Before You Learn 3D Animation: Some Things You Should Know
An easy yet powerful editor
Numerous effects to choose from
Detailed tutorials provided by the official channel
Before you delve into the profession of creating 3d cartoon filters, you need to understand or decide if creating animated characters is something you would like to do. It’s not going to be smooth as you will get frustrated at some point, you will get confused, and it will be challenging, but in the end, it is rewarding because it is an expression of your mind coming to life. You are the one to breathe life into your characters who represent your imaginations. You will also have to infuse a great deal of your creativity to create beautiful and exciting characters for others to enjoy. Meanwhile, let’s first understand what 3d animations mean.
Becoming a 3d animator is not a feat you can achieve in a short time. It is not days, weeks, months, or even years. Like any other profession, a professional 3d animator must have put in a great deal of work, mixed with a lot of passion and love for what he is doing. To become successful as a 3d animator, you must love what you are doing or be ready to put in the work.
This article will expose what you should learn to create beautiful 3d animation cartoons, including what to expect as a 3d animator.
In this article
01 [What are 3d animation and the process of 3d animation?](#Part 1)
02 [Differences between 2d animation and 3d animation](#Part 2)
03 [A roaster of 8 best 3d animation software.](#Part 3)
04 [Top 3 3d animation making mistakes to avoid](#Part 4)
Part 1 What Is 3D Animation And The Process of 3D Animation?
animation is a term that describes the art of creating 3-dimensional images and placing them in a digital environment. It is a process that uses motion to bring objects, characters, etc., to life.
It is also known as computer-generated imagery, and it is currently the most common animation type for feature films.
Various software and programs are designed specifically for 3d animations and allow the animators to bring the objects to life.
The process of 3d animation happens in three(3) stages;
● Modeling
● Layout and animation
● Rendering
Modeling in 3d animation involves generating the objects or characters either by using a modeling tool or using a real thing. The real object is scanned directly into the computer, where other processes follow. You have total control over your character and how you want them to appear by modeling. You decide the weight, specifications, feel, etc. However, scanning objects save a lot of time. You must add texture before modeling your character or reviewing it before moving to the following layout and animation.
Layout and animation stage: A layout is determined when the generated objects move to this stage. It involves creating a set/scene where the objects can position. Layout first happens before animation does. After adding the objects and characters, they get animated using animation variables. After this, you use motion capture or keyframing to give life to the models in the scenes.
Rendering: Rendering is using software or programs. It is not something to do using just your computer. These tools can generate the scenes into the finished image according to the client’s requirements or set goals.
Creating cartoon background images or any other form of animations is a process that requires a lot of planning and work, which sums up a lot of time. To learn 3d animation, you must be ready to give in ample time as it is a profession that requires some time to handle.
The process listed above also shows the creativity requirement required to succeed in the 3d animation industry. To think that you must create the scenes, which is the layout stage, means you have to be creative in your imagination. If you then decide to model your character from scratch using modeling tools. That also requires another job of thinking and extracting a lot of your creative juices.
Part 2 What is the difference between 2d animation and 3d animation?
Anyone can decide to learn animation with no plan in mind or understanding of what the profession involves. animation is different from 2d animation, and if you want to learn animation, you need to understand the distinction between these two.
animation can have a lot of creative possibilities, whereas 3d animation has a lot of natural abilities. The visual style of both types of animation is explicitly different.
3d animation is a more intensive technical process than the various stages mentioned earlier. It would most likely involve different specialists to handle them to get a more professional output. However, 2d animation consists of drawing the characters frame by frame.
animated cartoons are in The Simpsons, Pinocchio, the Lion king, etc.

animations are like the ones Dreamworks, Pixar, produce. They include the avengers, the bad guys, etc.


Part 3 A Roaster Of 8 Best 3D Animation Software

Several 3D animation software exists in the market, both free and paid. If you are a animation creator or love animation for fun, you can use the free software to make your videos, cartoon photos, 3d cartoon faces, etc.
With many animation software available in the market, you can only fully trust a few.
Here’s a roaster of 8 best 3D animation software you could use to create the cartoon monsters you’ve always been curious about;
● Filmora
● Blender
● Maya
● Wings 3d
● Adobe Animate
● Cinema 4d
● K-3D
● Milcamo
Filmora Video animation tool: This is a highly recommended 3D animation tool with many features and pros. It has a wide range of keyframes, about six of which make your cartoon background images smooth and natural.
| Software | Features | OS | Pro |
|---|---|---|---|
| Wondershare Filmora Video Editor | It has an auto-color correction It has smooth keyframes | Windows, Mac | You can apply light flare effects You can apply an audio mixer |
| Blender | It has textured brushes and masking for 3d painting. It has add-ons and customised tools with high python scripting. | Windows, Linux, Mac computers | It has Virtual reality rendering, Strong camera restoration. It had both manual and automatic tracking. |
| Maya | Free trial of 30 days. Can create complex technical effects | Windows, Max | Good Control and perfect accuracy. Can collect motion capture data. |
| Wings 3d | Auto UV mapping system It has support for light and material effects. | Windows, Linux, and Mac OS | Advanced 3d and 2d modeling tools. It is free to use |
| Adobe animate | Virtual camera functionality gives a realistic view. Adoptive animation effects, zooming, panning etc. | Windows, Mac | Effective audio syncing technology. Customizable font, styling etc. |
| Cinema 4d | Concepts develop without time modeling Large library of preset scenes. | Windows, Mac | Customised with a huge asset range It is a faster tool than Maya Dissect complete scene and is faster than Maya. |
| K-3D | It has property adjustment capabilities with handy strong features. I5 is made up of basic tools for animation, curves, patches. | Mac OS X, Linux, FreeBSD, windows platforms | It is very flexible for either complex or basic workflows. It has a wide selection of plugins. |
| Mixamo | Streamlined user experience It has a faster search function that is accurate | Windows, Mac | It has fast character and animation browsing. Download multiple animations at a go |
For Win 7 or later (64-bit)
For macOS 10.12 or later
Part 4 Top Three (3) 3d Animation Making Mistakes To Avoid

As we initially mentioned, 3d animation requires an intensive technical process. It is a skill that you need to hone over the years by paying attention to detail, being highly creative, and daring to succeed.
Here are 3 mistakes you must avoid during the animation process;
● Forgetting the ‘why’ factor
● Over-animating a scene
● Not giving your viewers time to take it in
Forgetting the why: In a animation cartoon, every move, walking step, and smile is essential. Every character represented in your cartoon background is there for a specific reason.
You would be making a mistake that will affect the result if you lose focus on this reason. Your viewers won’t find your cartoon believable if the moves and acting don’t add up.
Your characters don’t just move because they want to move. Something must have spurred the motion or reaction. It could be for what happened to them, what they heard, or saw another character did in the scene. Do not neglect the why of the act.
While animating, focus on why and keep revisiting until all your characters and objects are knitted closely together.
Over-animating a scene: This is another mistake animators should avoid. If you animate your characters, everything may be a mess if you animate the background and foreground. Simplicity is how to get this thing, keep it simple and focused.
Do not have much going on in each scene but only where you need the attention of your viewers. Animators that do this end up confusing their viewers with no direction.
You can use camera effects such as depth of field to make your audience focus on the point you are trying to make in the particular scene.
Not giving your viewers time to take it in: This is another 3d animation making a mistake you should be careful of. Not giving your viewers time to process the happenings on the scene before the next.
This can be avoided by timing and measuring cuts such that any animation at the start of a new scene is timed to enable the viewers to take it in. You can ask for third-party criticism on your work to find out how your animation is received and see pointers to mistakes such as this. The third party could be your colleague or friend.
Note: You can easily avoid any error or mistake or modify your 3D animation with the help of the Wondershare Filmora video editor. That will provide a solid base for featuring 3D animation.
● Ending Thoughts →
● 3D animation refers to using motion to breathe life into inanimate objects, and they can create animated videos and animation cartoons.
● 3D animation is highly technical, unlike 2d animation
● You can avoid the above 3d mistakes if you remain objective and open, and ready to accept constructive criticism.
● Becoming an animator is a fun thing to do, and it allows you to be free to express your creativity while entertaining other people entirely.
● Before you start learning 3d animation and create cartoon photos, ensure that you have read through all that we have explained here to have good information about what you are going into.
Before you delve into the profession of creating 3d cartoon filters, you need to understand or decide if creating animated characters is something you would like to do. It’s not going to be smooth as you will get frustrated at some point, you will get confused, and it will be challenging, but in the end, it is rewarding because it is an expression of your mind coming to life. You are the one to breathe life into your characters who represent your imaginations. You will also have to infuse a great deal of your creativity to create beautiful and exciting characters for others to enjoy. Meanwhile, let’s first understand what 3d animations mean.
Becoming a 3d animator is not a feat you can achieve in a short time. It is not days, weeks, months, or even years. Like any other profession, a professional 3d animator must have put in a great deal of work, mixed with a lot of passion and love for what he is doing. To become successful as a 3d animator, you must love what you are doing or be ready to put in the work.
This article will expose what you should learn to create beautiful 3d animation cartoons, including what to expect as a 3d animator.
In this article
01 [What are 3d animation and the process of 3d animation?](#Part 1)
02 [Differences between 2d animation and 3d animation](#Part 2)
03 [A roaster of 8 best 3d animation software.](#Part 3)
04 [Top 3 3d animation making mistakes to avoid](#Part 4)
Part 1 What Is 3D Animation And The Process of 3D Animation?
animation is a term that describes the art of creating 3-dimensional images and placing them in a digital environment. It is a process that uses motion to bring objects, characters, etc., to life.
It is also known as computer-generated imagery, and it is currently the most common animation type for feature films.
Various software and programs are designed specifically for 3d animations and allow the animators to bring the objects to life.
The process of 3d animation happens in three(3) stages;
● Modeling
● Layout and animation
● Rendering
Modeling in 3d animation involves generating the objects or characters either by using a modeling tool or using a real thing. The real object is scanned directly into the computer, where other processes follow. You have total control over your character and how you want them to appear by modeling. You decide the weight, specifications, feel, etc. However, scanning objects save a lot of time. You must add texture before modeling your character or reviewing it before moving to the following layout and animation.
Layout and animation stage: A layout is determined when the generated objects move to this stage. It involves creating a set/scene where the objects can position. Layout first happens before animation does. After adding the objects and characters, they get animated using animation variables. After this, you use motion capture or keyframing to give life to the models in the scenes.
Rendering: Rendering is using software or programs. It is not something to do using just your computer. These tools can generate the scenes into the finished image according to the client’s requirements or set goals.
Creating cartoon background images or any other form of animations is a process that requires a lot of planning and work, which sums up a lot of time. To learn 3d animation, you must be ready to give in ample time as it is a profession that requires some time to handle.
The process listed above also shows the creativity requirement required to succeed in the 3d animation industry. To think that you must create the scenes, which is the layout stage, means you have to be creative in your imagination. If you then decide to model your character from scratch using modeling tools. That also requires another job of thinking and extracting a lot of your creative juices.
Part 2 What is the difference between 2d animation and 3d animation?
Anyone can decide to learn animation with no plan in mind or understanding of what the profession involves. animation is different from 2d animation, and if you want to learn animation, you need to understand the distinction between these two.
animation can have a lot of creative possibilities, whereas 3d animation has a lot of natural abilities. The visual style of both types of animation is explicitly different.
3d animation is a more intensive technical process than the various stages mentioned earlier. It would most likely involve different specialists to handle them to get a more professional output. However, 2d animation consists of drawing the characters frame by frame.
animated cartoons are in The Simpsons, Pinocchio, the Lion king, etc.
animations are like the ones Dreamworks, Pixar, produce. They include the avengers, the bad guys, etc.
Part 3 A Roaster Of 8 Best 3D Animation Software
Several 3D animation software exists in the market, both free and paid. If you are a animation creator or love animation for fun, you can use the free software to make your videos, cartoon photos, 3d cartoon faces, etc.
With many animation software available in the market, you can only fully trust a few.
Here’s a roaster of 8 best 3D animation software you could use to create the cartoon monsters you’ve always been curious about;
● Filmora
● Blender
● Maya
● Wings 3d
● Adobe Animate
● Cinema 4d
● K-3D
● Milcamo
Filmora Video animation tool: This is a highly recommended 3D animation tool with many features and pros. It has a wide range of keyframes, about six of which make your cartoon background images smooth and natural.
| Software | Features | OS | Pro |
|---|---|---|---|
| Wondershare Filmora Video Editor | It has an auto-color correction It has smooth keyframes | Windows, Mac | You can apply light flare effects You can apply an audio mixer |
| Blender | It has textured brushes and masking for 3d painting. It has add-ons and customised tools with high python scripting. | Windows, Linux, Mac computers | It has Virtual reality rendering, Strong camera restoration. It had both manual and automatic tracking. |
| Maya | Free trial of 30 days. Can create complex technical effects | Windows, Max | Good Control and perfect accuracy. Can collect motion capture data. |
| Wings 3d | Auto UV mapping system It has support for light and material effects. | Windows, Linux, and Mac OS | Advanced 3d and 2d modeling tools. It is free to use |
| Adobe animate | Virtual camera functionality gives a realistic view. Adoptive animation effects, zooming, panning etc. | Windows, Mac | Effective audio syncing technology. Customizable font, styling etc. |
| Cinema 4d | Concepts develop without time modeling Large library of preset scenes. | Windows, Mac | Customised with a huge asset range It is a faster tool than Maya Dissect complete scene and is faster than Maya. |
| K-3D | It has property adjustment capabilities with handy strong features. I5 is made up of basic tools for animation, curves, patches. | Mac OS X, Linux, FreeBSD, windows platforms | It is very flexible for either complex or basic workflows. It has a wide selection of plugins. |
| Mixamo | Streamlined user experience It has a faster search function that is accurate | Windows, Mac | It has fast character and animation browsing. Download multiple animations at a go |
For Win 7 or later (64-bit)
For macOS 10.12 or later
Part 4 Top Three (3) 3d Animation Making Mistakes To Avoid
As we initially mentioned, 3d animation requires an intensive technical process. It is a skill that you need to hone over the years by paying attention to detail, being highly creative, and daring to succeed.
Here are 3 mistakes you must avoid during the animation process;
● Forgetting the ‘why’ factor
● Over-animating a scene
● Not giving your viewers time to take it in
Forgetting the why: In a animation cartoon, every move, walking step, and smile is essential. Every character represented in your cartoon background is there for a specific reason.
You would be making a mistake that will affect the result if you lose focus on this reason. Your viewers won’t find your cartoon believable if the moves and acting don’t add up.
Your characters don’t just move because they want to move. Something must have spurred the motion or reaction. It could be for what happened to them, what they heard, or saw another character did in the scene. Do not neglect the why of the act.
While animating, focus on why and keep revisiting until all your characters and objects are knitted closely together.
Over-animating a scene: This is another mistake animators should avoid. If you animate your characters, everything may be a mess if you animate the background and foreground. Simplicity is how to get this thing, keep it simple and focused.
Do not have much going on in each scene but only where you need the attention of your viewers. Animators that do this end up confusing their viewers with no direction.
You can use camera effects such as depth of field to make your audience focus on the point you are trying to make in the particular scene.
Not giving your viewers time to take it in: This is another 3d animation making a mistake you should be careful of. Not giving your viewers time to process the happenings on the scene before the next.
This can be avoided by timing and measuring cuts such that any animation at the start of a new scene is timed to enable the viewers to take it in. You can ask for third-party criticism on your work to find out how your animation is received and see pointers to mistakes such as this. The third party could be your colleague or friend.
Note: You can easily avoid any error or mistake or modify your 3D animation with the help of the Wondershare Filmora video editor. That will provide a solid base for featuring 3D animation.
● Ending Thoughts →
● 3D animation refers to using motion to breathe life into inanimate objects, and they can create animated videos and animation cartoons.
● 3D animation is highly technical, unlike 2d animation
● You can avoid the above 3d mistakes if you remain objective and open, and ready to accept constructive criticism.
● Becoming an animator is a fun thing to do, and it allows you to be free to express your creativity while entertaining other people entirely.
● Before you start learning 3d animation and create cartoon photos, ensure that you have read through all that we have explained here to have good information about what you are going into.
The Secret Sauce for Making GIF Instagram Story More Stunning
The Secret Sauce for Making GIF Instagram Story More Aesthetic
An easy yet powerful editor
Numerous effects to choose from
Detailed tutorials provided by the official channel
Adding own gift stickers to an Instagram story is in trend. An Instagram story can be made more creative with an Instagram gif story. Make a powerful impact with a gif on an Instagram story.
In this article
01 [How to Post Gifs to Instagram Story](#Part 1)
02 [8 Cute Instagram Stickers to Make Your Stories Aesthetic](#Part 2)
03 [How to Create Custom Gifs for Instagram Stories](#Part 3)
Part 1 How to Post Gifs to Instagram Story
Instagram stories are one of the best mediums to get connected to people at large. To be in trends and grab maximum people’s attention, it is very necessary to be updated with the new elements of Instagram stories. Gif Instagram story is a new way to increase the followers and be in trends. Adding these gifs in Instagram stories will improve your business by creating more engaging content for business promotion. Let’s see how this can be done?
● Go to the Instagram app installed on your phone. While adding a sticker to a picture of videos in Instagram stories, a GIF option will appear.
● When you tap it, you can find several attractive gifs in the library powered by GIPHY.
● Tap add sticker button that appears on the top of the Instagram stories. Tap the ‘GIF’ icon; the library of trending gifs will appear.
● Look for the gif you need to add to your story. You also have a search option to find your favorite or trending gif.
● After selecting the desired gif, you can add it to your photo or video after resizing it as you desired.
● After finishing, tap on the ‘Your story’ icon.
So, this way, it is easy to create gif story instagram with just a few simple steps.
Part 2 Cute Instagram Stickers to Make Your Stories Aesthetic
Cute Instagram stickers are the best way to lift the creativity of your Instagram stories. Adding stickers are an amazing idea to add design to Instagram stories. Stickers make stories more creative and interesting. Some of the amazing stickers to beautify Instagram stories are:
01BOHO
Boho stickers are good when you search for new stickers. They add fun to the story and give an amazing look for any lifestyle picture over an Instagram story. Boho white is also one type of sticker where are of them are white. Applying white boho to the picture background highlights the space and looks good. One has so many options from cute stars, hearts, lines, and flowers.
02FOOPKLO
For those who want words and saying gif on instagram story, there are some cute pink stickers available. These can be searched as FOOPKLO. Pink flowers, clusters, sayings, hearts, and some more cute stickers are there which can make Instagram stories lovelier.
03HALEYIVERS
For those who are active Instagram users and update their stories every day, the old stickers may not entertain them. So, for those, there are HALEYIVERS stickers. Good morning, days, sunshine, coffee, stars, and hearts add a great style to the Instagram stories. So, next time you need some punch over Instagram stories add some HALEYIVERS stickers.
04OHLALALITA
Instagram story gif is one of the great ways to even express your thoughts and moods in a summarized way. So, for those who wish to add a short story on Instagram, OHLALALITA has the best stickers. Loaded with so many cute words such as Tank you, Made with love, chill, glow, bye-bye, Wow, and many more, it makes any story in just simple words.
05SCARLETPIN
Instagram story gifs are a gift to those who are food lovers. Now with some new additions of gifs from GIPHY, they can post their food stories over their Instagram stories. The range of stickers that can help them is SCARLETPIN. These consist of some bright and colorful stickers of food. Red strawberries, tea, leaves, and oranges are great stuff to include in the morning Instagram stories.
06CURSIVE

Gif for Instagram story is also available in attractive writings. CURSIVE is the most attractive form of writing stories. Popular and cute sayings can be checked on CURSIVE and can be included in the stories. They can be searched and remembered easily. Cursive phrases can be added to the Instagram stories that look visually appealing to the viewers.
07EMOJIS
Emojis are the most lovable stickers available and can be part of any Instagram story. Typing on emojis can be done easily and they can be searched on the search bar. Perfect emojis gifs can be applied to an Instagram story that suits the situation. It can be moved or resized as per the requirement. These emojis gifs add a fun element to the Instagram stories.
08PAINT & BRUSH
Instagram gif story can be made creative with paint and brush. Earlier the users can add text with plain background only. But, paint and brush have enhanced it. Now users can add paint behind the text to make it more engaging. They are simple yet very attractive when added to the stories.
Part 3 How to Create Custom Gifs for Instagram Stories
Funny and expressive Instagram stories of your own always win the hearts of followers. Custom-made gif for Instagram is a great tool for business owners as it brings volume to their business by increasing leads. Custom-made gifs over Instagram stories are eye-catching and thus people get interested in the business. This helps in creating a good brand image for the business.
So, some of the ways to create fascinating custom Gifs Instagram stories for self and business are:
01Pin Instagram stories
Visiting a place and letting people know where you are through Instagram stories is always loved by all. Now, this can be done attractively by using the Pin feature. One can pin on the pictures and videos over the Instagram stories to a particular place. This is the most interesting element to make an Instagram story catchy. It can be done easily by tapping and holding it till it shows a pin at the little bar. This was one can pin gif at the desired location. This gif can pop up at a certain location only. It can be applied to videos one has made of a certain location by moving the gif to a place where one desires.
02Using Gif to give life to any image
To make gif Instagram story aesthetic, adding some moves with sparkles will be the right option. An Instagram user can give life to a picture by including animated elements. Gif adds a fun and surprising element to any Instagram story. When movement in any picture is added through gif, it catches the attention of the viewers and they follow it. A business can make its content engaging with gifs and can achieve its goal.
03Gifs Instagram story to catch viewer’s attention
Gif can be used effectively to create attractive Instagram stories. These gifs are good for the business to highlight their important elements. Gifs like the link in bio, sound on, and swipe up are created for a call to action from the viewers. Adding arrows and signals through gif in the Instagram stories direct the people to spend some minutes on the stories and find something new.
04Highlighting text with gif effects
A customized Instagram story can be made by highlighting text through adding gifs. Sparkle, stars, and highlights gifs can be searched easily and can be applied to any Instagram story. By adding a gif, the text looks stunning and grabs the attention of the viewers. GIPHY has several text-based gifs which can take an ordinary text over the story at a great level. It can be searched by mentioning related keywords.
05Adding gifs to customize selfies
Selfies to Instagram stories are very common. But they can be made even better with some amazing gifs from GIPHY. One can add sunglasses, hats, jewelry, and other fun props to the selfies. Filters can be added by creating their own story through a gif.
06Filmora V11 – A GIF resource
Wondershare Filmora Video Editor (The Filmora Meme maker) : Some many apps and websites offer beautiful gifs to beautify Instagram stories. One of the places where Instagram users can find a wide collection of attractive gifs is Filmora V11. It is a user-friendly tool that has media editing features. It can be used to add sound, light effects, and beautiful gifs to Instagram stories.

Wondershare Filmora - Best Video Editor for Mac/Windows
5,481,435 people have downloaded it.
Build unique custom animations without breaking a sweat.
Focus on creating epic stories and leave the details to Filmora’s auto features.
Start a creative adventure with drag & drop effects and endless possibilities.
Filmora simplifies advanced features to save you time and effort.
Filmora cuts out repetition so you can move on to your next creative breakthrough.
For creating gifs, Filmora V11 can be used and it can be made in a few simple steps. Filmora V11 app is required to be installed on the system and media files can be imported there. Files can be dragged for creating gifs. Filters, stickers, and other effects can be added. They can be further customized as per the requirement of the users. After adding background effects, music, and sound, the gif can be previewed also. The media can be saved as GIFs and can be easily exported also. To customize gifs, the Filmora Meme maker can be used. Captions can be added to GIFs and can be customized by using templates available at Filmora.
So, next time you need to know how to add your own gif to Instagram story, go to Filmora V11. This is one of the great platforms to create some amazing custom gifs to add to Instagram stories. If you want to surprise your viewers with some interesting gifs, try Filmora V11.
● Key Takeaways from This Episode →
● Instagram stories are the most effective way to mark a great impression on the viewers. It is also one of the effective tools to lift any business. Best results can be obtained when attractive and interesting gifs are added to Instagram stories.
● Instagram stories gifs are becoming trendy and there are so many cute and amazing gif stickers available to create Instagram stories. Some of the widely used gifs and stickers are Boho, FOOPKLO, HALEYIVERS, OHLALALITA, and EMOJIS. Instagram users can explore these cute and funny stickers and add them to beautify their Instagram stories.
● Customized gif has spiced up the Instagram stories and amazed the people. This feature helps a business to influence people towards their work and attract more people. The content becomes more engaging and interesting through a customized gif.
Adding own gift stickers to an Instagram story is in trend. An Instagram story can be made more creative with an Instagram gif story. Make a powerful impact with a gif on an Instagram story.
In this article
01 [How to Post Gifs to Instagram Story](#Part 1)
02 [8 Cute Instagram Stickers to Make Your Stories Aesthetic](#Part 2)
03 [How to Create Custom Gifs for Instagram Stories](#Part 3)
Part 1 How to Post Gifs to Instagram Story
Instagram stories are one of the best mediums to get connected to people at large. To be in trends and grab maximum people’s attention, it is very necessary to be updated with the new elements of Instagram stories. Gif Instagram story is a new way to increase the followers and be in trends. Adding these gifs in Instagram stories will improve your business by creating more engaging content for business promotion. Let’s see how this can be done?
● Go to the Instagram app installed on your phone. While adding a sticker to a picture of videos in Instagram stories, a GIF option will appear.
● When you tap it, you can find several attractive gifs in the library powered by GIPHY.
● Tap add sticker button that appears on the top of the Instagram stories. Tap the ‘GIF’ icon; the library of trending gifs will appear.
● Look for the gif you need to add to your story. You also have a search option to find your favorite or trending gif.
● After selecting the desired gif, you can add it to your photo or video after resizing it as you desired.
● After finishing, tap on the ‘Your story’ icon.
So, this way, it is easy to create gif story instagram with just a few simple steps.
Part 2 Cute Instagram Stickers to Make Your Stories Aesthetic
Cute Instagram stickers are the best way to lift the creativity of your Instagram stories. Adding stickers are an amazing idea to add design to Instagram stories. Stickers make stories more creative and interesting. Some of the amazing stickers to beautify Instagram stories are:
01BOHO
Boho stickers are good when you search for new stickers. They add fun to the story and give an amazing look for any lifestyle picture over an Instagram story. Boho white is also one type of sticker where are of them are white. Applying white boho to the picture background highlights the space and looks good. One has so many options from cute stars, hearts, lines, and flowers.
02FOOPKLO
For those who want words and saying gif on instagram story, there are some cute pink stickers available. These can be searched as FOOPKLO. Pink flowers, clusters, sayings, hearts, and some more cute stickers are there which can make Instagram stories lovelier.
03HALEYIVERS
For those who are active Instagram users and update their stories every day, the old stickers may not entertain them. So, for those, there are HALEYIVERS stickers. Good morning, days, sunshine, coffee, stars, and hearts add a great style to the Instagram stories. So, next time you need some punch over Instagram stories add some HALEYIVERS stickers.
04OHLALALITA
Instagram story gif is one of the great ways to even express your thoughts and moods in a summarized way. So, for those who wish to add a short story on Instagram, OHLALALITA has the best stickers. Loaded with so many cute words such as Tank you, Made with love, chill, glow, bye-bye, Wow, and many more, it makes any story in just simple words.
05SCARLETPIN
Instagram story gifs are a gift to those who are food lovers. Now with some new additions of gifs from GIPHY, they can post their food stories over their Instagram stories. The range of stickers that can help them is SCARLETPIN. These consist of some bright and colorful stickers of food. Red strawberries, tea, leaves, and oranges are great stuff to include in the morning Instagram stories.
06CURSIVE
Gif for Instagram story is also available in attractive writings. CURSIVE is the most attractive form of writing stories. Popular and cute sayings can be checked on CURSIVE and can be included in the stories. They can be searched and remembered easily. Cursive phrases can be added to the Instagram stories that look visually appealing to the viewers.
07EMOJIS
Emojis are the most lovable stickers available and can be part of any Instagram story. Typing on emojis can be done easily and they can be searched on the search bar. Perfect emojis gifs can be applied to an Instagram story that suits the situation. It can be moved or resized as per the requirement. These emojis gifs add a fun element to the Instagram stories.
08PAINT & BRUSH
Instagram gif story can be made creative with paint and brush. Earlier the users can add text with plain background only. But, paint and brush have enhanced it. Now users can add paint behind the text to make it more engaging. They are simple yet very attractive when added to the stories.
Part 3 How to Create Custom Gifs for Instagram Stories
Funny and expressive Instagram stories of your own always win the hearts of followers. Custom-made gif for Instagram is a great tool for business owners as it brings volume to their business by increasing leads. Custom-made gifs over Instagram stories are eye-catching and thus people get interested in the business. This helps in creating a good brand image for the business.
So, some of the ways to create fascinating custom Gifs Instagram stories for self and business are:
01Pin Instagram stories
Visiting a place and letting people know where you are through Instagram stories is always loved by all. Now, this can be done attractively by using the Pin feature. One can pin on the pictures and videos over the Instagram stories to a particular place. This is the most interesting element to make an Instagram story catchy. It can be done easily by tapping and holding it till it shows a pin at the little bar. This was one can pin gif at the desired location. This gif can pop up at a certain location only. It can be applied to videos one has made of a certain location by moving the gif to a place where one desires.
02Using Gif to give life to any image
To make gif Instagram story aesthetic, adding some moves with sparkles will be the right option. An Instagram user can give life to a picture by including animated elements. Gif adds a fun and surprising element to any Instagram story. When movement in any picture is added through gif, it catches the attention of the viewers and they follow it. A business can make its content engaging with gifs and can achieve its goal.
03Gifs Instagram story to catch viewer’s attention
Gif can be used effectively to create attractive Instagram stories. These gifs are good for the business to highlight their important elements. Gifs like the link in bio, sound on, and swipe up are created for a call to action from the viewers. Adding arrows and signals through gif in the Instagram stories direct the people to spend some minutes on the stories and find something new.
04Highlighting text with gif effects
A customized Instagram story can be made by highlighting text through adding gifs. Sparkle, stars, and highlights gifs can be searched easily and can be applied to any Instagram story. By adding a gif, the text looks stunning and grabs the attention of the viewers. GIPHY has several text-based gifs which can take an ordinary text over the story at a great level. It can be searched by mentioning related keywords.
05Adding gifs to customize selfies
Selfies to Instagram stories are very common. But they can be made even better with some amazing gifs from GIPHY. One can add sunglasses, hats, jewelry, and other fun props to the selfies. Filters can be added by creating their own story through a gif.
06Filmora V11 – A GIF resource
Wondershare Filmora Video Editor (The Filmora Meme maker) : Some many apps and websites offer beautiful gifs to beautify Instagram stories. One of the places where Instagram users can find a wide collection of attractive gifs is Filmora V11. It is a user-friendly tool that has media editing features. It can be used to add sound, light effects, and beautiful gifs to Instagram stories.
Wondershare Filmora - Best Video Editor for Mac/Windows
5,481,435 people have downloaded it.
Build unique custom animations without breaking a sweat.
Focus on creating epic stories and leave the details to Filmora’s auto features.
Start a creative adventure with drag & drop effects and endless possibilities.
Filmora simplifies advanced features to save you time and effort.
Filmora cuts out repetition so you can move on to your next creative breakthrough.
For creating gifs, Filmora V11 can be used and it can be made in a few simple steps. Filmora V11 app is required to be installed on the system and media files can be imported there. Files can be dragged for creating gifs. Filters, stickers, and other effects can be added. They can be further customized as per the requirement of the users. After adding background effects, music, and sound, the gif can be previewed also. The media can be saved as GIFs and can be easily exported also. To customize gifs, the Filmora Meme maker can be used. Captions can be added to GIFs and can be customized by using templates available at Filmora.
So, next time you need to know how to add your own gif to Instagram story, go to Filmora V11. This is one of the great platforms to create some amazing custom gifs to add to Instagram stories. If you want to surprise your viewers with some interesting gifs, try Filmora V11.
● Key Takeaways from This Episode →
● Instagram stories are the most effective way to mark a great impression on the viewers. It is also one of the effective tools to lift any business. Best results can be obtained when attractive and interesting gifs are added to Instagram stories.
● Instagram stories gifs are becoming trendy and there are so many cute and amazing gif stickers available to create Instagram stories. Some of the widely used gifs and stickers are Boho, FOOPKLO, HALEYIVERS, OHLALALITA, and EMOJIS. Instagram users can explore these cute and funny stickers and add them to beautify their Instagram stories.
● Customized gif has spiced up the Instagram stories and amazed the people. This feature helps a business to influence people towards their work and attract more people. The content becomes more engaging and interesting through a customized gif.
How to Turn Yourself Into a WhatsApp Cartoon
How to Turn Yourself Into a WhatsApp Cartoon
An easy yet powerful editor
Numerous effects to choose from
Detailed tutorials provided by the official channel
Let me ask you a question - how much fun would it be if you could create your own animated stickers and send them to your friends and family members on Whatsapp? I mean, it would make the entire conversation more fun and also add a personal element to the entire chat. Right? Well, to tell you the truth, it is possible to create Whatsapp cartoons and stickers, and the best part is you don’t need any technical expertise to get the job done.
Of course, for a long time, Whatsapp didn’t allow its users to use third-party animated stickers within the messenger. But, recently the messaging platform introduced a custom “stickers pack” feature that now allows people to upload their own stickers and create a dedicated sticker app.
You can also rely on several third-party sticker designer applications to get the job done. So, if you have been looking for a way to use your own face as an animated sticker in Whatsapp, continue reading. In this guide, we’ll walk you through different ways to create and upload a custom cartoon sticker in Whatsapp and make your Whatsapp chats more fun.
In this article
01 [How to Create Your Own Custom Animated Whatsapp Stickers](#Part 1)
02 [How to Create Custom Animated Whatsapp Stickers on Android and iPhone](#Part 2)
Part 1 How to Create Your Own Custom Animated Whatsapp Stickers
Now, before we go any further, I would like to point out that Whatsapp doesn’t allow users to directly create a custom cartoon sticker. There’s no AR feature that’ll turn your face into a cartoon character. So, to use a cartoon Whatsapp profile picture, you’ll have to rely on a third-party tool to get the job done. Based on which platform you use to access Whatsapp, you can choose a wide variety of Whatsapp animated sticker creators and use them to design custom cartoon stickers to make traditional Whatsapp conversations more fun.
One of the easiest ways to create custom stickers for Whatsapp is to use Wondershare Wondershare Filmora Video Editor . Filmora is a full-scale video editing software that’s specifically designed to help editors unleash their creativity and create stunning movies for different platforms.
For Win 7 or later (64-bit)
For macOS 10.12 or later
Filmora is among the most popular video editing tools that many creators use to edit high-quality YouTube vlogs and other types of videos for other platforms. However, Wondershare Filmora is not just a video editing tool. You can also use it to create custom cartoon animations and export them in the desired format within a few seconds. Filmora has a timeline-based interface that makes it relatively easier for editors to streamline the entire editing process while ensuring that none of the shots go missing.

Filmora also has a built-in media store - known as FilmStocks - where you can find hundreds of video effects, animations, animated characters, etc. FilmStocks also offers access to copyright-free music, allowing creators to use high-quality music in their videos without worrying about unexpected copyright strikes.
So, if you are looking for an all-in-one tool to create Whatsapp cartoon stickers, install Wondershare Filmora on your computer and start turning your face into an animated sticker.
Part 1 How to Create Custom Animated Whatsapp Stickers on Android and iPhone
One of the tools that can help you do the job is “Toon Me”. As the name implies, Toon Me is an online platform that’s designed to help users turn their faces into respective cartoon stickers. It’s designed by the developers at Photo Labs - an online platform that makes photo editing a hassle-free task. Since the tool is designed by expert developers, you can expect to get the best results in the end. And, the best part is creating custom cartoon characters using Toon Me is a relatively easy process.

All you have to do is download Toon Me on your phone and use the camera to create a Whatsapp cartoon sticker for yourself. The app is available on both Google Play Store and Apple’s App Store. It means regardless of the smartphone you’re using, Toon Me will allow you to design a Whatsapp cartoon sticker without any hassle.
Like Toon Me, there are dozens of other applications you can install on your smartphone to create personalized animated stickers. One such example is Sticker Maker. Sticker Maker is an Android application that’ll allow you to capture your face and turn it into an animated sticker. It’s compatible across different Android versions and runs smoothly on all Android models. So, if you own an Android device, here’s the step-by-step process to use Sticker Maker to turn your face into an animated sticker.
Step 1 - Start by installing Sticker Maker on your smartphone and launch the application to get started.
Step 2 - On its home screen, click the “Create a New Sticker Pack” option.
Step 3 - Give the sticker pack a name and then, press enter to proceed further.
Step 4 - At this point, you can either select one of the existing pictures from your Gallery or open the camera to click a fresh selfie. Either way, upload the picture and let the app convert it into a corresponding sticker.
Step 5 - You can upload 8-10 pictures at once and create the entire sticker pack instantly. And, once you have successfully created the sticker pack, simply click the “Add to Whatsapp” button.

That’s it; the selected sticker pack will get added to your Whatsapp’s sticker collection and you’ll be able to use them right away. That’s how quick and easy it is to create custom Whatsapp cartoons using different tools on your smartphone.
● Ending Thoughts →
● Using personalized Whatsapp cartoon stickers is a great way to make Whatsapp conversations fun.
● Wondershare Filmora is a feature-packed video editing software that’s designed to help creators create stunning videos and Whatsapp stickers. Its timeline-based interface and built-in media store will allow you to create stunning Whatsapp stickers without any hassle
● You can also download dedicated sticker maker applications on your iPhone or Android devices and use them directly to create visually appealing animated stickers for Whatsapp.
Let me ask you a question - how much fun would it be if you could create your own animated stickers and send them to your friends and family members on Whatsapp? I mean, it would make the entire conversation more fun and also add a personal element to the entire chat. Right? Well, to tell you the truth, it is possible to create Whatsapp cartoons and stickers, and the best part is you don’t need any technical expertise to get the job done.
Of course, for a long time, Whatsapp didn’t allow its users to use third-party animated stickers within the messenger. But, recently the messaging platform introduced a custom “stickers pack” feature that now allows people to upload their own stickers and create a dedicated sticker app.
You can also rely on several third-party sticker designer applications to get the job done. So, if you have been looking for a way to use your own face as an animated sticker in Whatsapp, continue reading. In this guide, we’ll walk you through different ways to create and upload a custom cartoon sticker in Whatsapp and make your Whatsapp chats more fun.
In this article
01 [How to Create Your Own Custom Animated Whatsapp Stickers](#Part 1)
02 [How to Create Custom Animated Whatsapp Stickers on Android and iPhone](#Part 2)
Part 1 How to Create Your Own Custom Animated Whatsapp Stickers
Now, before we go any further, I would like to point out that Whatsapp doesn’t allow users to directly create a custom cartoon sticker. There’s no AR feature that’ll turn your face into a cartoon character. So, to use a cartoon Whatsapp profile picture, you’ll have to rely on a third-party tool to get the job done. Based on which platform you use to access Whatsapp, you can choose a wide variety of Whatsapp animated sticker creators and use them to design custom cartoon stickers to make traditional Whatsapp conversations more fun.
One of the easiest ways to create custom stickers for Whatsapp is to use Wondershare Wondershare Filmora Video Editor . Filmora is a full-scale video editing software that’s specifically designed to help editors unleash their creativity and create stunning movies for different platforms.
For Win 7 or later (64-bit)
For macOS 10.12 or later
Filmora is among the most popular video editing tools that many creators use to edit high-quality YouTube vlogs and other types of videos for other platforms. However, Wondershare Filmora is not just a video editing tool. You can also use it to create custom cartoon animations and export them in the desired format within a few seconds. Filmora has a timeline-based interface that makes it relatively easier for editors to streamline the entire editing process while ensuring that none of the shots go missing.
Filmora also has a built-in media store - known as FilmStocks - where you can find hundreds of video effects, animations, animated characters, etc. FilmStocks also offers access to copyright-free music, allowing creators to use high-quality music in their videos without worrying about unexpected copyright strikes.
So, if you are looking for an all-in-one tool to create Whatsapp cartoon stickers, install Wondershare Filmora on your computer and start turning your face into an animated sticker.
Part 1 How to Create Custom Animated Whatsapp Stickers on Android and iPhone
One of the tools that can help you do the job is “Toon Me”. As the name implies, Toon Me is an online platform that’s designed to help users turn their faces into respective cartoon stickers. It’s designed by the developers at Photo Labs - an online platform that makes photo editing a hassle-free task. Since the tool is designed by expert developers, you can expect to get the best results in the end. And, the best part is creating custom cartoon characters using Toon Me is a relatively easy process.
All you have to do is download Toon Me on your phone and use the camera to create a Whatsapp cartoon sticker for yourself. The app is available on both Google Play Store and Apple’s App Store. It means regardless of the smartphone you’re using, Toon Me will allow you to design a Whatsapp cartoon sticker without any hassle.
Like Toon Me, there are dozens of other applications you can install on your smartphone to create personalized animated stickers. One such example is Sticker Maker. Sticker Maker is an Android application that’ll allow you to capture your face and turn it into an animated sticker. It’s compatible across different Android versions and runs smoothly on all Android models. So, if you own an Android device, here’s the step-by-step process to use Sticker Maker to turn your face into an animated sticker.
Step 1 - Start by installing Sticker Maker on your smartphone and launch the application to get started.
Step 2 - On its home screen, click the “Create a New Sticker Pack” option.
Step 3 - Give the sticker pack a name and then, press enter to proceed further.
Step 4 - At this point, you can either select one of the existing pictures from your Gallery or open the camera to click a fresh selfie. Either way, upload the picture and let the app convert it into a corresponding sticker.
Step 5 - You can upload 8-10 pictures at once and create the entire sticker pack instantly. And, once you have successfully created the sticker pack, simply click the “Add to Whatsapp” button.
That’s it; the selected sticker pack will get added to your Whatsapp’s sticker collection and you’ll be able to use them right away. That’s how quick and easy it is to create custom Whatsapp cartoons using different tools on your smartphone.
● Ending Thoughts →
● Using personalized Whatsapp cartoon stickers is a great way to make Whatsapp conversations fun.
● Wondershare Filmora is a feature-packed video editing software that’s designed to help creators create stunning videos and Whatsapp stickers. Its timeline-based interface and built-in media store will allow you to create stunning Whatsapp stickers without any hassle
● You can also download dedicated sticker maker applications on your iPhone or Android devices and use them directly to create visually appealing animated stickers for Whatsapp.
Create Animated Social Media Posts in Canva
Versatile Video Editor - Wondershare Filmora
An easy yet powerful editor
Numerous effects to choose from
Detailed tutorials provided by the official channel
Eye-catching social media posts are an excellent, attention-grabbing way to make your ideal clients stop scrolling. Today, we’ll describe how to create animated social media posts through Canva posts entirely free and without any design experience required on Canva.
Level up your next social media campaign by adding beautifully designed graphics! You can choose from our library of professionally designed Canva layouts for Facebook, Pinterest, Twitter, Instagram, and more.
Without any further ado, let’s get into the process as follows!
In this article
01 [Which social media animated posts can be created on Canva?](#Part 1)
02 [What Canva can help with animated social media posts?](#Part 2)
03 [Steps to create animated social media pictures in Canva](#Part 3)
04 [Steps to create animated social media videos in Canva](#Part 4)
Part 1 Which social media animated posts can be created on Canva?
With the latest Canva Pro feature, you can go for Canva Animator!
Yes, you can easily create animated social media posts via Canva, like Facebook stories or animated Instagram stories. And, you can also create ads for any other social media platform using its Custom Design feature.
It consists of ready-made templates for Facebook, Twitter, Instagram, and more.
To explore the entire animated social media templates, visit the Canva official website, log in, and type in the vibrant social media to see different options below.

All of the templates that will come upon Canva are fully customizable as per your requirements. If you prefer, you can also select a blank animated story template, which is probably the first among these options.
Part 2 What Canva can help with animated social media posts?
As already discussed, Canva consists of thousands of templates to choose from among the category of animated social media posts. Moreover, there are lots of free as well as paid templates.
Another thing that Canva can help you with these templates is complete customization. You can easily customize the entire template ranging from its colors selection to images to elements etc. And, you can even remove aspects if you don’t like anything among the template designs.
Understand the pros of Canva to get our point better as follows:
Canva provides a range of features due to which has gained popularity among millions of people. The benefits of using Canva are −
1. Free Design Platform
Canva is free to use platform for everyone. You can use it for creating attention-grabbing designs for marketing campaigns, social media, or projects.
There are certain features in Canva that are useful for professionals. You can get Canva Pro to access those features with a premium library of stock photos, shapes, fonts, and templates.
You can also go for in-app purchases if you are not looking to purchase the Pro version.
2. No skills or experience required
To use Canva, you don’t need any prior experience as a graphic designer. You can swap between images and fonts to create a professional design with many layouts and tools available.
3. Ease of use with multiple templates and fonts
Canva has a library of different backgrounds, images, templates, fonts, stickers to ensure that you get outstanding outcomes. You can create an engaging design in just a few clicks with these tools. The only thing you need is creativity.

4. Endless options
Canva has every digital design option covered, from Pinterest and Facebook posts to Resume, e−book

5. User−friendly interface
The Canva’s layout is pretty simple to use.
On the design page of Canva, there are the grids for templates, photos, stickers, and background on the left-hand side. Above the design are the color palettes, font tabs, and other formatting tools. You can use these tools with the drag and drop editor in your design in a few clicks.

6. Create a team
You can make your Canva team so that they can have access to the designs. You can determine the kind of access your team members or employees have through the shareable links to make edits.

Part 3 Steps to create animated social media pictures in Canva
Unleash your creativity by animating your design pages, elements, and text.
Make or open an existing design.
- Hit to choose the page, element, or text box that you wish to animate.
- Once you hit the Animate tab above the editor on the toolbar, you will see the displayed options on the side panel.
- Please hover your mouse over it to preview an option. Then, you’ll see your design animate.
- Click on it to apply.
- For pages: To control the animation timing, click to select the page, and then click on the stopwatch icon above the editor.
- Download your design in GIF or video format.
You can also directly share them on social media or schedule them for later.
Part 4 Steps to create animated social media videos in Canva
1. Select your template
Sign in to Canva, then choose and make your social media story template. There are two vastly different ways to explore this: You can either select “Create a design” at the top or go for a particular template to get the ideal dimensions.
2. Animate your video
Here’s where the fun begins! Now that you are ready to start editing your selected template, you can add animated and unique elements to your story in three various ways.
- Add a video
You’re ready to add in your video once you’ve chosen your template! Upload or select any video you might want to use and drag it into a placeholder on your story chosen template. If needed, adjust the size and positioning until it fits.
- Animated design elements
Another option to animate your social media posts videos is through the Elements feature in Canva by choosing the “Stickers” tab.
You can either enter your requirement in the search bar or scroll through Canva’s huge graphics and enter “animated {insert the word you’re searching for, i.e., lines, arrows}. Then, you can drag and drop them right into your design.
There are specific search terms for your reference: Animated Sparkle, Animated Arrow, Animated Word, and Animated Line.
- Use the Animate button.
There’s an “Animate” button you’ll see at the top when you’re in your design. Hit on the page you wish to animate, and the Animate tab will pop up on the top left.
Use these three features to create an animated video individually or all together – they’ll be sure to up-level your stories in a fun and unique way.
3. Preview and Download
You can preview your animated stories once you finish the action by hitting the “Play” tab at the top of your screen.
There you have your Canva animated social media creation!
For quick reference, be sure to download my Animated Canva Elements document, all my favorite animated elements. Head to the video to grab them!
As you know how to create an animation and the steps needed, you must also be aware of one of the best editing software available.
Here we recommend using Filmora. You can use it to create compelling animation videos than the animated social media on Canva posts so that the animation will come out smooth and natural by adding keyframes. You are just required to frame a white plane to begin creating animation. Despite this, its audio mixer and color correction editing elements will increase your animation video to a new level. Download it to have a try (Free)!
Wondershare Filmora
Get started easily with Filmora’s powerful performance, intuitive interface, and countless effects!
Try It Free Try It Free Try It Free Learn More >
AI Portrait – The best feature of Wondershare Filmora for gameplay editing
The AI Portrait is a new add-on in Wondershare Filmora. It can easily remove video backgrounds without using a green screen or chroma key, allowing you to add borders, glitch effects, pixelated, noise, or segmentation video effects.

Conclusion
And that, my friends, is how you can create your unique animated graphics quickly and easily. So, now it’s your turn! With our above tutorial, you can now permit yourself to make and craft your first and exclusive Canva animated GIFs for social media!
Besides, do not forget to try out the Wondershare FilmorPro for any video editing that you may need for your animated social media videos via Canva.
I can’t wait to hear all about it. See you next time.
Eye-catching social media posts are an excellent, attention-grabbing way to make your ideal clients stop scrolling. Today, we’ll describe how to create animated social media posts through Canva posts entirely free and without any design experience required on Canva.
Level up your next social media campaign by adding beautifully designed graphics! You can choose from our library of professionally designed Canva layouts for Facebook, Pinterest, Twitter, Instagram, and more.
Without any further ado, let’s get into the process as follows!
In this article
01 [Which social media animated posts can be created on Canva?](#Part 1)
02 [What Canva can help with animated social media posts?](#Part 2)
03 [Steps to create animated social media pictures in Canva](#Part 3)
04 [Steps to create animated social media videos in Canva](#Part 4)
Part 1 Which social media animated posts can be created on Canva?
With the latest Canva Pro feature, you can go for Canva Animator!
Yes, you can easily create animated social media posts via Canva, like Facebook stories or animated Instagram stories. And, you can also create ads for any other social media platform using its Custom Design feature.
It consists of ready-made templates for Facebook, Twitter, Instagram, and more.
To explore the entire animated social media templates, visit the Canva official website, log in, and type in the vibrant social media to see different options below.
All of the templates that will come upon Canva are fully customizable as per your requirements. If you prefer, you can also select a blank animated story template, which is probably the first among these options.
Part 2 What Canva can help with animated social media posts?
As already discussed, Canva consists of thousands of templates to choose from among the category of animated social media posts. Moreover, there are lots of free as well as paid templates.
Another thing that Canva can help you with these templates is complete customization. You can easily customize the entire template ranging from its colors selection to images to elements etc. And, you can even remove aspects if you don’t like anything among the template designs.
Understand the pros of Canva to get our point better as follows:
Canva provides a range of features due to which has gained popularity among millions of people. The benefits of using Canva are −
1. Free Design Platform
Canva is free to use platform for everyone. You can use it for creating attention-grabbing designs for marketing campaigns, social media, or projects.
There are certain features in Canva that are useful for professionals. You can get Canva Pro to access those features with a premium library of stock photos, shapes, fonts, and templates.
You can also go for in-app purchases if you are not looking to purchase the Pro version.
2. No skills or experience required
To use Canva, you don’t need any prior experience as a graphic designer. You can swap between images and fonts to create a professional design with many layouts and tools available.
3. Ease of use with multiple templates and fonts
Canva has a library of different backgrounds, images, templates, fonts, stickers to ensure that you get outstanding outcomes. You can create an engaging design in just a few clicks with these tools. The only thing you need is creativity.
4. Endless options
Canva has every digital design option covered, from Pinterest and Facebook posts to Resume, e−book
5. User−friendly interface
The Canva’s layout is pretty simple to use.
On the design page of Canva, there are the grids for templates, photos, stickers, and background on the left-hand side. Above the design are the color palettes, font tabs, and other formatting tools. You can use these tools with the drag and drop editor in your design in a few clicks.
6. Create a team
You can make your Canva team so that they can have access to the designs. You can determine the kind of access your team members or employees have through the shareable links to make edits.
Part 3 Steps to create animated social media pictures in Canva
Unleash your creativity by animating your design pages, elements, and text.
Make or open an existing design.
- Hit to choose the page, element, or text box that you wish to animate.
- Once you hit the Animate tab above the editor on the toolbar, you will see the displayed options on the side panel.
- Please hover your mouse over it to preview an option. Then, you’ll see your design animate.
- Click on it to apply.
- For pages: To control the animation timing, click to select the page, and then click on the stopwatch icon above the editor.
- Download your design in GIF or video format.
You can also directly share them on social media or schedule them for later.
Part 4 Steps to create animated social media videos in Canva
1. Select your template
Sign in to Canva, then choose and make your social media story template. There are two vastly different ways to explore this: You can either select “Create a design” at the top or go for a particular template to get the ideal dimensions.
2. Animate your video
Here’s where the fun begins! Now that you are ready to start editing your selected template, you can add animated and unique elements to your story in three various ways.
- Add a video
You’re ready to add in your video once you’ve chosen your template! Upload or select any video you might want to use and drag it into a placeholder on your story chosen template. If needed, adjust the size and positioning until it fits.
- Animated design elements
Another option to animate your social media posts videos is through the Elements feature in Canva by choosing the “Stickers” tab.
You can either enter your requirement in the search bar or scroll through Canva’s huge graphics and enter “animated {insert the word you’re searching for, i.e., lines, arrows}. Then, you can drag and drop them right into your design.
There are specific search terms for your reference: Animated Sparkle, Animated Arrow, Animated Word, and Animated Line.
- Use the Animate button.
There’s an “Animate” button you’ll see at the top when you’re in your design. Hit on the page you wish to animate, and the Animate tab will pop up on the top left.
Use these three features to create an animated video individually or all together – they’ll be sure to up-level your stories in a fun and unique way.
3. Preview and Download
You can preview your animated stories once you finish the action by hitting the “Play” tab at the top of your screen.
There you have your Canva animated social media creation!
For quick reference, be sure to download my Animated Canva Elements document, all my favorite animated elements. Head to the video to grab them!
As you know how to create an animation and the steps needed, you must also be aware of one of the best editing software available.
Here we recommend using Filmora. You can use it to create compelling animation videos than the animated social media on Canva posts so that the animation will come out smooth and natural by adding keyframes. You are just required to frame a white plane to begin creating animation. Despite this, its audio mixer and color correction editing elements will increase your animation video to a new level. Download it to have a try (Free)!
Wondershare Filmora
Get started easily with Filmora’s powerful performance, intuitive interface, and countless effects!
Try It Free Try It Free Try It Free Learn More >
AI Portrait – The best feature of Wondershare Filmora for gameplay editing
The AI Portrait is a new add-on in Wondershare Filmora. It can easily remove video backgrounds without using a green screen or chroma key, allowing you to add borders, glitch effects, pixelated, noise, or segmentation video effects.
Conclusion
And that, my friends, is how you can create your unique animated graphics quickly and easily. So, now it’s your turn! With our above tutorial, you can now permit yourself to make and craft your first and exclusive Canva animated GIFs for social media!
Besides, do not forget to try out the Wondershare FilmorPro for any video editing that you may need for your animated social media videos via Canva.
I can’t wait to hear all about it. See you next time.
Make Creative Animation Videos
Animation can explain whatever the mind of man can conceive – Walt Disney. Animation video is a craft in which images go through the process of conspiring, layout addition, and photographic chronology to create an illusion of action. In this article, let’s learn the importance of video animations and when and why to use this technique.
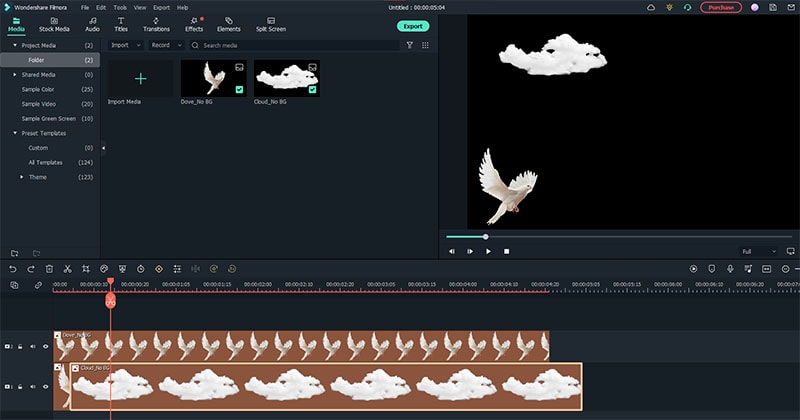
What are Video Animation and its importance?
Video as a marketing tool has become more popular but also more important. In this article, you can read more about why media marketing is getting more essential in comparison to text marketing. Therefore, an explainer video with Animation is an amazing way to show your target audience who you are, where you stand for, what you do and how you can solve the customer’s problem.
Video animation is an engaging technique that can help you comprehensively tell your story. Animated meaning can be better comprehended as a simulation of motion created by showing a series of pictures. Animated videos for a business catch the viewers and make for an enjoyable story-telling experience.
Often, animation videos are used to explain a concept or process. It’s straightforward to make these videos appealing and likable as you can primarily create them however you want. It can take longer to get the point across when people explain how to do something. Animations not only trigger emotions but spark conversations as well.
What are most common types of Animation?
The purpose of this article is to take you through the complexity of the different types of animation styles and methods. It also covers the track you should take (and what that path entails) to become an animator for each of the five types.
This guide is not about learning how to animate. But instead, it breaks down the five types of Animation available to you and what you’ll need to start animating: best software, schools, and courses.
Motion Graphics (Key framing): Motion graphics focus on making dynamic and exciting presentations of moving text logos and fundamental illustrations.
- Motion graphics can be 2D and 3D, and you’ll find them everywhere in news, sporting videos, the news, and other TV productions.
- Correct character animation is generally outside the scope of motion graphics, but many core animation principles also apply to motion graphics.
- Creating Motion Graphics depends on the plan used since video editing software often have different user interface or settings, but the idea is the same. Motion Graphics usually involves animating texts, pictures, or video clips using keyframing that is tweened to make a smooth motion between frames.
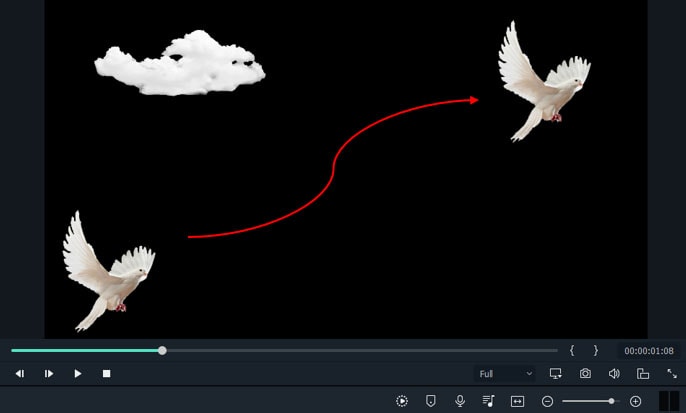
Traditional Animation: This is the classic type of Animation you’re probably most well known with. In the past, animators drew characters frame by frame, and then those pictures were moved onto transparent sheets for painting. That’s where the term animation comes from.
They started scanning drawings into the computer for digital coloring. The important thing is that hand-drawn animators still create their animation frame by frame using the same method and concept as in those old days of paper and cels.
How to Use Motion Graphics Animation in Filmora
Keyframes specify the start or end of a transition in a shot. A series of keyframes can give the semblance of the movement of an object. Keyframes include parameters such as Position, Scale, Opacity, and Rotation. These values can be changed and customized to make animations using keyframing.
Wondershare Filmora makes it really easy to use. Even learners or novices can use keyframe animation to create extraordinary videos. Plus, the keyframe templates are an added satisfaction. If you have limited time and need a quick fix, using Presets in the Animation tab is your best bet.
For this example, we’ll walk you through using Keyframes on the short video clip to make your Animation using Wondershare Filmora.
Free Download For Win 7 or later(64-bit)
Free Download For macOS 10.14 or later
Step1 Launch Wondershare Filmora from your system and select New Project.

Step2 Import your selected images. In this case I imported no background images to have a clear view on how key framing works.
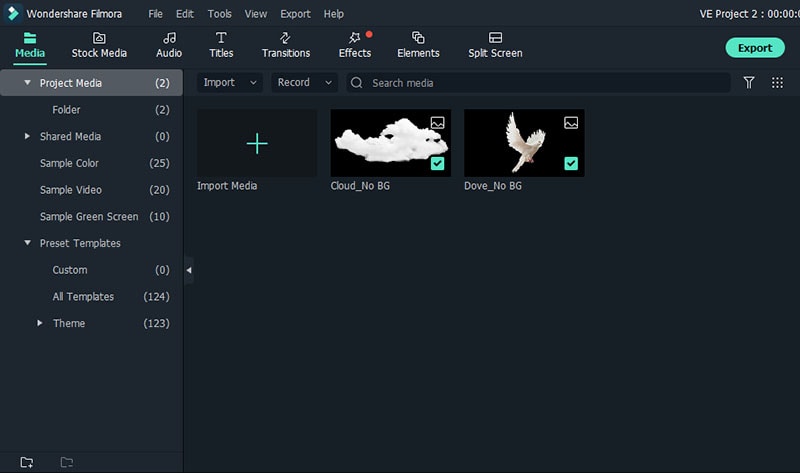
Step3 Drag or add the image on the Timeline Panel.
In this case I use a dove and a cloud to demo the Motion graphics animation
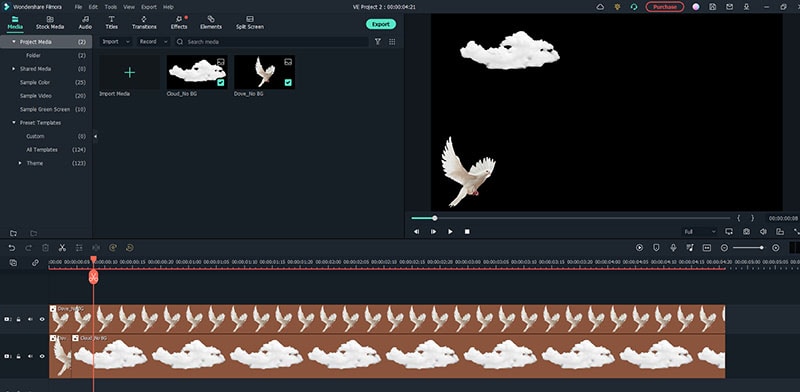
Step4 Double click the image then the Animation tab will display. Here, there are available presets, either the latest or the Legacy Animation, as indicated on the display that you can use.
There is also a tab if you want to customize your animations which requires premium account.
- Fade In
- Fade Out
- Pause
- Slide right
- Slide up
- Vortex In
- Vortex Out
- Zoom In
- Zoom Out
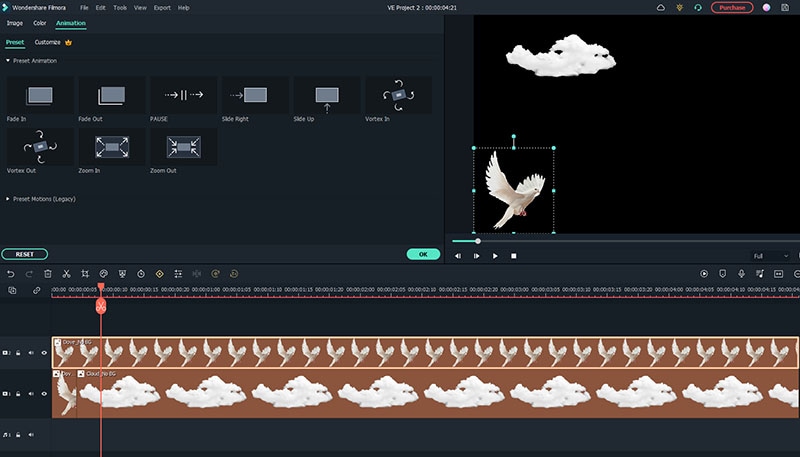
Step5 Select any animation you want by double-clicking the presets. In this case, I selected a slight right preset, and you will notice that the start arrow and end arrow indicator are displayed.
In the Timeline panel, you have an option to customize the start and end of the Preset. Just drag the arrow keys on either side to reach the keyframe you wish to change. Just simple.
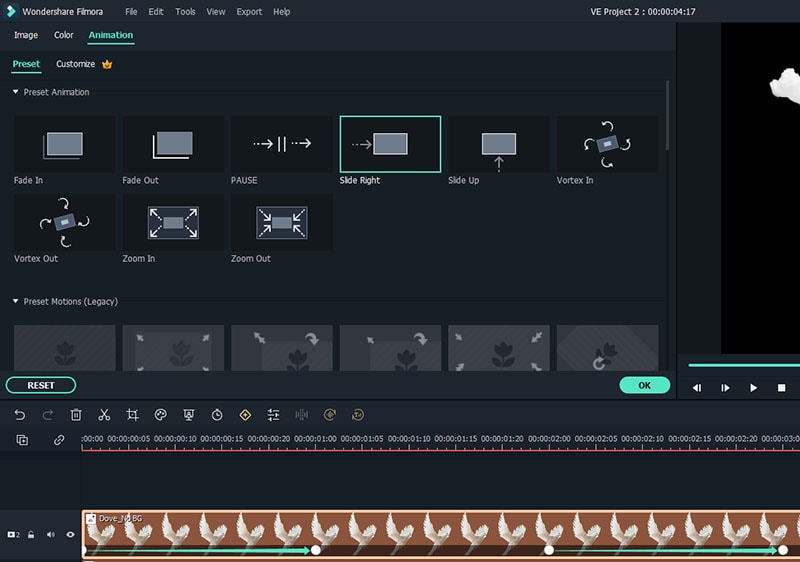
You can also do it on the cloud image that we’ve added.
Takeaway
Keyframing can bring steady images to life by introducing animations. With the super-easy keyframing tool in Filmora, you can now make invigorating videos. From easy to complex key framing. The customization property lets you unbind your creativity and take your editing to a professional level. Make your logo pop by adding keyframe animations. Better yet, you can also animate text.
No matter what industry you’re in, Animation can be relevant. Small start-ups to giant corporations use animation videos, too. Animation videos help to explain tricky processes or concepts, sell a product, or even to gain recognition for a product. Everyone resonates with Animation in some way or another. Almost everyone has watched cartoons or animations in their life, so these tend to grab attention more effectively.
We all love animation. From the animated cartoons we watched as kids to the latest and hottest animated music video, there’s something about seeing visuals come alive that captivates and inspires us. But video animation isn’t just for children, and it isn’t just for the entertainment value only.
Free Download For macOS 10.14 or later
Step1 Launch Wondershare Filmora from your system and select New Project.
Step2 Import your selected images. In this case I imported no background images to have a clear view on how key framing works.
Step3 Drag or add the image on the Timeline Panel.
In this case I use a dove and a cloud to demo the Motion graphics animation
Step4 Double click the image then the Animation tab will display. Here, there are available presets, either the latest or the Legacy Animation, as indicated on the display that you can use.
There is also a tab if you want to customize your animations which requires premium account.
- Fade In
- Fade Out
- Pause
- Slide right
- Slide up
- Vortex In
- Vortex Out
- Zoom In
- Zoom Out
Step5 Select any animation you want by double-clicking the presets. In this case, I selected a slight right preset, and you will notice that the start arrow and end arrow indicator are displayed.
In the Timeline panel, you have an option to customize the start and end of the Preset. Just drag the arrow keys on either side to reach the keyframe you wish to change. Just simple.
You can also do it on the cloud image that we’ve added.
Takeaway
Keyframing can bring steady images to life by introducing animations. With the super-easy keyframing tool in Filmora, you can now make invigorating videos. From easy to complex key framing. The customization property lets you unbind your creativity and take your editing to a professional level. Make your logo pop by adding keyframe animations. Better yet, you can also animate text.
No matter what industry you’re in, Animation can be relevant. Small start-ups to giant corporations use animation videos, too. Animation videos help to explain tricky processes or concepts, sell a product, or even to gain recognition for a product. Everyone resonates with Animation in some way or another. Almost everyone has watched cartoons or animations in their life, so these tend to grab attention more effectively.
We all love animation. From the animated cartoons we watched as kids to the latest and hottest animated music video, there’s something about seeing visuals come alive that captivates and inspires us. But video animation isn’t just for children, and it isn’t just for the entertainment value only.
Whiteboard Animation Services: Top 15 Animation Companies to Pick
Whiteboard Animation Services: Top 15 Animation Companies to Pick In 2022
An easy yet powerful editor
Numerous effects to choose from
Detailed tutorials provided by the official channel
When looking for a whiteboard animation company, Google will search you hundreds of them, but the question is which of them is the best when it comes to work, behavior with the client, or ranking?
Also, the most critical question is will this company deliver the desired results in the given time, or will they be like every other company that consistently fail to fulfill their promises? Find out in this article.
In this article
01 [Why Custom Whiteboard Animation Videos Work](#Part 1)
02 [Key Aspects to Consider When Choosing a Whiteboard Animation Video Company](#Part 2)
03 [Top 15 Whiteboard Animation Studios Out There](#Part 3)
Part 1 Why Custom Whiteboard Animation Videos Work
The whiteboard animation video is an explainer video used to sell a product or describe a system. These animation videos are incredibly effective in communicating complex ideas and boosting attention and retention for your audience. A custom whiteboard animation video is a do-it-yourself video that does not require a template, but you need to start from scratch. Here are top reasons why you need a custom whiteboard animation video to work:
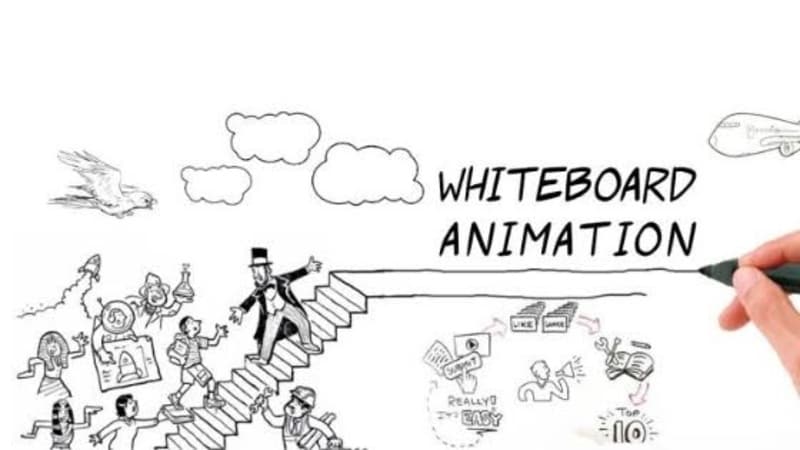
● When you want to describe a complex, highly technical, or intricate idea, product, or system, a custom whiteboard animated video will help you out. The more detailed an explanation is, the harder it is to focus, and people often get bored during the description. Therefore, sharing a new business process with a custom whiteboard animation with your team is more manageable. Getting your point across will maintain our interest as long as the video is playing.
● A custom whiteboard animation saves you the stress of hiring actors to play in your video and turn, saves costs and serious embarrassment by actors.
● Custom whiteboard animation videos are helpful when you want to use social media ads or YouTube for marketing as people like them, so, therefore, it is a good chance for you to get clicks, views, and more sales.
● A custom whiteboard animation helps you to tell the story of your brand.
● It helps to reuse old audio content lying around, for example, podcast episodes. You can create pre-existing audio with a custom whiteboard animation that will help you capitalize on content that has already been created and breathe in new life.
Part 2 Key Aspects to Consider When Choosing a Whiteboard Animation Video Company
A whiteboard animated video is ideal for sharing your brand on social media pages, hosting your website, and featuring on the internal company intranet. These whiteboard animated videos are tactically created to help you sell your services and products, improve internal communication, educate your customers, provide better user engagement, and convey complex or essential ideas. Choosing a whiteboard animation service you trust is crucial for creating a whiteboard animation video. The key elements to note when choosing a whiteboard animation video company is as follows:
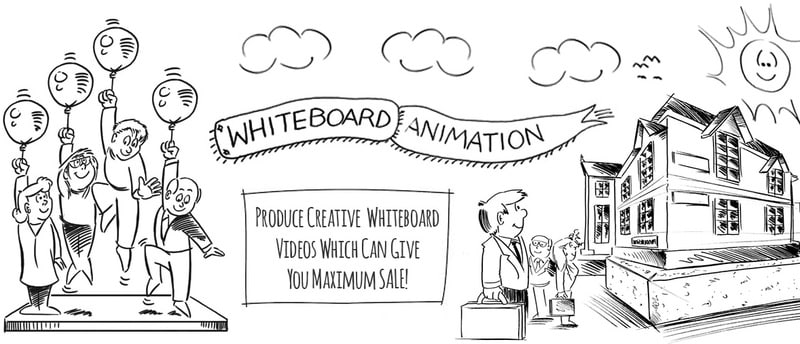
● When you work with a professional and reputable team, the process is smooth, and the final product created is more valuable.
● There is a solid understanding of what you should expect in terms of cost length and the process of creating the animated videos.
● Companies that do not use imagery and stop animation from creating the whiteboard animated video can manage a production schedule or experience in the field.
● Works on the combination of creativity, understanding, and accessibility.
● Well-versed with the digital platform and its functionality.
Part 3 Top Whiteboard Animation Studios Out There
Whiteboard animation is a video production method that uses illustrations and static images to explain to viewers the contents of the video. More so, whiteboard animation video’s production cost depends on various factors, including the animation time, the overall value, and the style of the characters. In this section, we have created a list of the best whiteboard animation studio for you to review:
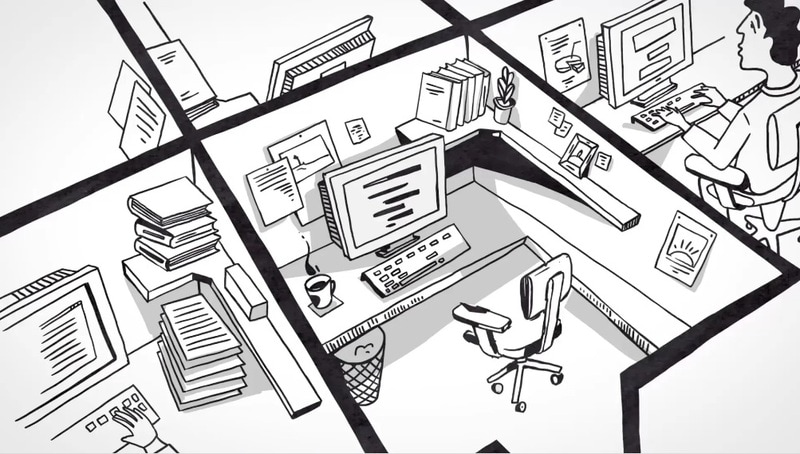
01ExplainVisually.co
“Their fantastic flexibility as well as ability to prepare great visual synthesis.” - Former Operational Community Manager, General Merchandise Retailer
This is a visual thinking agency based in Warsaw, Poland, and founded in 201providing a graphic design and video production service with a team of more than 1This animation studio serves smaller companies and enterprises in the Financial Services, Telecommunications, IT, Healthcare and Medical, Utility Industry, and Energy Natural Resources.
Price: $1,000+
02Max curious productions
“They’re incredibly communicative and proactive, as well as deadline and budget-driven, which is great. They’re the kind of vendor that does what they need to do to make sure they deliver on time, working late nights or weekends if necessary.” - Creative Director, Television Network.
This is a video production company located in New York City and founded in 20has about two decades of experience in video production and has a production team of 6 employees.
Price: $5,000+
03Next Day Animations
“Direct feedback was very effective and helpful, making this collaboration go smoothly.” Development Director, Youth Non-Profit
This is an animation production company based in Baltimore and has additional offices in brace bridge, Canada; Madison, Wis, Minneapolis; Bend, Ore; and was founded in 201It provides marketing strategy, social media marketing, and video production with employees.
Price: $5,000+
04IdeaRocket
“They made me feel like I had the attention I needed whenever I needed it.” – CIO, Clothing Company
This is a production agency based in New York, founded in 201They provide services on video production to all sizes of clients and have a team of about ten employees.
Price: $10,000+
05MotionGility
“The promotional video was well received.” — Owner, Tech Company
This is an explainer video company with headquarters in Indore, India, founded in 2015, specializing in video production and some basics of graphic design and logo design with employees. Their clients range from enterprises mid-market and small businesses in various industries, including business services, consumer products and services, and advertising and marketing.
Price: $5,000+
06Rip media group
“Throughout the entire project, they were extremely responsive and always reachable.” — Co-Founder & CEO, Food Services Company.
This video production company located in Los Angeles was founded in 200They specialize in video production with a team of about employees to create motion graphics, motion, and live-action videos. Their claims are basically in the medical, IT, and business service industries.
Price: $1,000+
07Exaltus
They provided me with quality video for my marketing agency, and I think they are the best I’ve seen so far - the HR marketing department.
With its headquarter in Montreal and founded in 201this content marketing agency works with mid-market and enterprise companies in the entertainment, music, arts, education, and business service industry. It specializes in web development services and video production for clients.
Price: $5,000+
08Webdew
“The video was great, and it came at a really good price.” – Marketing Manager, Software Development Company.
This is a video production agency headquartered in Seattle and additional offices in London and Mohali, India, founded in 201It specializes in video production service to mid-market, small, and Enterprise businesses with a team of about specialists.
Price: $5,000+
09Switch video
“They’ve been very good at reaching out with questions, coming up with scripts and visual concepts, and letting my team focus on our responsibilities.” – Senior Solution Support Manager, IT Solutions Provider.
This is a video marketing company based in Collingwood, Canada, and founded in 200specializing in video production and other digital marketing services to meet market-level businesses with a team of members.
Price: $10,000+
10Alconost
“Alconost delivered the work on time, and the budget was what we agreed on. Whenever I requested a change, it was done quickly.” —Head of Marketing, Education App.
This information technology agency based in Alexandria, VA, with other Bolero offices, started in 200They specialize in advertisement translation video production for small businesses.
Price: $1,000+
11Cartoon Media
“[Cartoon Media’s] workflow was exceptional on their behalf. Their communication skills set them apart. “ - Employee, Electrical Company.
This is a digital production company located in Canterbury, UK, launched in 201They specialize in video production advertising, and broadcast production to their Enterprise mid-market and small businesses.
Price: $1,000+
12Ydraw
“All videos are in the process of being released, but everybody who has seen them so far has been impressed with the production quality. The concepts that are illustrated in the videos are clear to the viewer, which is what we struggled with.” - CEO, BTravel Software.
This animation and marketing firm in Saint George, Utah, founded in 201is Ydraw. They specialize in video production and works with clients of all sizes from business service, consumer products, and the advertising industry with employees.
Price: $5,000+
13Dream engine
“Everything surprised me in a lovely way.” – Communications Manager, Dementia Organization,
Dream engine is a video producing and marketing strategy firm based in St Kilda Melbourne, Australia, founded in 200They specialize in corporate video, motion graphics, and filming and serve clients in the education and advertising sector with a team of five.
Price: $5,000+
14Video Explainers
“The final product was exceptional. There was an increase in traffic from our social media to our website.” – CEO, Veterinary Staffing Company.
This is an external video and whiteboard animation company founded in 20and located in New York. He specializes in scriptwriting, storyboarding, illustrations, voice-over, animation, infographic, editing, and motion graphics with employees.
Price: $5,000+
15Wienot Films
“The excellence at Wienot sure makes us want to find ways to partner with them in the future as we grow, as we know we can trust any project to their capable hands and creative minds. We can’t thank them enough for such a professional and amazing final product. It was well worth the investment, and they have our highest recommendation.” – Co-owner, Healthcare Consulting Firm.
This is an explainer video and whiteboard animation company based in Austin and started in 201He specializes in creating a video that turns complex ideas into coin-sized memorable, easy-to-understand stories with teams.
Price: $5,000+
TipBest Whiteboard Animation Software
While we are busy discussing some of the best Whiteboard Animation companies, we cannot ignore the area that might benefit you the most while starting your venture with Whiteboard Animation. Here, the name comes under best whiteboard animation software lies with Wondershare Filmora Video Editor . That gives you an excellent interface to edit, modify and create whiteboard animation with the best support system.
For Win 7 or later (64-bit)
For macOS 10.12 or later
● Key Takeaways from This Episode →
● This article has given a breakdown of the best white bond animation company.
● It also gives you top reasons you need a whiteboard animation company for your business growth.
● Additionally, to create a custom whiteboard animated video, Filmora has proven the best software with its keyframing feature and effects to create a smooth and perfect whiteboard animation video for your business growth.
● Therefore, if you need a whiteboard animation service, this article is for you.
When looking for a whiteboard animation company, Google will search you hundreds of them, but the question is which of them is the best when it comes to work, behavior with the client, or ranking?
Also, the most critical question is will this company deliver the desired results in the given time, or will they be like every other company that consistently fail to fulfill their promises? Find out in this article.
In this article
01 [Why Custom Whiteboard Animation Videos Work](#Part 1)
02 [Key Aspects to Consider When Choosing a Whiteboard Animation Video Company](#Part 2)
03 [Top 15 Whiteboard Animation Studios Out There](#Part 3)
Part 1 Why Custom Whiteboard Animation Videos Work
The whiteboard animation video is an explainer video used to sell a product or describe a system. These animation videos are incredibly effective in communicating complex ideas and boosting attention and retention for your audience. A custom whiteboard animation video is a do-it-yourself video that does not require a template, but you need to start from scratch. Here are top reasons why you need a custom whiteboard animation video to work:
● When you want to describe a complex, highly technical, or intricate idea, product, or system, a custom whiteboard animated video will help you out. The more detailed an explanation is, the harder it is to focus, and people often get bored during the description. Therefore, sharing a new business process with a custom whiteboard animation with your team is more manageable. Getting your point across will maintain our interest as long as the video is playing.
● A custom whiteboard animation saves you the stress of hiring actors to play in your video and turn, saves costs and serious embarrassment by actors.
● Custom whiteboard animation videos are helpful when you want to use social media ads or YouTube for marketing as people like them, so, therefore, it is a good chance for you to get clicks, views, and more sales.
● A custom whiteboard animation helps you to tell the story of your brand.
● It helps to reuse old audio content lying around, for example, podcast episodes. You can create pre-existing audio with a custom whiteboard animation that will help you capitalize on content that has already been created and breathe in new life.
Part 2 Key Aspects to Consider When Choosing a Whiteboard Animation Video Company
A whiteboard animated video is ideal for sharing your brand on social media pages, hosting your website, and featuring on the internal company intranet. These whiteboard animated videos are tactically created to help you sell your services and products, improve internal communication, educate your customers, provide better user engagement, and convey complex or essential ideas. Choosing a whiteboard animation service you trust is crucial for creating a whiteboard animation video. The key elements to note when choosing a whiteboard animation video company is as follows:
● When you work with a professional and reputable team, the process is smooth, and the final product created is more valuable.
● There is a solid understanding of what you should expect in terms of cost length and the process of creating the animated videos.
● Companies that do not use imagery and stop animation from creating the whiteboard animated video can manage a production schedule or experience in the field.
● Works on the combination of creativity, understanding, and accessibility.
● Well-versed with the digital platform and its functionality.
Part 3 Top Whiteboard Animation Studios Out There
Whiteboard animation is a video production method that uses illustrations and static images to explain to viewers the contents of the video. More so, whiteboard animation video’s production cost depends on various factors, including the animation time, the overall value, and the style of the characters. In this section, we have created a list of the best whiteboard animation studio for you to review:
01ExplainVisually.co
“Their fantastic flexibility as well as ability to prepare great visual synthesis.” - Former Operational Community Manager, General Merchandise Retailer
This is a visual thinking agency based in Warsaw, Poland, and founded in 201providing a graphic design and video production service with a team of more than 1This animation studio serves smaller companies and enterprises in the Financial Services, Telecommunications, IT, Healthcare and Medical, Utility Industry, and Energy Natural Resources.
Price: $1,000+
02Max curious productions
“They’re incredibly communicative and proactive, as well as deadline and budget-driven, which is great. They’re the kind of vendor that does what they need to do to make sure they deliver on time, working late nights or weekends if necessary.” - Creative Director, Television Network.
This is a video production company located in New York City and founded in 20has about two decades of experience in video production and has a production team of 6 employees.
Price: $5,000+
03Next Day Animations
“Direct feedback was very effective and helpful, making this collaboration go smoothly.” Development Director, Youth Non-Profit
This is an animation production company based in Baltimore and has additional offices in brace bridge, Canada; Madison, Wis, Minneapolis; Bend, Ore; and was founded in 201It provides marketing strategy, social media marketing, and video production with employees.
Price: $5,000+
04IdeaRocket
“They made me feel like I had the attention I needed whenever I needed it.” – CIO, Clothing Company
This is a production agency based in New York, founded in 201They provide services on video production to all sizes of clients and have a team of about ten employees.
Price: $10,000+
05MotionGility
“The promotional video was well received.” — Owner, Tech Company
This is an explainer video company with headquarters in Indore, India, founded in 2015, specializing in video production and some basics of graphic design and logo design with employees. Their clients range from enterprises mid-market and small businesses in various industries, including business services, consumer products and services, and advertising and marketing.
Price: $5,000+
06Rip media group
“Throughout the entire project, they were extremely responsive and always reachable.” — Co-Founder & CEO, Food Services Company.
This video production company located in Los Angeles was founded in 200They specialize in video production with a team of about employees to create motion graphics, motion, and live-action videos. Their claims are basically in the medical, IT, and business service industries.
Price: $1,000+
07Exaltus
They provided me with quality video for my marketing agency, and I think they are the best I’ve seen so far - the HR marketing department.
With its headquarter in Montreal and founded in 201this content marketing agency works with mid-market and enterprise companies in the entertainment, music, arts, education, and business service industry. It specializes in web development services and video production for clients.
Price: $5,000+
08Webdew
“The video was great, and it came at a really good price.” – Marketing Manager, Software Development Company.
This is a video production agency headquartered in Seattle and additional offices in London and Mohali, India, founded in 201It specializes in video production service to mid-market, small, and Enterprise businesses with a team of about specialists.
Price: $5,000+
09Switch video
“They’ve been very good at reaching out with questions, coming up with scripts and visual concepts, and letting my team focus on our responsibilities.” – Senior Solution Support Manager, IT Solutions Provider.
This is a video marketing company based in Collingwood, Canada, and founded in 200specializing in video production and other digital marketing services to meet market-level businesses with a team of members.
Price: $10,000+
10Alconost
“Alconost delivered the work on time, and the budget was what we agreed on. Whenever I requested a change, it was done quickly.” —Head of Marketing, Education App.
This information technology agency based in Alexandria, VA, with other Bolero offices, started in 200They specialize in advertisement translation video production for small businesses.
Price: $1,000+
11Cartoon Media
“[Cartoon Media’s] workflow was exceptional on their behalf. Their communication skills set them apart. “ - Employee, Electrical Company.
This is a digital production company located in Canterbury, UK, launched in 201They specialize in video production advertising, and broadcast production to their Enterprise mid-market and small businesses.
Price: $1,000+
12Ydraw
“All videos are in the process of being released, but everybody who has seen them so far has been impressed with the production quality. The concepts that are illustrated in the videos are clear to the viewer, which is what we struggled with.” - CEO, BTravel Software.
This animation and marketing firm in Saint George, Utah, founded in 201is Ydraw. They specialize in video production and works with clients of all sizes from business service, consumer products, and the advertising industry with employees.
Price: $5,000+
13Dream engine
“Everything surprised me in a lovely way.” – Communications Manager, Dementia Organization,
Dream engine is a video producing and marketing strategy firm based in St Kilda Melbourne, Australia, founded in 200They specialize in corporate video, motion graphics, and filming and serve clients in the education and advertising sector with a team of five.
Price: $5,000+
14Video Explainers
“The final product was exceptional. There was an increase in traffic from our social media to our website.” – CEO, Veterinary Staffing Company.
This is an external video and whiteboard animation company founded in 20and located in New York. He specializes in scriptwriting, storyboarding, illustrations, voice-over, animation, infographic, editing, and motion graphics with employees.
Price: $5,000+
15Wienot Films
“The excellence at Wienot sure makes us want to find ways to partner with them in the future as we grow, as we know we can trust any project to their capable hands and creative minds. We can’t thank them enough for such a professional and amazing final product. It was well worth the investment, and they have our highest recommendation.” – Co-owner, Healthcare Consulting Firm.
This is an explainer video and whiteboard animation company based in Austin and started in 201He specializes in creating a video that turns complex ideas into coin-sized memorable, easy-to-understand stories with teams.
Price: $5,000+
TipBest Whiteboard Animation Software
While we are busy discussing some of the best Whiteboard Animation companies, we cannot ignore the area that might benefit you the most while starting your venture with Whiteboard Animation. Here, the name comes under best whiteboard animation software lies with Wondershare Filmora Video Editor . That gives you an excellent interface to edit, modify and create whiteboard animation with the best support system.
For Win 7 or later (64-bit)
For macOS 10.12 or later
● Key Takeaways from This Episode →
● This article has given a breakdown of the best white bond animation company.
● It also gives you top reasons you need a whiteboard animation company for your business growth.
● Additionally, to create a custom whiteboard animated video, Filmora has proven the best software with its keyframing feature and effects to create a smooth and perfect whiteboard animation video for your business growth.
● Therefore, if you need a whiteboard animation service, this article is for you.
What Is the Best Collage Photo Grid Maker - Experts Choice
What is the Best Collage Photo Grid Maker - Experts Choice
An easy yet powerful editor
Numerous effects to choose from
Detailed tutorials provided by the official channel
Whether it is an Instagram collage grid, other social media sites, an online platform, a greeting card, or even a wall of your room, collages are everywhere. It is a great way to assemble multiple pictures into a single frame. Depending on your purpose, theme, and other factors, there are several different styles of collages that can be created like photo grid, shaped collage, polaroid collage, and more. One of the most classic and traditional styles is a photo grid collage. Taking the help of a dedicated collage-making app or a tool can help you create an amazing and eye-catchy collage in no time. Keep reading to learn more about collage photo grid and the best tools to create them.

In this article
01 [What is a photo grid?](#Part 1)
02 [Need for using special tools and apps to create a photo grid collage](#Part 2)
03 [Top 5 tools to create photo grid](#Part 3)
04 [Use stock images to enhance your photo grid](#Part 4)
Part 1 What is a photo grid?
When a special grid frame having a specific number of rows and columns is used for arranging photos, the created collage is known as a photo grid collage. These multiple added images will make them look like a single picture in a frame. A photo grid is one of the most classic styles of creating a collage that is also the most widely used one. You can never go wrong with a collage while arranging the pictures in a photo grid.
Part 2 Need for using special tools and apps to create a photo grid collage
Though creating a photo grid may look like a simple process which it is also, there are a lot of elements that go into creating an impressive and attractive collage. Adding the images of the correct size and orientation, adjusting the borders, customizing the frames, adding filters, adding text, are some of the many factors that help in creating a wonderful collage, and for this good collage-making tool or an app is required.
These special photo grid collage maker tools have built-in templates, designs, and support other features that help you create an interesting photo grid of your choice. Moreover, some of these programs also come with high-quality stock images that can be used in the grid to further enhance their overall looks.
Part 3 Top 5 tools to create photo grid
We have selected the top 5 grid collage maker tools that can be used to create a customized photo grid.
01Fotor
This is one of the best tools available for creating a photo grid using one of the several templates available. It is the Classic Collage style of this app that will let you create a customized grid where you can add the desired number of images and then edit the background, borders, and other elements. You can even add text, stickers, effects, and other interesting filters. Fotor is a free online tool that can be used from your browser and you just need to free sign-up using your Google, Facebook, or Apple account.

02FotoJet
This is another free-to-use browser-based tool that can be used for creating a photo grid. The interface of the tool is simple and there are multiple grid options to choose from depending on the number of images to be added. The spacing between the grids as well as the roundness of the margins can also be adjusted as desired. The tool also gives you the option to choose the added image file resolution. Text, clipart, and background to the collage can also be added and there is also a library of images that can be used. The created collage can be saved or can also be shared directly to Twitter, Pinterest, and Tumblr.

03Adobe Spark
This is one of the top collages making tools that can be used to design the desired collage in different styles including photo grid. Unlike other Adobe tools, the collage-making program is simple and quick to use and does not require advanced technical know-how. You simply need to create a free account for Adobe Creative Cloud and the collage-making features can be easily used. There are pre-set designs and templates available to match your theme and requirements. You can further make customization to other collage elements as needed.

04Photo Collage
This free-to-use online tool requires no software download or installation and allows creating a grid quickly and easily. The interface of the tool is user-friendly where you just need to browse and add the images or can simply drag and drop them as well. You can choose from multiple template options available and can also add text, effects, and stickers to the collage. Multiple image editing options are also supported like zoom, flip, transparency, and more.

05Canva
Free and simple to use, this is one of the most widely used collage-making tools that is available as a browser-based program as well as Android and iOS app. Several photo-grid templates in different styles are available at the site that lets you create the desired collage in no time. You can customize the selected templates by adding filters, texts, effects, and more elements available. A paid version of the tool with advanced features is also available.

Part 4 Use stock images to enhance your photo grid
Adding high-quality and interesting images to your photo grid will level up its overall look and make it eye-catchy. If you are running short of such interesting and bright images, no need to worry as several sites have a good collection of images that can be used. One such program that we recommend here to check the stock images is Wondershare Filmora. Though Filmora is an advanced Windows and Mac-based video editing software, there are multiple additional features supported one of them is a collection of images in an array of categories.
Depending on the theme of your photo grid, you can select the desired images and other media from Wondershare Filmora Video Editor . Additionally, the split-screen feature of the software will let you add and play multiple videos in a single frame that makes it look like a video collage.
Wondershare Filmora - Best Video Editor for Mac/Windows
5,481,435 people have downloaded it.
Build unique custom animations without breaking a sweat.
Focus on creating epic stories and leave the details to Filmora’s auto features.
Start a creative adventure with drag & drop effects and endless possibilities.
Filmora simplifies advanced features to save you time and effort.
Filmora cuts out repetition so you can move on to your next creative breakthrough.
● Key Takeaways from This Episode →
● A photo grid is a classic and traditional style of creating a collage.
● There are several online tools, software, and mobile apps available for creating interesting photo grids.
● Wondershare Filmora is a great site to get stock of images in different categories and for all types of video editing requirements.
Whether it is an Instagram collage grid, other social media sites, an online platform, a greeting card, or even a wall of your room, collages are everywhere. It is a great way to assemble multiple pictures into a single frame. Depending on your purpose, theme, and other factors, there are several different styles of collages that can be created like photo grid, shaped collage, polaroid collage, and more. One of the most classic and traditional styles is a photo grid collage. Taking the help of a dedicated collage-making app or a tool can help you create an amazing and eye-catchy collage in no time. Keep reading to learn more about collage photo grid and the best tools to create them.
In this article
01 [What is a photo grid?](#Part 1)
02 [Need for using special tools and apps to create a photo grid collage](#Part 2)
03 [Top 5 tools to create photo grid](#Part 3)
04 [Use stock images to enhance your photo grid](#Part 4)
Part 1 What is a photo grid?
When a special grid frame having a specific number of rows and columns is used for arranging photos, the created collage is known as a photo grid collage. These multiple added images will make them look like a single picture in a frame. A photo grid is one of the most classic styles of creating a collage that is also the most widely used one. You can never go wrong with a collage while arranging the pictures in a photo grid.
Part 2 Need for using special tools and apps to create a photo grid collage
Though creating a photo grid may look like a simple process which it is also, there are a lot of elements that go into creating an impressive and attractive collage. Adding the images of the correct size and orientation, adjusting the borders, customizing the frames, adding filters, adding text, are some of the many factors that help in creating a wonderful collage, and for this good collage-making tool or an app is required.
These special photo grid collage maker tools have built-in templates, designs, and support other features that help you create an interesting photo grid of your choice. Moreover, some of these programs also come with high-quality stock images that can be used in the grid to further enhance their overall looks.
Part 3 Top 5 tools to create photo grid
We have selected the top 5 grid collage maker tools that can be used to create a customized photo grid.
01Fotor
This is one of the best tools available for creating a photo grid using one of the several templates available. It is the Classic Collage style of this app that will let you create a customized grid where you can add the desired number of images and then edit the background, borders, and other elements. You can even add text, stickers, effects, and other interesting filters. Fotor is a free online tool that can be used from your browser and you just need to free sign-up using your Google, Facebook, or Apple account.
02FotoJet
This is another free-to-use browser-based tool that can be used for creating a photo grid. The interface of the tool is simple and there are multiple grid options to choose from depending on the number of images to be added. The spacing between the grids as well as the roundness of the margins can also be adjusted as desired. The tool also gives you the option to choose the added image file resolution. Text, clipart, and background to the collage can also be added and there is also a library of images that can be used. The created collage can be saved or can also be shared directly to Twitter, Pinterest, and Tumblr.
03Adobe Spark
This is one of the top collages making tools that can be used to design the desired collage in different styles including photo grid. Unlike other Adobe tools, the collage-making program is simple and quick to use and does not require advanced technical know-how. You simply need to create a free account for Adobe Creative Cloud and the collage-making features can be easily used. There are pre-set designs and templates available to match your theme and requirements. You can further make customization to other collage elements as needed.
04Photo Collage
This free-to-use online tool requires no software download or installation and allows creating a grid quickly and easily. The interface of the tool is user-friendly where you just need to browse and add the images or can simply drag and drop them as well. You can choose from multiple template options available and can also add text, effects, and stickers to the collage. Multiple image editing options are also supported like zoom, flip, transparency, and more.
05Canva
Free and simple to use, this is one of the most widely used collage-making tools that is available as a browser-based program as well as Android and iOS app. Several photo-grid templates in different styles are available at the site that lets you create the desired collage in no time. You can customize the selected templates by adding filters, texts, effects, and more elements available. A paid version of the tool with advanced features is also available.
Part 4 Use stock images to enhance your photo grid
Adding high-quality and interesting images to your photo grid will level up its overall look and make it eye-catchy. If you are running short of such interesting and bright images, no need to worry as several sites have a good collection of images that can be used. One such program that we recommend here to check the stock images is Wondershare Filmora. Though Filmora is an advanced Windows and Mac-based video editing software, there are multiple additional features supported one of them is a collection of images in an array of categories.
Depending on the theme of your photo grid, you can select the desired images and other media from Wondershare Filmora Video Editor . Additionally, the split-screen feature of the software will let you add and play multiple videos in a single frame that makes it look like a video collage.
Wondershare Filmora - Best Video Editor for Mac/Windows
5,481,435 people have downloaded it.
Build unique custom animations without breaking a sweat.
Focus on creating epic stories and leave the details to Filmora’s auto features.
Start a creative adventure with drag & drop effects and endless possibilities.
Filmora simplifies advanced features to save you time and effort.
Filmora cuts out repetition so you can move on to your next creative breakthrough.
● Key Takeaways from This Episode →
● A photo grid is a classic and traditional style of creating a collage.
● There are several online tools, software, and mobile apps available for creating interesting photo grids.
● Wondershare Filmora is a great site to get stock of images in different categories and for all types of video editing requirements.
In-Depth Study of Cartoon Painting Starts
In-depth Study of Cartoon Painting Starts from Learning to Draw It
An easy yet powerful editor
Numerous effects to choose from
Detailed tutorials provided by the official channel
Cartoon painting is slowly becoming popular due to its many benefits, especially easy cartoon canvas painting. For instance, it is pretty eye-grabbing, especially if your audience is children.

Thanks to the animation aspect, it has become relatively cheap to do advertisements with cartoons instead of real people.
In this article
01 [What Are Good Cartoons to Draw?](#Part 1)
02 [How Do You Draw a Cartoon Character for Beginners?](#Part 2)
03 [Is There Anything else You Can Do to Draw Cartoons More Quickly?](#Part 3)
Part 1 What Are Good Cartoons to Draw?
As far as good cartoons are concerned, expect about 5 popular types. These cartoons to draw include:
01 Illustrative Cartoons
They are the most suitable cartoons to draw when portraying particular ideas directly and simply.
The cartoons are primarily used in advertisements, teaching aids, and explaining stories. They also have text that explains them further.
It explains why they are common in school books, making them perfect for explaining content or subject.

02 Animated Cartoons
It is important to note that these cartoons are drawn using computers despite looking as if they are hand-drawn. One thing that makes them stand out is that they seem to be in action and movement.
As much as that’s how they seem from the viewer’s perspective, that’s far from the truth. They are just drawn in series, and since the first one will differ from the second one, there is that illusion of movement created.

03 Comic Strips or Panels
In most cases, these are regular features characterized by established or known characters and usually displayed in newspapers.
Just like the animated cartoons, they are showcased in series to tell or illustrate a story. The series of panels have words said by the various characters.
The words are usually in balloons, and a single comic strip may cover a single or double page of a newspaper.

04 Gag Cartoons
As the name gag suggests, these cartoons revolve around jokes. These single-paneled cartoons often make fun of human beings.
Through overstatements, humor resonates from what is drawn. They can either serve as entertainment or point out, if not make fun of, people, especially their mistakes and faults. Besides the cartoon, expect a caption that’s often a single sentence.

05 Editorial or Political Cartoons
These cartoons are also made for the newspapers. Expect them to be a single drawing on an editorial page. It sheds more light on a particular newspaper’s editorial comment.
As much as some have captions, that’s not always the case. Just like the gag cartoons, they ridicule people, but the editorial ones focus on celebrities.

Part 2 How Do You Draw a Cartoon Character for Beginners?
Even cartoon painting experts were once beginners. So, feel encouraged because you stand a chance also to become an expert in the long run. All you need to do is take the first step. Fortunately, we are here to hold your hand as you do so. So. Without further ado, let’s get started.
01 Cartoon Painting of a Young Character
These are the steps you need to follow when doing so:
Step 1Start with the face
The face is significant, especially when it comes to cartoon painting. It has complex as well as simple parts. For example, the face itself is pretty basic since you will need to begin with a circle.
After that, draw a horizontal and vertical line and ensure that they intersect in the middle.

Step 2Draw the eyes by drawing
Draw the eyes by drawing an oval and ensuring that the top side is slightly tilting to the side.
Do the same thing on the other side since the norm is a pair of eyes. The gap between the two should also be sensible.

Step 3Draw eyebrows
On the upper side of the eye, ensure that the lines are slightly thick. The eyebrows also need to be placed above the eyes, slightly above the thick line representing the eyelashes.

Step 4Draw jaw
After that, start shaping the jaw. Keep in mind that it plays a huge role in determining whether the character will look thin or fat. Additionally, how you draw the jaw determines whether the character will be old or young and how old or young the person will look.

Step 5Draw nose
Design the nose and ensure that you don’t put many details. The good thing about the nose is that a tip is enough to serve the purpose. Another common approach when drawing the nose is doing so as if you are viewing it from the side.

Step 6Draw mouth
Next, draw the mouth and consider the age of your character as you do so. If it is a child, despite the gender, stick to simplicity. You should also avoid drawing the lips. Preferably, go for the good, expressive trace since it never disappoints.

Step 7Draw ears
Proceed to the ears and in relation to whether the character is facing the camera or not. If your character is looking at the camera, you should see the front side view. Therefore, it won’t make sense to display the internal cavities in this case.

Step 8Draw haircut
Proceed to the ears and in relation to whether the character is facing the camera or not. If your character is looking at the camera, you should see the front side view. Therefore, it won’t make sense to display the internal cavities in this case.
As scary as it may look, you need not be an expert to make the haircut look perfect. Additionally, there is no constant way of drawing the haircut, and you are at liberty to practice as much creativity as possible.
Nevertheless, please don’t take it lightly since it can be quite descriptive. For instance, the hair is used to tell the personality of a character. Practice makes perfect, and you better keep doing it until you get it right. Ensure that what you draw shows the age and character of the cartoons to draw as perfectly as possible.
So far, our focus has been on a young character. However, that’s not always the case explaining why we will look at a cartoon painting of an old character.

02 Cartoon Paintings of an Old Character
If you want your character to look old, this is the way to go:
Step 1Old character draw a face
The face is no different from that of a young character. Start with the eyes and add their pupils, eyebrows and don’t forget to add wrinkles.
Since the character is old compared to the previous one, ensure that the eyebrows are thick. They should occupy more space of the forehead.

Step 2Old character make the chin
Make the chin longer too.

Step 3Old character draw the nose
Ensure that the nose design looks wider and larger since the character is old. To achieve that, make the nose look close to the eyes

Step 4Old character exaggerates mustache
Skip the mouth bit and instead go for a big, exaggerated mustache. That’s one common characteristic of an old character, especially male.

Step 5Draw hair
When it comes to hair, bald and side hair will play the trick perfectly. The nose is no different from that of a young character.

03 Cartoon Painting of a Female Character
So far, our focus has been on a male character. So, what do you do if you want to create a female one instead? These are some of the steps to follow as you do so.
The procedure is not that different. However, consider that women’s facial structures are more delicate than those of their male counterparts. Some of the things that stand out include long hair, a small nose, a thin chin, thin eyebrows, and large, expressive eyelashes. Large pupils will also do, especially if you are good at drawing.

Key Takeaways from This Episode
● There are five major types of cartoons to draw, animation, editorial, gag, illustrative and comic strips.
● Cartoon painting is not that hard, especially if you have a guide on how to go about it.
● If that turns out to be difficult, you can always go for the Filmora pro.
Cartoon painting is slowly becoming popular due to its many benefits, especially easy cartoon canvas painting. For instance, it is pretty eye-grabbing, especially if your audience is children.
Thanks to the animation aspect, it has become relatively cheap to do advertisements with cartoons instead of real people.
In this article
01 [What Are Good Cartoons to Draw?](#Part 1)
02 [How Do You Draw a Cartoon Character for Beginners?](#Part 2)
03 [Is There Anything else You Can Do to Draw Cartoons More Quickly?](#Part 3)
Part 1 What Are Good Cartoons to Draw?
As far as good cartoons are concerned, expect about 5 popular types. These cartoons to draw include:
01 Illustrative Cartoons
They are the most suitable cartoons to draw when portraying particular ideas directly and simply.
The cartoons are primarily used in advertisements, teaching aids, and explaining stories. They also have text that explains them further.
It explains why they are common in school books, making them perfect for explaining content or subject.
02 Animated Cartoons
It is important to note that these cartoons are drawn using computers despite looking as if they are hand-drawn. One thing that makes them stand out is that they seem to be in action and movement.
As much as that’s how they seem from the viewer’s perspective, that’s far from the truth. They are just drawn in series, and since the first one will differ from the second one, there is that illusion of movement created.
03 Comic Strips or Panels
In most cases, these are regular features characterized by established or known characters and usually displayed in newspapers.
Just like the animated cartoons, they are showcased in series to tell or illustrate a story. The series of panels have words said by the various characters.
The words are usually in balloons, and a single comic strip may cover a single or double page of a newspaper.
04 Gag Cartoons
As the name gag suggests, these cartoons revolve around jokes. These single-paneled cartoons often make fun of human beings.
Through overstatements, humor resonates from what is drawn. They can either serve as entertainment or point out, if not make fun of, people, especially their mistakes and faults. Besides the cartoon, expect a caption that’s often a single sentence.
05 Editorial or Political Cartoons
These cartoons are also made for the newspapers. Expect them to be a single drawing on an editorial page. It sheds more light on a particular newspaper’s editorial comment.
As much as some have captions, that’s not always the case. Just like the gag cartoons, they ridicule people, but the editorial ones focus on celebrities.
Part 2 How Do You Draw a Cartoon Character for Beginners?
Even cartoon painting experts were once beginners. So, feel encouraged because you stand a chance also to become an expert in the long run. All you need to do is take the first step. Fortunately, we are here to hold your hand as you do so. So. Without further ado, let’s get started.
01 Cartoon Painting of a Young Character
These are the steps you need to follow when doing so:
Step 1Start with the face
The face is significant, especially when it comes to cartoon painting. It has complex as well as simple parts. For example, the face itself is pretty basic since you will need to begin with a circle.
After that, draw a horizontal and vertical line and ensure that they intersect in the middle.
Step 2Draw the eyes by drawing
Draw the eyes by drawing an oval and ensuring that the top side is slightly tilting to the side.
Do the same thing on the other side since the norm is a pair of eyes. The gap between the two should also be sensible.
Step 3Draw eyebrows
On the upper side of the eye, ensure that the lines are slightly thick. The eyebrows also need to be placed above the eyes, slightly above the thick line representing the eyelashes.
Step 4Draw jaw
After that, start shaping the jaw. Keep in mind that it plays a huge role in determining whether the character will look thin or fat. Additionally, how you draw the jaw determines whether the character will be old or young and how old or young the person will look.
Step 5Draw nose
Design the nose and ensure that you don’t put many details. The good thing about the nose is that a tip is enough to serve the purpose. Another common approach when drawing the nose is doing so as if you are viewing it from the side.
Step 6Draw mouth
Next, draw the mouth and consider the age of your character as you do so. If it is a child, despite the gender, stick to simplicity. You should also avoid drawing the lips. Preferably, go for the good, expressive trace since it never disappoints.
Step 7Draw ears
Proceed to the ears and in relation to whether the character is facing the camera or not. If your character is looking at the camera, you should see the front side view. Therefore, it won’t make sense to display the internal cavities in this case.
Step 8Draw haircut
Proceed to the ears and in relation to whether the character is facing the camera or not. If your character is looking at the camera, you should see the front side view. Therefore, it won’t make sense to display the internal cavities in this case.
As scary as it may look, you need not be an expert to make the haircut look perfect. Additionally, there is no constant way of drawing the haircut, and you are at liberty to practice as much creativity as possible.
Nevertheless, please don’t take it lightly since it can be quite descriptive. For instance, the hair is used to tell the personality of a character. Practice makes perfect, and you better keep doing it until you get it right. Ensure that what you draw shows the age and character of the cartoons to draw as perfectly as possible.
So far, our focus has been on a young character. However, that’s not always the case explaining why we will look at a cartoon painting of an old character.
02 Cartoon Paintings of an Old Character
If you want your character to look old, this is the way to go:
Step 1Old character draw a face
The face is no different from that of a young character. Start with the eyes and add their pupils, eyebrows and don’t forget to add wrinkles.
Since the character is old compared to the previous one, ensure that the eyebrows are thick. They should occupy more space of the forehead.
Step 2Old character make the chin
Make the chin longer too.
Step 3Old character draw the nose
Ensure that the nose design looks wider and larger since the character is old. To achieve that, make the nose look close to the eyes
Step 4Old character exaggerates mustache
Skip the mouth bit and instead go for a big, exaggerated mustache. That’s one common characteristic of an old character, especially male.
Step 5Draw hair
When it comes to hair, bald and side hair will play the trick perfectly. The nose is no different from that of a young character.
03 Cartoon Painting of a Female Character
So far, our focus has been on a male character. So, what do you do if you want to create a female one instead? These are some of the steps to follow as you do so.
The procedure is not that different. However, consider that women’s facial structures are more delicate than those of their male counterparts. Some of the things that stand out include long hair, a small nose, a thin chin, thin eyebrows, and large, expressive eyelashes. Large pupils will also do, especially if you are good at drawing.
Key Takeaways from This Episode
● There are five major types of cartoons to draw, animation, editorial, gag, illustrative and comic strips.
● Cartoon painting is not that hard, especially if you have a guide on how to go about it.
● If that turns out to be difficult, you can always go for the Filmora pro.
Also read:
- Top 4 Websites to Get Anime Footage for Free
- Popular Tips on Learning Animate Rigging for 2024
- Updated 2024 Approved 18 Best Tools and Services to Create Animated Videos for Business 2023
- New In 2024, How to Make Well Done Animated GIF By Yourself?
- Top 7 Best Animated Lyric Video Software for FREE for 2024
- New 2024 Approved The Complete Guide to Whiteboard Animation
- Updated 2024 Approved 12 Animated Slideshow PowerPoint Templates and Tools to Make Them
- Best 12 Video to GIF Converters High Quality to Check Out for 2024
- Updated 15 Best Apps to Turn Photos Into Cartoons and Sketches
- New 2024 Approved Learn What Are Differences Between 2D And 3D Animation
- In 2024, Handy Tip From Adobe Animate Rigging Tutorial for All Learners
- How to Create Benime Whiteboard Animation in Android for 2024
- New 10 Most Memorable Japanese Cat Cartoons
- 2024 Approved 15 Types of Cartoon Drawing Styles with Examples
- Updated 10 Best Romance Anime Movies You Need to Watch for 2024
- 2024 Approved Looking for Love Animated GIFs? Here Are 5 Free Sources For You
- New 10 Stunning Stop Motion Movies You Should Not Miss
- Updated 2024 Approved Obtain and Create Animated GIF Icons
- Top 10 Banned Anime Around the World and Why
- New 2024 Approved What Is the Meaning of Motion Graphics
- Updated Best GIF Croppers How to Crop an Animated GIF for 2024
- Updated How to Make Whiteboard Animation Videos for 2024
- New That Will Make Aesthetic Cartoon Drawing More Understandable
- In 2024, Best GIF Croppers How to Crop an Animated GIF
- Formula to Animate Photos From 10 Animate Pictures App for 2024
- Updated How to Create a Whiteboard Video Step by Step 2023 Updated for 2024
- New What Is Anime? Anime VS Manga VS Cartoon for 2024
- Updated 15 Forgotten Cartoon Characters of All Time You Used to Love
- 2024 Approved 12+ Stunning Instagram GIF Stickers
- The Best 20 Motion Graphics Companies & Studios
- In 2024, 10 Cartoon Photo Converters You Couldnt Do Without
- In 2024, Additional Tips About Sinnoh Stone For Honor Magic V2 | Dr.fone
- In 2024, 3 Effective Methods to Fake GPS location on Android For your Poco C65 | Dr.fone
- How To Create an Apple Developer Account On iPhone XR
- How To Fake GPS On Xiaomi Redmi Note 12 Pro 5G For Mobile Legends? | Dr.fone
- 2 Ways to Monitor Google Pixel Fold Activity | Dr.fone
- In 2024, How to Unlock Apple iPhone 12 mini With an Apple Watch & What to Do if It Doesnt Work | Dr.fone
- In 2024, How to Remove Apple iPhone 7 Plus SIM Lock?
- How to Change/Fake Your Samsung Galaxy A14 4G Location on Viber | Dr.fone
- How to Bypass FRP on Google?
- In 2024, How to Unlock Nokia G22 Phone without Any Data Loss
- Complete Tutorial to Use VPNa to Fake GPS Location On Apple iPhone XS | Dr.fone
- How to Repair Broken video files of Xiaomi ?
- In 2024, How to Transfer Everything from Apple iPhone 15 to iPhone 8/X/11 | Dr.fone
- Solved Warning Camera Failed on Realme 12 5G | Dr.fone
- What is Fake GPS Location Pro and Is It Good On Honor X50i+? | Dr.fone
- How to Unlock Infinix Hot 30i Phone Password Without Factory Reset?
- Life360 Circle Everything You Need to Know On OnePlus Ace 2 | Dr.fone
- Google Play Services Wont Update? 12 Fixes are Here on Oppo A56s 5G | Dr.fone
- In 2024, Best 3 Tecno Pova 6 Pro 5G Emulator for Mac to Run Your Wanted Android Apps | Dr.fone
- Title: Updated Ways to Create an Adobe Collage for 2024
- Author: Elon
- Created at : 2024-05-19 03:05:18
- Updated at : 2024-05-20 03:05:18
- Link: https://animation-videos.techidaily.com/updated-ways-to-create-an-adobe-collage-for-2024/
- License: This work is licensed under CC BY-NC-SA 4.0.
